Community Brag Posts

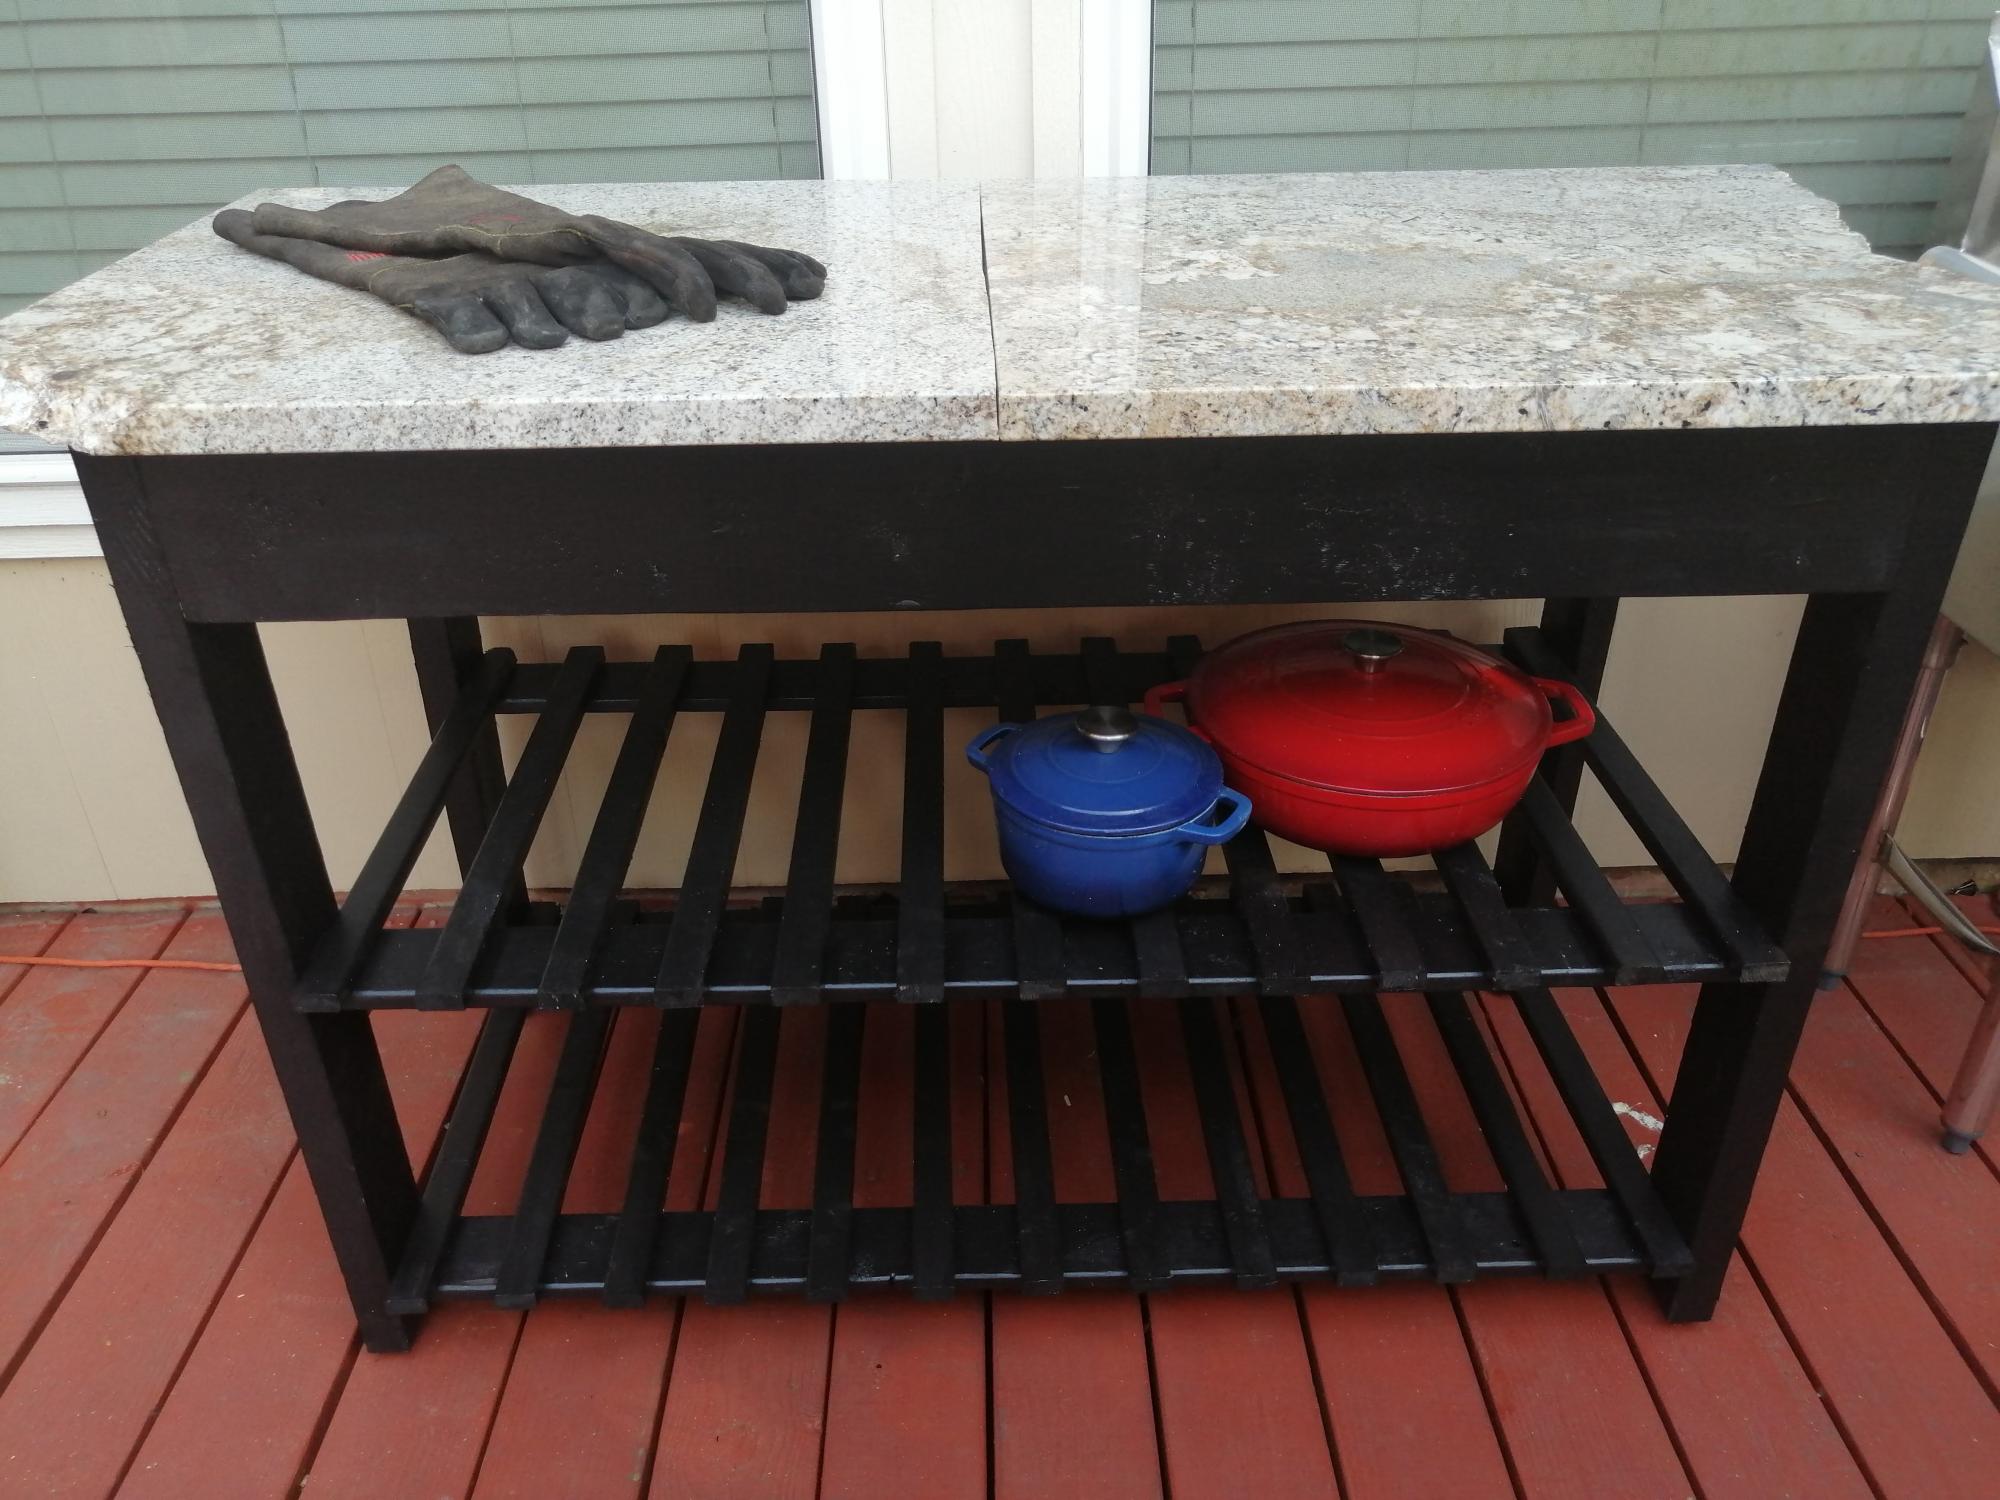
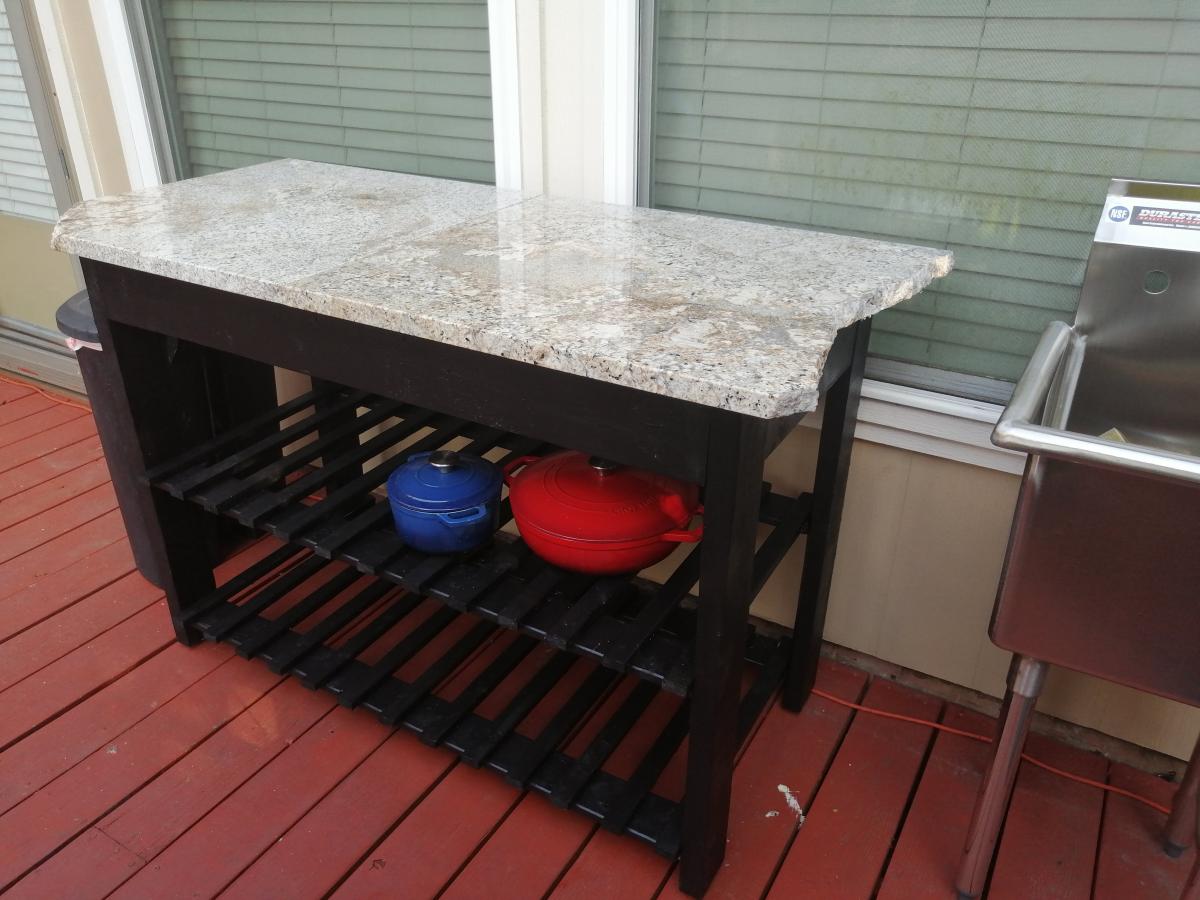
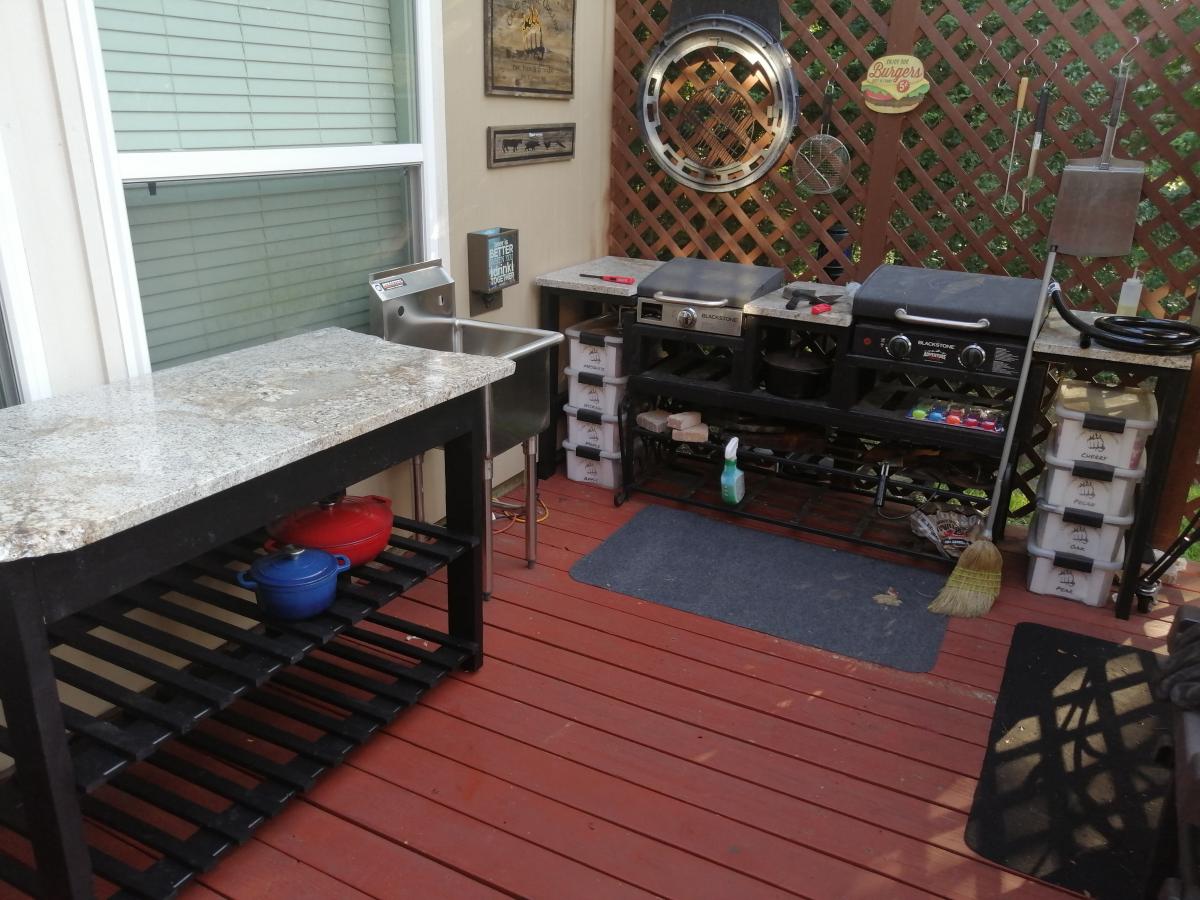
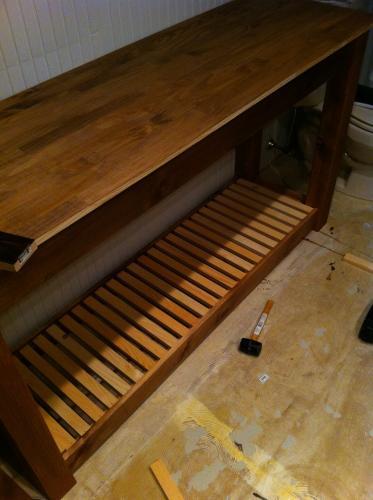
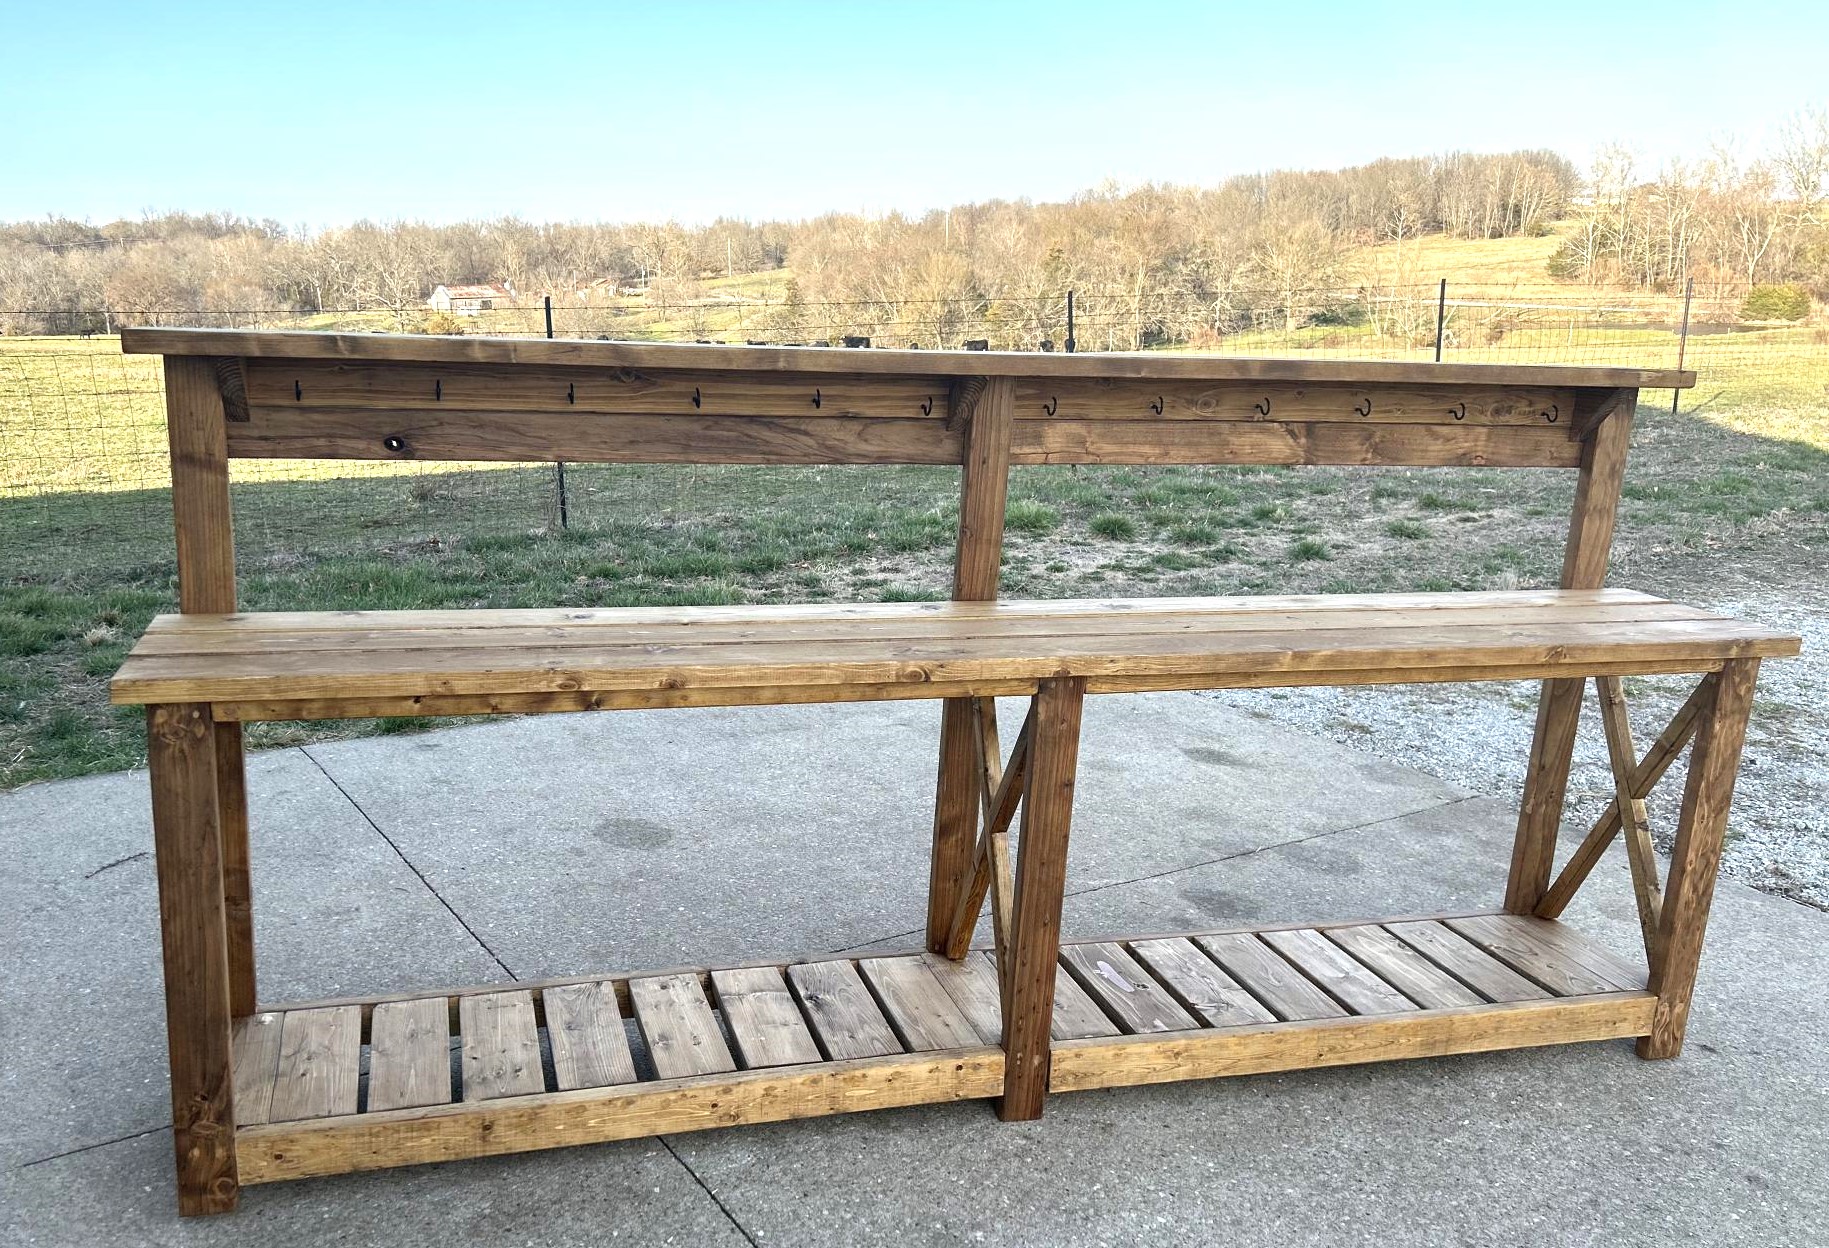
Outdoor Kitchen Island using remnant Granite

Submitted by gerrell on Wed, 06/23/2021 - 18:07

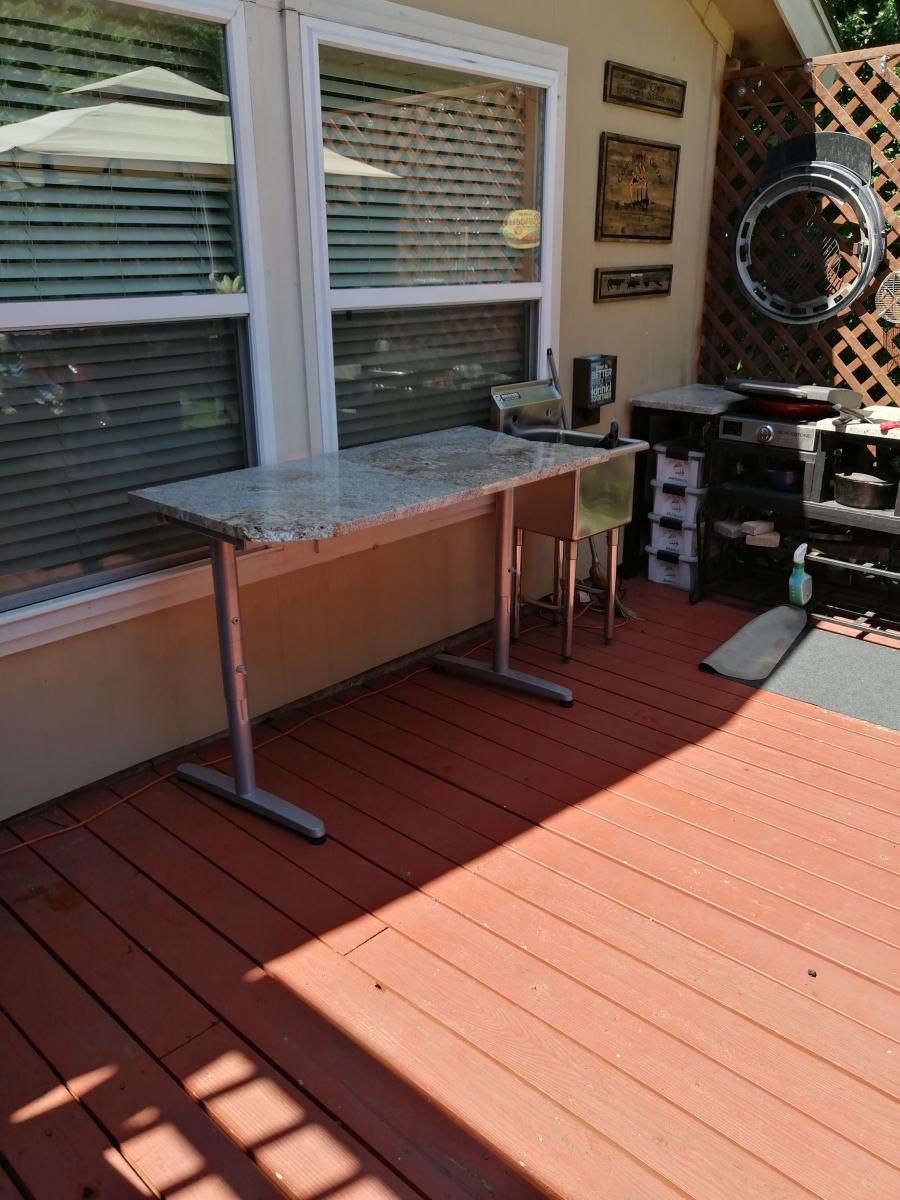
I've had these granite pieces that I got incredibly cheap from a remnant place last year for another project. A few weeks ago, I put them on some spare IKEA desk legs to make a workspace on my deck. I hated the look AND they were a little wobbly.
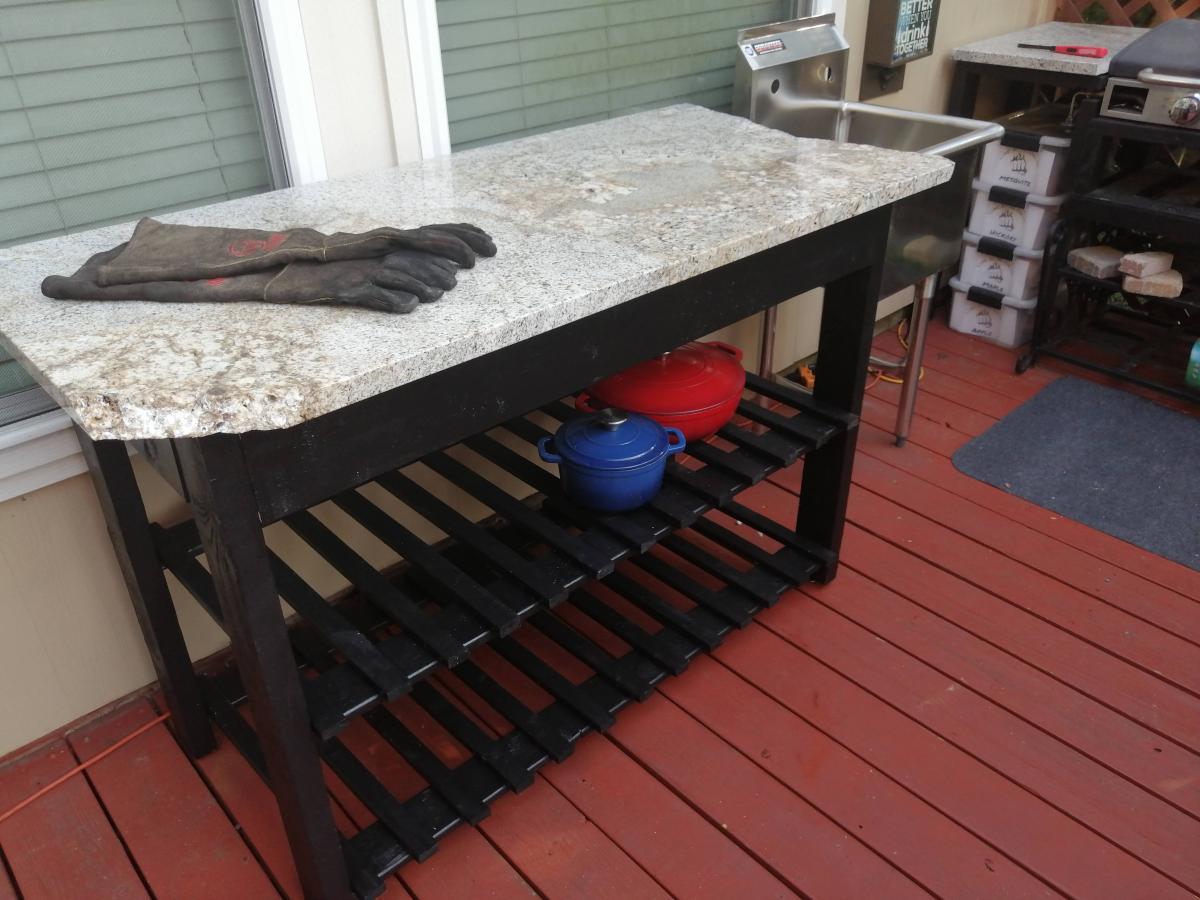
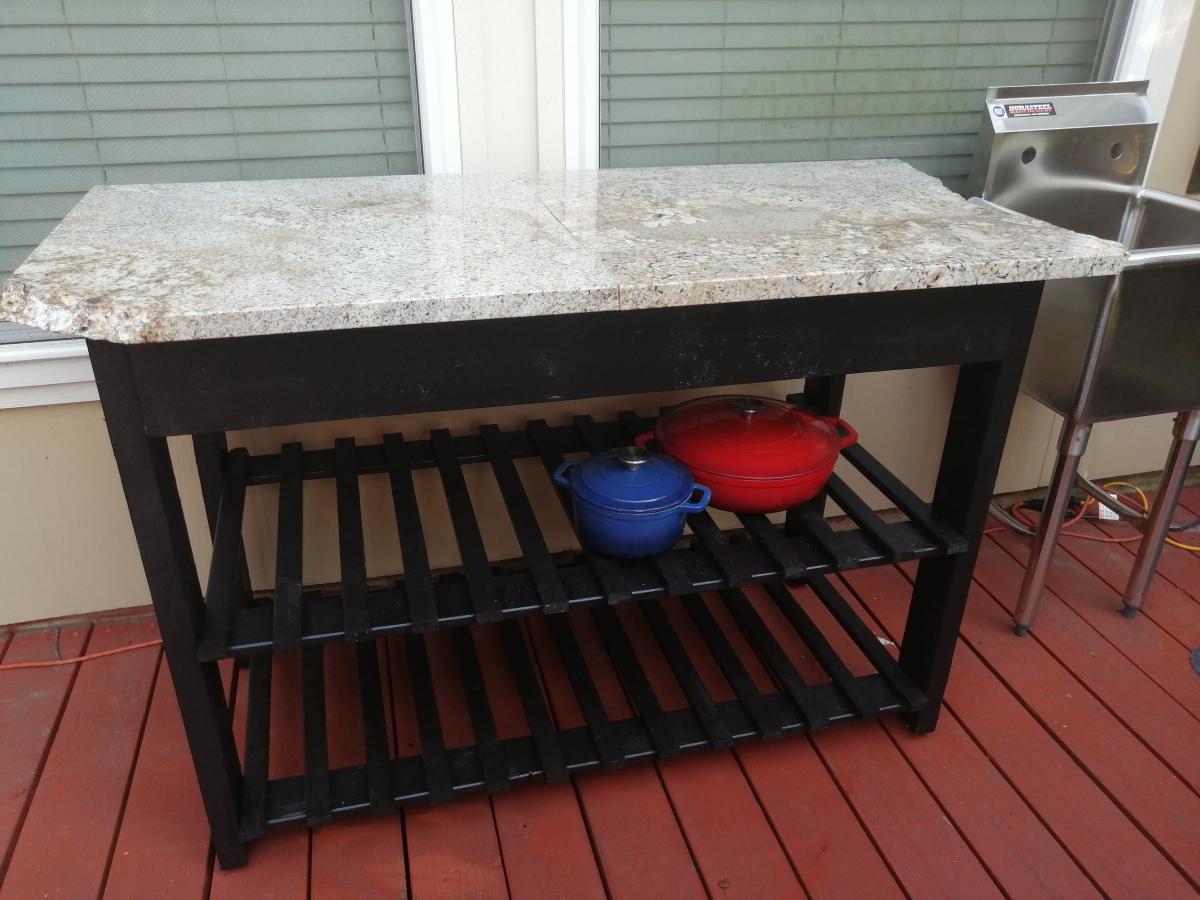
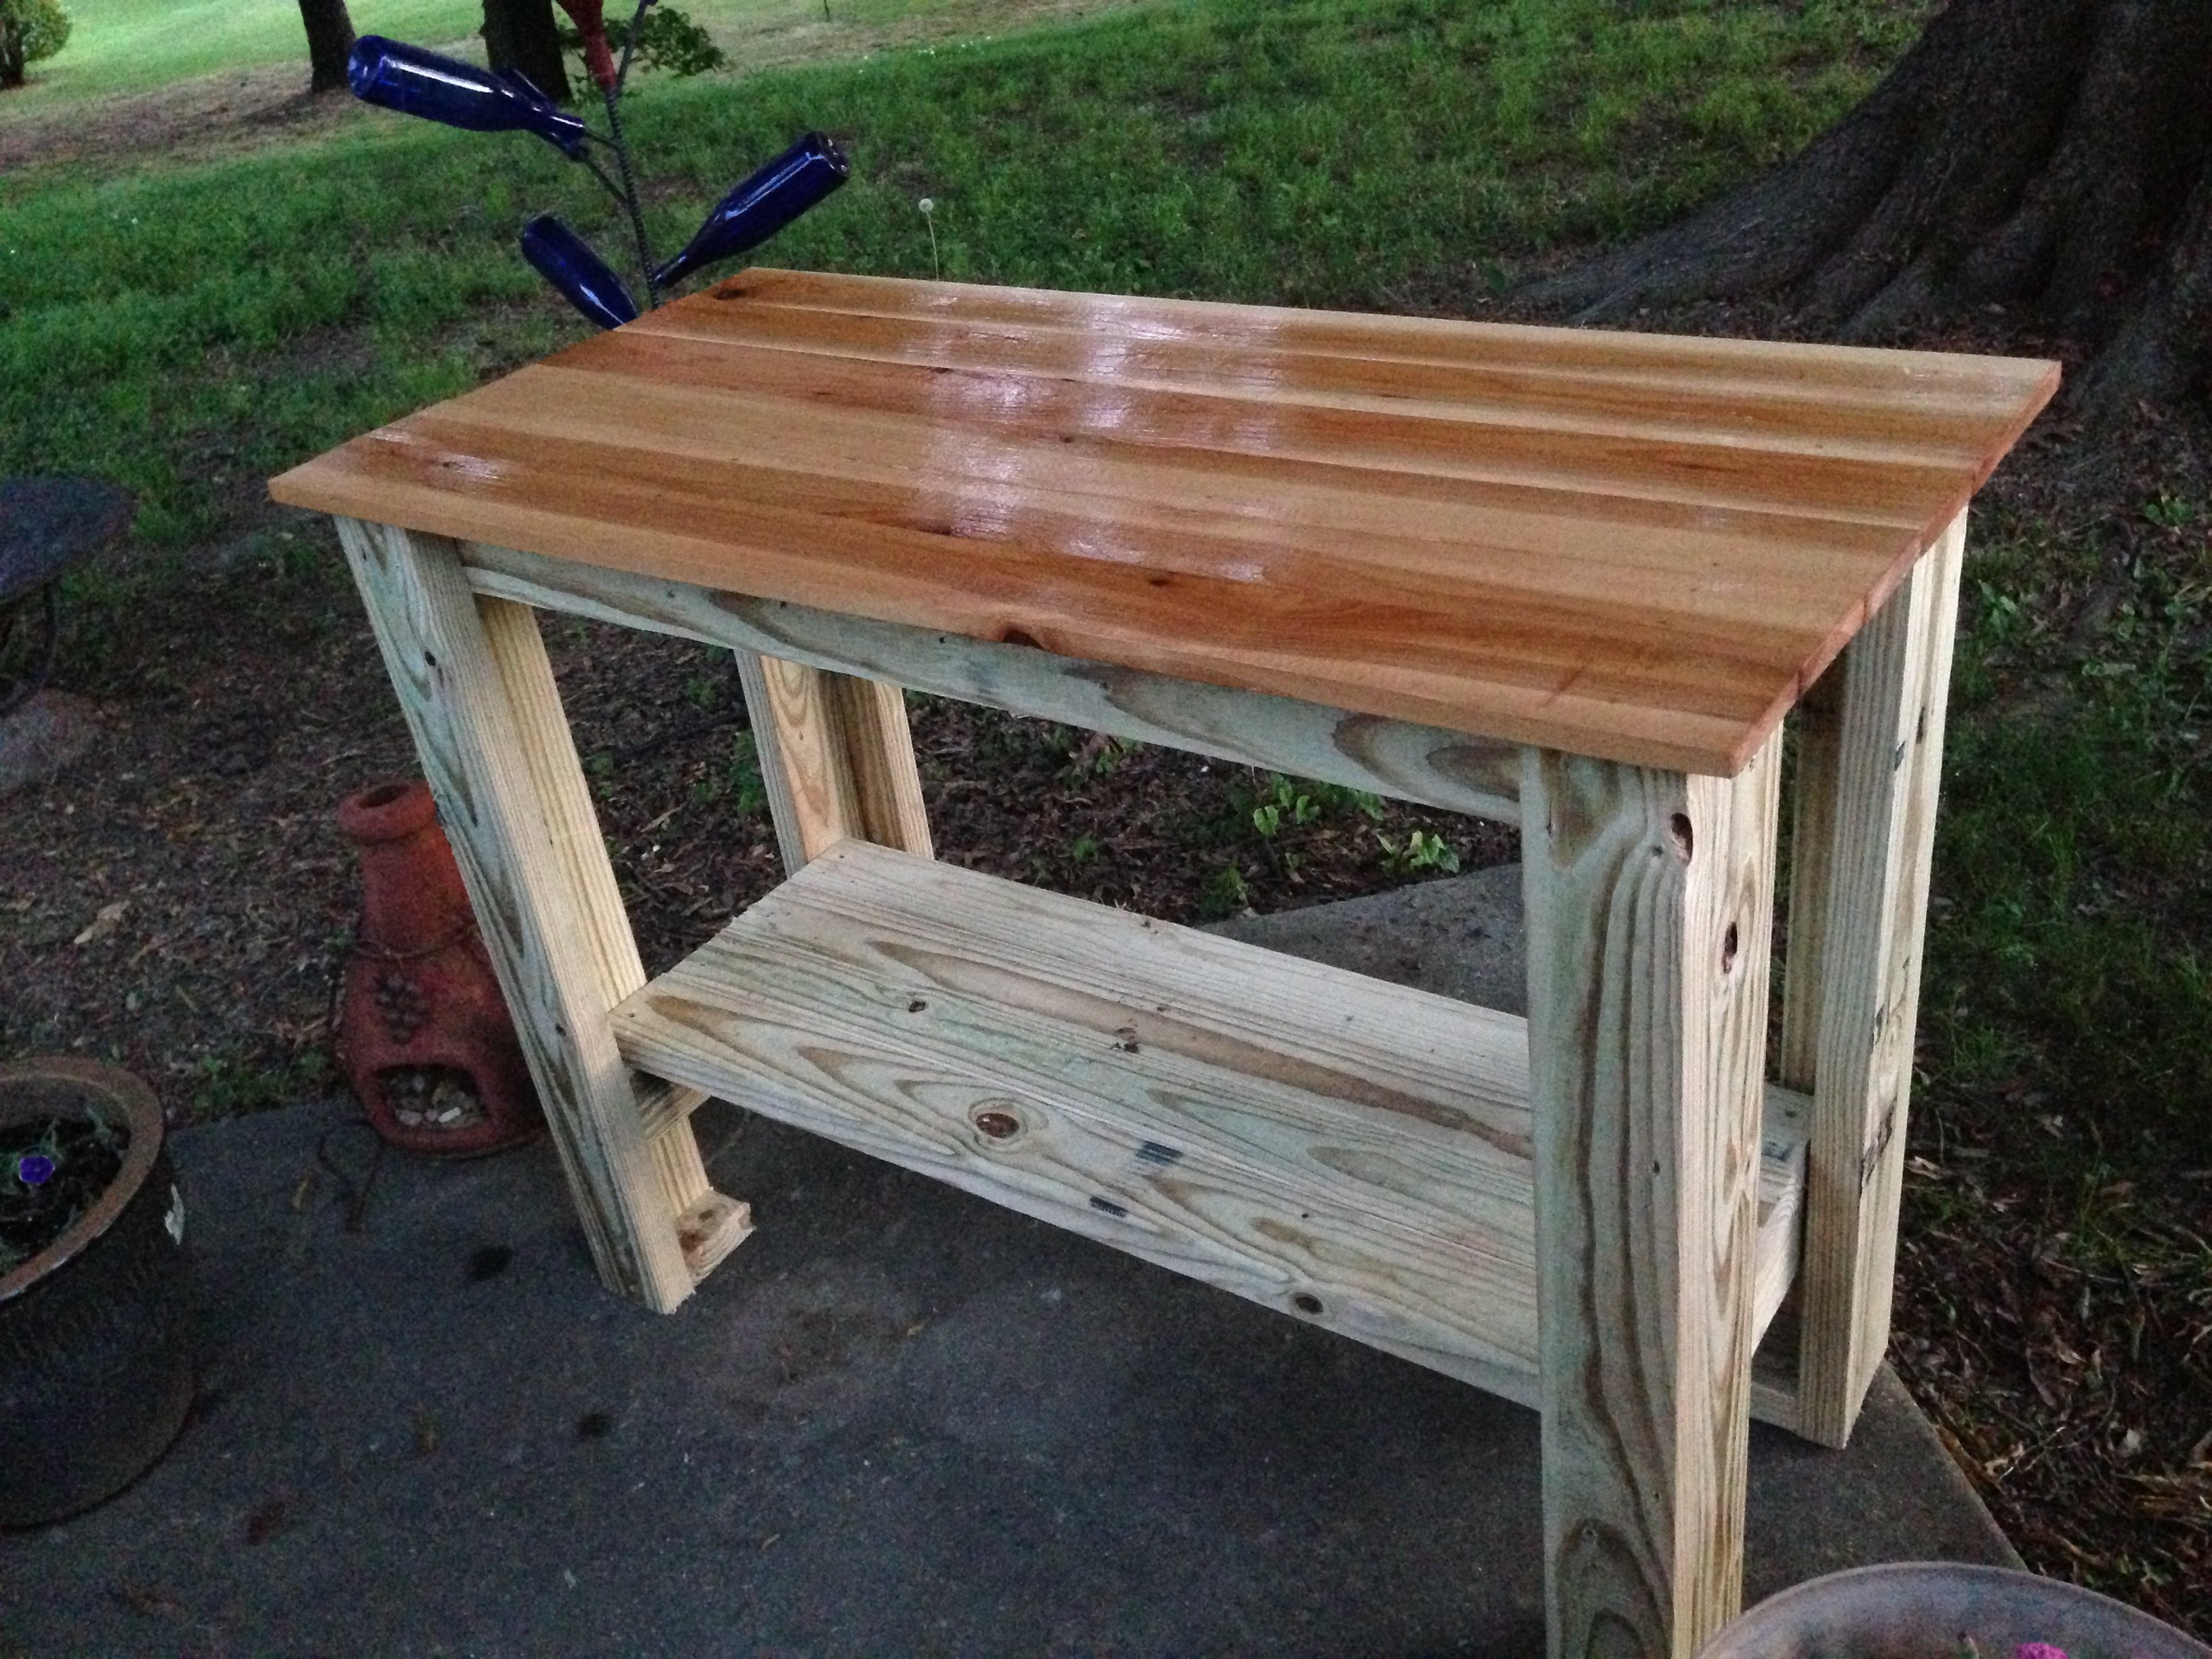
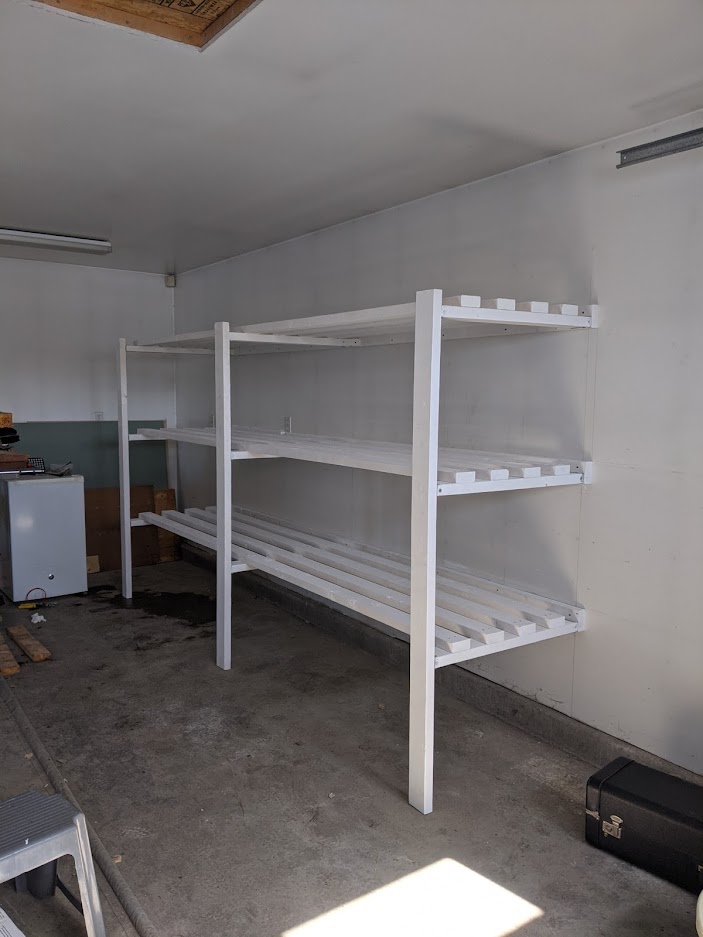
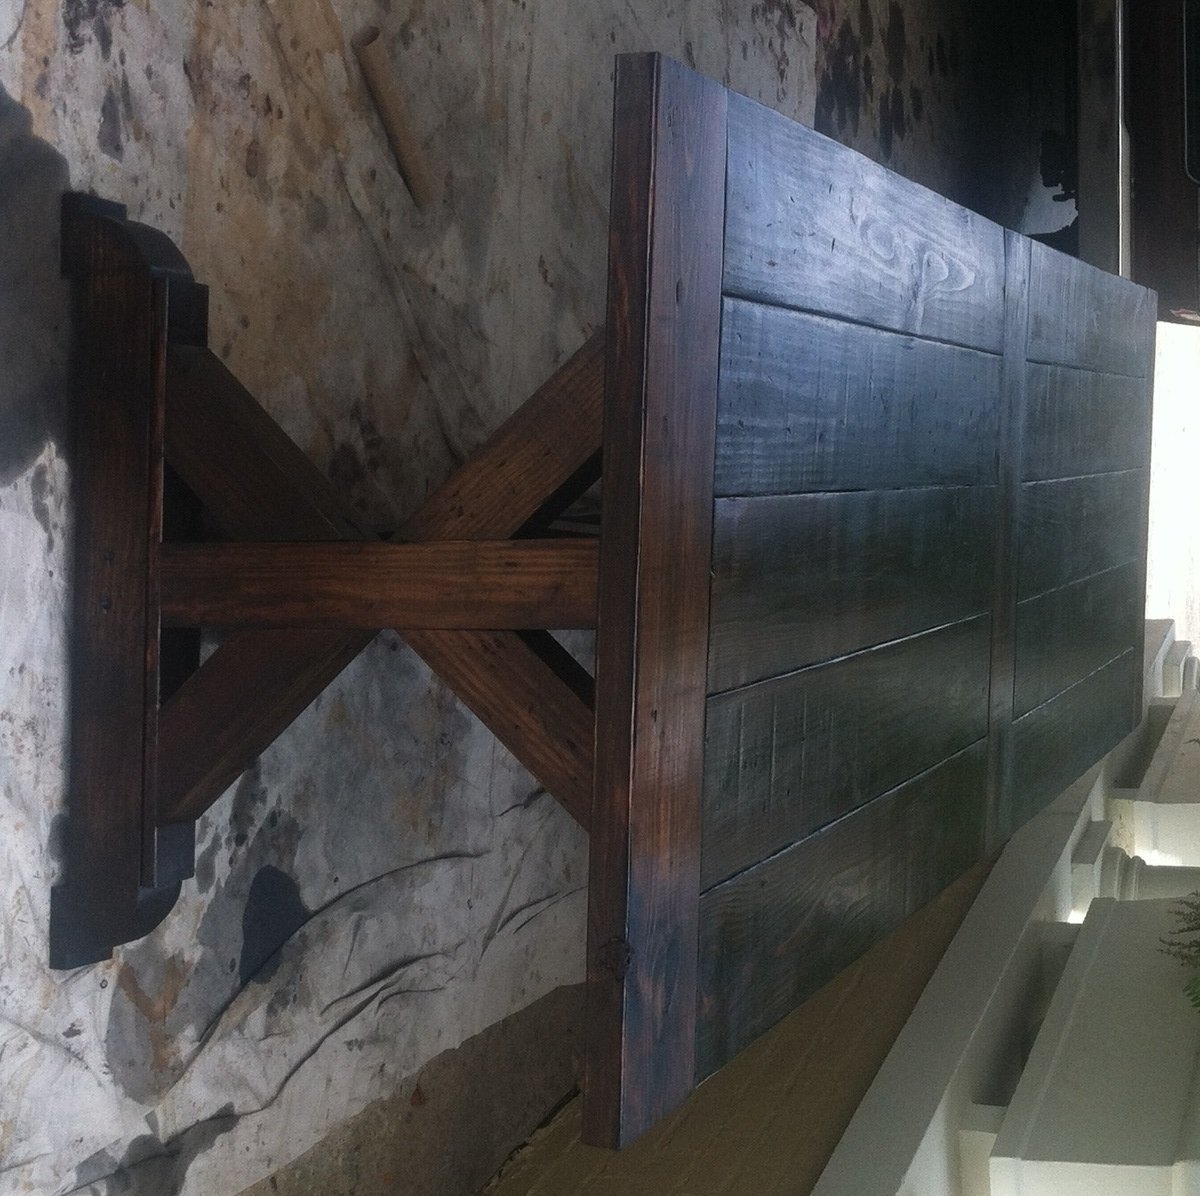
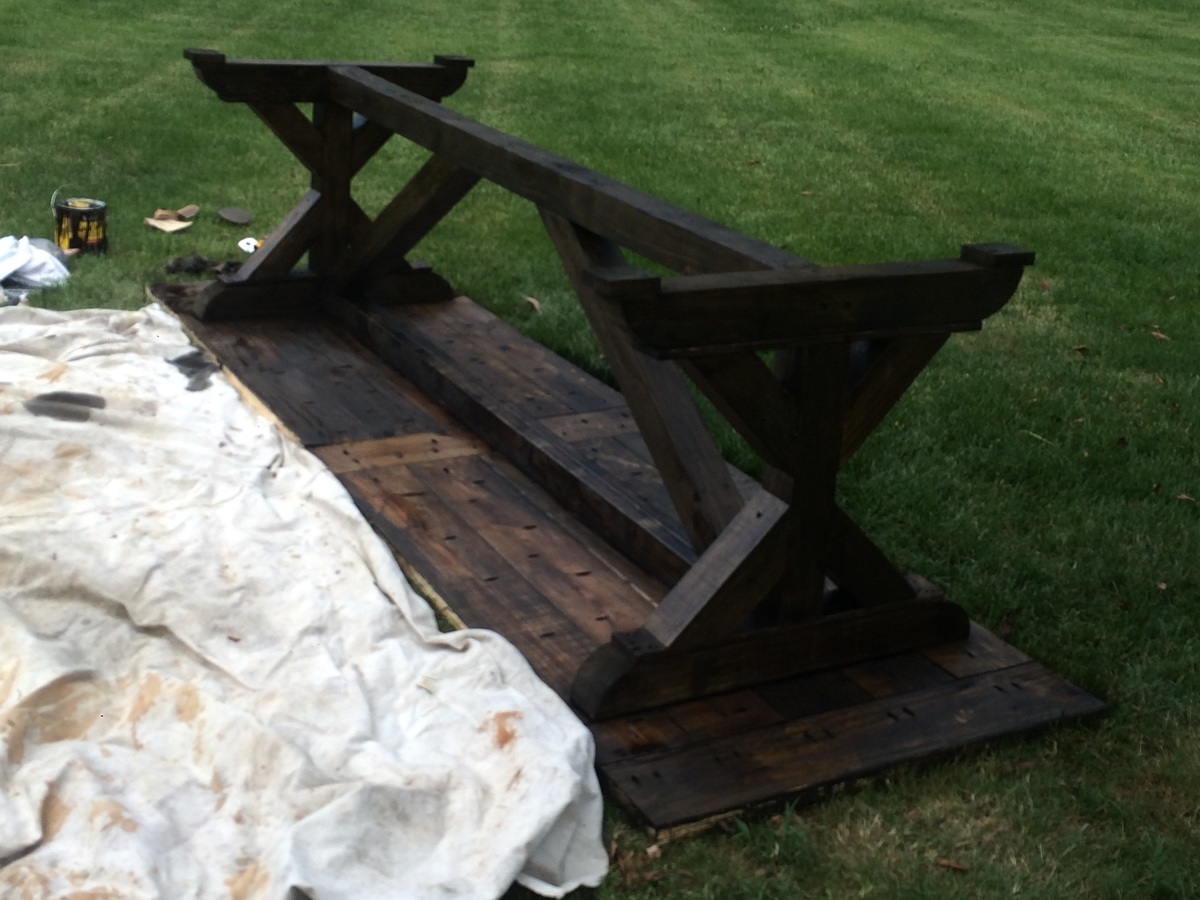
I spent some time searching the web and thankfully stumbled upon these plans. I modified the dimensions to fit the granite tops, used fewer pickets on the shelves and painted the whole thing black.

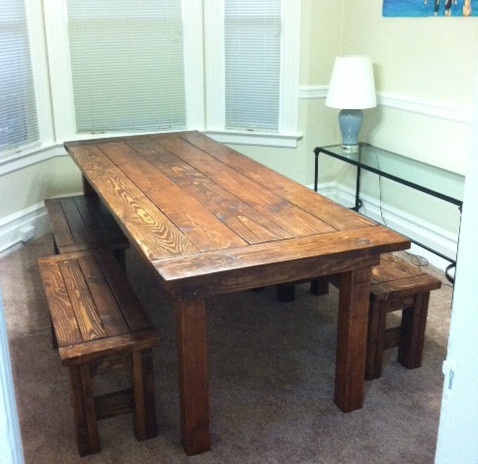
I think it looks great and adds awesome outdoor counterspace on the grilling deck!

Estimated Cost
$100
Estimated Time Investment
Weekend Project (10-20 Hours)
Recommended Skill Level
Beginner

Comments

Kids double trustle table

Submitted by Anonymous (not verified) on Fri, 07/16/2021 - 08:46

I loved this project!!! And am so happy with how it turned out!! I have 4 kids and this has so much space for everyone!
We paired the double trustle table with the farm table benches ( which I adjusted the length and height of the legs to make it kids size.)
The table top instead of a solid top we used 2 1x12 boards. And for the beaches we used 1x10 board for the seat.
Thank you for the amazing plans!

Estimated Time Investment
Weekend Project (10-20 Hours)
Finish Used
Tops are finished with a walnut gel stain and than coated with a few coats of varathane. Legs and bottom we wood burned with propane tiger torch and finished with linseed oil.
Recommended Skill Level
Beginner

My first build!

This locker cabinet was my first build and I learned a ton. For example:

1. Use the Kreg face clamps while drilling into the Kreg Jr.
2. Buy straight wood.
3. Buy wood that is not warped.
4. Do not try to buy wood with grouchy kids in tow.

Are you seeing a theme? Yep, your project will only be as square and perfect as the wood you buy.

I modified the locker plan to include apothecary-style drawers for our cell phones, sunglasses and chapstick. I also drilled through the back of one of the drawers to turn it into a charging station for our cell phones.

The locker has been super useful so far and is such a great way to keep my kids' backpacks and lunchboxes organized. The baskets are designated for my purse, stuff I need to return to stores, the dog's leashes, and library books. It's so nice to have all this stuff near the front door and never wonder where any of it is!

Estimated Cost
$100
Estimated Time Investment
Weekend Project (10-20 Hours)
Finish Used
Ralph Lauren "Aged Mint" in flat. Distressed and coated with Minwax Polycrylic in satin.
Recommended Skill Level
Beginner

Grillin' and Chillin' - Outdoor Grill Food Prep Station

Needed a table for food prep with my grill and found your plans! I used treated lumber for the base and nice cedar planks for the top. The treated lumber had a whiter than usual color which made the base really pop out. I put a nice pecan stain on top and a few coats of poly so the BBQ sauce wouldn't stain it! This was so easy, literally took 2-3 hours to build, stain and poly was done over the next few days. Ready for my next ana-white project. Thanks for posting these plans.

Built from Plan(s)
Estimated Time Investment
Afternoon Project (3-6 Hours)
Finish Used
Simple pecan stain and minwax poly. Brushed on the stain and kept brushing until I got the darkness I wanted
Recommended Skill Level
Starter Project

Comments

tr7dul

Wed, 07/09/2014 - 16:24

I was looking on Pinterest and found this table. It was exactly what I was looking for. You inspired me to go out and buy a miter saw and some wood and make the table. It turned out wonderful. It now has a permanent place on my patio and gets used when I grill mostly. I was hoping to be able to upload a photo but don't see the option to do so. Anyway, I want to say thanks for the great plans/instructions.

Spa-Slatted Double Vanity

We redid our master bathroom - we ripped out a soffit, a closet, the old vanity, and we ripped off the HORRID old wallpaper, put up 5' tall beadboard, designed our own trim, designed and built some heavy-duty floating shelves (see pic below) and decided we wanted an open-concept vanity, too. I fell in love with these rectangle porcelain white sinks and with all the white beadboard, and soon-to-be dark walnut stain hardwood floors in there, I thought the vanity should be dark brown stain too.

I used the farmhouse vanity plans to build the frame of the vanity, but i had to design the shelves on my own - I chose to do spa-style slatted shelves - they whole thing keeps the bathroom very open looking and not heavy and closed off. we LOVE it! :)

Estimated Cost
$80
Estimated Time Investment
Day Project (6-9 Hours)
Finish Used
General Finishes water based stain dye in MEDIUM BROWN - 3 coats. then 3 coats of water based polyurethane.
Recommended Skill Level
Intermediate

First Project- reclaimed wood look Queen headboard!

Submitted by jamie_C on Tue, 03/22/2011 - 12:02


Pin For Later! 

First Project- reclaimed wood look Queen headboard!

Estimated Cost
around $75
Estimated Time Investment
Afternoon Project (3-6 Hours)
Finish Used
Used only one coat of Minwax Dark Walnut (really liked the rustic look), and finished with Minwax polyueruthane.

This was a quick build- did all of the cutting, & got it mostly assembled while my toddler was napping! One thing to note- we had to add some wood braces on the back in order to straighten our boards out. They looked ok at the store, but we got them home & realized they were quite warped! Sanding, staining and polyurethaning took additional time that was spread out over a few days (didn't include that in total time). This was great for a first project. I've got lots more on my to-do list now!
Recommended Skill Level
Beginner
Seasonal And Holiday

Farmhouse potting bench by Rocky Acres Woodworks

Submitted by Anonymous (not verified) on Sat, 11/06/2021 - 07:17

I used 1x4 for the top and stained with dark walnut danish oil

Built from Plan(s)

Comments

Garage Shelving

Submitted by NLough on Thu, 12/16/2021 - 08:42

I made these shelves - following the plans on the site - with my kids who helped with the painting. What a straight forward way to organize the garage and have fun introducing kids to building. The shelves are deep enough for storage tubs, access items easily and are very sturdy. I would fully recommend this plan to get things sorted in your garage and have more room for other projects!

Comments

Northwest Ohio Pergola

Submitted by russell_h on Sat, 06/27/2015 - 17:57

I used flat stone and a masonry circular blade for the base of the corner posts. I also used 2 x 4's for both layers of the top boards. It was a lot of fun to build.

Built from Plan(s)
Estimated Cost
$250.00
Estimated Time Investment
Week Long Project (20 Hours or More)
Finish Used
I will stain and seal in a year
Recommended Skill Level
Intermediate

TV Stand

My wife wanted a new TV stand. I found some plans online but ended up using the basic plan then added my own ideas to it. Used all pine boards. Then finished with Minwax Simply White.

Comments

10.5' Farmhouse Dining Table

Submitted by ehays216 on Mon, 07/06/2015 - 06:20

I built this 10.5' farmhouse table for my aunt and uncle's dining room. I modified the plans slightly to try and look more like the Restoration Hardware version, using 4x4's for the beams and side supports and rounding the sides of the side supports. I also modified the top by adding an extra sideways board in the middle. The rationale for this was that I was worried about finding boards at the length I wanted that were perfectly straight from end to end, so by adding the center sideways board I only had to find boards that were perfectly straight for about half the full length. Also, we liked the look of the extra board in the middle. My little cousins had fun helping me distress the wood with hammers and other tools laying around. We love the way it came out, thank you Ana!

Built from Plan(s)
Estimated Cost
300-350 including staining materials and hardware. I bought twice the wood for the table top boards due to the modified tabletop/ and length.
Estimated Time Investment
Week Long Project (20 Hours or More)
Finish Used
Minwax dark walnut with Minwax red mahogany on top of that. On the 2x8 boards, the dark walnut made a lot of contrast with the grain of the wood, and I was trying for a more evened-out color. The dark spots were almost black after one coat. Additional coats and the red mahogany helped even out the contrast and added color. We ended up really liking the final result, but in the future I think I will go back to using the black tea/ steel wool and vinegar method which is what I had been using in the past.

I used polywhey on top and applied several coats.
Recommended Skill Level
Intermediate

Corn hole

Another great tutorial and project done. Thanks Ana

Comments

Pottling bench/greenhouse/water collector

Submitted by richvide0 on Tue, 03/15/2022 - 08:58

I modified the simple potting bench into 3 components. The potting bench, a place for seedlings and a sink.

We get a ton of rain up here in the mountains of Puerto Rico. So much so that it tends to drown seedlings if they aren't covered. So I took the Simple 2x4 Potting Bench plans and modified them to fit the space I had picked out for the project. Since we get so much rain I wanted to collect it. So I added a clear pvc roof and with a gutter made with pvc pipe which flows into a 27 gallon storage container. This disperses into the sink. There is a bucket under the sink to collect the water.

Note: I had to add a 2x4 support under each shelf. I made the two big shelves a little longer so it needed it to support the 1x4s.

I am an avid gardener so I should have given myself this gift after years of not having any level/proper space to work.

Comments

Camp Loft Bed (slightly higher)

Submitted by Anonymous (not verified) on Fri, 08/26/2022 - 05:53

I made it slightly higher with some extra bracing for additional strength. Added a table underneath and some colored lights. The stain and satin clearcoat finished it off well I think.

Comments

Modern Patio Chairs/Love Sear

Submitted by Anonymous (not verified) on Sun, 09/25/2022 - 15:57

Super easy and fun project! We altered the original plans to build a loveseat and had zero issues. We did add some extra support below.
I did not find 25”x25” cushions within our price range so I settled for 25”x22.5” and they work but ultimately 25x25 works best.

Low Loft Bed for Toddler

Submitted by Anonymous (not verified) on Sat, 11/12/2022 - 17:08

I built this low loft bed following Ana’s plan as soon as I found out that I was pregnant with baby #2. We needed a “big boy” bed for our 3 year old, and I couldn’t find a loft bed on the market that was priced reasonably or looked sturdy. This the biggest challenge I have taken on to date, and I was certainly sore after building. I don’t have a workbench, so I worked on the floor of my garage and used a couple of saw horses that my dad had next door. I am so proud of this and can’t wait to build more after baby boy comes!

Comments

Farm House Table and Benches

Submitted by markelll on Mon, 09/12/2011 - 09:28

I wanted a big rustic farm table, didn't want to drop thousands on one from a store, so I decided to make my own!

I built it in the (formerly empty) dining room, with tarp on the floor and plastic to seal the doorways.

Was a big project and my first project so I started with the benches as this site and users recommended.

I used the farm house bench plan - just shortened the dimensions so that I could have two benches on either side of the table. Then I merged the two table plans so that I could have the top with the bread boards but legs that attached underneath (like the rustic table) so that they could be removed when we move. I'll work to upload my plans too.

Used Minwax Wood Stain in "english chestnut" and Deft Satin Wood Brushing Lacquer (instead of a Polyurethane).

Estimated Cost
approximately $300 (for wood, finish, sand paper, stain, screws..)
Estimated Time Investment
Week Long Project (20 Hours or More)
Finish Used
Minwax "English Chestnut" and
Deft Satin Wood Brushing Lacquer to finish.

I prepped the wood by sanding it down to 220 (could have done an even better job sanding, and sanded the table and bench tops even finer).
Used a sponge brush to apply the wood stain, wiped off rather quickly (only a few minutes on the wood).
Used brush to apply Deft Sating Wood Brushing Lacquer. Used spray can of Deft when I ran out of liquid. Didn't go on as thick. Although using a brush is more of a hassle, it had a better coat.
Recommended Skill Level
Beginner

Comments

Guest (not verified)

Sun, 09/25/2011 - 12:18

Your use of short benches makes the set more family and guest friendly. I usually hand rub my finish, I think i want to build this and probably use 0ak 2X12's (know it will be heavy).

Suggestions?

I will use it on a Florida roofed concrete deck for an outdoor dining area. Typically more formal dinners. Deck overlooks beautiful cove.

Guest (not verified)

Thu, 10/13/2011 - 11:00

Can you explain how you merged the plans to add the bread boards? I would love to do the same!

Jeff (not verified)

Fri, 06/01/2012 - 09:09

This is exactly what I am looking for in a table to build. We want bread boards on the end and we don't want stretchers on the bottom. How did you combine the two to do this. Can you send me a copy of your plan? [email protected]

Kimberly Dassel (not verified)

Sat, 08/04/2012 - 13:35

Could you please send me the plans for this table? I love it and would love to attempy making it. Thanks so much!

Joe (not verified)

Wed, 01/02/2013 - 15:53

Your farm table and benches were exactly what I was looking for. Please send me the plans if they are available. Thanks

Faye Sawatzky (not verified)

Wed, 01/02/2013 - 19:23

I would love a copy of the plans for this gorgeous table you made. I am inspired.

Kelly Lucas (not verified)

Tue, 01/22/2013 - 15:26

Would love, love the plans for this project if you are willing to share. Many thanks! :)

danno2084

Fri, 01/25/2013 - 20:57

I'm sure you've heard this a hundred times already, but we've been looking for a very long time for a table like this. We would also love the plans if you're sharing. Thanks for the great blog!

jsh2001

Tue, 01/29/2013 - 07:47

Getting ready to build my own and now you have me thinking I prefer this design with no stretchers on the bottom. Looks great!!!

Mammavof3

Sat, 03/16/2013 - 20:12

Can I please please please have the plans? I have a very narrow dining area and this table is PERFECT. Thanks

PorkyPok

Wed, 05/08/2013 - 13:30

I too would really love/need these plans. PLEASE. Thanks :)

Cbreck21

Sun, 05/12/2013 - 14:30

I would REALLY like the plans for his version as well. I am going to combine them. Can someone ask him to post or his he sending via email? If so, [email protected]

Thank you SO much!!!

wendykeeler

Mon, 07/15/2013 - 09:48

just bought a cabin and need all sorts of furniture. I love what you did and would sure love to have your plans and how you merged the two----both for the table and especially for the benches. Trying to do a 10' table for huge family gatherings. Thanks so much! You rock!

Sarina88

Tue, 07/23/2013 - 14:28

This table and bench set is exactly what I am looking for. You did such a great job!

Do you have plans that you wouldnt mind sending to my email? [email protected]

KailuaGirl

Fri, 09/06/2013 - 14:25

Hi There!
It seems like there are no replies to the many requests for the merged plans.
I'm guessing he used the top of one set of plans and the bottom portion of the other set of plans?? I will attempt to tweak myself..
Good Luck!

markelll

Fri, 01/09/2015 - 19:54

Hi everyone,
Well I didn't see all these comments! Sorry to have ignored your requests for plans!

This is the bench I made (I did four of these, and adjusted the measurements so they were each about 40" long)
http://ana-white.com/2011/01/farmhouse-bench

I was going to do this table, because it matches the benches, but decided I wanted a table with removable legs so it would be more maneuverable when we move!
http://ana-white.com/2009/12/plans-farmhouse-table-knock-off-of.html

I ended up using more of this plan in terms of how I assembled it, but adjusted the plans to have the tabletop include breadboards (the plank on top perpendicular to the long tabletop planks) and I used 4x4s for legs, plus the top was from 2x8s not 1x10s. I put in the optional cross supports too, and additional supports under the breadboard to connect it to the table frame and table top slats.. this is more info than you need, all to say, plans are flexible and you can do what you want!
http://ana-white.com/2010/03/plans-very-rustic-table-and-cool.html

Sorry I don't have detailed notes. I was very picky about the dimensions (based on space) and how high I wanted the table (about 1.5" taller than a normal table). I also measure the distance between the underside of the table and the tops of the benches so I could cross my legs under the table (an odd requirement).

Happy Building!

brentlbg

Wed, 04/01/2015 - 15:10

I like the english chestnut stain. That works so well with this type of lumber. Great job. I plan to use the same stain on the Tryde coffee table I am building. Thanks for sharing your work!!!

Smaller Dog Crate with a drawer!

Submitted by Anonymous (not verified) on Wed, 01/06/2016 - 12:28

You may remember my green stratton day beds that I built a long time ago- finally I have another project to post- I am soo happy I found Ana White's website. We just got back from a 2.5 week vacation in Israel and my dogs were staying with my sister. She told me they had been sleeping in the same kennel together instead of separately. Their kennels are too small so I decided to build them one using wood I already had. But since they are small dogs, I decided to size it down- but I wanted it end table height- so I built a smaller kennel- 20"H x 19"W x 28"D. but... I added a drawer to the top to bring it to the right height. You can read all about it on my blog- link below.

Built from Plan(s)
Estimated Time Investment
Weekend Project (10-20 Hours)
Finish Used
provincial wood stain.
Recommended Skill Level
Intermediate

Comments

Rustic Farm Potting Bench

Submitted by Anonymous (not verified) on Fri, 03/10/2023 - 06:24

I built this 10’ long potting bench to fit into a 12’ barn stall. It fills the need to have a work surface plus room for storage on top and underneath. The hooks provide a place to hang my many hand tools and my Bluetooth speaker.

Built from Plan(s)

Comments