Raised Planter with Drip Water Hose Built-in
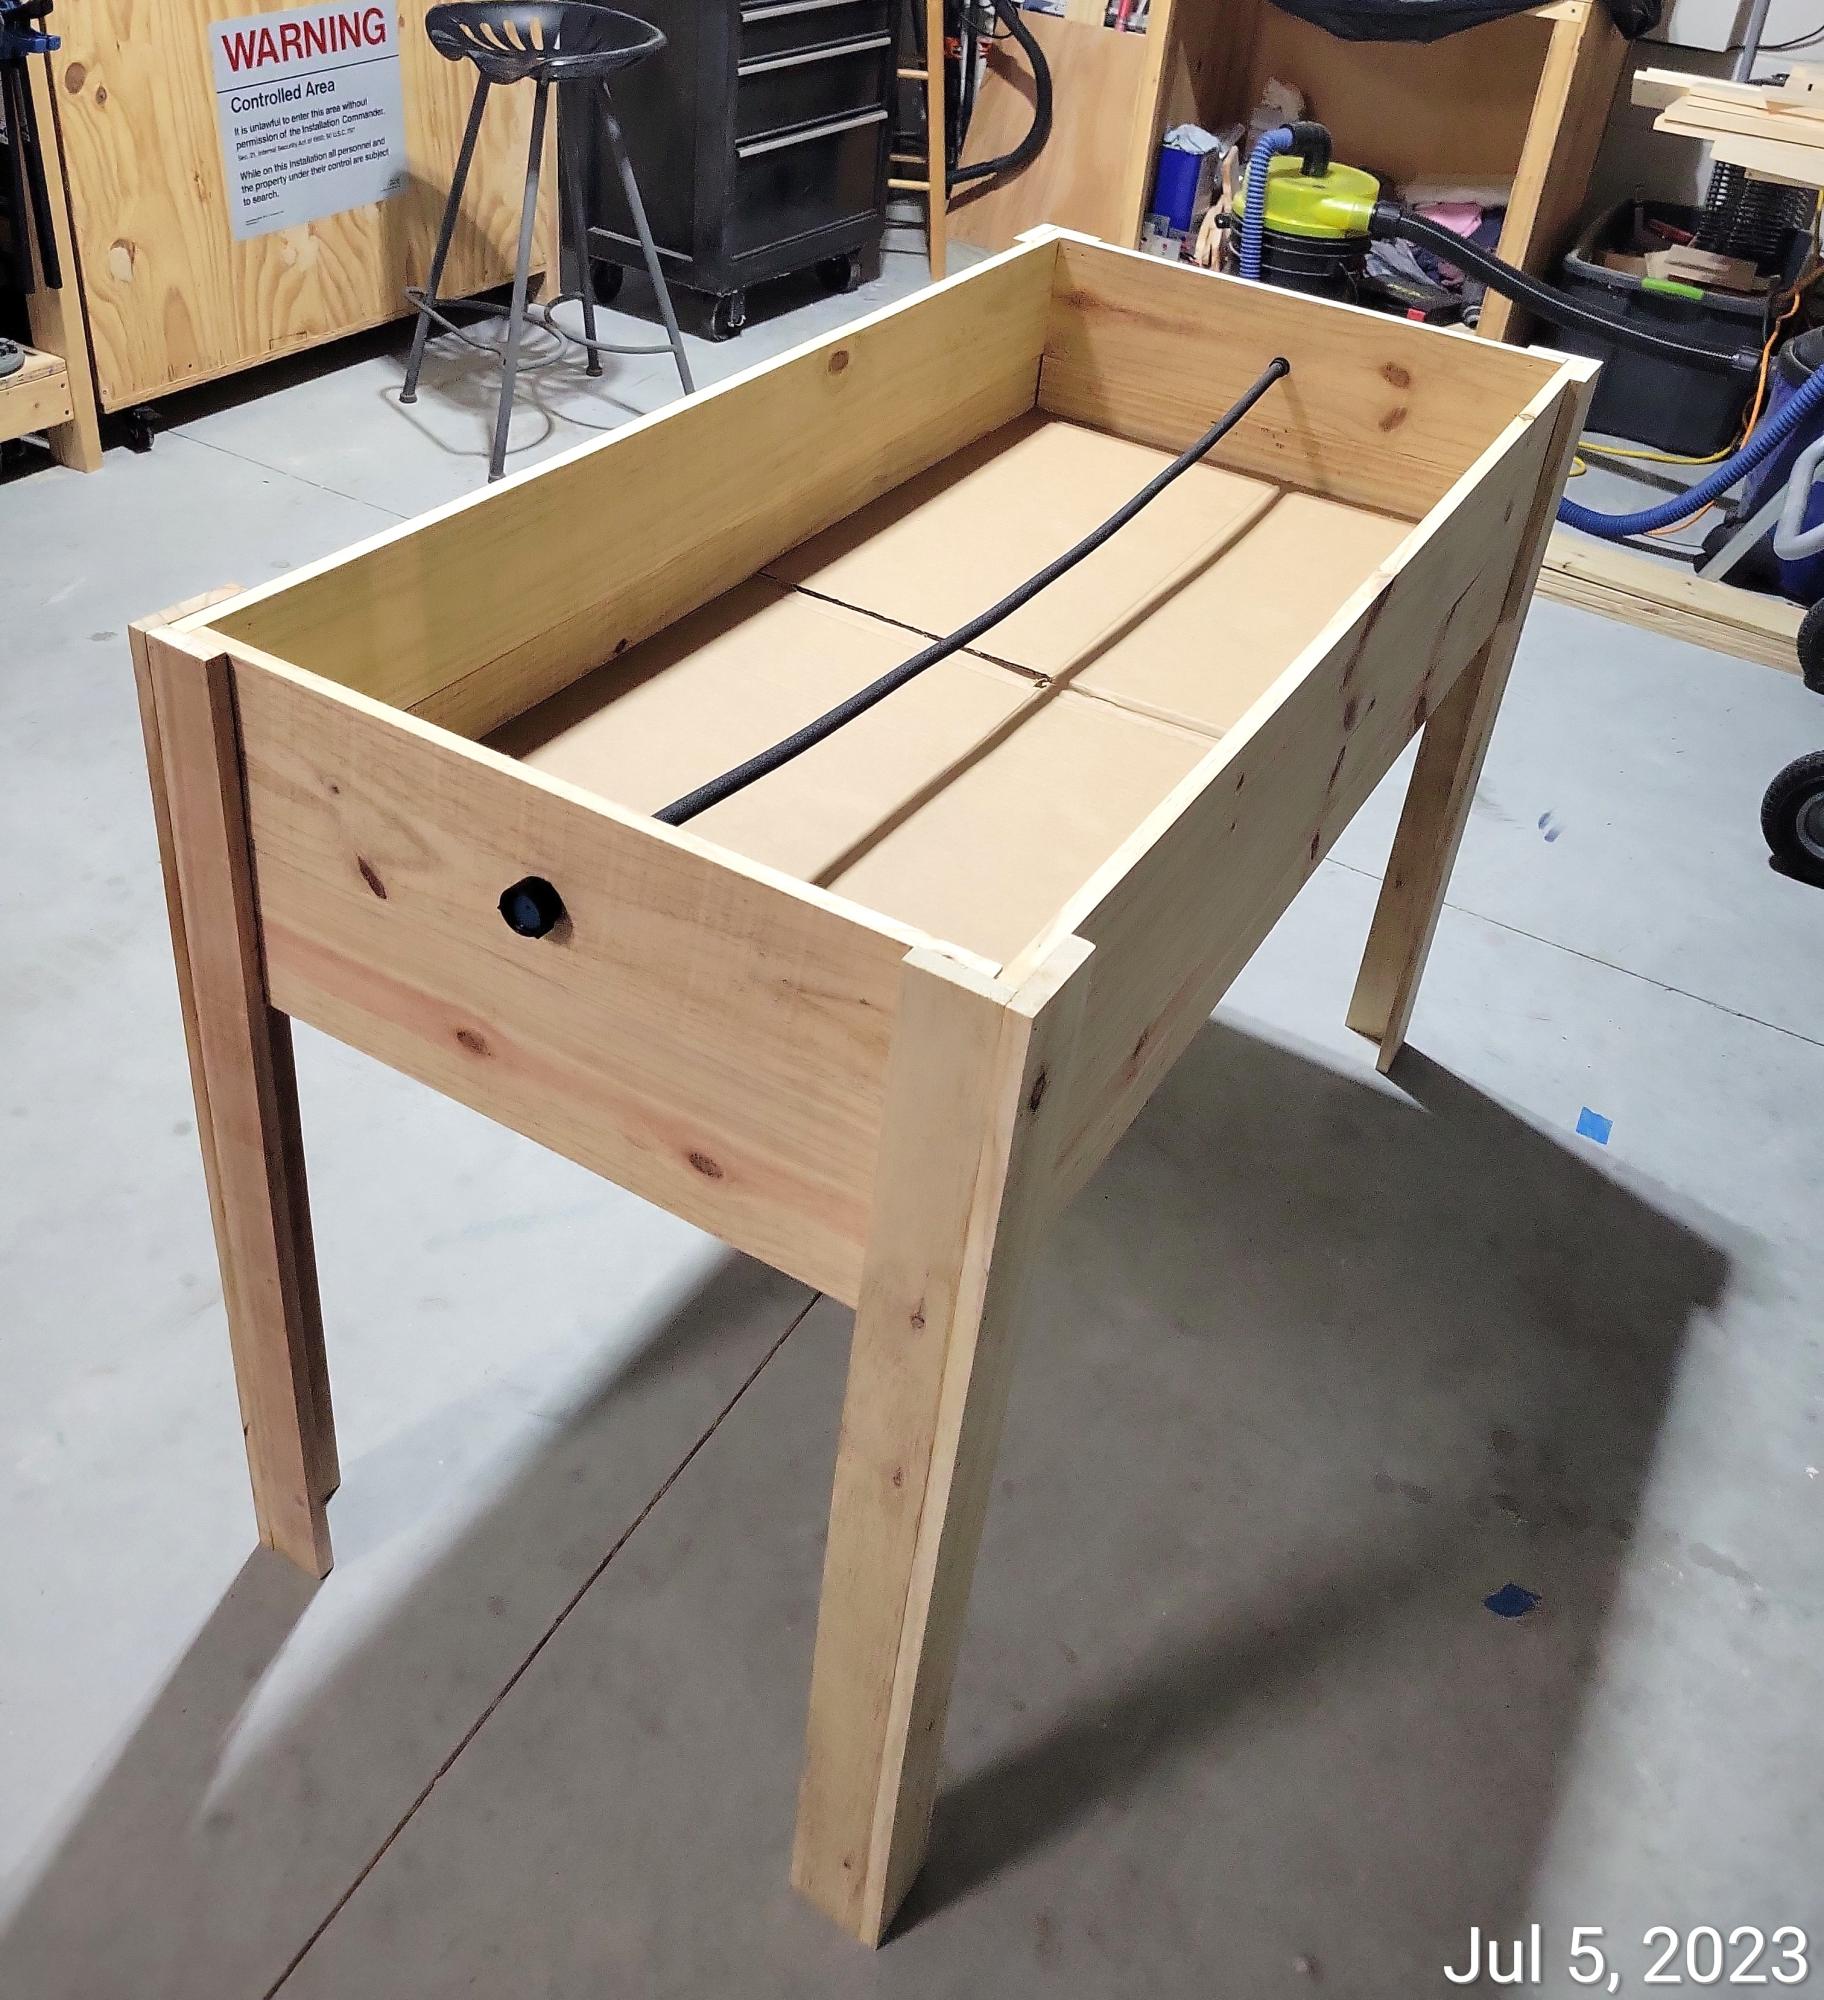
Raised planter with water hose.
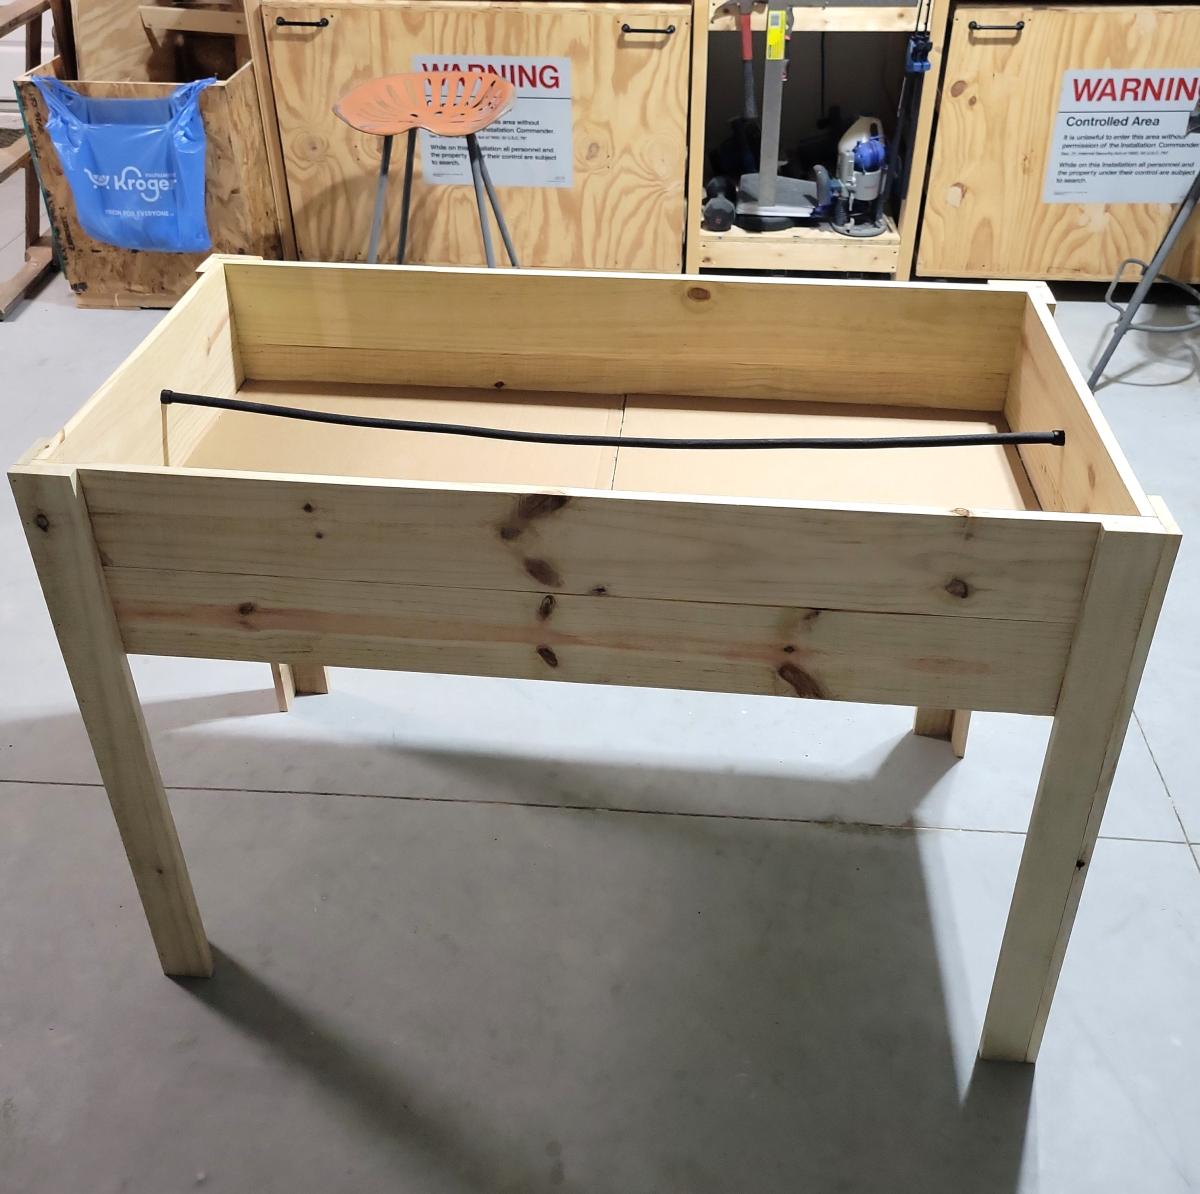
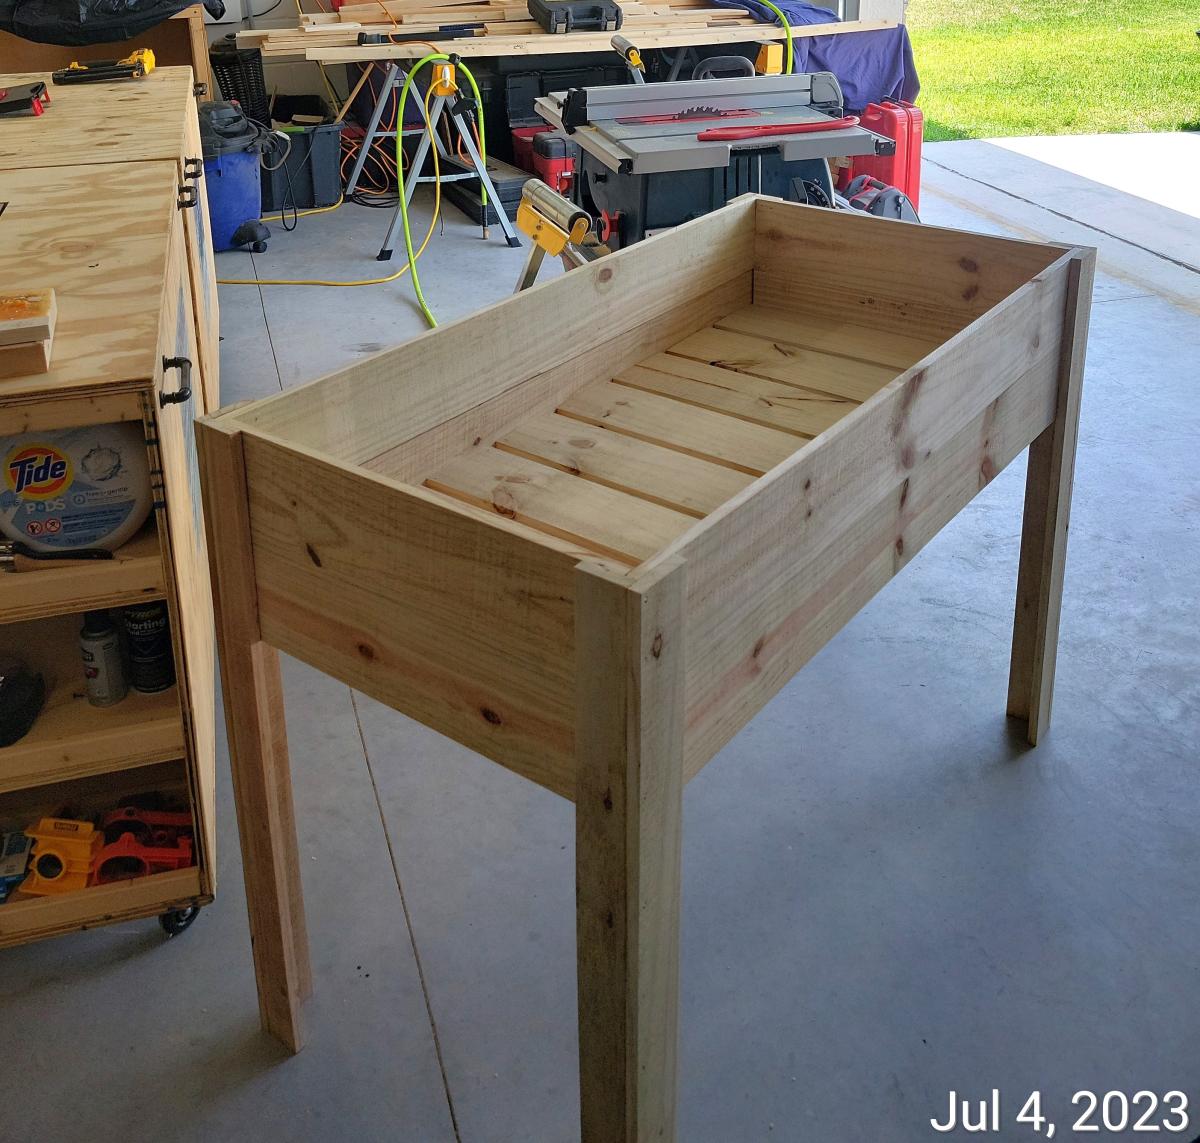
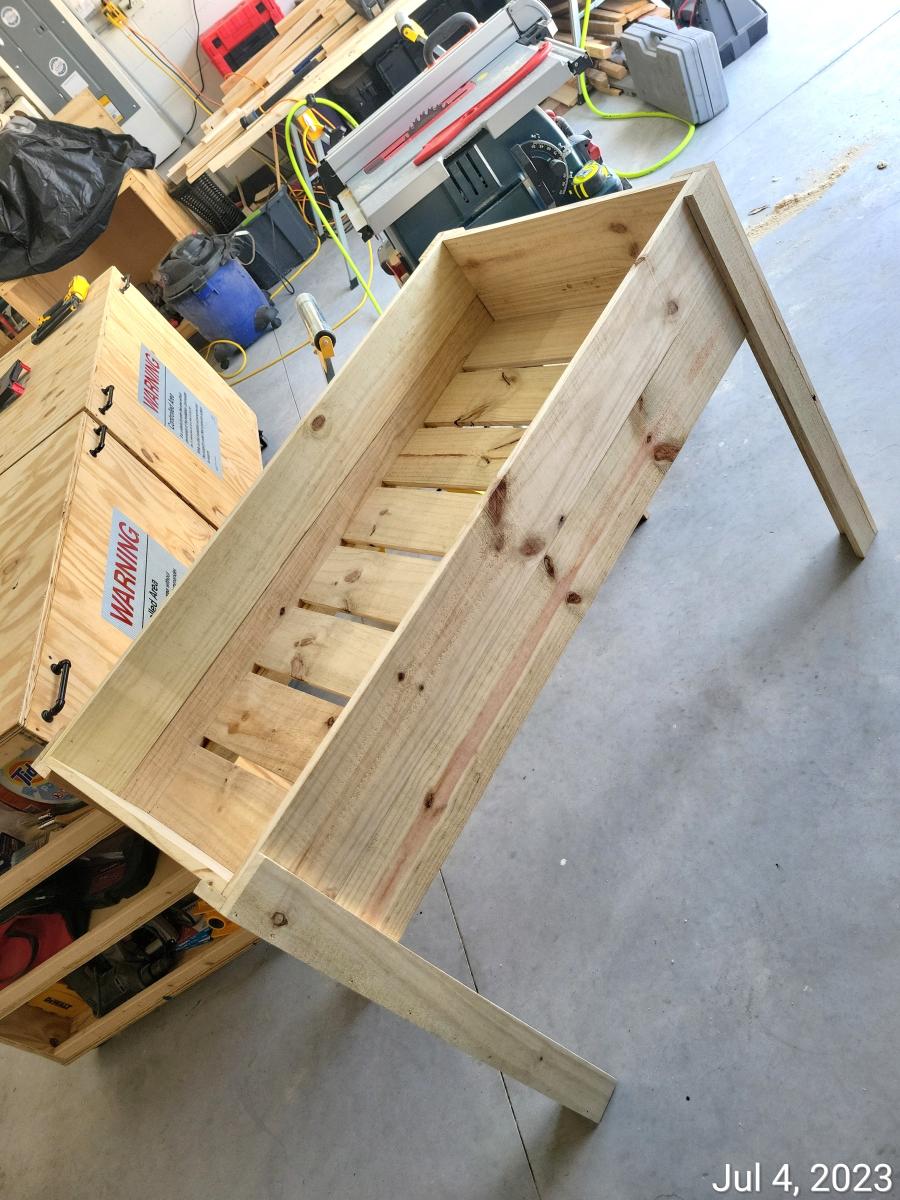
Built from Plan(s)
Raised planter with water hose.
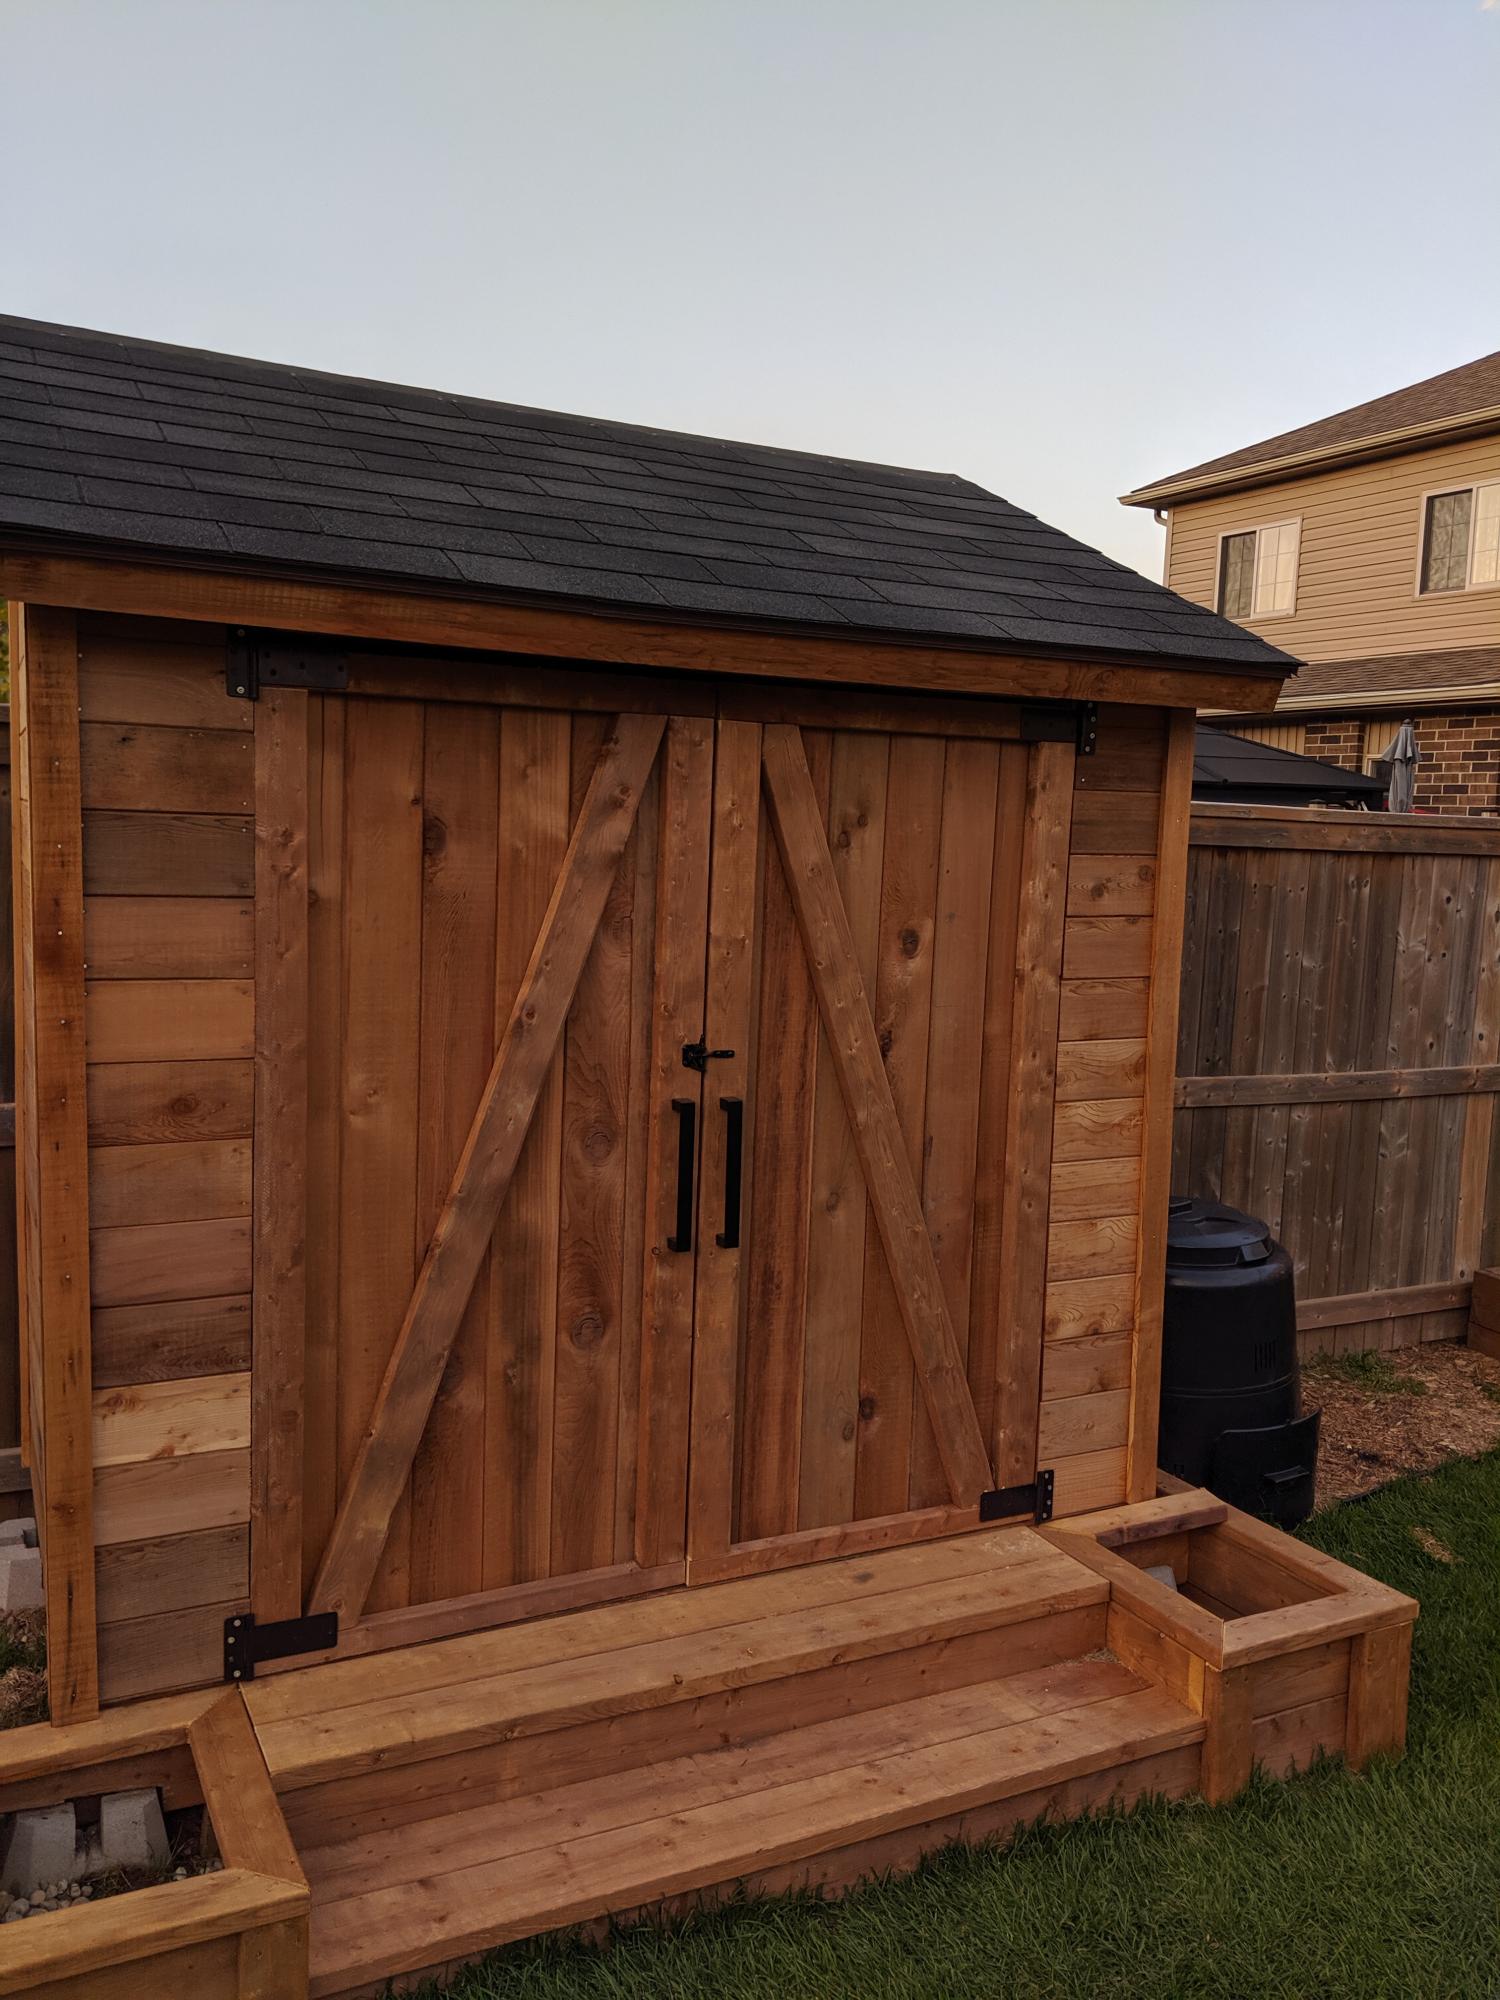
Cedar shed with planter box stairs. Both plans modified slightly to fit my needs. Siding is tongue and groove cedar. All other wood is brown pressure treat. Planter box stairs were sized and positioned to hide cement posts. Sorry for only one photo. Finally finished and ran out of time with good weather here in Canada. Will post more with weather permits. Thanks again for your plans. I've also built night stands and a farmhouse dining table.
Not sure if I linked the proper stairs plan. Was https://www.ana-white.com/woodworking-projects/outdoor-planter-steps-or…

Sat, 11/21/2020 - 18:14
This shed is beautiful! what were the end dimensions of your shed?
I made a few modifications that I think people starting this project may want to know. 1. 4x4 box gets a little tight for more than one kid. I chose 4x6 so that the bench dimensions would scale up to 3 slats per section correctly, but the length of 1x4 boards would not have to be lengthened, which would required additional support. 2. As a rule of thumb, any outdoor lumber that may have prolonged exposure to water (IE. Touching the ground) should be pressure treated. I couldn't find 1" thick treated boards, so the box uses 2x10 boards. 3. Used a redwood semi-transparent stain.
Outdoor couch is a delight.
Damian
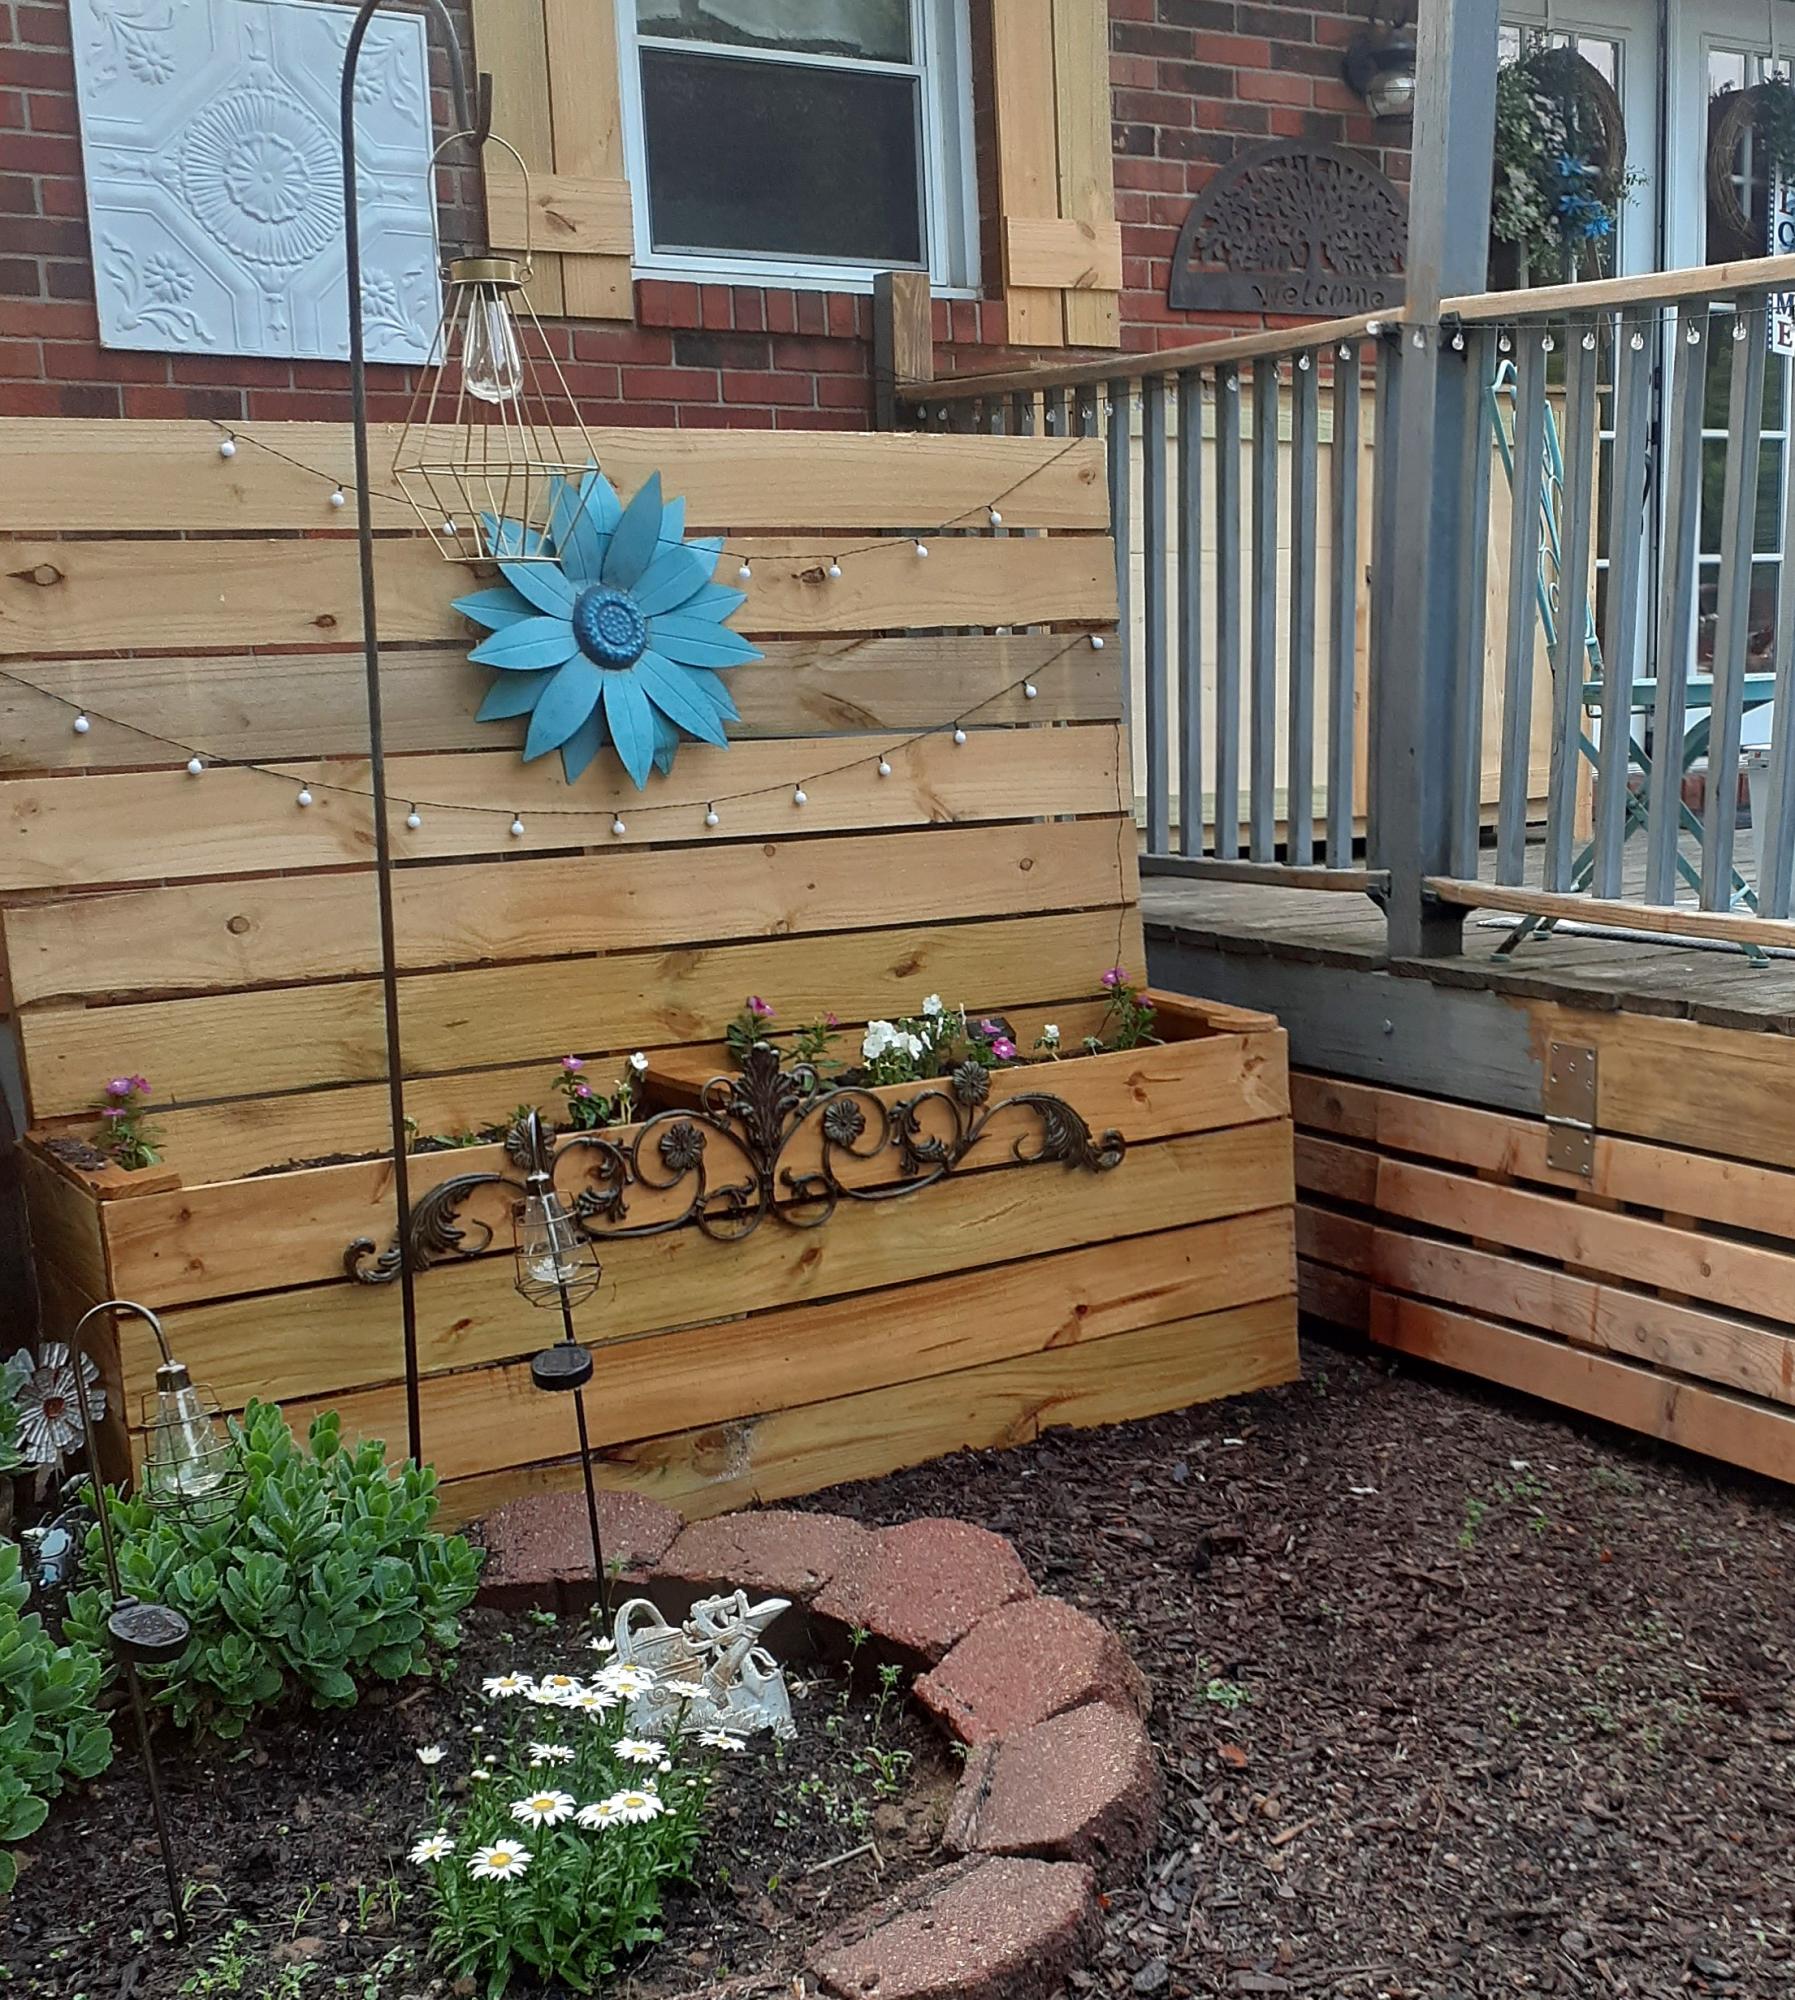
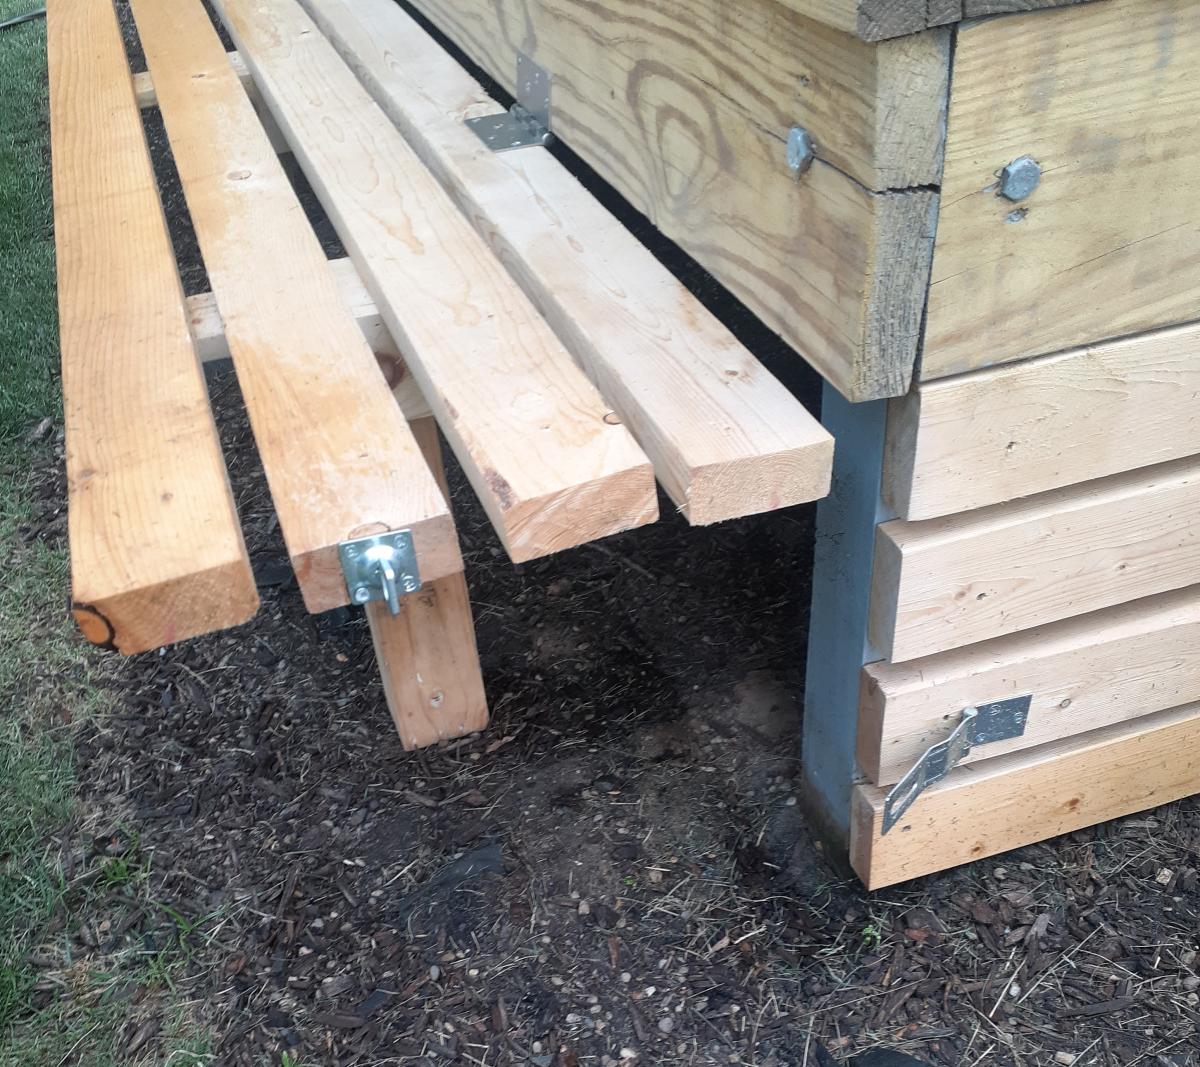
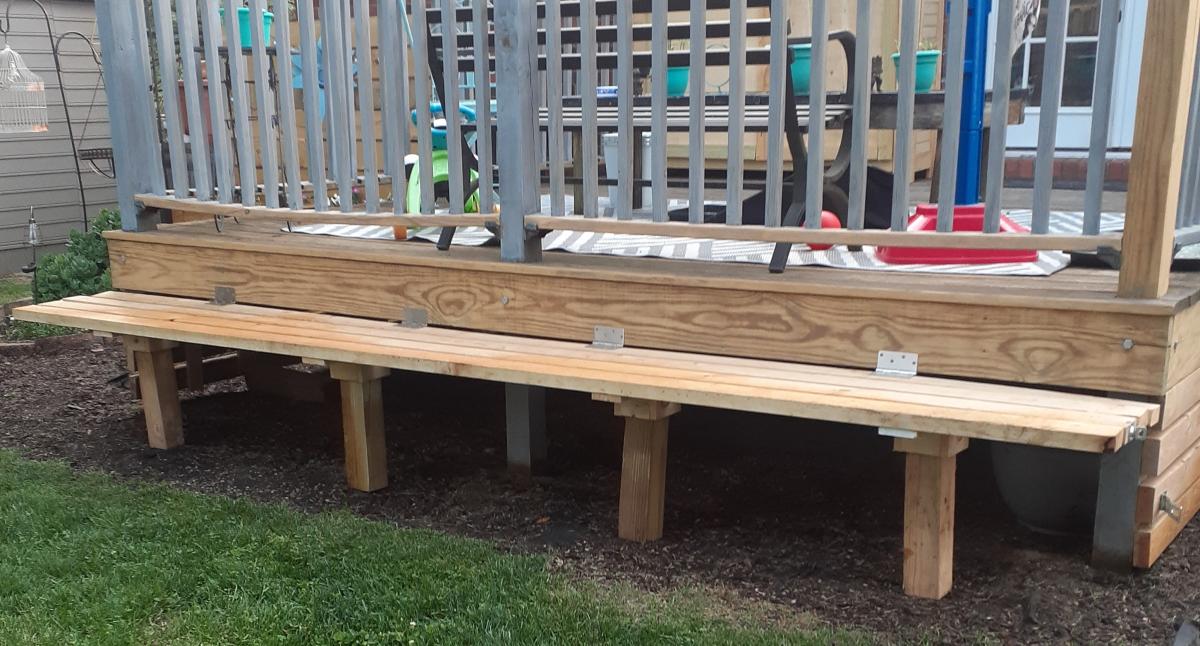
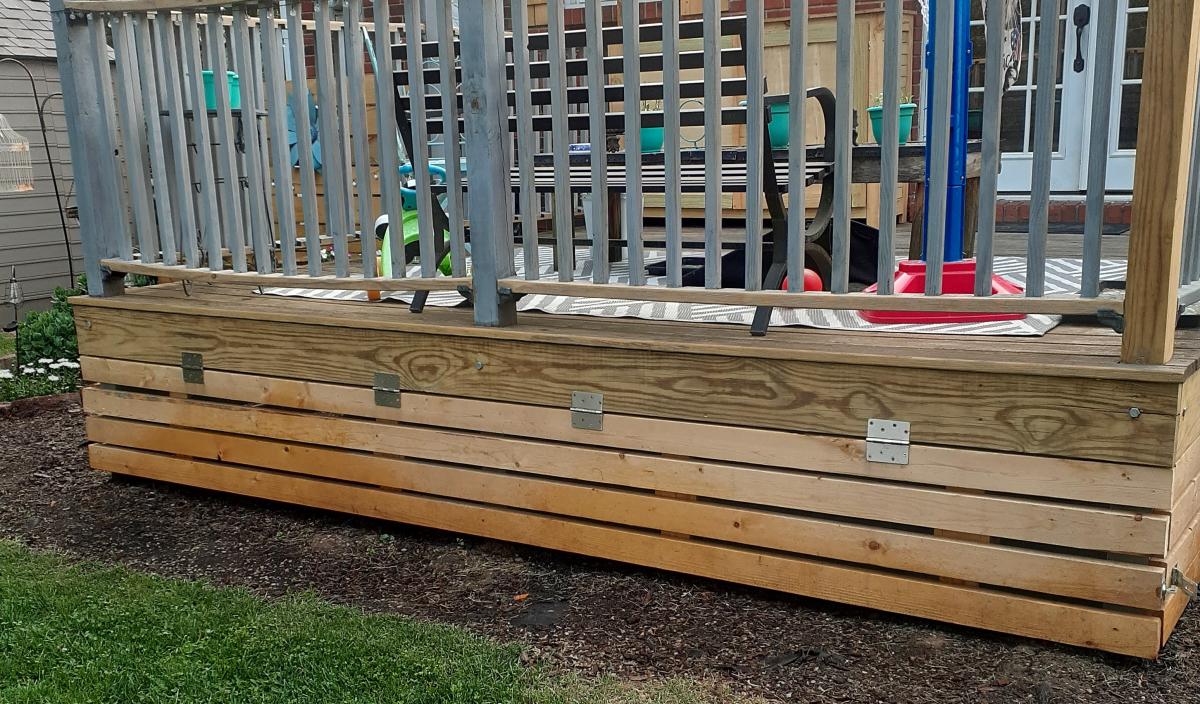
In the middle of a much needed makeover on our back deck! We did not have skirting around the deck and decided that we would like to close it in for extra storage(ladders,compost bin...) and we came up with this little something as a bonus. We are always hosting backyard get togethers and seating is a challenge. Setting up and putting away chairs,ugh. This has been the perfect solution. This was completely an "as we went" plan but the biggest need to know is, heavy duty hinges! (As I said,the deck is getting a makeover so go easy on the appearance:)
Jodi and Matt B.
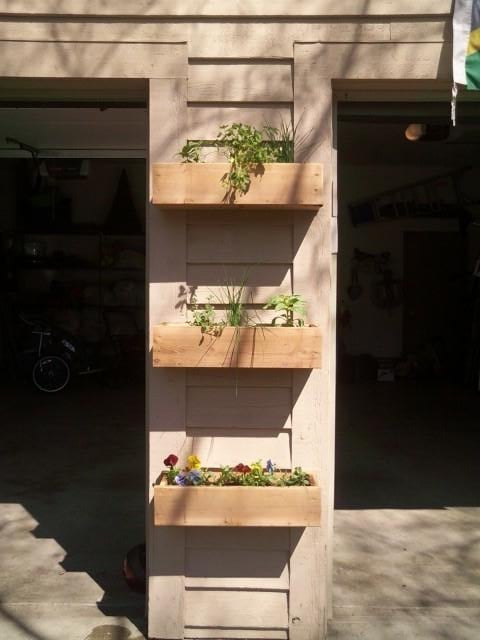
Decided to build a vertical herb garden after seeing a brag post. I used 3 six foot cedar fence pickets cut to 22 inches to fit between our garage doors. I used 2 inch nails and wood glue to keep everything together.
The best part was ripping th left over pieces of cedar at a 45 degree angle to use as hangers. I have not seen this described yet on this site yet. After you rip the boards you attach the one side to the back of the box so that the short side is flush. The other portion you attach to the wall so that the pieces will slide together to form a full board again. Its a great way to get the boxes flush against the wall and avoid expensive hanging accessories. It also allows you to do all your gardeining at your potting bench and then hang them when you are done.

Tue, 04/03/2012 - 11:27
looks great, and the french cleat idea is brilliant for planter boxes. Strength and mobility.
Thu, 11/01/2012 - 10:24
That technique you used is called a French Cleat system. I had three parallel rails installed on the walls in my garage, and, so far, have built two cabinets that hang on the walls (I have many more to go!).
Anything to which you can attach a cleat on the backside can be hung on a corresponding cleat on the wall! Pencil boxes, pegboard sheets (I have pegboard hanging on cleats), swivel lights, paper towel holders, an old bookcase (makes for instant shelving), etc.
Hugs!
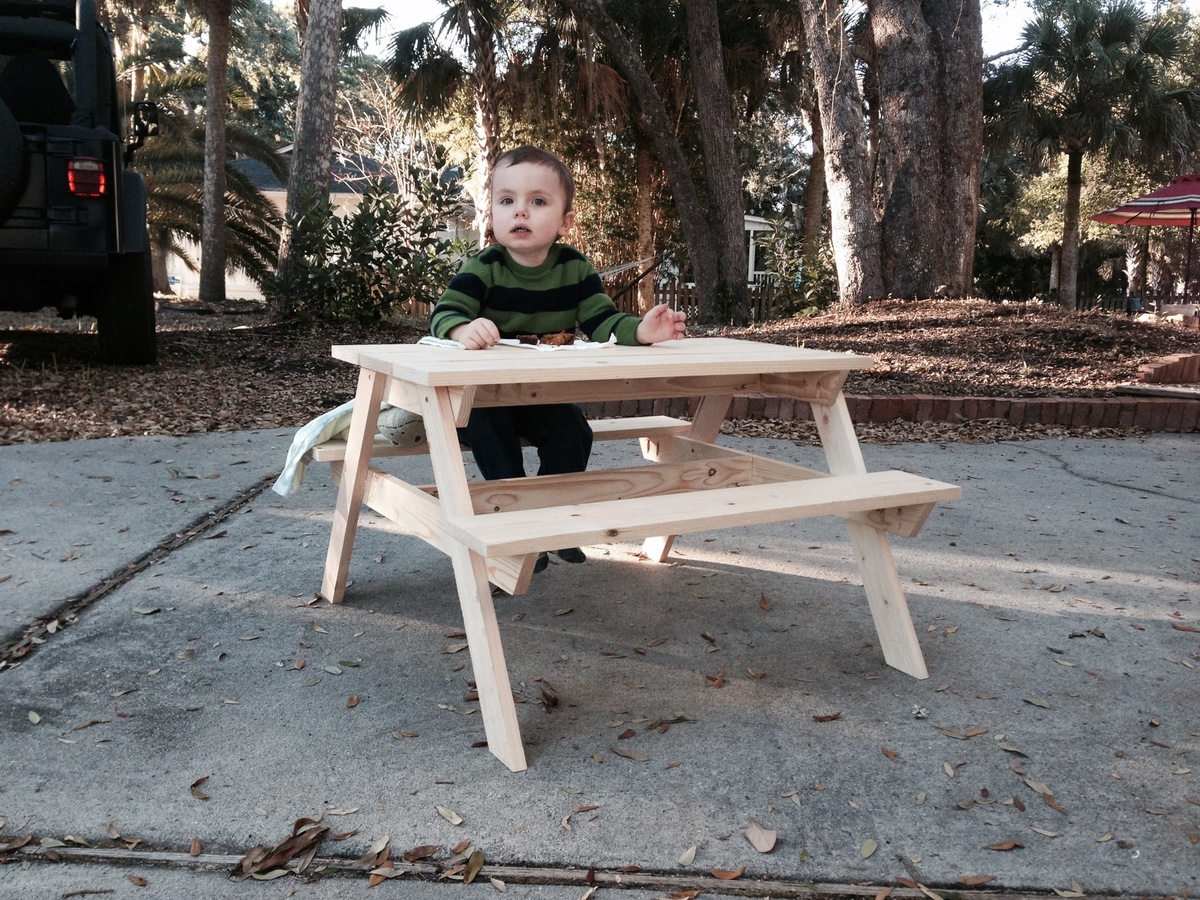
This was a fun, easy project. The main modification I made was to use 1 x 6 boards for the bench tops.
I also used my Kreg Jig extensively for this project. There are no visible screws on the tabletop or bench tops.
My grandson Oliver couldn't wait for me to put a finish on it. He had to try it out while snacking on his great-grandmother's pumpkin bread.
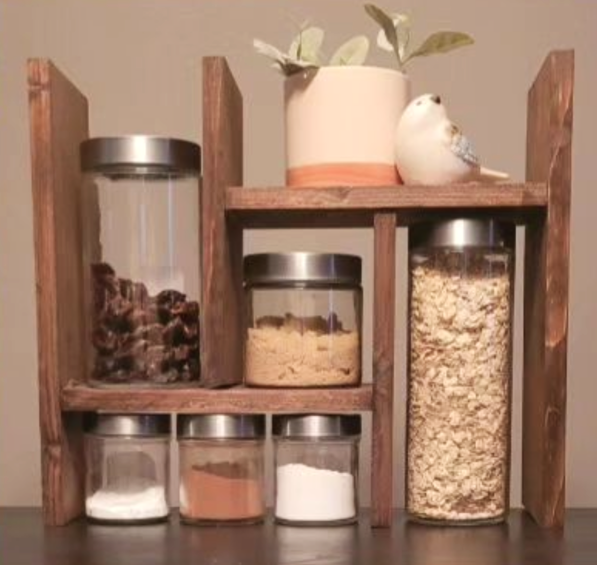
This is such a cute countertop organizer ! The possibilities for this are endless - maybe a tea / coffee bar or a hot chocolate bar - a breakfast bar or a snack bar ..... I may need to make another one...and definitely one for the bathroom !
.
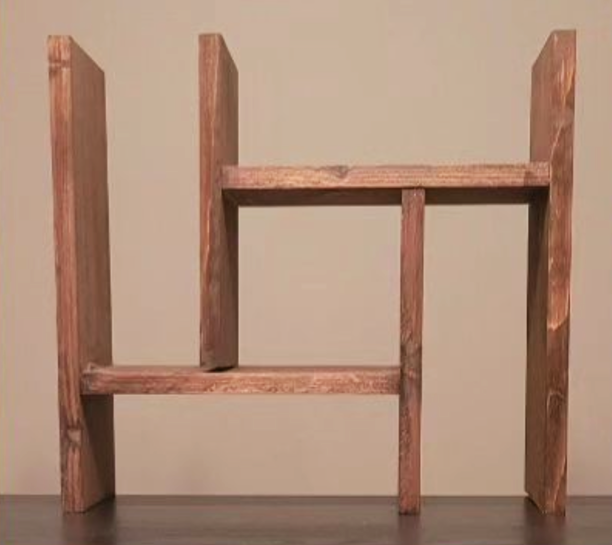
The shelves slide to change the width or turn one and it becomes a corner piece!

Tue, 09/12/2023 - 12:30
So great to see you made this and it turned out awesome! Thank you so much for taking time to share photos.
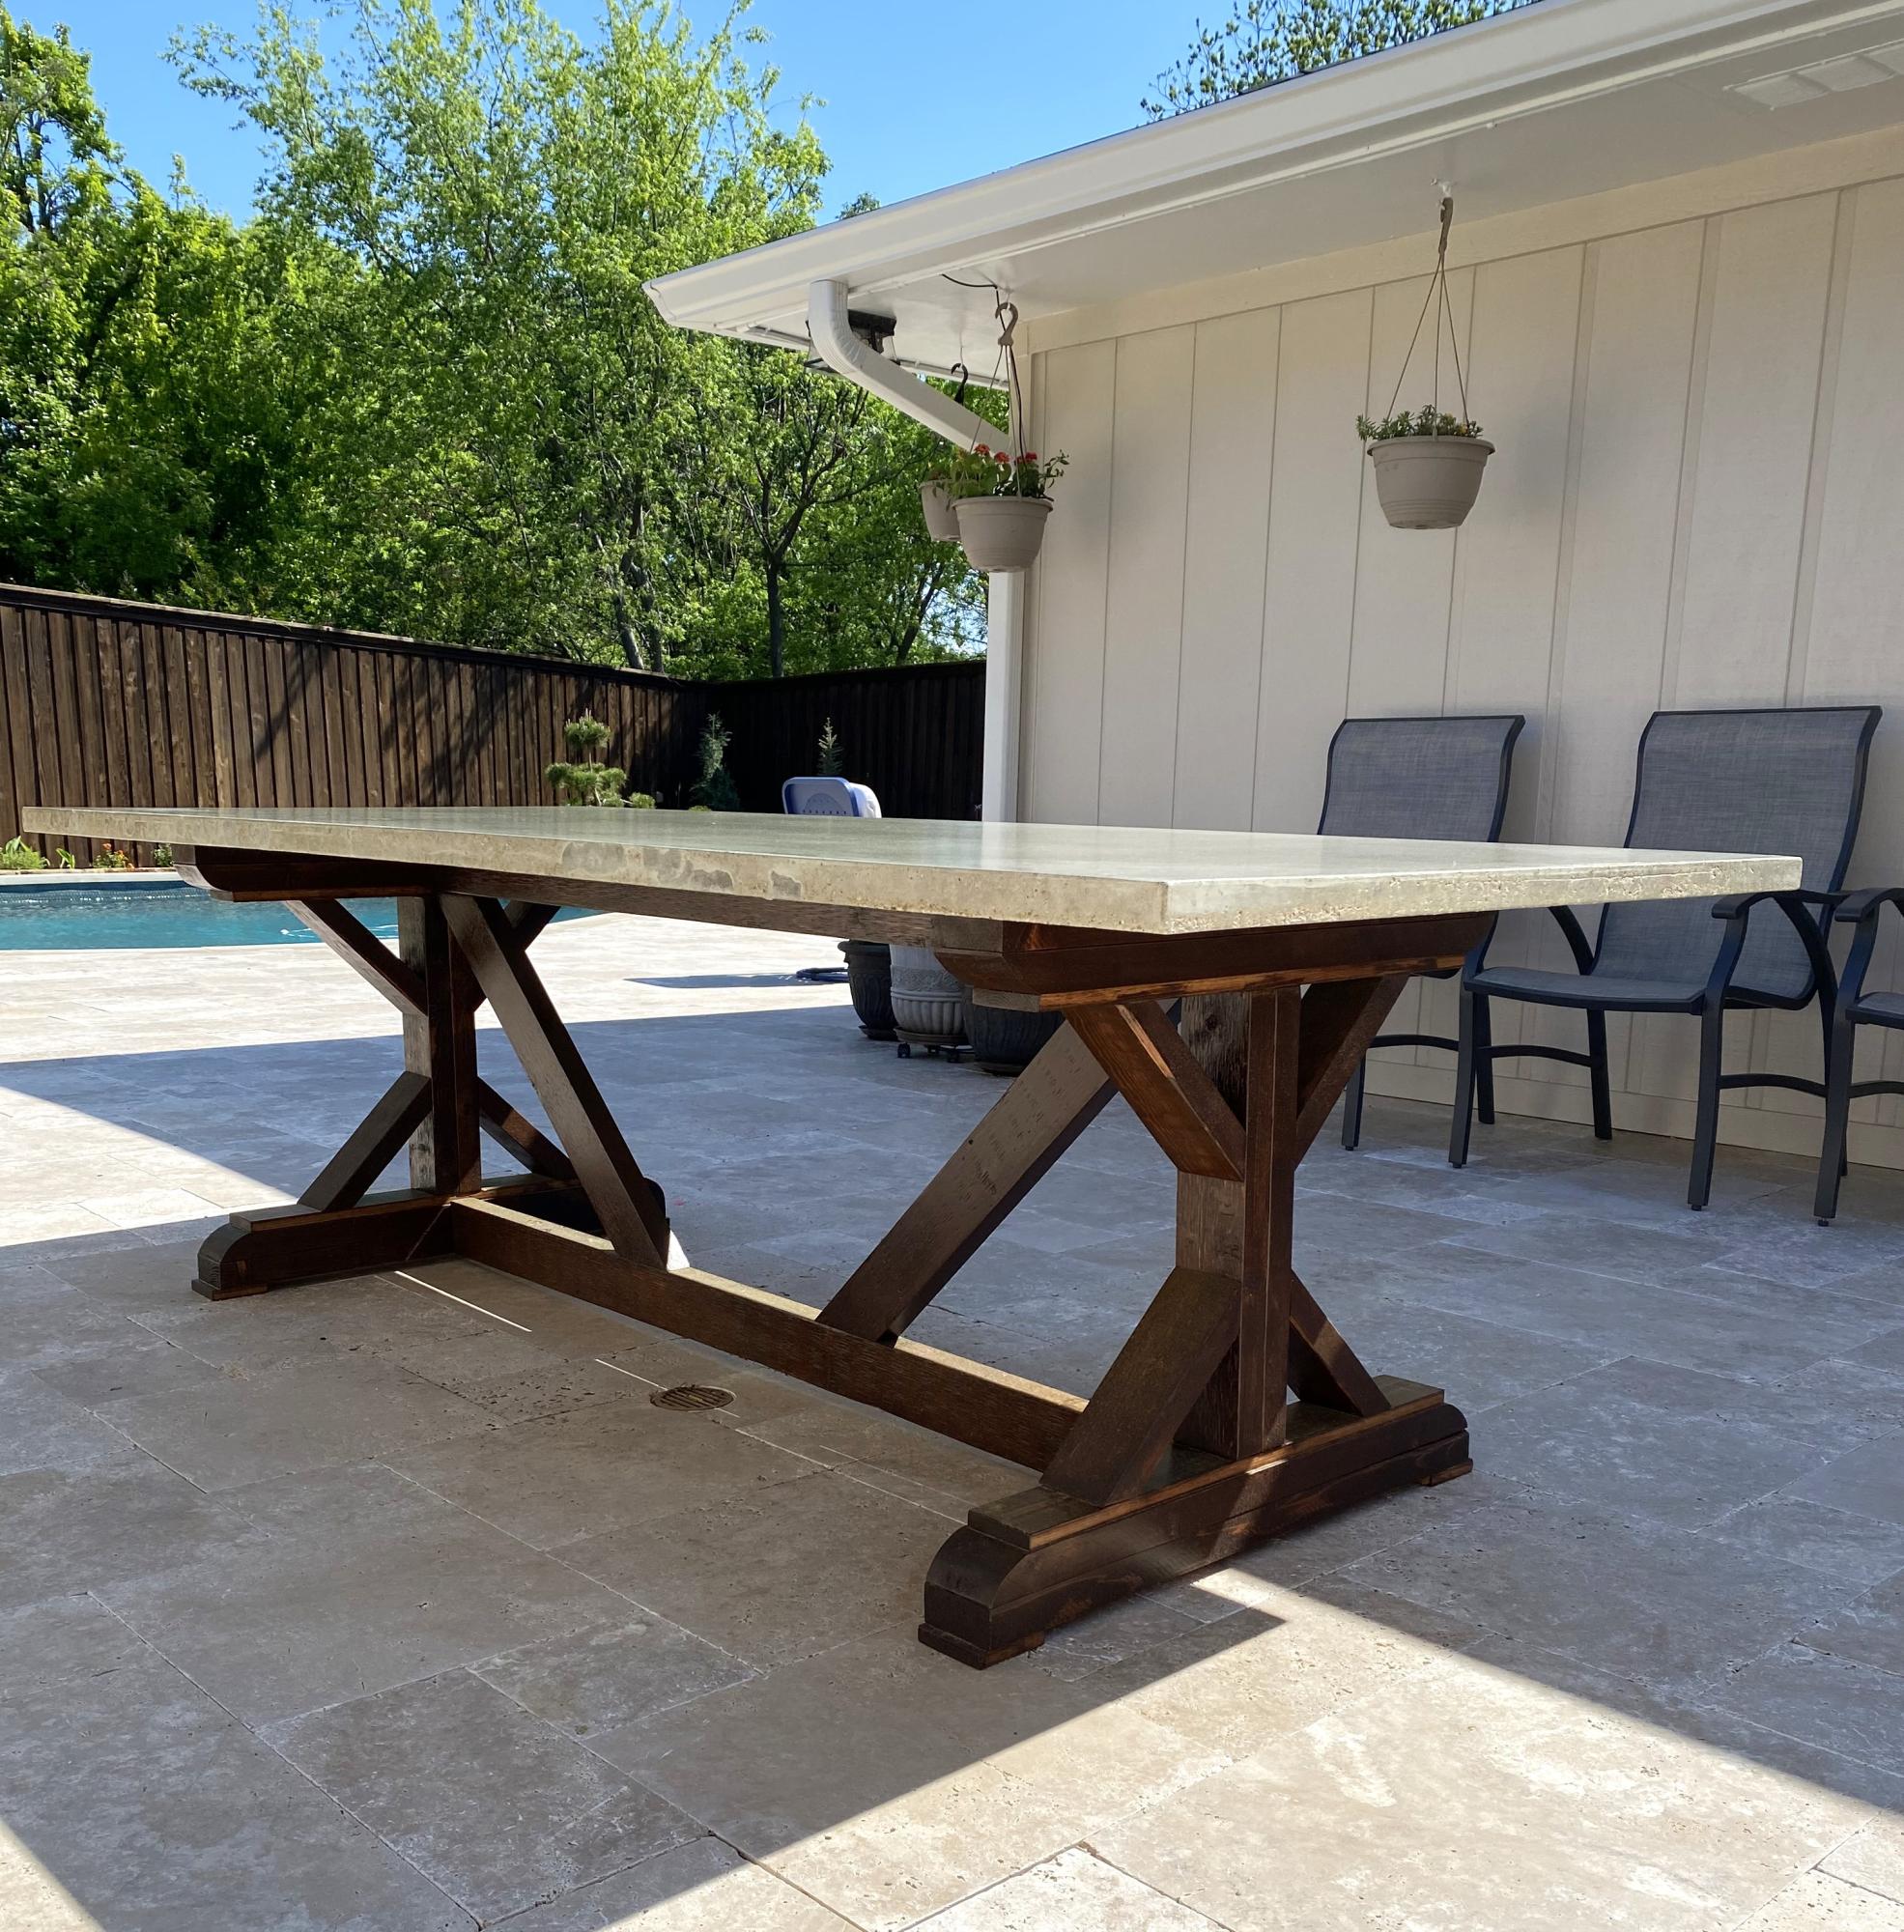
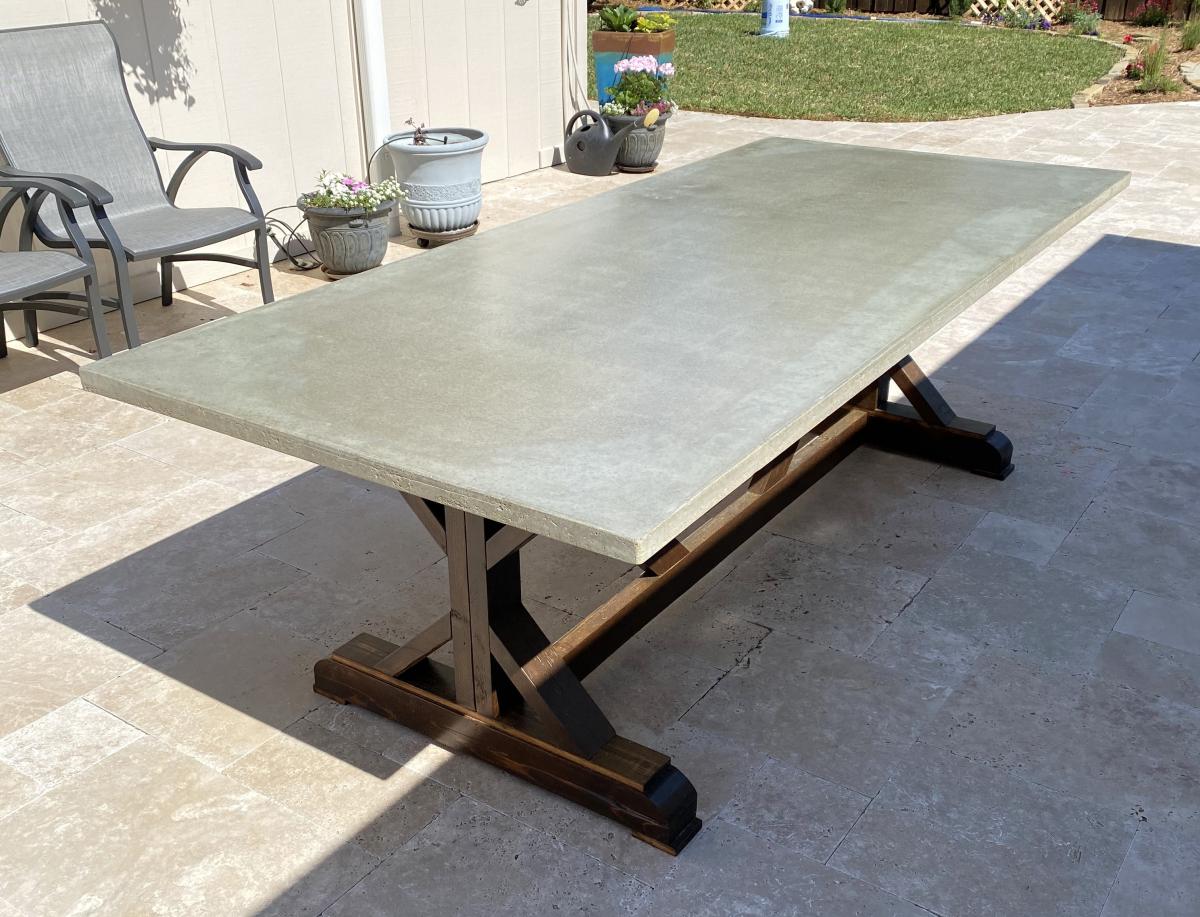
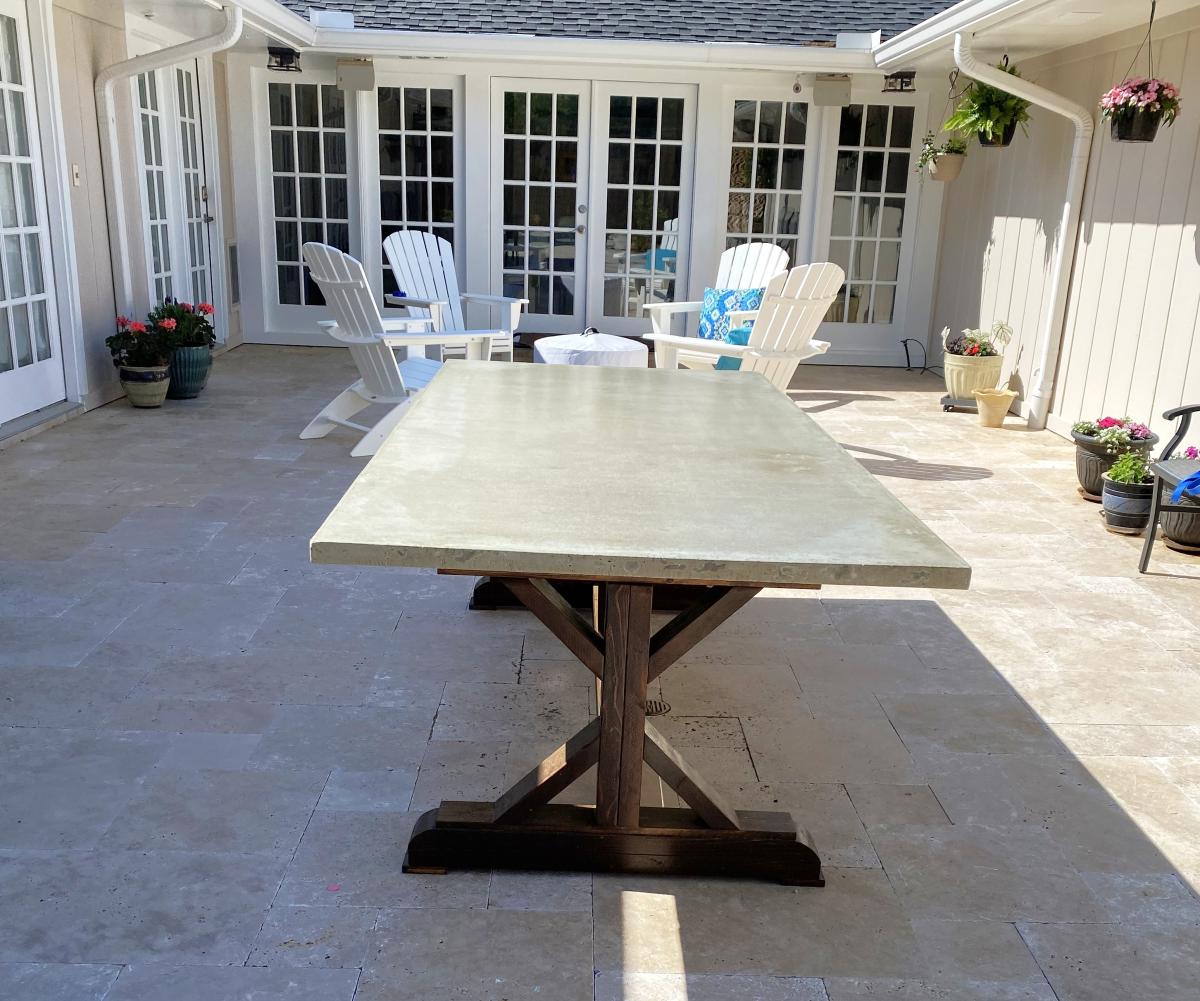
Fancy X Farmhouse Table in stained cedar with concrete table top. Concrete top made using 4’x8’ melamine coated MDF boards for form, reinforced with welded wire fabric, standard Quikrete concrete mix.
MDeMotte
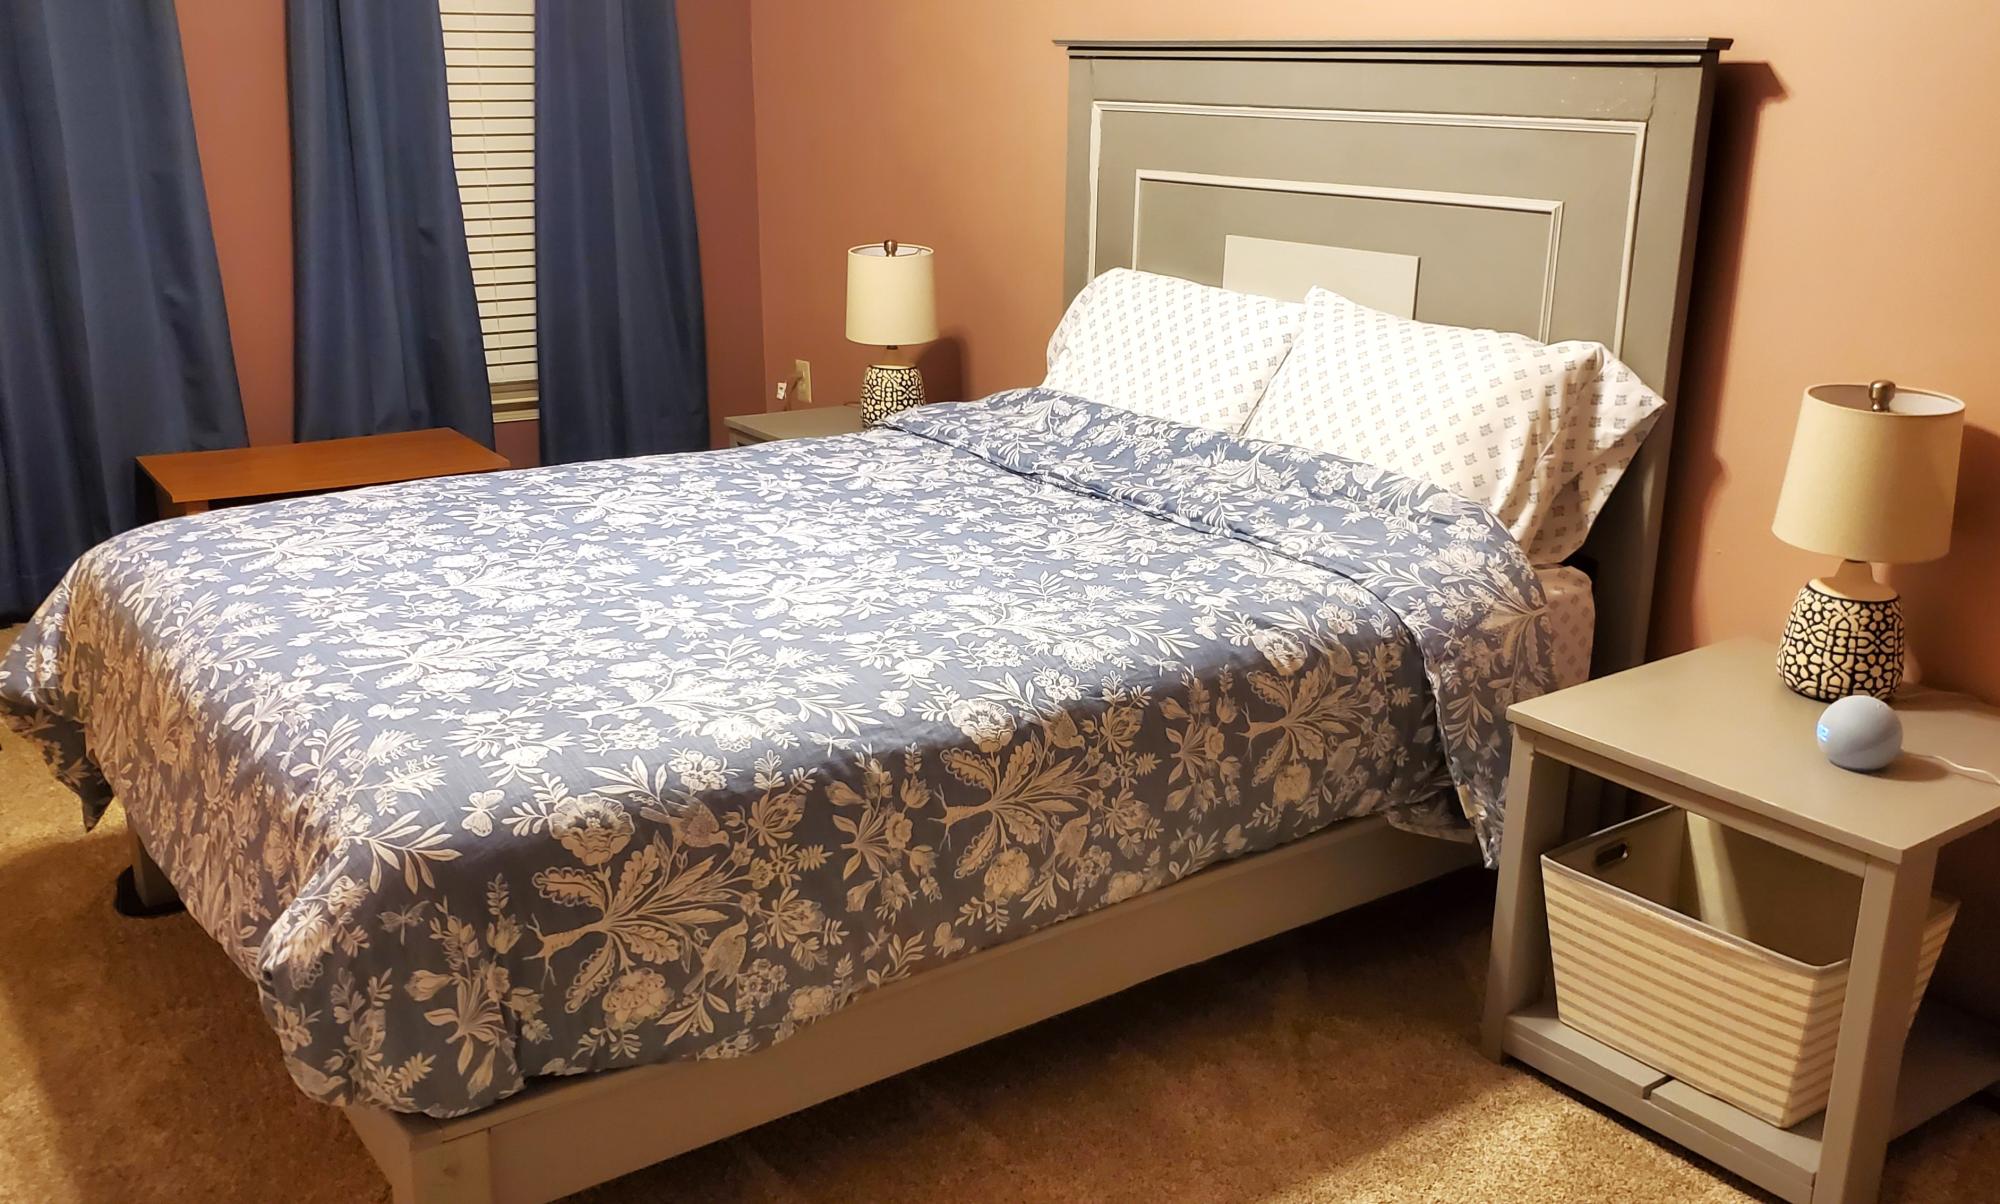
Essential bed frame with headboard customized from various Ana's bed plans. Side table nightstand from Ana's plans - easy and simple build. Great thanks to Ana and Jen for all they do.

This was one of my first bigger builds. I am so happy with the way it turned out!
Thu, 05/10/2012 - 10:32
So stunning! It's gorgeous! I just love the wood!
Thu, 05/19/2016 - 19:05
This bookcase wouldn't be out of place amongst the Pottery Barn's bookcases. In fact, it inspired me to go out this afternoon and buy some cedar boards so I can start building my own version first thing tomorrow. Thank you, Becky.

Who says you can’t go mountain farmhouse? Used Ana’s plans for bed, nightstands and dresser and couldn’t be happier!
D
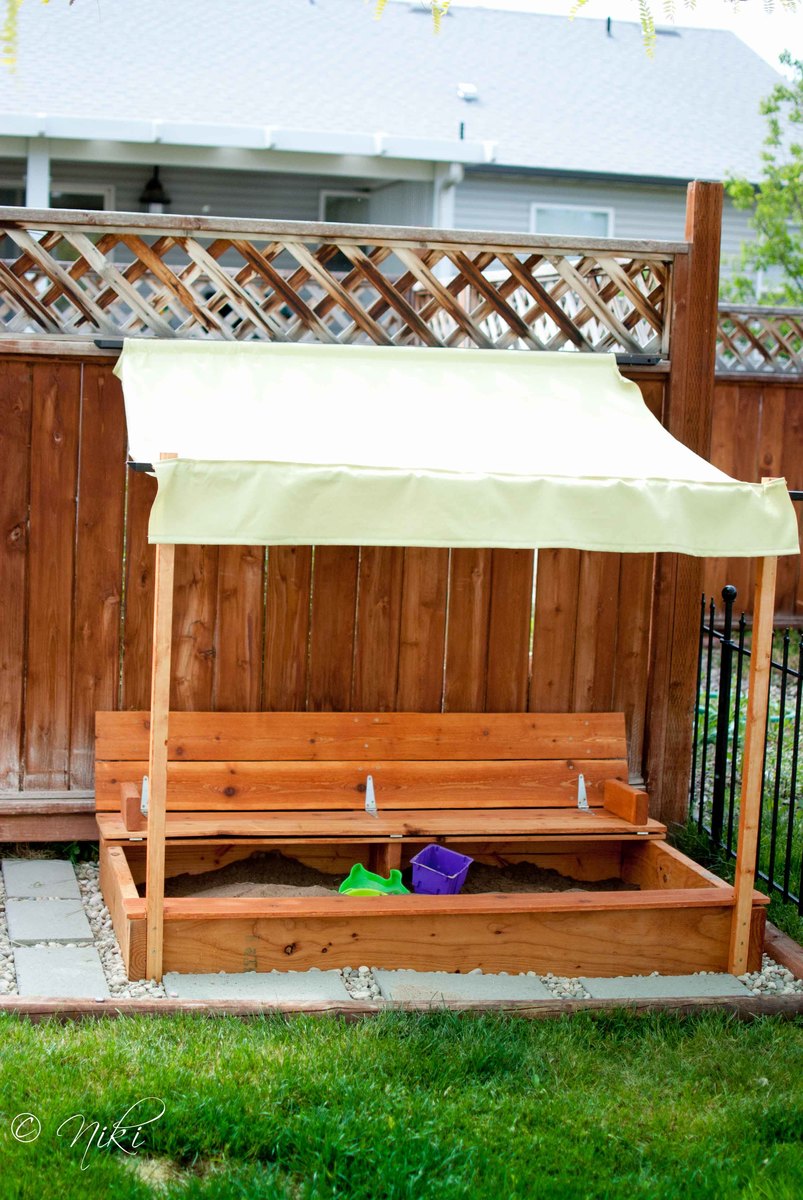
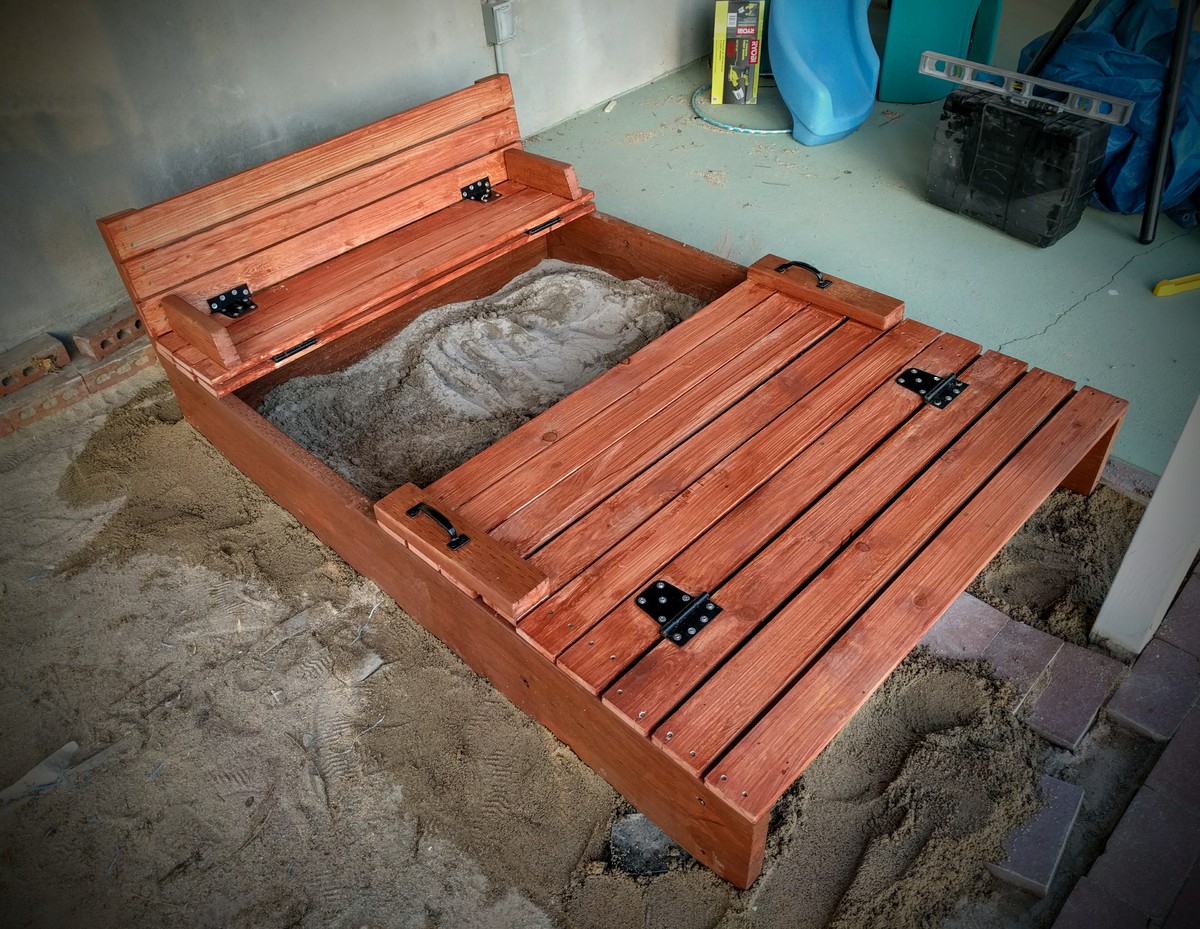
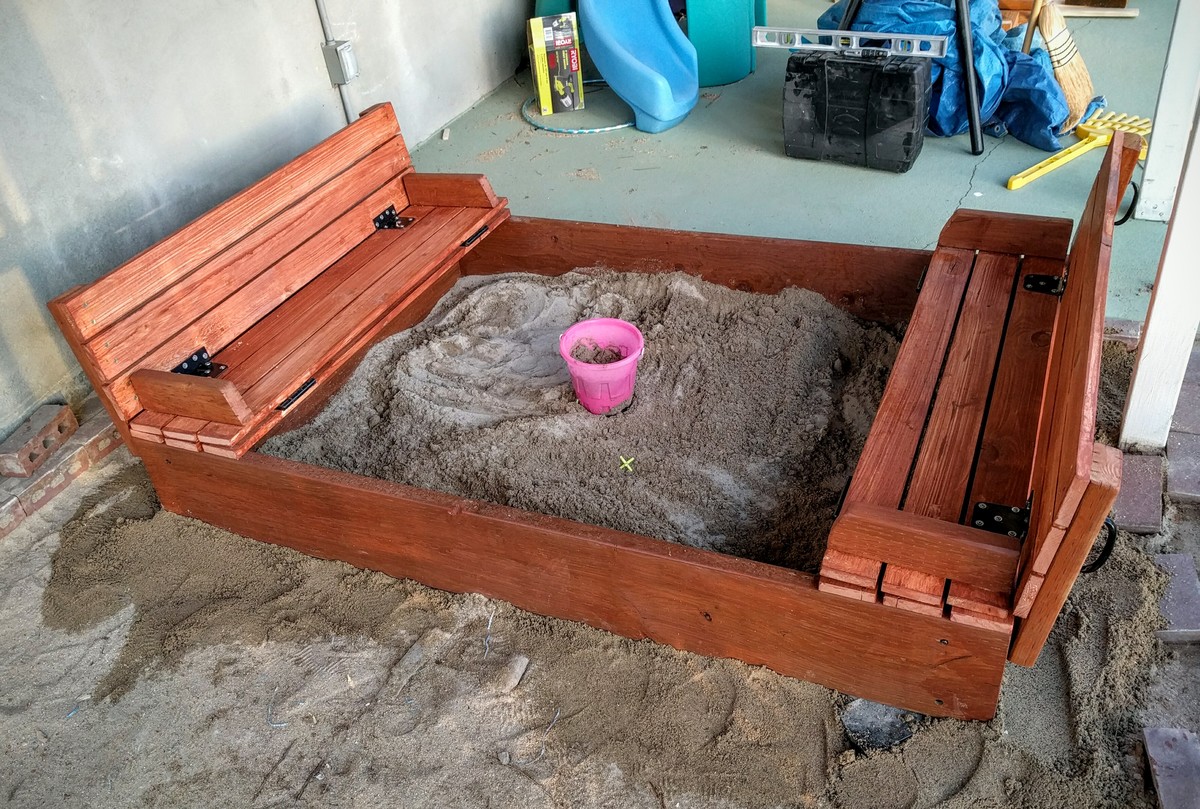
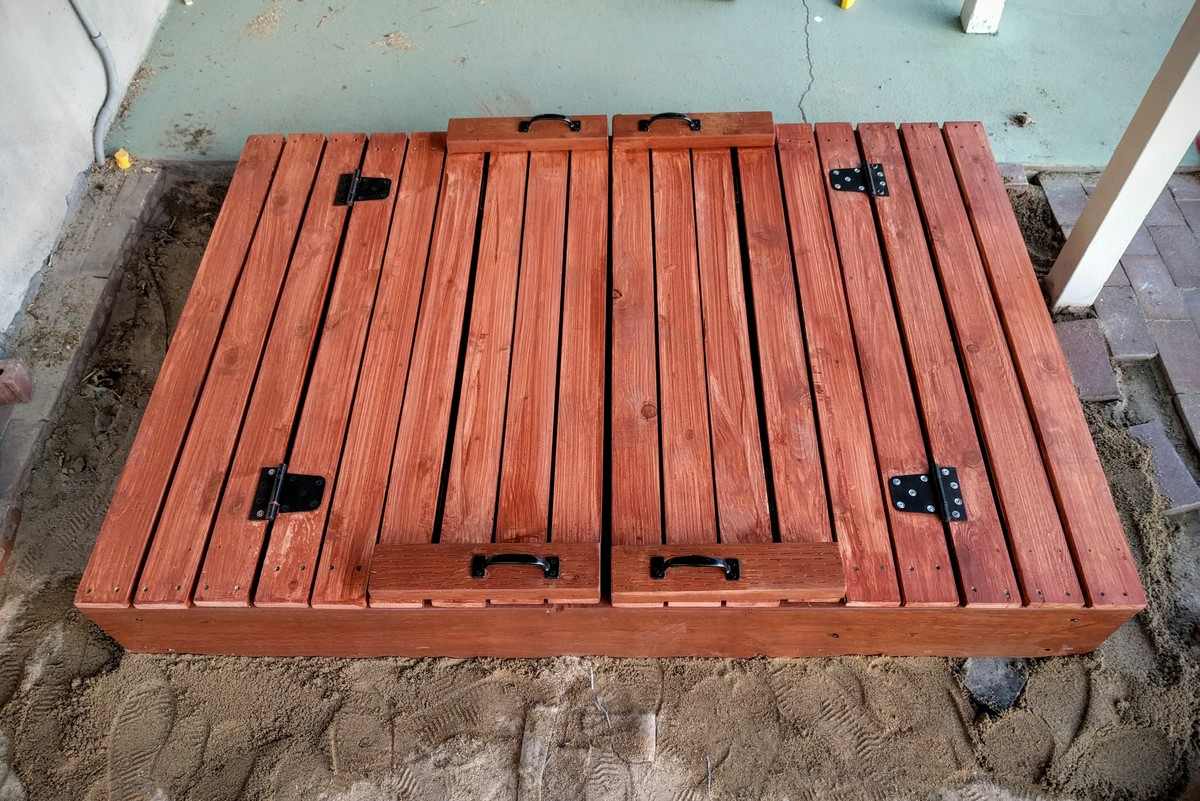
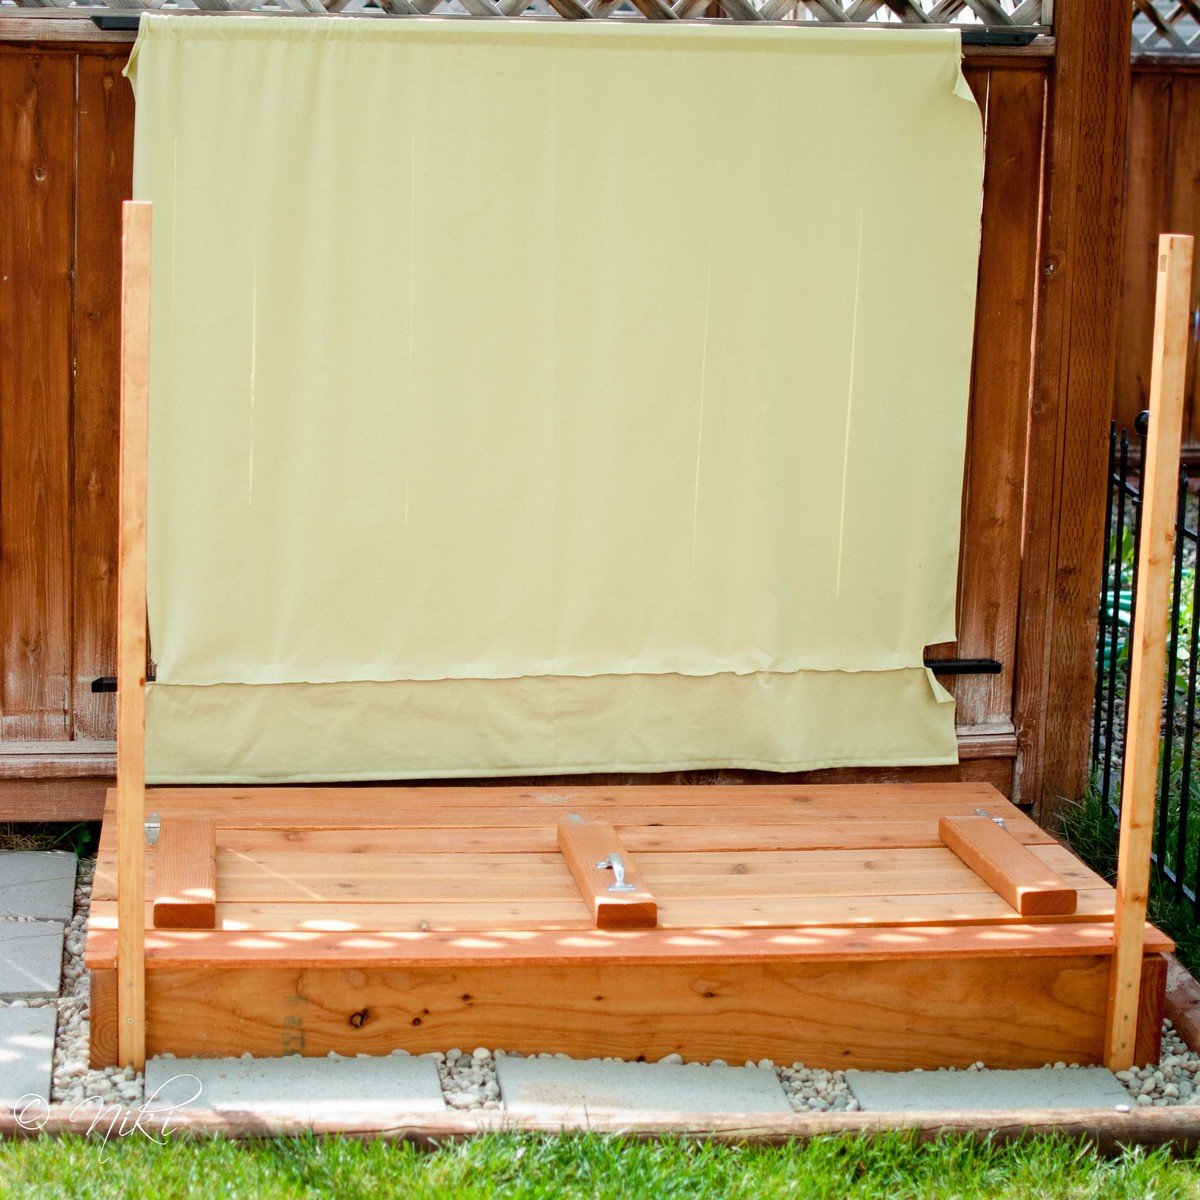
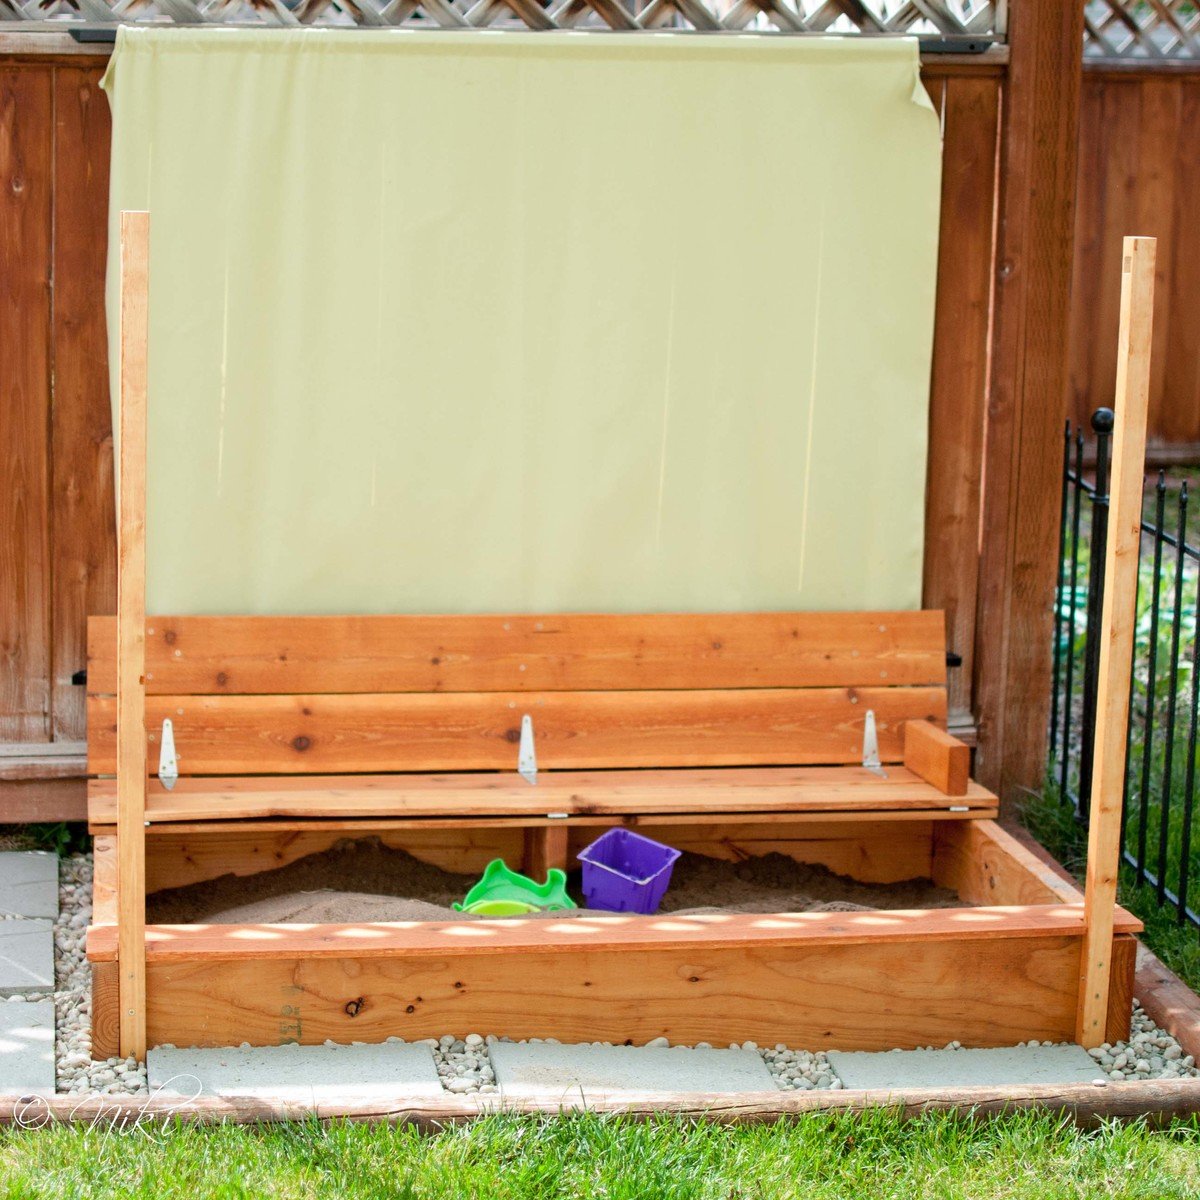
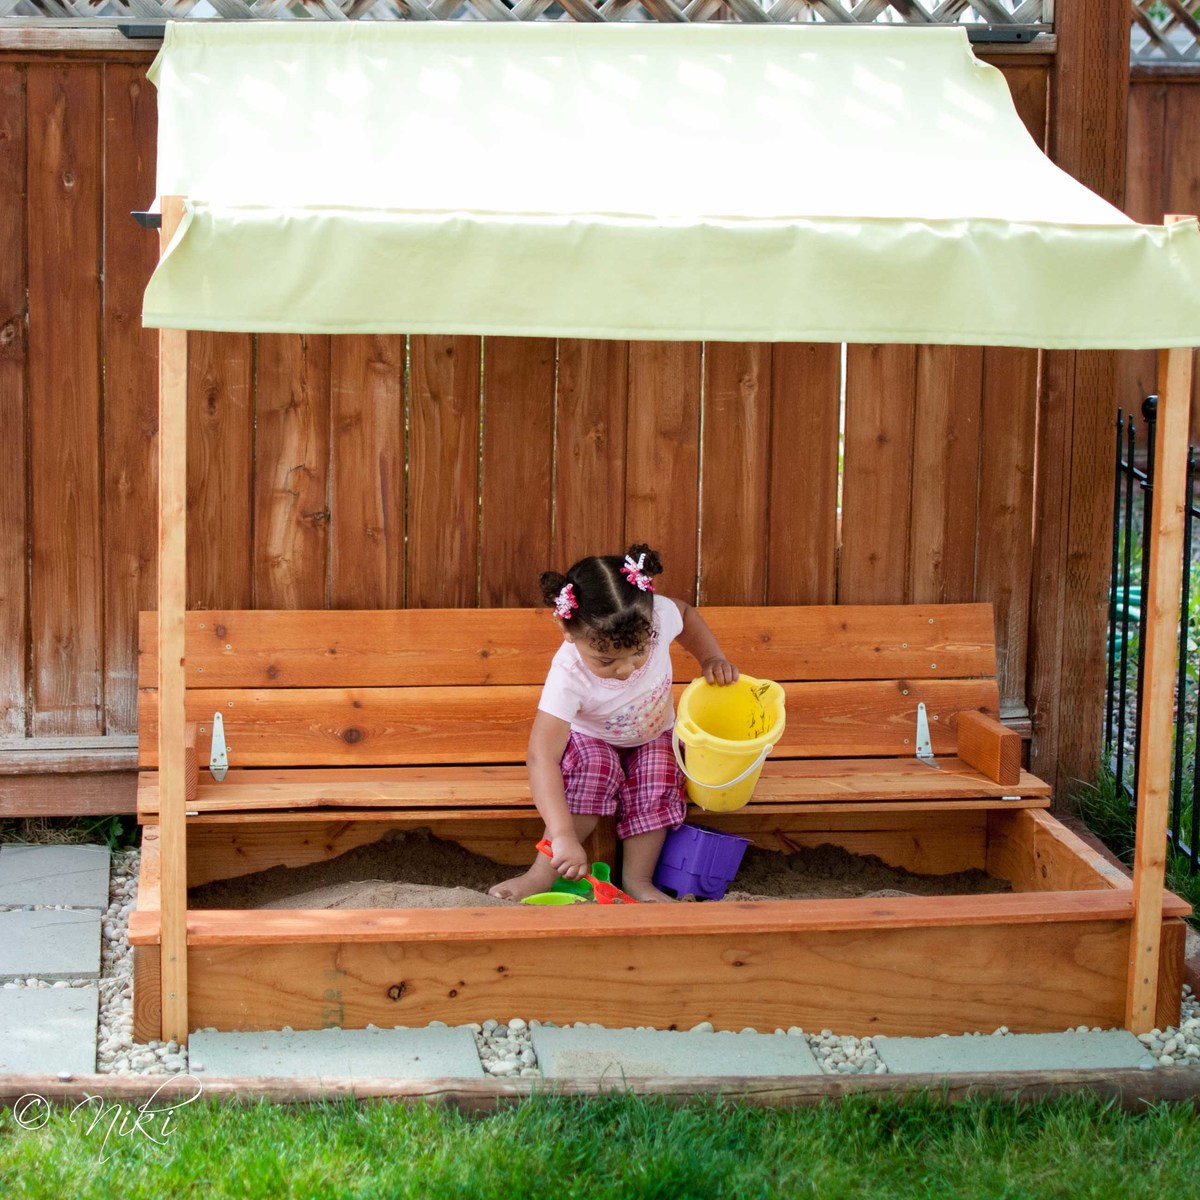
"Cellar? What cellar? We don't have a cellar... Oh, you mean the new sand box! Here, let me get some shade too."
I'm not sure why, but I can never seem to follow plans exactly. I guess that's not entirely true. I CAN follow plans exactly, but I almost never do. Maybe it's some sort of passive rebellion or something, but I usually have to put my own spin on the things that I build. Sometimes it works out in my favor. Sometimes not. This build was a little of both.
I decided to only build one bench in our sand box. This cut down on a lot of supplies. By making it longer a single bench and making it longer, it covers about the same amount of square feet, just in a rectangle instead of a square. When pricing lumber, I noticed that 2x8's were cheaper than 1x8's. So I went with those instead. It can't hurt to beef up the sides a little, right? This required some easy calculations on the cut list. I also decided to use 1x6 fence planks instead of 1x4 whitewood or pine. The fence planks were cheap, and I figured they would look nice in the back yard. They are also naturally pest and rot resistant. They required extra sanding to take the rough off. However, this is one place that I'm thinking the modification didn't work in my favor. The fence planks are not as thick as the whitewood. This combined with the increased length makes the the top pieces feel pretty weak. I put a little support piece under the bench. I'm quite sure the bench would not have held up well without the support.
Because this is an outdoor piece, I dry fit everything, and then stained everything before assembling it, to make sure all of the edges were well protected.
Cost breakdown (not including canopy)
Fence planks $14
2x8x8 $11
hinges $9
handle $2
stain $10


Thu, 03/07/2013 - 08:49
I just love the changes you made to this sandbox! Can you tell me what you used for the construction of the canopy? Thanks!
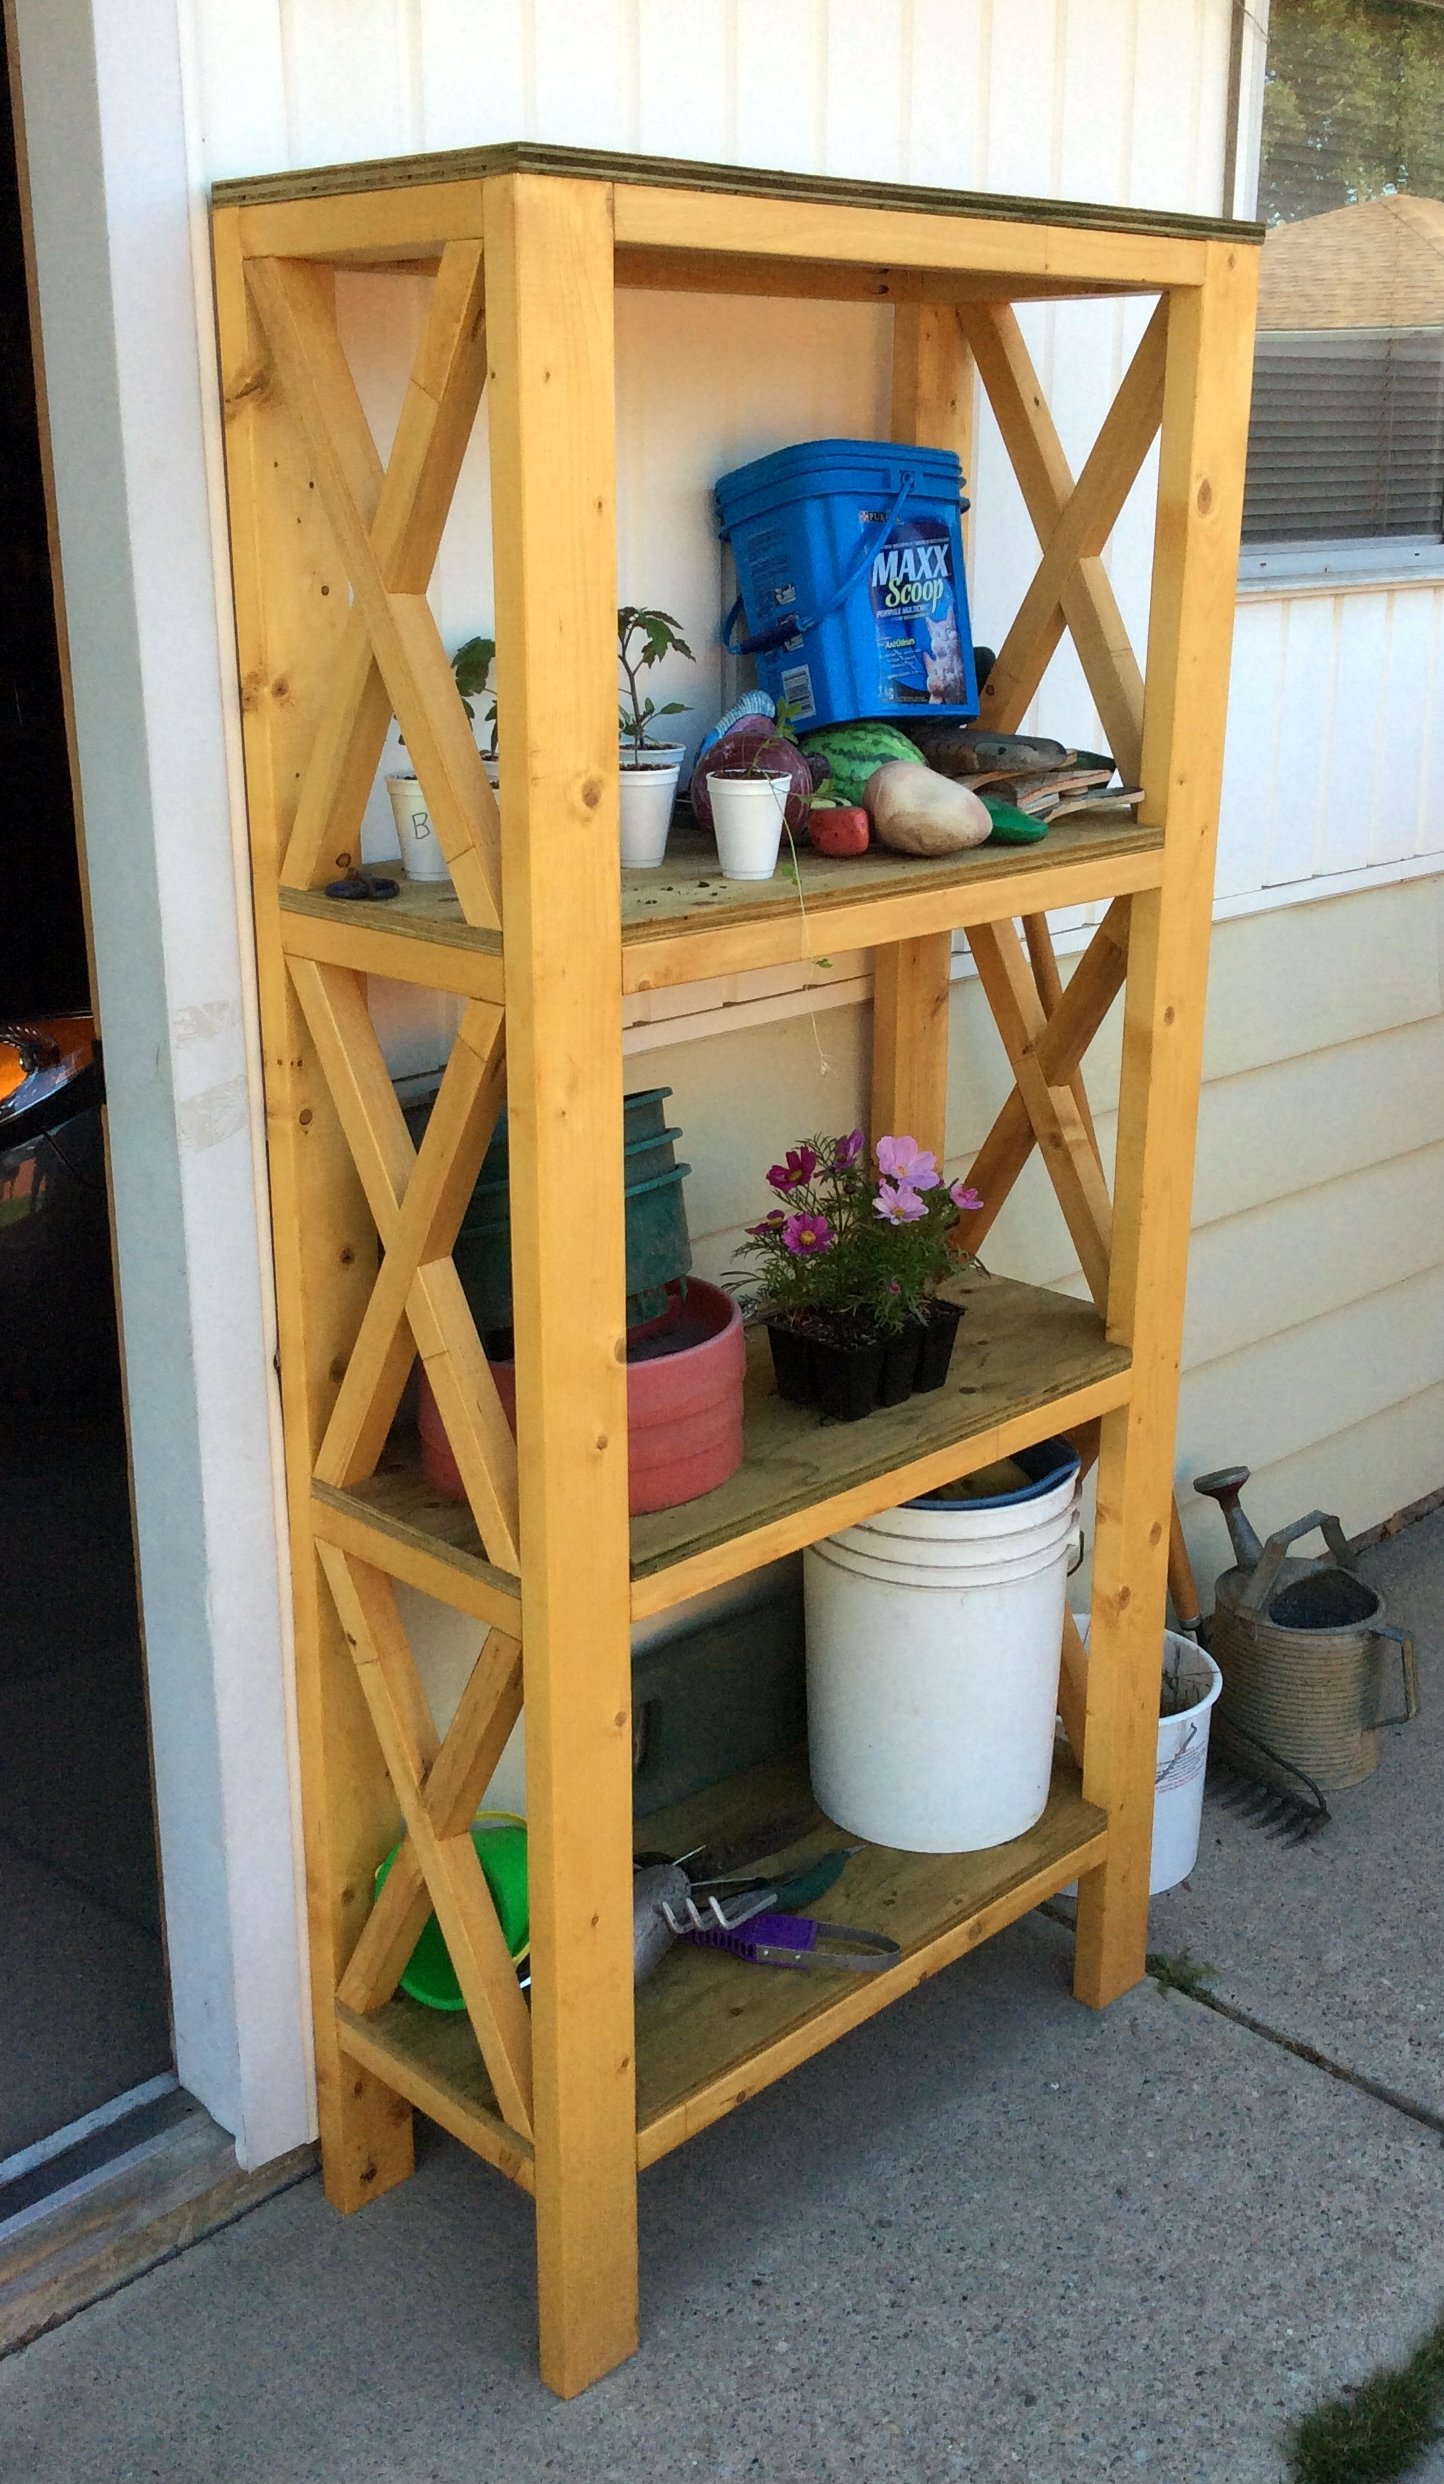
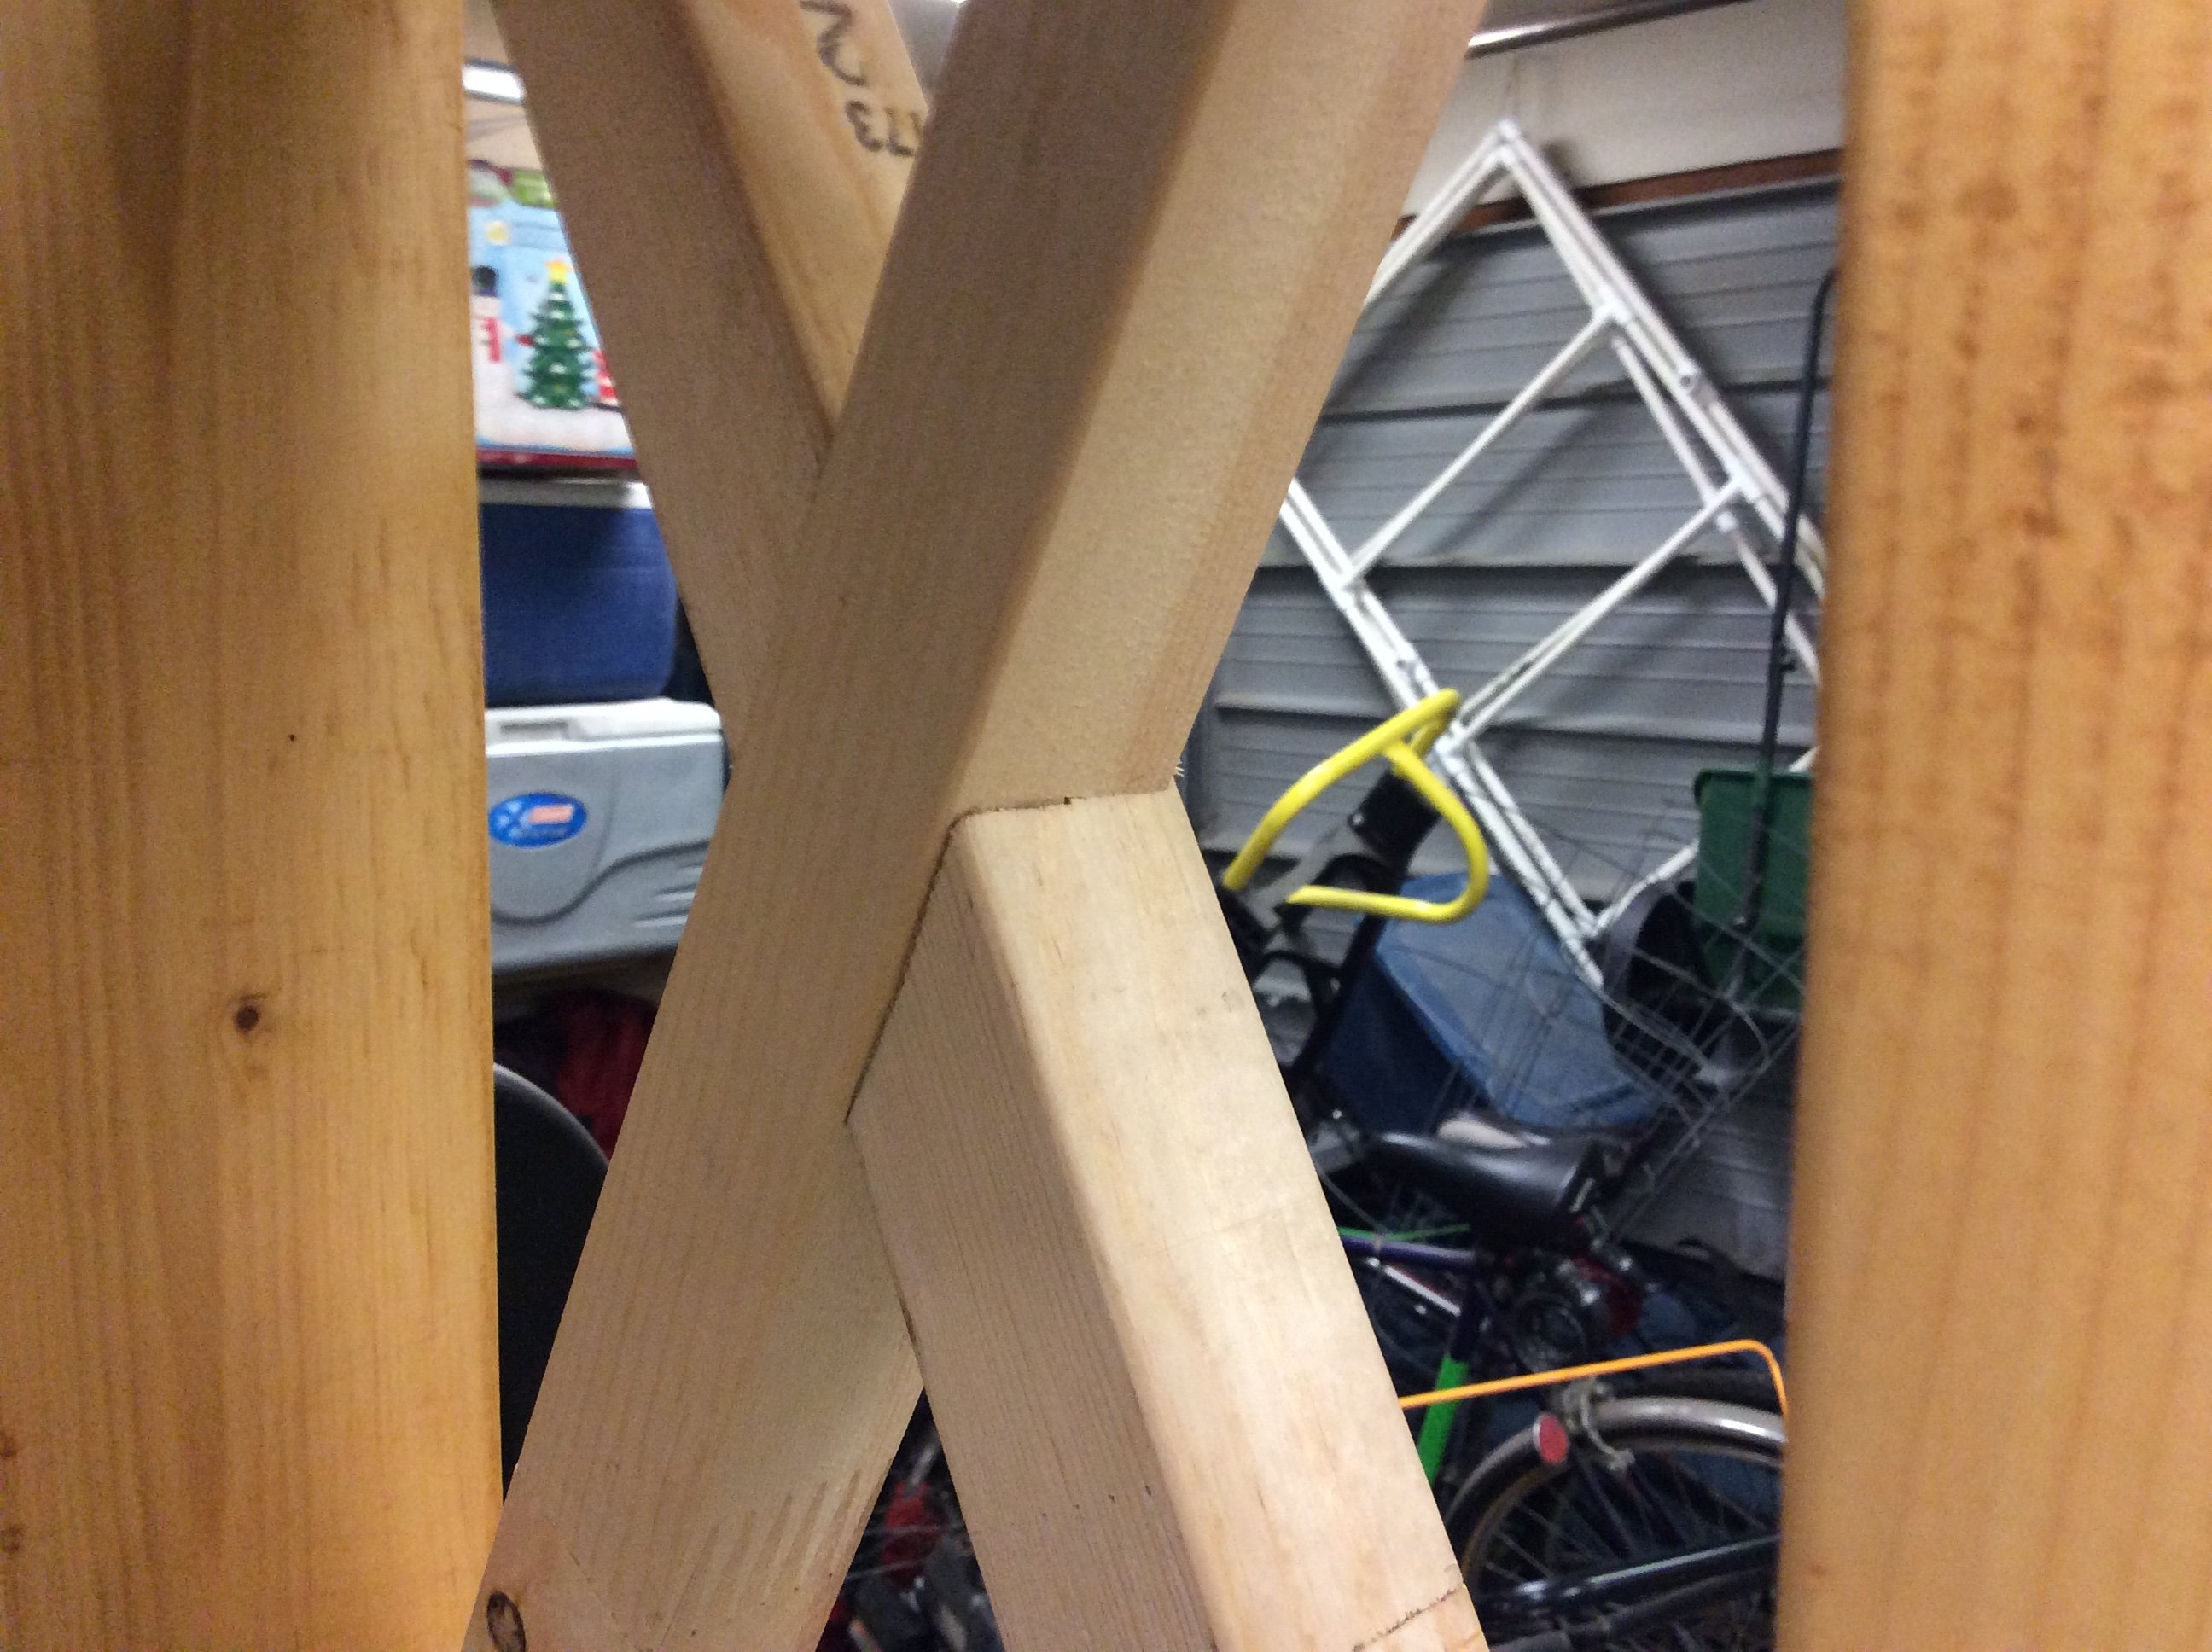
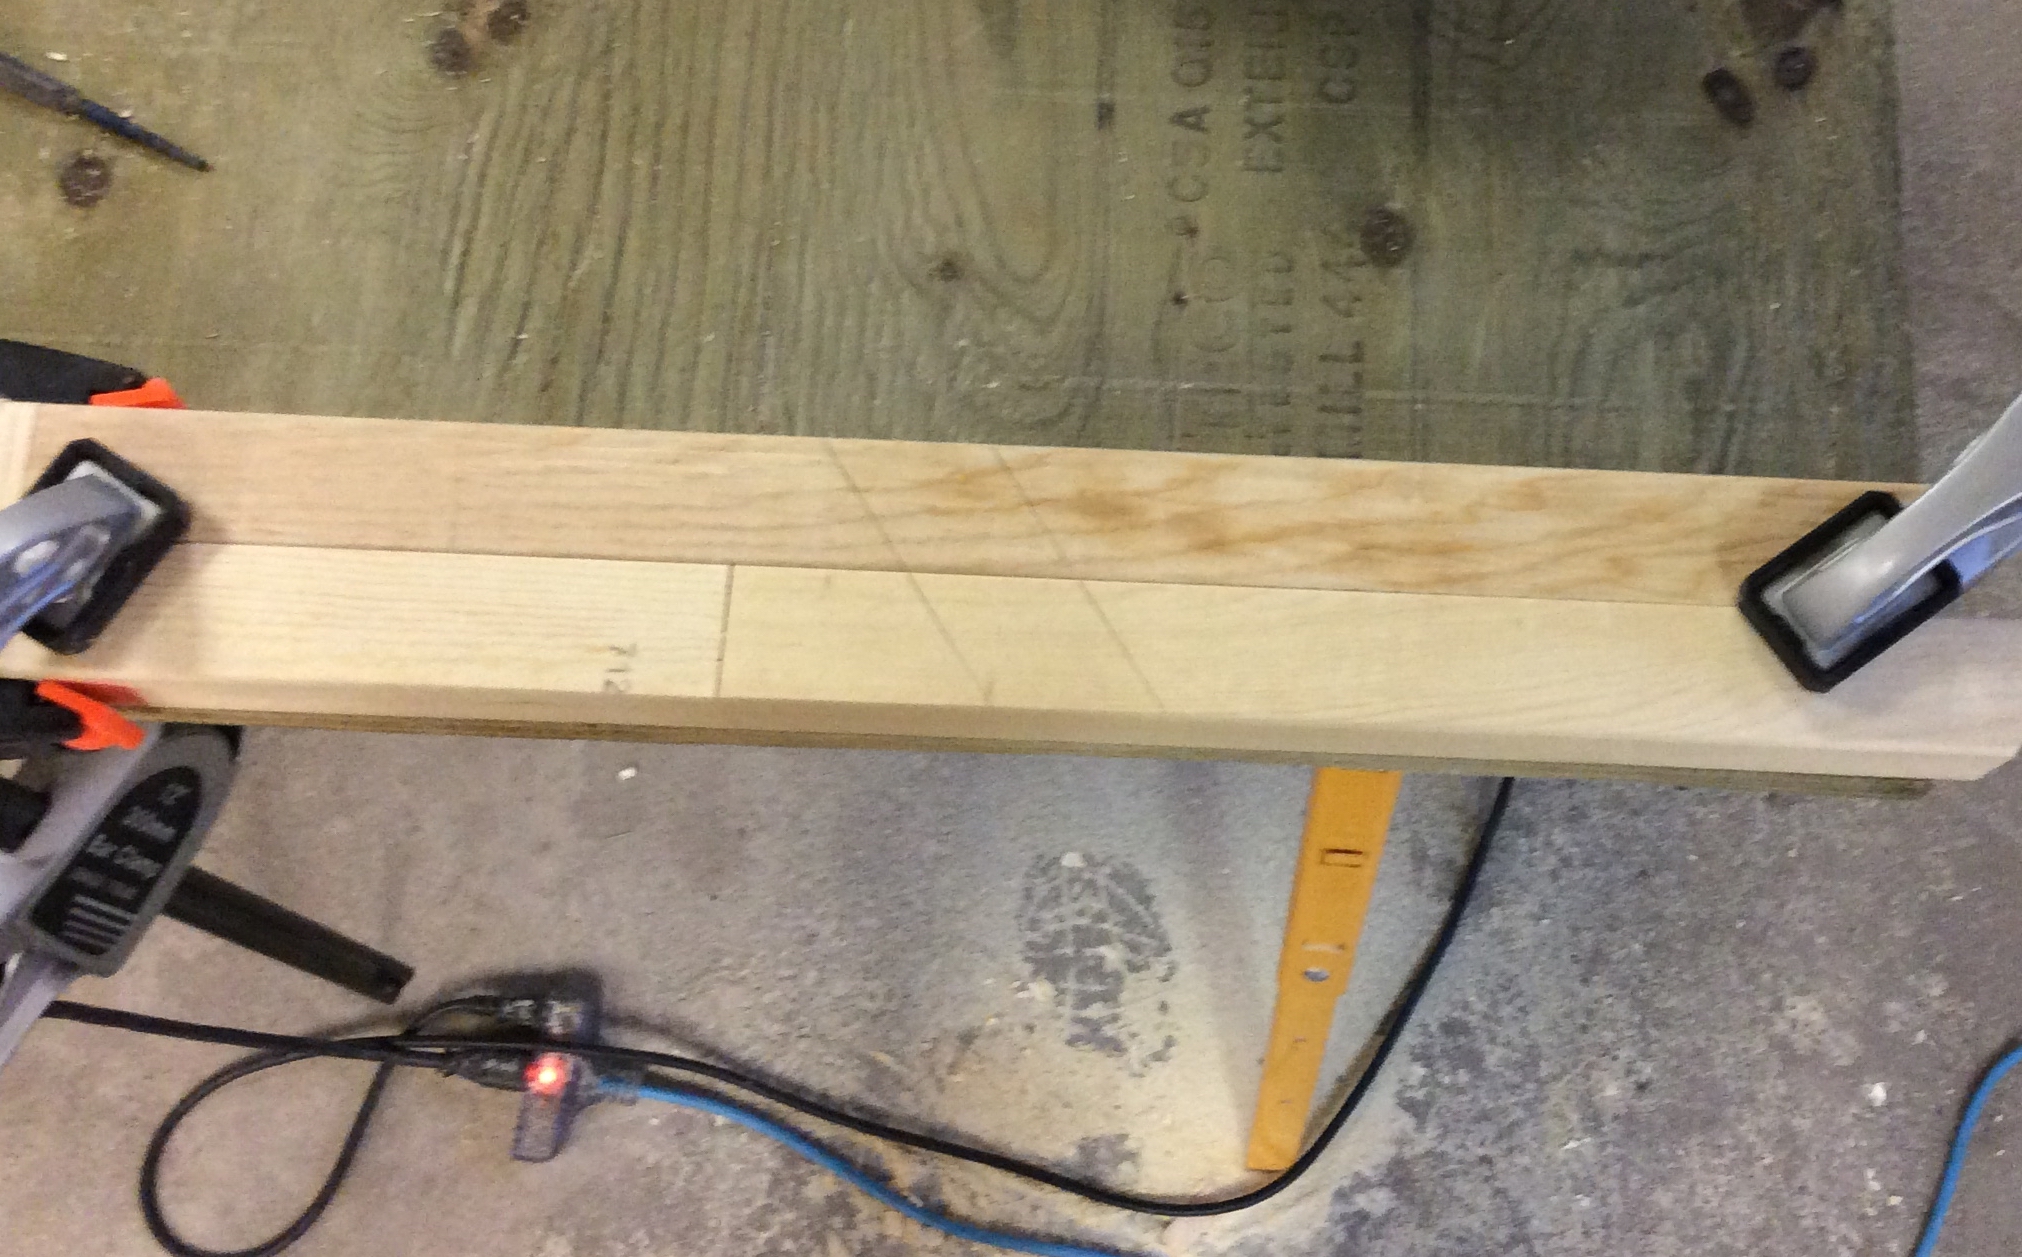
My wife wanted a Garden Shelf to replace the one that just gave up the ghost, so I browsed my favorite site for plans similar to what I was thinking. Thats when I found the Rustic X Book Case. Perfect.
I need to stuff larger objects then books in there, so I changed it to 3 shelves and I put those on top of the cross members. That was easier and it gives it that work bench look.
For the X's, I had the wood to risk so I tried recessing them. I dry fitted (chop saw highly recommended) and marked them and when I flipped them over, they aligned perfectly. With a circular saw set to just slightly less then 1/2 depth, and some very careful cutting, they fit together quite well.
Sturdy with a bit of class. I'm pleased. Thanks.
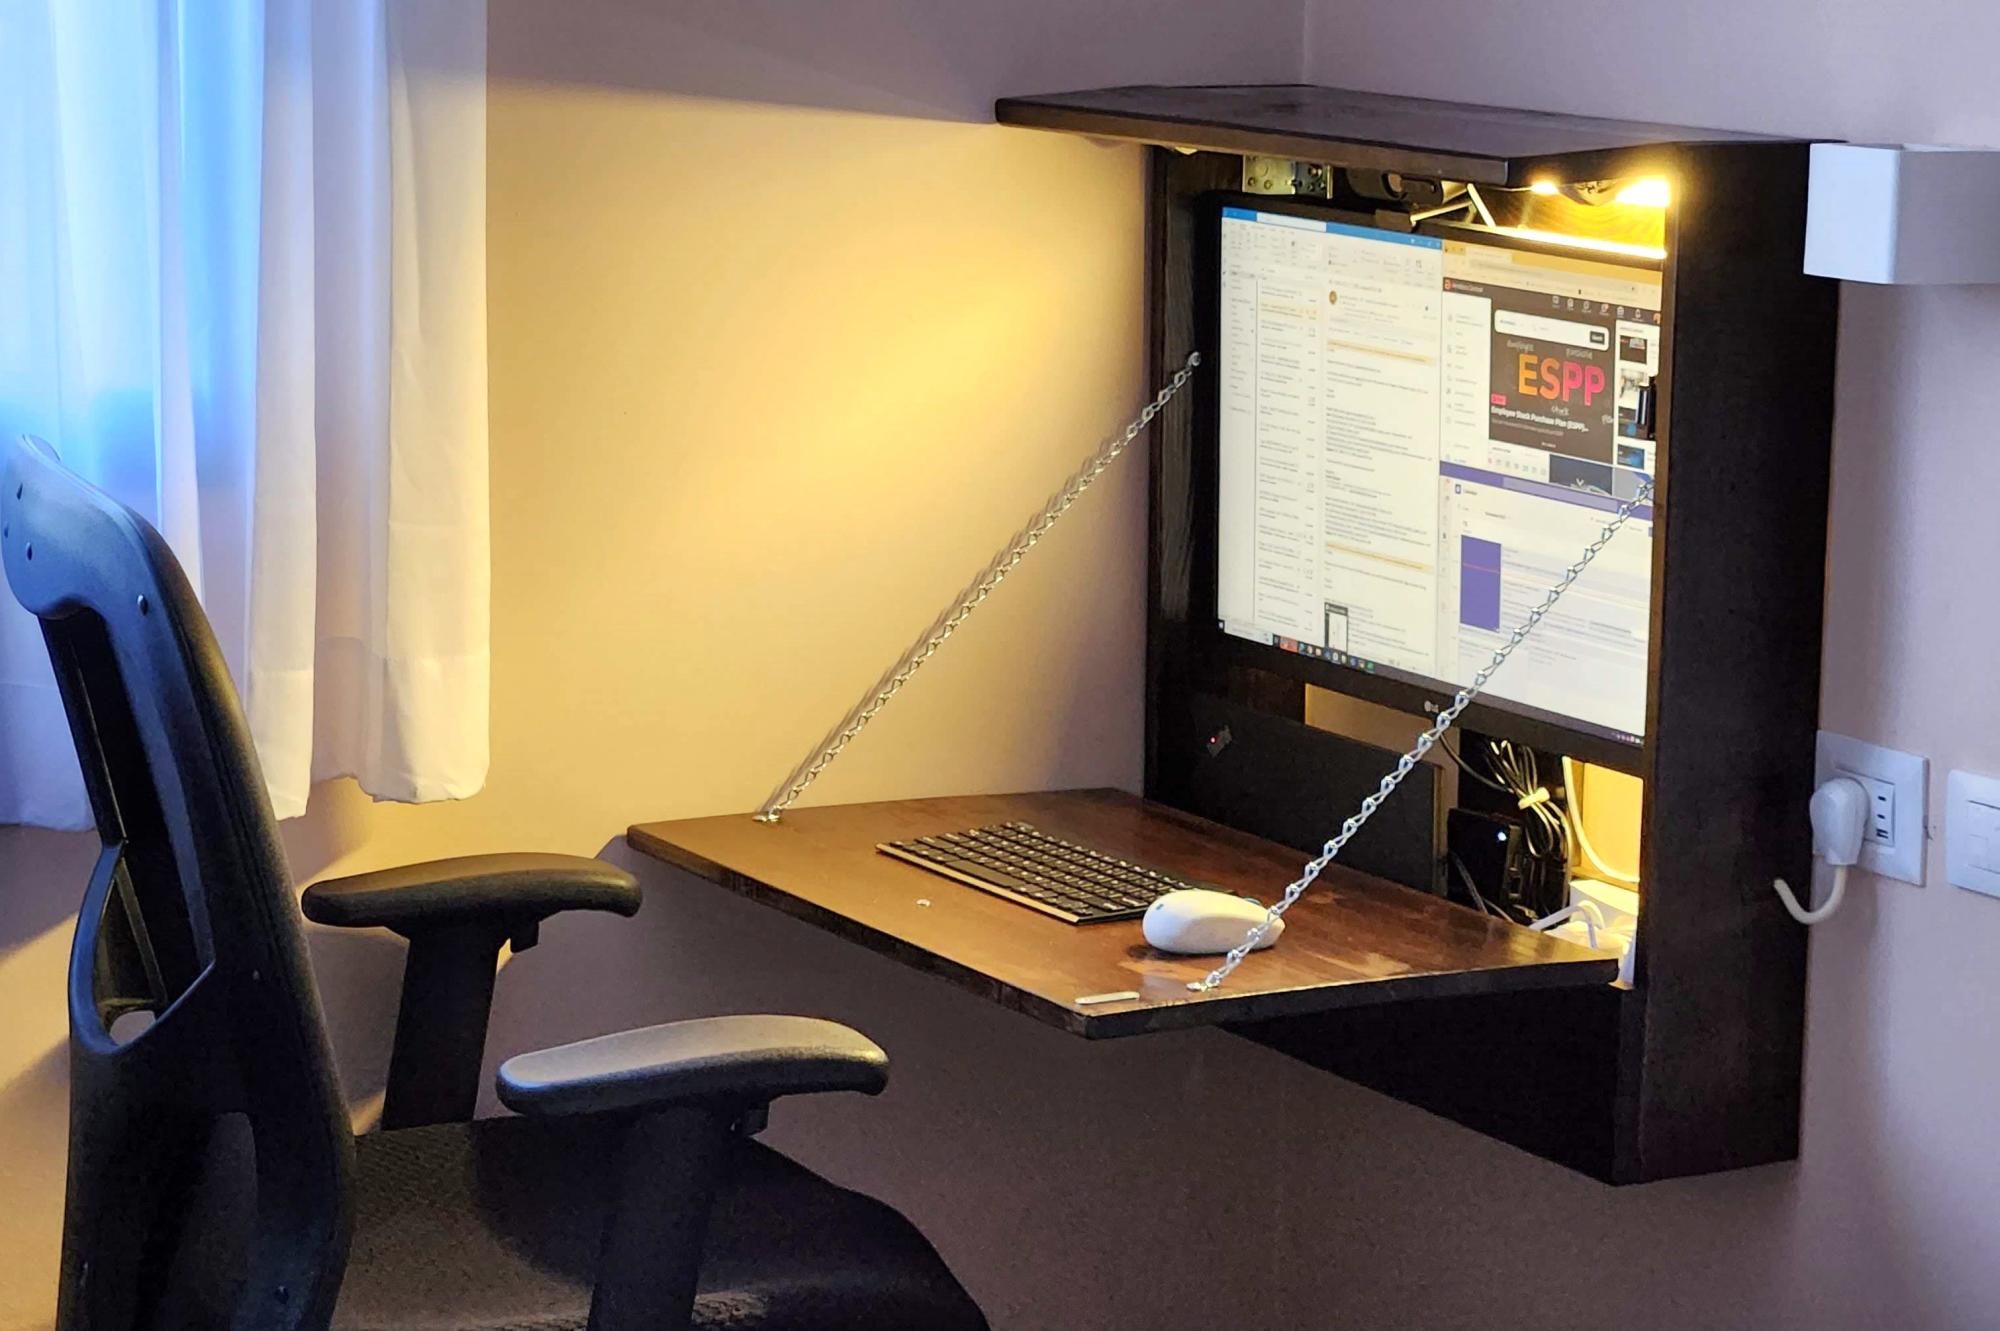
I built this fold-up desk, out of sheer necessity. It's rather unassuming when closed, yet fully functional when open, with built-in power outlets and light, a large screen, a nook for the laptop and the chargers, etc. It's tailored to my needs and specific size limitations, but I think you could make a great general plan of it for anyone needing a small-space hideaway desk.

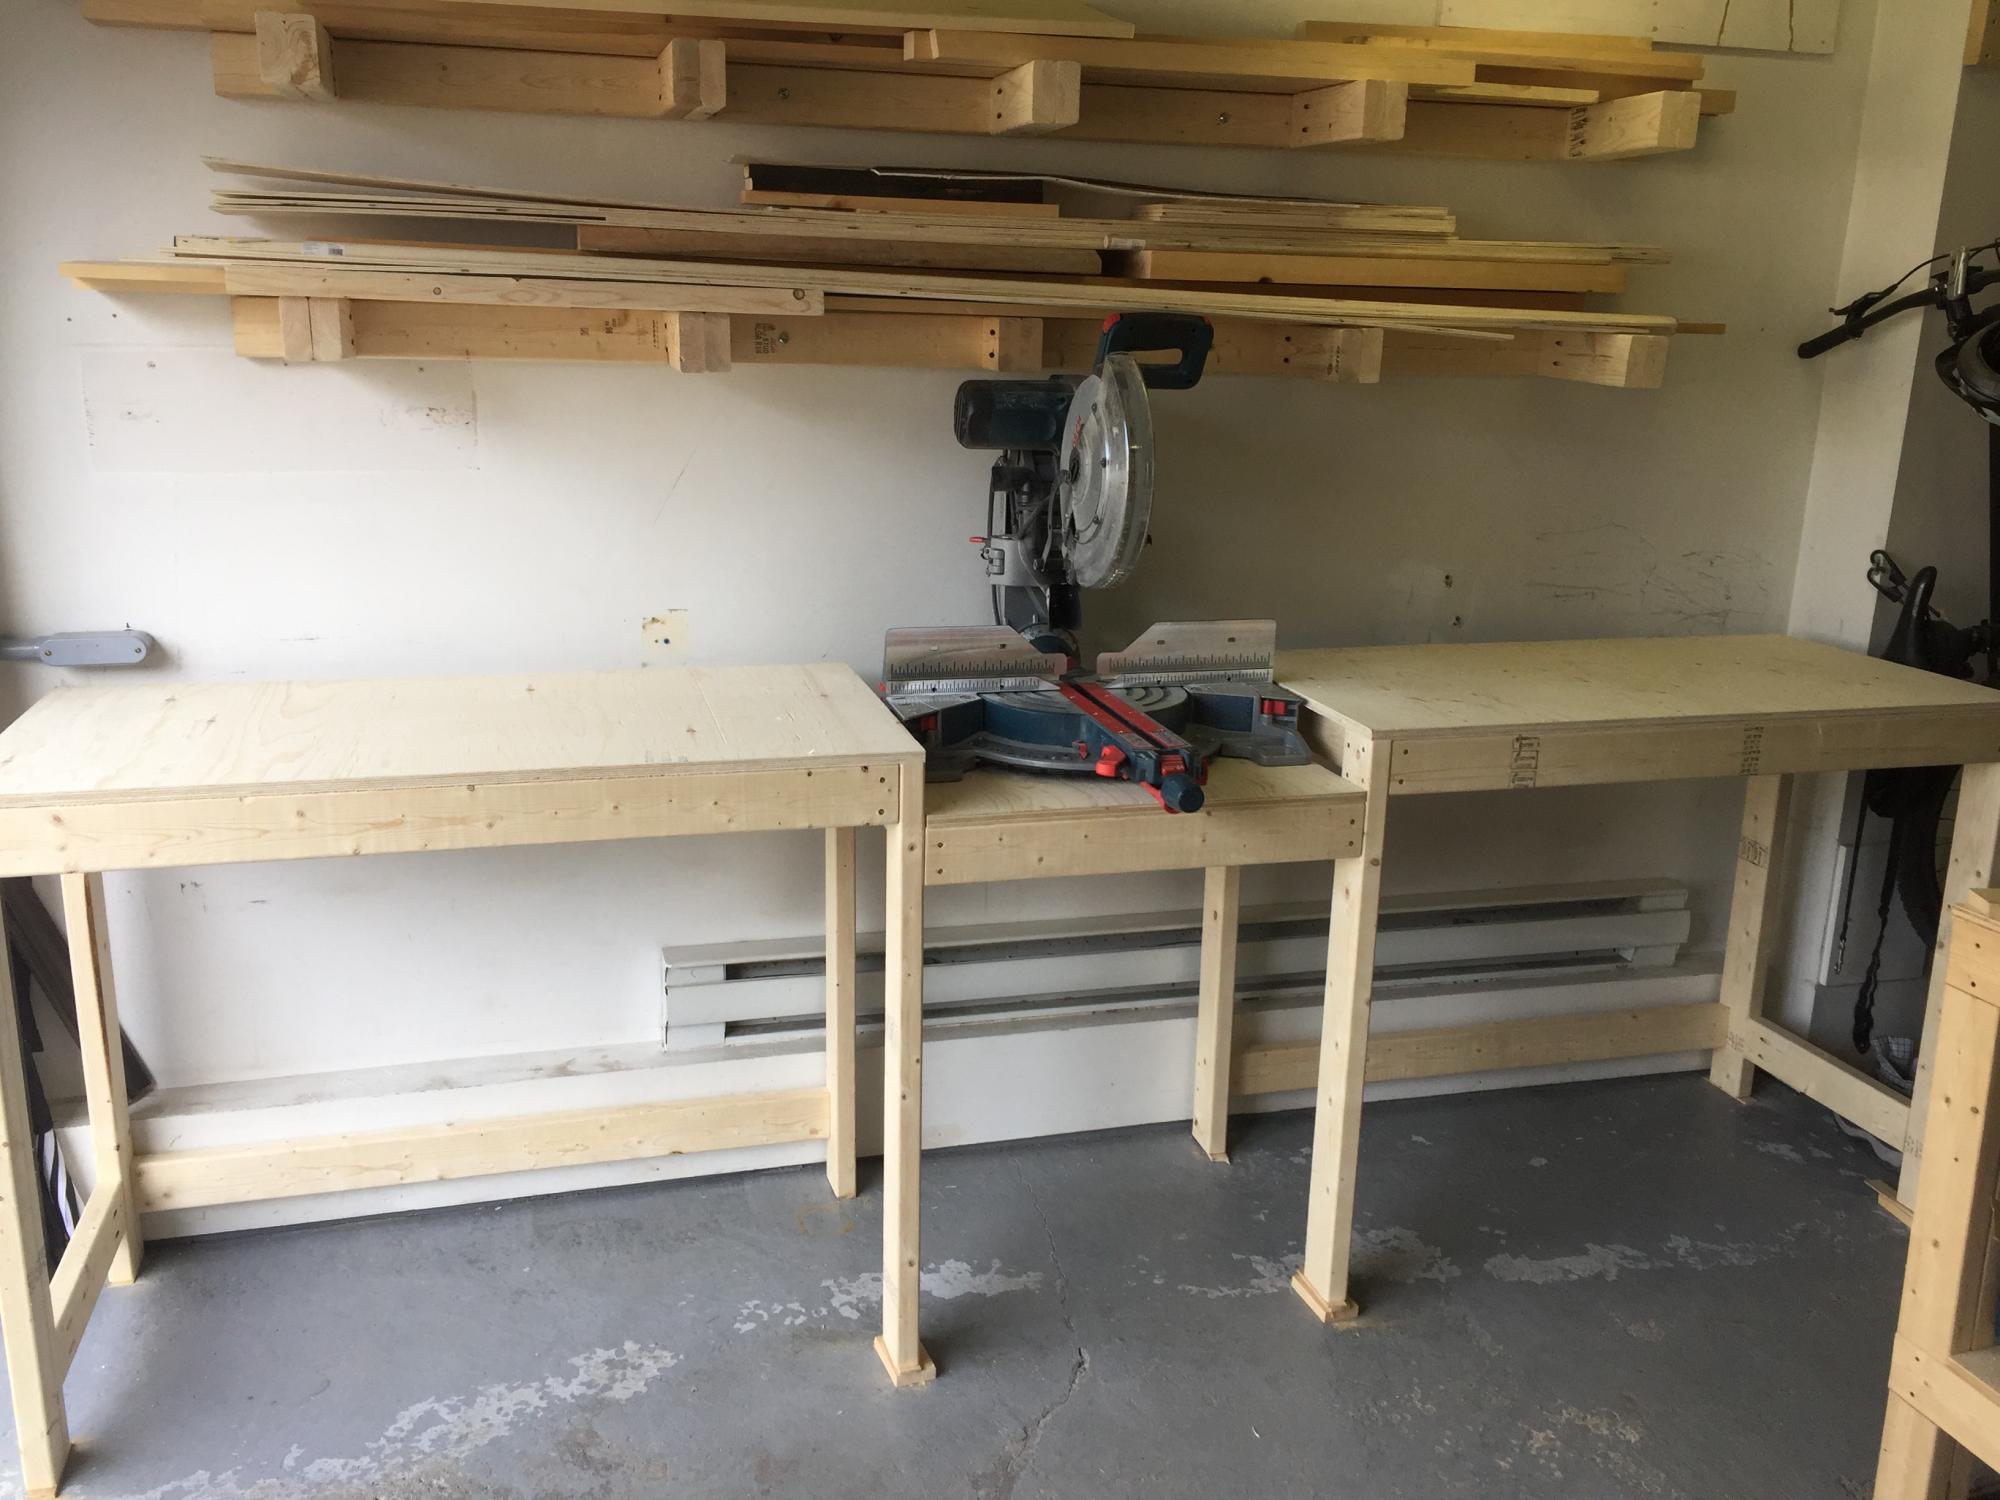
We built this workbench adapting Ana's plans. We did not build the carts yet.
It is very practical! We just love it!
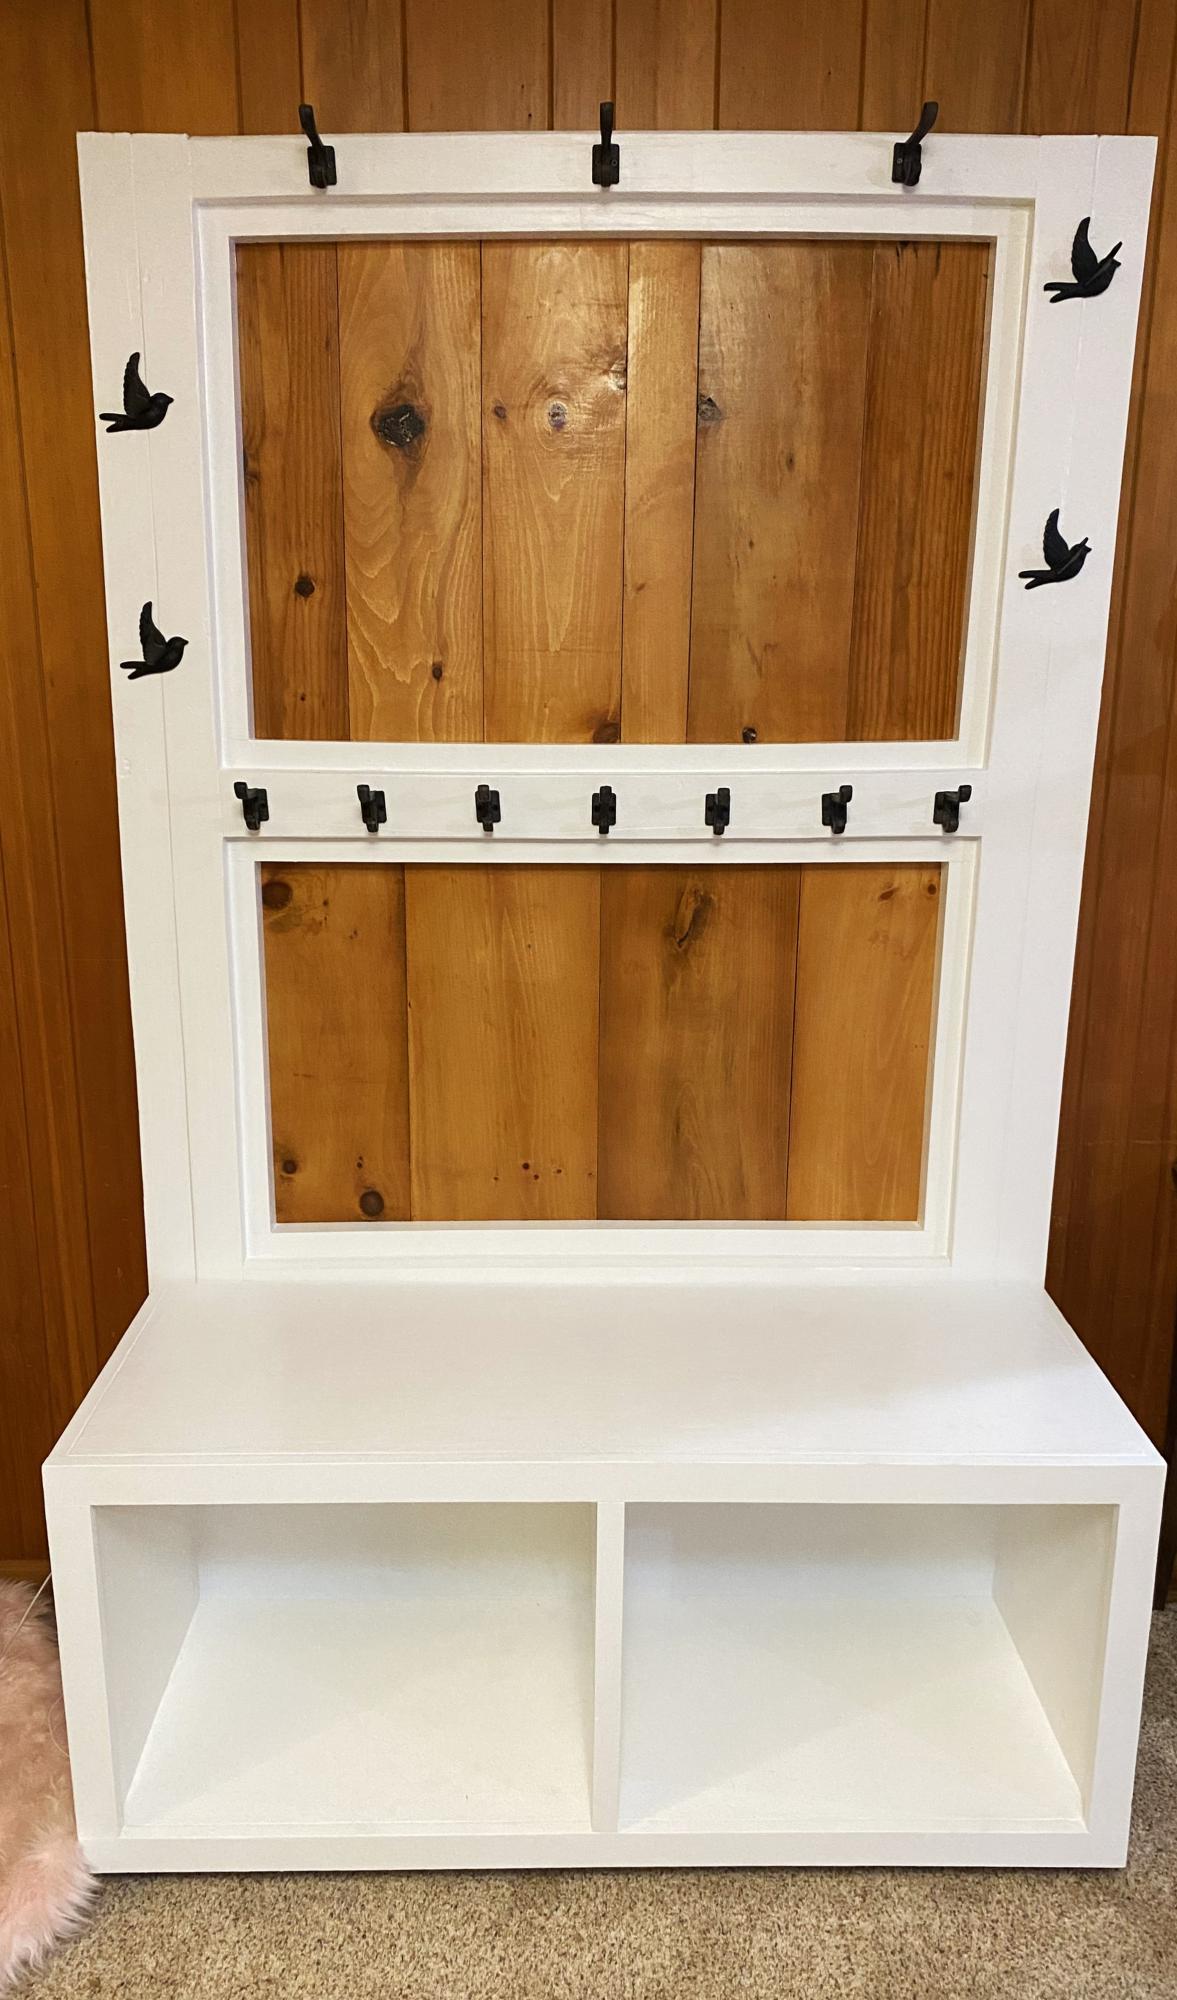
The family needed a safe place for backpacks, shoes, jackets and everything else needed for school. I modified Ana's plan since this project was made with recycled shipping pallets. Rather than struggle with warps, twists and other imperfections I embraced them with glossy white paint. I added the waxed pine panels to absorb the daily use and abuse and be readily buffed when necessary.

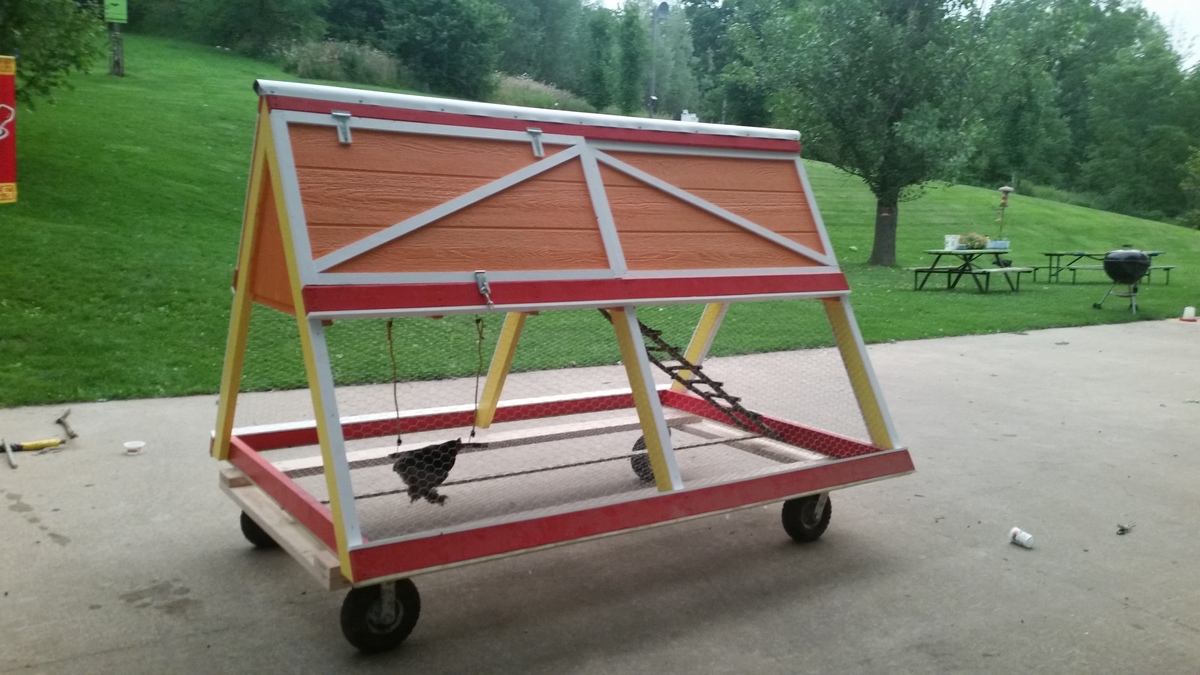
I used your plan to create a breeding pen for my little brother's millie fleur d'Uccle. I am using it as a 4H project. Thank you so much for the plans.

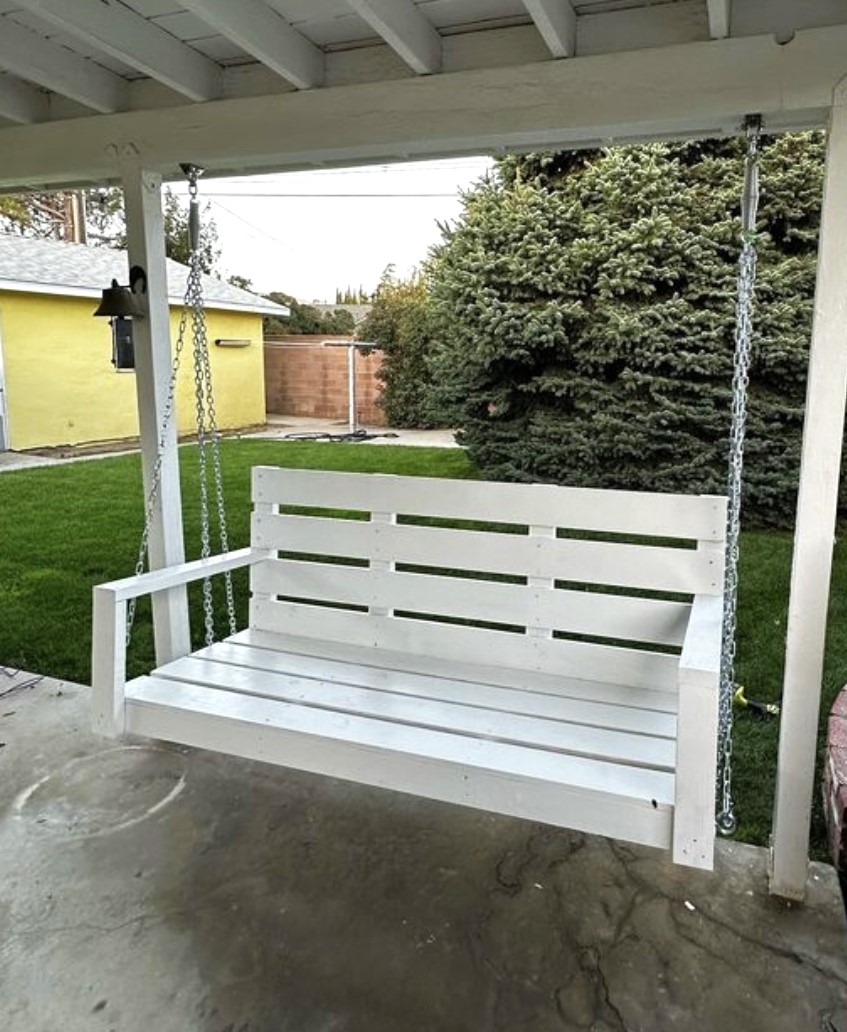
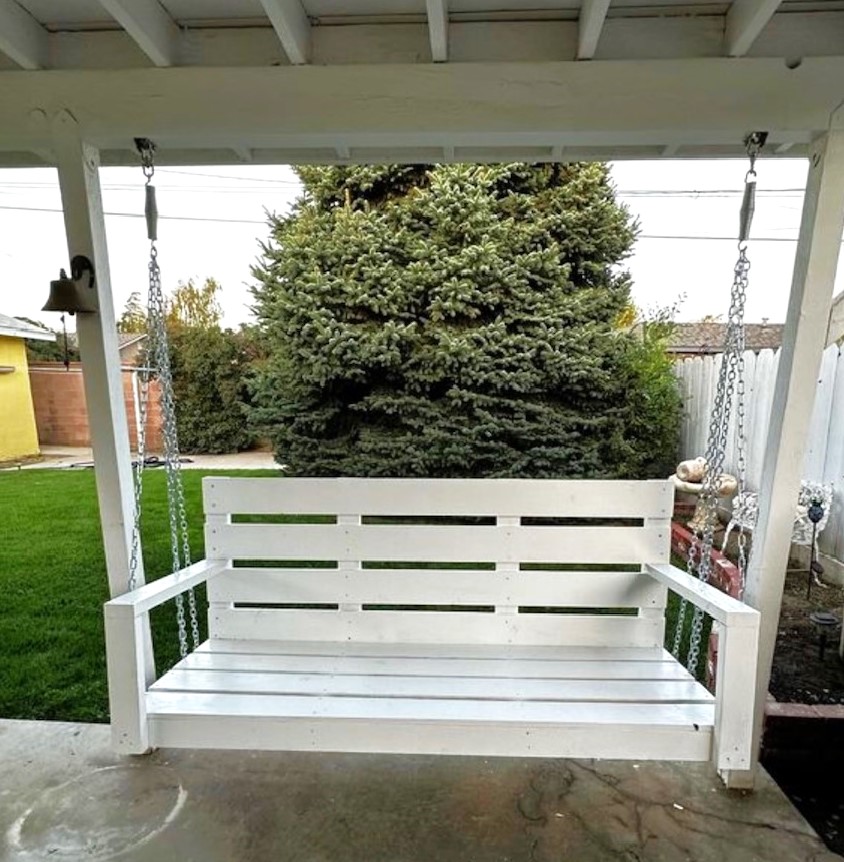
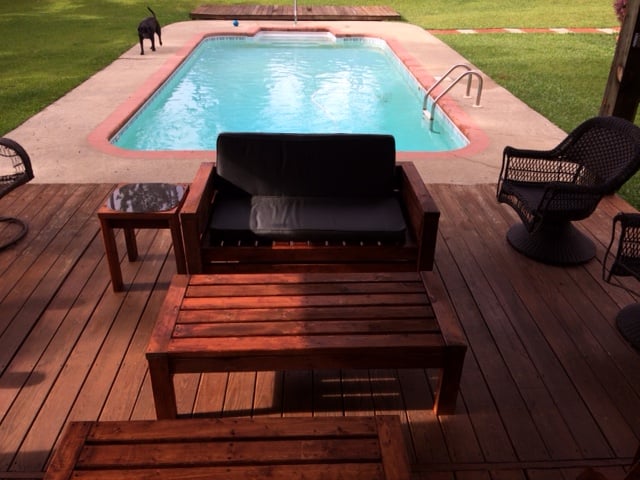
started with outdoor sofa, and ending making 4 chairs, loveseat, and 2 coffee tables

Mon, 05/18/2020 - 20:29
Love the look, posted on Facebook and had requests to build for others. Made my Mother - in-law 2 chairs and a coffee table for her birthday.
Mon, 05/18/2020 - 20:29
Loved the ease, price, and quality of this furniture.
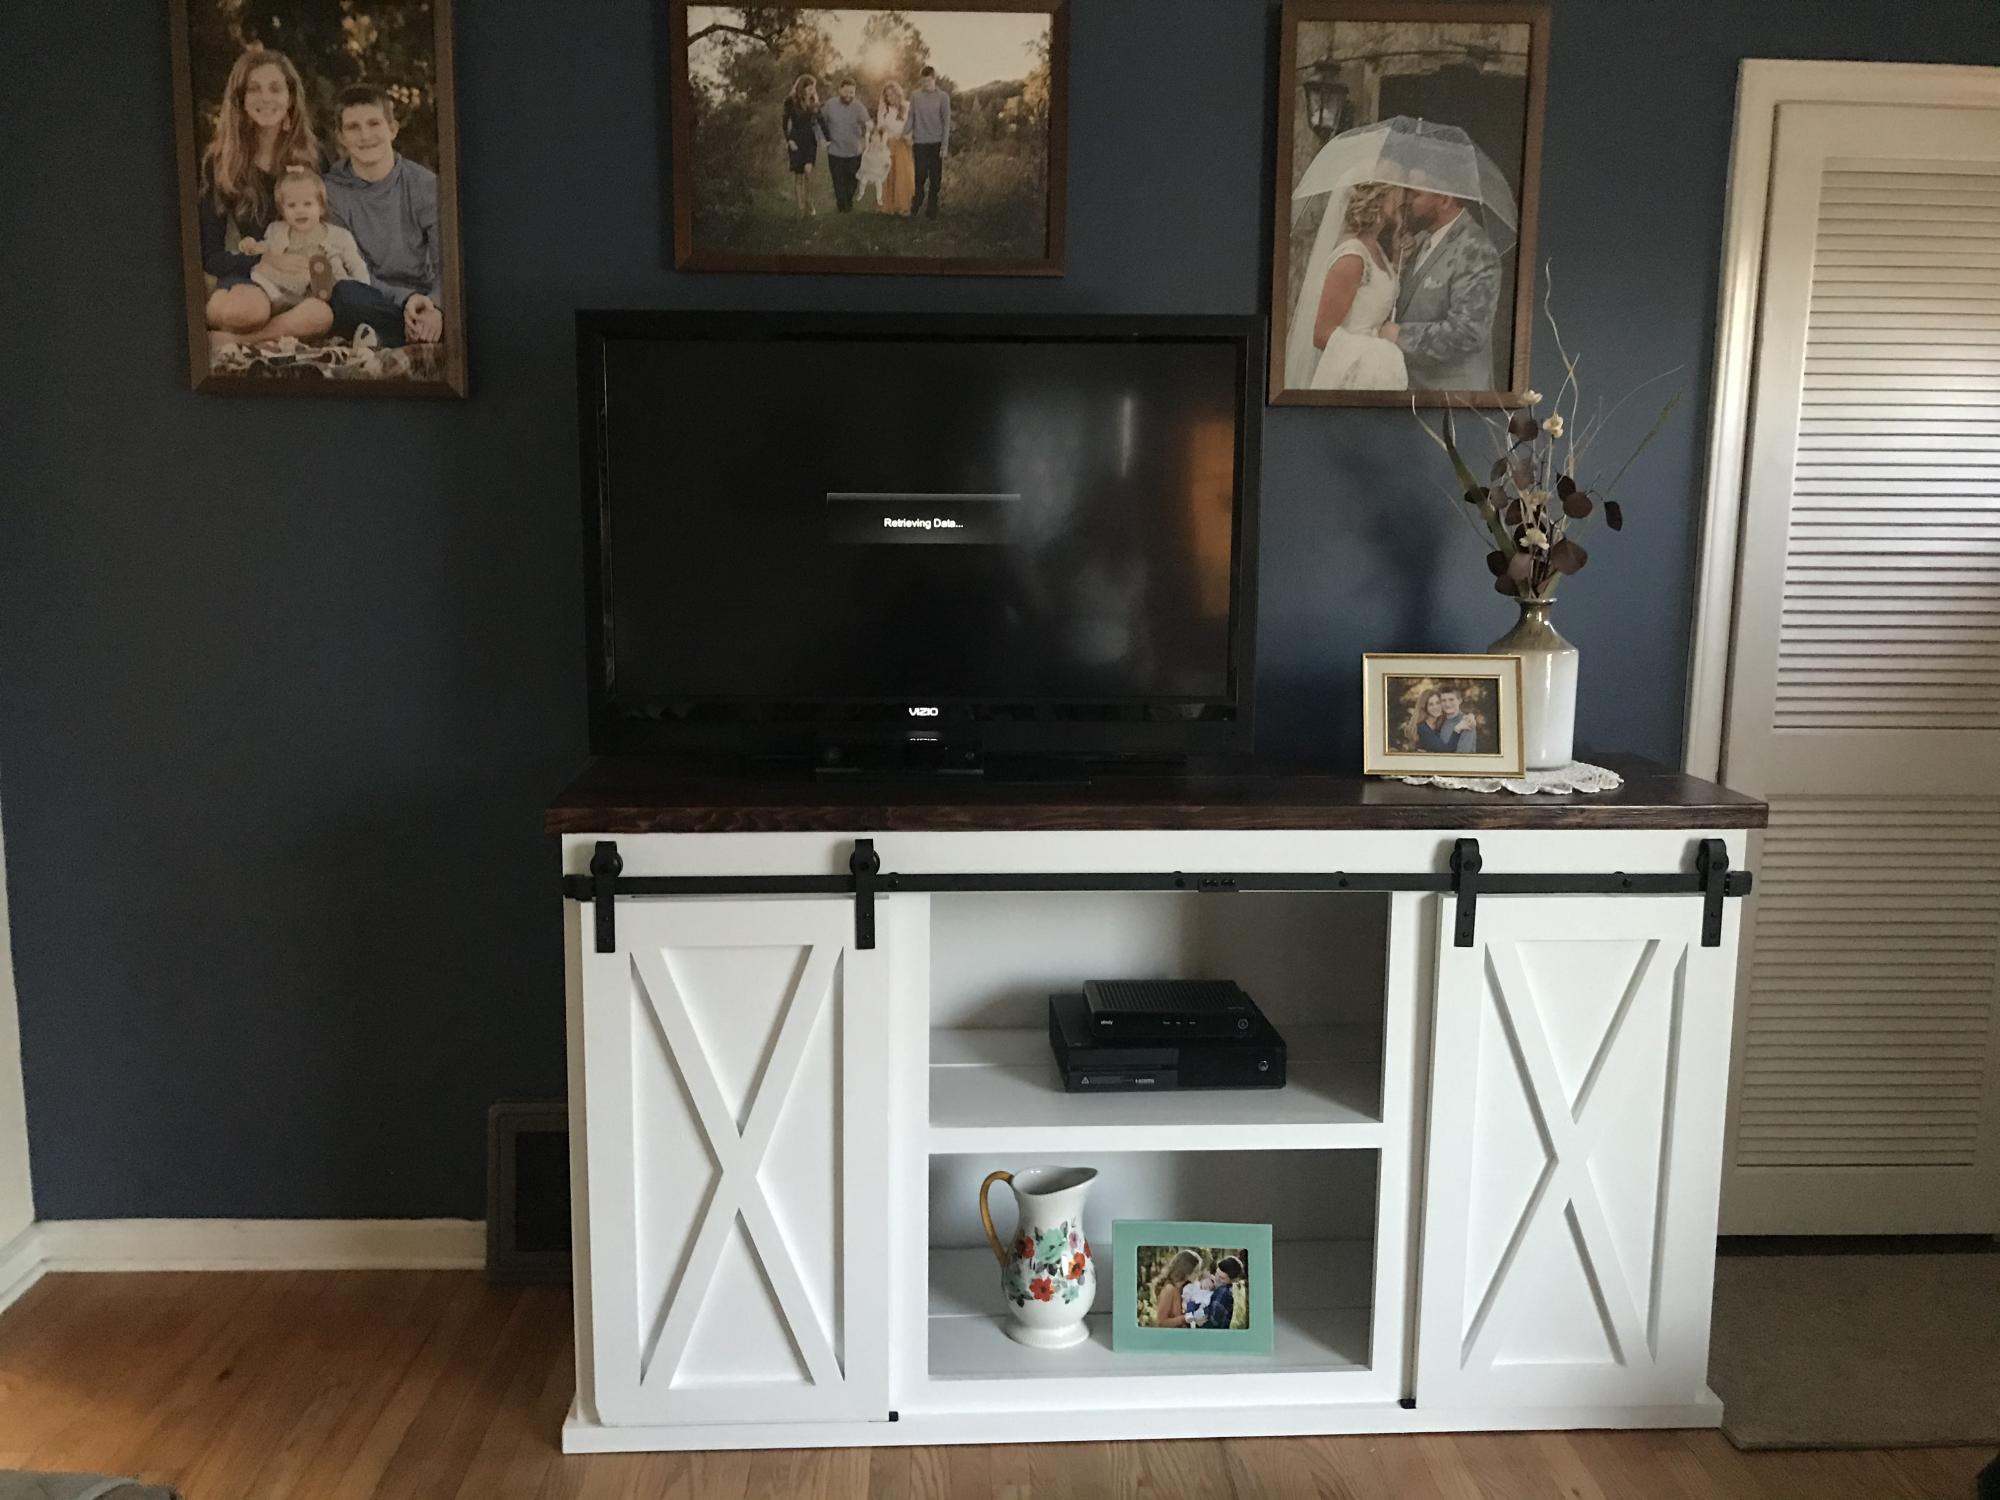
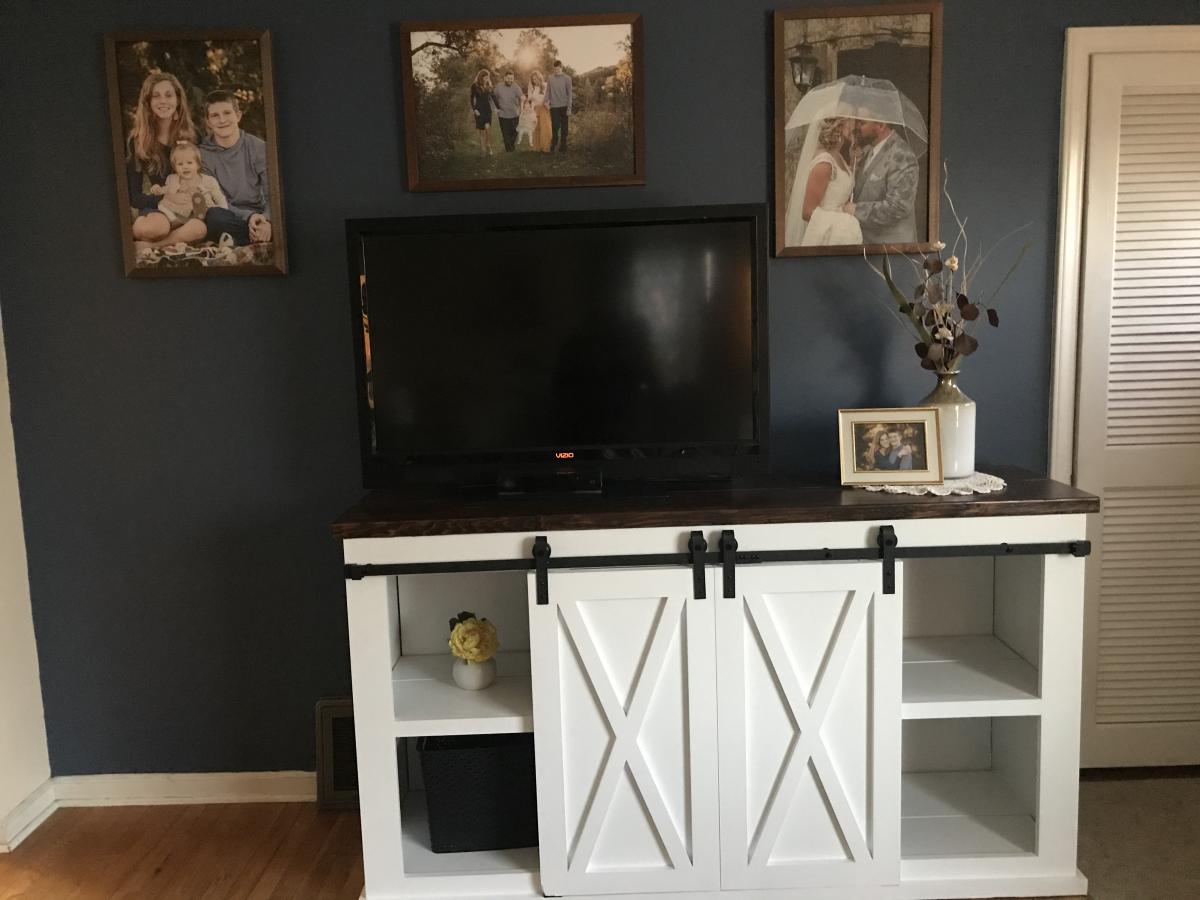
I built this unit based on the Grandy Barn Door Console plans. I adjusted it down to 66”. The top is Dark Walnut with Satin Poly. All lumber was purchased at Menards.