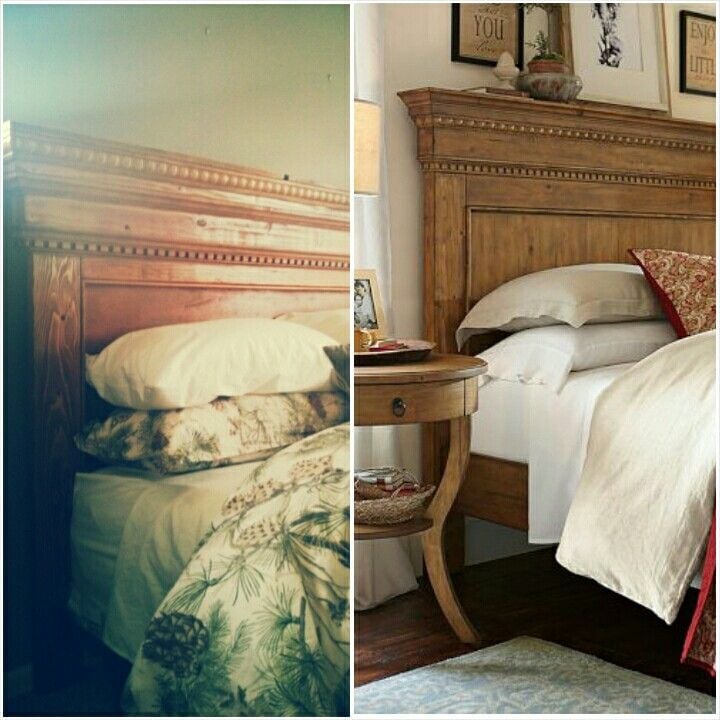
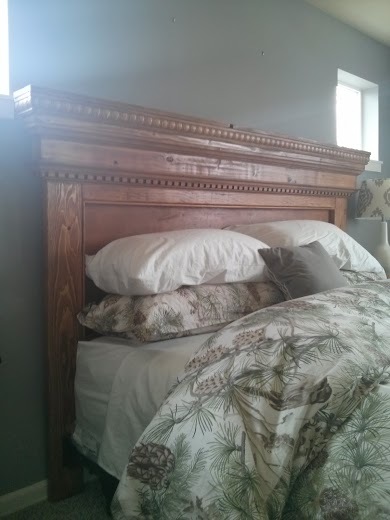
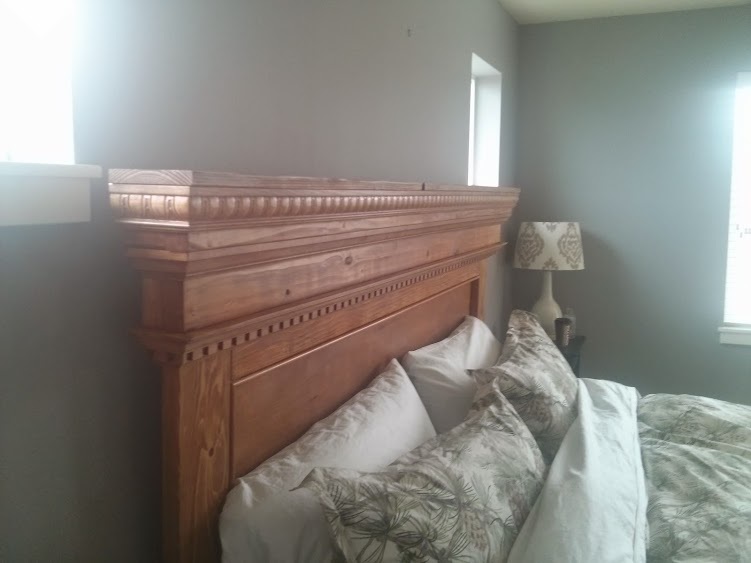
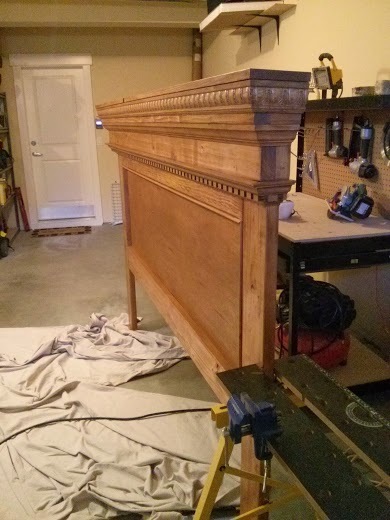
Faux Mantle
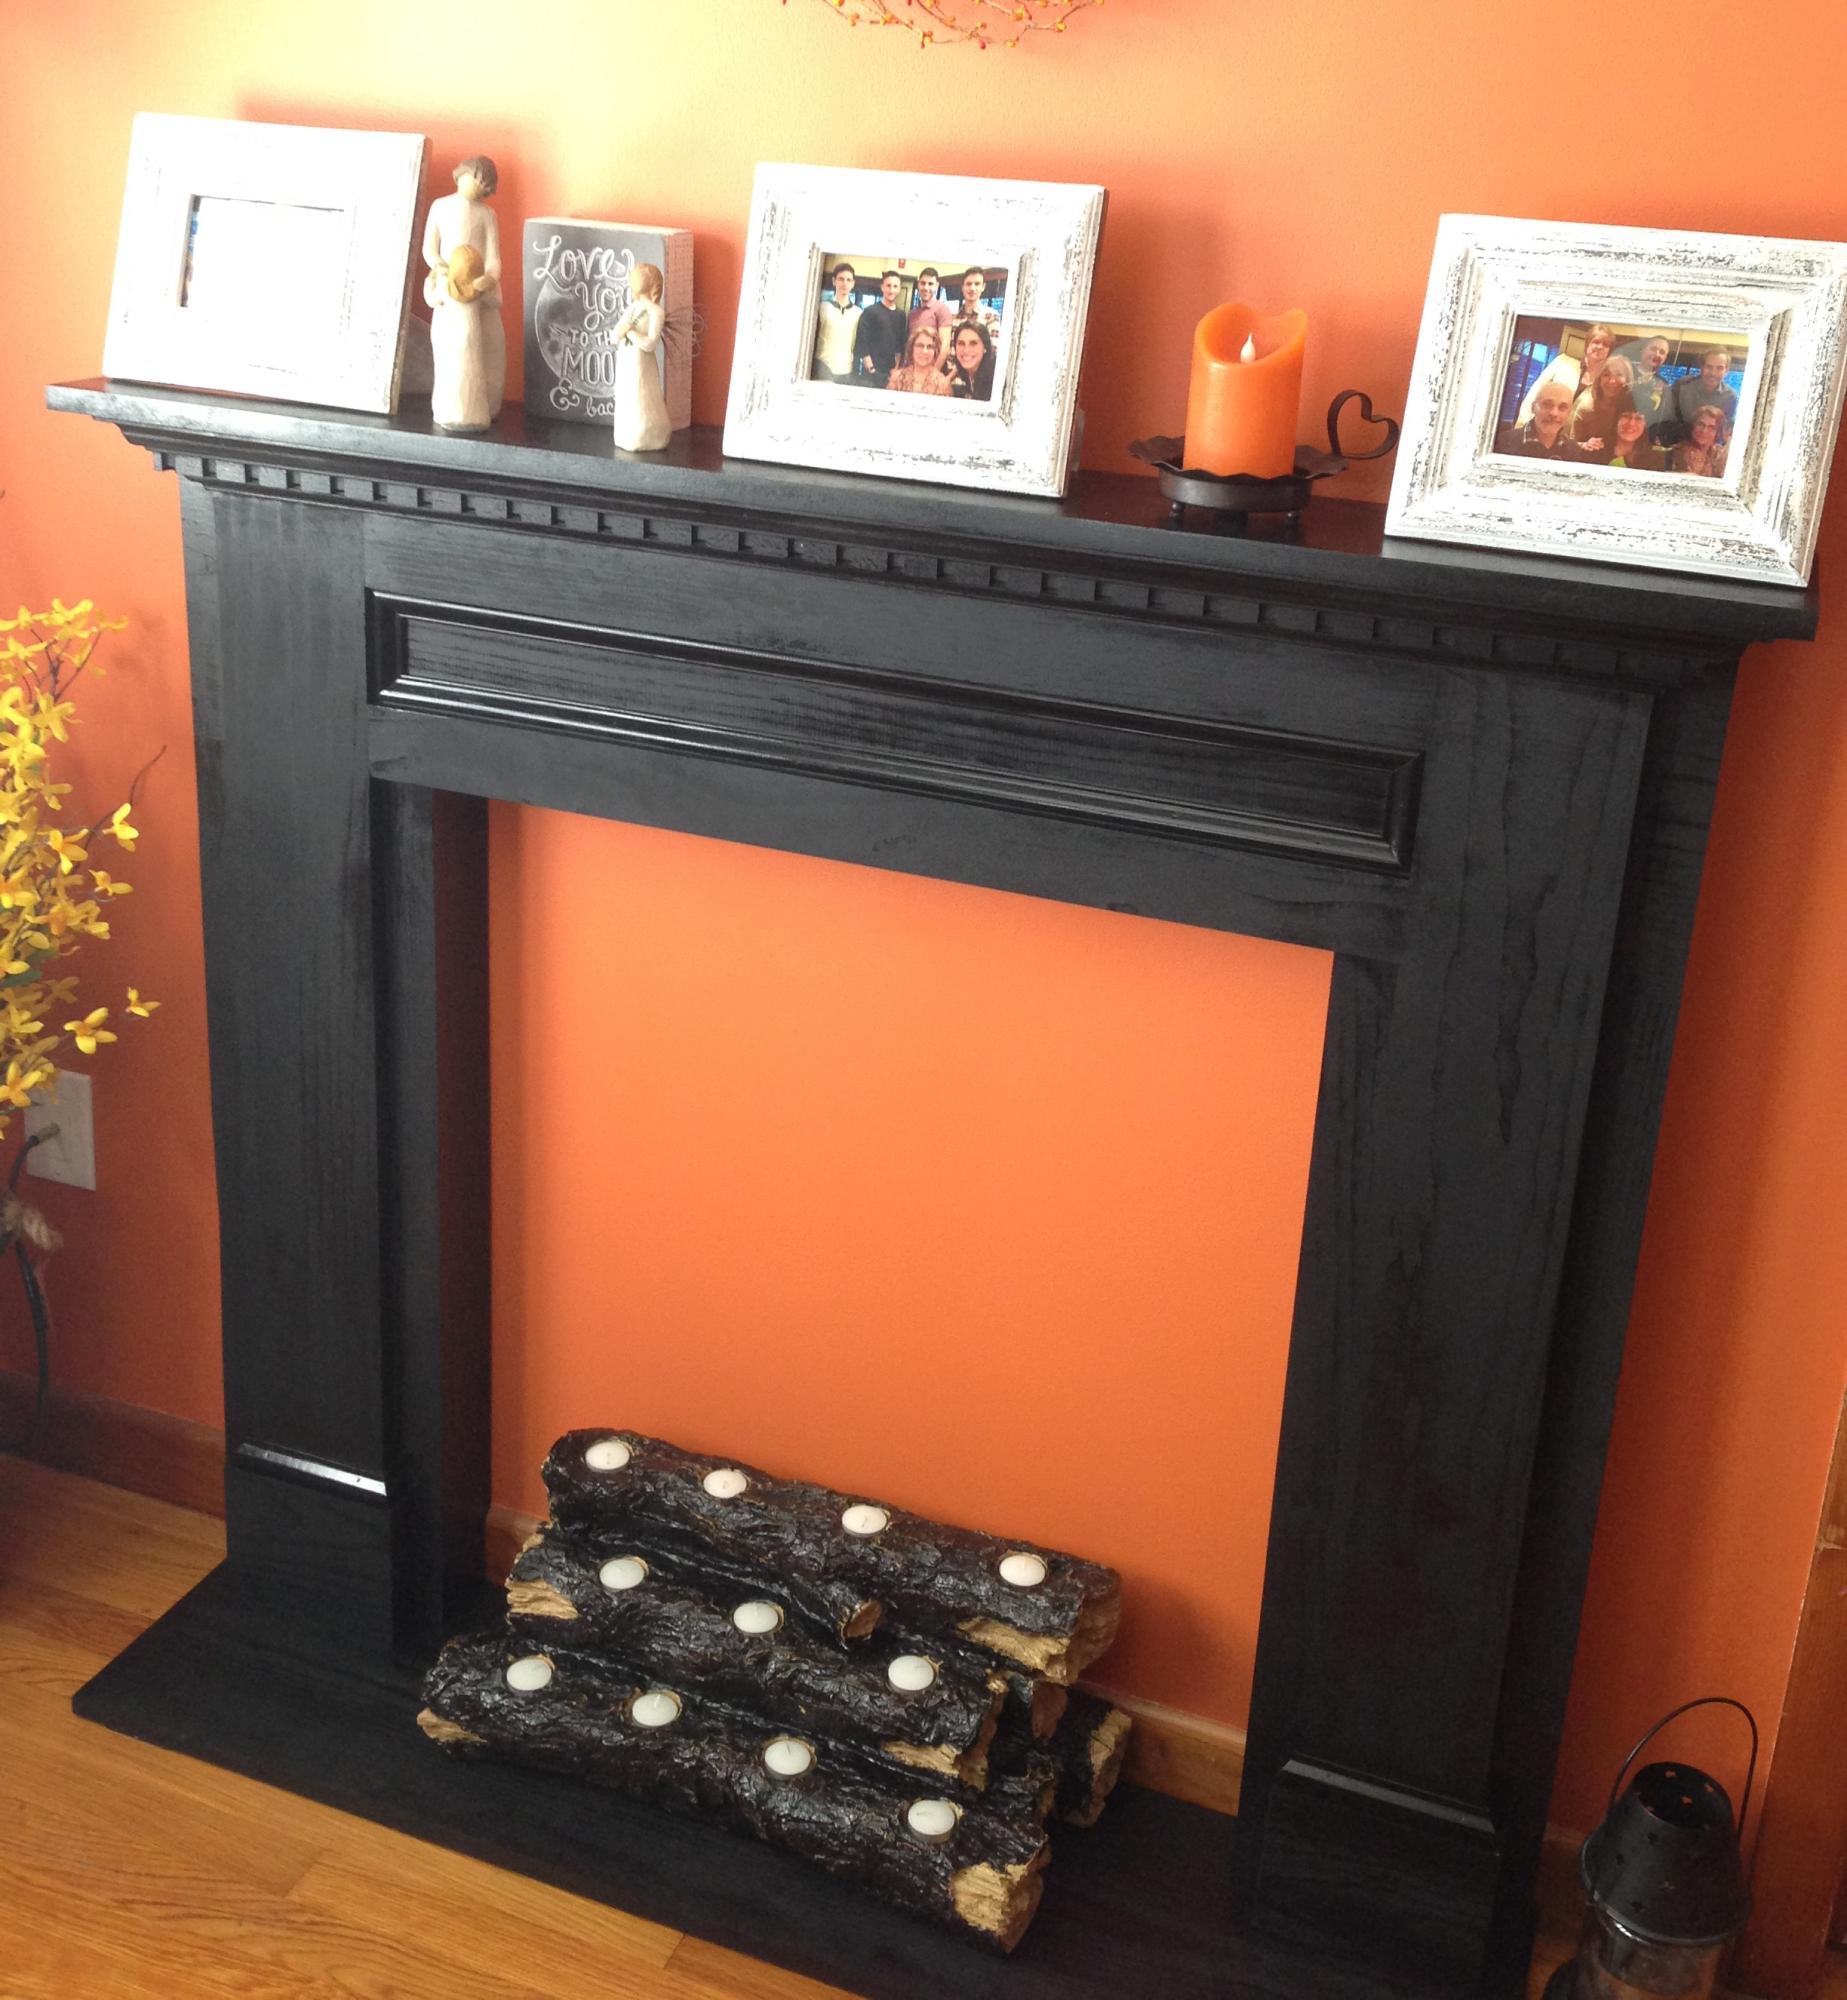
My office faux mantle came out awesome thanks to Ana White. The only changes we made was that we used dental crown molding and we added the base. Other than that everything else was exactly according to the plans.
We chose the Dream Dollhouse plan because all four grandchildren could play with it at the same time. We also wanted to make the dollhouse entirely by hand - including much of the decor. The original plan was expanded by raising each floor 2 inches (to allow for the repainted Susy oven cabinets); and an attic was added to allow all the third floor walls to be full height. Interior walls were increased (7, 9 and 12 inches) to accommodate Barbie-sized furniture. Eliminating the stairs and adding an elevator also increased usable floor space. The wallpaper was scaled from online wallpaper images or designed to coordinate with the space. All the bedding, rugs and the living room furniture were made by hand. Some plastic Barbie or Susy doll furniture was repainted. All the art and photos are specific to each grandchild. Both the fireplace and chandelier will light. The floors are cut from vinyl floor tiles. The shingles are cut from jumbo craft sticks. The completed house took 2.5 months with some very long days as we were on a Christmas deadline! We intend to make a 2-car garage topped by a deck (and maybe a pool) that can sit next to the house this summer.
We have been slowly updating our sunroom and making it a play area for our kids. I built this trestle play table and a couple of rolling cubes to go with it. I still need seating for two more (for playdates and when the grown-ups want to sit) so I'm trying to decide what to do on the other side.
I wanted to use all wood that we already had in the garage, so the top is made from 1x12s connected with pocket holes, and the legs are 2x6s.
In the background you can see the board & batten my husband and I installed a few weeks ago. We also ripped out some moldy carpeting, sanded the concrete and laid vinyl plank flooring. It's coming along!
Plan for the rolling storage cubes: http://www.shanty-2-chic.com/2012/07/rolling-storage-cube-stools.html
We just love your work and detailed plans!
Hubby and I built the Console Unit and plan to add on the base units and hutches. We built the unit only 30" tall vs. the 34-1/2" height from the plans. We used oak plywood and oak trim and finished it with a Fruitwood Stain and Polyurethane Seal. We shortened the height of the upper shelf, adding two shallow drawers and a pull-out tray for setting our cable modem on and hooking up our laptop to view movies and You Tube videos on our television, when desired. My hubby loves to make You Tube videos and made one of our work and posted it at:
https://www.youtube.com/watch?v=6JuQ4N-jUq4
Keep up the great work and we plan to posted more pics!
i love the farmhouse look and decided to start changing the furniture in my bedroom. I went shopping and everything I liked was very expensive. I looked online and found DIY plans on Ana’s website. They were an awesome start. I tweaked a few things and absolutely love the end product.
I decided to buy a metal frame and put the mattress on plywood. It’s as solid as a rock!!
Fri, 01/17/2020 - 21:03
Sorry that some of the pictures are sideways. I don’t know how to change them.
This is the second project I have made from this website, which I LOVE! I needed some sort of table to use with a large sectional sofa because I refused to give up my huge ottoman for a coffee table! This is perfect. I loved the brag post with the shelf added so I used that idea also.
When it came to decoration, I used some apple barrel craft paint and found some scrapbook paper I really liked. This was my first use of modge podge so it was not as flawless as I hoped but I still think it turned out well. And best of all it will be used often!
FYI - by saving money on the particleboard shelf, I ended up spending a lot of time applying wood filler.
Instead of using 1x3's for the legs we used two 2x4's for the outside legs and then used 1x4's for the fillers. We also used 1x4's for the ladder. We will be adding shelving against the wall and we have a desk top that has been painted with dry erase surface which will give it a whole new dynamic. Project one of many is done :)
I built this farmtable using old fashioned methods of tongue and groove, biscuits, etc. It was a true labor of love but it came out great. The stain I made using vinegar, steel wool and water. I the protected it with spar urethane. Next project is the chairs and benches. Thanks Ana for the inspiration.
Made this for my Son and His Wife. They love it.
Built using pallet wood for the top.
Grace LeBlanc
Directly from plan. Fun to make. Kreg and glue attachements.
This site features the queen size version of this headboard, I decided to build the King and use more elaborate molding pieces, which increased the cost. I stained the wood to a very close match although my mobile photos don't do justice to this claim. It took me about a week to complete with nights and weekend availability.
Wed, 02/26/2014 - 17:42
I love the way your headboard turned out. I would like the details on the wood used and measurements to make the king size version.
Thu, 03/12/2015 - 13:37
looks great. Did you use pine? Which stain did you use? I would like to be able to closely match the stained version of pottery barns addison too. Thanks!
Wanted a builtin hutch change the plans a little for depth and height. I used tempered glass instead of lexan for the last ability as lexan discolor and looks a little cheap. Mostly red oak plywood, but choose hard wood for shelves so they wouldn't sag and small desk drawers and doors because it was easier to buy it cut and cost effective. Wish I would have done the drawer faces hardwood also. I used maple on the bottom and decided I wanted more grainy look so finished the desk and top with redoak. Matches bottom trim which was red oak. Special ordered old style secretary desk hinges. I had them played $60 for both. I liked the look and they are stable. Time consuming building but impressive when done. Don't know why photos alway turn up sideways, tried flipping them and saving them same result...
Great table! Loved the build.
Fri, 01/31/2020 - 09:01
That turned out really nice! What finishes did you use?
We needed a coat rack in the mud room to go along with the X Bench that I built earlier. This was made from a drop of wood left over from the bench. I had the hooks left over from a project I made a couple of years ago. My wife says our mud room is now complete. I used the plans Entryway Bench and Storage Shelf I just didn't use the shelf part
Fri, 06/15/2012 - 00:26
It is great to have the opportunity to read a good quality article with useful information on topics that plenty are interested on.
www.ahappydeal.com/product-74678.html
Video of the build is here:
http://www.youtube.com/watch?v=9Vmjm2BS3xQ
Other projects
http://www.youtube.com/playlist?list=PLcLIJdluqiyiI7J9qp5VAXrALMOftr0RT
Planters from Pallets
Drawing File -- Plan 1
https://drive.google.com/file/d/0B21TbB8gGNQbMEl2WDBpU19semc/edit?usp=s…
Drawing File -- Plan 2
https://drive.google.com/file/d/0B21TbB8gGNQbUWUwNV9UNk9tTTQ/edit?usp=s…
Image 1
https://drive.google.com/file/d/0B21TbB8gGNQbVzhRRGRDNS1KS1U/edit?usp=s…
Image 2
https://drive.google.com/file/d/0B21TbB8gGNQbVGcxenVvRlZ4X0k/edit?usp=s…
STEP-BY-STEP INSTRUCTIONS
http://www.instructables.com/id/Planter-Box-from-Pallets/
Used the original plans and customized it a little bit. Great plans !
Plans from the Tryde table plans. Added bottom shelf. Next up, Tryde end tables, one is done, other trying to plan it out to include a drawer. I added carriage bolts for looks, and black metal corners. So much fun!
Tue, 02/04/2020 - 12:36
Thanks Ana! You really were my inspiration to try and build furniture. With every build I’m getting more comfortable. I talk about you all the time when people ask where I learned... Ana White!
Thanks again.
btw. I really need rocking chair plans!
Tue, 04/14/2020 - 20:32
What kind of mods could you add in order to open the table top for a bin. Nothing deep, but a great place to keep a firearm, hide remotes etc.
Spruced up guest room by replacing full size bed with Ana's design for a queen size headboard and frame. Love the result! Thanks Anna
I followed the plans exactly, except I didn't put the trim pieces on the lower shelves sides. I really like the way it turned out, and my wife painted it with Annie Sloan Chalk Paint, color "Paris Grey" and then used Annie Sloan finishing wax (both clear and dark wax) to protect the piece and age it. I think it turned out great! Thanks for the plans!
Nothing was to difficult with these plans, at least not if you have a Kreg Jig. I would add that I used pocket screws on the top pieces not only to join them to the breadboard end pieces, but also to each other. That made it really strong!