Community Brag Posts

Farmhouse Indoor Playhouse - I May have gone a little overboard...

Submitted by Anonymous (not verified) on Fri, 01/08/2021 - 19:38

Thanks for your amazing Farmhouse Indoor Playhouse plans!
So easy to follow your directions! I may have gone a little overboard.
I used some scrap wood from recent Renos and wood from an old boxspring my parents had.
The kitchen was originally from Ikea with some updates.
The shrubs are silk plants from Ikea and scrap wood.
The only real cost was Paint $30 ish.

Built from Plan(s)
Estimated Cost
50
Estimated Time Investment
Weekend Project (10-20 Hours)
Recommended Skill Level
Beginner

Comments

Seasonal And Holiday

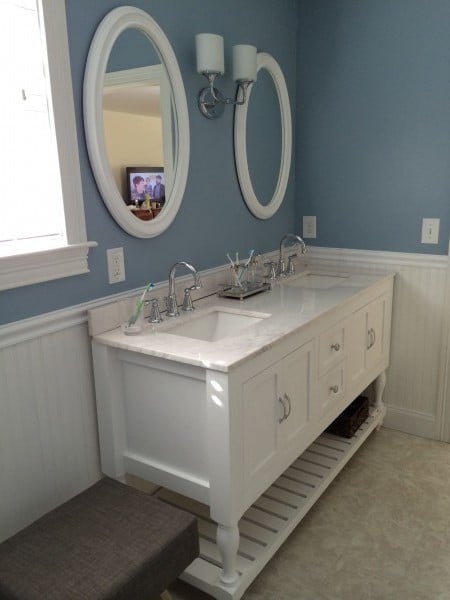
62" Turned Leg Vanity

Submitted by gwphoto on Tue, 01/20/2015 - 12:21

First time visitor. I recently built this modified 48" Turned Leg Vanity for my wife.

We expanded it to a 62" double sink with drawers in the middle and opening below the sinks.

Thanks for the great site Anna.

Built from Plan(s)
Estimated Time Investment
Week Long Project (20 Hours or More)
Finish Used
Paint
Recommended Skill Level
Intermediate

Comments

brittanyj

Wed, 01/21/2015 - 08:06

This looks great! Will be making a similar one soon. Well done!

lkbuckley13

Wed, 06/10/2015 - 09:35

This looks great! I am going to work on one very similar and use this sink http://www.us.kohler.com/us/Ceramic-Impressions™-61-rectangular-double-bowl-vanity-top-bathroom-sink,-single-faucet-hole/productDetail/Styles-of-Bathroom-Sinks/1006992.htm?categoryId=651428&skuId=1006846&hash=id%3Dfilters%26chk-183%3D183%26startIndex%3D20%26scrollTop%3D411

Did you save your plans for this size vanity?

Shuzog

Fri, 10/23/2015 - 09:55

Gwphoto, do you have plans for this project that you would share? Have been wanting to modify this 48" vanity just as you did. Thanks so much!

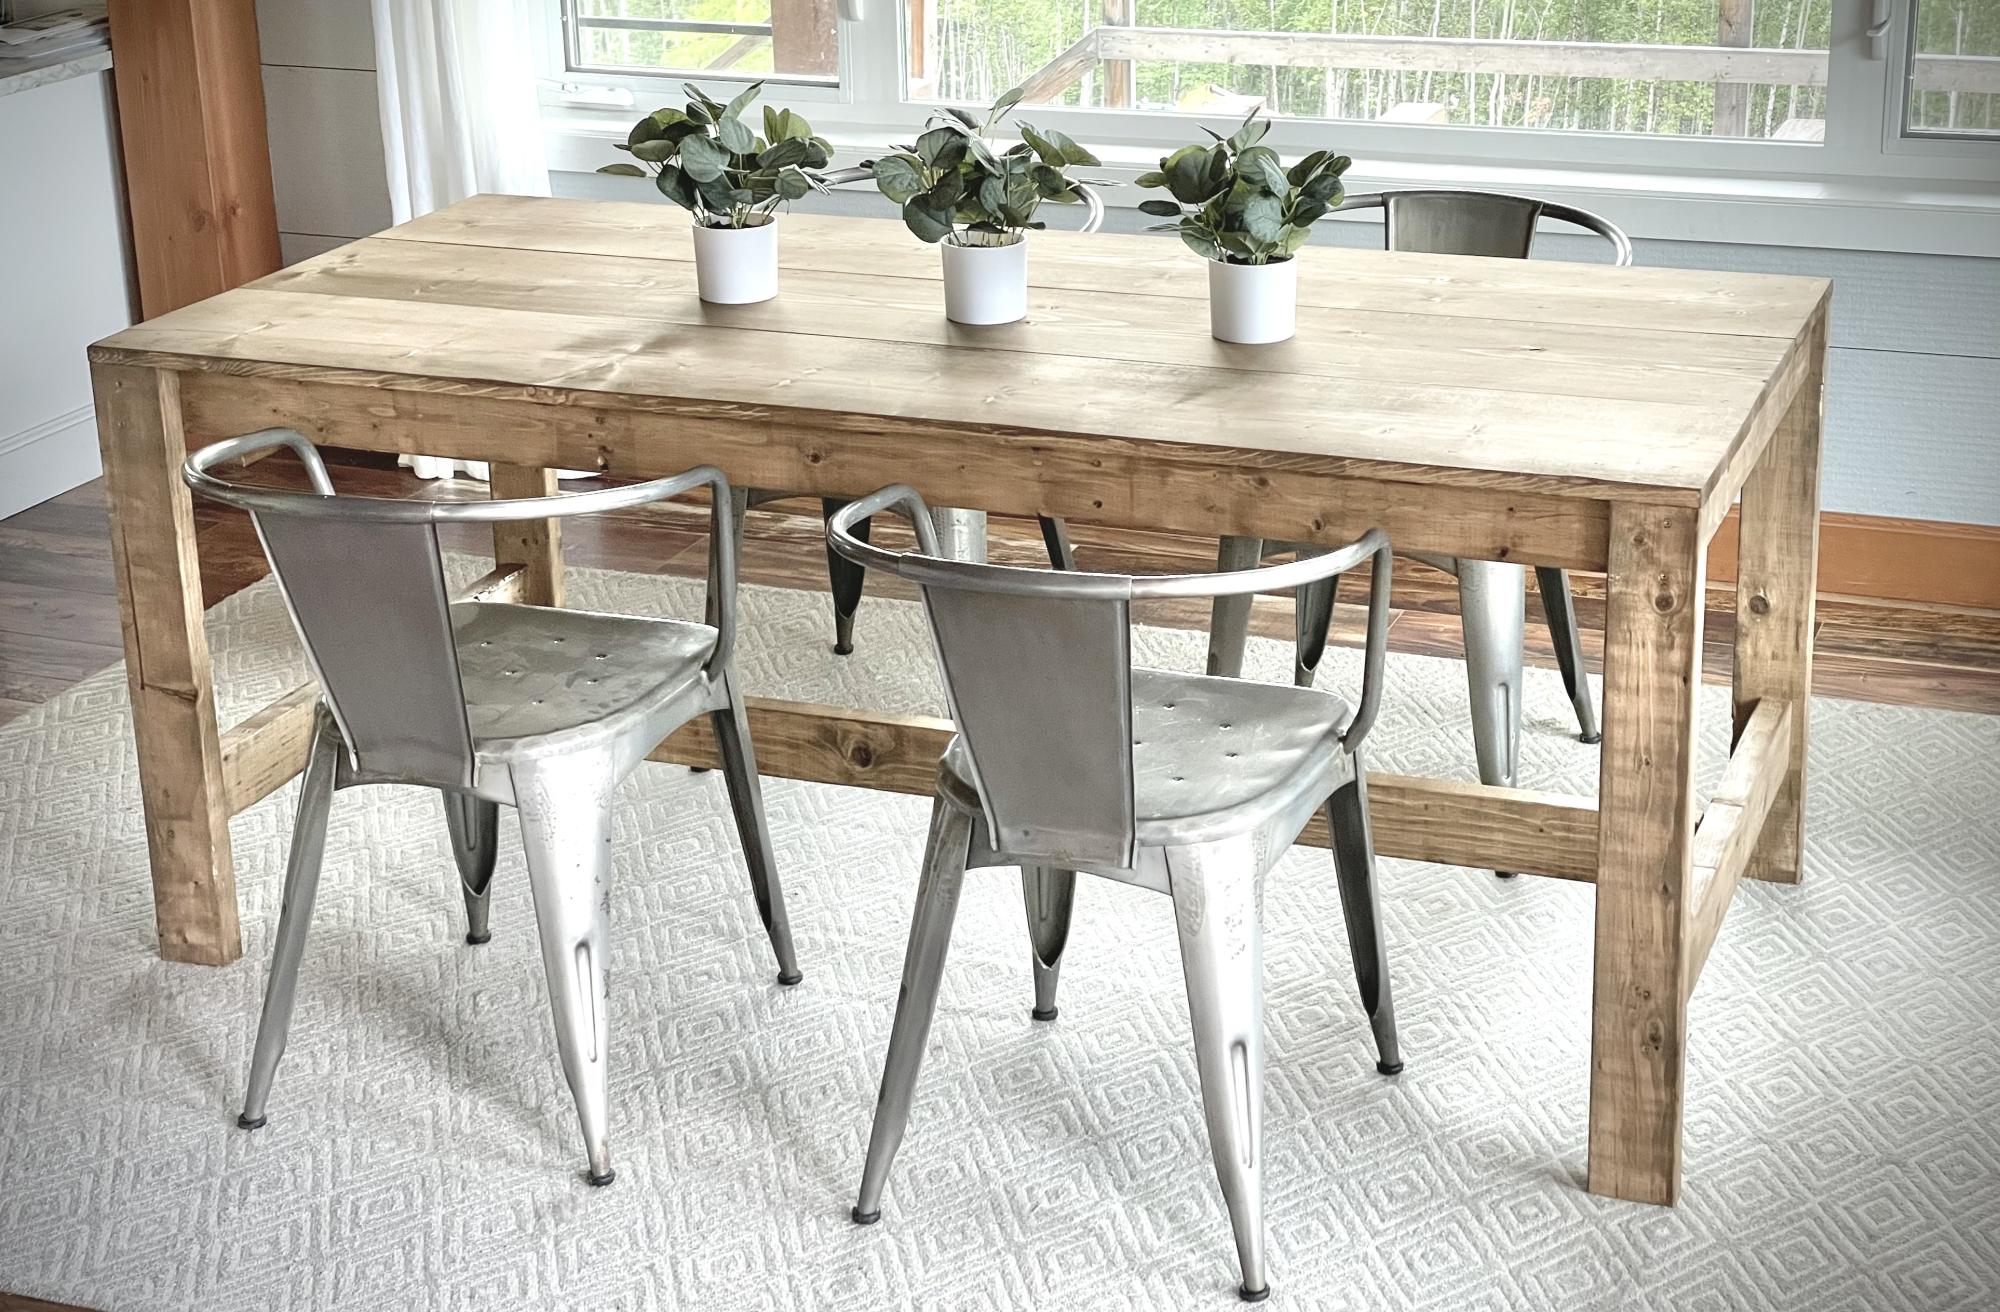
Exterior farmhouse table for the farm

we needed an exterior table big enough for 8 on short notice. It's hard to find nice exterior furniture on the Big Island of Hawaii so we decided to build ourselves using borrowed tools. only wish i had my kreg jig nearby :).

*this is July 2021 (pandemic) so wood prices have shot up. that's the reason the cost of the project is higher than normal.

Estimated Cost
350
Estimated Time Investment
Weekend Project (10-20 Hours)
Finish Used
1. Primer: Zinsser Bulls Eye 1-2-3 Primer
2. Wood conditioner: Varathane pre-stain wood conditioner
3. Paint – Legs: Benjamin moore soft gloss finish premium exterior paint in white
4. Stain – Top: Varathane premium poly+stain in Satin Jacobean
5. Varnish: Minwax Helmsman Spar Urethane
6. #9 x 2-1/2 in. Star Flat-Head Wood Deck Screws by Deckmate
Recommended Skill Level
Beginner

Comments

Wedding Arbour

Submitted by Anonymous (not verified) on Mon, 10/04/2021 - 13:43

Hi, I built this wedding Arbour for my daughters wedding a while ago and unfortunately, I have no plans as I built from my head. It now sits in pride of place within thier garden as arch for thier garden.
I built this with a drop saw, hand saw, router, drill and hammer only.
I follow Ana's plans every release and save her plans for when I retire in two years to build for our house as well as try to run a small business from my shed.
Thank you Ana for you continued plans and wonderful advice.

Built from Plan(s)

Comments

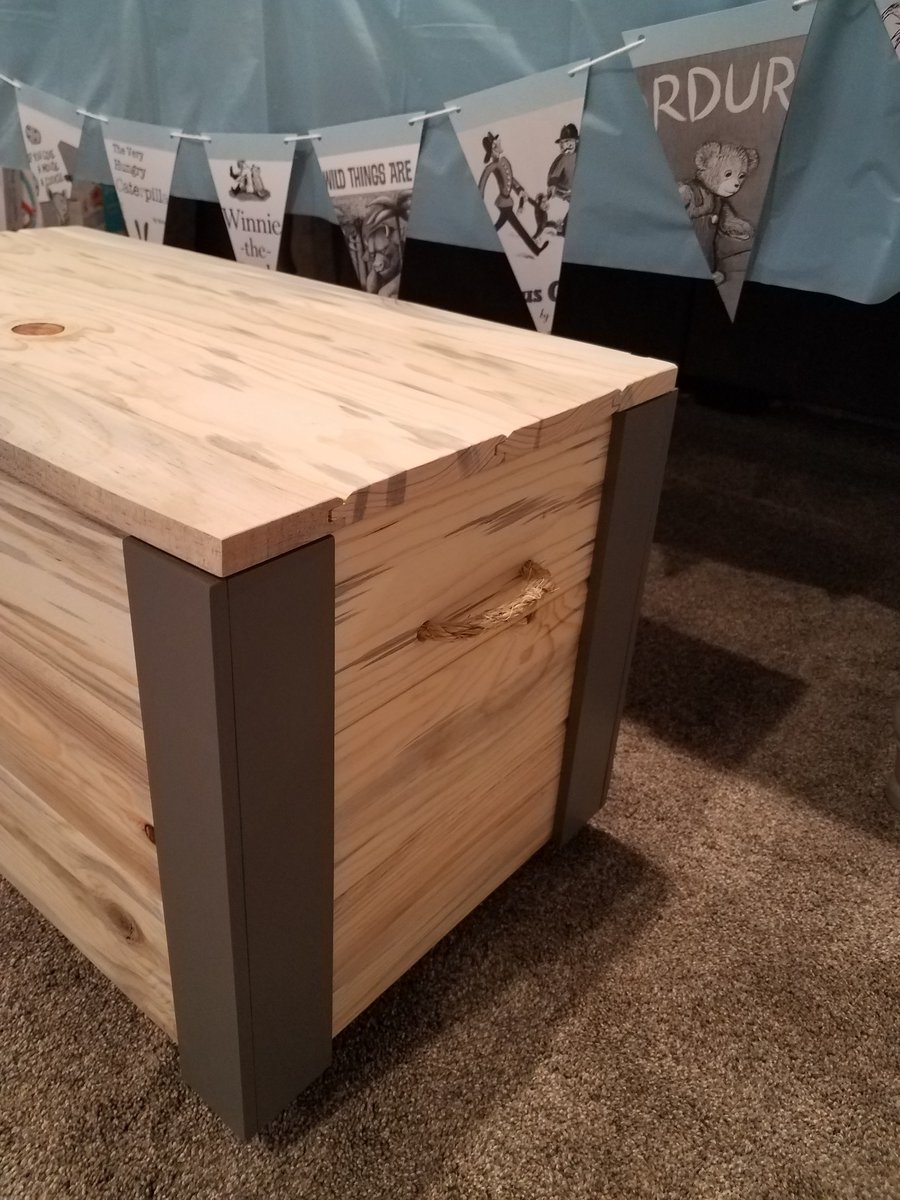
Toy Box

Submitted by JustJ on Sun, 02/18/2018 - 07:13

I used your basic plans,  but modified it to use some scrap wood I had from another project. I used blue stain pine,  tongue and groove. 

I made this toy box for my niece who is expecting her first baby (it's a boy).  I know she likes things clean and uncluttered,  so I added a lid, and then added some corner pieces to make it a little more juvenile. 

It was so much fun. 

Estimated Cost
If you have to buy everything, it's around $75.

I really only had to buy some hardware and rope, so it was minimal for me.
Estimated Time Investment
Afternoon Project (3-6 Hours)
Finish Used
Satin finish, poly coat.
Recommended Skill Level
Beginner

Outdoor patio table

Just a simple, but solid and stable patio table to replace the IKEA version that was warping and disintegrating. So much happier with this version. Also used bolts and wing nuts for attaching the legs for easy disassembly and storage for the winter. Should get many years out of this table.

Built from Plan(s)
Estimated Time Investment
Week Long Project (20 Hours or More)
Finish Used
Opaque stain and polyurethane.
Recommended Skill Level
Starter Project

Garden Planter Boxes

Just in time for Fall Mums, I wanted a set of sturdy planters that I knew would hold up in the winter. I wanted to try something that felt more 'simple' to me than the pattern I was inspired by.

I used some 2" wide pine so they ended up quite heavy, but I know they'll hold the test of time.

It was quite an easy project, and I encourage anyone to make their own. It took me only a Saturday once I got going. Painted them the next day... then done!

Enjoy the details here --> http://projectjumanji.blogspot.ca/2013/08/homemade-decorative-planter-b…

Built from Plan(s)
Estimated Time Investment
Afternoon Project (3-6 Hours)
Recommended Skill Level
Starter Project

Coffee Bar

Submitted by Anonymous (not verified) on Wed, 12/28/2022 - 18:35

My wife wanted a coffee bar and I wanted a fridge for wine and beer. So we compromised on this.

Comments

Porch Planter Steps

Submitted by Anonymous (not verified) on Sun, 08/27/2023 - 12:23

I love how sturdy and beautiful these planter steps turned out! They were easy to build and work perfectly with the new deck/front porch I built this summer. I only needed one step and I used the same 1x material for the top of the step as I did the deck. I just added a couple more supports for the 1x material, as it isn't as sturdy as 2x6's. Thank you so much for the wonderful plan!

Painted Tryde End Table with Shelf

Submitted by Anonymous (not verified) on Mon, 06/27/2016 - 01:00

A white spruce base painted with hessian chalk paint and waxed with furniture wax over the top. Topped off with a section of oak block kitchen counter waxed with dark oak wax

Estimated Time Investment
Weekend Project (10-20 Hours)
Finish Used
Rust Oleum Hessian chalk paint with furniture wax over the top
Old Oak Kitchen counter top with Briwax dark oak wax
Recommended Skill Level
Starter Project

Comments

Modern Sectional Sofa

Submitted by reinkense on Fri, 05/30/2014 - 17:22

I looked all around my town for a sofa that meet my needs. I wanted something with tall legs, modern lines and fit my living room. I did not have $3,000 to buy one online so I said to myself why not???


Estimated Cost
$400
Estimated Time Investment
Week Long Project (20 Hours or More)
Recommended Skill Level
Intermediate

Comments

reinkense

Sat, 05/31/2014 - 15:58

Thank you! I am really proud of it. I was thinking of putting together some plans.

Samigdal

Fri, 12/25/2015 - 17:48

Are there step-by-step instructions for building this posted anywhere?

walthoca

Fri, 01/06/2017 - 11:06

I am so impressed. We recently spent a small fortune on a sectional, but yours looks equally beautiful. You are incredibly talented! 

Simple Patio Chair

Submitted by keltik on Tue, 07/08/2014 - 11:04

This was my first project from Ana's site. I wanted something simple and cheap to make, so all in all, this project was very simple.
I think I will paint instead of stain next time though as the quality of the wood I purchased from Home Depot wasn't the best.
Very happy with it though, and I'm planning on making more.

Built from Plan(s)
Estimated Cost
50
Estimated Time Investment
Afternoon Project (3-6 Hours)
Finish Used
Behr Weatherproofing Wood Stain - Russet Brown
Recommended Skill Level
Starter Project

Modern Outdoor Chairs

These were so easy to build and look amazing! The only challenge was finding cushions. Finally found the 25x25 cushions at Lowe’s.

Estimated Cost
$60 each
Estimated Time Investment
Weekend Project (10-20 Hours)
Finish Used
First coat SW New Ebony Stain
second coat Varathane Briarsmoke
Recommended Skill Level
Beginner

Kaitlyn's Crib

Submitted by MCdesigns on Sun, 11/06/2016 - 10:05

So this is my first post of one of my projects, and super excited to share!   I have to say this is one of the most rewarding projects I have ever done.  First time Dad and so excited to meet her!  My wife is now 35 weeks. I have built many furniture projects in the past but I will admit this one intimidated me more than anything.  There are so many safety regulations on cribs and so many stories and blogs online about child safety it made my head spin.  I almost let the fear get the best of me and just bought a crib.....but the DIY in me said NO, and here it is!  After it is all said and done I couldn't be more happy and a proud Father at the same time!  I am still working on finishing this project, so I will add more pics as they come along.  We will be painting it a light gray color and top coating with a water based polycrylic. This is made to be convertable, and will also become a Full size bed.  Thank you Ana White and other users for inspring us all! 

Estimated Cost
Around $280. I buy all my lumber as rough stock from a local hardwood supplier, and joint/plane myself.
Estimated Time Investment
Week Long Project (20 Hours or More)
Finish Used
Behr Latex paint/ Minwax water based polycrylic
Recommended Skill Level
Intermediate

Comments

greyboarder

Tue, 02/27/2018 - 12:02

This crib is terrific and just what I am looking to build for my son and daughter in law.  Do you have any dimensions or even rough plans you could share?  I will certainly work ast sketching m own but if you have something you are willing to share it would serve as a great starting point.

Thanks so much,

Mark

greyboarder

Wed, 02/28/2018 - 06:37

My wife and I are going to be first time grandparents in the spring and have been asked by our son and daughter-in-law to build a crib - one just like the one you built.  I think it wil be a fun project.  Could you share any dimensions, drawings or other pictures rom your build?  You can reach me at my email address:  [email protected].

Thanks,

Mark

Modified Simple Rolling Bar Cart

I honestly think Ana is a mind reader. Whenever I need plans for a particular piece of furniture, they magically appear on her site. Of course if she was a true mind reader, everything will be exactly as I need it requiring no modifications. That's what makes her plans so amazing. I can build bigger and better because I've learned to modify her plans to fit my current needs.

This Cart was no exception. I had to make mine a few inches deeper and change the height of the legs and it was a piece of cake. I put this together in less than 2 hours and finishing was easy too.

I did a blog post all about what I did differently including how I constructed a towel bar instead of the pipe. Check it out at www.thepursuitofhandyness.com

Built from Plan(s)
Estimated Cost
$25 Depending upon the type of casters used
Estimated Time Investment
Afternoon Project (3-6 Hours)
Finish Used
Oil Based Primer & Rustoleum Painters Touch Spray Paint in Paprika Satin
Recommended Skill Level
Starter Project

Grandy Barn Door Fireplace and Matching Console

Submitted by Anonymous (not verified) on Wed, 11/11/2020 - 17:38

We originally built the original console a while ago as an entertainment unit for underneath our television. We enjoyed the console so much that we decided that we wanted to do another modified console with a fireplace in it and make the other one into a buffet/storage area for the dining room.

Both of these are fairly modified from the plan, however the basic concepts remain the same. One big thing that we did was use 1x4s as much as possible to reduce the different sizes of lumber we were buying to both reduce complexity and end up with as little as possible scraps.

The frames are made of the 2x3s, The sides (4 deep), shelves, middle shelves and face frame are all 1x4s. The back and inside frames are scrap plywood. The top is 1x6s.

The addition of the fireplace was not difficult. What it did require us to do was to add the centre section and essentially create a box that is closed to the outside cabinets. If it were not closed off it wouldn't support the fireplace insert correctly. The important piece with the fireplace is to ensure you have enough clearance on the top and sides to allow the fireplace to mount safely without overheating. The nice thing about this setup is the additional shelf above the fireplace which we used for electronics. The wires go through the back of the cabinet and it looks very clean.

These are probably my favorite things I've built this year. They're simple to make and add a lot to any living space.

Built from Plan(s)
Estimated Cost
$500
Estimated Time Investment
Weekend Project (10-20 Hours)
Finish Used
White paint for body
Minwax Polyshades Classic Black for top
Recommended Skill Level
Beginner

Comments