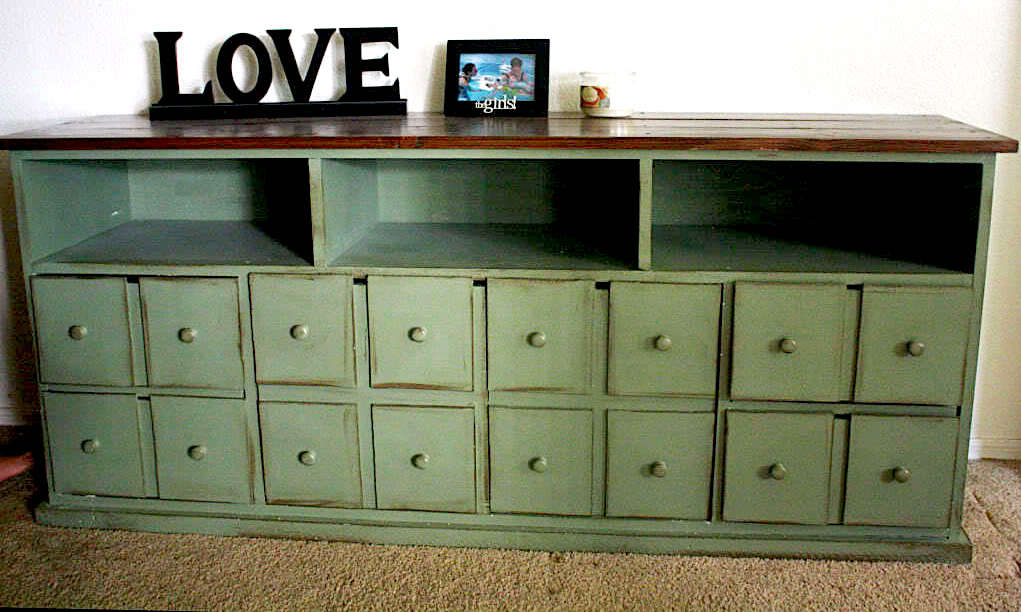
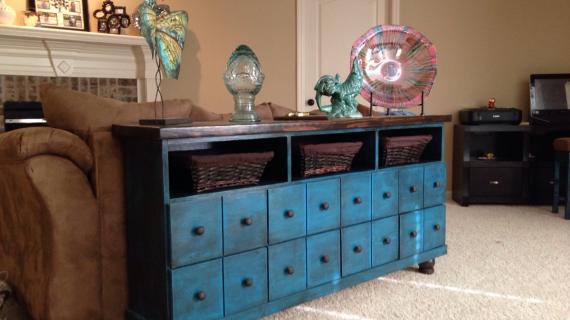
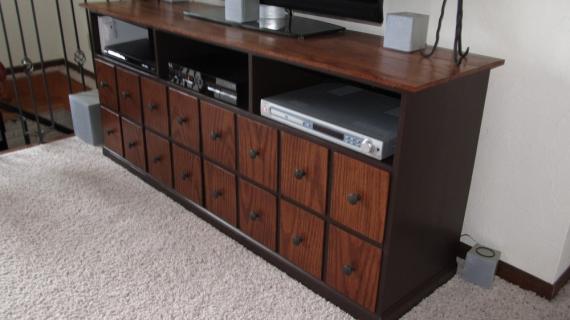
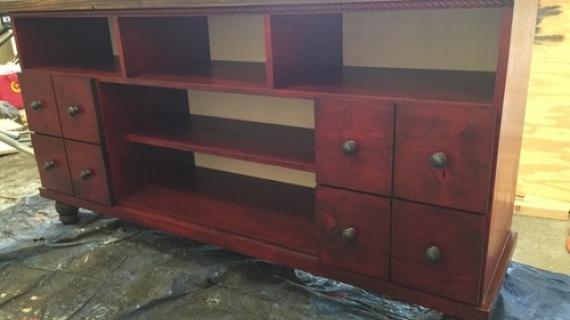
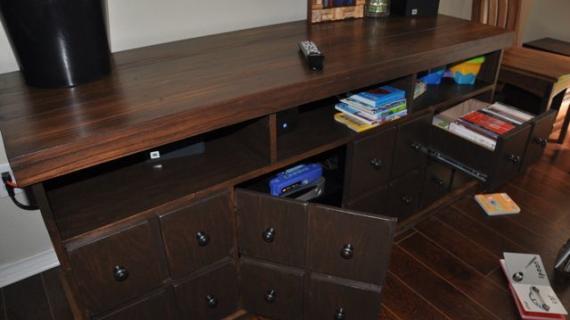
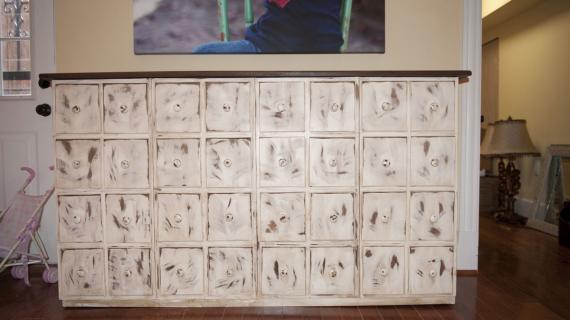
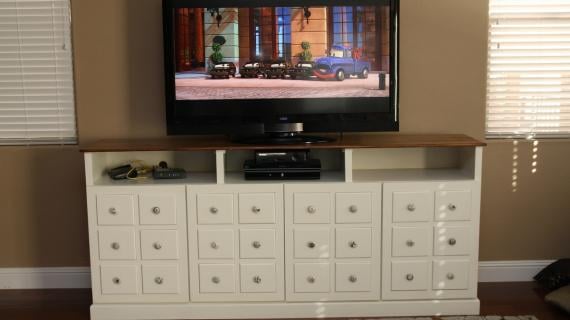
This beautiful apothecary console features three open cubbies perfect for storing entertainment controllers, four drawers and two cabinets, all concealed by door fronts that look like an apothecary cabinet. Loved by so many, this console is easy to build and can add that touch of character to your family room.

Preparation
- 2 – Sheets of 3/4″ MDF or Plywood, cut into 15 1/2″ wide strips, 8′ Long
- 1 – 1/4″ Plywood or Lauan or MDF (for the back)
- 1 – 12′ long 1×6
- 1- 8′ long 1×6 Boards
- 2 – 1×2 Boards
- 2″ self tapping star bit screws
- 1 1/4″ self tapping star bit screws
- Wood Glue
- Wood Filler
- Finishing Supplies
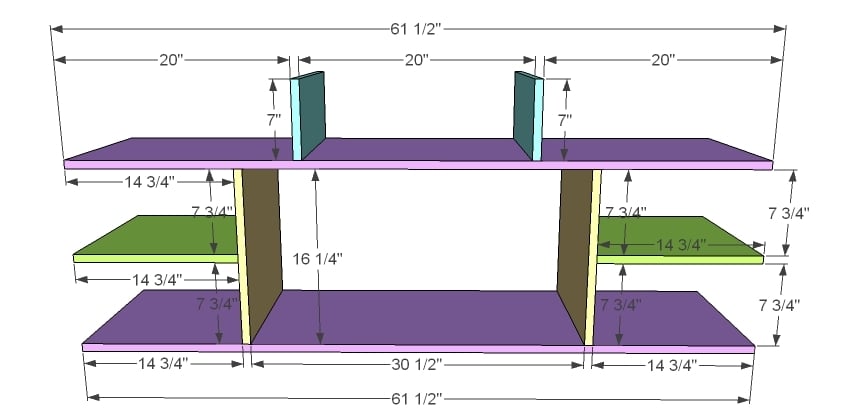
- 3 – 1×16 @ 61 1/2″ (Shelves)
- 2 – 1×16 @ 16 1/4″ (Bottom Dividers)
- 2 – 1×16 @ 14 3/4″ (Drawer Dividers)
- 2 – 1×16 @ 7″ (Top Dividers)
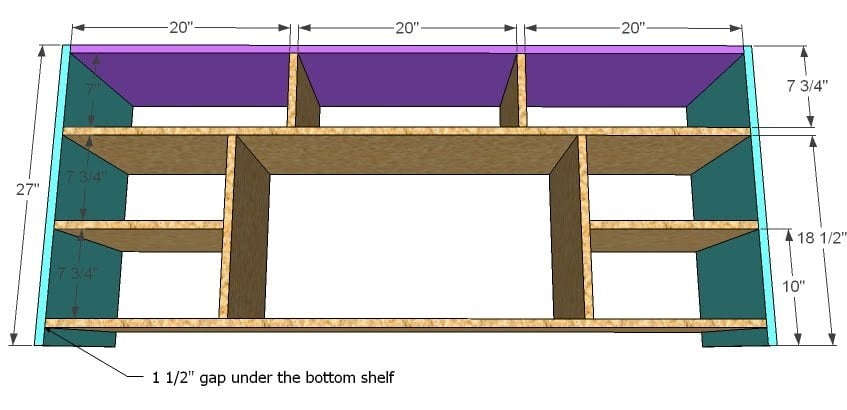
- 2- 1×16 @ 27″ (Sides)
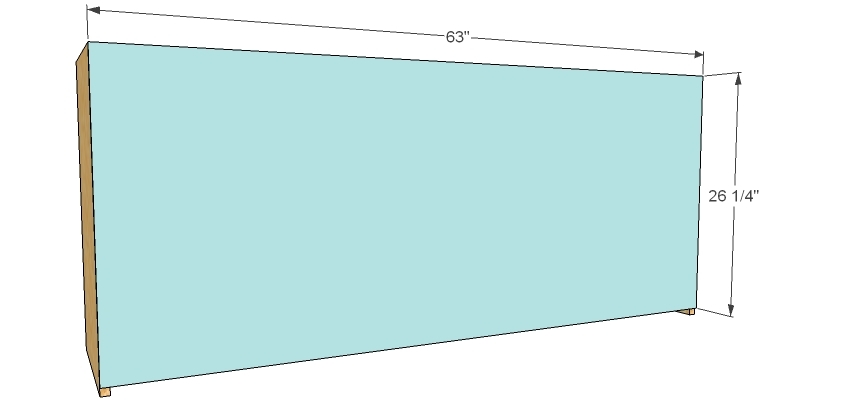
- 1 – 1/4″ Plywood @ 63 x 27″ (Back)
- 3 – 1×6 @ 65″ (Top)
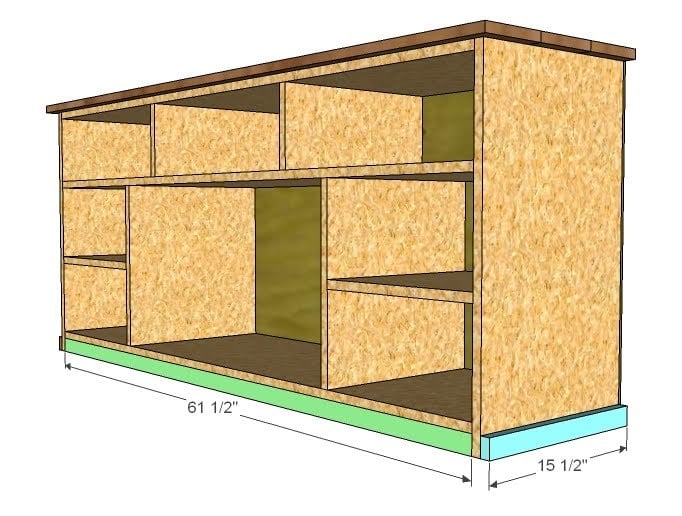
- 1 – 1×2 @ 61 1/2″ (Inset front footer)
- 2 – 1×2 @ 15 1/2″ (Side Footer)
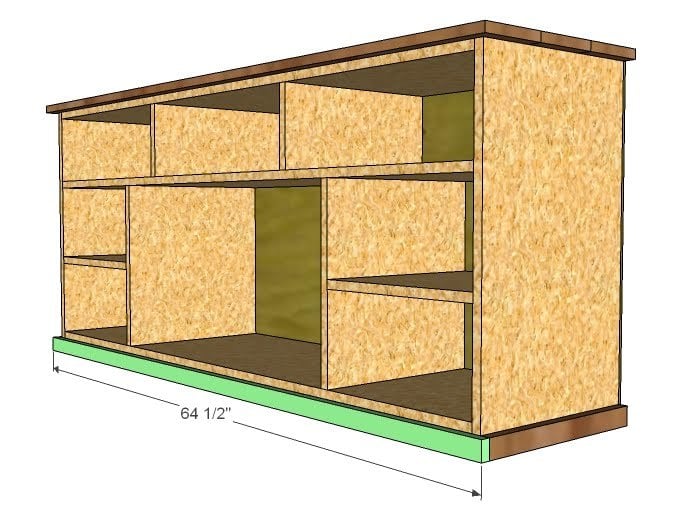
- 1 – 1×2 @ 64 1/2″ (Front Footer)
Instructions
Step 1
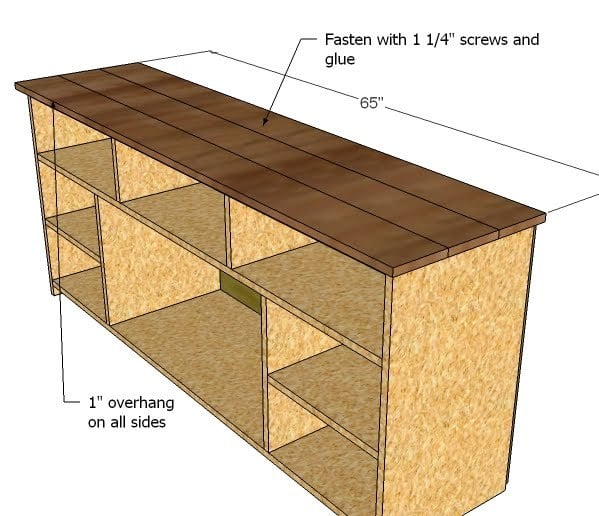
Box Partitions Begin by marking out all the joints on both sides of the boards as shown above. Don’t forget that the boards are 3/4″ thick. Then beginning on the bottom partition (yellow) attach the green partition. Now attach the yellow boards to the purple. Finally, attach the blue boards to the purple. Use 2″ screws and glue. Remember, you can click on images to see a full size view.
Step 2
Step 3
Back Cut your 1/4″ plywood as shown above. Then use 1 1/4″ nails and glue to attach the back to the box. Don’t forget to fasten to all of the partitions and shelves. Make sure your project is nice and square before attaching the back. The measurements shown here are slightly different from the cut list because I choose to make the cabinet slightly taller for drawer reasons, but either measurement would work just fine.
Step 4
Step 6
Step 7
Drawers and Doors: Click here for Part 2



Comments
Annalea (not verified)
Thu, 08/05/2010 - 08:05
Oh Anna, don't let this blog
Oh Anna, don't let this blog interfere any more with mothering than it has to. Yes, it's an important thing you're doing, helping so many people to be able to learn new skills, beautify their homes, gain confidence and independence . . . but we're all grown-ups, and don't need you like Grace does.
If your production goes down by half, or 75%, because you're taking care of your daughter, don't sweat it! You have such a huge catalog of plans now that there's plenty to keep us groupies busy for quite some time. ;o)
As one whose husband has worked himself far, far too hard, for too many hours while his little children were growing up, trust me on this one. We'll all live just fine if Knock-Off Wood slows down. Grace's growth isn't going to slow any, and she'll be so big before you know it . . . and now is the time to build the foundation of your relationship for the rest of your lives.
I know how attractive it is (ay, irresistible sometimes!) to throw myself into something that's a good cause, and take my mind off of my children. It's good to have something "on the side" . . . but there's one person in the world for whom there is no substitute: Grace's mom. Be her mother, first. Be an amazing, wonderful, lovely, loving mother to your little girl, and wife to your good husband. Then, after that, be the amazing Ana of Knock-Off Wood.
We'll all understand. :o) And Grace will thank you for the rest of her life.
Wolfie (not verified)
Thu, 08/05/2010 - 21:57
I LOVE this! I've been
I LOVE this! I've been wanting for my craft room. I'll need to modify it a bit because i actually need/want the smaller drawers, but you're definitely made this task much easier. Thank you!
Lex (not verified)
Fri, 08/13/2010 - 09:48
Ooh, I see this as a dresser
Ooh, I see this as a dresser for my sons' room. I think I will do 8 drawers instead of 4 drawers and 2 cabinet doors, but with your step-by-step instructions and idiot-proof diagrams, even I can easily see the changes I need to make. Beautiful, beautiful. My husband is out buying the wood right now to make them matching twin Farmhouse beds. Love your blog, you seriously rock! <3 <3
Jenn Hoff (not verified)
Thu, 09/02/2010 - 07:43
Haha- that's EXACTLY what I
Haha- that's EXACTLY what I keep thinking of! I want one just because of that episode! And I keep hearing in my head, "Who even knows what an apothecary is?!" And Chandler says, "A pharmacist." ....Awkward silence.....
Ana, this is absolutely beautiful. I can't wait to build it! And Kaptain Spalding, yours made my jaw drop open. Wow.
Molly (not verified)
Fri, 09/03/2010 - 13:51
OMG!!!! I am so glad I found
OMG!!!! I am so glad I found your blog! I cannot wait to make this cabinet-it is beautiful.
Thanks so much for the great plans :)
Ana White (not verified)
Fri, 09/03/2010 - 18:53
Hi Molly, thank you! And you
Hi Molly, thank you! And you must check out our facebook page - one of our readers just submitted a photo of this console with some mods, it's stunning!
mardi (not verified)
Mon, 09/13/2010 - 09:34
Hi Ana! I wanted to share
Hi Ana! I wanted to share with you my finished product. I credited your website for the plans and my friends all think you are amazing, which you are. Let me know what you think!
http://thewyattreport2.blogspot.com/2010/09/another-project.html
Amanda L. (not verified)
Wed, 09/29/2010 - 18:29
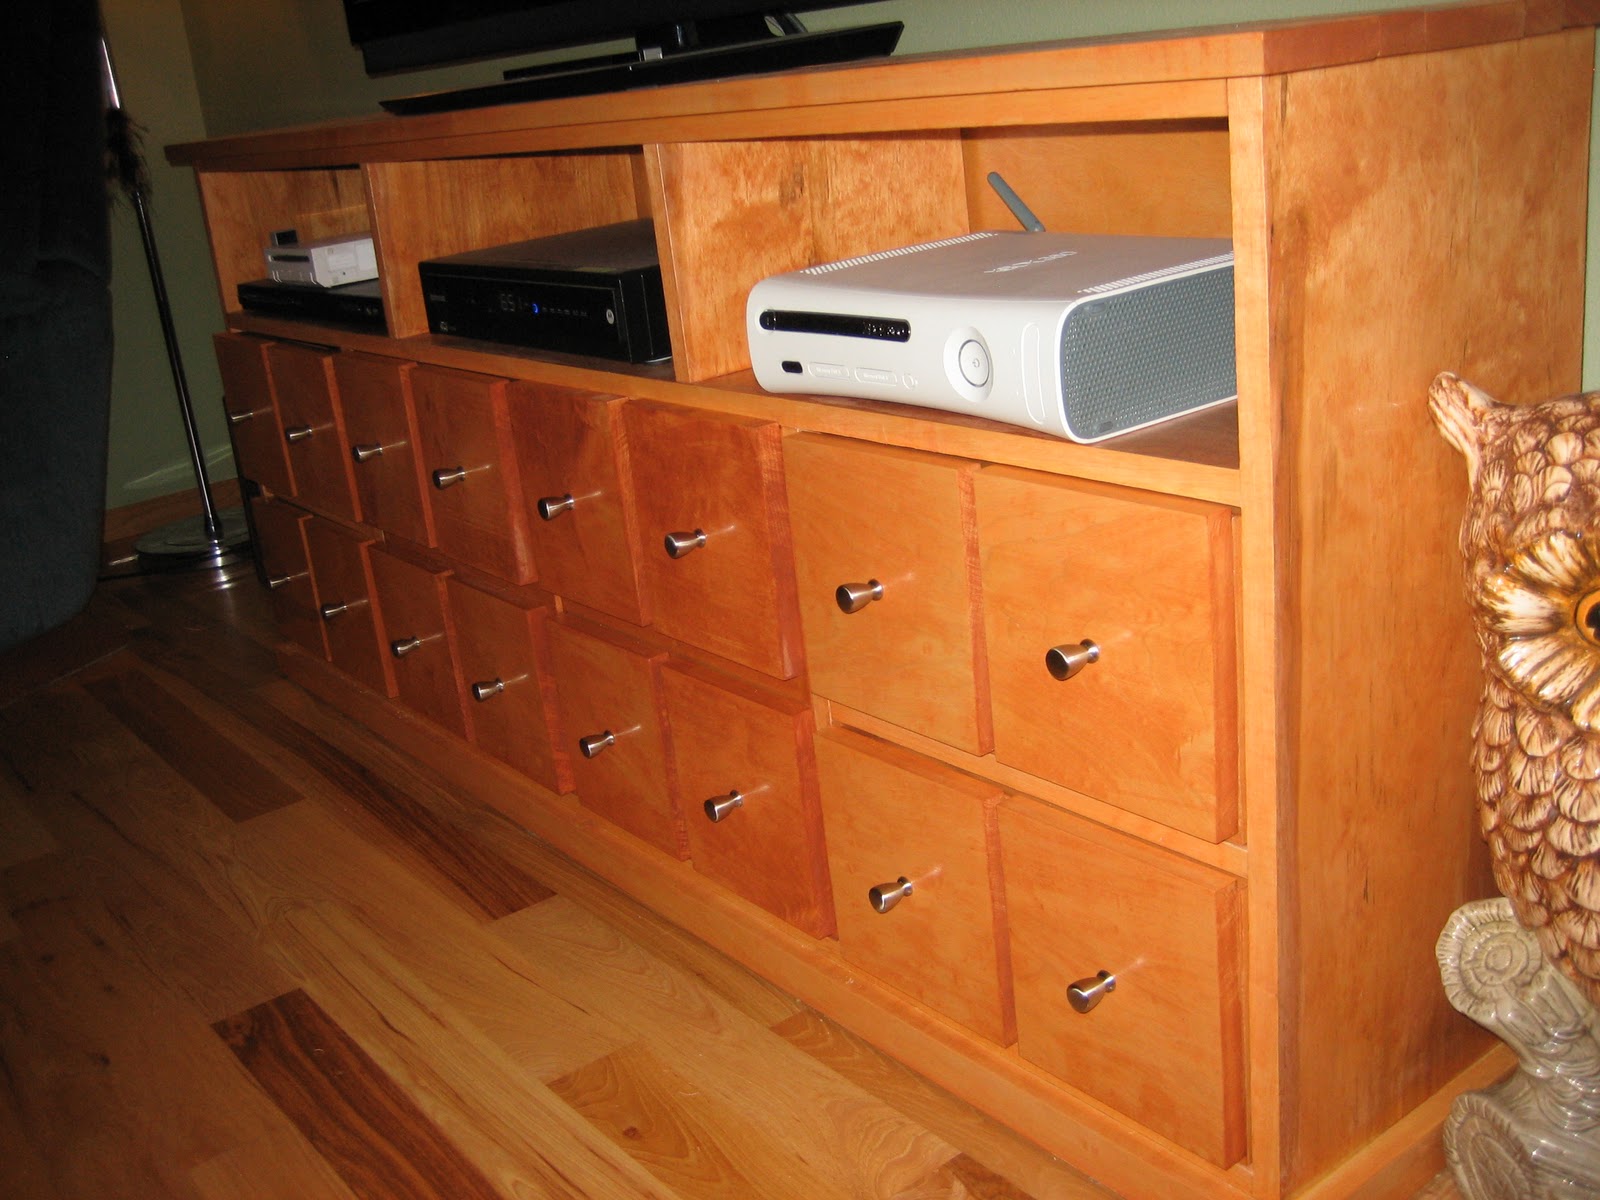
I got the cabinet finished
I got the cabinet finished and it looks great. Thank you, Ana!
http://uffdaprojects.blogspot.com/2010/09/project-media-center-complete…
Danelle (not verified)
Wed, 10/06/2010 - 16:23
How difficult is this to
How difficult is this to make?
Tyler (not verified)
Thu, 10/21/2010 - 18:55
This was a sweet project. It
This was a sweet project. It totally changed our family room! I would suggest using an extra 1x2 on the back if you're on carpet because ours tilts toward the back due to poor support. But it still looks killer.
aparadekto (not verified)
Mon, 10/25/2010 - 06:42
Hey, I can't view your site
Hey, I can't view your site properly within Opera, I actually hope you look into fixing this.
Stephanie Clark (not verified)
Wed, 11/10/2010 - 04:11
This is an AWESOME project.
This is an AWESOME project. My hubby and I have been looking for a dresser to re purpose for a TV Console. We thought of removing the top drawers for component shelves, but just have not found the right dresser yet.
Your design is perfect for what we pictured. I emailed my hubby the links at work and he thought it was "sexy". I think we are going to give it a try. Thanks so much!
Christina (not verified)
Wed, 11/17/2010 - 06:19
This is gorgeous - and
This is gorgeous - and perfect! I'm tempted to try it even though my husband is going to call me crazy!
Aunt LoLo (not verified)
Sat, 11/20/2010 - 07:44
Ooh, gorgeous!!! I've been
Ooh, gorgeous!!! I've been looking all over your site for something I could use in the living room. I need a console sized cabinet. It needs to be rustic, to match my Benchwright PB furniture in the room, but it also needs to have cabinet doors so I can store all my music inside. (I'm a piano/voice teacher and have been collecting music for years!) This might work...if I modified it a little bit? Hrm. I'll have to keep thinking. Thank you!!!!
Siri (not verified)
Mon, 11/22/2010 - 04:13
I love this too, but I also
I love this too, but I also want it with the smaller drawers, all 16... I don´t think this will be my first project, specially because there is no room in my studio... :-(
Apothecary Con… (not verified)
Thu, 12/02/2010 - 19:58
[...] like the distressed
[...] like the distressed bench and work up from there. The Apothecary Cabinet plans – step one are here The Apothecary Cabinet plans – step two are here Read more from Woodworking Patterns [...]
Apothecary Con… (not verified)
Sat, 12/04/2010 - 18:42
[...] the distressed bench
[...] the distressed bench and work up from there. The Apothecary Cabinet plans – step one are here The Apothecary Cabinet plans – step two are here Read more from Storage Furniture, [...]
Andrea Crump (not verified)
Fri, 12/10/2010 - 07:07
I just finished mine go check
I just finished mine go check it out at my blog crump04.blogspot.com . I still need to put knobs on but it looks great in our living room. Thanks for the plans Ana. Love ~Andi
melissa (not verified)
Fri, 12/10/2010 - 09:38
Are the plans for this one
Are the plans for this one much shorter than the PB one? 27 3/4 inches just seems so short. Has anyone modified it to make it a bit taller?
Amanda (not verified)
Thu, 12/30/2010 - 08:15
I have been looking for more
I have been looking for more storage for my kitchen! This would be a great buffet and also be able to store my other cookware. I love Apothecary consoles :) Thank you so much for all you do! I LOVE your website and have passed it on to a bunch of my friends. After finishing up the "mom's train table" I will see about making this one. Thank you for your hard work and the inspiration. Never thought I would be able to make furniture :)
Stefanie (not verified)
Mon, 01/03/2011 - 04:21
Is there anyway to make this
Is there anyway to make this with just drawers like the first picture? I'm in love with these...but I don't need a media console, or something with shelves.
sarah norman (not verified)
Mon, 01/03/2011 - 13:21
lex, did you ever make it as
lex,
did you ever make it as a dresser? if so can you please post a picture
Stefanie (not verified)
Fri, 01/07/2011 - 16:32
I want it with the smaller
I want it with the smaller drawers too. I'm surprised she hasn't made one yet. Ana, is one in works?
Ashlee (not verified)
Mon, 01/17/2011 - 07:29
I found you website
I found you website yesterday!! I have already gone thru a majority of your blog and I am in LOVE!! There are so many great projects! This is going to be one of the projects I want to try and build, i'm so excited! Thanks so much for you wonderful blog : )
Angie Smith (not verified)
Mon, 01/17/2011 - 13:02
I absolutely adore this!
I absolutely adore this! Thank you so much for sharing your gorgeous work and idiot-proof plans! Any chance you have plans for matching apothecary end tables? I swear I came across some a while back, but can't seem to find them now.
lazerclaire (not verified)
Mon, 01/31/2011 - 07:04
I can see why people want the
I can see why people want the smaller drawers, its novel I think. But in my mind they don't even seem practical. Perhaps 2 tiny drawers would suit me.
Melissa (not verified)
Thu, 02/10/2011 - 14:02
I am excited to build this
I am excited to build this media table, but I want to adjust the height to make it 30 inches. How does that affect the other measurements? I'm not sure that I've come up with the correct adjustments.
Monica (not verified)
Sat, 02/19/2011 - 21:23
Hi, I love this apothecary
Hi, I love this apothecary cabinet, my husband will be building it soon. Can you tell me what color this is and where you got the paint for it? It's so beautiful! Thank you!
bhoppy
Wed, 03/09/2011 - 07:42
step by step
I love how you redesigned your new website Ana!!! The step by step feature is so awesome!! It should help me out tremendously when I get confused (which is quite often) Thank you so much for all you do!!
warriaeditor
Wed, 03/30/2011 - 11:55
HELP with the apothecary console
Where are the rest of the directions? It stops at Step 7 for the drawers and doors. ???
nichole (not verified)
Fri, 04/01/2011 - 10:39
Steps 7 and beyond?
I adore this console, and am looking forward to forcing my husband to help me build it...but where is step 7? Is there a link somewhere that I am not seeing?
In reply to Steps 7 and beyond? by nichole (not verified)
dan-k
Fri, 04/01/2011 - 10:44
There's more steps here
http://ana-white.com/2010/05/furniture-plans-doors-for-apothecary.html
nichole (not verified)
Fri, 04/01/2011 - 10:54
you are awesome!
thank you SO much!! You are the best!
BellaB (not verified)
Thu, 06/14/2012 - 21:00
Thank you, dan-k! I was
Thank you, dan-k! I was freaking out that I couldn't find the rest of the steps. Thanks so much for the link!!!
Guest (not verified)
Mon, 04/18/2011 - 05:39
Part 2?
Help! There isn't an active link to Part 2 of the plans!
Marisol
Fri, 05/06/2011 - 10:18
i am making this!!!!
I am picking up materials in appx. 4 hours! :) I am soooo excited!
HarrySeaward (not verified)
Sun, 05/15/2011 - 12:21
My version of this project
I set out to make this at DW's request but we wanted the 8 drawers and a few inches taller. With my tendency to over-engineer everything, I decided I wanted a solid wood top. DW and I settled on African Mahogany as a good mix of price and appearance. We purchased the lumber locally and had them end-glue the pieces together and plane it flat for us. Out the door, it was $100 or so, but we have a 20"x30" piece left over for another project.
For the added height, I simply extended the end pieces to 30" and used 4-1/2" footers instead of the 2" called for in Ana's plans. I added an extra footer to the rear of the cabinet and a cross piece in the middle of the bottom to help prevent sagging.
I don't like the way the ends of plywood look in finished projects so I used veneer tape (available at home depot) for the exposed ends of the plywood. You just use a regular clothes iron to secure it to the plywood. You'll need a router or small hand plane to flush-trim the edges but the end result looks so much better than the 'sandwich' plywood effect.
The last thing I did was on the drawers. I didn't see a way to easily add slides or hardware but I was worried about the drawer bottoms dragging on the shelves. I solved this problem in two ways. I have a router table so I used a 1/4" round-over bit on the inside and outside of the bottom edge of the drawer sides (but not the back or front). When I assembled the drawer boxes I raised the bottoms and back up about 1/16" with spacers so that the end result was the sides were 1/16" lower than the bottom and back so that the drawers ride on the sides only. The sides have less surface area, thus less drag. The second thing I did was apply some 1/2" wide adhesive teflon tape (Amazon.com, search "ptfe mouse tape") to the bottom of the edge that rides on the shelves. I don't have anything to compare to, but the drawers slide in and out very smoothly.
If I were to make another one, I think I would use 5/8" plywood for the drawers. 3/4" just seems too bulky.
Because of the hardwood top, this project cost us quite a bit more than if we had stayed with Ana's plans, but wow, this thing looks awesome in our bedroom.
Thanks for the inspiration, Ana!
Emma (not verified)
Fri, 05/20/2011 - 09:49
Step Seven and more!
Hello Anna. My computer won't let me click on step seven is there a way you can e mail it to me? Thank you!
HarrySeaward
Tue, 05/24/2011 - 07:35
Doors and Drawers
Here are the drawers and doors.
http://ana-white.com/2010/05/furniture-plans-doors-for-apothecary.html
Guest (not verified)
Mon, 08/15/2011 - 16:14
Apothecary console piece
You have posted plans for everything with the apothecary piece but it says "click here" for making the front of it and there is no link to do this. Can you assist?
Thanks,
john
xuaner loh
Mon, 10/24/2011 - 10:01
excuse me , can i ask how i
excuse me , can i ask how i go in the step 7 ? the click here is not function there :( help ...
pmp pdu (not verified)
Sun, 02/05/2012 - 02:06
great job, I like your blog
great job, I like your blog
Guest (not verified)
Sun, 02/19/2012 - 07:37
part two
hey i really would like to build this but i cannot access part two of the building designs. can you please help me?!
Guest (not verified)
Thu, 03/01/2012 - 17:08
Part 2?
I've seen a lot of plans, including this one, where something *should* be linked; i.e., click here for step 7, or another project that said "click here for how to check for square", etc....but there is no link, and search doesn't bring anything up.
Naomi Hanks (not verified)
Thu, 06/14/2012 - 10:02
Can not access part 2
Hey Ana,
My husband and I have already started working on this but can not find the plans to part 2 (the doors and drawers). Can you please direct me where to find them? Thank you!
Cavale (not verified)
Tue, 07/24/2012 - 18:55
I found this with a google
I found this with a google search: http://ana-white.com/2010/05/furniture-plans-doors-for-apothecary.html
Hope it helps
Cavale (not verified)
Tue, 07/24/2012 - 18:54
To everyone who can't find
To everyone who can't find the second part of this plan, I did a google search and found them!
http://ana-white.com/2010/05/furniture-plans-doors-for-apothecary.html
Hope this helps!
In reply to To everyone who can't find by Cavale (not verified)
RusticCharm
Sun, 02/10/2013 - 08:19
Apothecary drawers!
Thank you so much for your post & finding this! So appreciated!
I am so excited to get started!
Carrie
Honey (not verified)
Sun, 12/02/2012 - 14:29
Can't wait to start, but....
My husband and I would like to build this, but Step 7 says: Drawers and Doors: Click here for Part 2. The link is not click-able, and the PDF version says the same thing, so I can't seem to figure out what the next step is! Can you help?
MarlaC (not verified)
Thu, 12/06/2012 - 06:00
I am looking for part 2 of
I am looking for part 2 of these plans. The wedsite says "click here" for part 2, but has no link to click on.....help please...I LOVE this website. Have already made a doll bed for my grand daughter :-)