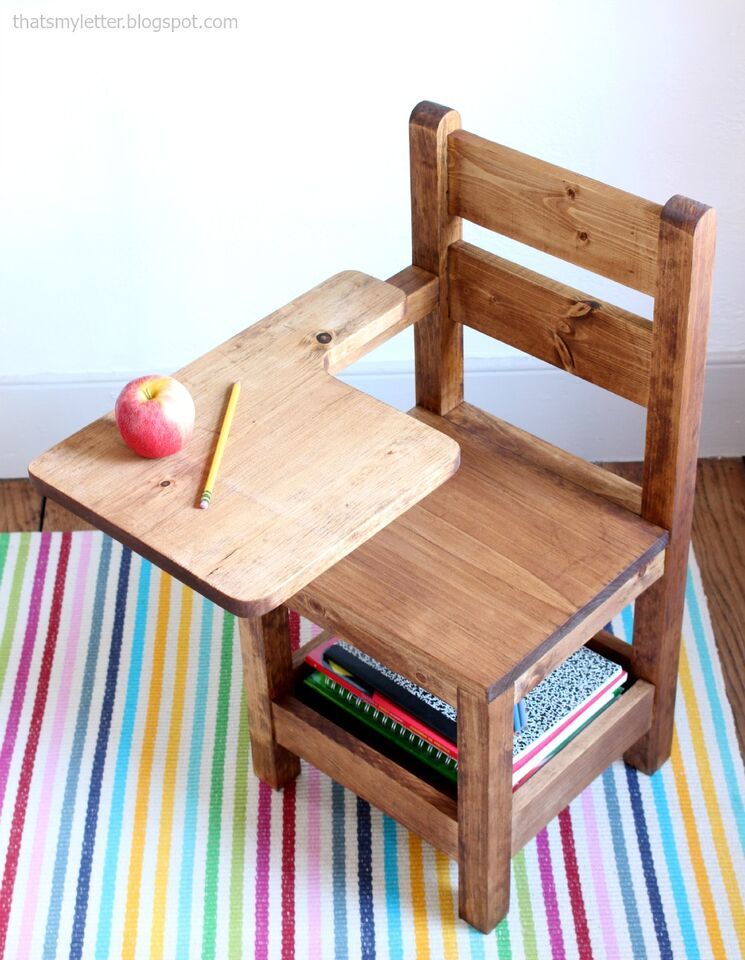
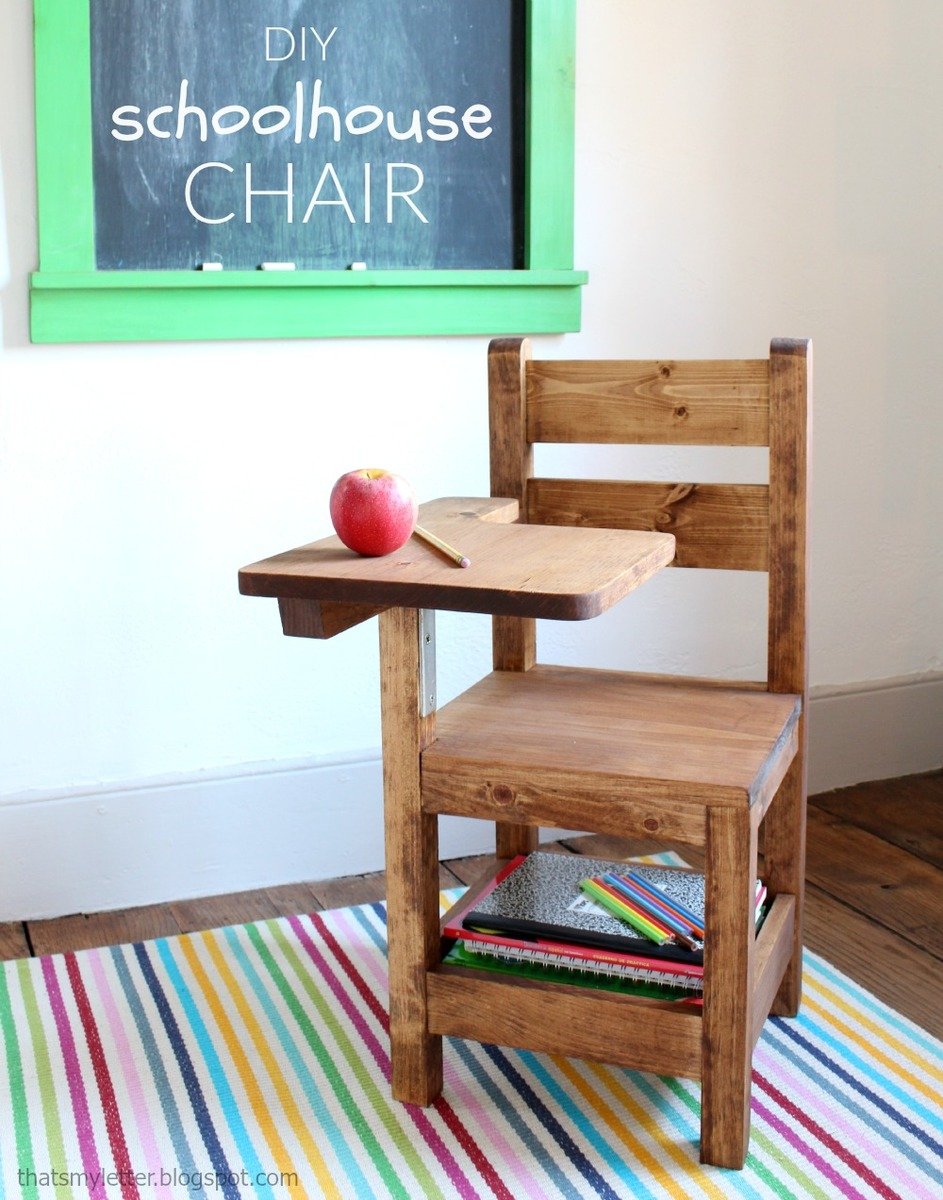
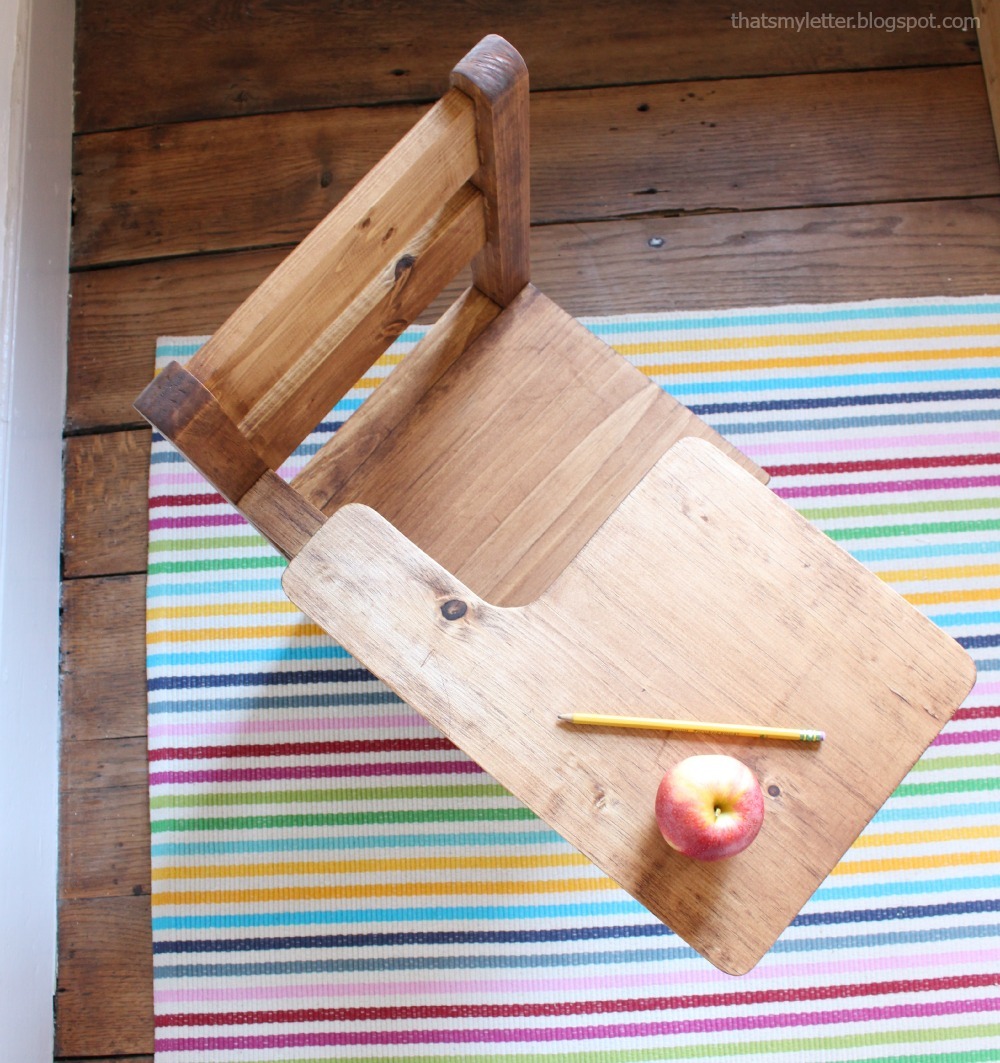
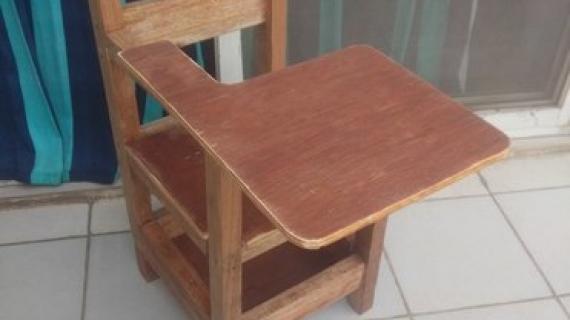
Plans for schoolhouse chair with writing pad desk.
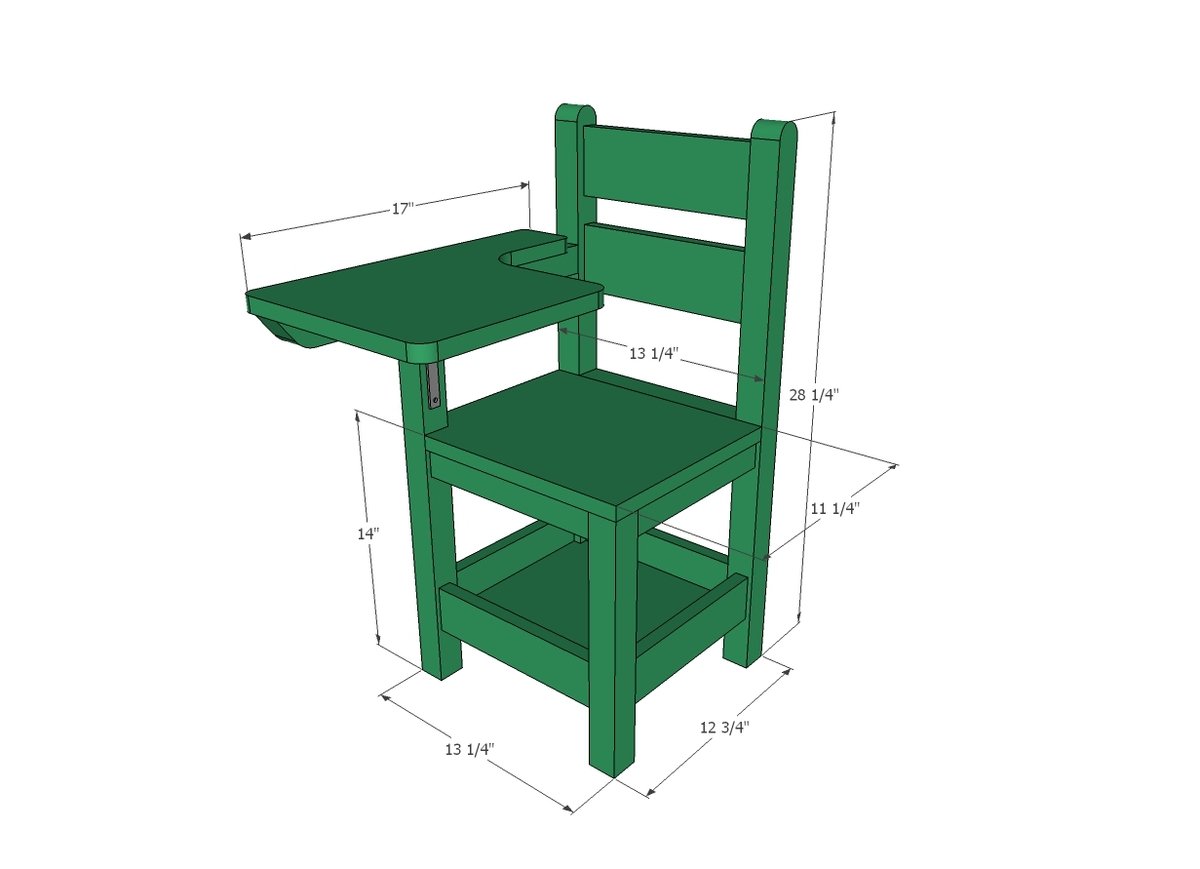
Preparation
- 1 - 2x2 @ 10 feet long
- 1 - 1x4 @ 2 feet long
- 1 - 1x2 @ 6 feet long
- 1 - 1x3 @ 4 feet long
- 1 - 1x12 @ 4 feet long
- 1 - 6" L bracket
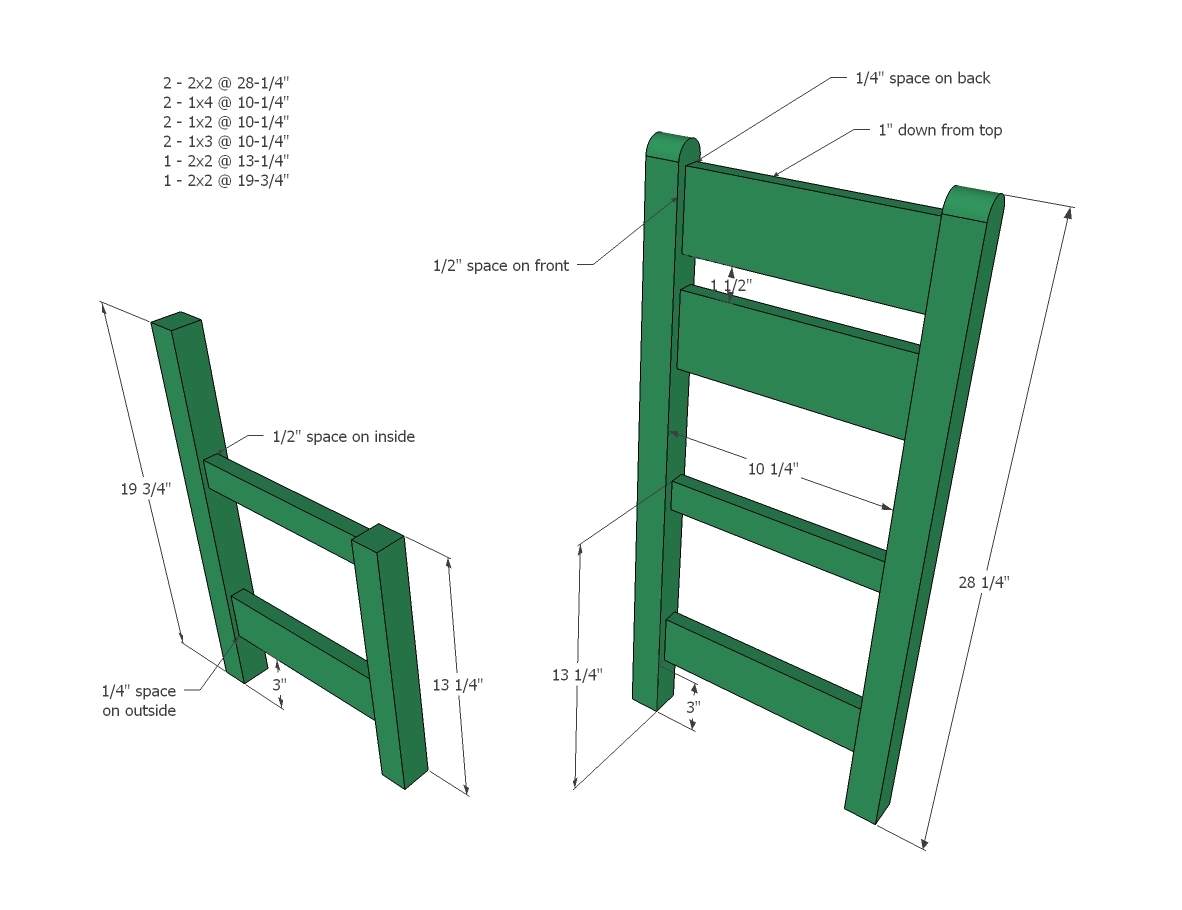
- 2 - 2x2 @ 28-1/4" - back legs
- 2 - 1x4 @ 10-1/4" - chair back rungs
- 2 - 1x2 @ 10-1/4" - seat aprons
- 2 - 1x3 @ 10-1/4" - storage compartment
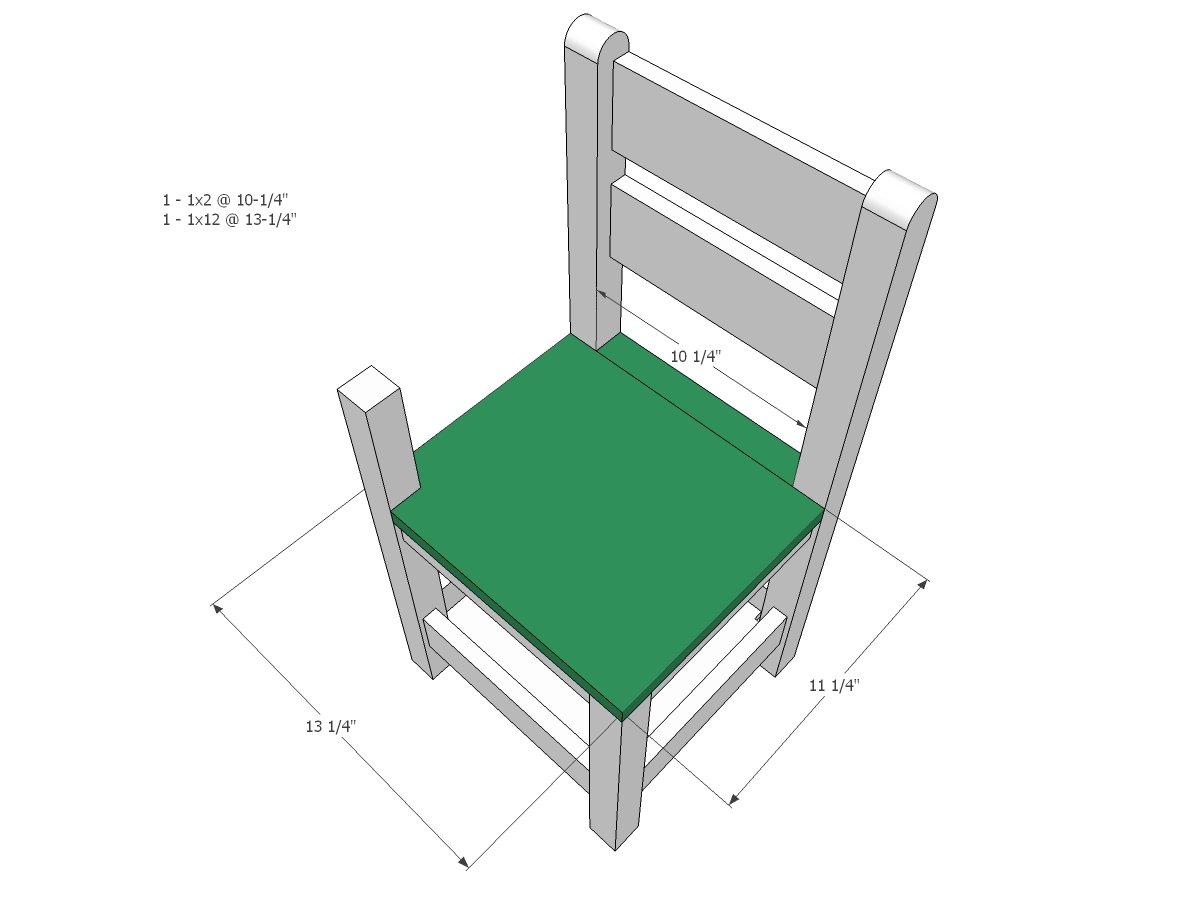
- 1 - 2x2 @ 13-1/4" - short front leg
- 1 - 2x2 @ 19-3/4" - long front leg
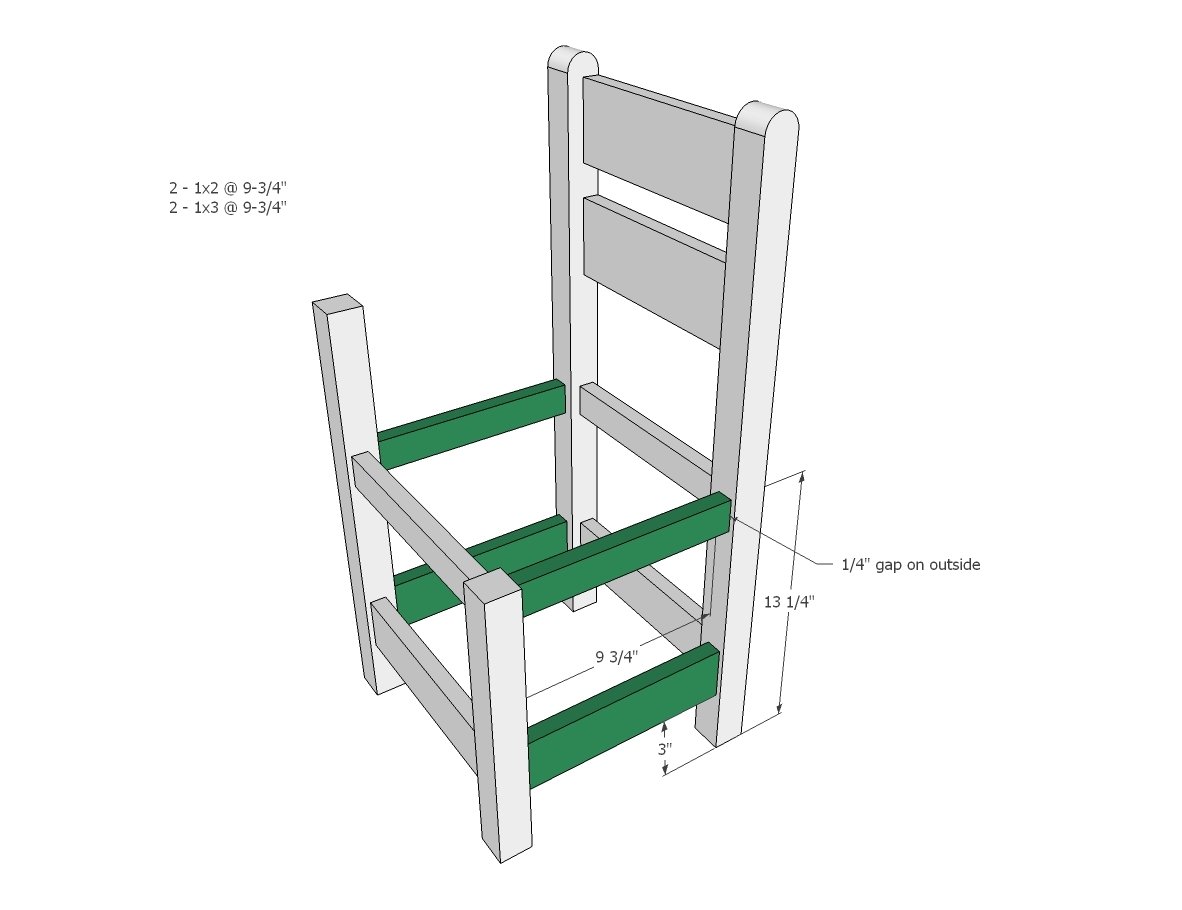
- 2 - 1x2 @ 9 - 3/4" - seat side aprons
- 2 - 1x3 @ 9-3/4" - storage compartment sides
- 1 - 1x12 @ 10-3/4" bottom shelf bottom - (can also use 1/2" or 3/4" thick plywood)
- 1 - 1x12 @ 13-1/4" - seat
- 1 - 1x2 @ 10-1/4" - seat back spacer
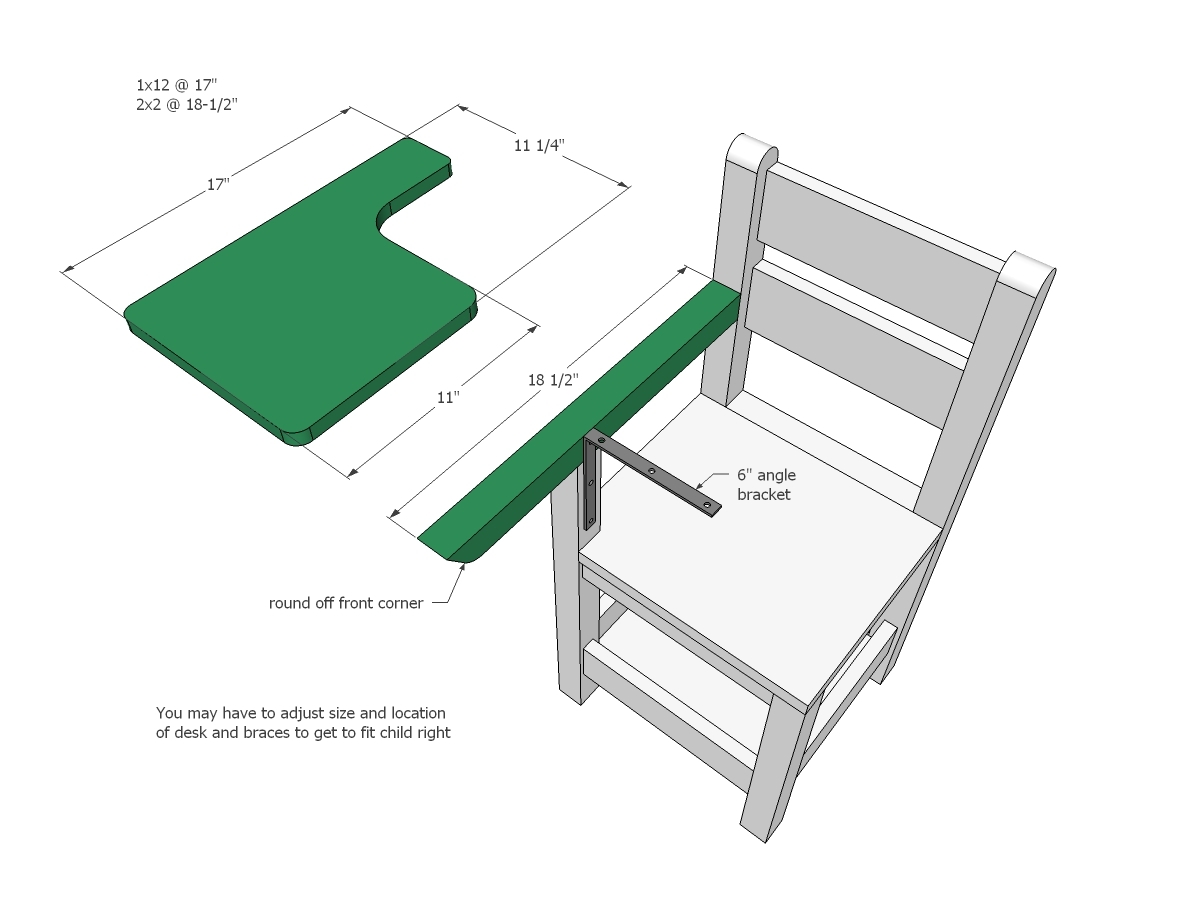
- 1 - 2x2 @ 18-1/2" - desk support (round front edge)
- 1 - 1x12 @ 17" - desk
Please read through the entire plan and all comments before beginning this project. It is also advisable to review the Getting Started Section. Take all necessary precautions to build safely and smartly. Work on a clean level surface, free of imperfections or debris. Always use straight boards. Check for square after each step. Always predrill holes before attaching with screws. Use glue with finish nails for a stronger hold. Wipe excess glue off bare wood for stained projects, as dried glue will not take stain. Be safe, have fun, and ask for help if you need it. Good luck!
Instructions
Step 1
Use 3/4" pocket holes to build the back of the chair and the front supports. Use a 1/4" piece of plywood as a spacer to inset the aprons/supports on the 2x2 legs. Attach all pieces with glue and 1-1/4" pocket hole screws.
SEAT ATTACHEMENT NOTE: For no exposed fasteners when attaching seat, drill 3/4" pocket holes facing upward on inside of aprons. Just two per apron is fine.
DESK ATTACHMENT NOTE: In step 5, you will attach the desk support piece. To easily attach to front leg, you can drill a 1-1/2" pocket hole on outside of front leg. However, this will be very visible and is not recommended for a stained finish, but for a paint finish will work fine.
Step 2
Drill 3/4" pocket holes on ends of aprons and storage compartment sides. Attach to front and back pieces with glue and 1-1/4" pocket hole screws. Like back and front, these boards are all inset from outside on the 2x2 legs by 1/4".
NOTE: For no exposed fasteners when attaching seat, drill 3/4" pocket holes facing upward on inside of aprons. Just two per apron is fine.
Step 3
Notch corners to fit inside legs. Drill 3/4" pocket holes around the edge of bottom shelf bottom and attach inside 1x3 sides with 1-1/4" pocket hole screws. Can also be nailed and glued in place.
NOTE: If you wish to attach seat from underneath with no exposed fasteners, attach seat before attaching bottom shelf so that you can fit your drill inside.
Step 4
It is always recommended to apply a test coat on a hidden area or scrap piece to ensure color evenness and adhesion. Use primer or wood conditioner as needed.






Comments
maggiekat
Sat, 11/07/2015 - 08:12
measurement?
Sorry, I can extrapolate most of it, but what is the width of the arm portion of the desktop? About 3"?
allpurpose
Wed, 01/10/2018 - 07:51
Like the concept
I've built several dining chairs over the past few years, but I fasten everything with solid dowel rods, not the cheapo store bought fluted kind and definitly not pocket screws. I tend to use yellow pine because it's cheap and plenty strong. The part I wouldn't use pine for would be the writing pad itself because of the soft areas between the growth rings. A pencil or pen tip digs in too easy.
I'm really thinking of an adult version to use in my shop although I have a feeling it will end up being more of a sawhorse than desk in the shop, but still fun and useful to have.
I'll bookmark this page and revisit if I get around to building it.