Beach themed Adirondack chair
![](/sites/default/files/E091DFF3-3B24-41EC-A85B-80238554A434.jpeg)
Built as a Birthday gift for my daughter-in-law. Hope she likes it.
- Minwax Helmsman Spar Urethane.
Built as a Birthday gift for my daughter-in-law. Hope she likes it.
Made this for a friend…that had an oddly shaped room.
With two small boys it took me several days to make. I had some problems in the beginning because I cut the legs using a carpenter square and not a miter saw. But it worked out in the end. I love the way it came out!
I gotta be honest, I'm kind in love with the farmhouse collection and when i saw this little bed i knew i had to build it for my 2years old and he loves it. It is so perfect for him, not too big and not too small. The bed was very easy to build, affordable and very strong ( trust me, my son makes me lay down there with him sometimes so he can go to sleep) . I changed the plans for a 28" wide crib mattress after reading all the comments, but it was really easy to do. I'm very happy how it came out.
Thank you Ana for sharing all the amazing plans with us and i'm looking forward to start building more furniture soon, my to-do-list is just getting longer and longer lol.
Thank You Ana XOXOXO
Wed, 08/06/2014 - 07:17
It's beautiful. :) You did a great job! I love the comforter.
In reply to It's beautiful. :) You did a by booksnotbombs
Wed, 08/06/2014 - 17:43
Thank you, i was looking for a Dr Seuss bedding and i saw this fabric, i made it myself, i think it looks nice.
My husband made this for my daughter and her friend to have stables at each house for their horses. We painted the roof with blackboard paint to making decorating fun and creative.
We made this adorable dress up center for my niece’s 3rd birthday. Peyton and her sister Ava will be able to use this gift for years to come! It’s strong and sturdy and built to last. The cart itself is quite large and will hold loads of dress up costumes. Can’t wait to give it to the birthday girl this weekend!
I loved Ana's cubbies the first time I saw them. :) I used different measurements and set mine for one large cubby to hold class papers and the others each fit a mason jar that holds chalk/ eraser cloth/ misc. Measurements/Wood Used: back: 4" x 1" x 44" bottom: 3" x 1" x 44" front: 3" x 1" x 44" I miter cut the insert separators to go edge to edge. Setting was 31 degrees and sanding to finish top point to back I added the inserts last after distressing the front/back/bottom assembled. I stained the inserts with no distressing and slid them in and used finishing nails to hold them to place front and back as my last step.
Tue, 01/22/2013 - 10:54
I love this project! You did an amazing job. I also love that you put the inserts in at the end, that would have been so much easier!
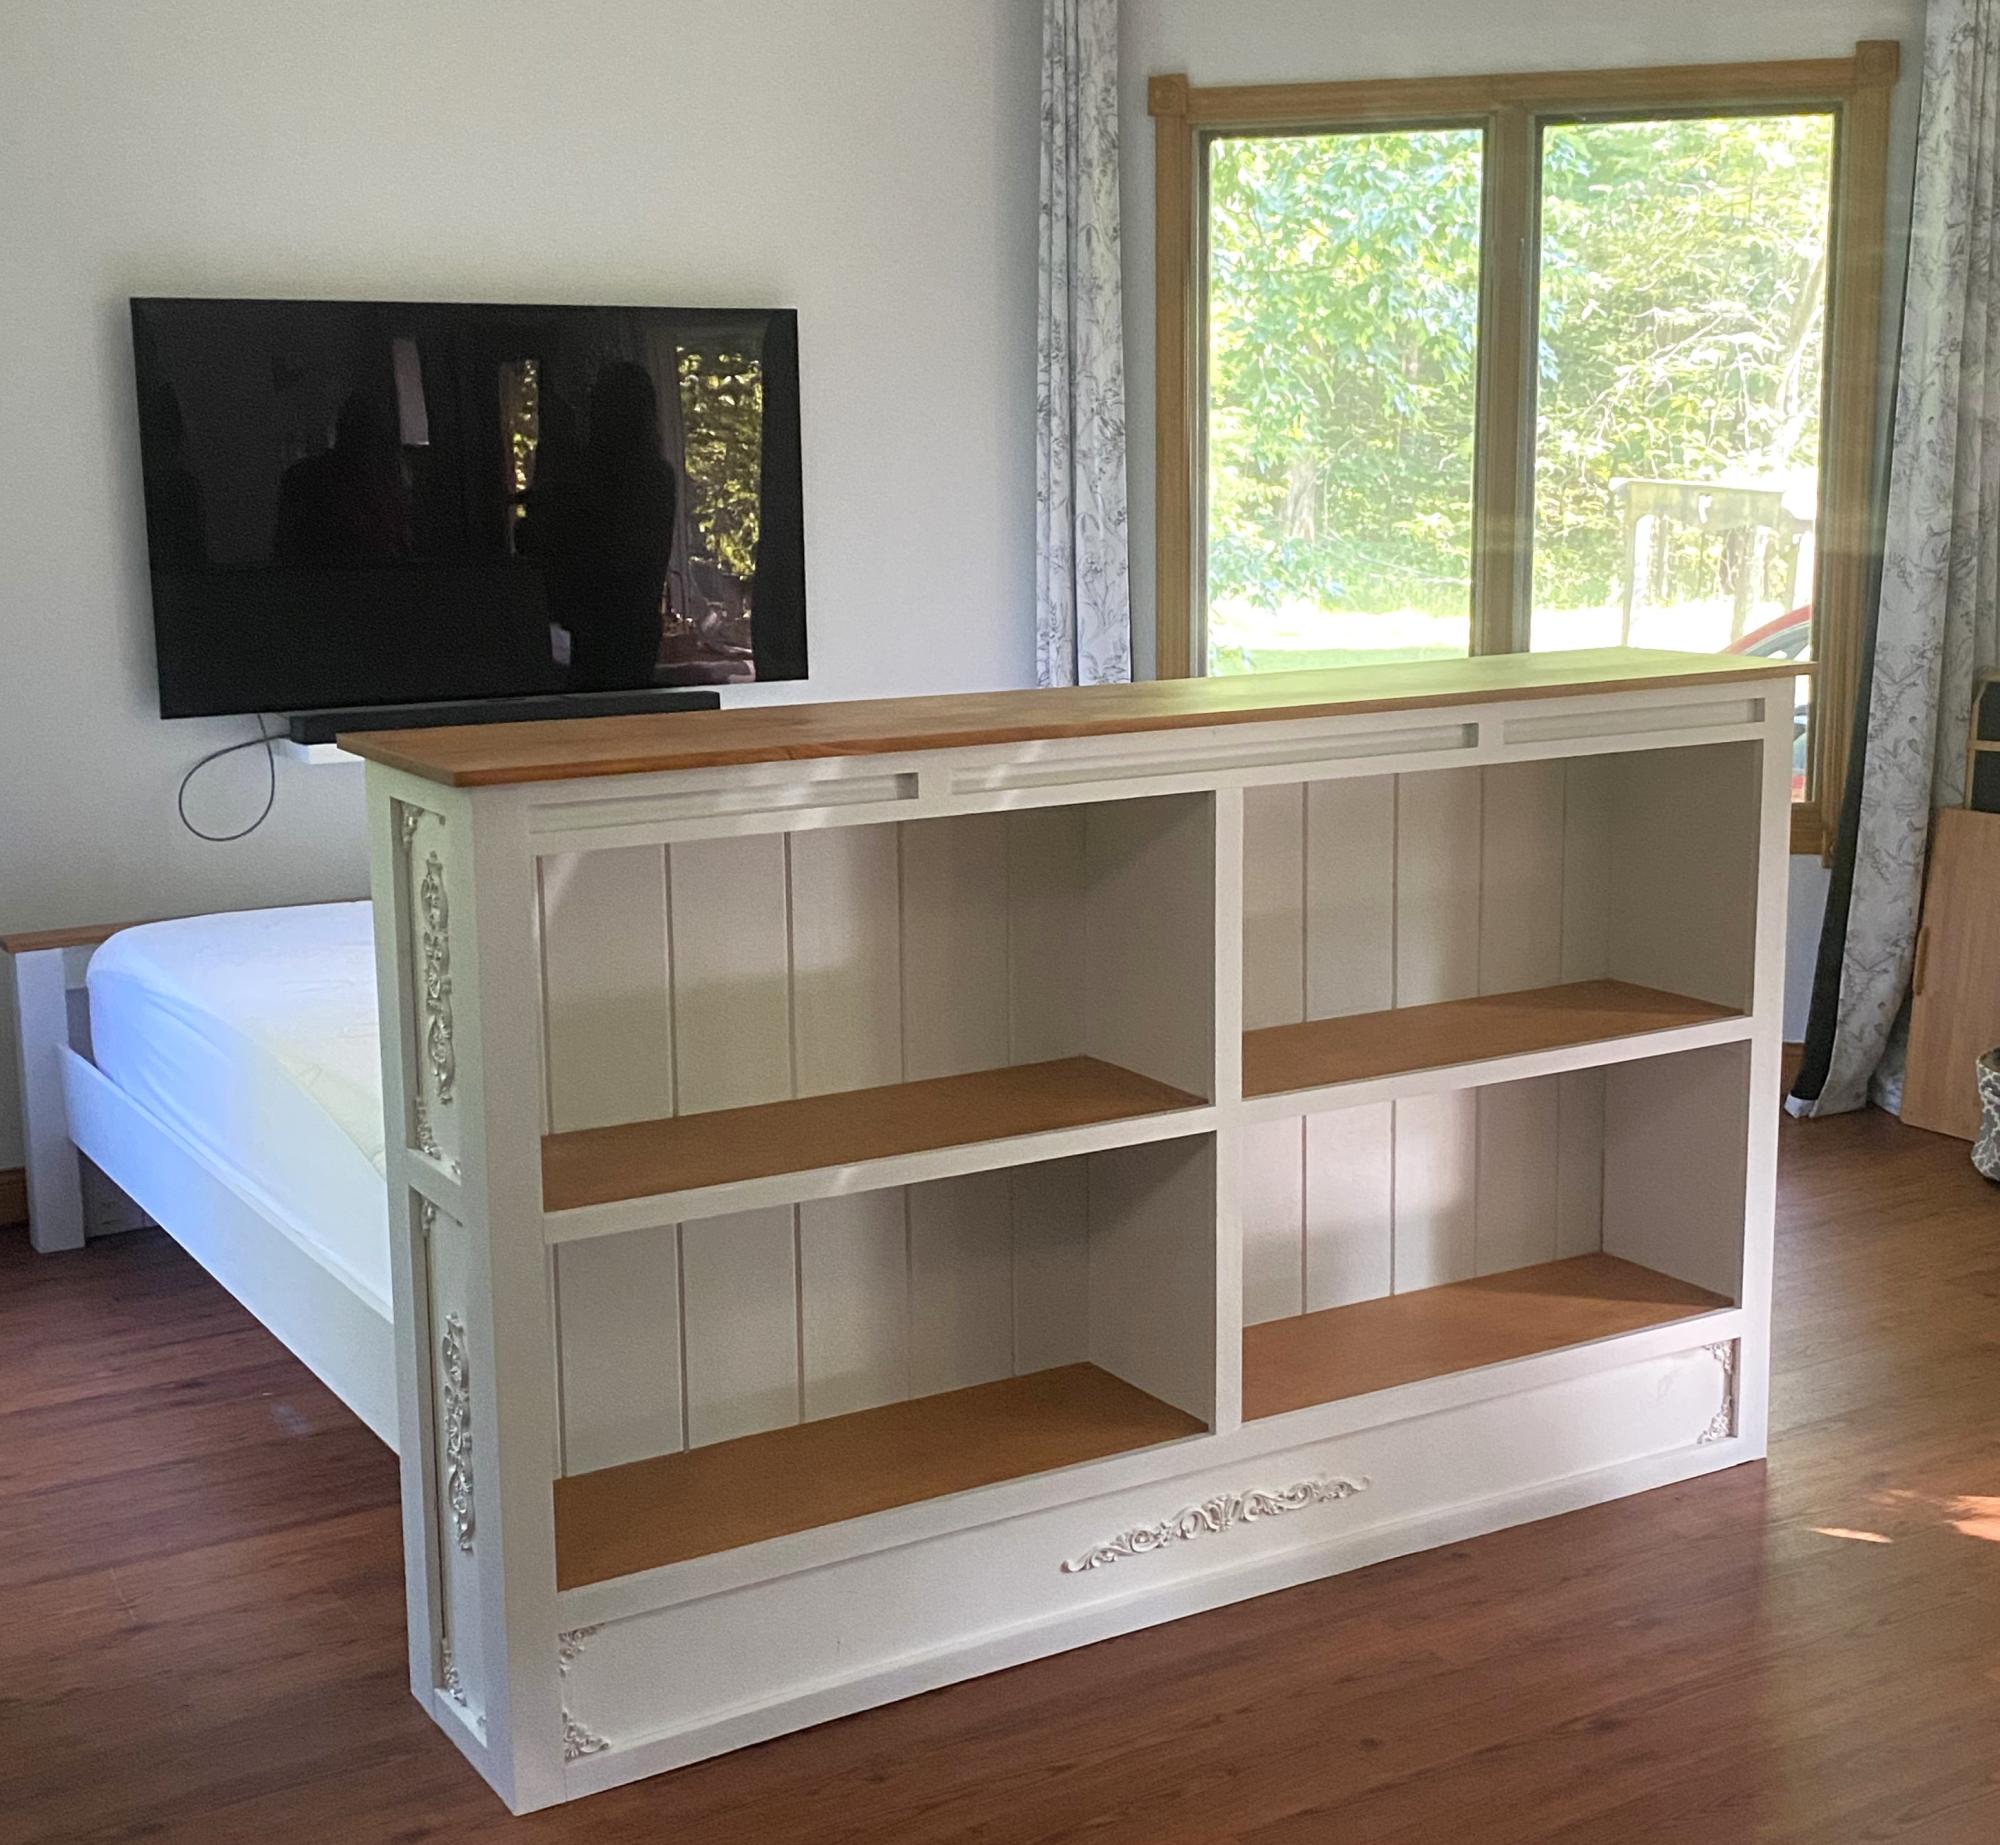
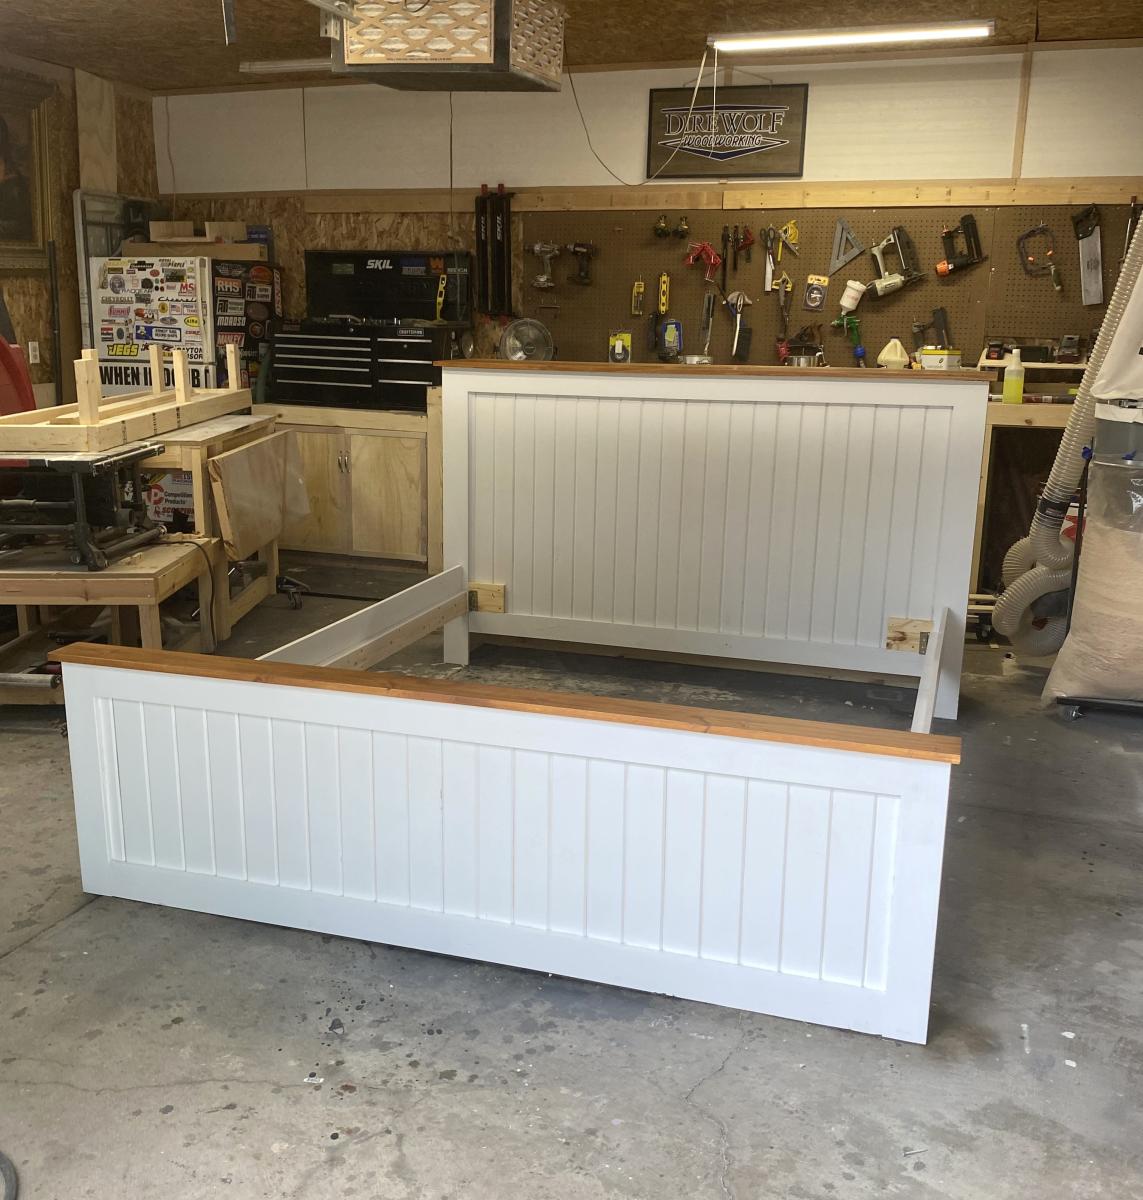
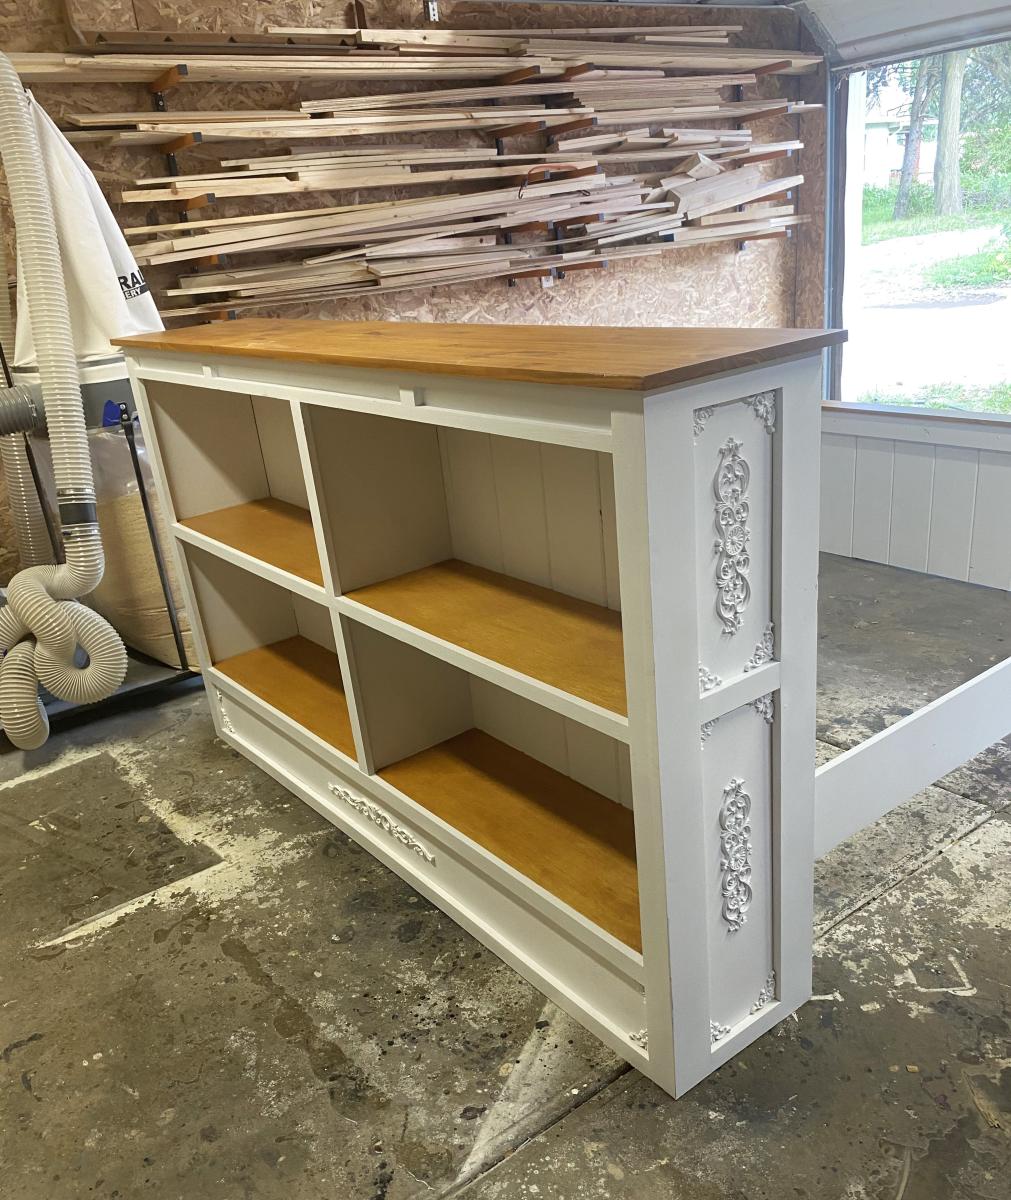
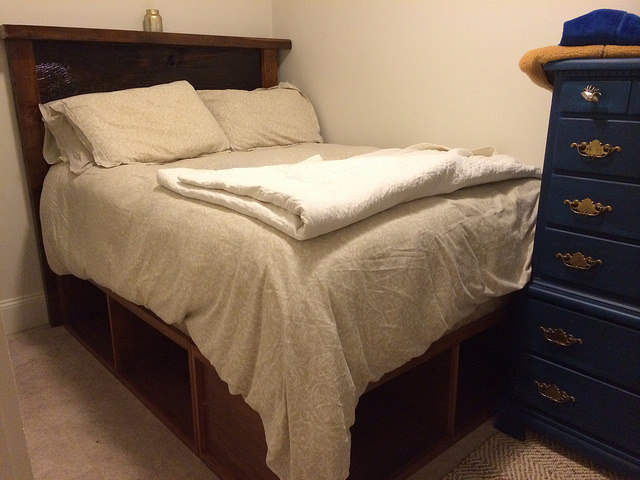
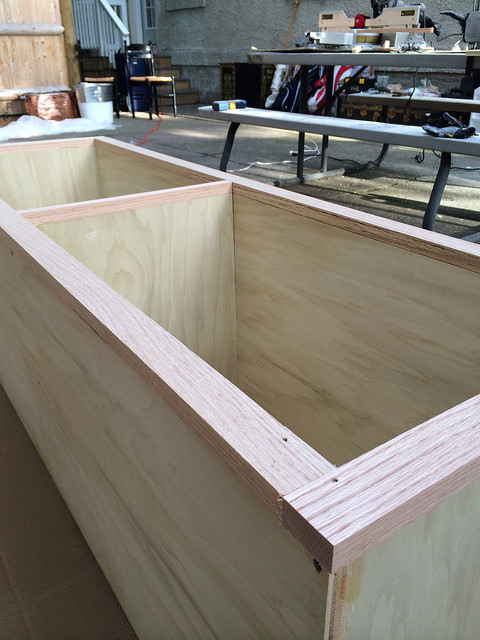
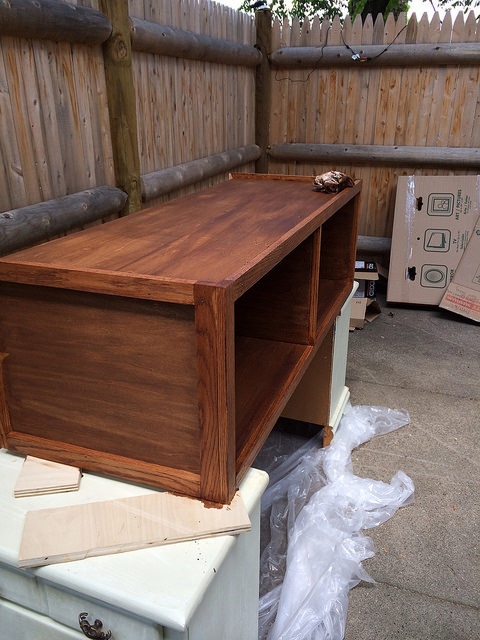
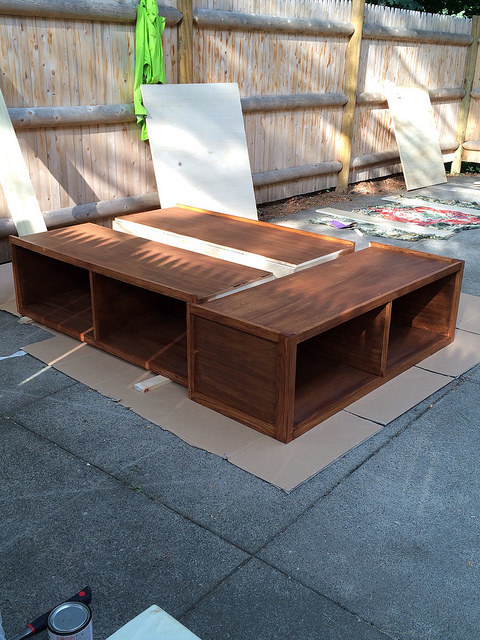
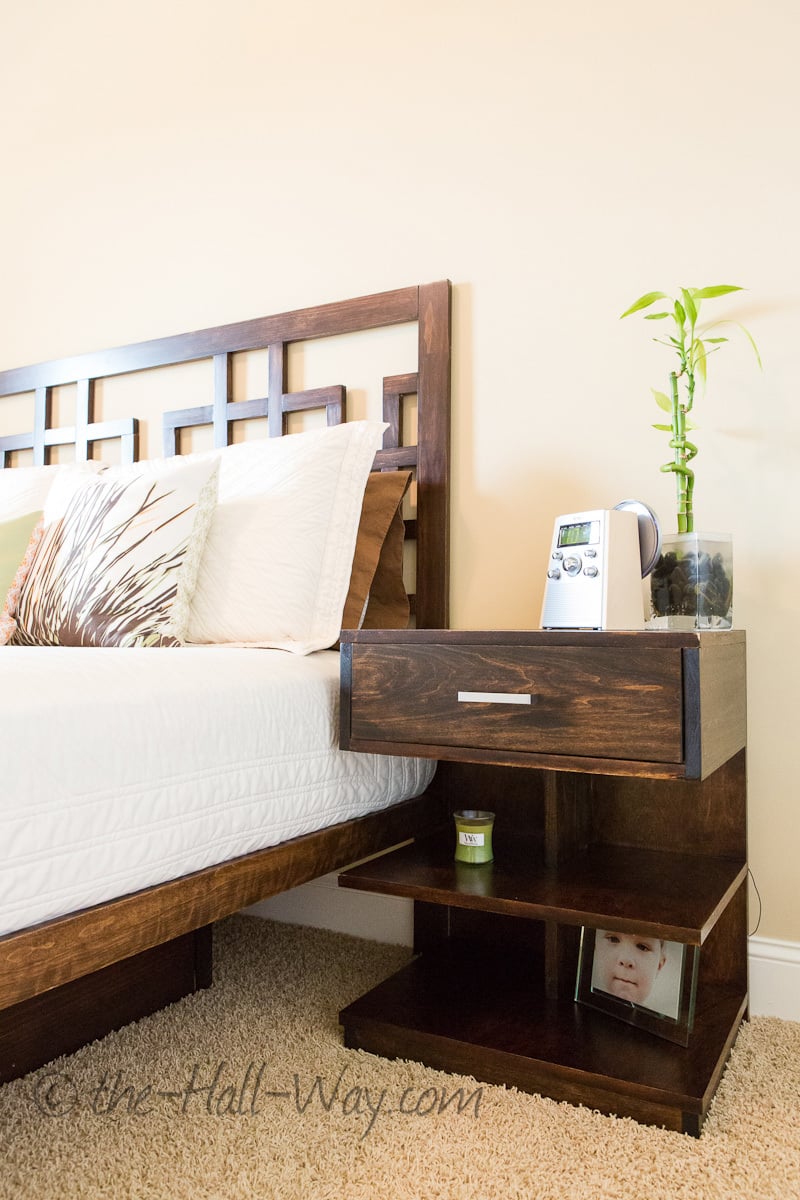
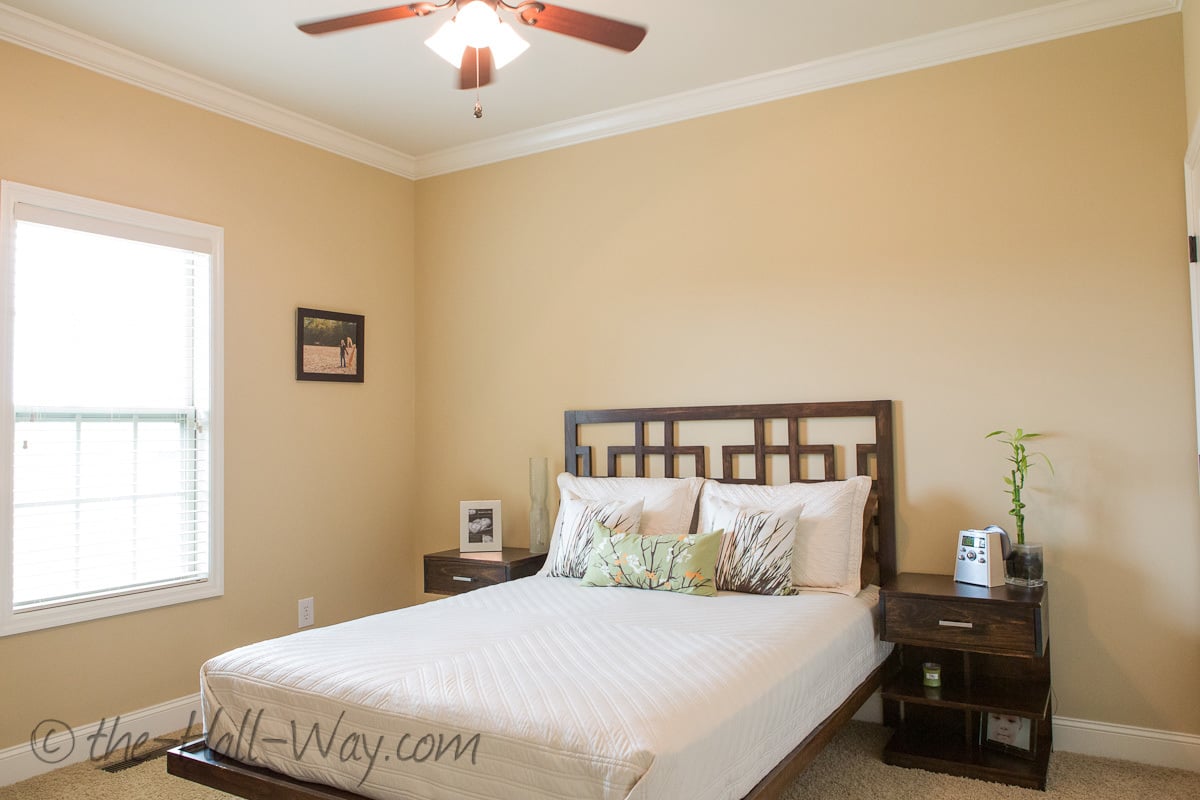
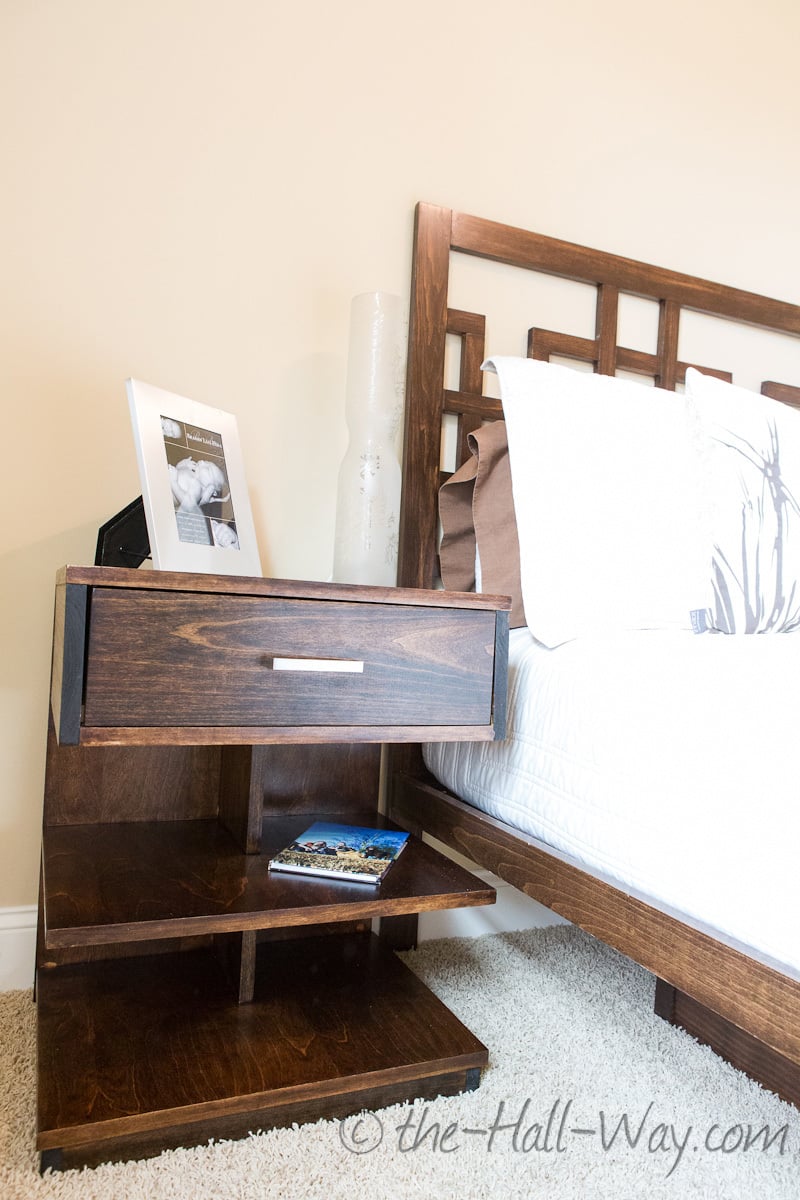
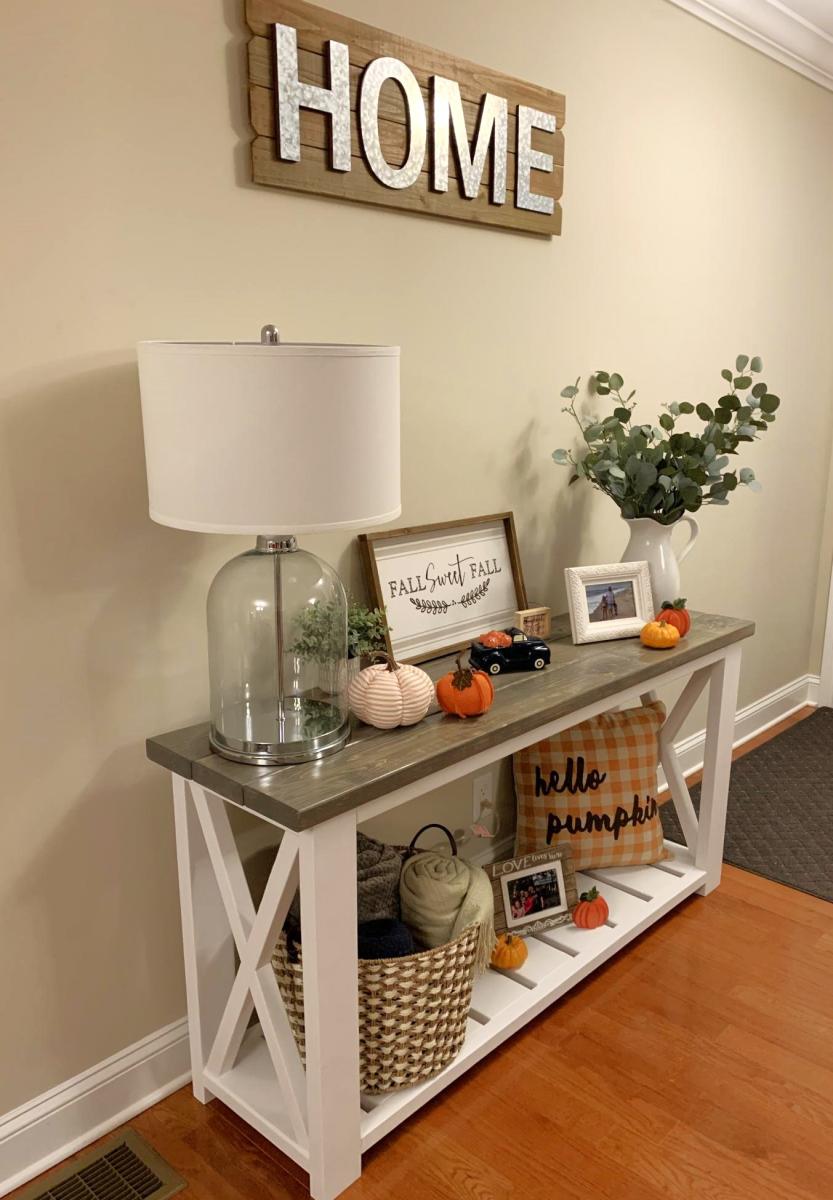
I took Ana's awesome queen-sized storage bed plans and jut made a couple minor tweaks for my full. Our bedroom is TINY, so I wanted queen (or king) sized drawers/cubbies, which means I kept 20" depth. The side boxes run 53" in length, 54" for the end. I used poplar ply for the boxes, red oak for the trim, and I stained everything with a Varathane Early American wood stain, followed by a couple coats of polycrylic. It came out beautifully, and I love how easy it is to move around and set up.
For the final step, I'm still debating adding drawers or doors, which would hinge on the bottom and secure with cabinet magnets. I'm leaning toward the latter just because our bedroom is so small it will make accessibility a bit easier.
I wanted to make this porch swing ever since seeing it in the plan catalog (Large Modern Porch Swing). Just a matter of setting aside a weekend to get it done and then to find A frame to support it. I made the A-frame from a combination of this post:
http://www.buildeazy.com/newserve/swing_seat_support_dec07_1.html
and this one:
http://www.hgtv.com/home-improvement/custom-a-frame-childrens-swing-set…
I made the back a bit higher on our swing... and not quite as wide.
Reading several other blogs on this- I chose to attach the chains to the top back of the swing to keep it from tipping backwards...
Now just get to enjoy it!!
This is an extremely easy project and great for beginners. The step by step guide was spot on. I would only suggest that if you are having your local home goods store do the cutting to make sure they cut according to the guide given or you will end up with only enough "correct cuts" to make one shelf.
I applied a dark brown base coat and then a nice coat of DIY chalk paint (off white). I distressed the edges and a couple of spots on the top shelf and topped it off with clear paste wax. Looks great in the living room.
Thank you for the plans!
This project cost us about $850CAN and took us around a week (5ish hours a day) to complete. My husband and I are definitely not carpenters so it's not perfect but it's pretty amazing :)
we made several alterations to the plans including making the bottom bunk larger to accommodate a double/full size mattress. We also made the "door" to the bottom bed larger with an opening of 30". Another alteration was we dropped the mattress cleats to 9" off the ground so that the mattress dat down in the bed. The bed is for our 2 year old so we thought she would have trouble getting in if it was much higher. This eliminated the storage area underneath but she has a large closets so we didn't think it would be an issue.
The plans were great and pretty easy to follow. We are over the moon with how it all turned out!
Followed Ana's plan and built two benches table. Pretty happy with the results.
Cost was about $250 including the paint which was $100.
I built this bed for the guest room at our previous house. The room was small, so I made floating shelves for the nightstands to save space. We have since moved and are now renting, so we didn't want to put holes in the walls to hang the shelves. I took the opportunity to build these nightstands instead. The original design was a little too tall and wide, so I reduced those dimensions by 3". This was my first time building drawers, but they went together surprisingly well. I had used a combination of stain on the bed and was worried about matching it, but 2 coats of Minwax Dark Walnut ended up being a pretty close match.
Rustic x coffee table made from plan. Used 3-4 coats of early american stain and two coats of poly.
This project was such a fun challenge for me! I needed a table top version of this great Christmas tree shelf, so I modified the plans just a bit, and created an additional shelf. The little ornament blocks were fun to make too!
I wanted to do floating shelves in my bathroom but I have very limited space so I decided I was going to do floating shelves in a corner where I did have space. This is not going to be the only shelf, I will make another one to go above it. I was tired of having no storage space for things like toilet paper and towels so now we can use these floating shelves to do that for us :) Tomorrow I'm going to build the second one to go above this one. Making it for a corner is really no different than making it straight. The sleeve fit right over the frame I built and it looks beautiful I think :)
I had an idea that I wanted to buy my daughter a wooden doll crib and was having a look around on google when I stumbled across Ana's website. I have never made anything from wood in my life and coerced my husband into giving me a hand!
We found that Ana's plans were just so well thought out, we had a little struggle with the metric to imperial thing but carefully plotted ahead and adapted the plans to wood sizes available in the UK.
I also used Ana's plans for a mattress to go in it, I upcycled an old duvet cover.
I am absolutely amazed by the outcome - and, most importantly, our daughter loves it!!
I made this surround to give me a place to hang my stockings for Christmas and give me a mantel to decorate. It also moves easily!
Happy Fall Y’all. Love the Gray / White Farmhouse Colors. I can share the plans I modified for this build if anyone wants to build their own .
Sat, 08/22/2020 - 08:33
Hello could you please share the plans for me. Want to duplicate your awesome work.
Sat, 08/29/2020 - 12:33
I believe this is JUST what I came here looking for! Please share the plans and dimensions. :)
Sun, 10/25/2020 - 14:31
Hello! I’d like the plans & dimensions for this as well! Thank you so much! Turned out AMAZING!
Thu, 06/17/2021 - 17:40
This is exactly what im looking for. Can you please share your plans 😍
Sun, 08/08/2021 - 15:36
Hi Ana can you please share your plans for this with me? Thank you
Wed, 10/13/2021 - 19:36
Can you please share the plans with me? Thank you!!
Mon, 01/31/2022 - 03:50
Lovely build. I would love to receive the plans for this particular project please? Thank you!!