Community Brag Posts

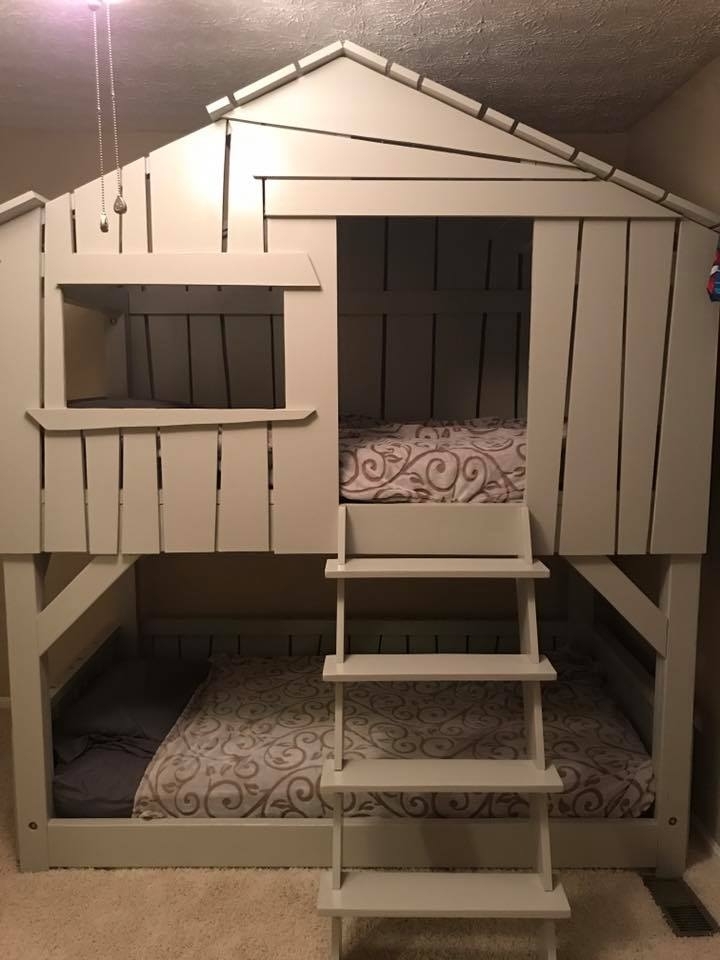
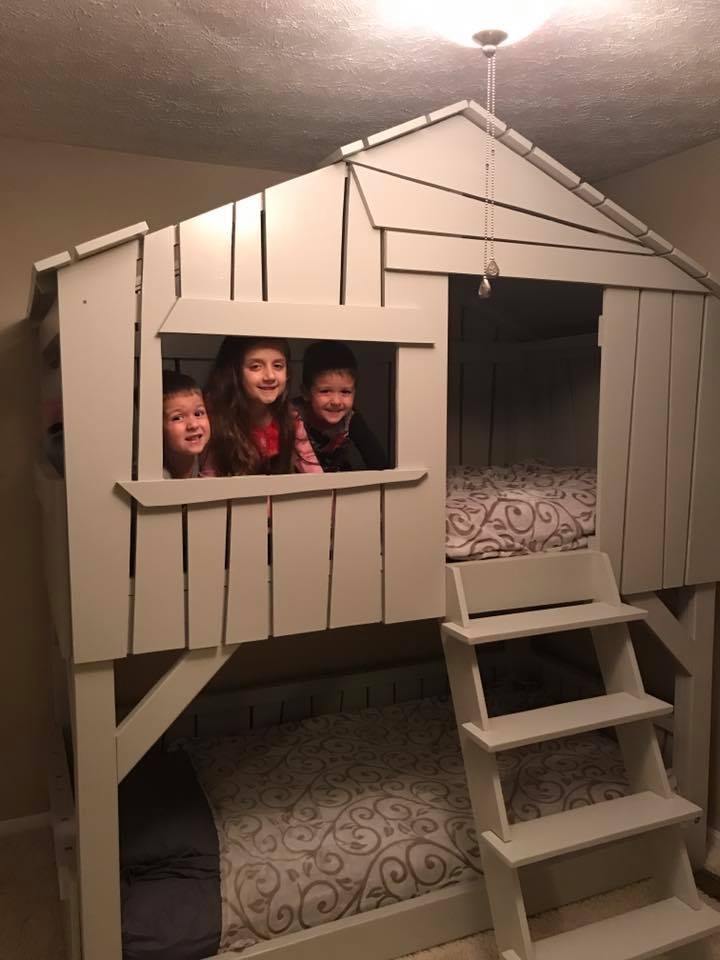
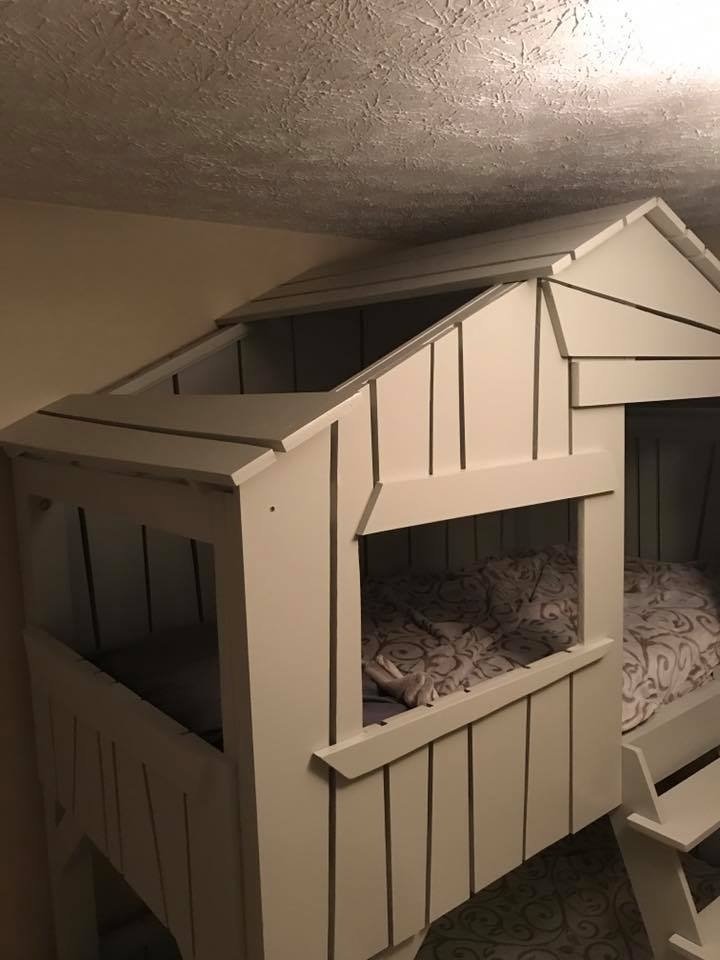
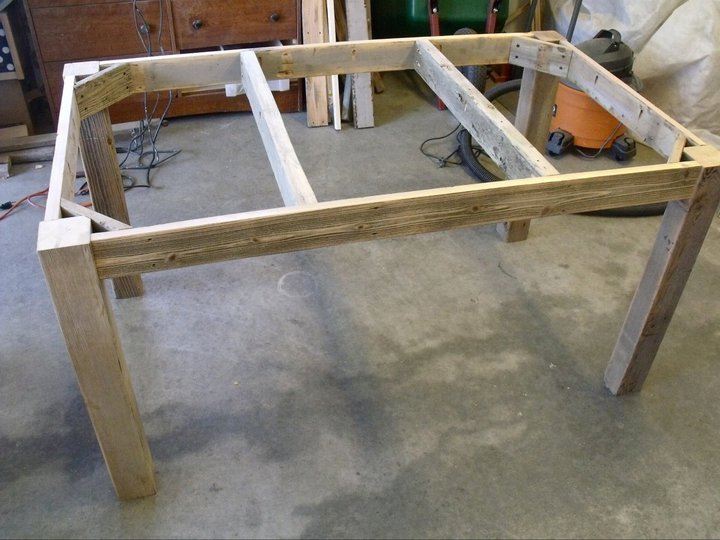
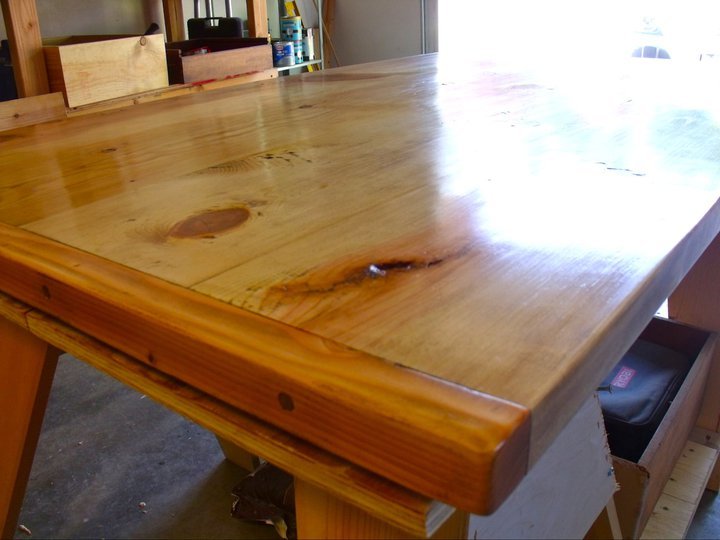
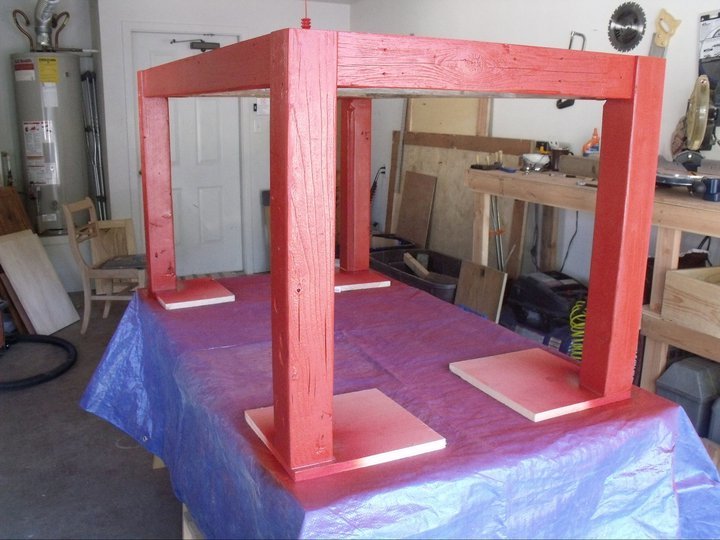
Treehouse bed with slide

Submitted by ritchsam on Fri, 02/10/2017 - 19:56

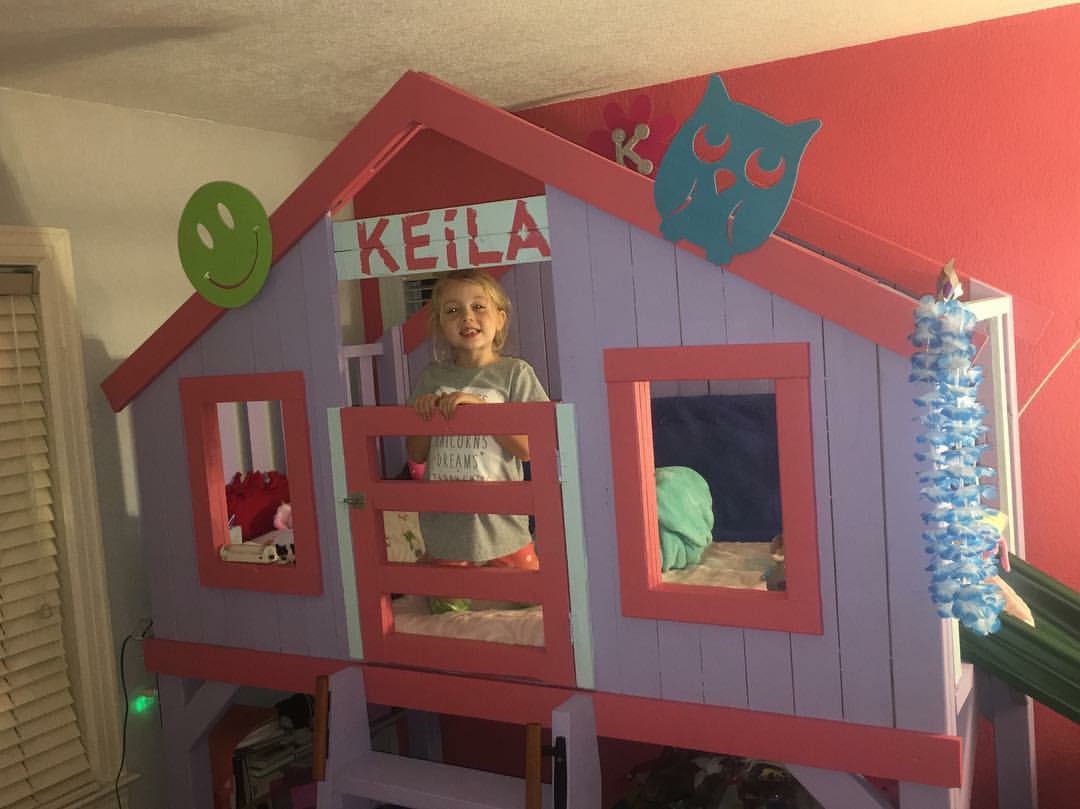
I built this for my daughter Keila.  She loves it and her friends do too!  Took me one day.  I painted the entire bed in deck paint.  It completely eliminated all
Splinters!!! I added the slide, a USB plug, cup holder, and fan.  

Built from Plan(s)
Estimated Cost
350.00
Estimated Time Investment
Weekend Project (10-20 Hours)
Finish Used
Deck paint to cover all splinters. Slide was 75.00 extra found at a discount overstock supply house. I had to cut off two feet for it to fit in a 11x11 room
Recommended Skill Level
Intermediate

Adirondack Minnie Mouse

Submitted by vangy04 on Fri, 11/14/2014 - 08:29

My daughter is into everything Minnie Mouse right now so I figured, why not!

Built from Plan(s)
Estimated Cost
$15
Estimated Time Investment
Afternoon Project (3-6 Hours)
Finish Used
I used stickers for the white details, but my daughter promptly peeled them all off. I suggest paint.
Recommended Skill Level
Beginner

Comments

pr22joyce

Thu, 09/08/2016 - 12:08

I have looked, clicked all over this site to download the plans for the Minnie Mouse Adirondack chair.  Can someone please help?

KelHad

Sun, 02/19/2017 - 13:28

Has anyone been able to locate the plans for the Minnie Mouse chair yet?

I still can't find them.

Stocking Stand

Submitted by mpjacob08 on Thu, 12/10/2020 - 06:34

So fun! Directions were easy! Can also be used as Backpack hanger if you put a little bit longer feet on them. I bought the metal hooks from Walmart.

Built from Plan(s)
Estimated Cost
$18
Estimated Time Investment
Afternoon Project (3-6 Hours)
Finish Used
Jacobean Minwax stain
Recommended Skill Level
Starter Project

Comments

Seasonal And Holiday

Bathroom Storage Tower

Submitted by Quintin79 on Sat, 01/26/2013 - 08:53

I loved the look of the Craft room Storage tower but modified to suit my wife's bathroom theme/decor. The inside back (MDF beadboard) is painted a milk coffee color to lighten it up. The door inserts are plexiglass, which was more expensive than glass but with 2 boys 6 and 2 it is well spent, and the MDF beadboard. Covered the plexiglass with self-adhesive film for glass on both sides to hide the towels inside. This project took me about 12 hours to complete but over a 3 month period, mostly spent on finishing the project with my boys underfoot or at 12-2am. YIKES!!! If i keep this up she will want to buy instead of letting me build.
Price List:
wood: $100
Stain/Paint: left over from house reno. would have been $15 stain $20 Varnish 30$ quart of paint
Handle: $7
Hinges: $4 basic style
I wanted to use Eurostyle hinges but opted to buy the Kreg system instead of Forstner drill bits.

Will be building another just different dimensions for laundry room makeover.

Built from Plan(s)
Estimated Cost
100$ CDN for lumber everything is more expensive in Canada
Estimated Time Investment
Weekend Project (10-20 Hours)
Finish Used
Saman's waterbased stain Chocolate Varnish applied
Recommended Skill Level
Starter Project

Comments

Quintin79

Sat, 01/26/2013 - 12:18

Thanks! It was my first furniture building project! I did a huge reno that i did on my house but that is construction and 1/8th in isnt as big of an issue as in furniture.

SMALL GABLE ROOF GREENHOUSE

Submitted by Ledopmi on Wed, 12/23/2020 - 06:07

I was planning on building a greenhouse some time next year but I just happen to see this by chance and fell in love with it. I've always built from my own designs but when I saw this I decided to purchase the plans. I couldn't be more happy with it. Right now its doubling as a feed room. I wanted a solid foundation so I build a floating deck to mount the walls on. The deck added quite a bit to the total price.

Built from Plan(s)
Estimated Cost
$1384.94
Estimated Time Investment
Week Long Project (20 Hours or More)
Finish Used
Paint
Recommended Skill Level
Advanced

Comments

Lawnmower Shed

Submitted by PipesTX on Wed, 01/07/2015 - 06:19

Modified the design to allow me to roll lawnmower directly in the end. Fun project.

Built from Plan(s)
Recommended Skill Level
Intermediate

Comments

Washer & Dryer Pedestal / Platform with Drawers

Submitted by dmccoy on Tue, 03/12/2013 - 10:26

Platform (Pedestal) with Drawers for front-loader Washer & Dryer. Cheaper than buying the manufacturer's plastic pedestals and more fun to build anyway! The drawers are also much wider and deeper than the manufacturer's pedestals. We can usually fit about 3 full loads of laundry in each drawer. (That's 6 loads of laundry before we have to start folding!) It's a very easy and basic DIY project. I made a 2nd one for my brother using these plans (sans the drawers). I gotta say, the drawers are SO nice to have though. But you could just leave the front open, without drawers, and slide some laundry baskets underneath for an even quicker project. We've been using this platform now for over 2 years and there is still no squeaking or rattling. The washer & dryer haven't moved from the vibration even in the slightest. They're exactly where I placed them on the pedestal 2 years ago. There's also zero problem with the weight of the washer either...it really is a strong frame. (After finishing, I jumped up and down on it!) A couple small tweaks I would make doing it over is raising the drawers a 1/2" in. off the floor to tuck a rug underneath (as is, they sit about 1/8" in. off the floor). Also, I would cut out a couple of square holes in the back panel to access those socks that fall behind (I can't access the sides of my W&D in our particular laundry room). Lastly, I would have painted with a quality paint (I just used a few cans of white spray paint to be quicker). Step-by-Step Plans and Materials List (PDF) and many more photos found at the Blog Link below...I'm certainly no professional "Plans Writer" so email if you have questions! Happy DIY-ing! Estimated Cost: ~$200 (2x6 lumber, plywood, drawer trim, nails, screws, paint)

Estimated Time Investment
Weekend Project (10-20 Hours)
Finish Used
White spray paint
Recommended Skill Level
Beginner

Comments

nikolegraves@h…

Wed, 03/13/2013 - 10:12

I have wanted to do the pedestal project for quite a while. I am so glad I held off though. Yours are fantastic! I would never have thought of drawers to hide the dirty laundry! Love it!

gmccoy20

Tue, 04/02/2013 - 11:06

Really appreciate the help with mine brotha! We really like them (even without the drawers) and are glad you had these plans to go off of for ours.

I'll be calling you for our next project!

strahmers8

Fri, 02/07/2014 - 17:05

Hello this looks great and for the amateur carpenter I am but one item I need clarified "the top measurement at 64" is .25" greater than the bottom at 63.75"

Please explain if I am missing something
Thanks

dwm22

Mon, 02/10/2014 - 15:33

Not sure what measurement you mean that's 63.75" since there's no "bottom" to the pedestals. Or do you mean 1/4" wider than the sides? The top panel should overhang both sides by 1/4" each so that when the side plywood is attached, it will be flush. Hopefully that helps? (If I'm understanding the question correctly)

jmkc

Mon, 02/24/2014 - 10:29

Could leave the back panel of plywood out so you could reach what may fall behind? Then you would just have to pull the drawers out?

heverest

Wed, 06/22/2016 - 16:35

Back panel is very very structural and provides lot of strength. If i wanted more access than the 5-7 inch of duct space behind the pedestal gives me, then i would replace the back panel with a long 2x6, that holds the three legs from going in different directions due to all that weight.

dmccoy

Mon, 12/12/2016 - 14:58

This is the one modification I could make if i could redo these plans...I would still put on the back panel of plywood as it stabilizes the pedestal, I would just have cut out a rectangle (behind each drawer) so that I could remove the drawers and stick my hand/arm through to grab fallen clothes or vacuum the lint.

dachiri

Mon, 12/18/2017 - 19:17

Rather than cut holes in the back, I just cut the back and side boards a little small and left a gap around the bottom the whole way around.  That way I can get a vaccuum hose in there or reach through and get lost items.  Because my washer and dryer seem to be deeper than yours (I needed at least 33" depth, so I went with 3'), that also worked out well in getting the most out of the boards.  I could do the top, back, and sides out of one single sheet of good 3/4" plywood just leaving those small gaps at the bottom for clean-up and retreival.

Jperera

Fri, 11/20/2015 - 05:23

Hello,

I downloaded the pdf but have exactly the same information that the website html, where can I find a solution step by step guide?

Thank you for all the interesting posts.

Modified Clubhouse Bunkbed

Submitted by Anonymous (not verified) on Sun, 06/04/2017 - 18:39

I used the plan from the Clubhouse bunk bed and modified to look similar to a Mathy-by-Boles Treehouse Bunkbed.

Built from Plan(s)
Estimated Cost
$450
Estimated Time Investment
Week Long Project (20 Hours or More)
Finish Used
Primer and kid friendly paint. oh yeah...sanding. Lots and lots of sanding!
Recommended Skill Level
Intermediate

DIY Closet shelving

Submitted by Ruiz1323 on Sat, 08/07/2021 - 10:22

Closet

Built from Plan(s)
Estimated Cost
180
Estimated Time Investment
Day Project (6-9 Hours)
Finish Used
Spray paint
Recommended Skill Level
Beginner

Comments

Cal-King Storage Bed

Submitted by Chris 1975 on Thu, 04/25/2013 - 12:03

I loved the bed by plan, and now love it more that I have built it.

Estimated Time Investment
Weekend Project (10-20 Hours)
Recommended Skill Level
Beginner

Triple Printer Console

Submitted by jbolson21 on Tue, 04/07/2015 - 16:07

We made this and a dresser just like it.  We wanted matching furniture.

Estimated Cost
$350
Estimated Time Investment
Week Long Project (20 Hours or More)
Finish Used
Danish Oil
Recommended Skill Level
Intermediate

Comments

Jewelry Box Retirement Gift

Submitted by JoanneS on Mon, 04/20/2015 - 17:19

This jewelry box is a gift for a friend at work who is retiring.   It is a variation of the Easy Jewelry Box, with the following modifications:

Hinged lift-up top with mirror

Overlay drawer fronts from ¼” craft wood (Gold stencil on top false drawer front, and drawer boxes are 1/8” shorter than the shelf from front to back, to ensure the fronts sit flat against the box front and drawer back doesn't touch the box back at all)

The bottom is 2 pieces thick, to allow space for the drawer overhang and attaching the bottom moulding.

Solid wood back (instead of plywood)

Top and bottom edged with mini stop moulding to make the overhangs, and added feet made from lattice

Removable drawer divider tray and 2 heights of removable dividers for the top, made from dentil, lattice and screen bead mouldings

I really took my time on this build to get everything just right with the build and the finish.   Probably spent about 6 hours spread out over the last few weekends. 


Built from Plan(s)
Estimated Cost
Cost: 1x8 and 1x2 Lumber and finishes were already on hand (left over from other projects) and I spent about $25 for the mirror, hardware, felt, mouldings, and craft board.
Estimated Time Investment
Day Project (6-9 Hours)
Finish Used
3 coats Clark & Kensington semi-gloss paint + primer in Crushed Peanut, sanded between coats. Stencil: 1 coat Americana Gloss enamel metallic in glorious gold. Soft wax on the shelf and drawer bottom.
Recommended Skill Level
Beginner

Comments

Linda7

Tue, 04/21/2015 - 18:57

This is your best one yet, Joanne. Love it! :-)

JoanneS

Wed, 04/22/2015 - 18:29

Hi Linda, thank you for the nice comment! This was a fun build, and I'm very glad to say the gift was a big hit! :)

Rustic X Farmhouse Table

We were able to finish this table after work one afternoon and stain it the next day. (we have a 16 month old also, so you can do it! :) ) I wanted a similar style I had found at World Market that retailed for $700 we were able to complete this entire table for $100 including all hardware and stain. LOVE it so much and get SO many compliments on it. Thanks so much!

Shelby
The Dandy Lion

Estimated Time Investment
Day Project (6-9 Hours)
Finish Used
A satin poly with espresso stain in one
Recommended Skill Level
Intermediate

Low Activity Table

With three little kids we needed some place to put the loads of toys that we have.  The first time I saw this - I knew I had to build it!

This project was quite the task.  For me building is a breeze - it's the painting that is the process!!!


I started working on this on Sunday last week - it was built in about 3-4 hours.  Painting took forever, and three colors!


Love for you to check out my blog post with all the details, even my painting flub up.

Estimated Cost
$108...$70 in wood, $30 in Wheels, $8 in paint.
Estimated Time Investment
Afternoon Project (3-6 Hours)
Finish Used
Sanded...primed...sanded...random painting experience...ended with Rustolium Kola - Semi-gloss.
Recommended Skill Level
Intermediate

Bookshelf Hidden Doors Over Closet

Submitted by Anonymous (not verified) on Mon, 10/23/2017 - 10:13

Hidden door bookshelves hide a furnace closet.  Built by Kraig Faulkner

Built from Plan(s)
Recommended Skill Level
Advanced

Comments

charkue

Thu, 09/17/2020 - 08:01

I'm currently working on a basement renovation project. I'm probably going to incorporate a feature like this for my mechanicals, too.

One important safety note for anyone who wants to do this: It's recommended that your furnace be a minimum of 30" away from any combustible materials. That includes walls and partitions. The image of this project displayed is right next to the furnace, which is not a good idea.

Modern Farmhouse Dining Room table with 2x4 chairs

Submitted by NeekosMac on Thu, 08/01/2013 - 13:28

Modern Farmhouse Dining Room Table (with pocket hole) and 2x4 chairs with plans reposted from morelikehome.net.

Surfed the site for the right plans and dove right in. Thank you for the inspiration all!

Estimated Cost
$200
Estimated Time Investment
Week Long Project (20 Hours or More)
Finish Used
Minwax Golden Pecan and Poly coat.
Recommended Skill Level
Beginner

Comments

Accidental Sectional

Submitted by JoanneS on Fri, 05/18/2018 - 09:44

This project evolved from us purchasing the wrong foam to go under 4 area rugs.  After it didn’t work for the first rug, we had 3 more rolls of the stuff that we couldn’t take back to the store (we had waited too long to do a return).  I originally had intended to buy an inexpensive sectional sofa for the downstairs family room, but with all this foam staring at me, I decided to put it to use and make sofa cushions.  There was enough foam to do a whole sectional!


The sofa frame is based on Ana’s Outdoor 2x4 Sectional sofa.  I adjusted the size, because the fabric I wanted to use was 54” wide, and that would fit nicely around a 22” deep x 4” thick cushion.  Each cushion is 11 layers of the foam (seat cushions: 67 x 22 x 4, backs: 67 x 18 x 4). That length for the cushions fit exactly into the 8 yards of fabric available on the bolt.  The next week I ended up going back for some more fabric for the corner cushion and an ottoman that's in work. 


I had the frame assembled and was ready to add the final upper back pieces, when Hubby suggested we give it a slanted back.  That required a little re-engineering and a couple of extra boards on the back and armless end.  Instead of using 2x4s the full length for the seat, I had used some 1x2 furring strips reclaimed from another project.  Also used some of those for the upright pieces for the backs.  Added some 1x6 to top the arms and ½ x 3 ½” craft boards to the front to hide the cut 2x4 ends.


The cushions are covered in a polyester faux tooled suede (fabric from Hobby Lobby).  The cushion covers are slightly loose on purpose, to give the nice worn squishy look that a real soft leather sofa cushion would have.


It’s surprisingly comfy and we love the look! 


Estimated Time Investment
Weekend Project (10-20 Hours)
Finish Used
The finish is 2 coats of Clark & Kensington Satin enamel in Winter Storm. 

Recommended Skill Level
Beginner

Comments

Ana White

Tue, 06/05/2018 - 14:47

You are so resourceful!  Love how this turned out!  Thanks so much for sharing such detailed instructions, much appreciated!

Free Farmhouse Table

I got all the wood from the dump. The best way to get a good glue up for the table top is joint the sides flat, and then hand plane the top for a smooth surface. Gorgeous table for nothing.

Estimated Cost
$0.00
Estimated Time Investment
Week Long Project (20 Hours or More)
Finish Used
Non wax Shellac, Walnut Stain, Semi-Gloss Poly, Red Spray Paint
Recommended Skill Level
Advanced

Comments

Wooden garden tools storage shed

Our last project was building a tiny garden tools storage shed. We used only 1 x 4 boards. We don't have any plans, but you can watch the entire building process on our YouTube channel. We are very proud of the way the project turned out.

Built from Plan(s)

Comments

Seasonal And Holiday

Toddler version of the platform bed

We reworked the plans for the pottery barn inspired bed into a toddler sized version. Arms were added near the head to prevent our child falling out in the first year. They ended up being something of a hazard in those early days, as our child kept hitting her head. If we were to recreate it, we would make the arms go up higher or without the finished top. The bed also was not lifted off the ground in as great of a proportion to the original.

The pine is left untreated and unfinished. The only glue used was homemade milk glue.

Estimated Cost
<$100
Estimated Time Investment
Weekend Project (10-20 Hours)
Finish Used
None
Recommended Skill Level
Intermediate

Comments