Community Brag Posts
DIY Little Kids Picnic Table
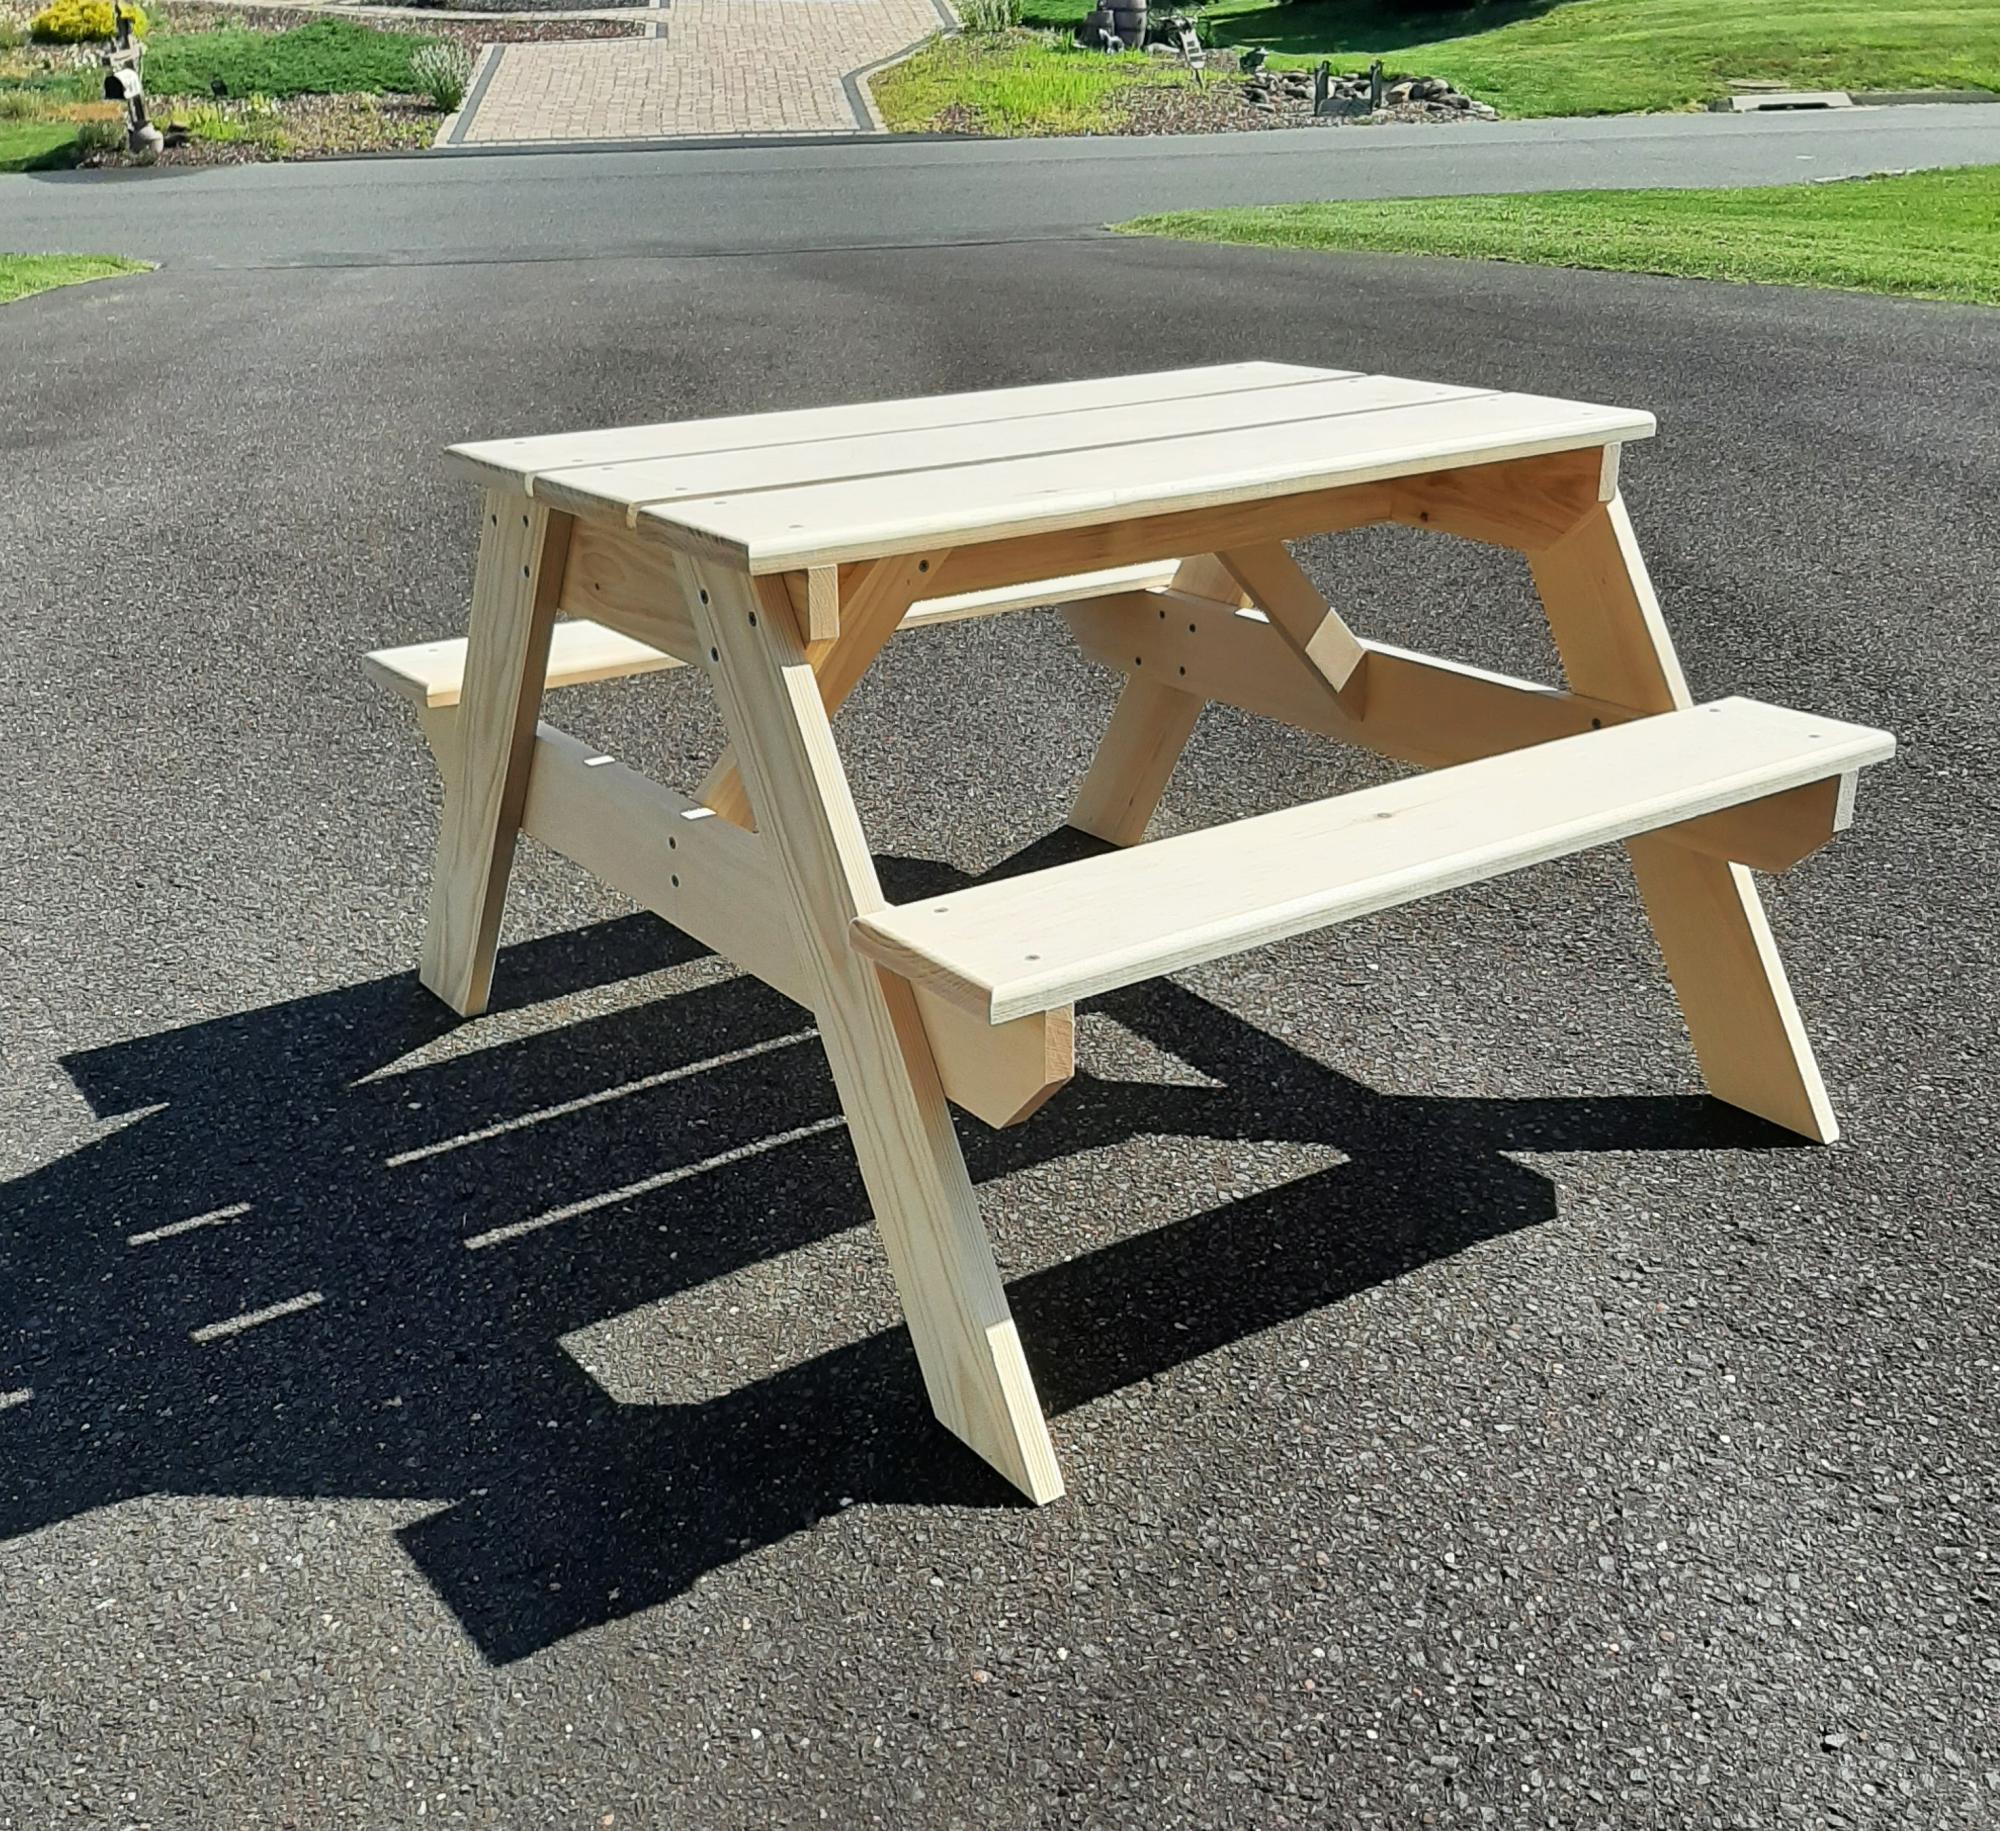
When I built the little kids picnic table, I substituted 1x4 lumber, except for the top slats, the seats and the cross supports. The measurements needed to be adjusted of course. It was a fun project to build. The plans were clear and easy to follow.
Rick
Built from Plan(s)
Farmhouse Bench

We have Pottery Barn furniture in our cottage and I wanted a bench for our bedroom. I found this plan was very close to the "Benchwright" style and I'm very happy with the results, including the match in stain colour. It cost me approx. $40 vs $650 at Pottery Barn. The effort was definitely worthwhile !
Estimated Time Investment
Day Project (6-9 Hours)
Finish Used
Minwax stain 1 coat + Crystalex water base varnish 2 coats on top.
Recommended Skill Level
Beginner
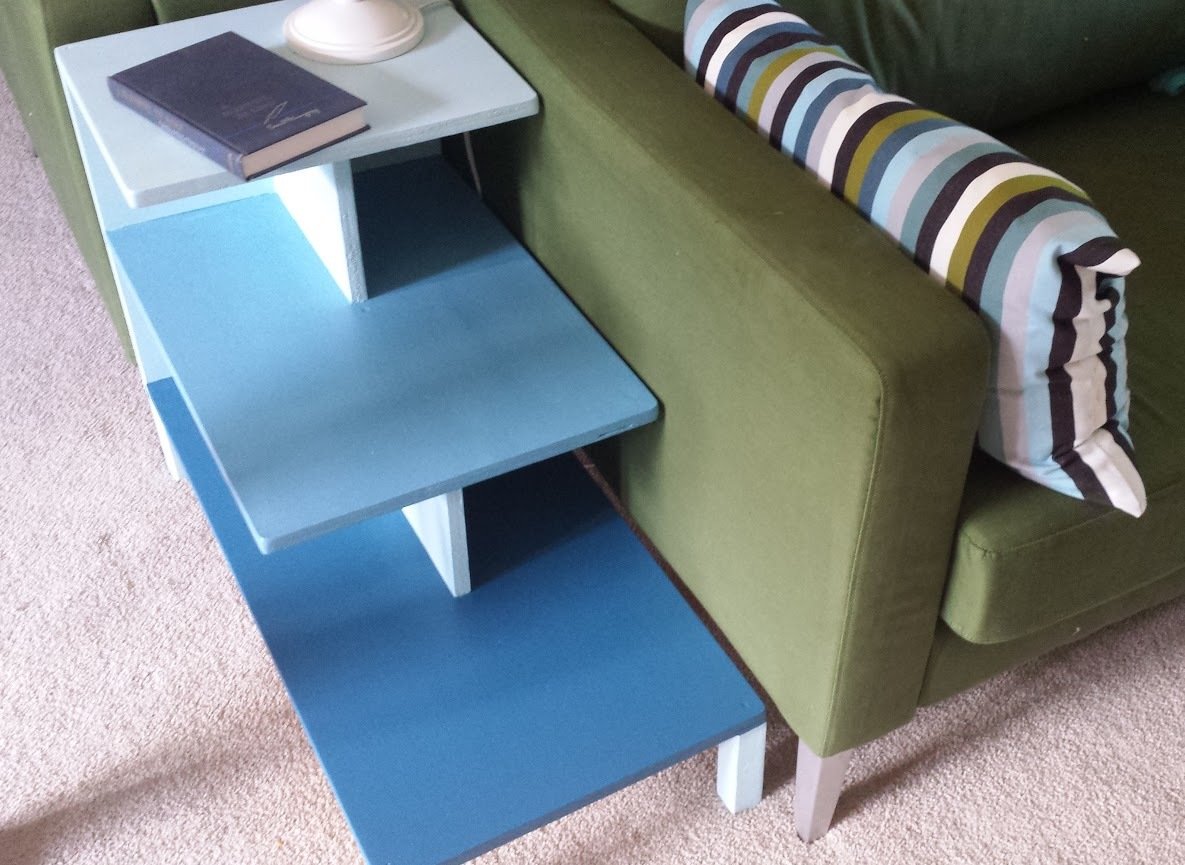
Ombre Step Up Side Table
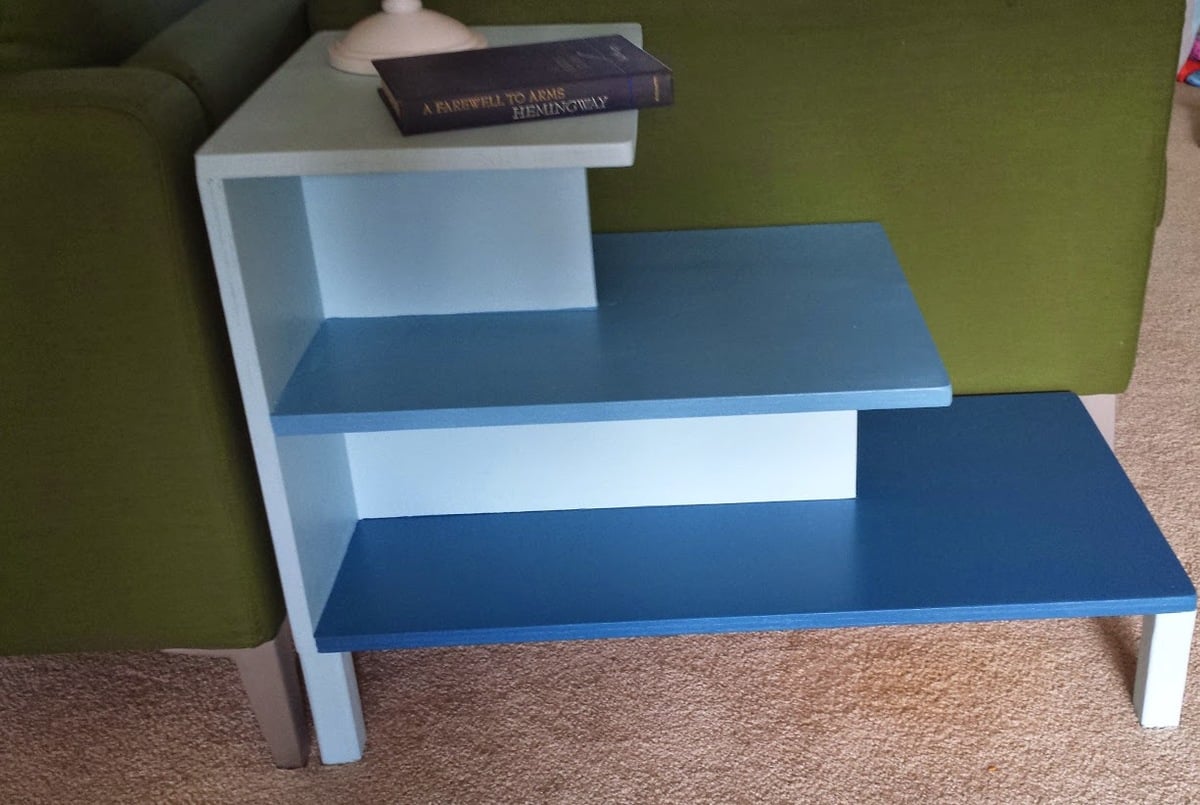
I needed a table to fit in the gap of my offset and back to back couches. I made the bottom shelf a little bit longer to better fit the space. I also added additional screws to the back for more stabilization since I knew my kids would find the steps irresistible. The different hues of blue make it more interesting.
Built from Plan(s)
Estimated Cost
$50
Estimated Time Investment
Day Project (6-9 Hours)
Finish Used
Latex paint and spray clear coat
Recommended Skill Level
Beginner
Rustic X Coffee Table
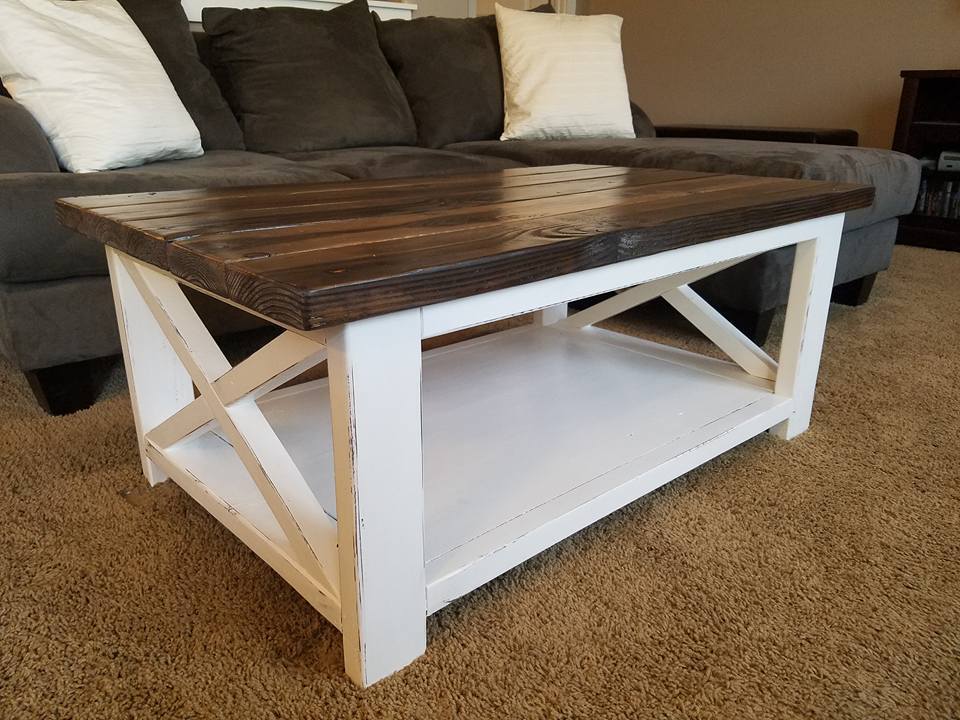
I had already built the Rustic X End Tables, and 3 years later I finally built the Rustic X Coffee Table to match! I shorted the length by 8" and coated the whole piece in a steel wool and vinegar solution. I then went back and used White Adirondack chalk paint by Folk Art for the base. I sanded the edges lightly for the distressing and put 3 coats of Minwax Matte Polyurethane over the entire piece for the top coat. I ended up putting 2 large wicker baskets underneath for extra storage and it is perfect!
Built from Plan(s)
Estimated Cost
$60-$100
Estimated Time Investment
Weekend Project (10-20 Hours)
Finish Used
Steel wood & Vinegar, White Adirondack chalk paint by Folk Art, Minwax Matt Polyurethane
Recommended Skill Level
Beginner
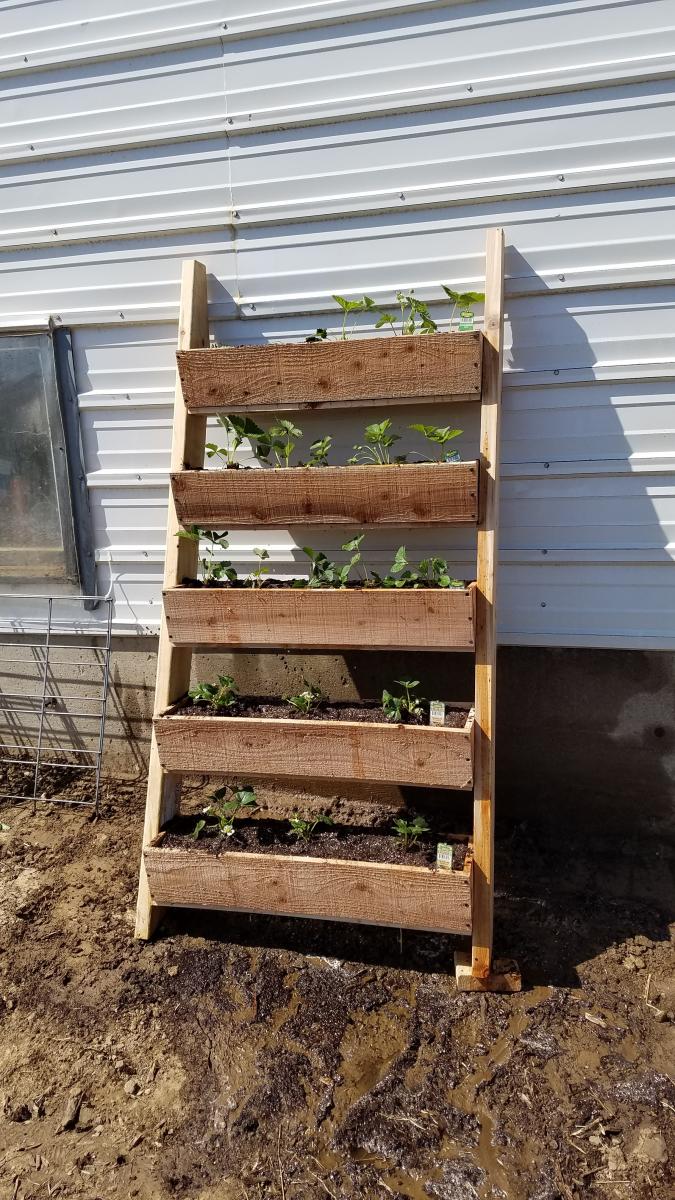
Vertical Garden Planters
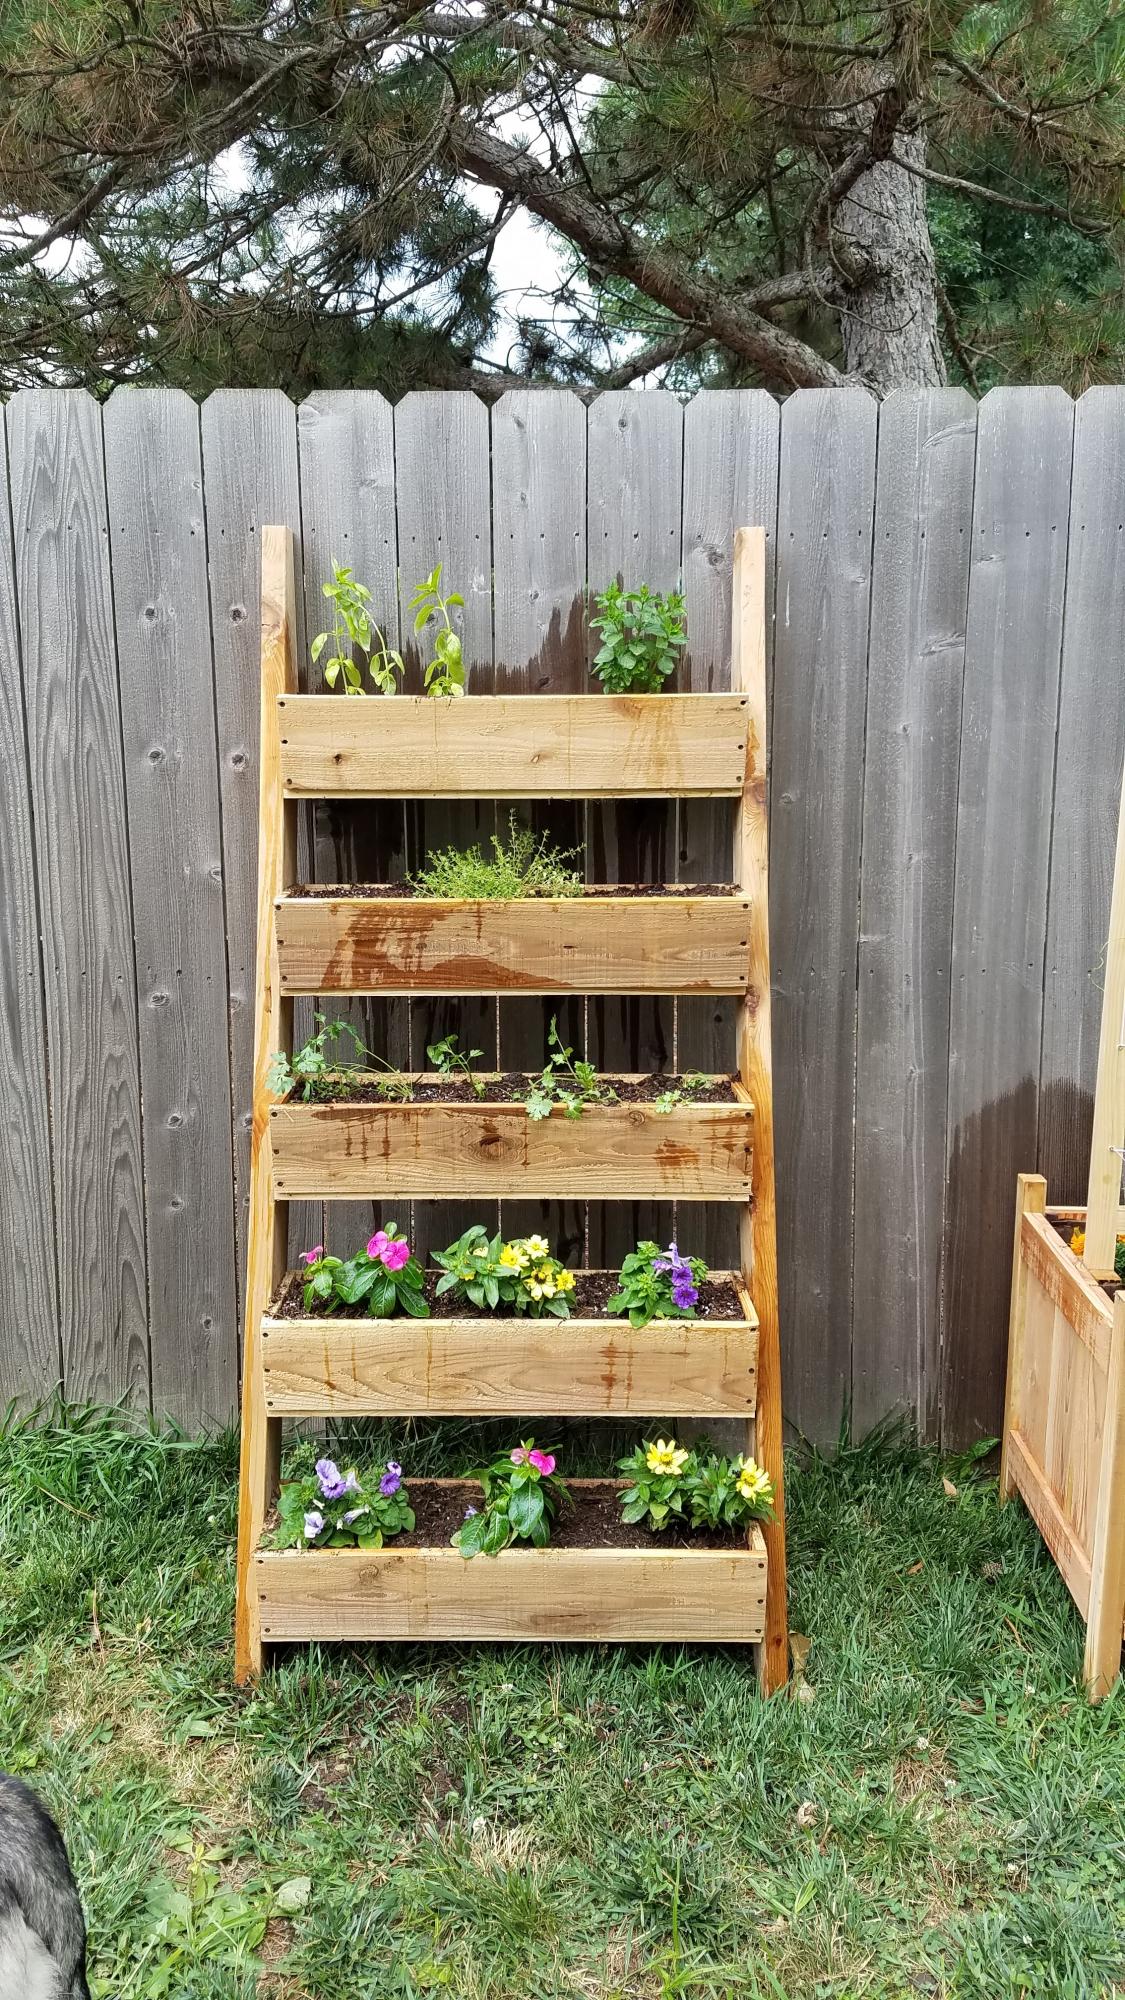
Made two of these this spring. One for strawberry plants, and one for herbs and flowers. Made according to plans.
Built from Plan(s)
Estimated Cost
$20 each
Estimated Time Investment
Afternoon Project (3-6 Hours)
Finish Used
None
Recommended Skill Level
Beginner
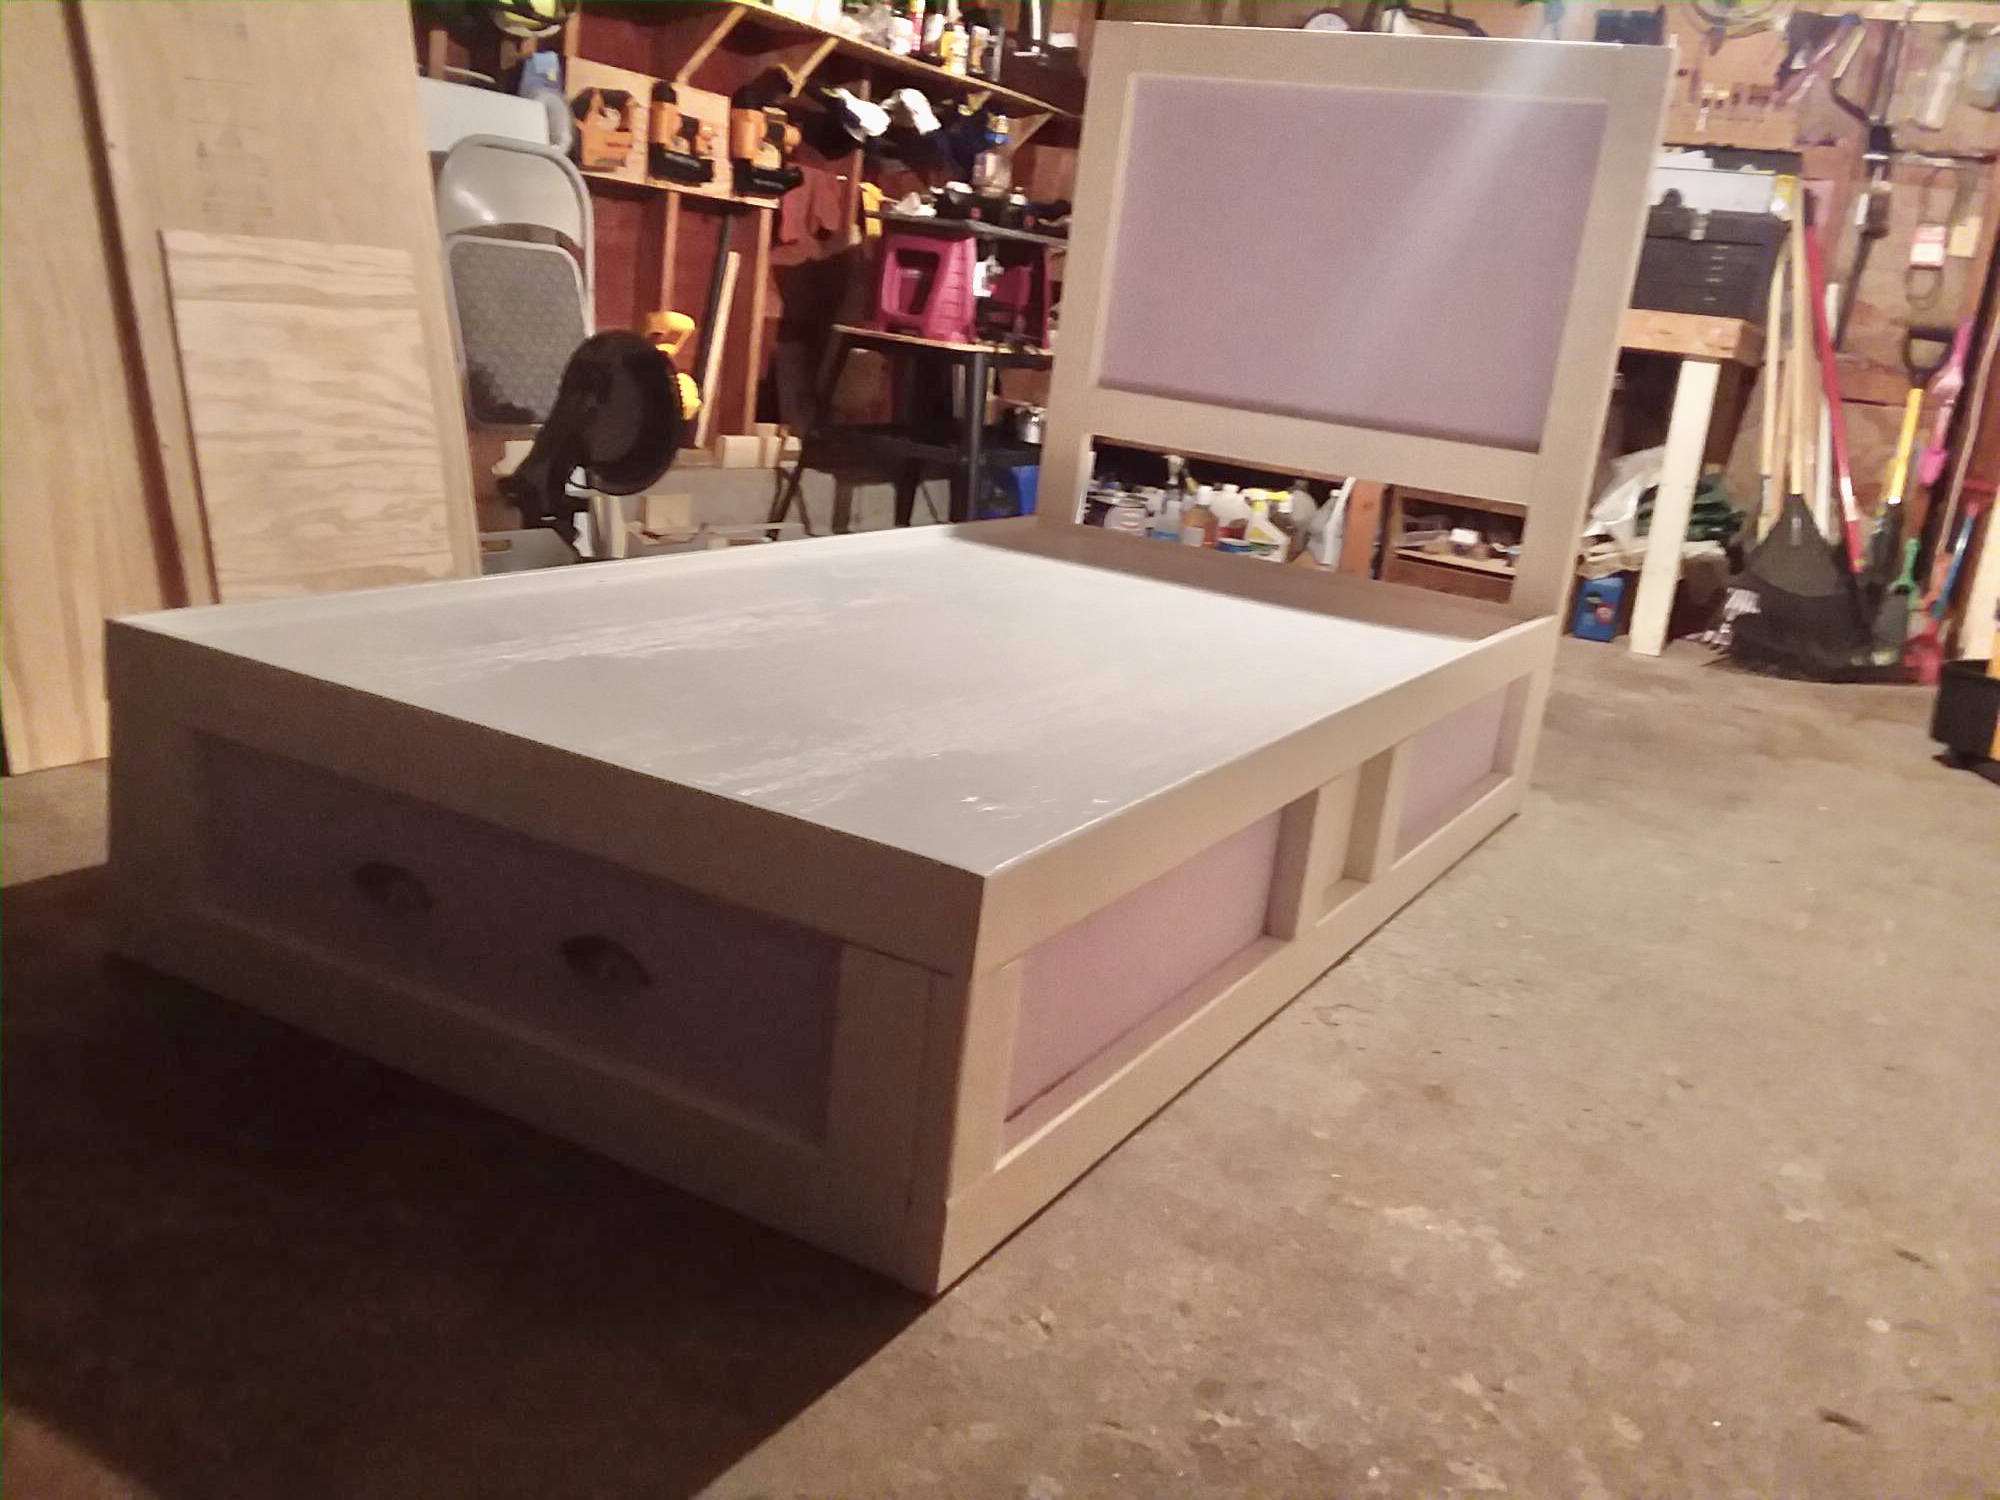
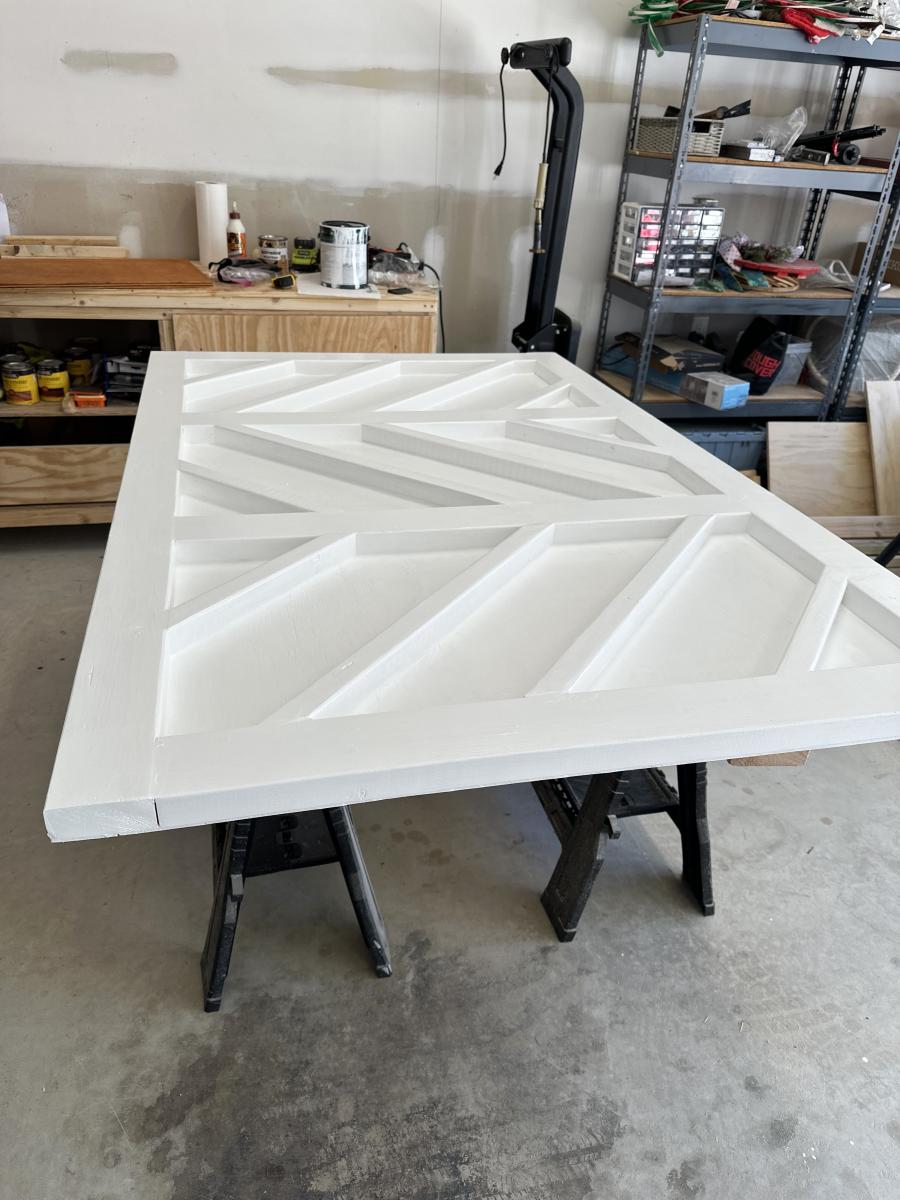
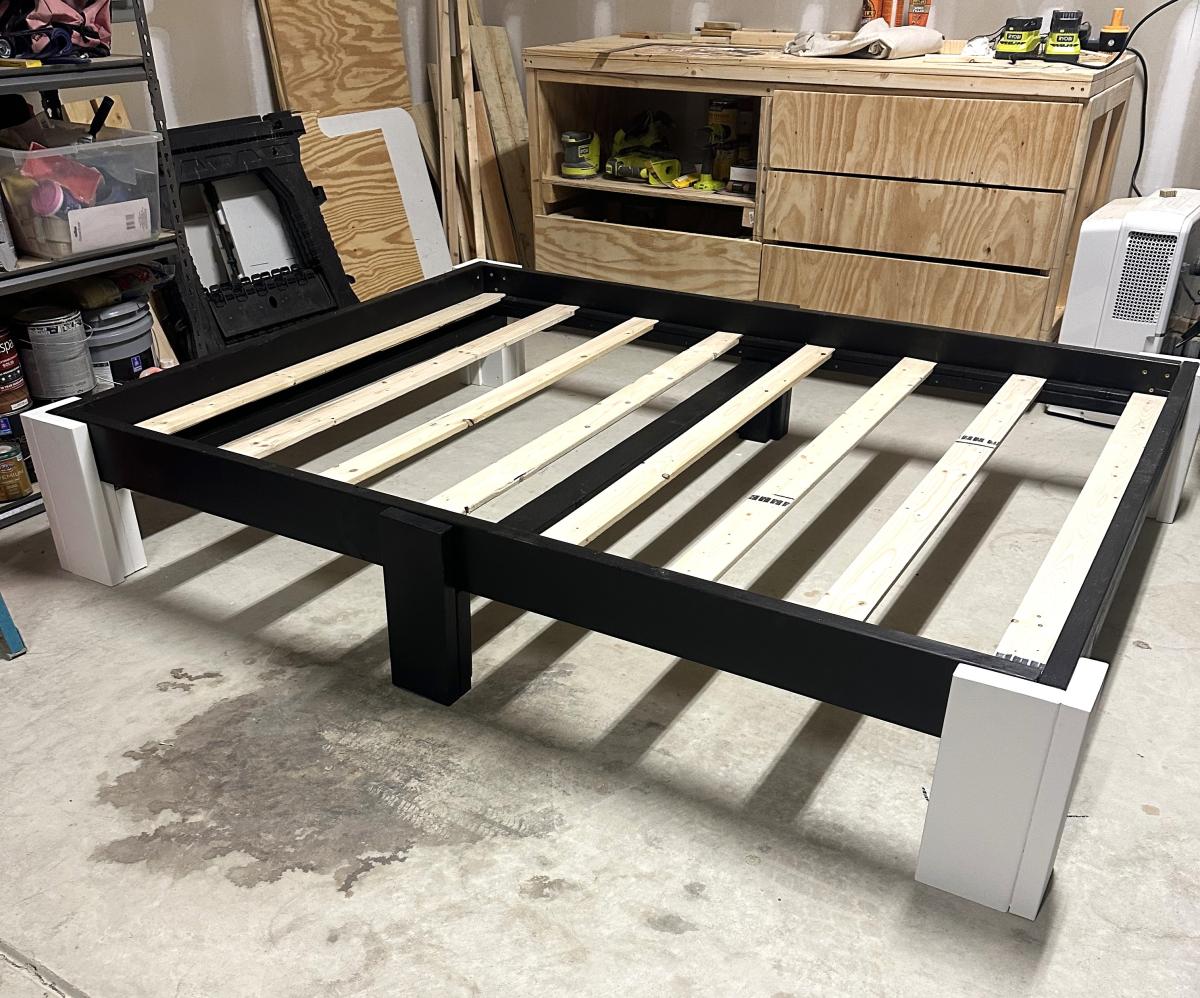
Heavy Duty Bed
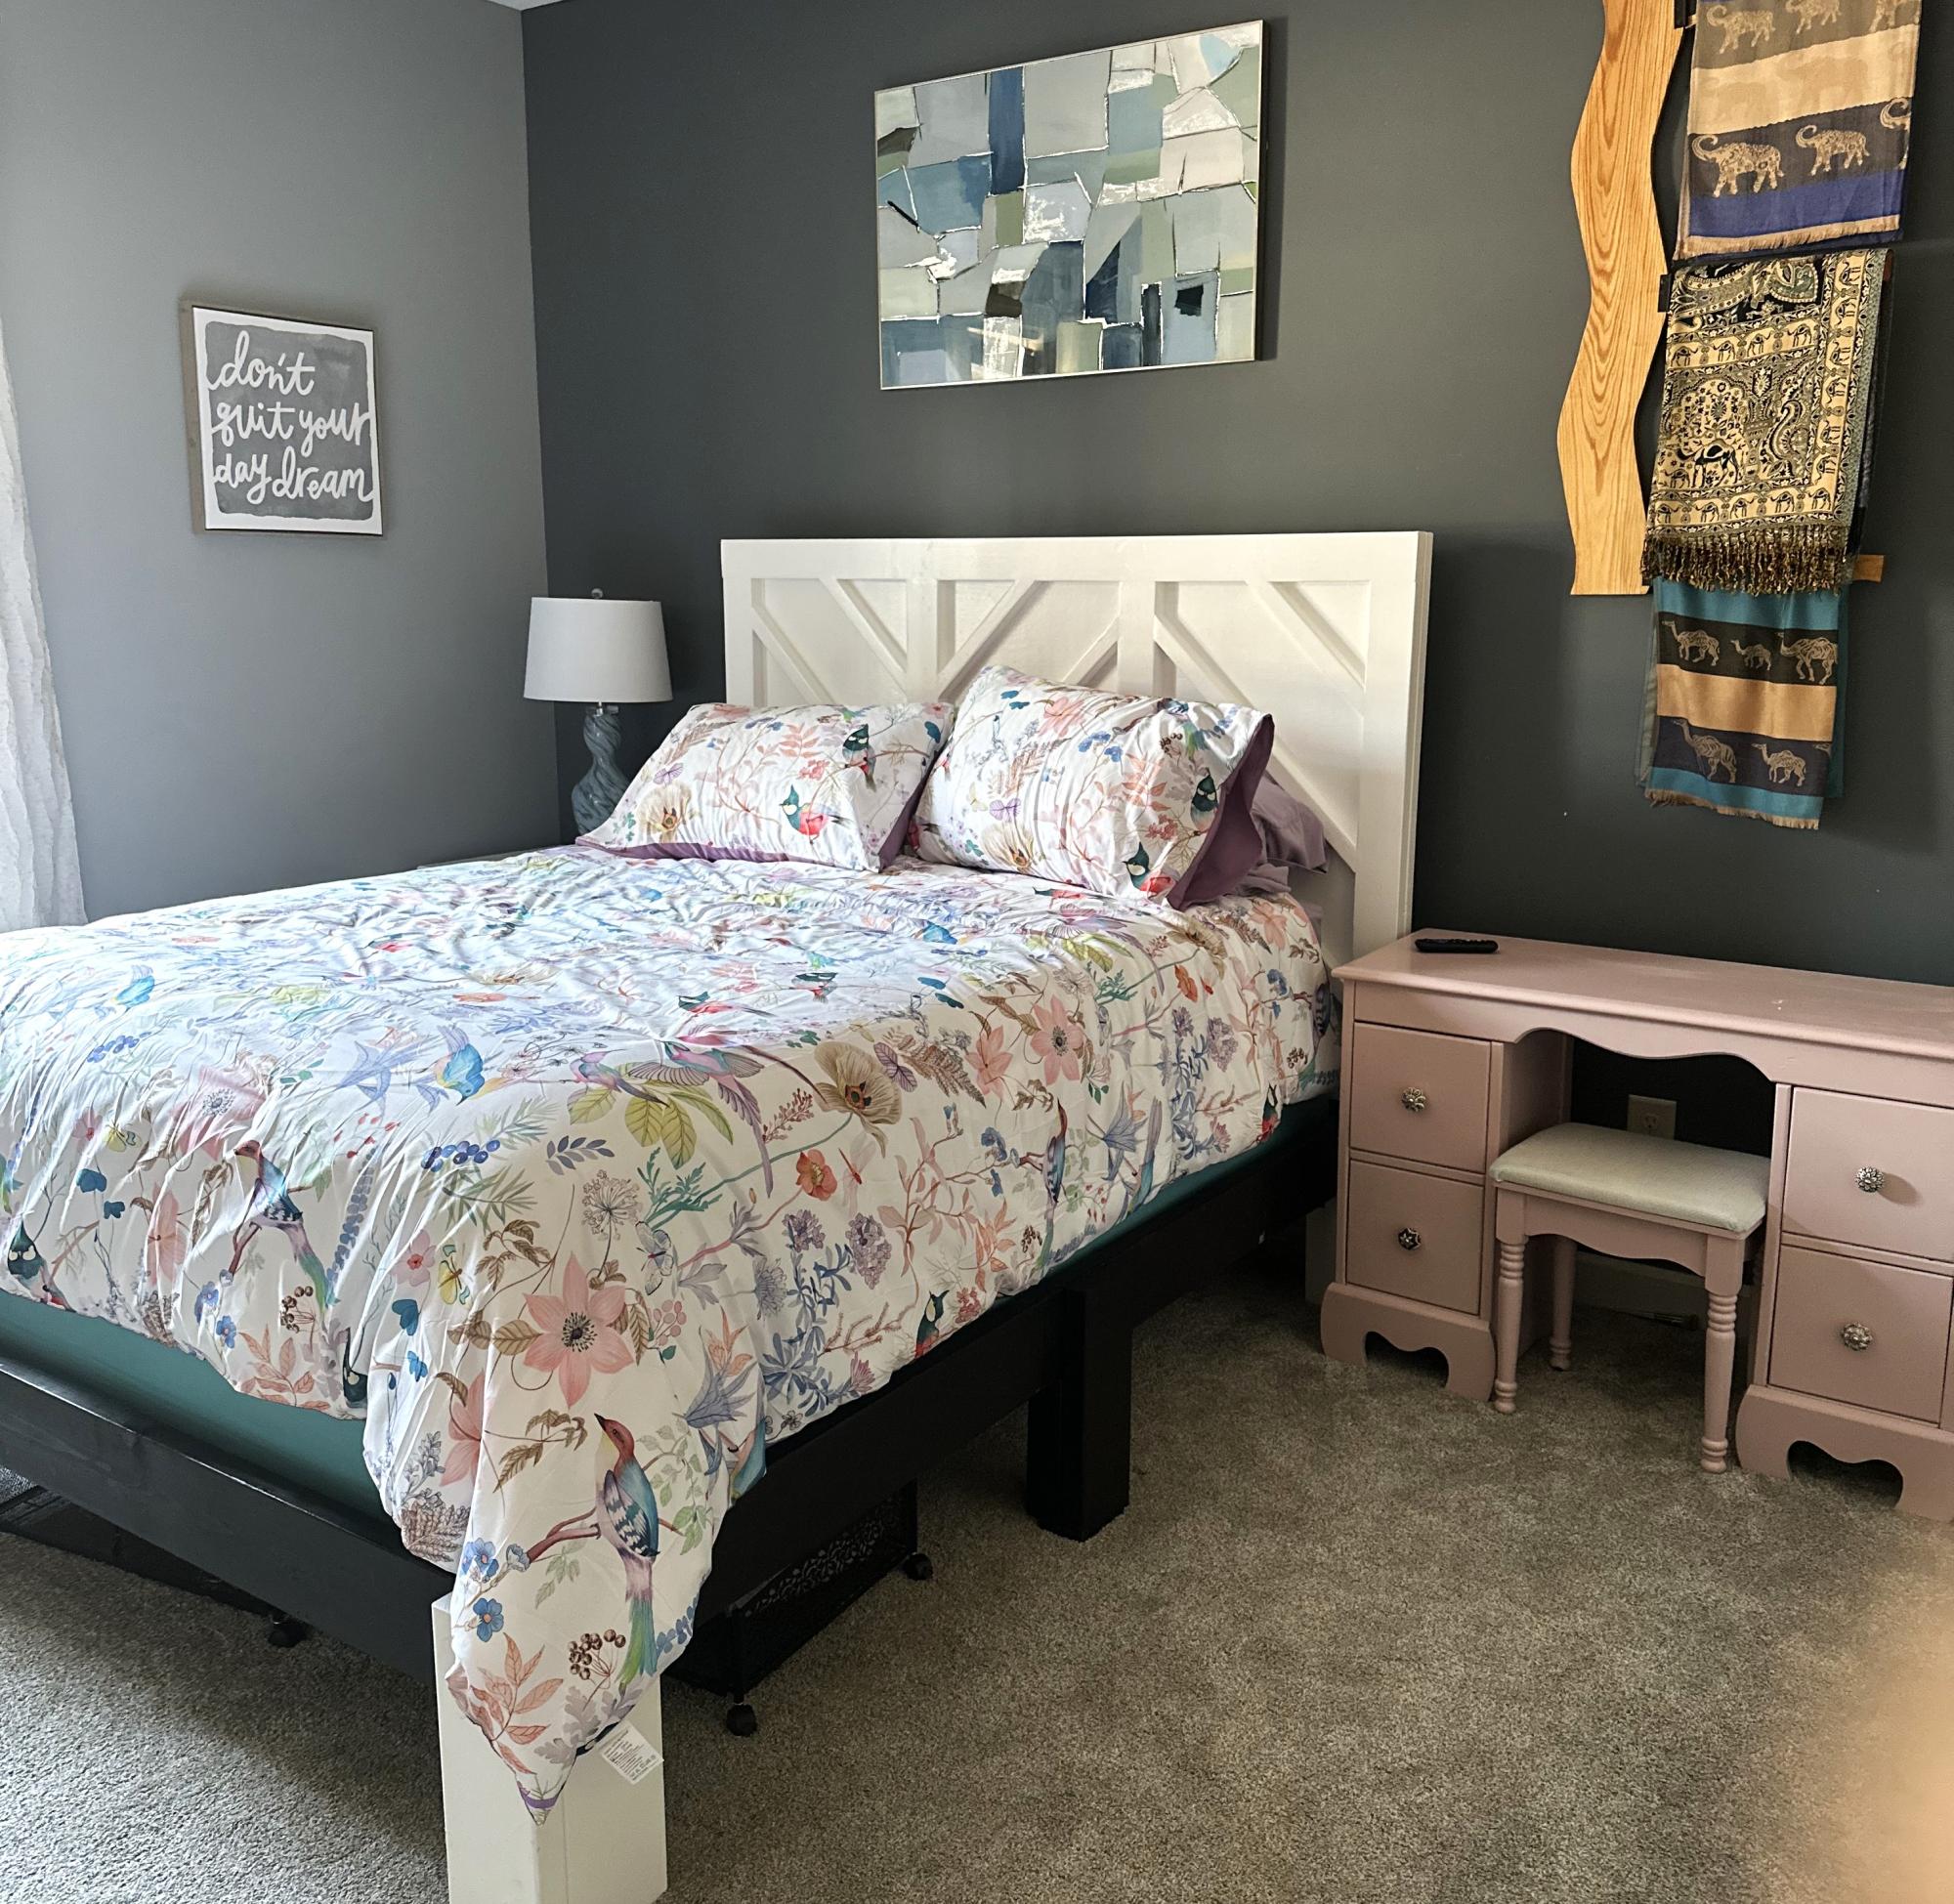
I wanted a heavy duty spare room bed but didn’t want to pay a mint… so I built one.
RosieOh
Built from Plan(s)
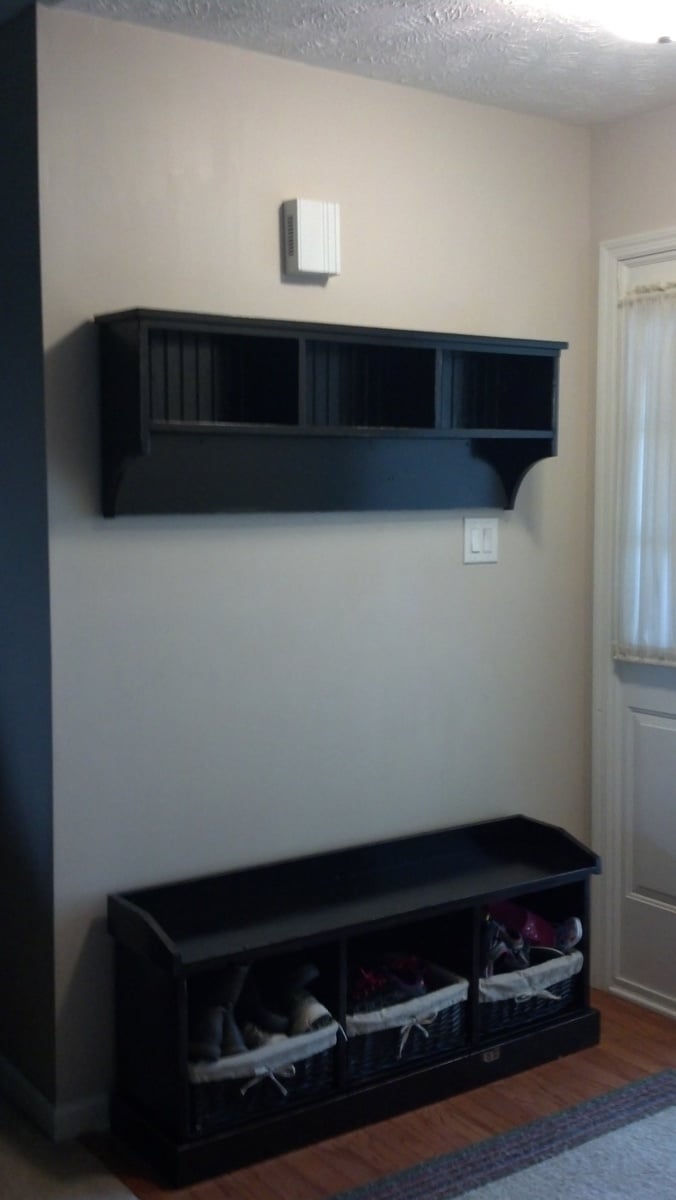
Hall Tree
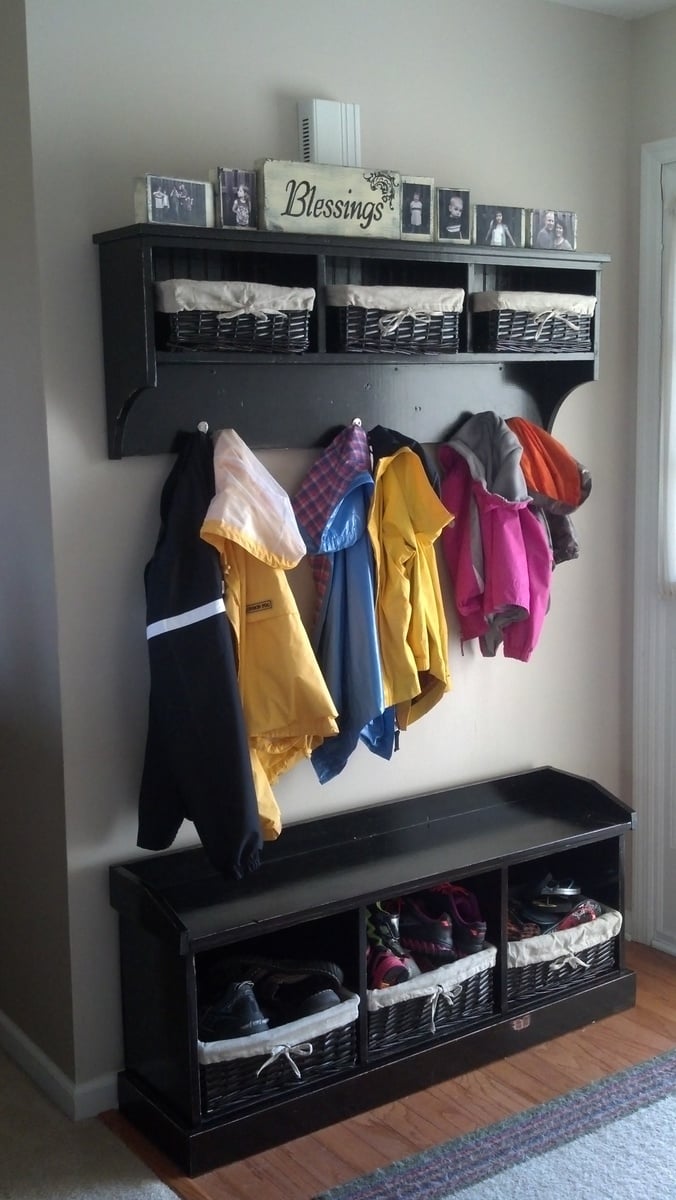
I have always wanted a hall tree, but could not spend the hundreds of dollars for one. I was so excited when I found these plans.
I had a very hard time finding baskets to fit the cubbies. I thankfully found some cheap ones at Wal-Mart that were a two pack of the small and large. I would recommend buying the baskets first, then adjusting the plans.
I hung the shelf with three heavy duty D ring hangers, and then added three screws drilled directly into the studs. We have four rambunctious kids, and did not want the shelf falling down on them. It is super sturdy! I love this piece of furniture so much!
Built from Plan(s)
Estimated Cost
$60 (guessing here)
Estimated Time Investment
Day Project (6-9 Hours)
Finish Used
I used BIN primer followed by two coats of Valspar Gloss Black. I distressed the wood with sandpaper, and then used Miwax Red Mahogany on the distressed areas. I also applied a coat of clear protectant over the paint. It took a long time to dry between each type of paint, but it was very hot and humid in the garage. The paint is holding up fabulously!
Recommended Skill Level
Beginner
Comments
Mon, 09/12/2016 - 10:24
how did you get the curves?
i want to build this shelve but am perplexed on how to cut the curves on the sides.
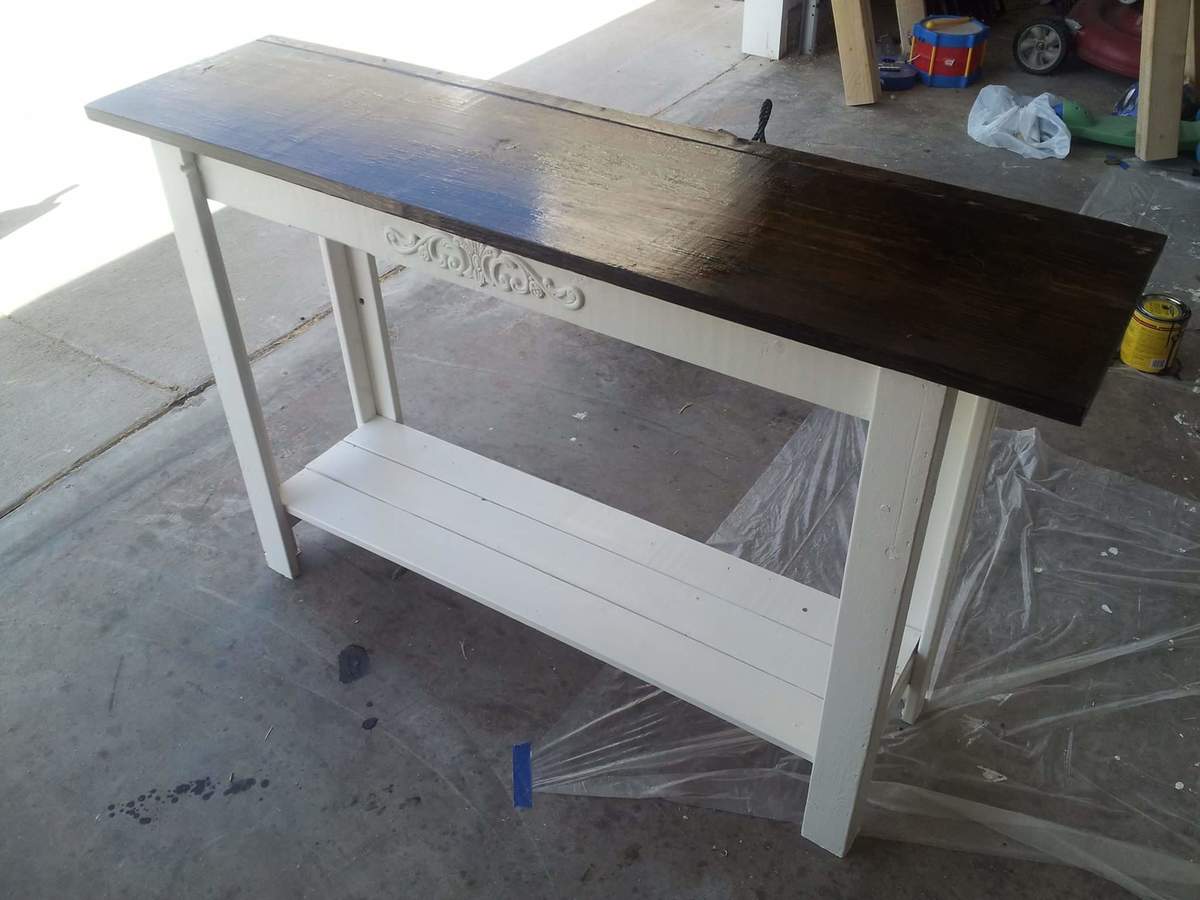
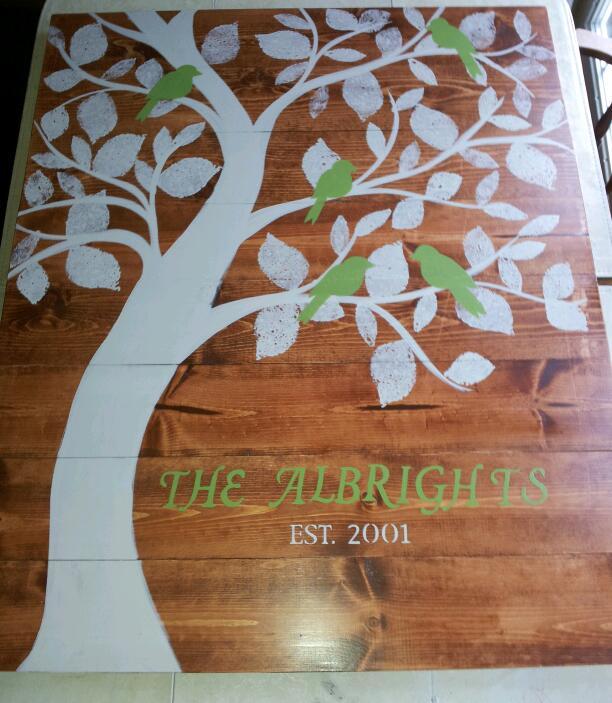
Simple console with shelf

I used antique white paint for the bottom and dark walnut atain for the top. I added a appilque to make it look a little fancy.
Built from Plan(s)
Estimated Cost
$40
Estimated Time Investment
Afternoon Project (3-6 Hours)
Recommended Skill Level
Beginner
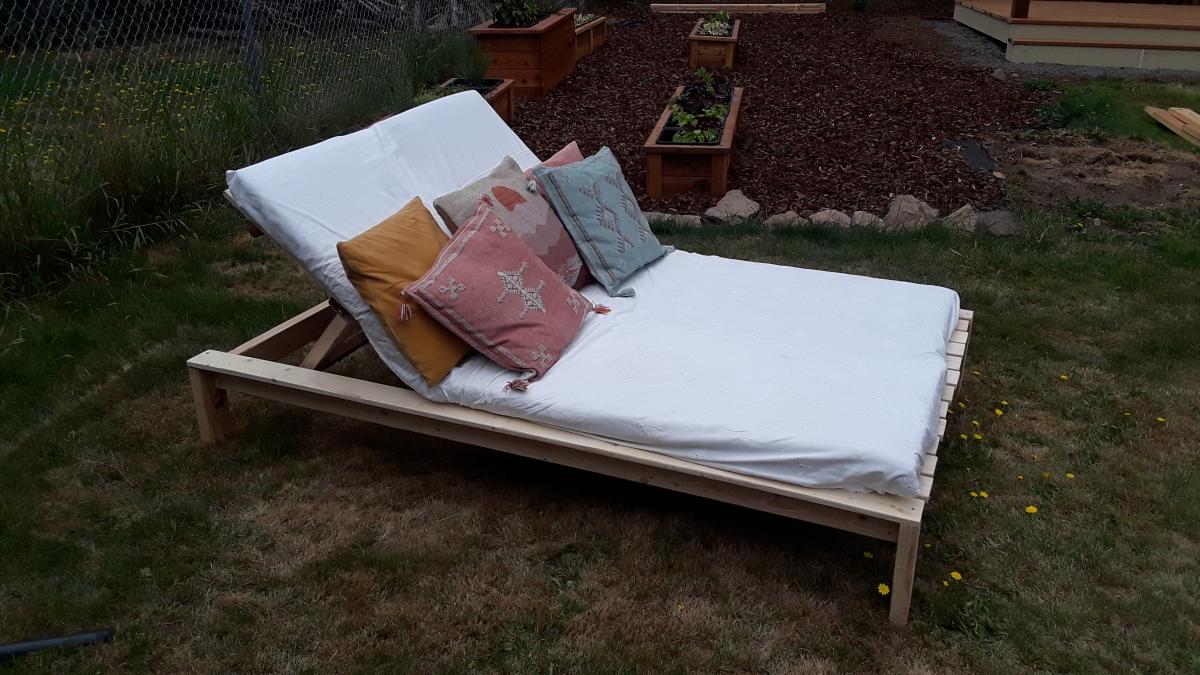
Double Wide Modern Chaise Lounge
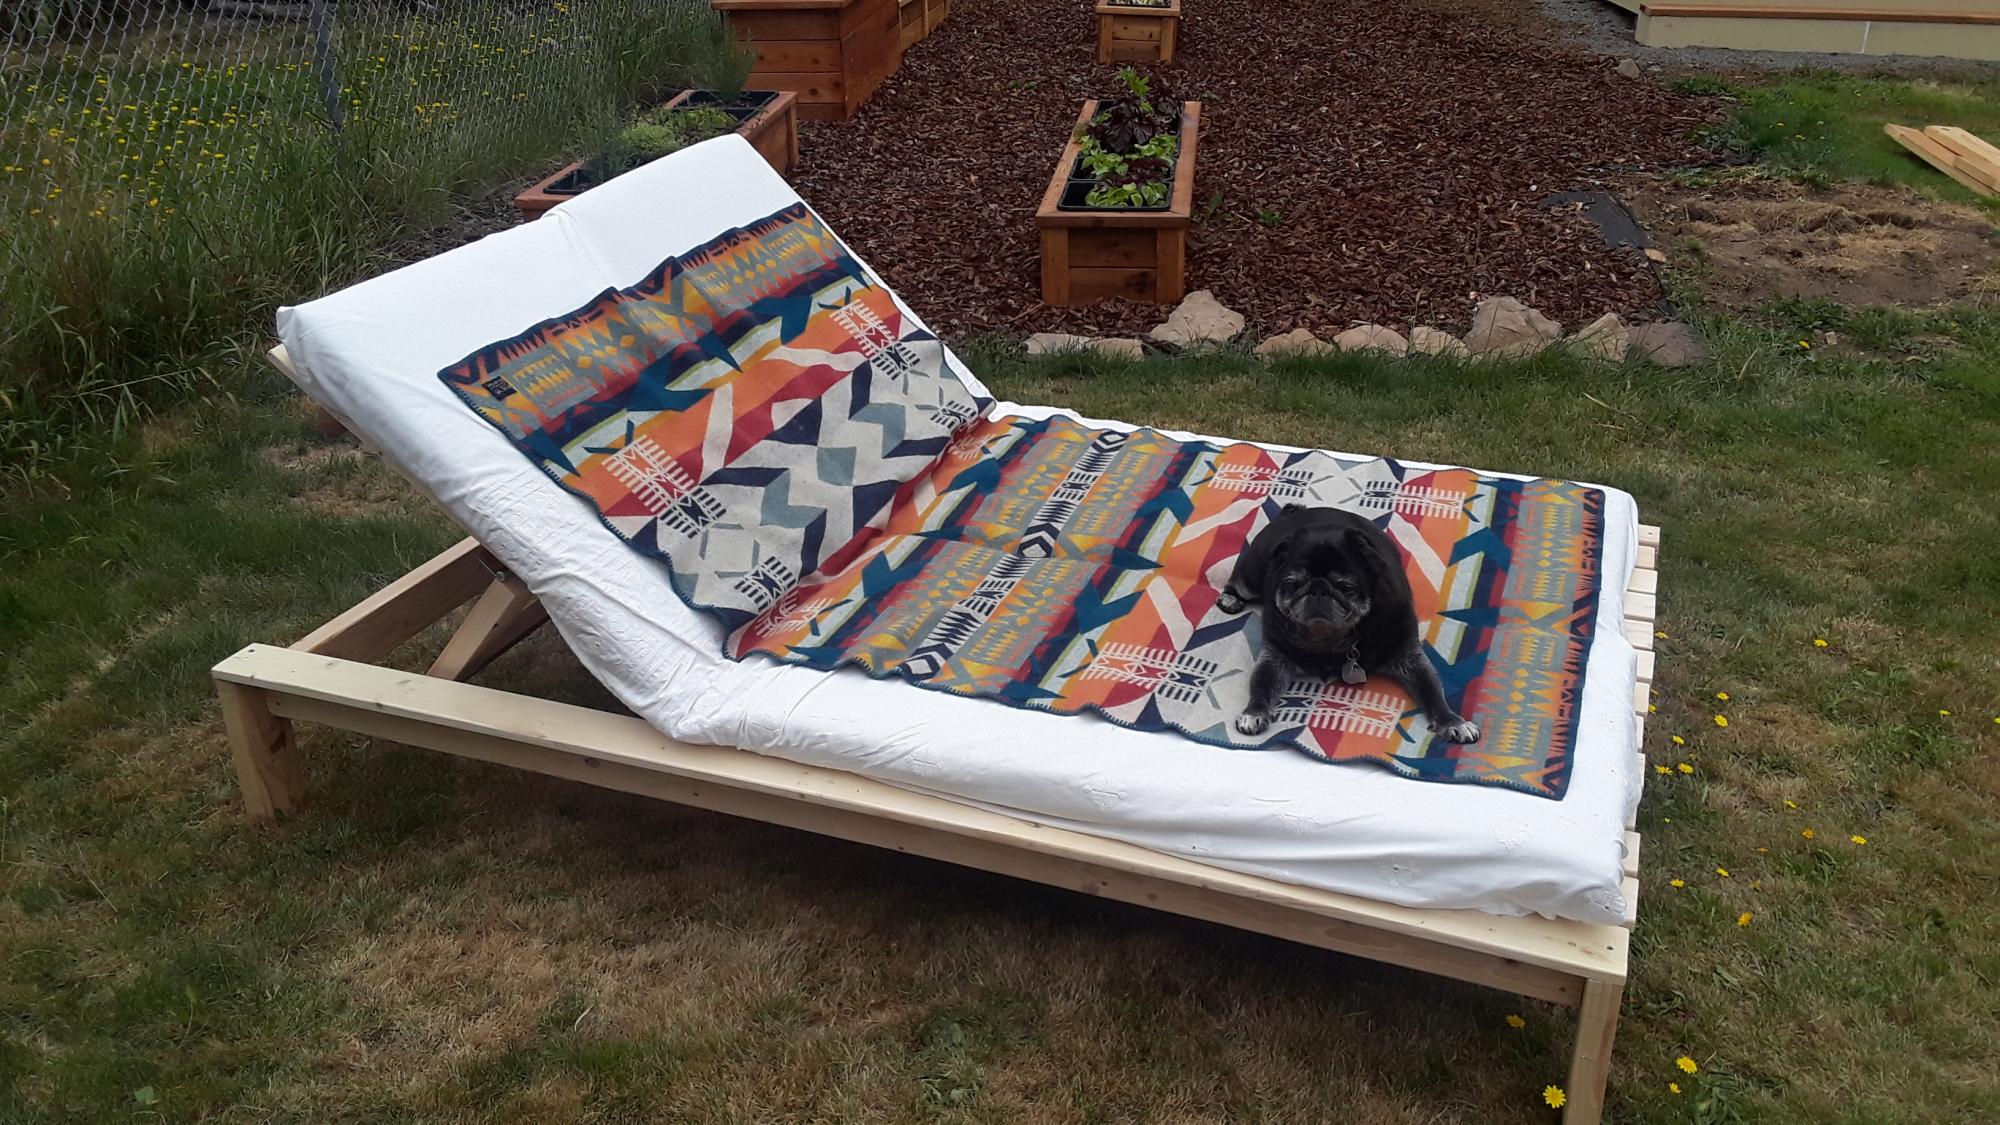
I used pine to build this bed. I am still going to paint it with some exterior house paint! The lumber and screws came in around $120. I got two cushions on clearance at Target for $20 each. I got a duvet cover on clearance at Bed Bath and Beyond for $20. The paint was $25 for a quart, and I also bought a gallon of primer to use on lots of future projects for about $20. I spent 5 hours sanding, 4 hours cutting, and 5 hours assembling with a friend. Much cheaper and more fun than the $1400 one from Restoration Hardware!
Built from Plan(s)
Estimated Cost
$225
Estimated Time Investment
Weekend Project (10-20 Hours)
Recommended Skill Level
Intermediate
DIY Teeter Totter

I made this with my grandson today. It was so much fun and very easy. My grandbabies love it!
Carol (Gigi to my grandbabies)
Built from Plan(s)
Junior loft bed
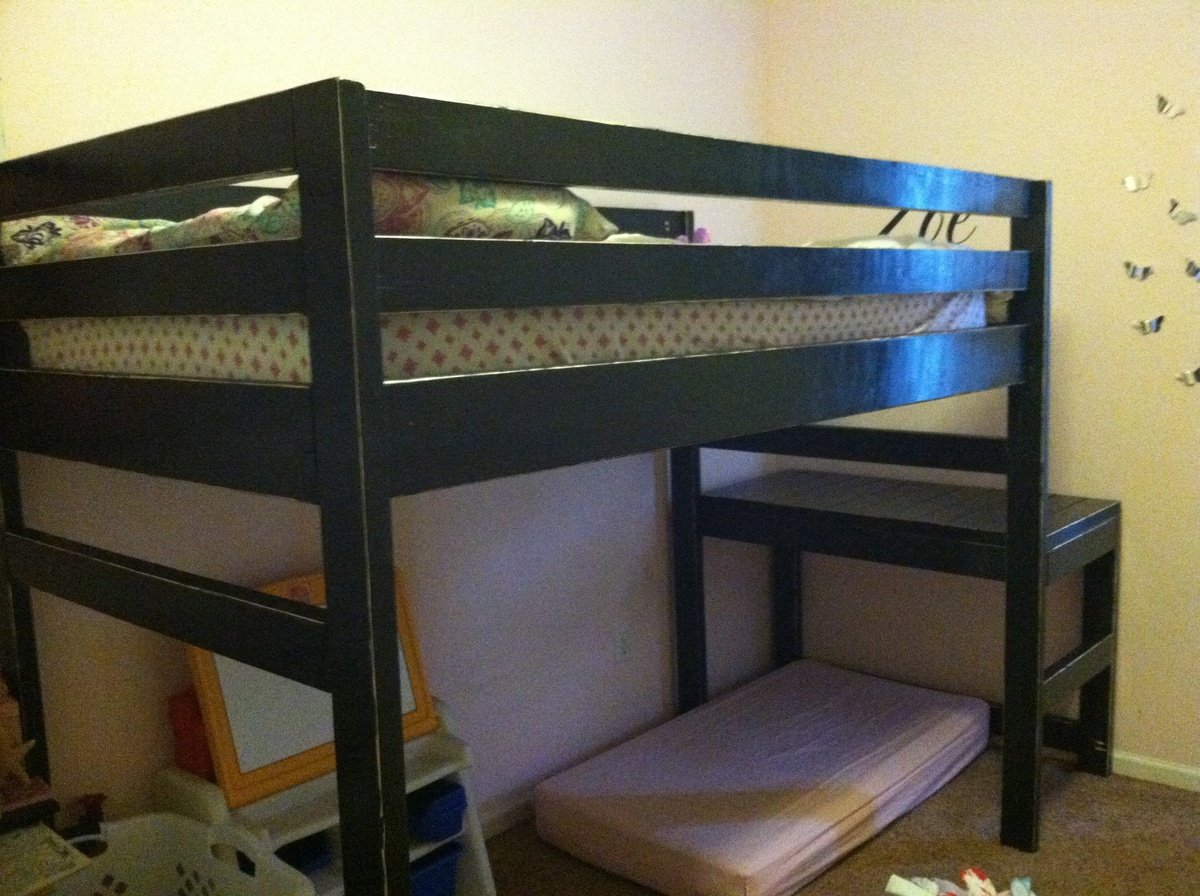
Junior loft bed built using junior loft plans
Built from Plan(s)
Estimated Cost
$75.00
Estimated Time Investment
Weekend Project (10-20 Hours)
Finish Used
Distressed black
Recommended Skill Level
Beginner
I did it!! And I love it!
My friend found this for us to do one day while our kids played outside! It was a wonderful time!!! Her husband helped us out by having the wood already to go for us. Being that we didn't think cutting wood with our kids running around would be safe. For them, or our sanity. :-) We crafted while we watched our kids play. I loved seeing how they turned out so different from each other, but equally fantastic! Thank you for sharing these plans!
Estimated Time Investment
Afternoon Project (3-6 Hours)
Recommended Skill Level
Beginner
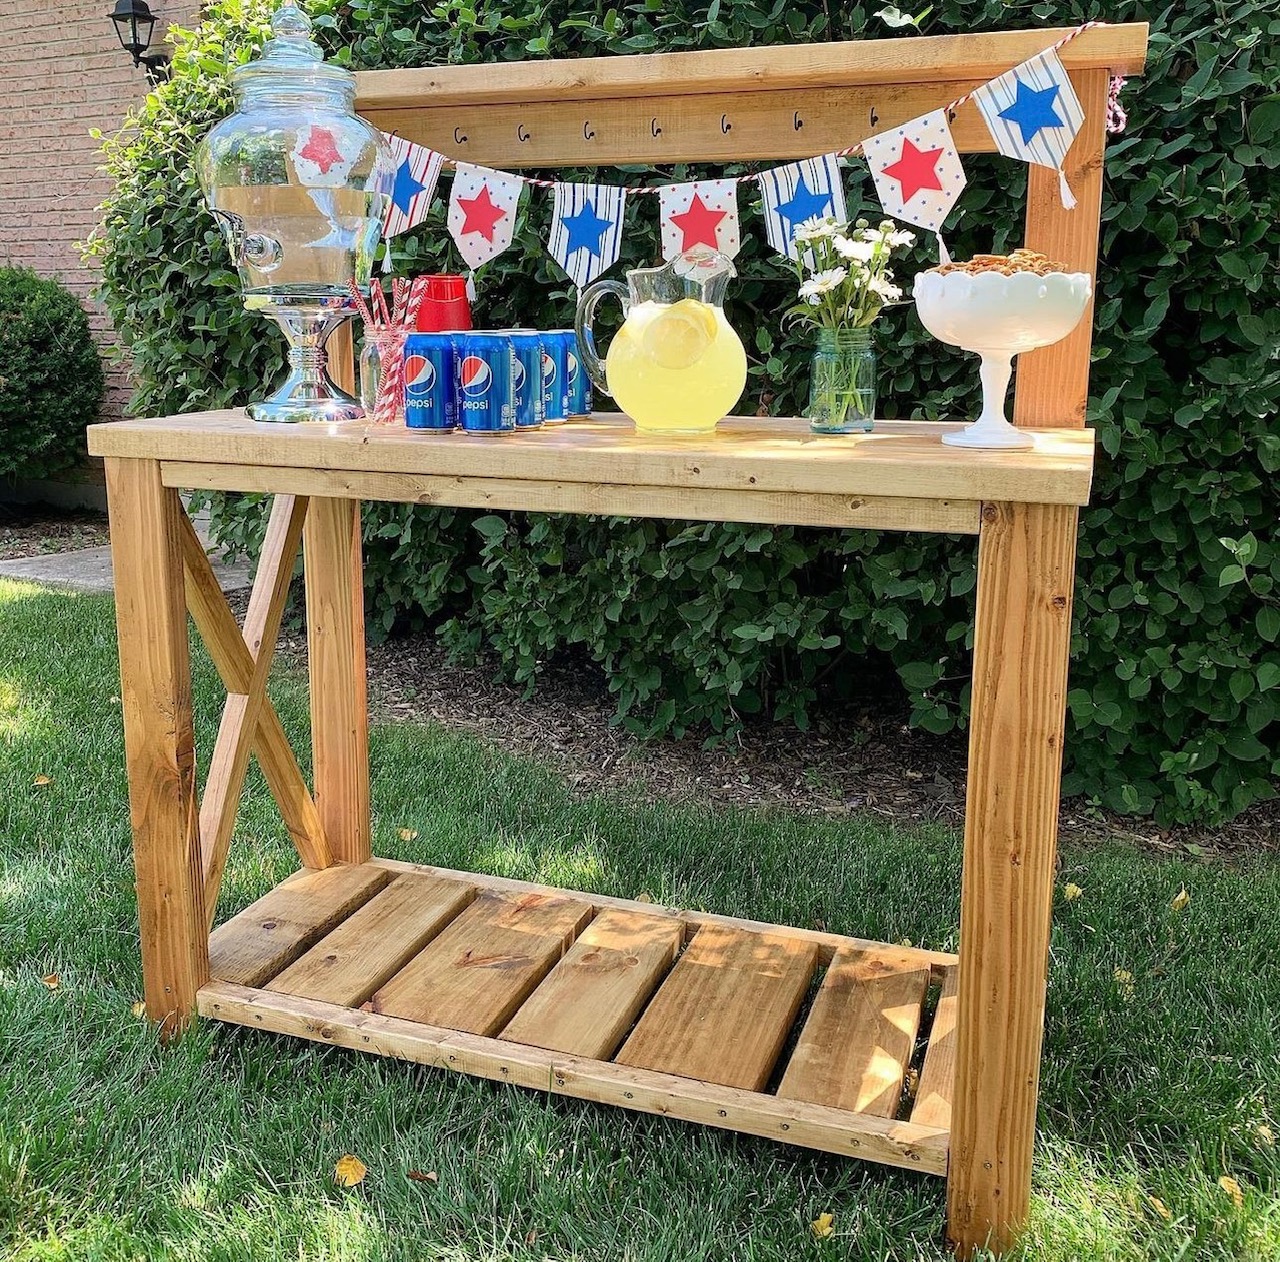
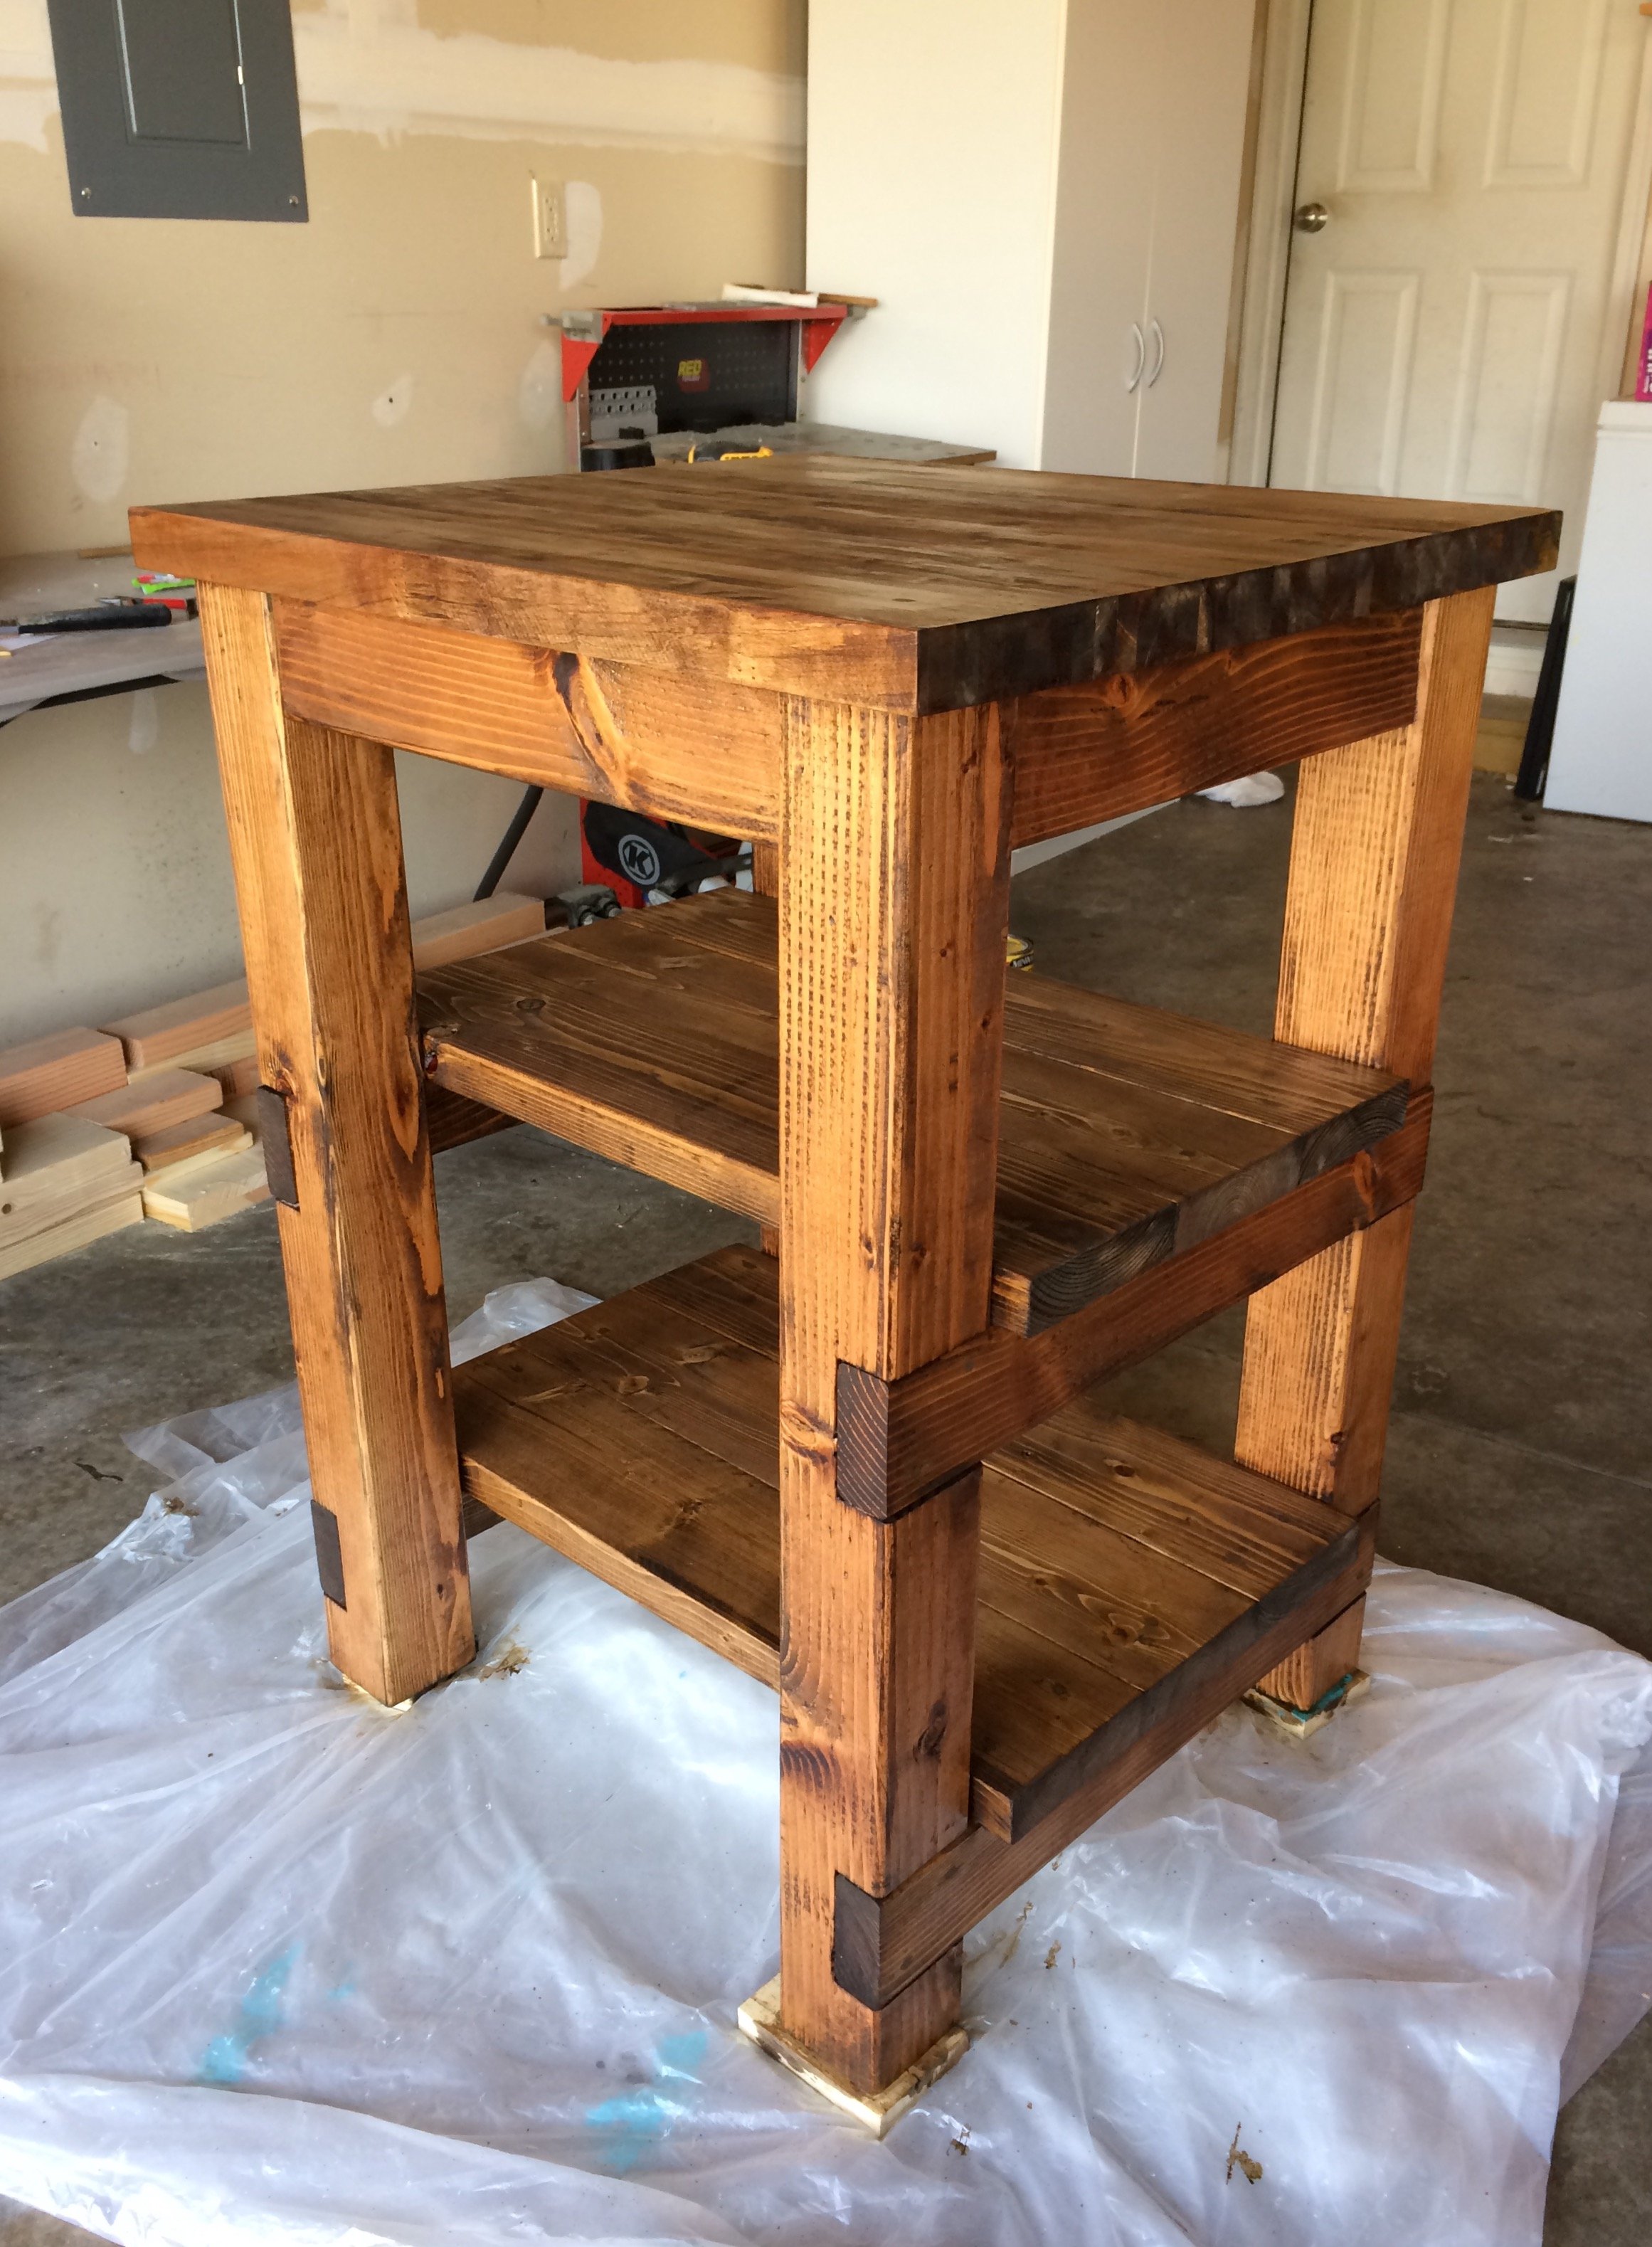
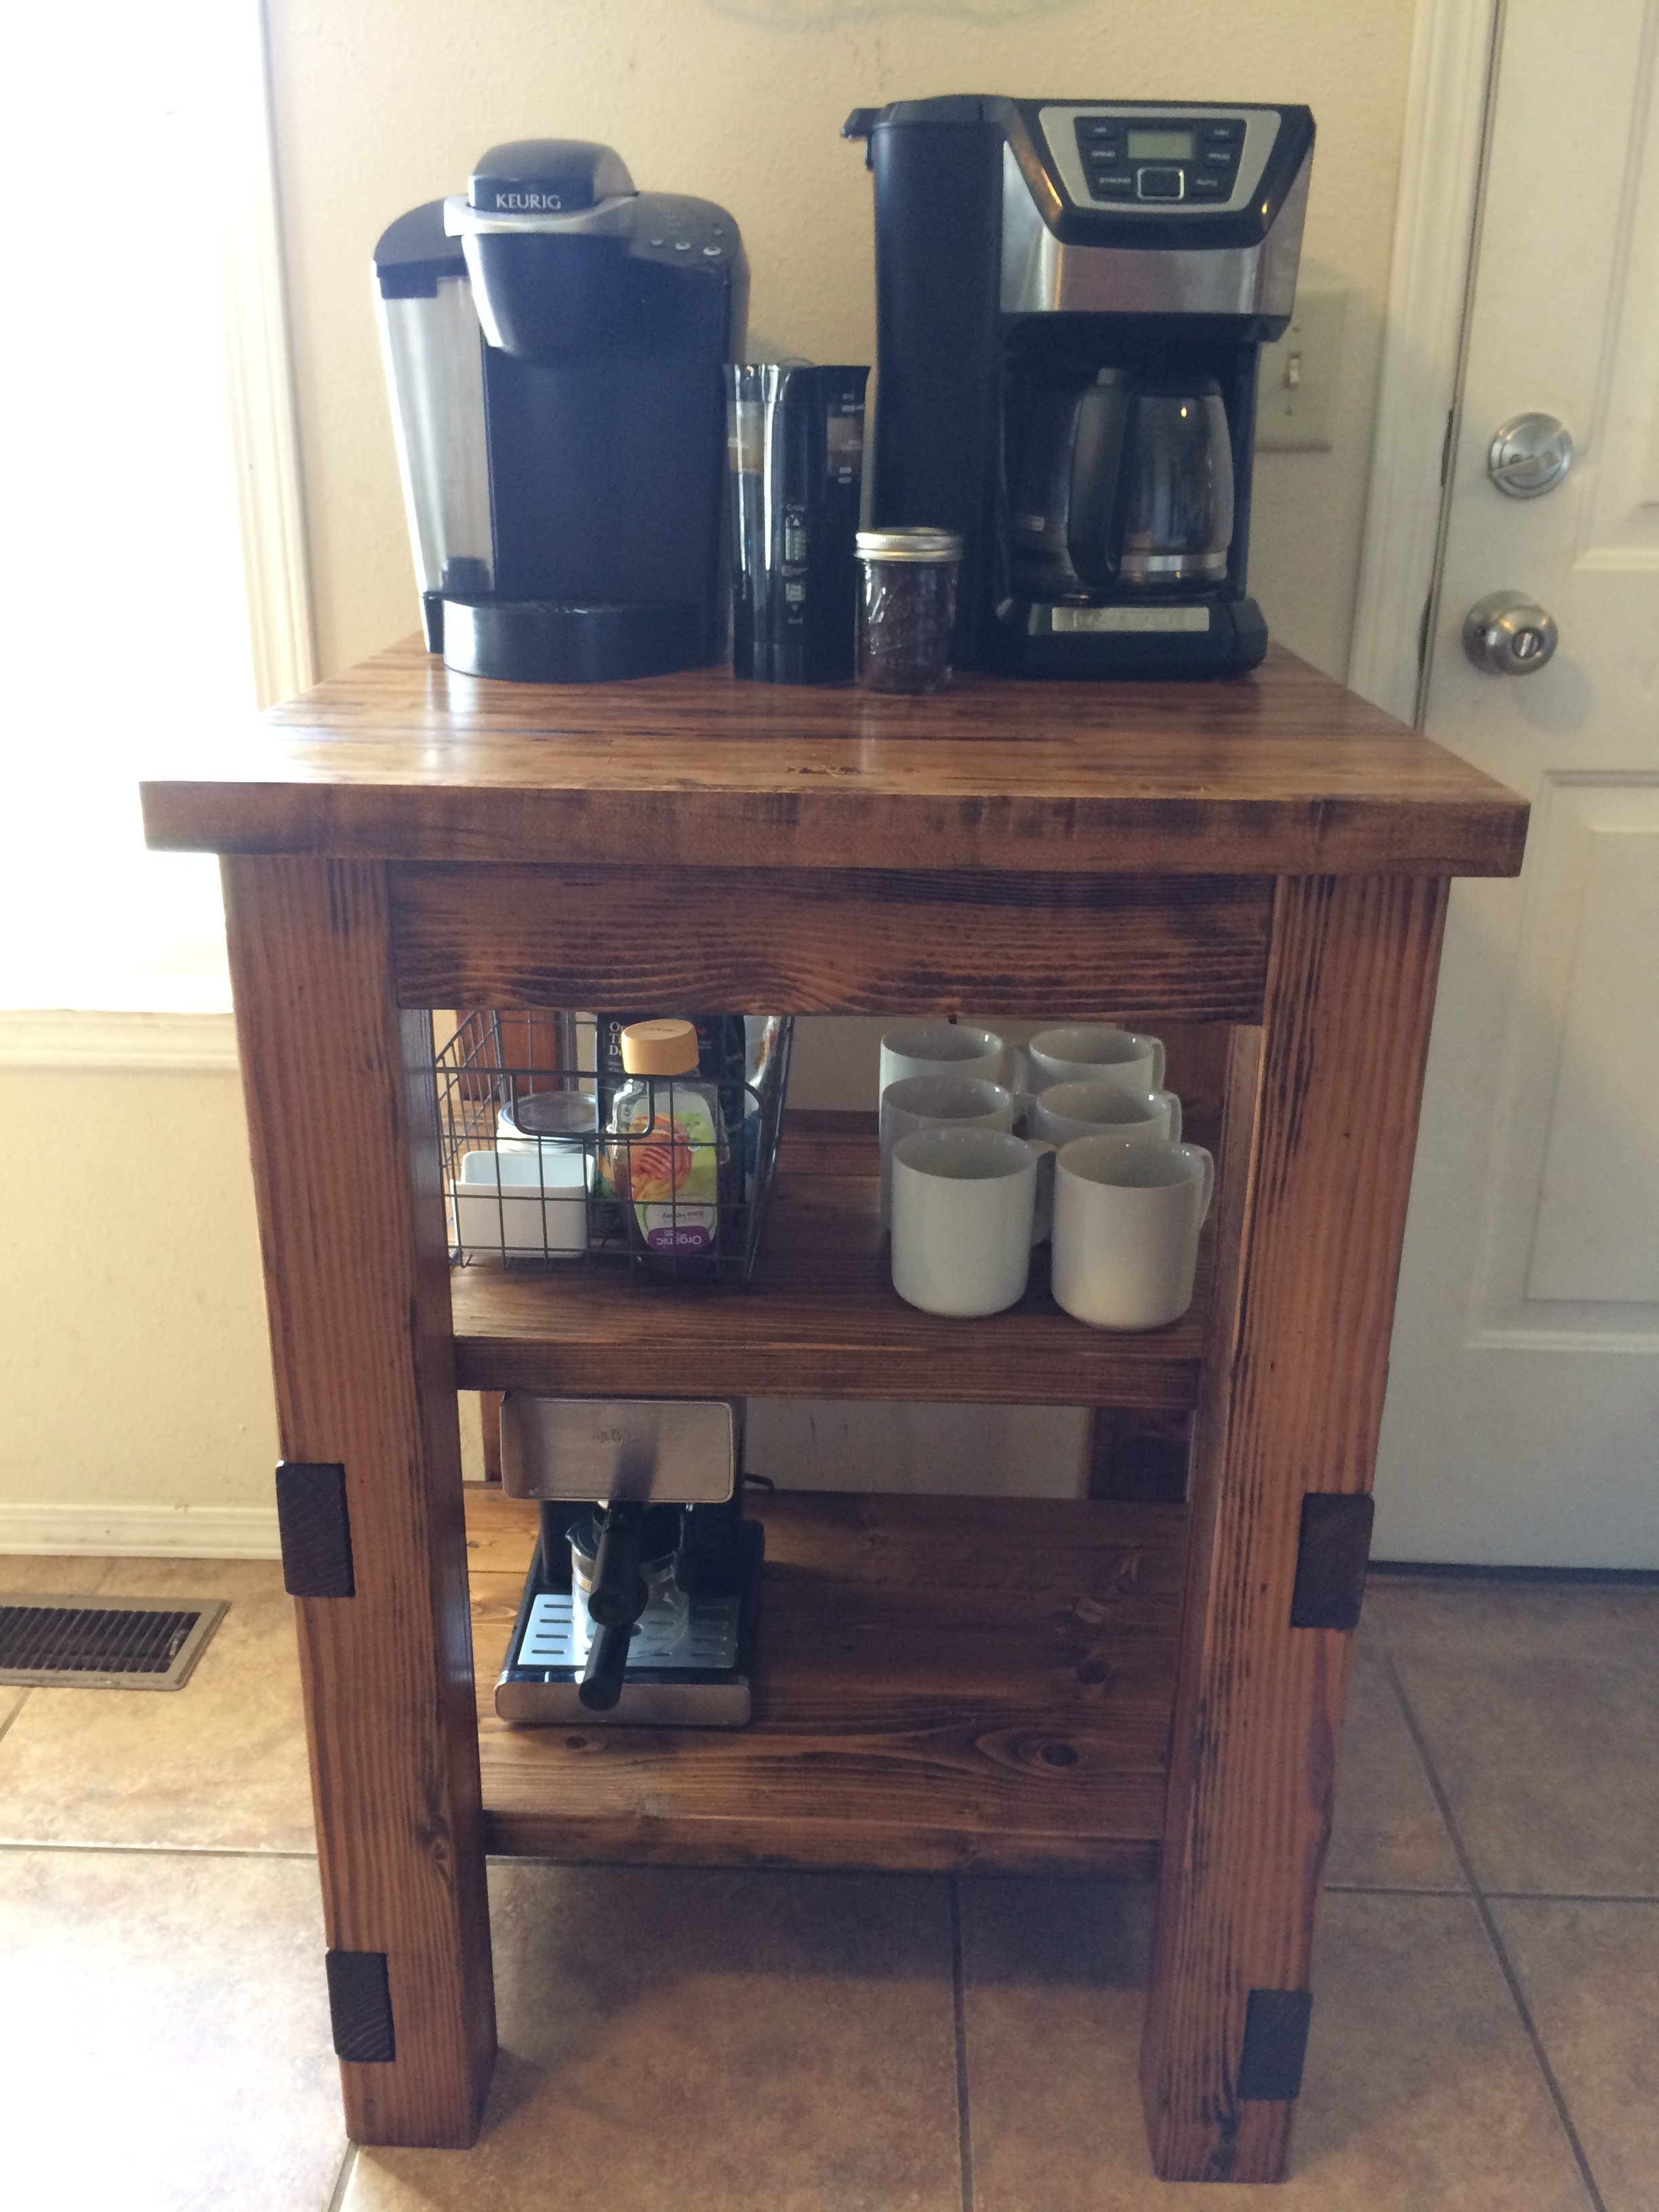
Coffee Bar
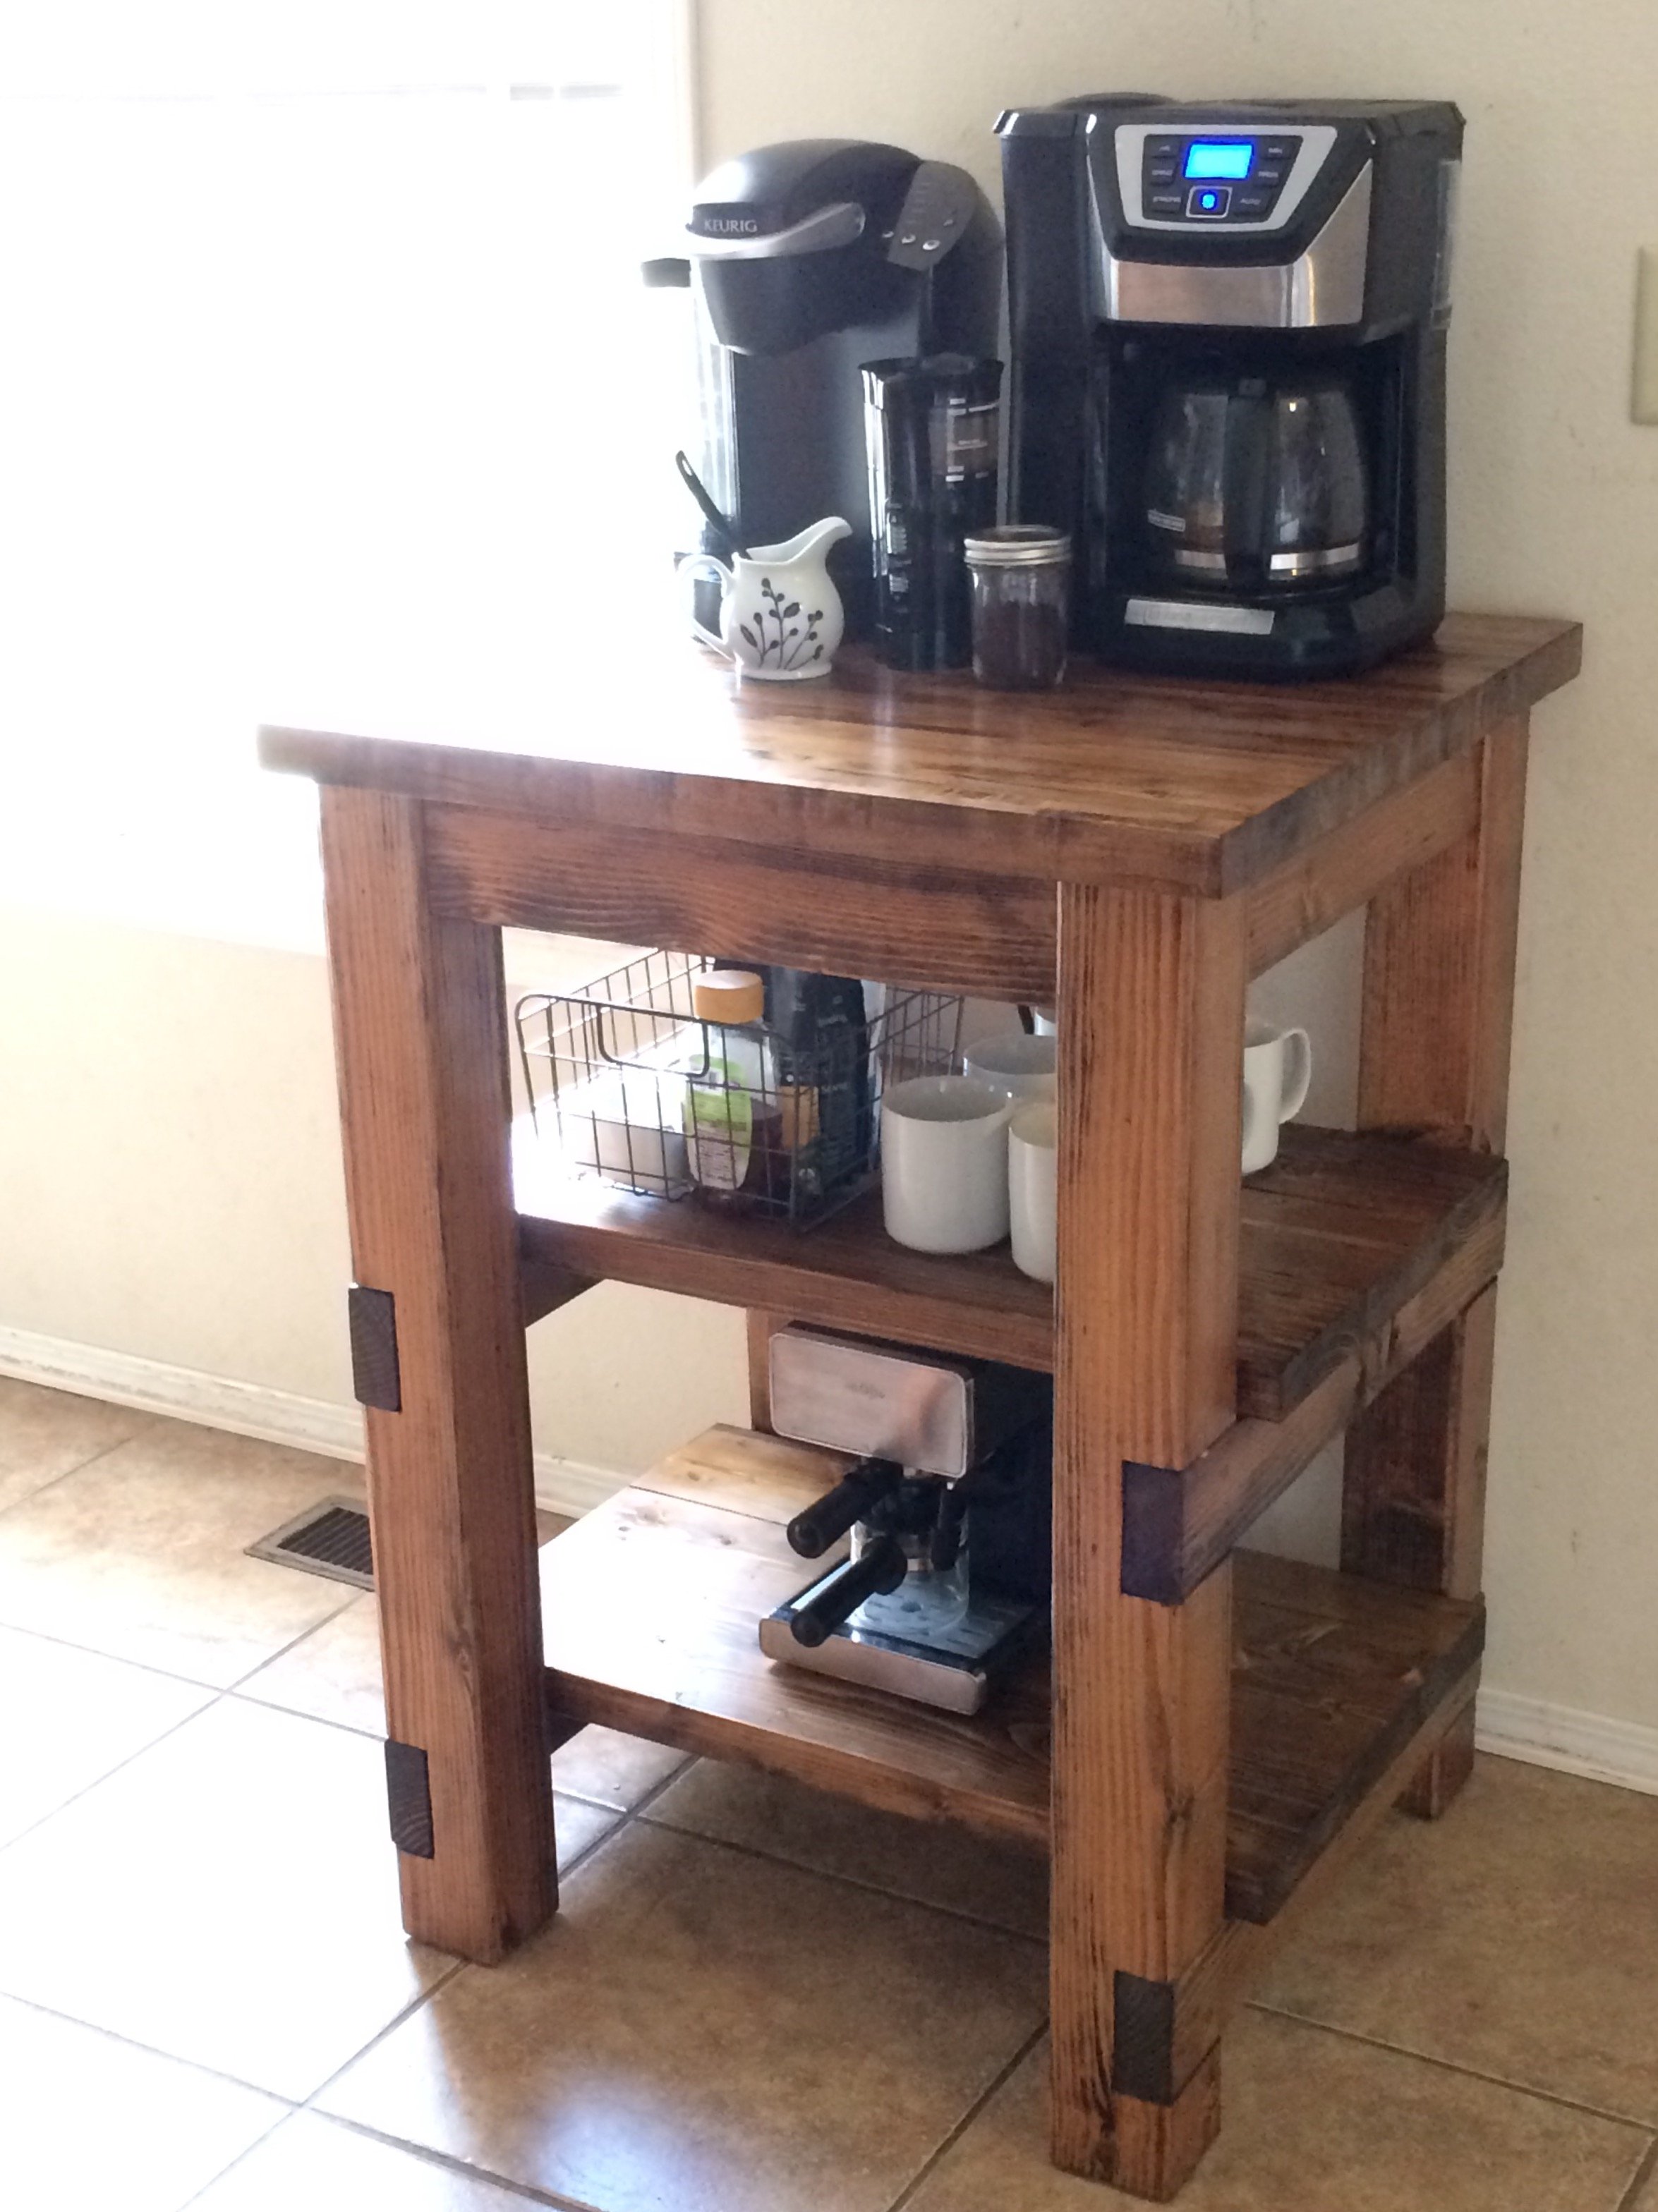
I modified this plan to fit a 27"x 25" chunk of butcher block that my mother-in-law gave me. The finished height is 36 & 1/2". I didn't have any special tools to make the notches for the shelves. I simply lowered the blade-stop on my 7&1/4" miter saw and fastened the screw with hair ties (or in other words, I jimmy-rigged it ;)). I practiced on scrap wood until I reached the depth I needed. There is a 9&1/4" clearance between both shelves, and the shelves have a 1" overhang off the sides. I mainly used pocket holes to connect the pieces. The shelves (3-2x6s each) were fastened together with wood glue and pocket holes, then I slid them into place and screwed them into the side aprons/supports from the top, then filled with wood filler. For the top, I added support from underneathe (2x2s that I had on-hand), then used 2&1/2" screws from underneathe through the 2x2s into the butcher block. At first I used zinc wood screws, but learned quickly that they strip extremely easily, so I switched to sheet rock screws. Fun project!!
Built from Plan(s)
Estimated Cost
$35 in lumber, not counting the butcher block top which I got for free from my mother-in-law.
Estimated Time Investment
Weekend Project (10-20 Hours)
Finish Used
For the butcher block, I decided to stain it since it would not be coming into contact with food. I sanded the butcher block with 220 grit sandpaper with my orbital sander. For the rest of my project I first used 80 grit, then 220 grit. Then I applied pre-stain wood conditioners overall, then Minwax provencial stain (I left it on for about 3 minutes then wiped it off). Then I used two coats of polyeurethene, sanding with 400 grit between the coats.
Recommended Skill Level
Intermediate
Outdoor patio furniture
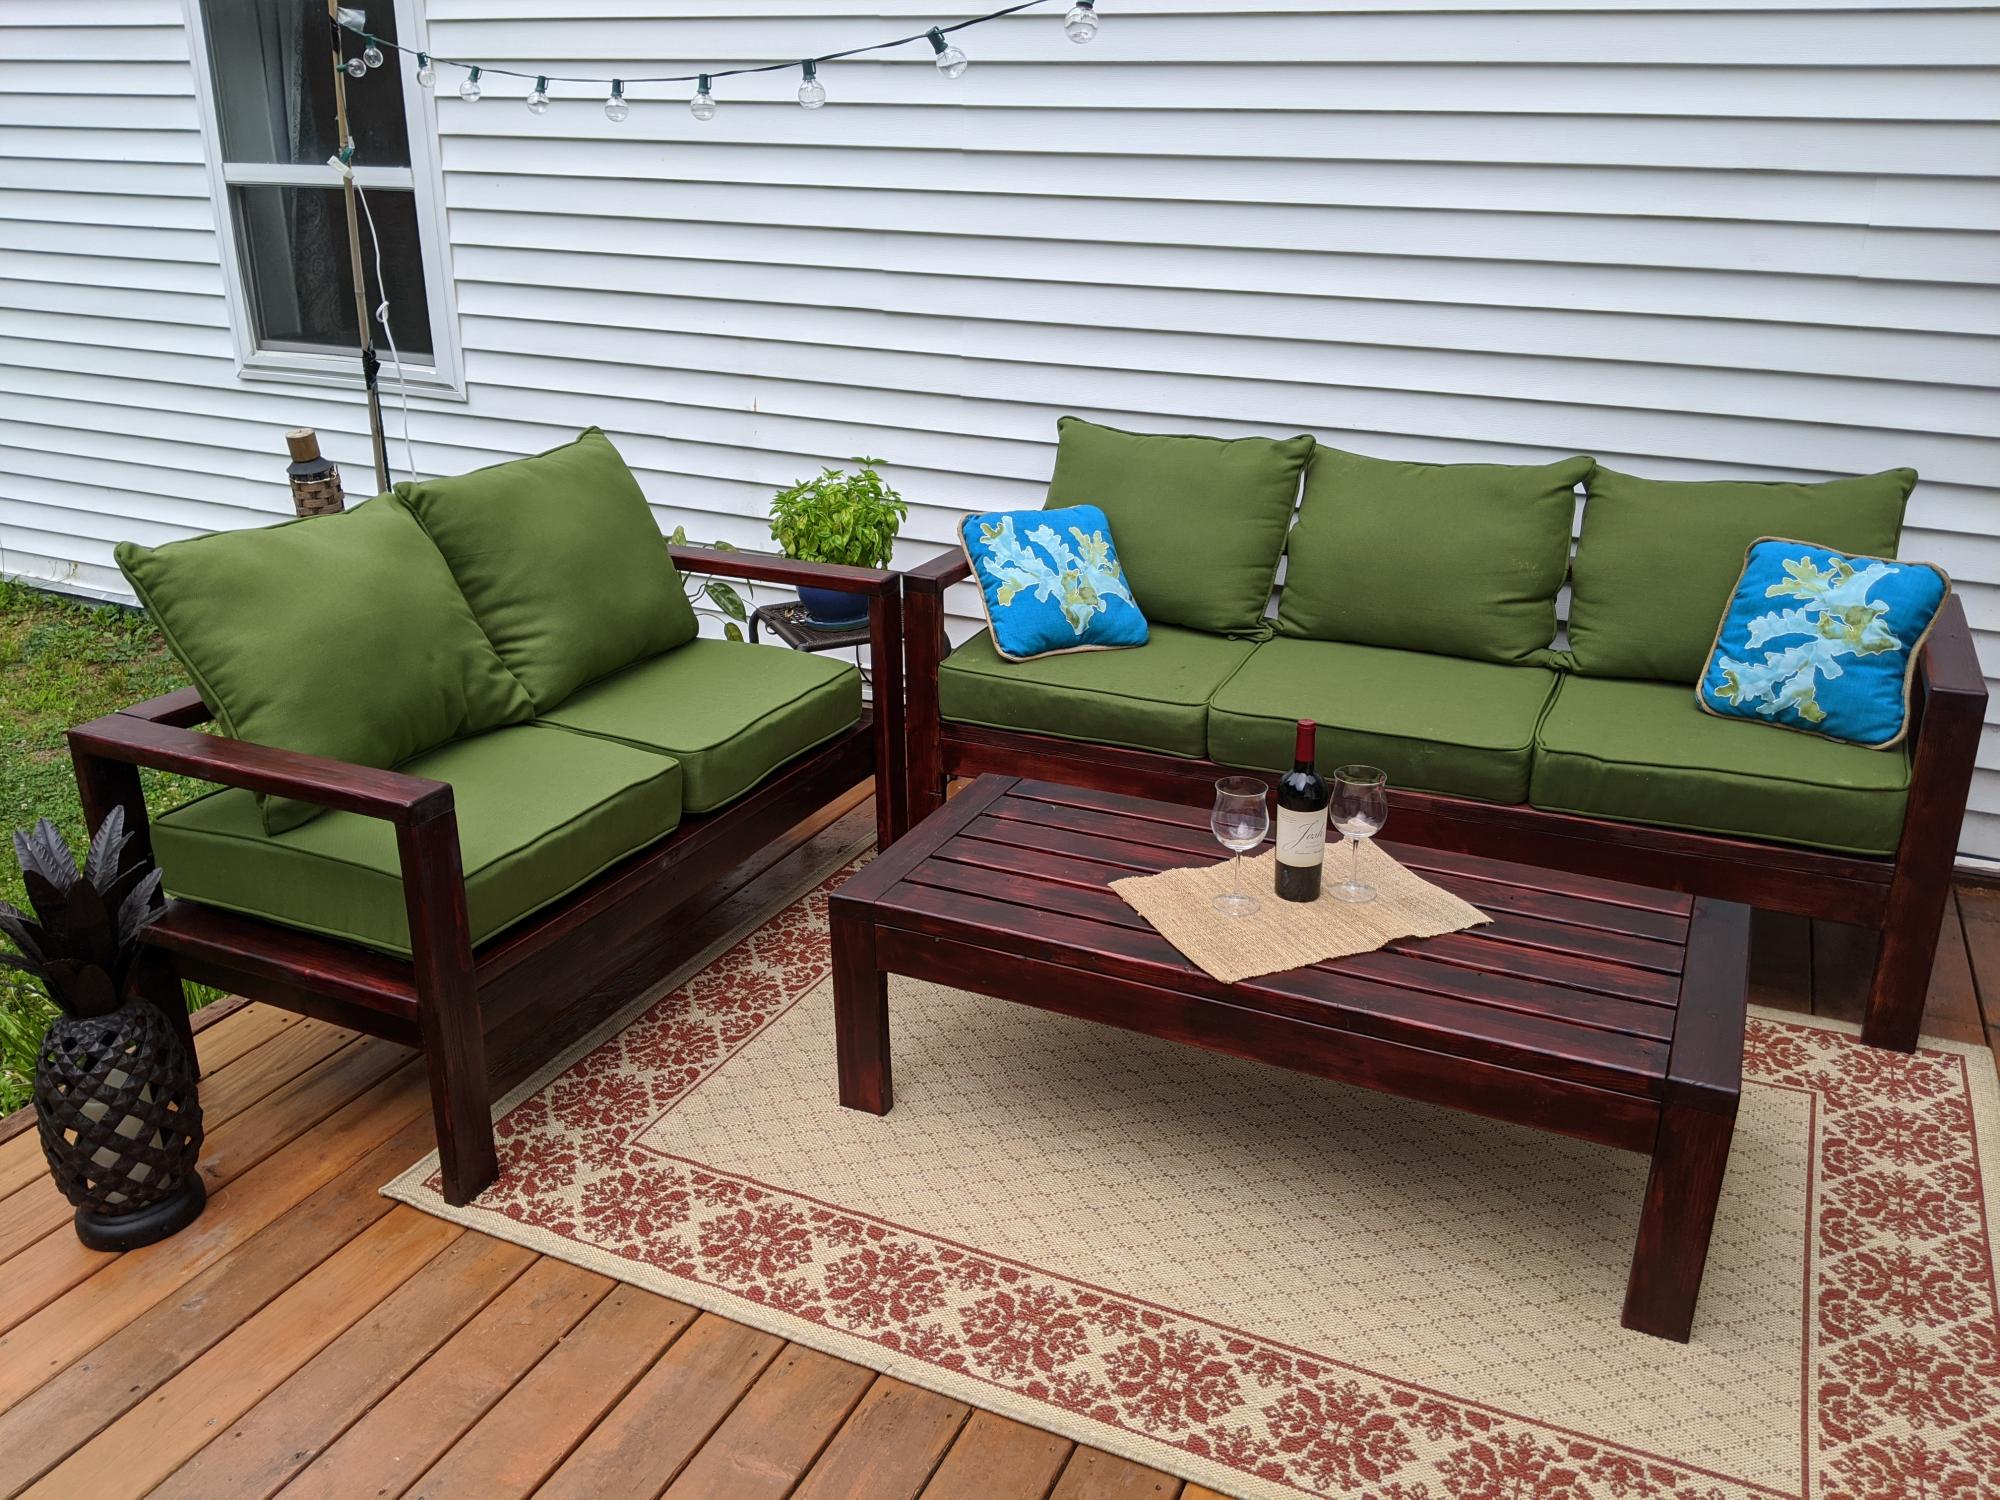
Thanks Ana, for the great plans and inspiration!
Built from Plan(s)
Estimated Cost
$450
Estimated Time Investment
Weekend Project (10-20 Hours)
Finish Used
Minwax stain & polyurethane ( Bombay Mahogany)
Recommended Skill Level
Beginner
Firepit Chairs
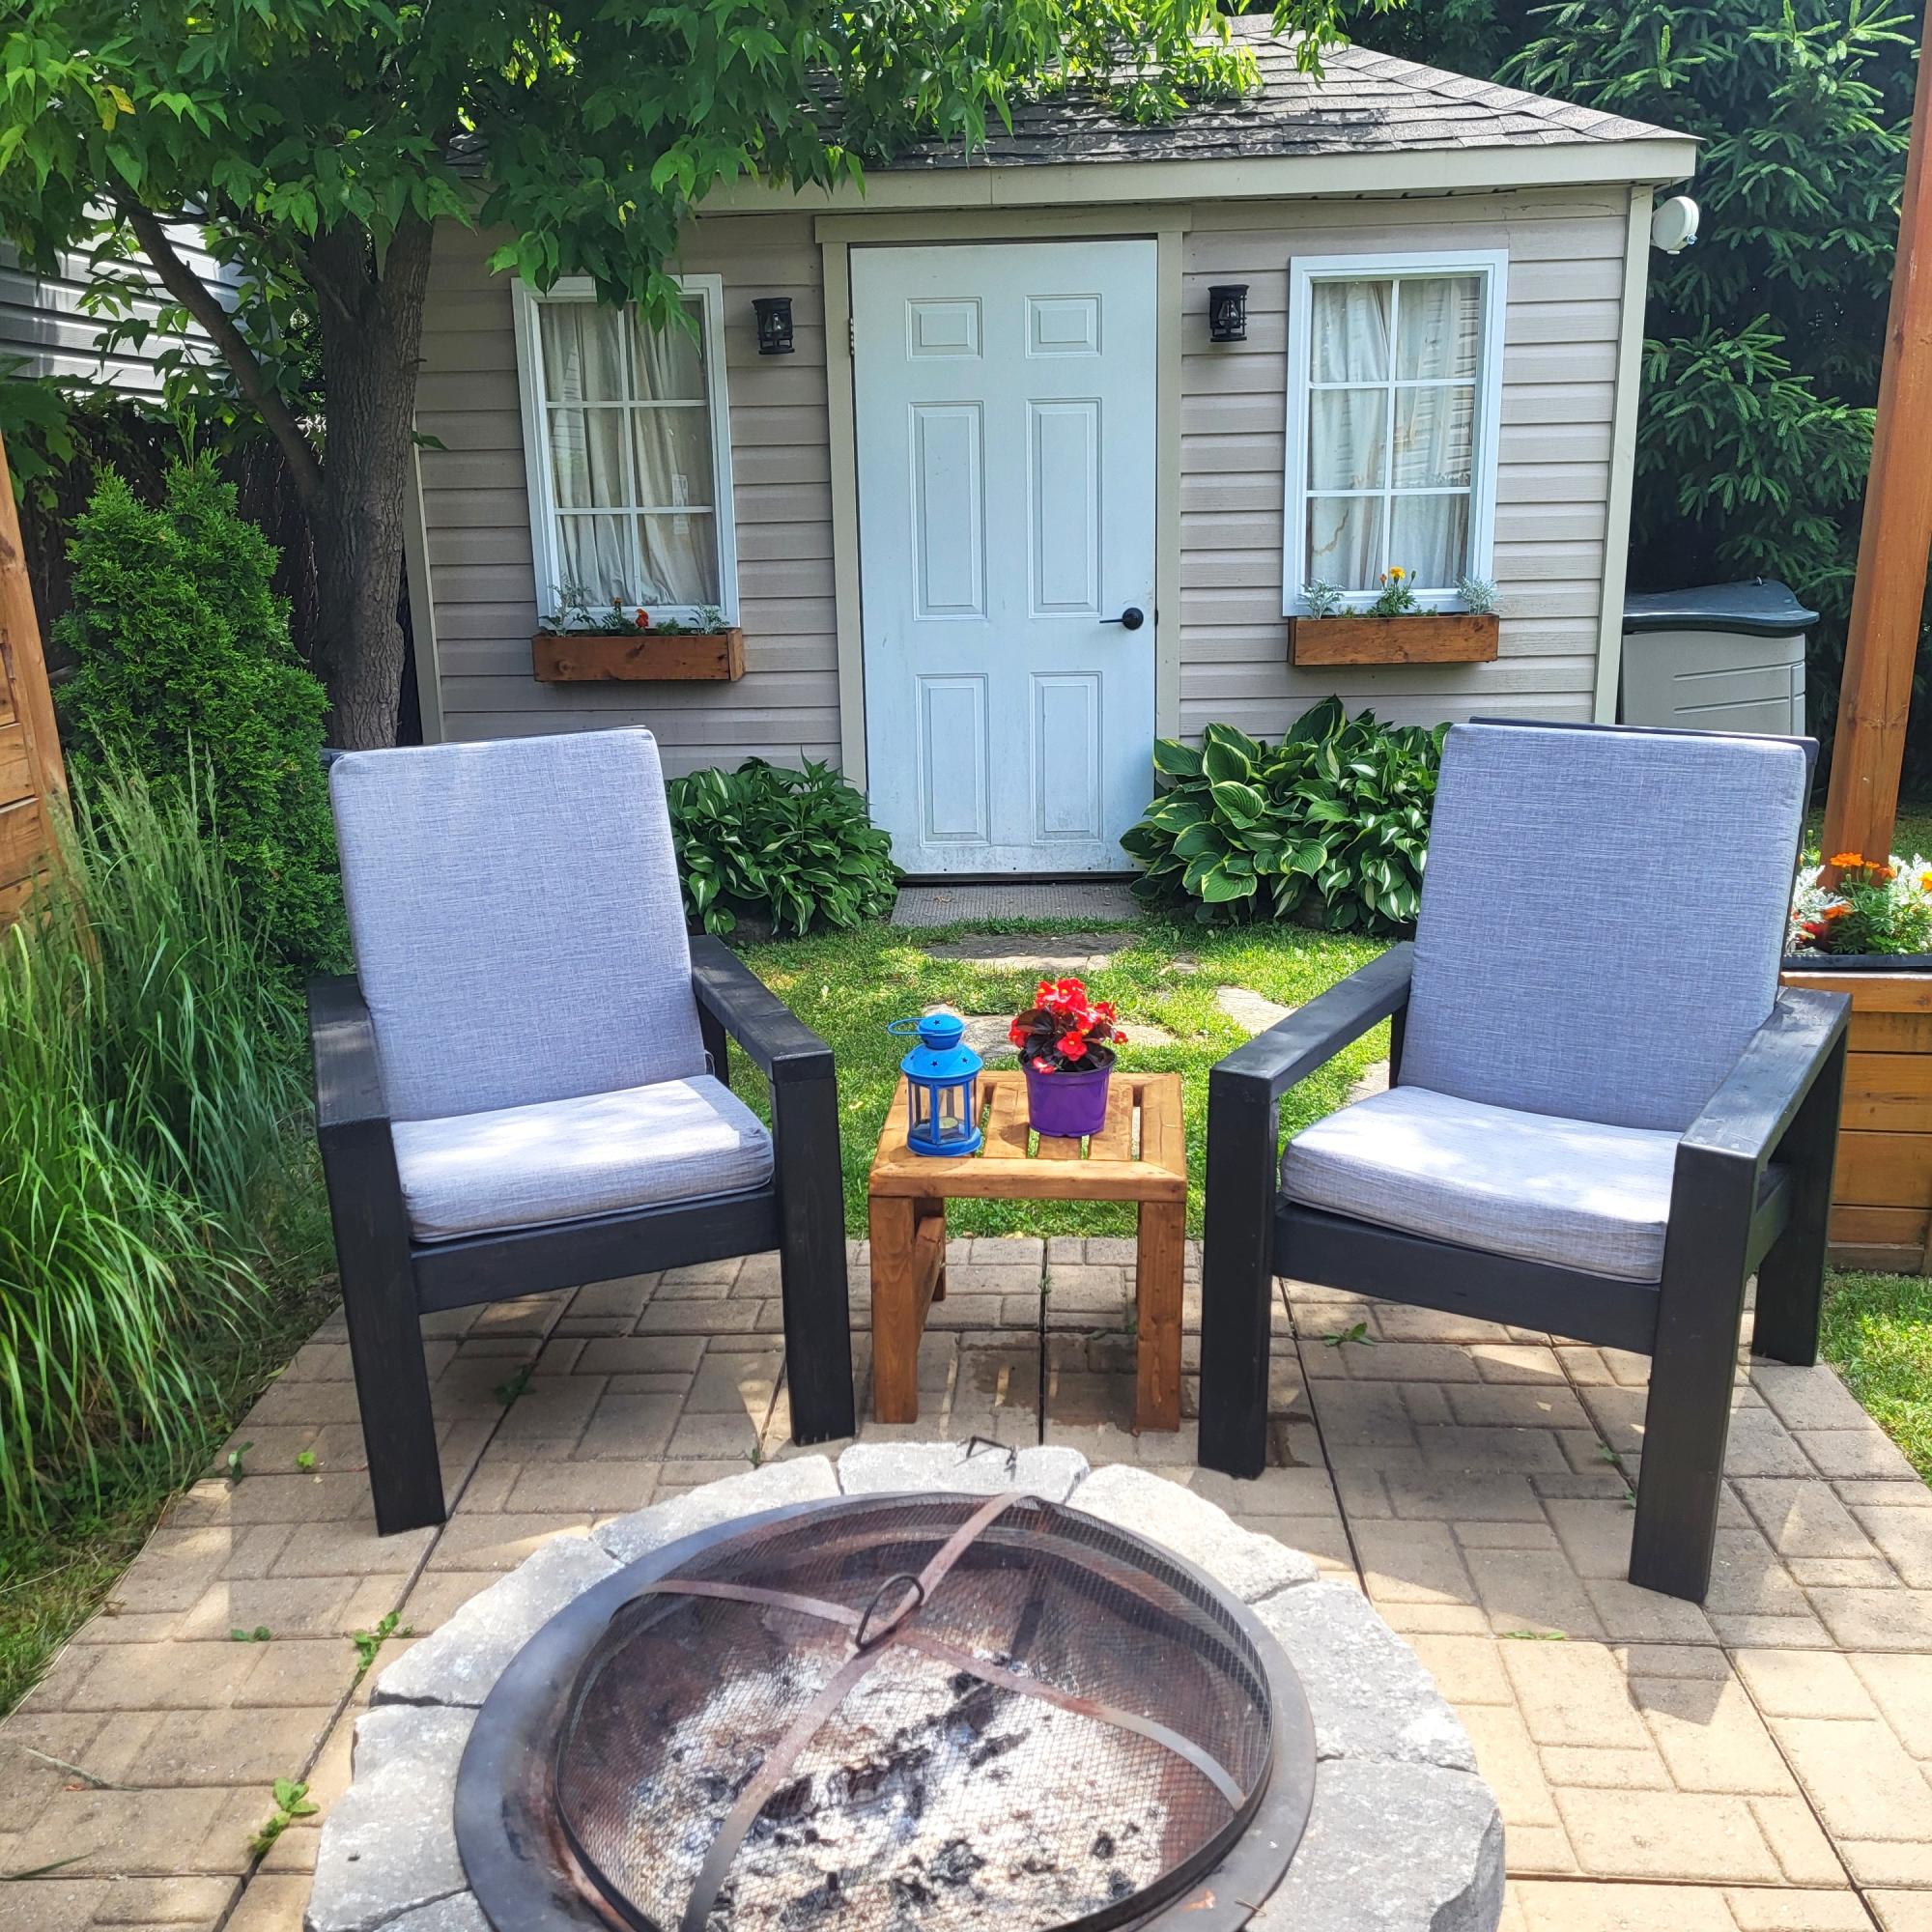
These chairs are very easy to make. I ordered the cushions online and made the chair from those dimensions so they would fit perfectly. Going to make 2 more soon. They are cheaper than the plastic ones.
Eddy
Built from Plan(s)
Two Drawer/Shelf Modern Nightstand
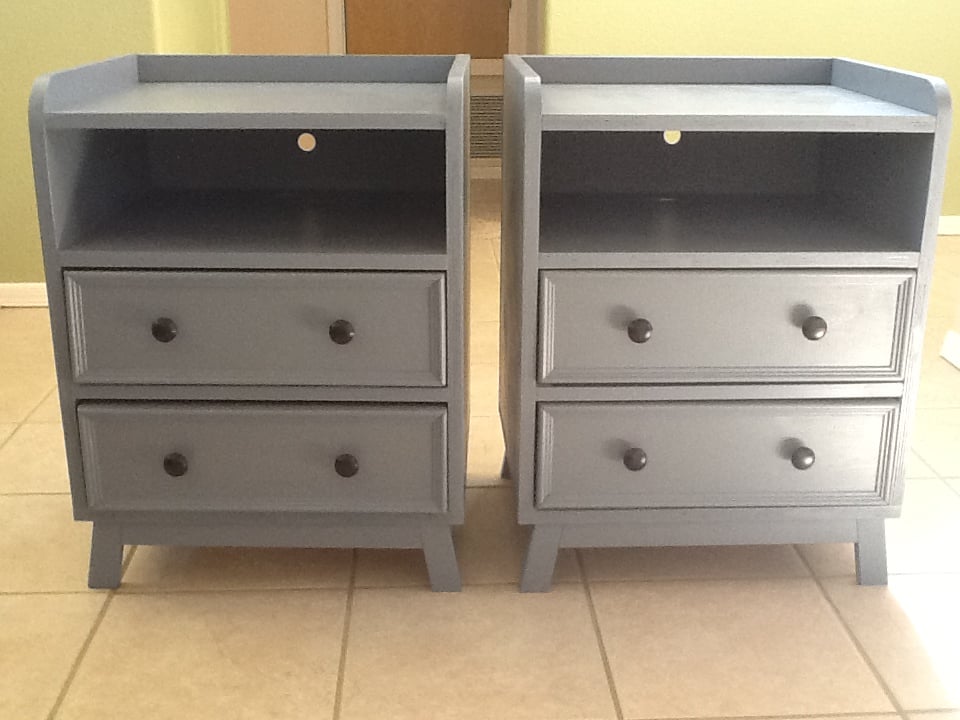
I built these nightstands to replace the mismatched ones in my bedroom. I'm going to use the lower shelf to charge my phone, iPad, and things like that. It'll be nice to have them out of the way.
This was a very easy build, but it took me a while to make, simply because I made a pair and there was a lot of cutting to do. I had never done drawers before, and they were a little tricky at first, but by the time I got to the last one, it went on super fast! Ana's plans are very clear, and easy to follow! Thanks Ana!
Built from Plan(s)
Estimated Time Investment
Weekend Project (10-20 Hours)
Finish Used
I used two coats of Valspar Paint + Primer in Mercer Blue
Recommended Skill Level
Beginner
Comments

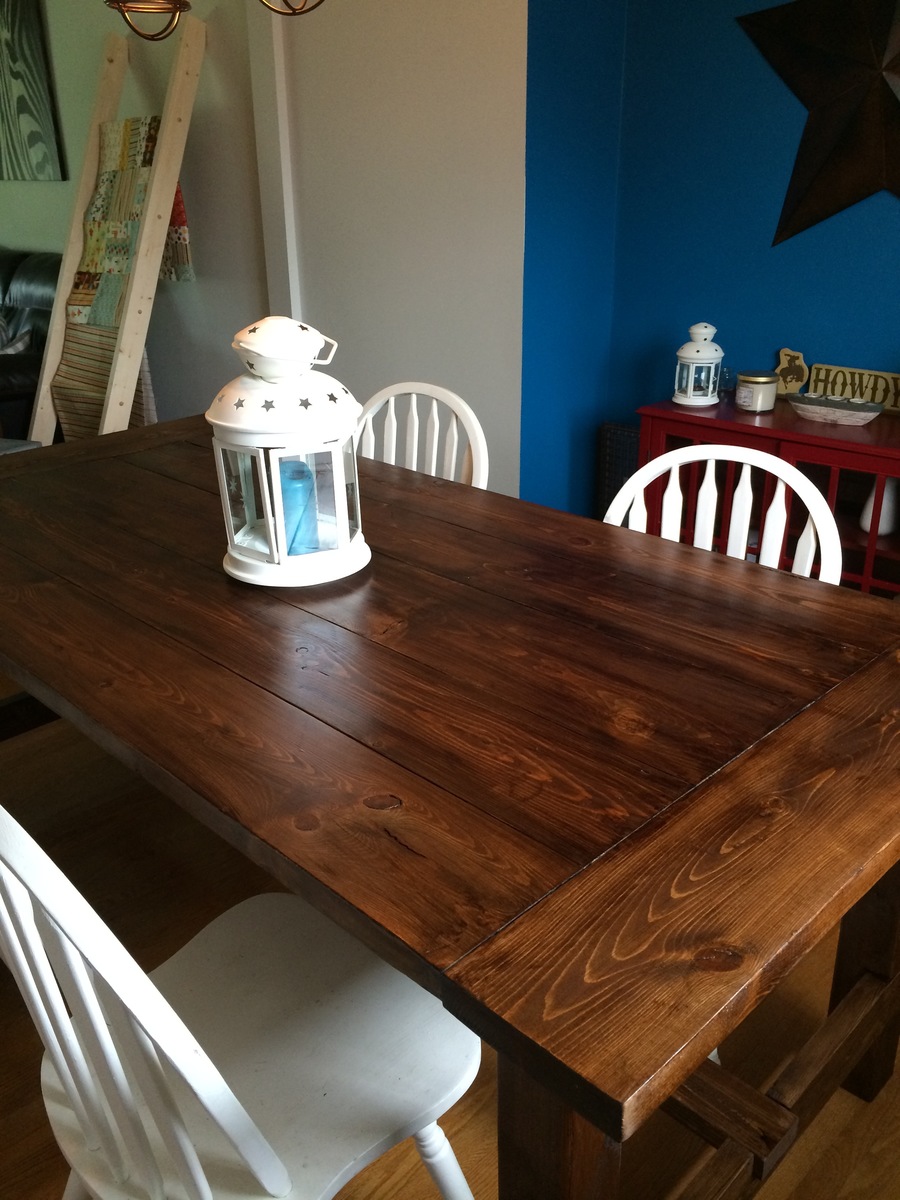
Our first DIY a beautiful Farmhouse Table
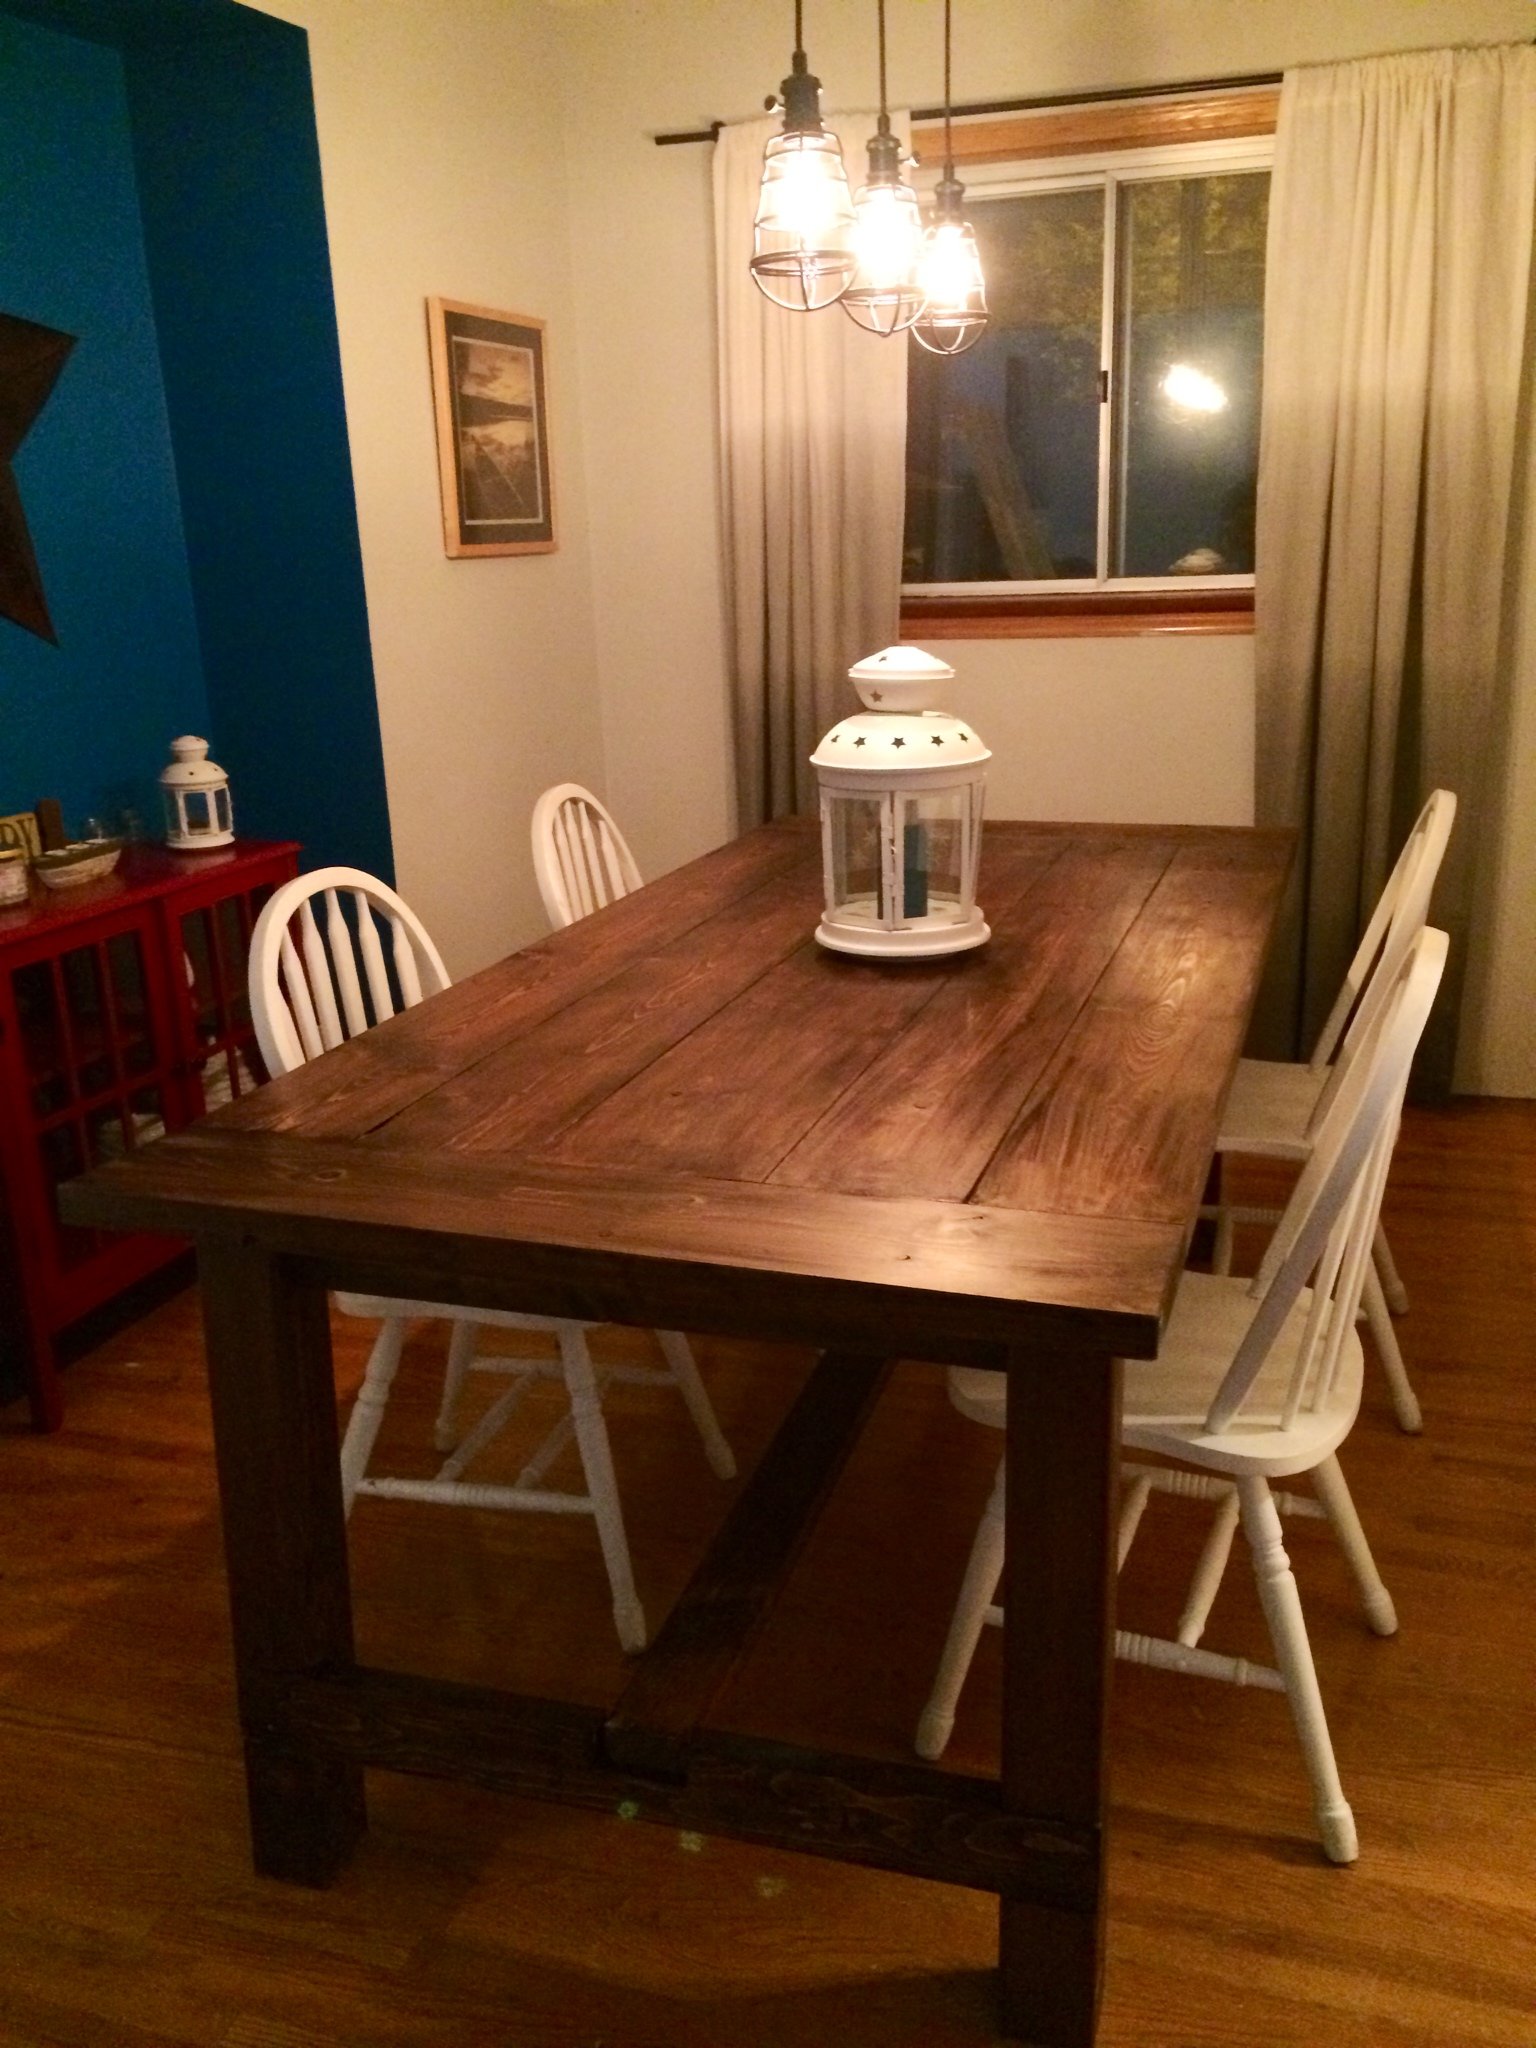
Our first DIY project and although we were a little nervous getting started I couldn''t be happier with how it turned out! It's exactly like all the tables I loved in stores and magazines and the plan made it so easy! It's hard to believe we did it ourselves. To anyone who is nervous about getting started don't be! I recommend you read the whole plan start to finish before you start and the brag posts are awesome for trouble shooting.
A few recommendations I have would be to sand down condition and put a single coat of stain on before building. I found it difficult to get stain in the cracks between the table top boards. I would also cut the notches out on the base of the table based on the size of the board not the measurements on the plan to make sure you get a snug fit. We have a few gaps which I can live with but would change if we do it again. I also learned the hard way DO NOT use wood filler. Even if it says it's stainable it's all lies! Mix together wood glue and saw dust. The wood filler did not absorb stain so we had to sand down the entire table top again and start over.
Overall the plan was easy to follow and produced a beautiful table that I can't wait to entertain with!
Built from Plan(s)
Estimated Time Investment
Weekend Project (10-20 Hours)
Finish Used
Combination stain of Minwax American Walnut and Minwax Special Oak no finish yet.
Recommended Skill Level
Beginner
Comments

Mon, 07/28/2014 - 06:38
great job!
Beautiful table, I love the way your finish mixture came out and want to try that on my next project! Thanks for sharing the details!
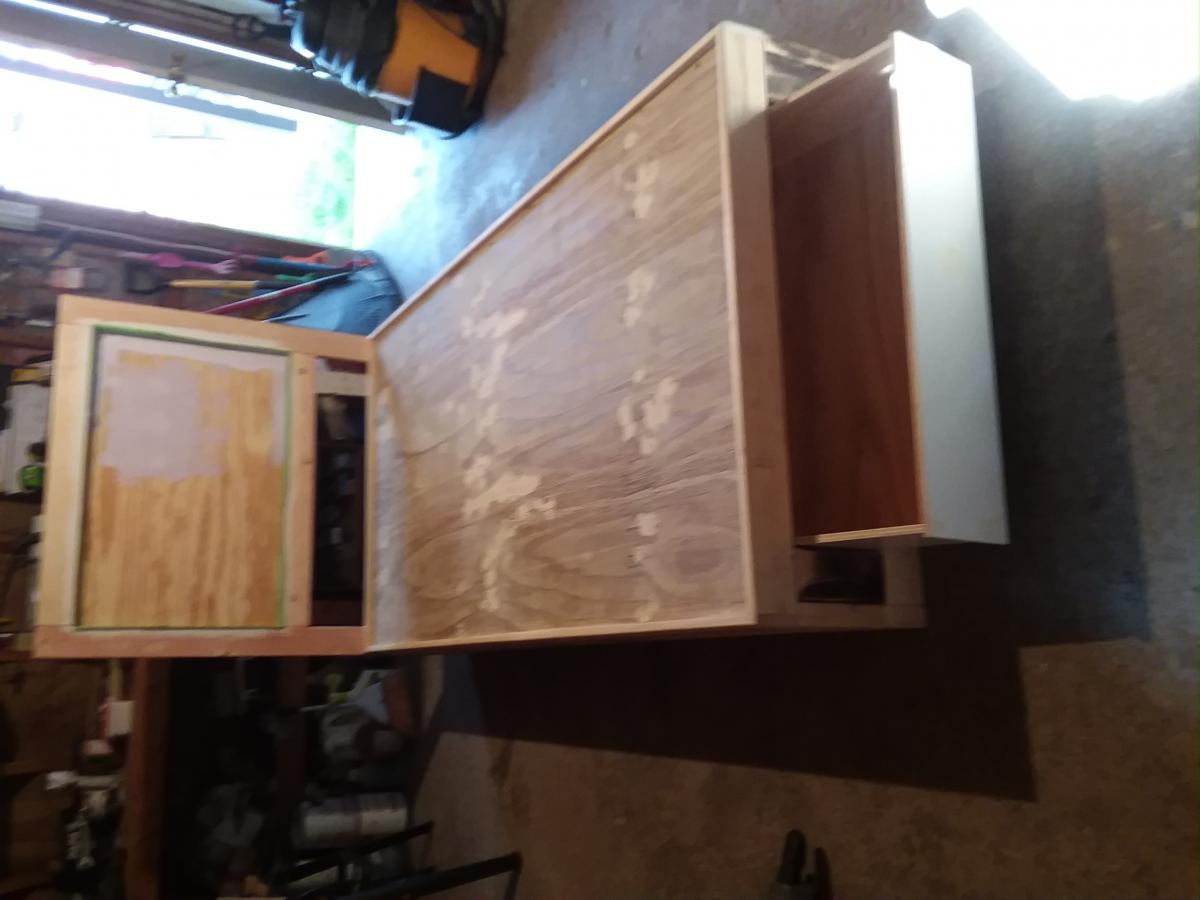
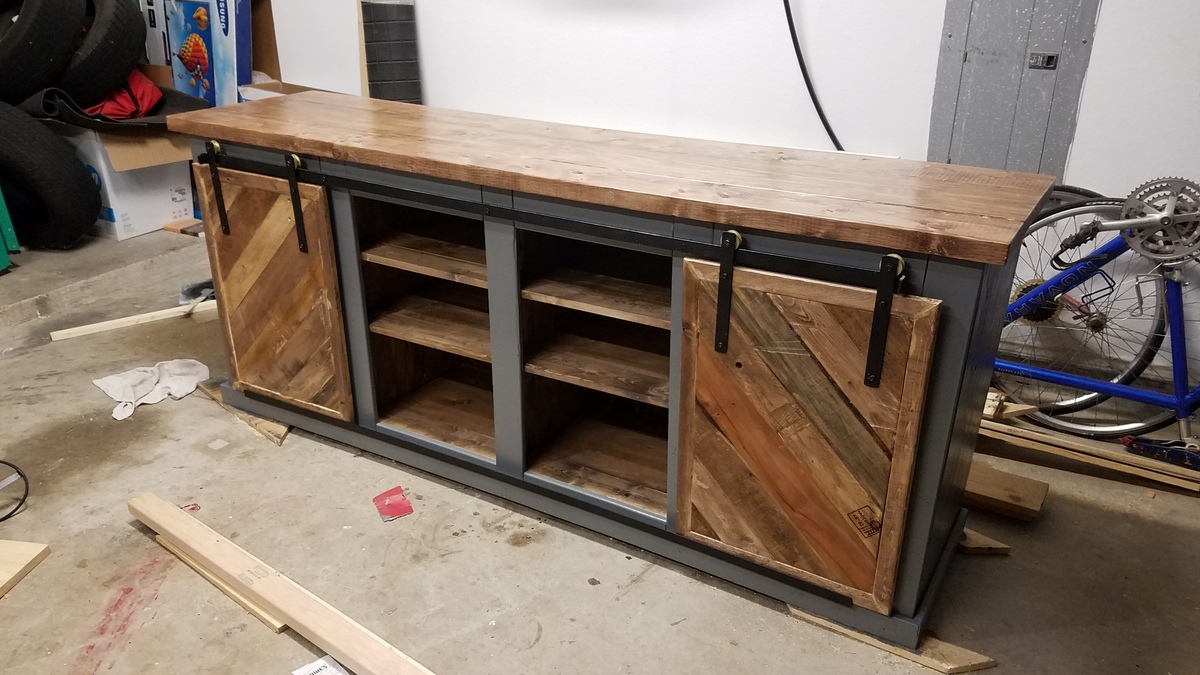
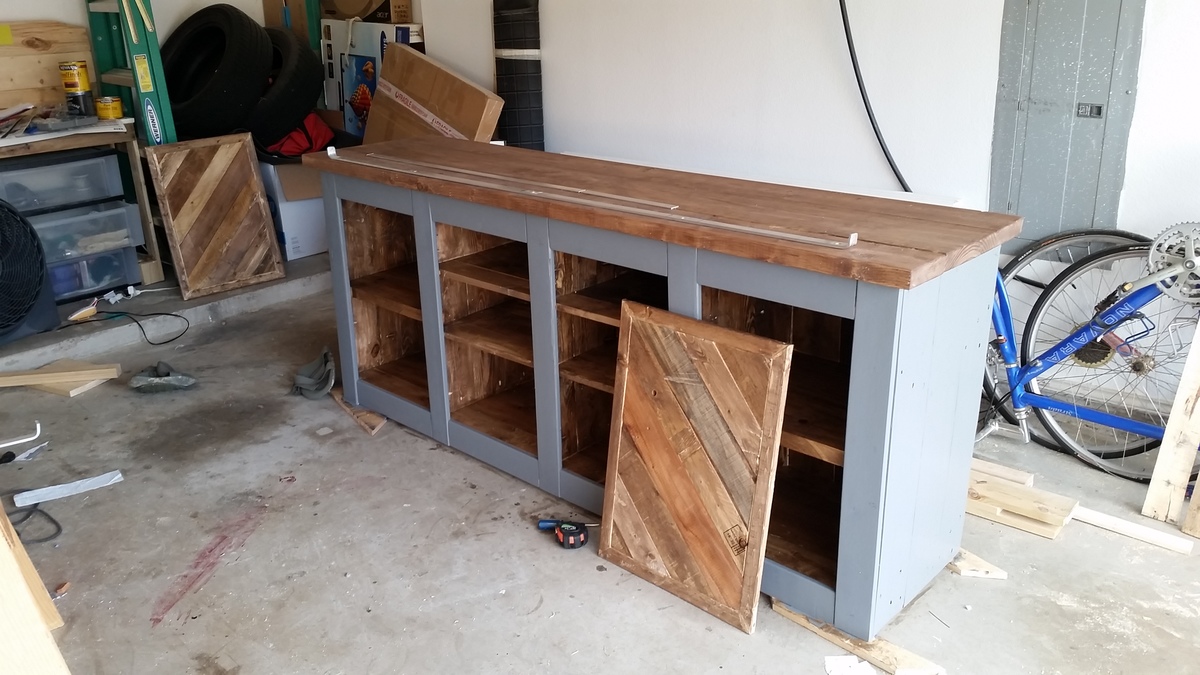
Sliding Door Console
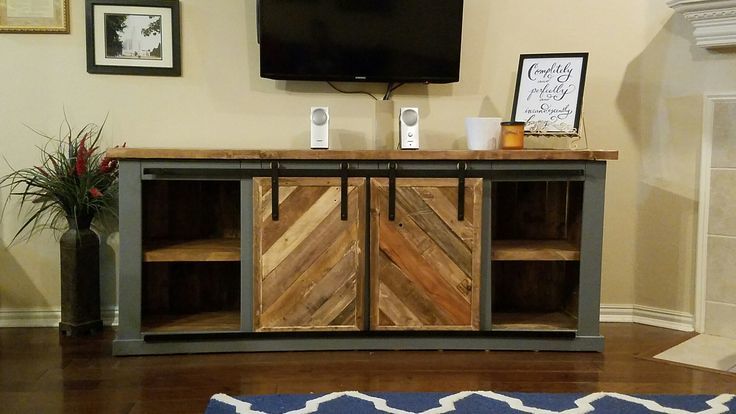
My wife and I had a great time building this sliding door console. Most of the vertical pieces (doors included) were build with pallet wood. Horizontal pieces and frame were build from wood from local hardware stores. Sliding hardware was constructed with aluminum and pulley wheels. Unlike Ana White's original plans, we decided to isolate each cabinet section of the console. The far left and right areas are separated into two, whereas the middle sections are split into three. Using a Kreg Jig was exceptionall helpful. Please visit https://www.pinterest.com/pin/263319909442699999 if you have any questions.
Estimated Cost
$250
Estimated Time Investment
Weekend Project (10-20 Hours)
Recommended Skill Level
Beginner
Rustic X coffee table

Made another video of Ana Whit's X table!
Built from Plan(s)
Estimated Cost
$50
Estimated Time Investment
Afternoon Project (3-6 Hours)
Finish Used
oak stain and poly
Recommended Skill Level
Intermediate