Community Brag Posts

Patio Table

Submitted by marcosdos on Mon, 02/20/2017 - 14:33

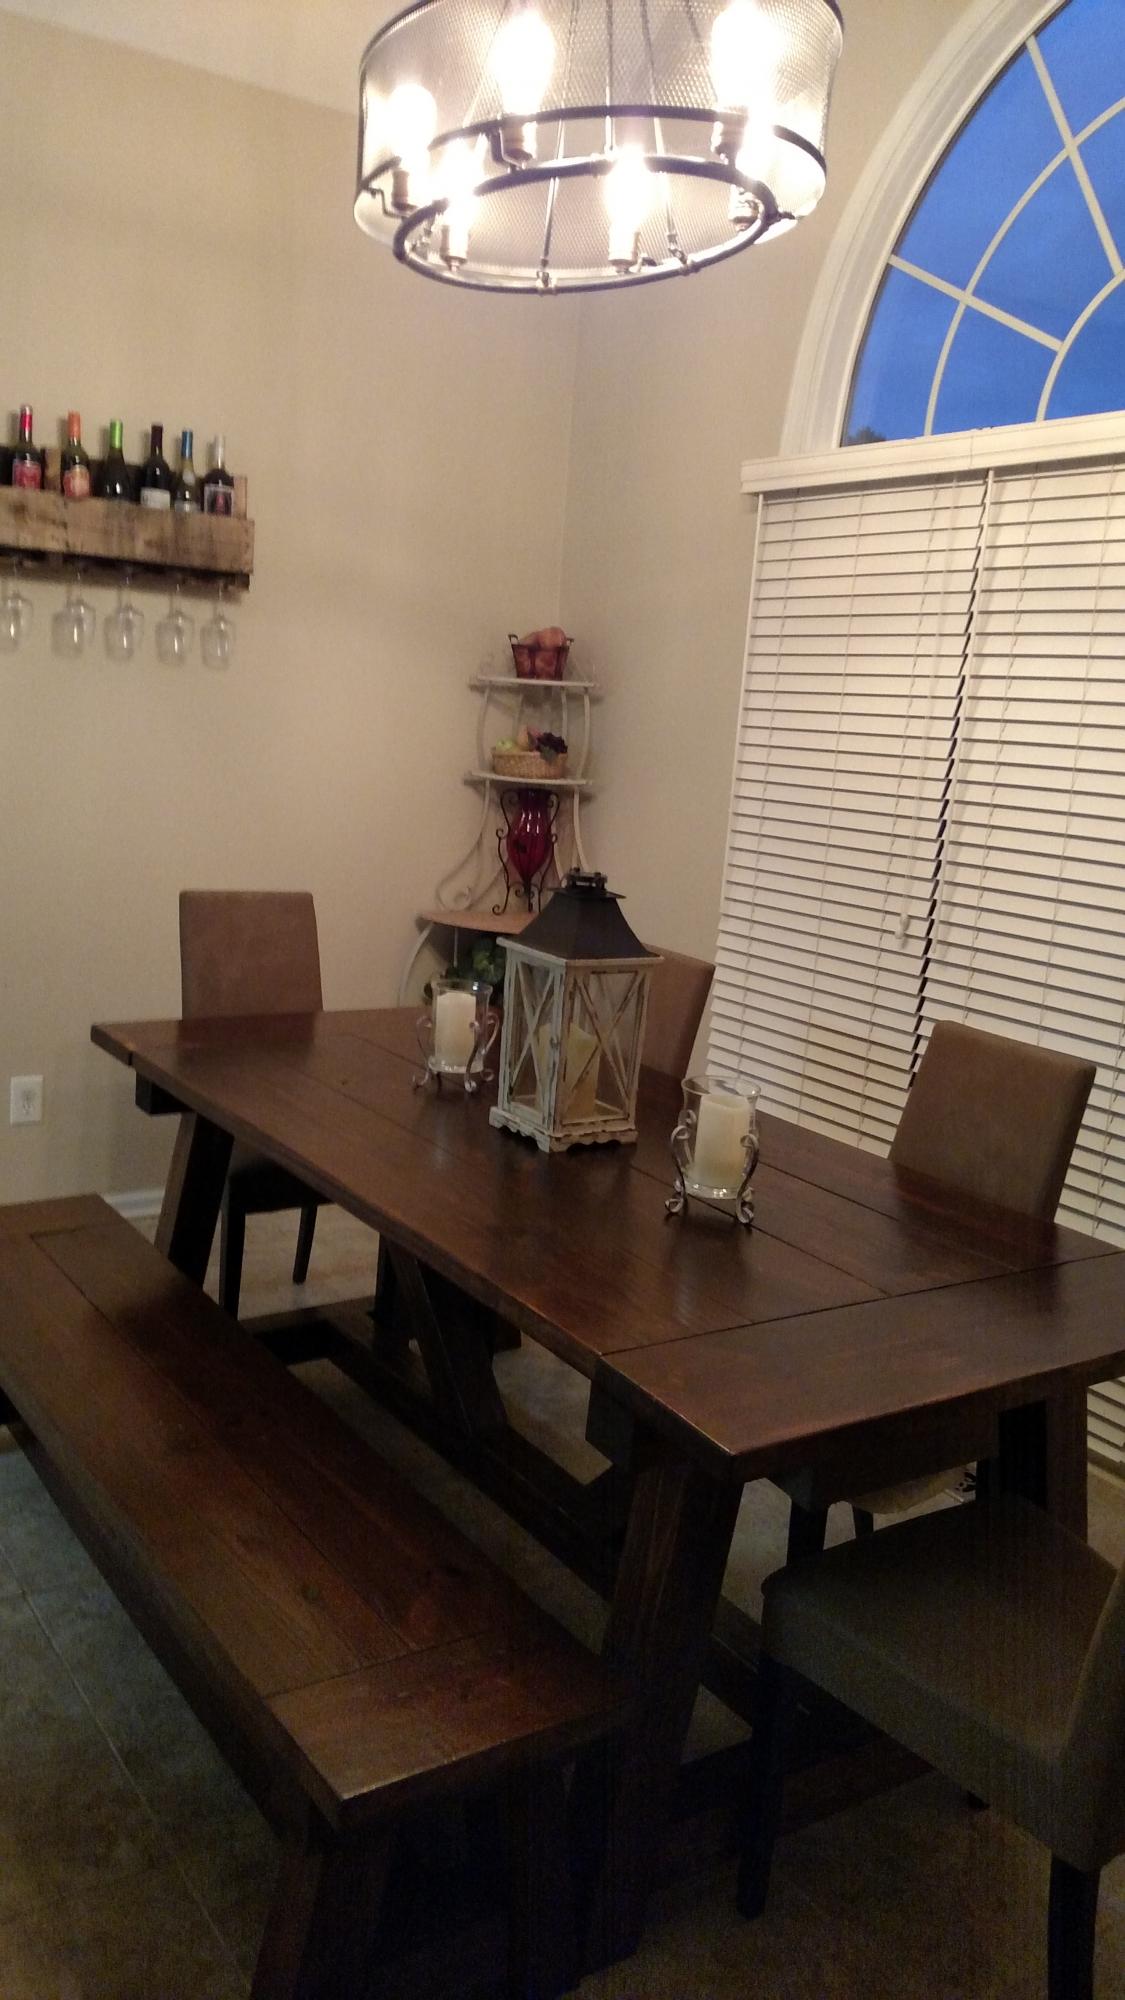
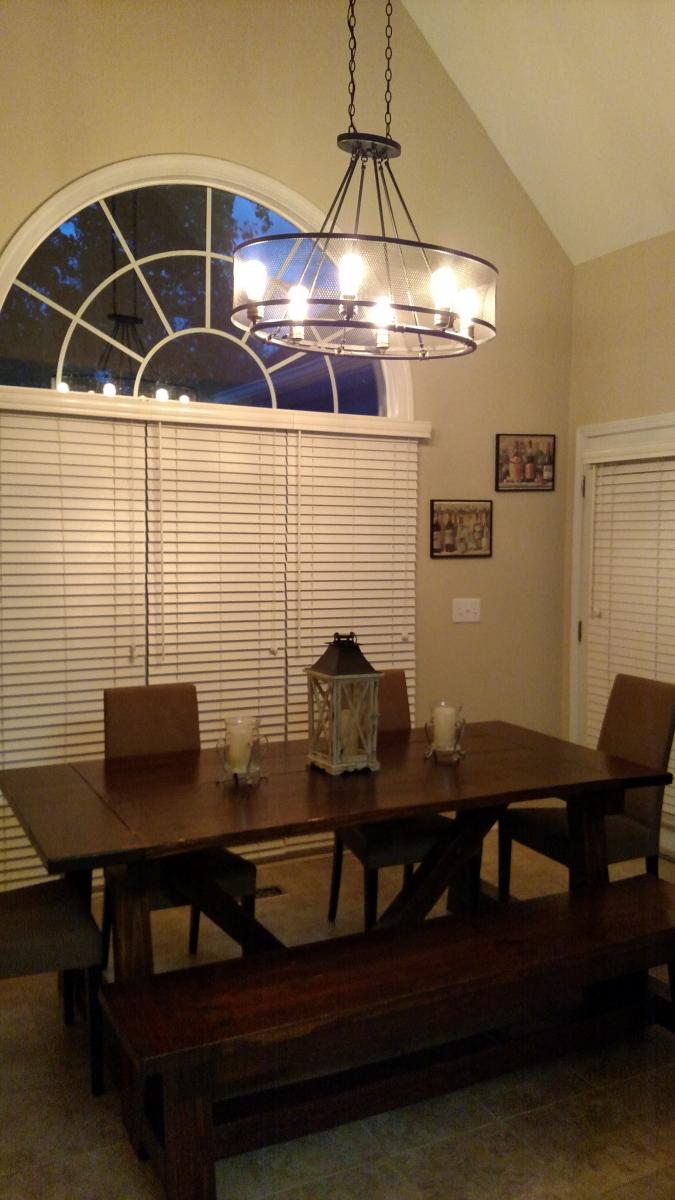
I loved Ana's 4x4 Truss Beam Table which was my inspiration for building this outdoor patio table Yesterday, I had a lot of fun. I used brown pressure treate wood because I wanted a table for my patio which would be weather resitant, a strong, great looking table that goes well with the rest of my patio anf I bet it wil last for a long time... Ready to entertain family and friends as soos as Spring comes!

Built from Plan(s)
Estimated Cost
CAD $250 = US $190
Estimated Time Investment
Afternoon Project (3-6 Hours)
Finish Used
none
Recommended Skill Level
Beginner

Console table

Submitted by Anonymous (not verified) on Sun, 02/26/2017 - 09:38

we made this for our friends for a housewarming gift. Will definitely make again!

Built from Plan(s)
Estimated Cost
140
Estimated Time Investment
Week Long Project (20 Hours or More)
Finish Used
Kona
Recommended Skill Level
Beginner

Turned-Leg Media Console turned PB Printer's Keyhole Desk knock-off

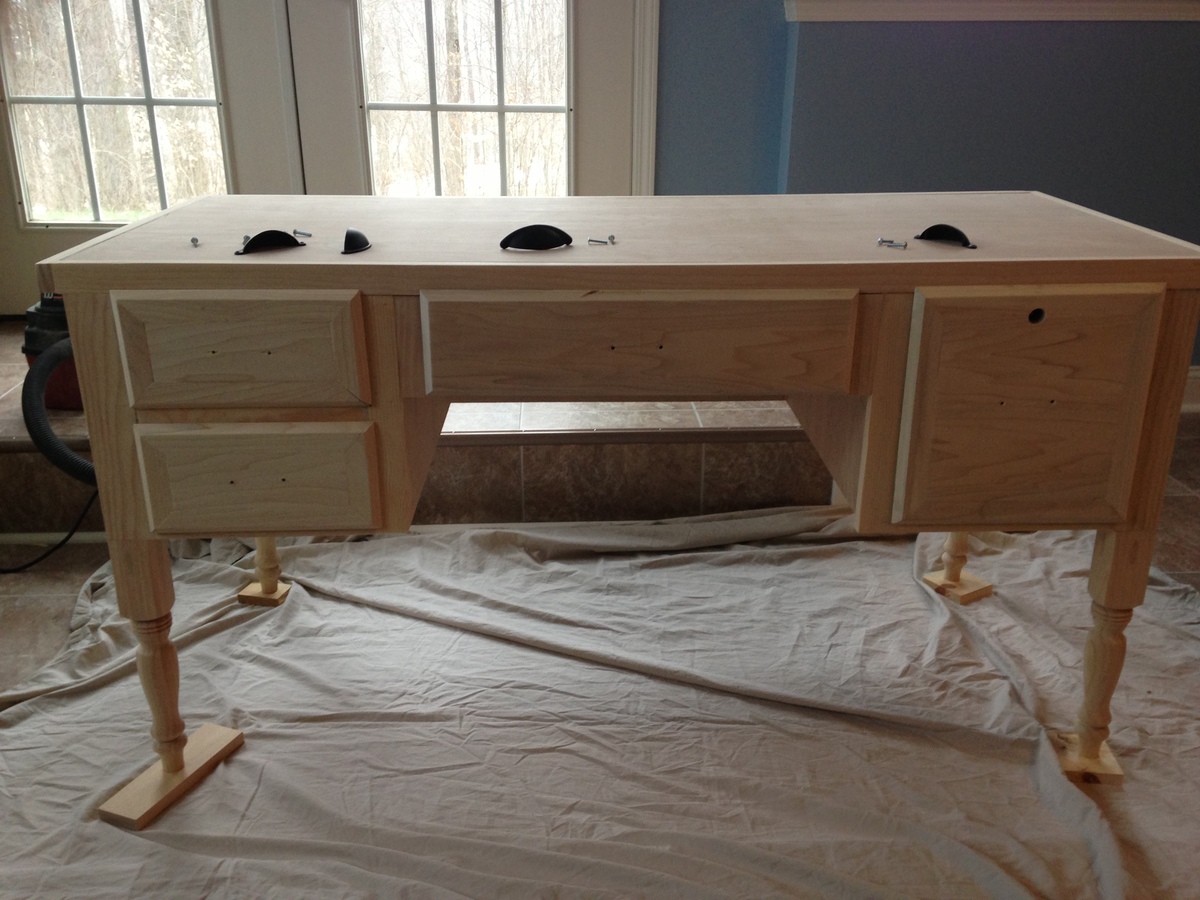
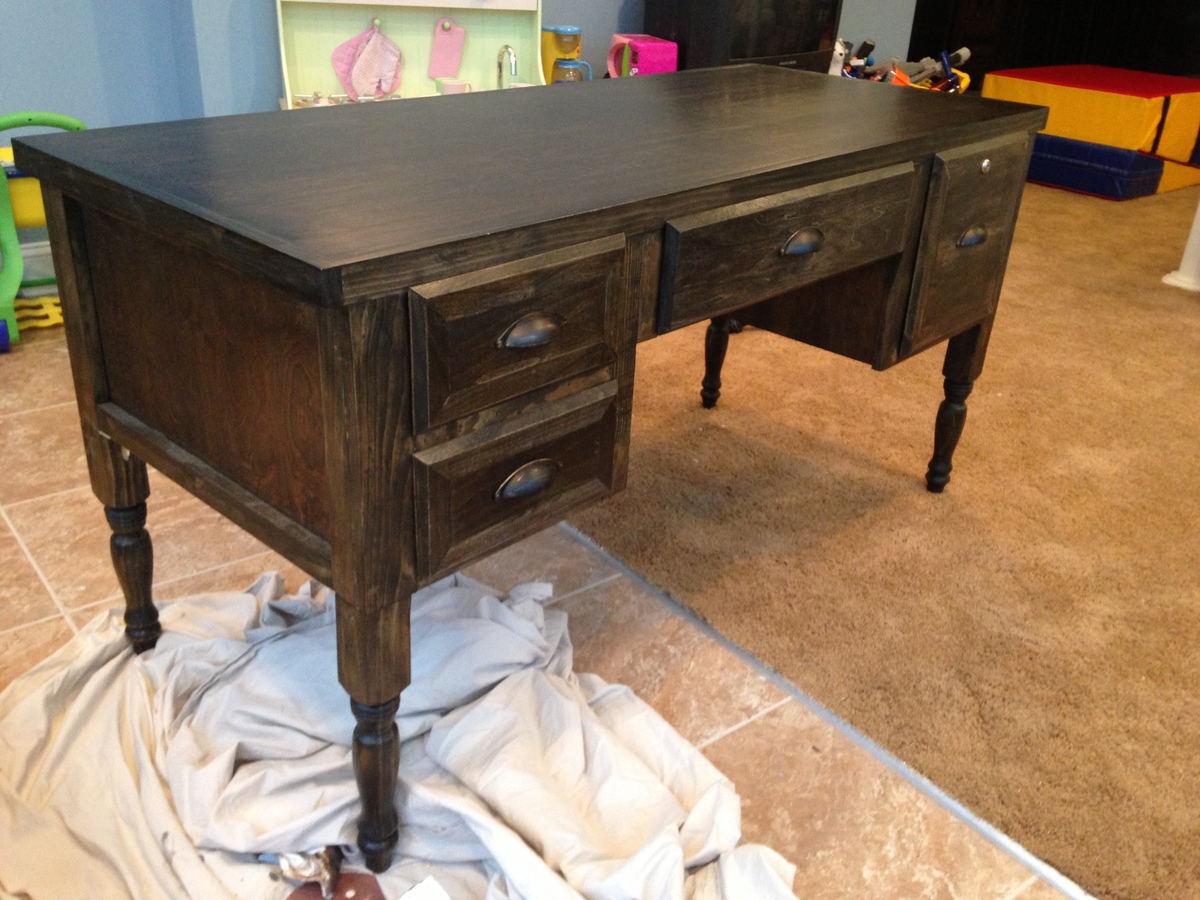
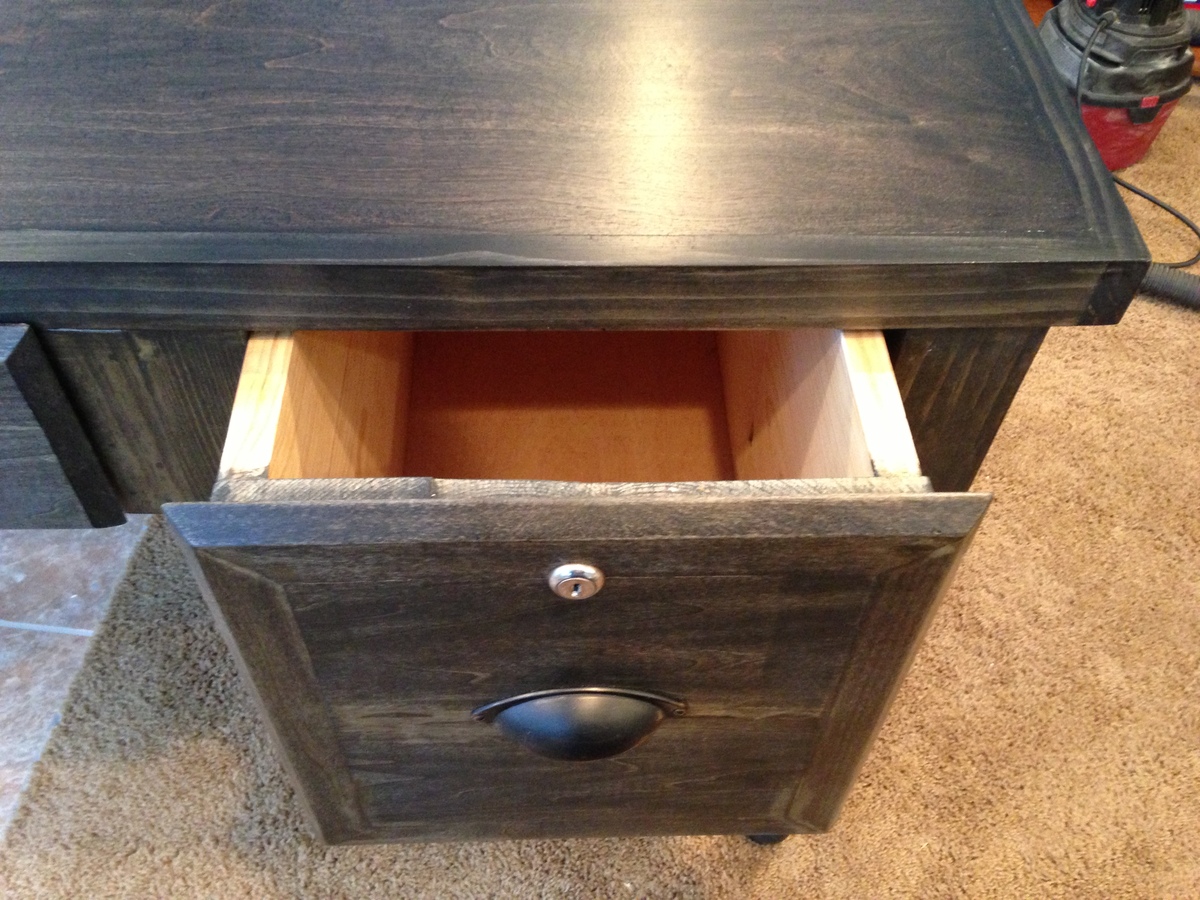
I wanted to build a desk for each of my 3 kids. We have an unused loft space in our home that I wanted to convert to a kid's homework area. Initially, I was going to build cabinets and create two walls of built in bookshelves and desk space. But decided I wanted free standing desks in a style that would last them into adulthood. (And possibly move with them into their own homes:) I really liked Pottery Barn's Printer's Keyhole Desk for the first desk but couldn't find a plan to build something like that. I ended up modifying the Turned Leg media console plan instead. It was a lot of work trying to figure out the correct changes to the plan. It totally made me appreciate how easy Ana's plans are to follow. I changed the depth to 24 inches and also changed the basic box from the plan into 3 boxes (left side drawers, middle drawer, right side drawer) then attached the boxes to each other then to the top. It was a heck of lot easier to say that in a couple of sentances then to actually do it. I also found it easier to put face frames on my drawers to hide my not perfect drawer boxes.

This project took me about a month to complete. I am a SAHM, and was not able to work on it every day.

The finish is Minwax Ebony oil based stain. I've had success using Annie Sloan waxes on other projects but was not happy with how the top looked after using it on the desk. Eventually I sanded the finish off and re-stained it 2x then topped it with 3 coats of Polycrylic. I left the rest of the desk with the original stain/Dark Wax finish.

I am too lazy to attempt sanding off the rest of the desk and restaining and sealing it. Kid #2 is already asking when I'm going to start on his desk (I'm thinking RH St. James style) and Kid #1 came home from school today and wanted to do his homework in the basement (where his desk is currently drying) so I think I should just say it's done and move on!

My experience comes just from reading this site and a few others. I've made AG doll furniture, picture frames, a console table, 2 benches, built-in bookshelves and a dollhouse bookcase. I used pocket hole joinery, glue and nails in this project. I don't have a table saw, so I made my long cuts with a circular saw fitted with a Kreg Rip Cut and occasionally a jig saw.

I would like to add some sort of hutch to it and am considering the Channing Hutch from this site. Thanks for reading!

Built from Plan(s)
Estimated Cost
$200
Estimated Time Investment
Week Long Project (20 Hours or More)
Finish Used
Minwax Ebony Stain
Annie Sloane Dark Wax
Polycrylic
Recommended Skill Level
Intermediate

Comments

tracysmith

Tue, 02/05/2013 - 05:57

I've been looking for a desk plan to replace the antique desk my mom recently took back to her house and this just might be my saving grace! Where did you get the legs for this? Thanks in advance and what a great job you did!!! Looks awesome! :-)

Farmhouse Desk

Submitted by ottawaguy on Tue, 12/29/2020 - 14:15

Super easy build!

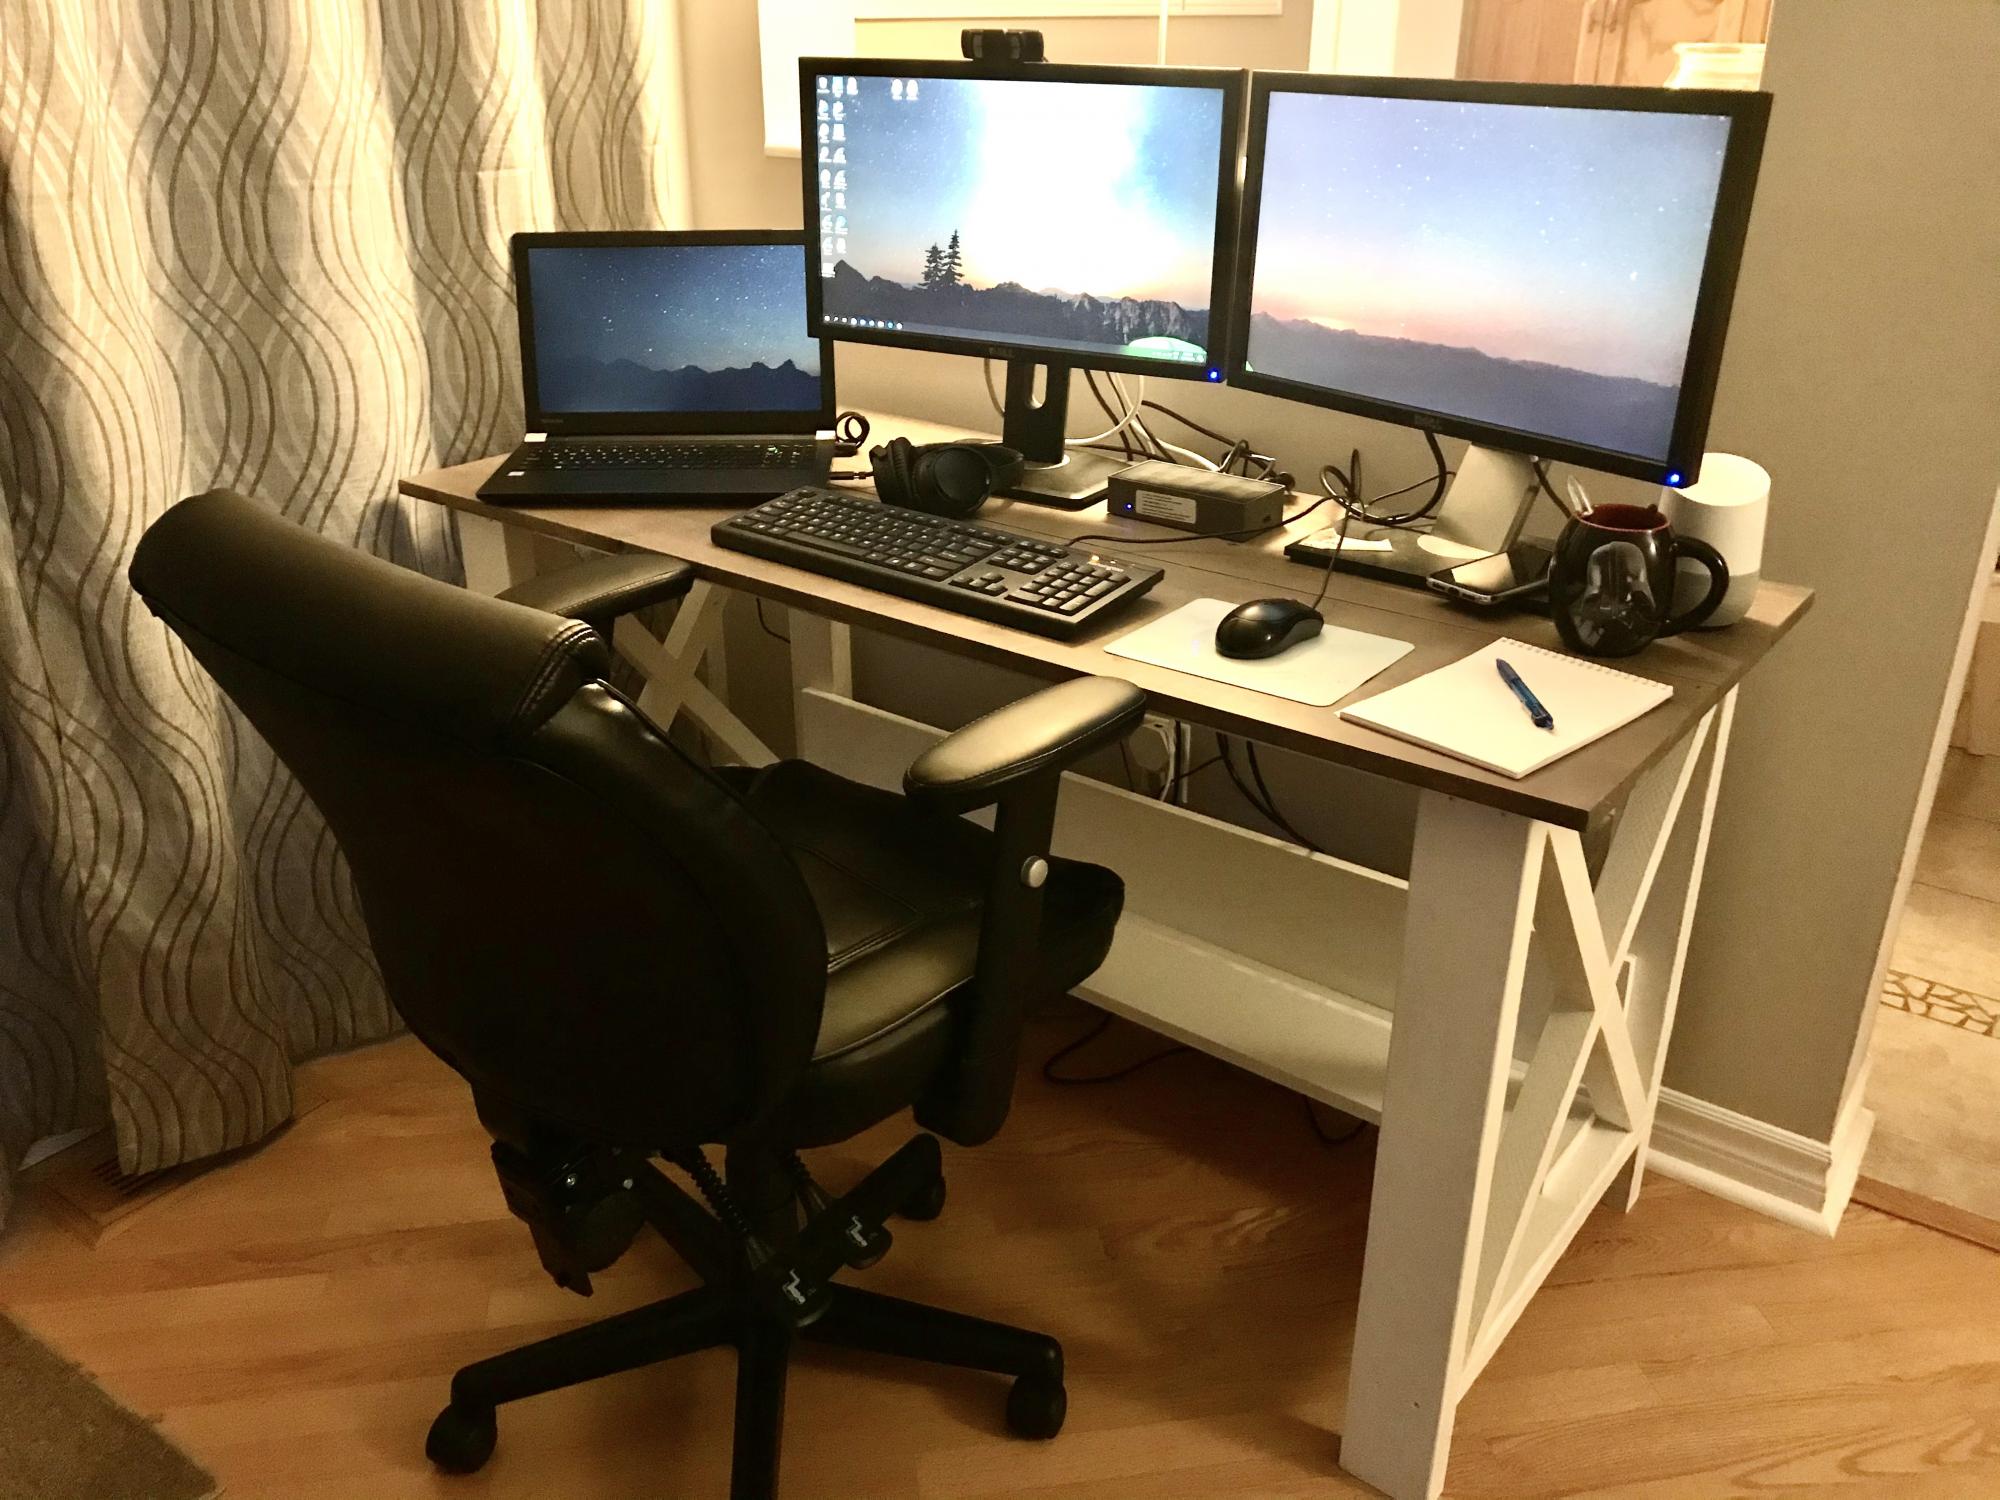
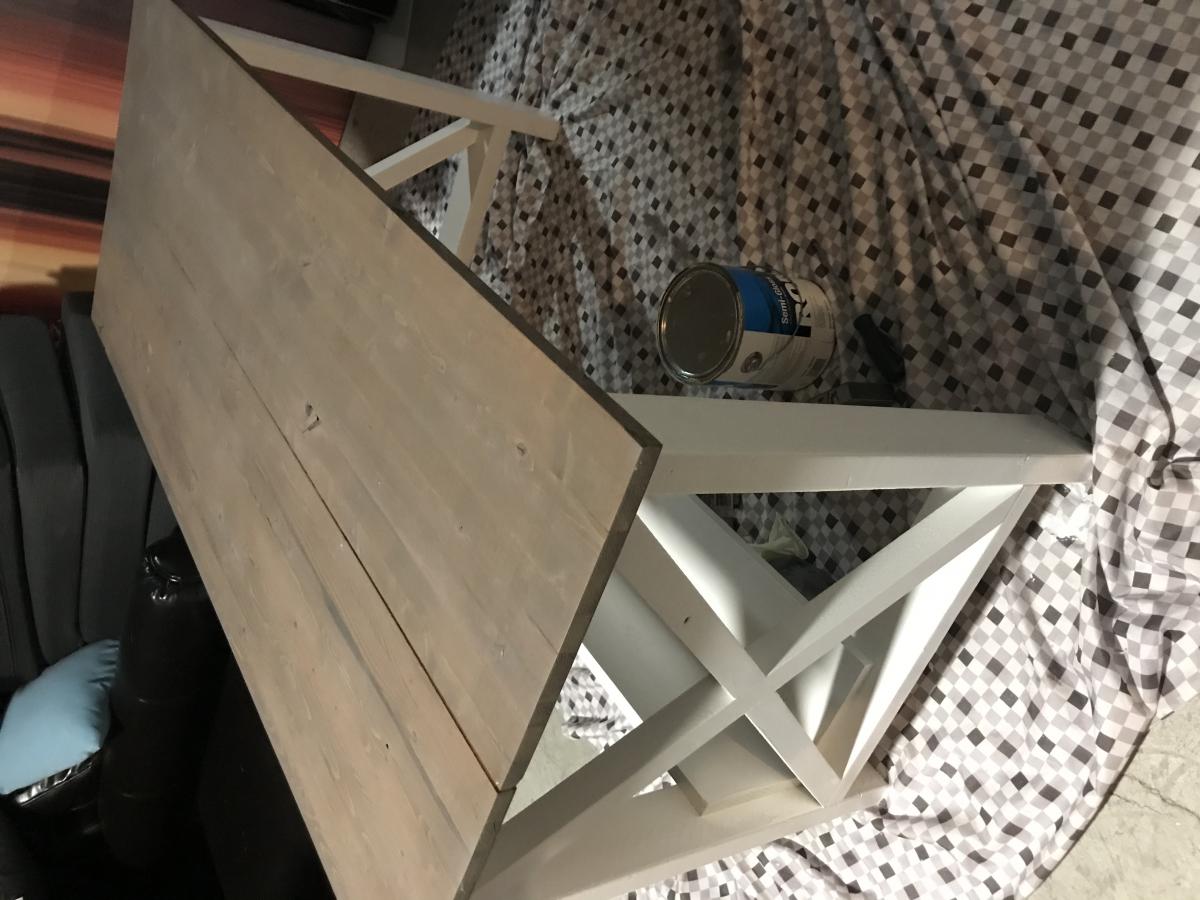
After months of working from home and using an old dining room table as my desk I built this desk in an afternoon. The finishing probably took longer than the build. A stained and grey washed top, with a simple while base turned out well. I built it a little larger than the plans and used 2 laminated pine panels I had already for the table top.

Built from Plan(s)
Estimated Cost
100
Estimated Time Investment
Afternoon Project (3-6 Hours)
Finish Used
Top - minwax “provincial” stain then grey-washed.
Base - white latex paint
Clear coat the whole desk
Recommended Skill Level
Beginner

Comments

ottawaguy

Mon, 06/28/2021 - 19:30

Sorry, i just noticed this comment. I only did a light sanding on the legs, leaving things a bit rough. If i were to do it again i'd probably spend more time sanding.

Olivia's Toybox Bench

Submitted by Anonymous (not verified) on Sat, 03/11/2017 - 13:35

The box is pretty similar to Mimi's bench with a few dimensions changed. I also fully framed out the inside to make sure adults could sit on it if need be. The arms and backrest took a lot of just staring and "pondering". I like it and everyone else seems to love it. Thanks Ana and Mimi. 

Built from Plan(s)
Estimated Time Investment
Week Long Project (20 Hours or More)
Finish Used
White prime, latex, finally aerosol. I need to learn more about the paint process because I was completely unsatisfied with the latex.
Recommended Skill Level
Intermediate

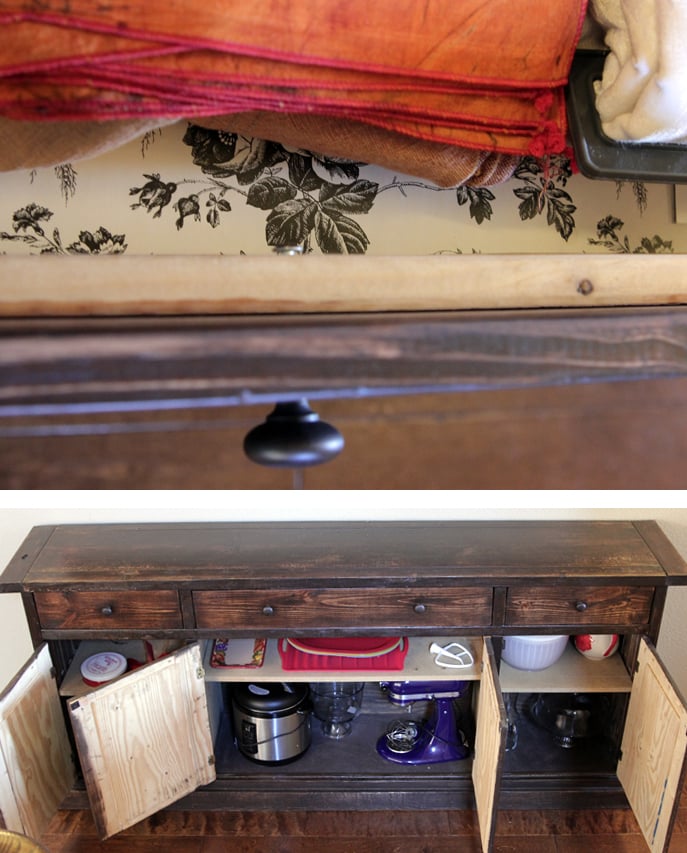
Rustic Sideboard / Buffet Table

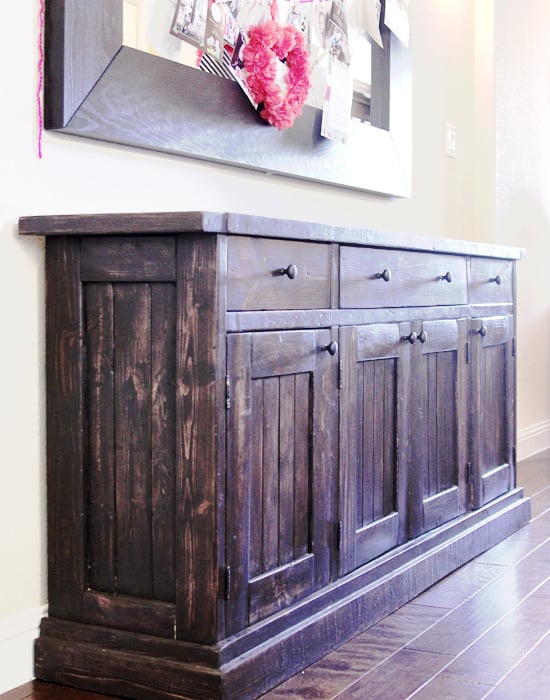
This was our second project (though I'm proud to say that I was able to put the bulk of it together all by myself...and that's because of the miracle of the Kreg Jig pocket hole kit!)

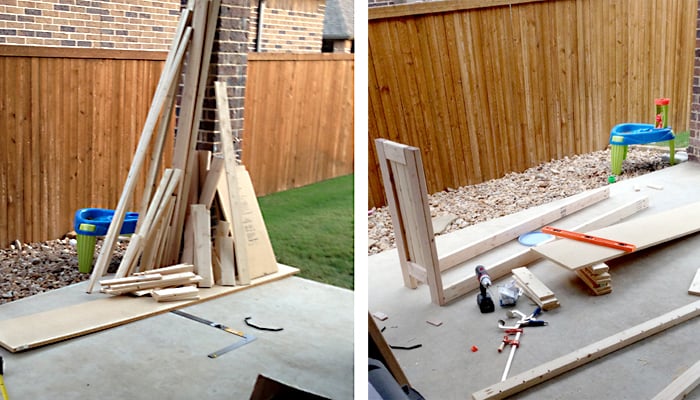
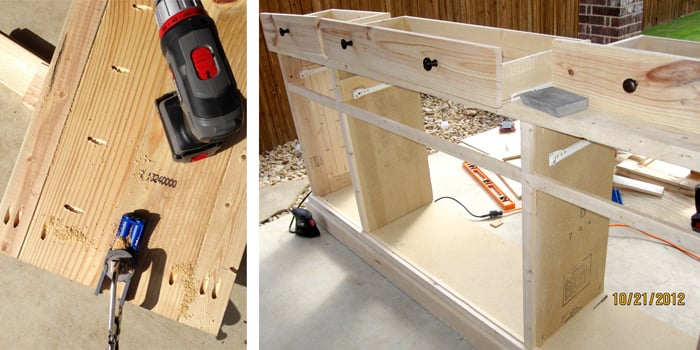
First I had to modify the plans so that the sideboard wasn't as deep (about 16" deep...so just a couple/few inches off the original plans). Then we bought the wood. My husband helped me cut most of the pieces, and then I started drilling pocket holes. It felt like it took forever! But once that was done, I was able to put it together so quick...like an IKEA furniture! BUT! I really should have checked for SQUARE better than I did, b/c once it REALLY started coming together, things were a little off kilter... Thank goodness my husband had the patience to SAND THE HECK out of the bottom of the poor thing to level it back out. :P

The door fronts took forever...and the drawers took a while to fit in correctly (all of which my hubs did). We had left our lumber on the patio, and the second day it got rained on. It might have helped if our lumber didn't get wet (to help keep things straight and square).

The things that took the longest: squaring, leveling, doors and drawers, and the base molding (I ended up using a 2x4 and 1x2 to build my own base along the bottom...we wanted to stain the wood instead of paint it, and didn't want to pay the $$$ for paintable molding).

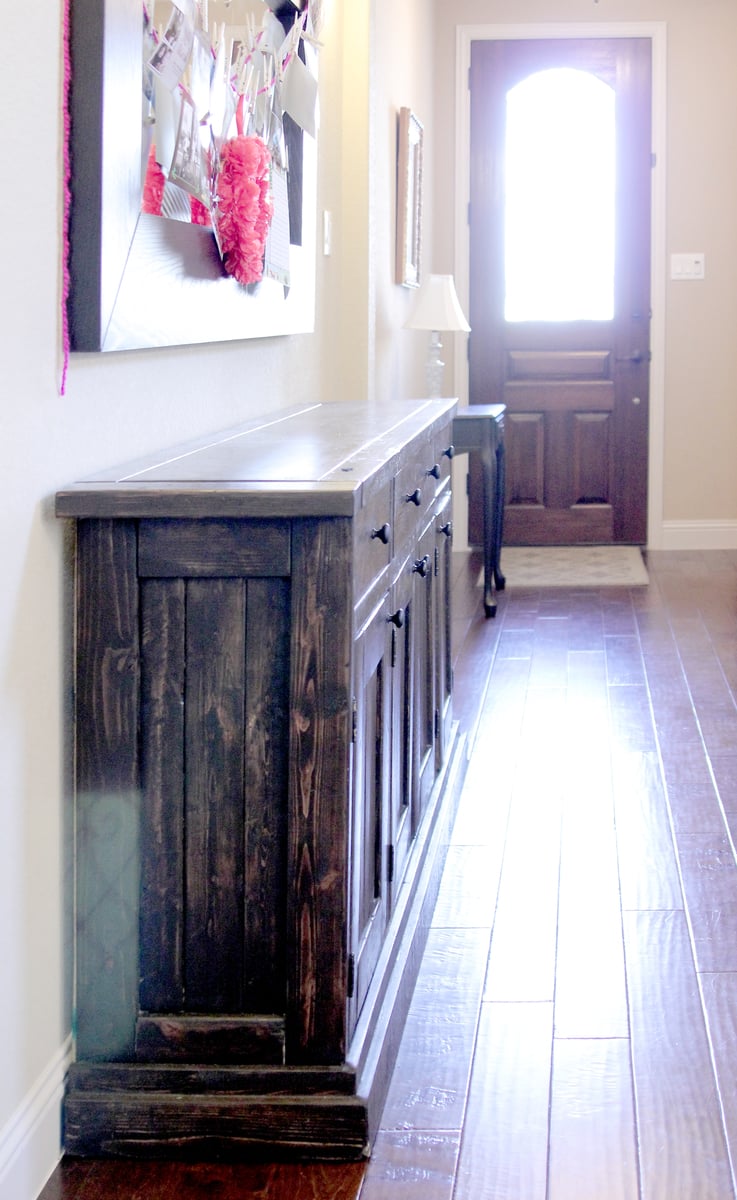
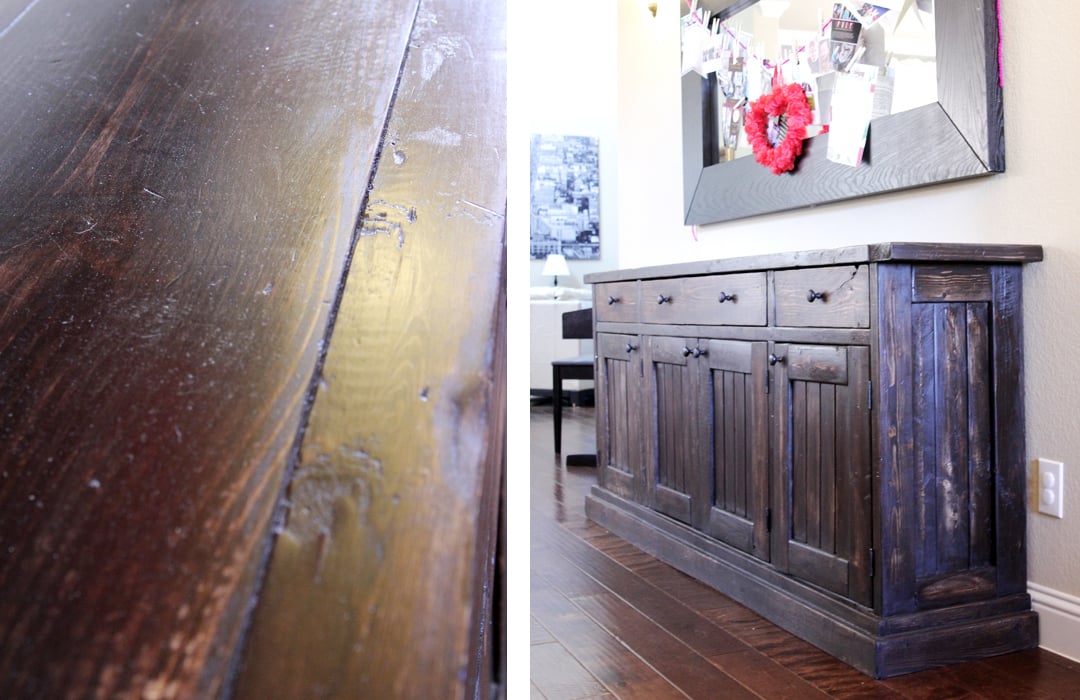
I used the same Rustoleum Dark Walnut stain that I had used on our Farmhouse Table...but I didn't shake it enough before using it, then left it on longer than I should have, so it is much darker than our table. Eventually may want to paint over it since it was so hard to get stain in all the nooks and crannies.

I didn't think to stain the inside of the doors. I will have to go back and paint it someday. We used particle board for the bottom and inside shelf (much cheaper than plywood). I tried staining the bottom piece, but it just soaked in the stain. So I used some dark brown spray paint instead. Worked like a charm. Planning on painting/covering the shelves one day, too.

OH! AND, I couldn't find the wider "bead board" (or whatever it is that everyone else used on their sideboards), so we used plywood as a backing, then attached some thin Poplar boards on the front for the appearance of planked boards. VERY painstaking. Would recommend a different method for that part.

(Timing: We started building this around the beginning of November, brought it in and used it before it was finished...then finished it a couple days before Christmas. Just the other day I added some drawer liners).
Built from Plan(s)
Estimated Cost
$200-300 for lumber.
Estimated Time Investment
Week Long Project (20 Hours or More)
Finish Used
Rustoleum Dark Walnut
Deft Clear Satin, 1 coat.
Recommended Skill Level
Intermediate

Comments

hillarylouise

Wed, 02/06/2013 - 15:20

I saw your comment on my blog and had to come take a peek! It sounds like it was a challenging project, but you did a fantastic job. Beautiful!

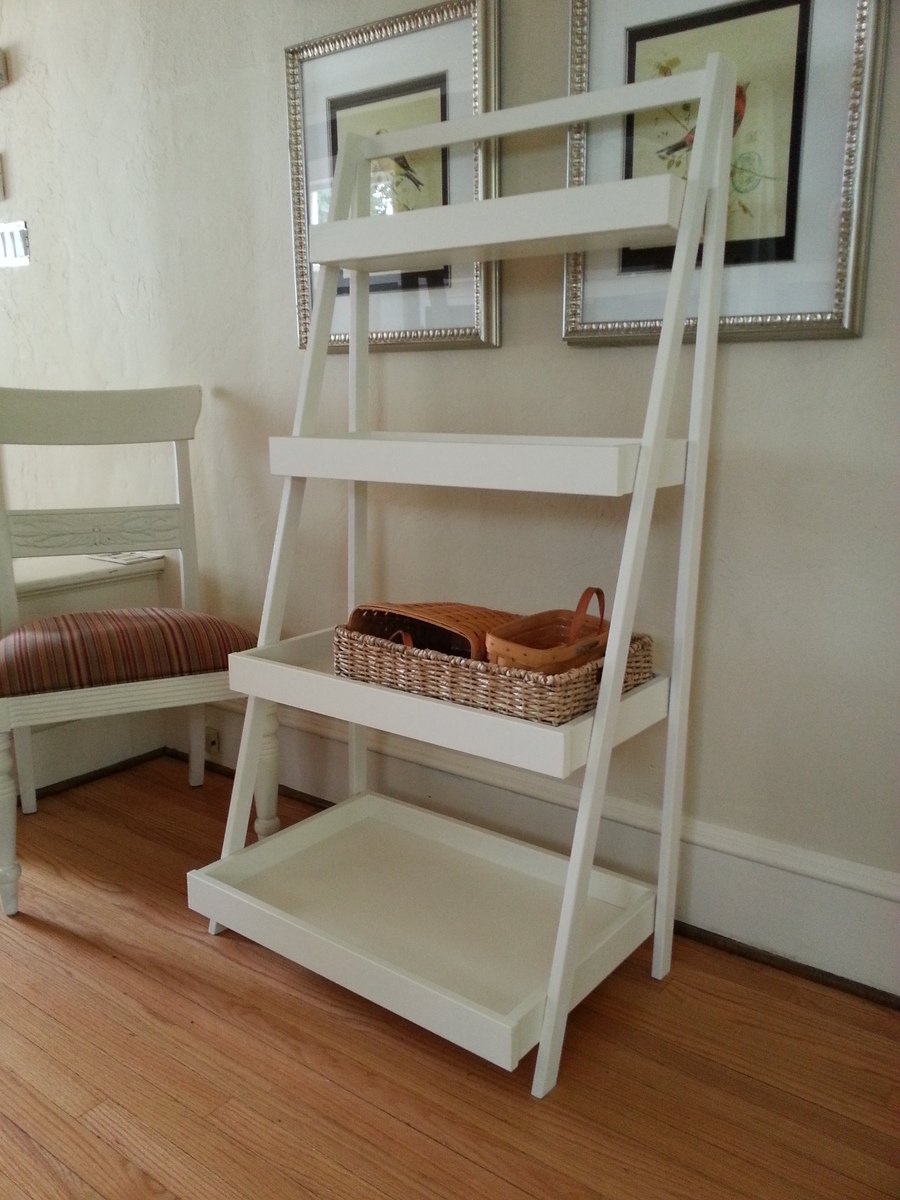
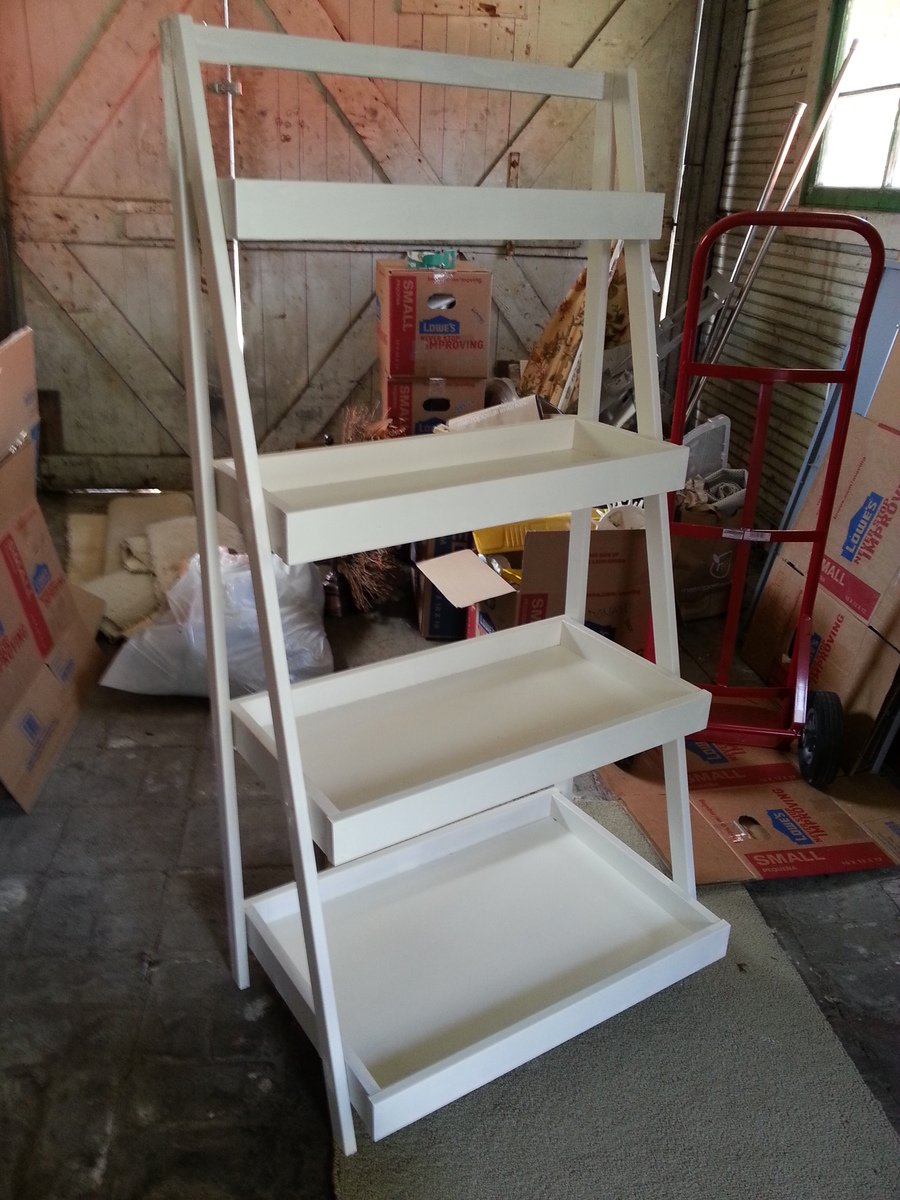
Ladder Shelf

Submitted by donnamarie on Sat, 01/03/2015 - 13:12

My master bath was in desparate need of storage, and as usual, it was Ana's site to the rescue.  I built this Ladder Shelf exactly from Ana's 'Painter's Ladder Shelf' plans.  I built and had it painted in about 2 days.  Now I finally have a place to store towels.  Thanks again, Ana!

Built from Plan(s)
Estimated Cost
$40
Estimated Time Investment
Day Project (6-9 Hours)
Finish Used
1 coat of primer, then a light sanding, then two coats of Sherwin-Williams Dover White in semi-gloss
Recommended Skill Level
Intermediate

Jr loft bed

Submitted by Anonymous (not verified) on Mon, 04/03/2017 - 14:17

I loved the junior loft bed plan and it was customizable and much cheaper than at the furniture store.

We ended up buying a thicker mattress than expected and adding an extra 2x2 with wood letters we got on sale at the craft store. Originally their was about a 5 inch rail over the height of the mattress and the letters made it more around 9-10 inches. We attached the letters to the wood first with glue and nails through the bottom and then screwed the board to the bed rail. 

My 3 year old loves it! 

Estimated Cost
With a Kreg jig, kd wood at lowes and materials and the letters we were at $170
Estimated Time Investment
Weekend Project (10-20 Hours)
Finish Used
Polycrylic satin 2 coats
Recommended Skill Level
Beginner

Farm house 4x4 table & bench

Submitted by charchav on Tue, 02/23/2021 - 10:07

I loved making this, I’m totally in love with the color it turn into. Thanks Ana

Comments

My take on "Lady Goats" cedar shed

Submitted by donbay91 on Sun, 03/14/2021 - 19:02

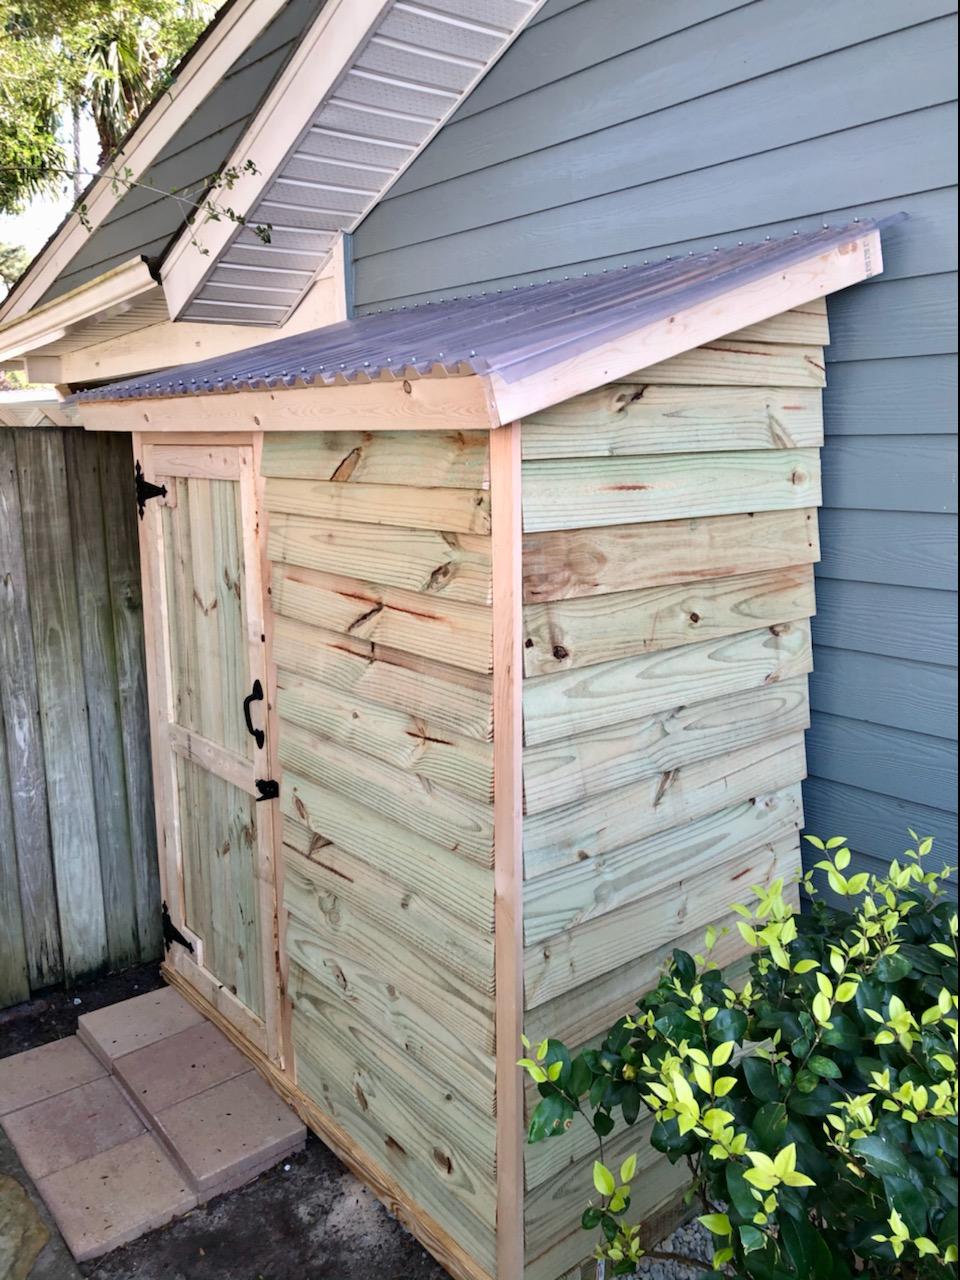
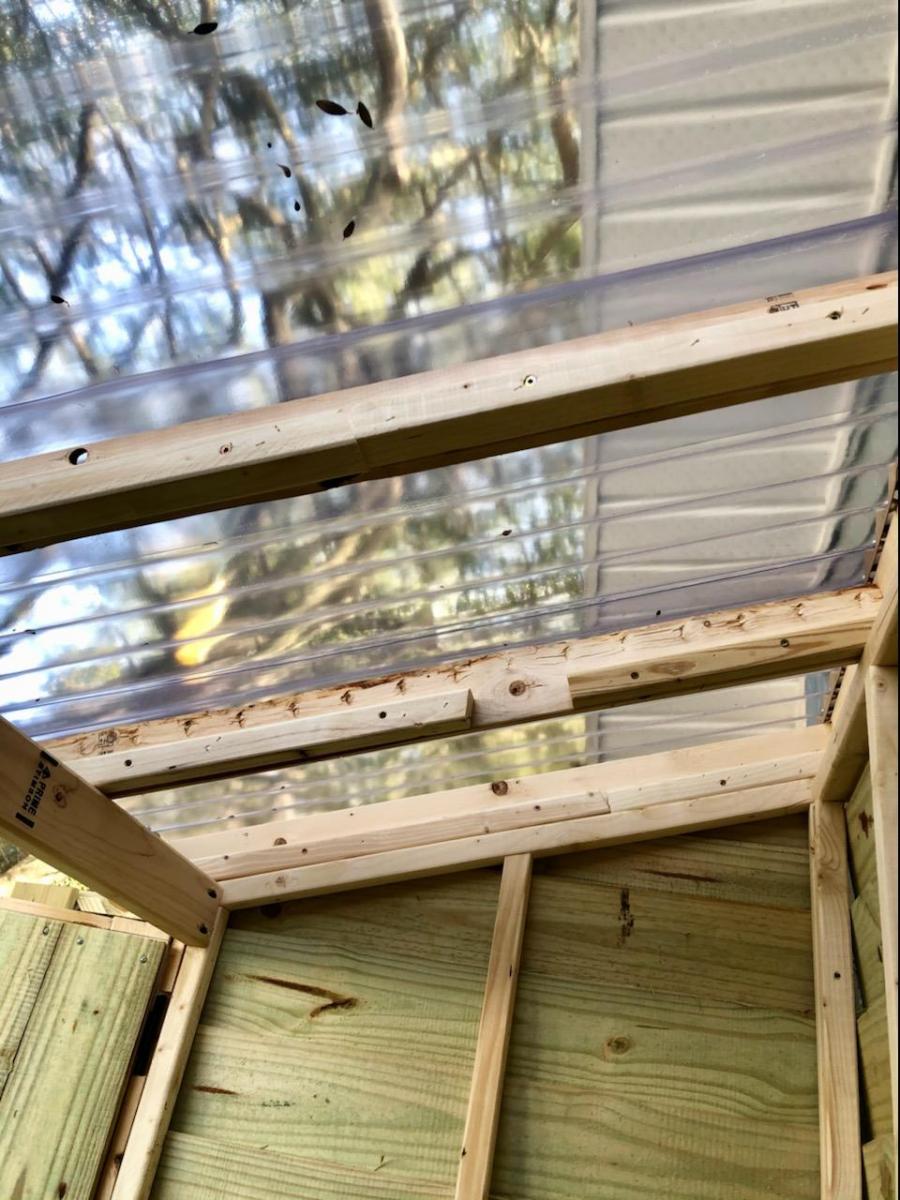
I absolutely loved these plans for this shed. I'm new to the site but I've been using your plans for things here at home... love it. I went with just one door to give me more places for shelves and I also went with a clear corrugated roof since it's shaded on that side of our house.

Built from Plan(s)
Estimated Cost
$300ish
Estimated Time Investment
Weekend Project (10-20 Hours)
Finish Used
No finish yet. I haven't made up my mind
Recommended Skill Level
Intermediate

Comments

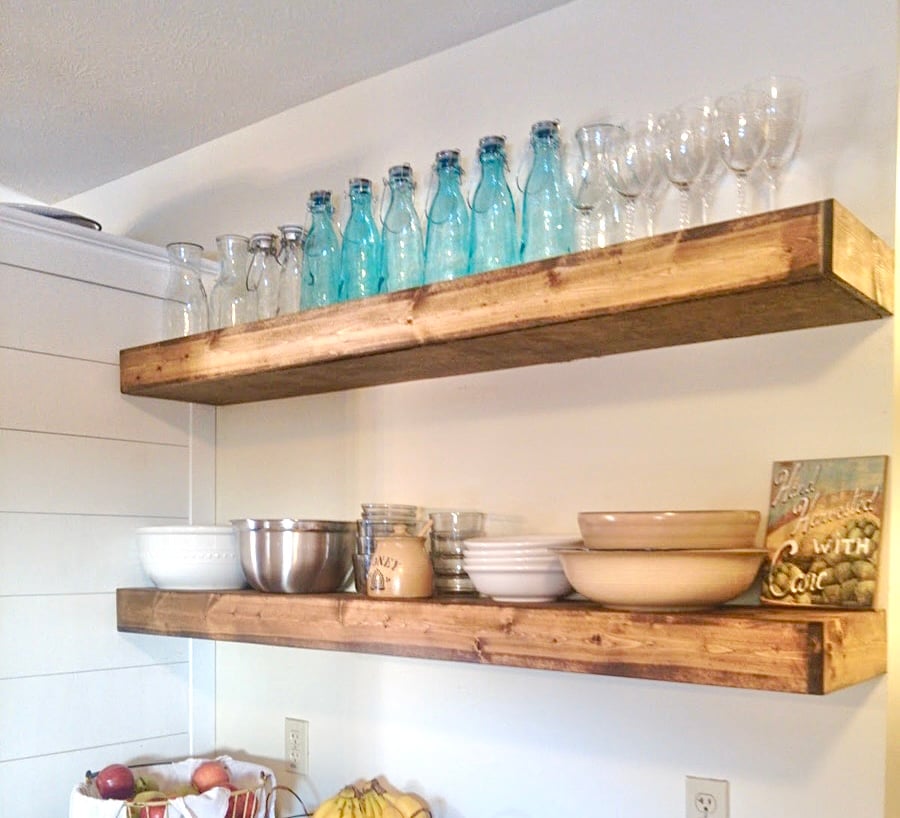
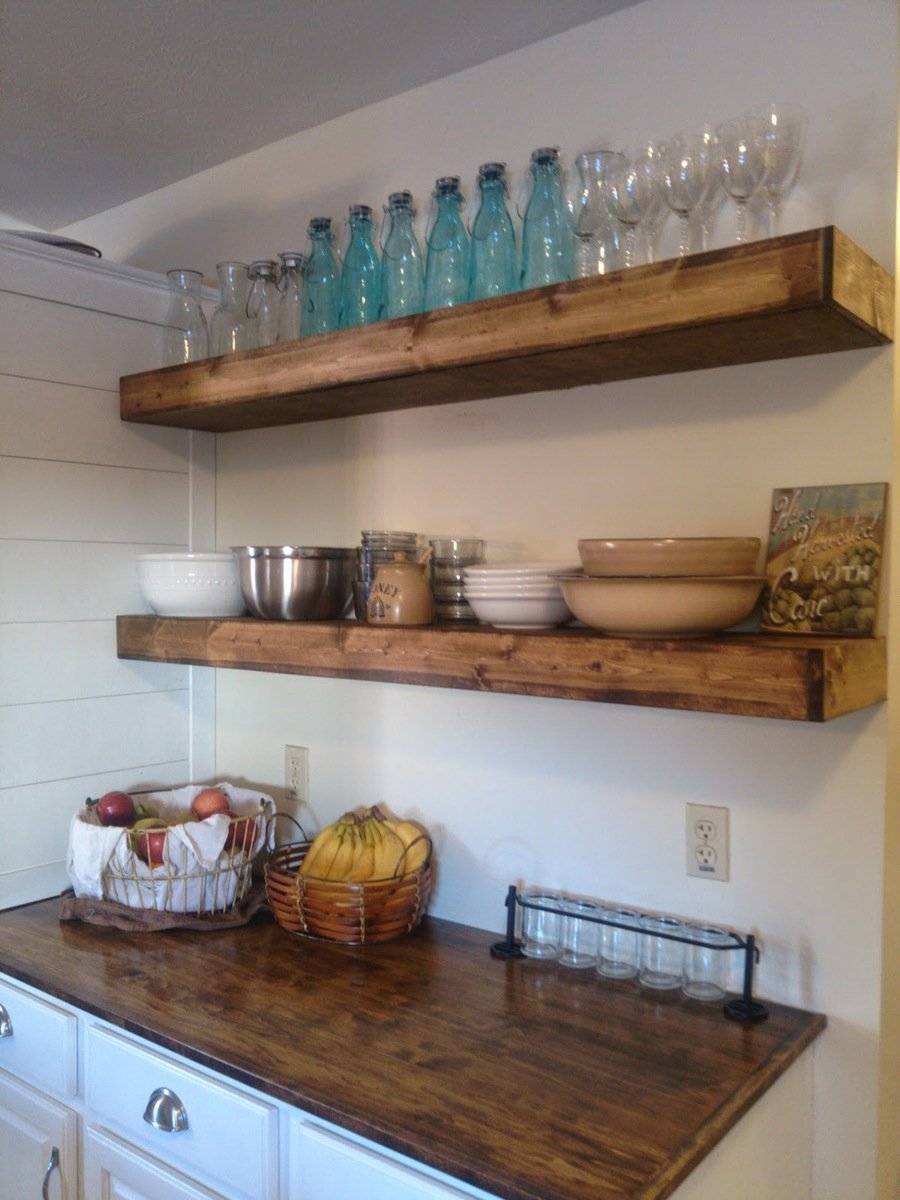
Floating Shelves

I built these shelves in an afternoon and they were really simple.  I'm fairly new to building and using powertools so these are quite an accomplishement!

Built from Plan(s)
Estimated Cost
$20 each shelf
Estimated Time Investment
Afternoon Project (3-6 Hours)
Finish Used
Provincial Stain and distressing.
Recommended Skill Level
Beginner

Comments

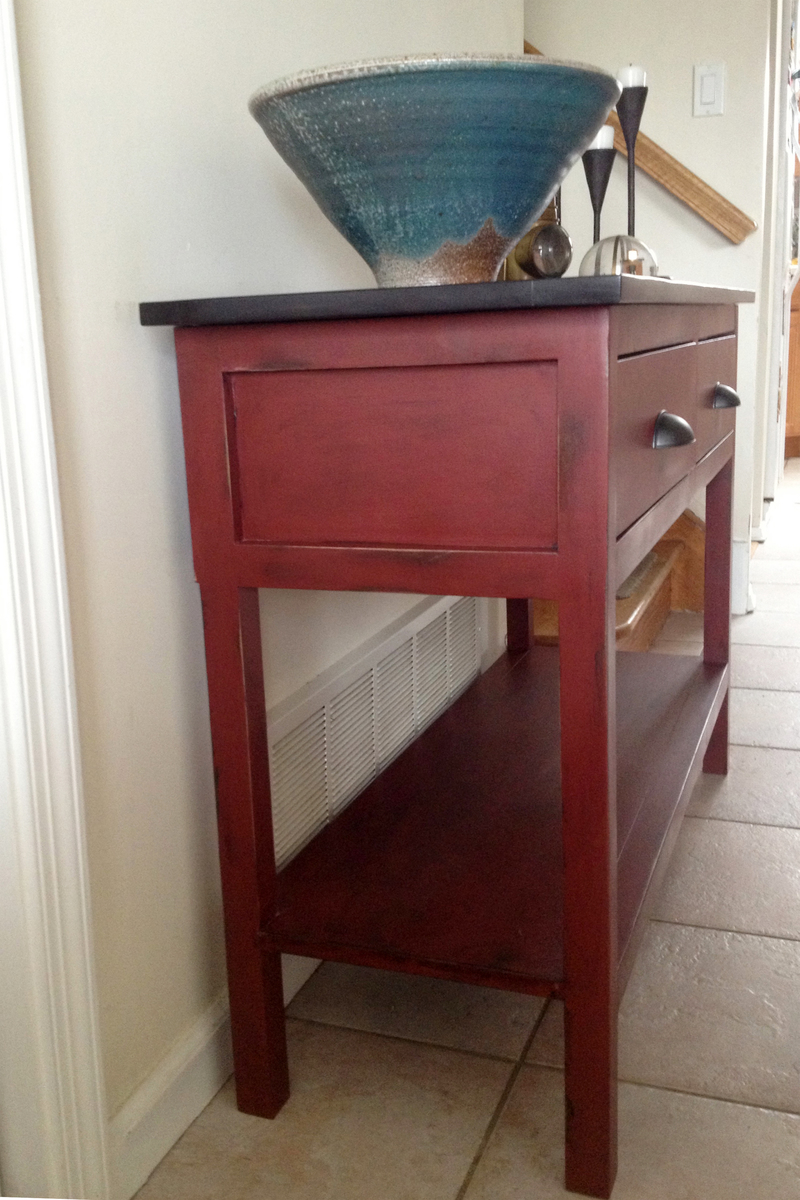
My First Build: Console Table from "The Handbuilt Home"

Submitted by timgerdes on Mon, 03/11/2013 - 12:56

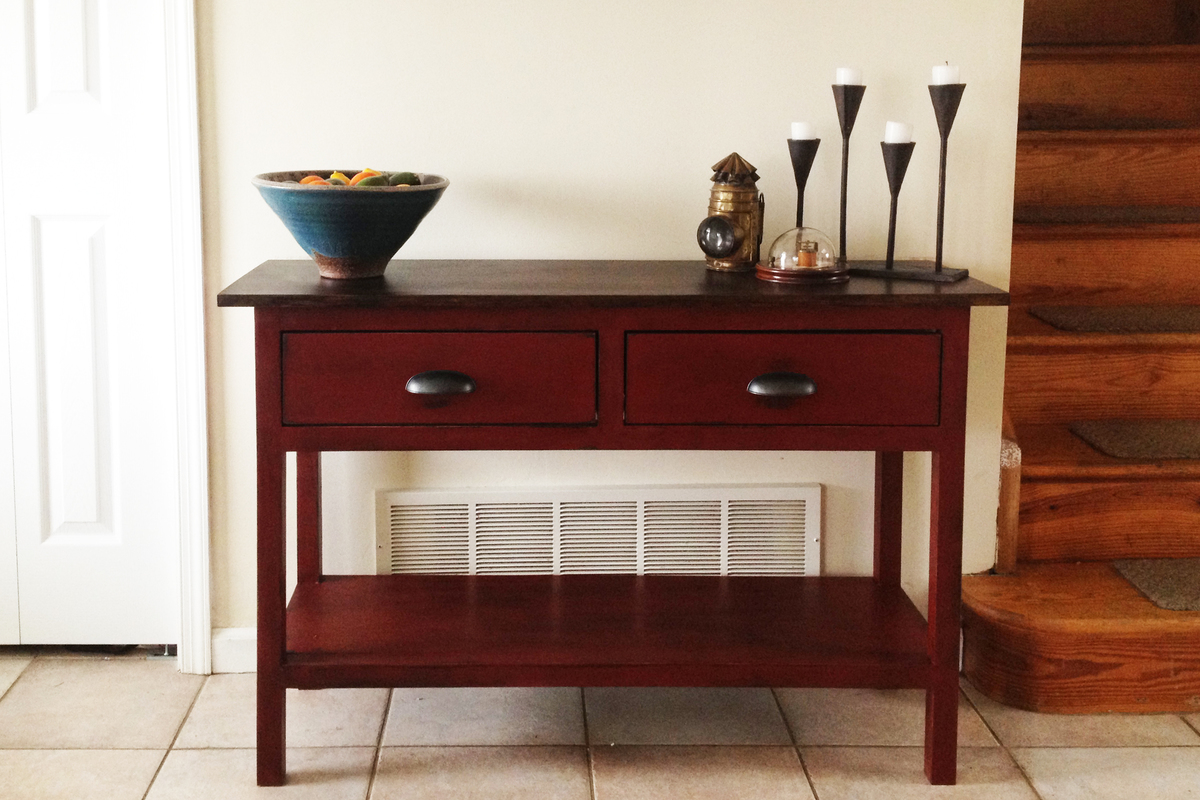
Not only was this my first furniture project from an Ana White plan, it was my first ever furniture project. I discovered this website and Ana's site through Pinterest and was inspired to build a table for my wife's craft room.

Leafing through "The Handbuilt Home," I found plans for a modern craft table, but decided I'd better get my feet wet first with a "smaller" project. Our front hall console table was a cheap, particle board piece from Target which seemed like the perfect candidate for replacement.

In retrospect, with drawer slides and hardware to contend with the craft table may in fact be an easier project than the console, but I found the plans straightforward and easy to read. Expecting to be intimidated by my own lack of experience, as the table came together I was, instead, continually inspired by my ability to actually build beautiful furniture for my home.

The most challenging part of building the console table was finding lumber, particularly straight lumber. Here in New Jersey, the local Home Depot and Lowes stores did not have a large selection of wood, virtually nothing beyond pine and most of that was visibly warped.

I eventually found boards that were relatively straight, though not perfect. As a result, getting the table perfectly square was an impossible task. For future builds I have already discovered some local lumber suppliers that offer a broader quality of materials than the big box stores.

The other part of this project that was really challenging was applying spray-on polycrylic. I never got a protective coat I was particularly happy with and decided to stop fussing because I feel like I was making things worse trying to correct my application mistakes.

In a few weeks I plan to add a layer of wax, which I hope will give the table a finish a more satisfying finish.

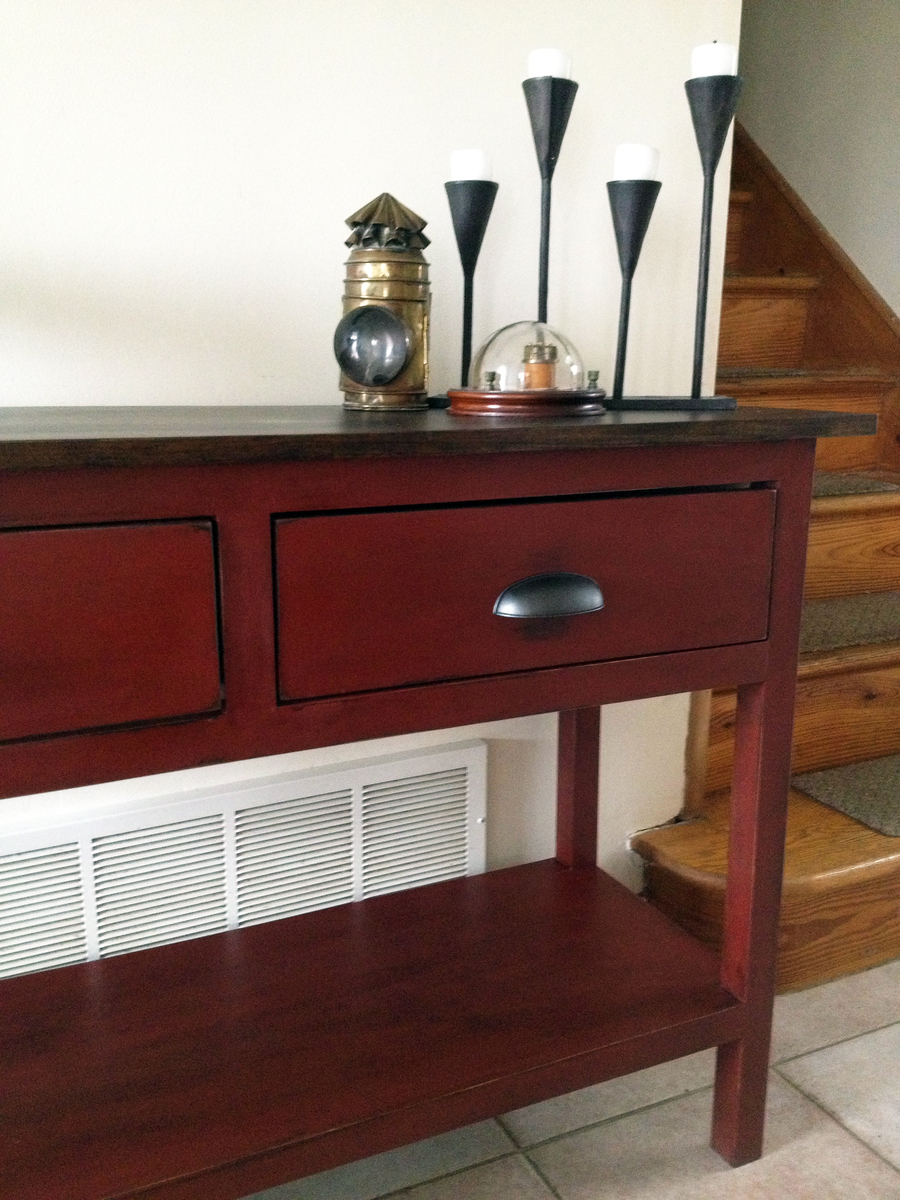
All things considered, especially as this was my first furniture project of any kind, I look at the beautiful console that now graces my front entry, dumbfounded that it's something I built from a small pile of wood. Many thanks to Ana White and her website and book for the inspiration!

Estimated Time Investment
Week Long Project (20 Hours or More)
Finish Used
The table top was finished in Minwax dark walnut stain and Minwax spray-on polyurethane in satin finish. The base was finished with a coat of the Minwax dark walnut stain, painted with General Finishes milk paint in Tuscan Red, hand sanded for a distressed look, treated with General Finishes glaze effects in Van Dyke Brown and a Minwax spray-on Polycrylic in satin finish.
Recommended Skill Level
Beginner

Comments

troy h

Mon, 03/11/2013 - 19:21

Great job, inset drawers can be a huge challenge. Love the finish.

Jibby

Fri, 05/10/2013 - 10:52

Hi!

Amazing job! Would you please direct me to where you found these plans. I've searched all throughout this website and can't seem to locate them...

Thanks :)

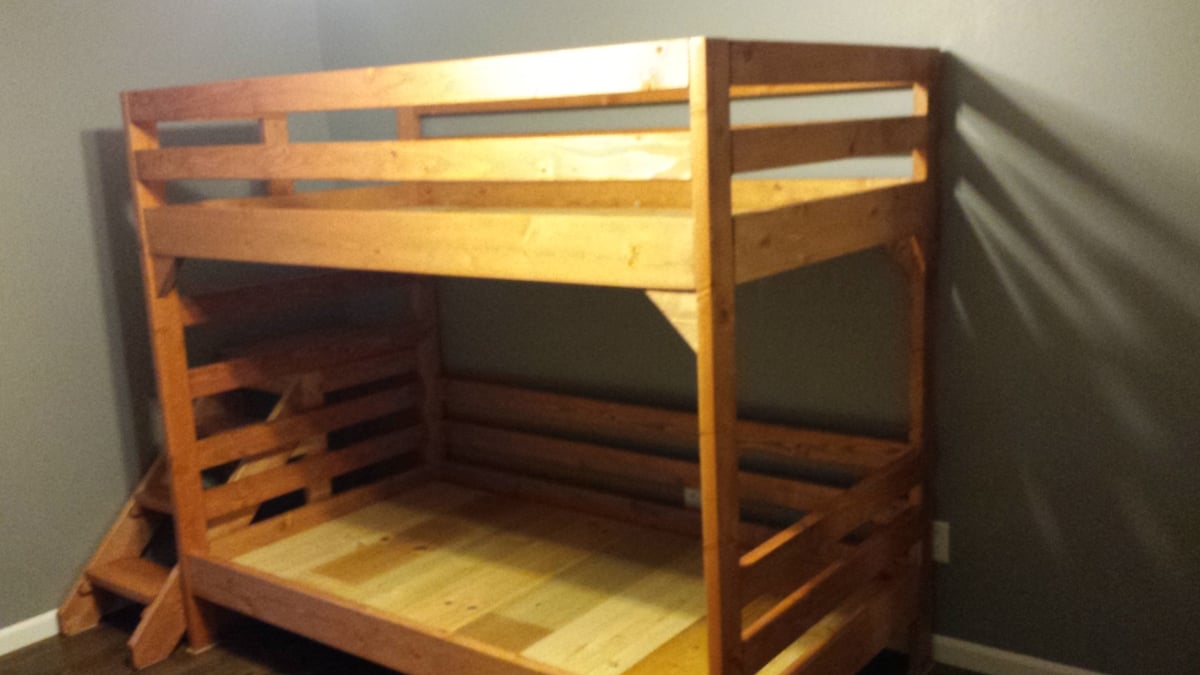
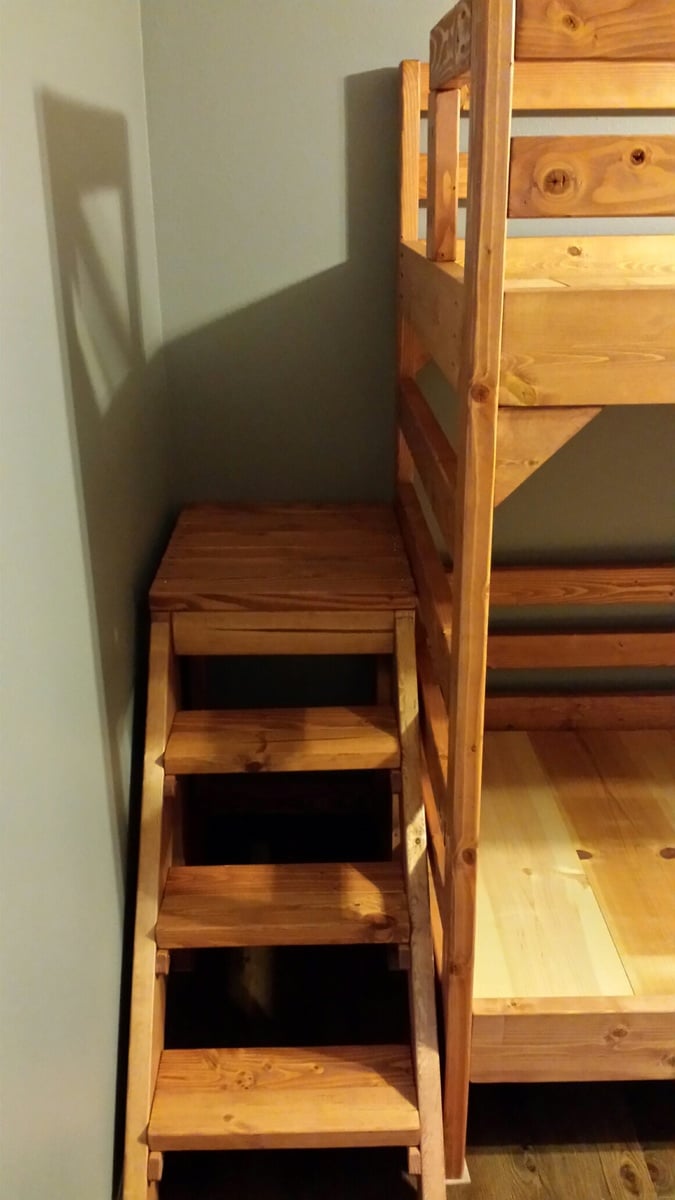
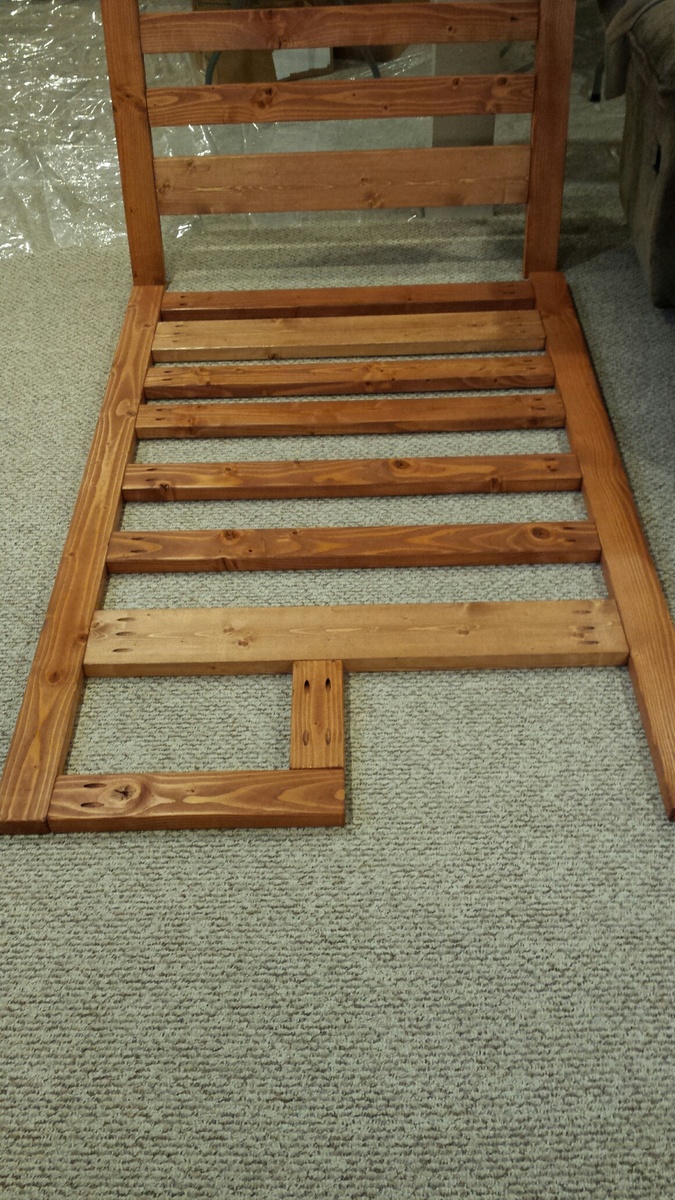
Modified Camp Loft Bed with Stairs into Bunk Beds

Submitted by tarzan21 on Sun, 02/08/2015 - 11:46

Using the Junior Height Camp Loft Bed plans...

I raised the height from 65 to 67 inches to better accomodate a bottom bunk.  Added bottom rails and extra 2X4s for the head board.  

I shortened the width and length of the stairs to better fit in the room, and in doing so, made a small mod to the post by the stairs to prevent the boys from falling down the stairs.

Kids Love them

Estimated Time Investment
Week Long Project (20 Hours or More)
Finish Used
Minwax Cherry Wood and Satin Poly
Recommended Skill Level
Intermediate

Kitchen pantry cabinet

Submitted by Anonymous (not verified) on Sat, 05/13/2017 - 18:28

Some added storage for small kitchen appliances

Built from Plan(s)
Estimated Cost
$100
Estimated Time Investment
Week Long Project (20 Hours or More)
Finish Used
Painted antique white with a reddish undercoat peeking through distressed areas
Recommended Skill Level
Beginner

2x4 Sofa, X Fancy Farmhouse Table Bench, and Bar w Stools.

Submitted by Anonymous (not verified) on Tue, 05/16/2017 - 10:07

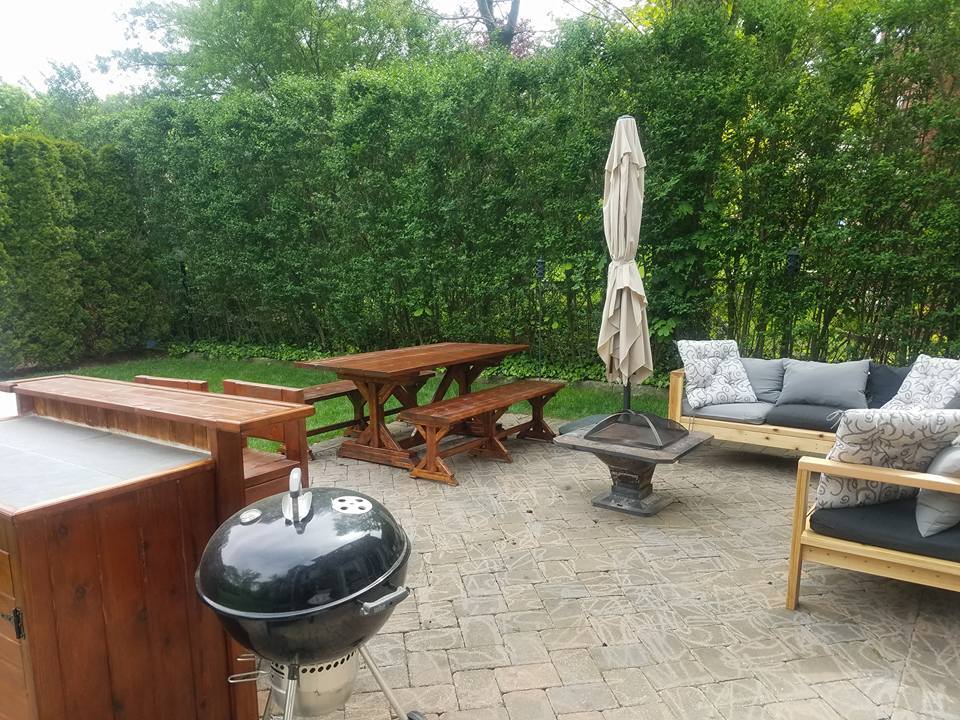
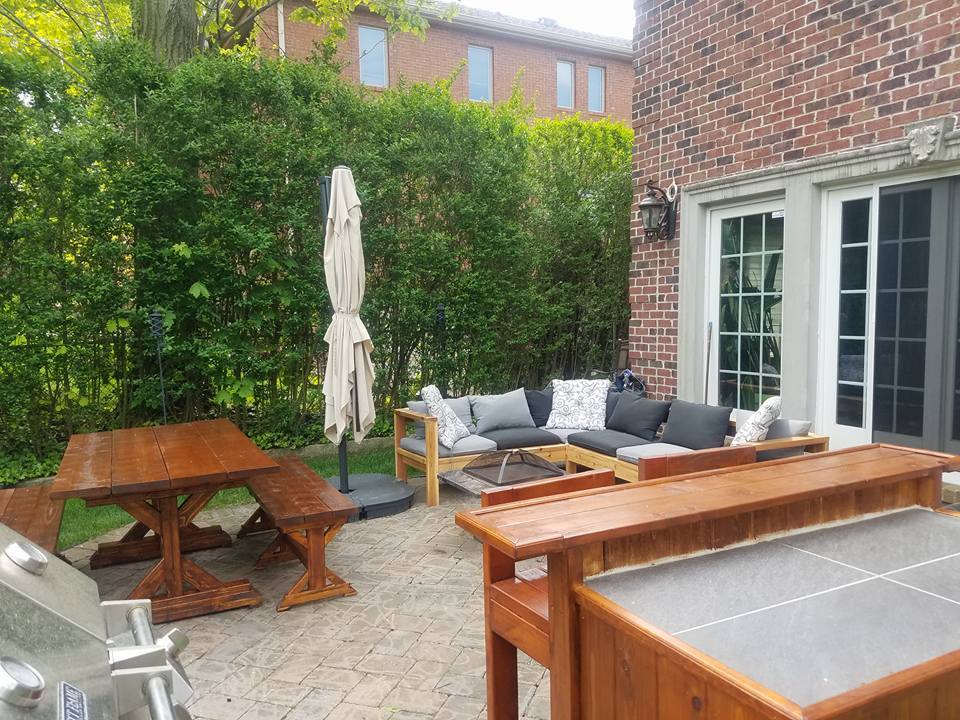
Started with building the 2x4 sectional sofa and the armless sectional.  Liked the plans so much starting building the bar from my own design.  Than completed the patio renovation with the fancy X farmhouse table and benches.  Thank you Ana White for all the inspirations to redo my backyard patio.


Estimated Cost
Farmhouse Table $100
Farmhouse Bench $60 for both
2x4 Sofa and Armless Sectional $300 (used Cedar 2x4)
Bar and Stools $250
Estimated Time Investment
Week Long Project (20 Hours or More)
Finish Used
Cabot Mahogany Outdoor Sealer and Stain
Recommended Skill Level
Intermediate

Finally Organizing My Garage - Shelving First

Submitted by bsohl214 on Thu, 06/17/2021 - 17:41

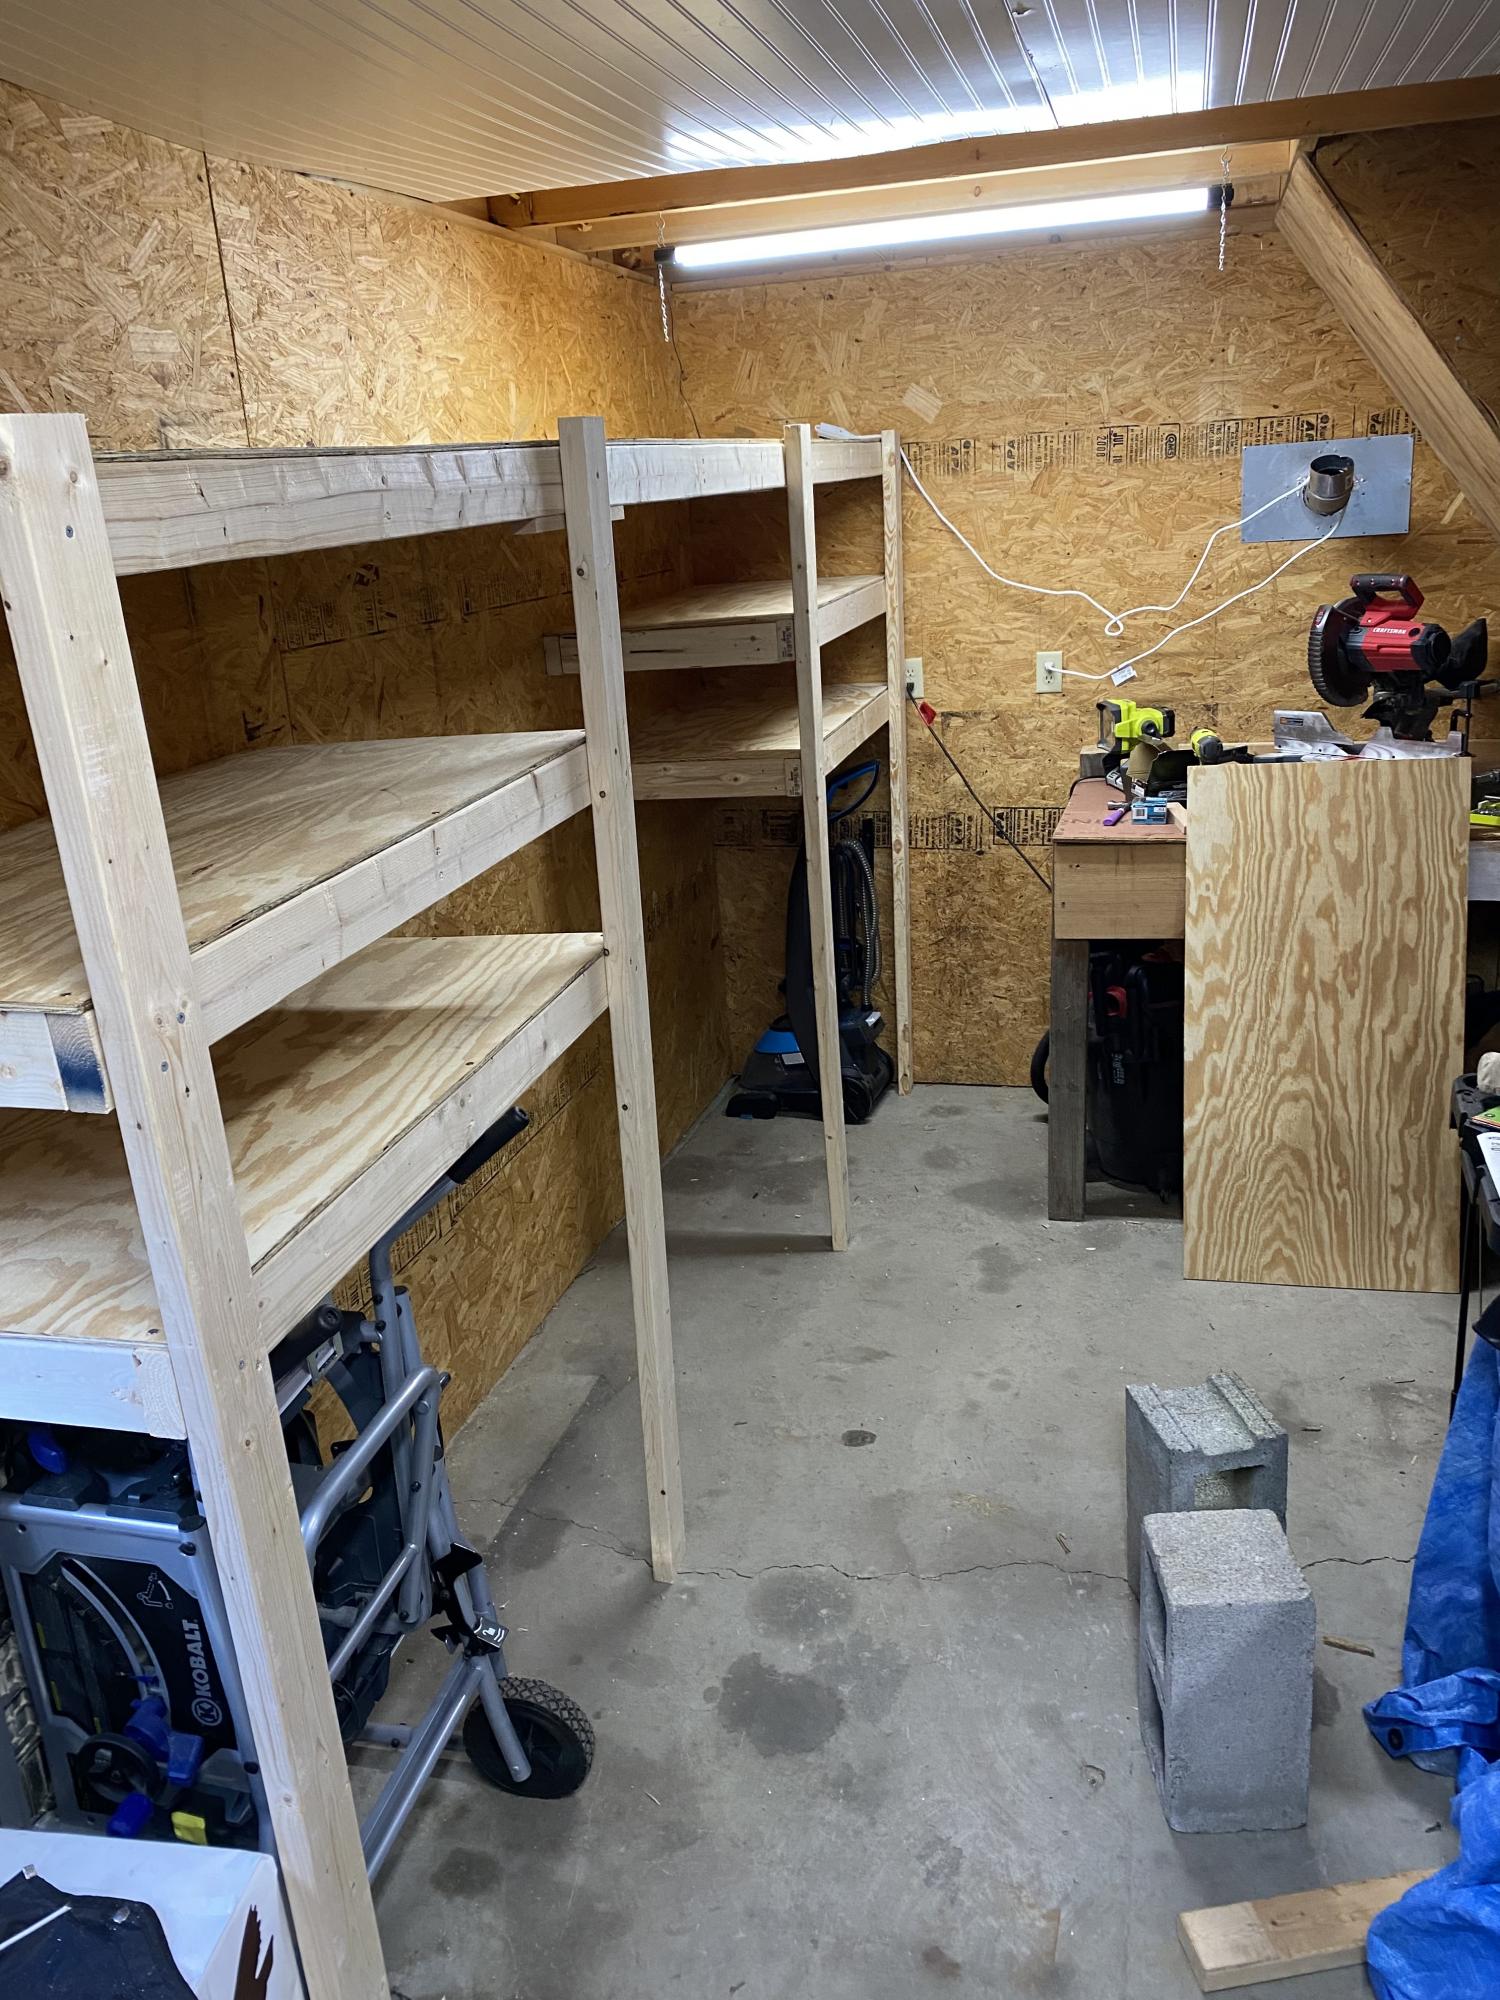
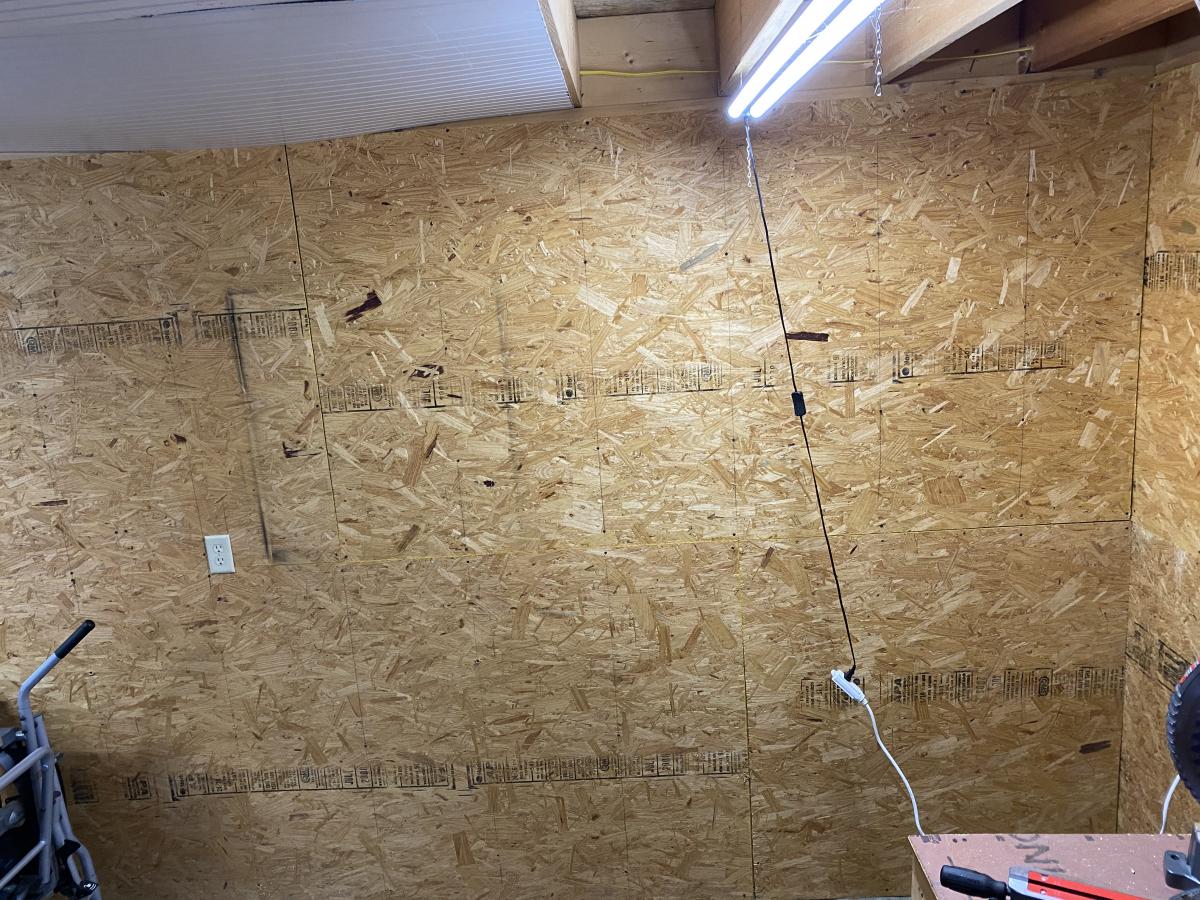
Took every pre-existing bit of rough, thrown up shelving the previous wonder tossed up and the garage walls. Moved the prior owner’s workbench build out of the corner, reinforced it, and relocated it to the center of the back wall. Spent the day building this unit in this corner of the space. Used modified version of plans below. Center gap is for a future build…rolling miter saw cart.

Estimated Time Investment
Day Project (6-9 Hours)
Recommended Skill Level
Beginner

Comments

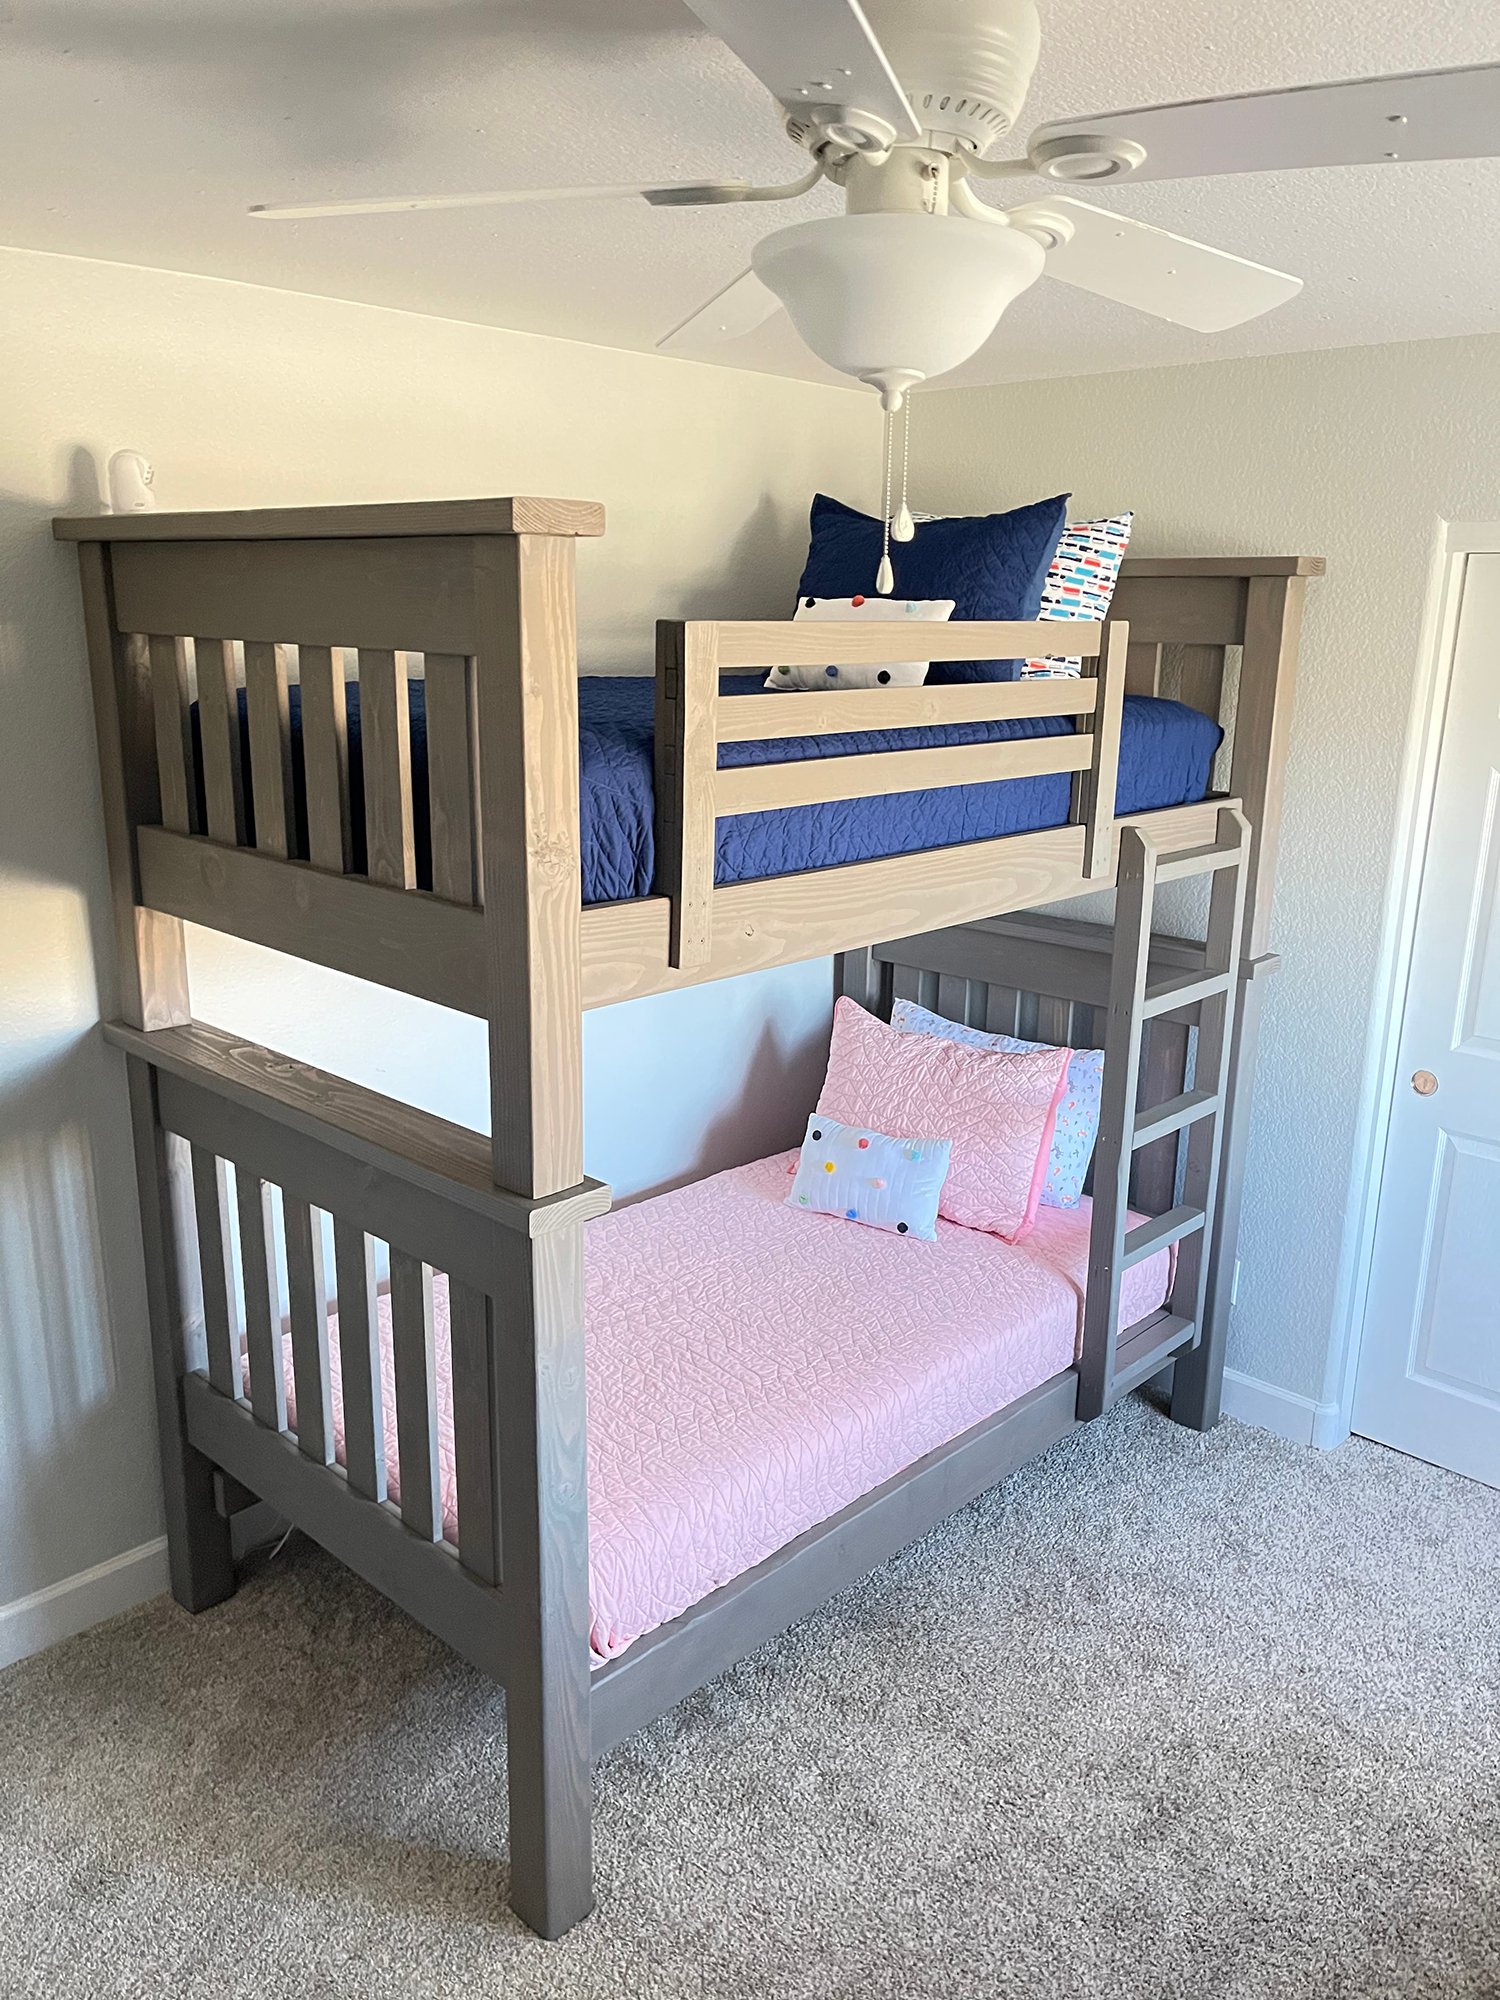
Simple Bunk Bed

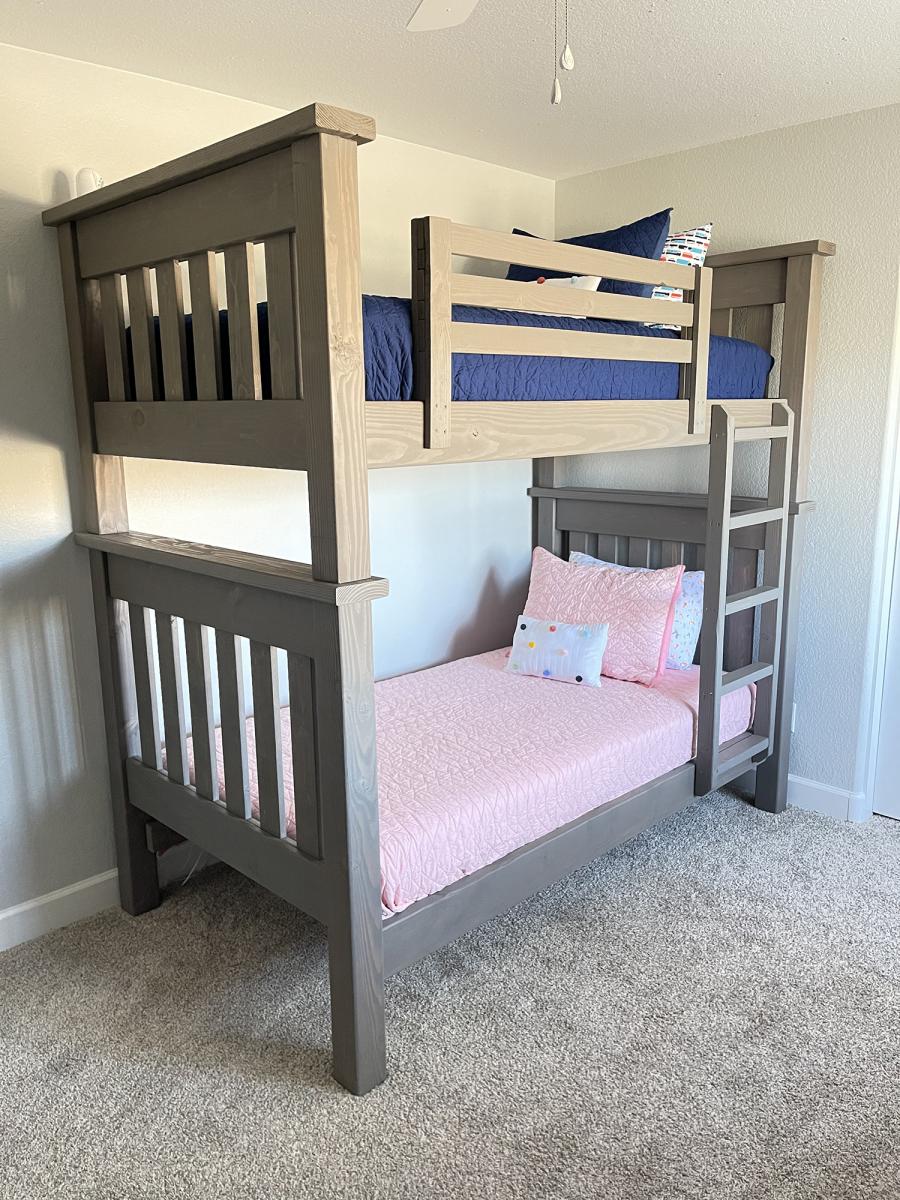
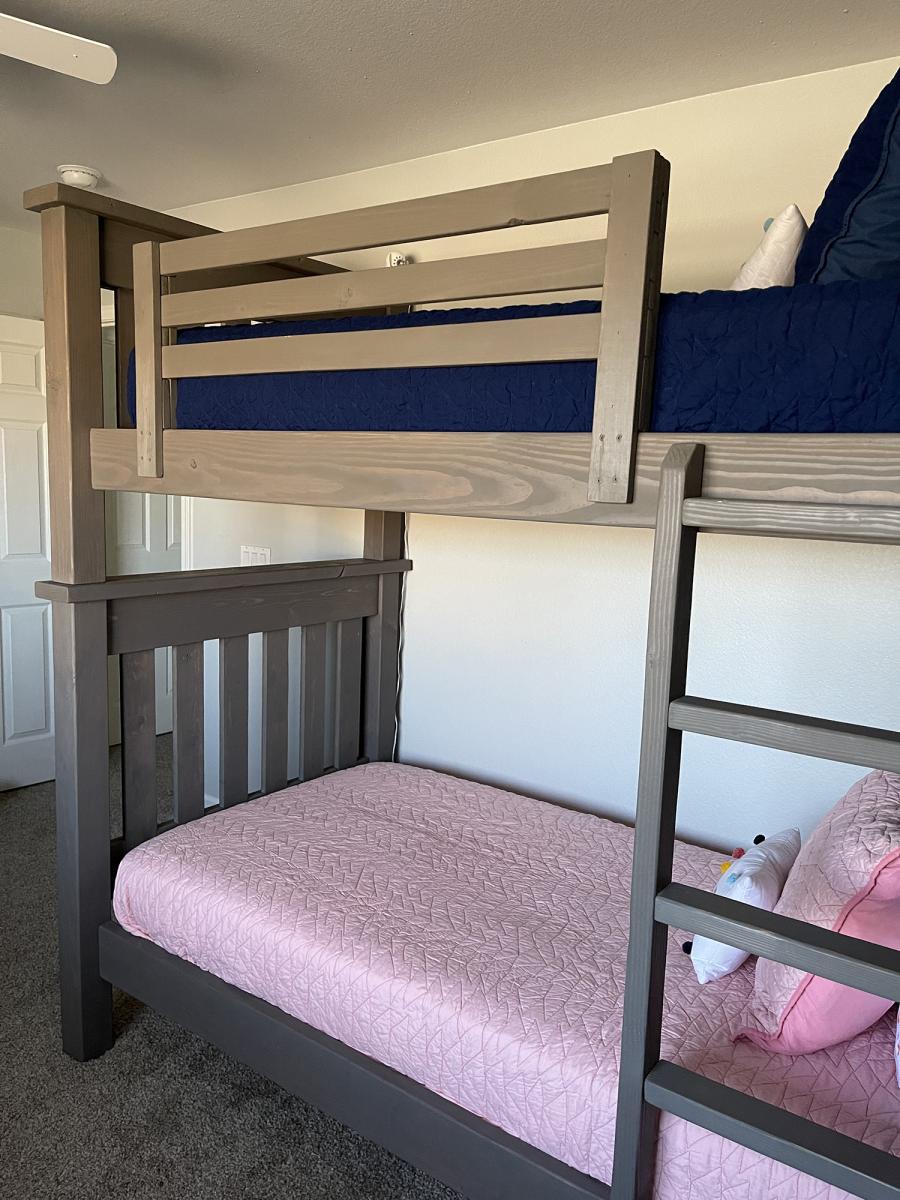
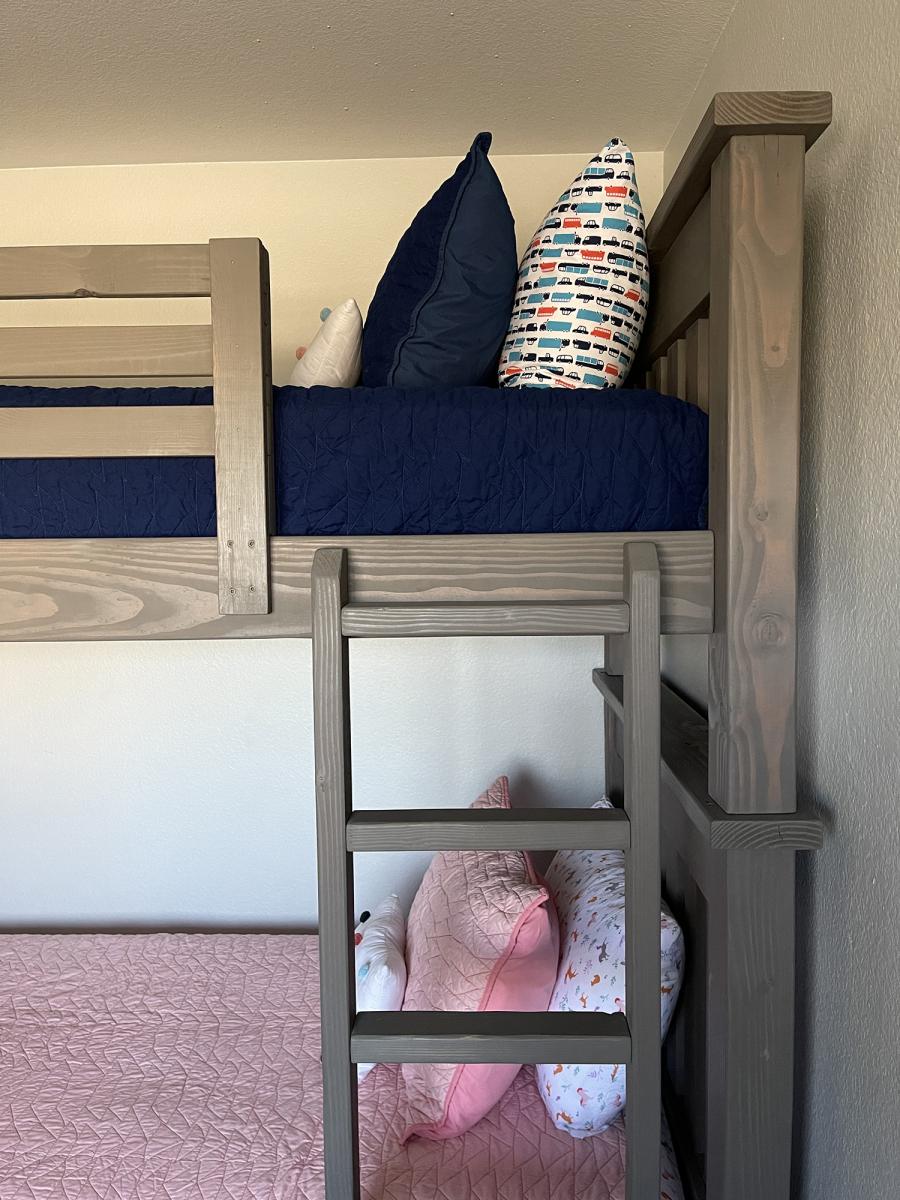
Submitted by jmartell10 on Sun, 06/27/2021 - 09:34

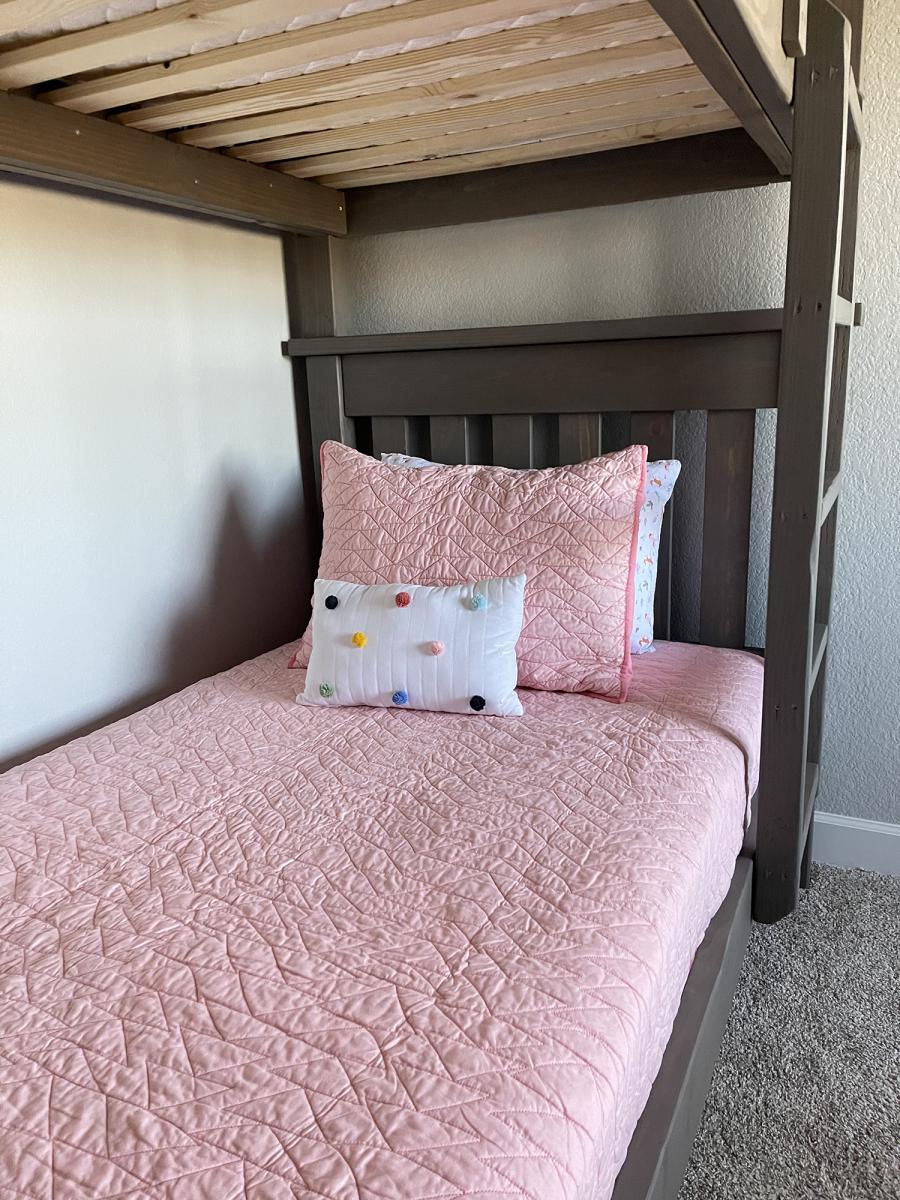
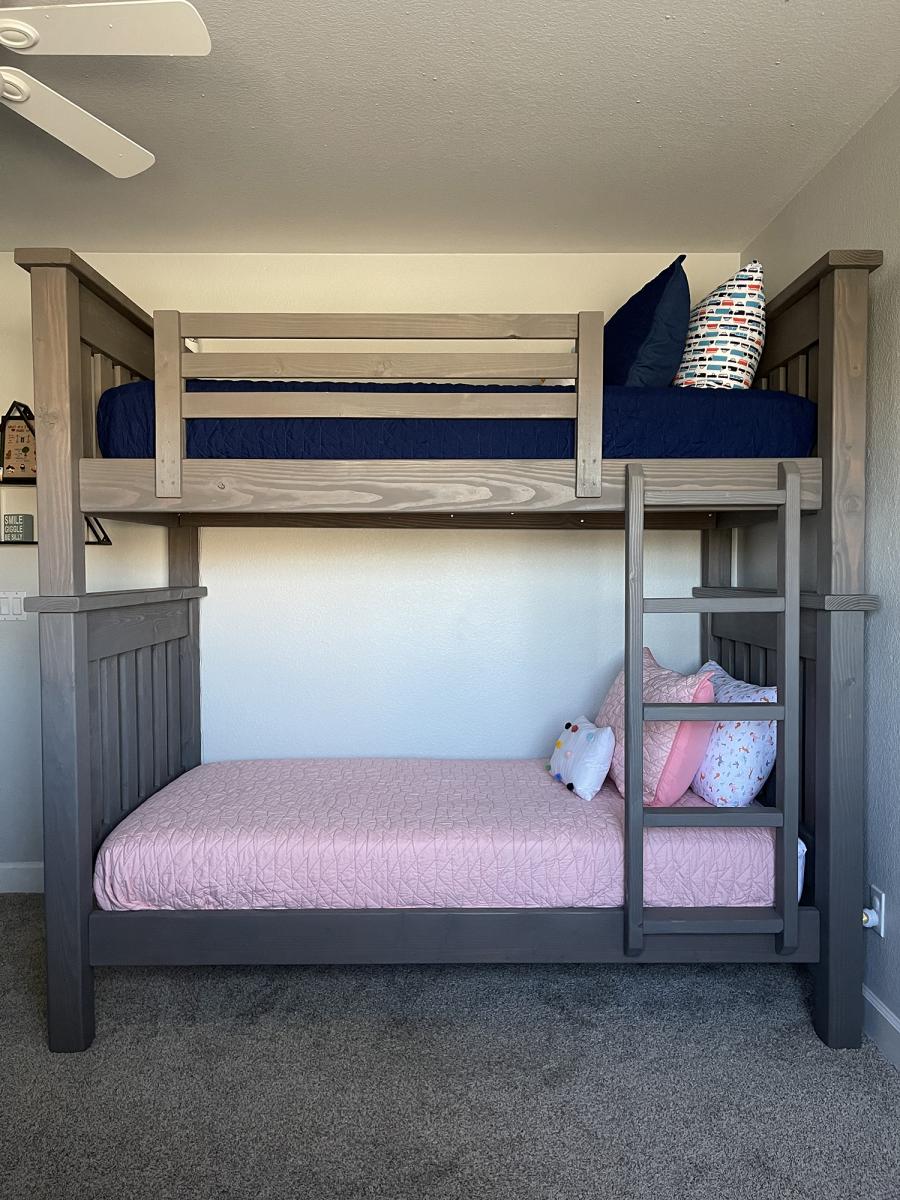
I searched high and low for the perfect bunk beds to buy for my four-year-old son and two-year-old daughter when our third child was on the way. We wanted something that had enough clearance between the top and bottom bunks so my husband and I could comfortably sit on the bottom bunk with our kids to read books before bed and it was nearly impossible to find a pre-made bed that fit that requirement in our price range. I was excited to find this plan because it looked like the perfect fit and we could modify it to meet our needs.

I built and stained most of the parts of the bed (while six months pregnant :P) and my husband did the final assembly. It took us about two weeks from start to finish since we could really only work during naptime and bedtime. We stained them with Behr water-based stain in Classic Gray. I love the way they turned out and they are super solid and heavy. My kids love them too.

Estimated Cost
$500
Estimated Time Investment
Week Long Project (20 Hours or More)
Finish Used
Behr water-based stain in Classic Gray
Recommended Skill Level
Beginner

Comments

White Oak Farmhouse Table

Submitted by Anonymous (not verified) on Sun, 06/04/2017 - 15:27

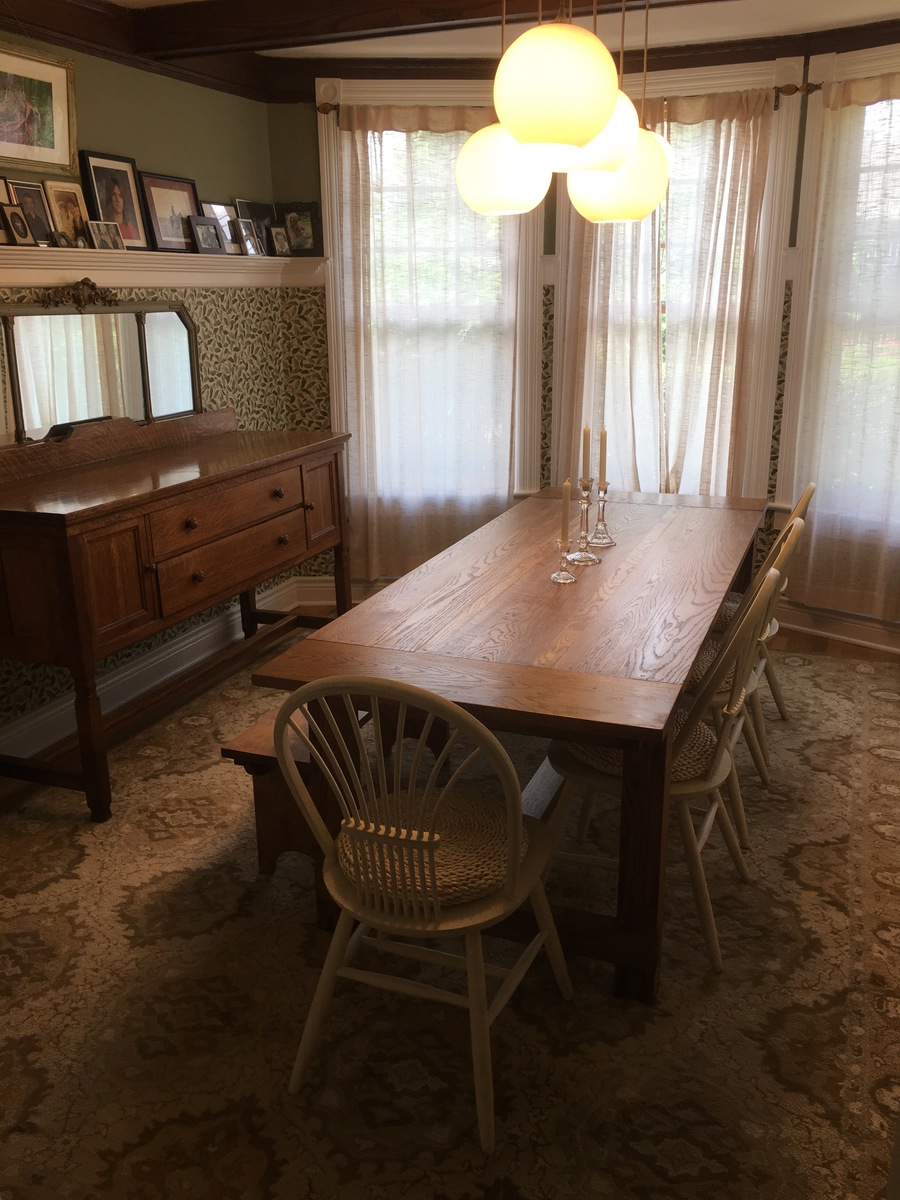
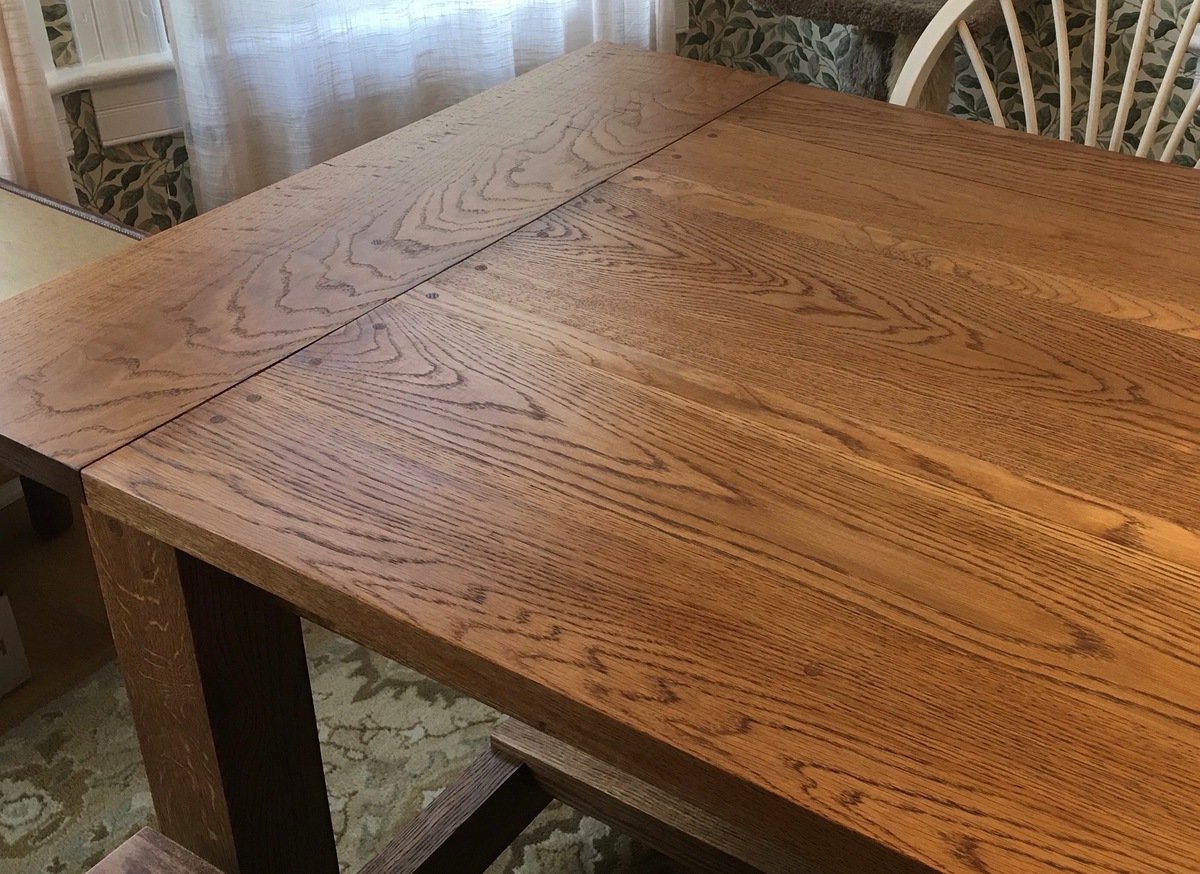
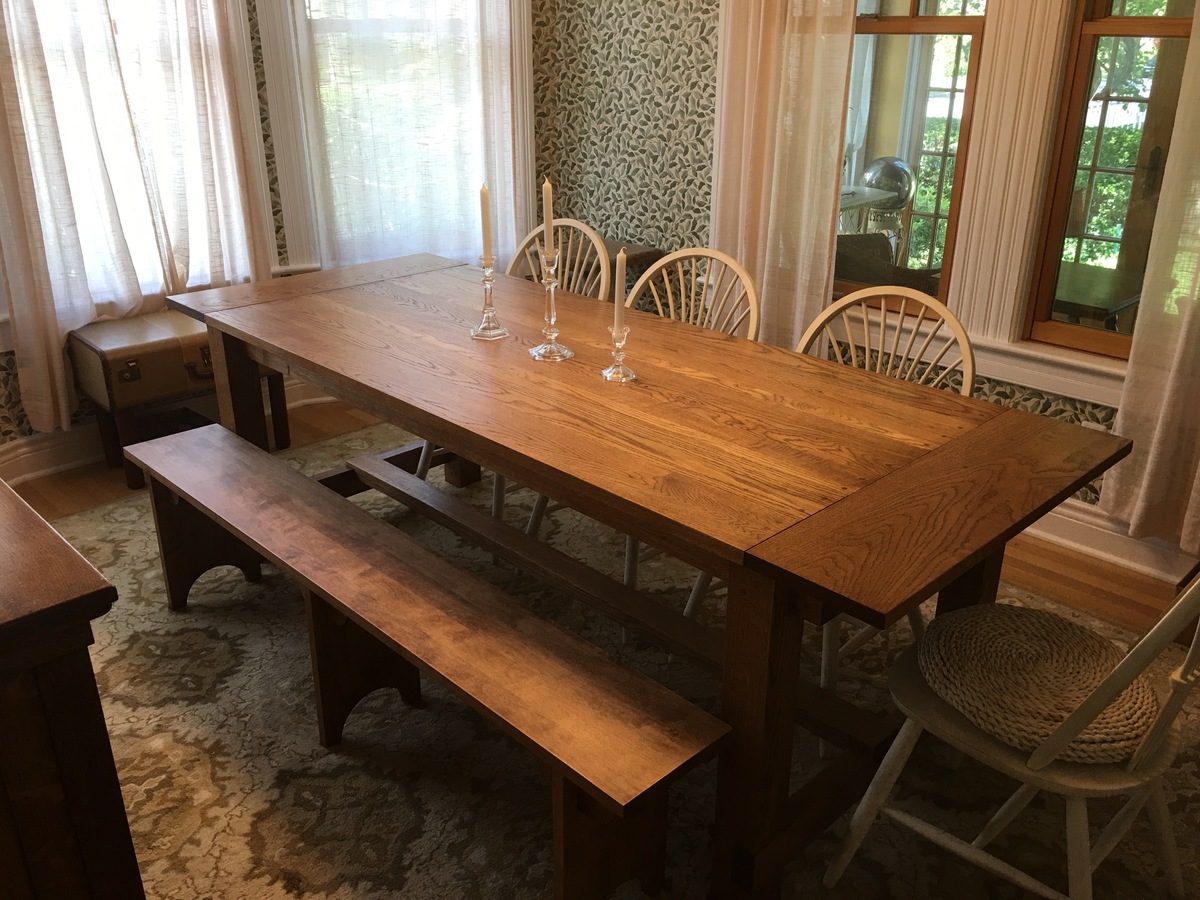
I built this using the Farmhouse Table plans, and we're thrilled with the results. My modifications included making the table longer and narrower to fit our dining room, and building it from some fantastic white oak from a local lumberyard called Boards & Beams in Fairfield, NJ. I used 5/4" thick boards of varying widths for the top, and created deeper overhangs at the ends by making the breadboard ends 10" deep. Unlike a more rustic version using pine, the lumber was extremely expensive, and the oak makes an already heavy table even heavier. Still, it is orders of magnitude less expensive than purchasing a custom table like this, and I only needed to "ship it" from my garage. 

My idea was to match, as closely as my skills would allow, the antique buffet in the photo next to the table. Or at least to build something that would look good next to the buffet. My prior woodworking experience is limited to DIY carpentry and building plywood shelves and radiator covers. I am not a "mortise and tenon" woodworker (although I'd like to learn). The plans are excellent because this was the first "real" furniture I've ever attempted, and it is literally as solid as if it were carved from a single piece of wood. I rented a 12" compound miter saw from Home Depot to make most of the cuts in one day, which worked out extremely well. The visible screw holes I plugged with oak dowls. 
If you decide to build this (or anything) from a hardwood, here are a couple mistakes I made early on that you don't want to repeat. First, EVERY screw into every piece needs a pilot hole. If you have even the slightest thought that your screw is about to strip or break, it is. Second, higher-quality wood is often cut larger than what you find in a big box store. A 2 x 4, which might be 1.5 x 3.5 from Home Depot, can be 1.75 x 3.75. This really matters a lot, and so you have to measure your actual wood and re-calculate every measurement accordingly. The upsides, for me, included fewer warped pieces, less splintering, and greater ease of sanding and finishing.

Thank you very much for posting these plans and for your excellent "how-to" on cutting out the notches. 


Estimated Cost
$900 worth of wood and screws, $50 for saw rental, $15 worth of stain and poly.
Estimated Time Investment
Week Long Project (20 Hours or More)
Finish Used
Varithane "Provincial" stain, applied with a rag, followed by three coats of Minwax Wipe-on Polyurethane applied with a rag. I used less than 1 pint of stain for the whole table. The Wipe-on is less glossy than a brush-on. It really wants to go on in VERY thin coats. I may have done 4 coats on the top. In between coats, I sanded with wet-dry grits of 800-1000. The result is a very even finish (but not as even as a professionally applied finish) that you can still feel the grain through, and there are no brush strokes to deal with.
Recommended Skill Level
Intermediate

Clock

Submitted by tedgray86 on Tue, 03/17/2015 - 22:10

For build materials, please ask!


Estimated Cost
$50
Estimated Time Investment
Day Project (6-9 Hours)
Finish Used
Gray stain
Recommended Skill Level
Intermediate

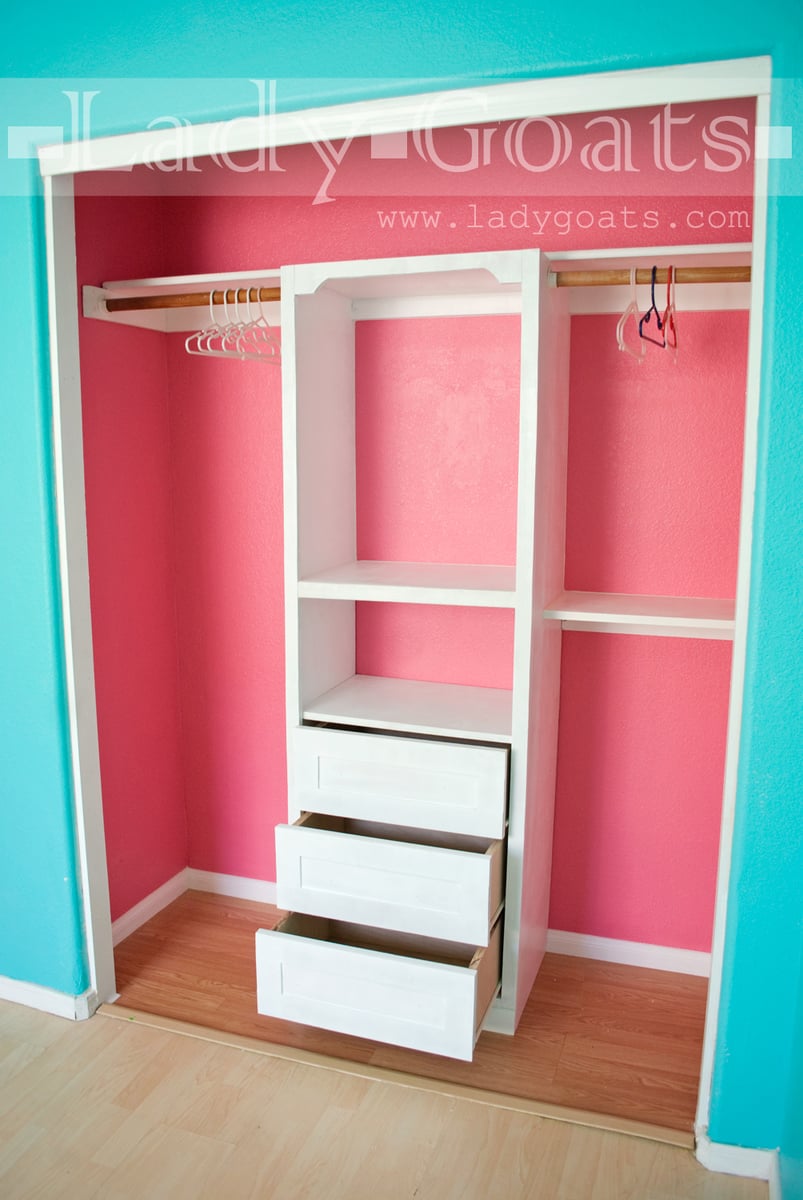
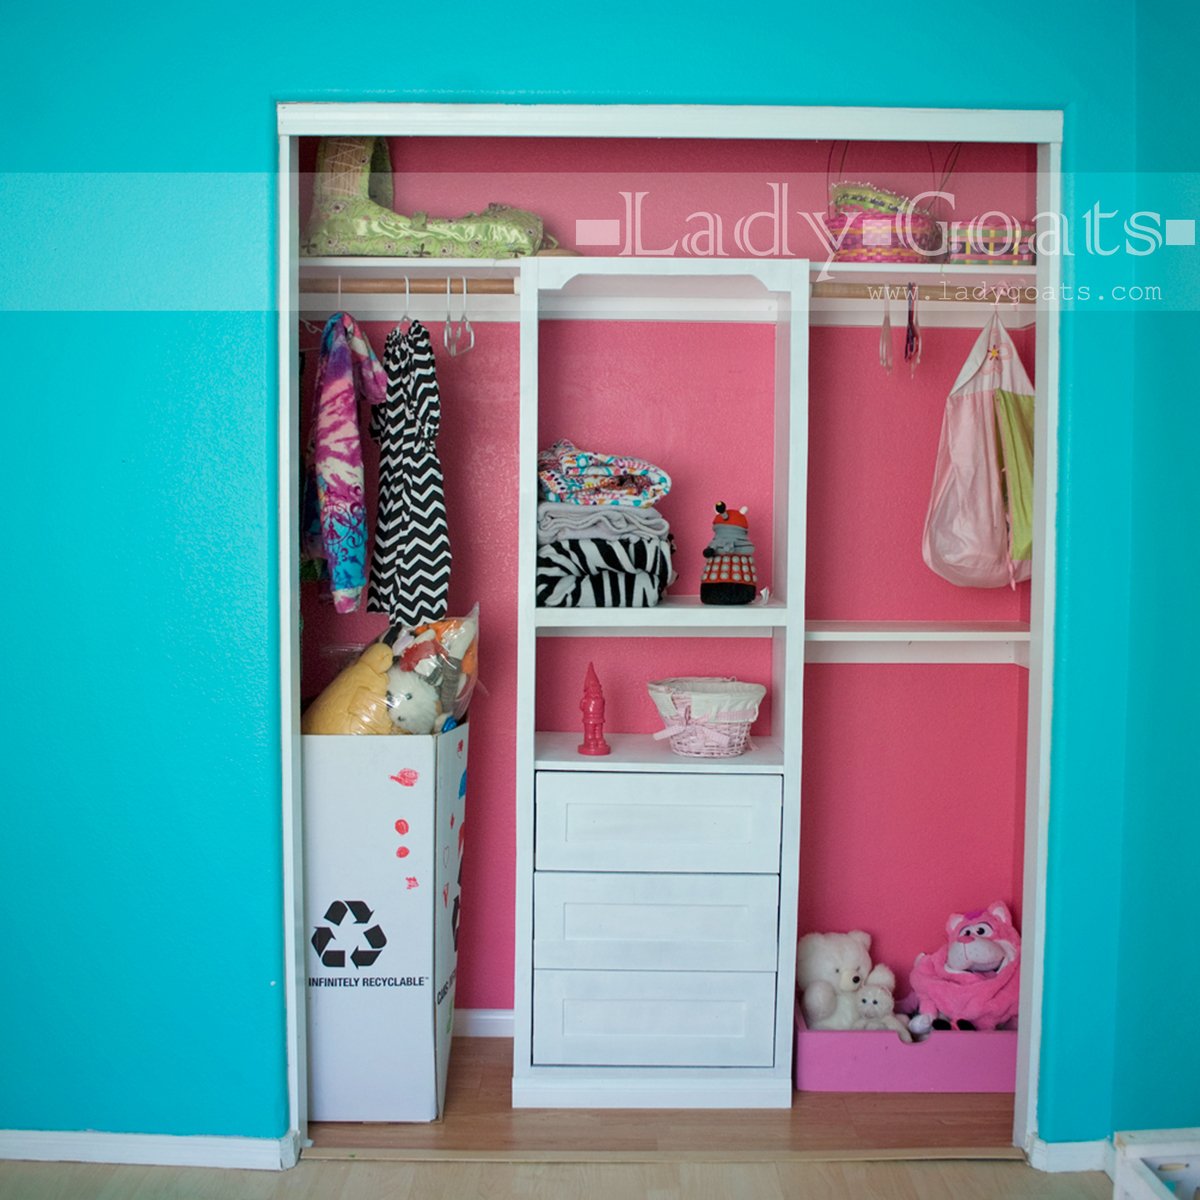
Drawers for the Closet Tower

Submitted by Lady Goats on Tue, 03/24/2015 - 10:40

When I realized I was going to build the closet tower, i made sure there were plans for the drawers before beginning. Thankfully there were, so that made this a brainless build. Thanks, Ana! Read about the build, here

Estimated Cost
$100
Estimated Time Investment
Weekend Project (10-20 Hours)
Finish Used
Behr Ultra White in semi-gloss
Recommended Skill Level
Intermediate

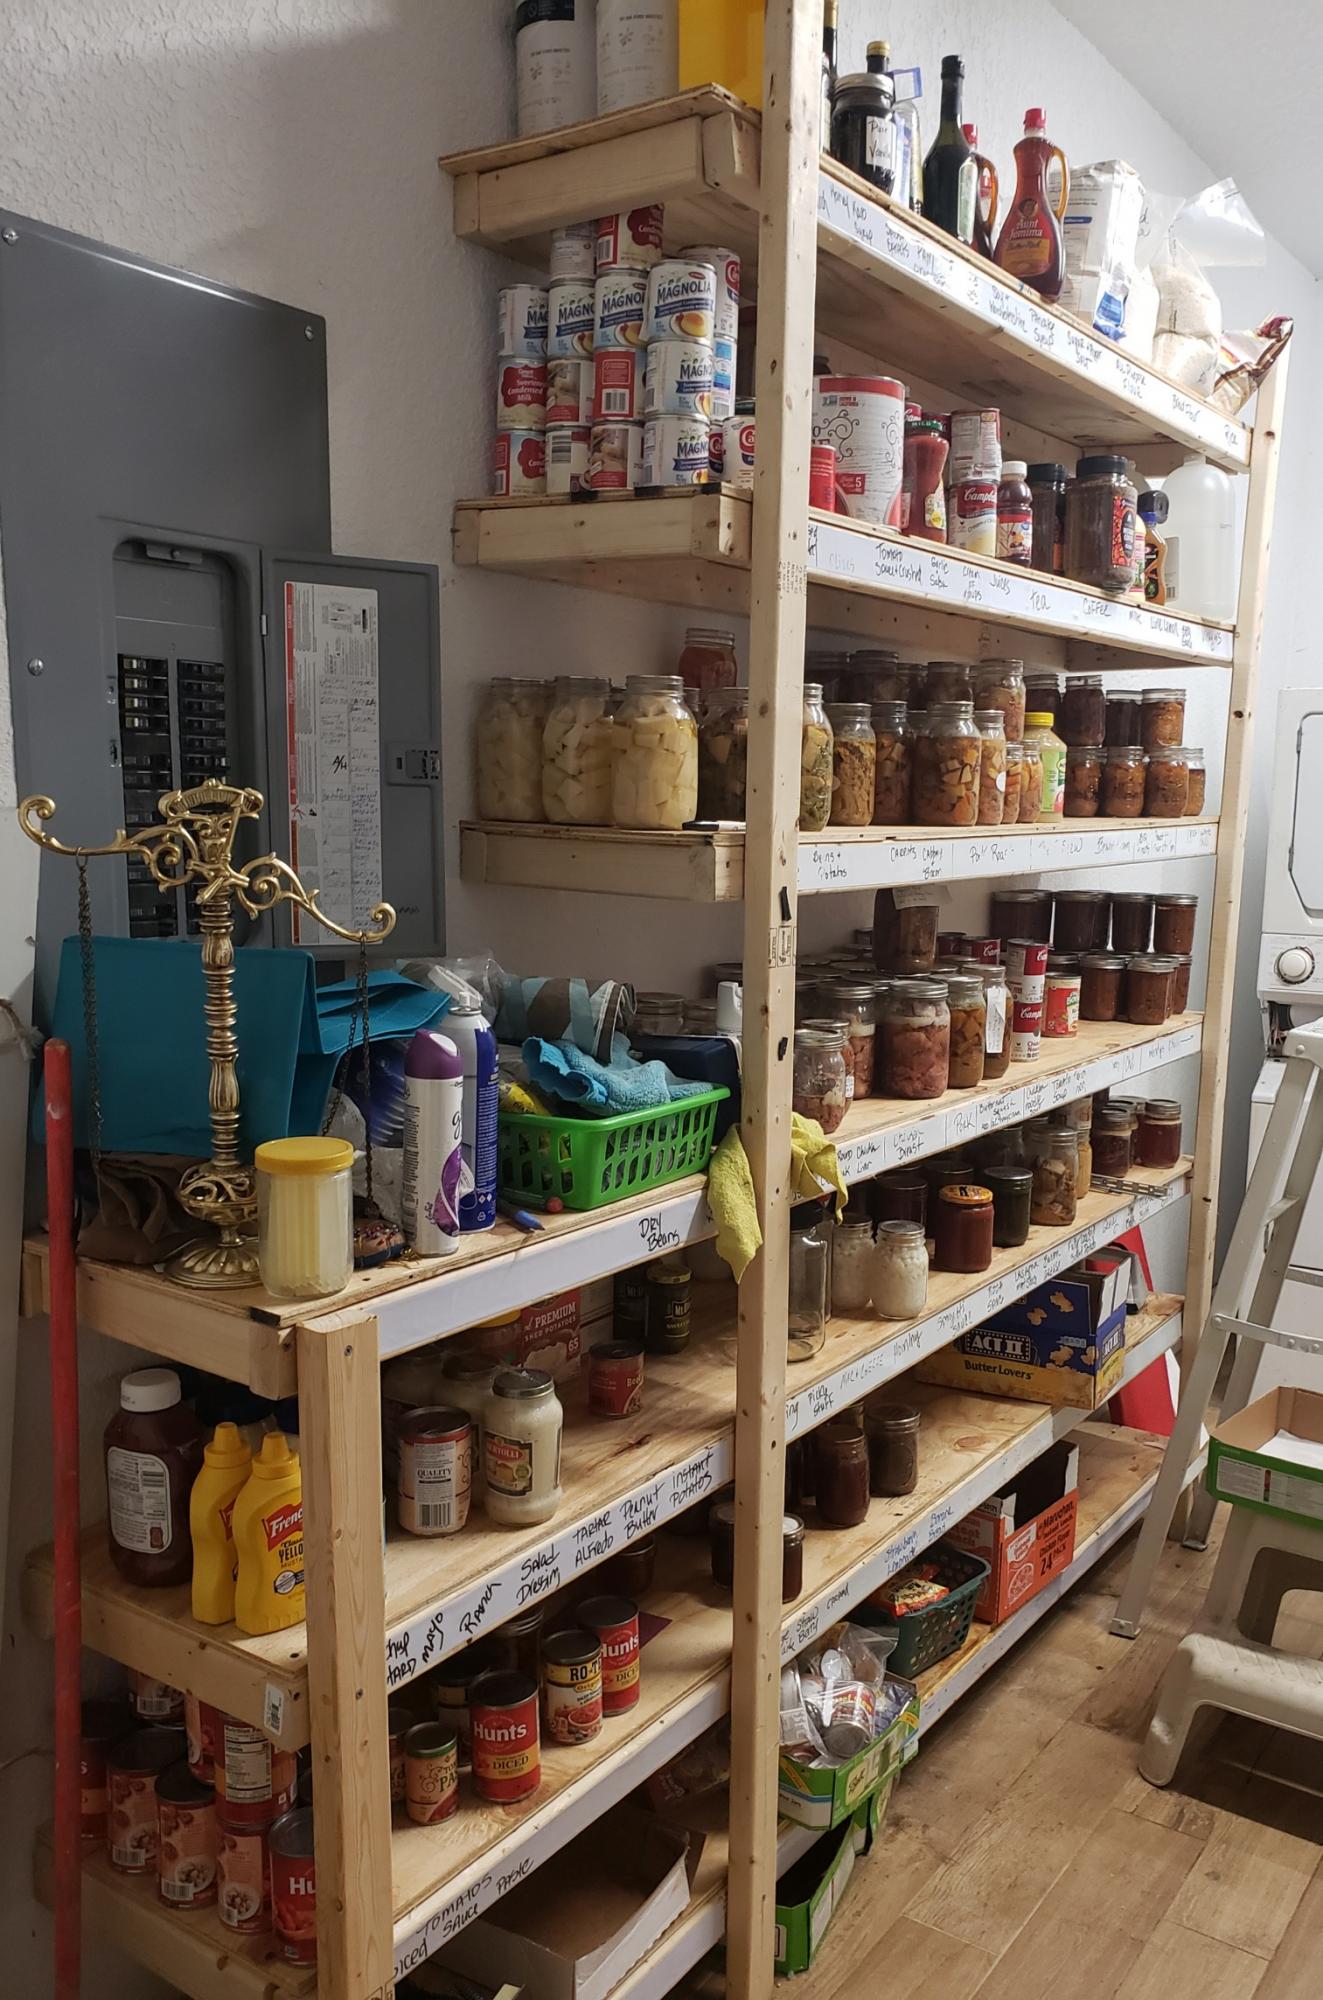
Canning shelves

Submitted by Anonymous (not verified) on Mon, 10/04/2021 - 12:11

I was 58 when I built these. Super easy. I also built these in my kitchen to store all my gadgets..
Thanks Ana. You have so many things I want to try.
April E

Comments