Community Brag Posts
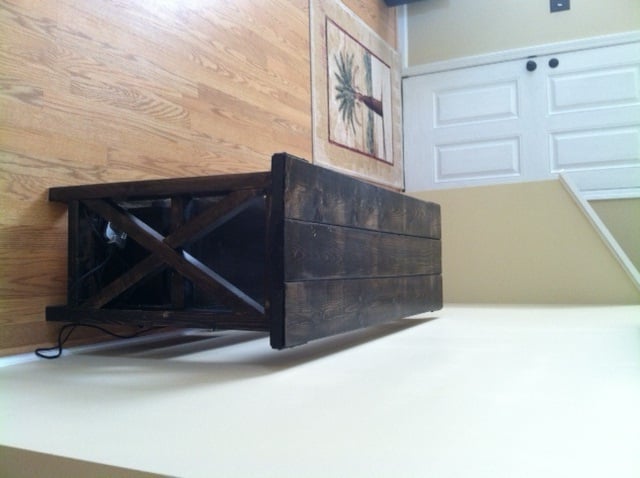
1st project
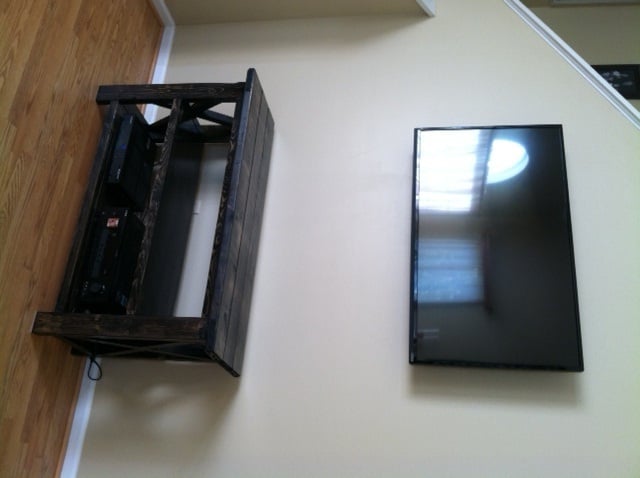
Built a set, used this as an entertainment stand below the TV, mactching coffee table done and end table to go with it. Altered the plans (dimensions) a little to accommodate my room. Love this site! Thanks Ana!
Estimated Time Investment
Weekend Project (10-20 Hours)
Recommended Skill Level
Beginner
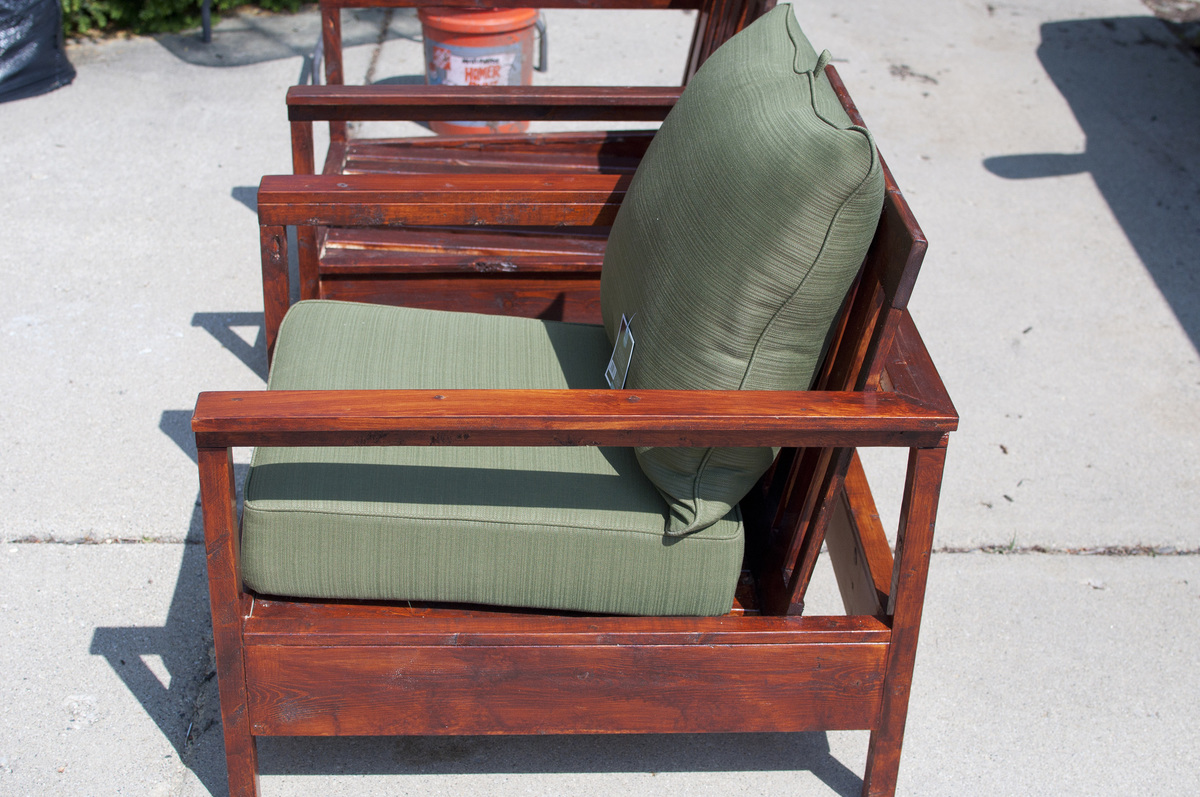
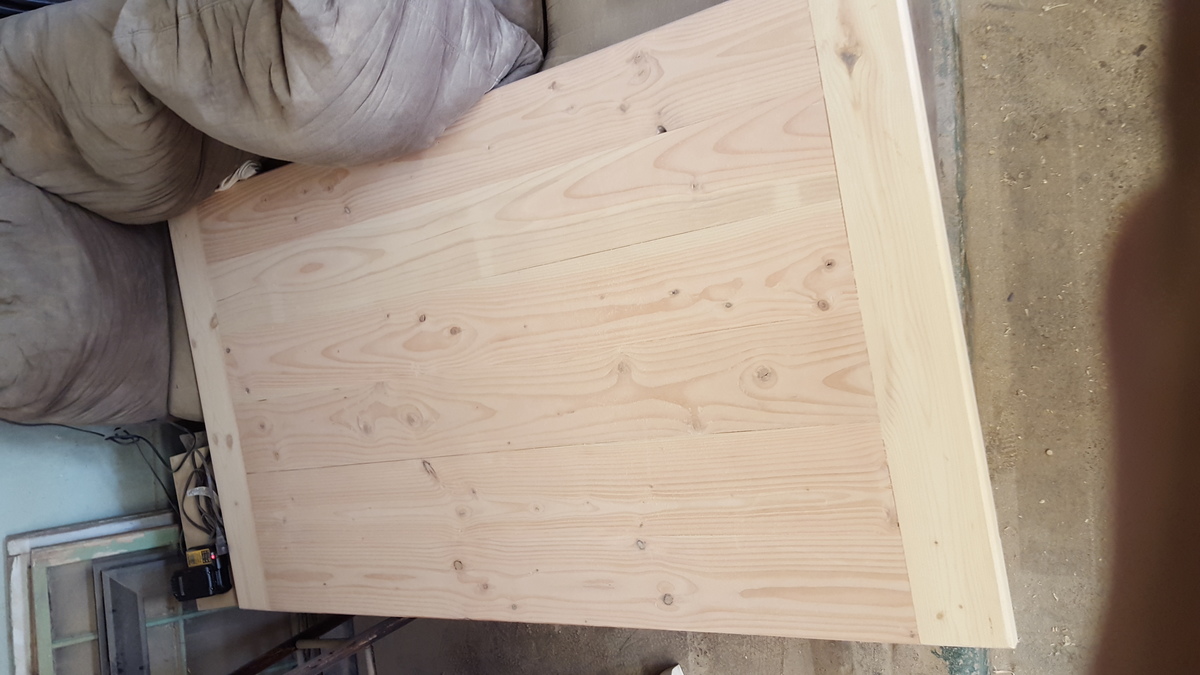
Pocket hole top, 6" lag bolt frame
Slightly lengthened from the plan, used 6" exposed lag bolts for a sturdier frame, covered the bolts on the sides with a dowel cap over the bolt to mimic a dowel construction.
Built from Plan(s)
Estimated Cost
$200
Estimated Time Investment
Week Long Project (20 Hours or More)
Finish Used
Minwax Honey stain with a water based matte finish - 3 coats.
Recommended Skill Level
Intermediate
Comments

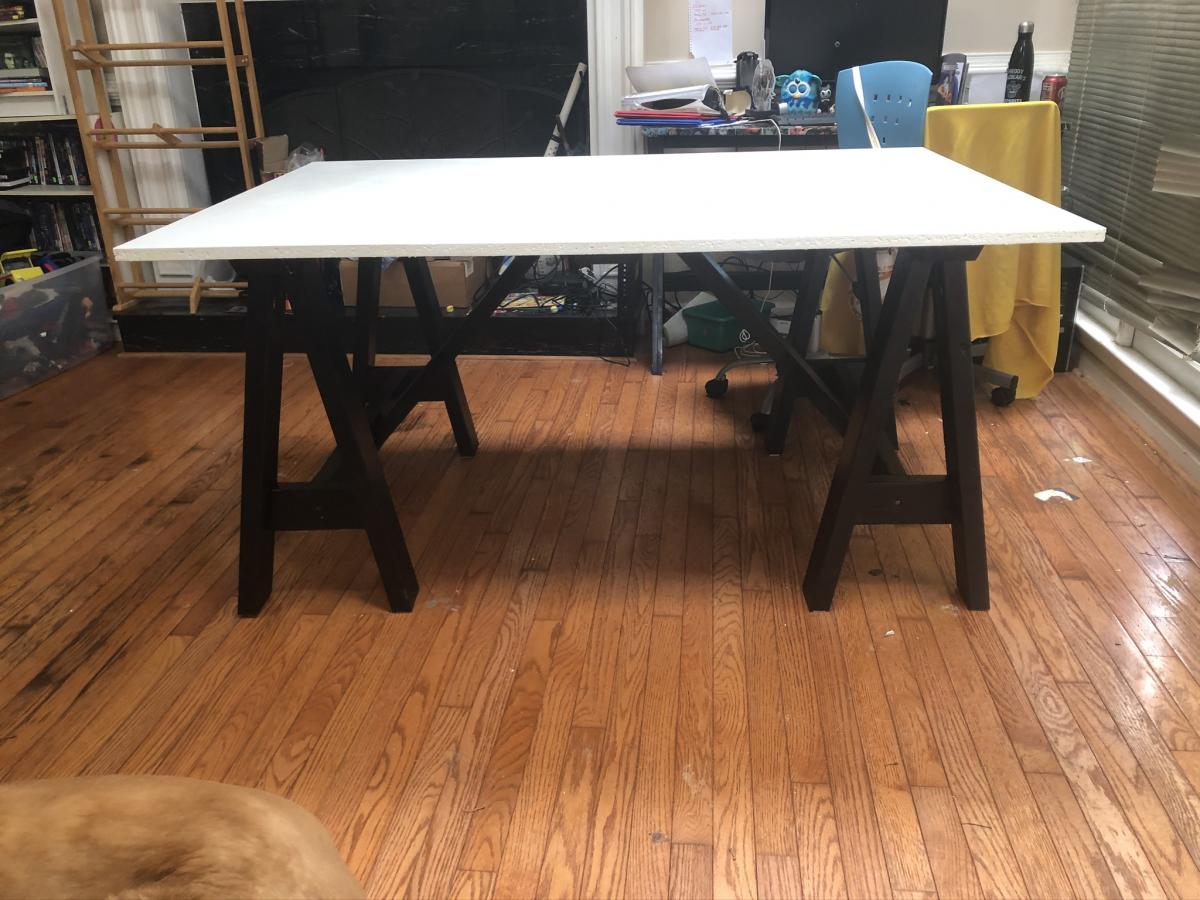
Farmhouse X desk
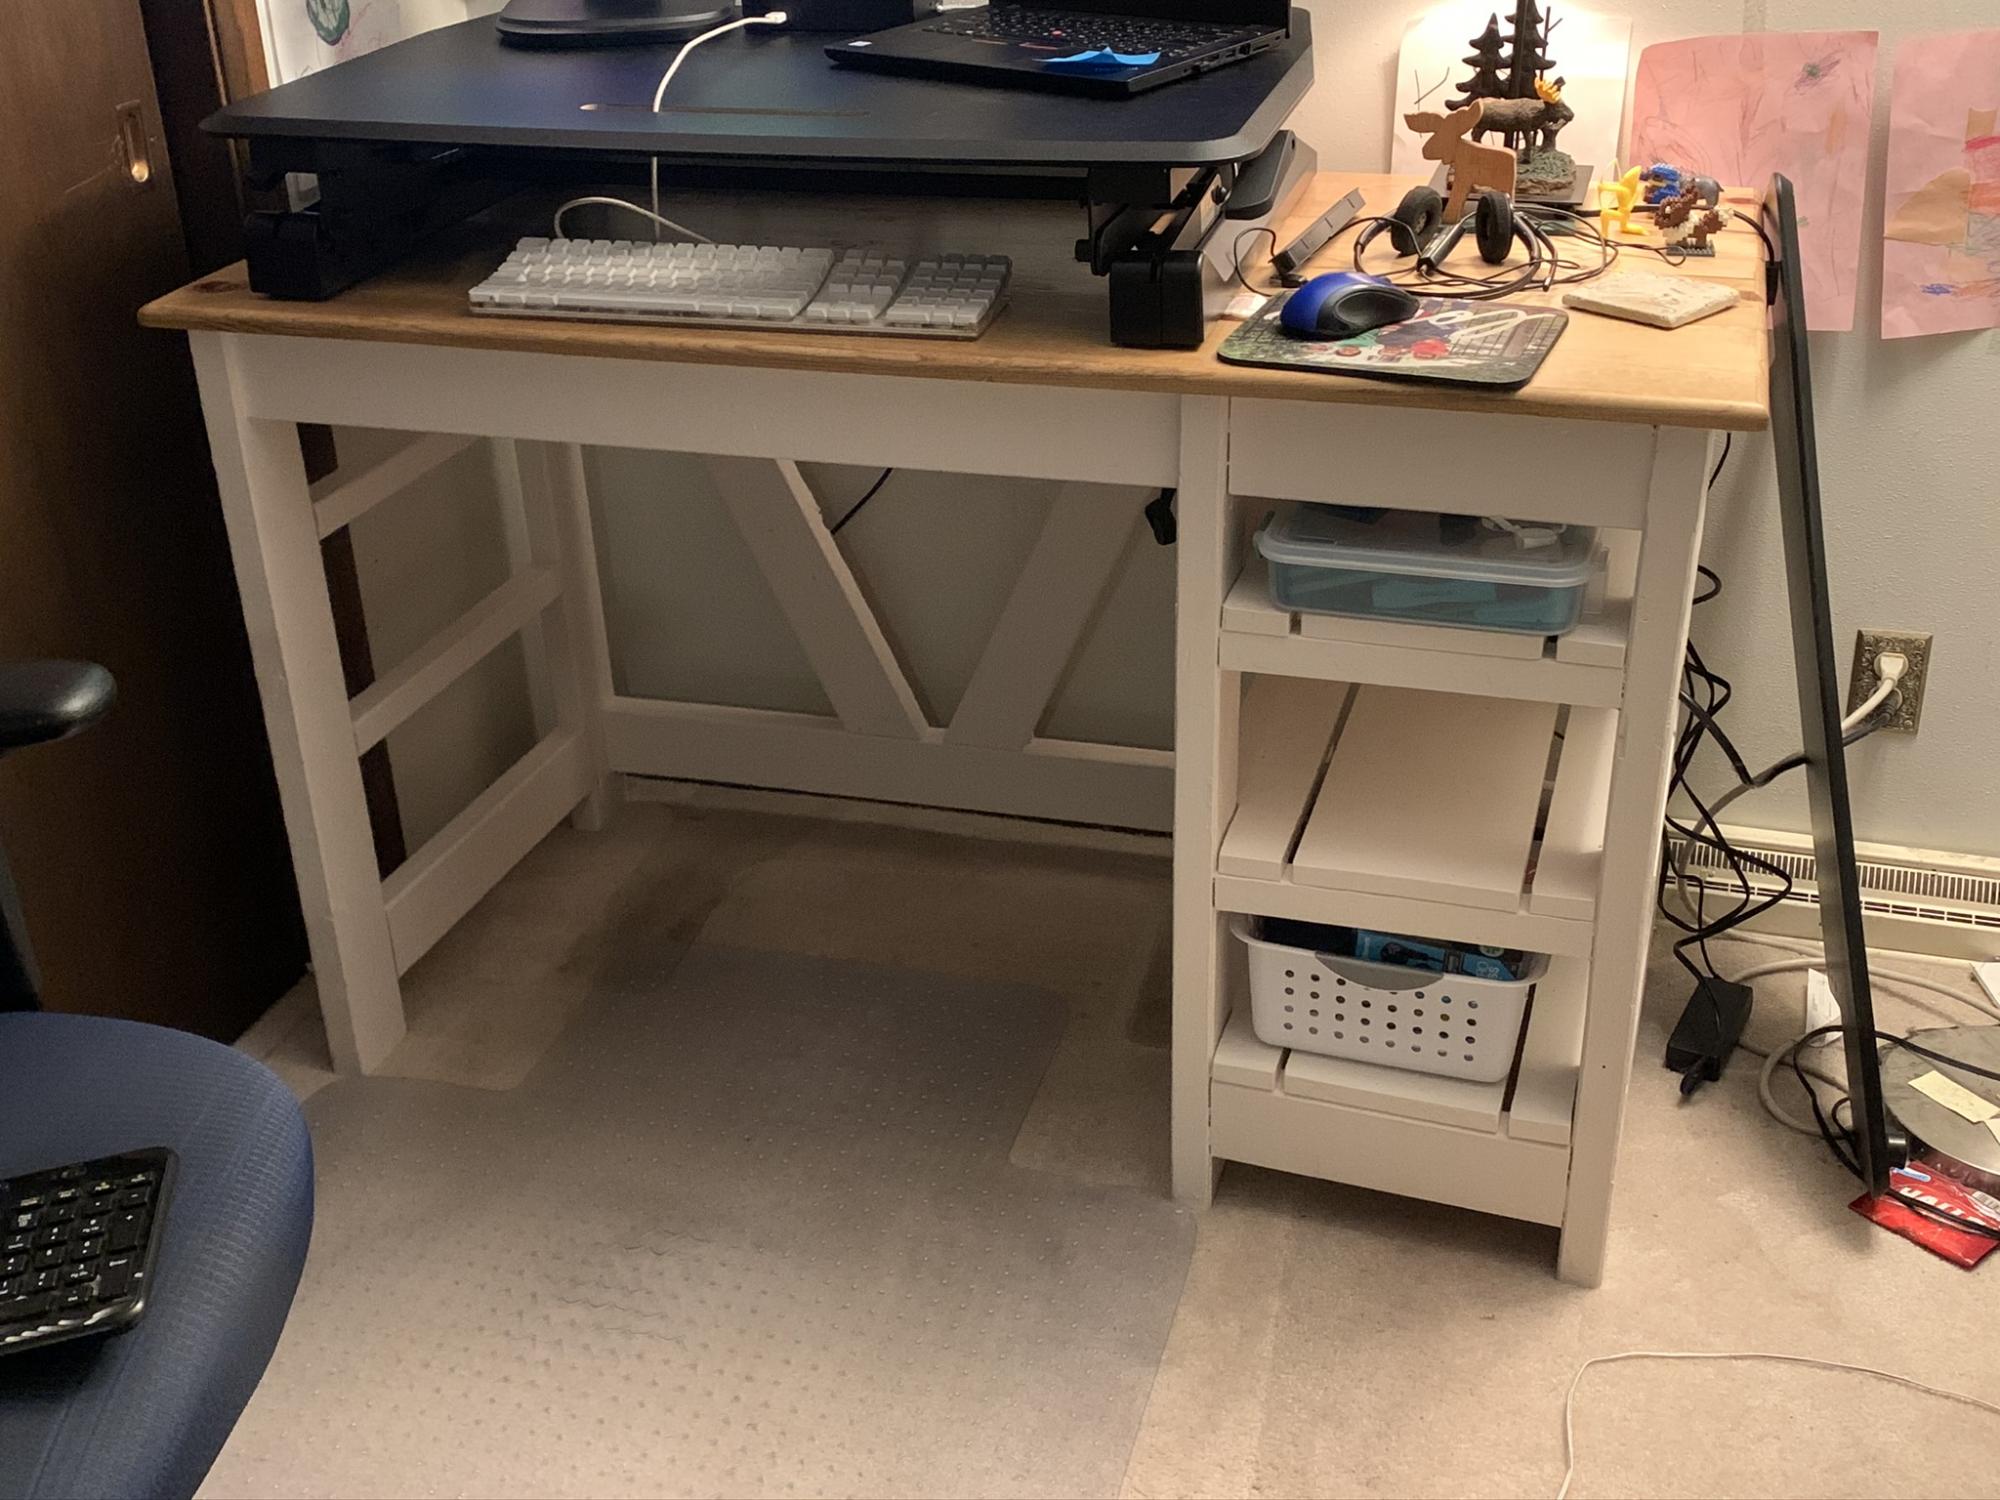
I changed the design a bit and added shelves to fit bins and a pencil box.
Built from Plan(s)
Pork and Bean Can Storage
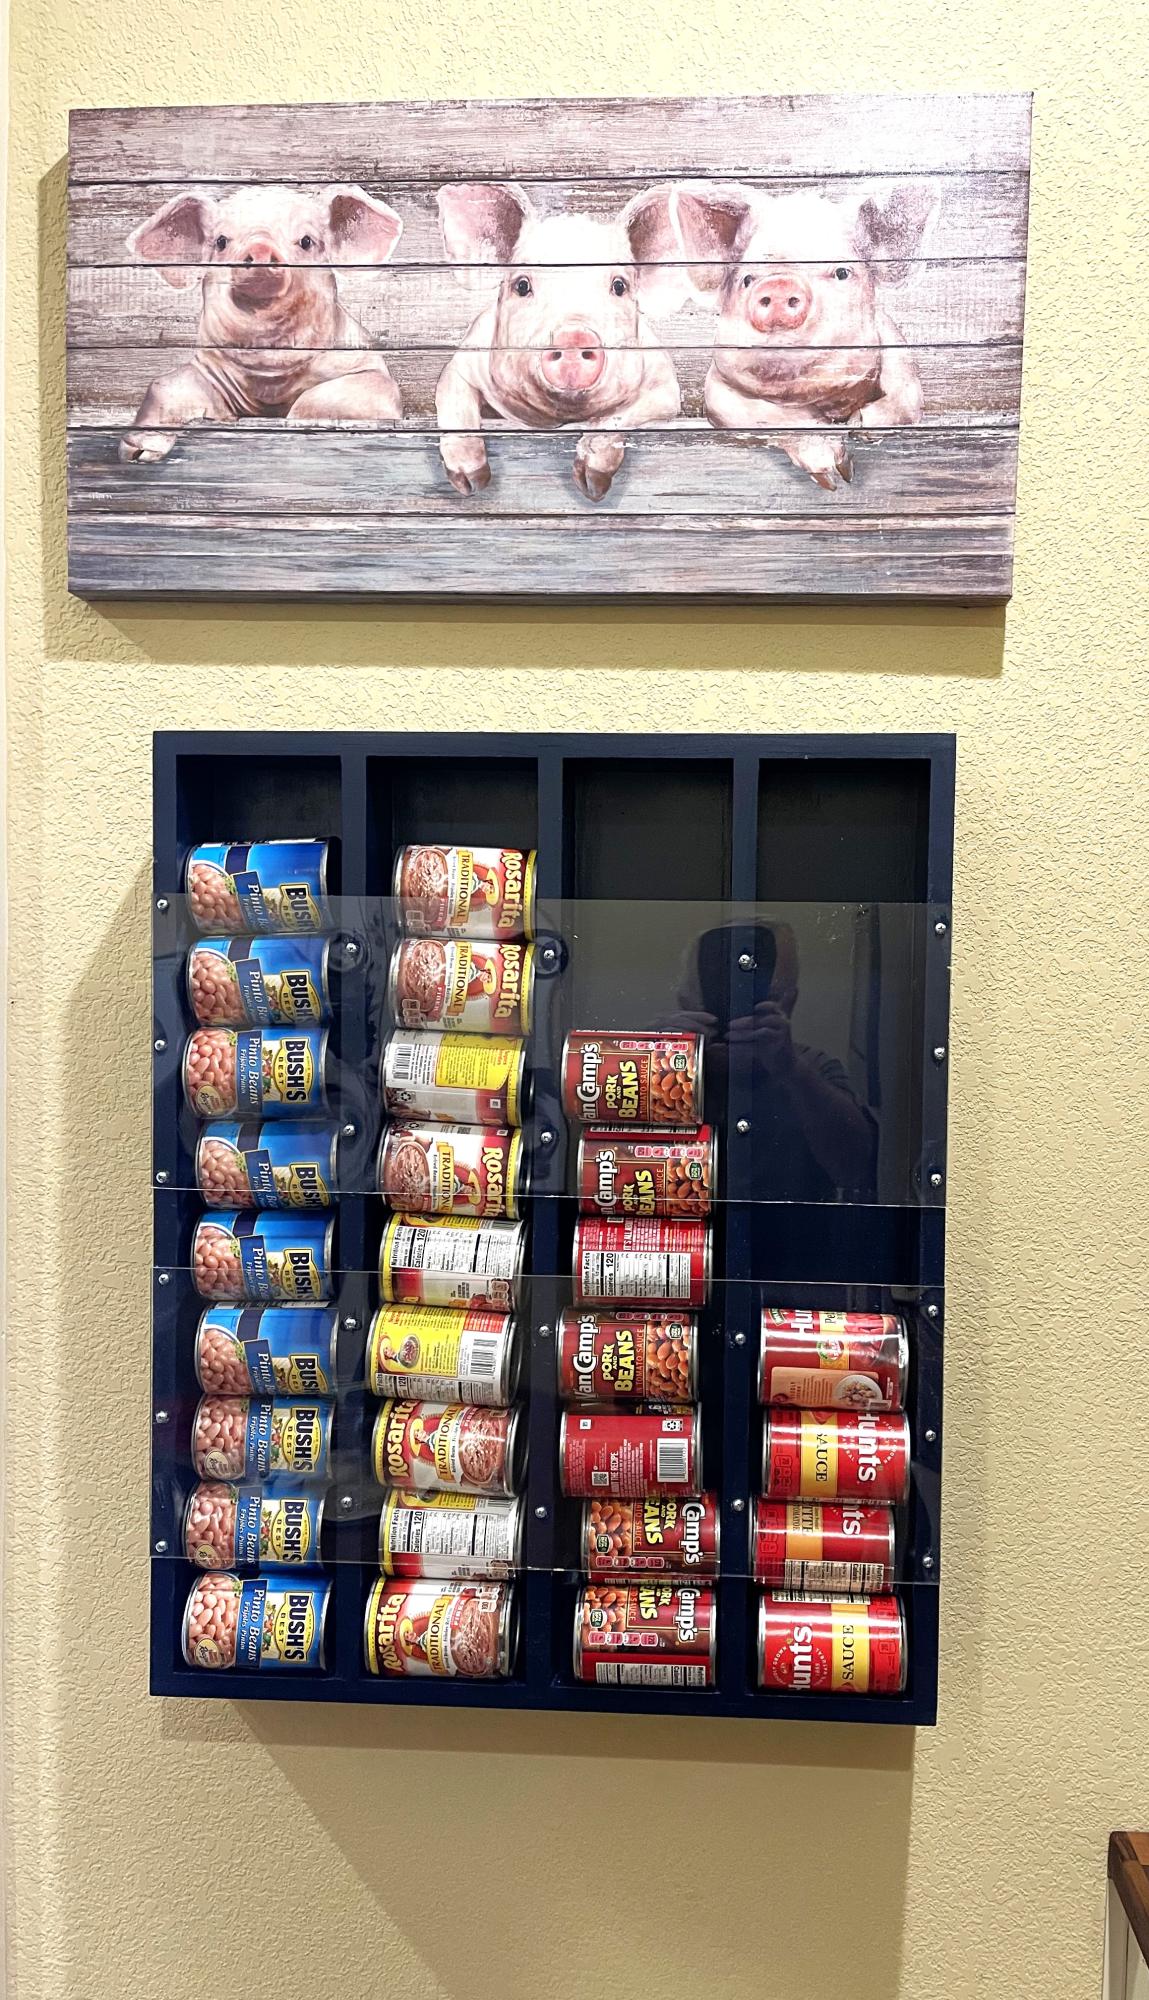
Pork and Bean Wall Storage
John
Built from Plan(s)
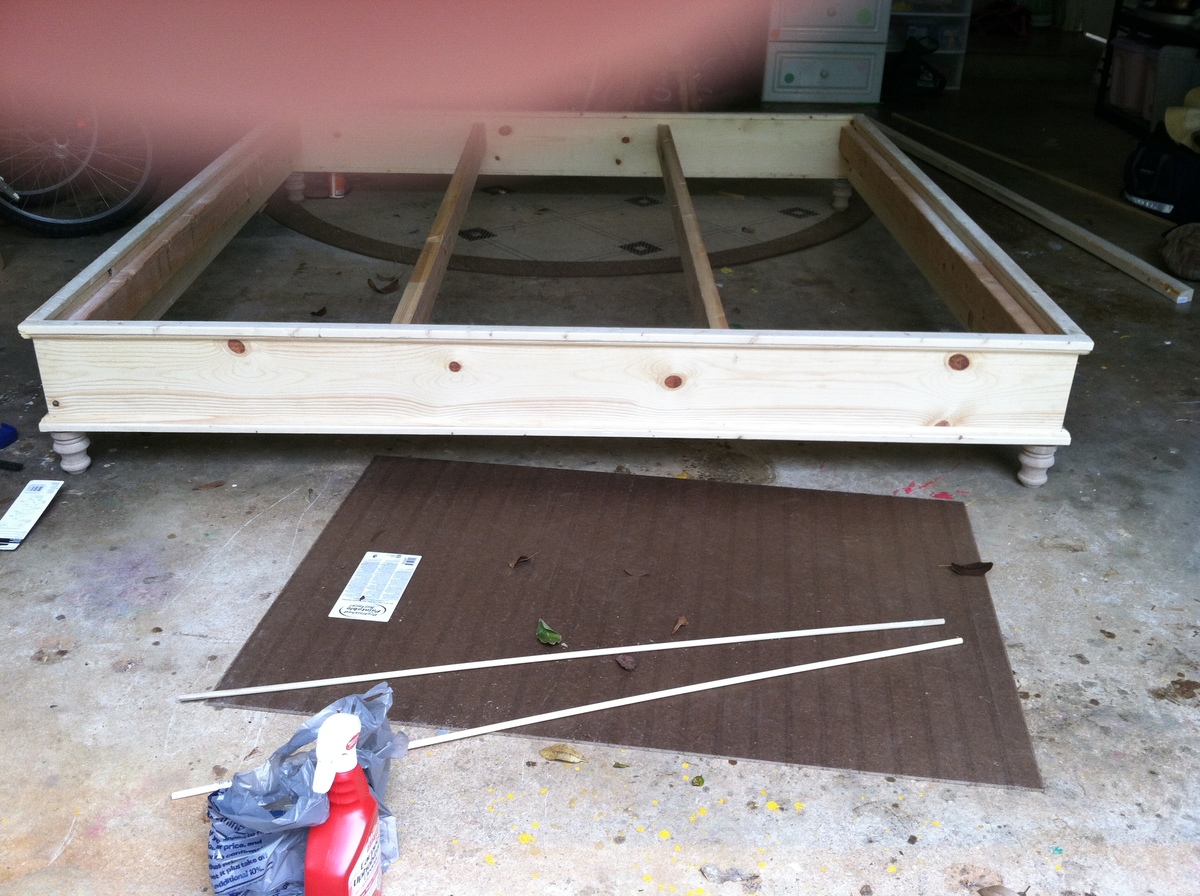
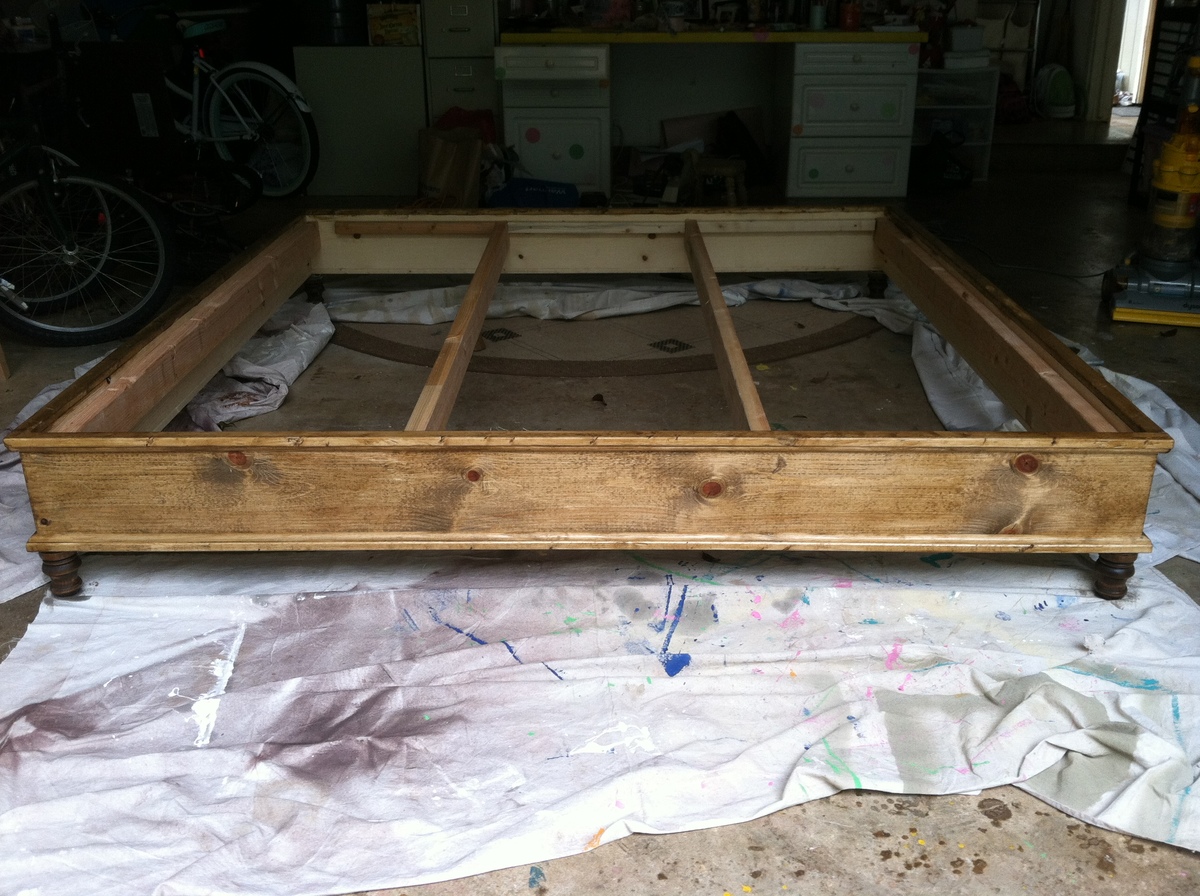
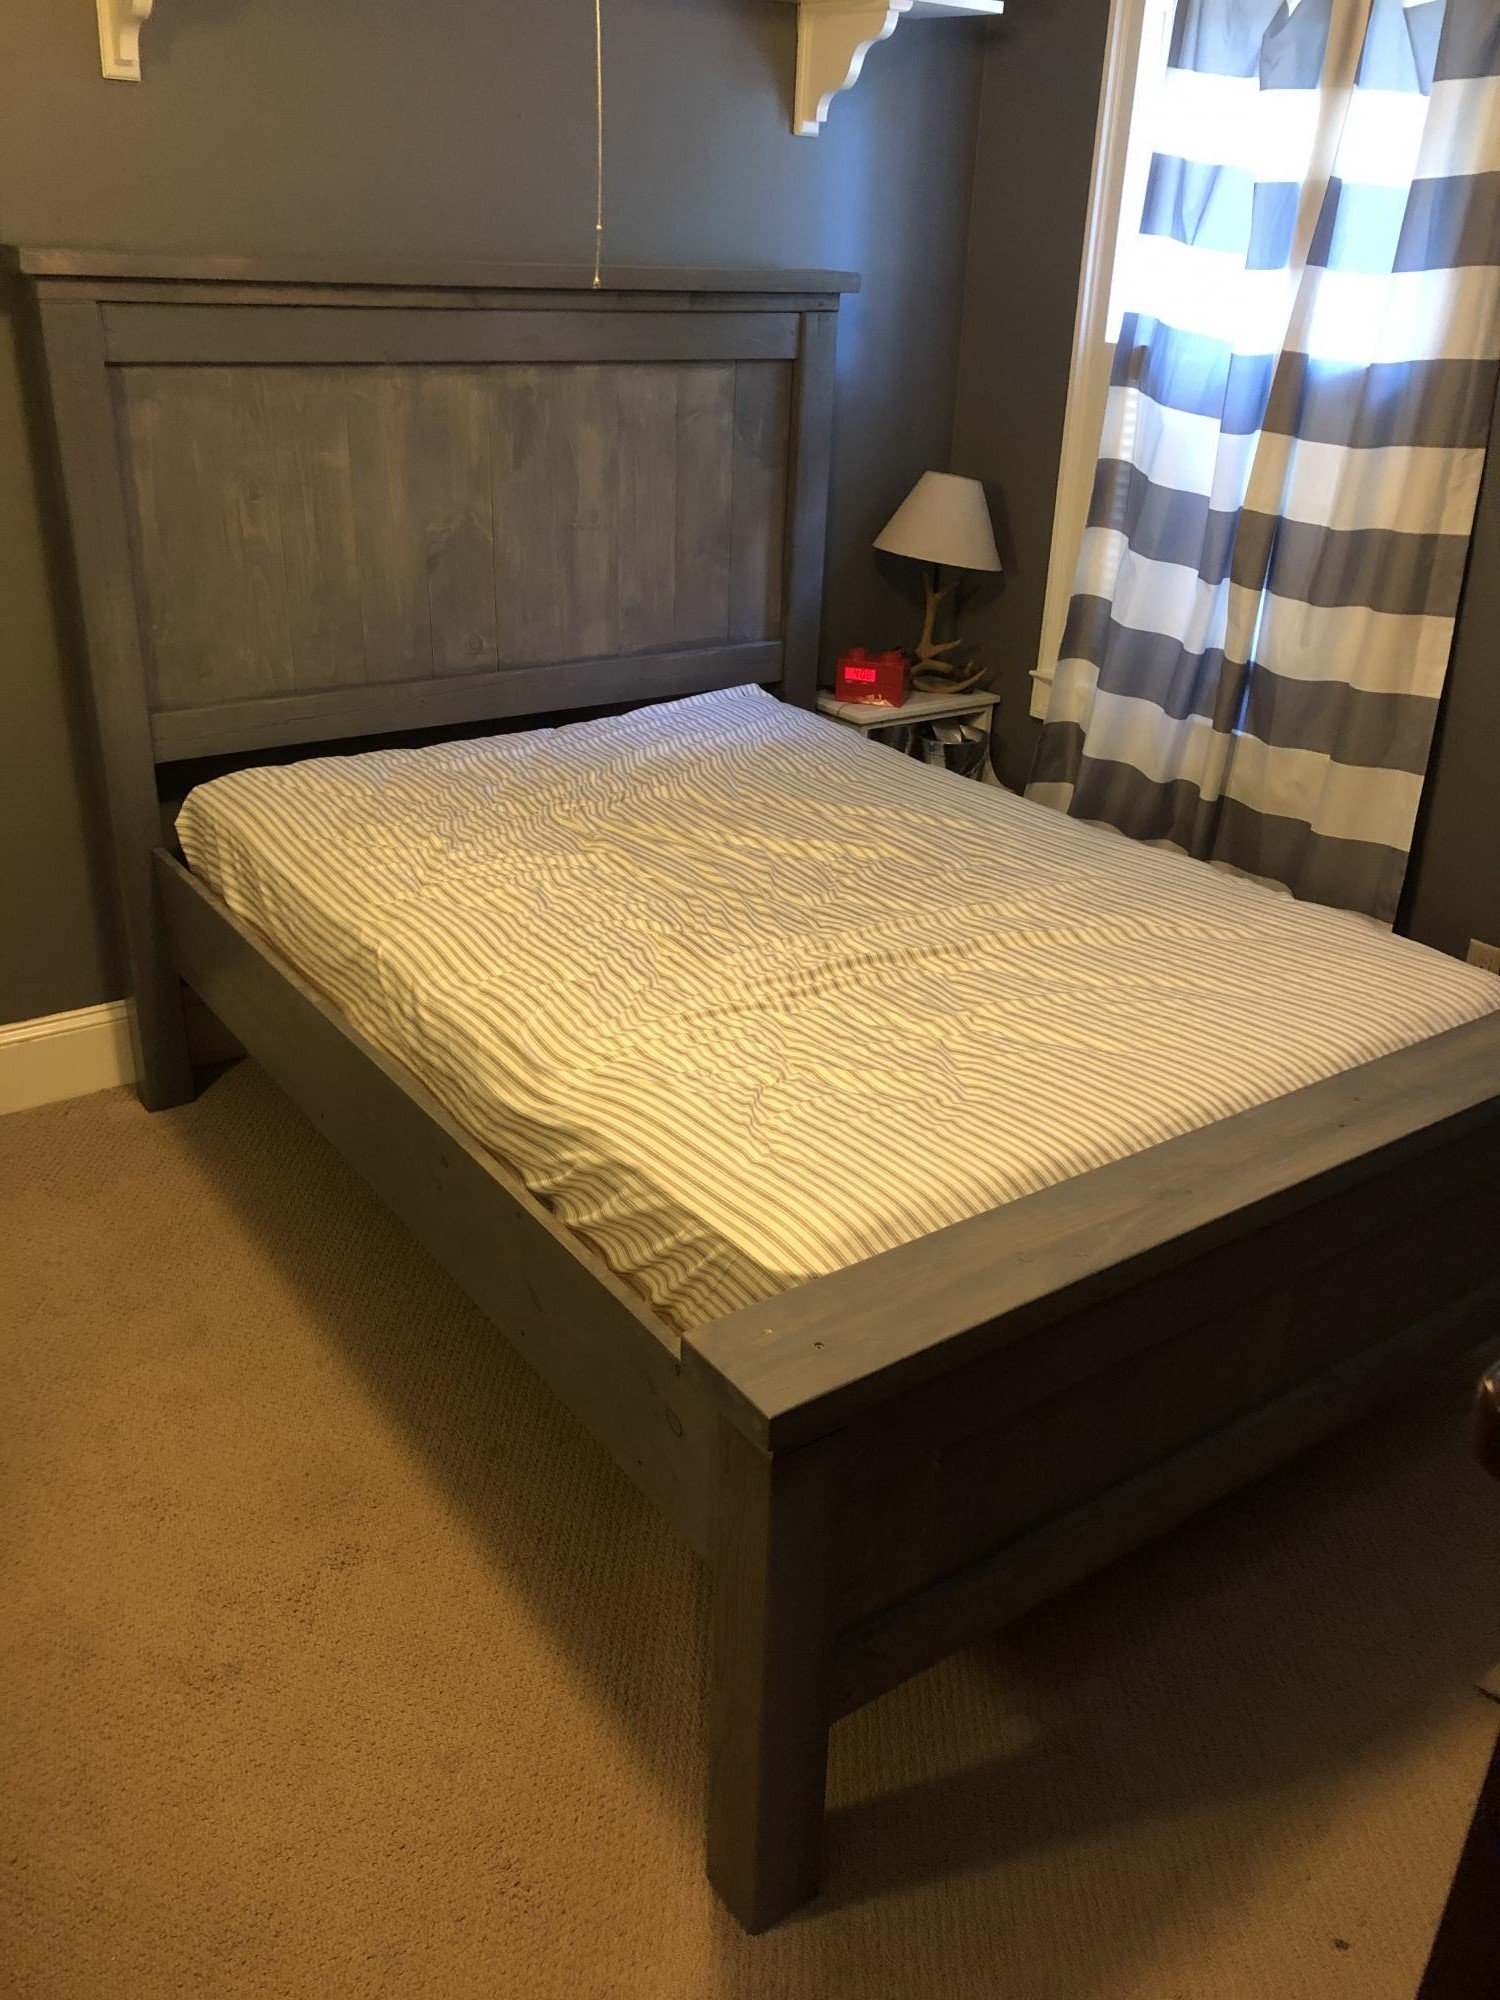
King Size Platform Bed
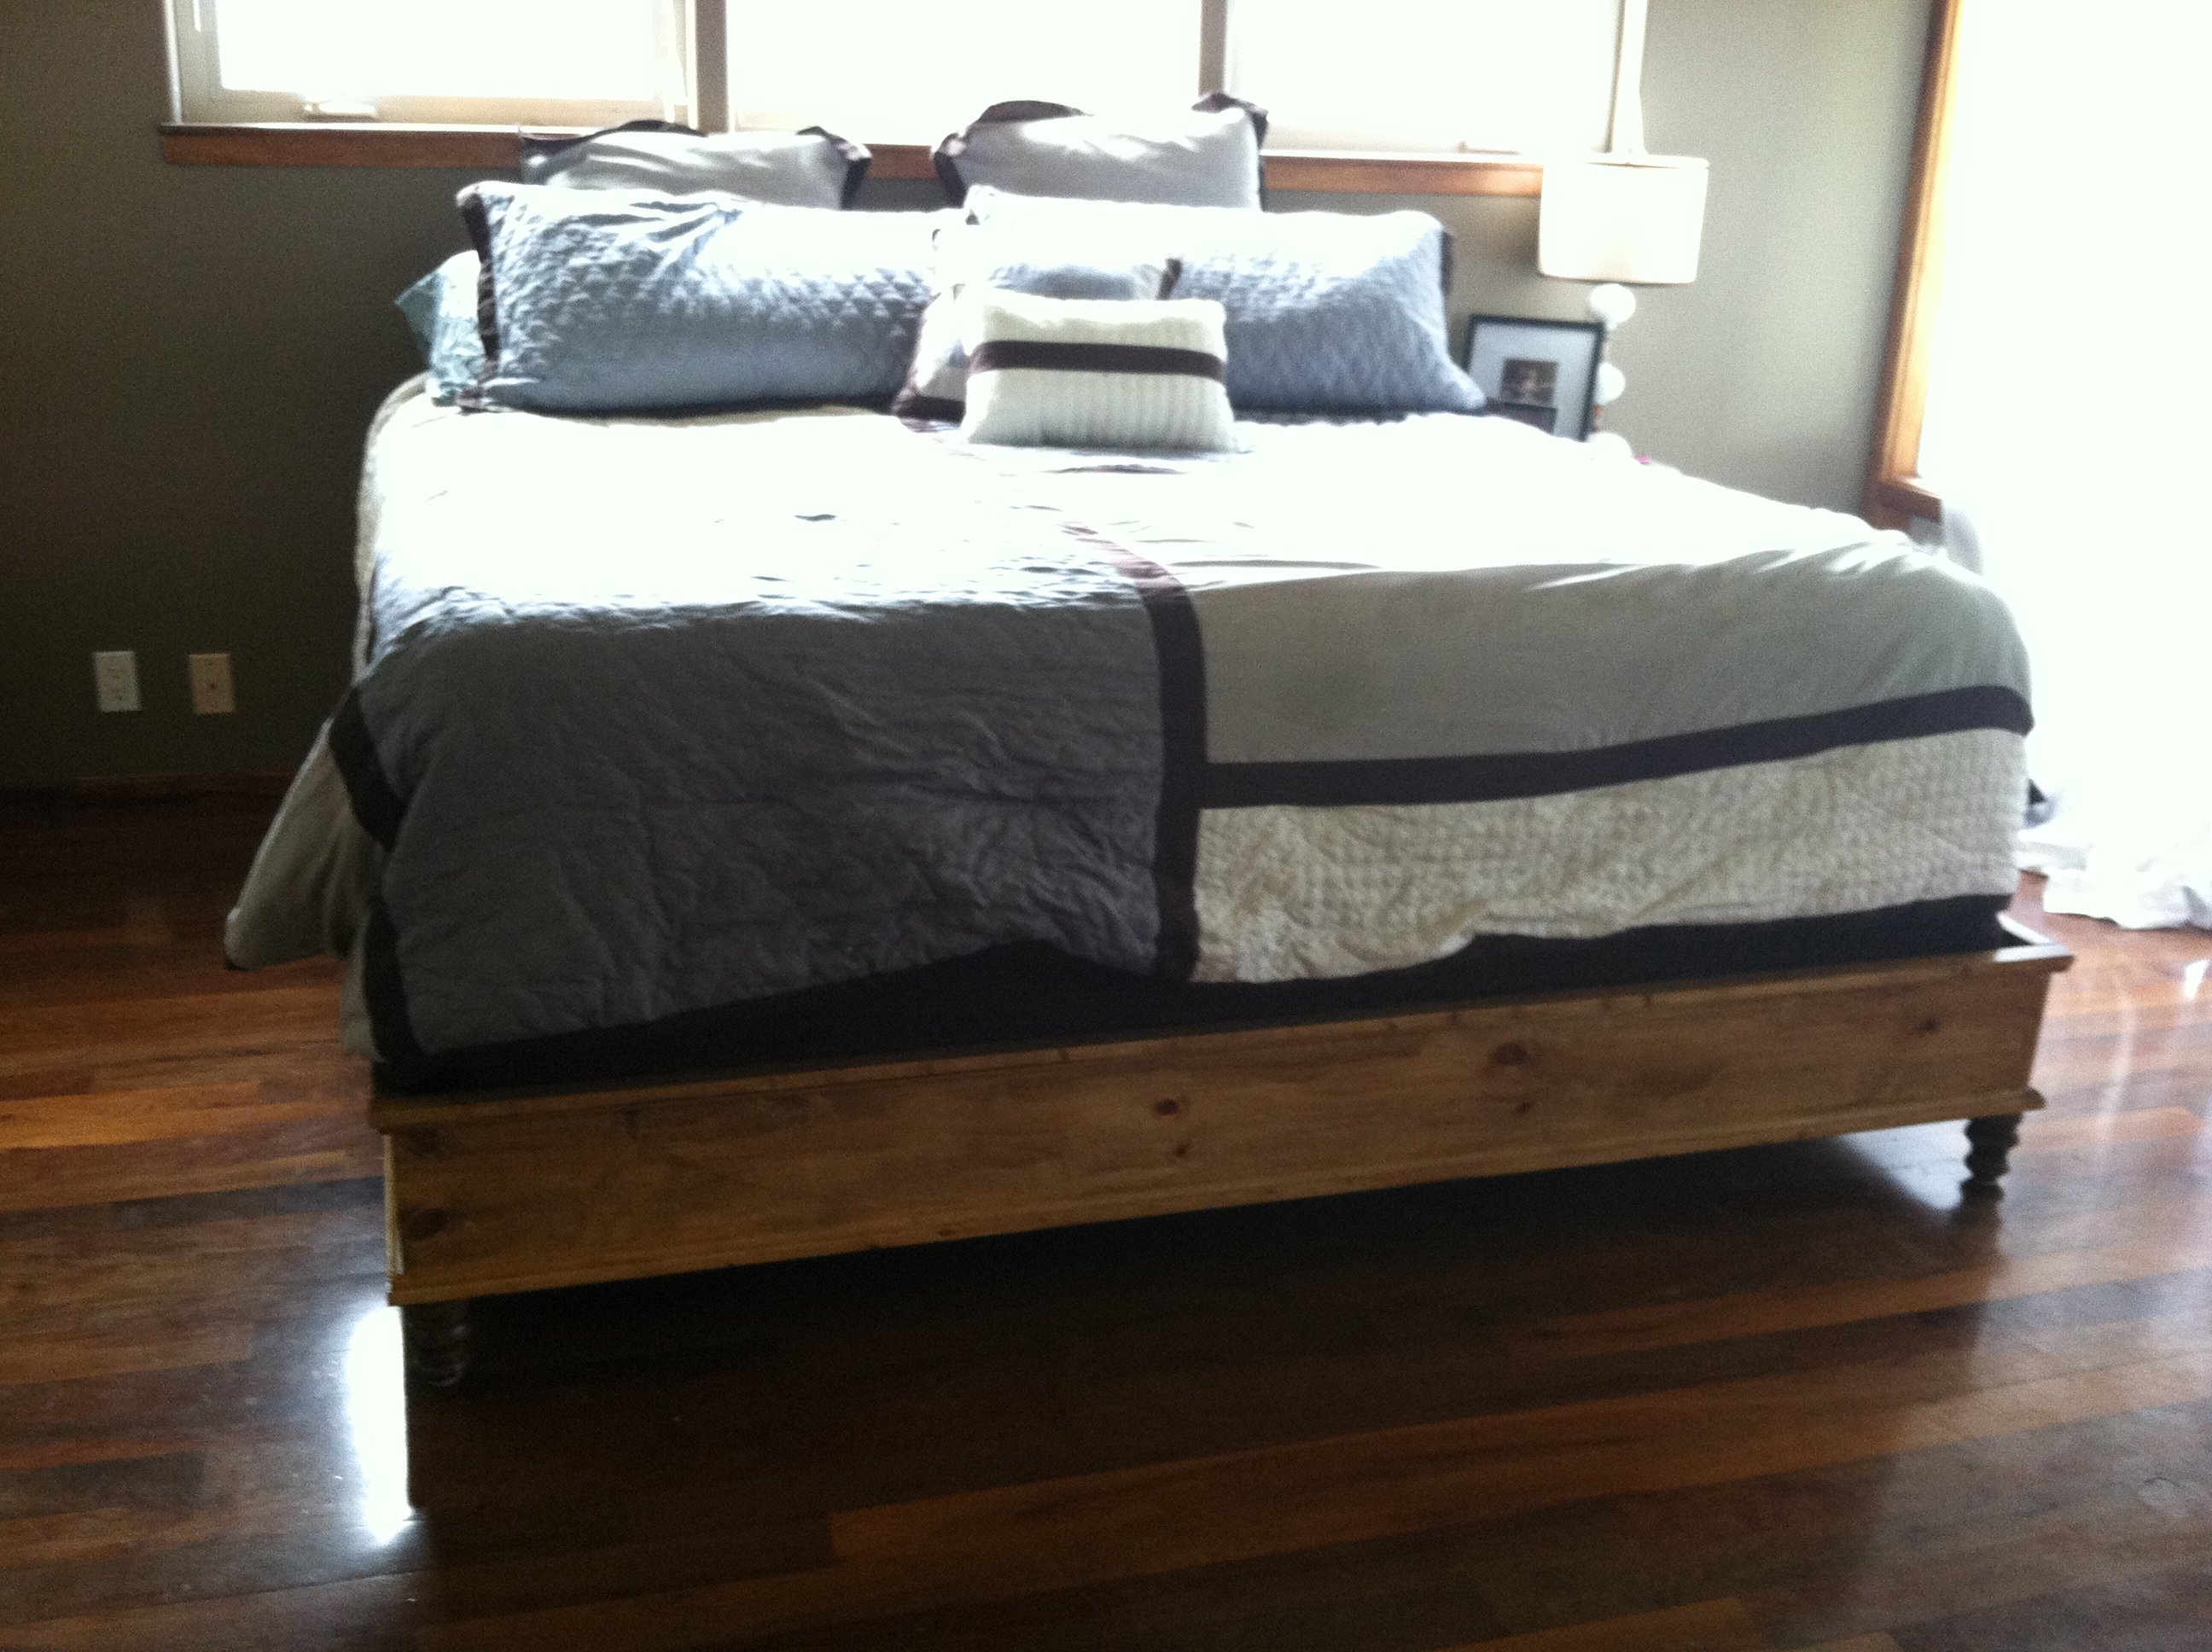
After building my daughter's beds and some outdoor day beds, I finally got around to building a bed for my husband and I. I altered the plans to a king size bed. I added a second 2x4 in the middle for support and around the inside edges as I used the box springs to make the bed taller. Using the kreg jig really made this project so easy. I also used 1x8's instead of 2x8's because I couldn't find those in Hawaii anywhere, except pressure treated wood. It still turned out great.
Thanks for the wonderful plans!
Built from Plan(s)
Estimated Cost
$125
Estimated Time Investment
Afternoon Project (3-6 Hours)
Finish Used
I used cabot stain in antique walnut with a cabot satin poly over it.
Recommended Skill Level
Beginner
Comments
Mon, 06/25/2012 - 19:40
King platform bed
I LOVE this bed! I'm asking my husband to build it and I was wondering if you could email me the dimensions for the plans of a king size Chestwick Platform bed? I'm pretty sure he could figure them out on his own, but I'd love to make it easier for him :) Love your work!
In reply to King platform bed by Katie Saldivar (not verified)
Sun, 07/22/2012 - 11:58
dimensions
I made the bed 80 x 79
Tue, 10/26/2021 - 10:48
cut list for the king size measurements
Amazing! can you please provide the cut list for the king size measurements?
Thank you!
Maple Mission-Style Farmhouse Table
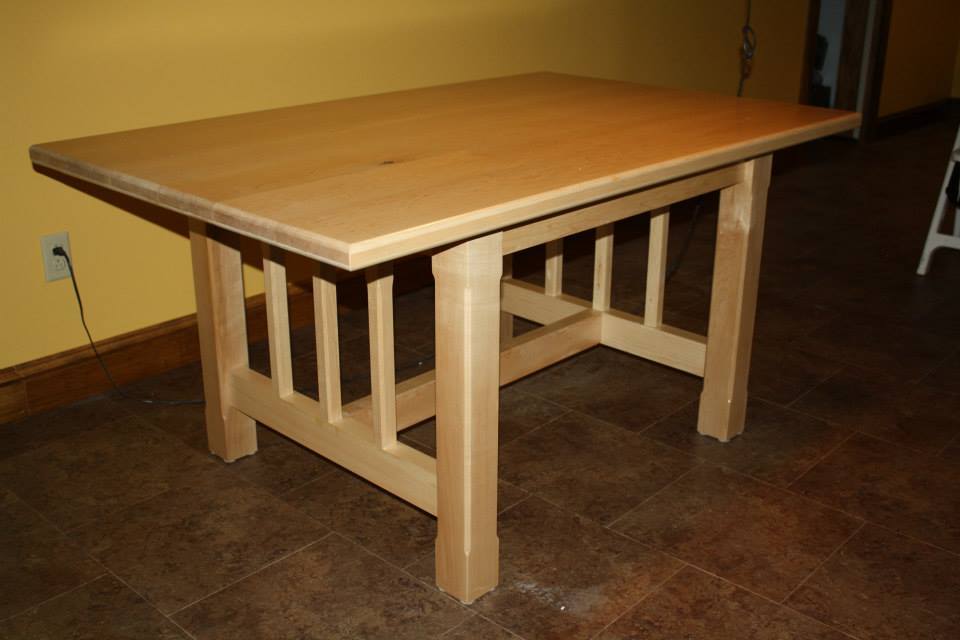
Using the Farmhouse Table plans I just modified them to the dimensions I thought would be best for my space. Tried mortise/tenon joinery on the legs and that took a lot of time since it was my first time. The table top is put together with pocket hole joinery. I love my Kreg Jig.
Recommended Skill Level
Intermediate
Kentwood bookshelf
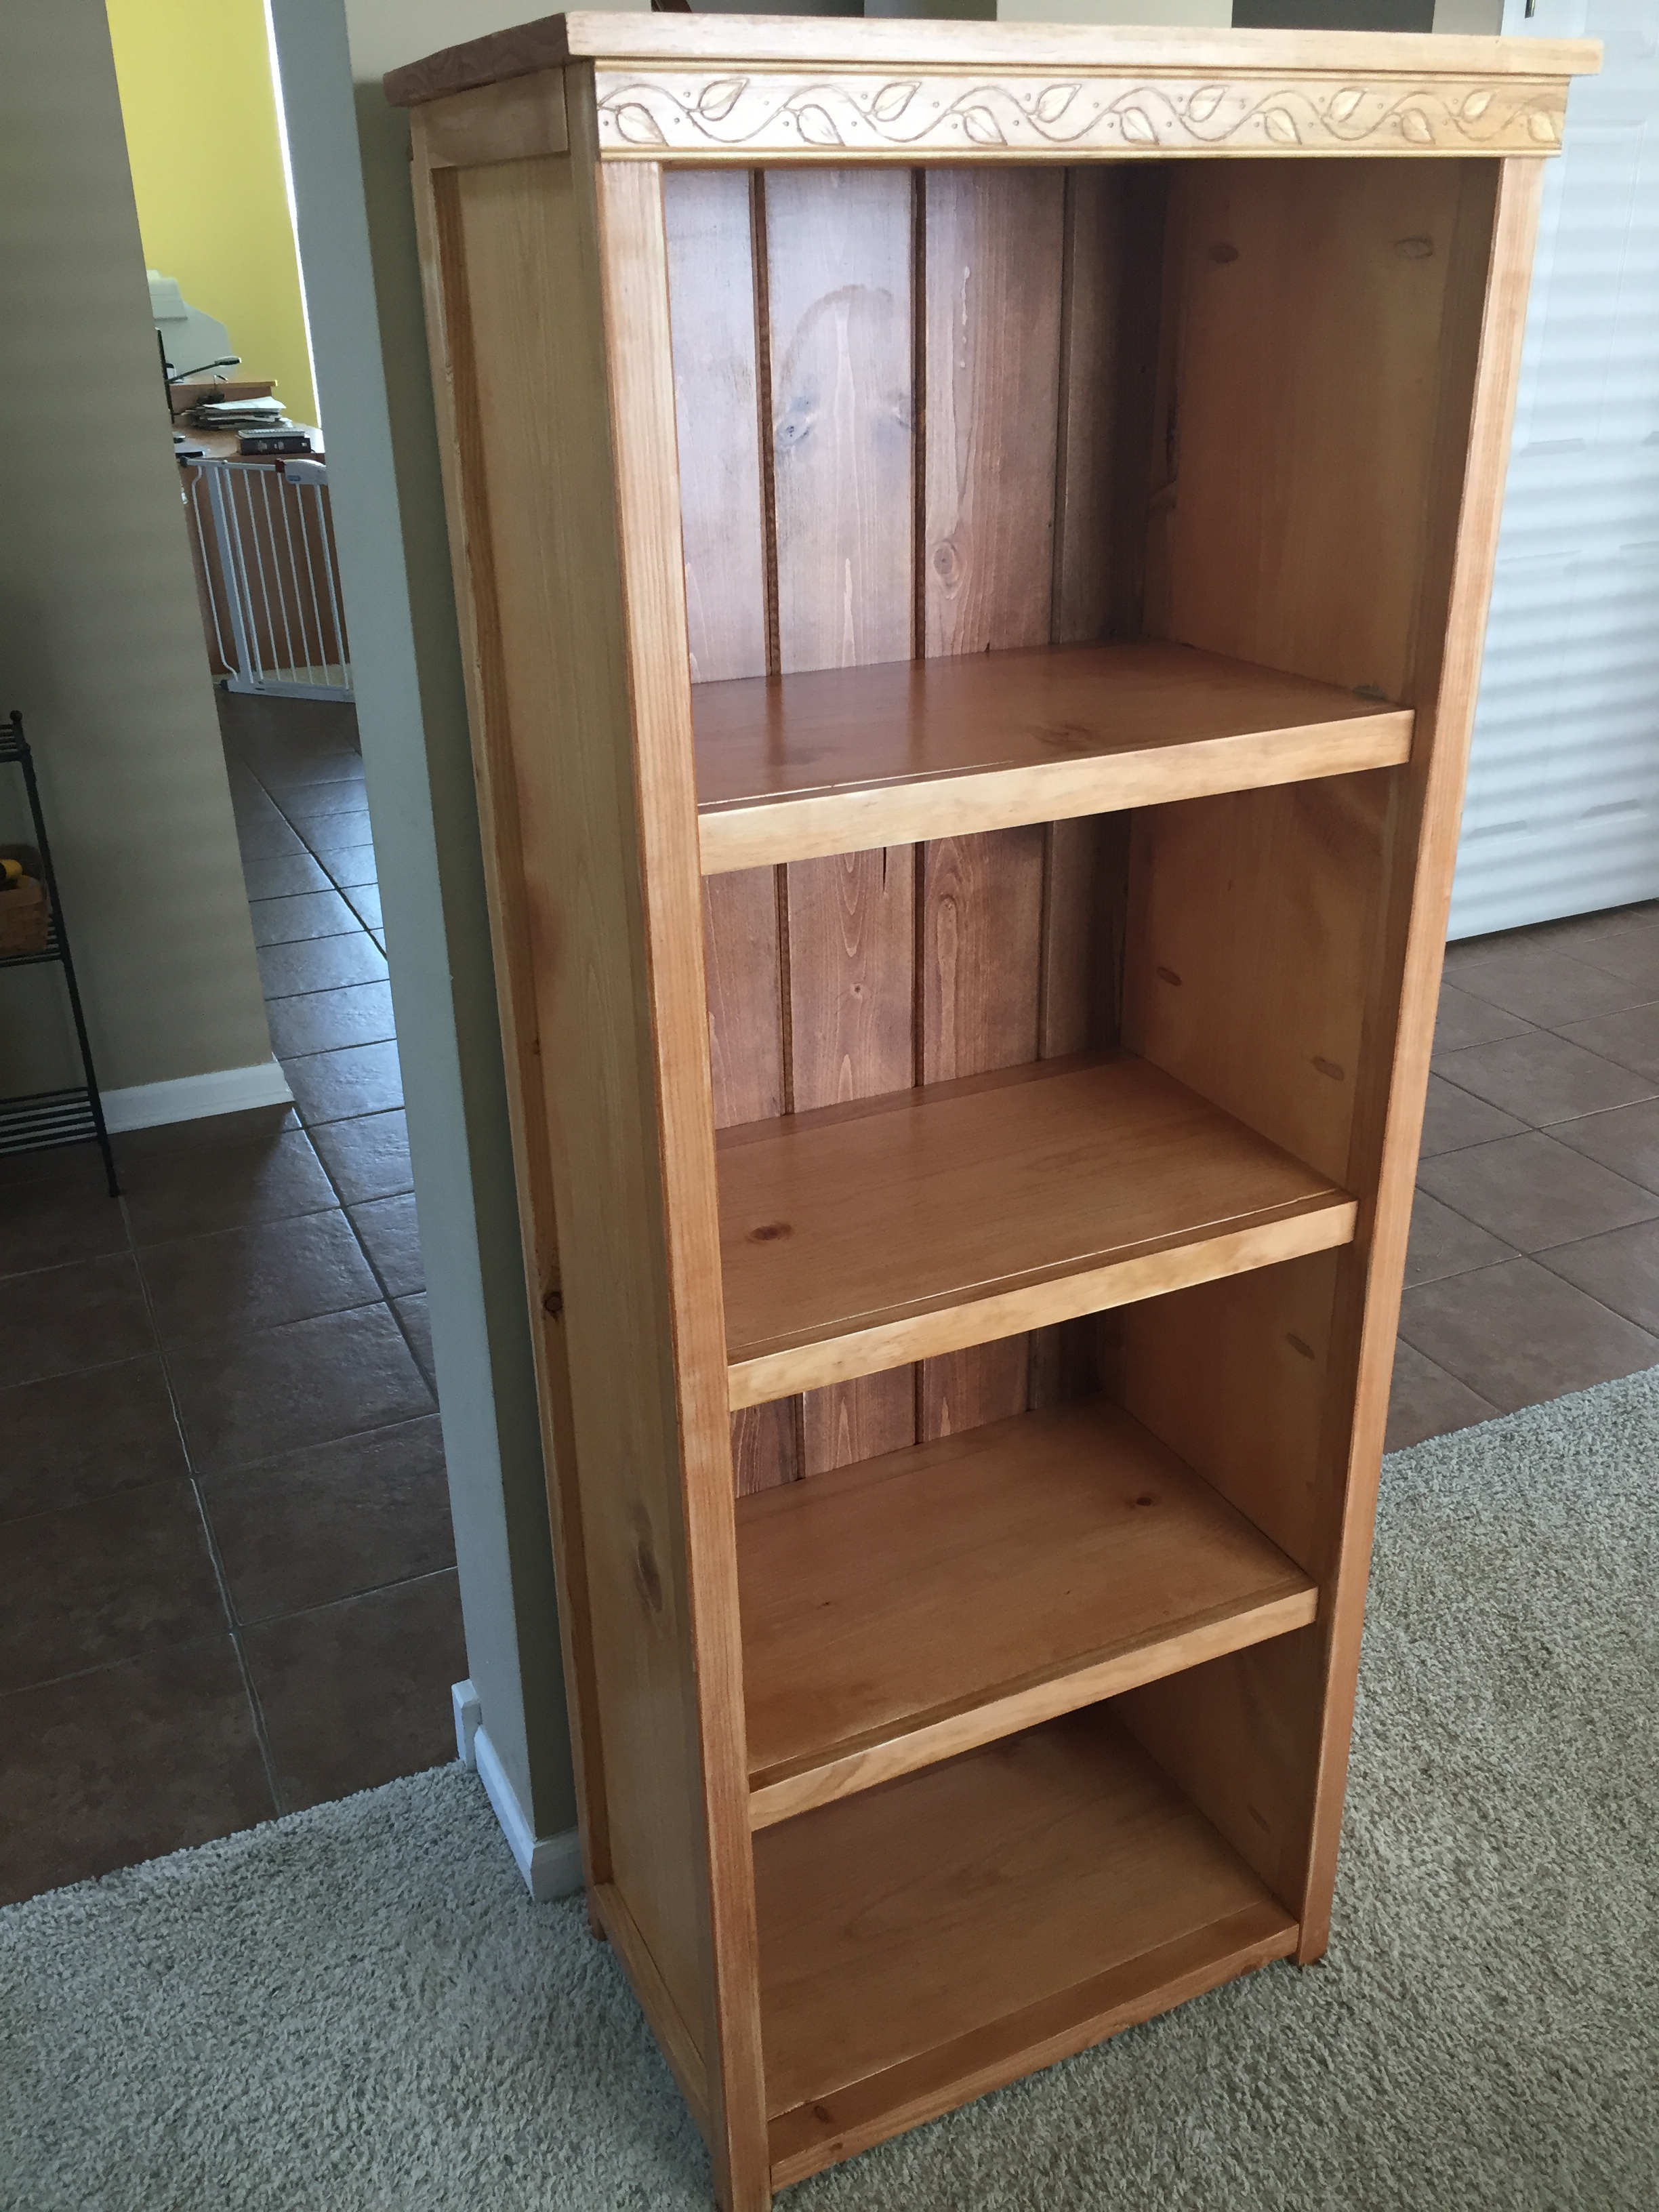
My gal loved the way this bookshelf turned out. It was my first time building it and if/when I'm commissioned to build another one, I'll likely use wainscotting for the back instead of knotty pine which is 3/4" thick. just made the back a little bulky for my taste. I also would've taken the time to put the pocket holes where the shelves were going to be so I didn't have the different tint of stain on the plugs. Would've been an easy thing to do, but I wasn't thinking ahead at that moment, I guess.
Great plan, Ana. Thanks for the resource!
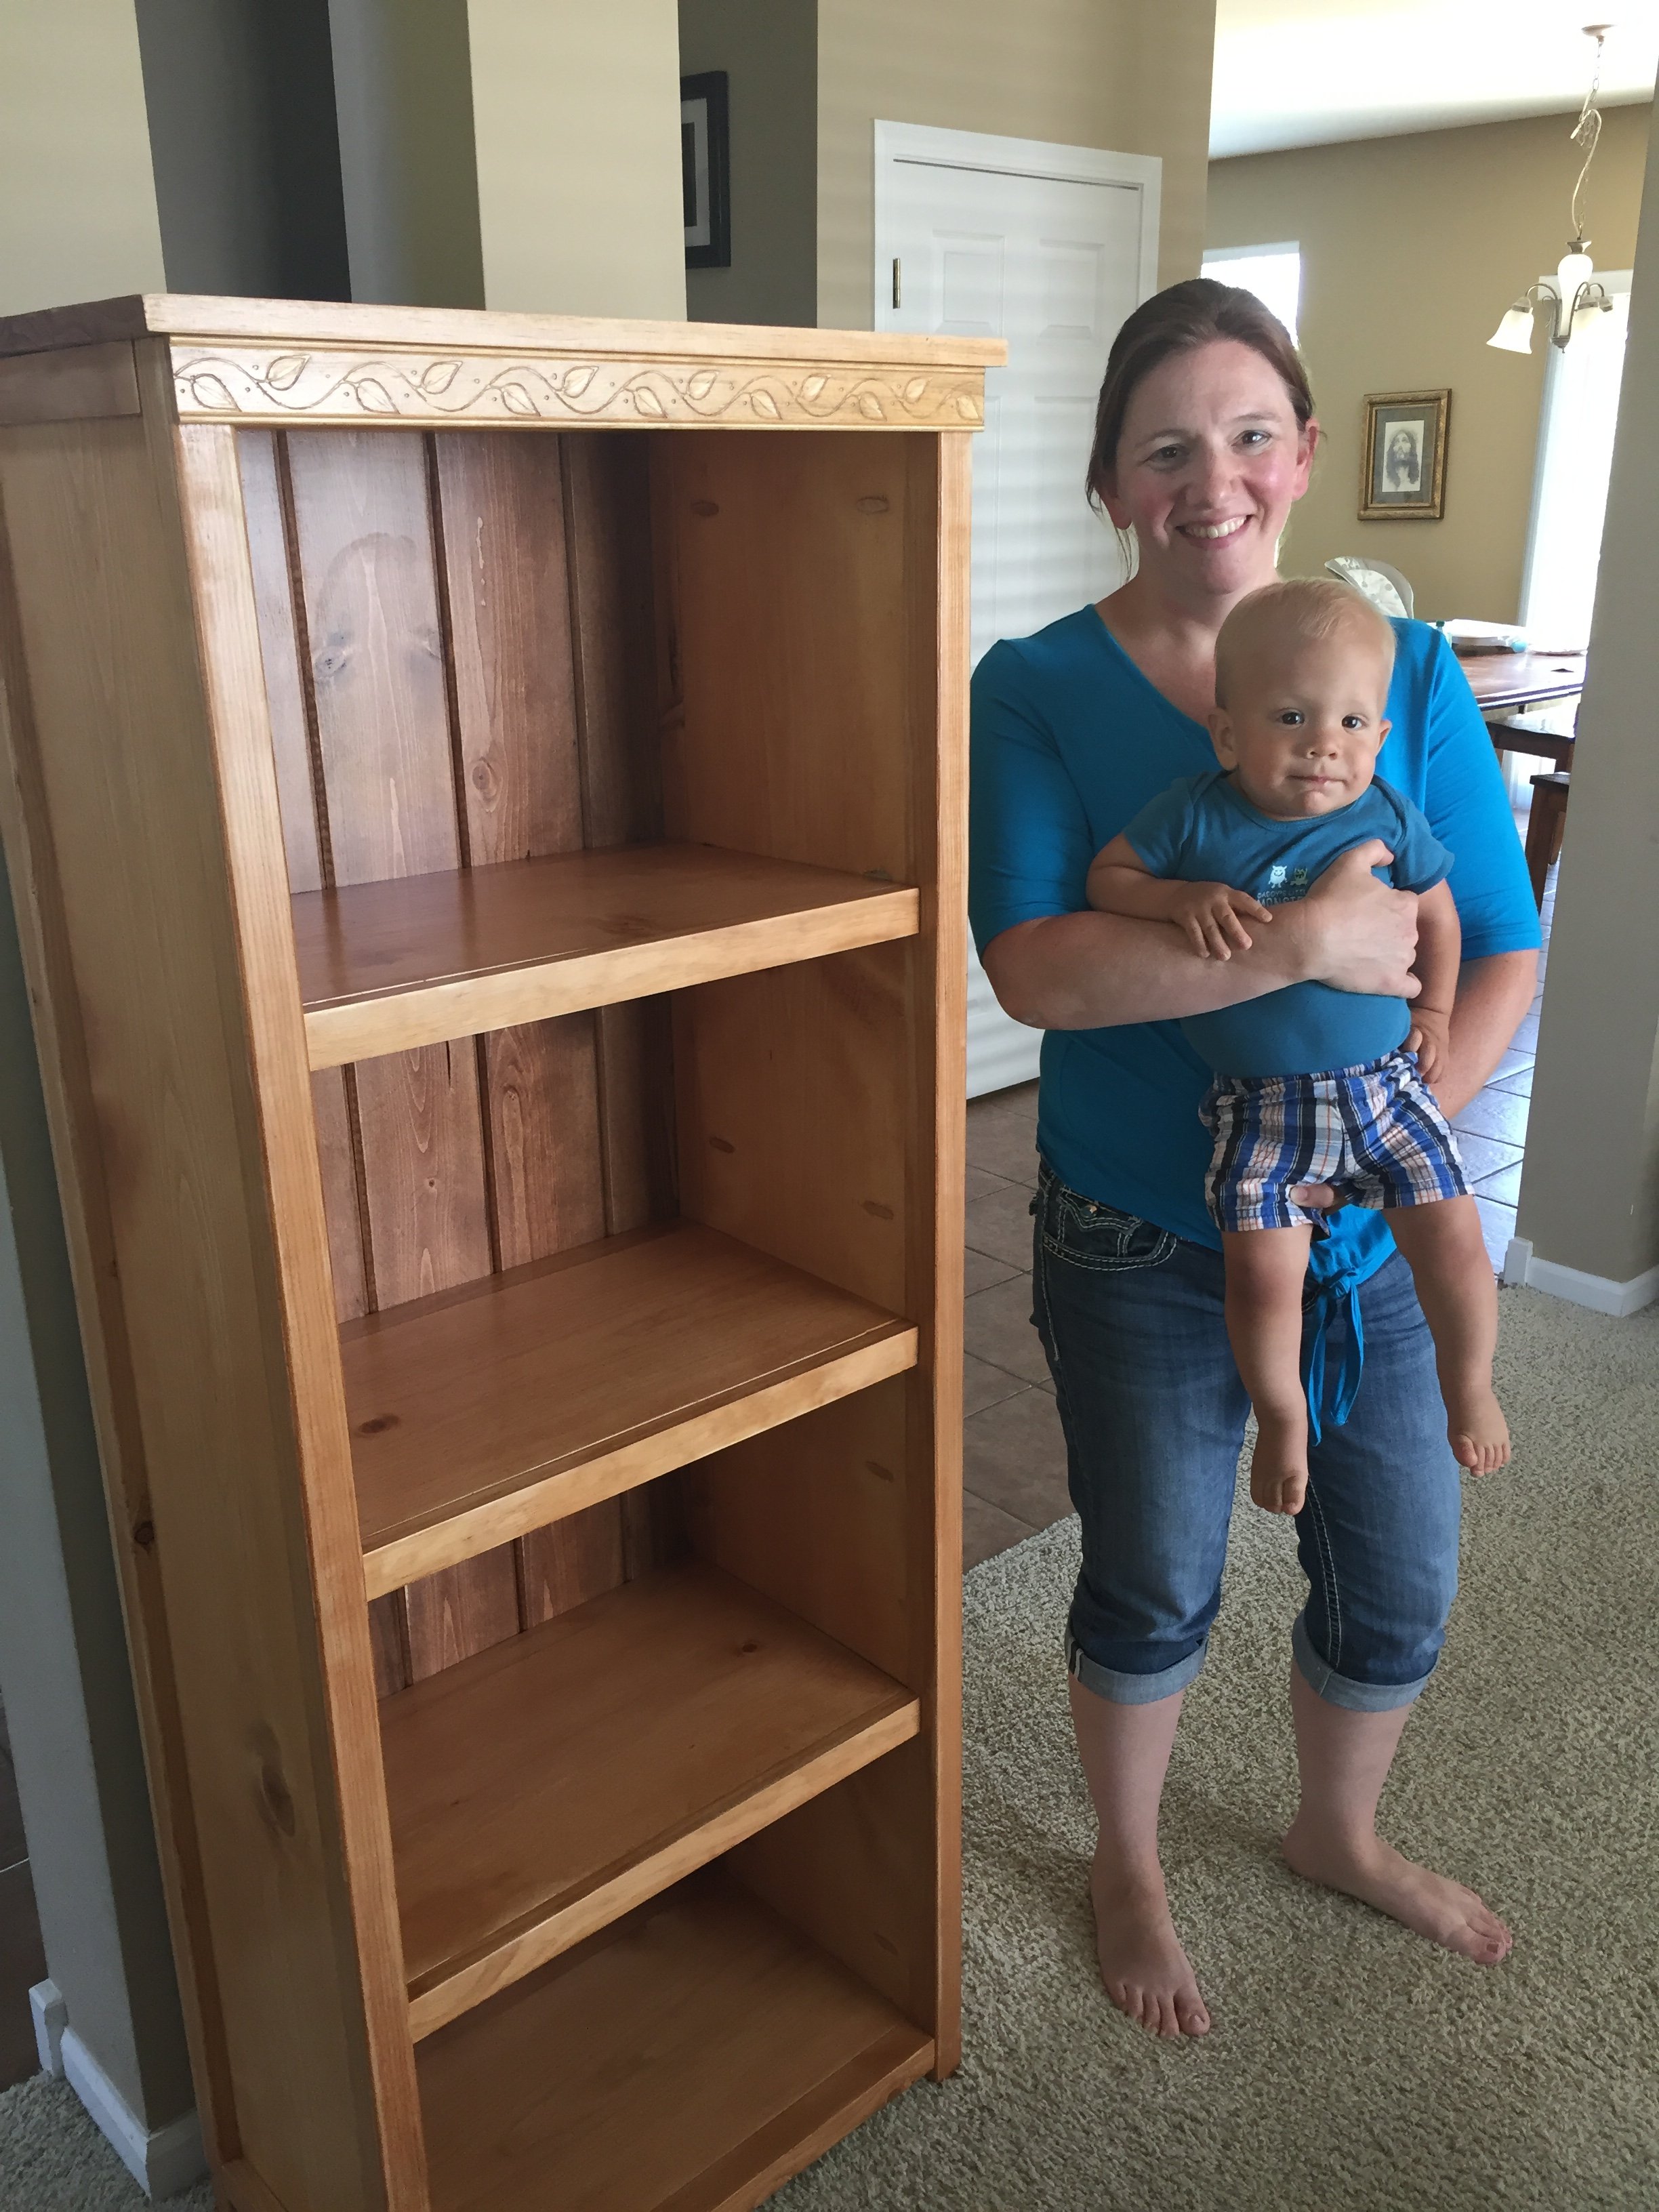
Built from Plan(s)
Estimated Cost
$70
Estimated Time Investment
Weekend Project (10-20 Hours)
Finish Used
Minwax Golden Pecan (3 coats) for sides and shelves, Minwax English Chestnut (1 coat) for back. Five coats of polyurethane.
Recommended Skill Level
Beginner
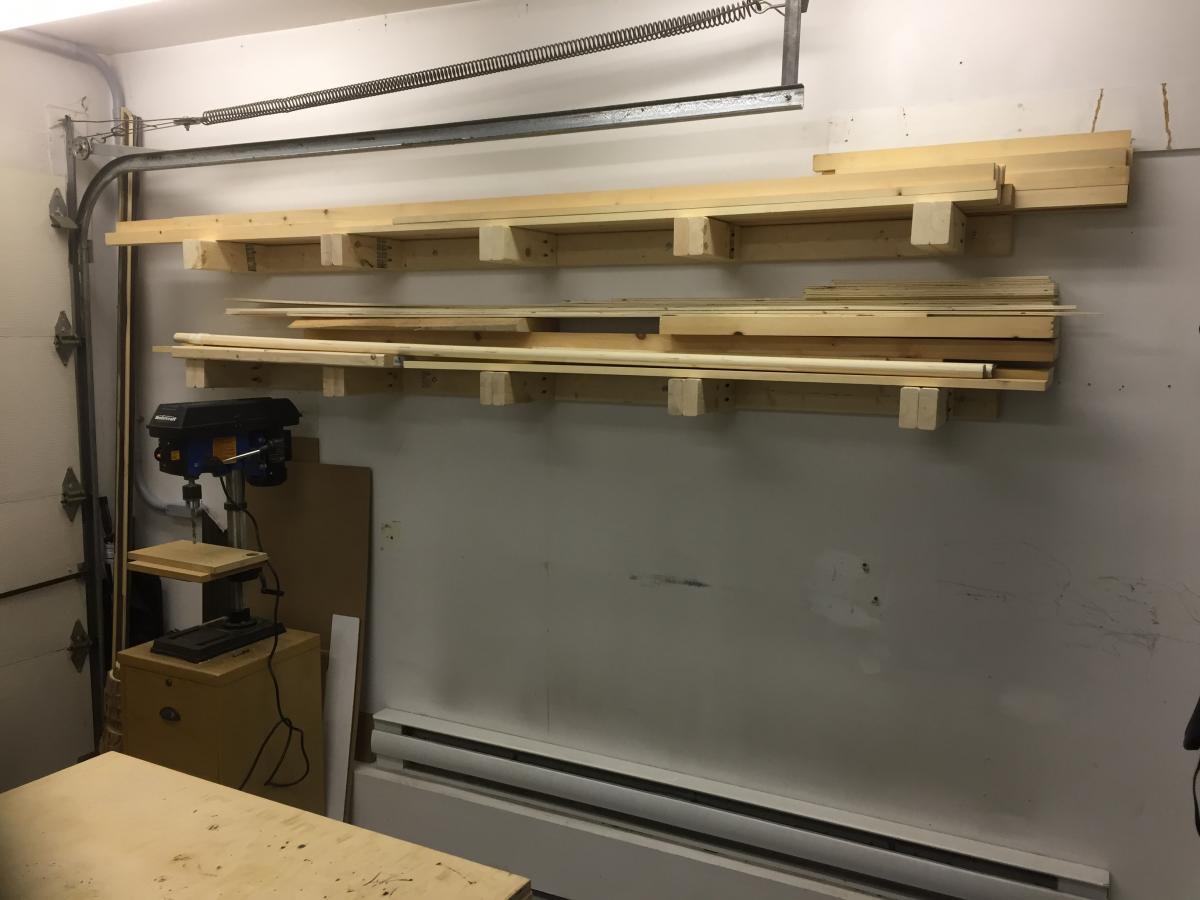
20$ lumber rack with 2x4s
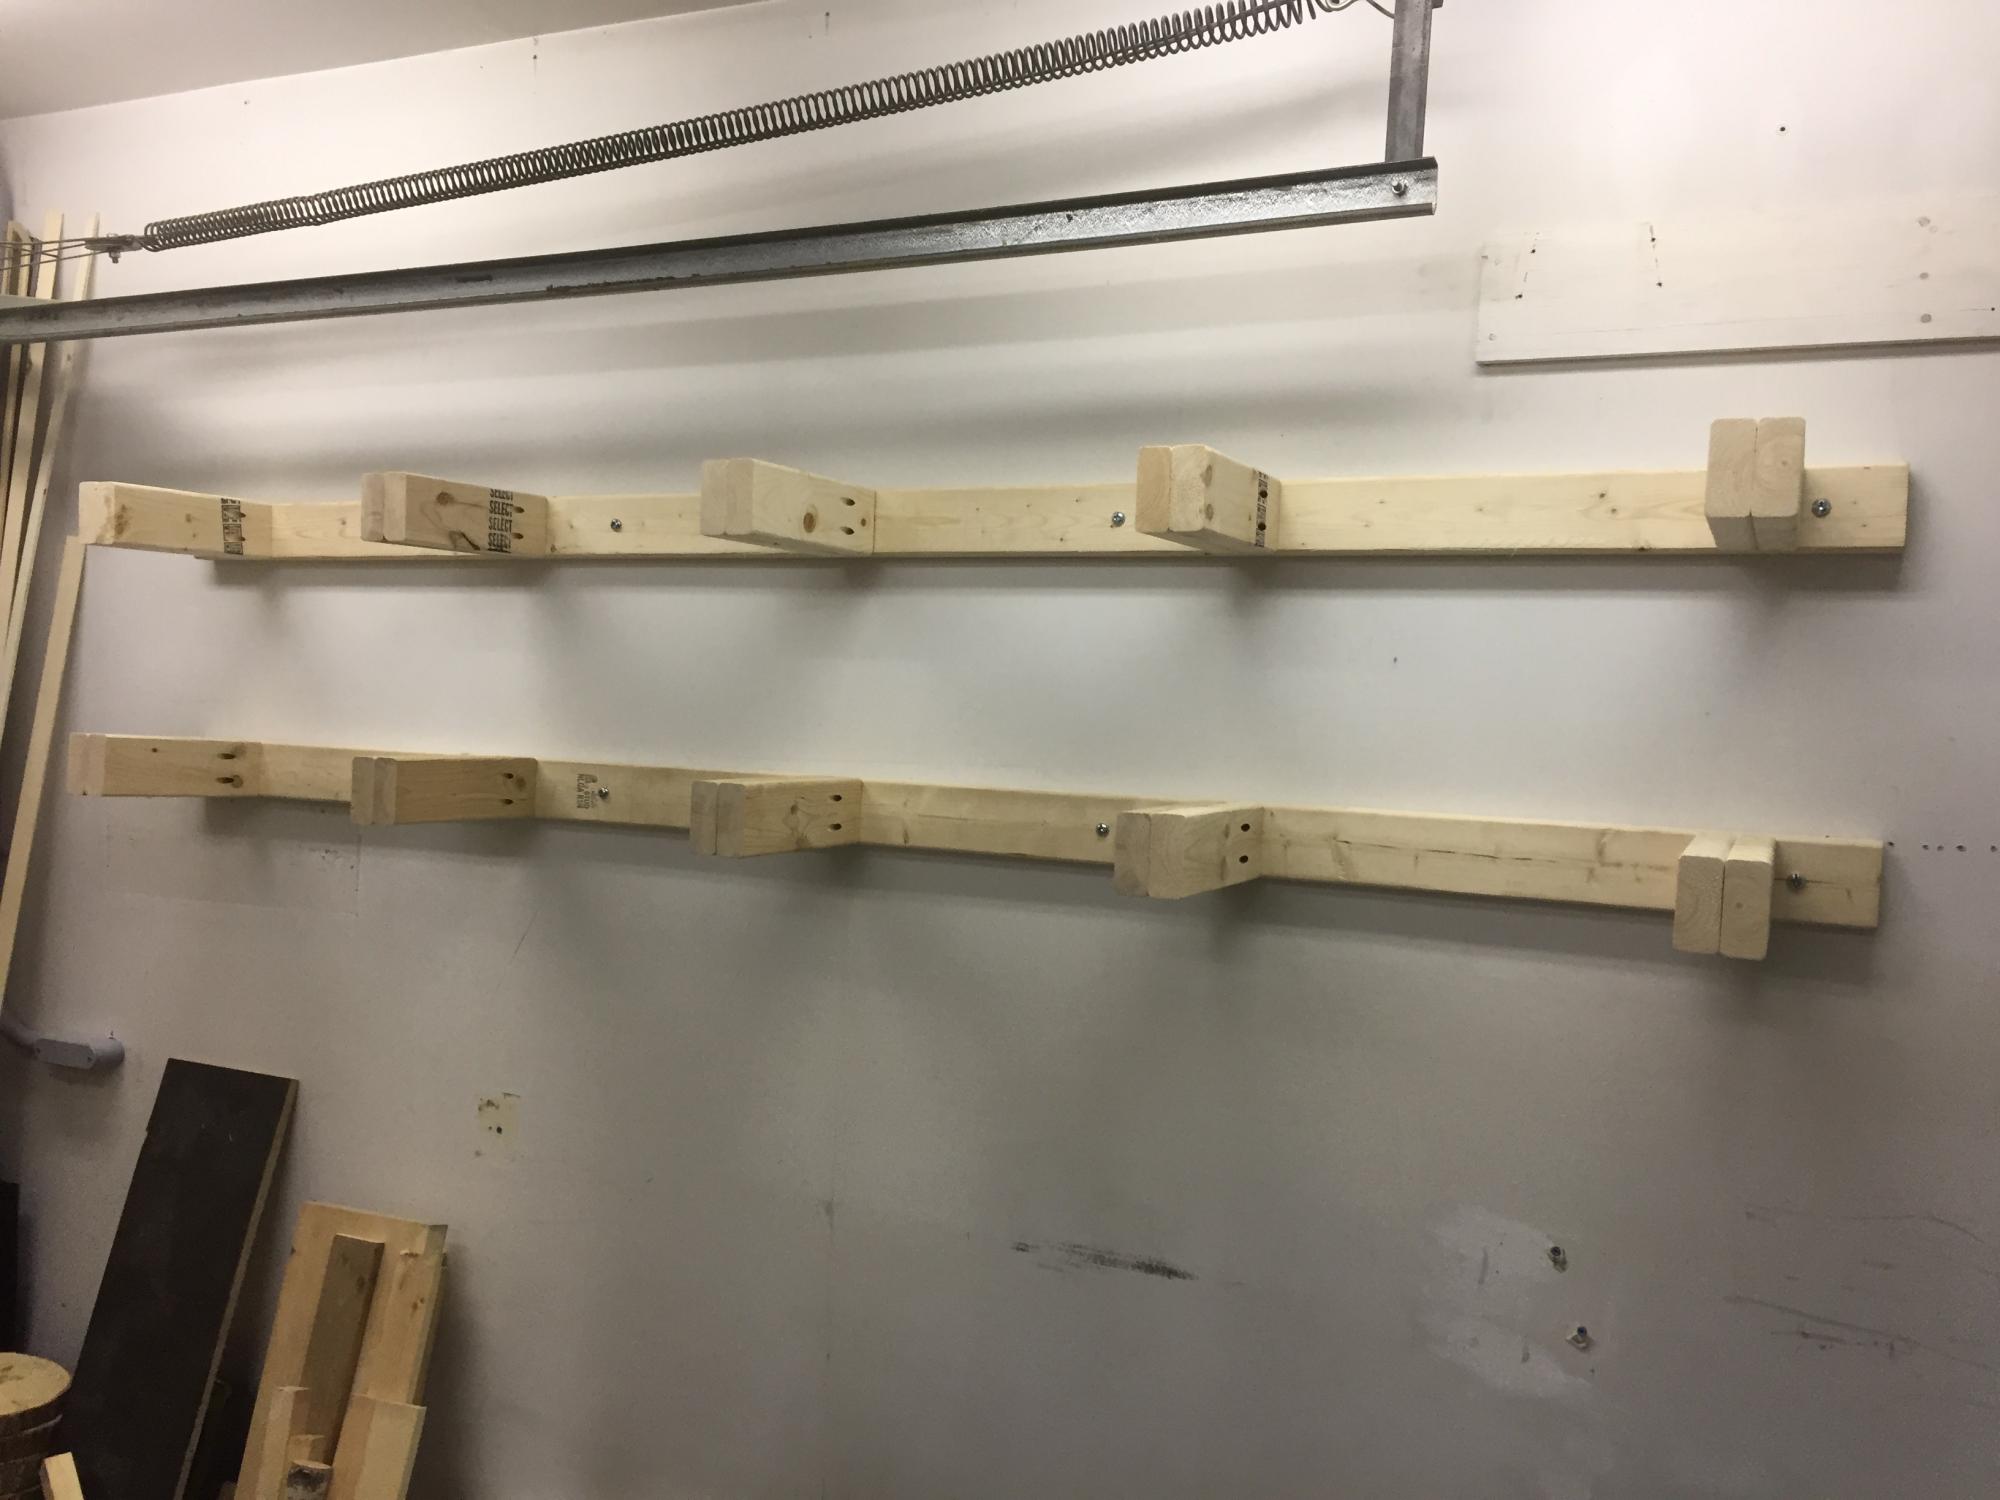
We built this lumber rack for about 20$ of 2x4s. It was an easy build and uncluttered our garage.
Built from Plan(s)
Estimated Cost
20$
Estimated Time Investment
Afternoon Project (3-6 Hours)
Finish Used
None
Recommended Skill Level
Starter Project
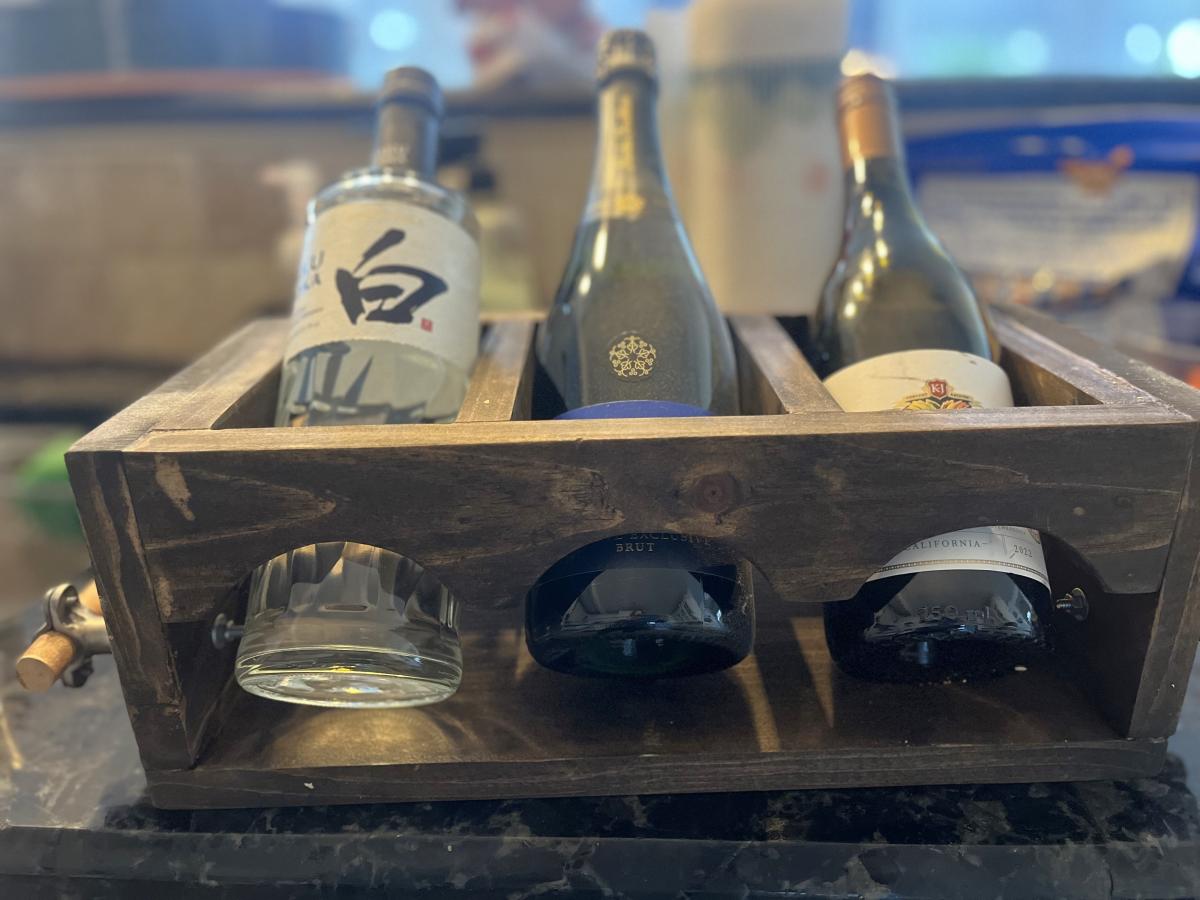
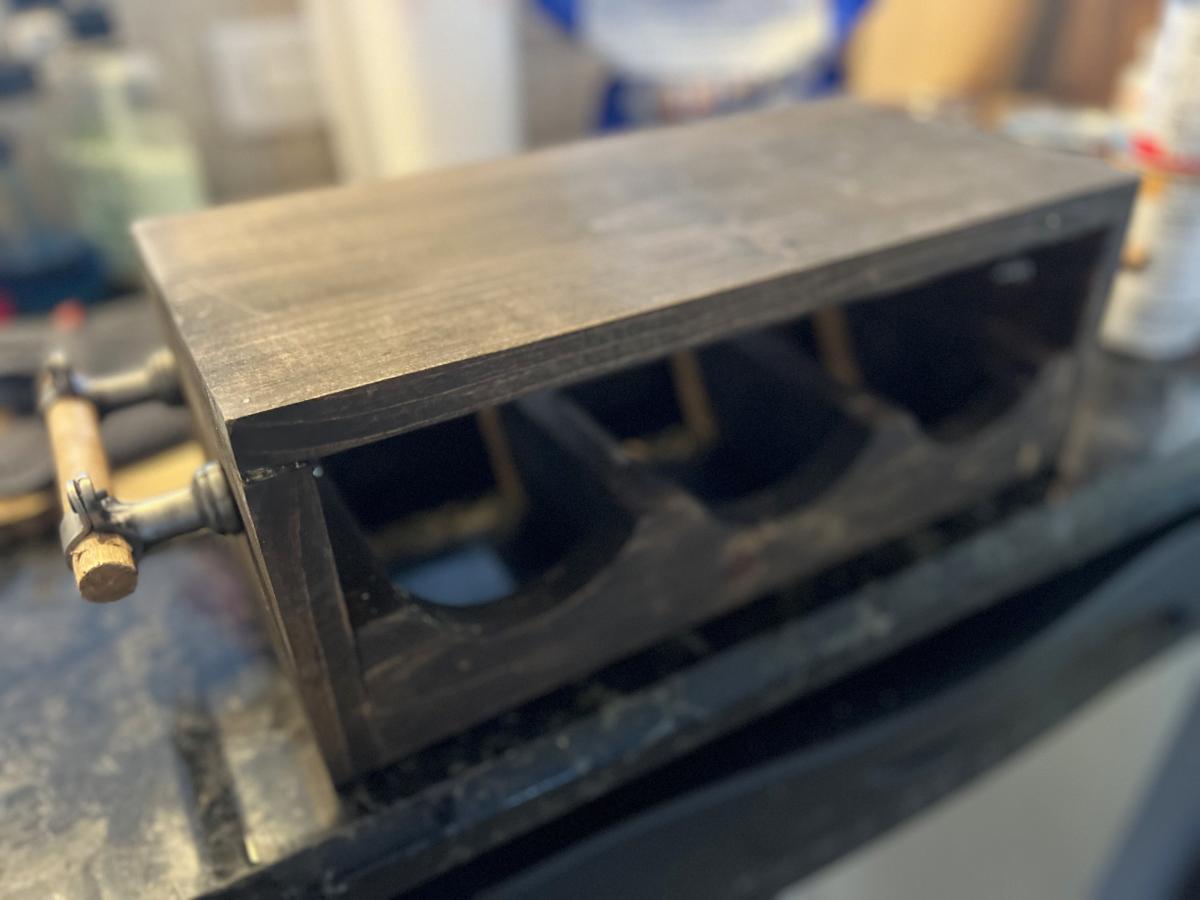
DIY Wine Caddy
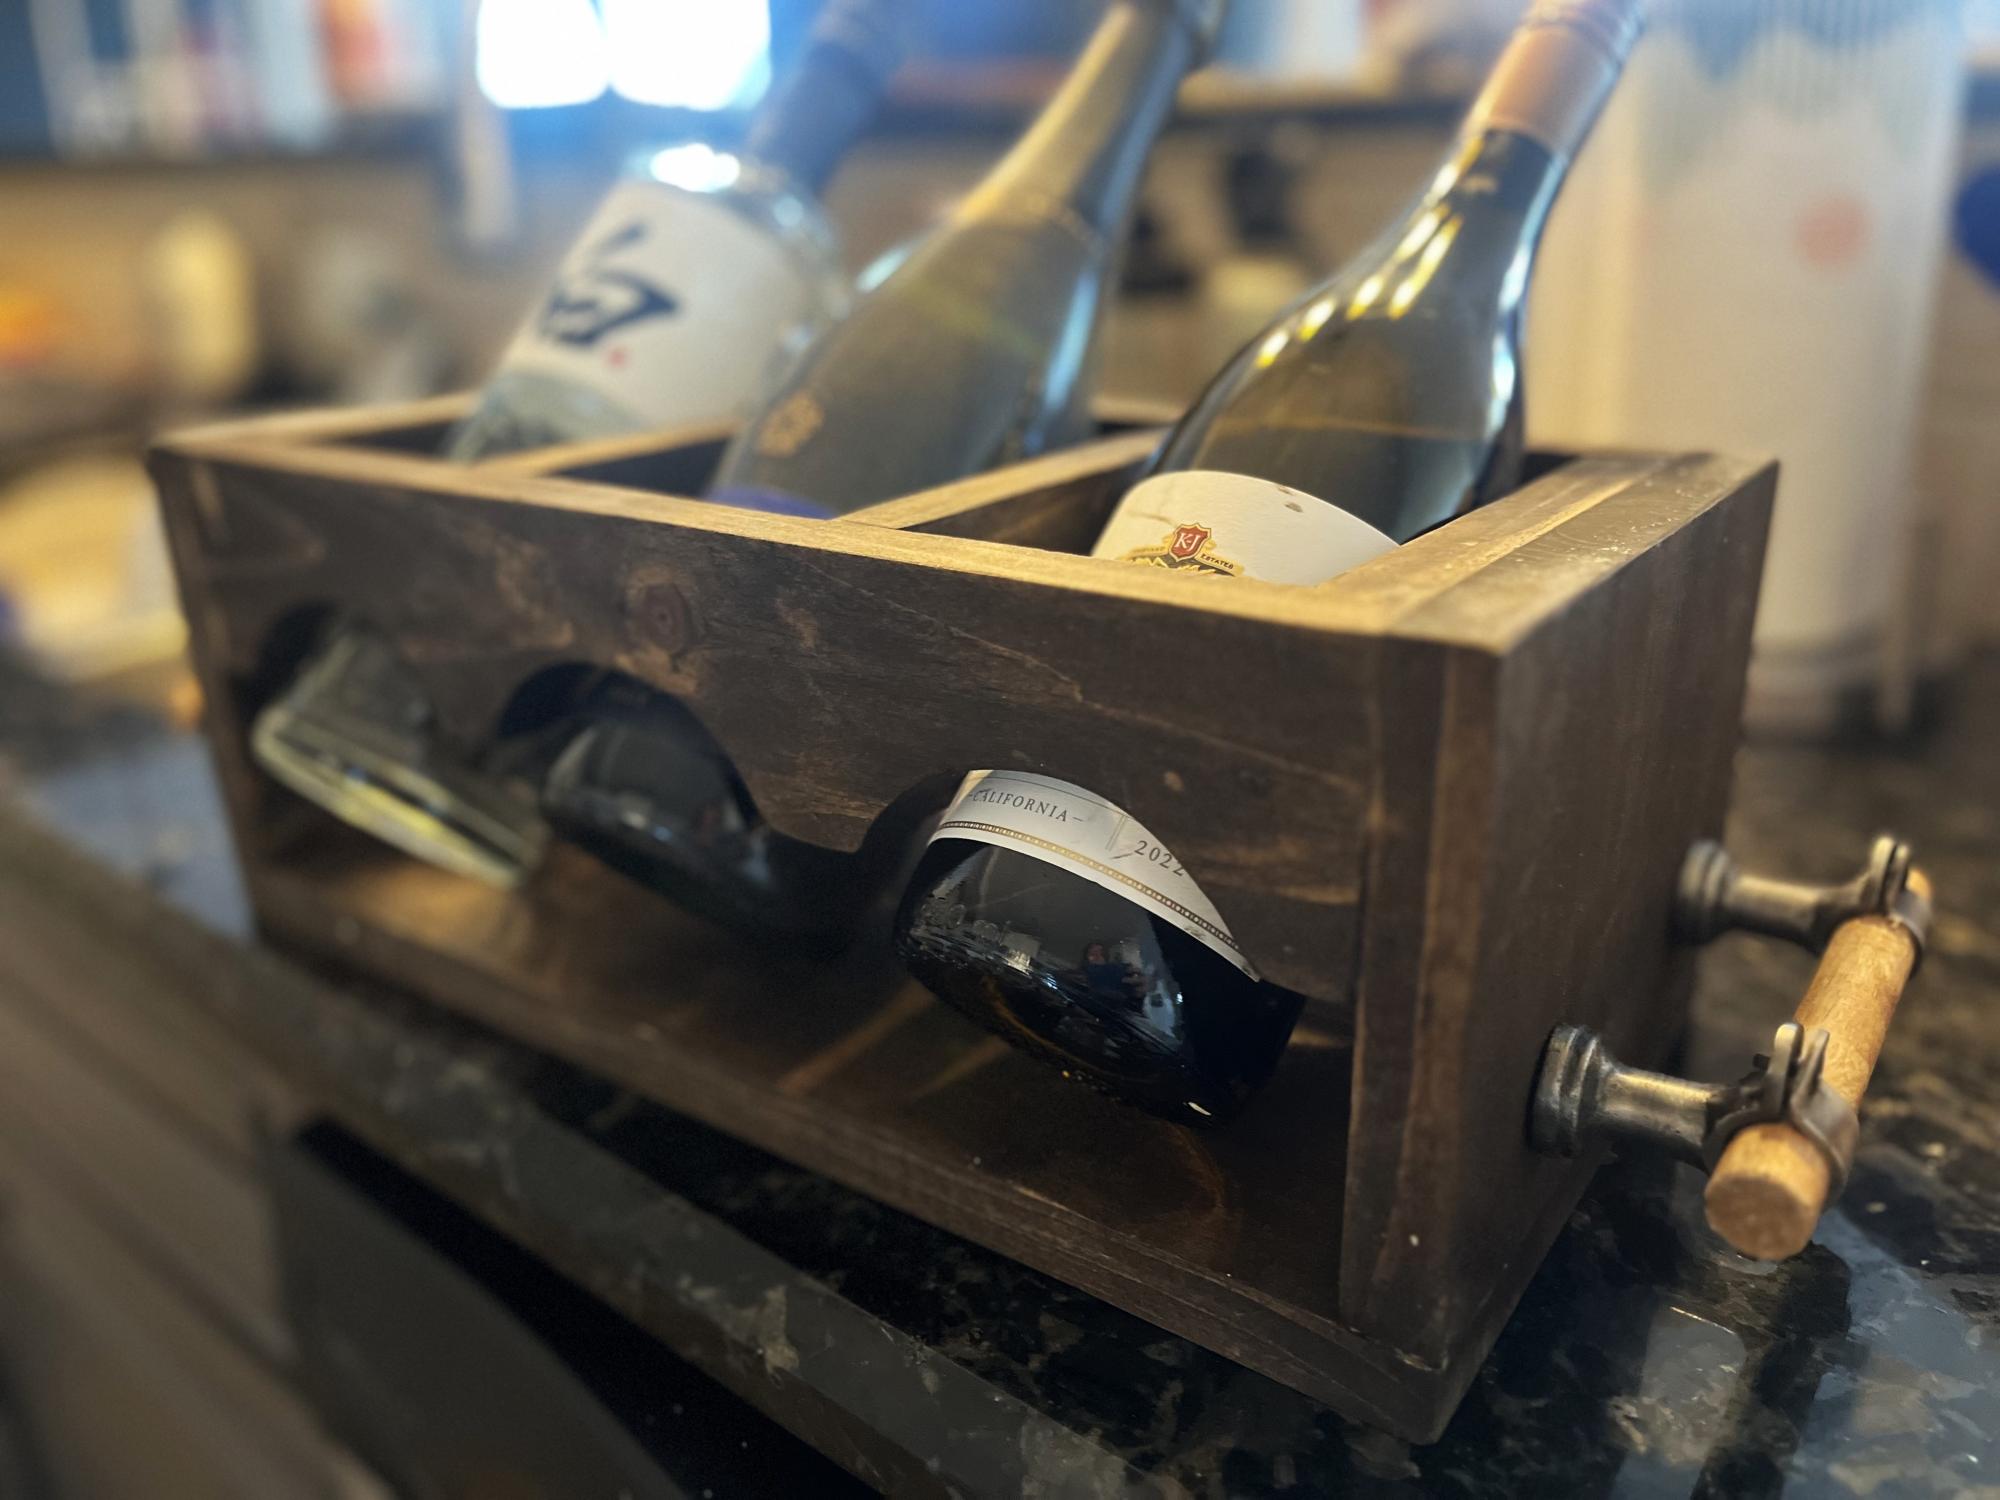
For a first try what I learned was my spaces was not exact. Hoping to make another one and correct next time around.
Built from Plan(s)
Extra Large Shoe Shelf
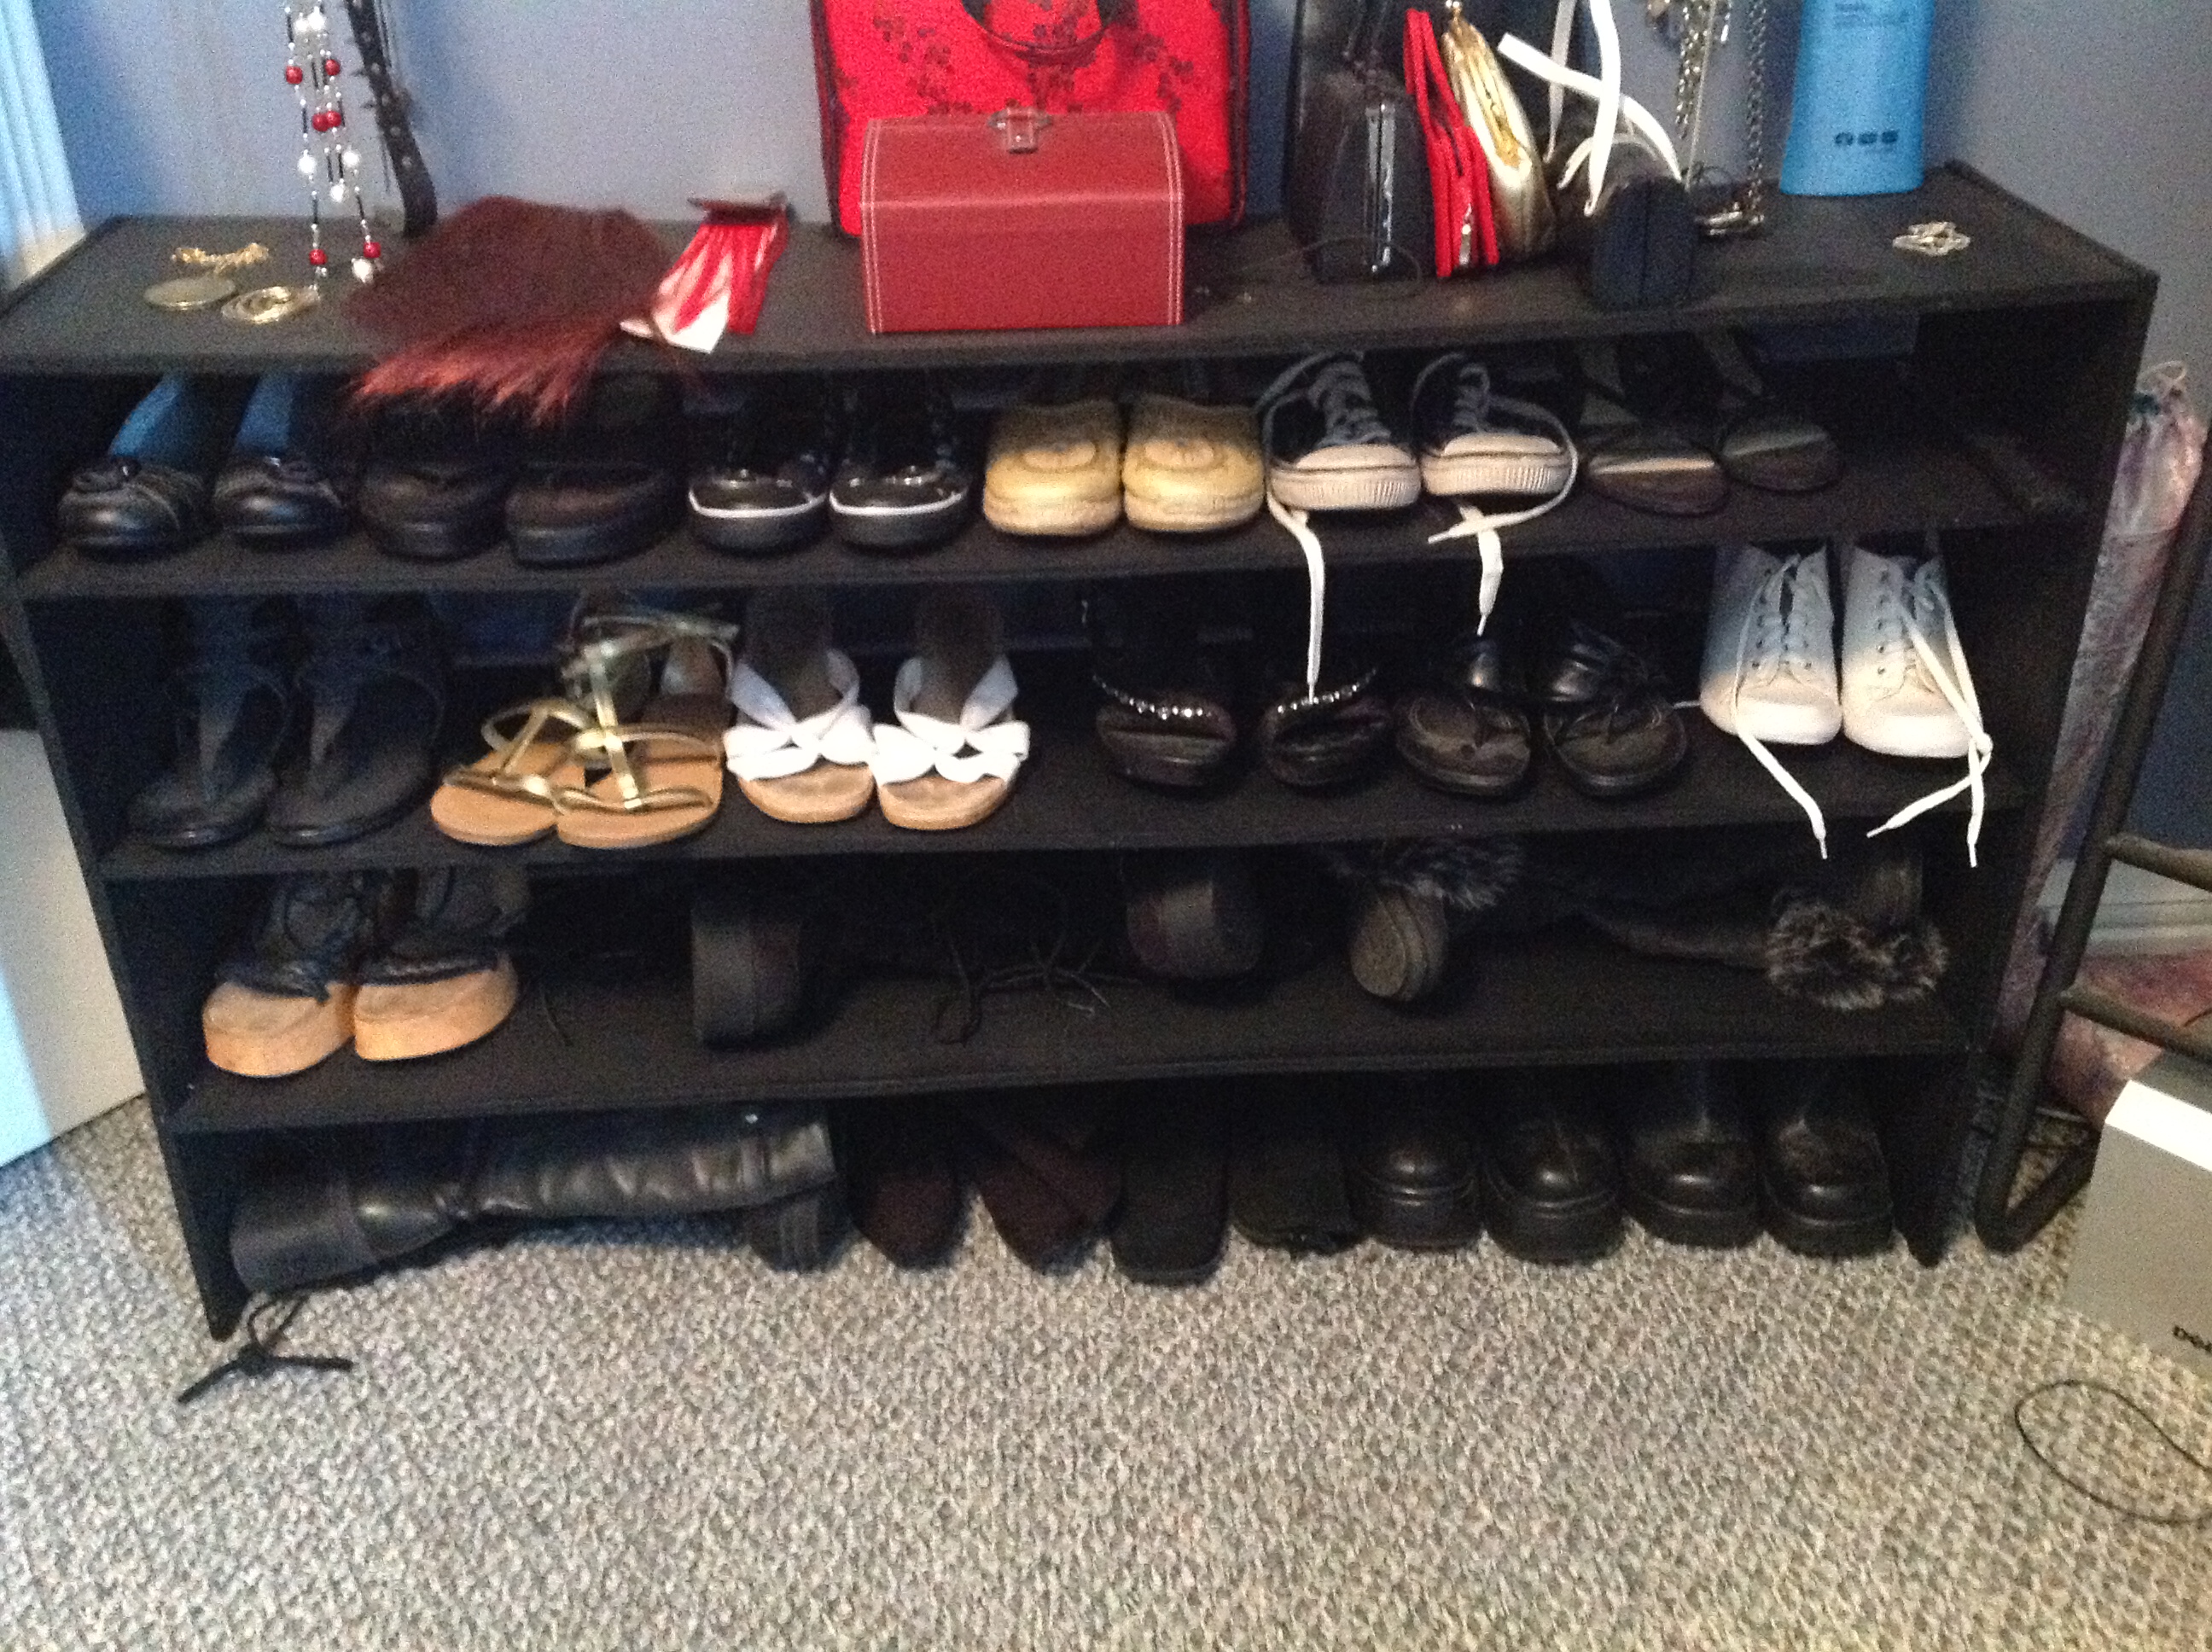
Like just about every woman, I have LOTS of shoes! Well I couldn’t find an attractive enough shoe rack to fit in with our “Closet” furniture. We use an entire bedroom that our bedroom is connected to because the closet in that bedroom is minuscule. Anyway the closest I came was a simple design from the particleboard stacking closet unit line, you all know what I’m talking about. Well the problem was that they were $10 each & I would have needed like 6 of them & they didn’t come in black, which I tend to like because it doesn’t show dirt & that way all the furniture in the house is interchangeable if I feel like moving things around. I had plywood left over from my bed project so I just copied the design but made it a bigger single unit.
Estimated Time Investment
Afternoon Project (3-6 Hours)
Finish Used
Valspar Flat Black Indoor/Outdoor Enamel
Recommended Skill Level
Beginner
Chalkboard Coffee Table

So I used the tryde coffee table plans and modified to size I wanted. For the top I cut off round edges on my table saw and them laminated with glue and pocket screws. I used 2 coats of the chalkboard paint allowing to dry 24 hours for each coat

Built from Plan(s)
Estimated Cost
75
Estimated Time Investment
Day Project (6-9 Hours)
Finish Used
Valspar Chalkboard paint
Colonial Maple Minwax stain
Colonial Maple Minwax stain
Recommended Skill Level
Starter Project
American Flag Rustic X Coffee Table

Loved the design of the coffee table and needed something in my living room to make it feel a little less empty. As I was building the table I realized that the bottom shelf was roughly the size of a flag that I've built in the past and decided to add one to it to bring a little patriotism to my living room. I used a torch to burn the flag onto the wood. Love the way it turned out!
Built from Plan(s)
Estimated Cost
$65
Estimated Time Investment
Day Project (6-9 Hours)
Finish Used
Varathane Kona
Recommended Skill Level
Intermediate
Comments
Farmhouse bed - full
We built the full sized Farmhouse bed and stained it with gray stain. Are building a trundle to put under later this week. We added 3 inches to the height to be able to add the trundle.
Built from Plan(s)
Estimated Cost
$180
Estimated Time Investment
Weekend Project (10-20 Hours)
Finish Used
Gray stain
Recommended Skill Level
Intermediate
Barstools

A 30" tall bar stools inspired by the plan simplest stool.
Built from Plan(s)
Estimated Cost
$ 40- $60
Estimated Time Investment
Afternoon Project (3-6 Hours)
Finish Used
valspar white paint
Recommended Skill Level
Beginner
Comments

Fri, 07/20/2012 - 05:32
I like your design. Finally
I like your design. Finally made an account and will be making matching ones. Thanks for the inspiration. If the better half doesn't like the first one I will have a new stool for my workbench

Tue, 09/04/2012 - 15:20
by adjusting circular saw
by adjusting circular saw depth and using chisel and hammer and lots of sanding :)
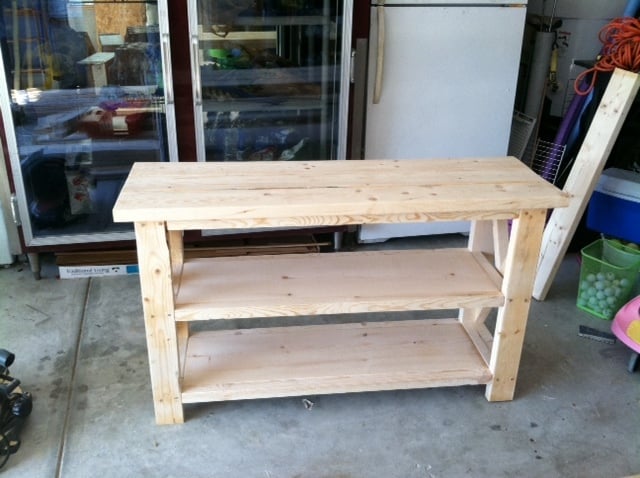
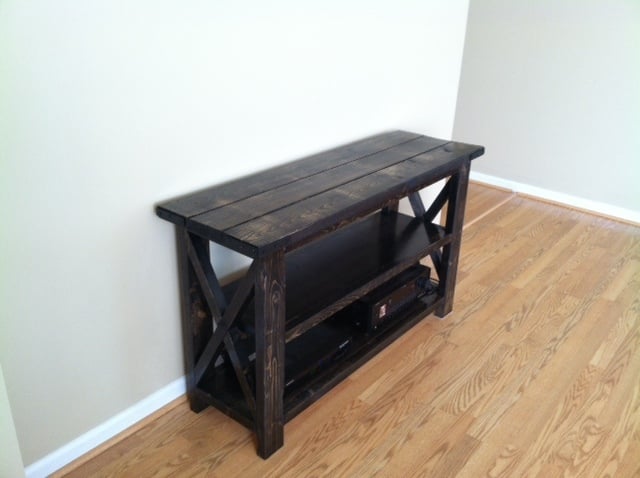
Taylor Console

I love this plan and had already built one a few months ago. It is an easy project to tackle ;) I did change things up a bit. Will be building another one soon :) Thank you so much for sharing the plans.


Built from Plan(s)
Estimated Time Investment
Day Project (6-9 Hours)
Finish Used
Dark walnut stain followed by white dry brushing on the base.
Recommended Skill Level
Beginner
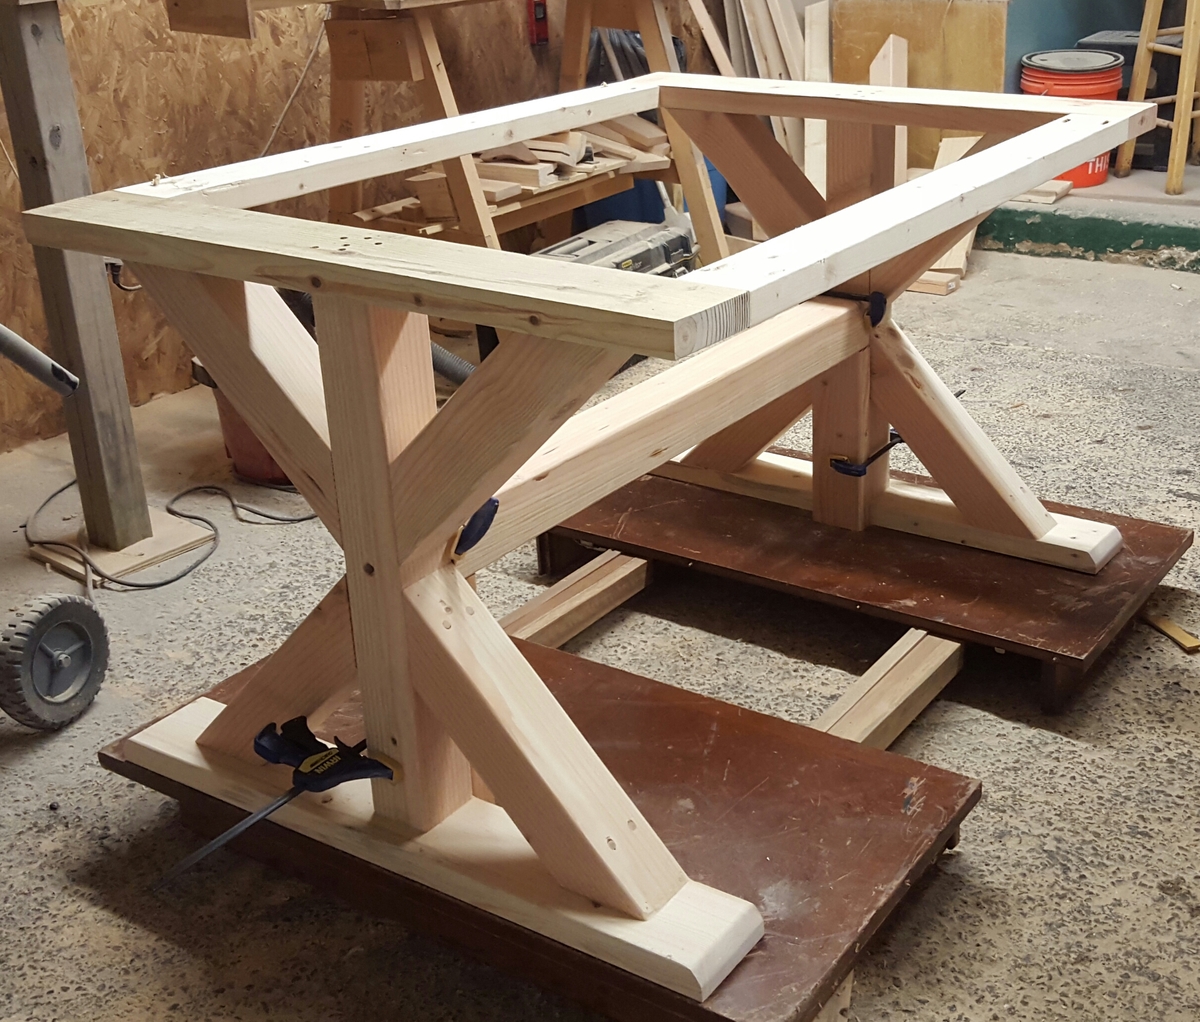
Breadboard Trestle Table and benches

This table was custom made for a good friend and his family. He wanted a trestle style with bench seats for his kids and able to have room to sit at the ends as well. In addition, he wanted breadboard table top. Engineering wise, thats a tall order. So I made the table top solid by using biscuits to secure the timber and since the breadboards could not be supported by the trestle legs I used 5/8" dowel rods, 6" long, 2 per board. I used a 2x4 and scrap plywood to make a dowel jig. I also reinforced them with 3" pocket screws on the bottom.
The next challenge was bringing the legs in enough to make room for end seating while still allowing room for the benches. I used 2x6s on the top and bottom of the trestles and secured them flush to the edge to allow for leg room at the ends.
I used 1" dowels to secure the 4x4 runner using a split/wedge technique. The benches are pretty strait forward and I also used biscuits to make solid tops.
To save money and to have a rustic look, I used douglas fur framing lumber which required many hours of scraping and sanding to make the top level and splitter free. Additionally, I used 5 layers of polyurethane to withstand the wear and tear of a young families daily use. Thankfully they fell in love with the table as much as I did!
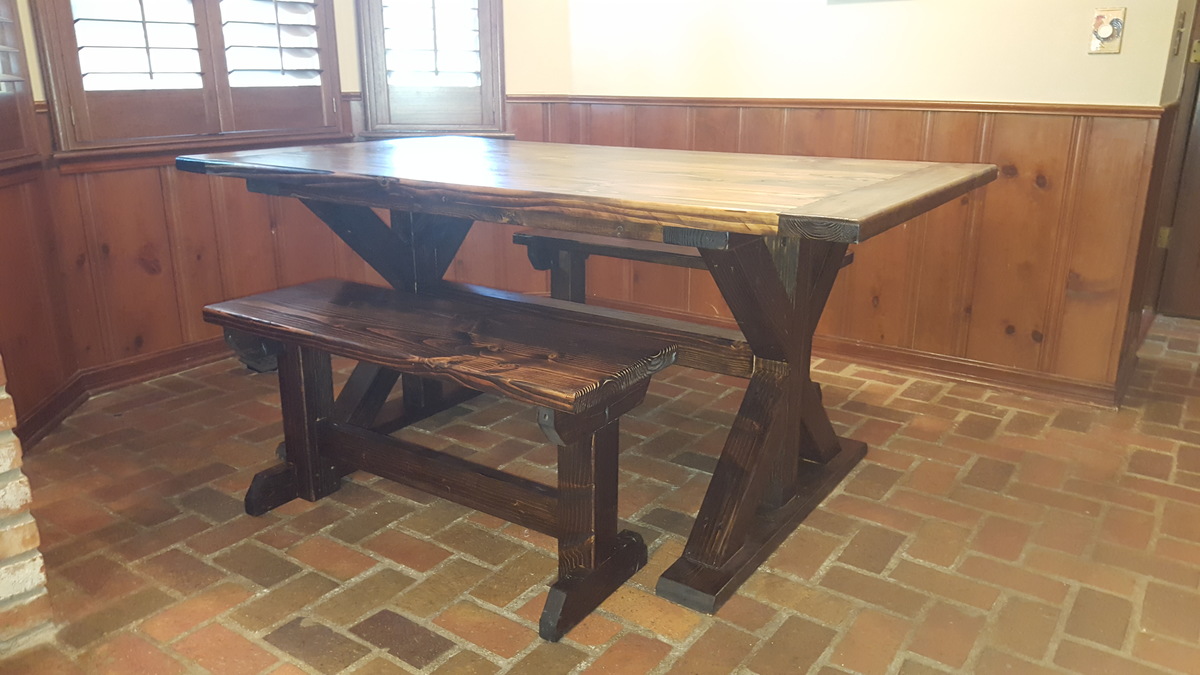

Estimated Cost
$375
Estimated Time Investment
Week Long Project (20 Hours or More)
Finish Used
Minwax Early American
Minwax satin finish polyurethane
Minwax satin finish polyurethane
Recommended Skill Level
Intermediate
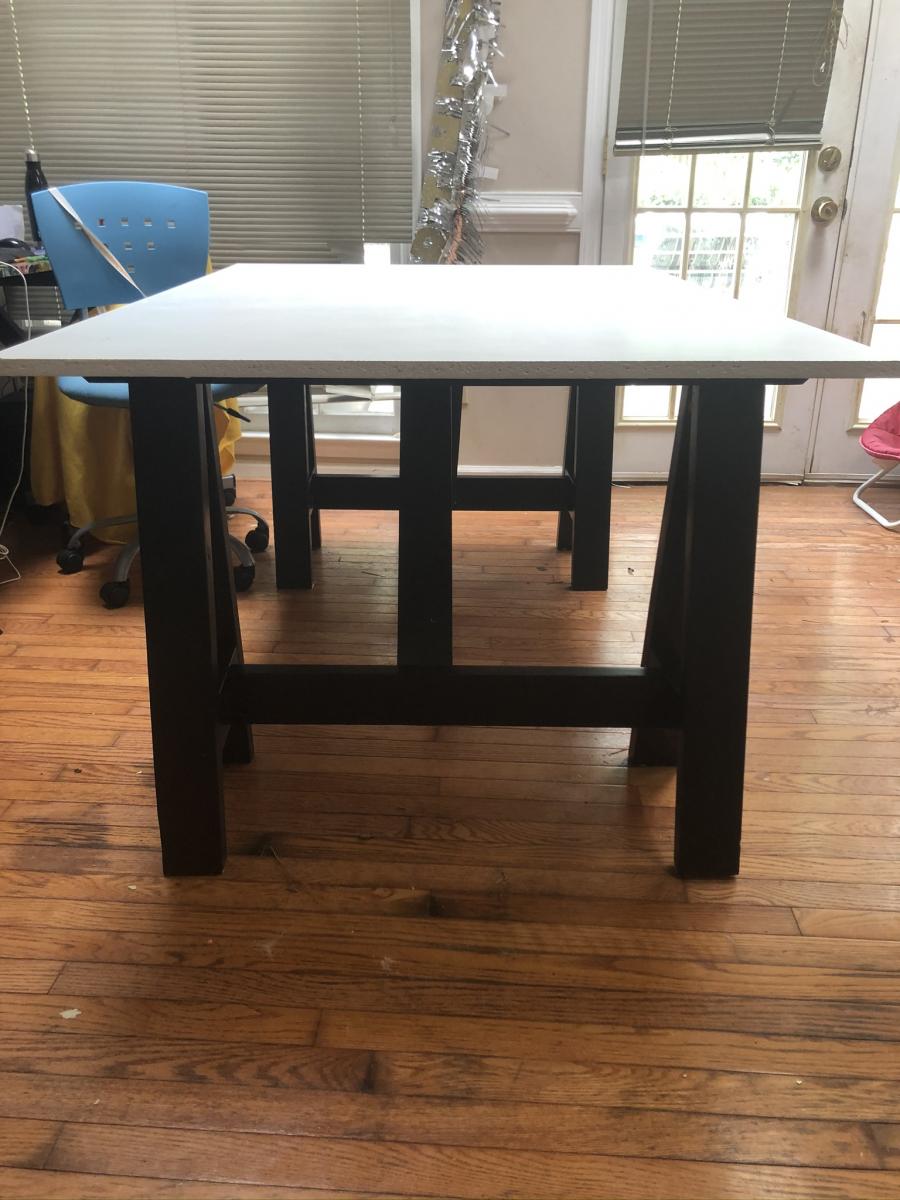
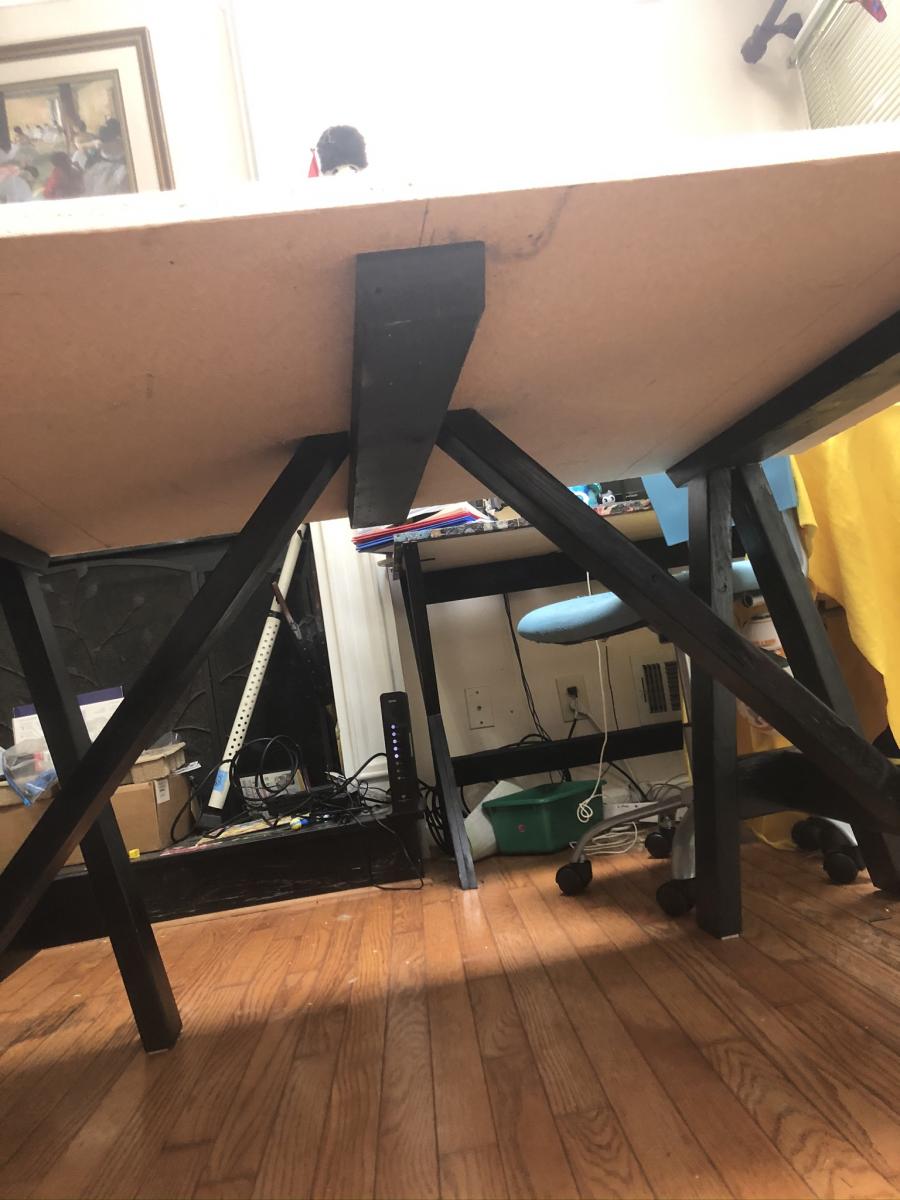
Sawhorse Table
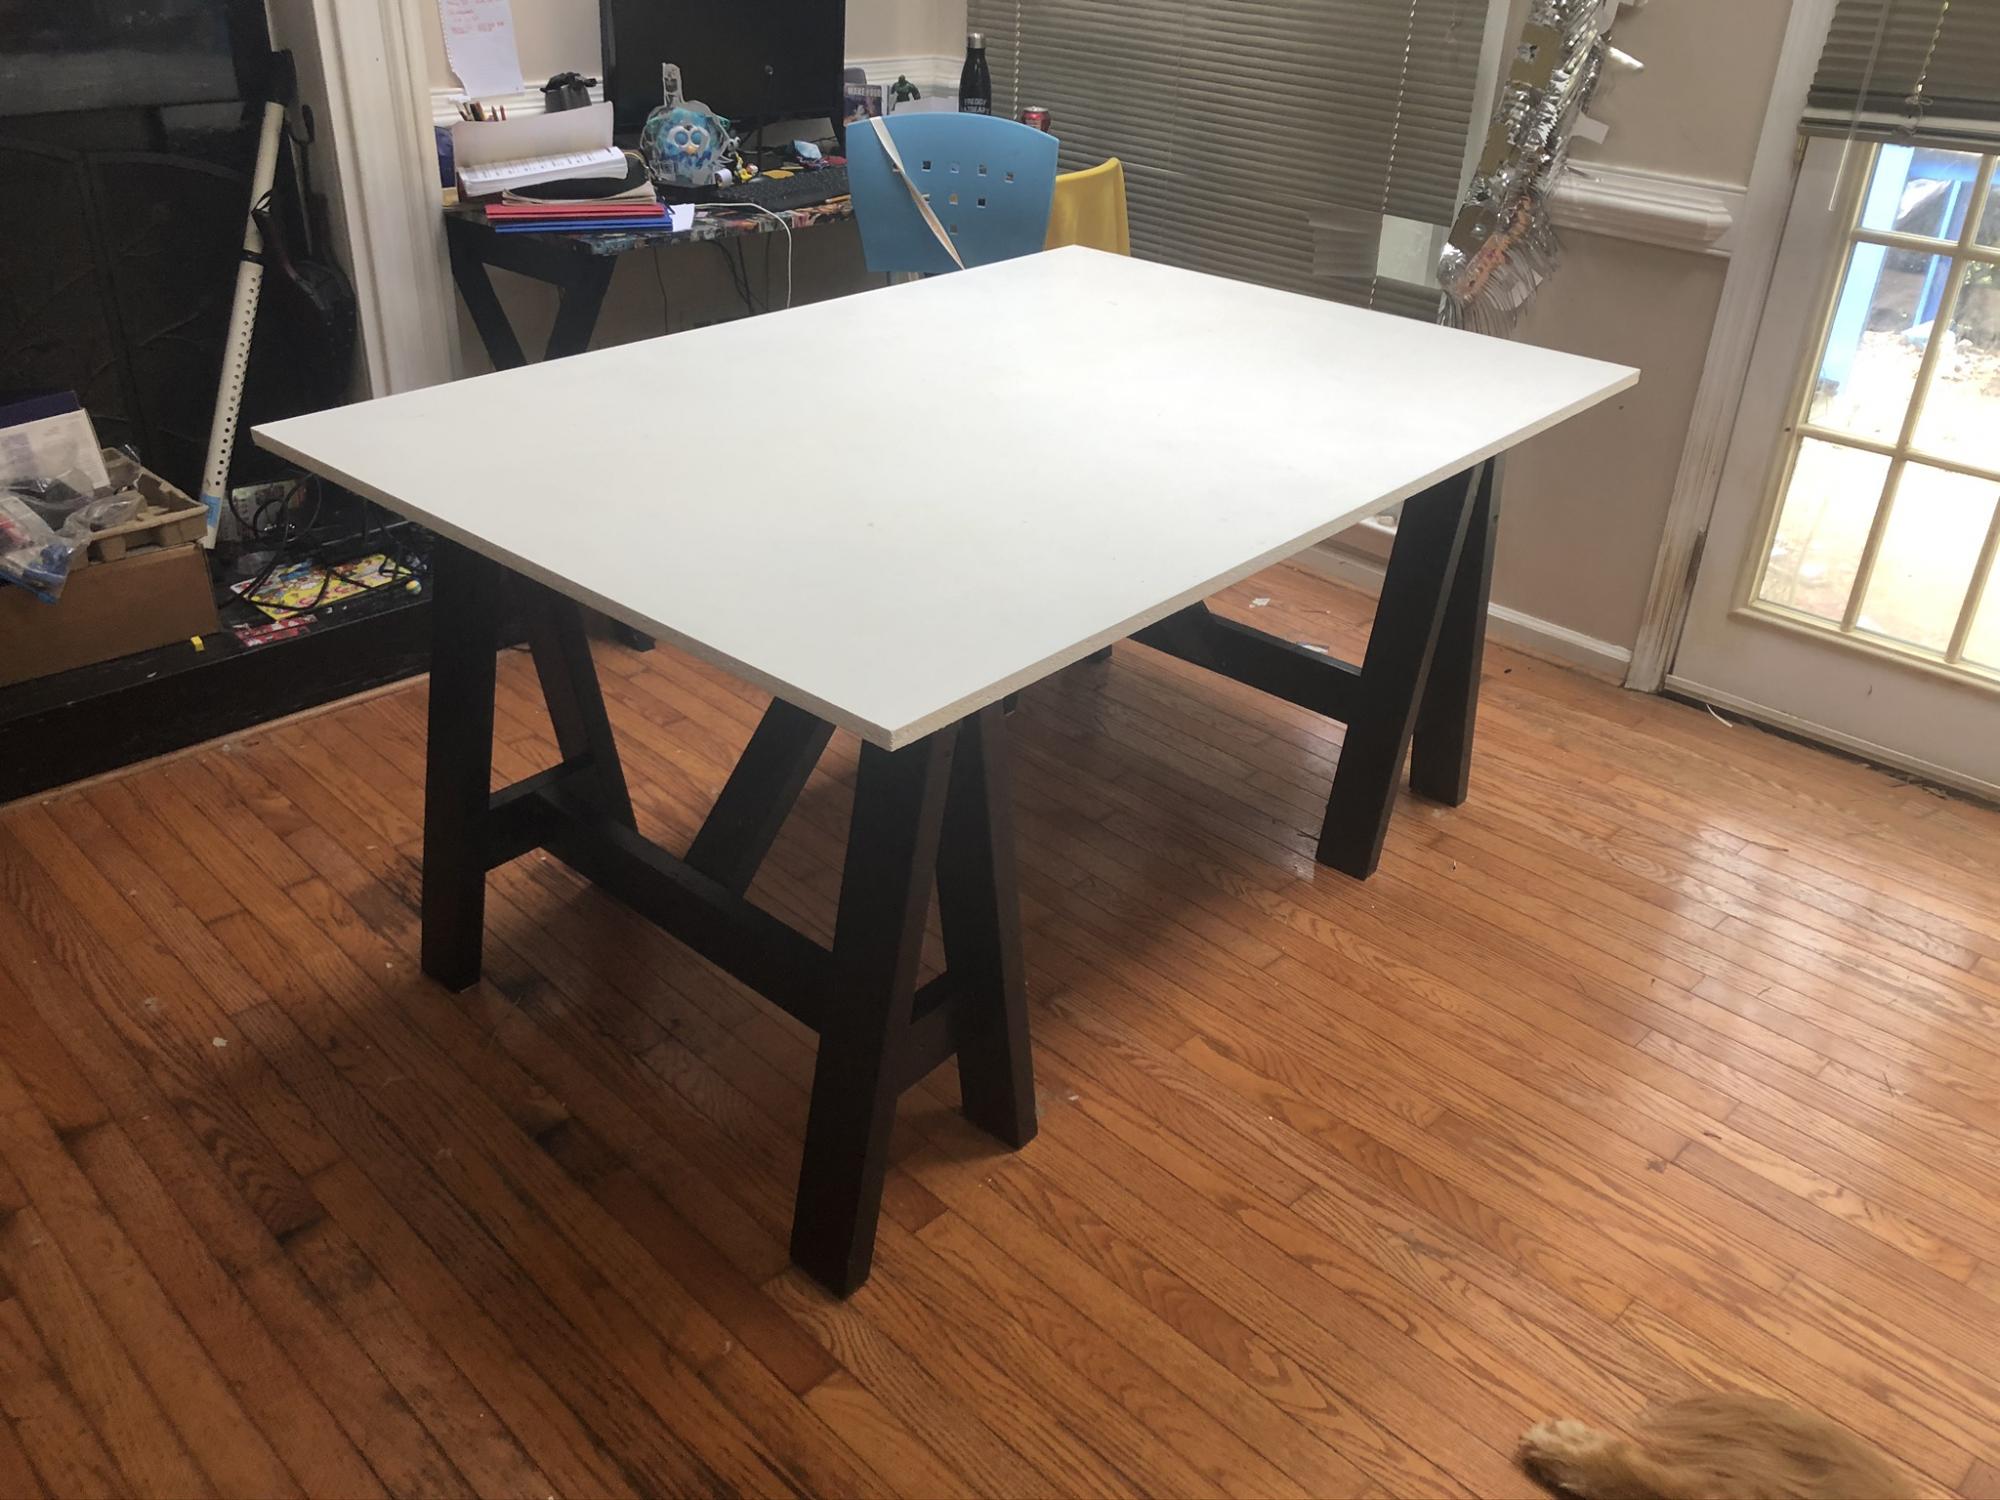
I made this table for my two boys to do their homework on so I modified it a little to make it shorter.
I used reclaimed 2x4's for the base and MDF for the table top.

Built from Plan(s)
Estimated Cost
$40
Estimated Time Investment
Day Project (6-9 Hours)
Finish Used
black stain, white paint, polycrylic
Recommended Skill Level
Beginner
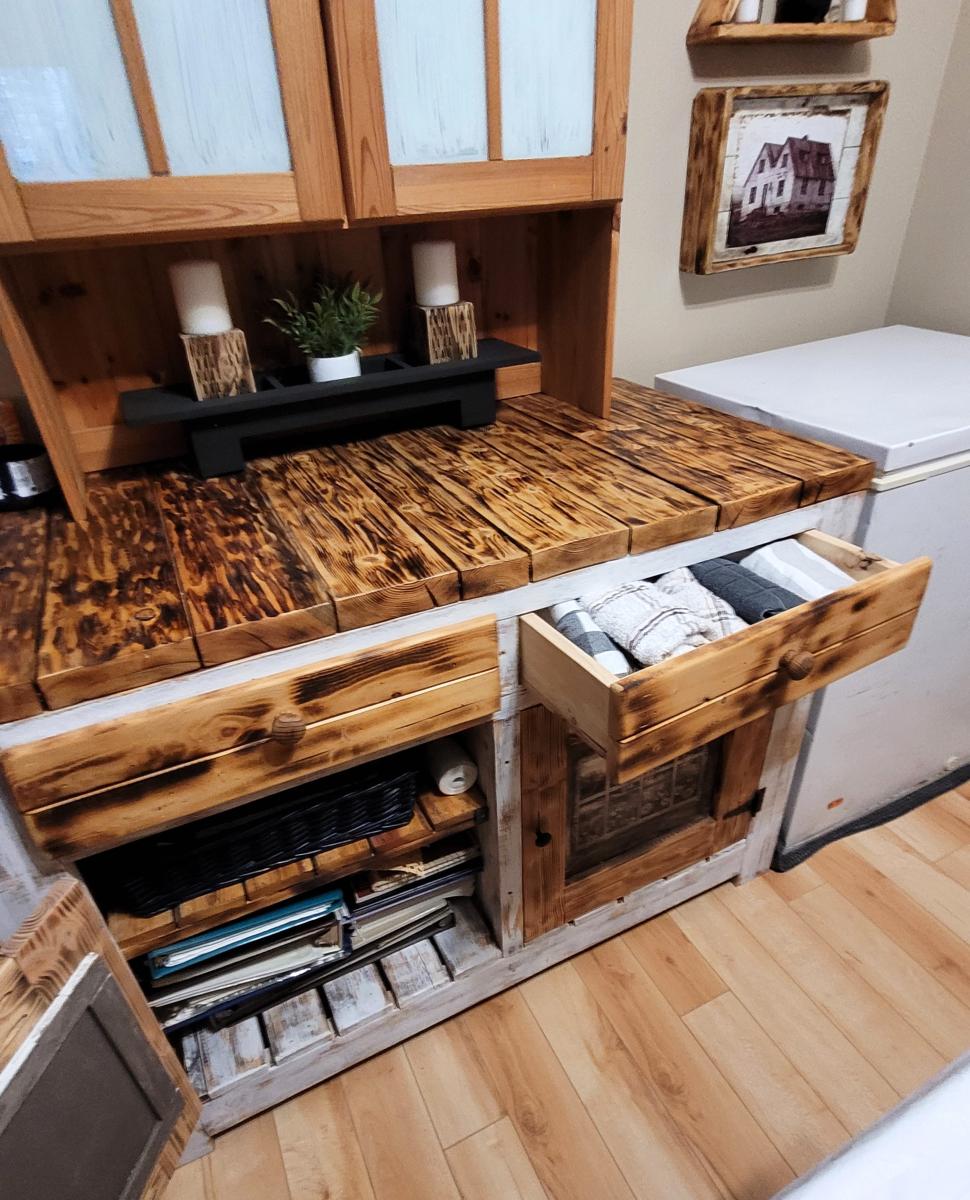
Kitchen Island with Storage
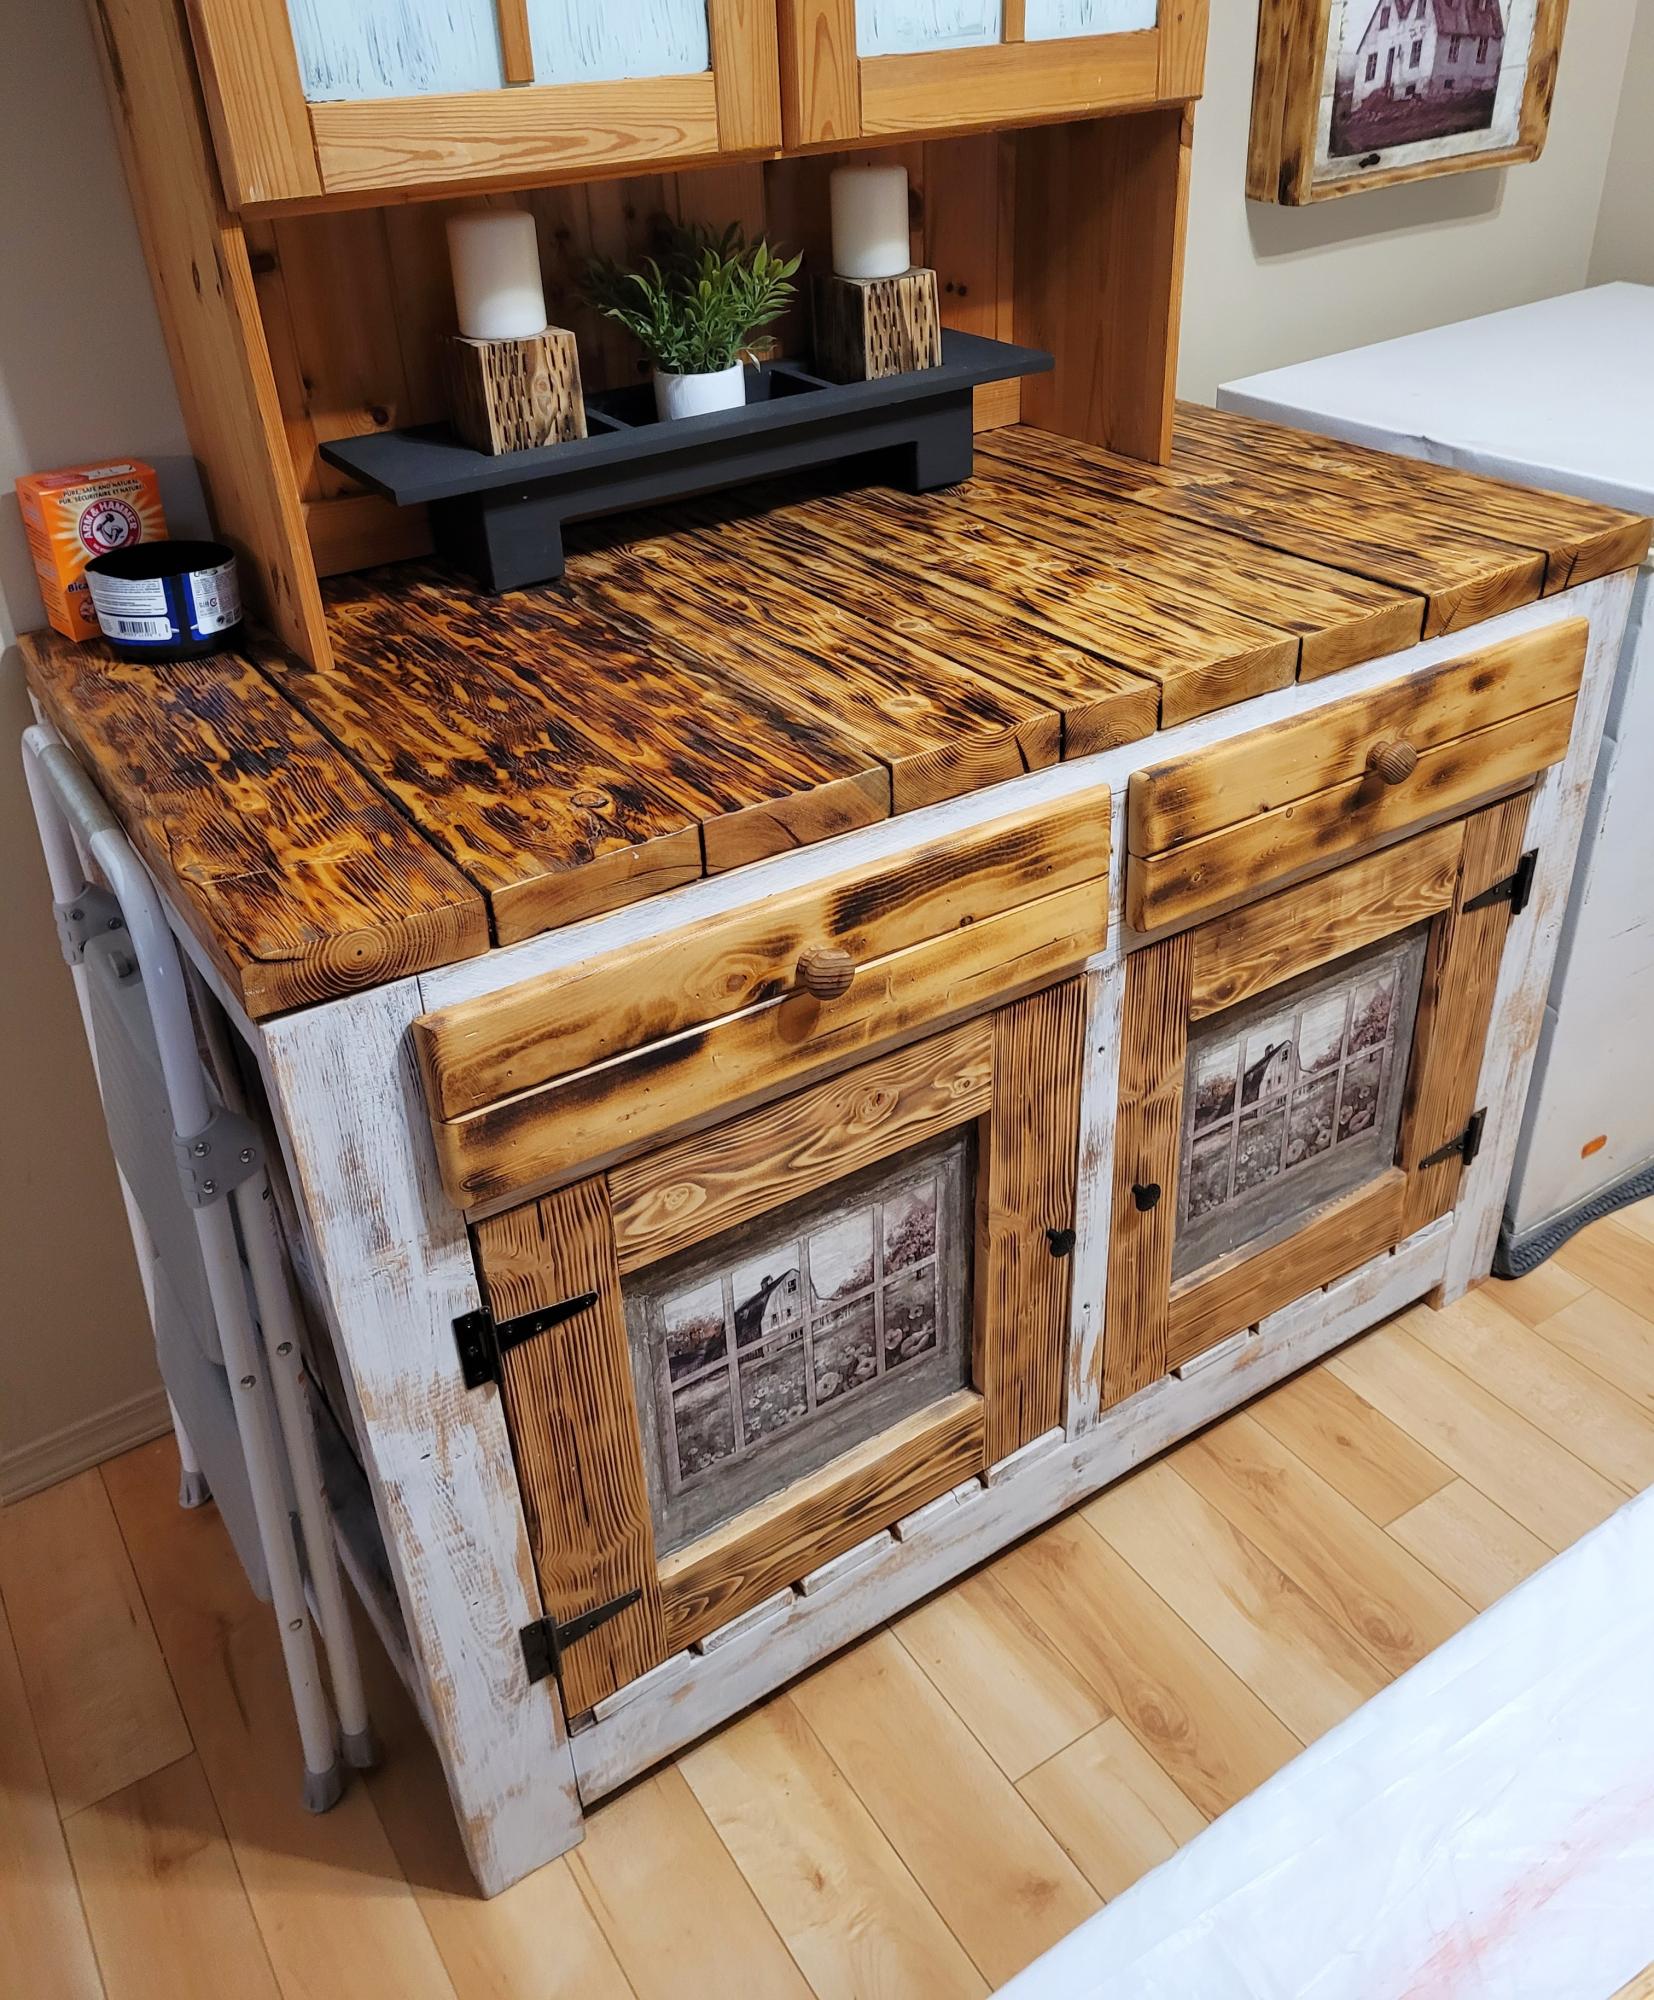
I started with your basic plan but i slightly modified it with out the overhang too much and added a set of doors and covered where the seating would be. But it still has room for two seats .. I made mine rustic :-)
backyarddiybuilder.ca

Built from Plan(s)
Farmhouse Bedside Table/Nightstand
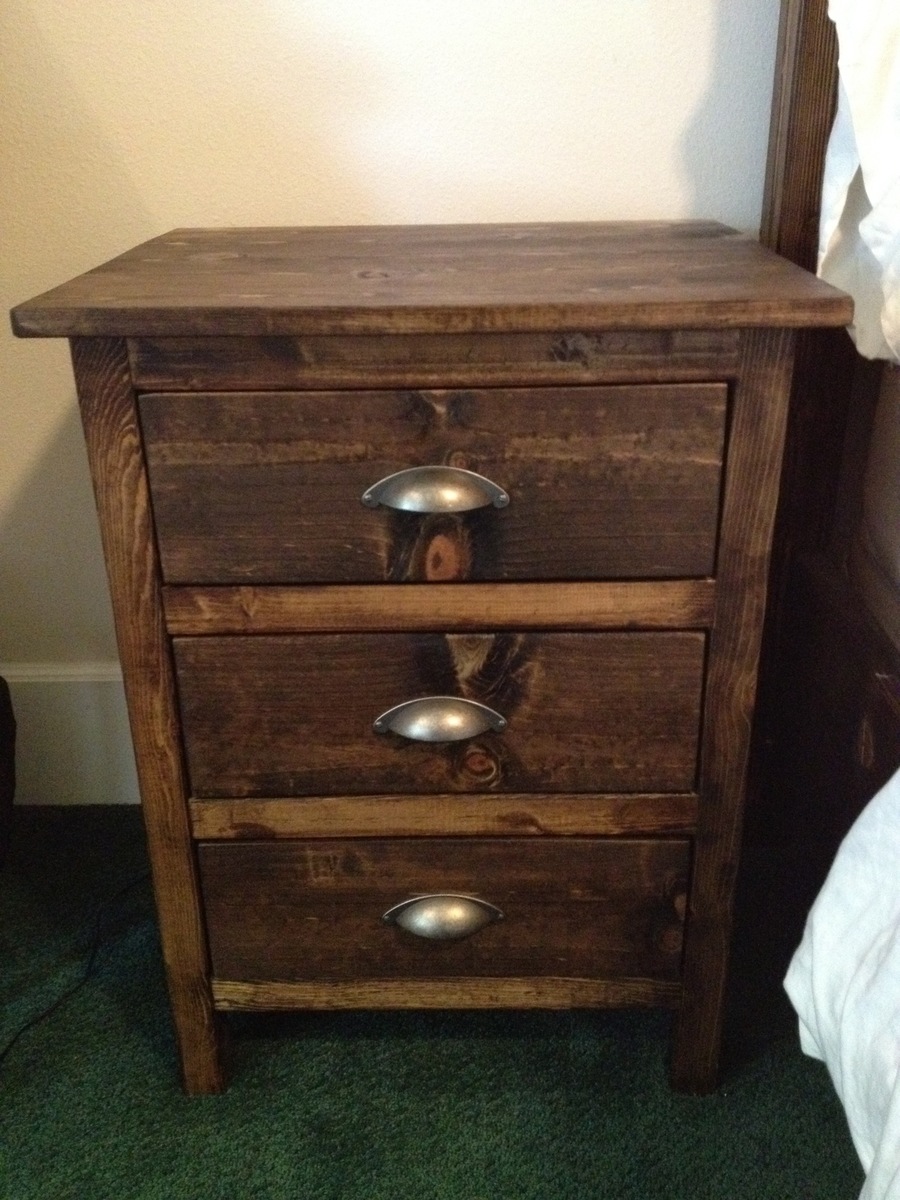
This was much more expensive than I had anticipated... but that's Oregon prices for you. Now that I've started with Home Depot woods I'm kind of stuck with it until I finish the bedroom set. But, I LOVE IT! It was my first project with the Kreg jig as well and the top of this nightstand is very flat.
No wood conditioner... went without it so it would match the bed. I like the wild look now.
I had to do it during my son's naps on the weekend so it took me quite a while to finish it.
Estimated Cost
$150
Estimated Time Investment
Day Project (6-9 Hours)
Finish Used
Dark Walnut satin stain and polyurethane finish. Rubbed on with an old t-shirt.
Recommended Skill Level
Beginner
Comments
Wed, 06/13/2012 - 18:13
drawers??
I am about to try 2 of these next week. (eek!!) Any tips on building these in general? Any troubles or things to watch out for when it comes to the drawers?
Yours look amazing....and I like the WILD wood looks too...seems more natural :-)
Tue, 10/16/2012 - 13:18
How did it turn out?
Hi Tasha (I have a new 'name' as I can't seem to log into my old account)
How did they turn out? Sorry, I didn't check for comments! I had trouble with the first nightstand set of drawers but by the time I built the second one I'd figured out how to keep things square. I made sure I focused on the bottom of the drawer being square and on a flat surface and then when the drawer was done I sanded it even on the top. Since then I've built a dresser in a similar style and made my own hardwood drawer slides... MUCH better. It's more difficult but it's well worth it if you have access to a table saw.
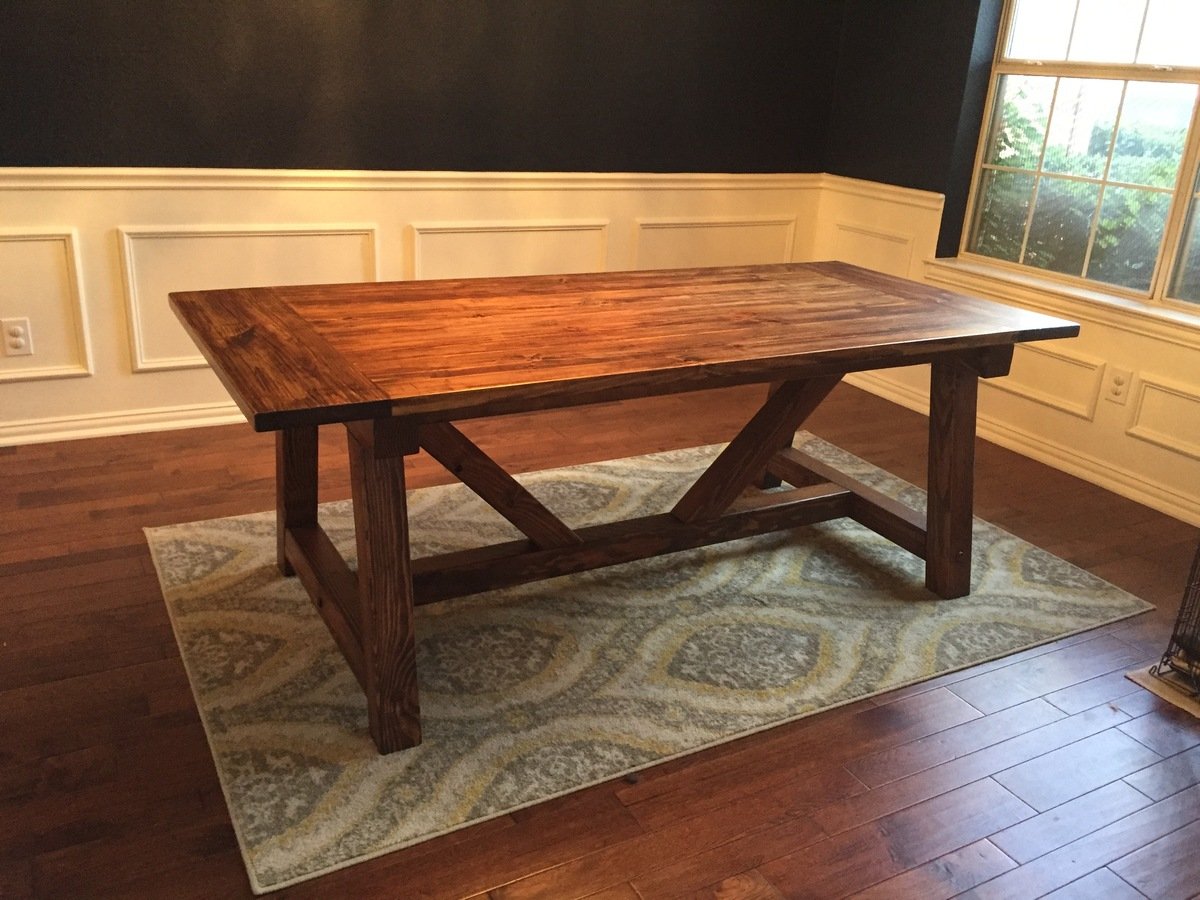
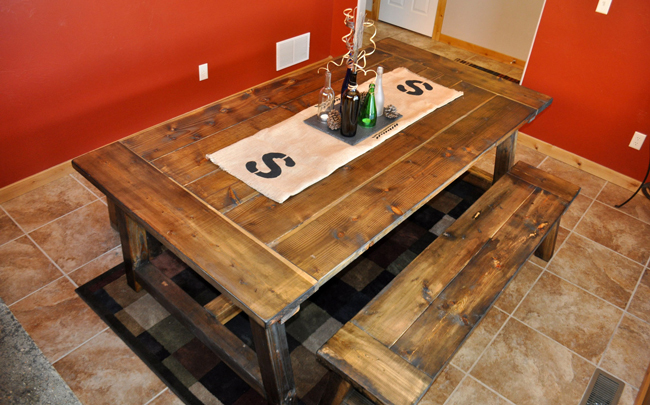
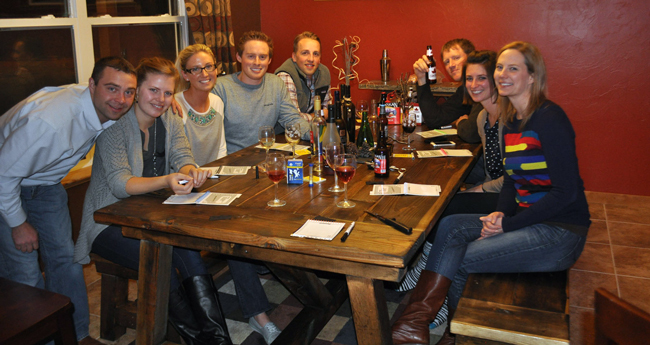
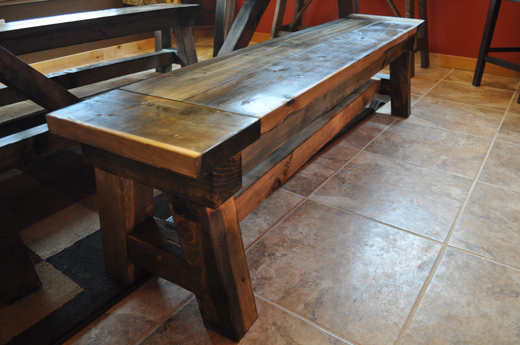
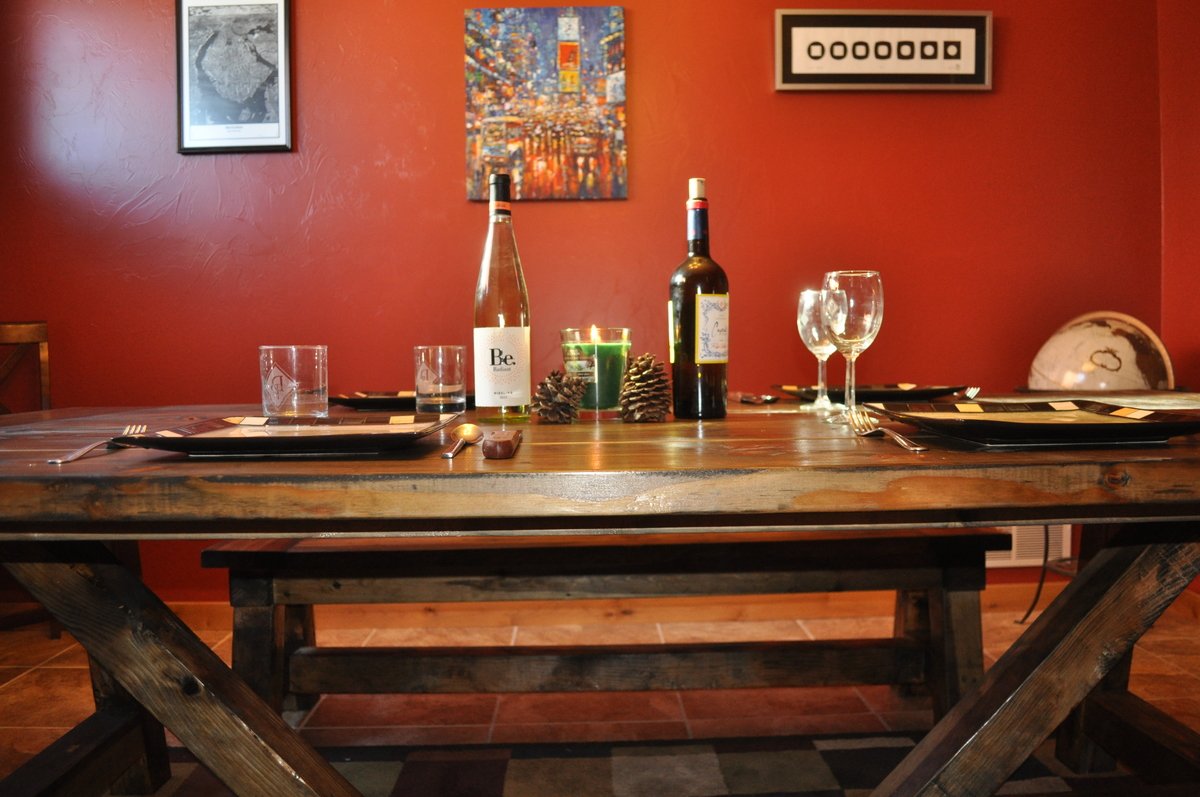
4x4 Farmhouse Table with Video
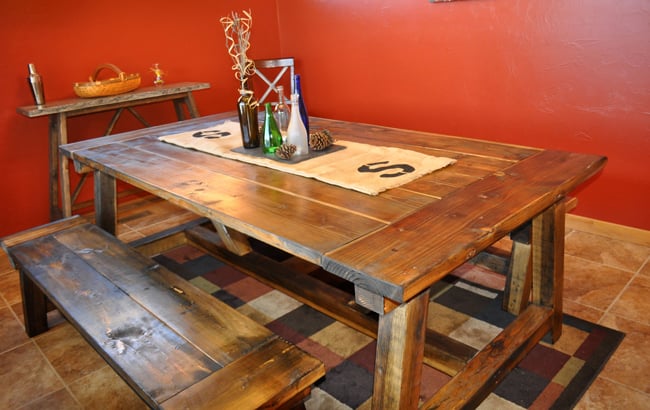
When I saw Ana's plans for this table I had to build it. I did modify the size to make the table top a little wider and longer. The extra width is great for putting more food or a center piece in the middle of the table.
I thought the build was pretty simple and everyone who visits our house loves the table. It is definitely a conversational piece.
The table and benches are heavy duty and will be able to passed on for many generations. I love the rustic look and so the steel wool/vinegar stain was my finish of choice.
I decided to document the entire build and created the most in-depth farmhouse table video tutorial online. The goal with the video is to show how easy it is to build the table using Ana's plans!

Built from Plan(s)
Estimated Cost
$200
Estimated Time Investment
Weekend Project (10-20 Hours)
Finish Used
Steel Wool and Vinegar Mixture. I then used an oil based Polyurethane from Minwax to protect the wood.
Recommended Skill Level
Beginner