Community Brag Posts
Fall Raised Planter
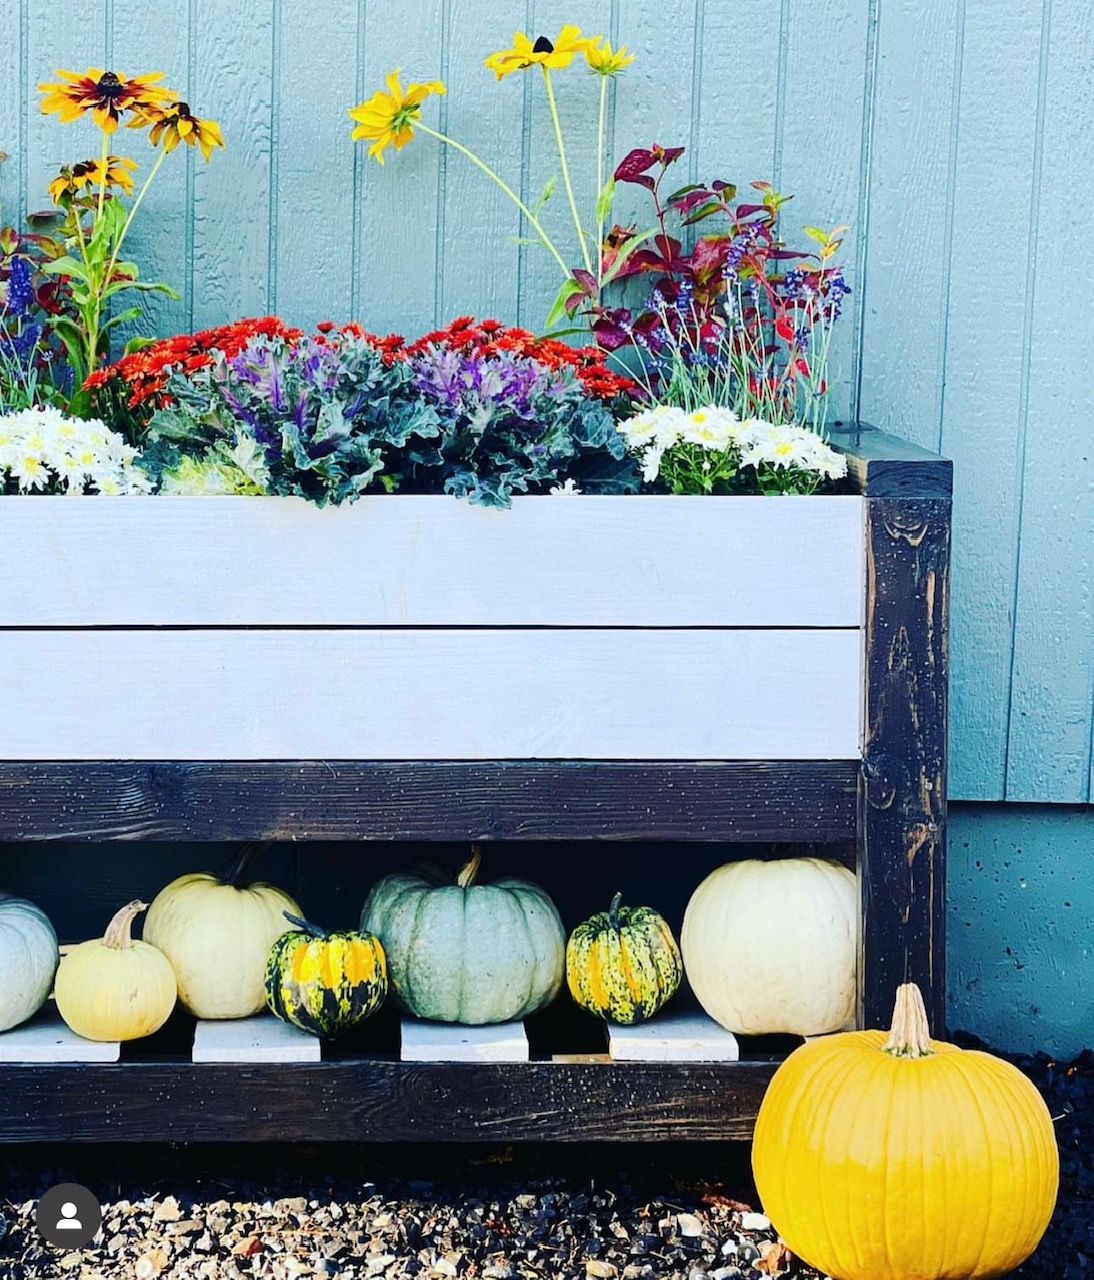
I love this planter because it's easy to change out with the seasons! Thanks for the plan Ana.
Built from Plan(s)
Seasonal And Holiday
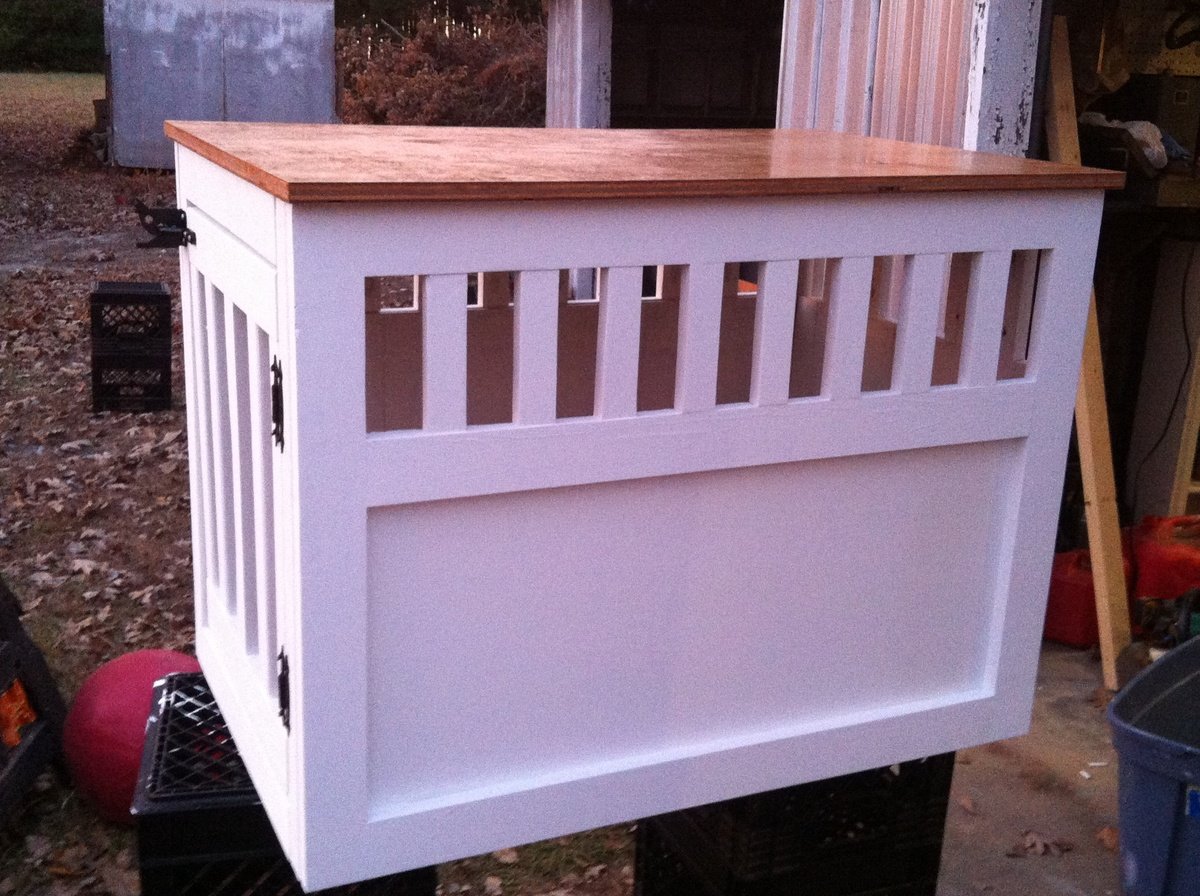
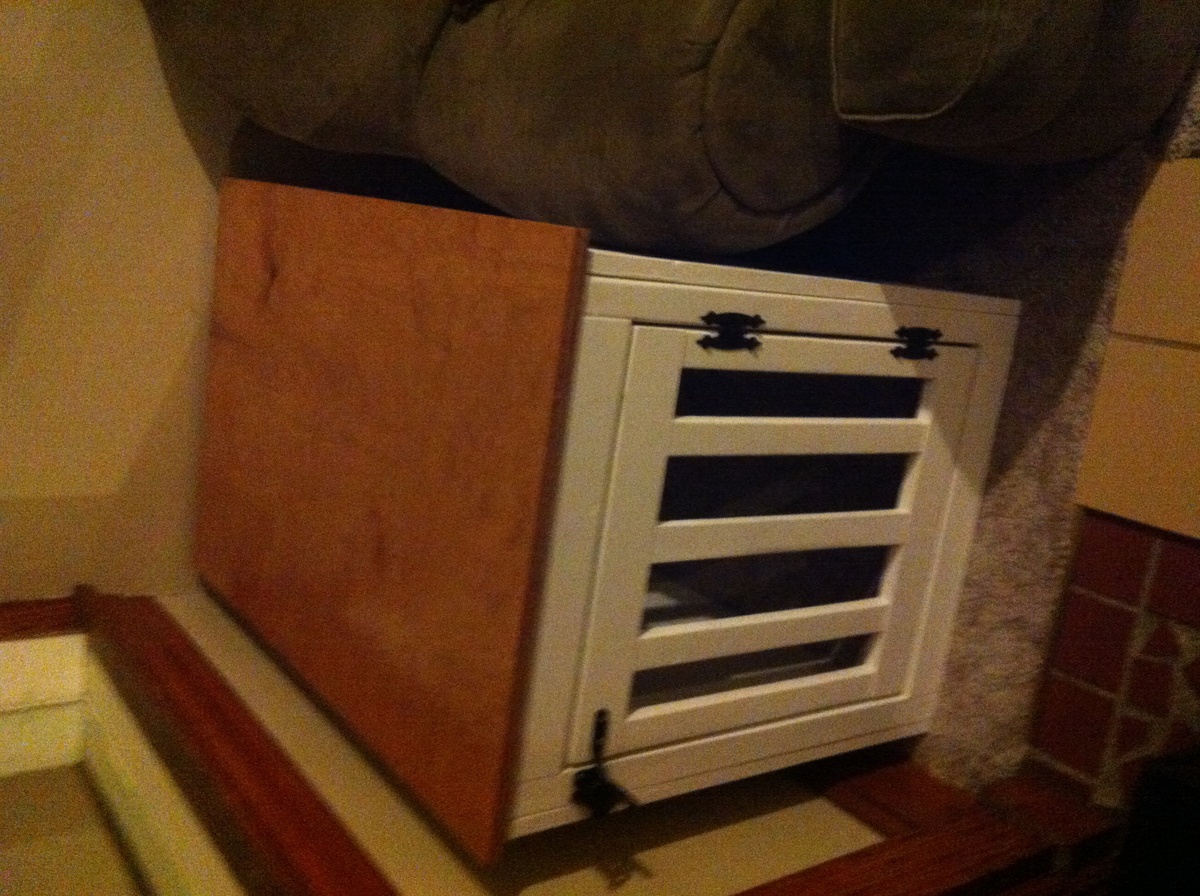
Large Wooden Dog Crate End Table
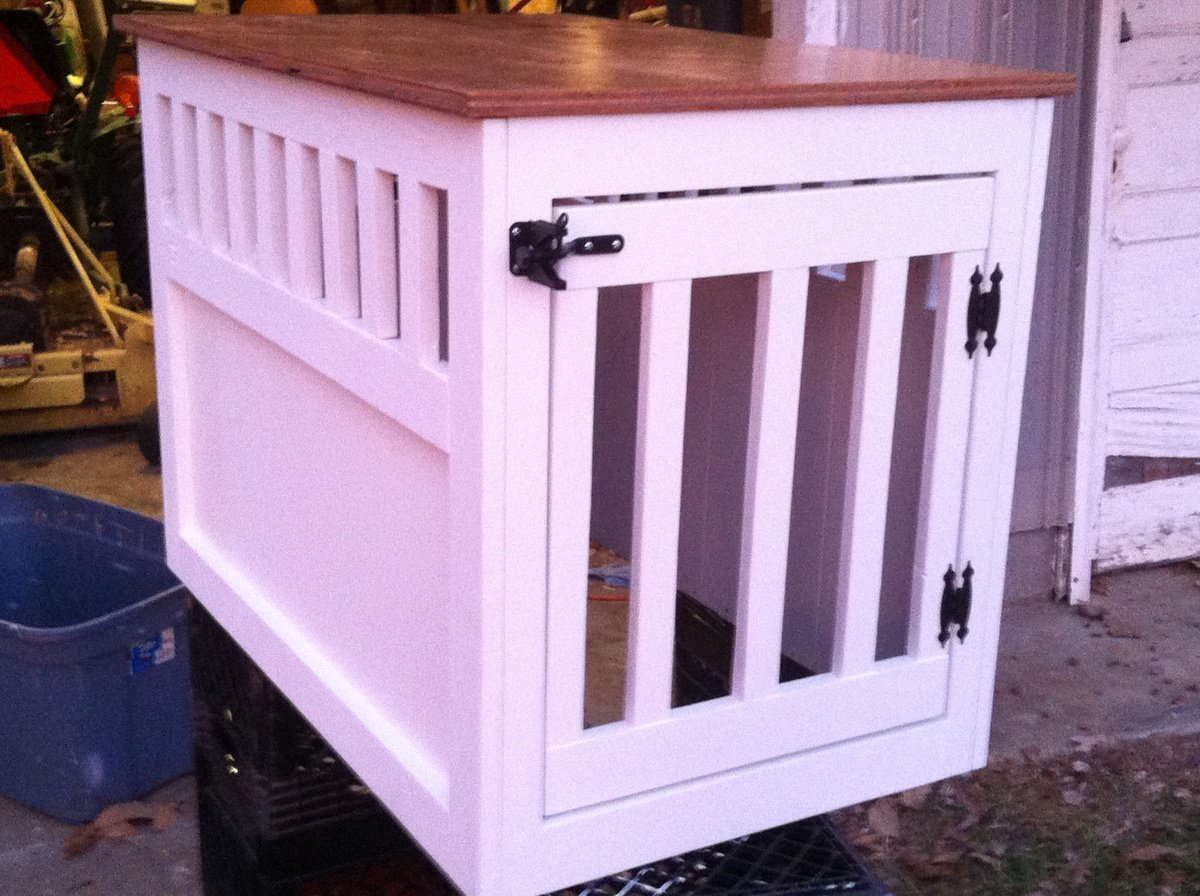
It was a straight forward project and the plans were excellent and easy to follow. We did purchase the Kreg Jig and that takes a little practice to get it right but it does make an extremely strong joint. We applied three coats of paint and one coat of stain on the top. This is for our German Shepherd and he loves it. It took us three or four days just because we worked on it a little bit each evening.


Built from Plan(s)
Estimated Time Investment
Weekend Project (10-20 Hours)
Finish Used
Flat White Paint
Recommended Skill Level
Intermediate
Pantry
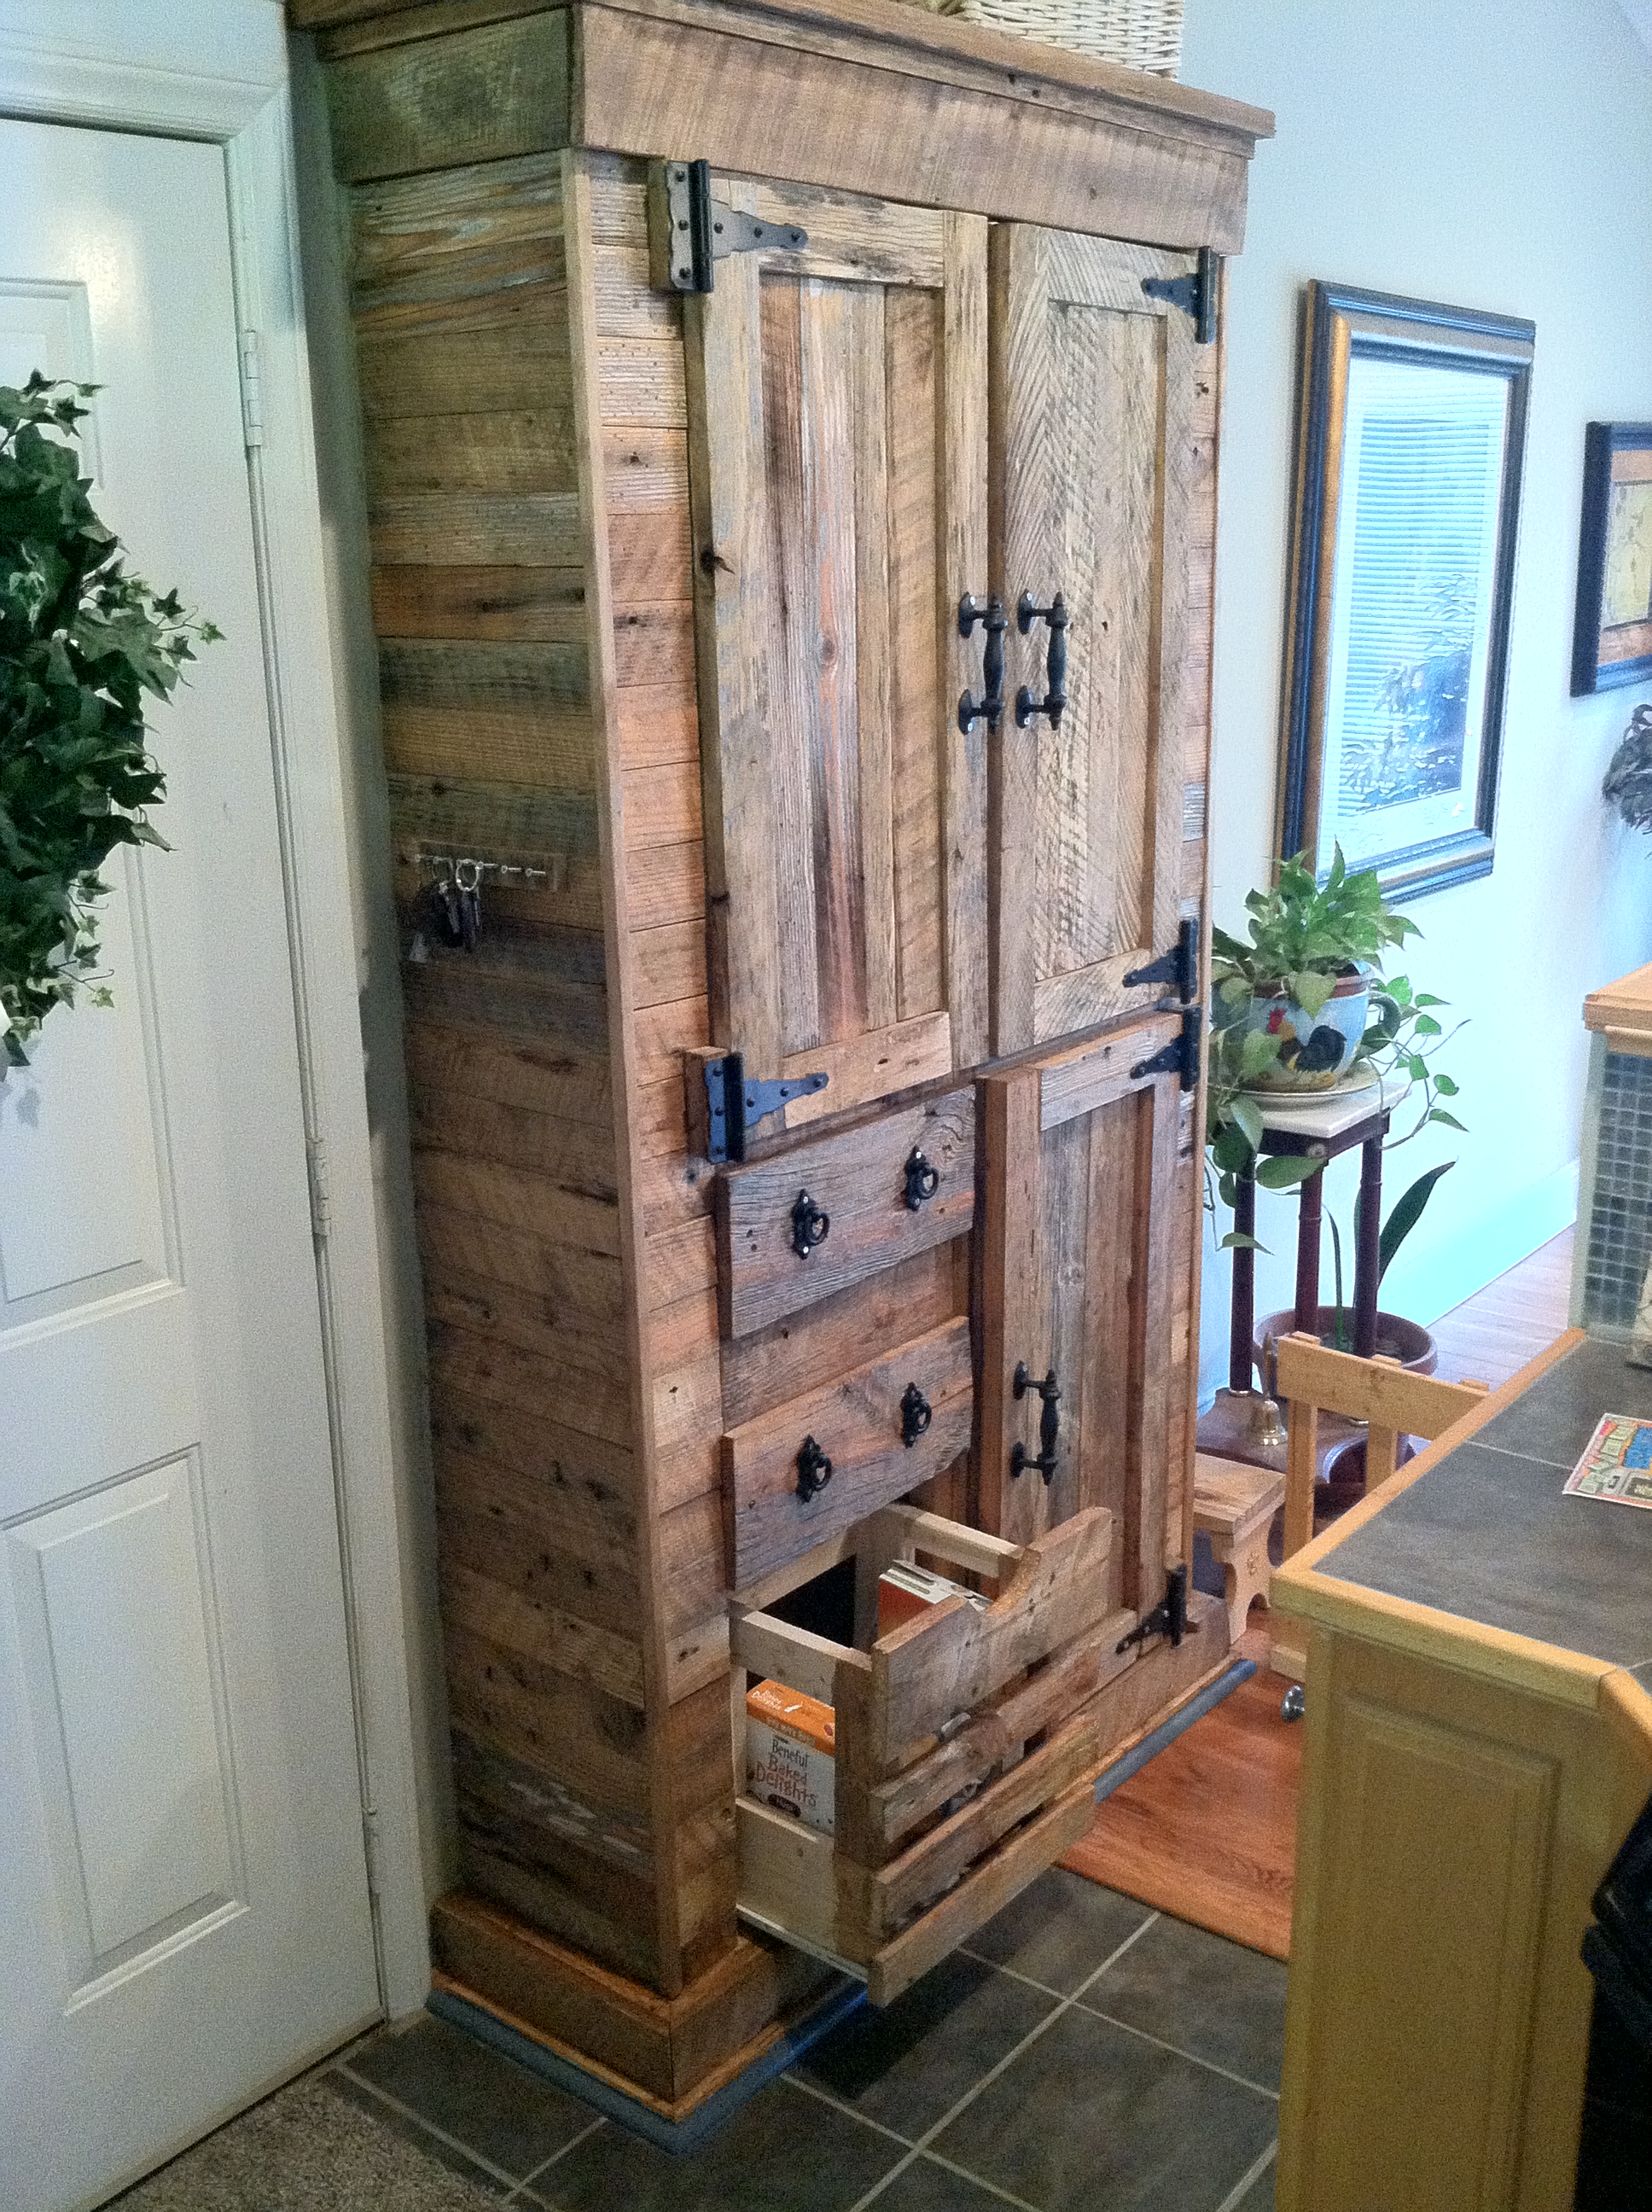
Built this out of old Barnwood Pine !
Recommended Skill Level
Intermediate
Comments
Sun, 11/02/2014 - 18:27
Instructions?
This is beautiful and I just purchased my first home with my fiance and we have an old farm house. This would be amazing in our kitchen as our pantry. I must attempt to make it! Please help me :)
Sun, 11/29/2020 - 15:26
Plans for barn wood pantry
Where can I find the plans for the barn wood pantry? I NEED to make this!!???
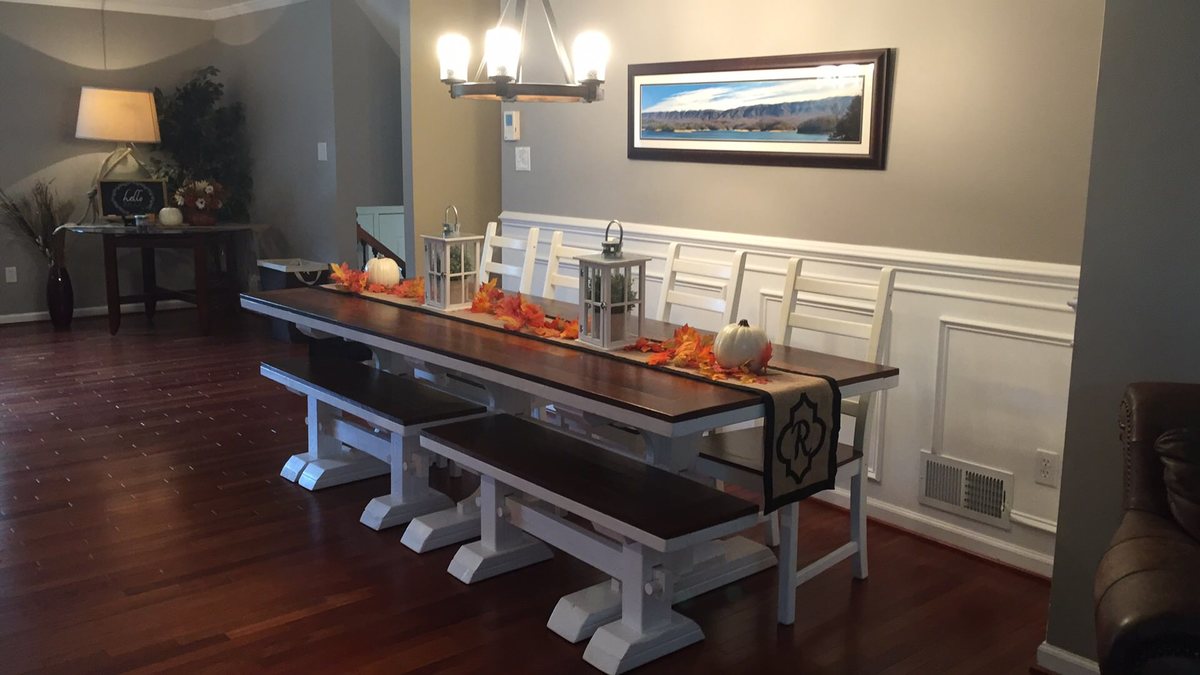
My Table and Bench
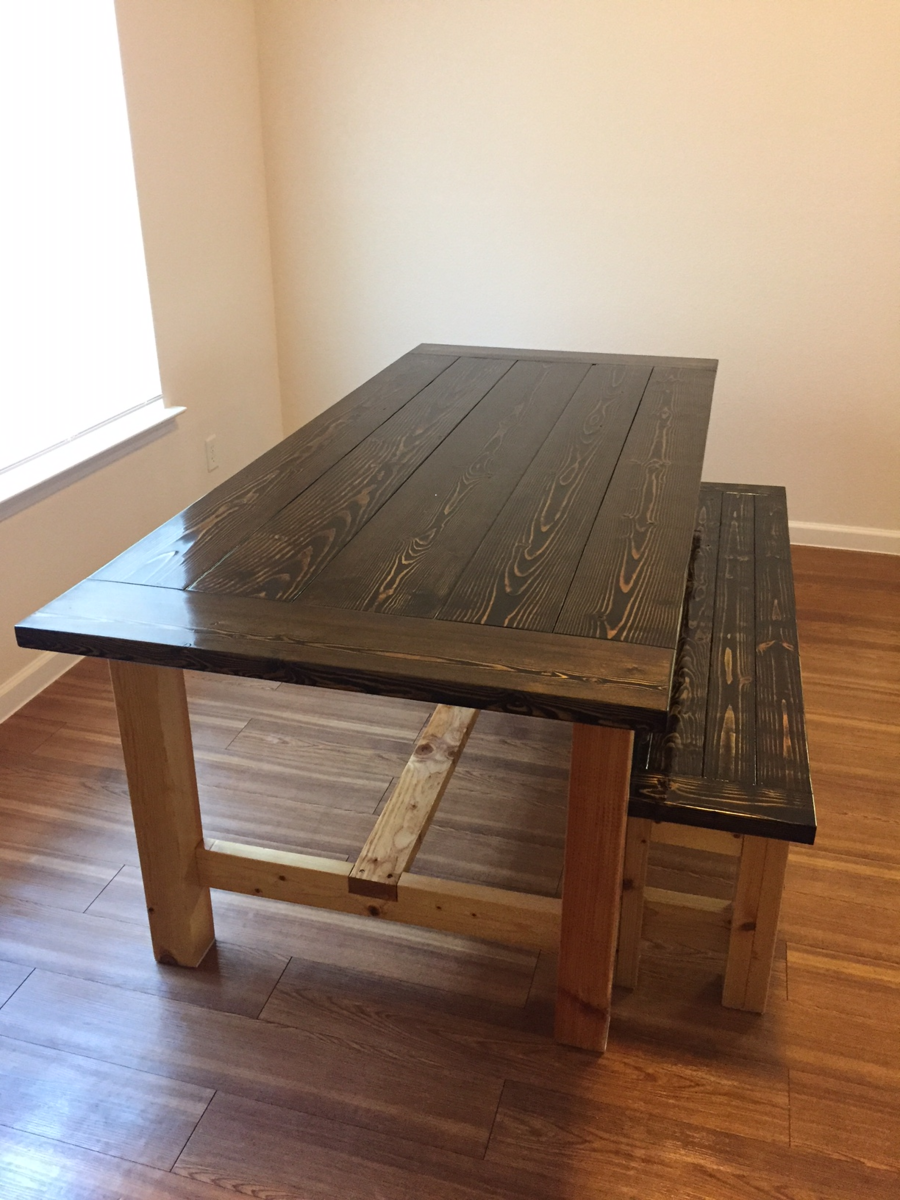
I know this is an older project on this website. However, I only recently happened upon this treasure trove of plans. As such, what better project than a new table and matching bench for the family? I made some adjustments to the bench as a result of the comments section. Essentially, I shortened the bench so it would slide between the legs of the table (65" instead of 72" as the plans call for). I also moved the stretcher supports to the inside of the table legs and shortened the stretcher (70" instead of 74" as the plans call for) to give a few more inches to push chairs in. I had every intention of staining the entire project uniformly. My wife really enjoyed the contrast between the dark and light, you see which idea I kept! The legs are a natural stain with clear coat. The tops are Minwax jacobean stain, I did two coats and a light sanding to expose some of the grain under the darkness of the stain. The cutting and assembly of the table and bench was rather quick. I would estimate 3 hours total of cutting and assembly. However, I spent a good amount of time on the sanding and staining. I would have been able to complete the finish quicker if the weather hadn't turned cold for about a week and slowed my dry times down. Finished the stains with a couple layers of polyurethane satin finish.
Built from Plan(s)
Estimated Cost
I already had the screws, stain, and clear coat. The wood for the table cost me $63.83 before taxes and the wood for the bench cost me $20.24 before taxes
Estimated Time Investment
Weekend Project (10-20 Hours)
Finish Used
Minwax Natural stain for bottoms
Minwax Jacobean stain for tops
Minwax polyurethane satin finish
Minwax Jacobean stain for tops
Minwax polyurethane satin finish
Recommended Skill Level
Beginner
Catio heaven

Ana doesn’t have a plan for a catio but she does for a playhouse and a cedar shed made from 2x2’s. I sort of combined my knowledge from making her plans over the last 10 years and came up with this for my cats. It was fun to make!! My baby kitten is loving it. I used garden fencing and stapled it to the outside and pocket holes for the walls. I made each wall individually like the playhouse then connected them once in place.


Built from Plan(s)
Estimated Cost
$250
Estimated Time Investment
Week Long Project (20 Hours or More)
Finish Used
Cabot semi transparent outdoor deck and fence stain. ($9 oops section)
Recommended Skill Level
Intermediate
Comments
Wed, 06/09/2021 - 12:36
Thank you for sharing! My…
Thank you for sharing! My daughter wants a cat for her birthday but it can't be inside due to our son's allergies. Roaming outside isn't really an option because we have coyotes. We are going to use one of these in combination with an underground electric fence.
Leaning Hall Tree with Key and Coat Hooks
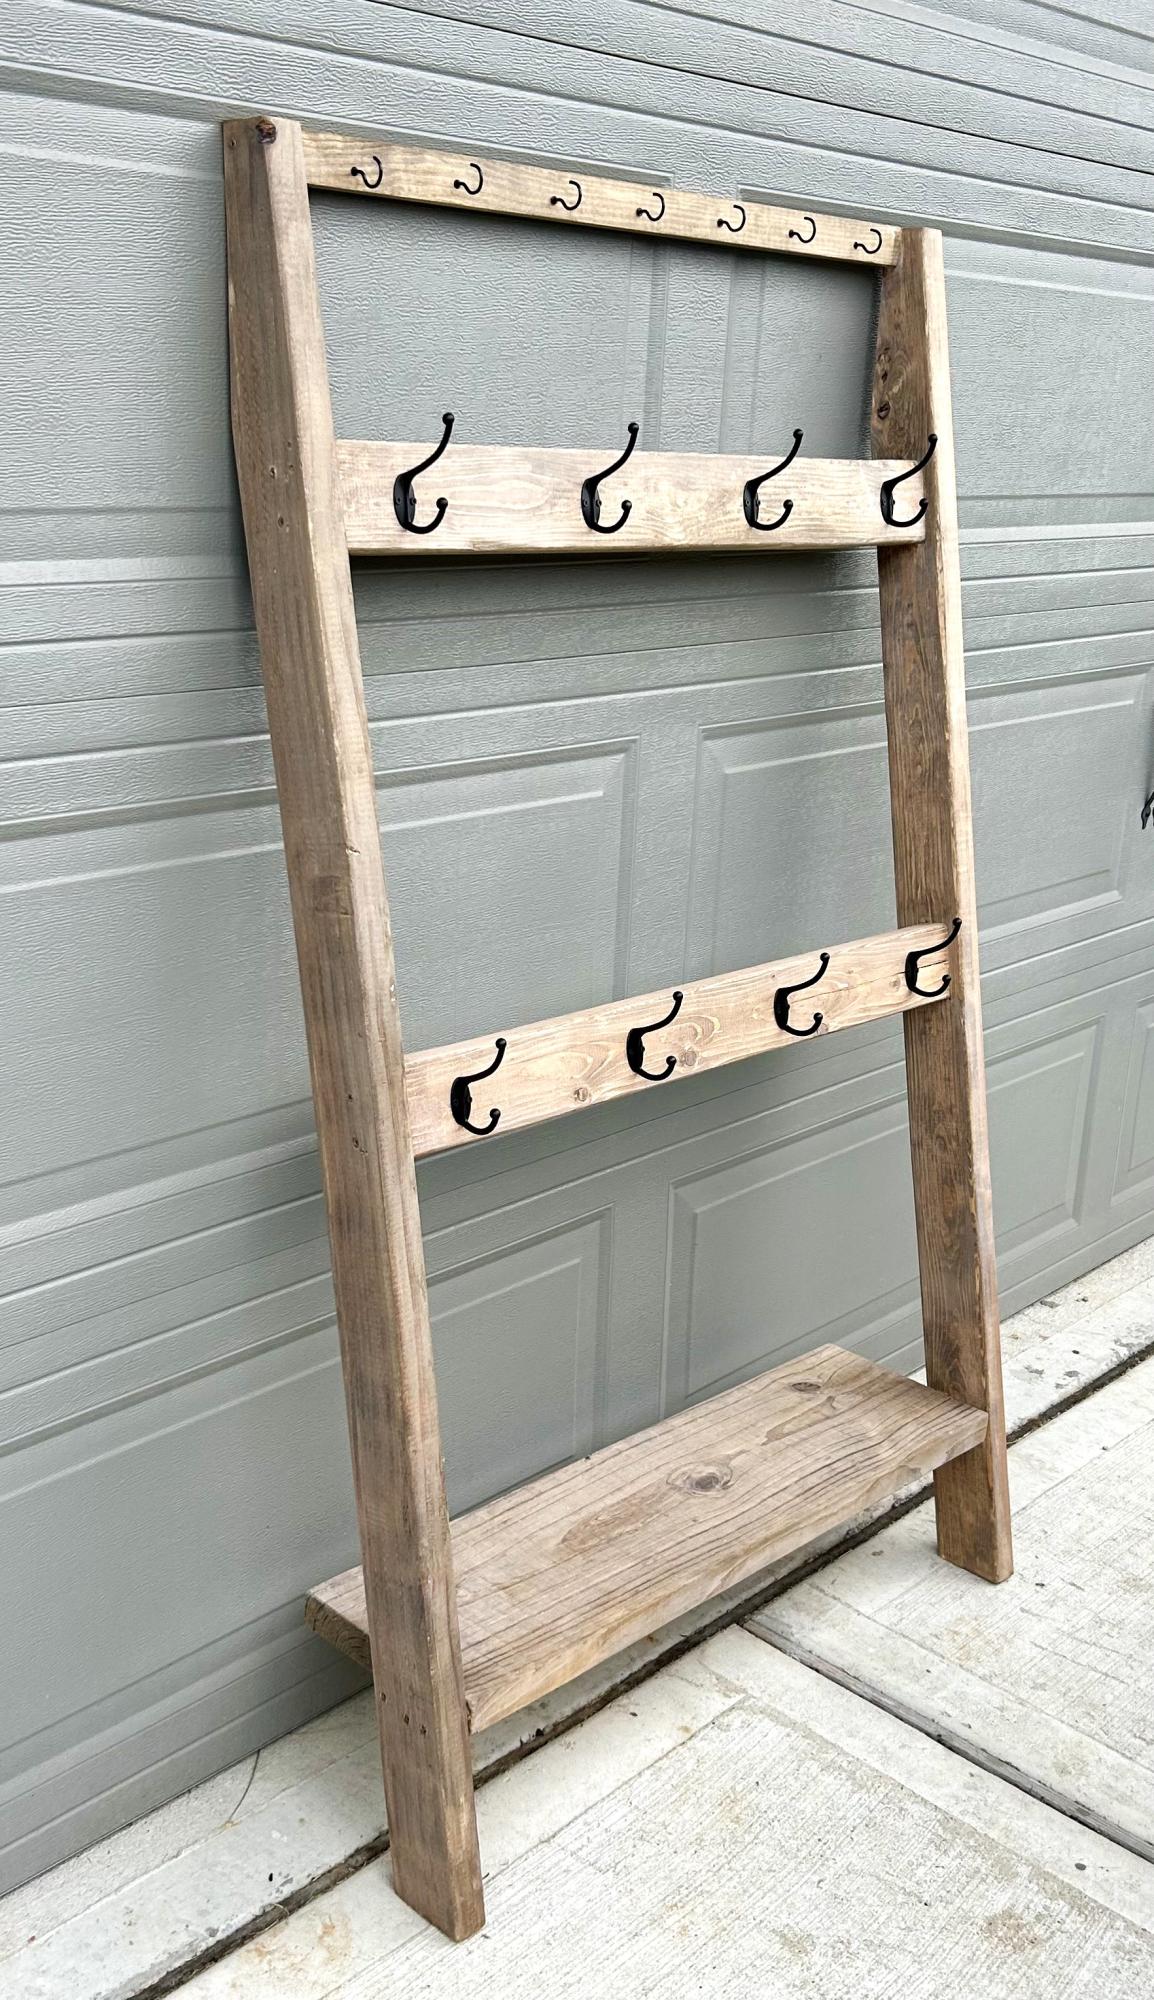
I added the top piece for keys. I stained it using early American stain but it was too dark so I used a paint wash on top of the stain. I love how it turned out! - Laura11310
Built from Plan(s)
Seasonal And Holiday
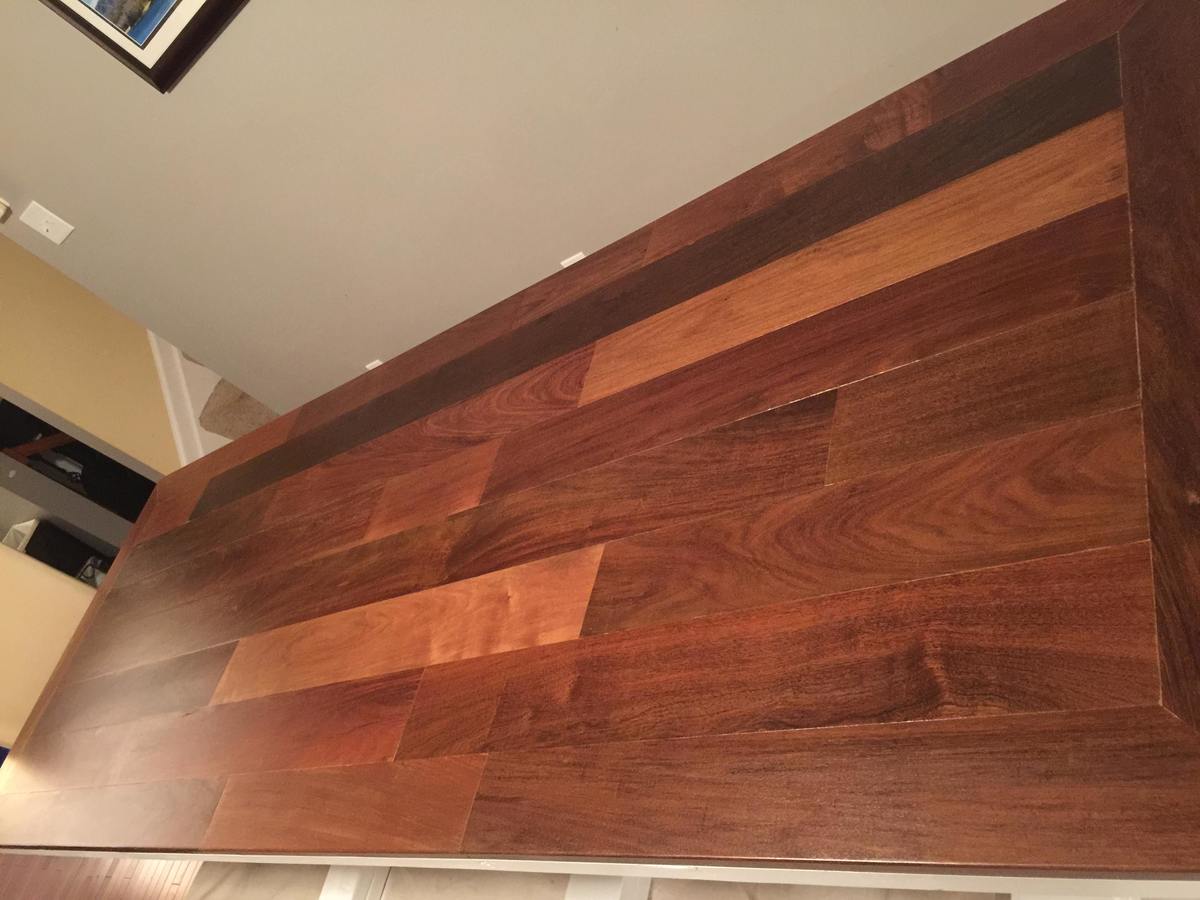
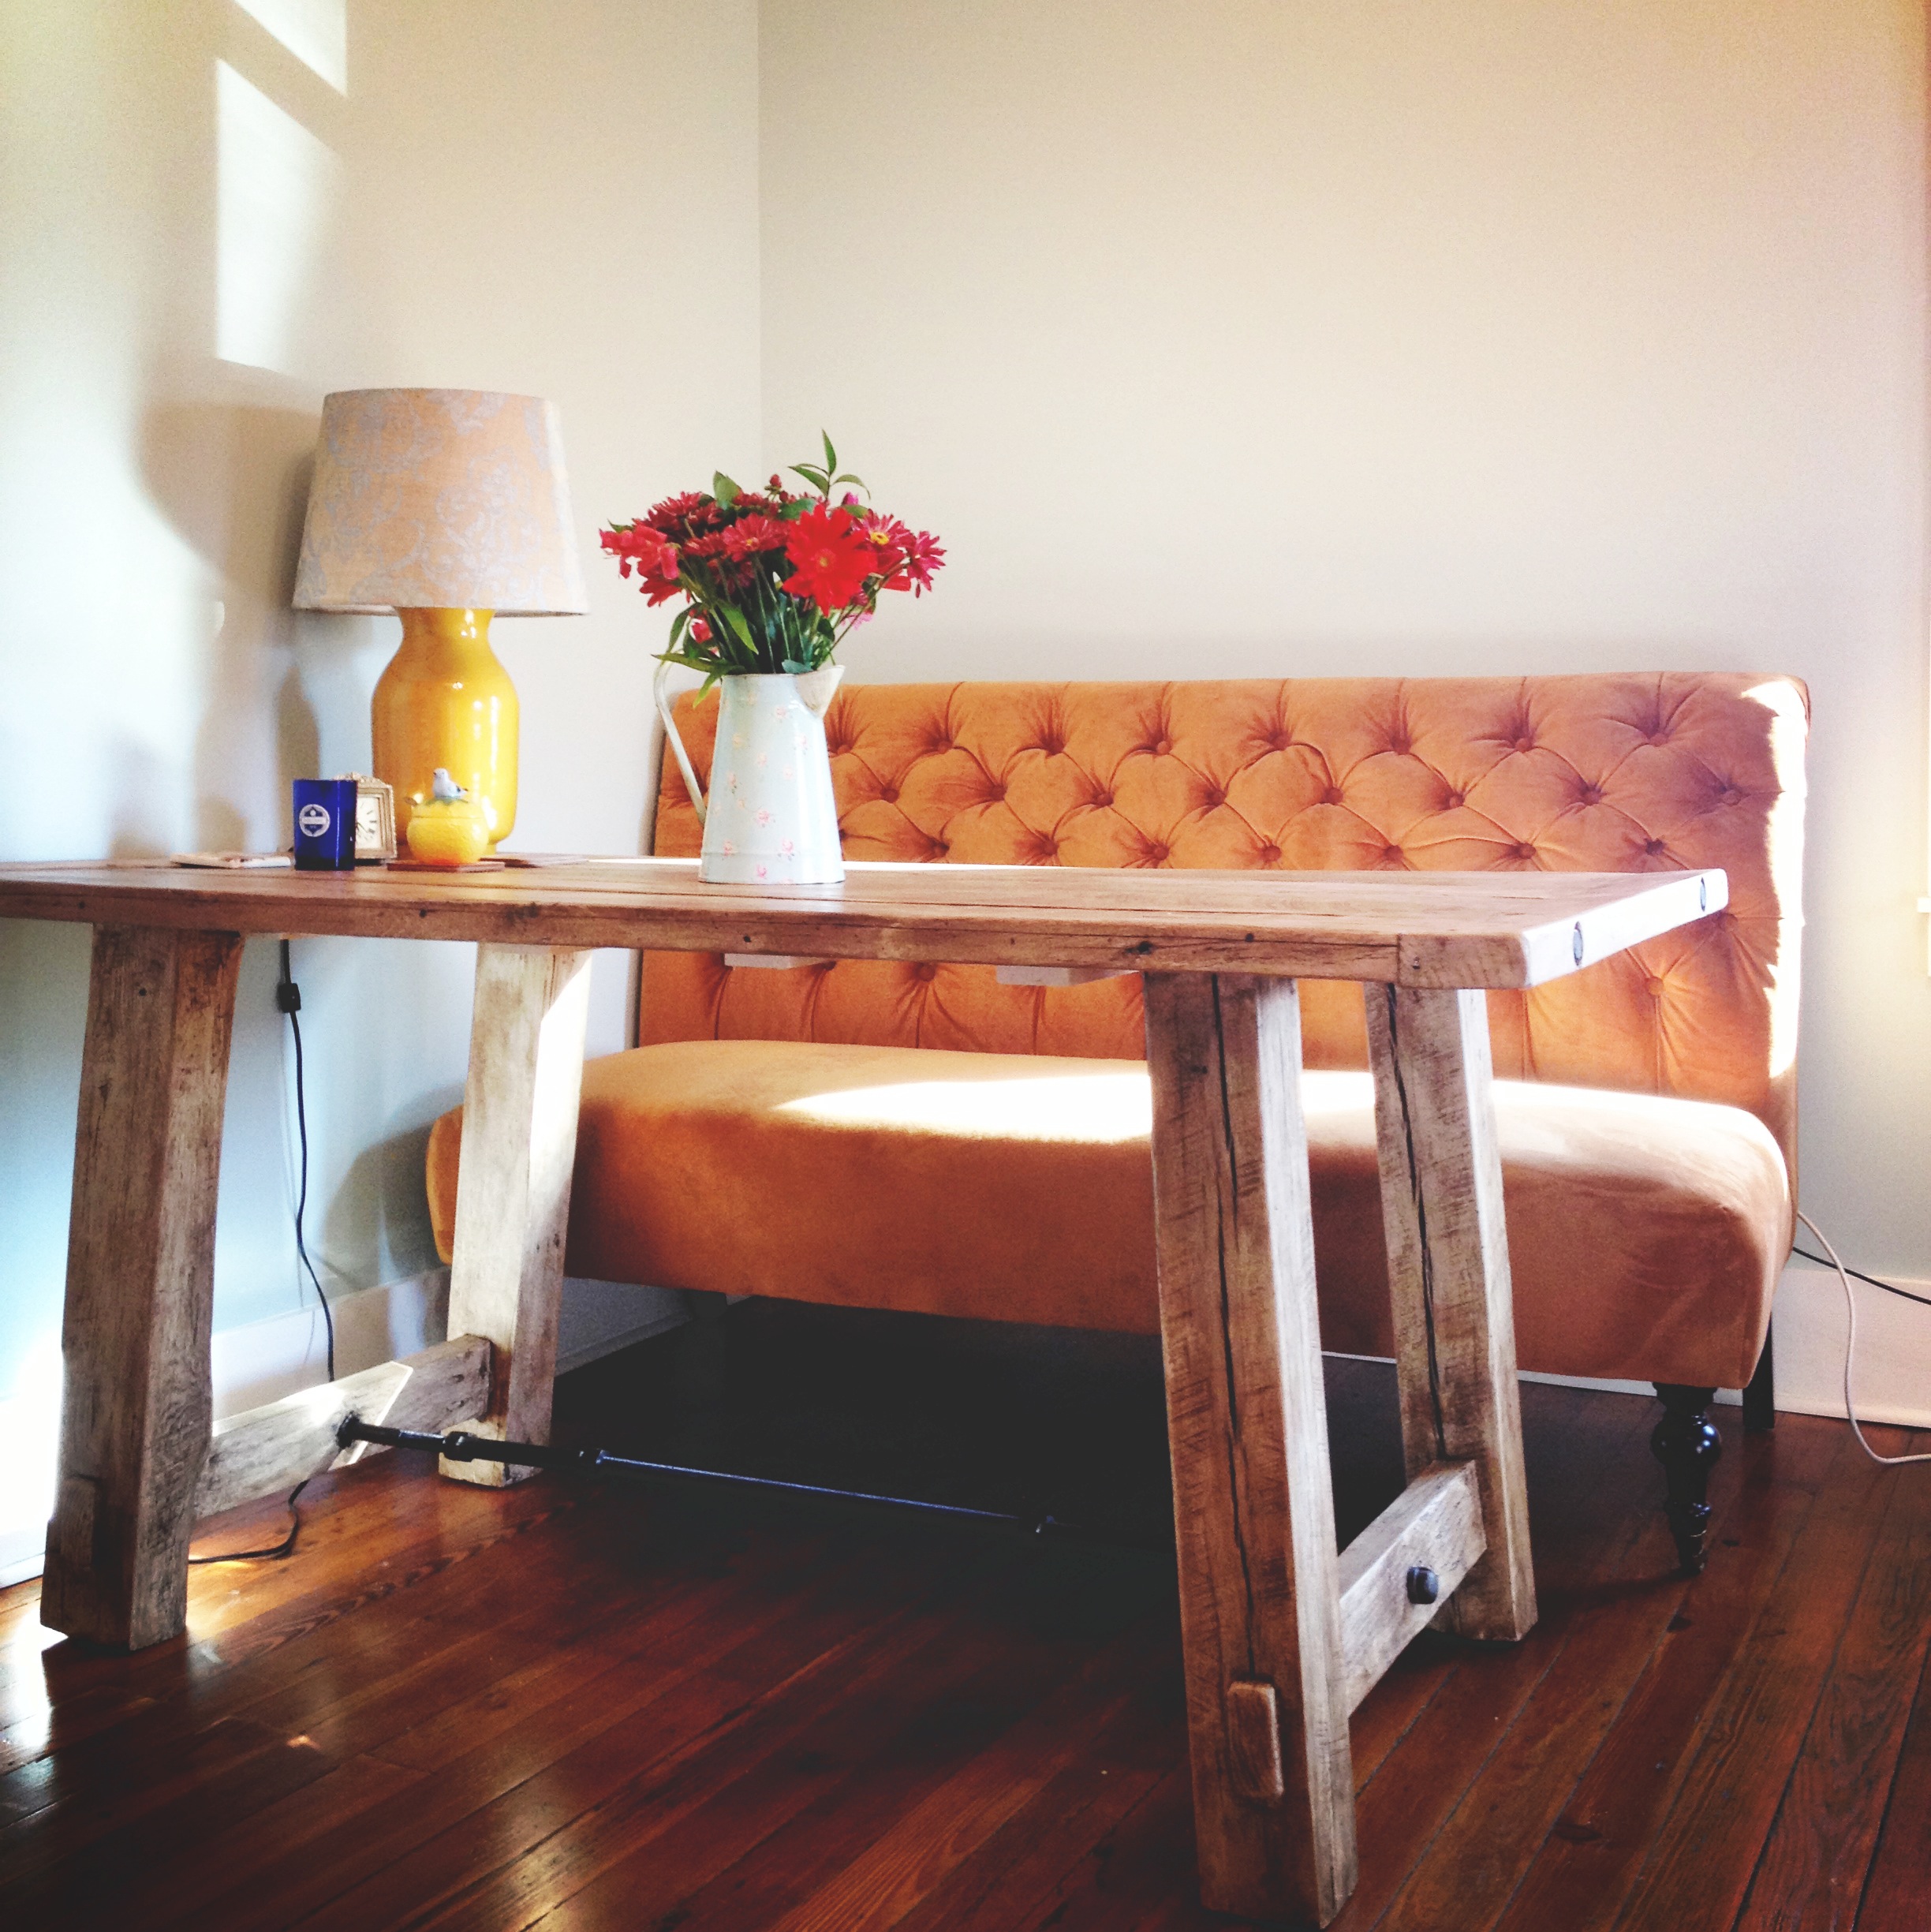
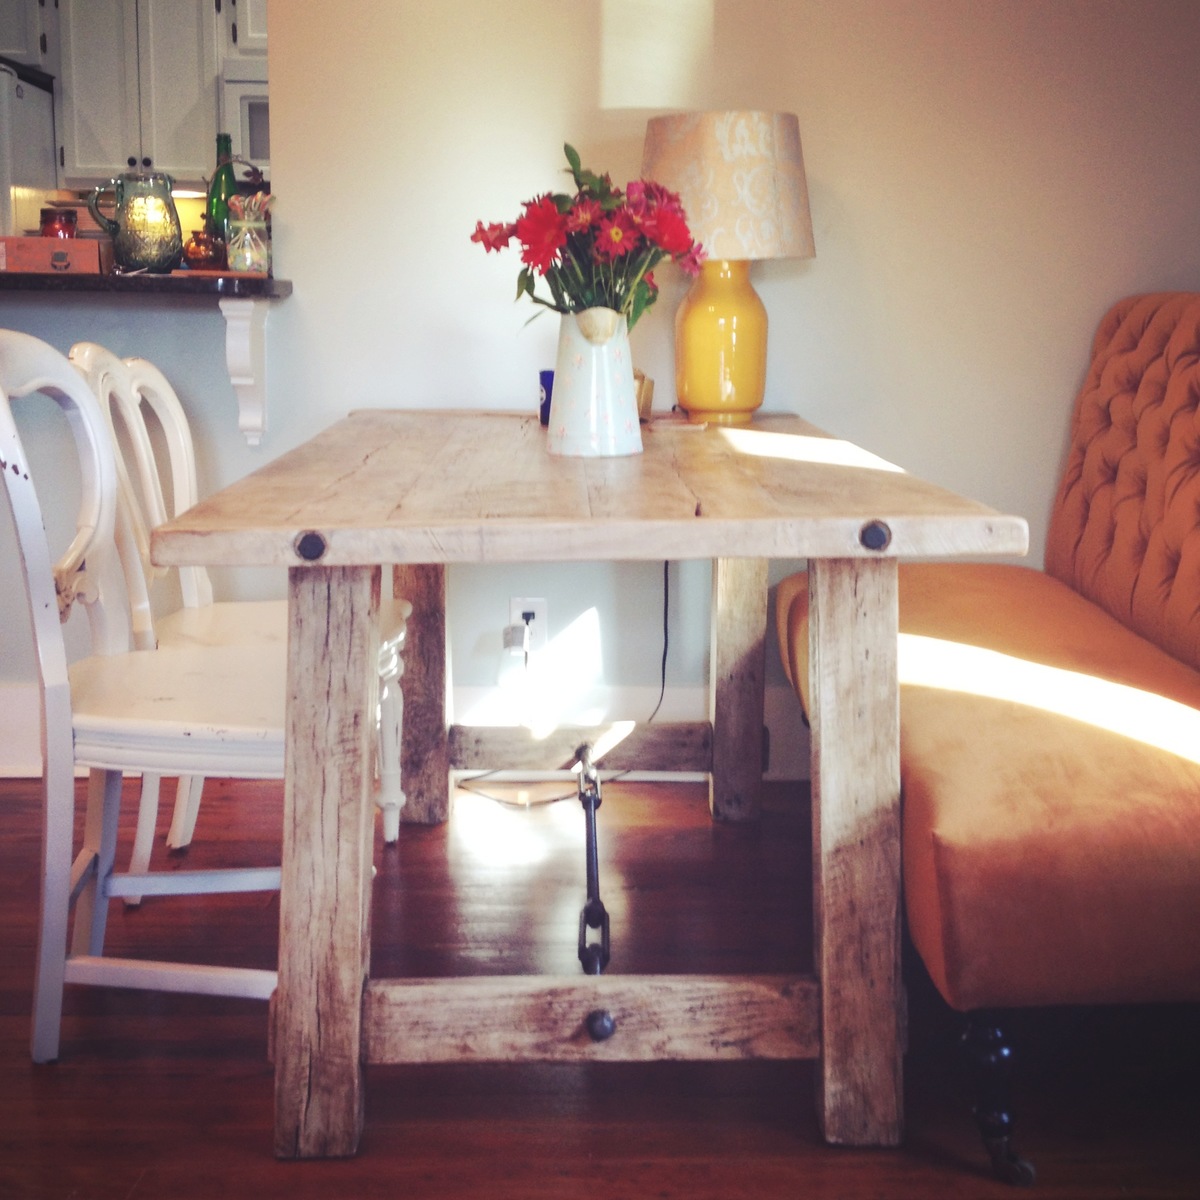
Farm Table
Brazilan Walnut flooring for table top and Pine for feet and supports.
Estimated Cost
$300.00
Estimated Time Investment
Week Long Project (20 Hours or More)
Finish Used
Triple Thick Coat Poly on table top and White semi gloss paint on everything else.
Recommended Skill Level
Intermediate


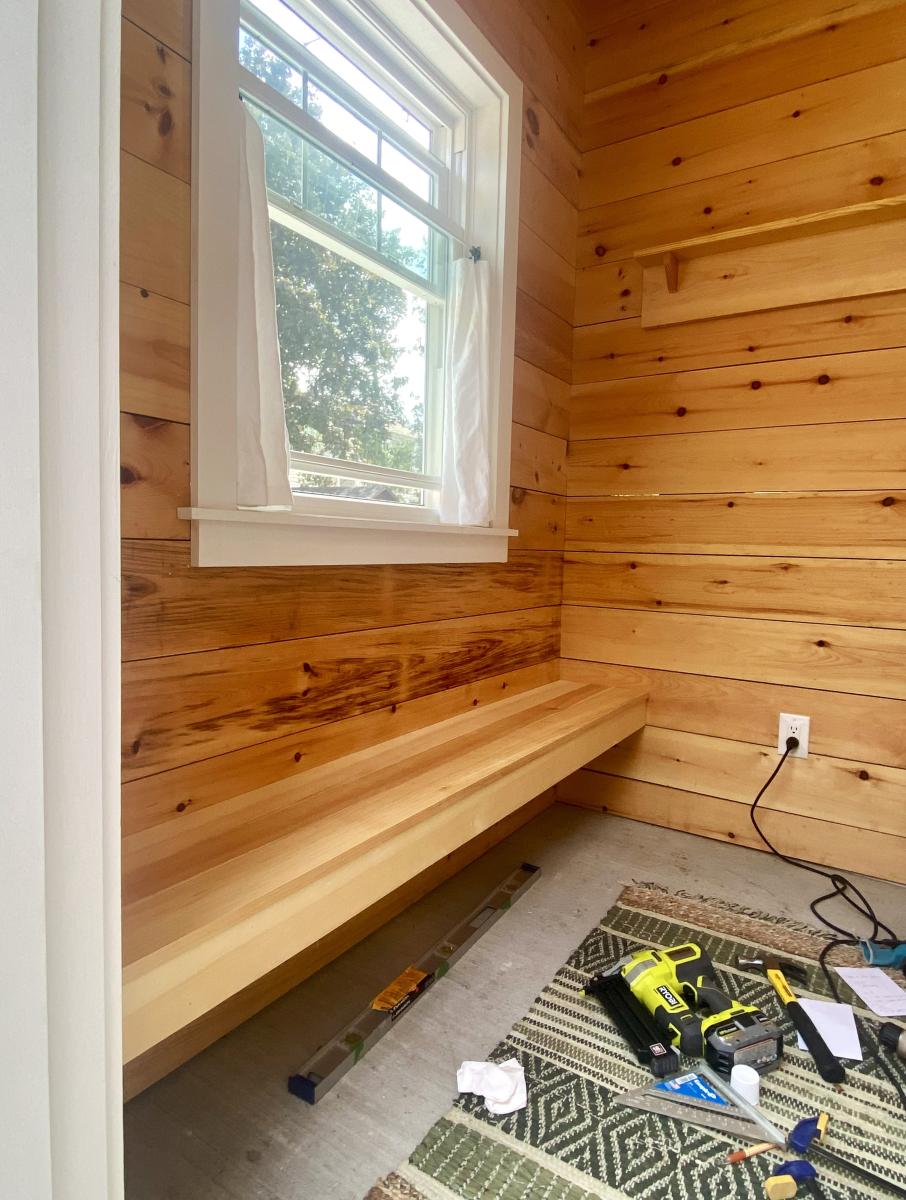
Floating Cedar Bench
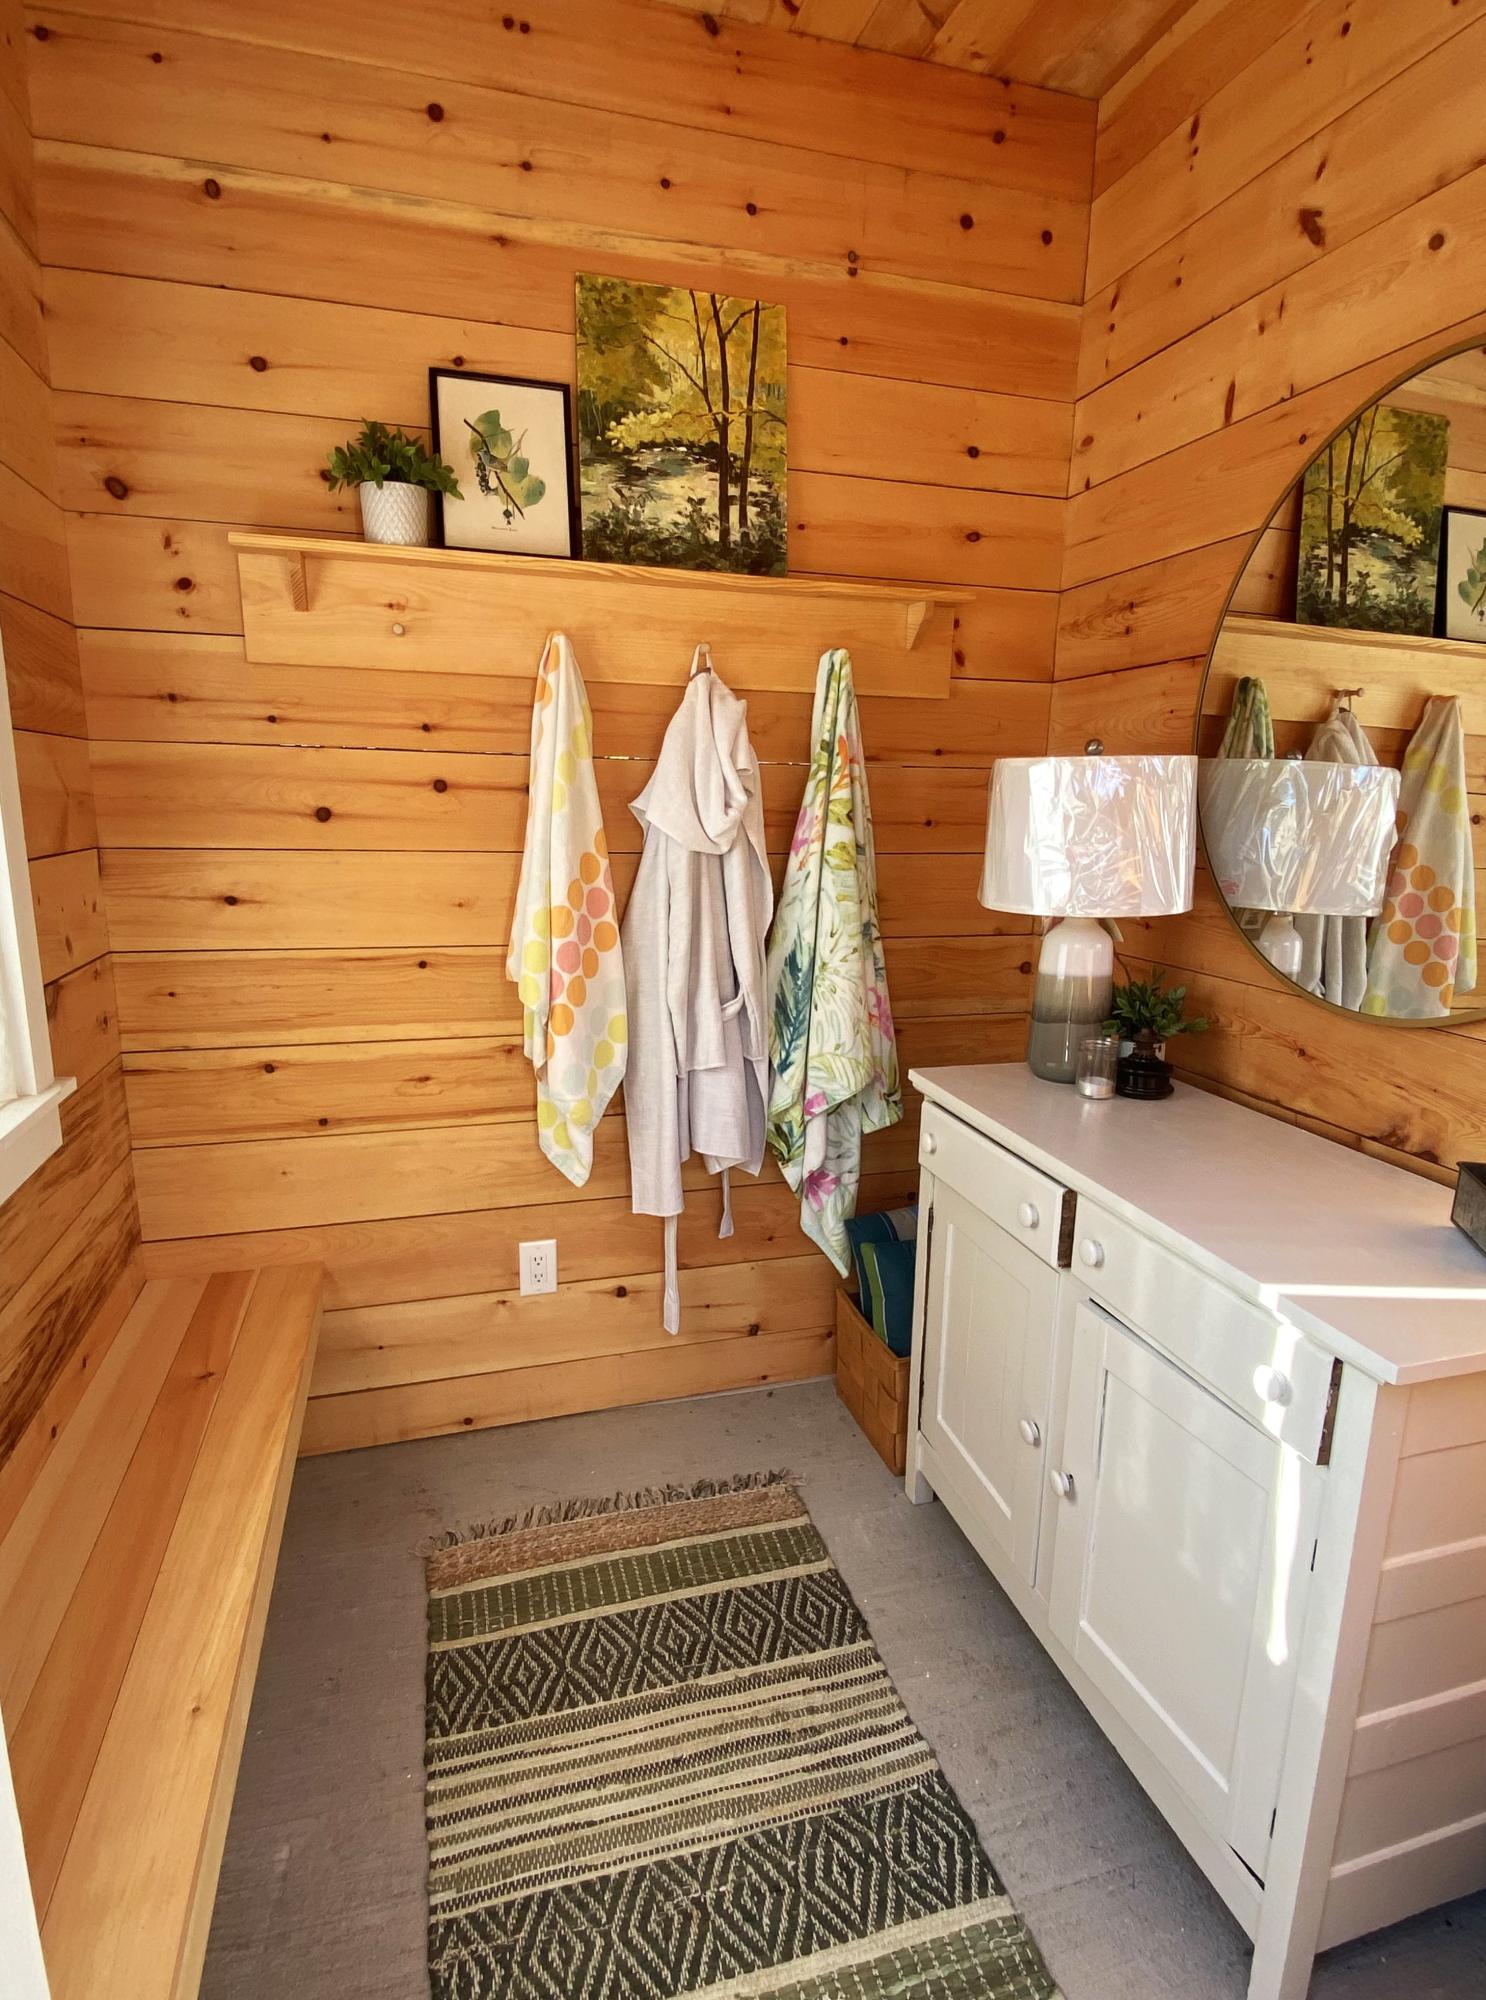
I built this floating bench (and shelf with towel pegs) for our pool change room. I was so excited when I finished it all by myself! It’s super sturdy and I’m so happy! Thank you Ana!!
Built from Plan(s)
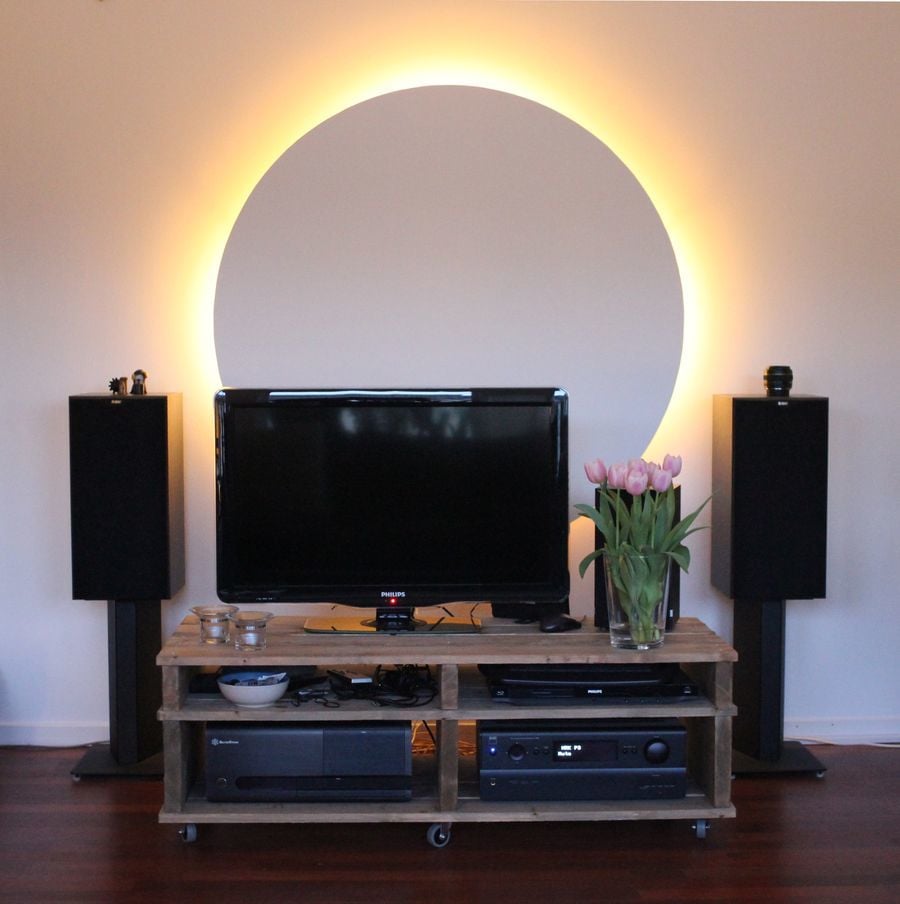
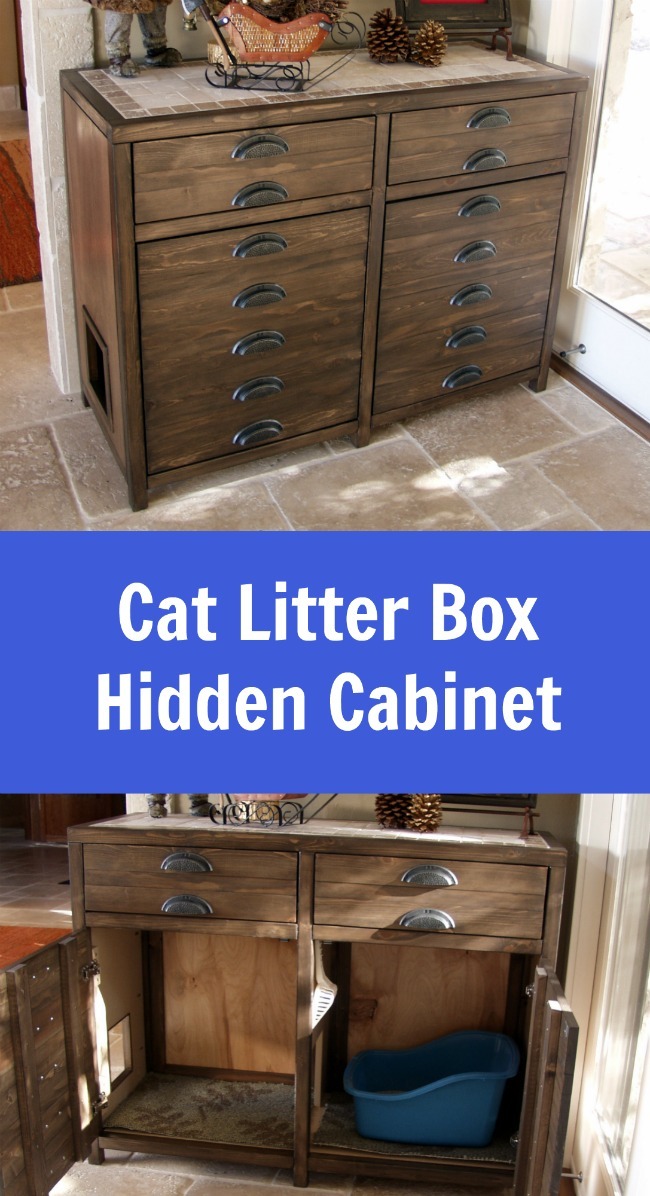
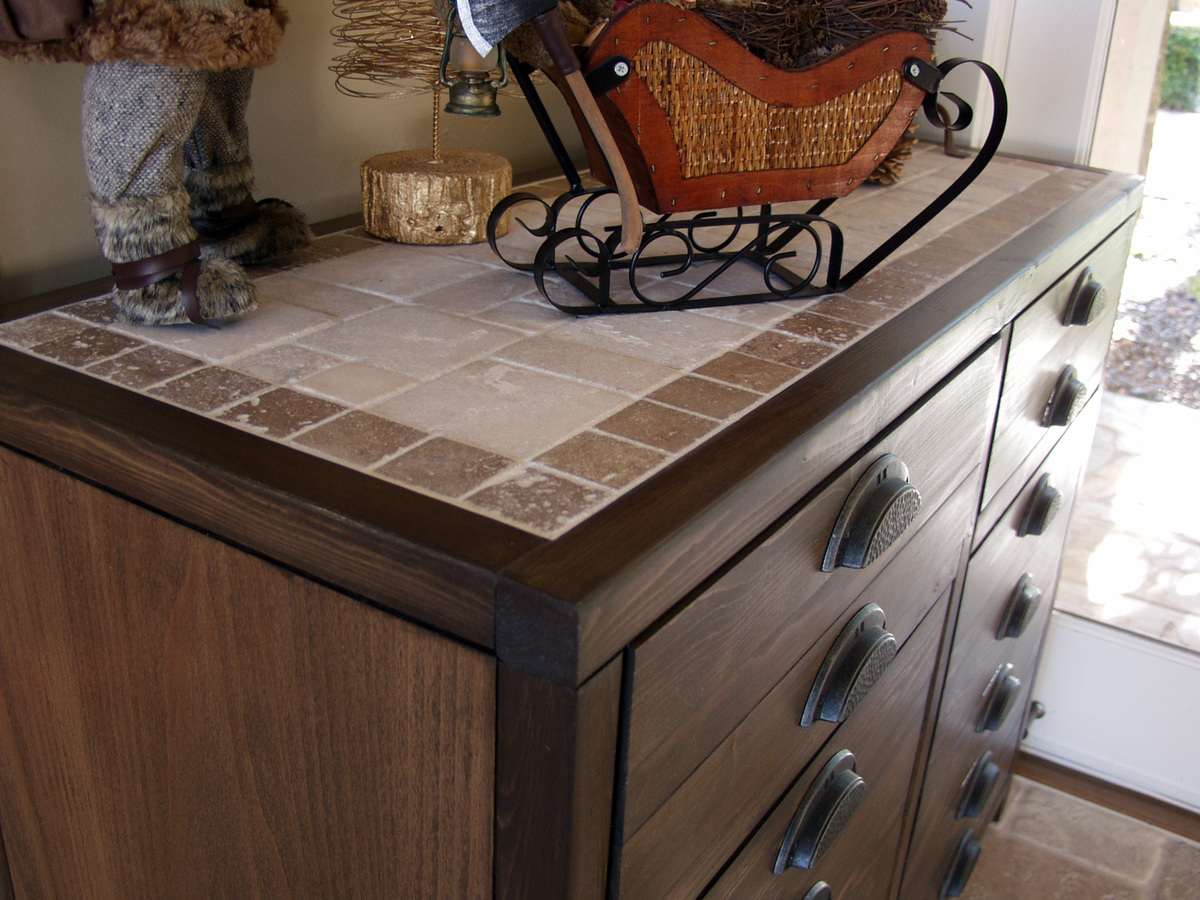
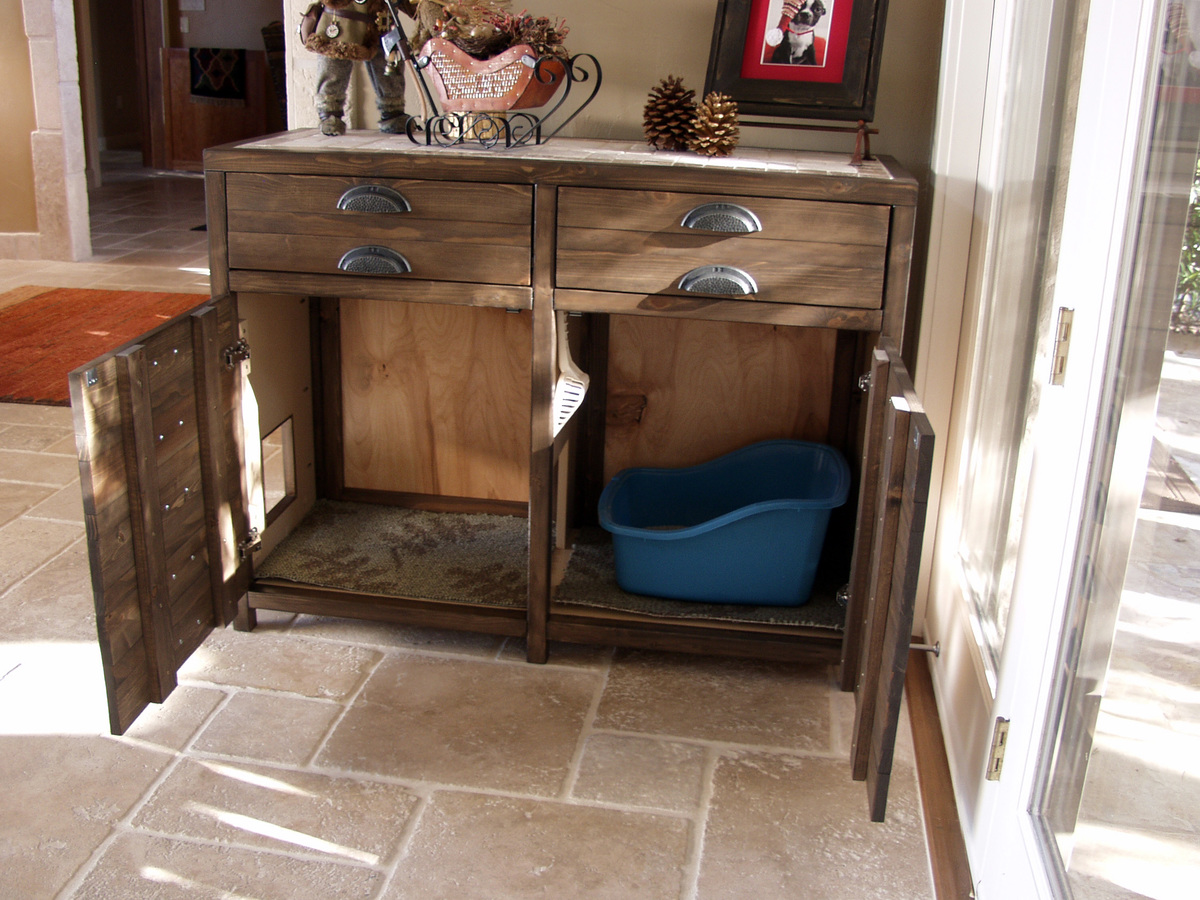
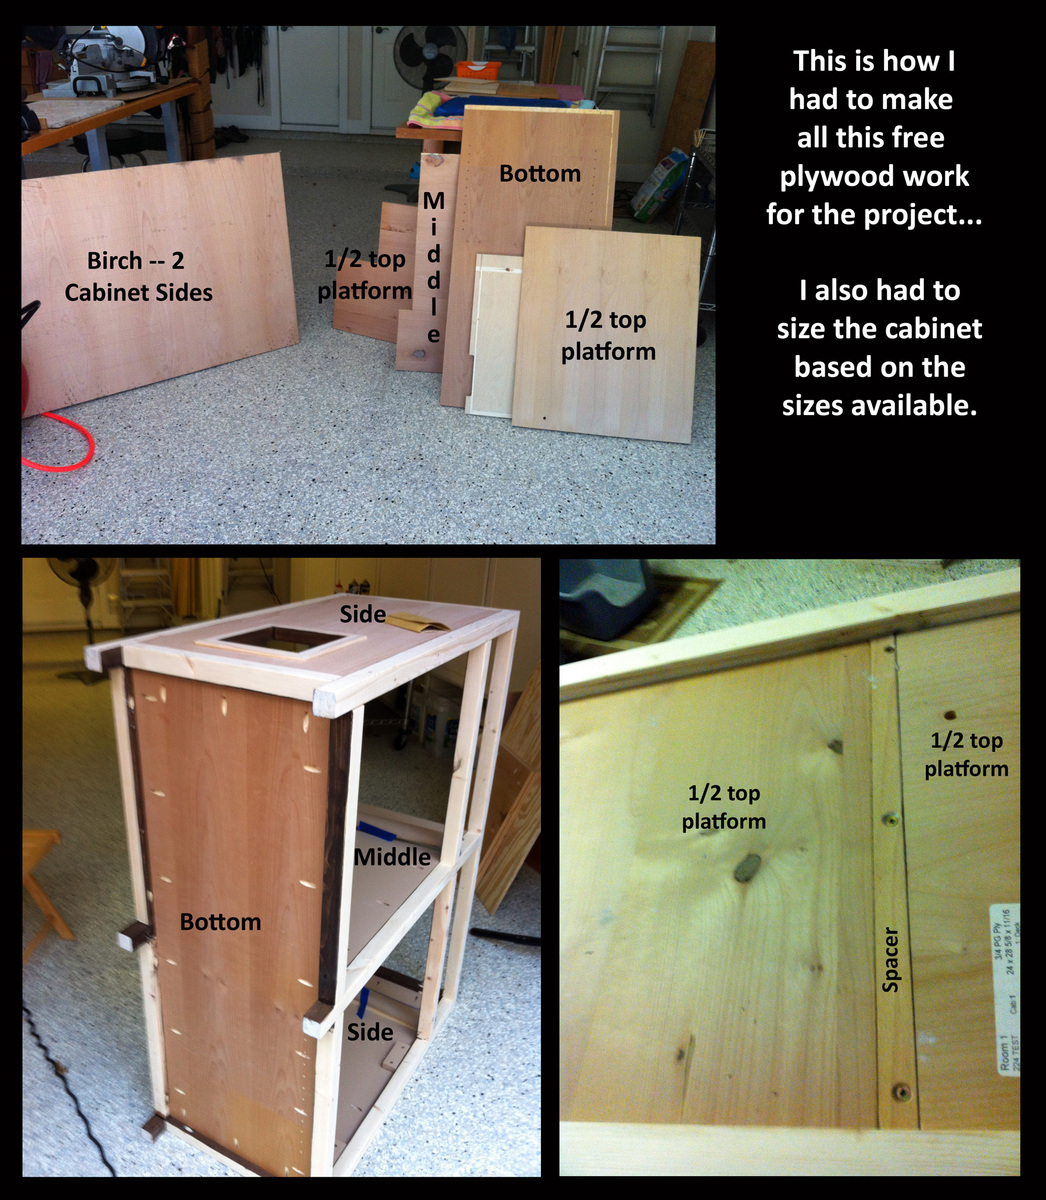
Printer's Console or Sneaky Litterbox Cabinet? Cat Litter Box Cabinet
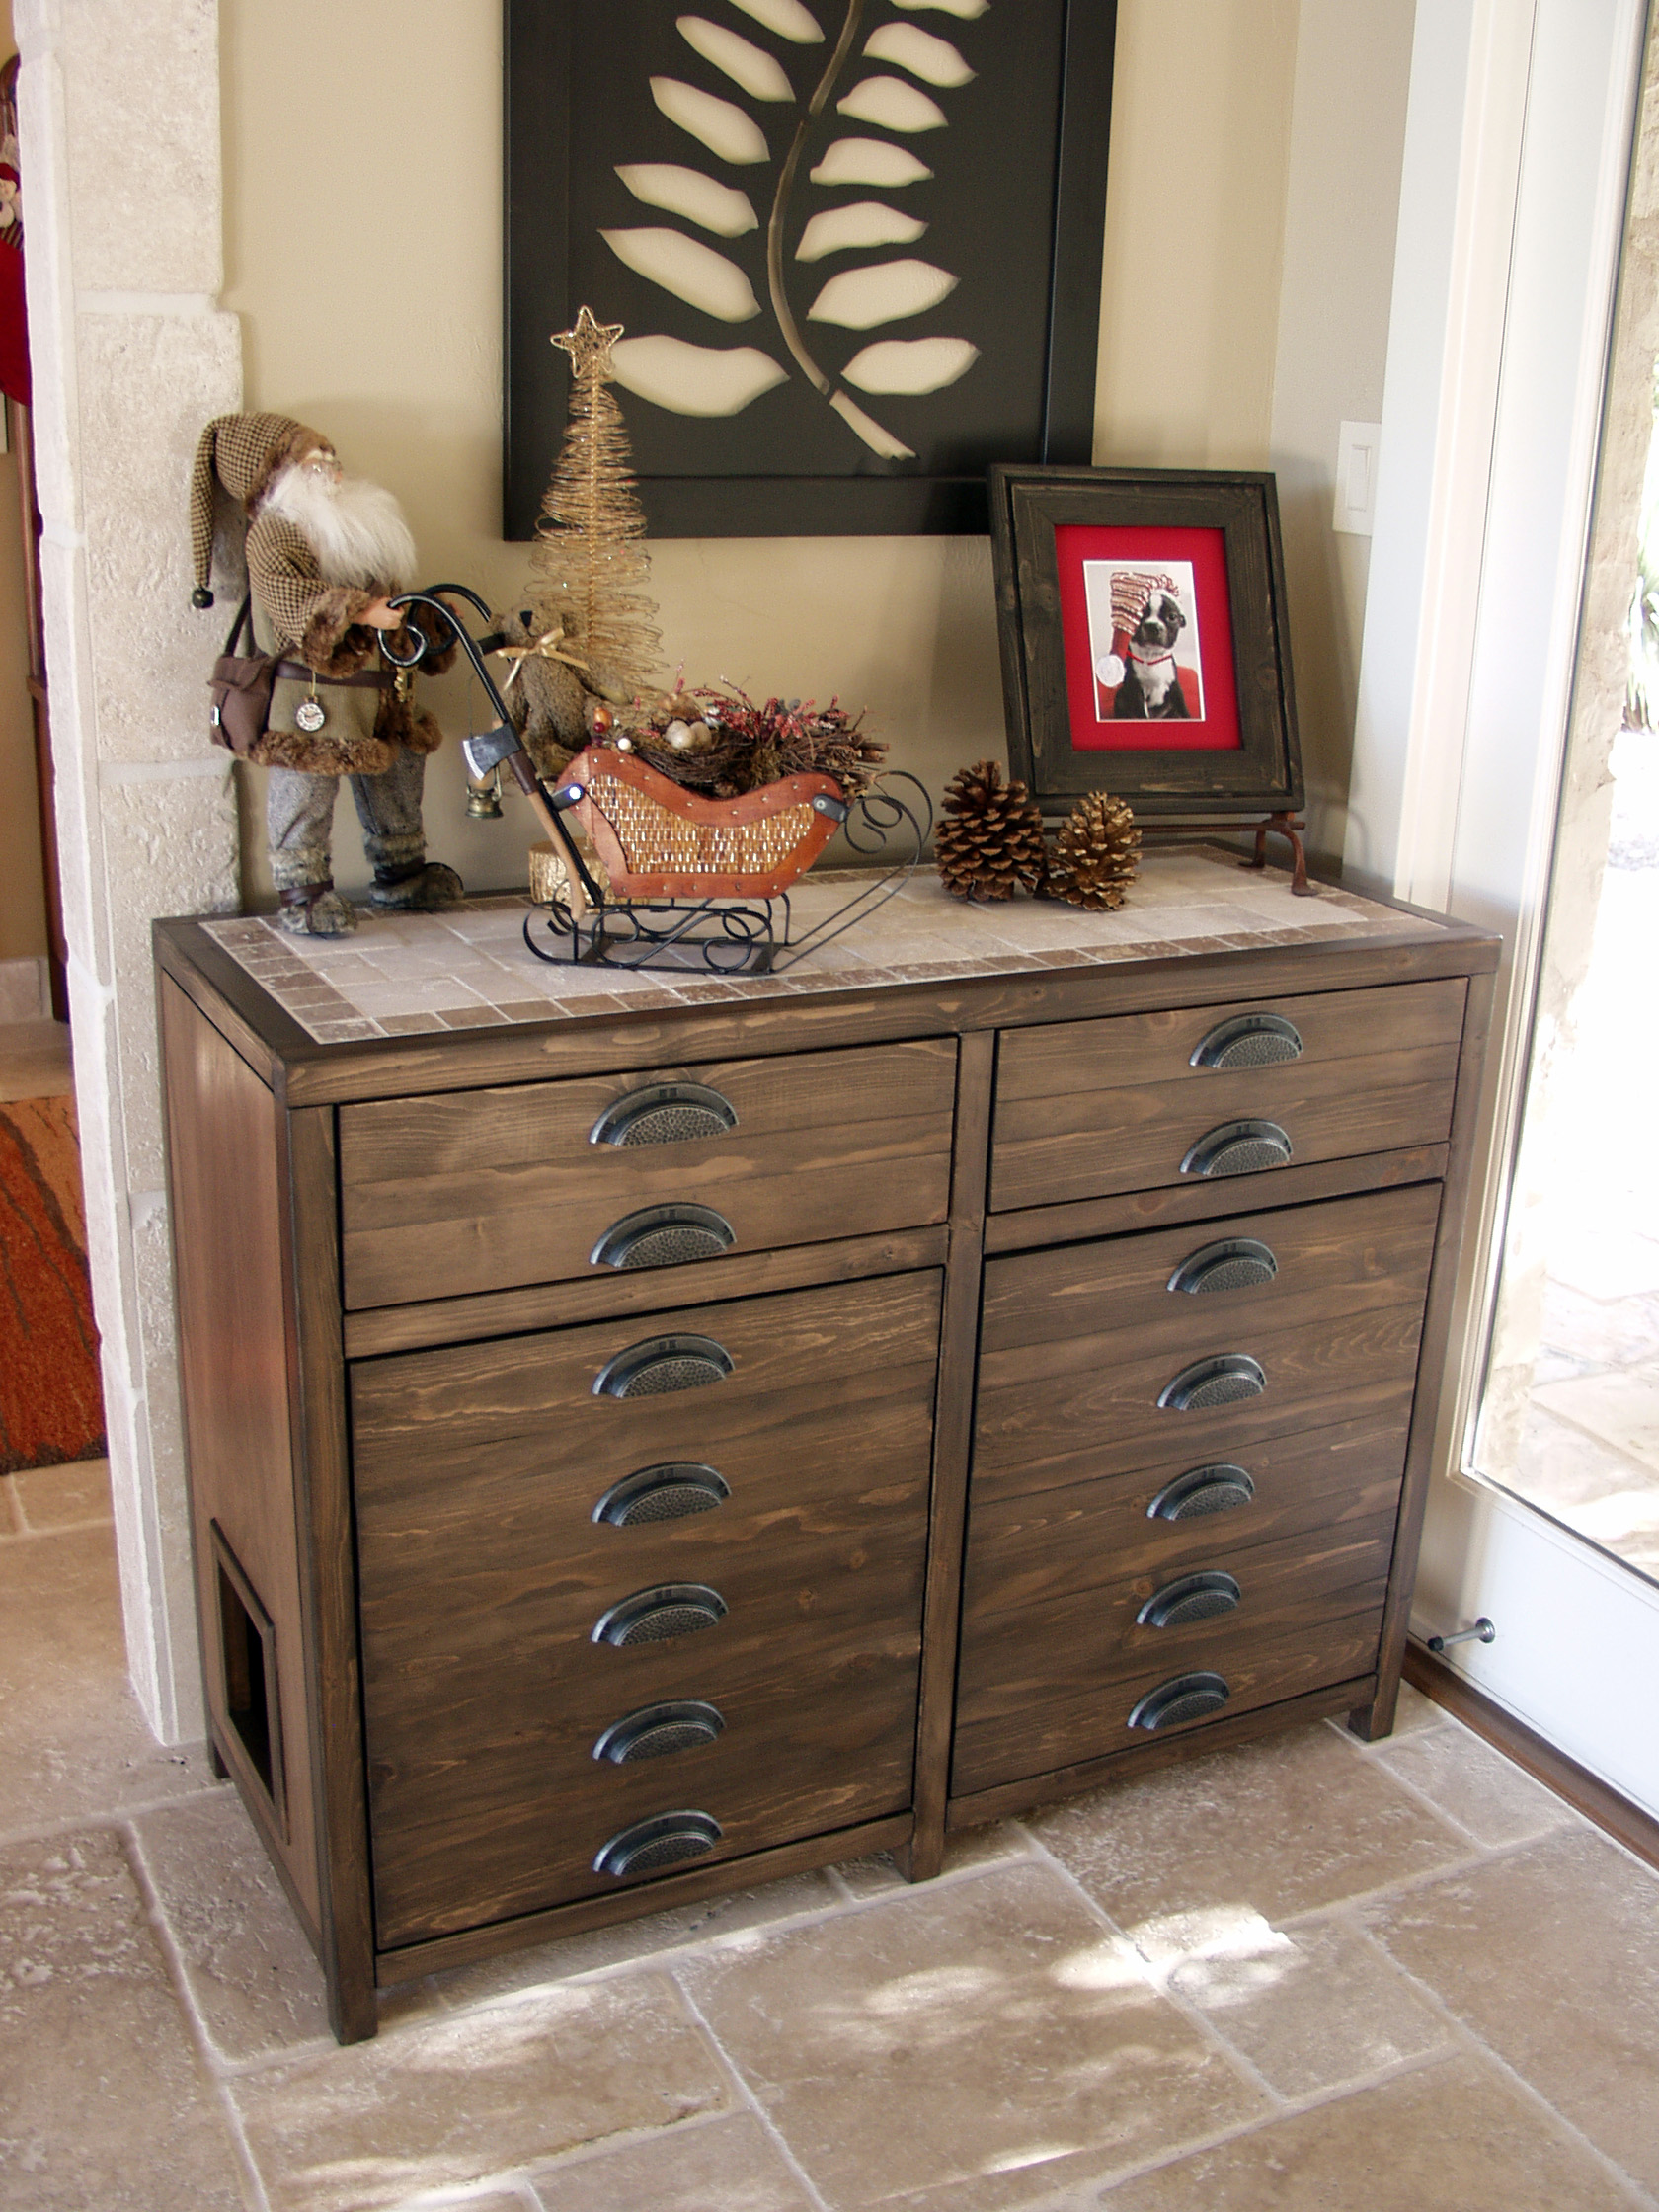
I had been wanting to build something to hide the litterbox for a long time. When I saw the Printer's Console plan, I knew this was the perfect plan for a cat litter box furniture. I loved that Jen Woodhouse's version was completely modified to her bar plan, so I thought I could modify for my litterbox idea. I modified the plans on size, as I was trying to use a bunch of mis-matched plywood. I also modified it to include a cat door, a cat passageway on interior panel, a vent on the back behind one of the drawers, and the stone top. I built a frame on the back to house the backing as an inset piece, as I didn't want it to be seen at all. I learned a very important lesson during this build. Not all 1x3s are created equal. Once I got my doors assembled, they were too big for the opening. I couldn't shave off the tiny amount needed, and couldn't make anything work short of starting over with 1x4s, sawing off a small amount, and cutting down the # of "drawers" (and handles). I wanted the inside to be fully finished (because cat pee on raw wood would not be good!). I had to finish certain "planes" prior to putting the thing together. I used kitchen and bath paint on the inside floor and sides for easy cleanup. The stone was carryover from construction on our house 12 years ago. The handles were an amazing deal @ $1.81/each .


Built from Plan(s)
Estimated Time Investment
Week Long Project (20 Hours or More)
Finish Used
Minwax Wood Conditioner, followed by a mix of American Walnut & Onyx Minwax water-based Stain. 3 Coats of Old Village Gel Varnish. On inside, I used a kitchen/bath paint.
Recommended Skill Level
Intermediate
Comments
Sun, 11/25/2012 - 09:51
That is a fantastic idea and
That is a fantastic idea and the table top is beautiful.

Mon, 11/26/2012 - 09:38
That is the most beautiful
That is the most beautiful litter box I have ever seen!
Mon, 06/17/2013 - 12:23
So we are not crazy!
Love your use of the buffet. Our family has discussed making a piece of furniture like this for our smaller dog. Nice to see someone has done it! Our big dog has scheduled feedings but our little dog would prefer to be a free feeder. Poor thing chokes down his food in our pantry listening to our big dog breathing under the door waiting for him to finish. When he is done we open the door and the Big, greedy dog bolts in looking for left overs. A family member has to wait patiently for the little dog to finish so he can escape the pantry. I really don't want a doggy door in my pretty swinging bi-fold doors to my pantry which is also access to our kitchen.That would be a pain to have to keep closed all day. But this buffet idea is super cute! Thanks for the inspiration.
Fri, 01/09/2015 - 22:01
tile top
I know this is an old post, but I'll ask anyway
I love this piece and am in the planning stages for ours. Thank you for sharing!
I am Wondering how you went about the table top. Did you install a 3/4 ply on top but not flush, allowing room for mortar and tile? If so how much room did you allow for the tile/mortar? 1/2 inch? How did you keep the surface of the tile level and uniform? Lastly, did you seal the tile with anything when you finished?
Aesthetically, the tile top really sets this piece off and I really want to make my own.
Thanks
Seasonal And Holiday
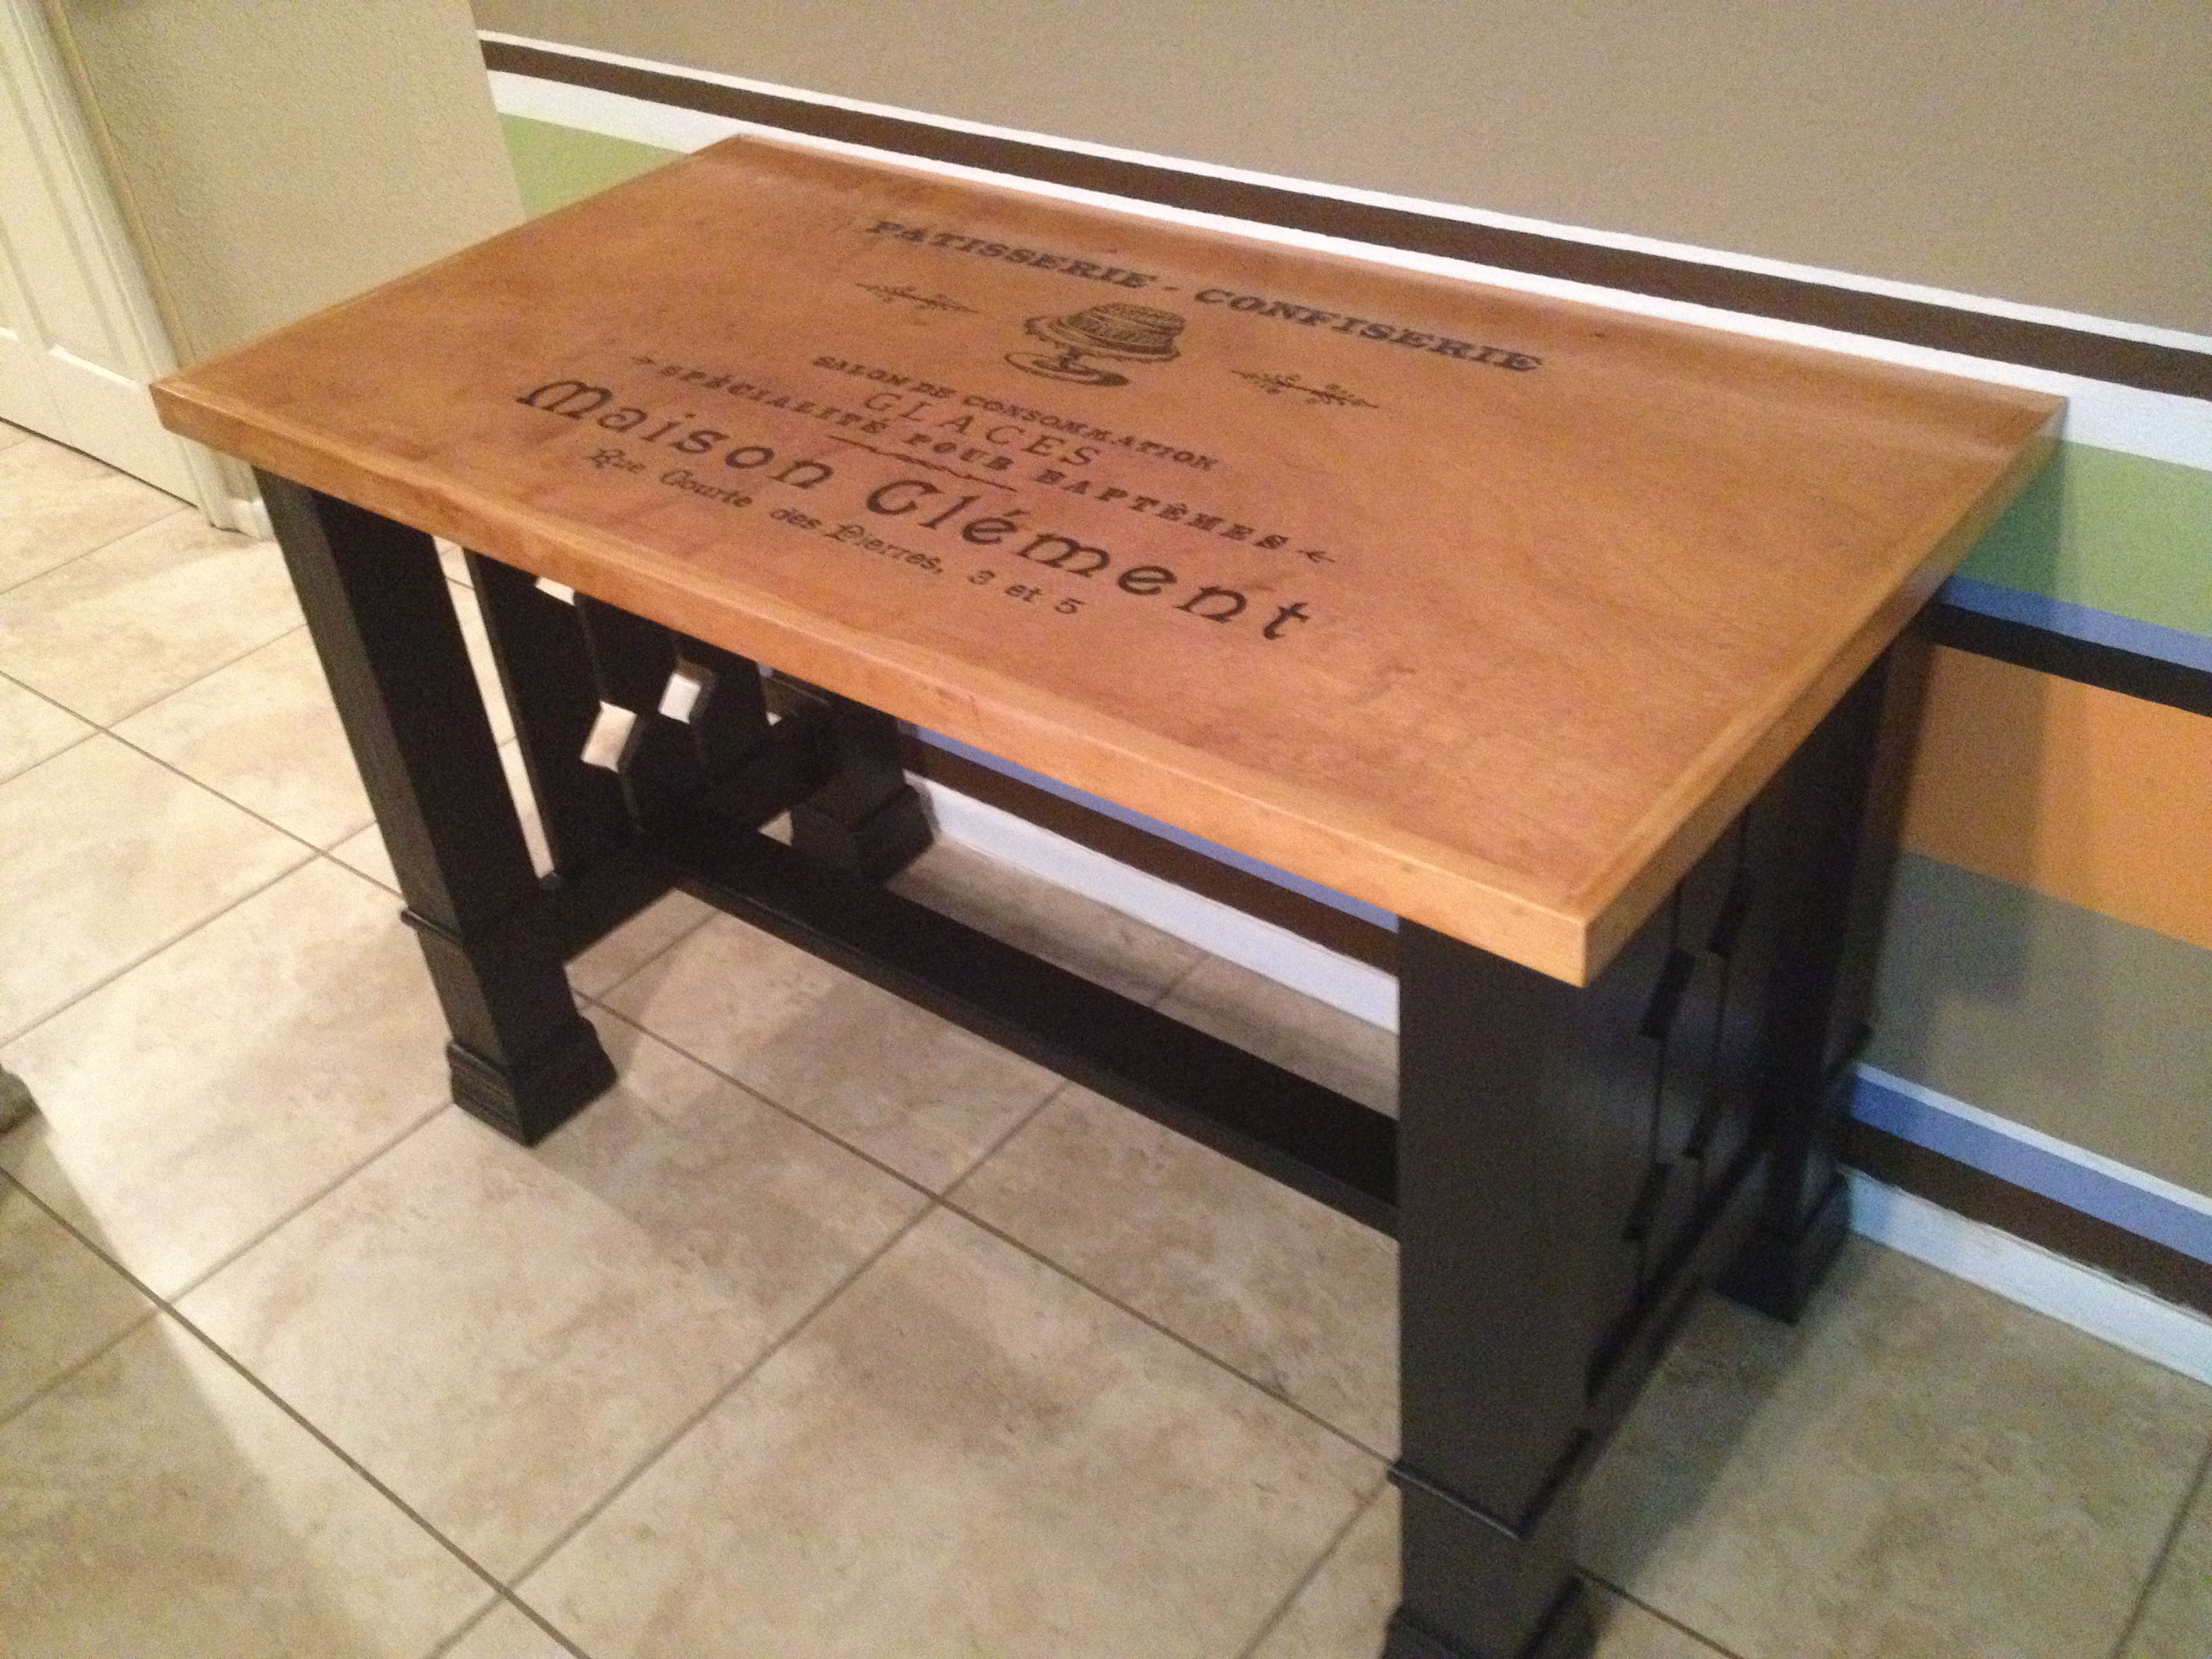
Mission style table with French Typographical
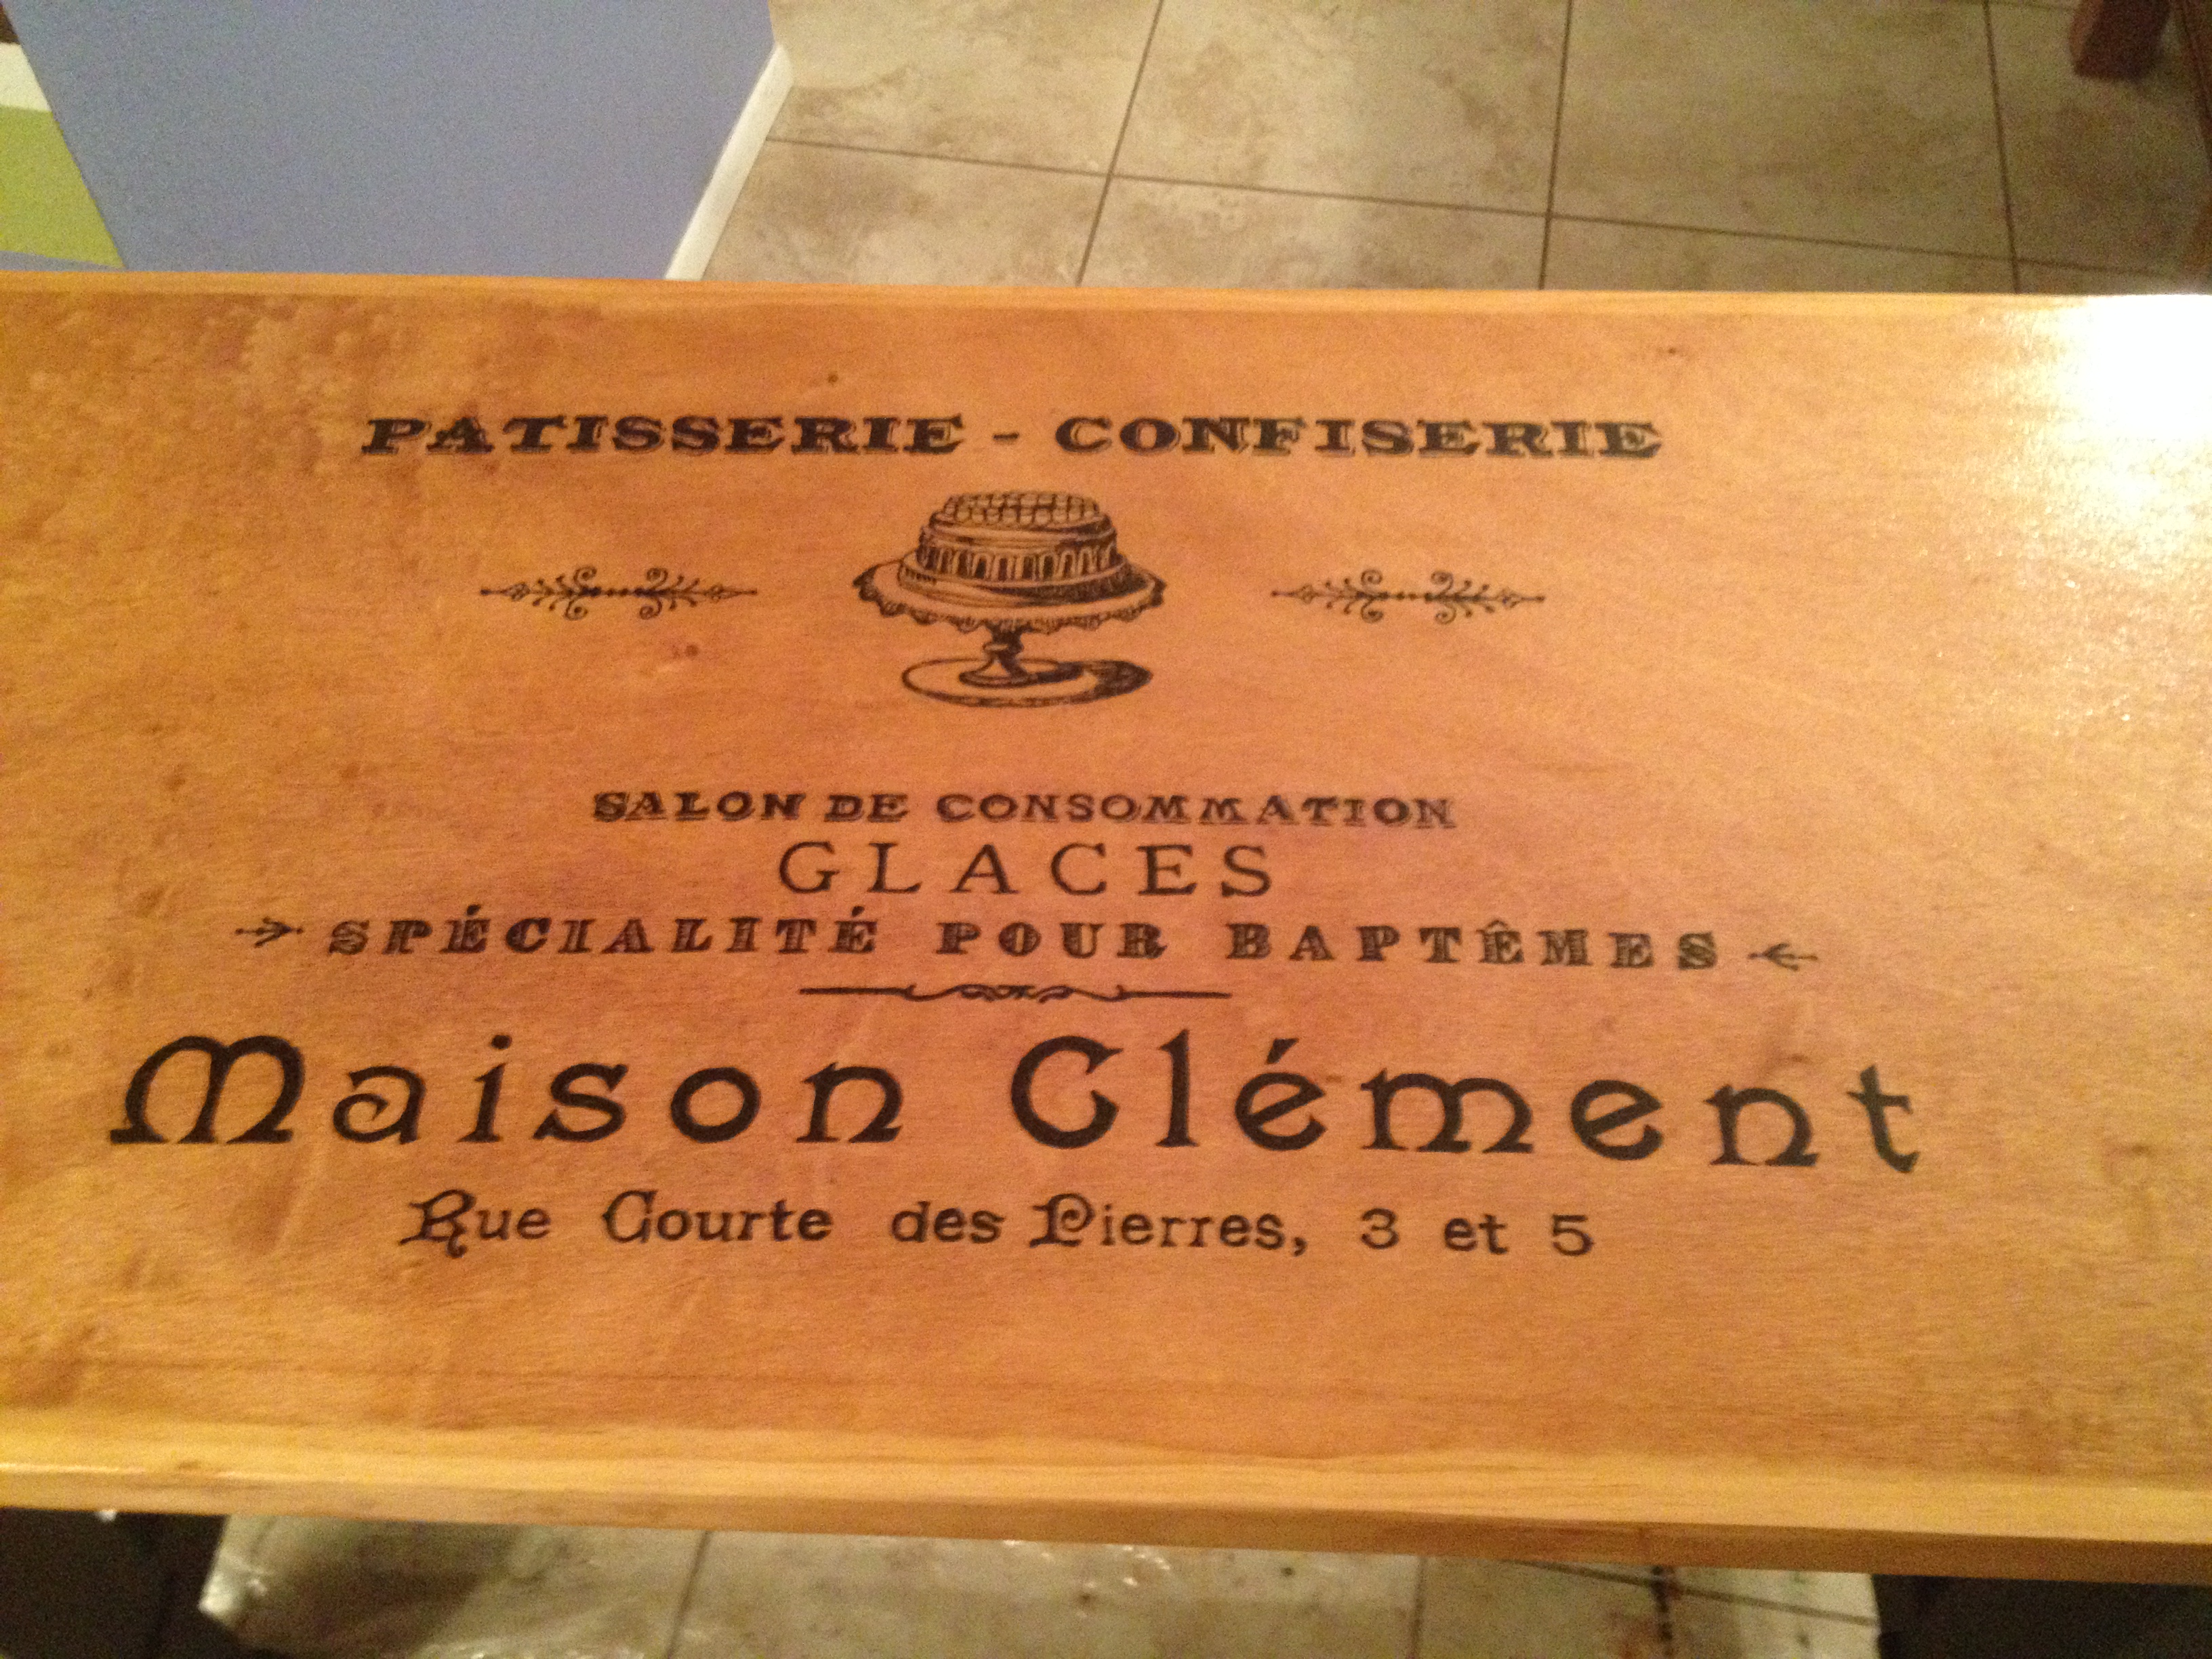
Was a fun project! Took only a few days. I hand painted the typographical using the method mentioned on the graphic fairy's website. Thanks for the post!
Built from Plan(s)
Recommended Skill Level
Intermediate
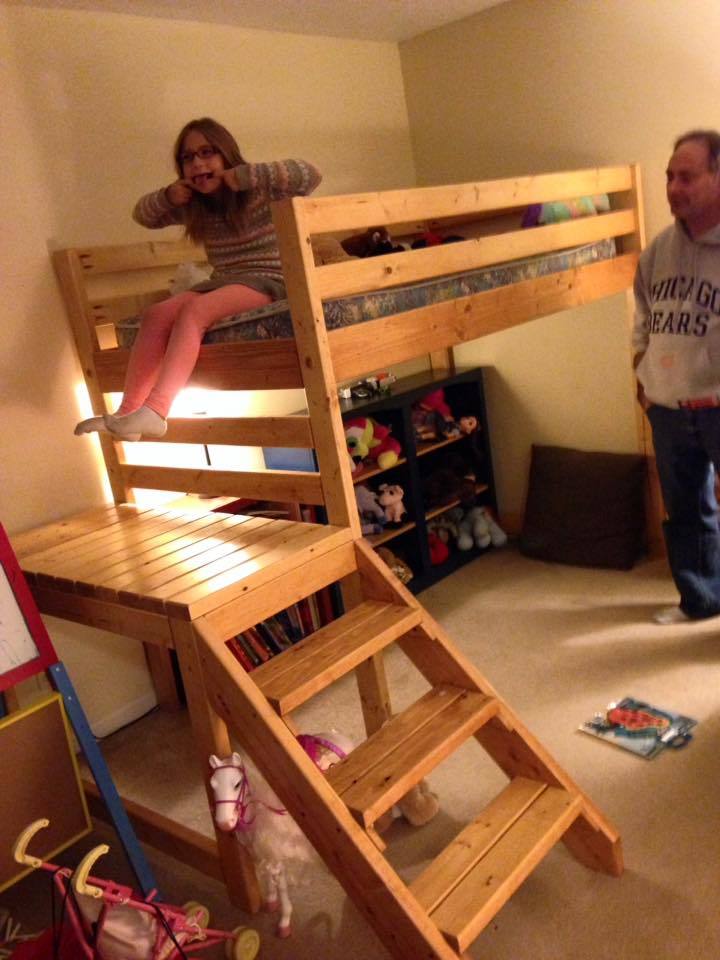
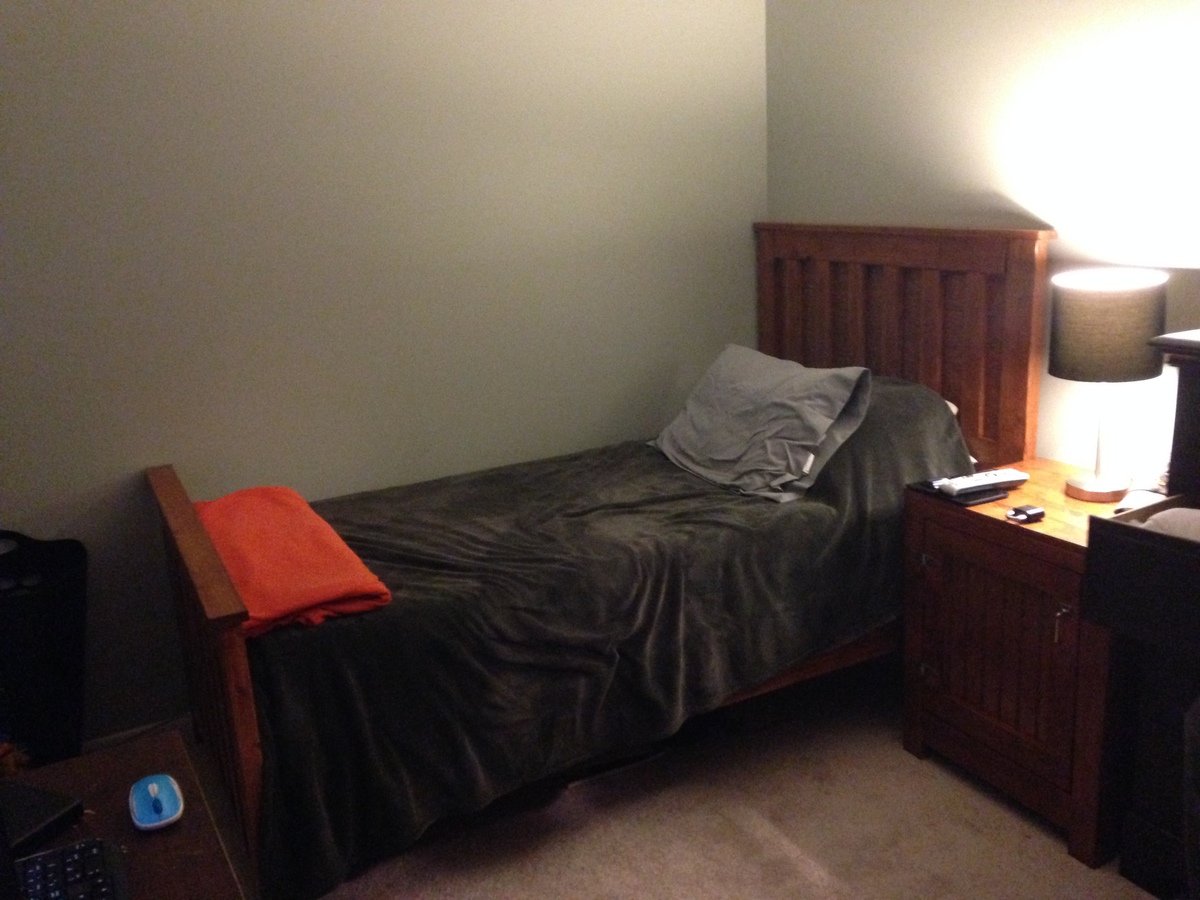
Cherry Farmhouse Bed
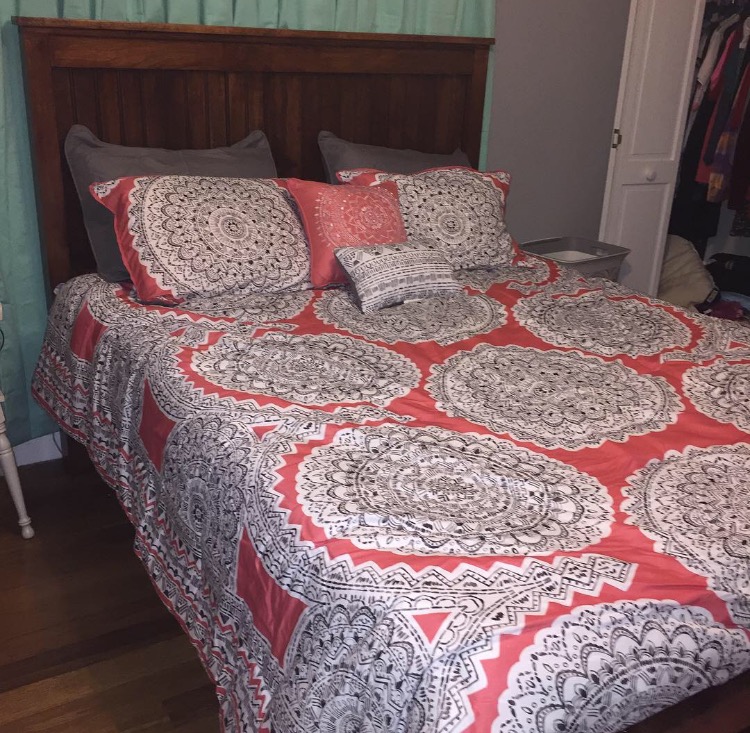
This is our third bed built from Ana White plans. My husband has built the loft bed and a daybed. This is by far our favorite. When my dad cleared his farm 18 years ago, he milled all of the lumber and it has been sitting in a barn waiting for special projects. My husband cut down the large beams to make the post and my dad had some of the cherry boards milled into bead board, which we used in the headboard and footboard. I love the way it turned out and I hope my daughter cherishes it.
Built from Plan(s)
Estimated Cost
$50--Stain, 2x4 platform, glue & nails. We also modified to use rail brackets.
Estimated Time Investment
Day Project (6-9 Hours)
Finish Used
Stain-Woodwright Stain (Boston)
2 coats wipe poly
2 coats wipe poly
Recommended Skill Level
Intermediate
Corner desk modified

My wife needed a bigger desk for her home office so built one. I used the modular office desk designs. I had to modify it, my wife wanted the 90 degree cut in where the two desk to meet. I built two open shelves and fastened then together and built one narrow shelf with drawers. Built mostly out of MDF with the top being melamine. Waiting on the edge banding to ship. Also, installed some rope lighting for indirect light.
Built from Plan(s)
Estimated Cost
Under $300
Estimated Time Investment
Week Long Project (20 Hours or More)
Finish Used
Painted the base cabinets.
Recommended Skill Level
Beginner
Easy to Build Toybox
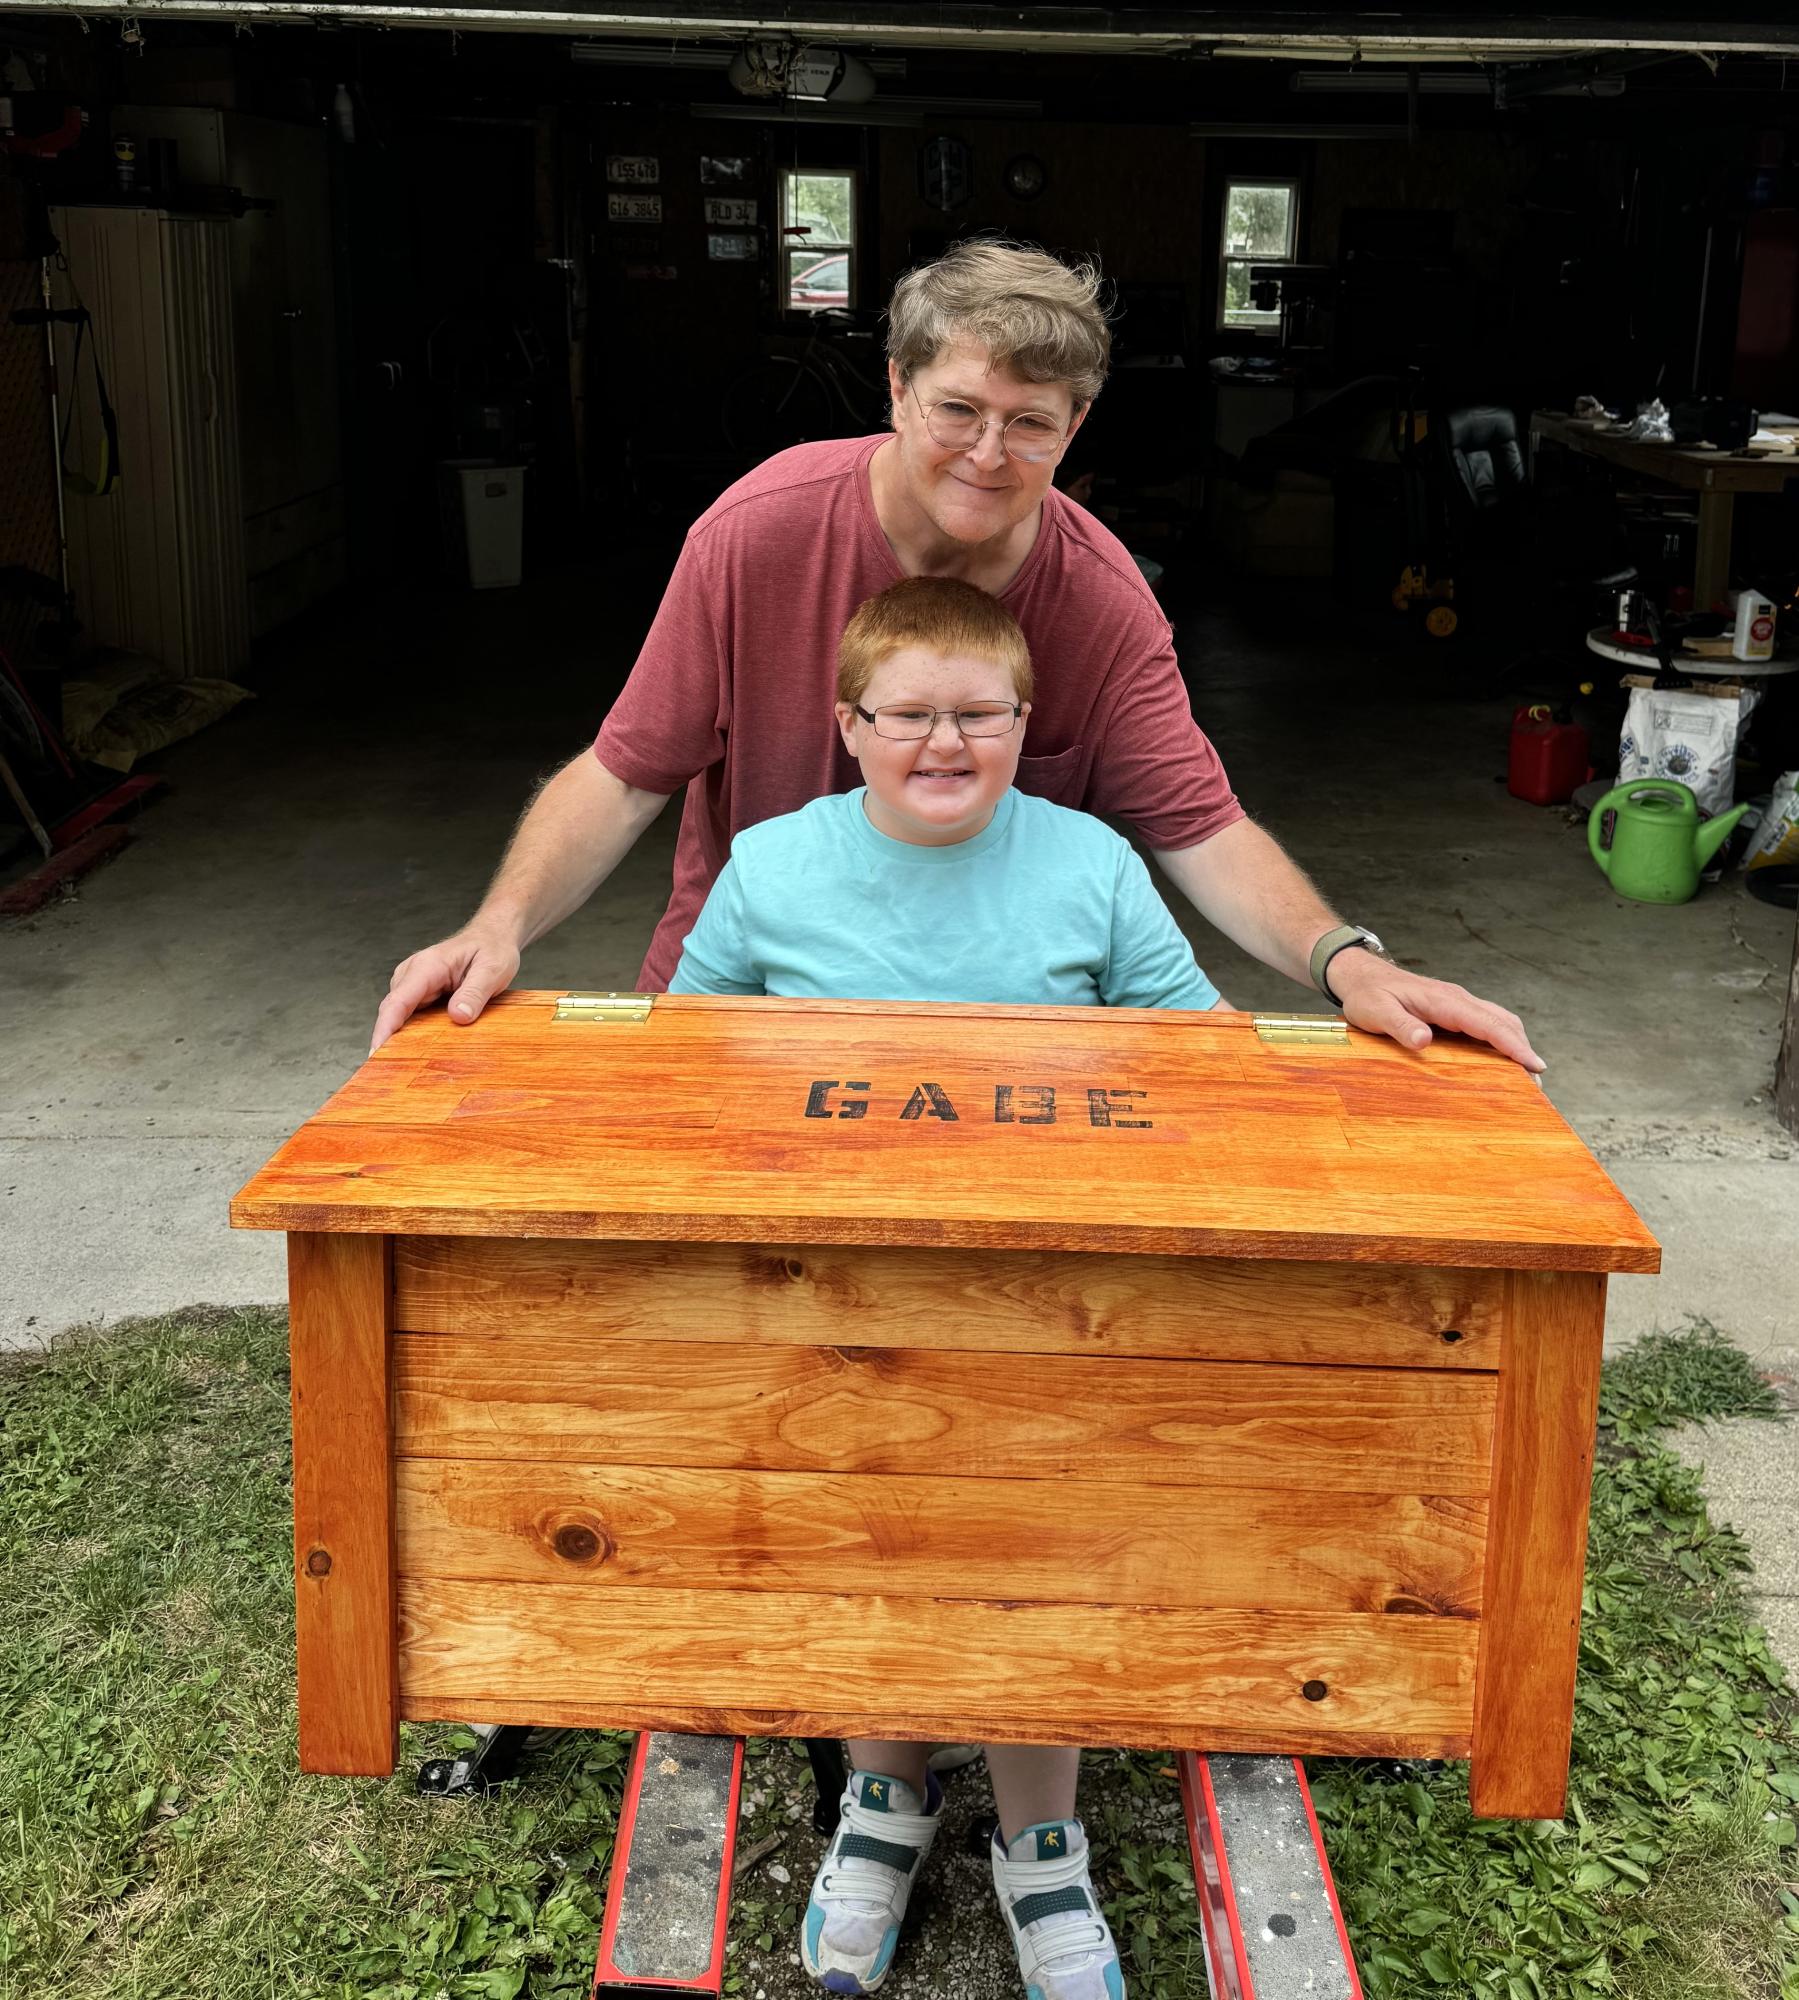
The farmhouse toy box project is wonderful. The first one I made I thought it’s easy enough that I had my 8 years old grandson come over and basically make it himself with a little help from grandpa. Thanks Ana for a great plan. -
Roger DeMoss
Built from Plan(s)
Farmhouse table - Tobacco farm wood
The end result of this project was incredible. The table is 3ft x 6ft x 31inches - Built with Tennessee tobacco farm wood. I used KREG for all the joining, even the legs. Finished it with the one and only Annie Sloan Paint/Wax combination.
Estimated Cost
350.00
Estimated Time Investment
Week Long Project (20 Hours or More)
Finish Used
Annie Sloan - Paint: Old White - Wax: Clear and Dark
Recommended Skill Level
Advanced
Comments
Kentwood Bed and night stand
Overall, these plans were easy to follow. It took me a little bit longer to complete, and definitely needed someone to help attach the bed rails to the headboard and footboard. We stained prior to putting the bed together, otherwise we wouldn't have been able to get the bed into the house.
For the night stand, the plans call for 4 boards across the top, but it definitely takes 5 so keep that in mind. I used pocket holes to attach the front and back of the top piece to the night stand, and then did nails to attach the sides of the top to the sides of the night stand.
Built from Plan(s)
Estimated Time Investment
Weekend Project (10-20 Hours)
Finish Used
Antique Walnut by Minwax
Recommended Skill Level
Beginner
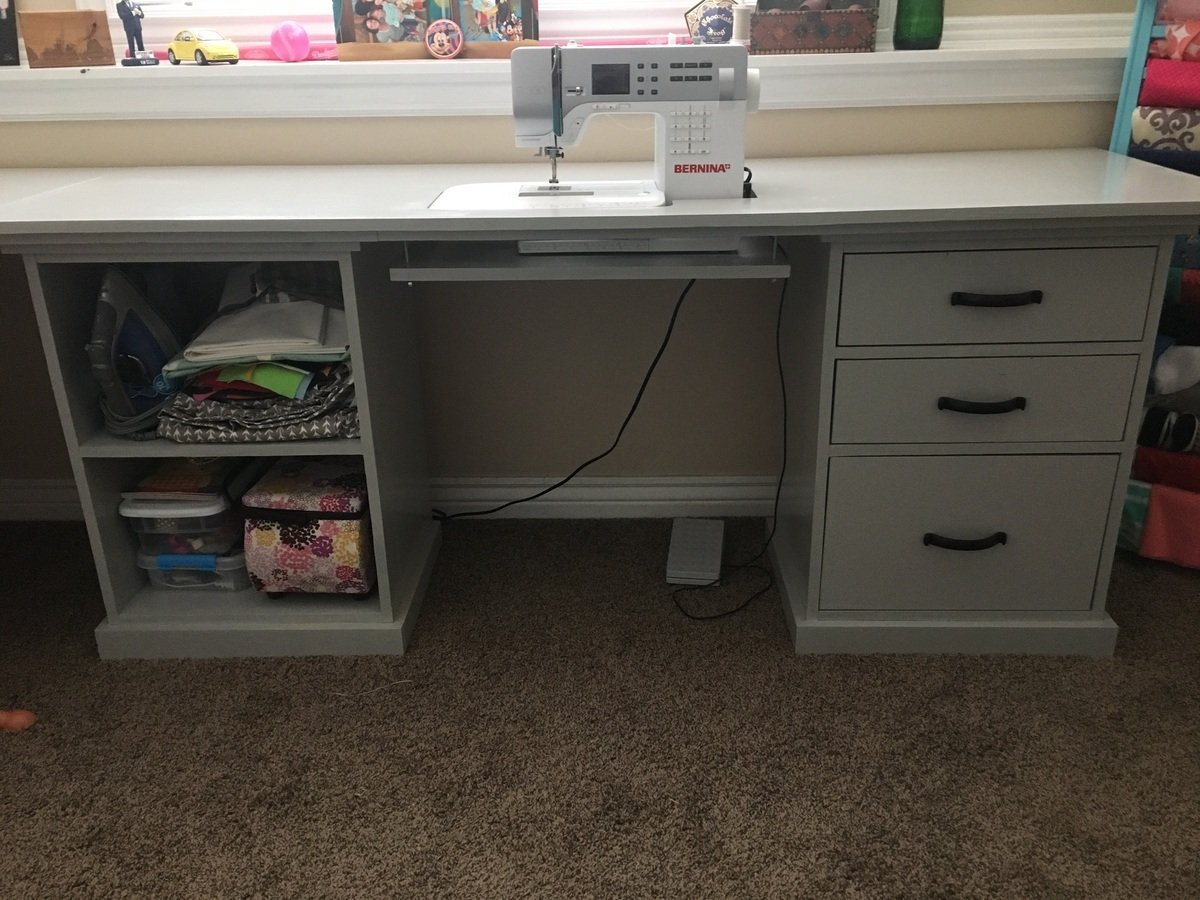
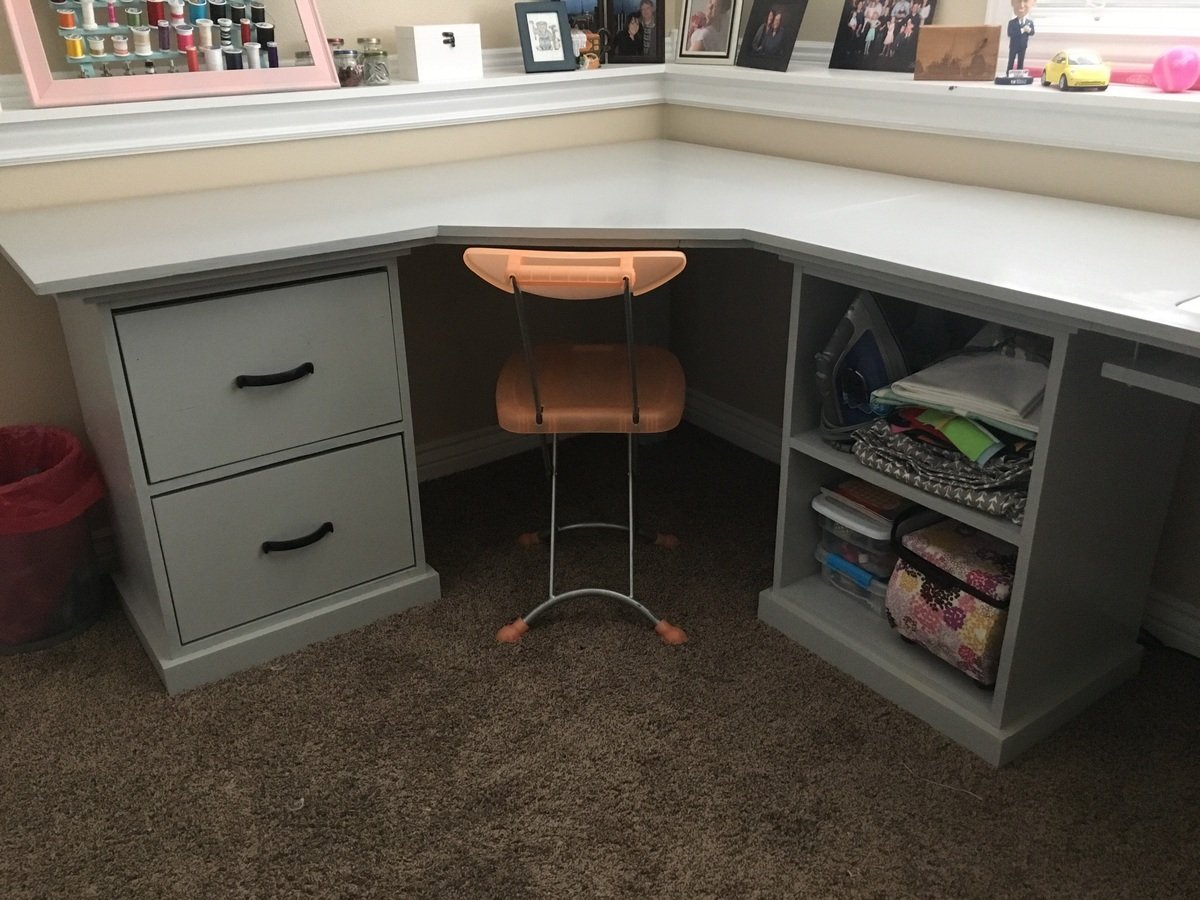
Modular office sewing/craft table
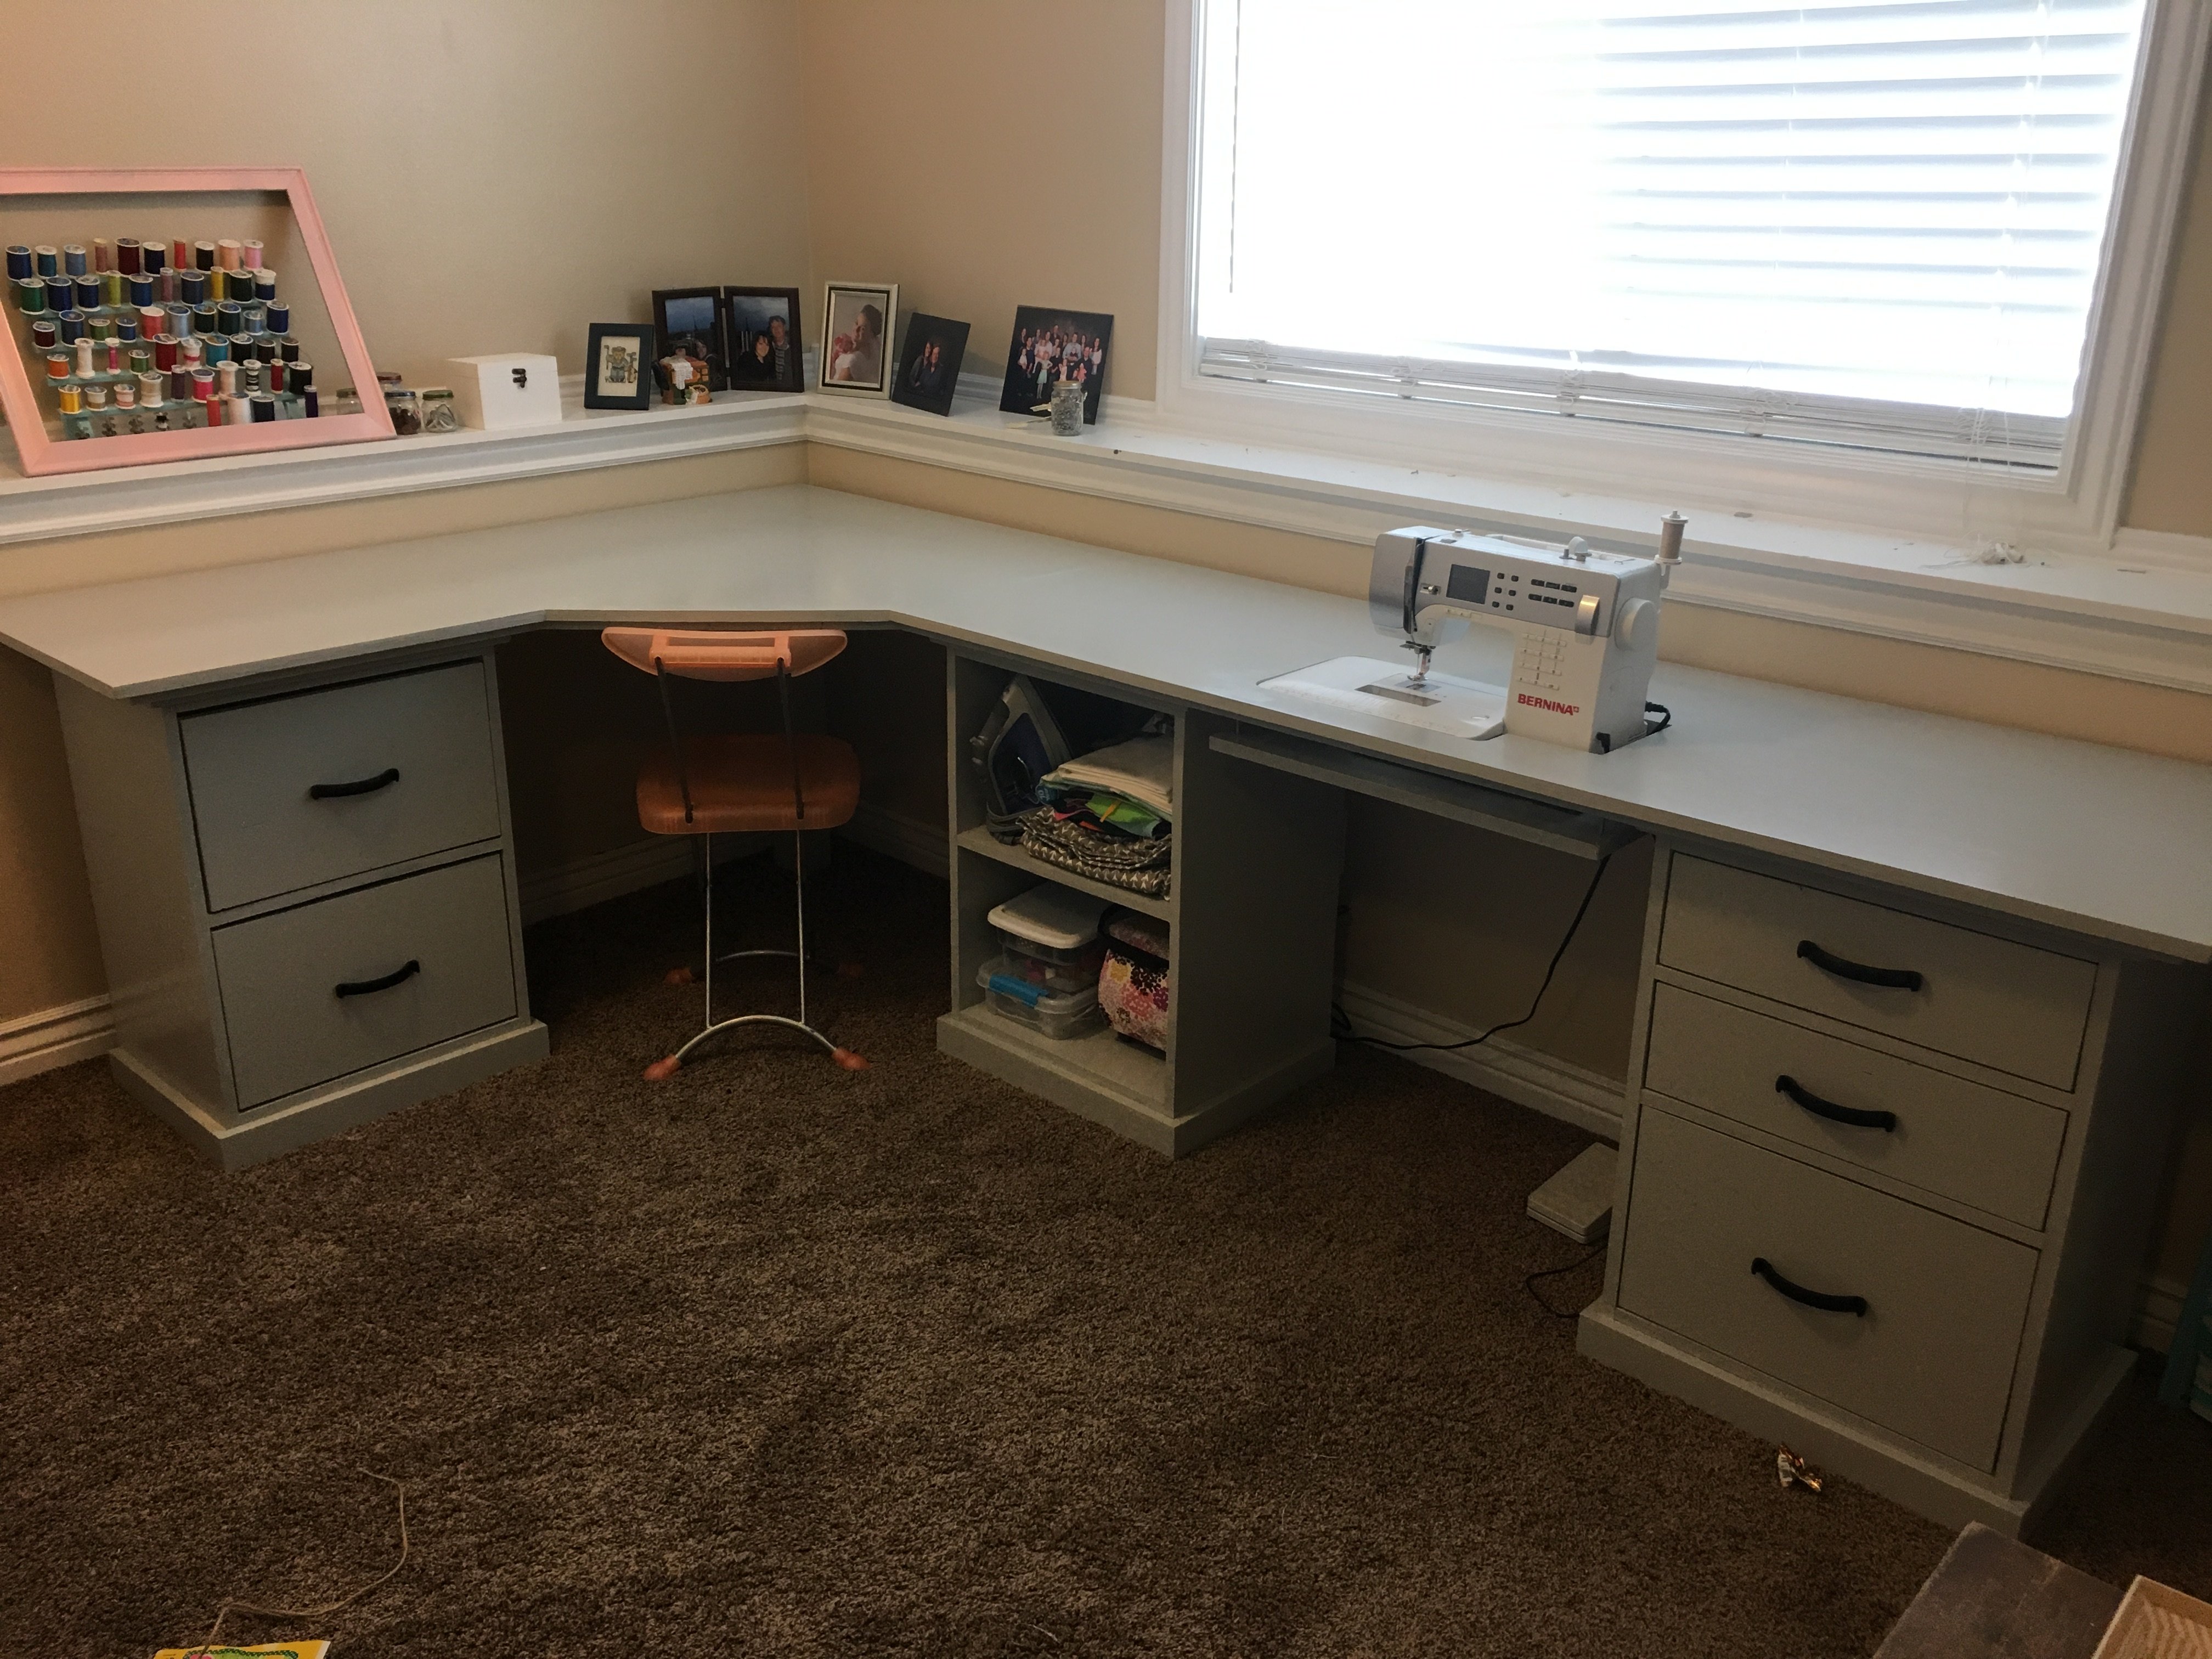
We built three base units-each with different storage options and used the corner desk plans. Then created our own long desk top using a 6ft long board and using a jigsaw to create an open space for the sewing machine.
Built from Plan(s)
Estimated Cost
$300
Estimated Time Investment
Week Long Project (20 Hours or More)
Finish Used
Semi gloss paint-behr paint and primer in classic silver. Polycrilic semi-gloss top coat-3 coats with wet sand before final coat.
Recommended Skill Level
Intermediate
Comments

Mon, 01/20/2020 - 07:49
It seems to me that this…
It seems to me that this room is suitable for yoga or painting.
Mon, 12/27/2021 - 18:28
sewing machine hole
How did you go about cutting the hole for the sewing machine and what extra building did you do underneath?
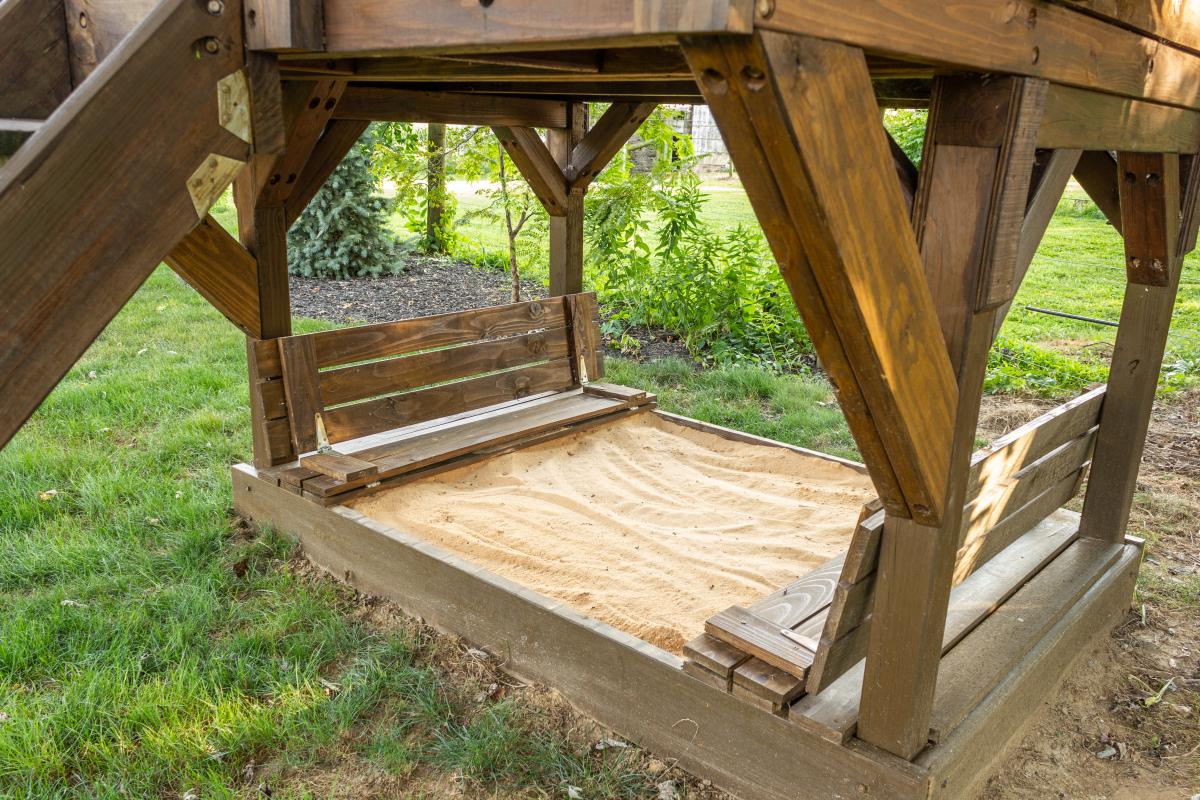
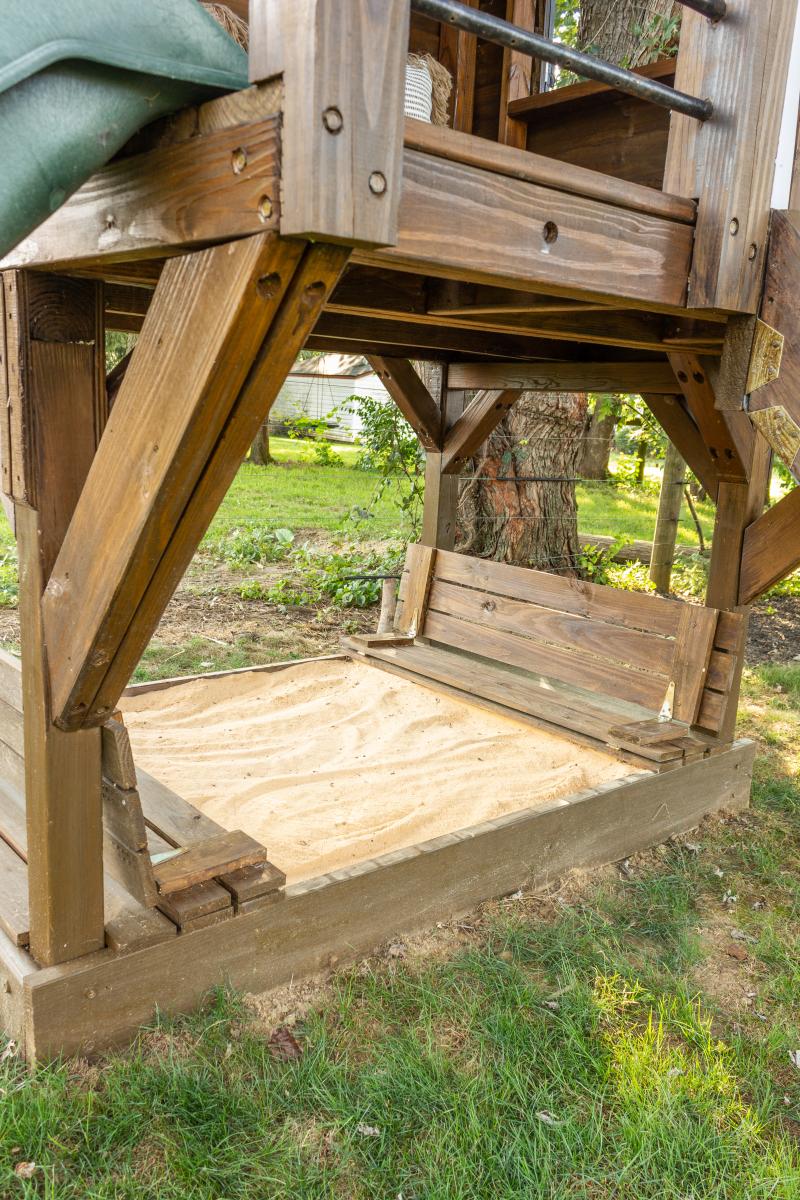
Sandbox with built-in seats in our playhouse
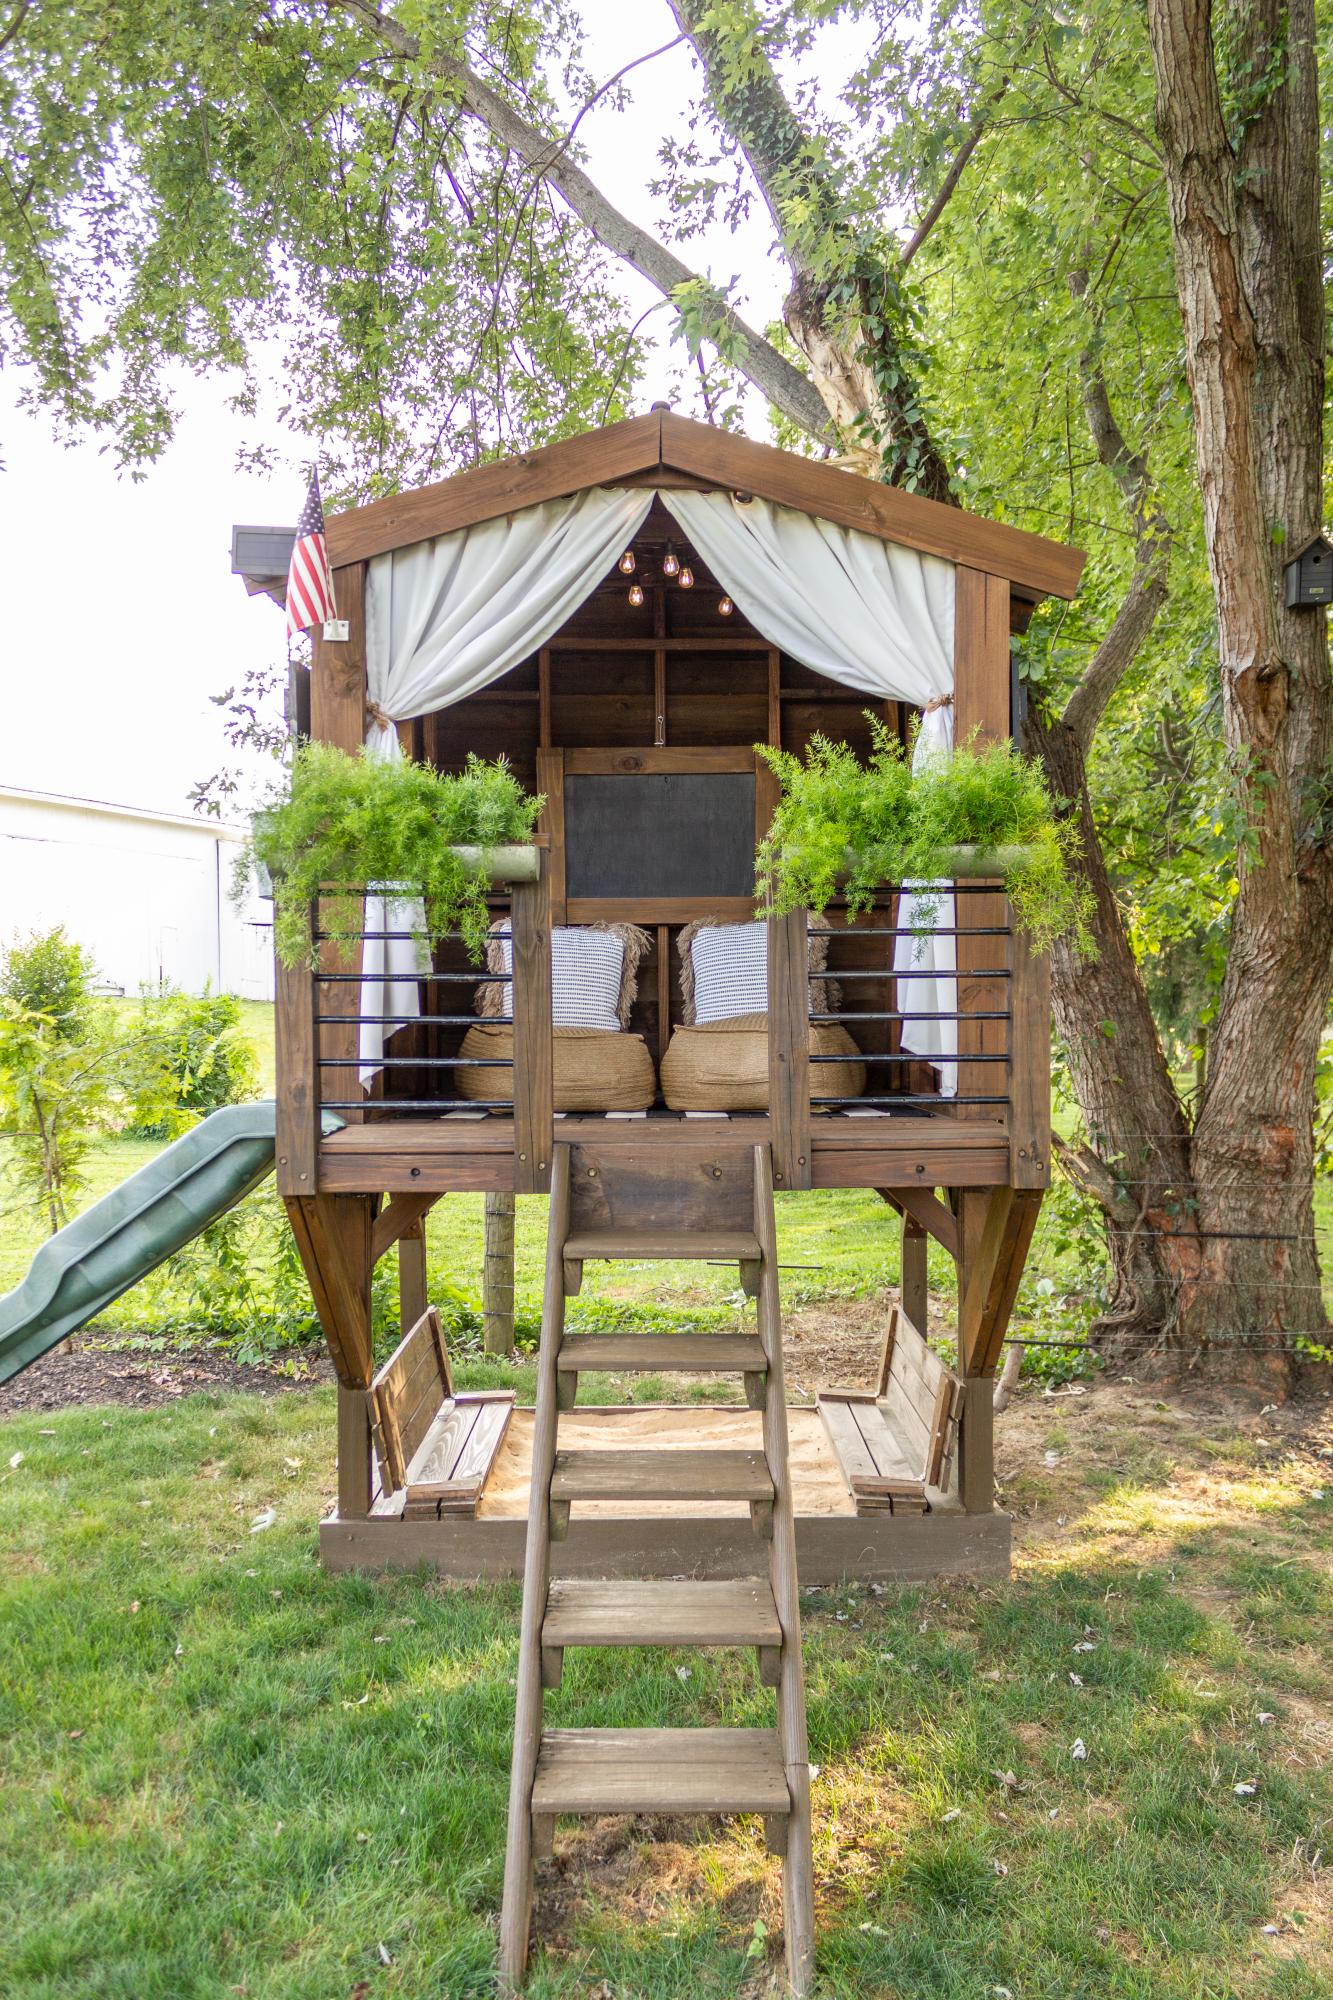
The base of our playhouse felt like the perfect spot to use the sandbox plan with built-in seats. The bench seats actually fold flat to create a lid for the sandbox when it’s not in use. I followed Ana’s plans exactly and used the list of materials she provided. The only modification I made was eliminating the back supports. It was not necessary for me to add the back supports since we have the playhouse posts to support the back of the bench.
Built from Plan(s)
Estimated Cost
$60
Estimated Time Investment
Afternoon Project (3-6 Hours)
Finish Used
Stain
Recommended Skill Level
Beginner
Custom Modern Round Dining Table
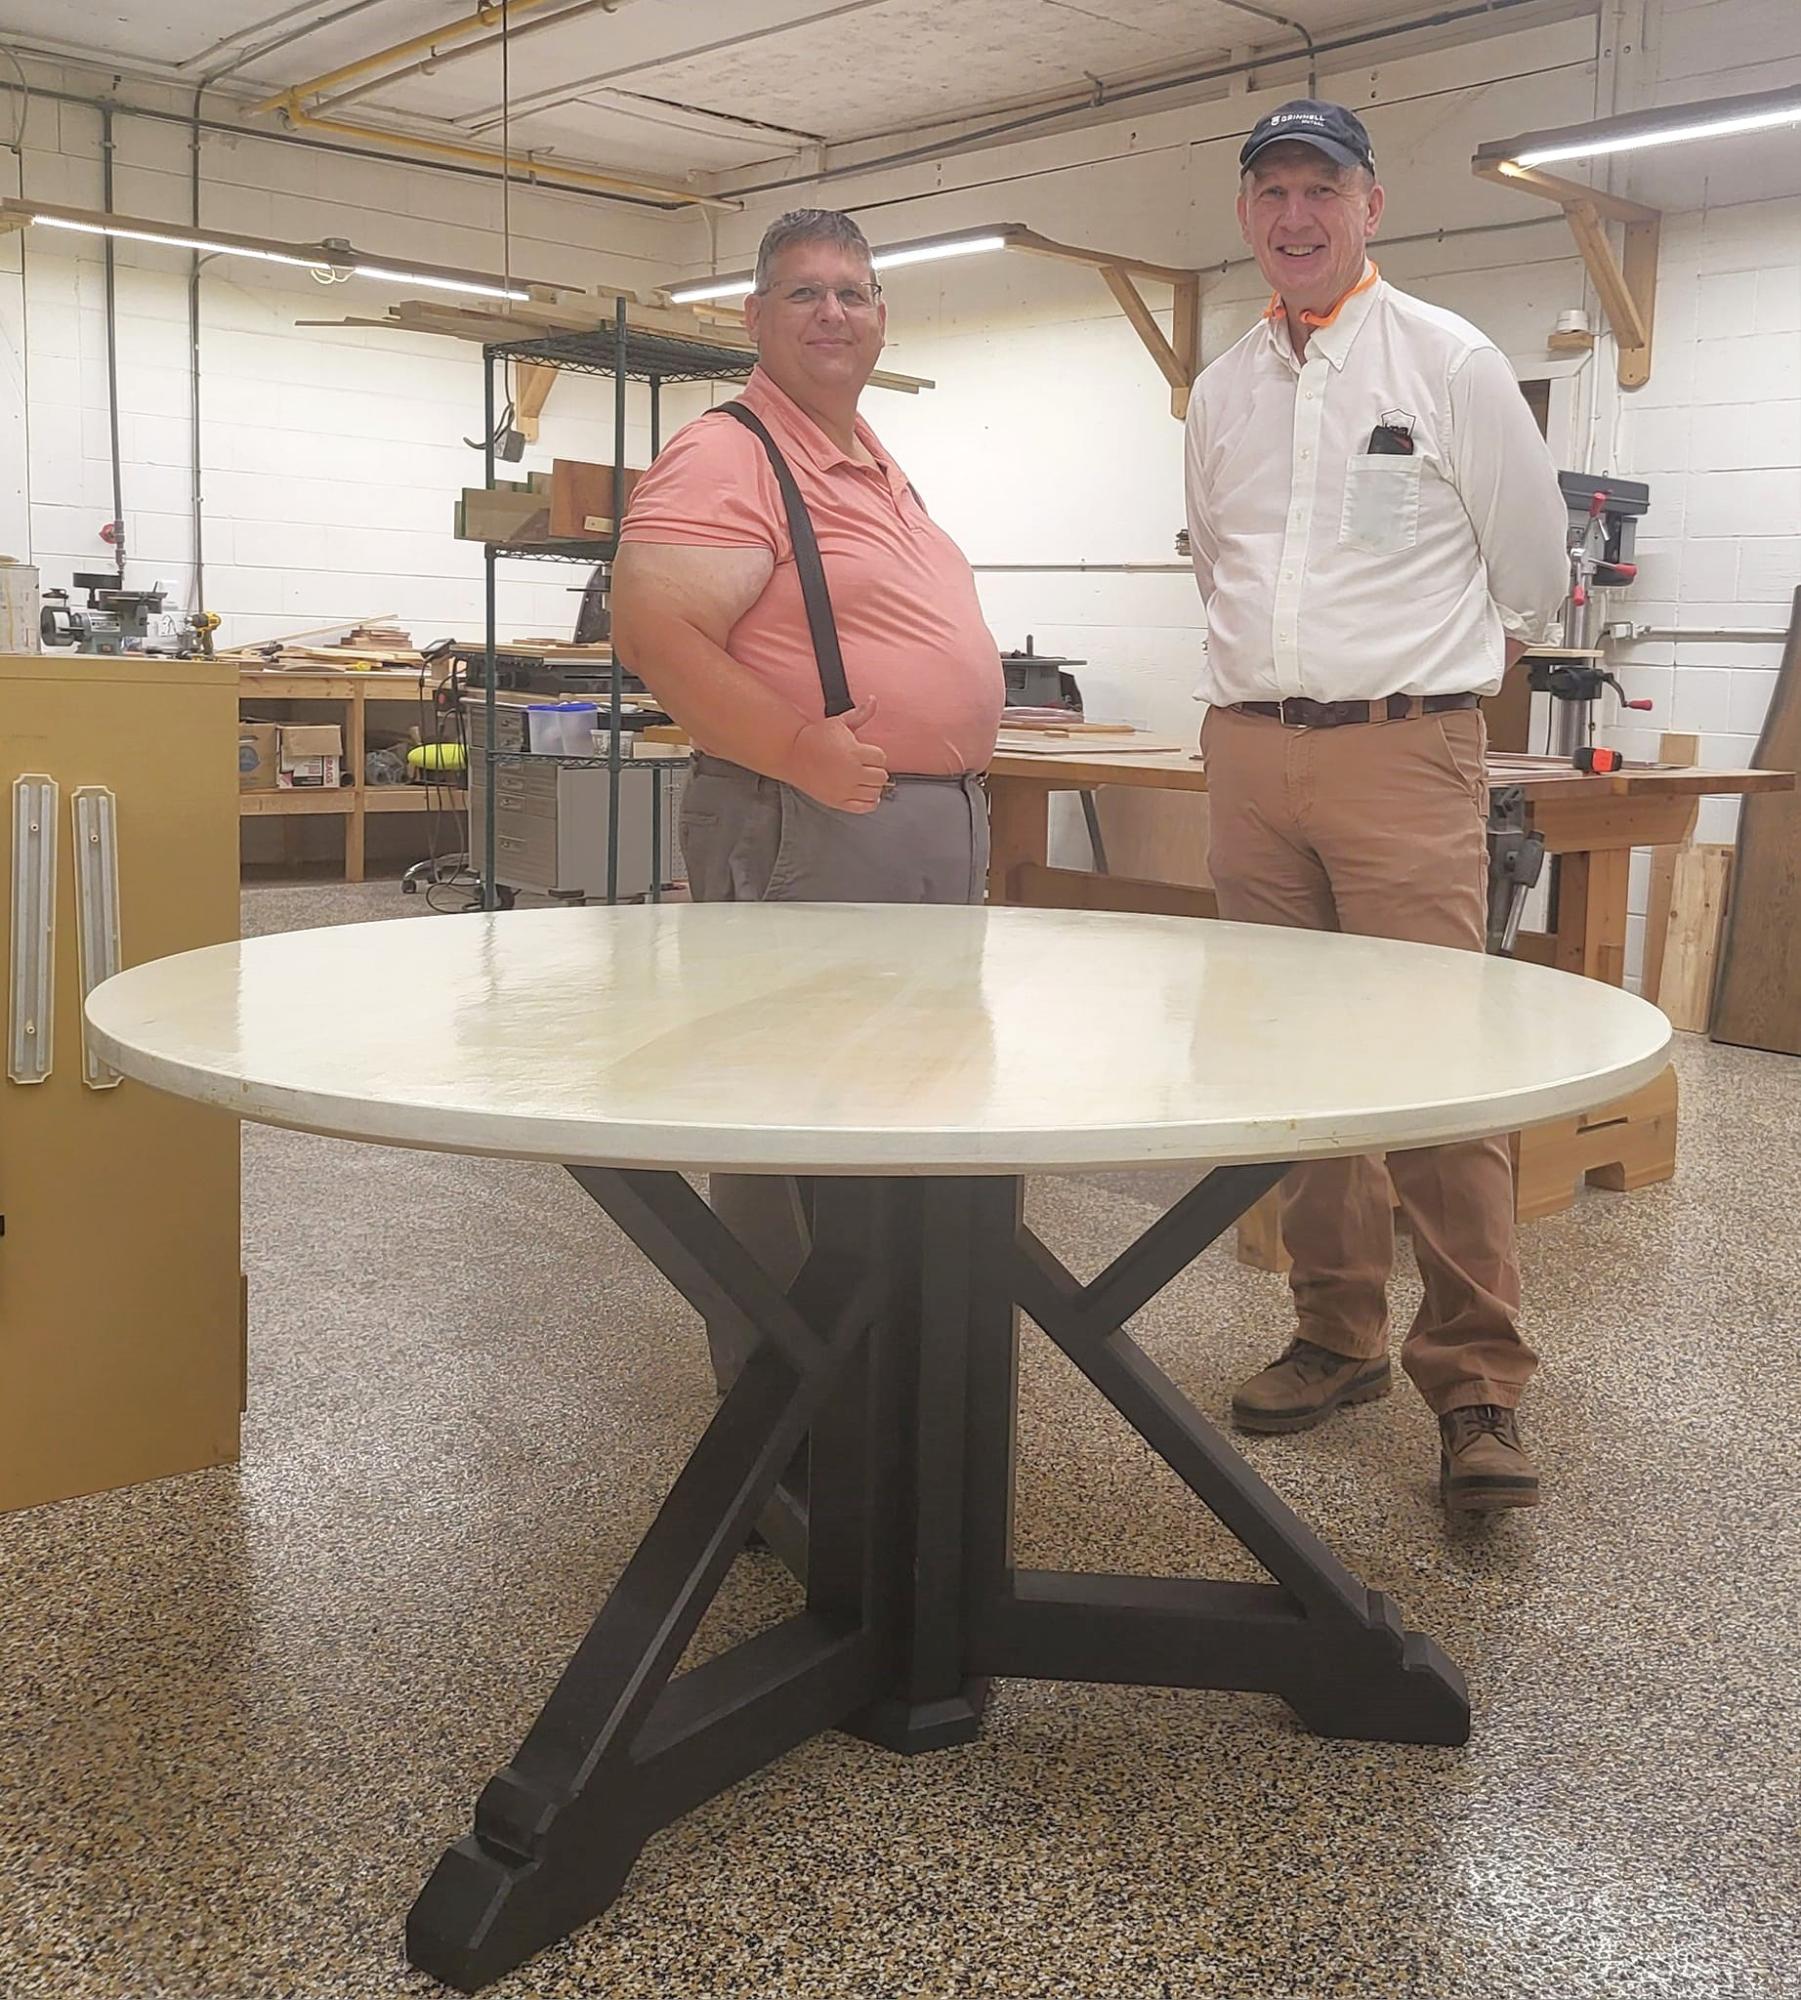
I've been a fan of Ana White’s Round Farmhouse Table for years, always intending to build it, but life kept getting in the way. Last year, after we remodeled our kitchen, my wife mentioned she wanted a 5-foot round table for the dining room. I immediately thought of Ana's design, but with no space to work on it, the project was delayed. That all changed in January when I discovered our community's Woodworking Club offering a 6-week class where you could bring your own project. I jumped at the chance!
While Ana White’s plans are geared toward simple tools, I was fortunate to have access to a fully equipped woodshop and guidance from a former high school shop teacher. With these resources, the Round Farmhouse Table became my personal project—and I decided to make a few custom modifications to fit my vision.
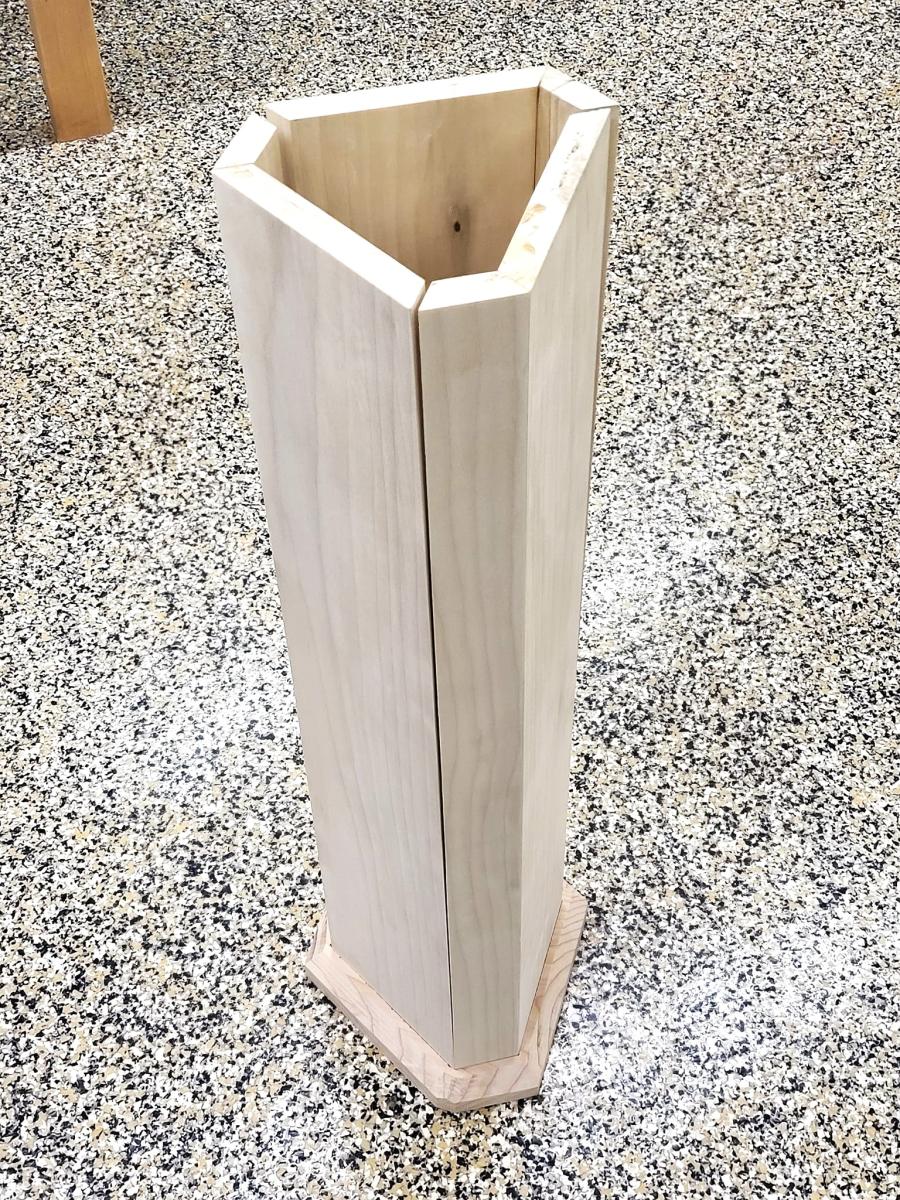
Leg Design: I didn’t want the legs to look like basic 2x4s. My instructor suggested ordering rough-cut poplar and shaping it myself. With $150 worth of poplar delivered, I learned to use the jointer, planer, and tablesaw to mill the pieces I needed for both the legs and tabletop.
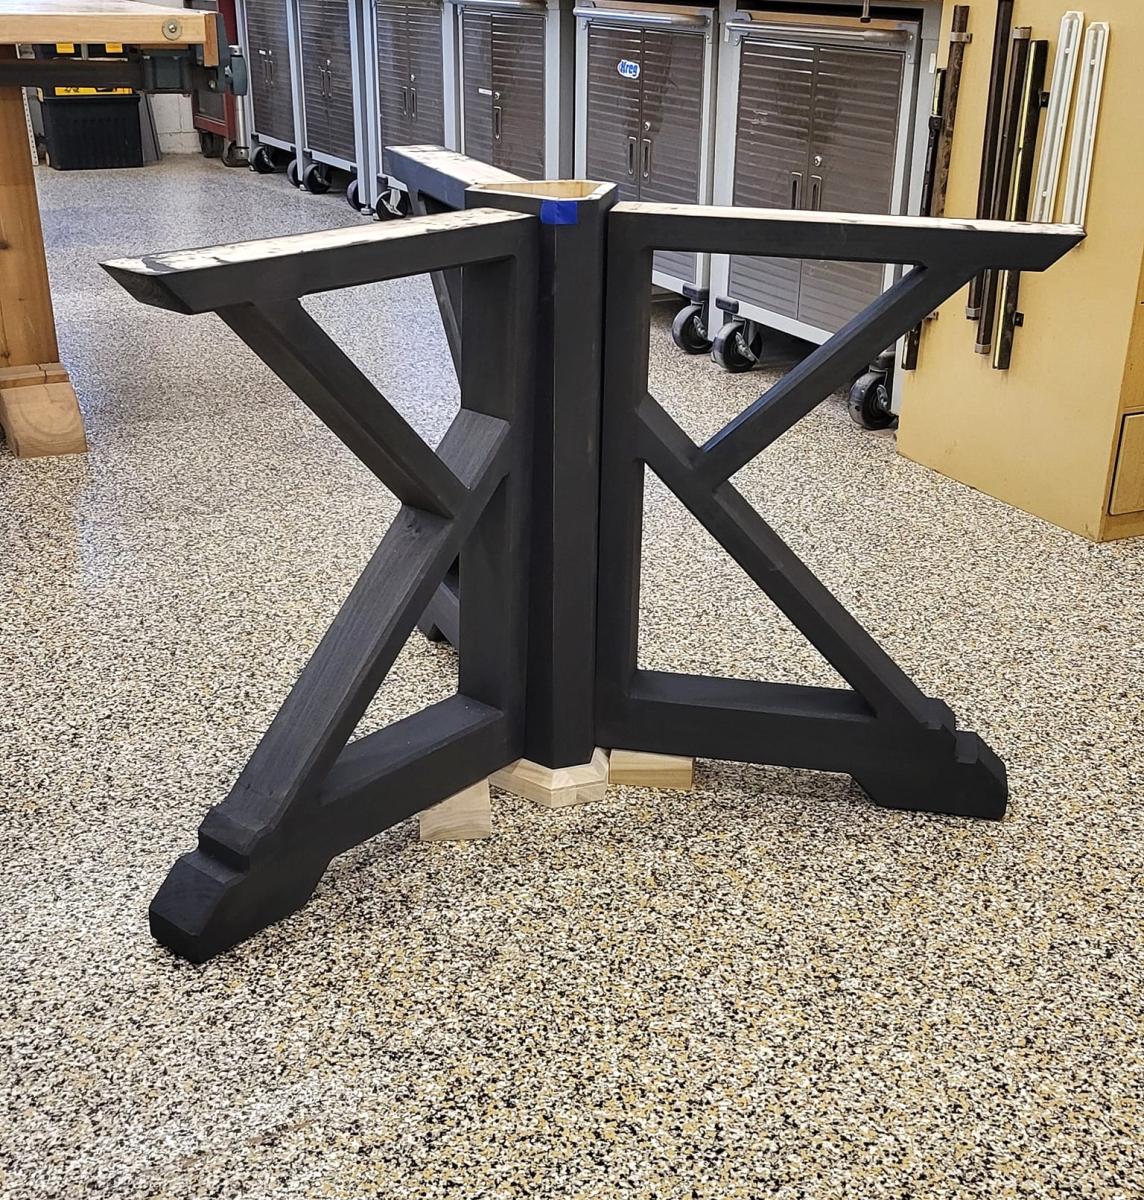
Seating & Structure: Since I wanted the table to comfortably seat six, I was concerned the original four-leg design would interfere with the chairs. So, I reimagined the table with three legs instead of four. This led to a big departure from the original plans. I created a hexagon core using 1x6 and 1x2 boards, and I even learned vCarve Pro to design a custom core base on the CNC router.
Mobility: Knowing we might need to move the table in the future, I designed it to be disassembled. The table breaks down into five pieces—the tabletop, three legs, and core base. Two bolts per leg securely attach the top to the base, making it easy to take apart and transport.
The tabletop was finished with a whitewash and sealed with TotalBoat Halcyon poly. I stained the legs with a deep Graphite color, finishing them with a satin poly spray for a smooth, polished look.
This project was a blast, and I couldn’t have done it without the inspiration from Ana White. Thanks for the great plans, Ana! - Scott Fosseen

Built from Plan(s)