Community Brag Posts

Magnetic Spice Rack Drawers!

Submitted by biz_kid1 on Fri, 10/05/2012 - 09:10

So our oven died back in July and we ended up having an unplanned mini kitchen remodel. One of the things I wanted to implement was magnetic spice racks in drawers, simply because we had a little space left on either side of the oven. Note: we hired a contractor to modify the existing cabinets because we had already been without an oven for over a month by the time home warranty decided they would have to replace the oven and we knew us doing it would take too long - a whole different, LONG story (read about that here: http://christinashaw.com/?p=1203).

But if you want to read more about the magnetic spice racks (which I LOVE, LOVE, LOVE, by the way!), you can read about that here: http://christinashaw.com/?p=1168

Recommended Skill Level
Intermediate

Side table

Submitted by sparkyht55 on Mon, 07/28/2014 - 17:06

My Dad wanted a table for his chessboard to sit on with the wood from the board to match the table. I had seen this design on the website and liked. It was different then the last table I built, so a new thing to learn. This is my 3rd wood project. Not an overly challenging build, but like anything, special attention to getting everything square and (lesson learned) drilling the 2x2 with the pocket holes, ensure they are lined up, centered and the correct depth. It came out very nice, and I'm sure Dad will enjoy.

Built from Plan(s)
Estimated Cost
about $40
Estimated Time Investment
Weekend Project (10-20 Hours)
Finish Used
Two toned oil based stain on pine. For the top used pecan stain and espresso and polycrylic finish from: http://ana-white.com/2012/12/minwax-two-tone-oil-based-stain-pine
Recommended Skill Level
Starter Project

Modified TV stand

Submitted by Sb1212 on Mon, 11/07/2016 - 22:49

This measures 70in wide. I added a second shelf as well. I used plexiglass in the doors. I really love how this turned out!

Built from Plan(s)
Estimated Cost
60
Estimated Time Investment
Weekend Project (10-20 Hours)
Finish Used
Valspar Olympic Black paint satin finish
Recommended Skill Level
Intermediate

Comments

Farmhouse Table & Bench

Submitted by frmoody on Tue, 07/28/2020 - 17:22

I've built tables from this plan several times. This one was a little different in terms of the colour wanted. I also beefed up the support in the table frame itself.

Estimated Cost
$120
Estimated Time Investment
Weekend Project (10-20 Hours)
Finish Used
Varathane "Worn Navy" mixed with some "Espresso" to darken it up. Then followed up with three coats of satin varathane. Table support was first painted a diluted black and then two coats of a diluted white were applied with light sanding in between coats to reveal some of the dark.
Recommended Skill Level
Intermediate

Bucket Garden with 2x4 Frame

Submitted by Anonymous (not verified) on Mon, 07/01/2024 - 13:25

Bucket Garden made out of 2x4s and painted with outdoor paint for many seasons of use.

Jeff DeVries

Murphy Bed - queen

Submitted by fielden_m on Mon, 10/08/2012 - 08:15

Taking the plans for the full sized Murphy bed (http://ana-white.com/2010/03/plans-a-murphy-bed-you-can-build-and-affor…) I added a few inches to convert to a queen and raised it off the floor 5 1/2 inches with removable fence post toppers.

The yellow head board lifts up and stores inside the frame when up. If I had it to do over again, I would sand and paint as I built. Thanks to Ana, I now have a guest room!

Estimated Cost
$150
Estimated Time Investment
Week Long Project (20 Hours or More)
Finish Used
wood was sanded, primed and painted
Recommended Skill Level
Intermediate

Comments

Cindy from Indiana (not verified)

Mon, 10/08/2012 - 11:13

Holy smokes! Great job! I just got my early birthday present - a Kreg Jig Master System!!! One of the first things I will be building is a murphy bed, so thank you for the inspiration.

It looks great!

nasrockswell

Wed, 04/24/2013 - 19:55

I love your adaptation of Ana's plans. Would you be willing to share the dimension for the queen murphy? Thank you!

fielden_m

Fri, 07/26/2013 - 18:51

I fudged the plans by adding to the width and height to make up for the change in bedding but also for the hinges and detachable feet. Measures will differ based on your hinges and feet.

vgb777

Mon, 04/29/2013 - 14:32

I am wondering what king of hinges you used for the bed. Did you use continuous (piano) hinges or regular door hinges? How wide are they? I am not sure what the acceptable width for the hinges is to be safe. Thanks.

fielden_m

Fri, 07/26/2013 - 18:47

I used 3 5" gate hinges. They are thick enough to leave a gap of 3/8" between my base and the part of the bed that swings down.

phelan1202

Wed, 06/12/2013 - 16:35

What were the altered measurements and exactly how did you raise it? I really like Anas plan except that the mattress was so close to the ground. I want to make this for my apartment and I'm painting the outside like a tardis. (:

fielden_m

Fri, 07/26/2013 - 18:50

I raised it 5 1/4 " using fence post toppers from home depot. The fence post toppers unscrew for upright storage. You could leave them in for a more dramatic look but I liked the cleaner lines with them out until needed

intrigued89

Sat, 11/02/2013 - 15:33

Would you be willing to share the dimensions you used when building your queen murphy? Even if they aren't exact, it would be such a big help to me!

rfpeterlin

Sat, 12/28/2013 - 03:33

That is definitely an attractive and well finished project. I am interested in how you finished the legs. I see in the second picture (bed in closed positions) where the toppers may have attached. Where do you store them?

fielden_m

Sat, 12/28/2013 - 22:56

In that same picture, if you look at the bottom 6 inches of the closed bed (under the hinge) there is a storage section where I hide the legs when the bed is raised. It is otherwise dead space and made for an easy storage conversion at the last minute.

Ben Childs

Sun, 01/10/2016 - 17:02

Can someone please help me I see this can be adjusted for a queen size bed. I don't know how to adjust the measurement to make it work. 

Ben Childs

Sun, 01/10/2016 - 17:04

Can someone please help me I see this can be adjusted for a queen size bed. I don't know how to adjust the measurement to make it work. 

John Deere Green Barn Shelf

Submitted by Veronica P on Wed, 07/30/2014 - 22:08

After finishing my boys' new John Deere room and tractor bunk bed (also posted), I saw this plan and thought it would be the perfect thing for some extra toy storage.

Yes, I know, barns are supposed to be red. Everything else in the room is John Deere green and I had paint leftover, which is not cheap. So green it is! I used my new paint sprayer for the first time on this project and am thrilled with it. I would recommend it to anyone who dislikes painting as much as I do. I bought the Wagner Flexio 590 which comes with a detail sprayer as well as the full size and I'm very happy with both.

Thanks to Ana for the well laid out, easy to follow plan and also for helping me create a big boy room that my boys love!

Built from Plan(s)
Estimated Cost
$60.00
Estimated Time Investment
Weekend Project (10-20 Hours)
Finish Used
John Deere green paint plus primer, black & white paints, white paint marker for the shingle detail and satin polyurethane.
Recommended Skill Level
Starter Project

Comments

Veronica P

Thu, 07/31/2014 - 09:38

Thanks so much for your comments. It's so nice to hear positive feedback since I'm very new to this! My 3yr old is quite particular about everything being in its place, I'll pass along that you liked his animal placement. Lol :)

Homework Table and Chairs

Submitted by Anonymous (not verified) on Sun, 11/13/2016 - 14:08

Needed a small "homework" table for my 6 year old. Looks more appealing in the living room than the Disney Princess table she's has since she was 2. Super simple build and very affordable!! This is my 3rd project from Ana White and definitely not my last.  

Estimated Time Investment
An Hour or Two (0-2 Hours)
Recommended Skill Level
Beginner

I made Adirondack chairs!

Submitted by Anonymous (not verified) on Sat, 08/01/2020 - 12:39

Hi from Pittsburgh! I’ve always wanted to make stuff from your site, and I finally did it — I made Ana’s favorite Adirondack chairs and man, are they comfortable! I made them out of cedar 2x4s and cedar shelving pieces for the slats. Very comfy and I hope they last a long time. Awesome instructions, Ana— I’ve directed my neighbor to your site bc he wanted to make some, too!

Estimated Cost
$80/ chair
Estimated Time Investment
Afternoon Project (3-6 Hours)
Finish Used
Chairs by fire pit
Recommended Skill Level
Beginner

Chris's Custom Beds

After seeing my daughter's bed. A guy I work with asked me to build his son one. He told me it could be just like Lillians, but if I could make it pirate themed that would be great. So here we are and the first bed from "Chris' Custom Beds" is done.

Estimated Cost
$1200.00
Estimated Time Investment
Week Long Project (20 Hours or More)
Finish Used
The agreement was it was to be deliever and primied only.
Recommended Skill Level
Intermediate

Cornhole Boards

Submitted by djsaffer19 on Sun, 08/03/2014 - 20:08

Custom cornhole boards, made with pocket joinery

Estimated Time Investment
Weekend Project (10-20 Hours)
Finish Used
Spray paint, stain, decals, always covered with polycrilic
Recommended Skill Level
Beginner

Comments

Kids chair

Submitted by Anonymous (not verified) on Wed, 11/16/2016 - 09:25

Childrens chair 

Estimated Time Investment
Afternoon Project (3-6 Hours)
Finish Used
Dark walnut stain. Lemons edge Valspar paint. Sprayed the whole thing with clear gloss spray paint.
Recommended Skill Level
Beginner

Pardon Tower Desk

Built this desk for my wife a couple months back. Love how it turned out, plans were a huge help as I am new to woodworking.

Built from Plan(s)
Estimated Time Investment
Day Project (6-9 Hours)
Finish Used
Minwax Dark Walnut, Minwax One Coat Polyurethane
Recommended Skill Level
Beginner

Rebecca Media Center (kind of)

Submitted by Medickep on Tue, 08/05/2014 - 22:02

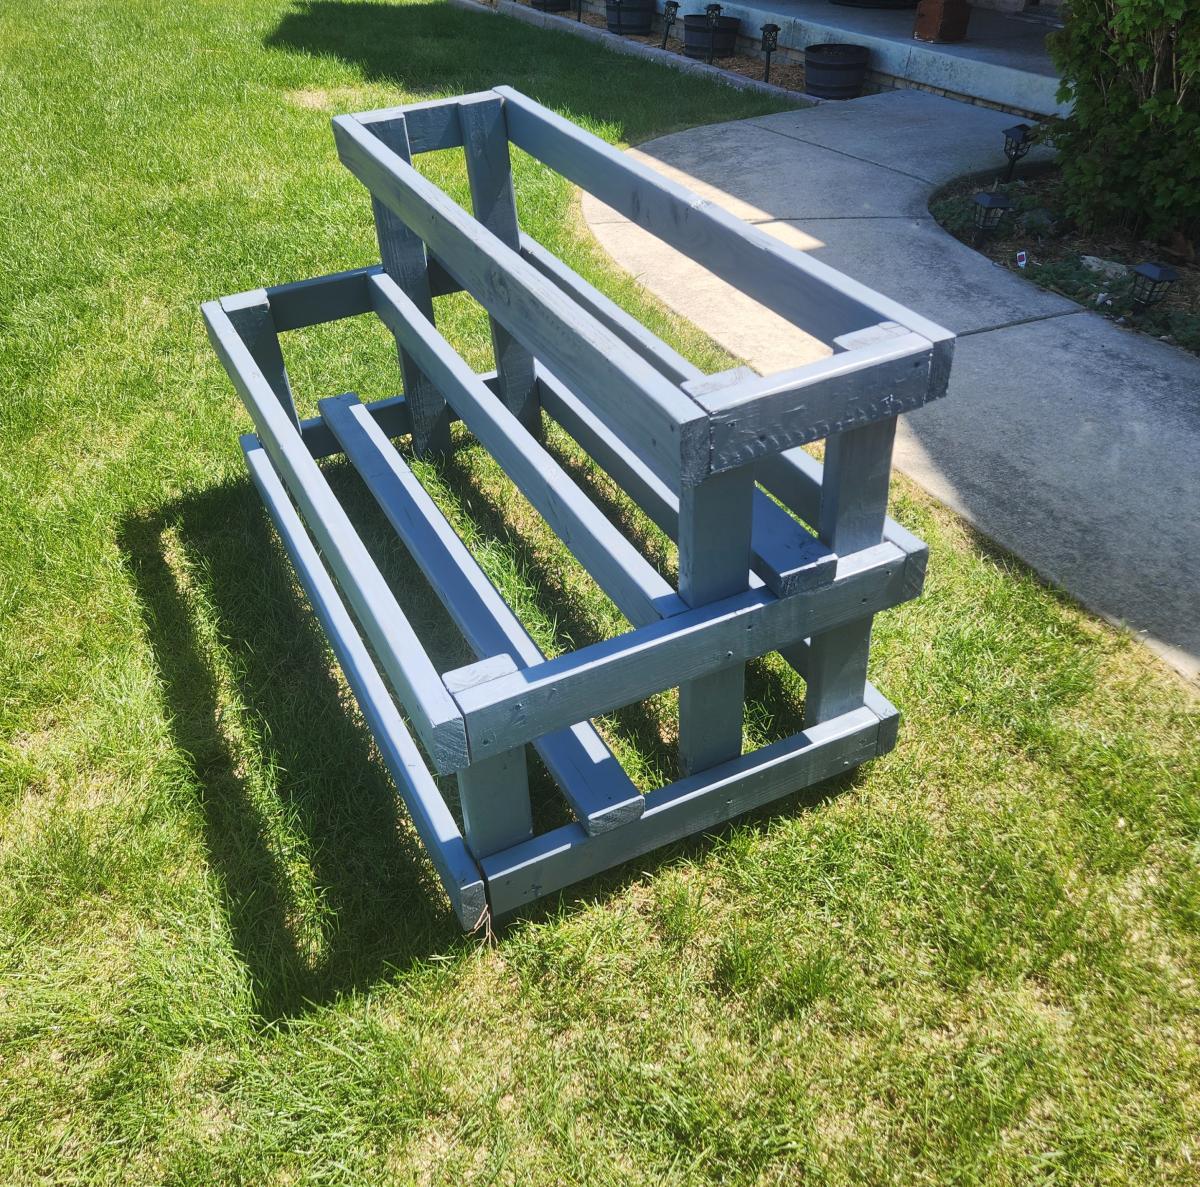
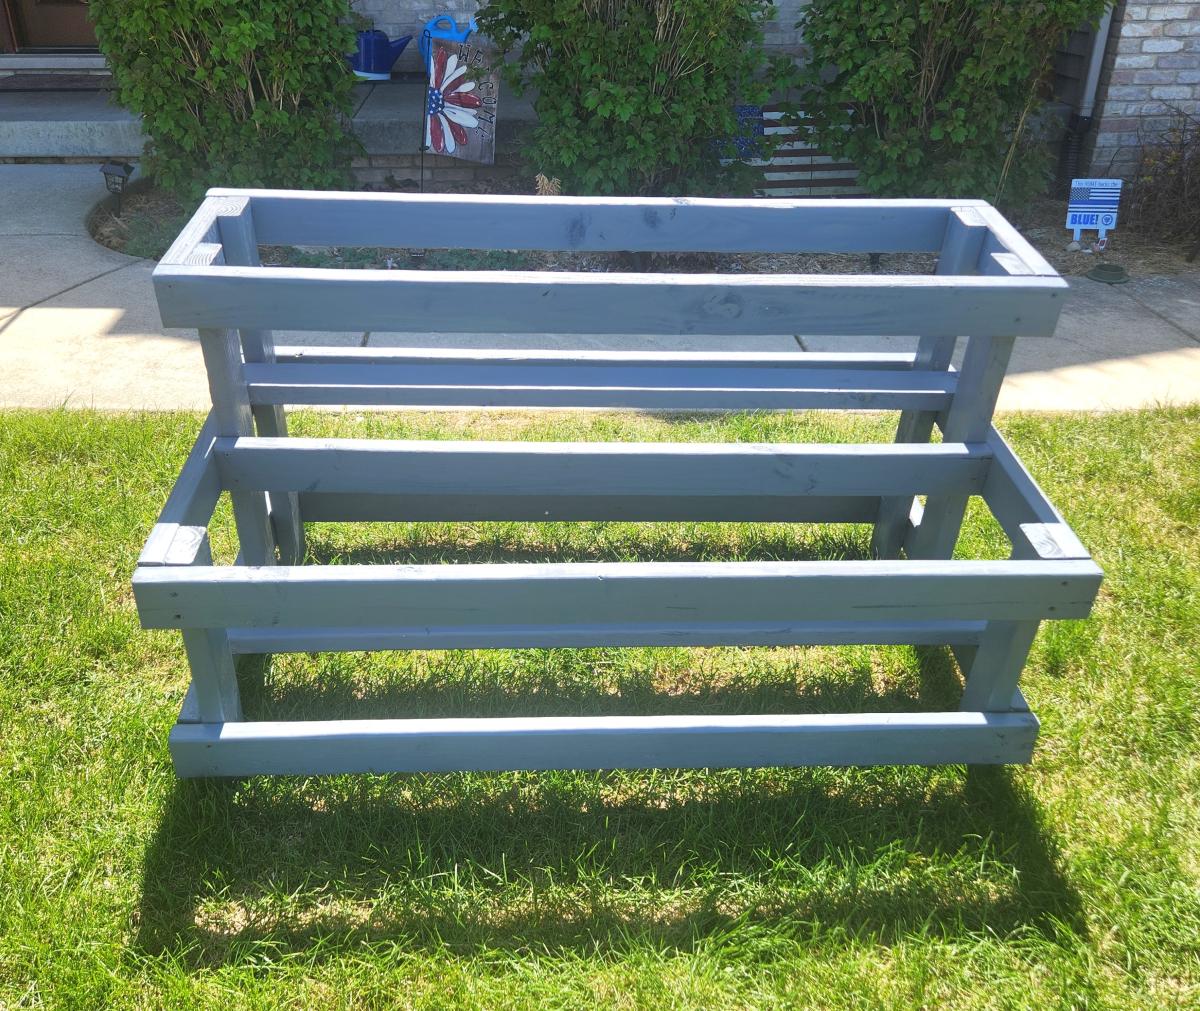
I've been wanting to build some built ins in the recessed area surrounding our fireplace for awhile now. I wasn't really sure how I wanted to tackle this and at first it was just going to be shelves from the floor up. After browsing around, I stumbled onto Rebecca's media center and could see how I could turn this into my built ins!

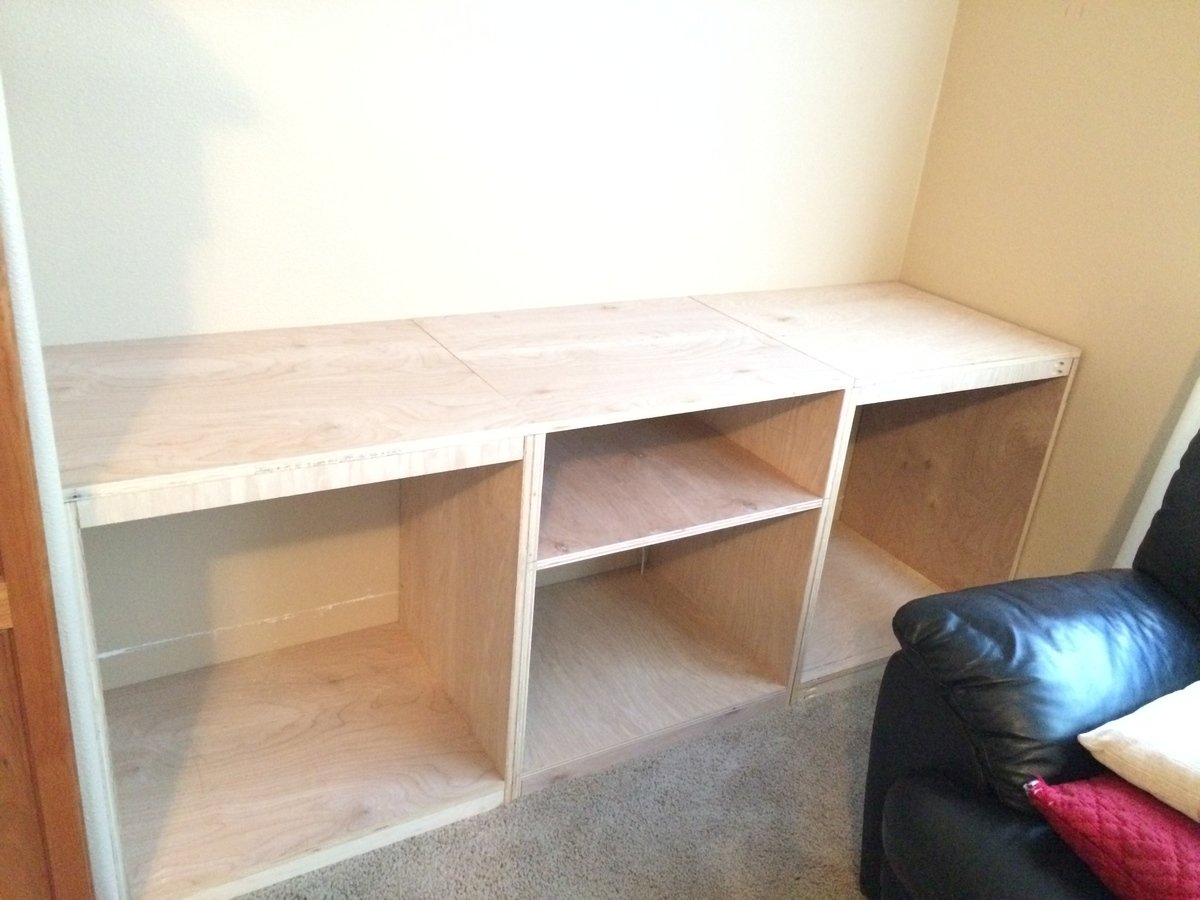
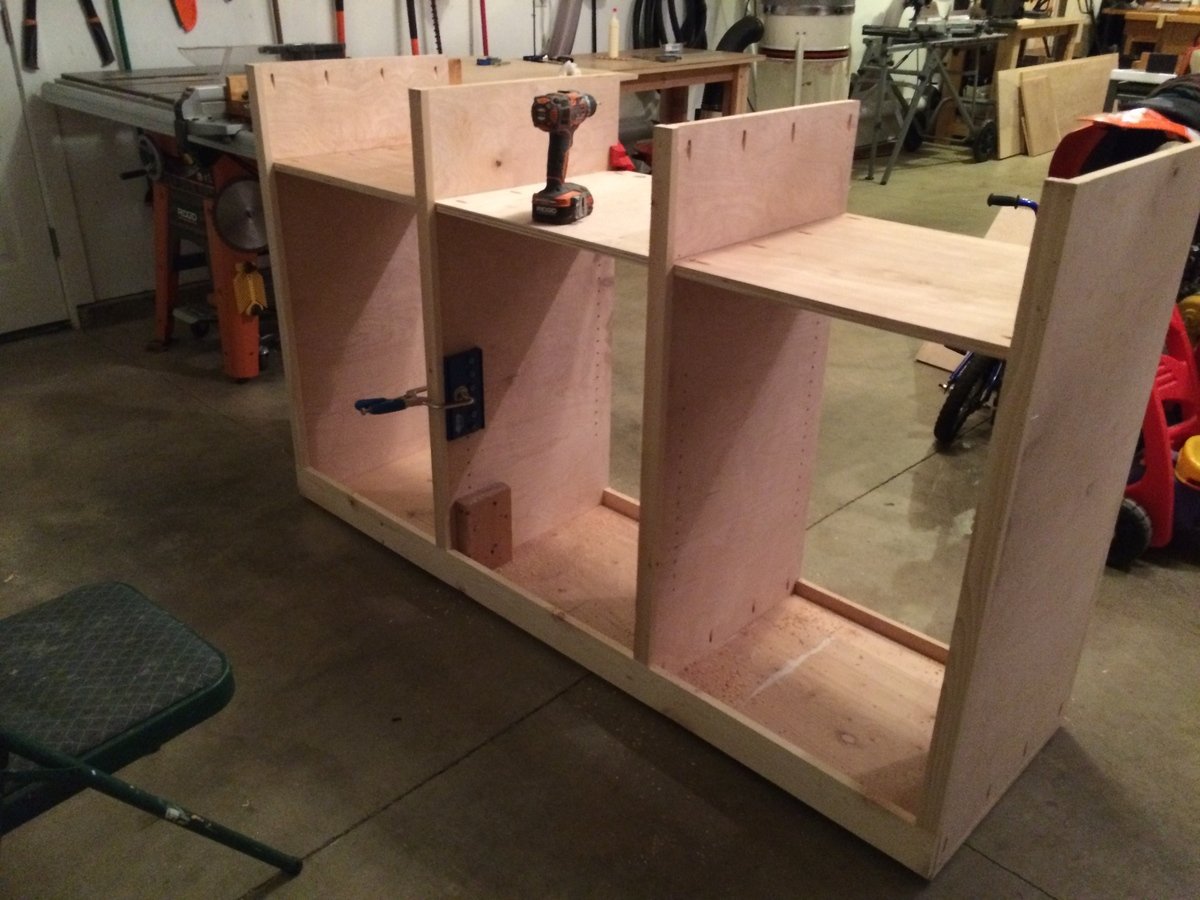
The whole thing is mostly boxes placed next to one another with trim that covers all of the seems. The bottom left and right cabinets were inspired by her media center side base and the middle of the bottom row is a modified version of the center console piece. For the top I combined the console side and hutch piece to get something that would work for me.

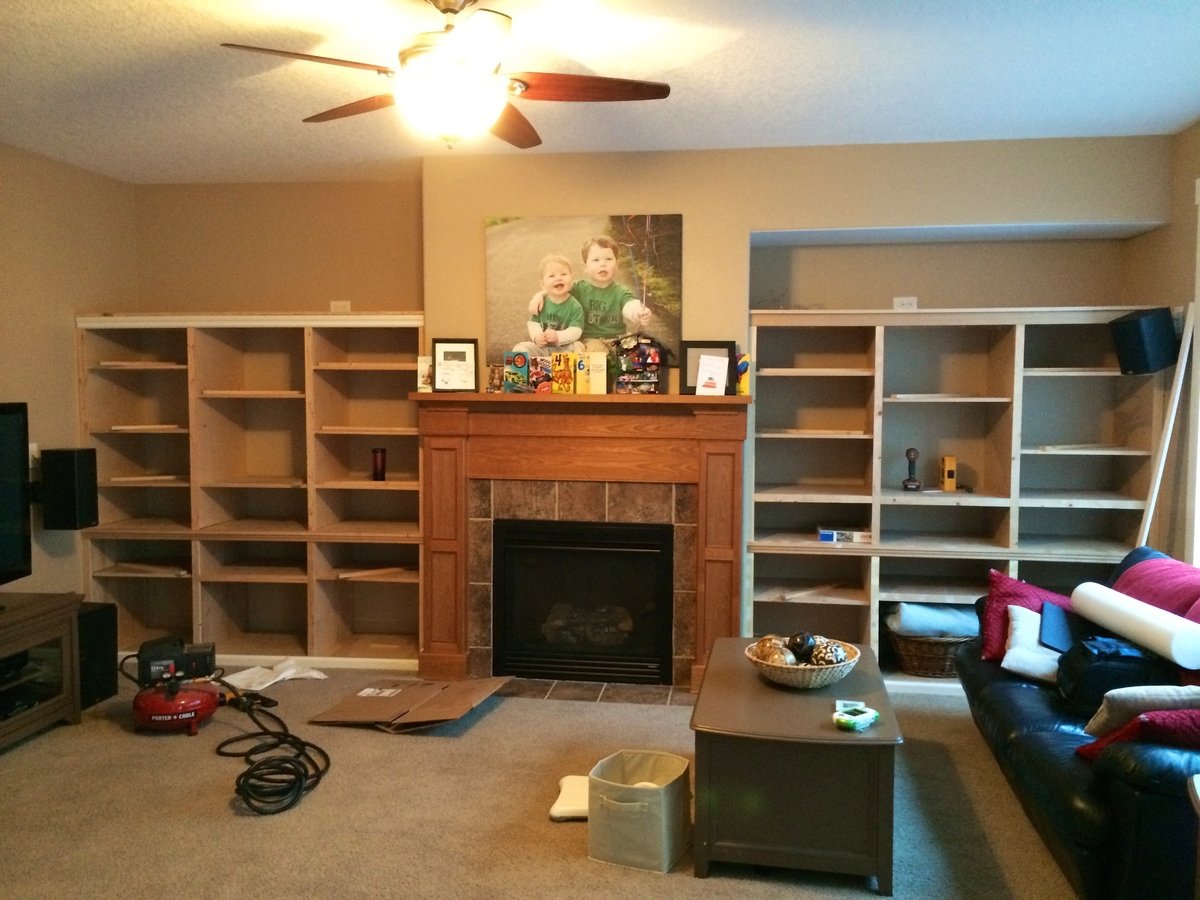
I learned a lot on this project and tried to take my time. Using trim across the entire project help make it look like one big piece of furniture. One thing I would do differently if I was to do this again is to use higher quality trim, such as hemlock as the pine required lots of wood filler, sanding and time, all which exceeded the cost difference between the two types of lumber. I used the Kreg drawer jig for the first time, which was nice and also used the Kreg shelving jig after I decided to make all of the shelves adjustable. It to was a nice and easy to use tool. A must for anyone who makes adjustable shelves.

I sanded, sanded and sanded some more and than put two coats of high quality primer (57$/gallon) from Rhodda, which was a God send. It hid all of the imperfections and created a nice smooth area to paint, which I used foam rollers and the Renaissance paint also from Rhodda. They said it went on and dried like a oil paint, which I love, but cleaned up with water. It was awesome paint to work with, but we'll see if it gets that hard eggshell layer that oil paint gets. It's already pretty hard the night I painted it!

The hardest part for me was going to the local Woodcraft store and deciding what hinges I need and how to adjust them perfectly! This was so hard as the tolerances were minimal and I wanted everything to be uniform. I could probably adjust them a little more!!

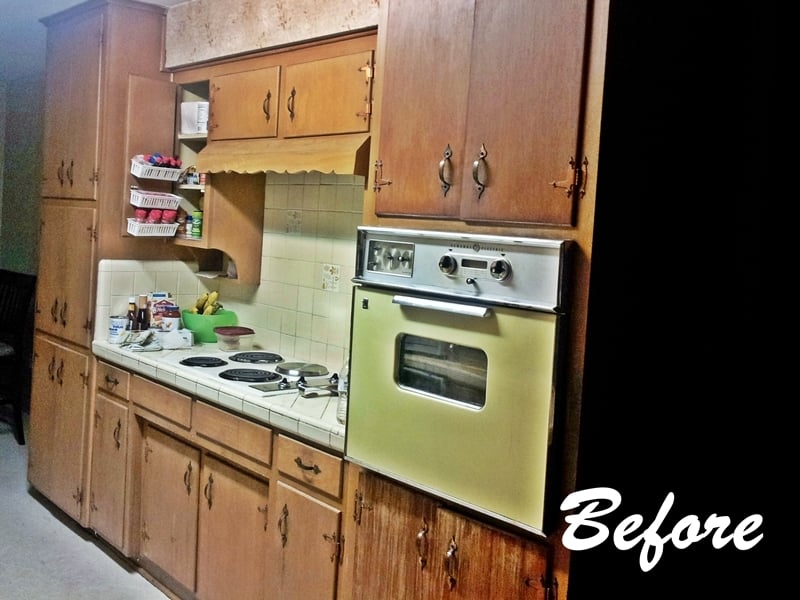
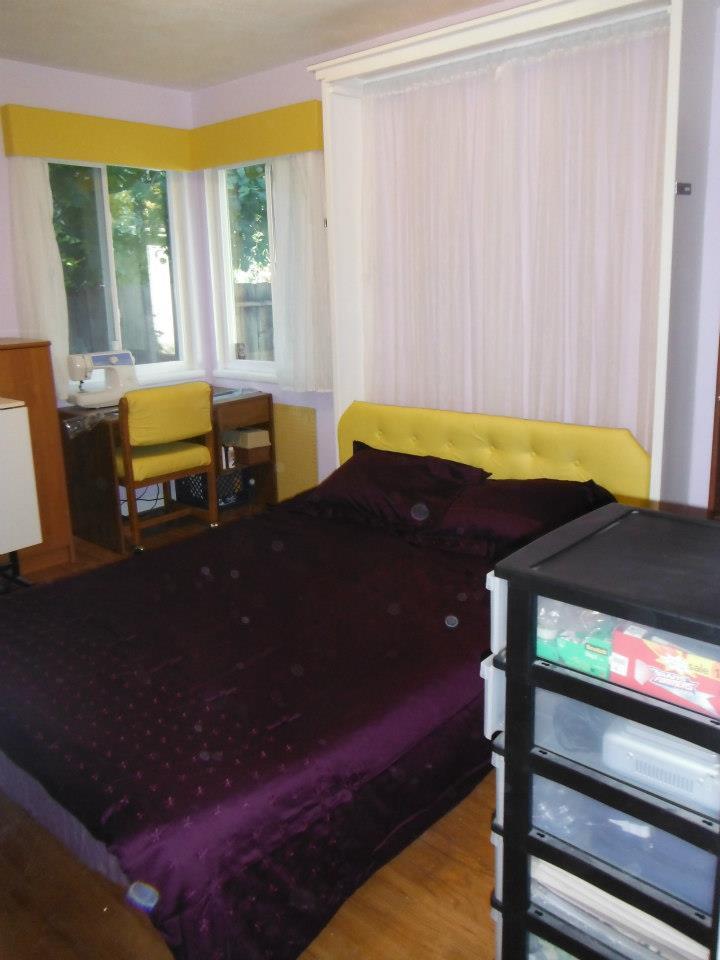
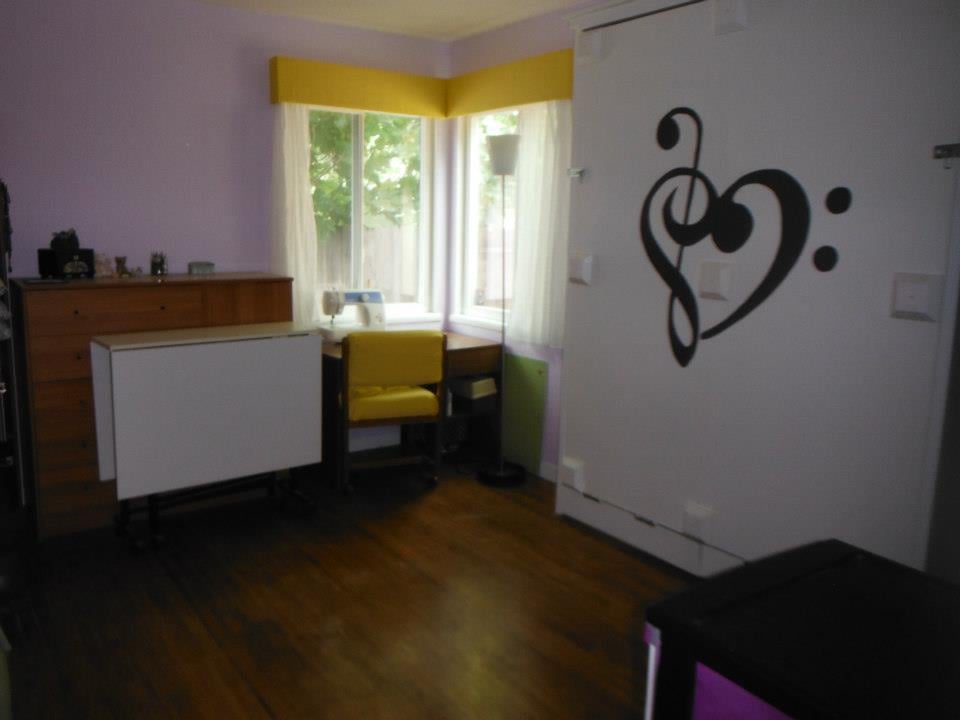
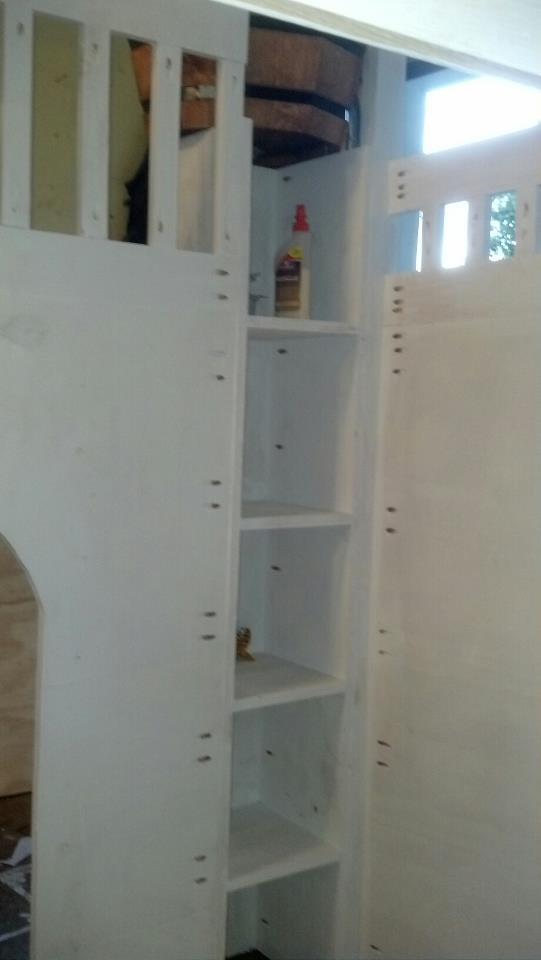
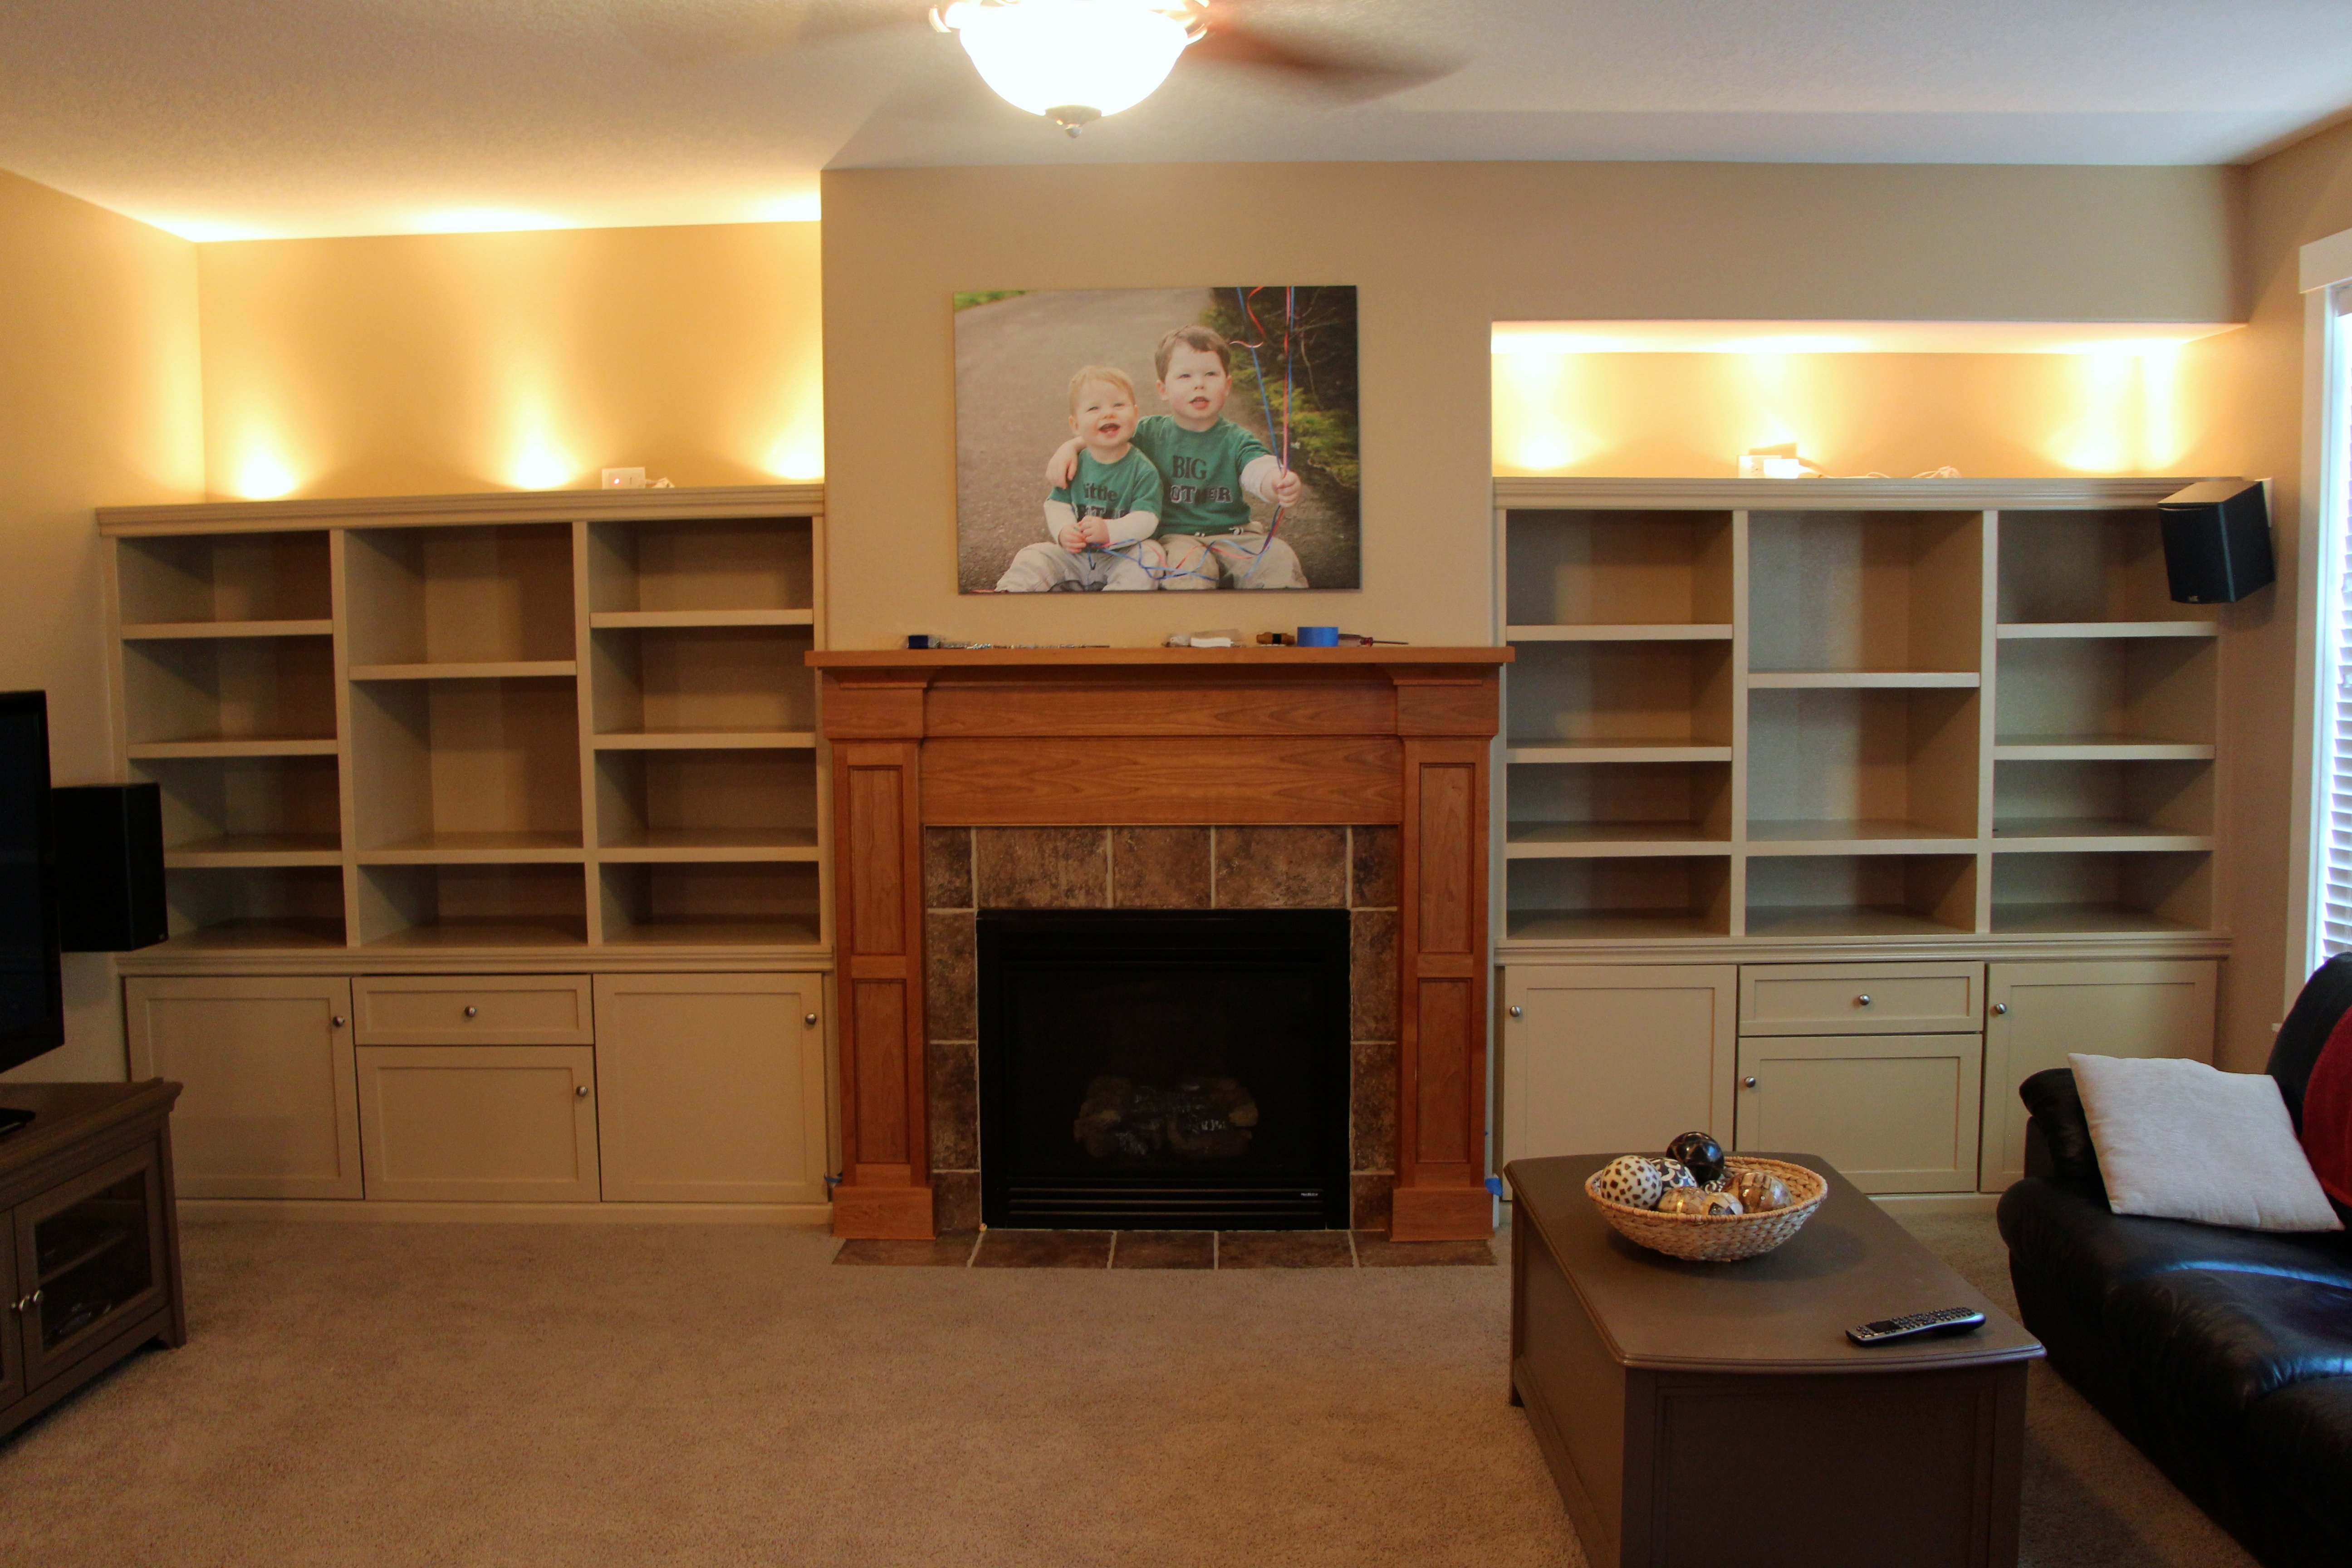
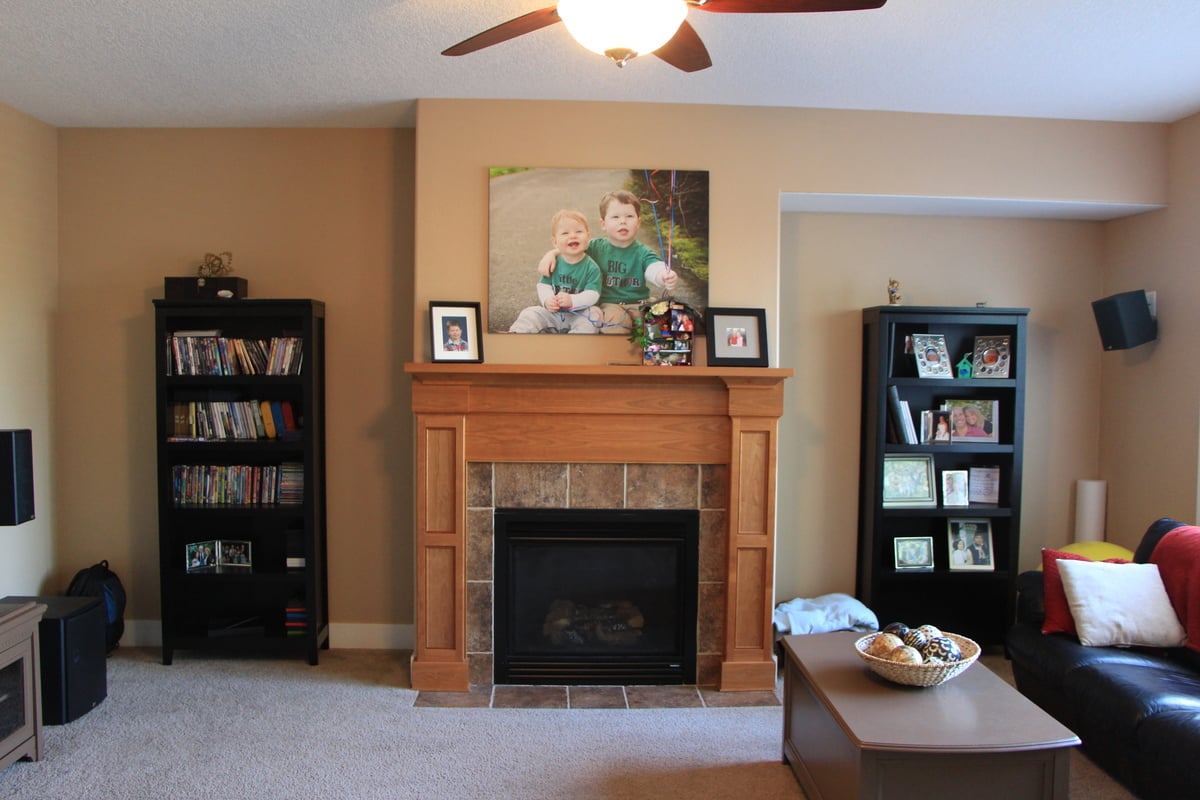
I included a picture of what the area looked like before!

The idea I had, which was the best, was when it came time to decide on a color, I had my friend who is handing in Photoshop, show me several colors on a picture I took. This changed the planned several times and save a lot of money in paint. In the end, we decided to paint them the color of the walls to make them look like they were always there. It also worked with the stained mantle next to them!

Estimated Cost
More than I want to calculate!
Estimated Time Investment
Week Long Project (20 Hours or More)
Finish Used
Rodda primer 2x coats. Rhodda Renaissance paint 2x coats.
Recommended Skill Level
Intermediate

Comments

Medickep

Wed, 08/06/2014 - 10:15

The build was much easier than the finish work, which surprised me a lot! I learned a lot on this project including having good corner clamps!

Booksnotbomb-

You can totally do this, which is why I included some of the earlier photos showing it was just a bunch of boxes! PM if you need help getting started!

corner cupboard

Submitted by Anonymous (not verified) on Sat, 11/19/2016 - 16:25

Finished it with two coats of shallac and used black iron hardware.


I built it for a cabin I am building. Thank you for the palns, they were great!


Built from Plan(s)
Estimated Cost
Around $100
Estimated Time Investment
Day Project (6-9 Hours)
Finish Used
Two coats of Shallac
Recommended Skill Level
Intermediate

Simple Modern Outdoor Sectional

This project my husband and I started together. We live in a very damp and rainy area where cushions would just be more of a pain than a comfort outside.
We decided to add slats on the back so the sectional would stand alone without cushions.

Well, after the first corner piece, I got busy and every day my husband would add another piece to it.

I did do much of the sanding and painting. We sanded and painted these before assembly, made life tons easier.

It was white pine with out exterior house paint color. We really love them!
Thank you Ana!!!

Estimated Cost
$170
Estimated Time Investment
Weekend Project (10-20 Hours)
Finish Used
Behr Exterior Paint and primer in one.
Recommended Skill Level
Beginner

American Flag Themed Adirondack Side Table

Submitted by kieseroll on Fri, 08/08/2014 - 05:09

I built this in small spurts over a week. The most time consuming part was waiting for paint to dry. I painted all of my wood before I assembled since it would be too hard to get in the crevices after putting together. I painted the table top at the very end after it was assembled. I used painters tape to make sure I didn't goof and the stars are stenciled on. I extended the table to 20 inches wide so it would look more like a flag and just adjusted my other cuts to make it work. I built one for my Step-Mom and had to build another for my Mom after she saw how cute it was.

Built from Plan(s)
Estimated Cost
$25-$30
Estimated Time Investment
Day Project (6-9 Hours)
Finish Used
Outdoor/Exterior paint + primer in red, white, and blue. I don't have the names in front of me right now to get the exact paint color name.
Recommended Skill Level
Starter Project
Back