Reduced Size Rustic X Console
I had a great time builidng a shorter version of the Rustic X console table. Total length is 41inches.
I followed the plans pretty closely. I always wanted to get into woodworking and once I bought a house I finally had the space! My wife wanted a farm house table and rather than spend $500+ on one I told her I could build it. Luckily that turned out to be true!
Wed, 10/02/2019 - 09:49
There's so much character in this table! Love it!
This is my first outdoor furniture project, learned much from Ana's plan and my own mistakes. Used Cedar as material which total to ~$500 and ~$200 on cushions found as discontinued items from AtHome.
Projects
* 2x4 Outdoor Sofa https://www.ana-white.com/woodworking-projects/2x4-outdoor-sofa
* Essential Wood Outdoor Chair https://www.ana-white.com/woodworking-projects/essential-wood-outdoor-c…
* 2x4 Outdoor Coffee Table https://www.ana-white.com/woodworking-projects/2x4-outdoor-coffee-table
* 2x4 Outdoor Side Table https://www.ana-white.com/woodworking-projects/2x4-outdoor-side-table
* Modern Cedar Outdoor Storage Bench https://www.ana-white.com/woodworking-projects/modern-cedar-outdoor-sto…
* Tongue and Groove Ottoman Tray https://www.ana-white.com/woodworking-projects/tongue-and-groove-ottoma…
Thu, 06/01/2023 - 10:18
WOW, you did amazing, thank you so much for sharing!
I designed this off of the laundry basket holder.
Thu, 05/03/2012 - 06:38
Great option & smart. Now, after seeing your changes to the original, I am thinking of making one similar to yours but build it to hold all my craft storage bins.
Sun, 05/20/2012 - 11:44
I was wondering if you had the plans for the project. I would like to make one of those. So what are the project plans? ( Wood used and the cutting measurements. )
Had to resize length to 64" so it could fit in the room. Took me a little longer than 20 hours. Also distressed the wood to make it look rustic. Plans were great! Thank you!
Thu, 05/22/2014 - 07:29
I love your version of this sideboard! The weathered-looking finish looks great.
easy project to make
We took the farmhouse bed with drawers plan and made it into a twin bed instead of a queen for my six year old son. He wanted it to be Batman blue, and we even got his own bat signal on the headboard!
I used the plans for the fire station loft bed (http://ana-white.com/2011/11/fire-station-loft-bed), but added the stairs from the camp loft bed (http://ana-white.com/2012/07/plans/camp-loft-bed-stair-junior-height) since my son is young. I was afraid of him climbing down the ladder at night if he wakes up. The stairs are not attached and can be removed when he is older. They were designed so he can climb through the space where the lower rungs of the ladder were and use underneath the stairs as a fort, etc. The project took quite a bit of time and cost about $500 (not including the Kreg Jig or mattress).
I built this for our family room TV and all the components. We wanted to hide all of the TV cords from view when we walked down the stairs - this was perfect! I'm so proud of it! Since this was going to be used where you were able to see the profile, I inset the planked back of the hutch and had to shave off 3/4" for the hutch shelves. I used pocket holes to hold the planks together for the back of the hutch. I decided to add cabinet doors to the console so that I could hide away all of the gaming supplies and unsightly necessitates. I used pine wainscoting and trim with a lip to hide the edges from view.
I followed the kitchen cabinet building plans to build all new upper cabinets up to my ceiling. I built all new drawers with soft close drawer slides also and built the refrigerator enclosure cabinet.I did the entire remodel myself including the new doors out of MdF.
Wed, 10/02/2019 - 22:53
What a phenomenal build! Thank you so much for sharing photos!
Tue, 11/05/2019 - 10:41
We are so thrilled to let you know your entry WON the Best Brag contest! There were many amazing entries, and it was tough to choose.
Look out for an email from us shortly!
Tue, 11/05/2019 - 11:41
Oh my gosh!!! Serious?! I can’t believe it! Thank you so much!
My granddaughter wanted a lemonade stand and it had to be easily portable. I used Ana White’s plans, made it a little taller (30” counter height, 65” total height), added hinges so the top drops down, and wheels on the back side so you can tilt and pull it behind you like a suitcase. Added a hook for a cutting board and hooks for a bungee strap to hold the cooler, pitchers and supplies inside while you haul it. A sign for her and sissy, some painted wood decor and we’re all set. Just add lemons!
Tue, 06/13/2023 - 08:58
So many great additions, I'm sure your granddaughter is thrilled!!! I'd love to see photos of her working it, if you'd like to share! [email protected]
Thank you for sharing!
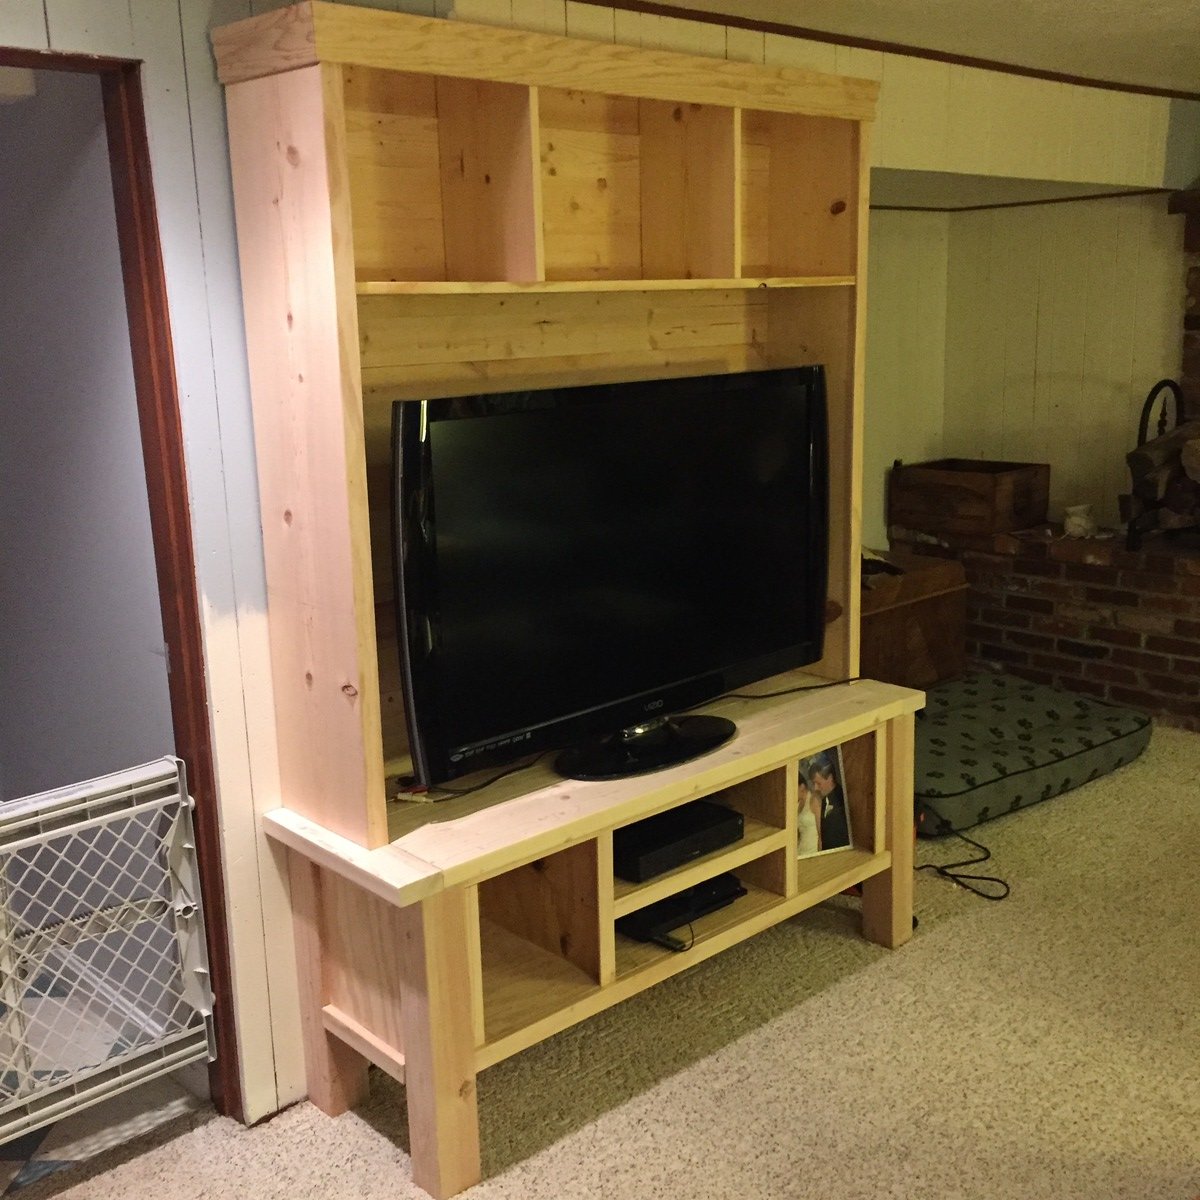
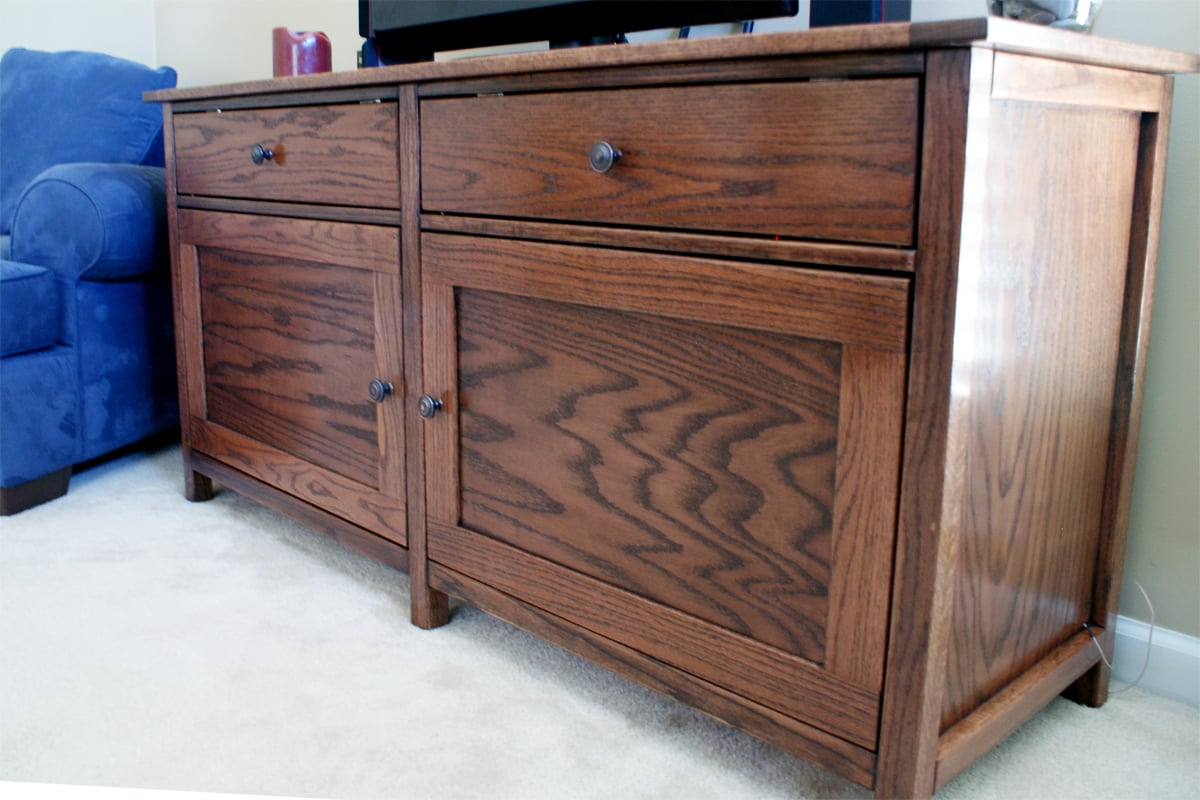
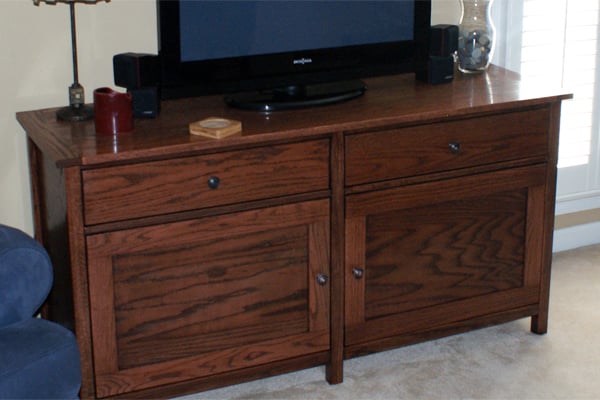
This is my FIRST ana-white project and the first furniture I have ever built.
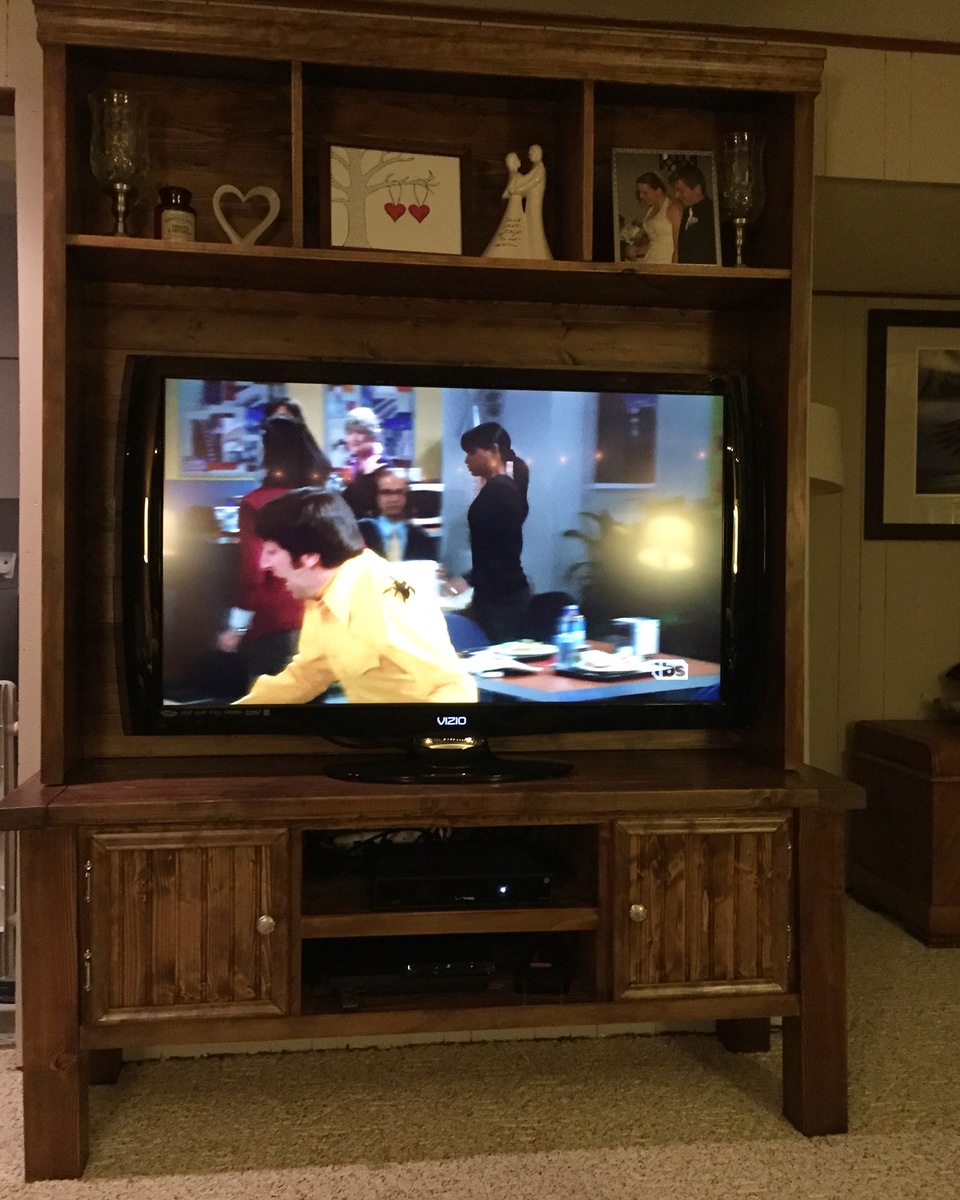
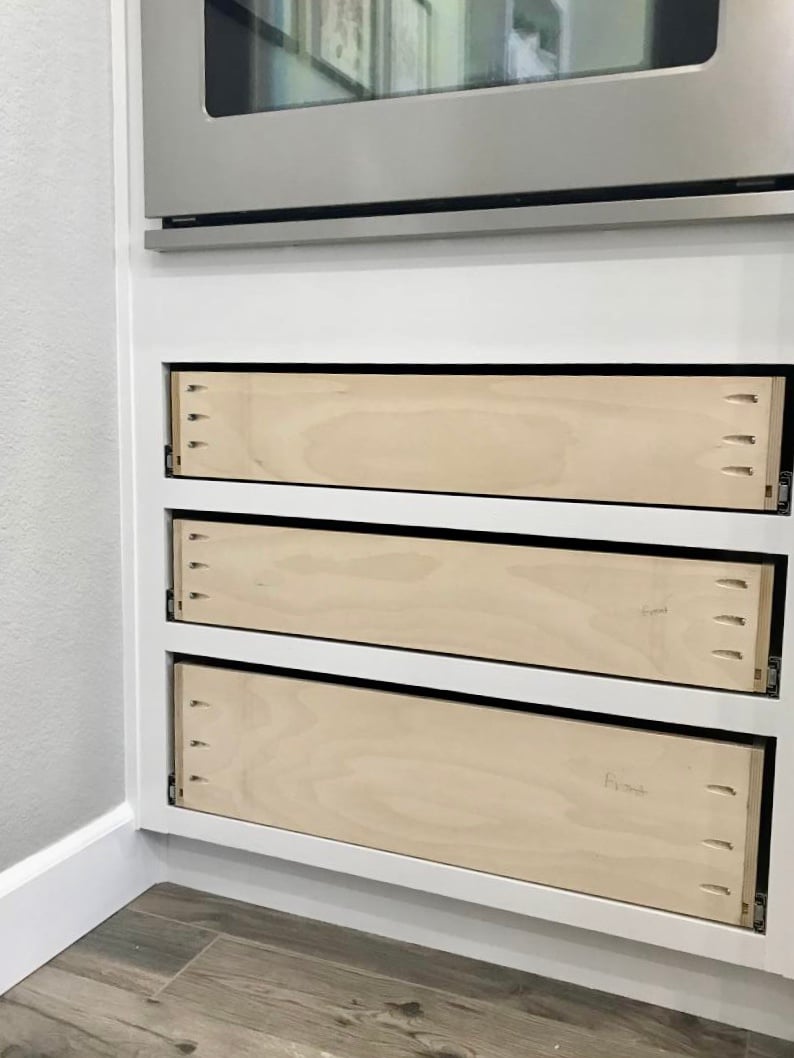
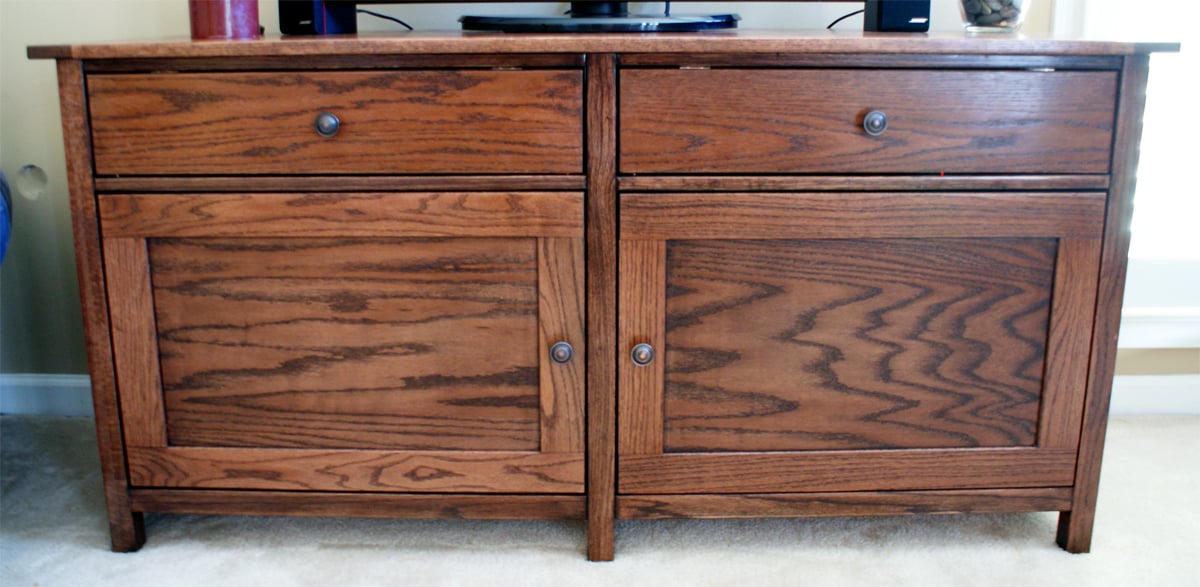
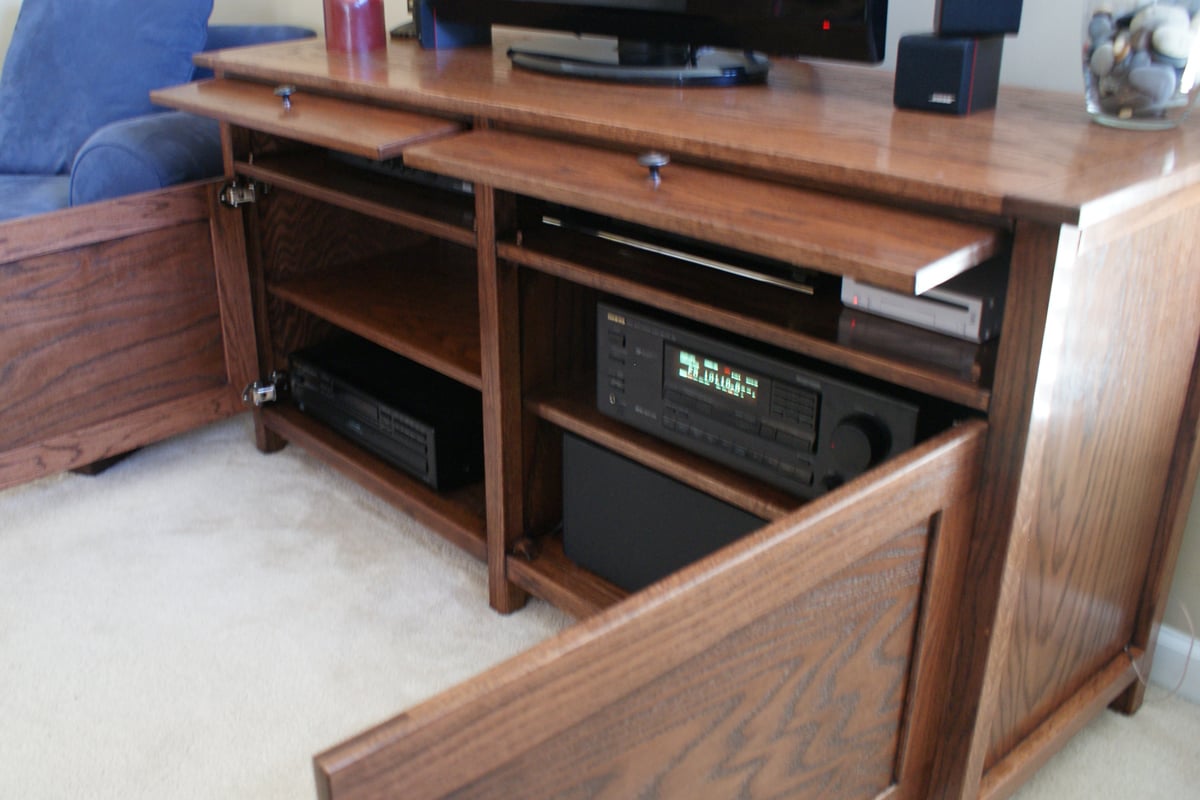
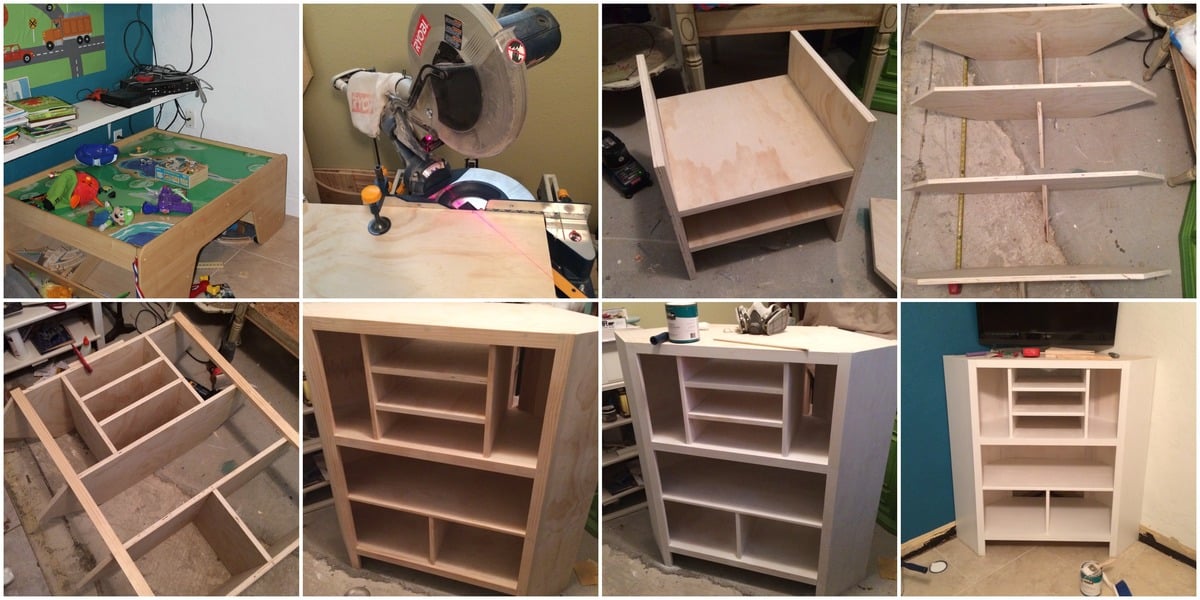
I made a few modifications to the original plan. Rather than using plexi-glass for the doors, I chose to use plywood panels to hide the electronics (Then I will use a rf repeater so the remotes still work). The doors are assembled using half-lap joints cut using a tenoning jig and a slot bit using a router with 1/4" plywood set into the slot during assembly.
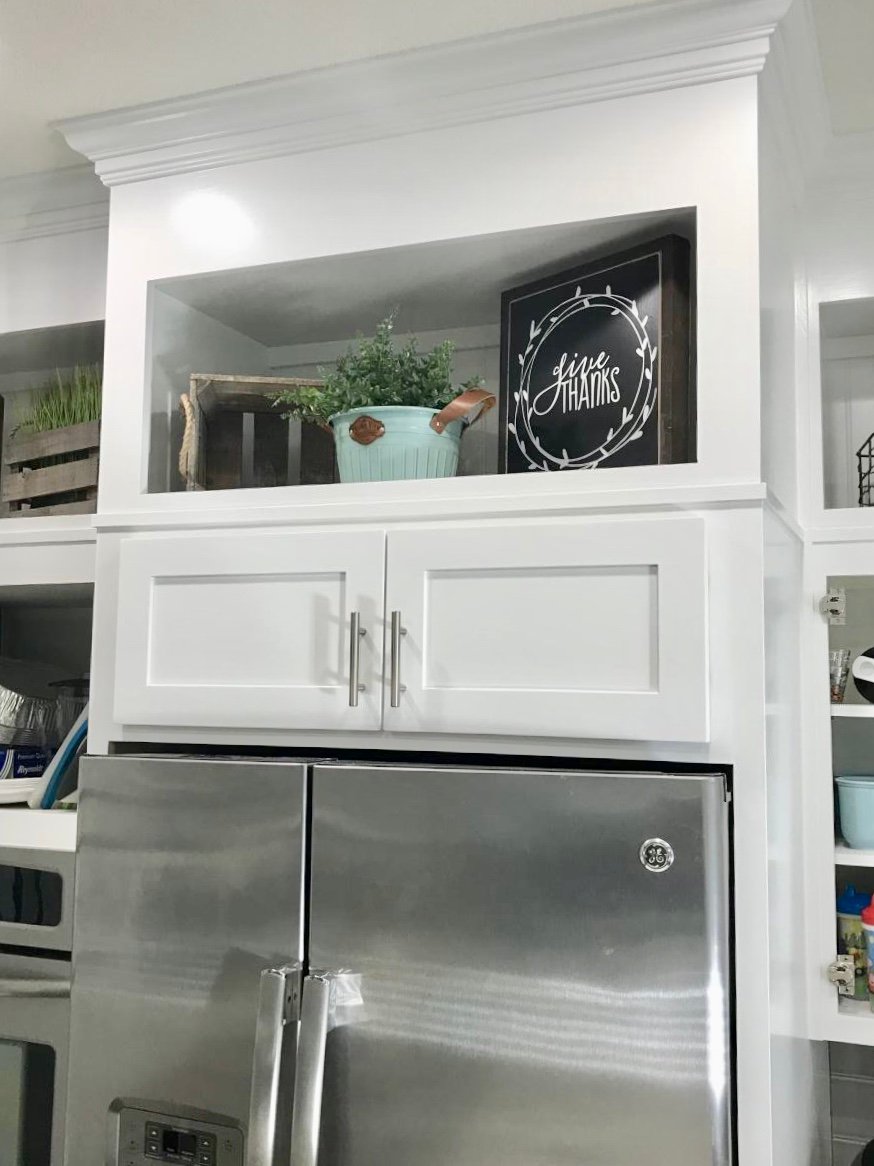
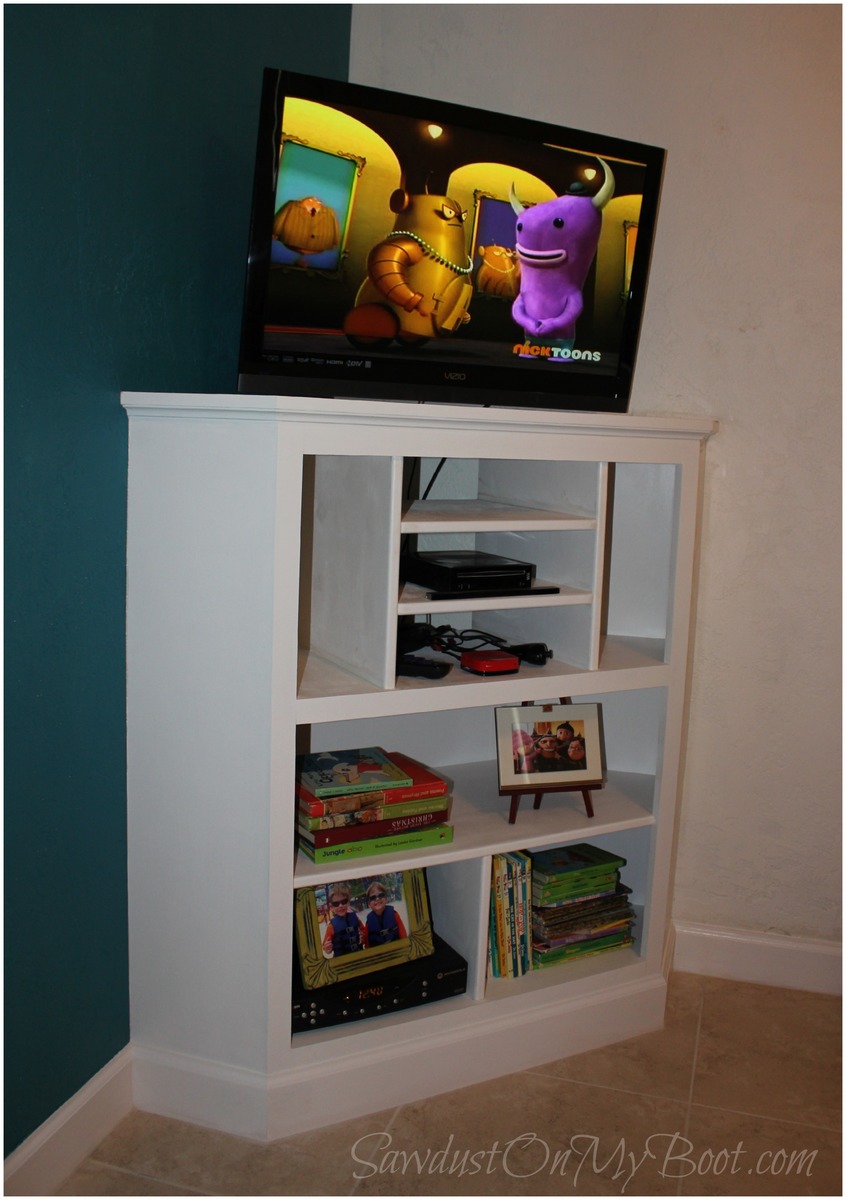
I also chose to put a 1/8" roundover to most of the edges with the router to add a little interest and mounted the top doors from the top so they "flip up" rather than down.
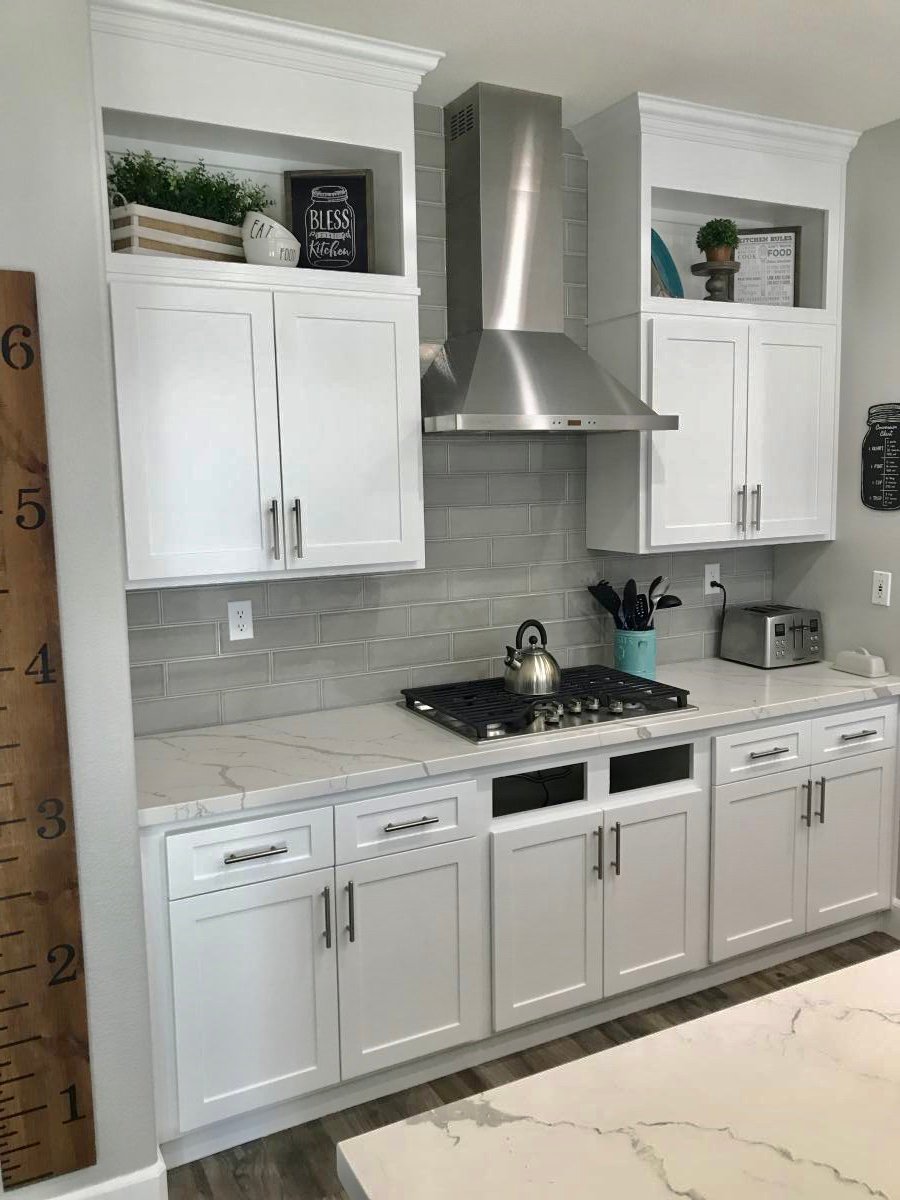
Finishing was my biggest challenge but after fixing many mistakes, I finally am satisfied with the result. I used 4 coats of oil-varnish blend on top of a water borne stain.
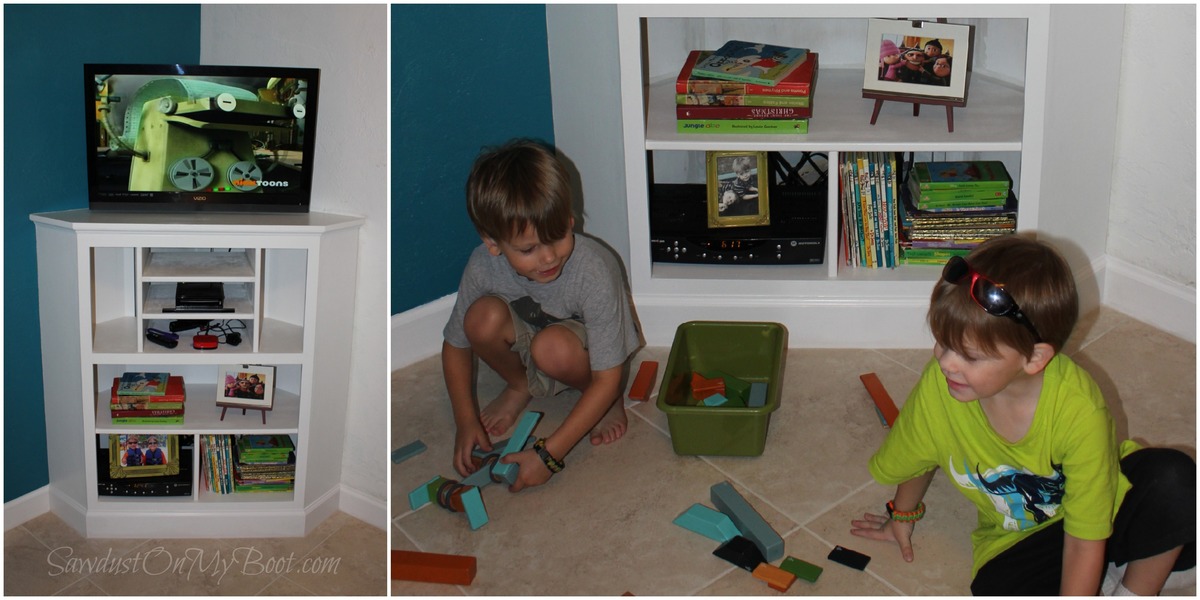
I really enjoyed this project and it definitely gave me the addiction. I'm pleased with the final product and it's a huge step up from the IKEA thing we had before. I just bought a new table saw and can't wait to start my next one.
Thanks for looking!
Tue, 01/31/2012 - 08:04
I really love how you attached the top doors! And the doors in general look great!
Tue, 01/31/2012 - 08:43
This is absolutely beautiful. What a timeless piece, your hard work has certainly paid off.
Tue, 01/31/2012 - 09:39
Very very nice - especially love that this is your first project!
Tue, 01/31/2012 - 10:05
Thank you sooo much for the comments. This website truly was my sole inspiration for getting into woodworking. I've learned a lot and am humbled by the talent in this community. Thank you.
This was a particularly fun build for me since it was for my little guys' room! Hope Santa fills it with tech goodies on Christmas!! Please check out the details on my website! Happy Holidays!!! :D
Fri, 12/13/2013 - 05:38
Great job. The molding looks perfect too!! I love the name of your site. I live on an island and when I'm working on stuff I like to wear my cowgirl boots :) my friends all tease me for them...but I love getting 'sawdust on my boots'! Again, great job!!
Made this little chalkboard shelf/key holder for my niece. She is building a new house and I thought it would look nice in her kitchen or entry way. It was inspired by Ana's "easiest chalkboard shelf from scraps," but I routed the edges of the 1x12 and add different hooks for keys.
Build this 4x4 Truss Beam Table for my wife's Birthday. For this table however, I did change the top and used the Fancy X Farmhouse Table top shortened to 7' (84"). I also used Whitney's plans on where to put the pocket holes (link provided in 4x4 Truss Beam Table Plans). This is my first wood project and with that first time using an Ana White plan. The plans are awesome and very easy to follow, we can not wait to build the matching benches! Biggest tip I have is do not wait to long after buying the boards to start the build, the wood sat for about 3 weeks(due to work travel) and some warped a lot.
I first made a set of these for my wife to use on the deck. She liked them so much that she's using them in the living room! (Second photo.) These were made from rough lumber left over from a building project so took a fair amount of time to cut and prep. I don't have a planer so the belt sander outside was put to good use. Then, to make them them fit well, I recut the sides, and rather than pocket holes I glued them into a plank before cutting the rounds with my table saw. That also gave me a tight flat top.
Her friend saw them and wanted a set, so here they are. Again I recut the sides and glued them to create a smooth plank. This time I used the router and a circle jig to cut the tops, giving me a much nicer finish. They will be stained mahogany and finished with multiple coats of polyurethane.
The large one I simply upsized from the original plan, roughly scaled. It is 22" tall, made with 2x8 lumber selected and purchased at the box store. My wife's friend is totally delighted with them! Thanks Ana for the inspiration.
I needed a closet organizer for my daughter's room that could grow and change with her age. Right now it needed to have lots of shelves at her height to hold the massive amount of stuff an 8 year old can accumulate.
Once she transitions out of the toys, I plan on moving the shelves all to one side or the other for shoes, and adding another rod. Another possibility is shoes in the door organizer and 4 sections of hanging clothes...regardless, the end result has options that will grow with her!
I was able to keep the cost of this down because I used all scrap plywood to make the drawers. I did splurge in S4S pine lumber rather than trying to make rougher cuts nice.
On the left door is Ana's Behind Closet Door Storage plan as well :)
Sun, 02/05/2012 - 11:17
I love the idea of the stuffed animals on the door! Those things multiply so fast and get in the way of making the bed - great closet!
Sun, 02/05/2012 - 18:58
Right now DD's room is a blank canvas. One of the first projects (after getting her window in) is to figure out the closet. I think this will be my inspiration!
Looks great!
Sun, 02/05/2012 - 19:25
Thank you! I am loving how organized her whole room is because of the closet being in good shape. And everything has a spot now, so it's easy for her to get it back where it needs to go!
Oh, those stuffed animals. I mentioned to her the idea of paring her collection down and she was horrified at the idea!
Mon, 02/06/2012 - 06:40
A shocking notion. I think there's a box in our storage area with my wife's stuffed animals somewhere. Keep in mind, my wife isn't a 20-something who just moved out of her parents' house. We have a grand-daughter. Stuffed animals are forever. In fact I think one of my nephews still has my teddy bear.
In reply to Paring Down Stuffed Animals?! by claydowling
Mon, 02/06/2012 - 09:04
...at the bottom of the basket where her stuffed animals used to live, were two of mine from when I was little, lol!
But you bring up a good point about forever. I think I need to put a ban on any new ones joining her stuffed animal family from here on out. Pretty soon I'm going to need to add another closet to her room just for those!
In reply to drawers by Guest (not verified)
Sat, 06/30/2012 - 20:46
Hi--sorry I missed this comment somehow this spring! I blogged the entire build, but here are the posts specifically on the drawers:
http://pinktoesandpowertools.com/2012/01/28/how-to-build-a-closet-organ…
http://pinktoesandpowertools.com/2012/01/30/how-to-build-a-closet-organ…
http://pinktoesandpowertools.com/2012/02/01/how-to-build-a-closet-organ…
Here's the reveal post with links to all the other posts:
http://pinktoesandpowertools.com/2012/02/05/how-to-build-a-closet-organ…
Thu, 02/23/2012 - 19:12
The easiest way to do a quick drawer, if you don't know how to do dovetails (and that's a simple skill totally worth learning), is to drill holes through the sides and into the front, and pin it with hardwood dowels. Use a domestic hardwood, you'll be a better dowel and a dimension that matches drills you own. The cheaper white imported dowels don't match any drill diameters that I can find.
In reply to Me likie! by hoffer5353
Sat, 06/30/2012 - 20:53
Here is the post with the plan mock-up with dimensions:
http://pinktoesandpowertools.com/2012/01/24/how-to-build-a-closet-organ…
It says 65.5" wide on there, and I don't believe I made any changes, so that should be accurate. I think you could get away with having an approximately 46" wide closet. You could have the drawers in the middle and then 12" wide shelves on either side that would fit sweaters, jeans, shoes. If you made them adjustable like mine, then you could really maximize the space in there. Just make sure you give yourself plenty of room in front of the shelves if there is wall there--you want to be able to easily take things in and out.
Good luck!
Tue, 02/05/2013 - 15:08
I'm looking forward to doing this to my closet too!! It's a good project to take on once you want to try out drawers for the first time--since it's behind doors, it doesn't have to be perfect. Good luck!
My husband and I built this together. Once we figured out how to use a Kreg Jig it was sooo easy!! I stained the top in English Chestnut and then chalk painted the based.
I have a friend who had a dream to have a Thanksgiving table that would seat her whole family! She asked for Two extra benches for the ends. She loves her new table, and I loved building it for her!