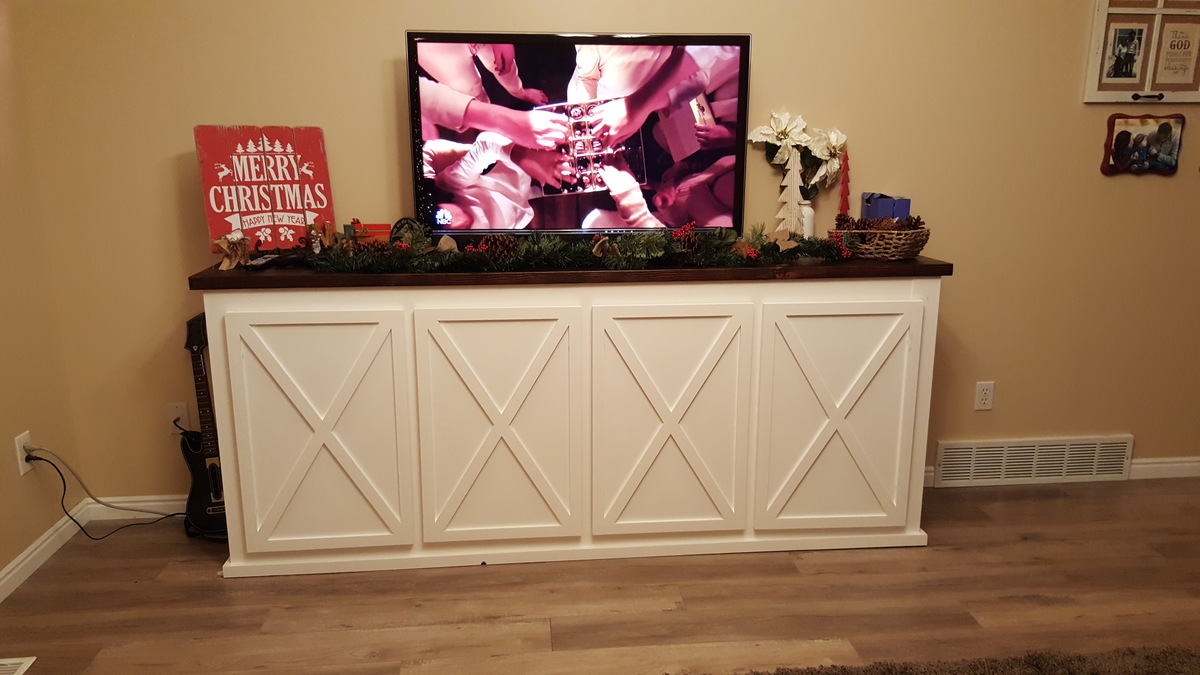
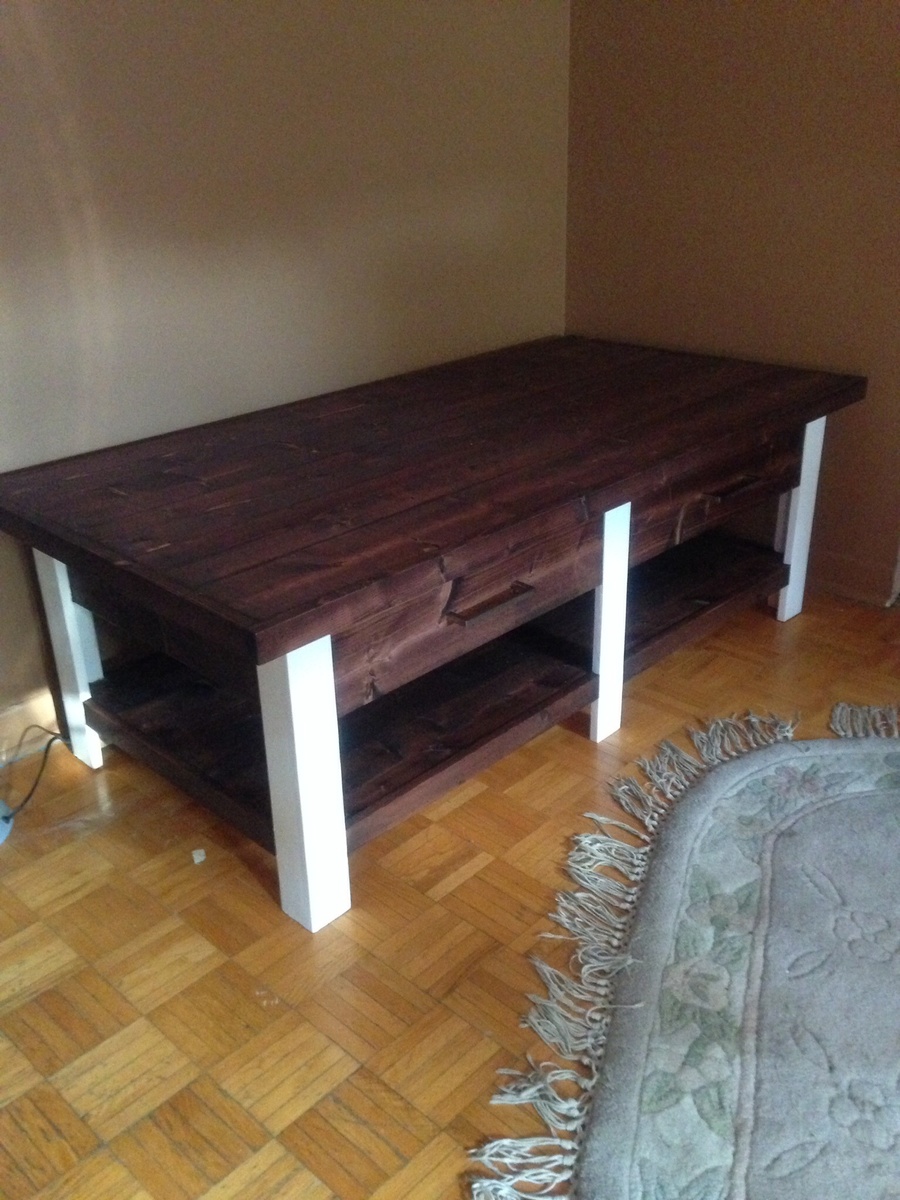
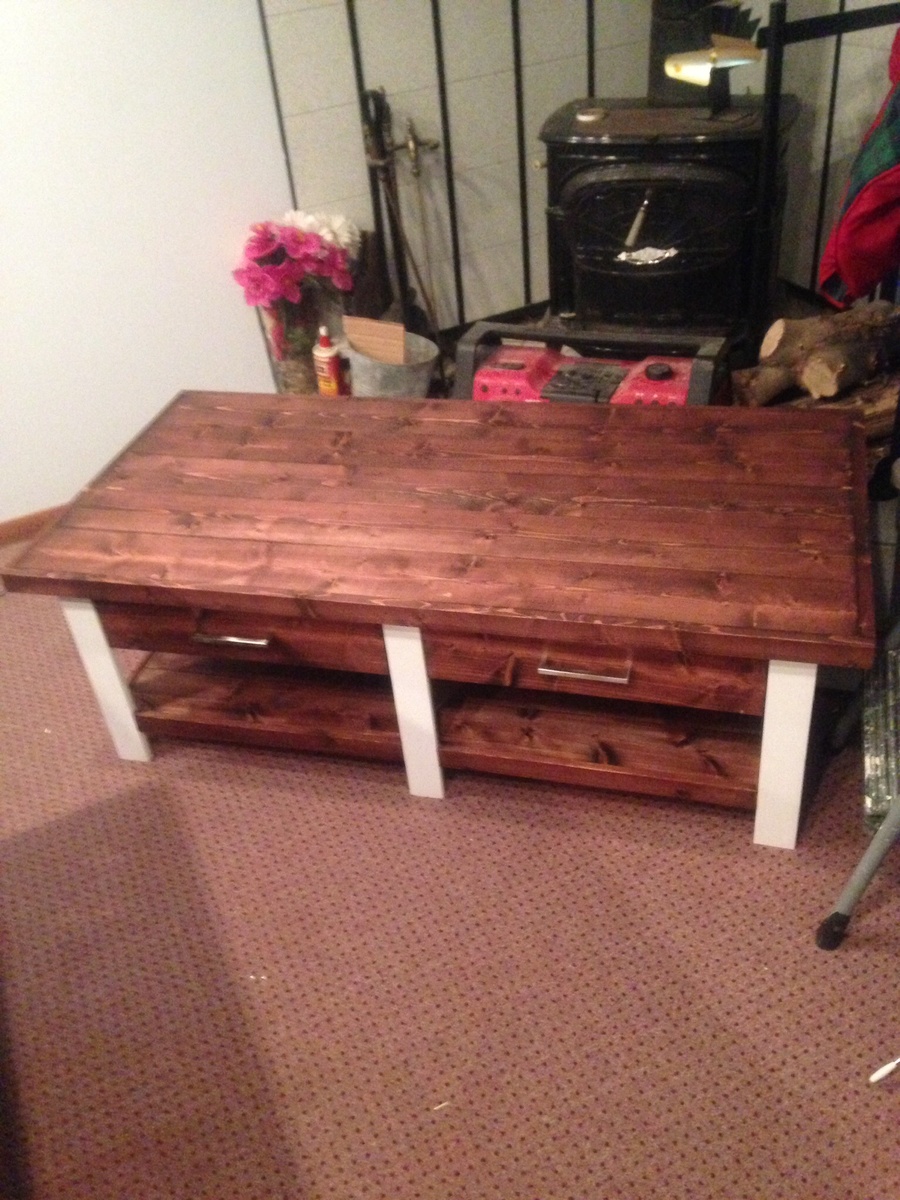
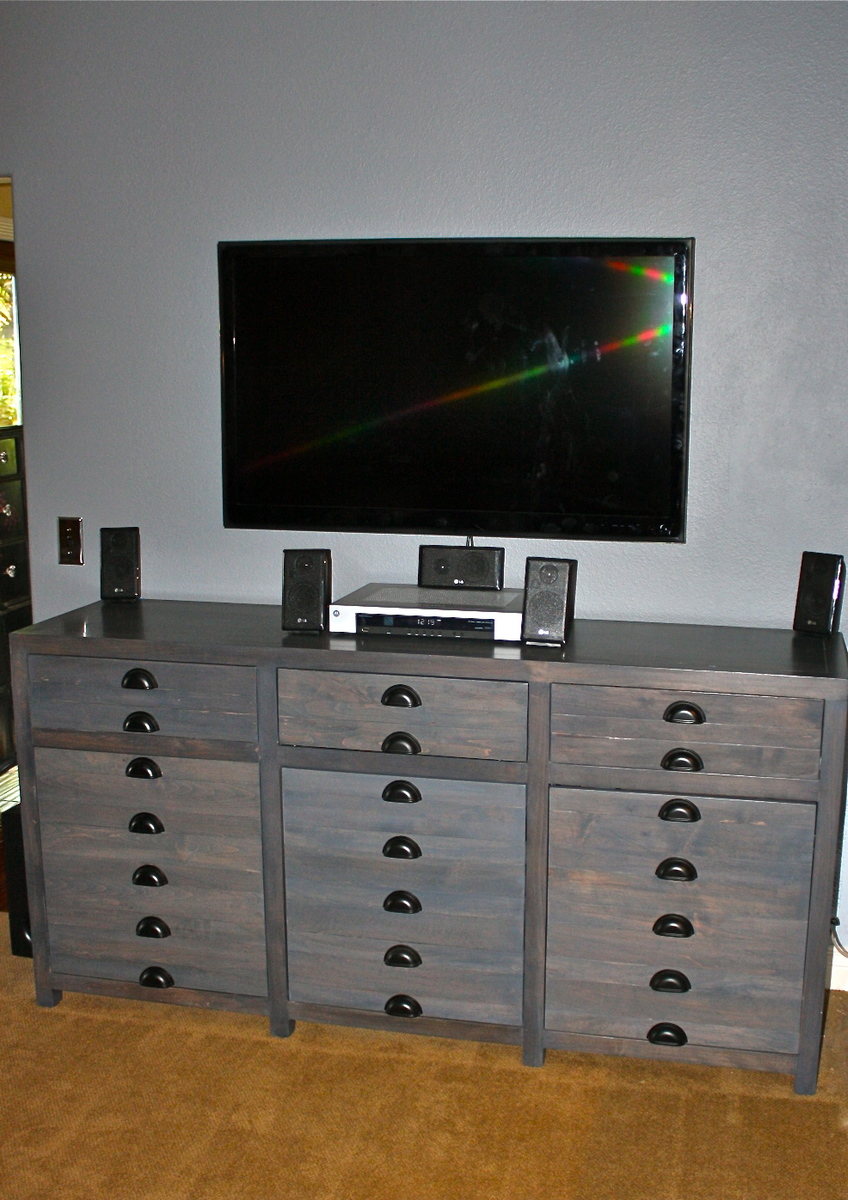
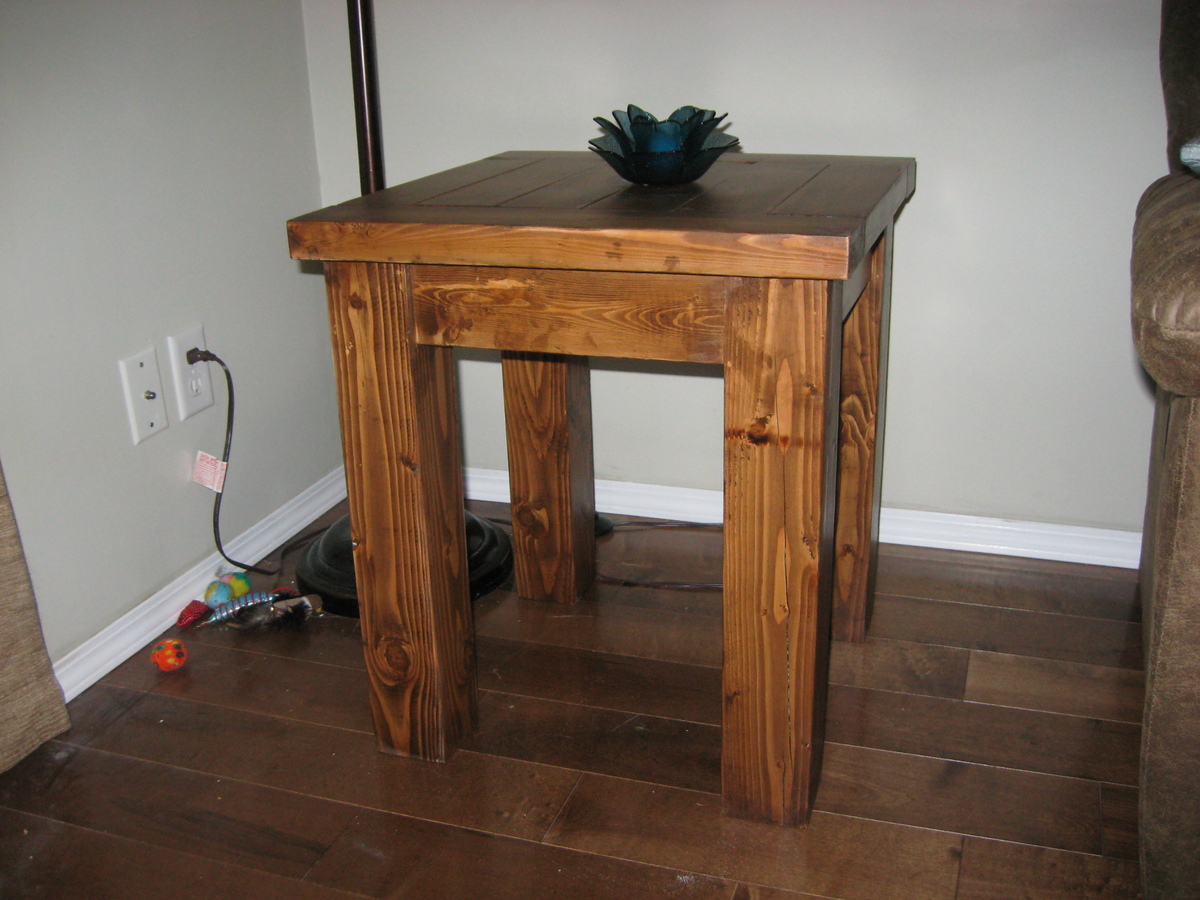
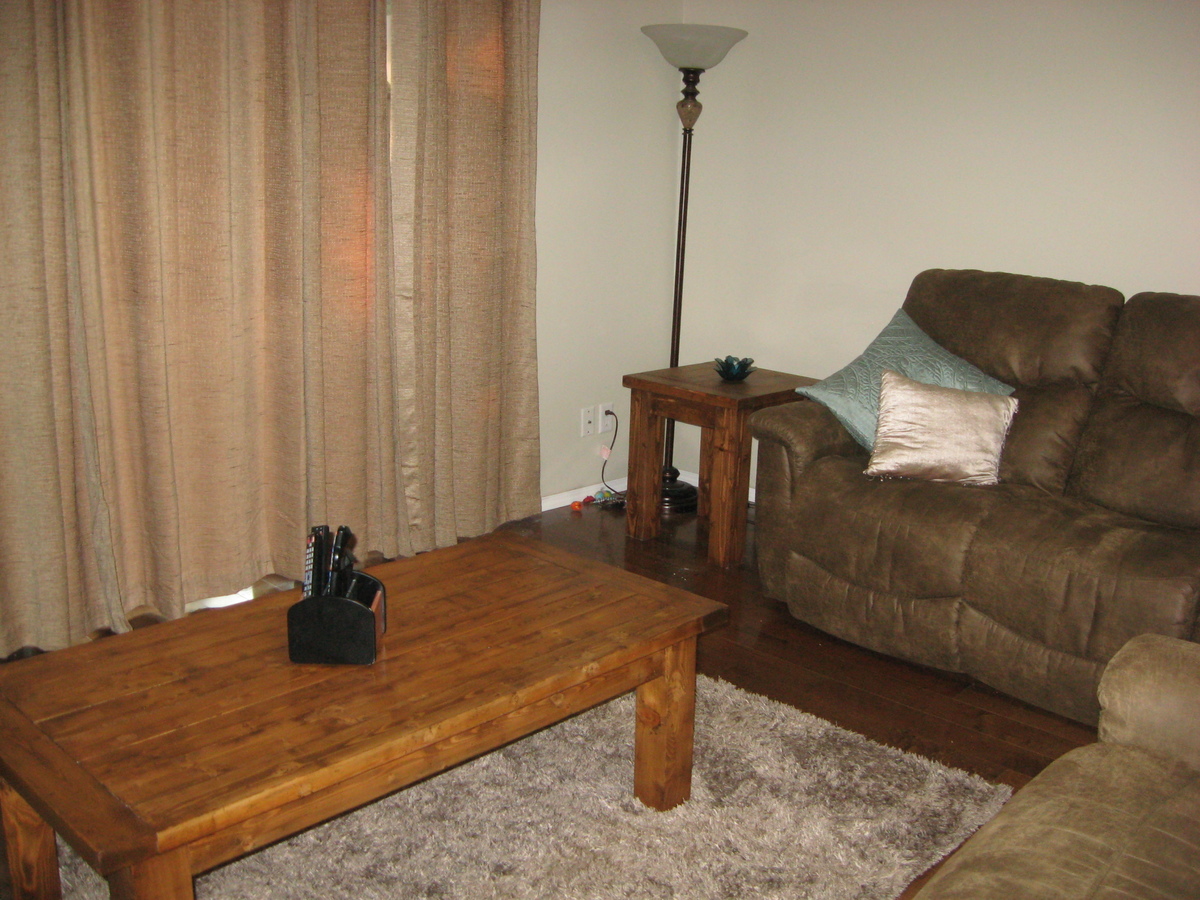
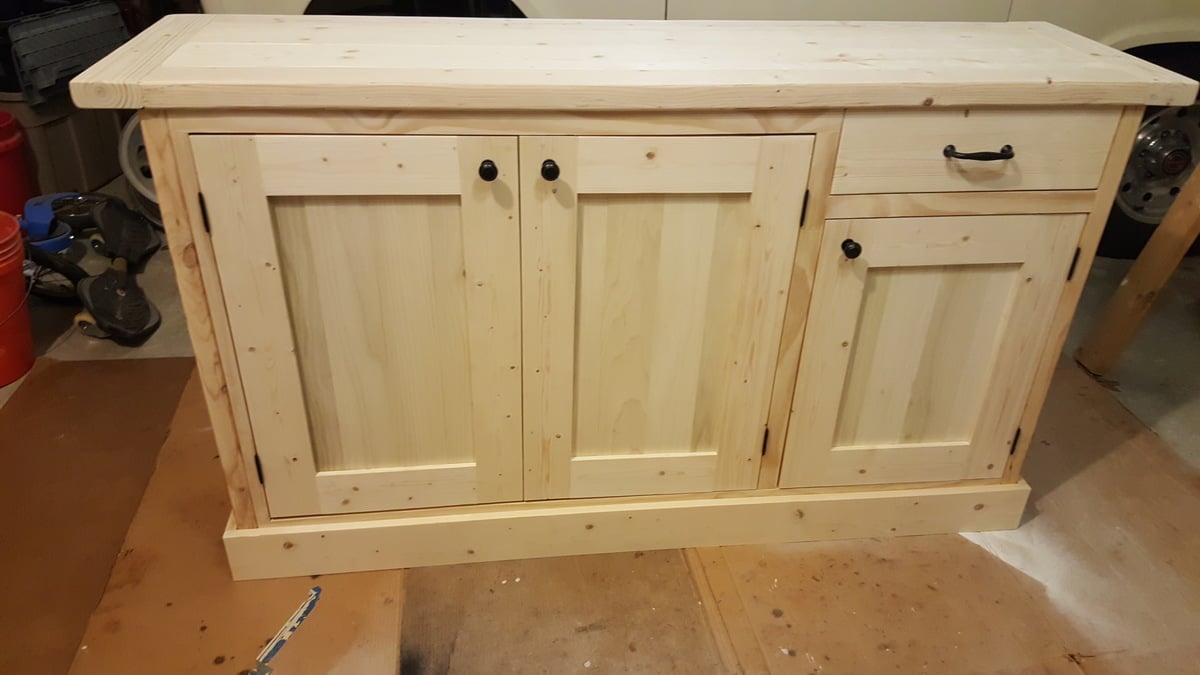
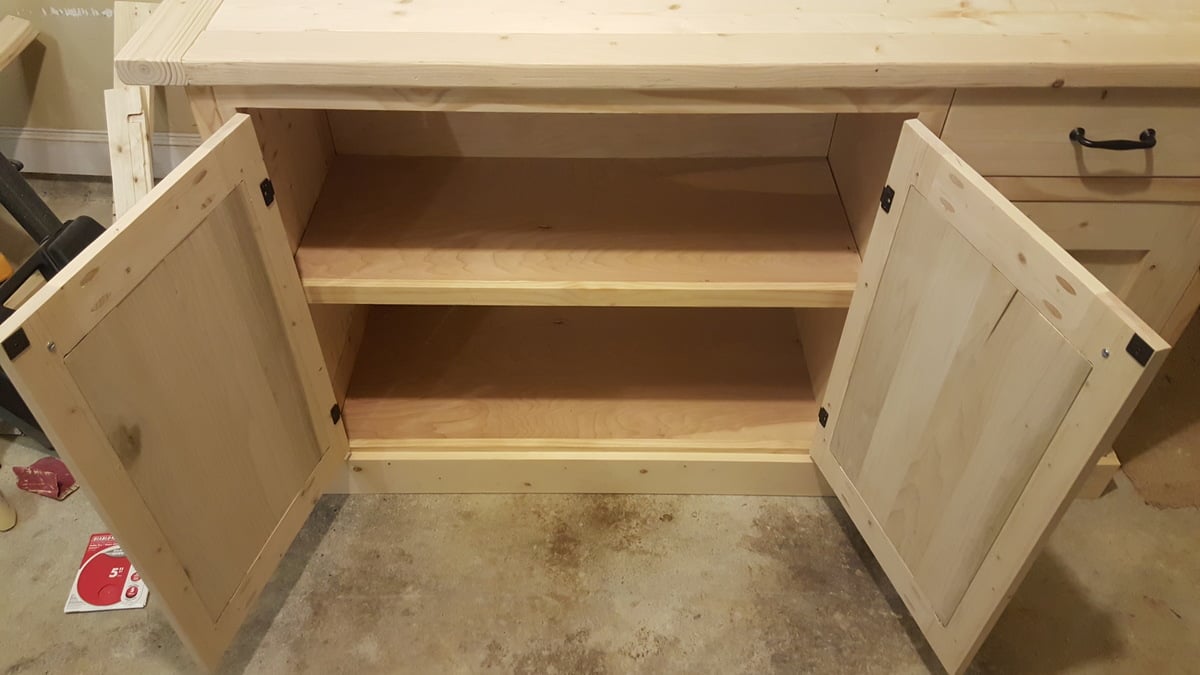
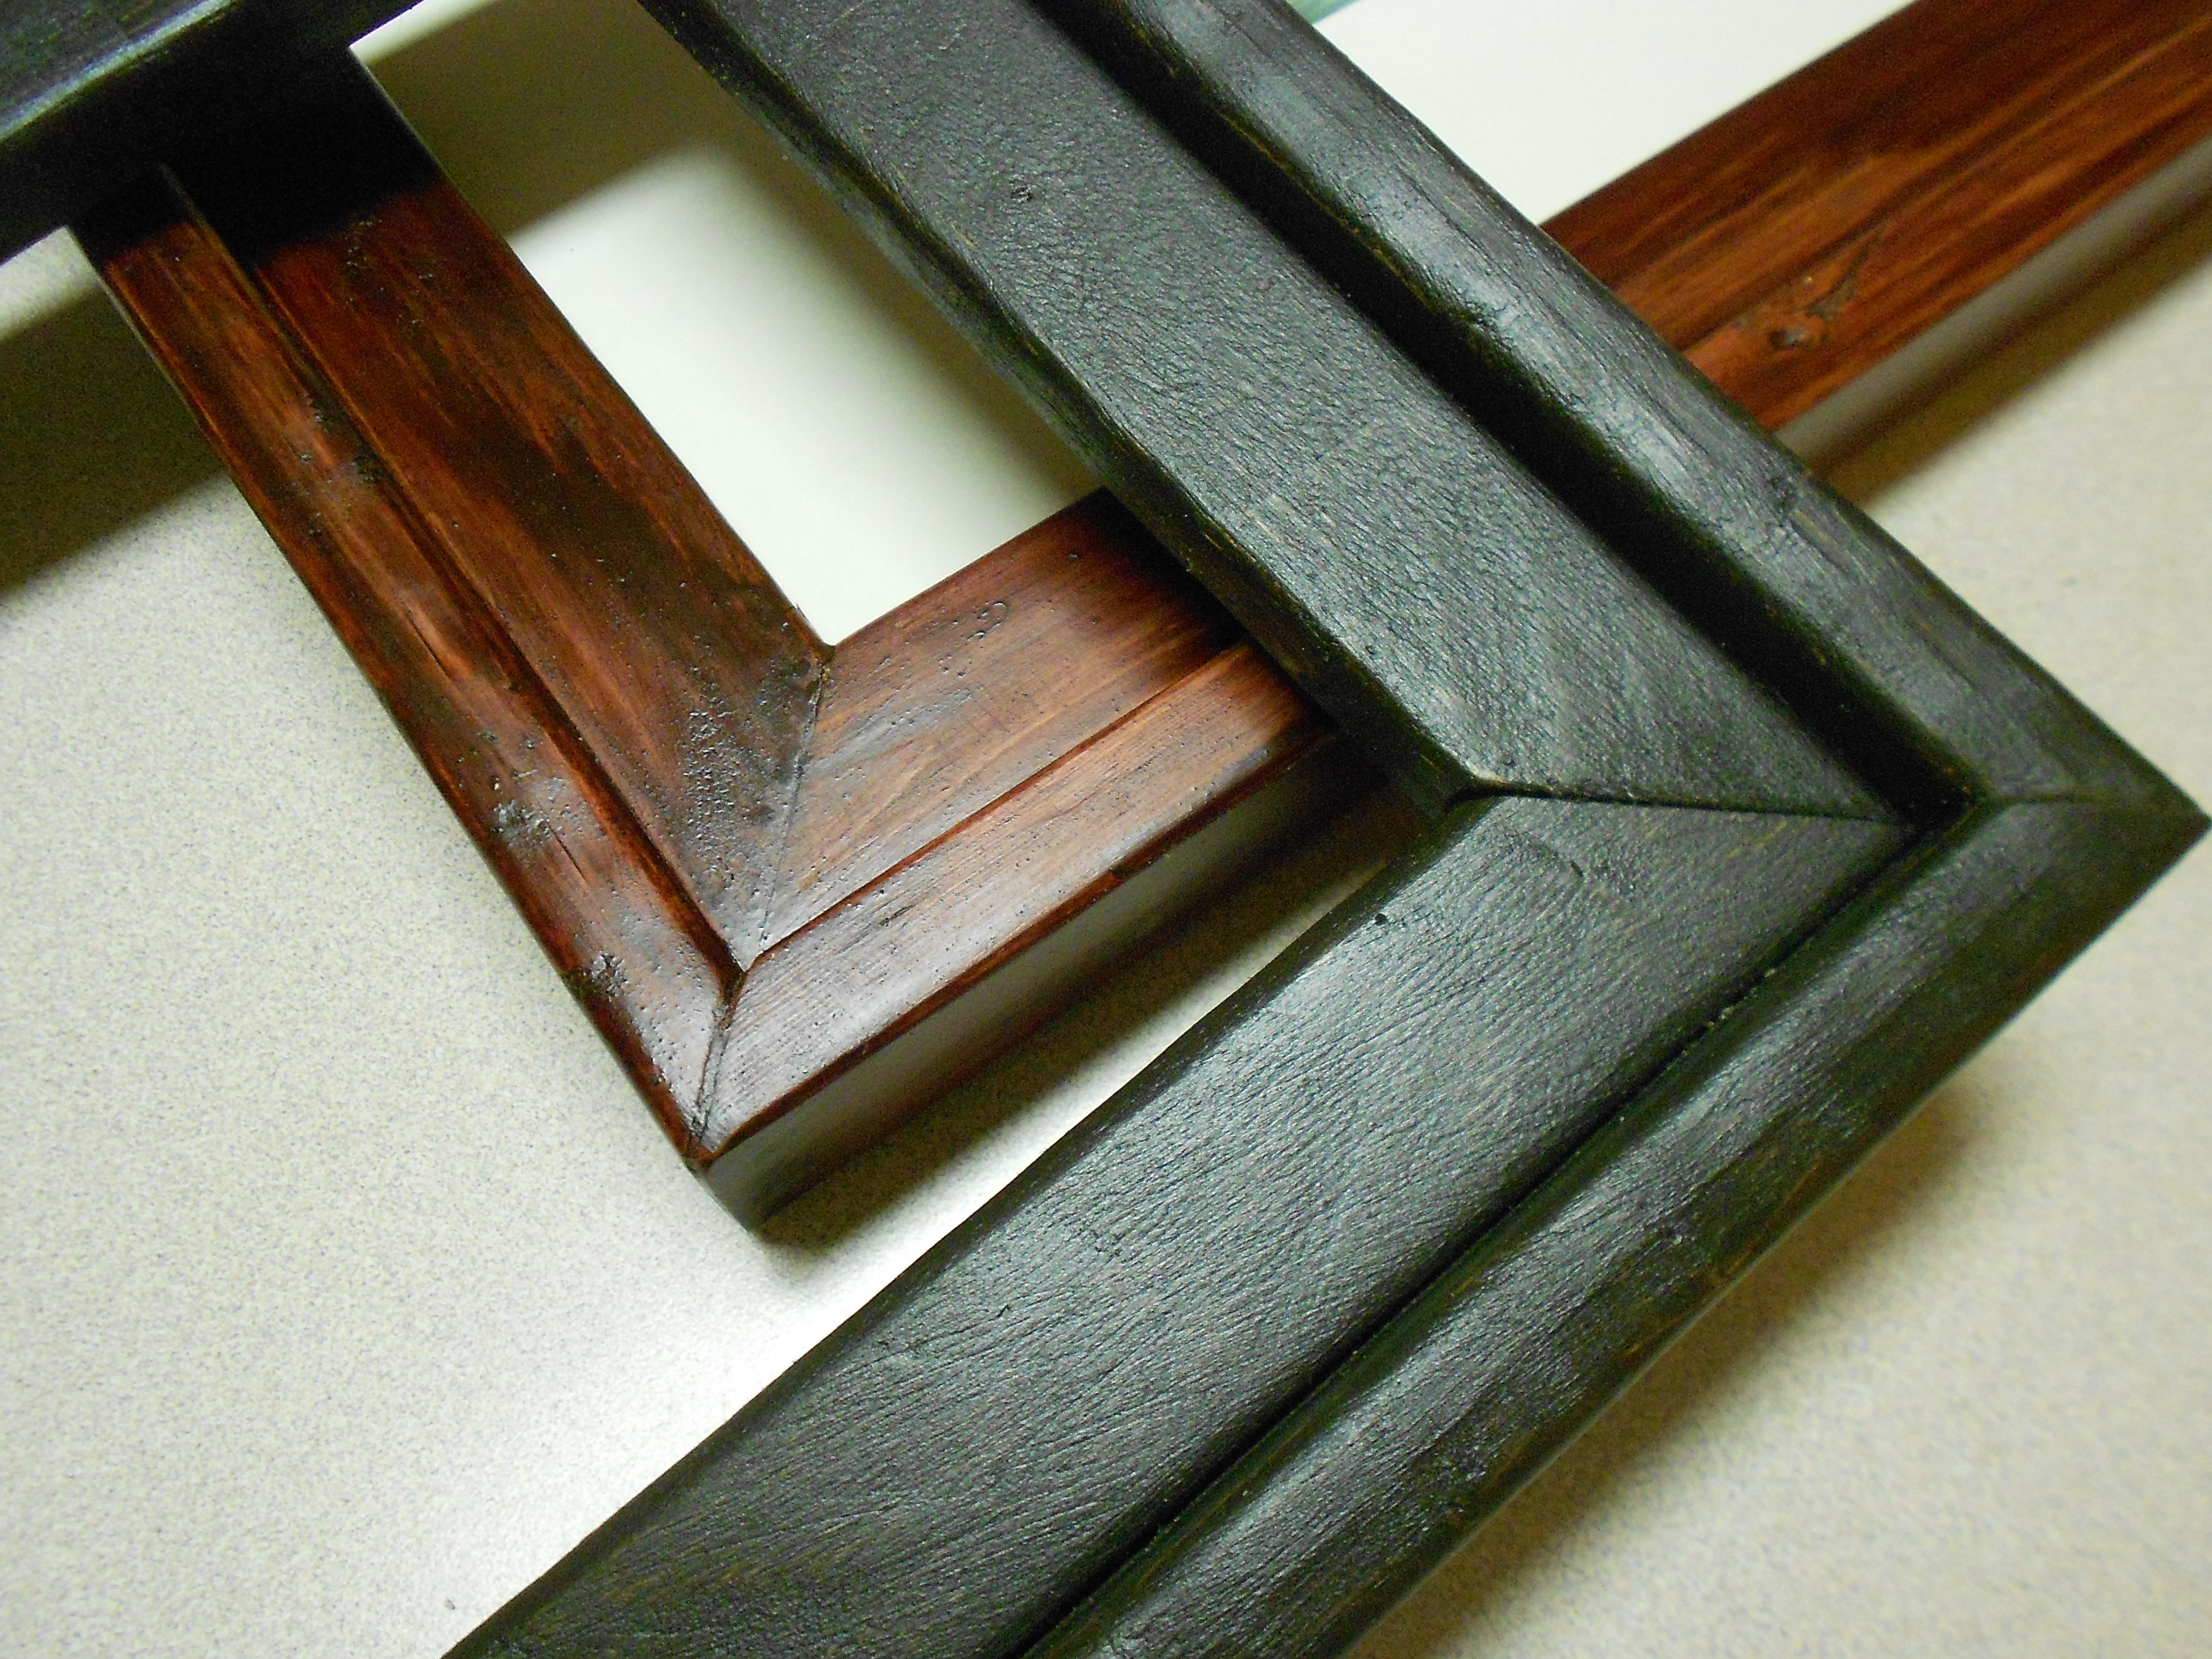
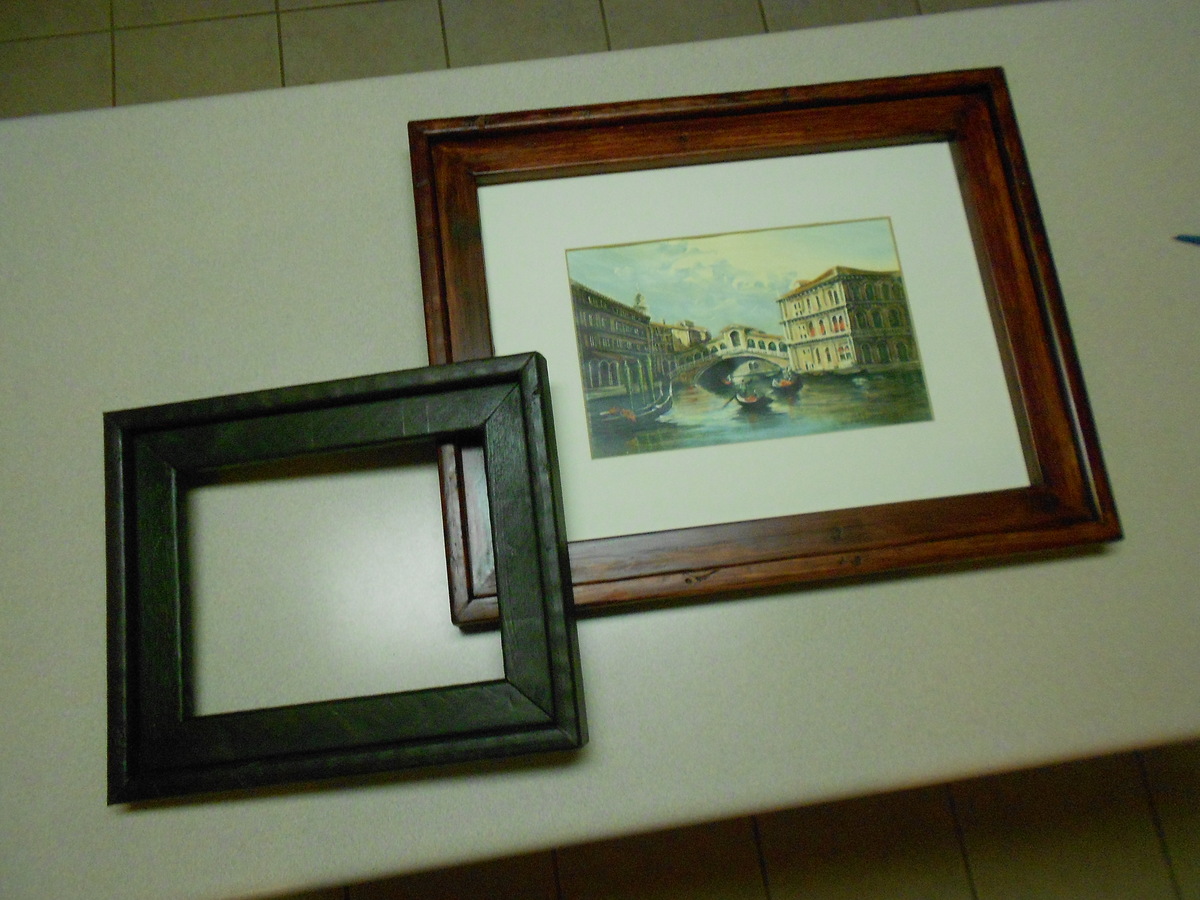
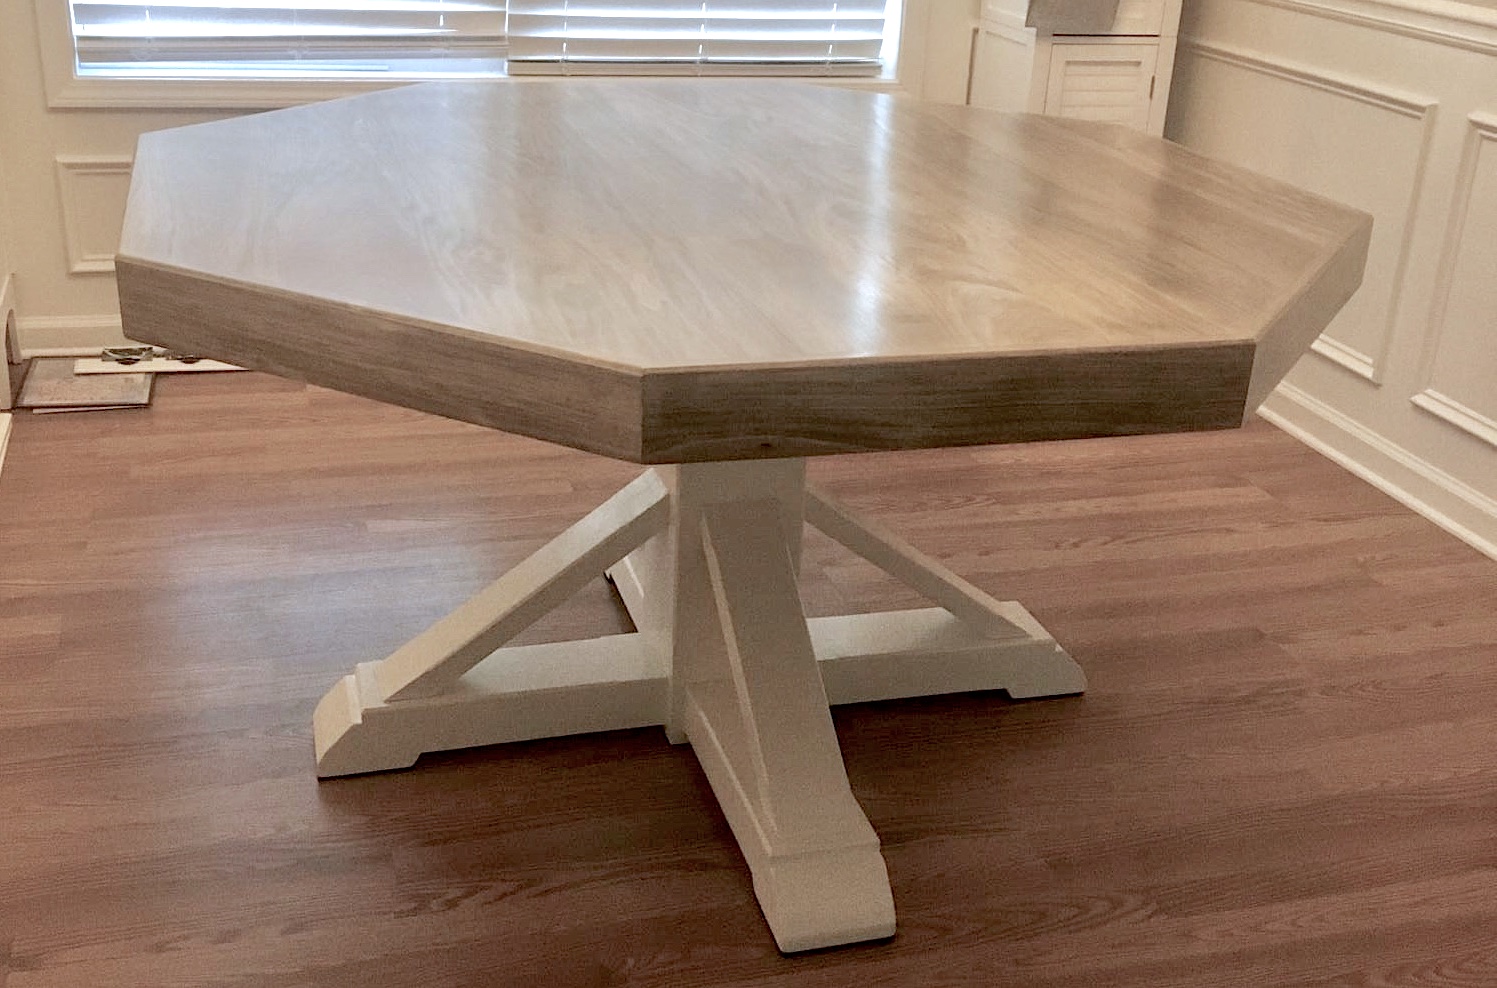
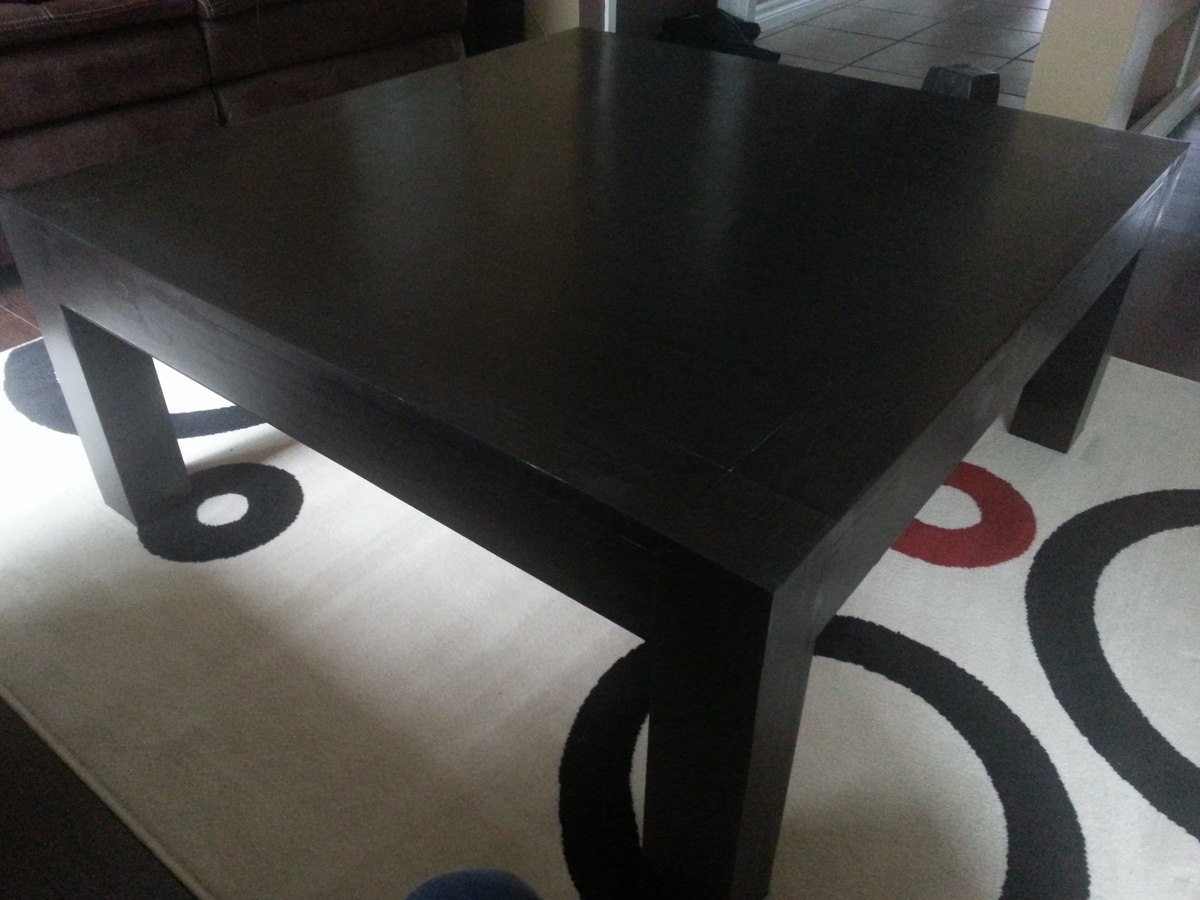
Community Brag Posts

Corona Coffee Table

Submitted by ercdig on Tue, 08/12/2014 - 07:59

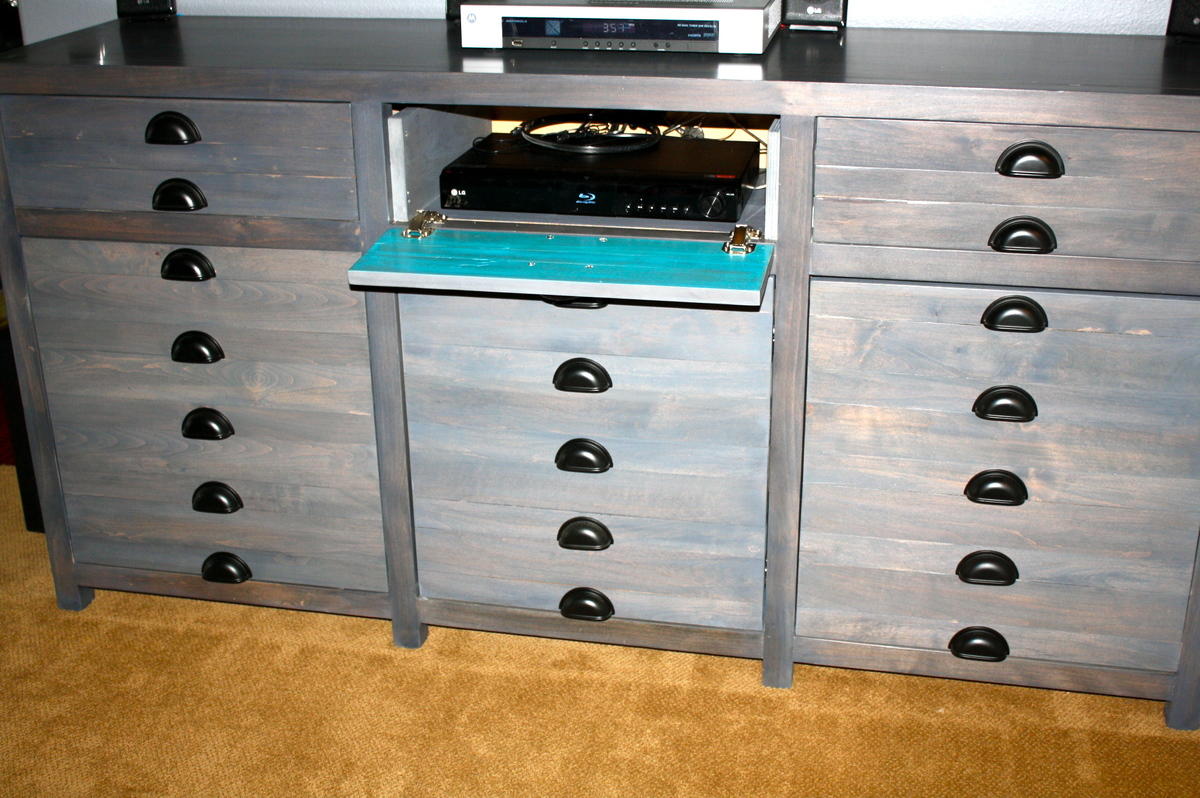
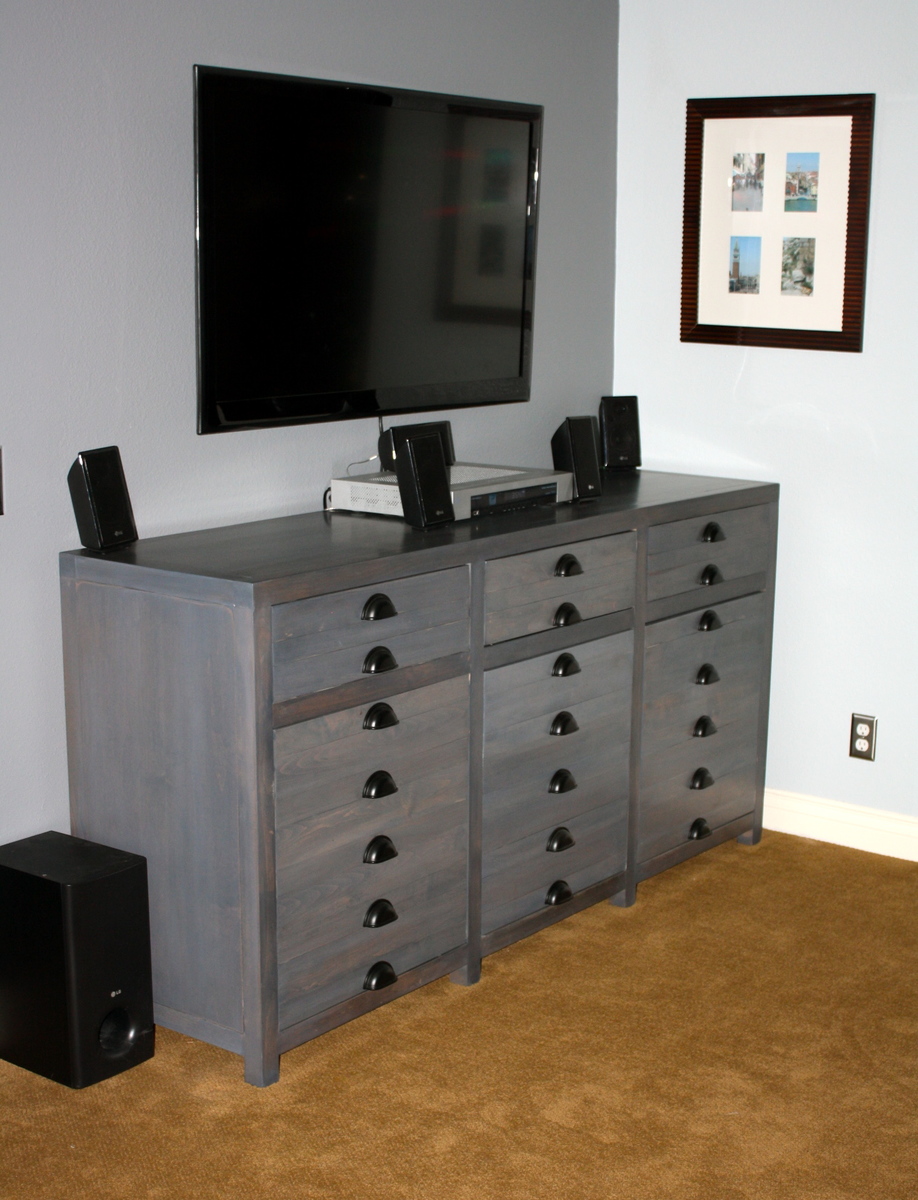
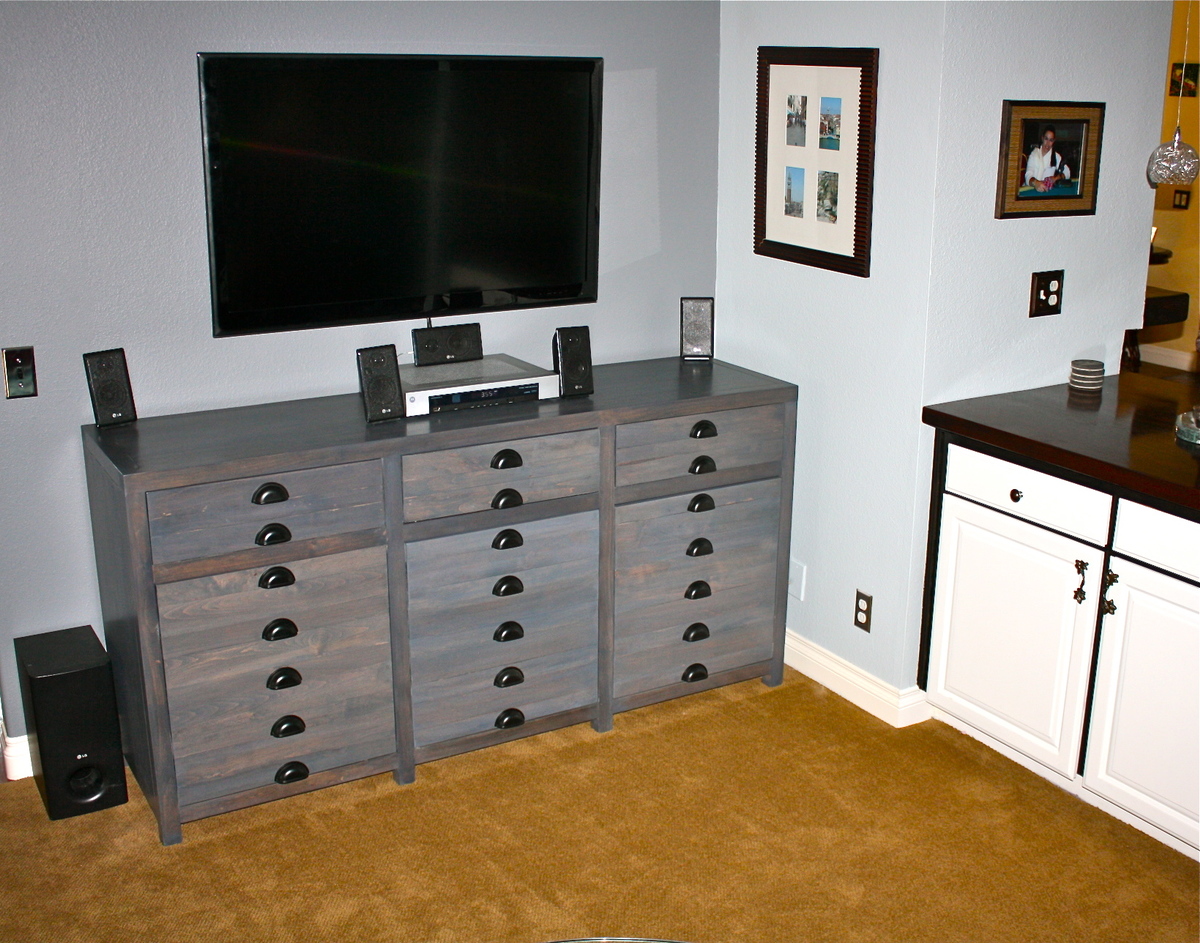
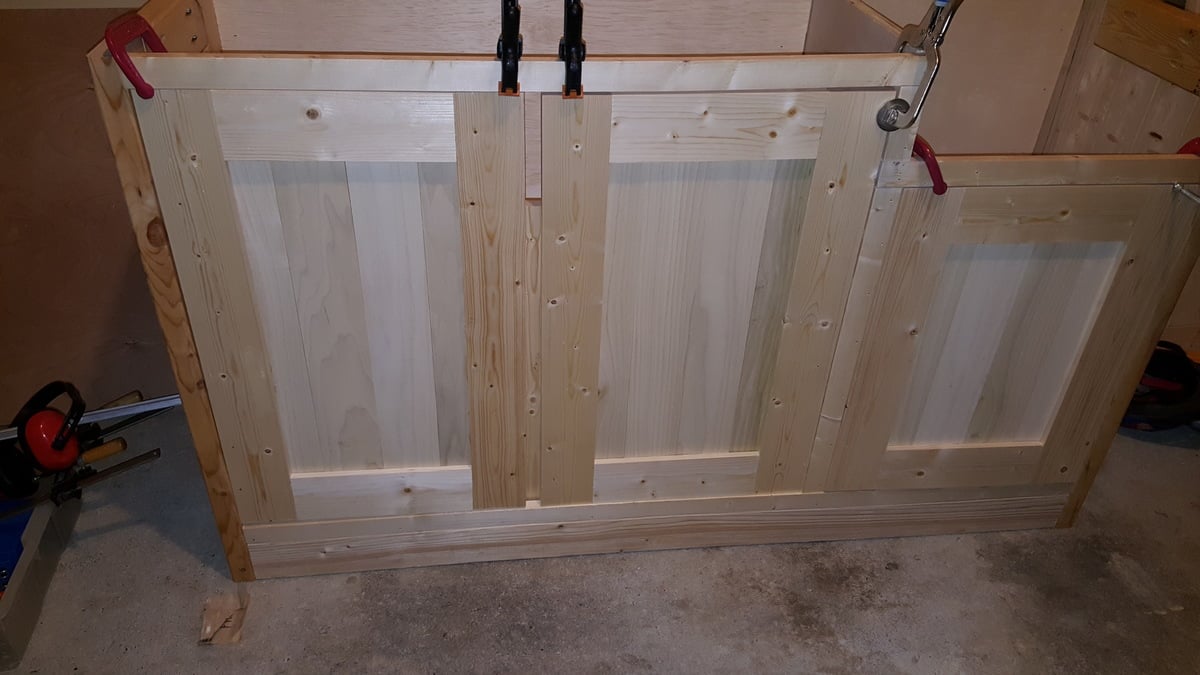
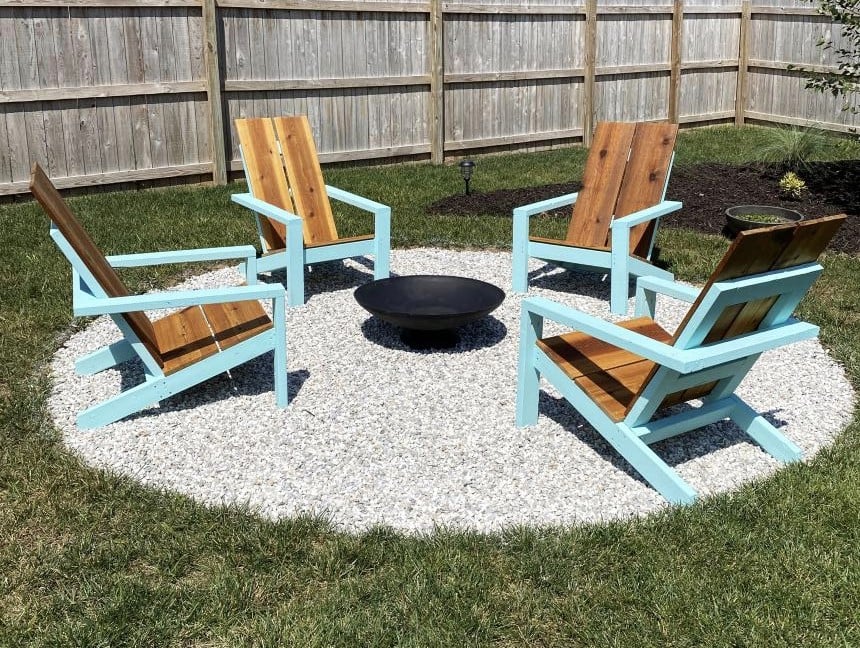
This was the second piece that I built using the plans here and I think it turned out great! Originally I was going to stain the whole project but my fiancee convinced me otherwise and I'm glad she did.

Estimated Cost
$220
Estimated Time Investment
Week Long Project (20 Hours or More)
Finish Used
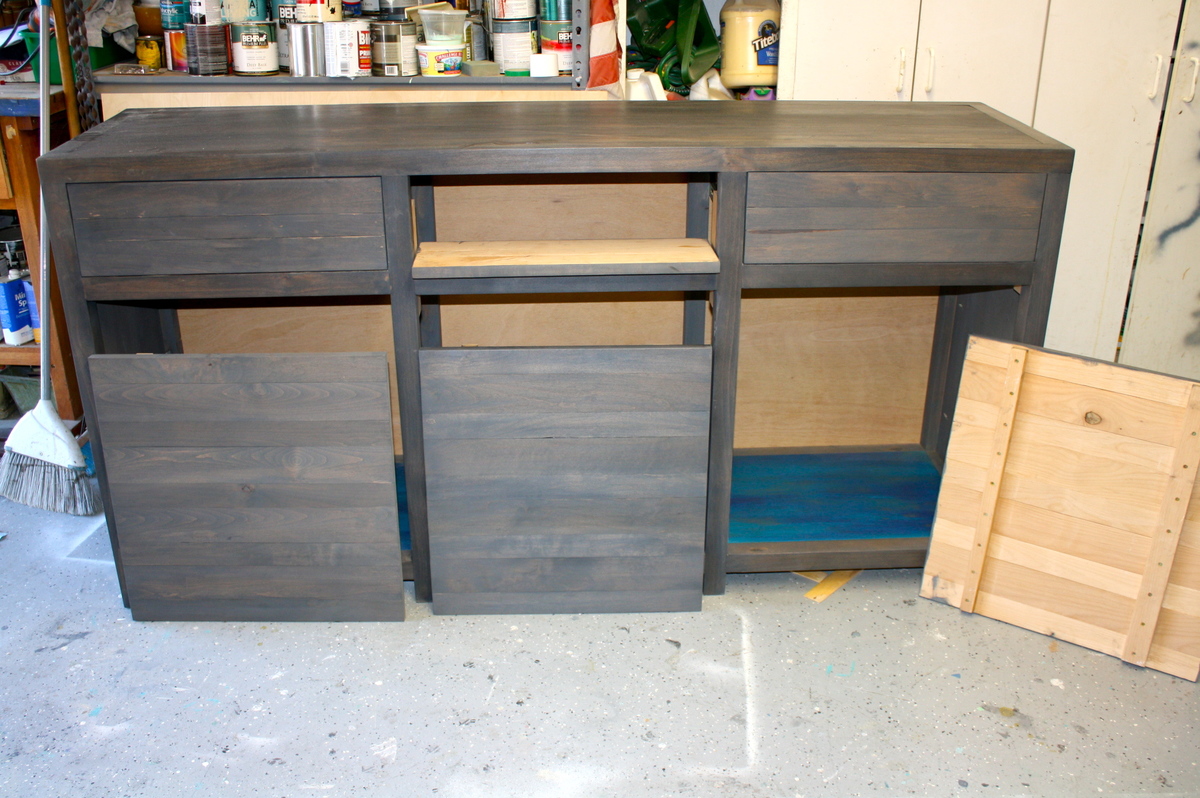
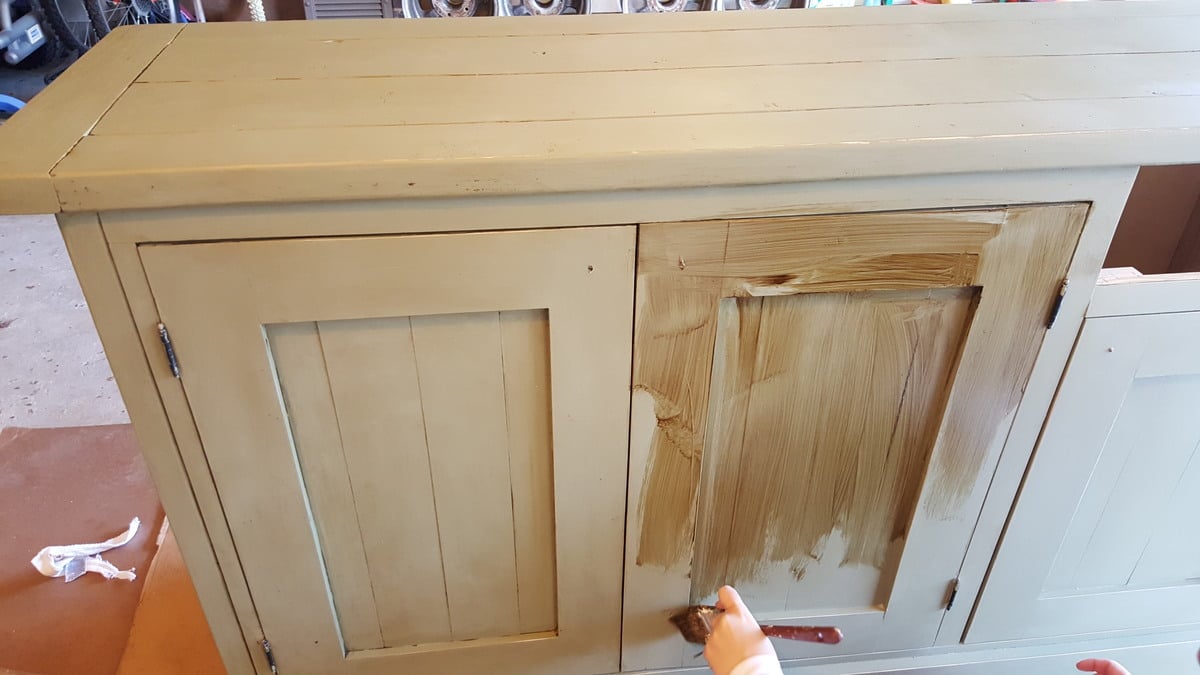
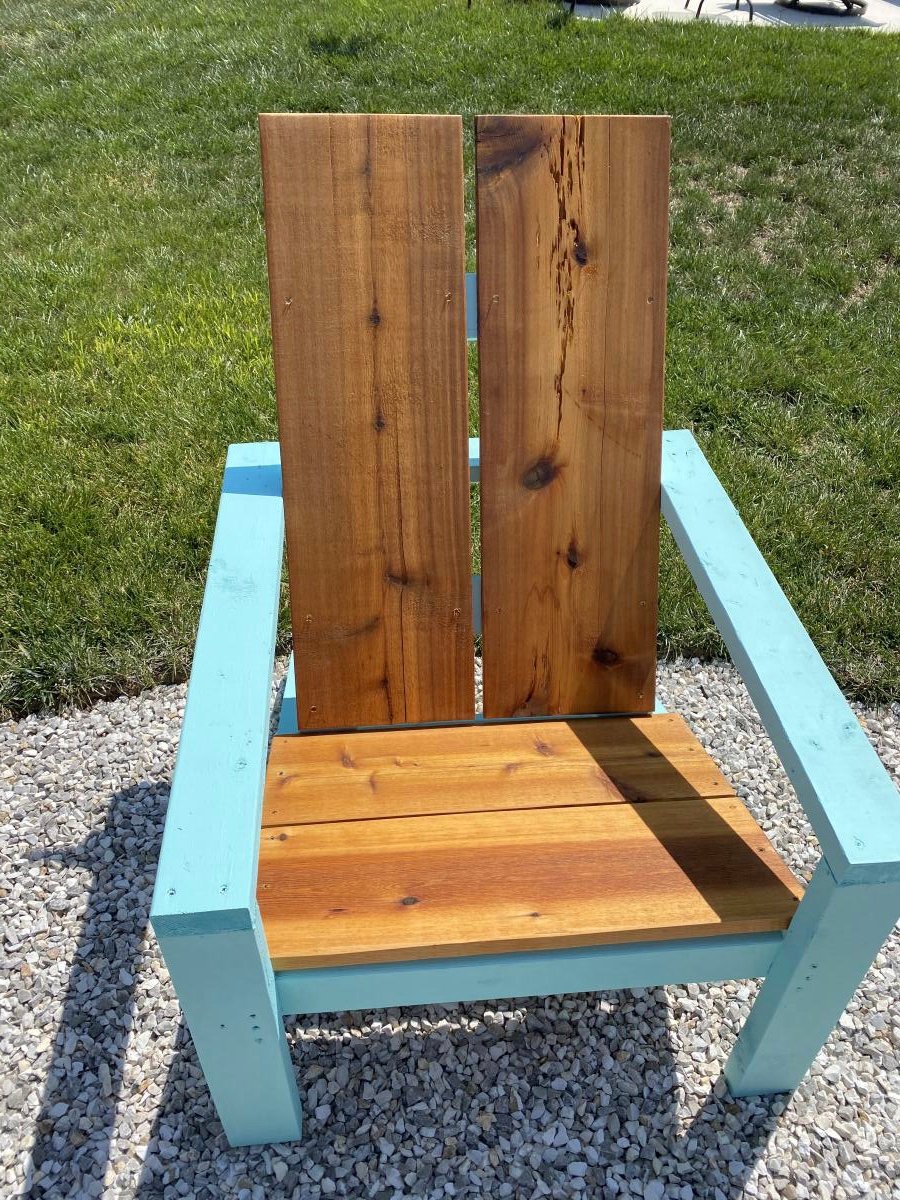
I started with wood conditioner for the top, 2 coats of red oak stain, then 2 coats of polyurethane. For the base I primed the project using a white primer tinted with the base coat color, chocolate brown. I followed that with a coat of chocolate brown, two coats of ivory bone, then 1 coat of polyurethane. All minwax and valspar products.
Recommended Skill Level
Intermediate

Baby Wrens changing table

Submitted by Anonymous (not verified) on Sun, 11/27/2016 - 10:19

I had a fun time building this easy to follow project. A brad nailer does make a world of difference. I chose to stain the inside of the drawers but had to let it sit out for awhile before use. Thank you for posting this project, it has made my family very happy.

Estimated Cost
$40 with available materials on hand
Estimated Time Investment
Day Project (6-9 Hours)
Finish Used
Rustoleum rolled on and dark walnut oil based for inside drawers. Only poly clear inside the drawers.
Recommended Skill Level
Beginner

Modified firepit bench

Submitted by kkushner on Sat, 08/15/2020 - 23:11

I built the one bench using the original plan with the storage and table top unit but needed two additional seating benches to go around the firepit without the bulk of the backside of the bench.

I modified the original plan as follows:

Shopping List:
(2) 2X6X8
(3) 2X4X8
(2) 1X6X8

Cutting List:
(2) 2X4X17" front legs, 15 degree cuts, parallel long to short
(2) 2X4X23" back support, 15 degree cuts, parallel long to short
(2) 2X4X20.75" back legs, 15 and 60 degree cuts, not parallel long to long
(2) 2X4X24.75" under seat, 15 degree cuts, not parallel long to long
(2) 2X4X30" bottom support, 15 degree cuts, not parallel long to long
(1) 2X4X42" bottom cross brace between leg sets, 90 degree cuts
(2) 2X6 cut equally in half, 3 for the seat and 1 for the top plate
(2) 1X6 cut equally in half, 3 for the back rest and 1 to be tucked under the seat overhang

Estimated Cost
$40.00
Estimated Time Investment
An Hour or Two (0-2 Hours)
Finish Used
Brown outdoor wood preservative.
Recommended Skill Level
Beginner

Comments

jwood4

Thu, 09/08/2022 - 11:23

Great work! Have you had any tipping issues with the benches without the table back? If you kneel on the bench backwards and lean on the back do you think it would tip? Ha I clearly have kids around to be asking such strangely specific questions... TIA!

kkushner

Sat, 02/25/2023 - 08:56

I built these for my daughter/son-in-law and their young family. I have grandkids that use them and have never tipped them. However a strong wind gust 100km/hr did flip one over but not the other. I would suggest adding a horizontal ground level ‘foot’ extension on one or both back legs to alleviate any concerns of tipping.

Easy and utilitarian!

Submitted by Galvi5 on Sat, 10/27/2012 - 15:42

An easy afternoon project. Thanks Ana White! The painting was more laborious than the building, by far.

Estimated Time Investment
An Hour or Two (0-2 Hours)
Recommended Skill Level
Starter Project

Comments

Grandy Sliding Door Console Modified

Submitted by Anonymous (not verified) on Thu, 12/01/2016 - 08:54

My wife and I were looking for a farmhouse style media console and found the Grandy Sliding Door Console and loved the look of it. After reading the plans and discussing it we decided that we did not want to take the extra time to build the metal sliding hardware and also wanted it for a lot of storage items, so we decided to just build 4 hinged doors instead. We love it and the plans were so easy to follow. We followed the plans step by step up until we built the hinged doors. We also did not put any wood on the back side of the project since it is against the wall and we have doors covering the front opening. Time consuming to finish it nicely with staining, sanding, painting, etc. But not too difficult of a project overall. The doors take some time to get all the angles just right, but worth taking your time to make sure everything is straight and even.

Built from Plan(s)
Estimated Cost
$250
Estimated Time Investment
Weekend Project (10-20 Hours)
Finish Used
Benjamin Moore Advance paint in Simply White color of the year 2016
General Finish Gel Stain in Java
Recommended Skill Level
Intermediate

Comments

maryklein4514

Mon, 01/02/2017 - 14:04

Beautiful job on this piece! We are also wanting to install hinged doors...was wondering if you might share how you installed them so that they aren't visible and doors are on the outside of the piece?

Planters

Submitted by Anonymous (not verified) on Mon, 08/17/2020 - 08:58

Made these planters which was my first try at building something from wood! They came out great and can’t wait to try another project!

Built from Plan(s)
Estimated Cost
20
Estimated Time Investment
An Hour or Two (0-2 Hours)
Finish Used
White outdoor paint
Recommended Skill Level
Beginner

Jewelry wall cabinet

Submitted by lbadger on Thu, 11/01/2012 - 07:46

Another huge THANK YOU to Ana for her amazingly timely posts! My daughters attend a pre-school that hosts an auction fund raiser every year. Last year I made Ana’s kids storage bench and filled it with fun craft items. This year I saw Ana’s jewelry wall cabinet and knew it had to be done! We have some amazing local artists so I purchased a beautiful pair of glass drop earrings to hang on the front of the cabinet. I think it turned out great (if I do say so myself!) Thanks again Ana! And by the way, distressing wood is an awesome project for little helping hands!!

Built from Plan(s)
Estimated Cost
$8 (for the hinges)
Estimated Time Investment
Afternoon Project (3-6 Hours)
Finish Used
Favorite distressed aged wood finish:
1. Give boards, hammer, keys, other sharp metal objects to my kids and let em at it
2. Brush with a strong black brewed tea (for the tannins), let dry
3. Soak steel wool in white vinegar overnight, brush over tea (chemical reaction grays wood)
3. Annie Sloan clear wax, dark wax as desired, another coat of clear
A beautiful soft aged finish!
Recommended Skill Level
Beginner

Coffee table

Really simple project, modified the plans a bit but kept the same concept. Had a lot of bun building.

Estimated Cost
130$
Estimated Time Investment
Weekend Project (10-20 Hours)
Finish Used
Mahogany stain.
Recommended Skill Level
Beginner

Comments

Queen Farmhouse Bed with Two Layers of Drawers

Submitted by Anonymous (not verified) on Sun, 12/04/2016 - 19:22

My brother-in-law and I took on this project in the fall of 2016. I don't mean to brag, but it turned out amazing. #happywifehappylife


We adopted the plans from the Full Farmhouse Bed Plans. But we added two banks of cabinets and made it a lot taller.

Built from Plan(s)
Estimated Cost
too much... but still worth it. between $600 & $700.

Estimated Time Investment
Week Long Project (20 Hours or More)
Finish Used
Dark mission brown (it is a dye from Woodcraft) mixed with denatured alcohol. To get that color it was about 6 or 8 oz of the dye to 1 liter of alcohol.
Recommended Skill Level
Advanced

Hanging Kids’ Desks

Submitted by Anonymous (not verified) on Tue, 08/18/2020 - 18:30

I am brand new at building but my big boys requested desks in their room for distance learning. One fell in love with the flip down wall art desk and this is our take on it. The other wanted a bigger surface, so we used an IKEA desk top and built our own brackets. The boys loved being part of the building. I put all the right angles together with a Kreg jig, and attached everything directly to studs in the wall (I don’t trust my boys not to be rough on them).

Built from Plan(s)
Estimated Cost
$40
Estimated Time Investment
Day Project (6-9 Hours)
Finish Used
One coat of General Finishes gel stain in Java, followed by General Finishes wipe-on polyurethane.
Recommended Skill Level
Starter Project

RH knockoff triple cabinet sideboard

Submitted by Beth H. on Sat, 11/03/2012 - 17:20

After seeing Ana's plans and how Jen Woodhouse at "House of Wood" finished it, I wanted one too! Ana's plan are very thorough and Jen's blog showed a very detailed version of how she completed it. I made a few changes, such as the pull down drawer front to conceal the DVR player and I inset the top rather than have an overhang.
It was quite a bit of work but totally worth it! The piece turned out beautiful.
Thanks Ana!!!! Beth.
Makemeprettyagain.blogspot.com for complete details

Built from Plan(s)
Estimated Cost
wood and hardware....$500
Estimated Time Investment
Week Long Project (20 Hours or More)
Finish Used
Deft-satin water based finish. 4 coats on top and 1-2 on the rest.
Varathane gray and ebony mixture for the stain. See blog for application tips.
Recommended Skill Level
Intermediate

Comments

itzann

Sun, 11/04/2012 - 05:28

Love this. Looks like a lot of work, but what a nice functional piece of furniture! I have always loved that style of drawer pull.
-Ann

Tryde Coffee and End Tables - Douglas Fir

Submitted by RebelOne on Wed, 08/20/2014 - 23:15

Although handy - these are the first pieces of furniture I have ever created. Used only 2X4 and 4X4 pieces - Douglas Fir right out of the lumber yard - not kiln dried wood. First time using pocket hole equipment - was worth getting the premium kit from Kreg's - drilled close to one hundred holes. Other than the equipment, the materials totaled less than $200 for all three pieces. $120 for the wood and another $80 for screws and paint products. Sanded the wood to a 220 finish and applied a Gel Dark Walnut stain and added 5 coats of clear satin from Minwax. Tried the wood conditioner on a test board and did not see not much difference so I decided to go without on all 3 pieces of furniture that I built. Experimented with different stainable wood fillers from Elmer's. Quite happy with the result - just in time for a visit from mom and dad. Total time for three pieces - close to 40 hours but worth it.

Estimated Cost
$200
Estimated Time Investment
Week Long Project (20 Hours or More)
Finish Used
Sanded the wood to a 220 finish and applied a Gel Dark Walnut stain and added 5 coats of clear satin from Minwax.
Recommended Skill Level
Intermediate

Comments

Hallway Buffet

Submitted by Anonymous (not verified) on Fri, 12/09/2016 - 13:20

I built this slightly modified version of the buffet for my wife.  She LOVEs it and did a great job finishing it with Annie Sloan paint and a wax (she's the finishing expert in the house).  Plans were right on and I'm very pleased with the final product.  Thanks for a great website and plans!  Getting ready to undertake a dining room table now.

Estimated Time Investment
Week Long Project (20 Hours or More)
Finish Used
Annie Sloan Chaulk Paint with Dark Wax
Recommended Skill Level
Beginner

Modern Adirondack Chair, Super Sized

Submitted by Anonymous (not verified) on Fri, 08/21/2020 - 10:39

Am a big fan of Ana's work, and have used several of her plans in prior builds including the more traditional Adirondack chairs. Those stayed with my old house, and I wanted something different for my new house. Really liked her Modern Adirondack design with the floating arm rest. However, plans are like recipes to me--a guideline. I wanted the back boards to run up and down, and I am a bit more robust than the lovely and petite Ms. White, so they would need to be wider after I built the first one at 19 1/2" wide per plan. The next three I made 22" wide and that worked well without throwing off the geometry and angles of the other parts. Since I ran the backboards up and down, I needed some cross beams for stability and to give an attachment point for the middle of the boards. Cut some 2x4s at 15" wide, drilled pocket holes in both ends, and attached in between the back supports with the pockets facing up to be hidden by the back boards. All of the 2x4s were leftover cut-offs from the houses being built in my neighborhood. Since the frames were free, I splurged and went with cedar boards for the backs and bottoms. With the wider frames, I had to use 1x12s ripped down to 10 3/4" to get the right look (about a board's width in between). Needed some color, so I painted the frames Teal Seaglass from Menards. Cedar was stained with a natural deck stain from Sherwin Williams. I experimented with salt paint (mixing unsanded grout with the paint) to give a heavily textured and weathered finish but this was unecessary--the wood was distressed enough and I am a terrible painter. It also toned down the color so I skipped that step and just went with 2 coats of plain paint. It looks like outdoor furniture should up close. As always, am pleased with Ana's plans. Thank you for doing all the hard work!

Estimated Cost
about $200 for all 4 chairs due to cedar and paint
Estimated Time Investment
Weekend Project (10-20 Hours)
Finish Used
Paint - Pittsburgh matte exterior with Dutch Boy coloring Teal Seaglass
Stain - Sherwin Williams Superdeck stain, Natural finish
Recommended Skill Level
Starter Project

Comments

Seasonal And Holiday

Barnwood Frames

Submitted by moosmani on Mon, 11/05/2012 - 18:34

I can't believe I made these two picture frames thanks to wonderfully simple plans! We bought a painting in Italy 16 years ago and I was never able to find a ready-made frame beause of the unusual dimensions and I didn't want to pay for a large custom frame. Now I have one! The smaller frame accommodates an 8x10. Both frames are made out of the $0.89 furring strips at Home Depot.

Recommended Skill Level
Starter Project

Comments

Stain & Paint Finish

Submitted by ajstormy85 on Sun, 08/24/2014 - 18:19

Did the multi-finish on the step stool. On the steps, I used the Minwax Pre-Stain Conditioner, followed by Minwax 'Early American' stain and then Minwax clear gloss polyurethane. The rest of the stool was painted with DIY chalk paint. The paint is 1 cup flat paint (Valspar Jungle Thicket) mixed with 1/3 cup plaster of paris and 1/3 cup water. The chalk paint portion was finished with the Minwax Finishing Paste Wax and gave the flat paint look a nice sheen.

Finish Used
Minwax products (pre-stain conditioner, Early American stain, clear gloss polyurethane; DIY chalk paint (1 cup flat paint, 1/3 cup plaster of paris, 1/3 cup water); Minwax finishing paste wax on chalk paint part
Recommended Skill Level
Beginner

Tilt-out trash/recycling cabinet

Submitted by Anonymous (not verified) on Mon, 12/12/2016 - 11:56

Tilt-out trash/recycling cabinet made with aspen stained with a combo of Minwax Natural and Golden Oak.

Estimated Cost
Materials: $110.00; Labor: priceless
Estimated Time Investment
Day Project (6-9 Hours)
Finish Used
Combo of Minwax Natural and Golden Oak to match other furniture in the house.
Recommended Skill Level
Beginner

Comments

iTable

Followed the plan perfectly. A little too perfectly, as the table turned out so well that I have To go back and rebuilt the iSideTables ;)

Same as the plan, used Kona stain, but I left it on for 2 coats.

Built from Plan(s)
Estimated Time Investment
Weekend Project (10-20 Hours)
Finish Used
Kona stain
Recommended Skill Level
Beginner

Queen Pallet wood bed

Submitted by naomi on Fri, 08/29/2014 - 08:07

I made this bed for my son and his girlfriend.

I used pallet wood and new pine for this.

I also added two metal strips to the headboard for decoration.

The headboard is connected to the siderails with 2 bolts straight through the side of each leg. The siderails are on the inside of the headboard.

The siderails are connected to the foot of the bed with 2 bolts straight through the foot into the end of the siderails. I added a third fake bolt to balance the look.

Estimated Time Investment
Week Long Project (20 Hours or More)
Finish Used
Teak Stain
Recommended Skill Level
Intermediate

Comments

naomi

Wed, 10/15/2014 - 07:25

Hi EarthyByBike,

I had previously built the queen farmhouse bed and this bed was modeled from that one. I basically ran the boards vertical instead of horizontal. It uses most of the basic techniques as the farmhouse bed. I took the ideas from the farmhouse bed and then just changed it up a bit.

I can't remember the exact height of the bed but I think it was 165cm.