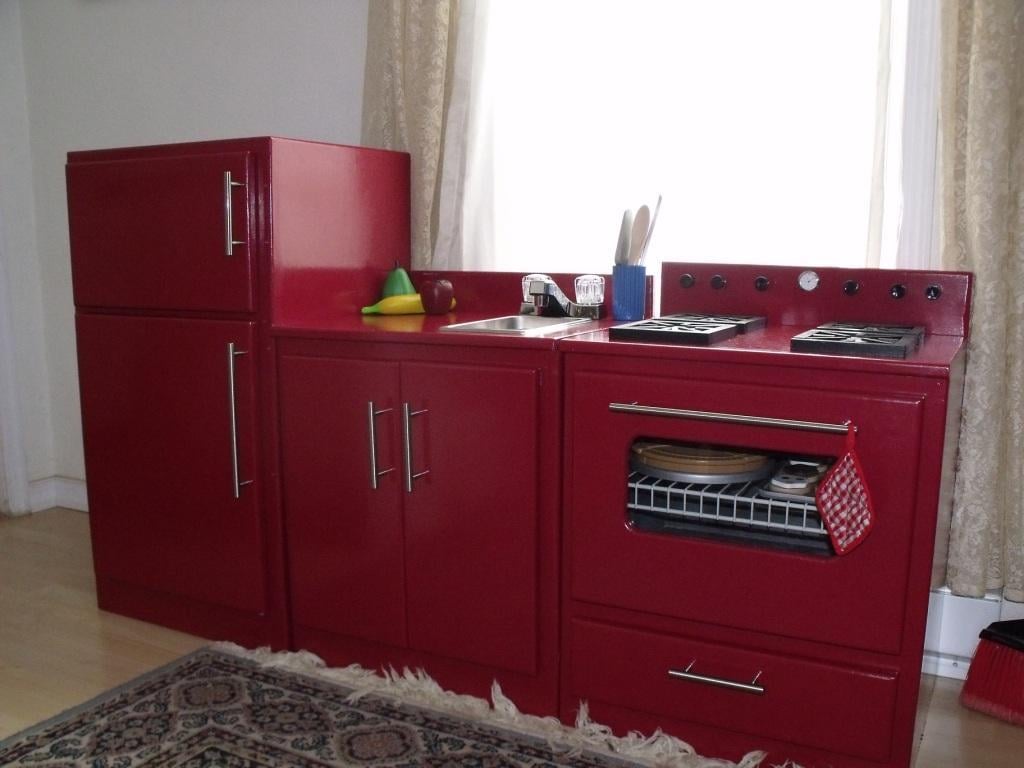
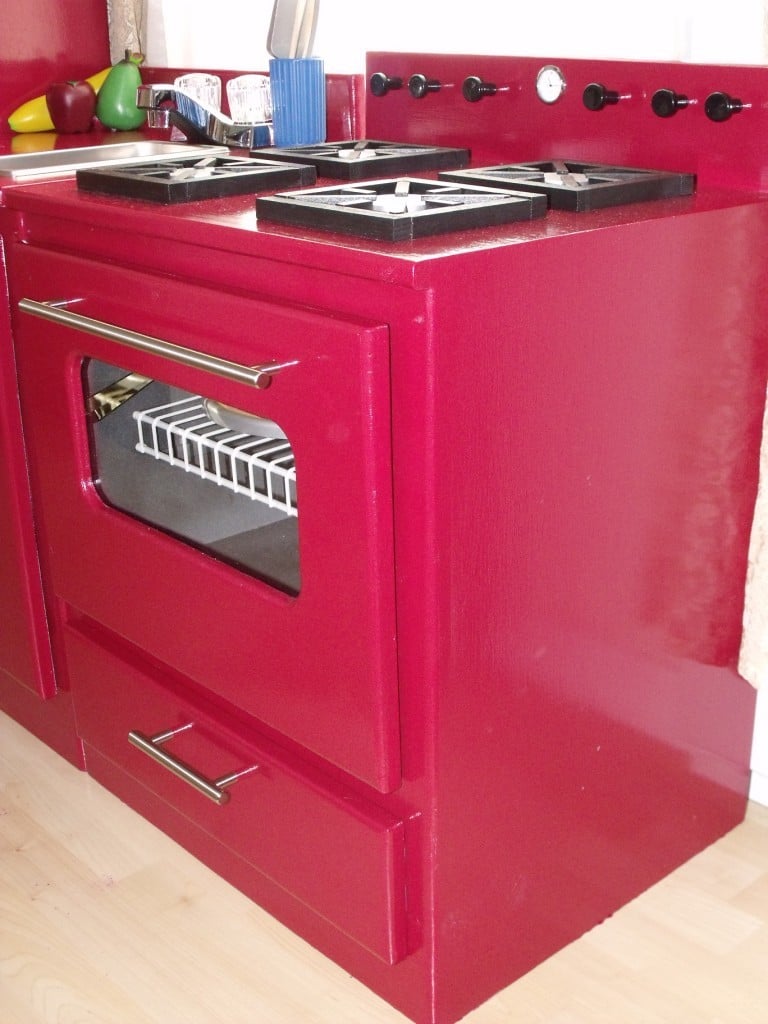
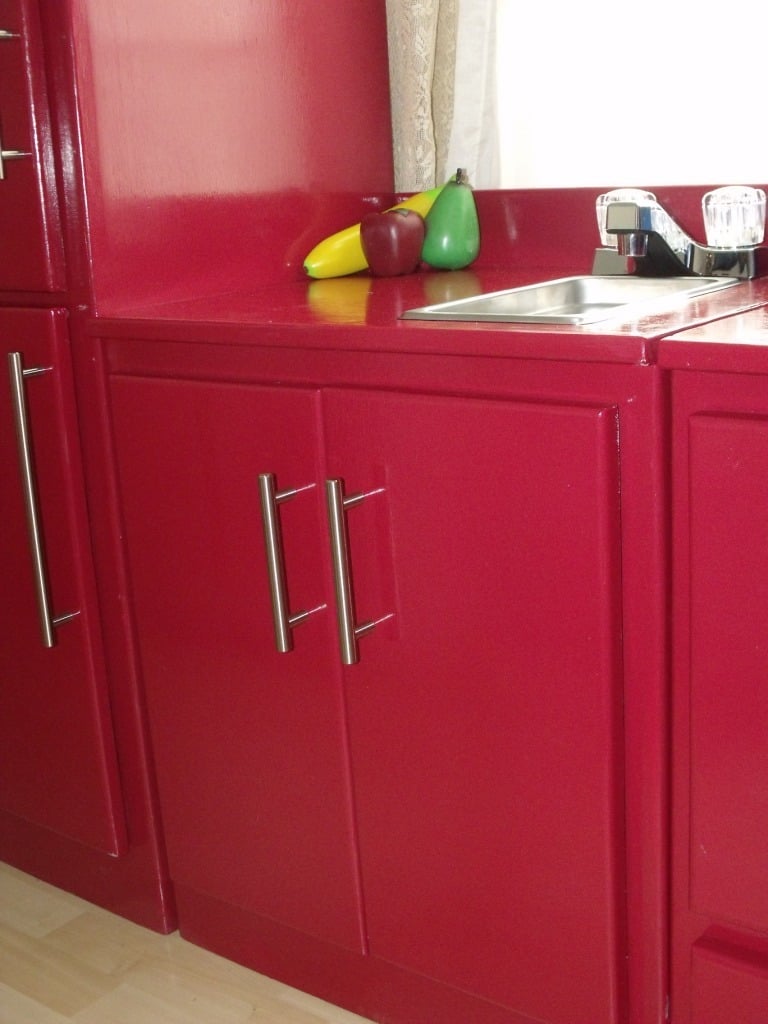
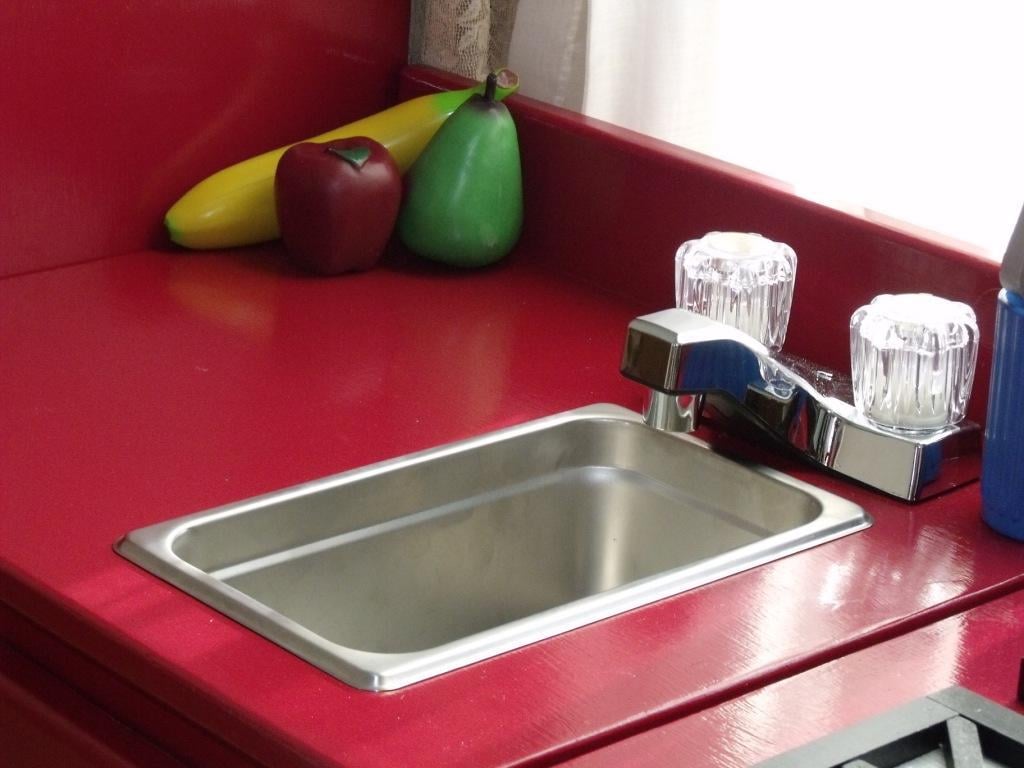
Community Brag Posts

dream dollhouse

Submitted by kmanntai on Thu, 11/07/2013 - 10:44

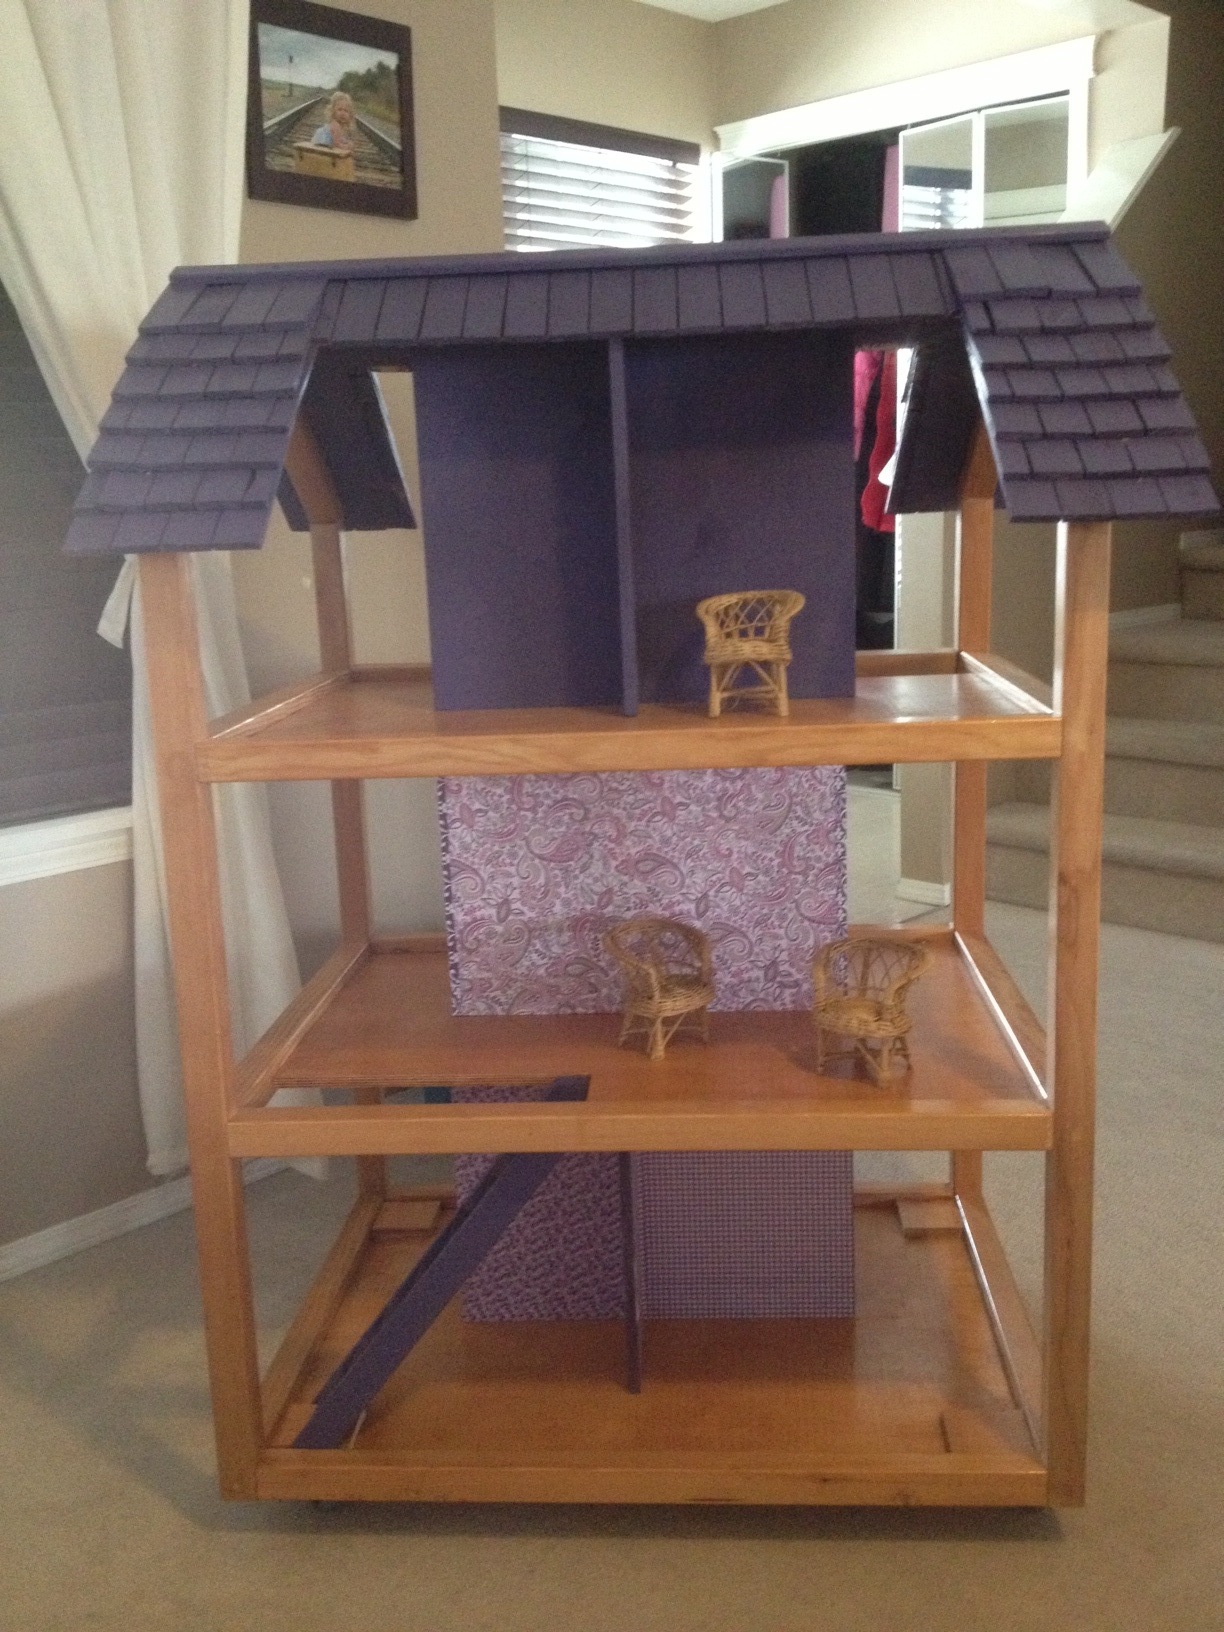
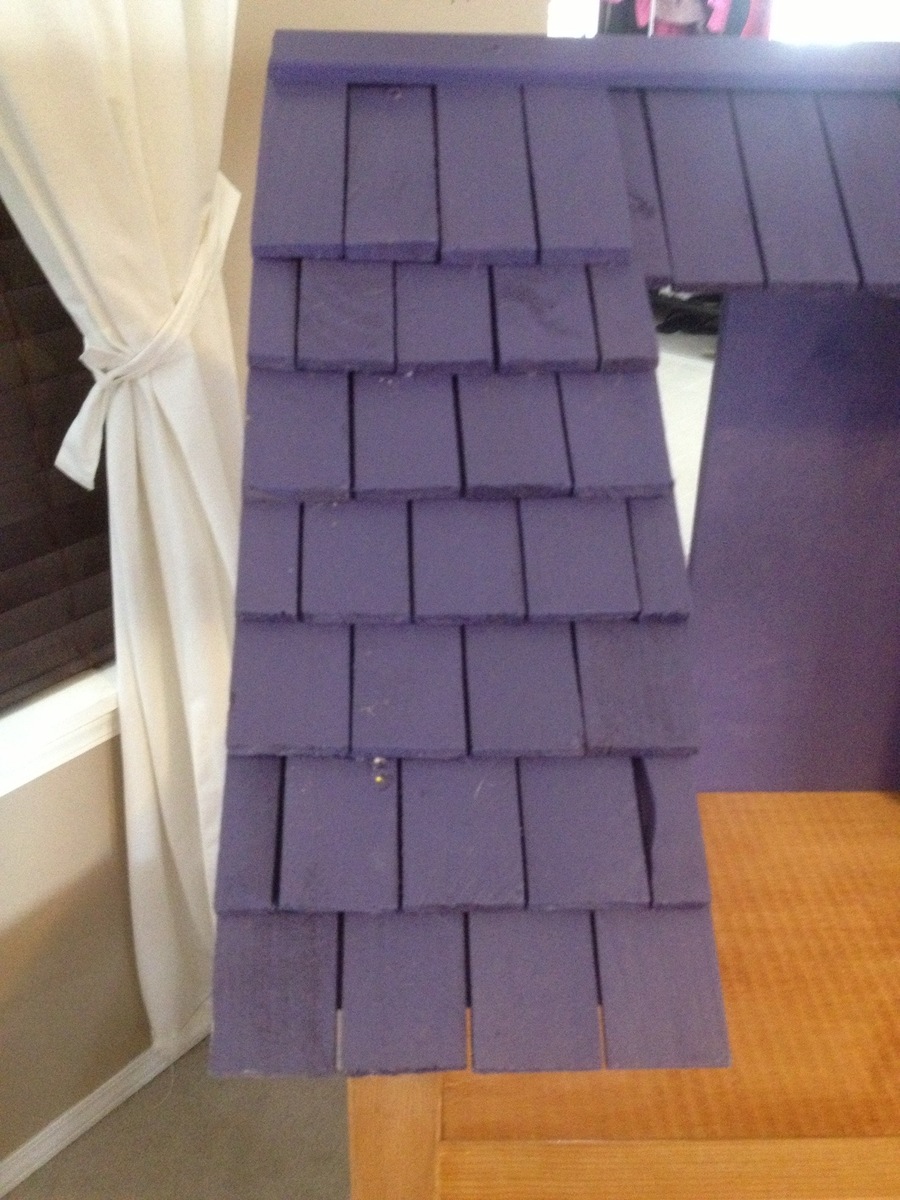
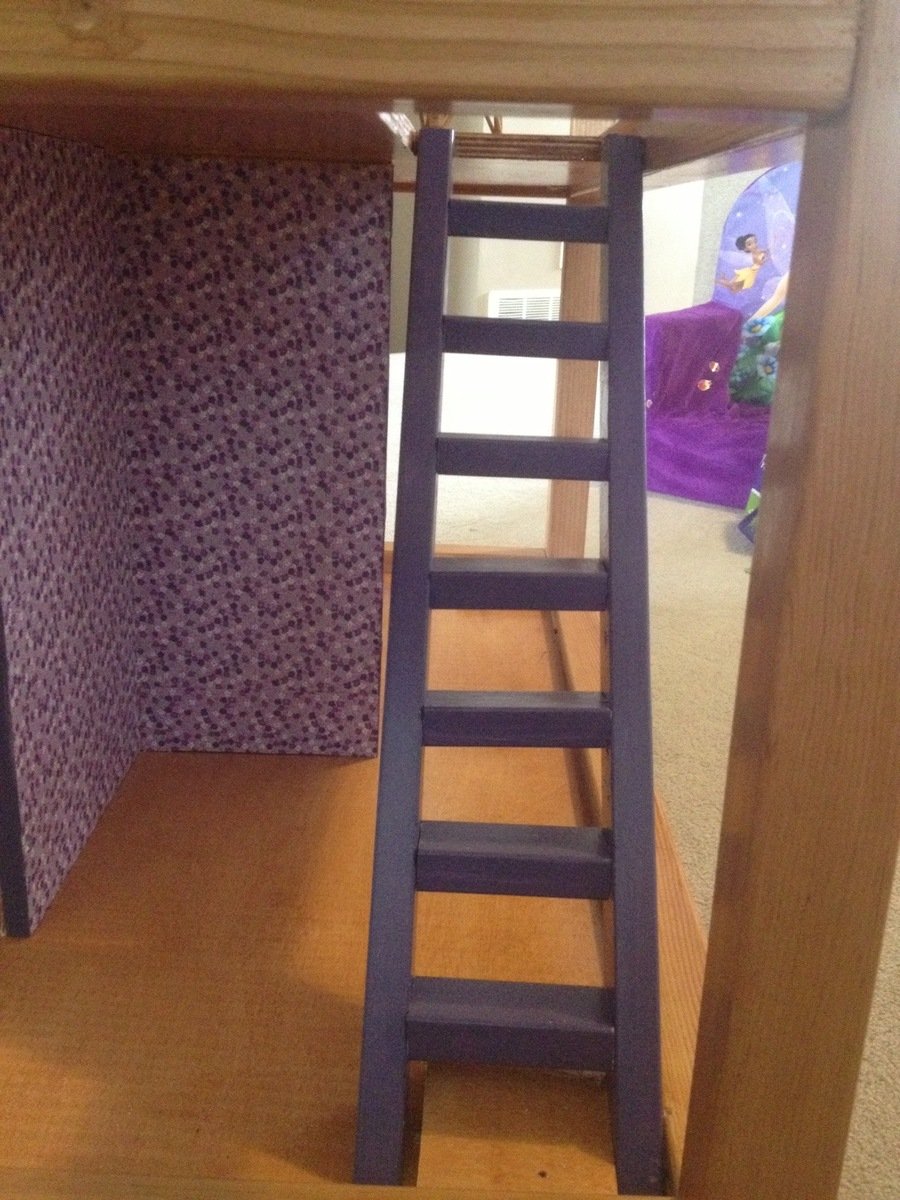
My dad and I made this for my 3 year old and she absolutely loves it. The wood that was recommended to use for the roof didn't cut well with the pattern so we decided to be creative and used door shims to make the roof look like it was made of shingles. We used scrap book paper and decoupage for the walls. Still having a hard time finding the right sized doll furniture for it, but it's a great house. Very sturdy and we put wheels on the bottom.

Estimated Cost
$200
Estimated Time Investment
Week Long Project (20 Hours or More)
Finish Used
treated the wood with a tinted stain and used semi gloss paint for the roof.
Recommended Skill Level
Intermediate

Comments

spiceylg

Fri, 11/08/2013 - 05:44

This came out great and I love the addition of the wheels. Clever!

Bedroom Remodel

Submitted by Anonymous (not verified) on Thu, 01/21/2016 - 18:35

We had 2 empty closets in our 100 year old home. The custom shelves took a day to build and have worked amazingly for our organization.

Built from Plan(s)
Estimated Cost
$200
Estimated Time Investment
Weekend Project (10-20 Hours)
Recommended Skill Level
Starter Project

First Ever Project

This was my first project I have ever done. The plans seemed pretty simple, so I gave it a try and it came out even better than I thought. 

Built from Plan(s)
Estimated Cost
$200
Estimated Time Investment
Weekend Project (10-20 Hours)
Recommended Skill Level
Intermediate

Outdoor coffee table

Submitted by Anonymous (not verified) on Sat, 04/08/2023 - 18:02

I'm building for stress management and it's working out well

Comments

Raised Pet/Cat Feeder - Small

Submitted by Joni on Mon, 12/19/2011 - 11:13

I didn't really use any of the construction techniques from the plan, but I got the idea based on seeing the platform feeder. I used spare wood (with routed trim already on it) that matched my bathroom, and made the cats a nicer looking feeder (one that they couldn't keep knocking to the floor and breaking!). The tile is mounted on cement hardibacker board, which is attached to the 3/4" wood platform. I used a zip saw to cut out the circles in the wood and the cement board (with the appropriate drill bit). I used a tile nipper to form the tile around the bowl opening. I added several coats of varnish to finish.

Built from Plan(s)
Finish Used
4 coats of General Finishes EnduroVar.
Recommended Skill Level
Beginner

Comments

Subway Tile Bookshelf

I used the Subway Tile Bookshelf plans and made it 74" total in height. Each of the bottom 4 shelves measured 14" and the top one was about 18" (I forget exact measurement). Instead of putting the plywood on two of the boxes, I switched it up and placed them on 4 boxes.

Love the plans and concept. Thanks!

Built from Plan(s)
Estimated Time Investment
Weekend Project (10-20 Hours)
Finish Used
Jacobean colored stain.
Recommended Skill Level
Beginner

Splayed Leg Coffee Table

Submitted by jpurp on Mon, 01/25/2016 - 19:29

This project took me about 8 hours from start to finish over 3 days. I can't buy 4X4's here (unless they are treated or made of cedar ($25) or $60 each at the specialty store) so I made the legs out of 1x4's that I ripped down and then did a bevel edge and glued and nailed with my 23 gauge nailer so that they look like posts. I just followed the directions after that. I used little L brackets to secure the top instead of the figure 8 brackets in the plans. They worked fine. I also didn't put in the cross pieces. I tested the top without them and it was really solid so I didn't see a need for them. I wouldn't recommend cutting everything ahead of time like they say to do in the plans. Nothing ever works our perfect with wood so it's better to cut as you go to get the perfect measurement. For example, the end pieces of the top we supposed to be cut to 21". I needed to cut to 21 1/16th. It doesn't sound like much but when you are then trimming the whole top out with 1x2's it is really noticeable if everything doesn't line up.  I sanded as I went.  I find it much easier to do it as I go then trying to get all the nooks and crannies when it's all put together.  I also stained and put on the poly before it was completley together.  I did the frame seperate from the top and the bottom shelf slats.  Once everything dried I put it together.  It's hard to do sometimes because I just want to get the piece together as fast as possible but it is actually quicker in the long run if you sand and stain along the way.


It will go at my rental house at the lake. I tried it out at my home. I don't need a coffee table but I may have a hard time letting it go. I really love how it turned out.

Estimated Cost
$50
Estimated Time Investment
Day Project (6-9 Hours)
Finish Used
Old Masters Provincial
3X Poly
Recommended Skill Level
Beginner

Rustic Hall Tree

Submitted by po_kay_mon on Wed, 07/10/2019 - 21:03

Modified "Mimi's Hall Tree" as I'm a single guy and wanted a more "rustic manly" (haha) look than the white with beadboard.  Widened by 12" and 12" taller as well.  Used 2 sheets of corrugated metal from Lowe's.  The corrugated metal came extremely reflective and just too "new" looking so I followed a youtube video on how to make corrugated metal look old.  It's really easy.  Just rub toilet bowl cleaner on it with steel wool, leave it for 30 min, and rinse off, repeat until desired look is achieved.  You can even leave pieces of the steel wool on with the toilet bowl cleaner and it will create rusted spots.

Estimated Time Investment
Afternoon Project (3-6 Hours)
Finish Used
corrugated metal, dark walnut stain
Recommended Skill Level
Intermediate

Twins

Submitted by Anonymous (not verified) on Fri, 04/14/2023 - 08:01

Twin beds - adapted from a queen bed Ana White plan.

Built from Plan(s)

Comments

Loft bed

Submitted by jbyler on Fri, 12/23/2011 - 09:19

Husband built the loft bed plans for our oldest daughter. She said this was he was the best dad in the world!

Estimated Cost
$300 with mattress
Estimated Time Investment
Weekend Project (10-20 Hours)
Finish Used
We painted the wood 1 coat with a little touch up, gives it a "pink stained" wood look
Recommended Skill Level
Beginner

Comments

jbyler

Fri, 12/23/2011 - 09:20

We are so excited to complete this project for our oldest, but of course the middle child is wanting a bunk bed too-guess we'll be building one of those soon.

Double Wide Cedar Fence Picket Storage Shed

Submitted by moosmani on Mon, 11/11/2013 - 03:12

I read and studied every comment and brag post about this shed. I must have read the plans a hundred times before I got up the courage to tackle it. It’s a very attractive and affordable shed design. I thought a double wide version would be perfect for our long, narrow side yard, and it is! I mostly stuck to the plans except for a few things. I made it 10” taller overall so there would be plenty of head clearance under the doorway. That was a very easy modification. I used 2x4s for the walls instead of 2x2s because we have high winds in our area. That modification was a little bit more challenging, but I planned it out and it worked! Also I used 2x6s for the headers instead of 2x4s. I also added 2x4s at the thresholds because I couldn’t image making it stay square without them. I basically made two sheds joined by a common wall in the center. I did not increase the depth, mostly because I was afraid to mess with the angles and how that would change the pitch of the roof. Joining two sheds together meant that I didn’t have to put the exterior pickets on the middle wall. But it also meant that I had to build 4 doors. Yuck. They were difficult to get lined up and level, but I was amazed it actually worked and that all the doors operate properly and smoothly. I was questioning the wisdom of my decision to do 4 doors while I was in the thick of it, but now that all the work is done, I love that I can open all 4 doors and have easy access to absolutely everything in the shed. Very convenient! I told my dad I was building a shed and he recommend that I add cross braces. It seemed sturdy enough without them but it certainly can’t hurt. My dad knows everything about building and I know nothing, so I took his recommendation. If I were to do this again, I would overlap the cedar pickets by 1” instead of ½”. My pickets were not quite wide enough. I could swear they shrunk after I applied the stain/uv protection. I used liquid nails along each lap but it didn’t hold. Where the glue DID hold tight, the wood split lengthwise. Anyway, for whatever reason, gaps appeared and I spent a fortune on clear silicon applied on the interior walls to make it water tight. I had to keep going back for “just one more tube.” So with hind sight I would have been better off just buying a few more pickets and increasing the overlap. Another thing I might do is make it deeper. I decided against it initially because I was worried that increasing the depth would make it flimsy. Now I don’t think that would be a problem. This shed is sturdy. I can’t say thank you enough. Great plans and a great website! I am completely hooked.

Built from Plan(s)
Estimated Time Investment
Week Long Project (20 Hours or More)
Recommended Skill Level
Intermediate

Comments

moosmani

Mon, 11/11/2013 - 14:56

I kept every receipt from caulking gun to stains and brushes. I just now added it up and it came to (cringe) just under $900. But I have lots of left overs for another shed and it's still a huge bargain. Other sheds that are similar to this plan are much smaller and start at $1,999 and up! I think it was well worth it to have a sturdy bargain shed that's also beautiful.

t0mpr1c3

Sat, 01/22/2022 - 23:01

It looks great with the stain. I think your Dad's advice was good. Also I like that the heavier timbers add rigidity to the frame.

Seasonal And Holiday

Grandy Console Table

Submitted by Anonymous (not verified) on Thu, 01/28/2016 - 17:43

A few notes on our build:
- we wanted to keep the center section open for a wider display by deleting the middle upright

- if using barn door slider kits, you need to take into account the recess and height of these. Recommend either building up the top as we did with layering more boards in a stepped fashion, or going with 1x6 for full clearance.
we dressed up the sides by adding a cross brace. I found a double door kit on Amazon for $125. I now have a spare rail for future project.

- the top was finished from walnut

Overall pretty easy build, and first time spraying paint through HVLP sprayer. Thank you for the plans and ideas!

Built from Plan(s)
Estimated Cost
Walnut top: $150
Barn door hardware: $125
Cabinet materials: $350
Paint and Misc: $40
Estimated Time Investment
Weekend Project (10-20 Hours)
Finish Used
Behr Alkyd Paint, Valspar Matte Poly
Recommended Skill Level
Intermediate

Comments

Kitchen Center

Submitted by RoxanneK on Thu, 07/18/2019 - 19:02

I built this for my Granddaughter, which i must say she loves it.  

I built two of the same centers and turned one around to build the washer instead of a fridge.  

I attempted to make light up burners by purchasing 4 solar lights from the dollar store and gluing them into a shallow pan.  when a pot is placed on top of the solar panel the light comes on.  it is not as bright as i would have liked but she likes it.  I purchased a play sink from Walmart that has a small pump in the tap  so she had running water in her sink.

The hardest par of this build i found was the doors.  i do not have the device to make pocket holes so i drilled holes in the edges and attached the frames of the doors together with wooden dowels.

This project was definitely a learning experience for me but i had a lot of fun building it.  

Built from Plan(s)
Estimated Time Investment
Week Long Project (20 Hours or More)
Finish Used
Not sure of the shade of pink that was used because i purchased it as a mis-tint for $5
The fridge and stove was Safety green Spray Paint
Washer was Safety orange spray paint
Recommended Skill Level
Intermediate

Comments

Ana White

Fri, 07/19/2019 - 16:10

Thank you for using our plans!  We love this kitchen, there will be hours and hours of play here!  We appreciate you adding a brag post - it is very helpful!  Ana

Outdoor Lounge

Submitted by Anonymous (not verified) on Thu, 04/20/2023 - 04:00

We couldn't be happier with our outdoor lounge, and the plans for the 2x4 sofa and chair couldn't have been easier. Most of all, I'm so proud to have been able to make this myself! Thank you Ana!

Comments

Christmas Kitchen Set

Submitted by Fuchsia on Mon, 12/26/2011 - 10:44

My father in law and I built this kitchen set for my two daughters, ages 3 yrs and 9 months. It was so fun to work with my father in law. I have built a few things before (table, chairs, doll bed, etc.) but nothing of this quality or magnitude. He is a great woodworker and knows how to do all the neat finishing touches that just make the project look really professional. I learned a ton working with him and had a blast!
I was inspired by Ana's kitchen sets and used a combo of then and the Lowes plans and I was very happy with how it turned out. I changed a few things: put two doors under the sink, made "gas" burners instead of "electric", used half the sink cabinet top for the sink and left the other half for counter space, added a clock to the stove, made the oven door open down.
The sink is a food service warming pan 1/4 size and the faucet came from Wal-Mart for $10. I will probably replace it with a nicer one from the ReStore when I get a chance
Break down of costs:
Lumber: $100
Hinges and pulls: $40
Paint and primer: $45
Burners: $20
Sink: $24

Estimated Cost
$230
Estimated Time Investment
Week Long Project (20 Hours or More)
Finish Used
Exterior: Glidden Red Delicious high gloss enamel
Interior: White
Oven: grey stone textured spray paint
Recommended Skill Level
Intermediate

Comments

Cindy from Indiana (not verified)

Mon, 12/26/2011 - 13:09

Holy cow! Fantastic job! You guys really pulled it together and I really love the creative use of hardware, etc.

Fuchsia

Wed, 02/29/2012 - 10:03

Sorry I didn't see your comment sooner - I made the burners with craft wood circles and squares and 1/2 inch pieces of wood. I notched the ends over the circle with a chisel.

Media Console

Submitted by kittykat on Fri, 11/15/2013 - 17:31

Took a 3 day weekend to put this together. We used biscuit joiner so that we wouldn't have any gaps in the top. Left the back open so our consoles could breath in their little spots. Modified the plans so it's only 4 foot long and fits perfectly under our TV.

Built from Plan(s)
Estimated Time Investment
Weekend Project (10-20 Hours)
Finish Used
Black paint and walnut stain
Recommended Skill Level
Intermediate

Hailey Planked Headboard

Submitted by Anonymous (not verified) on Sun, 01/31/2016 - 20:40

Loved building this headboard for my daughter's bed.  She loves it!

Built from Plan(s)
Estimated Time Investment
Weekend Project (10-20 Hours)
Recommended Skill Level
Beginner

Barnwood Frame

This is my first completed project from Ana's website!! I used a 1x3 around the picture and then a 1x2 for the trim. I bought a corner clamp to hold the corners together while I nailed.
The picture I made it for is 17" x 14 1/4" so I just took off 1/4" all the way around the picture to measure the length and width of the frame.

I think it turned out pretty good, but there were a few things that didn't turn out as planned. I didn't wipe up the glue that seeped out of the cracks good enough, and so my stain has a few "unstained" areas. Also, my last piece of trim didn't fit very well, so I had to cut another one that fit better.

Since this is my first project, I'm pretty proud of the way it turned out :)

Estimated Cost
$10
Estimated Time Investment
Afternoon Project (3-6 Hours)
Finish Used
Sanded with 120
Stain in "Red Oak" (1 coat)
Recommended Skill Level
Starter Project

BatStool

Submitted by Builder J on Mon, 11/18/2013 - 10:14

Kids Stool. Not the hardest project, but a fun one.

I am so happy with how the paint job turned out. Did the support boards yellow to look like his utility belt. And the Leg have accented Blue like his gloves/boots.

My wife painted the logo on after tracing the pattern. She did an amazing job.

The top isn't one piece, because I didnt have a thick enough piece that was 13" in diameter. So its actually three boards from an old pallet, glued and pocket hole screwed together.

Built from Plan(s)
Estimated Cost
$5
Estimated Time Investment
Afternoon Project (3-6 Hours)
Finish Used
Custom Painting
Recommended Skill Level
Intermediate