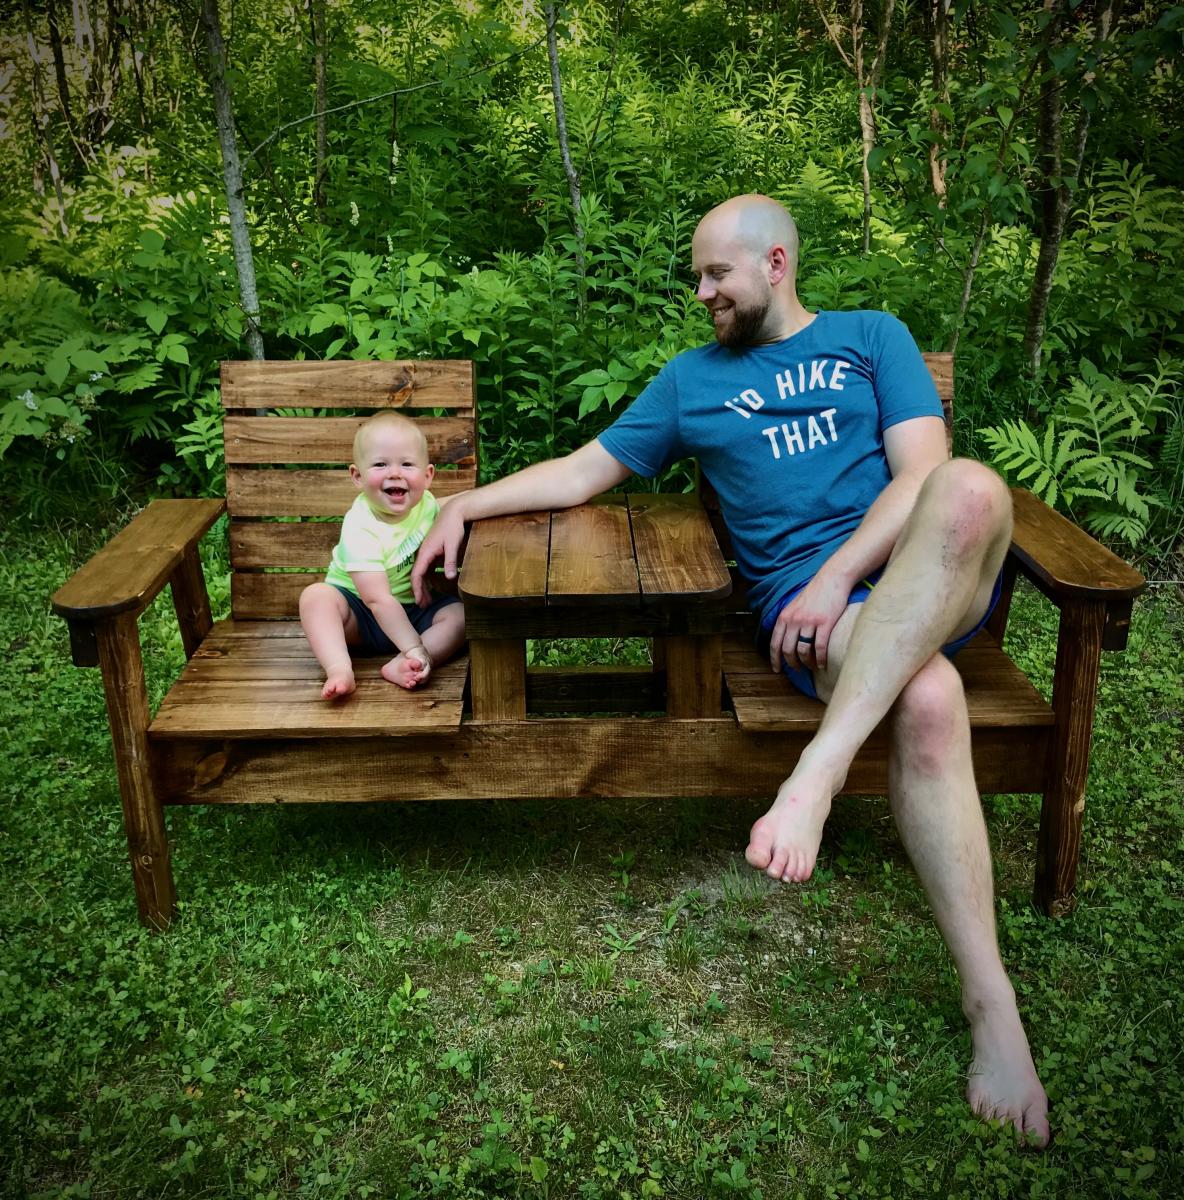
Modern 2x4 Adirondack Chairs
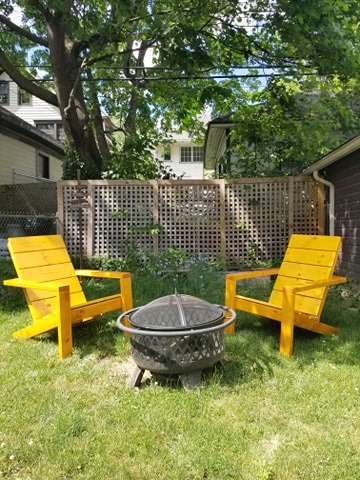
Modified 1x6 slats for seat and seat-back. Purchased four 1x6x8s for both chairs to replace 1x10s
Built from Plan(s)
Finish Used
Cabot Gold Sundrenched Oak
Modified 1x6 slats for seat and seat-back. Purchased four 1x6x8s for both chairs to replace 1x10s
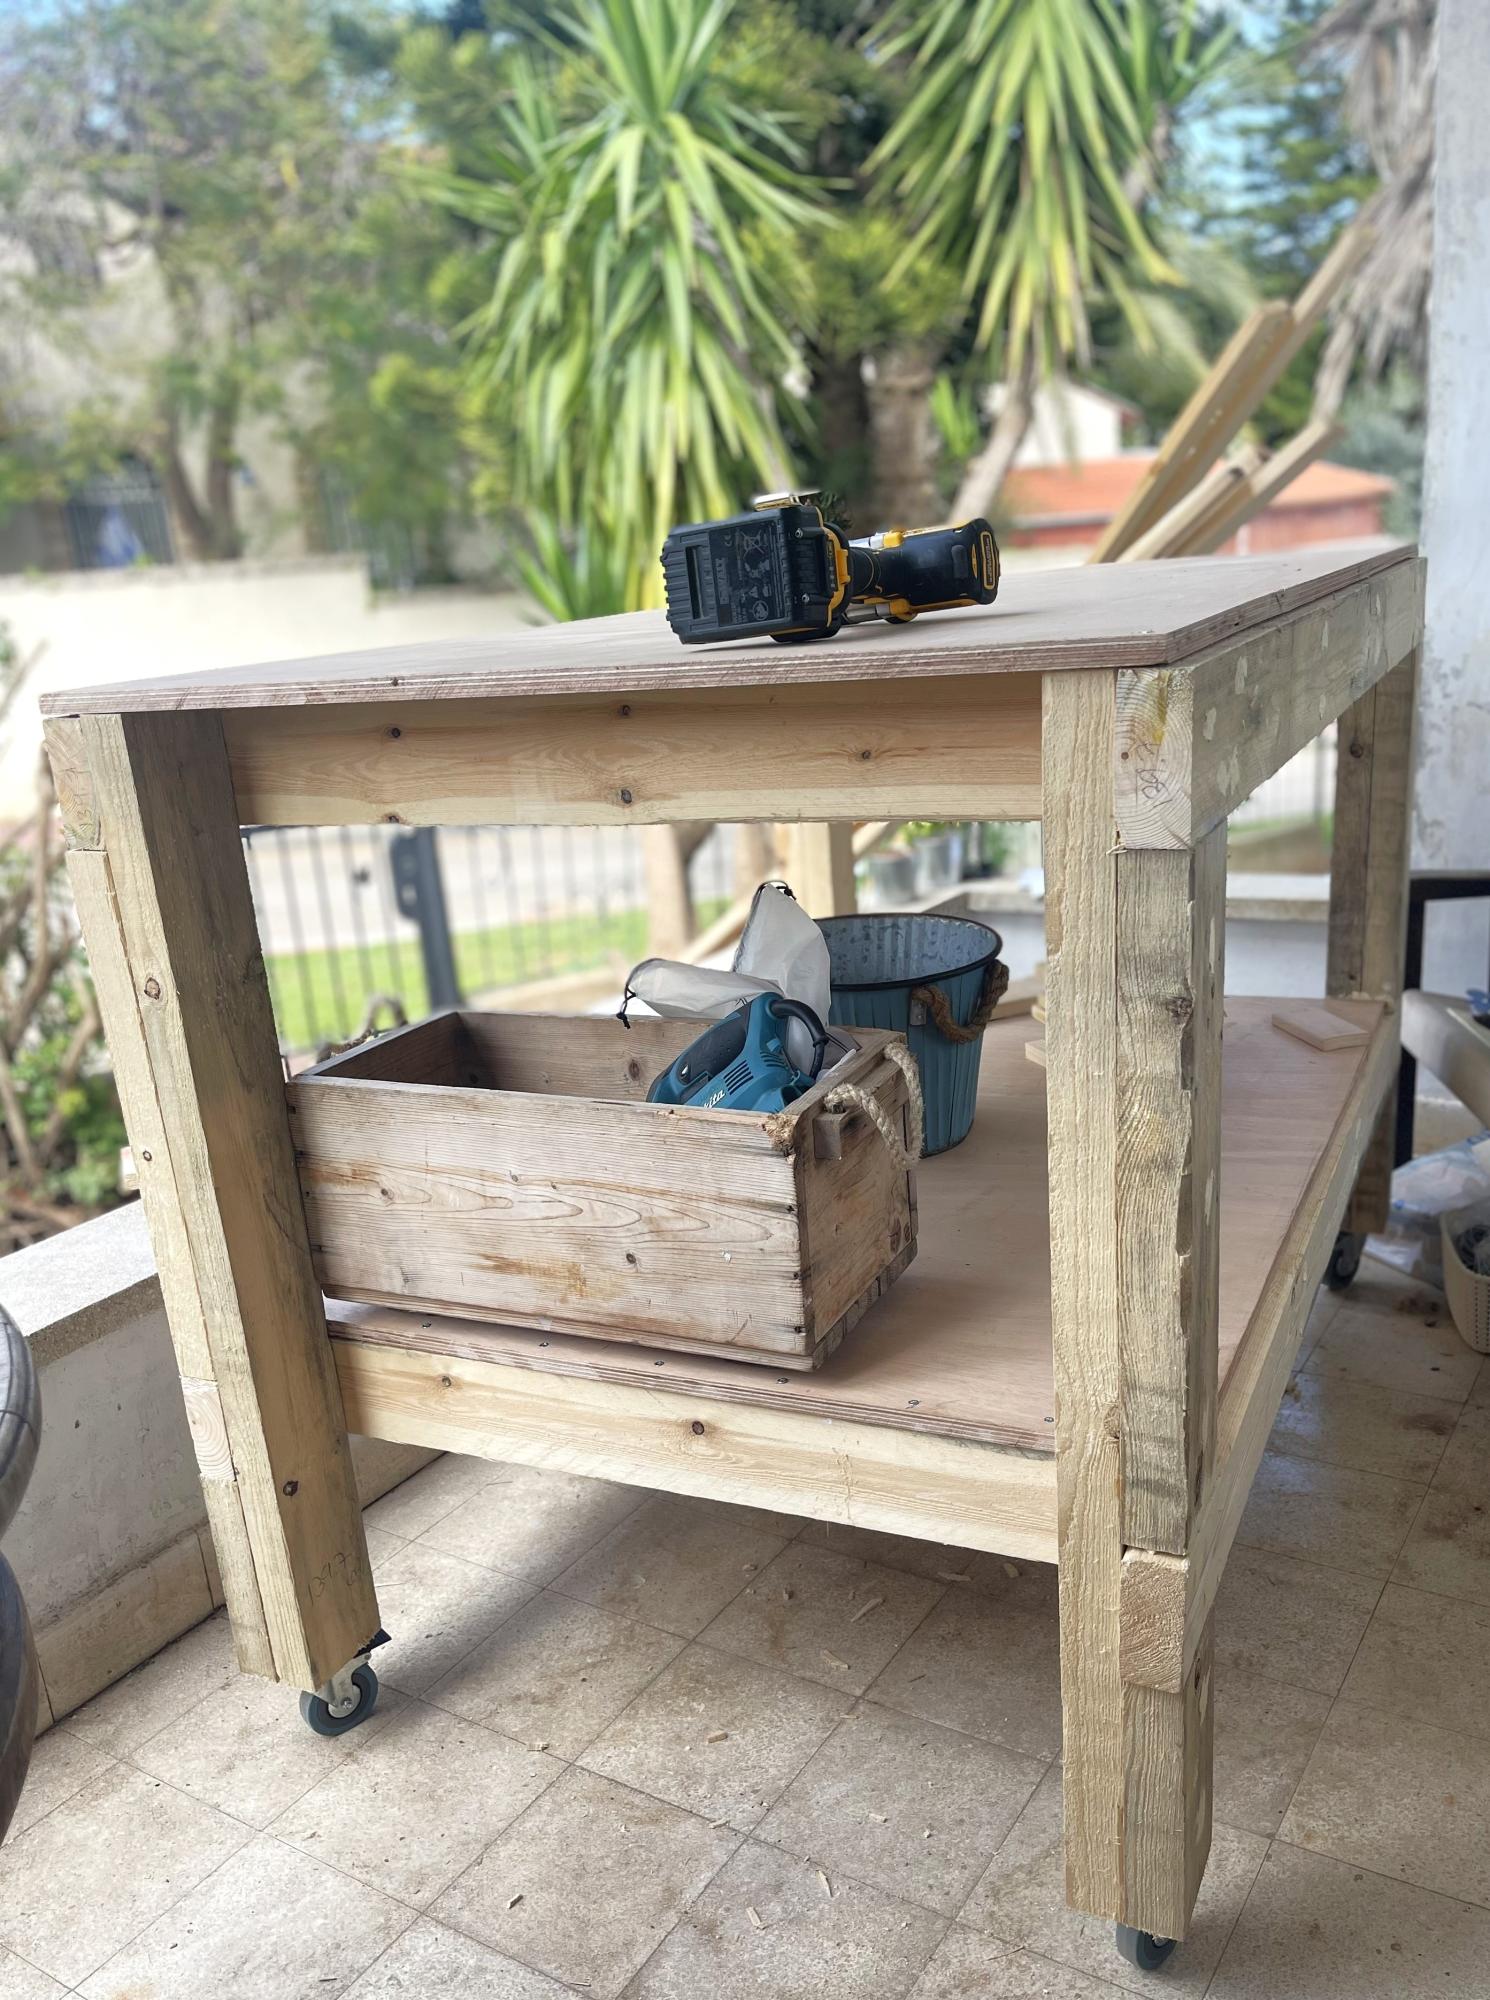
Easy Build Workbench by Dana
* I have tred EVERYTHING to get this picture right side up!!! So sorry it is upside down! This was my first every woodworking project and I am very pleased with the result. I have used it many time since for other projects now too. The plans were easy to follow and although it took me some time it was easy to make. Very sturdy and a great size to work on. I made it out of wood from orange and stained it with weathered oak stain.

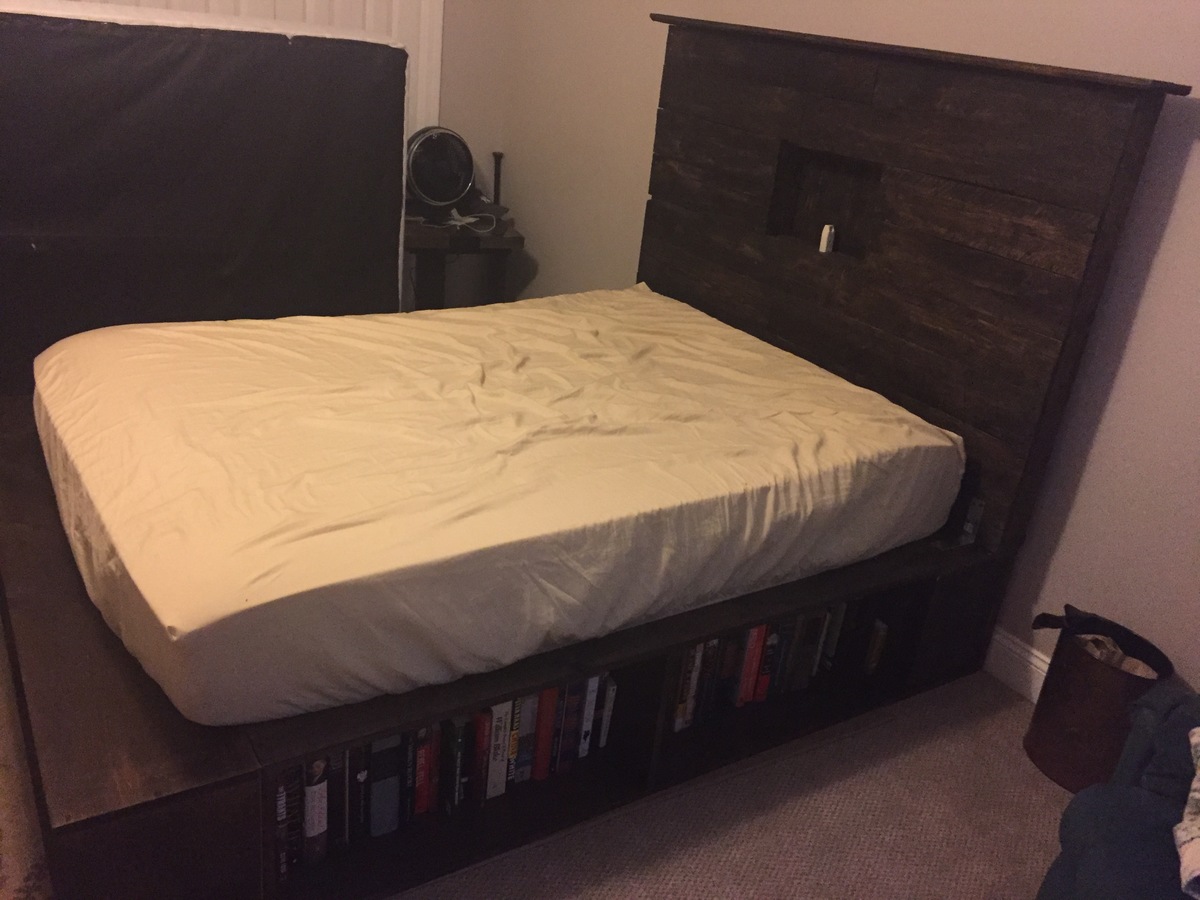
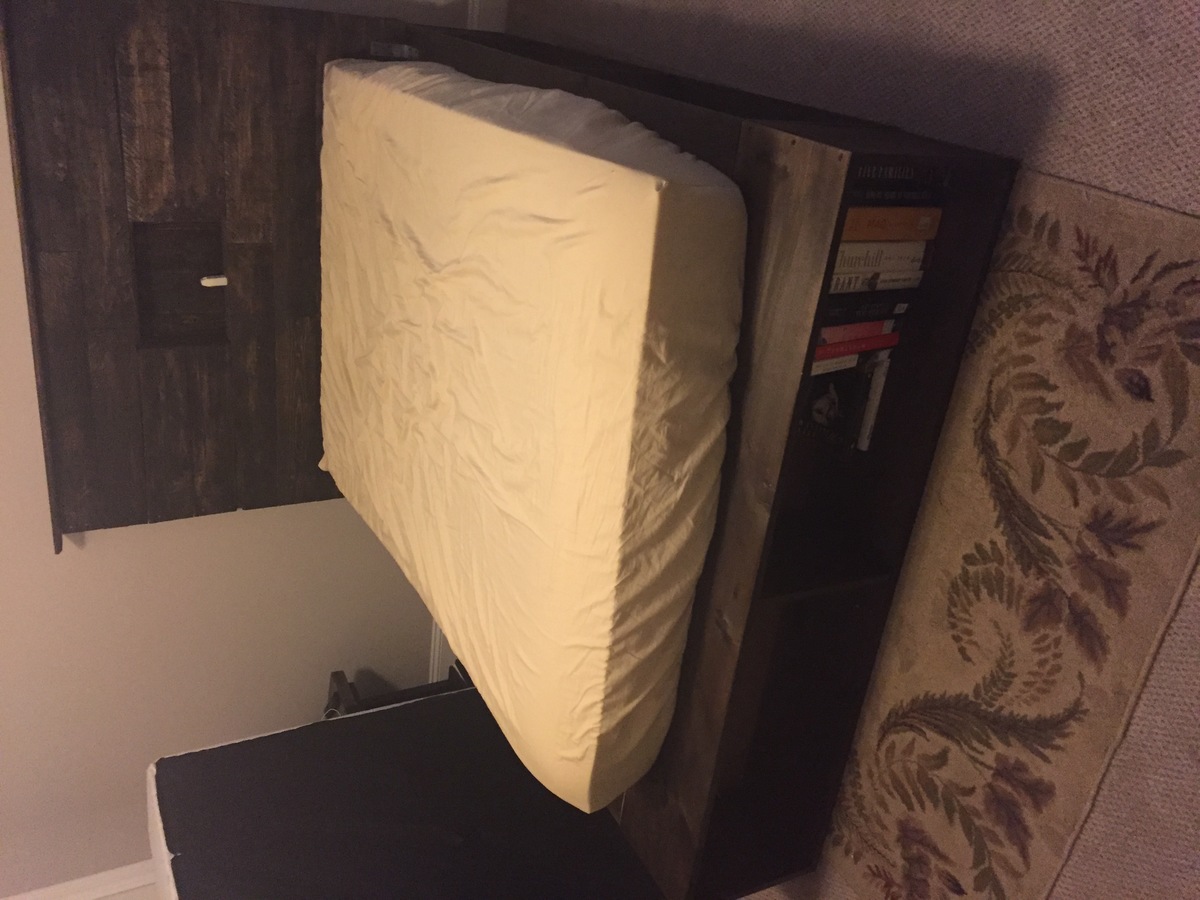
I built this bed for my two year old son and it is super sturdy! I used some Rockler bed rail hardware to attach the rails to the headboard/footboard for easier disassembly later. I attempted the tea/vinegar/steel wool staining technique with fairly good results. The plywood turned a little more gray than I wanted though. I spent around $100 for all of the supplies (wood + pocket hole screws), but a huge chunk of that was the 3/4" Maple plywood, and I only used half of the sheet. So, I guess the actual cost of the bed was closer to $75. Luckily, I'll be able to use the rest of the plywood for some beds for my daughters. This bed was super easy to build and my son loves it!


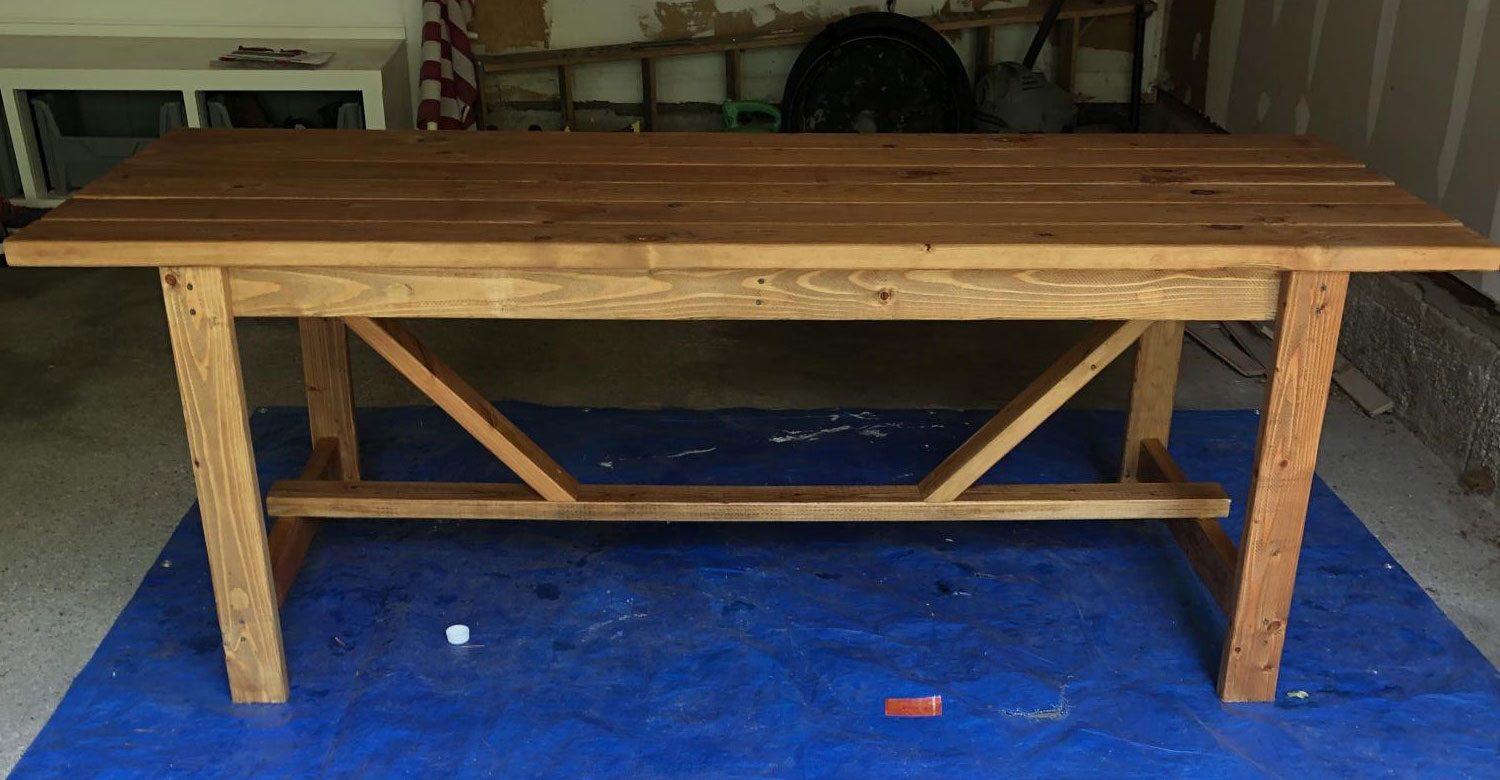
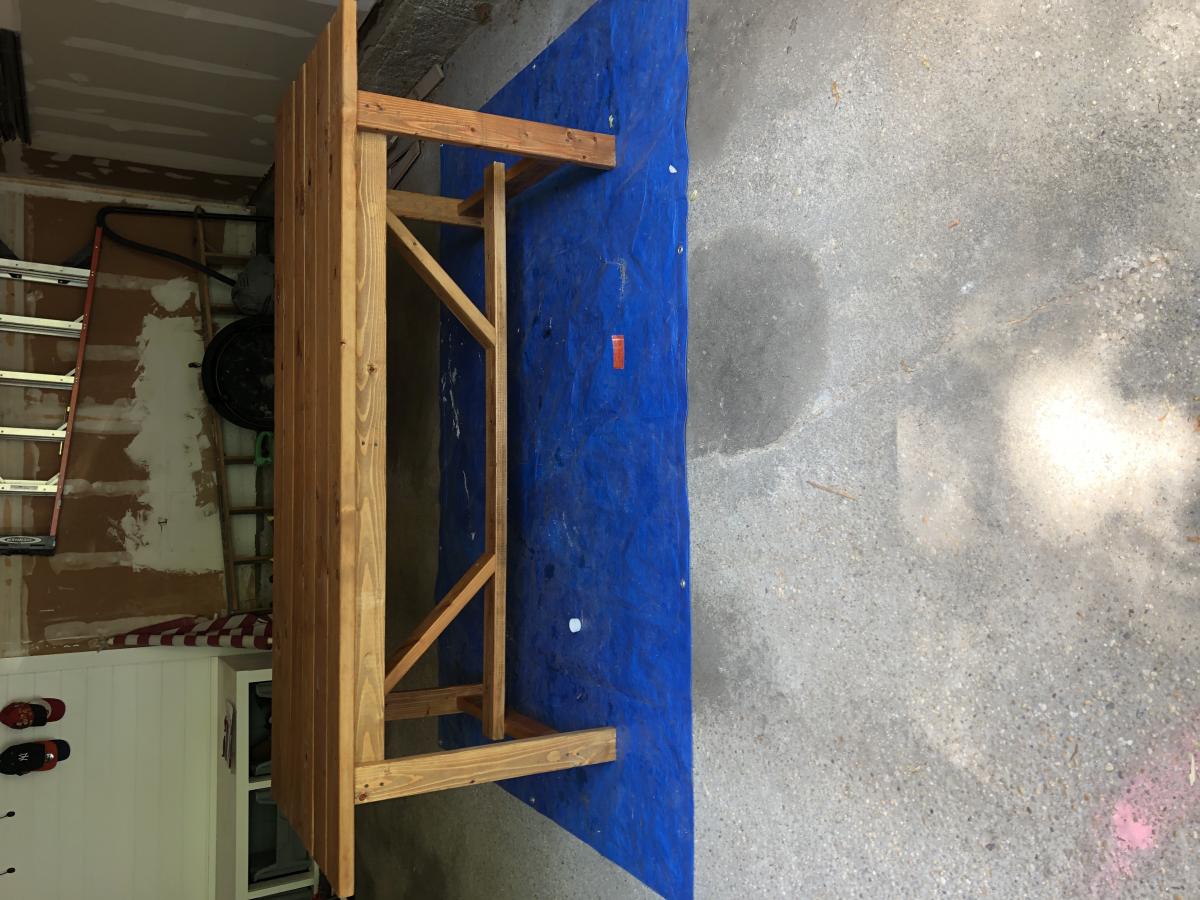
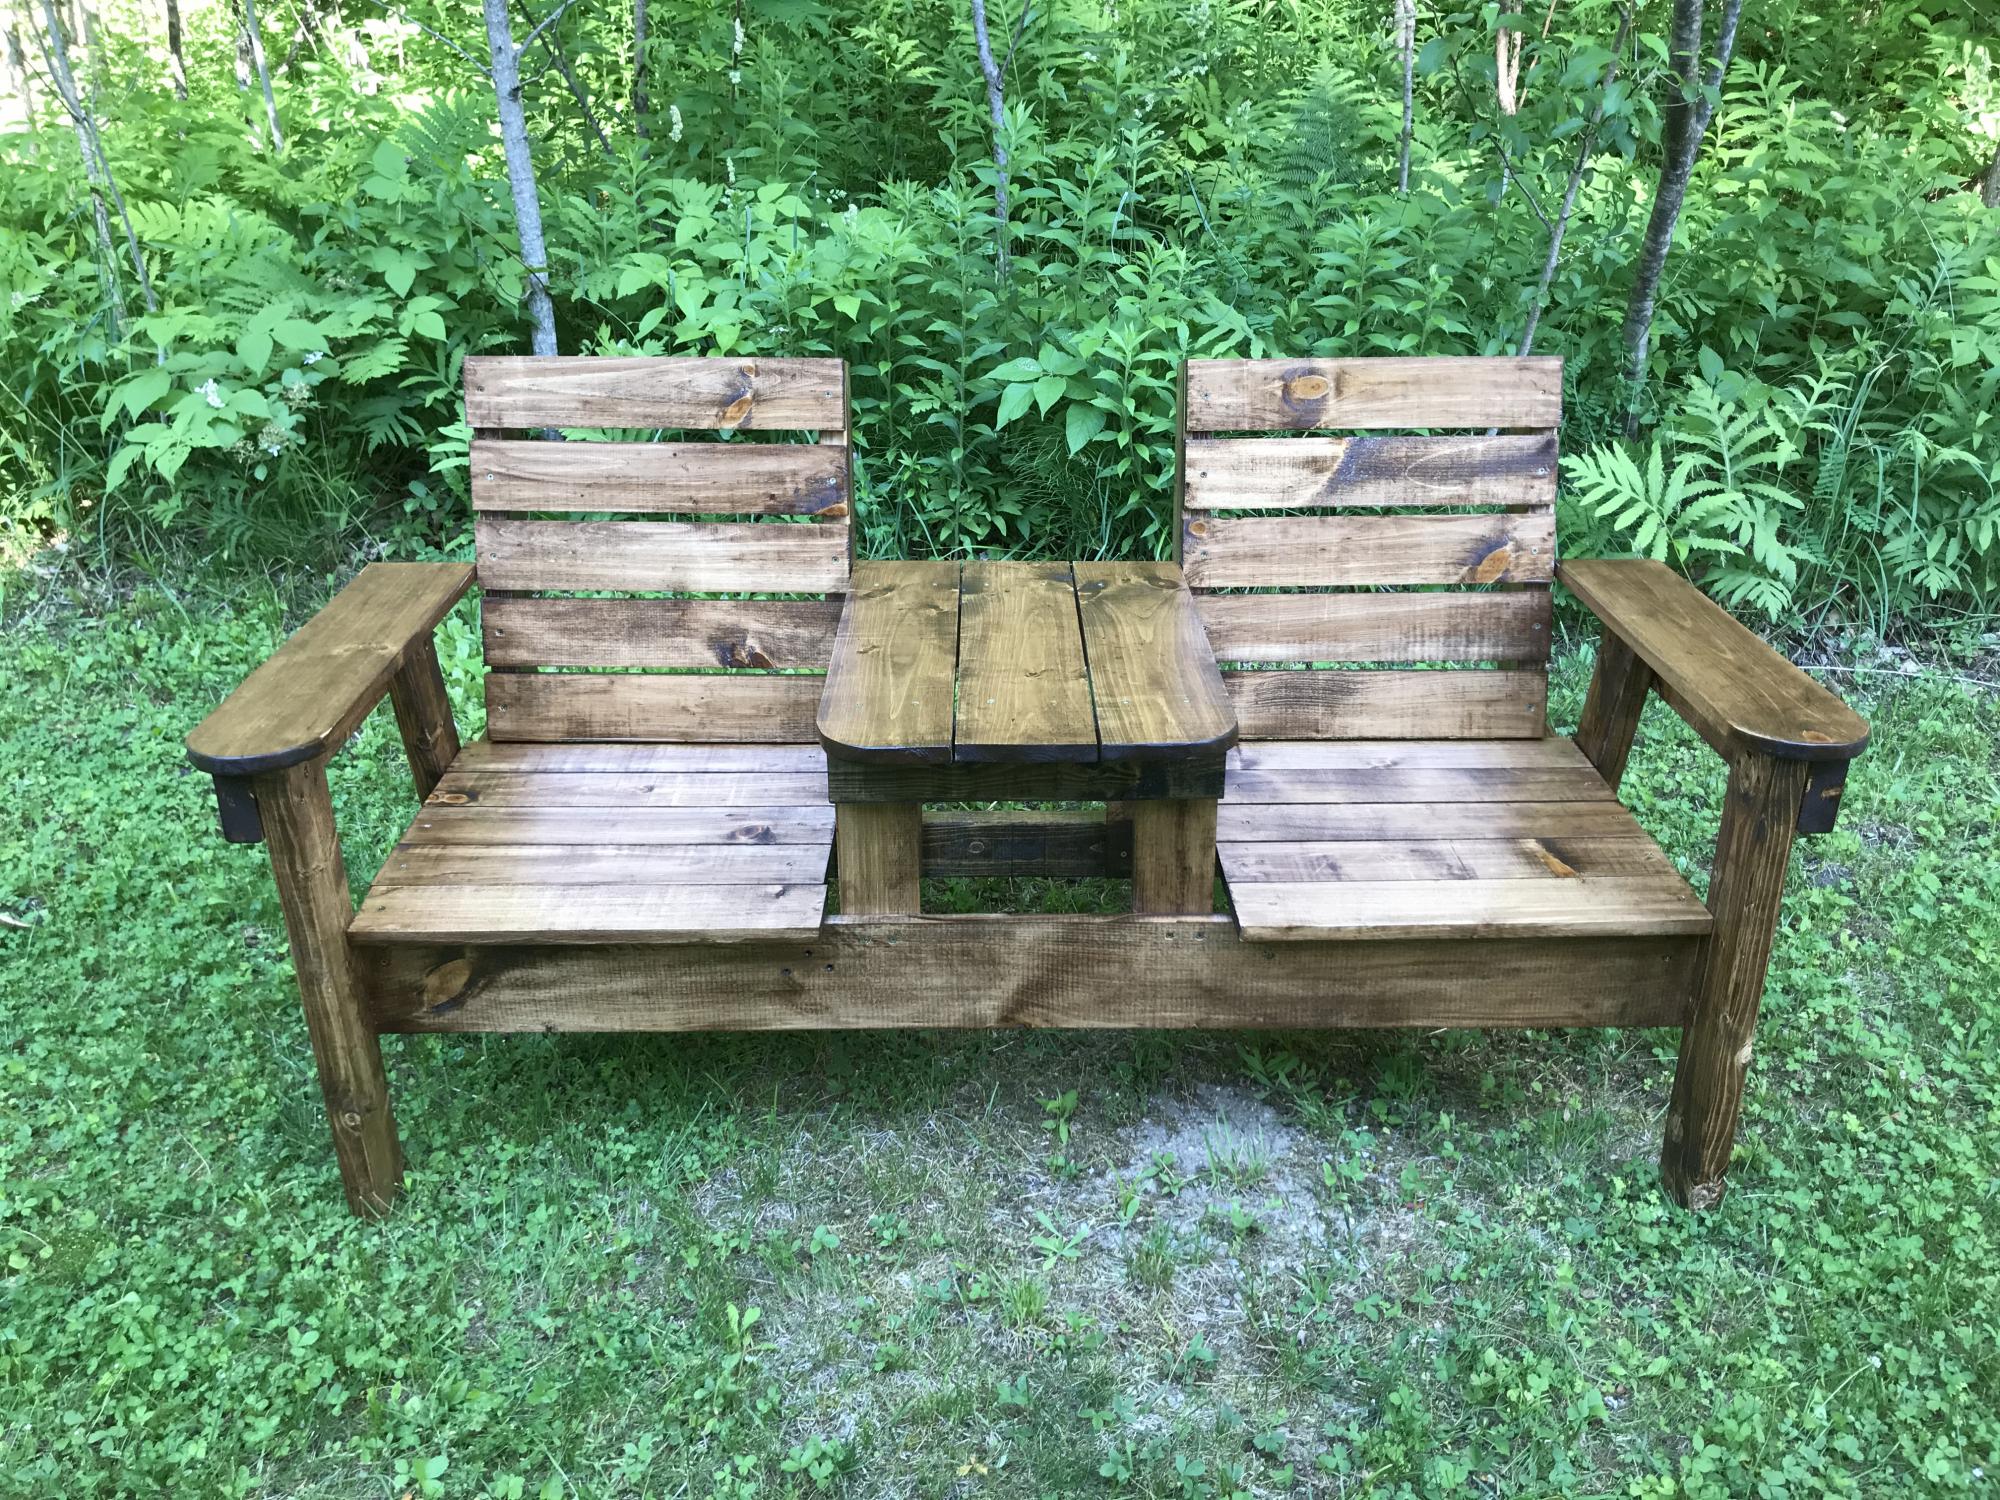
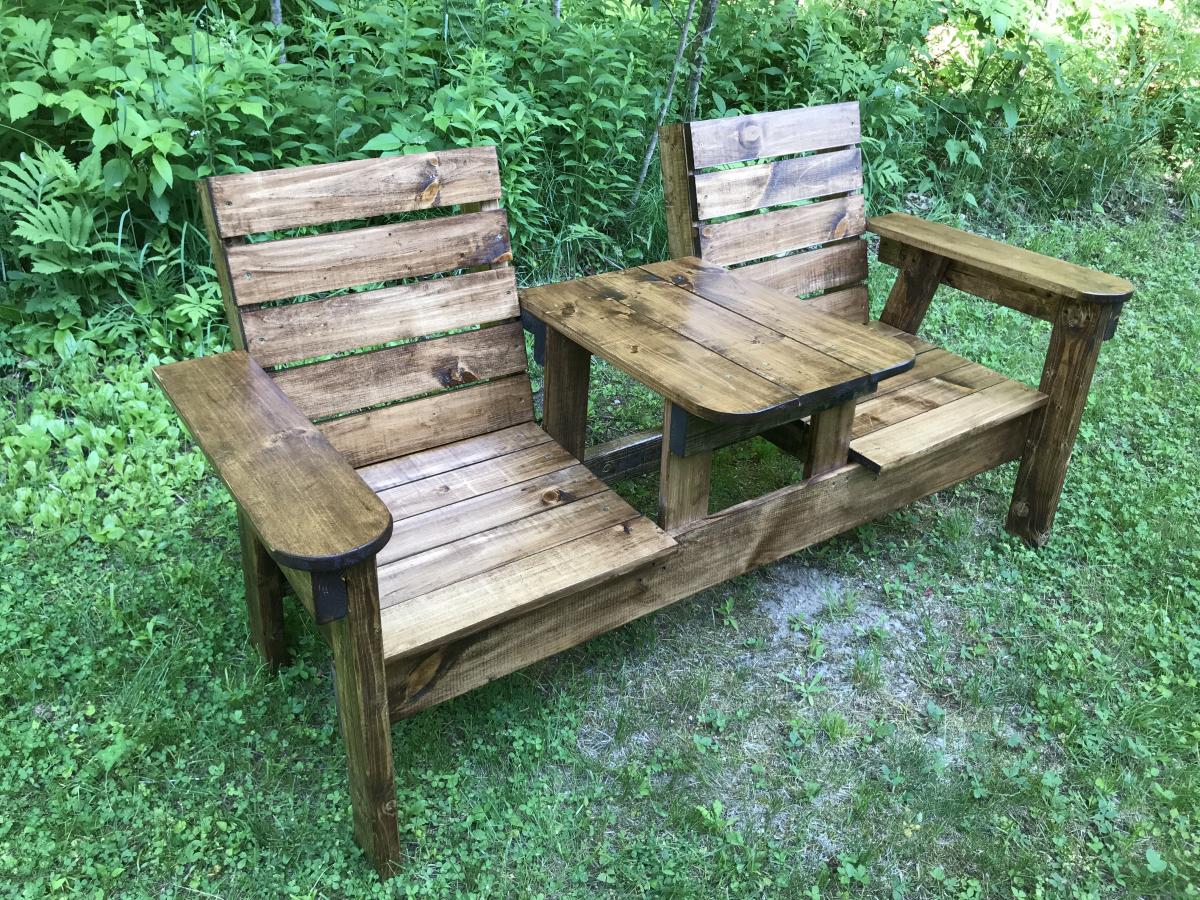
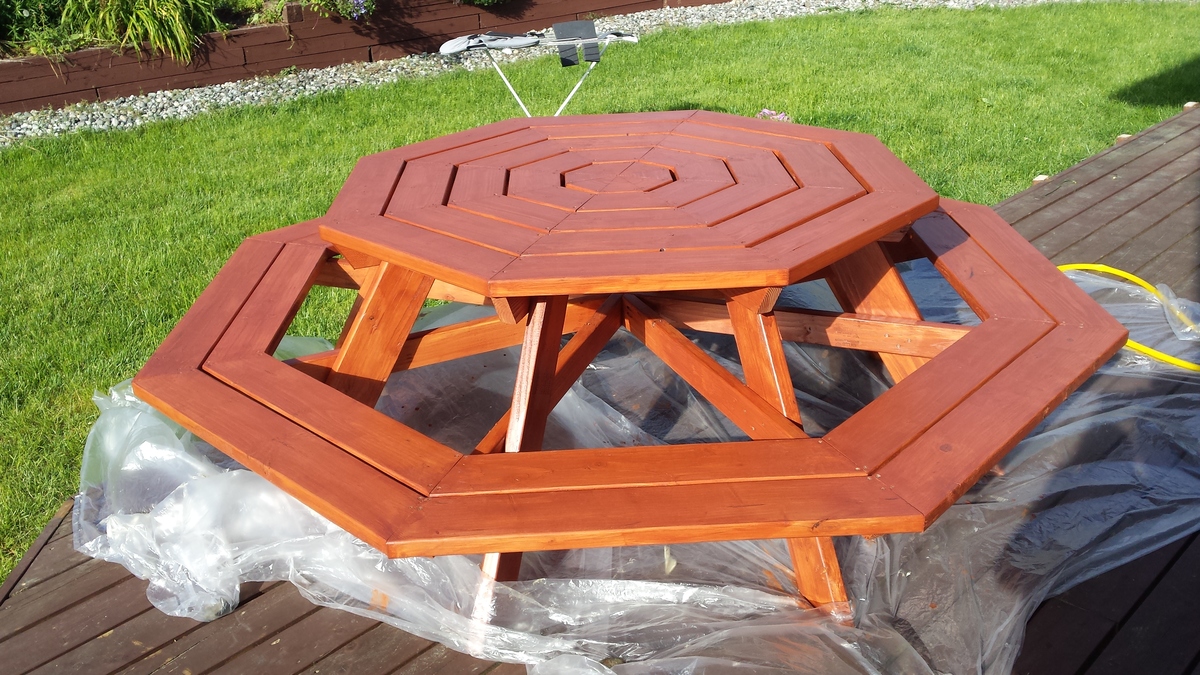
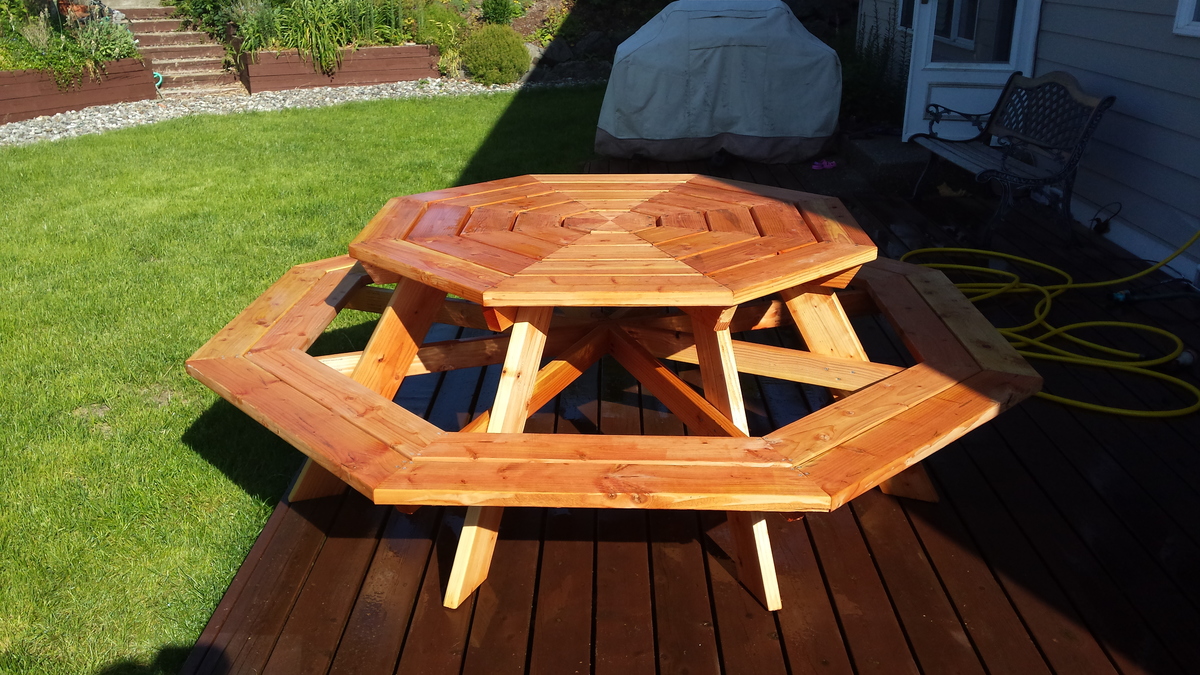
Used watco danish oil. Table will be used outside not sure how the danish oil will hold up by itself. May add polyurethane or if it falls apart I’ll build new next years. Also added diagonal supports at the bottom because it swayed a bit
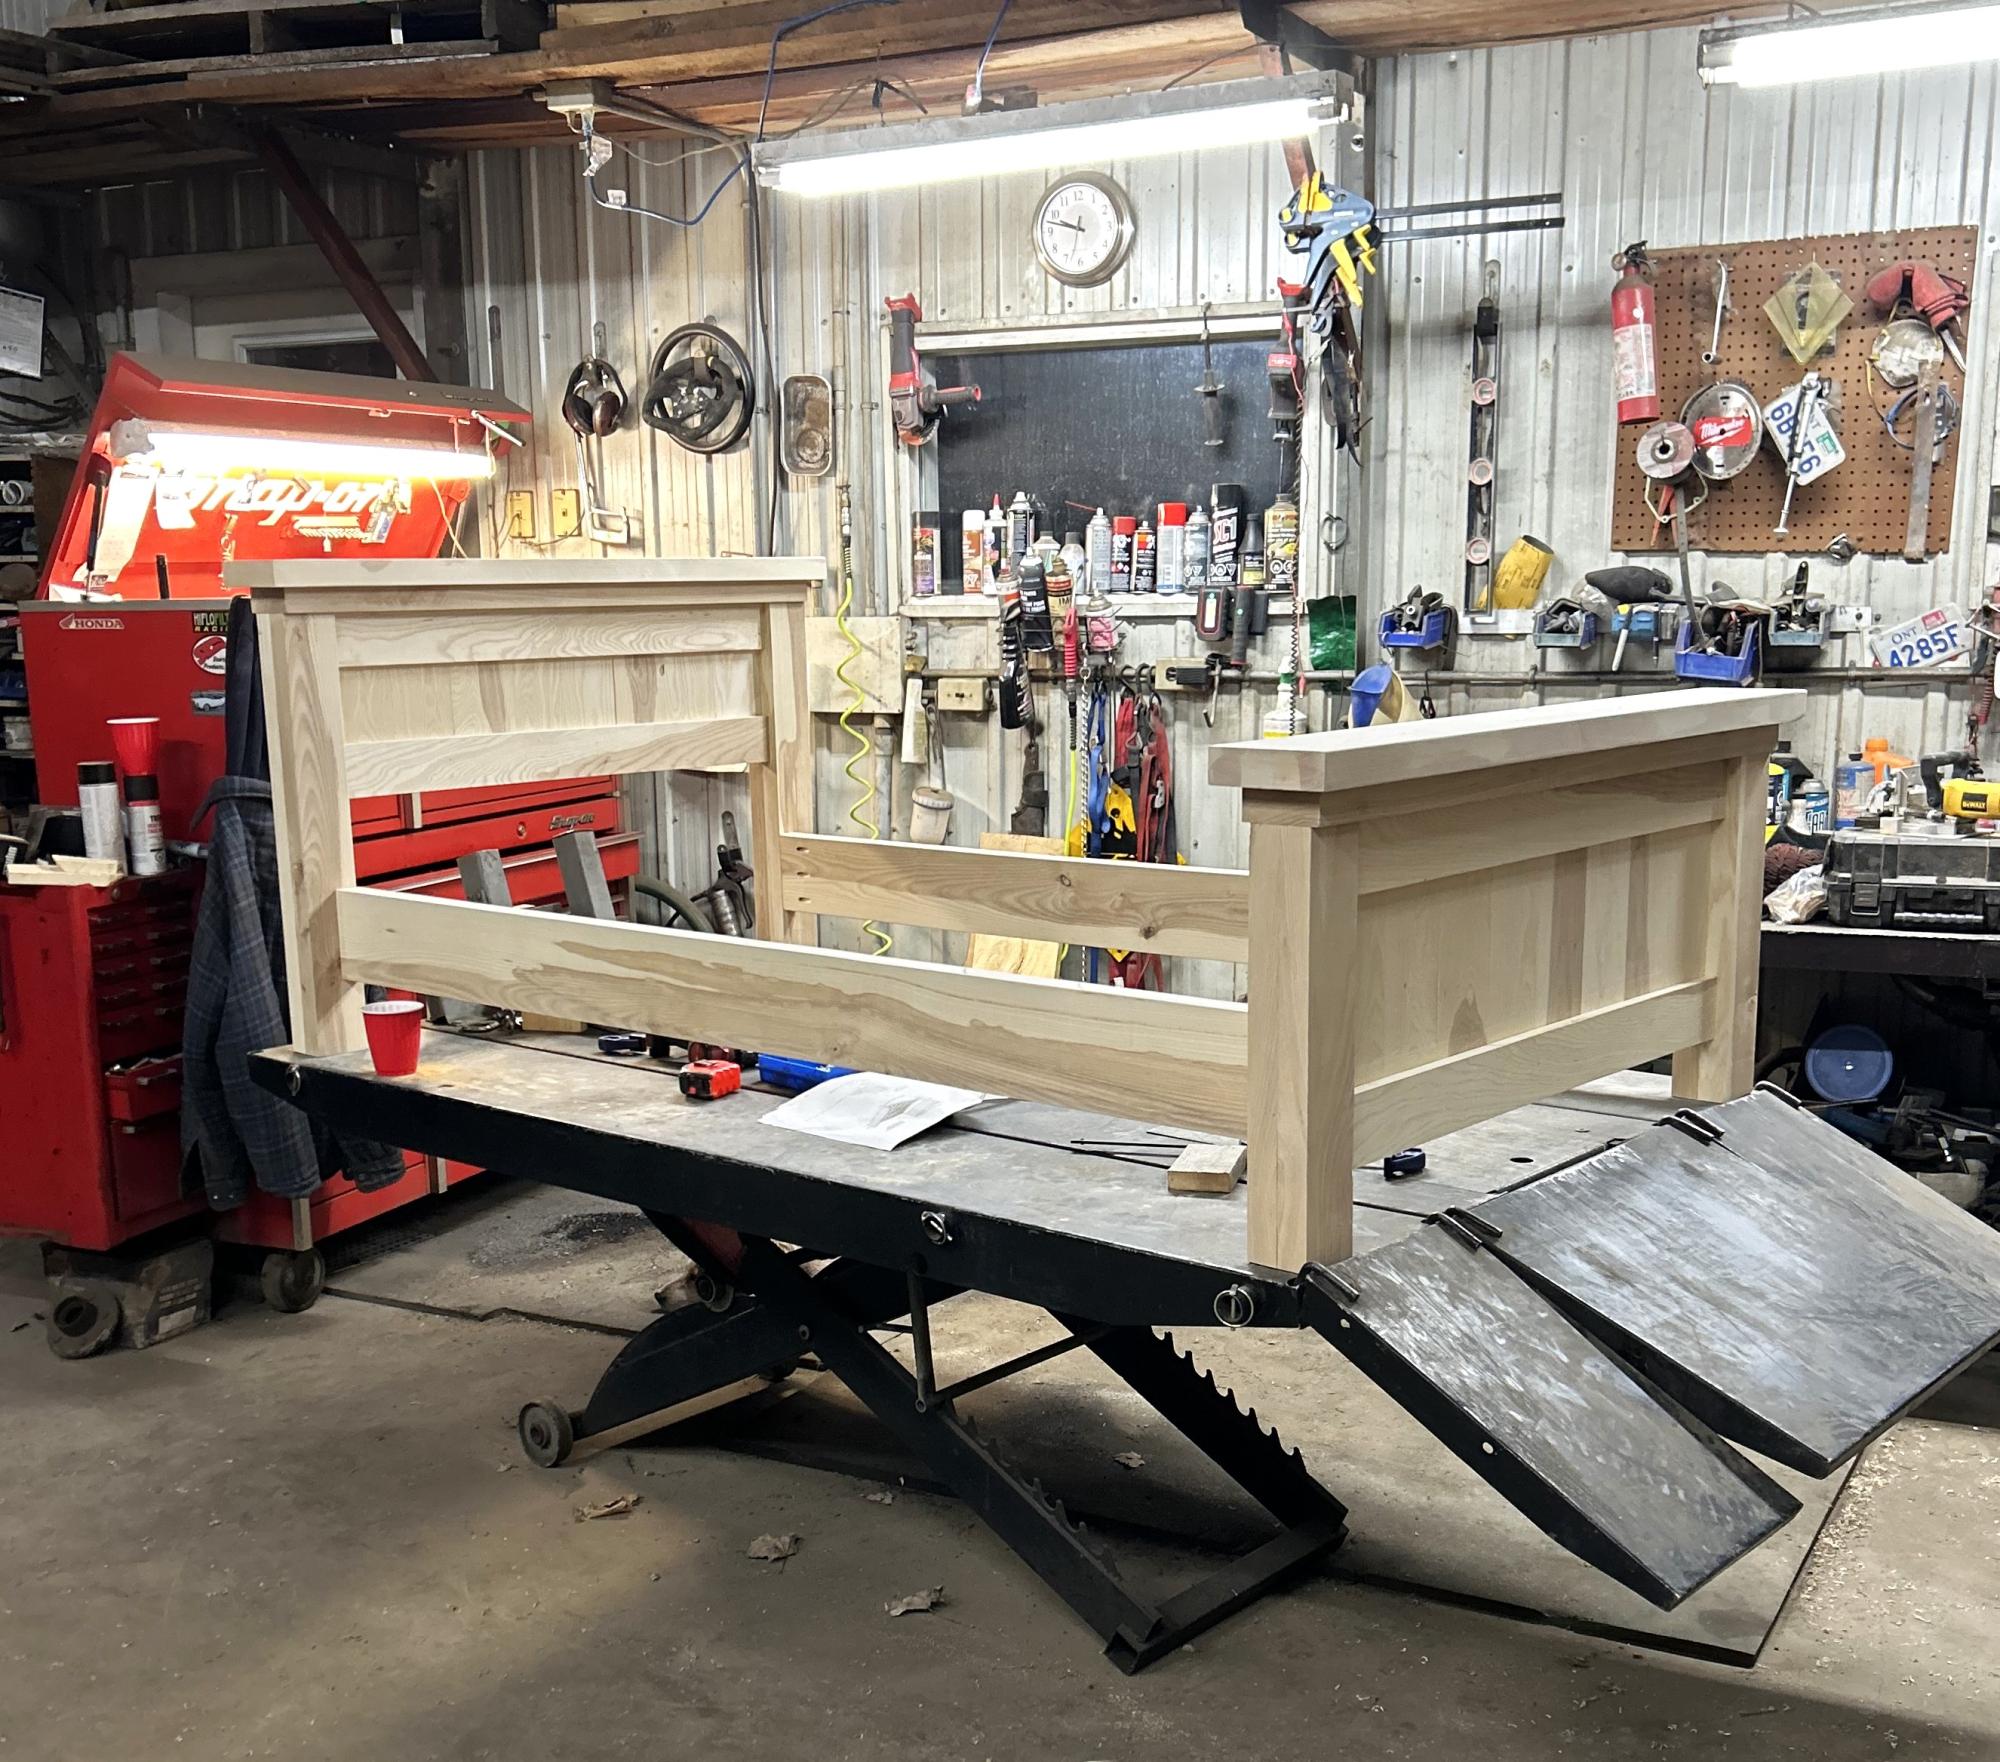
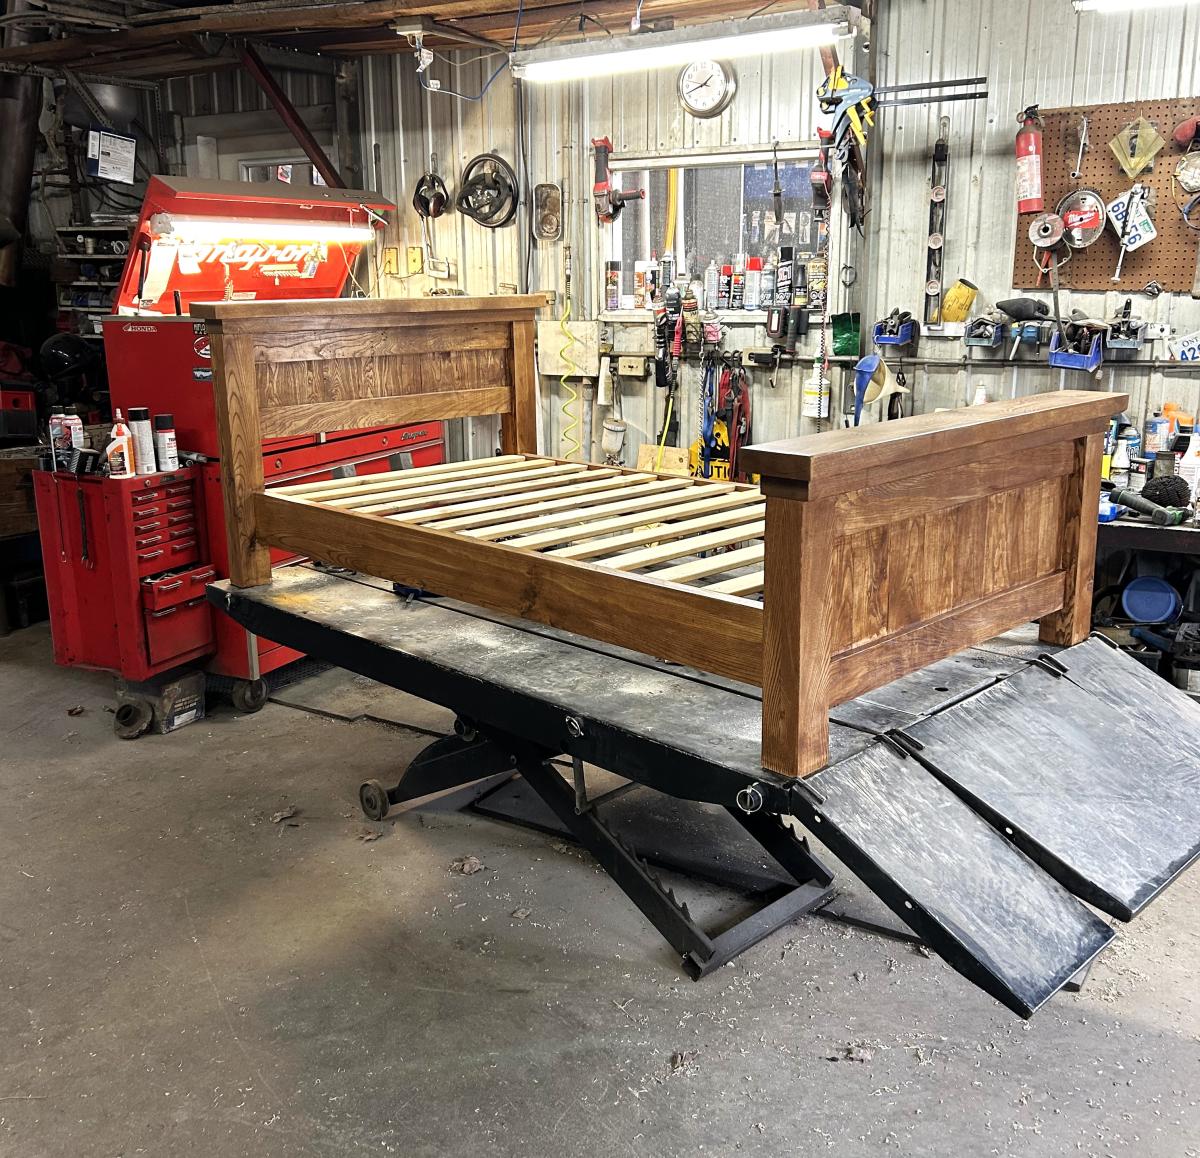
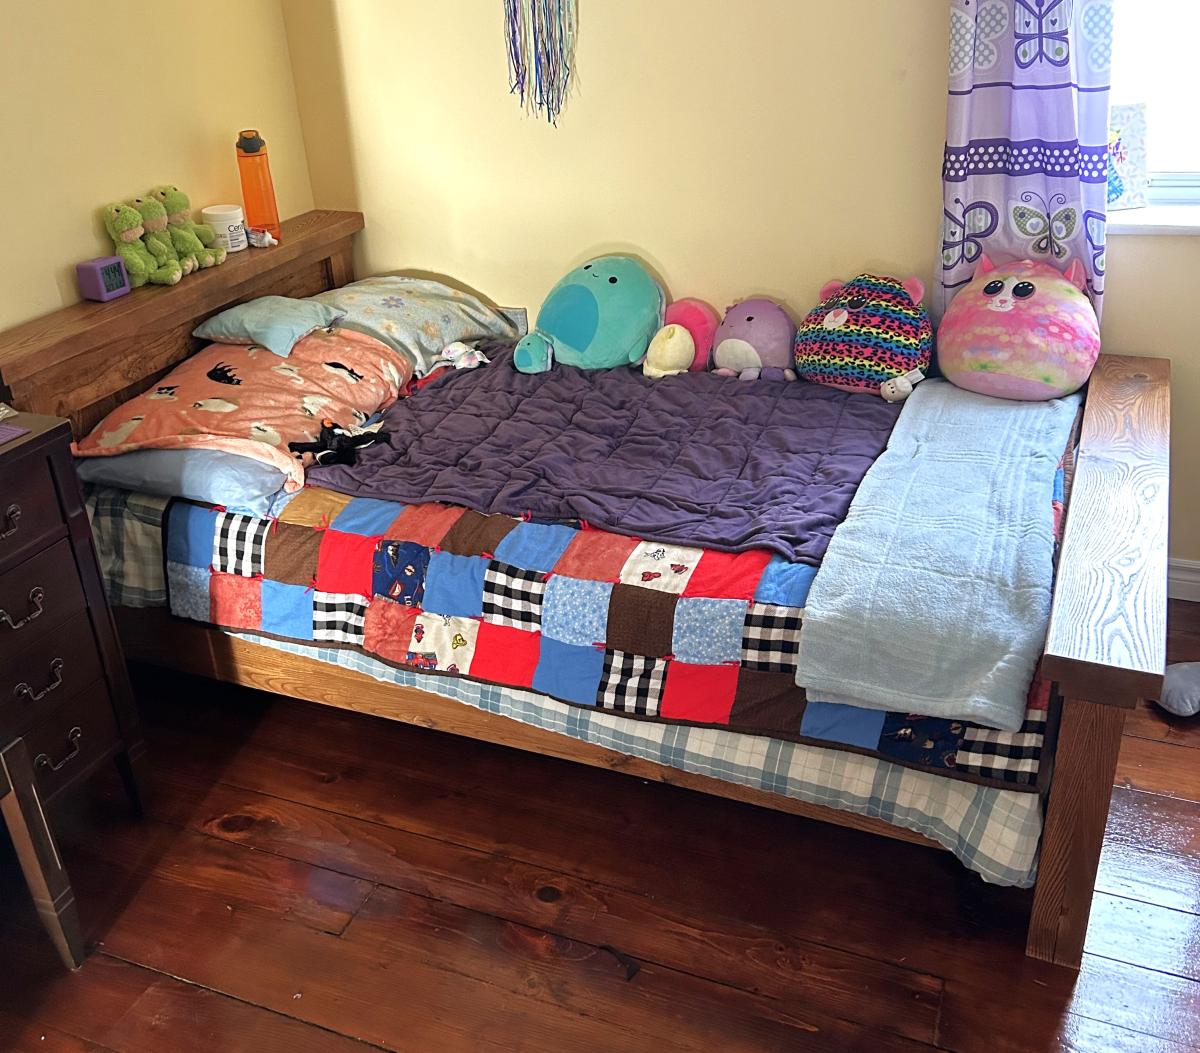
This was my first time building a pice of furniture. My daughter needed a bed and I had a bunch of ash lumber in my barn. Turned out great. Thanks for the great design.

Combination of the Farmhouse table (http://ana-white.com/2009/12/plans-farmhouse-table-knock-off-of.html) and the simple, cheap, easy console table (http://ana-white.com/2009/11/plan-simple-cheap-and-easy-console.html).
I wanted it taller so that I could make rolling crates to push underneath and might add a shelf later on to maximize storage potential. I kept the lengths of the pallets except for the side supports which I just cut in half, I wish I had cut a little more off the side supports making it so that I didn't waste as much pallet wood cutting the wood for the table top but I love it nonetheless and I have bonfire wood for our next get together. Right now I'm enjoying it since it's my first Ana-White project.
I used two free pallets I scored on a yard sale group on Facebook, lots of sanding, and I had the paint (one coat to keep it rustic) and screws on hand so it was a free project. I only received one splinter (should of been wearing gloves) and added an embellishment with chalk board paint (stating the year that my husband and I met since he just left on deployment). It took me 5 hours (I told you it was a lot of sanding) over the weekend. Fun project, can't wait to get started on the next one :)


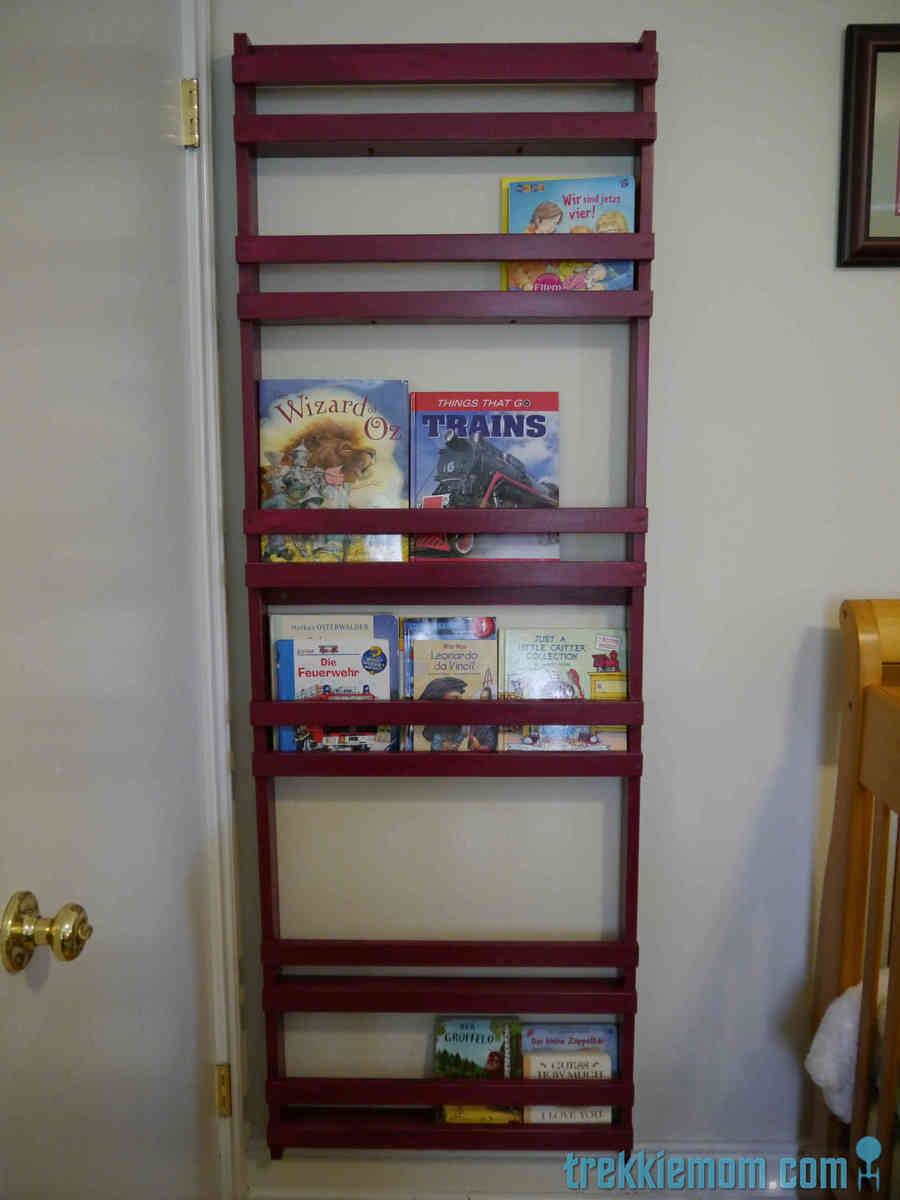
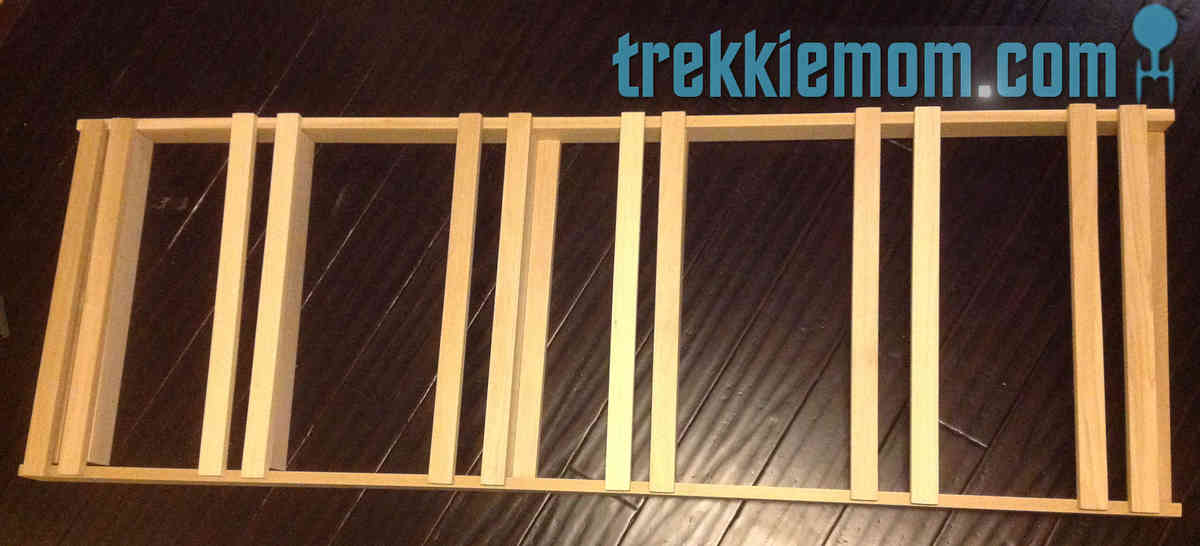
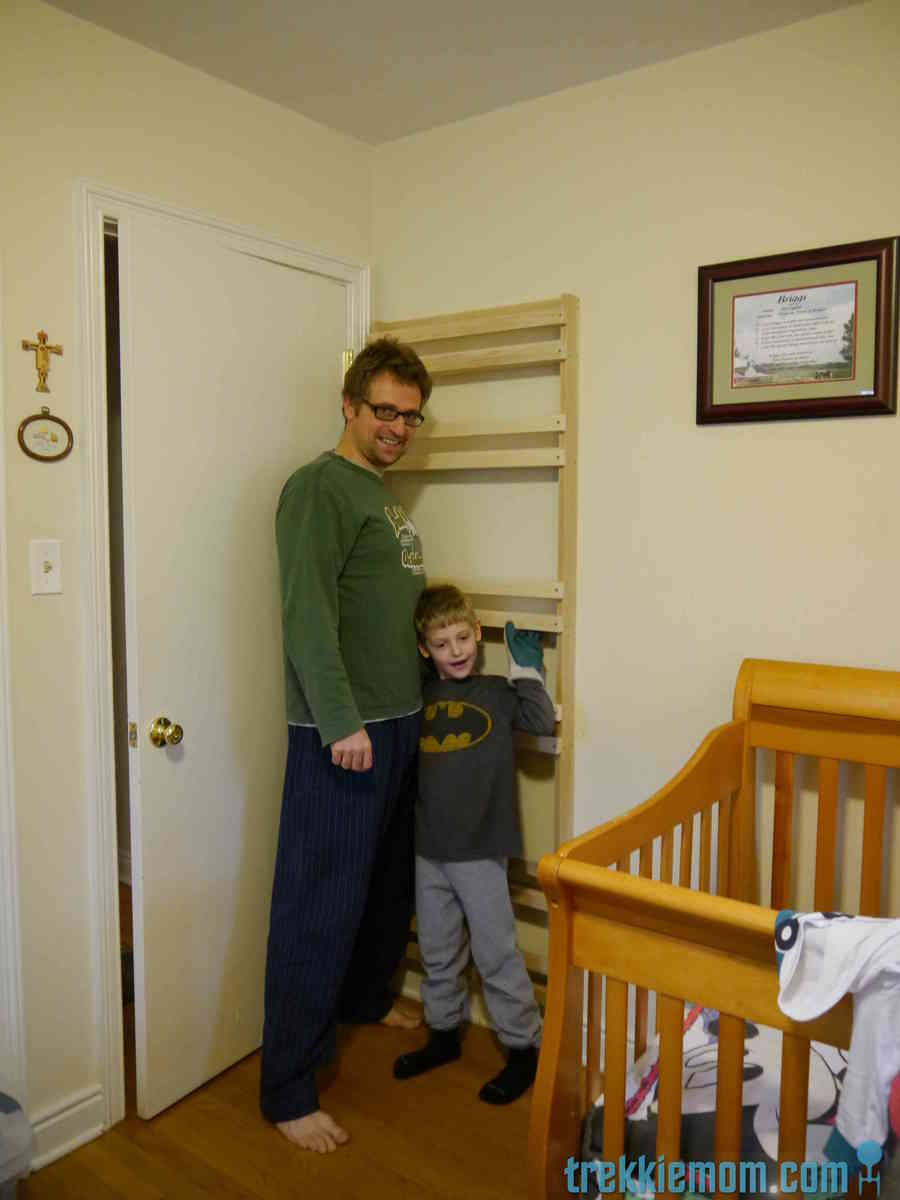
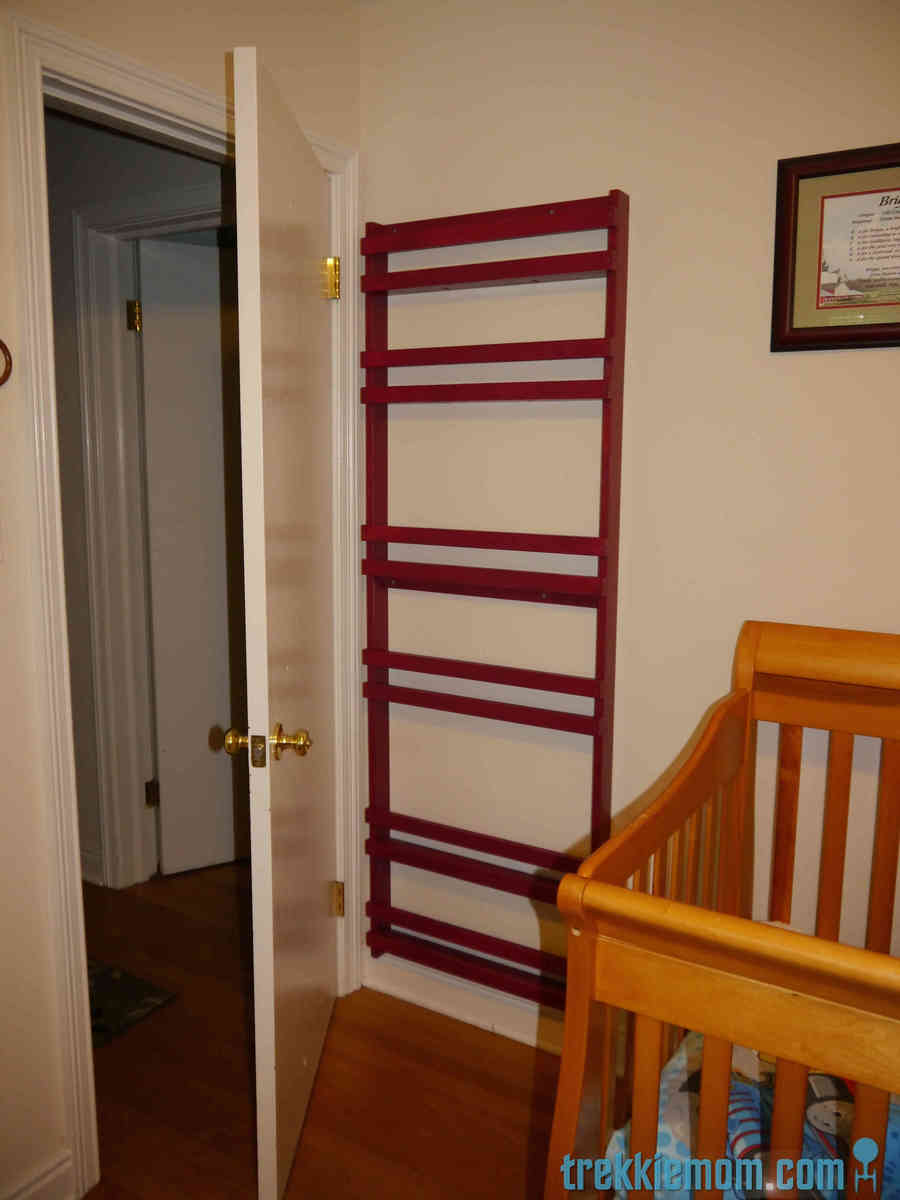
Our home is small, about 1600 sq/ft, so I am on a mission to create as much out of the way storage as possible. It feels like a loosing battle, but I suppose with 2 young children most mothers feel like this with or without more square footage. You might wonder why I don't buy furniture to solve my problems? My answer to that question is that most of the furniture out there is too expensive, it doesn't fit the space available, and just doesn't suit all of our needs. Most importantly, I know that I can make it myself, build it better, and use quality materials. No particle board here, thank you.
So, my storage solution for my boys books was inspired by the Ana Whites Flat Wall Book Shelves (http://ana-white.com/2010/04/plans-wall-book-racks-easy-and-inexpensive…). I wanted to maximize my storage and make a good use of space in our already cramped home.
Please visit my blog for a complete DIY on my version if you are interested.
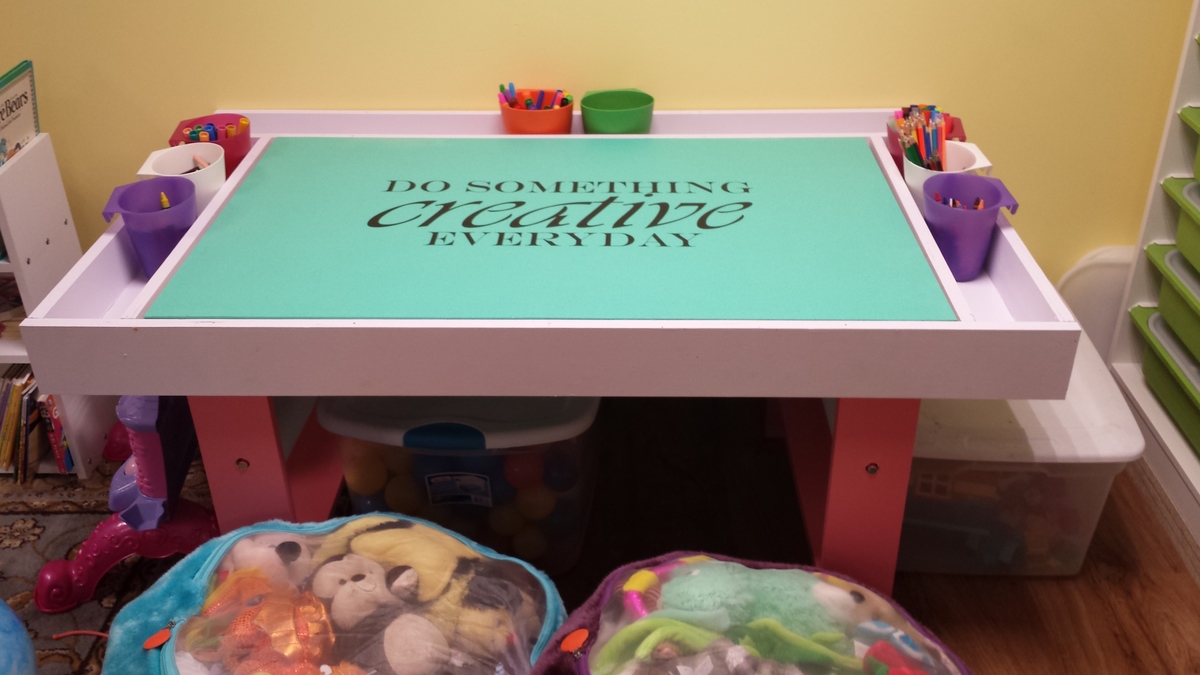
Built from the Art Desk plans. I added an additional tray and a second paper roll. Also made mine from 1 sheet of plywood. Used paint samples we had from previous painting projects, added glitter to make it sparkle.

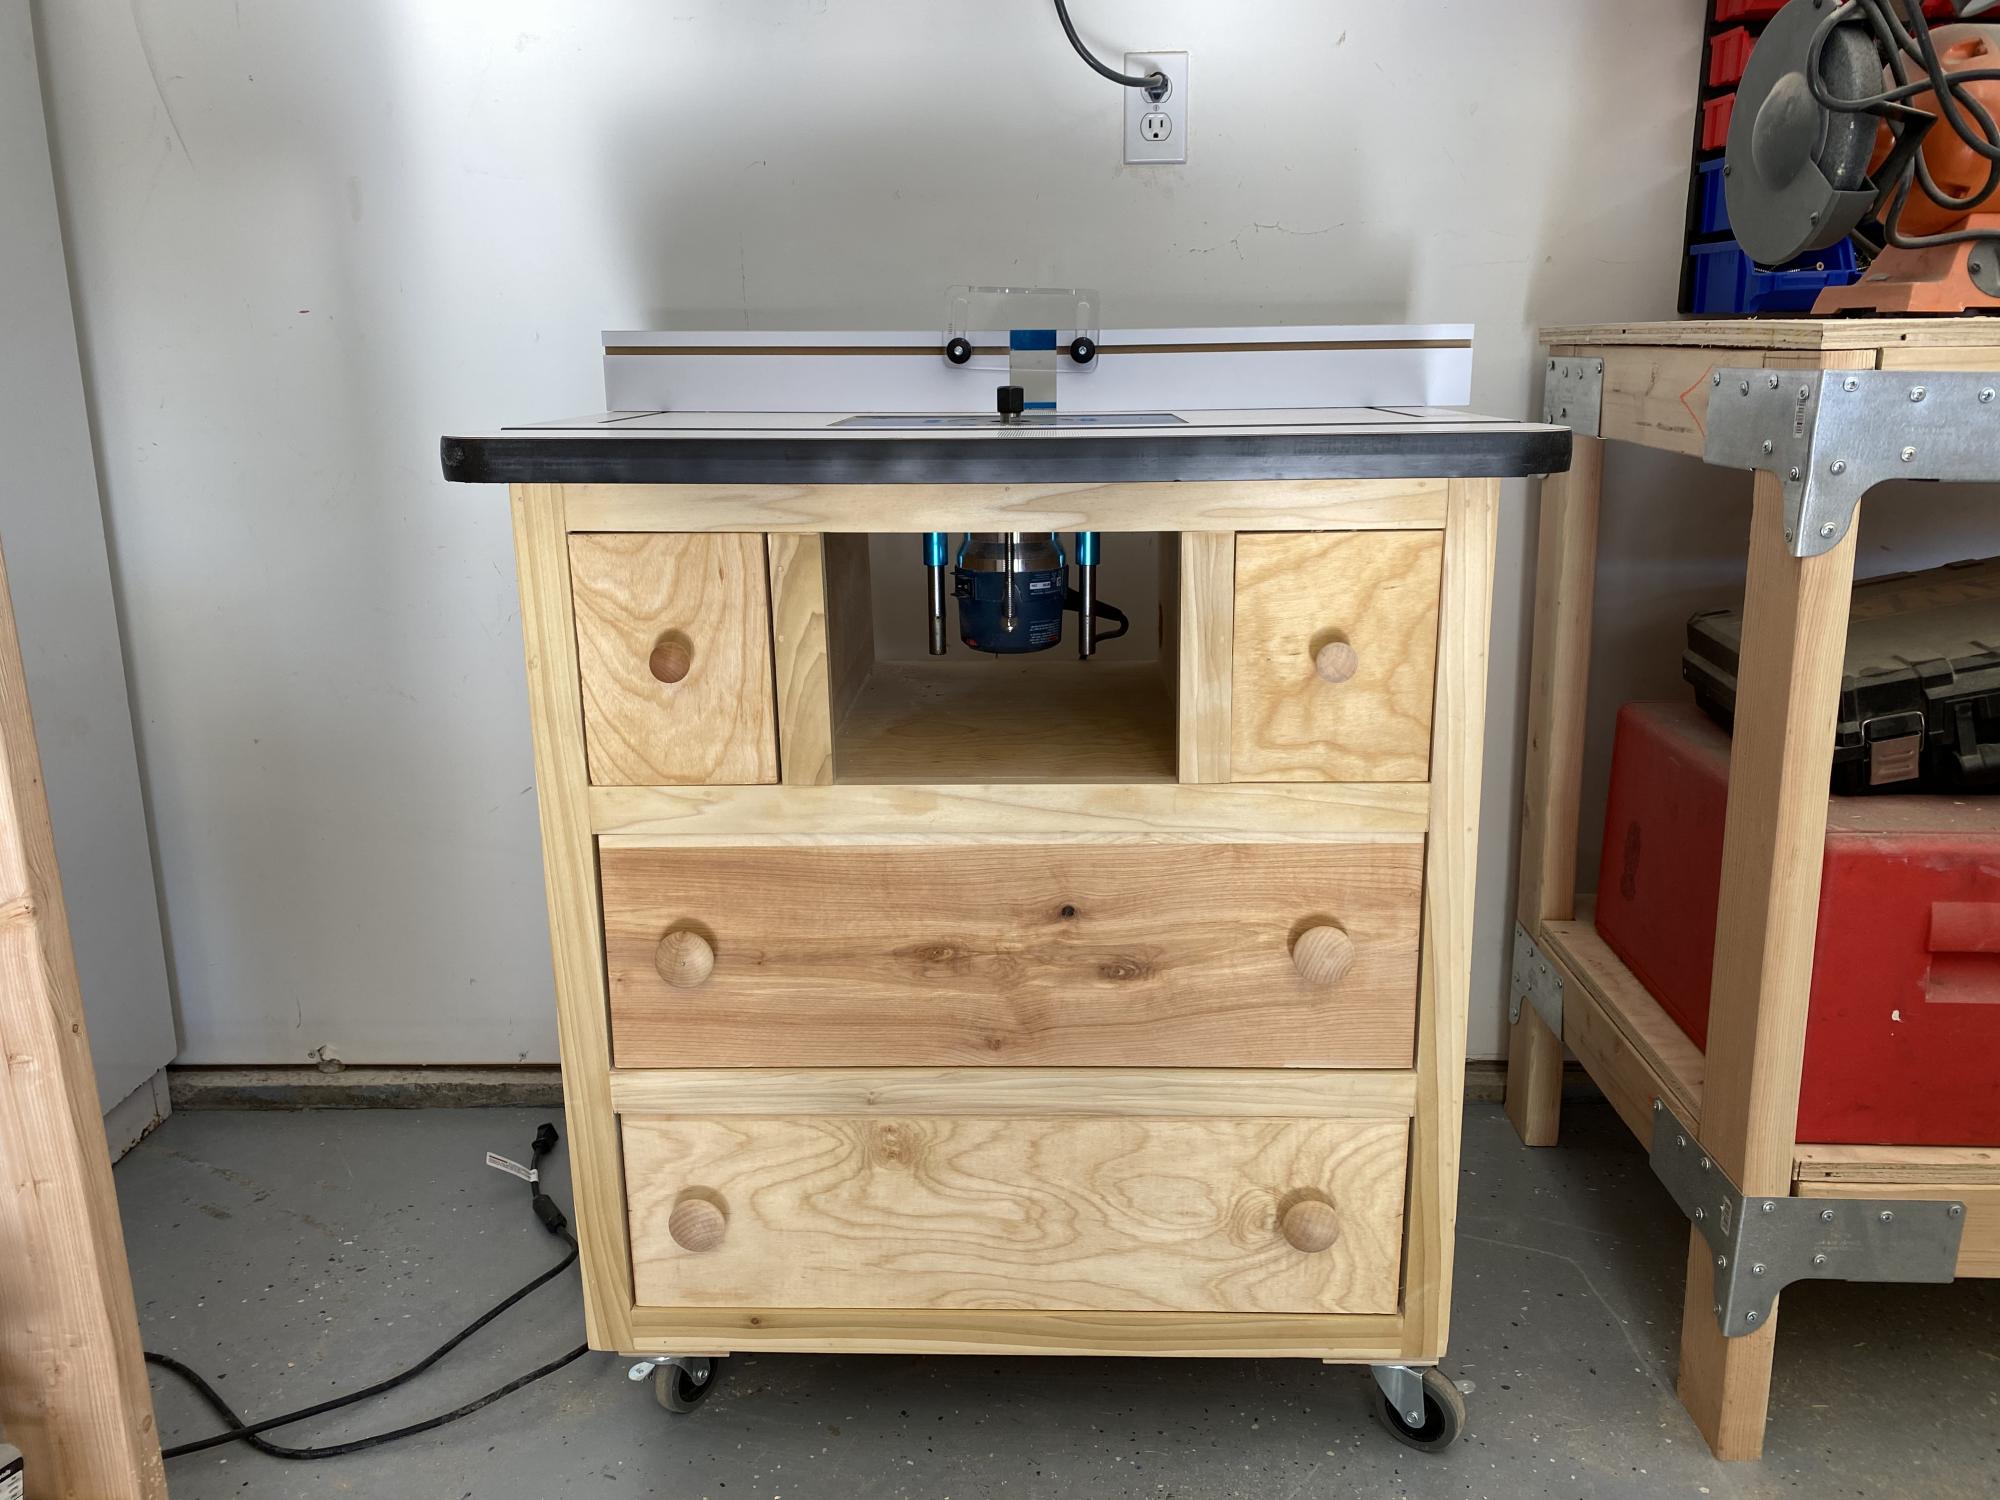
As a beginner woodworker I was searching for a router table project and came across this one. I constructed it entirely out of birch plywood. I will admit is was a challenge for me as I had never done drawers before. The biggest challenge was the small drawer for bit storage. I used a Rockler table top and it worked perfect. Overall I’m pleased with the way it turned out and have already used it in several projects
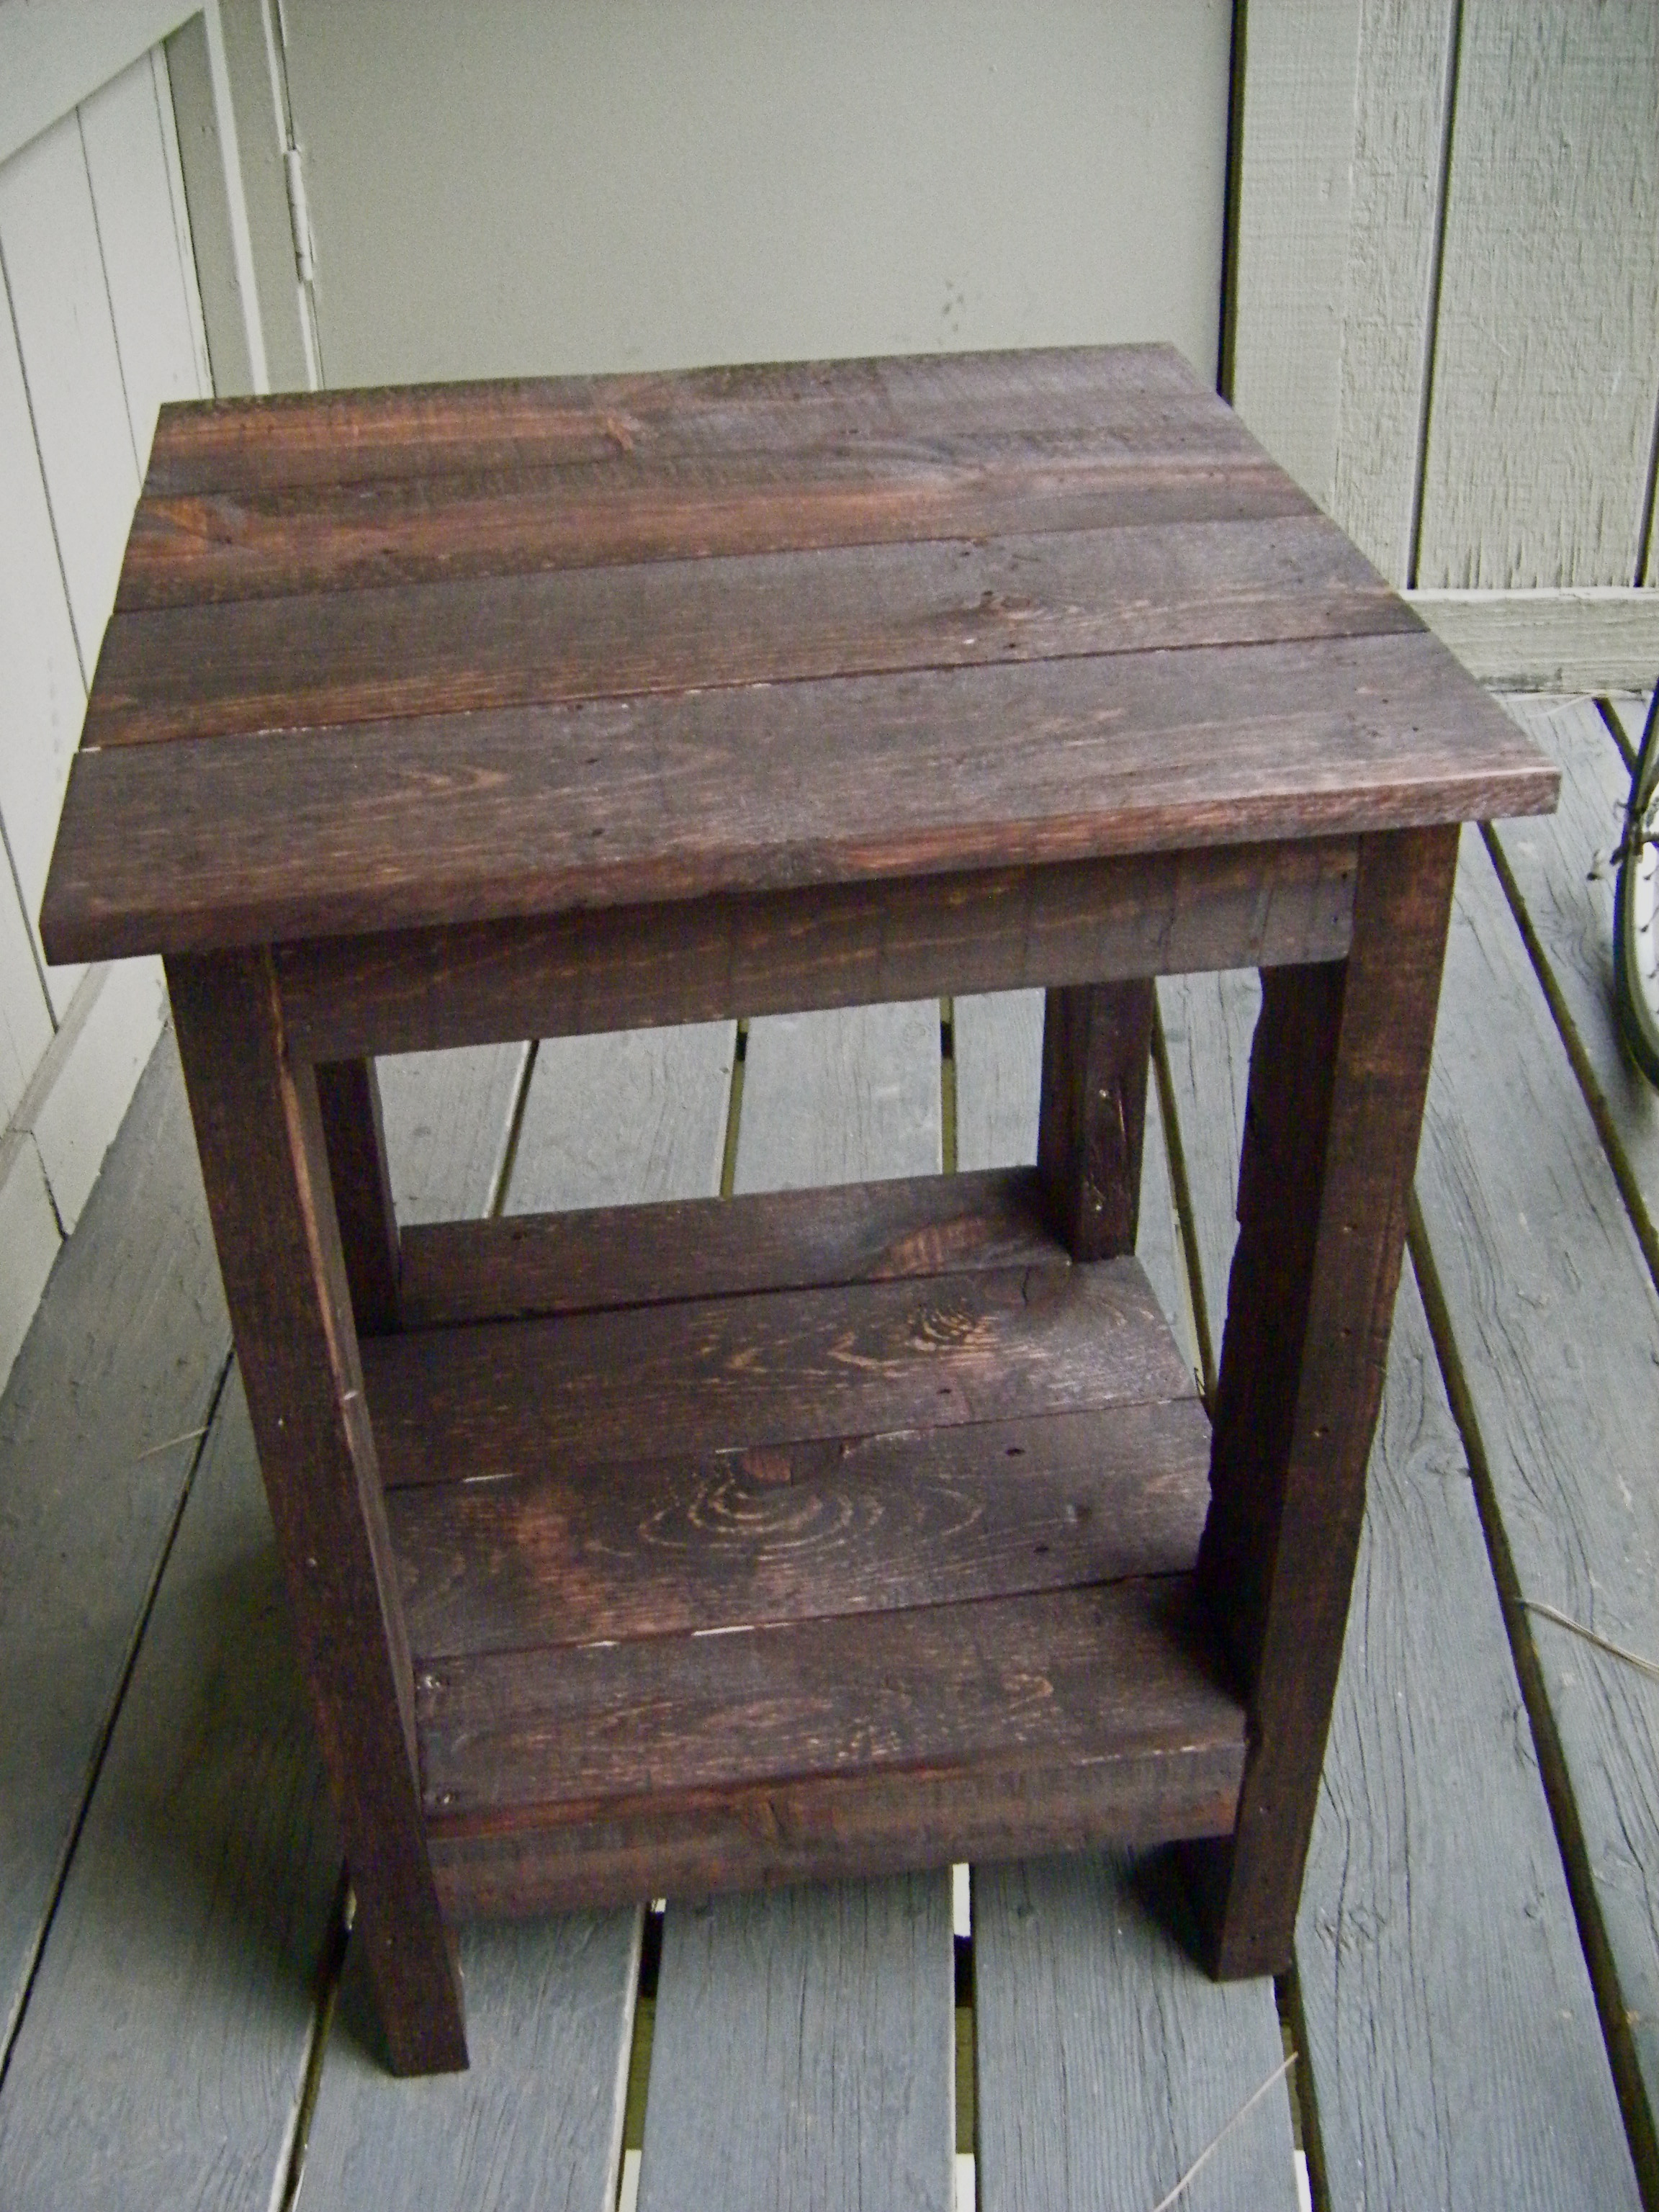
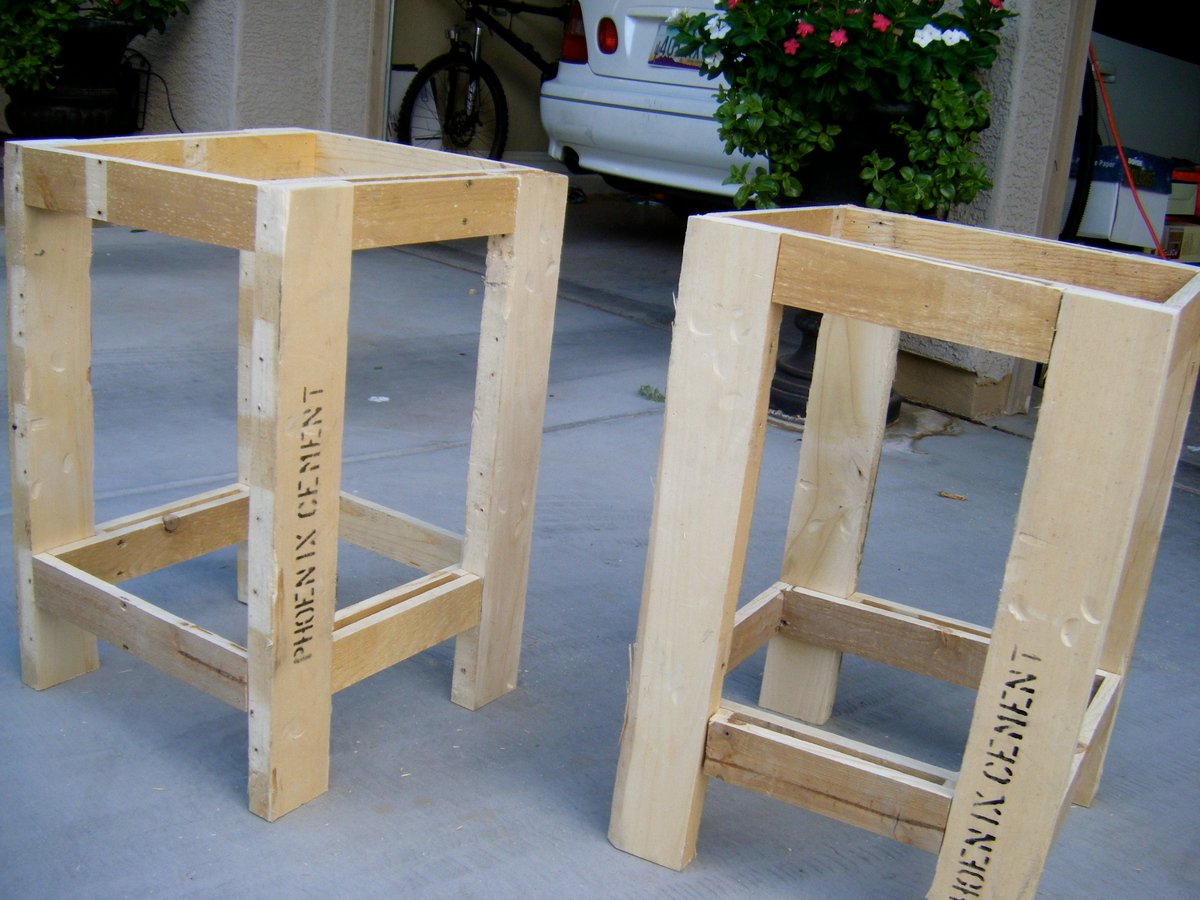
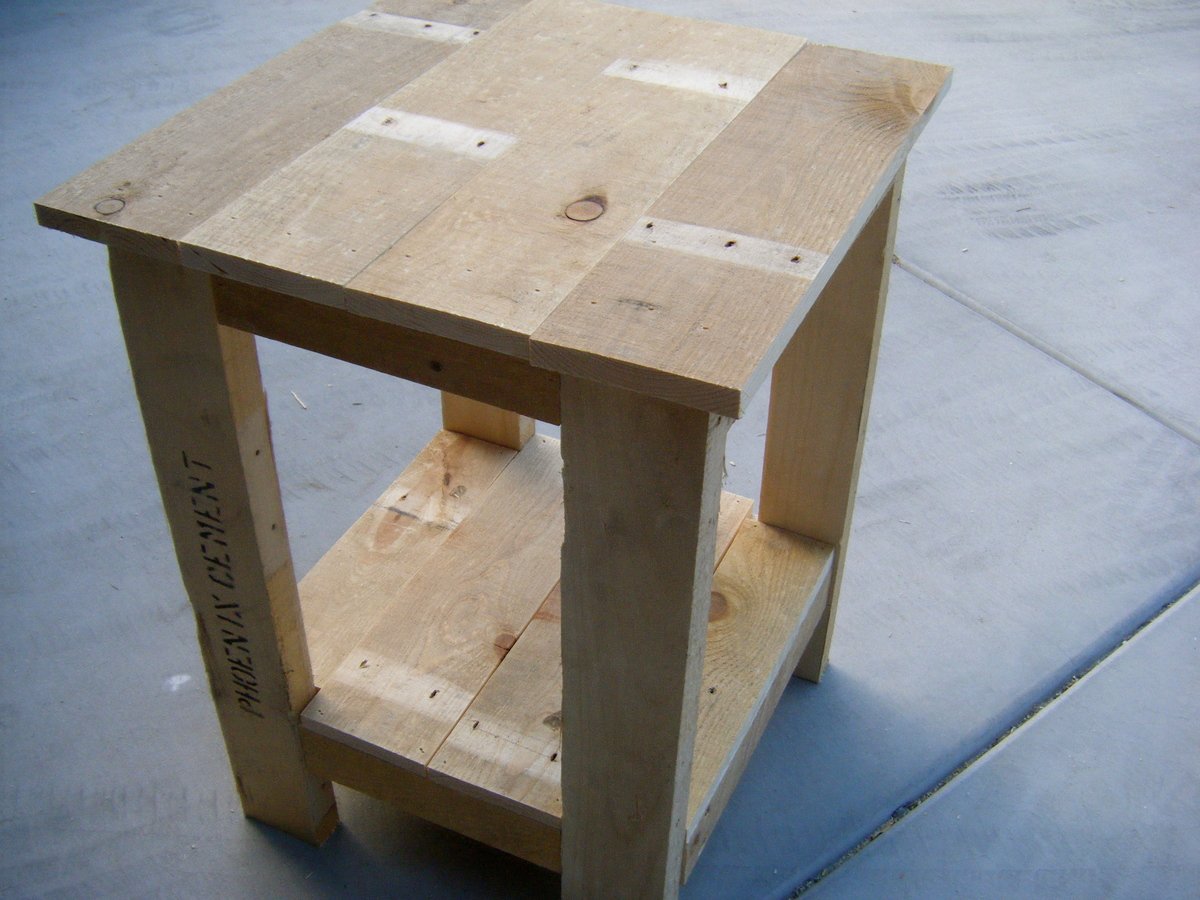
Made these side tables for our master bedroom using the wood from 3 wooden pallets. The pallets took about 45 minutes each to disassemble and the plank sizing required us to ripped the boards to 3 different uniform widths.

Fri, 09/14/2012 - 15:06
Do you have a blog? I commented on someone's blog and they sent me to this site, but now I cannot find their blog!!
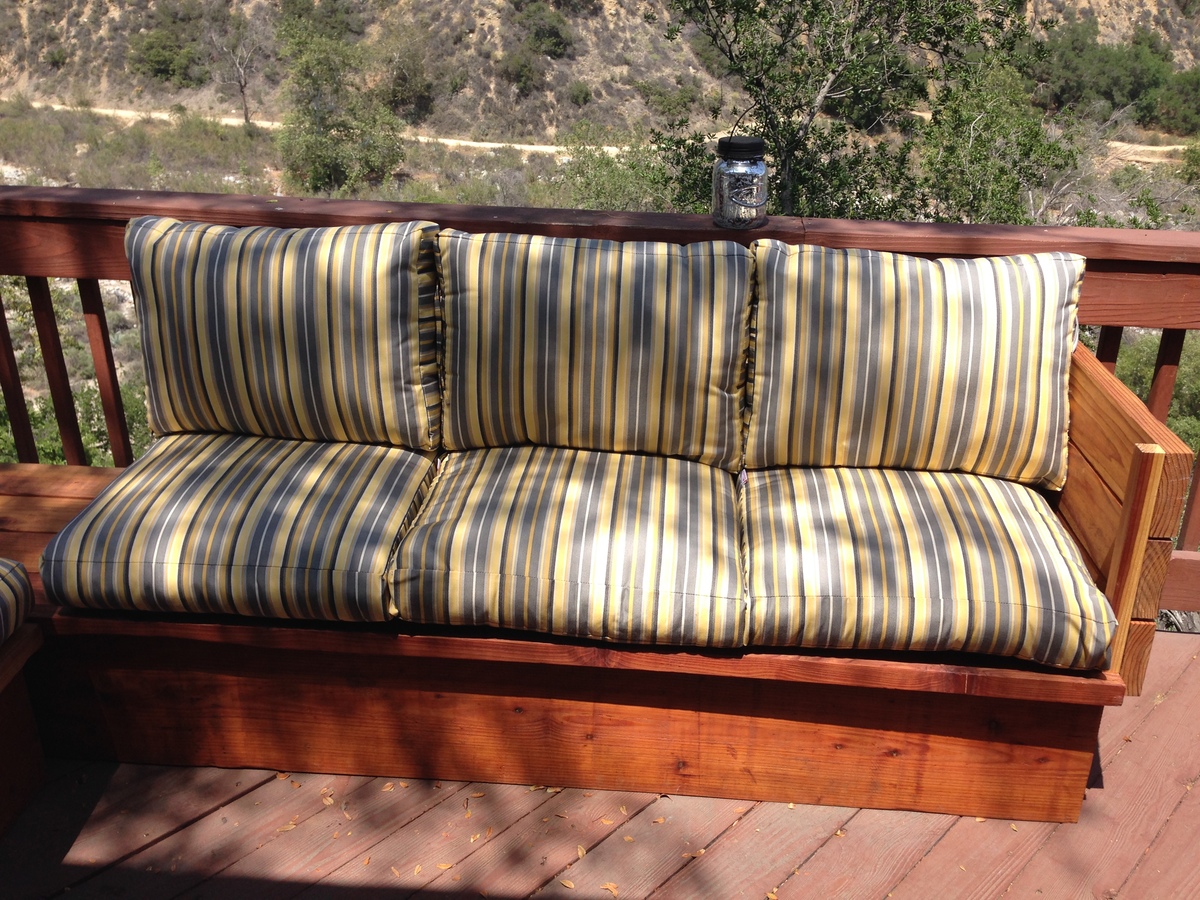
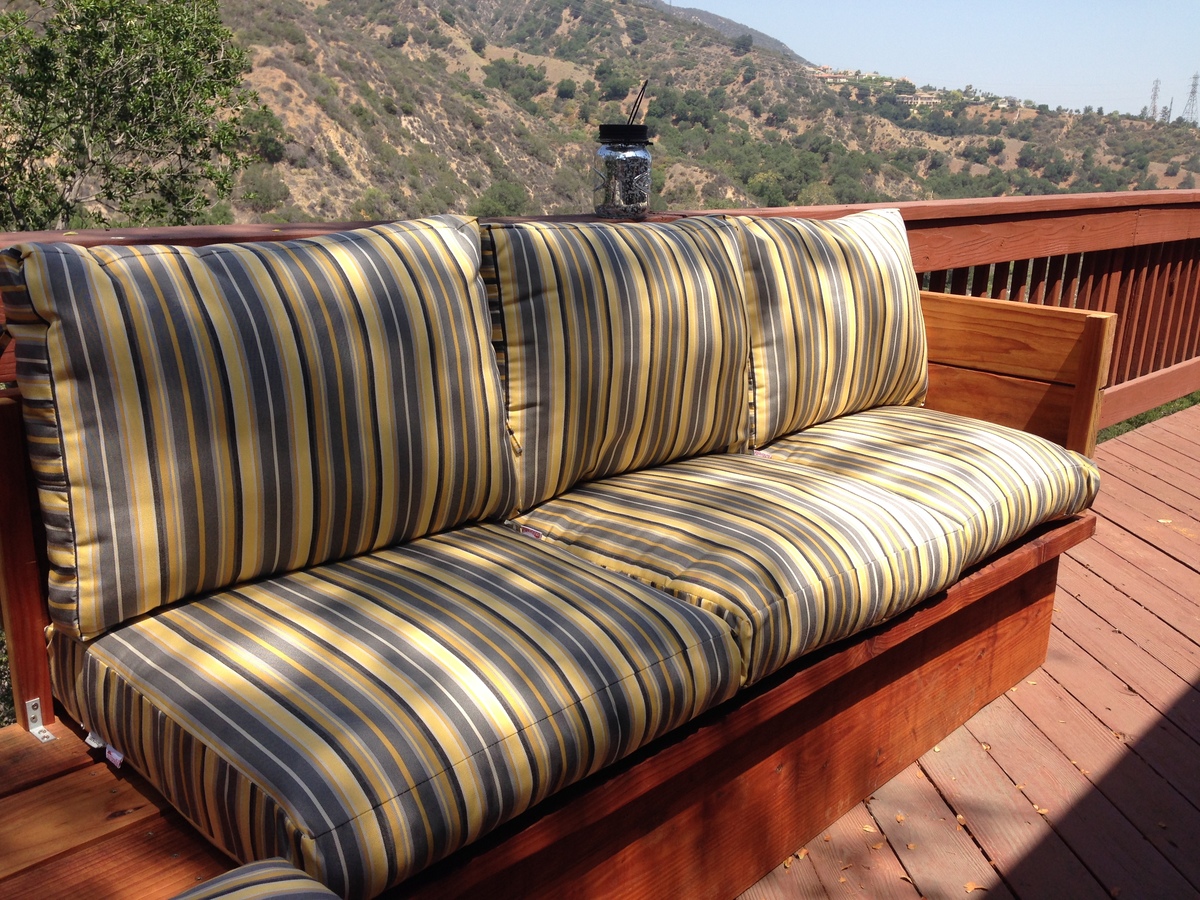
I used 2x12 instead of 2x4 for the base and four 2x6 instead of six for the seating area. So this modified version is higher and narrower compare to the original plan.
This was my second bigger builds. It came out beautifully and I am so proud to have built this for my husbands very first Fathers Day. Easy to build.
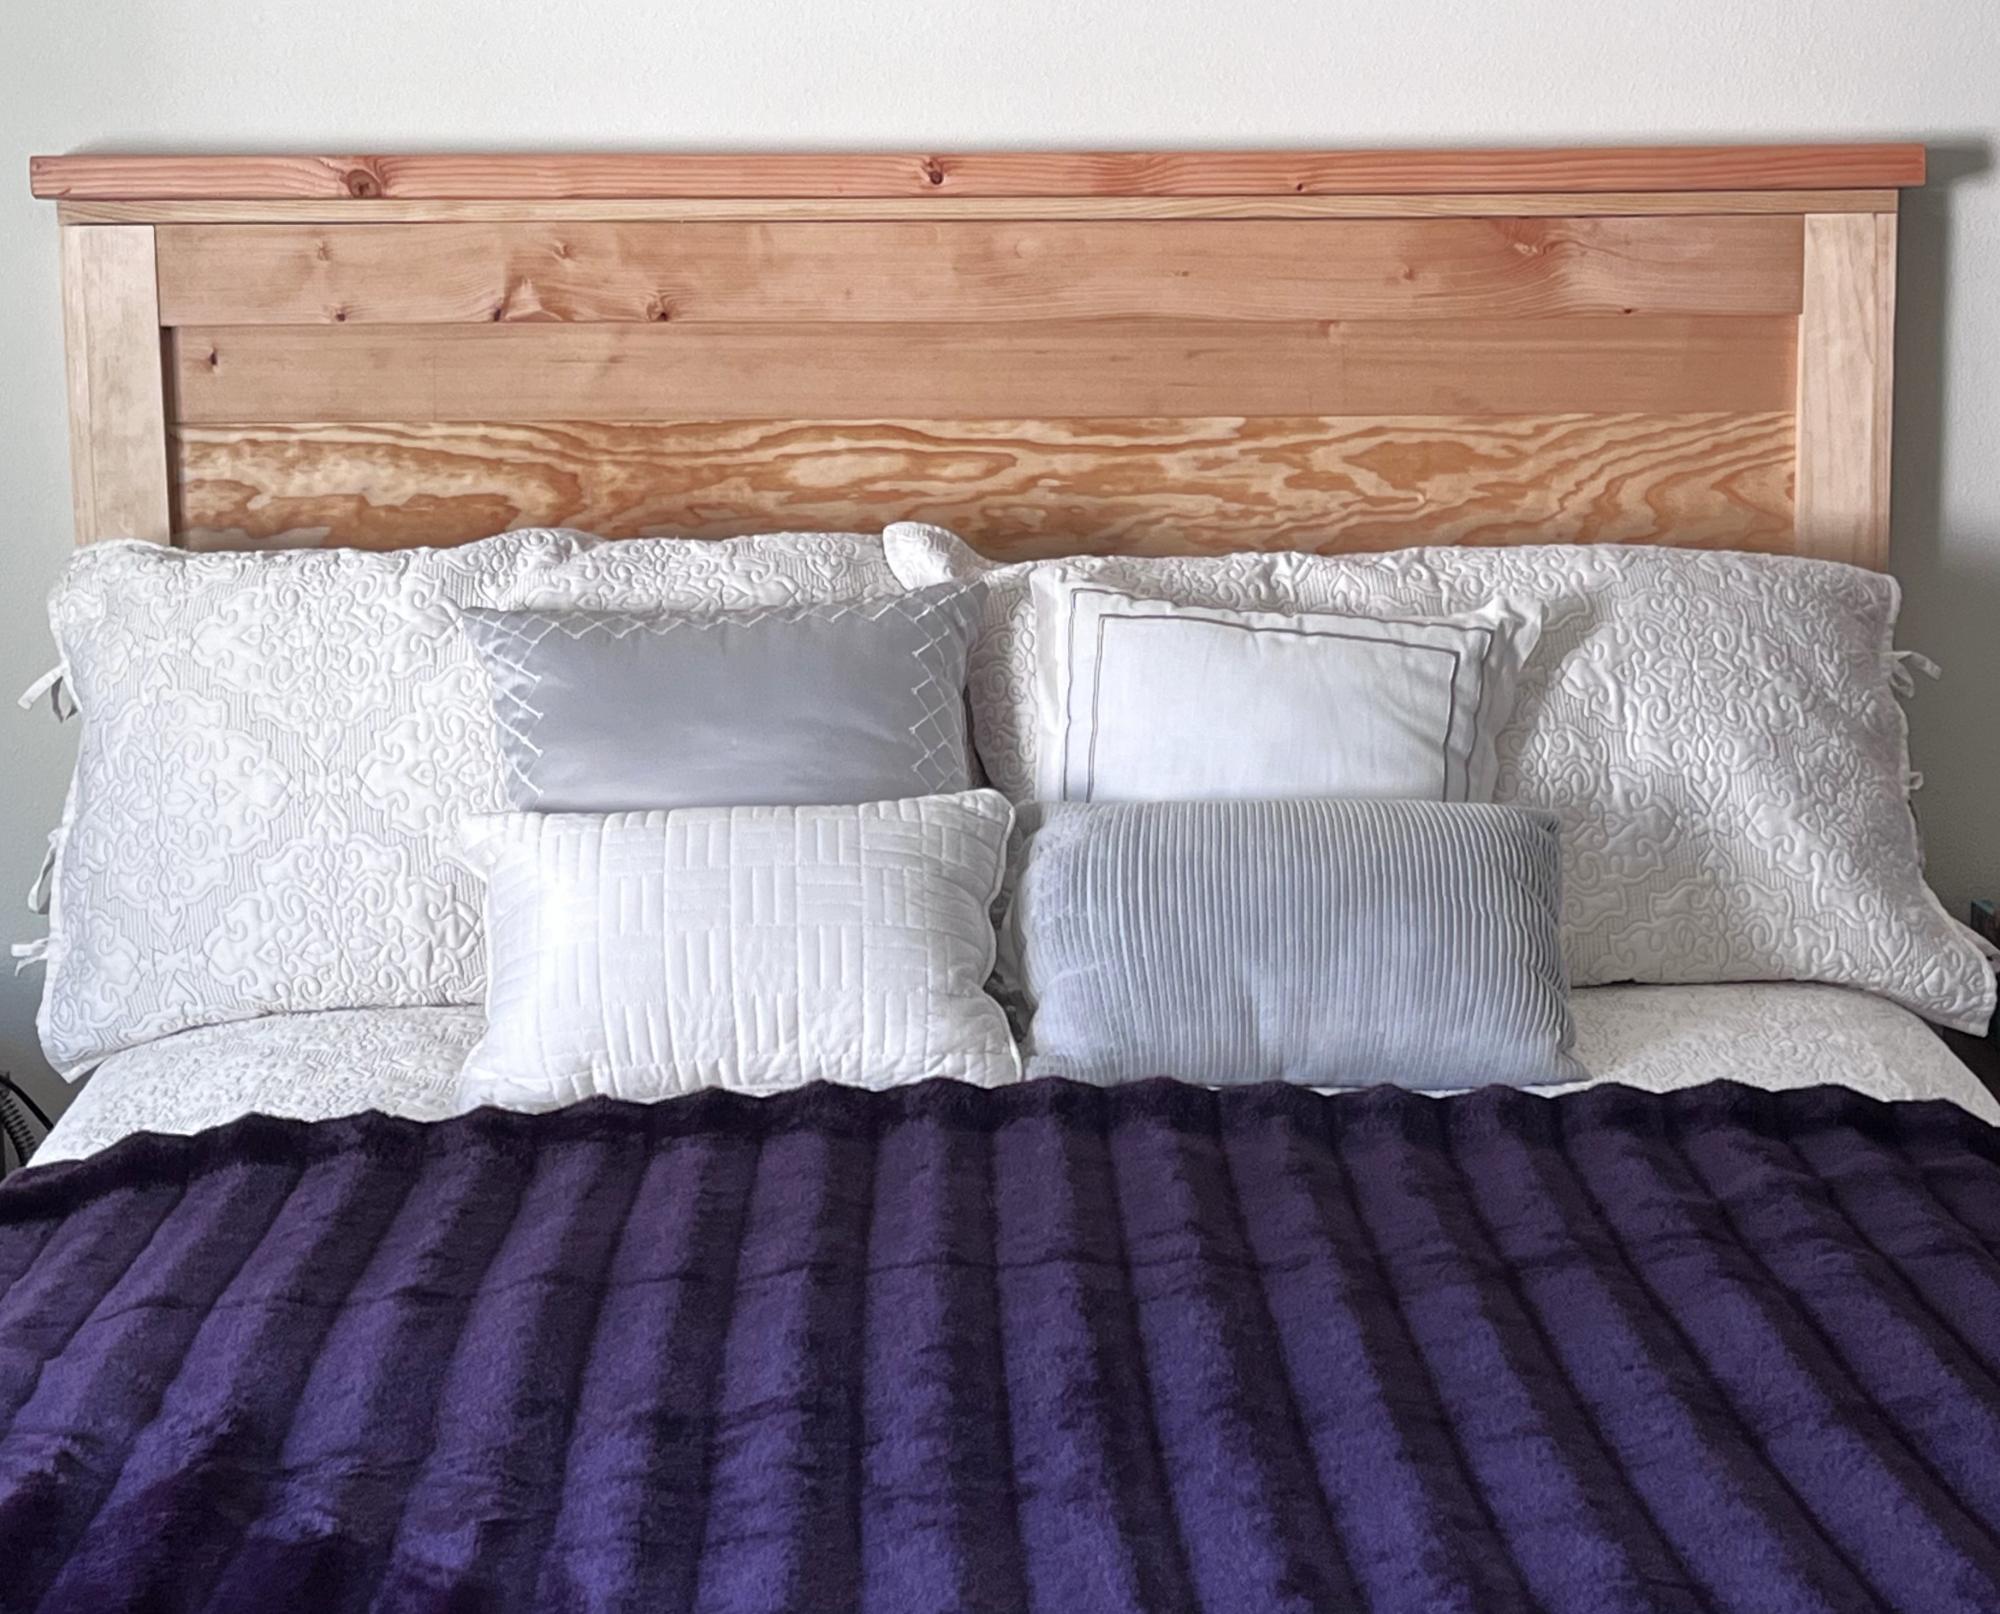
Queen size head board.
Jeanne L.
I changed the design a little, using 4x4's for the legs, eliminating the side X's, and tried to save a little money by cutting the top 2x6's so that I could use the same board for both the top and bottom shelf, so i didn't have to buy the 2x12's recommended in the plans for the bottom shelf.
I used Rustoleum Sunbleached for the finish, then covered in 2 coats of brown wax, let it dry for a day, then removed some wax with Motsenbockers Paint and Varnish remover, which is Biodegradable and low VOC. I think this really gave the wood the look of old reclaimed barn wood.
Mon, 10/22/2012 - 20:36
I looooove how this turned out. I am straight up stealing this. Keep my flings crossed that mine turns out as well as yours did!
Sun, 02/10/2013 - 18:36
What kind of brown wax did you use? Love the finish!
Sat, 08/03/2013 - 09:25
LOVE what you did here. I was wondering if I could do the same thing - use 2x6s for top & shelf! That'll make it a little easier to narrow it as well. And I'm ditching the X's also. They just don't appeal... so you know, just write up new plans for what you did, eh? :) Great job!
Sat, 08/03/2013 - 09:26
LOVE what you did here. I was wondering if I could do the same thing - use 2x6s for top & shelf! That'll make it a little easier to narrow it as well. And I'm ditching the X's also. They just don't appeal... so you know, just write up new plans for what you did, eh? :) Great job!
Sat, 08/03/2013 - 09:33
sorry for the extra comments. One other thing - For the bottom shelf: It looks like you used 2x4s to attach to the 4x4 legs; is that right? What did the dimensions of your table end up being? And, if you don't mind my asking, what *would* they be, if you eliminated one of the top 2x6s? Thanks!!
Sat, 03/28/2015 - 13:22
Hi Bob, your table looks awesome, what did you do for the base support under your top and bottom pieces? Thanks !
Finished building this table with the plan provided by Ana White! Worked out great. I stained it in a with a transparent deck stain in natural sequoia. Happy to help if anyone has any questions!
Tips: Definitely cut as you go. If you get the angles are off in the center when all the long pieces connect is it makes each top piece larger or smaller.

We built this for our mother.
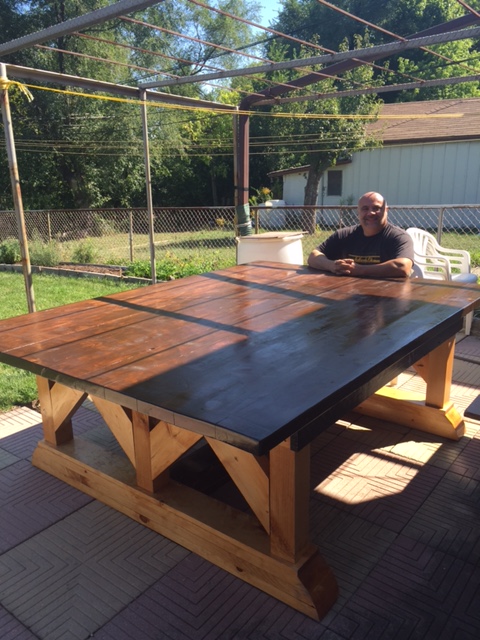
Used the plans provided but we beafed up all the sections to make a robust table.
Andy & Ralph
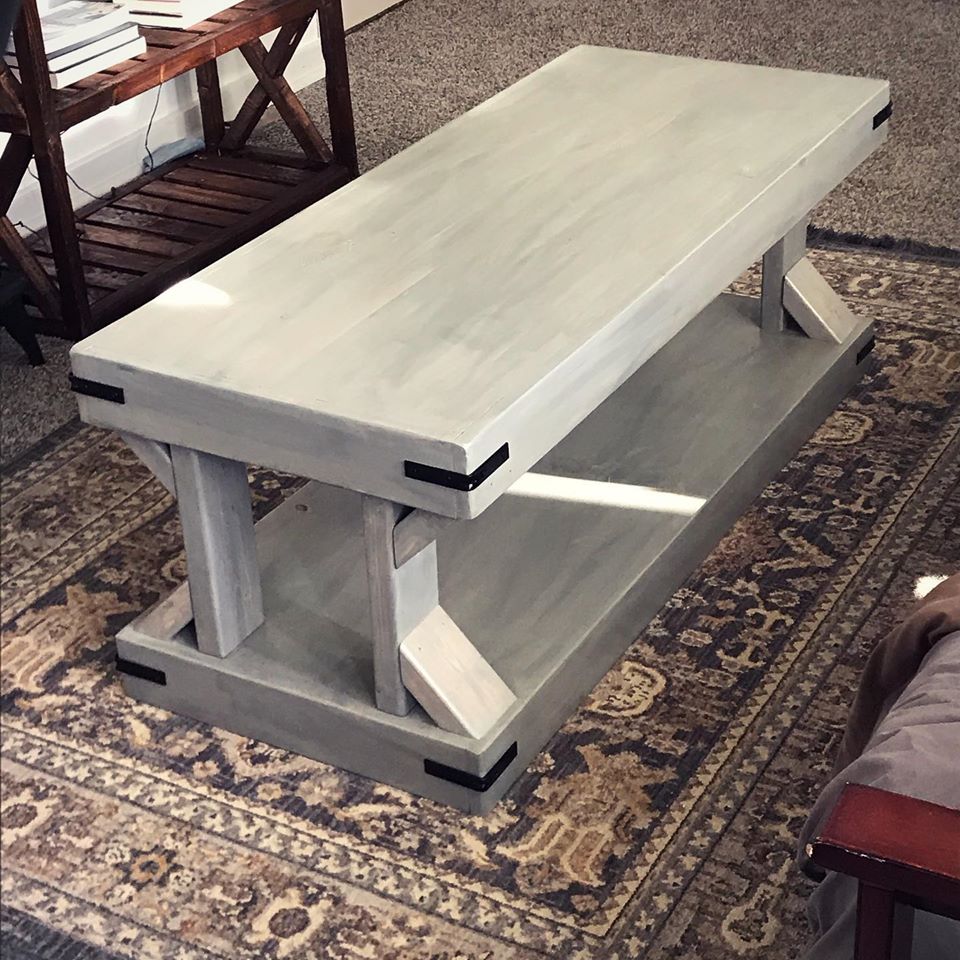
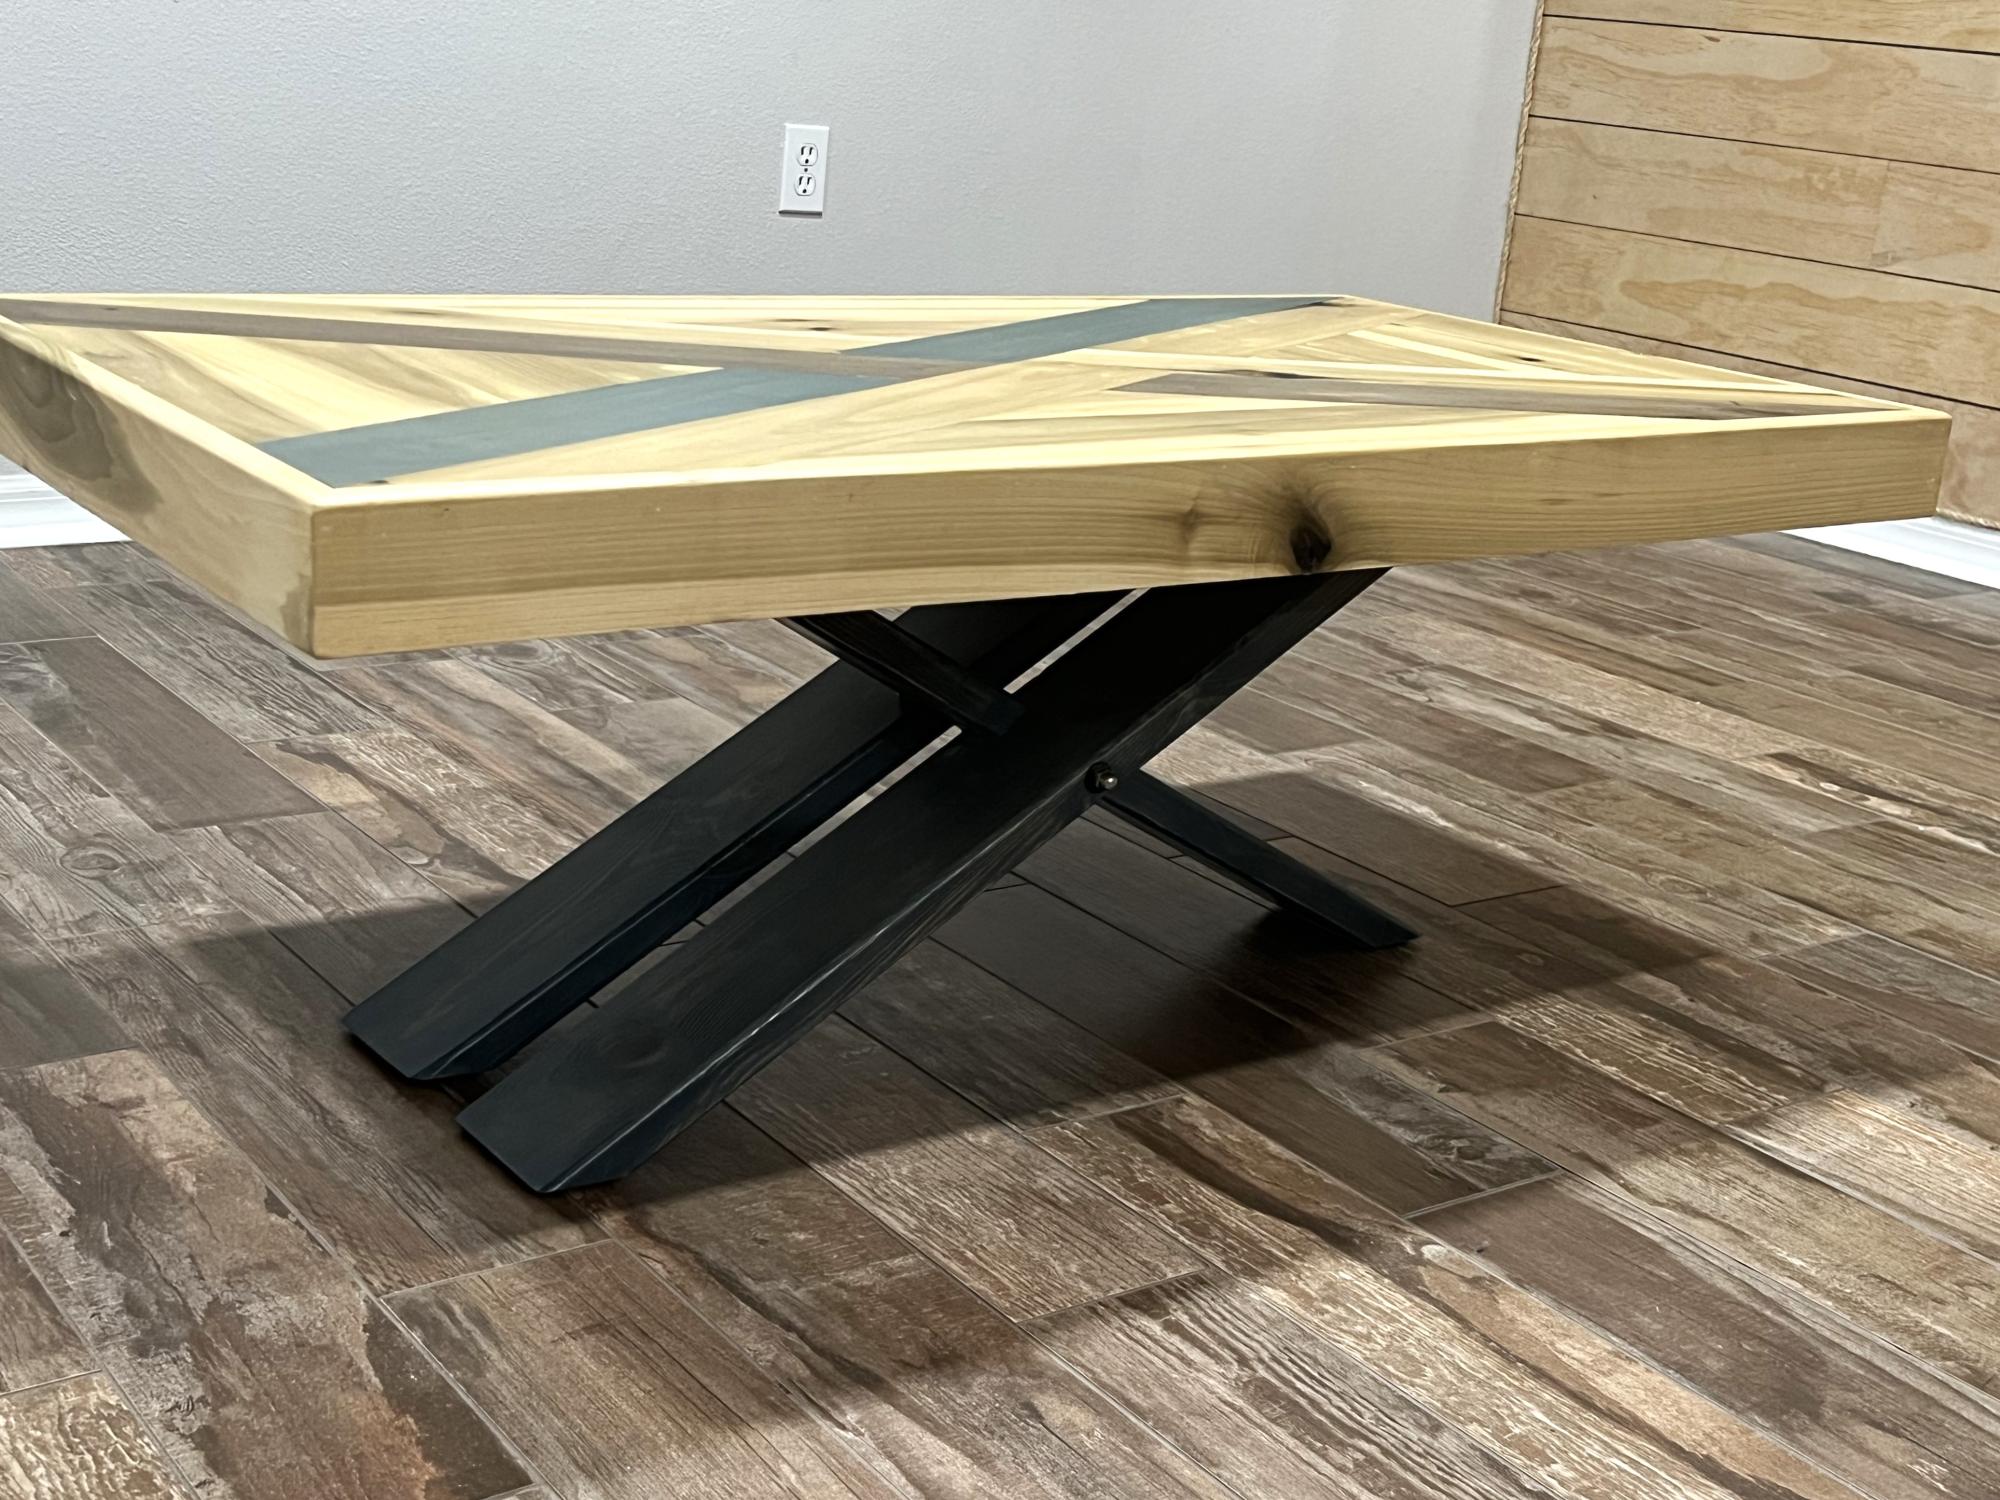
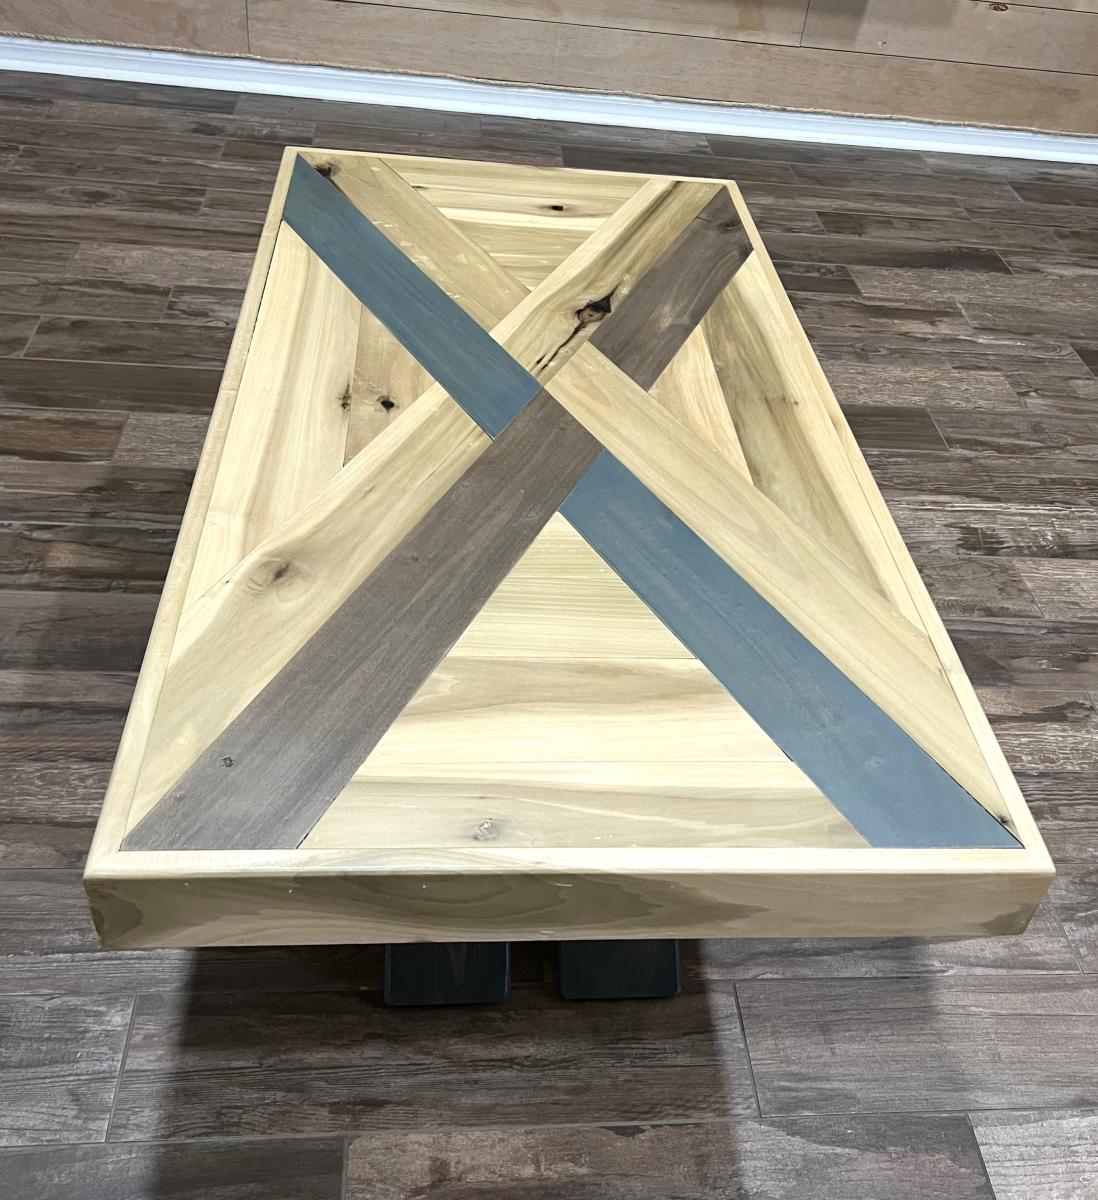
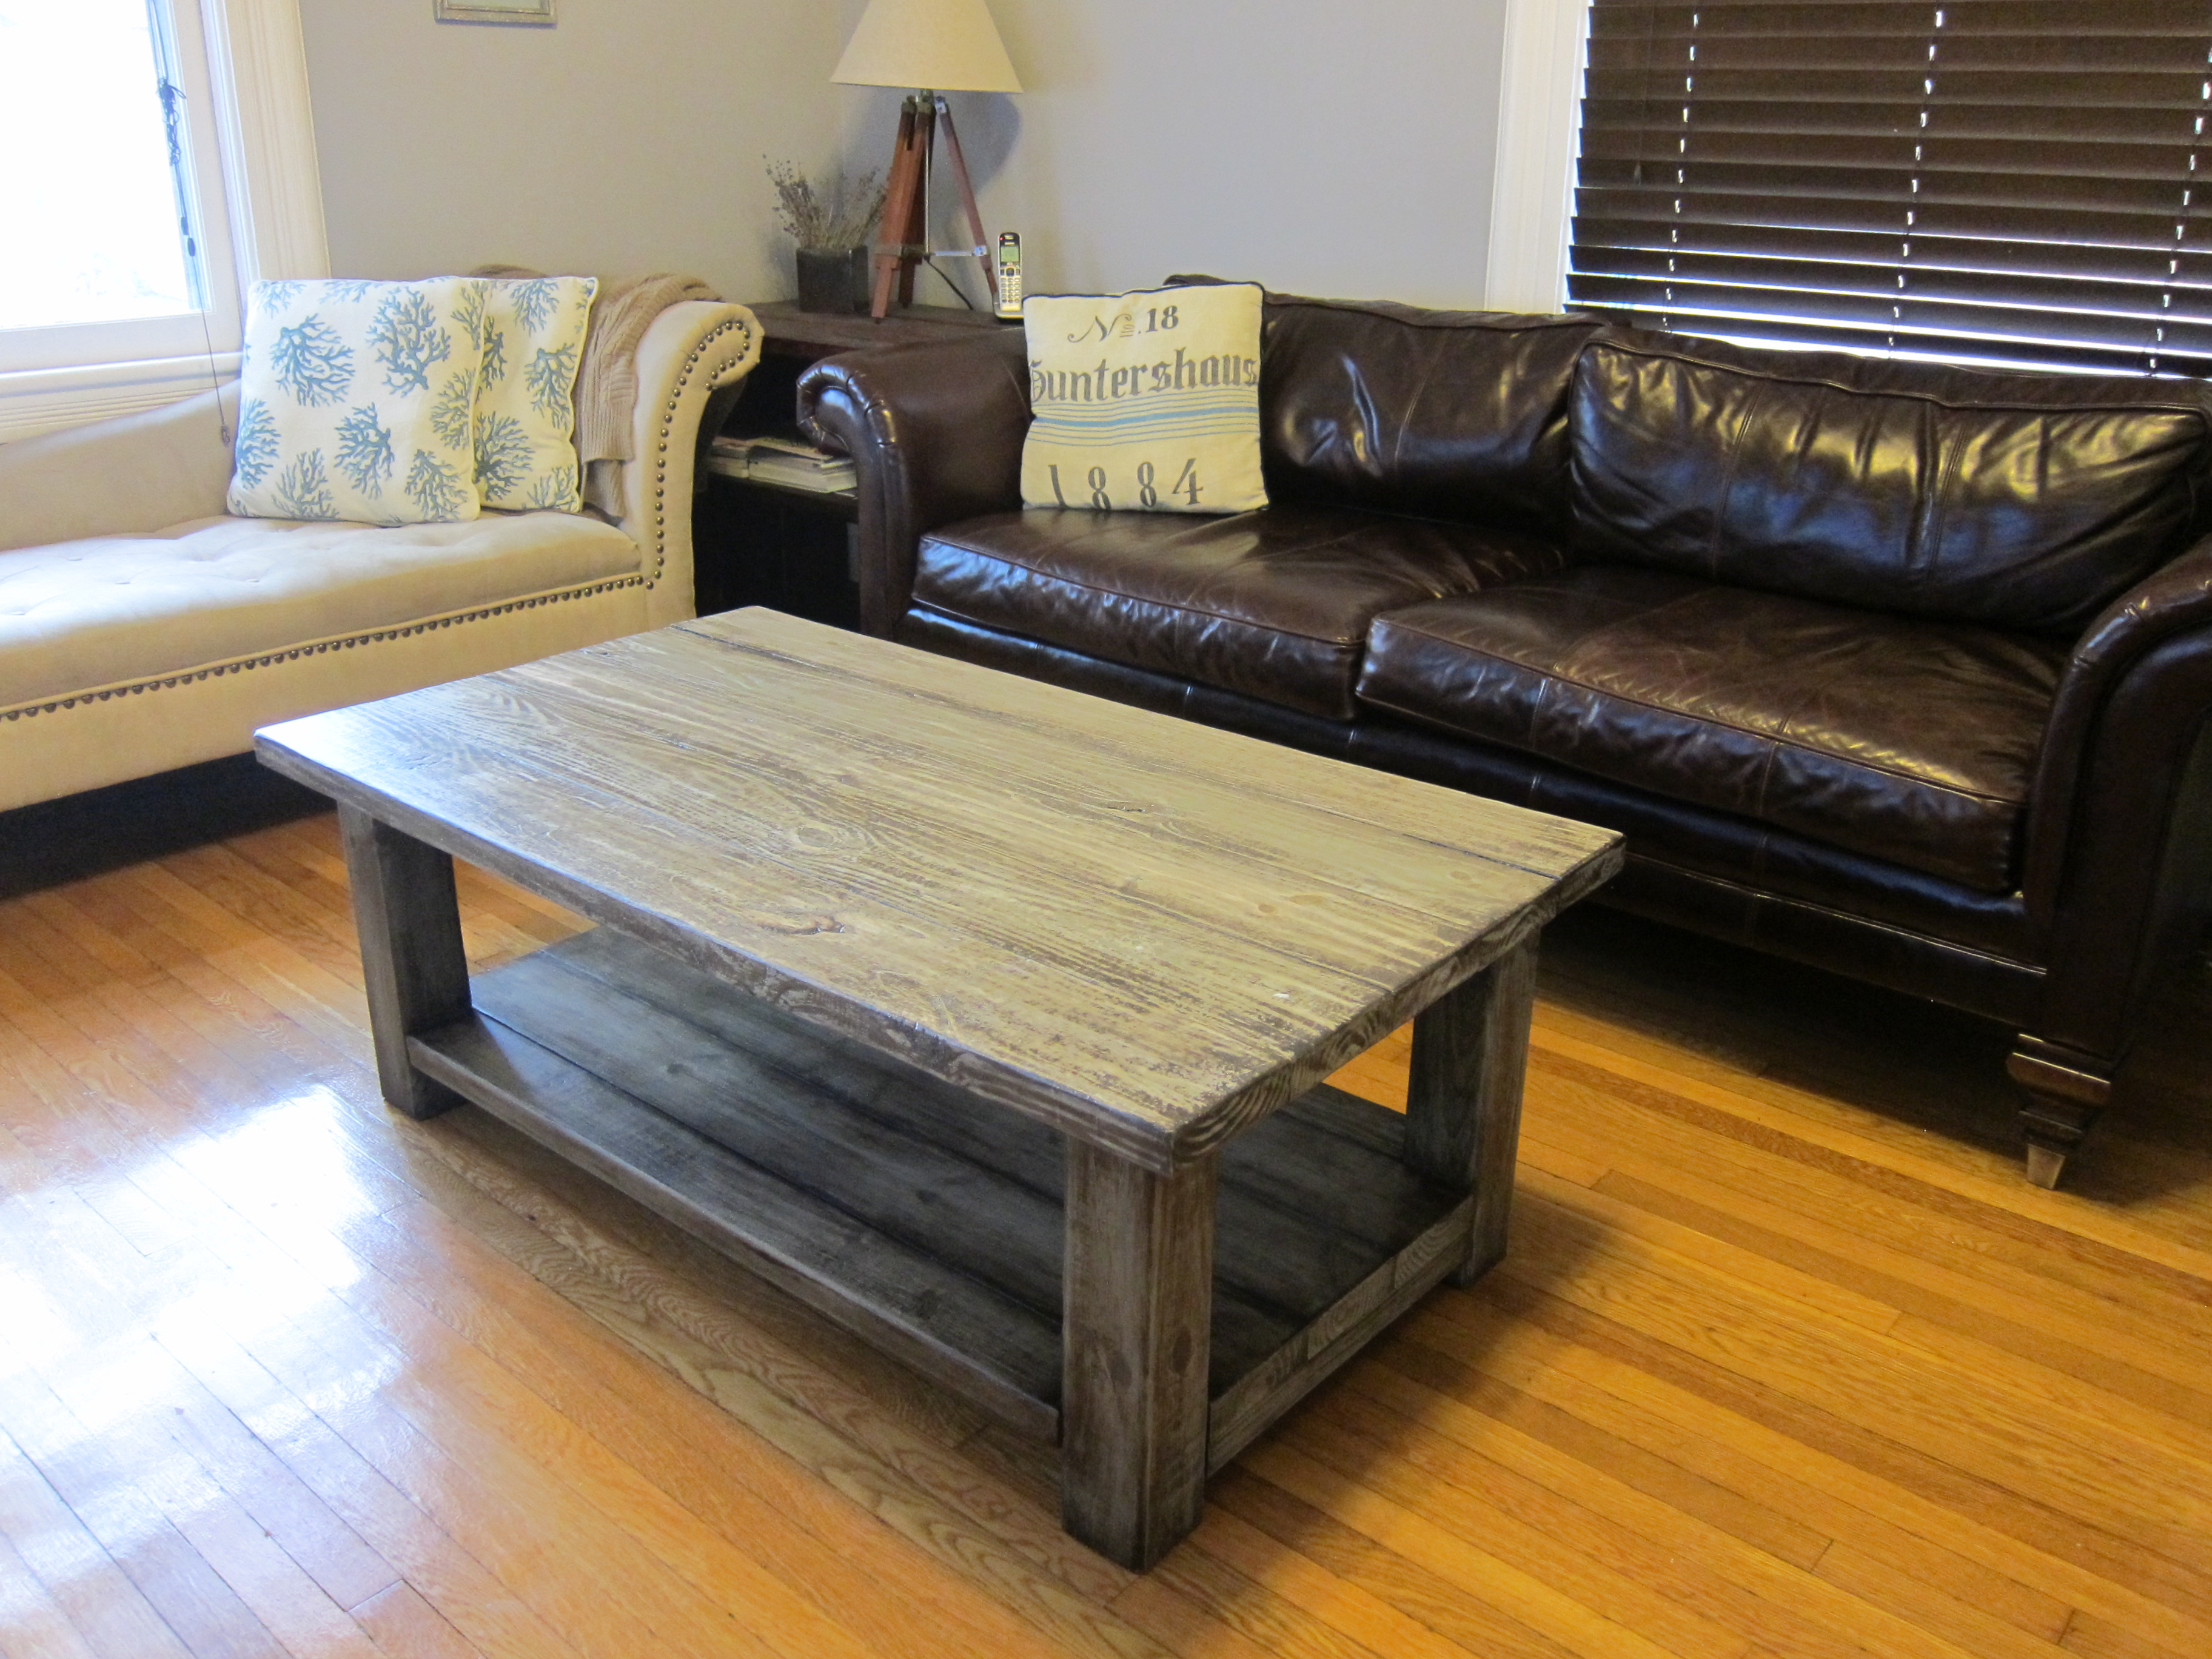
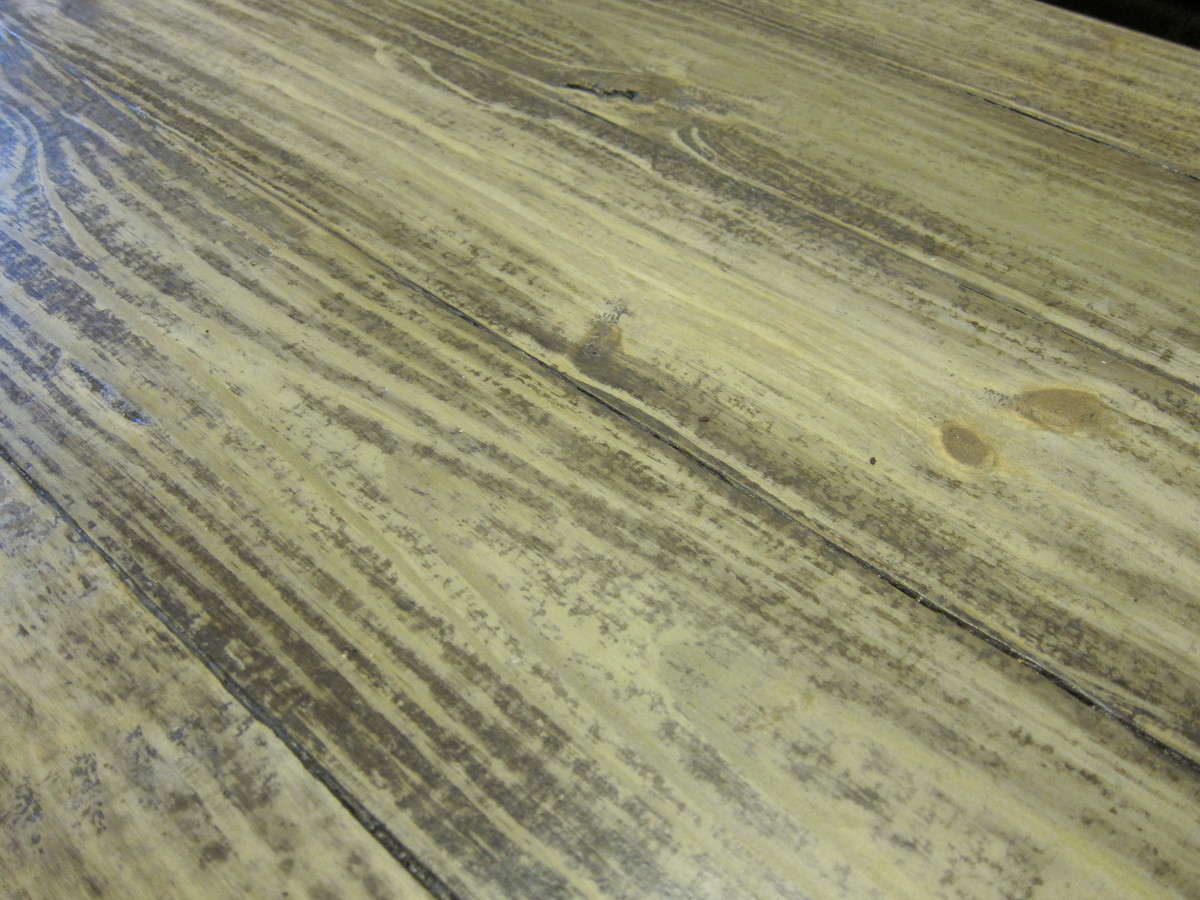
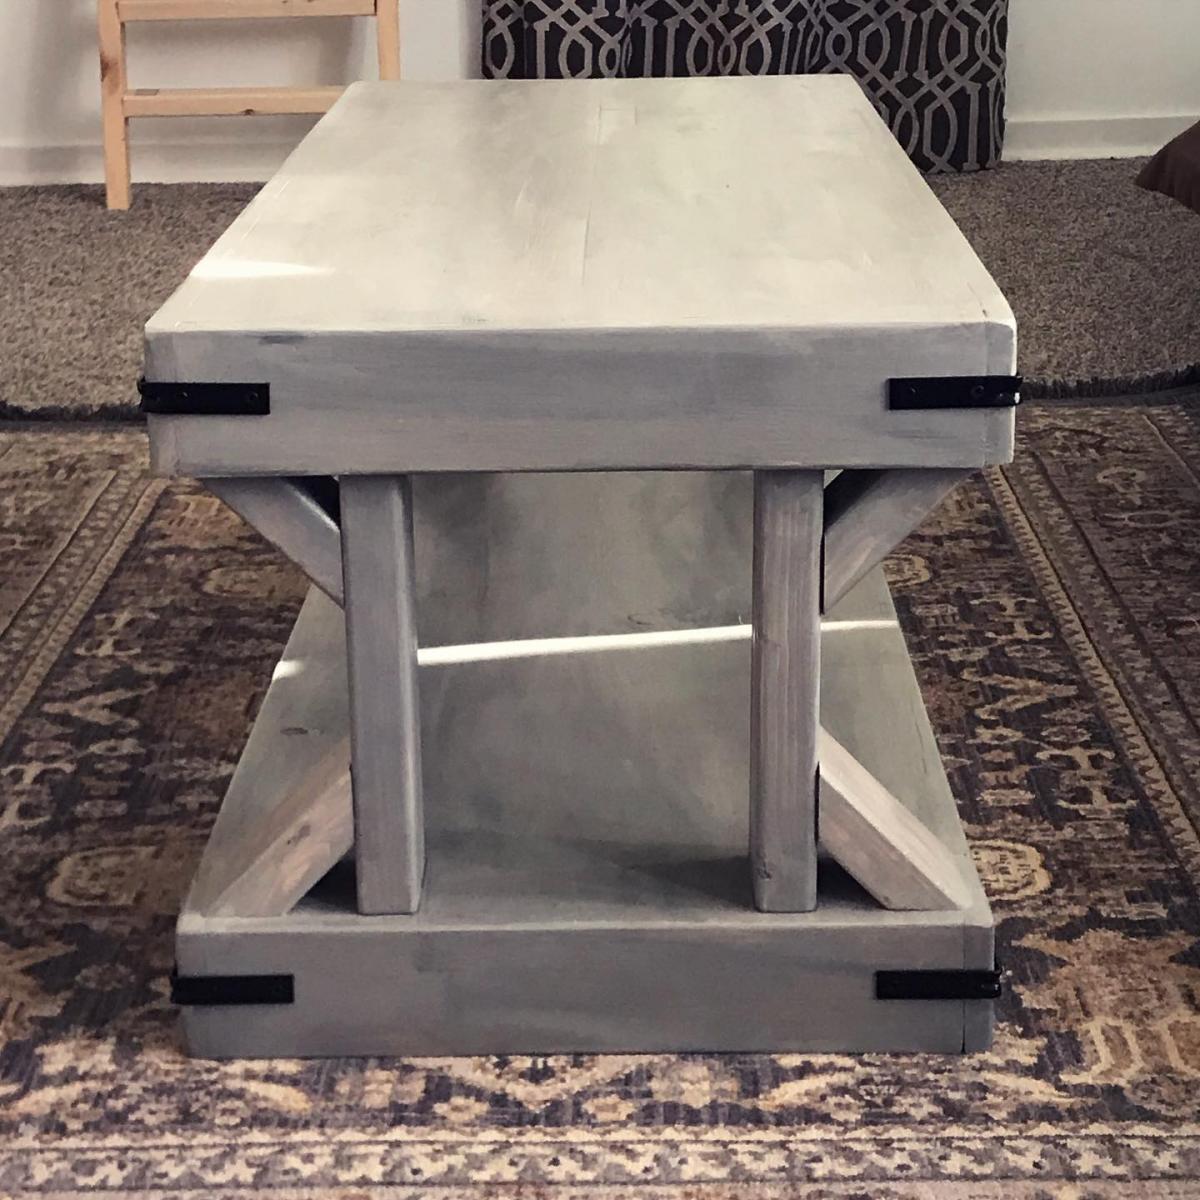
I built this coffee table with off the shelf lumber and finished with Varathane Sun Bleached and Weathered Gray Stains, and Minwax satin polyurethane. I applied a fairly even coat of the Sunbleached Stain and added a few streaks of the weathered gray. I used 1 ¼" pocket screws instead of the brad nails. I used a hammer and a couple of finishing nails for the braces.
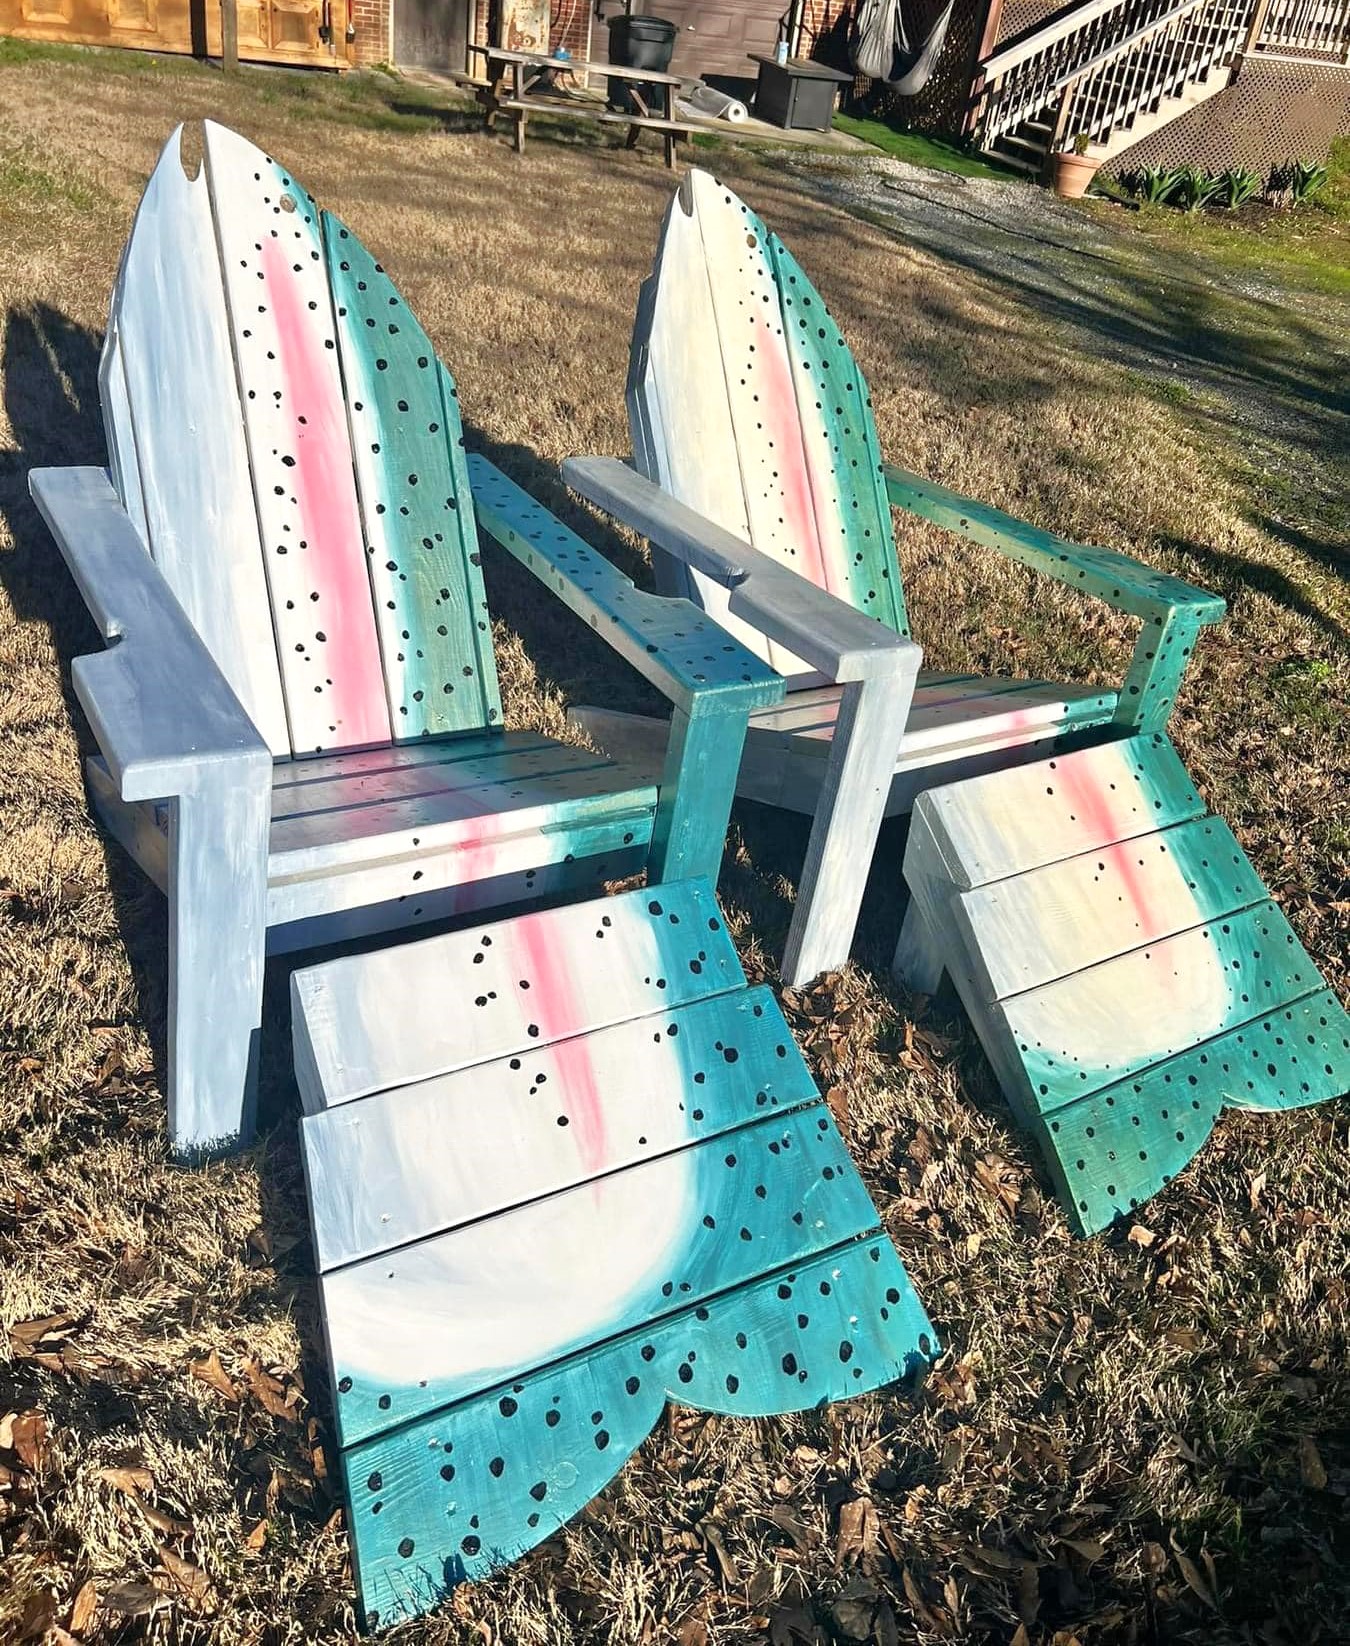
I have used your plan, to build several of the 2x4 Adirondack chairs, made a few modifications here and there but basically the same frame.