Community Brag Posts

Coffee Table
My first coffee table.
Built from Plan(s)
Estimated Time Investment
Afternoon Project (3-6 Hours)
Finish Used
Semi Gloss black paint and Red Oak stain with a polyurethane coat
Recommended Skill Level
Starter Project
Comments
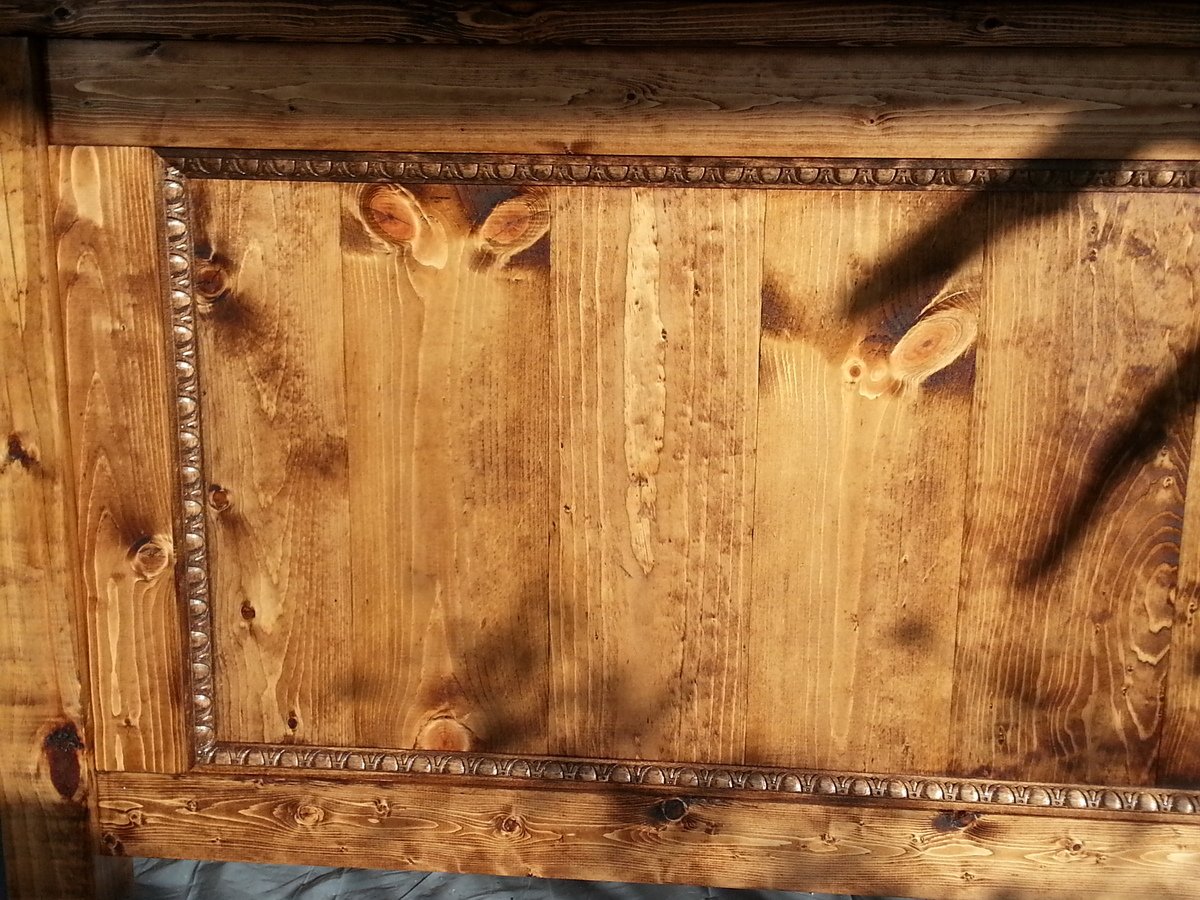
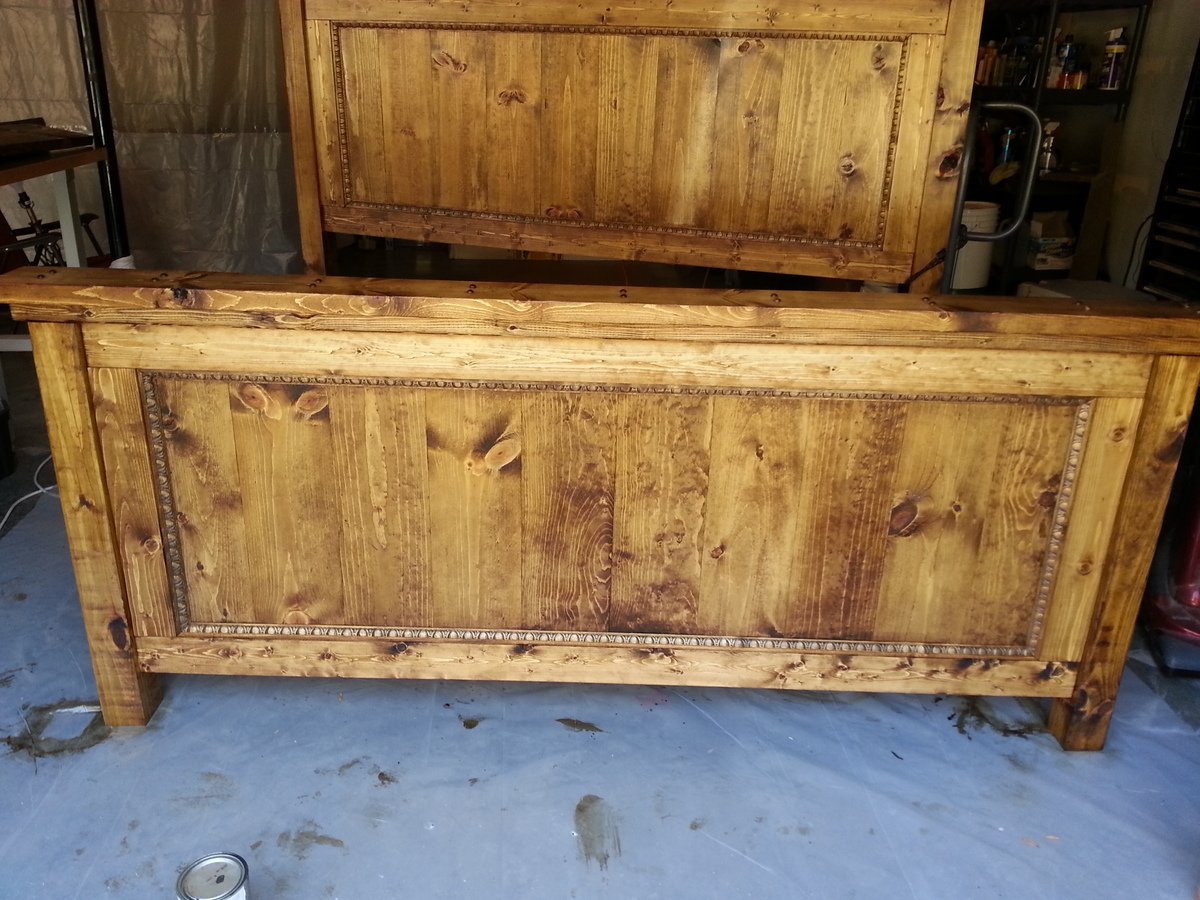
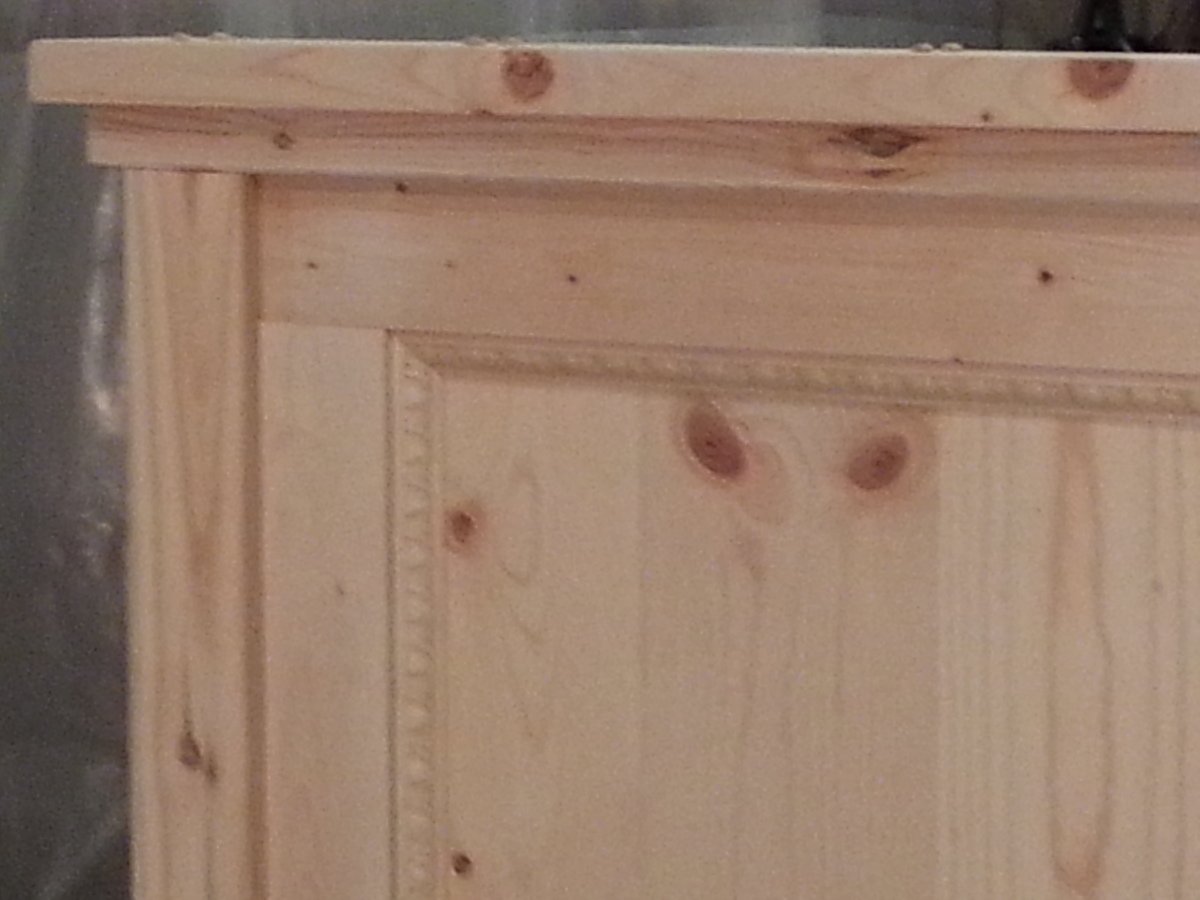
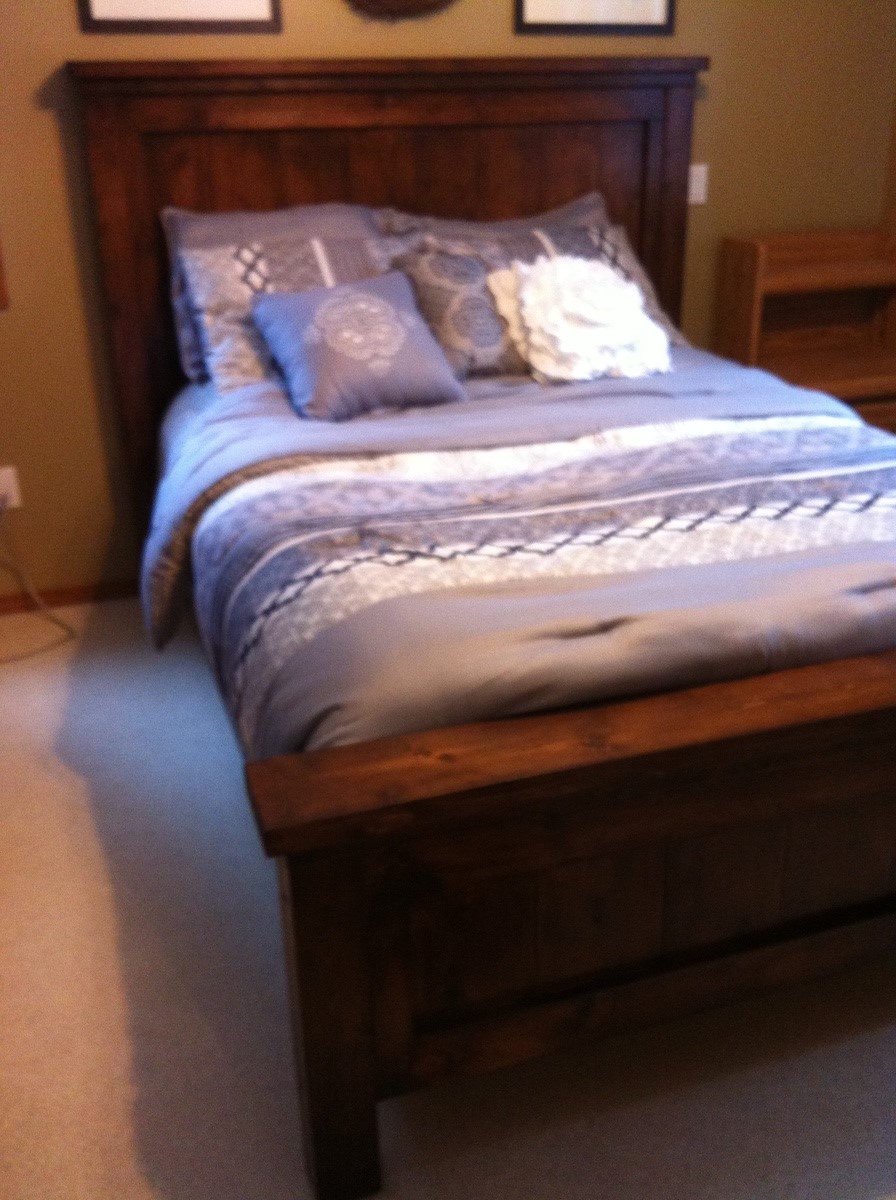
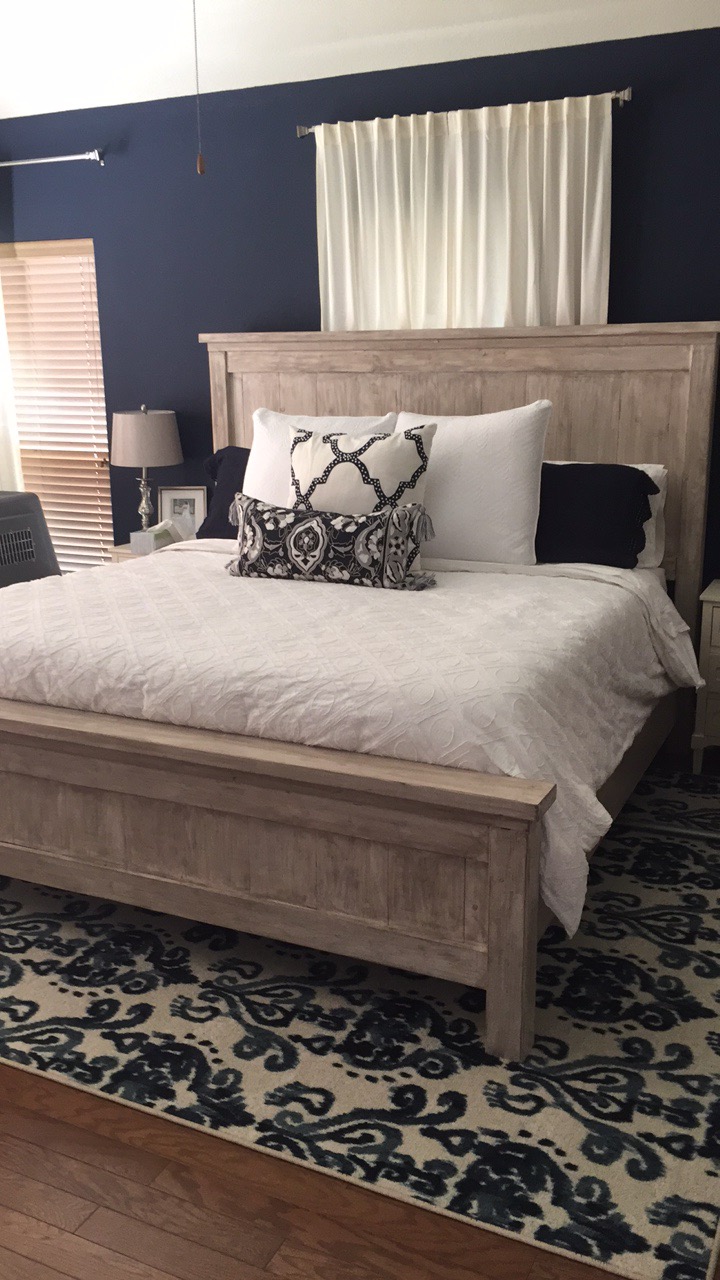
King Farmhouse Bed
I love how this bed turned out. I made the footboard panel the same size as the headboard because I wanted my footboard above the mattress.(just use shorter 4x4 post for the legs than you do the headboard) I also added some molding inside the panel to give it a little extra flare. The boards on the panels are connected with pocket holes and pocket hole screws and the trim I put on covers them completely so there was no need to fill them in. I ordered some bed rail brackets from Rockler and attached the side rails right onto the 4x4 legs instead of the panels and it worked out perfect and it's very easy to take apart if I ever need to move the bed. Thanks Ana for the plans. Any chance you will be doing nightstands to match?
Built from Plan(s)
Estimated Cost
$250.00 to $300.00
Estimated Time Investment
Week Long Project (20 Hours or More)
Finish Used
Minwax wood finish stain in Provincial and Minwax wipe-on poly in clear gloss
Recommended Skill Level
Beginner
Comments
Mon, 12/15/2014 - 17:21
Very nice
Very nice build. The finish is very pretty. Here is a link to, I believe, the farmhouse bedside table plans you were looking for. Many people have shared their builds of this, so you could check them out to get ideas to modify if you wanted to. http://ana-white.com/2011/01/farmhouse-bedside-table
Tue, 12/16/2014 - 00:33
Thank you so much Linda for
Thank you so much Linda for the link to the night stands. I'm going to get started on them first thing in the morning
Tue, 12/16/2014 - 08:07
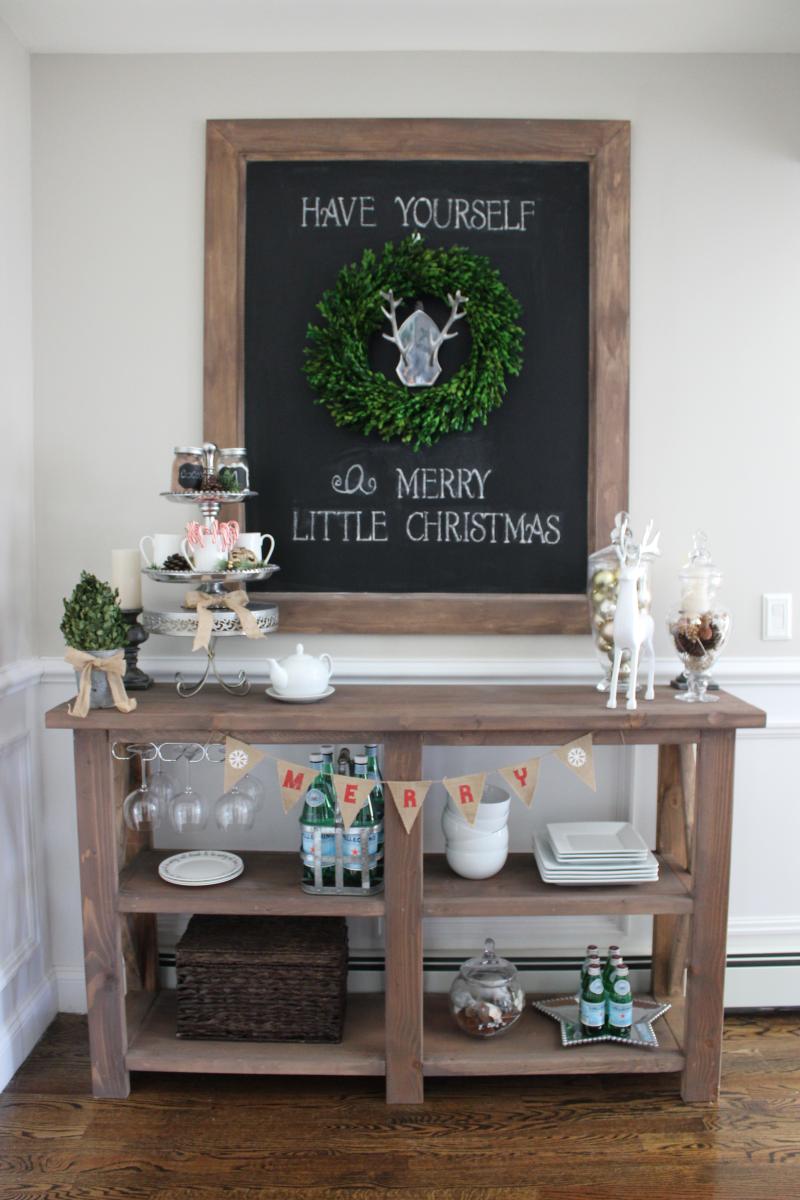
Mimi's Faux Mantle
Just love this mantle. I love the Primitive style & this is just perfect. Went over to Mimi's site so I could get the paint colors she used, the color is perfect.
Thank you both for posting. My husband is making the mantle for me for my Christmas gift. I'm going to put faux brick panel behind it & dirty it up with some black paint to make it look sooty.
I used to live in Cordova,AK., beautiful little town. I miss it alot.
Merry Christmas & Happy New Year, Linda Storey

Sun, 08/21/2016 - 16:54
Your bed is beautiful! Nice
Your bed is beautiful! Nice job!
Can you share a link to the bed rail bracketts you used and how you used them?
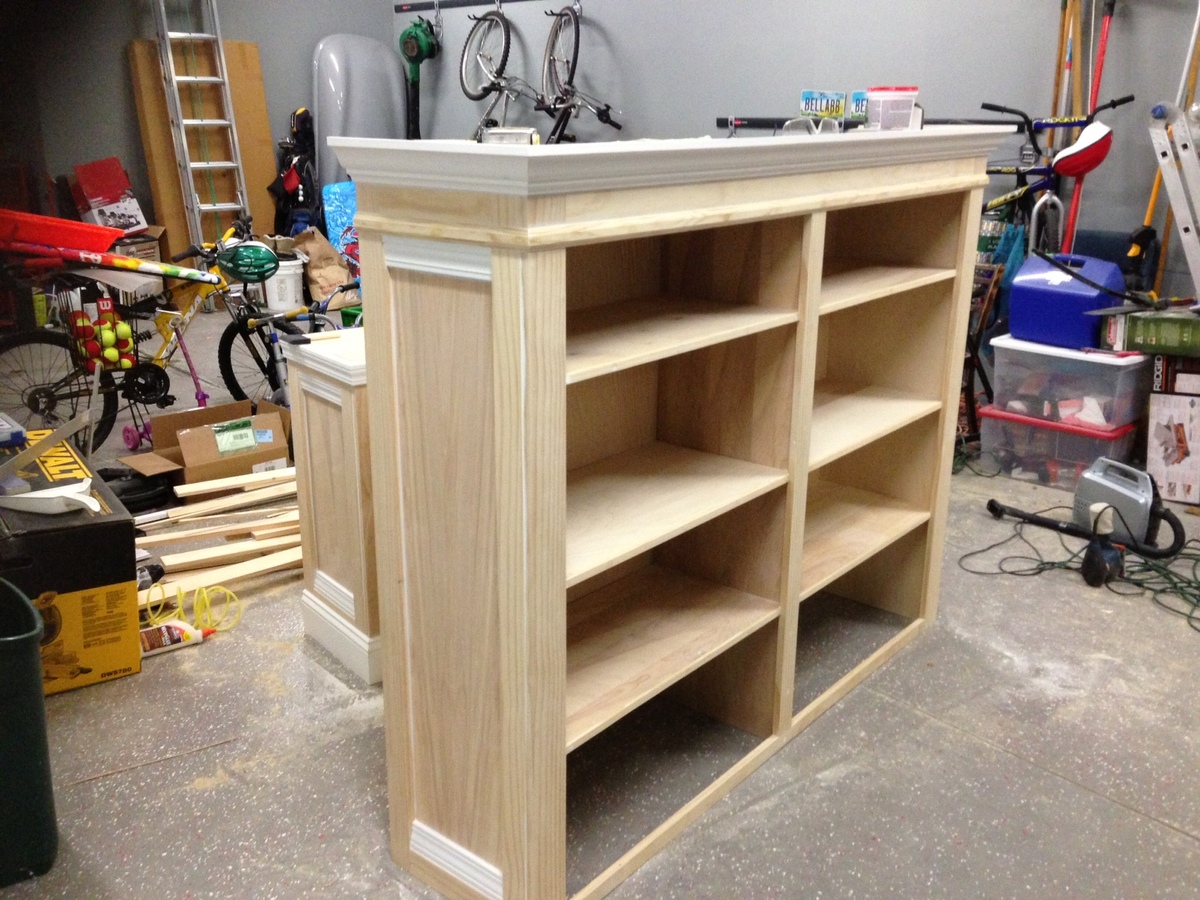
Son's Bookshelf
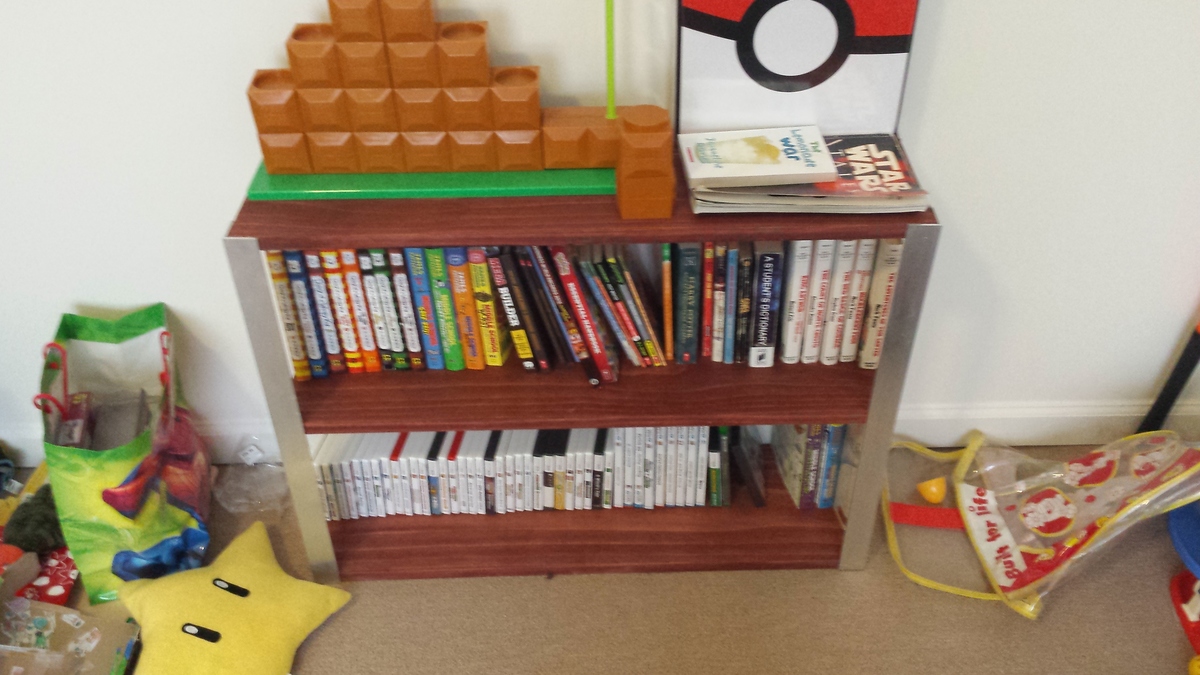
I decided not to use the wheels to keep my son from moving it around, stained it.
Built from Plan(s)
Finish Used
Minwax cherrywood stain
Recommended Skill Level
Starter Project
Farmhouse Queen Bed
Awesome project. Very simple, doing the sanding and finish requied more time than the cutting and assembly.
Built from Plan(s)
Estimated Cost
$160
Estimated Time Investment
Weekend Project (10-20 Hours)
Finish Used
3 coats Varathane Gel Stain in Dark Walnut, and 2 coats General Finishes Gel Topcoat in Satin.
Recommended Skill Level
Beginner
Comments
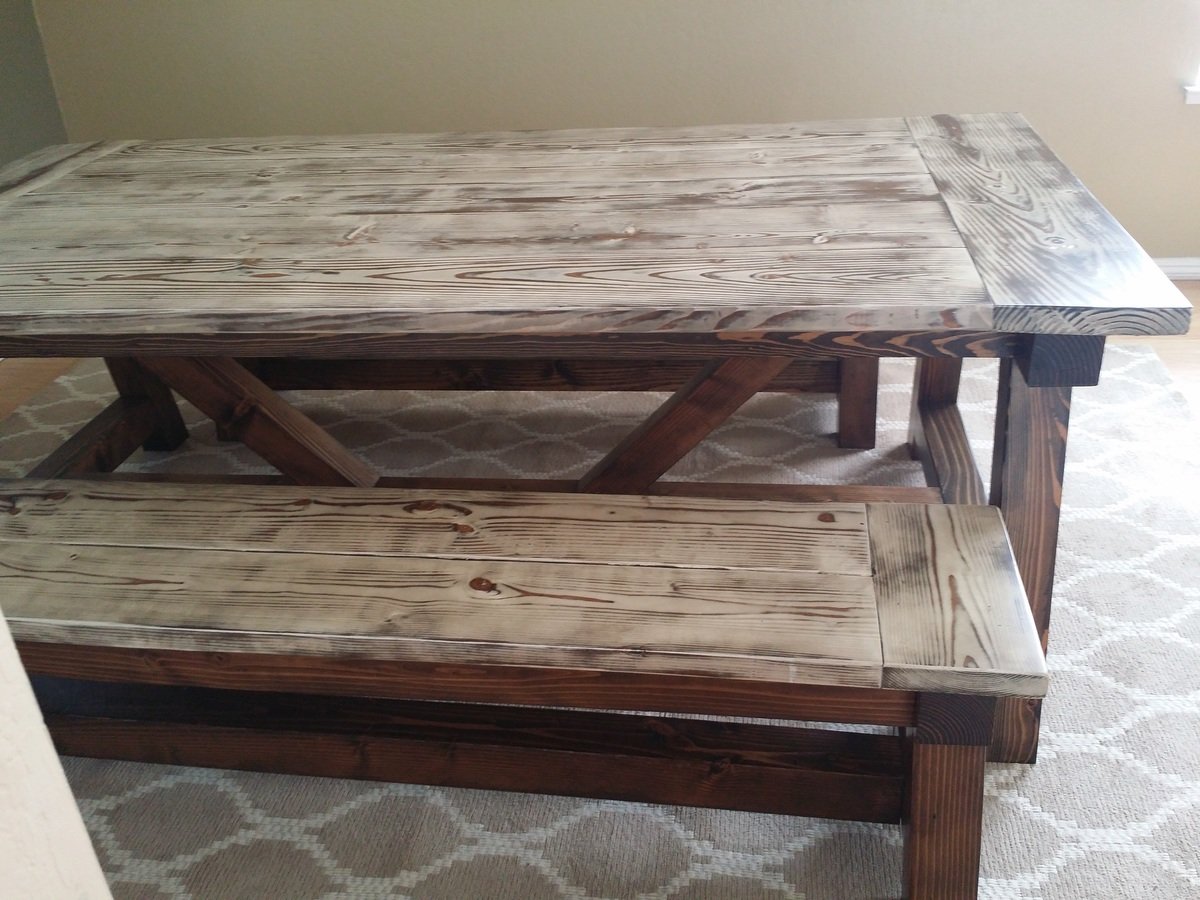
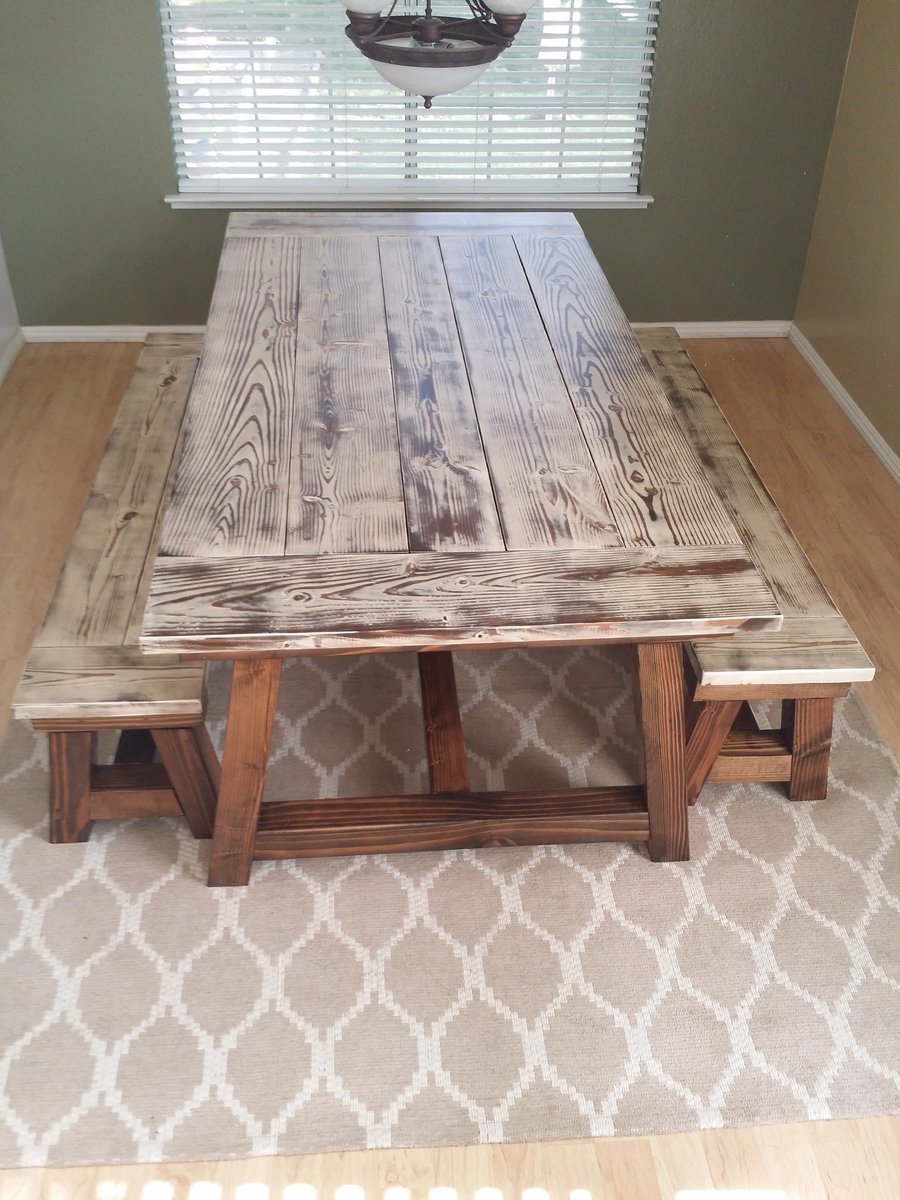
Farm Table
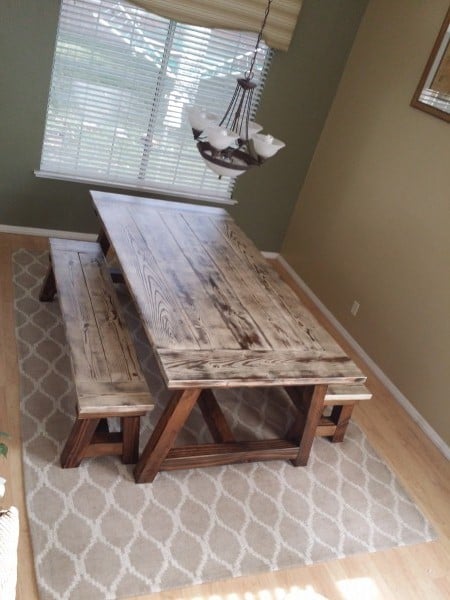
This table is a dream come true. I have always wanted one of these but could never find one I absolutely loved. I have now.
Built from Plan(s)
Estimated Cost
450.00 dollars plus time
Estimated Time Investment
Weekend Project (10-20 Hours)
Recommended Skill Level
Intermediate
Comments

Wed, 12/17/2014 - 16:04
I really like the look of the
I really like the look of the tabletop. How did you achieve that finish?
Tue, 12/23/2014 - 15:32
Finish on table
My husband painted the top with white paint, let it dry and then randomly sanded it all over and then put a coat of walnut stain on and rubbed it off and then put three coats of minwax polyurethane.
Tue, 12/23/2014 - 23:58
Great!
The design of table seems to be simple. However, I do like the color that you made for this. How can you mix the color like that?
http://www.proweb365.com

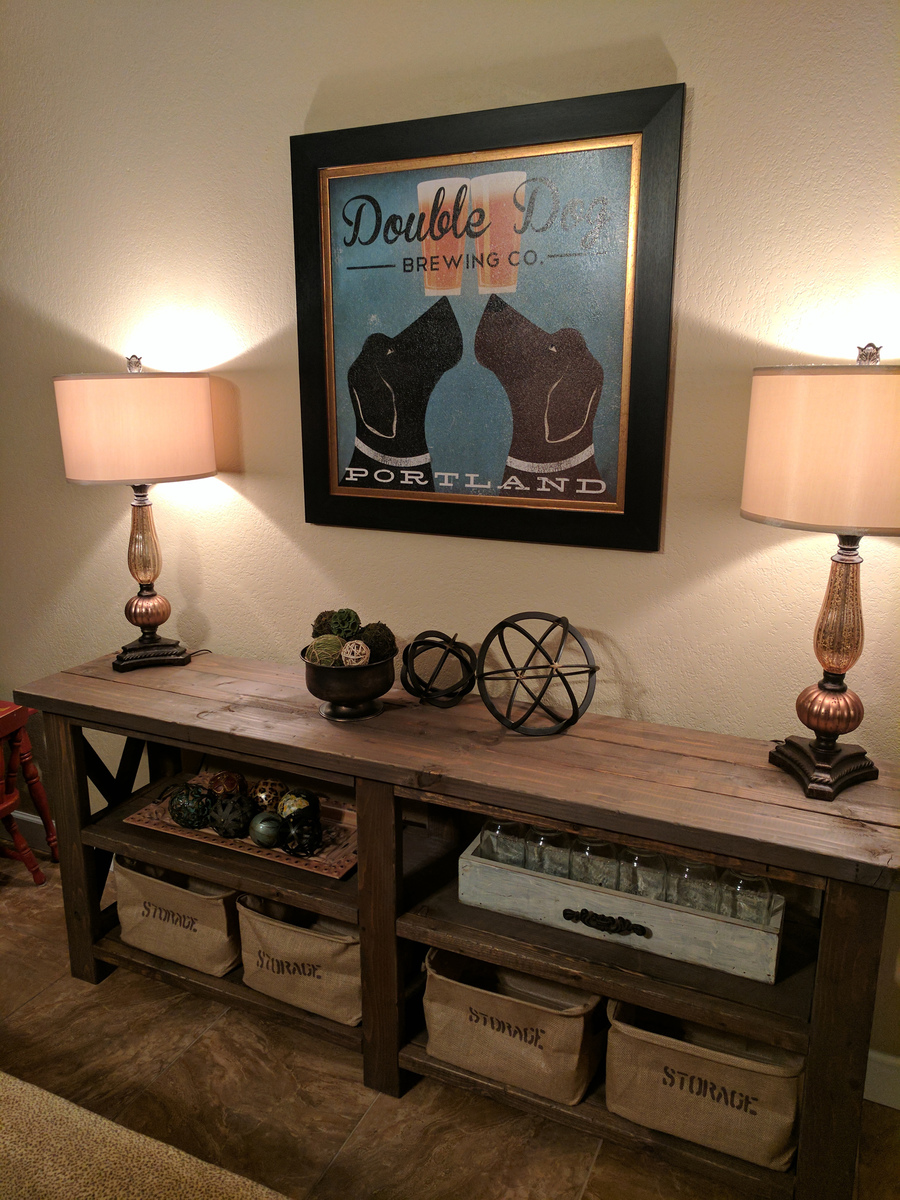
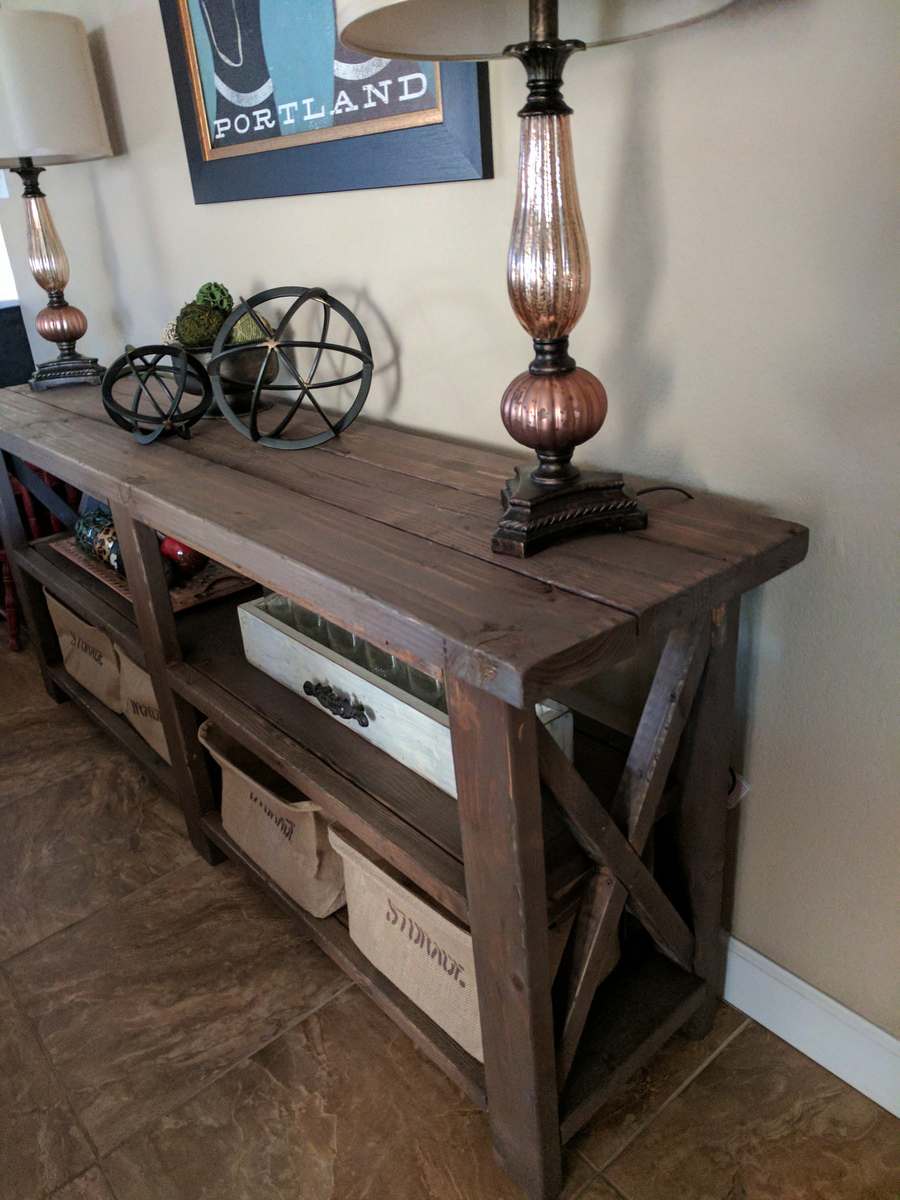
Rustic Console Table
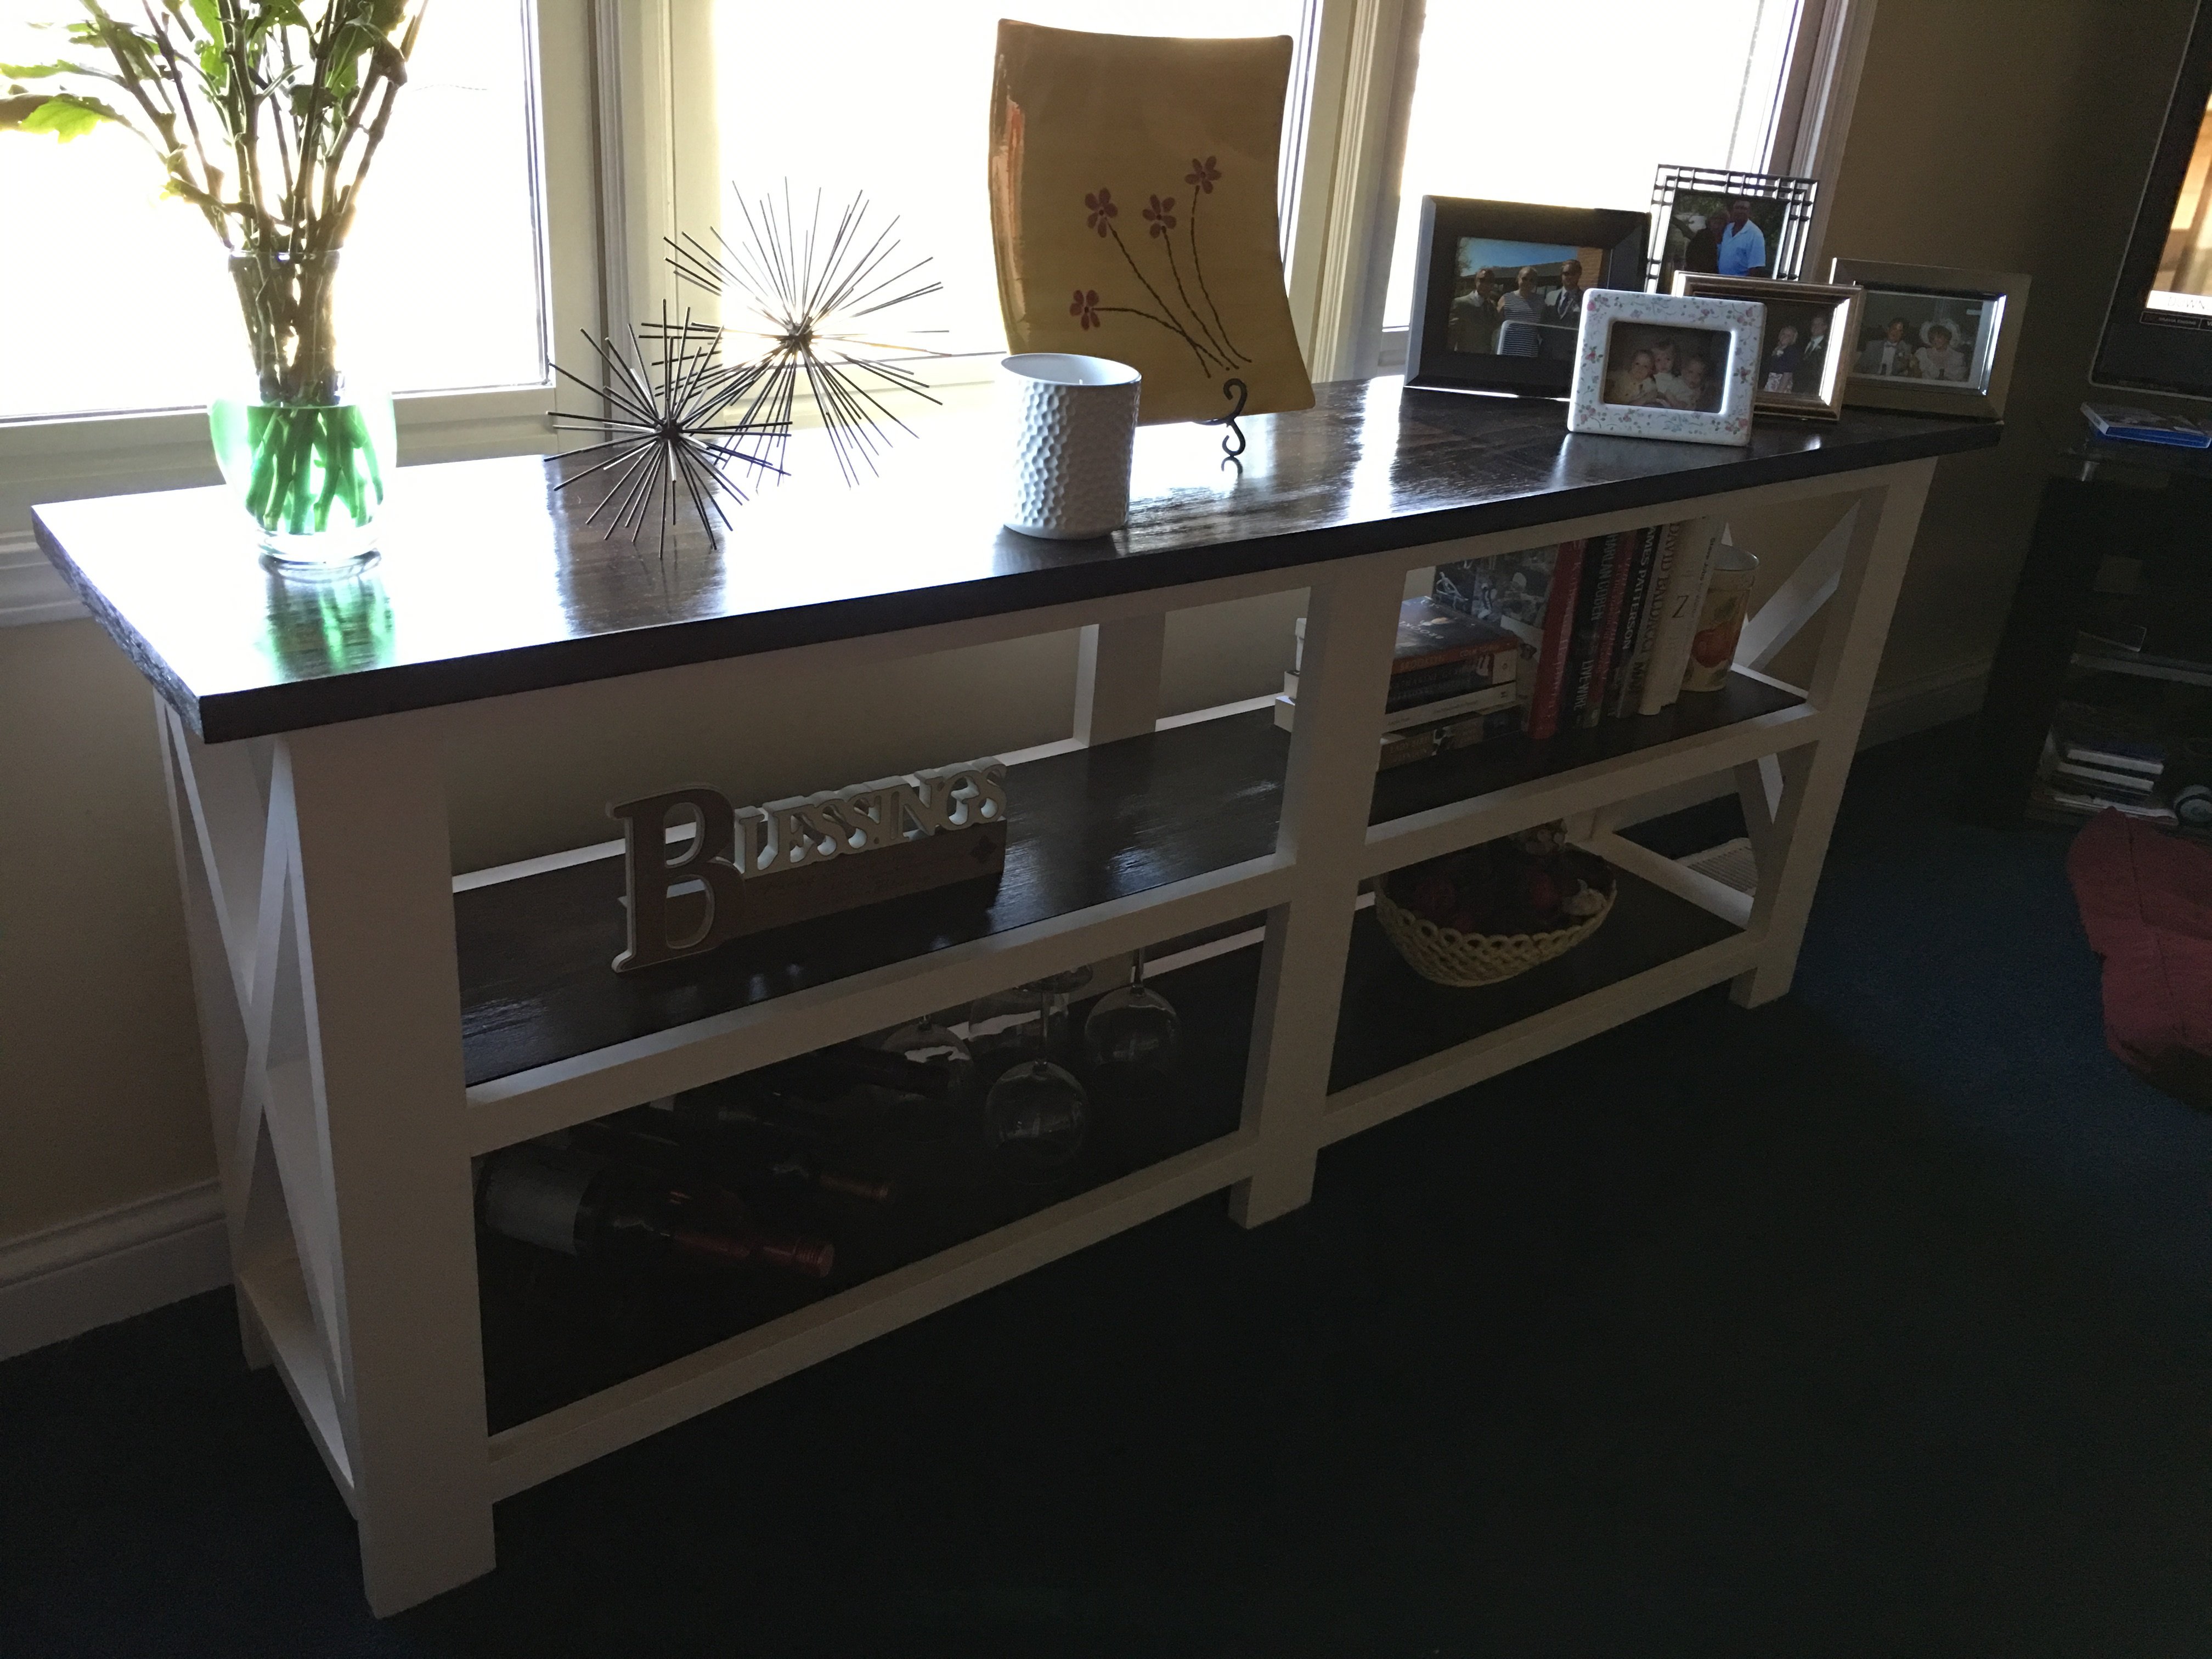
Fun project that turned out pretty good, we also made the matching end table
Built from Plan(s)
Estimated Cost
$200
Estimated Time Investment
Week Long Project (20 Hours or More)
Finish Used
Paint & Dark Walnut Stain
Recommended Skill Level
Intermediate
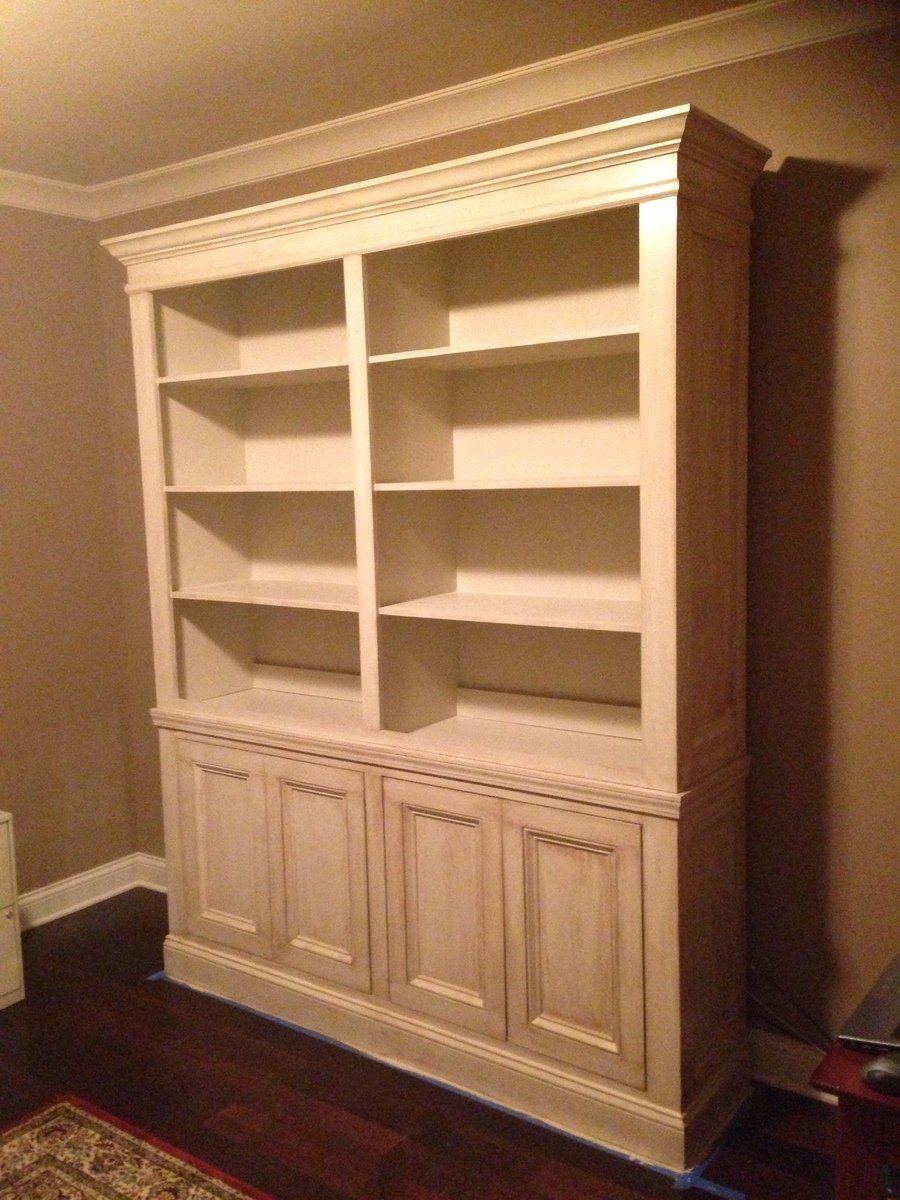
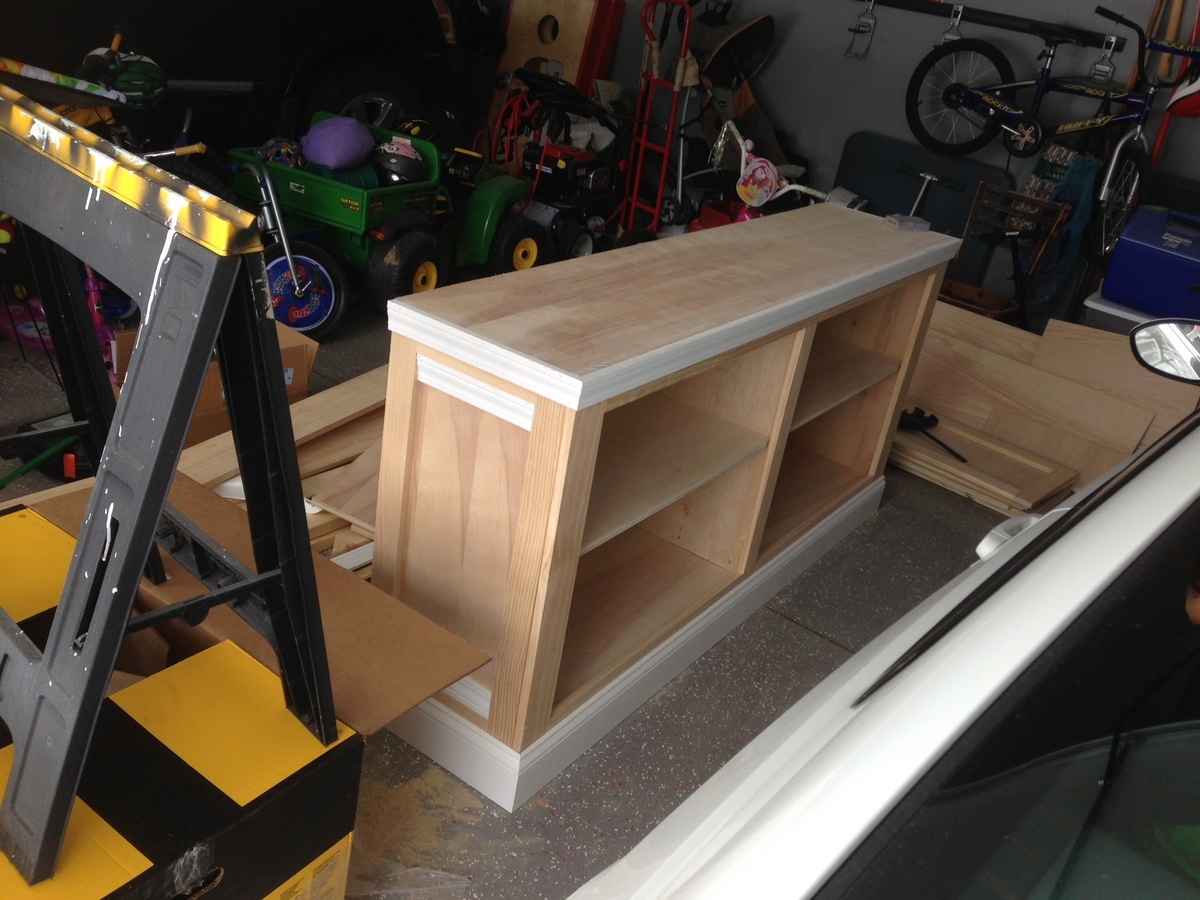
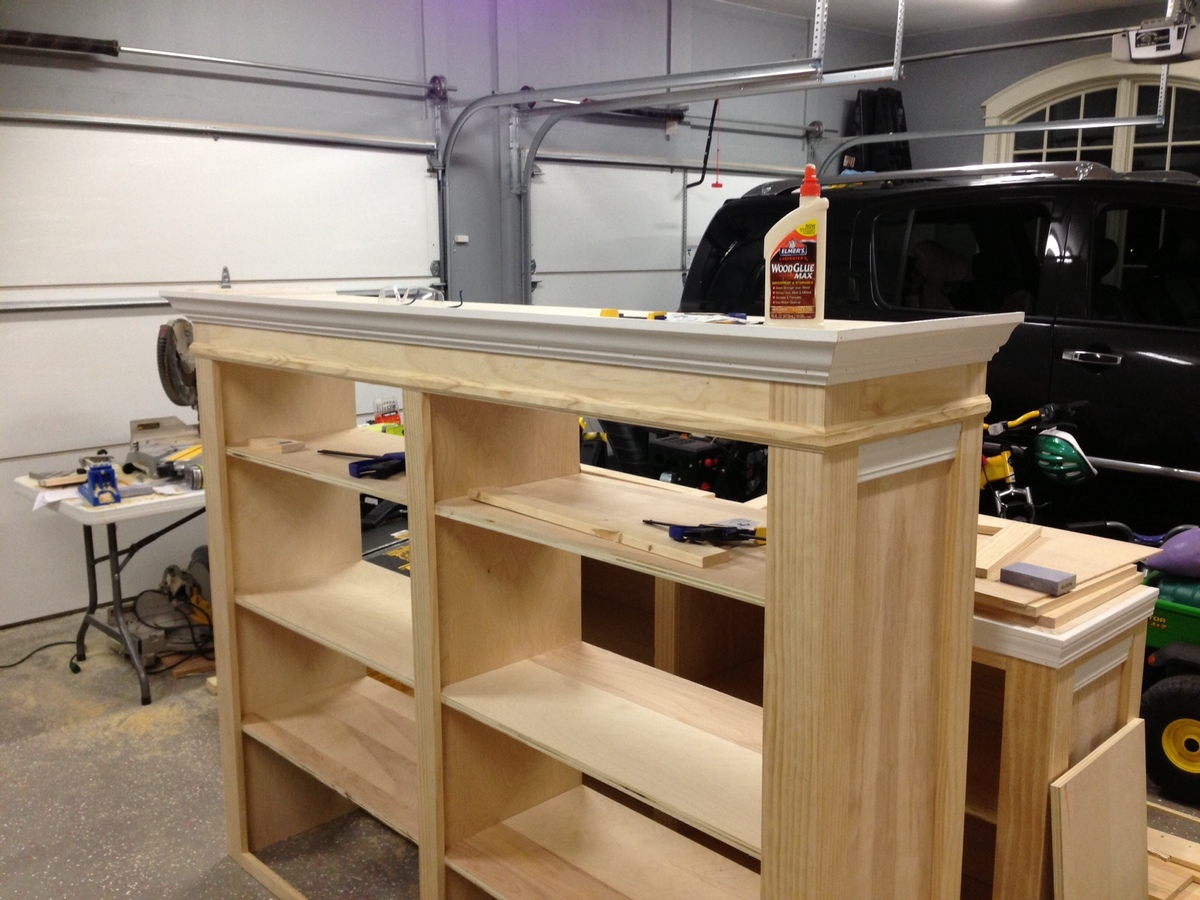
Shanty Sideboard painted

We loved the shanty sideboard and corresponding hutch. We painted the project in an offwhite with a brown glaze (consisting of 4 parts Behr faux glaze to 1 part minwax espresso stain). The only modifications to the plan are 3/4" trim pieces in the top part to hide the plywood, remove 1/4 inch from the sideboard shelves to allow room for doors to shut, and apply trim to the cabinet doors to dress it up a little.
Built from Plan(s)
Estimated Cost
300
Estimated Time Investment
Week Long Project (20 Hours or More)
Finish Used
semi gloss off white paint (behr paint that includes the primer) and glaze made up of behr faux glaze mixed with minwax stain - consisting of 4 parts Behr faux glaze to 1 part minwax espresso stain. We painted on the glaze then waited a minute and started rubbing off. Kind of tricky but if its too heavy we just had a wet cloth and took it all off.
Recommended Skill Level
Intermediate
Comments

Thu, 02/14/2013 - 08:59
I so badly want to build
I so badly want to build this! But other projects are the priority right now. You did a great job!

Thu, 02/14/2013 - 11:16
Love this!
You did a fantastic job on this. I love the finish - so "expensive" looking!
Fri, 02/15/2013 - 05:25
Keep the Great Work Coming!
You did a wonderful job on this project. Keep it up and let all of us learn from your experiences.

Mon, 04/20/2015 - 17:50
Attaching the Hutch to Sideboard
How did you attach the Hutch portion to the sideboard?
Camp Loft Bed
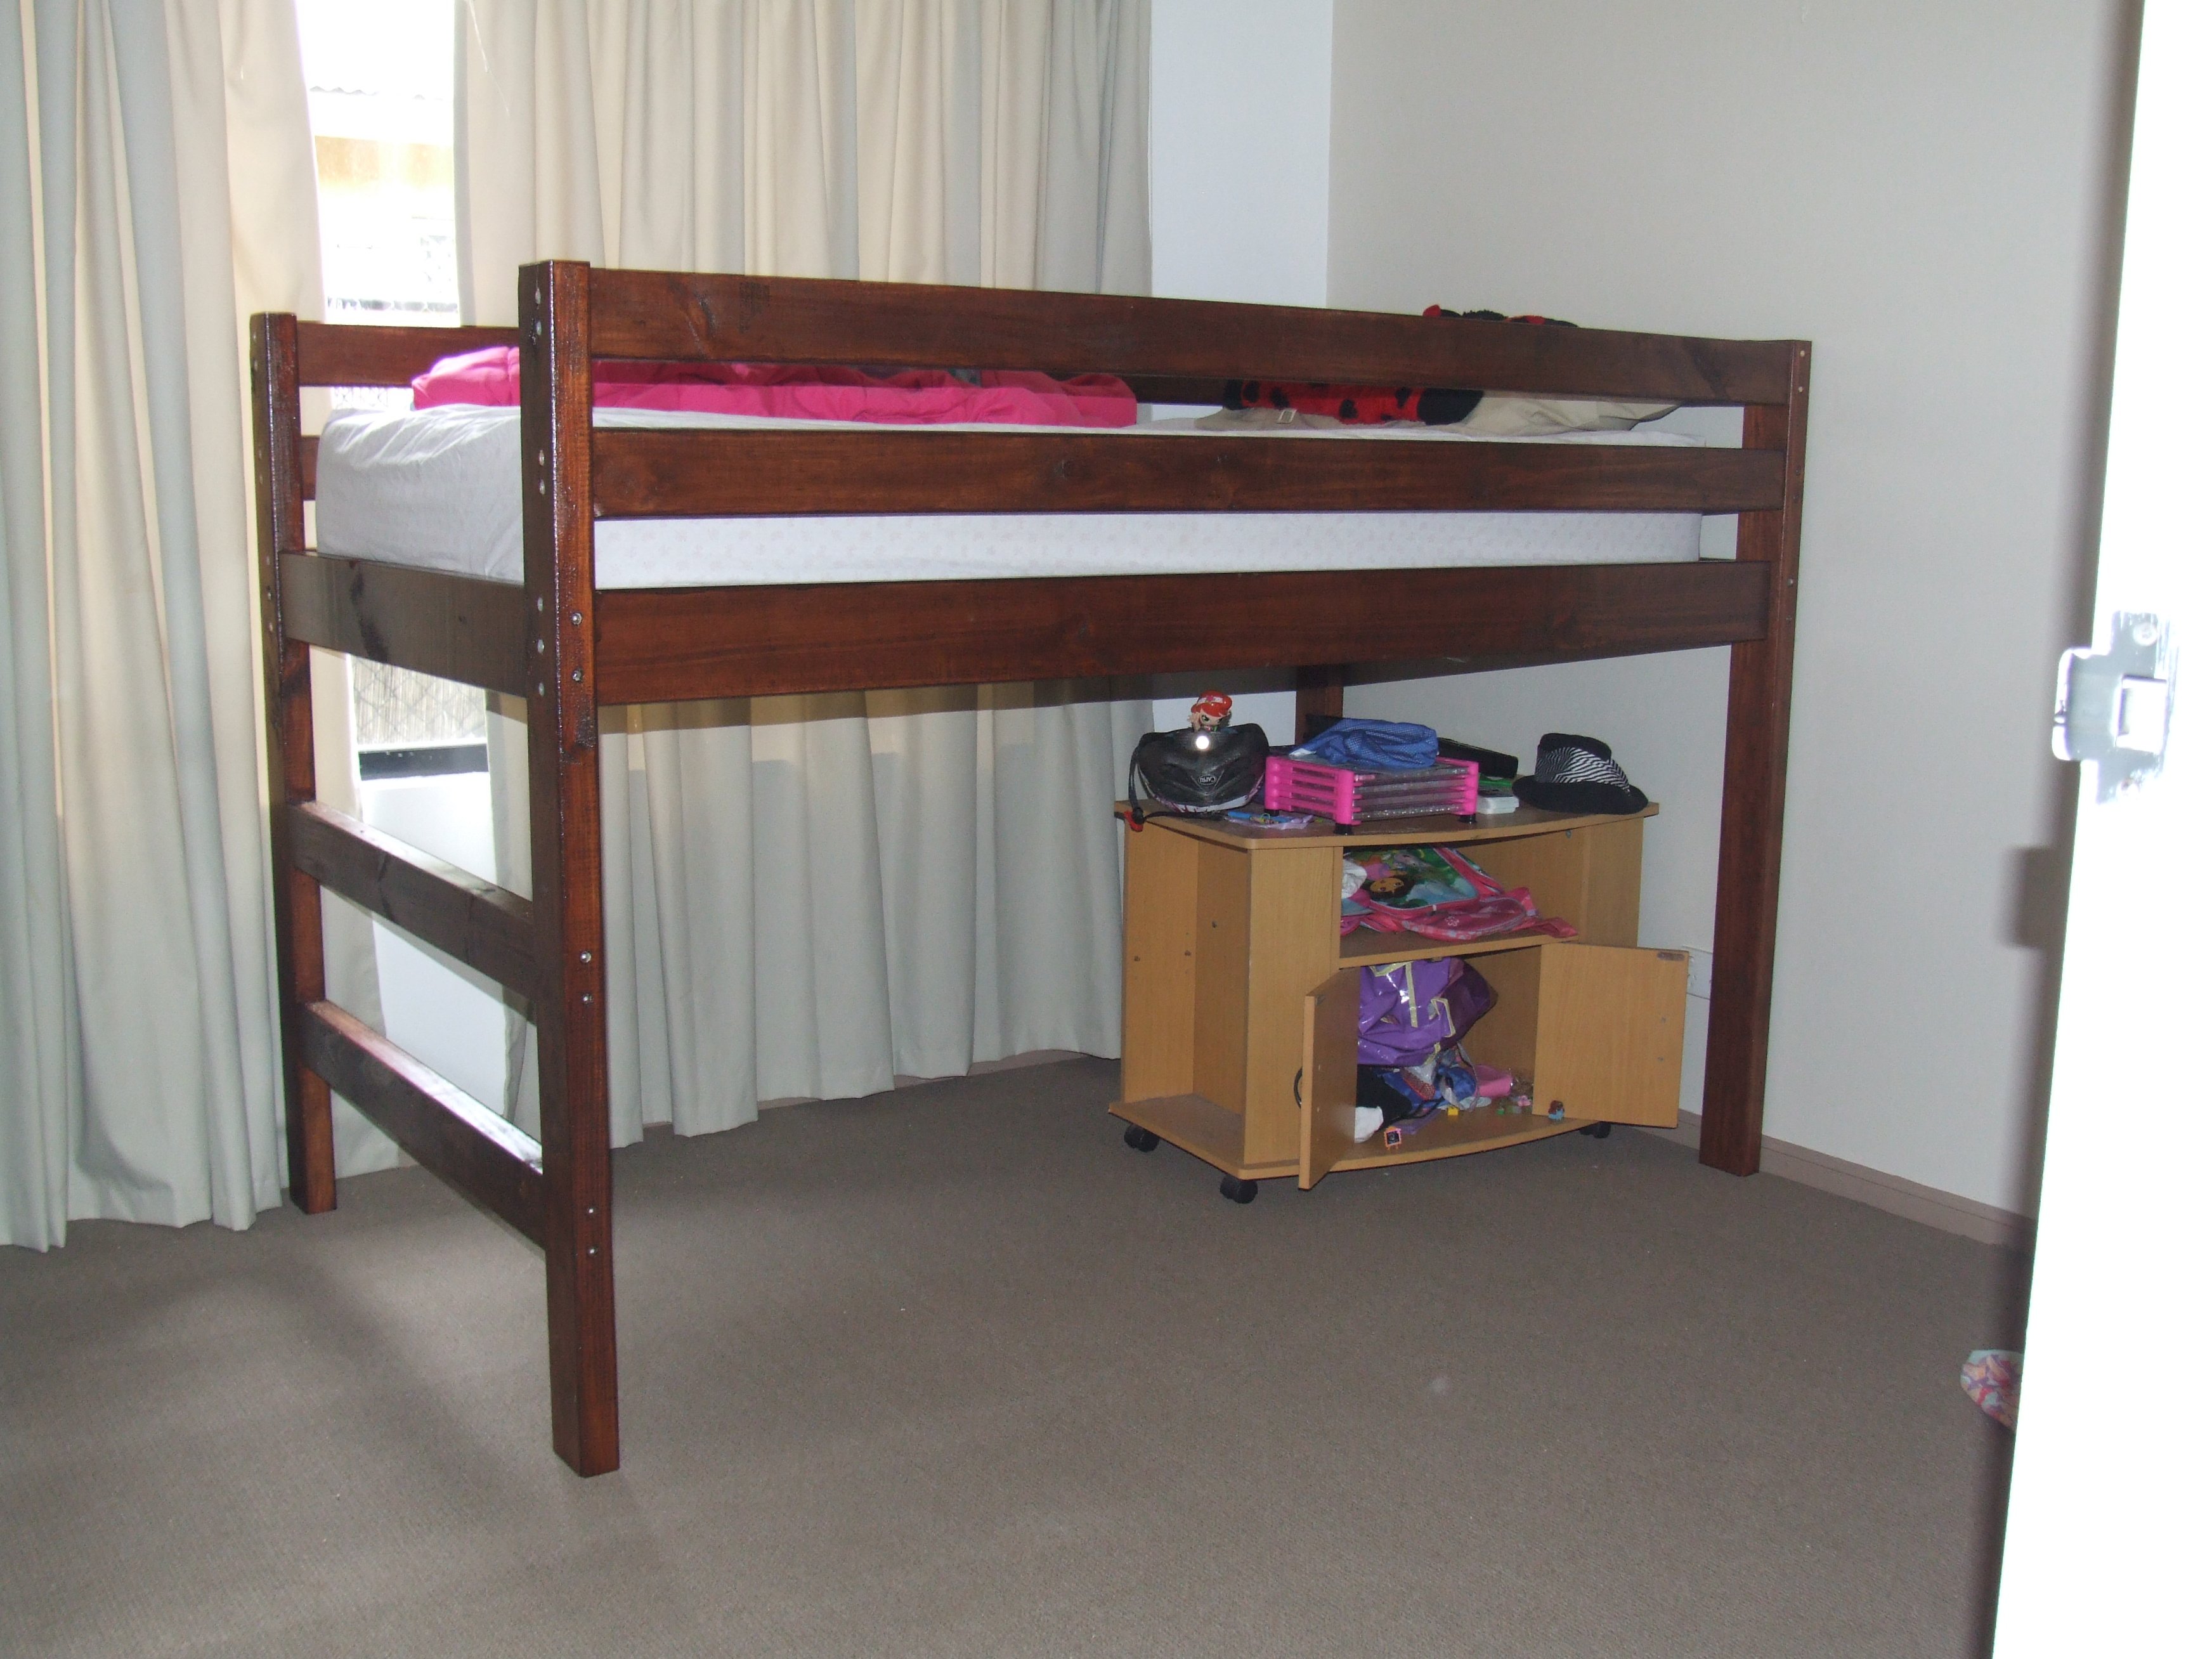
We didnt include the stairs on this bed as there wasnt enough room in my daughters bedroom. We are very happy with the finished product, and so is my daughter. We didnt quite make it as high as the plans as we were worried out the fan in my daughters room.
Built from Plan(s)
Estimated Cost
$260 Australian
Estimated Time Investment
Week Long Project (20 Hours or More)
Finish Used
Cedar stain
Recommended Skill Level
Beginner
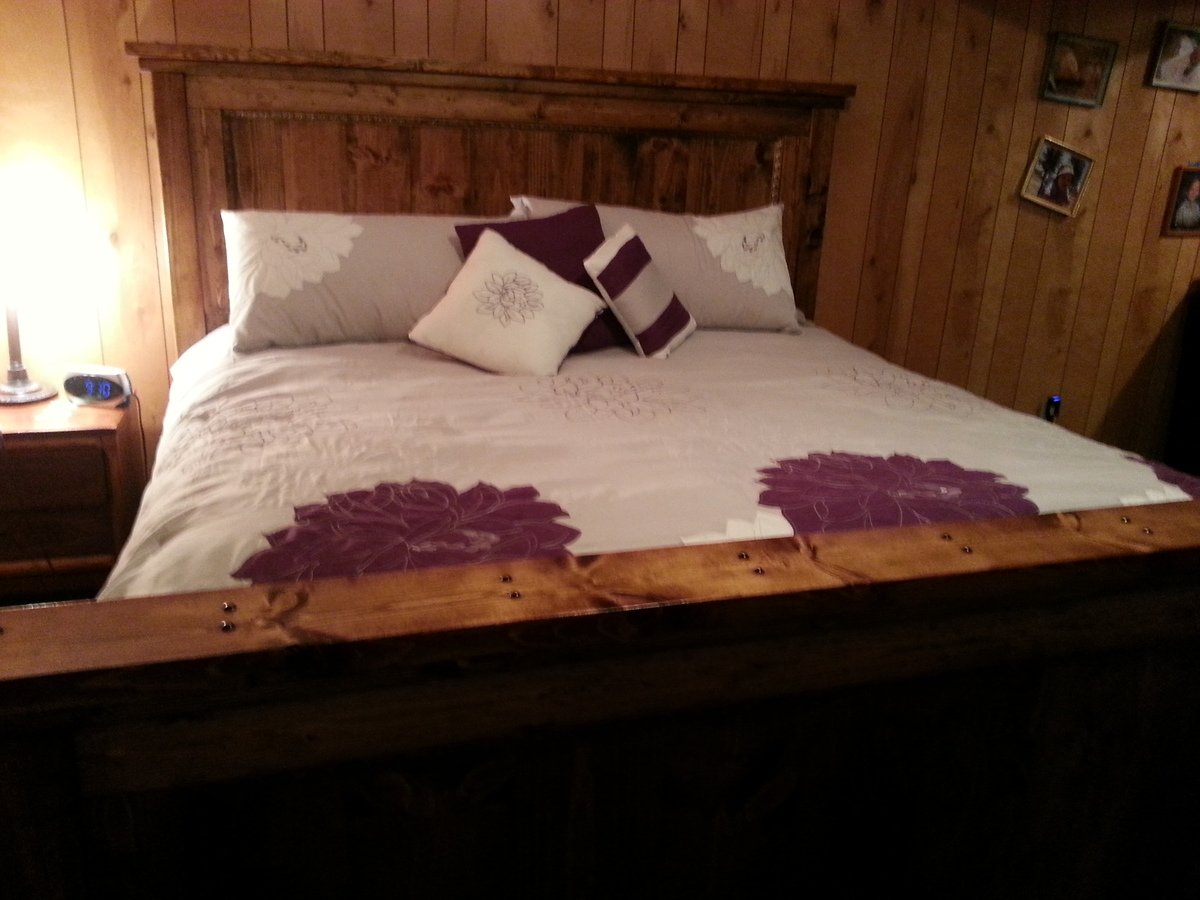
Farmhouse King Bed
The wood total was about $200. We added some height to the headboard for the build. The frame is done by screwing 1x2 boards along the side rails and laying (4) 2x4s across for the box spring to sit on. Absolutely love our new bed!
Built from Plan(s)
Estimated Cost
$200
Estimated Time Investment
Weekend Project (10-20 Hours)
Finish Used
Mix of white paint then sanded and mixed multiple varathane stains
Recommended Skill Level
Intermediate
Comments
Sat, 11/30/2019 - 03:34
It looks AMAZING! Do you…
It looks AMAZING! Do you happen to know how much height you added to the headboard?
Rustic Adirondack Chair... Nailed it!
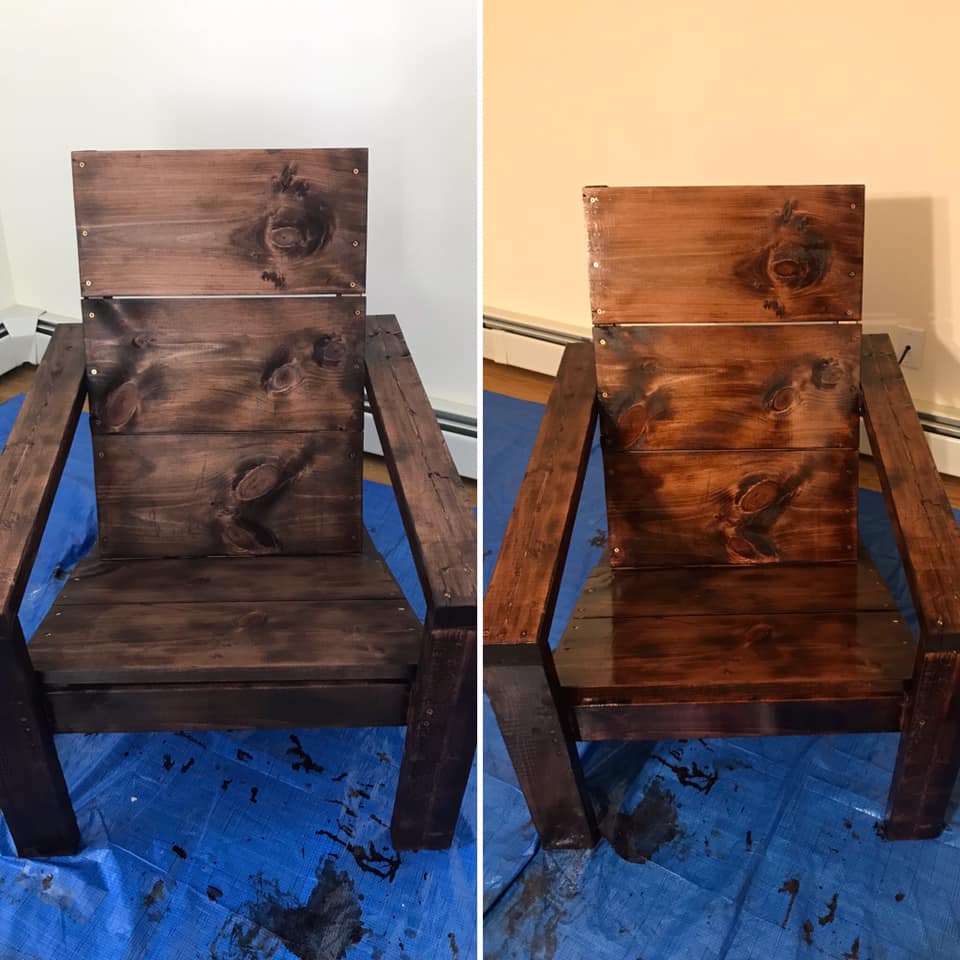
My first project using Ana's plans and they were easy to follow! I feel great about the project and plan to expand on it. I may double the width and make a little Adirondack bench seat!
Estimated Cost
$50 with hardware
Estimated Time Investment
An Hour or Two (0-2 Hours)
Finish Used
Mahogany stain and polyurethane
Easy console table
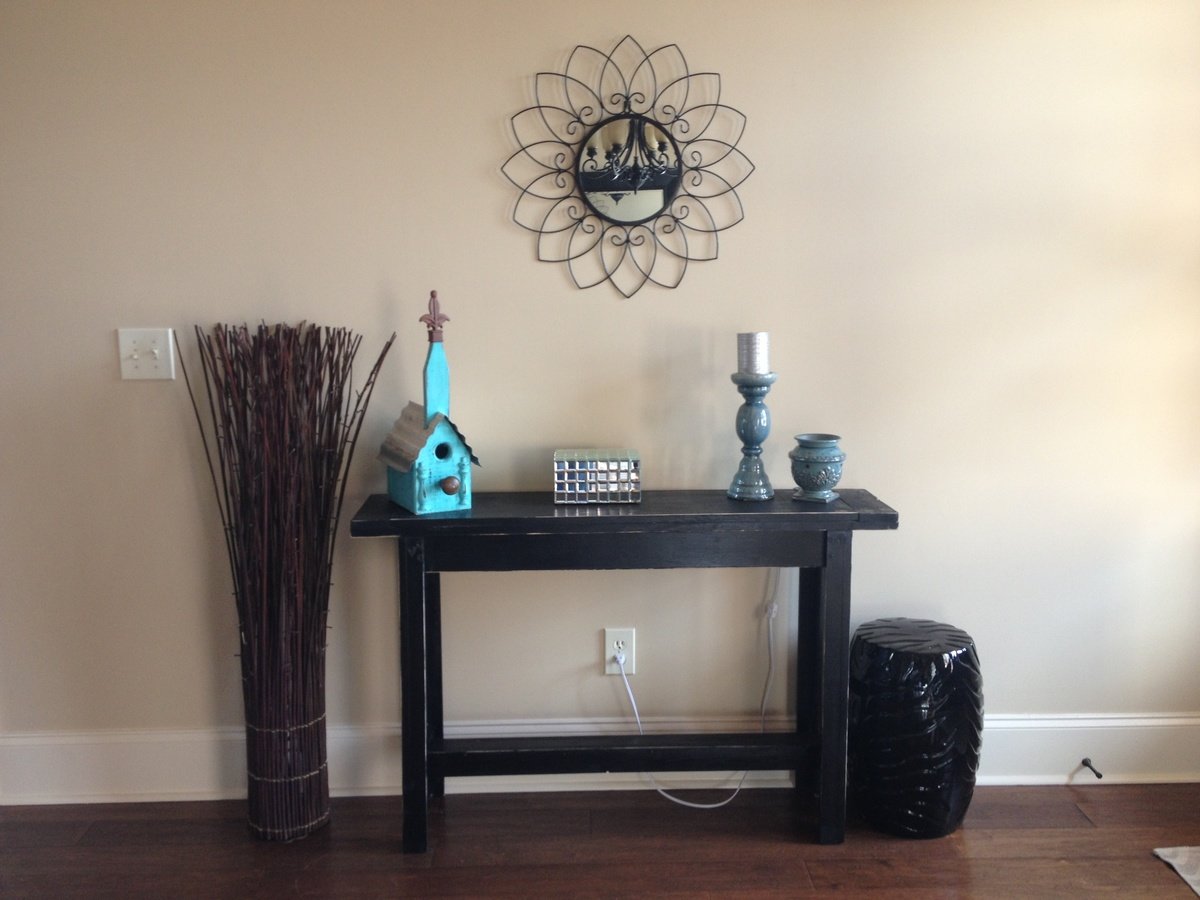
Very simple plans and project. Cost about 30.00 to make and about 2 hours to build. Painted it matte black and sanded for a distress look.
Built from Plan(s)
Estimated Time Investment
An Hour or Two (0-2 Hours)
Recommended Skill Level
Beginner
Comments
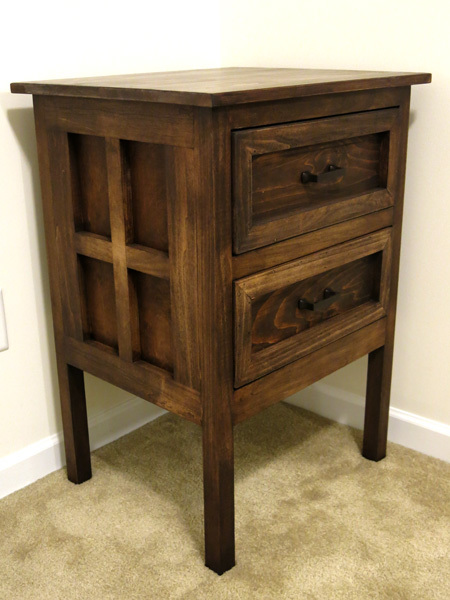
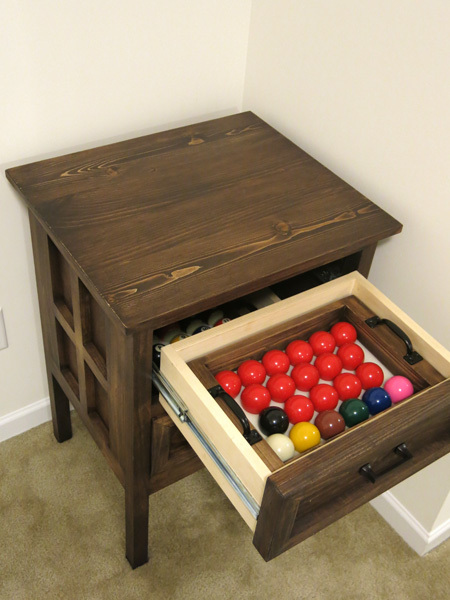
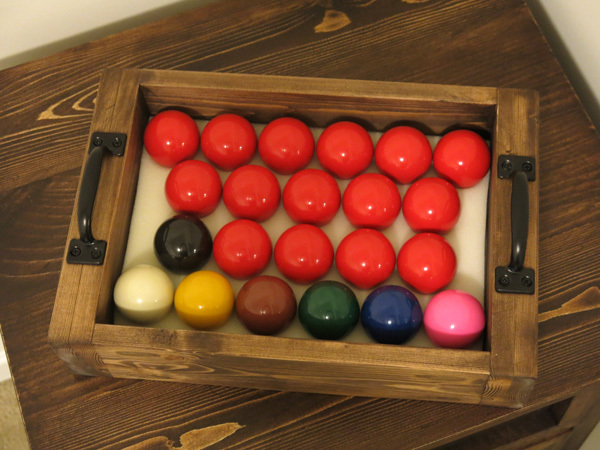
Snooker and Pool Ball Cabinet

Snooker and Pool ball cabinet with lift out ball storage trays.
Wanted somewhere to store the differnt balls and wanted lift out trays so the balls could be easily carried to the table.
Apart from the top the cabinet is made from Poplar. The top is made from Pine and the sides are 1/4 inch Birch ply.
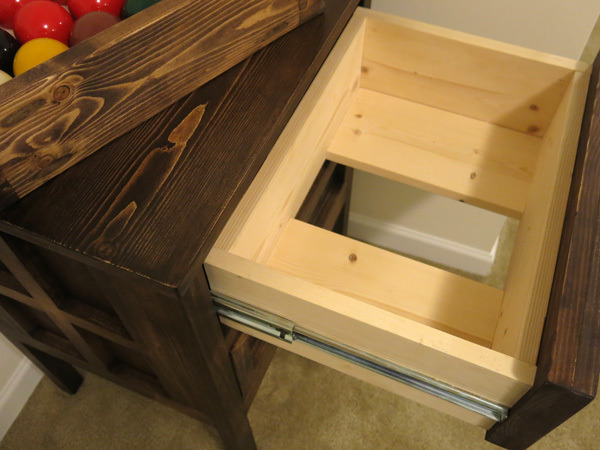
Used full extension drawer slides.
Actually made the ball trays first and then made the cabinet to fit based on the width of those and the depth they needed to fully extend by to allow the trays to be lifted out.
Made a couple of mistakes on this one and had to scrap the first drawer I made as put pocket holes on the pieces for the sides not the front and back. Kept the drawer though to use for another project. Lesson learnt!!
The poplar legs were on offer at Home Depot and only $2.50 each. Bargain!!

Estimated Cost
$130 - balls not included!! :-)
Estimated Time Investment
Weekend Project (10-20 Hours)
Finish Used
Minwax Preconditioner. Varathane Kona. Varathane Matte Poly. Top was also waxed to give it some protection.
Recommended Skill Level
Beginner
Comments
DAD DIY Kids Fold-up desk
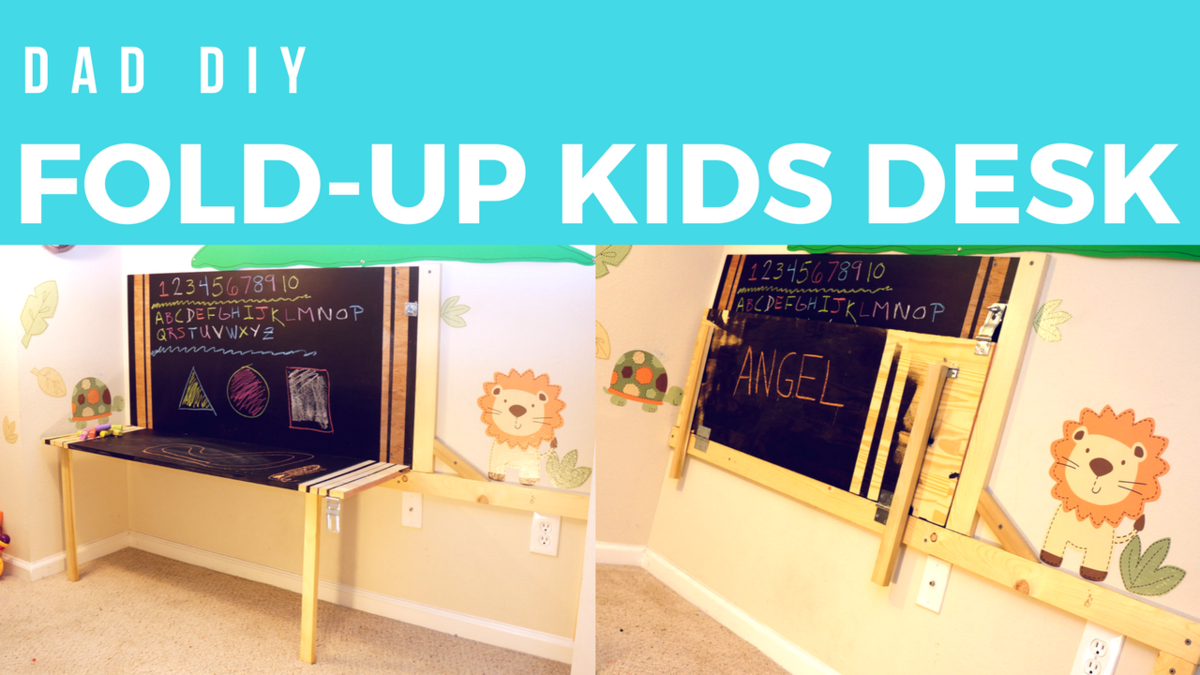
I've been a DIYer for as long as I can remember and recently I decided to start documenting them on my new YT channel. I try to keep the projects as simple and fun as possible for parents with little to no experience in DIY. This project was super easy and my son absolutely loves it. We use this desk for learning and playing (reference video). And since it folds up it saves space for his play area. I hope that you too feel inspired to try a project like this.
Estimated Cost
$25
Estimated Time Investment
Afternoon Project (3-6 Hours)
Finish Used
Play and learn
Recommended Skill Level
Beginner
First project
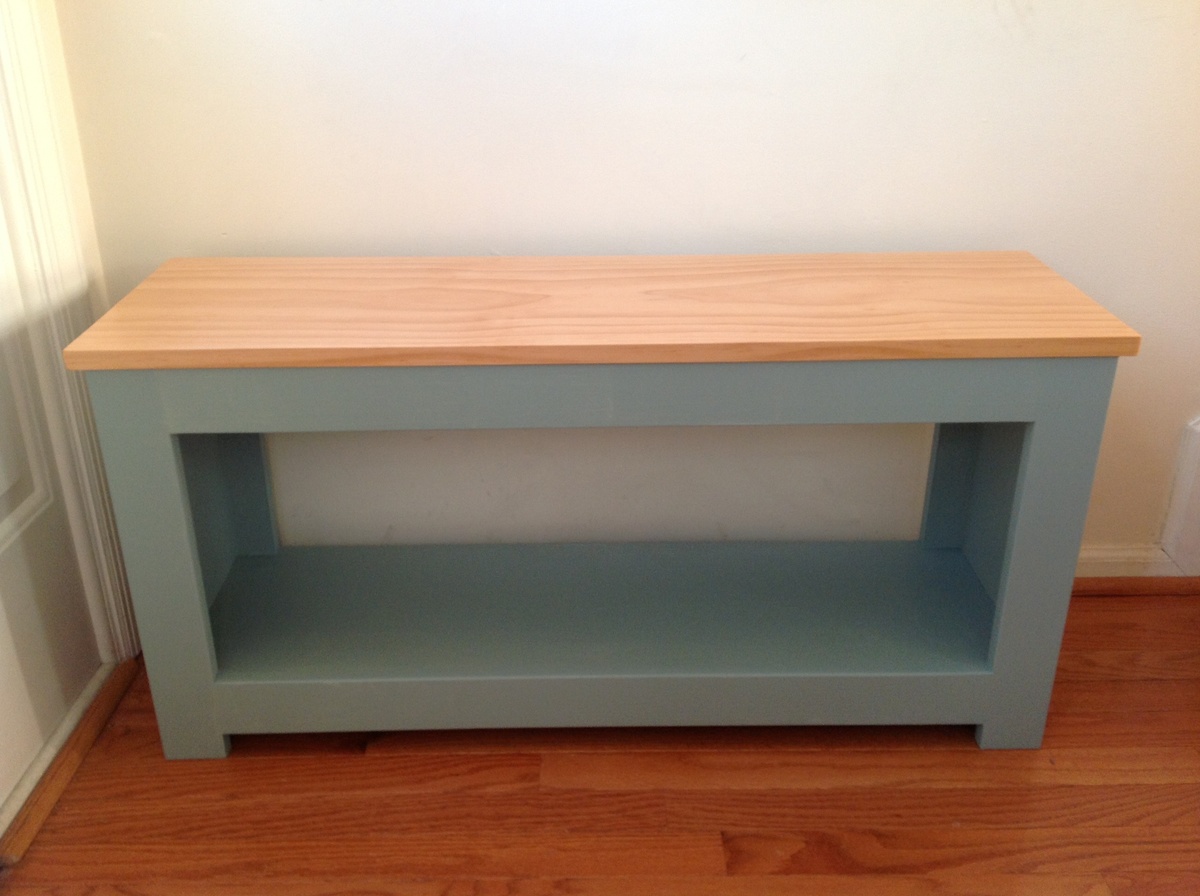
Used the plans for the spa bench to make a easy entryway bench...

Built from Plan(s)
Estimated Cost
40
Estimated Time Investment
Afternoon Project (3-6 Hours)
Finish Used
Top piece: Behr's Lotus Leaf
Base: Minwax's Ipswich Pine
Also added two coats of semi-gloss poly to the top piece for added protection.
Base: Minwax's Ipswich Pine
Also added two coats of semi-gloss poly to the top piece for added protection.
Recommended Skill Level
Starter Project
Comments

Mon, 02/18/2013 - 17:37
Beautiful project!
Beautiful job! Congrats on your first project! It looks really super and I love the finishes you used!
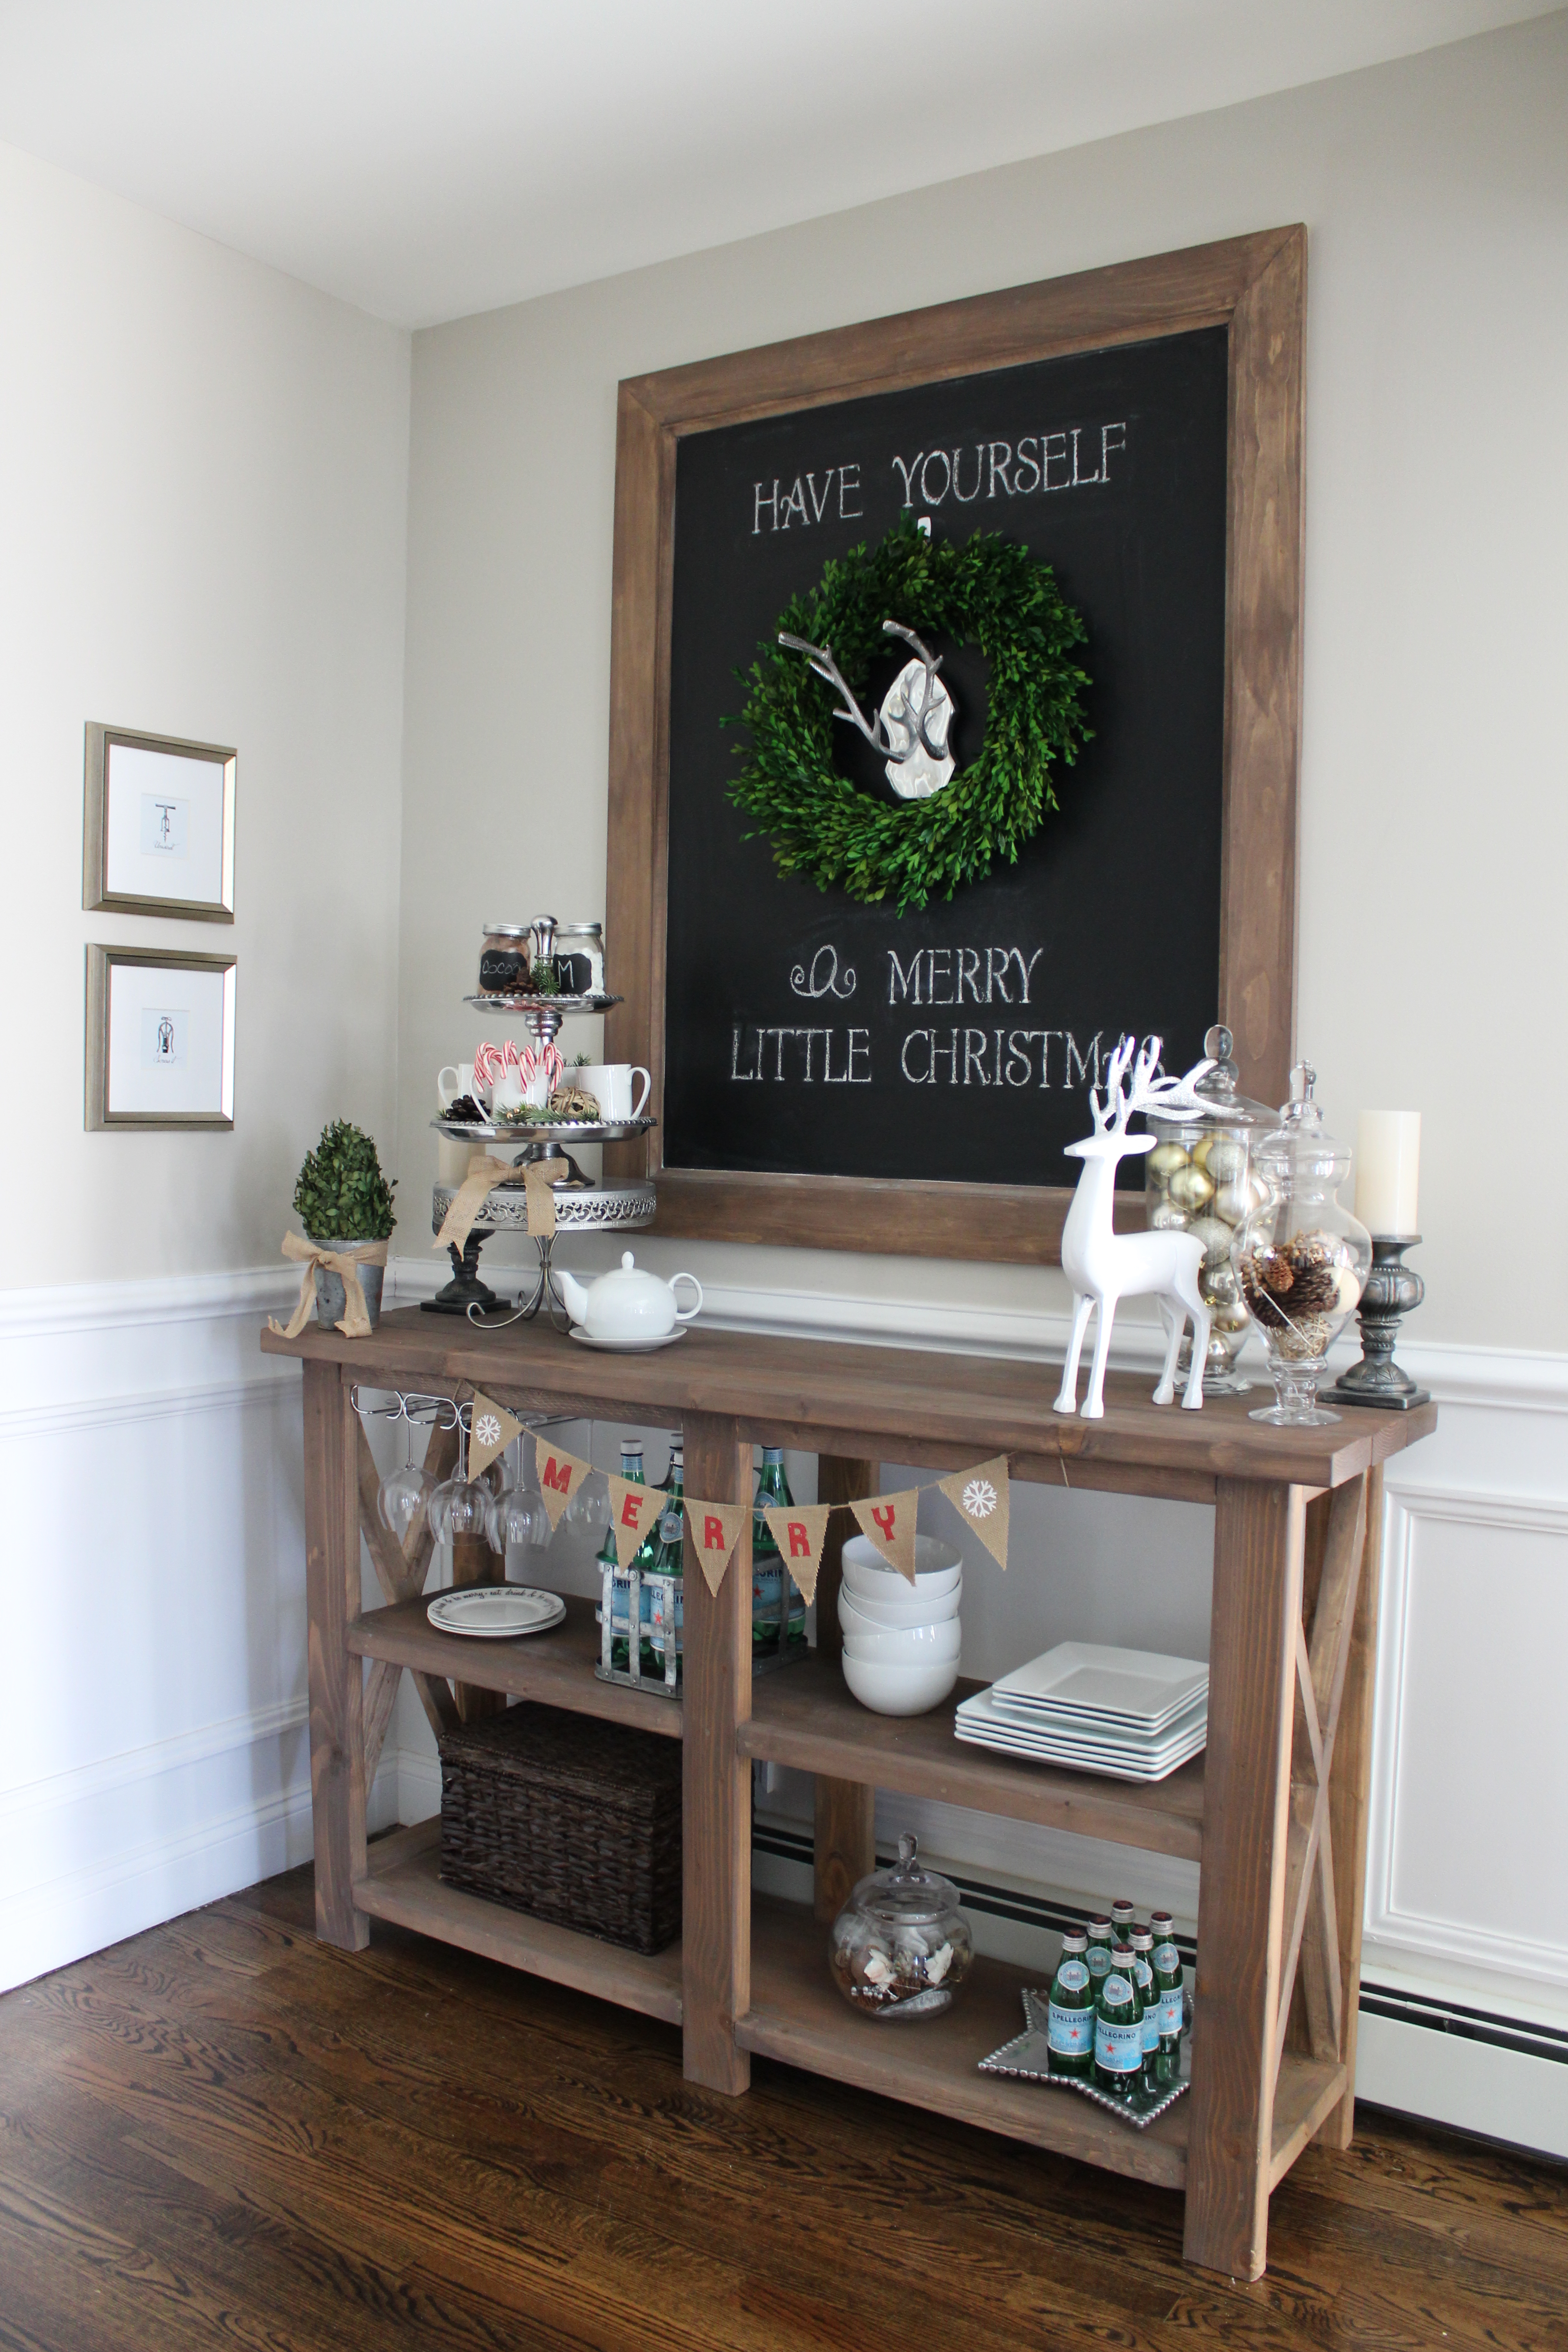
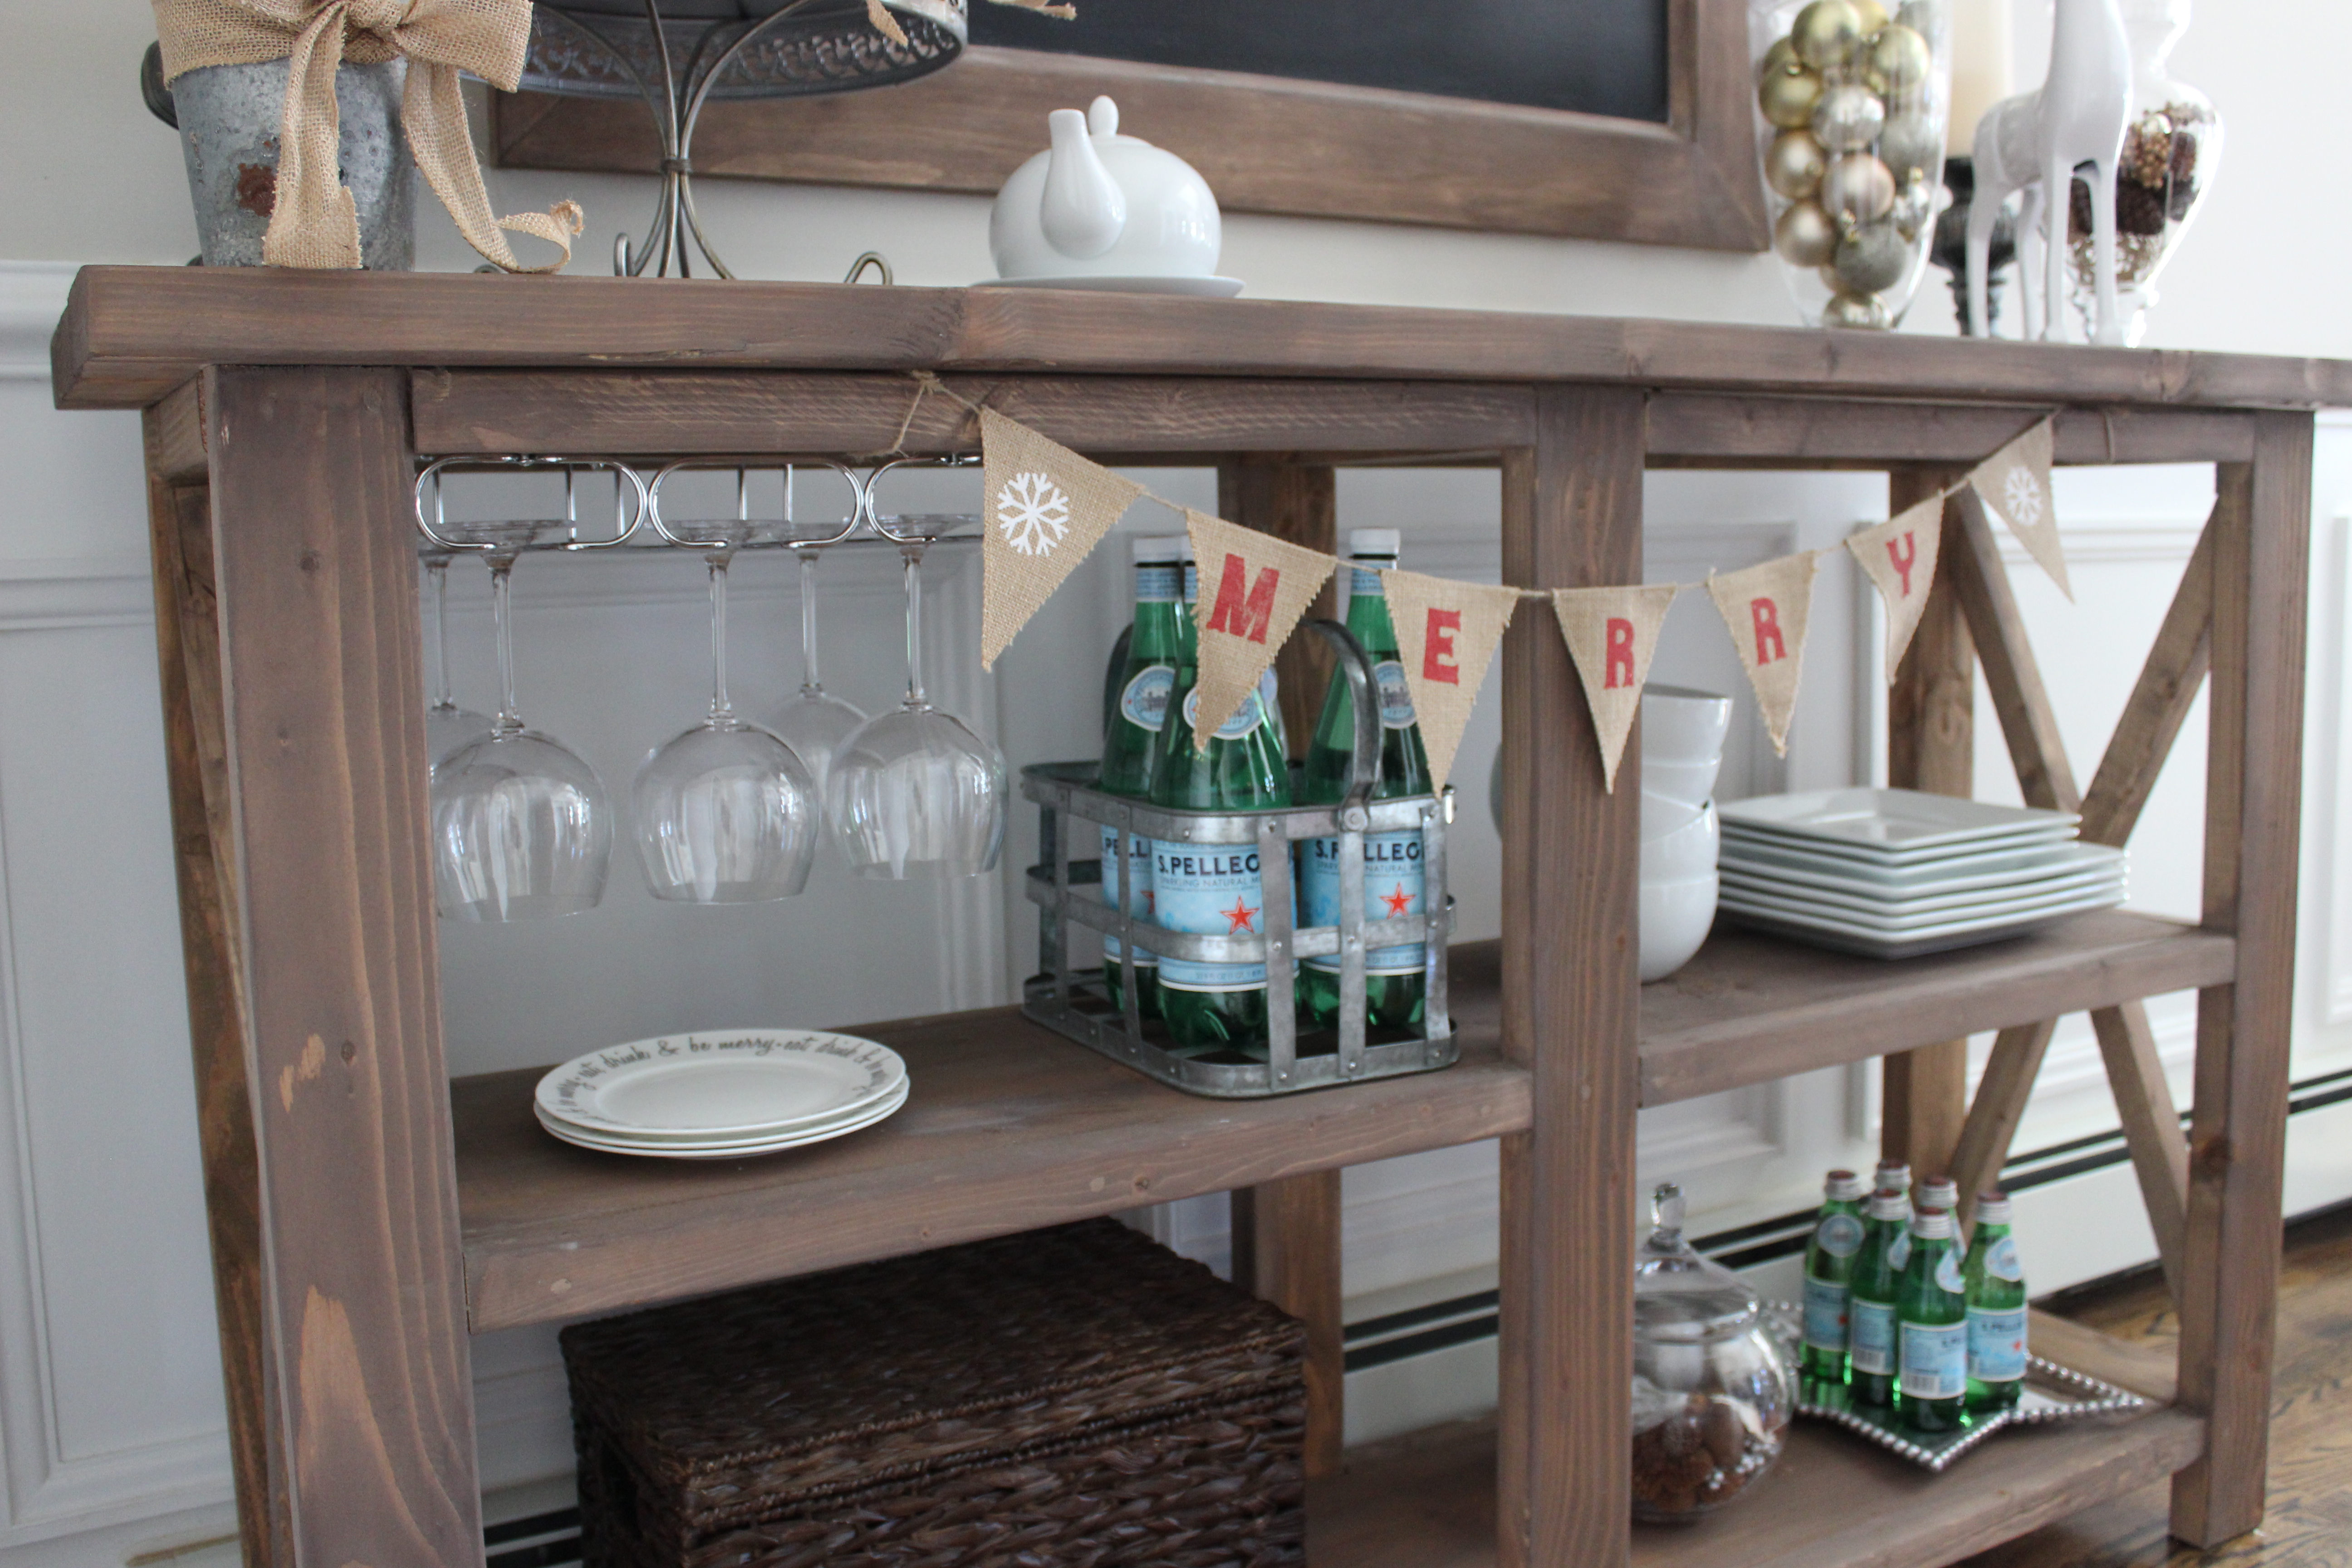
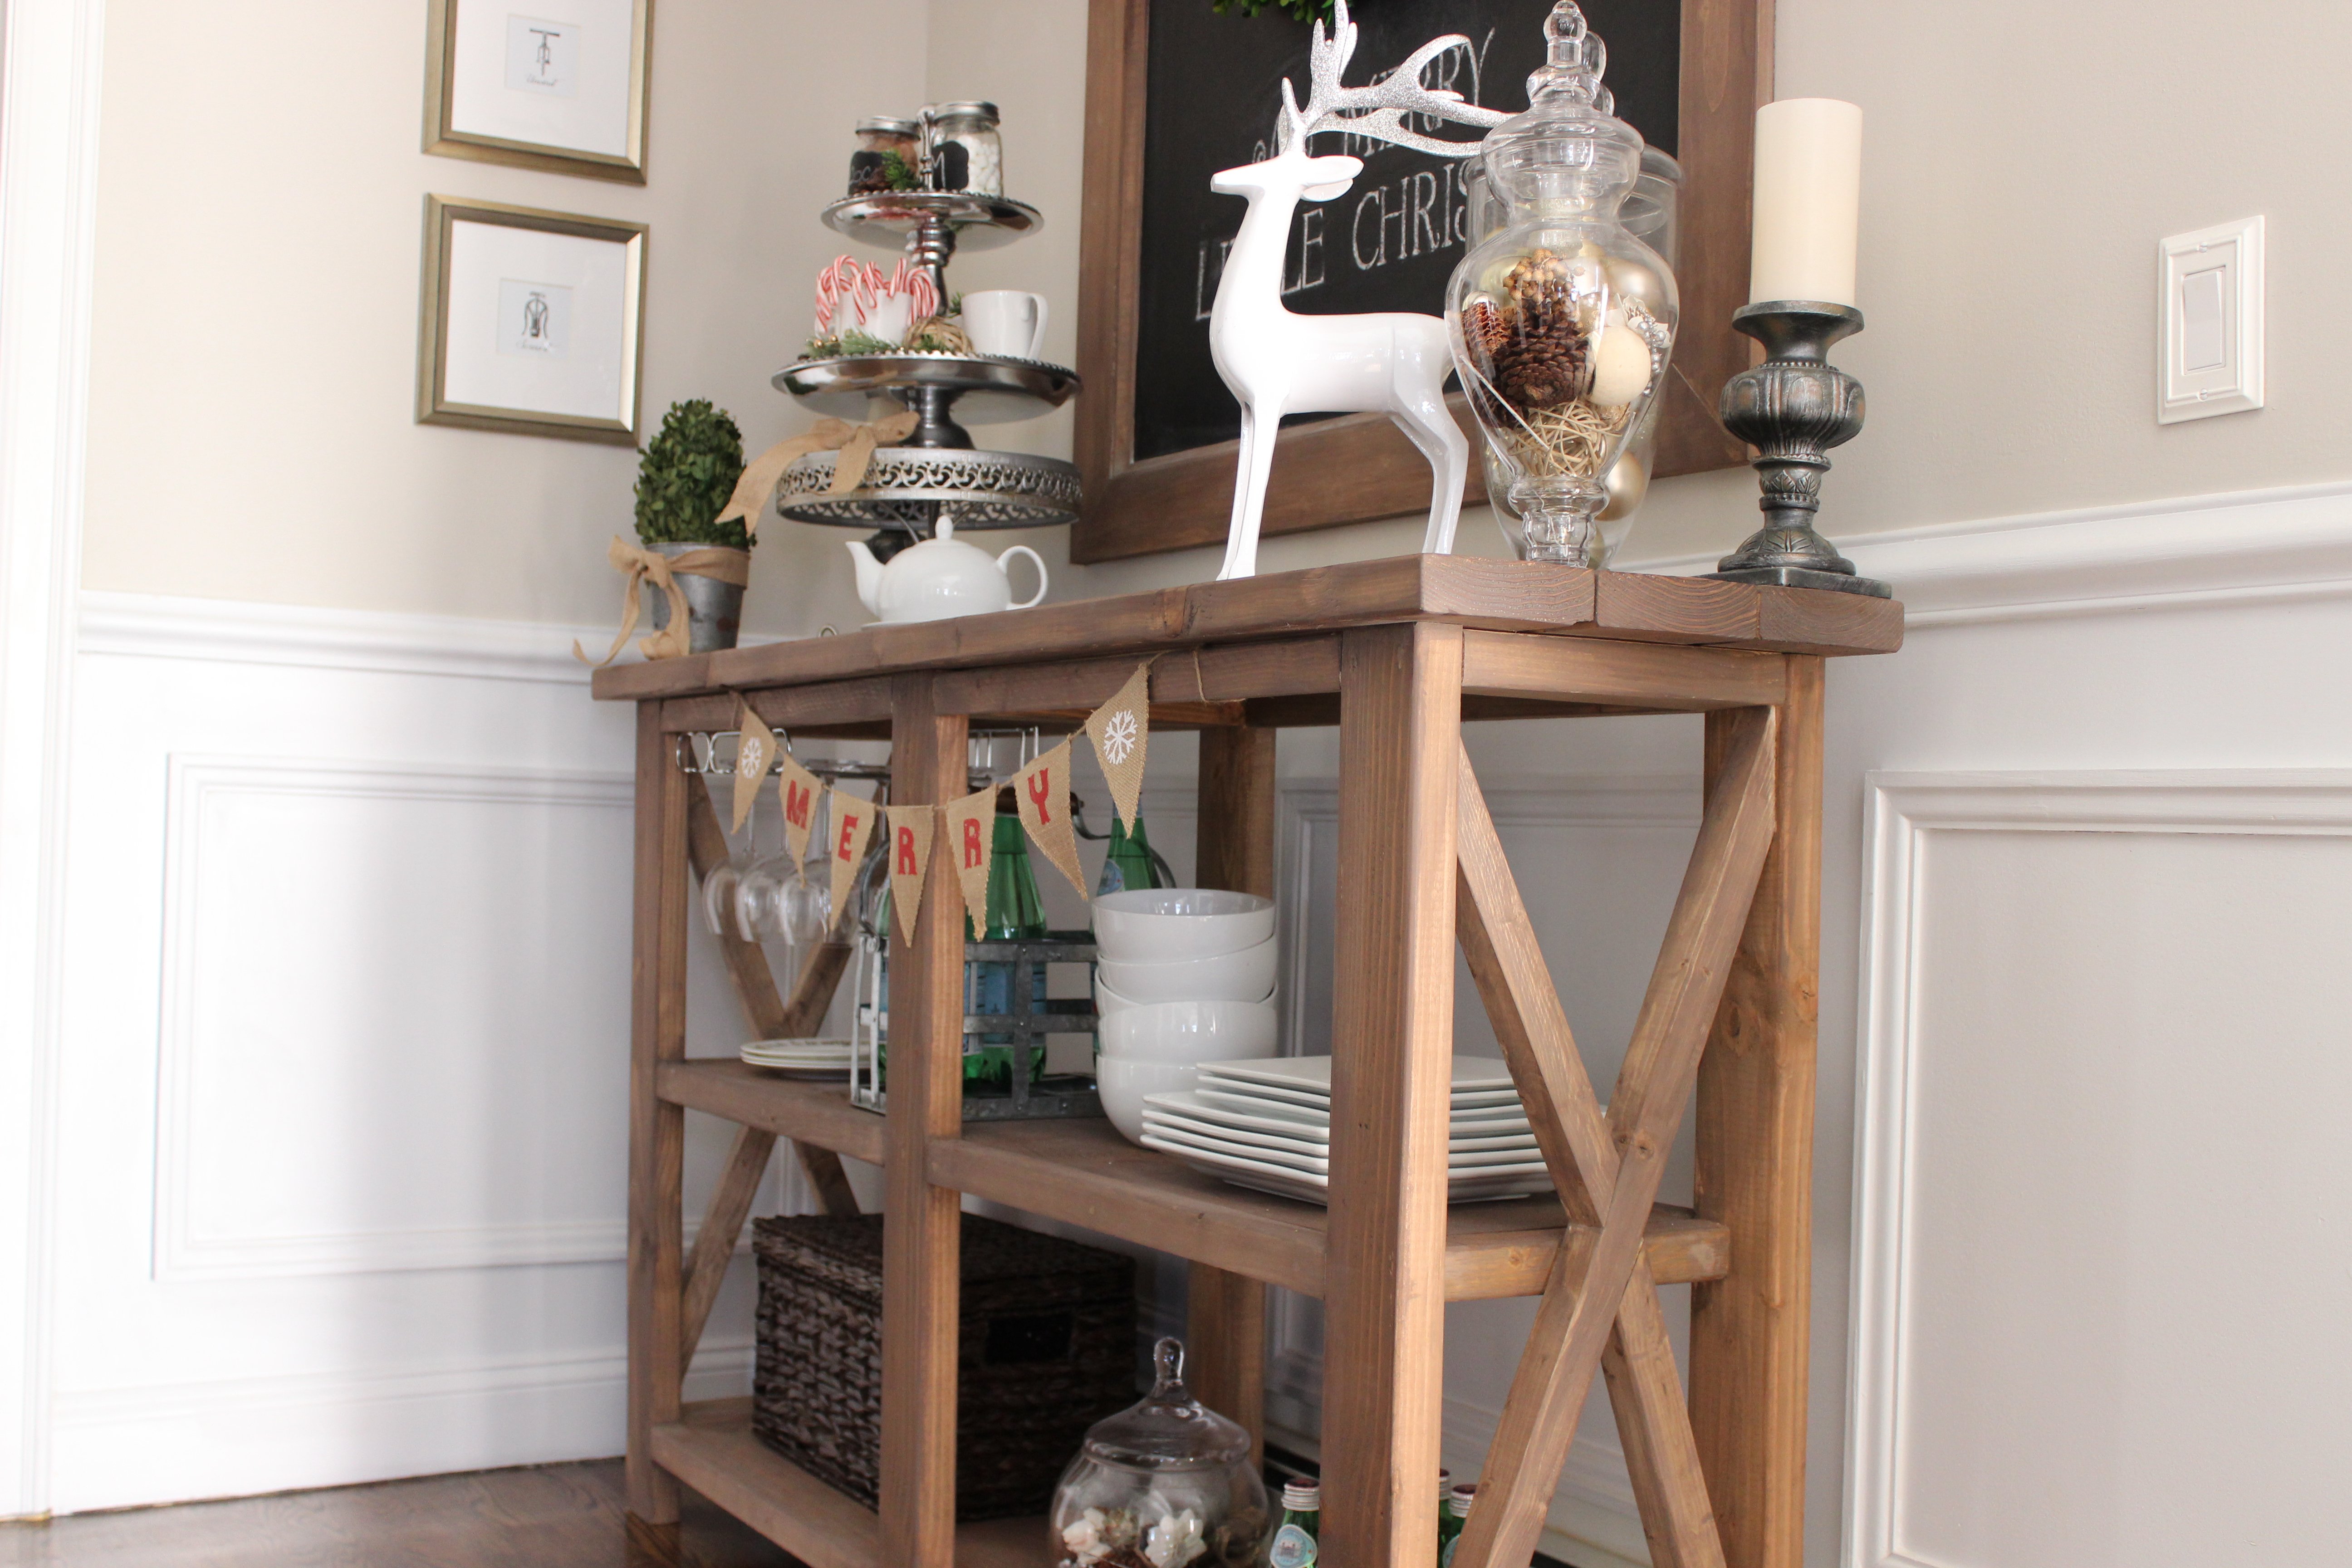
Rustic X Console Table
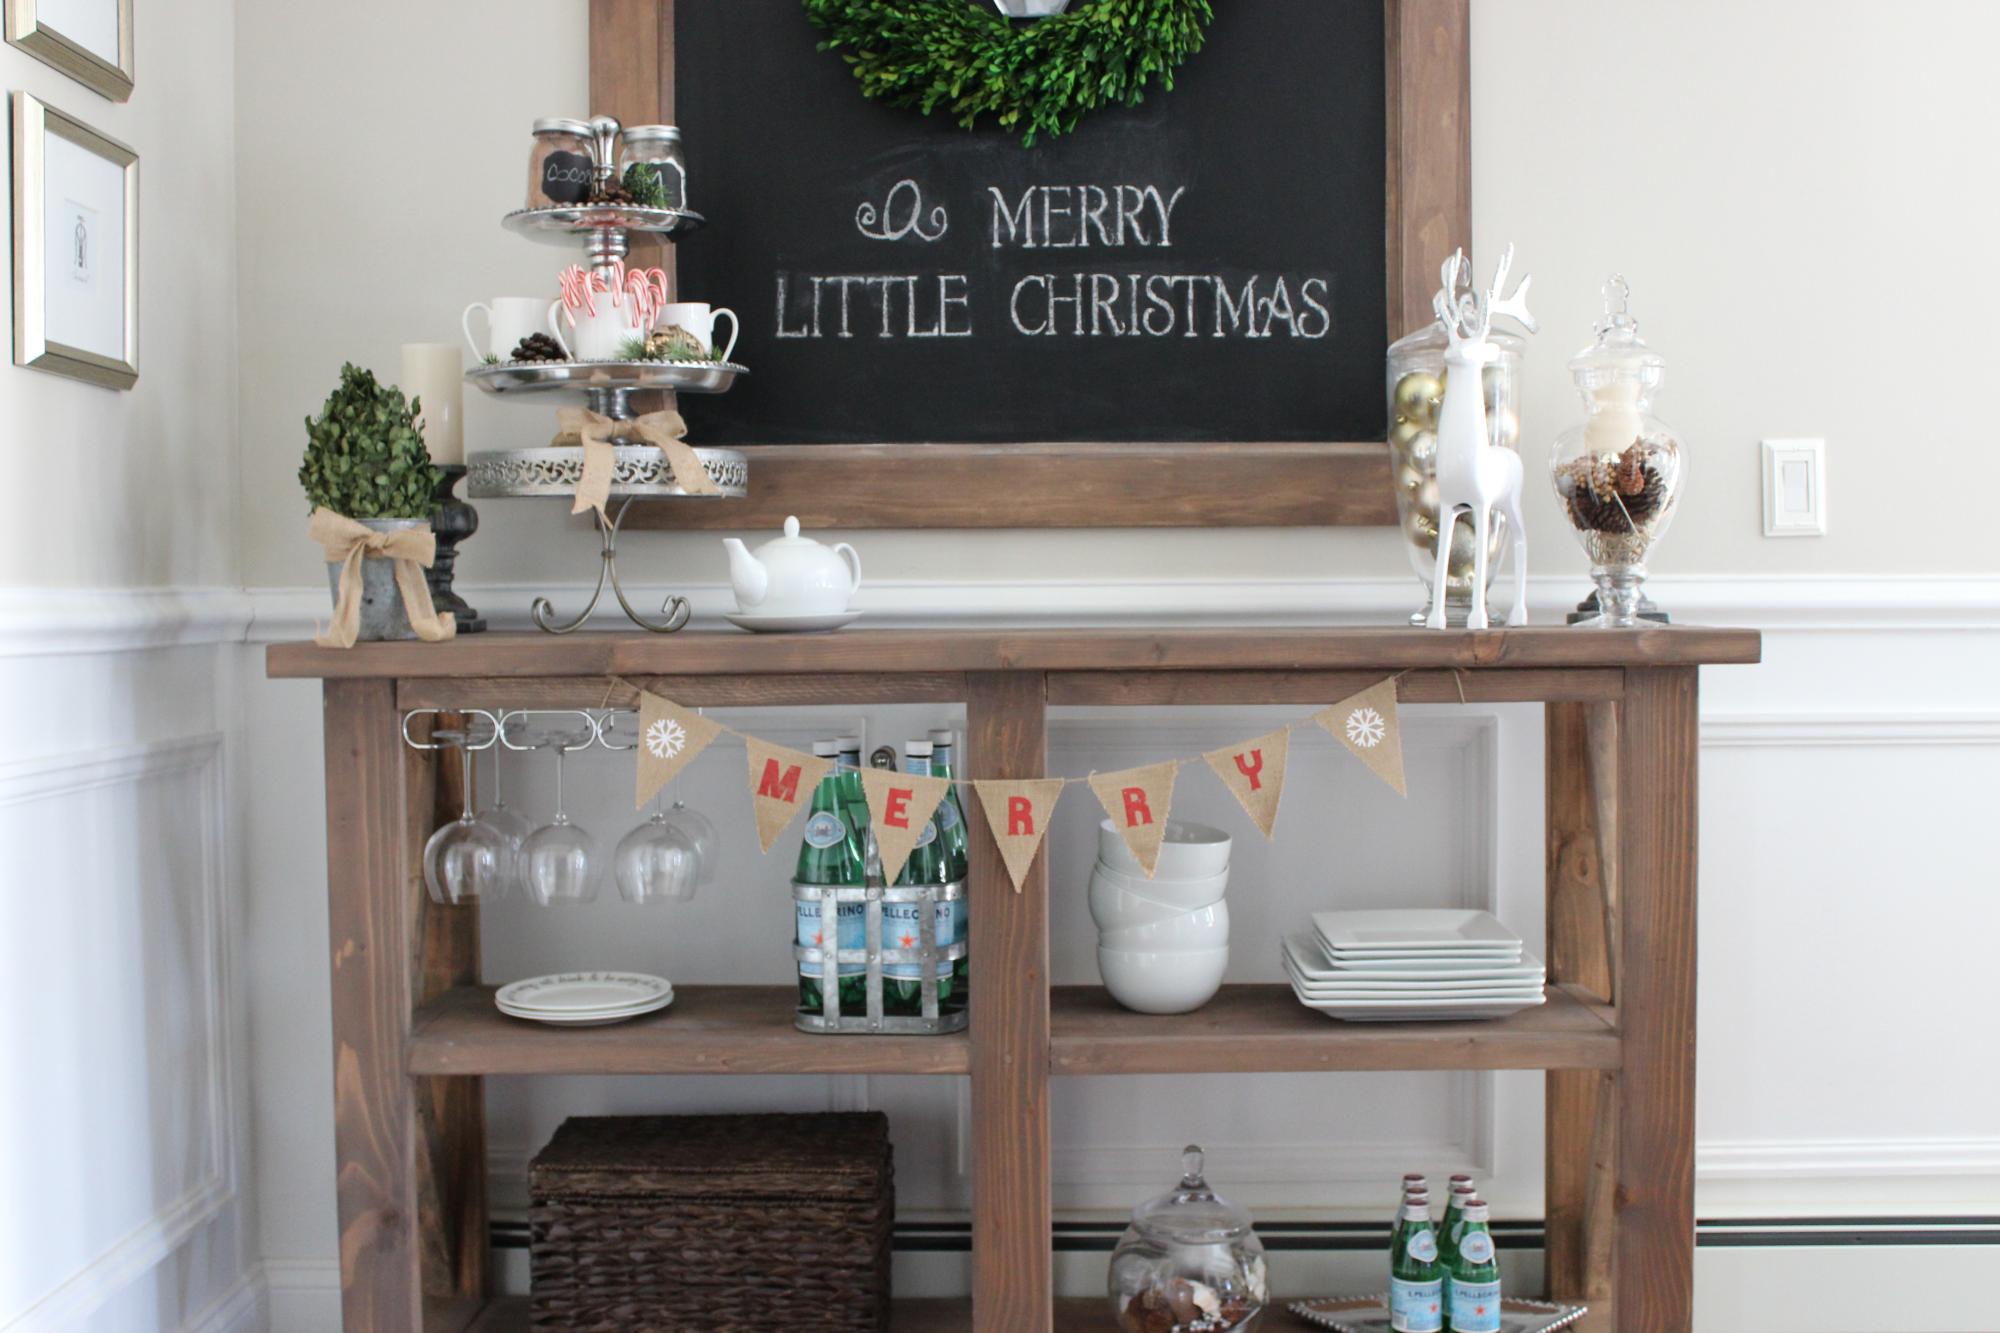
This console table was exactly what I wanted! We changed the measurements and made it a little smaller to fit in the corner of the room. My brother built this table for me and he was able to build it in 2 hours. The directions were easy and informative. Thank you so much Ana! I love your furniture!!!
Built from Plan(s)
Estimated Cost
The total cost including lumber and stain was $160.00.
Estimated Time Investment
Afternoon Project (3-6 Hours)
Finish Used
I used Milk Paint in the color "Curo" but watered it down to use as a stain.
Recommended Skill Level
Beginner
Seasonal And Holiday
Toddler Sized Cabin Bed (Crib Mattress)
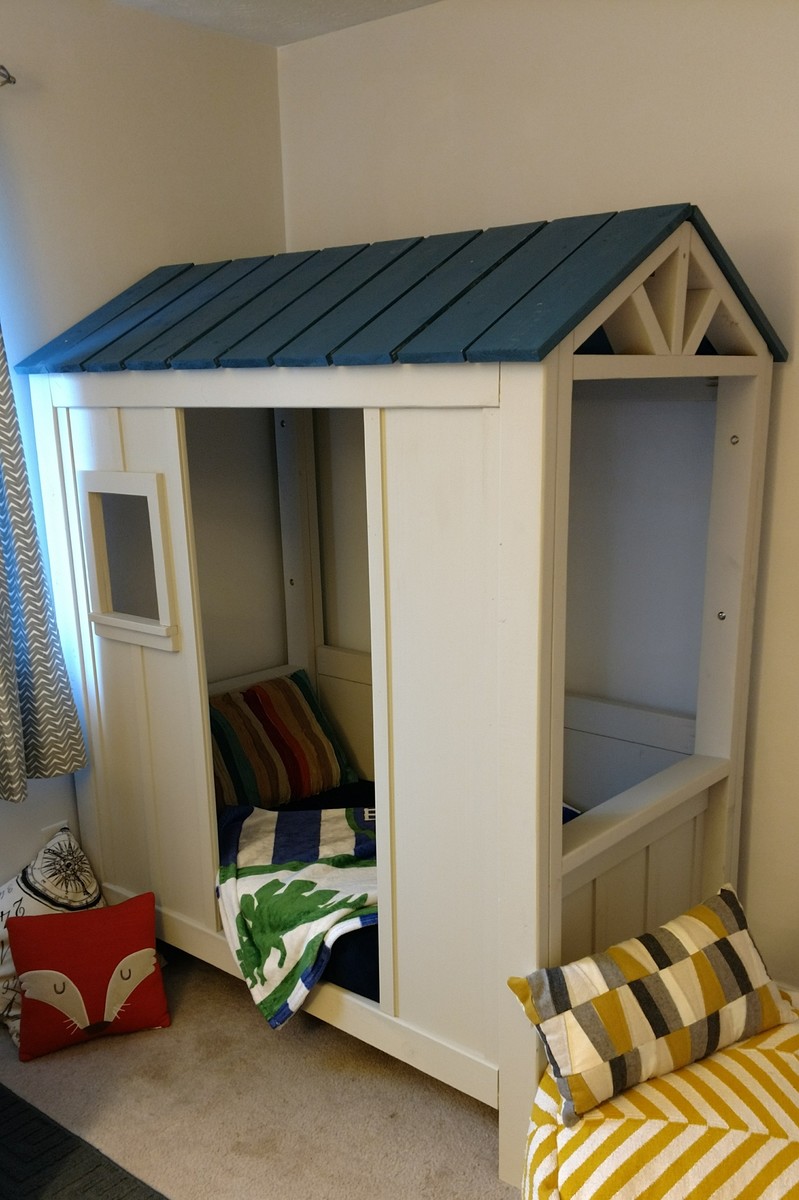
Loved the twin sized cabin bed but my grandson is a few years away from needing a big boy bed. Husband scaled down the plans and this is what we came up with.
Built from Plan(s)
Estimated Cost
$150
Estimated Time Investment
Weekend Project (10-20 Hours)
Recommended Skill Level
Intermediate
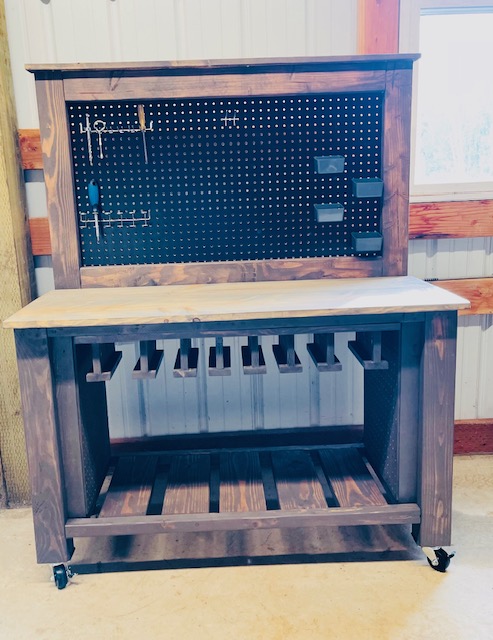
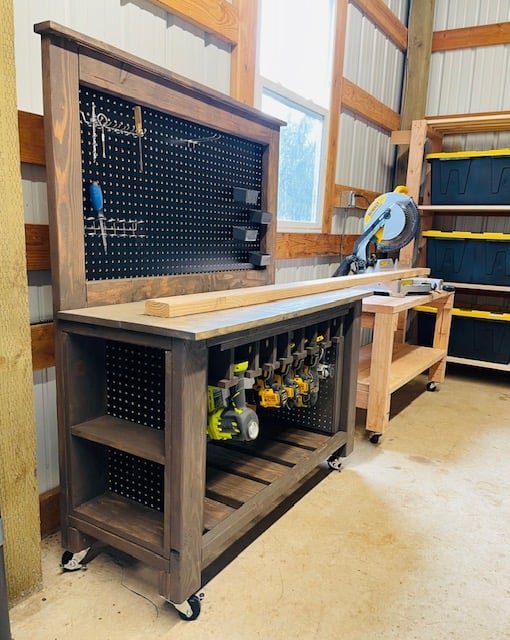
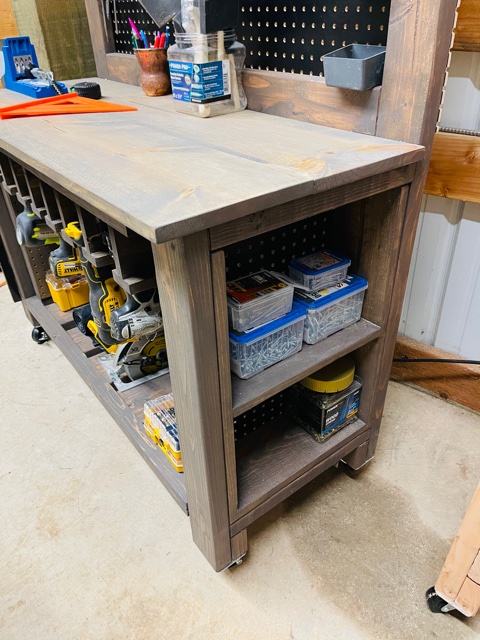
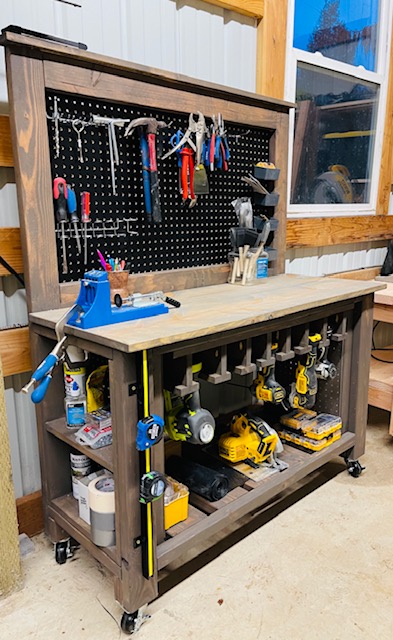
Farmhouse Workbench with Tool Storage
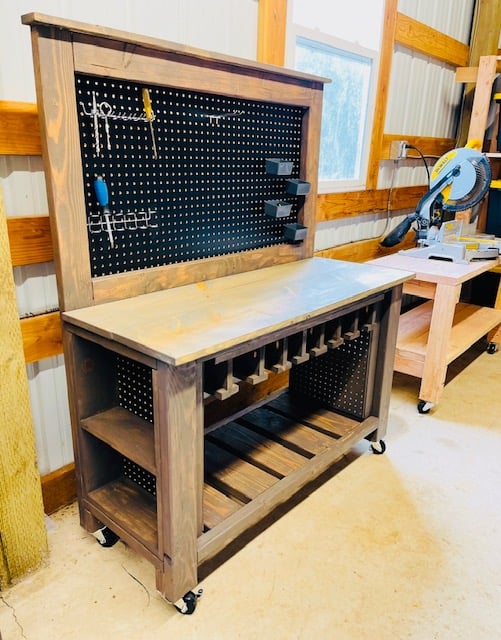
I took Ana's Farmhouse potting bench plan and made it a workbench with some mods. I added the tool storage and adjusted it for different widths depending on the tools. I added some support under the tabletop to attach the tool storage piece. On the ends, instead of the X detail I built shelves for each end for added storage for screws and paint. Finally the pegboard back allows for more storage! The height is consistent with the height of my chop saw on my other workbench for when I need to chop longer boards. I am very happy with how this project turned out and it is now full and in use!

Built from Plan(s)
Finish Used
Briarsmoke by varathane
Recommended Skill Level
Starter Project
Comments
Fri, 01/29/2021 - 10:28
Love this!
Nice job on this! I think the mods really are great and practical, you're a genius!

Mon, 05/09/2022 - 07:21
Best mod so far!
True inspiration! Love love love it and stealing it for my garage!!
Fancy X Desk and farm picture frames
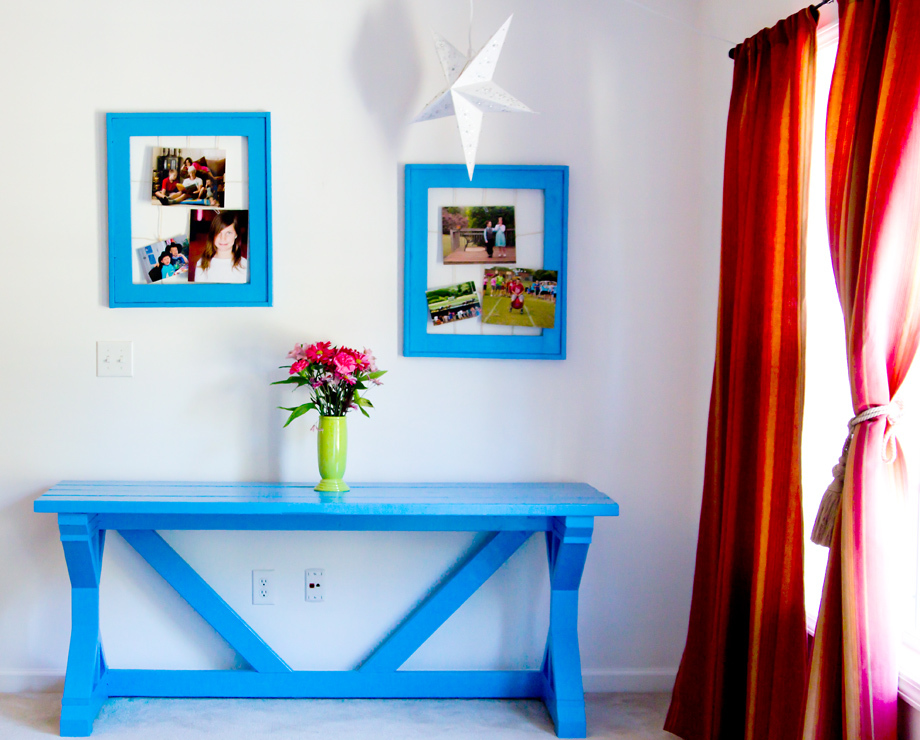
The table is the fancy x desk. This was my very first wood project. My first time using power tools and painting furniture. The picture frames are from Ana Whites book, The Handbuilt Home. They were my second project. This is located in the back of my frontroom. I love the color. Thanks Ana!
P.S. this was my first project, so I took my time.
Built from Plan(s)
Estimated Time Investment
Week Long Project (20 Hours or More)
Finish Used
semi gloss paint
Recommended Skill Level
Starter Project
Comments
Wed, 02/20/2013 - 21:32
Very nice! Love the color! So
Very nice! Love the color! So cheery and bright!
Thu, 02/21/2013 - 05:43
First Project!
What a fantastic job! (the color is great too) I am choosing this plan as my first project as well. I have built small things before and I am familiar with how to use saws and such, but this is a build that I have been working up the confidence to tackle, lol. Wish me luck, cause this is the weekend I will be starting it :)
Again, you did a great job!
Thu, 02/21/2013 - 06:07
BTW
By the way, I agree with your last statement about asking the paint associate at your Home Depot for advice on which paint or technique to use, I am an associate at The Home Depot and the folks we have in our paint department are fabulous!! they are very knowledgeable and most have years of experience and a background in the painting trade.
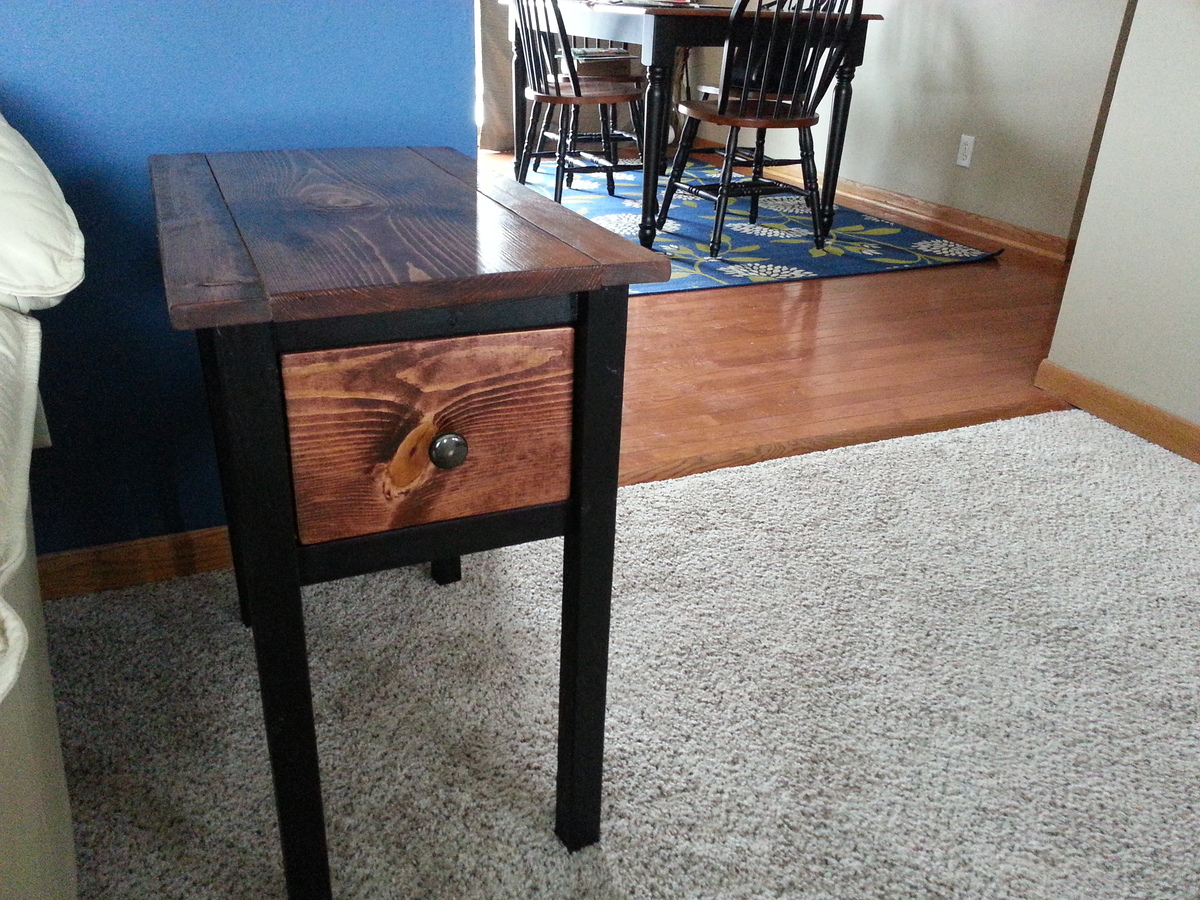
Desk build With My 7yr Old
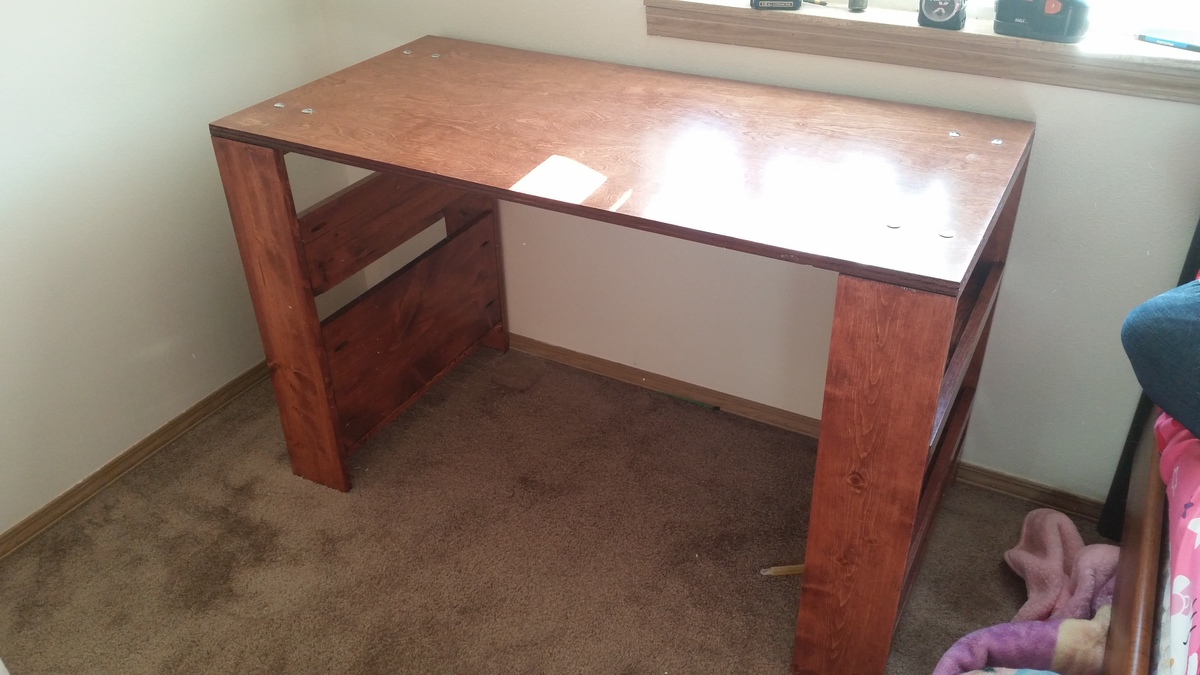
My daughter and I decided to build her a desk this past summer. We went with a precut project board from Home Depot for the top. I didnt like how the bookshelves were attached so I used round head bolts and nylock bolts underneath. This way I can later resurface the top as well as makes it easier to move. We used a redwood stain and 4 coats of clear semi gloss.

Built from Plan(s)
Estimated Cost
80
Estimated Time Investment
Weekend Project (10-20 Hours)
Recommended Skill Level
Beginner
One Arm Outdoor Sectional
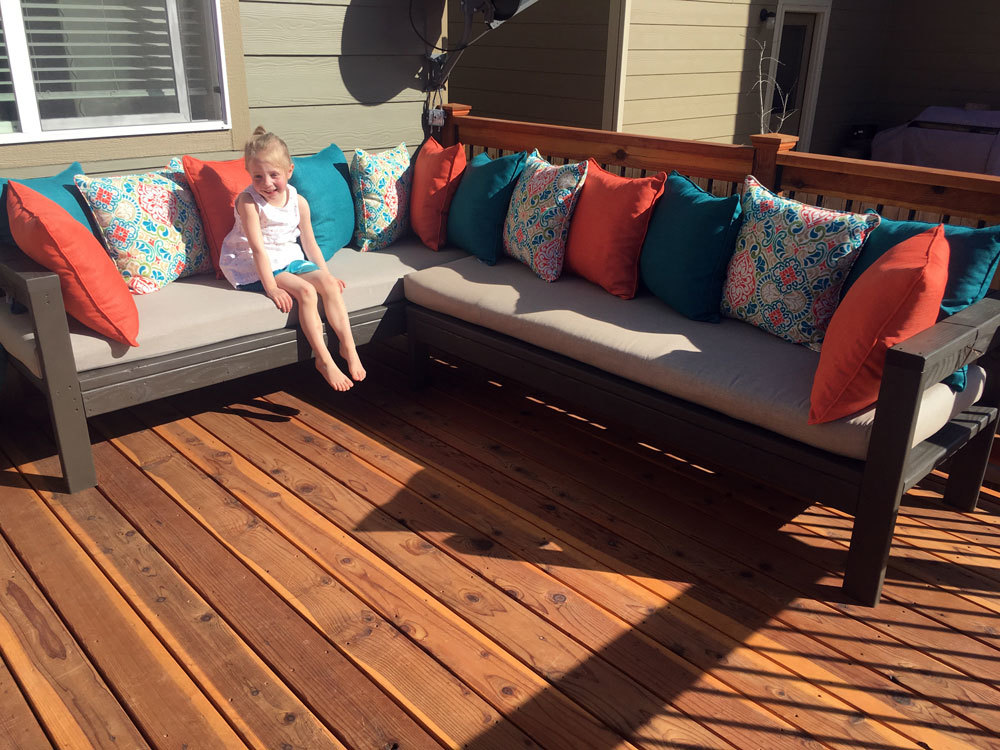
We are loving this outdoor sectional! It was super easy to build! The hardest part was figuring out cushions. I made the bottom cushions and got the back pillows on sale at Costco for less than I could make them. Thank you!
Built from Plan(s)
Estimated Cost
Less than $100 not counting cushions.
Estimated Time Investment
Weekend Project (10-20 Hours)
Finish Used
Outdoor Sherwin Williams Sealskin
Recommended Skill Level
Beginner