DIY 2x4 Outdoor Sofa
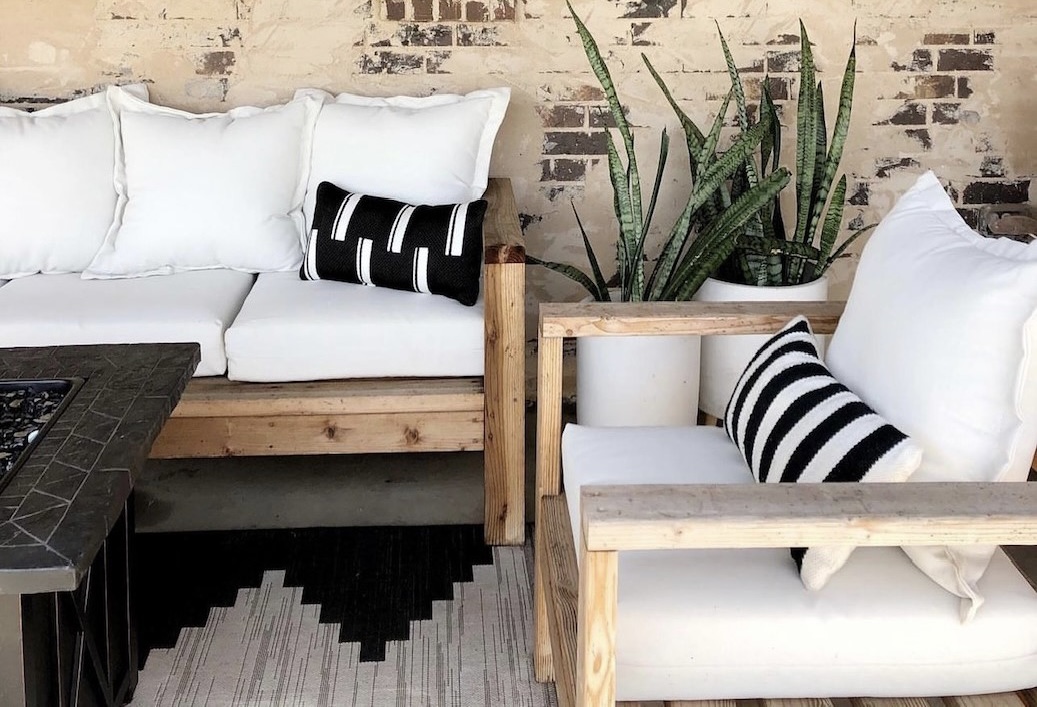
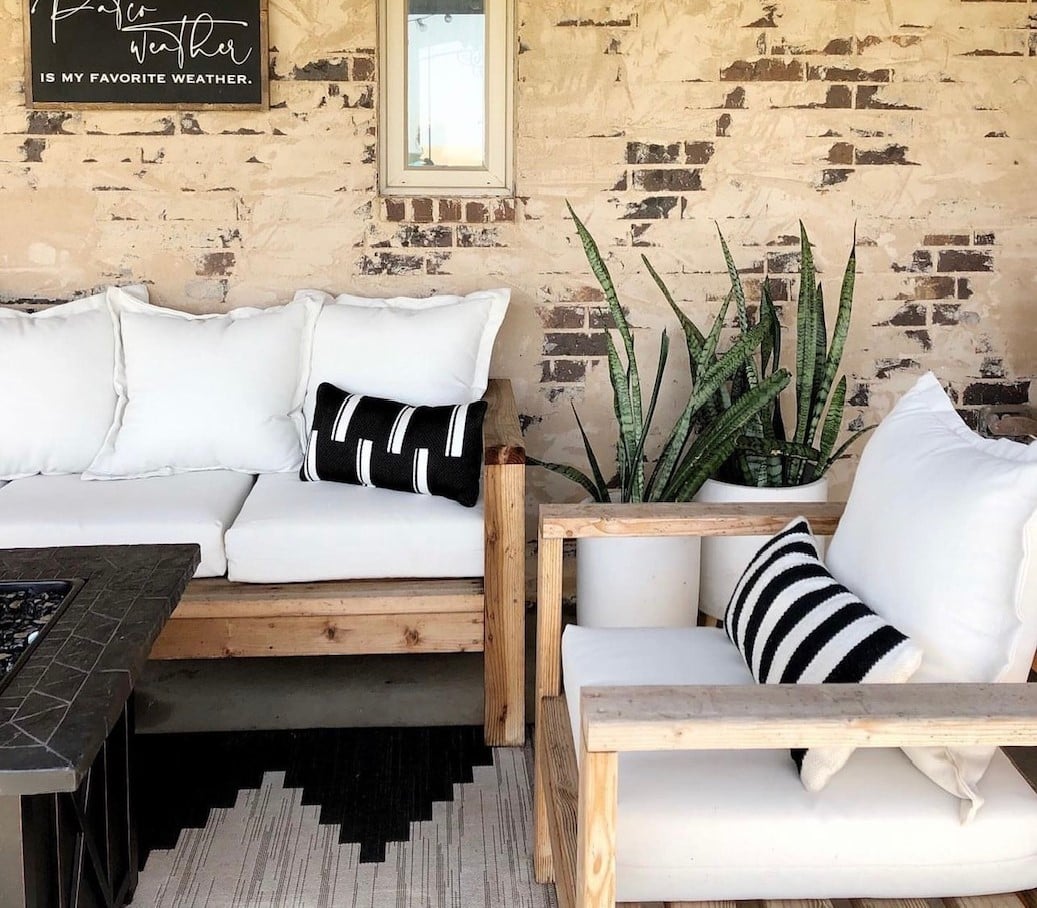
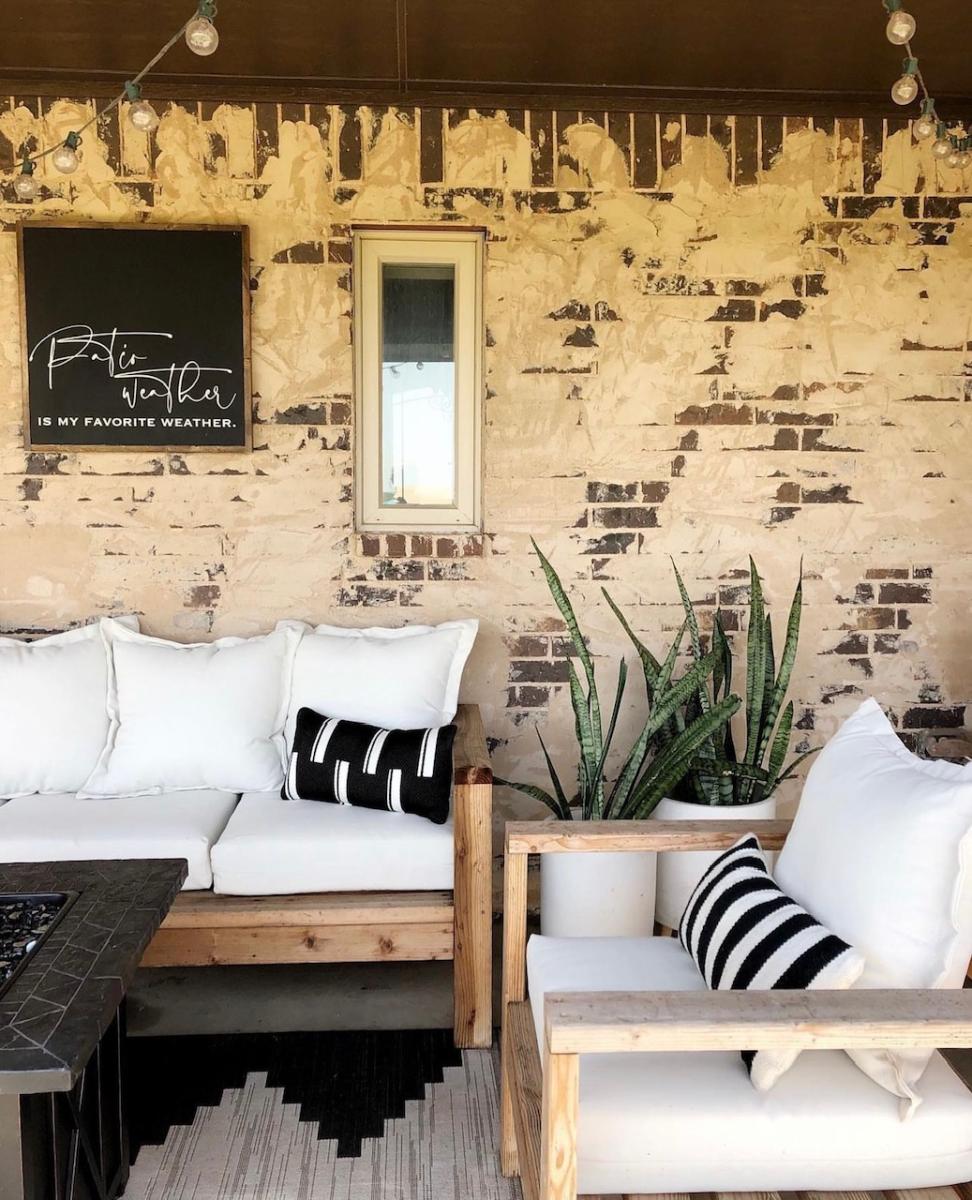
How cute is this new patio sofa I made out of 2x4s??? I used Ana White's plans and tweaked it just a little. I could not be happier with how it turned out and proud that I did it myself.
Built from Plan(s)
How cute is this new patio sofa I made out of 2x4s??? I used Ana White's plans and tweaked it just a little. I could not be happier with how it turned out and proud that I did it myself.
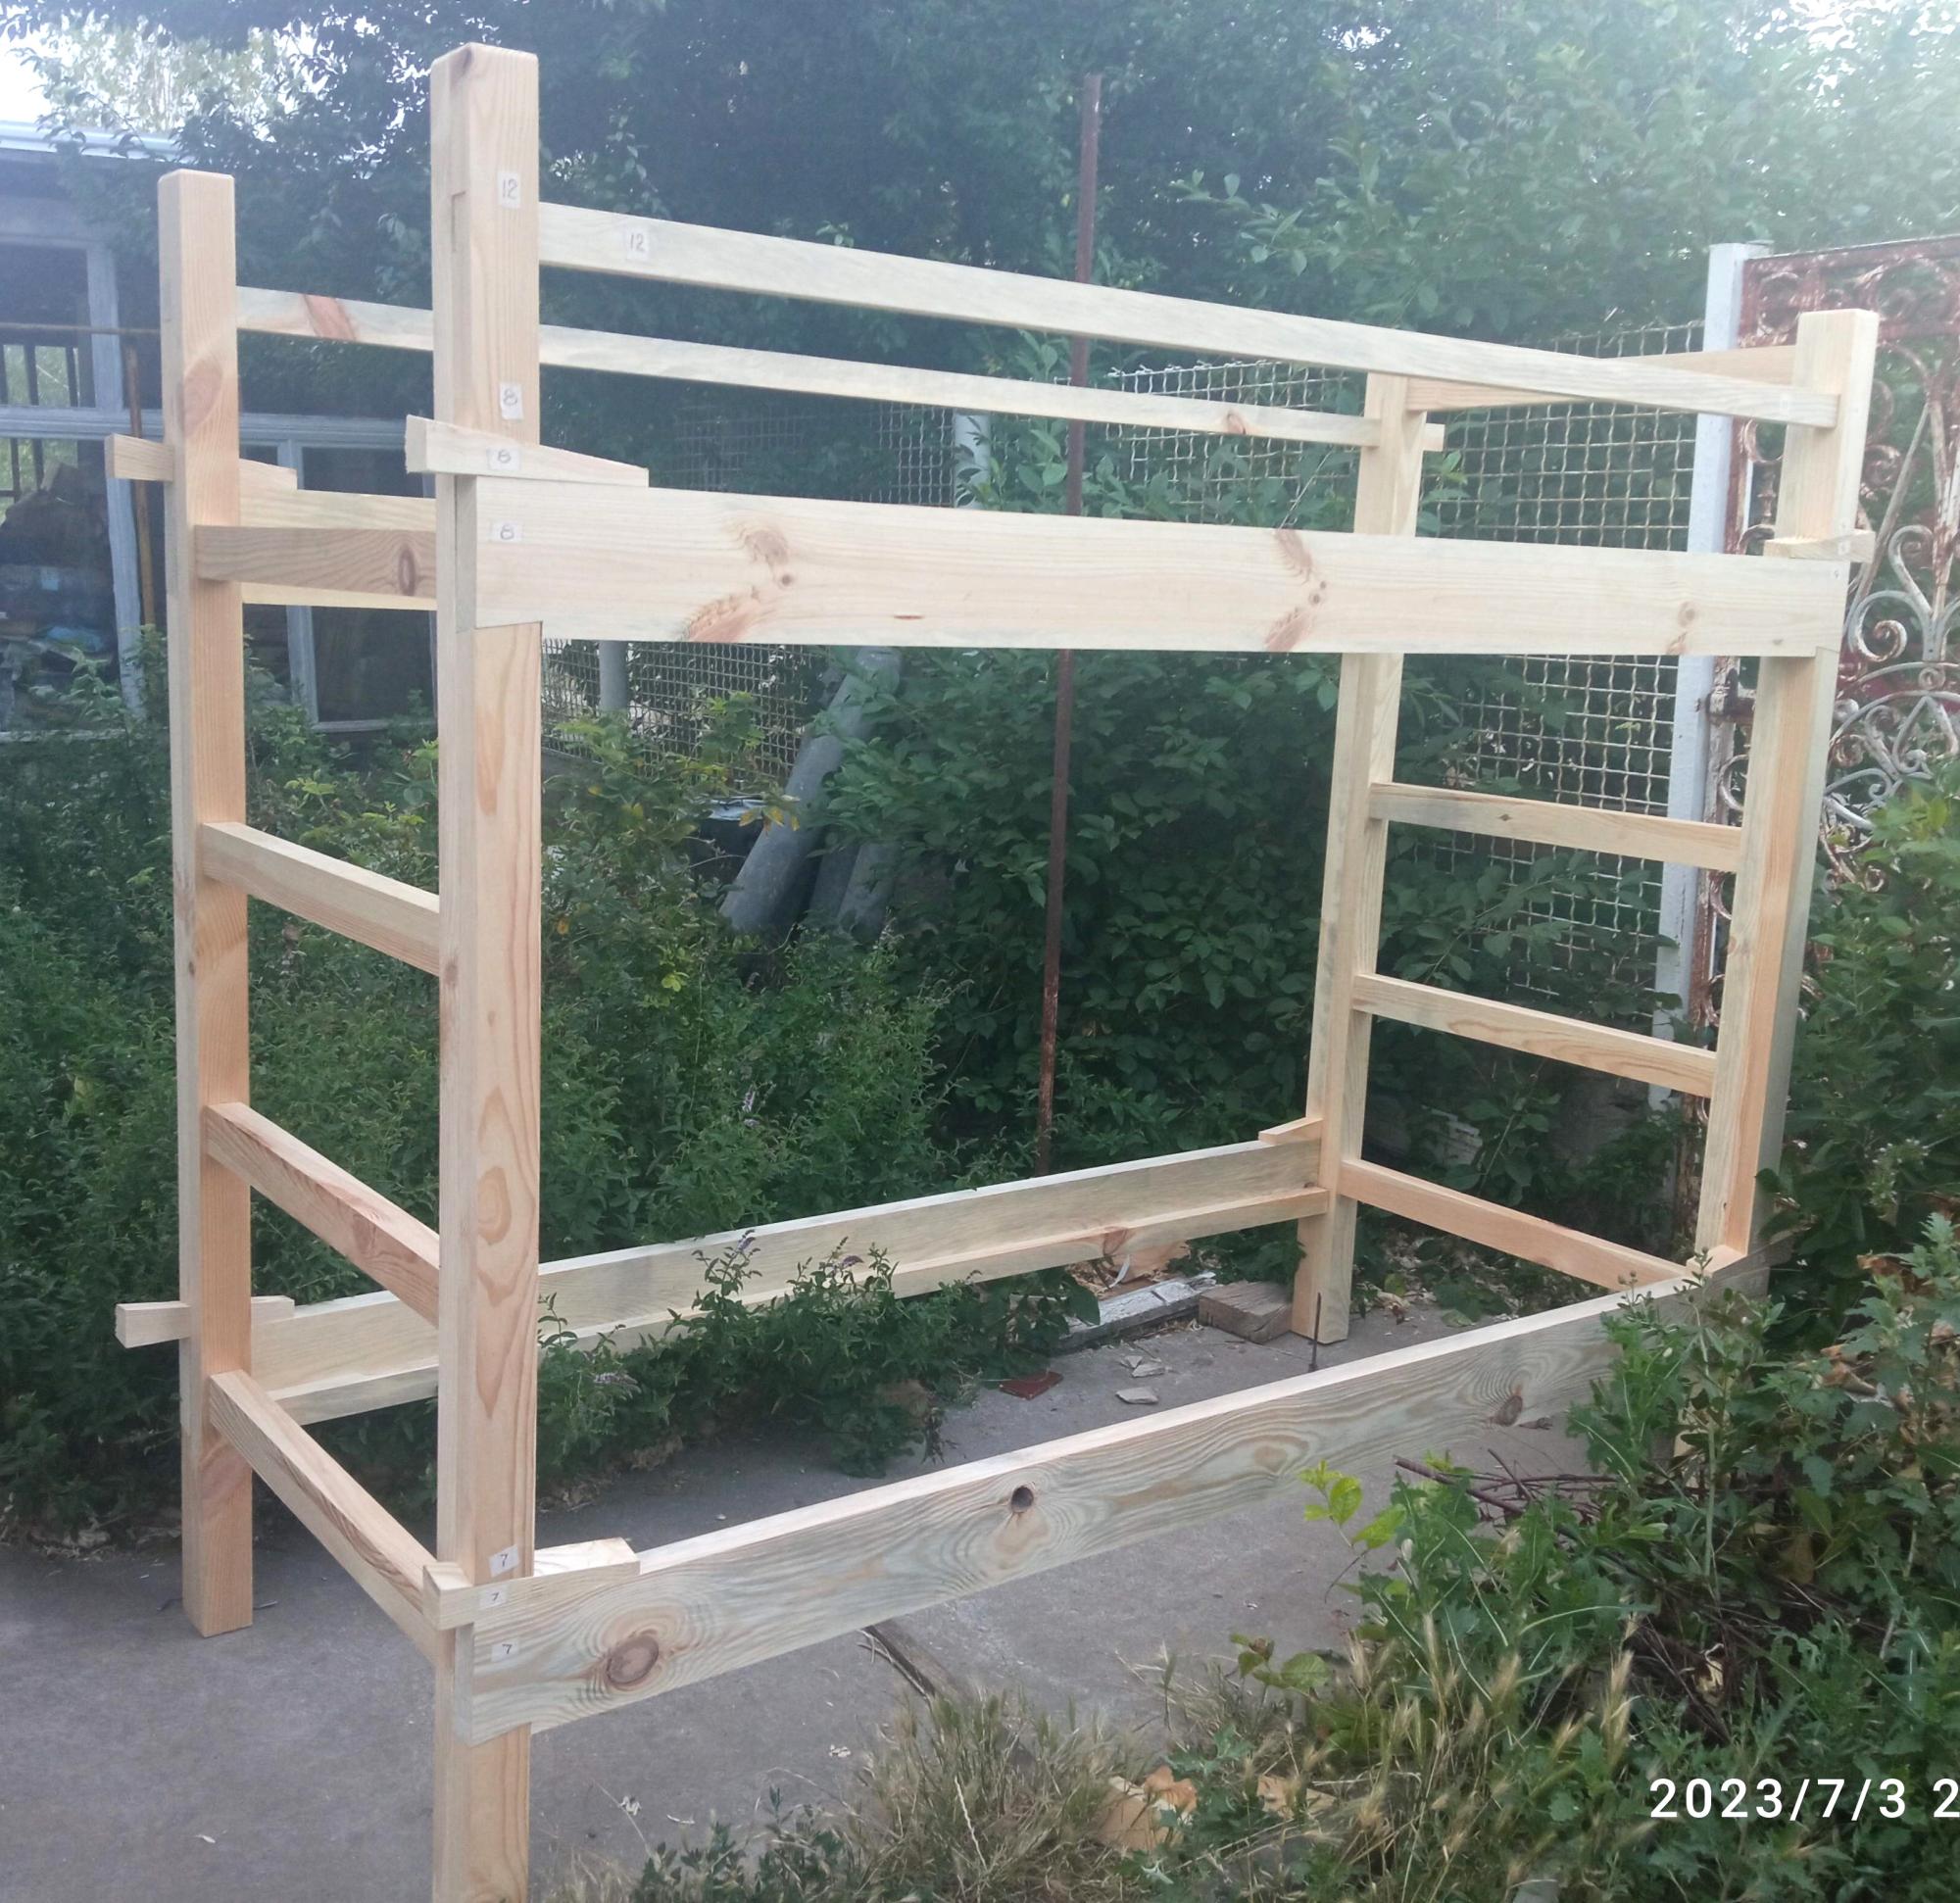
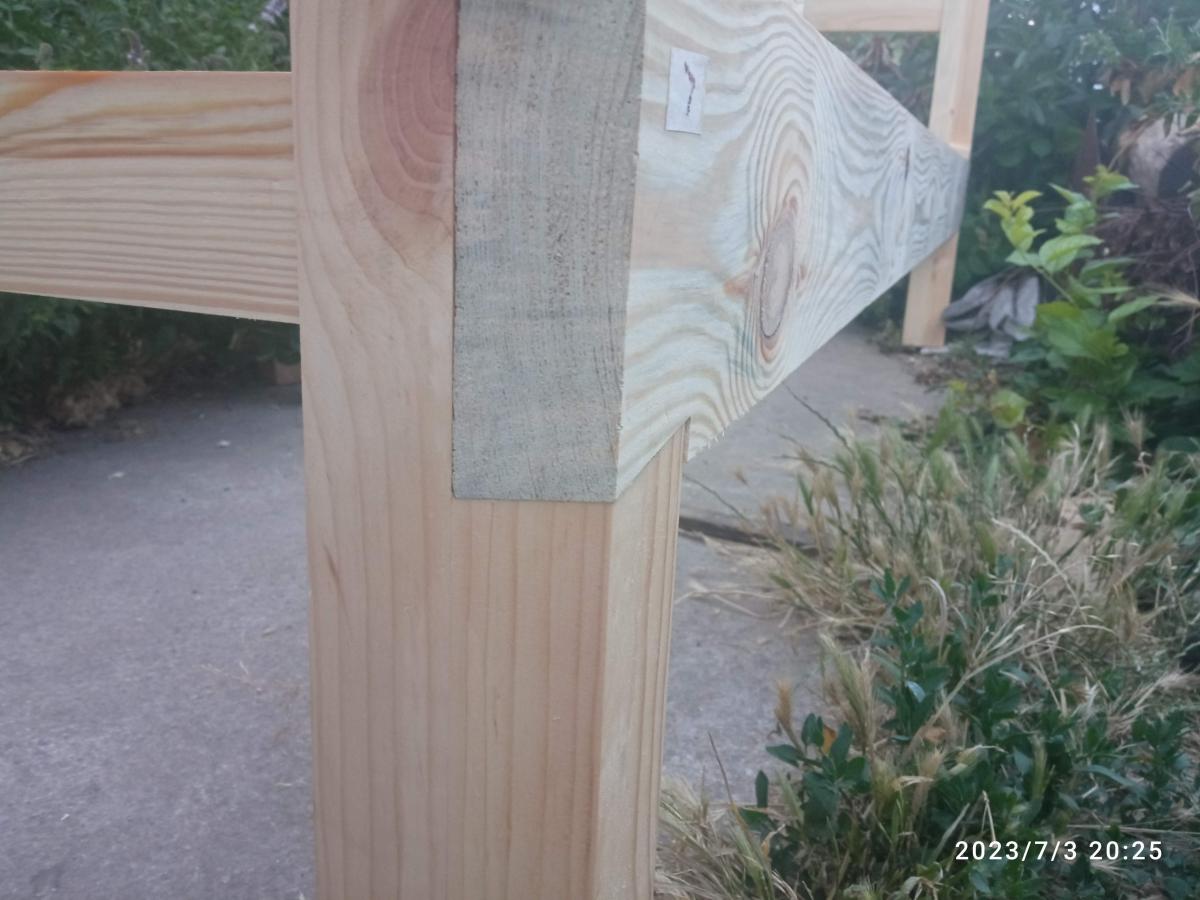
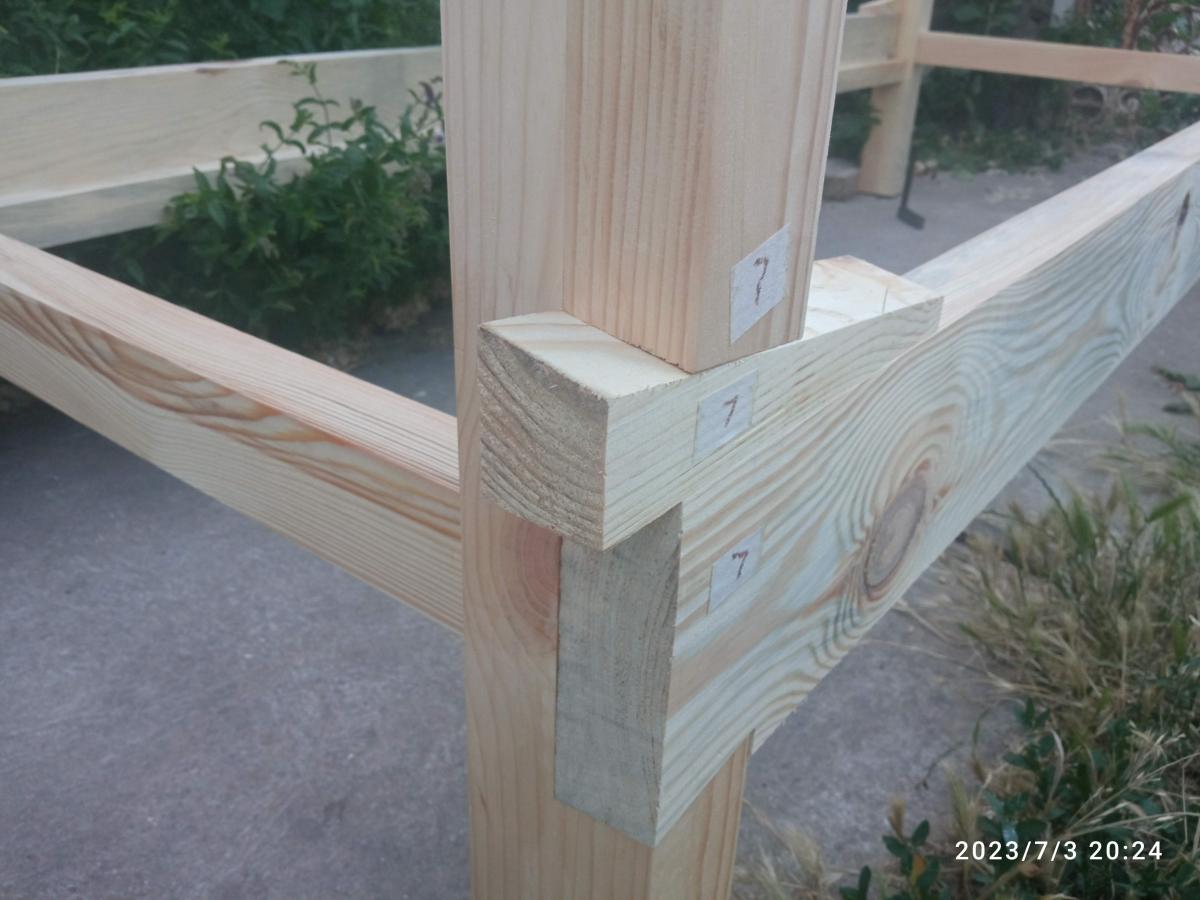
This double bunk bed has been inspired by Your plans for modern bunk bed - Side Street. To facilitate quick assembling - disassembling of beds for relocation dovetails joints with double inclined tails and wedges have been made. Because the beds has been made for orphanage/"kids in difficult life situations" I changed spacing between headboard and footboard rails to let footboard serve as ladder and in this manner reduce costs and time of construction, save place for installation, avoid tripping hasard. Thank You very much for detailed and simple plans.
Andriy Pronin, Ukraine

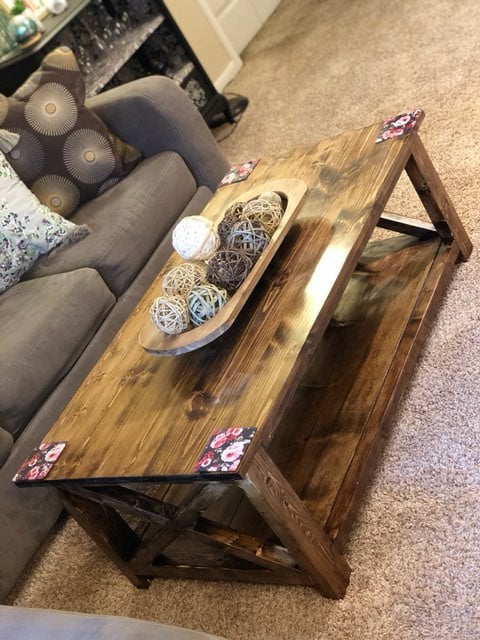
Love this coffee table. I built it for my daughter and she was very happy.

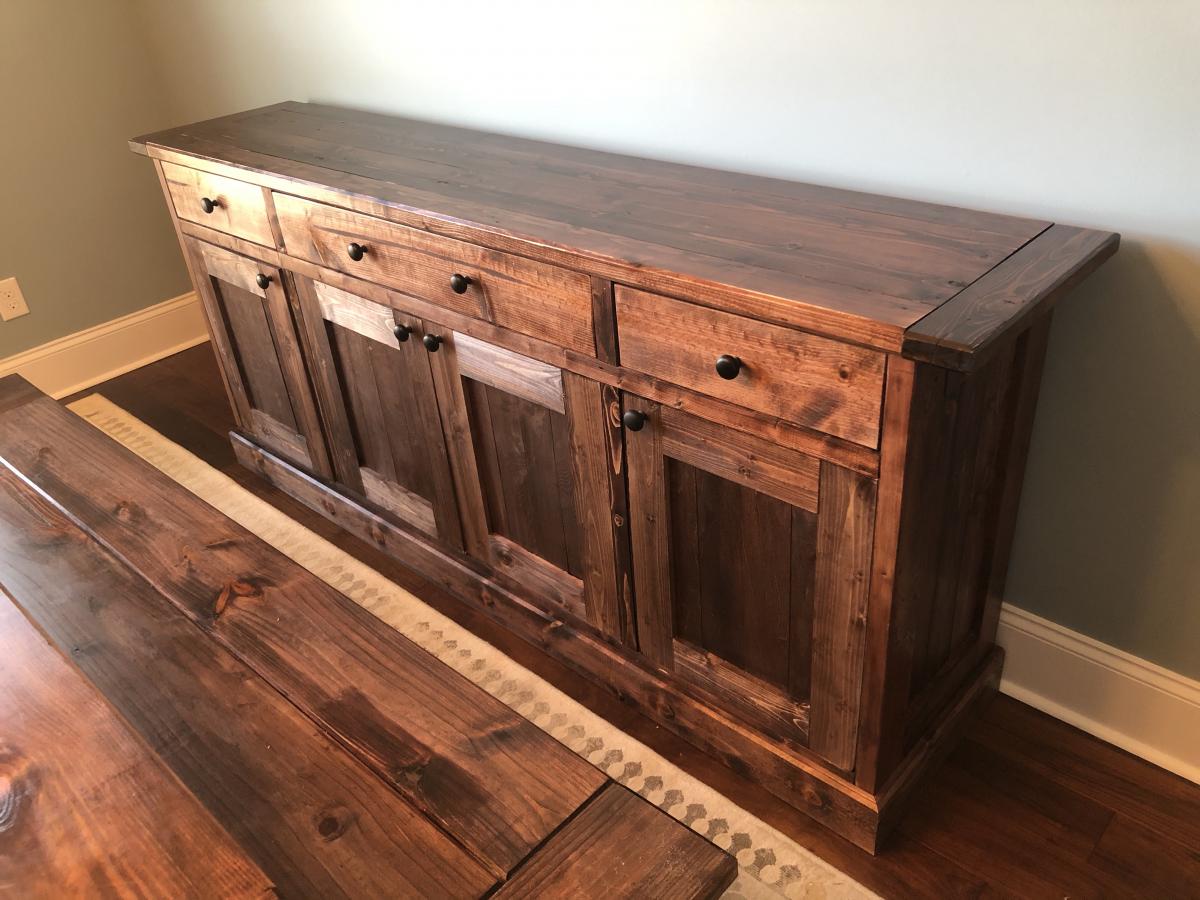
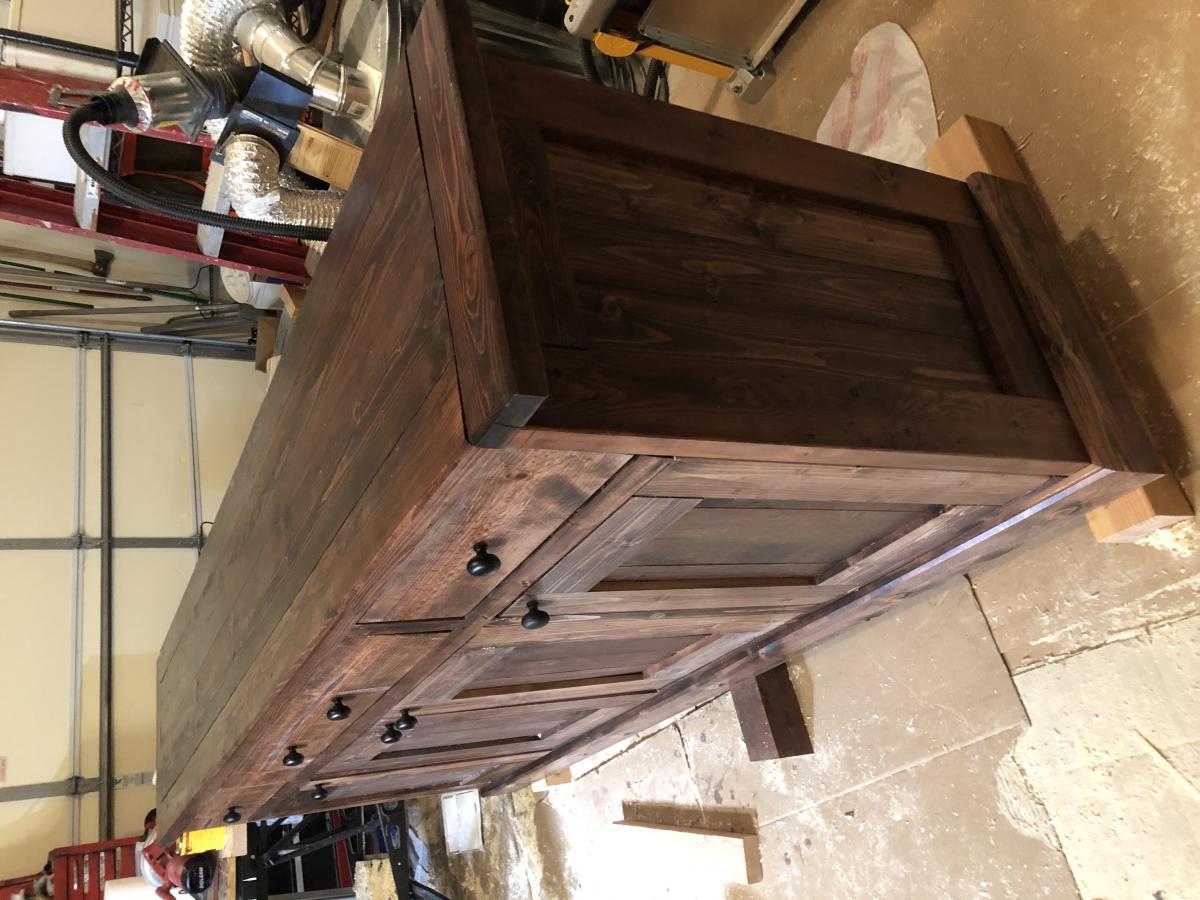
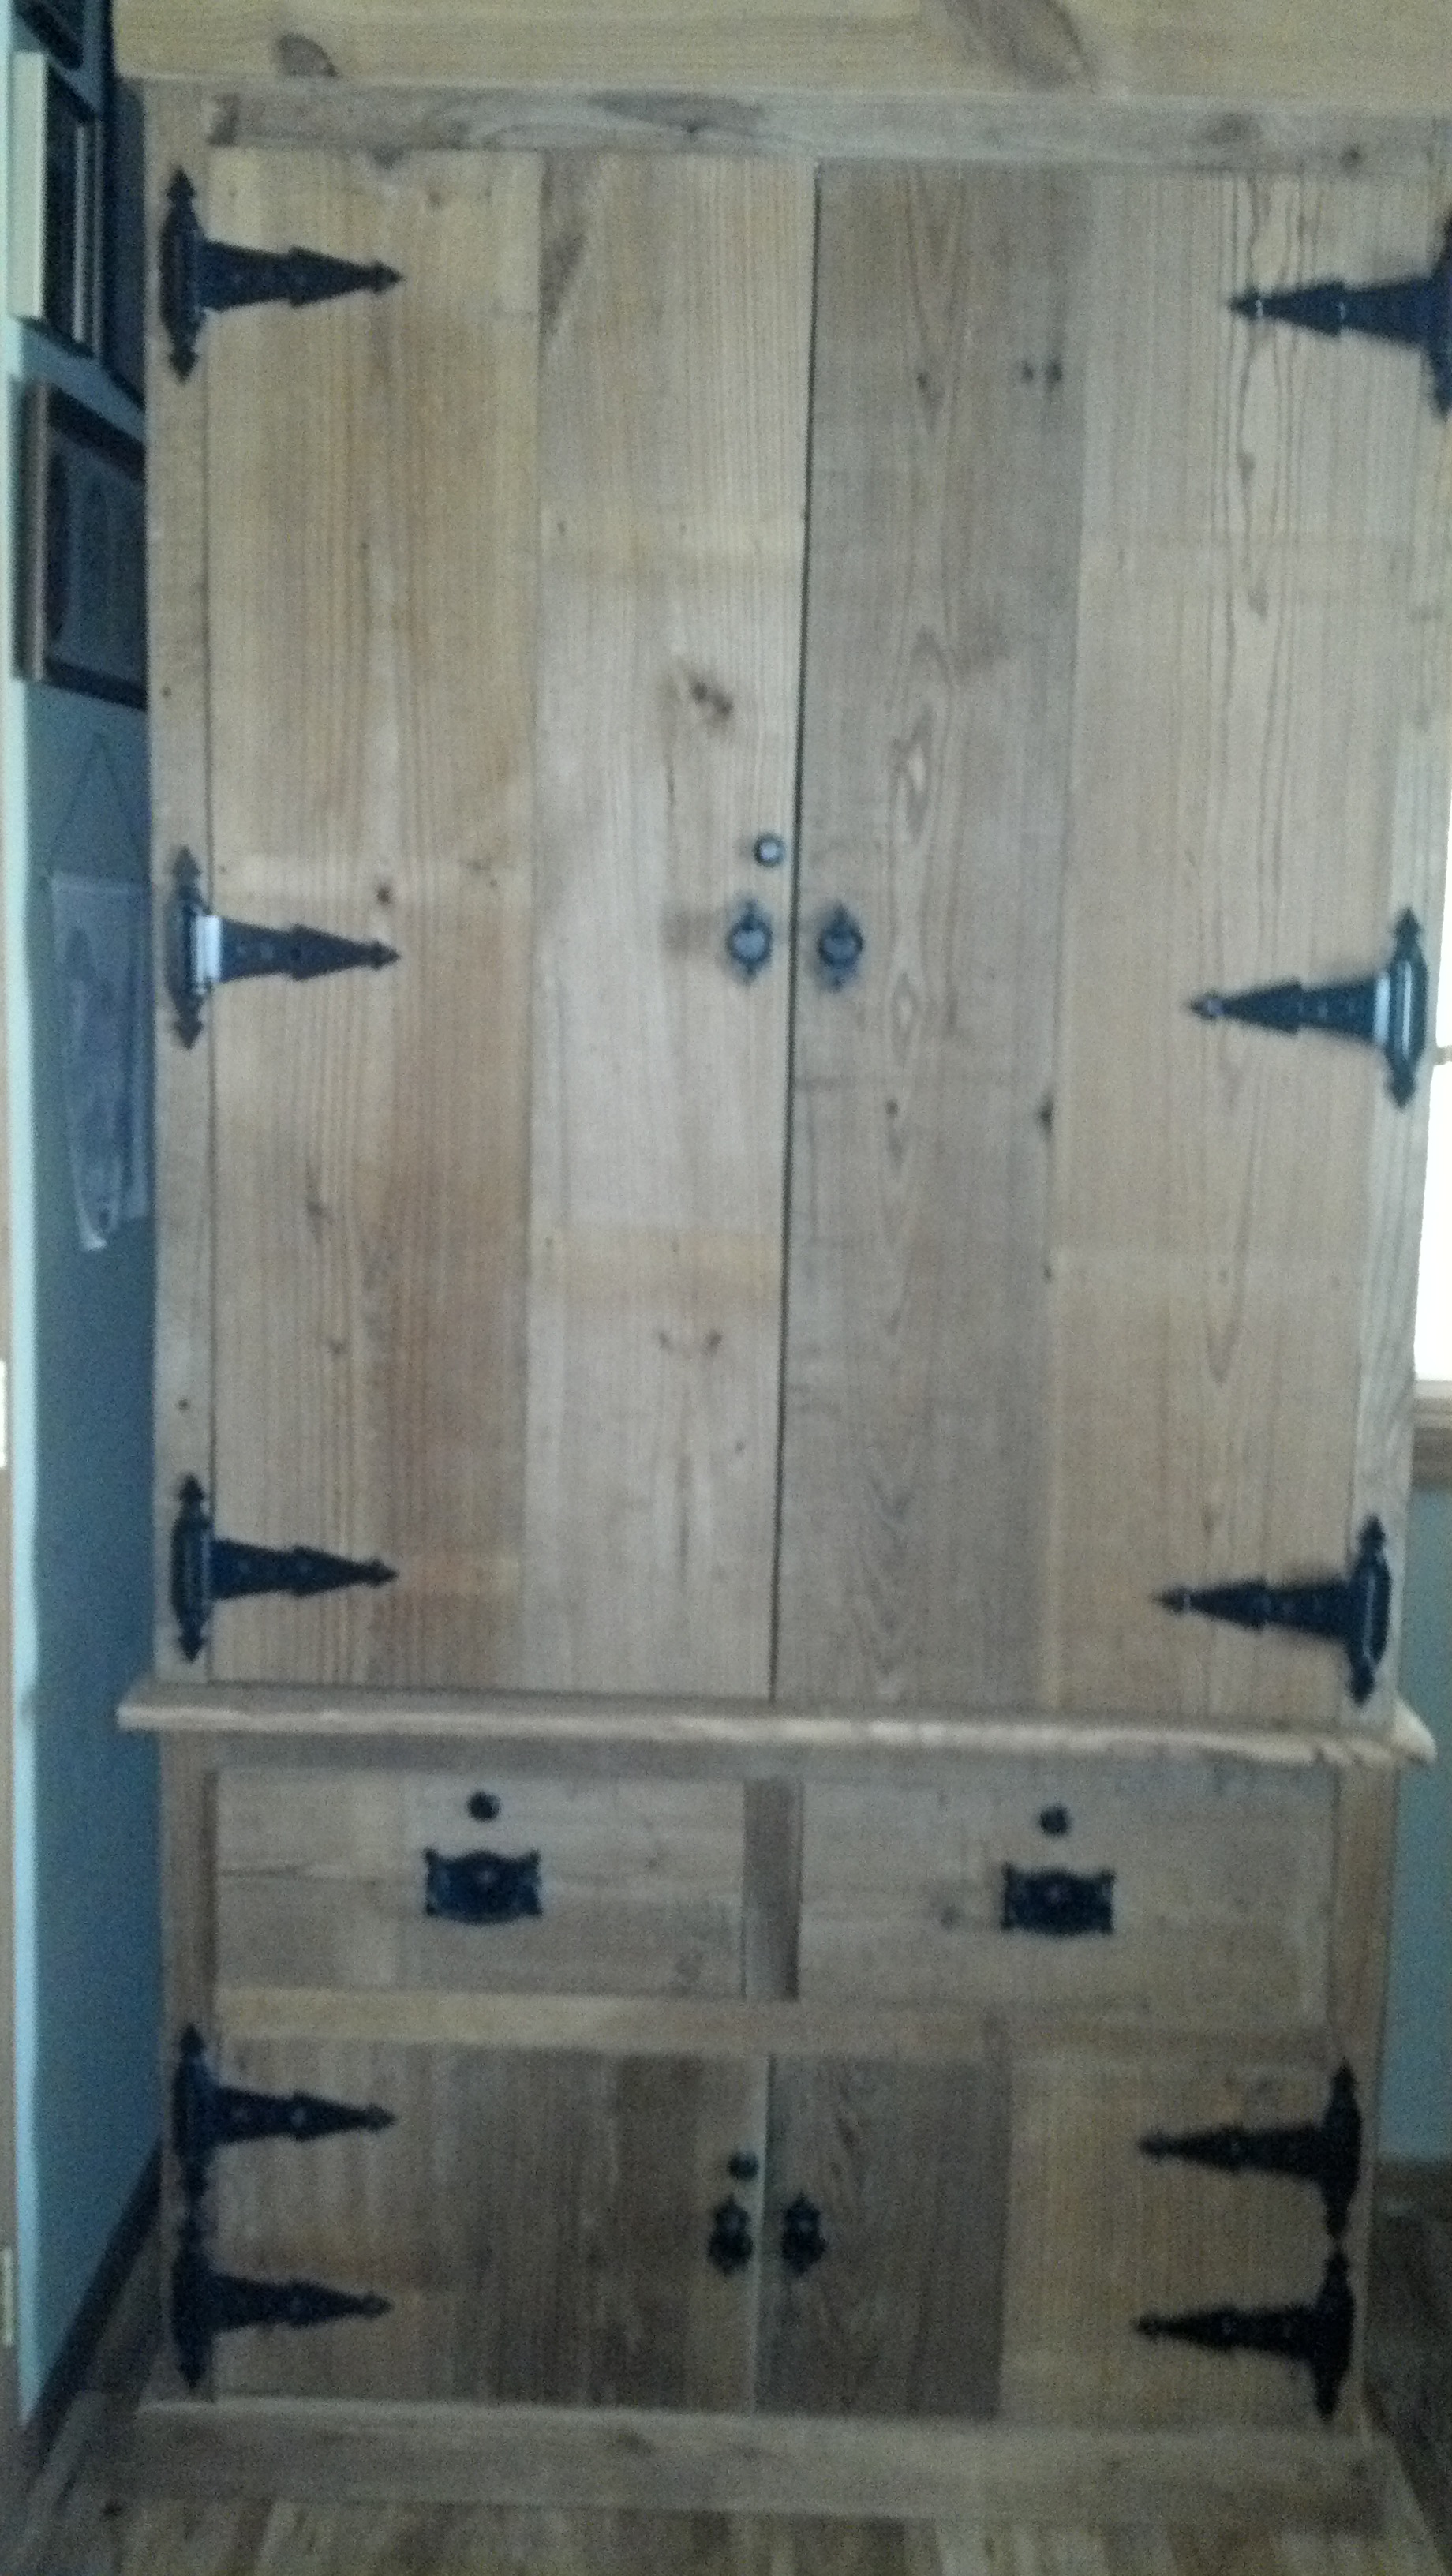
After the enlarged 4x4 Truss Table, we needed someplace to store the dishes. The Planked Wood Sideboard was the thing. Not an easy piece. This was my first attempt at "Doors & Drawers" and was a steep learning curve, but we are so pleased with the big, sturdy results that match the table.
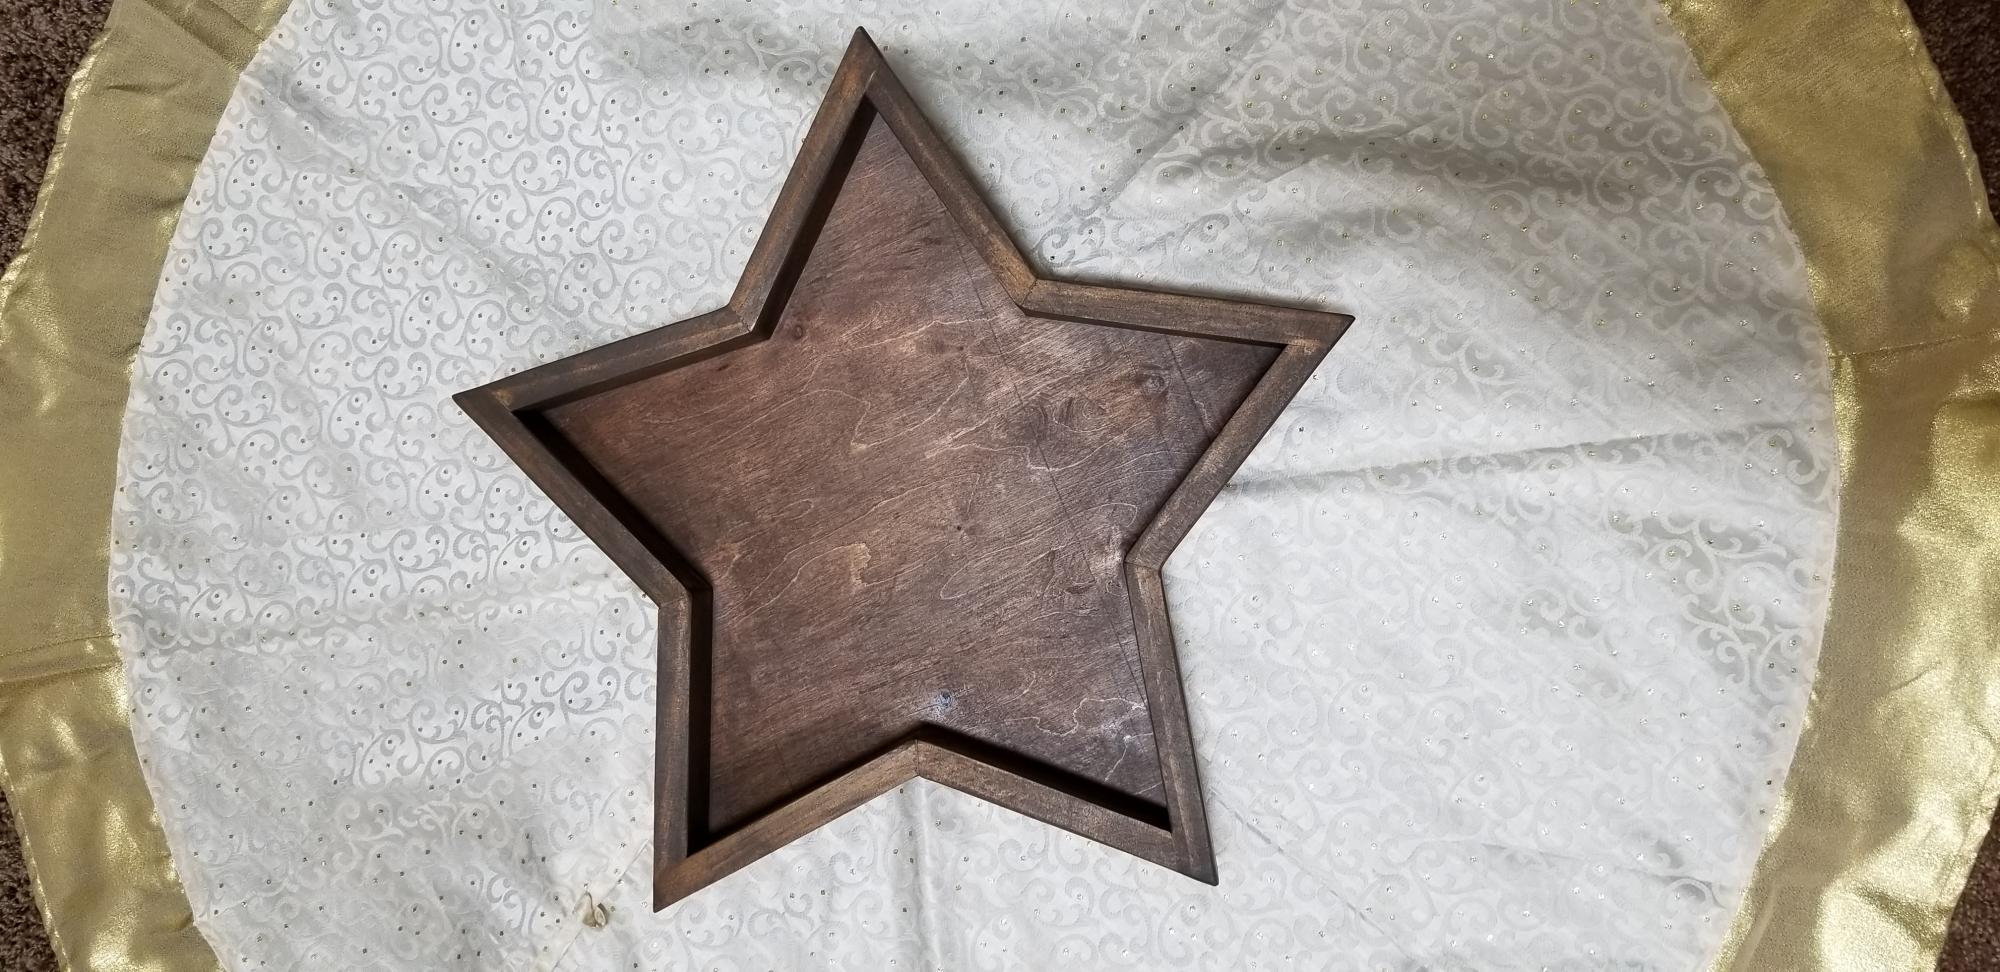
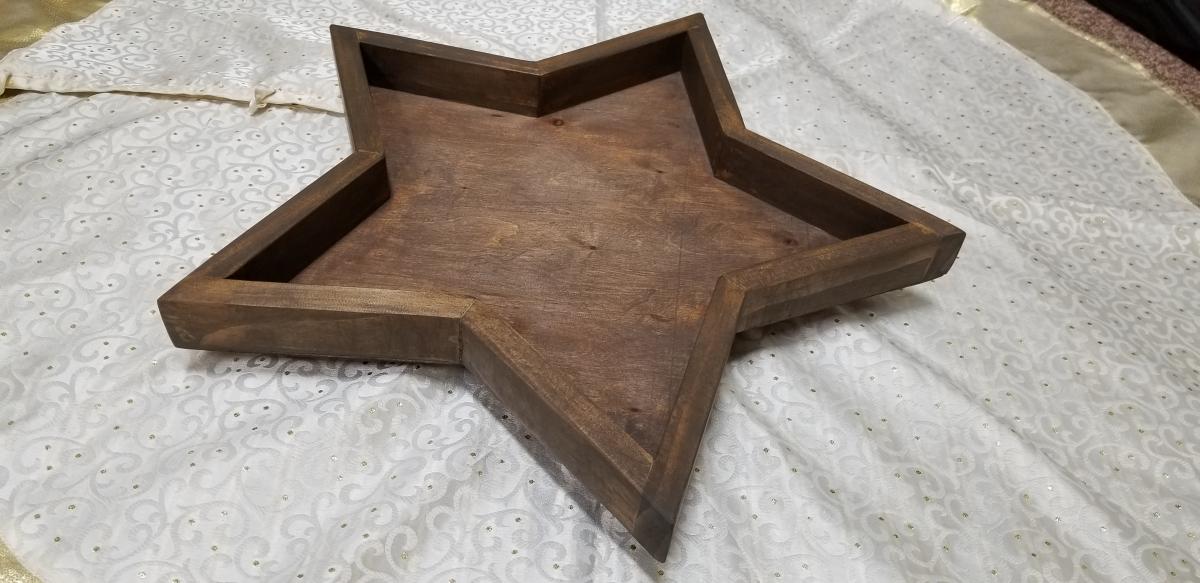
I followed the plans for the Wood Star Serving Tray. I thought it was a little tricky cutting all the angles to the correct length. One tip I would suggest is to mark which end has the 24 degree cuts, since you'll be attaching these joints first. Any gaps in the joints can be filled with wood filler, then sanded smooth. I would say this is an Intermediate level project due to the angles and trying to attach them without the nails popping through the other board. Would be fun doing a set of 3 and painting them red, white & blue for the 4th of July. Thanks for the plans, Ana!

Sat, 12/07/2019 - 17:51
It’s beautiful! Thanks for the tip on the cut list error I fixed it. I appreciate you taking your time to let me know! Ana
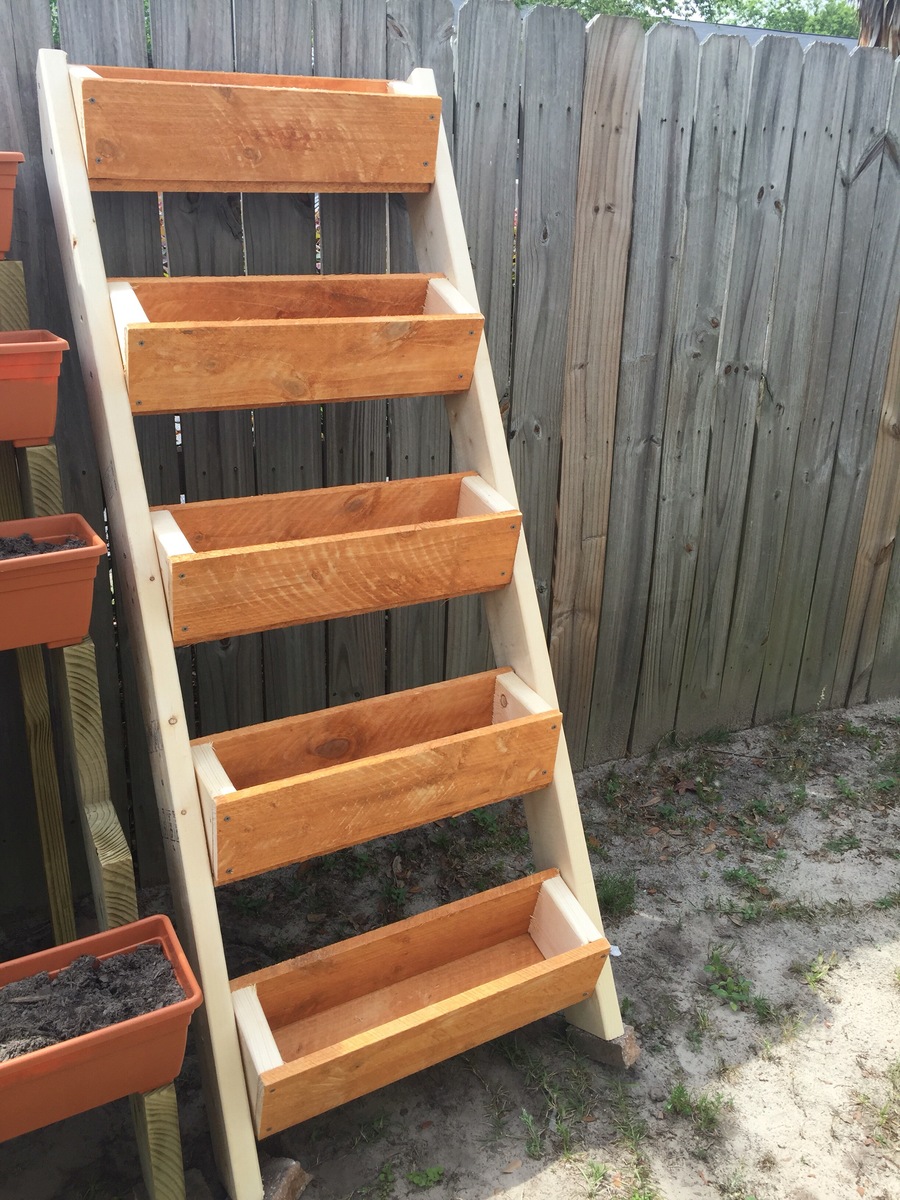
Used your plans but make changes to the planters since I do not own an angle machine. They look great and the cost was less than $30

Tue, 05/30/2017 - 14:33
Can appreciate wanting to do projects but not having all the necessary fancy tools. I need to make two of these anyway (one to give away), so going to steal this idea to make it a wham-bam quick job!
Great little project from your site!
I put PVC to the ground vs the metal siding and added a heat sink in the middle with some old computer fans.
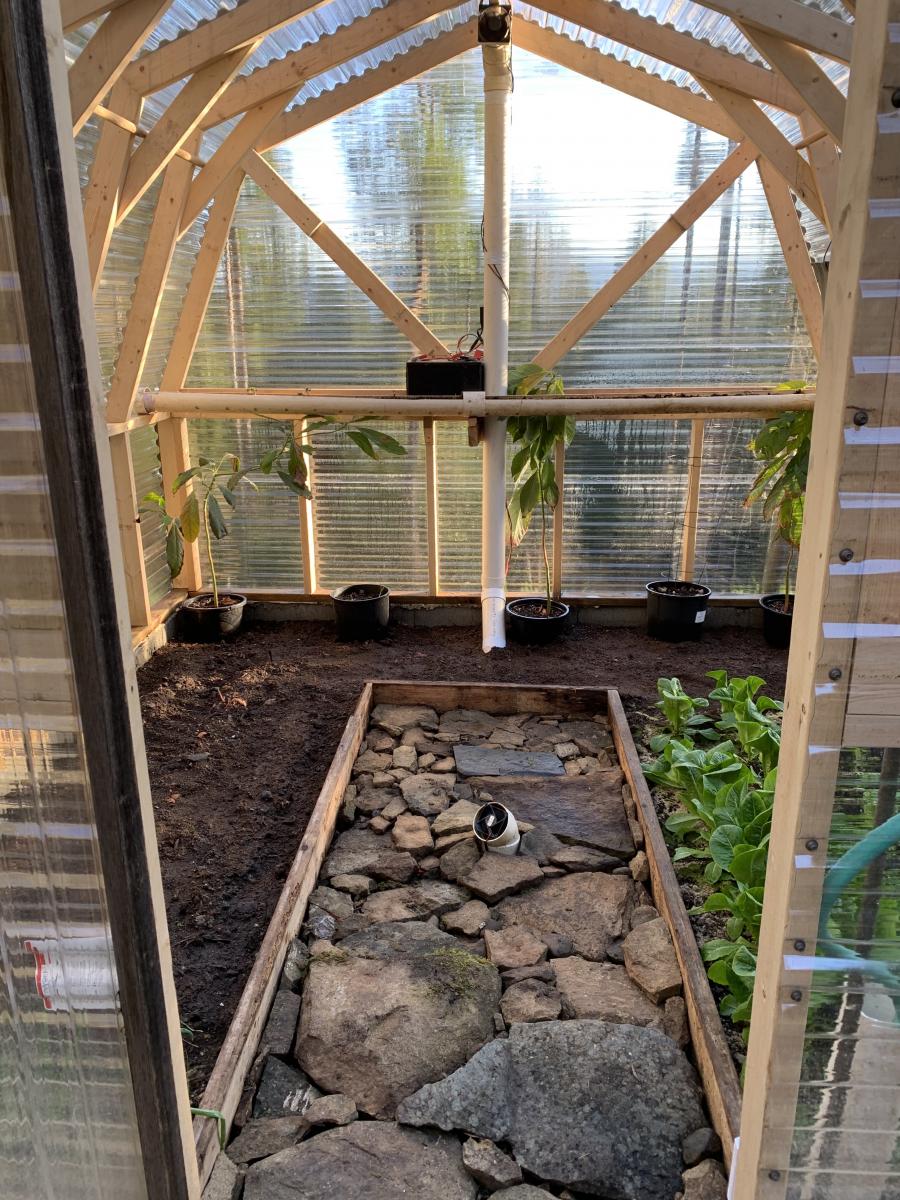
Sat, 05/23/2020 - 17:23
That PVC heat pipe intrigues me. Can you share a little more about it? I'm assuming it pulls hot air from the upper vent, and cools it down via the section of pipe below ground, sort of like a natural A/C. Keeps things from gettting too hot during the summer months?
Kinda looks like you'd frequently trip over it though. I'd probably have run the lower exhaust right up by the edge of the door frame, or a corner.
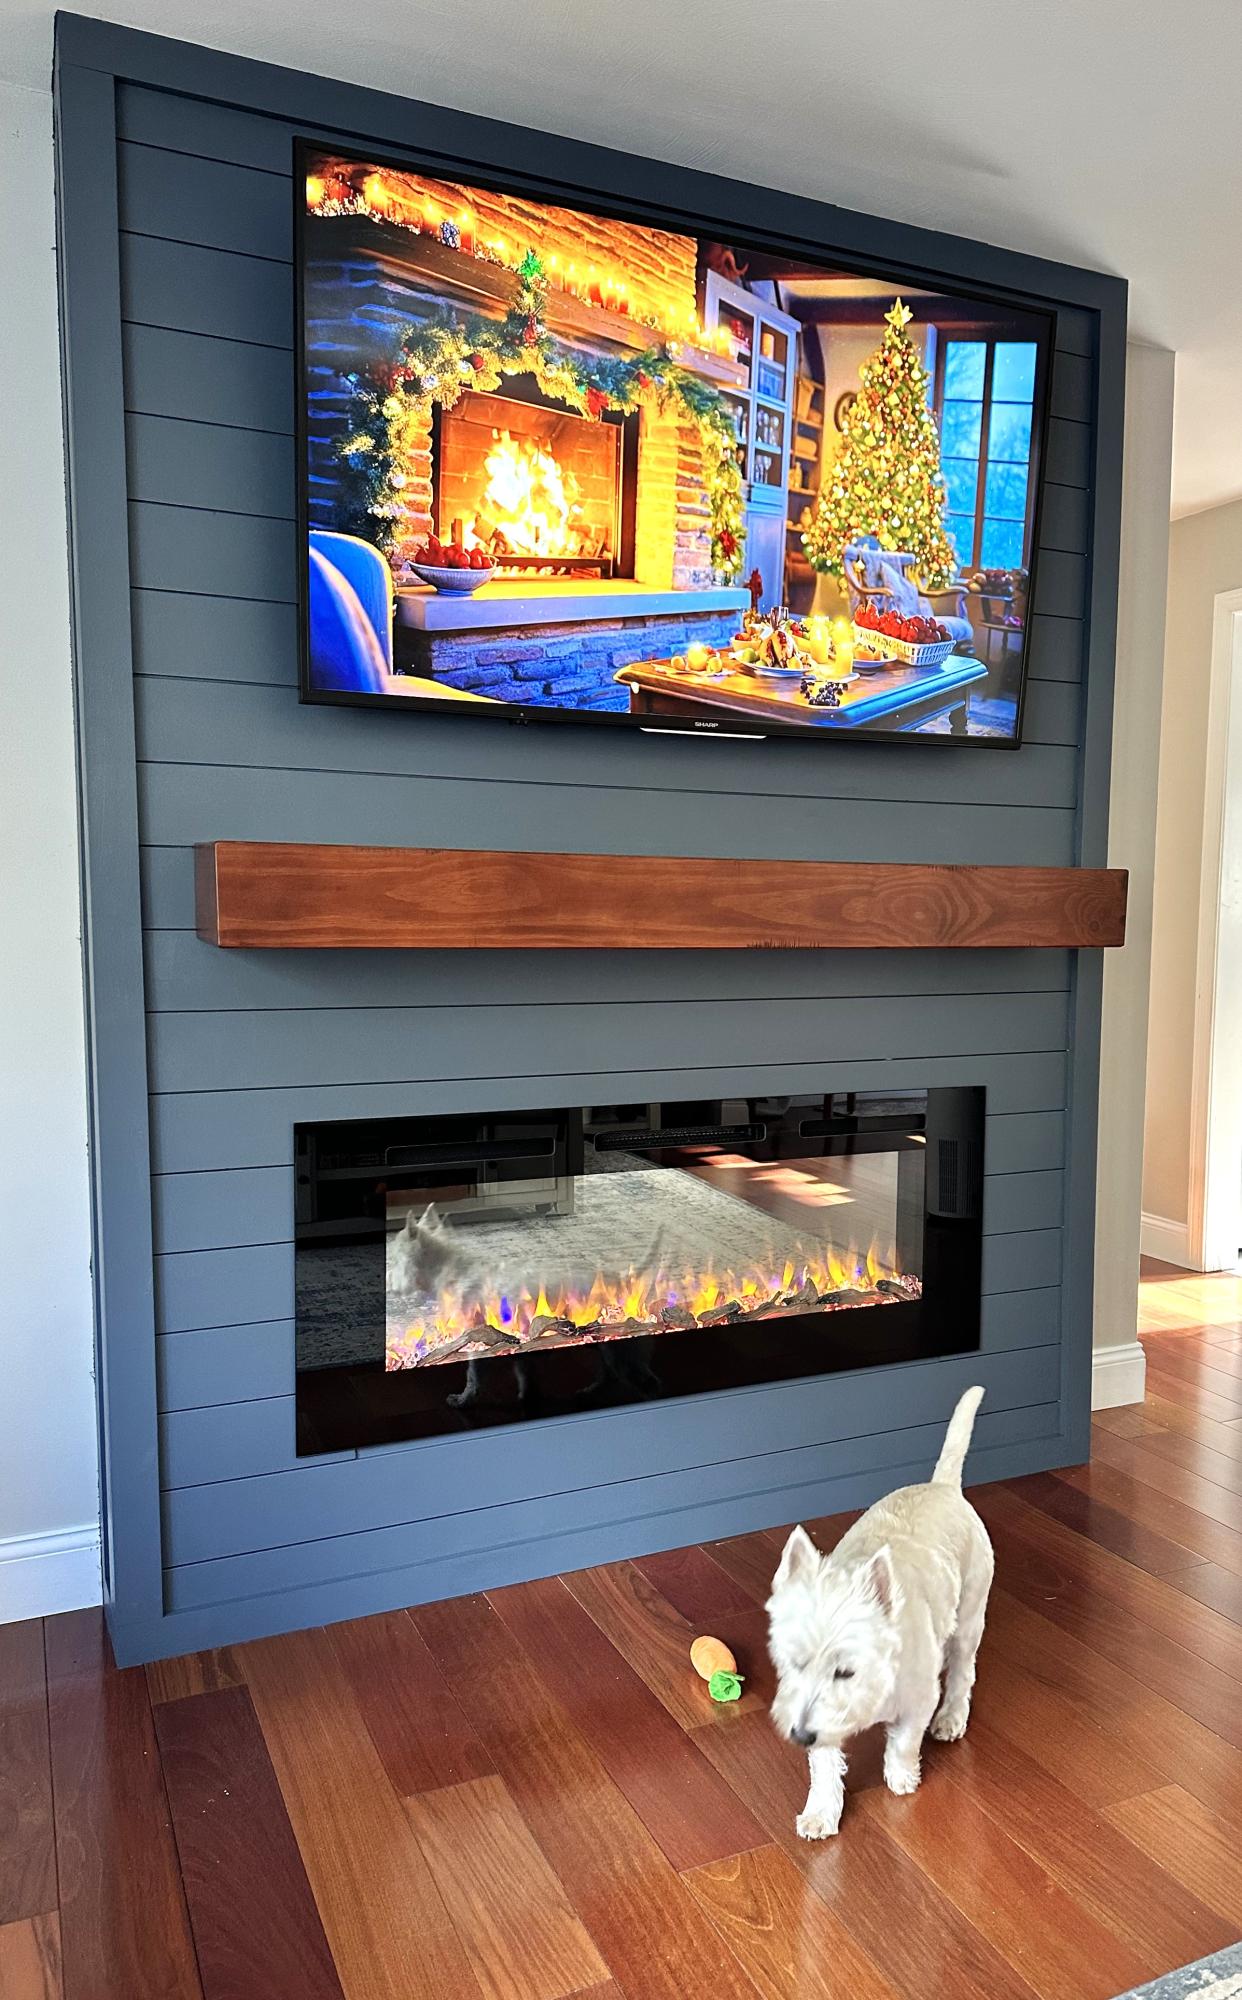
Shiplap fireplace build. Painted with Behr Marquee in color Calligraphy. My first building project ever!!
Jenn Lawson

This my expanded Christmas Stocking tree. With a growing family we needed room for at least 9 stockings. I decided to hope for one more and made it large enough for 10. Decided to make the sides look more like a candy cane and added red stripes. Thanks to Ana for the ideas.
RBM
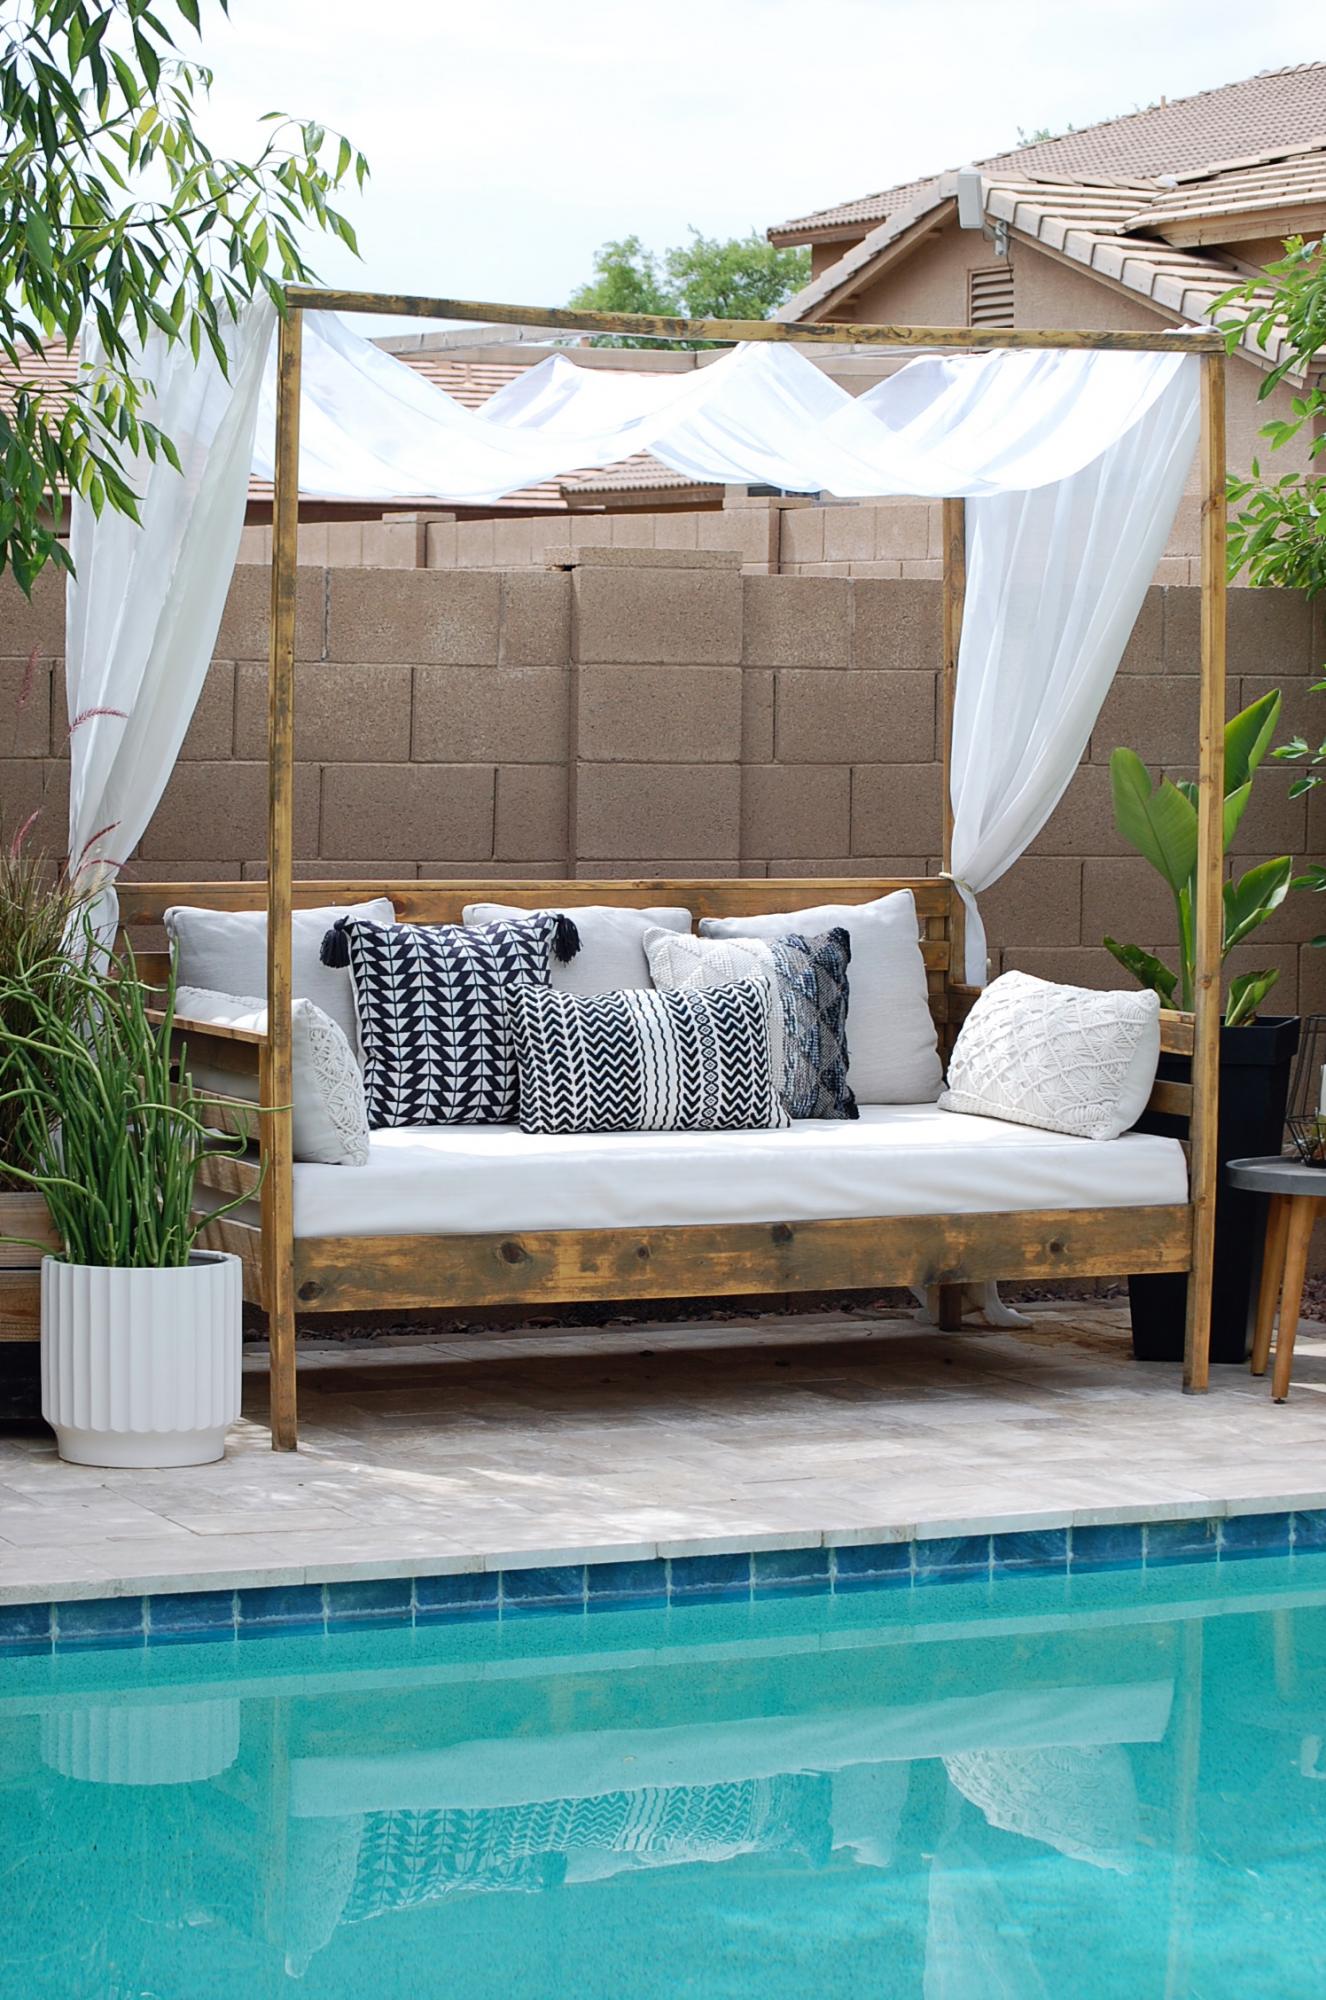
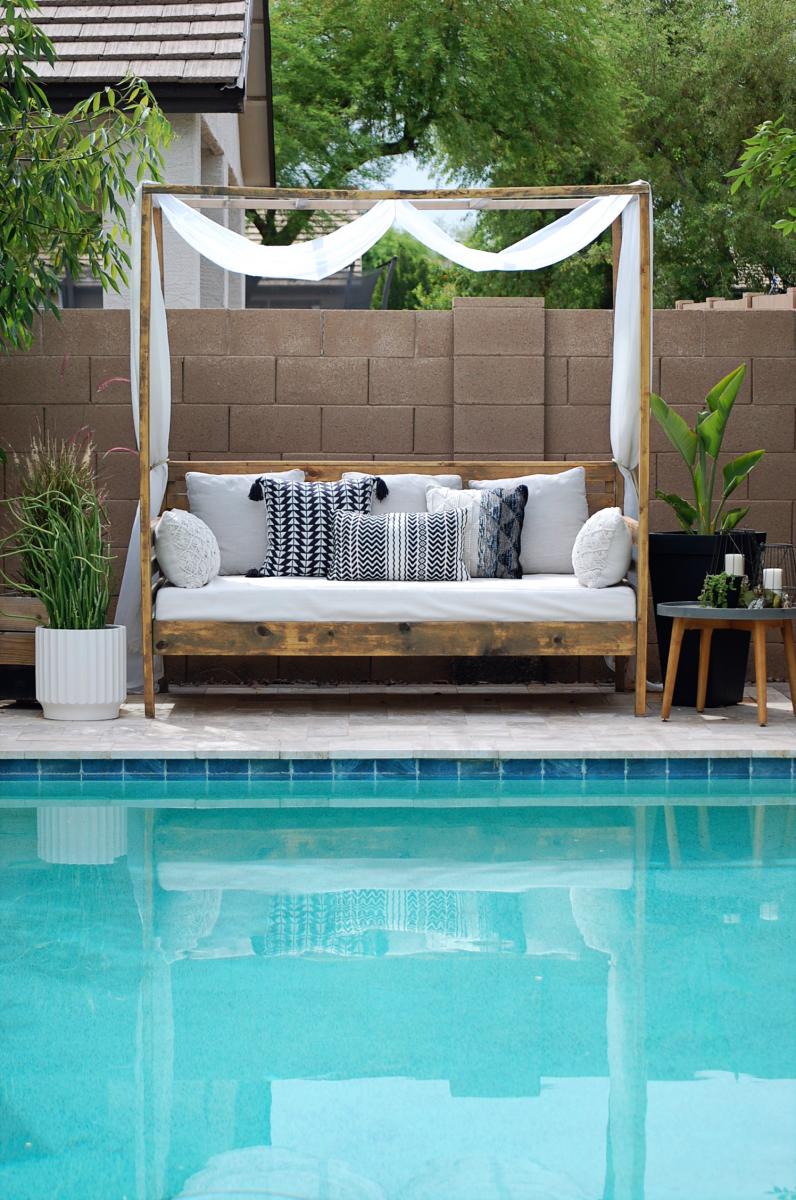
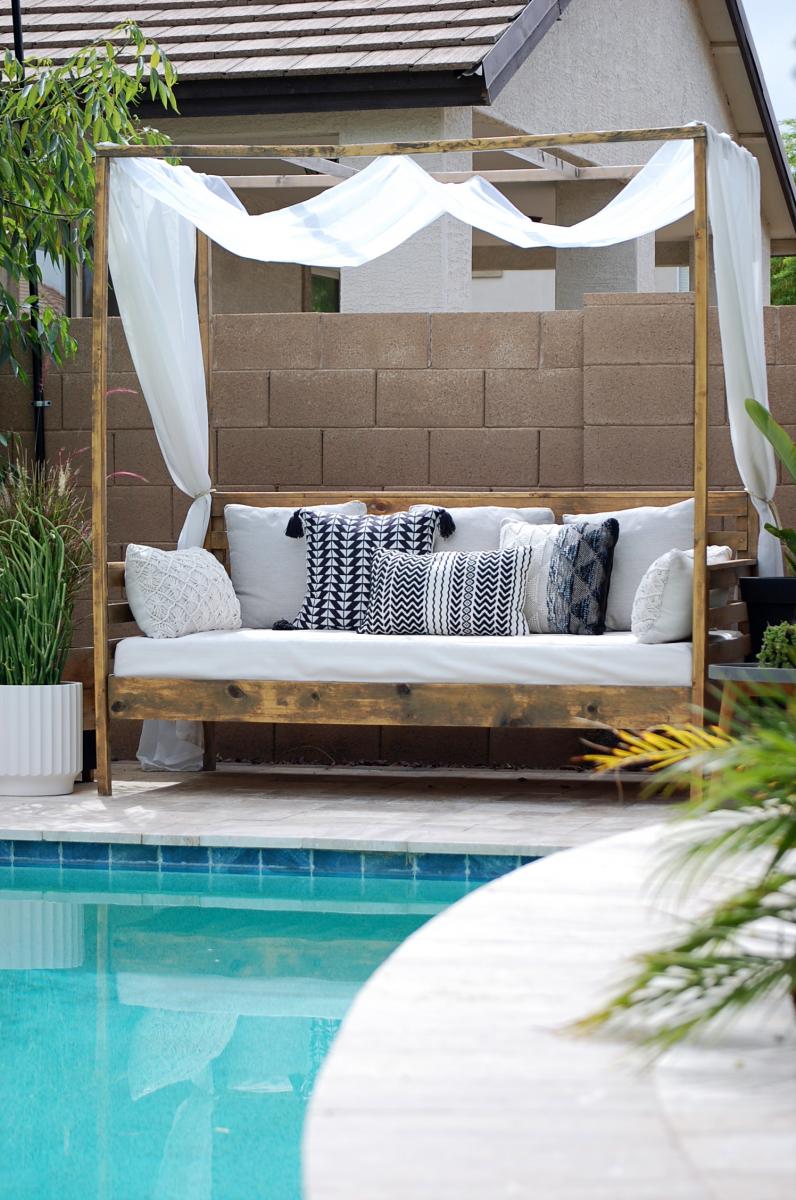
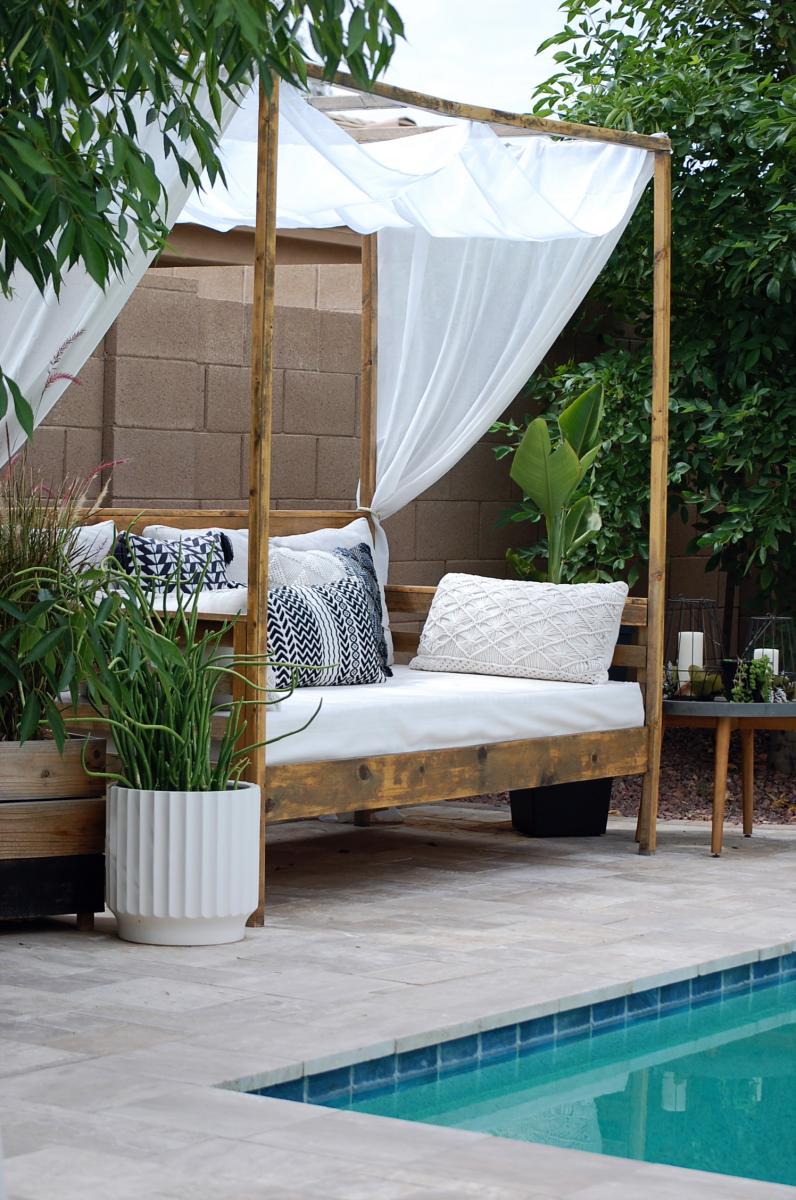
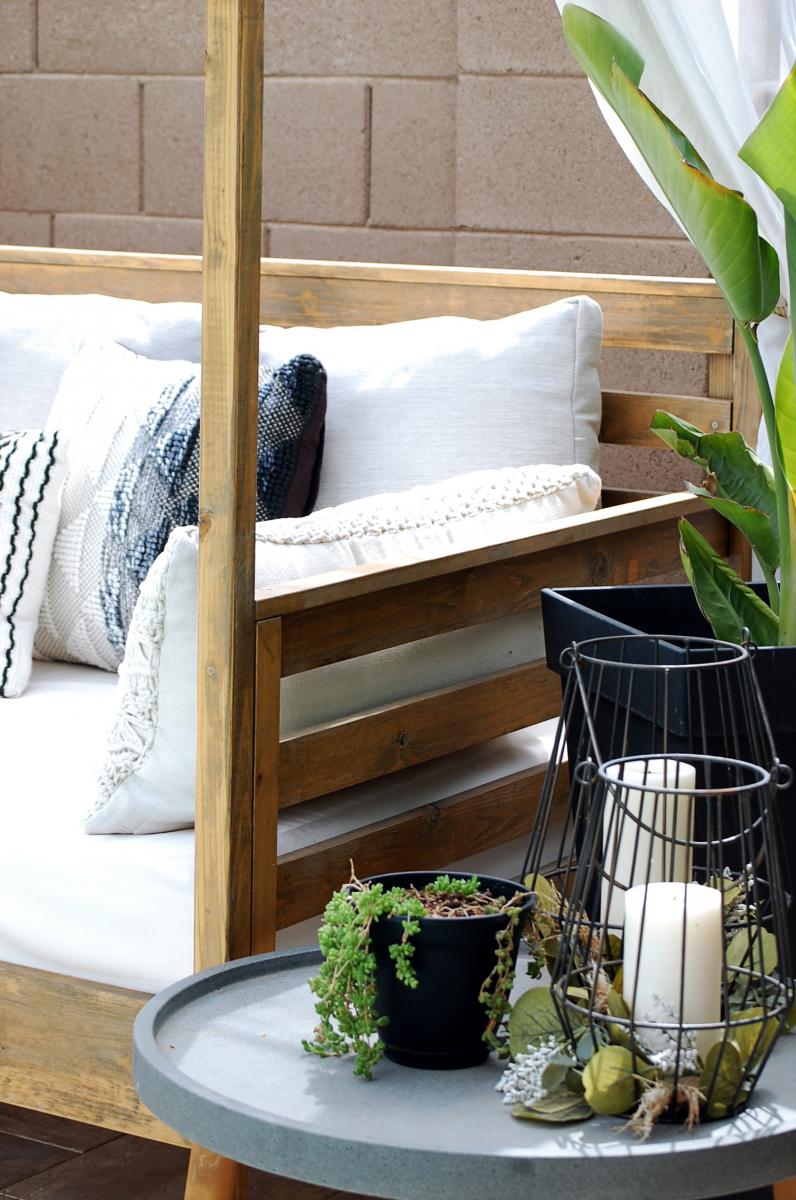
I built this outdoor daybed to add a cozy and inviting space to my backyard. It was a fairly easy build, which I managed to tackle by myself. Head over to the blog for more details.

Built for my son's room!
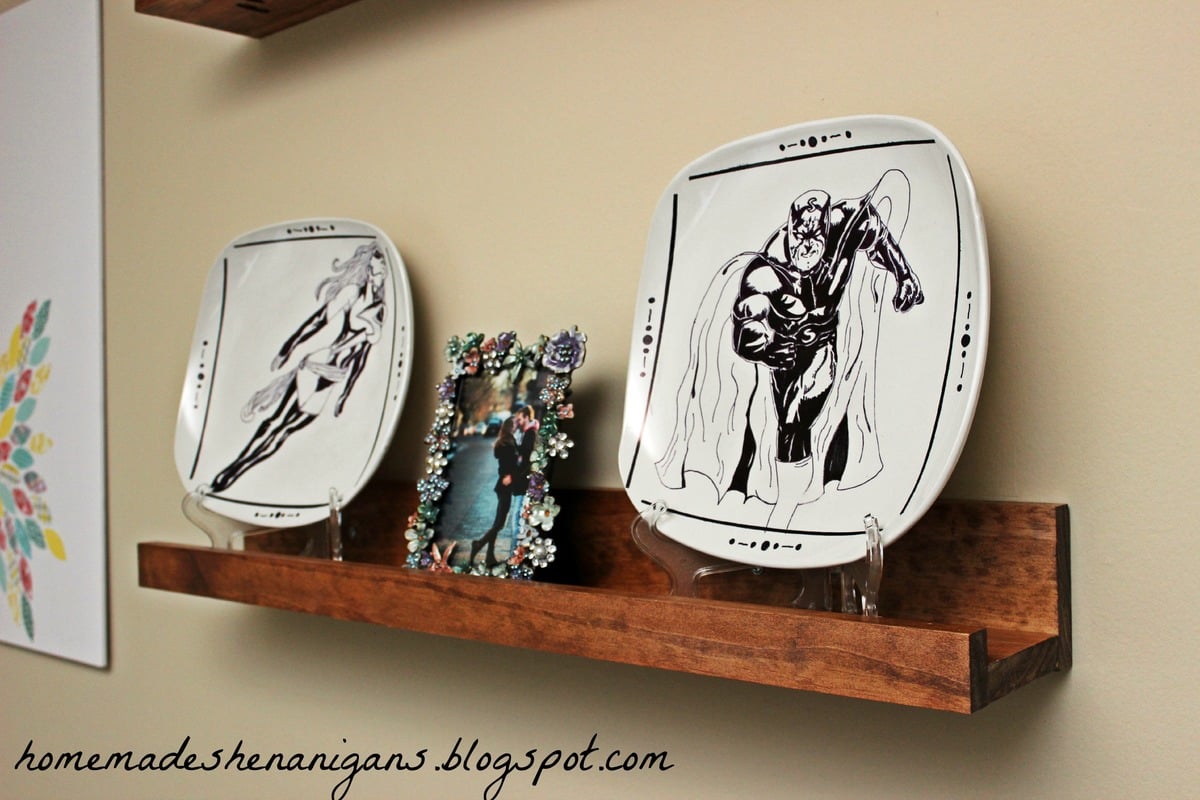
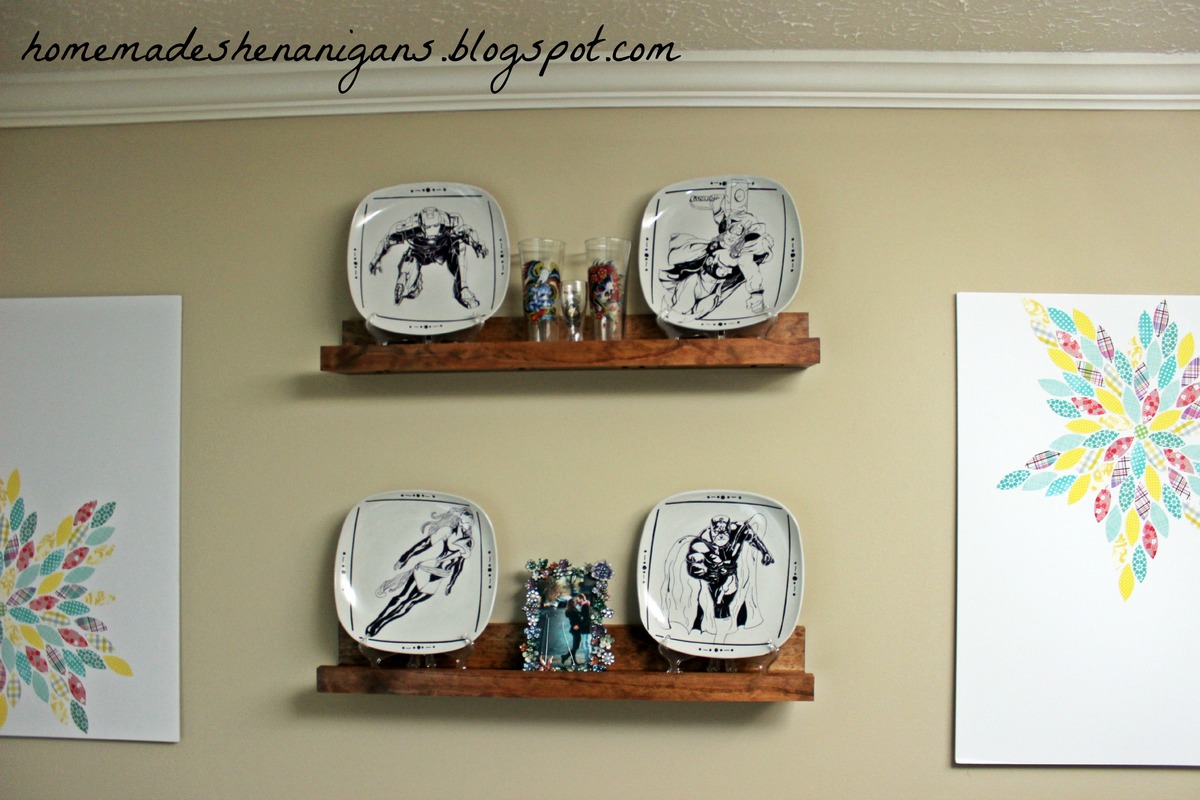
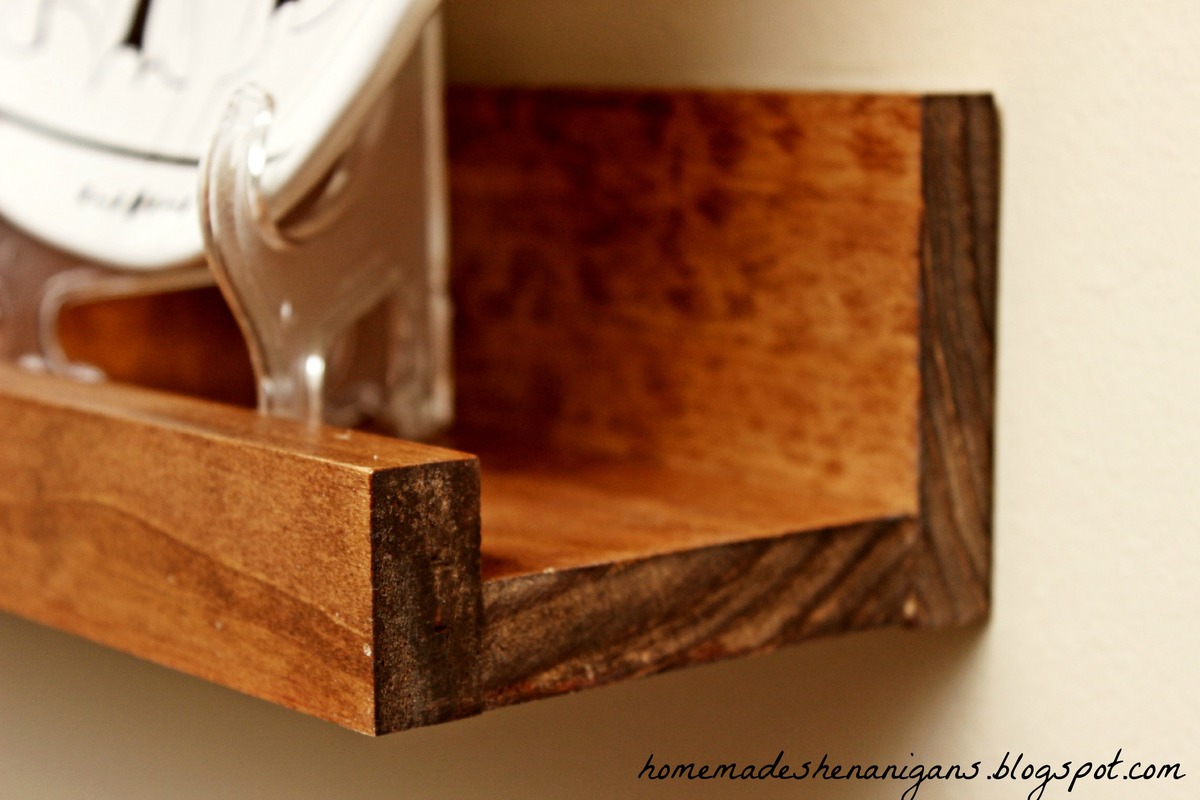
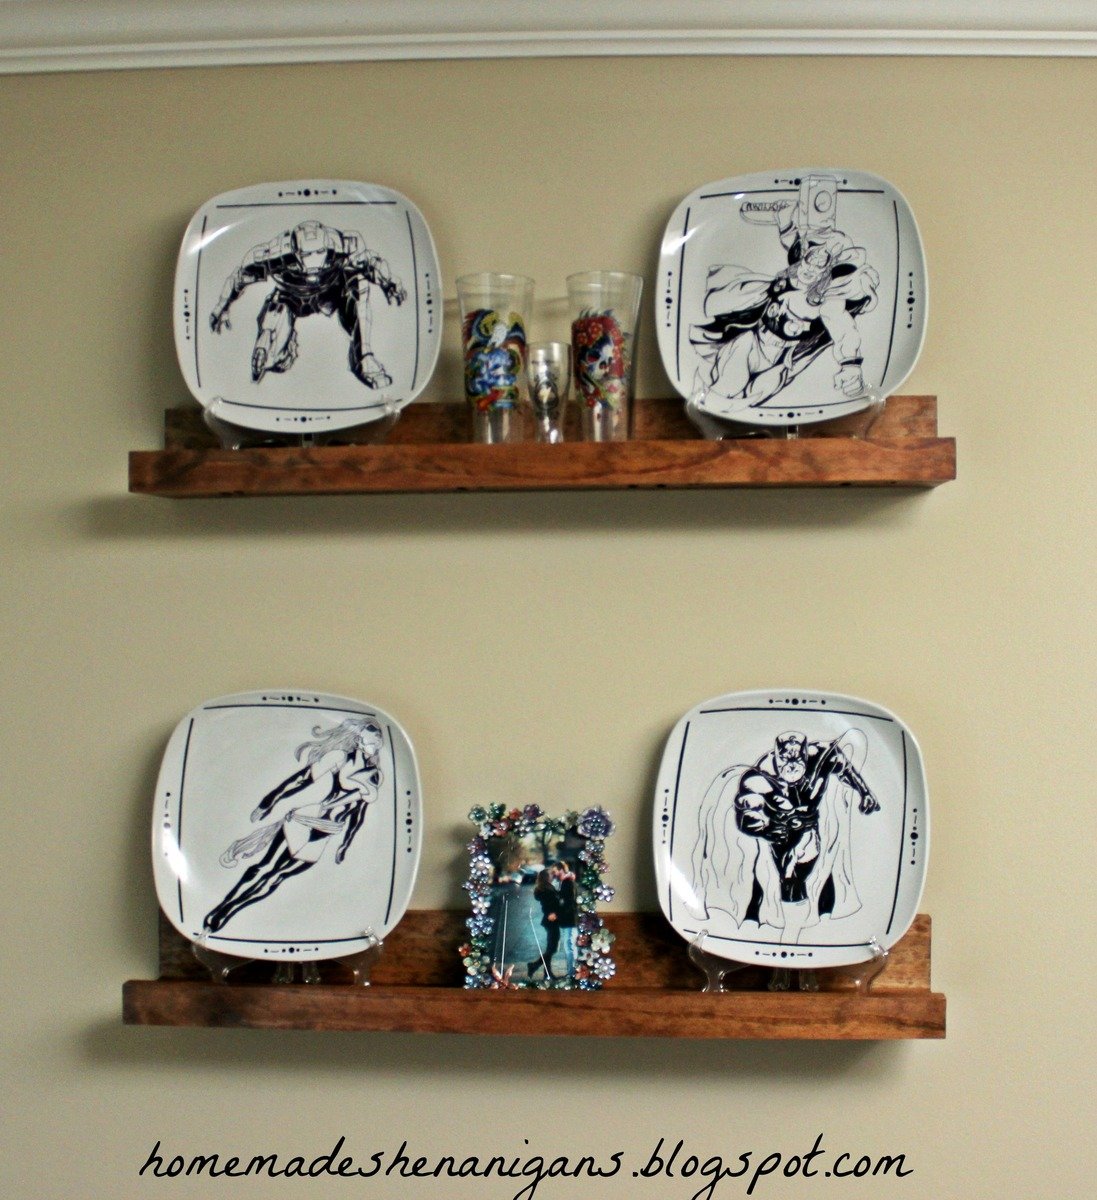
My shelves are about 2.5 ft long. I wanted a display area in my dining room to show off some plates I had made for my boyfriend a while back.
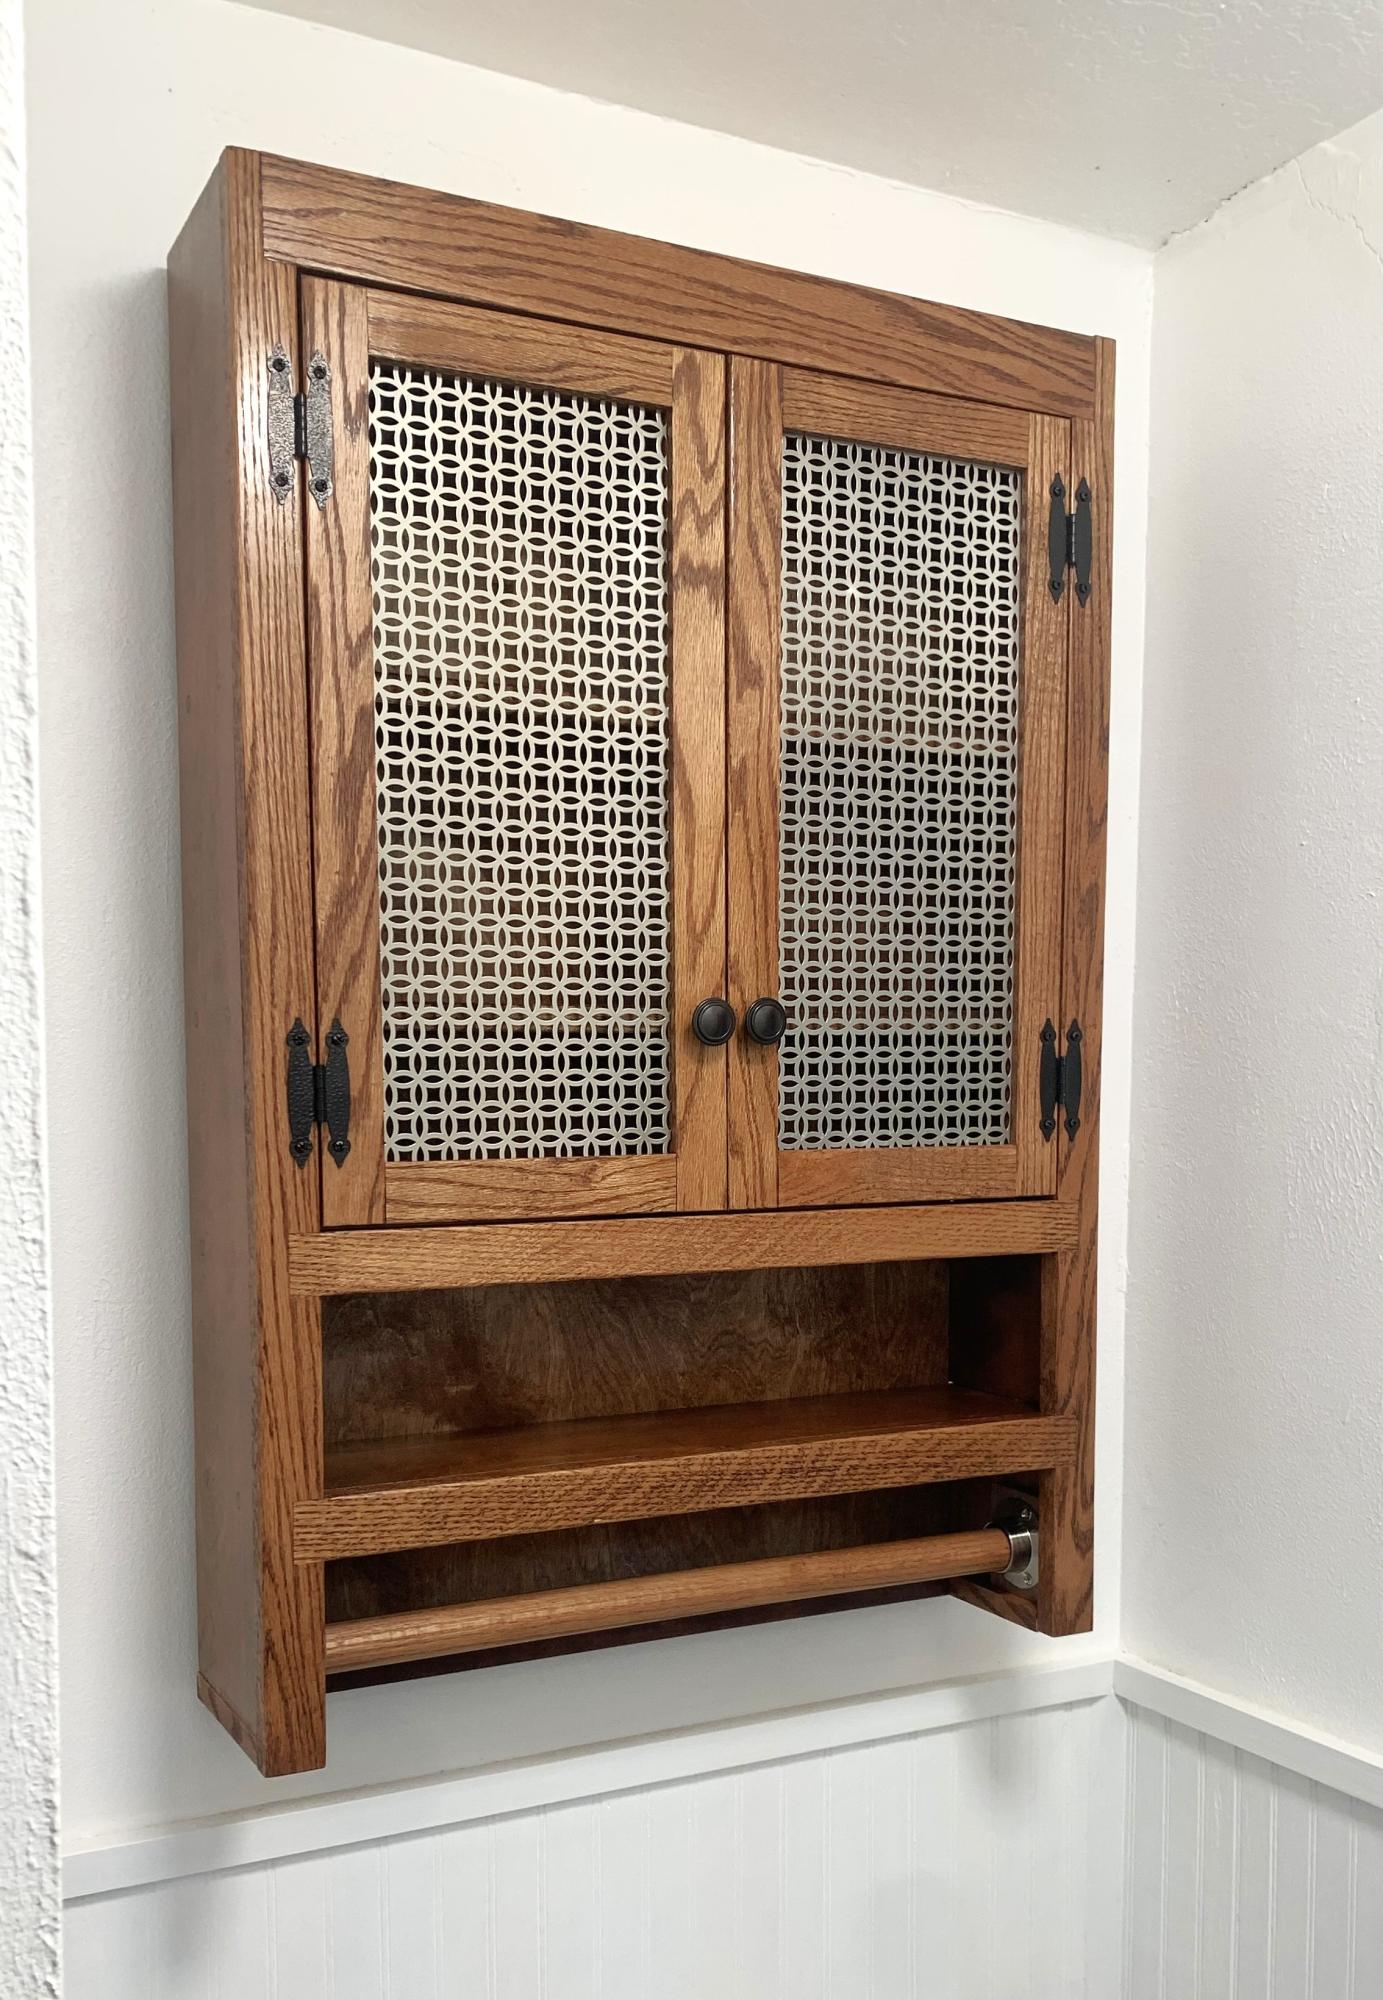
A medicine / bathroom vanity I built for my son’s master bathroom. Constructed of 3/4 oak veneer , 1x2 and 1x3 red oak for the face frames and doors. I used a combination of dowels and dominos to assemble. The metal for the doors was purchased at The HD. Finished off with Minwax English Chestnut stain and 4 coats of Shellac.
Gary Fox
This is a gun cabinet I made for my dad out of old barn wood.
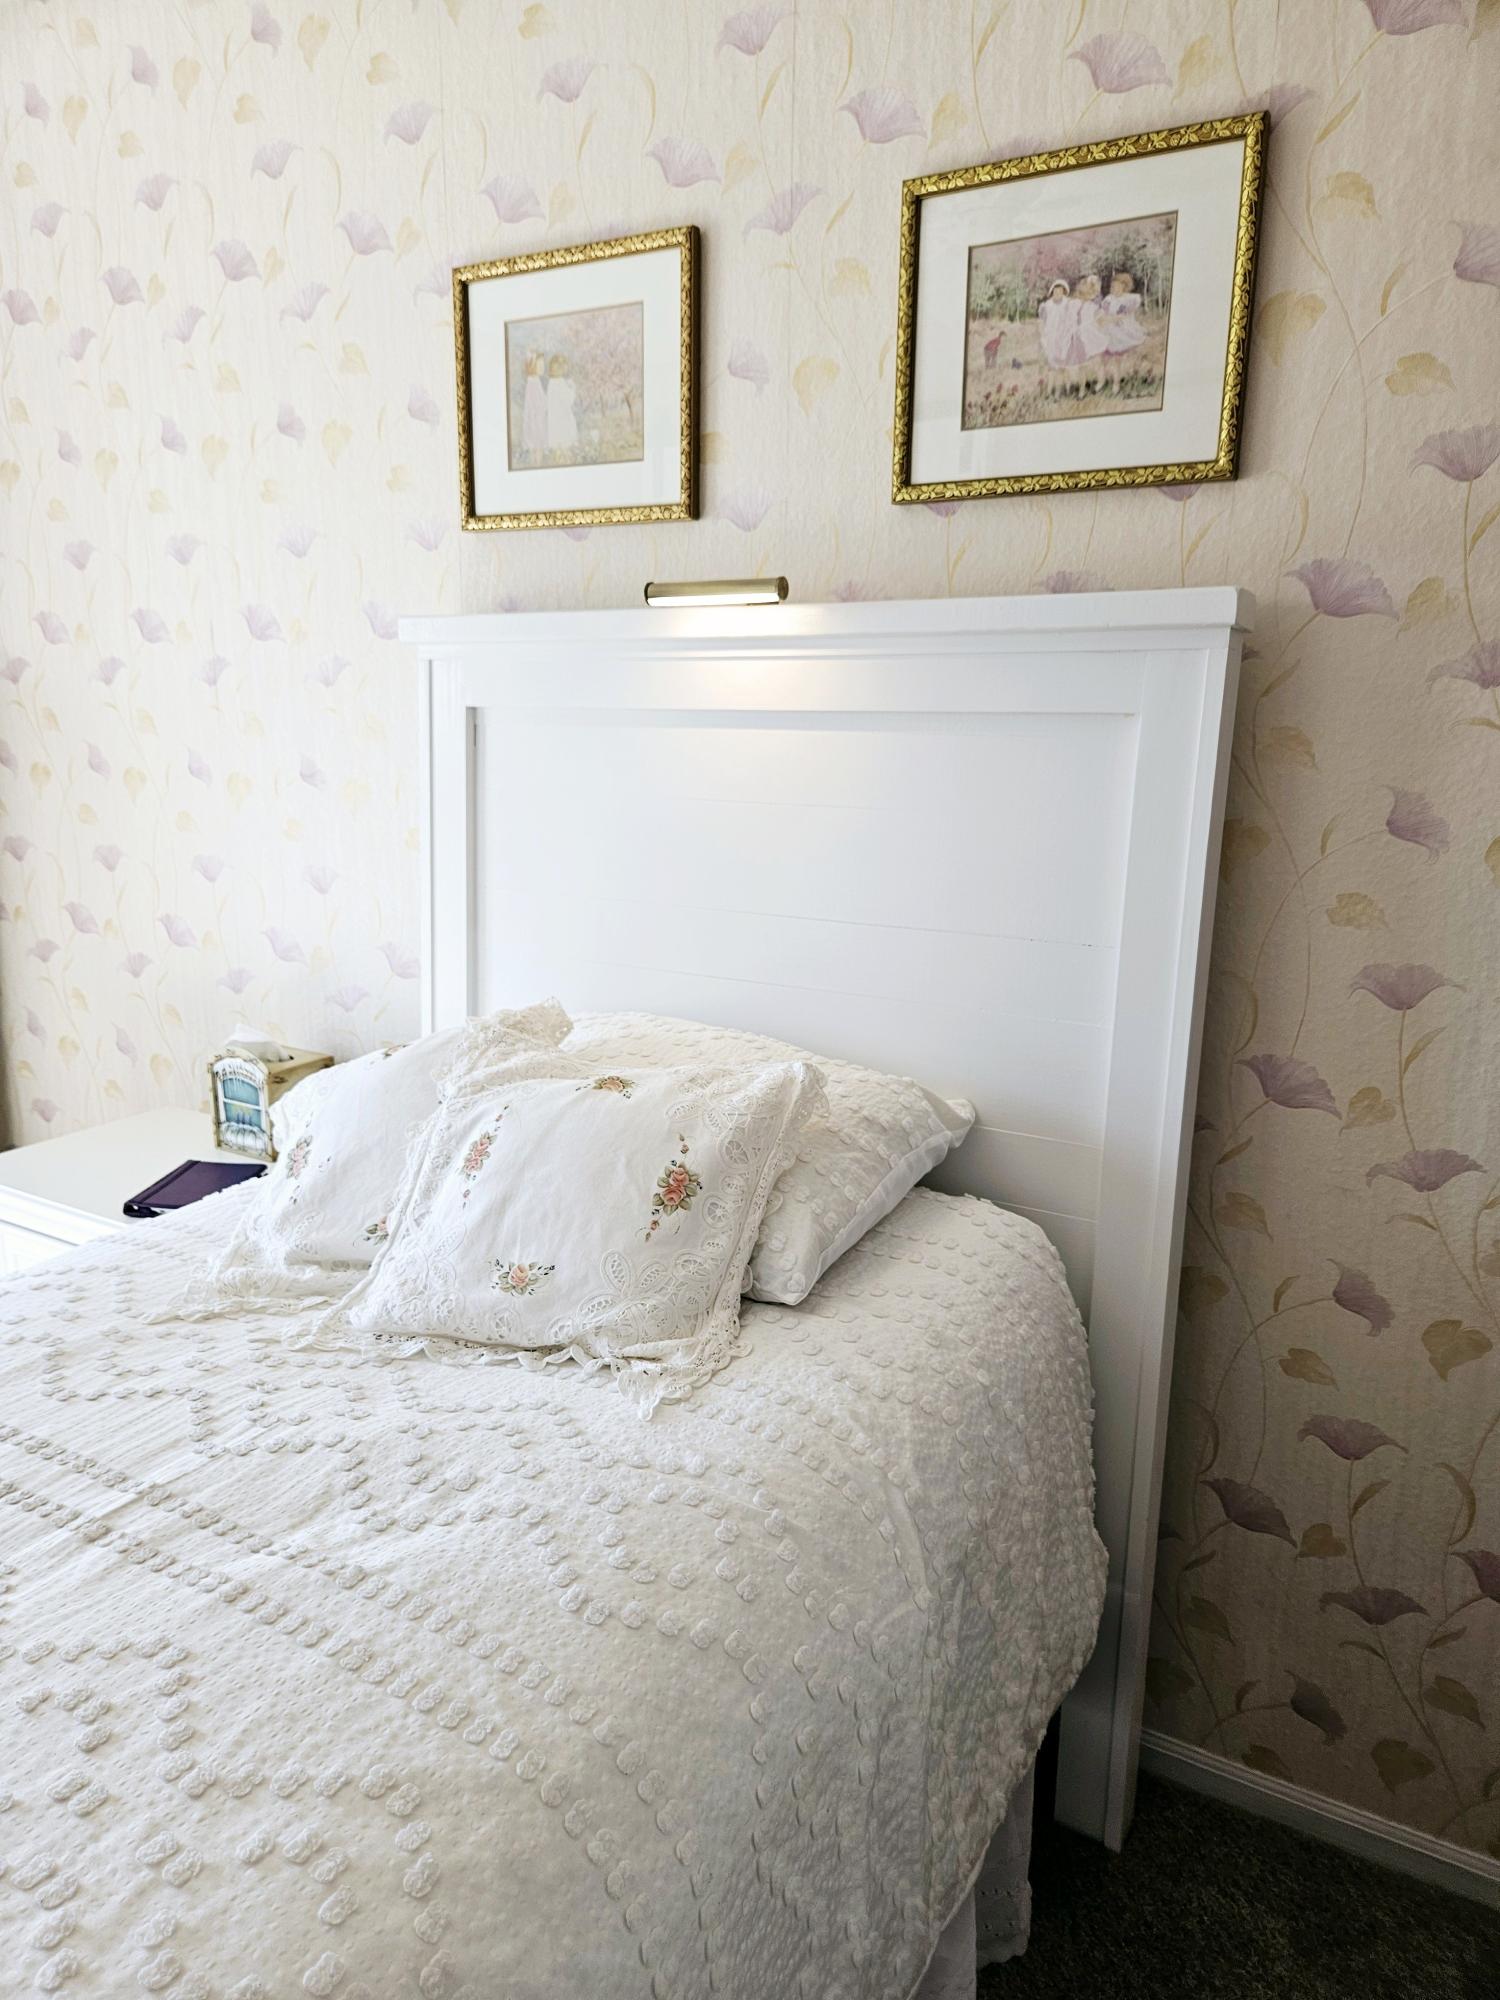
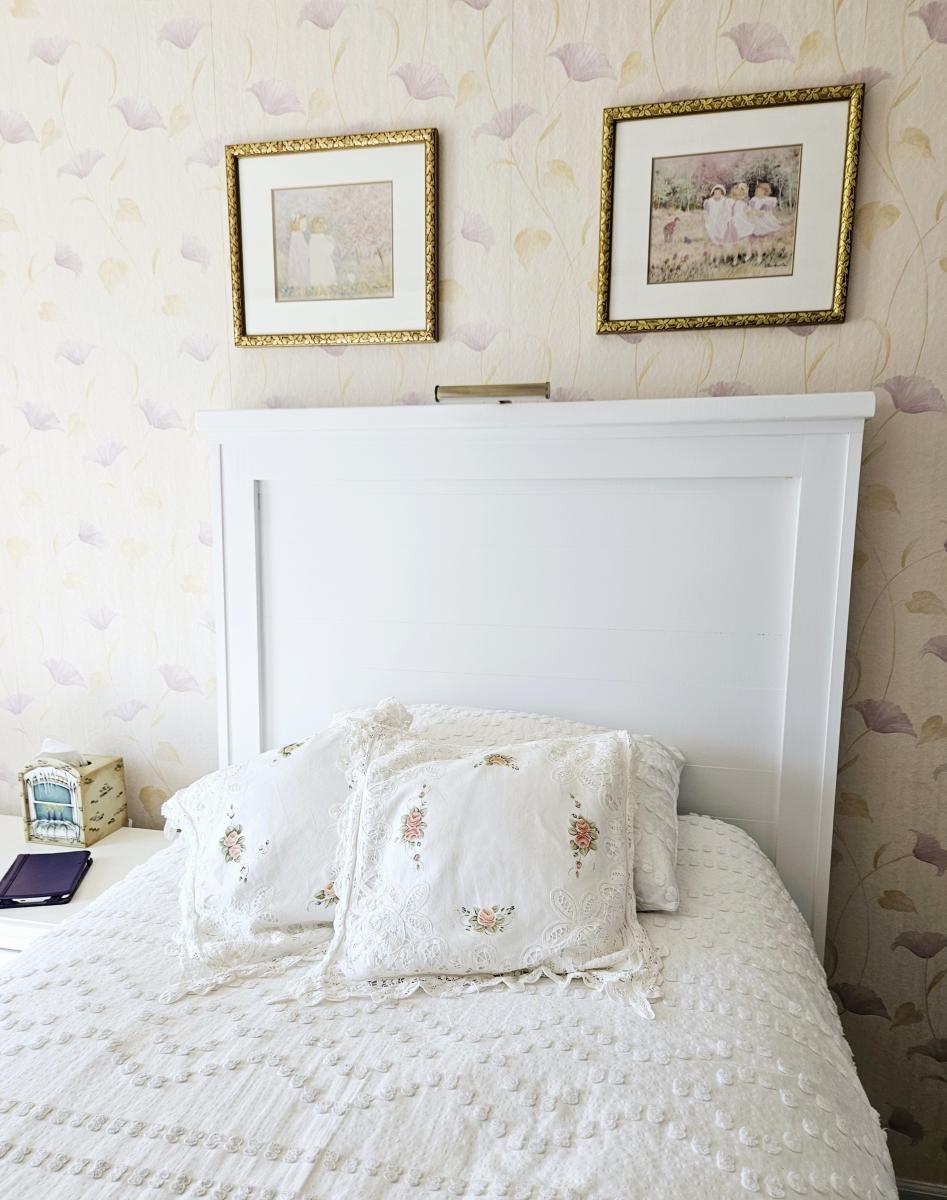
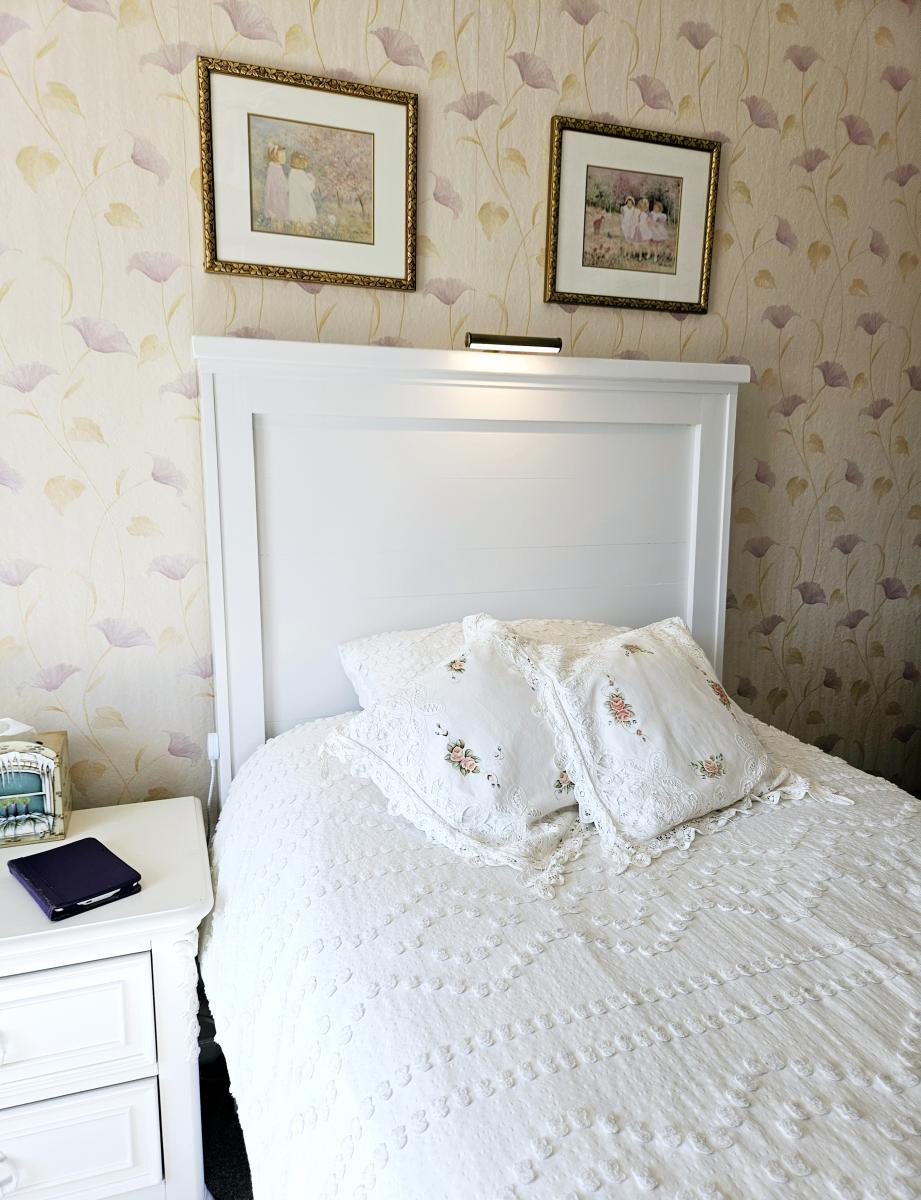
am thrilled with my new headboard. The plans made every thing about this project FUN and DOABLE. I'm a 70 year old Granma who loves to DIY. SO fun to show my photos of what I did ALL BY MYSELF! THANK YOU FOR YOUR WONDERFUL PLANS! With out them my pretty new headboard would never have happened. WHAT FUN. I mounted an LED picture light fixture on the top for reading in bed and mounted the corded on off extension cord switch to the side of the leg for easy on off ! Again, THANK YOU!
Cheryl King
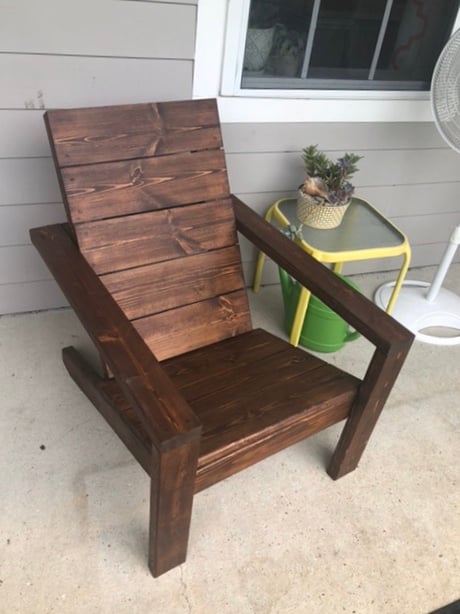
My wife and I were tired of the cheap plastic chairs but not wanting to spend a fortune. I came across Ana’s site and these great plans so I gave it a shot. Everything was pretty straightforward. I decided to use 1x6’s for the seat and back slats instead of 1x10’s. I also used dowel rods instead of wood filler to close all of the screw holes and I Roy fed the edge of the front seat slat one the router. I’m currently working on a partner for this chair with some adjustments (Making it 2” wider and using pocket hole and other techniques to hide the screws).

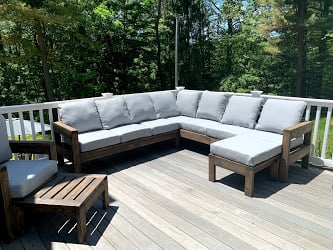
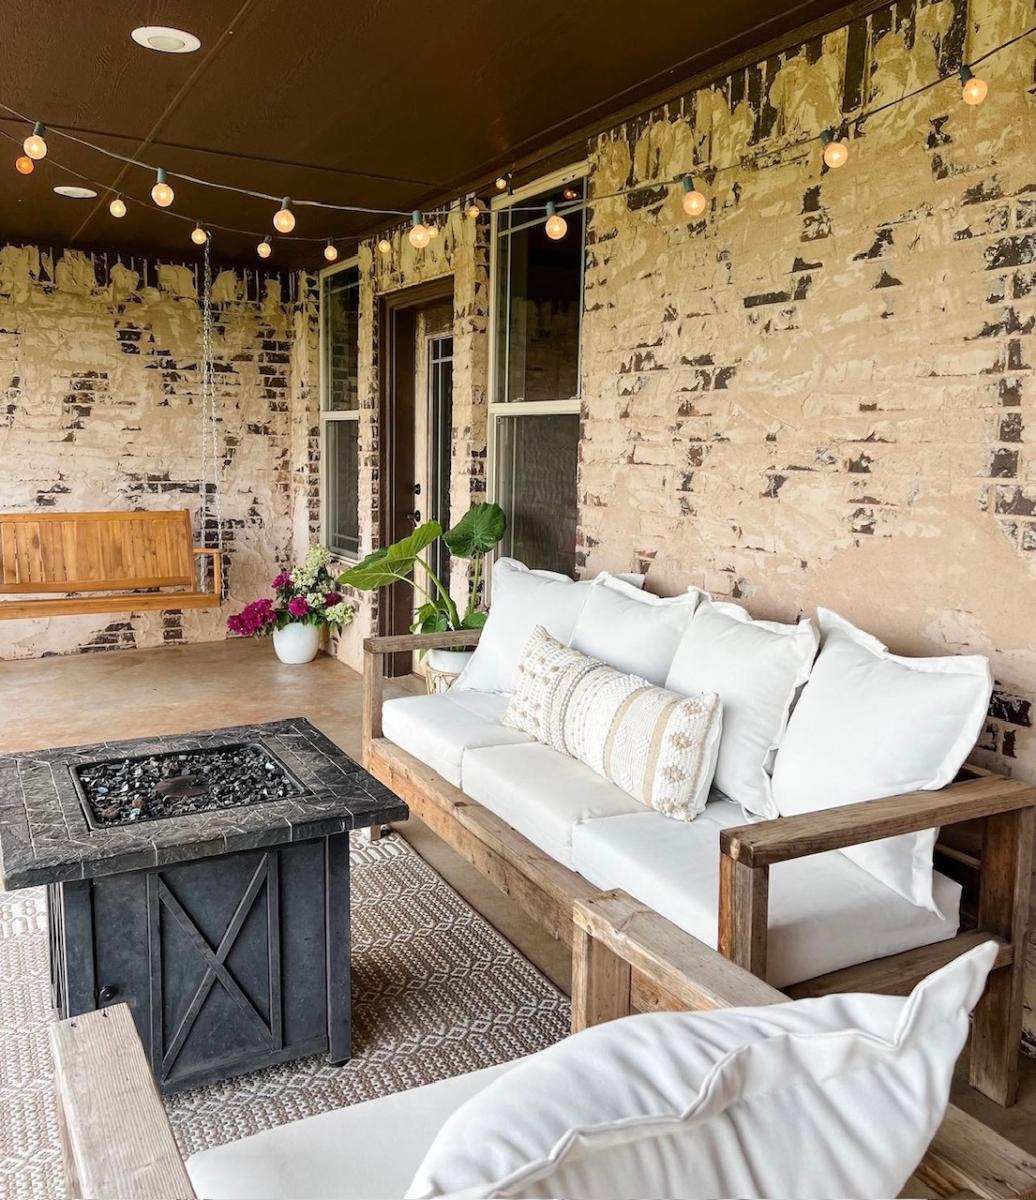
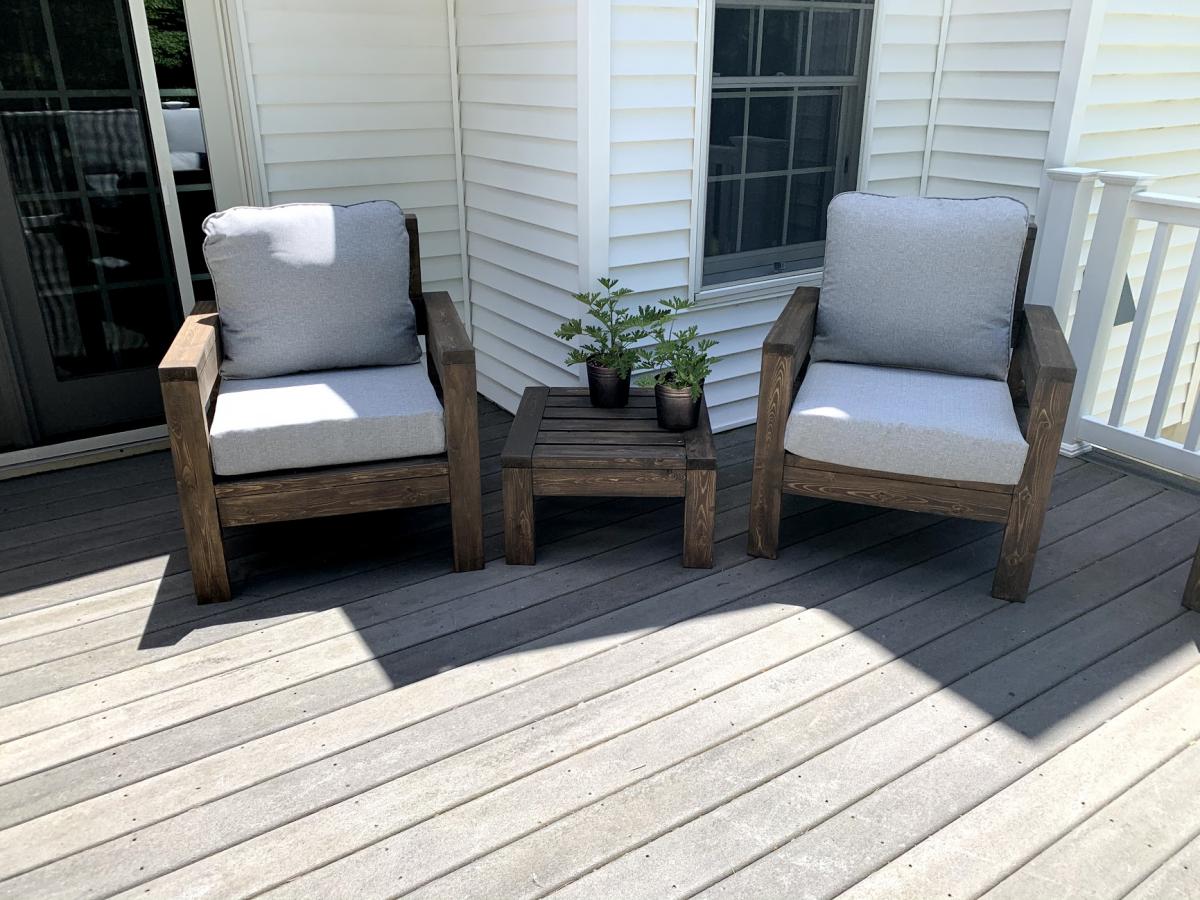
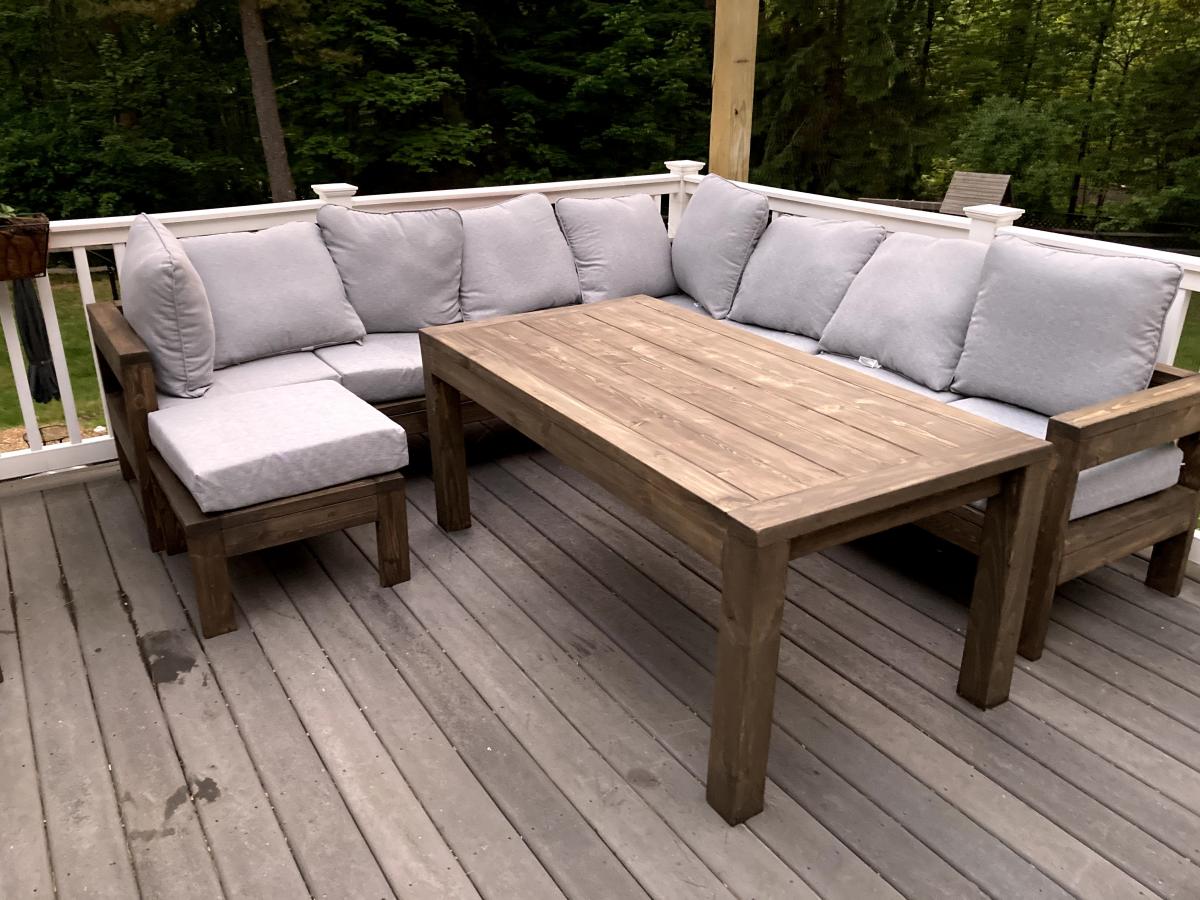
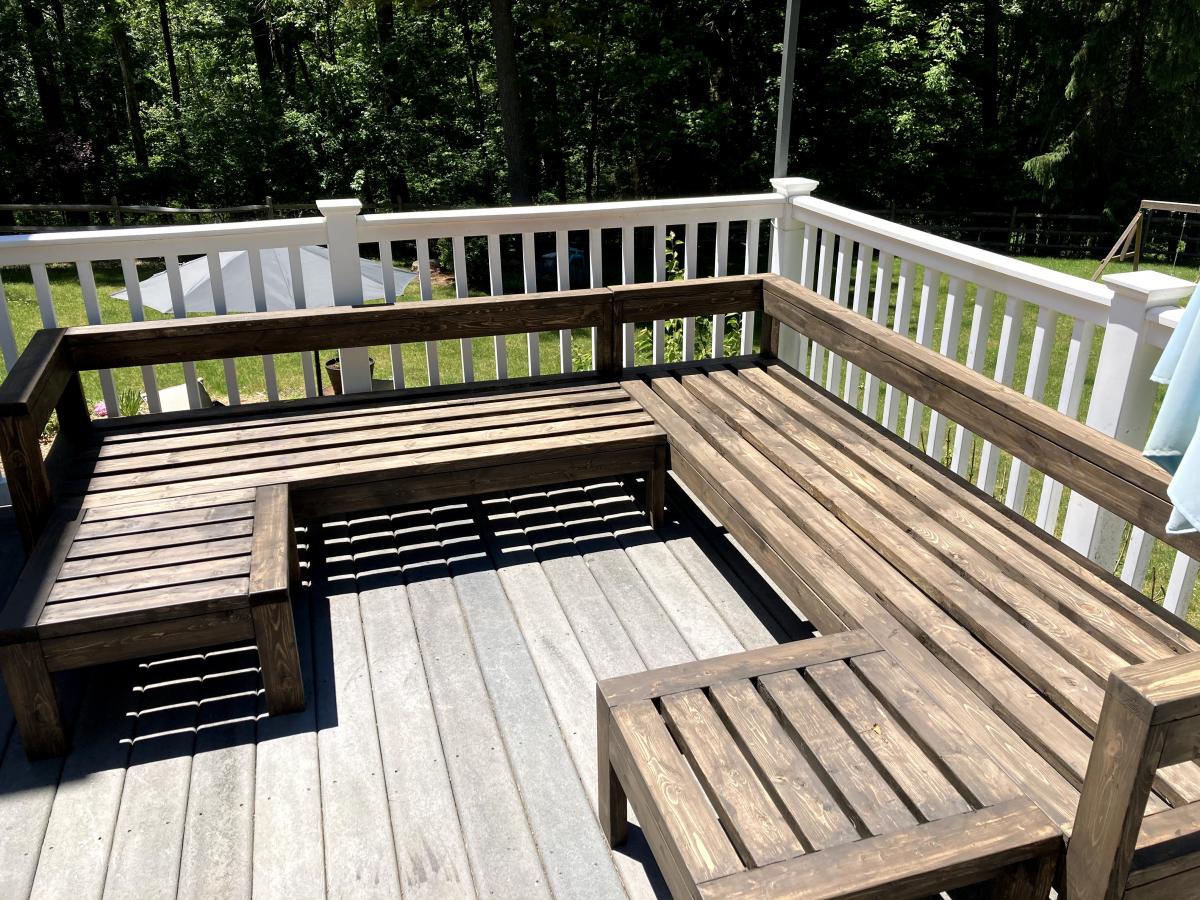
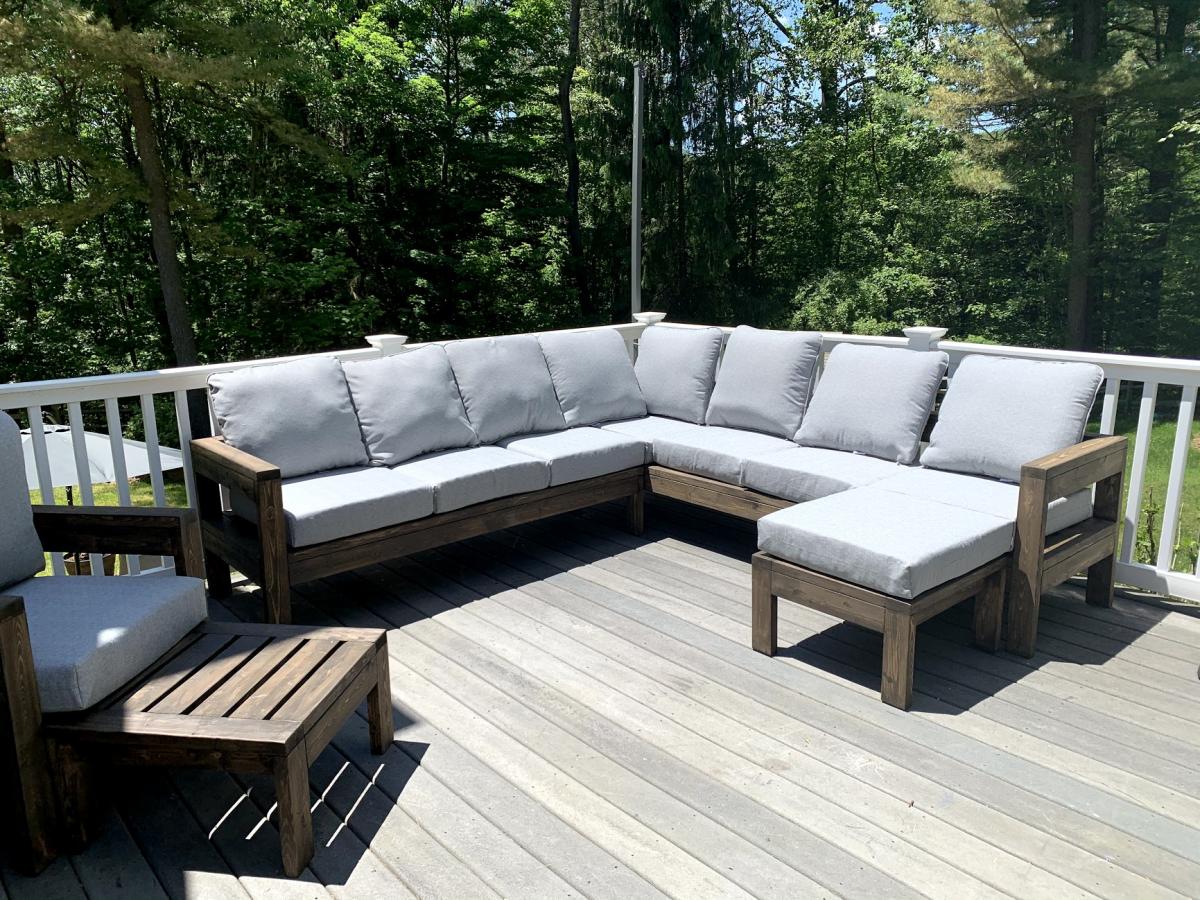
We were looking for outdoor furniture for our deck, and for the size and amount we needed it would have cost us at least $2000. We really like the idea of having an outdoor sectional that we can also use for dining, and we had trouble finding a set we liked. We found Ana's plans for the 2x4 Outdoor Sectional, and i loved the look. After seeing what others have done with the plans, I thought I would be able to modify it to get everything we needed for much less cost than buying a set.
We ended up extending the size of the 2x4 outdoor sofa by one 24" section, for a total length of 96". I then used the same design to make two outdoor chairs, just reduced the length to 24". I modified the 2x4 outdoor coffee table plans to create two ottoman's that can be moved around to make the seating more lounge style Finally, I modified the coffee table plans to make a 5 foot outdoor dining table. All in all, it took about a week and I couldn't be happier with how it turned out!

Mon, 08/02/2021 - 09:44
Looks amazing! What method did you use (pocket holes, dowels, deck screws, etc) to join the visible portions like the arms?
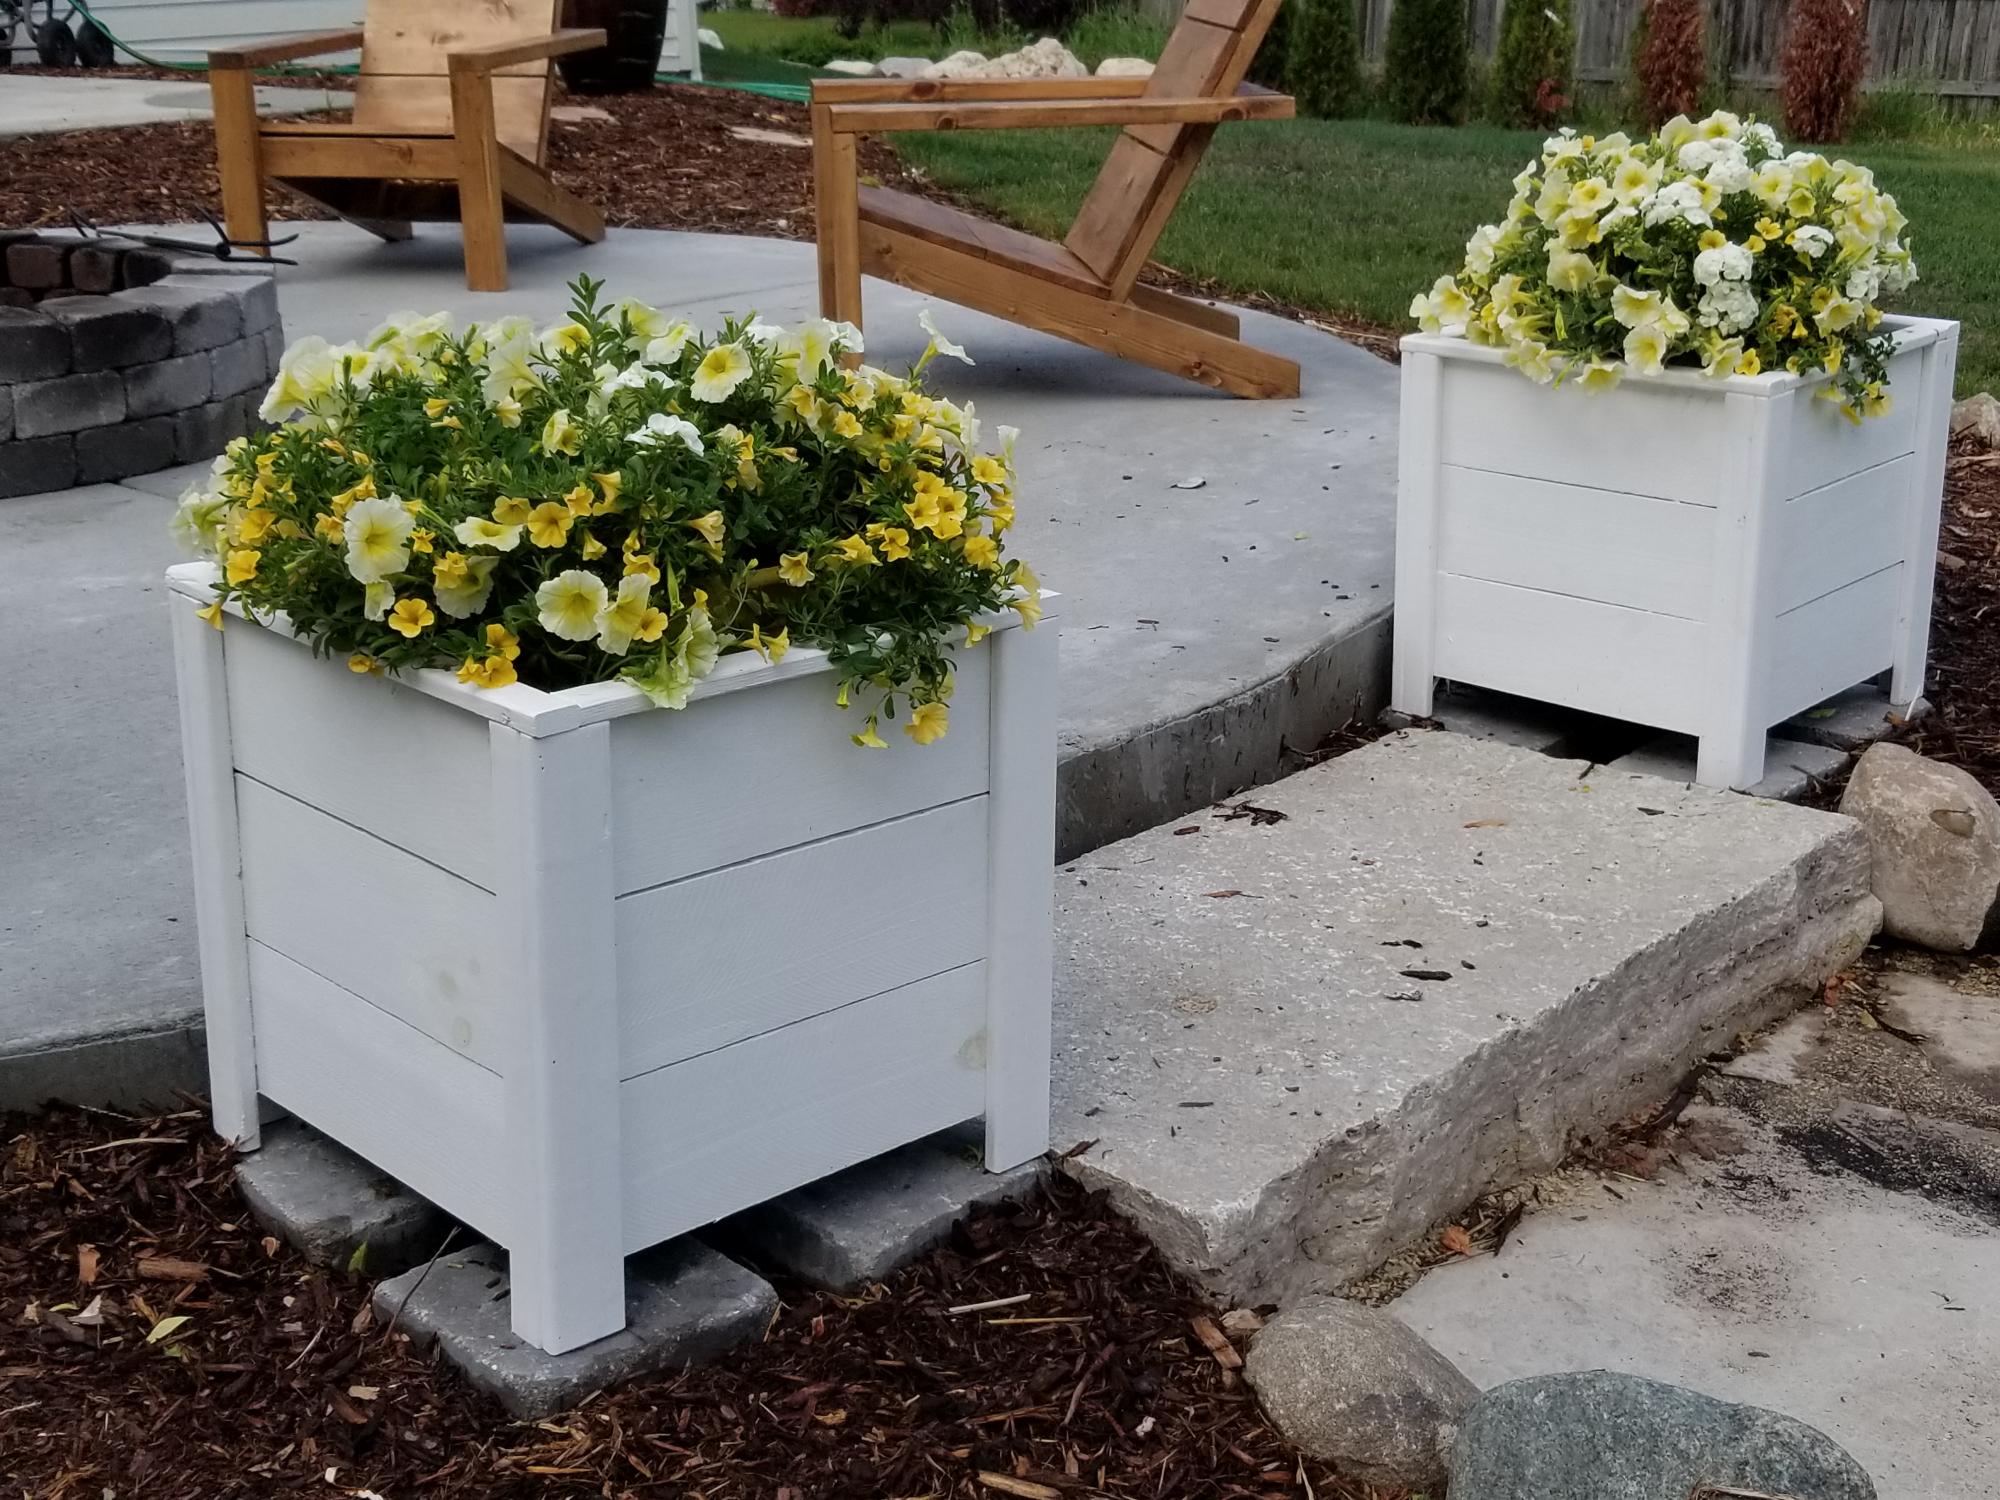
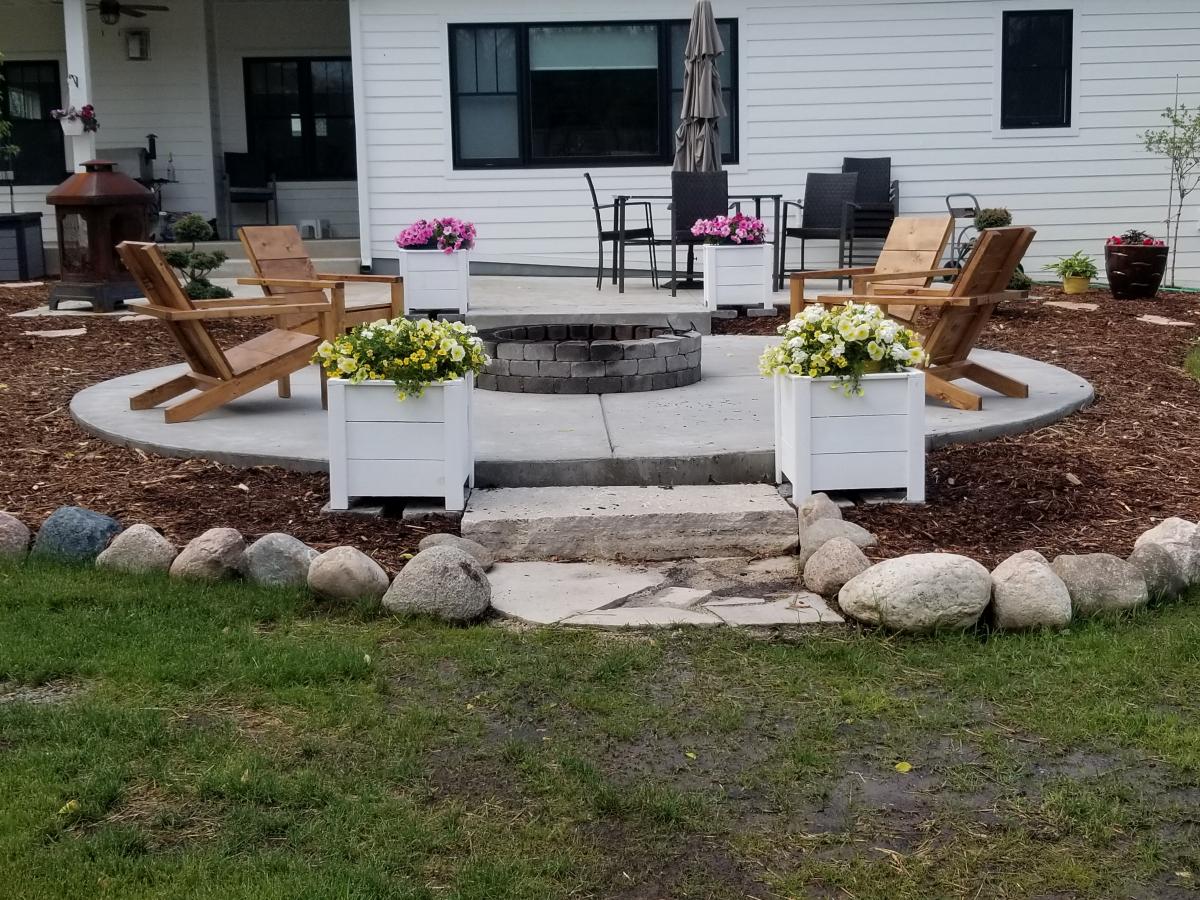
I followed the plan exactly including the suggestion of the fence paint (2 coats). This was a very easy build. It took much longer to paint than it did to build. These boxes are the perfect accent on our new patio/firepit.
Ana your plans are amazing- here’s how mine turned out, I love it
Arlene
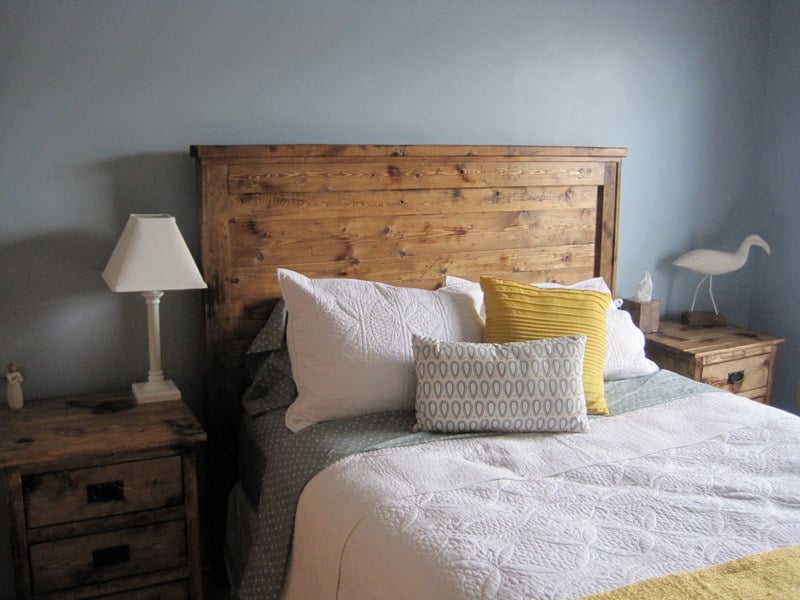
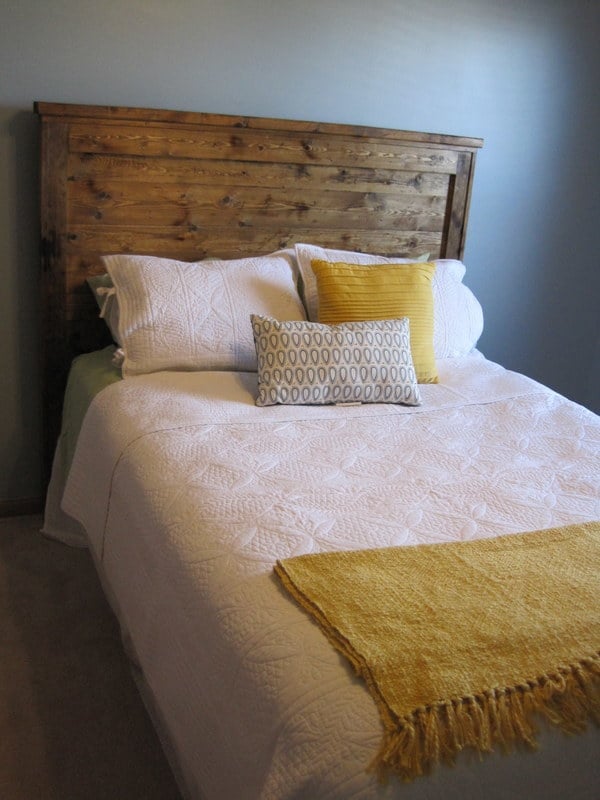
My husband and I had been looking for a great headboard for a bed in our guest room. We found ones we really liked but didn't like the price tag of 800-1500 dollars (not even including shipping!) We stumbled on this site and absolutely fell in love with the reclaimed wood style headboard. It was exactly what we were looking for. Building it just took a few hours. After we distressed the wood using a chain I found at the hardware store (only $1.60), a drill, a creme brulee torch and a hammer, we prepped the wood (sanded and primed), stained and clear coated. I highly suggest not only vacuuming off the wood but also using a tack cloth (so cheap but it makes such a difference) to make sure all of the dust was off. We bolted the headboard into the bed frame. It will be heavy but it is really sturdy and looks great! A good tip is to decide early what you want the front to be - you can chose the best sides of the wood that way!
Thu, 10/03/2024 - 02:38
Hello! Thank you very much for your useful information. I also have a website about home decoration, specifically curtains. If you are interested in this topic, you can visit our website for reference
https://www.dinhthanhphat.vn/man-cua-binh-duong-dep-mau-moi-nhat-2024/
thank you