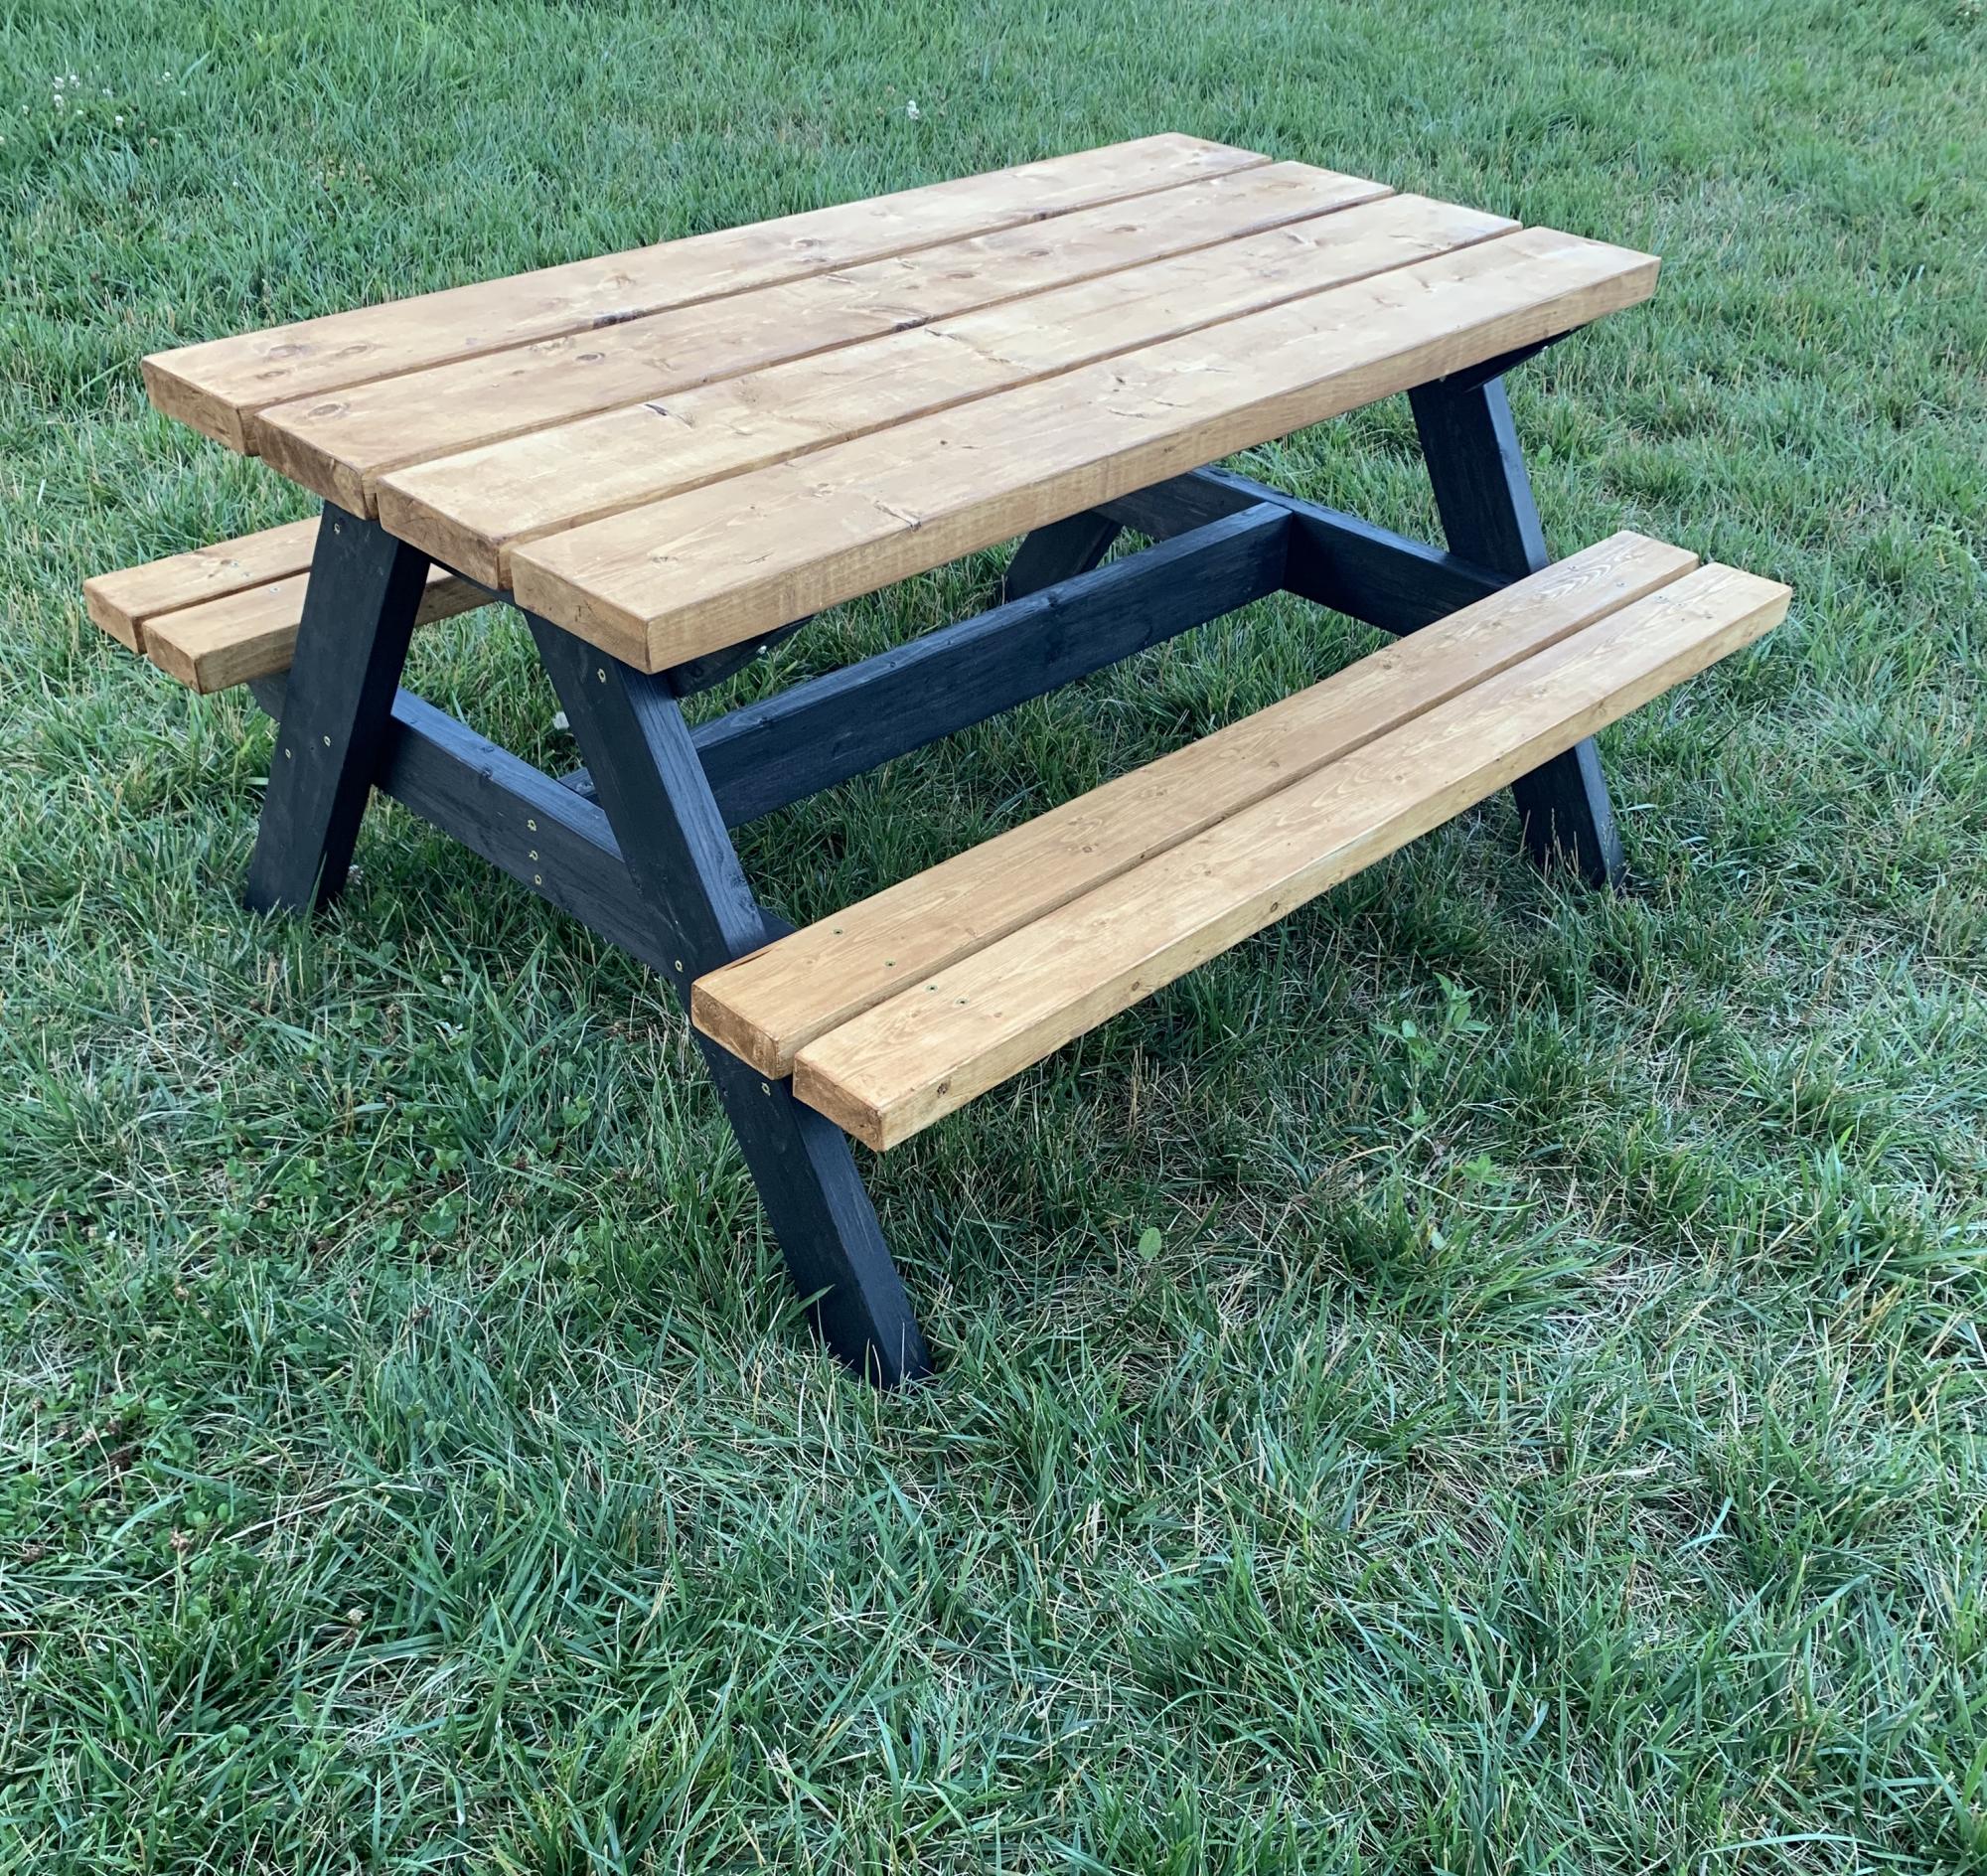
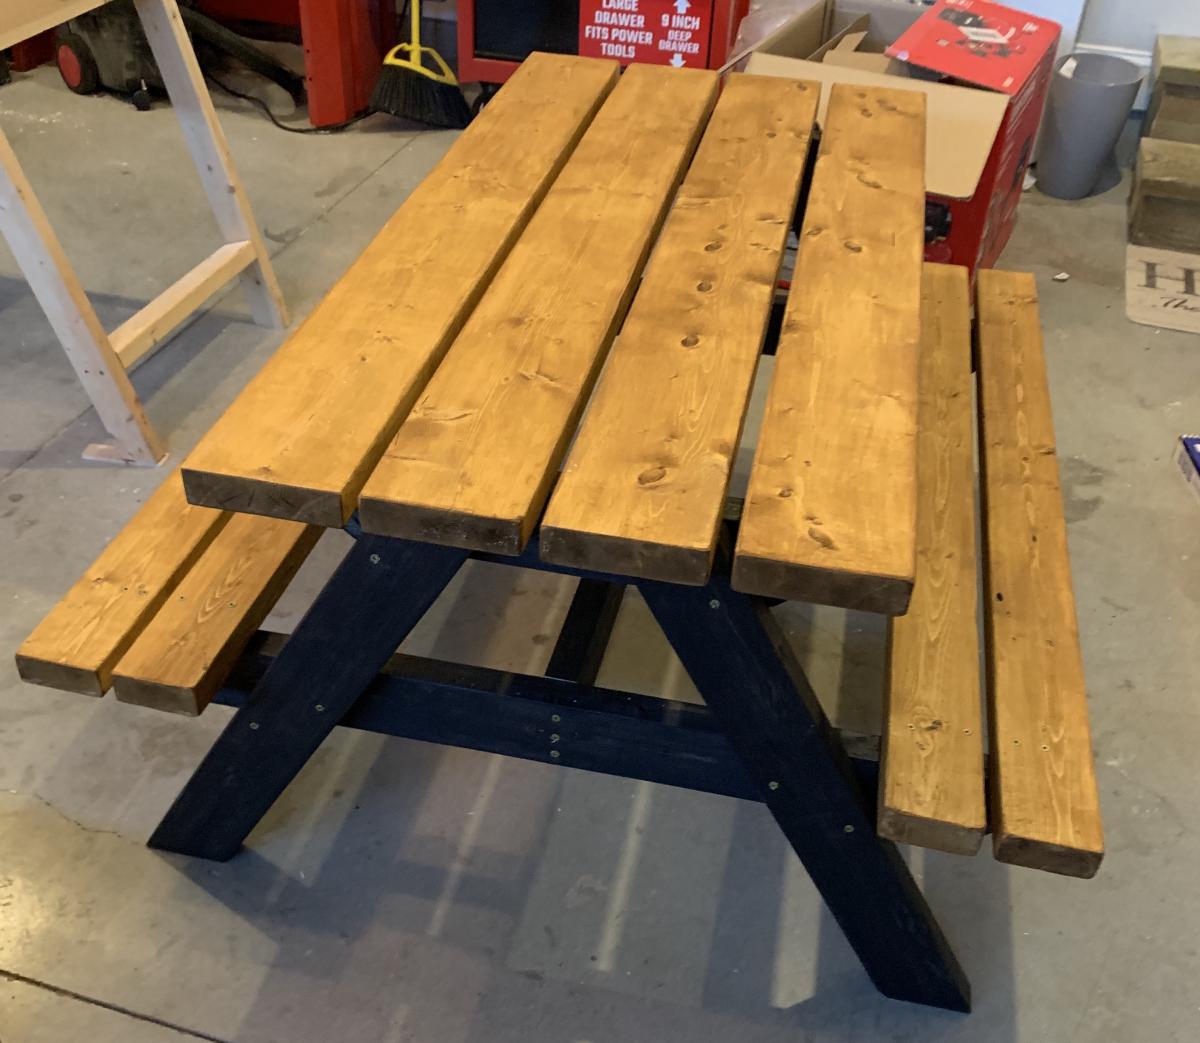
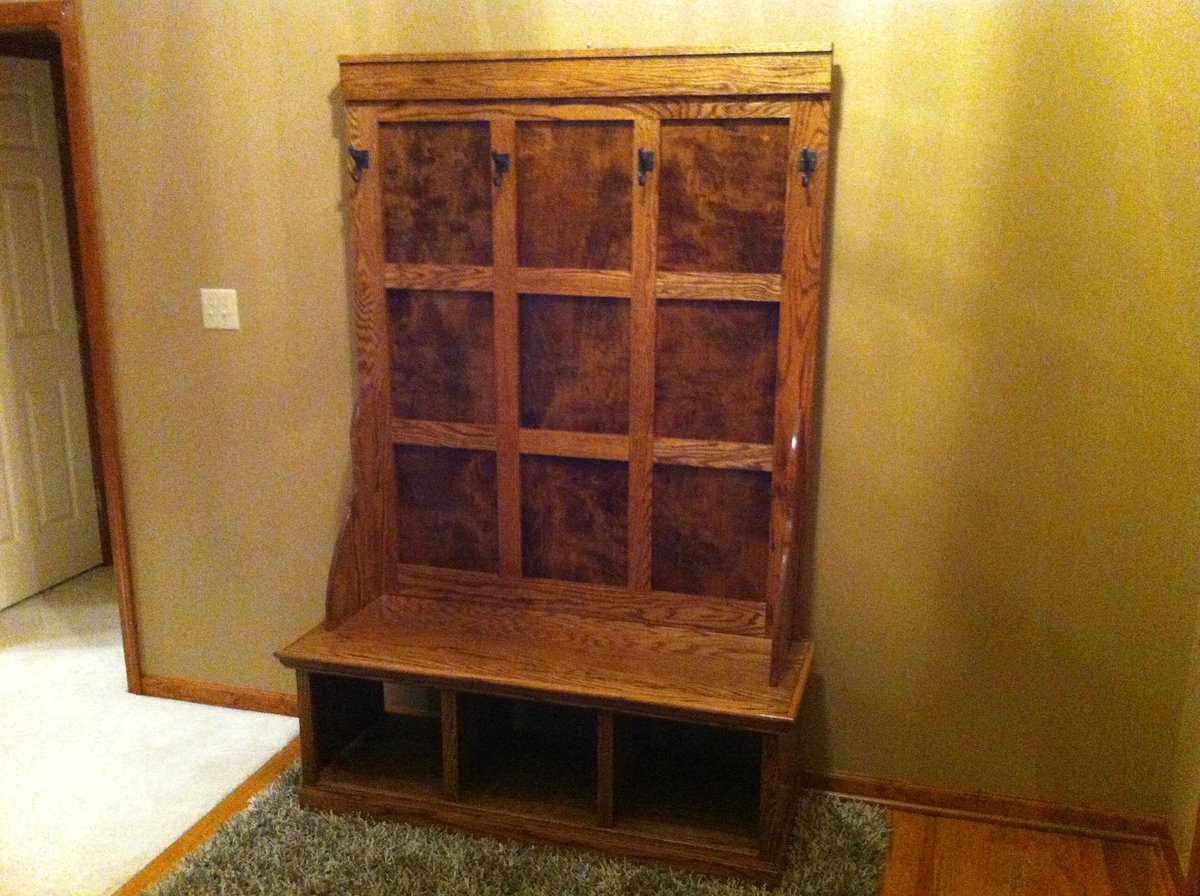
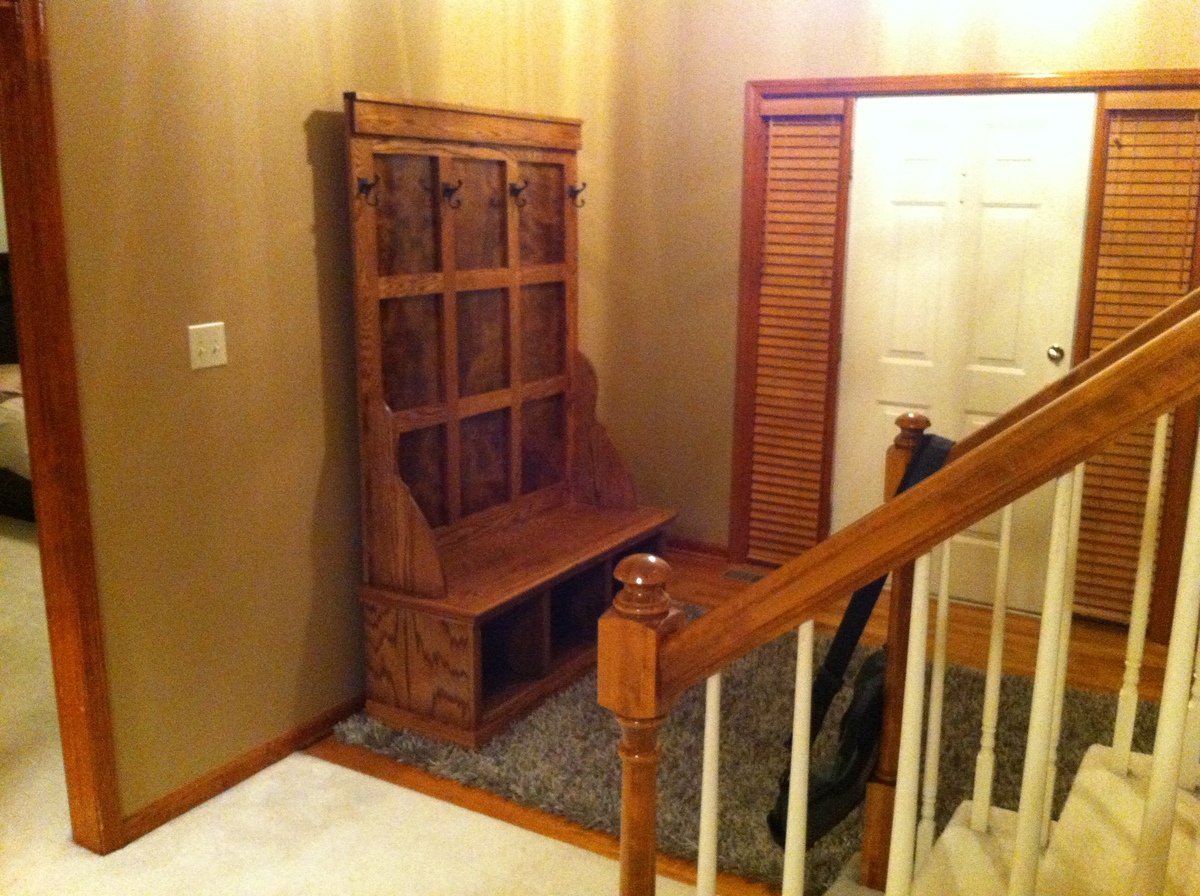
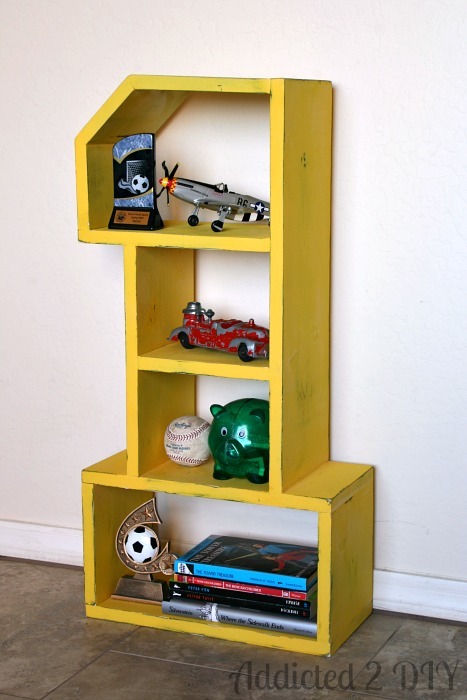
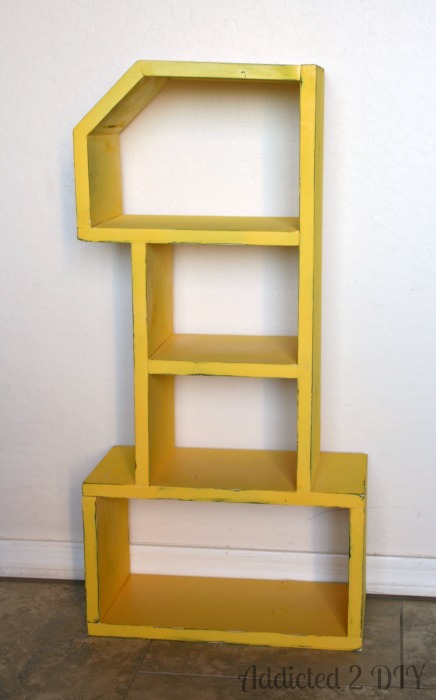
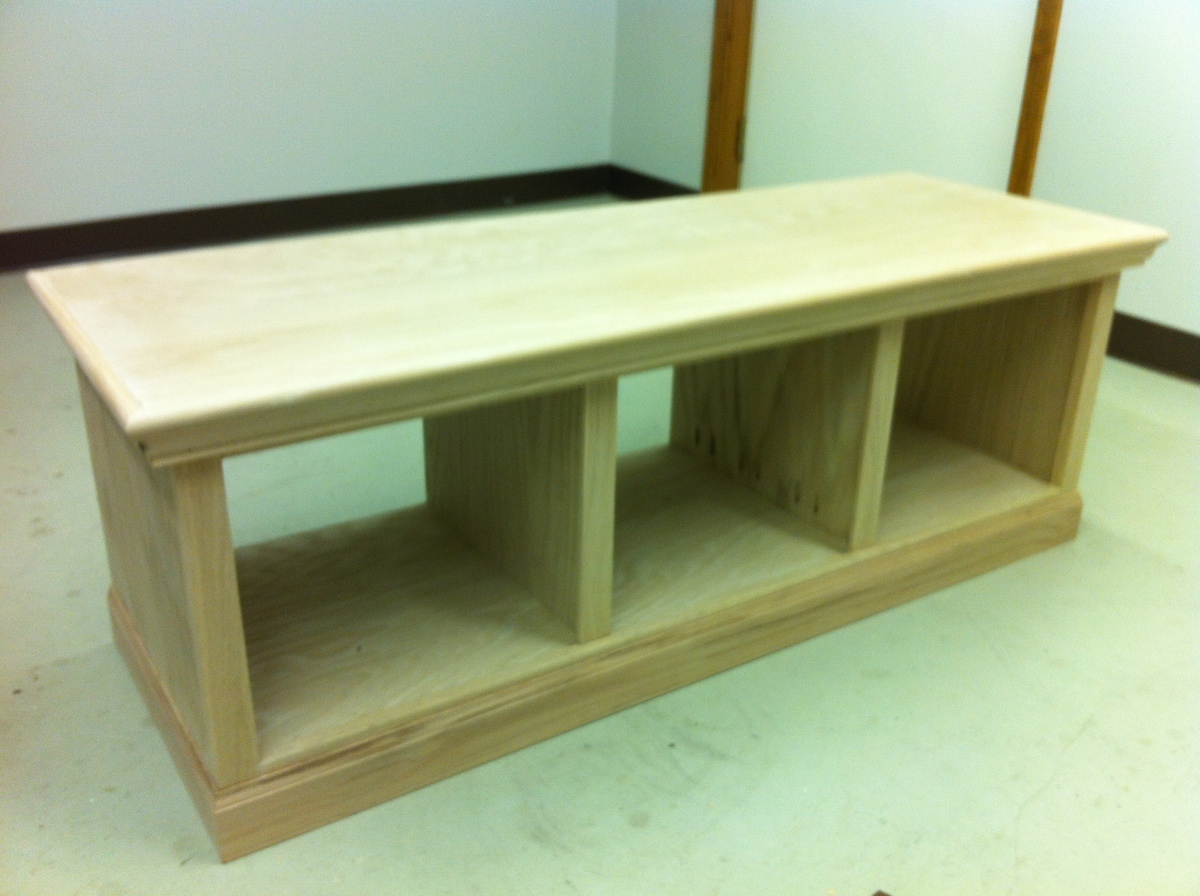
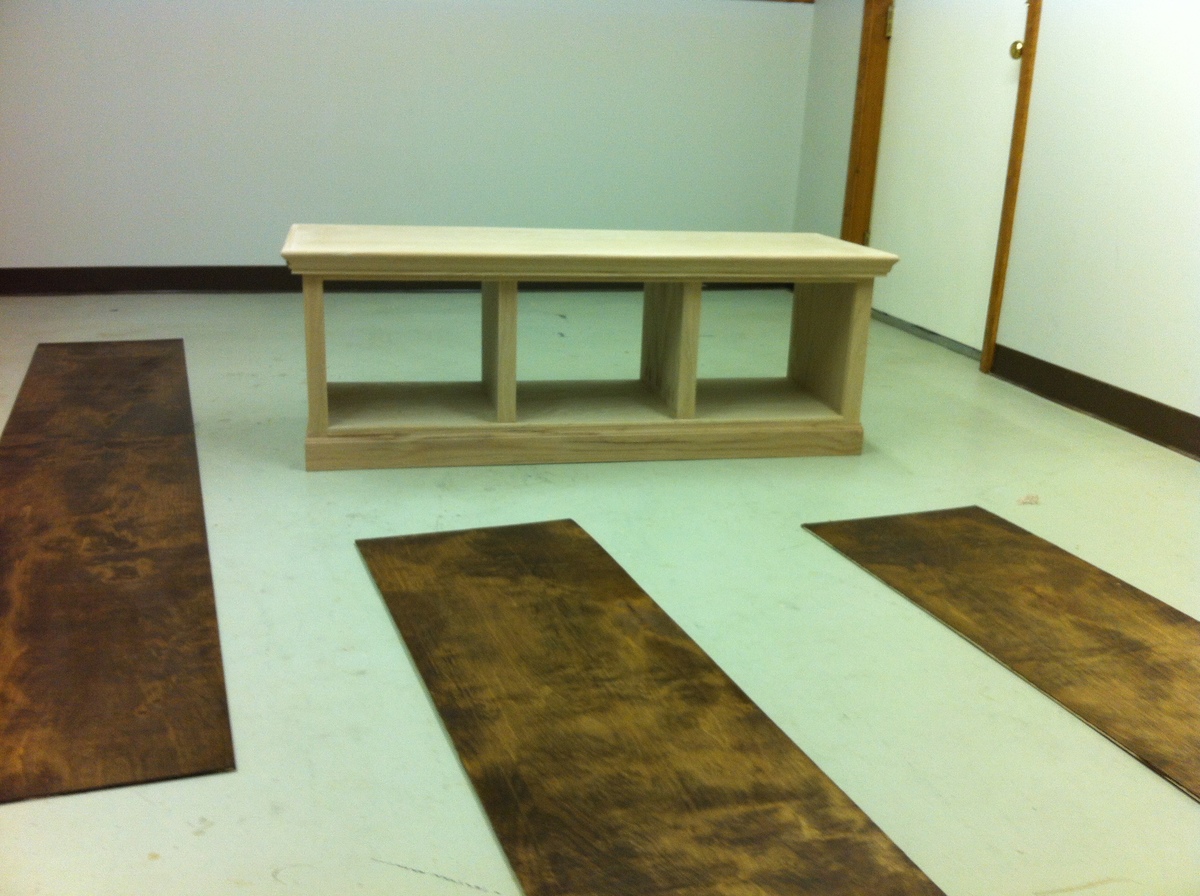
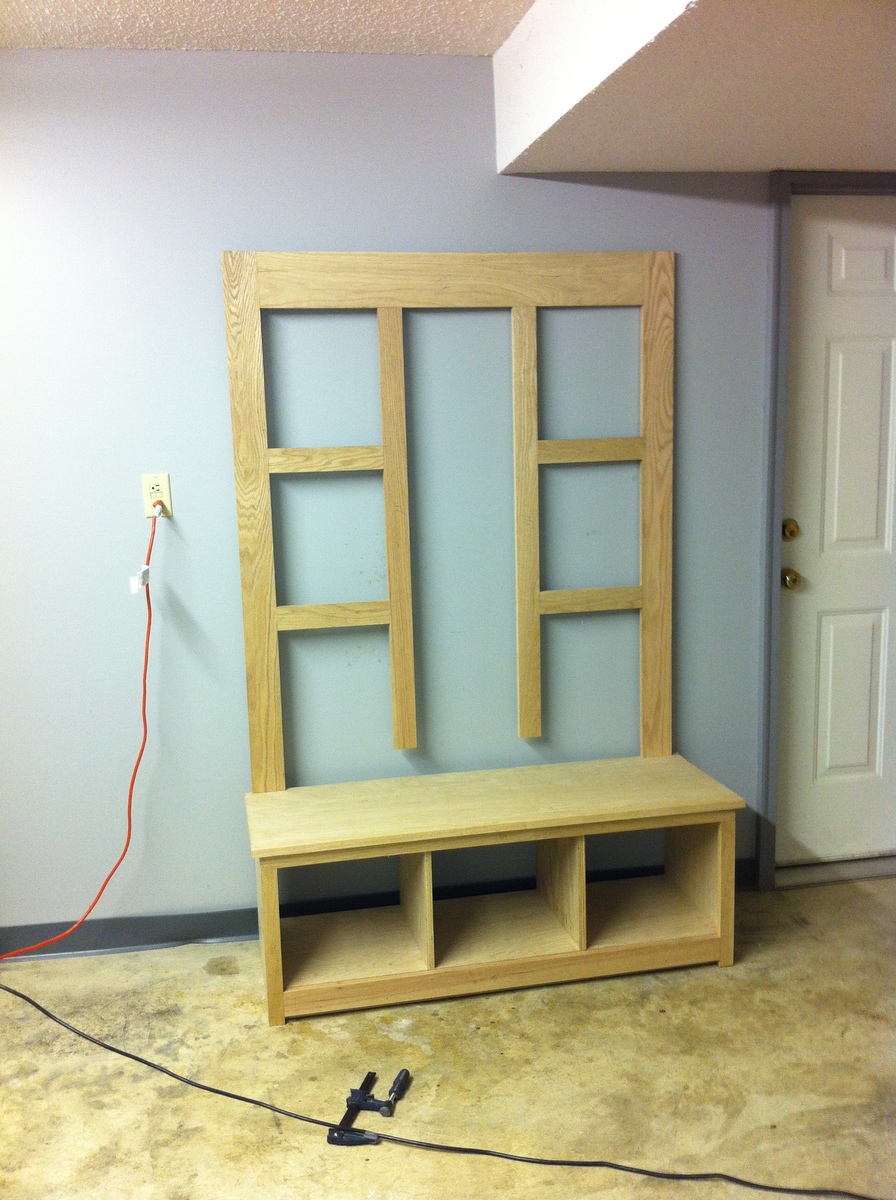
Community Brag Posts
farm table
![](/sites/default/files/3154820242_1358013860.jpeg)
it was a great project i made a few mistakes here an there but i really like the table. and i love the lag bolts makes the table a little more interesting to me.
![](/sites/default/files/3154820242_1358013860.jpg)
![](/sites/default/files/3154820243_1358013860.jpg)
![](/sites/default/files/3154820244_1358013860.jpg)
![](/sites/default/files/3154820245_1358013860.jpg)
![](/sites/default/files/3154820246_1358013860.jpg)
Maple and Walnut Farmhouse Table
![](/sites/default/files/image_309.jpg)
We built this table from Ana's plans using only a circular saw. Yea Ana's plans!
Comments
Workbench
![](/sites/default/files/workbench4.jpeg)
Great beginner project. I needed minimal help from my husband. Everyone in the family now wants a bench like mine. Thanks a bunch for the easy to follow plans. Love your website!
Planked Sideboards
![](/sites/default/files/office%20sideboards%20installed.jpg)
I used the Planked Wood Sideboard plans, but I only did the sides. I mirrored the top of the desk using a project panel.
![](/sites/default/files/office%20sideboards%20finished.jpg)
![](/sites/default/files/office%20sideboards%20unfinished.jpg)
Stain - Weathered Teak Sherman Williams
Poly - Varathane Clear Gloss
Comments
Farmhouse Bed - Modification
![](/sites/default/files/3154820482_1358359279.jpg)
I followed the bed design posted for the Farmhouse Storage Bed, with some modifications to the base support. I have a queen waterbed and needed to reinforce the structure substantially. So I added more center support by building a simple 2X4 Header frame down the middle with 4 legs and beefing up the rails along the drawer boxes. I also included additional slat supports. I also placed the drawer boxes directly on the floor so that I would not have to buildup any additional legs. For the headboard and footboard, I did not have any beadboard so I ripped some 1/4" Birch-Ply into 6 1/4" strips, beveled the edges and nailed them with brads onto the 3/4" ply. I placed 1/16" spacers to create gaps between each and then just painted it. This gave me the look I wanted. It was a little more work, but well worth it in the end. I live in Manhattan so I actually had to construct this in my living room. Luckily I was undergoing a renovation at the time so the additional mess and dust was not too much of an obstruction. But now I'm hooked and want to build a lot more.
![](/sites/default/files/3154820452_1358359279.png)
![](/sites/default/files/3154820453_1358359279.png)
![](/sites/default/files/3154820450_1358359279.jpg)
![](/sites/default/files/3154820451_1358359279.jpg)
![](/sites/default/files/3154820448_1358359279.jpg)
Comments
Thu, 02/14/2013 - 13:21
Looks great!
We just came upon the site and have been marveling at the people who "tweak" things a little. Great job!
How to get kids interested in woodwork...
![](/sites/default/files/Snowman%201%20FB_0.jpg)
This isn't really woodwork but was something made to get my step daughter interested in the art of making things from wood (and other materials)
Made from scraps of wood after an idea we saw on Pinterest. She helped paint them and make the eyes and scarves for them.
It's the smallest project ever done but hopefully will embed the "bug" into her that making things with your hands is fun.
She has another 5 to decorate ready for Christmas.
Maybe she will be the next Ana, you never know!! :-)
Comments
Nesting Grill Station
![](/sites/default/files/20201117_112328e.jpg)
I was tired of seeing my propane bottle on the porch and this project was a perfect blending of camouflaged storage with lots of potential countertop workspace. My grill station is smaller and shorter than the original plans to better fit our family size and the porch space we have available. My husband has a bandsaw mill. When he was milling boards this fall, I asked for some 1/2" thick planks just for this project. I also had the knobs and wheels leftover from past salvaging work. I have been trying my best to use up "stock on hand" during this pandemic. Though I spent some time sanding the rough cut lumber, it still absorbed lots of stain. I wanted two tones of color, so that's good, but I still had to mix two stains together to have enough for the lighter parts.
Now we are looking forward to some cold weather BBQ meals!
![](/sites/default/files/20201117_112412e.jpg)
![](/sites/default/files/20201117_112107e.jpg)
Comments
Sun, 11/22/2020 - 13:05
Looks like a great solution!
Fire up the barbie! Thanks for sharing, it looks perfect:)
Pottery Barn Benchwright Coffee Table Build
Wanting to finally get rid of our hideous fake wood coffee table, I found these plans to make the Pottery Barn Benchwright Coffee Table. I am so pleased with the result! It's really heavy and sturdy. Took about 4 days total, and around $100. First time making drawers. Overall the plan was very doable. Looking forward to making a pub table and chairs, and built in bookshelves next!
![](/sites/default/files/3154820684_1358798977.jpg)
![](/sites/default/files/3154820685_1358798977.jpg)
![](/sites/default/files/3154820686_1358798977.jpg)
![](/sites/default/files/3154820687_1358798977.jpg)
![](/sites/default/files/3154820688_1358798977.jpg)
Rustic x table
![](/sites/default/files/nail.jpg)
Love my entry way table, plans details really easy to follow! Thanks you so much for this helpful website.
![](/sites/default/files/20170219_190030.jpg)
Farmhouse Coffee Table
![](/sites/default/files/Farmhouse%20Coffee%20Table.jpg)
I made the farmhouse coffee table using 4/4 300 year old pine that was on a local home for 150 years. The frame, I used recycled pallet boards. Very simple to build, everyone love this table.
Comments
Wine Rack
![](/sites/default/files/3154820783_1358914191.jpg)
This is my first attempt at making a wine rack. It holds 18 bottles and 9-12 glasses. I made it from 1/2" red oak plywood and 1x3s. I used a drill press with a 3" hole bit and 1 1/2 bit for the neck supports. The one pic shows how I kreg jig the supports to a scrap piece of plywood so I could stain all sides of the pieces at once! Plus it allowed for a quicker drying time. I kreg jig all the supports from the back side with 1" PH screws and glue. I used my router and a straight edge to dado the top and bottom shelves to the side walls. This rack measures 5'Hx 15 1/4"w x 17" deep. The wine bottles do not stick out past the front at all. I stained it in a dark walnut to give it a country feel.
![](/sites/default/files/3154820784_1358914191.jpg)
![](/sites/default/files/3154820786_1358914191.jpg)
![](/sites/default/files/3154820787_1358914191.jpg)
Restoration Hardware Dining Table
![](/sites/default/files/20141118_210641_0.jpg)
Restoration Hardware Inspired Dining Table. Got these plans from Shanty 2 Chic.
![](/sites/default/files/20141118_210655.jpg)
![](/sites/default/files/20141118_210738.jpg)
![](/sites/default/files/20141118_211241.jpg)
![](/sites/default/files/20141116_214925.jpg)
Comments
Tue, 11/18/2014 - 21:26
Wow! Now this look super
Wow! Now this look super sweet! I love the colors that you chose!
Tue, 11/18/2014 - 21:26
Wow! Now this look super
Wow! Now this look super sweet! I love the colors that you chose!
13 ft Community Farm Table with extended Trestle base
![](/sites/default/files/FullSizeRender-3_1.jpg)
Began with supplied DIY plans from the www.ana-white.com and slightly modified them based on the length and width of the table. Table now resides in Haddon Twp, NJ as a community farm table for a small local business. The plans provide the foundation and cut list and depending on your experience, comfort level, and tools it is fairly simply to elaborate, expand, and modify.
Farmhouse Console Table
![](/sites/default/files/DB83A39A-B45E-4240-BF6C-BB968D1EF39A.jpeg)
I built this console table modeled from other diy plans on the Ana White website. The construction took 1 afternoon, but the project start to finish was 3 days to allow time for finishing. The overall dimensions are 49”W x 16 1/2” D x 30” H.
![](/sites/default/files/95A48123-8BCB-4061-B062-CA4F086A3360.jpeg)
Verathane Brairsmoke Stain
Mini wax Satin Polyurethane
Behr Farmhouse White Chalk Paint
Behr Clear Finishing Wax
Comments
Mon, 12/07/2020 - 09:47
Very pretty!
Yes the finishing seems to always take the longest! It looks fabulous, thanks for sharing:)
Farmhouse Table
I was so inspired by this site, I just had to try something out for my self! Being a beginner it was a little difficult trying to get the notches perfect without the correct tools! A table saw is neccessary but me and the fiance kept at it! After all assembled we banged up the table with some heavy duty chains, Gave it two coats of Minwax Dark Walnut, and finished with 2 coats of Minwax Poly Satin finish. We left out center support so we could get it in the house and installed once it was in, this is one heavy sturdy piece of furniture!
![](/sites/default/files/3154820874_1359042627.jpg)
![](/sites/default/files/3154820873_1359042627.jpg)
Minwax Satin Poly
Octagon Table
![](/sites/default/files/image_348.jpg)
Octagon table with metal chairs
![](/sites/default/files/image_349.jpg)
![](/sites/default/files/image_350.jpg)
![](/sites/default/files/image_358.jpg)
Comments
Fri, 11/21/2014 - 09:22
Wow that looks amazing! It
Wow that looks amazing! It looks great with your wall color and the floors! The rug is also a reall nice touch!
First Build EVER!
![](/sites/default/files/0F132F4D-3FA5-4B31-A05E-2451C9175B47.jpeg)
This was a great “gateway” build! This is easy to do and gave me the space to dig deeper into my newfound woodworking hobby! It’s not perfect but I love it!
"X" Coffee Table - Walnut
![](/sites/default/files/3154821020_1359223804.jpg)
My daughter and I chose this design for a table for her new apartment. I happened to have some walnut lumber available, so we decided to use that, and it turned out a little less rustic than some of the tables, but it is exactly what she wanted. It was a great project to do with her and we both had a good time, plus she has a piece of furniture she is proud of.
![](/sites/default/files/3154821021_1359223804.jpg)
![](/sites/default/files/3154821022_1359223804.jpg)
![](/sites/default/files/3154821025_1359223812.jpg)
Rustic X Coffee Table
Used the Rustic X Coffee Table plans for this project. I altered it slightly to add the bread boards on the end. I also used my jointer to create a more flush joint between boards. When I went to cut the "x"'s out of 2x2's the boards ended up being too short. I'm working on a similar piece for a family member and I am waiting to cut these pieces until I'm almost finished to save stock. I also used a chain, hammer, nails, and metal clamp to beat the table top to "age" the wood a bit.
This project doesn't take long to build. Finishing takes about a week.
- 1 coat of black tea
- used the oxidized solution on certain parts of the boards to create definition.
- Sanded these spots to lighten them up.
- 2 coats of Minwax Red Chestnut stain.
- 2 coats of finishing wax
- 2 coats of polycrylic
Comments
jahnkerk
Mon, 09/14/2020 - 09:42
Two Seat Bench
I love this two seat bench. Are the plans for building such a bench available?
bernieMac
Wed, 10/13/2021 - 13:17
Plans for Two seat outdoor bench
would be interested in the plans