Community Brag Posts

Haley Platform Bed and Headboard

Submitted by nelson6889 on Tue, 05/26/2020 - 07:50

First time building a bed. The plans were spot on and easy to follow. Used my left over flooring to make the headboard planks.

Estimated Cost
200
Estimated Time Investment
Weekend Project (10-20 Hours)
Finish Used
Painted with semi gloss White
Recommended Skill Level
Intermediate

Channing Desk

Awesome desk made from the Channing Desk plans on Ana-White.com! I had such a great time building this desk with my girlfriend. It was our first of many builds together.

thanks again ana-white.com

Estimated Cost
$110-$125
Estimated Time Investment
Weekend Project (10-20 Hours)
Finish Used
Minwax Jacobean (2 Coats) with Minwax High Gloss Super Polyurethane (2 coats). I sanded the polyurethane with a 180 grit block between coats and let dry overnight.
Recommended Skill Level
Beginner

Potting Bench

Submitted by fifi_momo on Mon, 05/12/2014 - 19:45

I adjusted the depth of the bench to accomodate a bath vanity top with sink (from the Habitat reStore). The width was adjusted to allow for 2 feet of workspace to the left of the sink. The overall height was adjusted to my wife's height. The front legs were made longer than the rear to account for the slope of the yard location.

Built from Plan(s)
Estimated Cost
$200
Estimated Time Investment
Weekend Project (10-20 Hours)
Finish Used
Deck oil
Recommended Skill Level
Beginner

Stained red oak toybox

Submitted by Anonymous (not verified) on Sun, 08/14/2016 - 11:29

Thank you very much for this marvelous plan and idea. I built one for each family of grandchildren and love the finger-saving torsion hinges and front lid relief. I did end up trying biscuit joints (except for where the 1x2 boards join to the legs) as it left the inside of the box looking cleaner, especially if stained instead of painted.

Built from Plan(s)
Estimated Time Investment
Week Long Project (20 Hours or More)
Finish Used
Minwax Polyshades Pecan combination stain/polyurethane after a pre-stain treatment.
Recommended Skill Level
Beginner

Benchright Table and Farmhouse Bench

Great plans and a great build. I used 4x4’s for the legs and decided to go with the Farmhouse Bench instead. The color I went with is Weathered Grey. I applied it with a brush and immediately wipes it off with a clean rag, then 2 coats of poly to finish it off.

Estimated Cost
$200
Estimated Time Investment
Weekend Project (10-20 Hours)
Finish Used
Weathered Grey Oil Based Stain with Semi-gloss Poly
Recommended Skill Level
Intermediate

Comments

Shoe Shrine Cabinet

Submitted by Anonymous (not verified) on Sat, 02/17/2024 - 09:58

I made 2 shoe shrines then decided to add a cabinet between them for long dresses . Was going to put cabinet doors on the shoe shrines but decided it looked good displaying her shoes. I followed the shoe shrine plans from Ana's web site I found the plans easy to follow although once I was finished I realized it would have been much easy to make the outside frames first and then square them rather then build the insides and then put the outsides on last. It's challenging to keep them square when following the plans . The whole project was allot more work then I anticipated I used my sprayer to paint it I filled all the pocket holes and used wood filler to make the cubbies all one seamless look. Then added crown molding to the top. The doors are the faker shaker doors . I have made real shaker doors on other projects I cant tell the difference between the fakers and the real shakers . Happy with how it came out.


Mark DePonzi

Built from Plan(s)

12 foot long cedar Providence Buffet

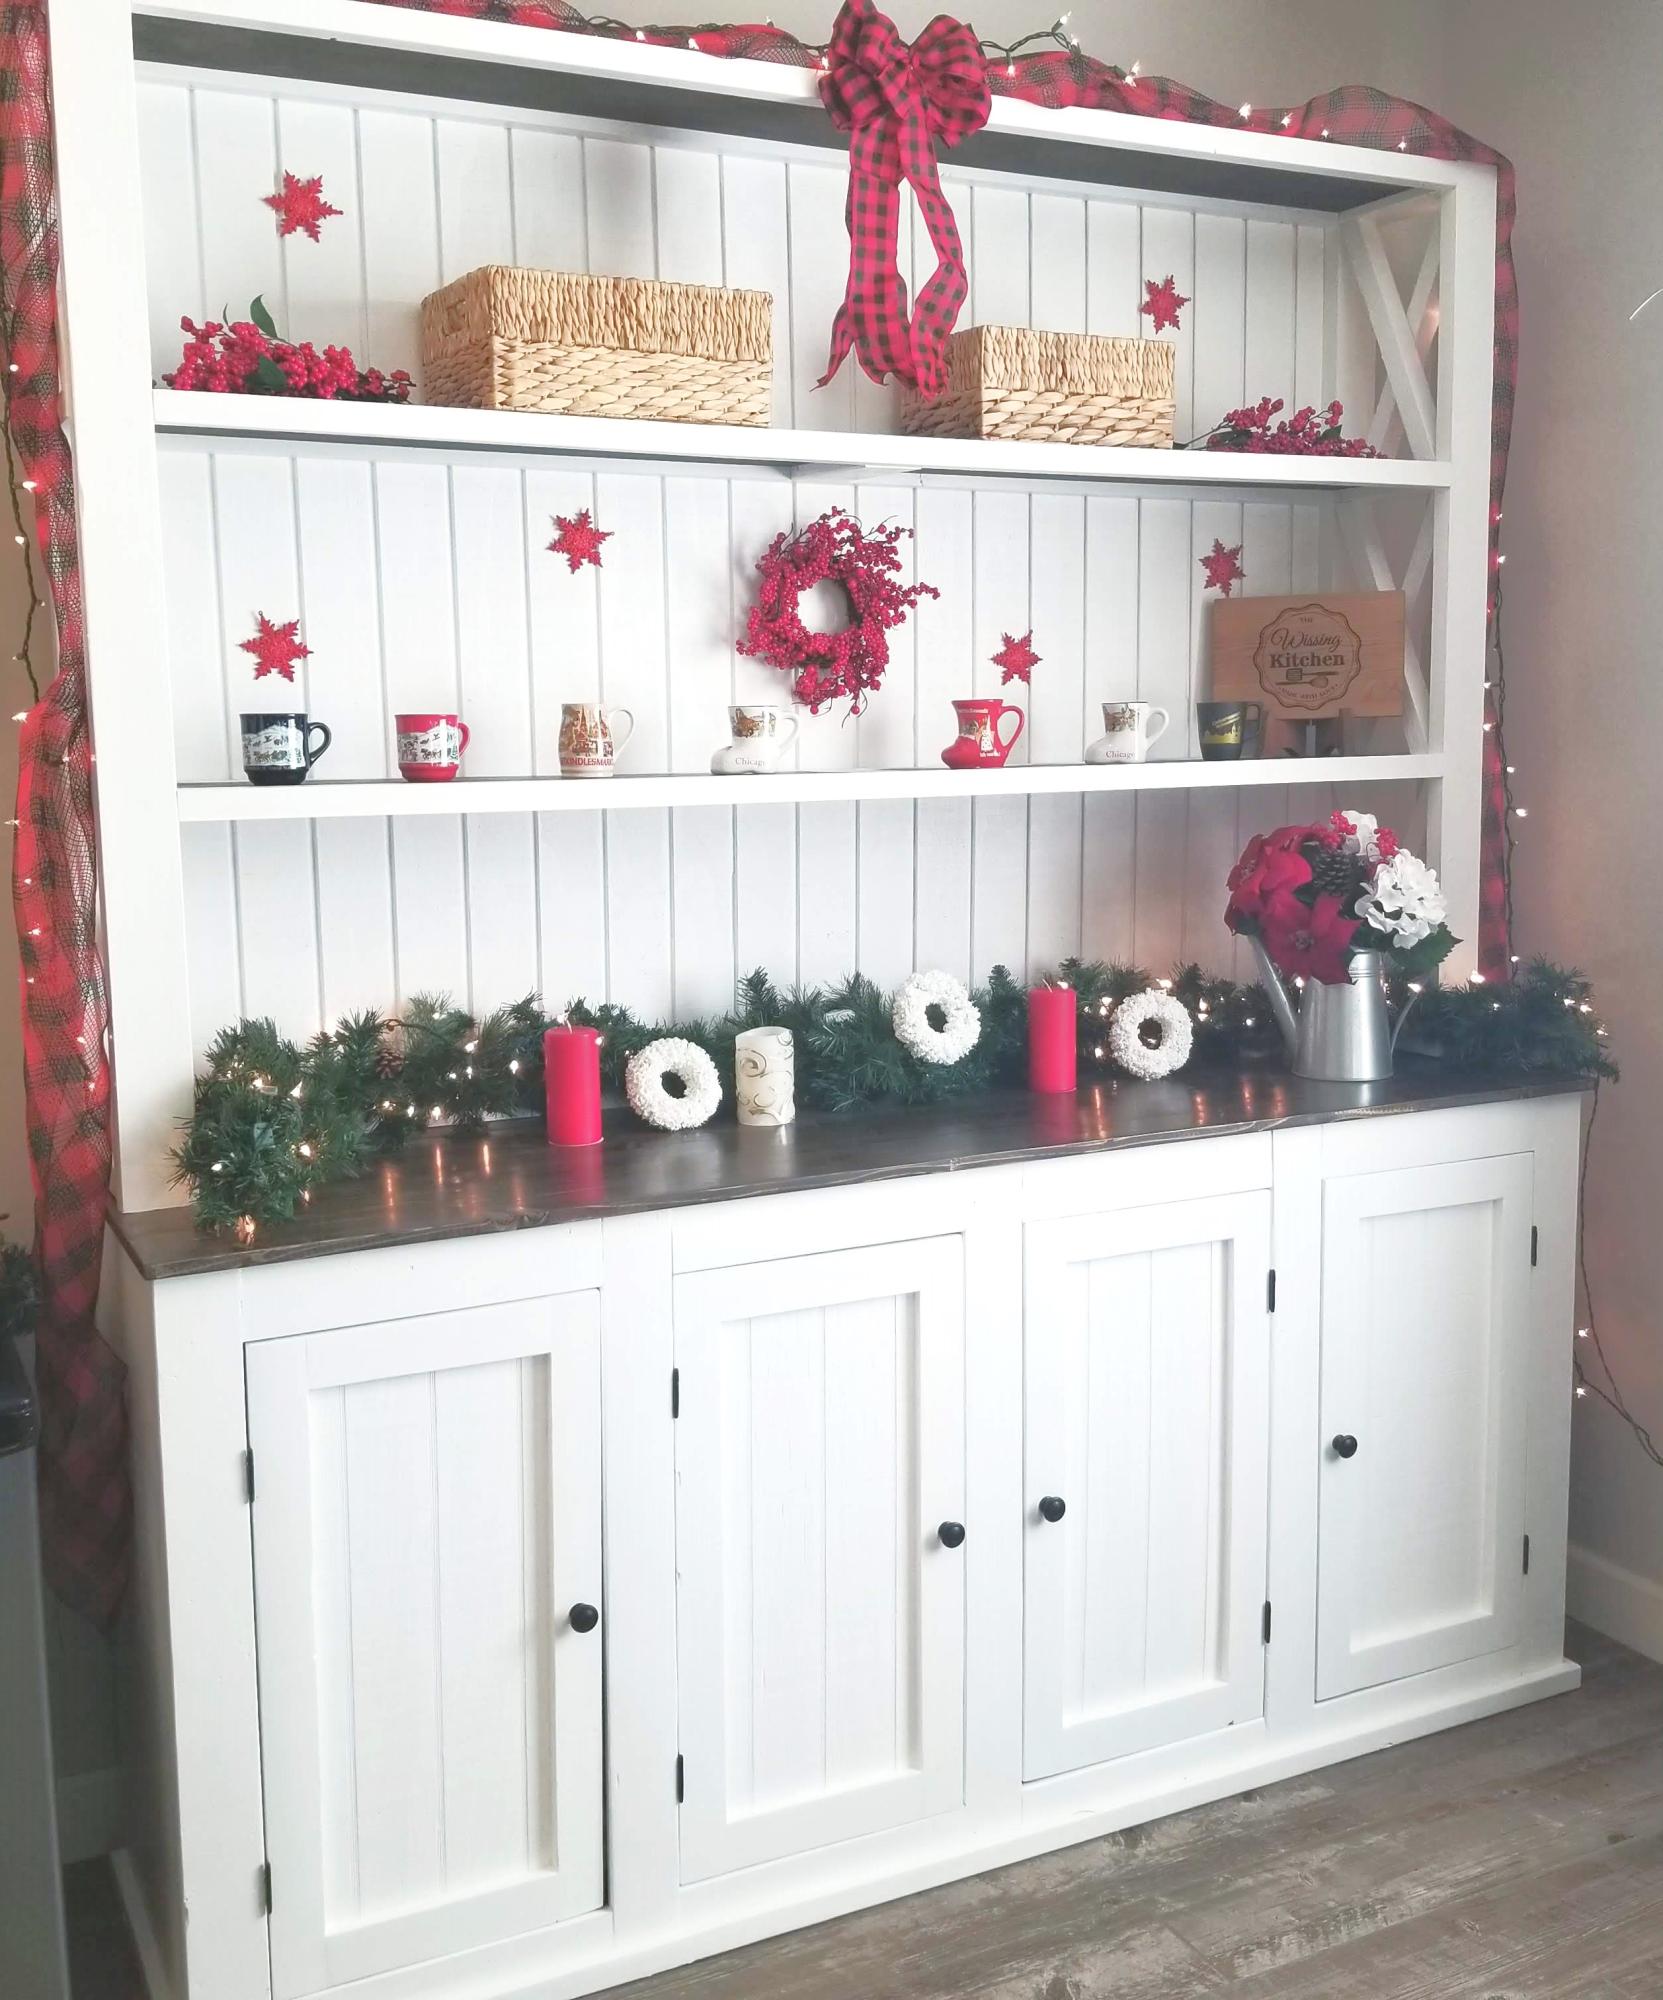
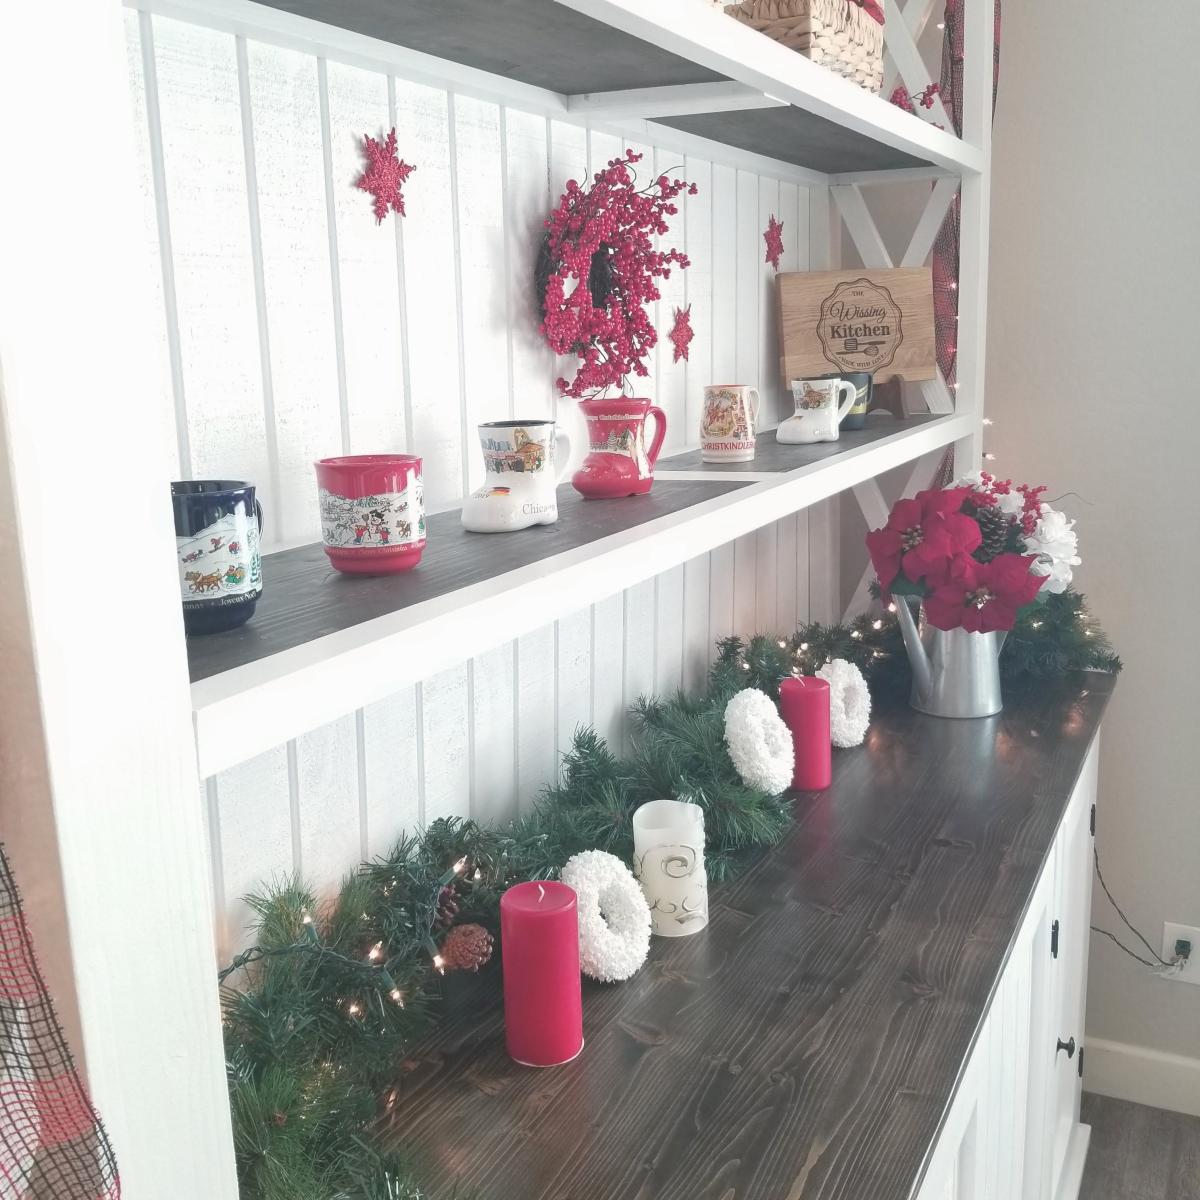
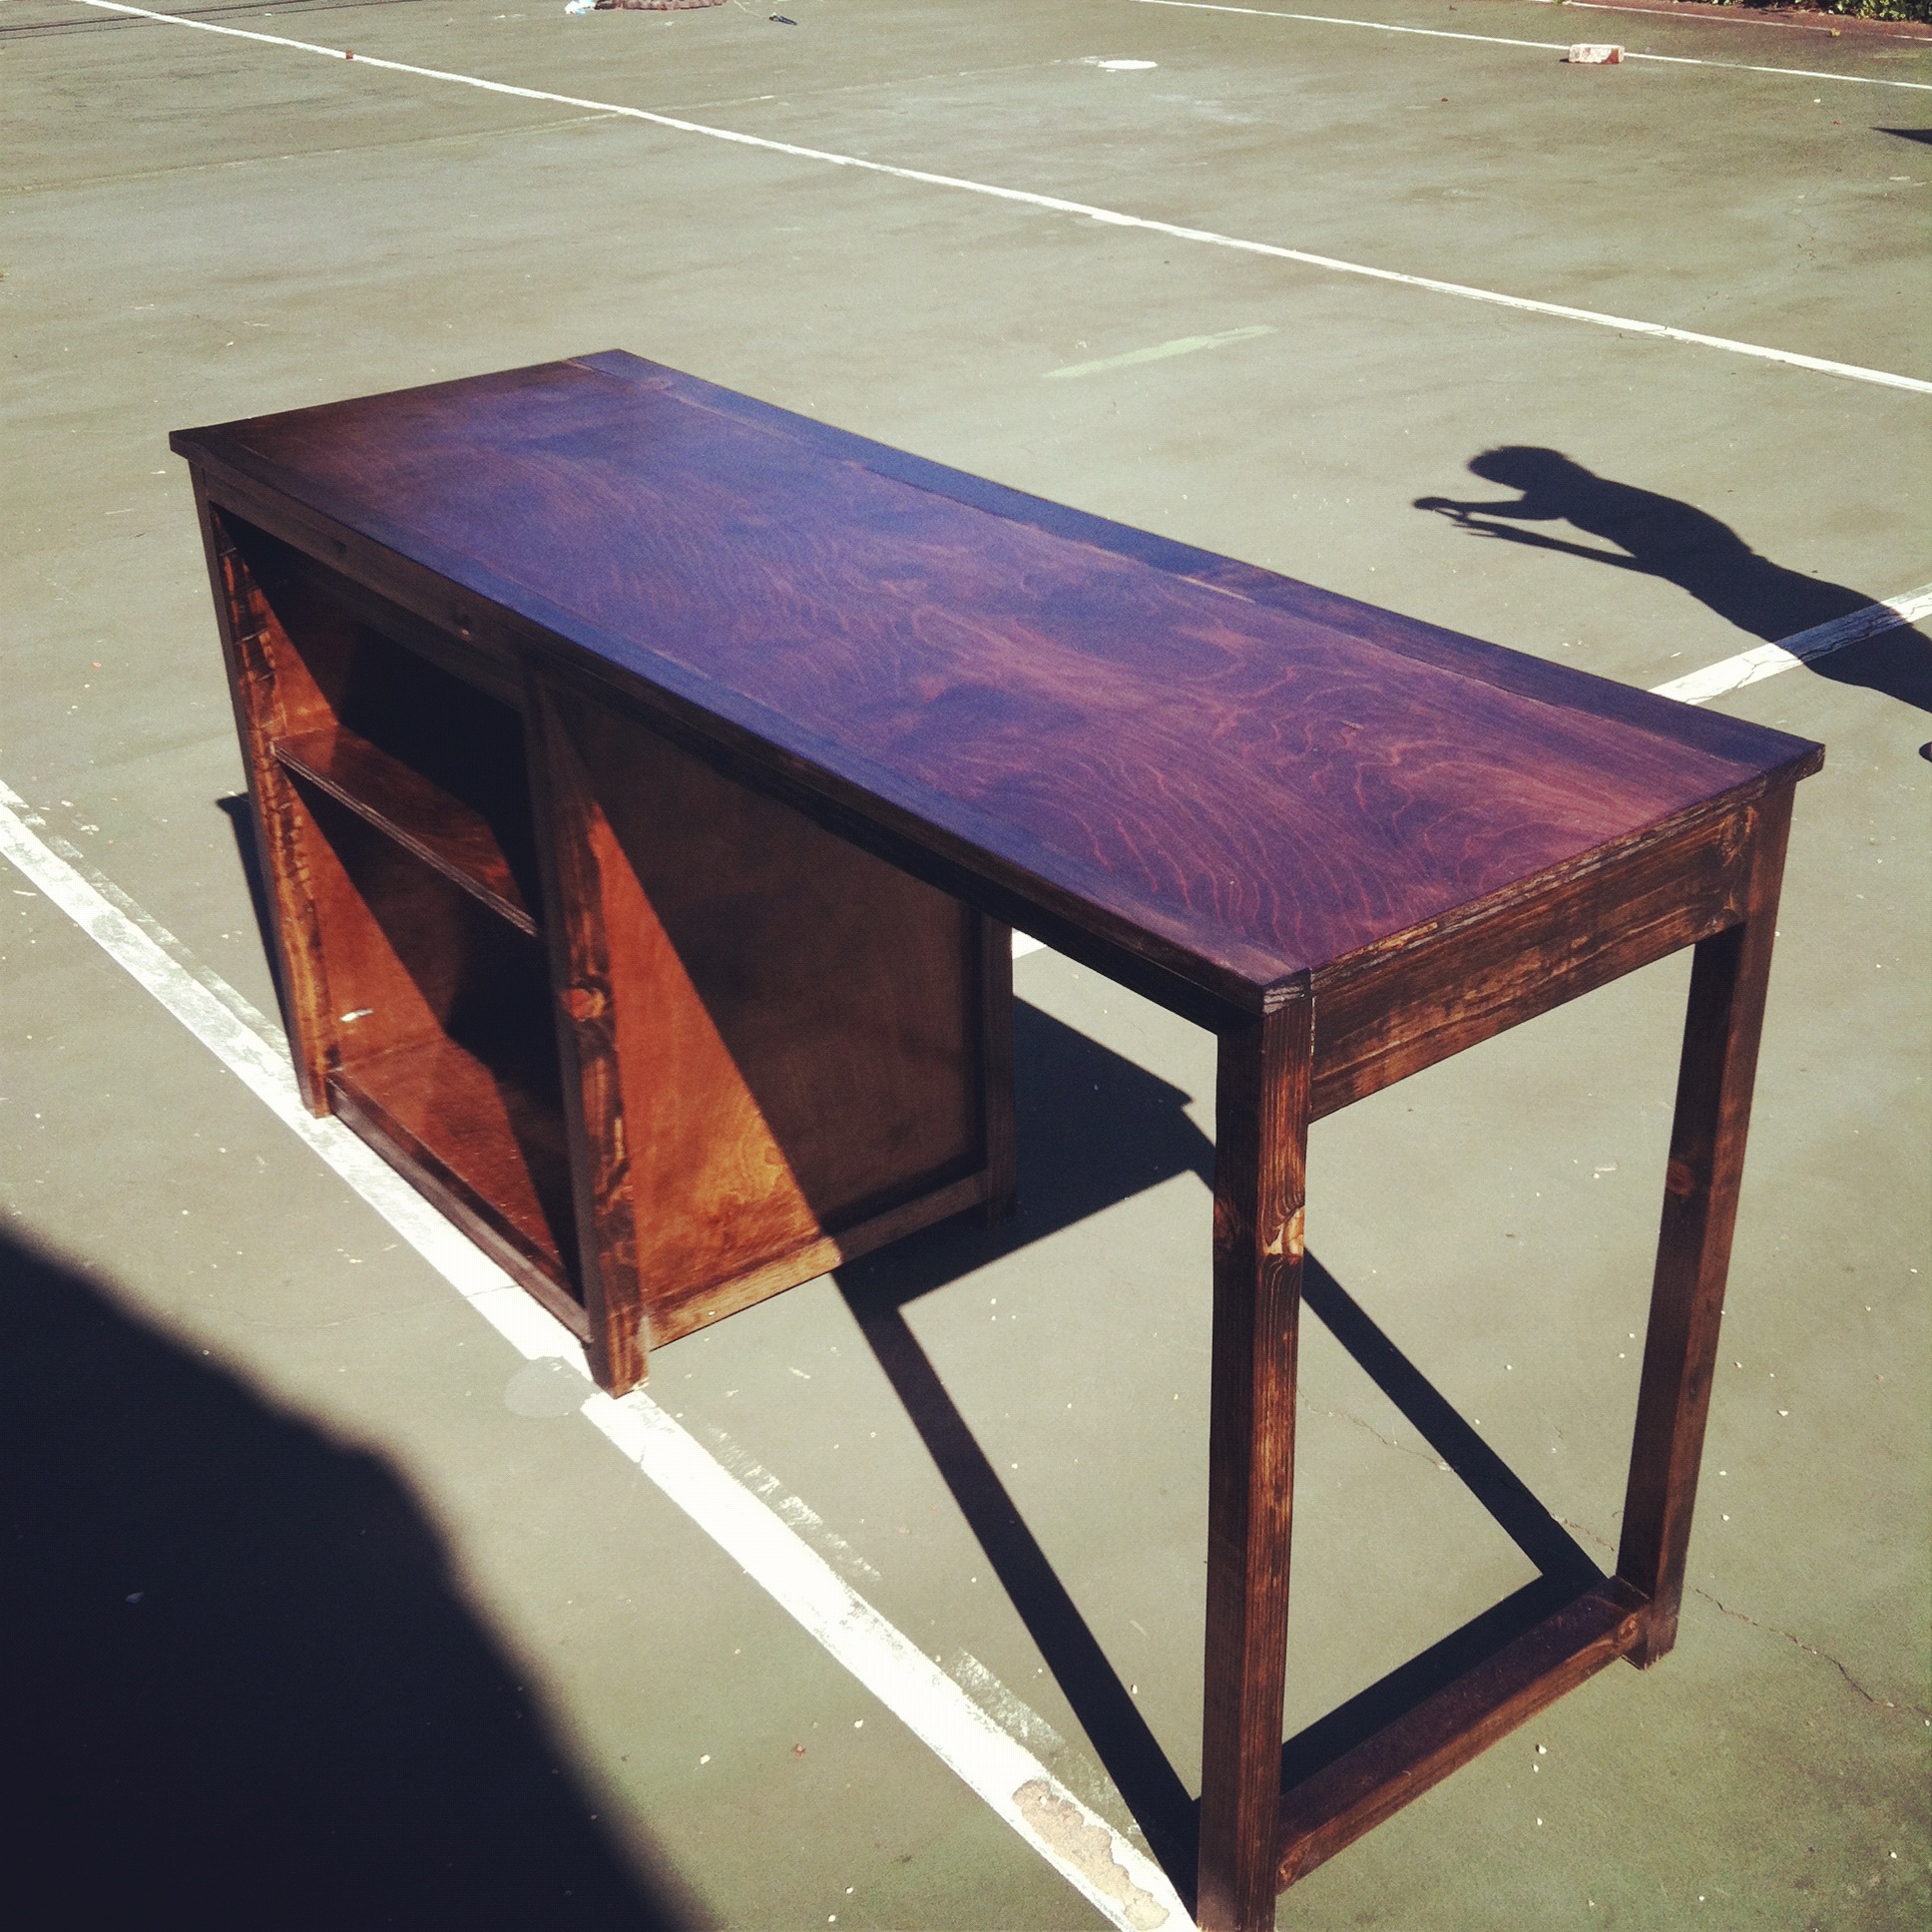
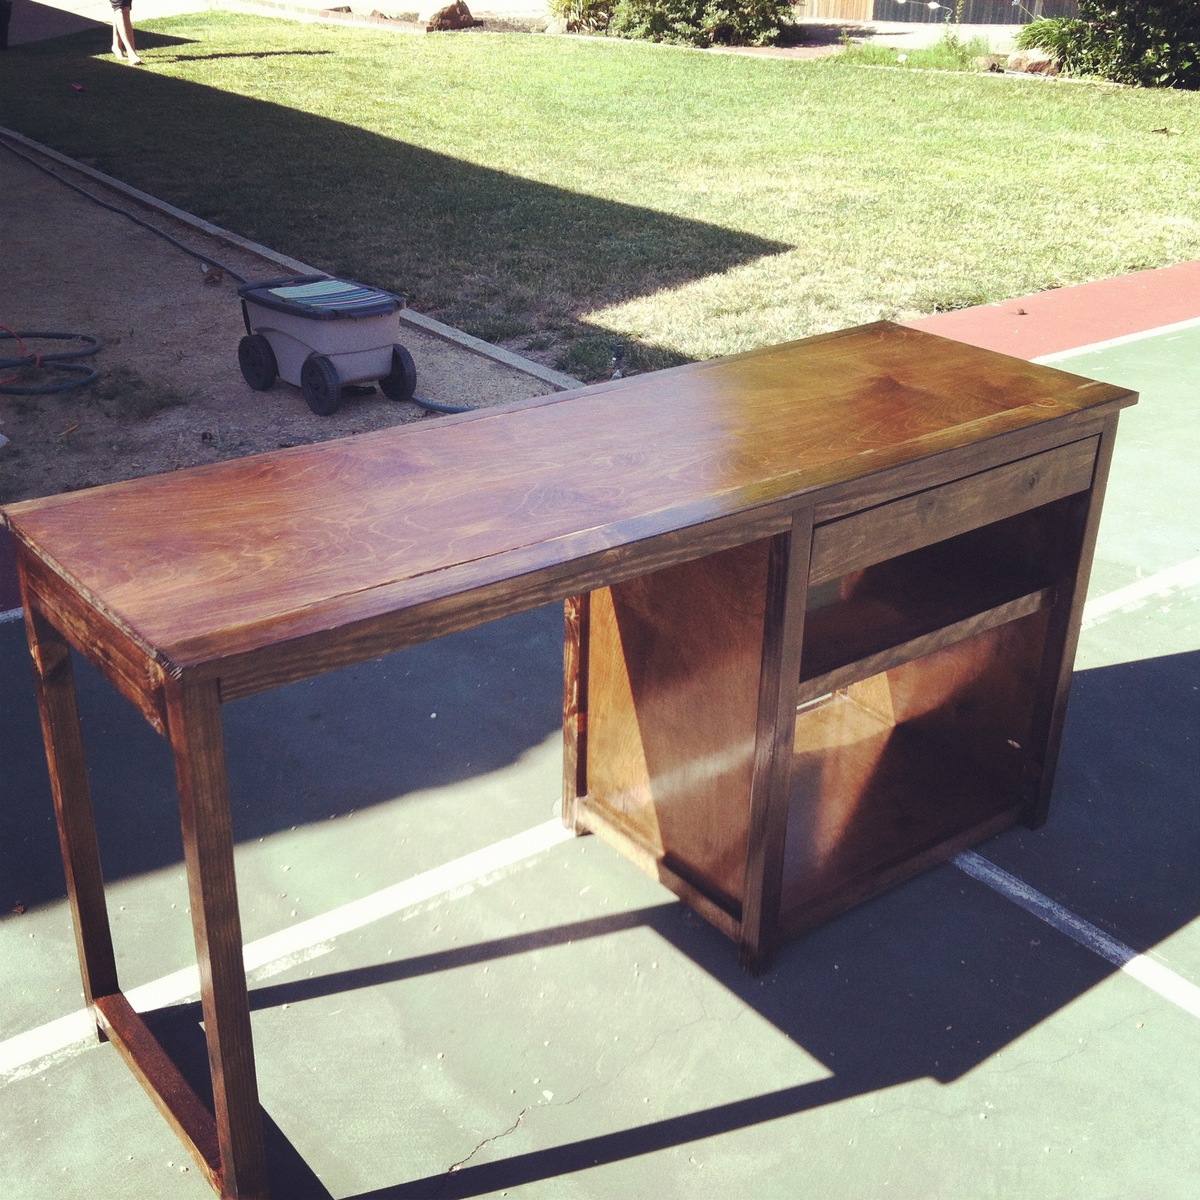
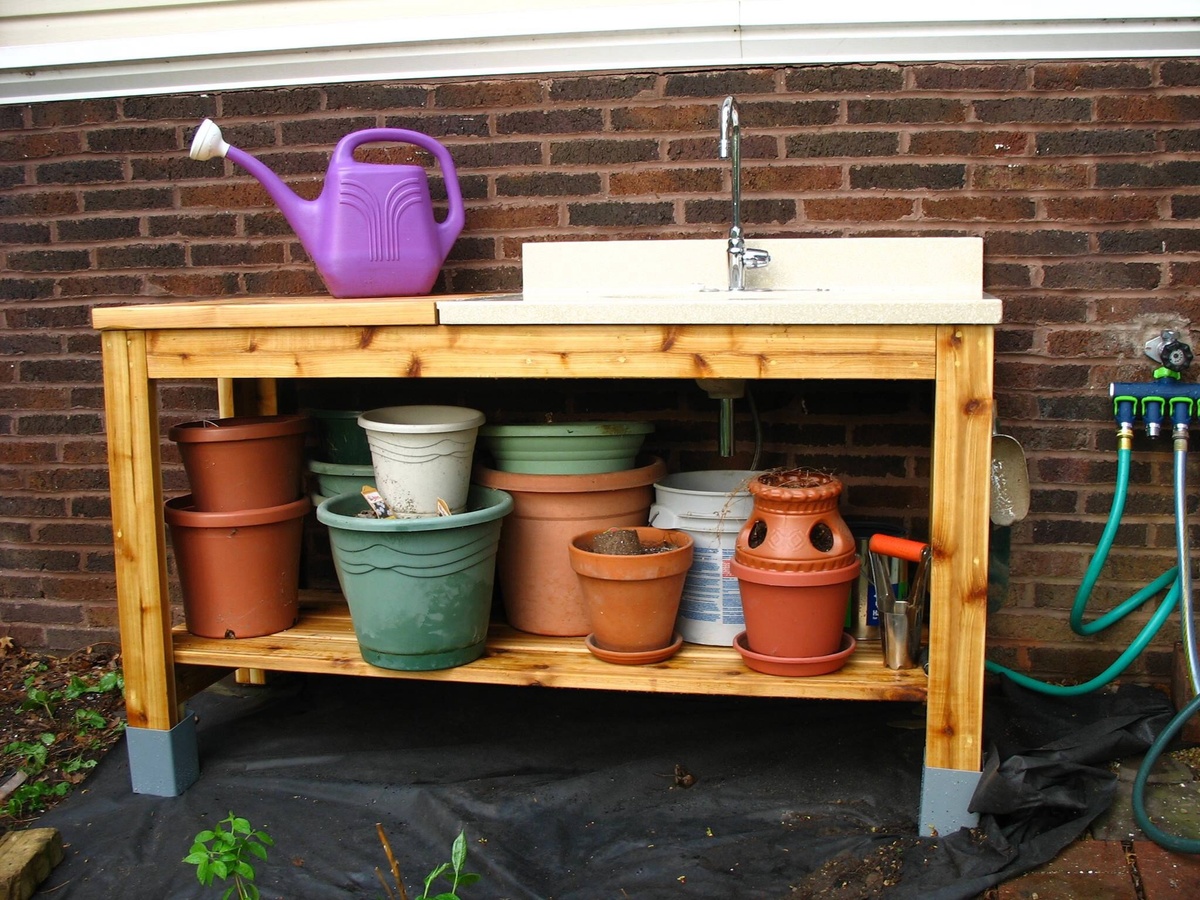
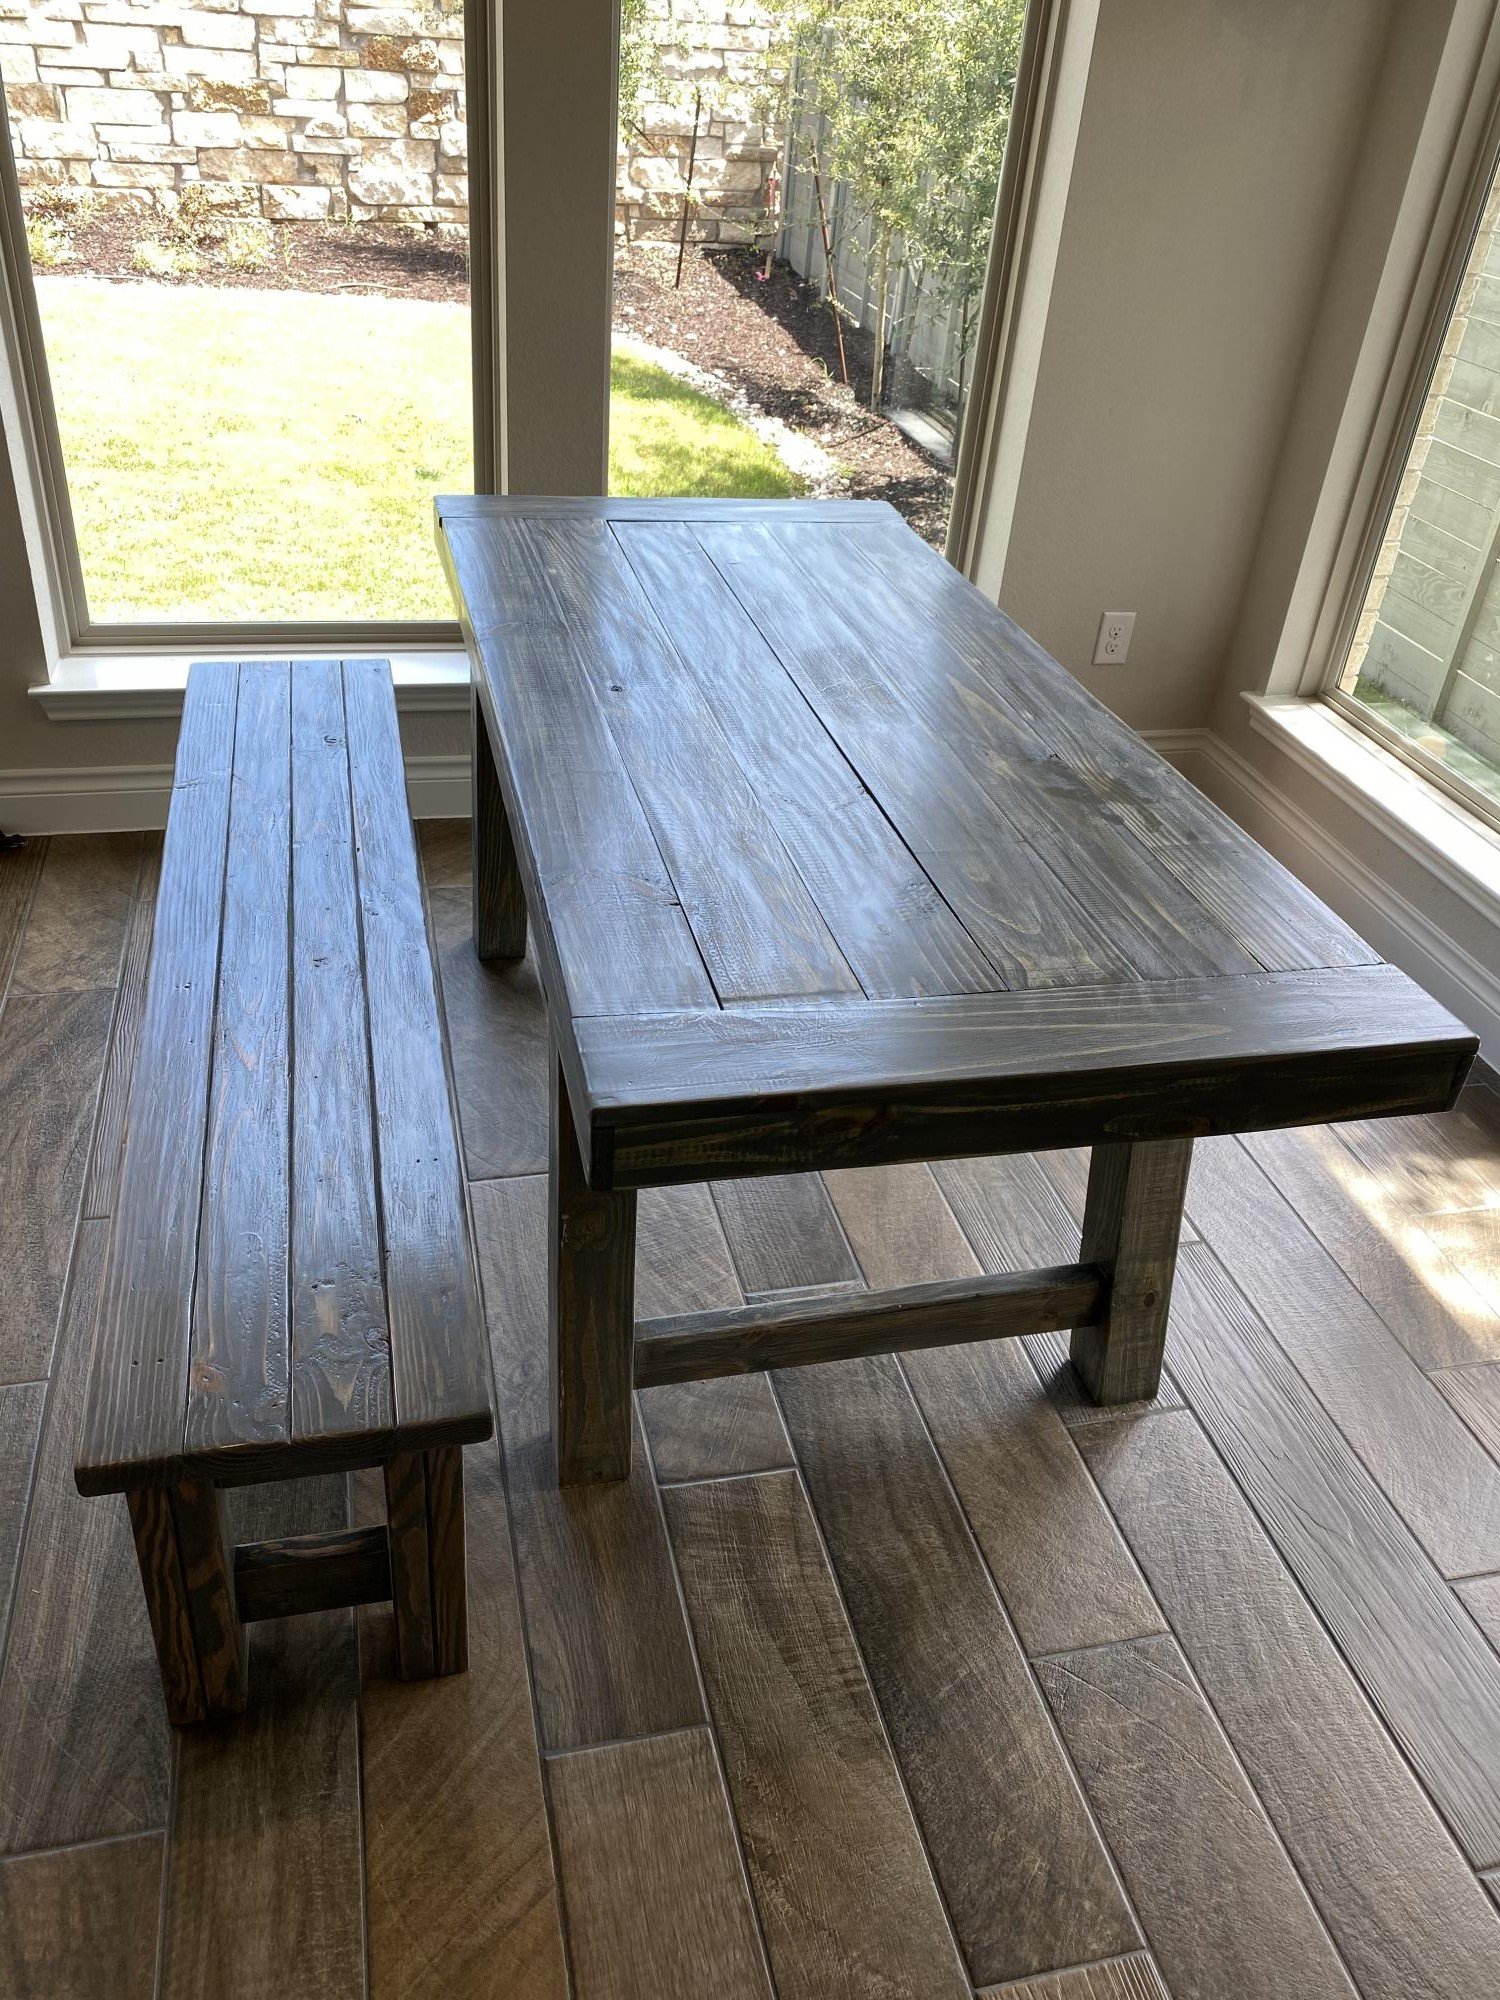
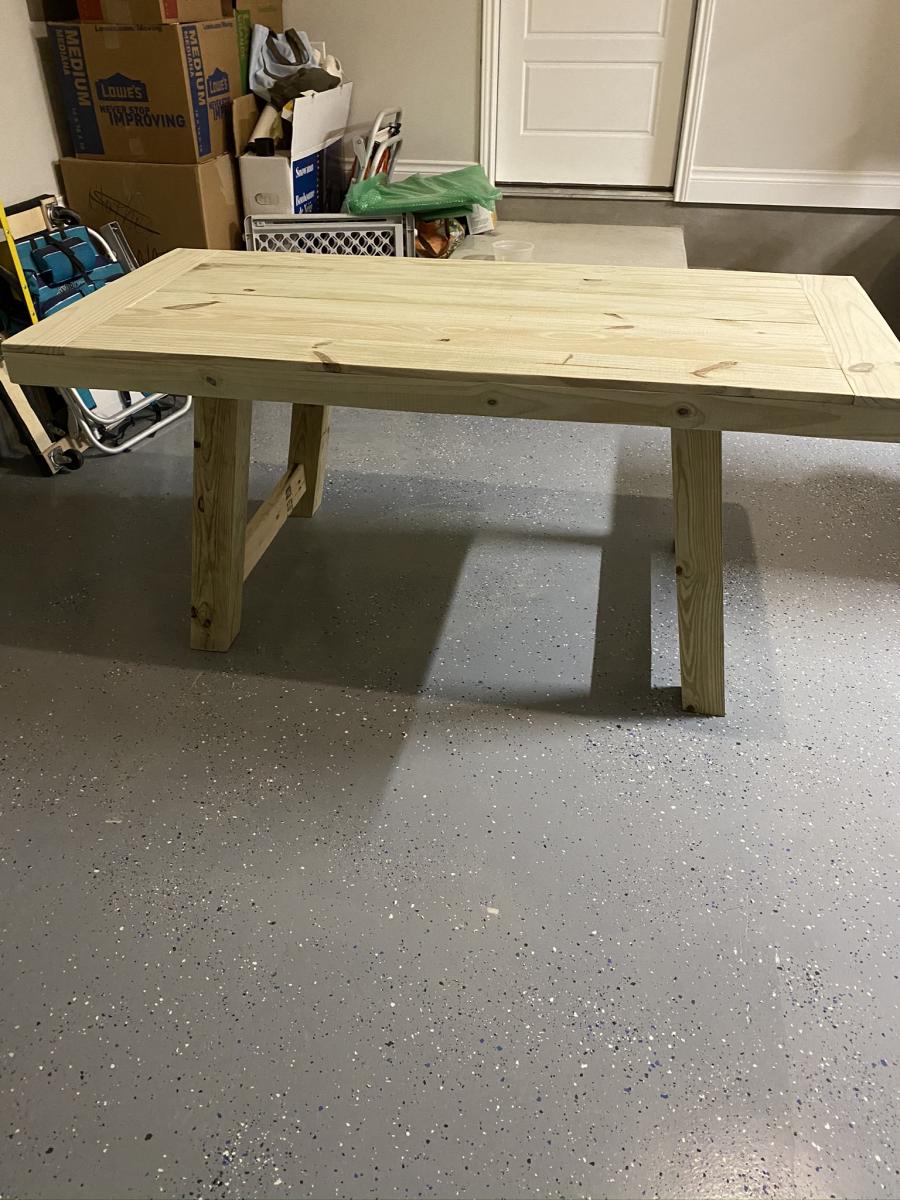
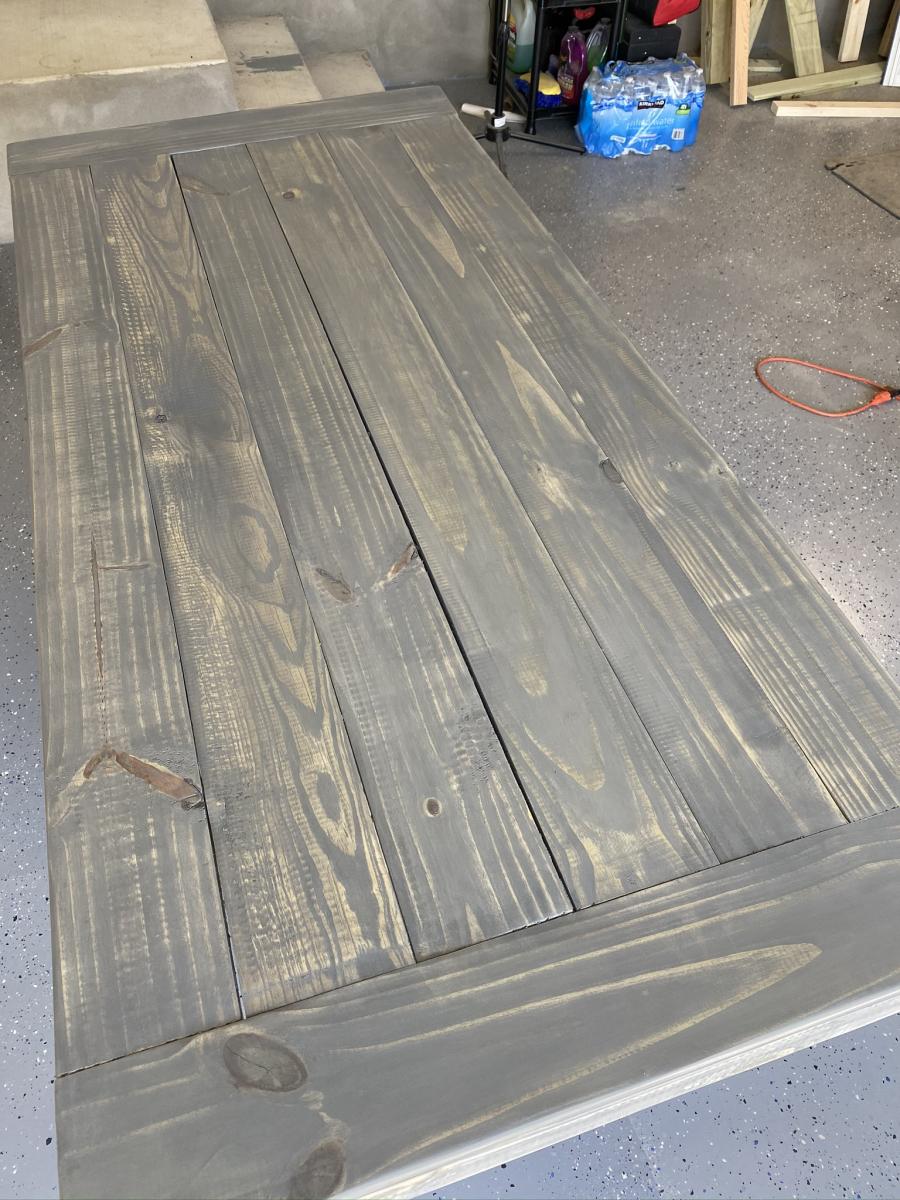
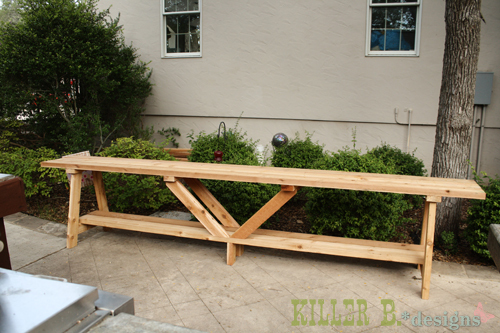
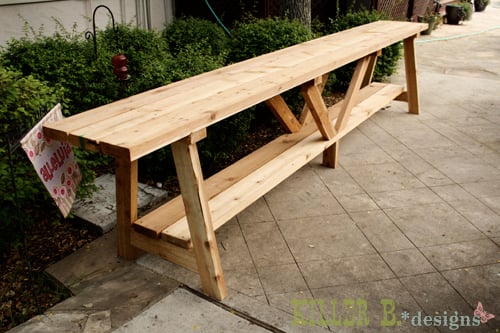
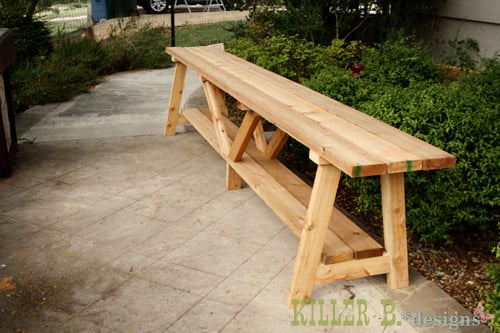
My mom asked me to build her a buffet to match the Provence style dining table I built her a few months ago. I used the Providence Table plan as a jumping off point. Here’s a quick breakdown of the changes I made to the plan:
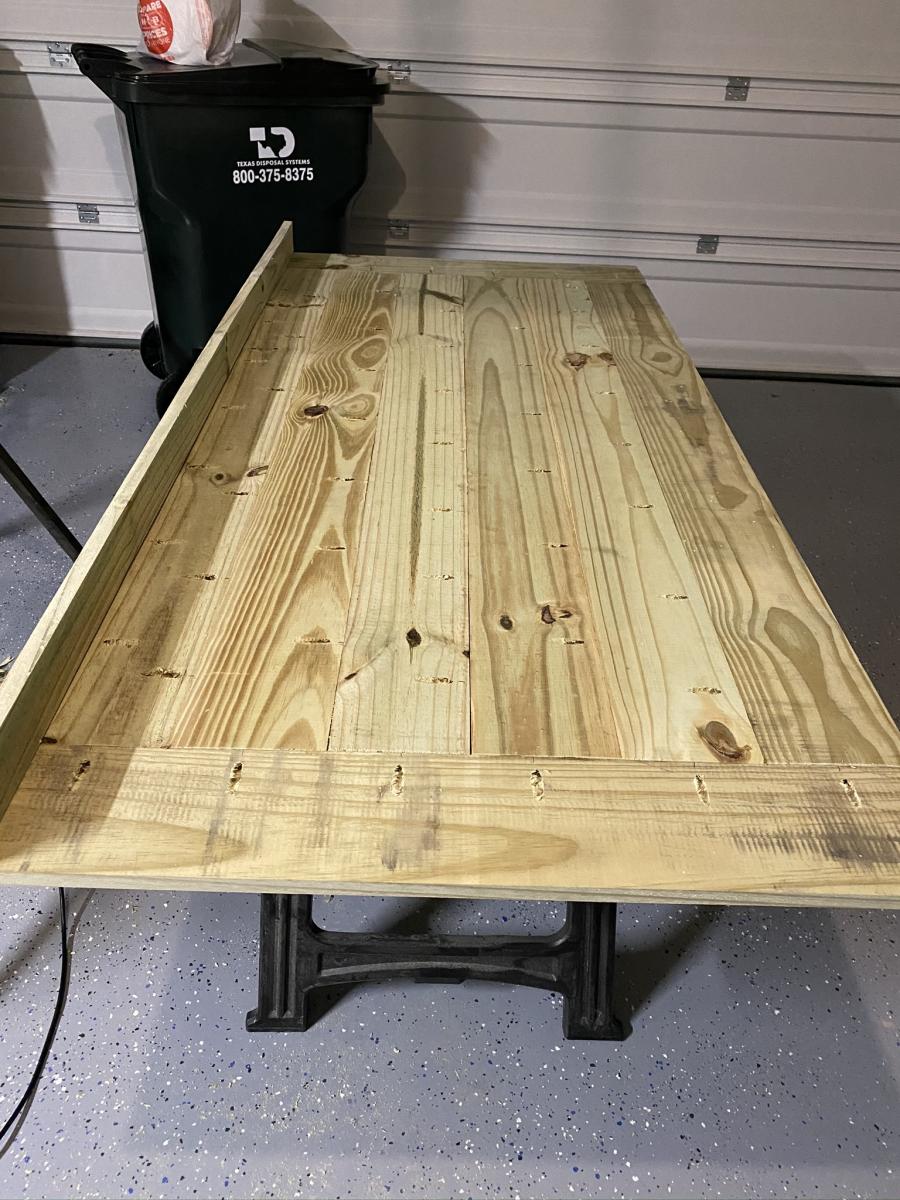
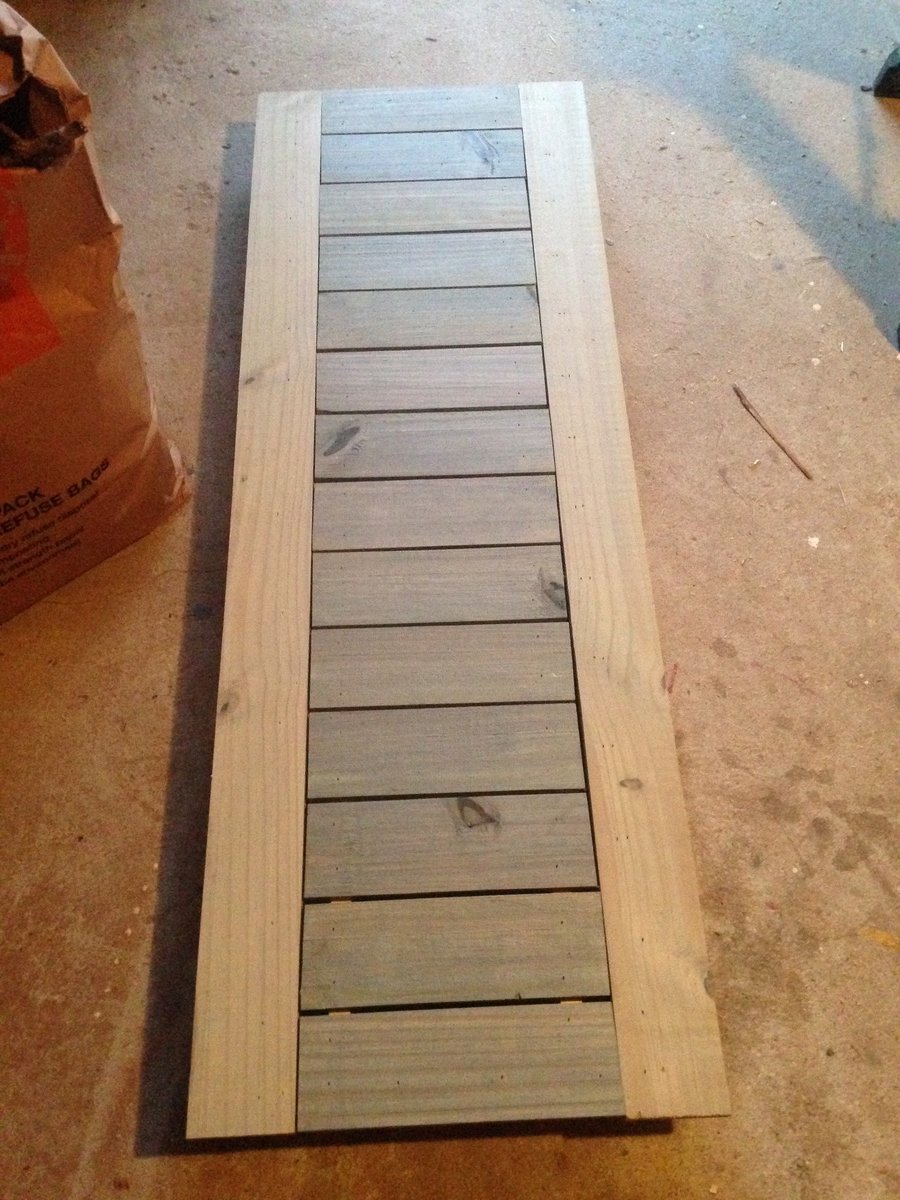
• Supply list – 3 2x6x12′ boards for the top
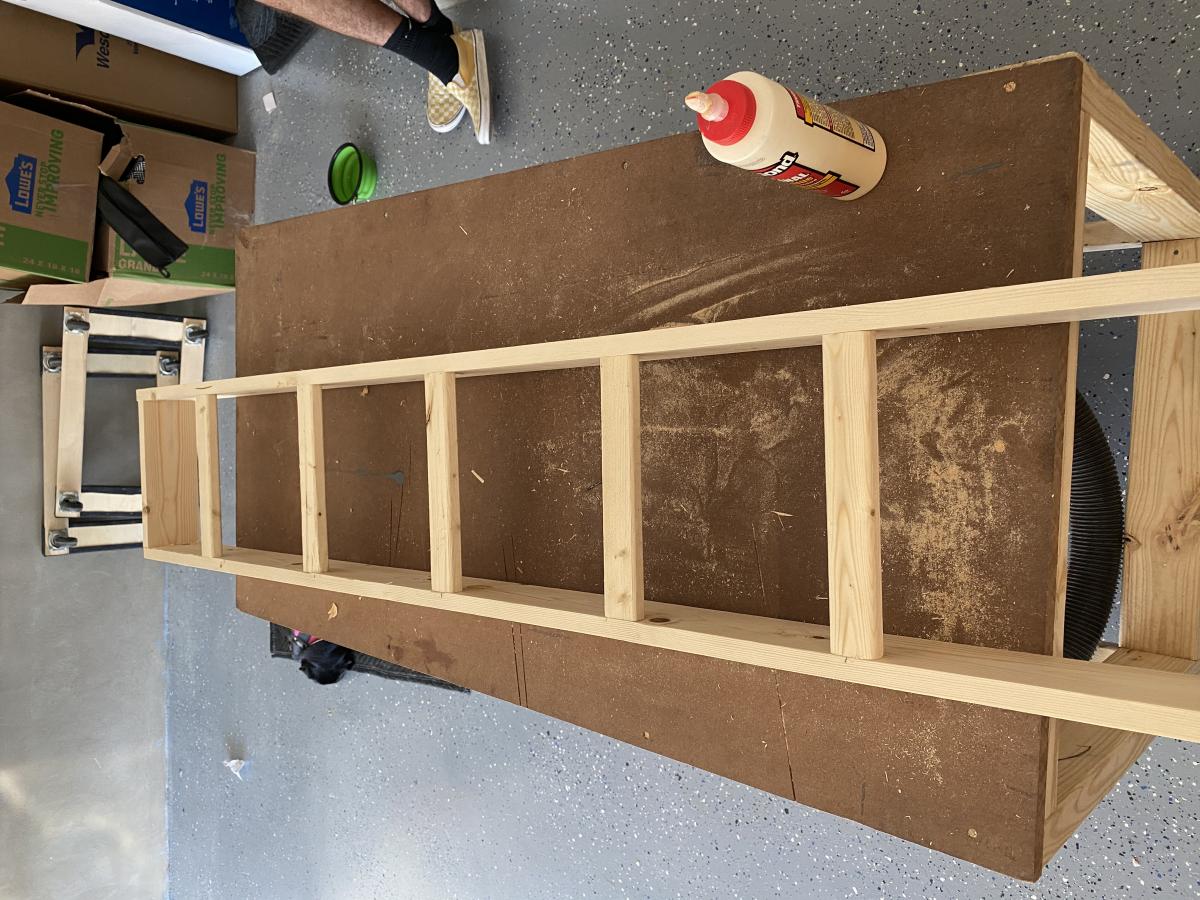
2 2x6x10′ boards for the shelf
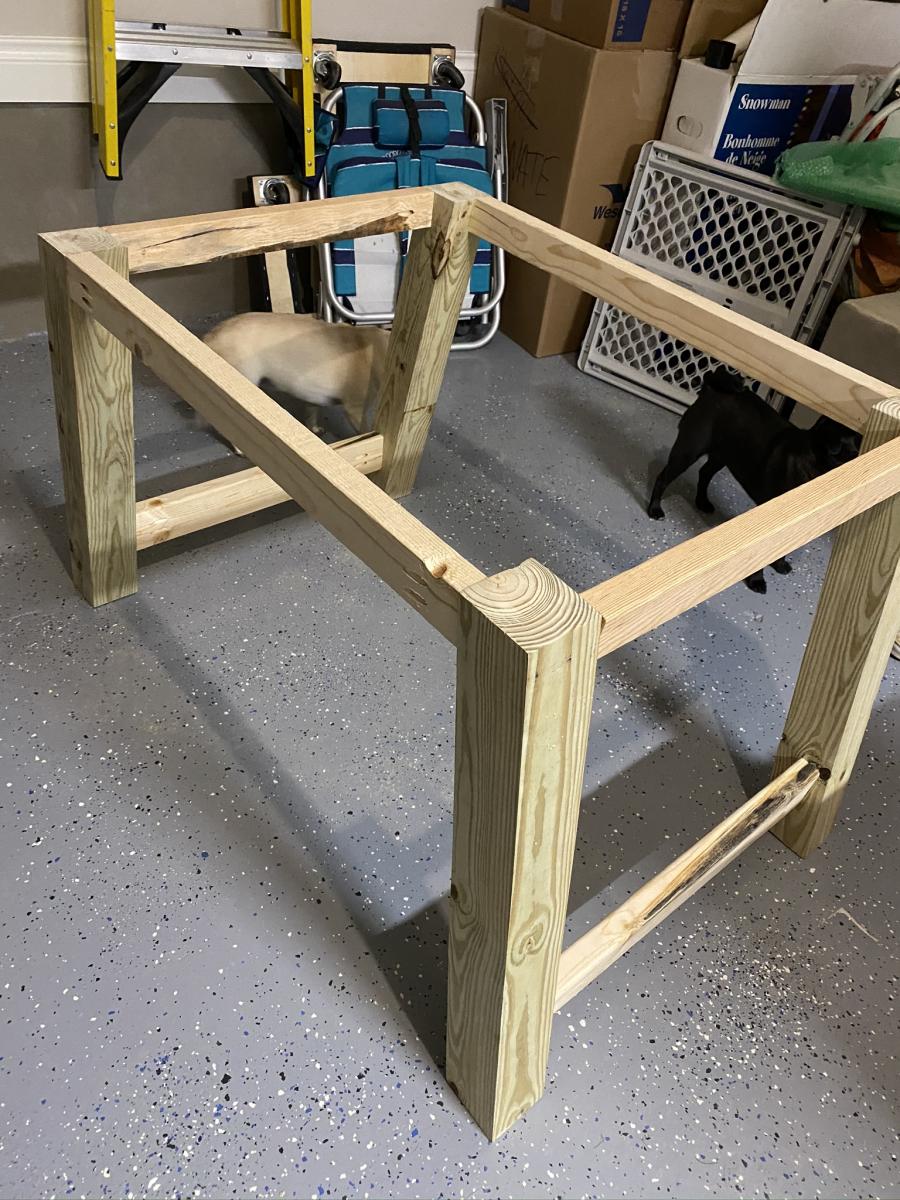
5 2x4x8 boards for the legs and supports
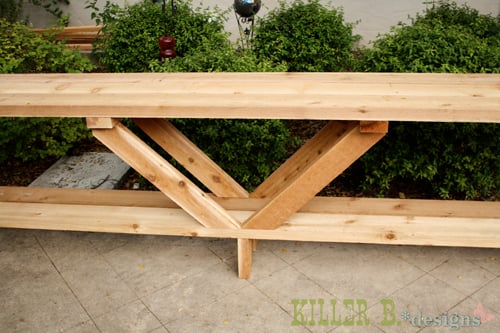
• Design – I cut the legs to the same dimension, but flipped the legs 90 degrees so the profile matched the table’s. I placed the leg support 4″ from the ground, again to match the dining table. I added a shelf by drilling the 10′ 2×6′s down onto the leg supports, and used scrap 2×4′s under the center to keep it from dipping. I nixed the center top support, and decided to keep the cross supports at the same angles and length, but doubled them and used scrap 2×4 cut at 18″ wide (the width of the buffet) to span the three boards so the center wouldn’t dip or warp over time.

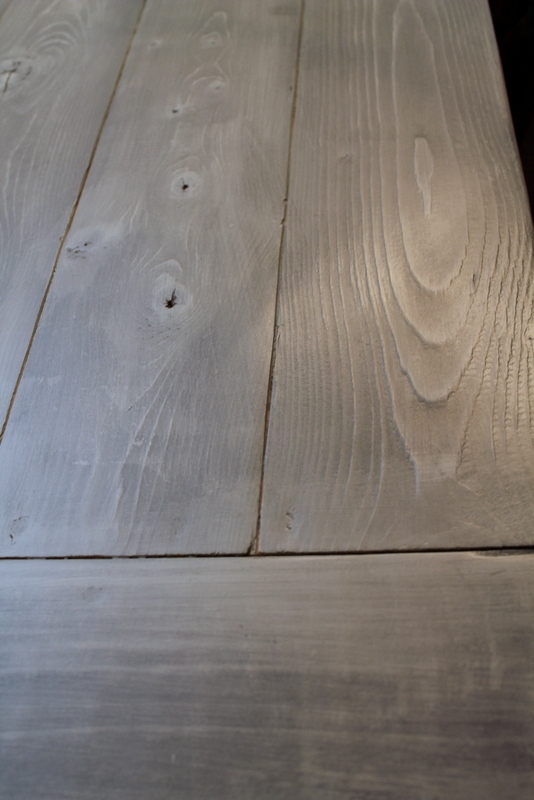
We chose cedar to match the table and cut down on chemicals, but it could cost a lot less if you used untreated pine for indoor use. Either way, $120 for a twelve foot long buffet isn't too shabby!

Built from Plan(s)
Estimated Cost
$120
Estimated Time Investment
An Hour or Two (0-2 Hours)
Finish Used
left unfinished, my mom will probably sand and use deck stain on it.
Recommended Skill Level
Intermediate

Comments

Patriotic Picnic Table for Kids

I built this for a silent auction at my school. My students chose the theme. Each of the kids in my class signed the white legs. Super easy to put together after following the plans to cut each piece of lumber. The painting was another story thanks to those stars!

Built from Plan(s)
Estimated Time Investment
Afternoon Project (3-6 Hours)
Finish Used
leftover paint and varnish
Recommended Skill Level
Beginner

Comments

AP - Play Kitchen

Submitted by Anonymous (not verified) on Sun, 05/31/2020 - 19:20

Loved the plans from the site Ana! I got inspired seeing all the lovely play kitchens that everyone had created! Thought I'd share the one I've made for my little one as well, she loves it!

Farm Table Sewing Base

Submitted by fallon on Wed, 07/25/2012 - 18:52

We just slightly modified the plan to accommodate our really great industrial sewing table base.

Estimated Time Investment
Afternoon Project (3-6 Hours)
Finish Used
First coat - Glidden Natural Linen
Stain - MinWax Classic Gray 270 (one person brushes while the other wipes it right off)
A little sanding for some aging
Several Coats of MinWax - Polycrylic, satin finish (sand between each coat)
Recommended Skill Level
Beginner

Comments

Great weekend project...the "love swing"

Submitted by Don Ellery on Mon, 05/19/2014 - 15:49

A great weekend project...the "love swing"! I used the plan from Ana for the swing seat and added two arm rests from left over 1x6, rounded them off and sanded.

I cobbled together an A-frame to hang everything, made from five 8 foot 4x4s and two 8 foot 2x6s laminated together for the stretcher. Assembled with 1/2" galvanized carriage bolts and hung with 1/4" chain.

Definitely going to want a good miter saw for the A-Frame angles (the top ones are a bit tricky to get everything lined up)

Love it! Thanks for another great plan Ana..and of course..Shanty2Chic!

Built from Plan(s)
Estimated Cost
$200 ish..including the A-Frame... the hardware and chain can be pricey!
Estimated Time Investment
Day Project (6-9 Hours)
Finish Used
Behr exterior weatherproofing stain - Chocolate.

Just 2 thin coats, dries fast...second coat can be applied later the same day.
Recommended Skill Level
Beginner

Comments

Carpenters Daughter

Mon, 12/12/2016 - 17:09

Could you please post the plans to build the a frame as well? I really love what you did and would like to copy it! Great Job!

Don Ellery

Wed, 07/19/2017 - 11:31

Hi! I wish I could, but I didn't take any notes on the angles or lengths when I made this and I left it with the house when we moved. 

Sittin', thinkin' and dreamin' bench for my Mermaid Mansion

Submitted by Anonymous (not verified) on Sat, 08/20/2016 - 15:55

I made this bench to replace a sidewalk planter box outside my front door.  The only modifications I made were adding 4- 2x4 supporting legs - you can see them in the first photo.  This just makes the legs a little sturdier and I also added some carriage bolts to give a slight decorative touch as well as to anchor the legs to the frame.  I use a nail gun and some wood glue to secure the 2x4 to the side of the existing leg, and voila!  Thank you for a very easy to understand and follow project, Ana!

Built from Plan(s)
Estimated Cost
$60, wood, screws and stain
Estimated Time Investment
Afternoon Project (3-6 Hours)
Finish Used
Behrs outdoor stain and sealer, semi-transparent colors.
Recommended Skill Level
Beginner

Farmhouse coffee table and large side tables

Submitted by Anonymous (not verified) on Wed, 06/03/2020 - 06:17

I needed a new hobby and missed going out on date nights with my husband. So we decided to take on a new hobby that we could do together while filling in our new home. (We moved from Florida to Illinois a year ago) I came across the farmhouse coffee table plans and just loved how it looked. With it being a beginner project I was pretty optimistic about how it would come out. I watched videos on how to stain and use polyurethane on YouTube to complete the project. I love that my husband and I built these together and that we can finish furnishing our new house with things we built.
Our cost was higher cause I added in everything it took to get to the end result.

Estimated Cost
$200
Finish Used
Minwax Pre-stain
Minwax Stain in Early American
Minwax Fast drying Polyurethane

A First Desk Build

Submitted by Anonymous (not verified) on Thu, 02/29/2024 - 07:44

This was the first time that I built anything from scratch and I must say that I was really surprised by how good it came out. It’s not perfect but I’m really proud of the finished product.
Thanks Ana for making it easy.

Tyra Williams

Built from Plan(s)

Custom Built-In Medicine Cabinet

Submitted by boxermum on Sun, 07/29/2012 - 18:29

We love the medicine cabinets that are found in 5 star hotels and had come across a blog (Batchelor's Way) that had built one very similar. We decided during our renovation that we wanted one, too. In the photo you can see that we still have to install the light fixture, which fits perfectly within the high top molding, and the vessel sink and wall-mount faucet below.

Estimated Cost
$50
Estimated Time Investment
Day Project (6-9 Hours)
Finish Used
Primer - Kilz
Paint - Behr's Silk Pillow in Satin finish
Recommended Skill Level
Beginner

Comments

birdsandsoap

Sat, 08/04/2012 - 18:42

This is beautiful. It turned out so great, I think I may have to copy you! We have such a tiny bathroom, and need all the storage space we can get. We have similar taste, I have beadboard in my bathroom too.

Did you get the latches some place special?

In reply to by boxermum

birdsandsoap

Wed, 08/29/2012 - 10:02

Thank You. I looked over her bathroom post (several times actually) and it is amazing. Did you see their kid's room? The pirate room? another amazing DIYer. I'm really thinking about making this, just have to finish my other million projects first.

boxermum

Wed, 08/29/2012 - 15:40

I can totally relate to having a million projects in the mind bank - I want to build the Lydia daybed, farmhouse night stands, the apothecary console for the living room, leaning shelves for the breakfast room, installing board and batten in the dining room, plank wall in the guest room, and the list goes on and on and on. We installed the light fixture on the medicine cabinet yesterday, and what a difference it made. We still haven't installed the wall faucet or vessel sink, though. Just so much to do and life gets in the way!

I did see Ronda's other rooms (her pirate room was featured in This Old House magazine) and it really is creative. She was really helpful when I asked her questions about the medicine cabinet, too. Totally classy lady.

What projects do you have in the works?

birdsandsoap

Wed, 08/29/2012 - 22:09

I just finished remodeling my kitchen for the 2nd time in 3 years due to a leaky water heater. I am currently finishing up a bunkbed that I built my girls over the summer (it has taken for-e-ver!), I have to tile my bathtub surround since we added a new tub when we did the kitchen. I've got to paint both rooms, and also paint a desk that I built earlier in the summer. I'm homeschooling, and we've got a bunch of furniture that goes in our "schoolroom" that needs refinished, ugh! I think I've done more painting in the last 4 months than my entire lifetime and I've got a lot more ahead. I'm going to build a divided shelf for the schoolroom (the plans are somewhere on here, it's a PB knock-off) and I've also got two dressers planned in my head for my bedroom. We want a built-in look and since our bedroom is tiny (old house, tiny bedrooms) I have to build two separate dressers so that we can move them into the room. I also wanted to do wall-to-wall shelving in our schoolroom up around the ceiling, but I don't know if I will get to that or not. I keep piling on the projects and I'm running out of time! As soon as winter hits, I'm done building; so if feels like a mad rush to "get 'er done!"

TV console

Submitted by Kmtgolden on Fri, 05/23/2014 - 08:20

This was my first attempt at building something with doors- the one on the right got knocked off square at some point and required some finagling to get it to fit. As a result, there's a gap above it, but it opens and closes smoothly. I'm okay with it. It's not perfect, but at least it's MY not perfect.

Built from Plan(s)
Estimated Cost
$100-$125
Estimated Time Investment
Day Project (6-9 Hours)
Recommended Skill Level
Intermediate

My modified version

Submitted by Anonymous (not verified) on Tue, 08/23/2016 - 19:05

I modified this bed plan. Decided to go flush with outside of bed post and wanted footboard same height as mattress

Estimated Cost
$300
Estimated Time Investment
Week Long Project (20 Hours or More)
Finish Used
Red chestnut
Recommended Skill Level
Intermediate

Garden Enclosure

Submitted by Anonymous (not verified) on Thu, 06/04/2020 - 17:29

My chickens took over my garden area and being the voracious raptors they are, I needed to build a garden enclosure to keep my veggies safe. I modified a little, making my beds deeper. I also had to stretch chicken wire over the top to keep the great flyers out. I also used it as a way to organize my garden tools (which is possible because I live in Southern California with moderate temperatures and little rain. Thanks for the plans! Yvonne

Built from Plan(s)
Estimated Cost
500
Estimated Time Investment
Weekend Project (10-20 Hours)
Finish Used
Deck on the outside. Clear coat on the inside. I also added chalkboard paint on the inside so I could fill in what I’m growing and erase it after.
Recommended Skill Level
Beginner
Back