Community Brag Posts

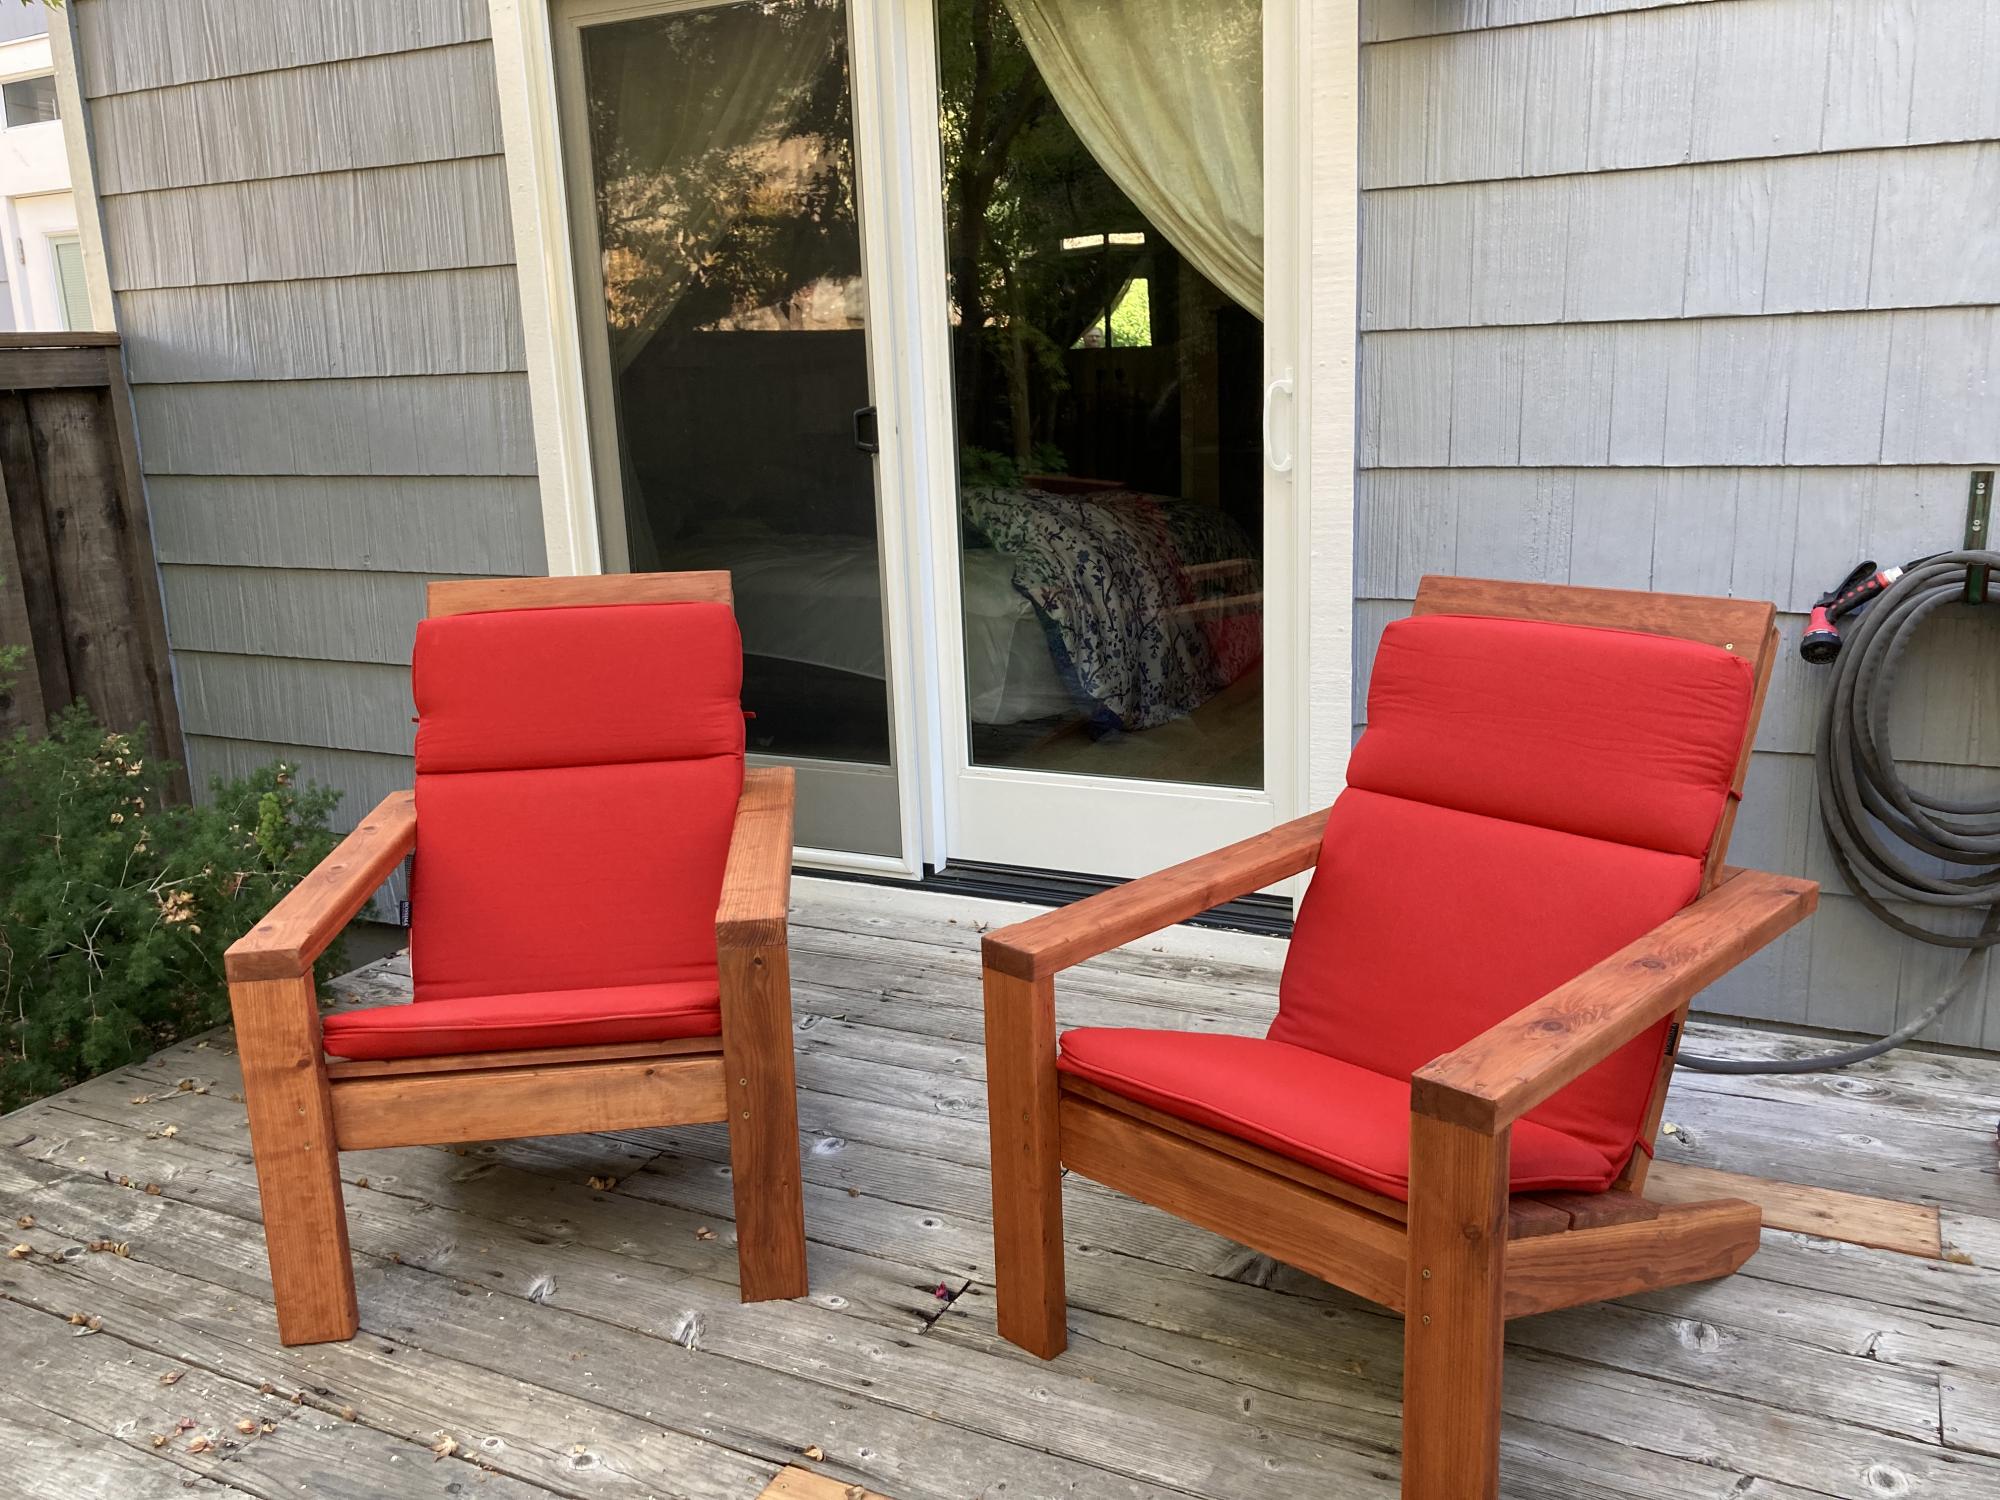
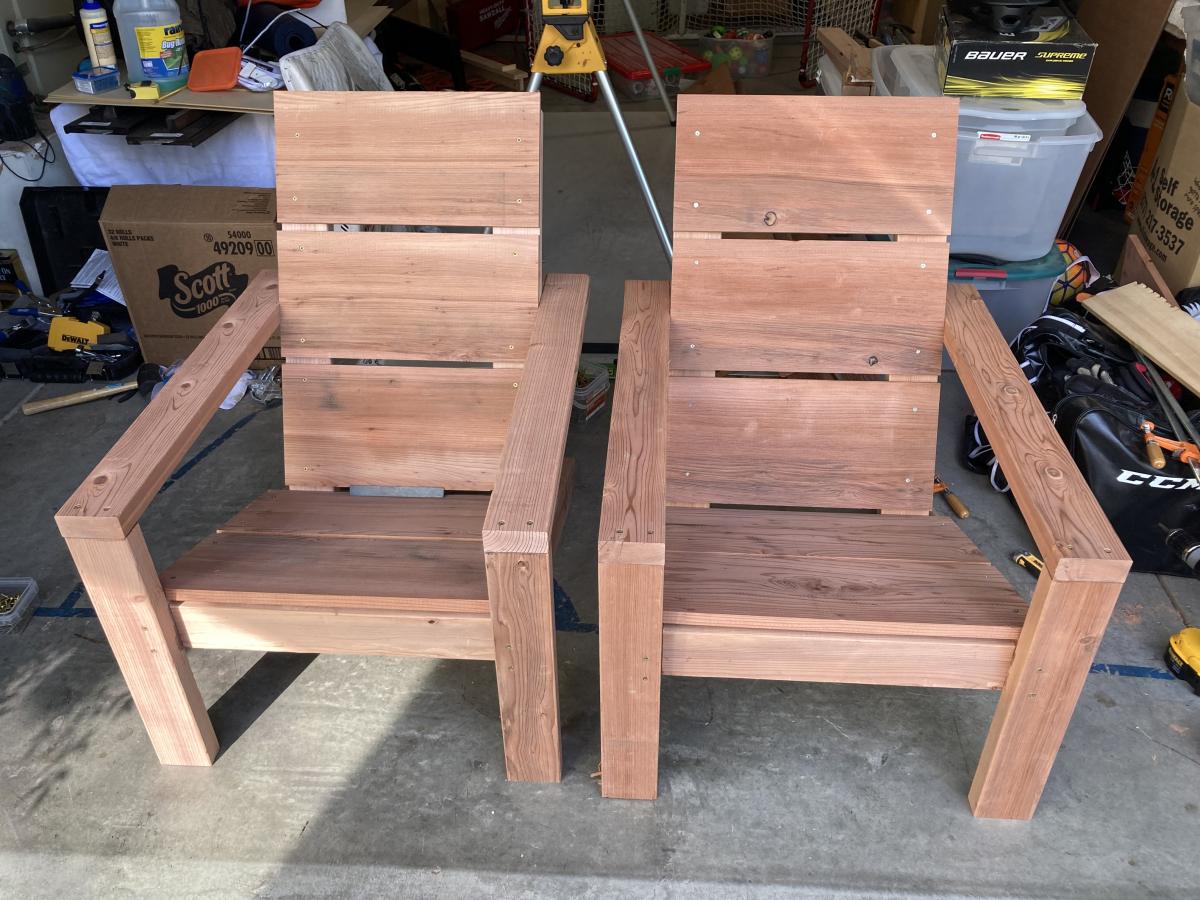
outdoor club chairs and couch set

Submitted by Anonymous (not verified) on Sat, 06/17/2017 - 14:16

We found an outdoor set online that we LOVED - until we saw the price tag haha! So DIY to the rescue, as always. This was our first project that we have ever done based on our own plans, but I did refer to Ana's adirondack post when deciding on the back-tilt of the chairs' support. The simplicity of the set definitely helped with the fact that we blazed our own trail - just straight cuts with a miter saw and screws! Easy peasy. We LOVE it, especially because they're so solid with these 4x4's so our kids can run all over these things like monkeys. DIY forever!

Estimated Cost
500
Estimated Time Investment
Weekend Project (10-20 Hours)
Finish Used
weathered grey from Rustoleum
Recommended Skill Level
Starter Project

Comments

Modern Farmhouse Bed Twin version

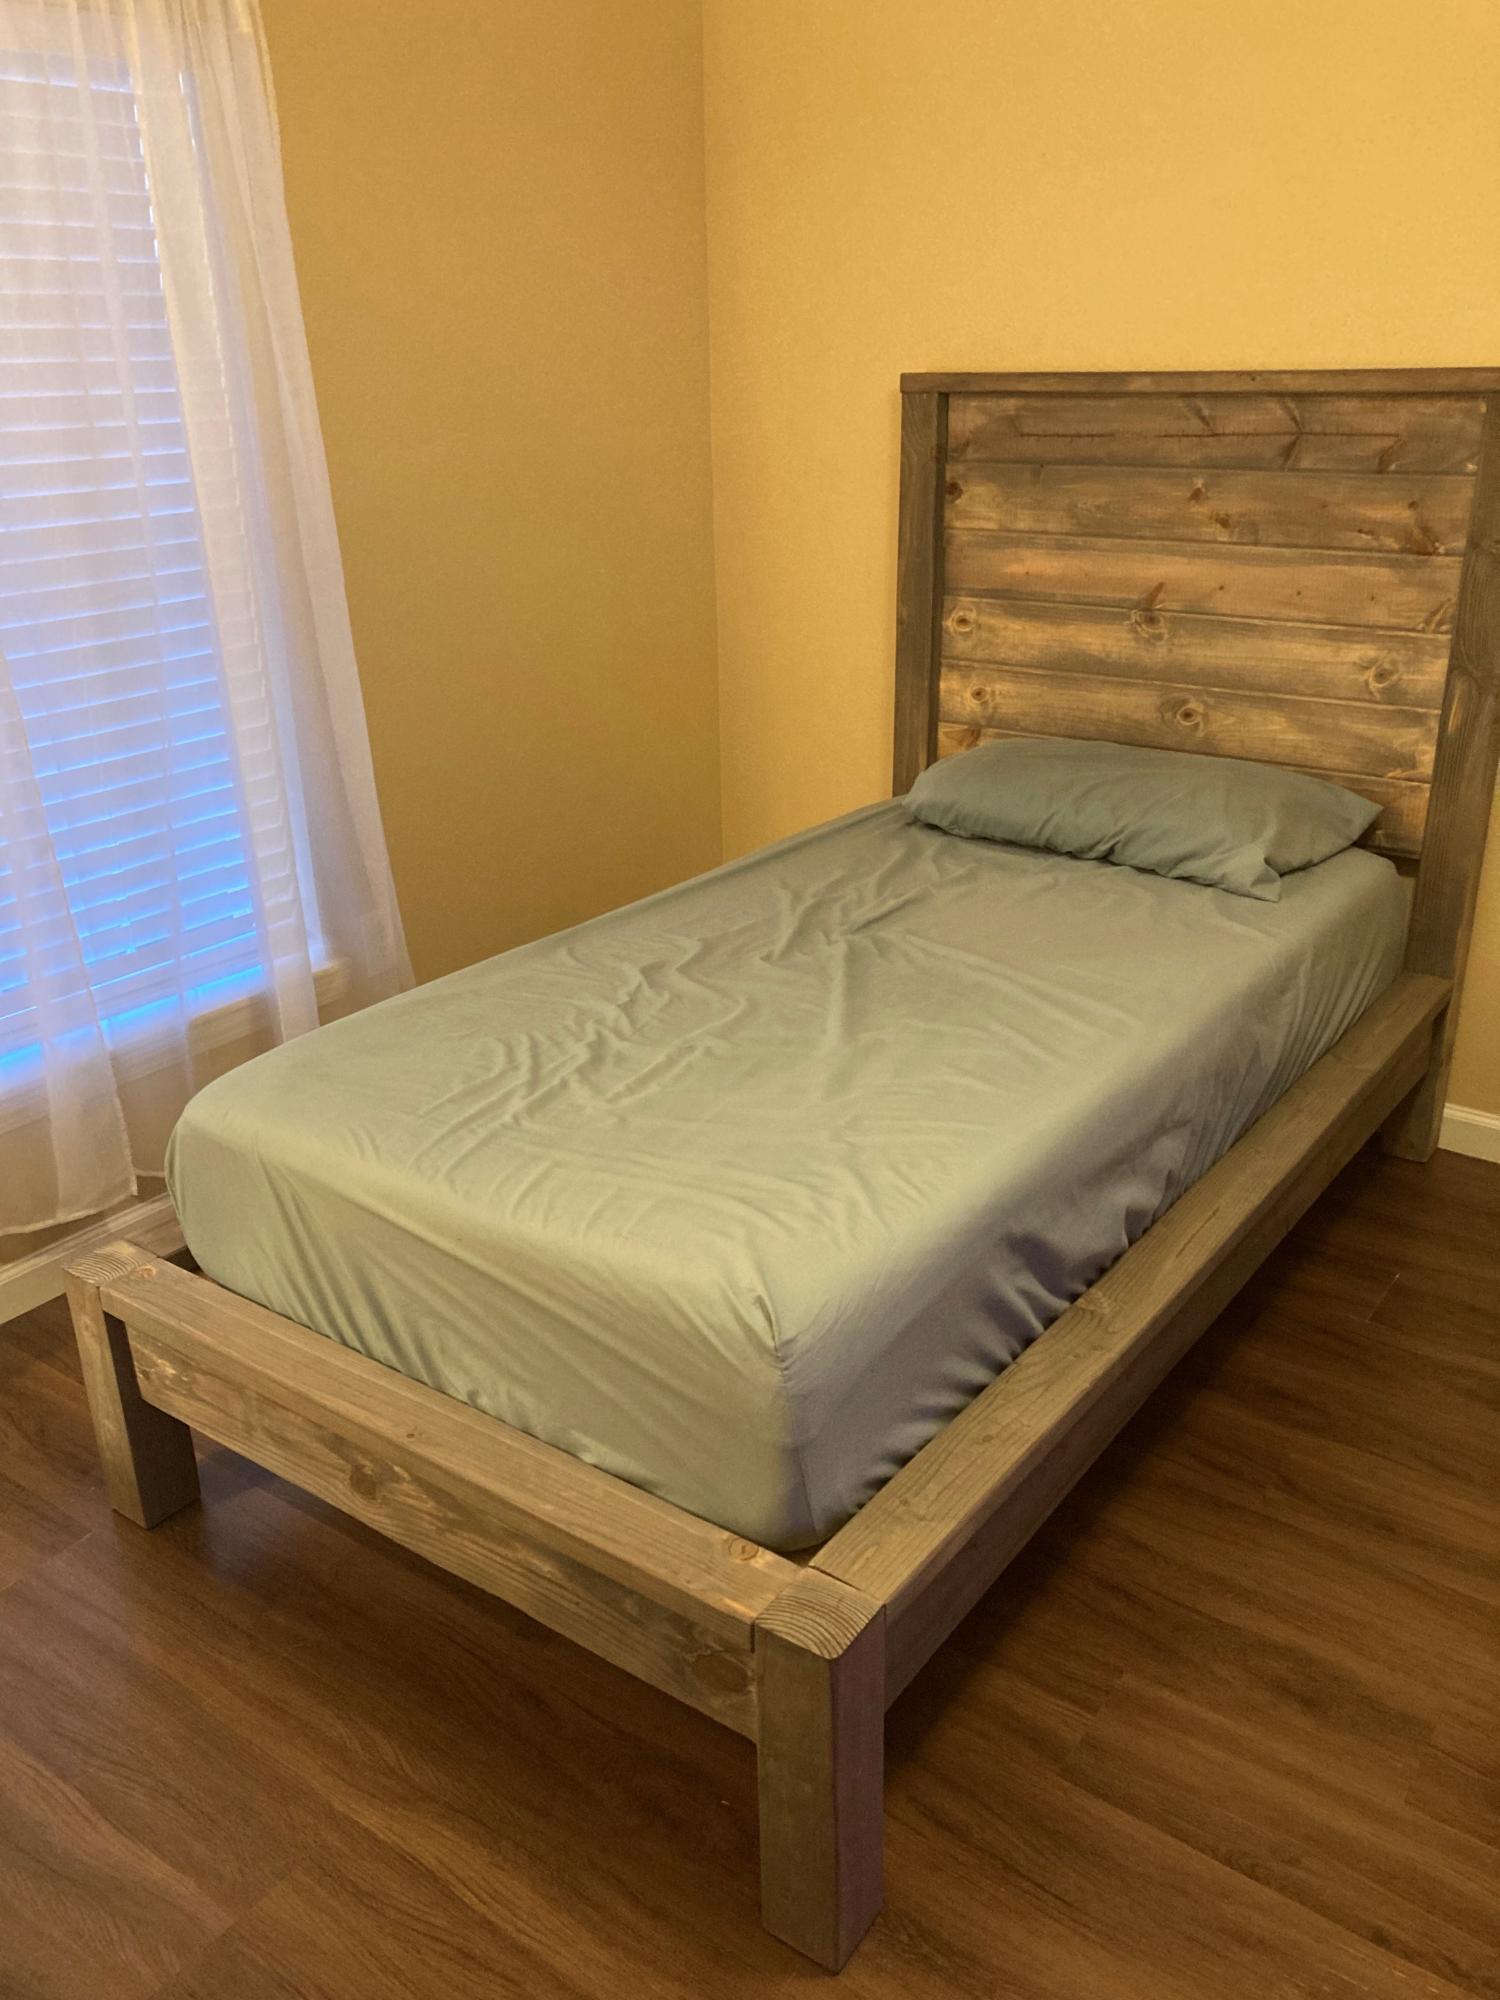
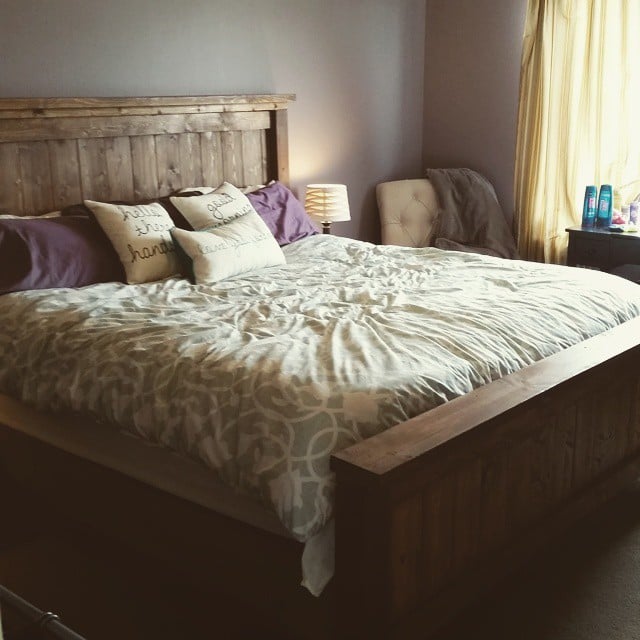
I built this bed for my (adult) son. The instructions were easy to follow. I left off the 2 x 2" cleats on the headboard to make it easier to attach the tongue and groove headboard pieces with pocket hole screws (I did lay two 2 x 2's underneath the tongue & groove pieces for spacing as I attached the boards). Since I made this as a platform bed I added a 6th tongue & groove headboard piece and the optional center cleat underneath. I used the suggested Varathane Weathered Wood Accelerator for the finish; mine came out much more grey than the bed pictured with the plans and my son liked the finish (I did too). Finding non-pressure treated 4x4's and semi-straight 2x4's was the hardest part. I used pine wood and bought all the lumber for about $175 (purchased at peak COVID lumber prices). This bed is definitely solid and I'm looking forward to making the matching nightstand! Thank you Ana for the bed plans!

Built from Plan(s)

Comments

Customized Farmhouse Table

Submitted by hhoward on Mon, 04/29/2013 - 23:06

I found this website while trying to find DIY plans for a bookcase for my sons room. After I saw all the plans, the bookcase project got bumped down the list. My husband was a little skeptical when I said I wanted to build a kitchen table, but he still handed over the keys to his truck and off I went to the hardware store.

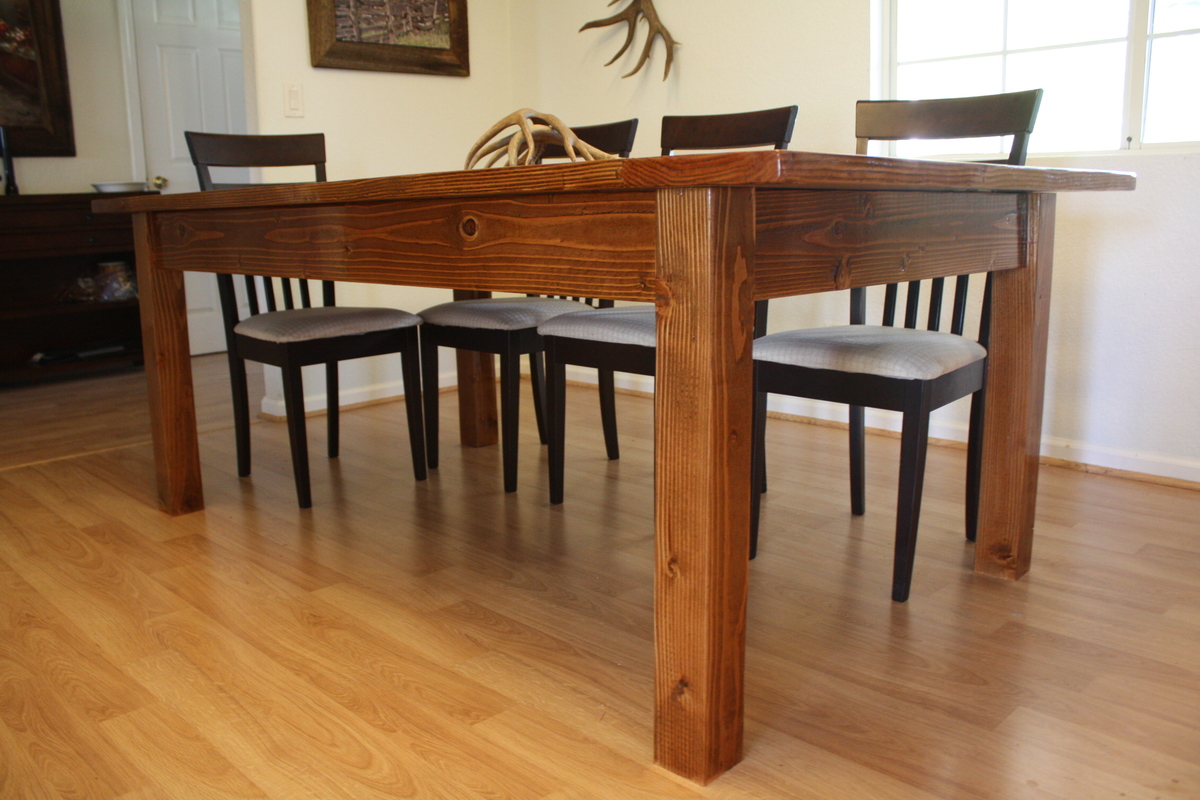
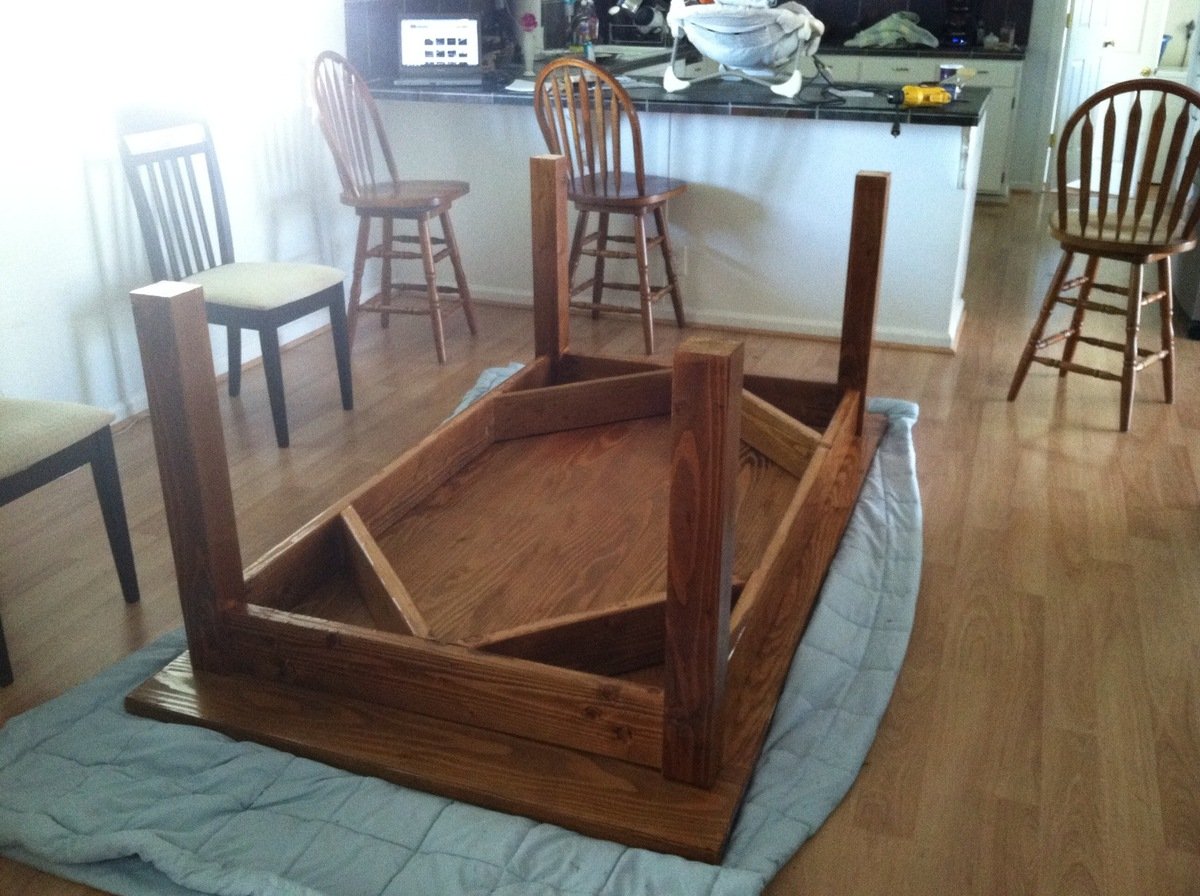
I built this during the night after my 4 month old son went down for the night, so usually around 7:30pm. I tried to be finished with anything loud (sanding) by 9pm. I changed the dimensions to be shorter and wider than the plans and I removed the stretchers since I wanted the option to put chairs on the ends. To keep the table sturdy and square I substituted 2 x 6 for the side boards instead of 2 x 4 and also added corner supports underneath. Because I had 2 x 6 as the side boards I also needed to make the table slightly higher to still give adequate leg room. The table is 31" high instead of the normal 30". The top is 2 x 10 tongue and groove clear Doug Fir left over from a flooring project.

I sanded the entire table starting with 80 grit, 120, 220 and then used 320 in between polyurethane coats. I also sanded down all corners and edges since in no time my son will be learning to walk and I want to avoid serious injuries by running into sharp corners.

.

Estimated Cost
$150
Estimated Time Investment
Weekend Project (10-20 Hours)
Finish Used
First coat was Watco Danish Oil Medium Walnut (brought more red out of the wood than I was anticipating) followed by two coats of Watco Danish Oil Dark Walnut. Applied 3 coats of Minwax Fast Drying Clear Gloss Polyurethane.
Recommended Skill Level
Beginner

Comments

Industrial shelf unit for basement bedroom

Submitted by PauletteC on Sat, 03/21/2015 - 06:34

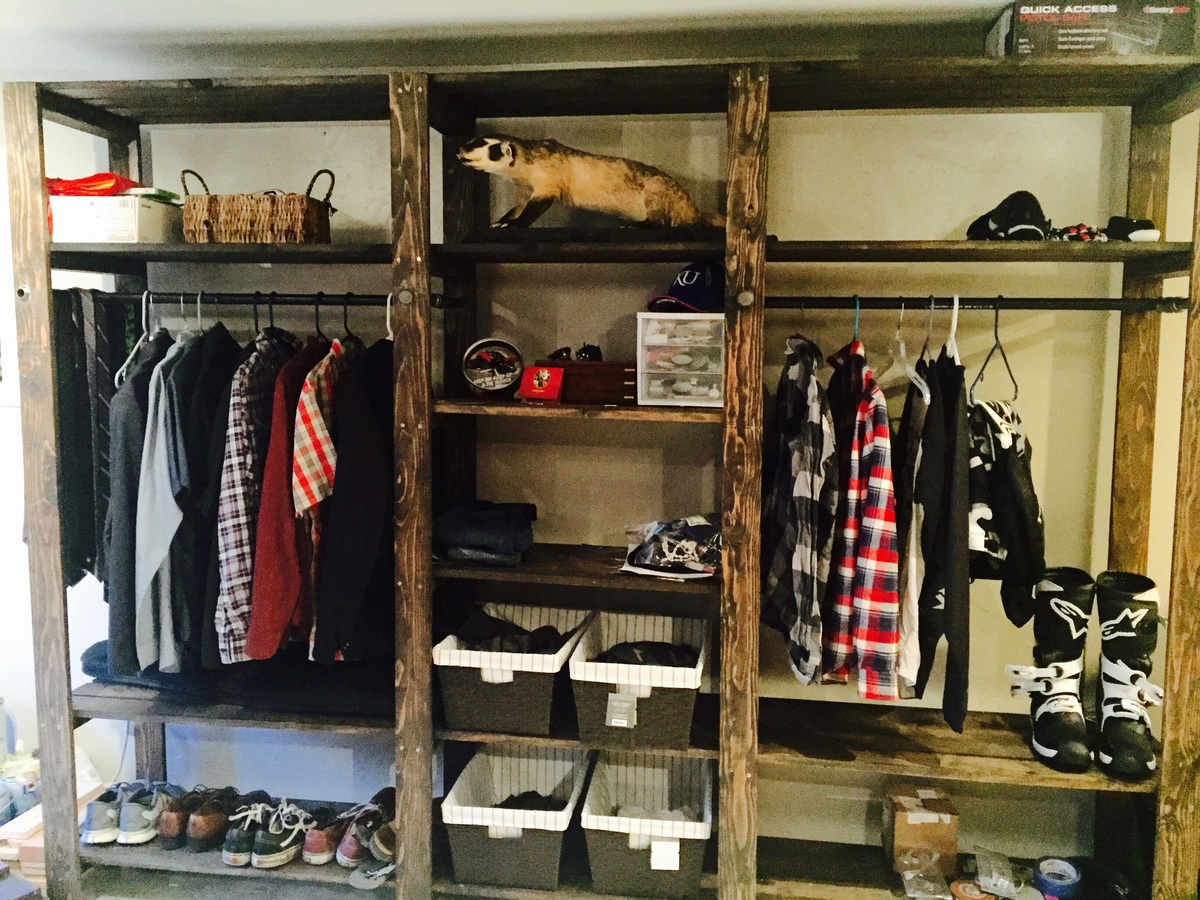
My son and I made this shelf unit when converting our basement to a dorm for him. While we think it turned out great, it DID take a lot longer than the plans suggest. The video suggests it can be completed in a couple of hours. It took us about 4 days. I found the instructions very clear which was very helpful. We chose a darker stain for our unit. It's very functional, although a little bit wobbly. My husband plans to attach it to the wall for better stability.  Thanks so much for a perfect solution to a room without a closet! He loves it and we've received many compliments. And I liked that we built it together. Cost was spot on for what you estimated. About $200

Built from Plan(s)
Estimated Time Investment
Weekend Project (10-20 Hours)
Recommended Skill Level
Intermediate

Comments

Console turned TV Stand

Submitted by Anonymous (not verified) on Thu, 06/22/2017 - 12:18

Took the console table and made some slight modifications to give different compartments for a TV stand :) Currently made the "Rustic" themed coffee table and some end tables. All have the matching "X" accents on the sides. Cabinet set into the center with shelves on either side. It's nice to have customized shelf heights for my various TV accessories. 

Built from Plan(s)
Estimated Time Investment
Weekend Project (10-20 Hours)
Finish Used
Minwax Dark Walnut
2 coats of Minwax Clear Semi-Gloss
Recommended Skill Level
Intermediate

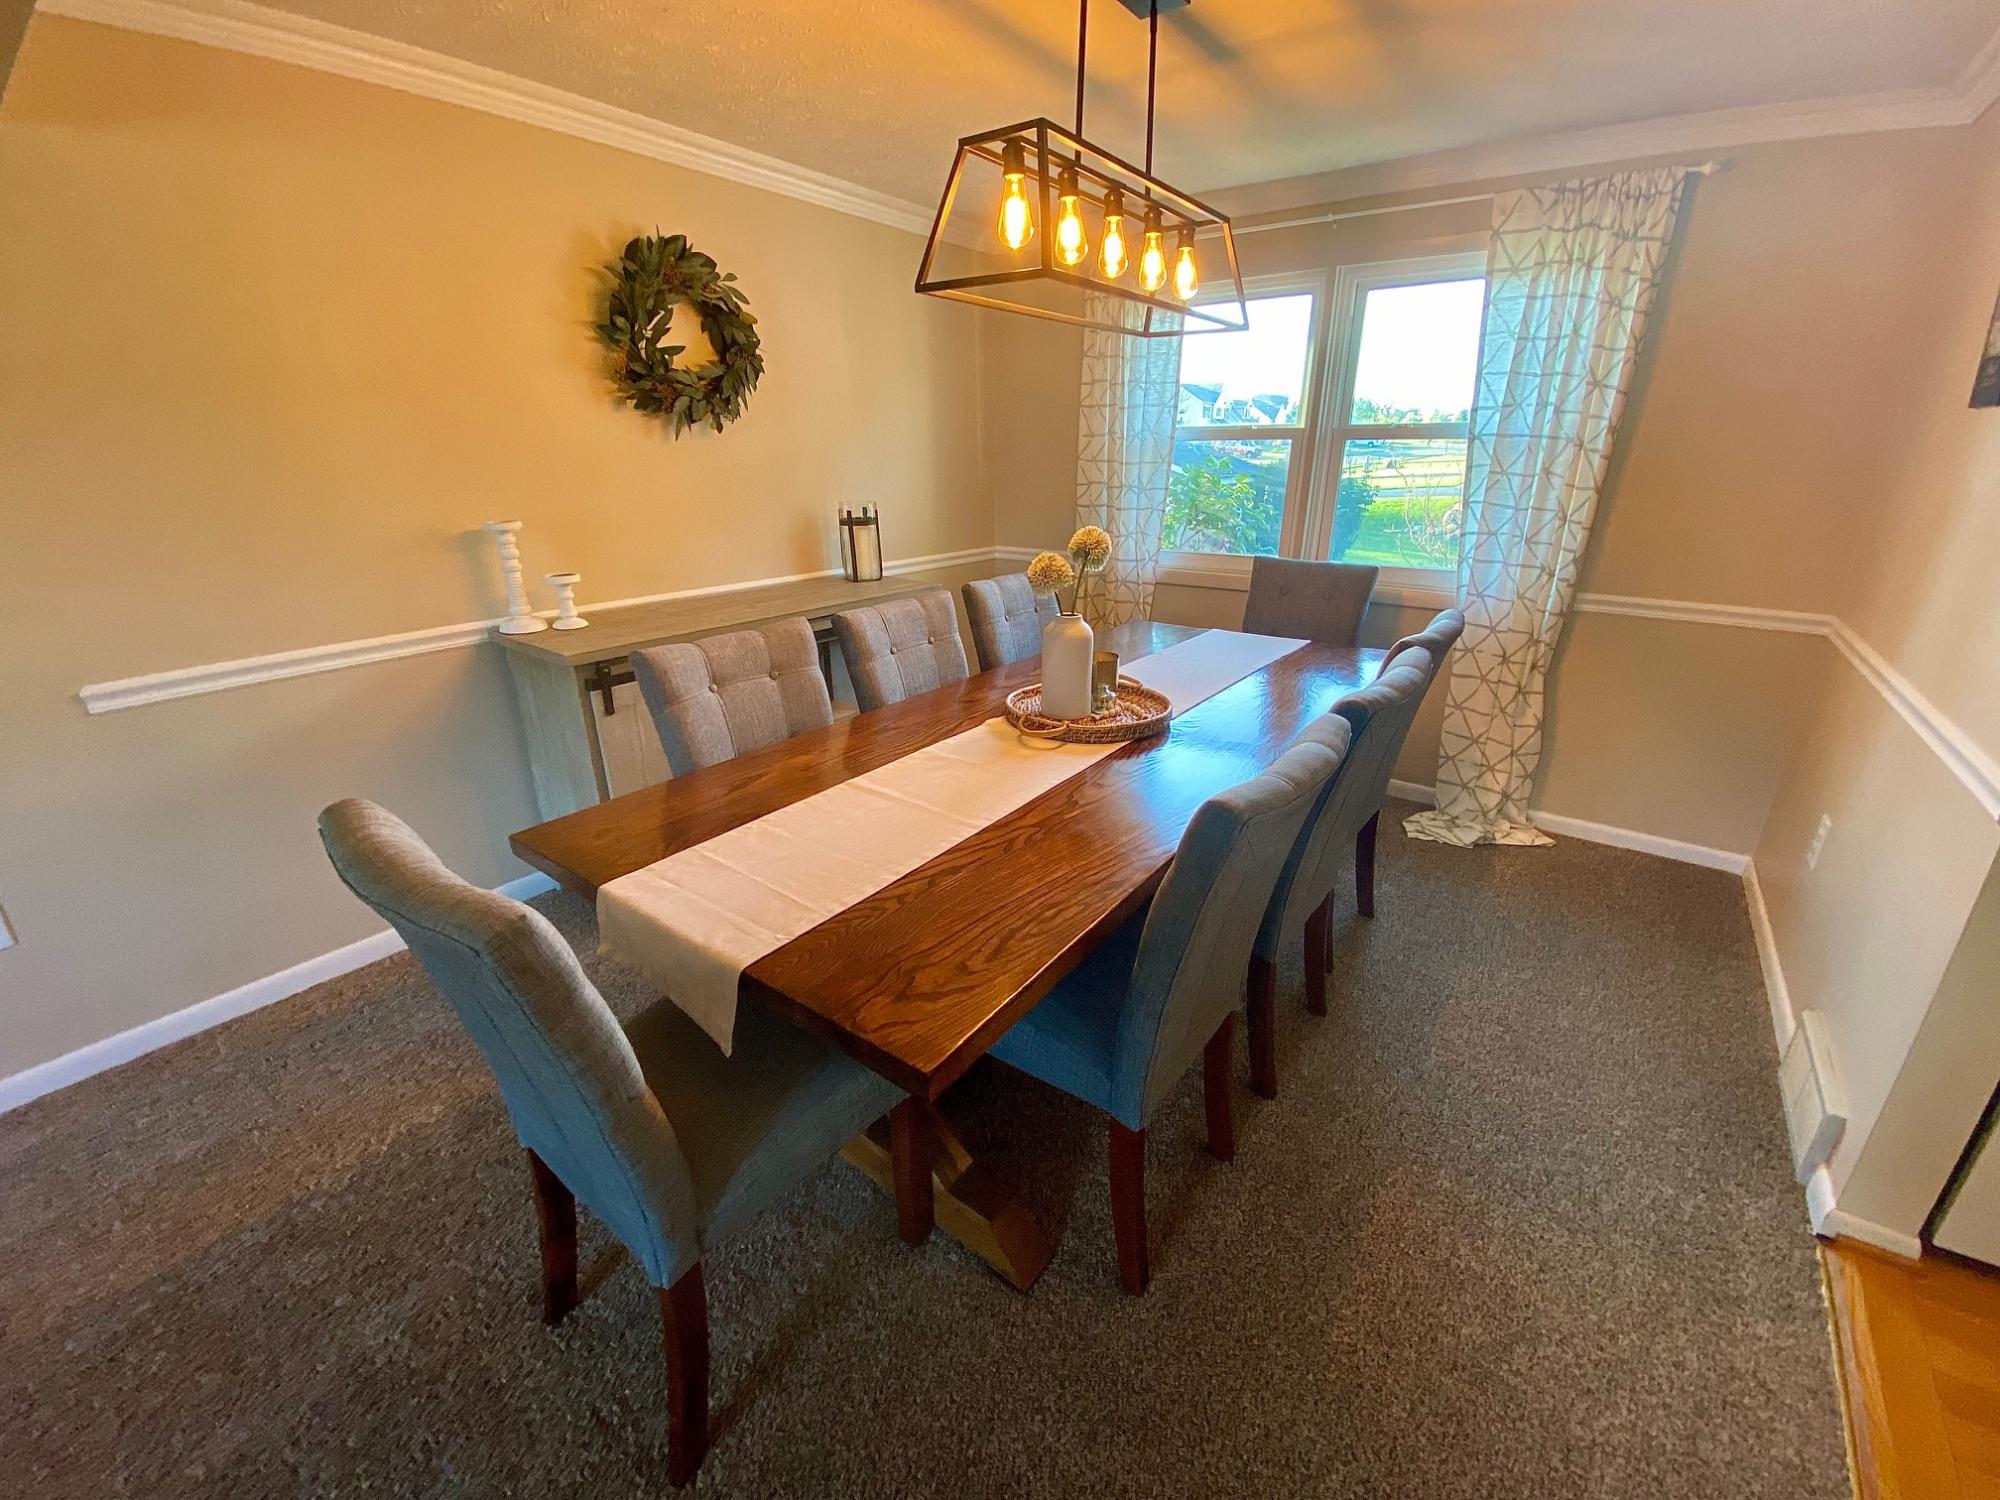
Fancy X Farmhouse Table

Submitted by classywolf on Mon, 09/13/2021 - 09:13

First AW project - very easy to follow with the plans, comments, and some basic problem solving. We like others did substitute some 4x4s for her stacked 2x4s.

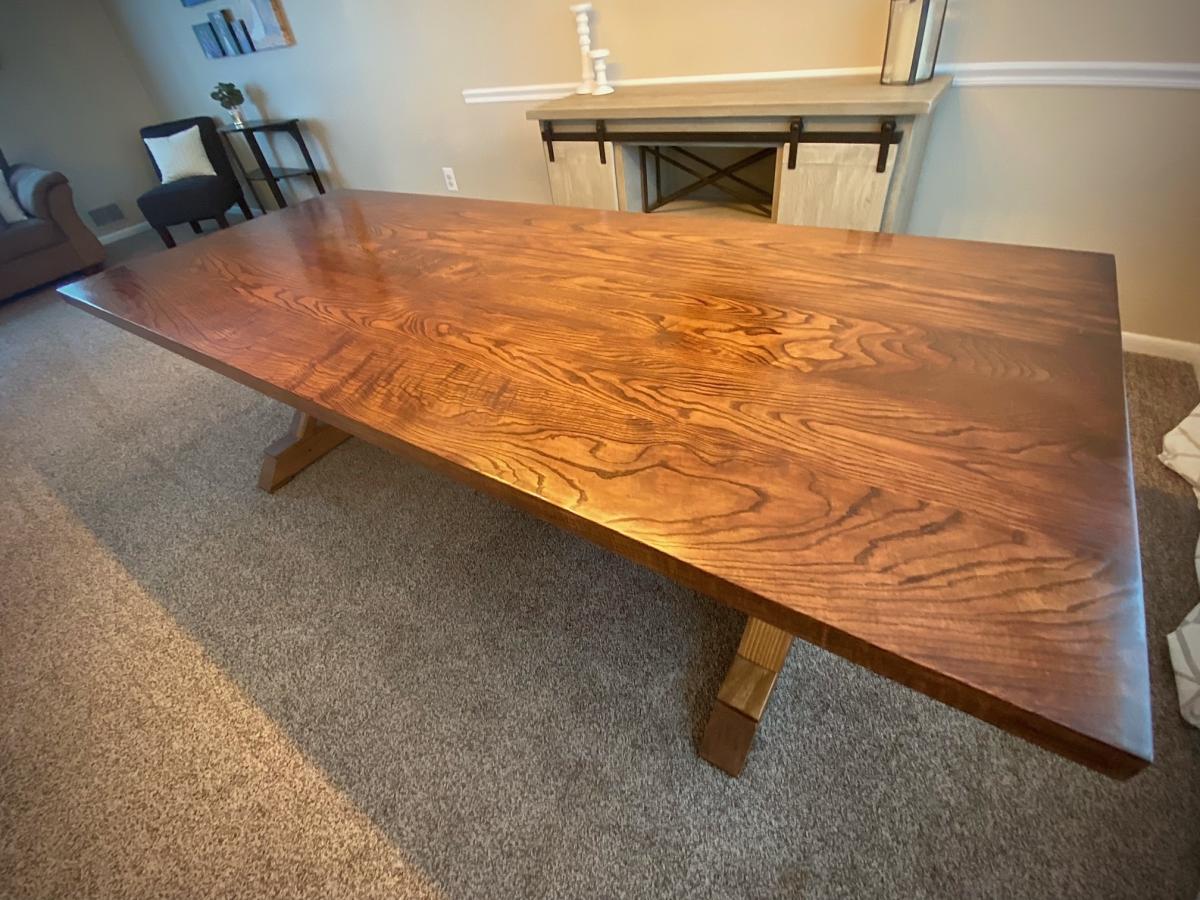
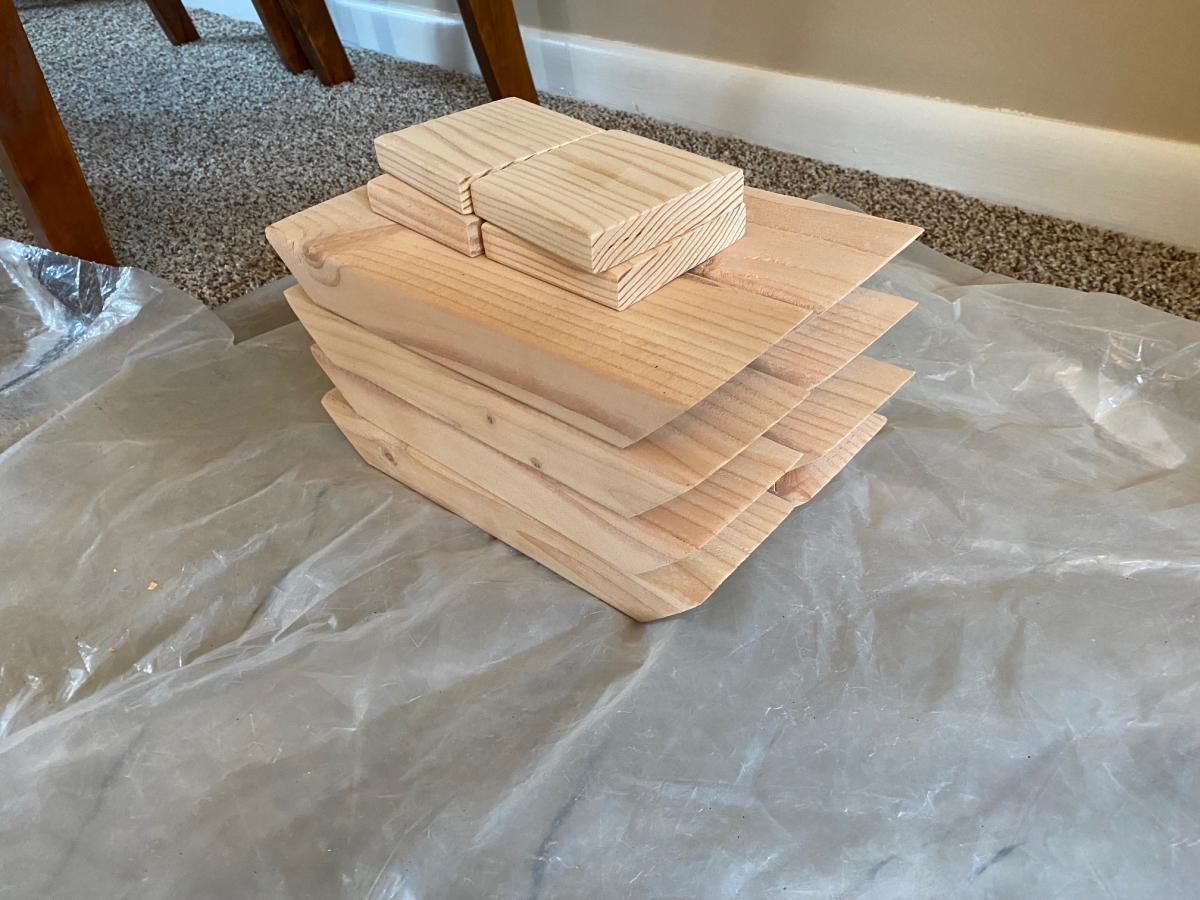
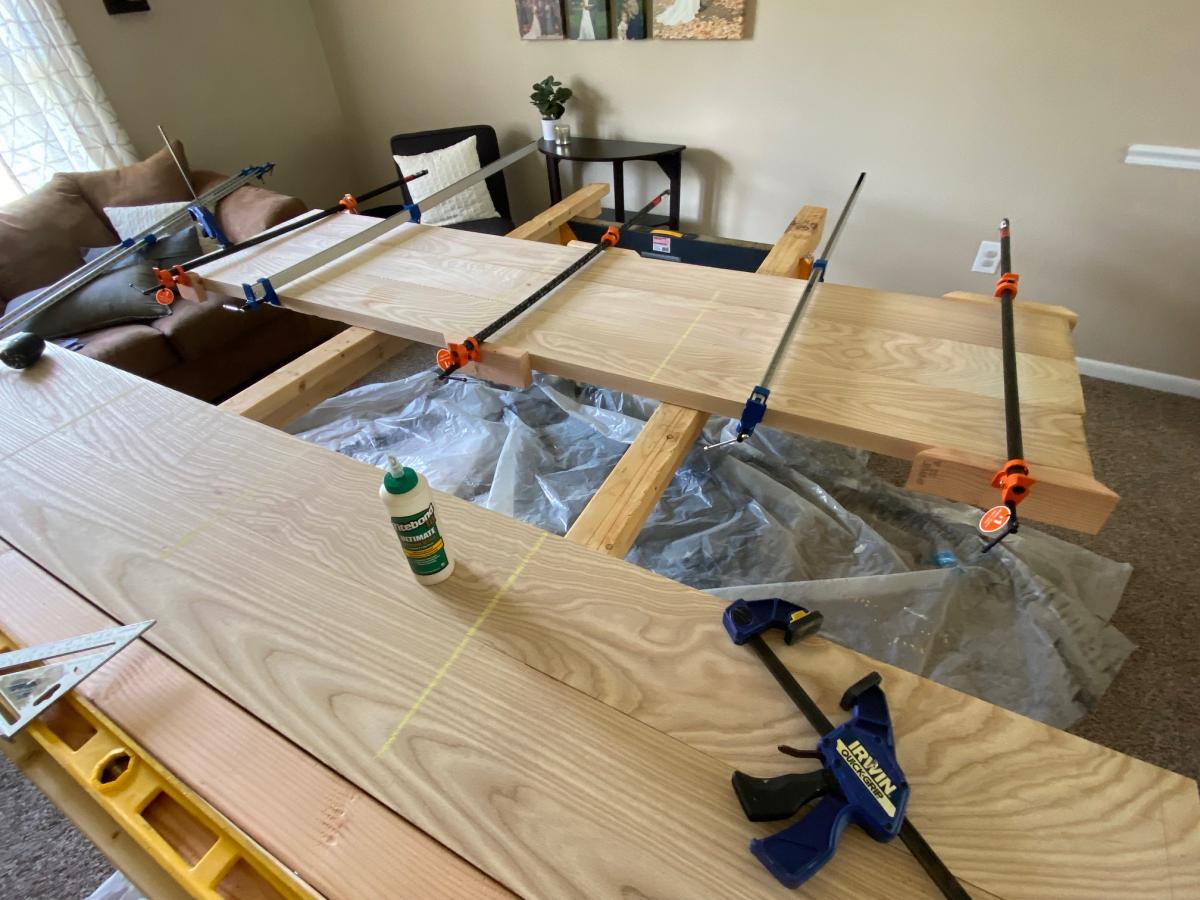
We used 2x8 Ash boards for the top, rough milled down at a local hardwood depot. ($600...Ouch). The lumber was glued up with Titebond iii and clamped with pipe clamps. Then used a combination of electric planer and belt sander to make sure it was completely flat and even after the glue up. Finish sanding was done with a 6" orbital, and the ends were cut flush with a circ saw.

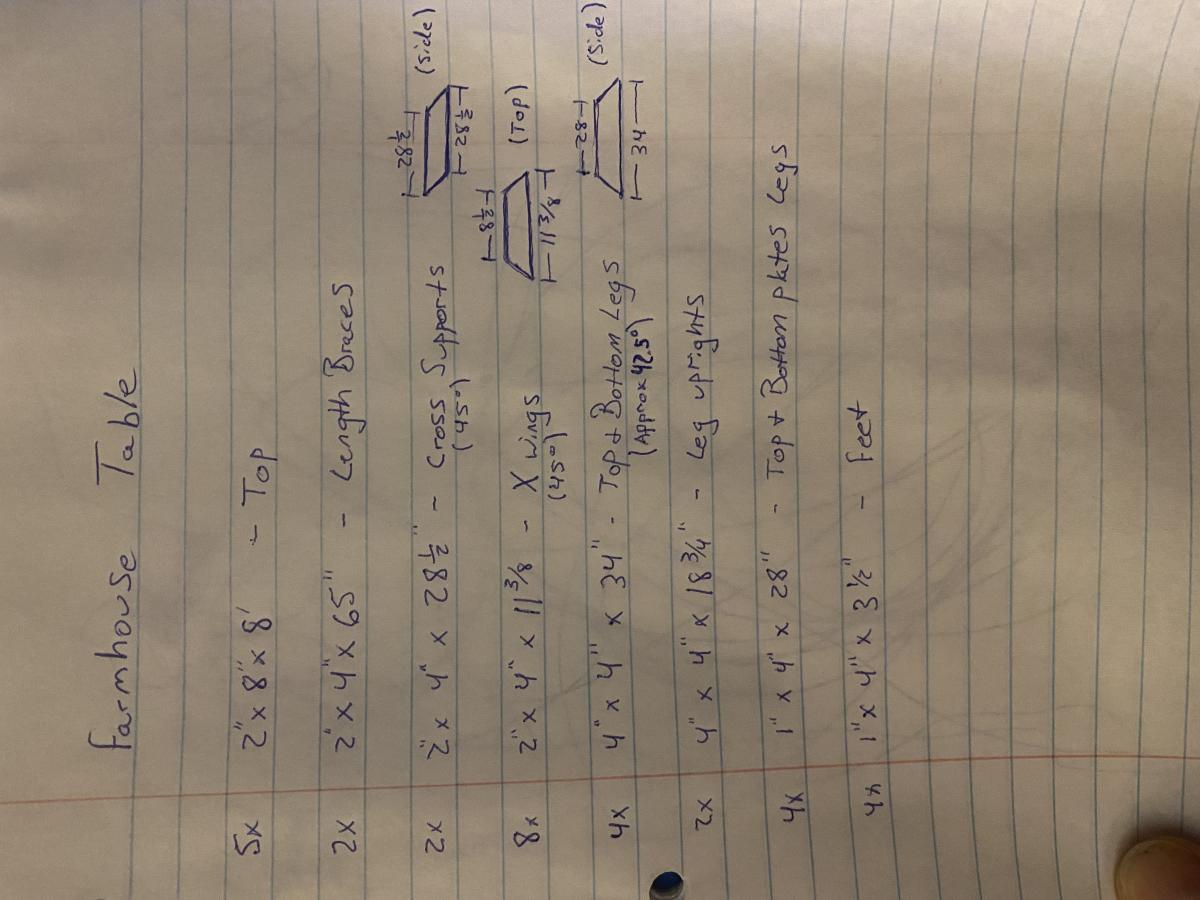
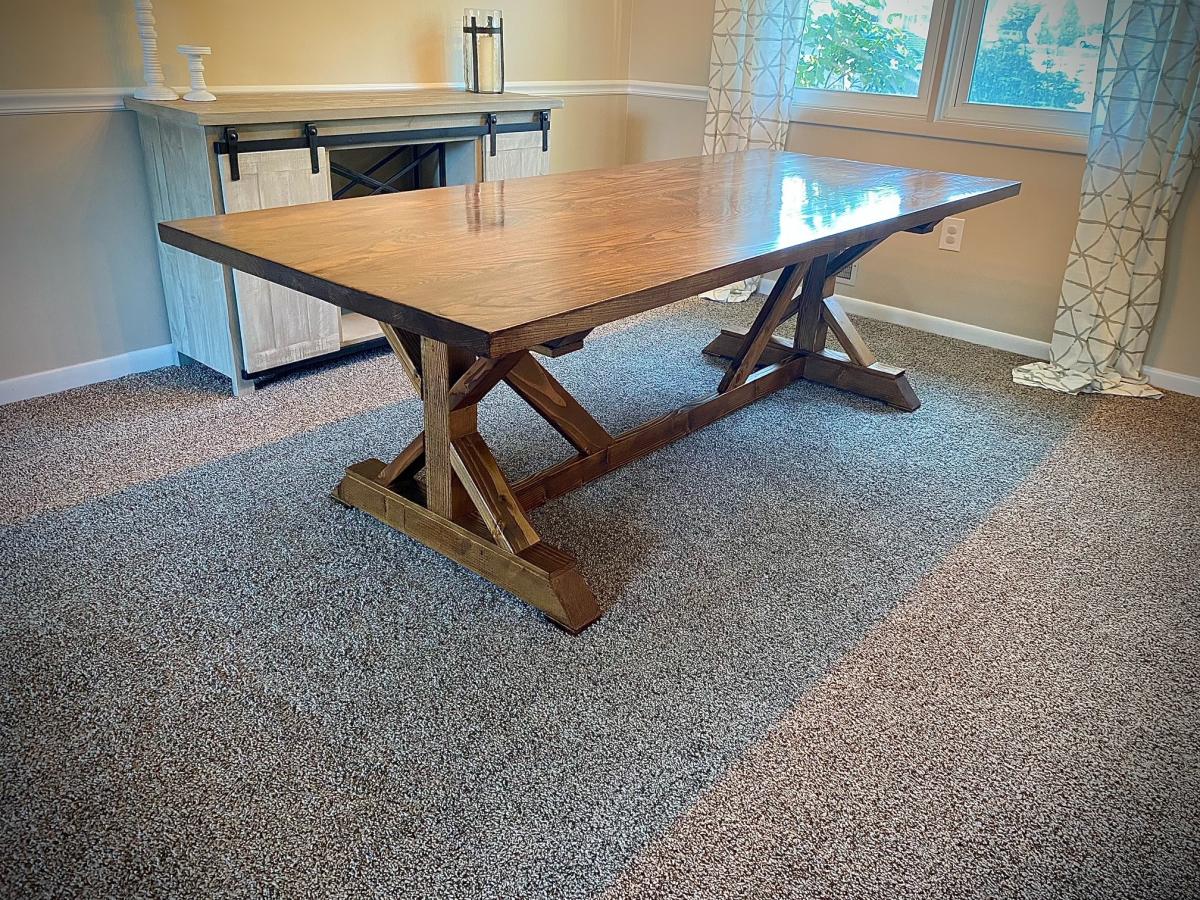
The base of the table was the easiest (and cheapest). It is made of kiln dried Doug Fir from the blue big box store. A photo of the cut list we used is attached. Used a chop saw for everything. This video helped visualize everything even though ours were not exactly the same. We used similar screw selection as this video as well:

https://www.youtube.com/watch?v=qg_hwoekV80

We used a kreg bit to predrill/counter sink our screws. Then purchased Douglas fir wood plugs from this etsy user. Didnt feel like cutting our own. This user has a lot of other species as well.

https://www.etsy.com/listing/991000659/douglas-fir-clear-tapered-wood-p…

A lot of people had questions about how to connect the top to the base. We routed a groove on the top of the base on each side and connected the two with Z clips. We used this method:

https://www.youtube.com/watch?v=J7Z69COtzzw

And these clips:

https://www.amazon.com/Table-Fasteners-Connectors-Screws-Brackets14/dp/…

Finishing was the most stressful part. Our first staining attempt was very blotchy despite being sanded very well and using a preconditioner. Since we spent so much money on the top and wanted this to be a perfect heirloom piece, we ended up re-planing and sanding the whole top (Kill me). We then used this method to precondition the wood by The Wood Whisperer - which worked great:

https://youtu.be/rjPX1byriM8

The table final coat was finished using these methods by PMK Woodworking. 3:2:1 ratio of
Mineral Spirits: Oil Based Poly: Boiled Linseed Oil:

https://www.youtube.com/watch?v=MxP5YuTHyic
https://www.youtube.com/watch?v=J_6g4oGEJ5s

Overall very happy. Took way longer and cost way more than expected. But hopefully will be our forever table that our kids will fight over one day. If you wanted to do this cheap and have it look rustic with imperfections, that would also be great and very doable.

Thanks to Ana, all the links above, and all your comments!
Good luck

Built from Plan(s)

Comments

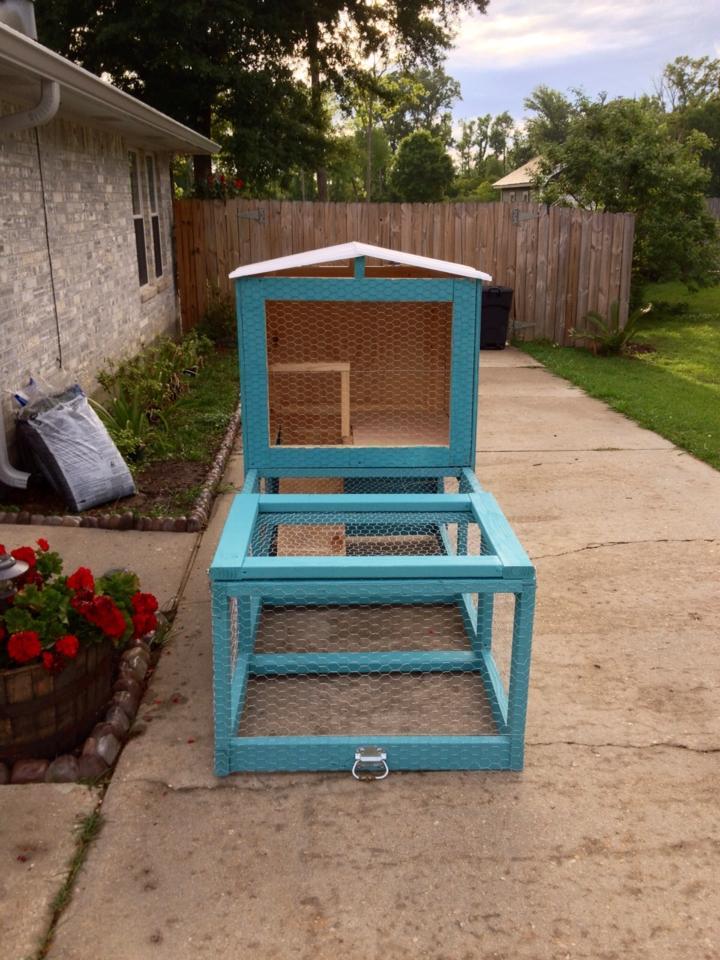
Chicken Tractor

Submitted by Cliffhorn on Thu, 05/02/2013 - 07:26

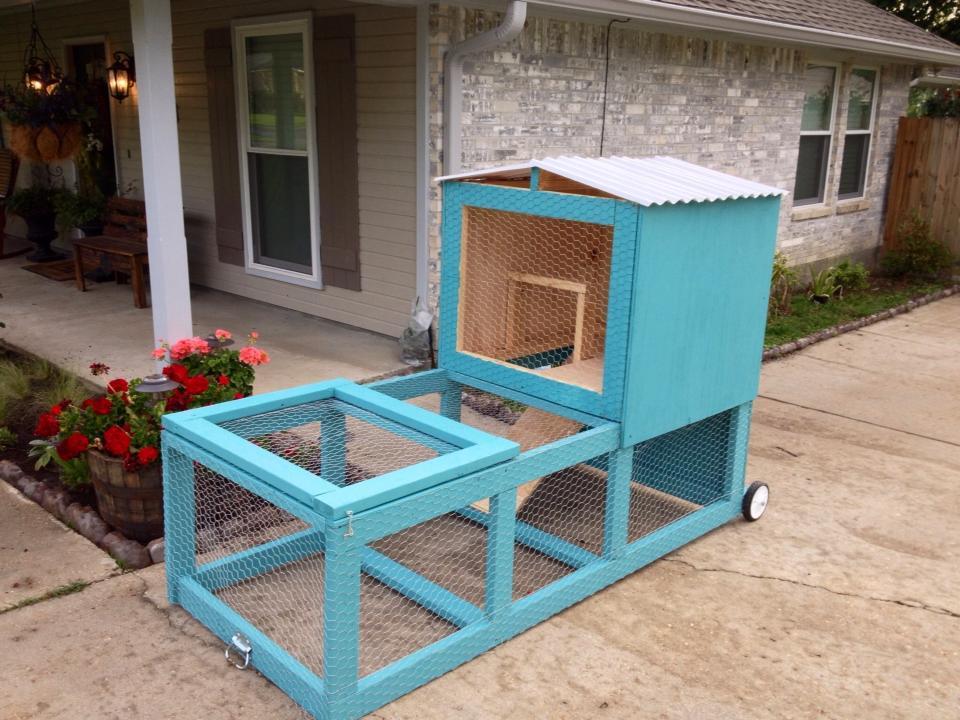
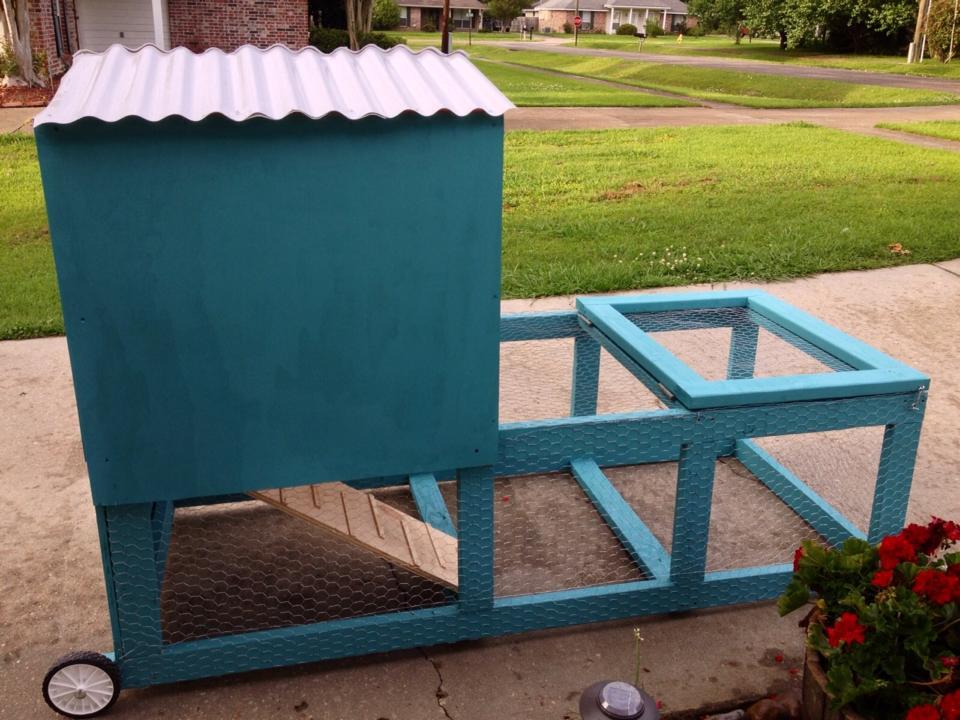
A friend of mine got two baby chicks and needed something for them to live in. She also wanted to be able to move it around the yard so they could have freah grass to be on. It uses 2x4s, 3/4 plywood, chicken wire, and plastic roofing. It was a fun build.

Estimated Time Investment
Day Project (6-9 Hours)
Recommended Skill Level
Starter Project

Comments

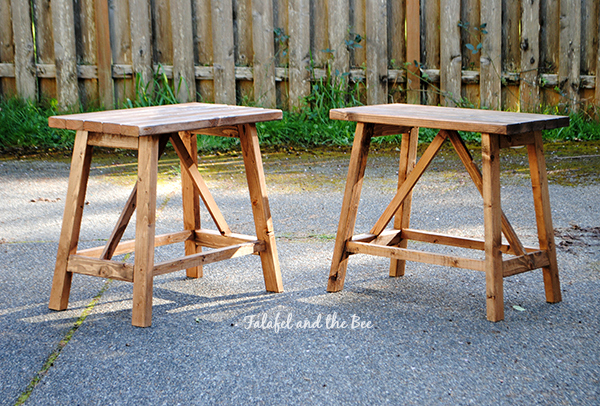
Truss End Table

My husband and I built these end tables together. The construction took about 3 hours.

Built from Plan(s)
Estimated Time Investment
Afternoon Project (3-6 Hours)
Finish Used
Minwax Special Walnut 224 stain
and Polycryllic
We only used these because the stain matched the table I built. The off-gassing takes a little too long for me (because I am chemical sensitive). I have used Saman products for other projects and liked them much better.
Recommended Skill Level
Intermediate

Comments

Painter Ladder Shelf (modified)

Client wanted some to sell cookies out on her porch. So I added a blackboard at her request so she could put prices and e-transfer info. Top shelf will also house an honor box for cash. Papa & Grammy Creations.

Built from Plan(s)

Comments

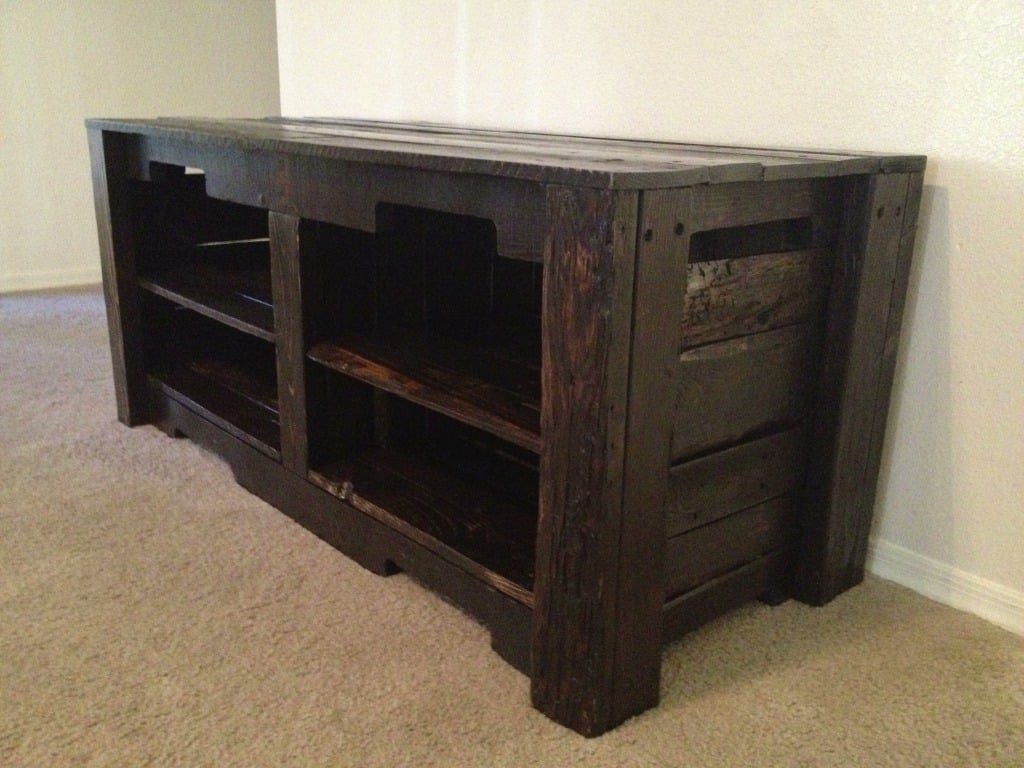
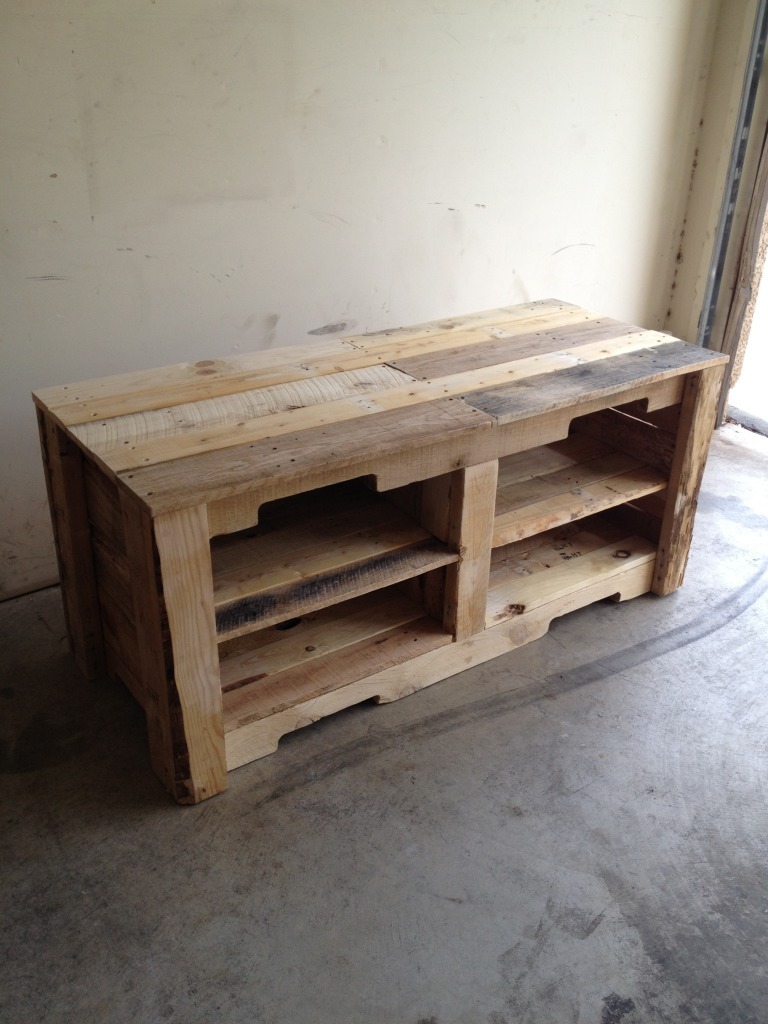
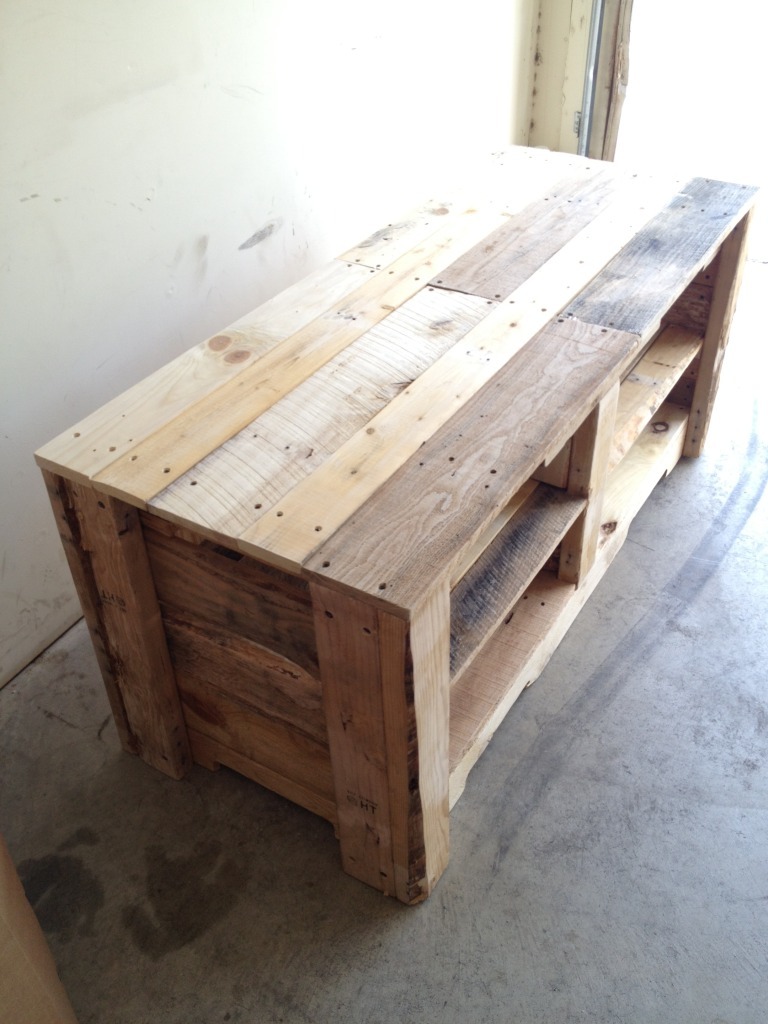
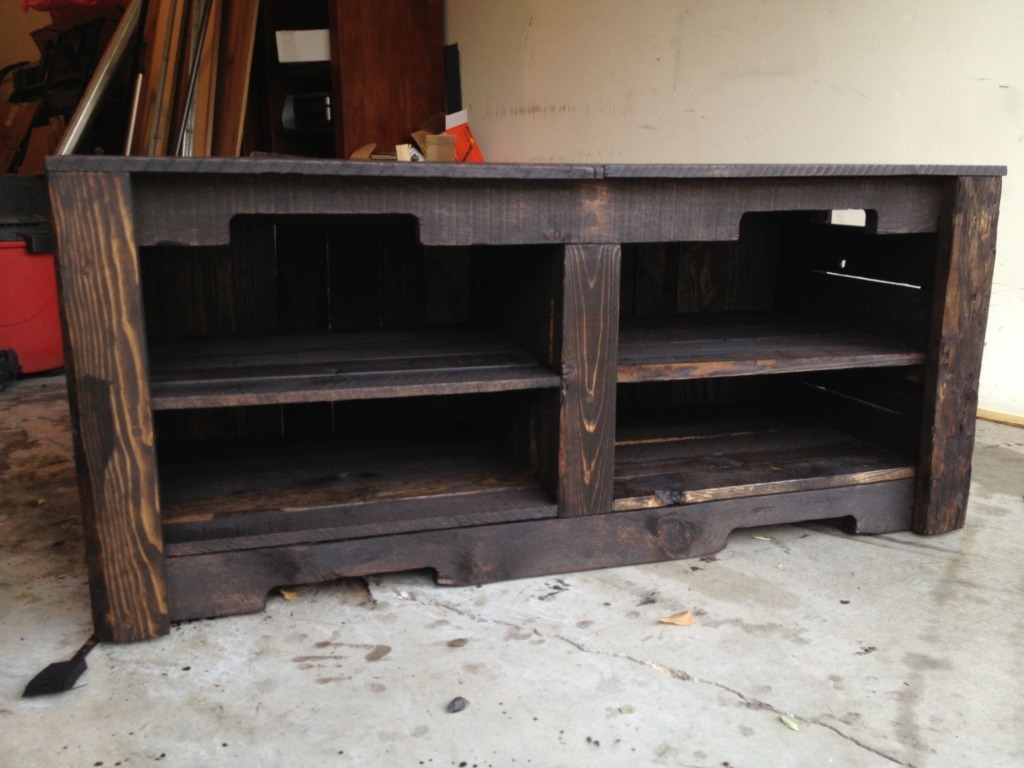
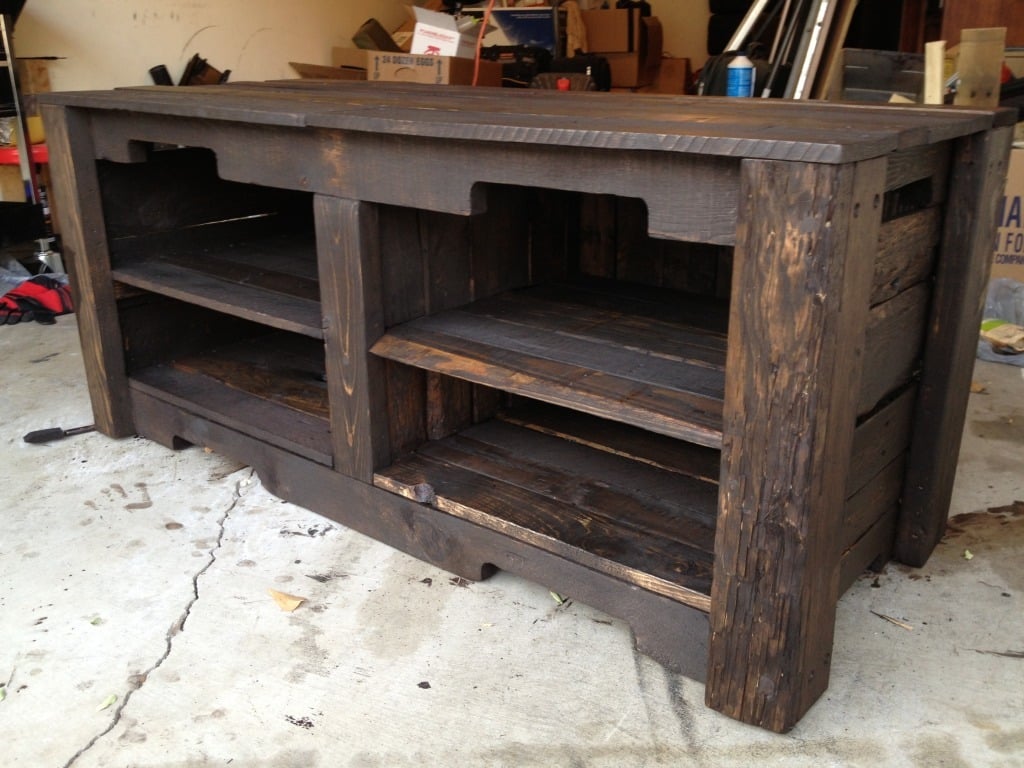
Very first build...Rustic Media Center

Submitted by tcoche on Sun, 05/05/2013 - 19:14

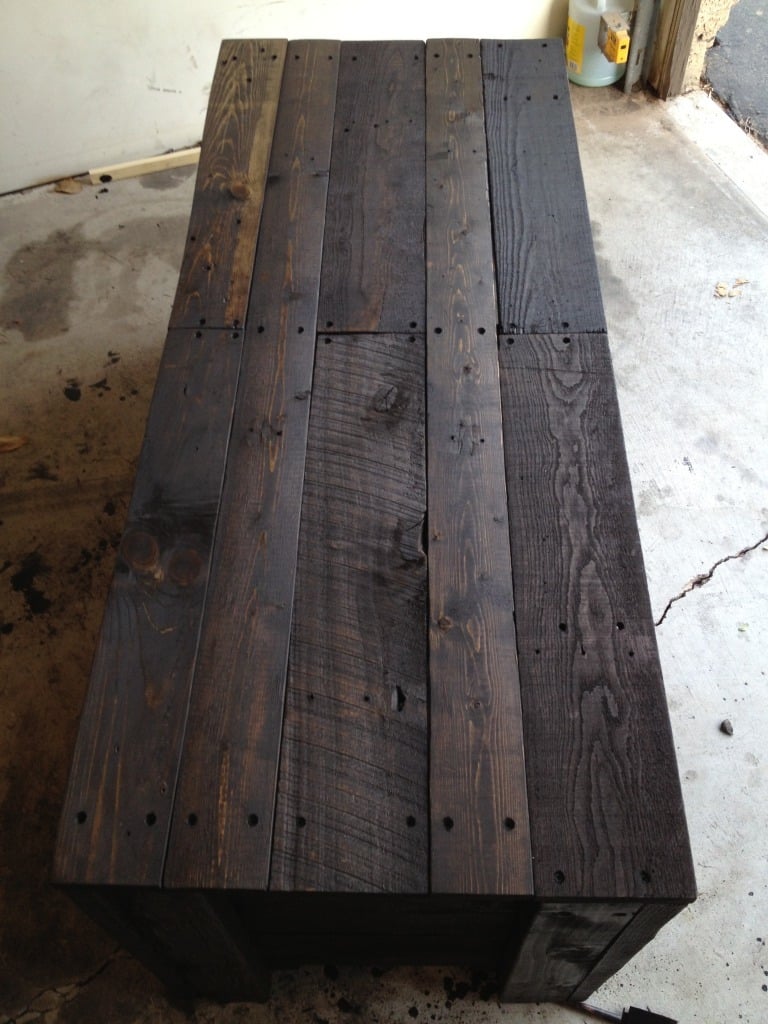
I really dont have any plans for this build. I wanted to purchase a nice rustic media center for my living. I am mounting my flat screen on the wall and wanted a cool media center to sit below it. So I came up with this project. I still plan on lightly sanding it some to bring out the grain and have that look of streaks. I also still need to add polycrylic, clear gloss. I literally just got done staining it. The pictures really dont do it any justice. It looks wayy better in person. Being that this is my first project it took me 1 week to build, sand and stain. Still have some work to put it to it, just a coat of polycrylic and light sanding. I probably have over 30 hours in to this build and around 40 bucks for screws, sandpaper, stain, glue and countersink bits. I think that is it, if you have any questions or comments please let me know! :)

Estimated Time Investment
Week Long Project (20 Hours or More)
Finish Used
Kona stain and soon to be minwax polycrylic
Recommended Skill Level
Starter Project

Comments

tcoche

Tue, 05/07/2013 - 19:09

Thank you!! I appreciate it. While I was staining it in my garage, with the garage door open. I had a few couples that walked by stop to talk and ask questions about the piece. Made me feel good that your hard work is appreciated. Thanks again!

Stacy Daybed

Submitted by Dave1344 on Wed, 03/25/2015 - 14:52

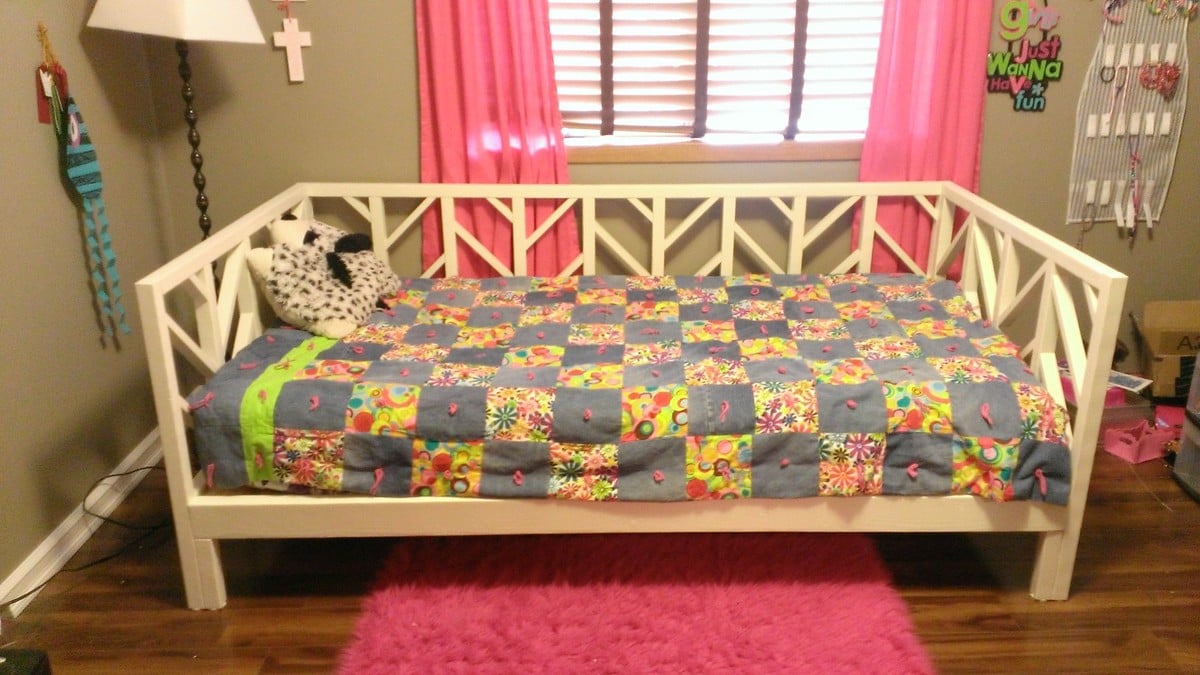
My daughter needed a new bed and I needed a project, so we headed to ana-white.com to find a plan that filled both of our needs.  We settled on the Stacy Daybed and got to work.

I followed the plans pretty much on par, but made a few minor changes to make it easier to take apart and put back together. You can also see that I added width to the legs in front, allowing the weight of the sleeper to set on the legs instead of being supported solely by the furniture bolts and metal thread inserts I used to hold it together.  I duplicated this in back to keep the design balanced.
This project was fun and challenging and the plans were very easy to follow as well as modify to my needs. 

Built from Plan(s)
Estimated Cost
$100
Estimated Time Investment
Week Long Project (20 Hours or More)
Finish Used
Dutch Boy Antique White. I used a 4 inch roller for the frame and flat parts, but needed to brush on all the angles. It was time consuming, but turned out really nice.
Recommended Skill Level
Intermediate

One Arm Outdoor Sectional Piece

Submitted by Anonymous (not verified) on Mon, 06/26/2017 - 11:24

Father and son project. Took less than half a day. Already have three offers to build for friends. Couldn't find 10' Cedar so had to use 8'  Using scrap pieces of cedar to make a coffee table. Great plans! 

Estimated Cost
$580. $260 for wood. $50 a pair for cushions.
Estimated Time Investment
Afternoon Project (3-6 Hours)
Finish Used
Unfinished for now. Will probably clear coat.
Recommended Skill Level
Intermediate

2x4 Adirondack Chairs

Submitted by skow23 on Mon, 10/04/2021 - 12:35

My first “Ana White plans” project. Great plans and easy to follow. Very comfortable chairs.

Comments

DIY Backyard Climbing Gym

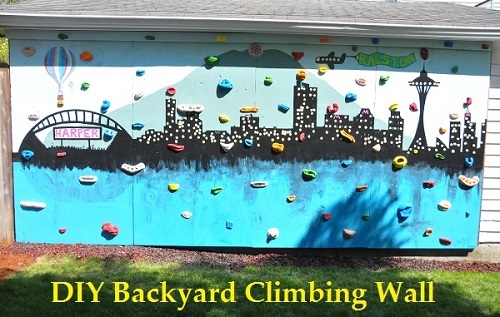
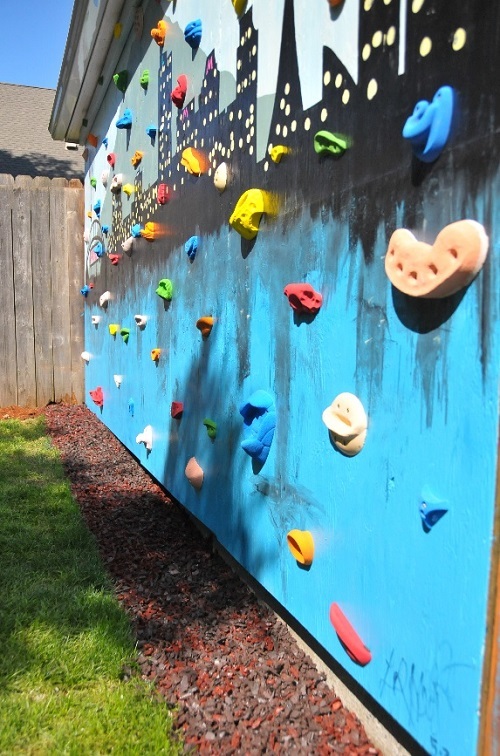
My very first woodworking project was Ana-White's farm house bed! I've made so many projects now, I decided to start fancy'ing up my backyard!. We took all pressure treated wood to make the wall foundation, painted it, sealed it, then used Screw on Holds to make the climbing portion.

I have a full tutorial listed here http://www.impatientlycrafty.com/2013/05/07/diy-backyard-climbing-wall/

Thanks Ana for helping inspire me to create more wood stuff!!!

Estimated Cost
$500
Estimated Time Investment
Weekend Project (10-20 Hours)
Finish Used
I painted with latex paint, and acrylic paint, then sealed it with rustoleum clear coat (4-5 coats)

we simply sketched out the design from ideas online..
Recommended Skill Level
Beginner

Farmhouse King Bed

Submitted by J_hebert on Sat, 03/28/2015 - 20:22

We finally built the #1 Project on my to do list. Took about 3 Days total with finishing and all. Love it so much, defintately my fave project to date! Have to do nightstands next!

Estimated Time Investment
Weekend Project (10-20 Hours)
Finish Used
One Coat Minwax weathered oak ( Canadians can find it at Rona) One coat Special Walnut
Recommended Skill Level
Intermediate

Comments

Junior loft bed

Submitted by Anonymous (not verified) on Thu, 06/29/2017 - 09:55

My very first furniture build! Took me about 5 days, but as a beginner I found it very easy to follow the plans. I did buy a Kreg jog for this project, highly recommend it! Other tools used were a miter saw, circular saw, and drill.

Estimated Cost
$80
Estimated Time Investment
Week Long Project (20 Hours or More)
Finish Used
Ebony stain
Recommended Skill Level
Beginner

Farmhouse nightstand

Submitted by Anonymous (not verified) on Mon, 10/04/2021 - 12:55

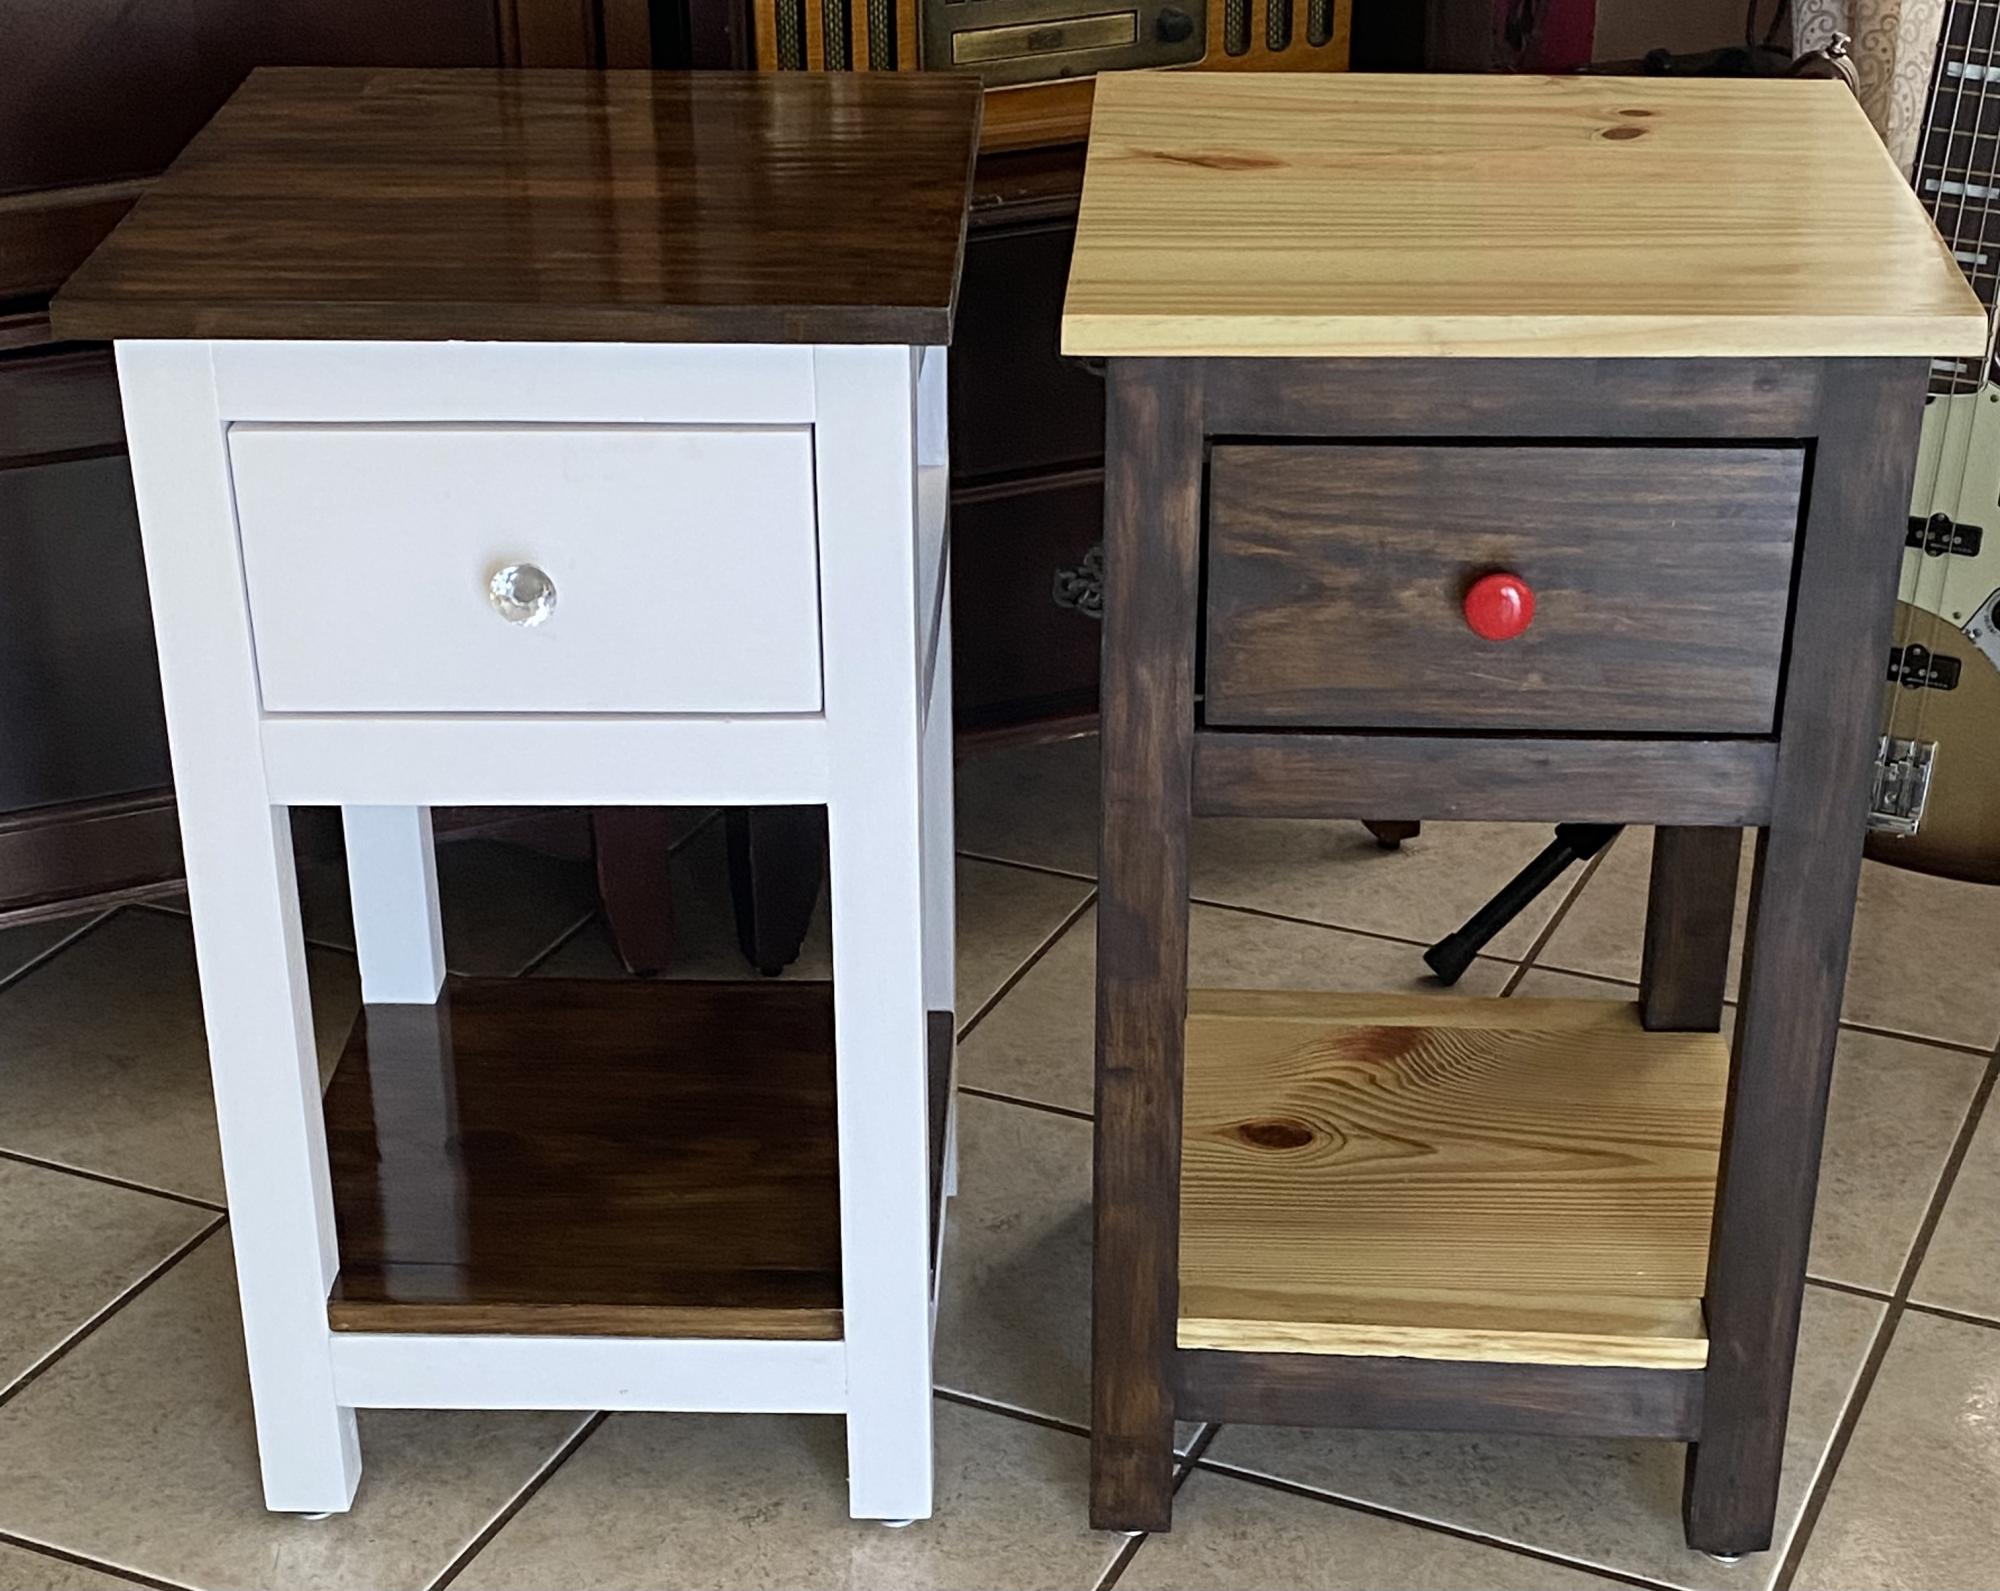
I have built various projects. A work table, a barn door cabinet and couple of Farmhouse nightstands for my grandson and granddaughter. It was fun!!

Comments

Kelsey's Simple Cheap Easy Console Table

Submitted by community-cont… on Fri, 02/25/2011 - 10:43

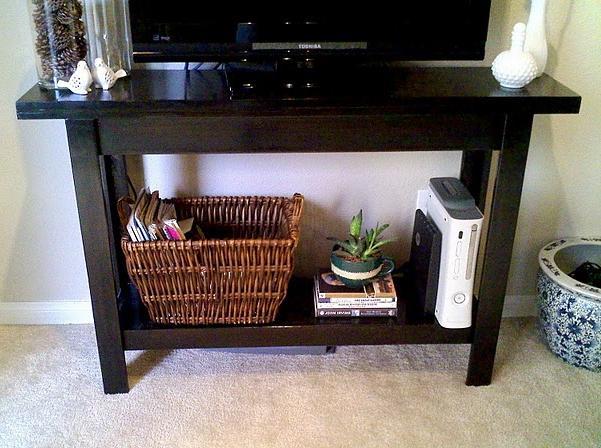
I just wanted to send in some photos of the simple, cheap, and easy console table that my father and I made a couple weeks ago. It only took us 3 1/2 hours to build, and your plans made it incredibly easy for beginning carpenters like us! We modified the plans slightly by adding a fully functionable shelf to the bottom, and used the Minwax stain in Ebony for a sleek Pottery Barn meets Cost Plus look. The total cost for this project was less than $50, and we still have leftover wood for future projects! Your tutorials are great, they make carpentry not-so-scary for beginners like us!! Thank you, thank you, thank you!! For more pictures, feel free to drop by my blog http://www.jamesandkelsey.com/ Thanks again!

Estimated Cost
$50
Estimated Time Investment
Afternoon Project (3-6 Hours)
Recommended Skill Level
Beginner

Sandbox with built-in hinged benches

Submitted by jlhamilton on Thu, 05/09/2013 - 11:55

Gave the plans to my father-in-law who built it for our daughter. Turned out great with no real issues with the plans! I love having the lid/seats built into the design.

Estimated Time Investment
Day Project (6-9 Hours)
Finish Used
Left it sanded but unfinished. No stain or paint.
Recommended Skill Level
Beginner

Comments