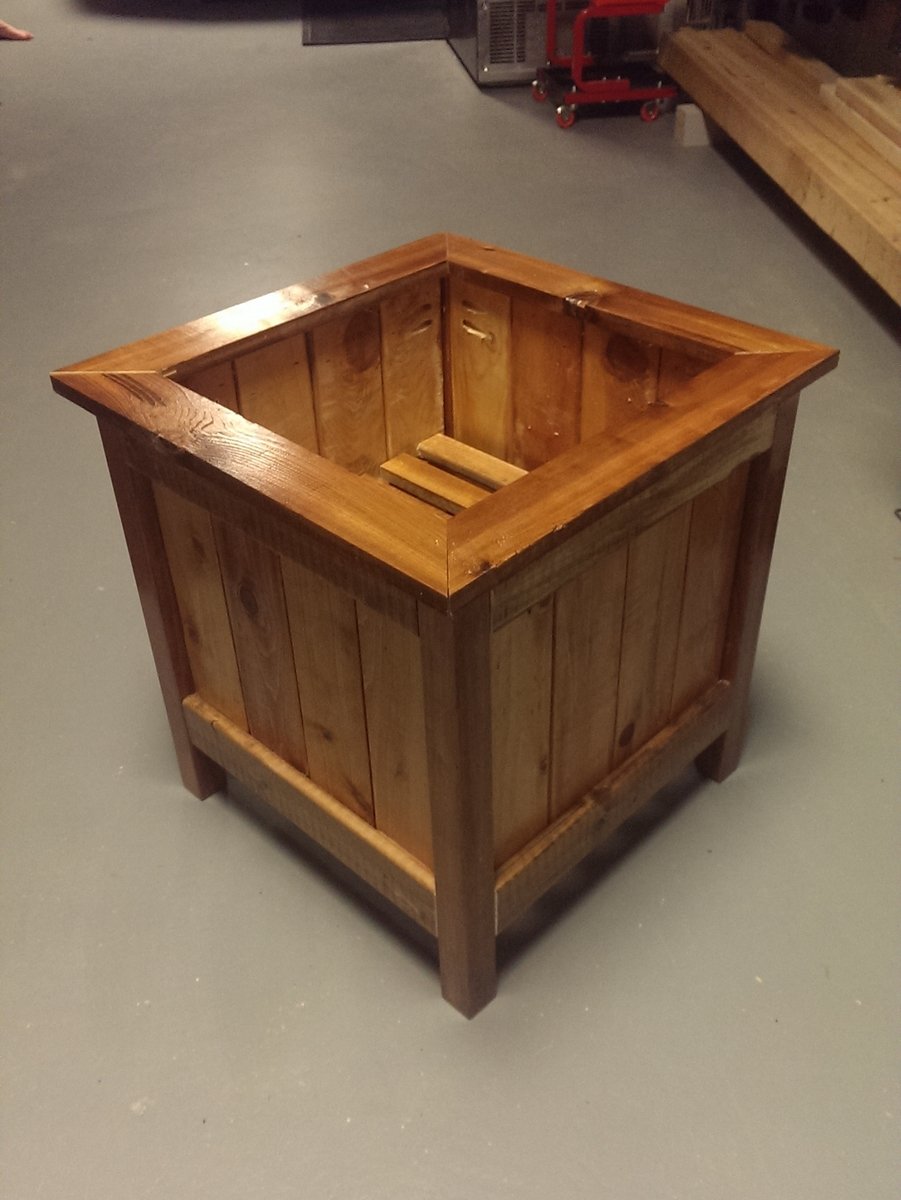
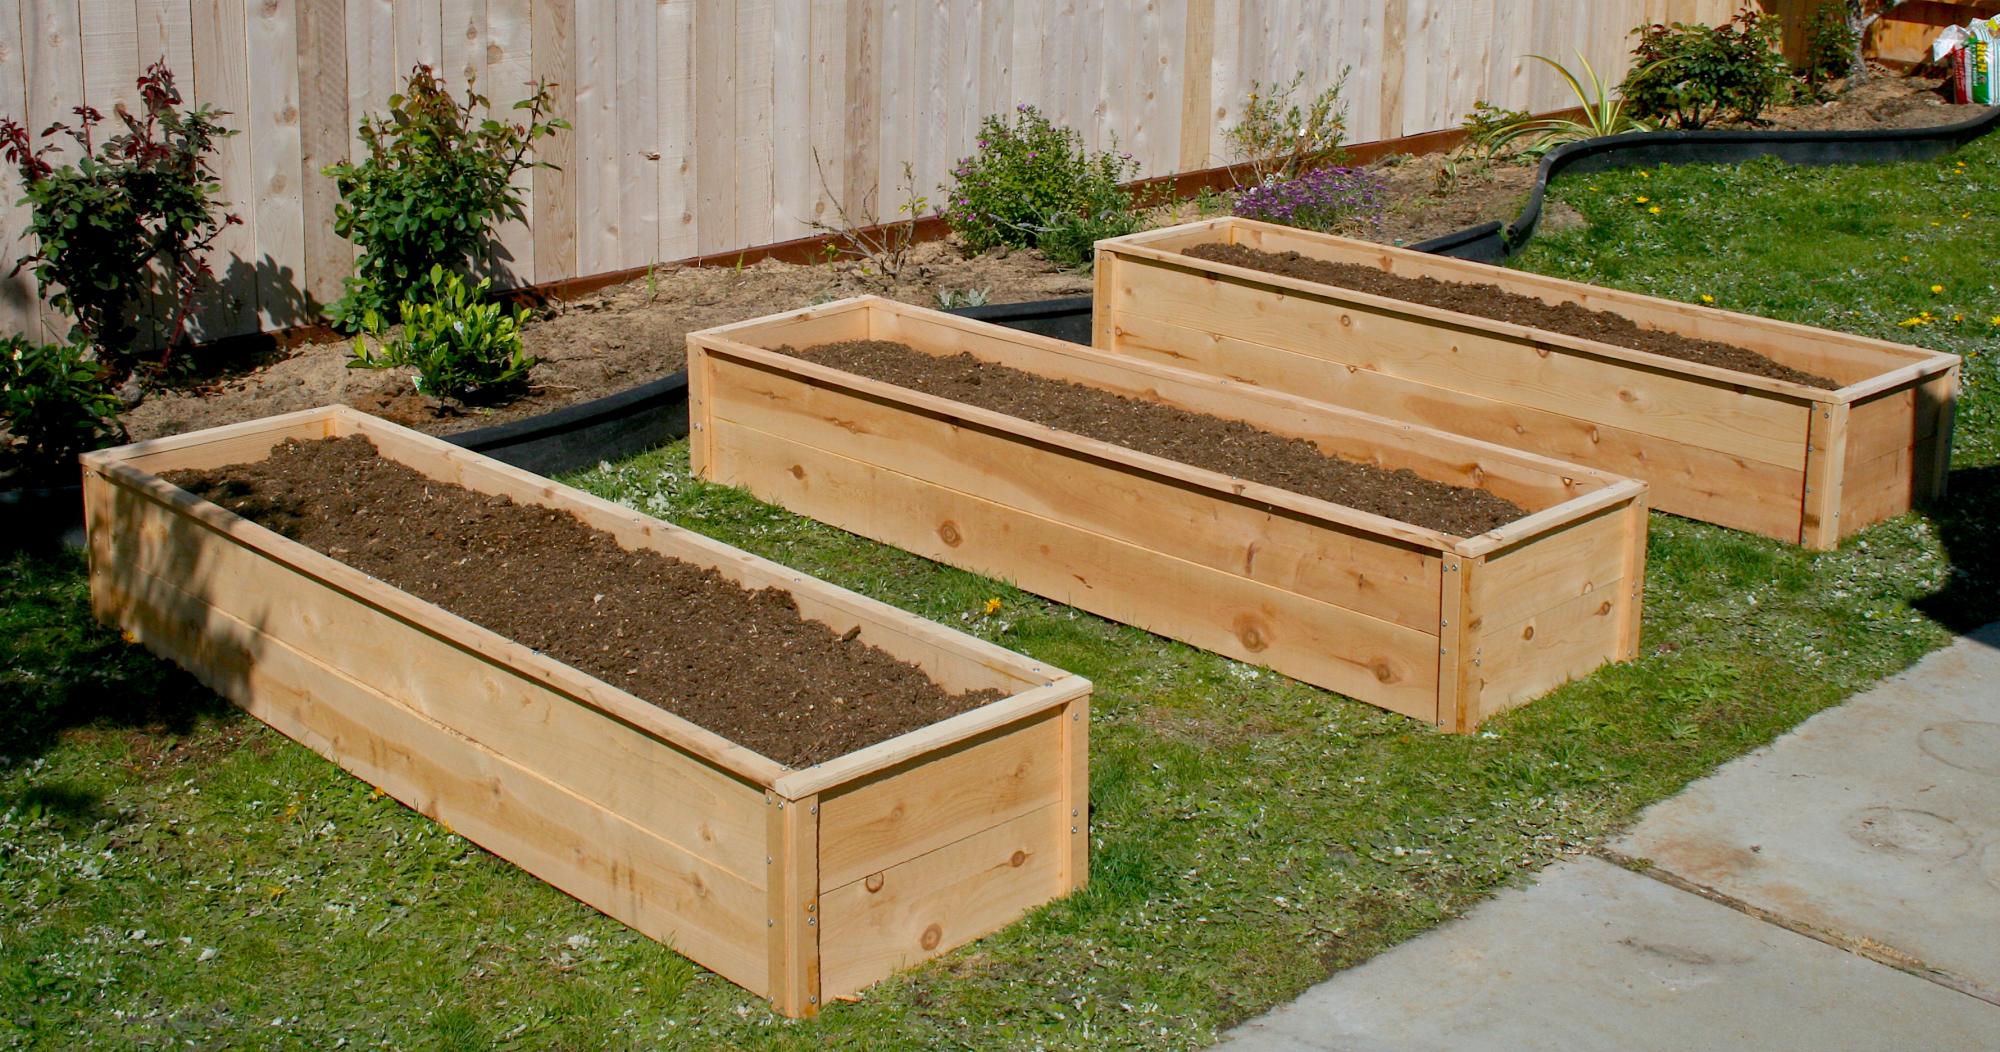
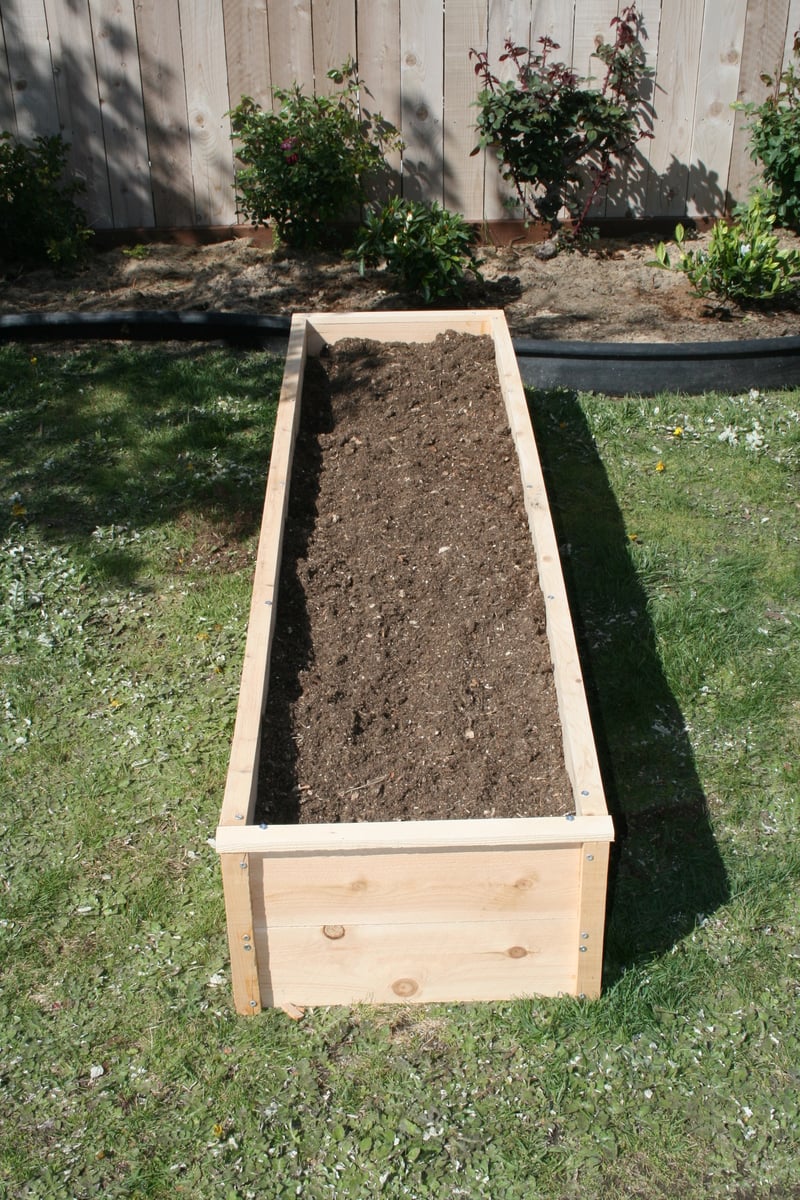
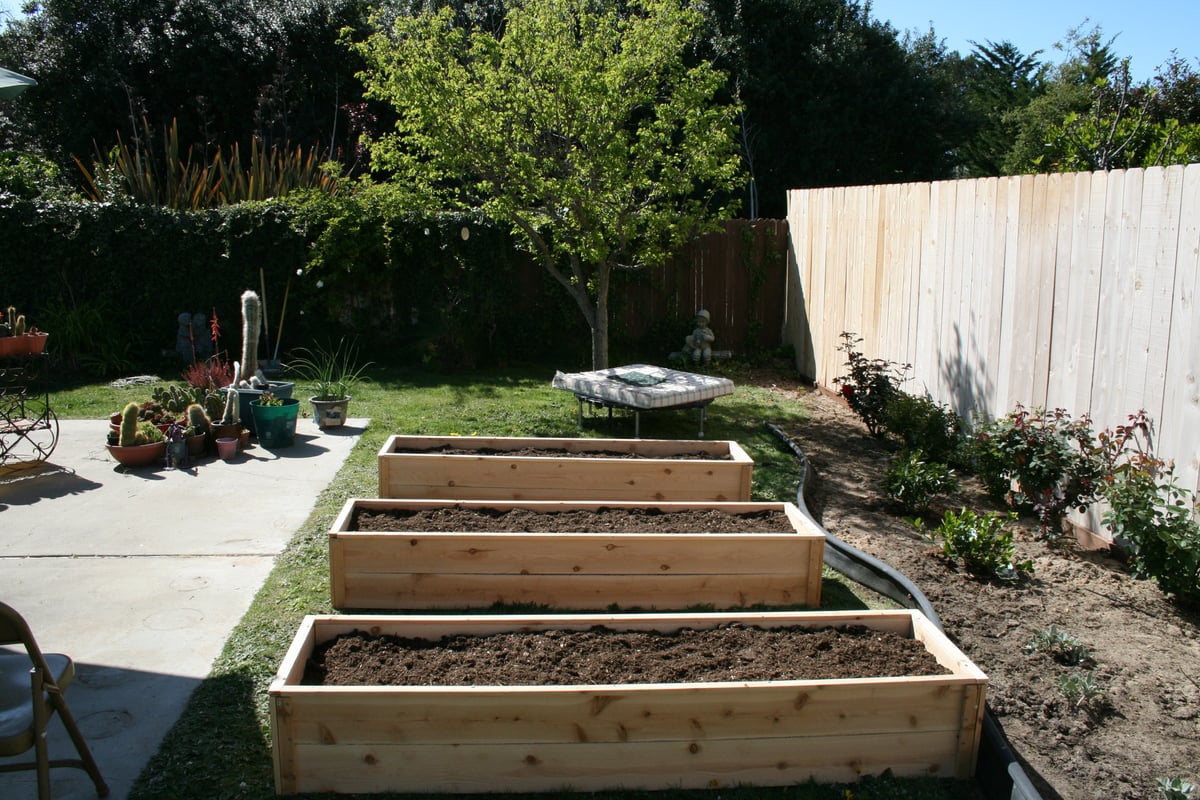
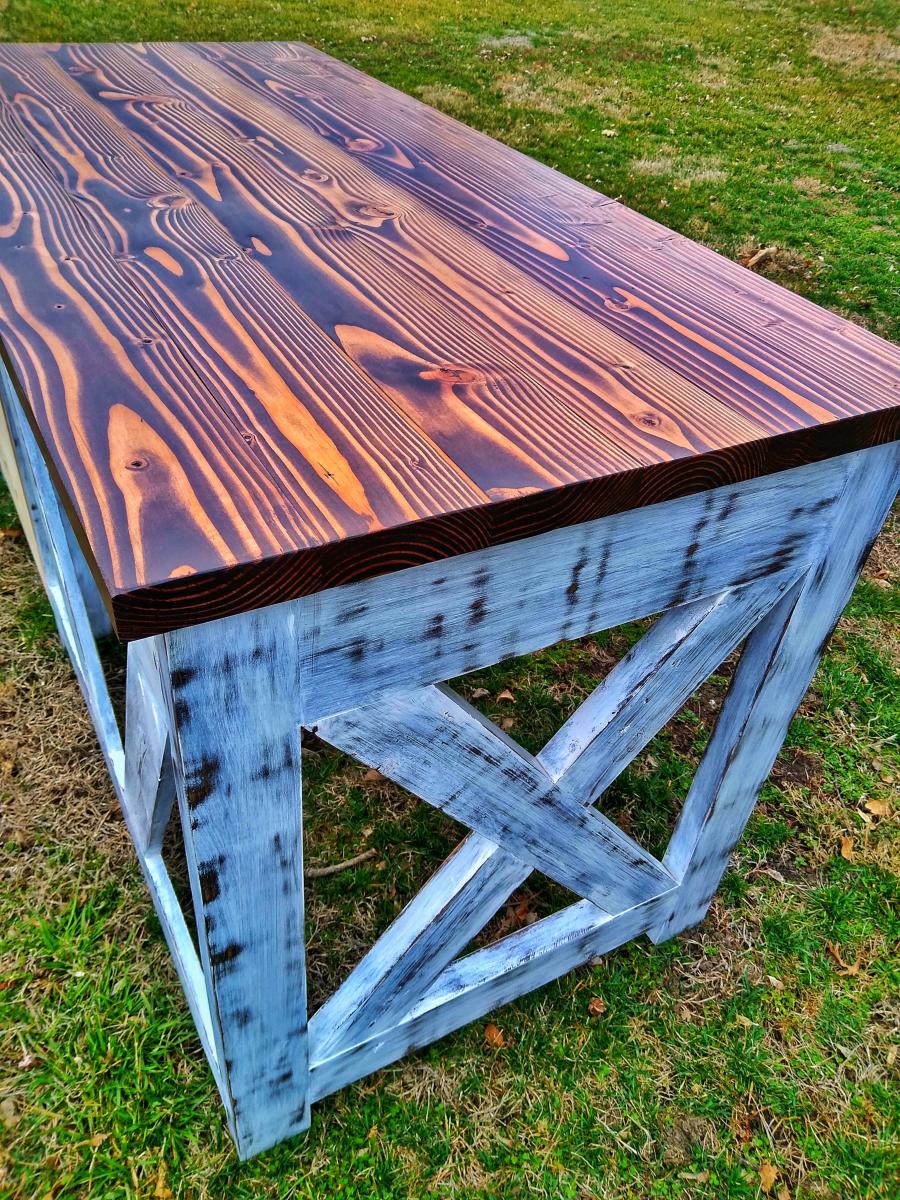
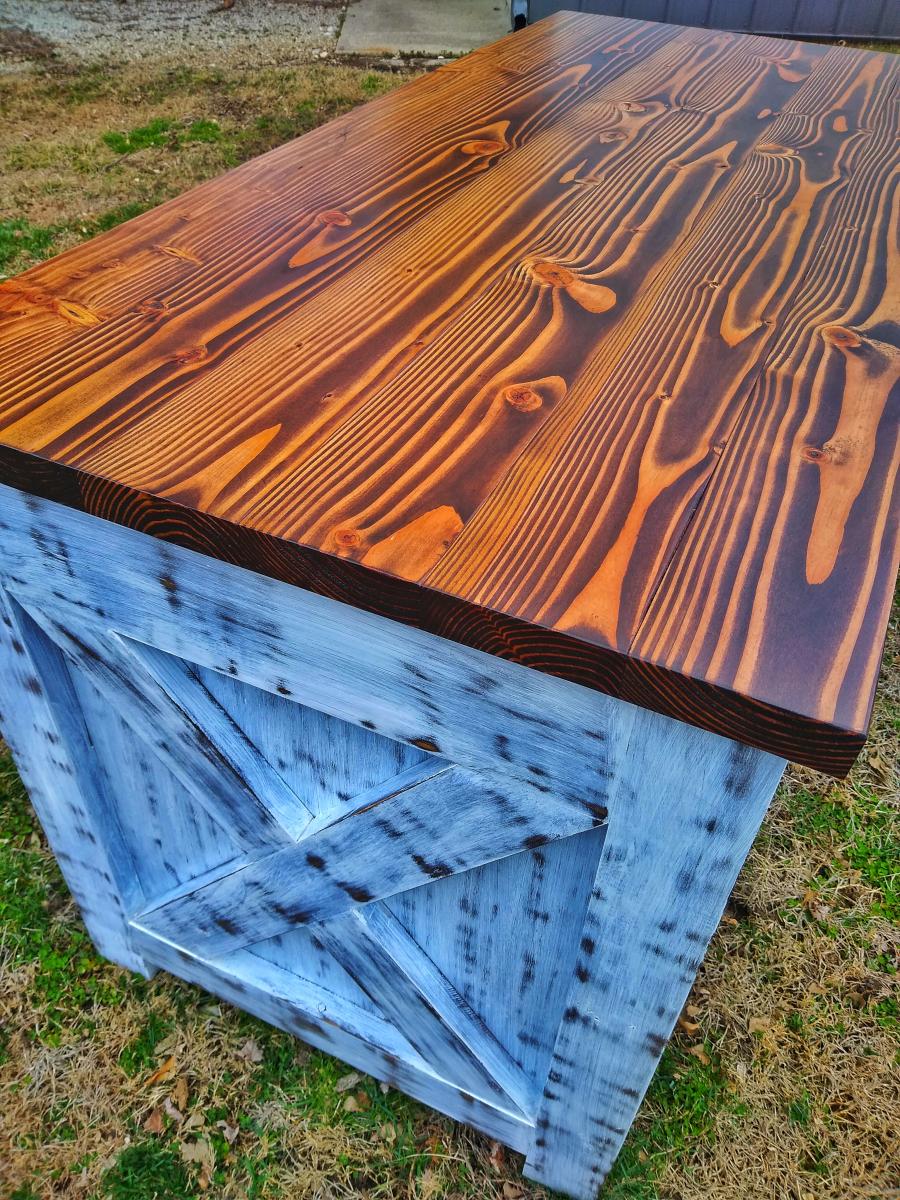
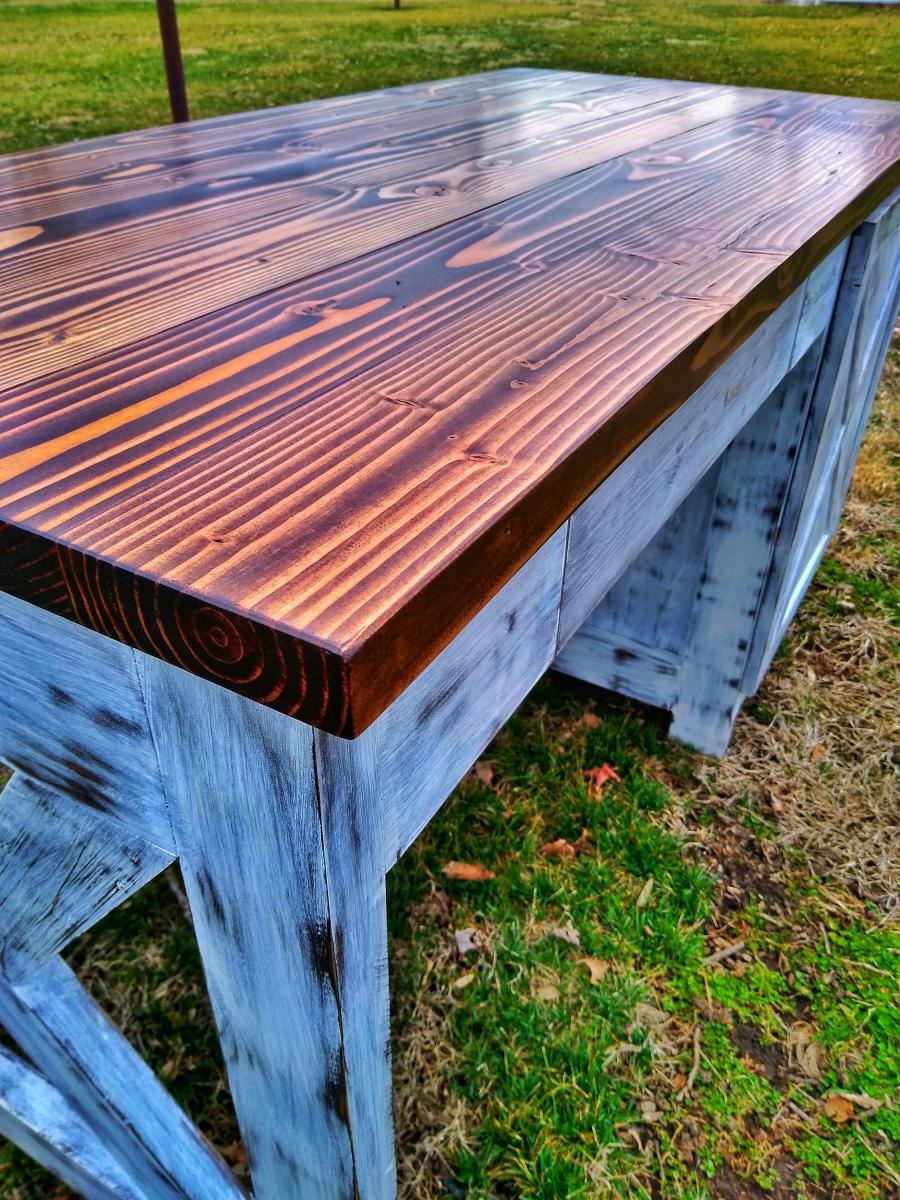
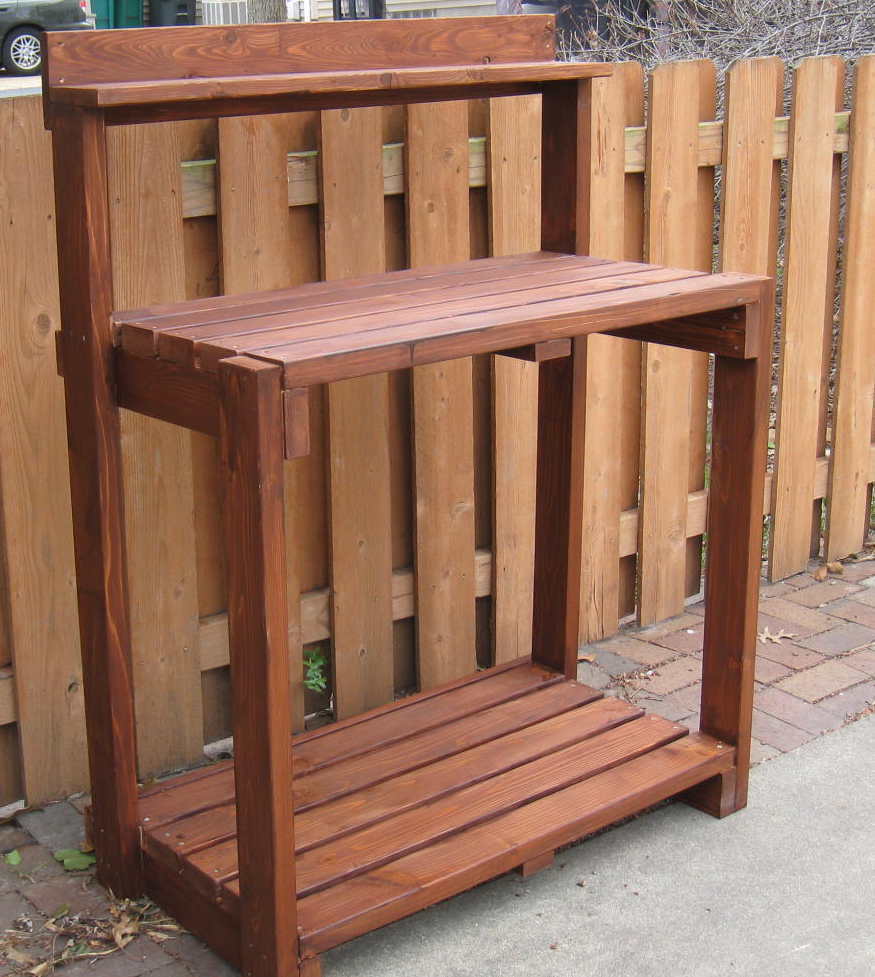
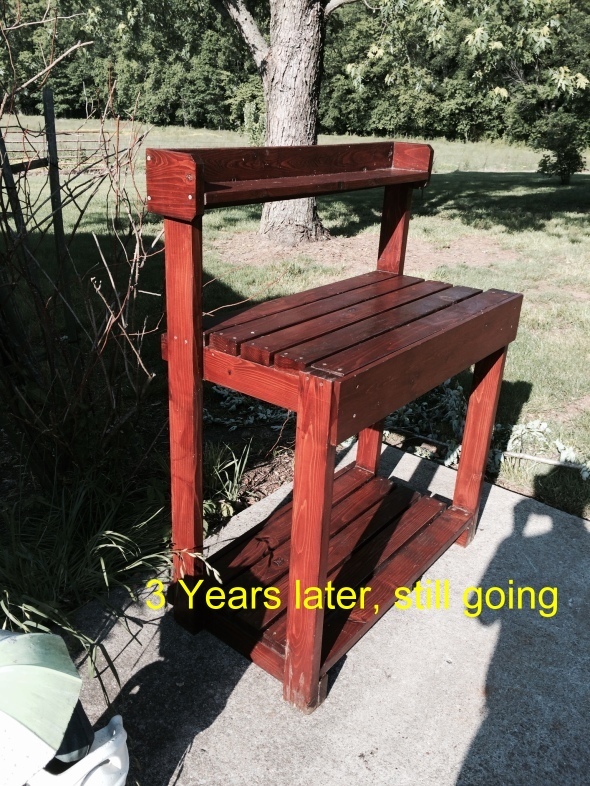
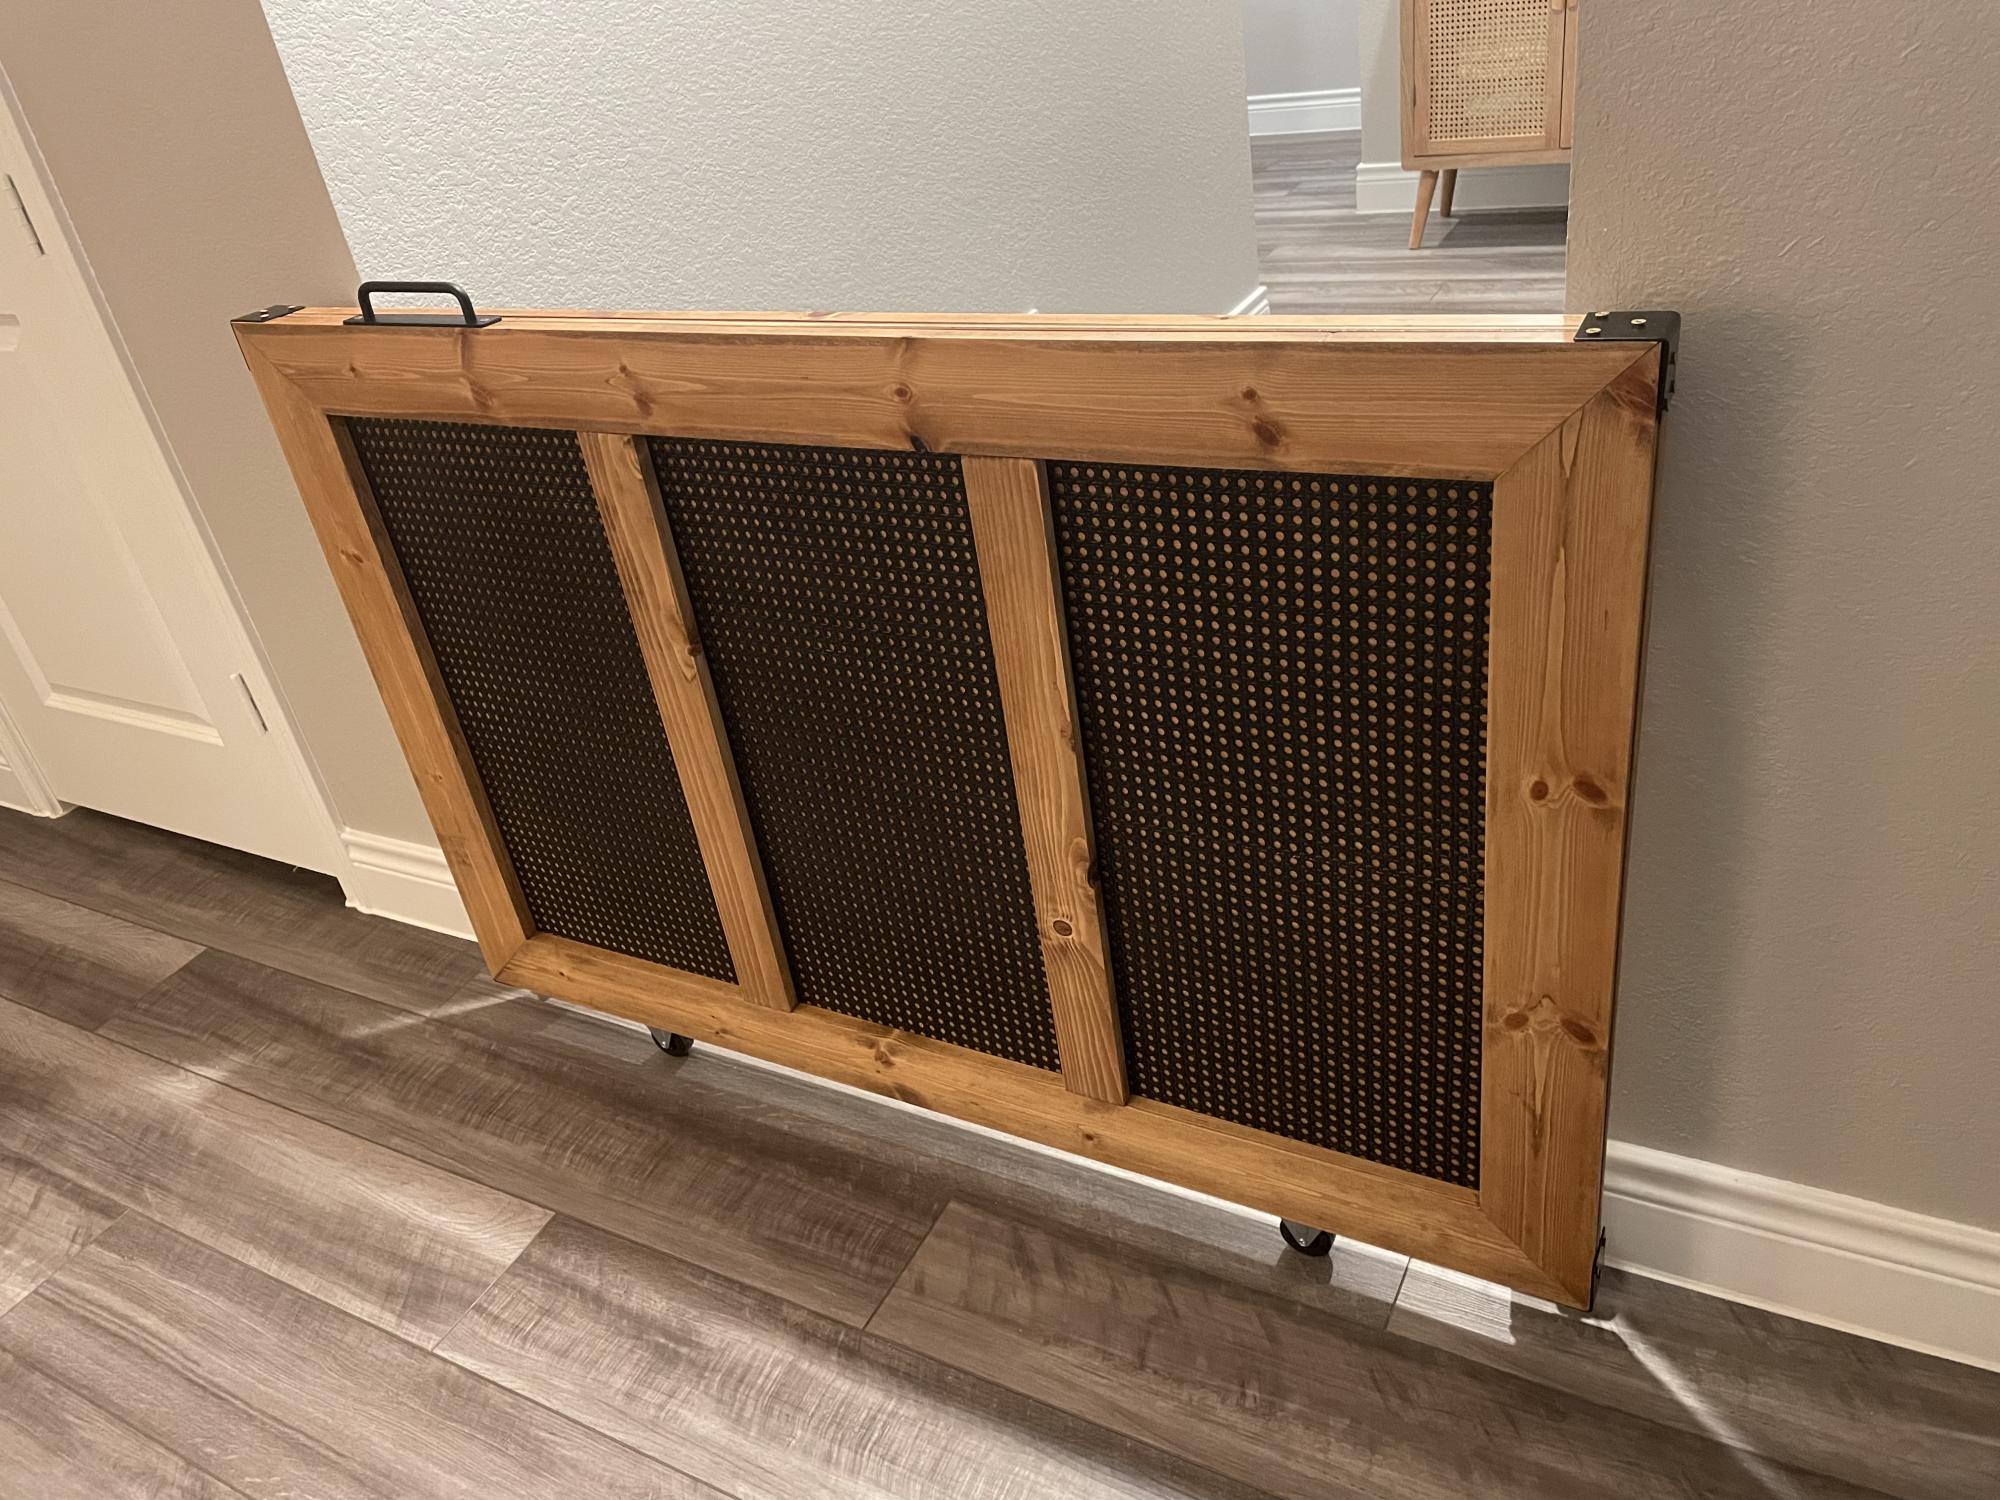
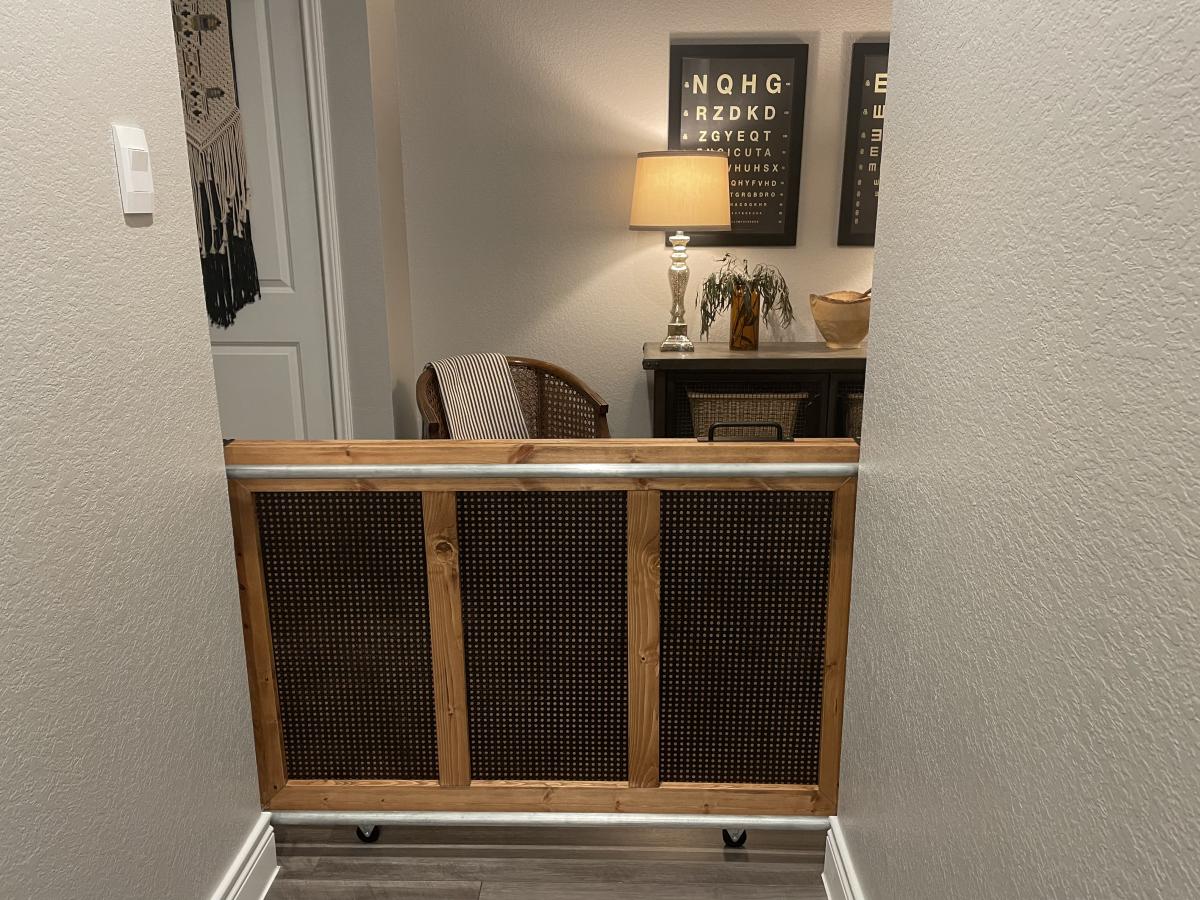
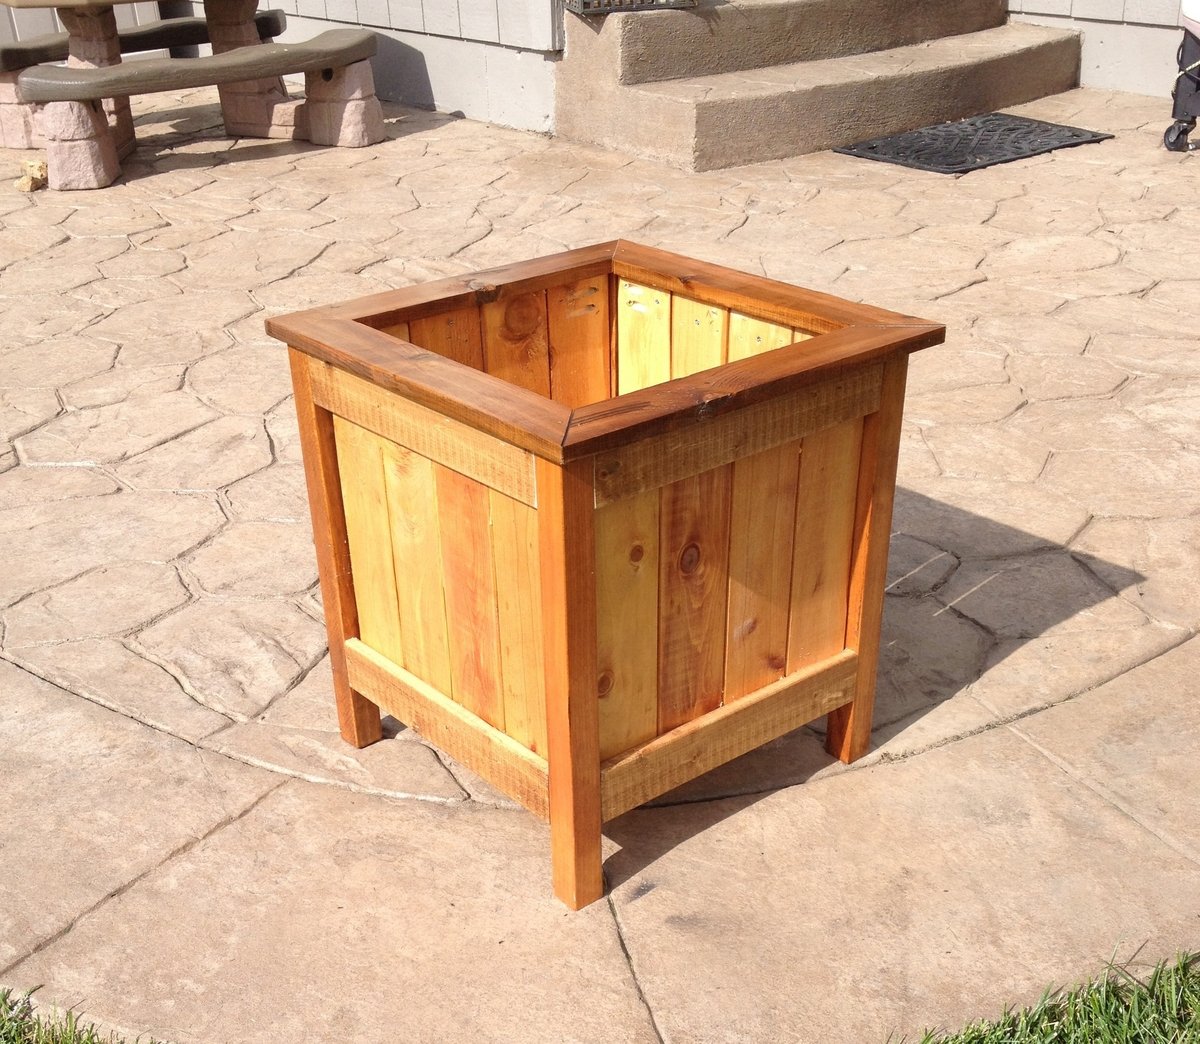
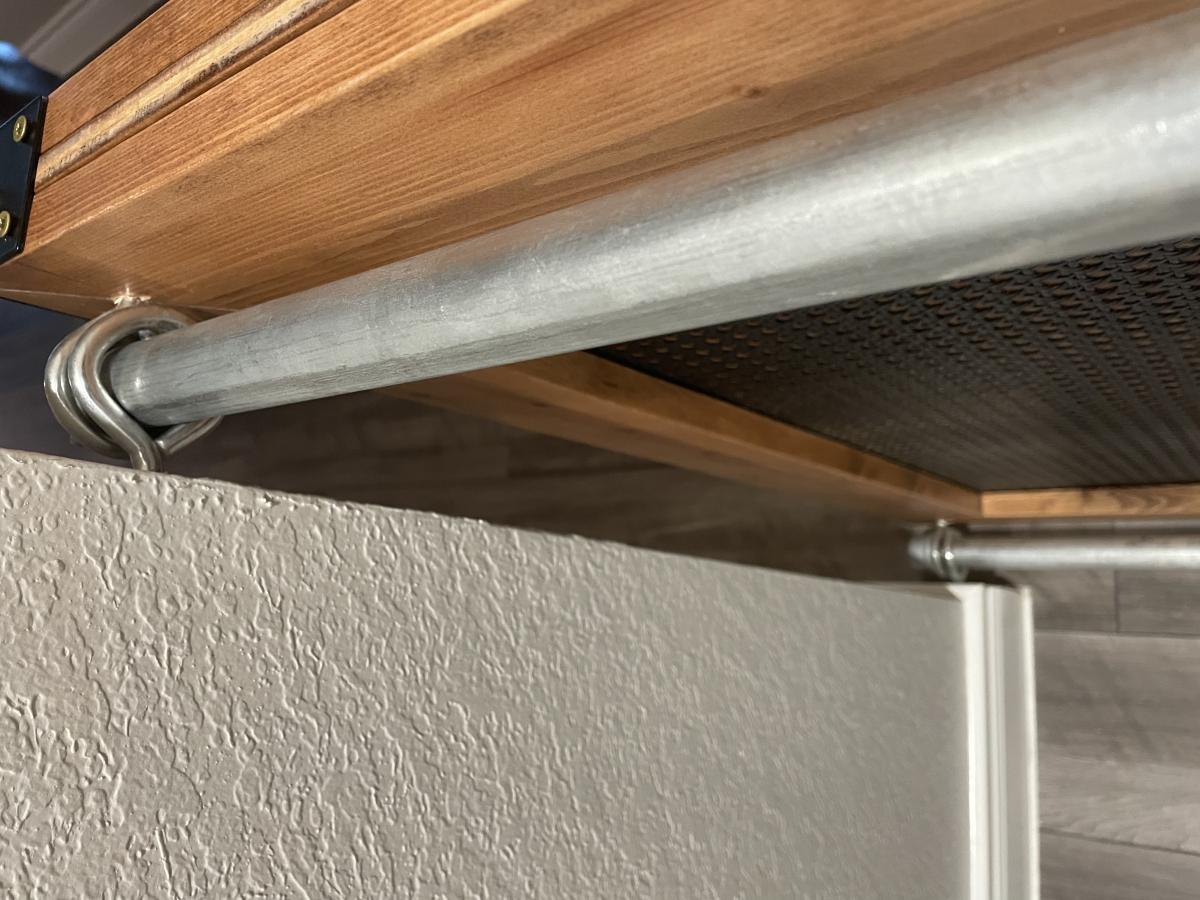
Community Brag Posts

Double Chair Bench

Built from plans from diyPETE.com.

One day project (another day for poly)


Estimated Cost
$100
Estimated Time Investment
Day Project (6-9 Hours)
Finish Used
Minwax Wood Finish penetrating stain: Gunstock 231 (2 coats), Minwax Helmsman Spar Urethane. (3-4 coats)
Recommended Skill Level
Beginner

Bookshelf Console

Submitted by Anonymous (not verified) on Mon, 07/15/2024 - 11:01

Extra Wide Console- we will use in our beach cottage. A little rustic paint job and tongue n groove back board. The paint job was a tedious process. First coat was Semi transparent gray stain, next was a thin coat of Kilz primer, then a light sanding and finally a baby blue stain.

Dana T

Built from Plan(s)

Three Bin Laundry Sorter

Submitted by Meyer1120 on Mon, 01/21/2013 - 21:10

Modified the original plan to meet our needs of a laundry sorter. Had problems with the hinges so ditched them. I used dowels with a combination of a chamfer cut on the bottom of the door. Dado-ed the trim on the doors and slide the bead board panels in. The face frame is all held together with pocket hole screws, which I highly recommend because it eliminates nail holes and keeps the face frame square. This was my first wood working project, took me a little long to get it done. Thanks for looking.

Modified January 28

So here are some more pictures of my project. I don't really have any good pictures of the dowels. But what I can tell you is, I drilled holes through the sides of the face frame and the trim pieces and then measured where the holes would be in relation to the "drawer". I then drilled holes in the drawers at those measurements, I was careful to not go to deep. I think I went in half an inch. After that I started at one end and placed the dowels in, then put each drawer in. It wasn't easy but with a little patience it worked. The key is to wax the dowels so they will last longer as well. I also am including pictures of the top and bottom trim. On the top the original plans called for an overhang piece and I didn't like the way that looked. I ran the top board an inch long on each side and then wrapped it in quarter round trim. I did this because I plan on adding the Mimi Hutch Top. The bottom was built per the plan, but I ran into a problem with my bottom trim not being level and you could tell. So I raised the whole unit on 1 1/2 legs then placed it on a level surface and again wrapped it in a decorative trim. The key on both trims was a nice miter joint. Last picture I added was of my stoppers. I took scrap from the 1x2 trim and cut them to an inch and a half or two (can't really remember), then using the Kreg Jig drill bit drilled recessed holes. I then opened the doors until the side 45s were level then mounted the blocks on each side. I feel that it is better than a chain or string catch. Again thanks for looking and I hope I answered all of your questions.

Estimated Time Investment
Week Long Project (20 Hours or More)
Finish Used
Primmer and paint
Recommended Skill Level
Intermediate

Comments

moosmani

Tue, 01/22/2013 - 11:29

Dowels! What a great idea! Would you mind sharing how you did it? Could you possibly add some pictures showing the dowels? You did a great job. It looks beautiful.

mullid1

Thu, 01/24/2013 - 09:27

I love what you have made! Could you post pictures of the top and the bottom trim? I'm very impressed that this is your first project!

mullid1

Tue, 01/29/2013 - 09:12

Thank you for the photos and new instructions! You're awesome!!!

VLT

Fri, 03/15/2013 - 12:05

This is lovely; I like the trim job you did. Is there a way to post the plans so we can all get to them. I cannot believe this was your first project!

Liz82

Sat, 11/16/2013 - 18:23

I am a little confused. I love the three bin laundry sorter, but everyone is mentioning plans. I am not finding plans for it on the site. Also, what goes in to hold the clothes? There may be obvious answers, but I am not seeing them. I'd appreciate any help you could give.

towering inferno

Tue, 12/02/2014 - 02:58

I've been thinking of working up one very similar to this, also with 3 bins, but I didn't want to use chain either.  Those stoppers will be ideal - do you put them on both sides or is one enough?  Thanks for the share!

Karahd

Sat, 01/24/2015 - 11:29

Hi-

Im not sure if you still have the plans to this awesome project, but if you do, would you be able to share them with me? Ive been looking to make something like this forever, but just couldnt find any help!

thanks,
karah
[email protected]

petemoore

Mon, 02/08/2016 - 07:46

hi im the same as everyone can you send me the build plans with dimensions etc

many thanks

virginie D.

Wed, 03/02/2016 - 14:49

Hi

It's exactely what i need. so amazing. Someone can send me the plan please? I'm so newbie to do tat all by myself without plans. Thanks you.

virginie D.

Wed, 03/02/2016 - 14:49

Hi

It's exactely what i need. so amazing. Someone can send me the plan please? I'm so newbie to do tat all by myself without plans. Thanks you.

ajbreaux

Mon, 05/02/2016 - 14:22

My wife loves this . if its possible could i get the plans and hopefully have time to build it to give to her for mothers day ? thanks 

Kimhubbell

Fri, 12/02/2016 - 11:01

I would also love to have the plans for the 3 bin sorter. I am barely an intermediate so more specifics would be a huge help! Thanks to anyone who could help.

lworthy

Mon, 07/10/2017 - 04:19

 I absolutely LOVE your laundry sorter!!!! You did a fabulous job and the TRIM, WOW amazing!!!! I've searched Ana's website and cant find the plans' could you please email me the plans to [email protected].  I started building my own furinture back in October 2016 and the reward is amazing... Keep up the good work.

Happy Building,

Lisa

woodmama

Tue, 01/16/2018 - 22:18

I'm too new at woodworking to be able to tackle this right now, but would love to download the plans for future. My most successful project so far is a pretty standard bookshelf. I got a free plan, with lots of guidelines and explanations, at https://tinyurl.com/ydeup8lo -- it came with a 440 page guide, "The Art of Woodworking" that has tips and techniques, and am plowing through that right now.

momto3

Wed, 02/28/2018 - 12:53

This is amazing.  I am very new to woodworking.  Could you send me the plans please?  I would be most appreciatative 

Ljohns

Wed, 03/11/2020 - 23:27

I would love to have the plans for the three bin laundry sorter to build for my laundry room. Are the plans available? Awesome work!

Large square Balustrade Coffee Table

Submitted by Dea Roc on Mon, 02/20/2017 - 13:53

About This Project

Loved loved the table and thought it would be perfect for our living room. I wanted an oversized square table so I adjusted the plans for a 55" square.  I also added center support frame due to size

I found round feet at Home Depot and counter sunk a nut onto bottom to screw in. 

I ordered the legs from Osborne. We assembled the table in sections since it was too large for our work table. I stained each section prior to assembling top to bottom. 

I used Minwax Pre stain. 2 coats Minwax Special Walnut. One coat Minwax classic grey which I wiped on and off immediately. Top coat Minwax poly 

My first ever wood project!

Thanks Ana and Jen's House of Wood for the idea and plan. 

Built from Plan(s)
Estimated Cost
275. Including legs.
Estimated Time Investment
Weekend Project (10-20 Hours)
Finish Used
I used Minwax Pre stain. 2 coats Minwax Special Walnut. One coat Minwax classic grey which I wiped on and off immediately. Top coat Minwax poly
Recommended Skill Level
Beginner

Comments

Frosty Garden Greenhouse

It was truly great for us to find a greenhouse design from a fellow Interior Alaskan blogger. We kept coming back to this design, enough times to where we decided to actually build it.

We would be the first to admit that tackling a gambrel style building was slightly intimidating and not what we had in mind for our very first self-built building! But, we faithfully followed the cut lists and directions. It turned out beautifully! If you're in the same boat, have confidence that you can build this too!

We love the options available for making it your own. We decided to stain the greenhouse lumber of ours to match our cedar sided home. We also built a semi frost-resistant foundation, since we're a little north of Ana at 65 degrees and sometimes experience frost heaving. We also added full climate controls to ours, adding both fans and louvers that keep our greenhouse at perfect temperatures.

The performance has been great! Building this greenhouse has been the single greatest thing we have done in our years of subarctic gardening. We might even consider building a second greenhouse down the road. No matter how big your greenhouse is, it's never quite enough!

Thanks for the great plans, Ana! We appreciate your work!

Built from Plan(s)
Estimated Cost
$2400
Estimated Time Investment
Week Long Project (20 Hours or More)
Finish Used
Transparent cedar stain
Recommended Skill Level
Intermediate

Comments

Bench to Table conversion

Submitted by Donna_Led on Fri, 04/09/2021 - 15:22

We made two of the Picnic Table to Bench units in the month of March. The second one is in the bottom part of the picture hidden by the wood rack. I took the picture from our upstairs porch. My husband is still amazed that we accomplished this. He is not a DIY'er. We built a new house in 2016 and had a bunch of leftover wood sitting on our (unfinished) basement floor. We managed to build our benches mostly from that wood. We did have to buy 3 more pieces to finish the second back/tabletop. Then we got the balance of the wood moved out to our storage barn. The color is deck stain from our porches. I chose 20 hours as our time frame because the used wood required a lot of sanding and prep work. Our time frame was probably about 3 weeks but we are 68 and 73 years old and were really in no hurry. The plans were very simple to follow. We made them 6 feet long.

Estimated Cost
Nearly free except for the big bolts and three 2x6x8ft boards. We had everything else.
Estimated Time Investment
Week Long Project (20 Hours or More)
Finish Used
Solid deck paint from Lowes in a cedar color we already had.
Recommended Skill Level
Beginner

Comments

Bookcase/ laundry and cleaning storage

Submitted by Anonymous (not verified) on Wed, 06/02/2021 - 08:26

We mainly followed the plan but made some adjustments because we wanted the “ugly” side to be able to house brooms and mops and we cut the width down just a tad. We absolutely love how it turned out!! And we definitely needed this in our space!

Built from Plan(s)
Estimated Cost
400
Estimated Time Investment
Weekend Project (10-20 Hours)
Finish Used
Chalk paint
Recommended Skill Level
Intermediate

Comments

Firewood Shed using Round Posts and 2x4s

Submitted by tommybo76 on Mon, 04/15/2013 - 15:50

I used the basic design principles from Ana's site but decided to use 3.5x6.5 round fence posts (purchased at my local Tractor Supply Company) for a different look plus they are a little cheaper than 4x4 posts. I also used pressure treated 2x4s for some added strength and perhaps longer durability. I used Ana's cedar fence pickets idea for my roof (these pickets are used as walls on one of the other shed plans on this site). I didn't need a very robust roof as my firewood shed sits underneath the deck which provides a lot of protection from the rain. I attached the structure using 3 inch deck screws and the roof with 1.5 inch deck screws (nails would have been more than adequate for the roof but I had the screws on hand).

I did run into some problems due to my design changes. Most of my issues involved attempting to square up the round posts which are much closer in shape to a jagged stick than dimension lumber such as a 4x4 post. If I had to do it over again I would not have used the round posts. Constant tweaks and adjustments to the posts significantly delayed my build time and frustrated me at times. I was just barely able to wedge my woodshed in between the 2 deck posts which actually came in handy as I was able to secure the shed to the deck posts with 3 inch screws...making the shed very solid! The final issue I discovered after loading up my wood shed. The 2x4s at the bottom of the structure began to sag. I fixed this by using my floor jack to raise them up and placed 8 inch tall 4x4s underneath (2 in the front and 2 in the back).

Overall I'm happy with the way it turned out and I really love all the plans on this site...GREAT ideas!!

Built from Plan(s)
Estimated Cost
$90
Estimated Time Investment
Day Project (6-9 Hours)
Recommended Skill Level
Beginner

Counter height dining set

Submitted by Lukilla on Sun, 10/10/2021 - 10:18

Threw this together over a 4 day weekend. Love how light these chairs are.

Substituted edge glued project panel for the table top and seats instead of joining several planks.

Used a combination dark walnut, jacobean, and early American stain on the finish.

Comments

Narrow Cottage End Table

Submitted by mom of 4 on Tue, 07/30/2013 - 16:21

I built matching side tables using Ana's Narrow Cottage End Table plan. I changed the height to suit the arms of my furniture. They fit our tight space and look fantastic with our existing wood pieces. Very easy to build, even the drawers! I used a router to finish the edge on the drawers, to make them stand out a little more. I learned to put my pocket holes on the outside of the drawer, since the back one is in the back, and the front one is covered by the separate drawer front piece. A Kreg jig makes this a very simple project. Also, I sanded my boards before assembly, then did touch-ups before finishing the project.

Built from Plan(s)
Estimated Cost
$50 total for two
Estimated Time Investment
Day Project (6-9 Hours)
Finish Used
One coat Minwax Ipswich Pine Stain. One coat Minwax finishing paste, hand rubbed.
Recommended Skill Level
Intermediate

Adapted to Printer Stand

Submitted by Anonymous (not verified) on Tue, 03/05/2019 - 05:30

I adapted the plan to make a stand for our printer and shredder.  Except for one board, I was able to use scraps so my total out of pocket was $9!  I did plane the 2x material to 1 1/4”, and also used 2x material for the base to add a little strength to hold the shredder.  Thank you Ana White, for generously sharing your plans!

Built from Plan(s)
Estimated Cost
$9
Estimated Time Investment
Weekend Project (10-20 Hours)
Finish Used
Top - mixed brown and gray rustoleum stains. Finished with poly acrylic
Base - latex eggshell trim paint (custom mix leftover)
Recommended Skill Level
Intermediate

Compact Potting Bench

Submitted by vendo on Wed, 02/01/2023 - 12:43

I used Ana's Farmhouse Potting Bench plans and modified it to be more compact and left out the x detail. I built it for under $40 in material. 

Modifications for Shopping and Cut List - Construction and placement is same as Ana's original plan, so make sure you look that over.

Shopping List 

3 - 2x6x8

3 - 2x4x8

1 - 2x2x8

Cut List

FOR 2 Legs
4 2x6 @15.5"
2 2x4 @34.5"
2 2x4 @54"
(cut the 34.5 and 54 out of 1 board and repeat)

2x2 Cross Supports
3 2x2@28"

2x4 Cross Supports
2 2x4@28"

Center Tabletop Support
1 [email protected]"

Bottom Slats
4 [email protected]"

Tabletop Boards
3 2x6@36"

Top Cap Board
1 2x4@37" leaving 1/2" overhangs

VIDEO OF THE BUILD PROCESS

Built from Plan(s)

Turntable/Vinyl Stand

Submitted by yhaas on Sat, 01/02/2016 - 09:21

This was a Christmas gift for my husband, who has resurrected his old turntable. I wanted the stand to be the same height as the chest I had previously refinished to house our stereo and cds. I also wanted to have two shelves for vinyl, so I modified the Channing bookcase to fit.

Built from Plan(s)
Estimated Cost
$80
Estimated Time Investment
Weekend Project (10-20 Hours)
Finish Used
Goudey stain in Rosewood, shellac wash coat, Goudey glaze in Van Dyke Brown, shellac again, then Deft satin polyurethane.
Recommended Skill Level
Beginner

Comments

jmb367

Mon, 02/26/2018 - 20:53

My husband has been looking for a stand for his turn table and this one looks perfect! Do you mind my asking for the adjusted measurements? I’d love to see if we could make one for him, if you don’t mind sharing. It looks fantastic!

yhaas

Sat, 12/01/2018 - 12:11

Apologies, I have not checked the site in almost a year. The height of the unit is 37,3/4' tall, the shelf widths are 14" inner width, and the spacing between shelves is 13" between the lower 2 shelves for vinyl, and 5" for the top shelf (for brushes or an occasional CD. Hope that helps.

Kids' Playhouse (under stairs)

Submitted by kdins31 on Sun, 12/18/2011 - 09:22

Had the perfect space for a little playhouse under the stairs in the basement and it's been our plan for 4 years to do something. Finally, we did something. Wanted depth so I added the roof and portico. Also added cedar shingles that I picked up for $7 at HD. Inside I had extra laminate flooring so I put that down and added beadboard, chair rail and crown molding. There's also a small transom window above the small kitchen area. The kids love the barnhouse doors with old fashioned doorbell, mailslot and window. The bookshelf under the stairs was the final touch. I didn't use any plans from this awesome site but did, as always, get a bunch of tips and inspiration!

Pin for Later!

Kids' Playhouse (under stairs)

Estimated Time Investment
Week Long Project (20 Hours or More)
Finish Used
Dark walnut stain on cedar shingles.
Recommended Skill Level
Intermediate

Comments

Cindy from Indiana (not verified)

Sun, 12/18/2011 - 19:00

Wow! That is awesome!

You really did a great job on that! So imaginative, too. WTG!

Guest (not verified)

Sun, 12/18/2011 - 19:58

That is so stinkin' adorable! Fantastic job. I love everything about it. Your kids (and grandkids) will remember the playhouse under that stairs forever!

spiceylg

Mon, 12/19/2011 - 06:54

Wow, this is too cool! They are going to love love love this! Can't wait to see the kitchen reveal!

bhoppy

Mon, 12/19/2011 - 08:43

LOVE LOVE LOVE this!!!! It looks amazing! Makes me want to buy a new house with stairs. LOL

birdsandsoap

Sat, 12/31/2011 - 18:26

You did an amazing job on this. I'm planning a bunkbed with a similar facade. I love how cozy it looks without having to make an actual pitched roof. The shingles are such a nice touch that I may have to copy you! And it's wired for lights; you've really outdone yourself.

Guest (not verified)

Mon, 02/27/2012 - 21:14

I love this playroom you created. We are currently in the process of building a playroom under the stairs for our girls. Where did you find the door...it is exactly what I am looking for! What a wonderful job you did!!!

kdins31

Mon, 03/19/2012 - 14:26

Thanks to all of you for the nice comments! Re: the door, I just cut a plain 18x80 door slab ($21 from orange) and trimmed it out. I still need to put the window grille over the open space, and was hoping to find a cool 'speak easy' grille that fits the space.

Thanks again!

megan_m

Fri, 04/27/2012 - 09:07

this is such an amazing little space! great work!

MicheleInAlabama (not verified)

Thu, 05/03/2012 - 23:38

This has to be one of the most adorable things I've ever seen! What an awesome idea......how cool is that for the kids??! Love the lighting and the laminate (or is it hardwood) flooring inside. Even the stove is gorgeous! Such fond memories will be made there and remembered forever. Kudos!!

Amanda Rhoads (not verified)

Wed, 12/05/2012 - 15:34

Oh my goodness this is such an inspiration! However, as a beginning tool user, I don't think I could get my finishes so nice. How much experience had you had at this kind of stuff before? Was the area closed in before this project or did you do that too? I've got an open stairway into our basement and would be starting from scratch with ceiling, walls, etc. and have no experience hanging drywall or anything. I think it would take me a year. Great job, and thanks for sharing!

maggieasselin

Sat, 06/21/2014 - 12:51

Hi there!

I was just wondering how you made the door for your play house? We're basically stuck at this level in ours right now... ;) Thanks for any tips!!!

Triple Bunk

Submitted by Anonymous (not verified) on Sat, 04/29/2023 - 02:17

I needed to find a way to conserve space for 3 children to sleep in a very small home. I used an adapted pattern from Ana White. It turned out perfectly!

Comments

Wall Mounted Hutch

Submitted by Anonymous (not verified) on Wed, 10/02/2019 - 06:48

I wanted a china hutch in my dining room, but did not have the space. Instead, I built a wall-mounted hutch, which provided room for the dining room chairs to slide back from the table. I altered the plans to make the hutch less deep and added a trim piece along the bottom. My favorite part about this hutch is decorating it for every holiday and season. Thank you Ana White!

Built from Plan(s)
Estimated Cost
75
Estimated Time Investment
Day Project (6-9 Hours)
Finish Used
China hutch and home decor
Recommended Skill Level
Intermediate

Comments

Ana White

Mon, 11/04/2019 - 12:23

Thanks so much for submitting this brag post!  It was selected randomly for a $100 gift card - look out for that in your inbox shortly!  Ana

Seasonal And Holiday

Modern King Farmhouse Bed with Canopy

Although I have experience building projects and using tools, this was my first Ana White project. I am a huge fan! I wanted a little bit more modern take on the Farmhouse bed with canopy, so I attached the headboards and foot boards directly to the 88" tall 4 x 4 posts. This was done instead of creating the king farmhouse bed first and adding the canopy on top of it like the plans show. I used solid 3/4" birch plywood instead of the planks for the headboard/footboard for a more streamlined look. I also used 1 x 4's around the entire perimiter of the headboard/foot board instead of just the top and bottom. I am thrilled with how it turned out, it looks exactly the way I wanted it to! Step-by-step information on how I built the bed are on my blog at decorsanity.com. Thank you Ana, you rock!!

Estimated Cost
$350
Estimated Time Investment
Week Long Project (20 Hours or More)
Finish Used
1 sprayed coat primer, 1 sprayed coat Behr flat paint in Polar Bear White, 1 coat sprayed Minwax Polycrylic
Recommended Skill Level
Intermediate

Comments

BeaxBuilt

Fri, 01/24/2014 - 23:28

It looks very sturdy. I like your idea of the 1x4 around the entire perimeters and making the canopy the actual bed frame. Thats what I would have done too. I am always trying to think of ways to use 2 x's or 4 x's instead of 1 x's I like the chunkier look. Great job

Garage shelves

Submitted by Queequeg on Thu, 03/31/2016 - 14:35

This is my first project ever built. I can't thank you enough for this site. I already have several other projects I want to build around the house because of this site. Thank you so much!

Estimated Cost
$150 for the wood. And some extra for the stain.
Estimated Time Investment
Weekend Project (10-20 Hours)
Finish Used
Minwax walnut water-based stain
Recommended Skill Level
Beginner

Comments

Queequeg

Thu, 03/31/2016 - 14:36

Didn't realize the photos were rotated. Can't figure out how to fix that!  Oh well.  :)


Back