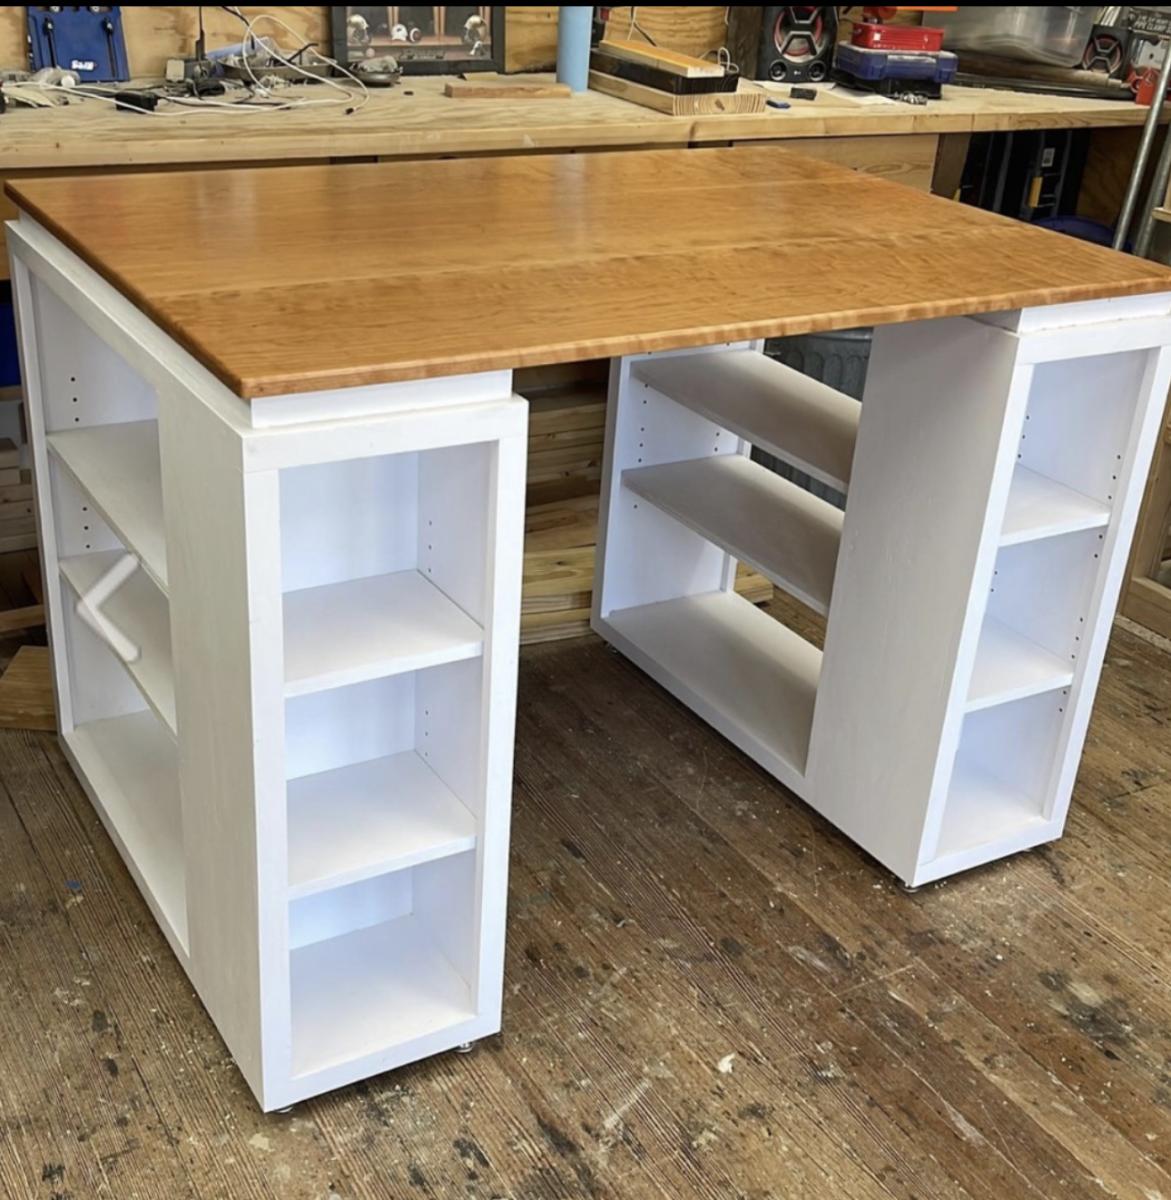
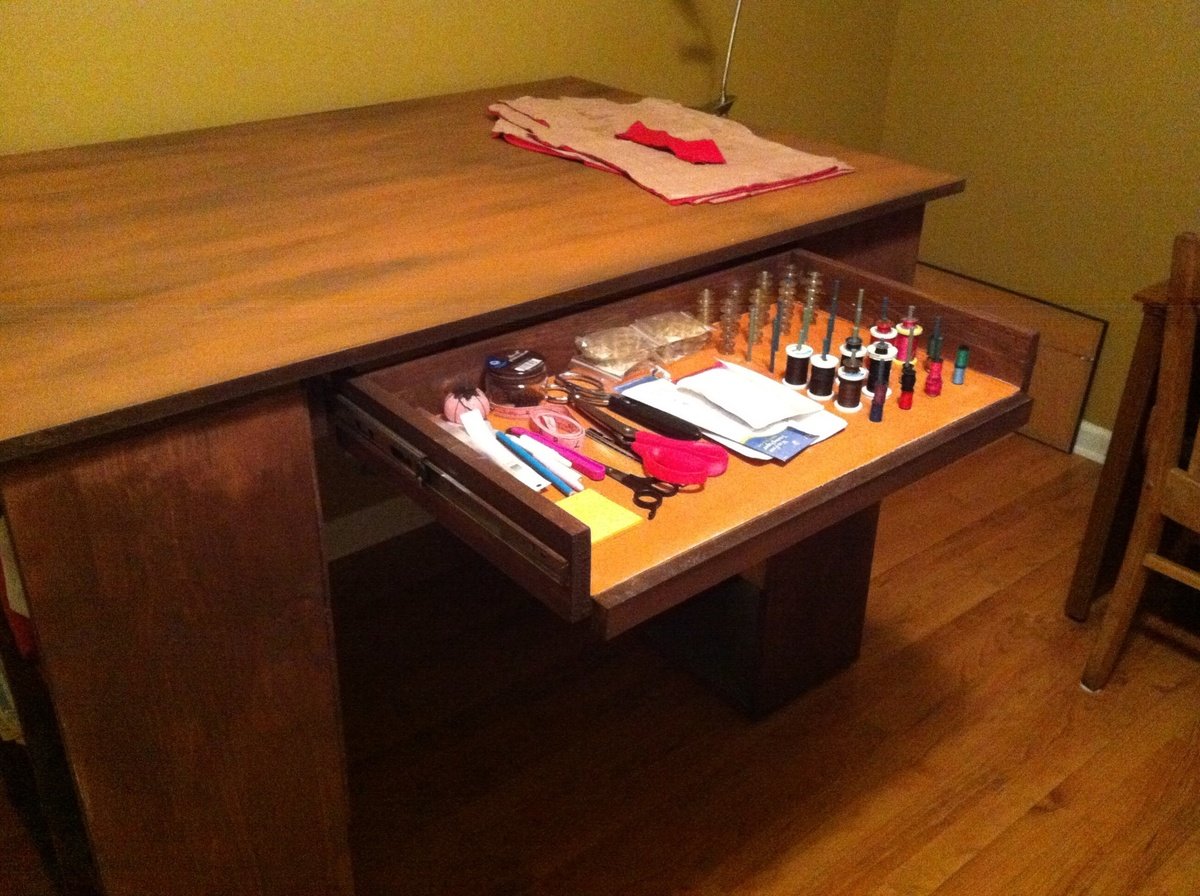
Craft and Homework Table
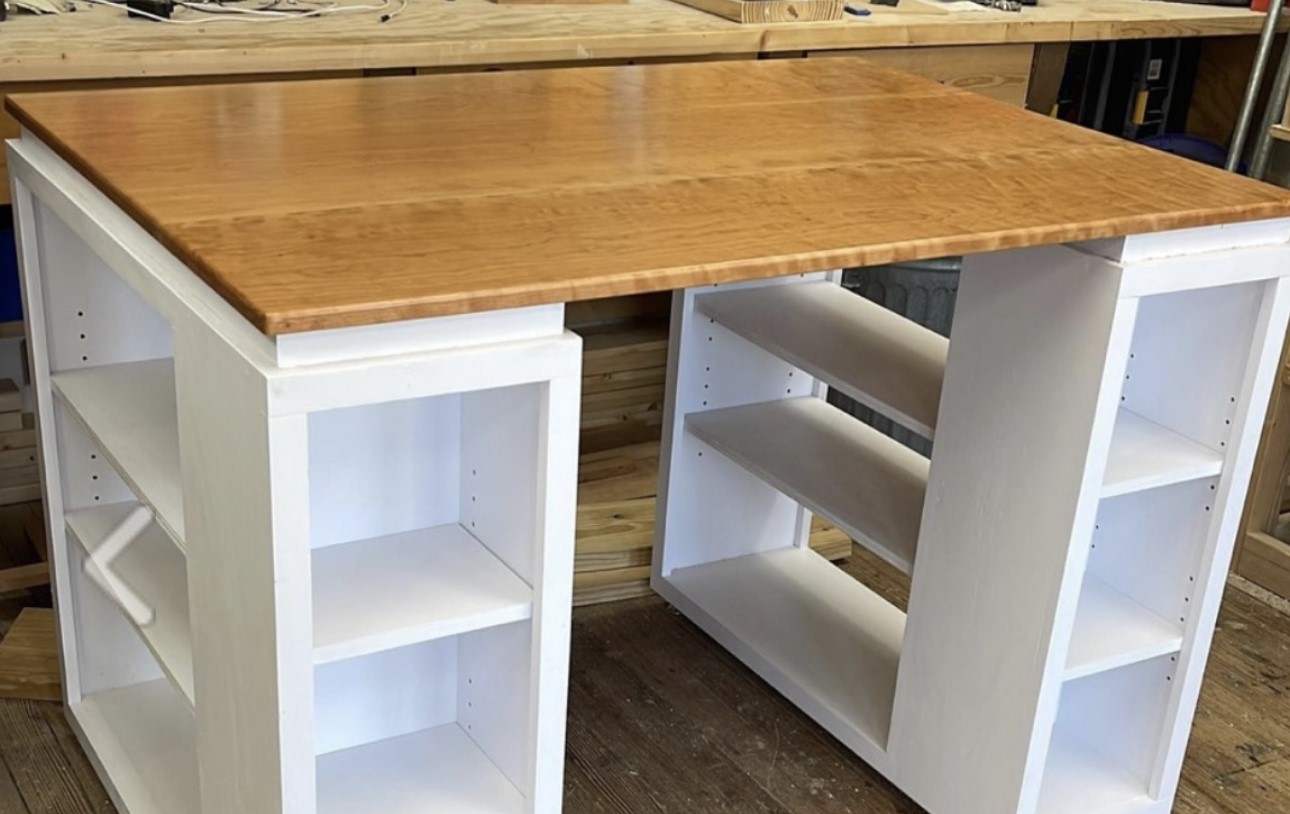
I used the plans for the modern craft table for this build and I had some curly cherry laying around begging to be use so I used that for the top.
Built from Plan(s)
I used the plans for the modern craft table for this build and I had some curly cherry laying around begging to be use so I used that for the top.
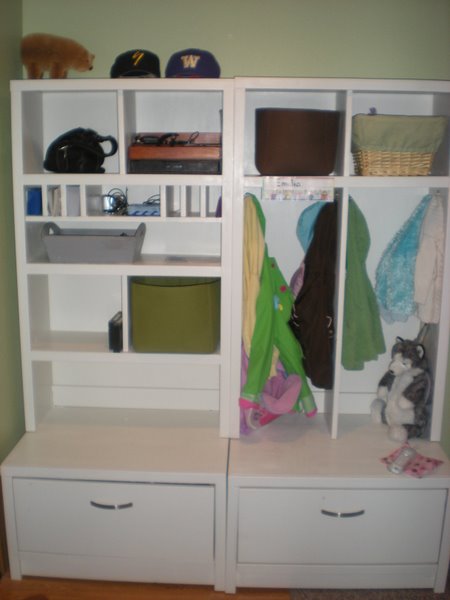
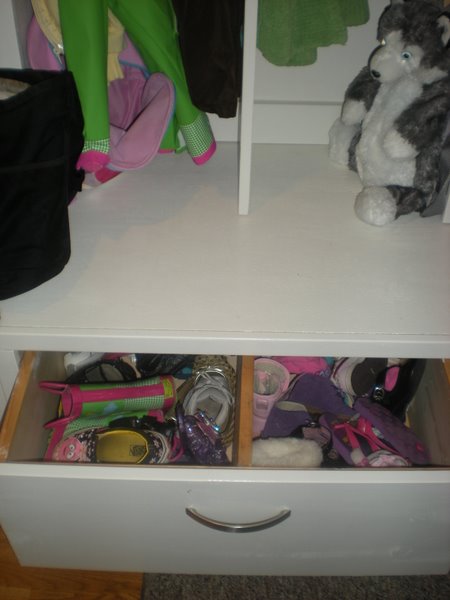
This is the greatest website ever! Thank you so much Ana White! Anyway, this was my first project. Our family room was a mess - shoes everywhere, coats strewn, you name it. We don't have a mud room - you just walk in from the garage to BAM, the family room. So the mess needs to be contained and organized and the Braden Shoe Drawer, Locker and Mail Sorter/Phone Charger was our answer! I would have loved to have done the locker-mail sorter-locker layout but space is limited in the room so I was only able to make one locker. I did make a 3rd drawer, per Ana's awesome wood cutting instructions and that drawer is in a storage closet. So, pay attention to her cutting instructions - she knows what she's talking about! I had some left over wood (1x10) and used that as a divider in the shoe drawer to keep each kids' shoes separate.

Sat, 09/03/2011 - 10:04
Just love the divided drawer and this whole set! What am amazing project! So proud of you! The finish is just perfect too!

Sat, 09/03/2011 - 12:59
This looks great for a first build! The drawers are great for hiding the shoes and I love the mail sorter. Awesome job!
Thu, 12/01/2011 - 13:26
I'm new to Ana's site & I desperately need to find a Mud Room Locker System & since I don't have an office downstairs I either need a desk put in my kitchen or a mail sorter system of some kind! You did a fabulous job but I have to admit that I'm terrified to even start this project!!!!! I'm afraid that I'll make a huge mess of it!!!! Any suggestions for a newbie???? Thanks a million!
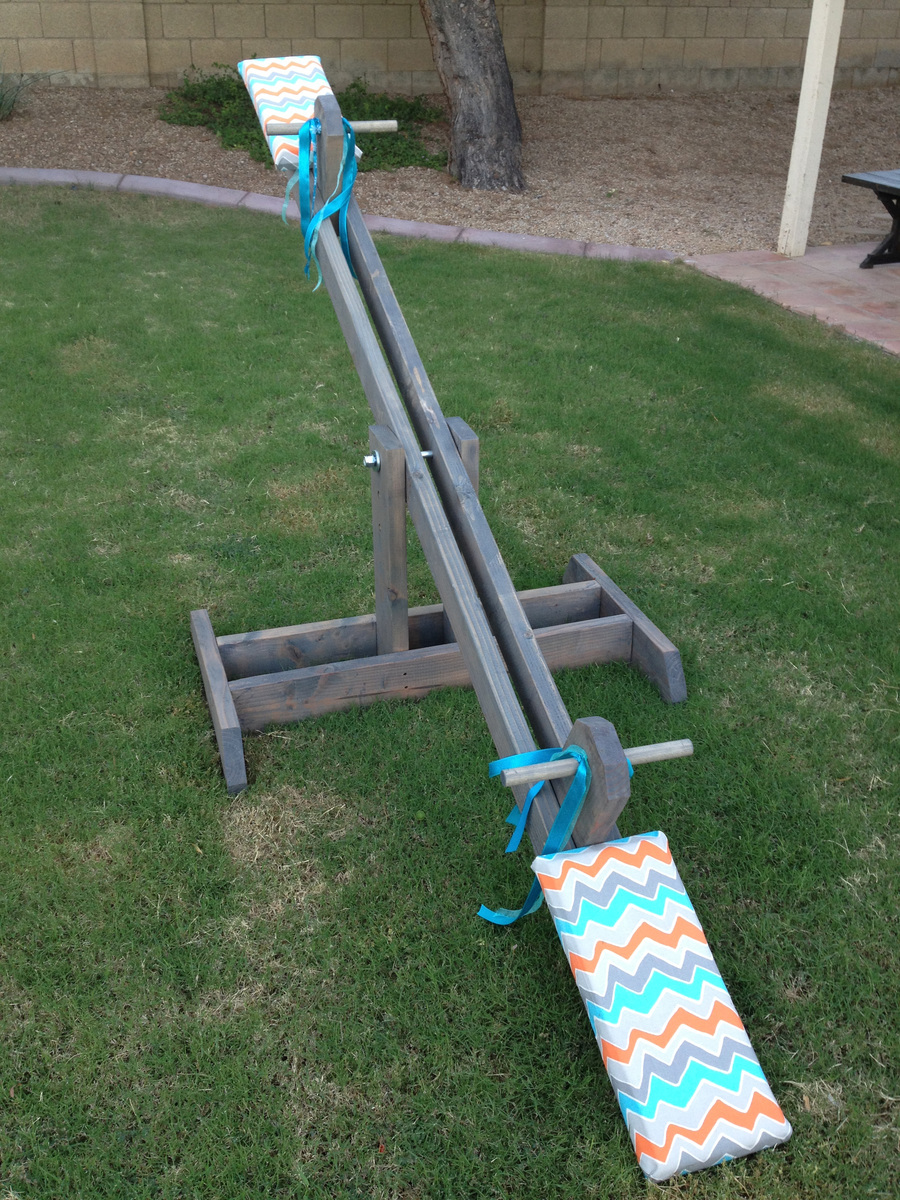
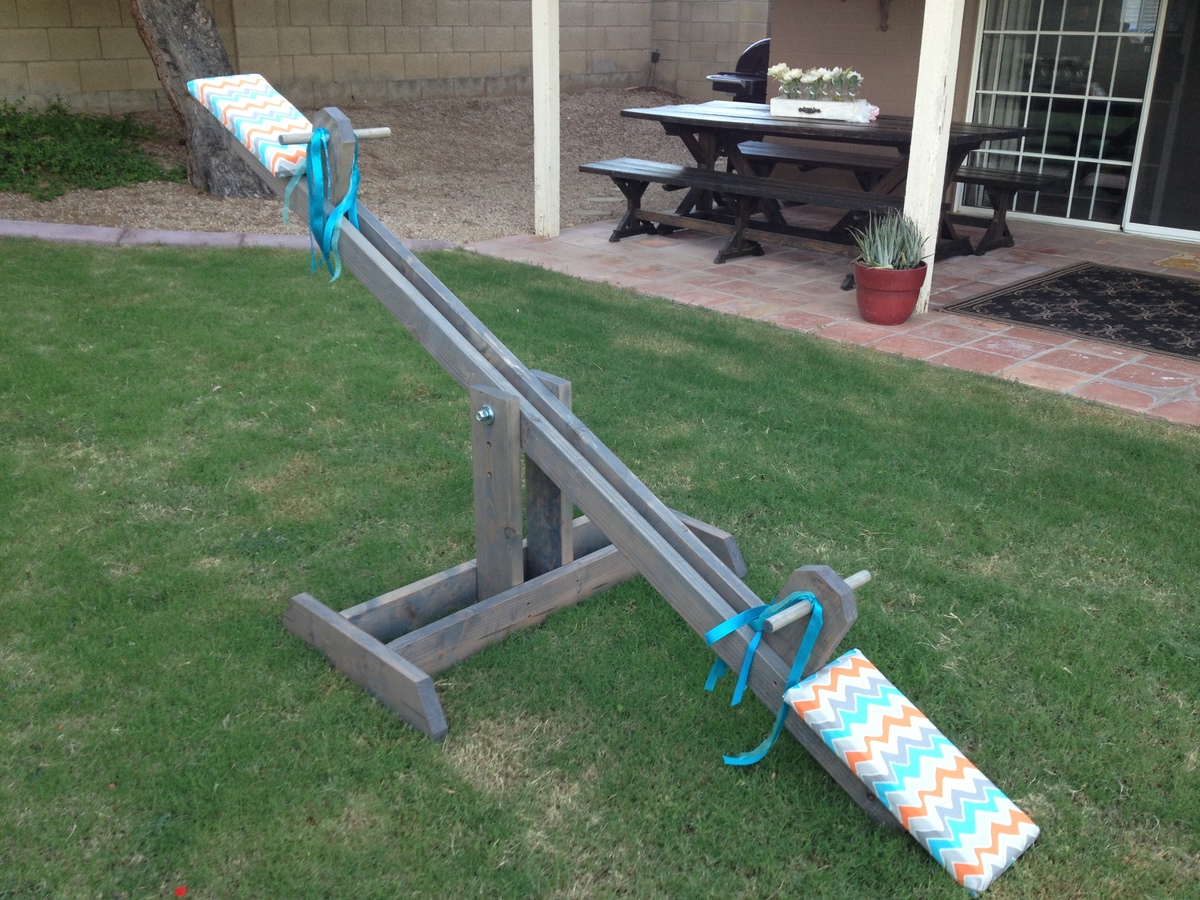
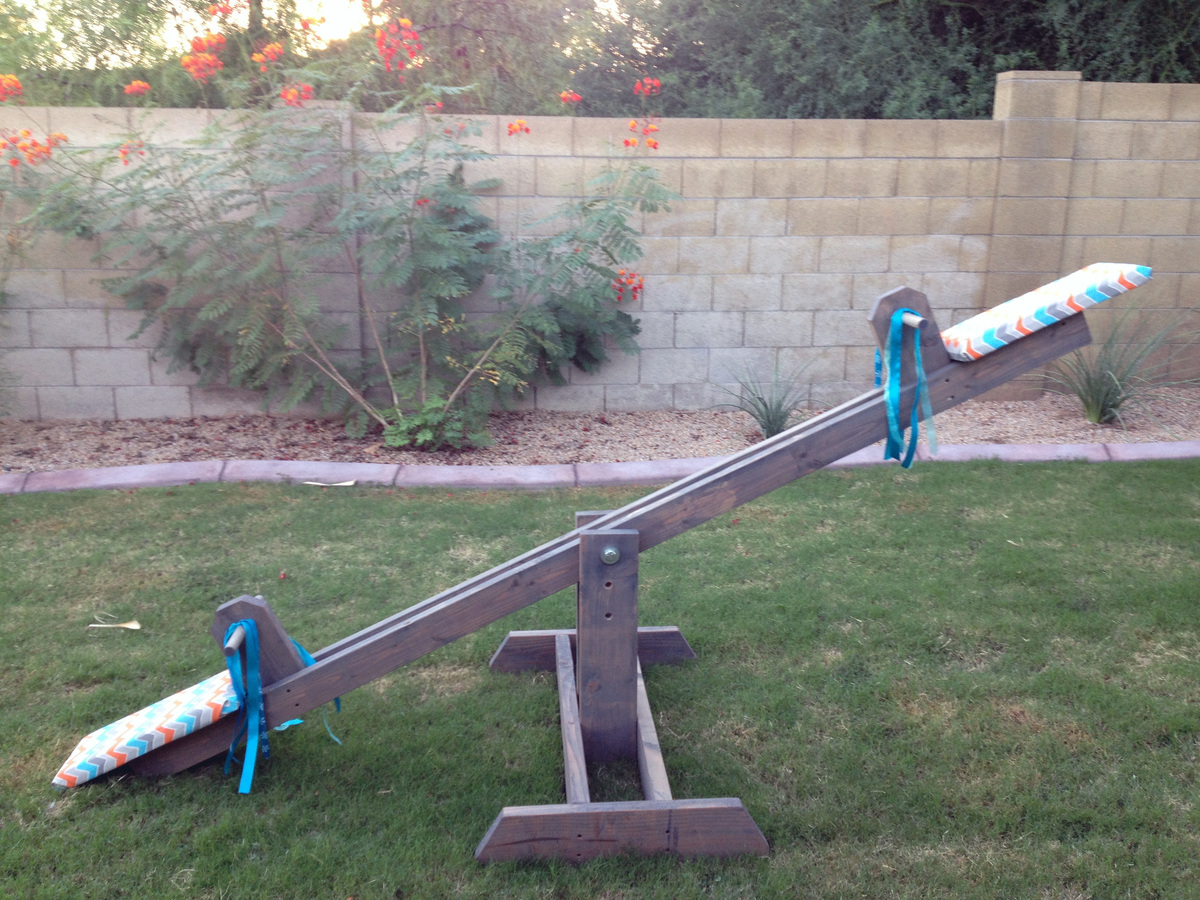
My husband built the seesaw and I applied the finish and covered the seats. This project was very easy and built in one weekend, including drying time for the stain. I used Minwax stain in Classic Grey and did not use a clear coat over the stain. I bought the canvas seat fabric at Hobby Lobby for $5.00 and used 2 inch foam cushion, which was about $3.00. I had some left over ribbons from another project that I tied to both sides of the handles to make the seesaw look festive for the birthday party! The project ended up costing about $50.00 in materials. My daughter Cwen loves it!
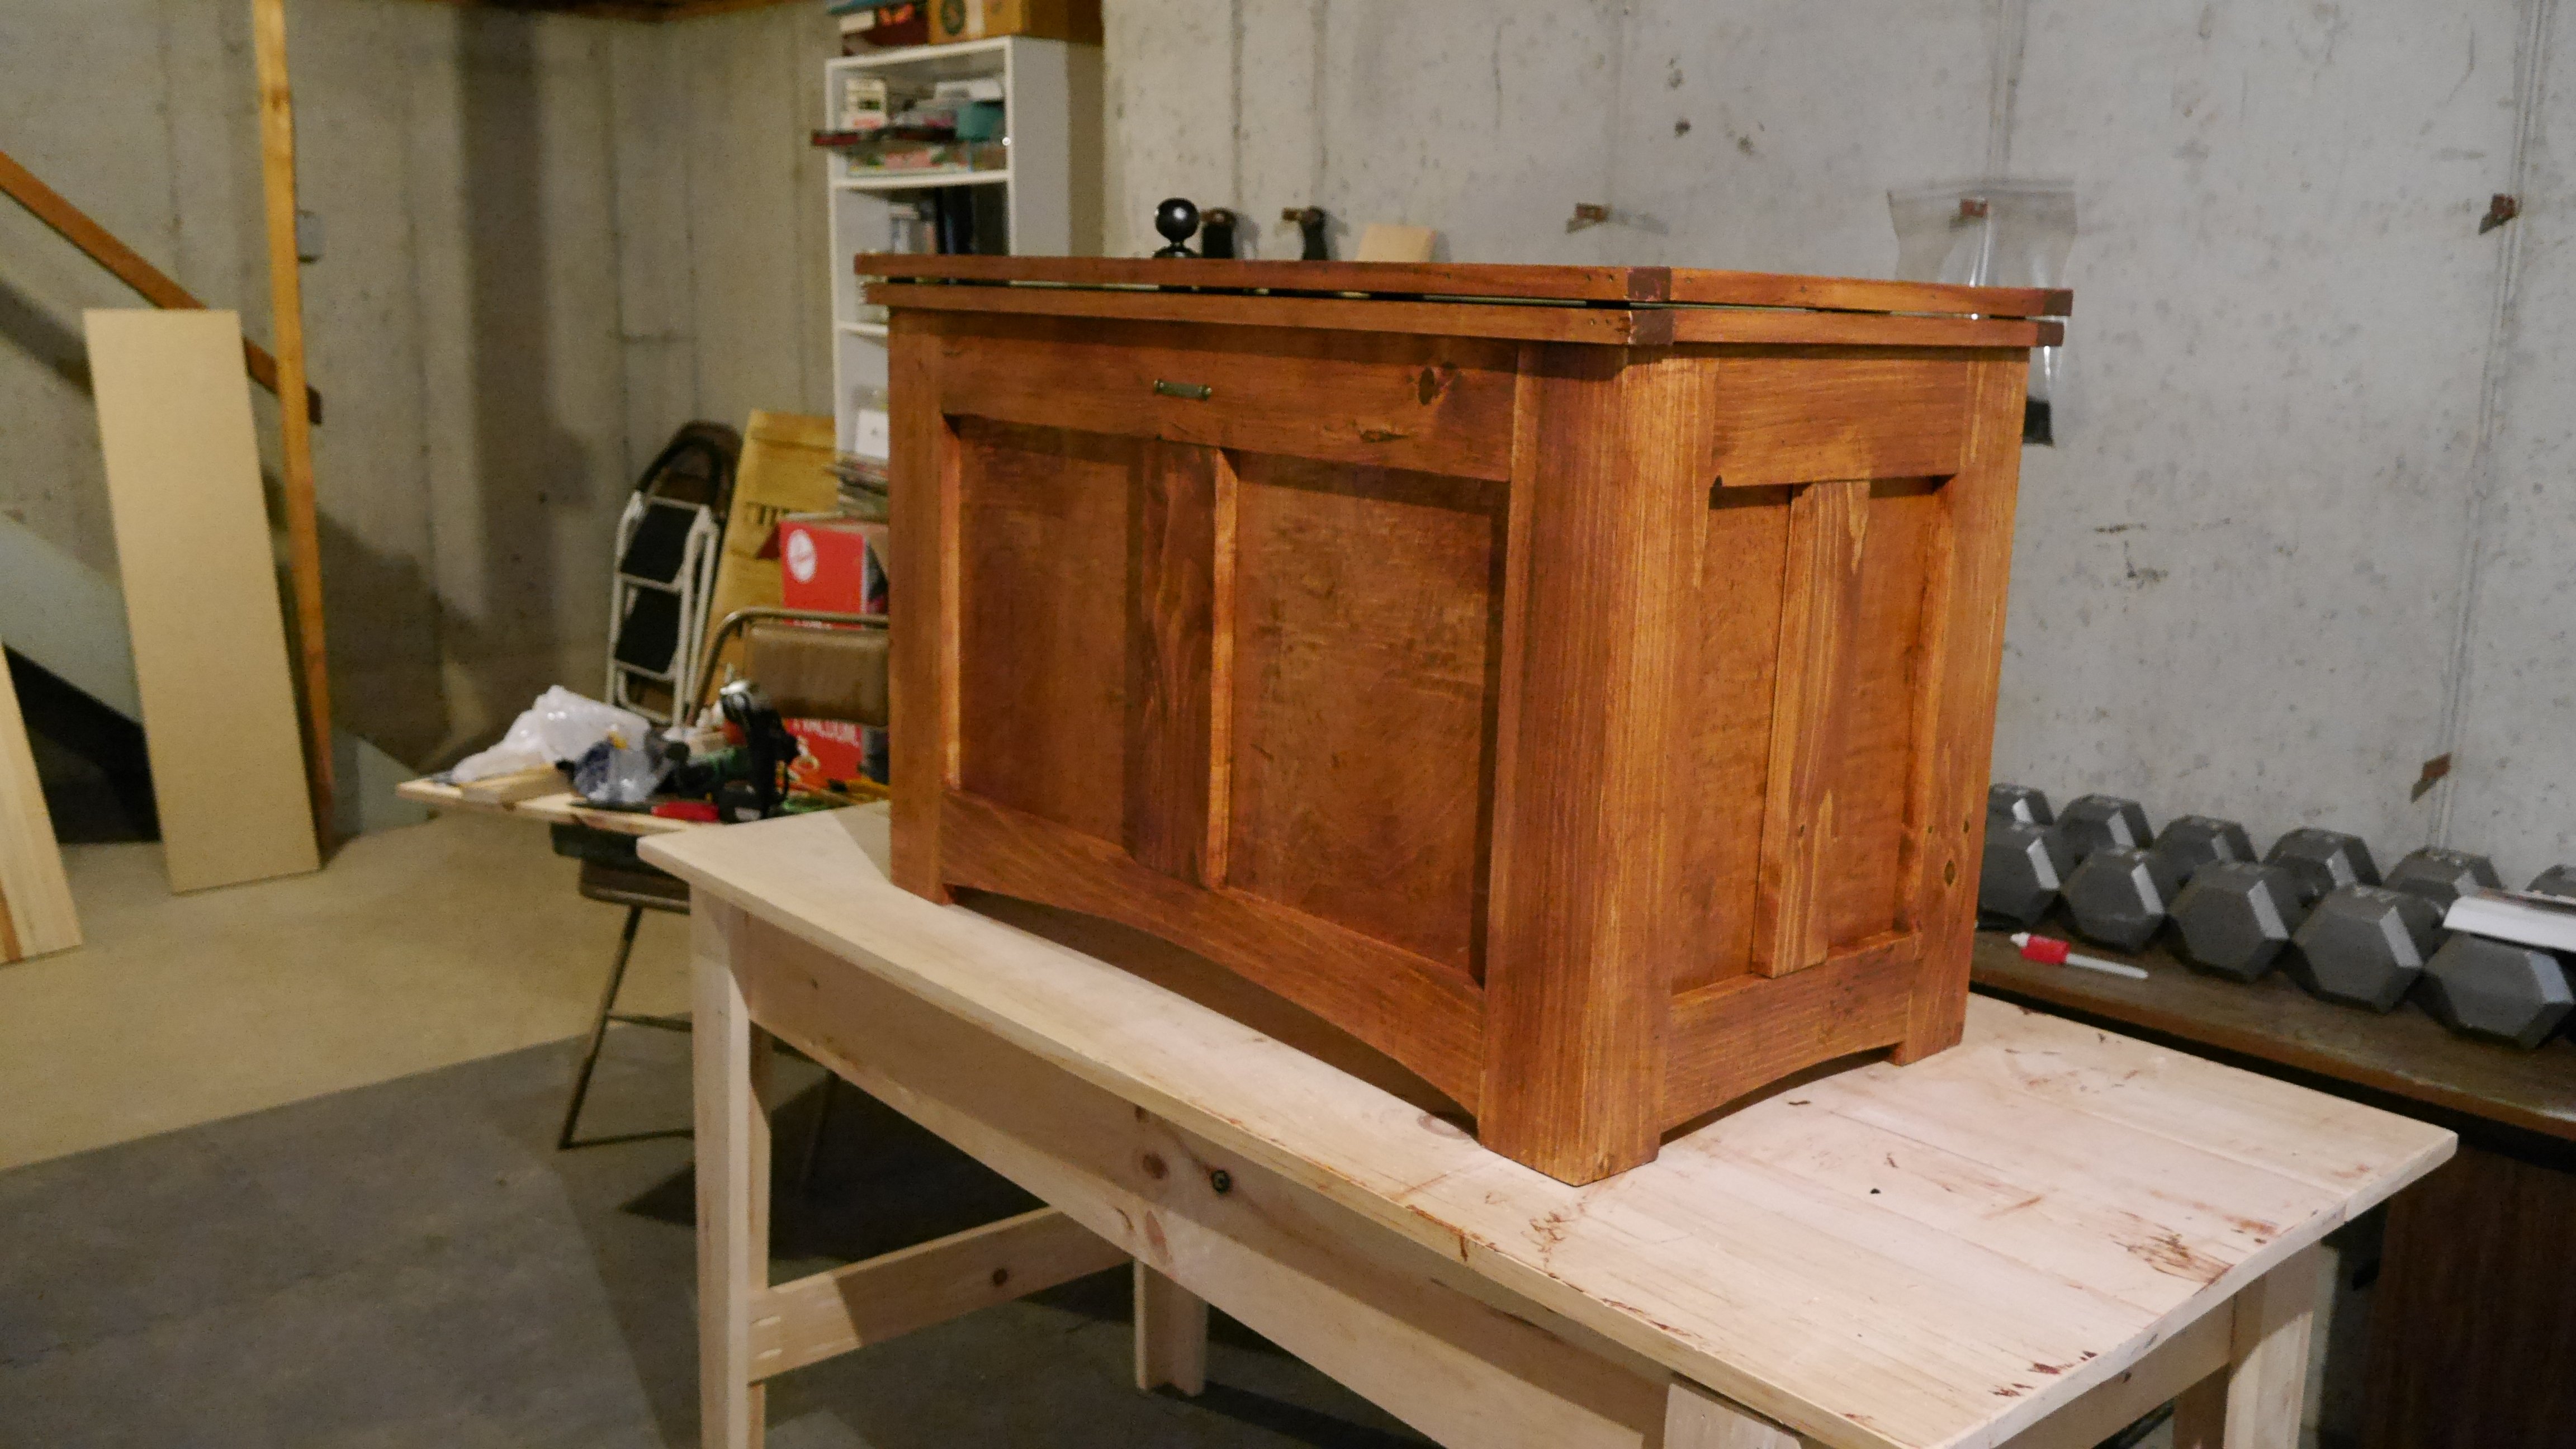
A few weeks back, my niece asked it I wouldn't mind building a Toy Box to auction off at a benefit she's holding this Saturday (December 5th - 2015). She and her husband are adopting 4, count 'em FOUR orphans from Latvia, so naturally I was more than happy to oblige. I didn't use any specific plans per se... I just used some pocket hole cabinetry I've seen on this site and others, as well as some pictures I found on the internet of different toy boxes and blanket chests for inspiration. The final project cost about $55 all in, including lumber and hardware. I used 1x3s and 1x2s for the frame, one 4x4 sheet of 1/4" plywood for the panels, and one 3/4" x 16" x 8 foot project board (which I got for $11 and change!) to use as the bottom and lid of the chest. For hardware, I used a couple of box hinges, a lid stay so that the lid both stays open on it's own and closes softly (gotta save those little fingers, y'know ;) ), and a cool wrought iron knob I found at Hobby Lobby for about $2 (gotta love the 40% off Black Friday Deals!). Oh... I also picked up a little quote plate from Hobby Lobby too, just too add that extra touch. ヅ Stain is Rustoleum American Walnut with 3 coats of satin poly.
UPDATE: The auction was yesterday and the chest sold for $330! ヅ


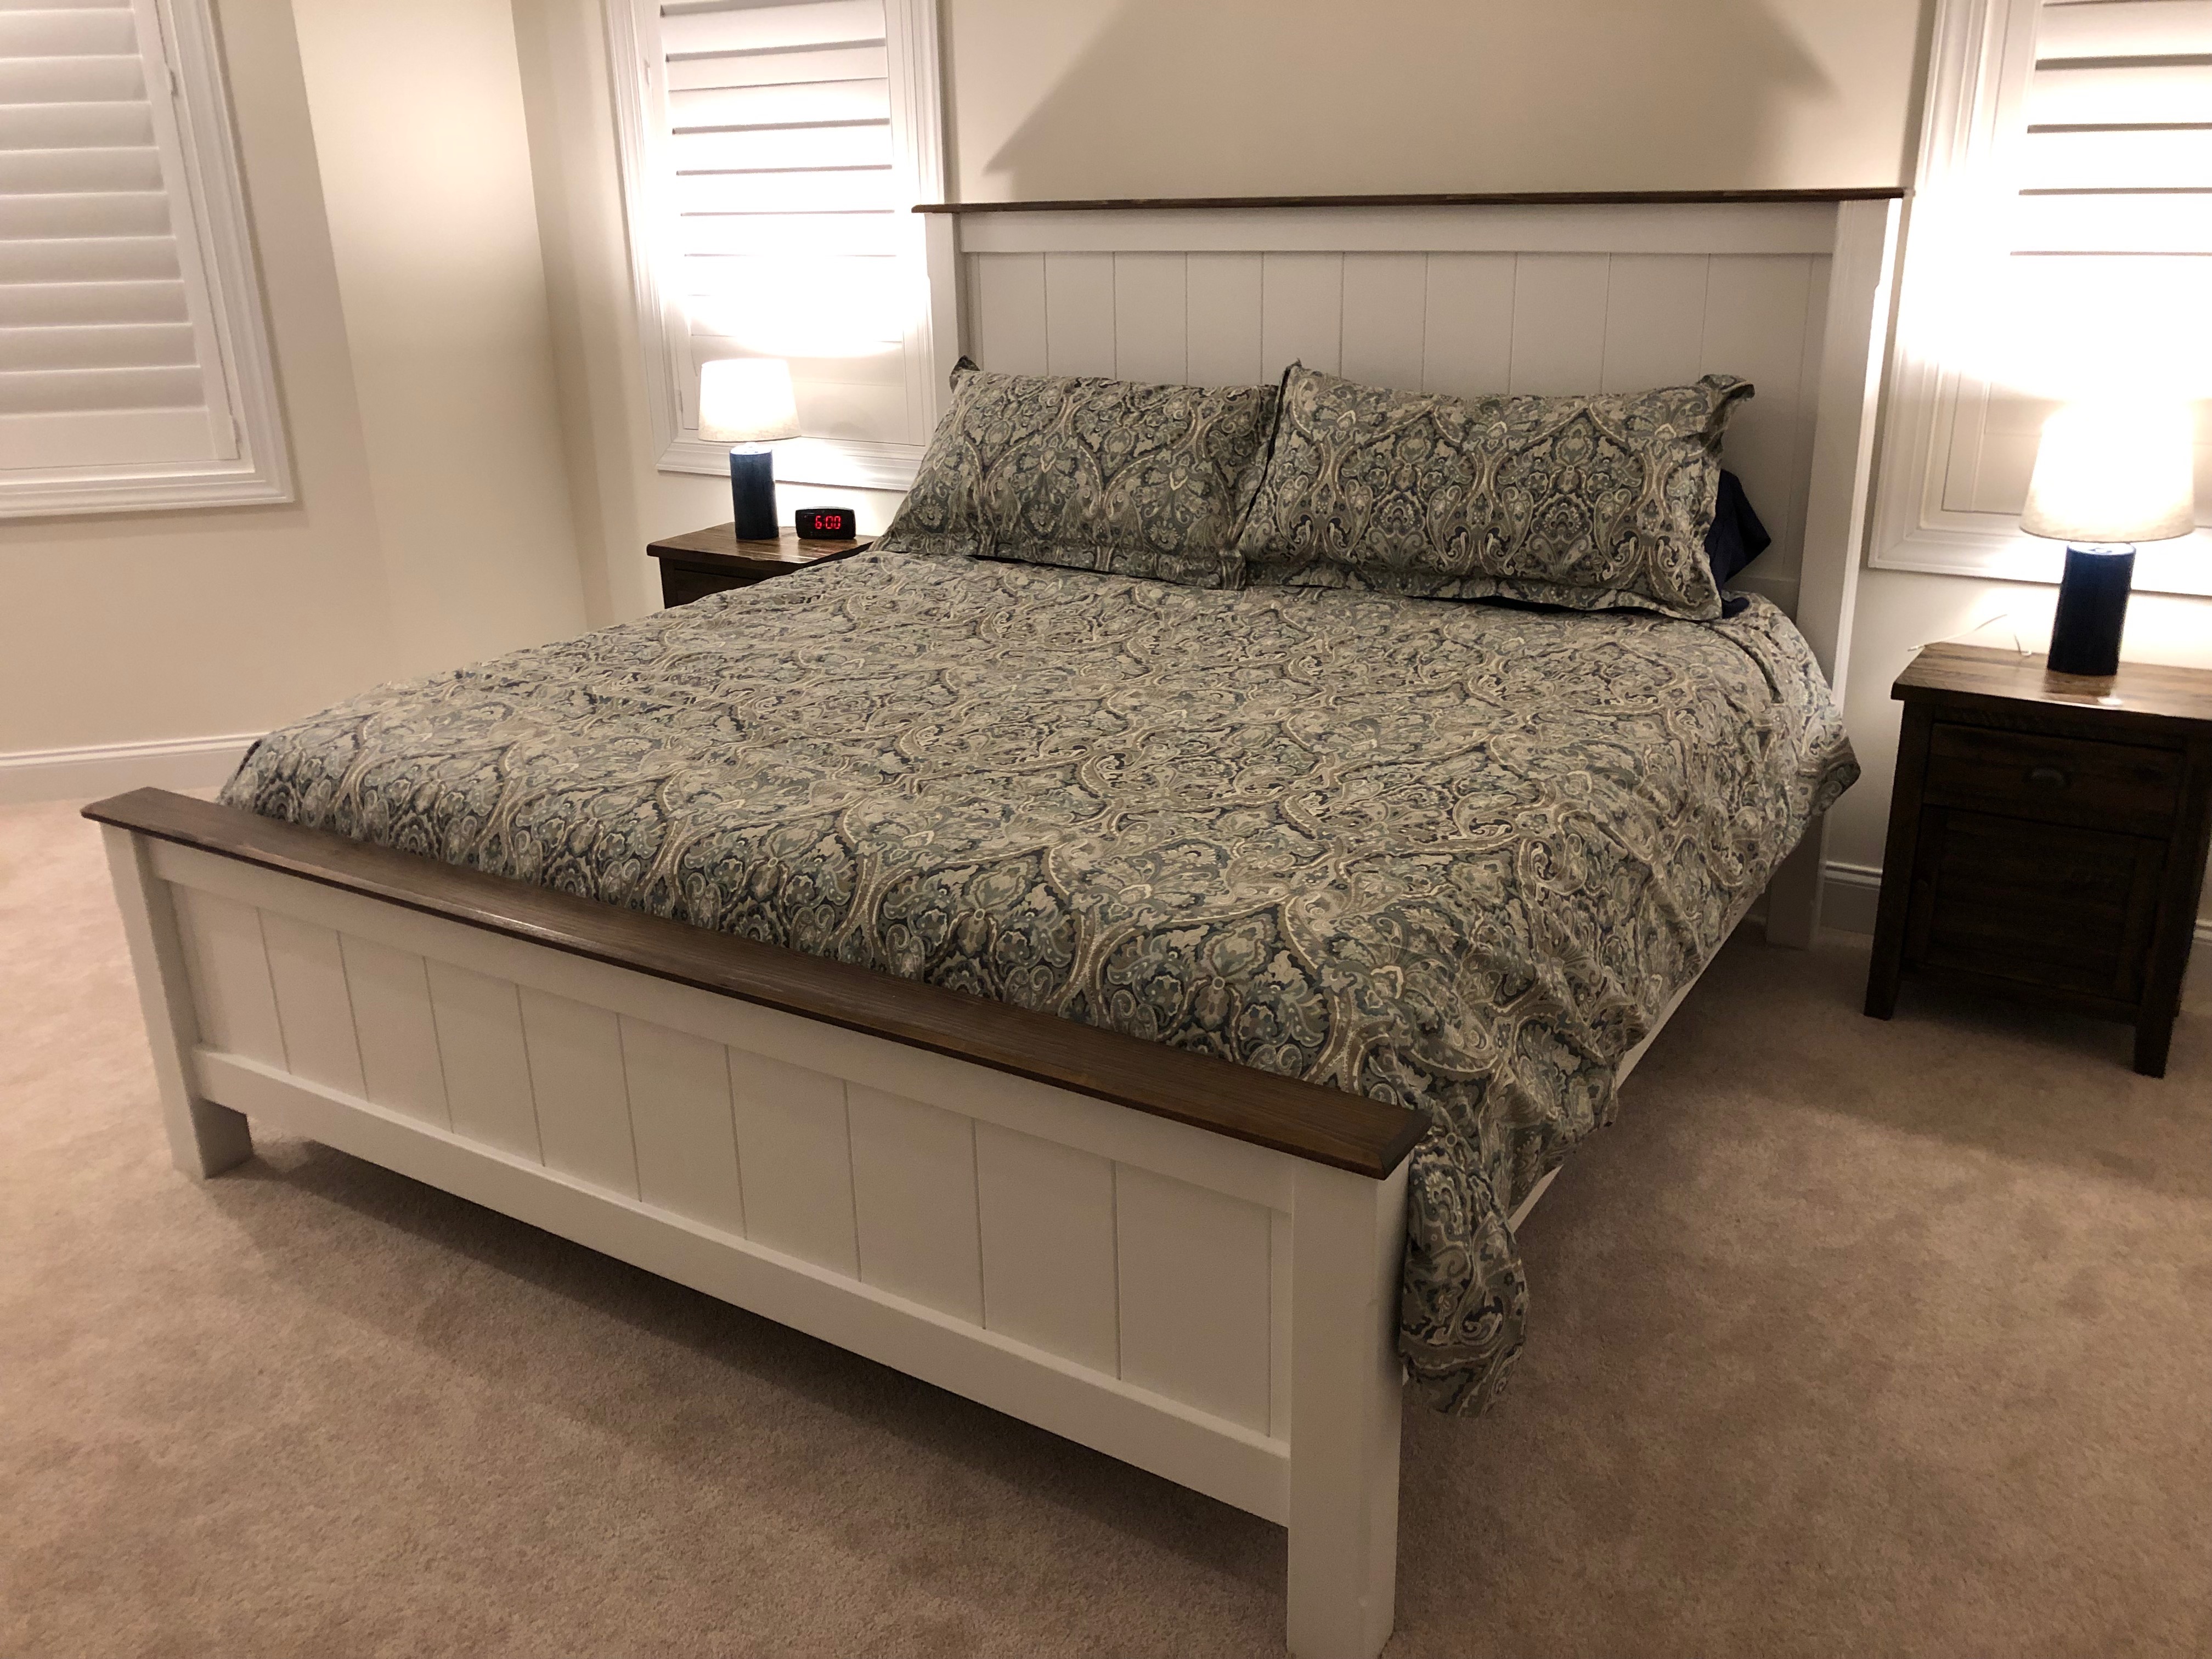
I pretty much followed the original plans. I added a chamfer on the outside corners of the posts and on the top boards on the head and foot boards. I also stained these to match the nightstands. Since I used a foam mattress, i built a platform by gluing/screwing a 2x4 inside the side rails. Then I set 1x6s on the 2x4 to support the mattress.
I use the free version of Sketchup to design the bed and estimate materials needed.
Lessons learned
It's not that difficult of a project. It is time consuming, though.
Fri, 10/16/2020 - 13:48
I love the look of your version. Do you have the SketchUp file anywhere that I can download? I would really like to make this version as I love your proportions and the color scheme.
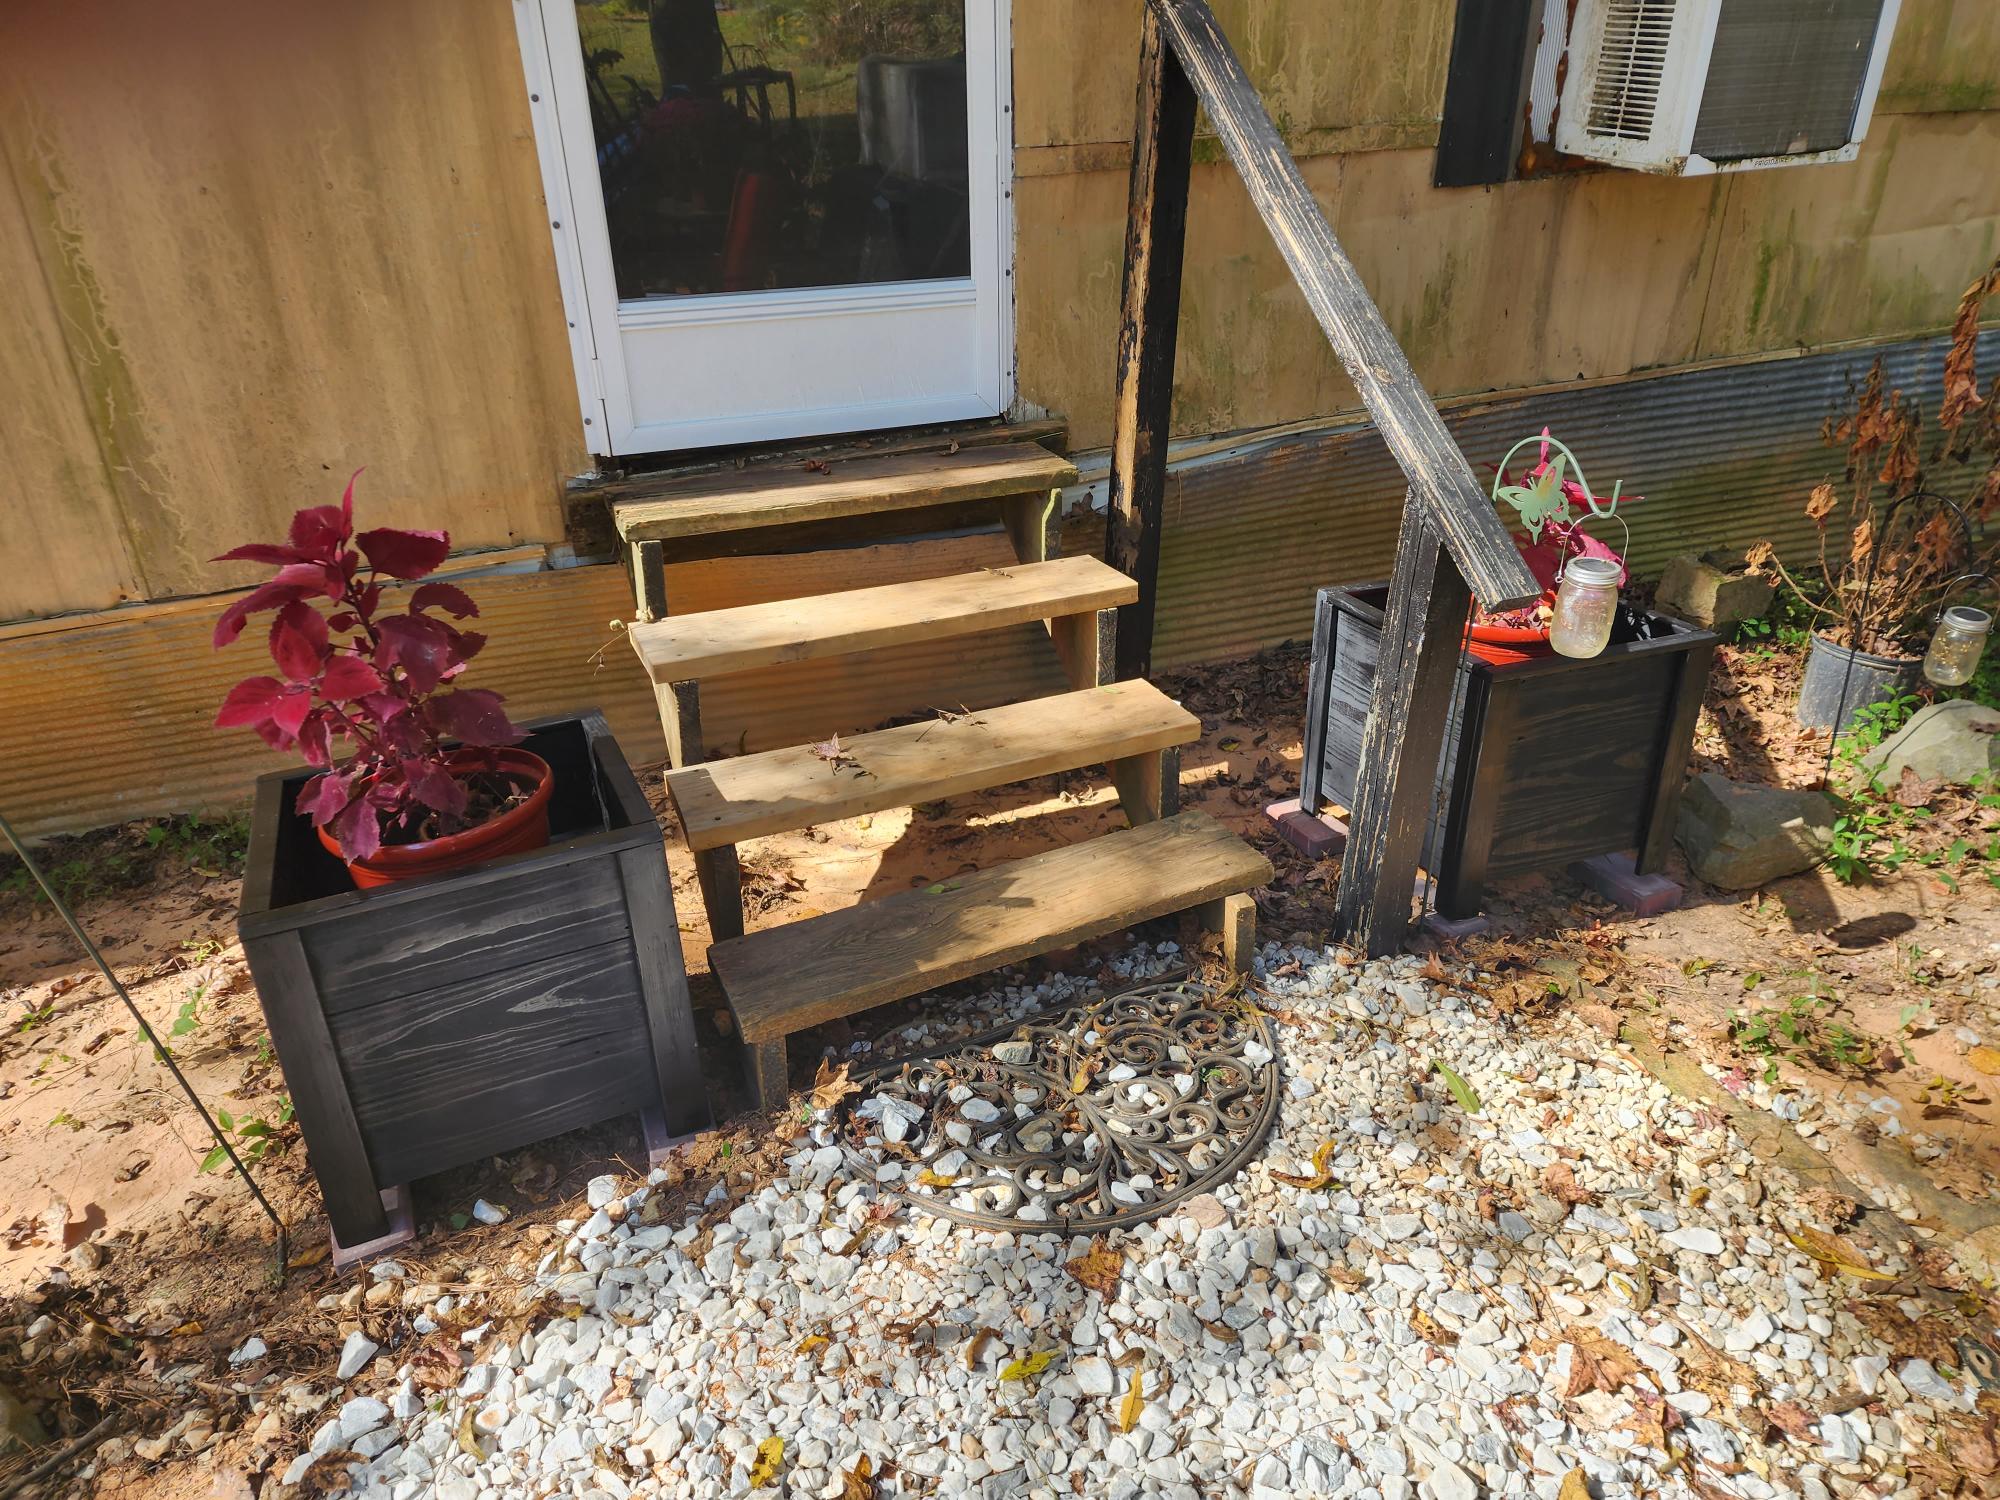
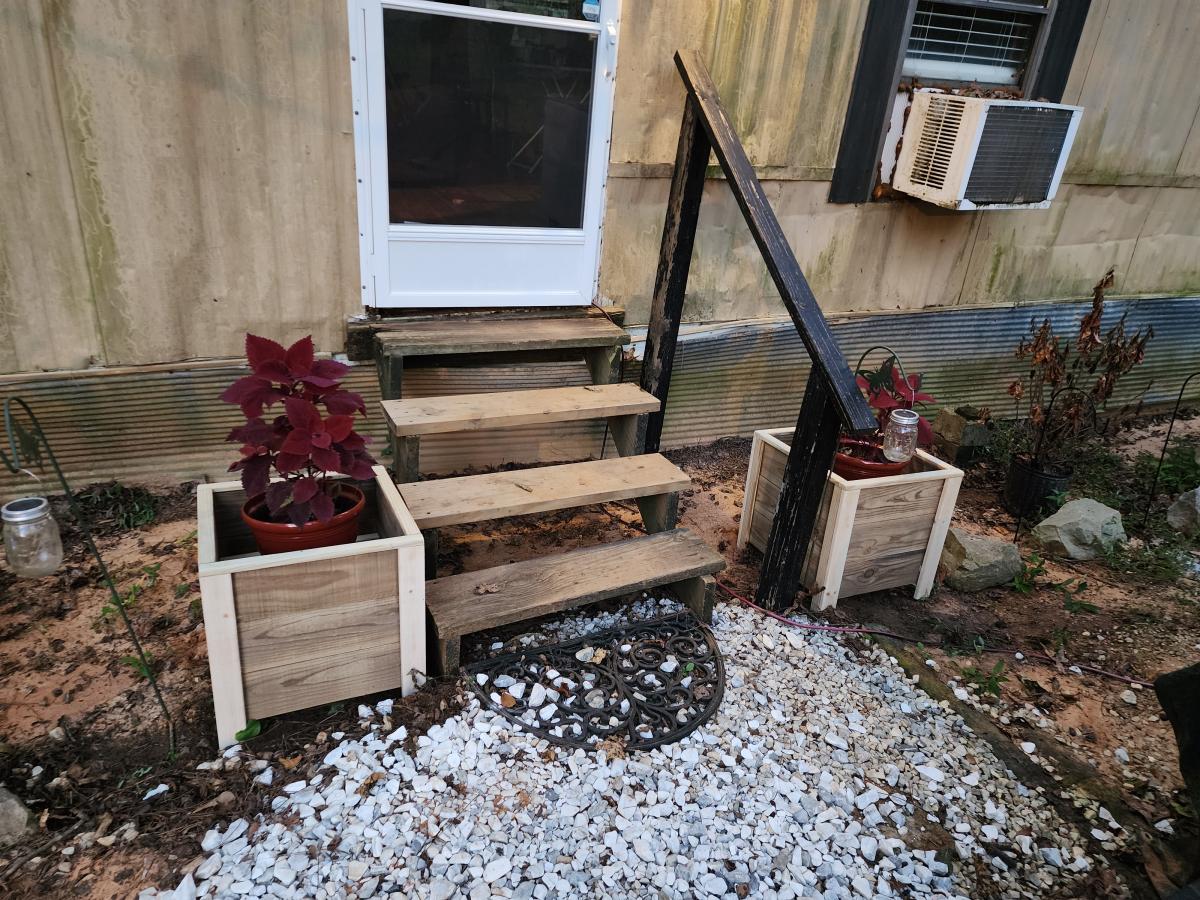
First time building planters. They came out perfectly.
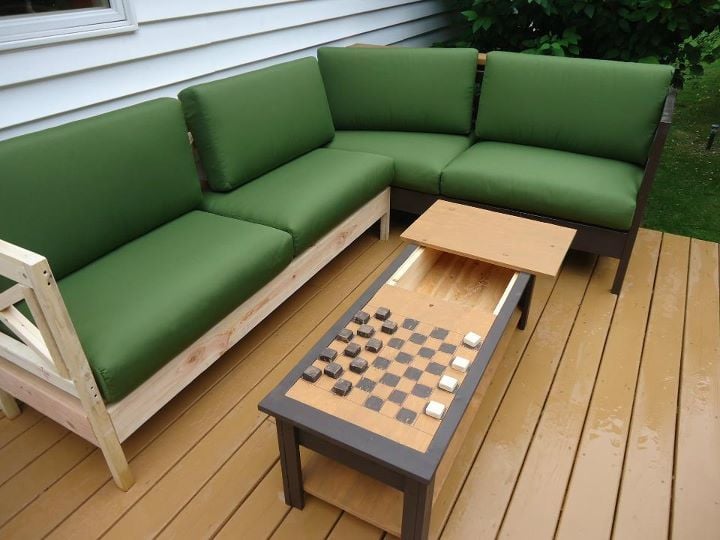
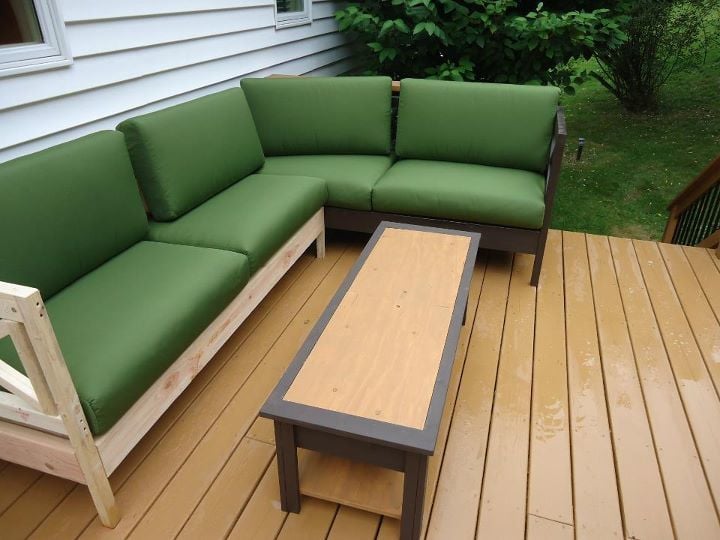
Two weatherly sofas butted up against each other make a great sectional! The "Lego" table has a checkerboard on the bottom of one of the removeable table top sides, and the other acts as a water table for the little one to splash around in. Thanks so much for the plans! These were all fun projects!
This was one of my favorite projects!!! I never could of completed this project without the guidance of Ana's blog and Hilary From the Friendly House. Thank you!!!

My son saw this project and wanted a rocketship. I was also tired of piling up his books on the floor. The only wood I bought for it was 1/4" ply for the back as I used leftover 3/4" plywood for the bookcase itself. Fairly easy with a Kreg, it just took a little while to finish all of the painting.
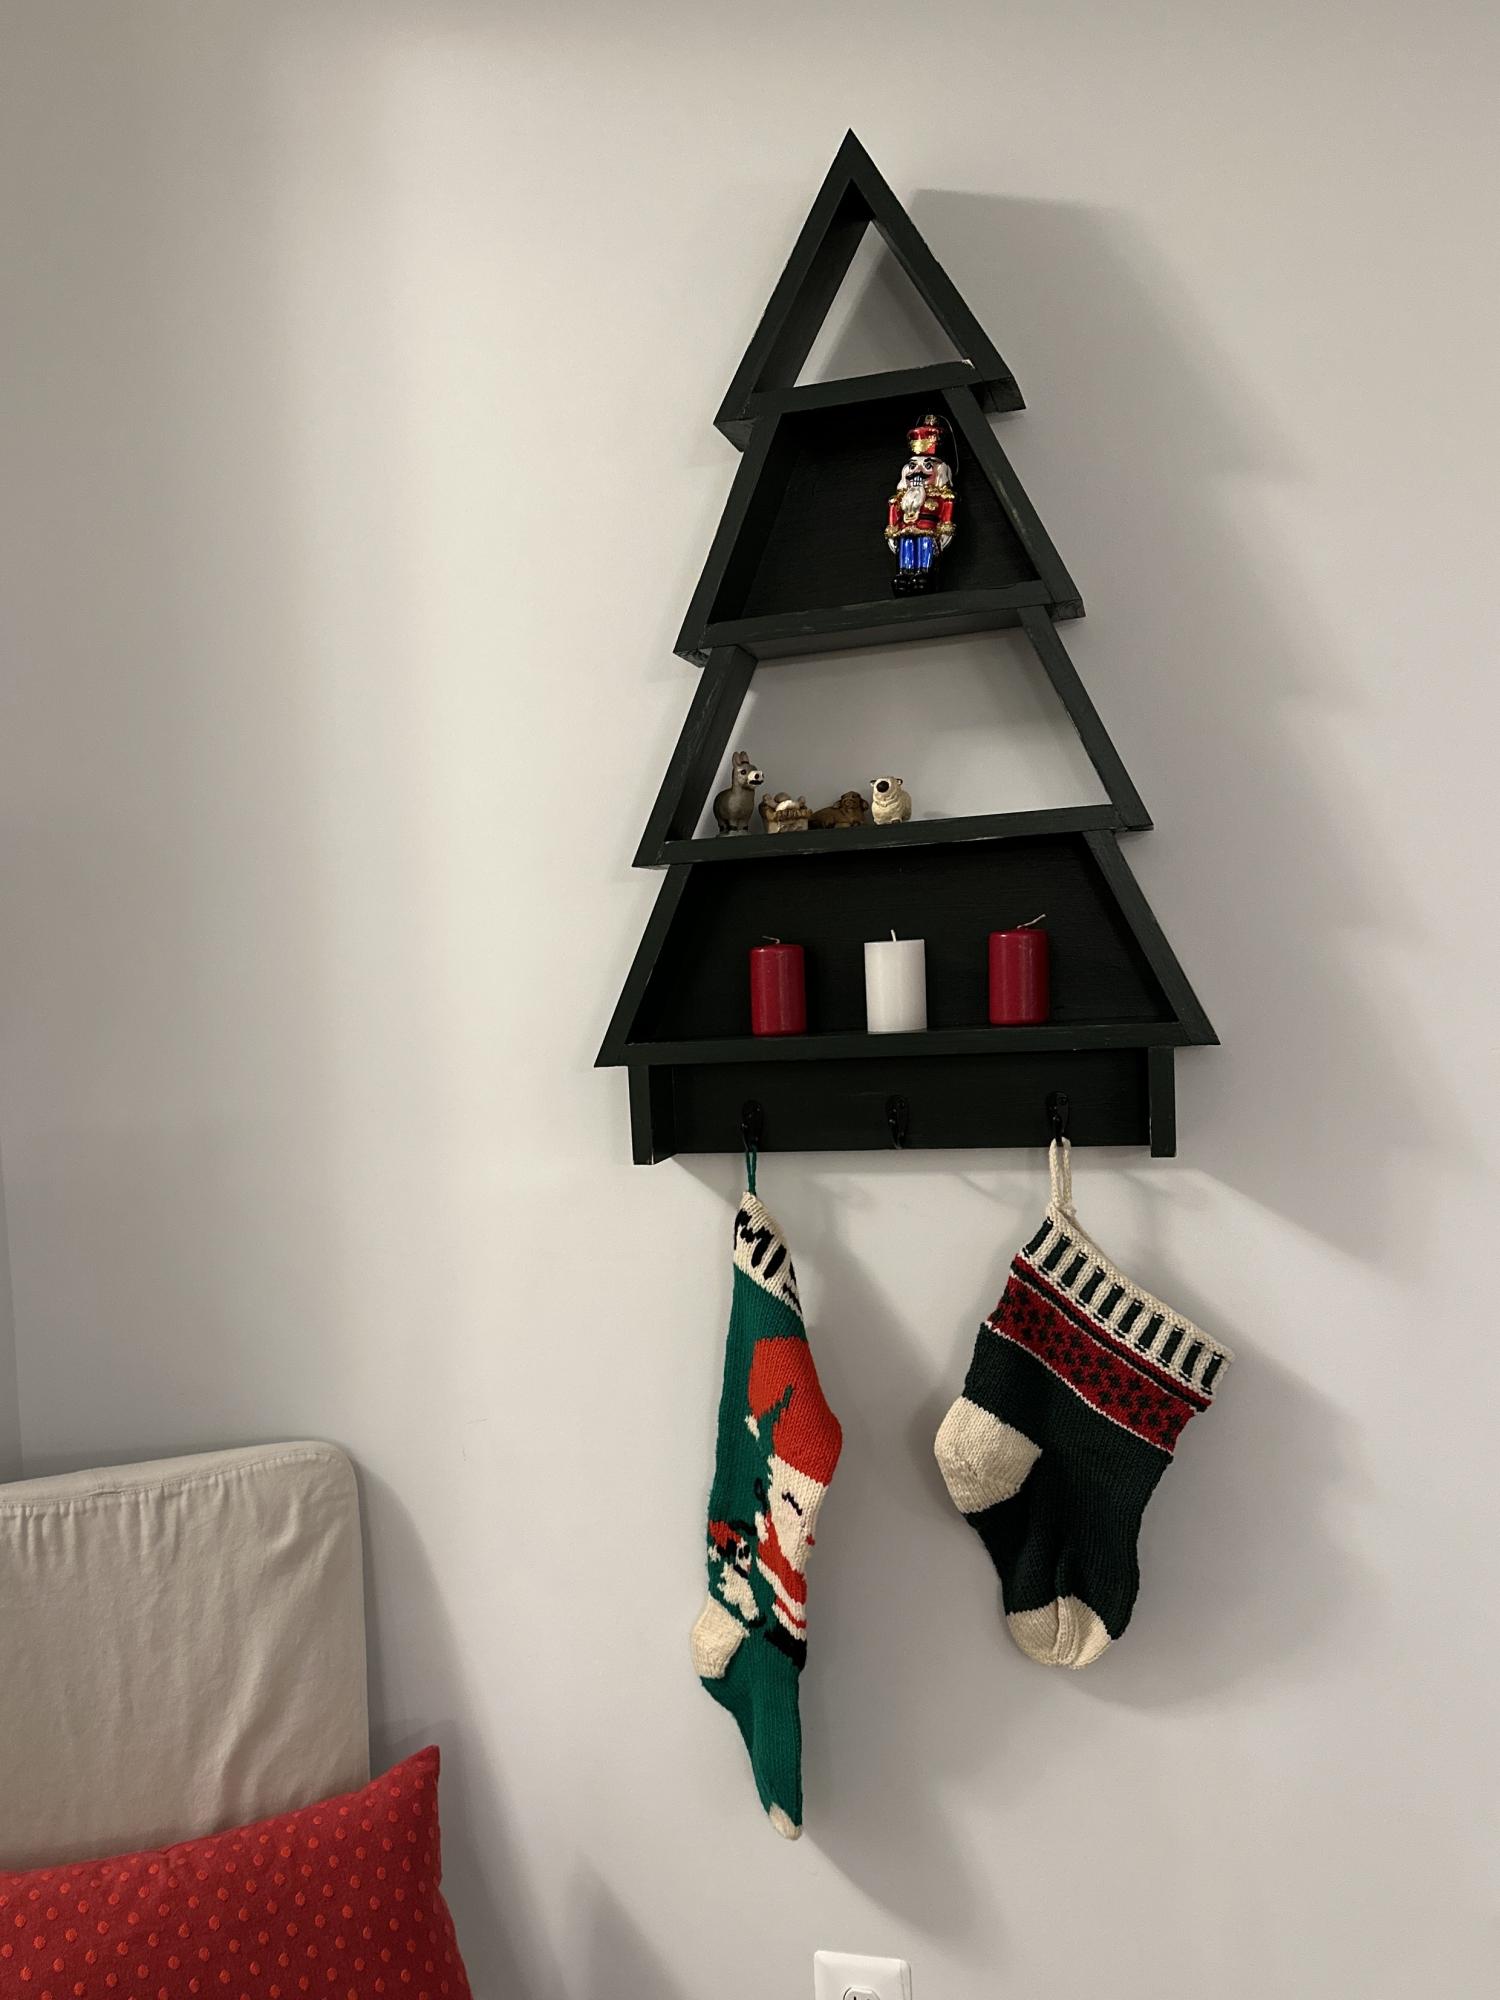
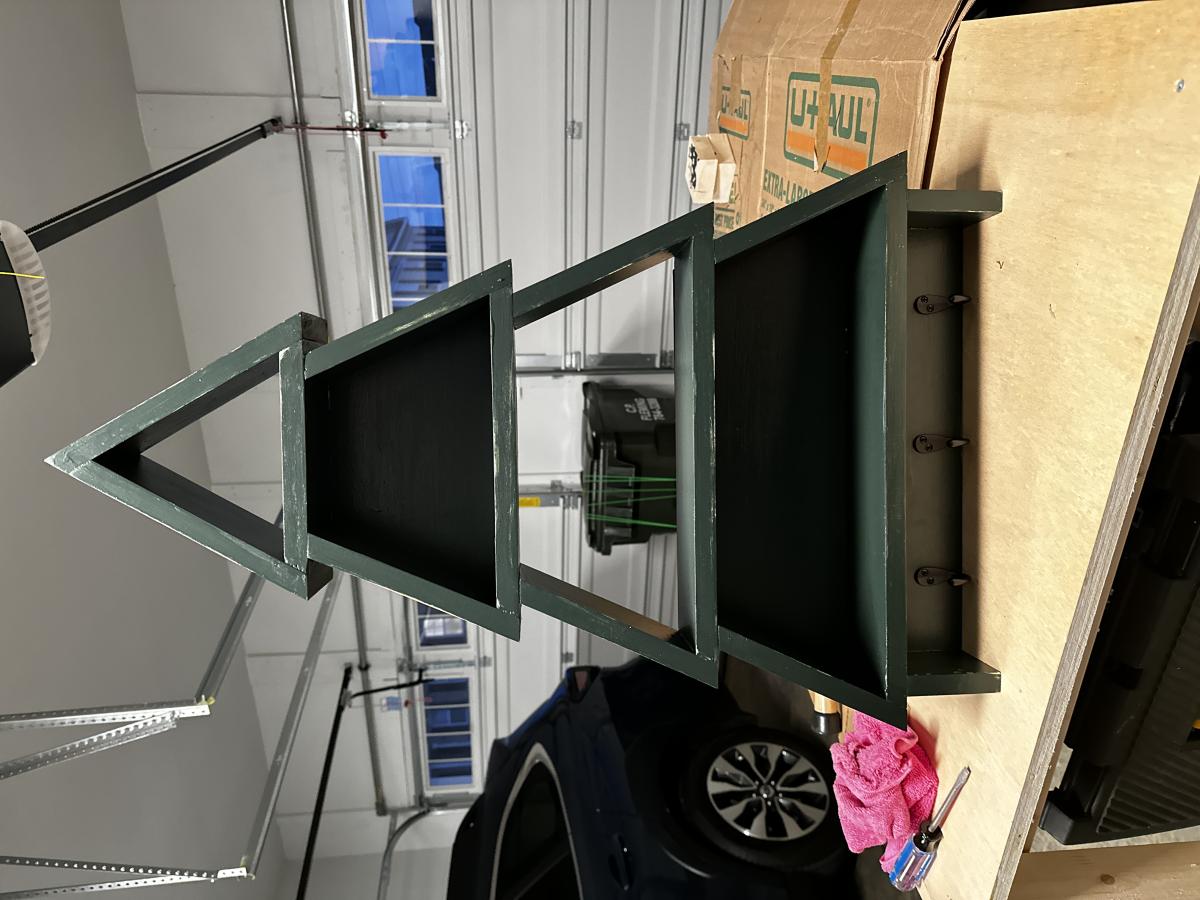
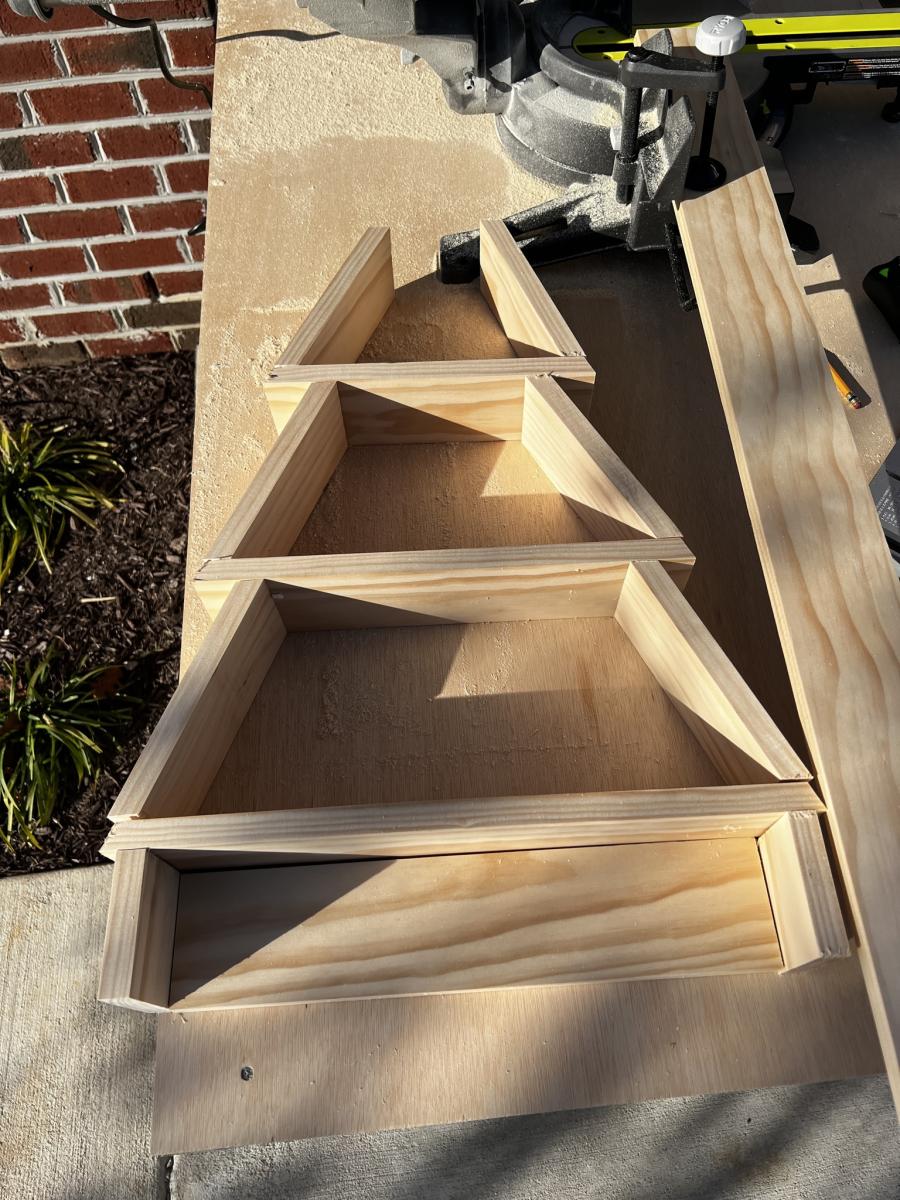
What a merry addition to my Christmas decor. I was drawn to this project because I wanted to use my new miter saw and to practice cutting angles & piecing together with great precision. It’s a bonus that I needed a place to hang stockings.
The directions were clear and helpful. It is forgiving if you don’t get boards aligned perfectly. That provided a great confidence boost for this newbie.
The stain is Minwax Austin Field solid. It was my first stain experience and it took me a while to get a smooth and consistent finish. But I love the tone.
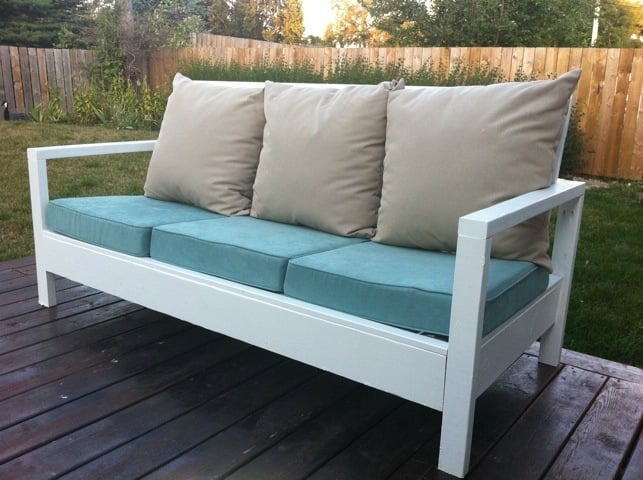
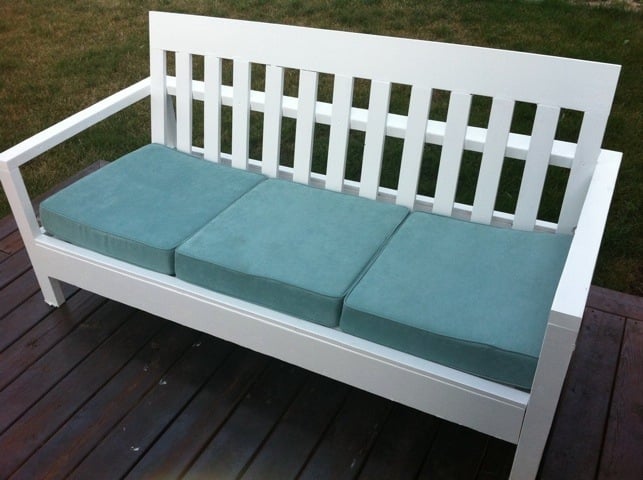
I built this sofa in one day, and painted it the next! I procrastinated all summer, and now that it's almost fall I decided to finally build it so that I could relax on the sofa in the back yard for the last month of nice weather here in Winnipeg. The plans were fantastic, the only problem I had was finding 24x24 cushions. The closest I could find were 22x22, so I adjusted the plans accordingly. It turned out well but I prefer it without the back cushions because that way there's more lounging room. Thank you so much for the plans!

Mon, 09/12/2011 - 08:56
Good idea to look for the cushions first and adjust accordingly. I love the color you chose to... works very well with the white sofa and warm wood deck. I agree that it is more inviting without the back pillows... That way you can see the wonderful detail of the back

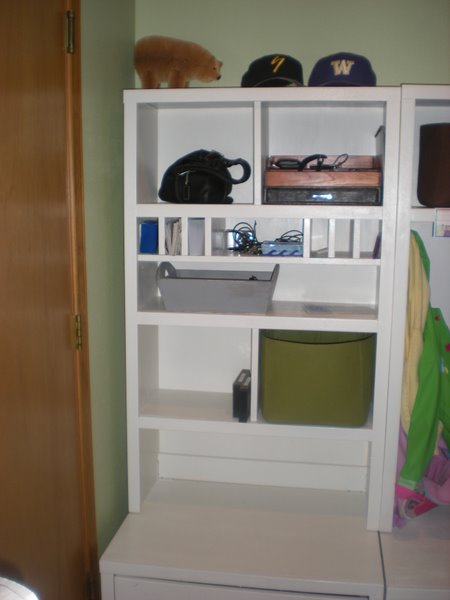
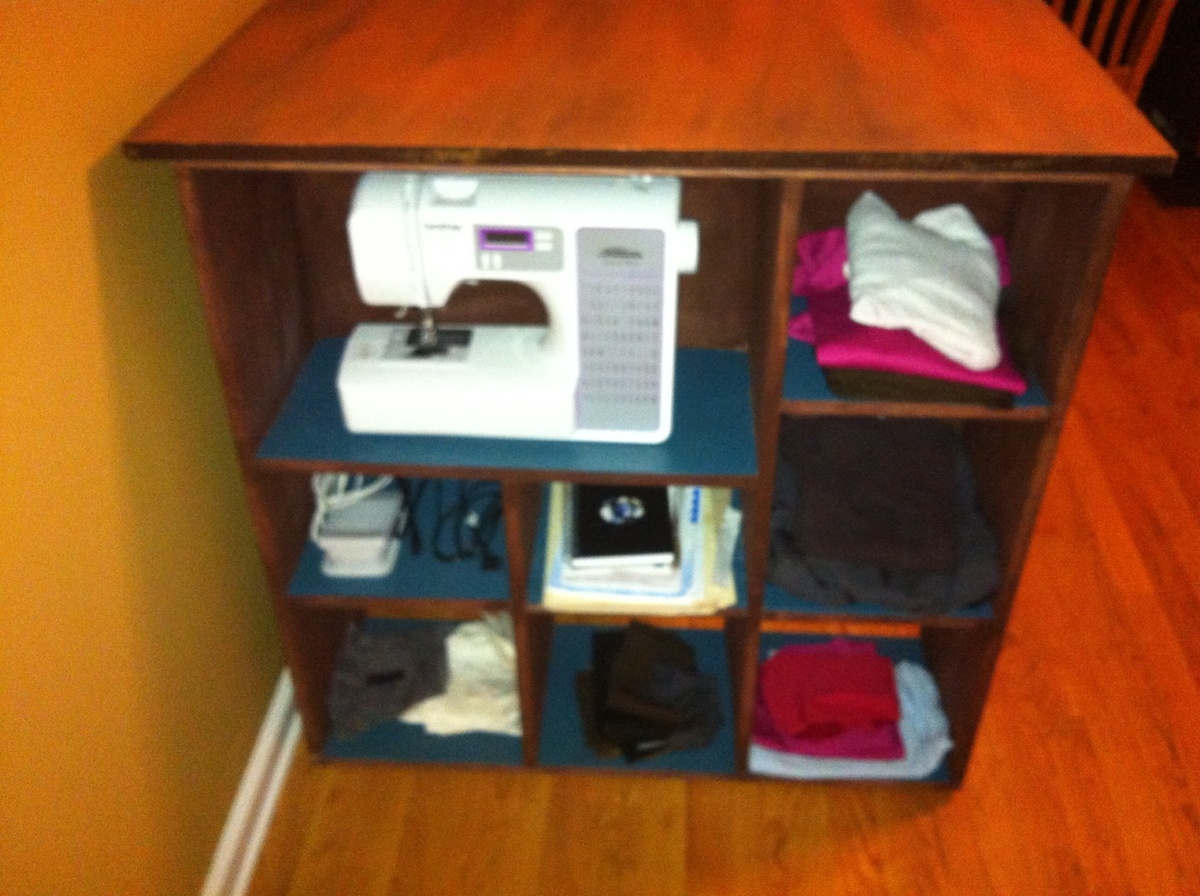
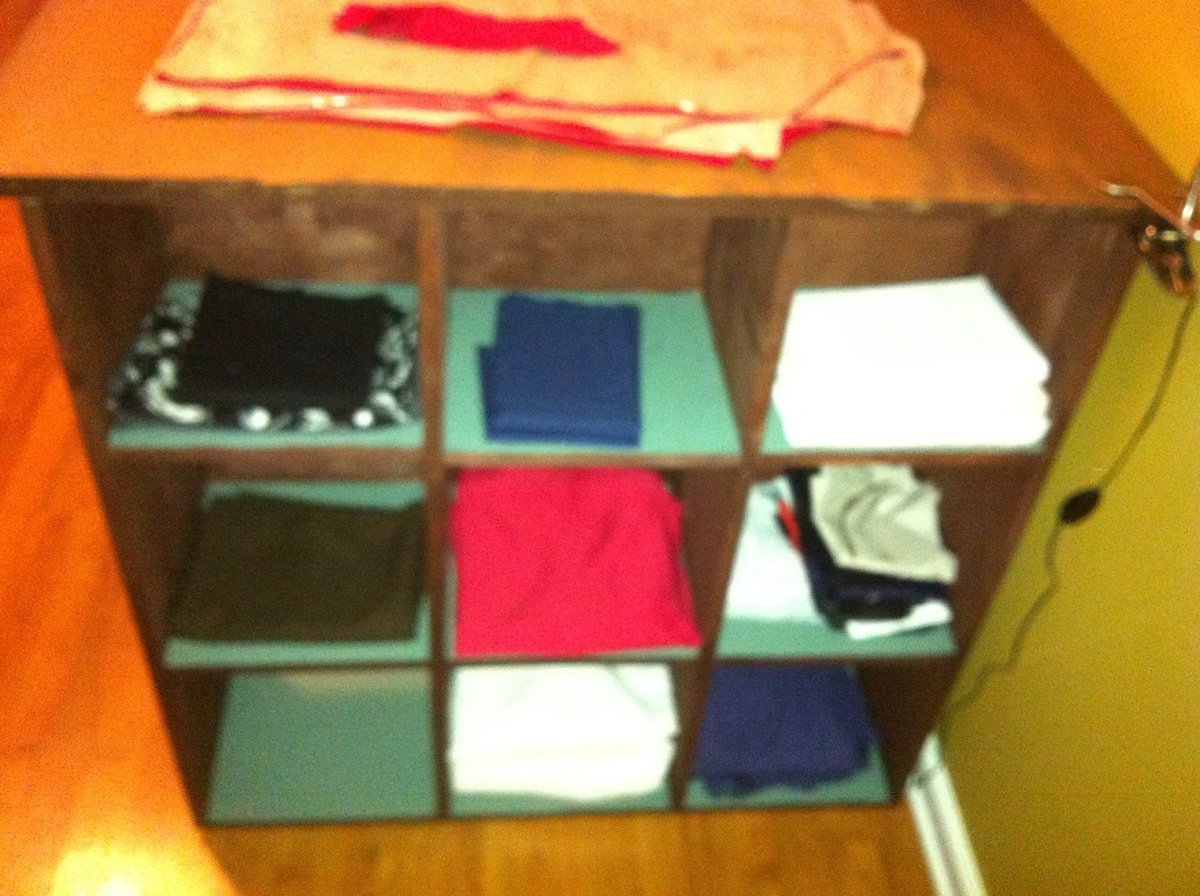
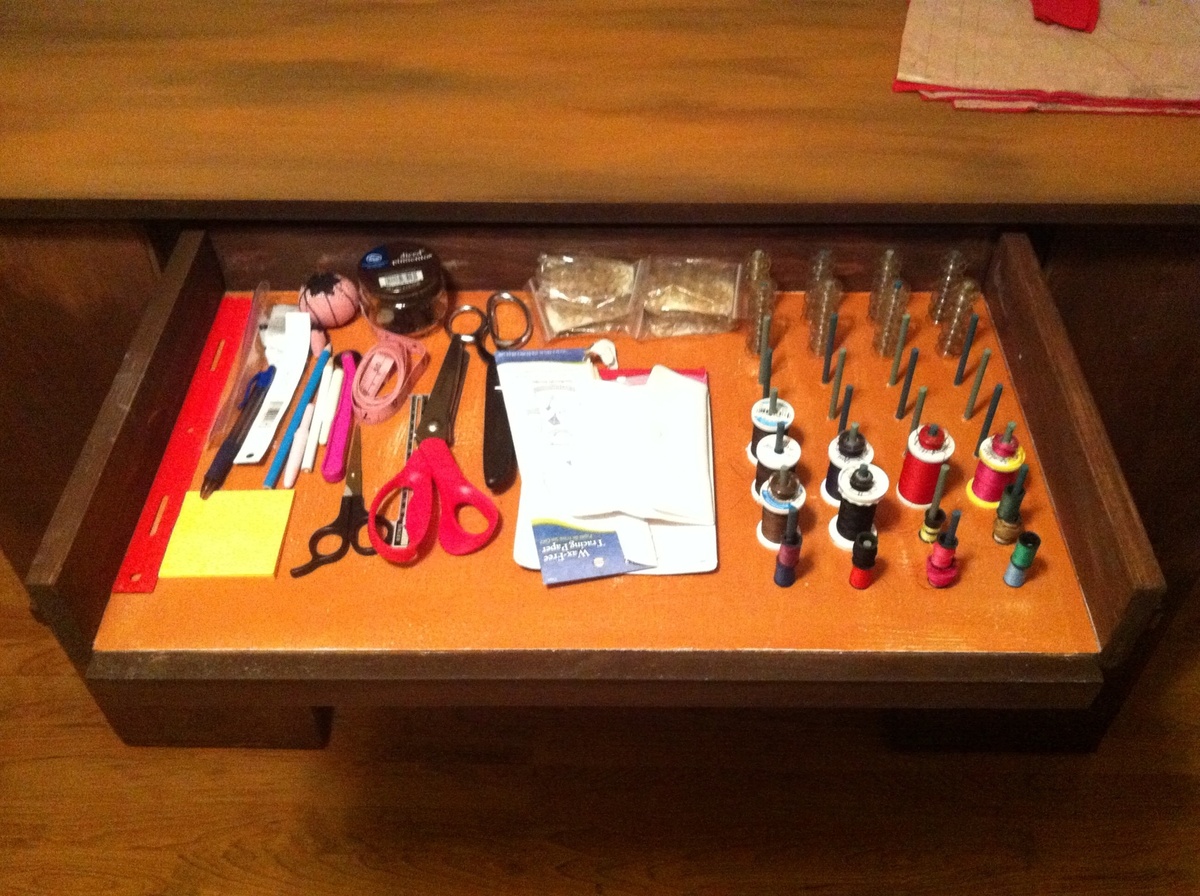
I modified one of the cubby book shelves for storing my sewing machine, altered the plan to have only 1 drawer since it will be against the wall and added dowel pegs to the drawer to hold thread spools.
This was very challenging but well worth it. I am excited because I was able to make this. Thank you!
Tue, 10/08/2013 - 02:53
My first project was really very tough. When we work on raw furniture or old home furniture, then we should take care about the damage of our important or valuable furniture items. It is really very exciting and good feeling time for all beginners.

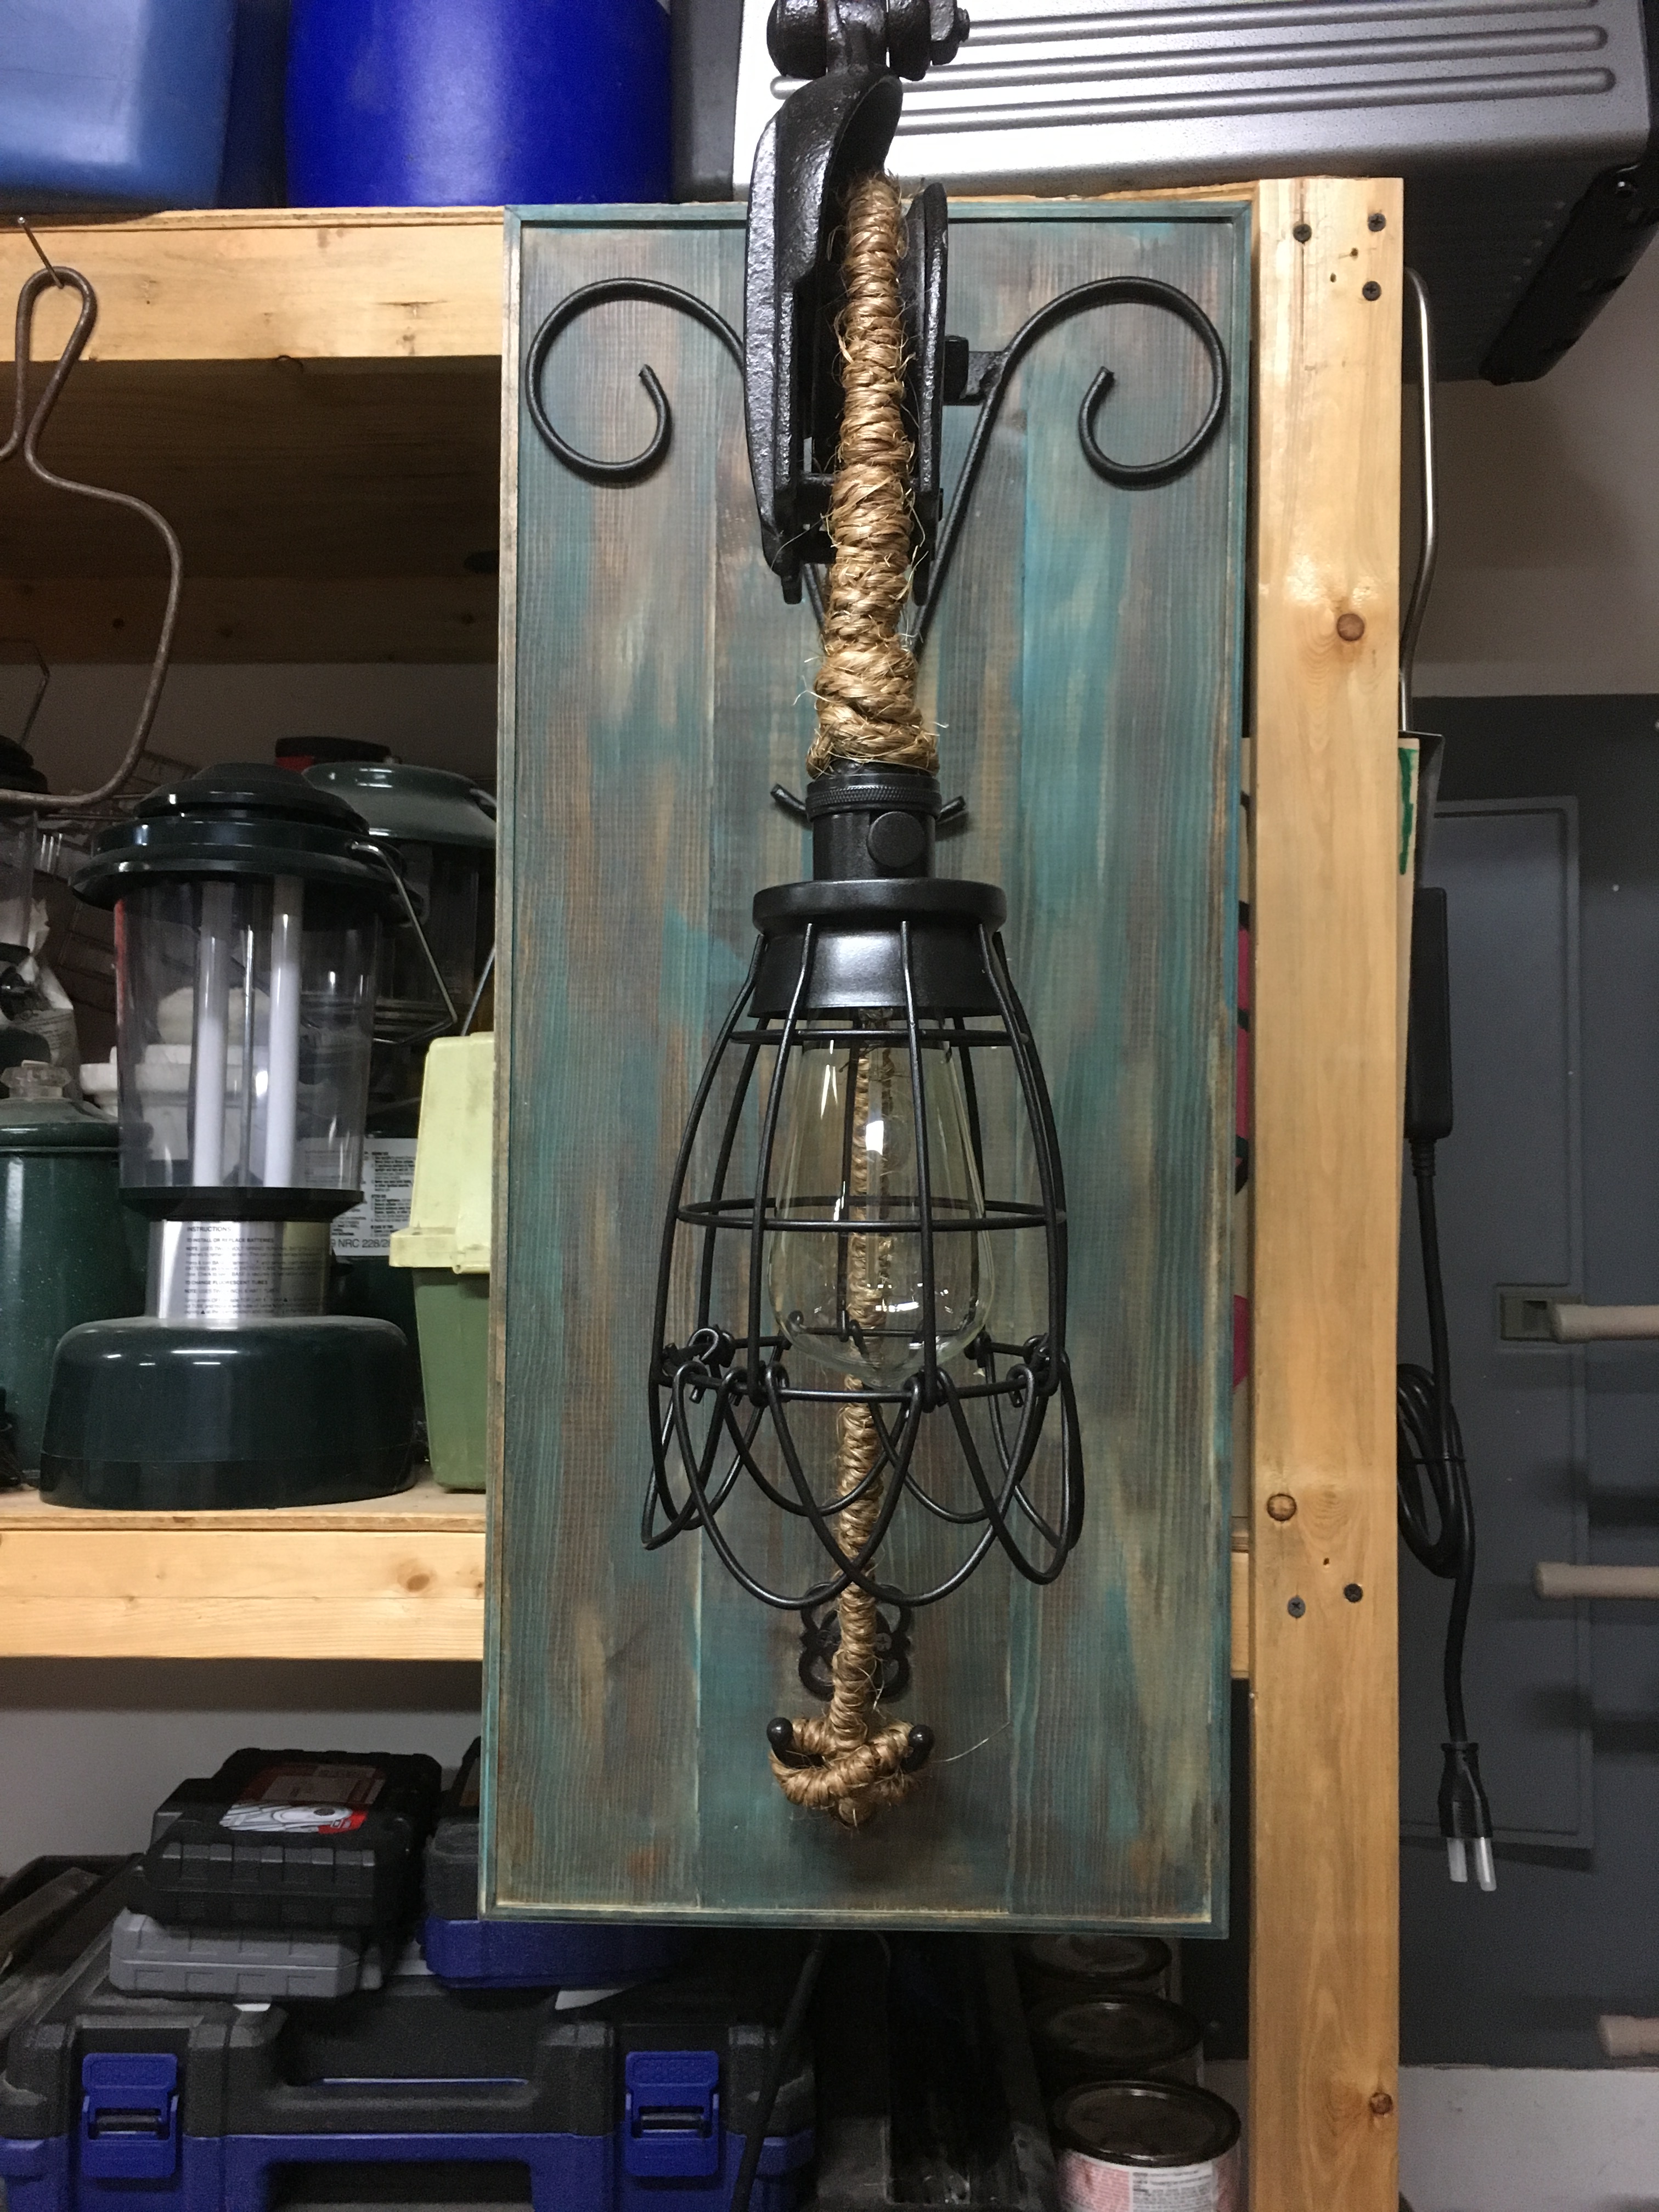
This project didn't require much when it came to woodworking other than the wood mounted base. I have seen a few variations of pulley pendant lights on the web and thought it would be neat to build my own. I came across an old pulley and hanger at an antique mall. I bought the light hardware from a local big box store. I put some scrap lumber to use and applied some paint and stain I had around. I was hoping to make this my first custom made item to sell but once the Christmas season is over and the decorations are packed away, the Mrs. says she wants this hung in the house.Thanks for looking.


The plans are pefect. Very easy to follow and the measurements make the drawer install a breeze. Very enjoyable project.
Built these for my Father-in-laws birthday
Thu, 12/29/2022 - 10:03
Love your choice of finish on these, they look fabulous! Thank you for sharing.
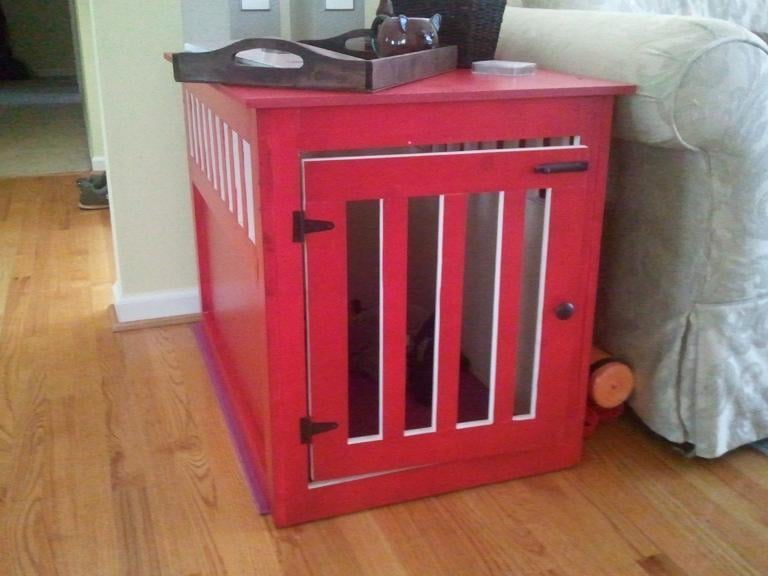
My dog is very scared of thunderstorms and was always trying to find the a place that she could hide, which was usually under my desk. I decided to build her the pet kennel so that she could have her own hiding spot.
This was my first project and I definitely learned a lot in the process. I learned how to use my kreg jig and that I much prefer using a hand saw over a power saw. I also learned about accent bases. This project probably took longer than it should have but it was my first! The husband and I are very pleased with it (and he can't believe that I enjoyed the hand saw so much!)
Sorry for the poor picture qualities, we have not finished unpacking yet...
Tue, 09/20/2011 - 11:27
Thank you for the compliments!
What I learned in making this was when suing the kreg jig, not too much pressure or it will split the wood. I also learned about the importance of predrilling. Make sure you check for square and remember (because i didn't) that the plans don't include a bottom! I had previously made my dog a bed that I had stuffed with two old standard sized pillows and it fit perfectly in the bottom!
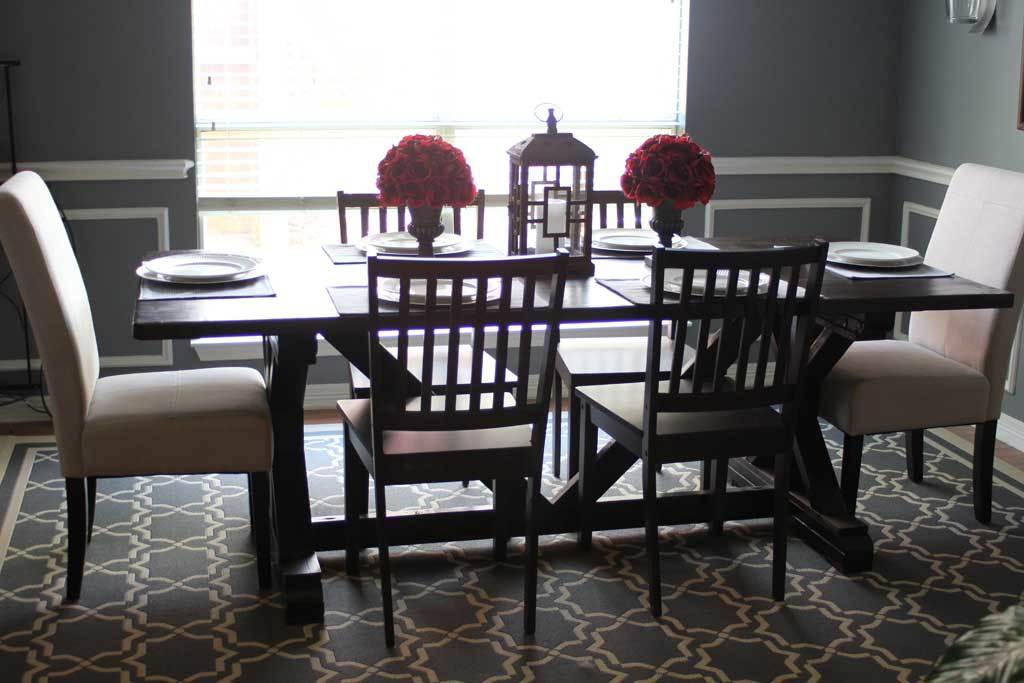
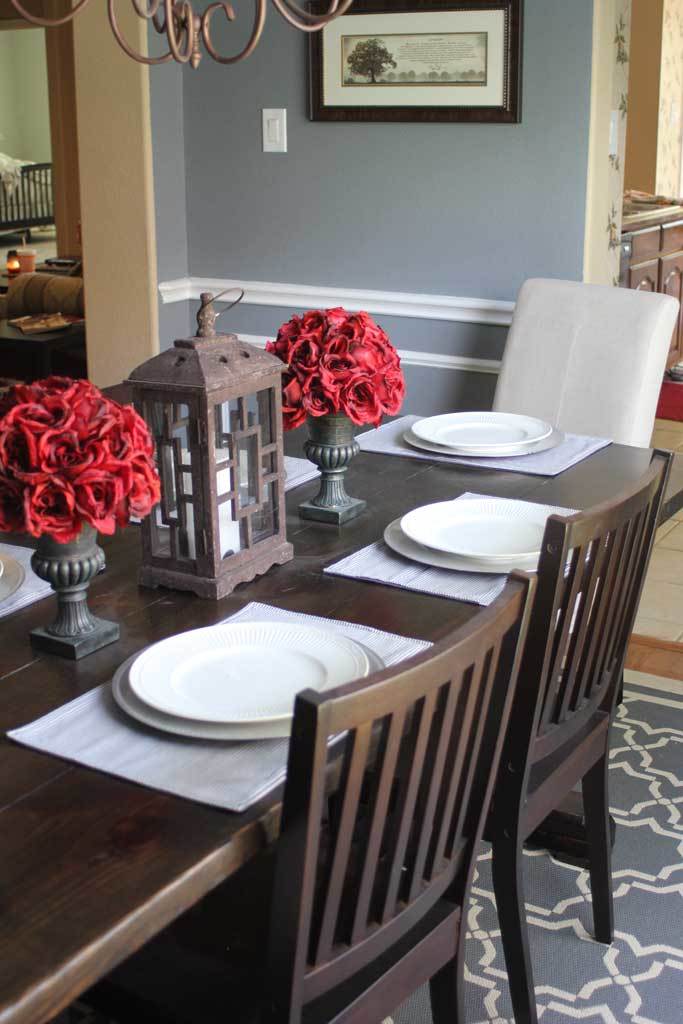
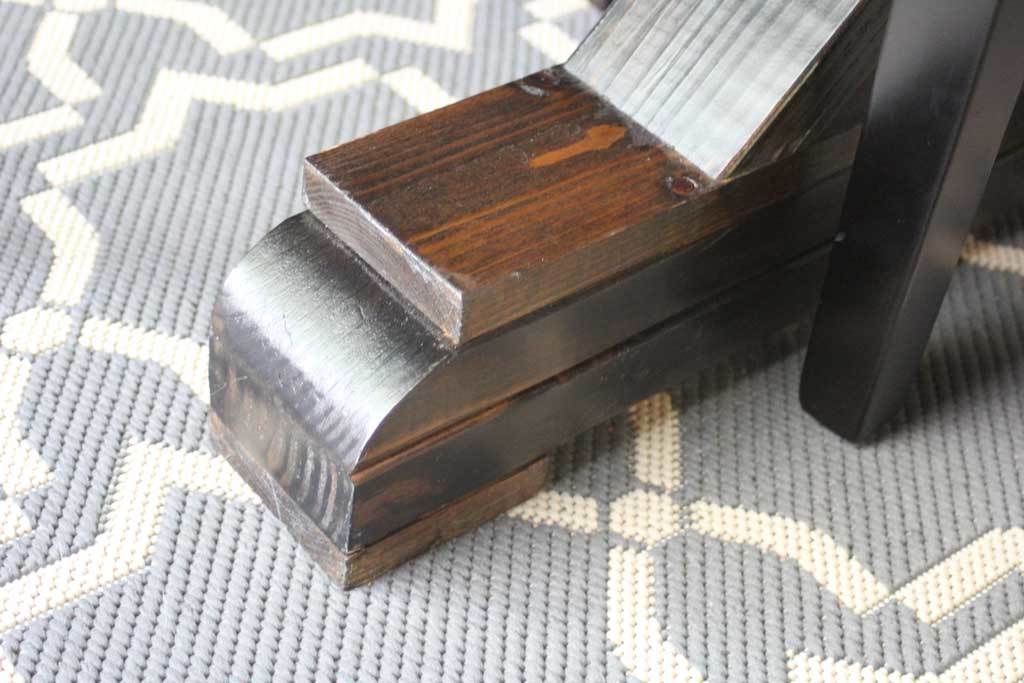
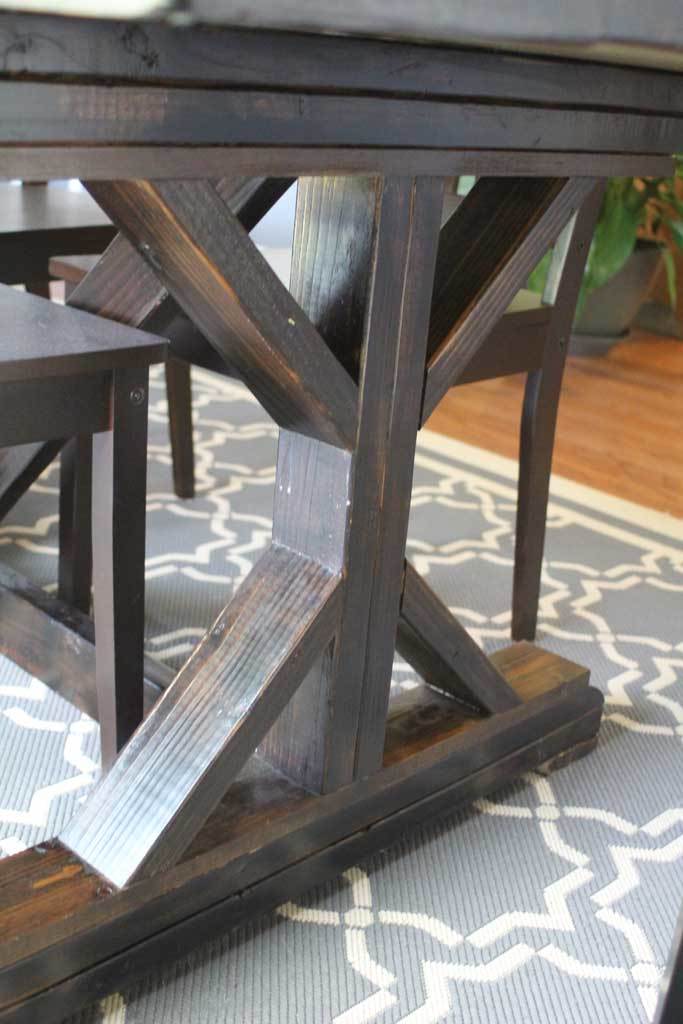
We built a dining room table for some of my best friends. It was our first table build and a year later it is still beautiful! If you want to see a few 'in progress' pictures check out my blogpost on it at www.amusingmj.com/dining-room-table

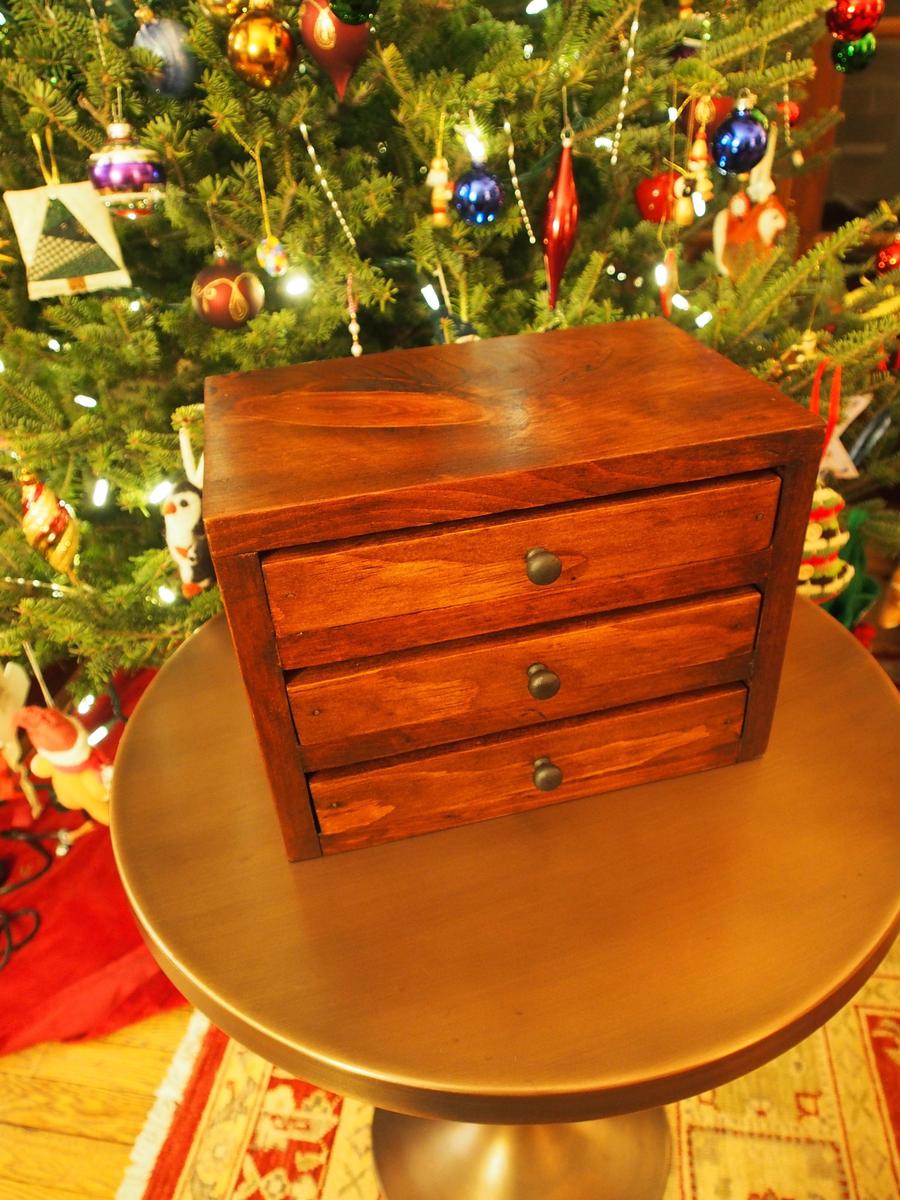
I built this as a Christmas gift for my office partner/best friend.
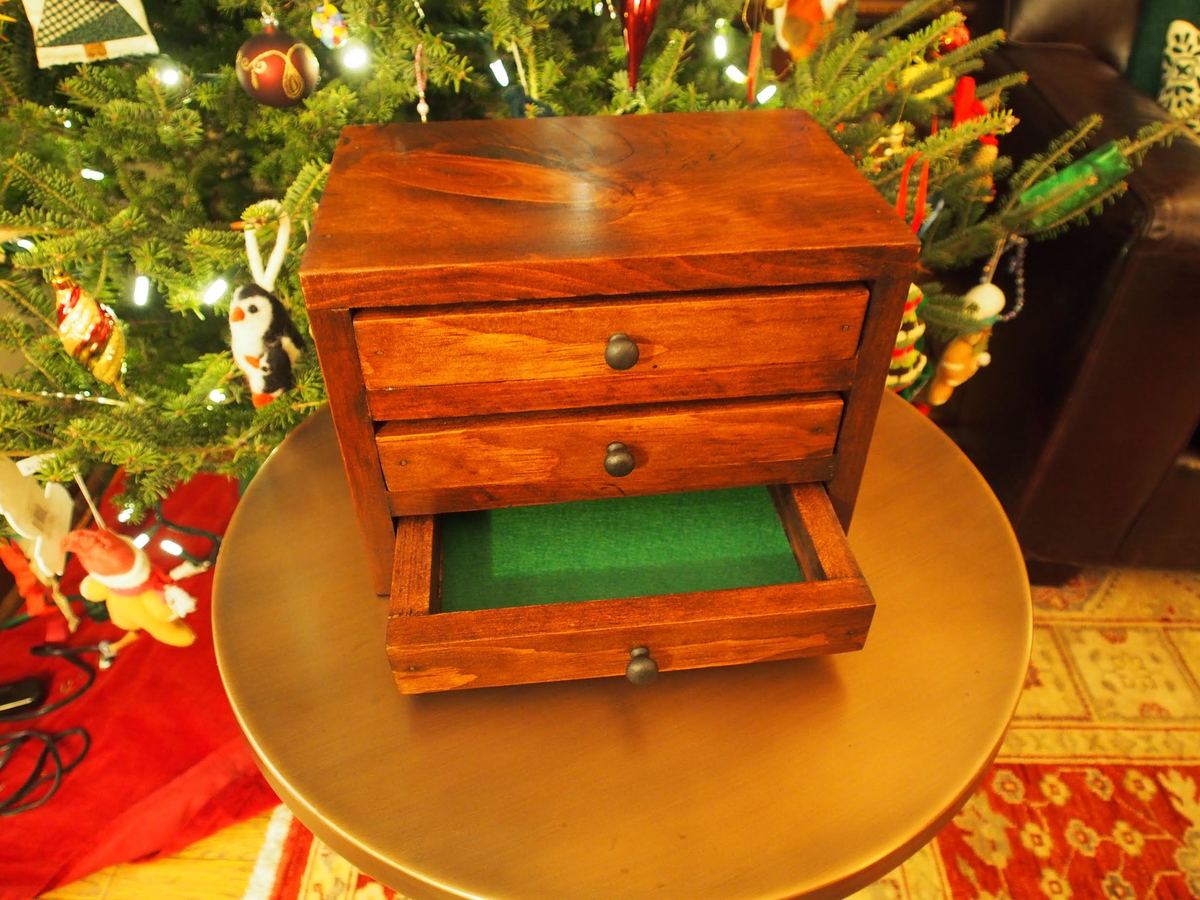

Sun, 01/03/2016 - 14:53
Gorgeous jewelry box! You did a fantastic job on this build! And your finish is amazing!

Had to build something to go with our brand new OLED TV. Combined Ana's 'Grandy Sliding Door Console' with a modified version of these modern barn door plans found at https://howdoesshe.com/build-a-fixer-upper-style-modern-barn-door/ from @angelarosehome to make the finished product shown here. My wife loves it (the pup doesn't mind it either)!
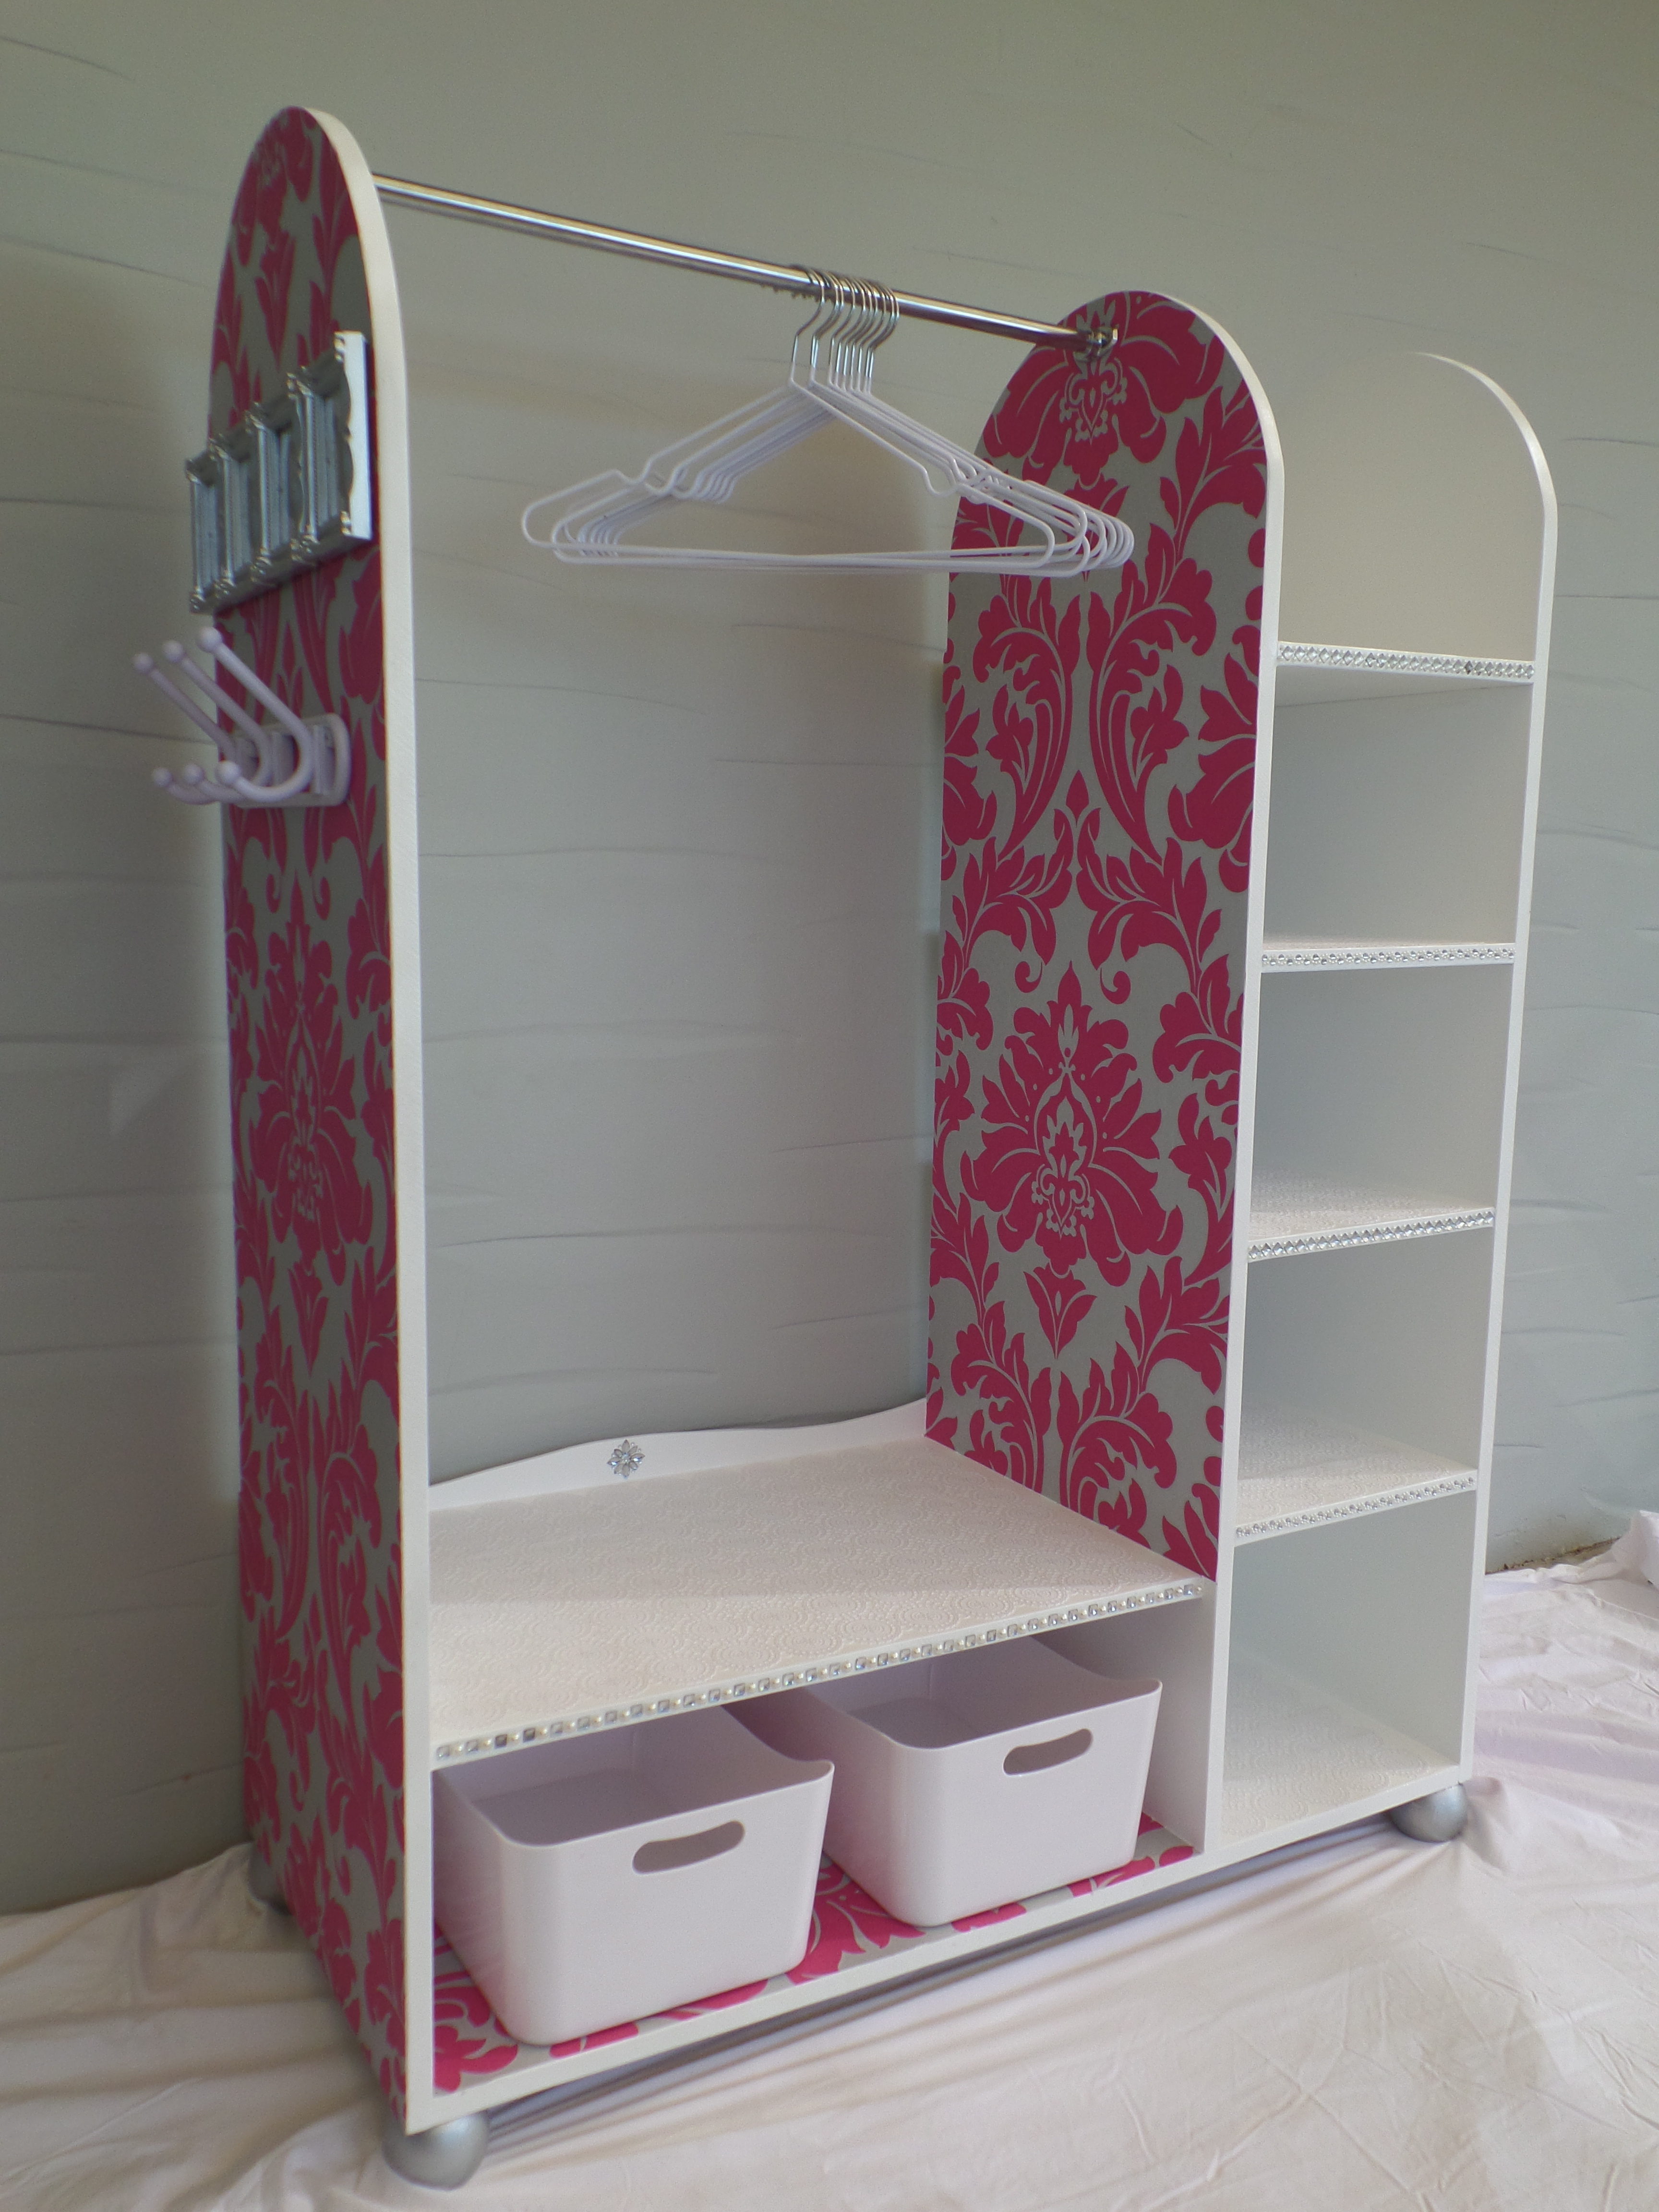
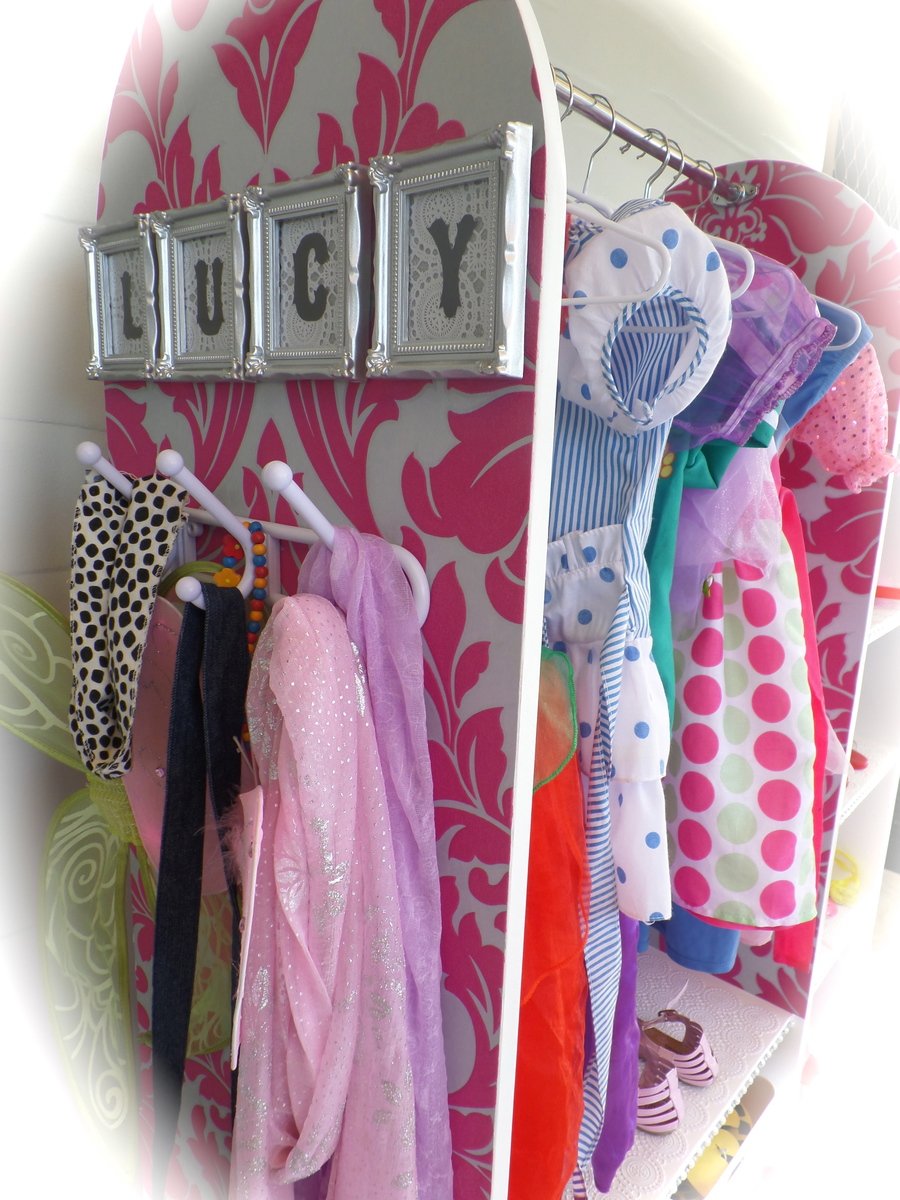
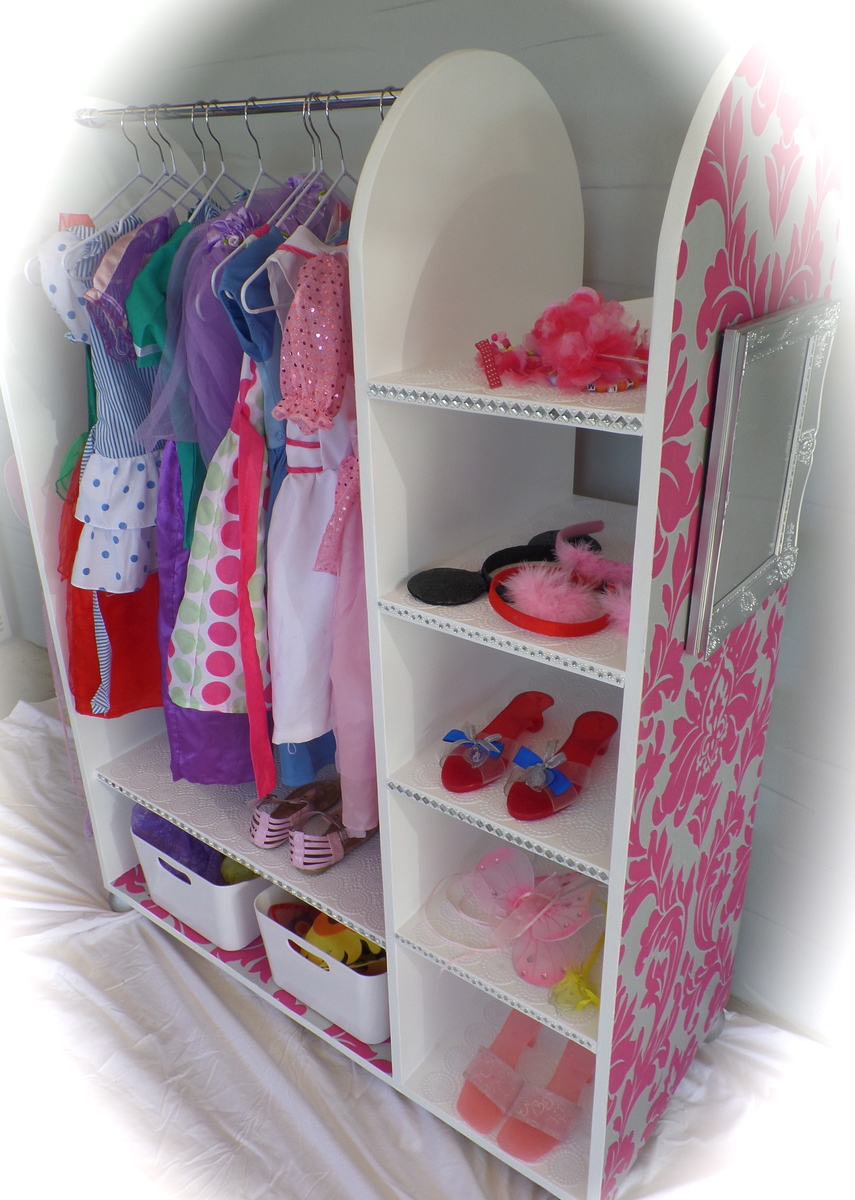
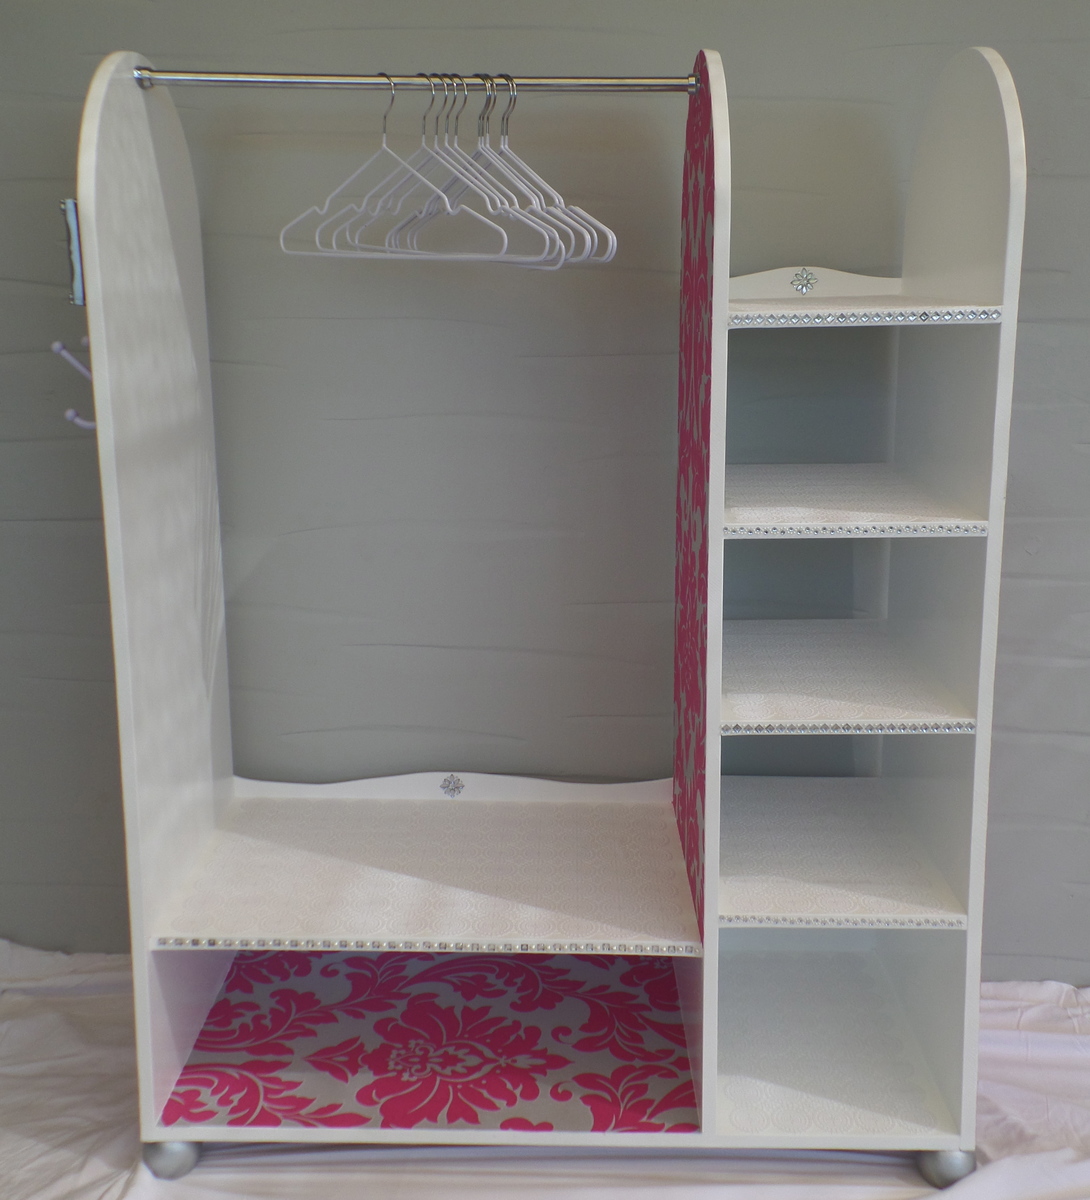
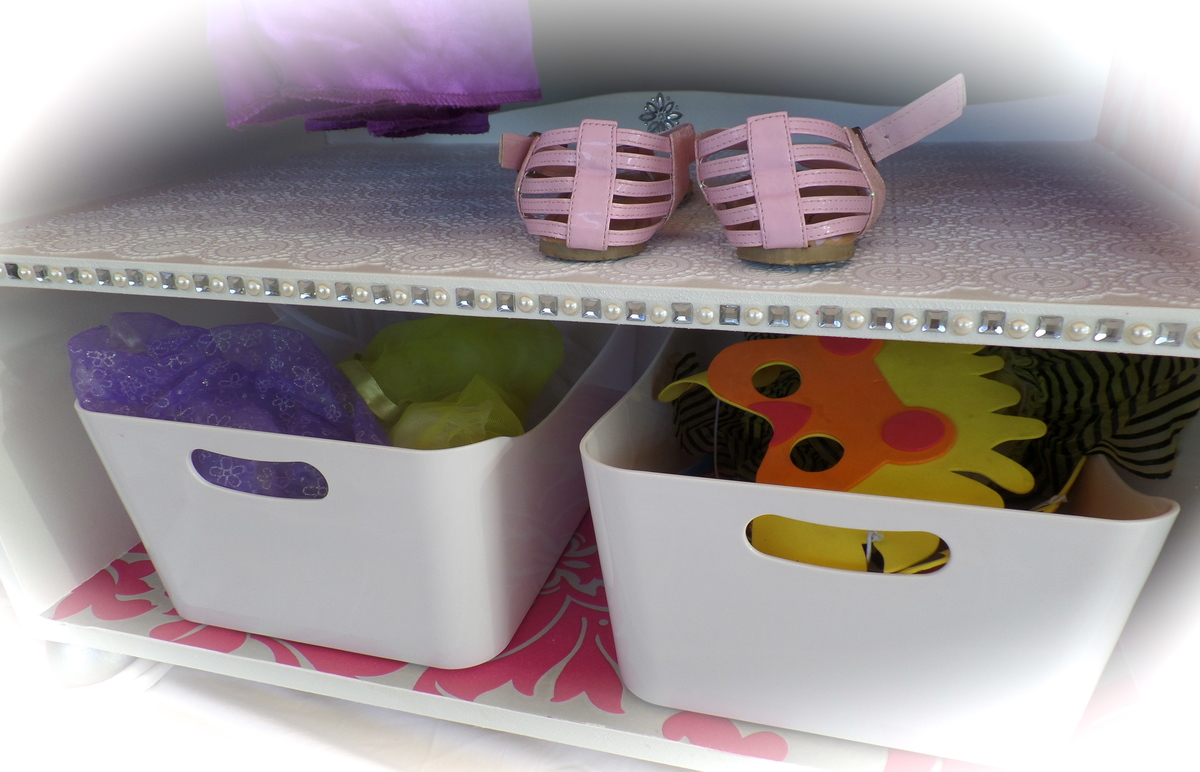
Ive made a couple of these dress up stations now, for presents for my daughters friends. I plan to make her one next!
Plenty of room for storing all their fancy dress items :)

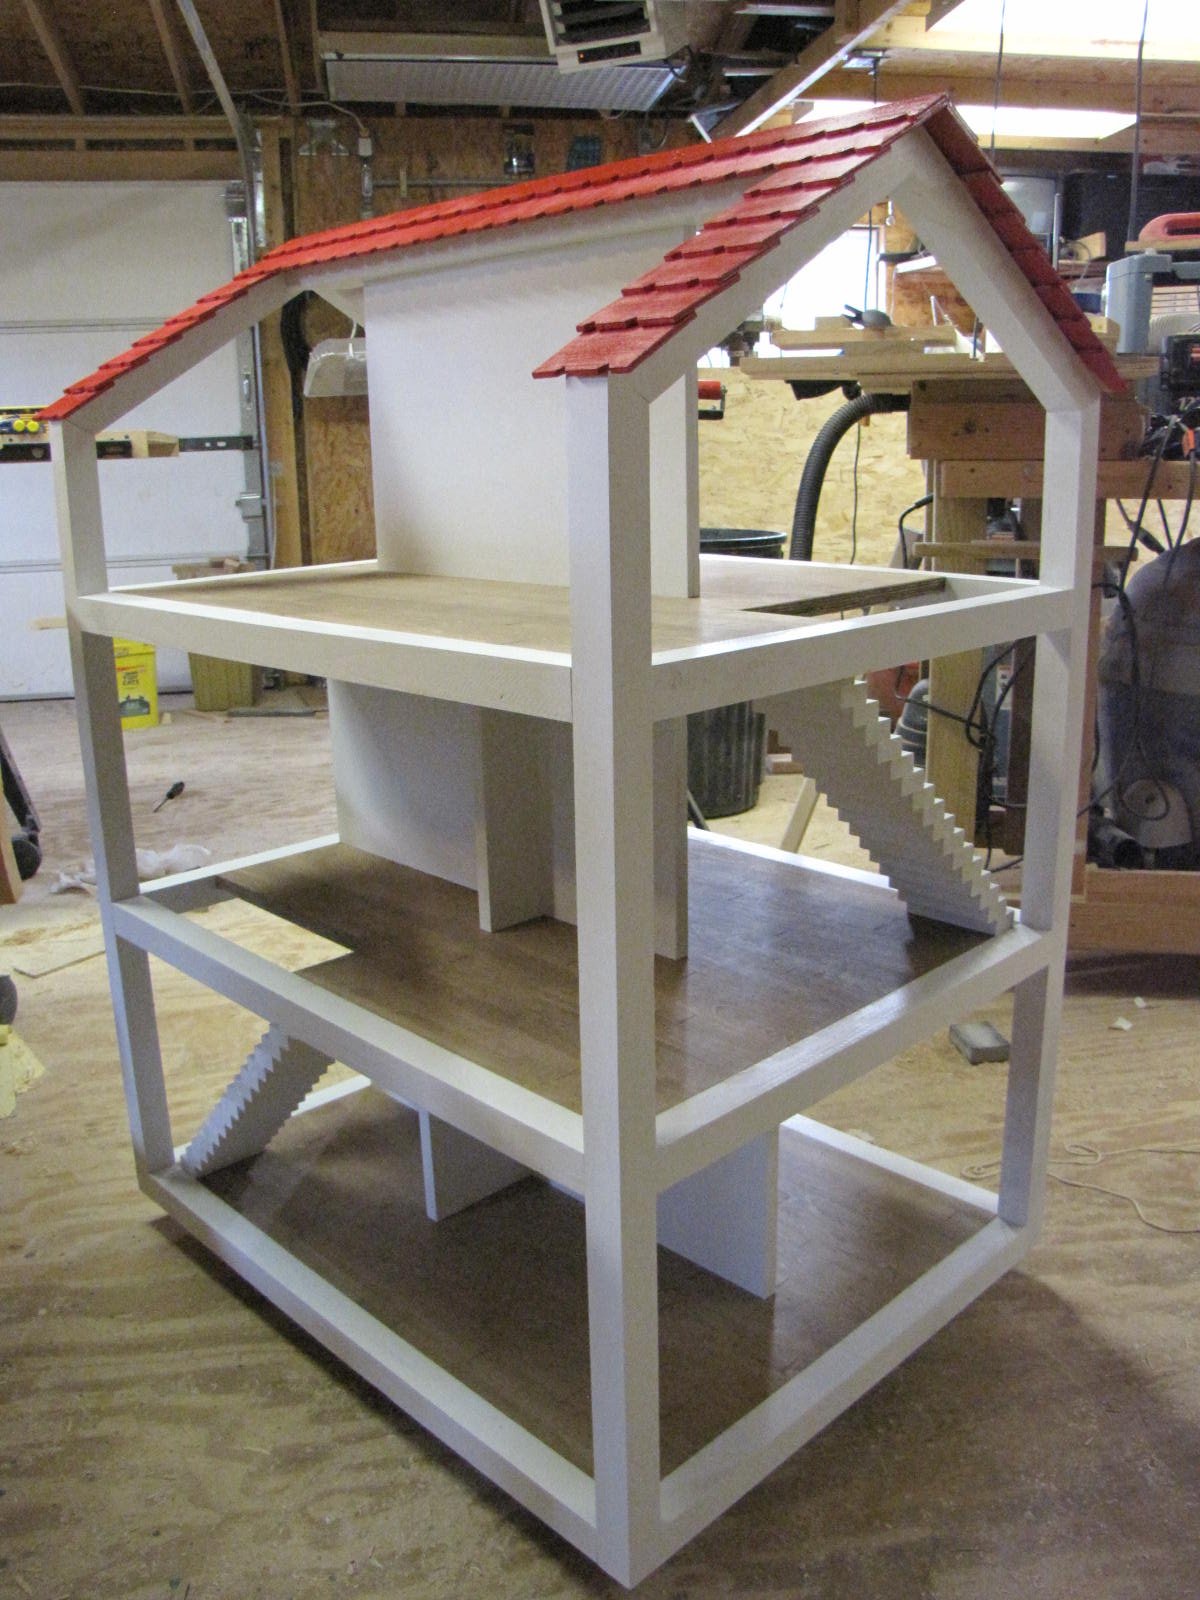
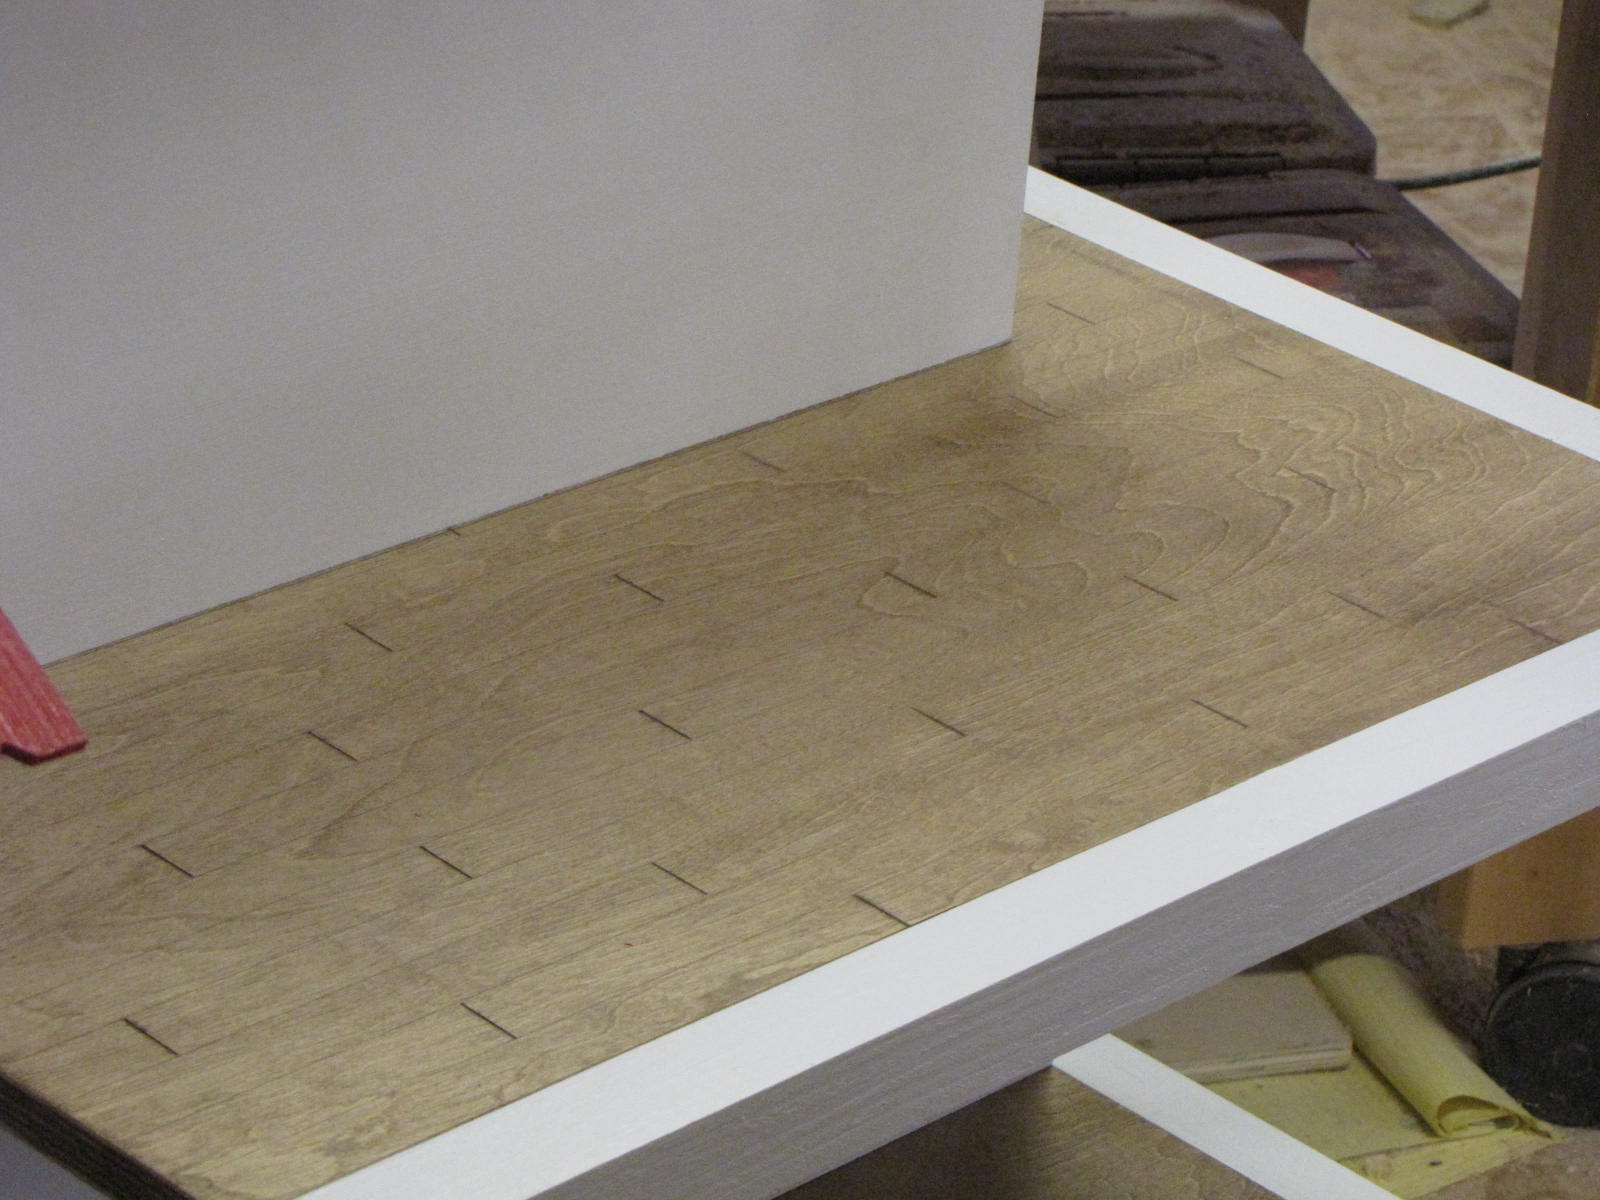
The house is 48" high and 36" wide and 28" deep. It has 3 floors with a total of 10 rooms. Floors were made to look like hardwood floors and stained. Was fun to build and my granddaughter cried when she saw it. Due to the size of it, I installed wheels on it also. I made it from a picture on Ana White of Kidkraft Chic Dollhouse 2011-12-06 Paint all your pieces before you assemble. It makes it a lot easier than trying to paint afterwards.


Comments
Ana White Admin
Sun, 11/20/2022 - 12:32
Gorgeous Craft Table!
This is delightful, love the white base and stunning wood top! Thanks for sharing.