Community Brag Posts

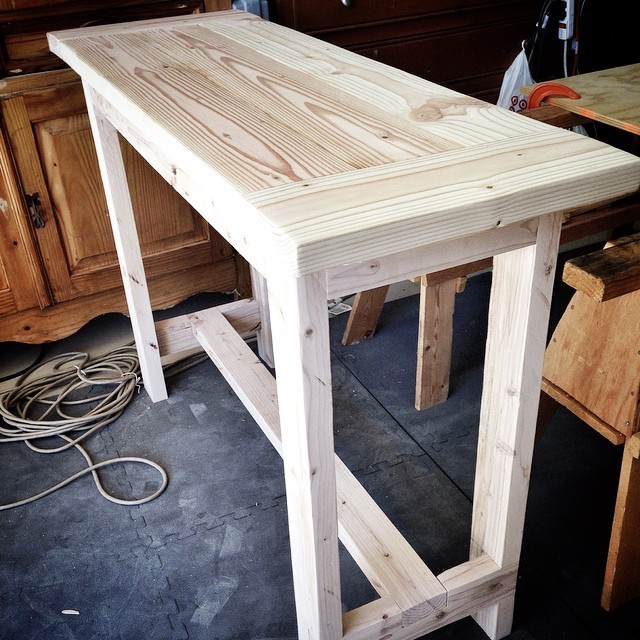
Console Table

Submitted by kcragun on Sat, 08/16/2014 - 21:36

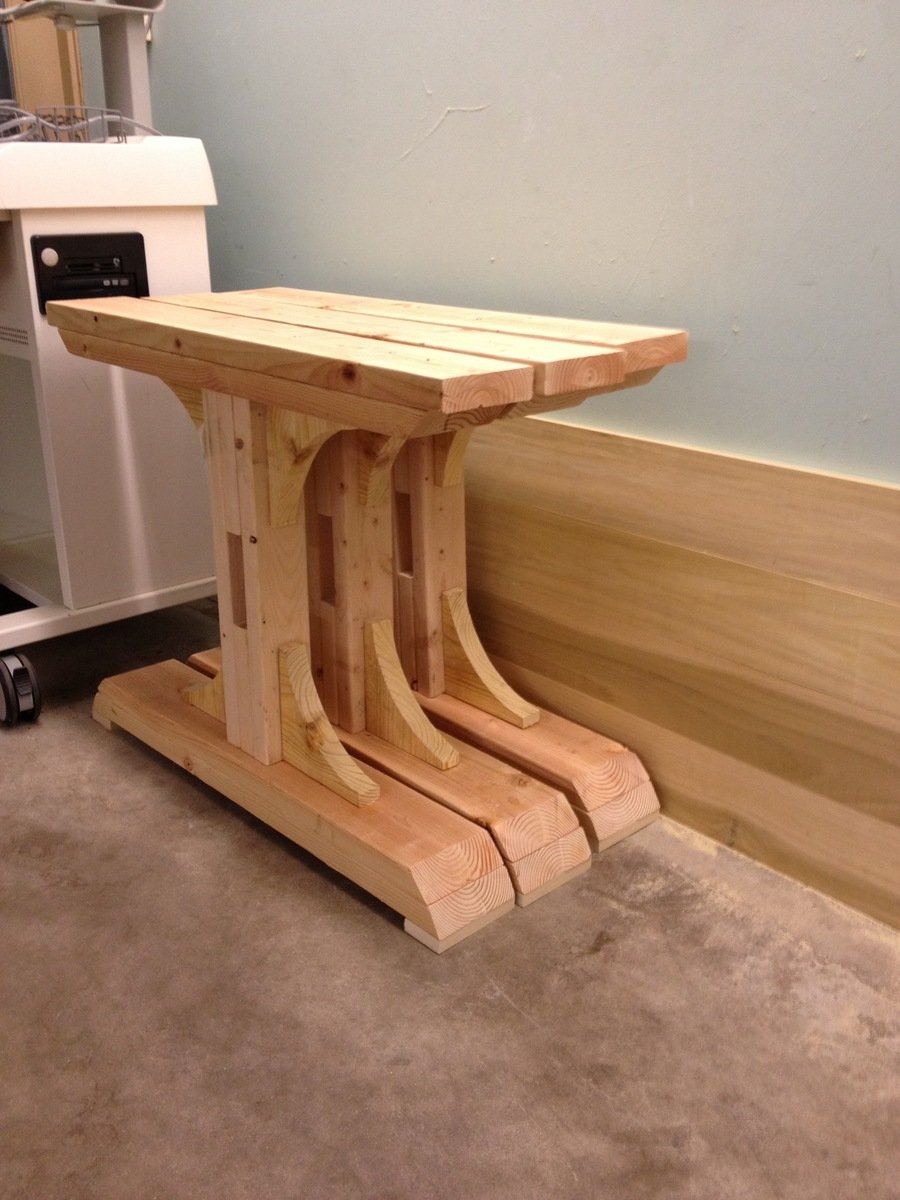
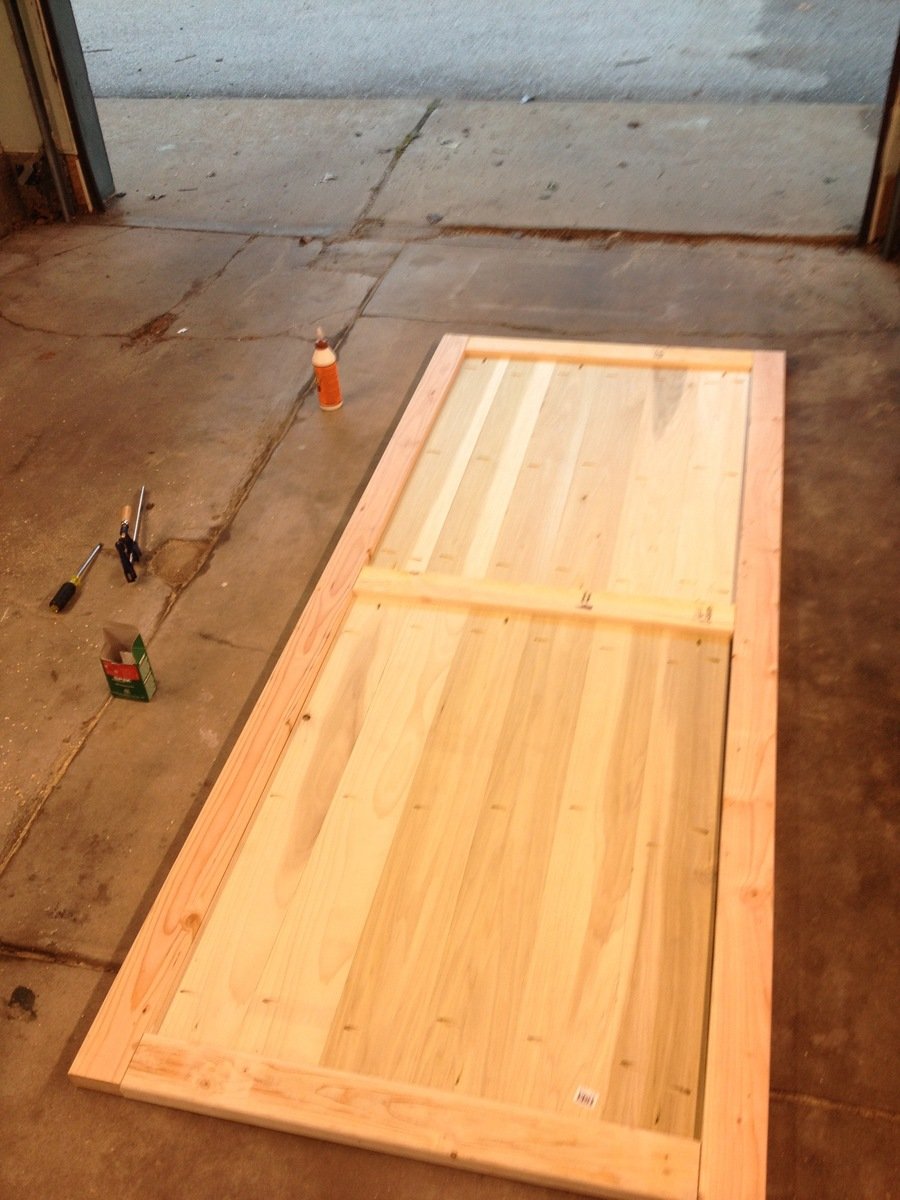
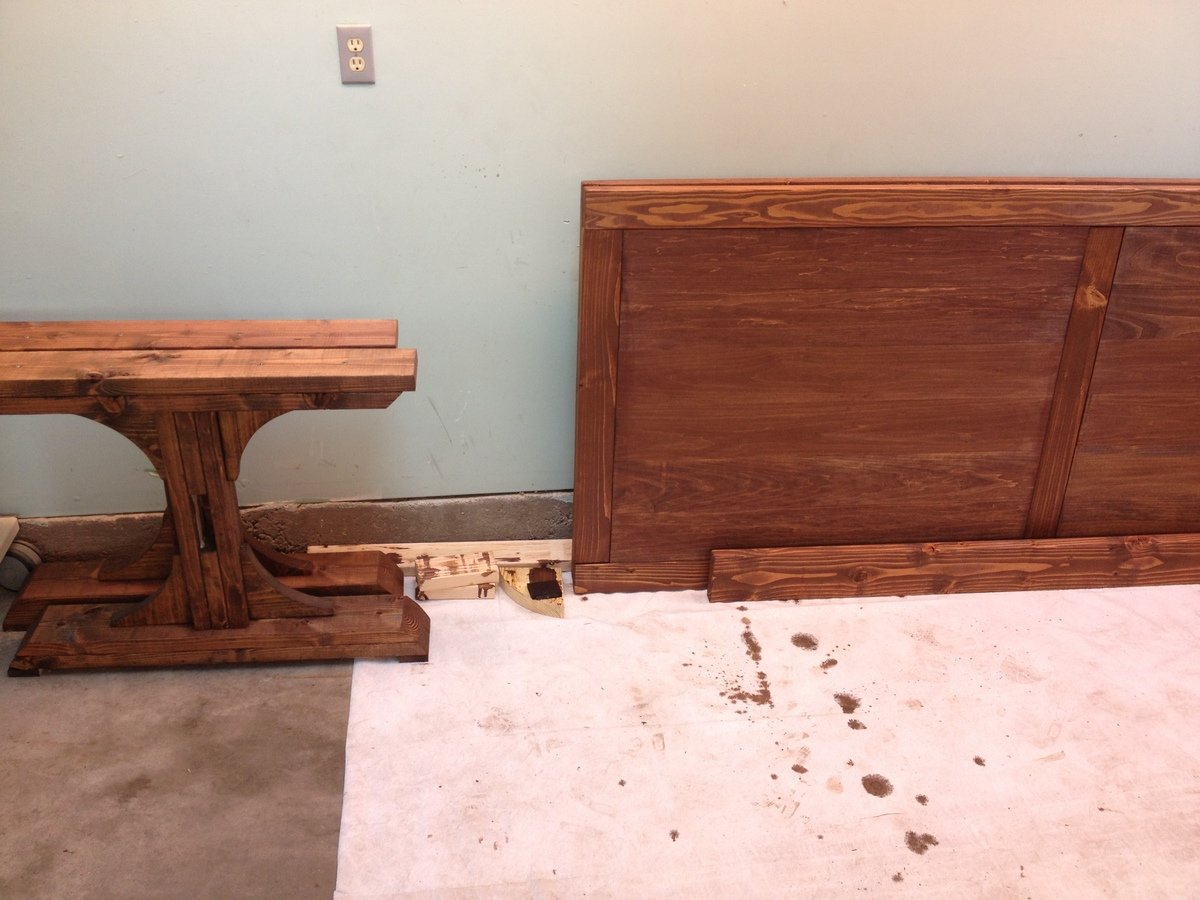
The Tryde Console table was the inspiration piece. Used kreg jig to join the top boards and connect the legs and aprons. The bottom stretchers were similar to the Farmhouse table plans. I plan on using this outside for a grilling table. I am not going to apply a finish - I want to see how the wood changes when exposed to the elements - hopefully it gets a nice Restoration Hardware-type finish.

Estimated Time Investment
Weekend Project (10-20 Hours)
Finish Used
No finish
Recommended Skill Level
Intermediate

Pine and Aromatic Cedar Blanket Chest

Submitted by tylerhey on Tue, 12/13/2016 - 12:21

Raised panel pine blanket chest lined with 5/8" aromatic cedar.

Estimated Cost
$200
Estimated Time Investment
Week Long Project (20 Hours or More)
Finish Used
Tinted Shellac and butcher's wax
Recommended Skill Level
Advanced

Comments

rnkimg

Wed, 11/13/2019 - 07:15

I have searched and searched and cannot locate the plans either. I am making 3, for my daughters for Christmas and this one is amazing. please share plans.

thank you!!

Simple 2x4 Bench

Submitted by jennibee on Sun, 09/14/2014 - 17:03

I made this in an afternoon. Loved this project. It is made with 2x4's using a Kregs Jig and mitre saw (plus additional tools like a drill and square).  This was my frist time using the Kregs Jig and I am sold!!

The free plans were taken from another website. They are very detailed and there is even a video (I recommend it as he gives a great tip for making sure the back stays equal/level to each other before putting the back on). Even though you can build this by yourself, I did have help for the heavier sides once they were assembled.  I plan to build the additional side table soon and finish them both with sanding and staining when the weather seems less iffy for rain.

If you are looking for a good beginner project that doesn't take forever or have complicated steps, this is your project.

Built from Plan(s)
Estimated Cost
Around $50
Estimated Time Investment
Afternoon Project (3-6 Hours)
Recommended Skill Level
Beginner

Recycling center

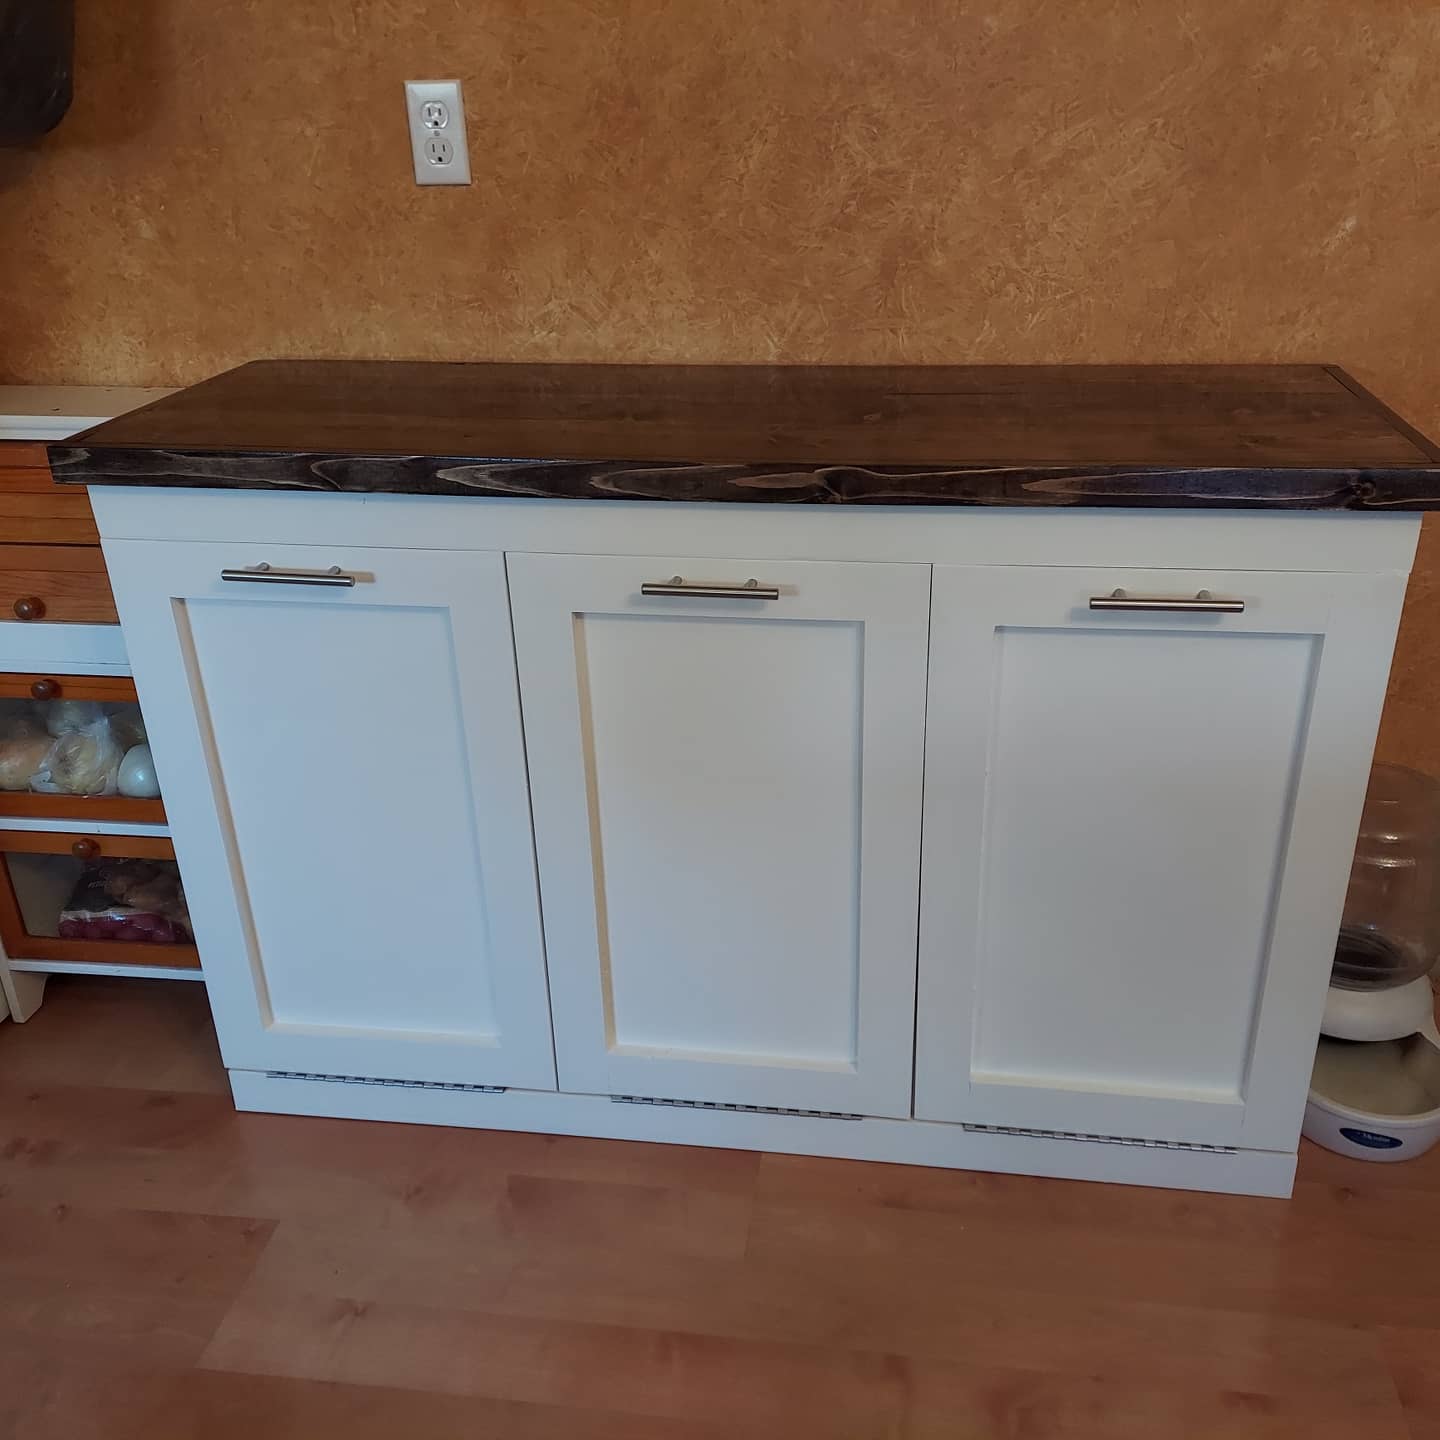
Loved building this recycling center. Basically made three cabinets from the plans and then attached them together. Now the dog can't get in the trash and the recycling and empty cans don't gather in the counter and it looks great! I used piano hinges for the doors which makes them feel much more stable.

Estimated Cost
$200 (including 3 garbage cans)
Estimated Time Investment
Weekend Project (10-20 Hours)
Recommended Skill Level
Intermediate

Comments

Farmhouse Playhouse for the Grandsons

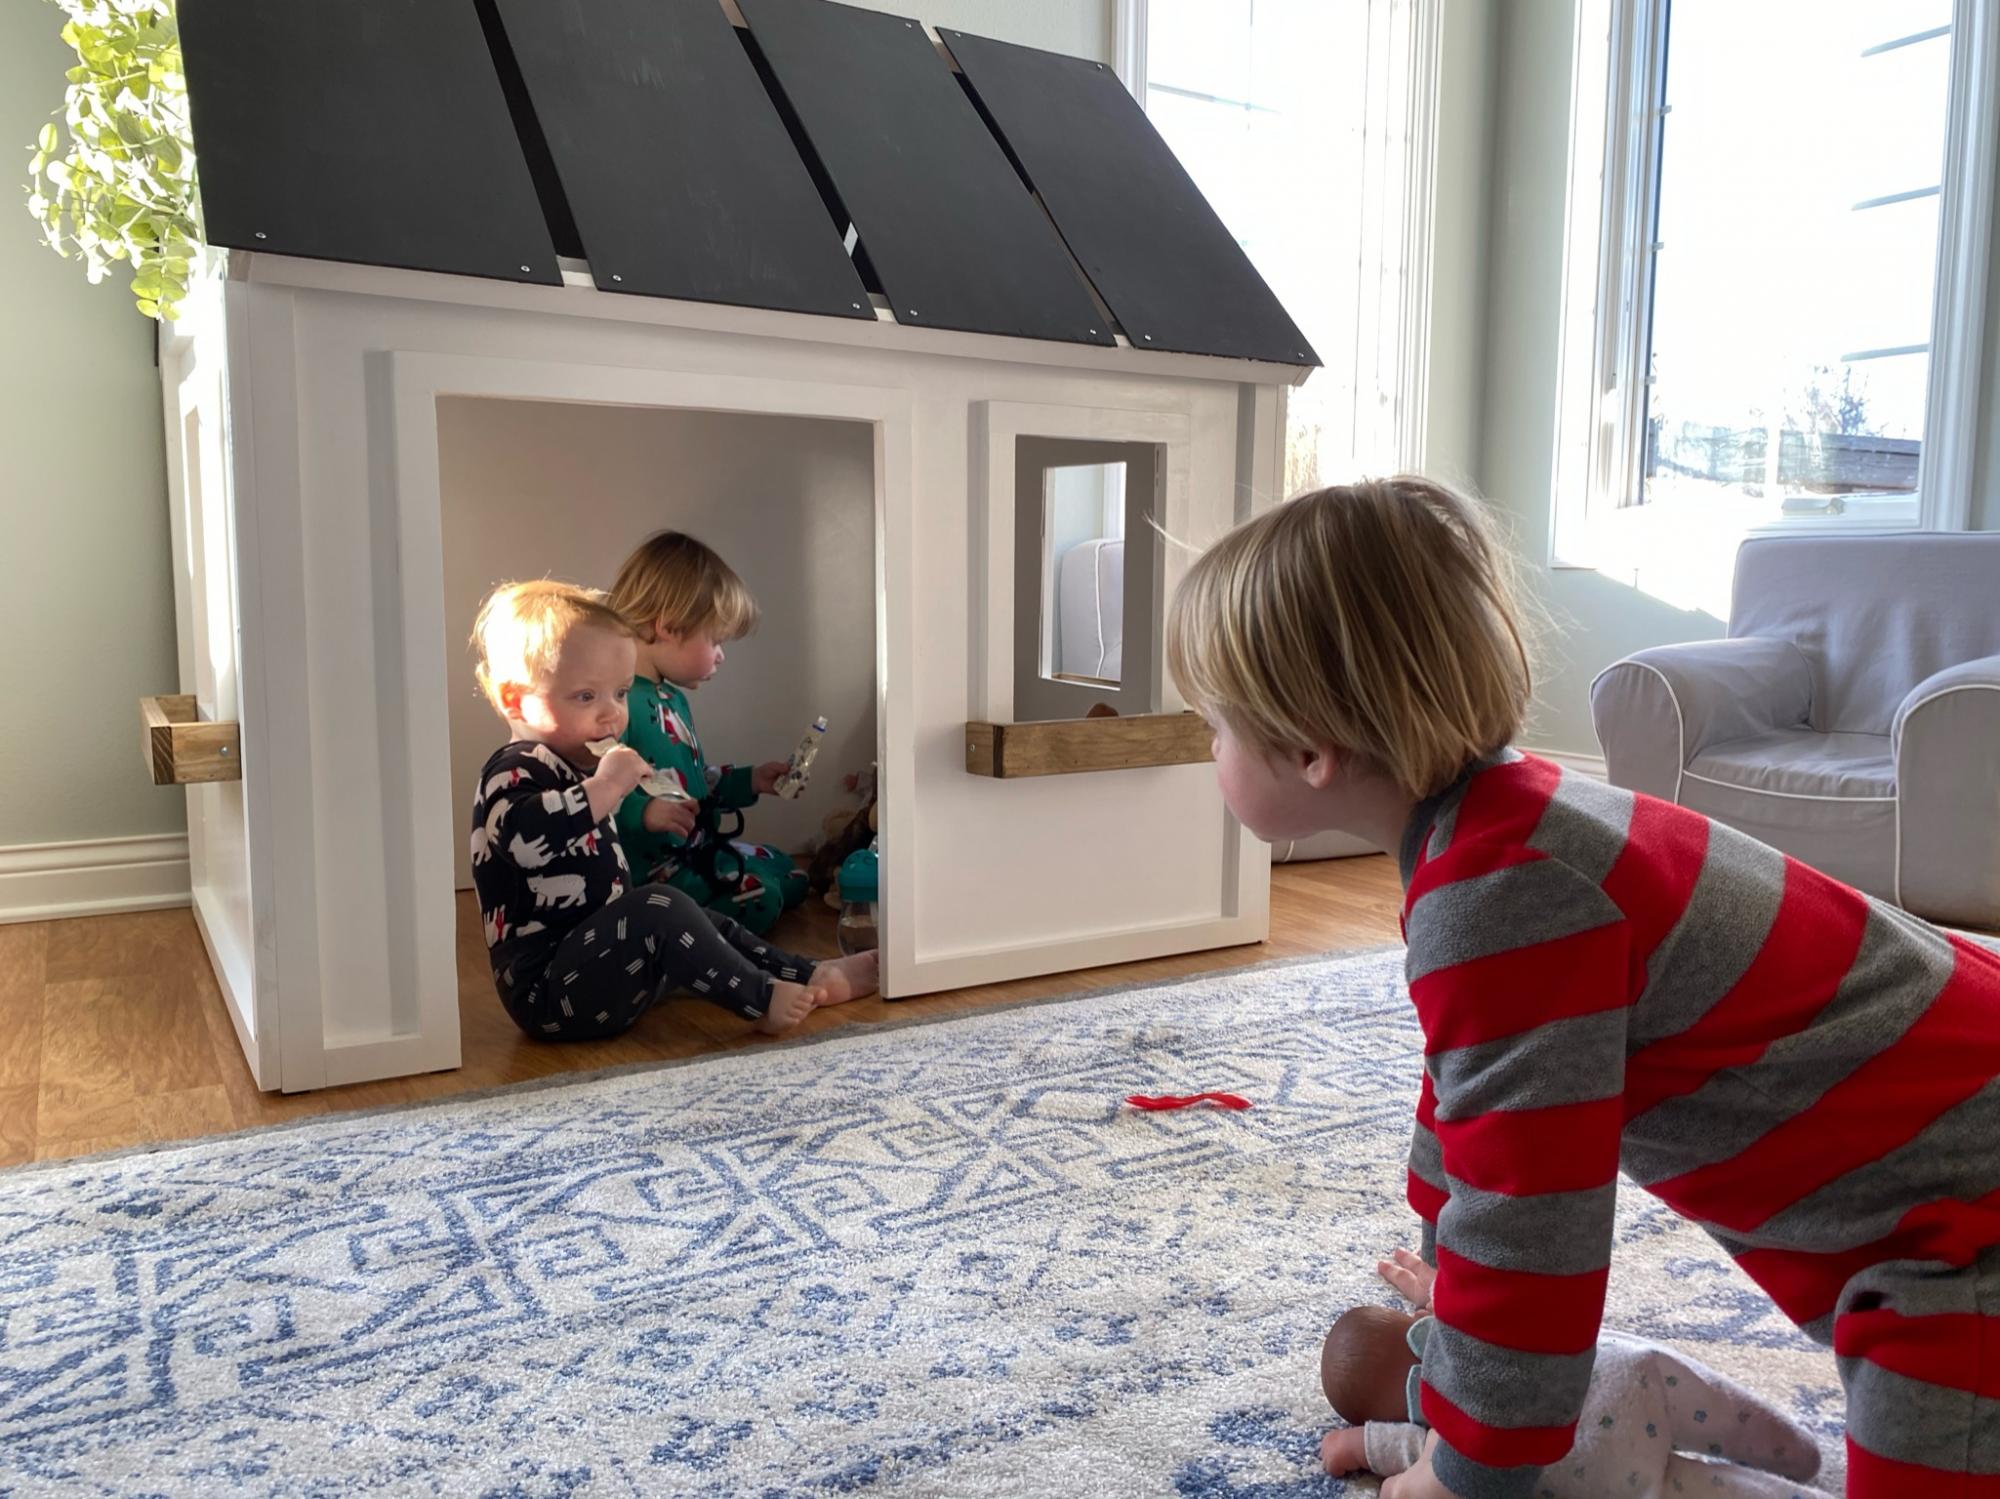
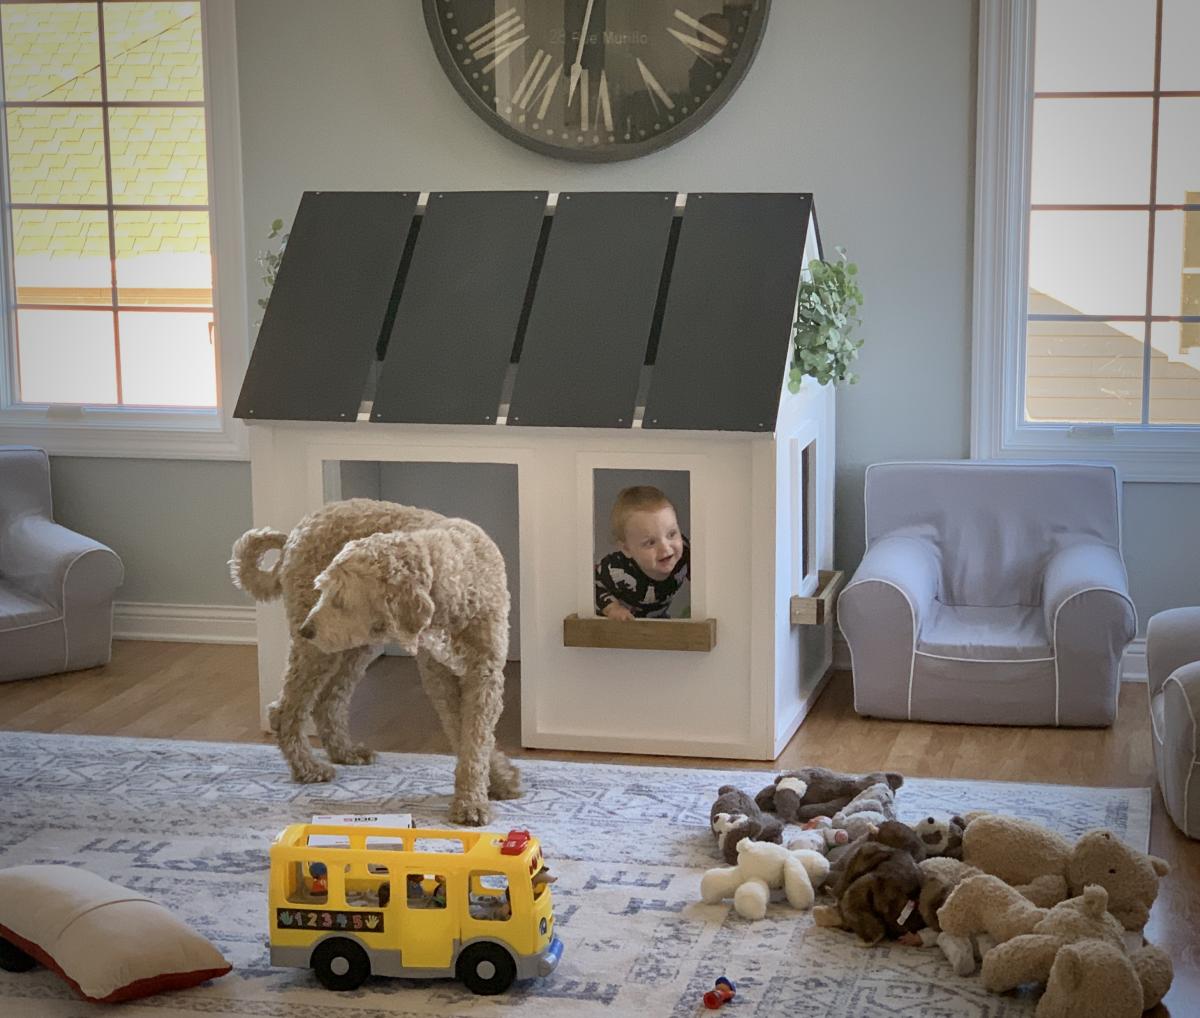
Ana White's plans were amazing and the outcome was perfect! What a fun project for Christmas! Thanks a Zillion, Ana!!

Built from Plan(s)
Estimated Cost
$100.00
Estimated Time Investment
Weekend Project (10-20 Hours)
Finish Used
Sanded, Primed and Painted
Recommended Skill Level
Intermediate

Comments

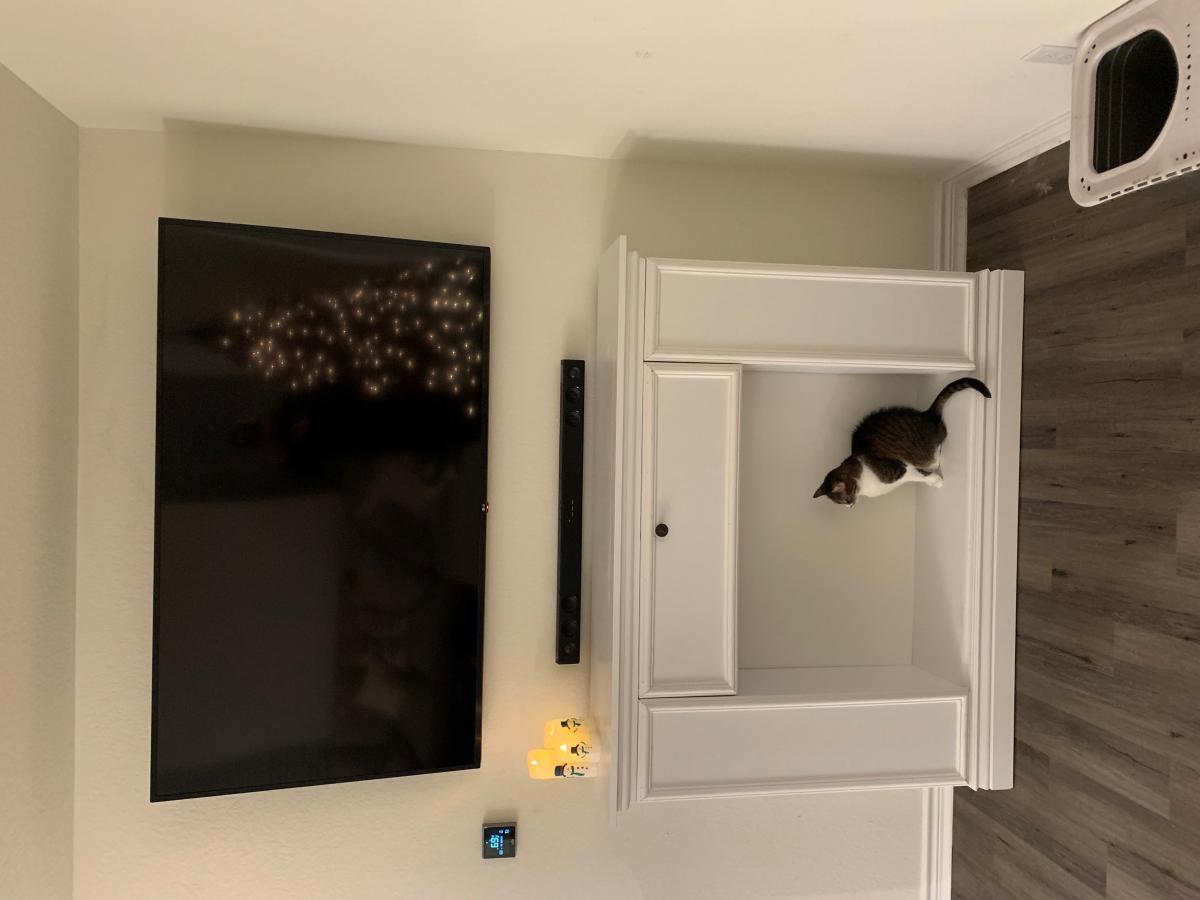
Faux Fireplace

Submitted by jhelton on Tue, 12/29/2020 - 08:19

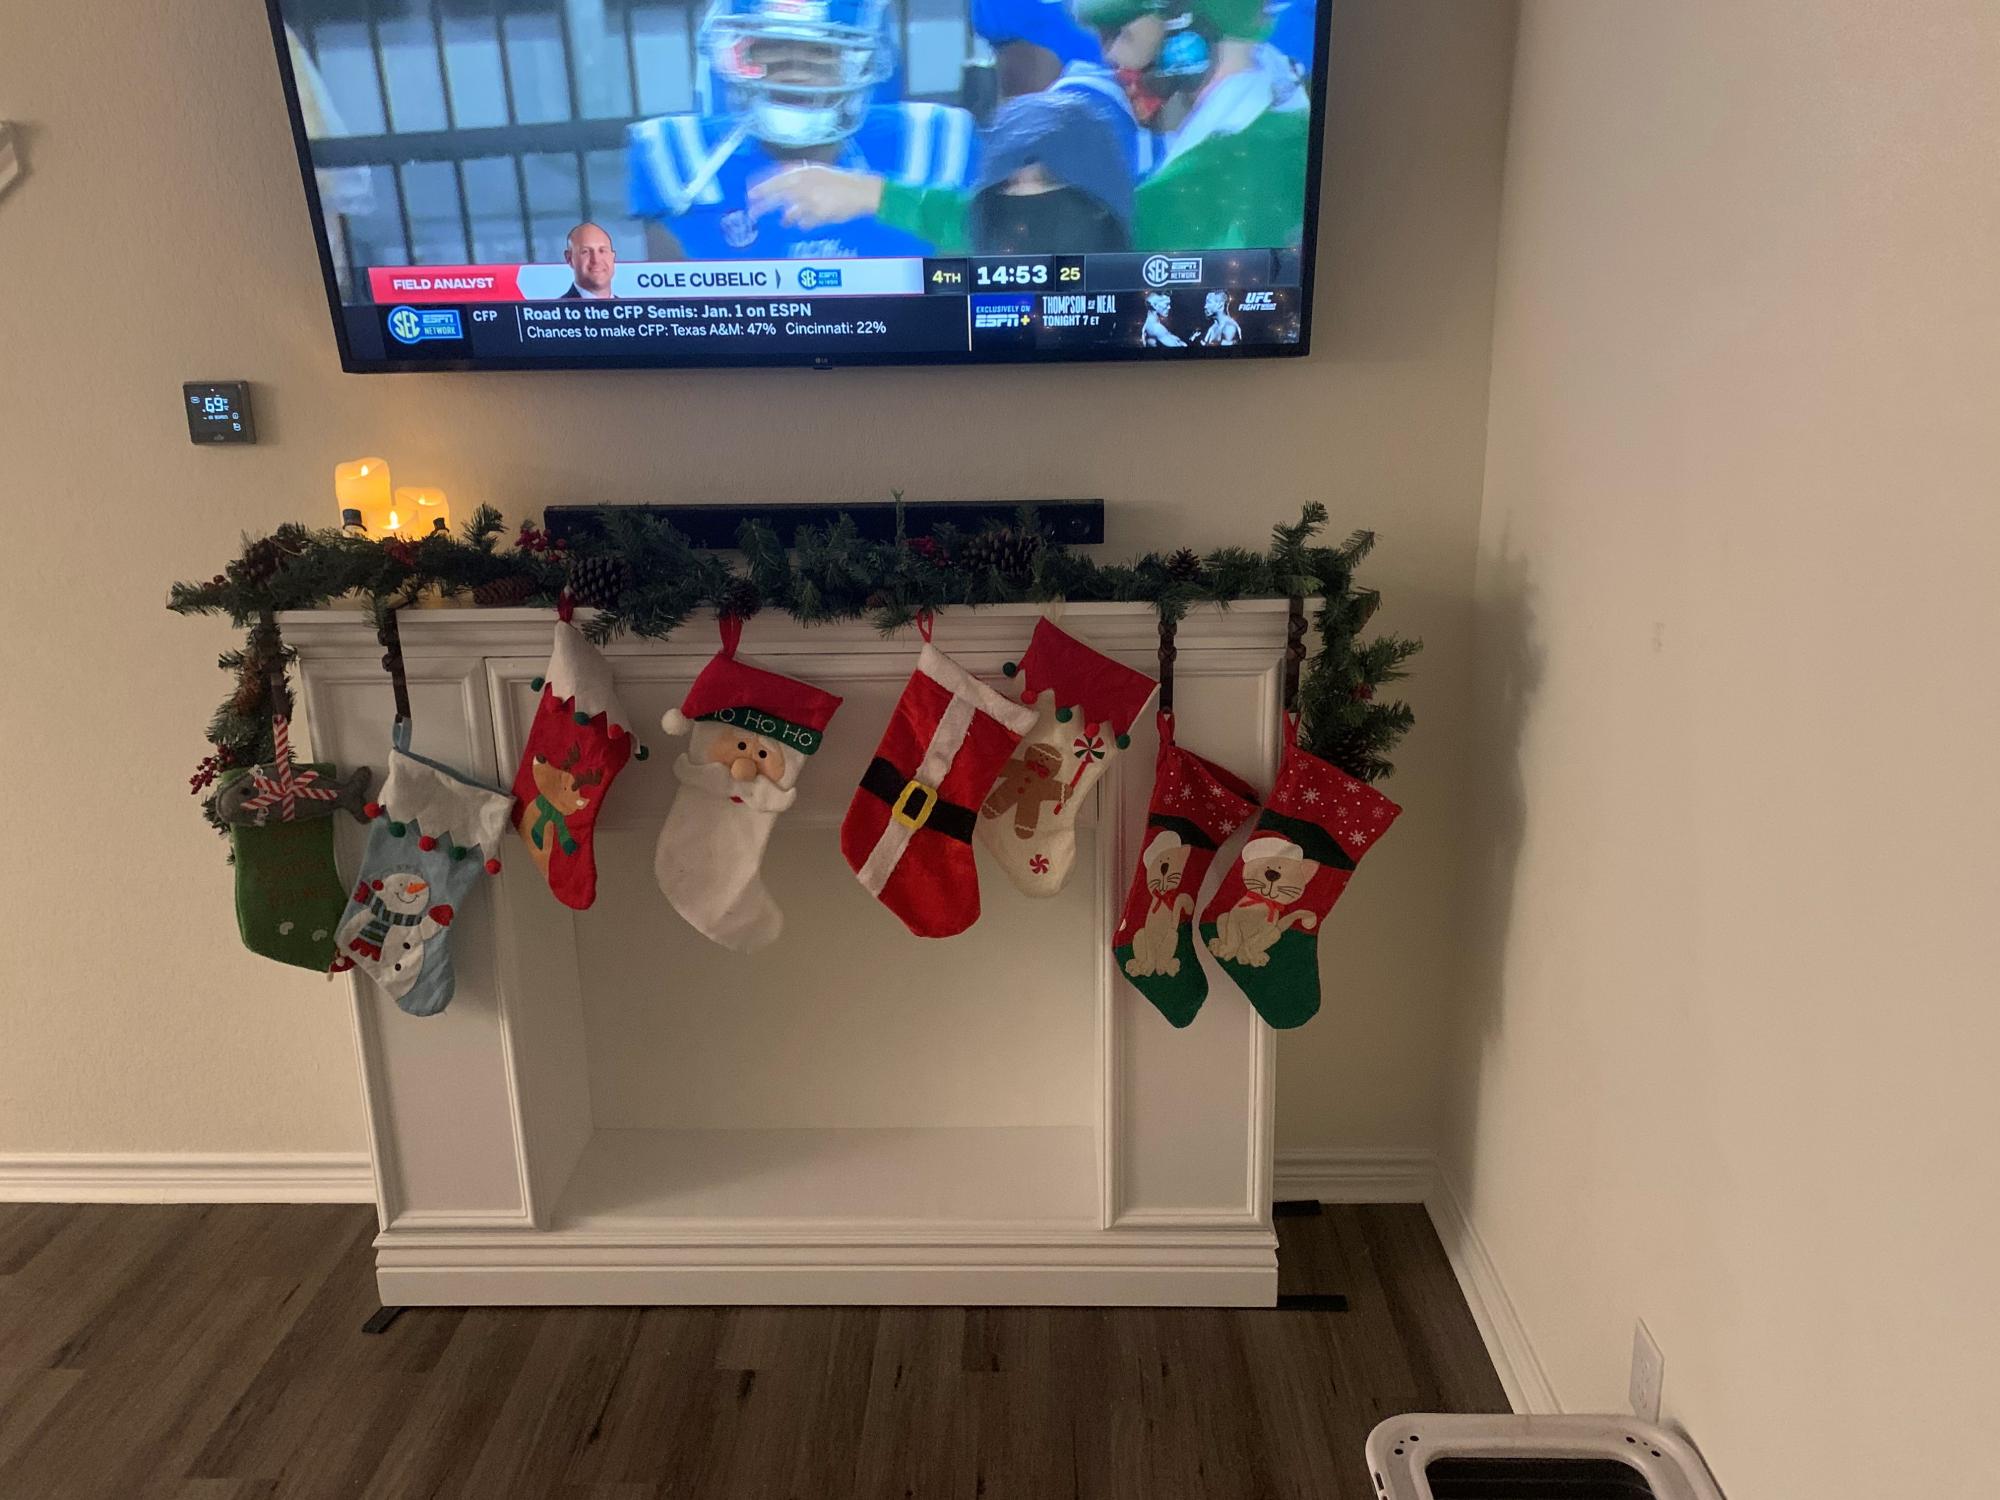
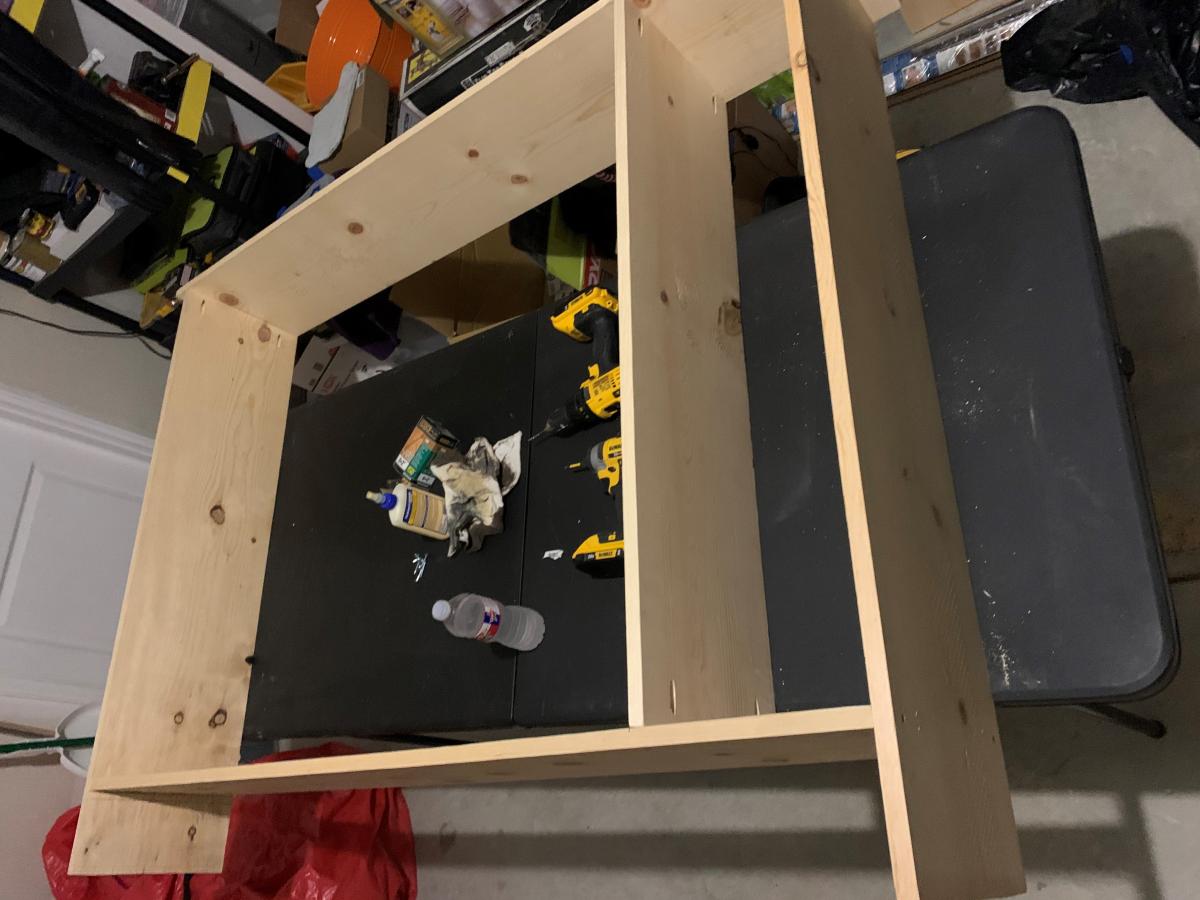
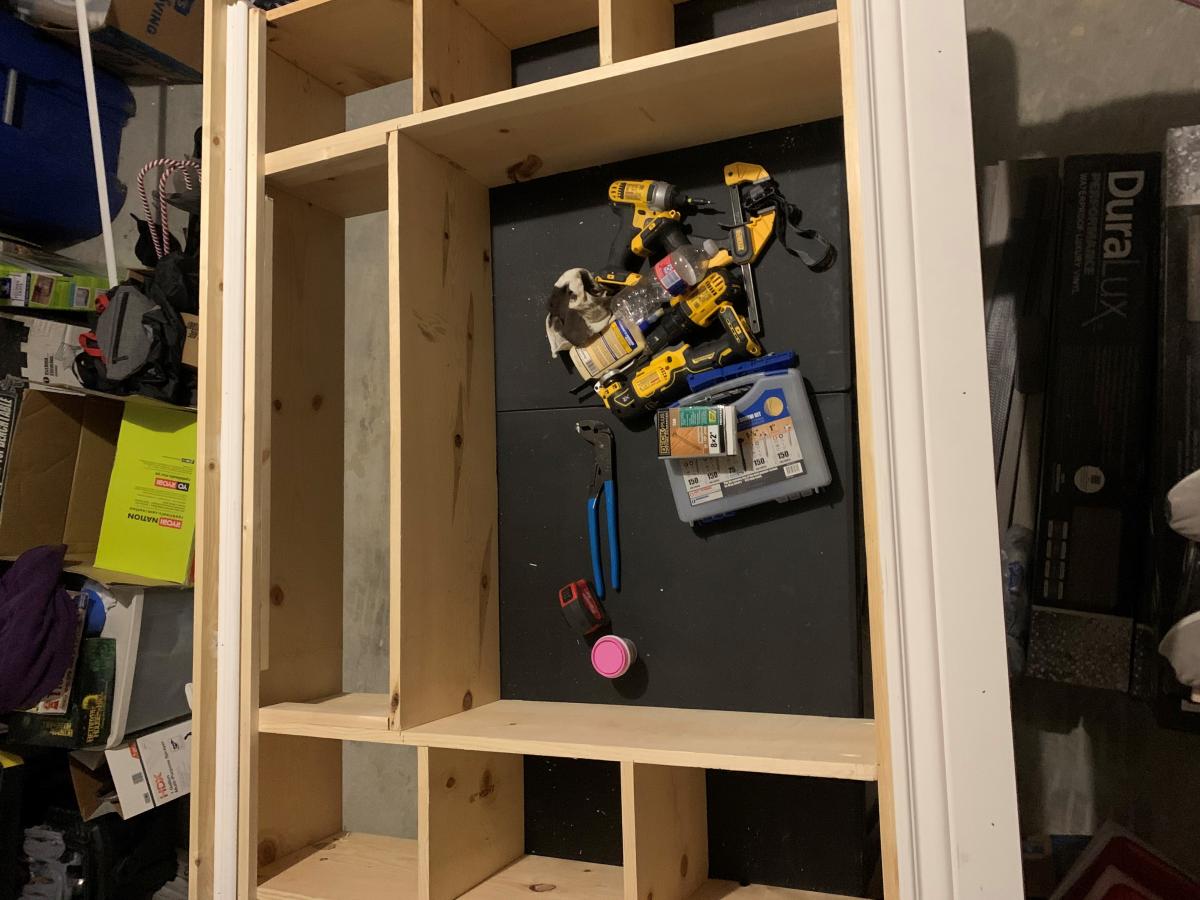
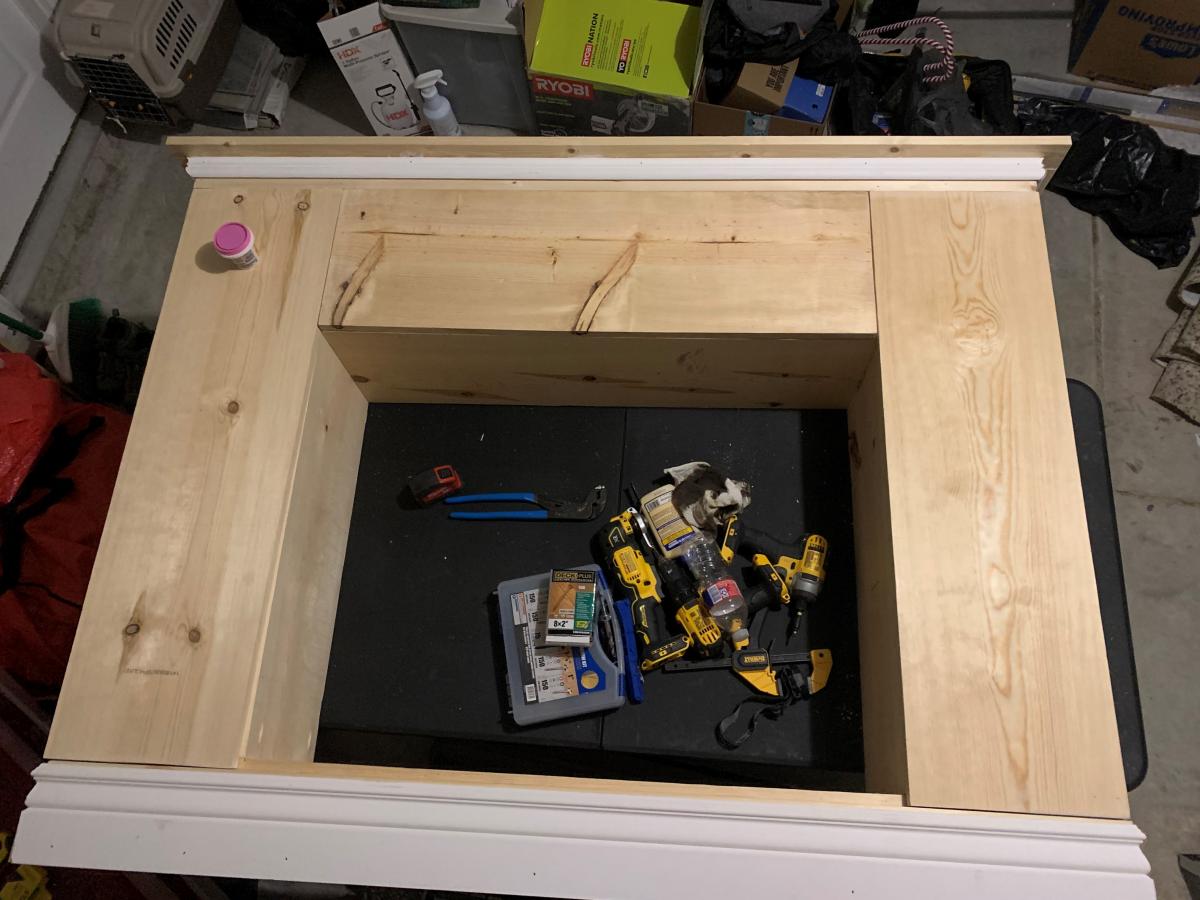
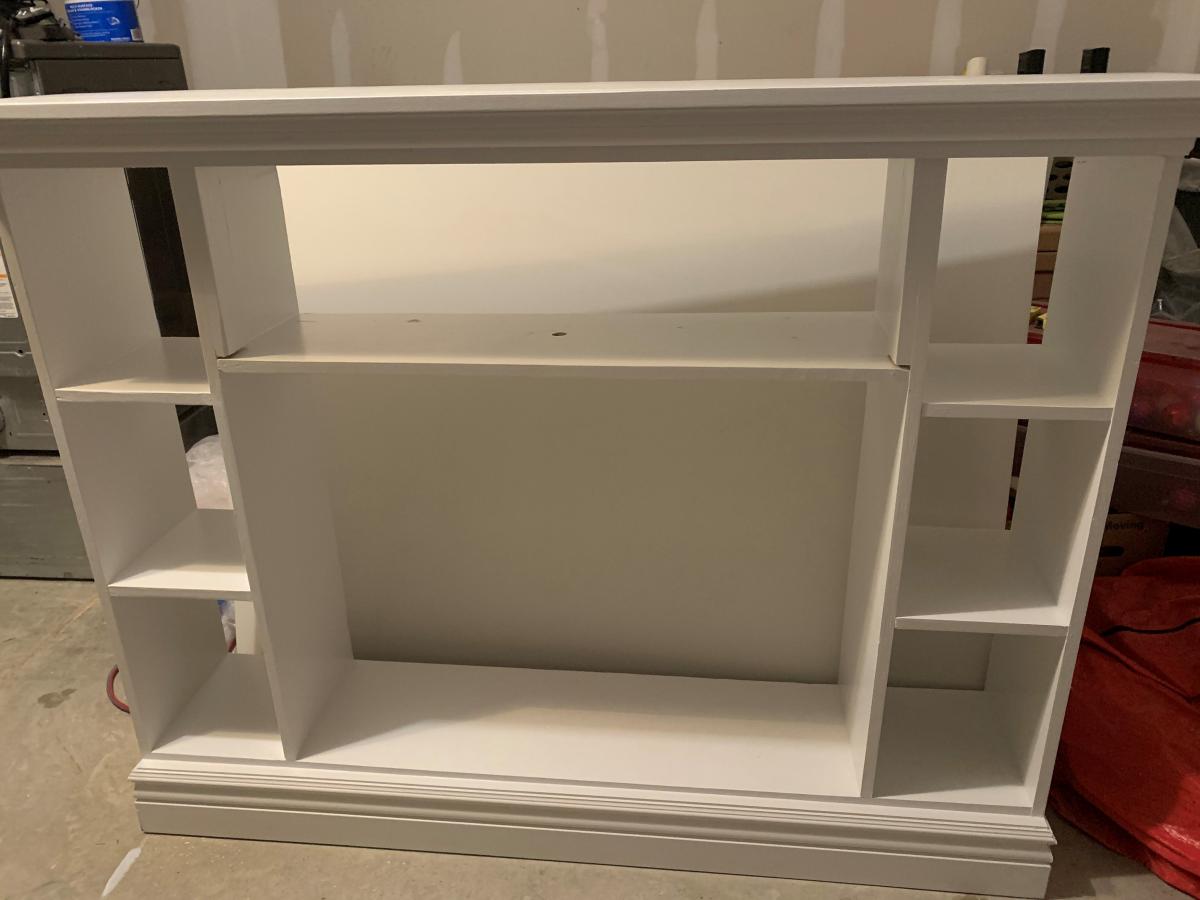
Decided to try my hand at a faux fireplace for our house to be completed and setup before christmas. Used ana white's faux fireplace with hidden storage plans but made a few tweaks to the size and style. Still have to add the electric fireplace logs and will update photos once it is added.

Estimated Cost
$300
Estimated Time Investment
Weekend Project (10-20 Hours)
Finish Used
Kilz primer, White semi gloss valspar 3000
Recommended Skill Level
Beginner

Classic Bunk Beds

Submitted by dwm22 on Tue, 03/26/2013 - 17:16

Construction phase of the bunk beds was about a day and a half project...Cutting, assembling, screwing, bolting. Nothing complicated about it at all. Just followed the instructions step by step. I didn't use metal brackets to reinforce the mattress rails (that the slats lay on). I'm a good 250lbs and I laid on them without a problem. Also, similar to the posted Comments, the original materials list is short a little lumber. I followed the advice of some of the Comments that indicate how much additional wood you'll need. I didn't have to make any additional trips for wood.

The finish took me another 2-3 days (incl. drying wait-time between stain and polyurethane coats). The sanding (electric hand sander) takes a number of hours to sand all the surface area and all the edges (300 grit). I then I applied 1 coat of pre-stain wood conditioner and then immediately 1 coat of Natural color stain (basically clear oil stain but it brings out the wood grain just a bit), and then 2 coats of semi-gloss polyurethane for a shine / protection. Each of those coats took me 2+ hours as I applied them using a paint brush (vs. spray gun).

Since I only need to take apart the bunk beds into 4 pieces to carry upstairs(front, back, 2 sides), I simply bolted them together using 3" bolts (with washers / nuts). 4 bolts in each of the 4 corner posts.

The only real modification I made was moving the ladder to the left-hand side (vs. right-hand side per the instructions). All other measurements were basically the same.

Really happy with the mini Kreg Jig! Simple to use and provides solid joints for the rails of the 2 shorter sides (without showing screw-heads from the exterior).

My toddlers have been sleeping on them for a week now and no squeaking or shaking. They are sturdy. And neadless to say, my boys LOVE having bunk beds.

Sure I could just buy some inexpensive bunk beds for $200-300 but where's the fun in that!?

Let me know if you have questions, happy to help out! Thanks again to Ana and her site.

Built from Plan(s)
Estimated Cost
300 ($220 for pine wood plus 16 bolts, screws, sandpaper, wood conditioner, stain, polyurethane)
Estimated Time Investment
Week Long Project (20 Hours or More)
Finish Used
Minwax Pre-Stain Wood Conditioner, Minwax Oil-Based Natural Wood Interior Finish Stain, Minwax Polyurethane Clear Semi-Gloss
Recommended Skill Level
Beginner

Comments

NimbleShopper

Wed, 03/27/2013 - 09:58

The bunks look really nice. Professional even.

What size bolts did you use?
Where did you purchase them?
And, finally, how much did they cost? Guestimation is fine if you can't remember exactly. :)

dwm22

Wed, 06/12/2013 - 09:55

The bolts I used are 3/8" x 5". I used 16 total bolts to assemble. Each bolt (+2 washers & nut) is maybe $2-$3 at Home Depot. So in total, around $35-$40 for the bolts and hardware.

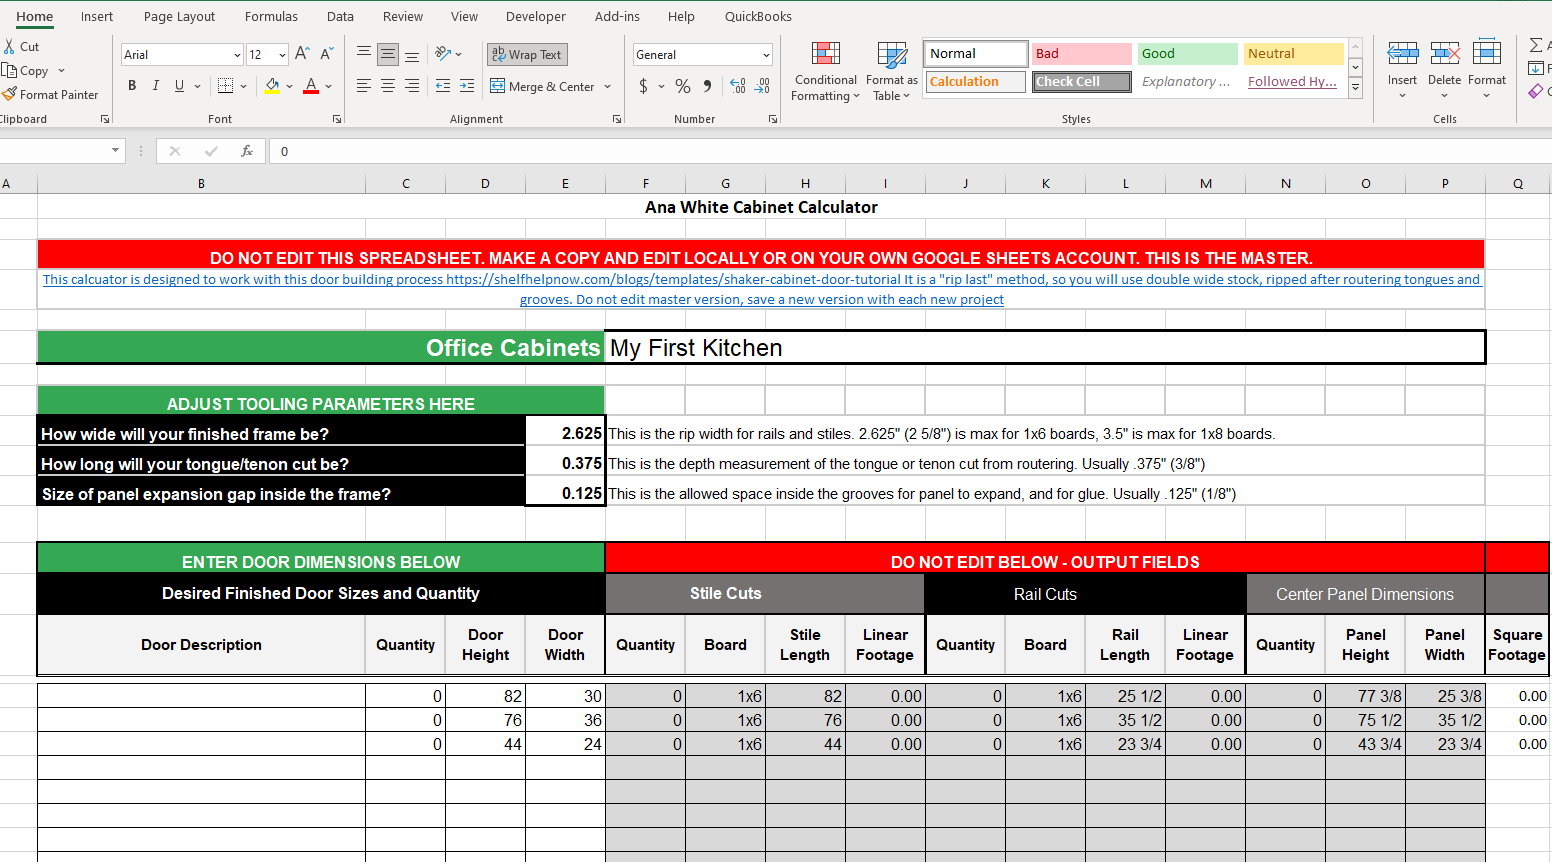
Ana White Cabinet Builder Google Sheet converted to Microsoft Excel

I was trying to use the google sheets cabinet calculator that Ana posted and found that others were accessing and editing the master at the same time. I thought perhaps a Microsoft Excel version of the calculator to download may be useful.

I wasn't able to upload to this site so I've created a Brag Post to link to it on my site.

UPDATE: Ana's website has been updated and the file is now an Excel Spreadsheet which can be downloaded.

Estimated Cost
none, just converted the functions and calculations to work in excel
Estimated Time Investment
An Hour or Two (0-2 Hours)
Recommended Skill Level
Intermediate

Double Pedestal Farmhouse Table (8 feet)

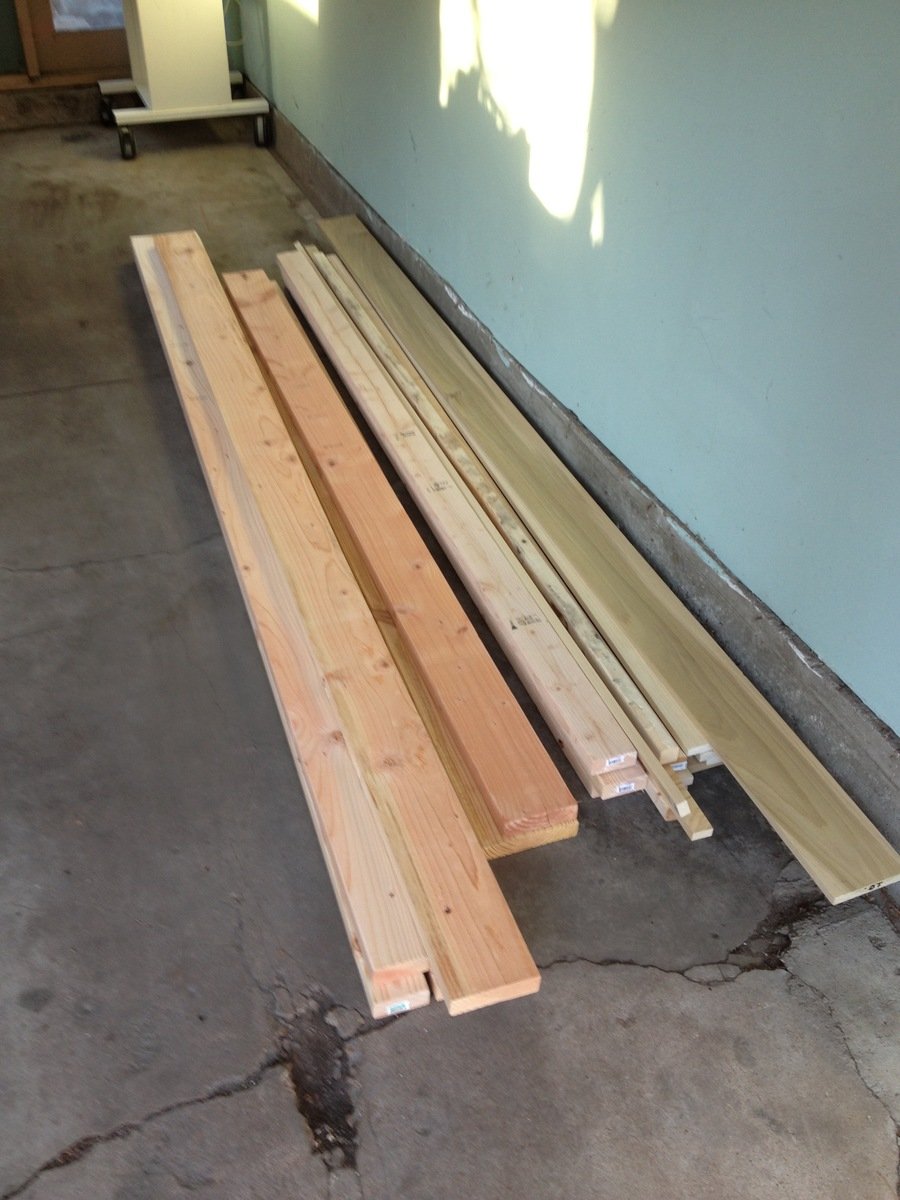
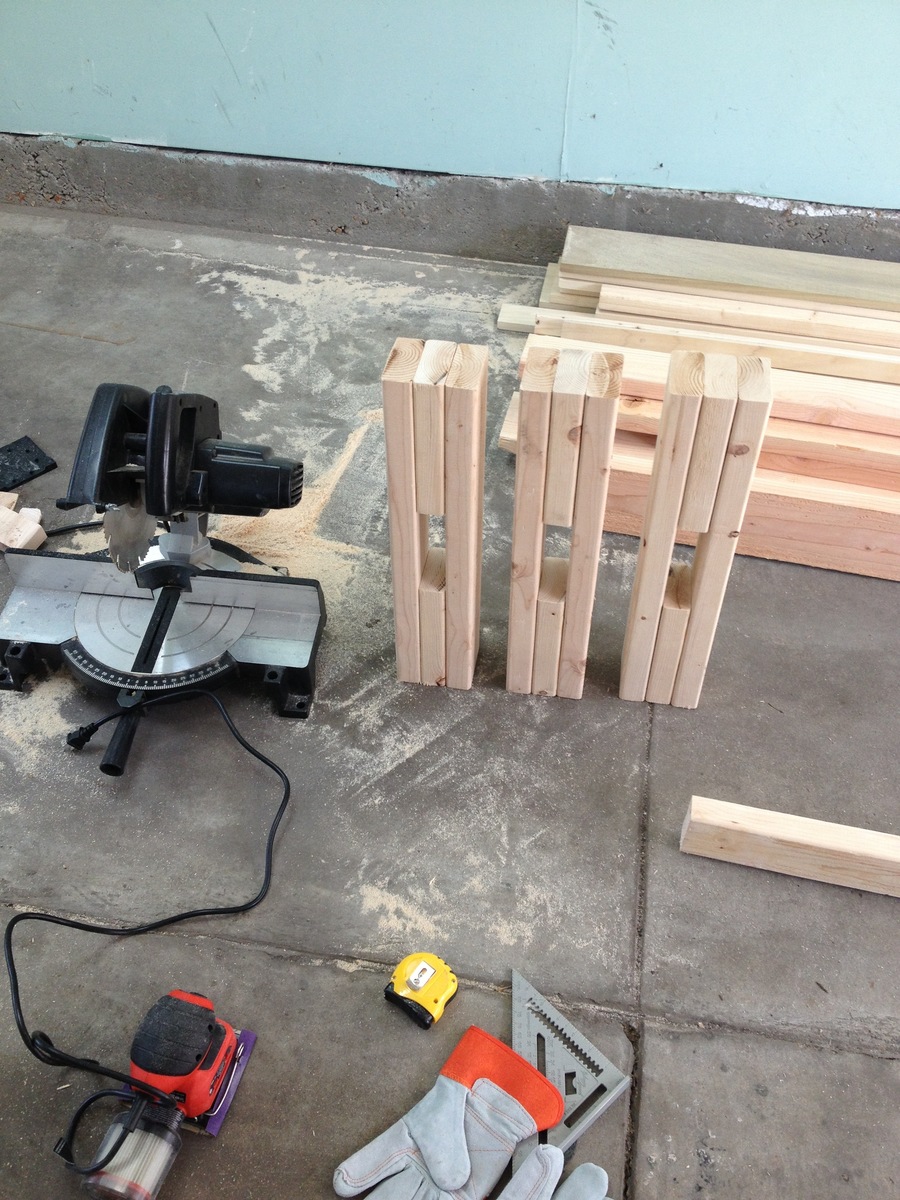
Built from the Triple Pedestal Farmhouse Table plans. Had to size down the plans a little bit to fit into my dining room. Created three pedestal legs but only ended up using two on the final table. Took about 16 hours from start to finish. All of the wood is pine except for the top, which is Poplar. Made a couple of mistakes along the way but am very happy with the way everything turned out. Feel free to ask questions and I will do my best to answer them. Happy Building!

Built from Plan(s)
Estimated Cost
$175
Estimated Time Investment
Weekend Project (10-20 Hours)
Finish Used
English Chestnut. Stained once and waited 7 minutes to wipe off. Two coats of Clear Satin Polyurethane.
Recommended Skill Level
Intermediate

Comments

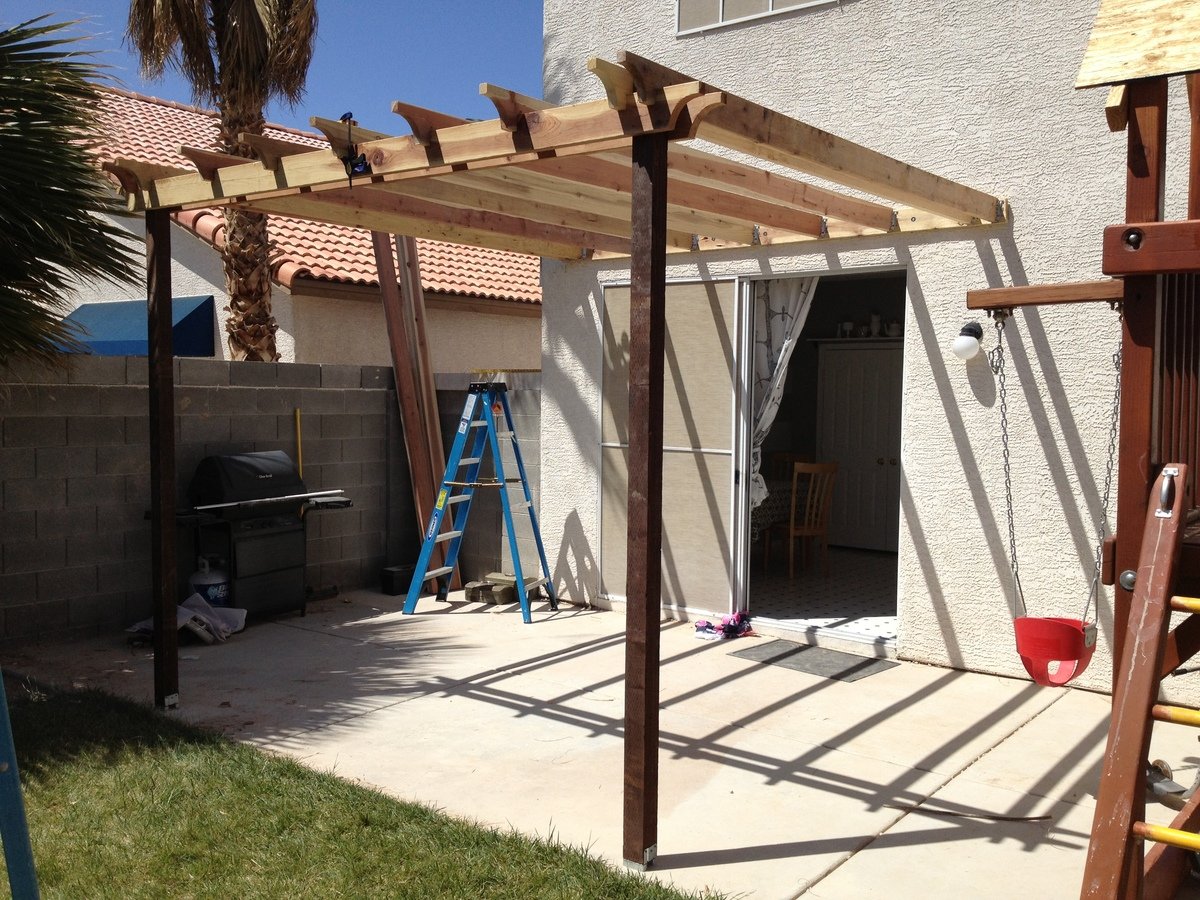
Pergola (attached directly to the house)

Submitted by dwm22 on Thu, 05/23/2013 - 17:34

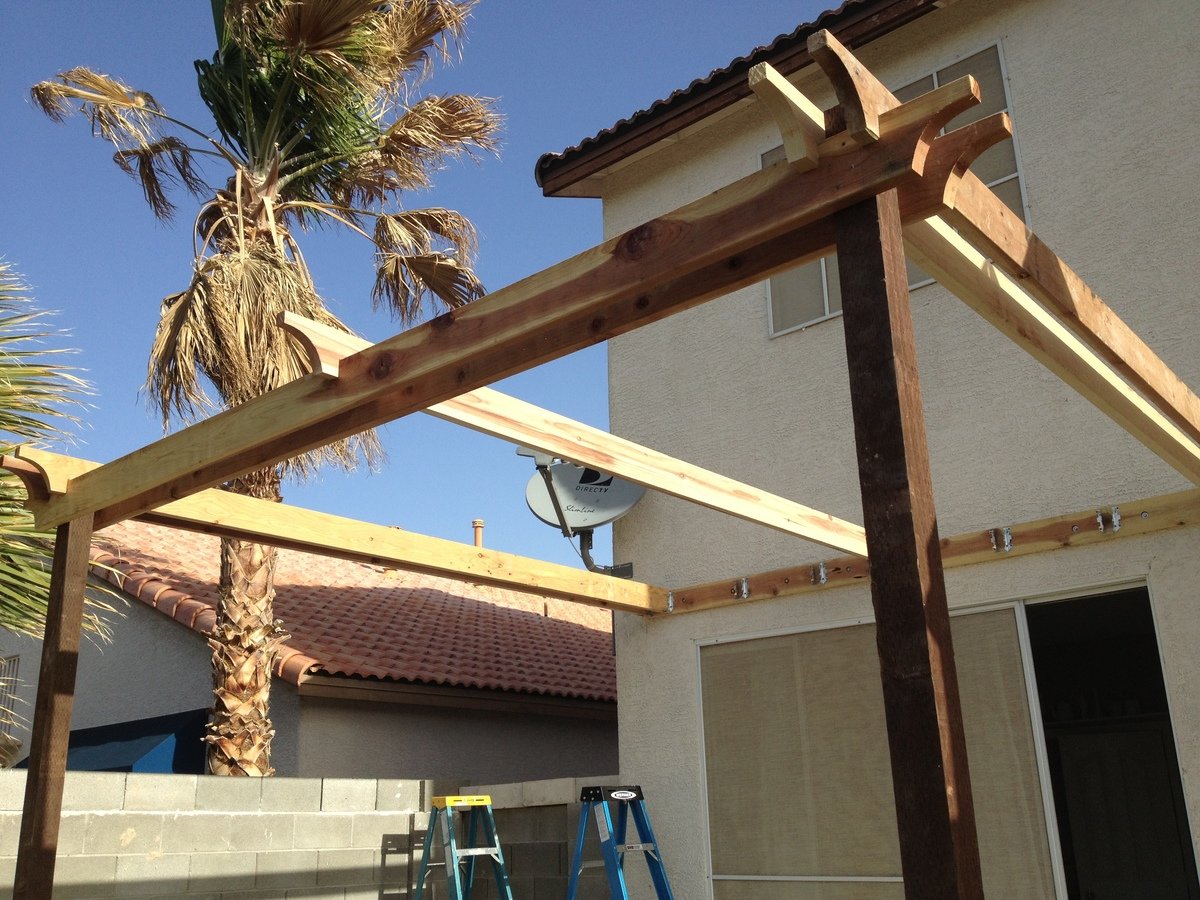
Instead of building a free-standing, 4-poster Pergola, I attached one side directly to the house. There are various Pergola design types and shapes. Simply Google for "pergola" images and decide which design you like best, or combine design ideas together (as I did).

Couple things to consider:
A: Is your Pergola more for decorative purposes or actual shade?
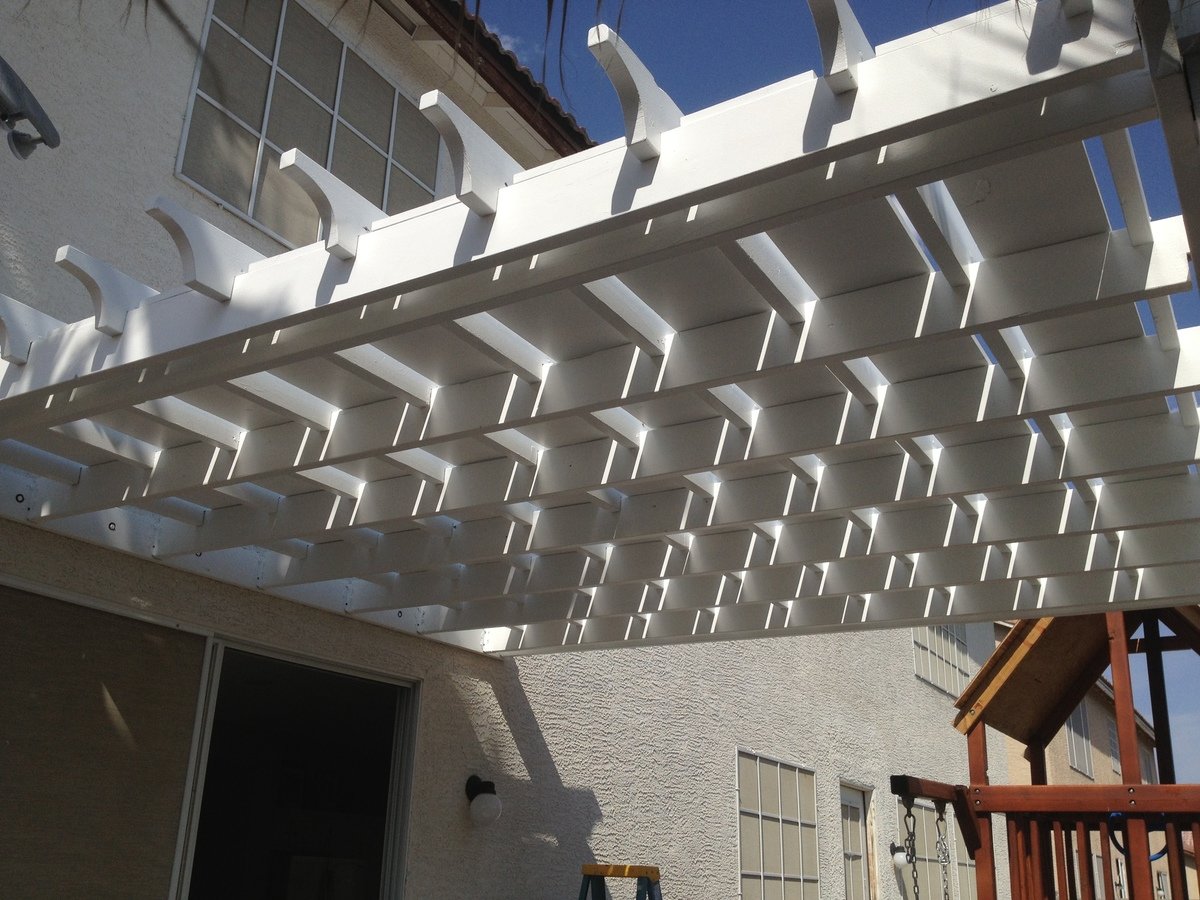
My design was more for actual shade (but with a decorative design), which is why I added the 1in x 12in x 12ft Pine boards between the cross beams at the very end (last picture). If your design is more for decorative purposes, you can space out your support beams and cross beams wider (using less wood and money).

You can also choose to use 2x4s as your support beams with 2x2 cross beams on top (essentially furring strips) either close together or spaced farther apart. This would also reduce the overall cost of your Pergola and make it much lighter as well. I chose to use all 2x6s for both support beams and cross beams.

B: What path does the sun follow across the sky over your Pergola?
If the sun passes directly over your Pergola and you want a lot of shade, you'll obviously need to consider this in your design (i.e., more cross beams that are close together).

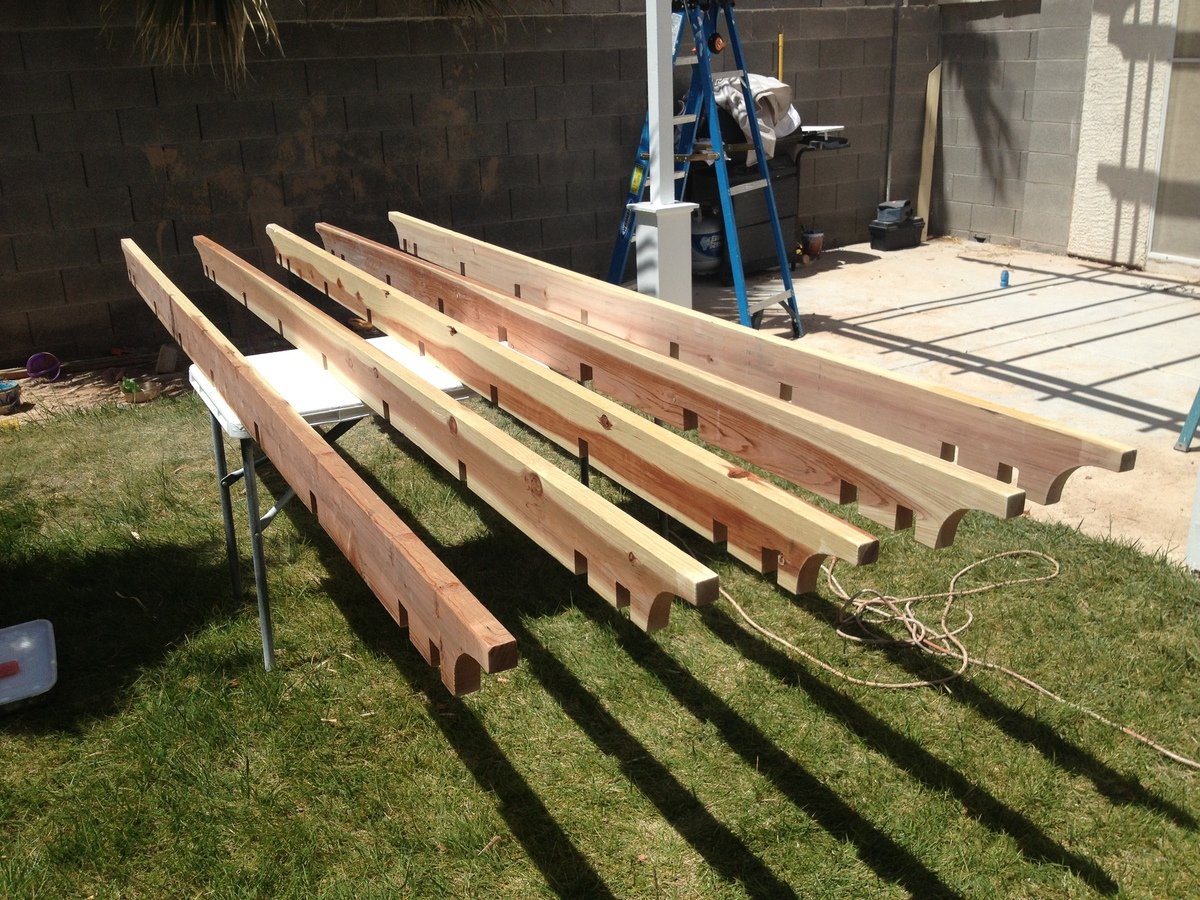
C: Do you want your support beams and cross beams to inter-lock (by cutting square notches and assembling them like linking logs), or simply stacked on top of each other? (Again, Googling for Pergola images will help you see the differences in designs.)

I chose to interlock all of my beams by cutting notches and fitting them together. Obviously more time consuming to measure each notch, cut, and chisel them but the stability of inter-locking beams should hold up a little better in the strong winds of Las Vegas.

HOW TO (abbreviated)

Overall Pergola Dimensions: 10ft Height, 12x12ft

Tip: Paint or stain all your wood prior to assembly. Much easier. You can always touch-up scuffs and scrapes after it's built.

1. 2x6x12 installed directly onto the house (thru the stucco into the studs) using 3/8in. x 5in. lag screws. (Tip: Seal the top edge of the 2x6x12 that's against the stucco so water doesn't run behind it and down into the lag screw holes.)
2. Install the 2x6 Double Shear Hangers (as many as you need for your design)
3. 4x4 post anchors secured directly into the cement patio using Tapcon 3/16 in. x 2-3/4 in.cement anchor screws.
4. 4x4x10ft posts screwed on top of the anchors. Ensure level on all sides (use a partner to help hold the posts).
5. Attach the front and side 2x6 beams to the 2 posts (again, use a partner to help hold posts while you're up on the ladder screwing your beams to the posts)
6. Attach the remaining 2x6 support beams.
7. Attach the 2x6 cross beams on top (whether you inter-lock them by cutting notches or simply resting them on top, be sure to toe-nail screw them in with 2in exterior screws).
8. Lay 1x12x12ft pine boards on top in between the cross beams and secure with 2in exterior wood screws.
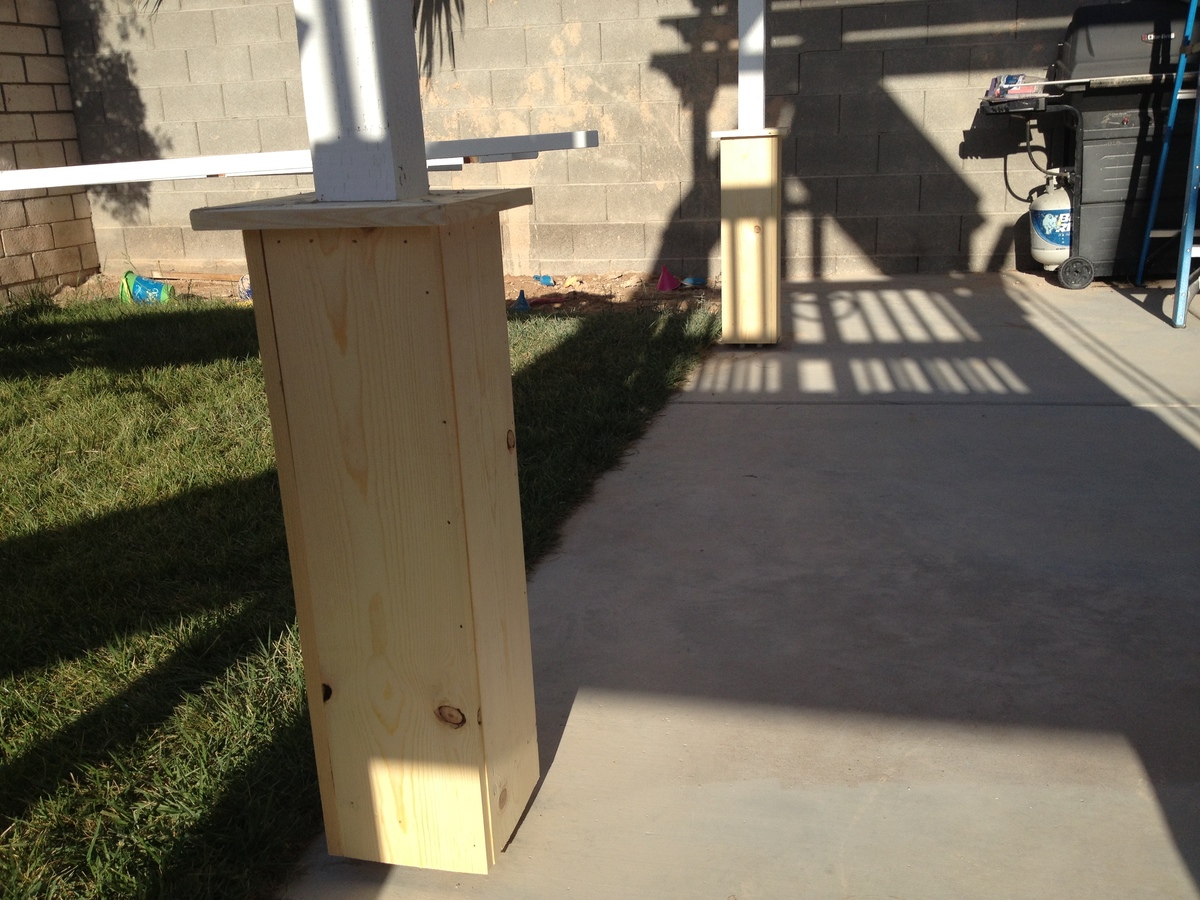
9. Construct the post bases ("sleeves" or "leggings") which greatly adds to the look, as outlined in the "Weatherly Pergola" plans.
10. Touch-up paint / stain any areas you need.

Built from Plan(s)
Estimated Cost
800
Estimated Time Investment
Week Long Project (20 Hours or More)
Finish Used
BEHR Premium Plus Ultra - Ultra Pure White Satin Acrylic Exterior Paint (2 coats applied with roller)
Recommended Skill Level
Intermediate

Comments

bullitt453

Tue, 05/28/2013 - 07:29

Great work and very detailed post. I plan to build something similar for my parents once they are done with their renovation.

Garage Pegboard Storage Wall

Thecreativityexchange.com did such a great job with the original project, so of course I had to give it a try! I had only a few minor adjustments in size. I made this one 8ft X 8ft and only using one sheet of pegboard. My amazing wife stained it too with English Walnut!

Estimated Time Investment
Afternoon Project (3-6 Hours)
Finish Used
English Walnut Stain
Recommended Skill Level
Beginner

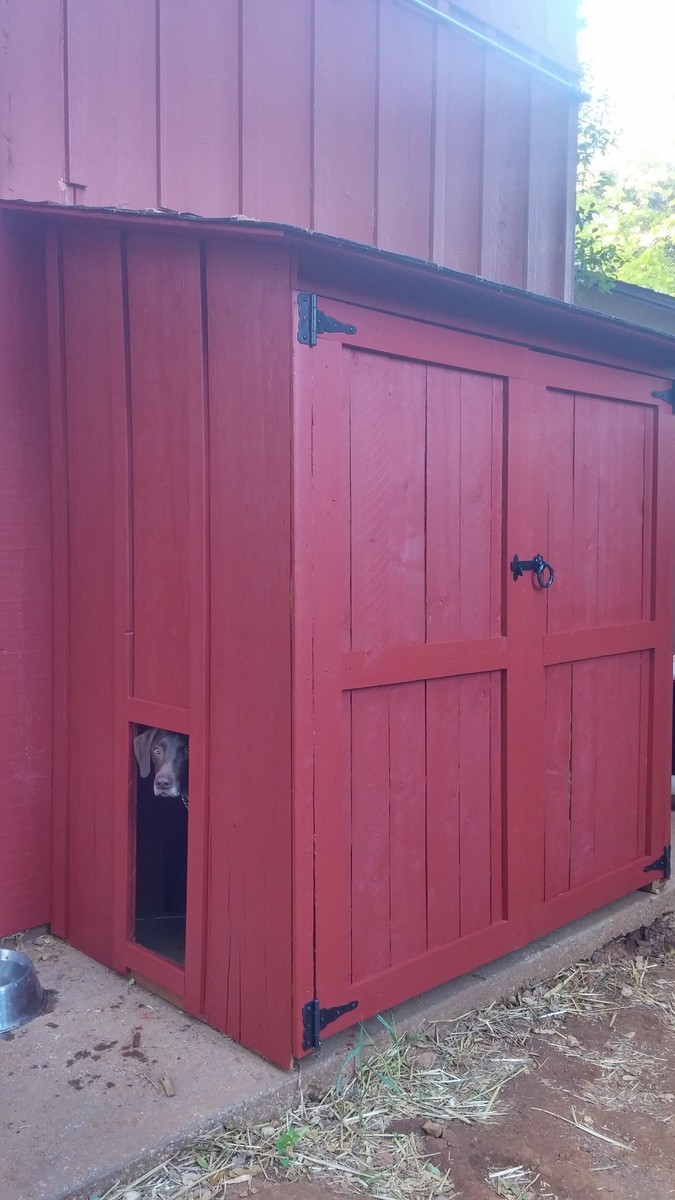
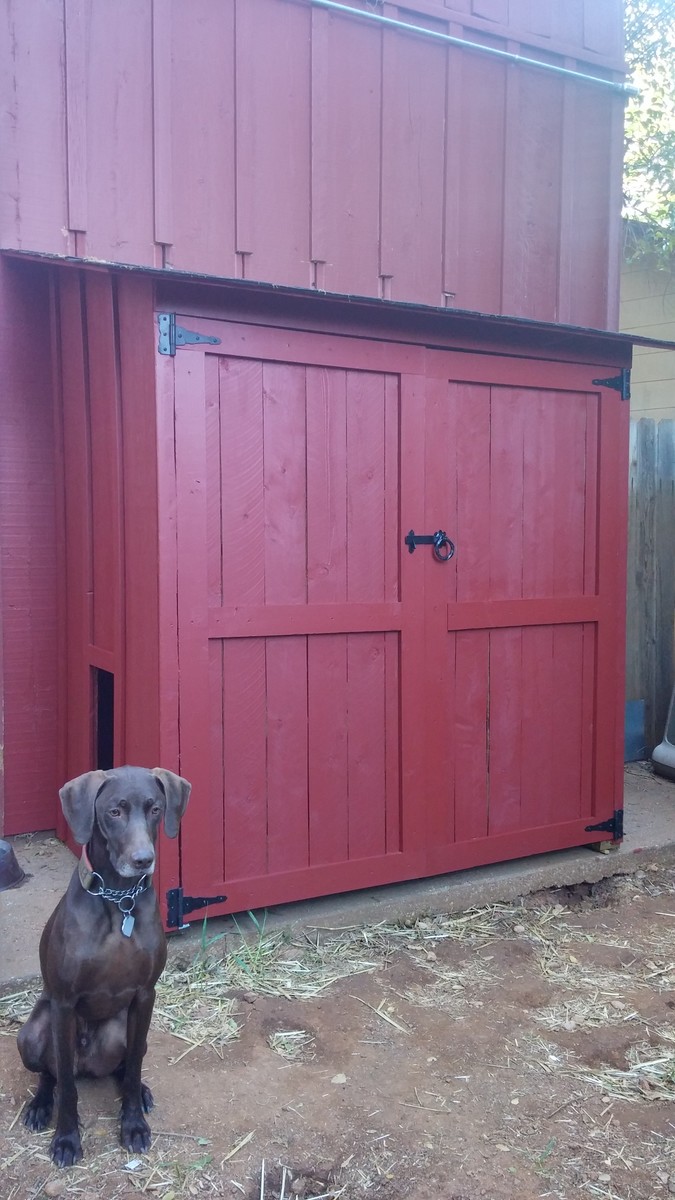
Modified garden shed for a combo dog house

Submitted by CDH906 on Mon, 05/18/2015 - 09:49

I needed a garden shed (for potting supplies) and a dog house, but I wanted it to look good. I started with Ana's plans, but screwed up a cut and was too lazy to go to the store, so I modified the plan a bit - also we didn't want a lot of venting off the roof.

OUR MODIFICATIONS:
NO BACK WALL - I did not build a back wall, as we pushed it all the way up to the house. (You need to check your codes for this if it's allowed. The way I'm integrating mine w/o breaking the exterior waterproofing of the house and it's unconditioned made mine OK)

DOG HOUSE- I cut away a hole for our dog between the battens. And as you can see - he loves it. He's got his Coolaroo dog bed inside. We also added a 'ceiling' to the lower dog house half, that divides the gardening storage from dog house. The large shelf inside that acts as a dog house ceiling, and above are my un-used pots, hand tools etc. (no worries no chemicals with the puppy)

PAINTED EXTERIOR- I painted it red to match the house, and will also be putting garden pavers in front of the doors.

ROOF- We did put an underlayment down on the roof before the asphalt shingles.

LESSON LEARNED- If your dog is a Mama's boy like mine, he may try to climb a ladder to remove you from a roof which he has determined is not OK for you to be up there.

*One concern is - most sidewalks slope away from the house, so we had to shim the sill plate so front of the shed doesn't lean outward causing the doors to pull open constantly. As you can see from the photo I still need to flash at the roof where we cut back our houses' battens.

COST- We live in CA - and this project was more expensive than anticipated, our lumber/roof shingle costs were around $270 alone, and keep in mind we didn't build a back panel. I have very little scrap left over too. When I was nearly done the hinges were an additional $15 a piece, $10 for the latch. And we had the primer and paint in the garage. Underlayment for roof, I already had in the garage too.

TIM-: I started this project on a weekend, but it ended up taking longer; probably because I didn't block out the weekend just for this project. I spread it over the course of a month, so hours wise it probably wasn't as bad as it felt... You do need two people though, and that's where I ran into some trouble, I kept trying to work on it when my husband wasn't home. Probably 24hrs, 3 easy going days. Could probably be done in a weekend if you were dedicated and didn't get distracted (or screw up a cut like I did, which sent me to the drawing board to fix my mistake)
Built from Plan(s)
Estimated Cost
$350
Estimated Time Investment
Week Long Project (20 Hours or More)
Finish Used
Exterior house primer and paint
Recommended Skill Level
Intermediate

Comments

Ana White

Mon, 05/18/2015 - 11:52

Great mods, love how you incorporated the dog house! Thank you for sharing!

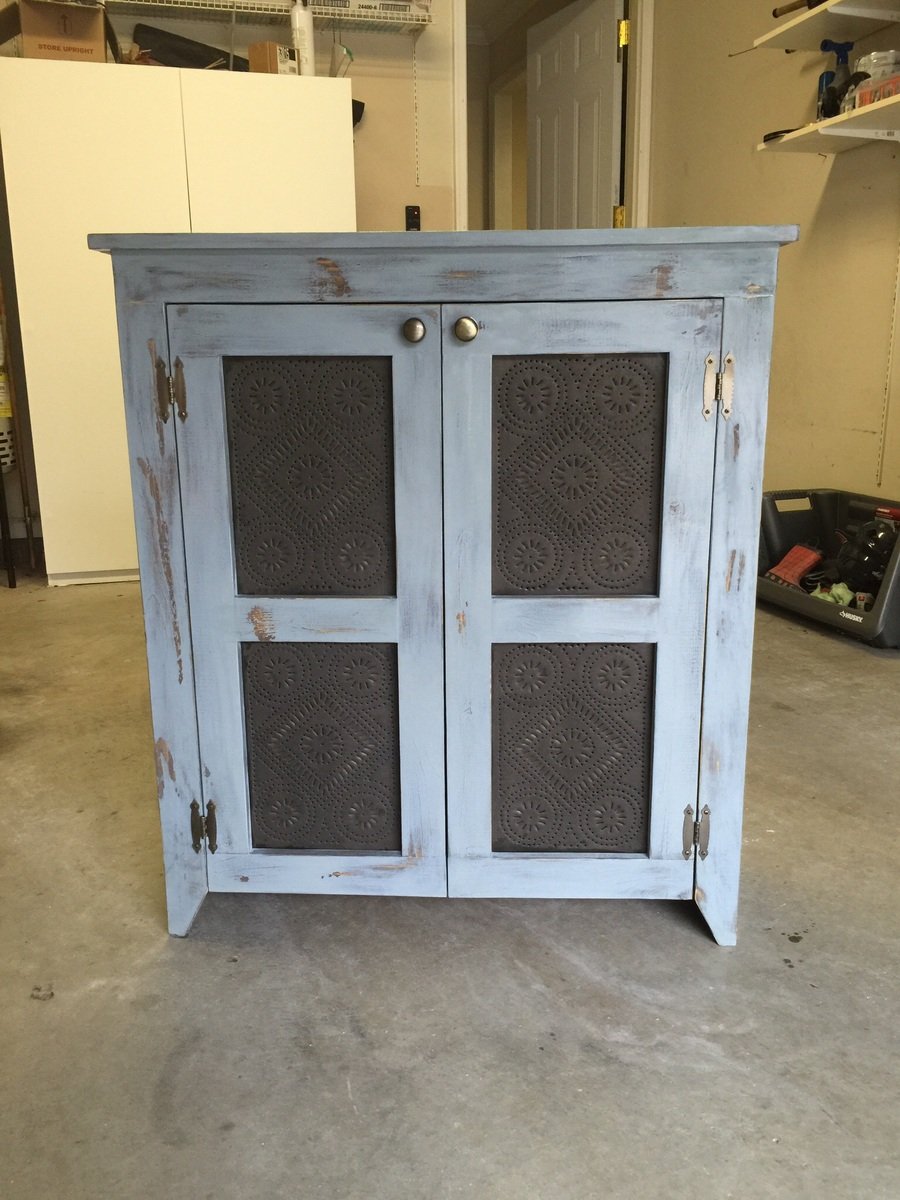
Pie Safe

Submitted by Duckhook18 on Wed, 10/28/2015 - 18:56

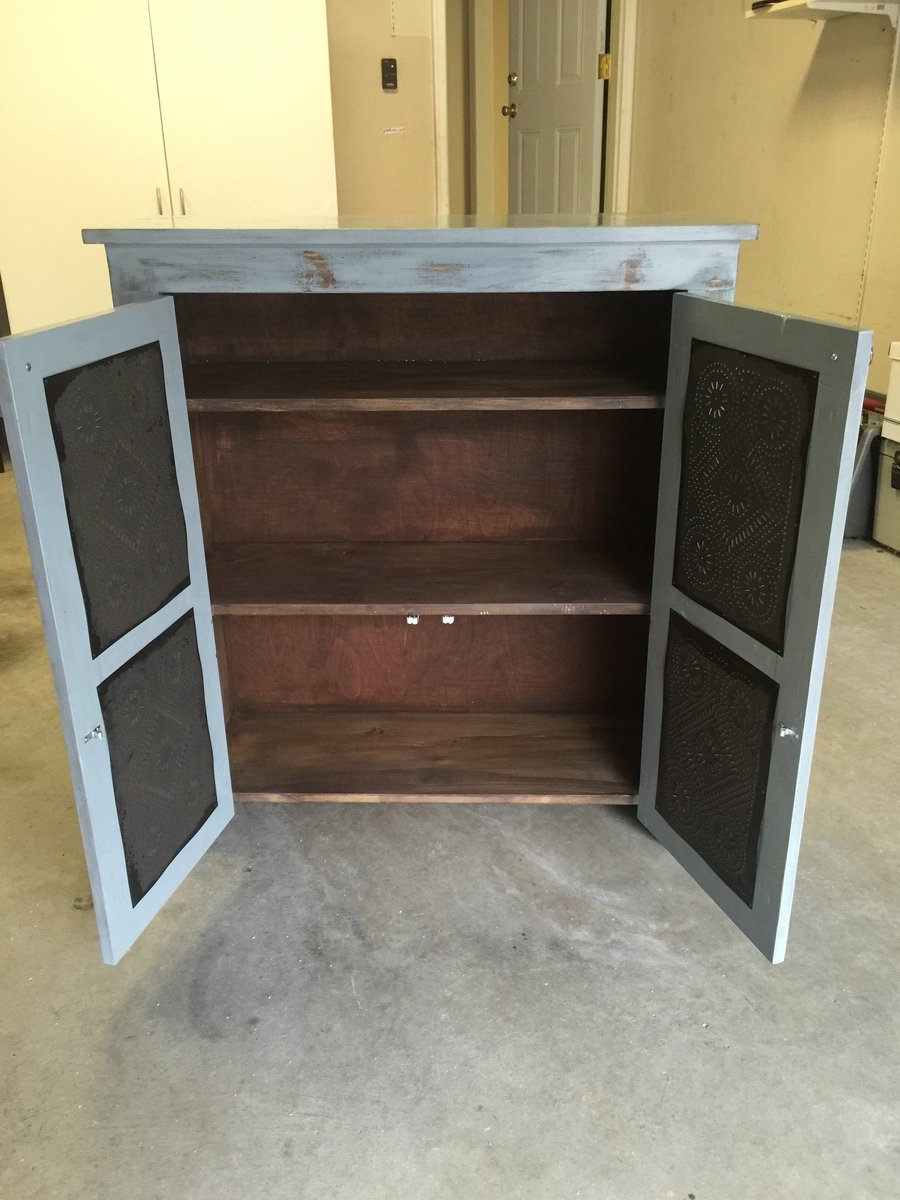
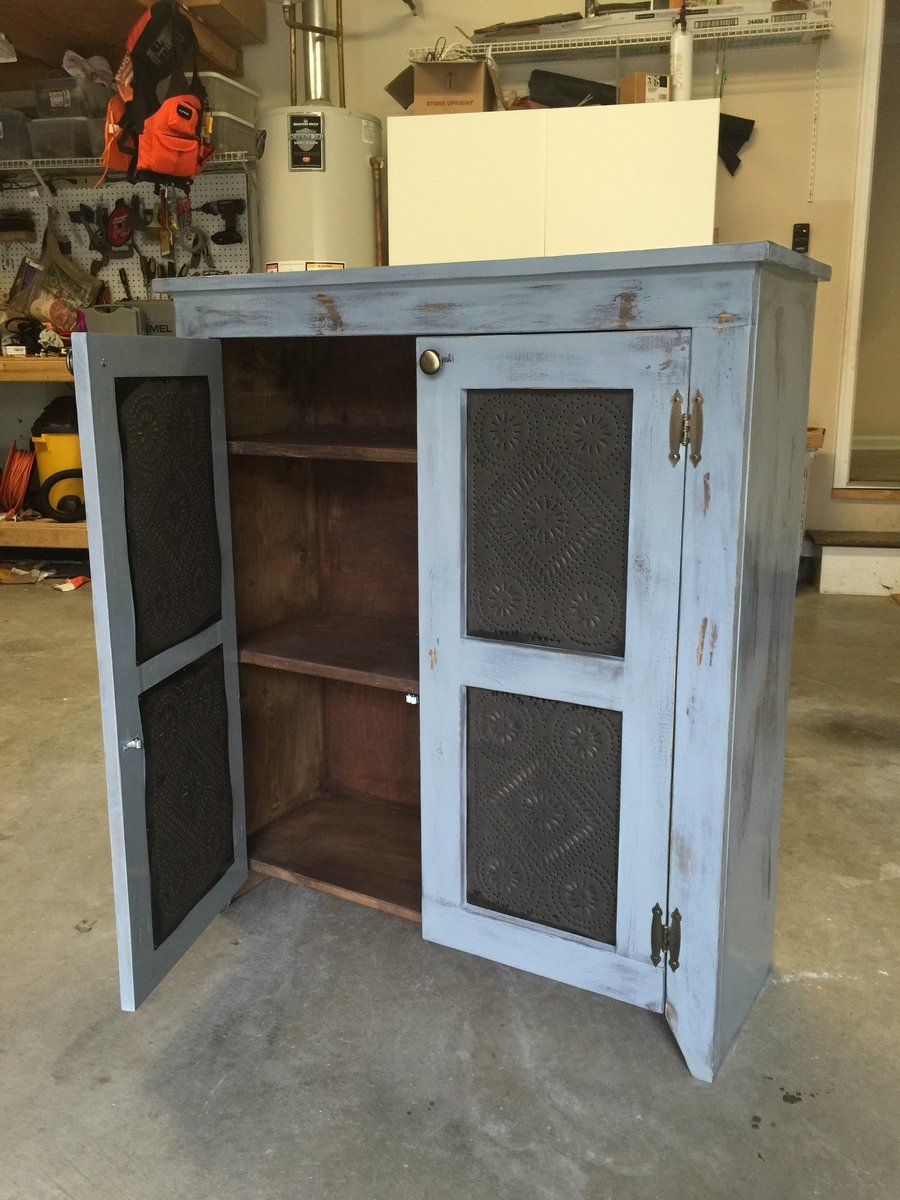
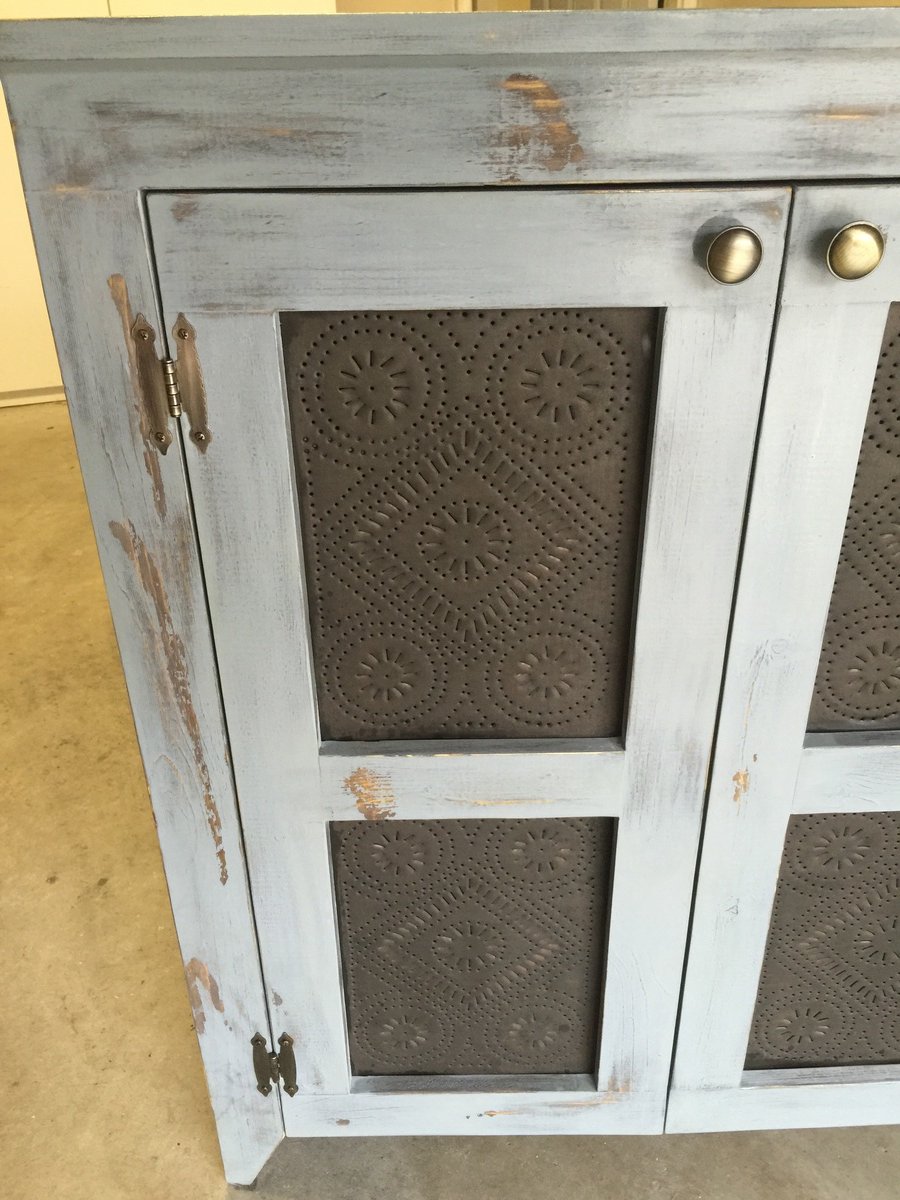
This is my first, of hopefully many projects to come. I modified Patrick's Jelly Cupboard plans to be 40" tall and added the tins to the doors. I used spruce and pine board from a local lumber yard. The finish is Miss Mustard Seed milk paint inside and out. With kids in the house I didn't want to use stain with the heavy chemical smell so I mixed the milk paint with a lot of water to look like a stain. That product is so easy to use and looks great. Needless to say my wife loves her pie safe. Thanks Ana for this site and the inspiration to give this a try. I'm hooked!

Built from Plan(s)
Estimated Cost
$140 including the tins, paint and lumber
Estimated Time Investment
Weekend Project (10-20 Hours)
Finish Used
Miss Mustard Seed Milk Paint - Shutter Gray (exterior), Curio (interior mixed 1 part paint to 3 parts water)
Topcoat - 2 coats of hemp oil
Painted entire piece in Curio first to get the layered look on the distressed finish. 2 coats of Shutter Gray over the Curio.
Recommended Skill Level
Starter Project

Comments

Joni

Sat, 10/31/2015 - 09:36

This is really beautiful!  Might I ask where you got your tin inserts?  Thanks!

Toddler Room

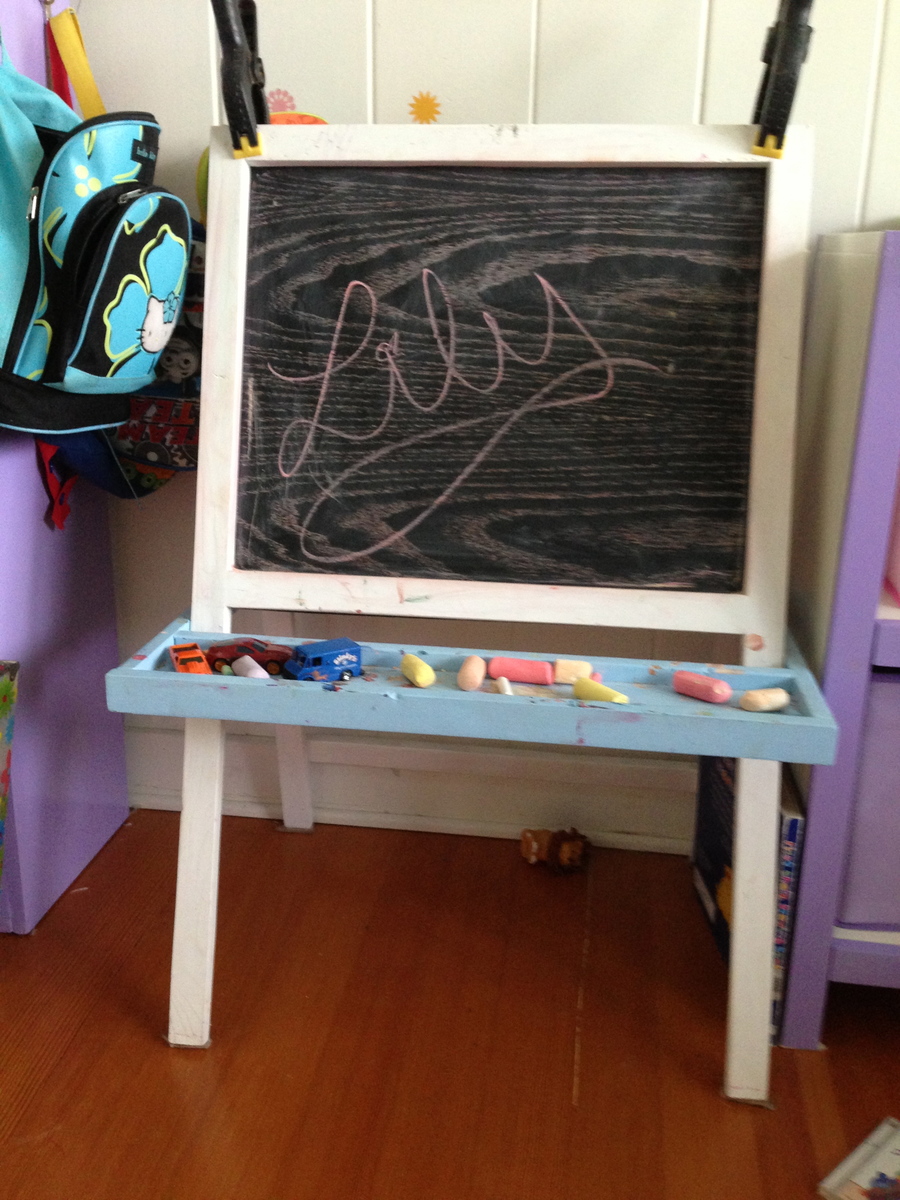
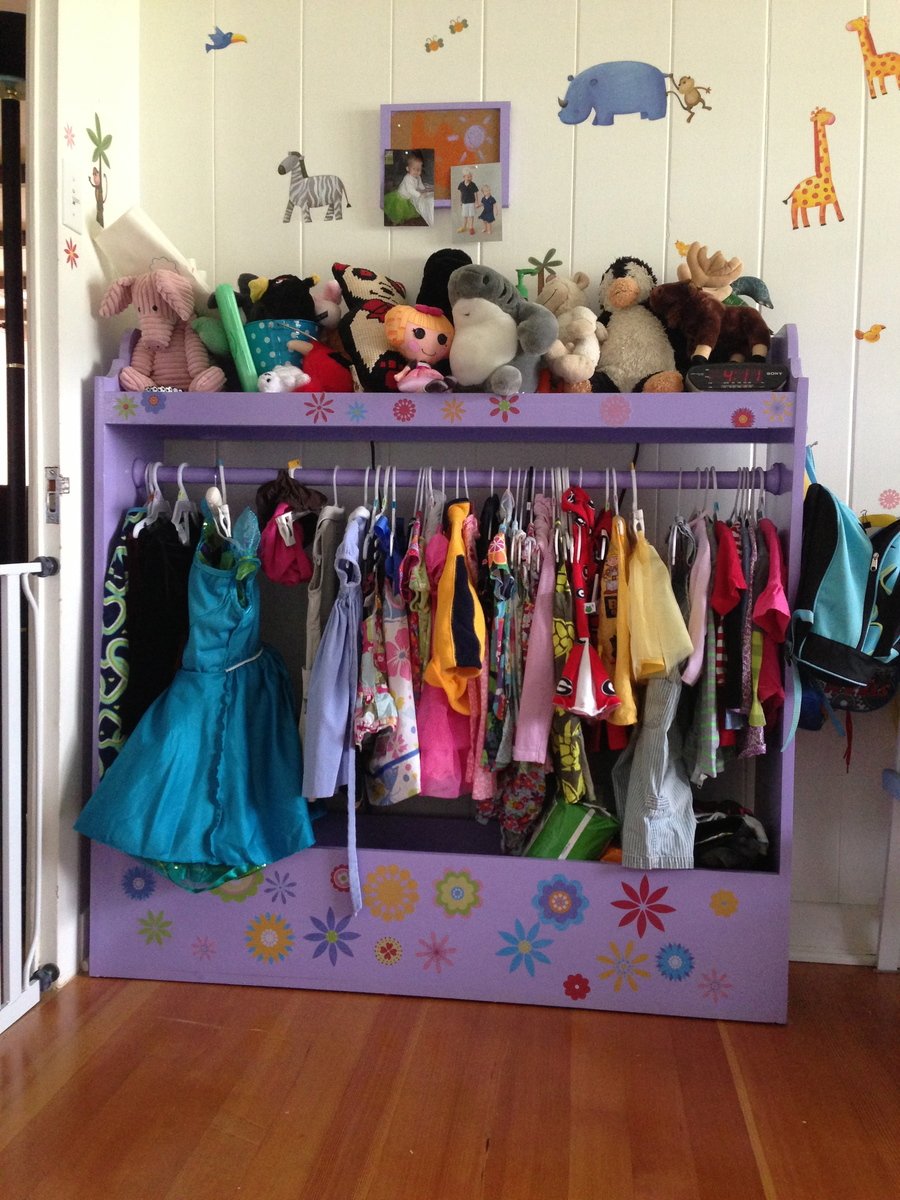
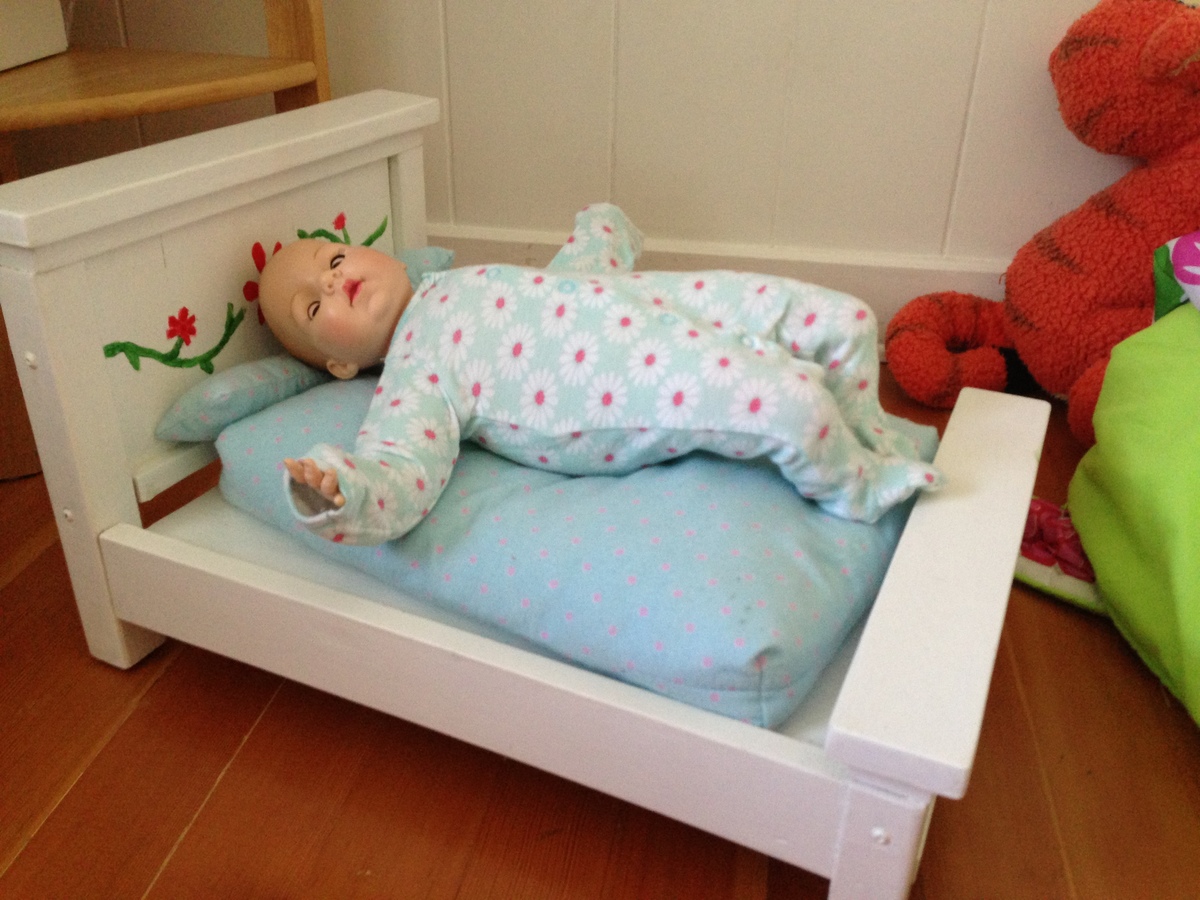
My daughter's room has no closet and is pretty small, and I just couldn't find any furniture I liked around here. But I found tons on Ana-white.com! So, her entire room (except one old bookshelf) is now ana-white originals.... the cubbies hide her clothes and toys; the dress-up center functions as her hanging closet; she colors on the easel (originally made for her brother, but he never used it...); and the doll bed serves as a resting place for several different dolls (sometimes all at once). I think I will build her the dollhouse bookshelf to replace the older bookshelf, and once she's ready for a real bed (as opposed to the mattress on the floor), I'll be building that too! The chalkboard easel was one of my first builds, and I have to say, it still remains one of the most challenging (my screws kept splitting, I had a hard time fitting things together, esp. without another pair of hands....), but watching my daughter scribble all over it nearly every day makes it worth every minute! Building the dress-up center and cubbies took almost no time at all - but it took me over a month to get them finished (sanded, painted and poly'd). Thanks again Ana for the great plans and all your hard work!

Estimated Time Investment
Week Long Project (20 Hours or More)
Finish Used
The lavender color is oops paint; the white on the cubbies is Benjamin Moore that we used as trim for other rooms in the house.
Recommended Skill Level
Beginner

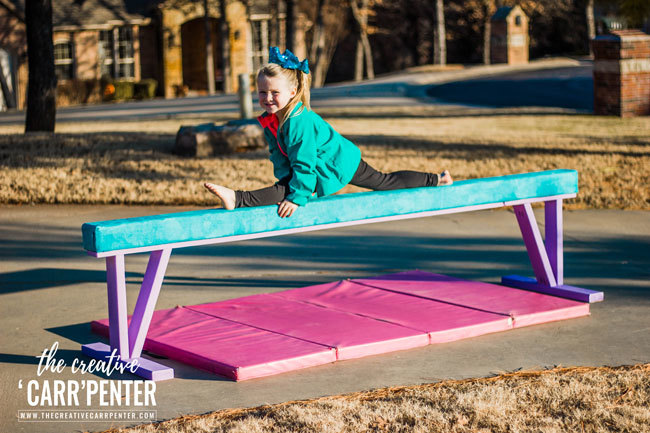
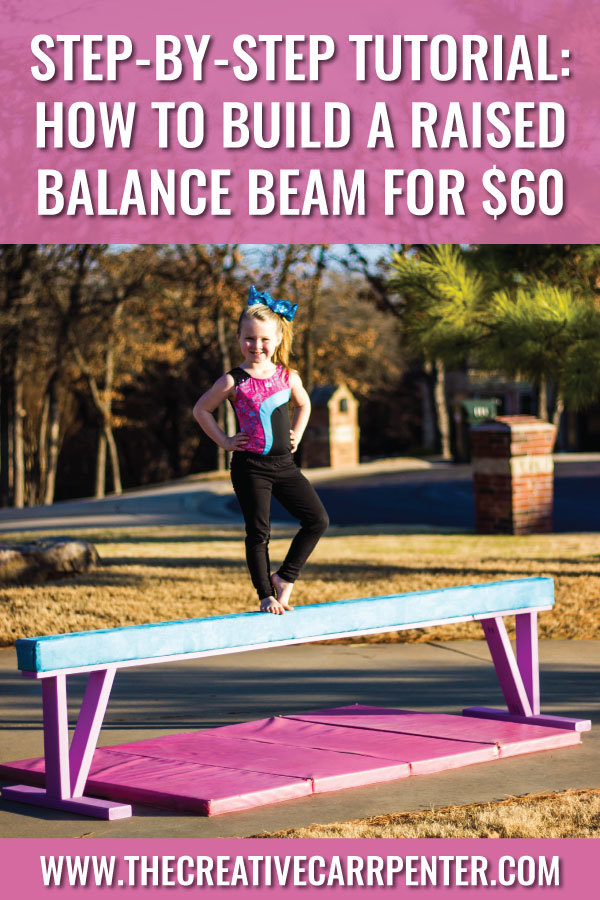
How to Build a Raised Balance Beam for $60

Submitted by Anonymous (not verified) on Thu, 01/31/2019 - 14:49

From watching Olympic gymnast Simone Biles on the television to running, flipping and twirling all around our living room — my girls LOVE everything gymnastics. Both girls began competing with a local gymnastics club. Now that my oldest has moved up and is pretty serious about practicing her beam handstands and dismounts, she begged me to build a raised balance beam with suede covering so it would have a similar feel to her beam at the gym.

If you can relate to this, or even if you have a new gymnast (like my youngest in the pic above) wanting to improve their skills at home, then this comprehensive tutorial on how to build a raised balance beam is for you.

Full plans available on my blog The Creative 'Carr'penter. You can also find and pin this tutorial on Pinterest here.

Estimated Cost
Cost of materials were about $60. Could vary depending on materials used.
Estimated Time Investment
Afternoon Project (3-6 Hours)
Finish Used
I used an outdoor flat paint to finish the exposed pieces of wood. The remainder was covered in padding and suede fabric.
Recommended Skill Level
Beginner

Comments

Mud Room - Inspired by Braden Entryway Collection

Submitted by flicker237 on Thu, 10/13/2011 - 09:19

We had a small mud room off our back door that was in need of serious help! We started from scratch in this room - framing, drywall, floor, molding, etc. To complete the room, we modified the Braden Entryway Hutch and shoe bench plans to fit the dimensions of our space, and add a third cubby. It has worked wonderfully!

Estimated Time Investment
Weekend Project (10-20 Hours)
Finish Used
White paint (2 coats)
Recommended Skill Level
Beginner

Comments

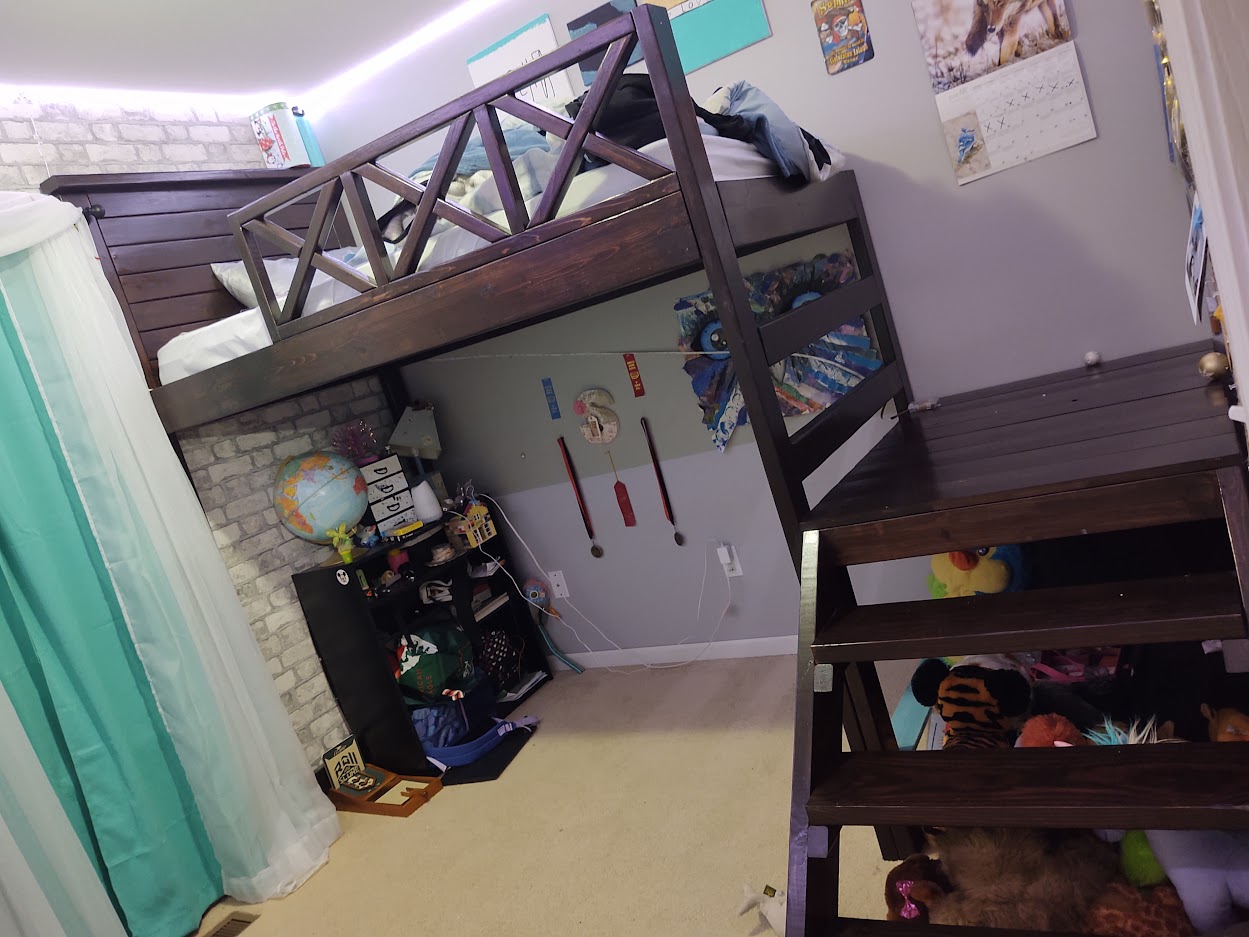
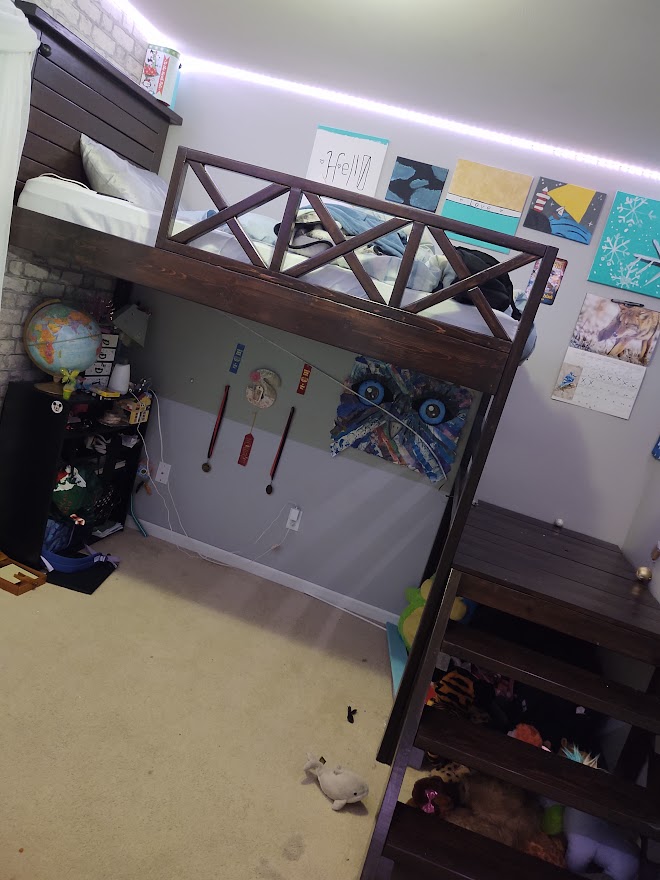
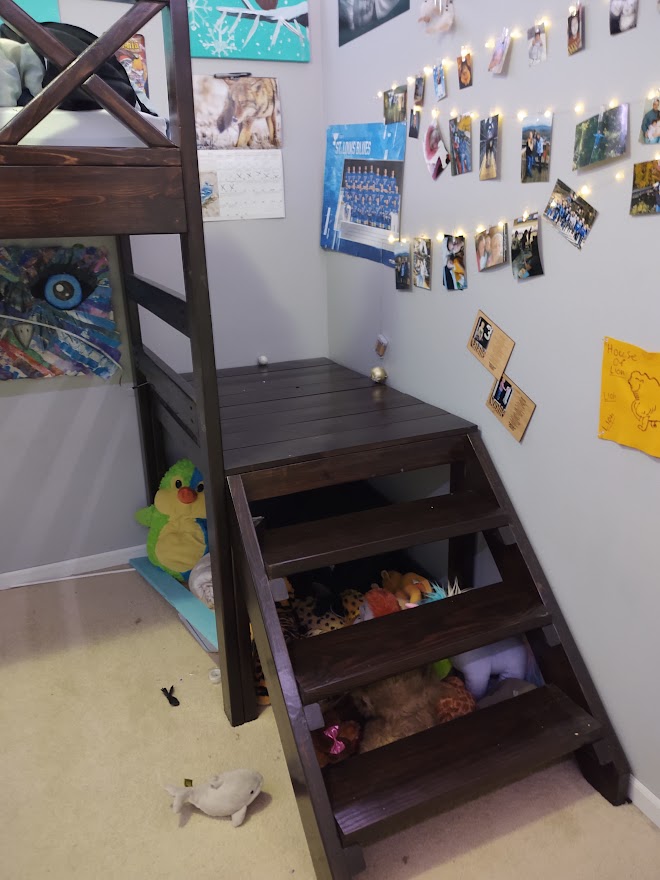
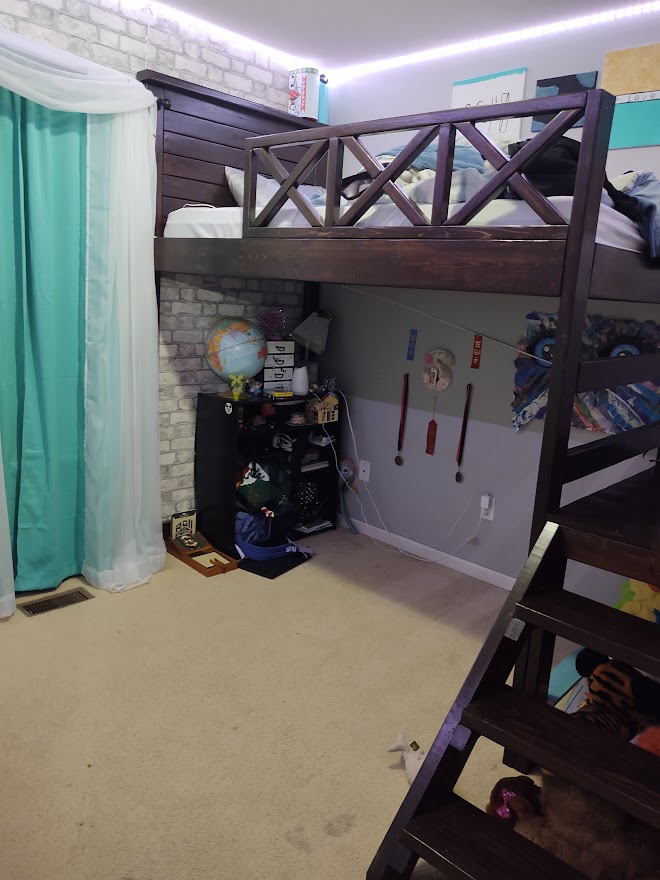
Camp loft bed with a farm house twist

Submitted by Anonymous (not verified) on Tue, 02/14/2023 - 07:58

As soon as I saw the plans for the camp loft bed with stairs, I knew it would be perfect for my daughters room. It was my first furniture build. While it is not perfect, I absolutely love it. The plans were easy to read and customize to fit her room. Don't mind the messy room, she's 13 and this is about as good as it gets lol.

Comments

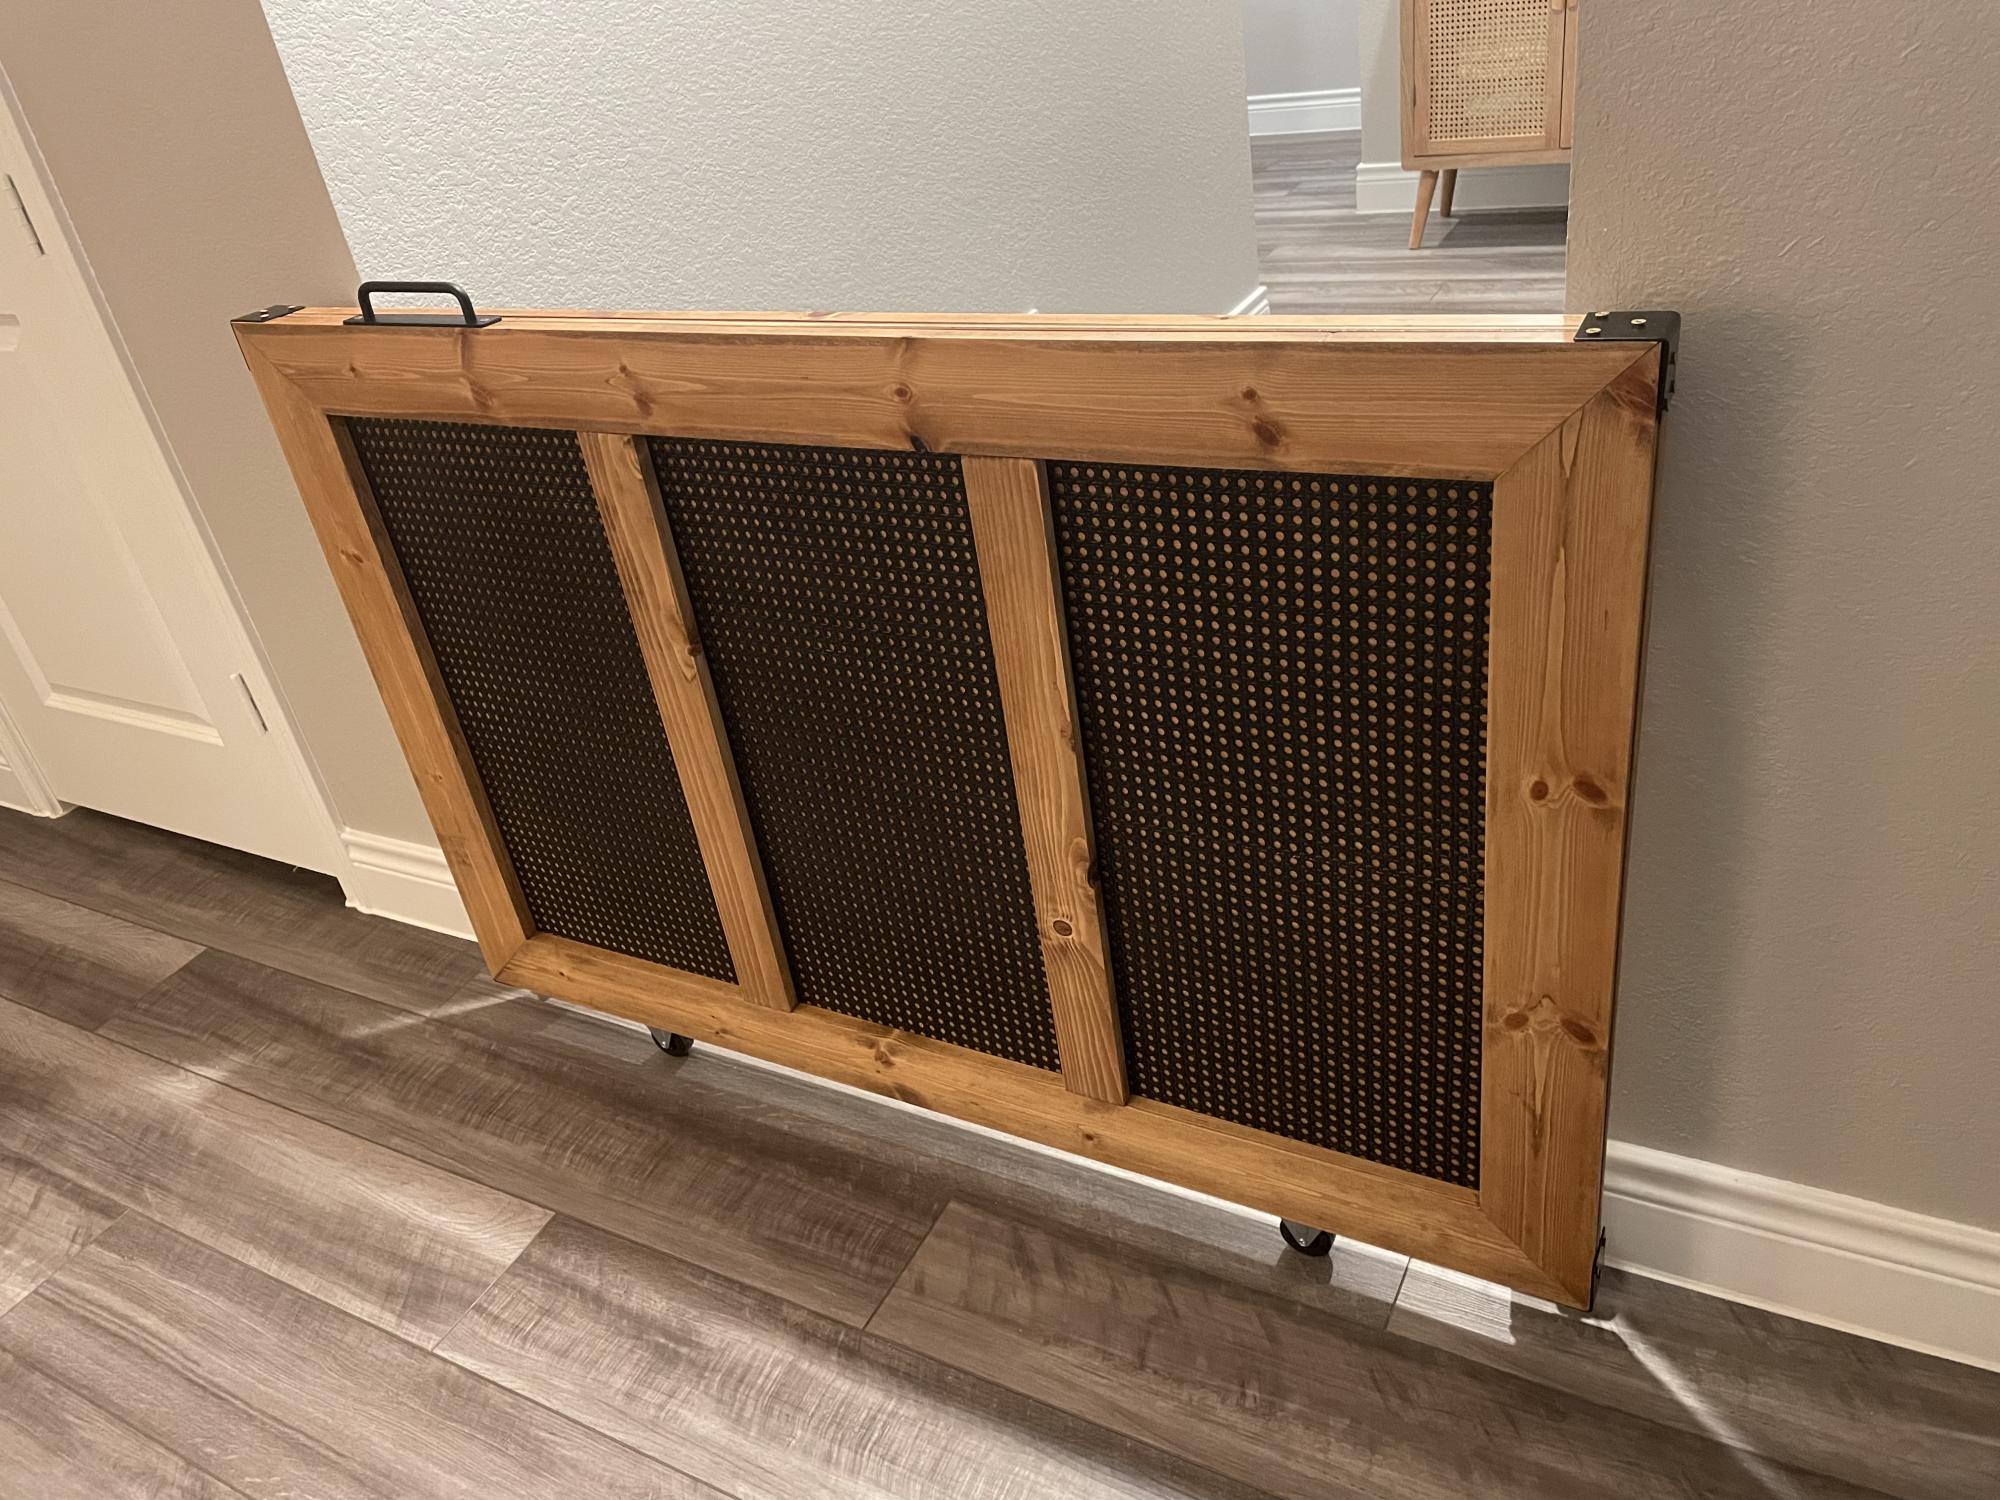
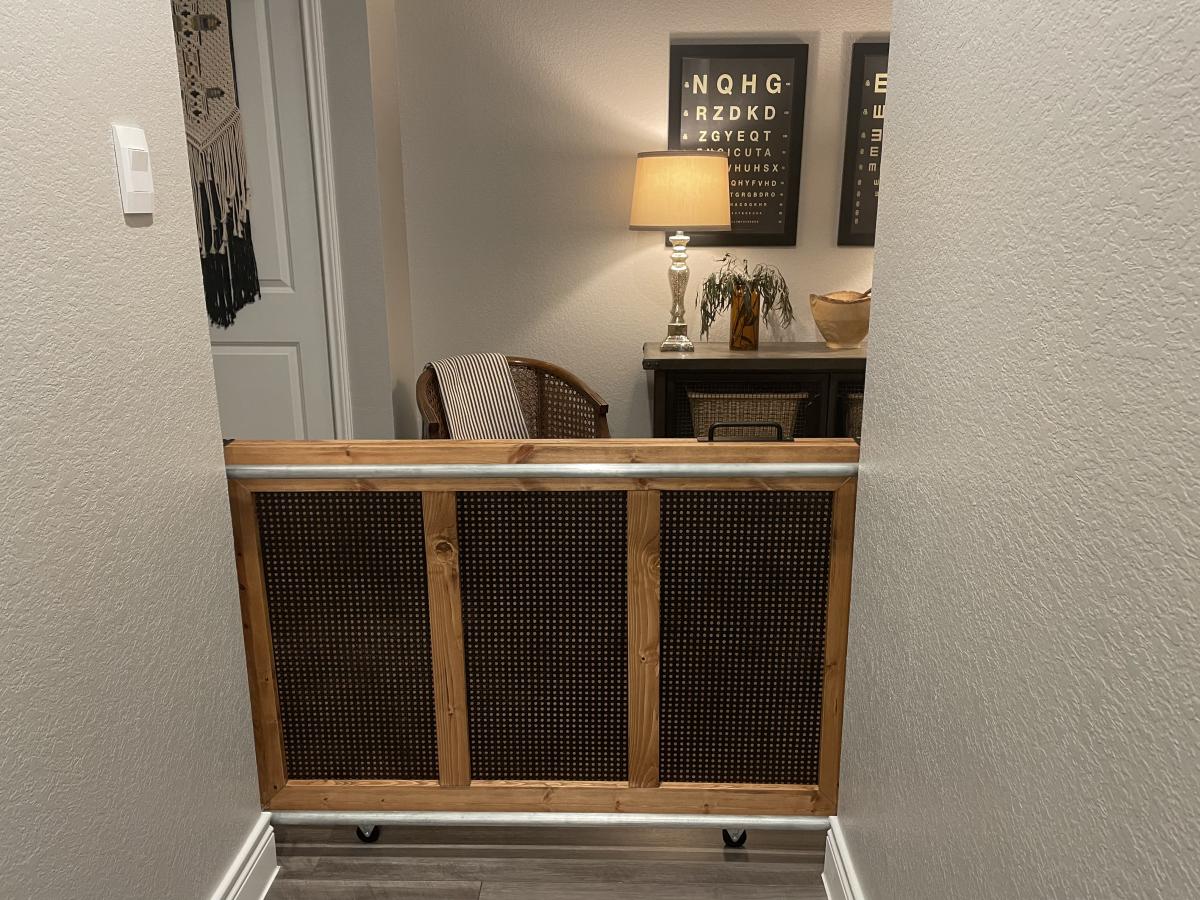
Sliding Pet/Baby Gate

Submitted by Anonymous (not verified) on Mon, 02/27/2023 - 20:13

We desperately needed a gate to keep our pets from accessing the rooms, with carpet, in our new home. We originally thought about building a full barn door but, the security system was in the way and it wouldn’t have allowed the light to pass through to our dark entryway anyway. We definitely wanted to steer away from the “barn door looking” gate we did at our last home and wanted to try something more timeless with the sprayed, black caning. We have a very eclectic style. Very vintage industrial, MCM, with pops of RH glam and a touch of BOHO. Sounds confusing but, I needed this gate to take the pressure off of trends we didn’t quite fit in and be easy to use for my teenager. The gate leads to her bed/bath and the guest rooms. The mechanism is not my design but, it’s brilliant, especially for the industrial element to our home. Took me close to 4 days from start to finish. Lost my Kreg jig in our move and was so thankful to a stranger-neighbor that willingly let me borrow his on the curiosity of what exactly I was building. NGL, it felt pretty good when he said how impressed he was with the build. 💞

Comments

Full Size Storage Bed

My daughter wanted her room redone for her tenth birthday. We decided to go big with Ana's storage bed plans. I had so much fun building this and really learned a lot. It took me three months to find enough spare time to finish it, but it was worth the wait.

Estimated Cost
$200+
Estimated Time Investment
Week Long Project (20 Hours or More)
Finish Used
Dutch Boy Refresh paint in Mocha White over no VOC primer. I rolled it on with a smooth roller.
Recommended Skill Level
Beginner

Comments

Misty Tillema

Mon, 11/07/2011 - 19:24

You did a really great job building the storage bed. I am in the process of building this same bed for my teenage son, only I'm not building the towers. Finding enough time to actually get a project finished is nearly impossible when you only have a few hours here and there! Your daughter will love all the extra storage space as she gets older.

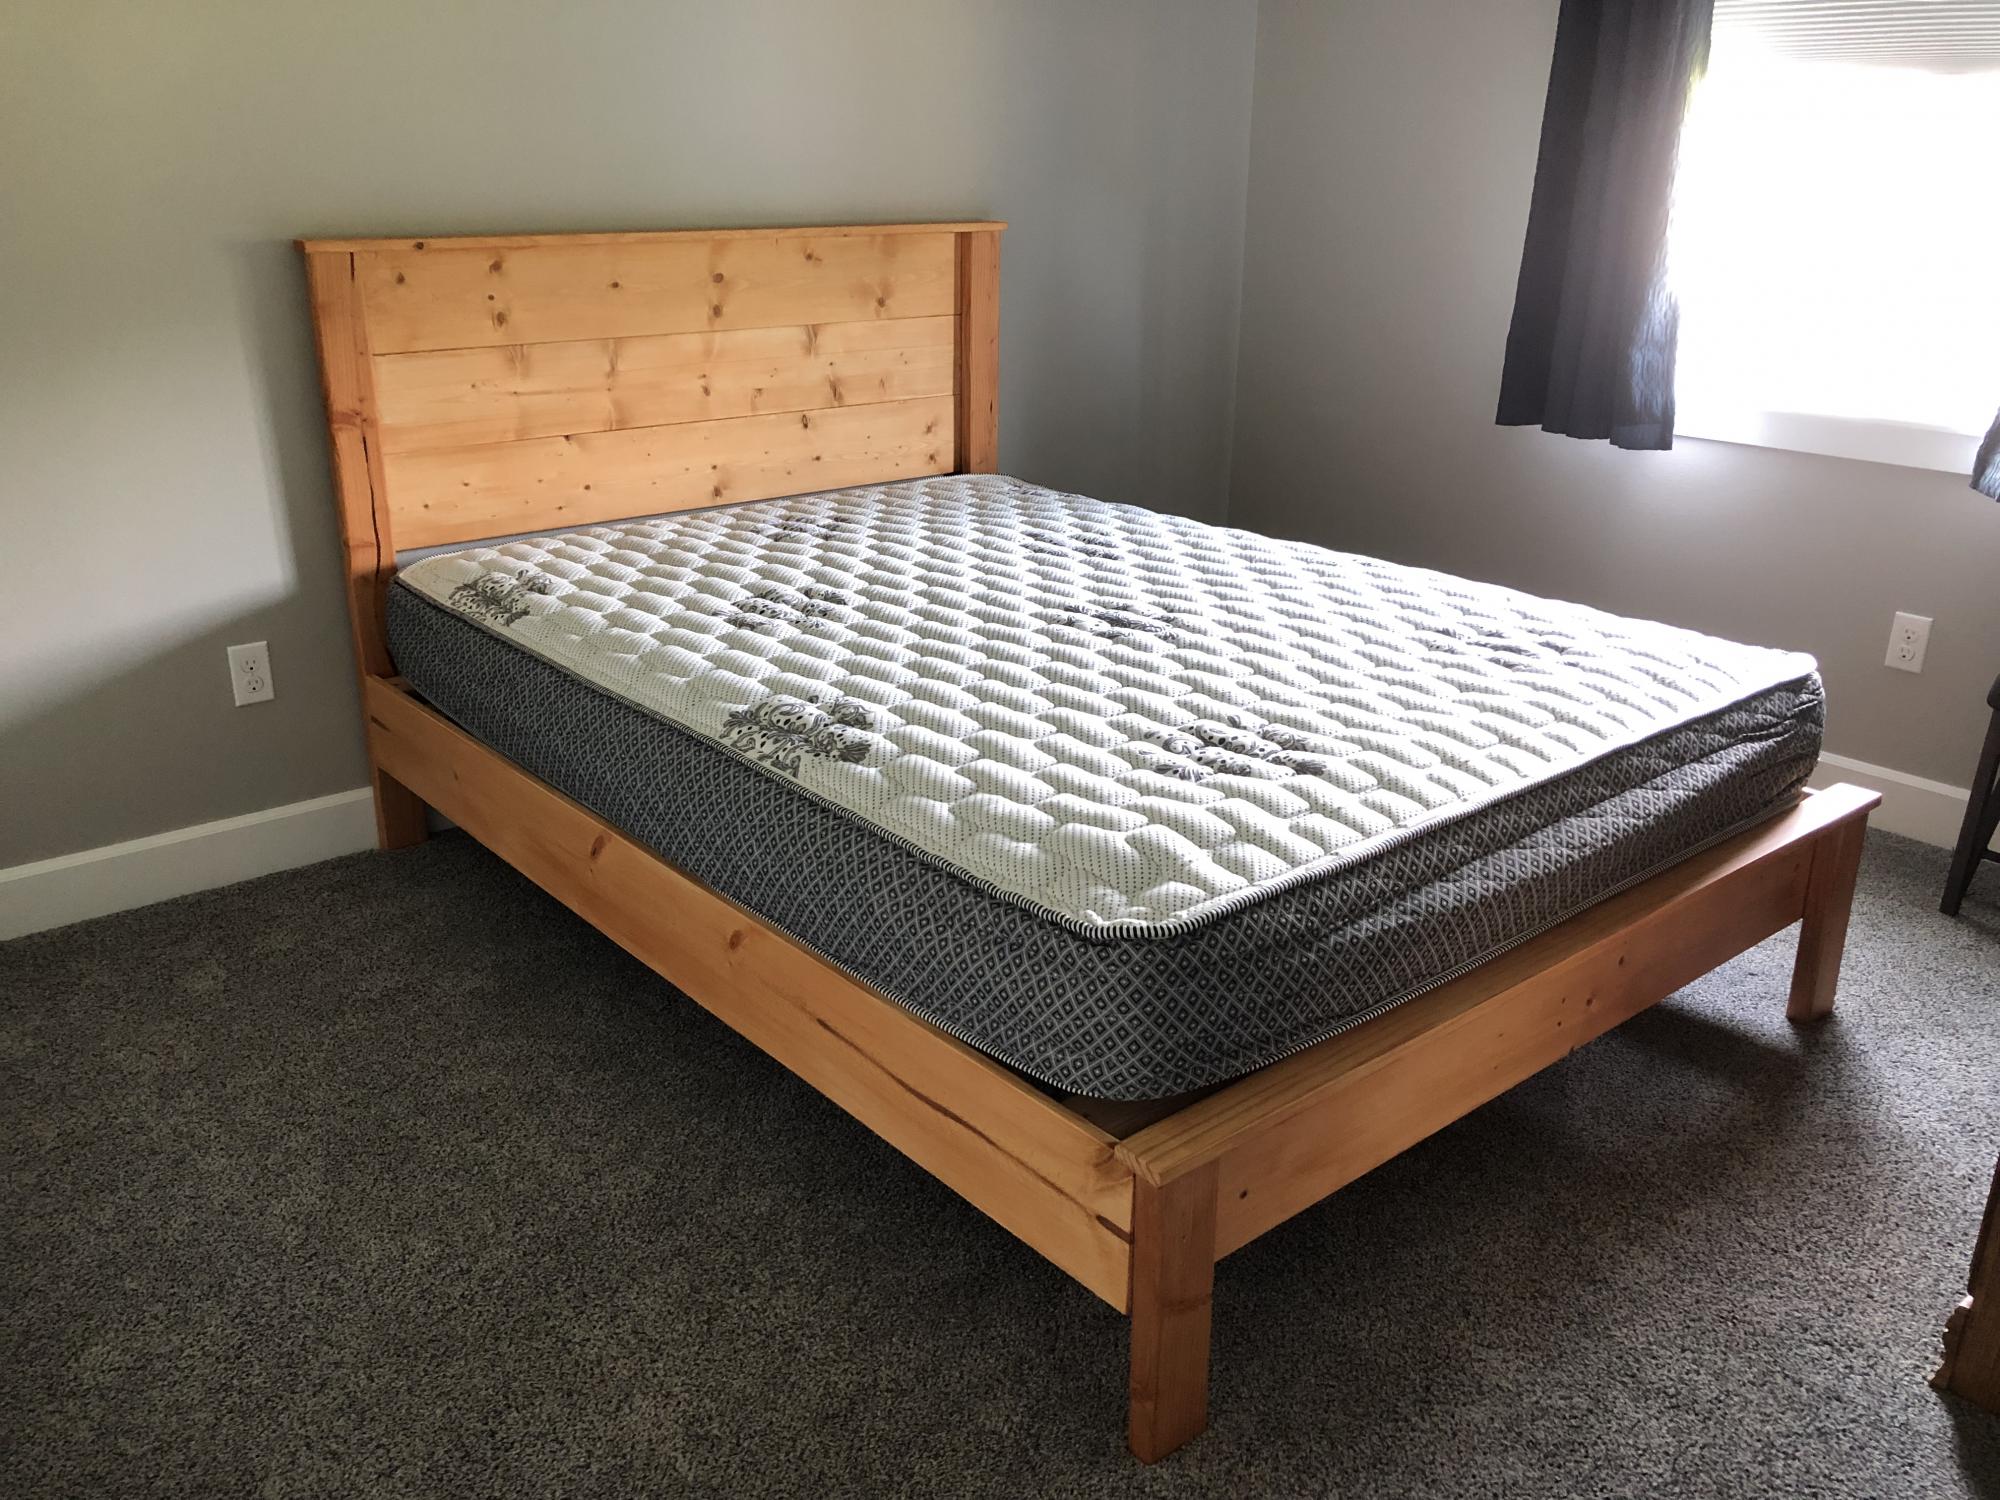
My wife built a bed.

Submitted by AKMan279 on Sun, 06/02/2019 - 20:45

We looked for a simple plan for a bed and found this one on Ana’s site.  Easy to build in a weekend.

Estimated Cost
$140 with all lumber and stain.
Estimated Time Investment
Weekend Project (10-20 Hours)
Finish Used
Poly stain
Recommended Skill Level
Beginner

Comments