Community Brag Posts
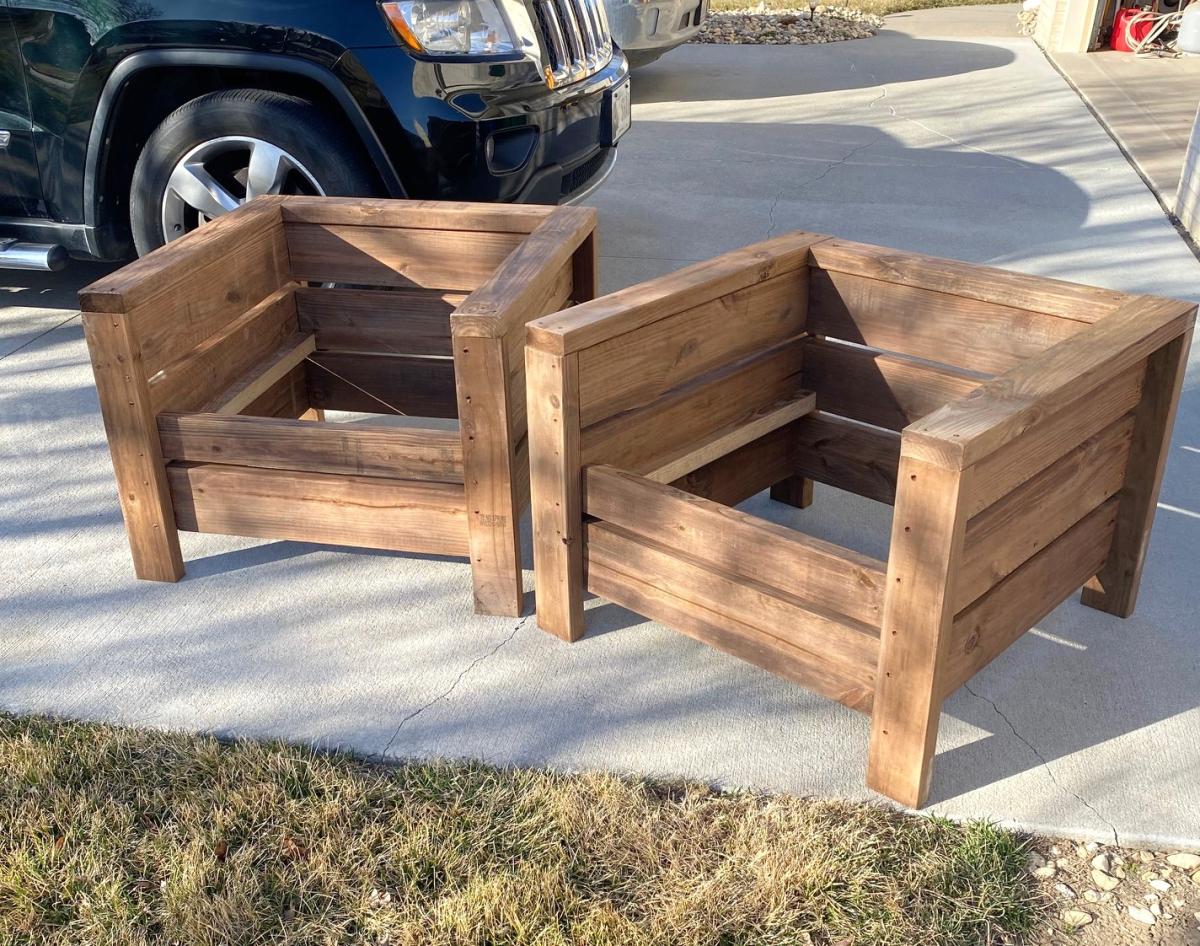
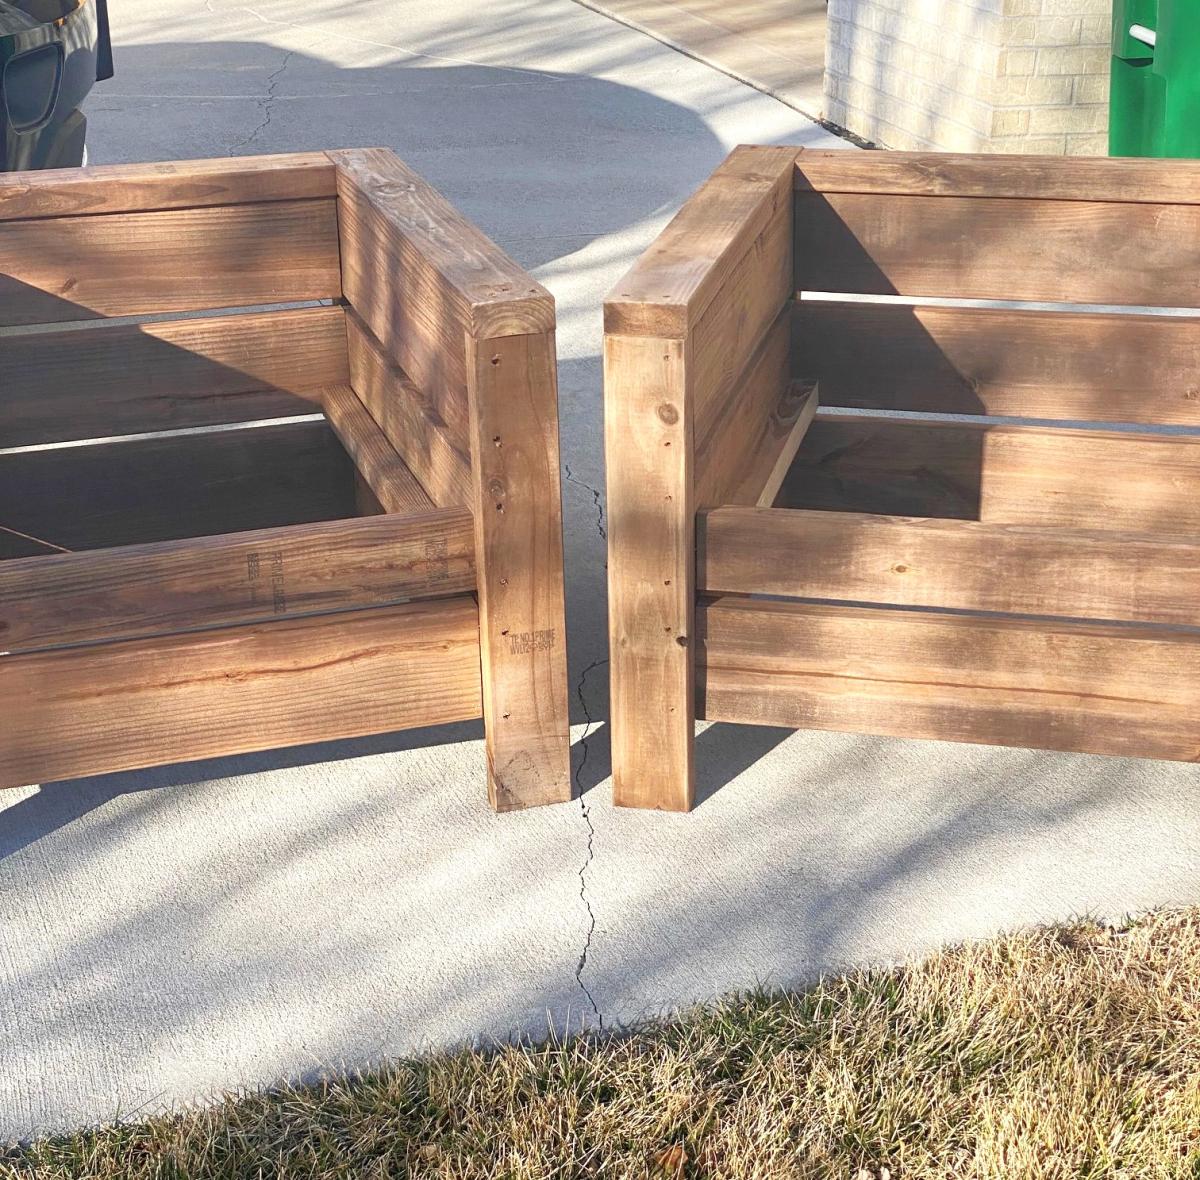
Rustic Outdoor Chairs

Seen these plans a couple years ago and finally have gotten around to making a set. This was a fun and really easy to follow set of instructions and I think they turned out really nice.
Jeff, with LaBrie Family Woodworking LLC
Built from Plan(s)
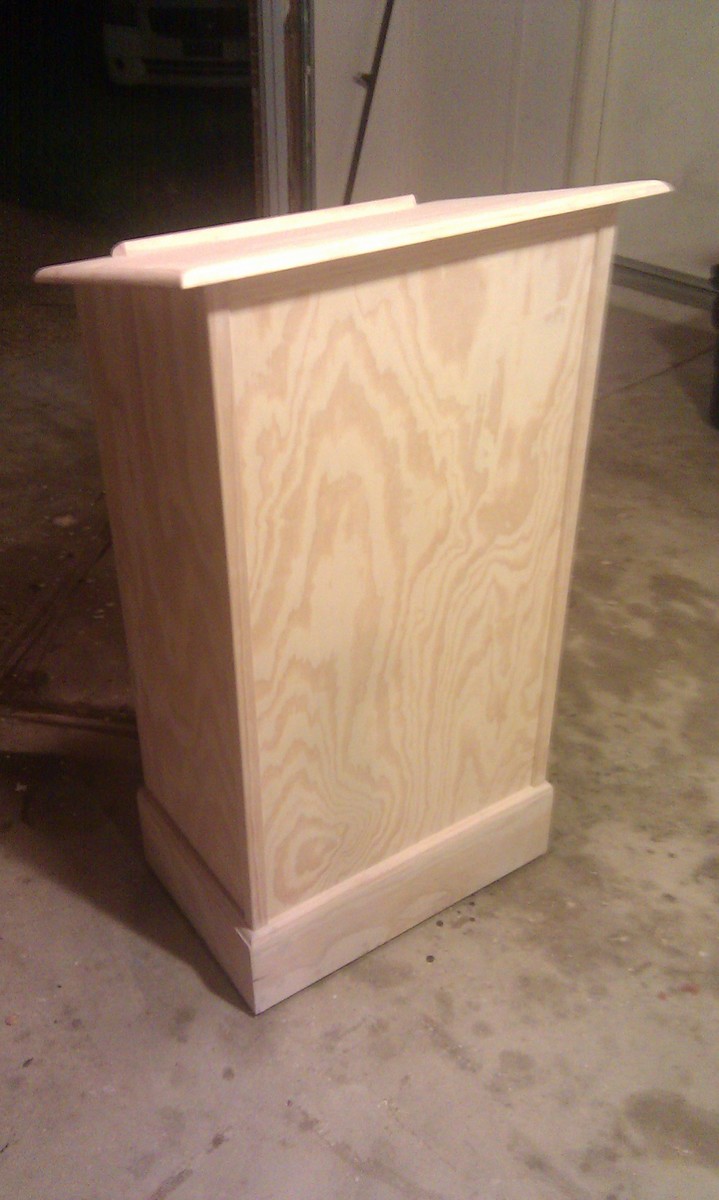
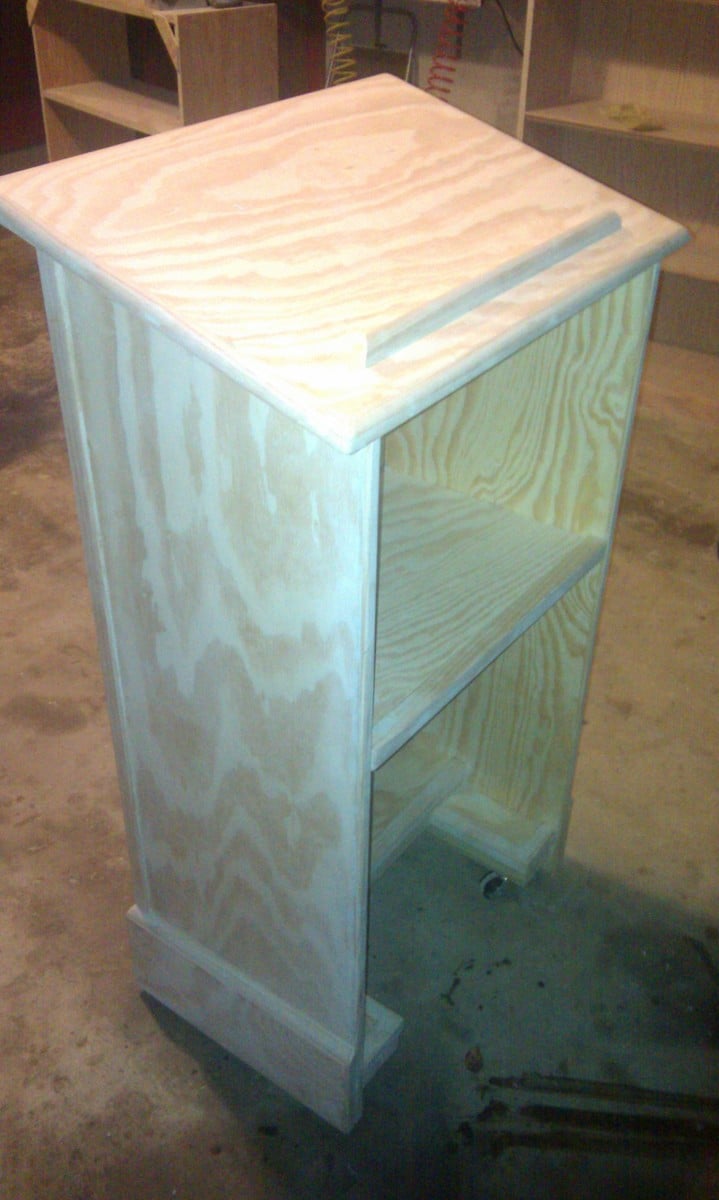
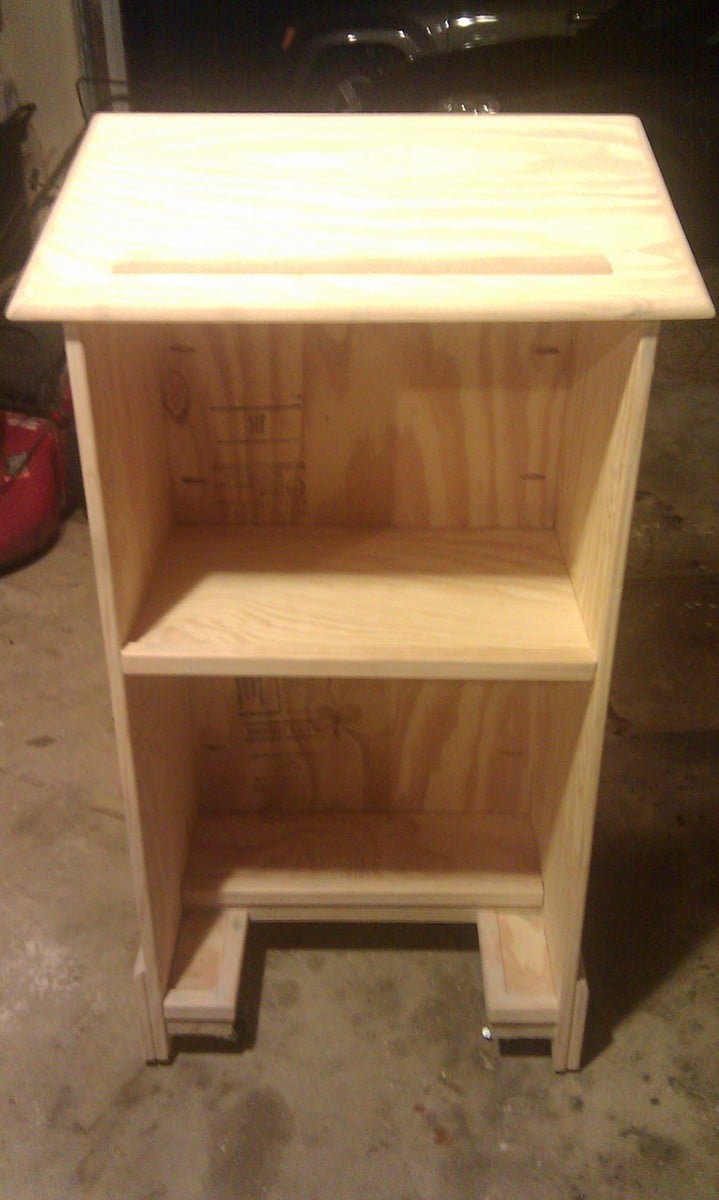
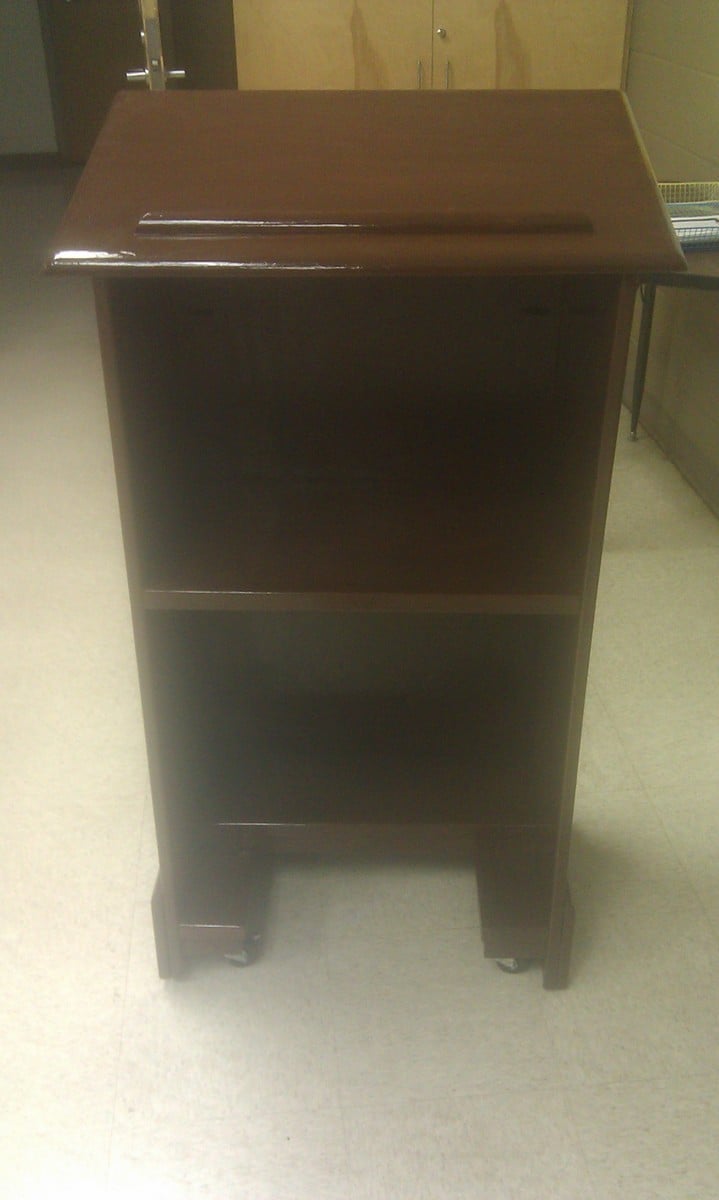
Podium for My Wife's Classroom
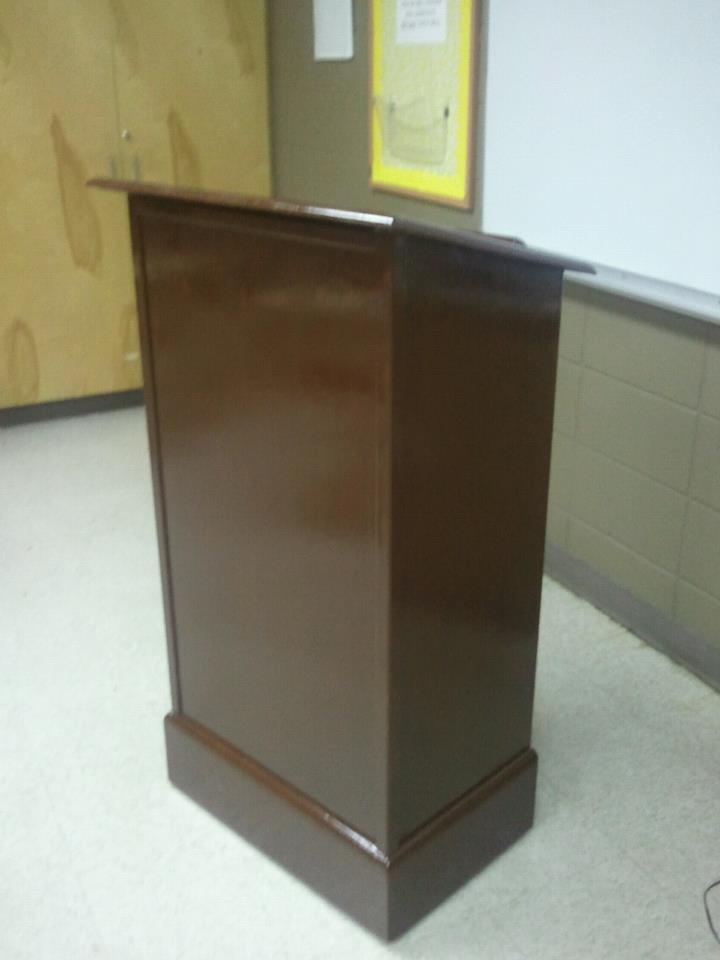
This is my first try at building furniture. I've built larger things in the past like decks and a fort for my nephews, but never furniture. Even though I used the plans to build the main box, I did change up the bottom and added some new stuff. I added wheels to the bottom my wife could easily move it around her classroom. I didn't want to put a square base on it because I thought it might hit her ankles when she was standing close to it. So I sort-of notched it out to give an opening for her feet and I used some scraps to create a short shelf at the bottom. I also added more trim that the plans call for. I cut strips of the pine plywood for the base molding and topped it with quarter round. I used corner trim for the front corners, the self inside and the bottom notched shelf. I also used screen trim for the back of it. I think it came out nice and I've very pleased with it. I used 2 coats of Minwax PolyShades American Chestnut on it.
Built from Plan(s)
Estimated Time Investment
Weekend Project (10-20 Hours)
Finish Used
Minwax PolyShades American Chestnut
Recommended Skill Level
Beginner
Cornhole Boards
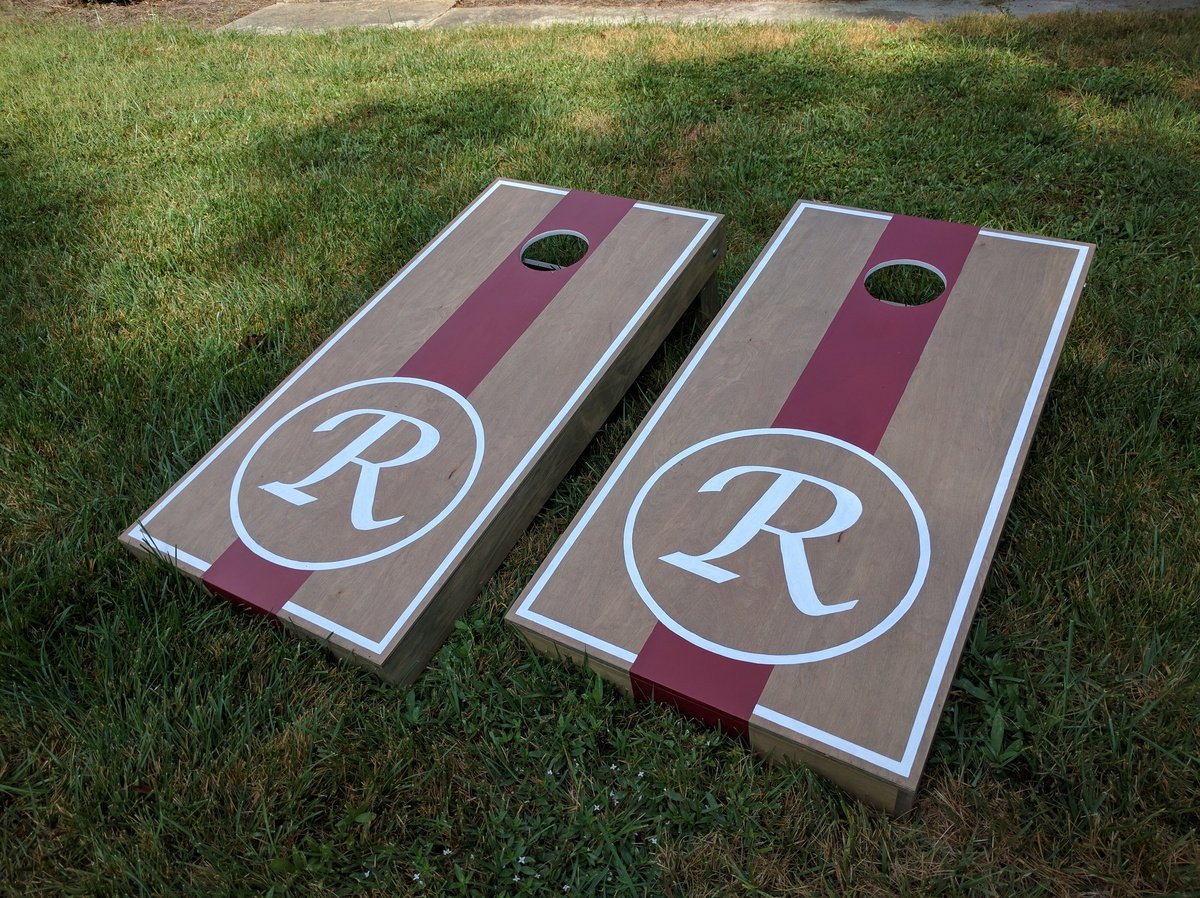
Cornhole boards for friends and family :) Used 1x4s for framing and legs, 1/2" ply for top.
"R" set: Birch plywood tops w/ (2) coats of Miniwax Weathered Oak oil stain. Red stripe is Behr 'Cherry Cola.' (3) coats of Polycrylic finish.
"AW" set: Regular plywood tops w/ (1) coat of Miniwax Special Walnut oil stain & Glidden 'Clemson Orange' stripe. (3) coats of Polycrylic finish.

Built from Plan(s)
Estimated Cost
$100/set (2 boards)
Estimated Time Investment
Weekend Project (10-20 Hours)
Finish Used
(see description)
Recommended Skill Level
Intermediate
Comments

Sat, 09/24/2016 - 10:16
Gorgeous! These would make
Gorgeous! These would make such a fabulous wedding or house warming gift!
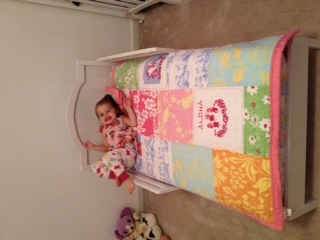
PB Inspired Toddler Bed
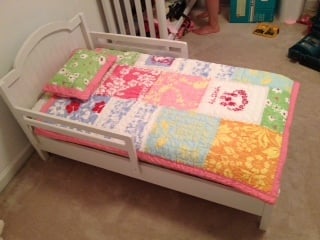
I loved this bed from PB but couldn't see spending the $400 that they wanted for this bed that the little one will only be in a shortwhile. This was a fairly simple build with the finishing taking the longest. A little more skill with the jigsaw would have made the curves flow better but all in all it turned out very nice. Looking forward to more fun things to build!

Built from Plan(s)
Estimated Cost
40$
Estimated Time Investment
Day Project (6-9 Hours)
Finish Used
Used Rustoleum spray paint with 3 coats of gloss minwax polycrylic.
Recommended Skill Level
Beginner
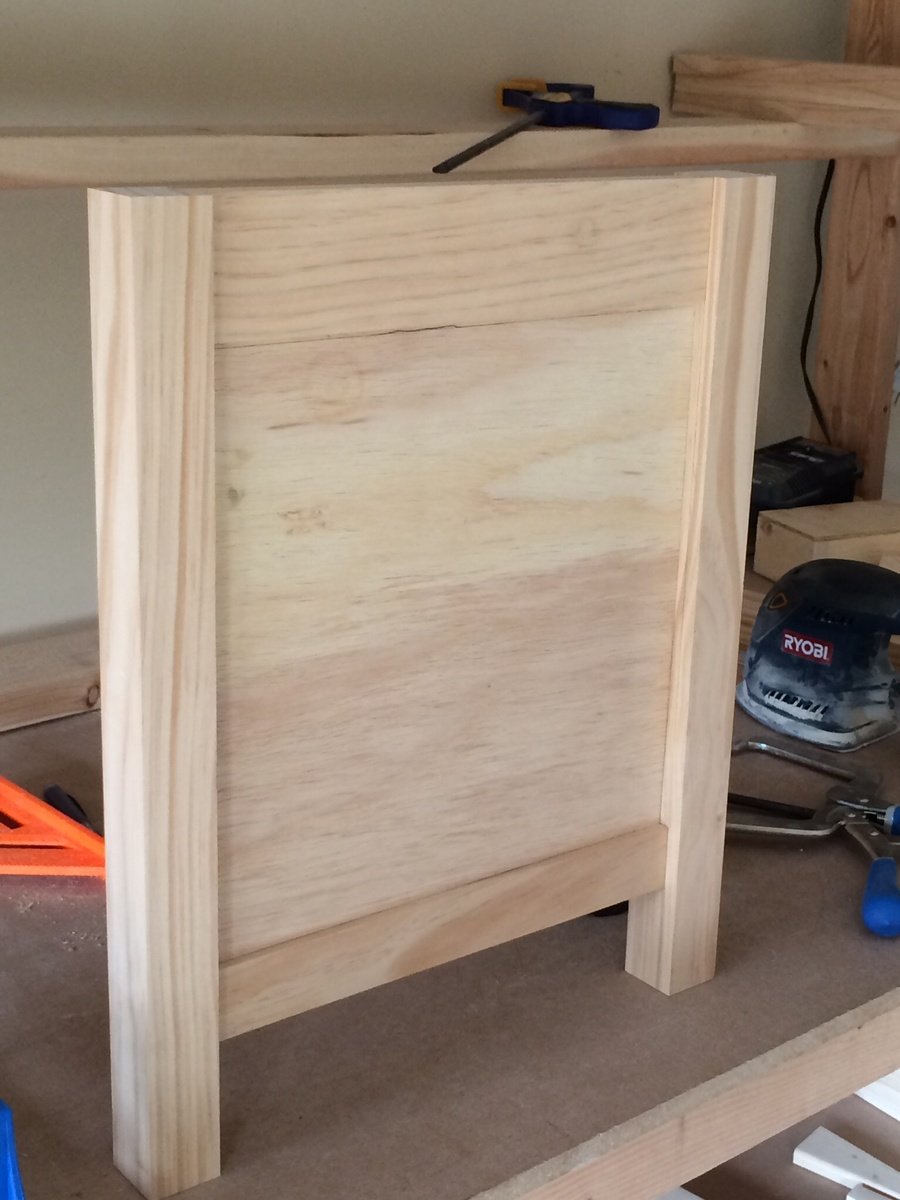
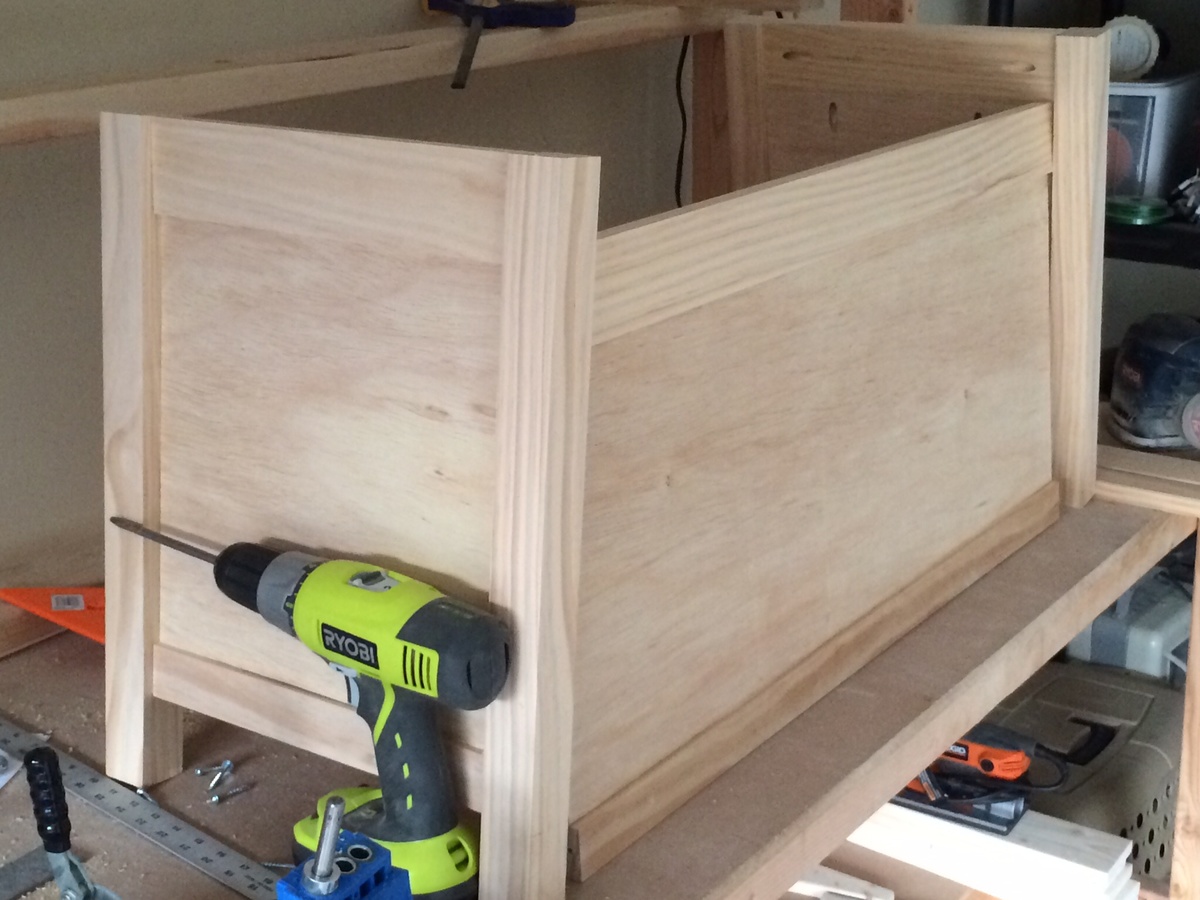
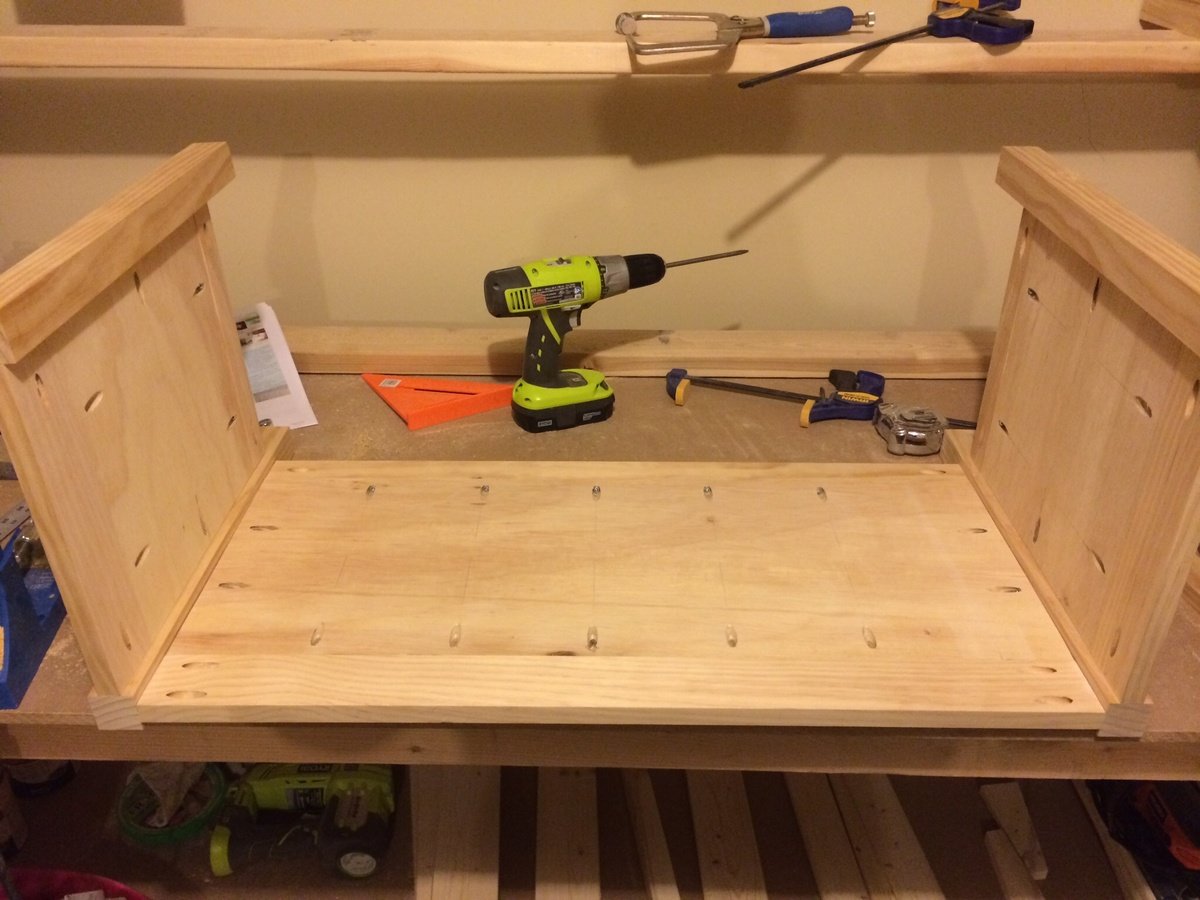
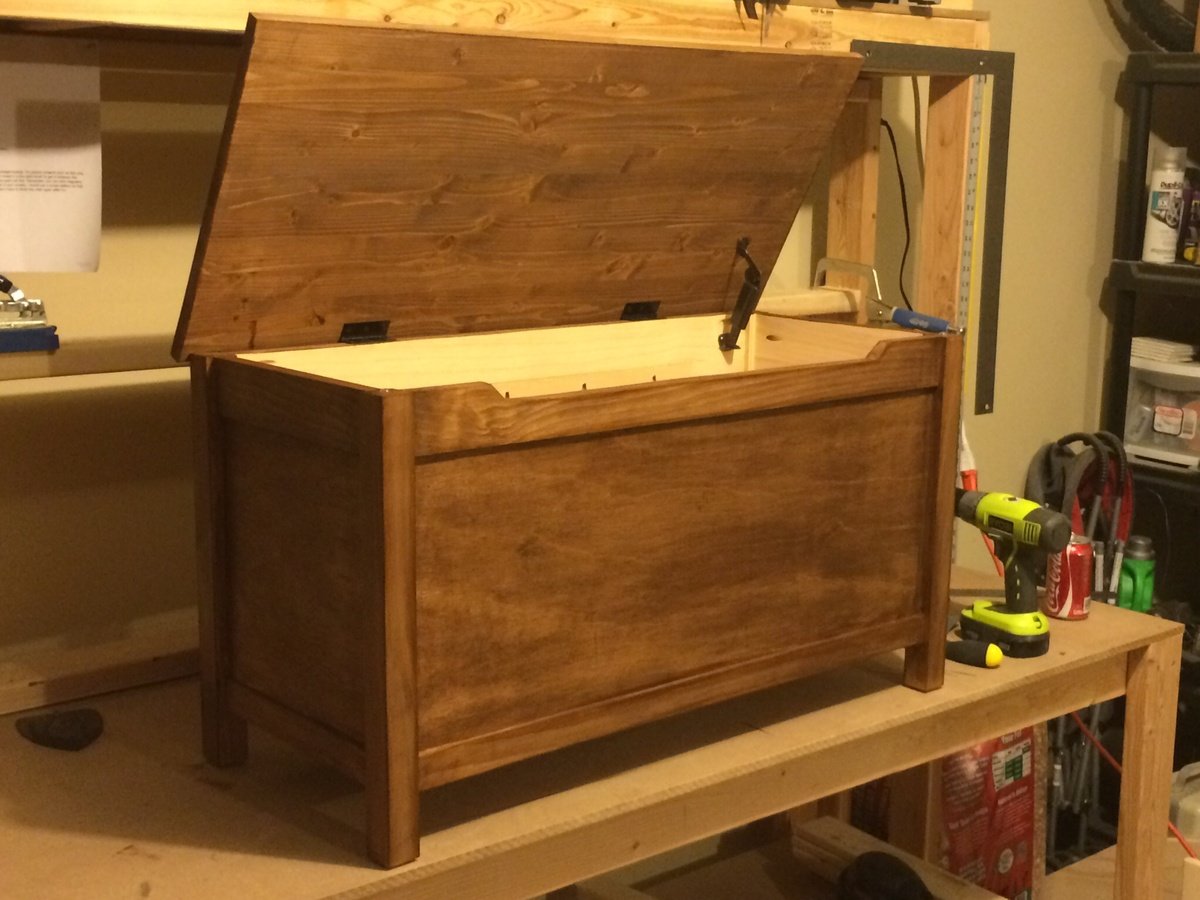
Simple toy box
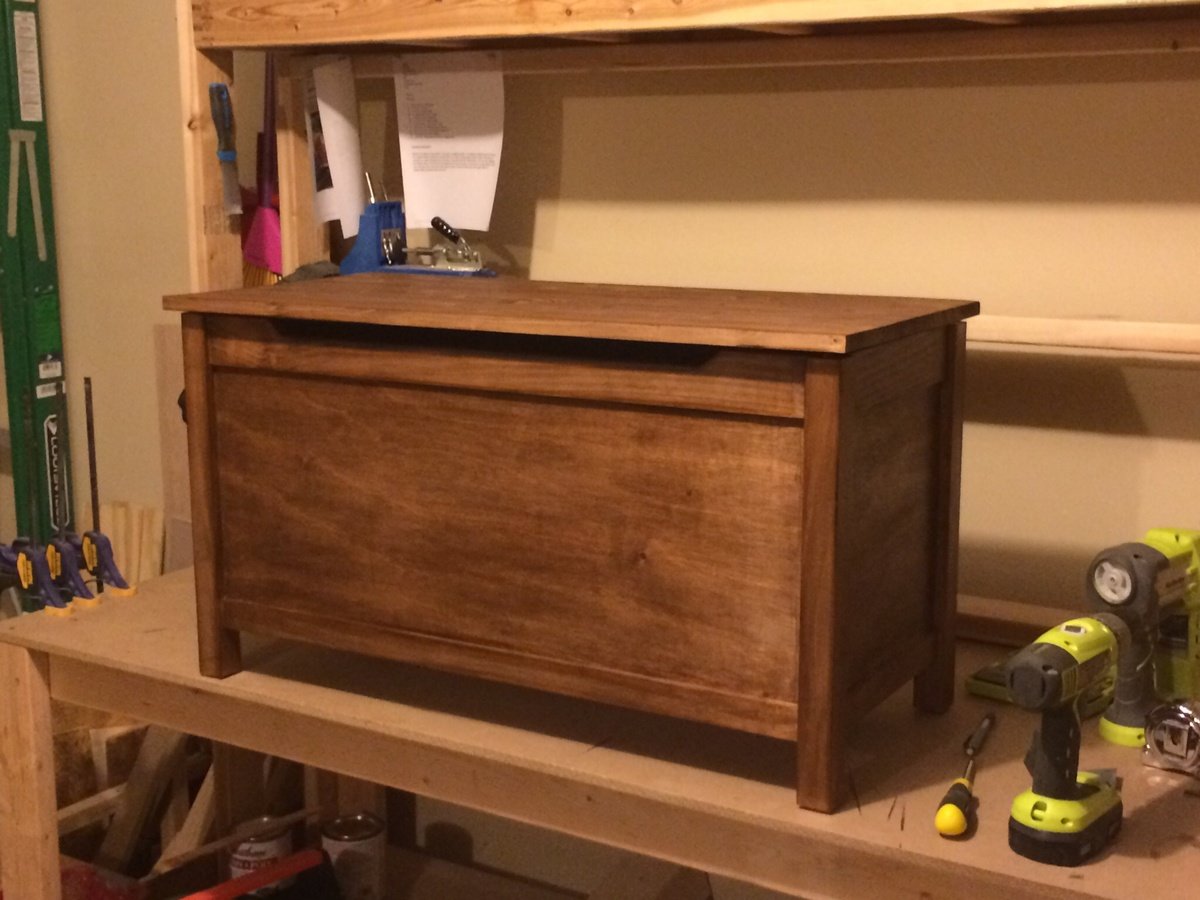
I followed the directions other than the hinges in the plans. Those hinges where $25 a piece so I went with a basic hinge and added the soft close attachment. Works just a as well! This was a mother day present and it turned out so nice I hated to give it up.

Built from Plan(s)
Estimated Cost
$100
Estimated Time Investment
Day Project (6-9 Hours)
Finish Used
I used a dark stain and sanded with 2000 grit sandpaper to smooth it out
Recommended Skill Level
Beginner
Comments
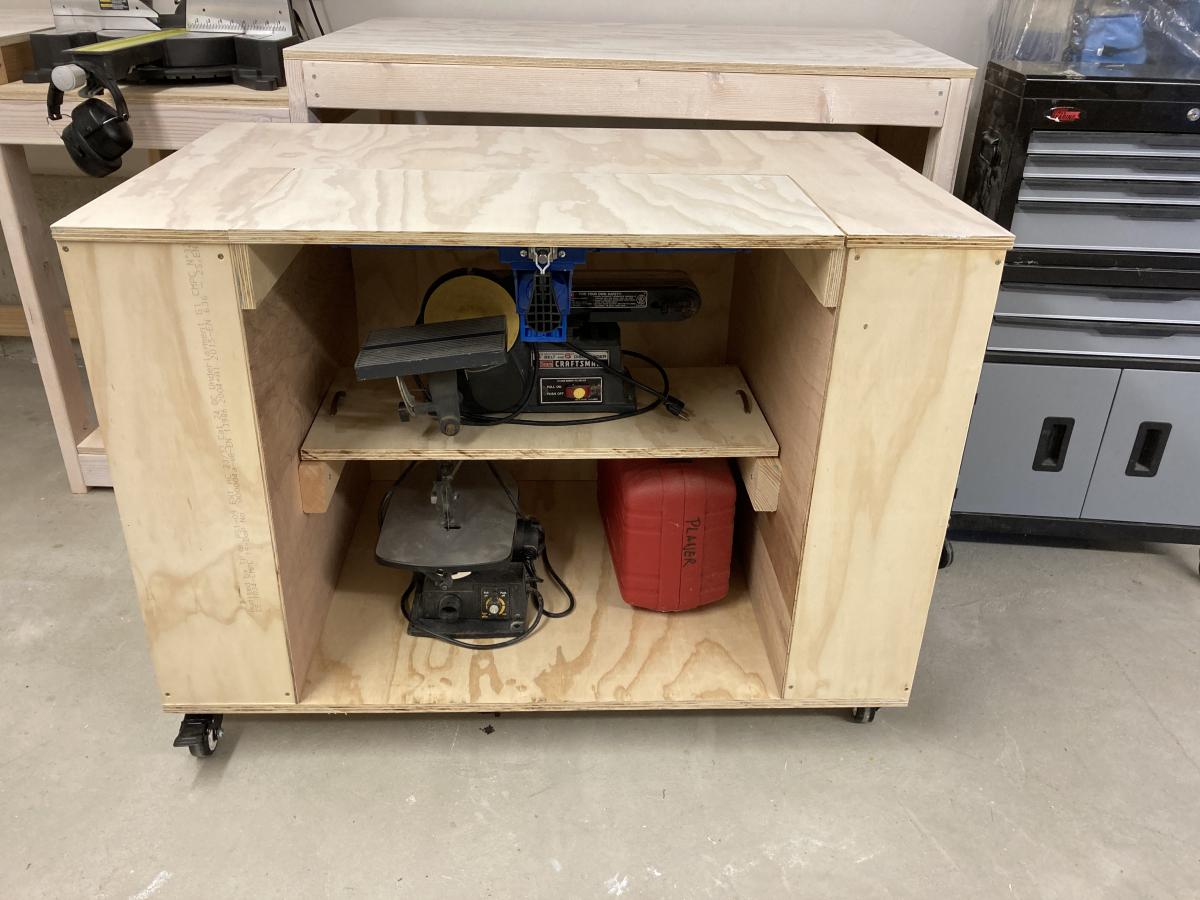
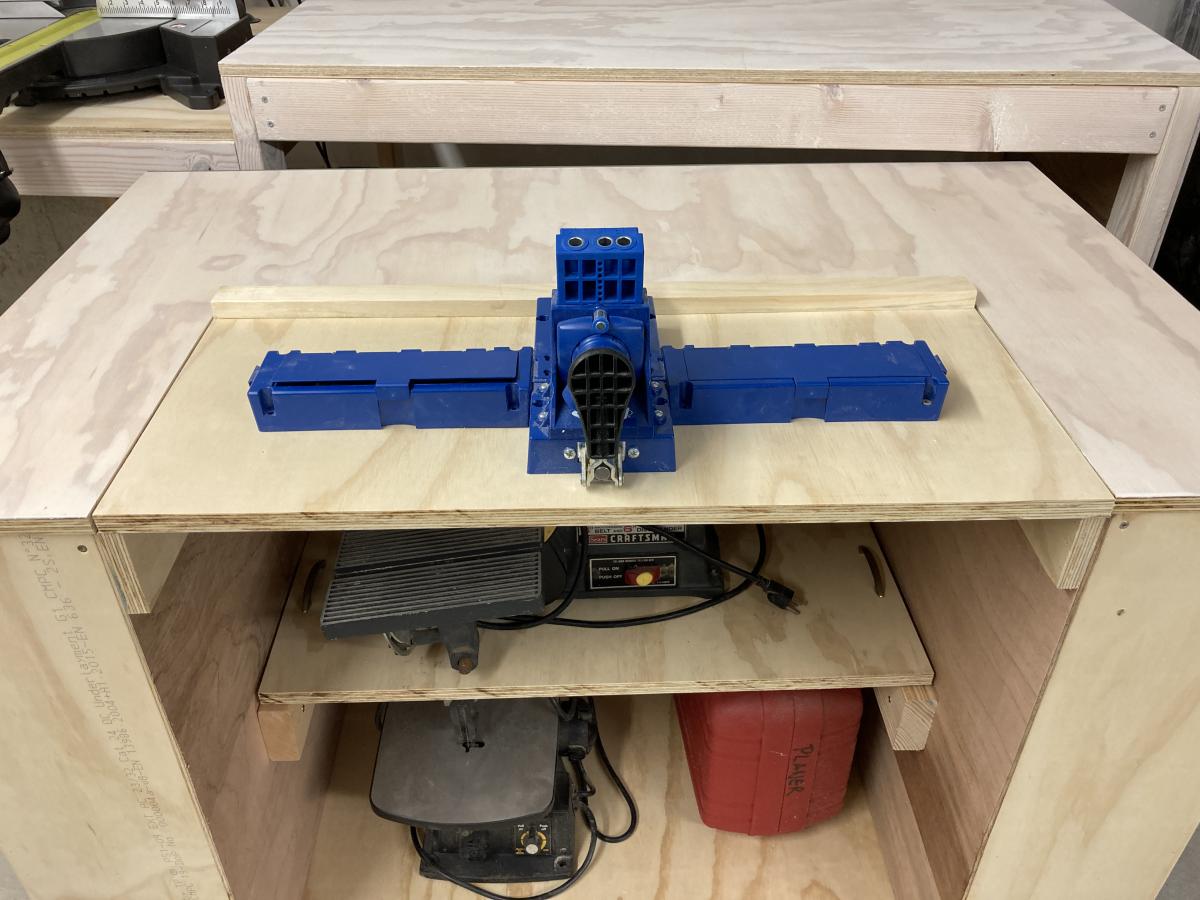
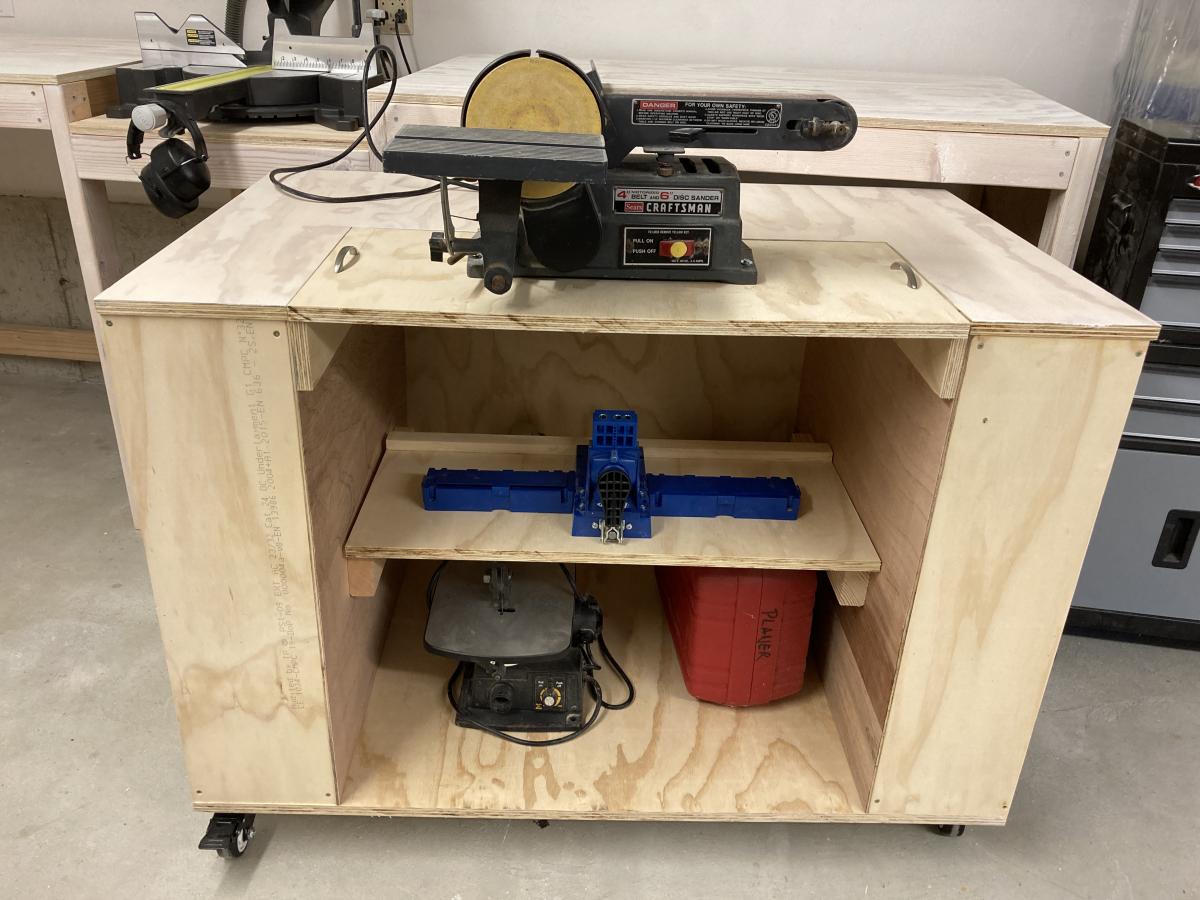
Ultimate Work Bench using Ana's plans
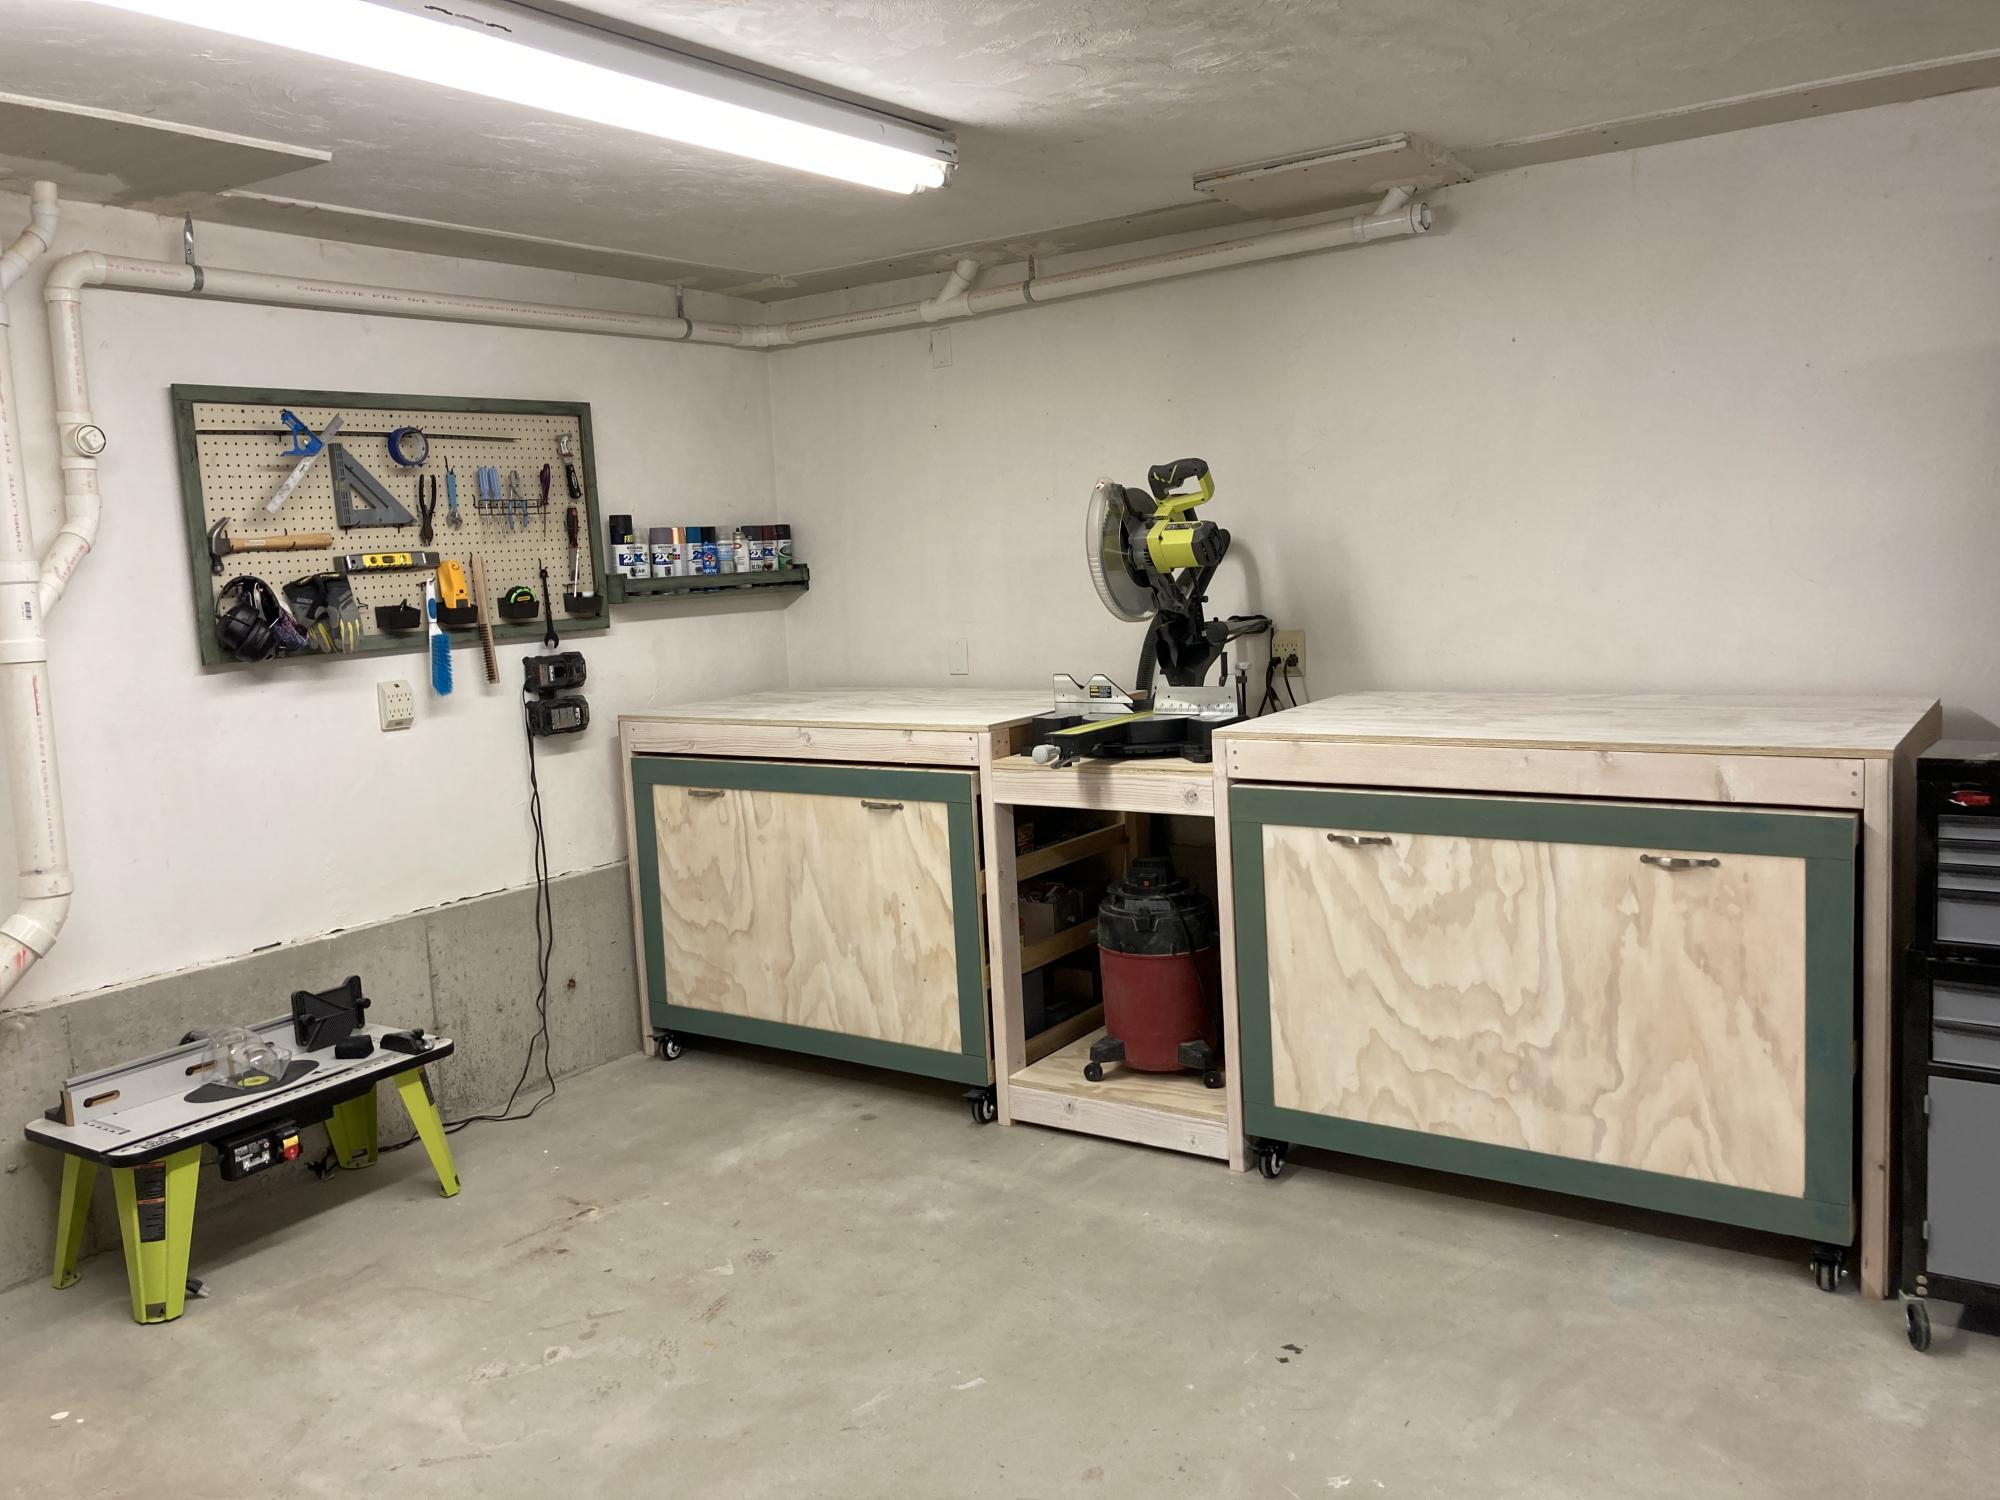
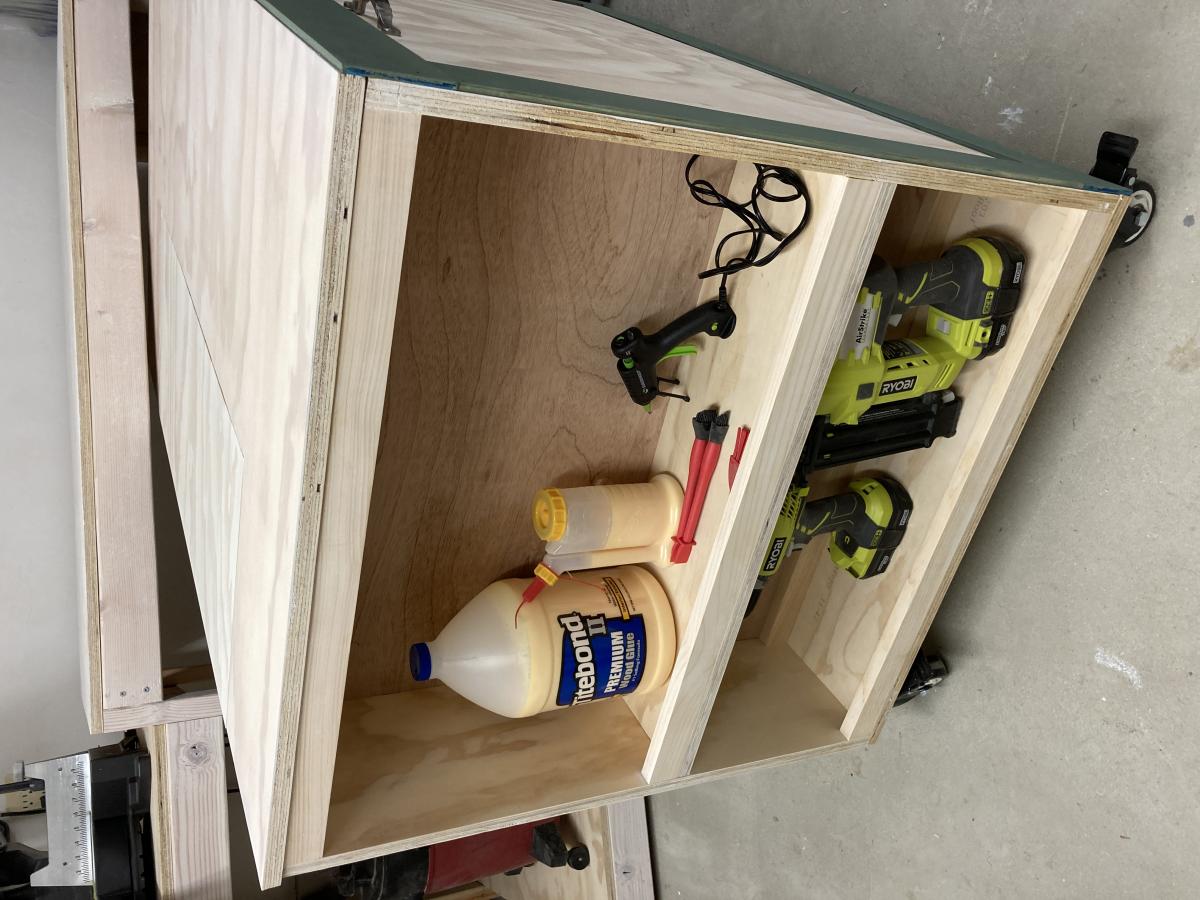
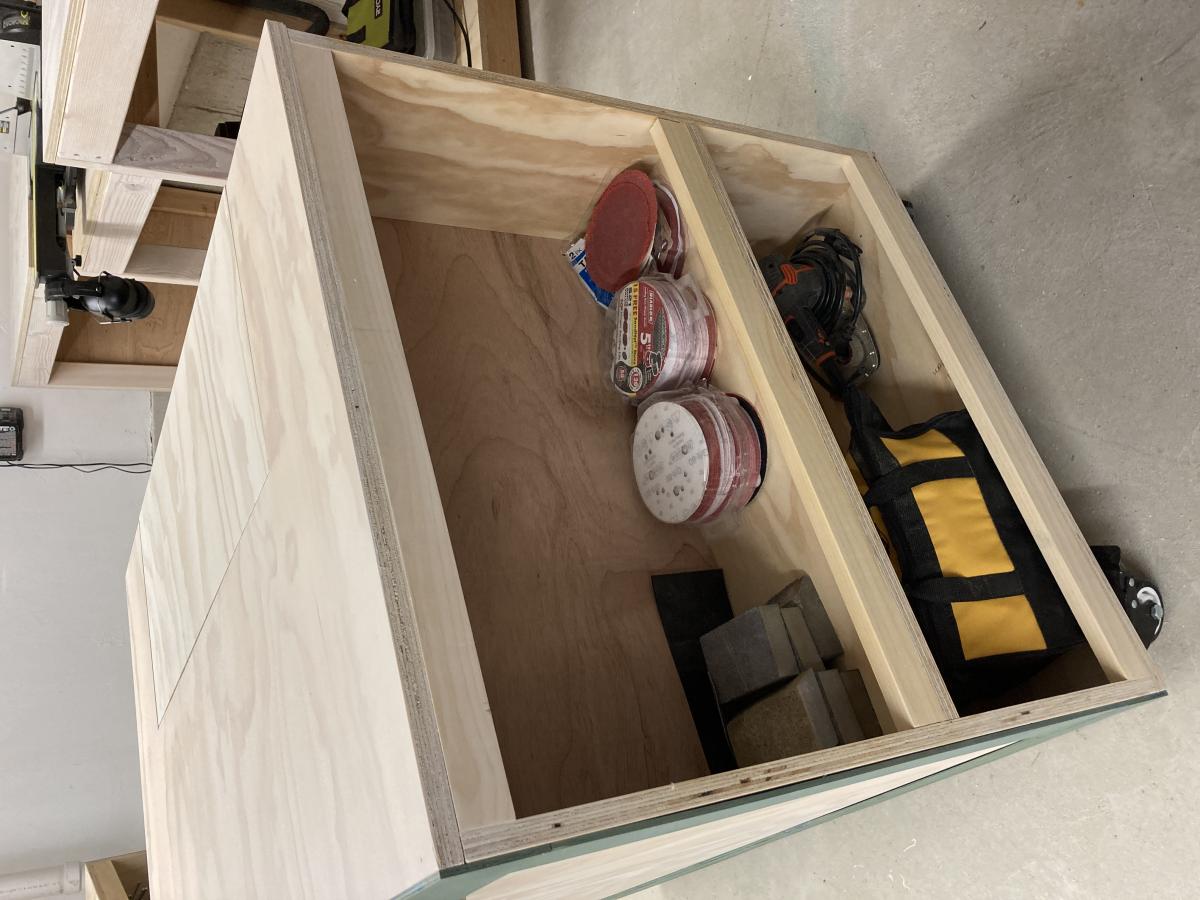
When I first saw Ana's Ultimate Work Bench I was blown away. I *had* to make this. I love how neat the garage looks when everything is put away.
I had to make a few extra cuts in order to allow room for my table saw fence, but other than that the only thing I did differently was to pretty it up using a white gel wood stain that I sealed with finishing paste. I also added trim using the leftover 1/4 inch plywood.
Thank you for being such an inspiration, Ana. I love your plans!
Built from Plan(s)
Estimated Cost
$375
Estimated Time Investment
Week Long Project (20 Hours or More)
Recommended Skill Level
Beginner
Side Tables
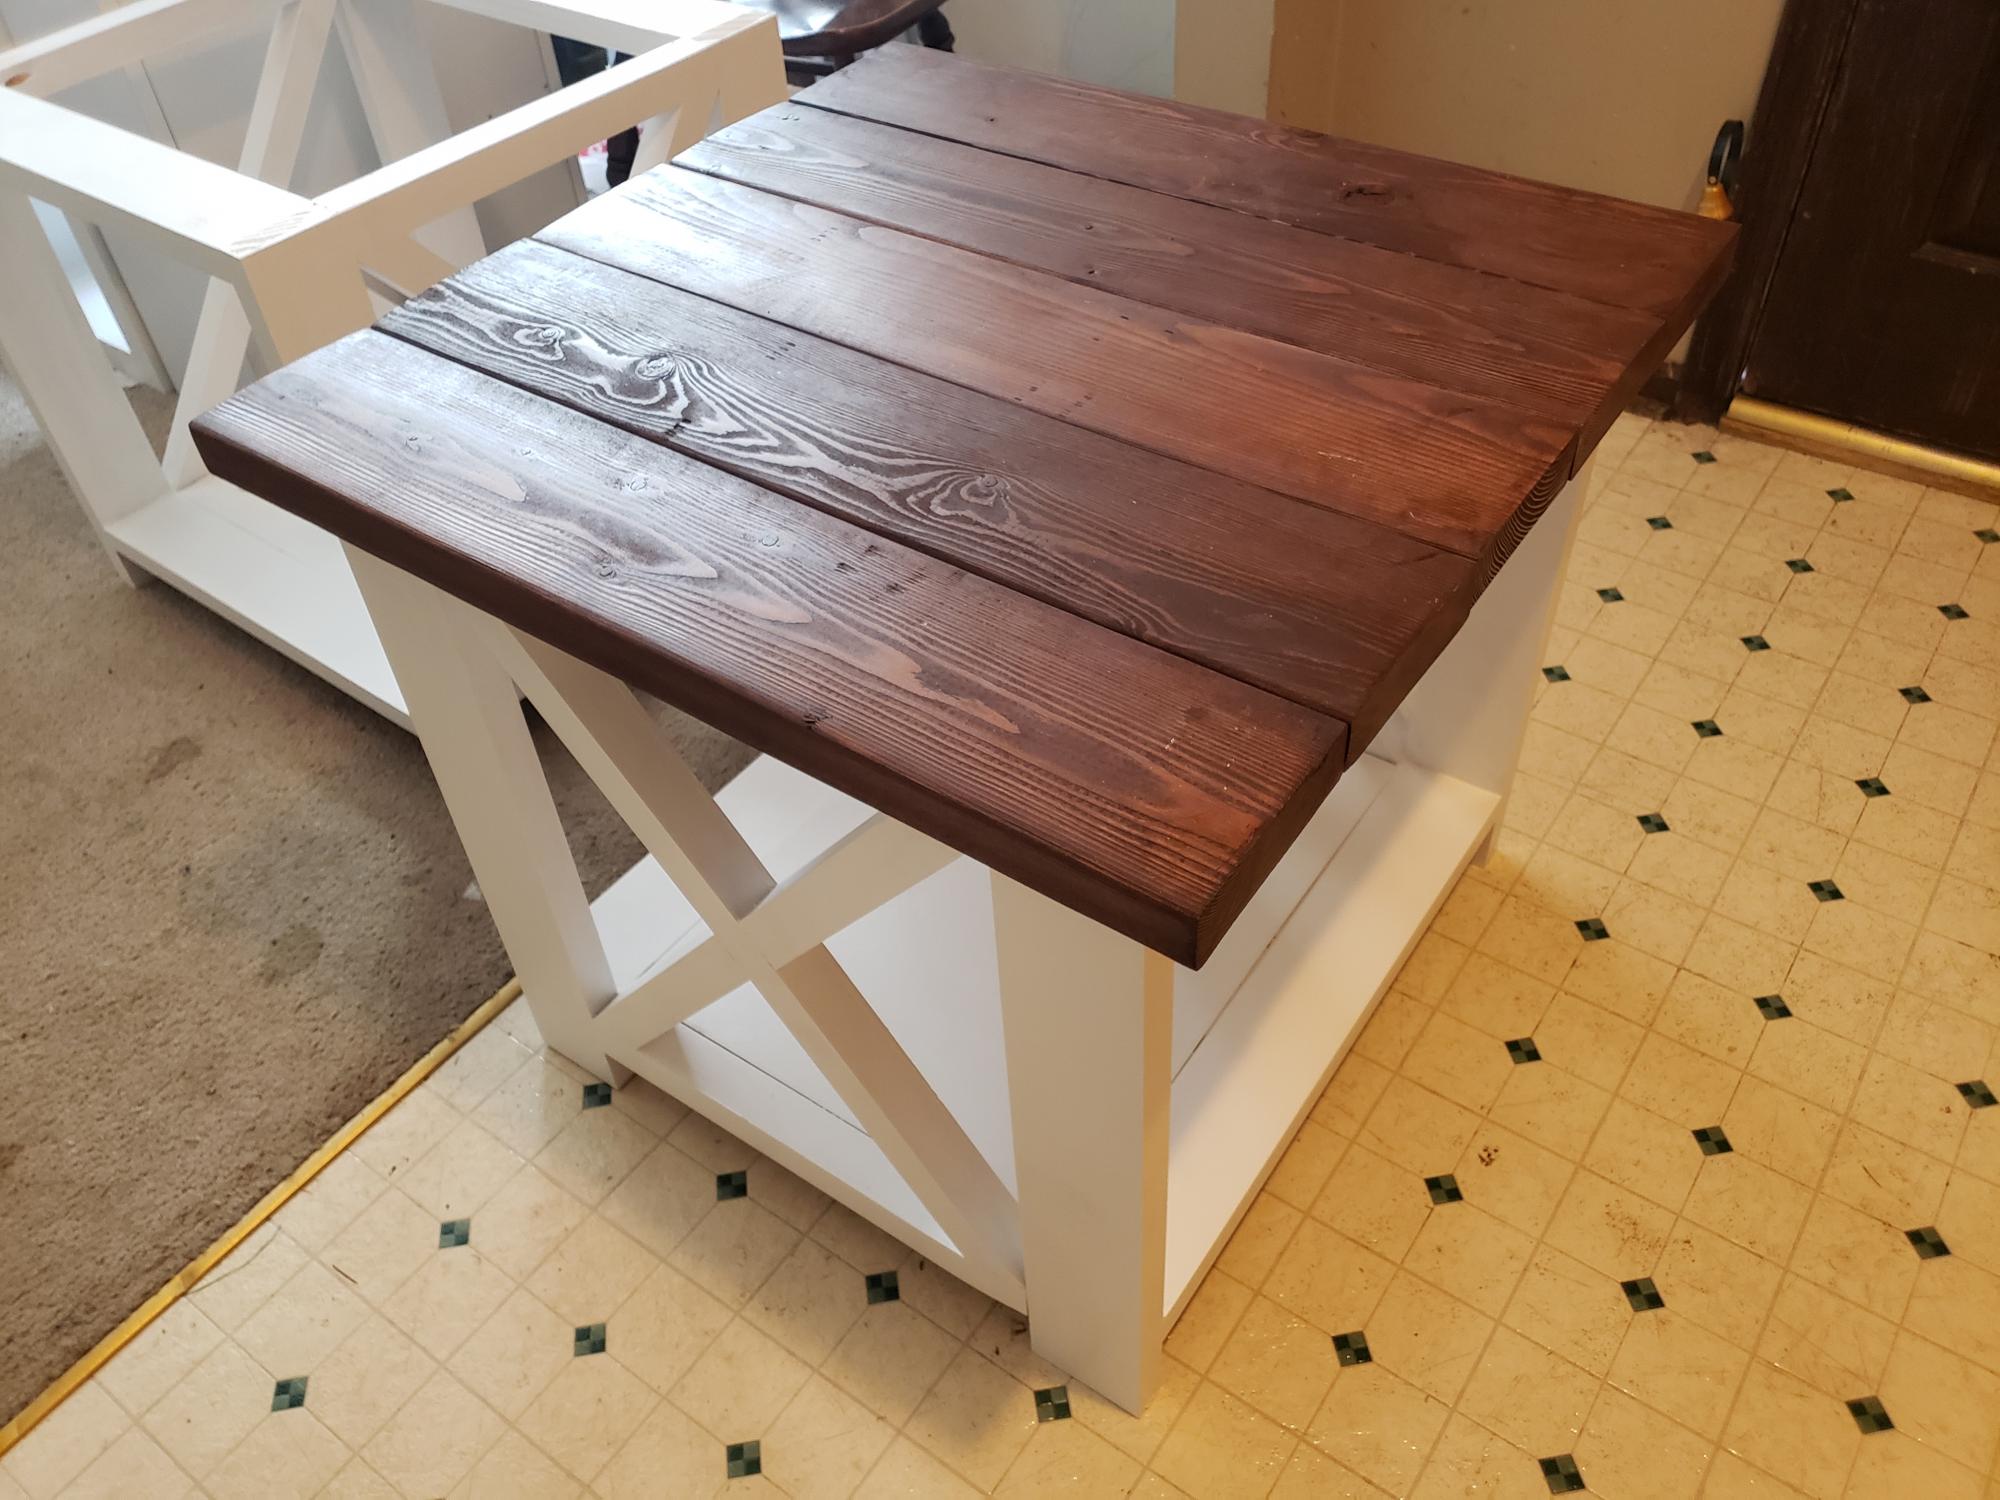
My wife and I made 2 of these for our living room. Plenty of mistakes, but we love them. Hardest part was the X.
Built from Plan(s)
Finish Used
White paint and dark gel stain
Comments
Love our new greenhouse!
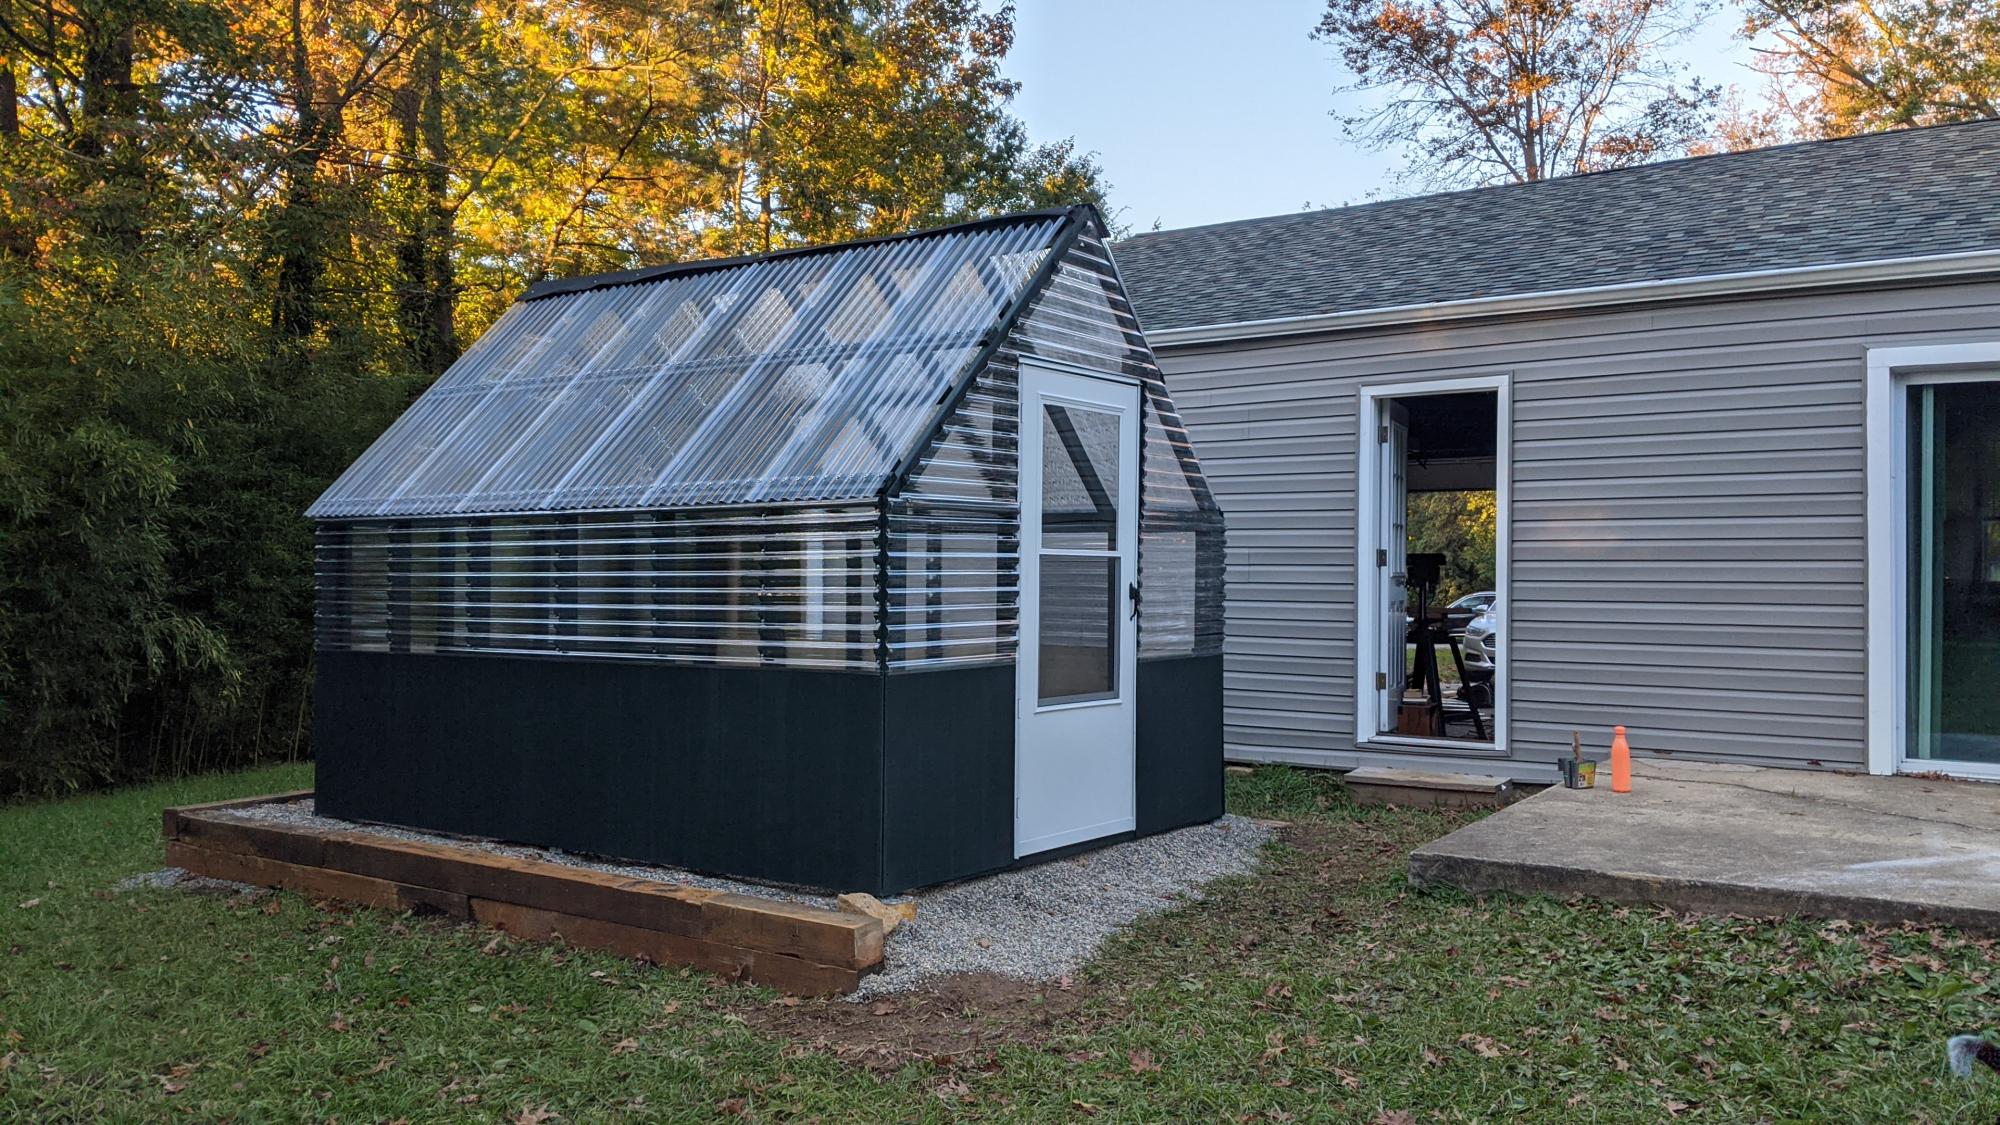
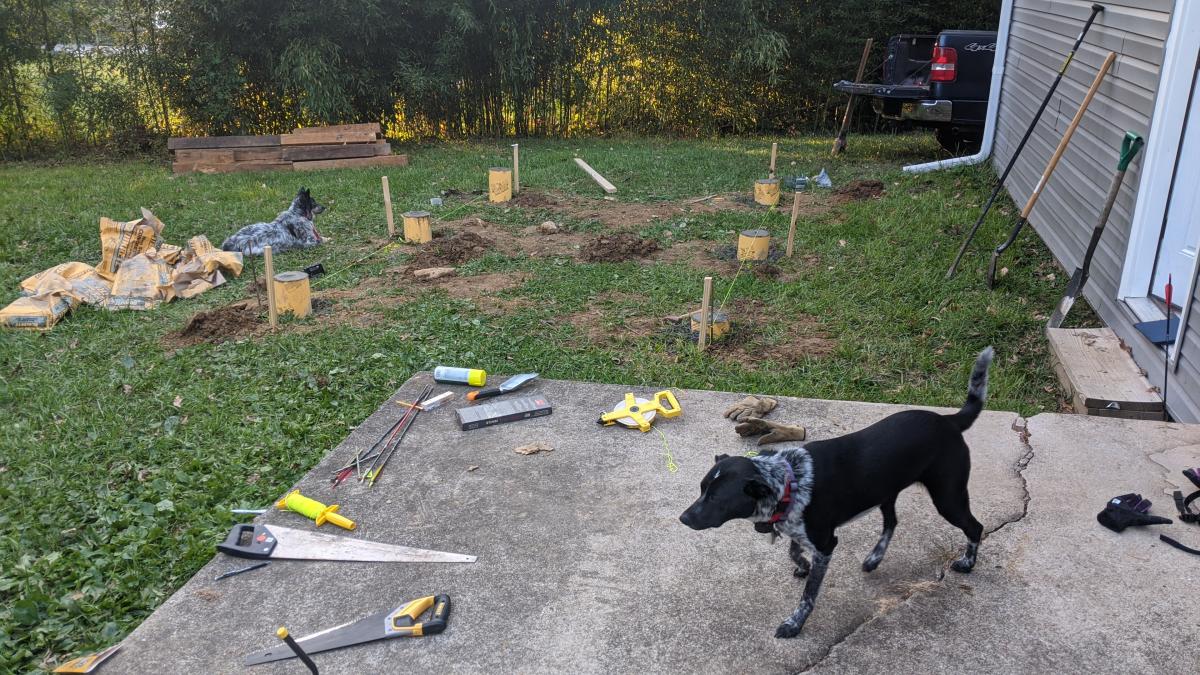
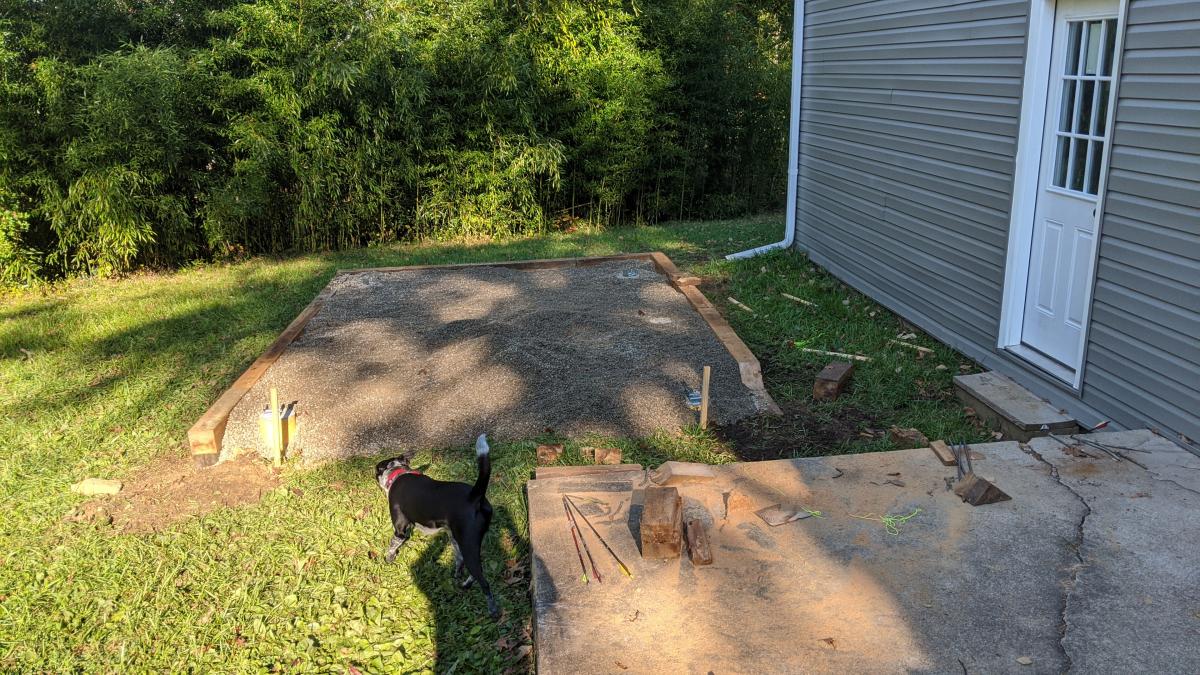
With the help of friends and family, we managed to build this greenhouse rather easily. We had to start with the foundation since the spot we chose was not an even grade. We did this by filling sono tubes with cement and leveling each off so the greenhouse would have a solid place to sit. We then built out a frame around the outside of the cement tubes with some reclaimed 6x6's. After that, we filled the space with 5 tons of river rock and then got to work! After the foundation was ready putting the rest of the house together was a piece of cake. The frame was so easy to put together. We had a few minor kinks to work out here and there, I won't say this house came out 100% perfectly, BUT I am so happy with the end results. We chose to paint it a deep green color as a final touch. So far we just moved a few potted plants from our deck to the greenhouse for the winter. It has been working very well to keep the plants cozy during the colder days we've had. Eventually, I plan to build a potting station, shelving, and most likely a garden bed for winter harvests.


Built from Plan(s)
Estimated Cost
$2000
Estimated Time Investment
Weekend Project (10-20 Hours)
Recommended Skill Level
Intermediate
Comments
Mon, 11/09/2020 - 09:52
Beautiful!
The foundation looks great the greenhouse looks amazing! I'm sure fun was had building it too:) Thanks for sharing.
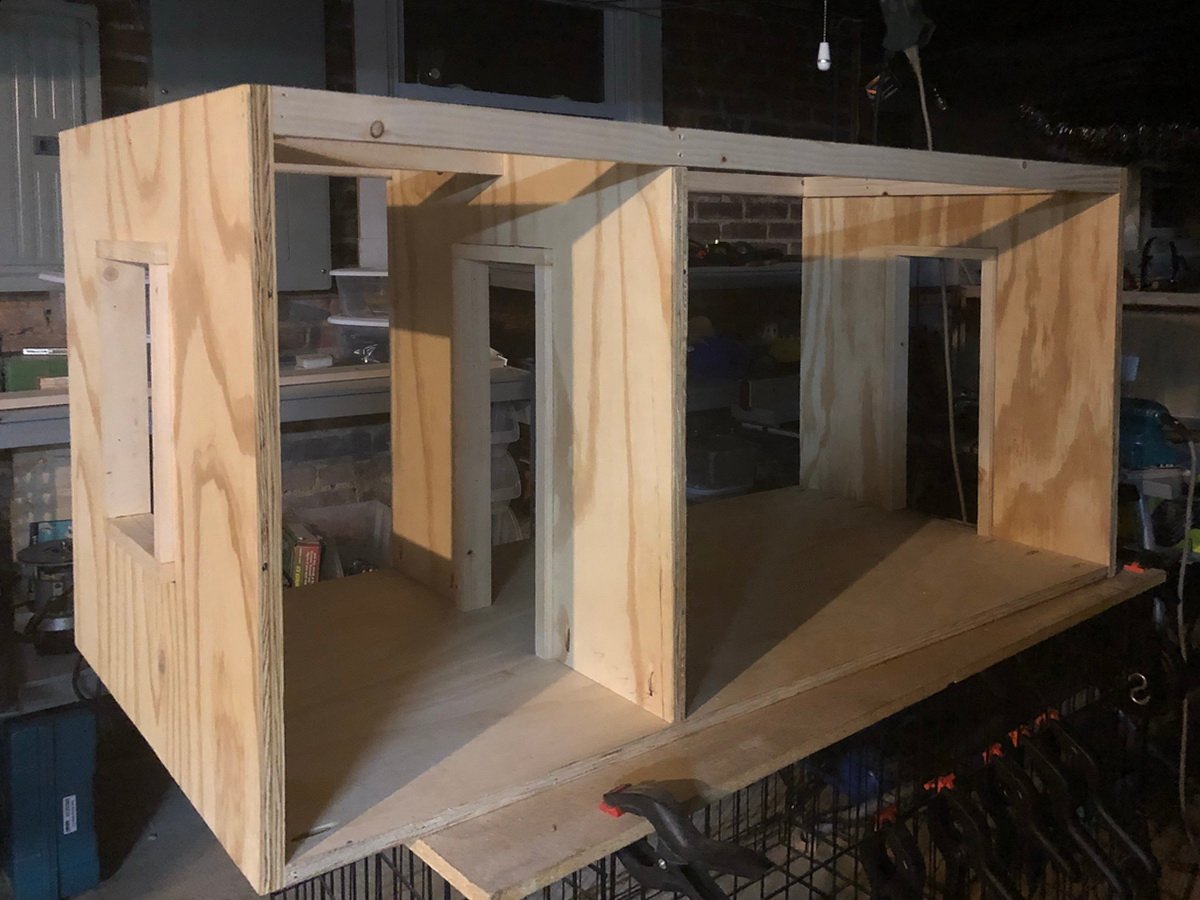
American Girl Doll House-tweeked
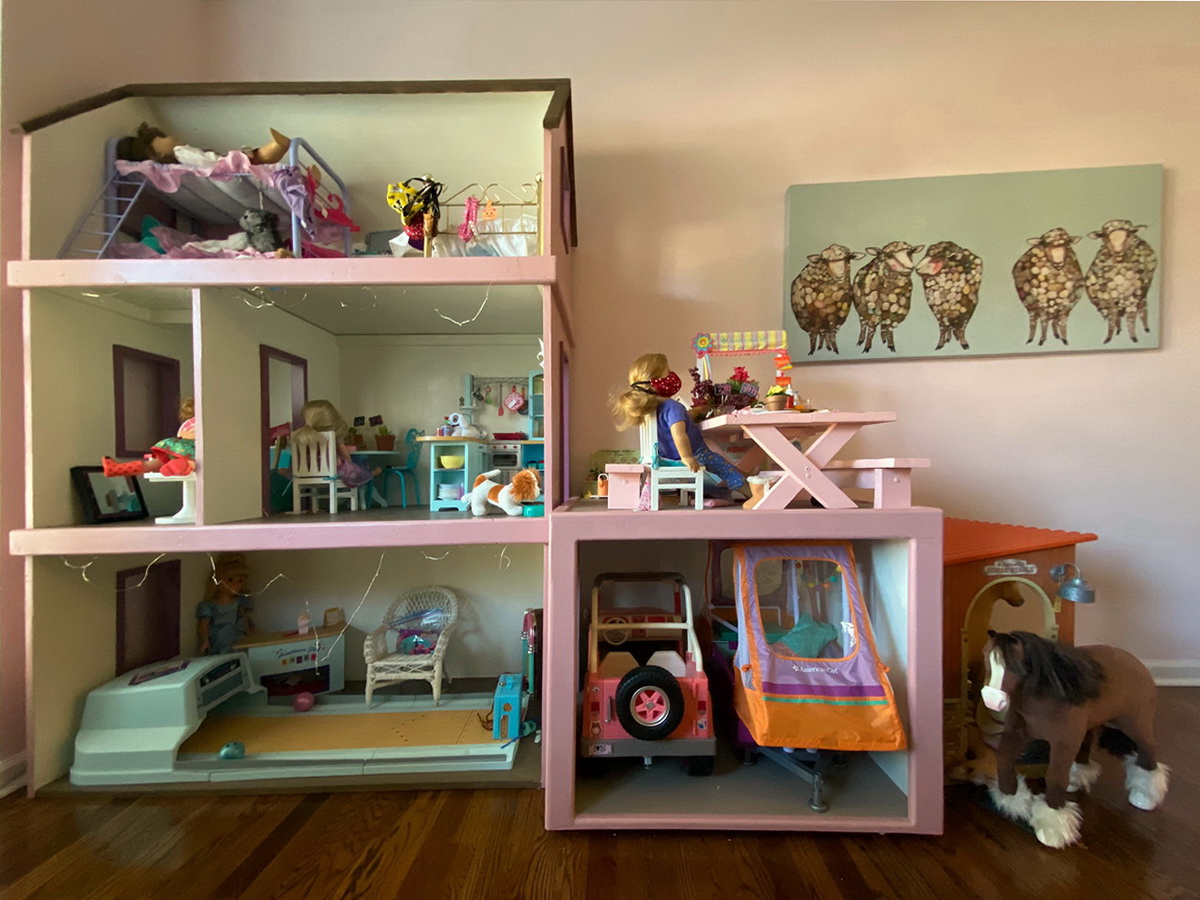
I loved the AG Doll House plans you designed and when my granddaughters asked me to make one for them.... how could I resist. Unfortunately my 7' basement ceiling and steps created a challenge. As a 72 year old female, there was no way I could man-handle a 6' x 4' x 2' - 3/4" plywood project in addition to the challenges of my work space. I was not going to disappoint my granddaughters so I had to come up with a plan. Instead of making the doll house in one piece, I decided to make it as 3 individual boxes (the floors) and stack them on top of each other. Not only would I be able to handle them mostly by myself, but I would be able to work around the low ceiling and transport them up the steps. With only a few modifications to the original plans, I believe I came up with a workable solution.
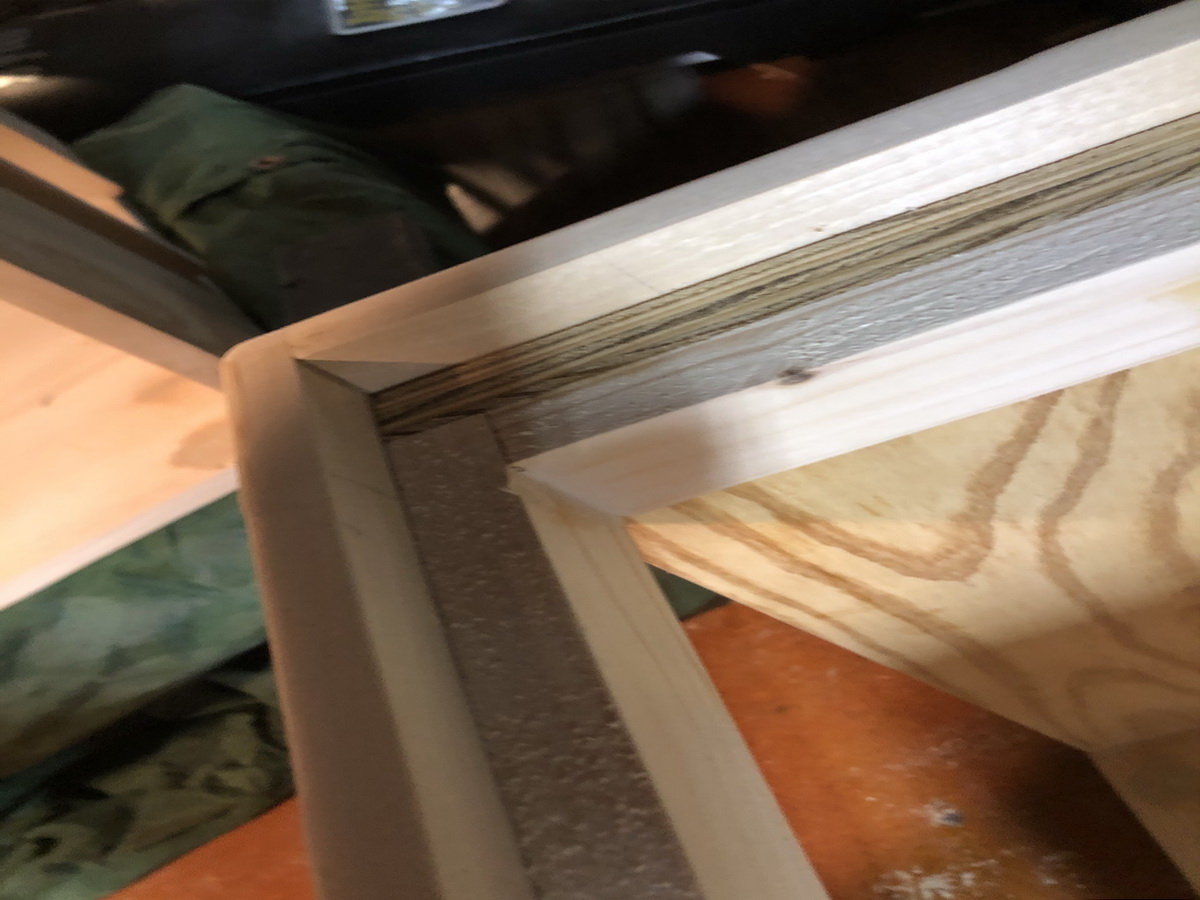
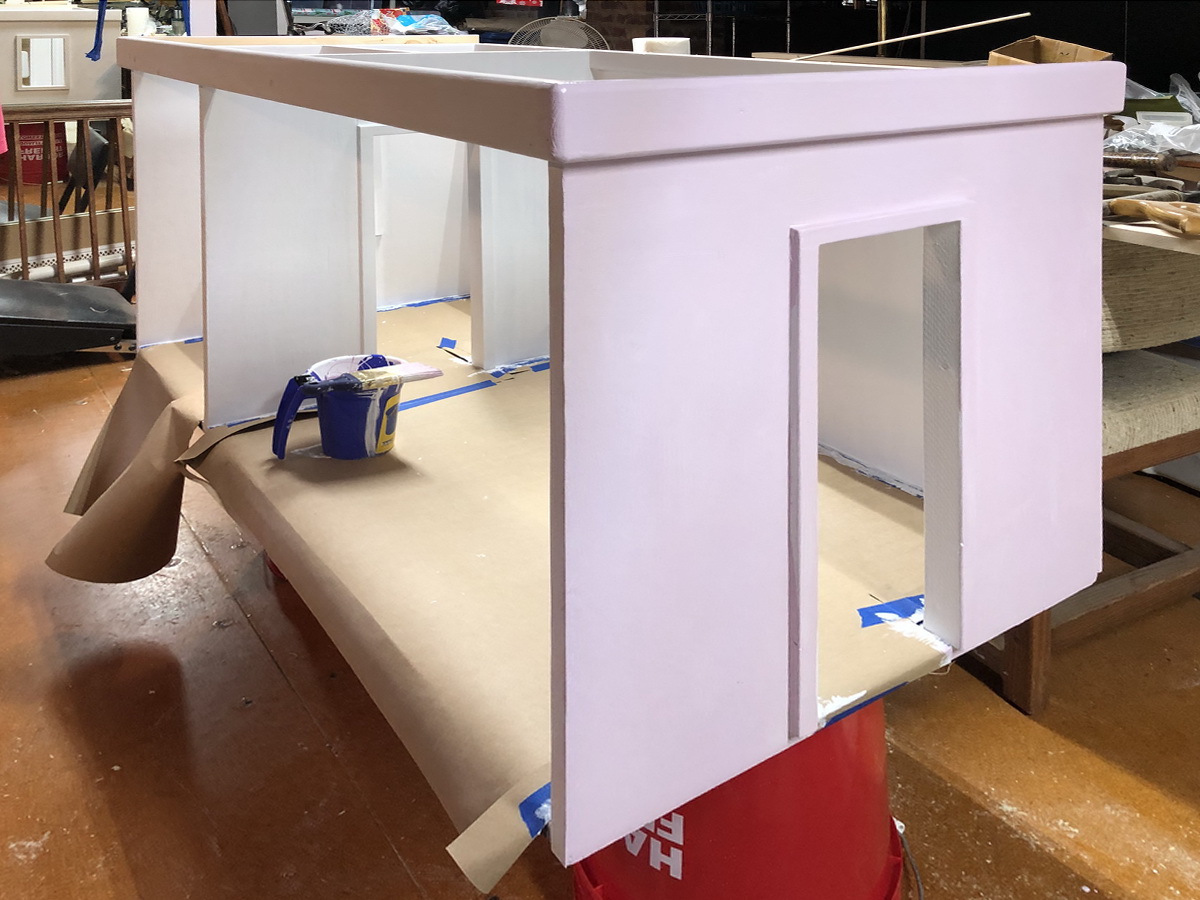
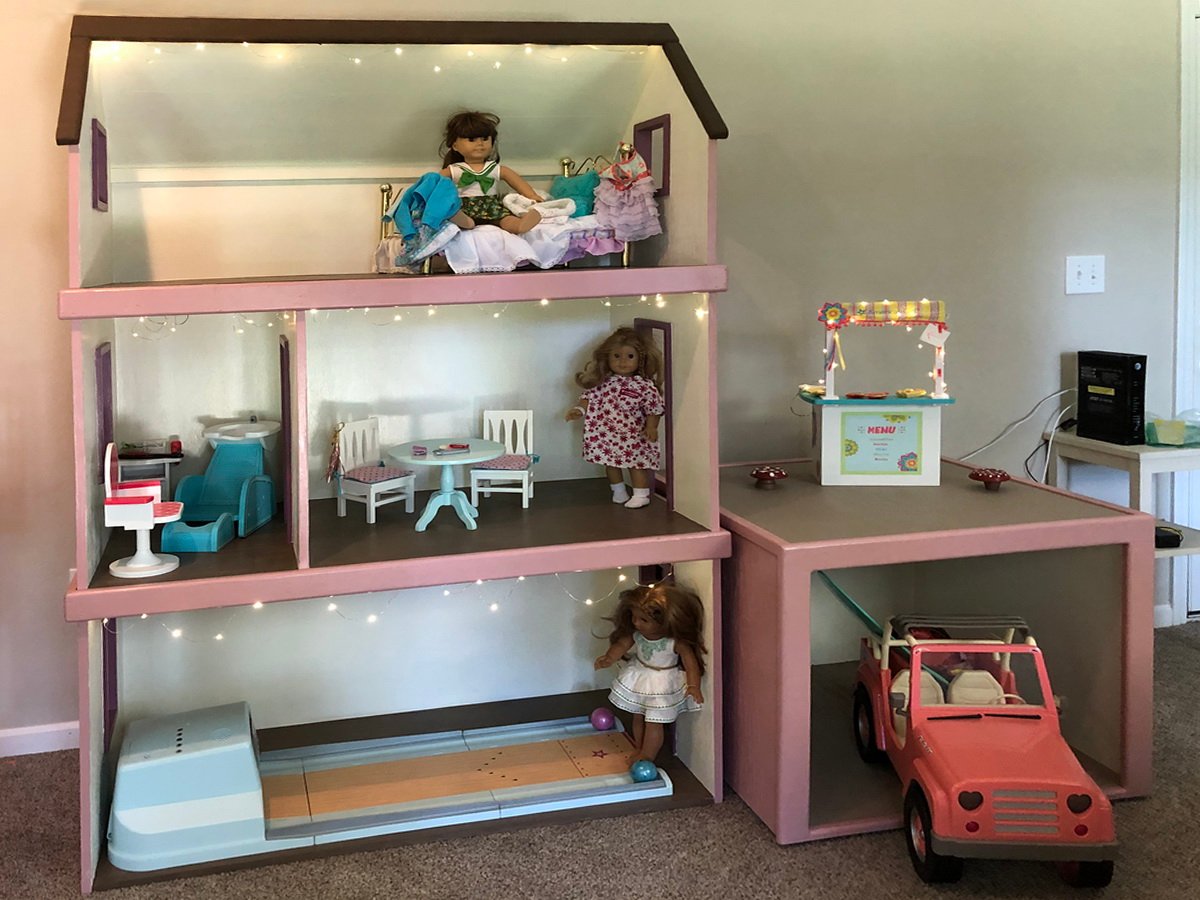
Instead of the sides resting on top of the doll house floor, I extended the sides 3/4" longer to run past the floor for more stability. I also used 1x 2s to frame the inside at the top of each unit for more support and to help in keeping the box square. This may not have been necessary, but I just wanted to make sure it would be sturdy. The main change to the original plan was to add 1" x 3" routed trim to the outside top of each box having it extend 3/4" above the sides. This created a pocket that allowed the next floor to nestle in place and protect it from sliding off in case any little ones decided to climb on it. I also made a 2 car (30" x 30" x 24") detached garage for the AG vehicles. I did fill the holes, plugs, and errors with wood putty, sand numerous times, prime and paint. It was a real help to add some of the paint to the primer because plywood really soaks it up. I think this kept us from having to paint a 3rd coat. The floor was painted a med dark brown, but wiped with the grain before it dried to give a wood grain look.
I finished it in time for the birthday party even though it took 3 vehicles to transport it to the destination. It was a joy to see their faces when it was unveiled and to watch them climb on it of course.

Built from Plan(s)
Estimated Cost
$200 (+/-)
Estimated Time Investment
Week Long Project (20 Hours or More)
Finish Used
PPG Acri-Shield (Exterior Semi-Gloss 100% Acrylic Paint and Primer in one.
Recommended Skill Level
Beginner
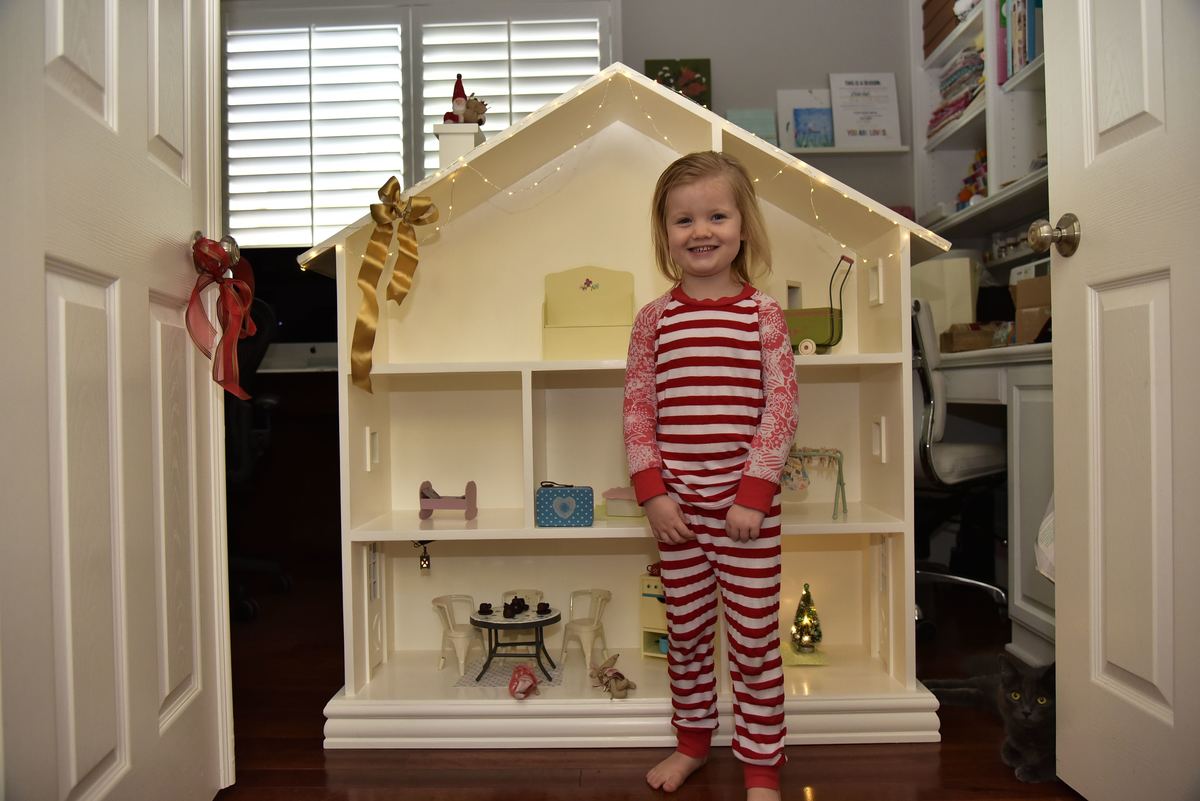
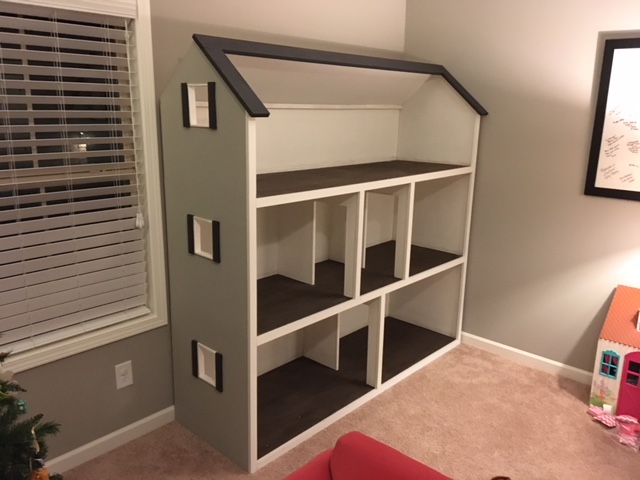
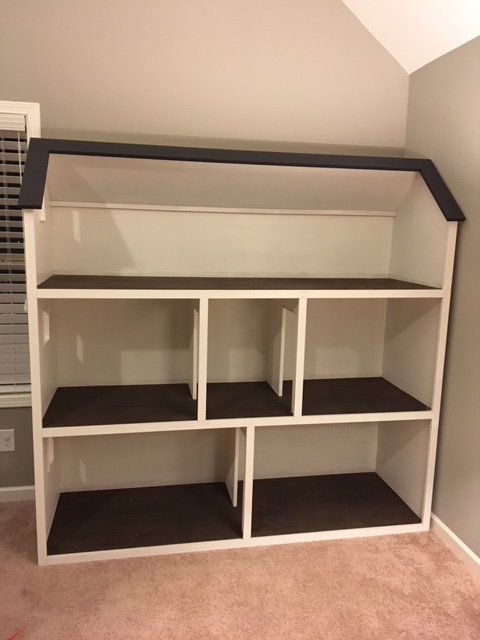
Dollhouse Bookcase
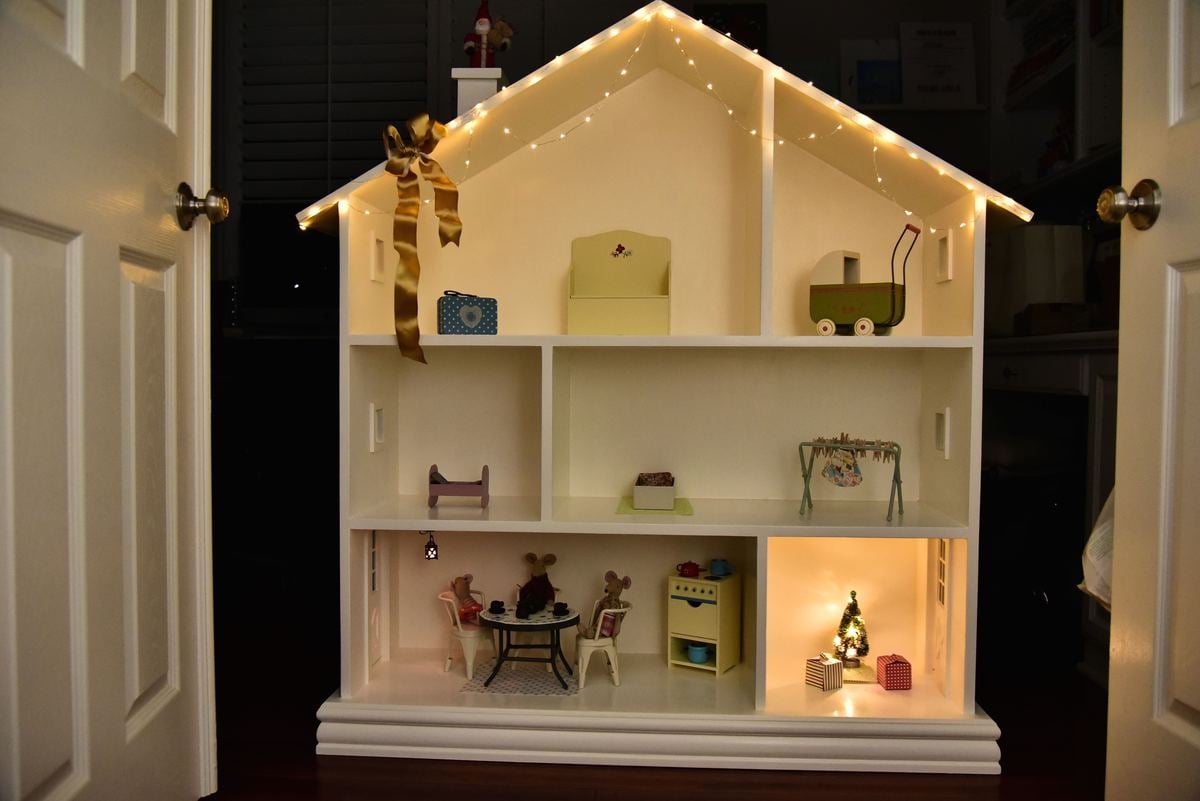
My Father built this amazing dollhouse for my daughter as a Christmas present. I loved the tall open look of this design and knew it would be perfect for my four year old! Instead of leaving the doorways open, we added dollhouse windows and doors to make this "bookcase" more into an actual dollhouse. The adorable mice and furniture are from the Danish toy company, Maileg. We hid the dollhouse in the home office on Christmas morning and had my daughter find it as her last present. She fell in love with it and immediately started playing! She has one talented Grandpa and I am so glad to have something like this in our family to be cherished for generations.
Built from Plan(s)
Estimated Time Investment
Weekend Project (10-20 Hours)
Recommended Skill Level
Intermediate
Comments
Sun, 01/01/2017 - 09:53
I really like what you do,
I really like what you do, this job is beautiful, congratulations. Happy 2017
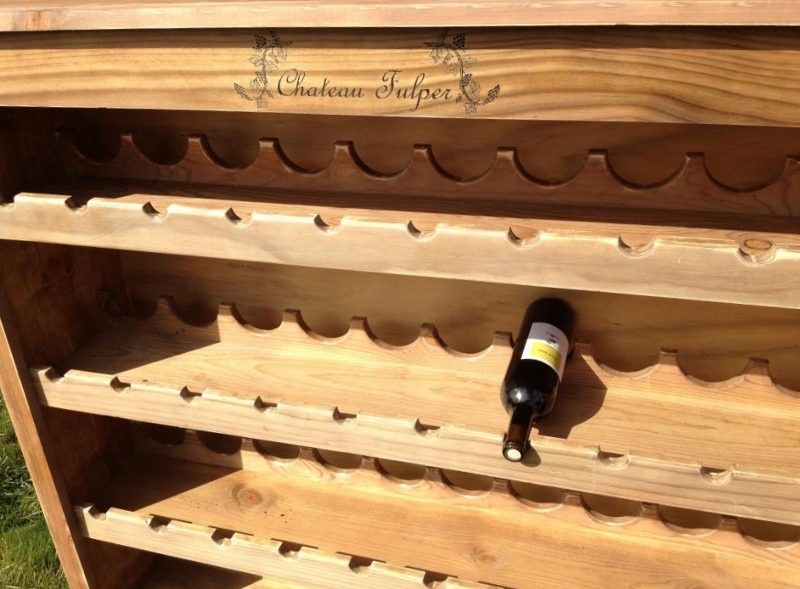
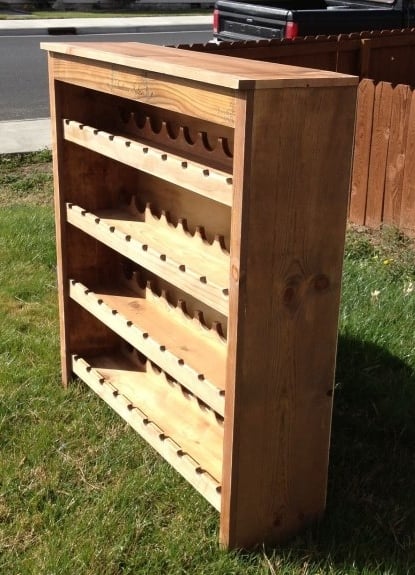
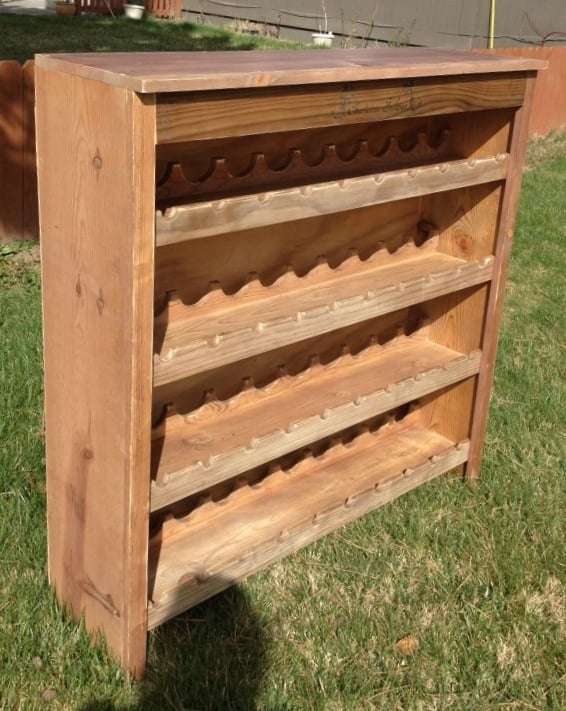
Rustic Wine Rack
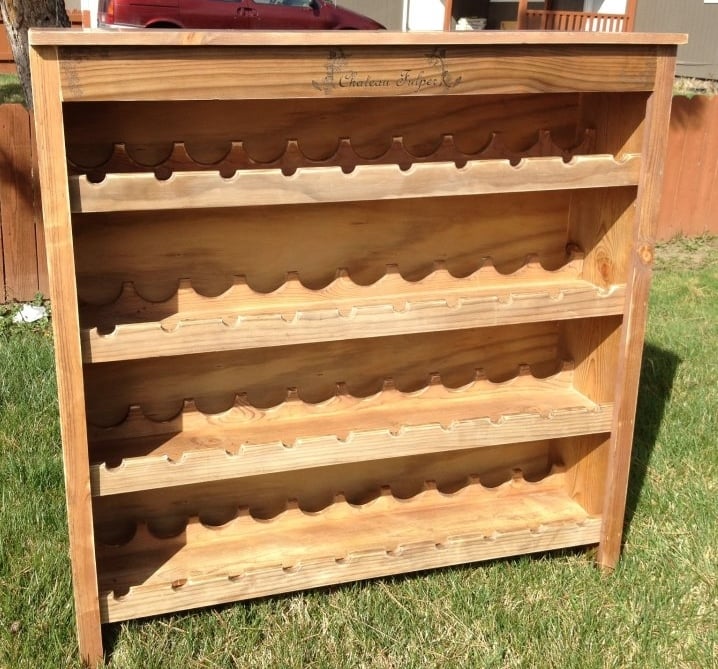
I've built many custom pieces for local folks but this one with all it's half circles really threw me - how was I going to do those, make them precise and not spend 3 days doing it. It's simple really.... I cheated!! LOL I used a 3 1/8" hole saw for the larger ones and a 1" hole saw for the smaller ones. I also took two boards and clamped them together with pipe clamps and then drilled two at once! It gives it a more consistent look and cuts the time literally in half!
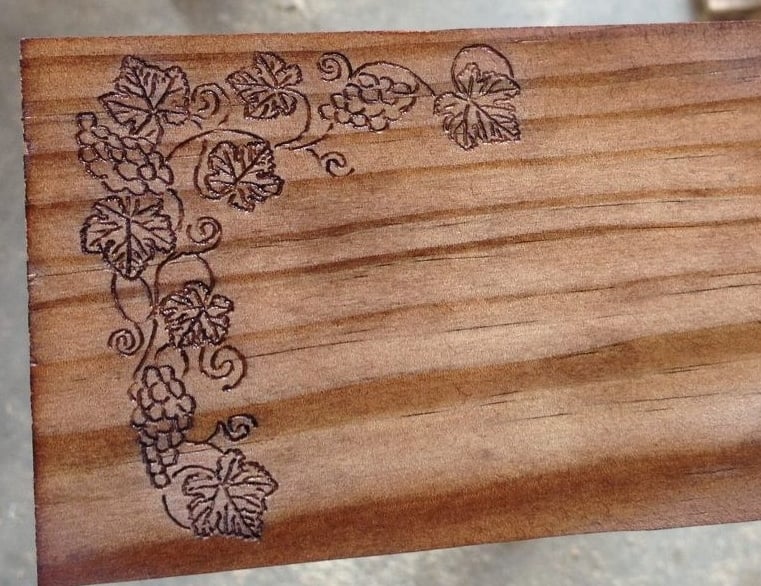
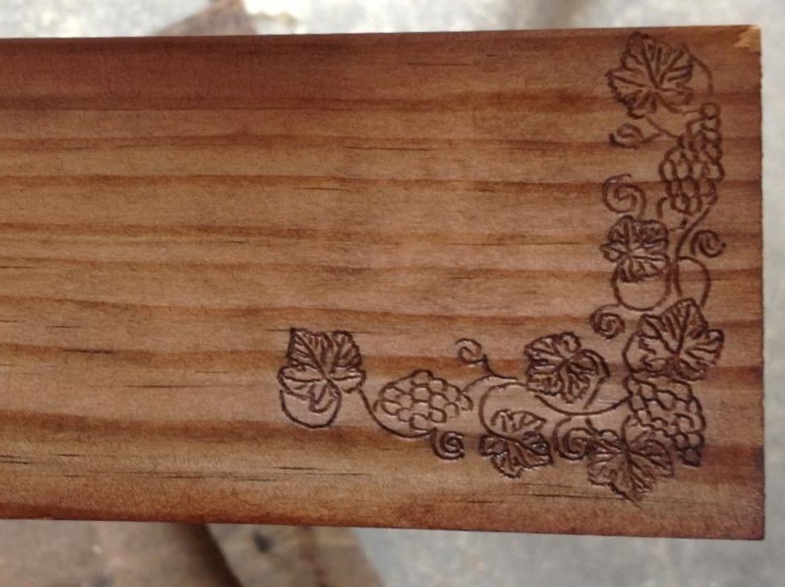
I used a home brew for the stain. Had a friend of mine do the engraving for the front header piece. I think the whole project took between 10 - 15 hours to do because there was a lot of experimenting with the stain and there was also readjusting the sides and top to look how I wanted.
The client loves it and I'll post a pic on my Facebook page of the whole thing loaded up with wine, later today.
Estimated Cost
$250 was retail on this
Estimated Time Investment
Weekend Project (10-20 Hours)
Finish Used
The finish used was steel wool dissolved in vinegar with a secret ingredient added. :-)
Recommended Skill Level
Advanced
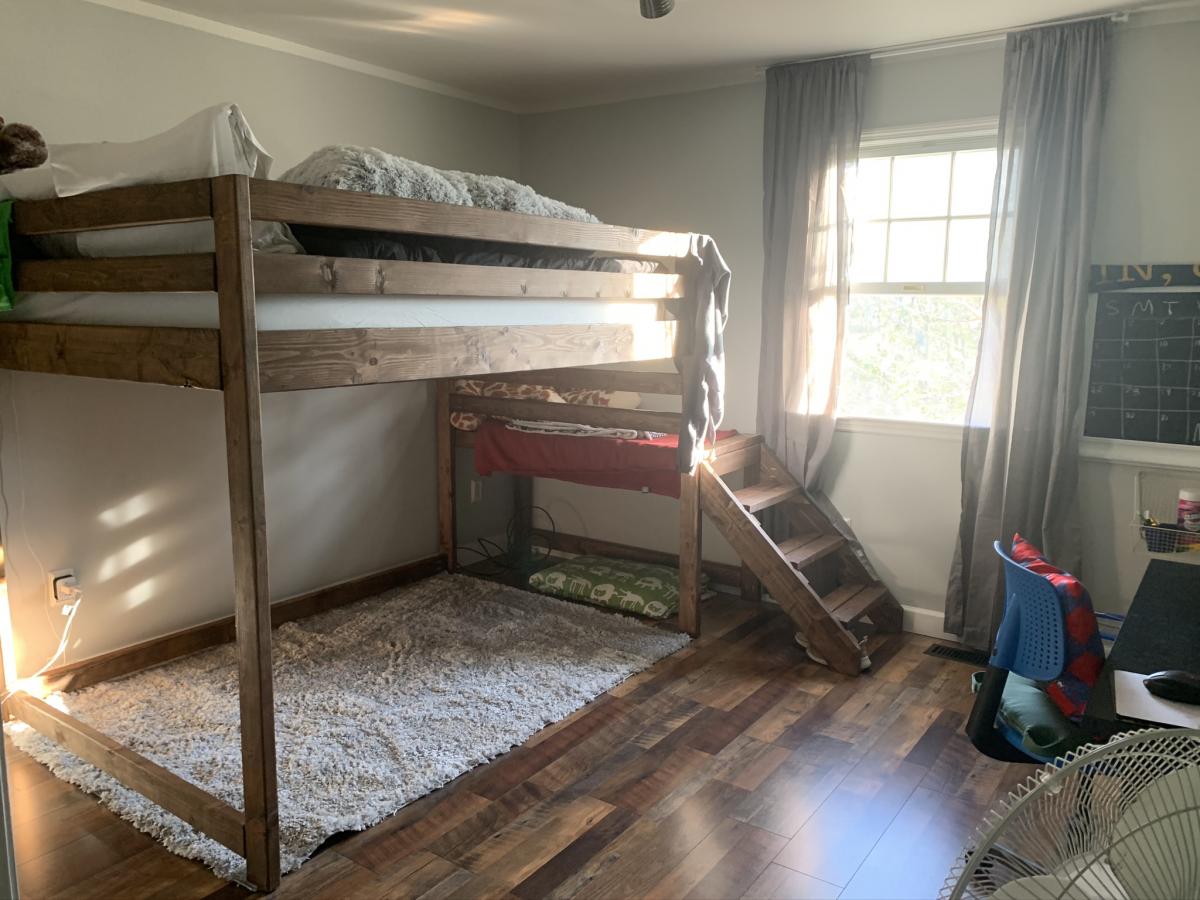
Camp Loft Bed for the Little Lady
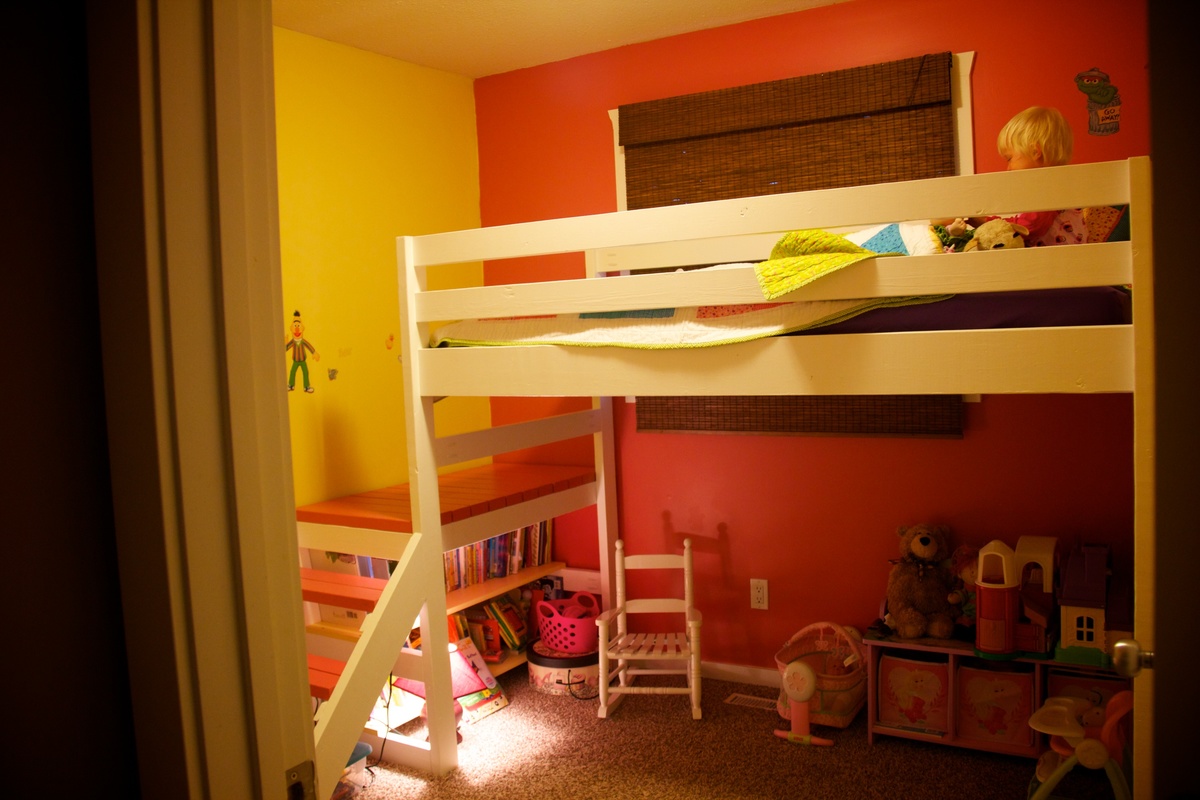
I came across the Camp Loft Bed on Pinterest a couple of months ago. My daughter was still sleeping in a crib, but I knew that she would need a big girl bed by summer. Since her room is small (inside walls measure just under 9'x9'), i thought a loft bed would be ideal.
I have NEVER done a DIY. I don't even own tools. But my step-dad is very handy, so I asked him to be my consultant and helper to tell me if I was doing things the wrong way! Fortunately, he was able to lend me a miter saw, some aluminum saw horses, and the odd screw (when I seemed to run out).
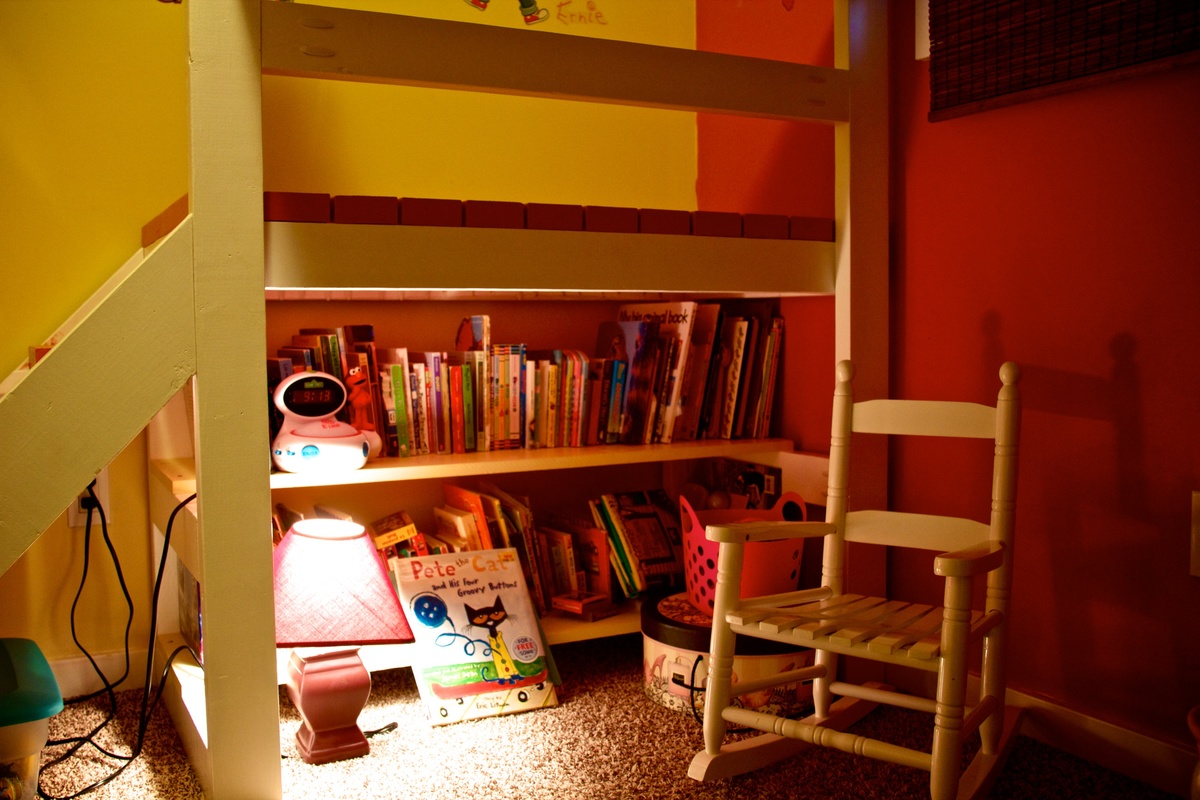
From start to finish, this was a 7 day project. I used construction grade spruce for my lumber, which cost me just shy of $100. I also went back the next day and bought a couple more 2x4s to make two shelves under the platform, which was another $30. I then pre-drilled with my new favourite tool the Kreg, and proceeded to sand, prime, and paint all of the pieces before assembly. With assembly being in my daughter's room, and having nice fresh paint on her walls and carpeted floors, I did NOT want to be finishing the bed in there, but there was no way I could move it into her room completely assembled. I did all the finishing BEFORE assembly.
Sand, prime, sand, paint, paint, paint. That process took three days, obviously not the entire day. Painting goes relatively quickly, but with boards, you paint one side, let dry, roate 90 degrees, paint, let dry, etc. I also had to work a couple of days in between as well. I went with Benjamin Moore Aura paint and that required three coats. I used to some leftover pink and yellow for the platform and shelves, but if I consider the cost, the paint set me back another $100.
I also had to order in the proper screws and I bought some of the white Kreg plugs to cover the exposed holes. Hurray for amazon! Even selecting the free shipping, the screws arrived within 4 days.
Assembly day:
My step-dad and I worked from 10:30-1:30. By this time, the bed and platform were completely assembled and in place. My daughter, however, needed to nap, so I put her down in her brother's bed, and we took a couple of hours off for lunch!
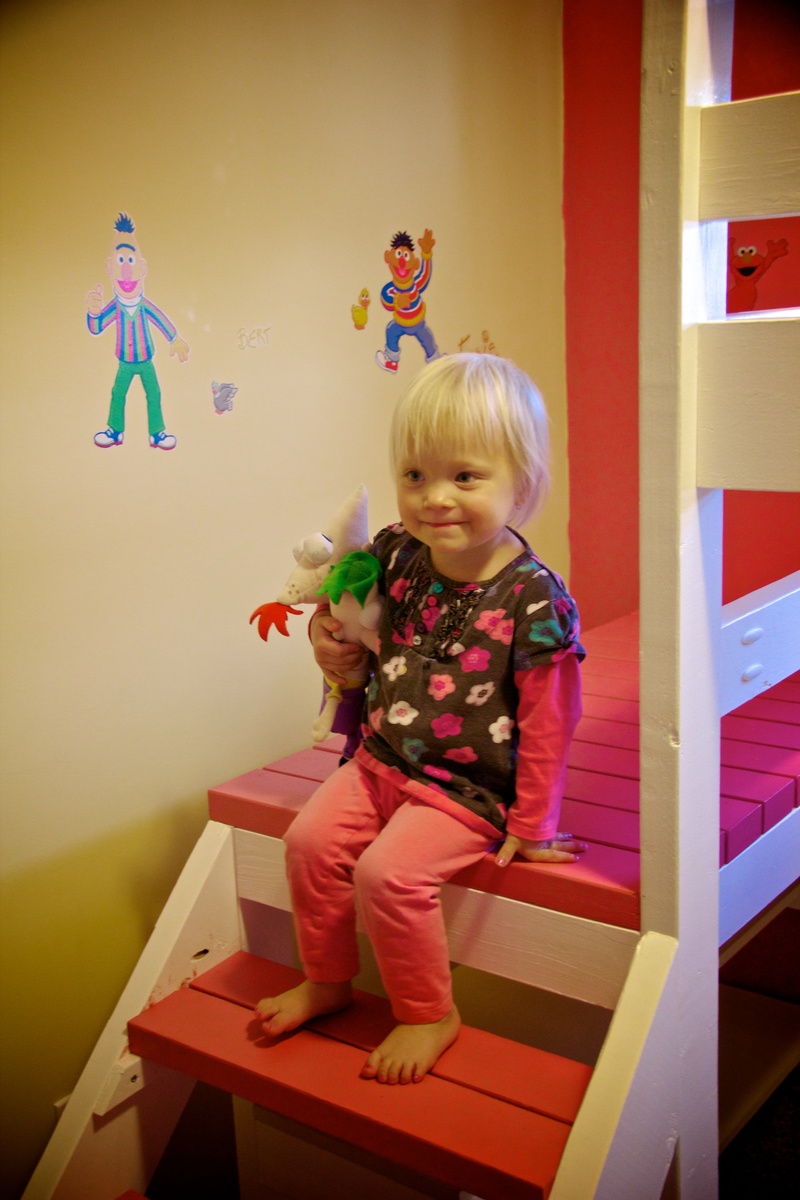
We then worked from 5-8:45 pm building the stairs, cleaning the room, measuring and screwing down the slats for the mattress, then making the bed and getting it ready for sleep. It seemed like a much longer day because in between, I had to run out and pick up a twin mattress, some extra screws, help my son play his new Skylander game, and deal with three kids trying to "help" with construction!
All in all, I am very pleased with the bed, with the plans, and with my first DIY. My kids are all in love with the bed and we spent a lot of time shooing them out of the room while we tried to assemble it.
Tips:
If I were to make this bed again (if my sons have their way, their beds are next!) I would not paint the wood, opting instead for a stained more natural look. I love the colours for my daughter, but what a pain all that painting and rotating the boards was. Paint was also a more expensive option for finishing.
That being said, if I do paint, I will NOT paint the ends of the boards that will be joined via pocket holes. In some cases, the boards were just a smidge too long to fit and we had to take the back to the saw and shave off the layer of paint in order for the board to fit.
I also opted to buy firm twin mattress as opposed to the plush ones. The plush mattresses add a lot of height and I was worried about my daughter having a bit too much fun up there and possibly tipping out from a high mattress. Stick to thinner mattresses on loft or bunk beds!

Built from Plan(s)
Estimated Cost
$250
Estimated Time Investment
Week Long Project (20 Hours or More)
Finish Used
Benjamin Moore Aura paint
colours: white, glamour pink and cornsilk (for the two shelves)
colours: white, glamour pink and cornsilk (for the two shelves)
Recommended Skill Level
Starter Project
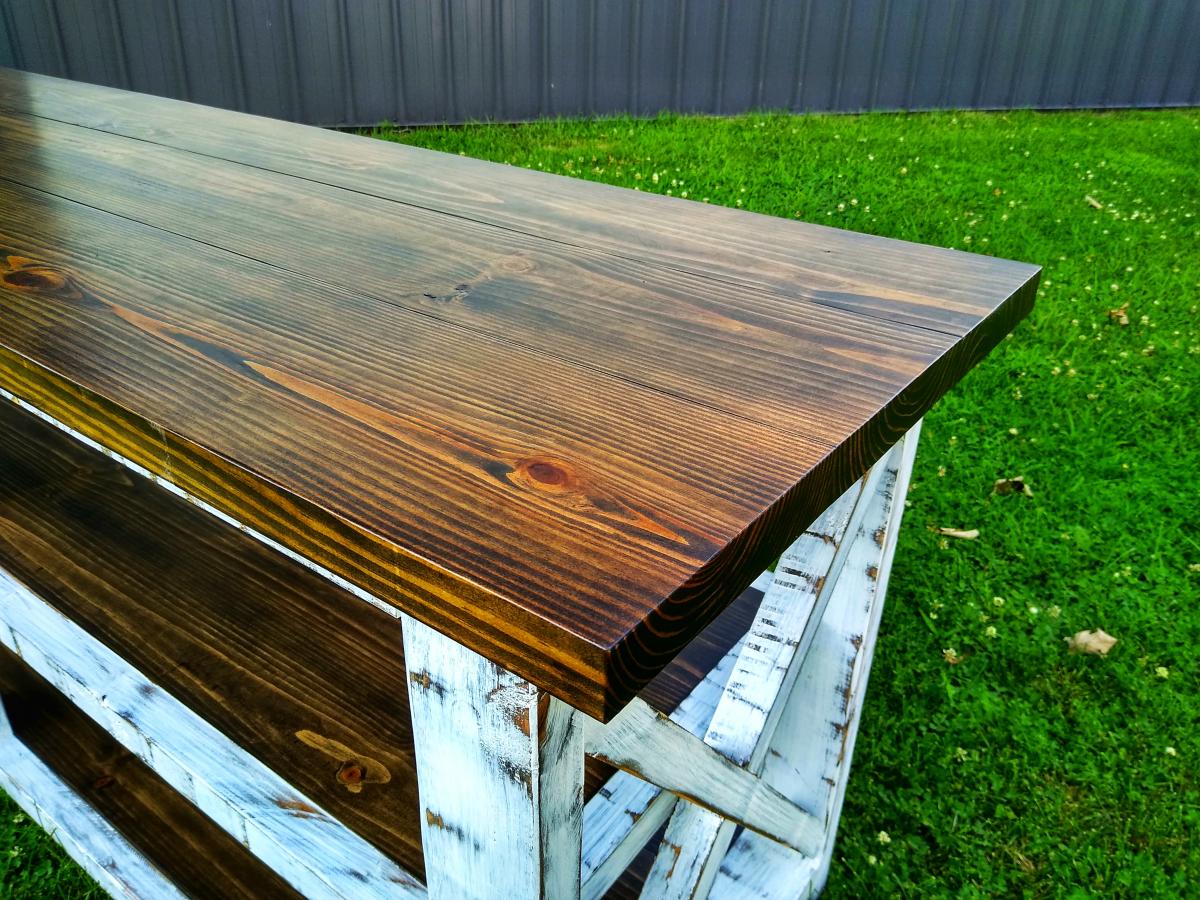
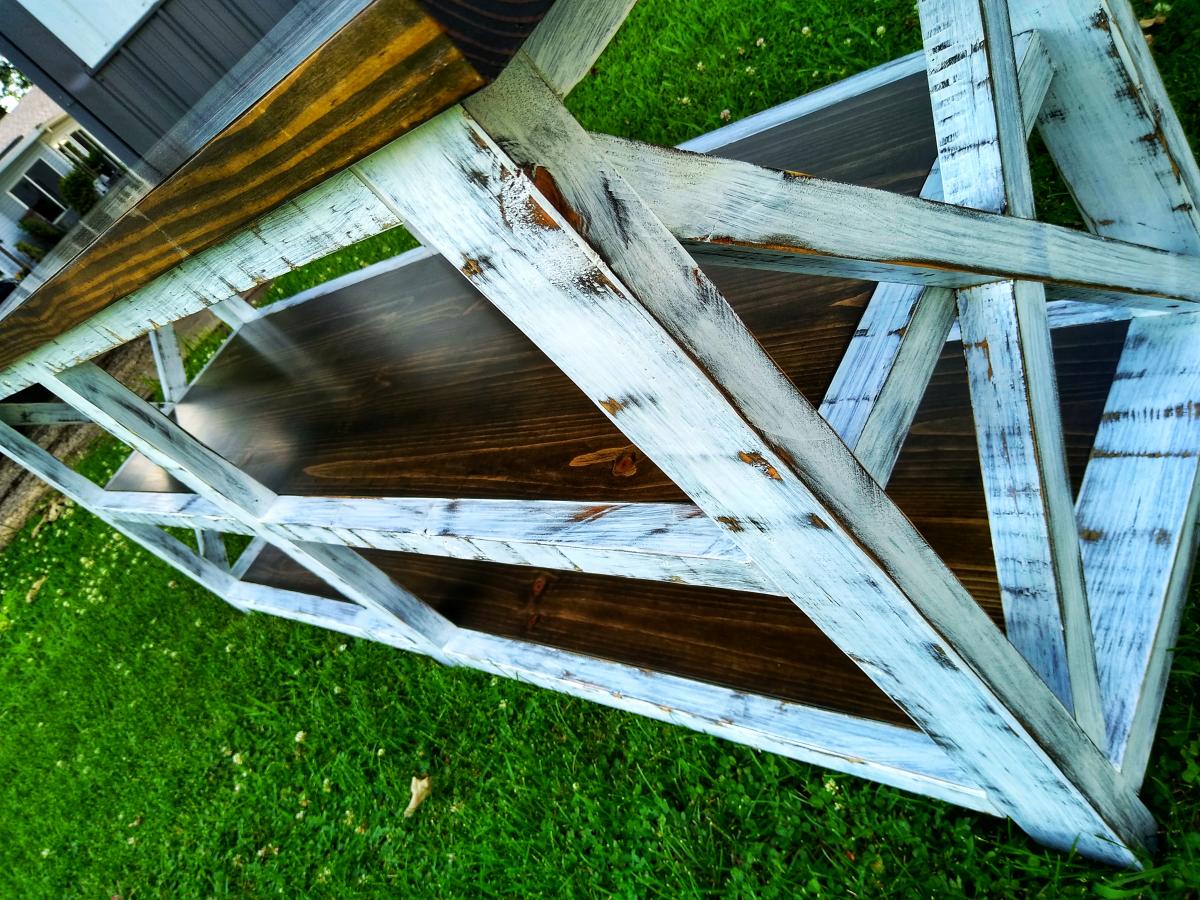
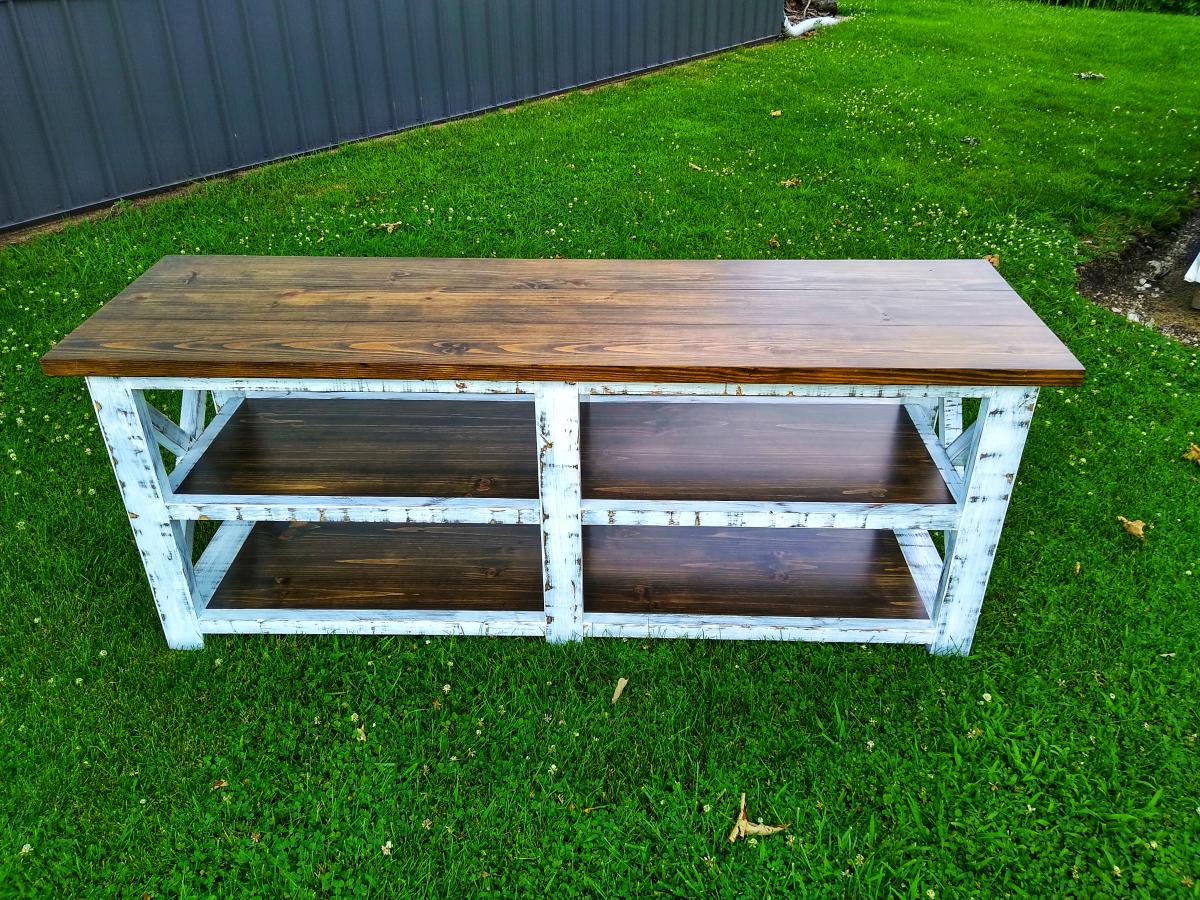
Rustic X Console Table
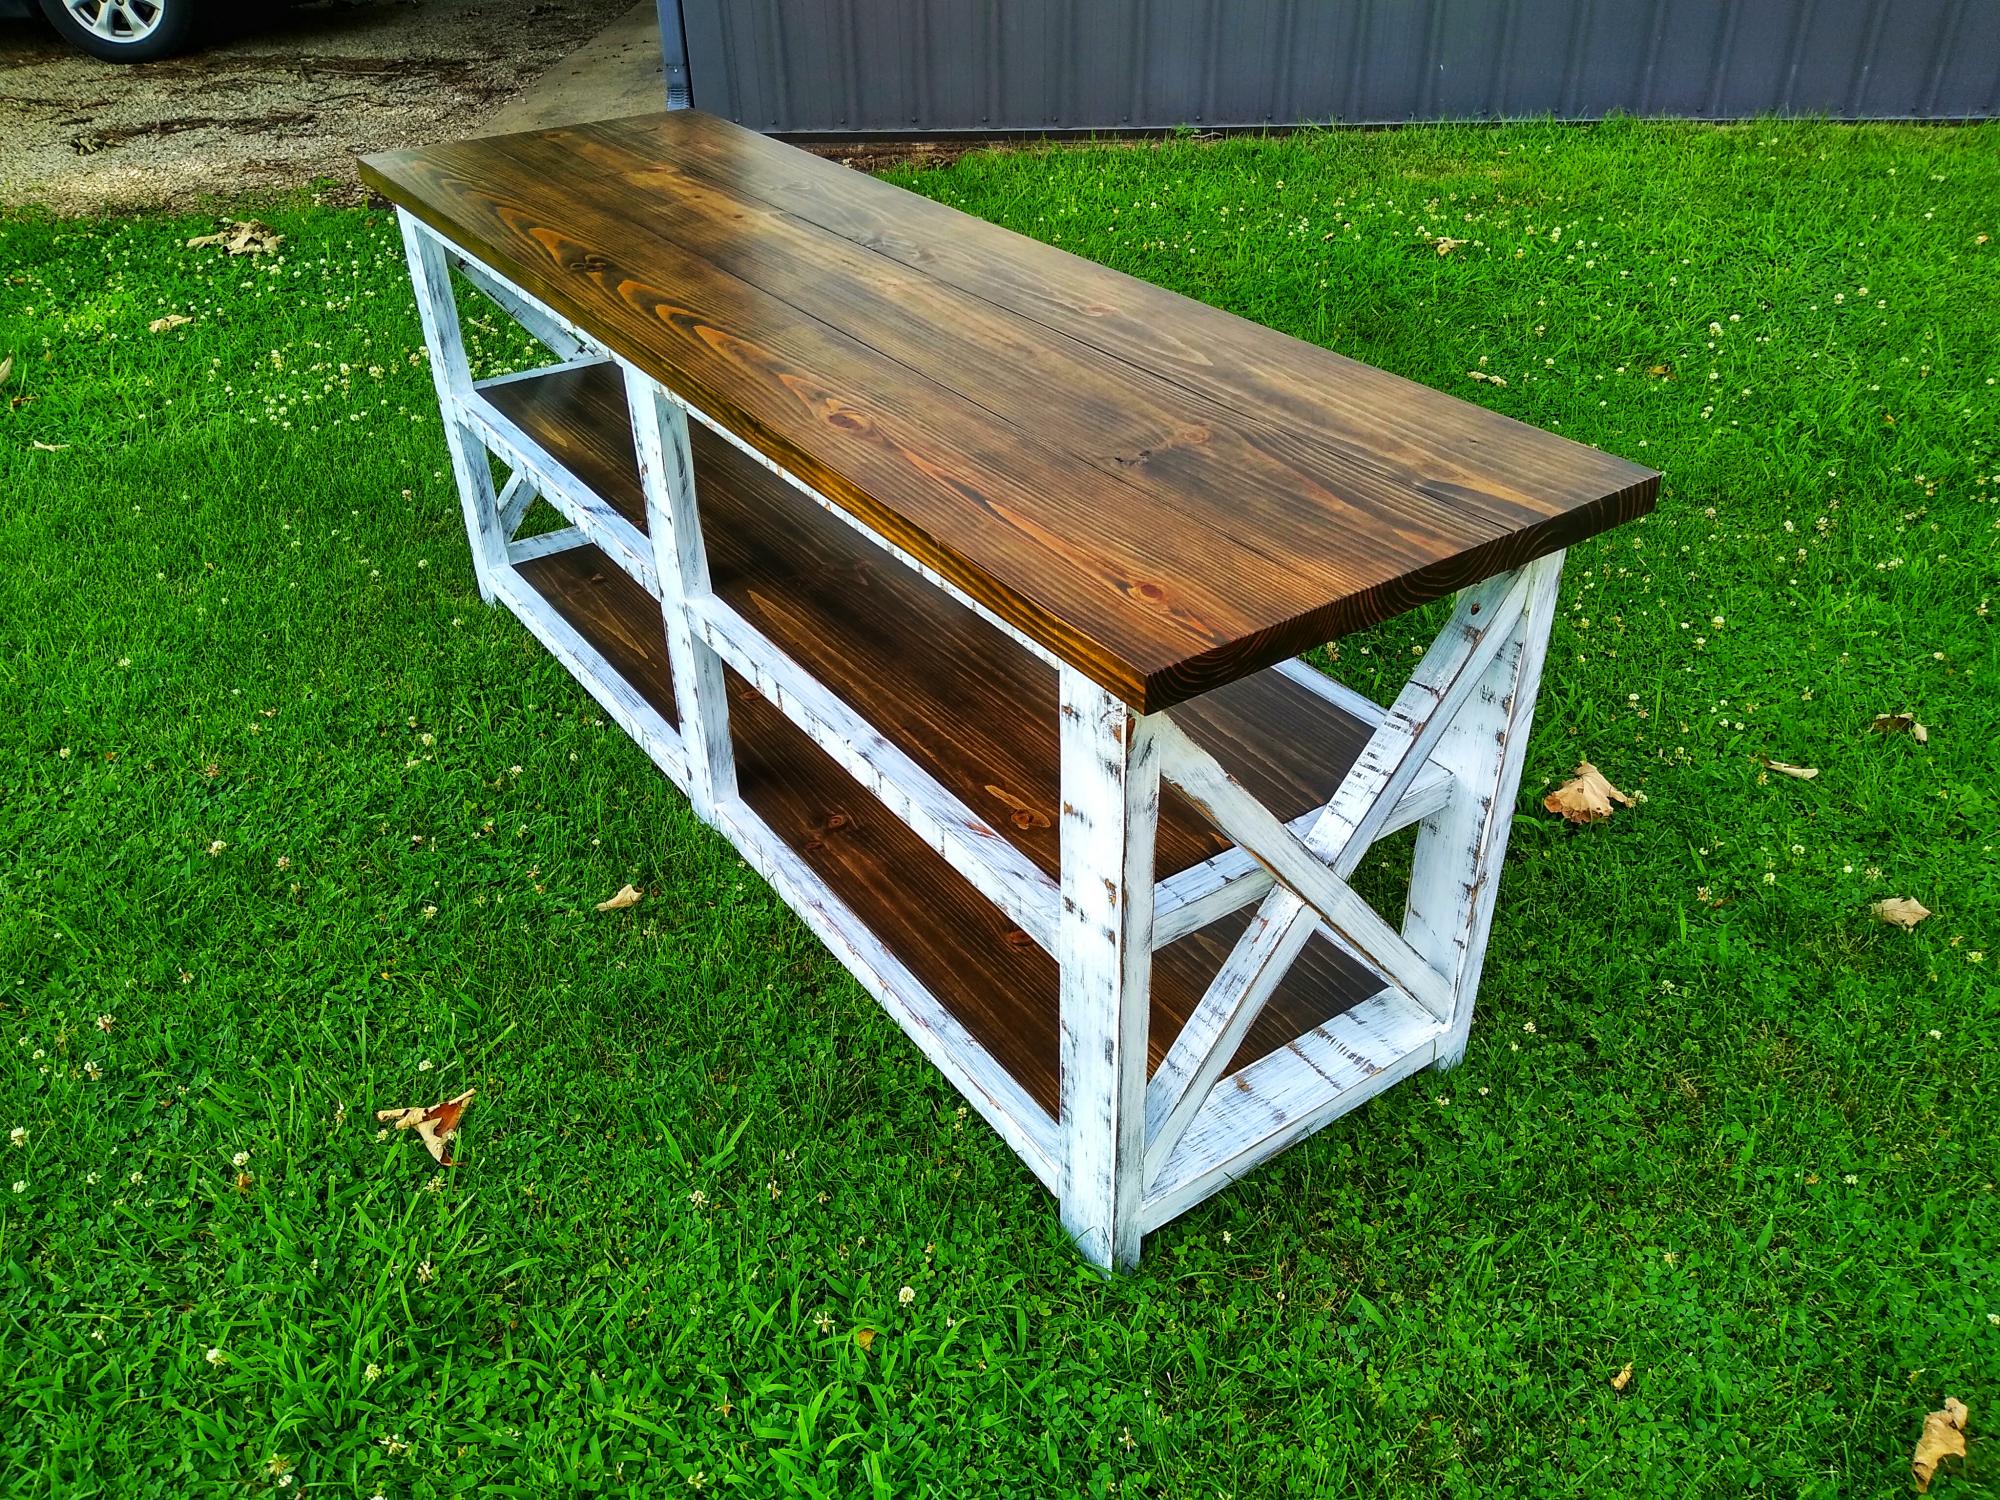
I was commissioned to build this console table along with a couple “Rustic X” bookshelves. The finish is distressed white and True Browns stain.


Built from Plan(s)
Comments
Camp Loft Bed Full size
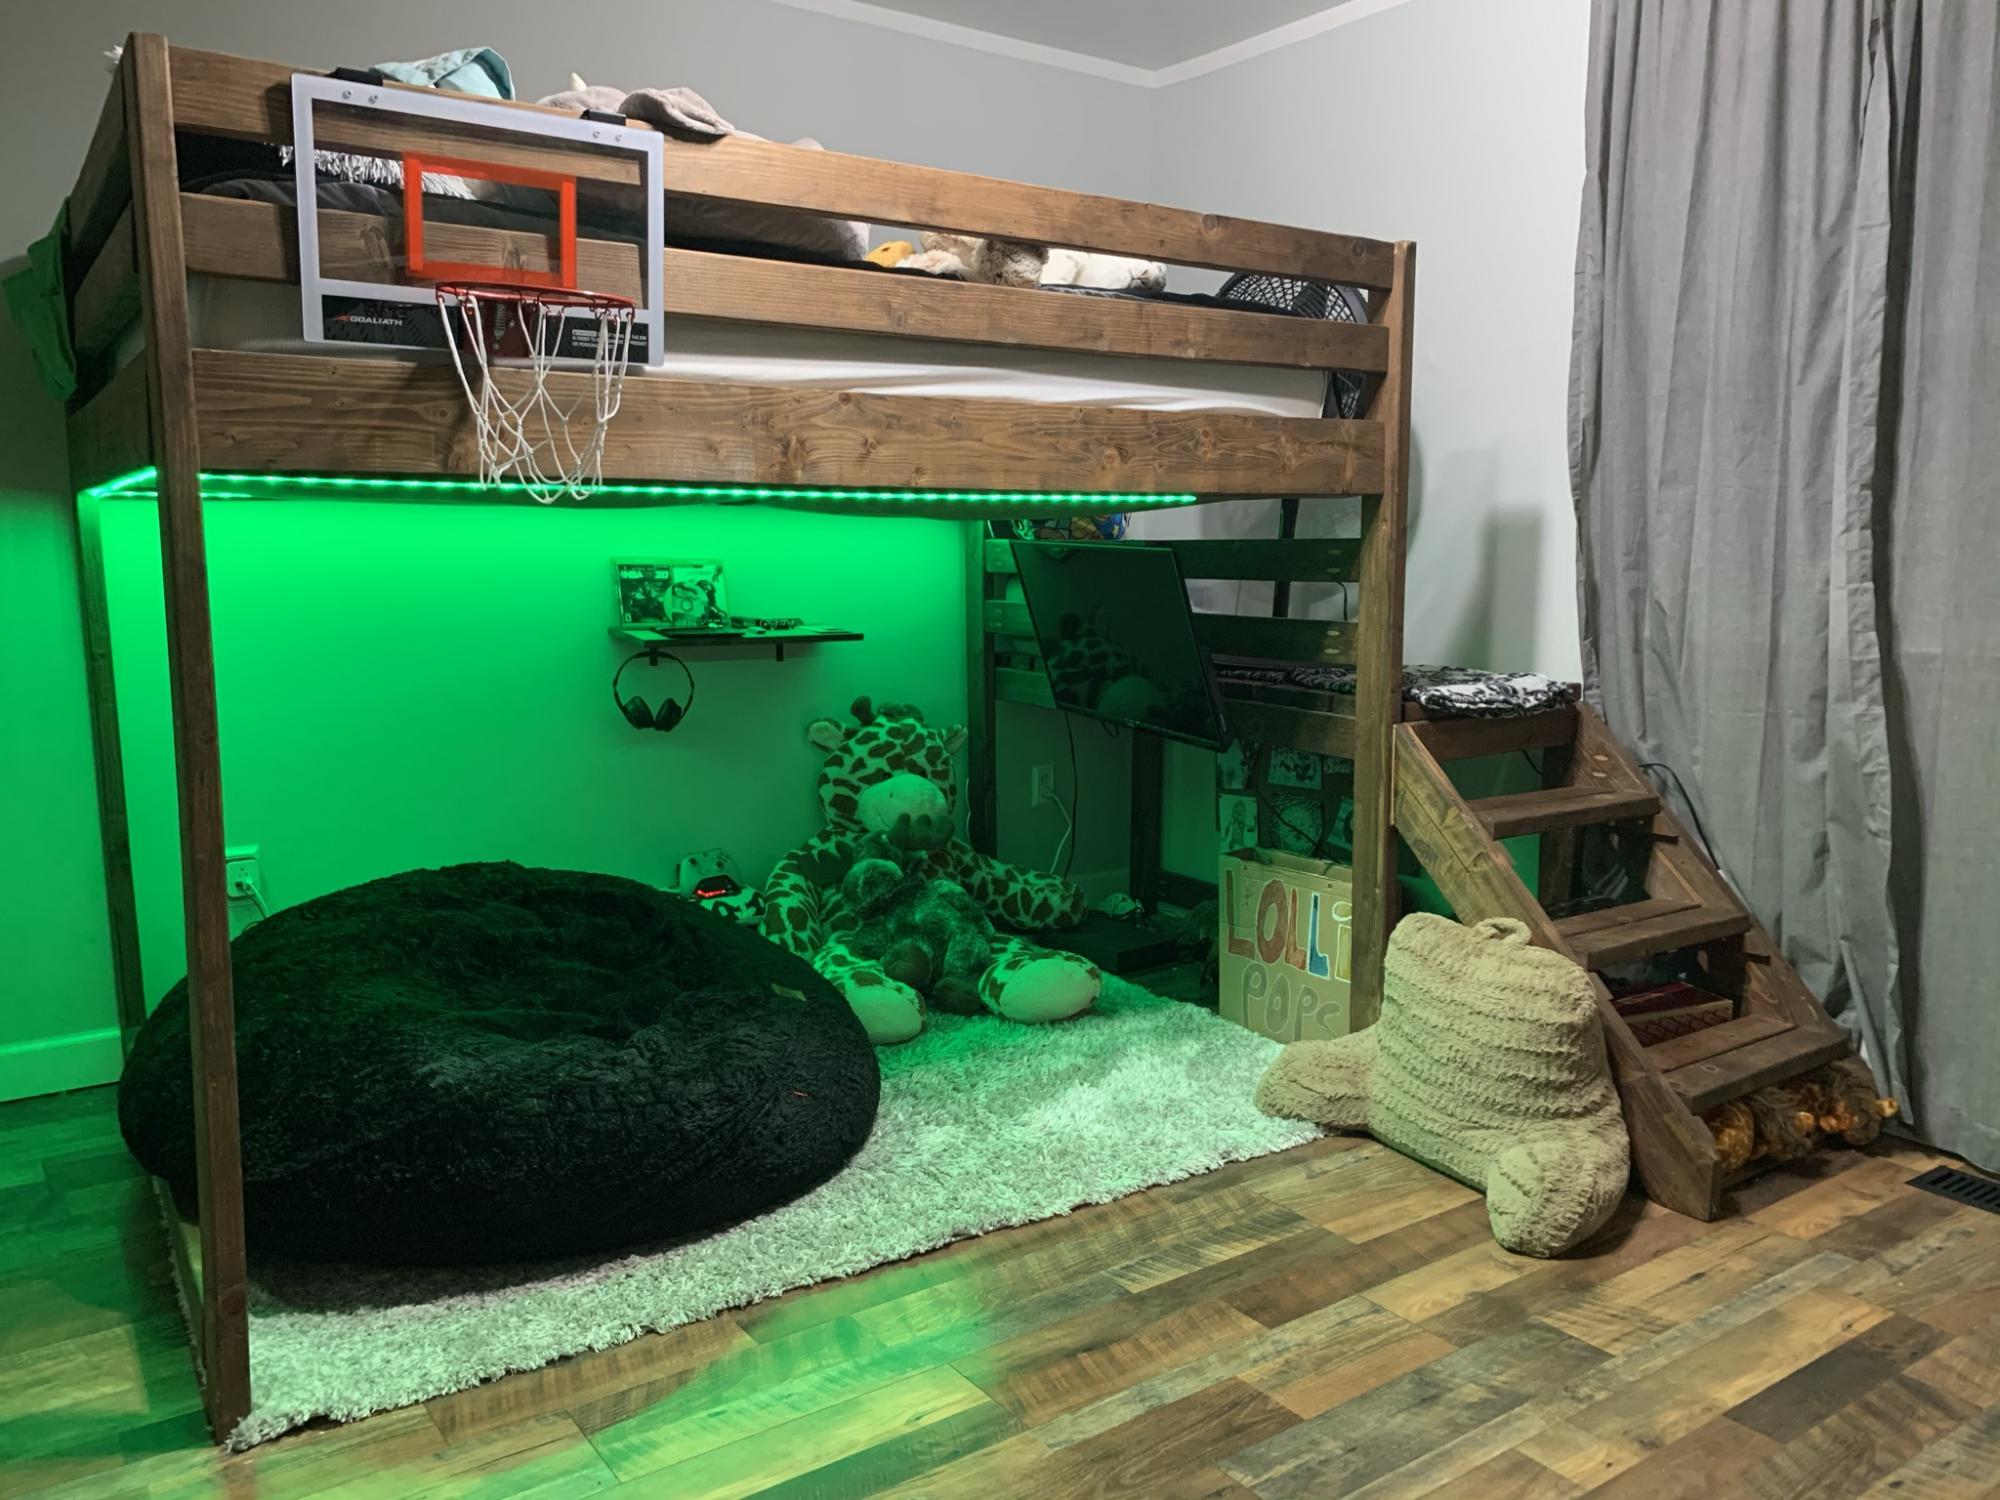
Made this Loft bed for a full size mattress in 2019 and it is still strong. I added a stretcher on the bottom of bed across the length of the the bed added strength.
Comments
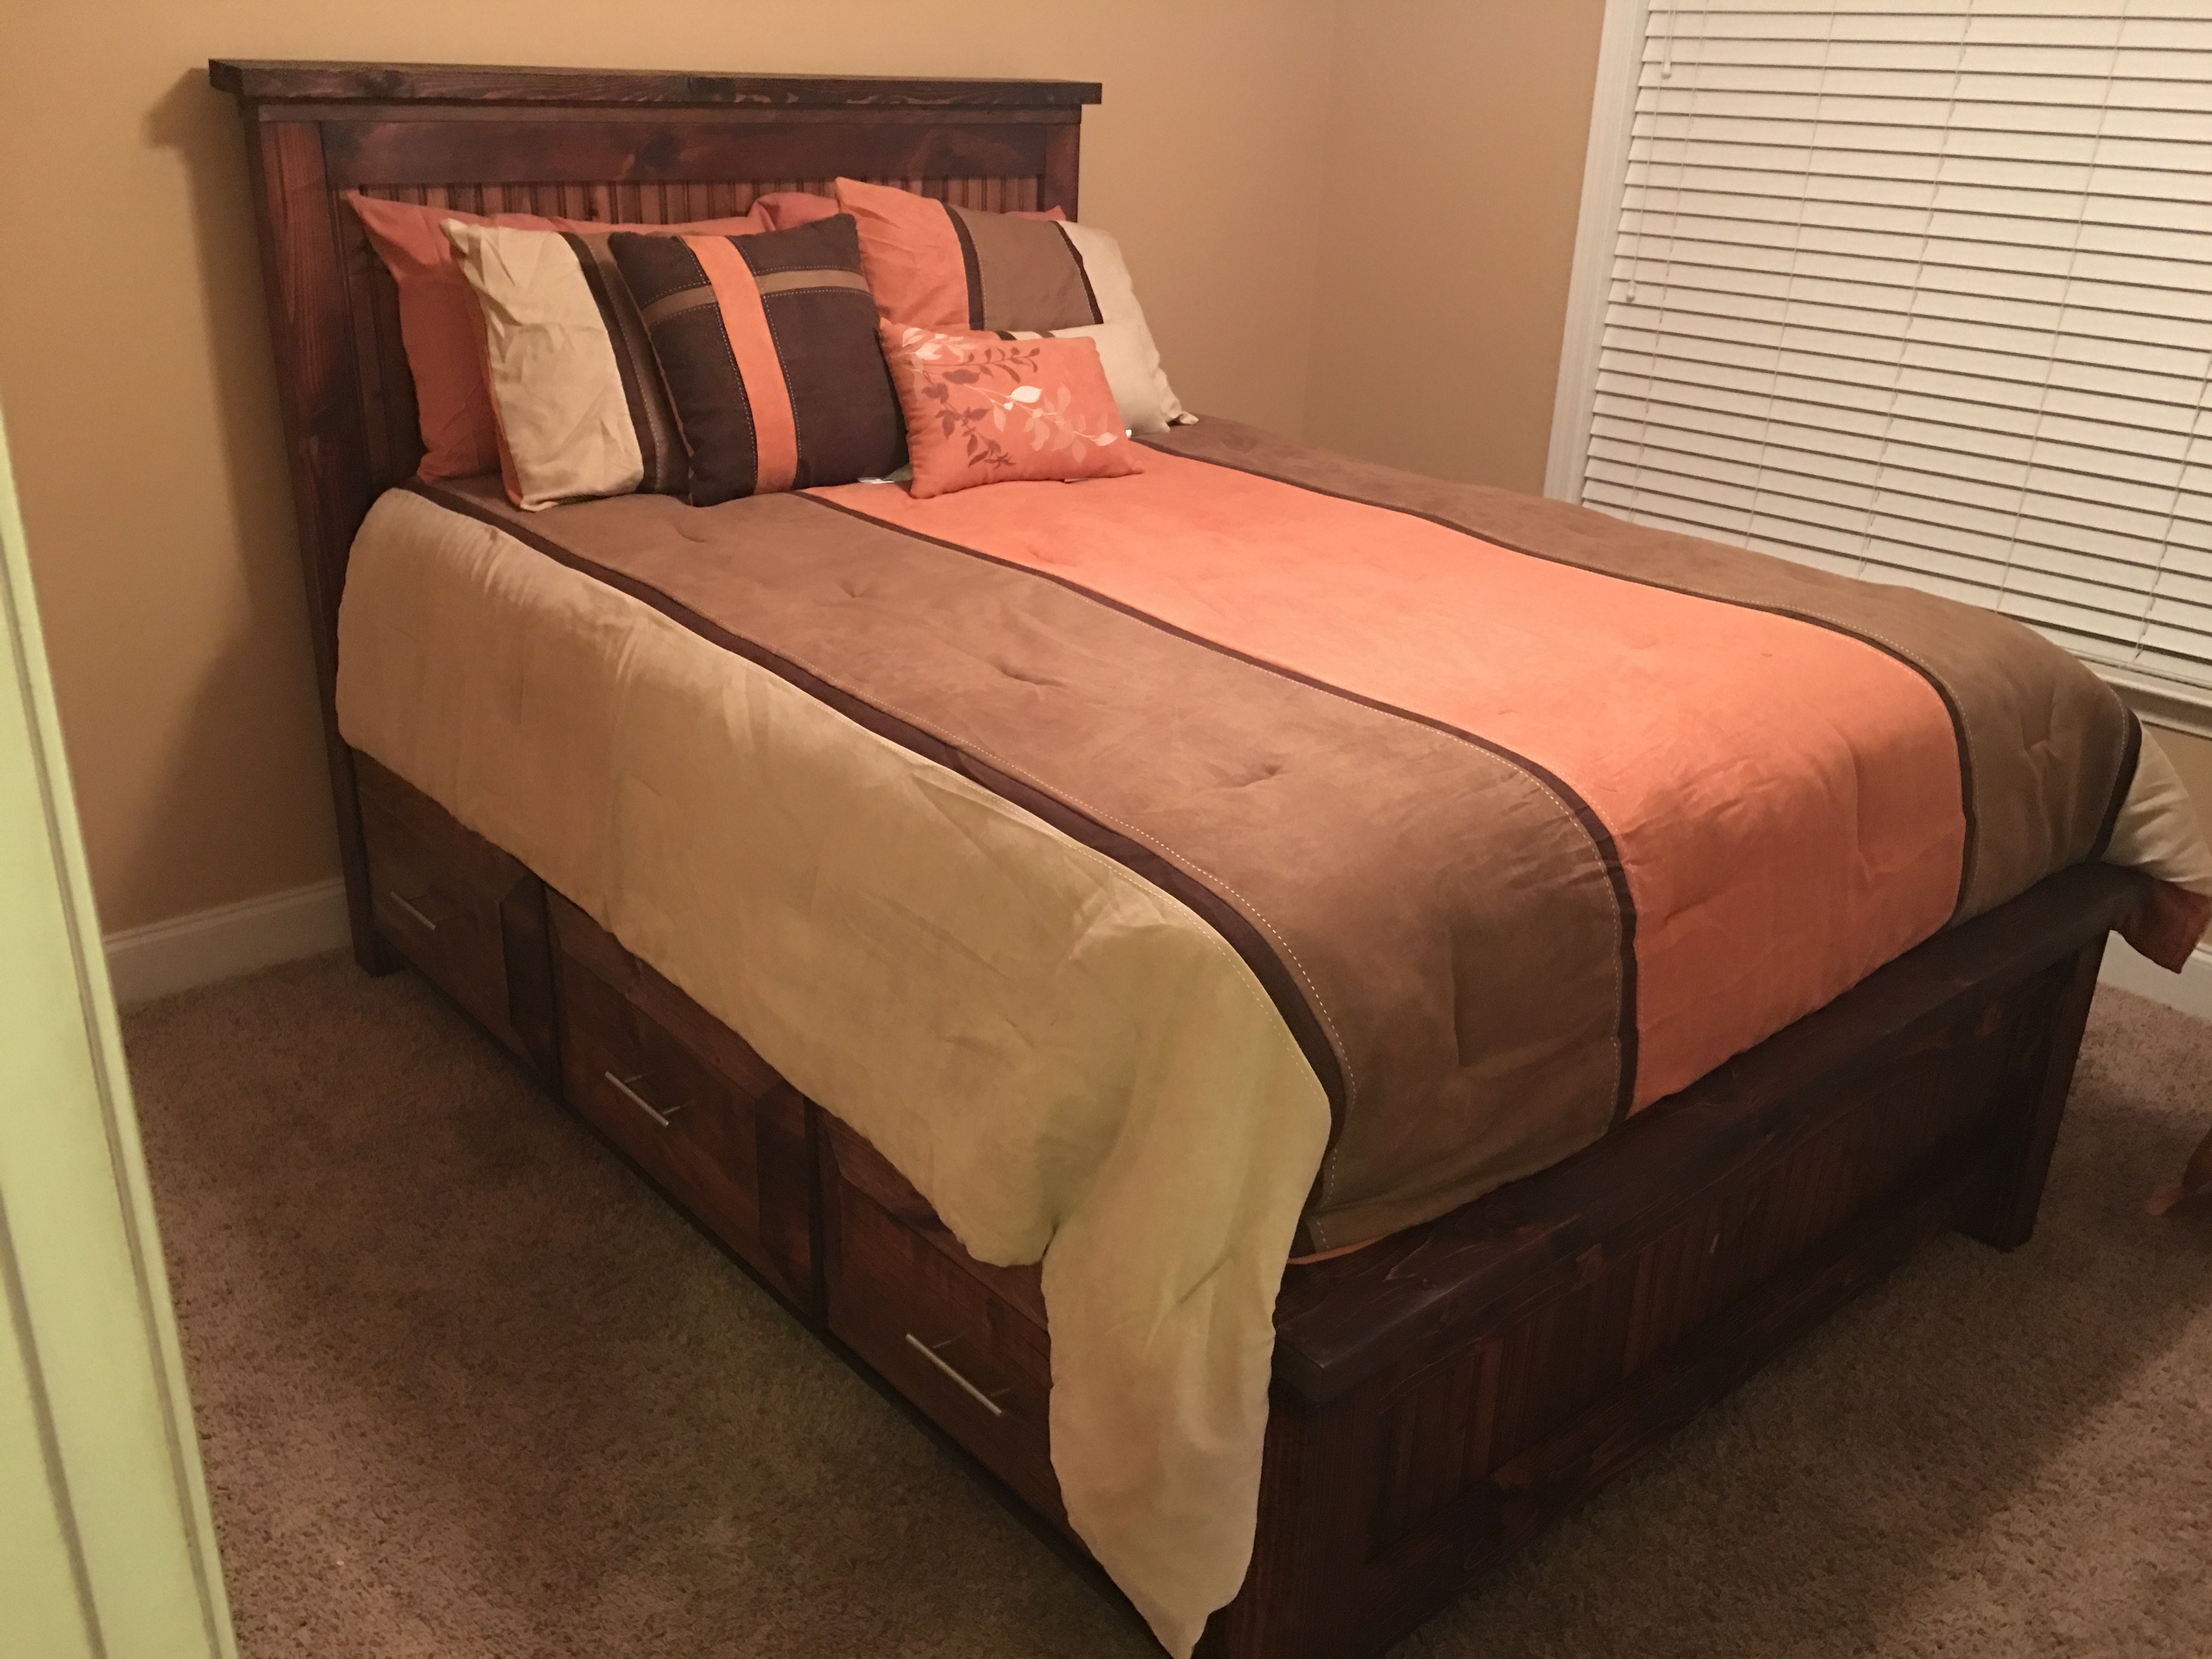
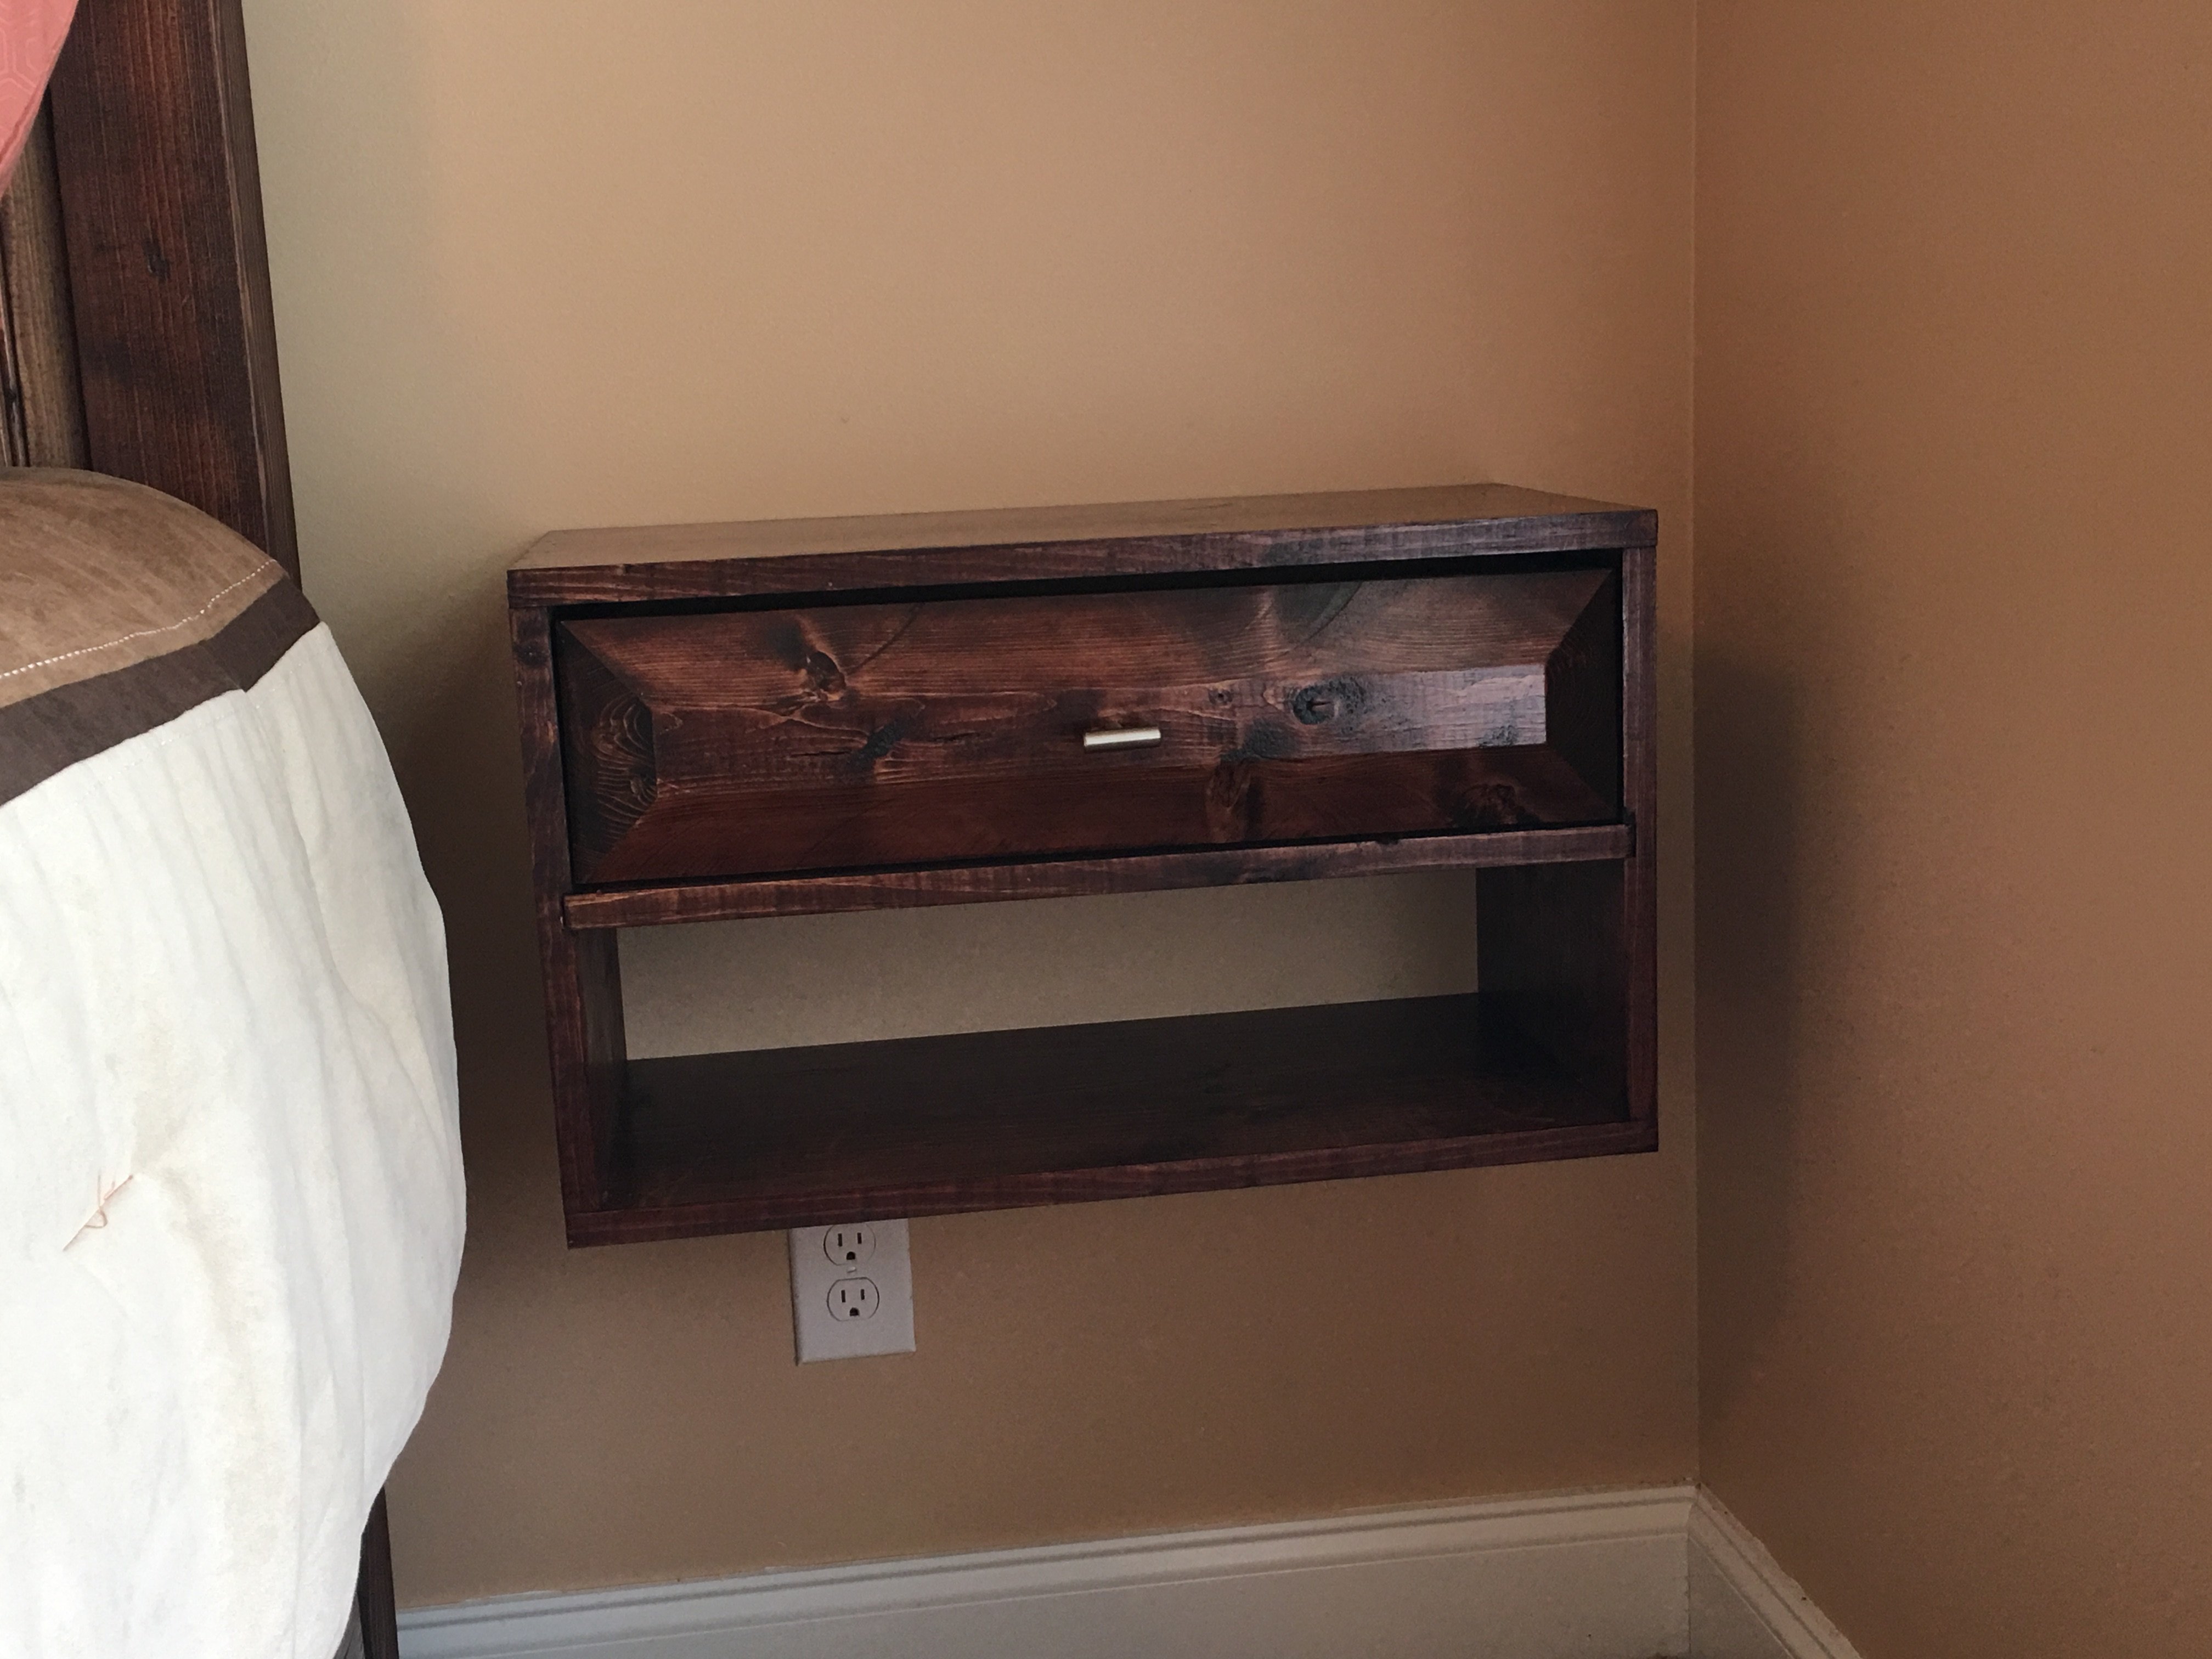
Farmhouse Bed with storage drawers

I had a great time building this project. Thanks For the idea and plans. I added floating shelves to the room.
Built from Plan(s)
Estimated Cost
$180
Estimated Time Investment
Week Long Project (20 Hours or More)
Finish Used
Red Mahogany and English Chestnut
Recommended Skill Level
Intermediate
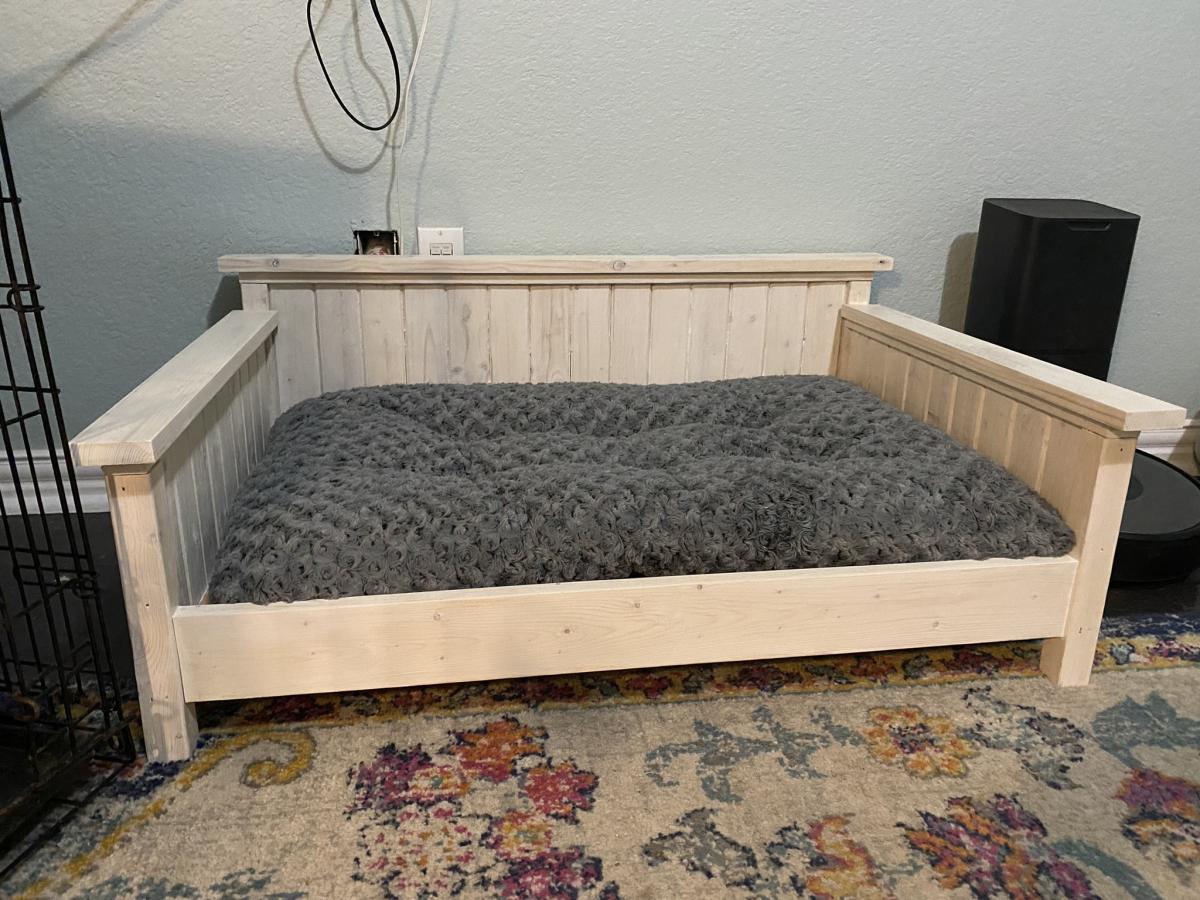
Farmhouse Doggie Daybed
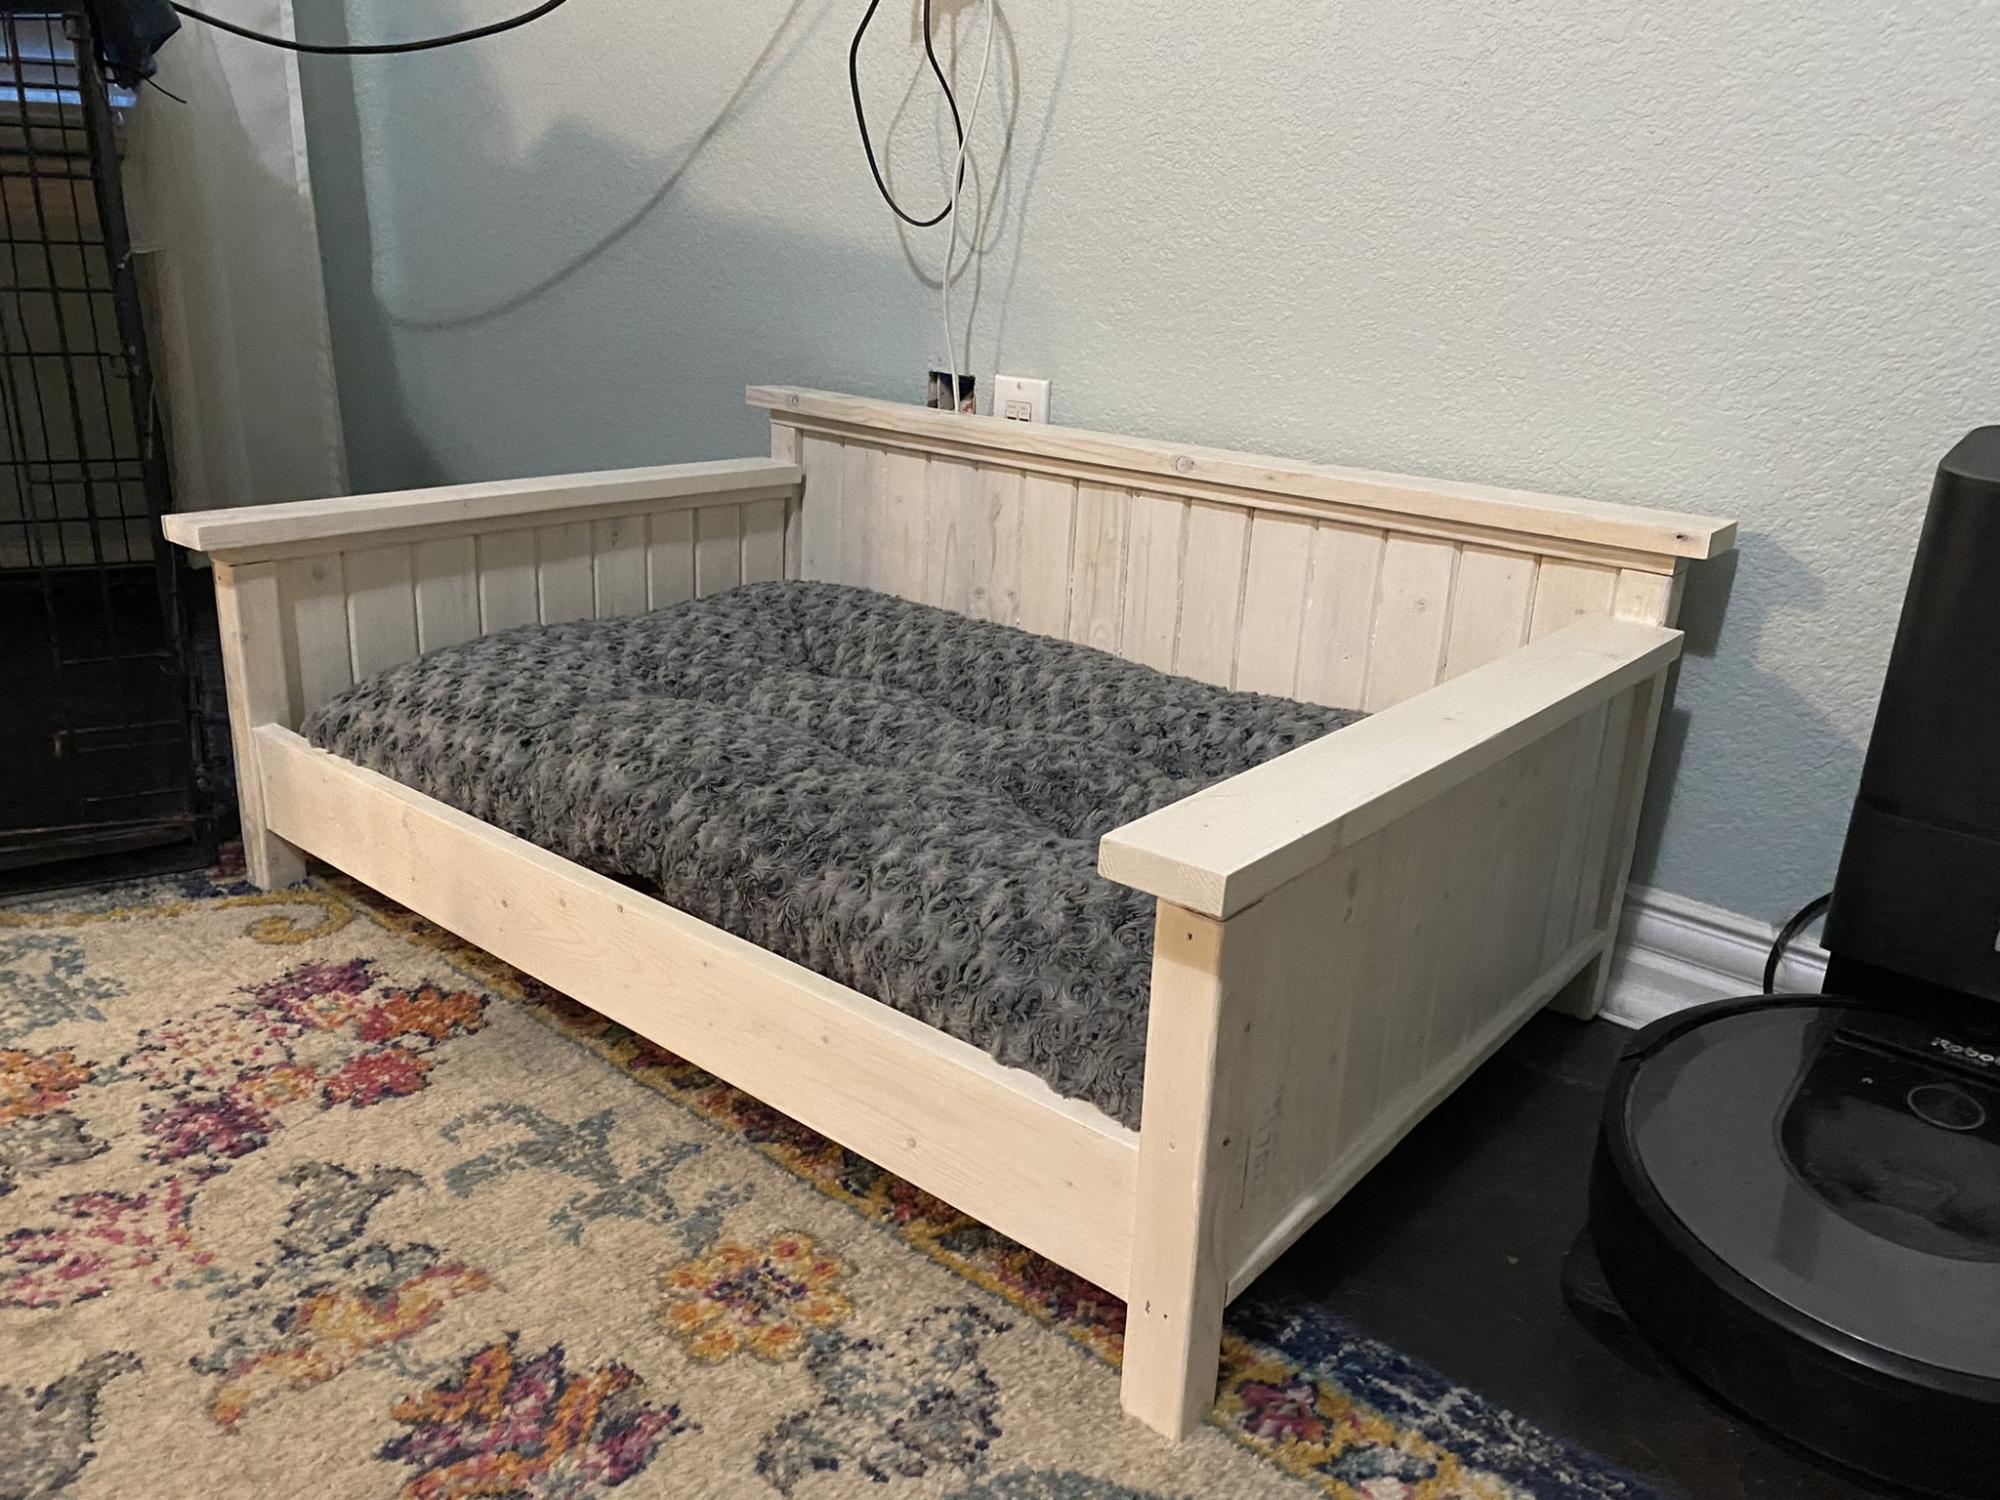
This was adapted from the Farmhouse bed plans to match our king size farmhouse bed.
Comments
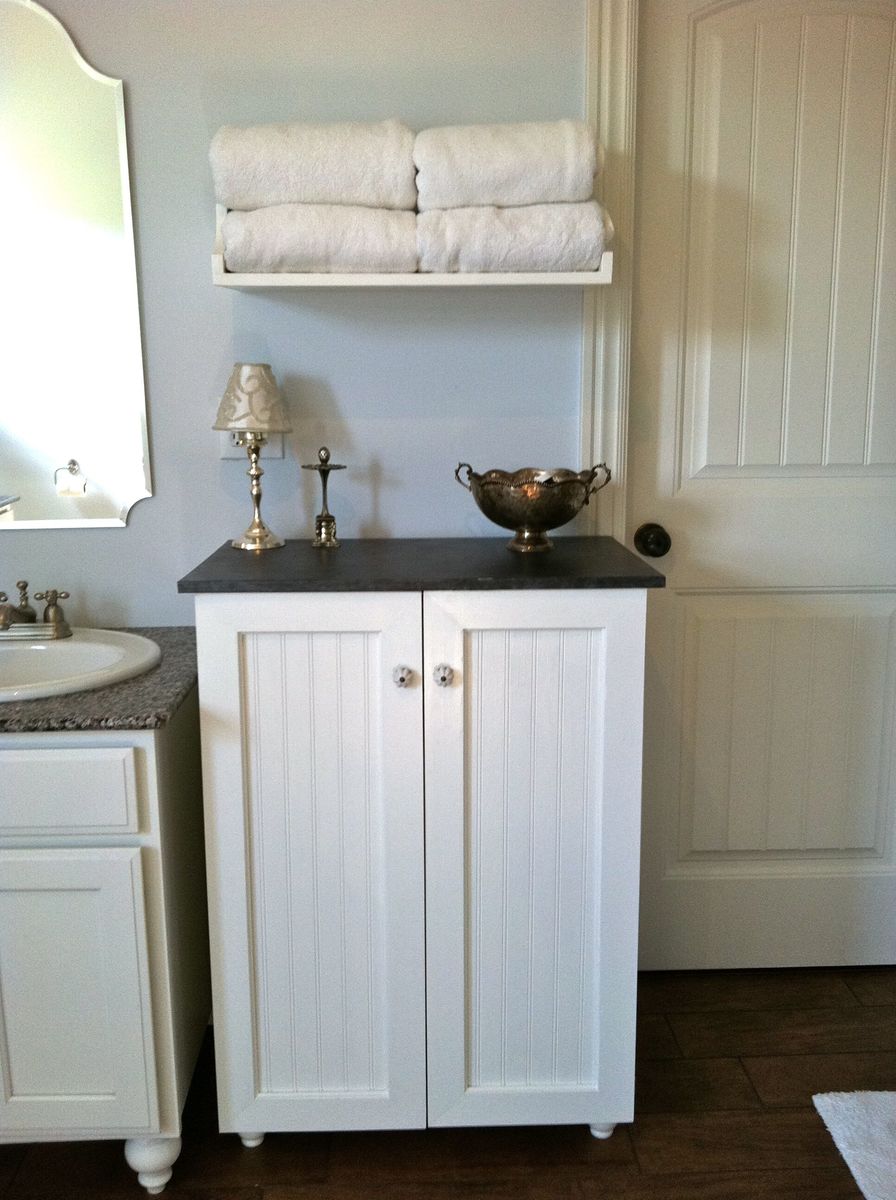
My laundry basket dresser with doors
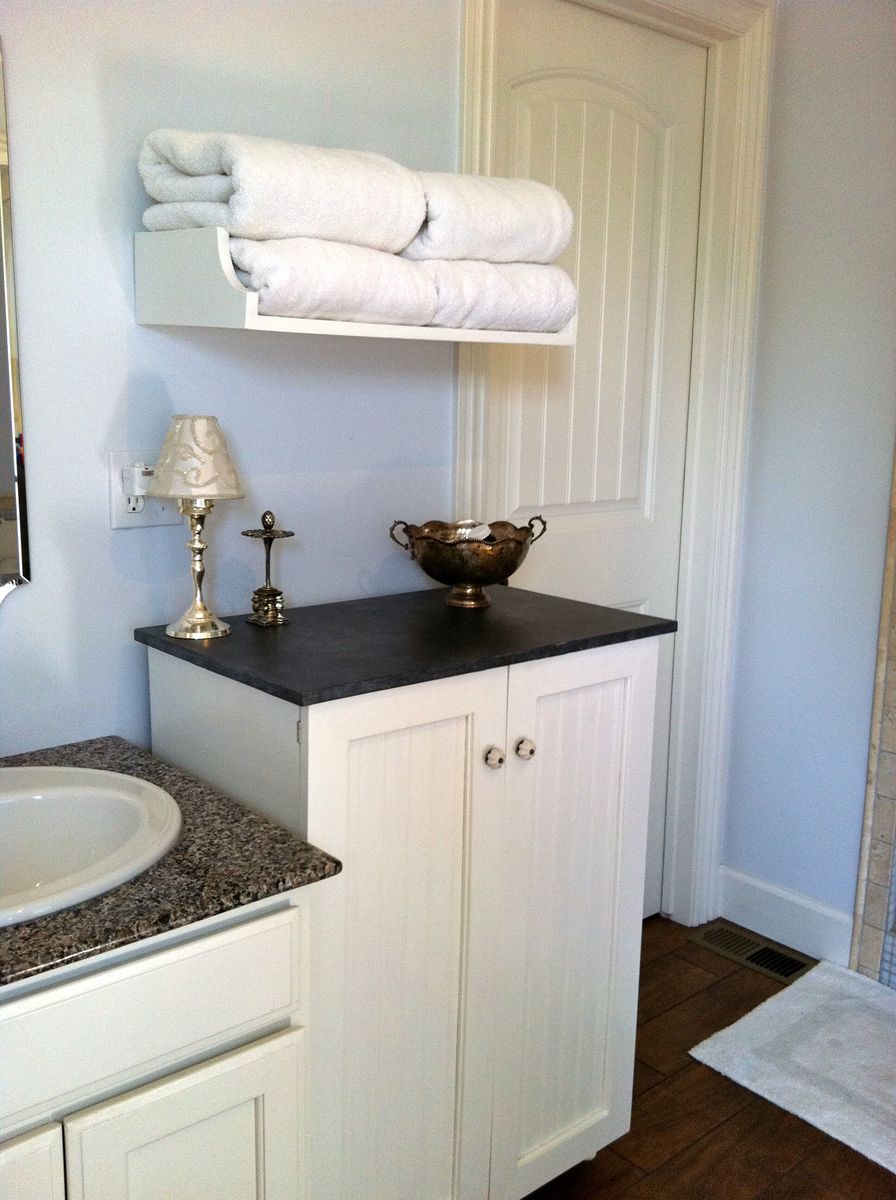
I wanted to use our laundry basket dresser as a collector for dirty laundry in our bathroom, and wanted it to have doors so it would blend in better. I also made the shelf above for our towels. It is painted white with a faux-zinc finish on the top. I made the top slightly larger so it would overhang and added cute little bun feet. My talented friend Carli helped me build the doors (and by helped I mean I handed her things while she impressed me with all her tools and skills!) and frame.
Built from Plan(s)
Estimated Cost
$75-100 (can't remember exactly)
Estimated Time Investment
Weekend Project (10-20 Hours)
Finish Used
white semi-gloss paint, zinc faux finish: layer 1 dark charcoal paint, layer 2 dark pewter metallic glaze, layer 3 white paint thinned with water & rubbed on/off.
Recommended Skill Level
Intermediate
Comments


Fri, 07/29/2011 - 23:37
BEAUTIFUL!!
this is perfect! i totally need a bunch just like this! I love the added doors!
Tue, 10/11/2011 - 20:42
Would you mind sharing the
Would you mind sharing the dimensions for this cabinet? Love this idea!!!! Great job!
Wed, 01/11/2012 - 08:29
I love this idea! I will have
I love this idea! I will have a new bathroom soon and I think this will get used! What are the dimensions, or what style cabinet would you suggest to look for? TIA!
Fri, 02/17/2012 - 05:57
The dimensions are the same
The dimensions are the same as Ana's plan: http://ana-white.com/2010/11/laundry-basket-dresser except that the top is slightly bigger (3/4" overhang on front/sides) to look more like a countertop. On the doors we just made a frame w/ angled pieces, routed a notched line on the back & glued/nailed some beadboard in from the back. Sorry I can't be much more detailed on that, a friend did most of the doors for me!
Sun, 02/19/2012 - 07:42
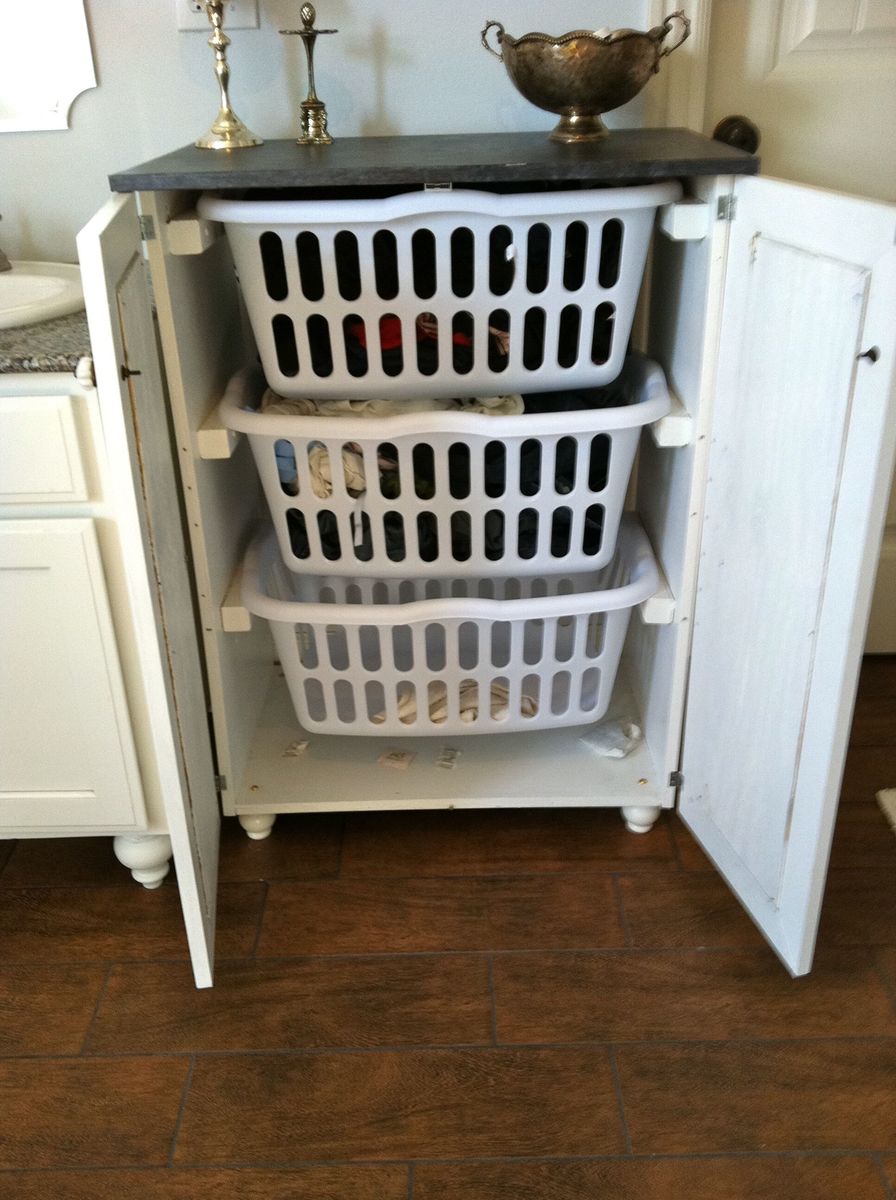
Baskets Used?
I actually got the plywood to do this project and I was going to add doors. I looked at the baskets suggested but it seems they would stick out the front. I was just curious, did you use different baskets that would fit inside the cabinet or did you make the cabinet slightly deeper?
Sat, 02/25/2012 - 05:36
depth/baskets
Actually I discovered the same problem after it was built. I just didn't put a back on and they stick out a tiny bit in the back. I actually kind of like it that way because it lets some air in (being in the bathroom and putting towels in I could see it getting mildewy without much circulation). But if I had gotten the baskets first I probably would have made it about 2" deeper, then leave some open space, but not all, on the back.
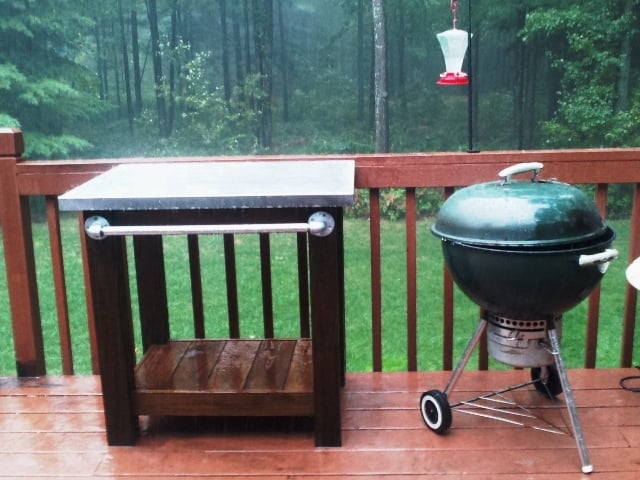
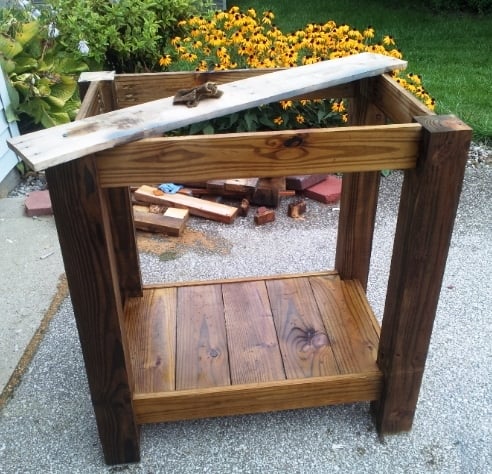
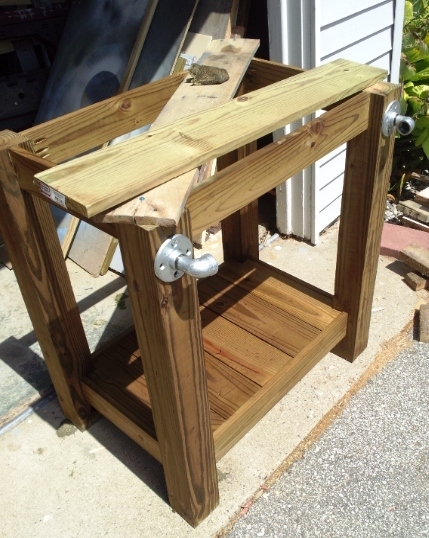
Grill table with stainless steel top

I made this table to go next to an outdoor grill to be used as a food prep area or just a surface for holding ingredients (instead of using the deck railing!). The top is stainless steel which fits tightly over 2 3/4" pieces of plywood laminated together. The bar/handle in front is made out of galvanized pipe. All wood was treated.
Legs - 4x4 posts
Bottom shelf - 1x6's
Sides - 1x4's
Top - 2 pieces of 3/4" plywood laminated together with a stainless steel top (custom fit) over top
Towel bar - galvanized pipe (cut and threaded to size at Lowe's), floor flanges and 90 degree elbows
Estimated Cost
$120
Estimated Time Investment
Day Project (6-9 Hours)
Finish Used
I used Kona stain but since it was over treated wood the stain did not take as dark as it should have. I will have to restain this piece after it has completely dried out.
Recommended Skill Level
Intermediate
Comments

Thu, 05/15/2014 - 10:33
Stainless Top
Sorry about the late reply! Yes, I just gave my dimensions to a local steel supplier and they made the top. I think I have about $40 into the stainless. They didn't weld the corners but I've never had an issue with them.

Sat, 04/26/2014 - 15:41
Stainless steel sheet metal
I too would like to know your source for the sheet metal.

In reply to Stainless steel sheet metal by Pursuit of Handyness
Thu, 05/15/2014 - 10:35
Stainless Top
I just found a local steel supplier, told them what I need and they formed the top. It cost me around $40 (without welding of the corners). I took a fine grit sandpaper to it afterward to scuff it up so it didn't look so bright.
Wed, 04/30/2014 - 12:55
Grill table with stainless steel top
I would like to know are there any plans available to make this table? I am very impressed of its design.
In reply to Grill table with stainless steel top by AMR4412
Thu, 05/15/2014 - 10:46
Plans for top
No...I didn't have any plans when I built it but it's a very simple concept. I chose to use all treated wood since I knew it would be sitting outside unprotected. However, my 4x4 posts weren't square so this caused a lot of problems and everything was built to fit. I believe I just used 4x4's, 1X6s (for the bottom shelf) and 1x4s for the sides (top and bottom). For the top, I just laminated 2 pieces of 3/4" plywood together to bulk it up and then had the stainless top built to fit. It fit perfectly so I didn't glue it to the plywood. This makes it easy to remove and clean, if necessary. For the galvanized pipe (towel bar), I bought it at Lowe's and had them cut/thread it to fit my dimensions.
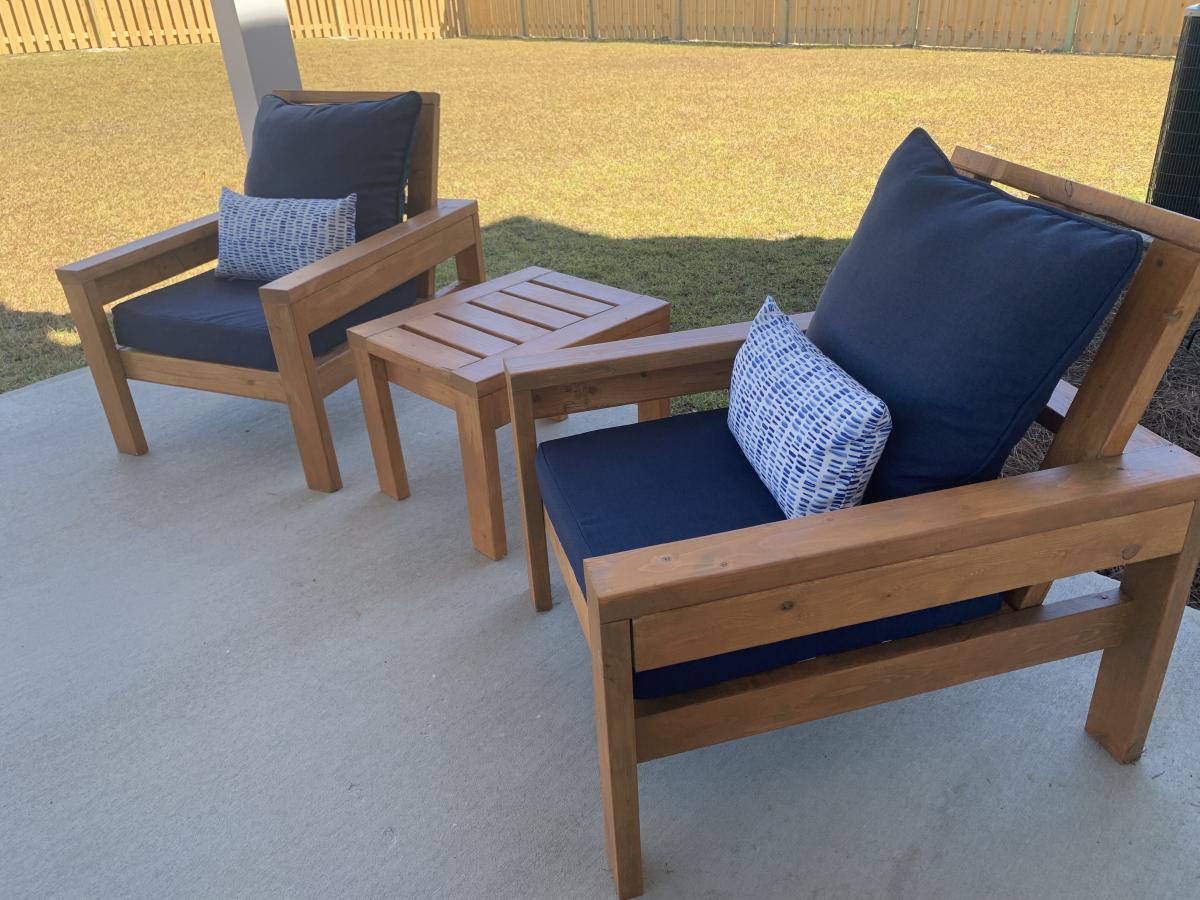
Modern Patio Chairs/Love Sear
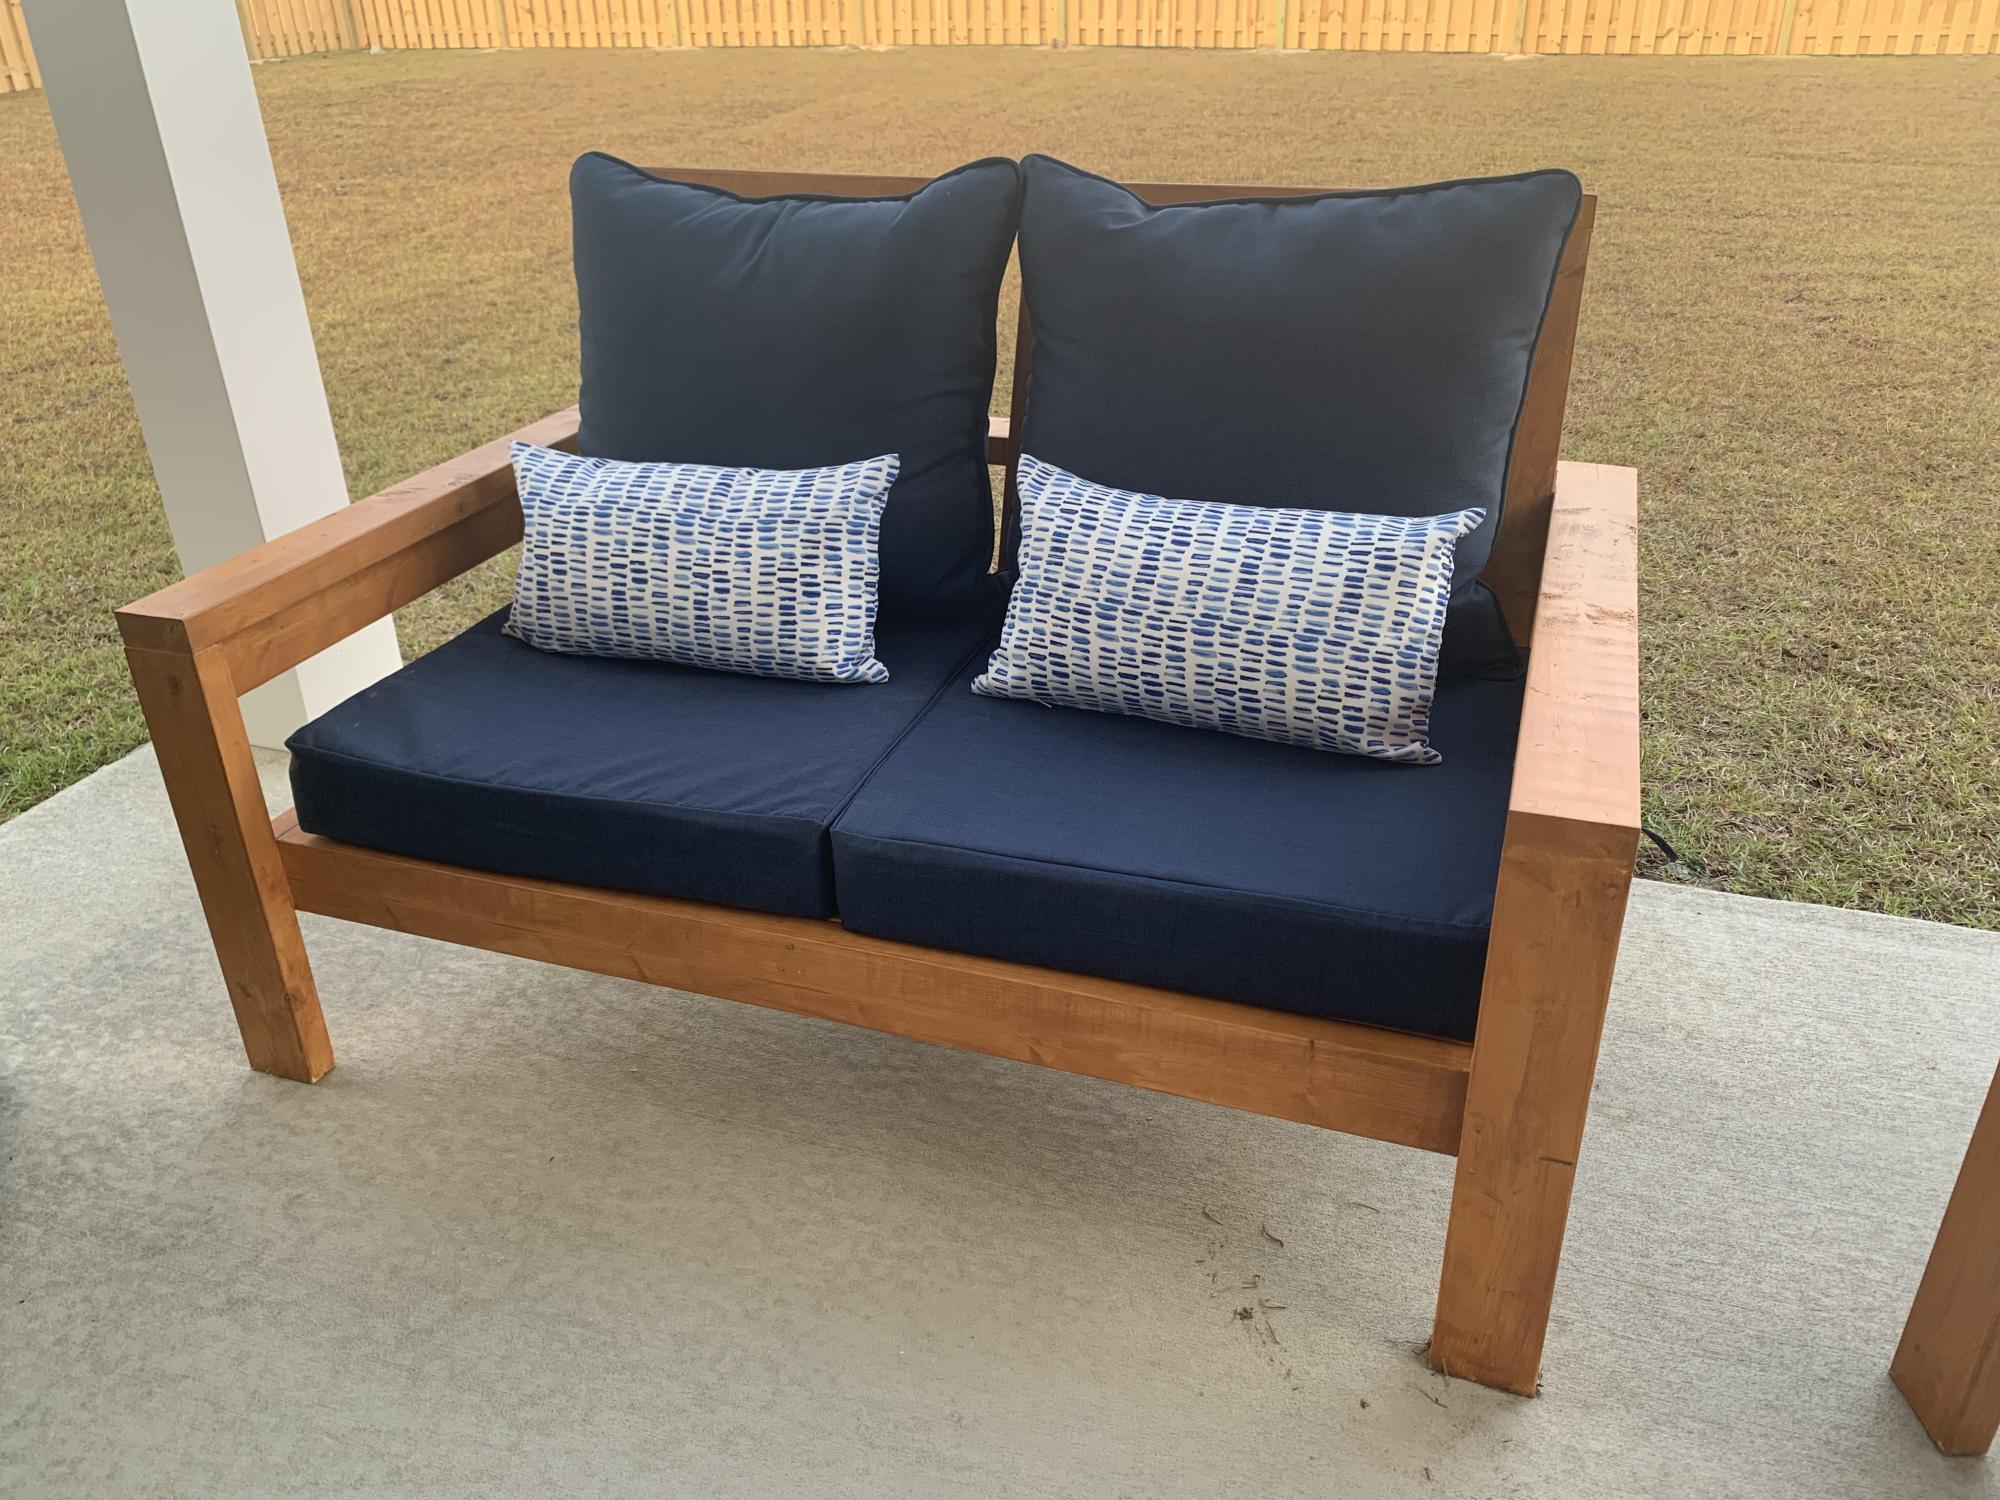
Super easy and fun project! We altered the original plans to build a loveseat and had zero issues. We did add some extra support below.
I did not find 25”x25” cushions within our price range so I settled for 25”x22.5” and they work but ultimately 25x25 works best.
Built from Plan(s)
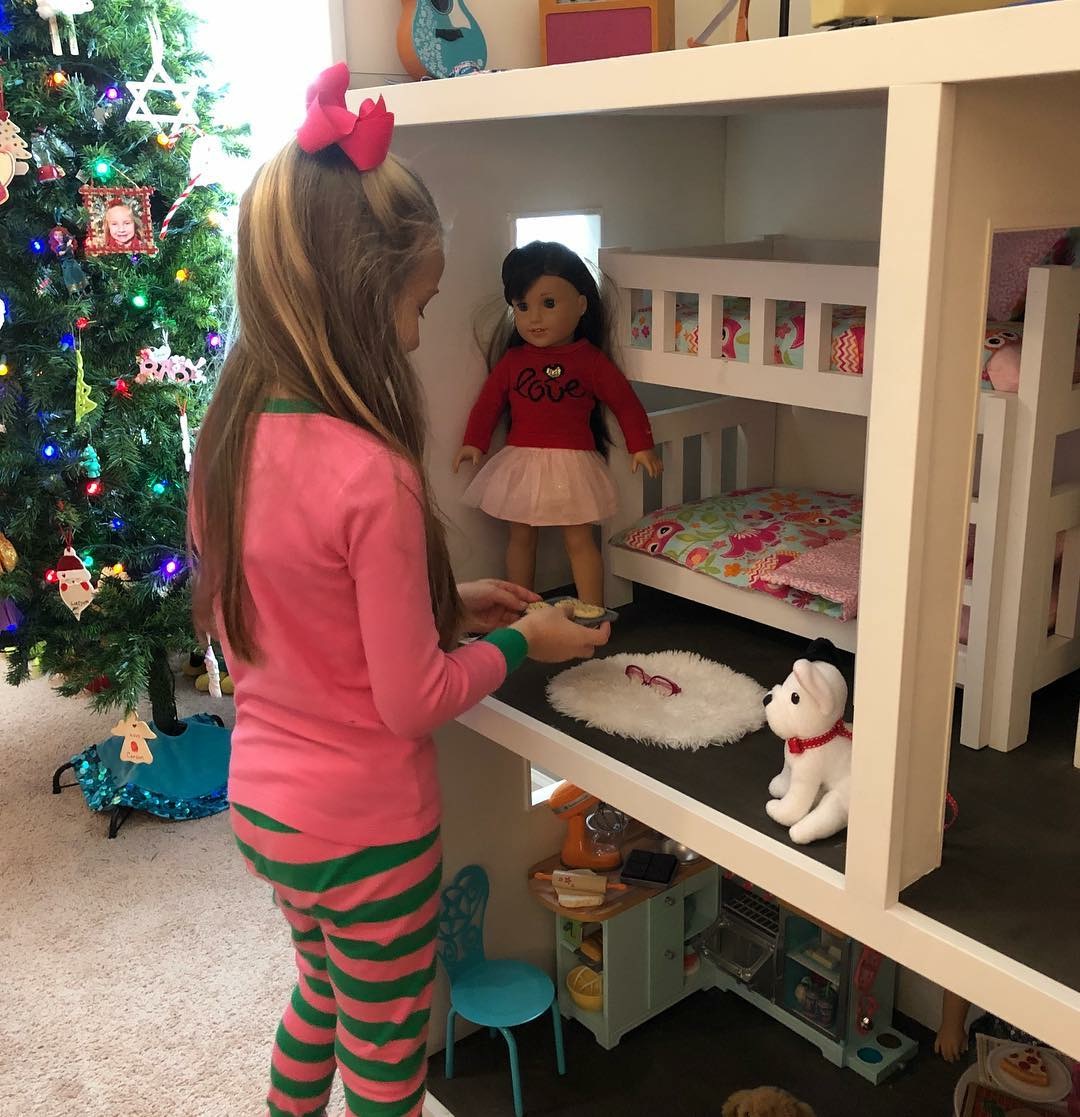
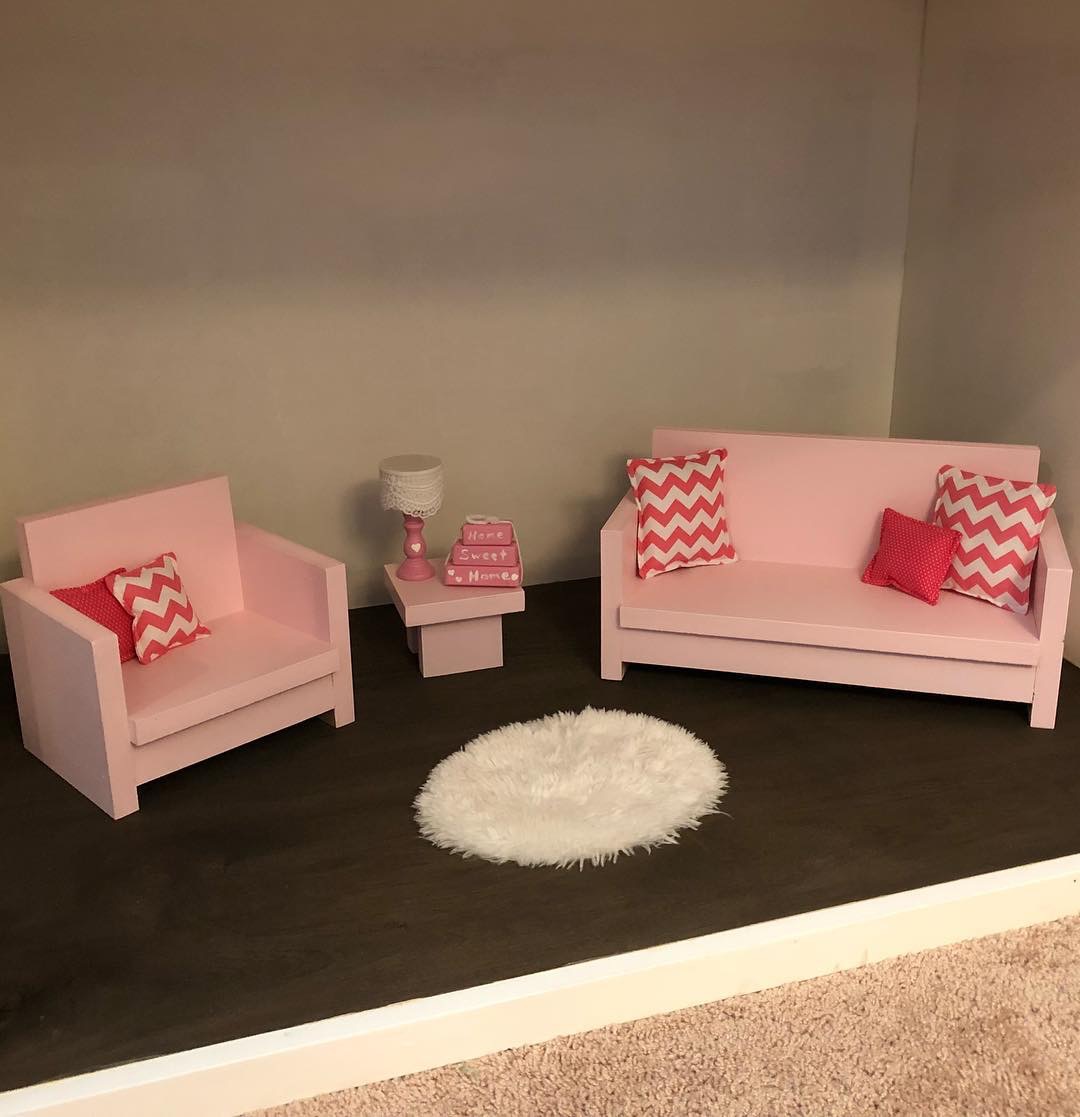
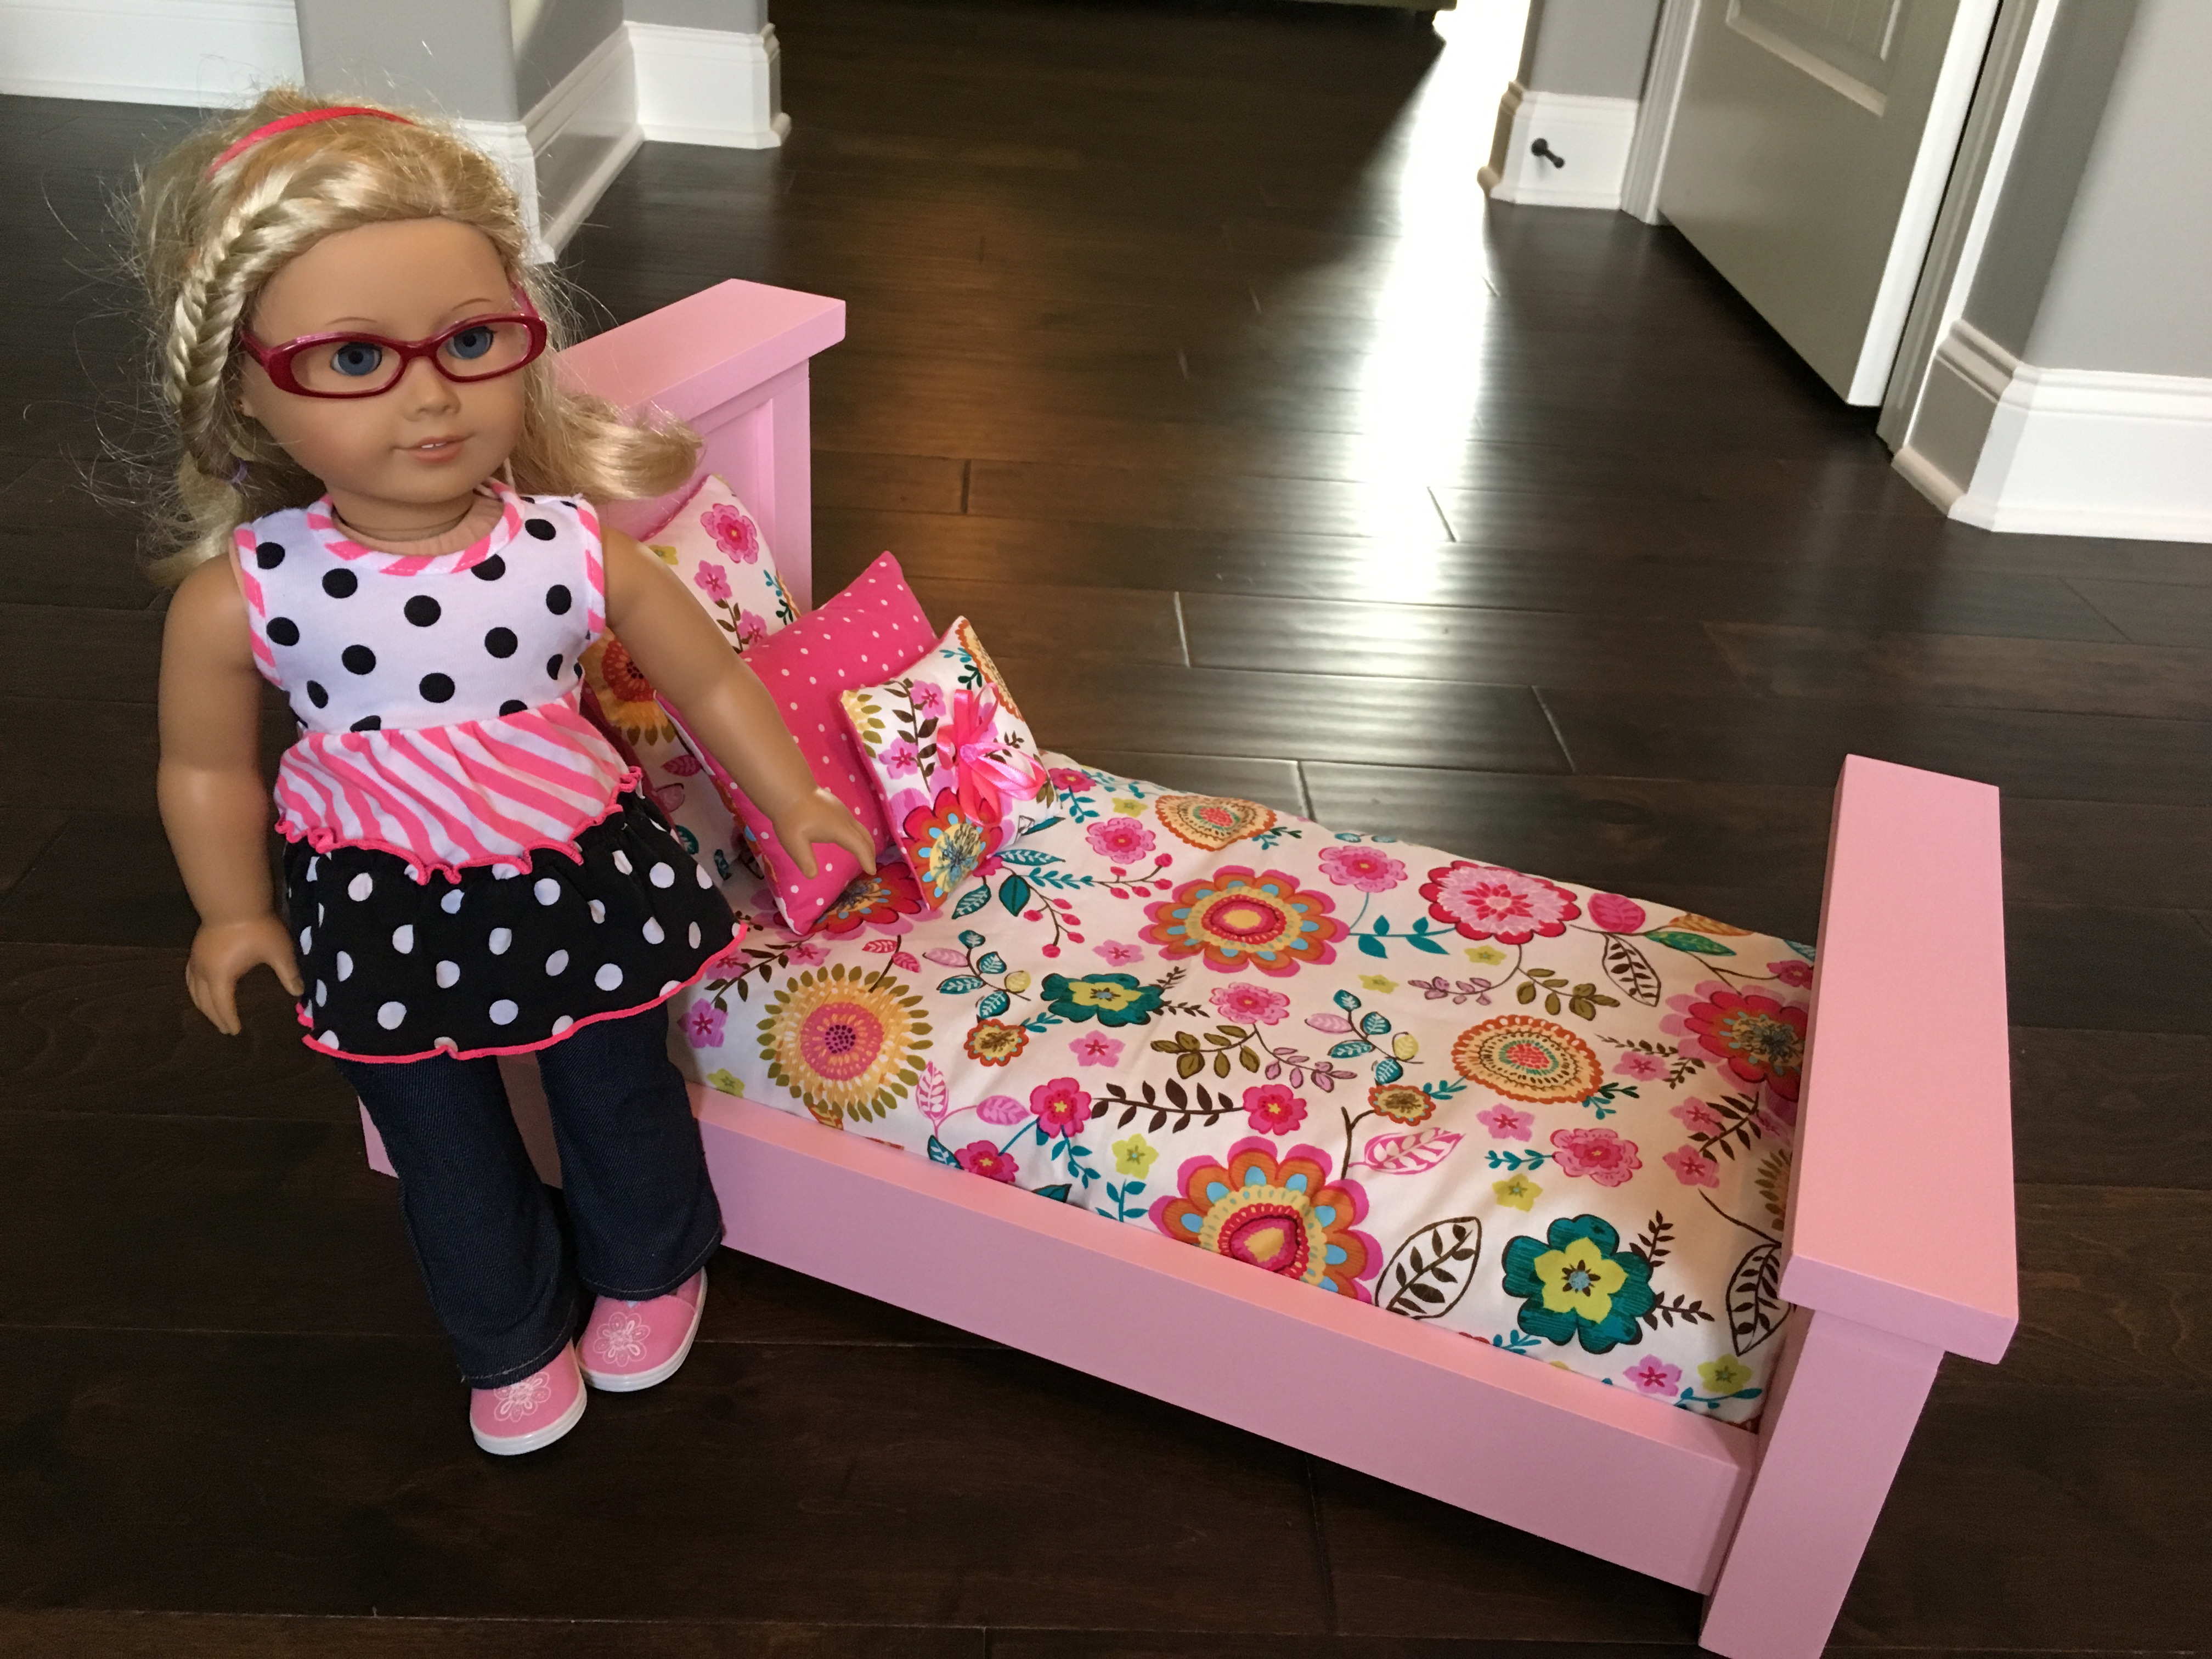
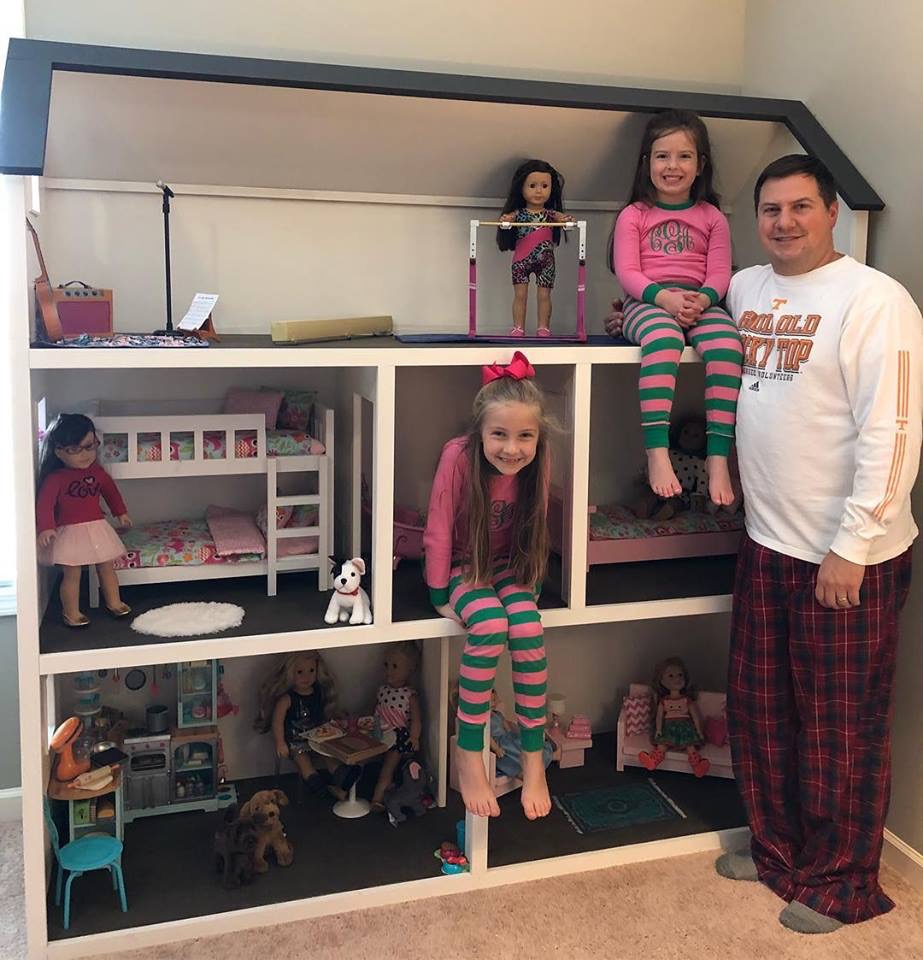
American Girl Dollhouse with Farmhouse Bed, Bunk Bed, and Furniture
I've been building Ana White American Girl doll furniture for my two daughters for the last three years, culminating with my biggest build of all - a modified version of Ana's dollhouse.
My wife kept telling me it would end up being huge, and she was right. The great news is that it doubles as storage when the girls aren't playing! 2 Bedrooms, kitchen, living room, bathroom, and upstairs bonus room for dance and gymnastics. 78" tall x 76" wide, mounted to the wall studs for safety. Lots of joy in our home on Christmas day. Thanks Ana!
Built from Plan(s)
Estimated Cost
$300
Estimated Time Investment
Week Long Project (20 Hours or More)
Recommended Skill Level
Intermediate