Community Brag Posts
Numbered cubbies on the wall
I saw this and fell in love! I've made three so far!
Comments
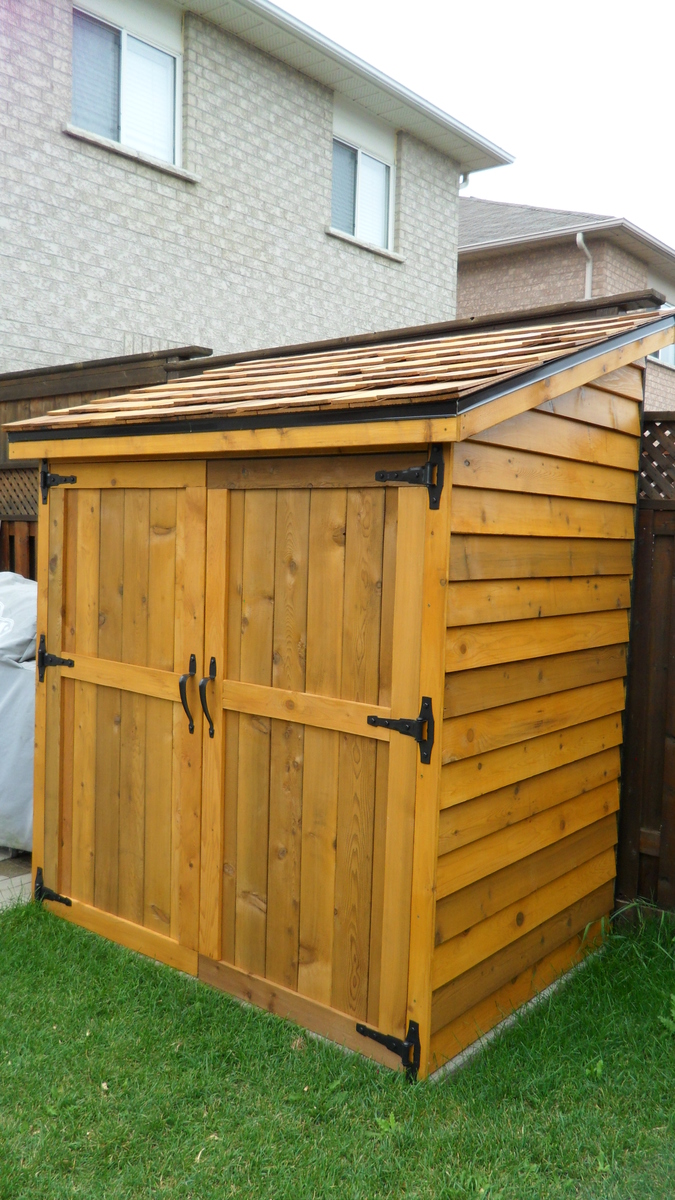
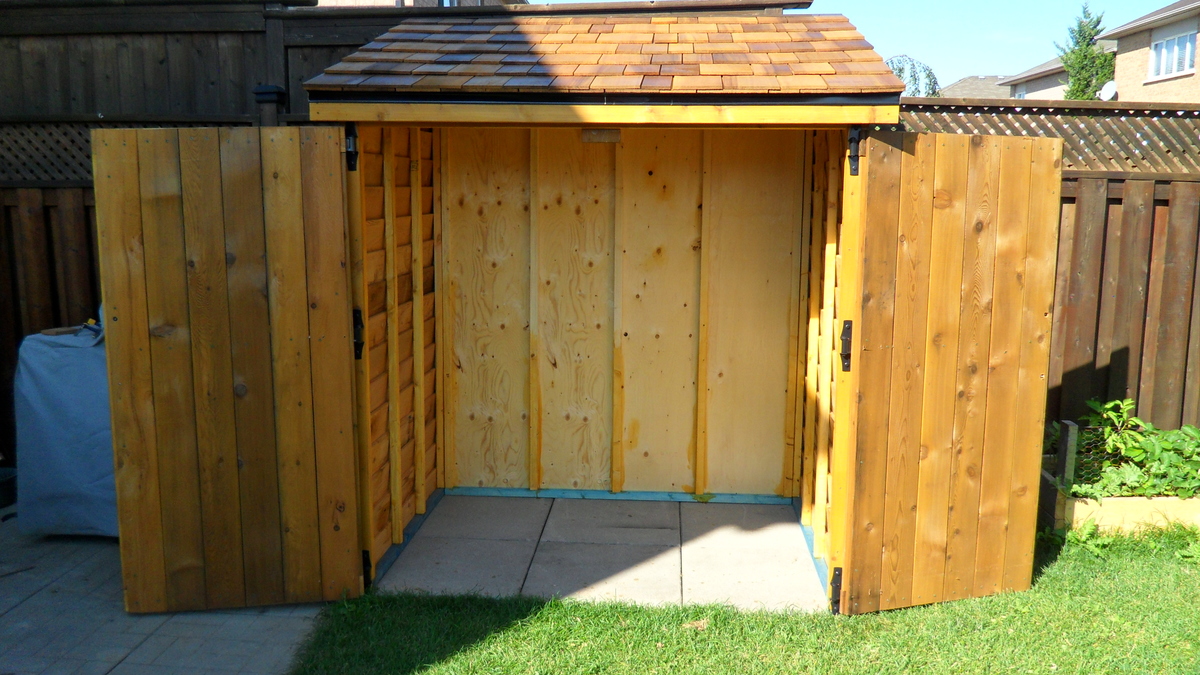
Cedar Shed
Thanks for the shed plans, I've been looking all over for something like this. I used 3/8" ply wood for the back wall to save money but spent what was saved and more on the shingles and stain/seal. I made the shed exactly 6' wide and 4' deep to fit the 6 2'x2's patio slabs.
The entire project took about 2 weeks to complete and cost about $700. We pay more in Canada but at least I finally got the shed I wanted.
DIY Barn Beam Mantel

We always wanted a real barn beam in the house, we bought an old ash beam that we used to create a modern mantel. After some research, I decided to save some money and mount it on a 2 x 4. I've provided some instructions on my blog.
http://www.woodworkingfourdummies.com/blog/barn-beam-mantel-diy
Cheers,
Ian
The only other costs were a 2x4 and a few screws!
Nightstand-charging table

This was built as a nightstand/charging cabinet. I made it a little deeper for more stability. I also replace the 4-5 drilled holes with a corded electrical/usb outlet that allows you to both plug electri cords and usb cords for electronics (about $10 online). I added a center 1 X 2 and magnet closers on the doors. I used unfinished wainscot for the center of the doors.

Comments
Two Sizes from One Set of Plans
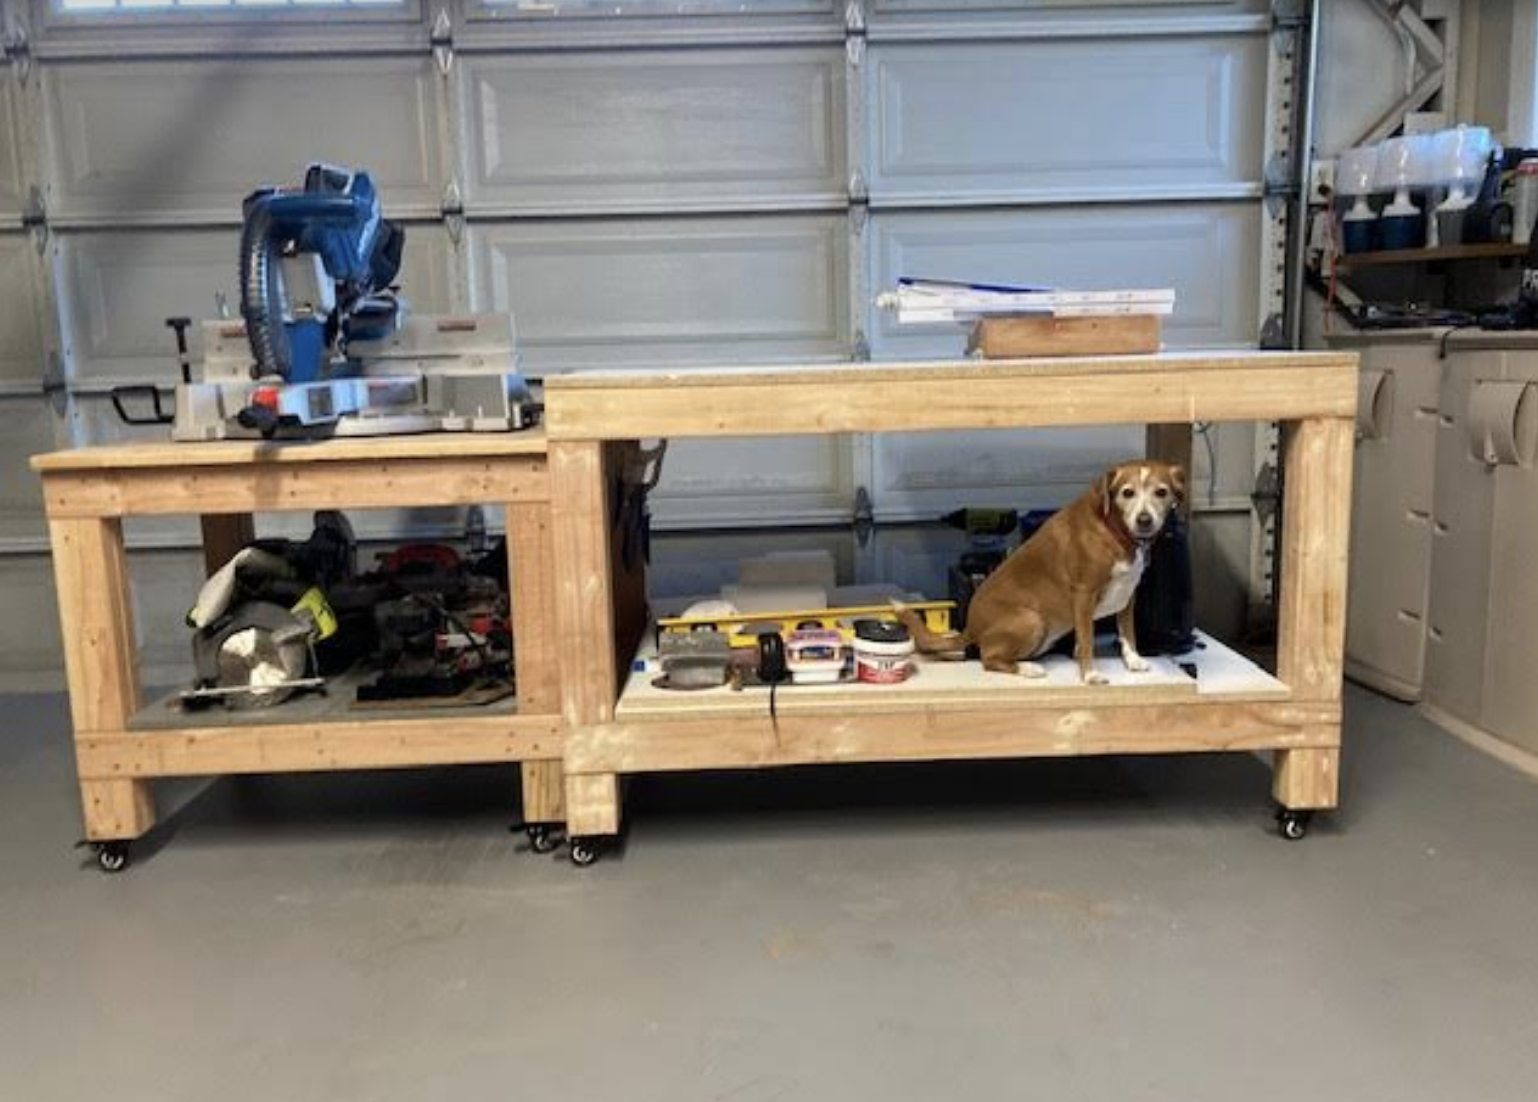
We followed Ana's plans for the large project bench. We altered the plans to make a bench for our compound miter saw with the saw platform level with the project bench.
Comments
Farmhouse Toddler Bed

The bed on the left is the one that I made. I used as much reclaimed wood as possible for this project. I had a bookcase that wasn't stable that had a lot of 1 x 4s so I took it apart and used them. In the second picture, I made the elephant wall art with some 1 x 2s and stapled the fabric to it. It hangs on the opposite wall. It was a fun project. (did not make the bench) I have a lot of interruptions when I build, so I am not sure about the length of time.

Comments
Saw Horse table for sewing!
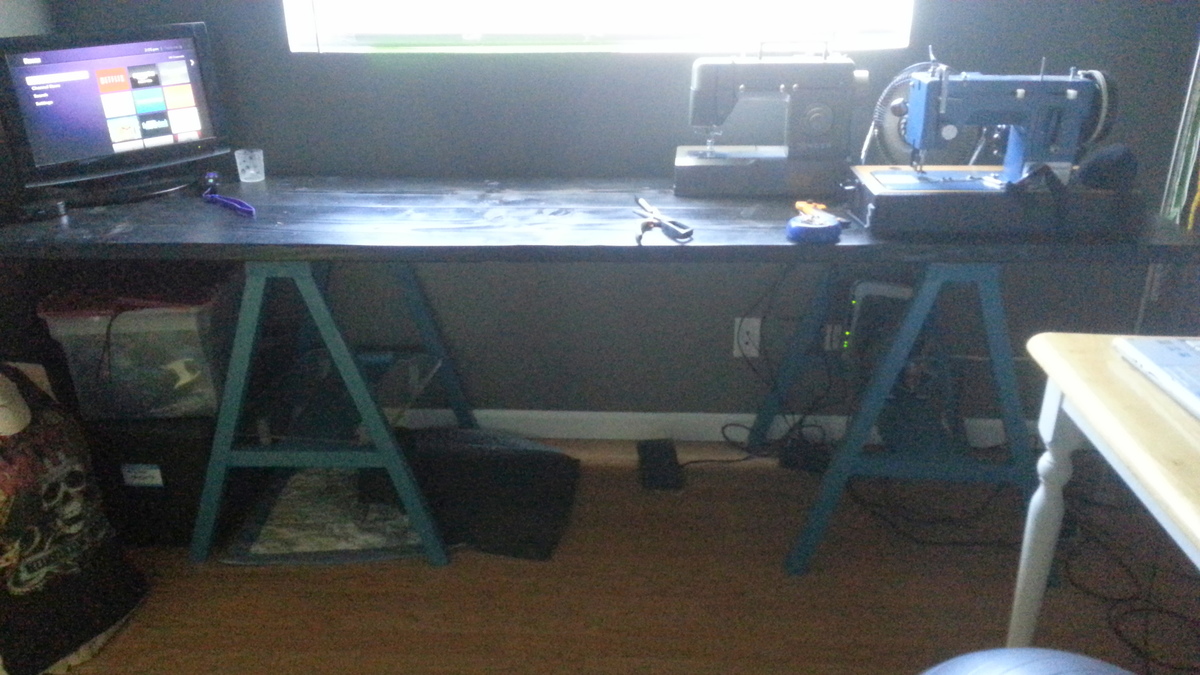
My first Ana white project!
It was easy and I really tried to take my time to make it look nice. Great new BIG table for my sewing room! LOVE IT!!
Stained the top 2x12's black and the legs are oops paint that are a teal color.
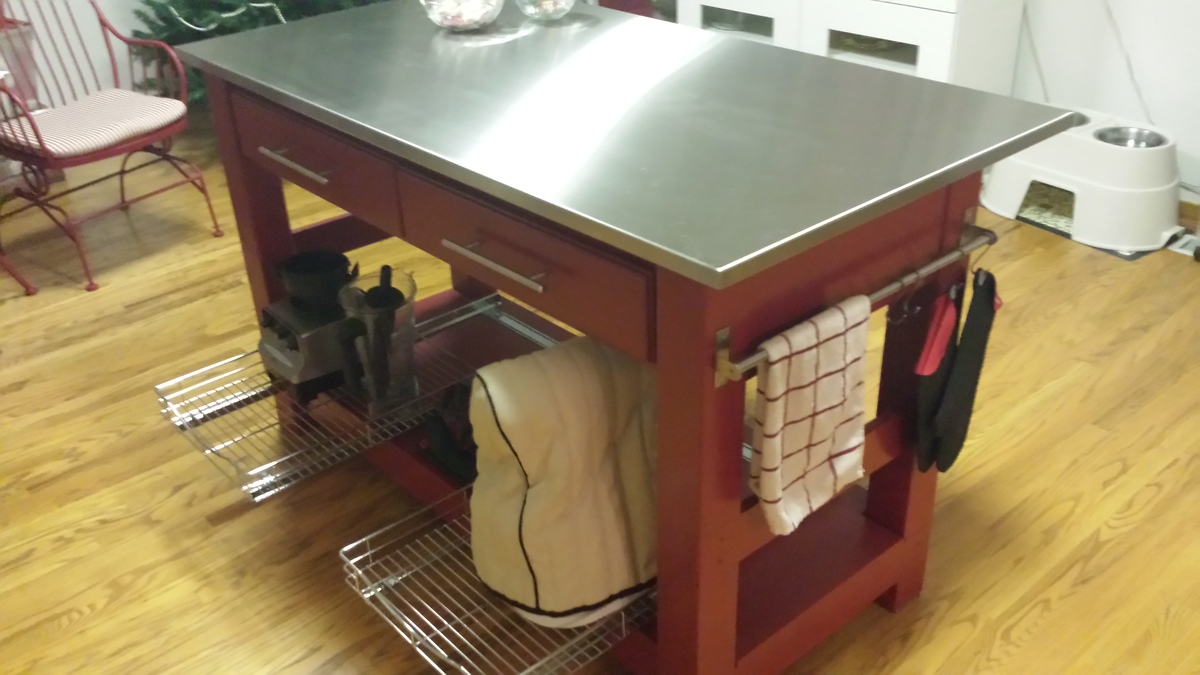
My stainless steel kitchen island
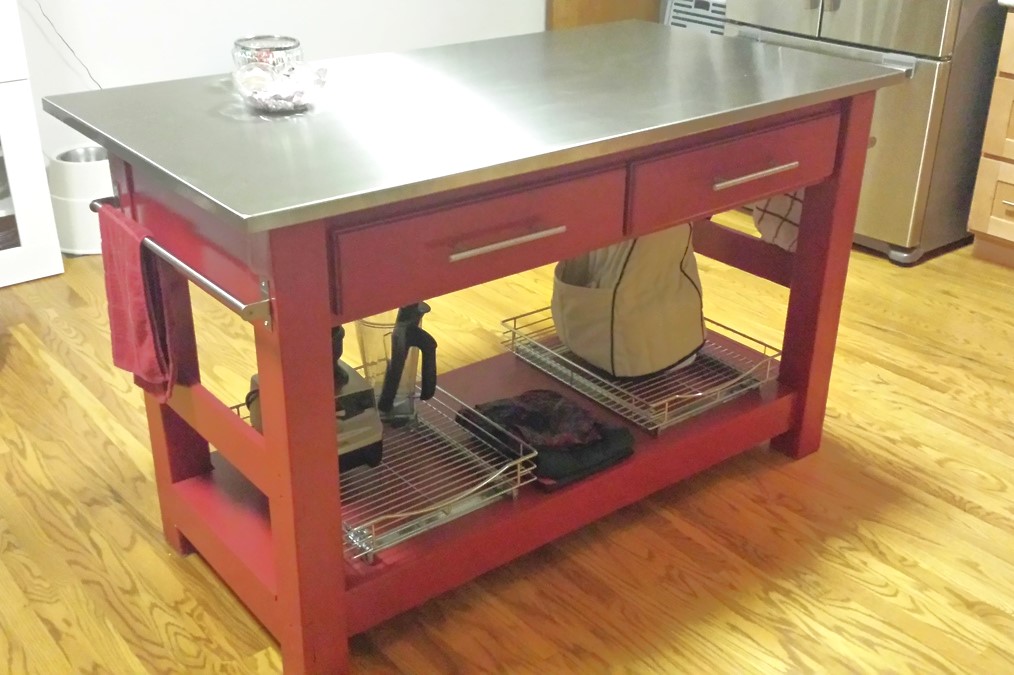
I really do enjoy my island. It has great storage and the added prep space has been wonderful. With the added counter space It has aloud me to make breads and pizzas and with the stainless steel top it is a breeze to clean. I really have enjoyed Ana's website with all the great plans and tips.
Farmhouse table and benches
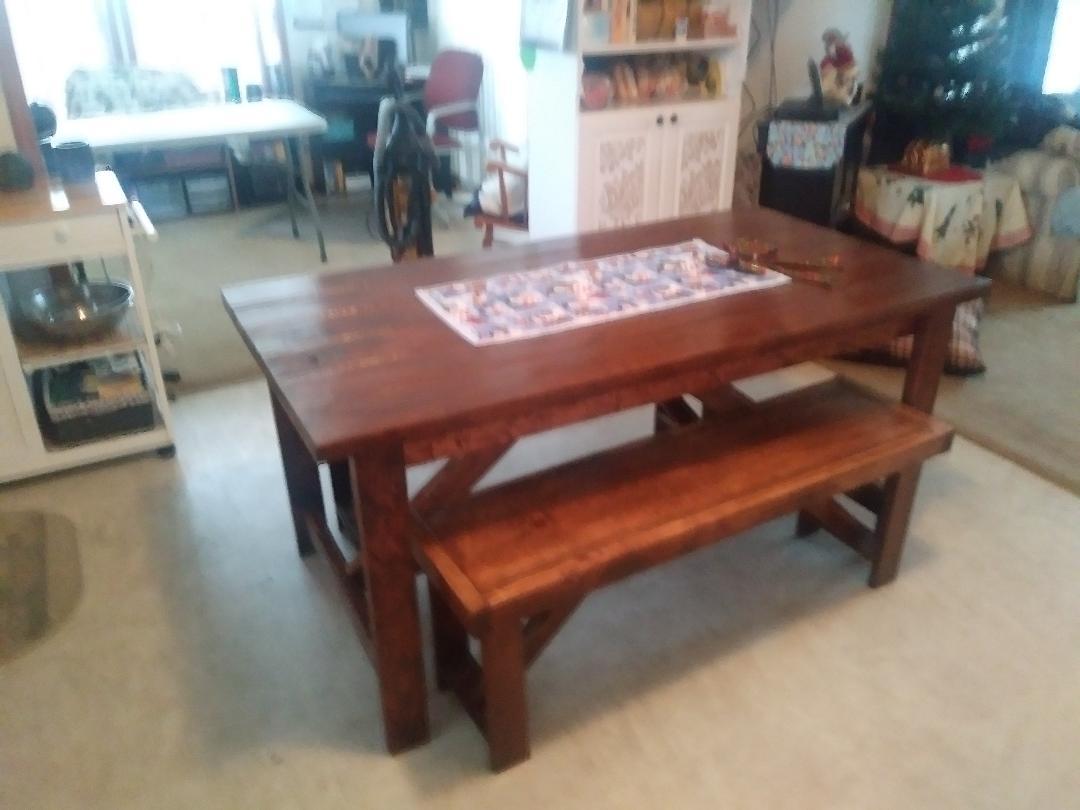
I enjoyed making this project! My wife loves the table and benches.
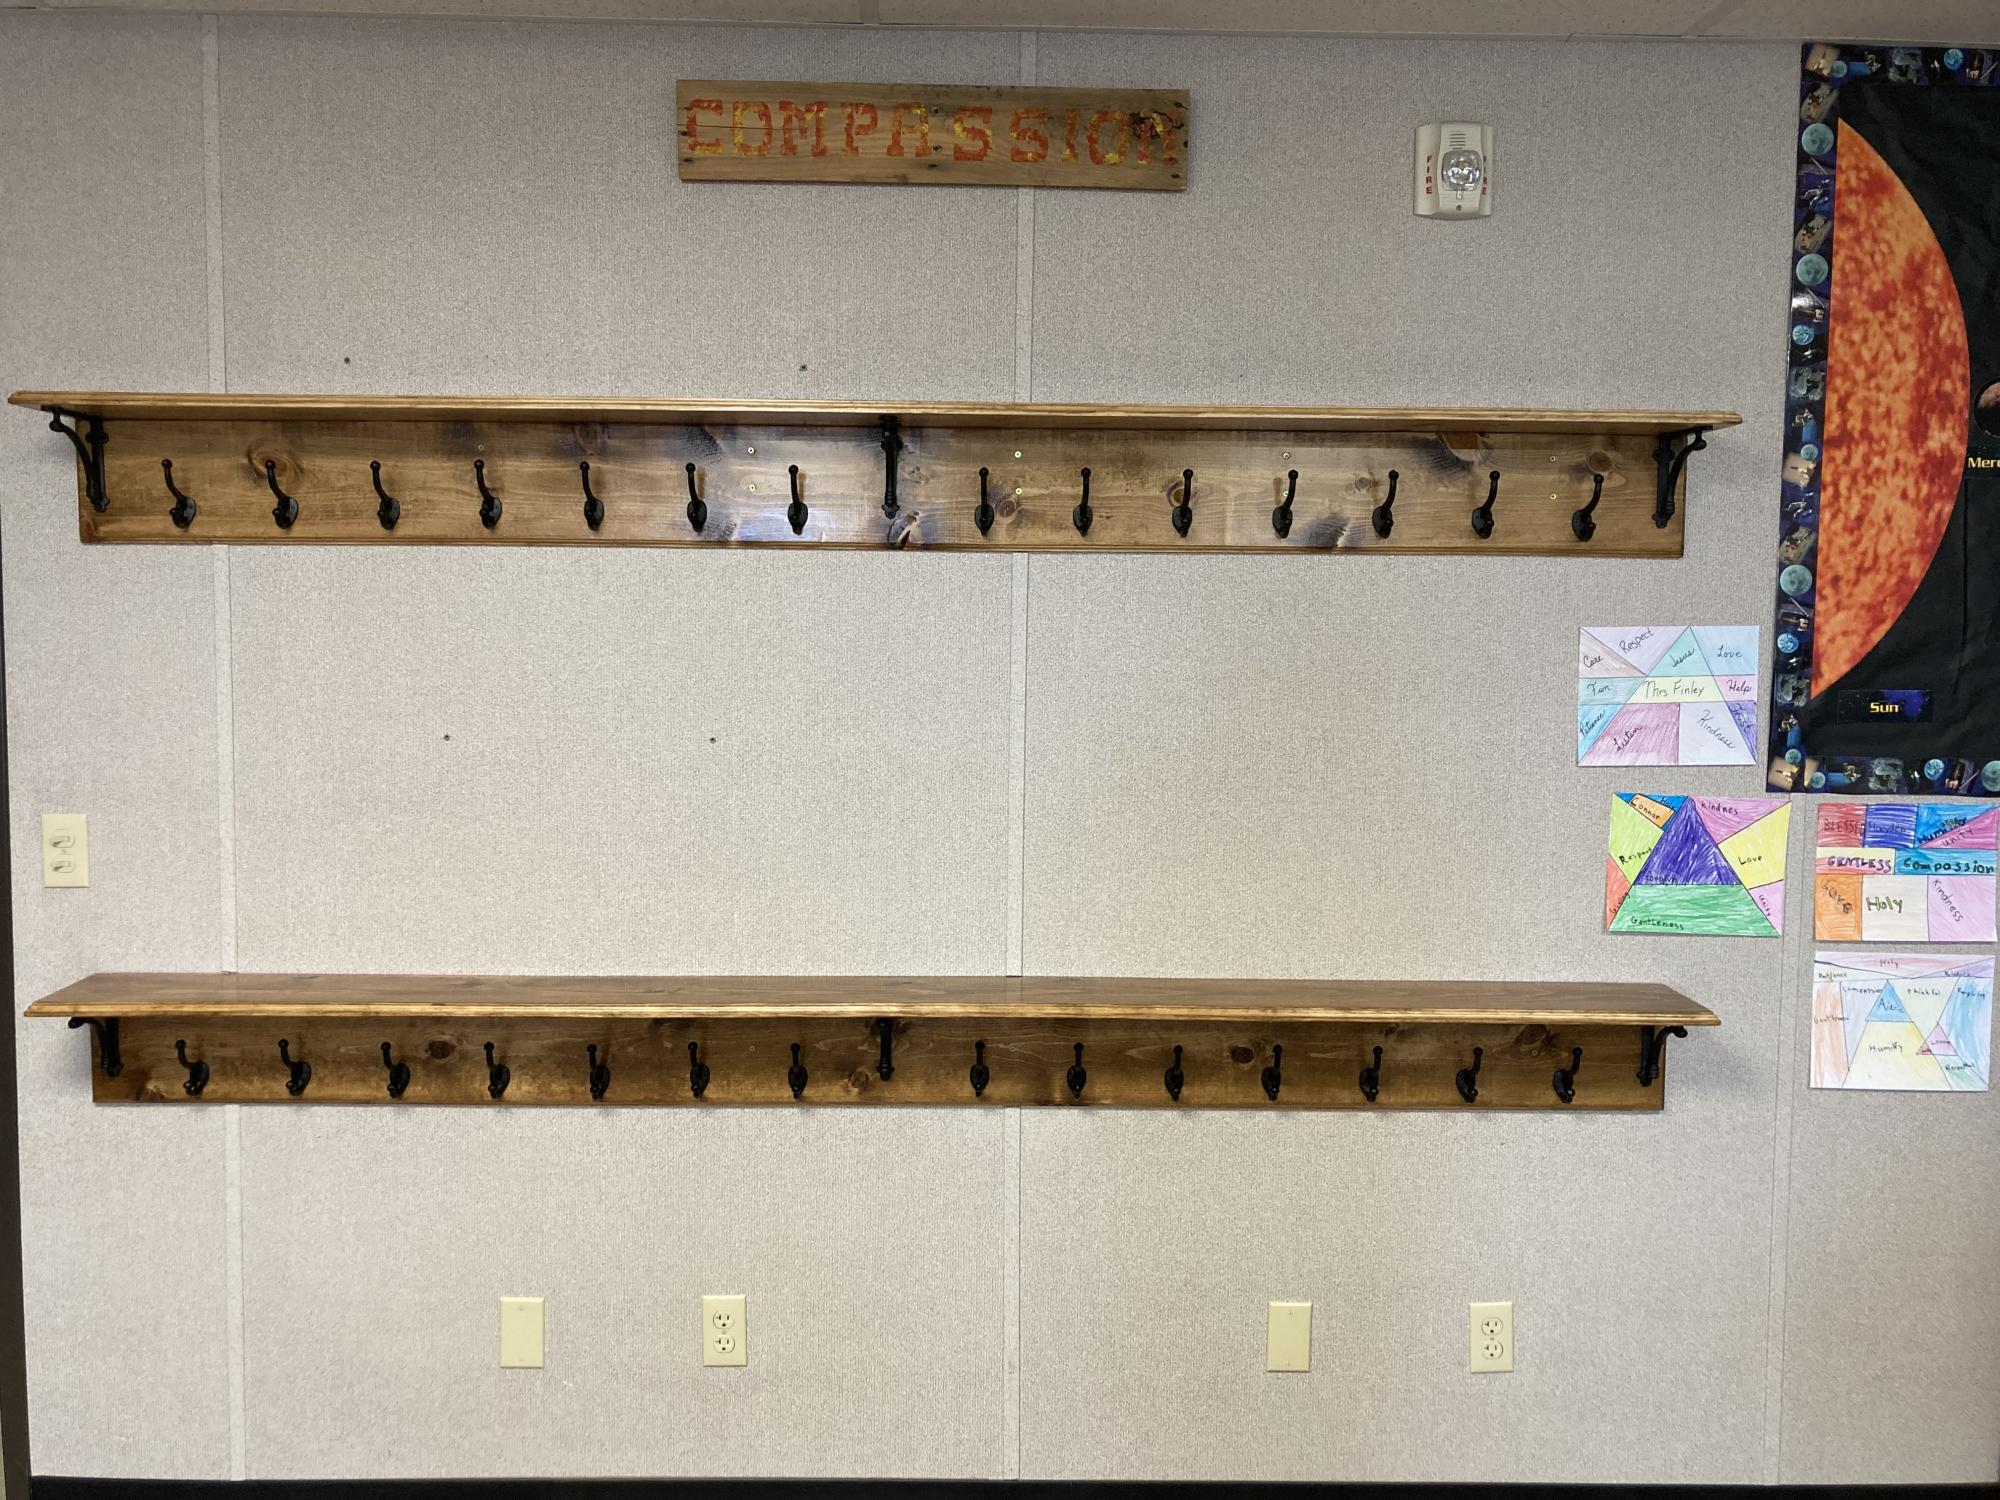
Classroom wall coat/backpack/lunch rack with shelf
Dear Ana,
I was able to change classrooms and needed a place for my students to hang their backpack, lunch, coat, and snow gear. I used a combination of your ideas and created this. Each shelf is 8ft. Long with cast iron supports and coat hooks. The zinc hooks were too thin and we could bend them. The wood was sanded, stained with golden oak, and routed out the edges. I pocket holed every 8 inches and joined wall board to the shelf. The coat hooks are 6 inches apart. I cannot wait for the class to see it on Monday. Thank you Ana for all the ideas and making me feel comfortable to create on my own.
Blessings,
Jennifer
Comments
Sat, 08/20/2022 - 21:01
Great job!
Thank you for sharing your projects, no doubt everybody is going to appreciate what you've built and use it everyday!
Claire's Loft Bed
A few months back a friend of my Sister asked if I would build a bed for her 10 year old daughter. I was excited to do it! So I finished up the projects I had already started and then went to work. I had never built bookshelves before. I wanted it clean and "hole-less" on the outside, so we found a Kreg Jig and I started learning. SUPER easy!! I believe it has been painted white. I can't wait to go see it!!
I followed Ana's plans except I used 2*2s for slats and used 16" wide boards for one of the bookshelves and the desk top. I want them to be able to use this for years to come and not out-grow it too quickly.

Comments
Fri, 10/21/2011 - 09:39
Loft bed with 16" deep desk and small book cases.
Where did you get 16" wide boards? We're thinking of making the same loft with the 16" desk and 16" small book cases. I was planning on using plywood.
In reply to Loft bed with 16" deep desk and small book cases. by Guest (not verified)
Thu, 11/24/2011 - 10:32
My apologies, I just saw
My apologies, I just saw this.
I got them from Home Depot down the shelving isle.
Sat, 02/25/2012 - 05:56
hello just a quick question
hello just a quick question about the railing. Is it screwed on or is it just sitting over the wood? Very nice bed.
In reply to hello just a quick question by judee (not verified)
Tue, 08/07/2012 - 15:06
My apologies, I just saw this
My apologies, I just saw this now. It is screwed on, but from the inside.
Tue, 08/07/2012 - 13:35
How many 2x2s did you use? I
How many 2x2s did you use? I think I am going to do the same to make sure that I do not outgrow the bed. Also did you have to change the size of the little bookshelves when you changed the desk to 16" instead of 12" ? I'm trying to build the whole set on my own (im 14)
In reply to How many 2x2s did you use? I by WannaMakeA LOFTBED (not verified)
Tue, 08/07/2012 - 15:09
I think I used around 20
I think I used around 20 2x2's, and did use a center beam to add strength. I only changed the one bookshelf to a 16" (the one under the desk). The other one I left as a 12". Good luck building your bed!
Sun, 05/12/2013 - 19:37
Thank you so much for your pics!
Hook fam, Thanks so much for your work and for the pictures. I really like how you left the lower back side of the big book shelf off and still included the desk behind. Love the 16" too and I think I will go with that for the desktop but leave the 12" for the shelves. Thanks again! This is now my next project!!!
My cedar fence--thank you!
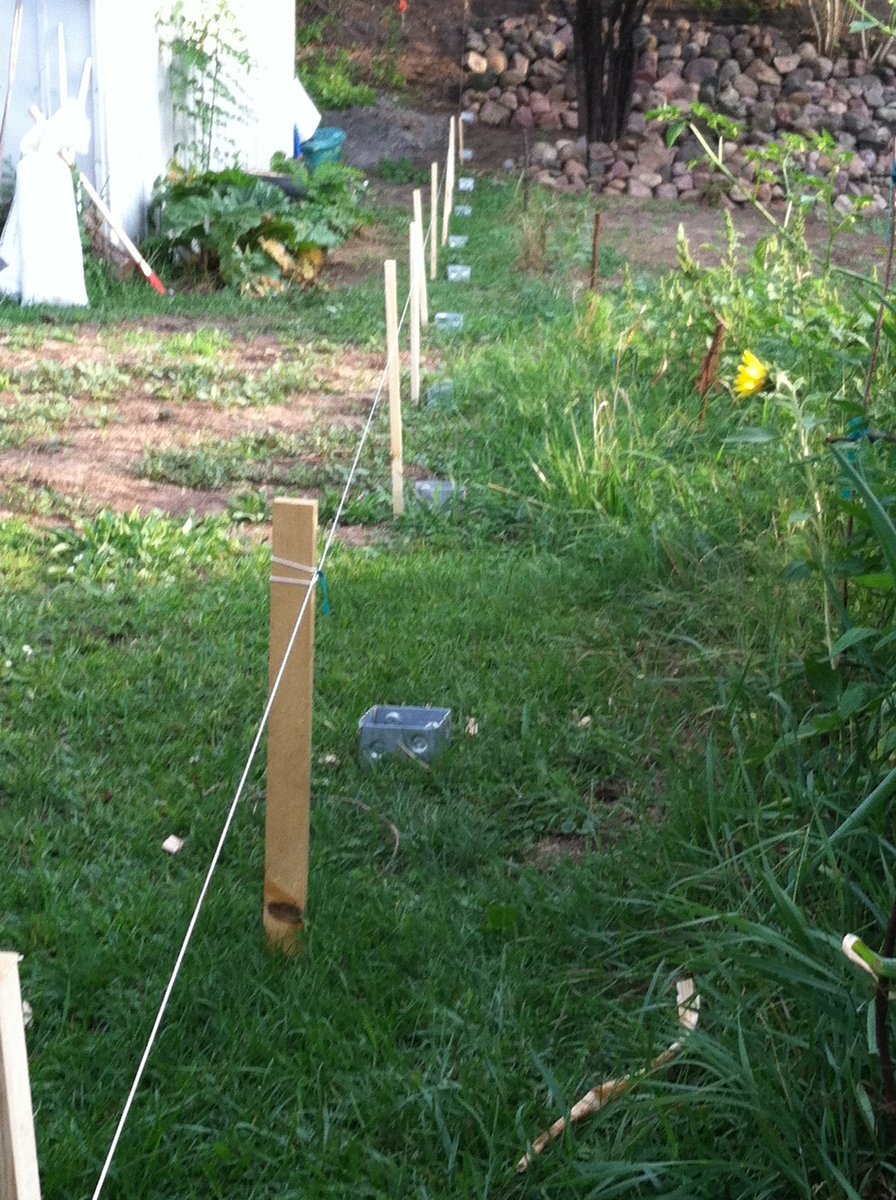
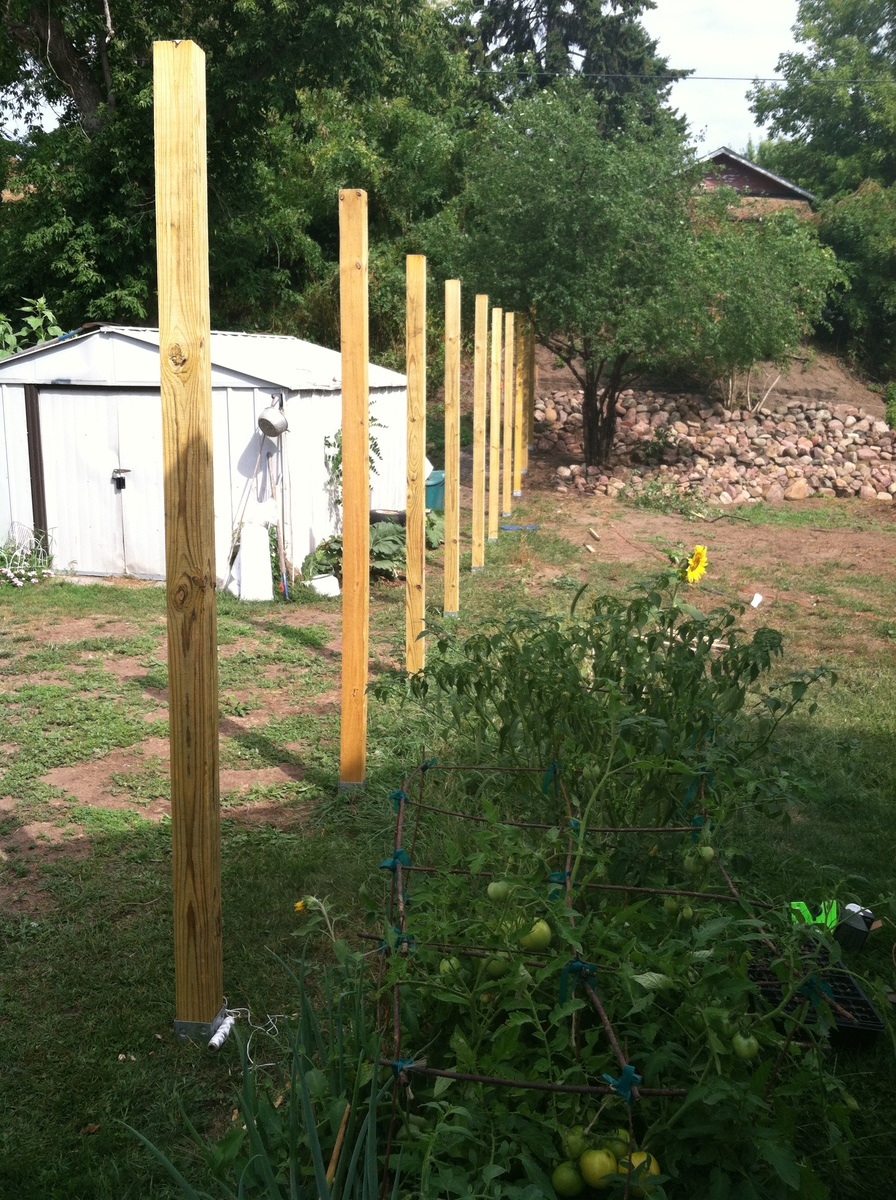
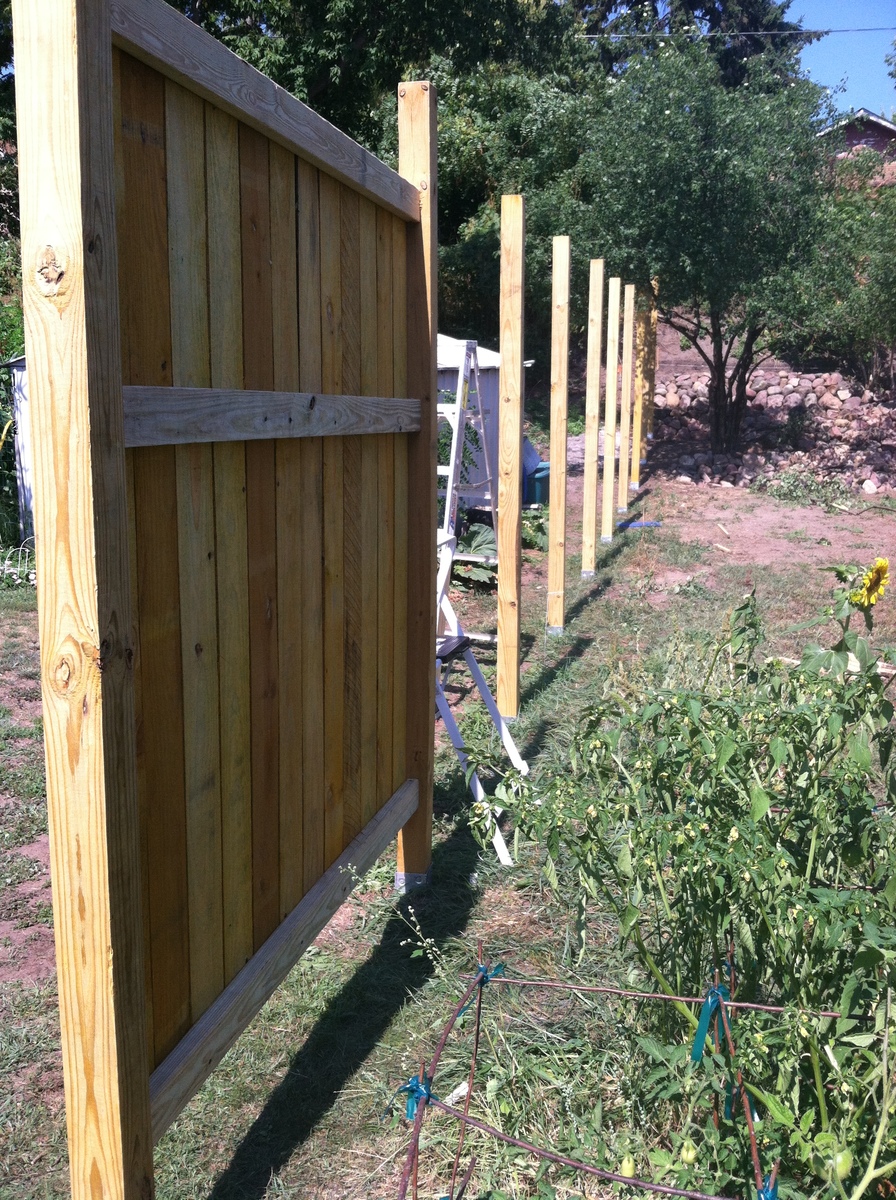
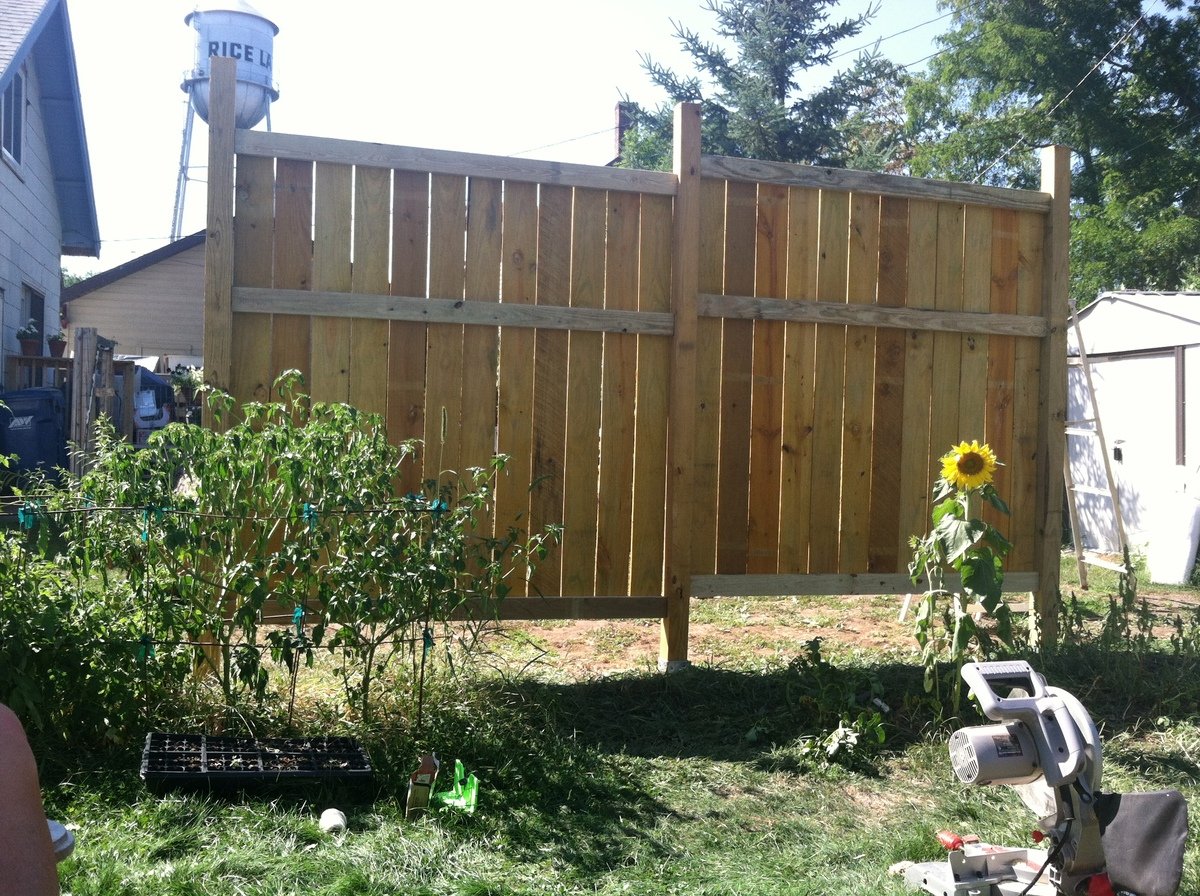
Thank you for the plans for this fence! So many sites tell you what you need to do to plan for a fence, but don't give you any dimensions, materials, etc.
I didn't do it exactly like your instructions, but close enough to give you all the credit!! I am a 45 year old woman, with only a little do-it-yourself experience. I went to the hardware store, and asked "what are these PH screws?" and felt a little stupid. But my friend Tanya and I built this fence this weekend, with a post level, stakes and string, a chop saw, two 18v drills,a sledgehammer, a string level and a sharpie! We are so proud of ourselves.
I still need to trim off the tops of the posts, and do a few little tweaks. Also, we did not dig post holes. We used oz-posts, and pounded them in with a sledgehammer, attached the wooden posts into the oz-posts with heavy-duty construction adhesive and 8 screws, and straightened them with a huge wood clamp. And next weekend, I'll be putting in raised flower beds along the bottom to cover the lower space. :-))
Comments
Wed, 09/04/2013 - 07:36
Thanks!!
If you check out the oz-post website (just google "oz-post"), there are video tutorials. We pounded them in with sledgehammers which kicked our butts. The oz-posts are about $16 each from Home Depot, which adds to the cost of your fence. But renting a jackhammer was $130 per day plus $30 per running hour, PLUS gas. Renting a post hole digger and buying cement is also expensive. So, buy yourself a sledgehammer, and use chunks of pressure treated wood to put in the tops and wack away!! We first used just regular wood, which splintered terribly, and then spent a lot of time trying to pry them out. If you do get the wood stuck in the posts, drill in a couple screws through the top, and pull them out with someting attached to the screws. Use chunks of pressured treated 4x4s and try to hit it square in the middle!! Good luck!
Thu, 10/30/2014 - 12:46
Water Tower
I know this has nothing to do with woodworking or fence buidling...but that water tower in one of the picture reminds me of one I saw during a drive through Wisconsin.
Farmhouse table
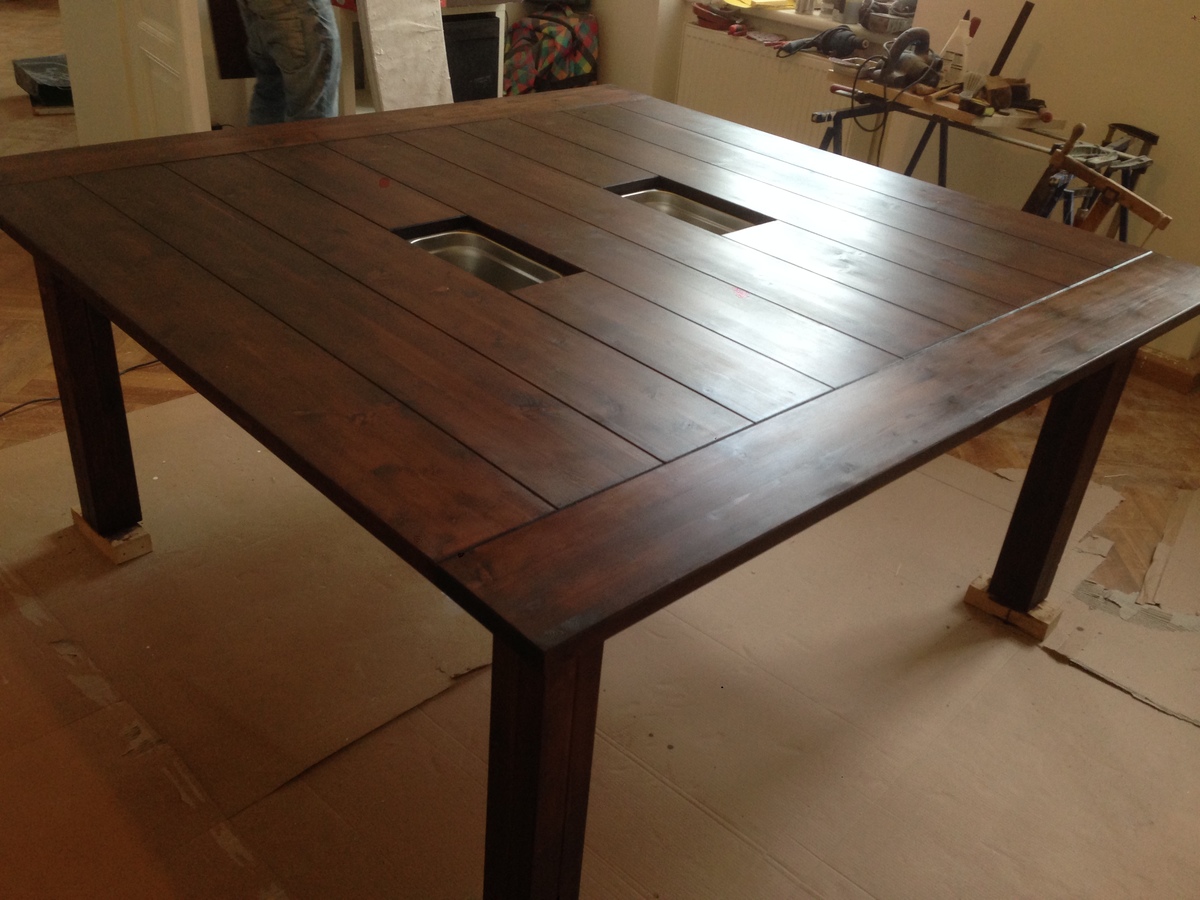
We have a very big dining room in which we tought none of the store-bought tables would look good in. We needed a square table!
We got inpired by this beautiful post on Ana White (http://ana-white.com/2011/05/farmhouse-tablesquared) and soon after that starting to go look for what sizes of wood we can get. We live in an apartment, with no access to super big machinery so we needed to work with what wood stores offered us. We adapted the plan to our desire. Total cost was lower that 300 Euros, including screws, glue and stain. We are THRILLED!! :)
Turned Leg Coffee Table
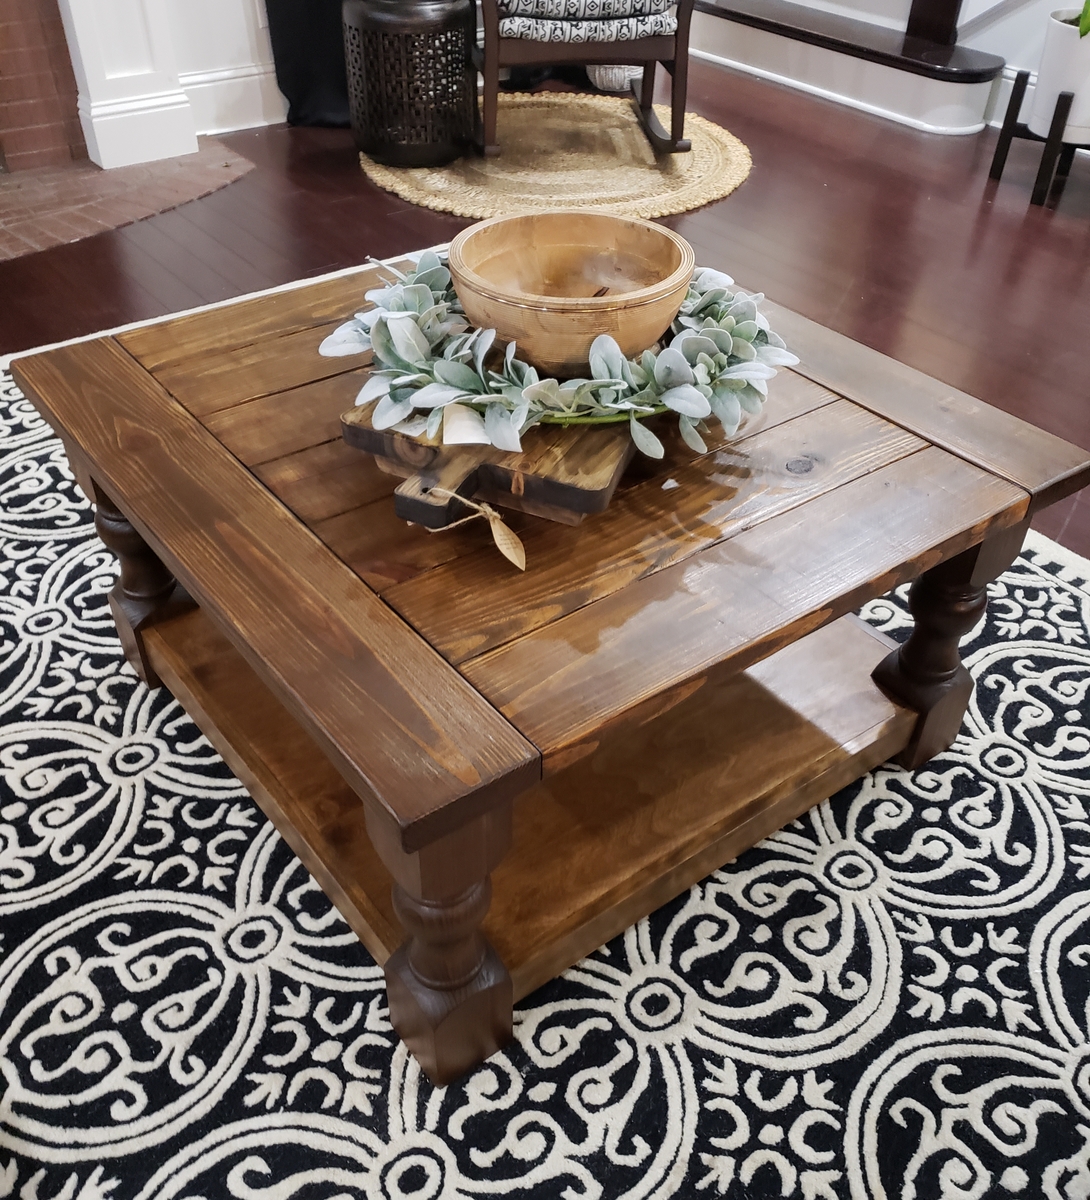
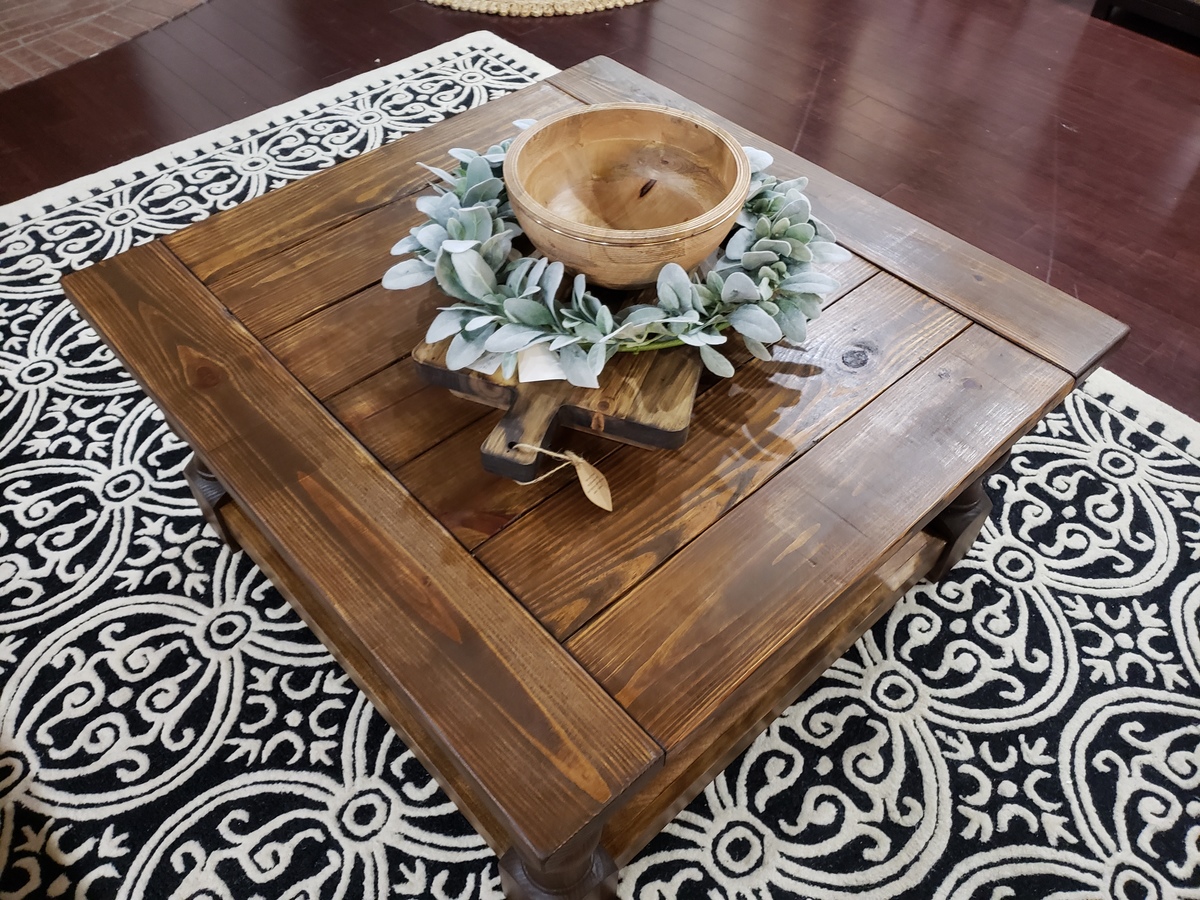
Turned leg coffee table from pine. I also built matching end tables (shown in another post). :)
Comments
Wed, 12/26/2018 - 13:47
This is gorgeous!!! LOVE!
This is gorgeous!!! LOVE! Thanks so much for bragging.
Sat, 12/29/2018 - 05:56
Thank you! I had stained it
Thank you! I had stained it with varathane dark walnut and I wasn't happy with the color. I sanded lightly and went back over with the golden oak that I had from another project. I love how it warmed up.
Thu, 12/27/2018 - 09:04
Turned legs
Did you turn the legs yourself, or order them from somewhere? They look great, as does the entire piece.
Sat, 12/29/2018 - 05:54
Thank you so much! I ordered
Thank you so much! I ordered the legs from Osborne Wood products. They are the Shanty legs.
In reply to Thank you so much! I ordered by kwildman
Sat, 12/29/2018 - 06:10
Thanks.
I'm actually familiar with Osborne, I basically drove past them going from ATL to CLT this week... They do have some nice legs at a good price.
Wed, 01/02/2019 - 10:13
Yes if you click on the plan,
Yes if you click on the plan, there is a link to the exact legs from Osborne.
Mon, 01/07/2019 - 09:15
Thank you! That is so sweet.
Thank you! That is so sweet. I am very happy with it. :)
Cedar potting bench
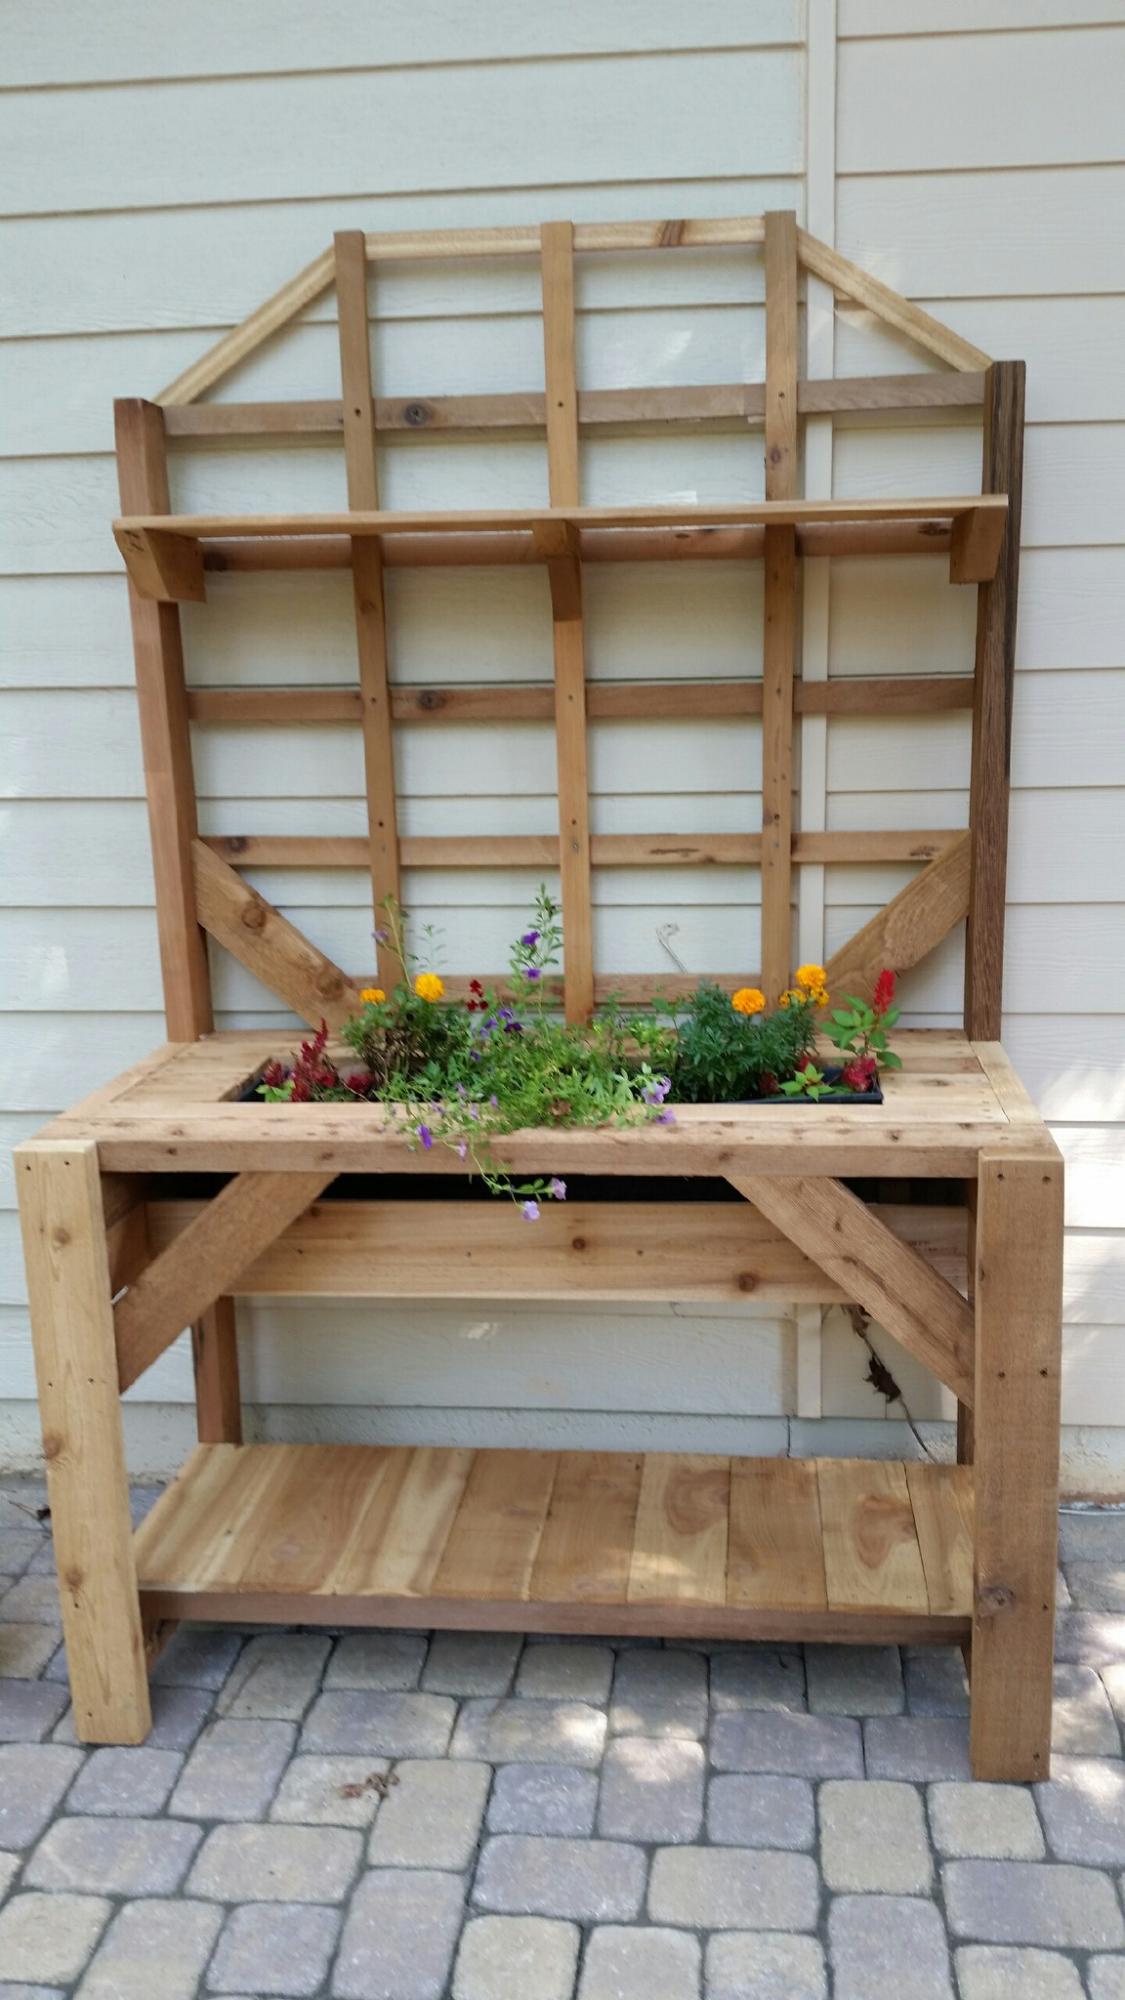
Cedar 4x4 and 2x4 frame, cedar fence wickets for the rest. Added - built around- a plastic planter box from big box store. Untreated, but good for covered outdoor area I think.
Comments
Spa Bench Finished with Milk Paint
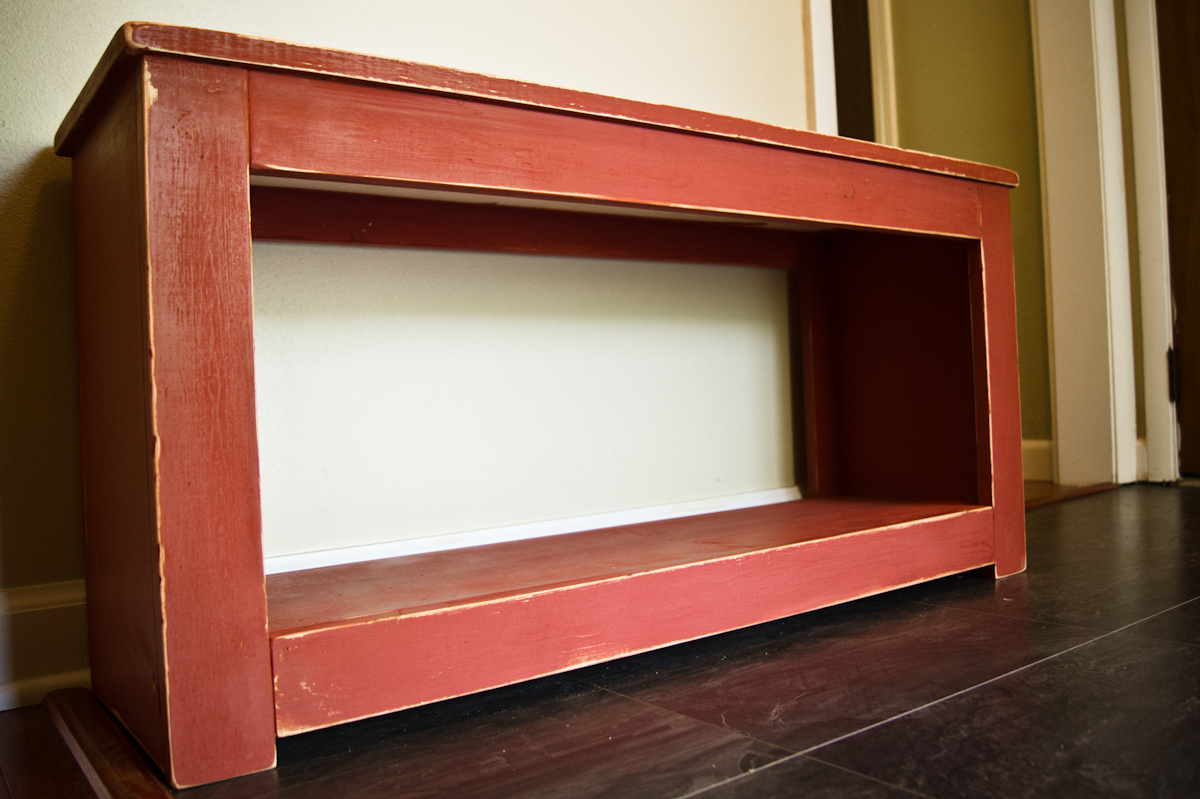
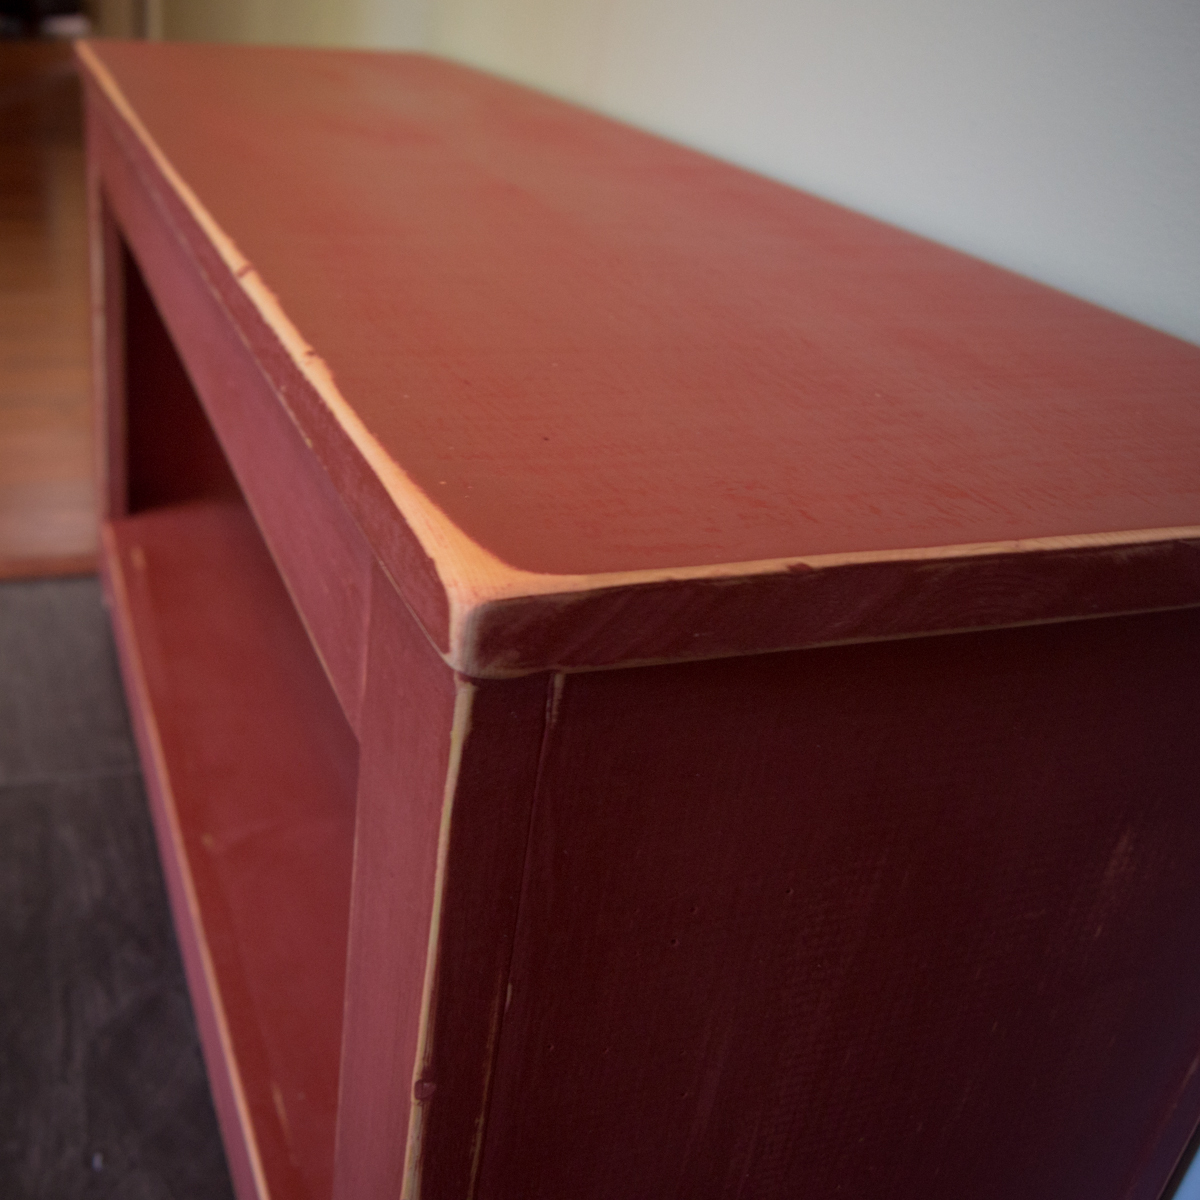
Built this bench over a couple of nights. It was really easy. The most difficult part was deciding on the color and finish. Overall it came out great and looks good by our front door. The finish is Old Fashion Milk Paint in Salem Red. I painted two coats and then sanded the sides and corners. I'm contemplating adding an antiquing glaze to give it an older look.
simple modern outdoor sectional
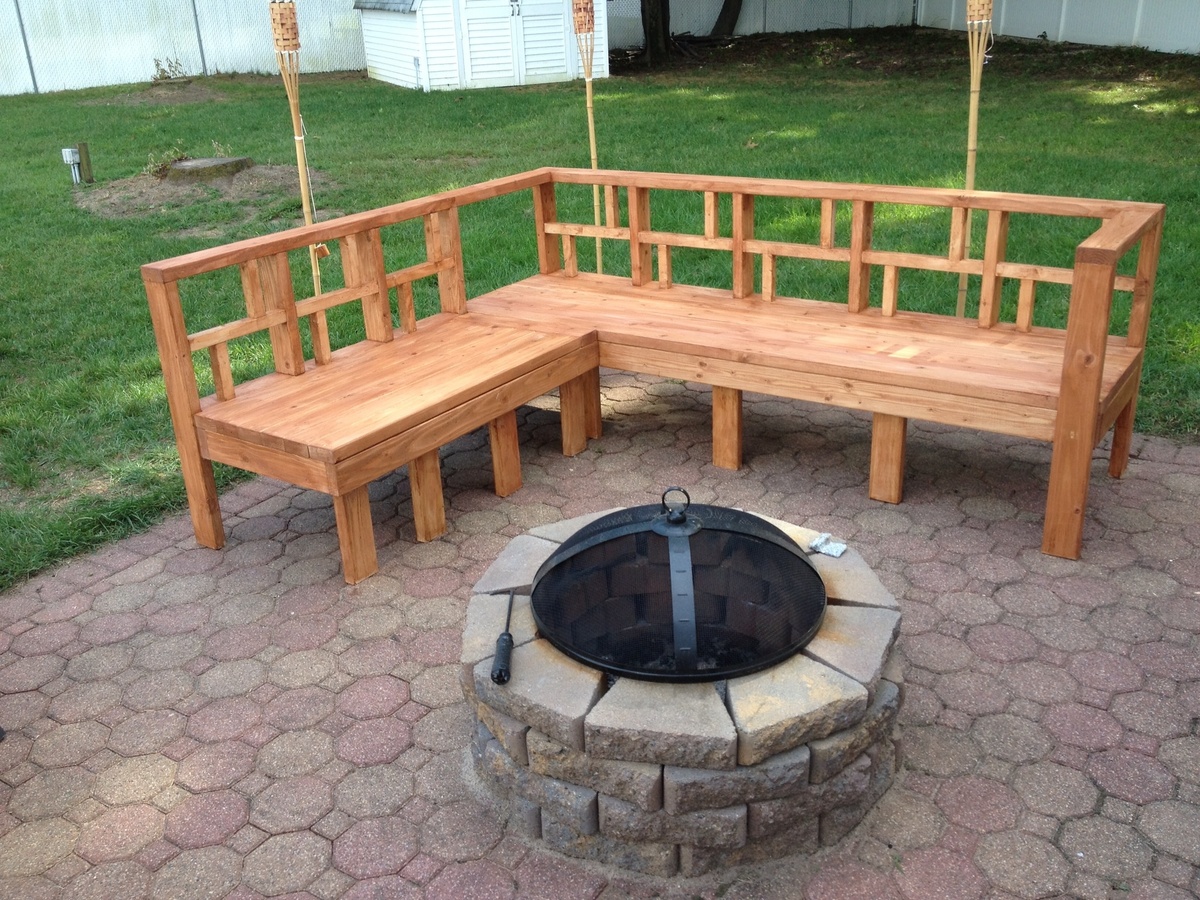
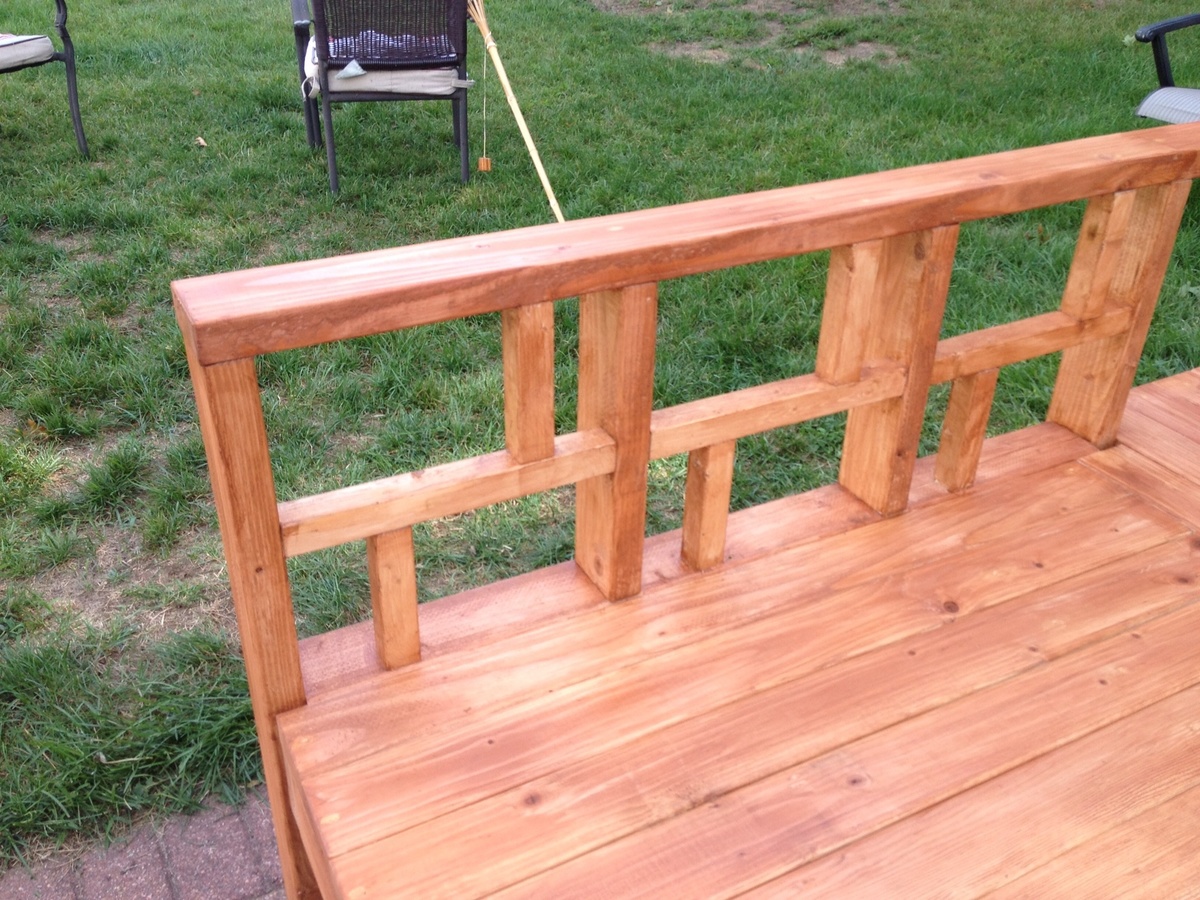
I utilized a mix of the platform sectional and the simple modern sectional to create this piece. I added the design on the back rather than the simple 1x4. I also made the entire piece out of 2x4s and 2x2s.
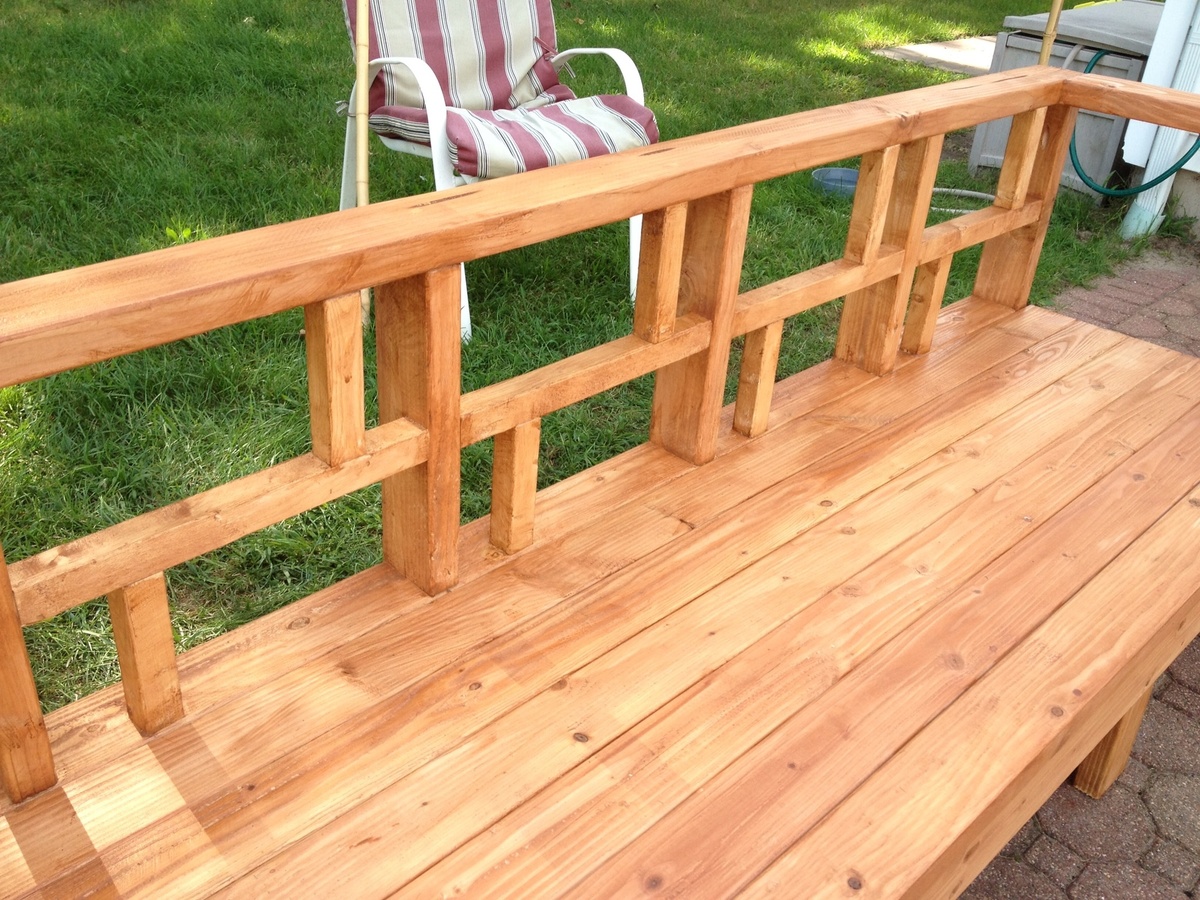
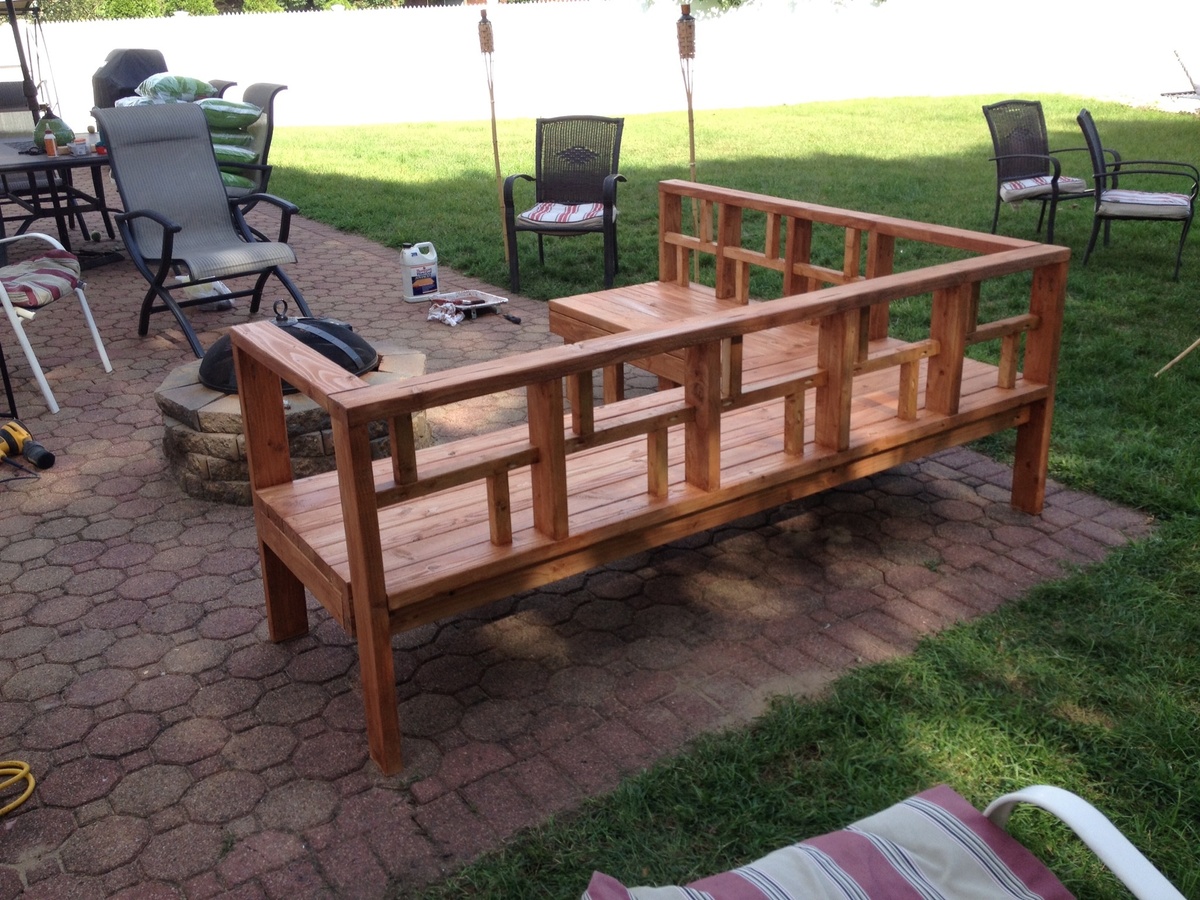
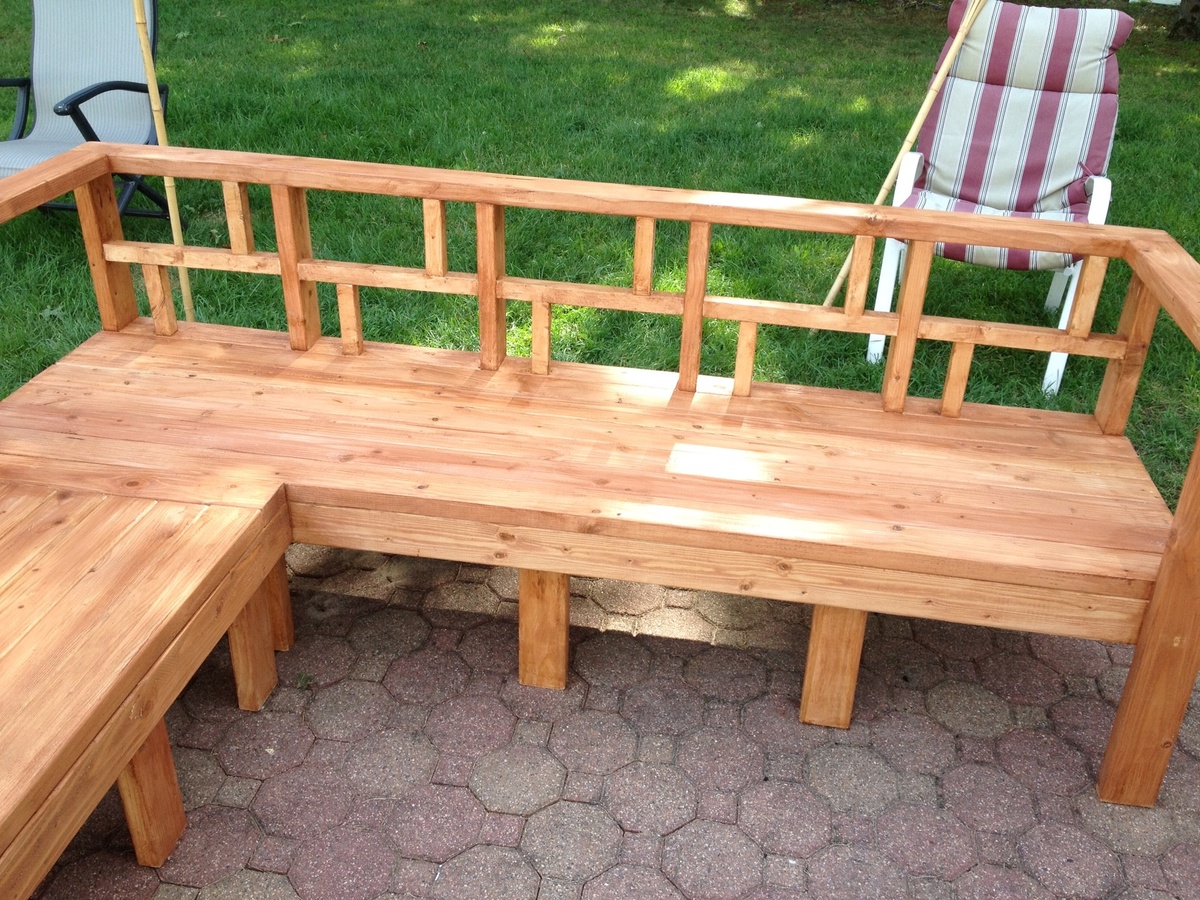
Comments
Easy, Economical Garage Shelving from 2x4s
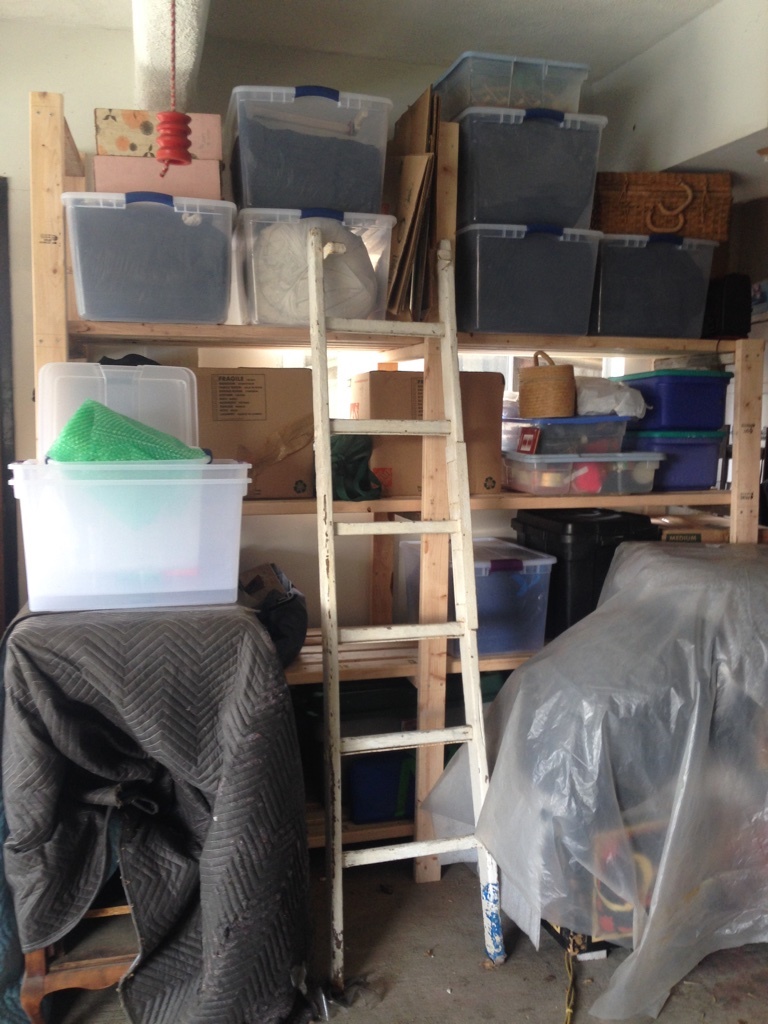
I modified the width of the shelves and as you can see from the variable height of my garage one side was made higher.
I used some scrap wook so I was able to cut expenses by about 25 dollars. The total cost was 50 dollars not including the nails. Although time is money. It took me one day to draw up the modified design, get prices and get the wood and then another day to put it together. With what I saved by doing it myself I could have made more working and buying a premade unit. However with this said, it would not be my personal accomplishment and modified to my unique needs. Besides, I had fun doing it.
Thanks for your info. It was very clear and simple. Debbie
Comments
Bamboo top buffet
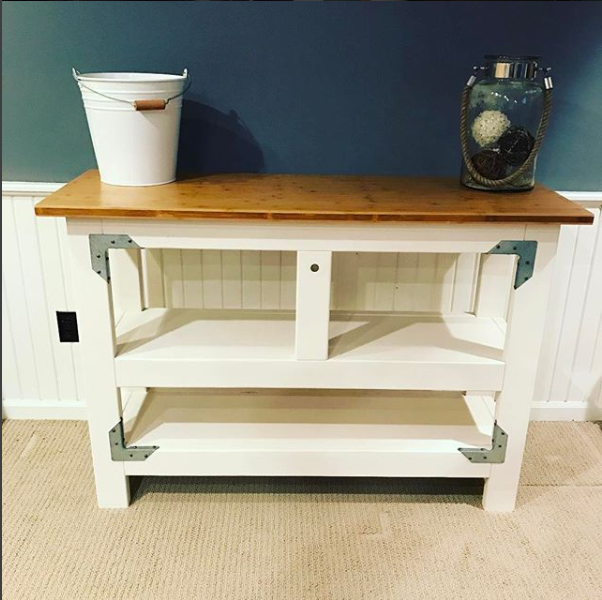
This was a fun project that ended up being a multi-use table! This was originally built as a small island for the kitchen but as the family grew it became a changing table! The top was purchased online at home depot, the base is made of douglas fir 2x4's and the corners accents are Simpson Strong-Tie ZMAX Galvanized 16-Gauge 2X Rigid Tie Connector available at HD for about $2 each. Thanks for looking! See more at my website analogwoodworks.com!
From Scrap 2 Useful
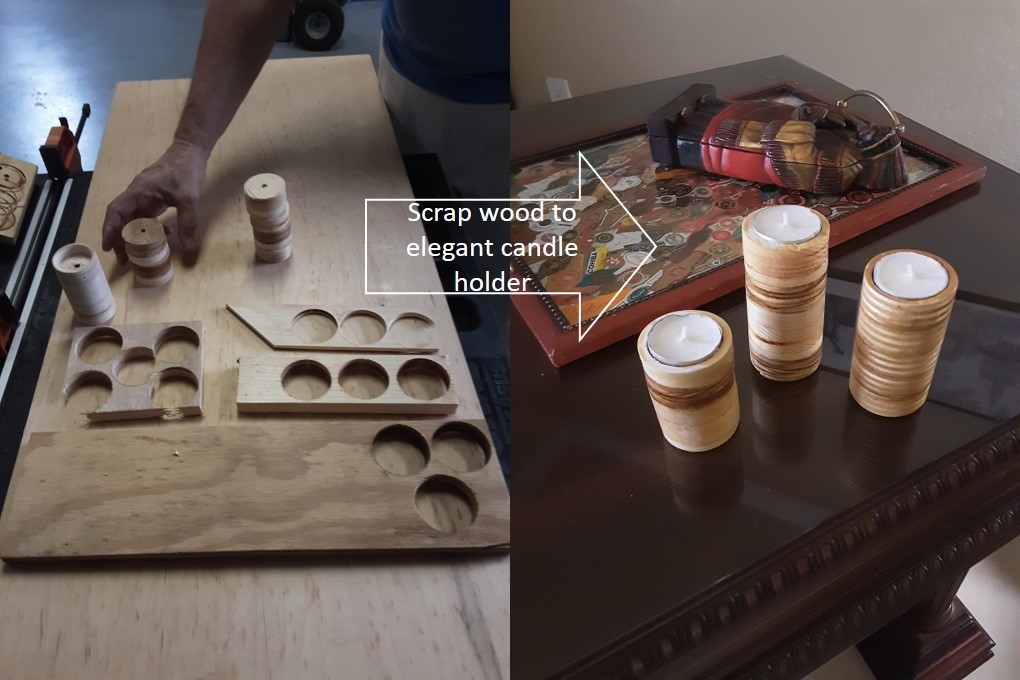
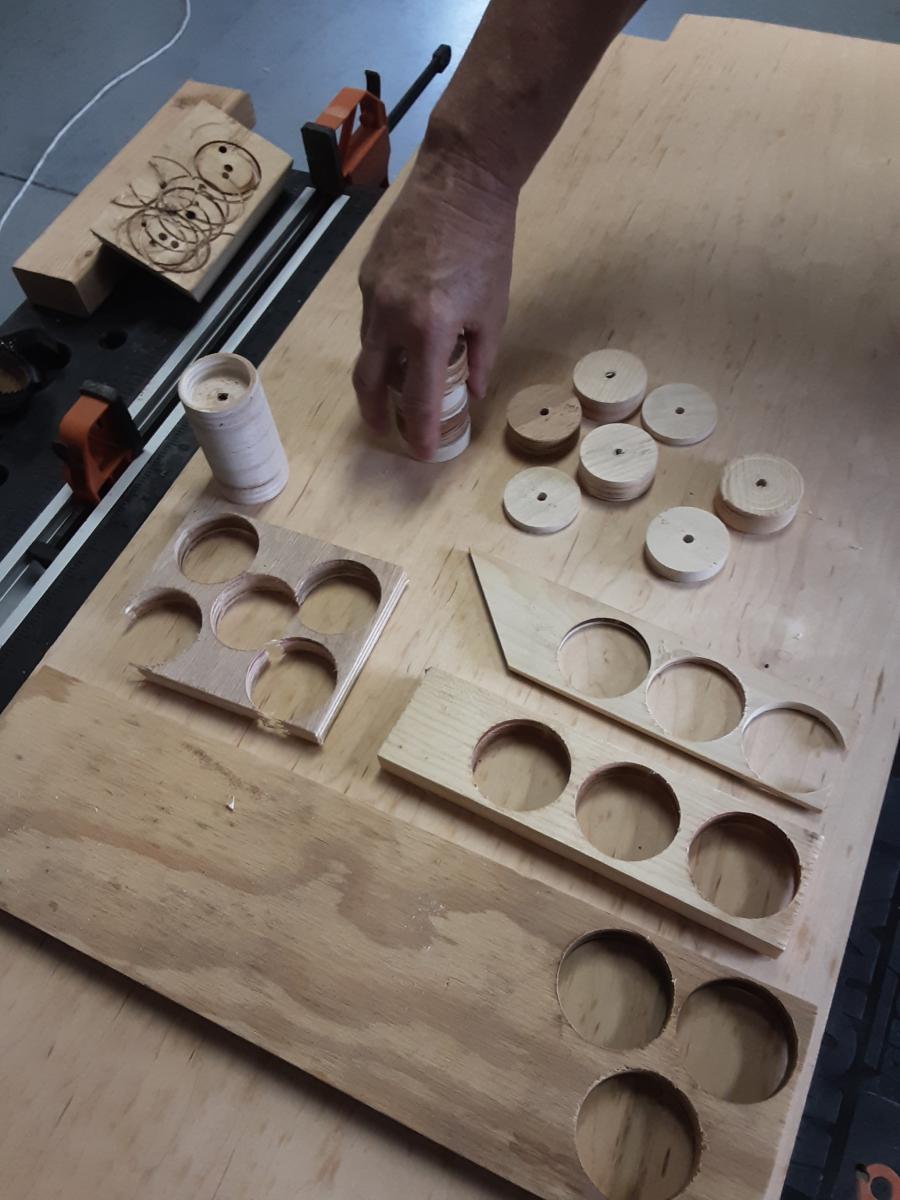
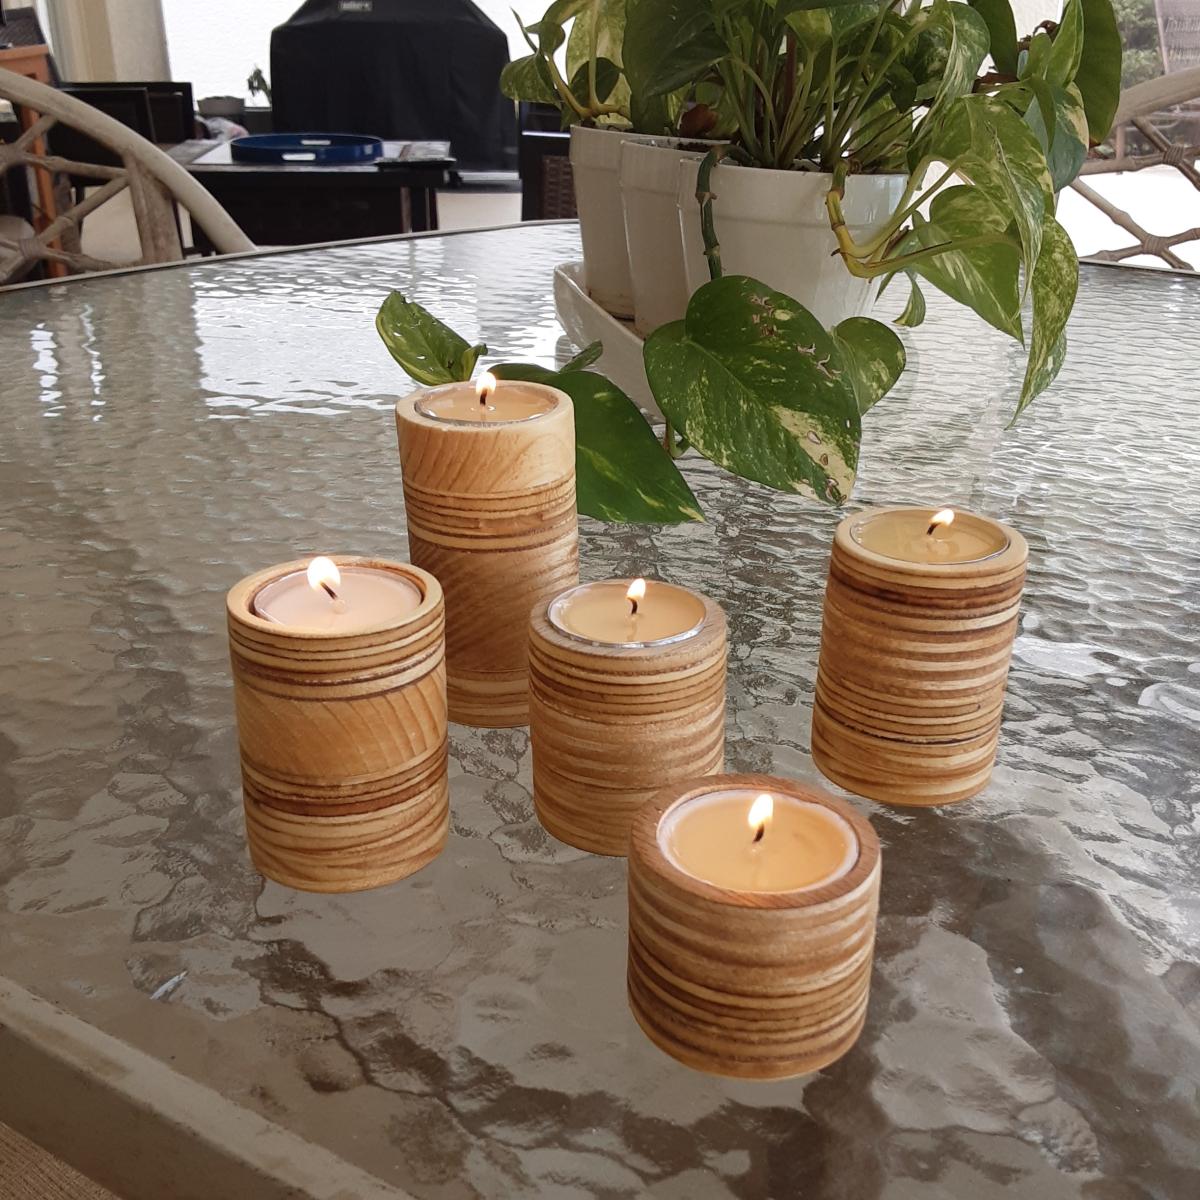
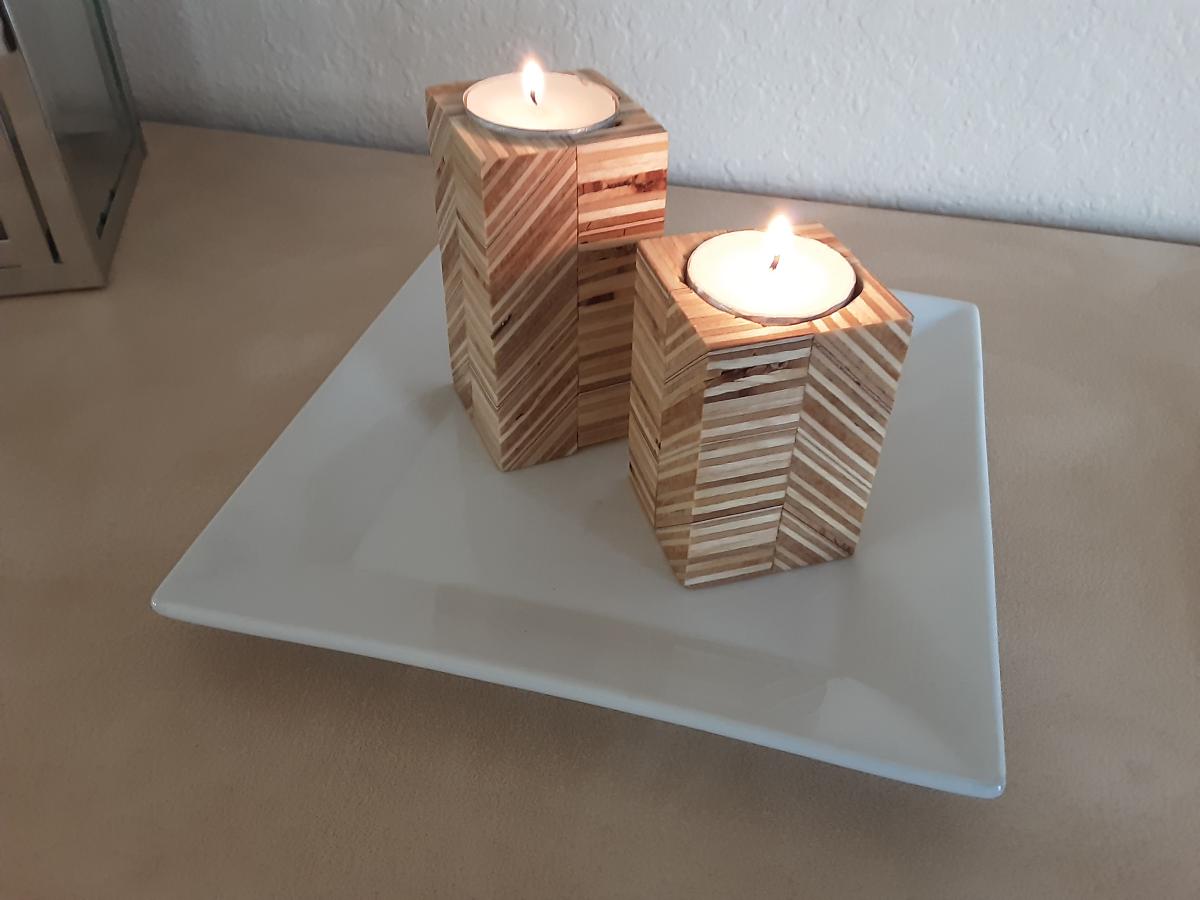
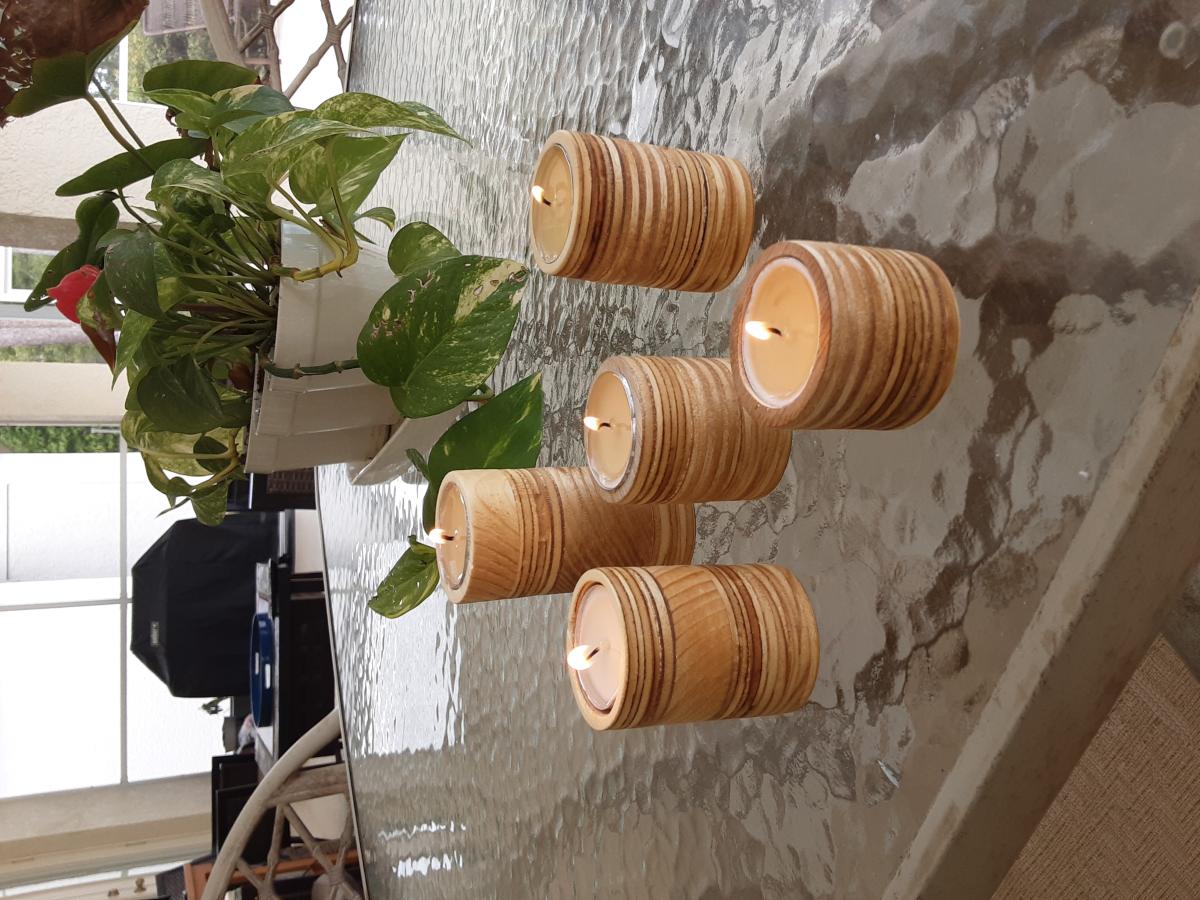
Diy project with scrap wood laying around the garage. Using a hole saw, cut 1 1/2 inch cookies from several pieces of wood. Glued them into 3 separate towers. Using 1" fostner bit cut recess for tea light candle. A quick sanding and coat of polyurethane. Also, included an example of using plywood cuts into a rectancular shaped candle holder.
They look pretty good for a quick fun project.




Comments
Ana White Admin
Wed, 08/03/2022 - 22:02
So adorable!
This is so great, thank you for sharing!