Community Brag Posts
Rocking horse
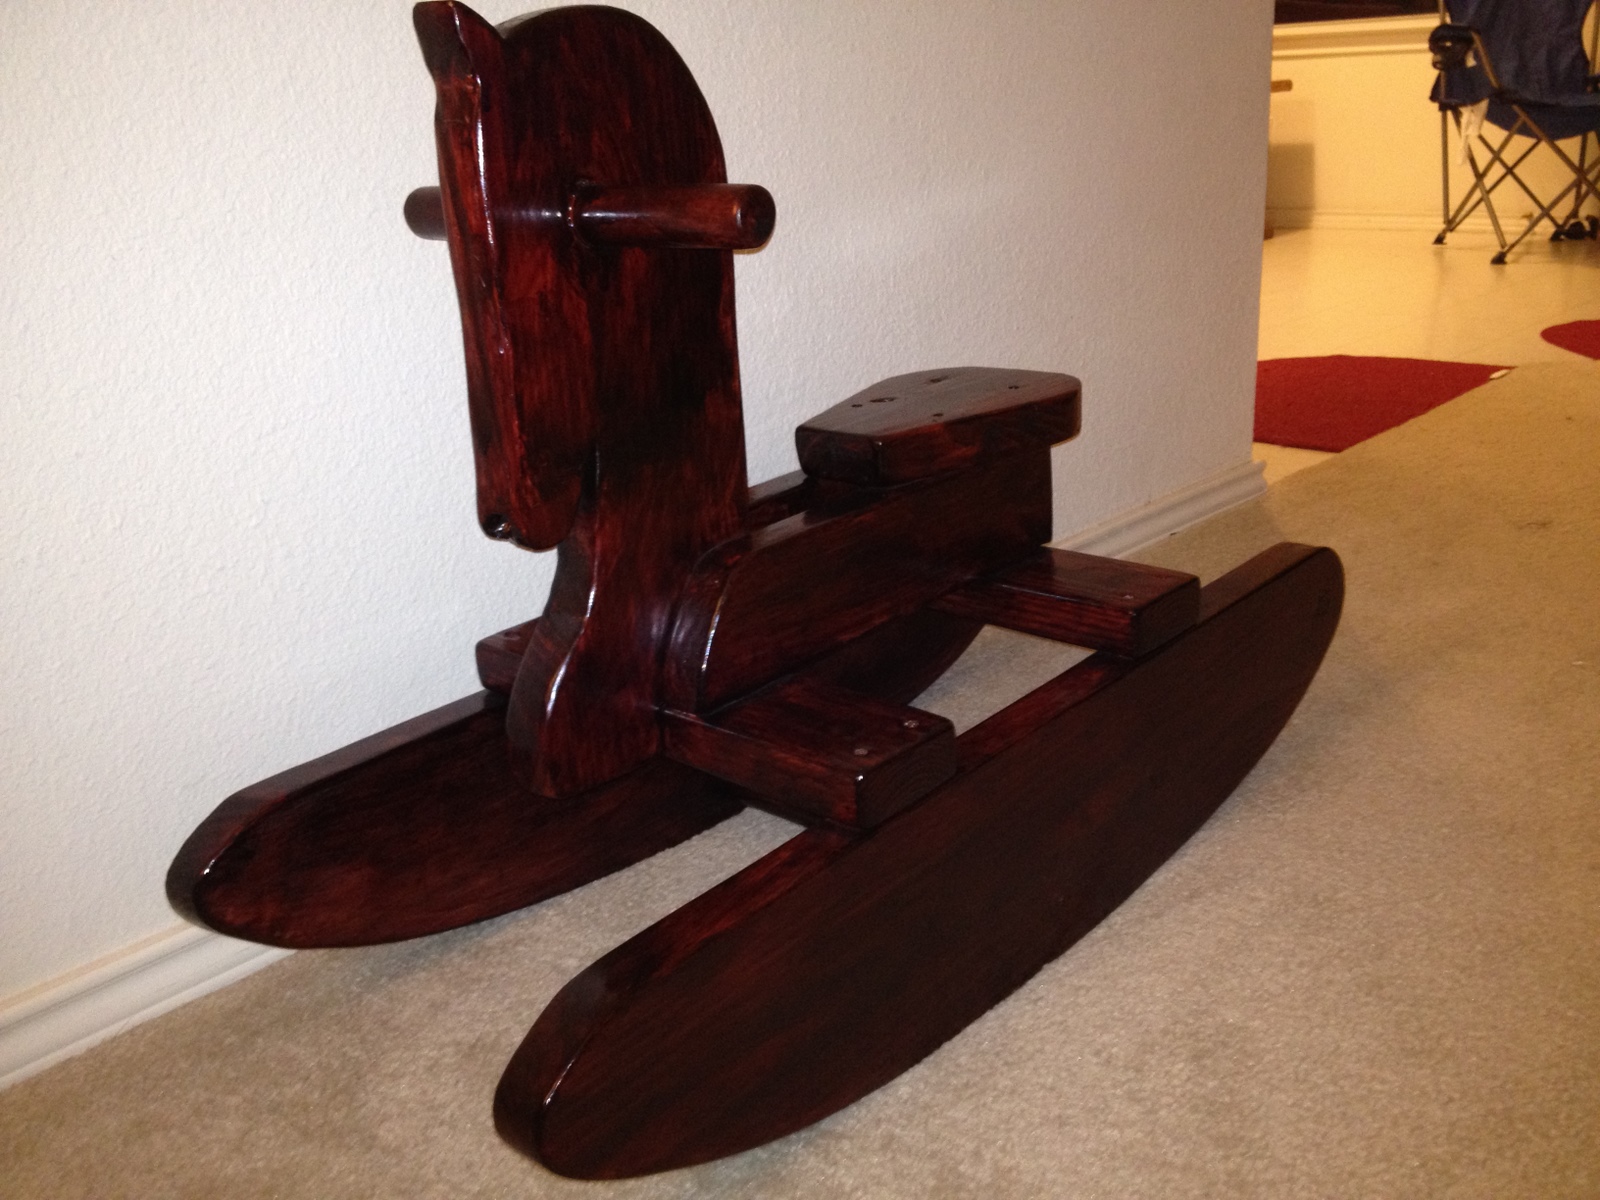
I made this for my daughter based on one her uncle made for her when she was little.
Estimated Time Investment
Day Project (6-9 Hours)
Finish Used
mini-wax Bombay mahogany
Recommended Skill Level
Beginner
Comments
Thu, 01/19/2012 - 09:00
Beautiful!
What a lovely heirloom gift you've created. So much more meaningful (and much more beautiful) than the plastic toys we see these days.
Sat, 01/21/2012 - 19:19
plans
I can give you the rough dimensions if you want. I used yellow pine. It is basically a 2x8x8 and a 2x4x8. The head, seat and rocker rails come from the 2x8. The 2x4 pieces hold it all together in the crossbeams. There is also a 1.25 inch dowel holding the two rocker rails together below the crossbeams. A piece of the same dowel is used for the handles.
Fri, 01/20/2012 - 20:45
Great idea. That looks very
Great idea. That looks very entertaining. Your daughter will surely like it. And that wood also looks hard and tough and stylish as well. amish furniture stores pa
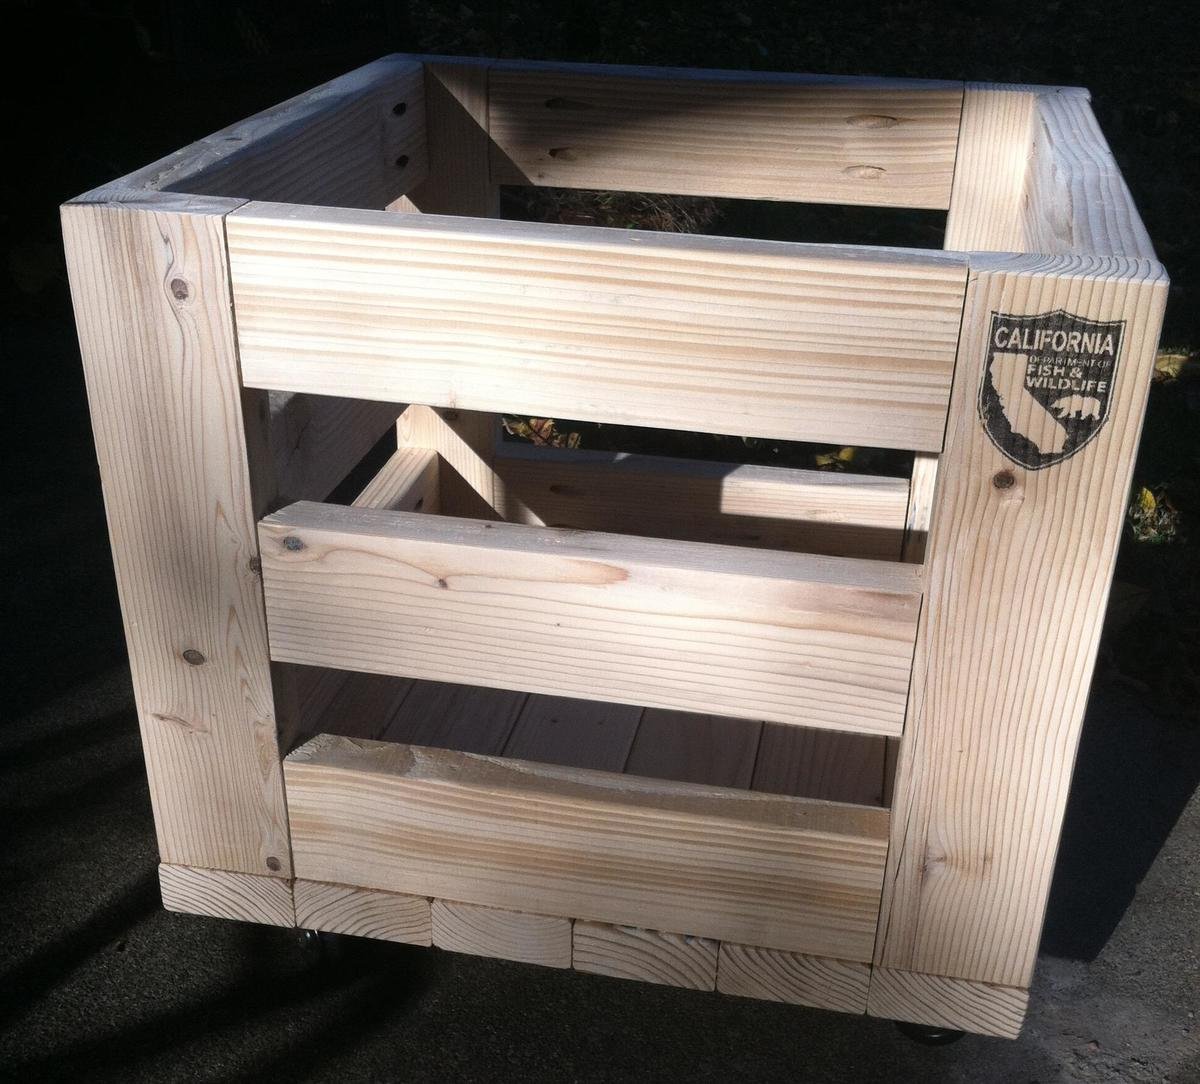
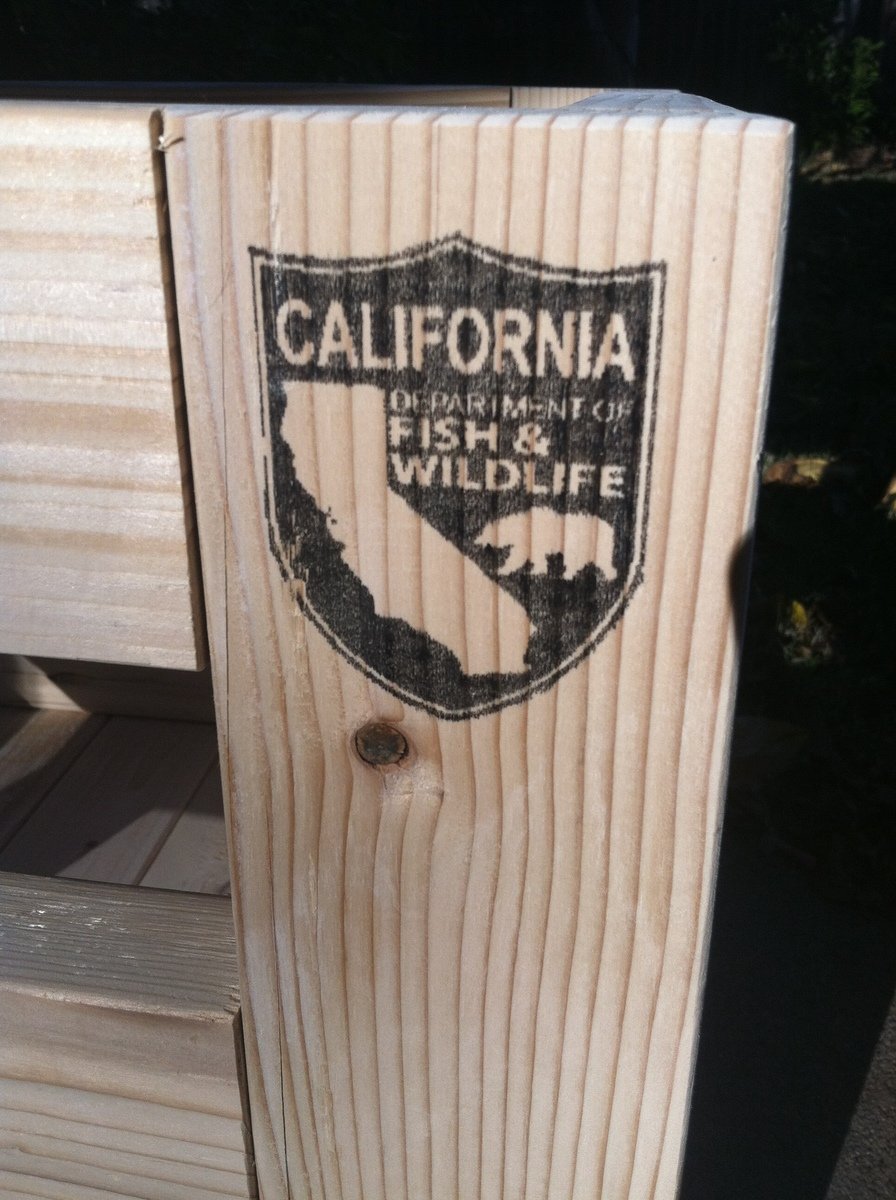
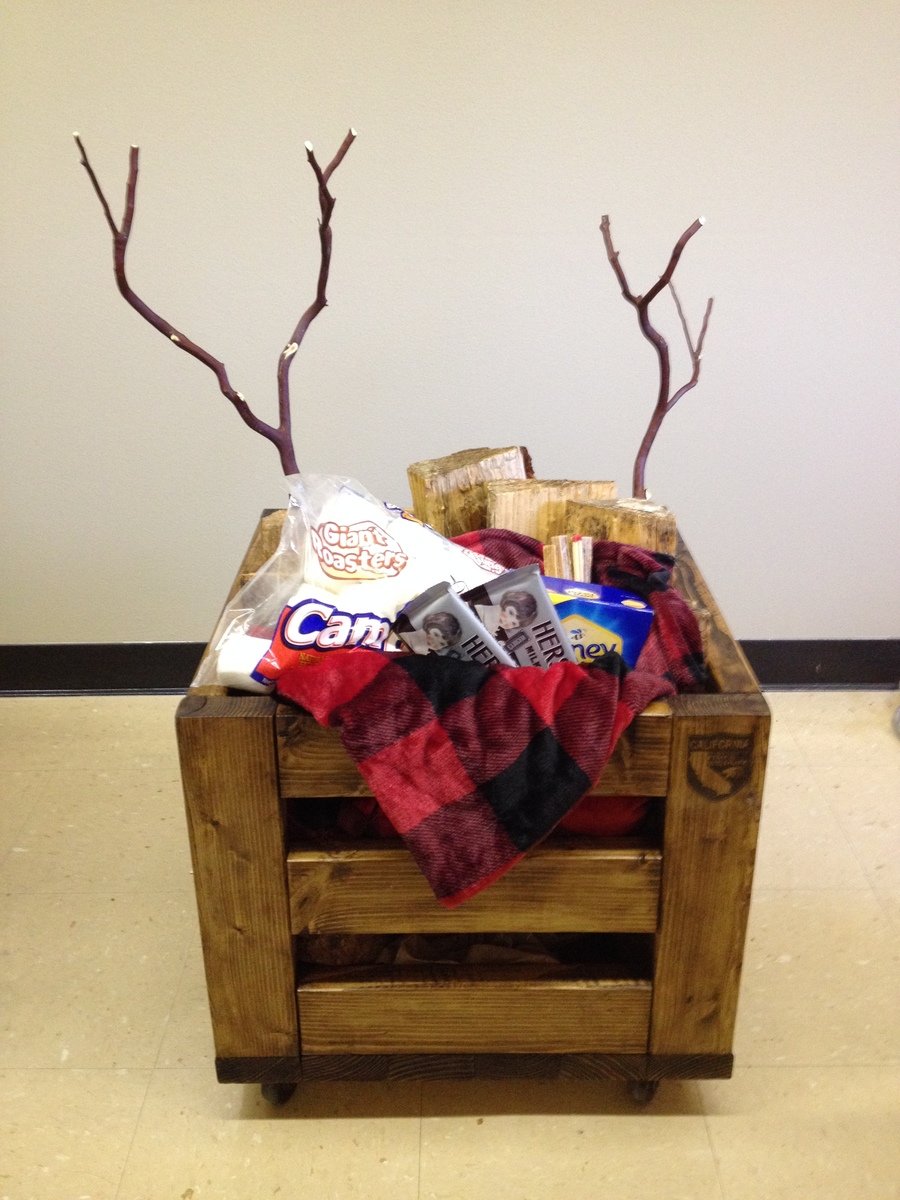
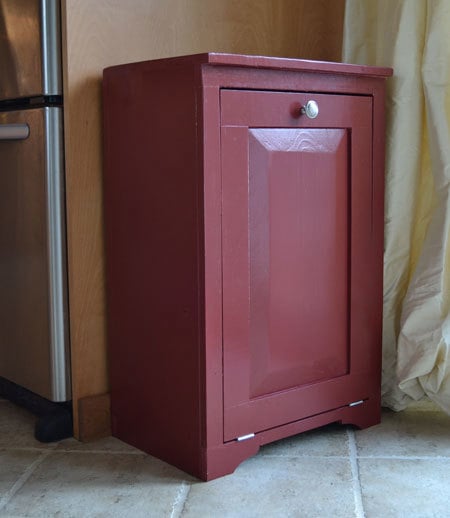
Storage Bin/"Christmas Basket"
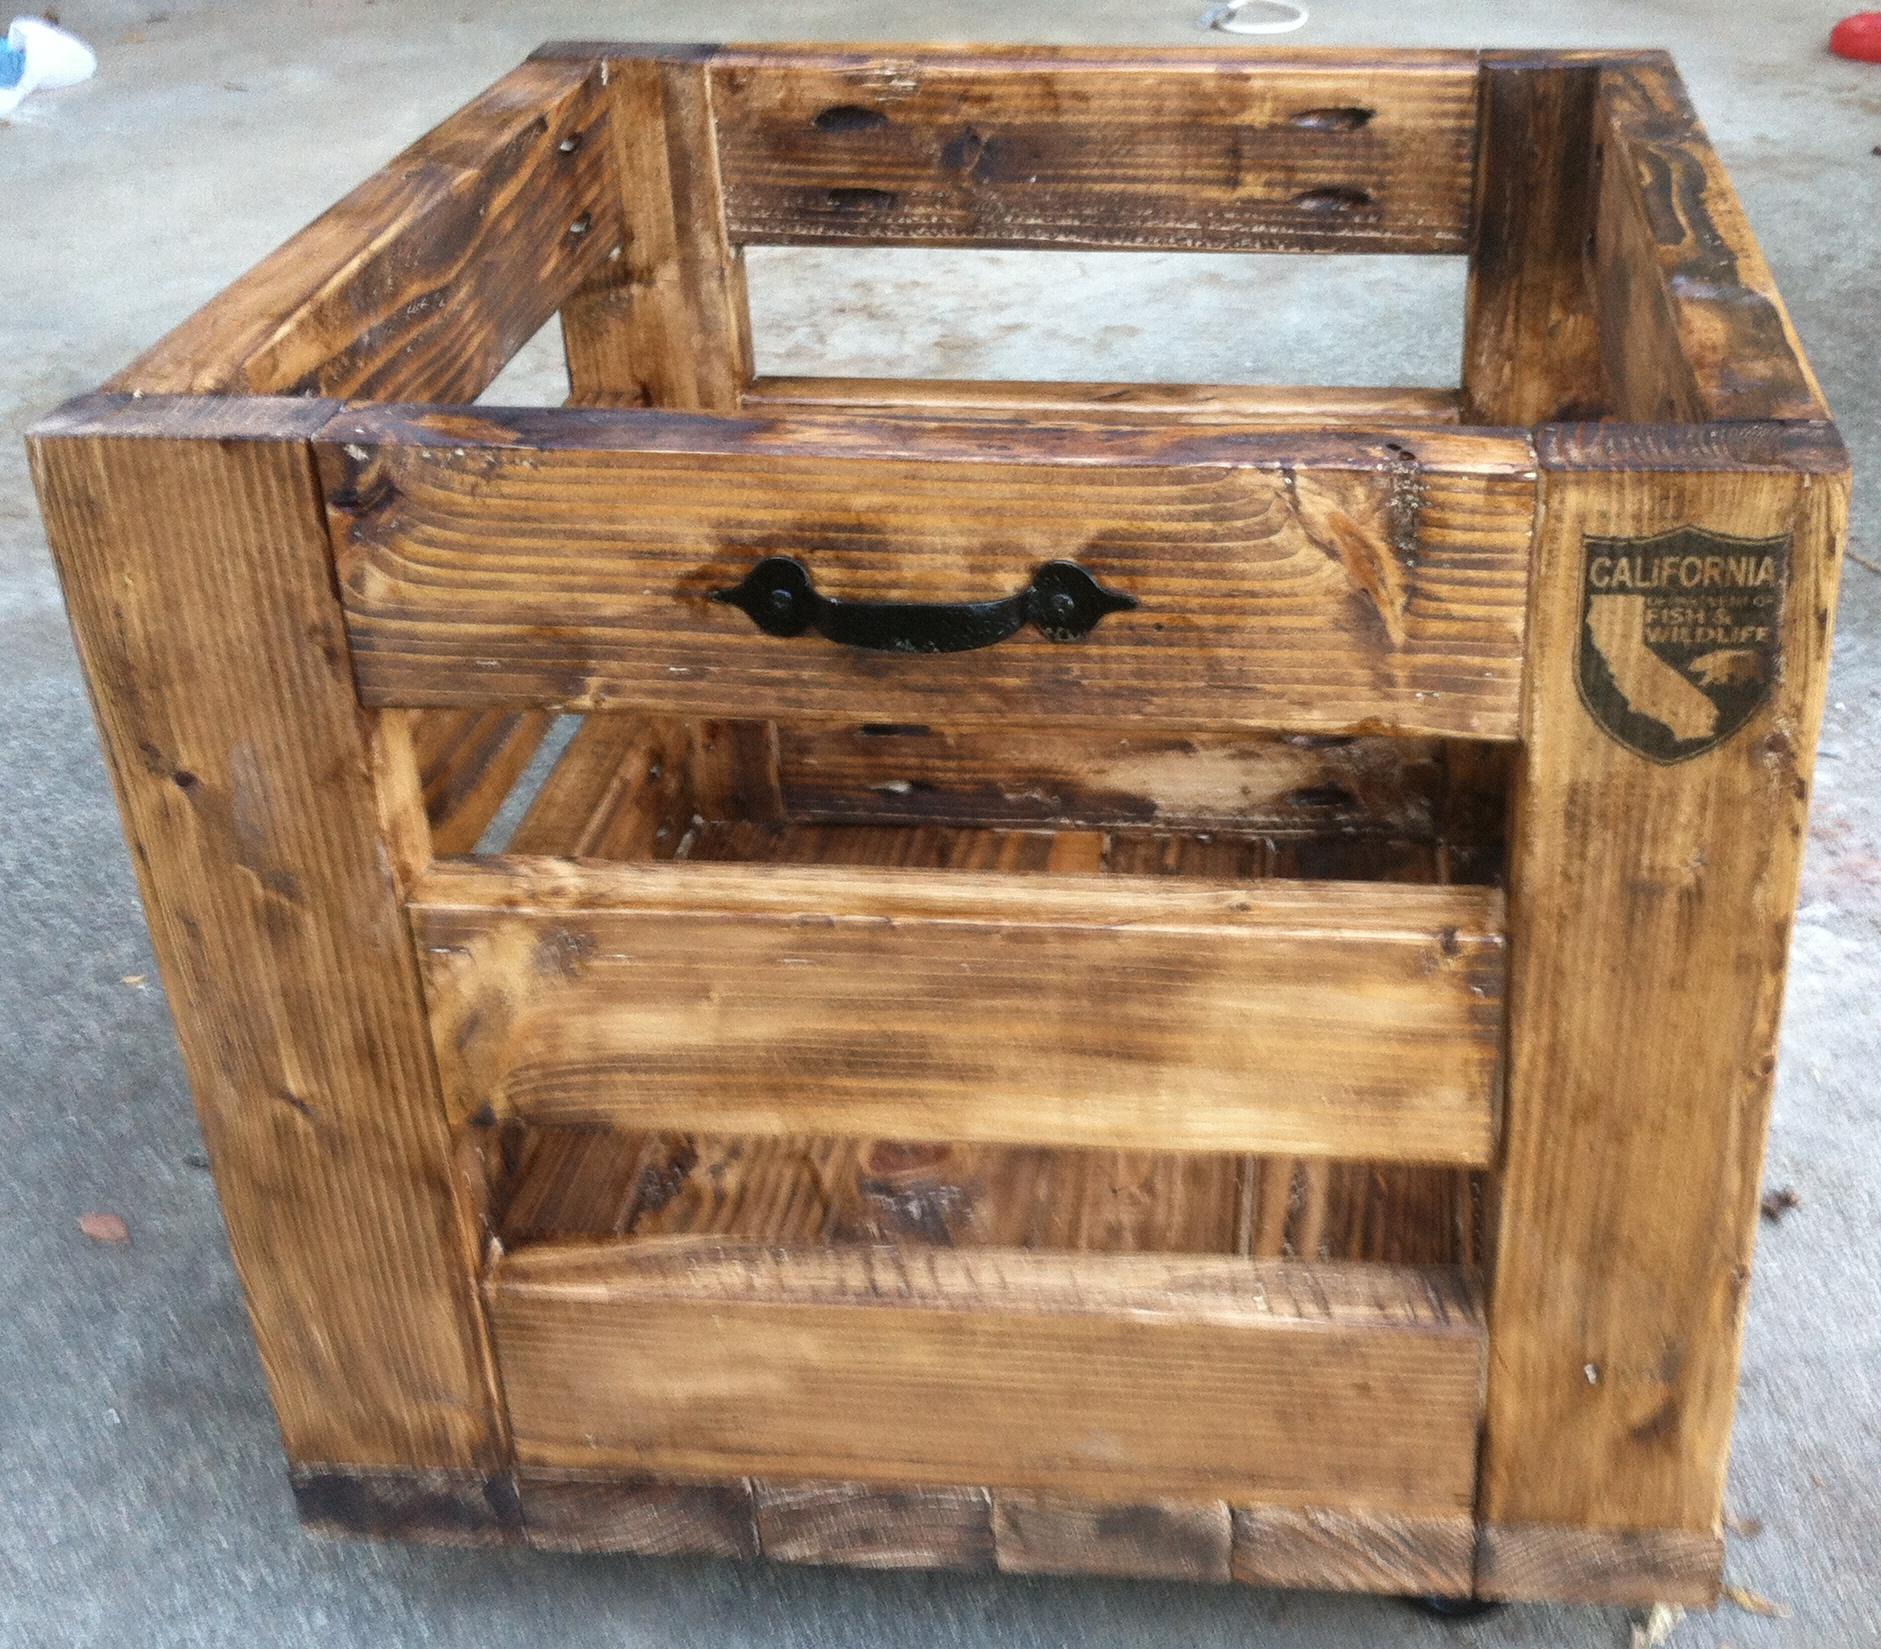
Made this project from the Storage Bin design. We have an annual holiday party at work. Since I work in the timber program for Ca Fish & Wildlife, I decided to make a project out of wood, stuff it with firewood and s'mores makings. I applied our logo using the instructions here: http://www.unexpectedelegance.com/2011/09/01/wax-paper-transfer-tutoria…
Super happy with the results.
Estimated Cost
$20
Estimated Time Investment
An Hour or Two (0-2 Hours)
Finish Used
Minwax Polyshades Mission Oak
Recommended Skill Level
Starter Project
Comments

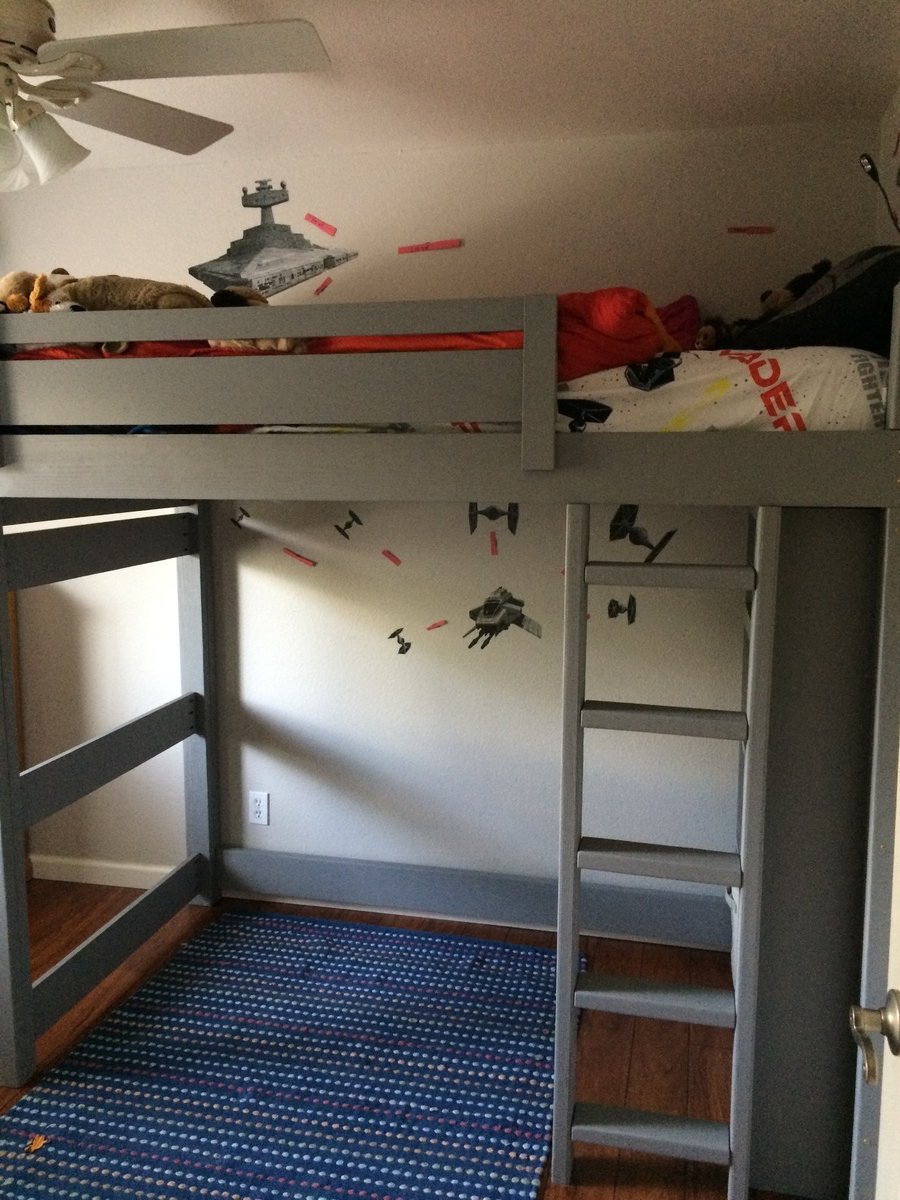
Side-Street Loft Bed
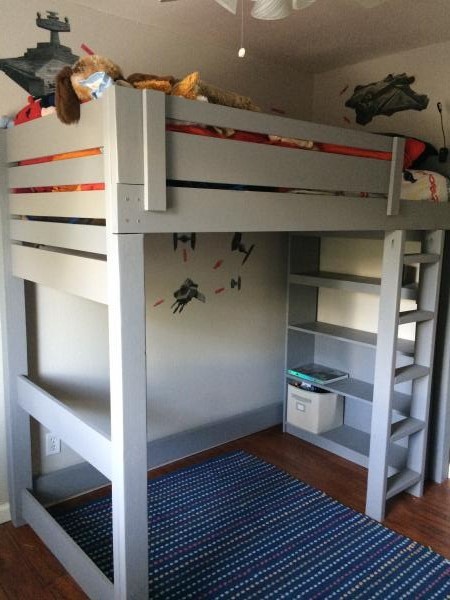
This is a mix the "Side-Street bunkbed" plan and the "How to Build a Loft Bed." I used "Spax" 3 inch wood screws to attach the side rails instead of bolts used in Side Street plan. I used KregJig pocket holes for everything else.
Built from Plan(s)
Estimated Cost
$250
Estimated Time Investment
Week Long Project (20 Hours or More)
Finish Used
Behr paint: Anonymous
Recommended Skill Level
Beginner
Comments
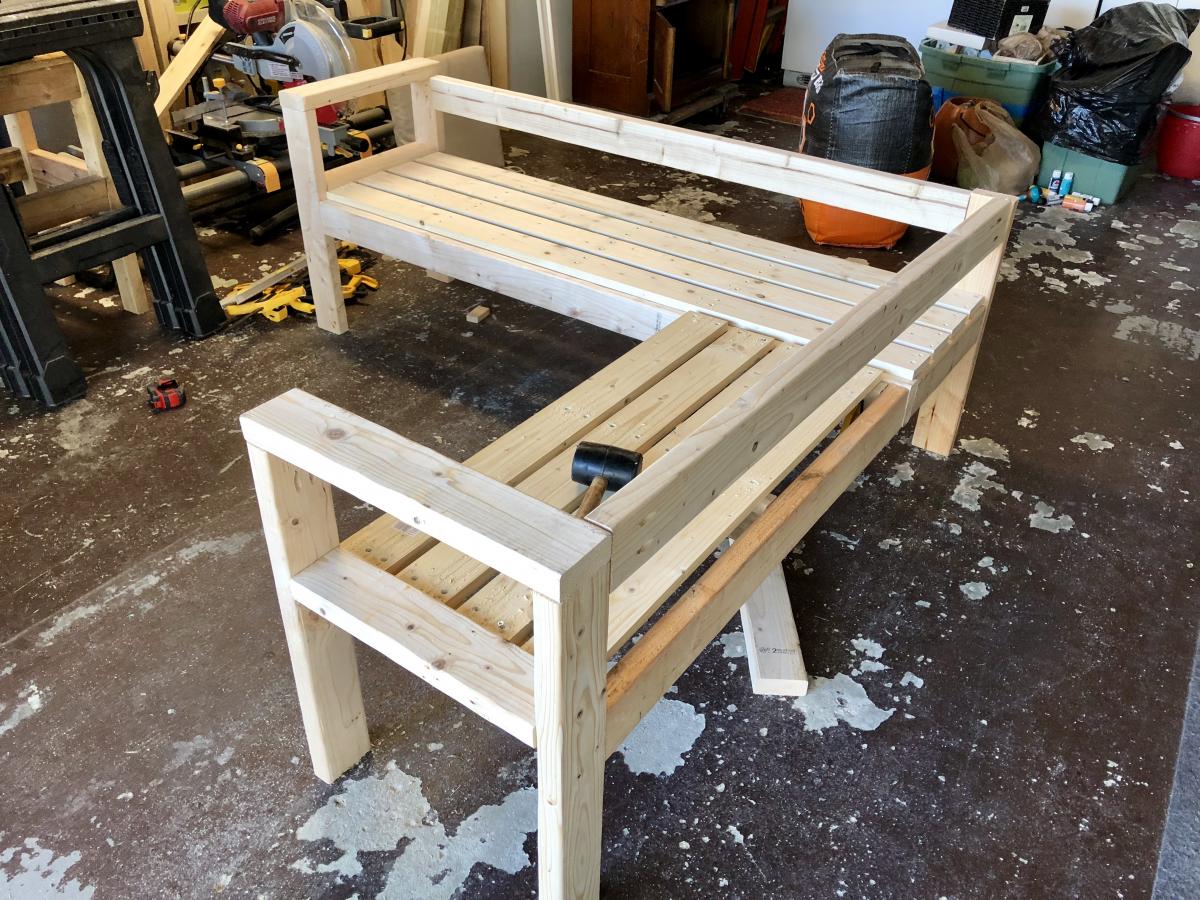
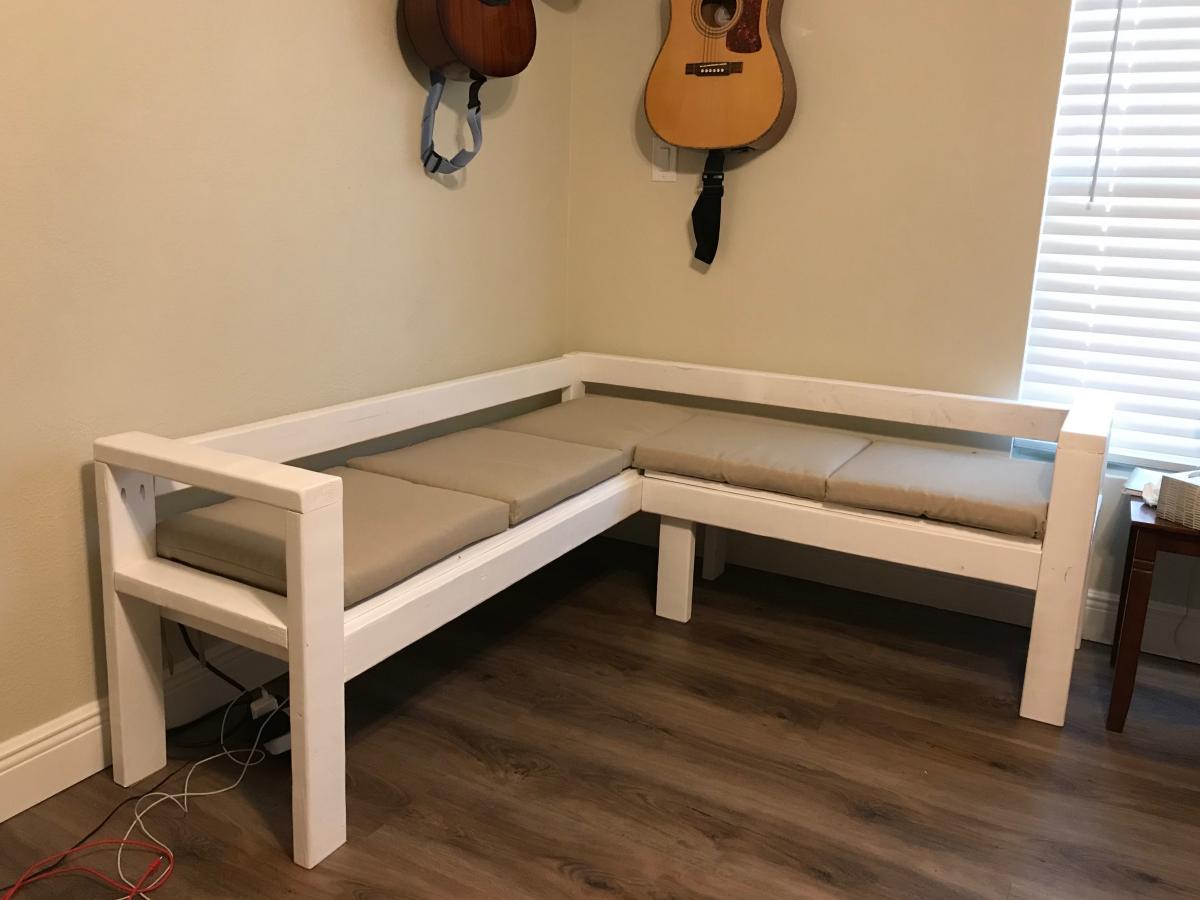
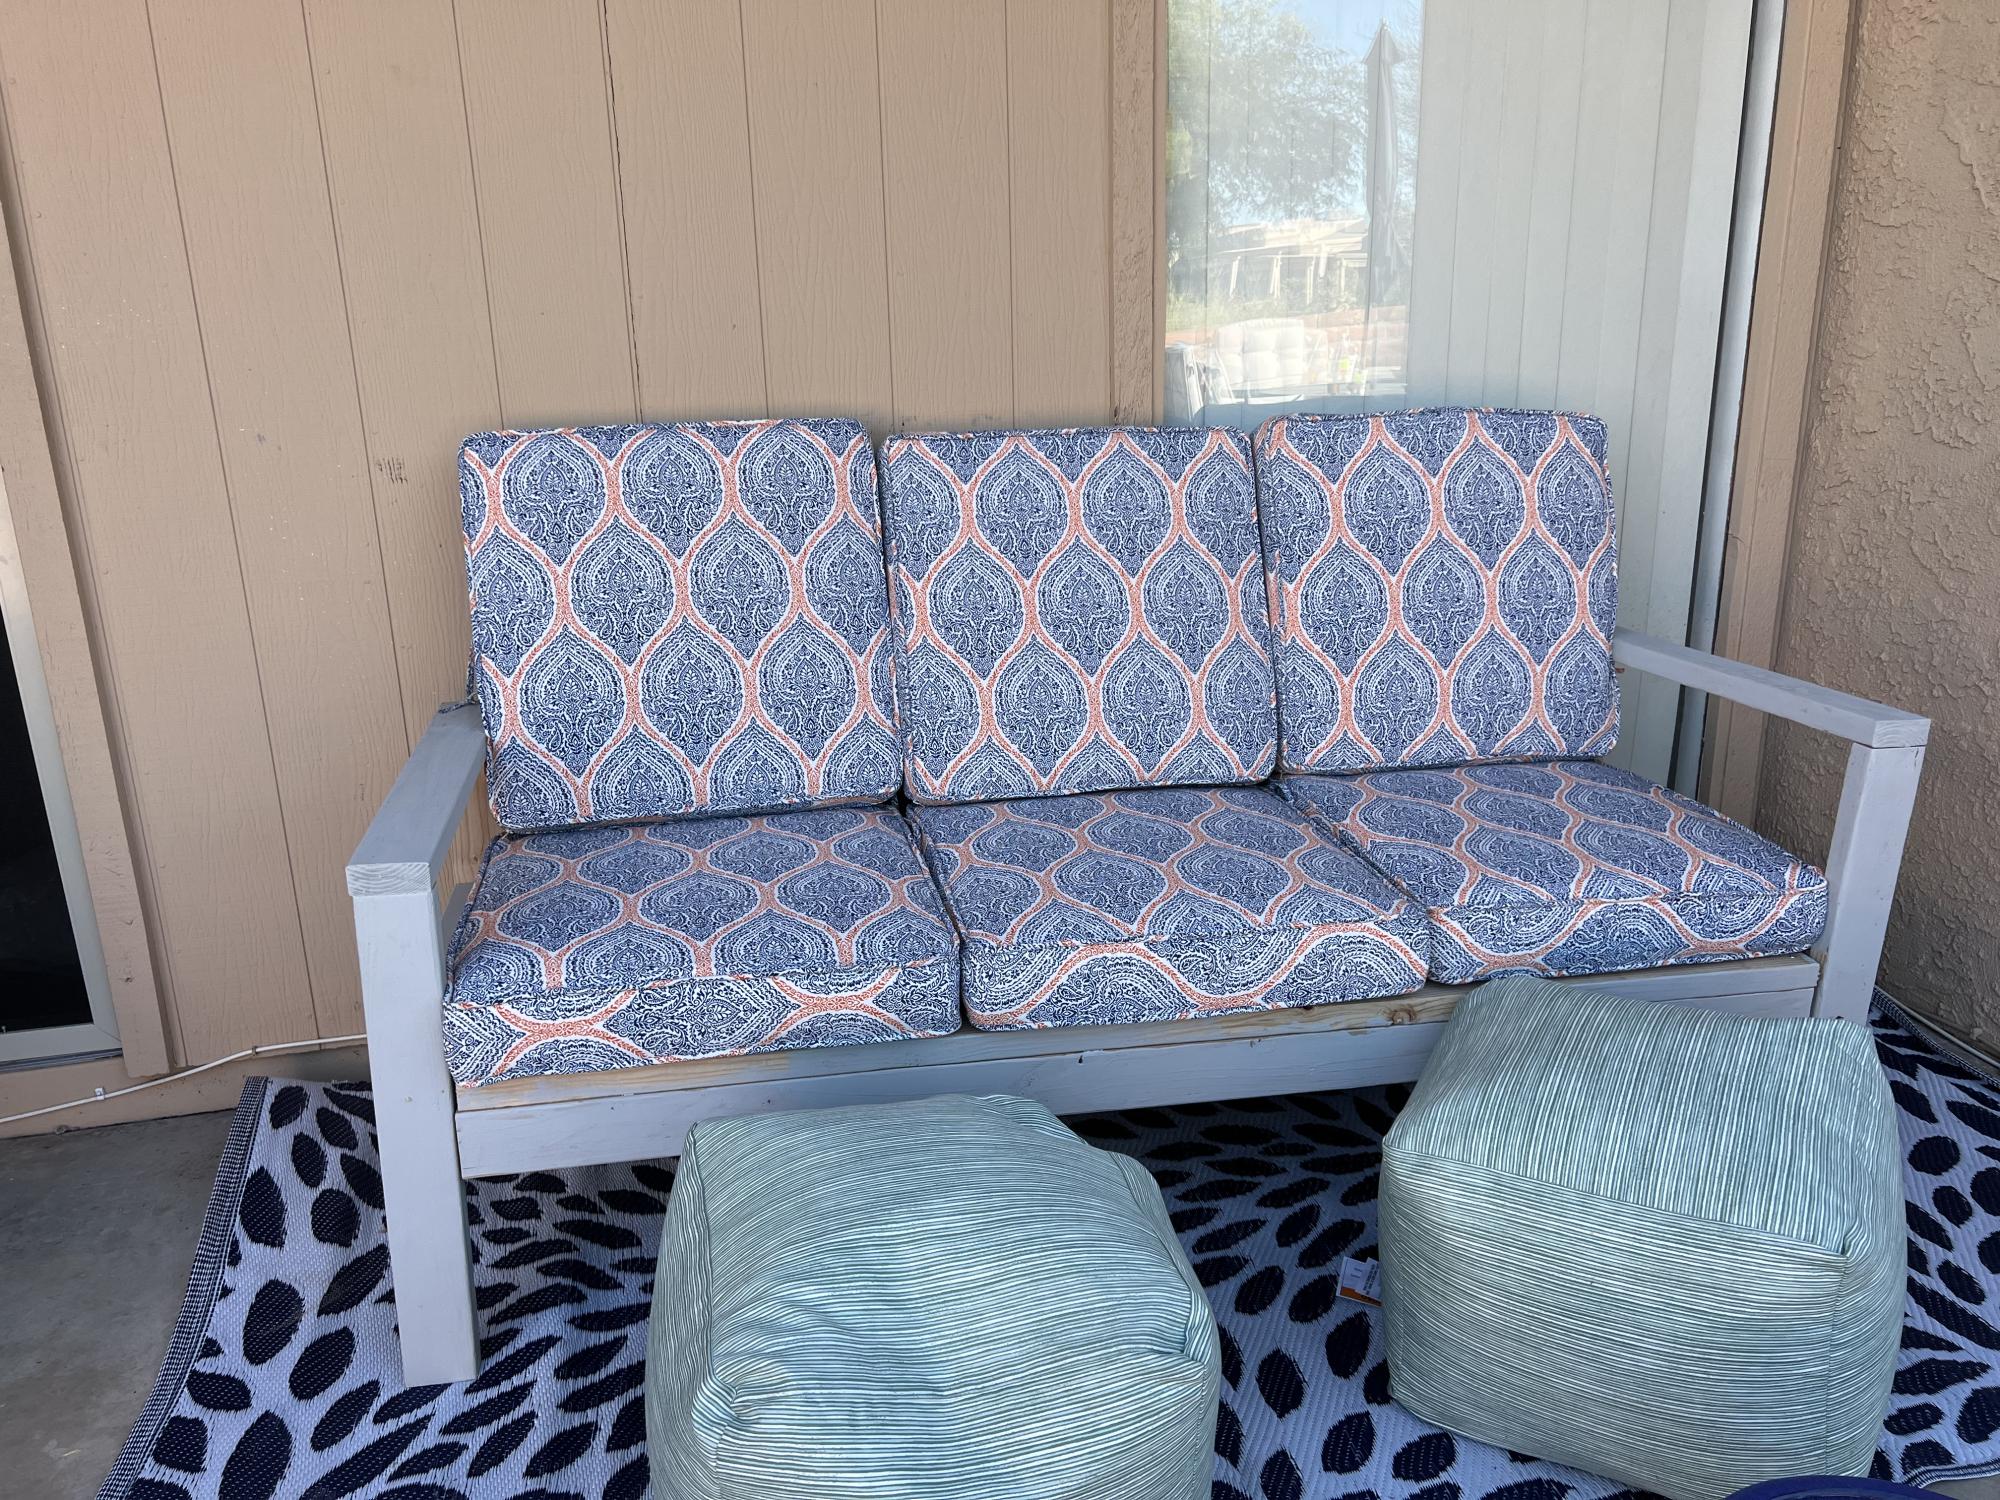
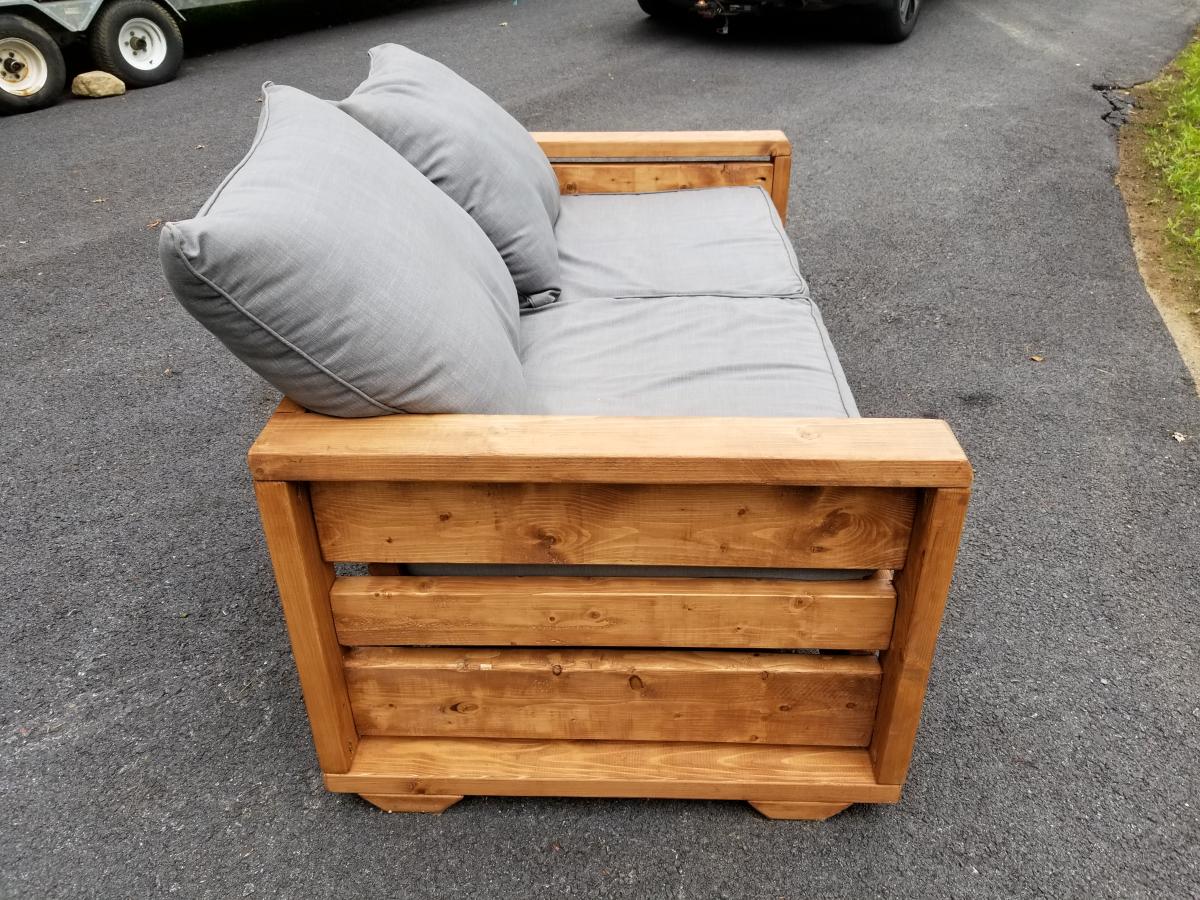
Sectional Sofa for Teen room
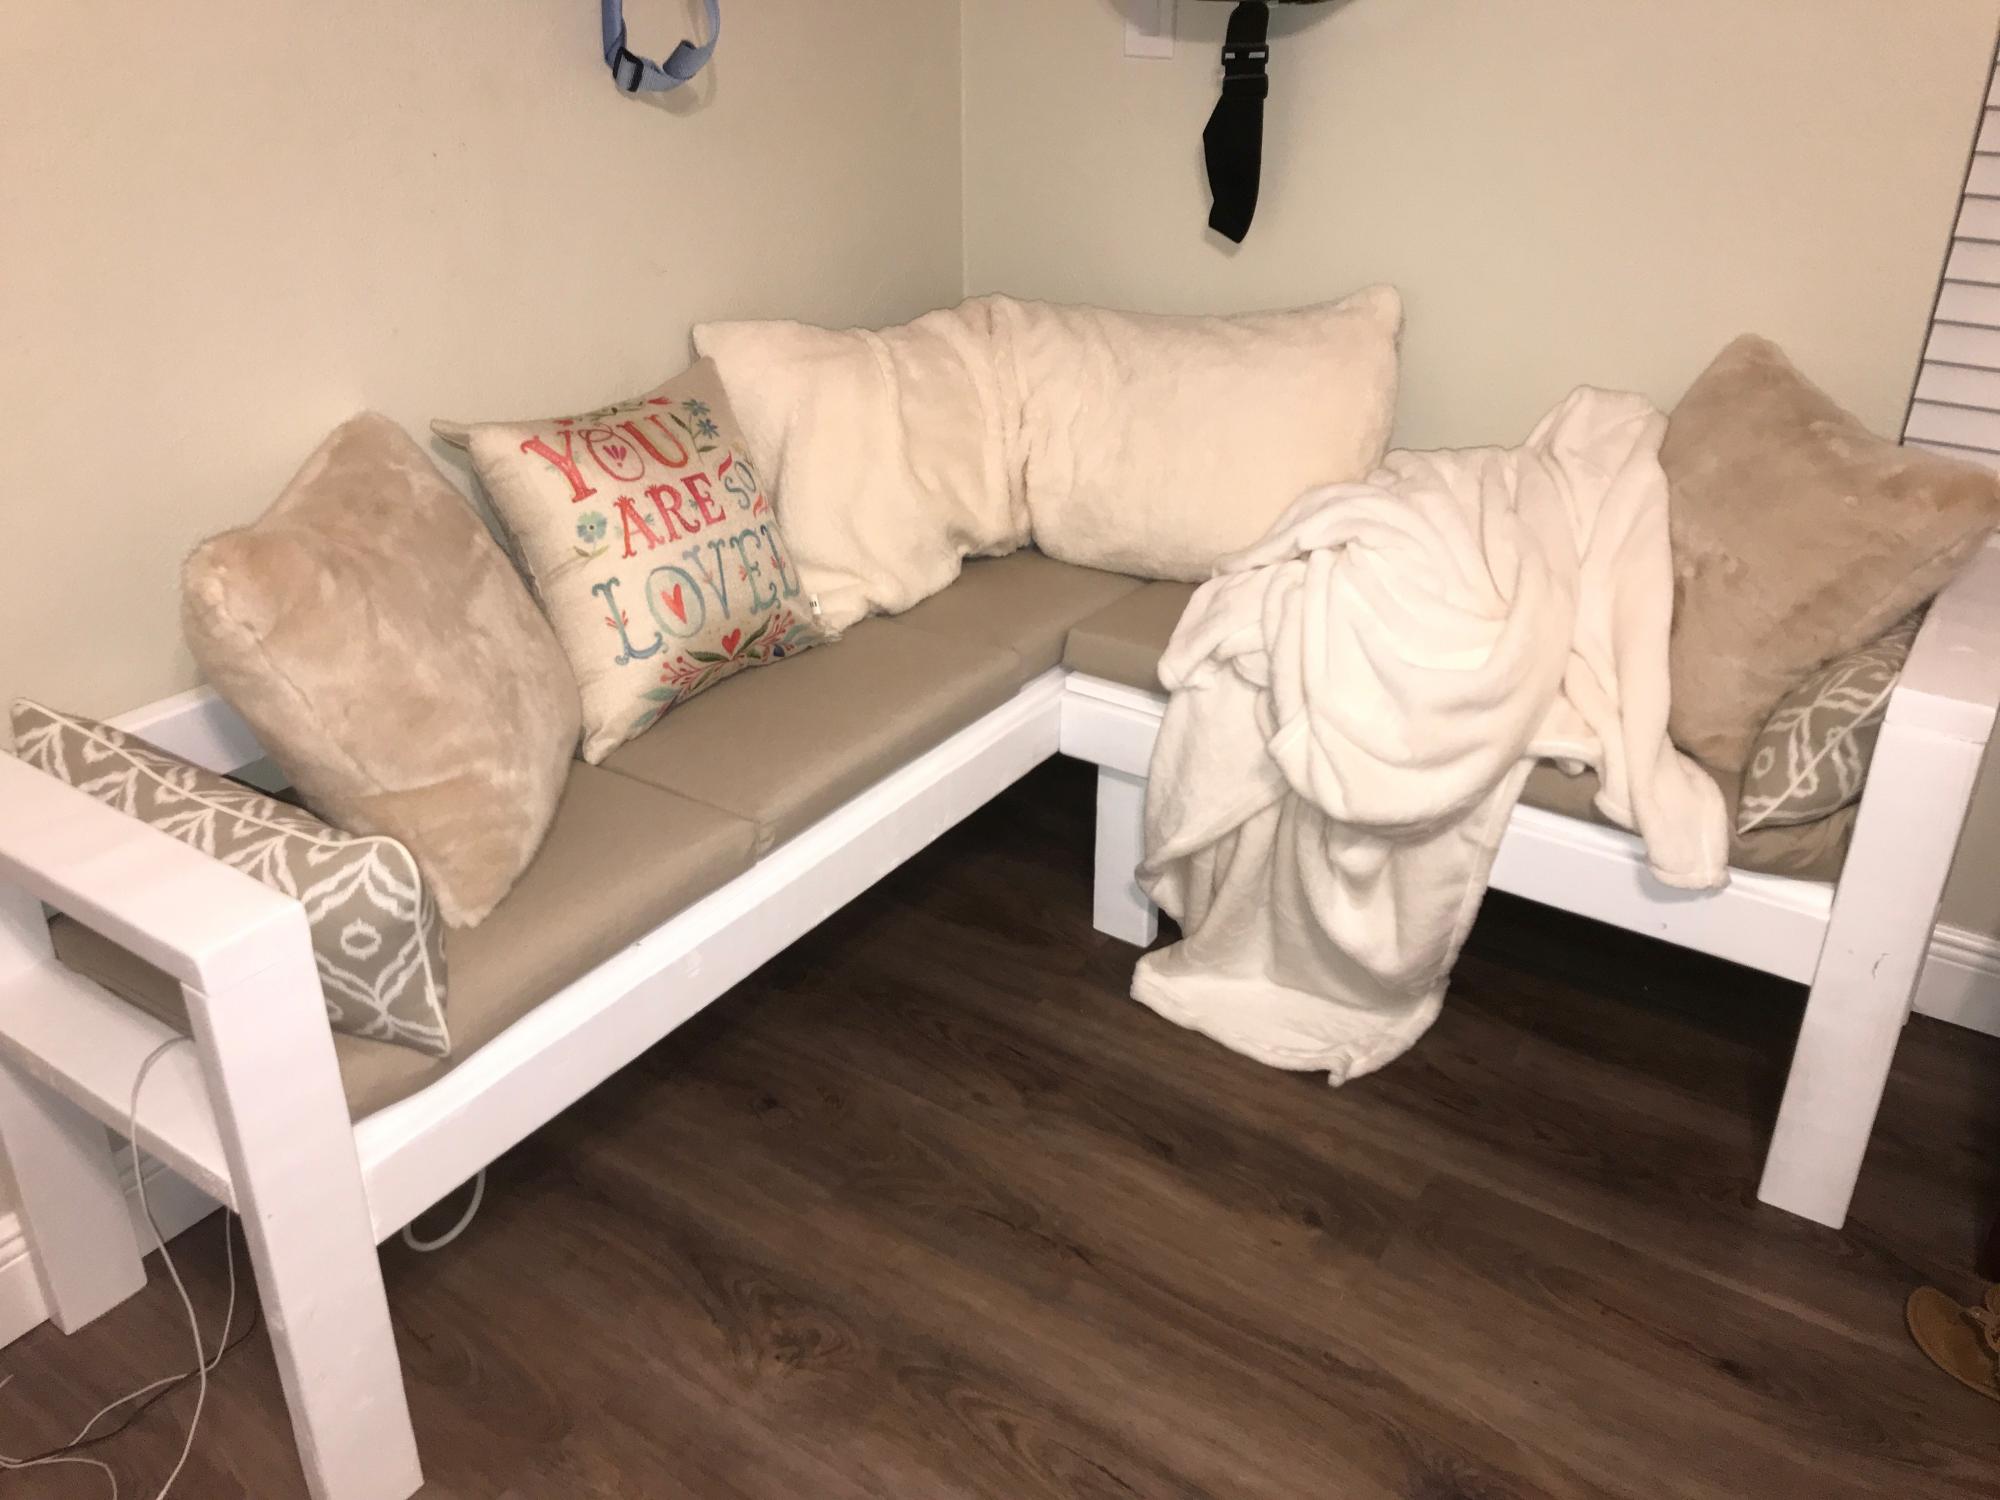
My teenage niece asked me to build her a cool seating area for her new bedroom. So I used Ana White’s Outdoor Sofa with Sectional for the plans. I modified the overall size for the space and the seat depth to accommodate the seat cushions she bought, painted it white, and let her add pillows and blankets to make it soft and cozy. She loves it and I’m the coolest Aunt ever!!
Built from Plan(s)
Estimated Cost
$87
Estimated Time Investment
Day Project (6-9 Hours)
Finish Used
Primer & white latex paint
Recommended Skill Level
Beginner
Comments

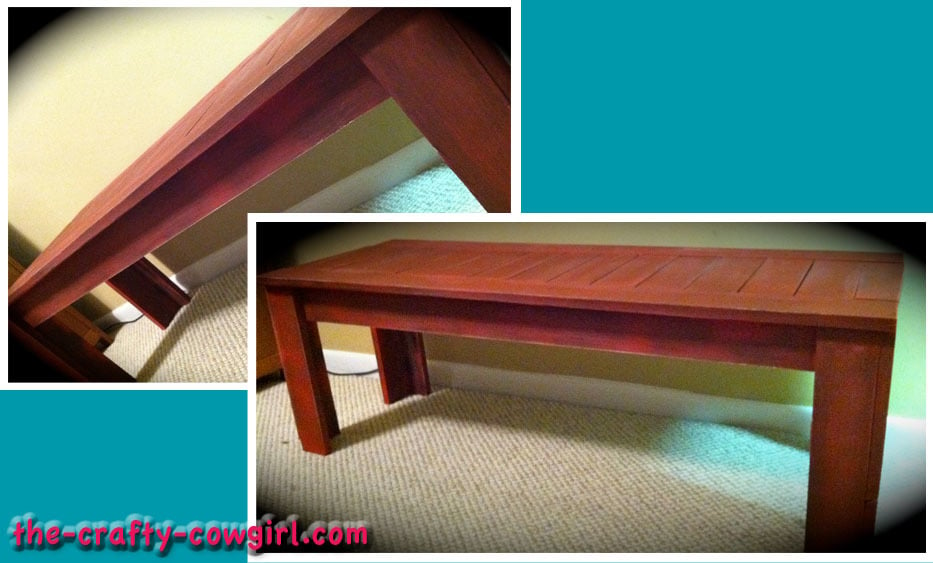
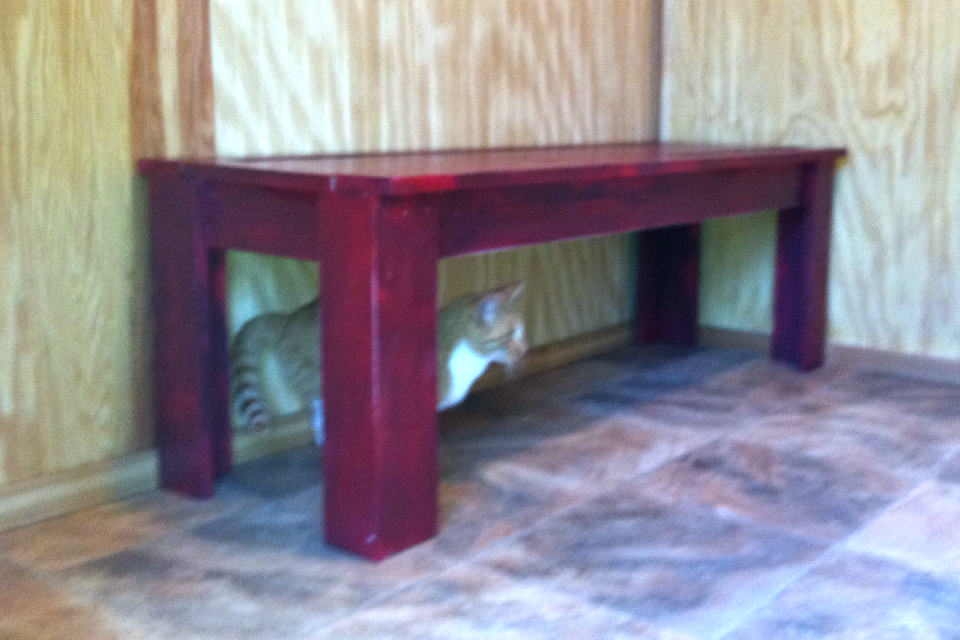
Simple Outdoor Bench
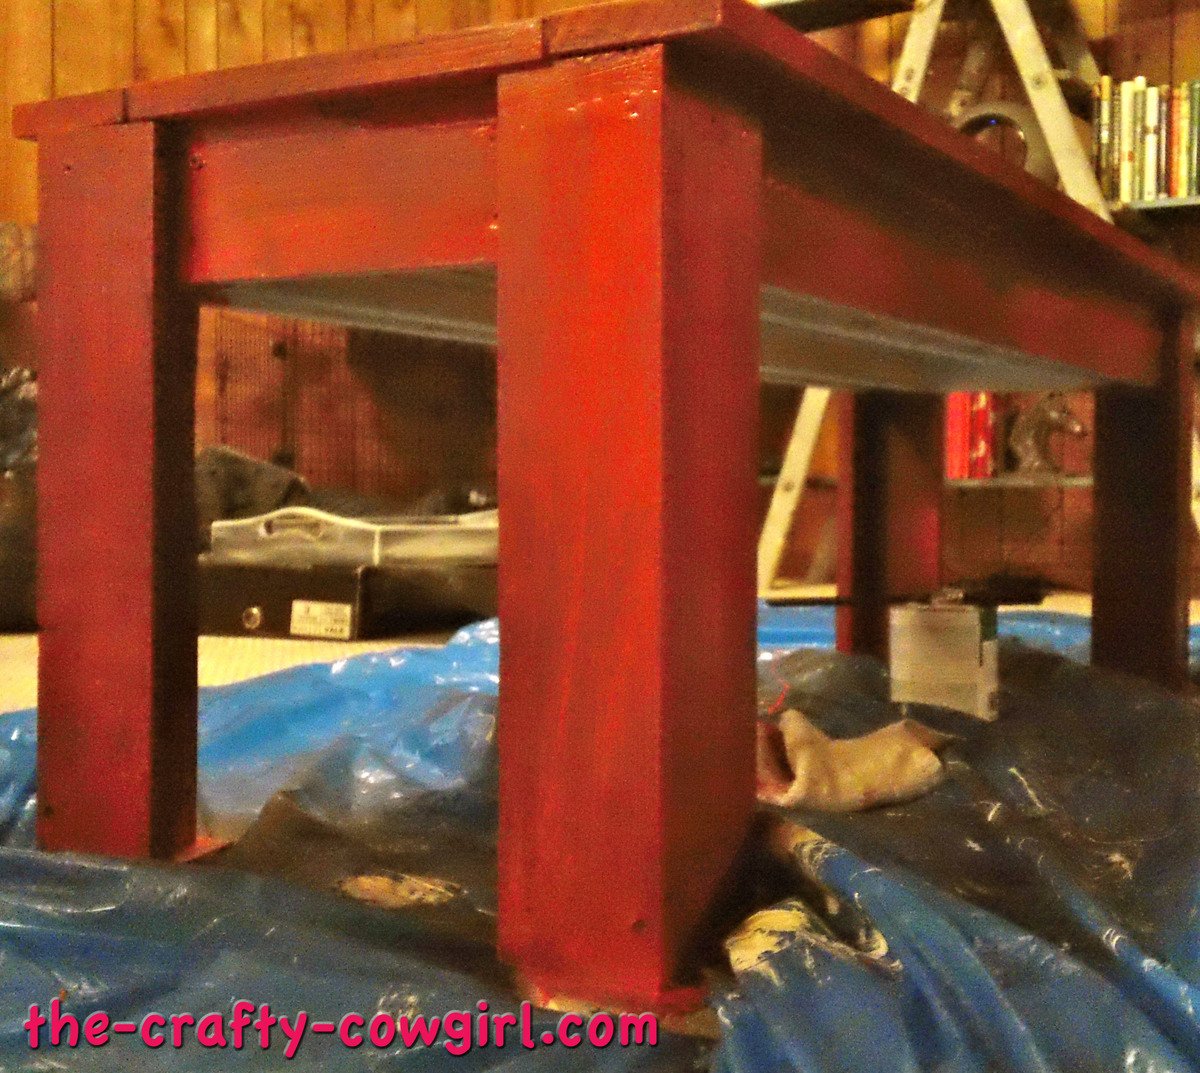
Very easy plan to follow! This was my first project and also my first time to use power tools. I made a few mistakes, but learned from them all and was very pleased with/proud of the bench!
Built from Plan(s)
Estimated Cost
$25
Estimated Time Investment
Afternoon Project (3-6 Hours)
Finish Used
Make sure you paint it before you put it together (one of the mistakes I made was to not do this!)!!! Spray paint camo brown and dry brush several coats of red on top. Distress/age with sand block on corners.
Recommended Skill Level
Starter Project
Comments

In reply to 1st Time Made by Martha Jones DW
Sat, 01/28/2012 - 18:32
Thanks!
Thanks! There were several little mistakes I made but I'm going to go ahead and just use the excuse that it adds character! Learned a lot that I'll be able to apply to my future projects.
Modified Recycling Console - First Build!
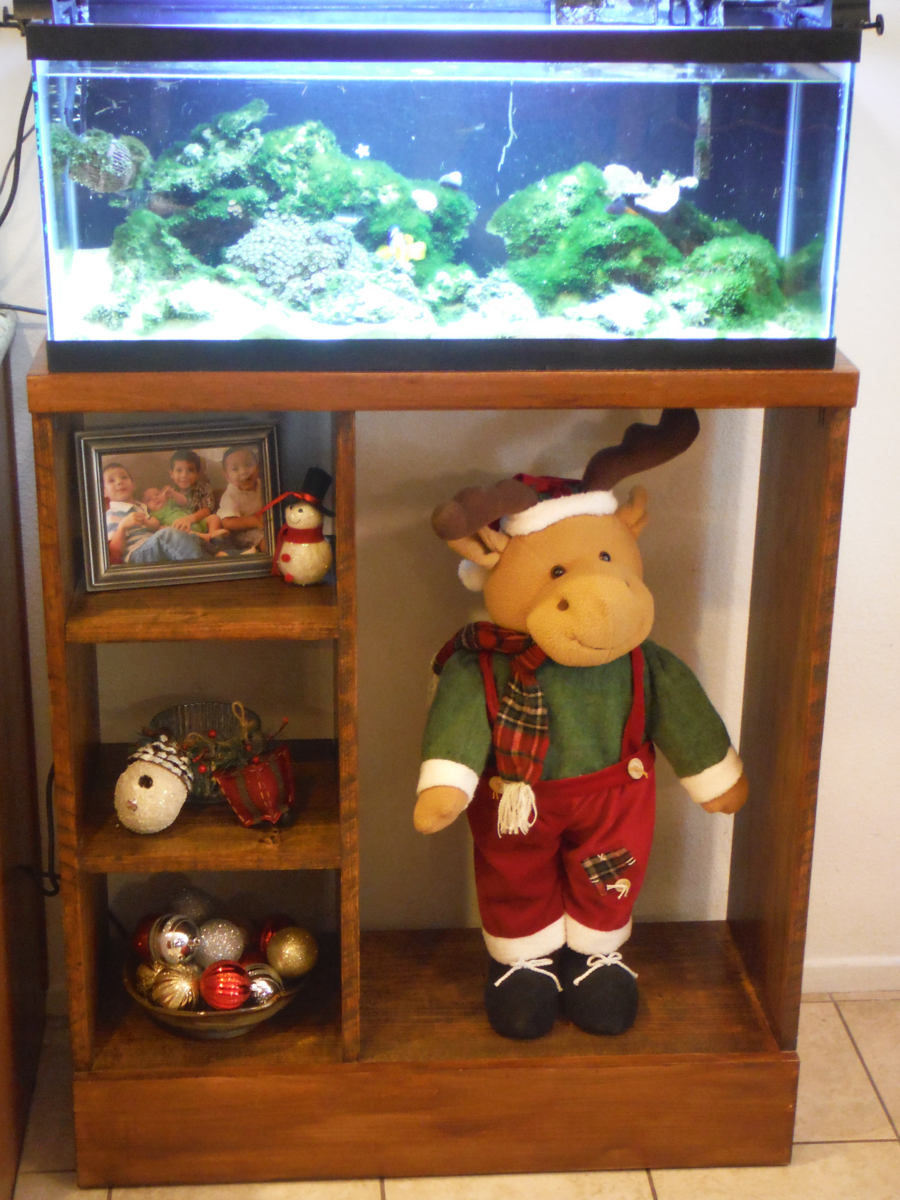
We needed to make sure this was strong enough to hold a 20 gallon fish tank.So, we decided to use poplar wood and stained it with golden mahogany. The height was adjusted to 37 inches.
Built from Plan(s)
Estimated Cost
$80 for the wood
Estimated Time Investment
Weekend Project (10-20 Hours)
Finish Used
Fish Tank Stand. Used Minwax Golden Mahogany Stain, and 3 coats of Minwax Poly.
Recommended Skill Level
Starter Project
Mini console table
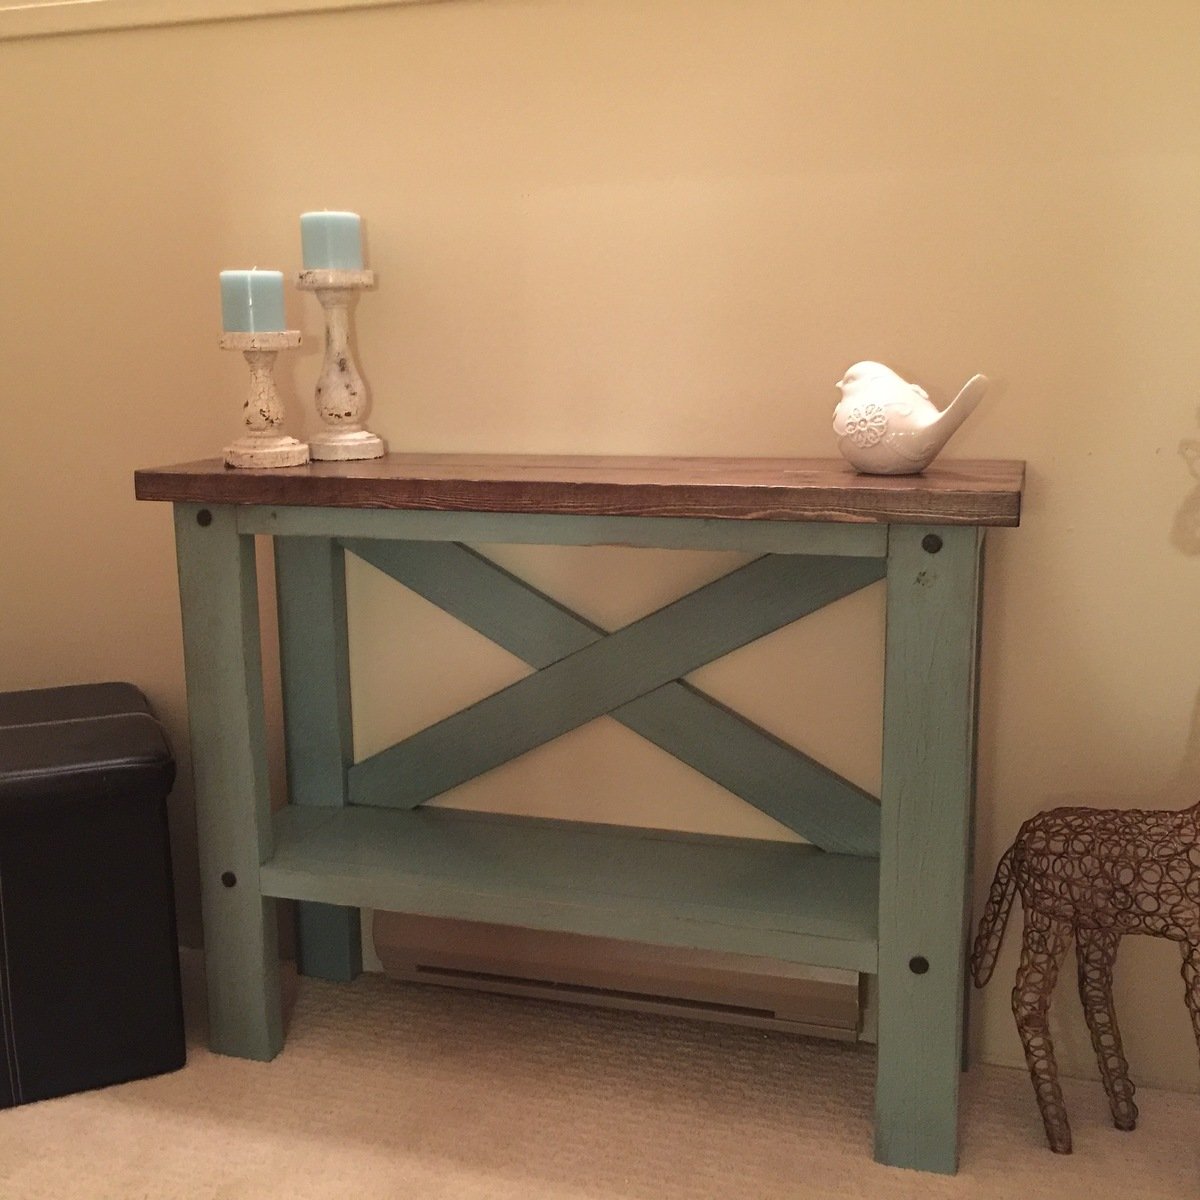
First table built by us. I think it turned out pretty good! Custom built to avoid baseboard heater.
Built from Plan(s)
Estimated Cost
$30-50 depending on if you need stain or not.
Estimated Time Investment
Afternoon Project (3-6 Hours)
Finish Used
Minwax stain, water based paint and Minwax Polycrilic.
Recommended Skill Level
Beginner
Comments

Sun, 01/15/2017 - 21:24
I need the table that is
I need the table that is green/gray/blue whatever on the bottom and stained brown on the top
Tue, 01/17/2017 - 12:35
Future plans to come
i plan on making this next week, so i can update you with the plans, the only thing i am doing different is the way i am doing my cross in the back.
stay tuned
Tue, 01/17/2017 - 12:35
Future plans to come
i plan on making this next week, so i can update you with the plans, the only thing i am doing different is the way i am doing my cross in the back.
stay tuned
Sat, 02/04/2017 - 13:12
Original plans?
This is beautiful and simple! Great job!
You costum built it to fit the baseboard, were the original plans Ana White's? Can you link it or tell me the name to find it?
I'm new to the site and not navigating very well. I'm trying to save plans for a console similar to this to my profile/account and looking for the little "save to plans" to easily find this again
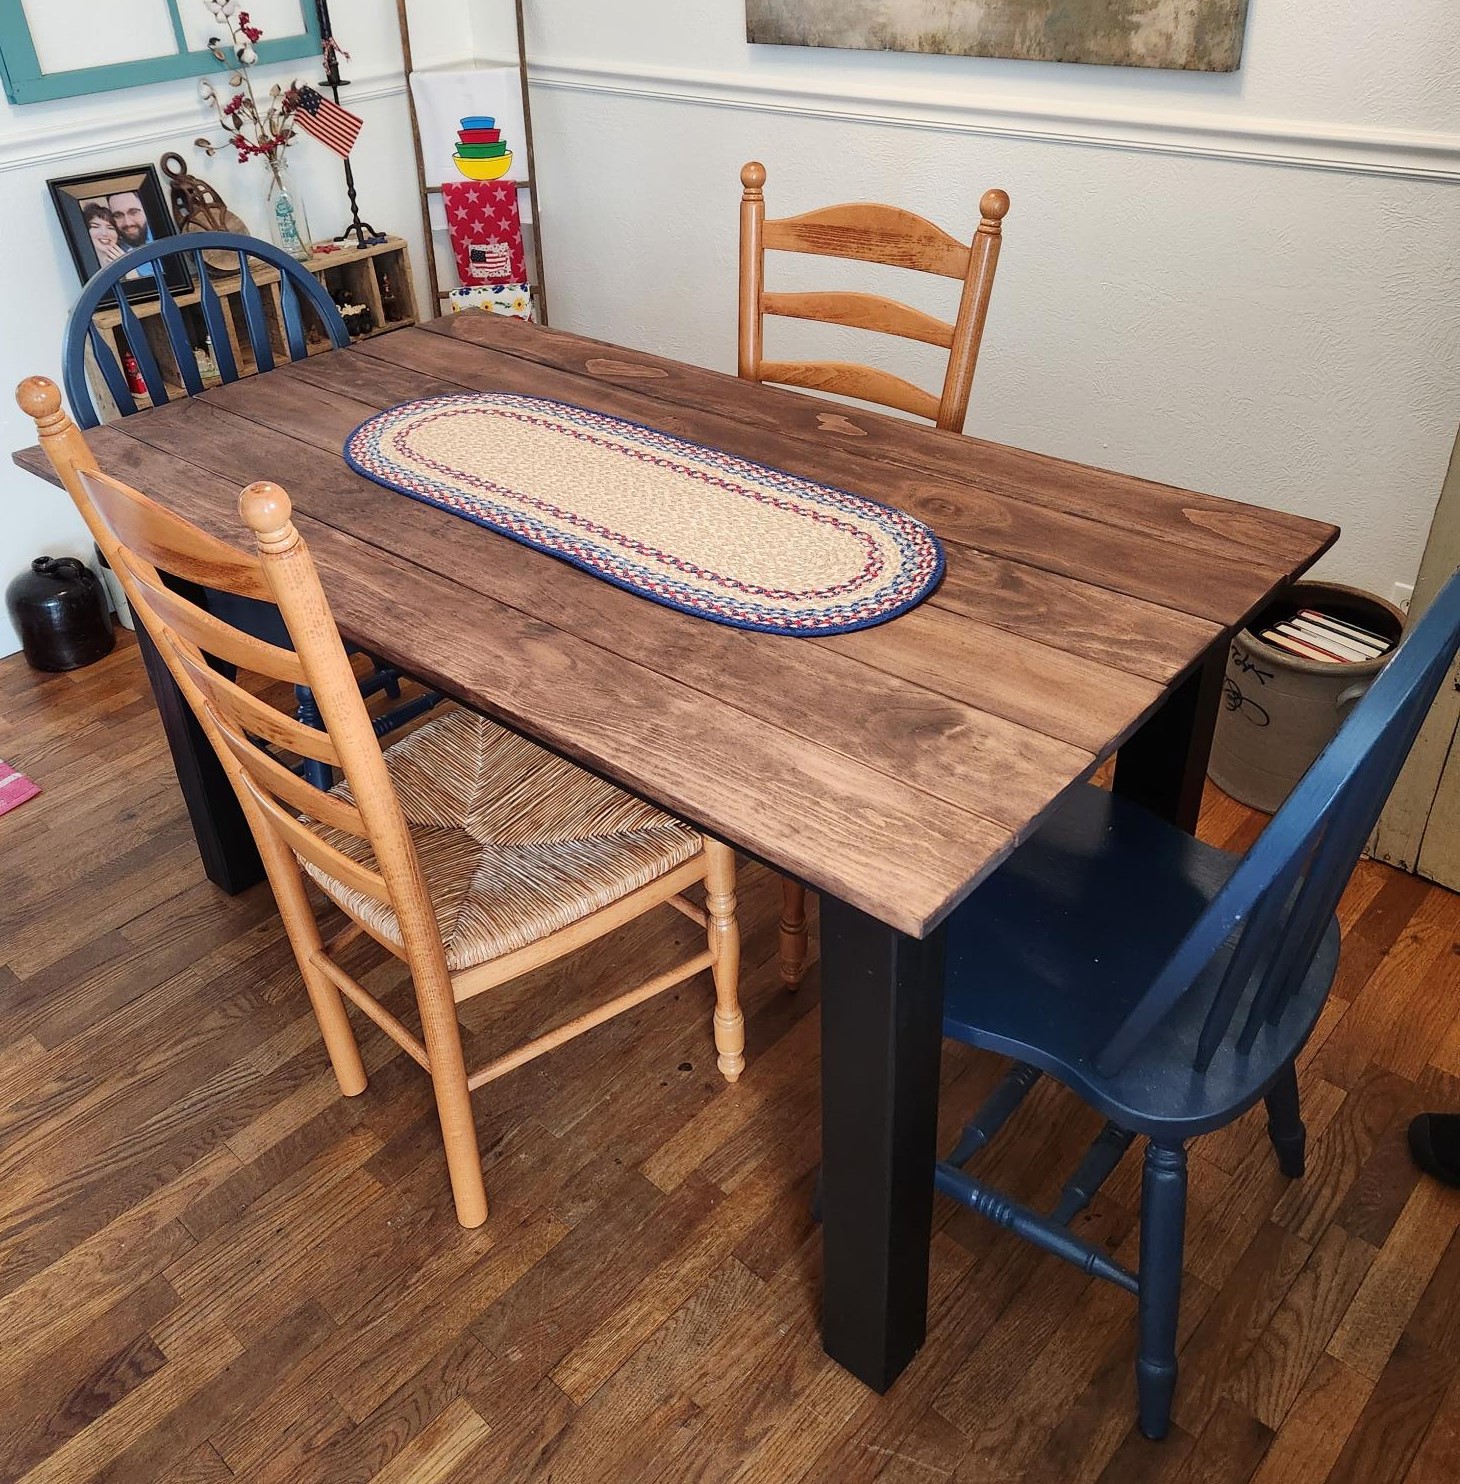
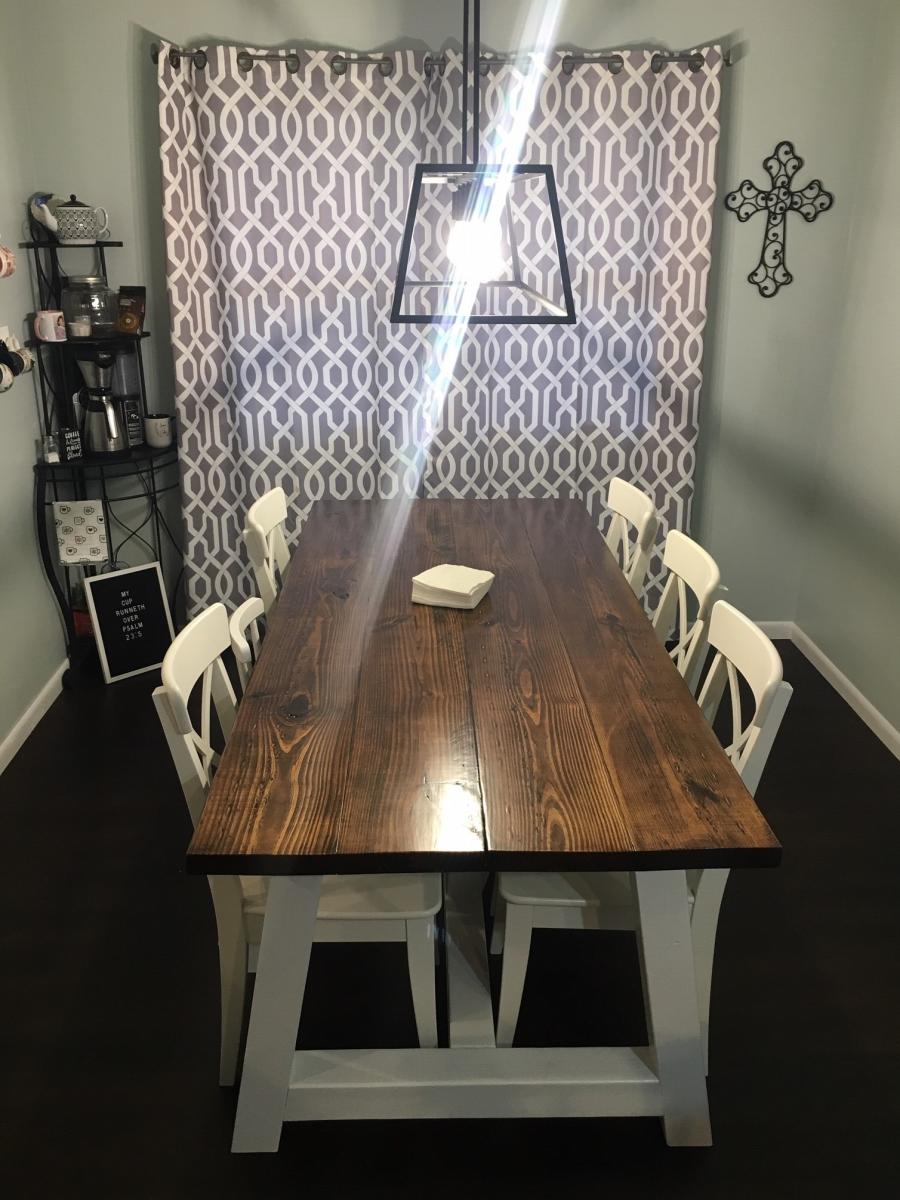
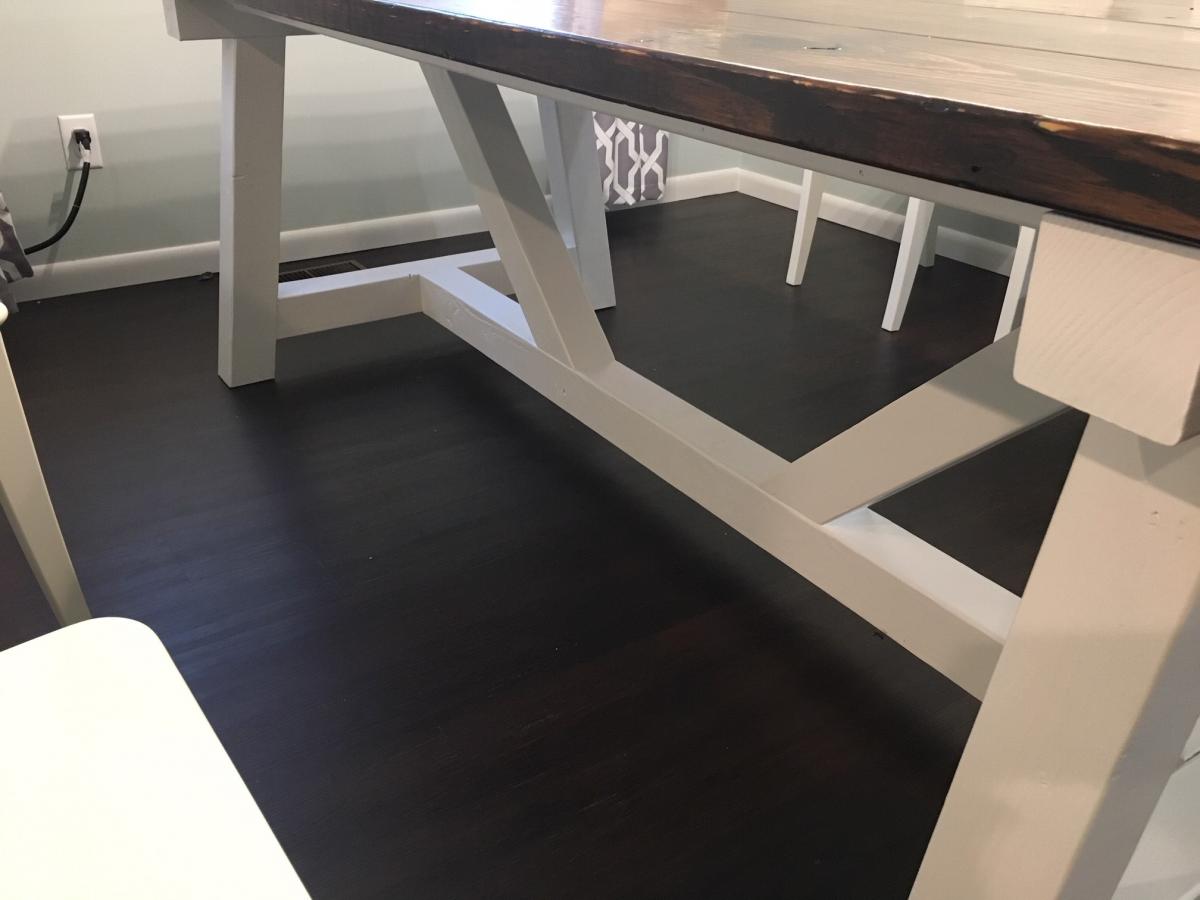
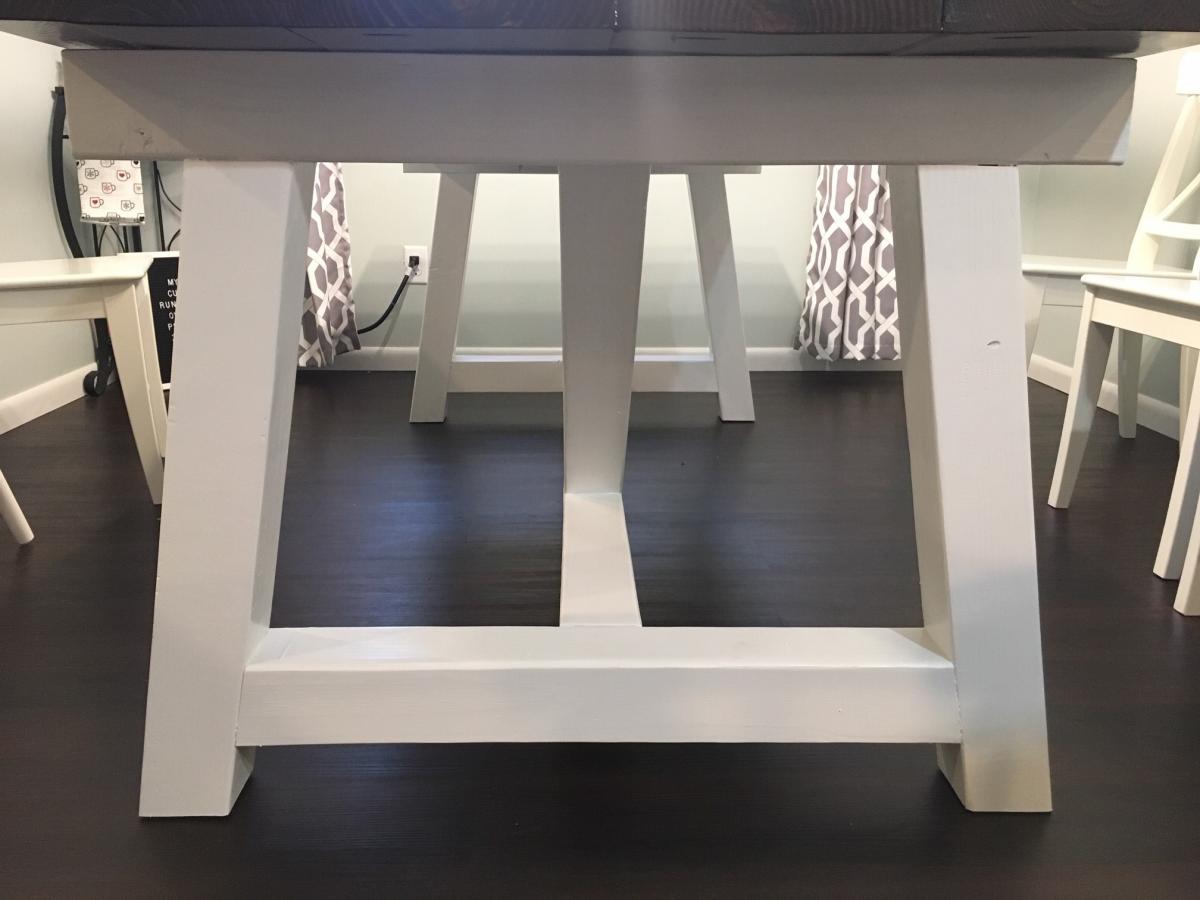
Modified 4x4 Truss Beam Table
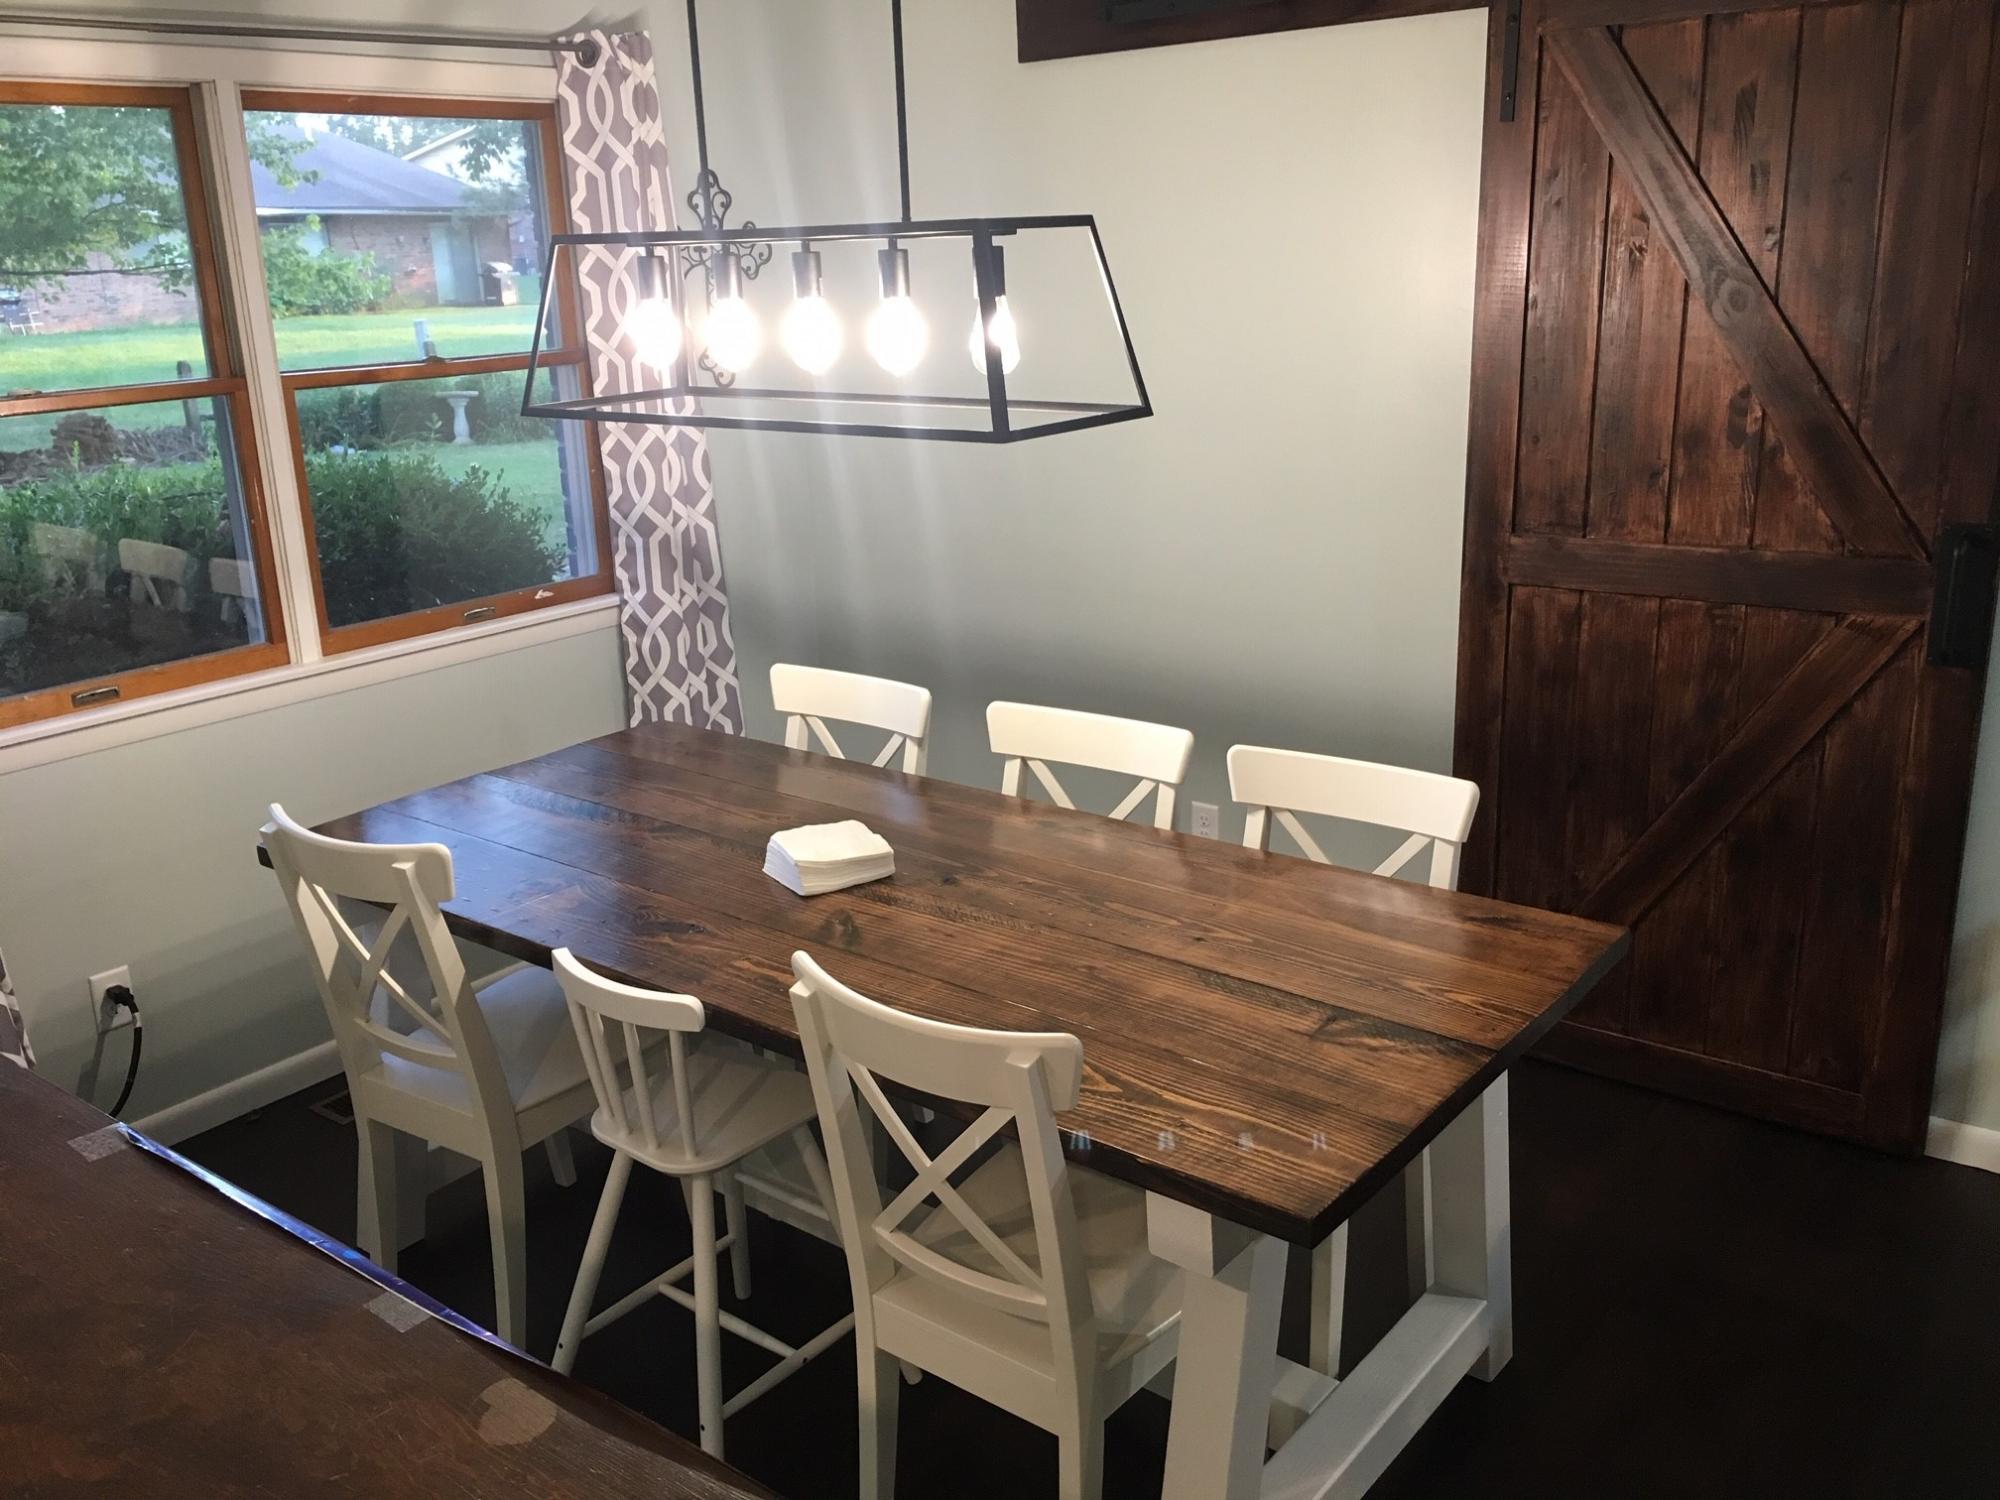
Build the 4x4 Truss Beam Table base with the Fancy X Farmhouse Table top shortened to 7' (84") for my wife's birthday! We love how it looks and can not wait to build the matching benches! Also, this is my first time attempting a building project and Ana-White Plan. The plans are very easy to follow and execute!!
Built from Plan(s)
Estimated Time Investment
Week Long Project (20 Hours or More)
Finish Used
Varathane - Kona and Clear Poly
Sherwin Williams - Cotton White
Sherwin Williams - Cotton White
Recommended Skill Level
Beginner
2x4 outdoor couch
Love my outdoor couch. Easy to build and follow plans. Thanks Ana!
Built from Plan(s)
Comments
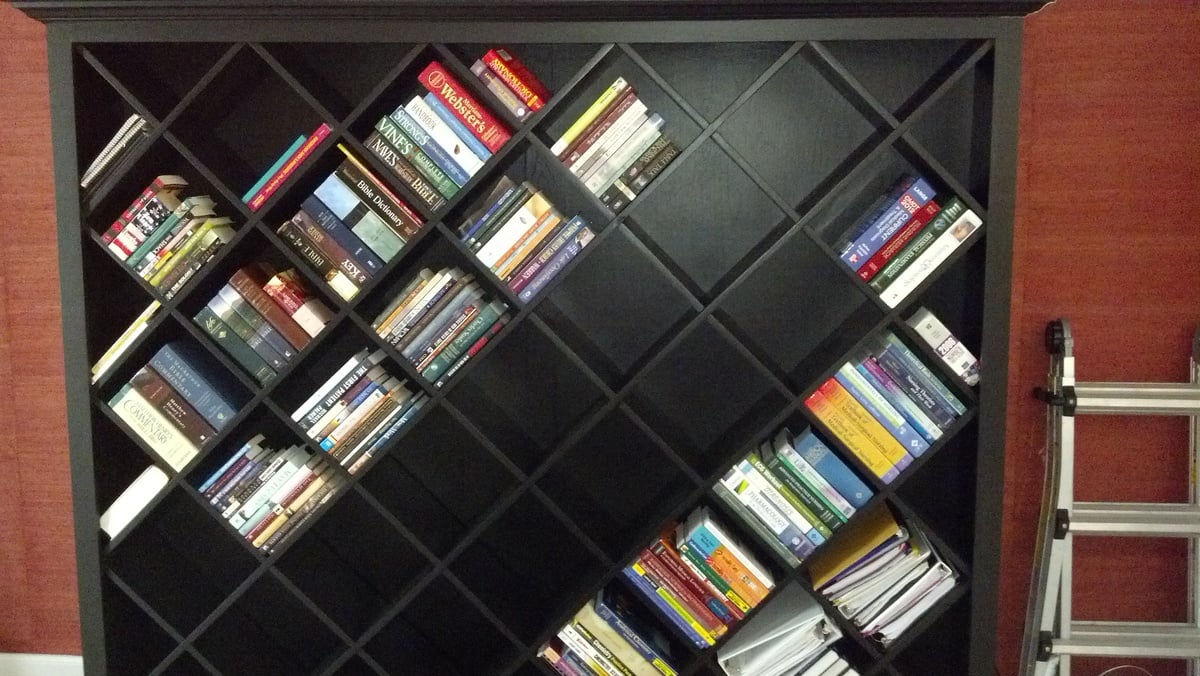
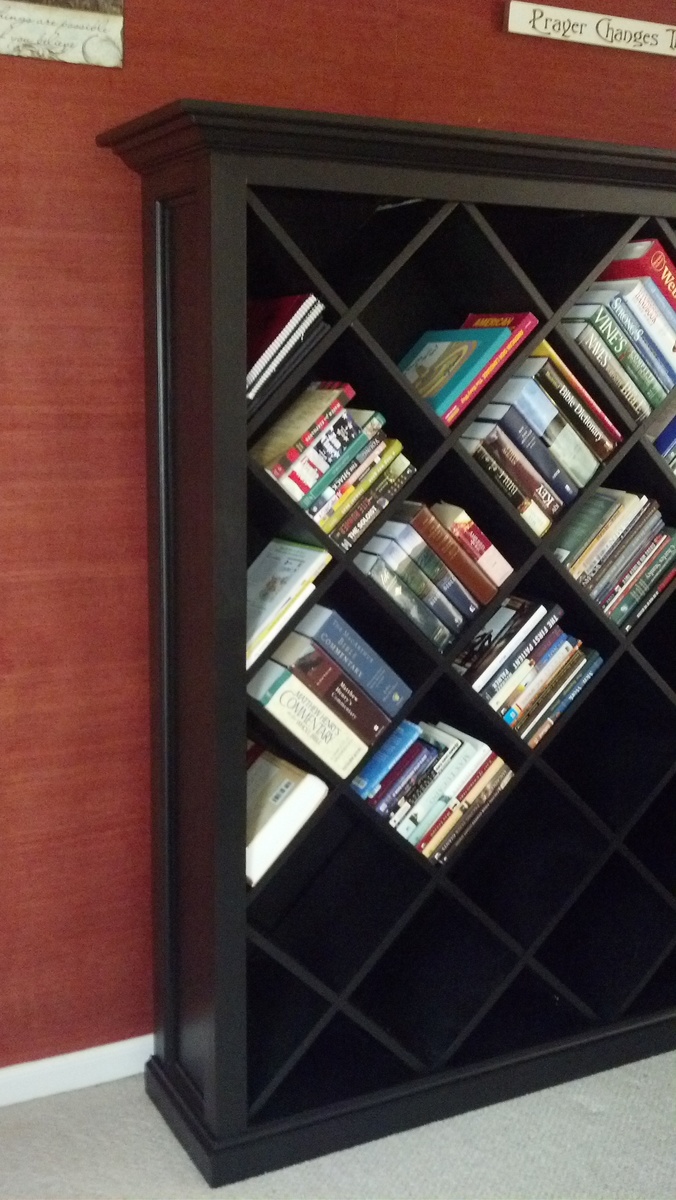
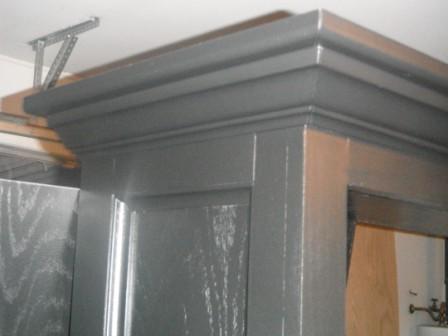
My First Project (Home Depot Inspired Bookcase)
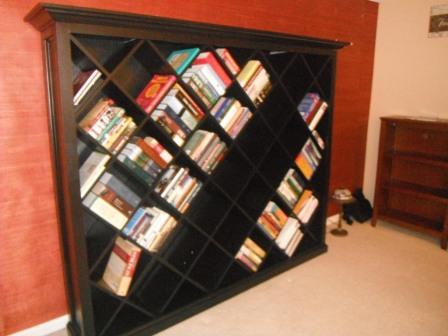
My wife was watching TV and she saw a Bookshelf on a Home Depot commercial with diagonal shelving. She kept telling me how much she wanted a bookshelf like that. So, for my first wood project ever, I decided to try and tackle it for her. It is slightly over 7 feet wide and a little over 6 feet tall. I am currently trying to learn sketchup8 to create plans for this project.
Unfortunately I didn't use a certain plan from Ana's site for this project, but you can find any bookcase plan and place the diagonal shelves in place of the horizontal ones.
Estimated Cost
about 500 ( because I am a novice. Im sure someone with more experience could build it for much less depending on type of finish)
Estimated Time Investment
Week Long Project (20 Hours or More)
Finish Used
Benjamin Moore Black with a pearl finish
Recommended Skill Level
Starter Project
Comments

Tue, 01/31/2012 - 21:02
Beautiful!
So you totally just solved my no fireplace dilemma! I think I'm going to take your design here and leave an open space for some electric logs. Thank you so much for sharing, it is really stunning!

In reply to Very cool by nicwolford
Wed, 02/01/2012 - 06:10
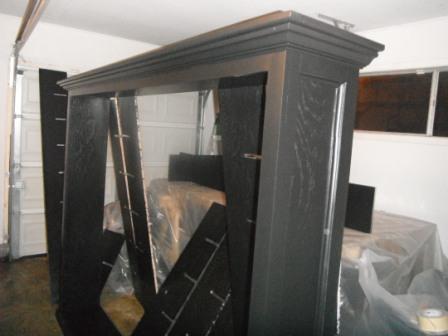
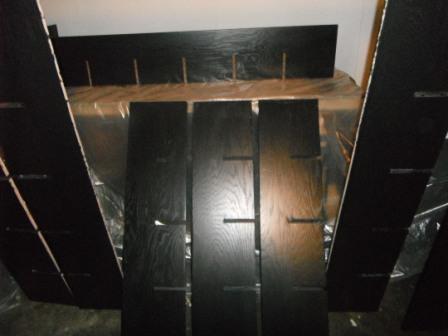
Slots
Those were challenging because, as I stated before I am not even a beginner. I was going to try and use my little trim router to cut them but I learned quickly routers cause much saw dust. I don't have a router table and my router is small. I decided to use my miter saw. I measured out where the slots should go and Cut the outside boarders of the slots with my miter saw. I don't have a jig saw either so I chiseled the the remaining piece to form the slot. I then used my small trim router to smooth out the slots. After I got in a groove it went pretty fast. It was a lot of Slots. Like I said before, I am very new and I know there are easier ways to do this lol. Just a hint..If you ever use interlocking slots and plan on painting the project, I wouldn't make the slots exact to the bare wood. The primer and paint add to the thickness of the wood so it is important to take this into consideration before cutting the slots. Again, very new to this.
Wed, 02/01/2012 - 06:28
Your not new anymore...
I don't think that you can say that your "new to this" any more. You cut your teeth on quite an ambitious project. You did a fantastic job! And just wait till you learn sketchup, the FUN you will have! Keep up the great work and keep posting! Can't wait to see your next project!
Wed, 02/01/2012 - 12:32
I've never seen a diagonal
I've never seen a diagonal bookcase before, but I like this one. You'll never have to worry about straightening books that have fallen on their sides either.

Sat, 02/04/2012 - 15:22
So impressed!
This book case looks truly expensive! My excuse is always a lack of tools, but look what you did with what you had! Everything is square and precisely done.
In reply to So impressed! by Debi G
Sat, 02/04/2012 - 19:26
Thank you
Thank you for your kind words. I appreciate all the input I have been getting. I look forward to posting more projects and getting more ideas.
Tue, 02/07/2012 - 12:16
I really hope you post your
I really hope you post your plans! You did a nice job. I'd like to use a very scaled down version of this to make a wine rack in an open cupboard we have over our sink. Might have to pick your brain later. ;)
Tue, 02/07/2012 - 20:25
Great Job!!
I saw the same commercial your wife saw, and kept trying to describe the bookshelf to my husband. Now I can show him. Thanks for posting,and I hope you figure out Sketch Up so we can see your plans!
In reply to Great Job!! by mrs2tone
Wed, 02/22/2012 - 20:33
Sketchup
I have started to figure it out a little bit. I thank you for the comments and am close to finishing the plans. Again thank you for your comments
Thu, 05/10/2012 - 17:29
Wow! That is wonderful...I
Wow! That is wonderful...I have a similar one that I LOVE and wanted for years. It was in the Pottery Barn Catalog and OUTRAGEOUSLY priced...I don't remember exactly the $$. When "Hold Everything", a subsidiary of PB, went out of business, I got the second to last one they had in stock for $200. AND...When I saw the HD commercial I realized I might be able to make a more custom version someday. Your story inspired me to plan something, and also to perhaps even open up and learn SketchUp which I downloaded months ago...Look forward to more projects!
Mon, 10/15/2012 - 20:33
Well it's crooked. LOL Jk I
Well it's crooked. LOL Jk I think it is insanely awesome! I hope my first project is even half as good!
Mon, 07/15/2013 - 10:09
Great Idea
Great beautiful first build! Thank you for this great idea that triggered an idea for myself. Going take this format, and adjust the dimensions to fit as a wine shelf.
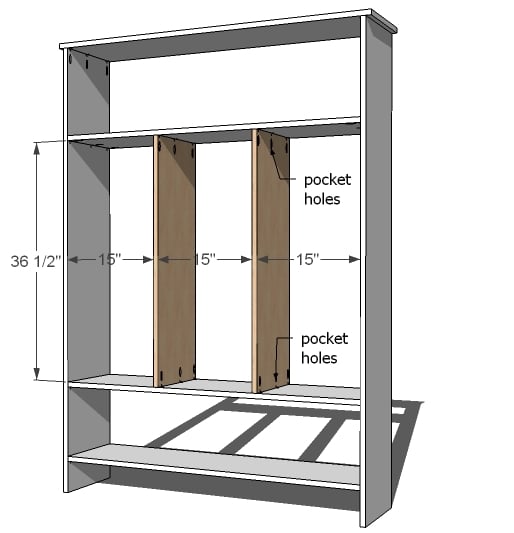
Tiered Storage Unit
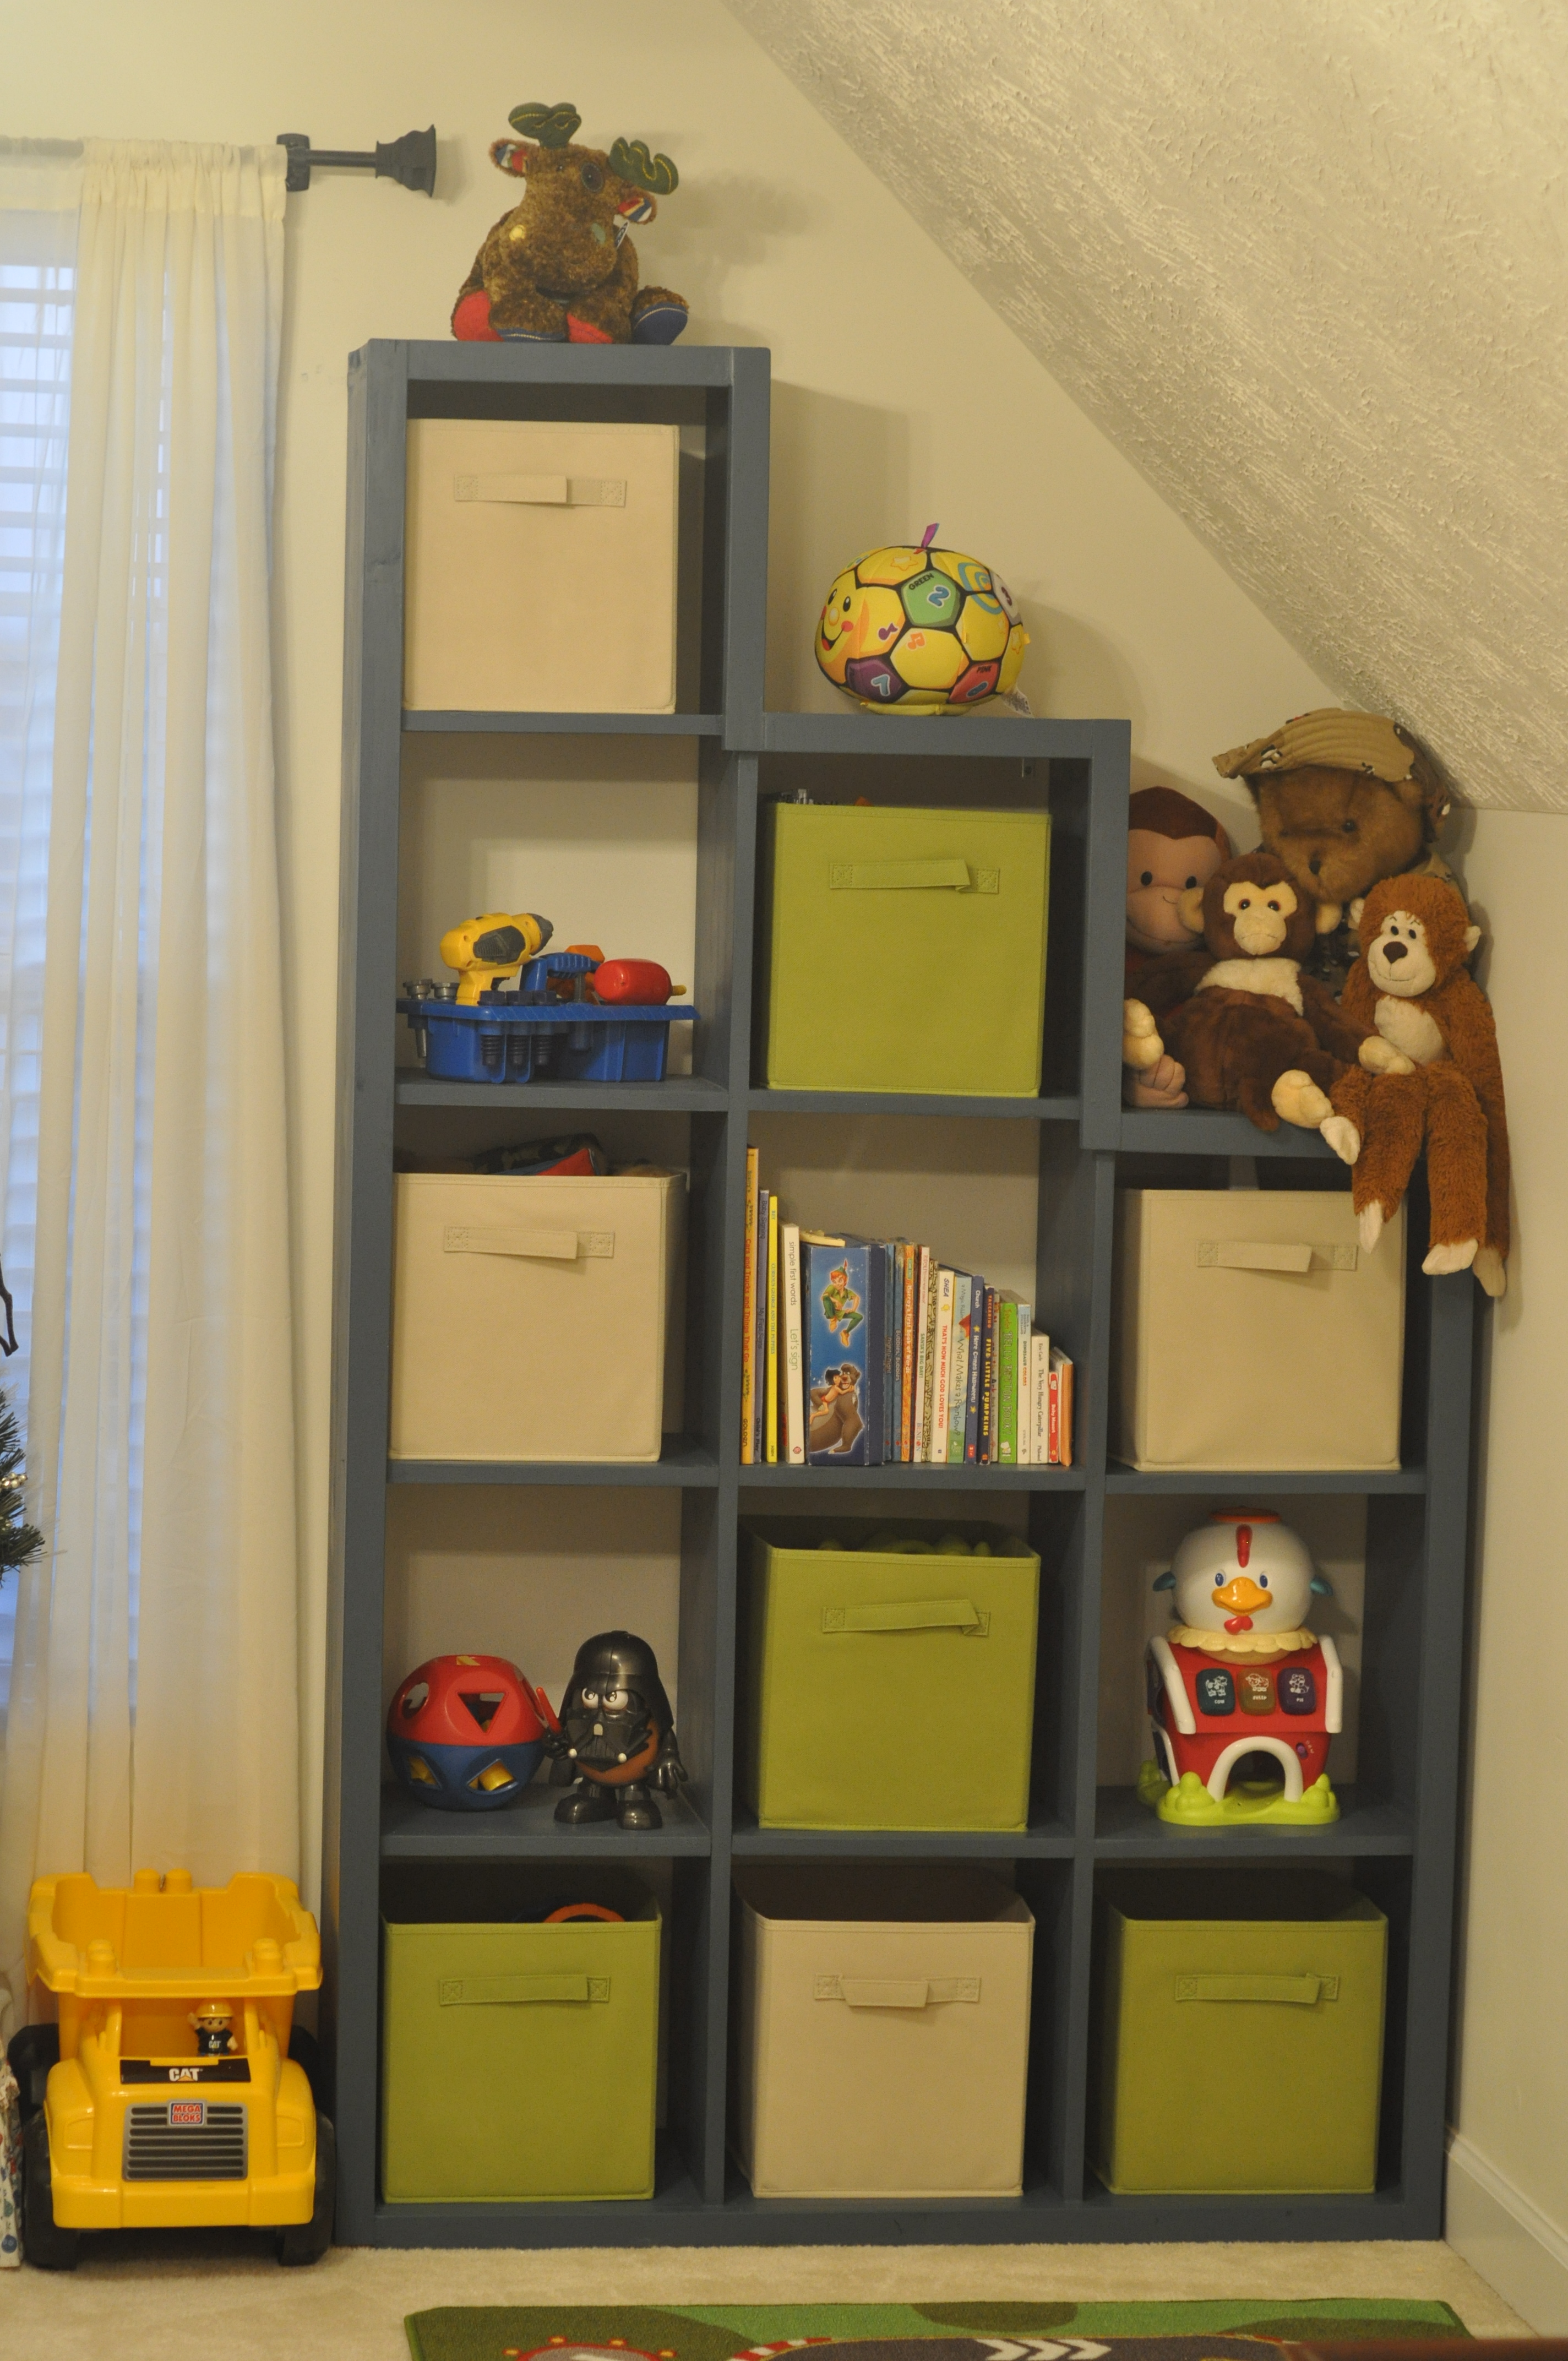
We recently decided to turn our bonus room into a Den/Play room for our energetic 20 month old son. It quickly became apparent that we needed storage... and FAST for all of those little toys that toddlers love so much.
I loved the idea of the 5' x 5' room divider cubby, but needed something that would accommodate the sloped roof. I modified Ana's plans to allow for a tiered storage option that would work with the roof line.
Cutting/prepping and assembling went quickly with the Kreg Jig. I prepped all the materials and assembled the unit in the room as it is quite heavy completely assembled. Cutting and Assembly took about 1 and 1/2 naps for my toddler (so about 3-4 hours). Sanding and Painting the following day took about another naps worth of time (2-3 hours).
The unit is still 72" tall at its highest point- and I modified the plans slightly to ensure that all cubbies would be a minimum of 13.5 inches tall/wide. After 2 coats of paint, it was ready to be mounted against the wall for safety. I installed 2 L brackets on the top and middle rows and screwed directly into the drywall- can't be to safe when it comes to toddlers and their love of climbing!
Cost Breakdown:
1 x 12 x 8 (6): 65.00
1 x 2 x 8 ( 3): 10.00
Low-Voc all in one Paint/Primer (Valspar) (Quart)- $2.50 (a paint department return area find!)
Total Project Cost (estimate) $80-90 (including screws, wood filler and supplies)
Estimated Time Investment
Day Project (6-9 Hours)
Finish Used
Valspar LOW VOC all in one paint/primer (semi gloss)
Recommended Skill Level
Beginner
Comments
In reply to Great Work by NimbleShopper
Fri, 12/13/2013 - 06:33
Thanks! I'll be making
Thanks! I'll be making another one to mirror it on the other side of the window for additional storage!
Wed, 01/15/2014 - 10:09
You got the right decision
You got the right decision placing the window there. Great house by the way!
Bath cabinet, my FIRST project!
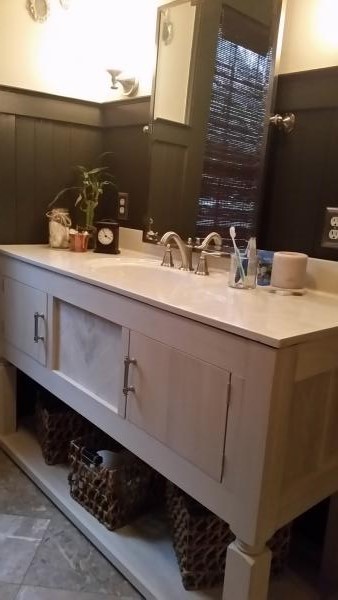
After contacting two cabinetry carpenters to do this project for me, I came upon Ana's plan for the Momplex. I made some adjustments for my home abd surprised myself.
My motto "what's the worse that can happen? I have to call someone! "
Built from Plan(s)
Estimated Cost
$500
Estimated Time Investment
Weekend Project (10-20 Hours)
Finish Used
Tinted kilz diluted with mineral spirits.
Recommended Skill Level
Starter Project
Comments
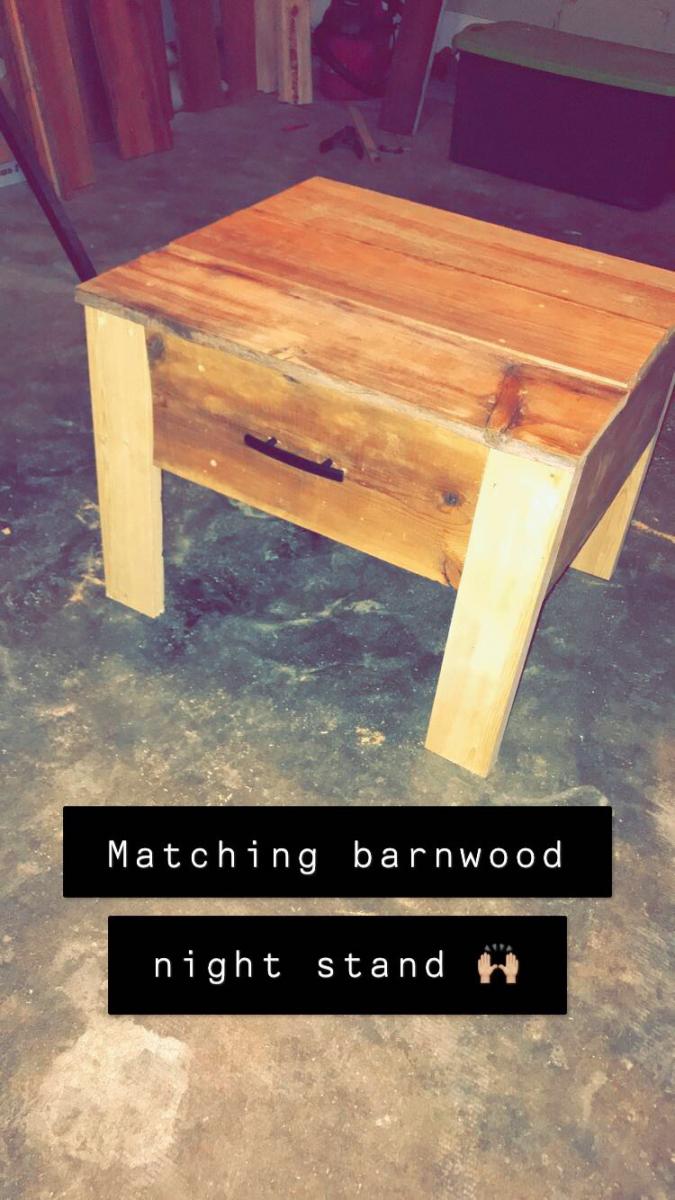
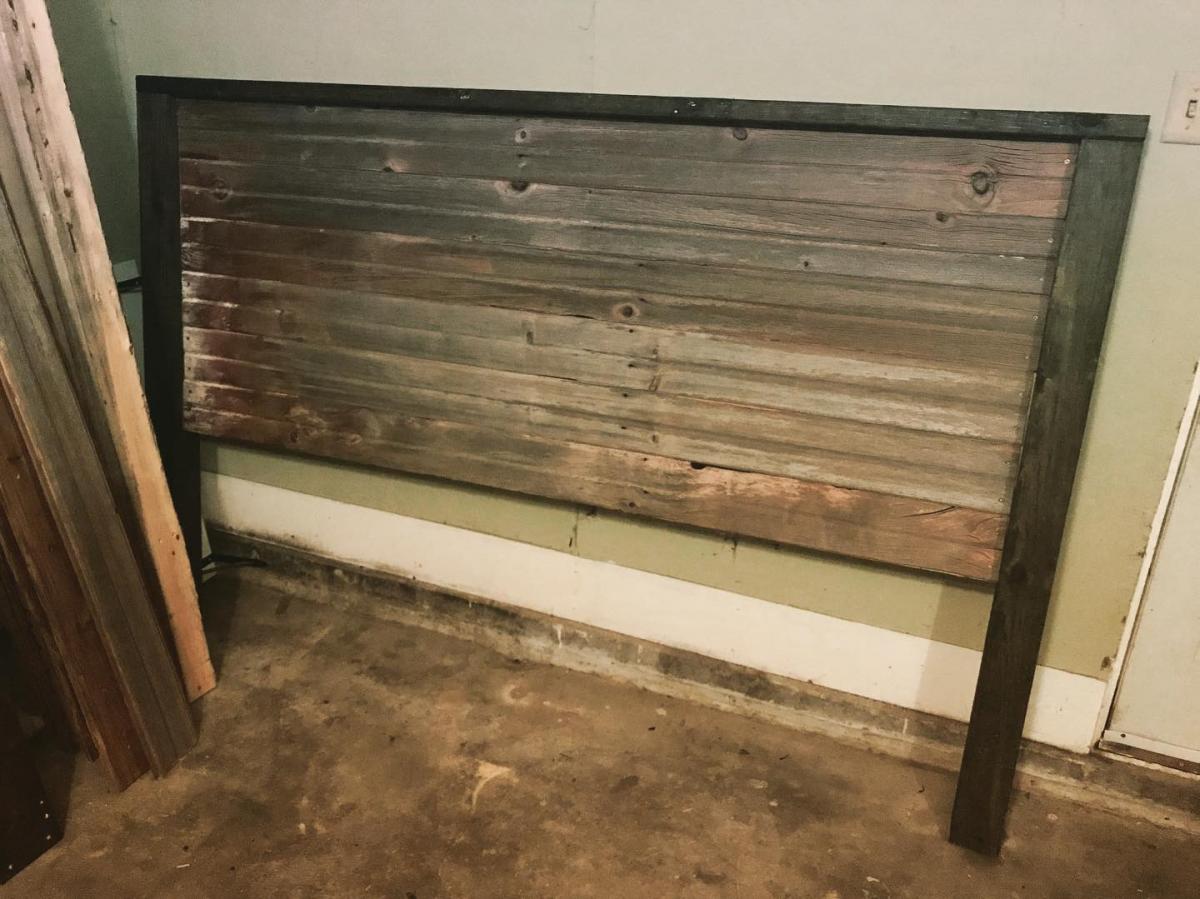
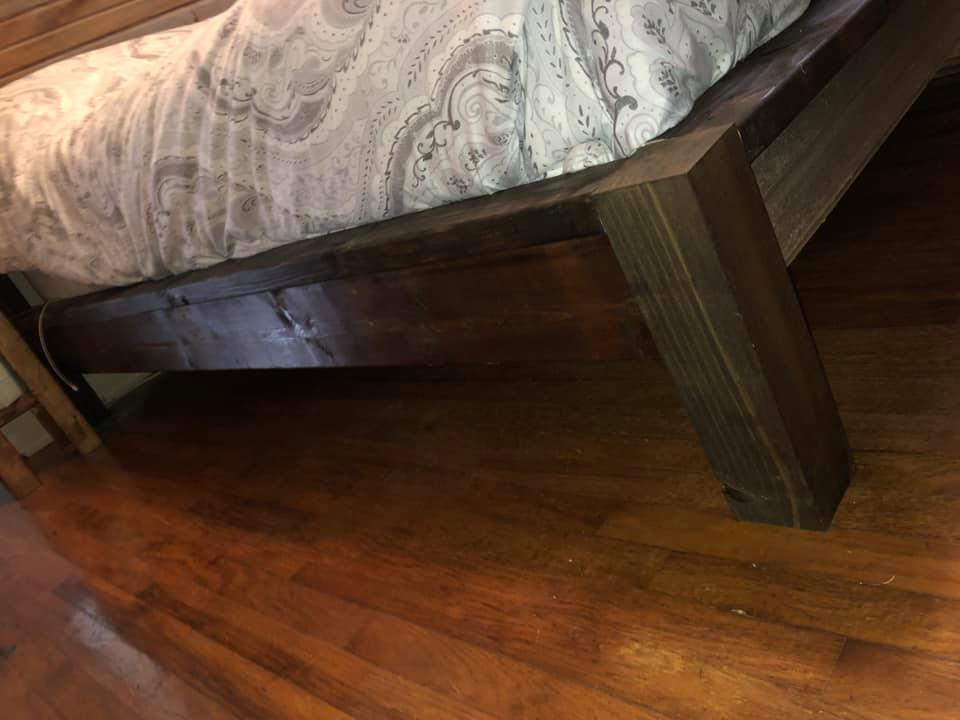
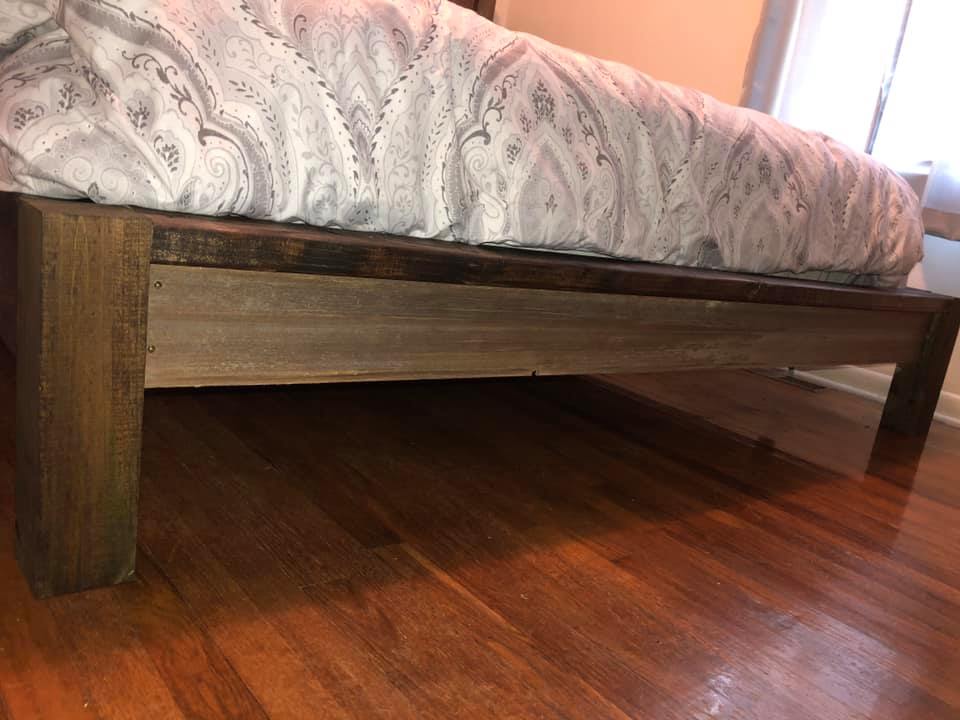
Modern Barnwood Bed Frame and End Table
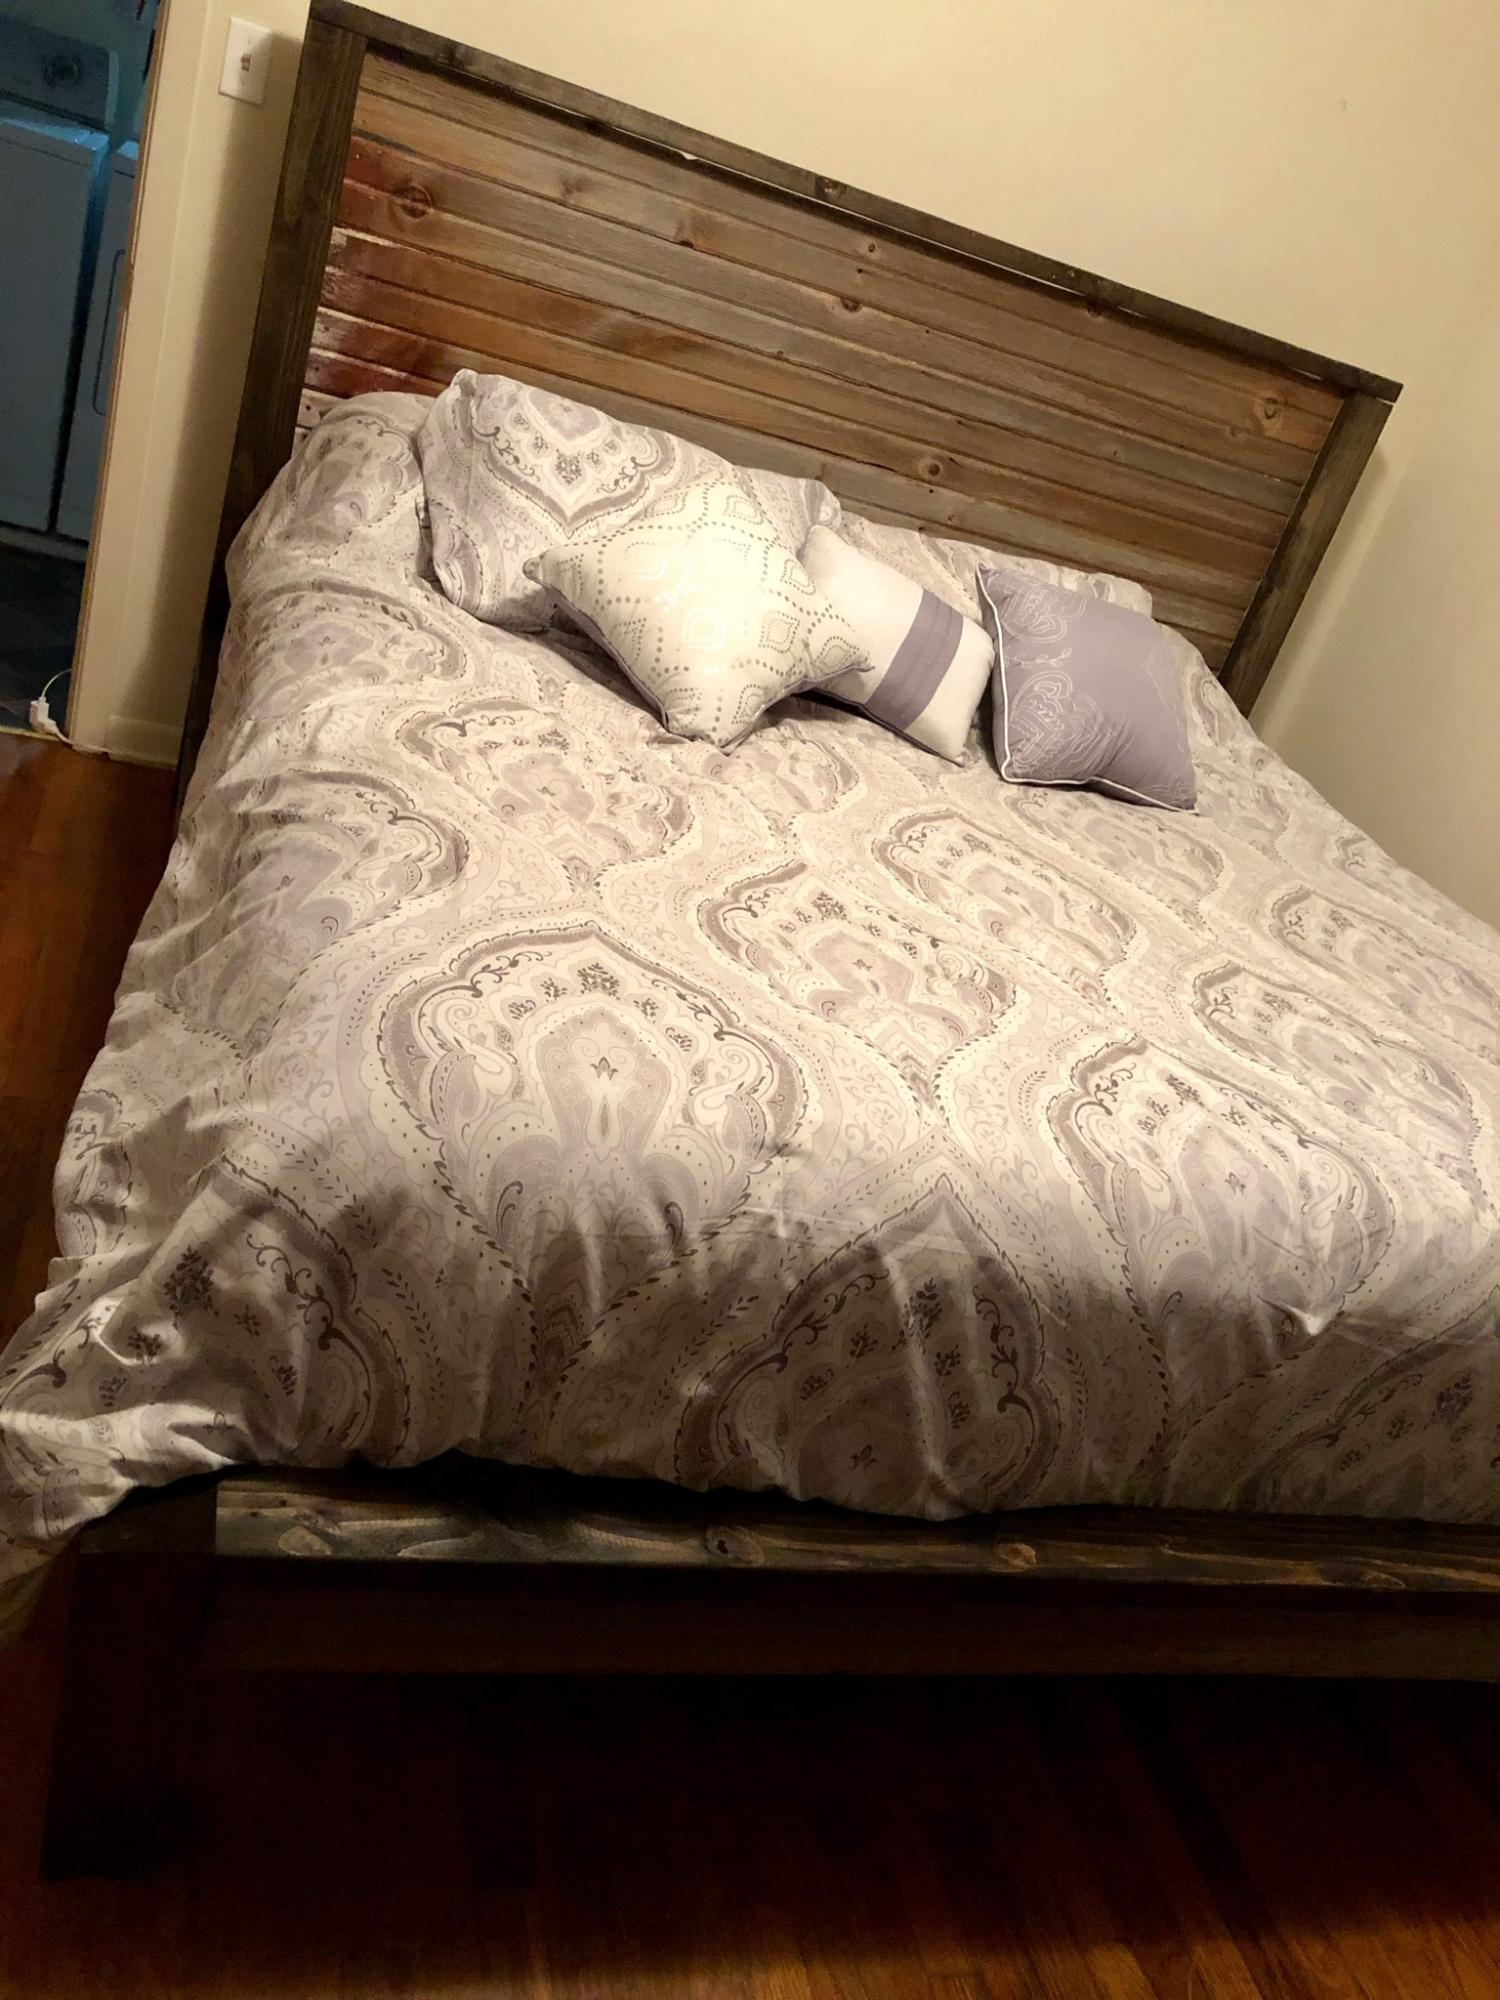
We built a bed frame off a different DIY website and never fell in love with it. We decided on Ana’s Modern Farmhouse and matching end table plans and decided to throw a local barn wood twist on it. We loved the look so much we didn’t sand or stain it, just gave it a good power wash. We really like the functionality of being able to take a few screws out to move and the fact that we could reuse our old barn wood headboard and make an end table out of it. Thanks for all your free plans!
Built from Plan(s)
Estimated Cost
$150 for both projects combined
Estimated Time Investment
Weekend Project (10-20 Hours)
Finish Used
Minwax Jacobean
Recommended Skill Level
Intermediate
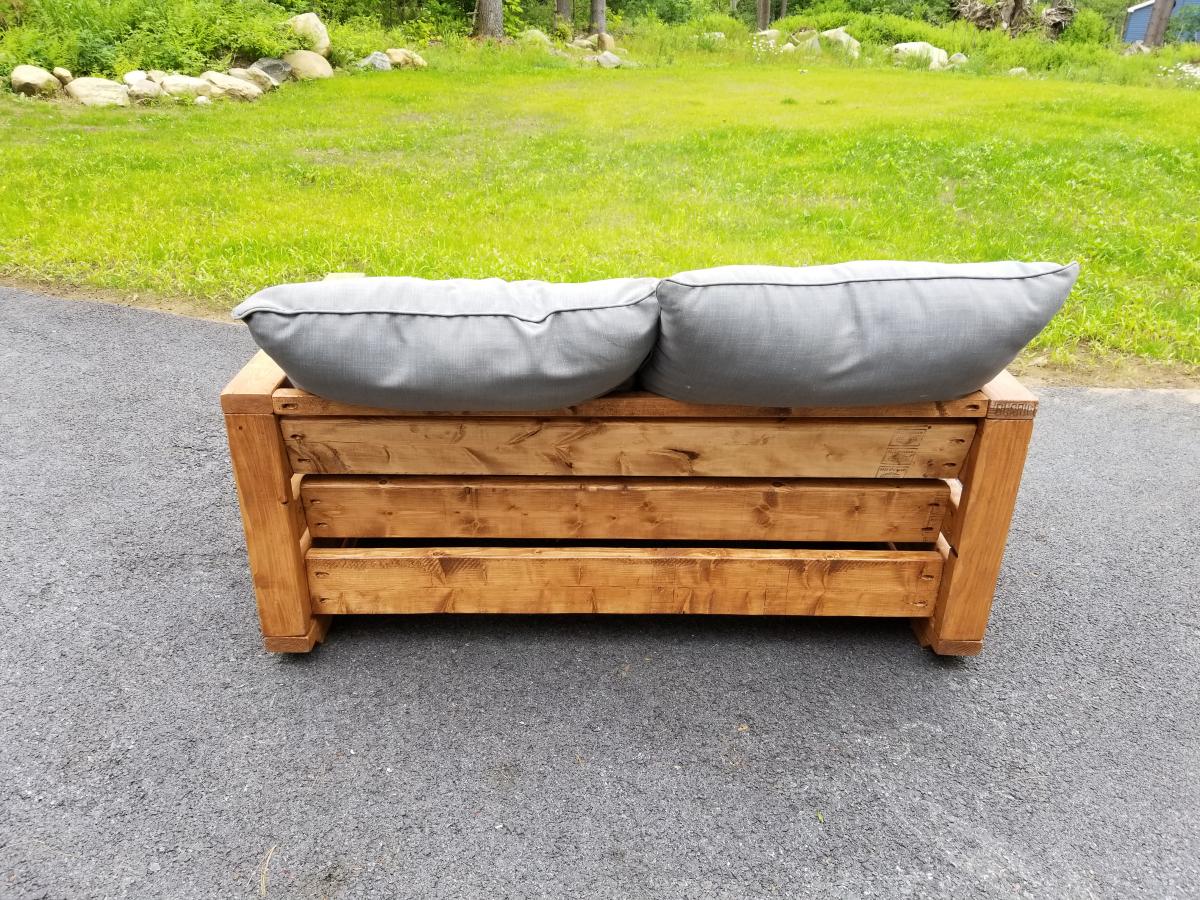
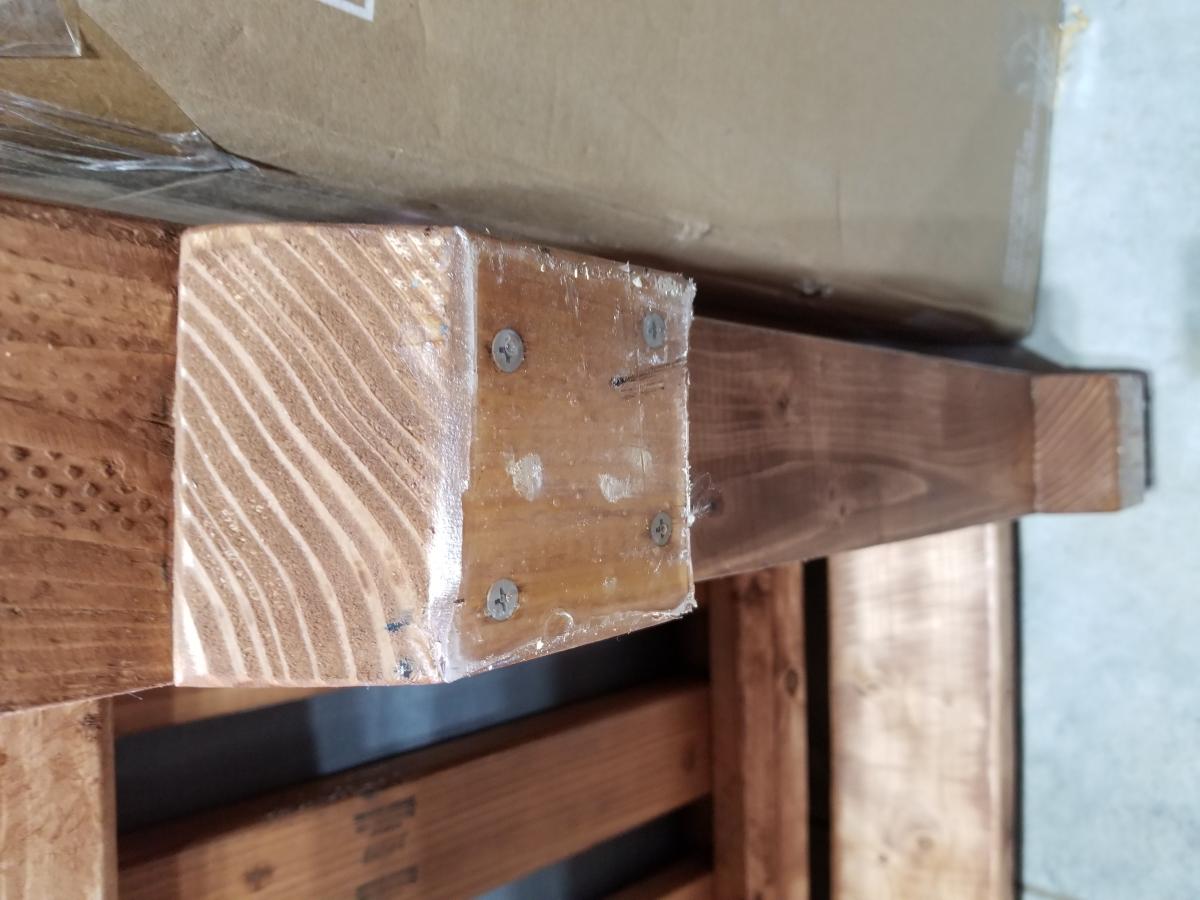
Outdoor loveseat
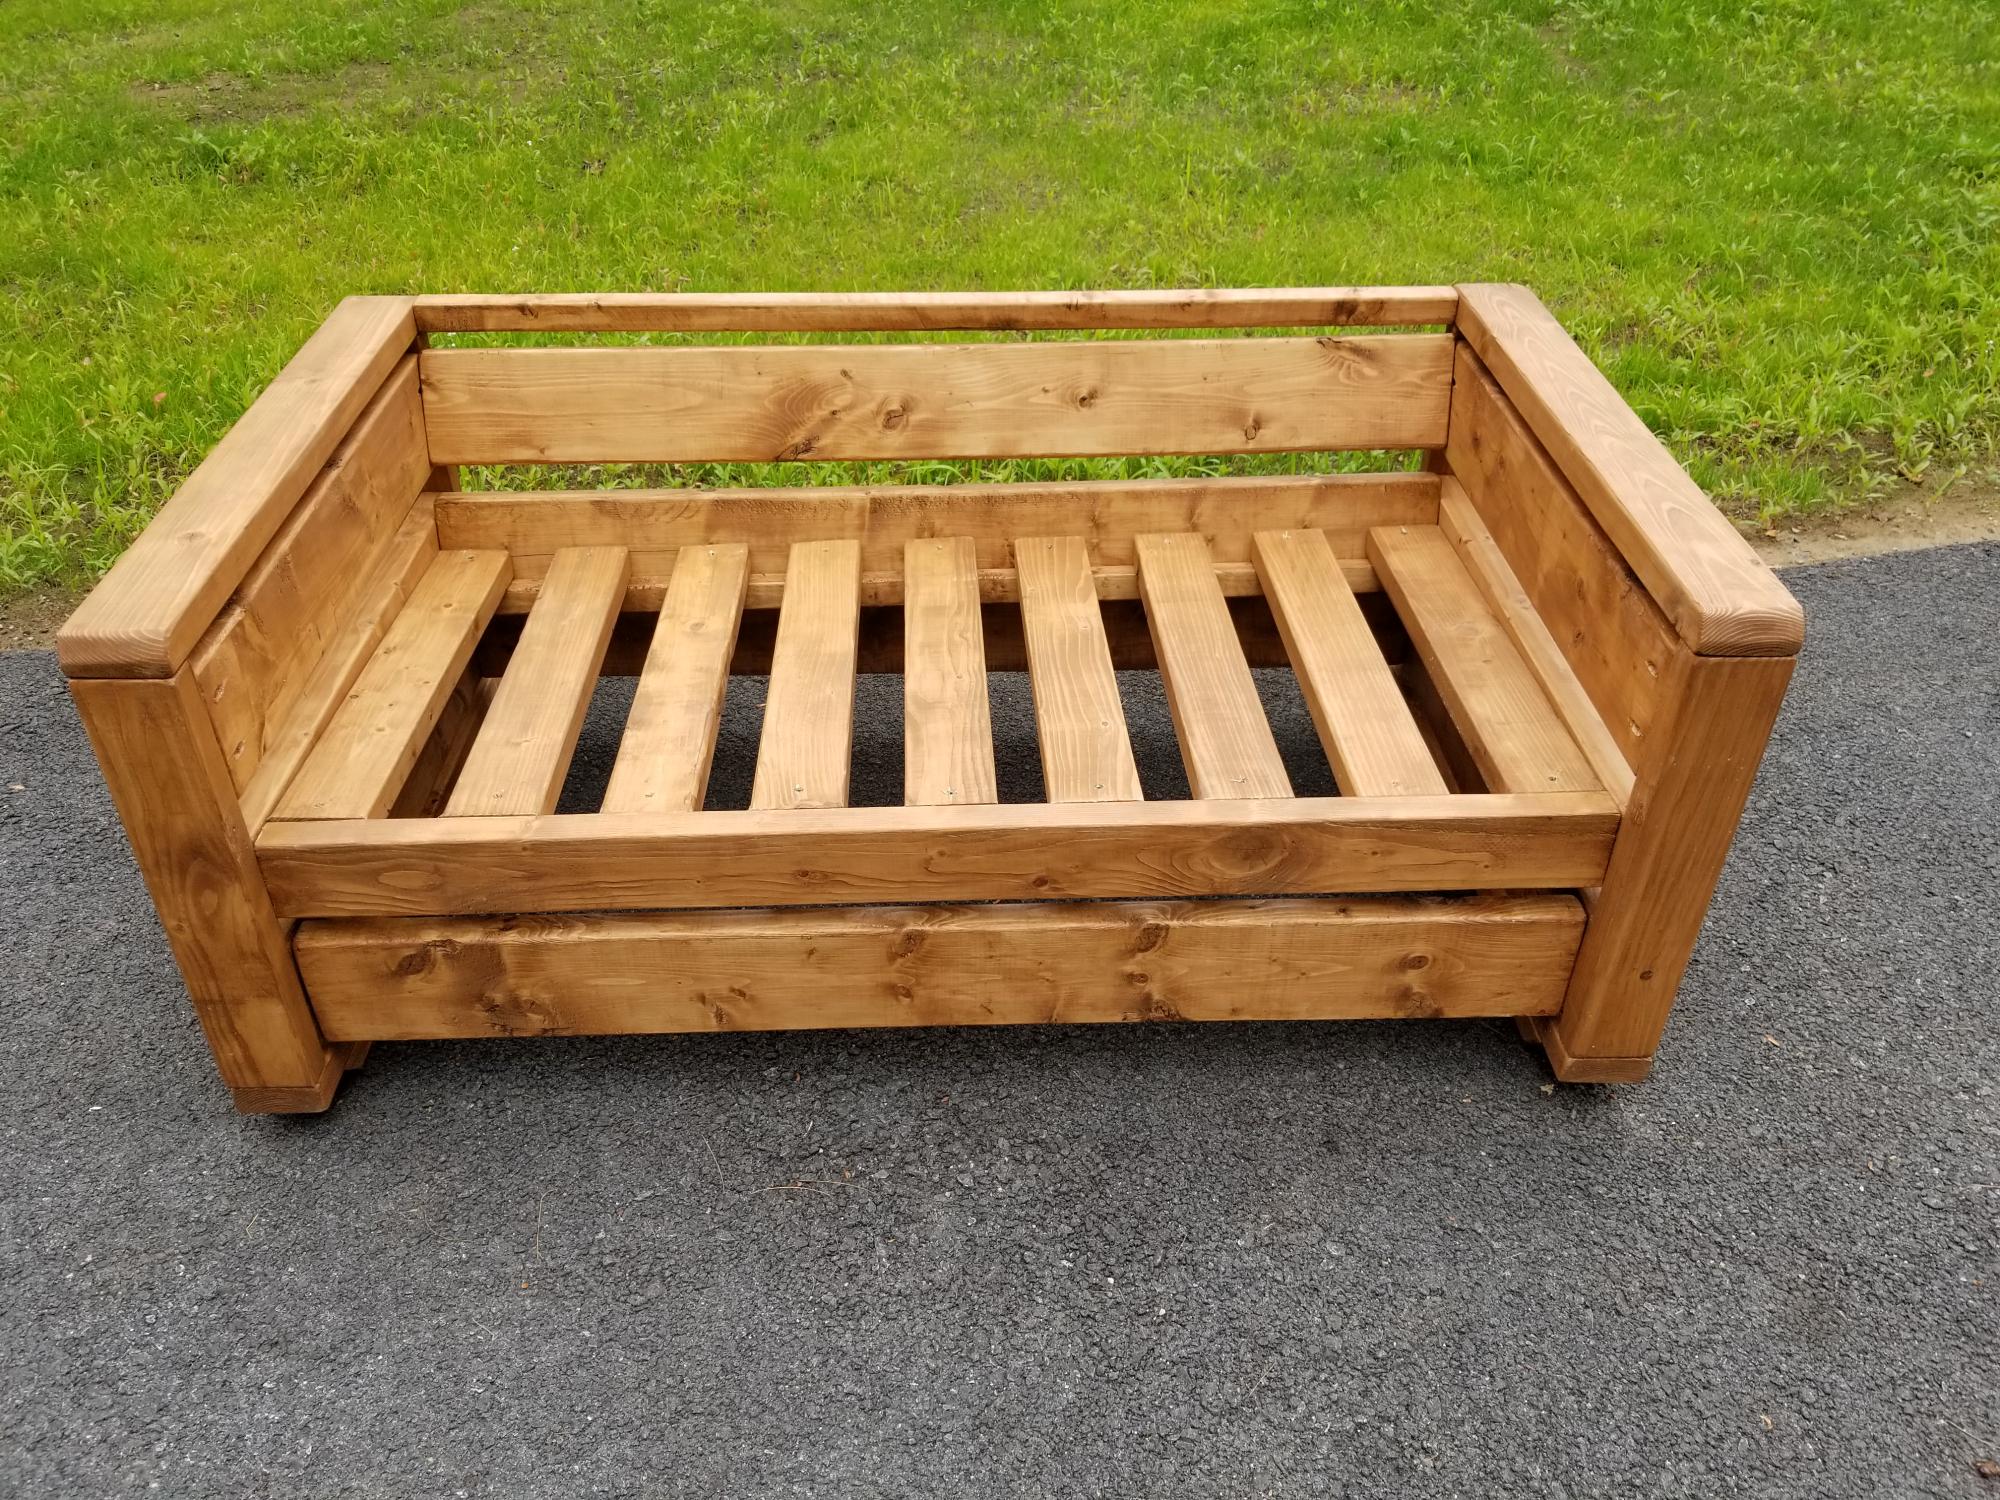
For this loveseat, I added a slight reclining angle to the back. I've also made this design with a reclining angle to both the back and seat slats.
The main alteration I've made to the plans is on the bottom. I added a bottom slat and beveled feet by subtracting 3" from the leg length. After attaching the feet to the bottom slat, I taped around the bottom of the foot. I then added a small layer of acrylic resin. This helps prevent splinters when moving the loveseat and helps to keep moisture out.
Built from Plan(s)
Comments
Sat, 06/17/2023 - 10:38
Great outdoor sofa!
Love how you modified it, looks amazing! Thanks for sharing.
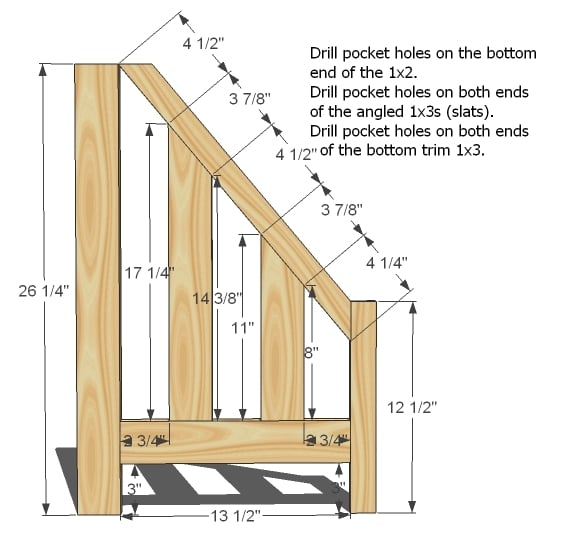
Kid's Storage Step Stool

I built this step stool for a friend. I may build one or two more for my kids if I ever get around to it. It was a fun build and a learning experience! It was my first time attaching hinges. I also used a chest-lid hinge support to avoid the lid slamming on little fingers.
Built from Plan(s)
Estimated Cost
30.00
Estimated Time Investment
Day Project (6-9 Hours)
Finish Used
Behr Disney Little Mermaid and Blast Off Yellow.
Recommended Skill Level
Starter Project
Queen Farmhouse Bed

This project took 2 days (weekend) plus a few days of drying time. Looking back, I would have measured the thickness of the box spring and mattress and made adjustments to the footboard height so that it would sit flush with the mattress.
The provided plans had to be altered as my local Canadian home building stores do not provide wood with the exact finished dimensions. Also, it is difficult to find 4x4 posts which are not either cedar or pressure treated. I was lucky to find them in Spruce!
Definitely fun to make and getting lots of compliments!


Estimated Time Investment
Weekend Project (10-20 Hours)
Finish Used
Minwax Early American with black latex highlights for a rustic, antique look.
Recommended Skill Level
Intermediate
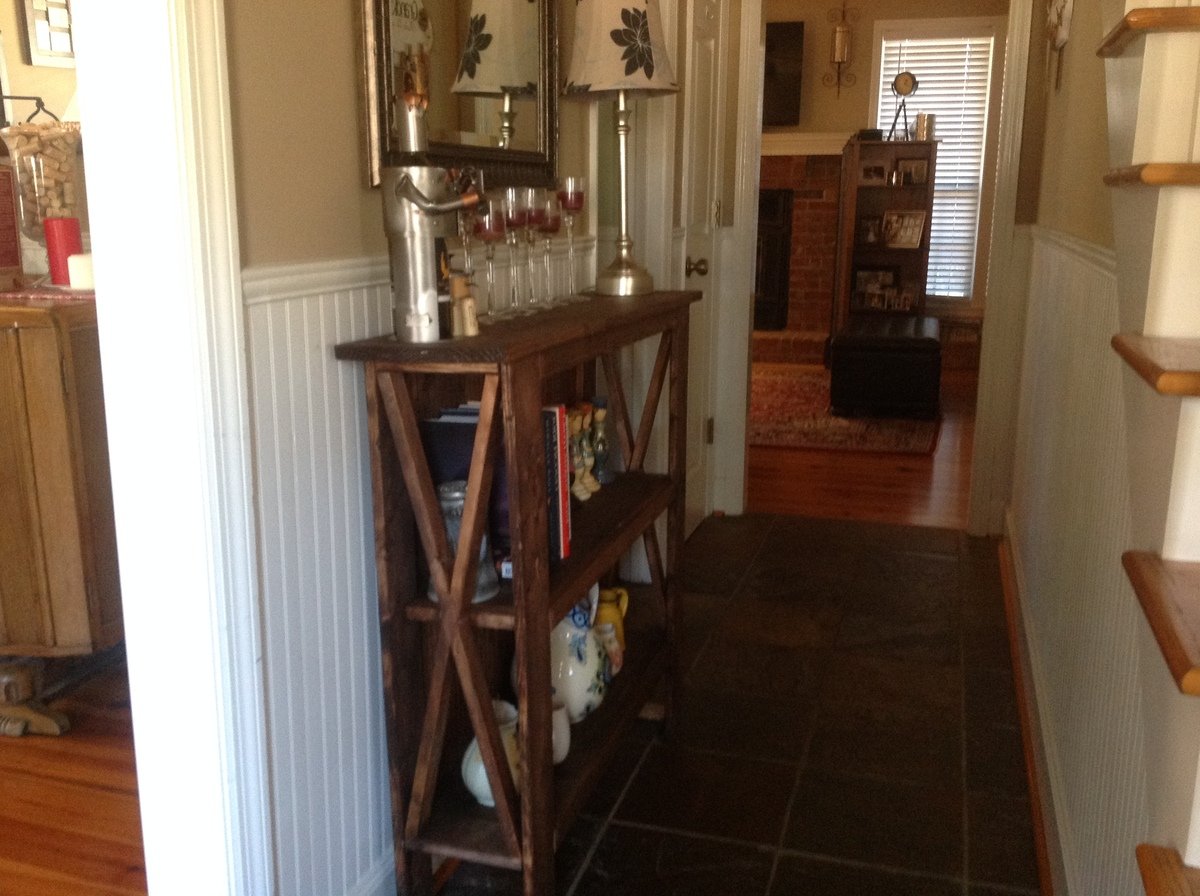
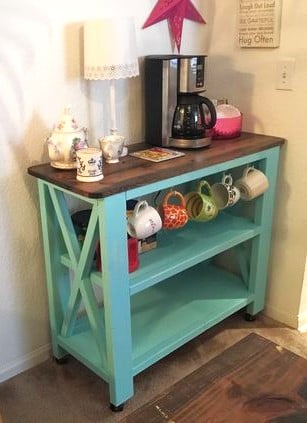
Variations on Rustic X Shelves
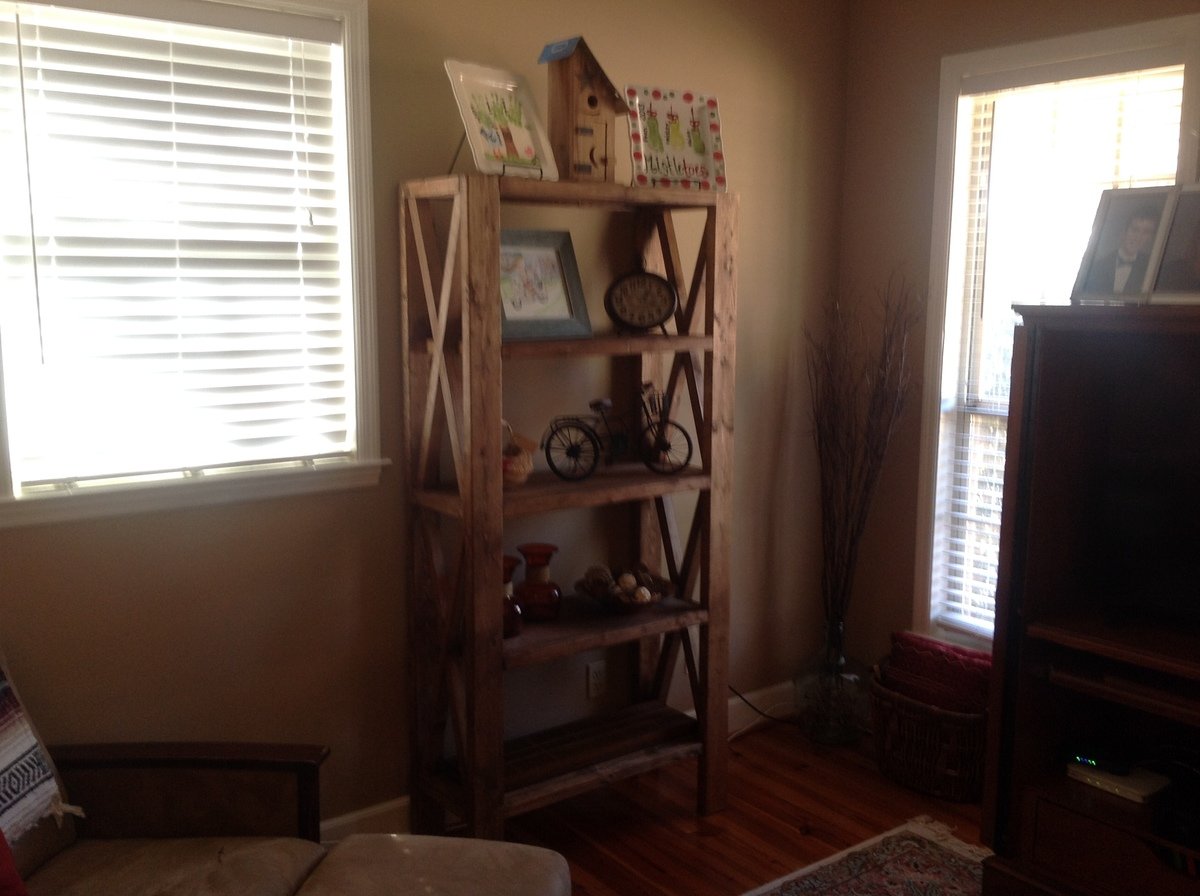
Very versatile and easy to build design. With some tweaking I was able to build a bookshelf, hall table and coffee station fro the same basic plan. End tables are next!
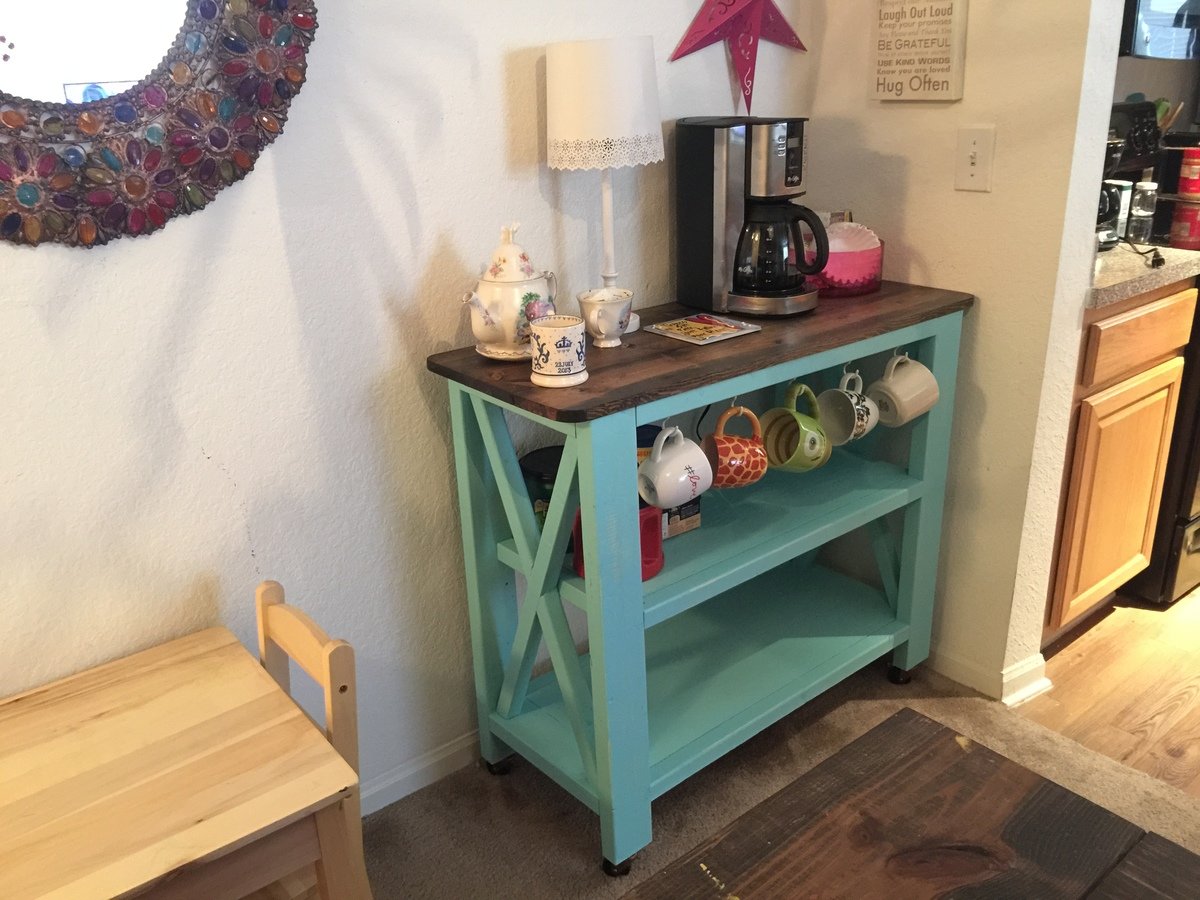
Built from Plan(s)
Recommended Skill Level
Beginner
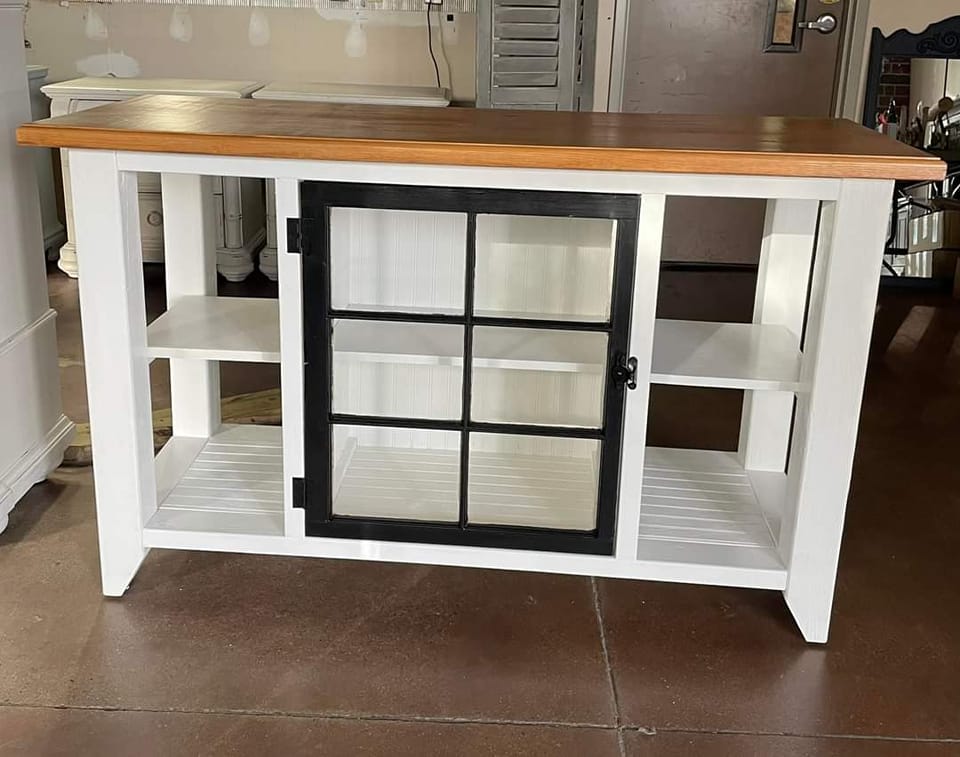
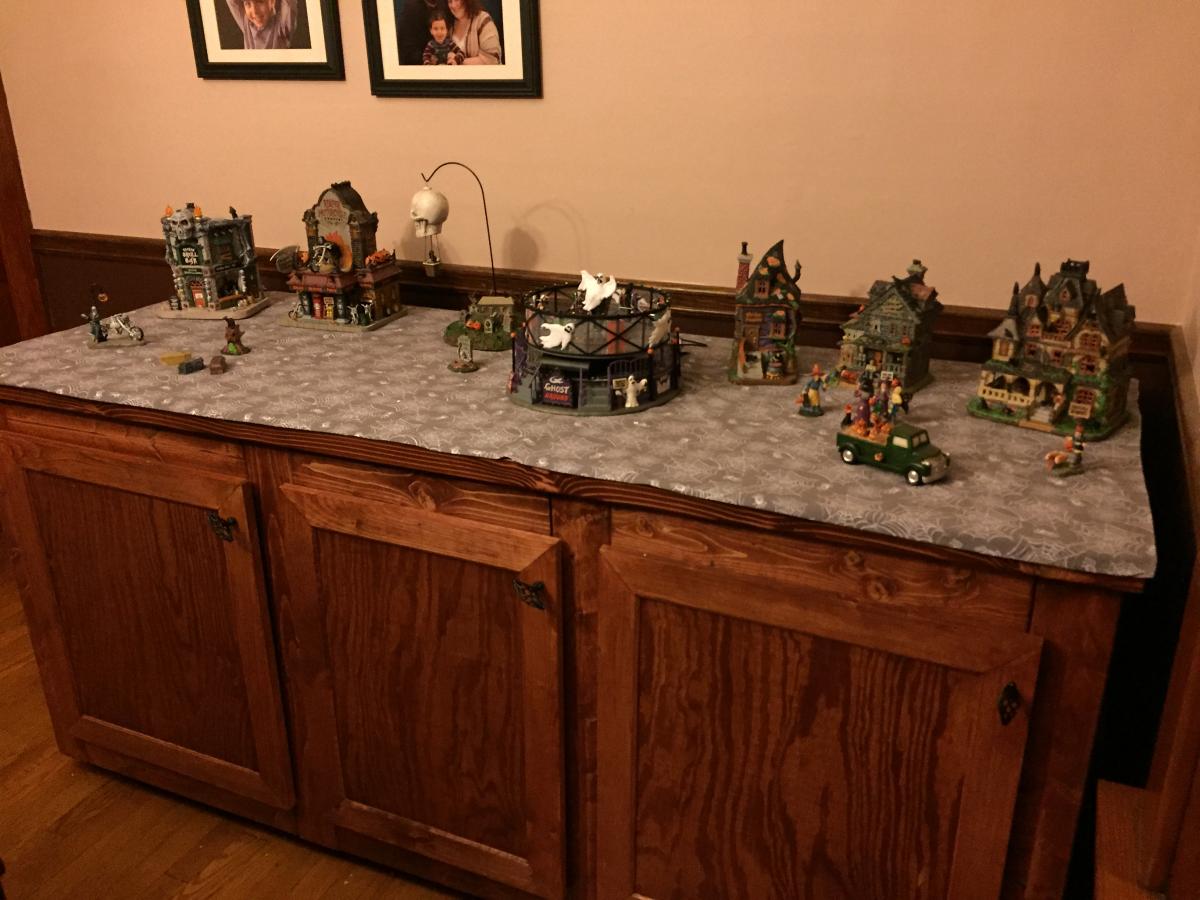
Farmhouse Console
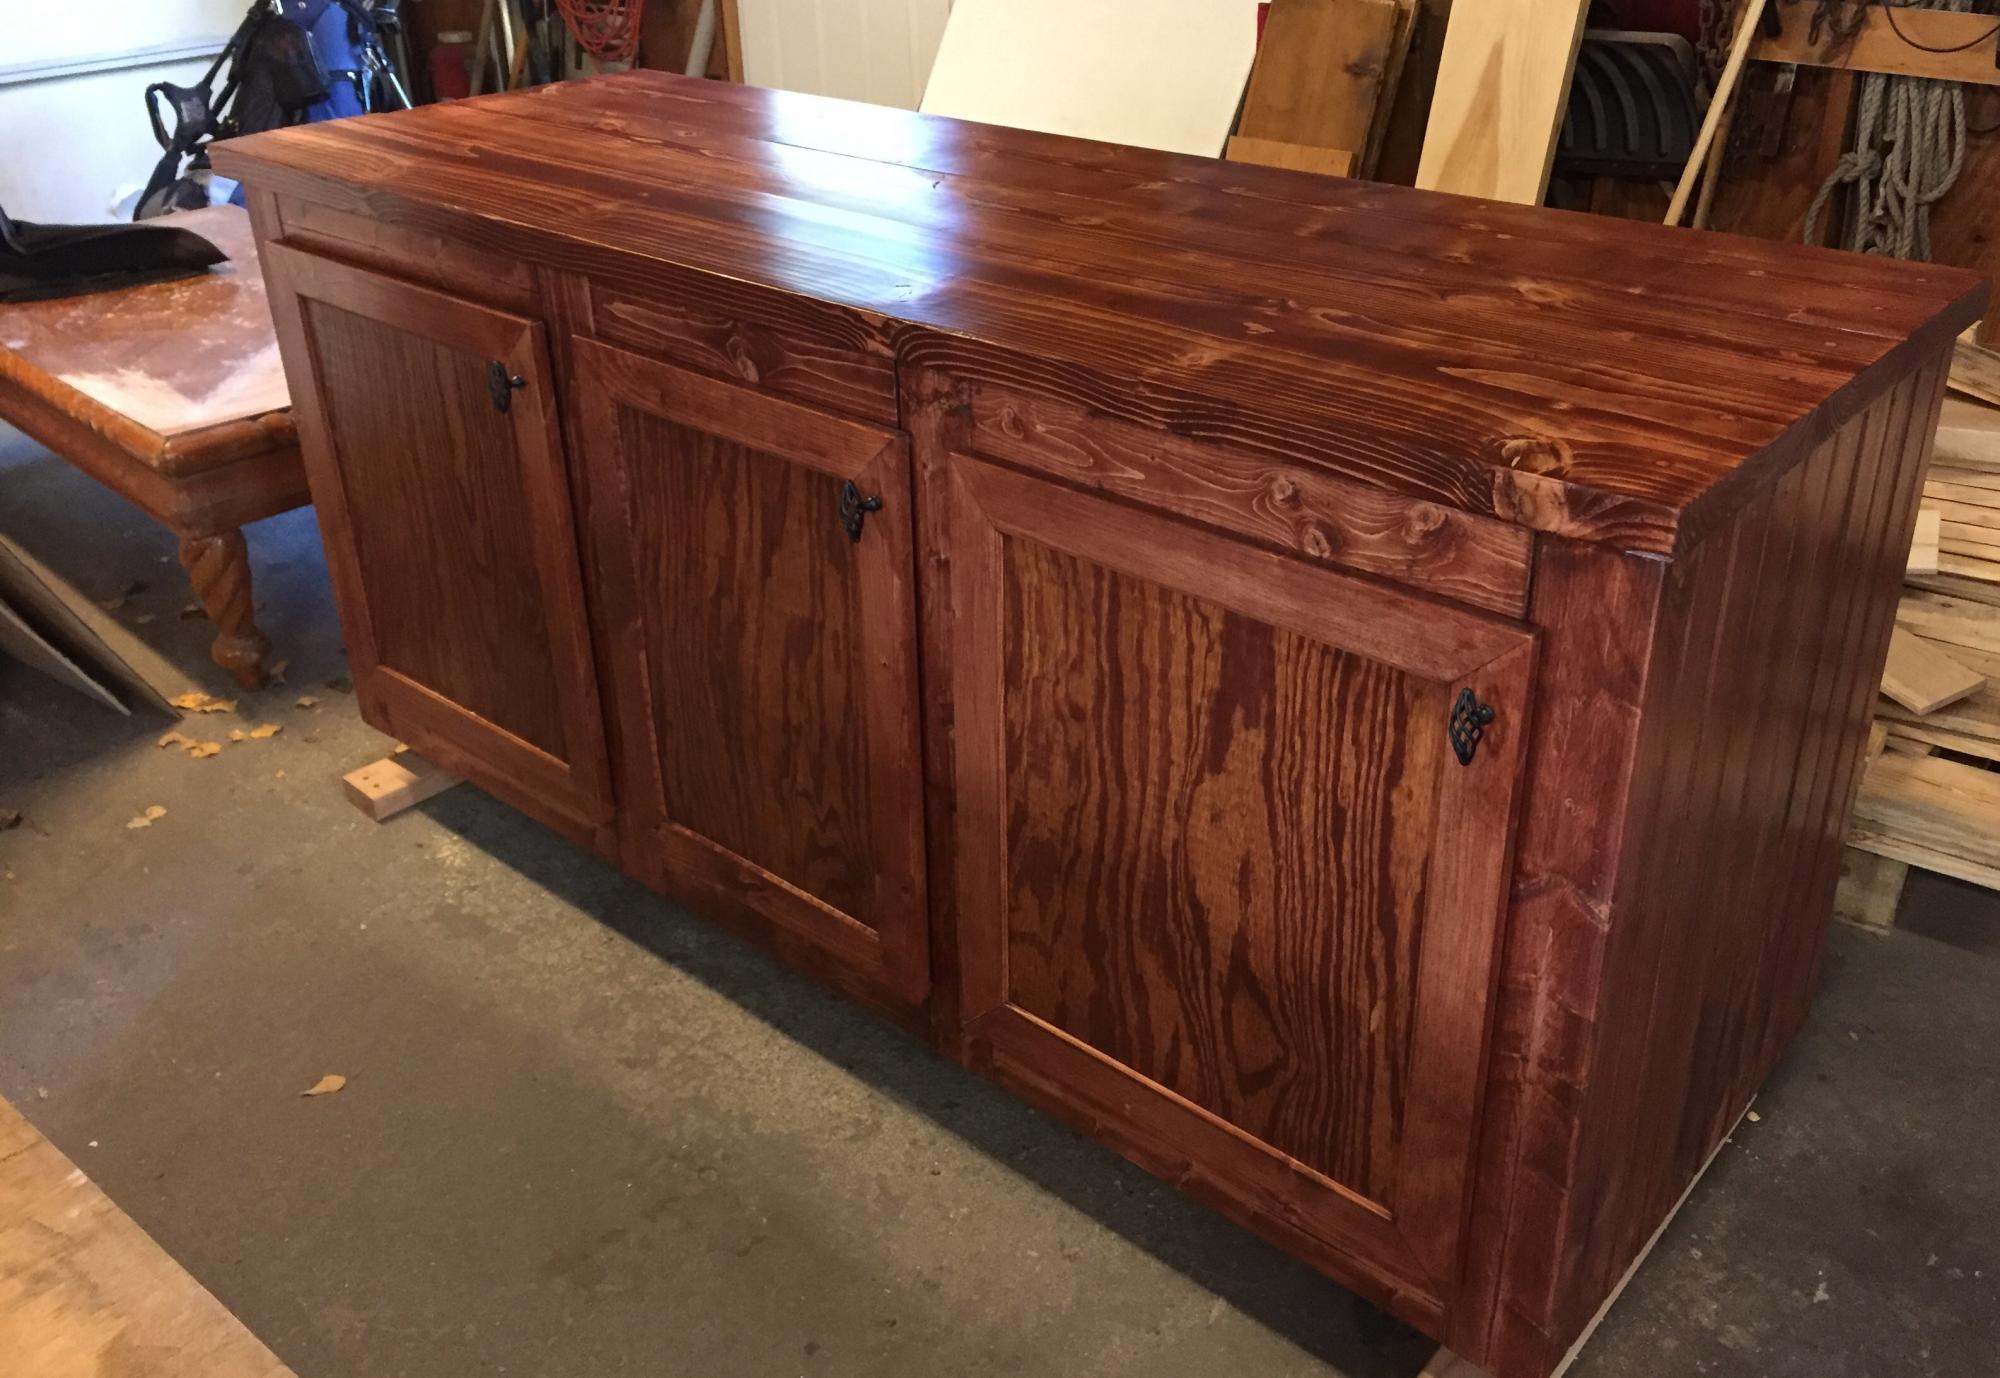
My daughter wanted a console for her holiday Halloween village and Christmas village. I had to measure and modify the original plans as they were longer and shallower than what I needed. I also used tongue and groove boards for the sides. She also wanted mitered doors on the front because the barn door stood out too much. Phew! I wish I had a CAD program.

Built from Plan(s)
Estimated Cost
$120
Estimated Time Investment
Week Long Project (20 Hours or More)
Finish Used
Minwax Red Chedtnut
Recommended Skill Level
Intermediate
Greenhouse
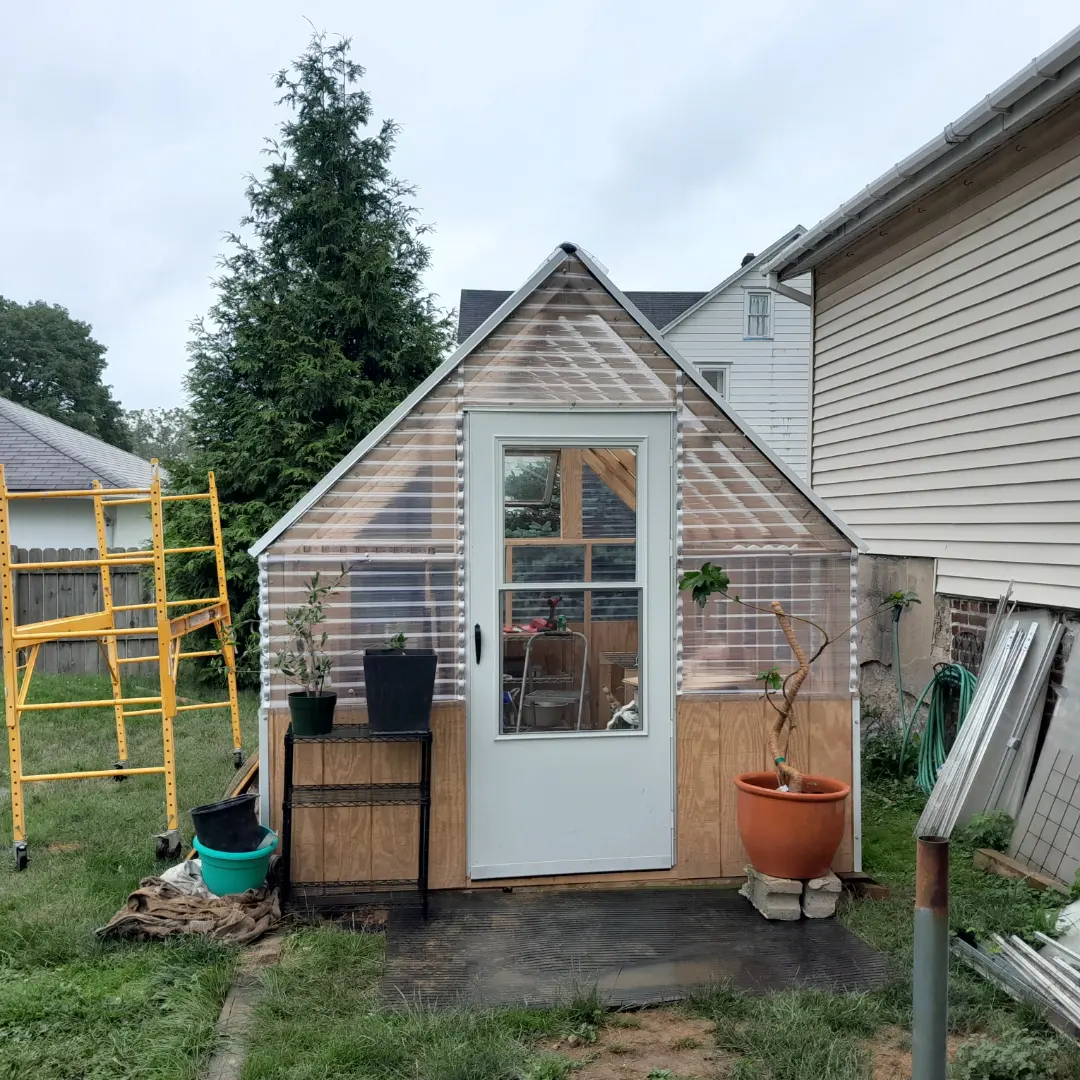
Greenhouse for extended growing.
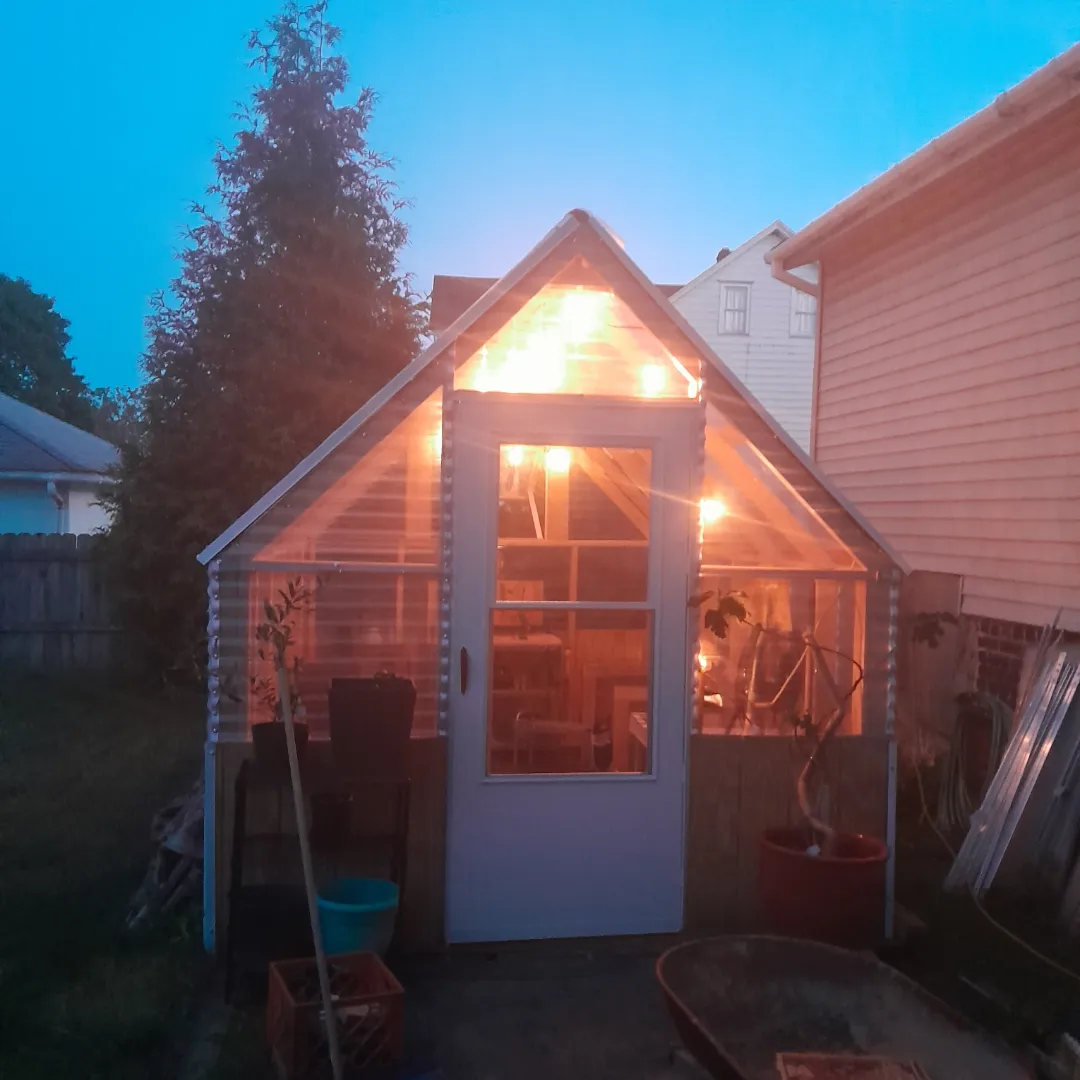
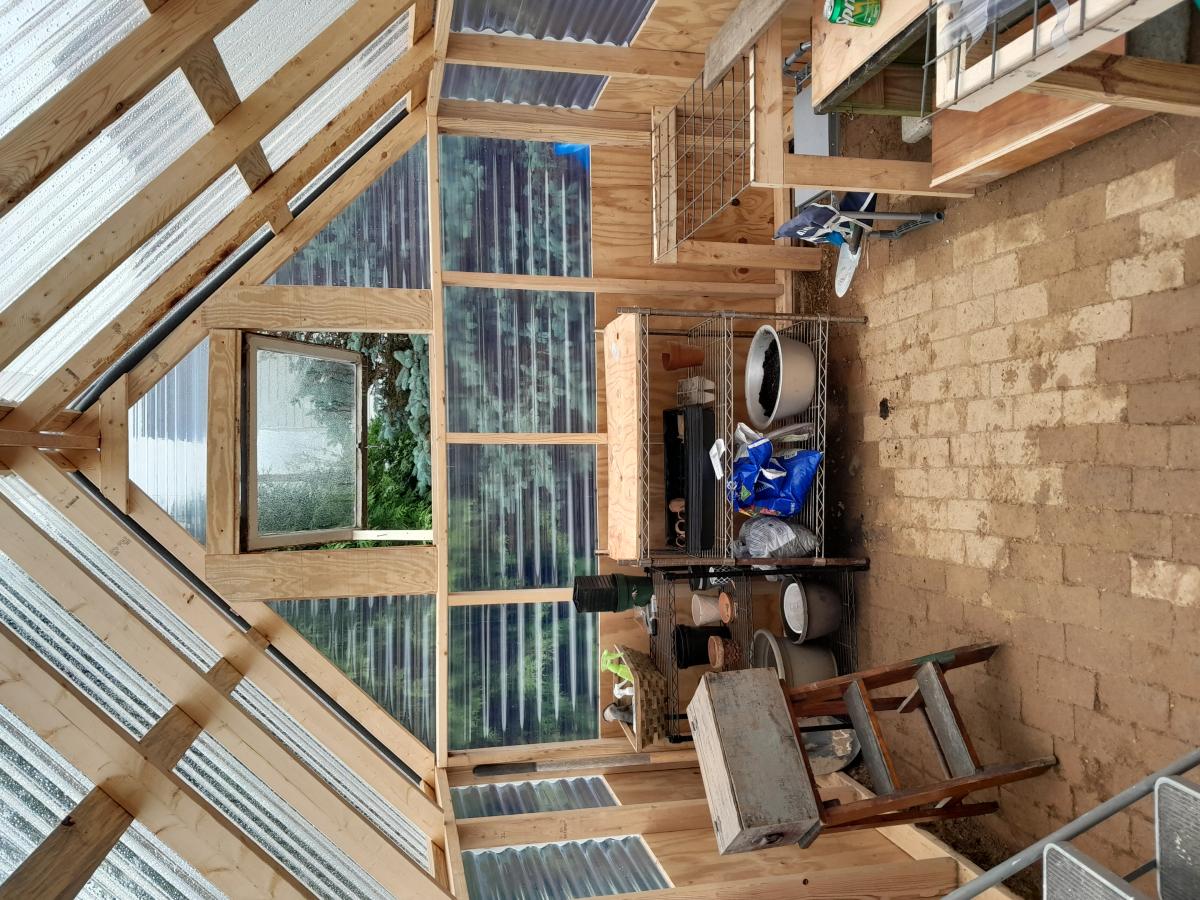
Built from Plan(s)
Comments
Ana White Admin
Fri, 06/02/2023 - 13:22
Super cute design!
Love your style, it looks amazing! Thanks for sharing.