DIY Fireplace Wall
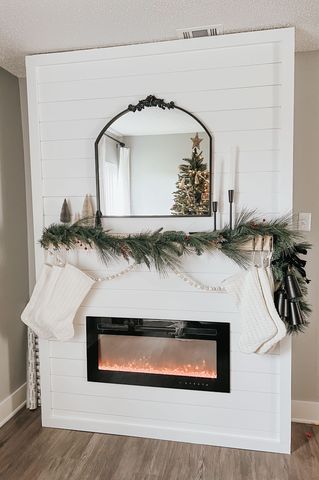
"I still can’t believe my mom and I built this beautiful fireplace.” - Megan Shaffer on Instagram
Built from Plan(s)
Seasonal And Holiday
"I still can’t believe my mom and I built this beautiful fireplace.” - Megan Shaffer on Instagram

A white spruce base painted with hessian chalk paint and waxed with furniture wax over the top. Topped off with a section of oak block kitchen counter waxed with dark oak wax
Sat, 08/14/2021 - 08:26
Love the table top, with beautifully done corners.
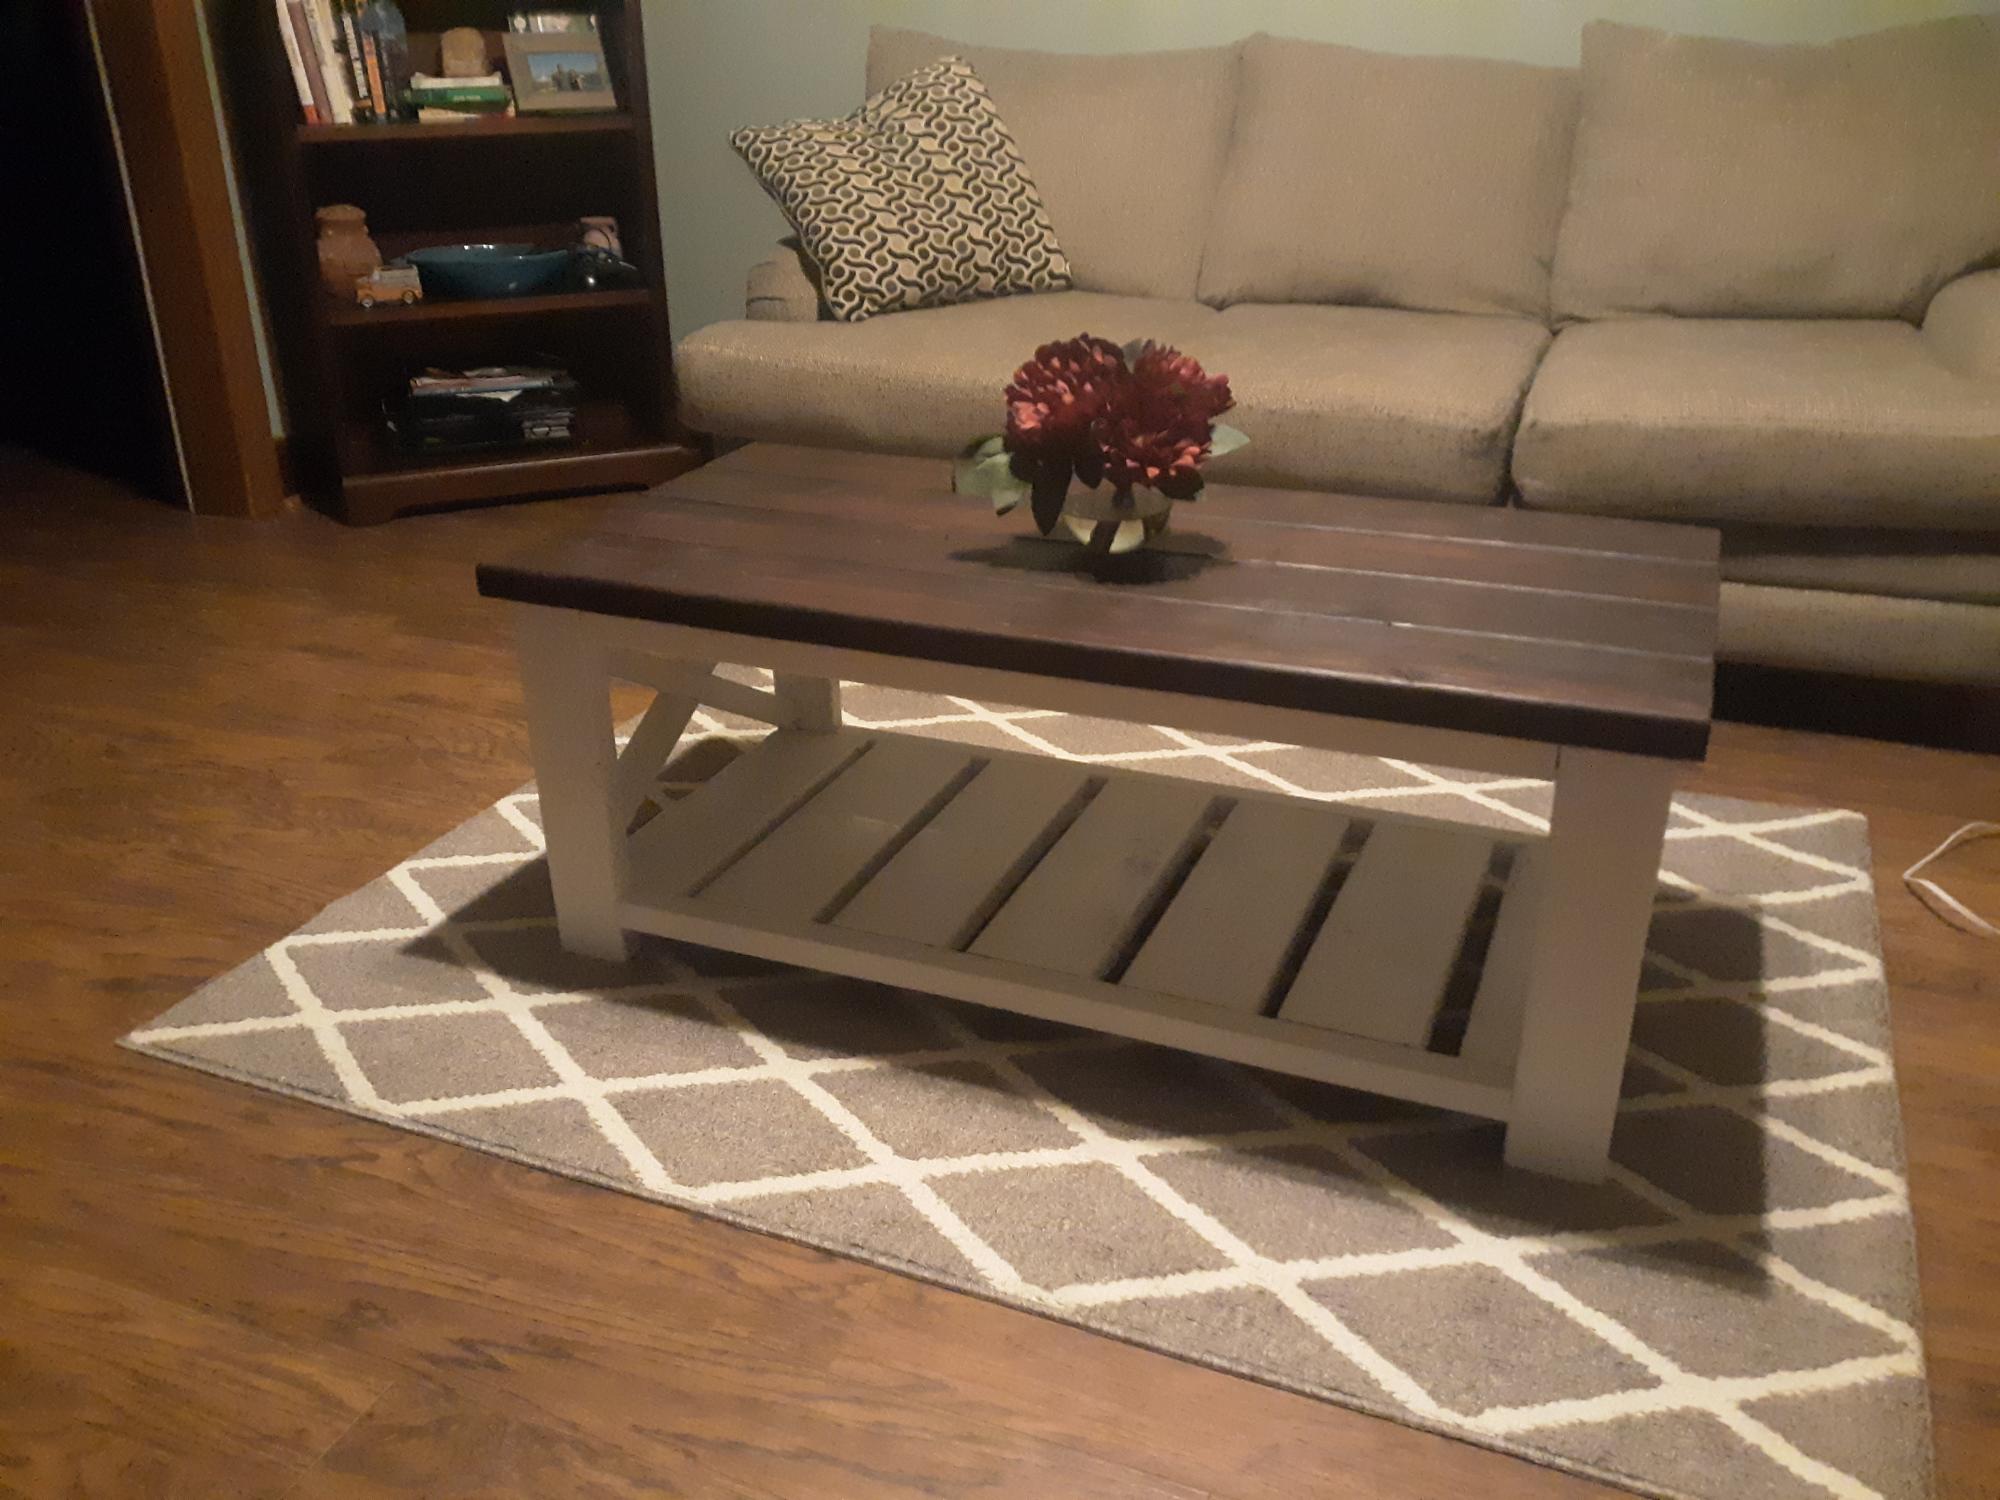
Worked on this table last week to save me some money on buying one from a store. This was my first ever time in my life building something on my own and I was surprised how easy it was. Came out better then I expected.

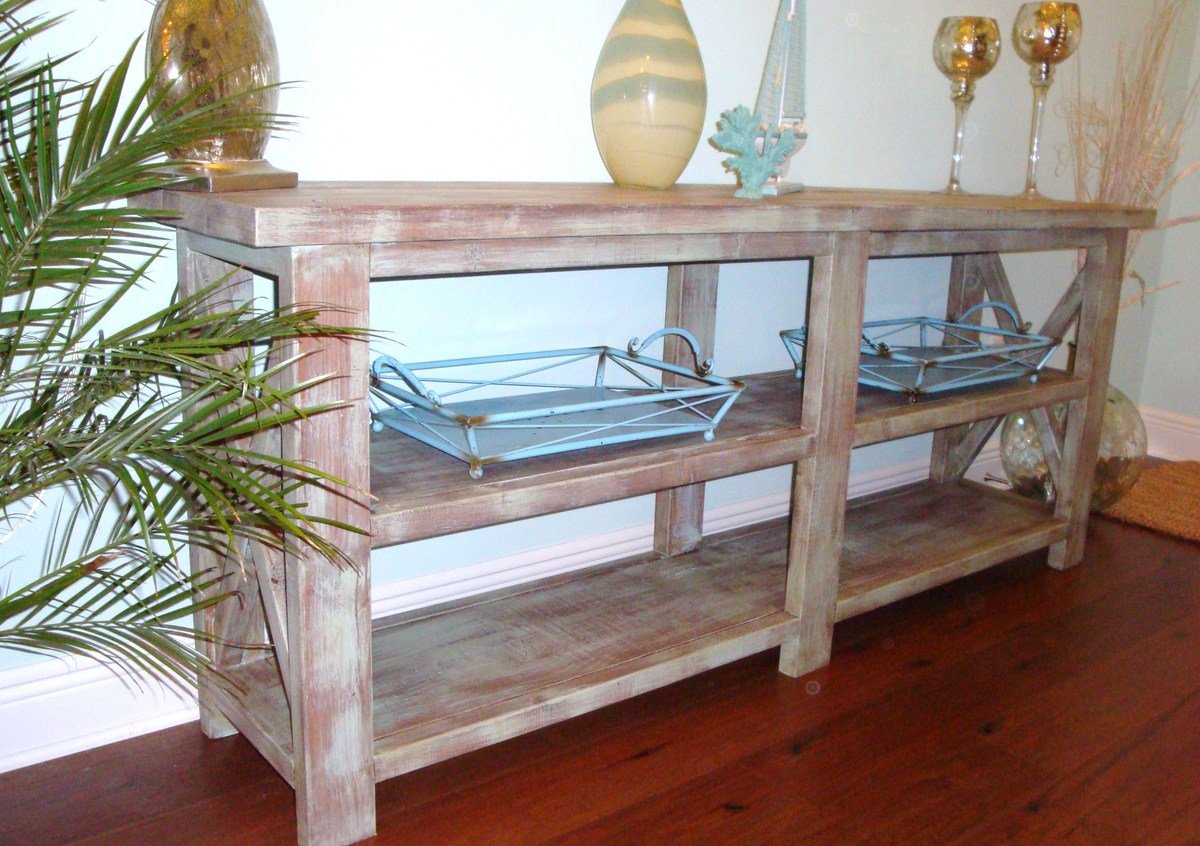
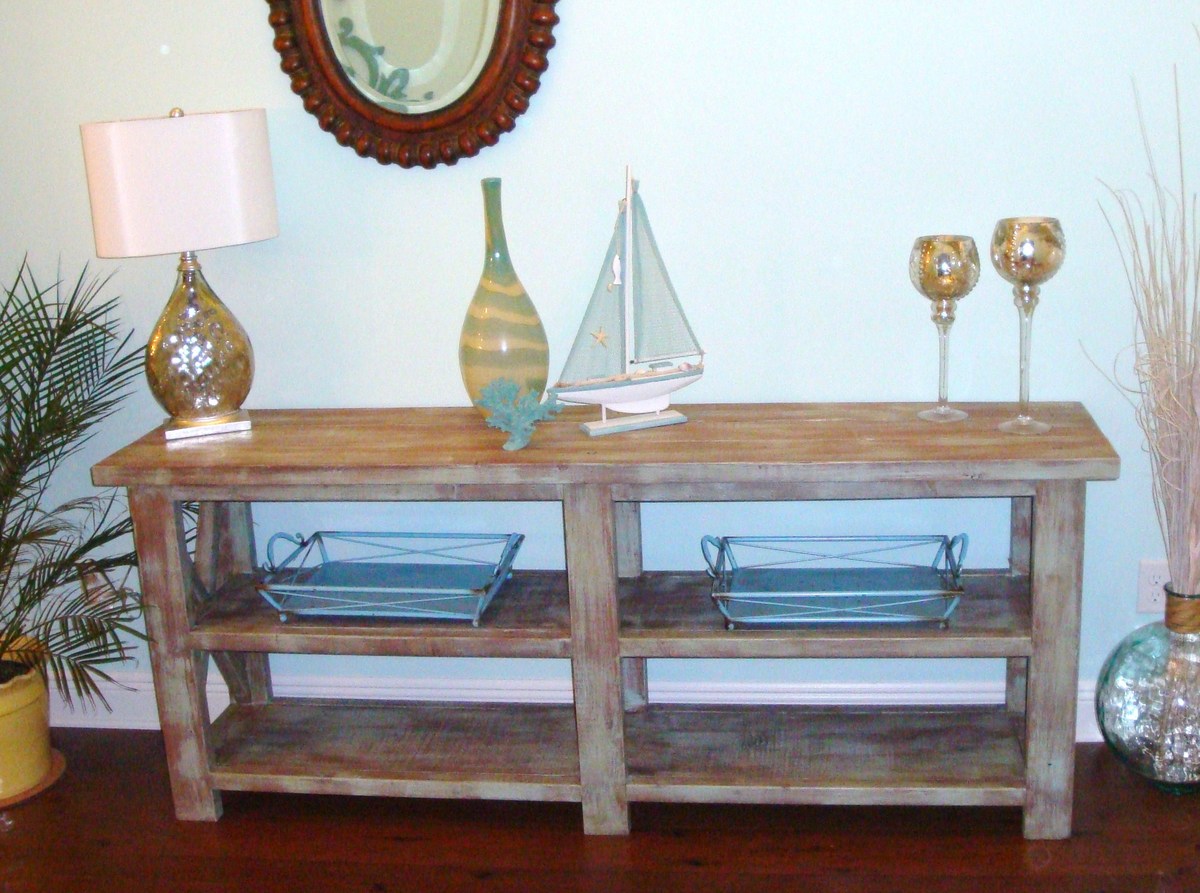
Farmhouse side table by Home with Jules

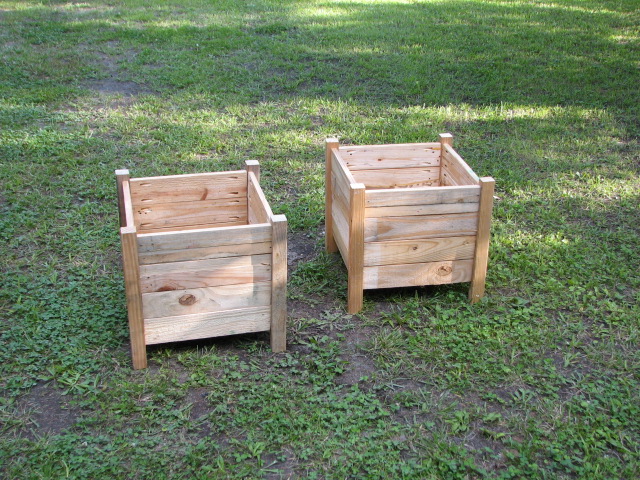
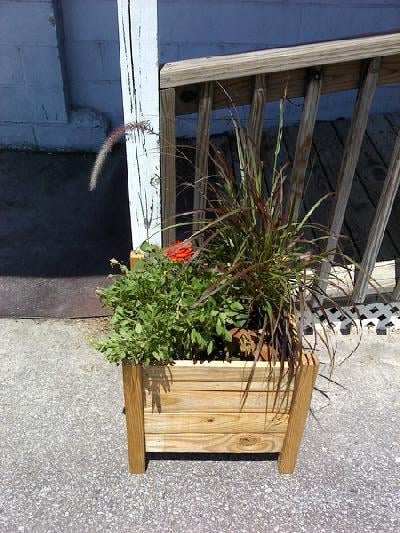
My co-worker and I built these planters from pallets that we had lying around at work. The only expense we had was the Kreg Jig I purchased (and love). It took us about 5 hours to put them together, including the time it took to cut the lumber to size. Then we used Thompson's water seal and stapled commercial grade landscaping cloth inside the planter. We made them for work and hope they will just naturally age. This was an easy project and we will definitely make more of these.
We had leftover screws, landscaping fabric and water seal from other projects.
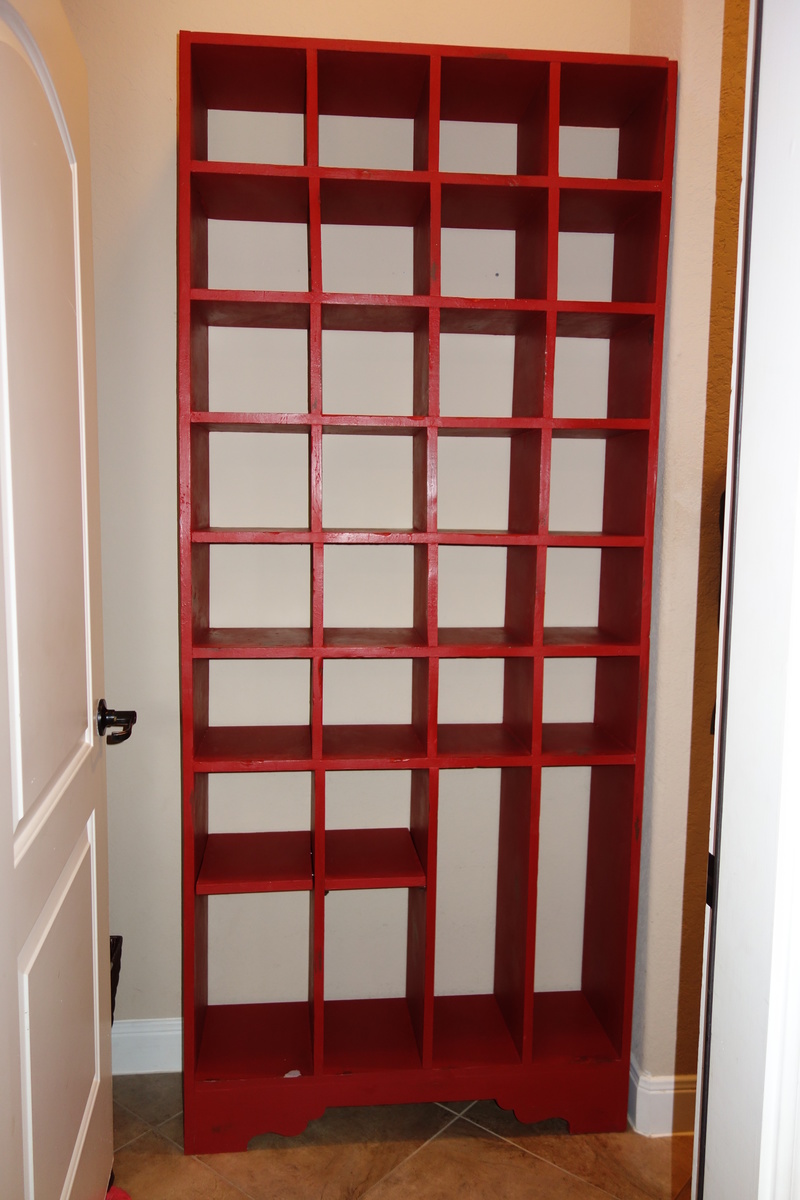
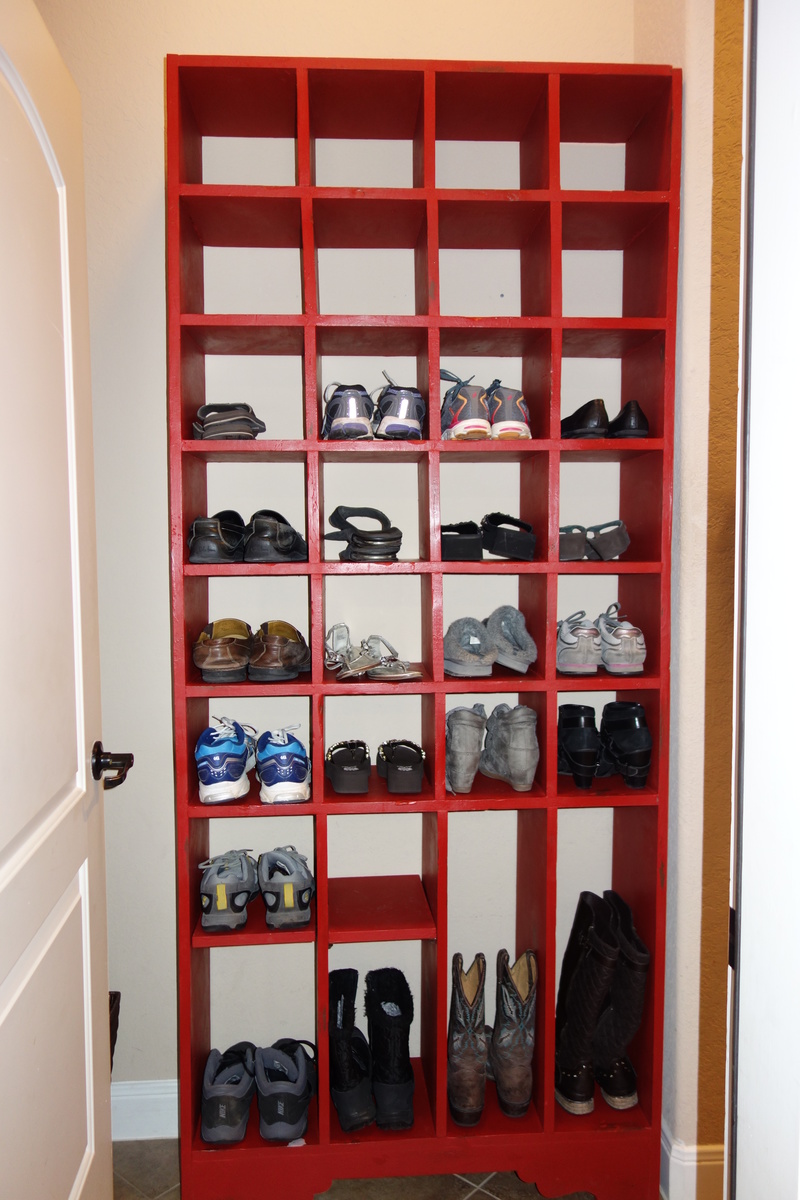
I was looking for an excuse to use my new Kreg Jig and also Annie Sloan Chalk Paint. My entrance from my garage had a cheap two level shelf which never was enough for all our shoes so when I saw this I thought it would be perfect. This was my first Ana-White project and the left cubbies ended up being wider than the right. I loved the Kreg Jig. What's cool is I did it all alone, with the help of my husband watching my kids! It was a lot of painting to get the distressed look that you really can't see from the pictures but I am very happy with it and it is very sturdy. I ended up doing 4 columns instead of 3 but only one shelf...probably also why the measurements got messed up.
I built this bed step by step from the Mom's fancy farmhouse bed - queen sized. I have no experience of building things before this, but bought a miter saw and nail gun. Banged it out in a weekend. More time was spent painting than assembly. I reused the slats from my old IKEA bed. In hindsight, I wish I had a way to even the boards better before assembly, like a planer.
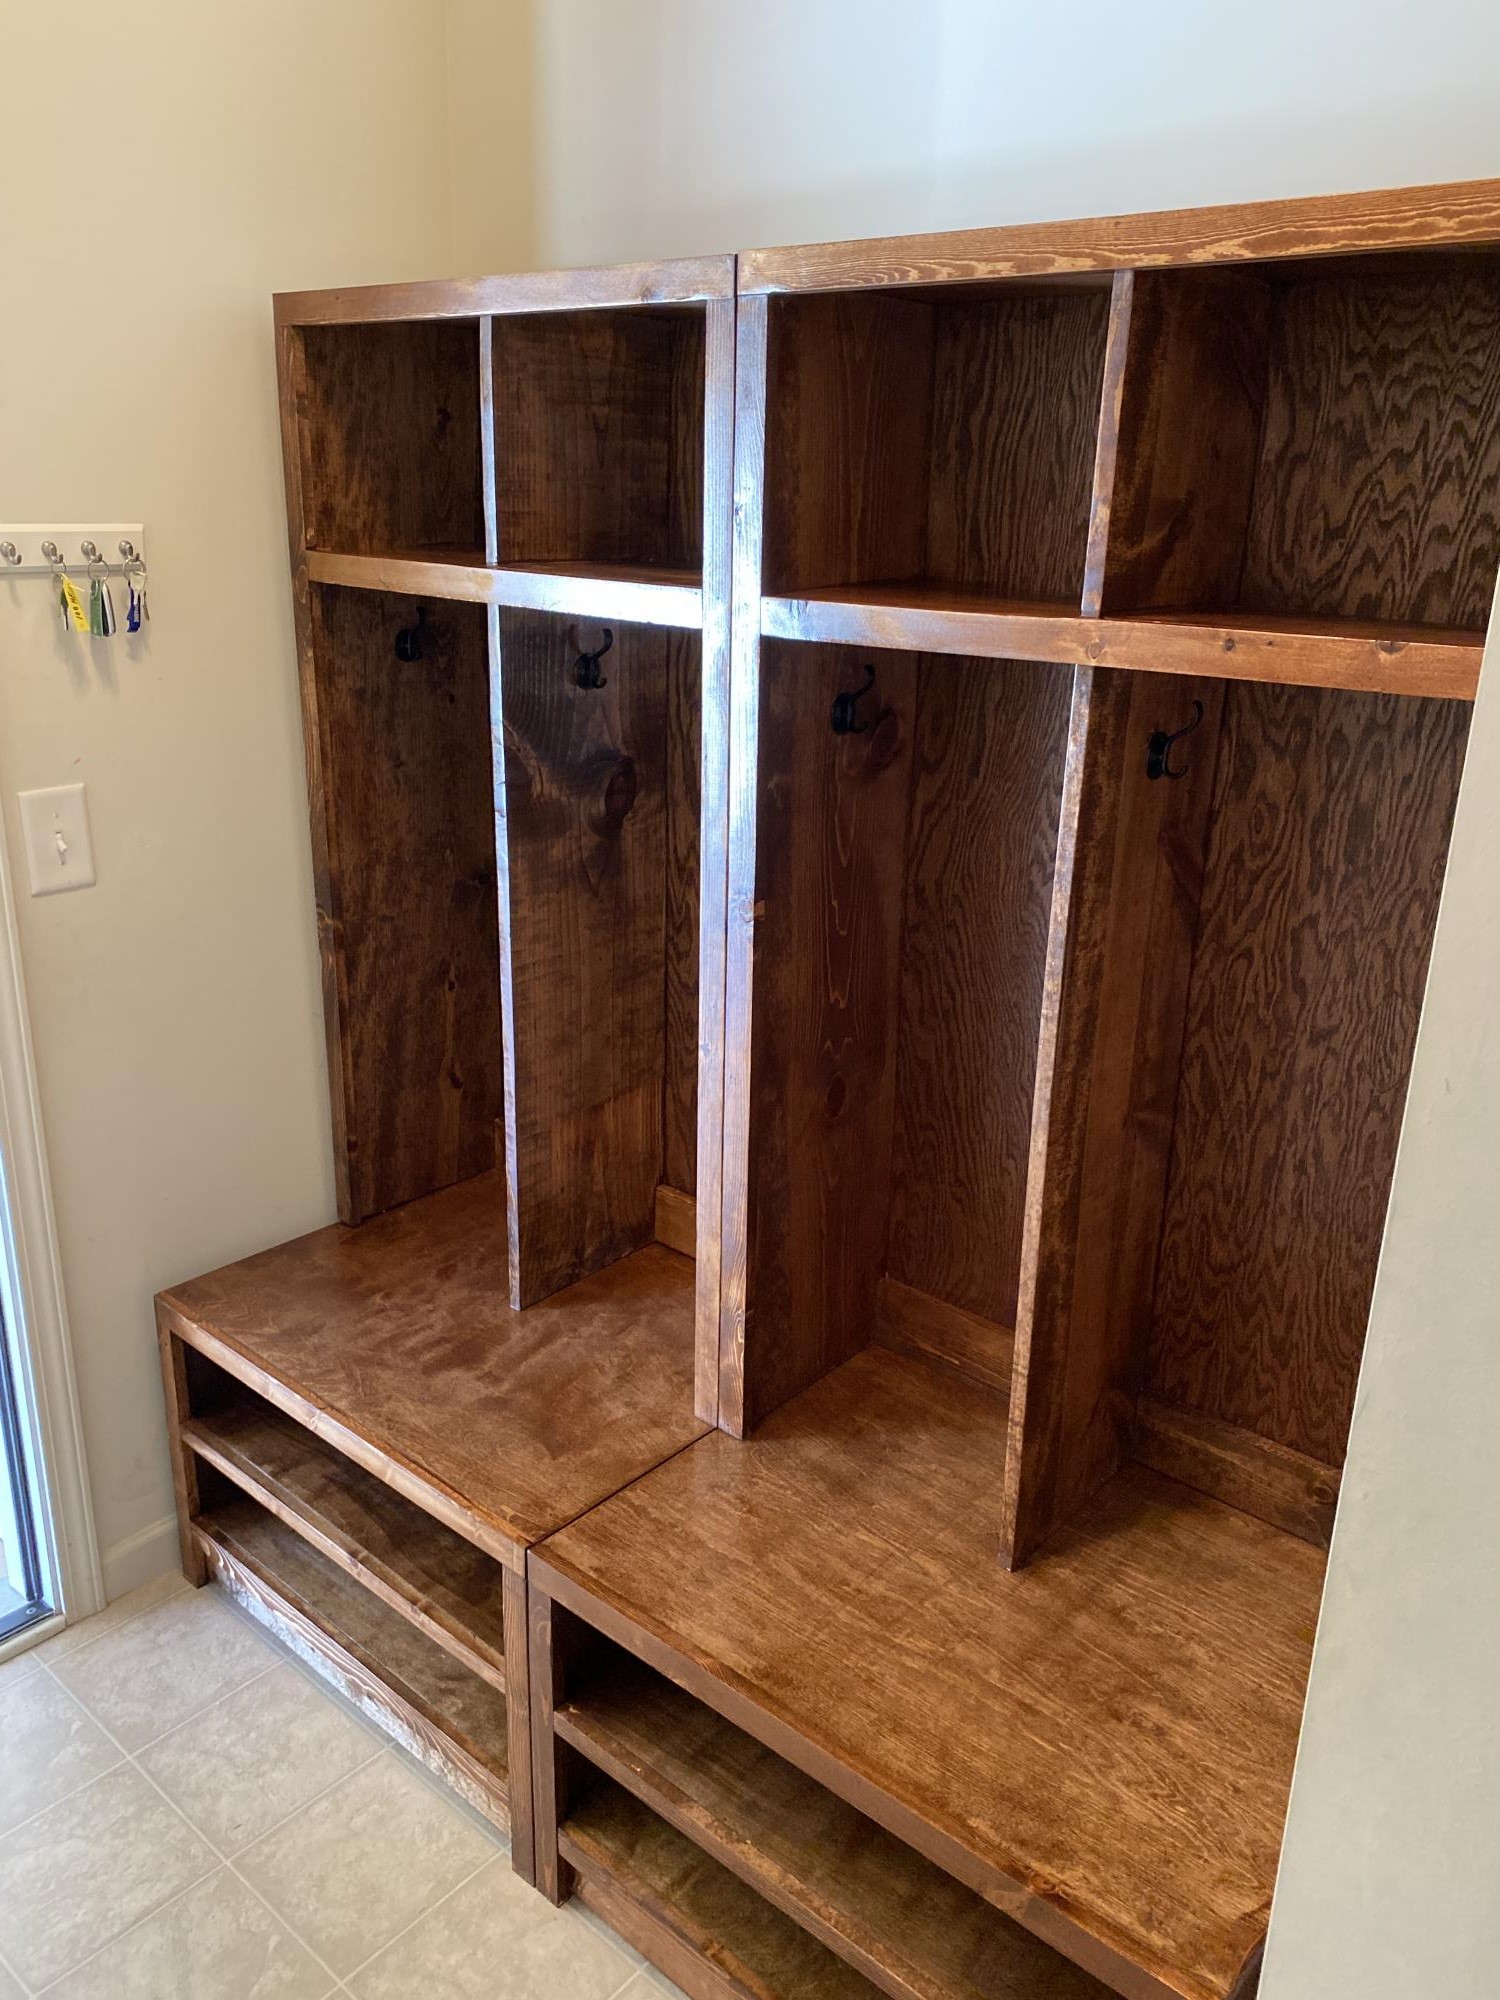
Took the standard Braden Bench/Hutch plans and used a English Chestnut stain to really make them pop. If used a few plans from this site but this one turned out the best. Unfortunately I didn’t have enough space to use the mail sorting hutch plans for a middle locker.
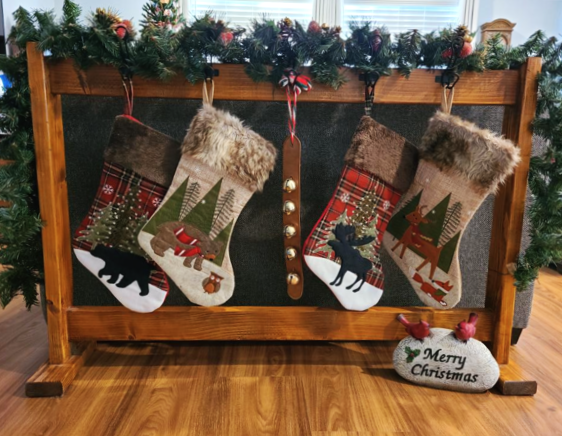
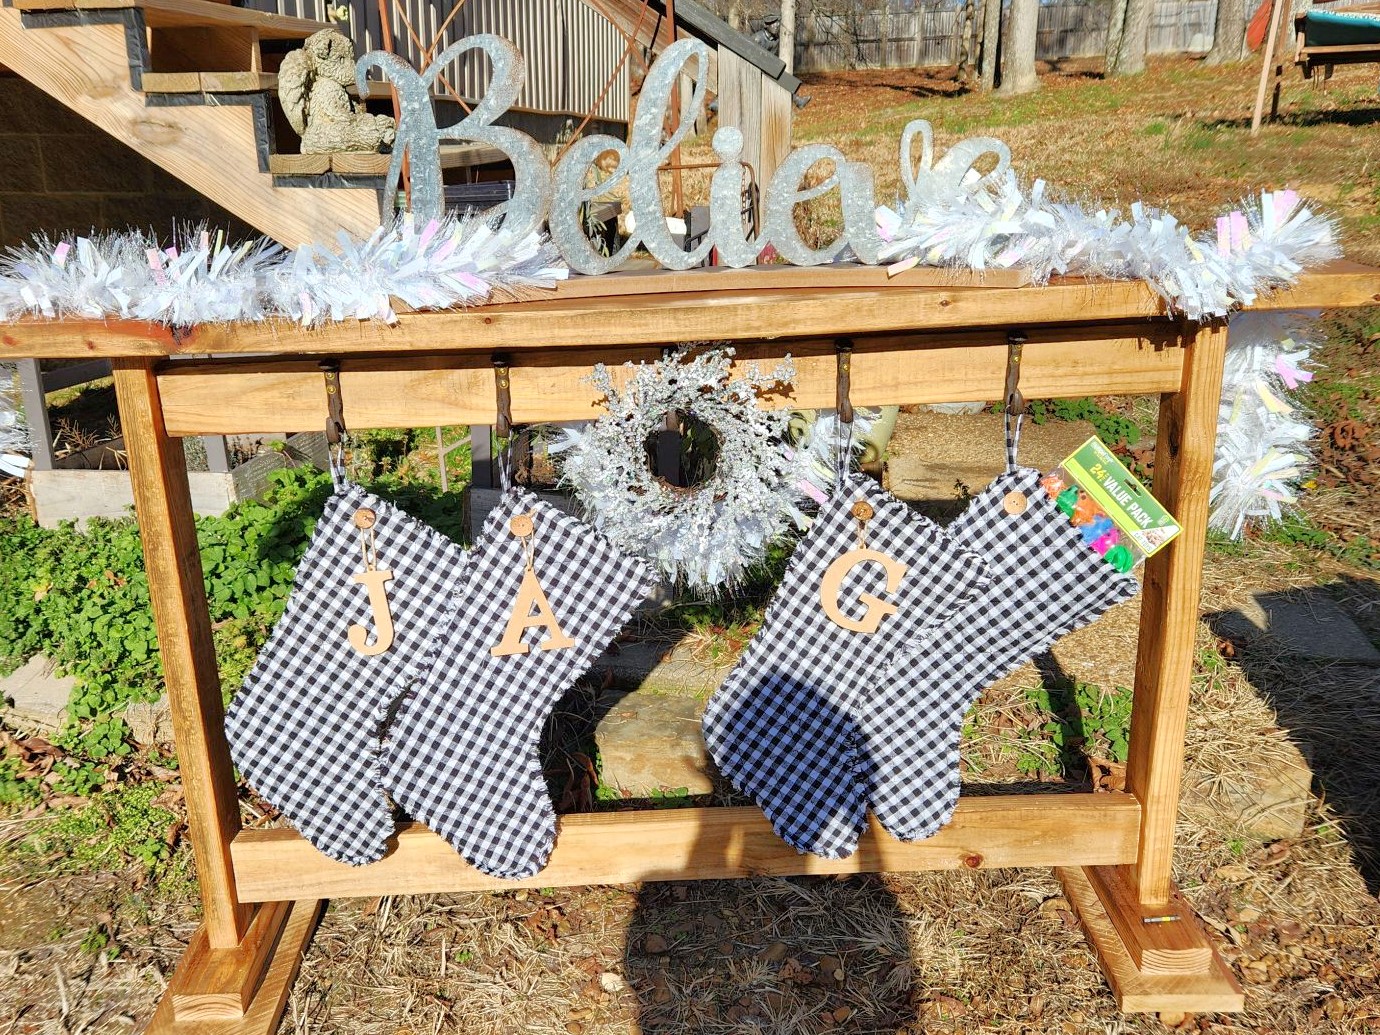
DIY Stocking Stand - Reader build
I used the modifications posted for 2X4 wood.
I used pressure treated wood, so I will stain it next year!
The plans were easy to follow, this was my first project and went off without a hitch!!
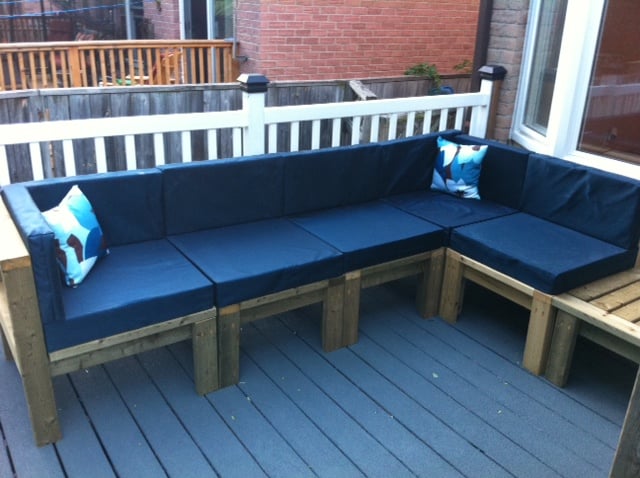
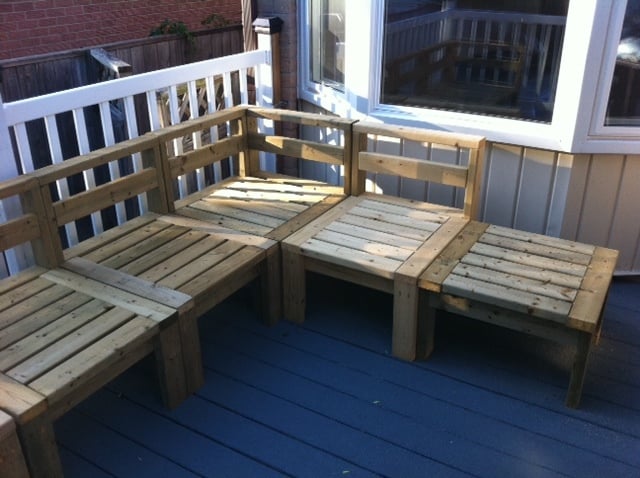
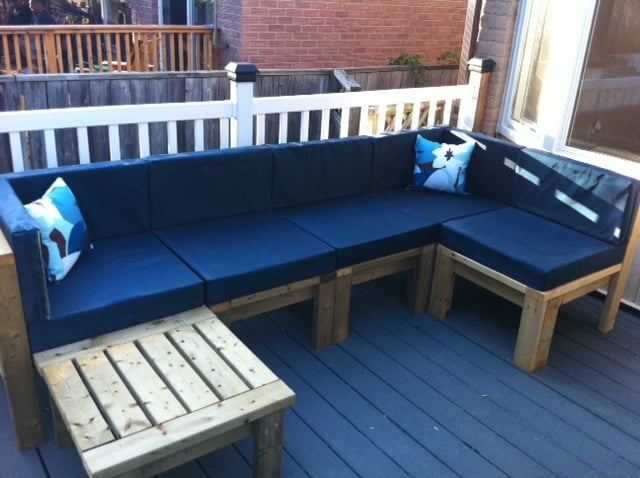
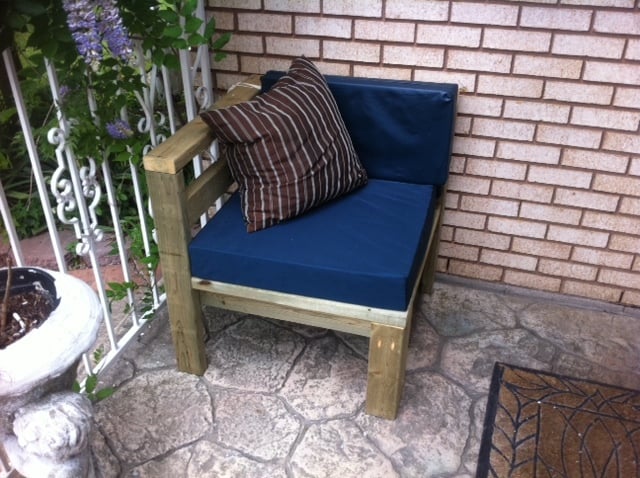
I purchased 24X24 foam for 9 dollars a piece and sewed waterproof material to cover them! It took probably took just as long to make the cushions than to make the actual sectional....but well worth it. I just couldnt find the right cushions ANYWHERE!!!
Sat, 06/23/2012 - 07:37
Great Job! Can you tell me where you purchased the foam for your cushions?
Sat, 06/23/2012 - 17:55
I would check out your local fabric store! I know that I have seen it at Joann's!
Mon, 06/25/2012 - 17:53
Your couch looks great! I too am having a difficult time finding cushions - did you use a pattern to sew them, or just sew around the foam?

In reply to Awesome Cushions! by Britnie (not verified)
Thu, 07/05/2012 - 05:44
Try Costco! I got 24"x24" "floor" cushions (4-5" thick) for $20 a piece and back throw cushions 20"x20", 2/$15! They are a really nice quality and are labeled as outdoor cushions. Look at Thrift Inspirations' brag post as she has the same cushions I bought (different pattern.) I haven't posted yet because we're in the midst of building ours.
Fri, 07/20/2012 - 21:02
I Purchased the foam at a local fabric store,
And sewed around them. I actually folded the material
In half, and sewed two sides. I then measured and sewed the
Corners so that when inverted it would fit perfectly.
Then I had to closed each pillow sewing by hand... Hope that helped..
Sat, 09/22/2012 - 12:56
I got mine from Improvement Catalogs. They have a sale going on selling 28" x 22" x 4". I bought about 8 of them and theyre selling for $13.97 a piece. Its for exterior use obviously and mine havent faded in the sun. Ive had my cushions since February 2012.

Sat, 09/22/2012 - 23:17
If you have a Garden Ridge in your area, they had a nice selection of cushions and now that its season end they may be on sale right now! The cushions I used on my sectional I got from the Big Orange store and paid about $60 for a bottom and top cushion set. Very well worth the money! When it rains the water sits on top of the cushion and I just brush off with my hands and so far it has never soaked in, they still look new!
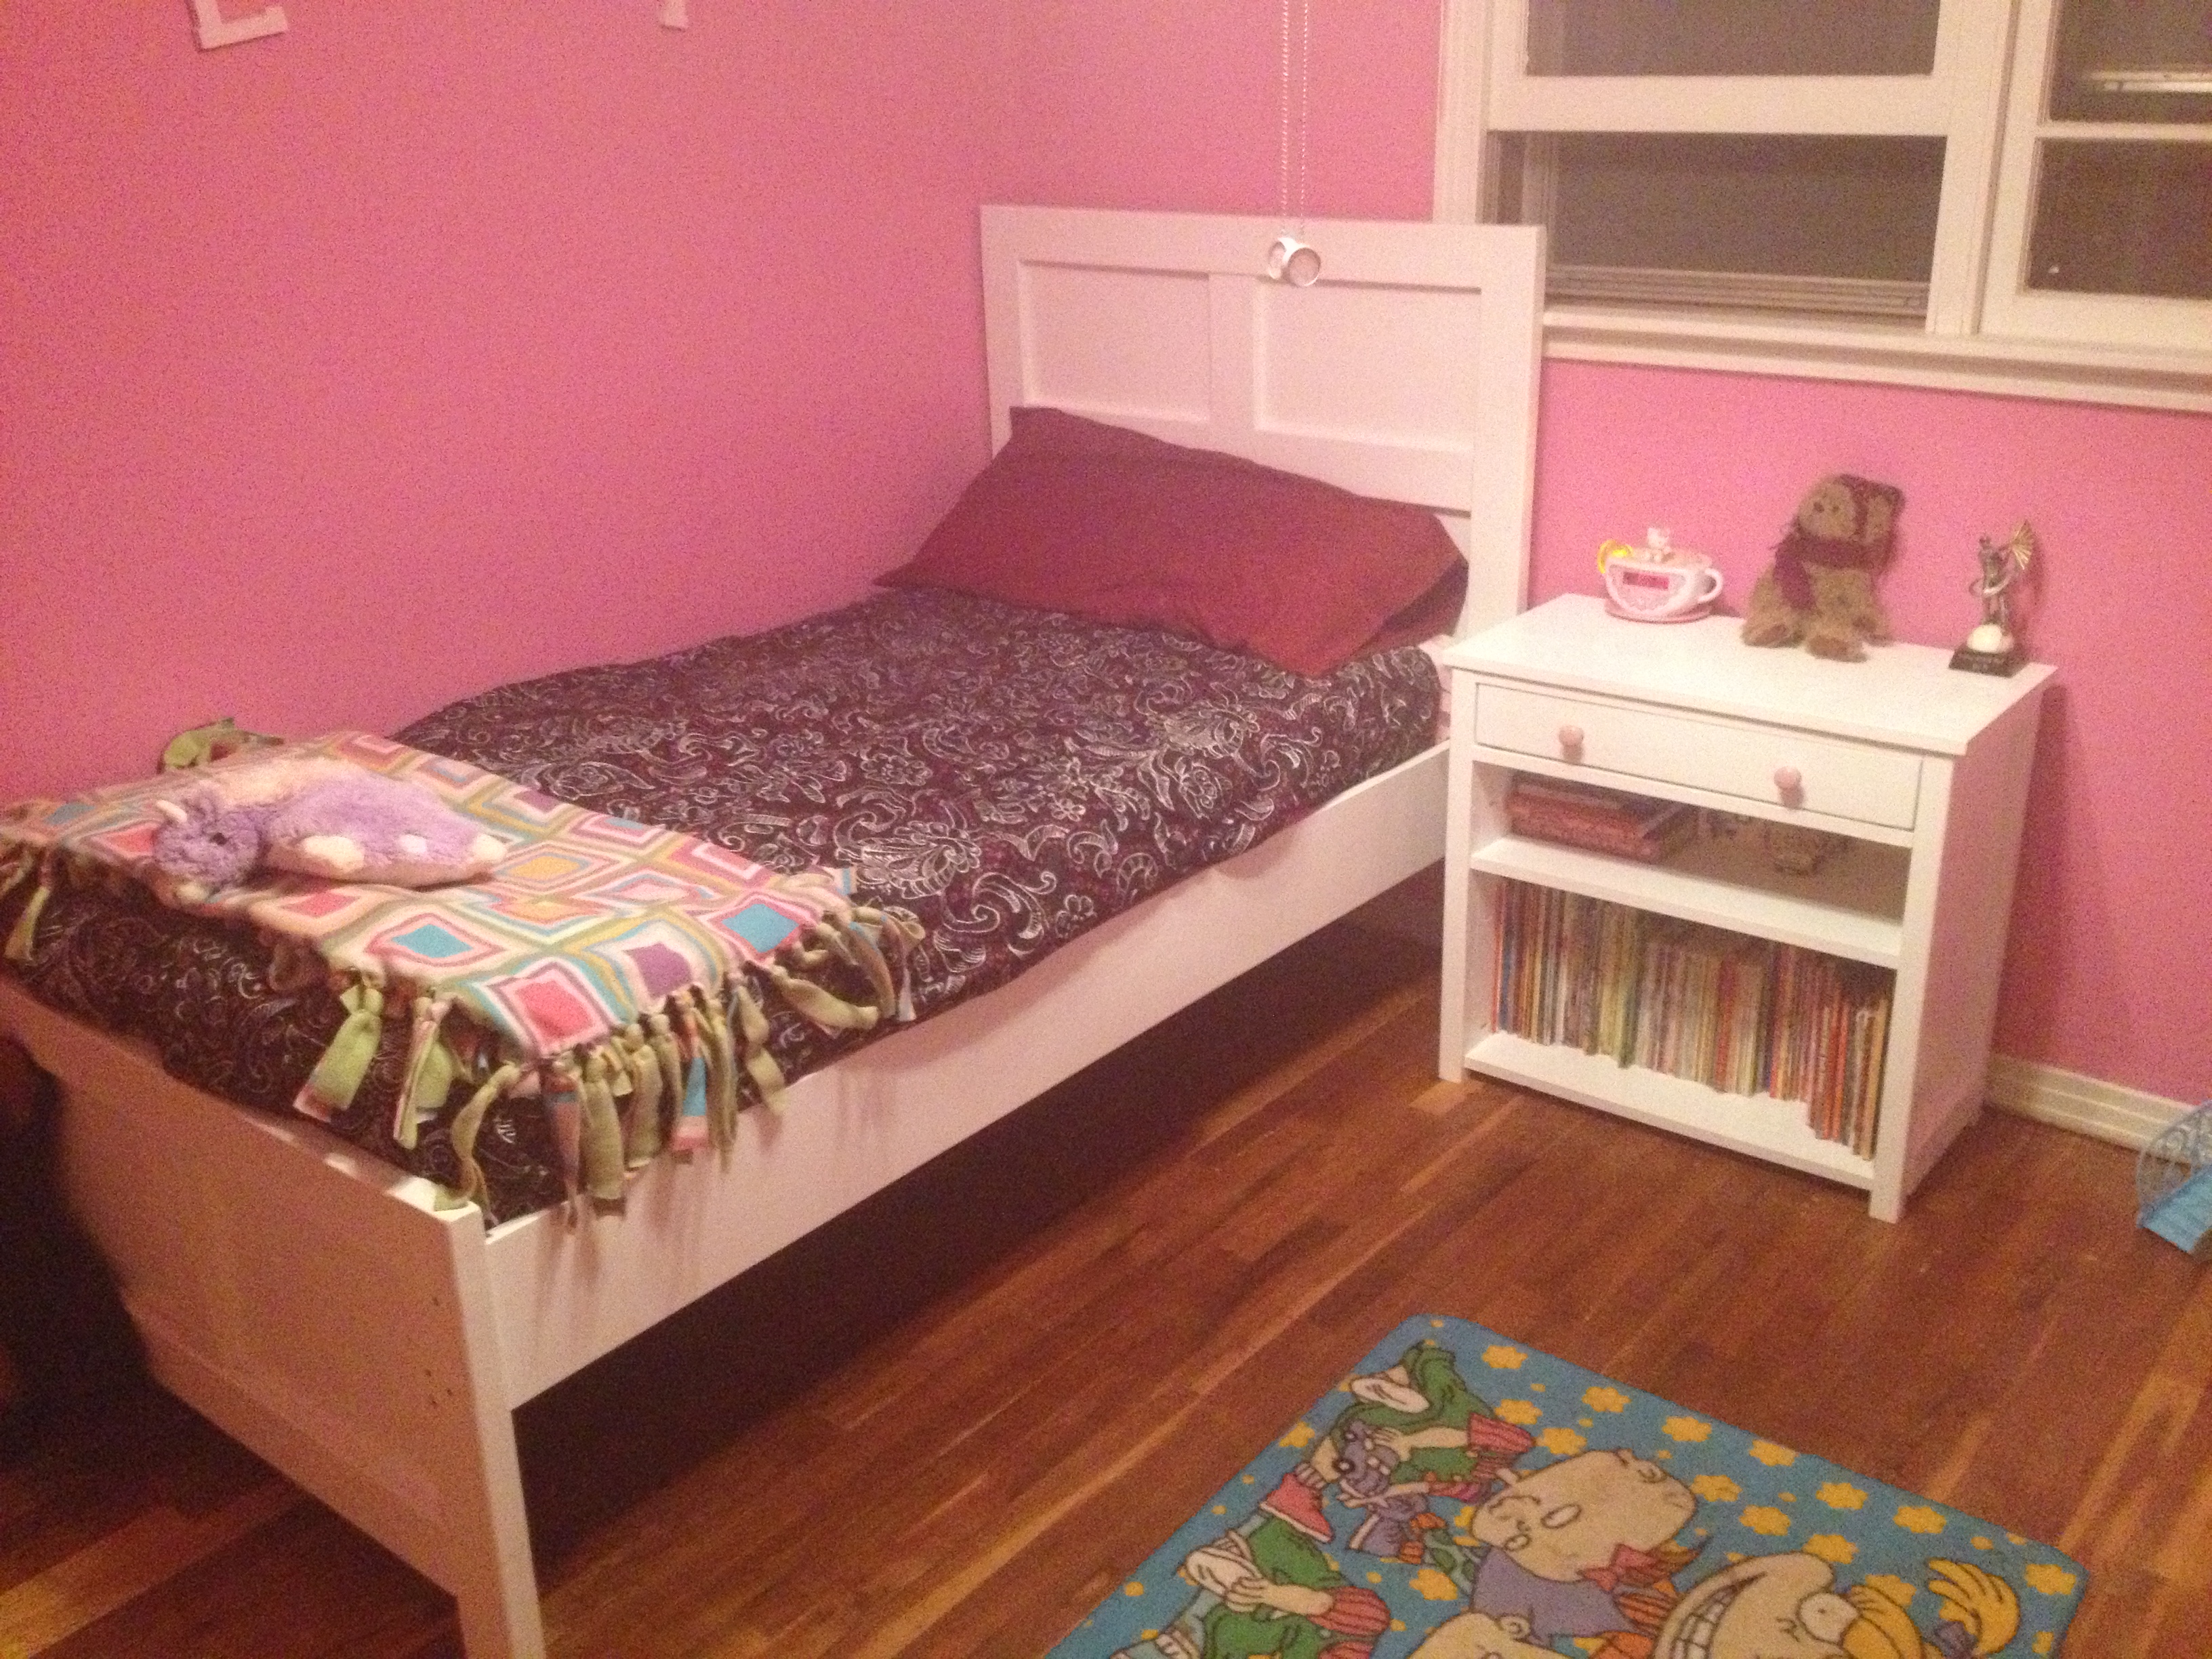
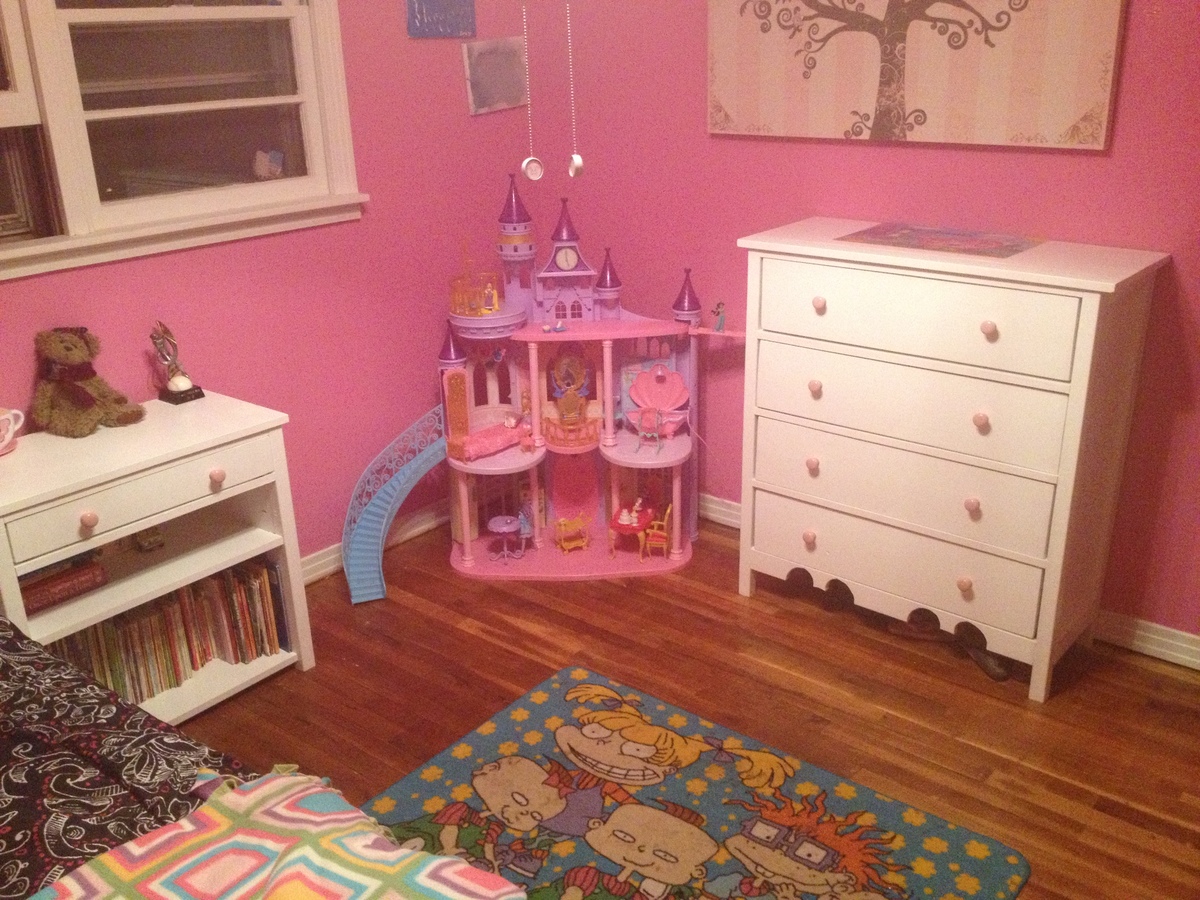
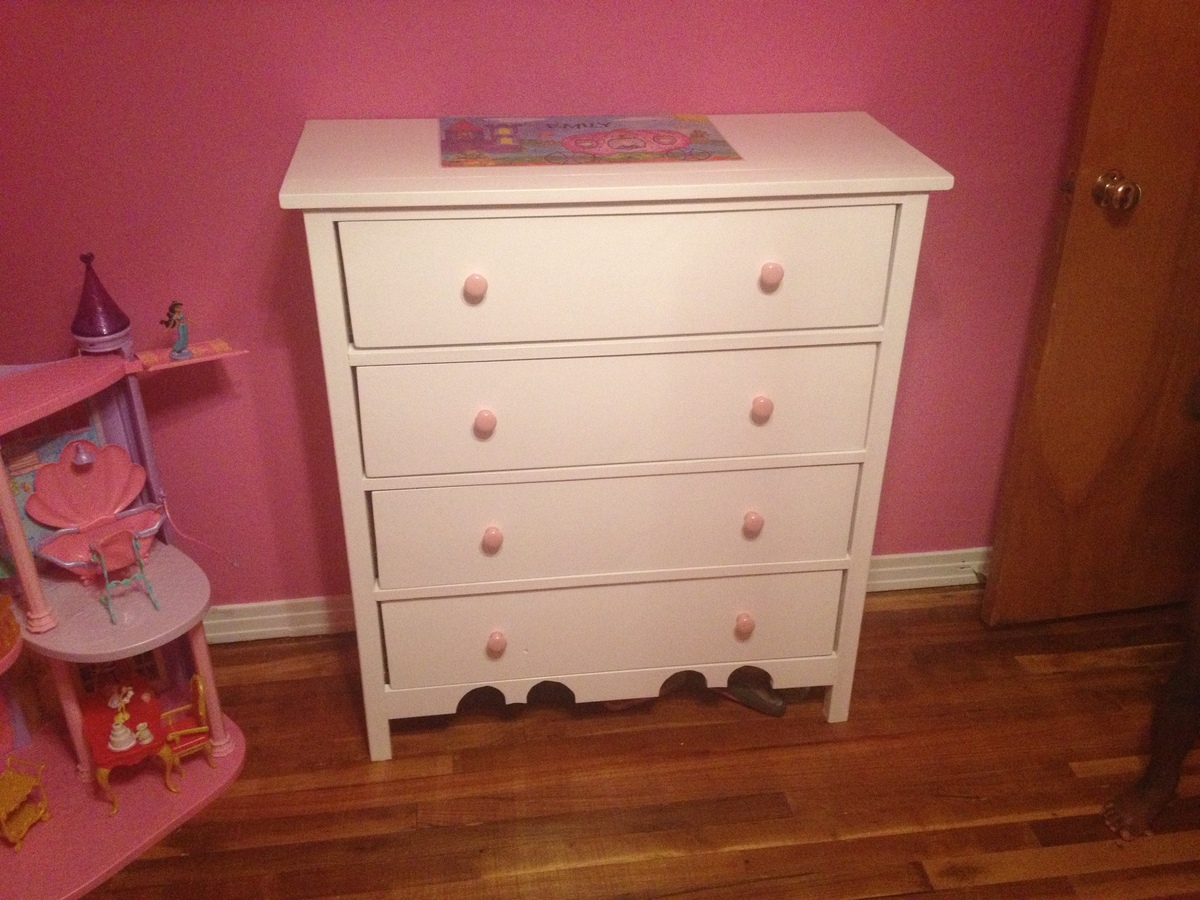
This is the bedroom set I built for my daughter. The Bed is the "Emme Twin Bed" Painted white. It is the 1st thing I ever built off of this web-site. The dresser is the mostly the"Beach Cottage Dresser" also painted white. I just left the trim pieces off the sides. Also, this one has something "hidden" at the bottom that we thought was cute. The night stand was just modeled after the same style as the dresser. I just kind of made that one up as I went along. My daughter loves her bedroom furniture. Thanks so much for the plans.
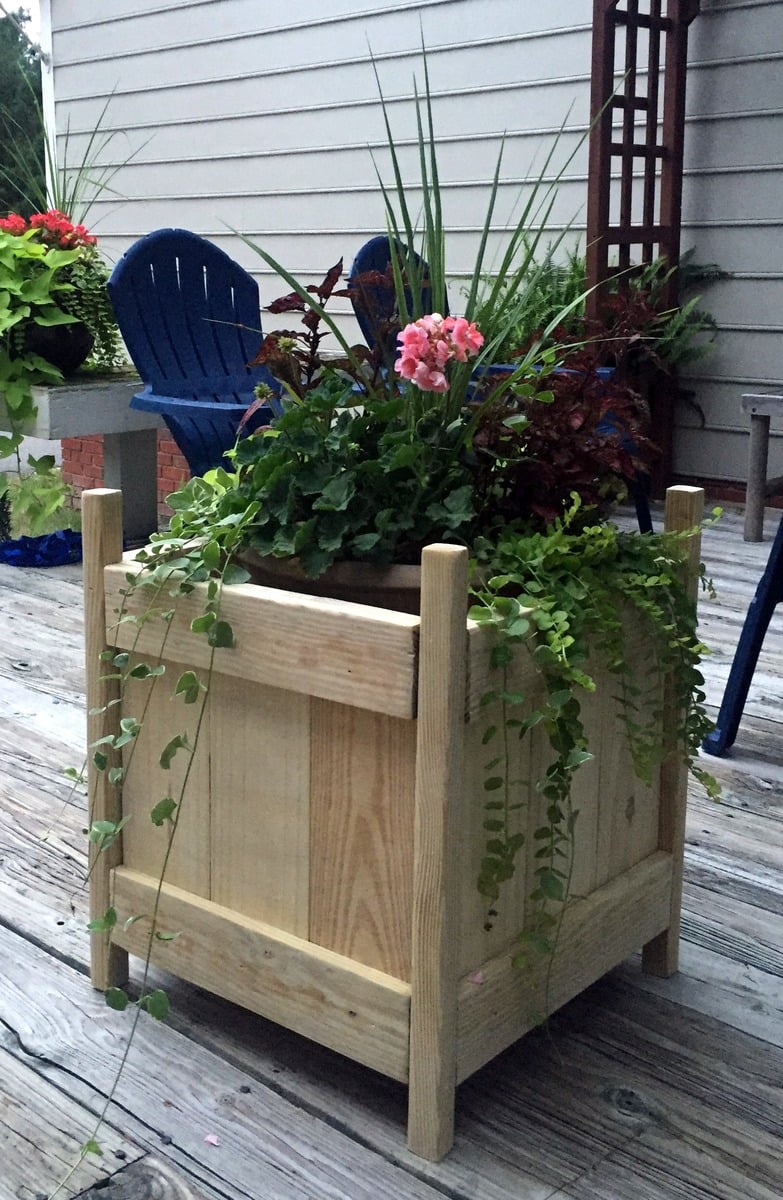
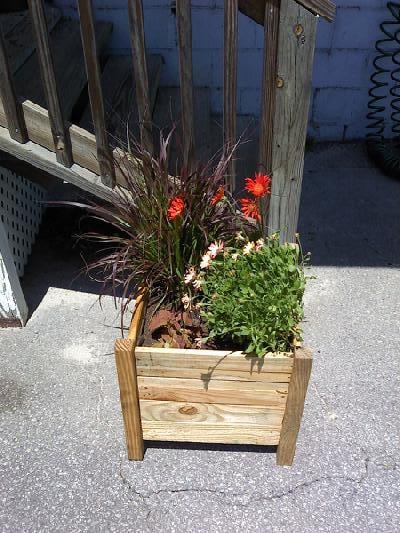
This planter box turned-out looking great! I put it together the first go-round using all kreg-jig screws, but couldn't get the pieces to sit flush with each other, so I took everything apart...and used star-drive screws instead of nails). I have decided that I hate nails.
I used the kreg jig to attach the 4 posts, but then used brackets to attach the rest of the panels -- this worked well! Once I put the slats in the bottom, it was very sturdy.
TIPS: don't be afraid to alter the plan. If you like working with brackets, use them!
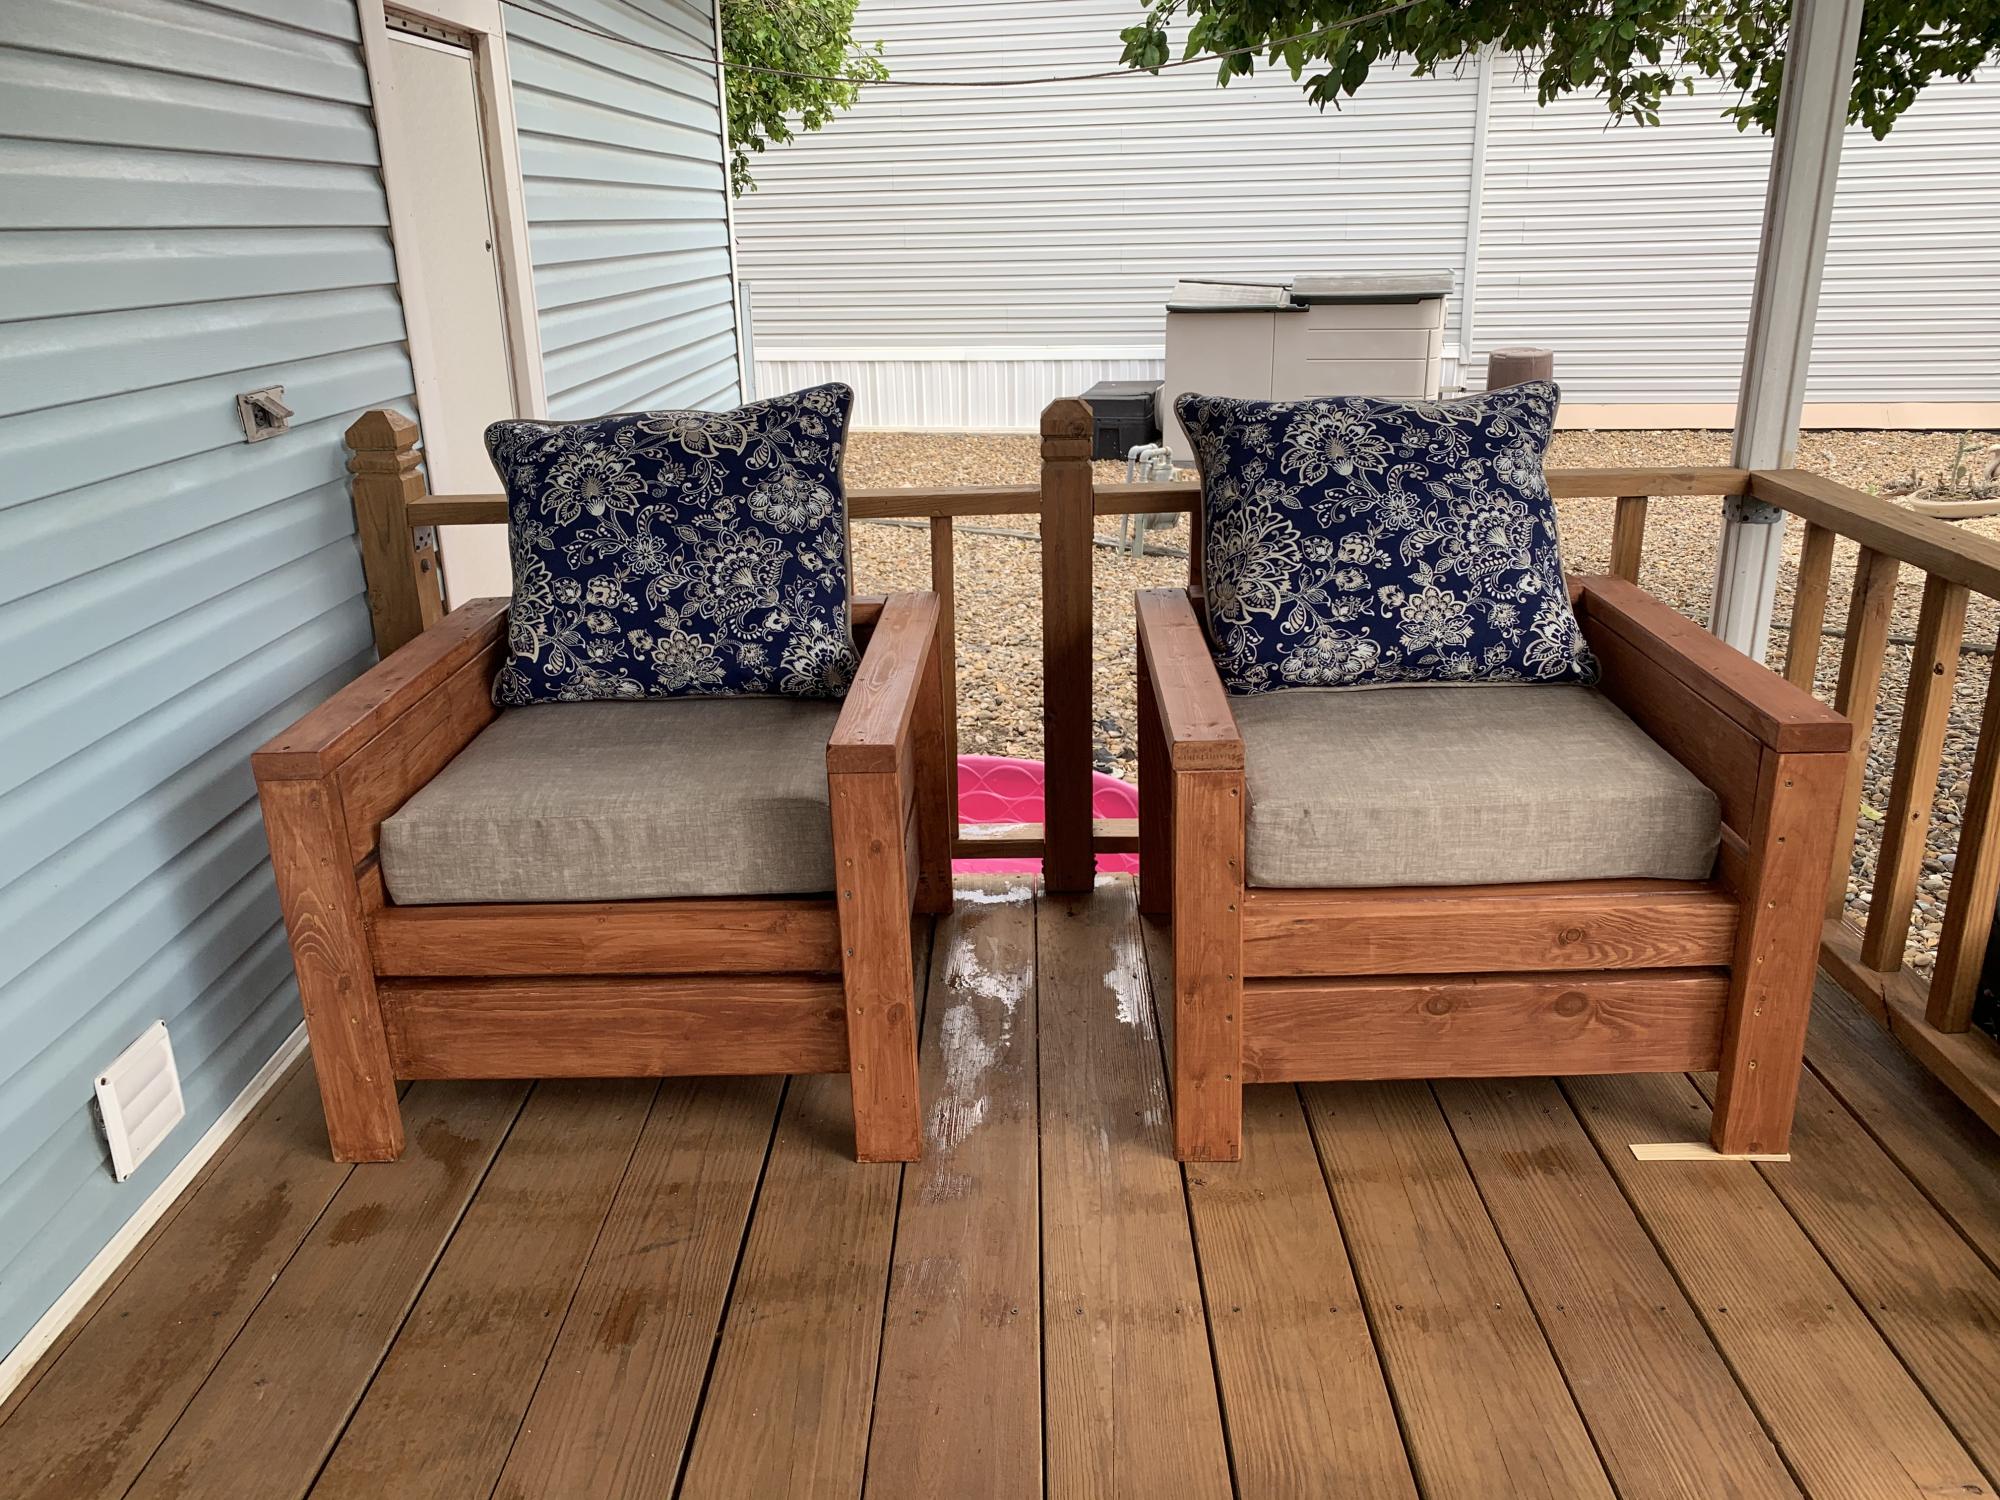
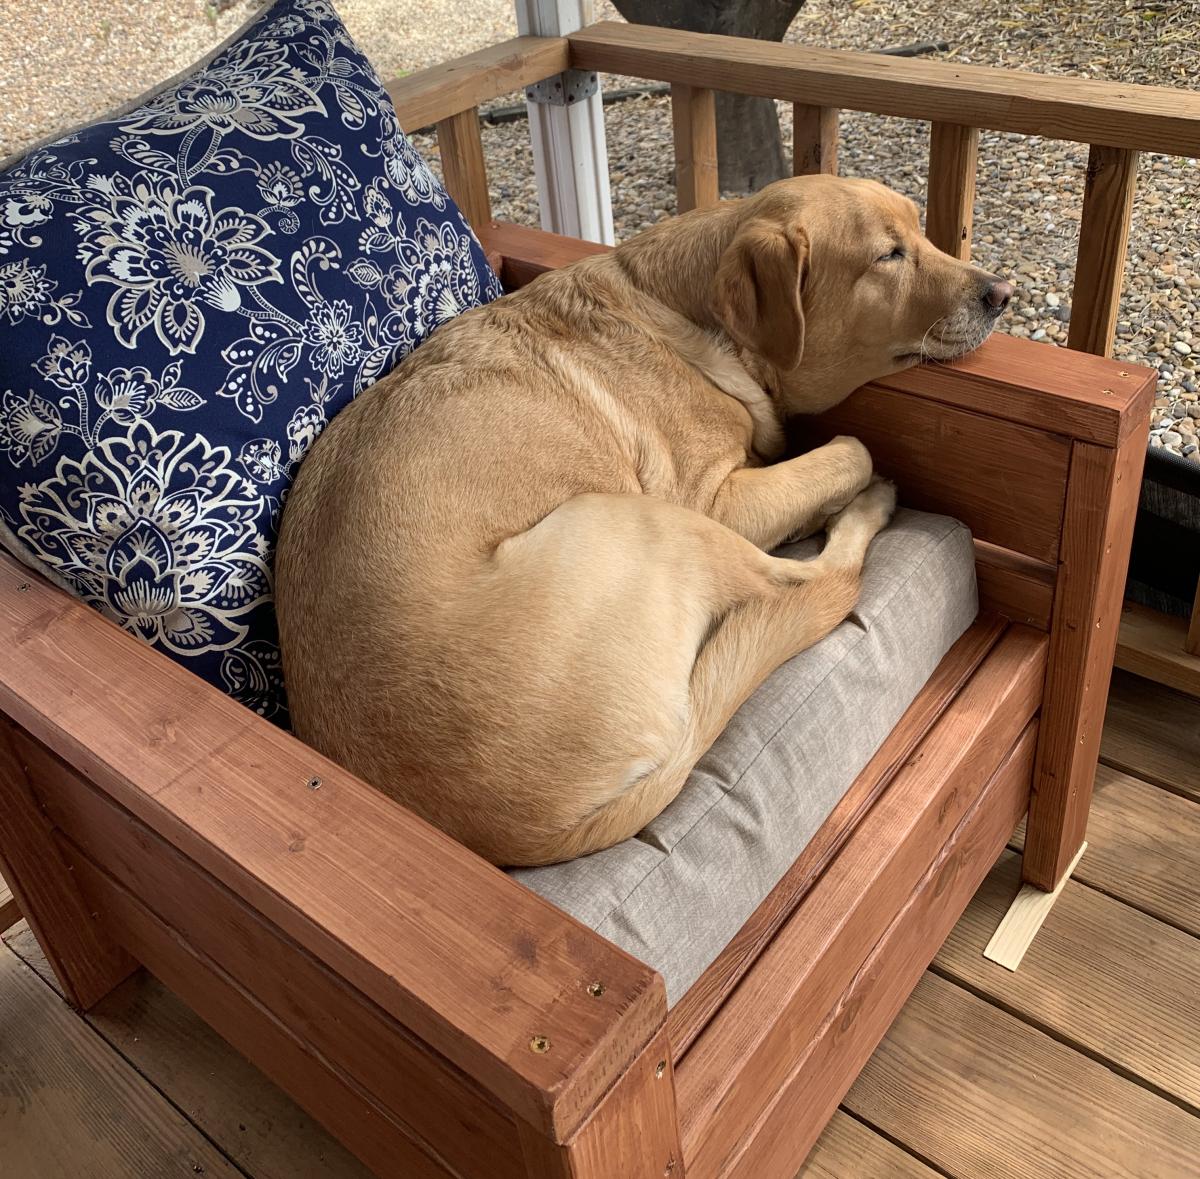
This was our first try at chairs and they came out super! Even our Yellow Lab, Cassie was pleased! We made a few mistakes on the first chair which were easily corrected. The only thing I would add to the buy list is a 2x2 .
Made for my sons house. Just made a few changes to top with 2x6 and bottom with 1x6's.
ANW
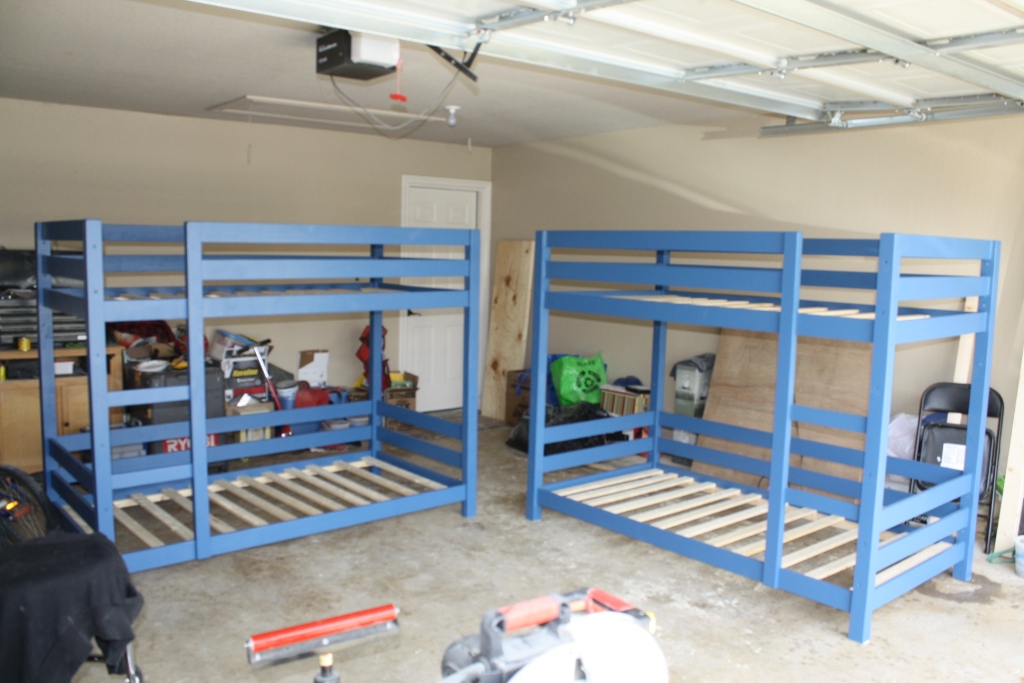
No major changes to the design. Just took the overall height of the ceiling, subtracted the 4" that we wanted to keep off the floor (to avoid any mildew issues, as they are in a lake house), and divided the rest in half. That told us how much space to put in between the bunks. :)

My husband and I made this for our son since we were transitioning him from a toddler bed. The ones we looked at in stores were cheaply made and horribly expensive.

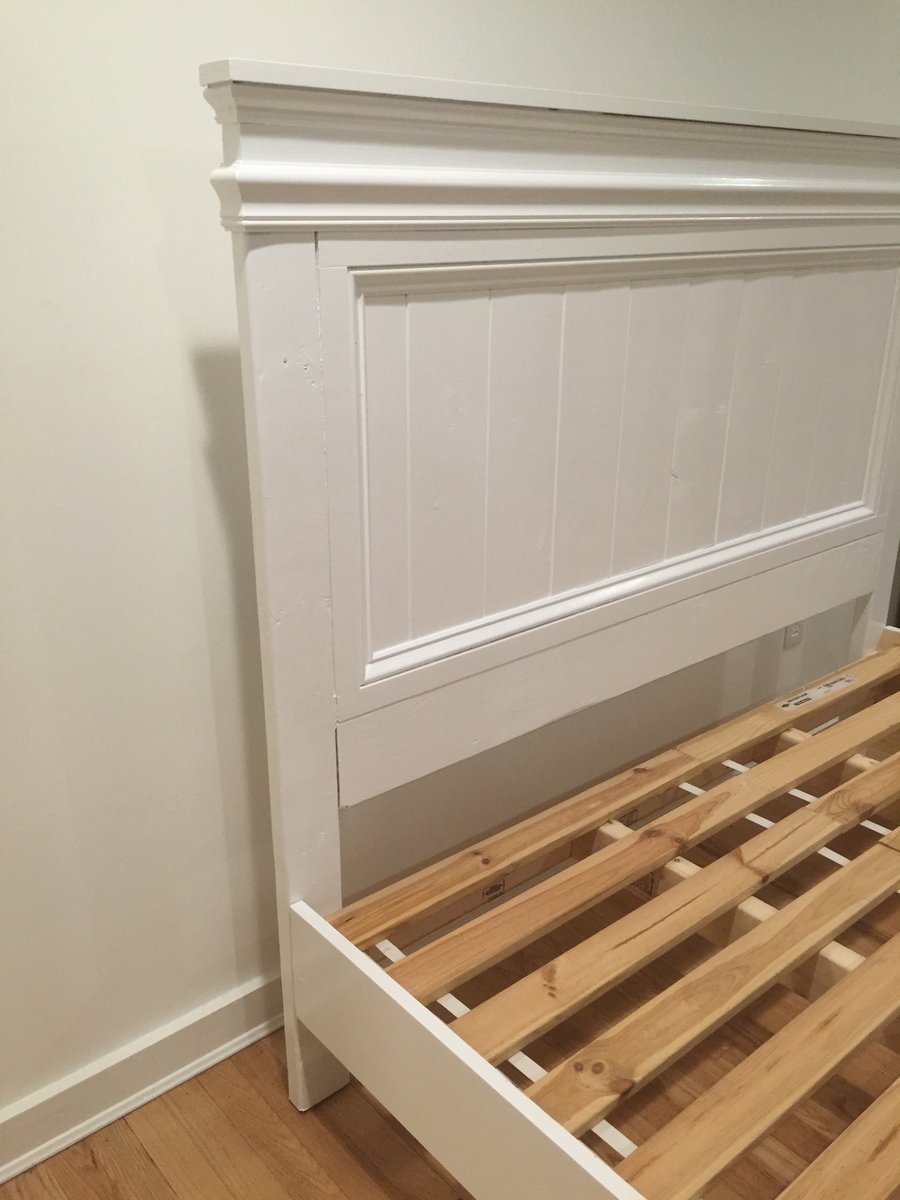
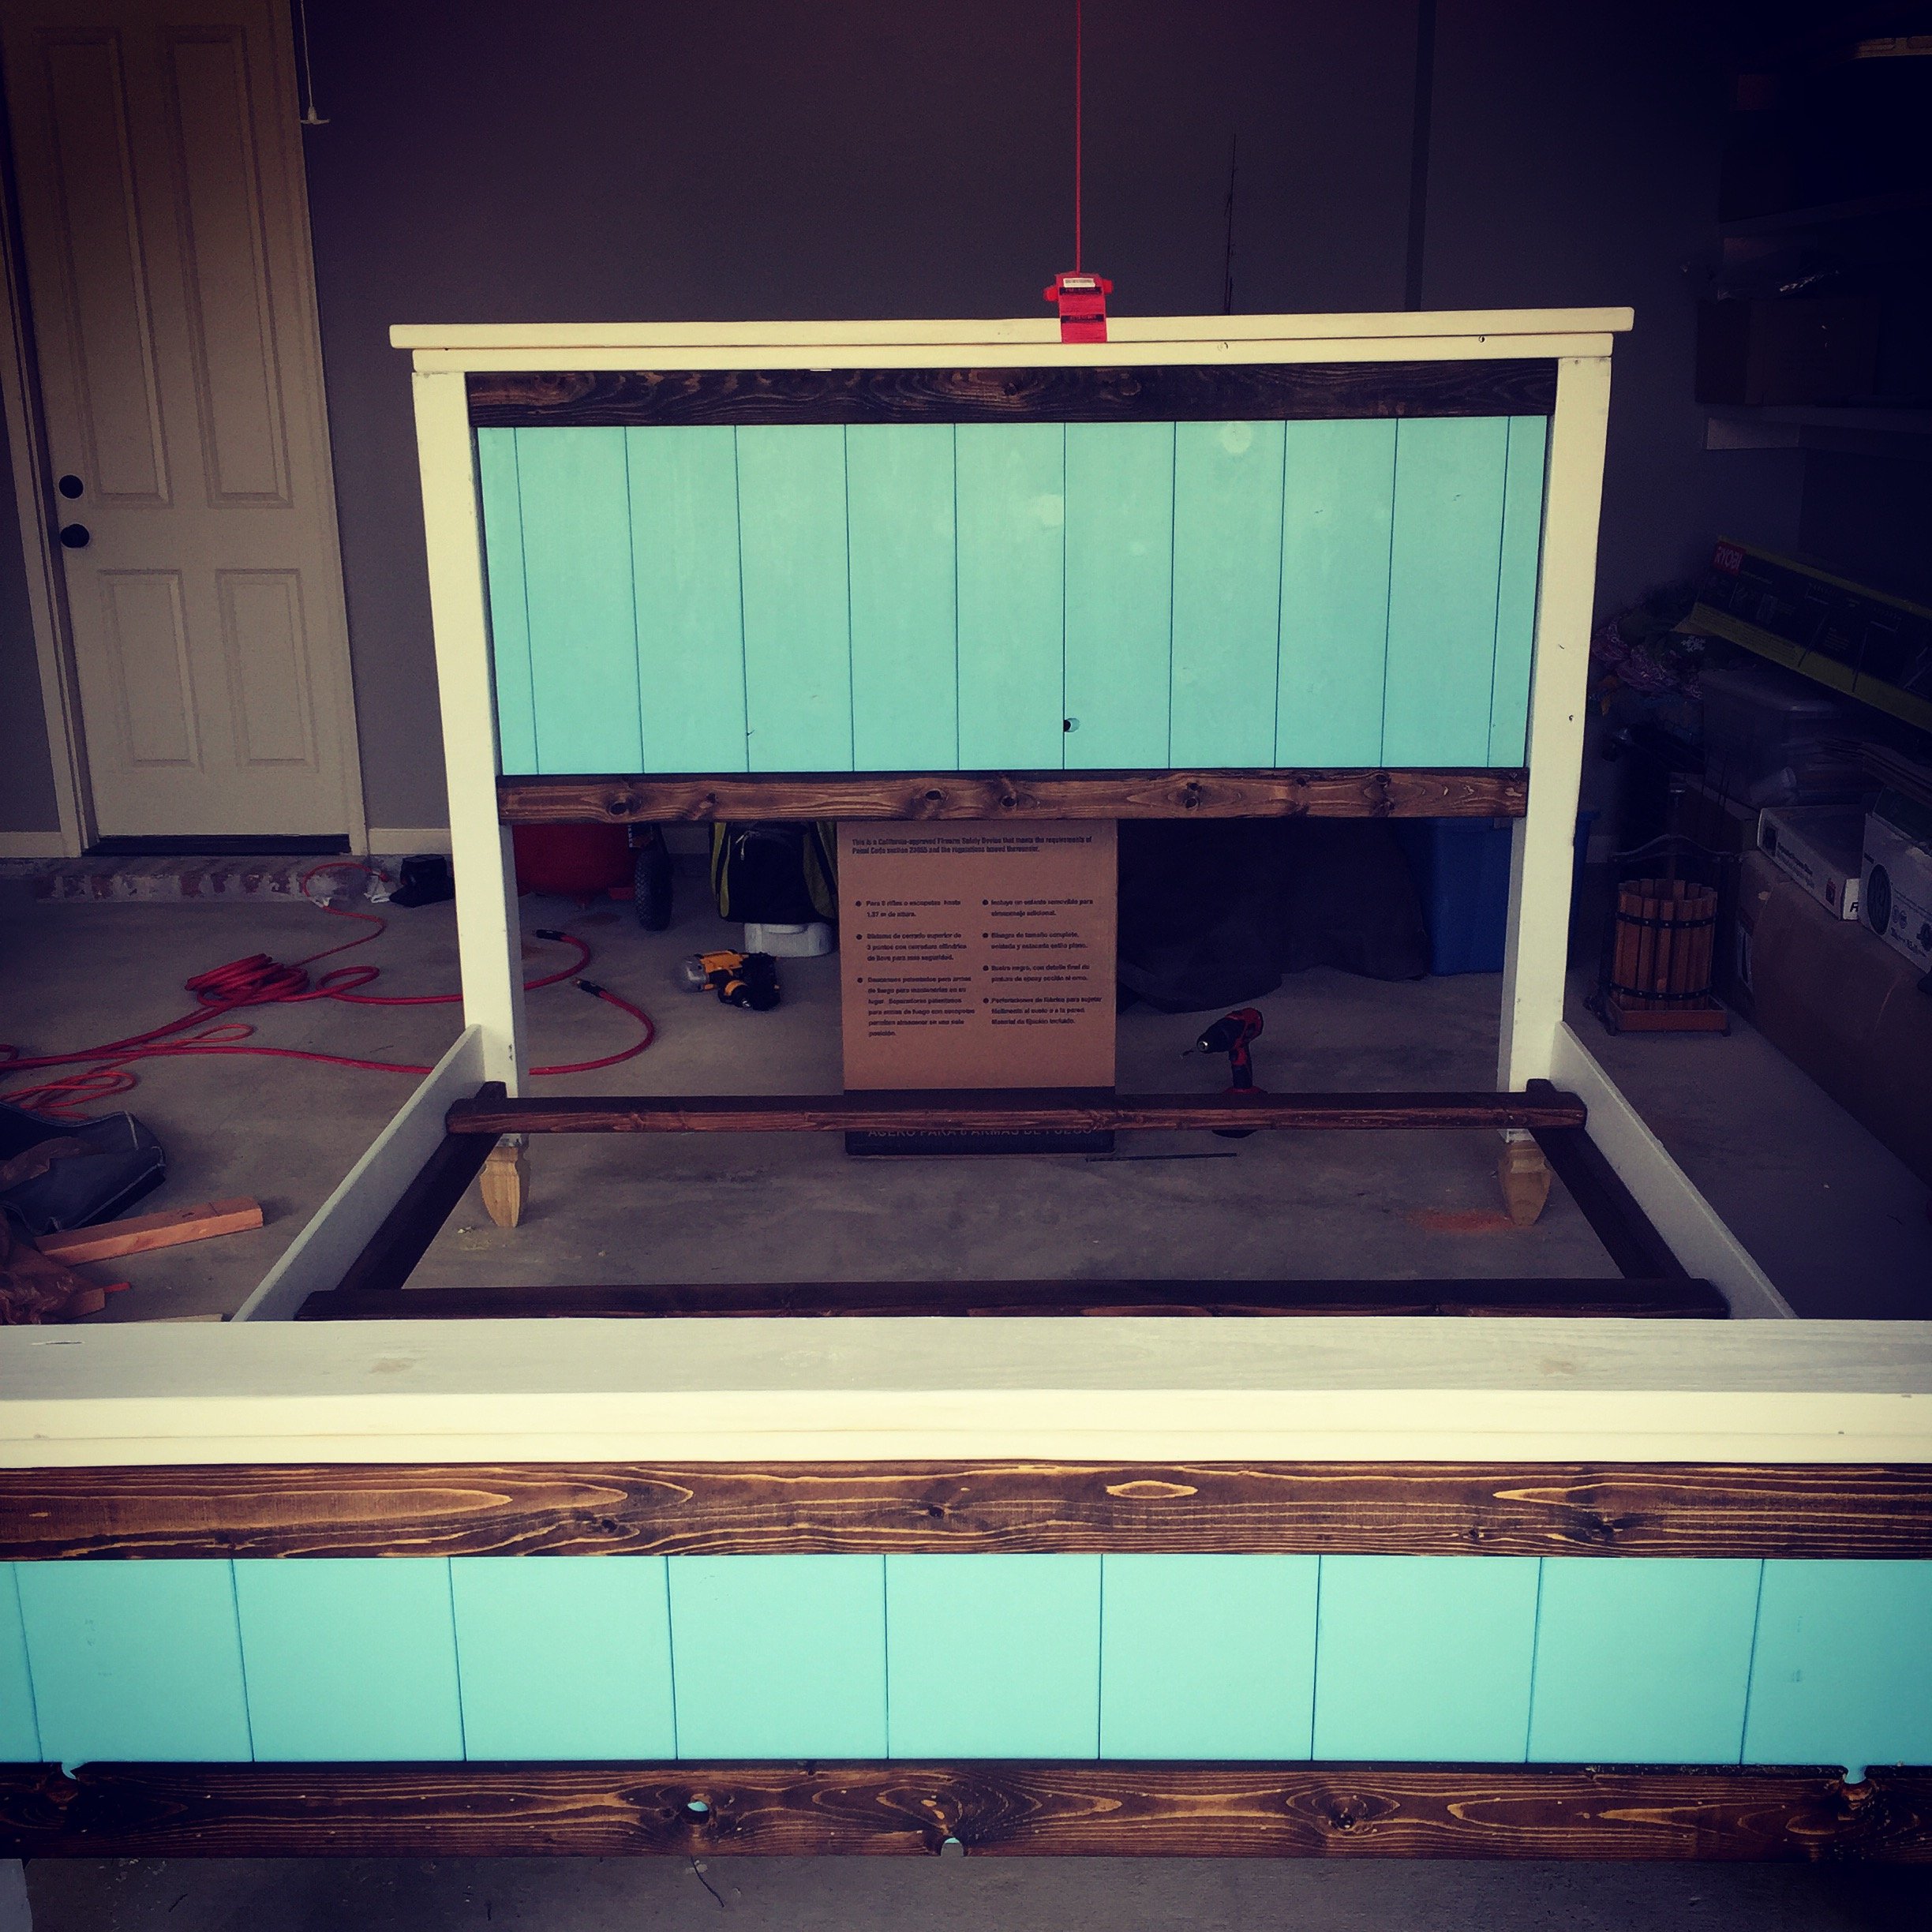
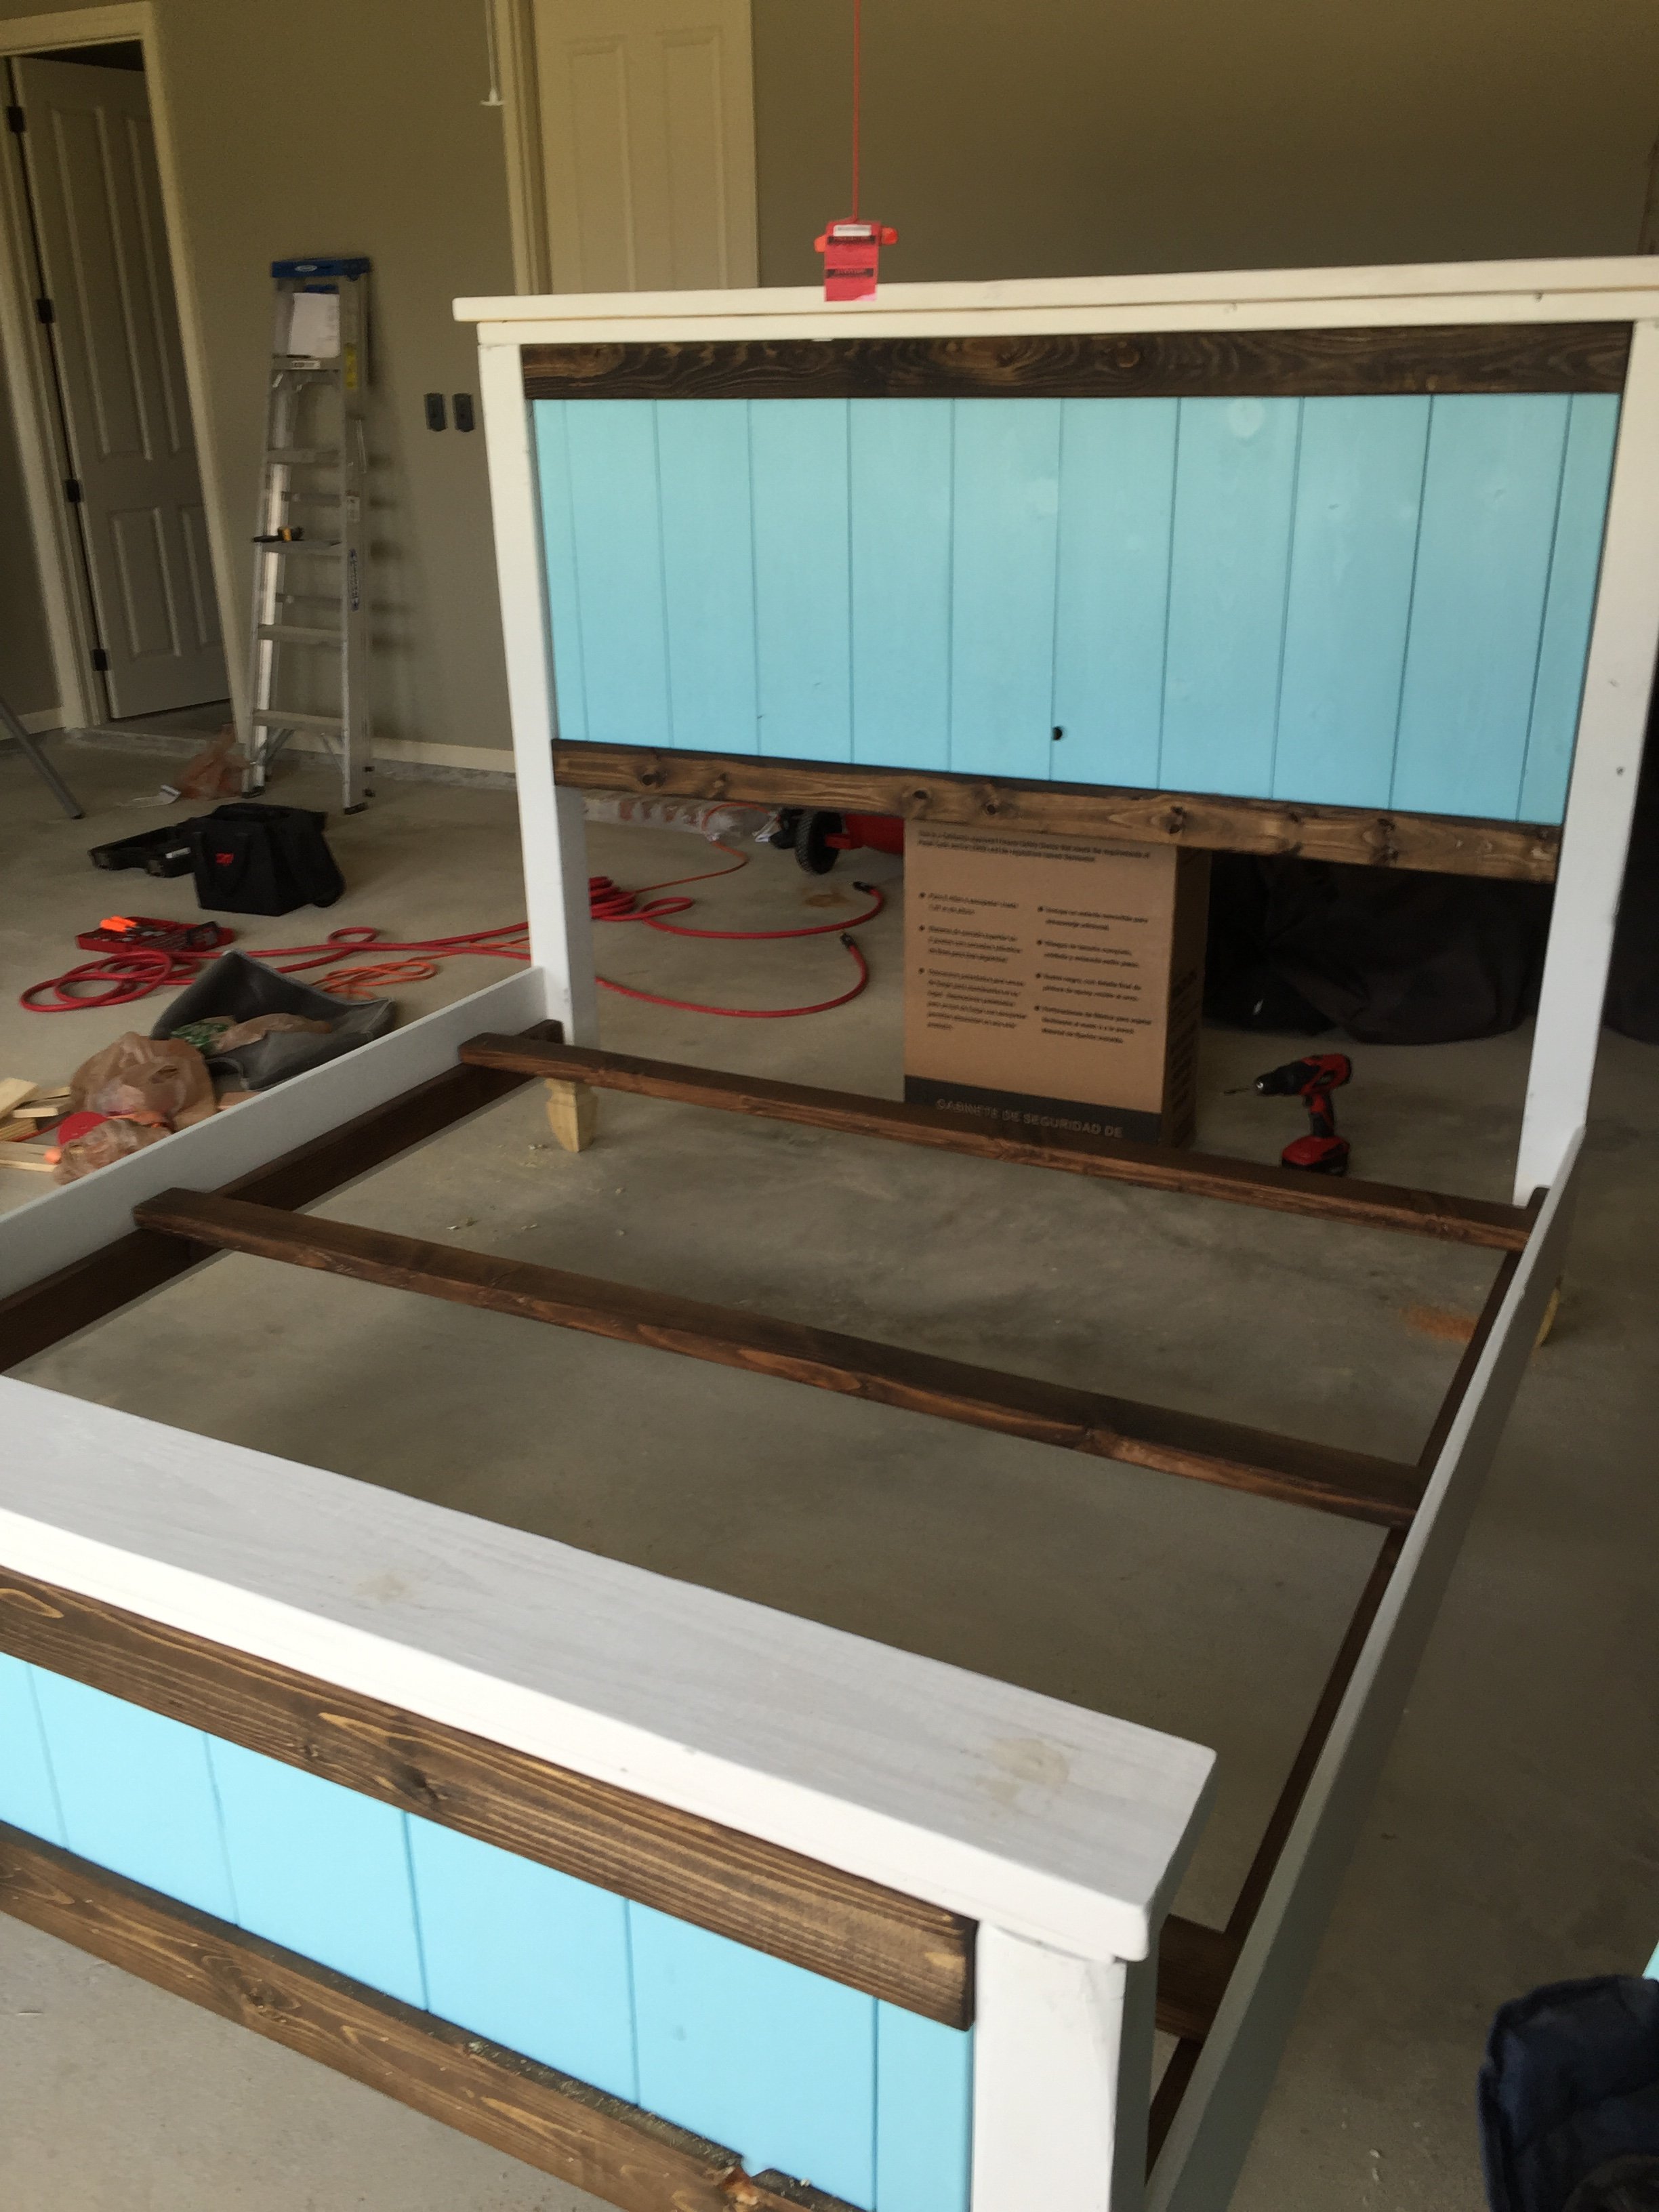
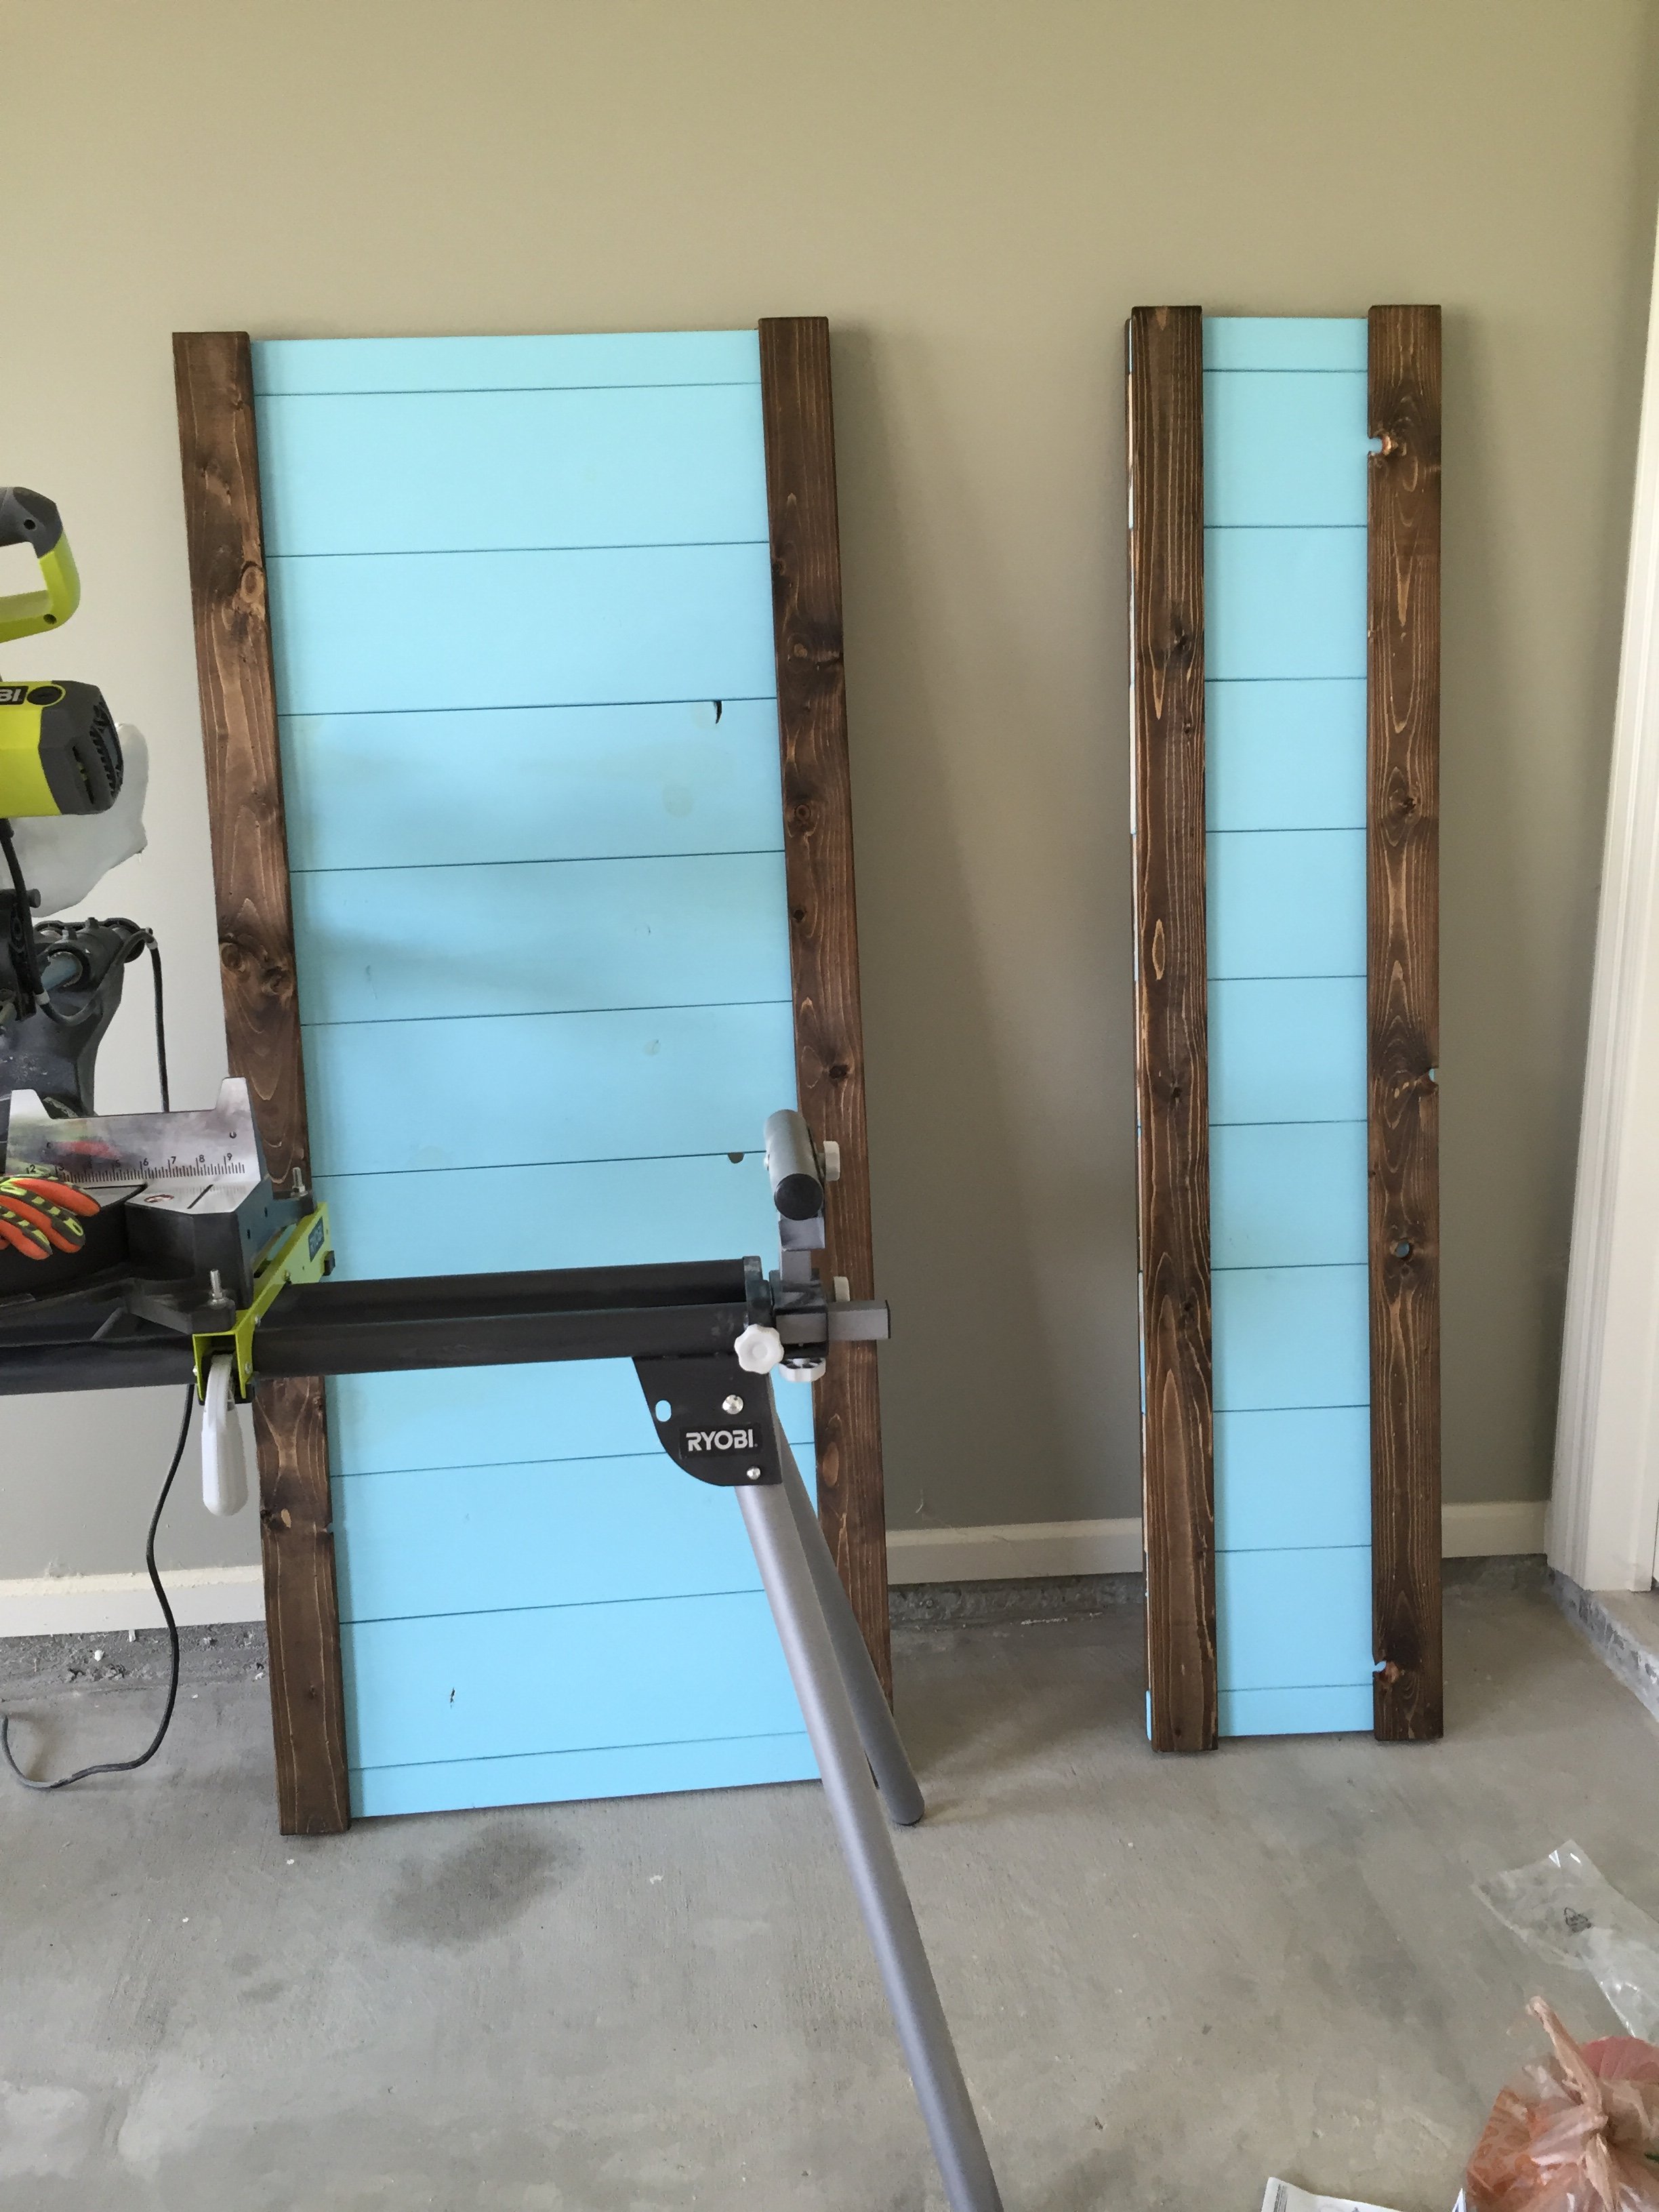
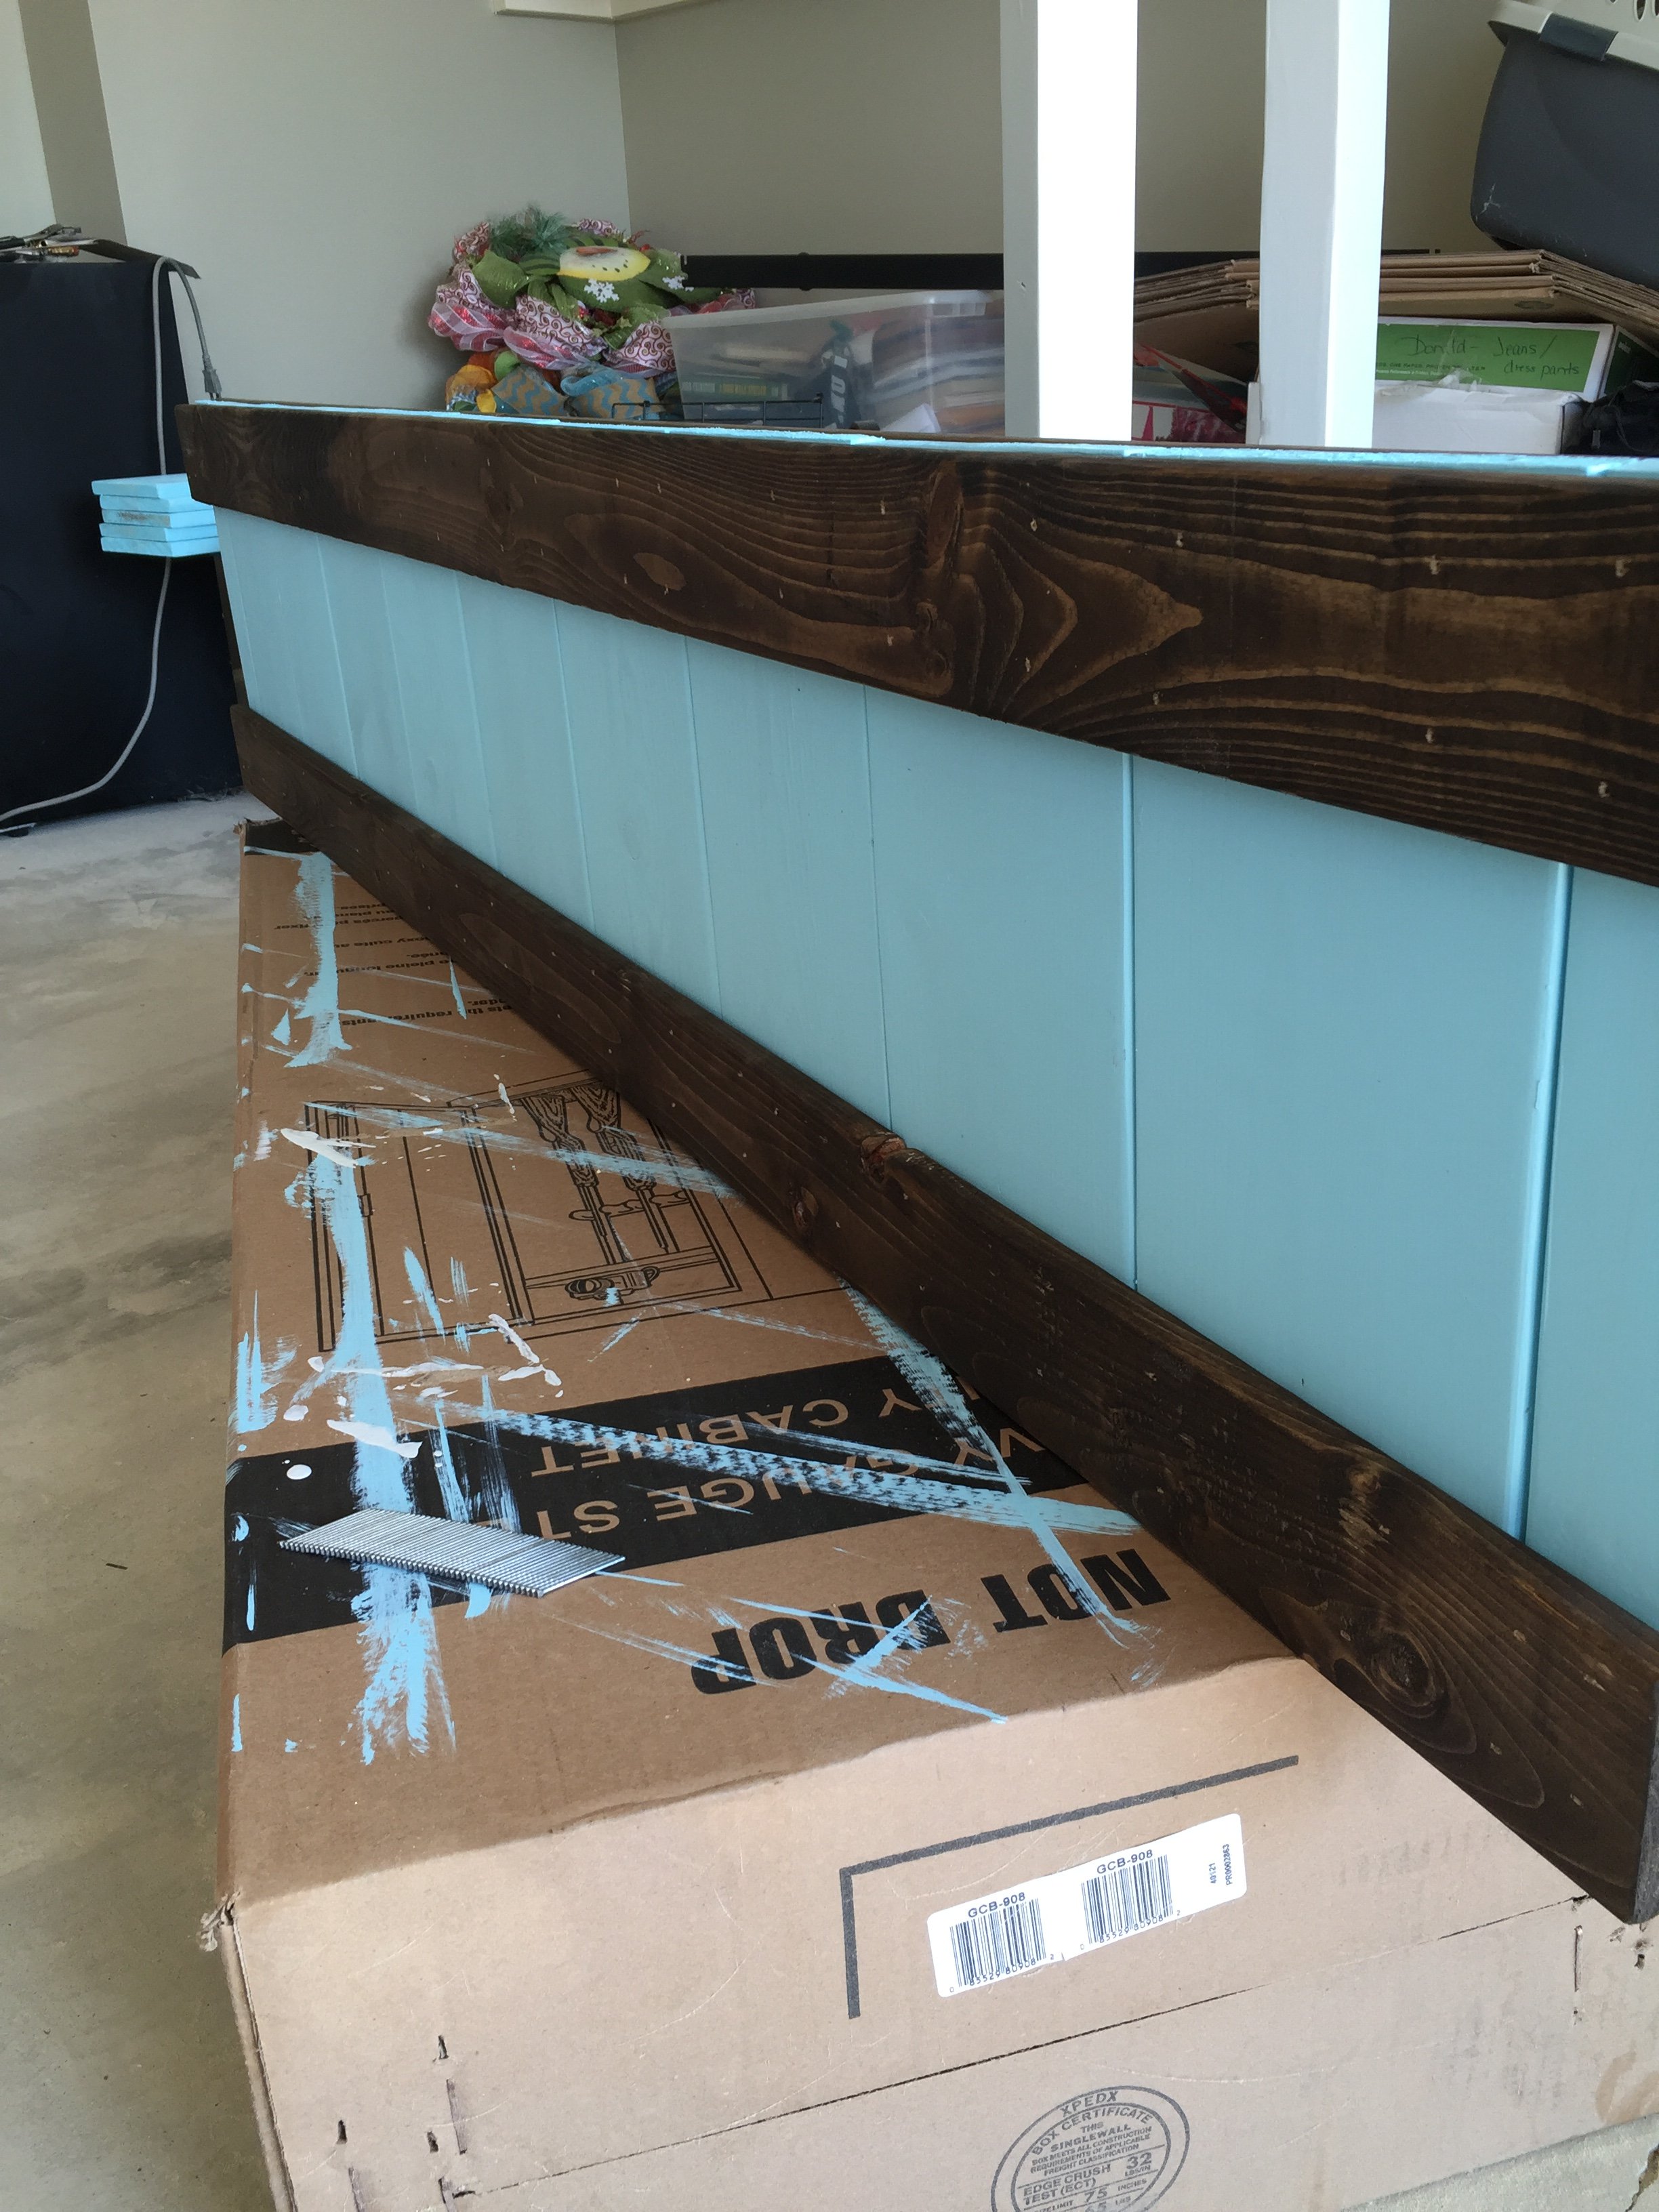
I decided to build the Farmhouse King Bed. I liked the look of the frame and am happy with the outcome. This was my very first piece of furniture I've ever built. Already started on my Farmhouse Bedside Tables!!!
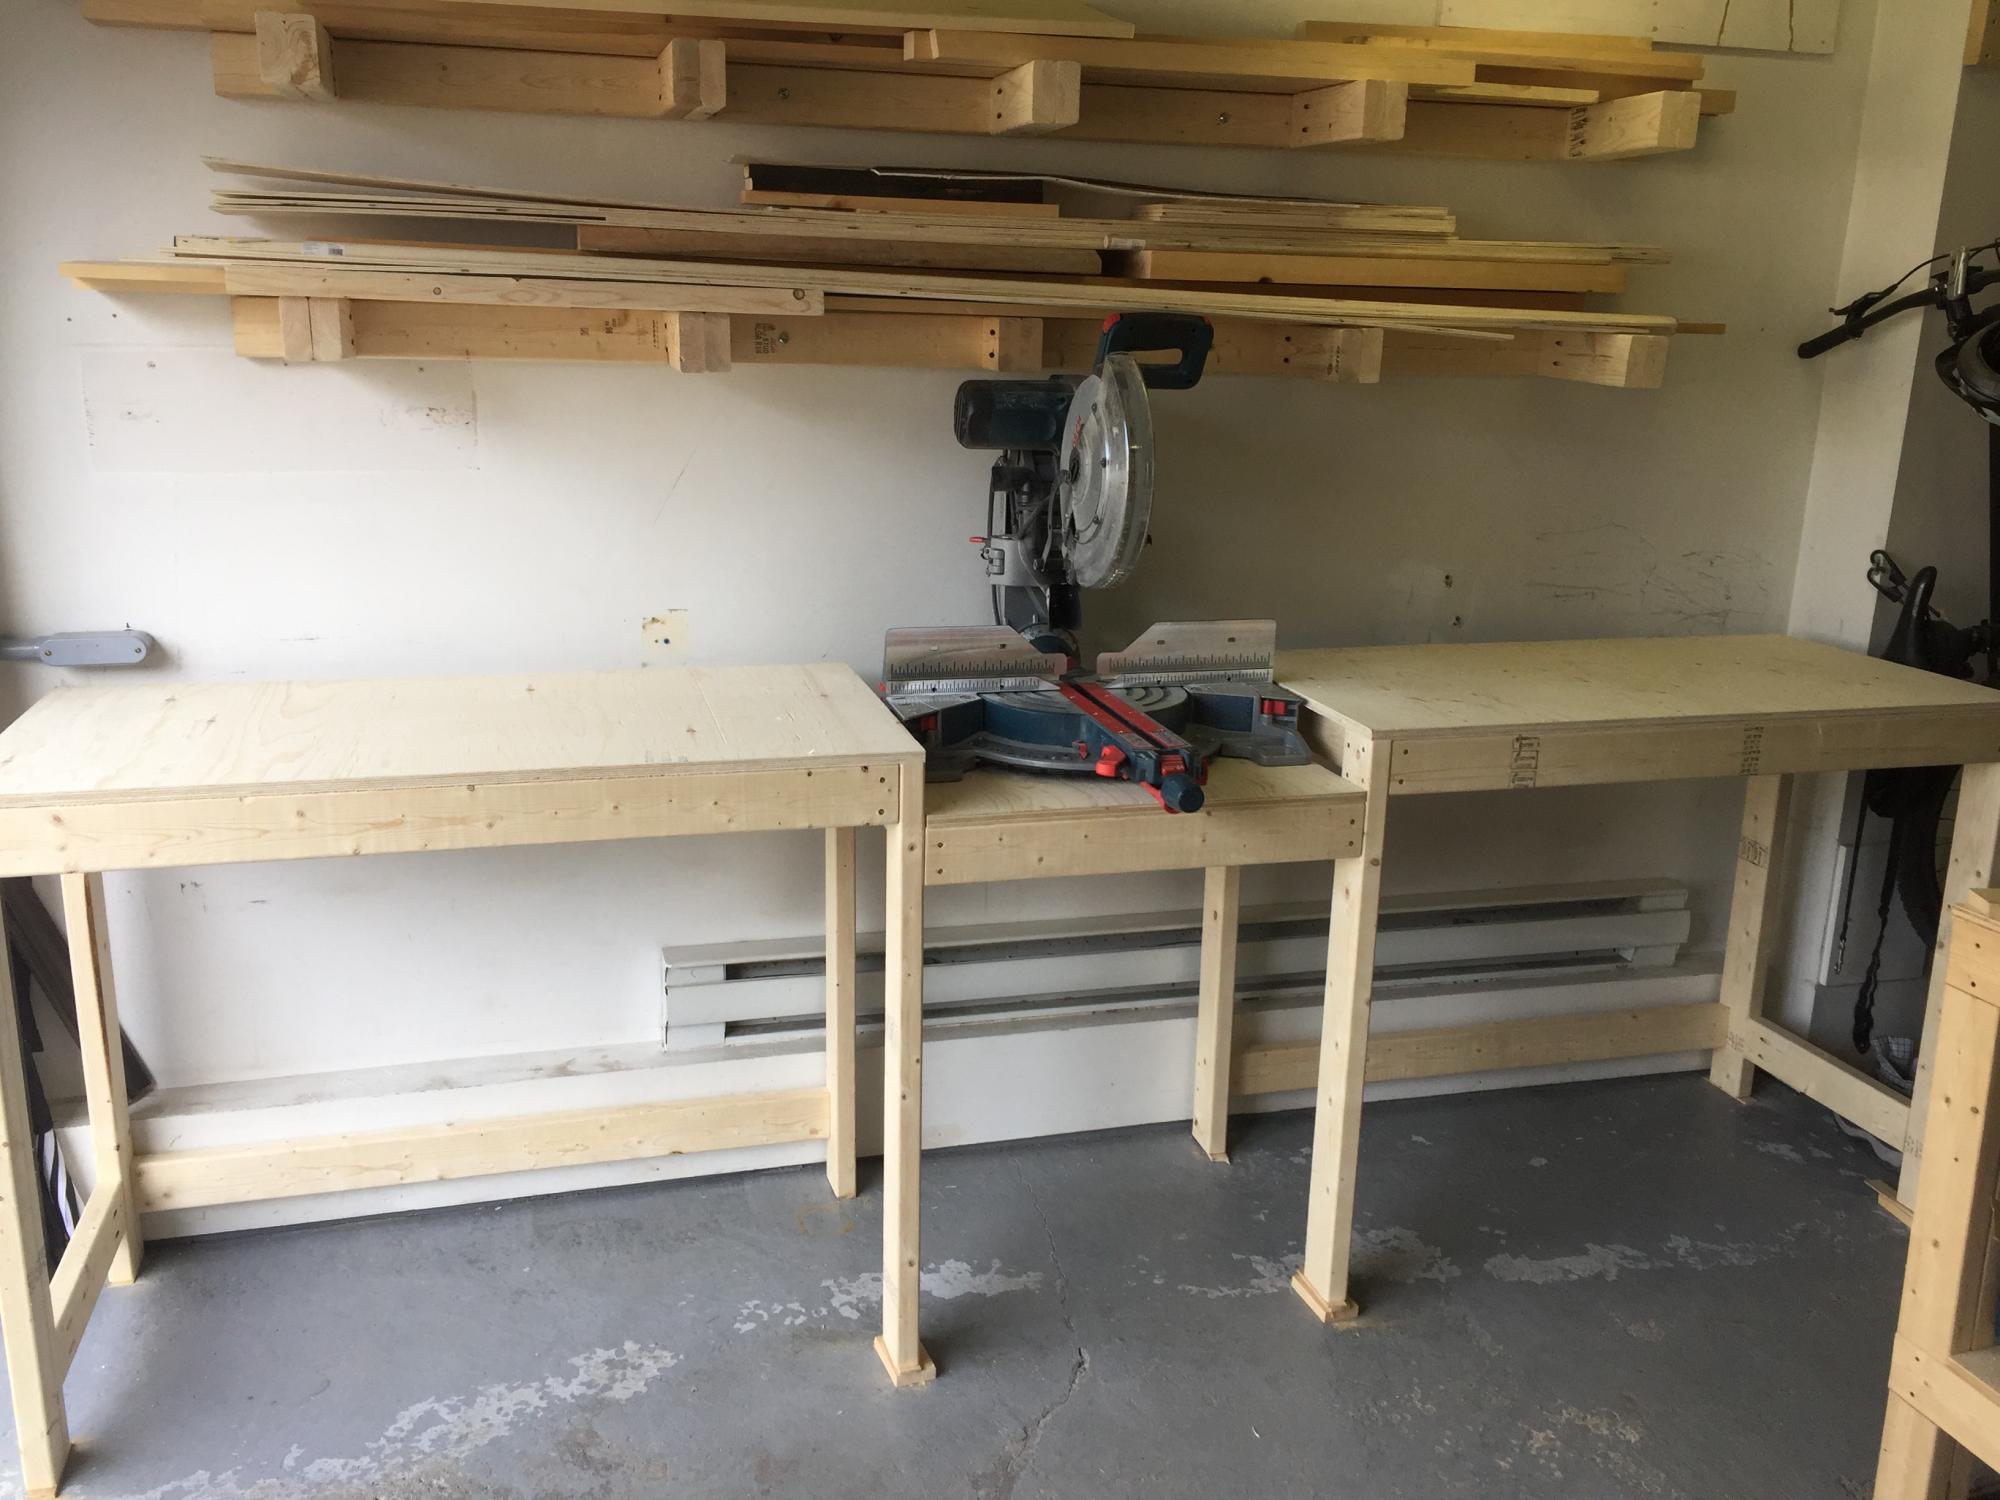
We built this workbench adapting Ana's plans. We did not build the carts yet.
It is very practical! We just love it!
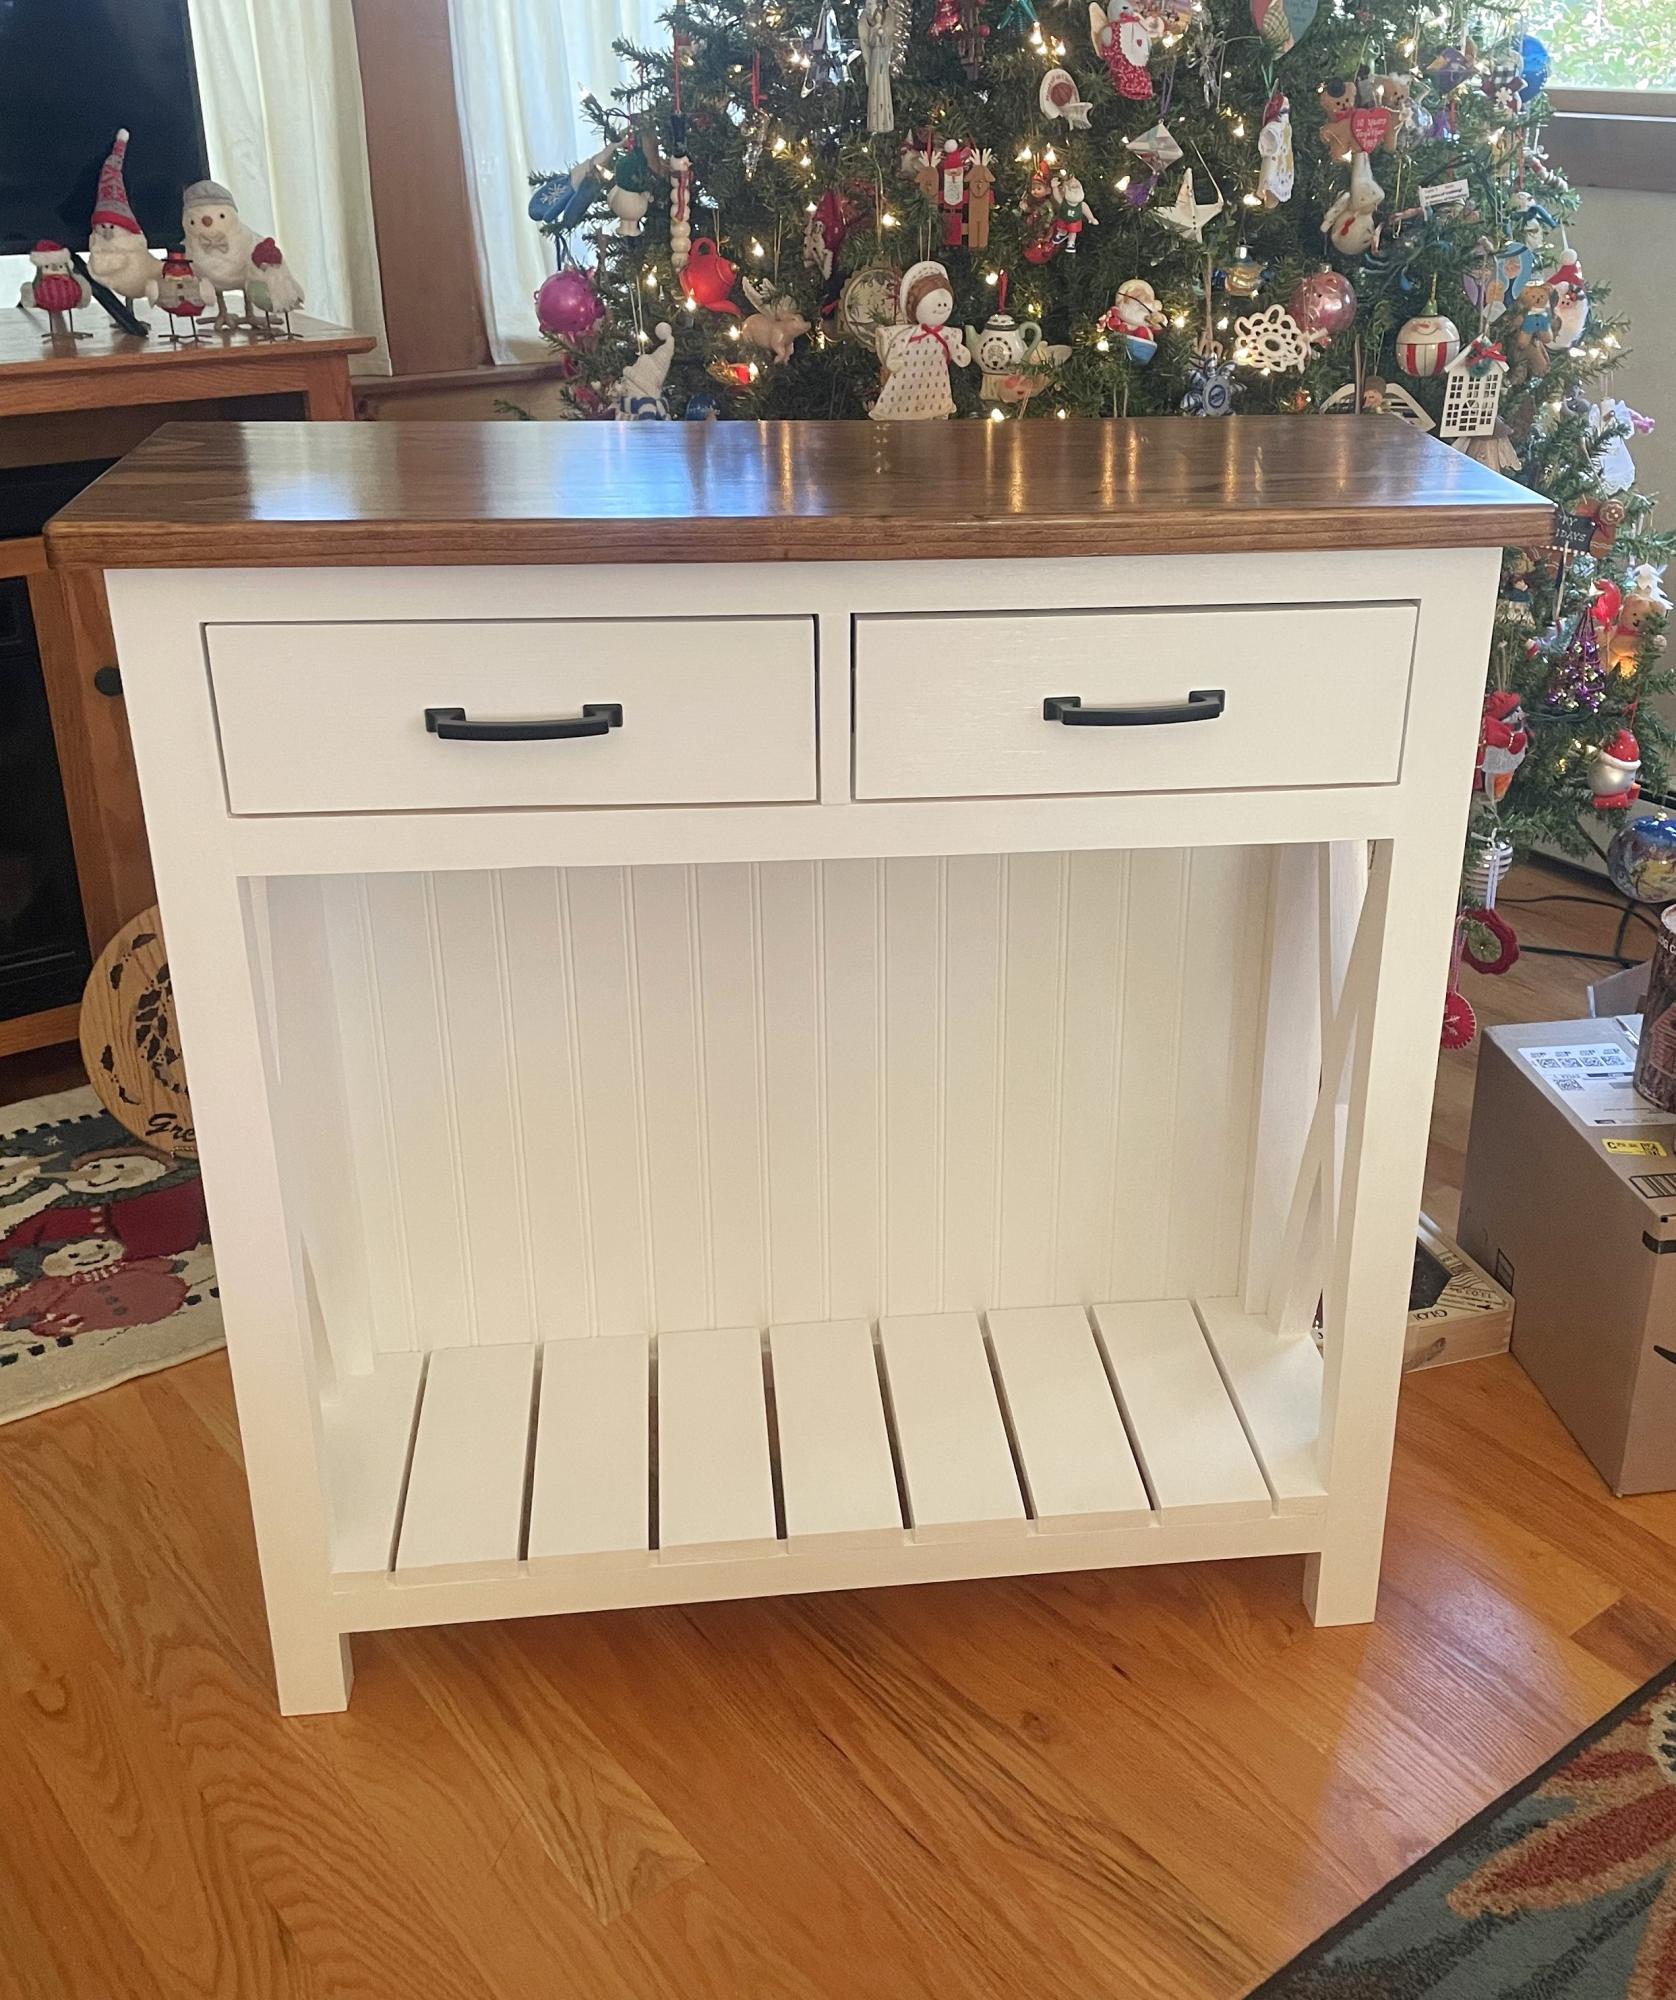
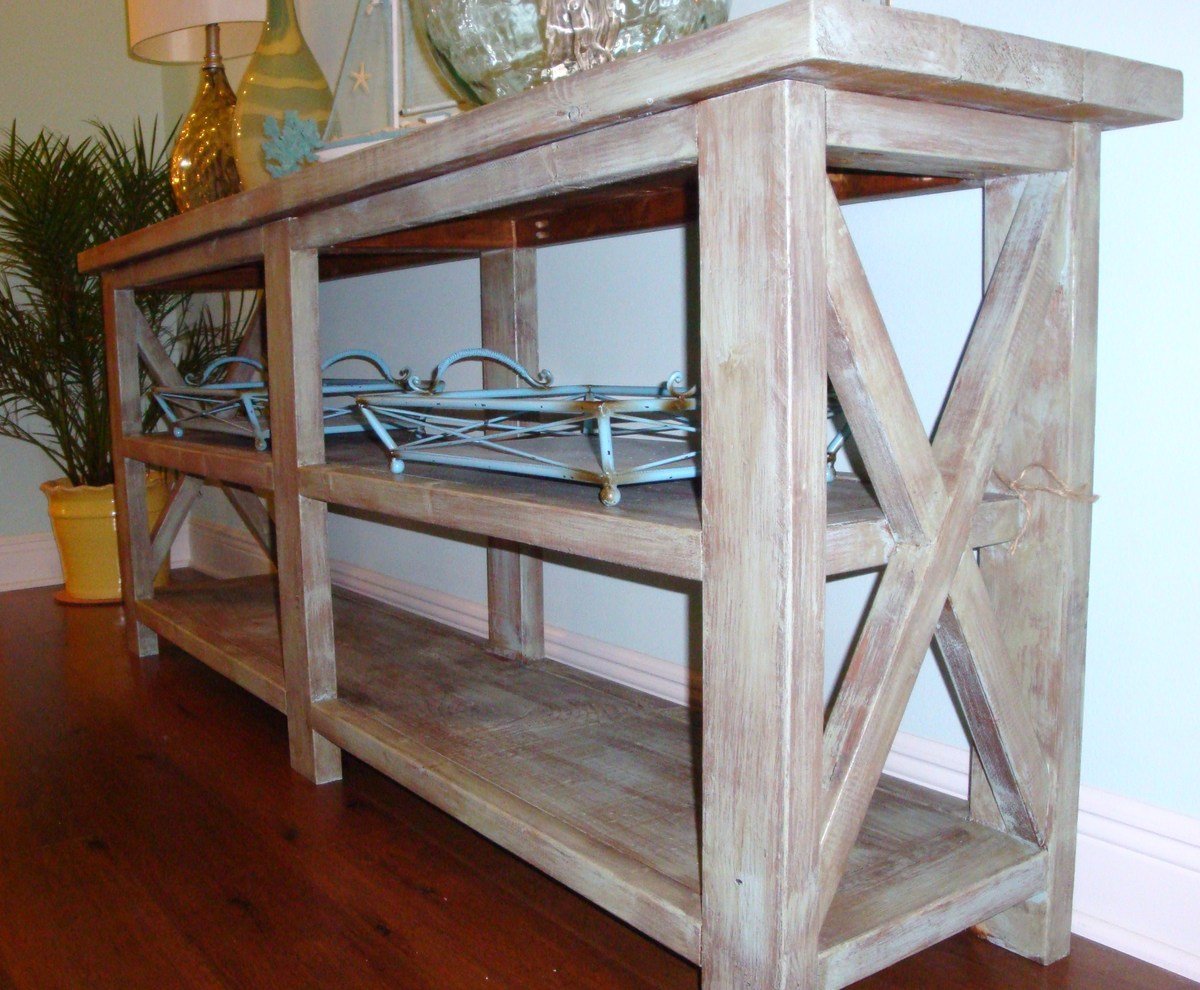
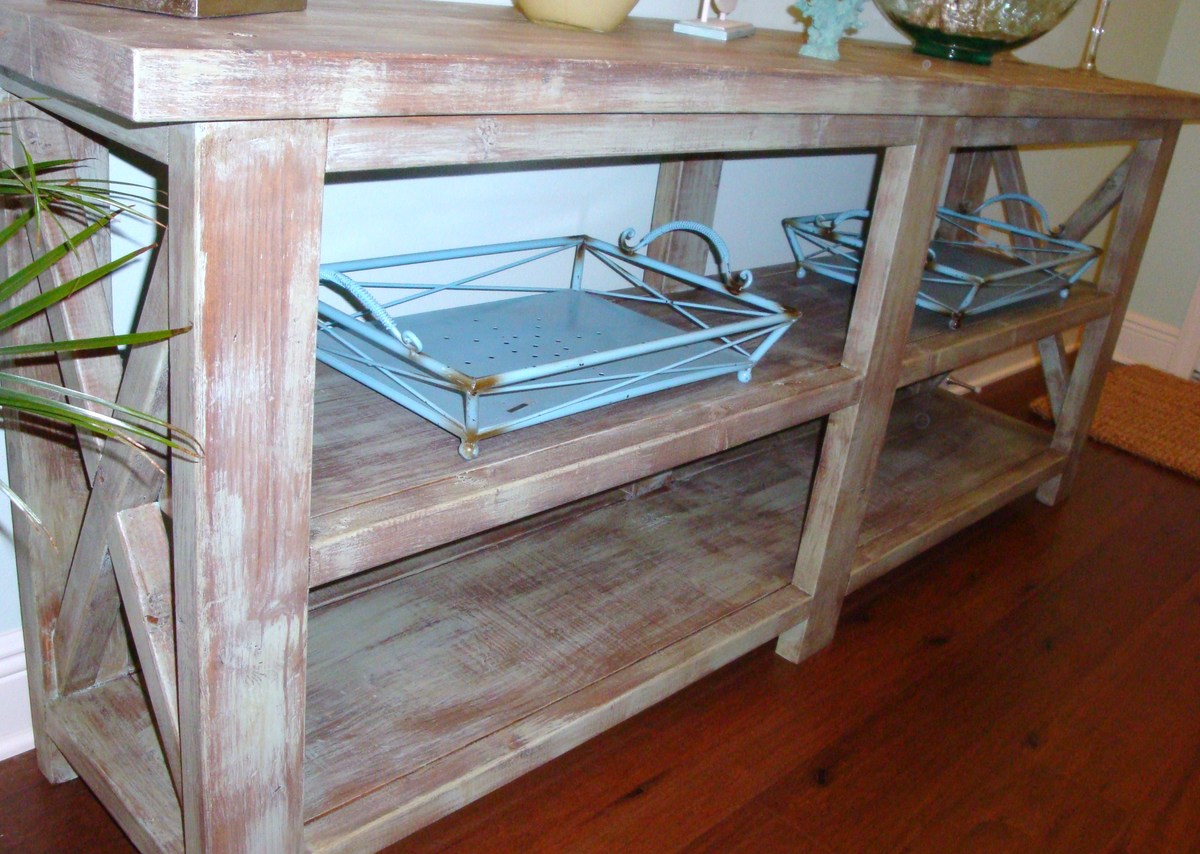
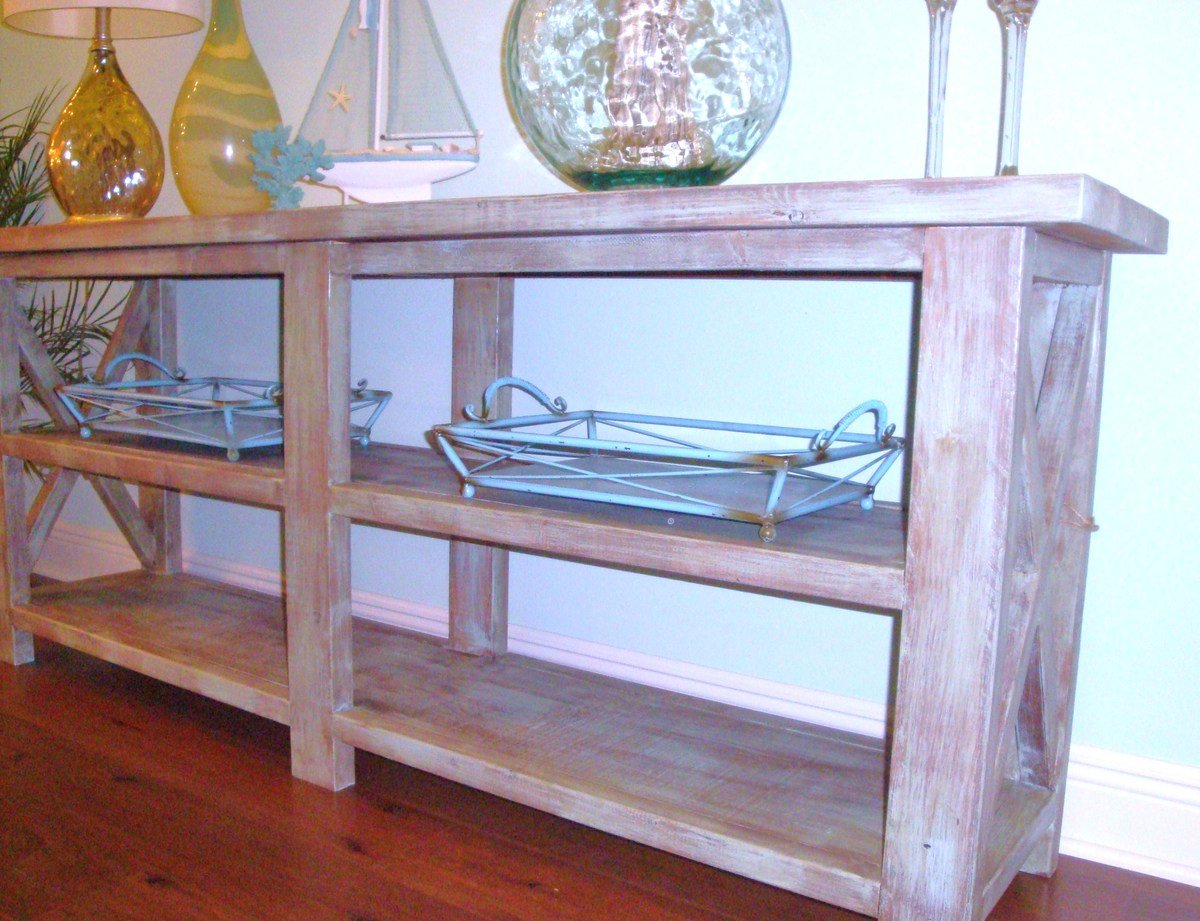
I ask my kids and spouses if they would like me to build something special for Christmas each year . Last year I surprised my daughter with a beautiful coffee table. This year she said Dad can you make us a TV stand that is a similar look to the coffee table. She provided me dimensions and had this piece in time for Christmas. Love your website Ana.
Thad

This is my first time ever building anything. I am so excited with the outcome. This site has so much to offer and I look forward to adding many more brags :)
Fri, 05/24/2013 - 08:43
I know I'm late, but I was wondering if you had more detail on how you finished the wood? I'd love to recreate this!