Community Brag Posts

Triple bunk bed

Submitted by Anonymous (not verified) on Sun, 09/18/2016 - 09:01

Thank you for sharing the plans for this. I really liked how out breaks down into 8 pieces to move. I felt the plans were lacking a bit of detail, I ended up downloading the sketch up app for $10. That app helped a ton! Due to lack of detail and not thinking ahead I ended up putting a couple bolt holes in bad spots and had to wood fill and move them. I also didn't understand what mirror image of left and right side were. Lol. I laid down the left side and carefully assembled, then I made the right side to look exactly like it. Lifted the left side, looks beautiful, lifted the right side and looks like a million screws. Lol. I also had to add additional wood to make it work since I essentially built the side inside out. I think I put the slats in a little closer then the plans suggested, I ended up cutting a few more if you notice the gap in bottom bunk slats. I also purchased "backpack strap" from ace hardware and laid it across the slats. I screwed the end slats and stapled the middle ones to the strap. All in all, a great project and it will last for years. Thanks for sharing. Built from http://www.ana-white.com/2013/06/plans/triple-bunk-staggered-beds

Built from Plan(s)
Estimated Cost
$275 for wood and bolts.
Estimated Time Investment
Week Long Project (20 Hours or More)
Finish Used
I built this for a friend who wanted it delivered with unfinished wood, I would have used either, varnish or high goods paint for the kids bed.
Recommended Skill Level
Intermediate

A-Frame Hen House

Submitted by Anonymous (not verified) on Mon, 04/22/2024 - 10:22

Great easy project to get the bigger chicks out of the garage to integrate with the older hens. Made some modifications because we have a lot of critters trying to kill the chickens/chicks.

Built from Plan(s)

Red Fancy Hall Tree

Submitted by keason5 on Tue, 08/28/2012 - 09:14

This was my first wood working project in a very long time. I was a little nervous about doing it because it would be on display in the main entry way of our house and I didnt want to make any mistakes. It took a little longer than I had hoped, but I think going slower helped make it perfect.

Built from Plan(s)
Estimated Cost
$200
Estimated Time Investment
Weekend Project (10-20 Hours)
Finish Used
painted red then roughed up the edges with sandpaper for a vintage look. then applied a brown glaze to antique it.
Recommended Skill Level
Beginner

Comments

Outdoor chaise lounge

Submitted by ogie on Mon, 06/23/2014 - 09:20

I wanted a set of pool deck furniture and your plans were exactly what I was looking for! I made two chaise lounges and two chairs. I bought the cushions from Big Lots at a great price. The longest part of the building process was sanding each board. I modified the plans by adding wheels, using a 1 × 2 instead of a dowel for the reclining bar, and changing the legs slightly. It was so helpful to have a buying and cutting list!

Built from Plan(s)
Estimated Cost
$110 for one lounge
Estimated Time Investment
Weekend Project (10-20 Hours)
Finish Used
I left the cedar unfinished for now as cedar weathers well. I may use a transparent stain to maintain the cedar color so it will not turn gray.
Recommended Skill Level
Intermediate

CalKing Farmhouse Bed with Storage with Upcycled Solid Oak

Submitted by fitgirl on Thu, 09/22/2016 - 13:49

So why did I decide to build my own bed?

1. Cal King Frames are hard to come by in Canada and if purchased from a store, they cost an arm and a leg.  Also I wanted a new mattress made of solid latex - very spendy -  so our budget was already maxed out from that.

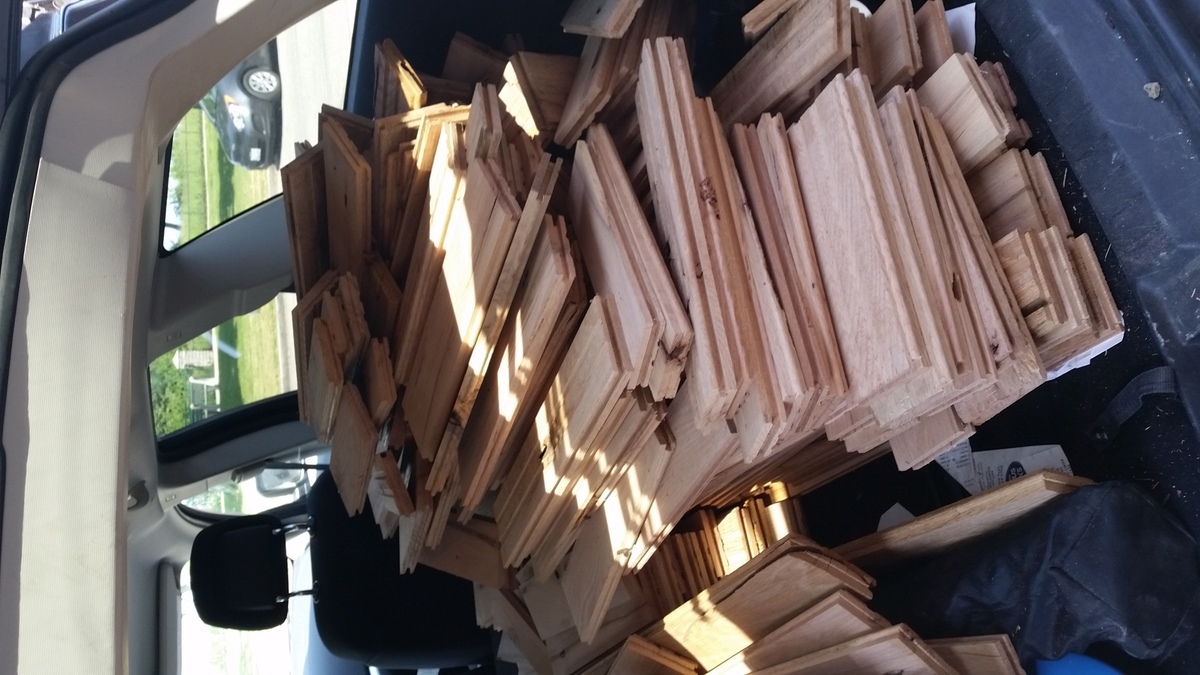
2. You come across a Kijiji (canada's craiglist) listing for 200sq ft of 3/4" solid oak flooring

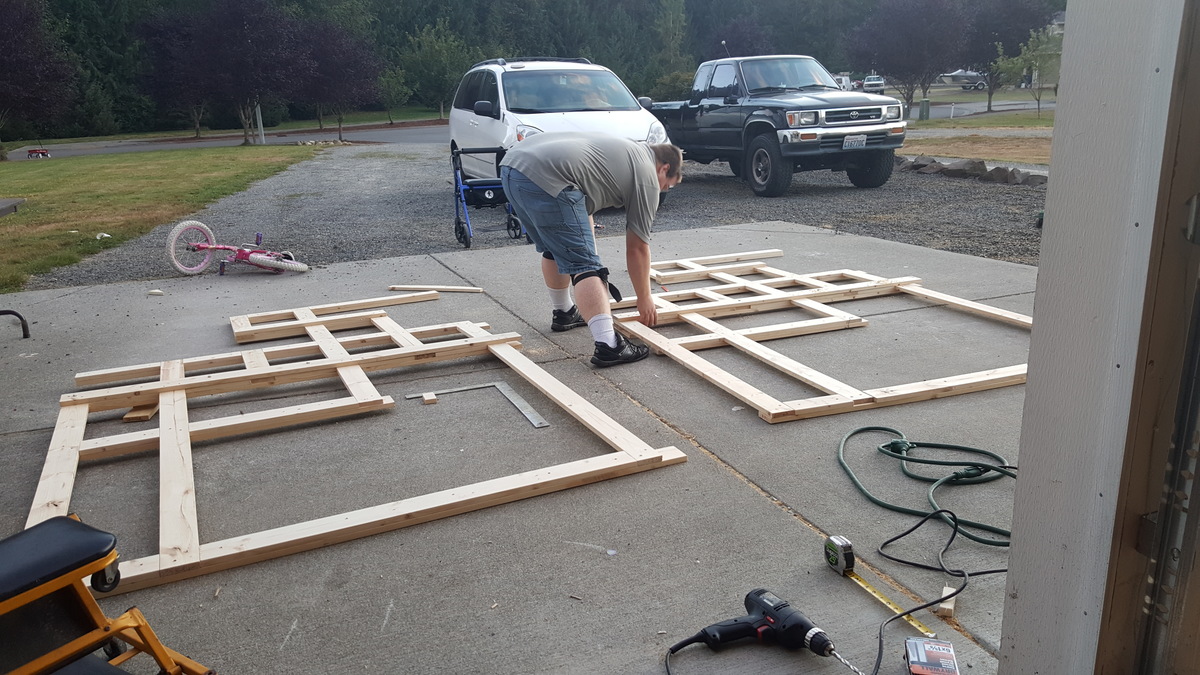
3. You know Ana's plans will help tremondously and it gives you the boost to finally decide - yes I can build my own furniture.


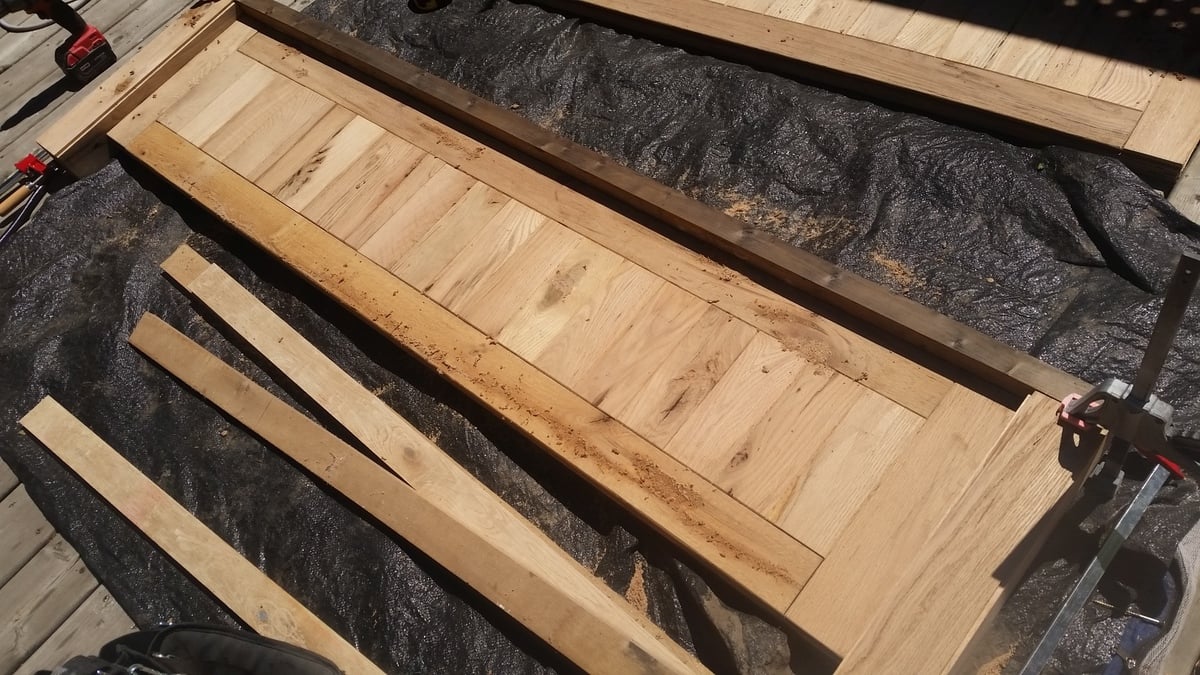
So the upcycling made this all doable!  Some random Kijijier thought to pass along the left overs from a flooring install (the other option was burning it he said)  I said thank you very much and took all that wood home.  Now he had bought raw rustic grade oak.  Only $1.89 a sq/ft to buy FYI) 

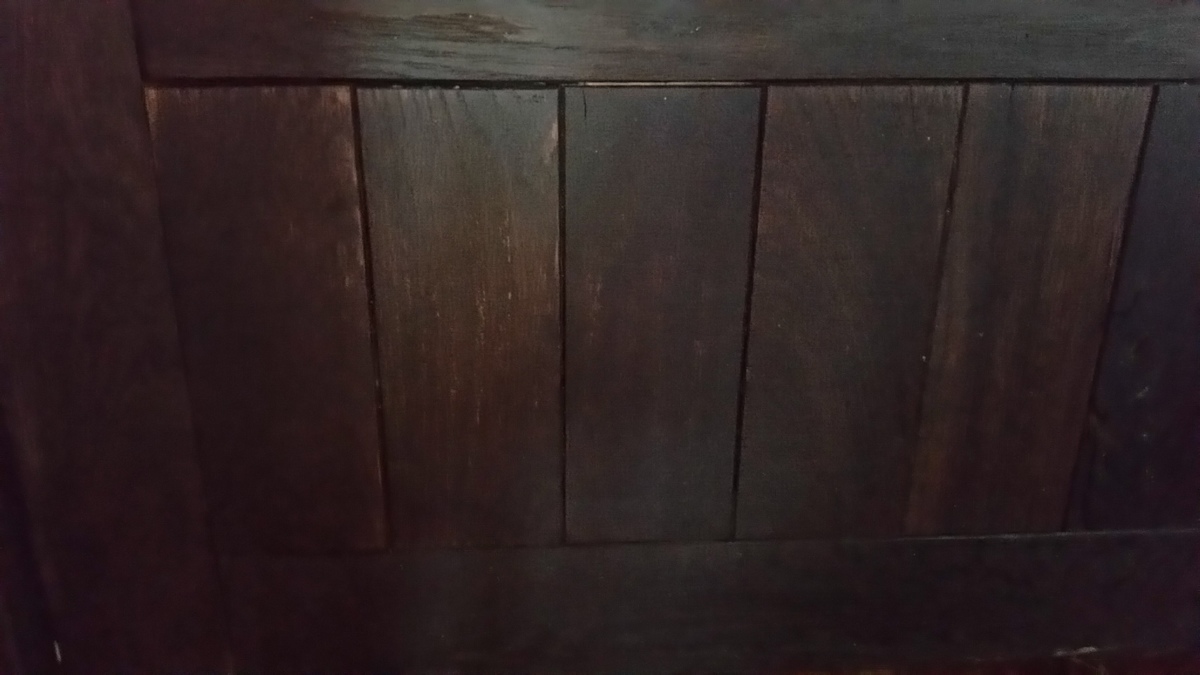
So it was not perfect, with many pits, wormholes, cracking and complete holes. But the raw oak was great for a number of things - the distressing was real - no extra effort required, also the raw oak was easily stained with my homemade iron acetate stain (steel wool and vinegar) and I was able to bevel the edges without ruining an existing finish.

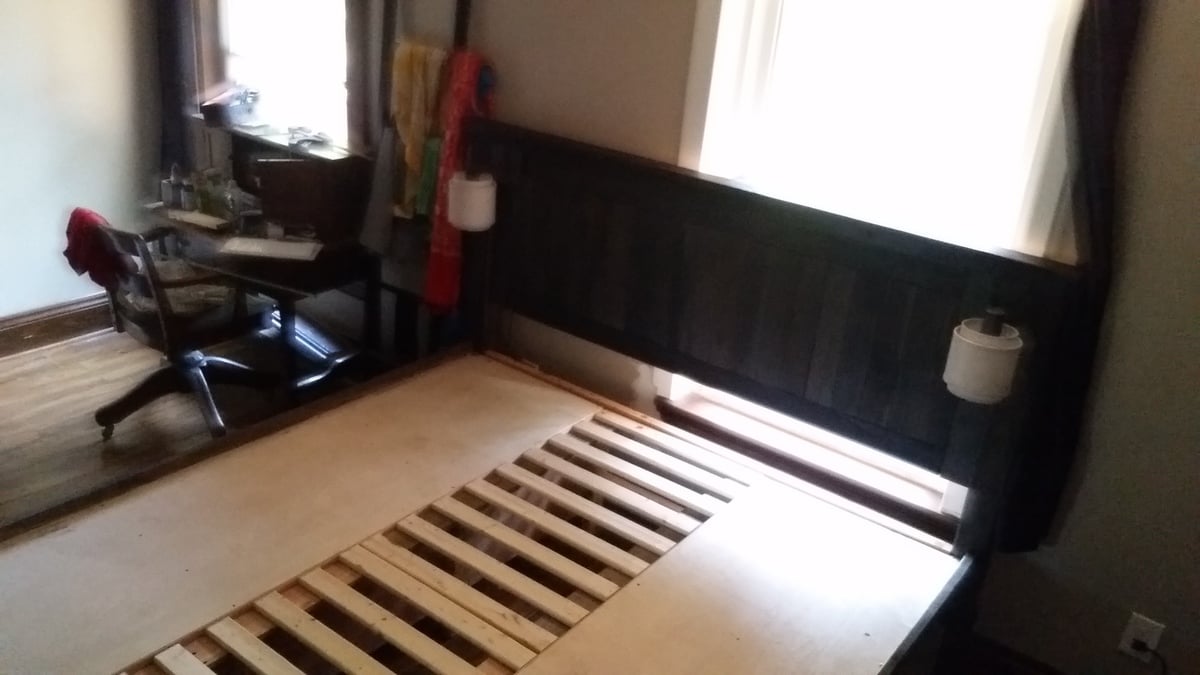
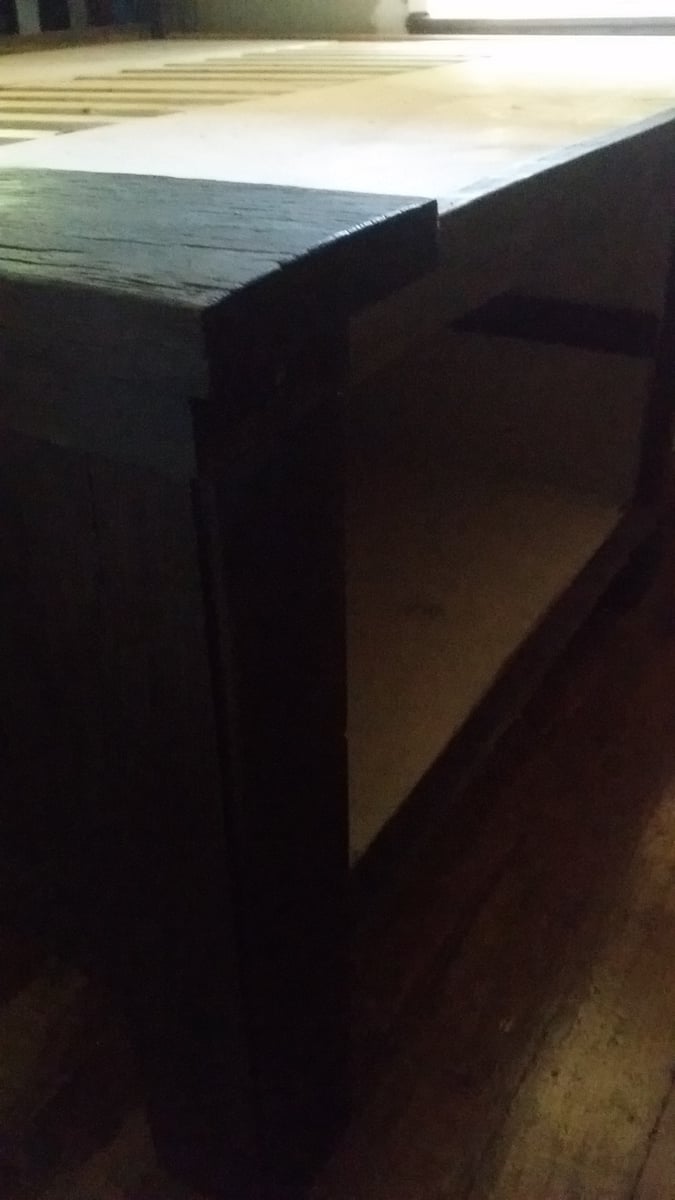
Thankfully I only needed a few long boards for the framing and was able to use the better short boards for building out the foot and headboards.  I improvised the posts on the end with a clever mitered 4 board combination.  Cutting just the tongue and the inside edge of the floorboard created a inset detail on the post that is very forgiving to my crappy cuts and ended up doing the trick.  I also saved my sawdust from cutting to mix with glue and fill the major holes and pits in the wood.  This took the stain very nicely and didn't add any extra cost to the project.  Anyways if anyone wants more suggestions on making use of cut off material just message or comment below.

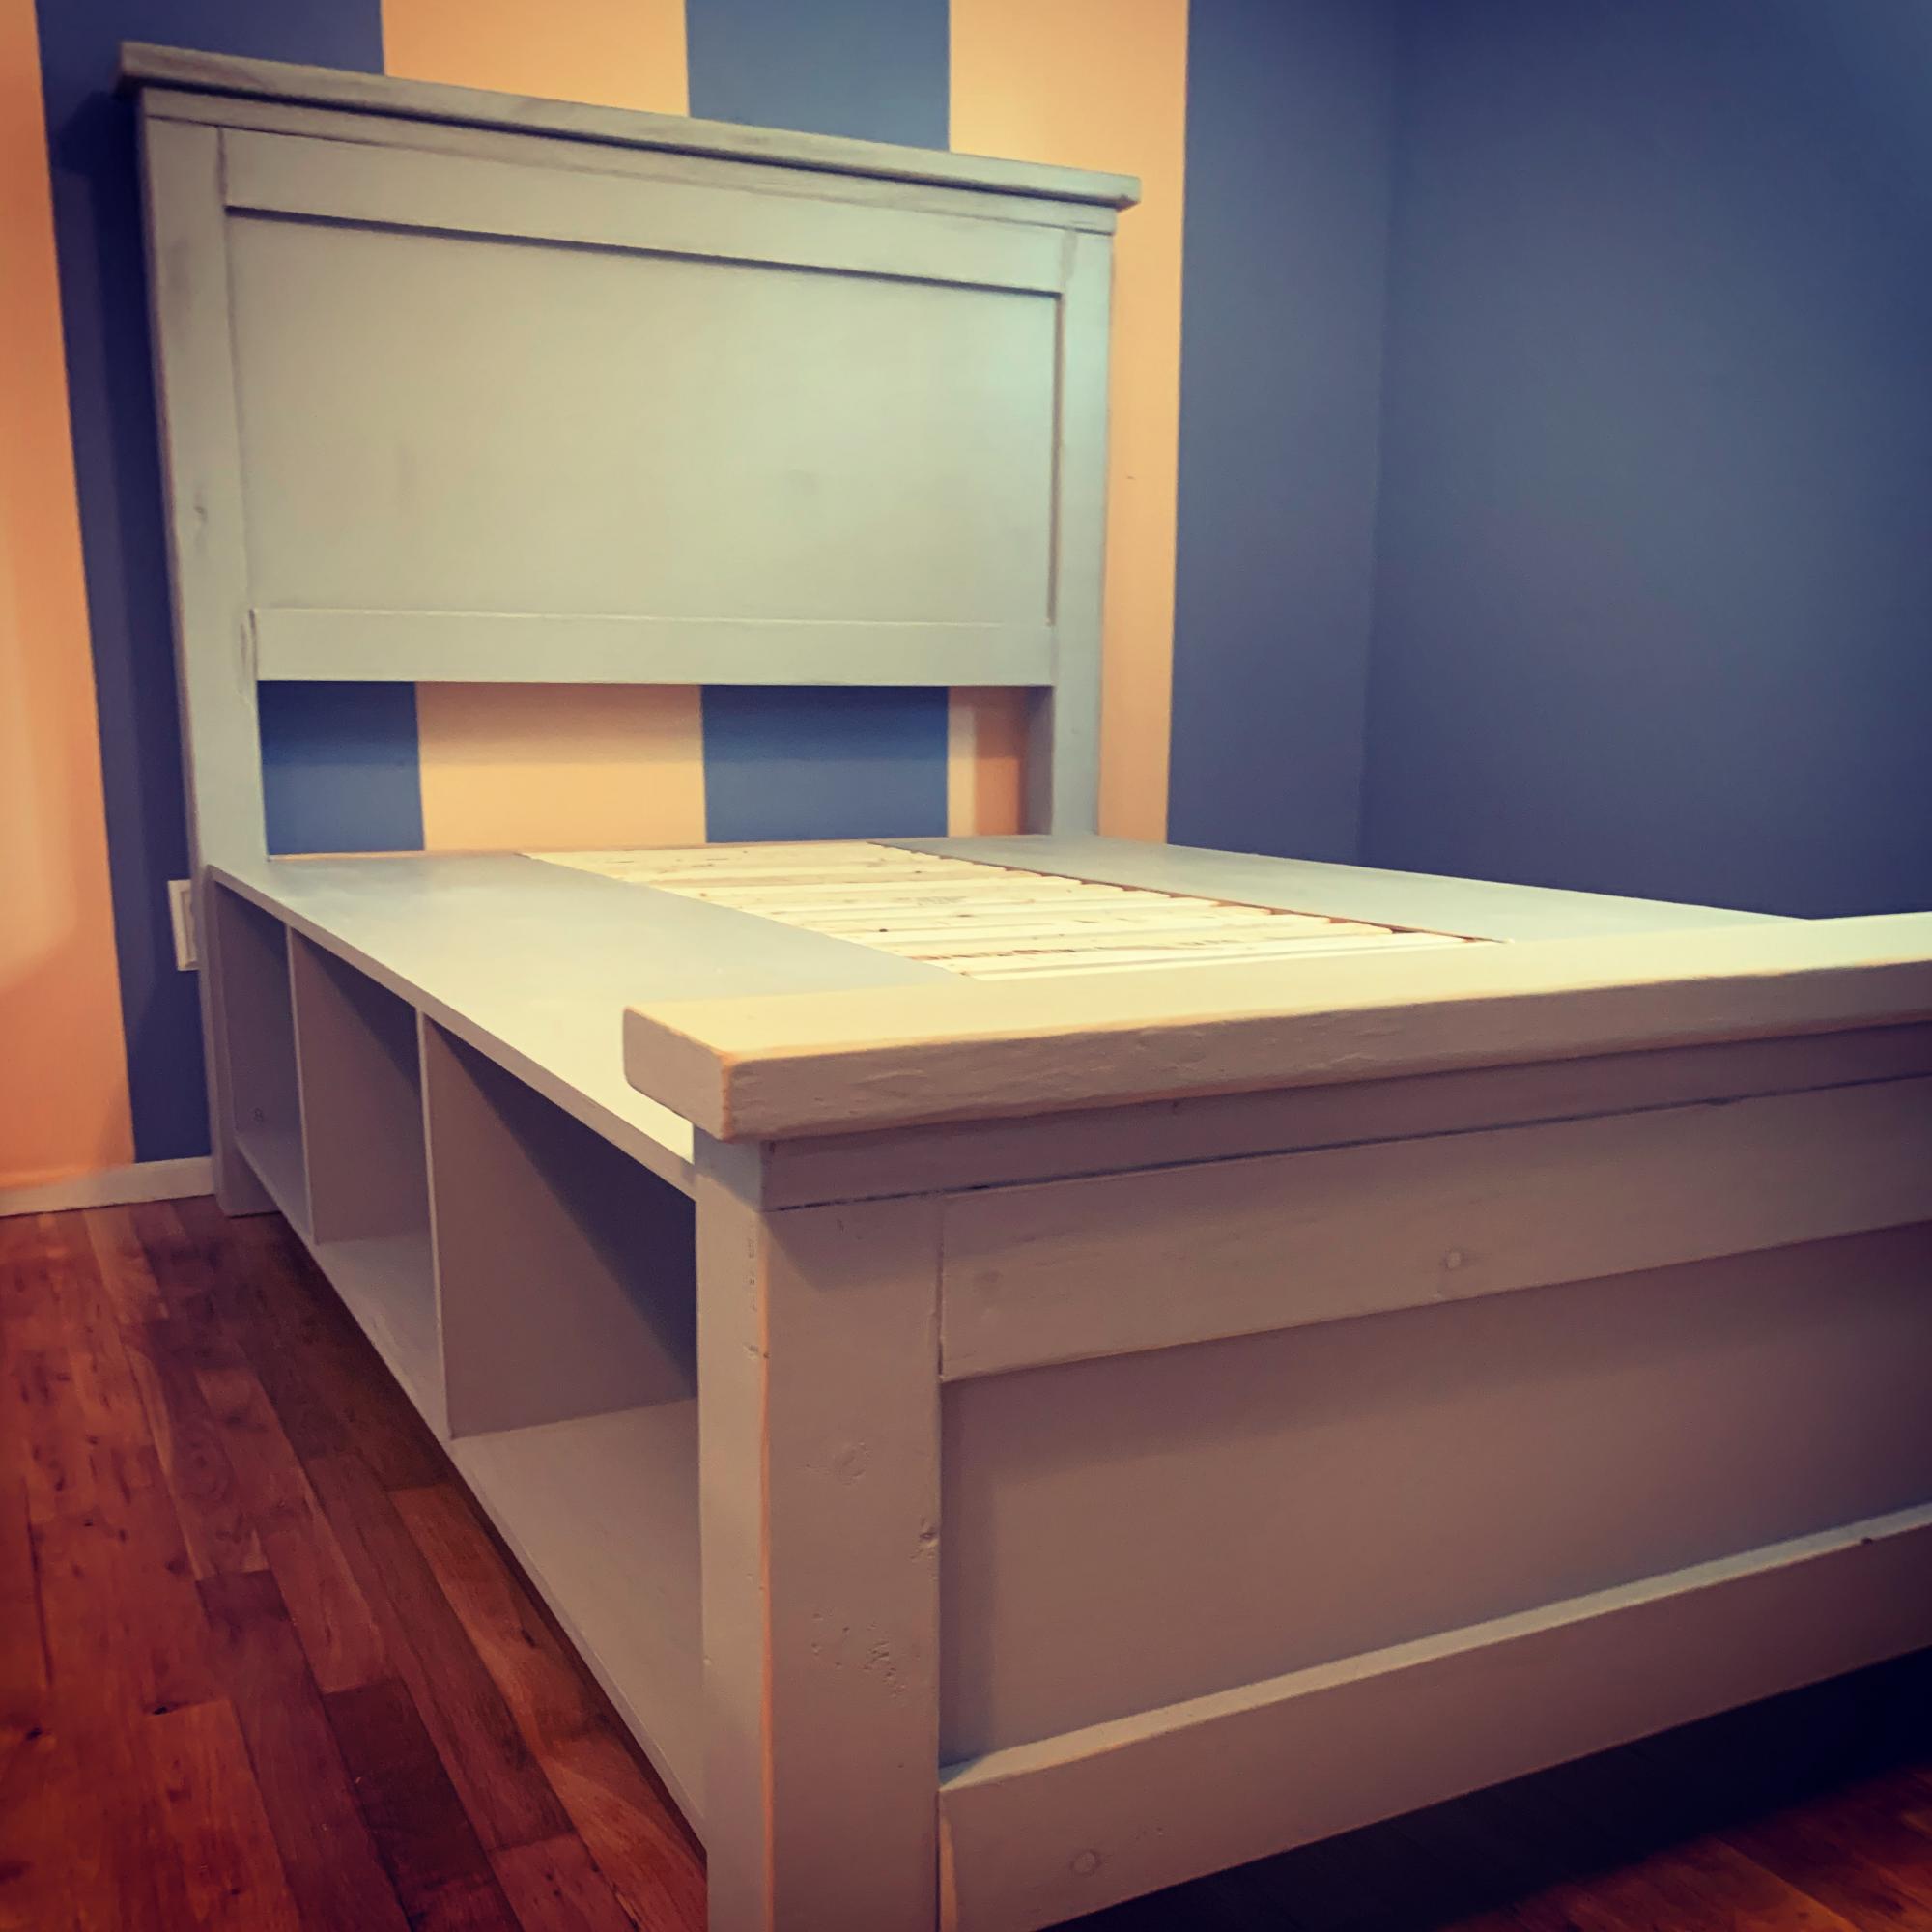
By the way the plan is awesome and I much appreciated it during the process.  I did complicate things by making the drawers 24" deep vs 16" and having to upcycle a product rather than just buying material.  

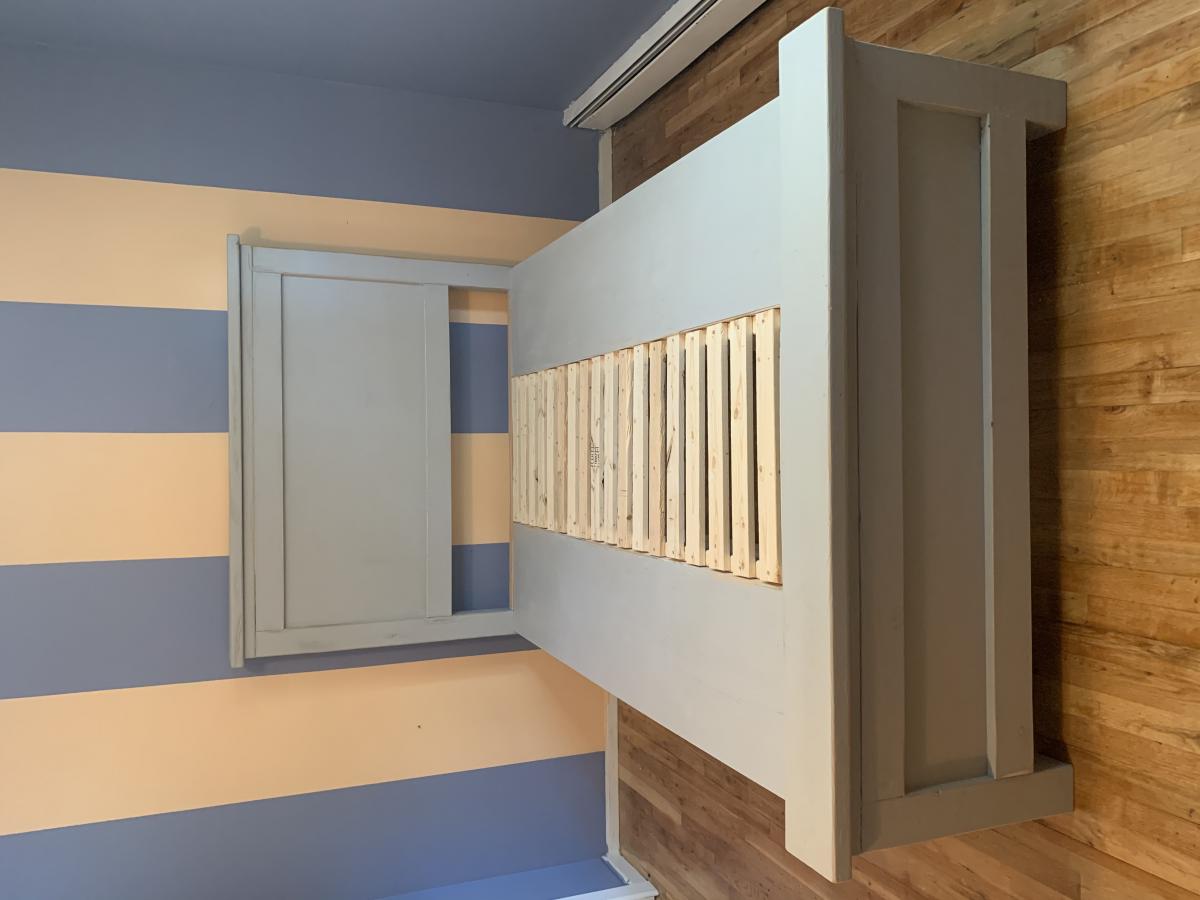
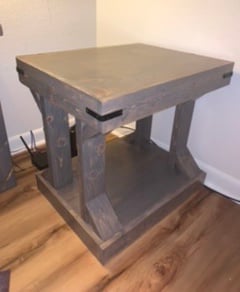
To make use of the depth with a cal-king I decided to go with 24" deep drawers - fyi this means more material, more dollars,and more weight!  Huge amounts of weight, once since I decided to go with 3/4" Birch ply for the build.  I lift for fun and fitness so I managed, but beforewarned - the plywood frames are awkward and heavy.

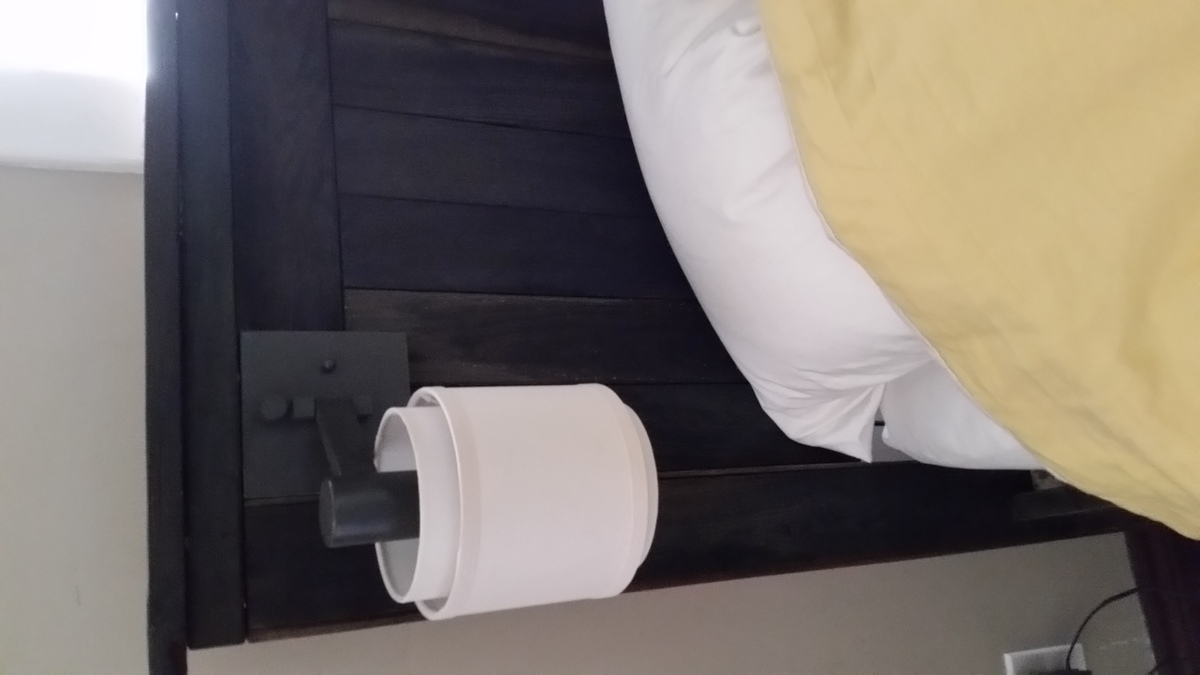
I ended up needing 4 sheets of 3/4" Birch ply b/c of the upgraded sizing.  Even at 50% off (lucky me) this still was $160 in plywood + $50 for Luann for drawer bottoms and closing the back of the frame behind the drawers.  I also used full extension drawer slides so that I can actually access all that storage so set me back another $180.   I got the lights from Lowes for $60 for the pair.


Total cost $500 + free oak floor cast off + time = a priceless project


Estimated Cost
$500
Estimated Time Investment
Week Long Project (20 Hours or More)
Finish Used
Iron Acetate (homemade Steel wool soaked in Vinegar) Topcoat made with homemade beeswax/coconut oil blend.
Recommended Skill Level
Intermediate

When you follow directions and plans..

Submitted by Anonymous (not verified) on Sat, 07/04/2020 - 05:54

Followed Ana’s plans down to the measurements. Didn’t have a brad nailer, so I attached the 1x4 sides with 3/4in pocket holes and 1 1/4in PH screws. Additionally used trim screws and 1 1/4 finish nails throughout it for places I couldn’t put a PH. Plan on getting four more brackets for the bottom half, like the top. Very proud of myself.
Stained the legs, top, and base before completely assembling them.

Estimated Cost
$35 (without tools and screws)
Estimated Time Investment
Weekend Project (10-20 Hours)
Finish Used
Varathane Briarsmoke. Three coats of Satin finish.
Recommended Skill Level
Beginner

so sweet - step stool

This is something I didn't know I needed until I built it - just wanted a quick, simple project - now it is finished, I use it frequently (It does hold an adult's weight!). I used radiata pine as per plans, but 3 pieces of cypress pine (fence pickets) for the threads. Very clever design & just a sweet piece of furniture. I like my timber au naturel, so finished it clear.

Built from Plan(s)
Estimated Cost
$20
Estimated Time Investment
Afternoon Project (3-6 Hours)
Finish Used
three coats of clear, water based polyurethane
Recommended Skill Level
Beginner

Comments

First attempt at wood work

Submitted by Emict326 on Wed, 06/25/2014 - 05:15

This is my first attempt at wood working. Now I am going to try the rustic look finishing.

Estimated Time Investment
Day Project (6-9 Hours)
Recommended Skill Level
Beginner

Comments

vickitee

Wed, 06/25/2014 - 11:54

WOW, first attempt looks really good. I'm scared of the X. The length and angles need to be just right. Was it hard?

Farmhouse Table

Submitted by Anonymous (not verified) on Sun, 09/25/2016 - 16:16

Made some size modifications. Loved the end product!

Estimated Cost
600.00
Estimated Time Investment
Weekend Project (10-20 Hours)
Finish Used
Dark Walnut
Recommended Skill Level
Beginner

Great plans!

Submitted by Anonymous (not verified) on Mon, 07/06/2020 - 07:34

These plans were great. Easy to put together and they look quite amazing. And they are solid! Bought cushions from IKEA and the wood from Home Depot. Stained and sealed.

Estimated Cost
250
Estimated Time Investment
Day Project (6-9 Hours)
Finish Used
Behr stain and seal
Recommended Skill Level
Beginner

Comments

Cabinet Door Snack Table

We really needed some sort of coffee table for our game room loft, but we didn't want something that big taking up space in the small room. Armed with the plans for Ana's Turned Leg Coffee Table and an old cabinet door we found on the side of the road, we made a snack table instead.

We modified Ana's plans a bit to accommodate the cabinet door. It was very simple, and only took us a few hours to build. You can find all the details on my blog.

Built from Plan(s)
Estimated Time Investment
Day Project (6-9 Hours)
Recommended Skill Level
Beginner

Toybox chest turned window seat

I've tried this before as a gift for a friend's new baby. I then wanted to do one for myself but change the measurements somewhat. This is 45" long and the same width as the original. I reduced the height to account for the 3" foam cushion. Besides that it's pretty much the same as the toy chest plan.

Building and sanding took about 3 days working after work only. Painting took the longest time.

Estimated Cost
$90 including foam and upholstery
Estimated Time Investment
Weekend Project (10-20 Hours)
Finish Used
Primer followed by white paint in semi gloss
Recommended Skill Level
Beginner

Fun

Submitted by Kelbs on Wed, 09/28/2016 - 21:17

This project was so much fun. I had to make adjustments for the size of my systems, but it was well worth it. I will be adding the doors later after our baby is old enough to crawl. Thank you so much for sharing this project!

Estimated Cost
125
Estimated Time Investment
Weekend Project (10-20 Hours)
Finish Used
Paint and sealer
Recommended Skill Level
Intermediate

Outdoor sectional and coffee table

Submitted by Rynhffr on Mon, 07/06/2020 - 21:06

Loved these plans! Was my first project I tackled trying my hand with a new hobby of wood working to stave off quarantine craziness :-) finished project looked awesome and got me started working on other plans on the site.

**note**
Side table was just sanded and refinished, wasn't built just tried to match.

Estimated Cost
400
Estimated Time Investment
Weekend Project (10-20 Hours)
Recommended Skill Level
Beginner

My Farmhouse Table

Here is my Farmhouse Table project! I made this table to fit my growing family.

Estimated Time Investment
Weekend Project (10-20 Hours)
Finish Used
Red oak on top
Recommended Skill Level
Intermediate

Dining Table 4x4 Truss Bench

Submitted by kyalamode on Mon, 06/30/2014 - 18:30

Using the 4x4 Truss Bench plan (http://ana-white.com/2013/10/plans/4x4-truss-benches), we built this bench using entirely reclaimed lumber. (We had removed an old patio and part of a fence.) We already had all of the lumber, screws, etc. so the only cost to us for this project was the cost of the stain.

We modified the plan slightly, using 2x4s on the ends.

My husband is obsessed with decking screws. Thus the entire bench is held together with 2 1/2 inch decking screws. (Unfortunately, we purchased our Kreg Jig a day following the completion of this project.)

Because the lumber was very old and weathered, there is a lot of character to the wood. There were some incredibly soft spots which made sanding a challenge, and some of the boards were somewhat warped. However, we still really like the way it turned out.

I sanded (and sanded and sanded) using 60 grit, then 80... then 120... then 220. I filled the screw holes with wood filler (and sanded again). I then conditioned the wood with Minwax pre-stain wood conditioner. I used Minwax Early American oil based stain on the entire project. I then went over the top only with Minwax Weathered Oak. After about 36 hours of drying time, I used 2 coats of Minwax Fast-Drying clear semi-gloss polyurethane.

This bench is a beast! I'm sure it weighs over 75 pounds. It is extremely solid, and quite beautiful in our dining room. The plans were easy to follow, and the whole thing went together fairly quickly. (It would have been completed even more quickly had we had our Kreg Jig at the time. Lesson learned.)

Built from Plan(s)
Estimated Cost
$10
Estimated Time Investment
Day Project (6-9 Hours)
Finish Used
I sanded (and sanded and sanded) using 60 grit, then 80... then 120... then 220. I filled the screw holes with wood filler (and sanded again). I then conditioned the wood with Minwax pre-stain wood conditioner. I used Minwax Early American oil based stain on the entire project. I then went over the top only with Minwax Weathered Oak. After about 36 hours of drying time, I used 2 coats of Minwax Fast-Drying clear semi-gloss polyurethane.
Recommended Skill Level
Beginner

Outdoor Rustic X Console Table With Mosaic

Submitted by Anonymous (not verified) on Tue, 07/07/2020 - 19:58

I took the rustic x console table but wanted it to be a nice piece for our outdoor seating area. I used some ebony stain, purchased mosaic tile from lowes, and finished with Spar Varnish. Around the tile, I used some old hardwood flooring strips as trim. Sanded and stained the trim to match. I'm very happy with how it turned out. And the varnish is UV resistant so it'll stand up to the rain and won't fade in the sun.

Built from Plan(s)
Estimated Cost
$150
Estimated Time Investment
Weekend Project (10-20 Hours)
Finish Used
Rust-oleum high gloss spar varnish. Ebony interior (gasp!) stain. Three coats of varnish. The UV protection should prevent the stain from fading.
Recommended Skill Level
Intermediate