Community Brag Posts
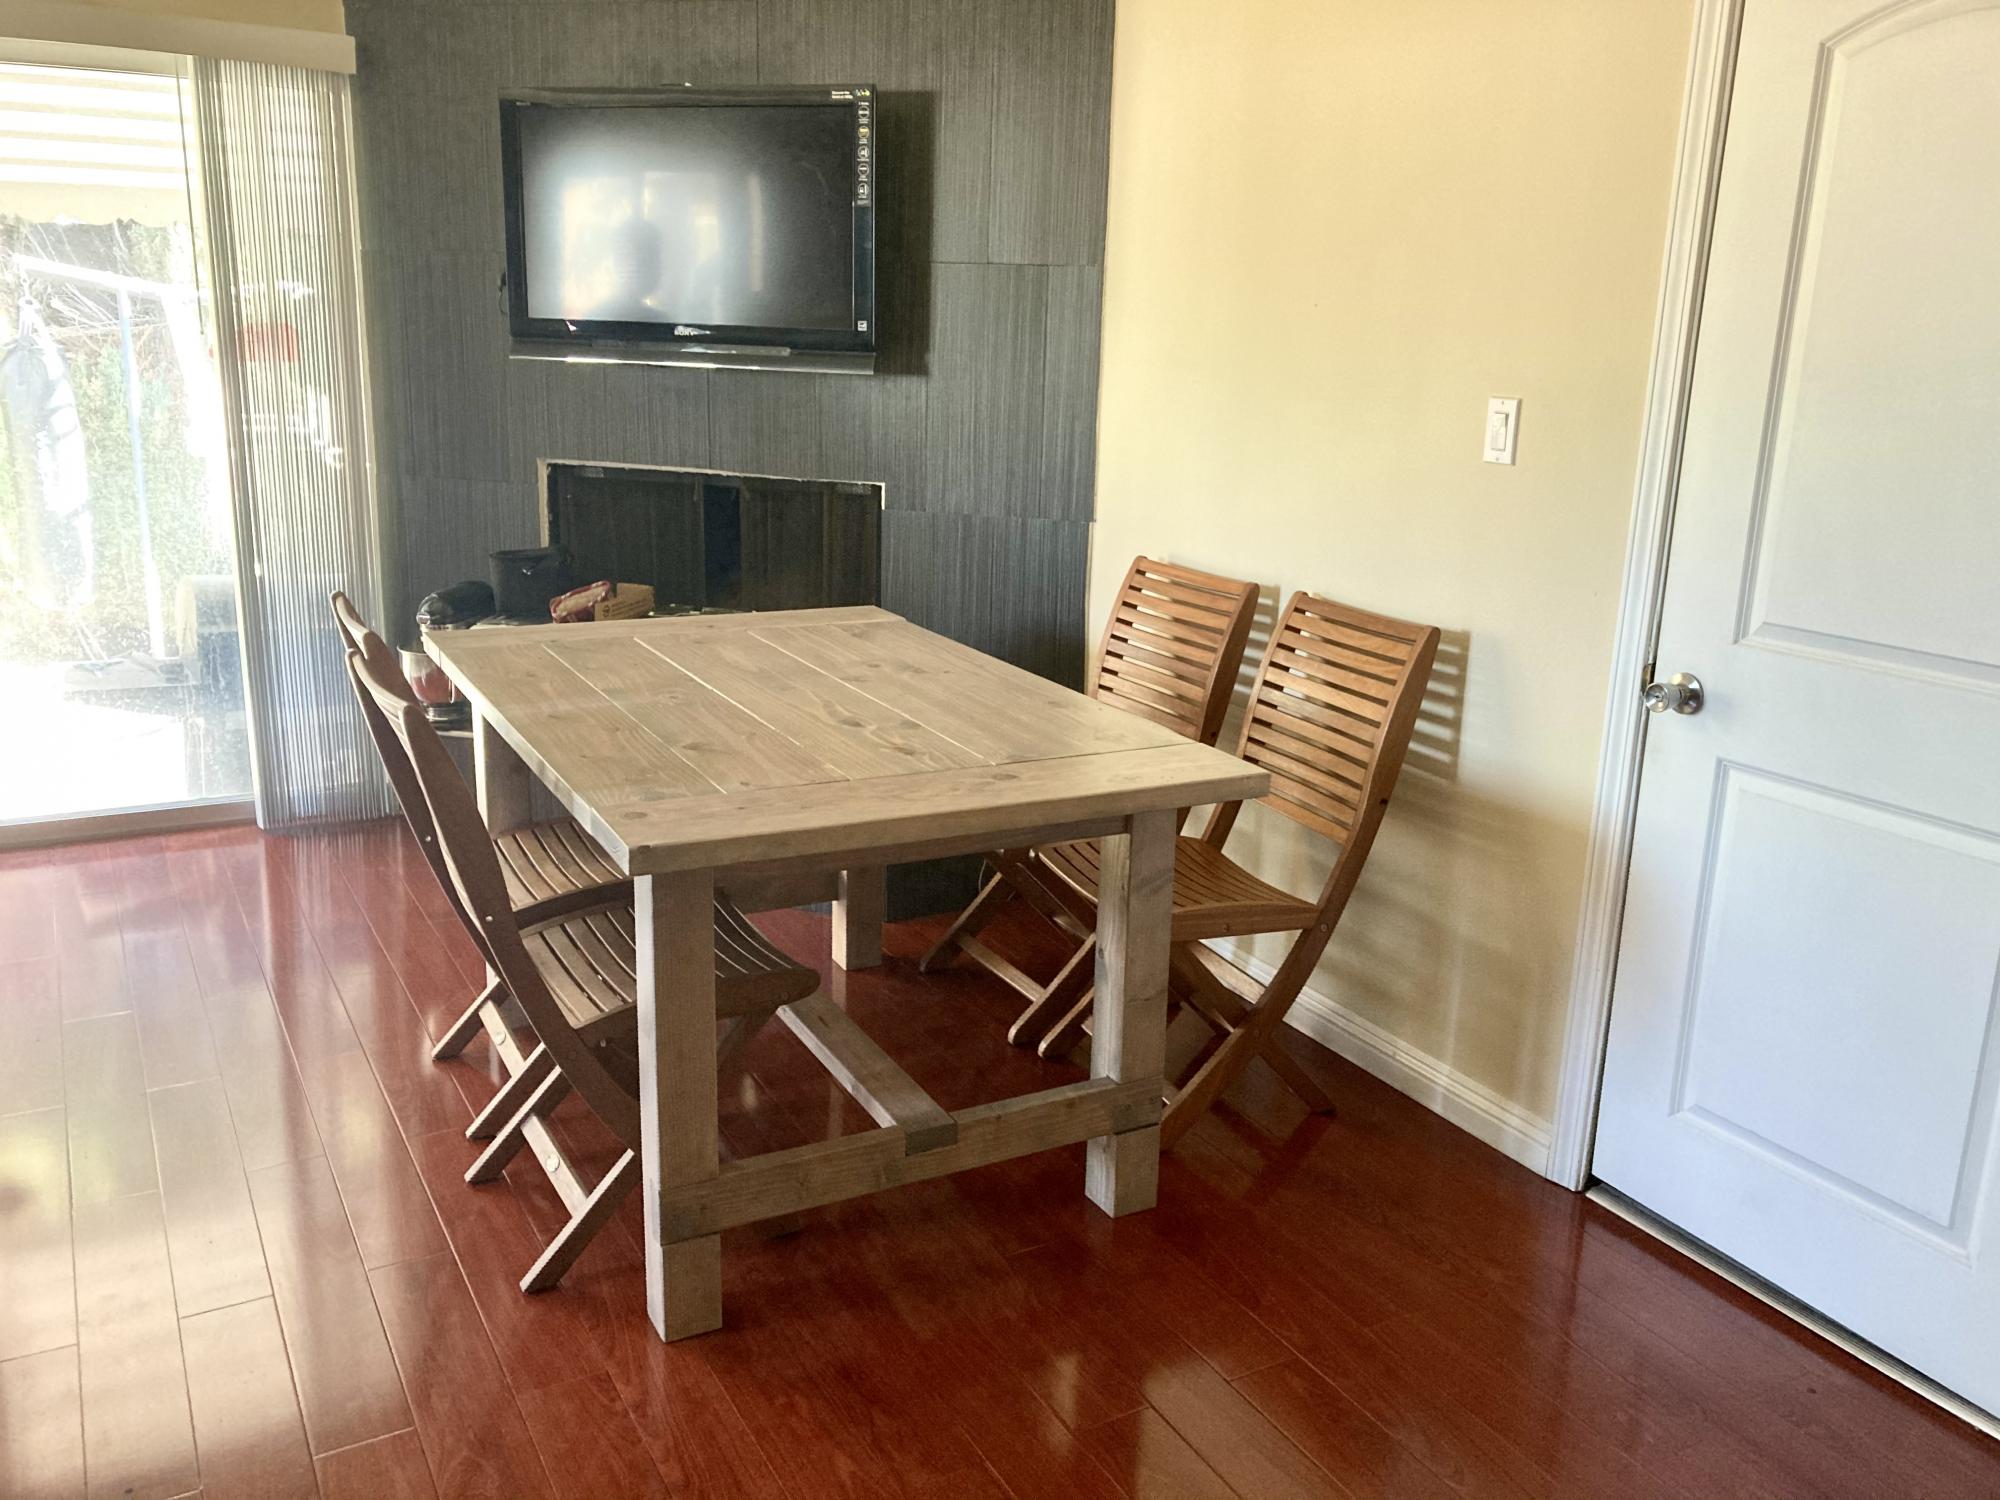

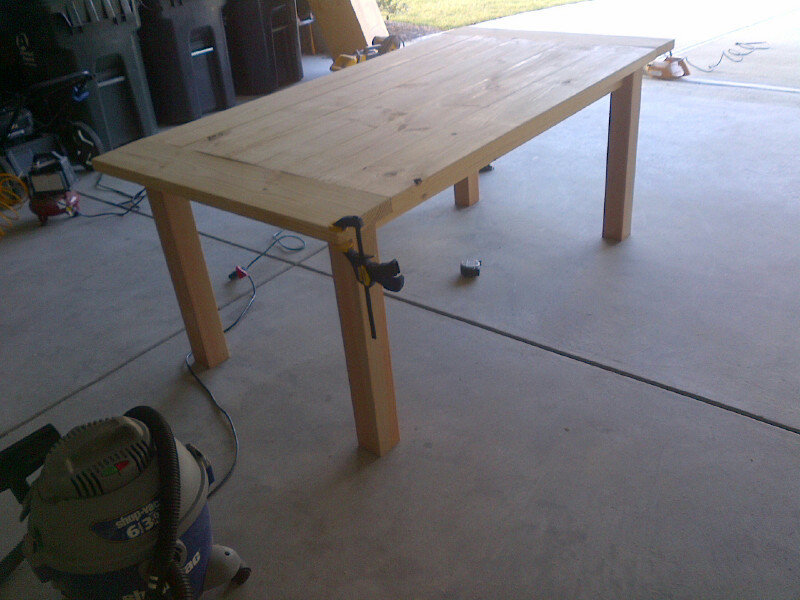
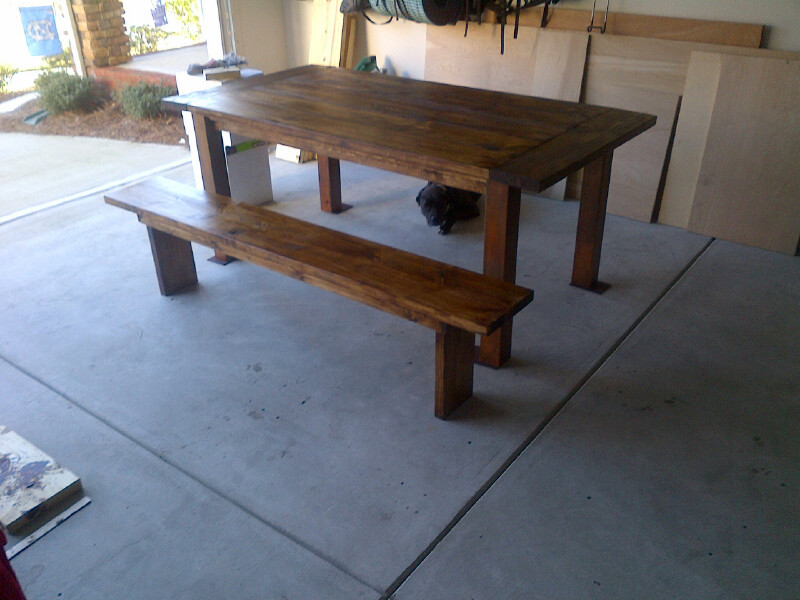
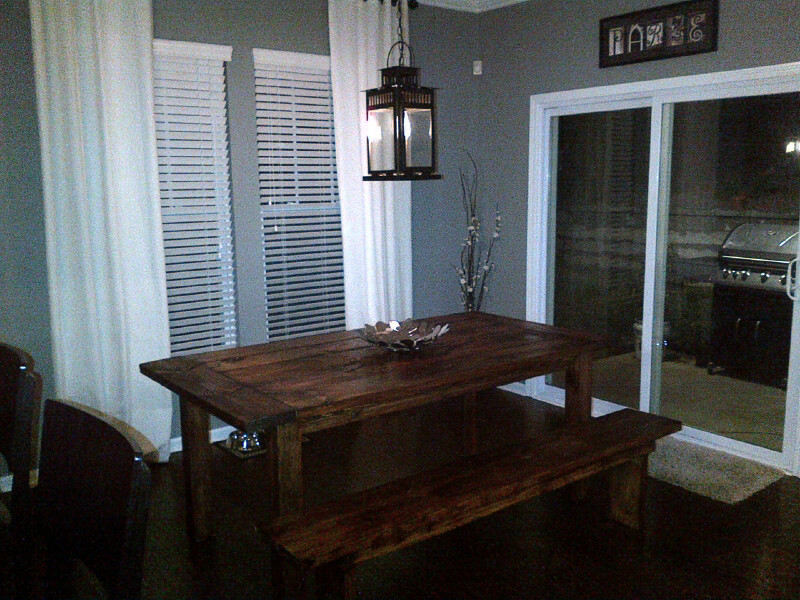
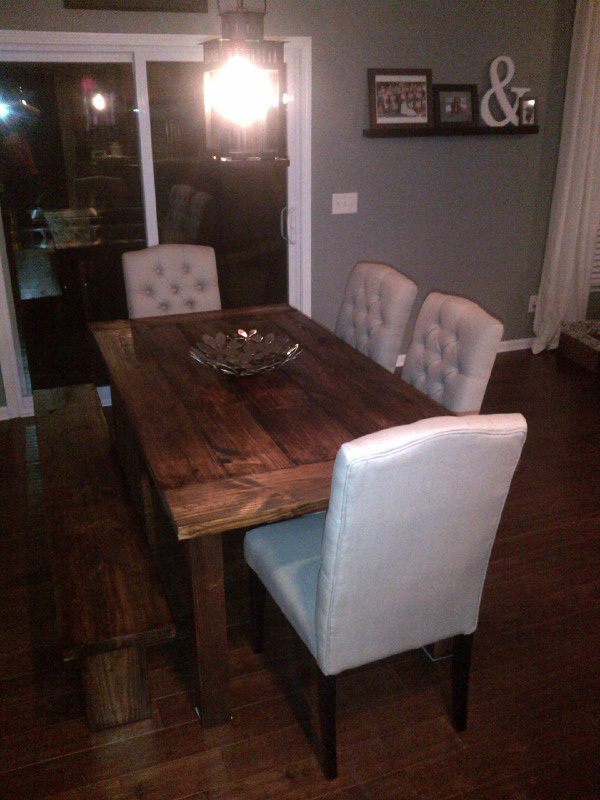
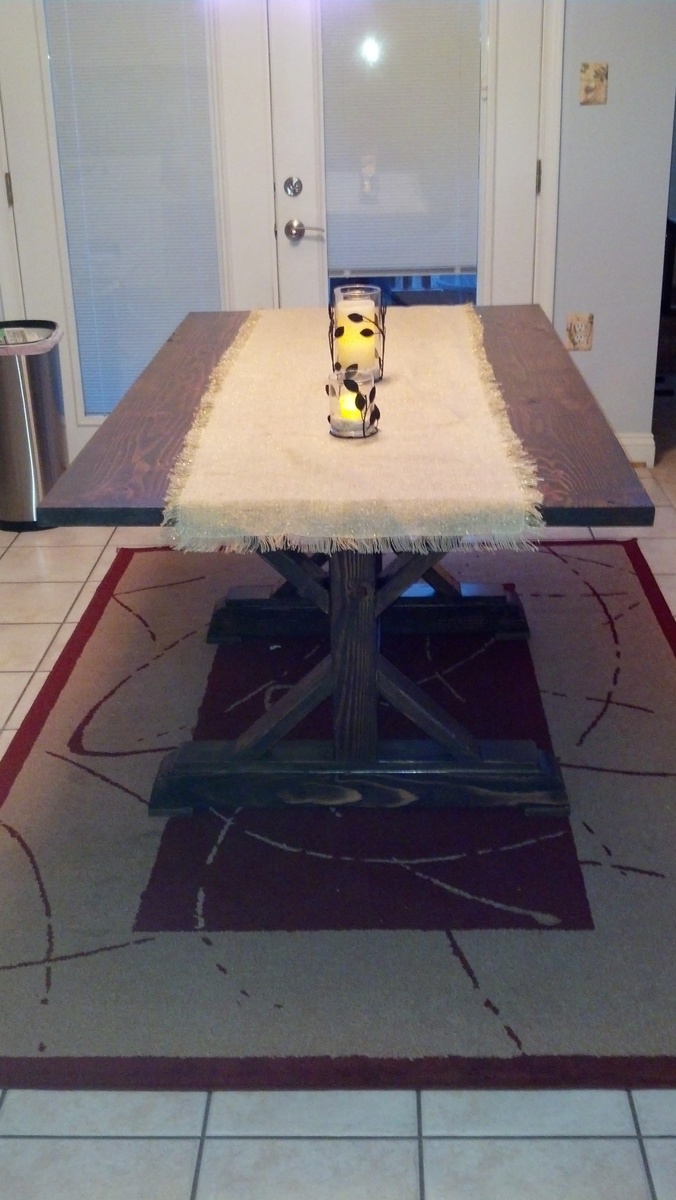
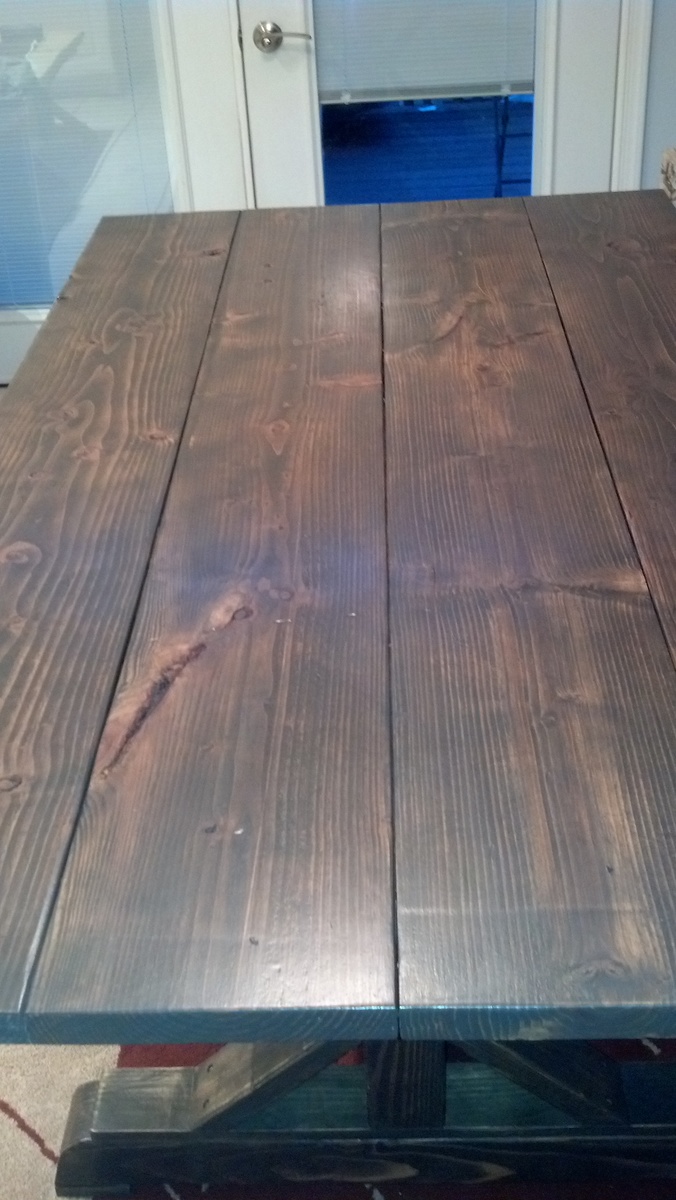
Farmhouse Kitch Table

My wife has been looking for a new kitchen table for the house. Me being thrifty and not wanting to drop a grand plus on a kitchen table at PB, I decieded I would make one.
I modified a few of the plans I found on this site to make it work for us and our space.
After about a weekends worth of work and $140 in stain and wood, I got a table that's 100 times better than what PB has for sale.
I even got a little crafty and figured out an Ikea hack for the light.
I used builder grade top choice 2x8s, 2x10s, and 2x12s for the table and bench, a blow torch to distress the wood a bit, and three coates of misson oak stain.
If anyone wants my plans, I have them done up in CAD as well.
C
Estimated Time Investment
Weekend Project (10-20 Hours)
Finish Used
I blow torched all the edges and knots. Oncce assembled, I used 120 grit paper over everything, and then applied three coats of misson oak stain with a good steel whool rubbing between coates. Finished off with some Murfy's oil soap
Recommended Skill Level
Intermediate
Comments

Mon, 01/28/2013 - 20:14
Looks really nice! I like
Looks really nice! I like the look of the heavy, dark wood with the white upholstered chairs.
Hillary's Locker Cabinet With Charging Cubbies First Project Thanks

This is my Thank You Project. I made this as was presented with the plans from my daughter and asked to make it. Thanks to Ana White for posting great plans to follow. This unit has been through five moves with teenagers doing the lifting. There are no issues except I did repaint it. http://ana-white.com/2011/12/plans/hillary039s-locker-cabinet-charging-cubbies This is my first project so I followed the plans exactly.
Built from Plan(s)
Estimated Cost
A little over a $100 with some beginner mistakes and redos.
Estimated Time Investment
Weekend Project (10-20 Hours)
Finish Used
Sand and Paint as requested.
Recommended Skill Level
Starter Project
Comments
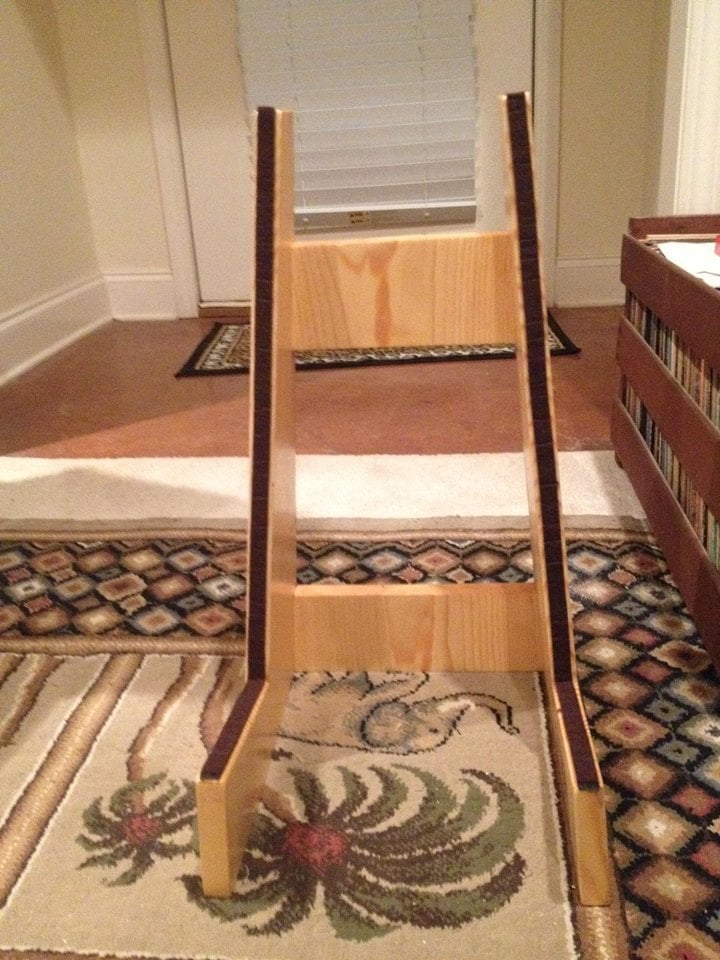
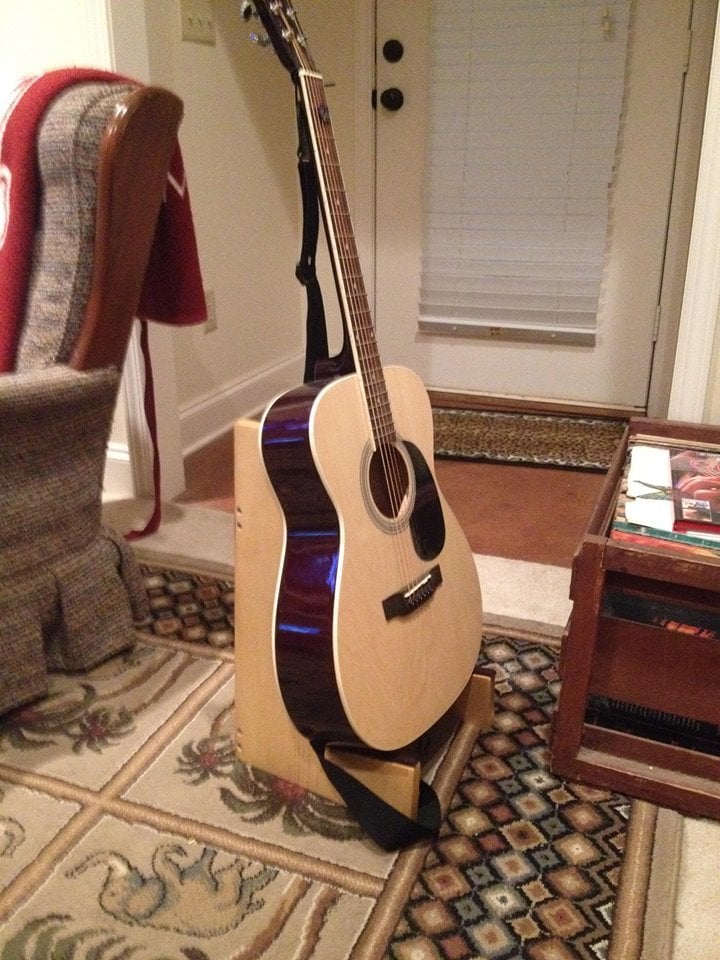
Guitar Stand
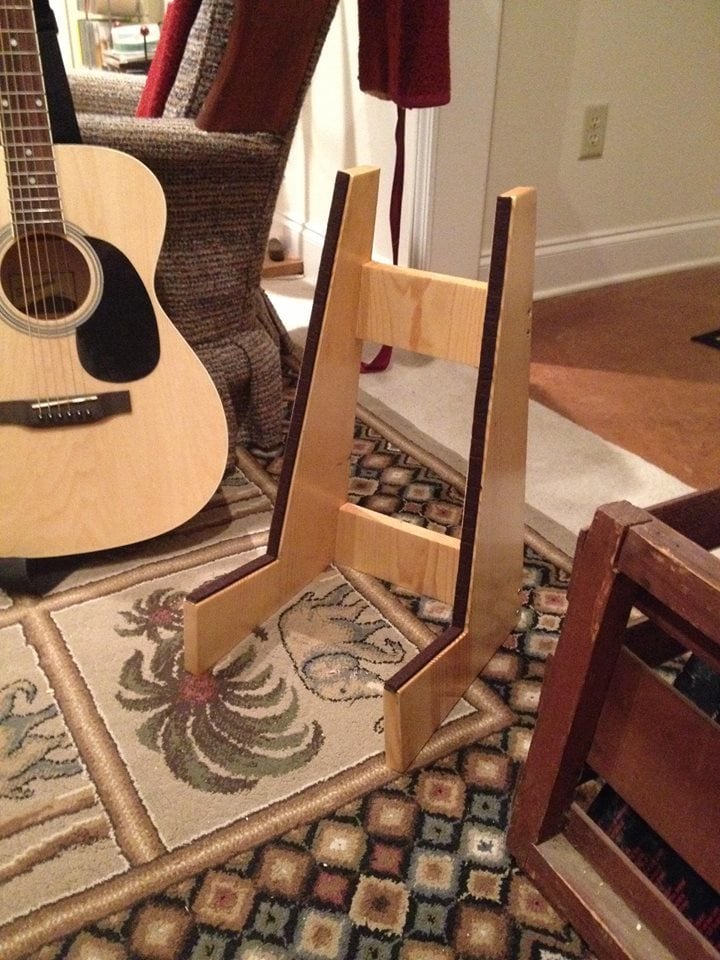
Built this guitar stand basically by using on-hand materials left over from another project. Used 1x12's; 18" tall fir for sides and back braces (cut at 5 degrees on each side). Added felt strips to protect the instrument.
Estimated Cost
Probably around $20-25. Need about 4' of 1x12 fir and Minwax Polyshades in Classic Oak. All materials were on hand except the roll felt, so hard to pinpoint.
Estimated Time Investment
Afternoon Project (3-6 Hours)
Finish Used
Minwax Polyshades in Classic Oak.
Recommended Skill Level
Beginner
Comments
Thu, 05/28/2020 - 17:37
Very nice and well designed…
Very nice and well designed. Thanks for some ideas!
Rustic X console table
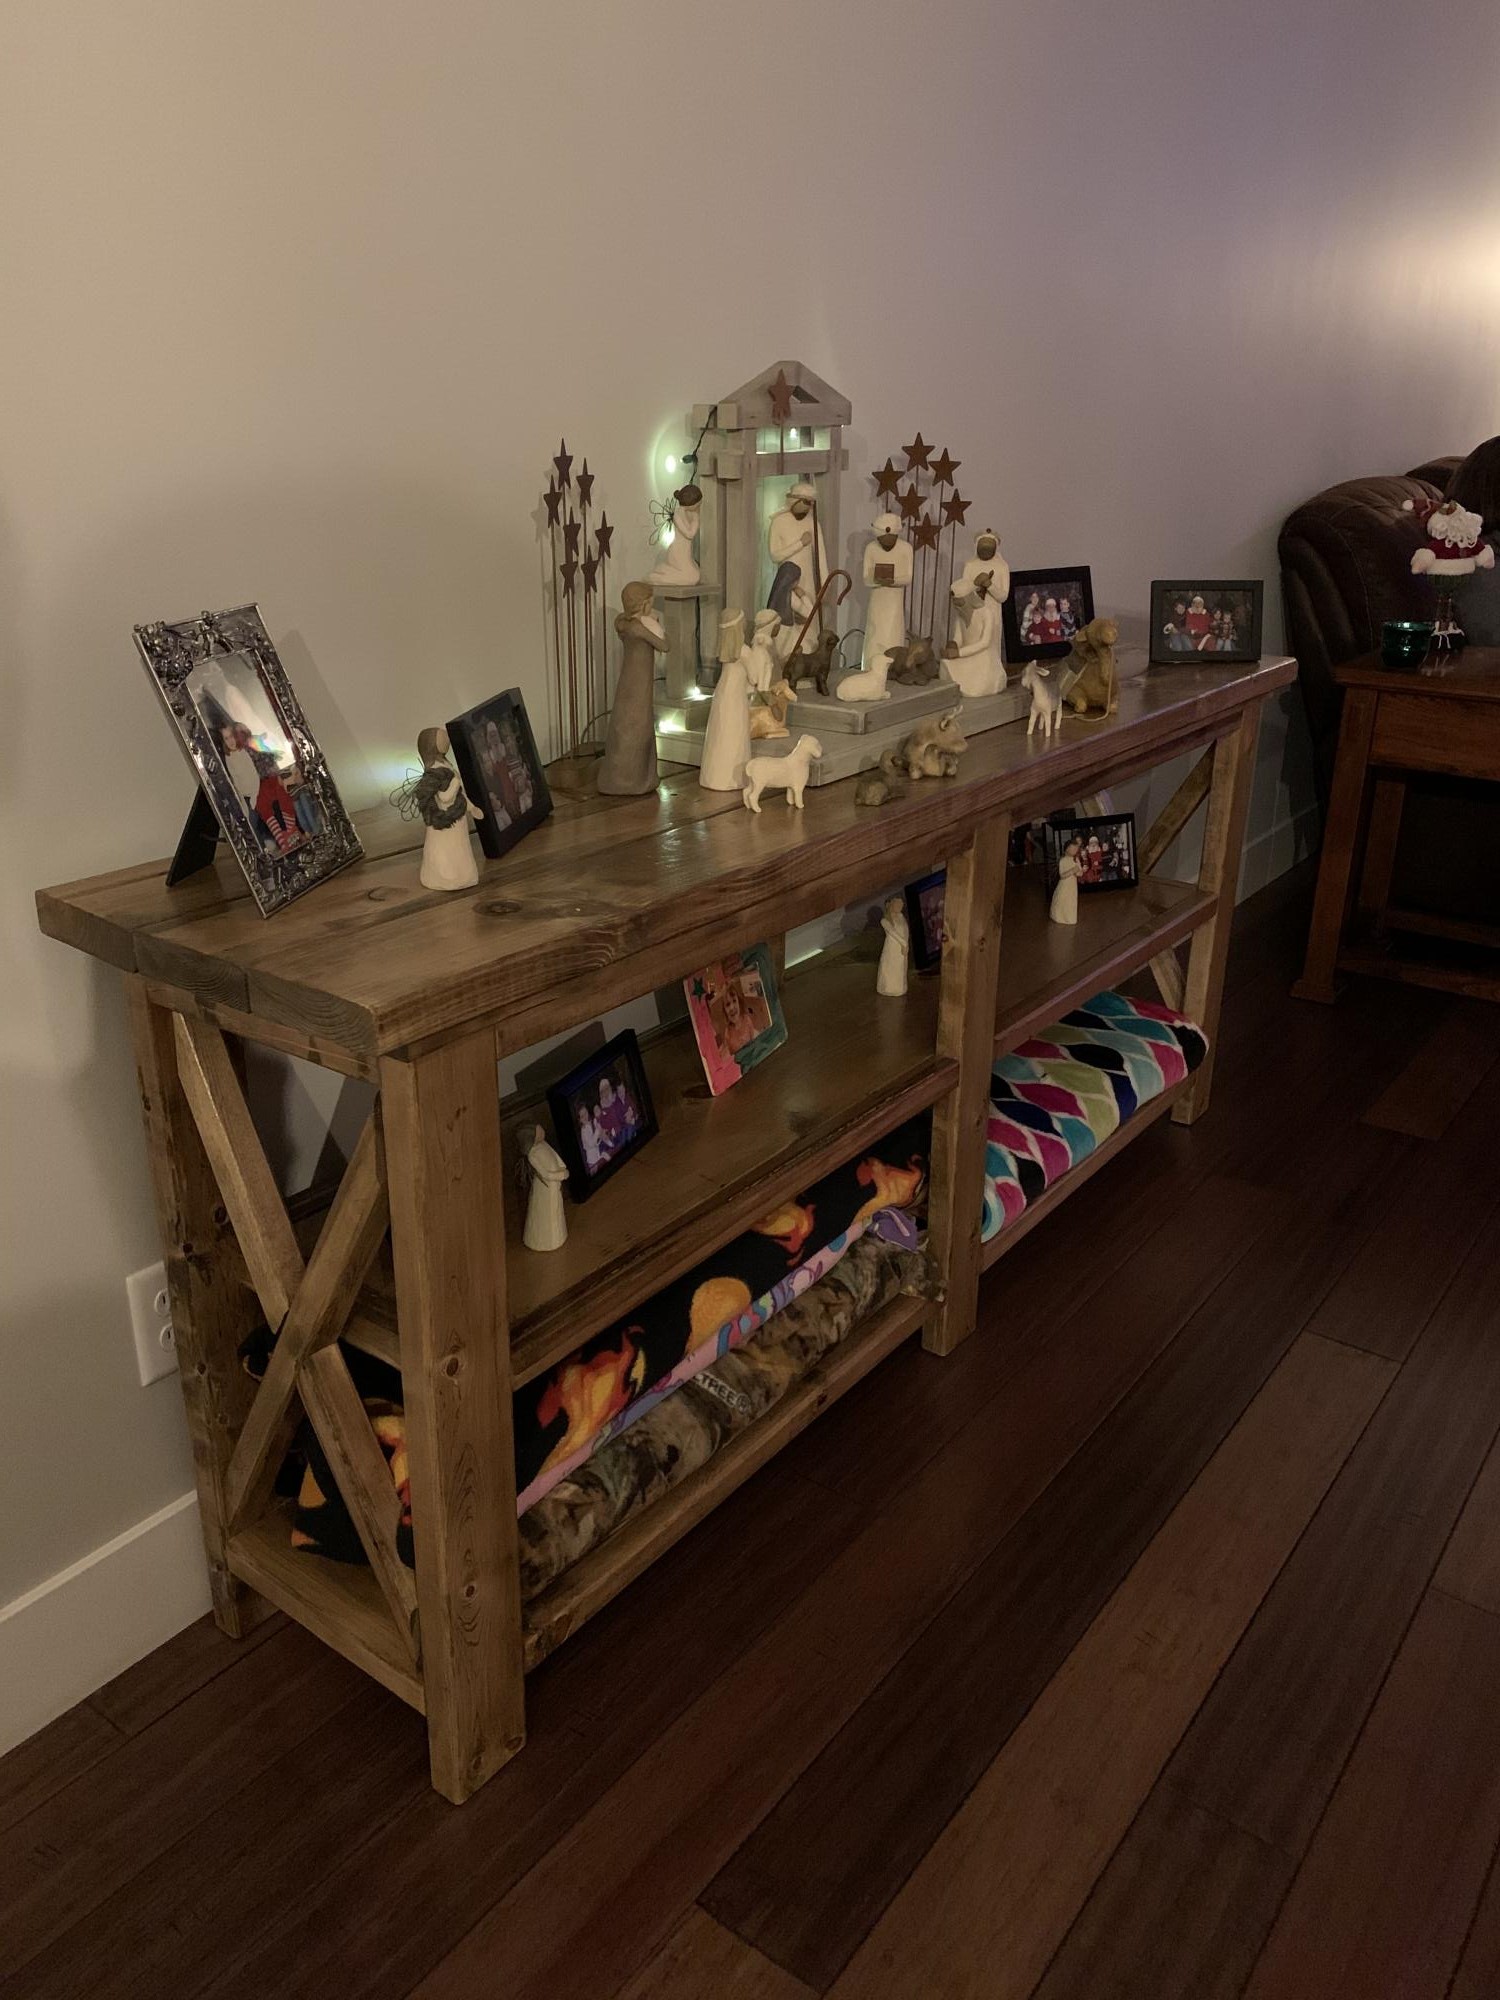
Absolutely love how this table turned out! So much fun building it with my daughter and teaching her how much fun it is to hold things!
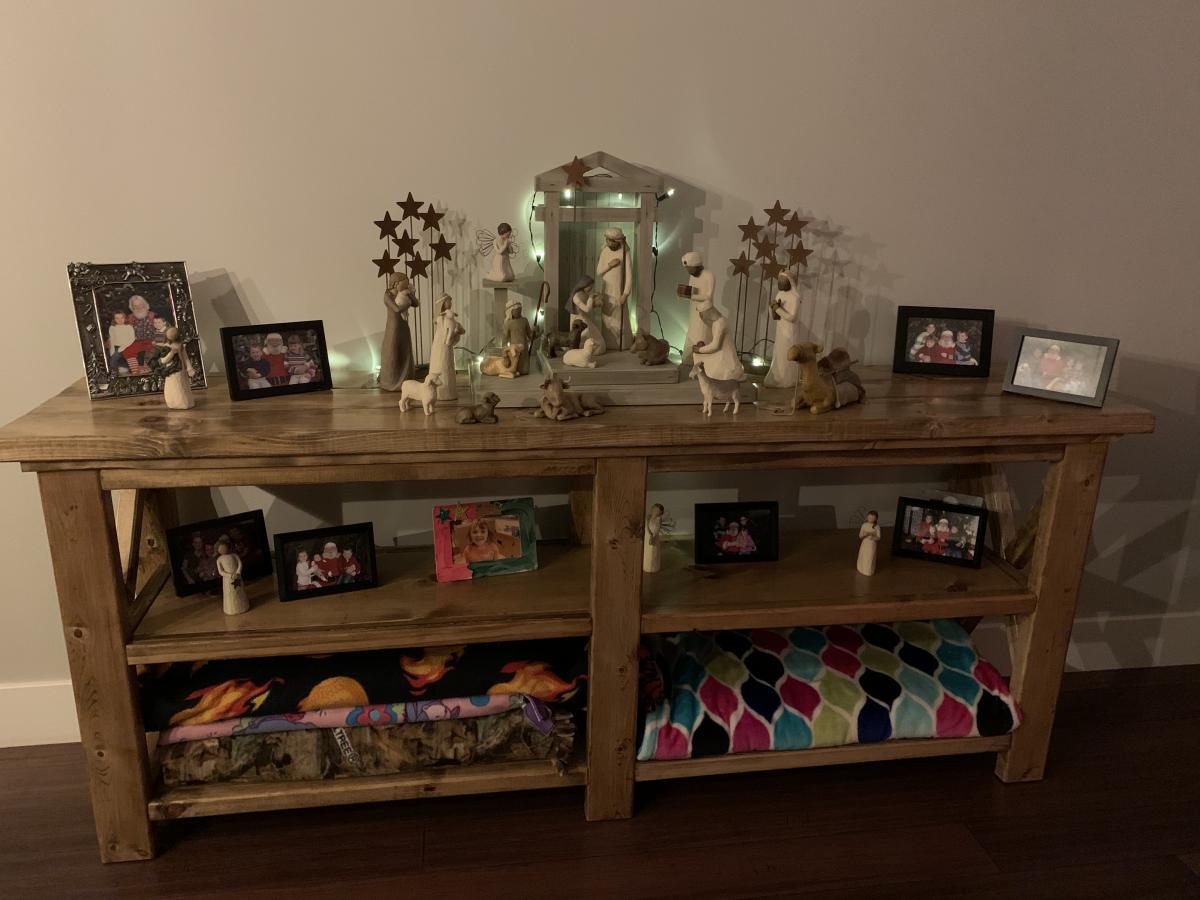
Built from Plan(s)
Estimated Cost
100.00
Estimated Time Investment
Weekend Project (10-20 Hours)
Finish Used
Minwax special walnut and polycrylic
Recommended Skill Level
Intermediate
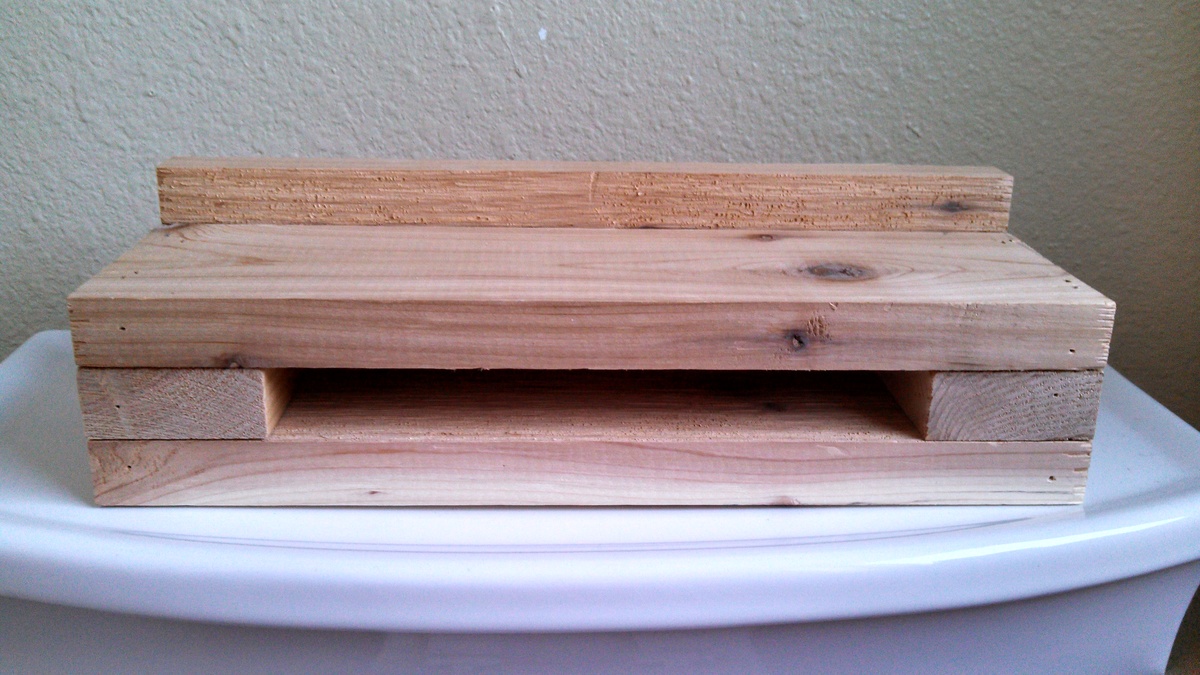
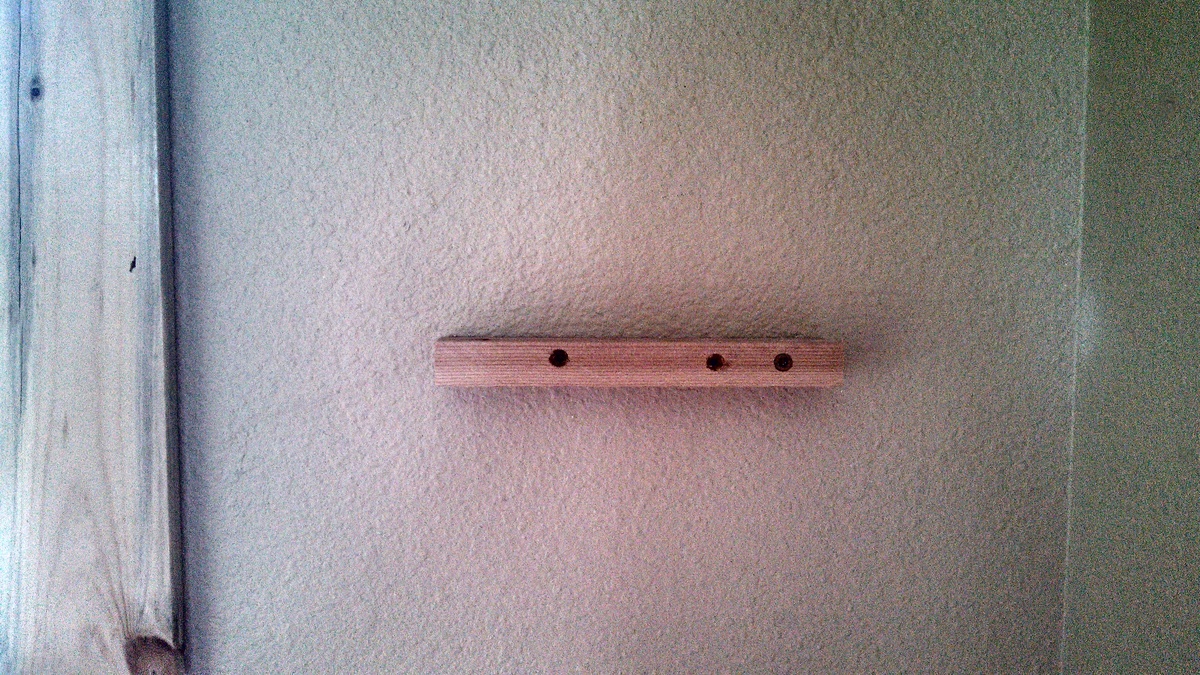
Bathroom Barn Beam Shelves
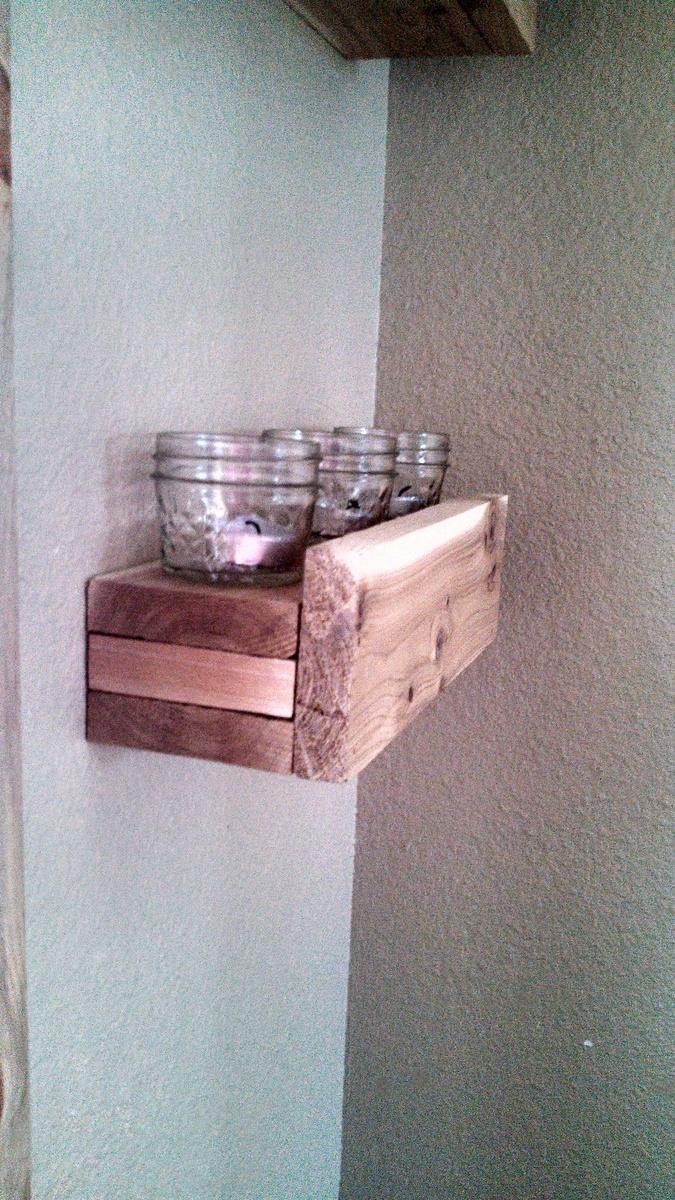
I used cedar left over from a bar my husband made in our kitchen. I didn't have to purchase any materials as I used his left over pieces.
I didn't like my ledges with the back board, and I wasn't too keen on making the key holes. Instead of 24 inches I made my shleves 1 ft. long. I also laid the spacers so that the distance between the top and bottom of the ledge was less than the plan called for. This allowed me to attach a wooden strip (7.5 x 1.5 cut from the cedar 1x4 that I ripped on the table saw) to the wall that the barn beam shelf slips onto and anchors the ledges instead of using the key hole hanger.
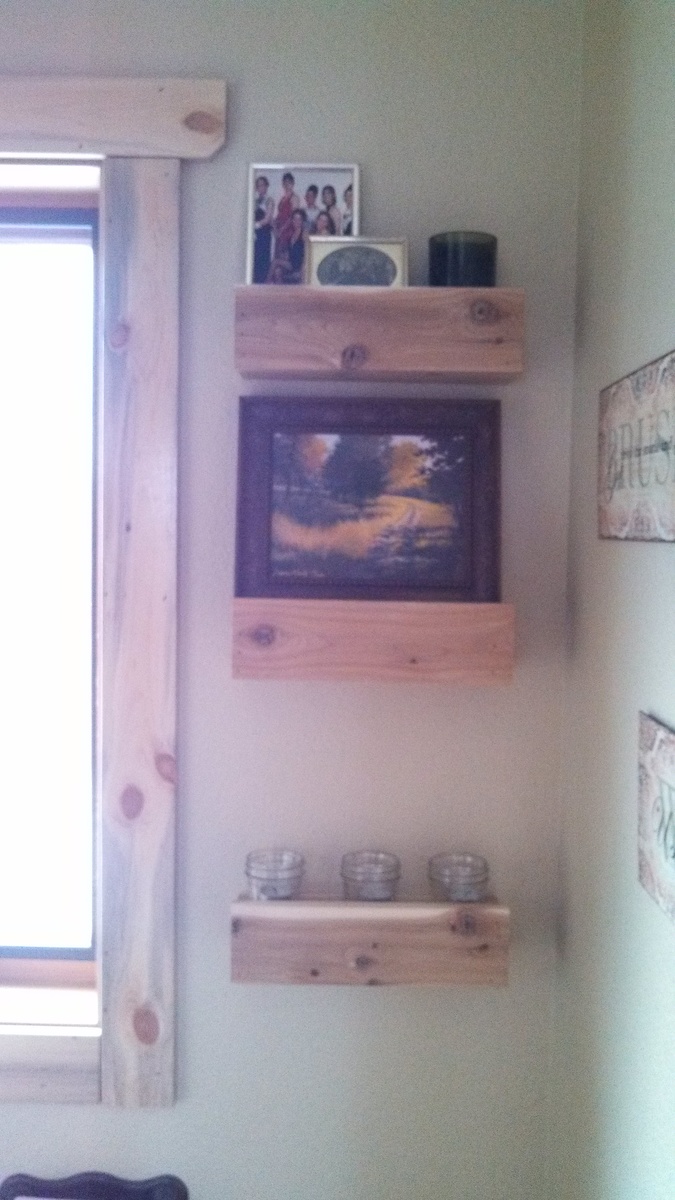
Built from Plan(s)
Estimated Cost
Free
Estimated Time Investment
An Hour or Two (0-2 Hours)
Finish Used
None at this time
Recommended Skill Level
Starter Project
Farmhouse coffee table

This coffee table was my first build. Its a blend of mulitple coffee table designs by Ana White.


Built from Plan(s)
Estimated Cost
$200
Estimated Time Investment
Week Long Project (20 Hours or More)
Finish Used
Minwax Red Oak stain and sealed with a satin polyurethane.
Recommended Skill Level
Intermediate
Comments

Kitchen Island heavy modified
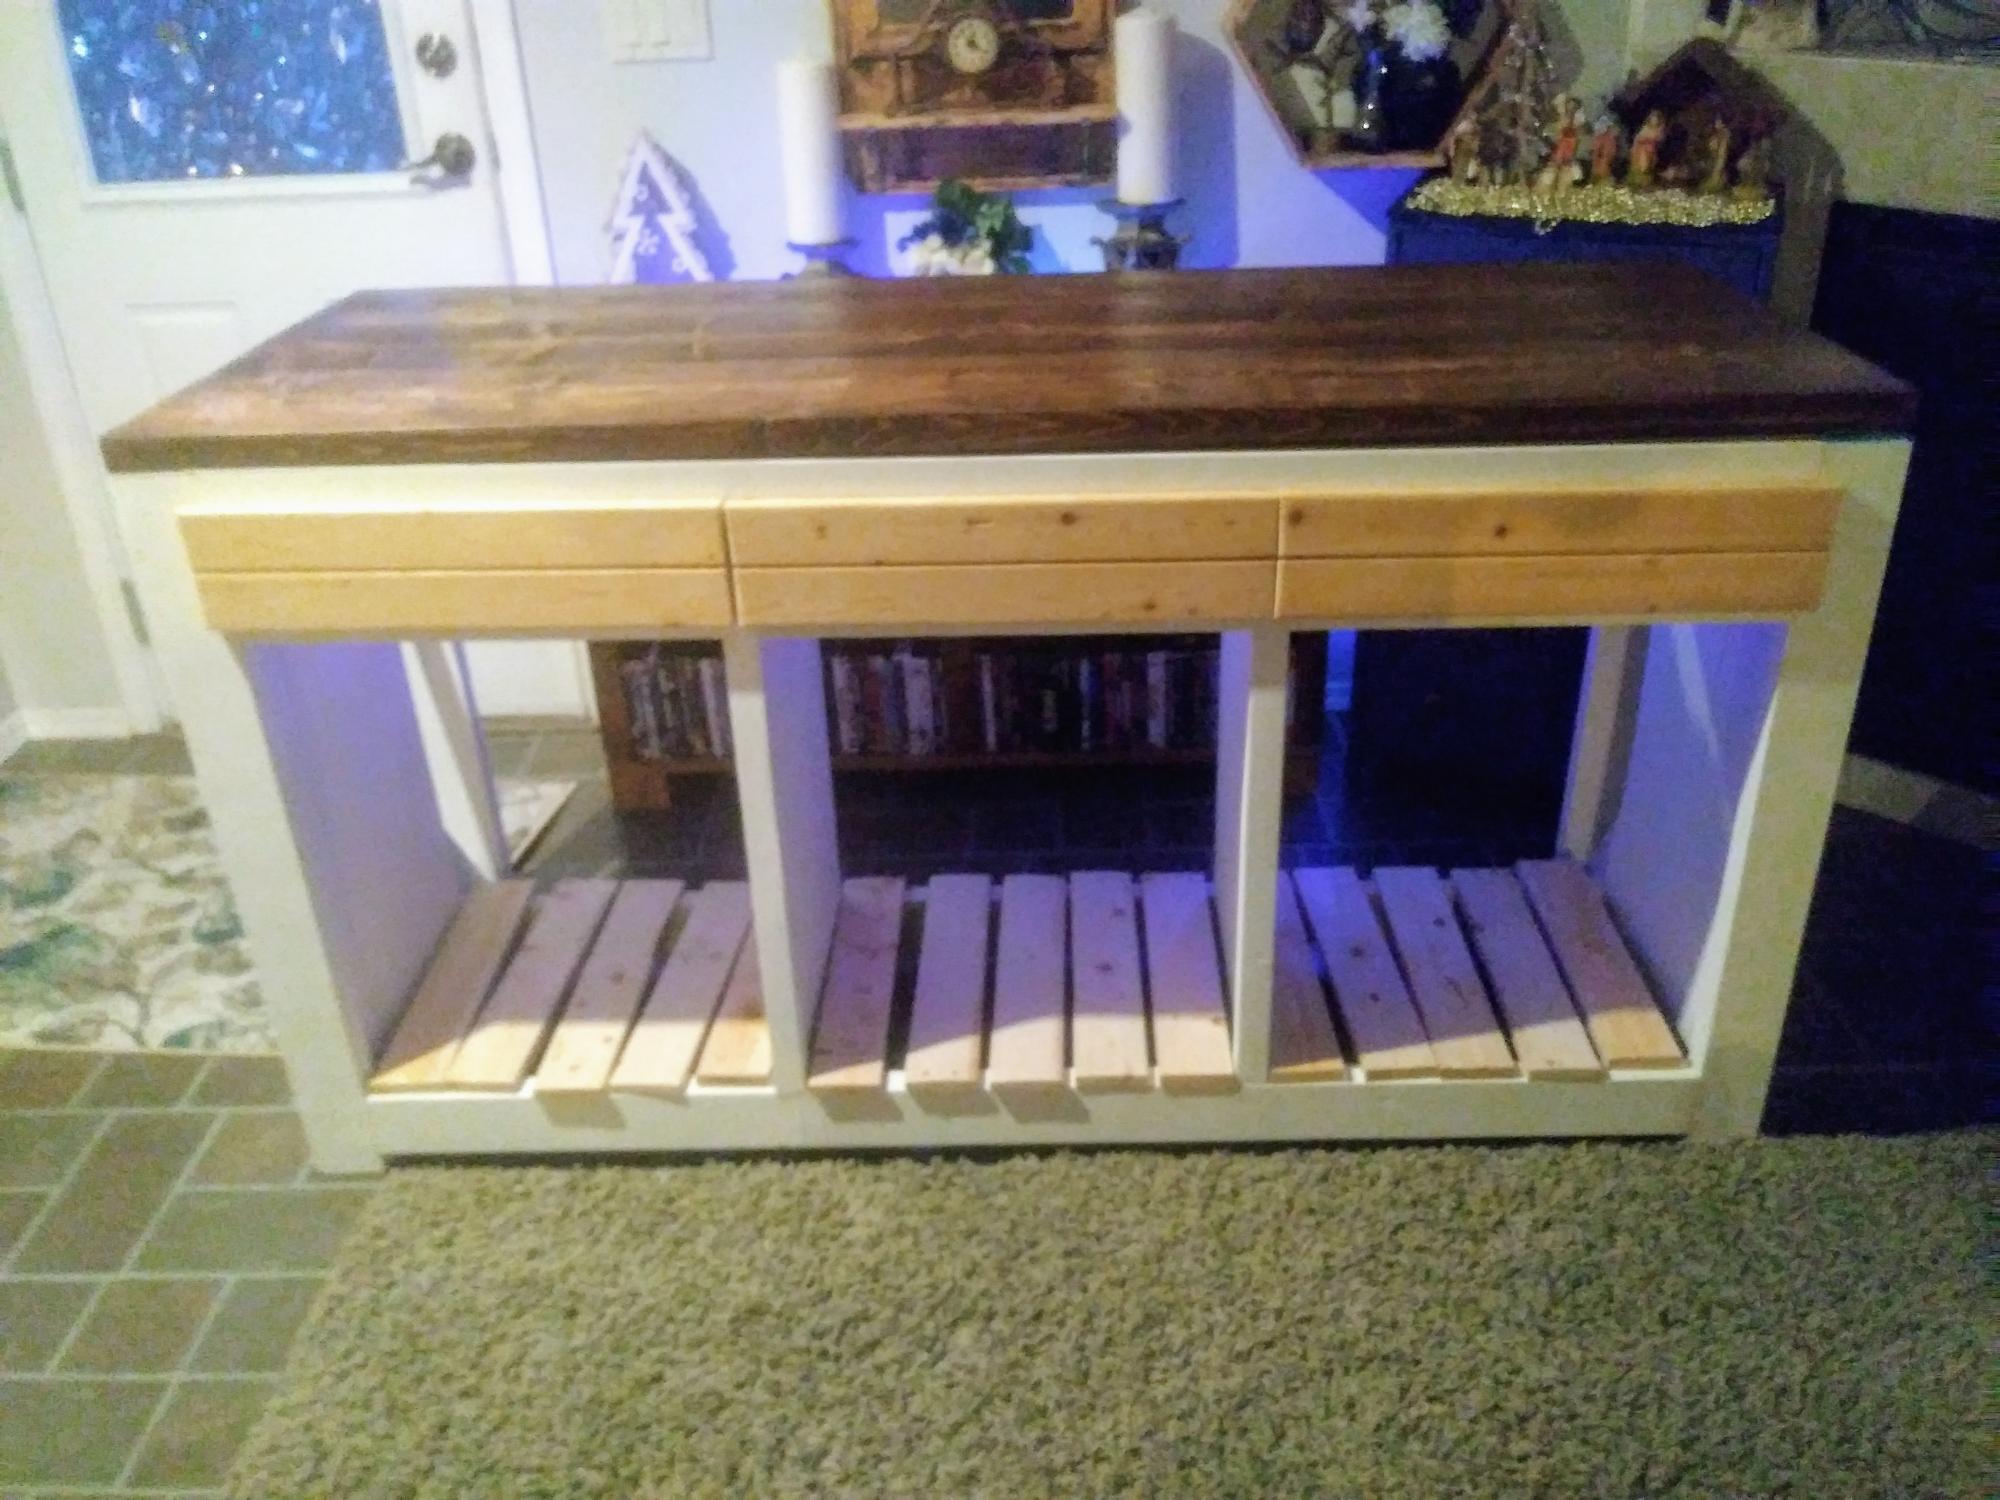
This was made using your plans as a start.
The client wanted extra long , and adjustable shelves. It's almost done.
I had to modify the drawers a little because they wanted more under storage, and I had a tough time with the flush drawers , so I slightly modified that as well. So thanks for my first advance build :)
Built from Plan(s)
Estimated Cost
250 in wood
Estimated Time Investment
Week Long Project (20 Hours or More)
Finish Used
White linen chalk paint
Dark walnut stain
Dark walnut stain
Recommended Skill Level
Advanced
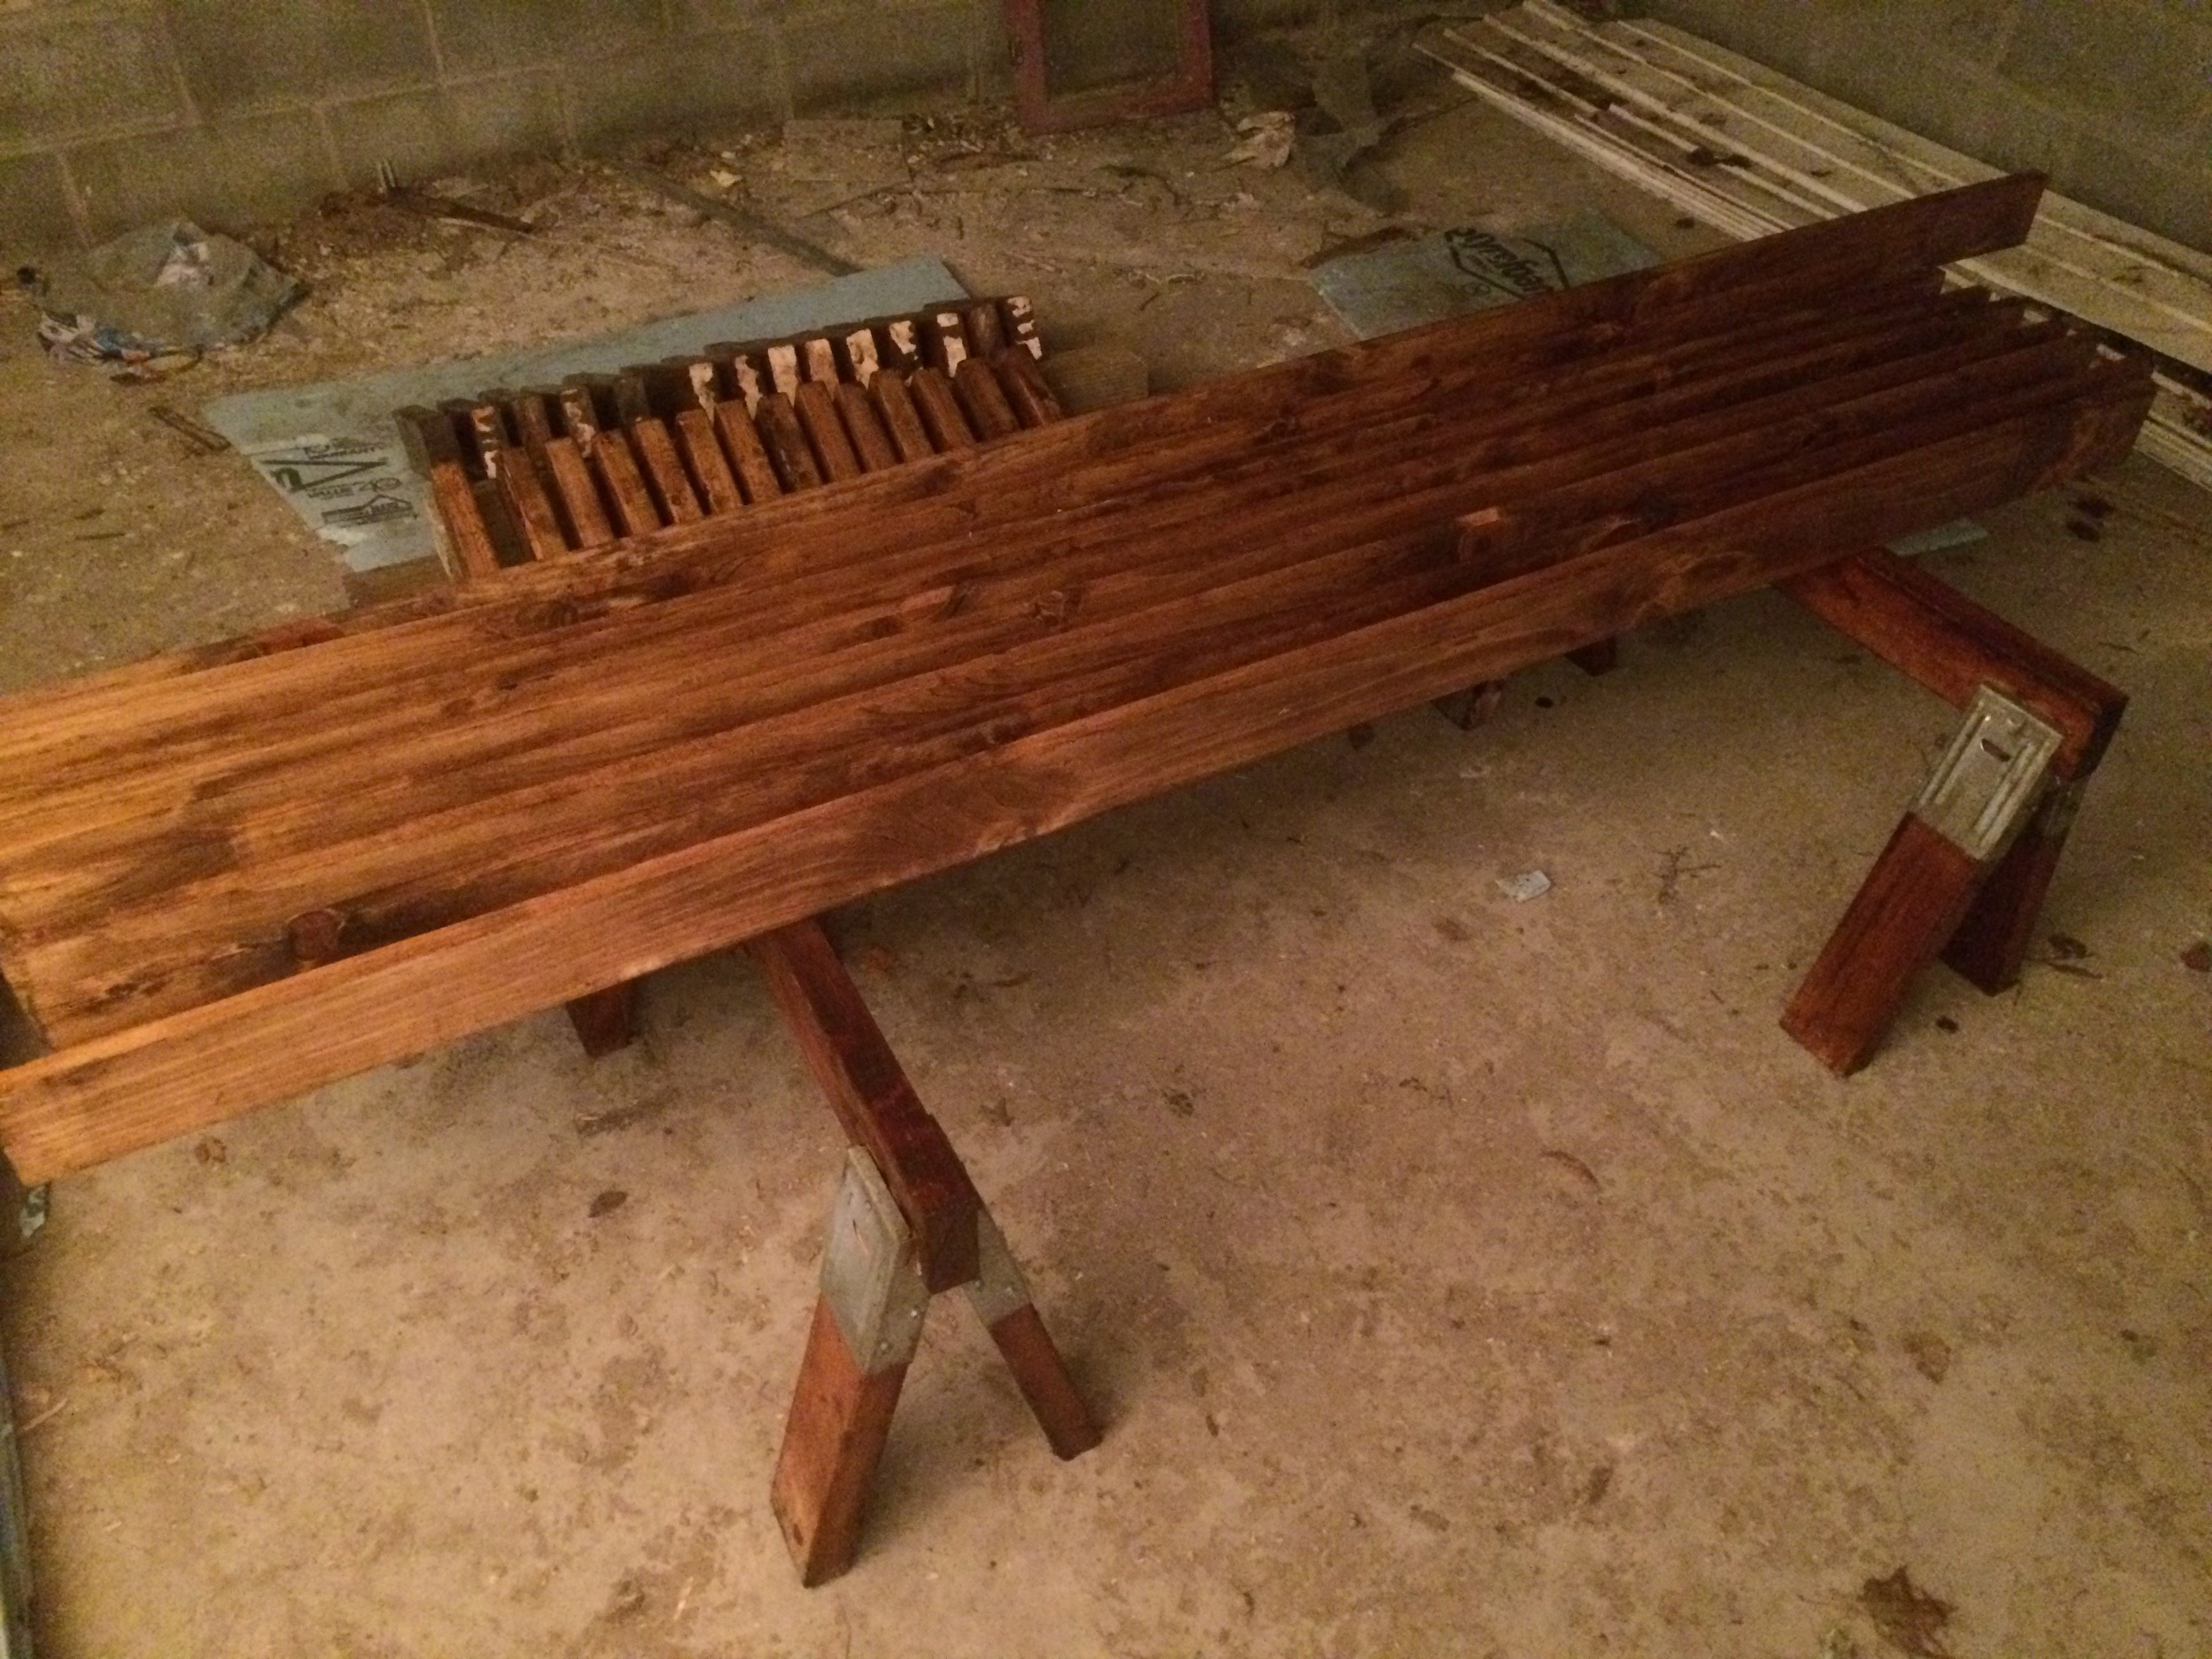
Benchright Table

Built the benchright table with a few modifications. Finding straight or even somewhat straight 2x2's is near impossible so I used top choice 2x4s. I used a chain and a turnbuckle instead of the black iron pipe. I painted the hardware with copper spray paint. The stain is ebony miniwax water based stain. Let me know what you think, I'm open to suggestions.


Built from Plan(s)
Estimated Time Investment
Weekend Project (10-20 Hours)
Finish Used
Miniwax ebony water based stain
Recommended Skill Level
Beginner
Comments
Fri, 02/01/2013 - 19:44
Farmhouse Table
The ends drop slightly, it's agrivating me to no end. I'll fix it.
Fri, 02/01/2013 - 23:37
Looks great. I love the
Looks great. I love the copper, wouldn't match my wifes decor/color scheme but it looks awesome. Amazing job
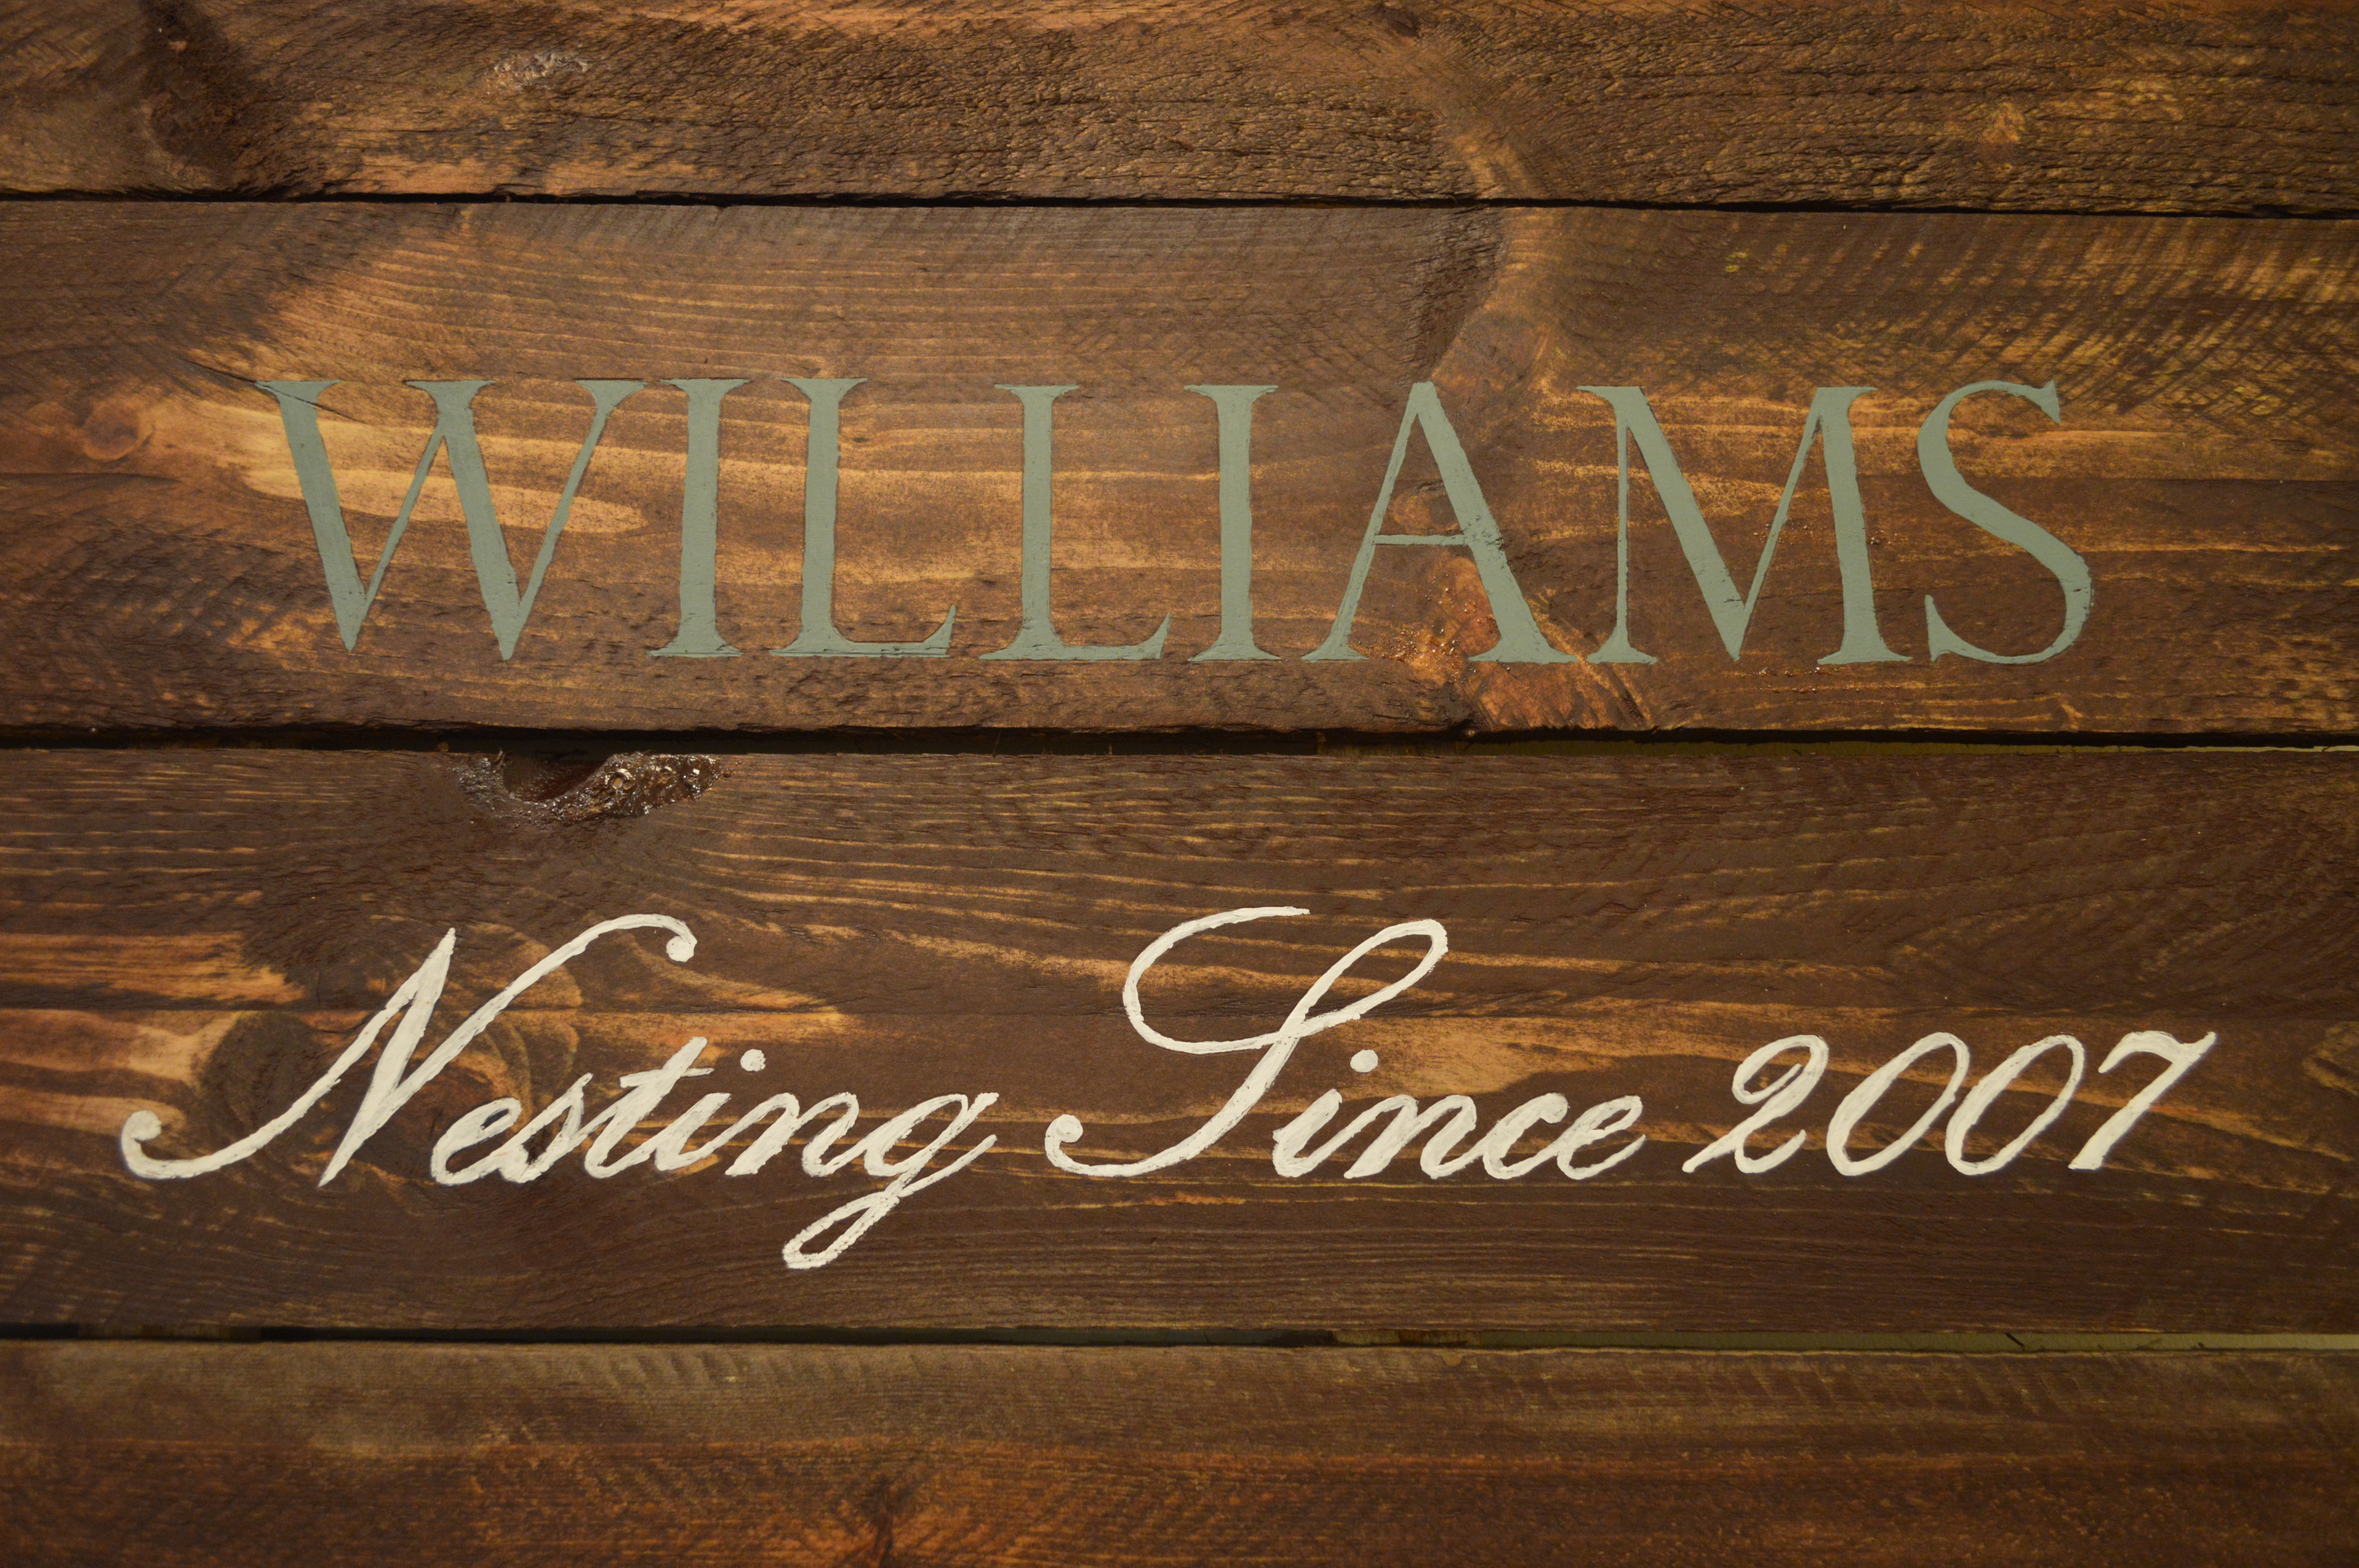
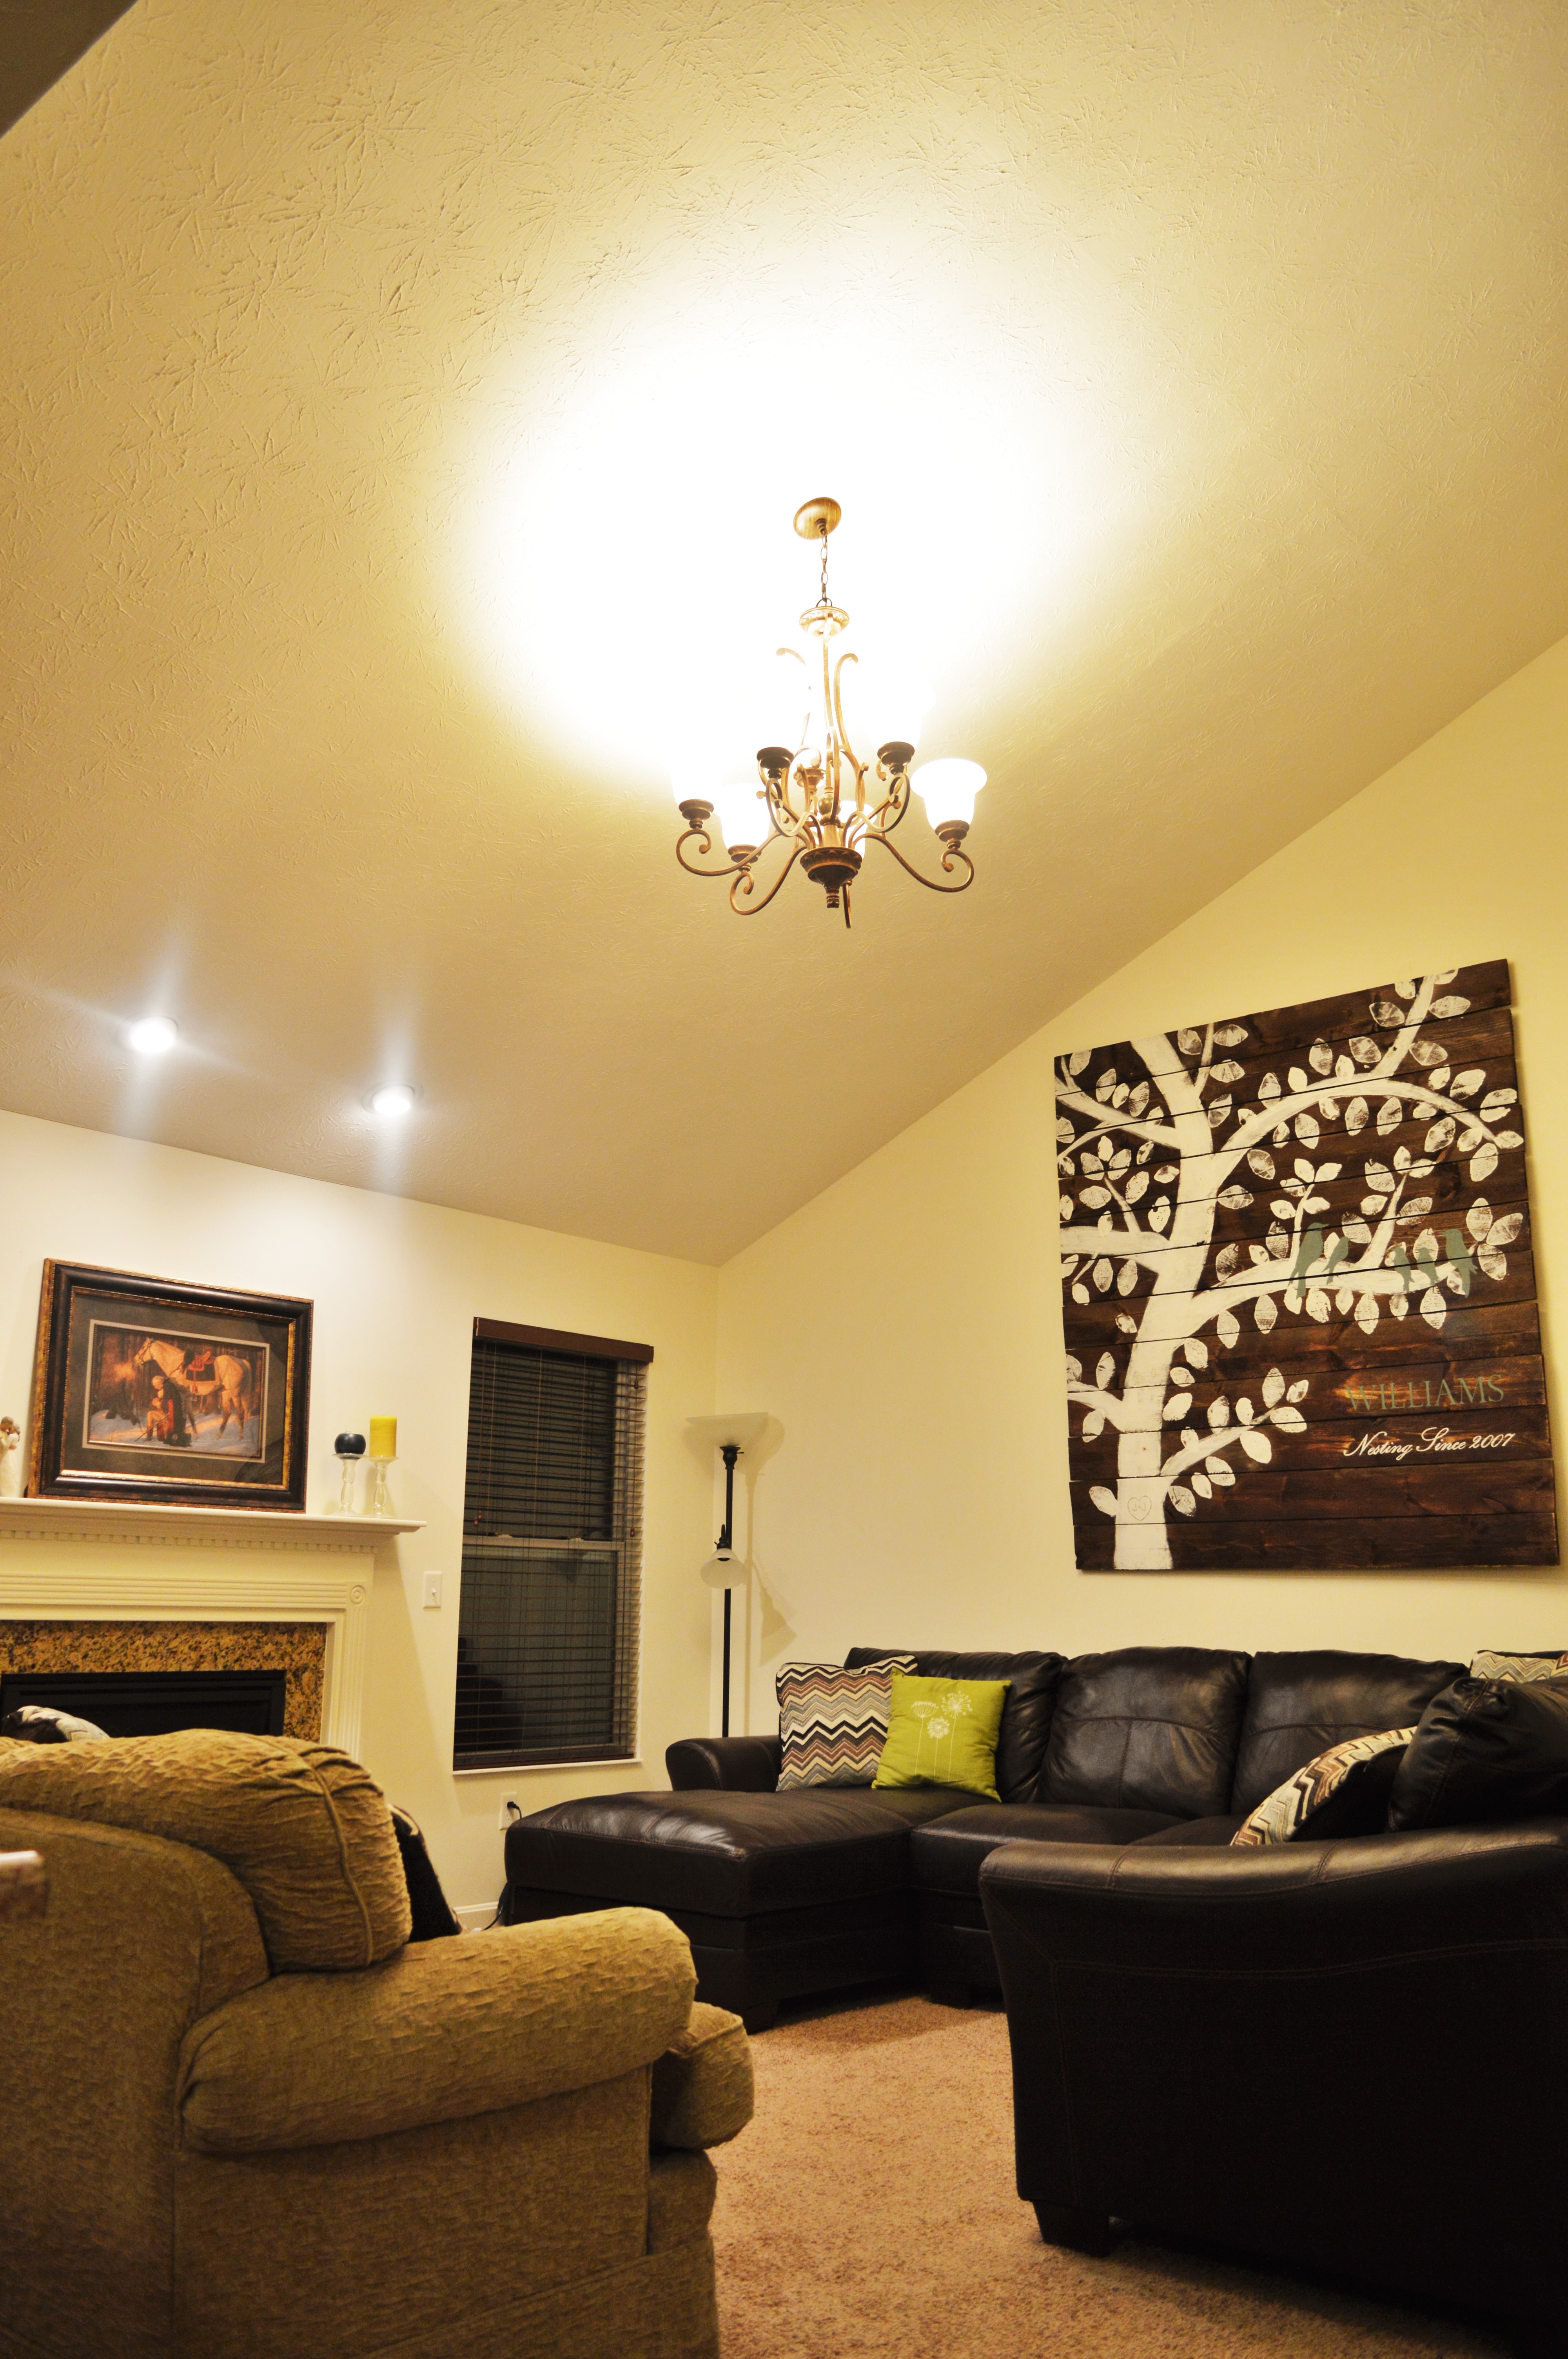
Family Tree Nesting Birds
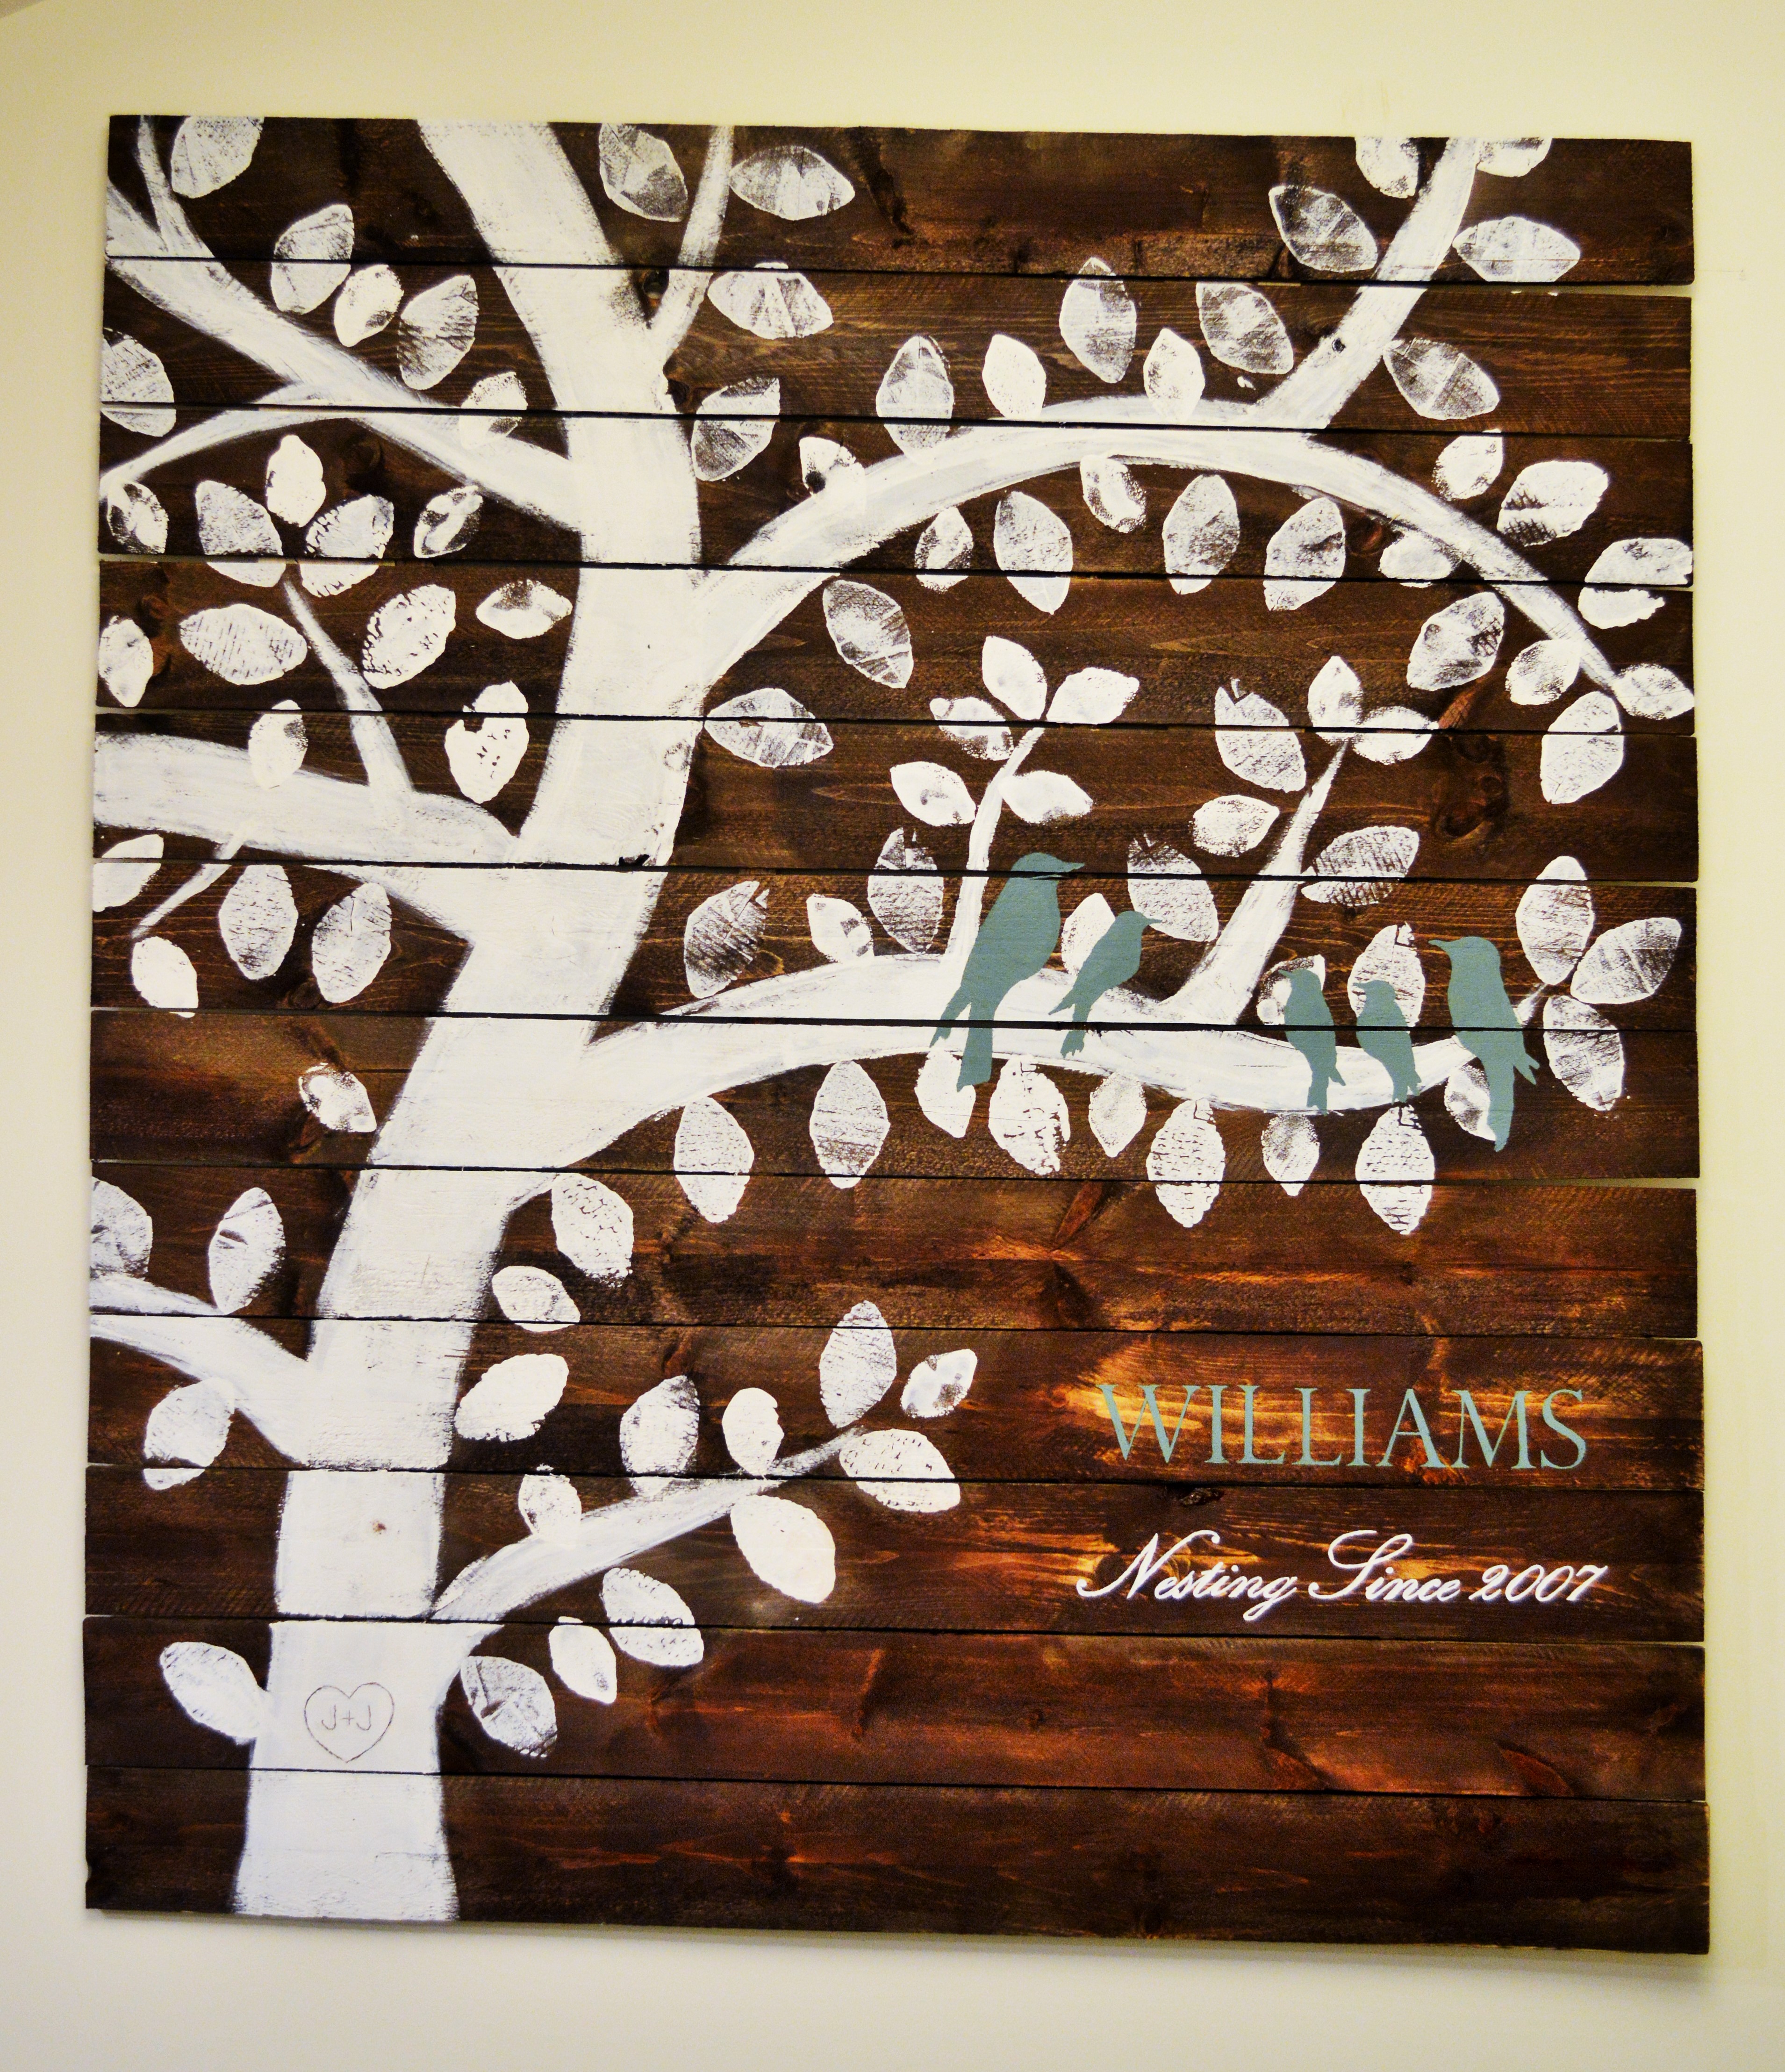
I made this one huge! It is 6 feet by 6 feet. I handpainted the birds, and I used Ana's technique for painting on the letters.
Built from Plan(s)
Estimated Time Investment
Day Project (6-9 Hours)
Recommended Skill Level
Beginner
Comments

Wed, 12/23/2015 - 11:47
How amazingly gorgeous is
How amazingly gorgeous is this?!? Great job, I can't believe I didn't see this sooner. Love the huge size in your room!
Industrial coffee table
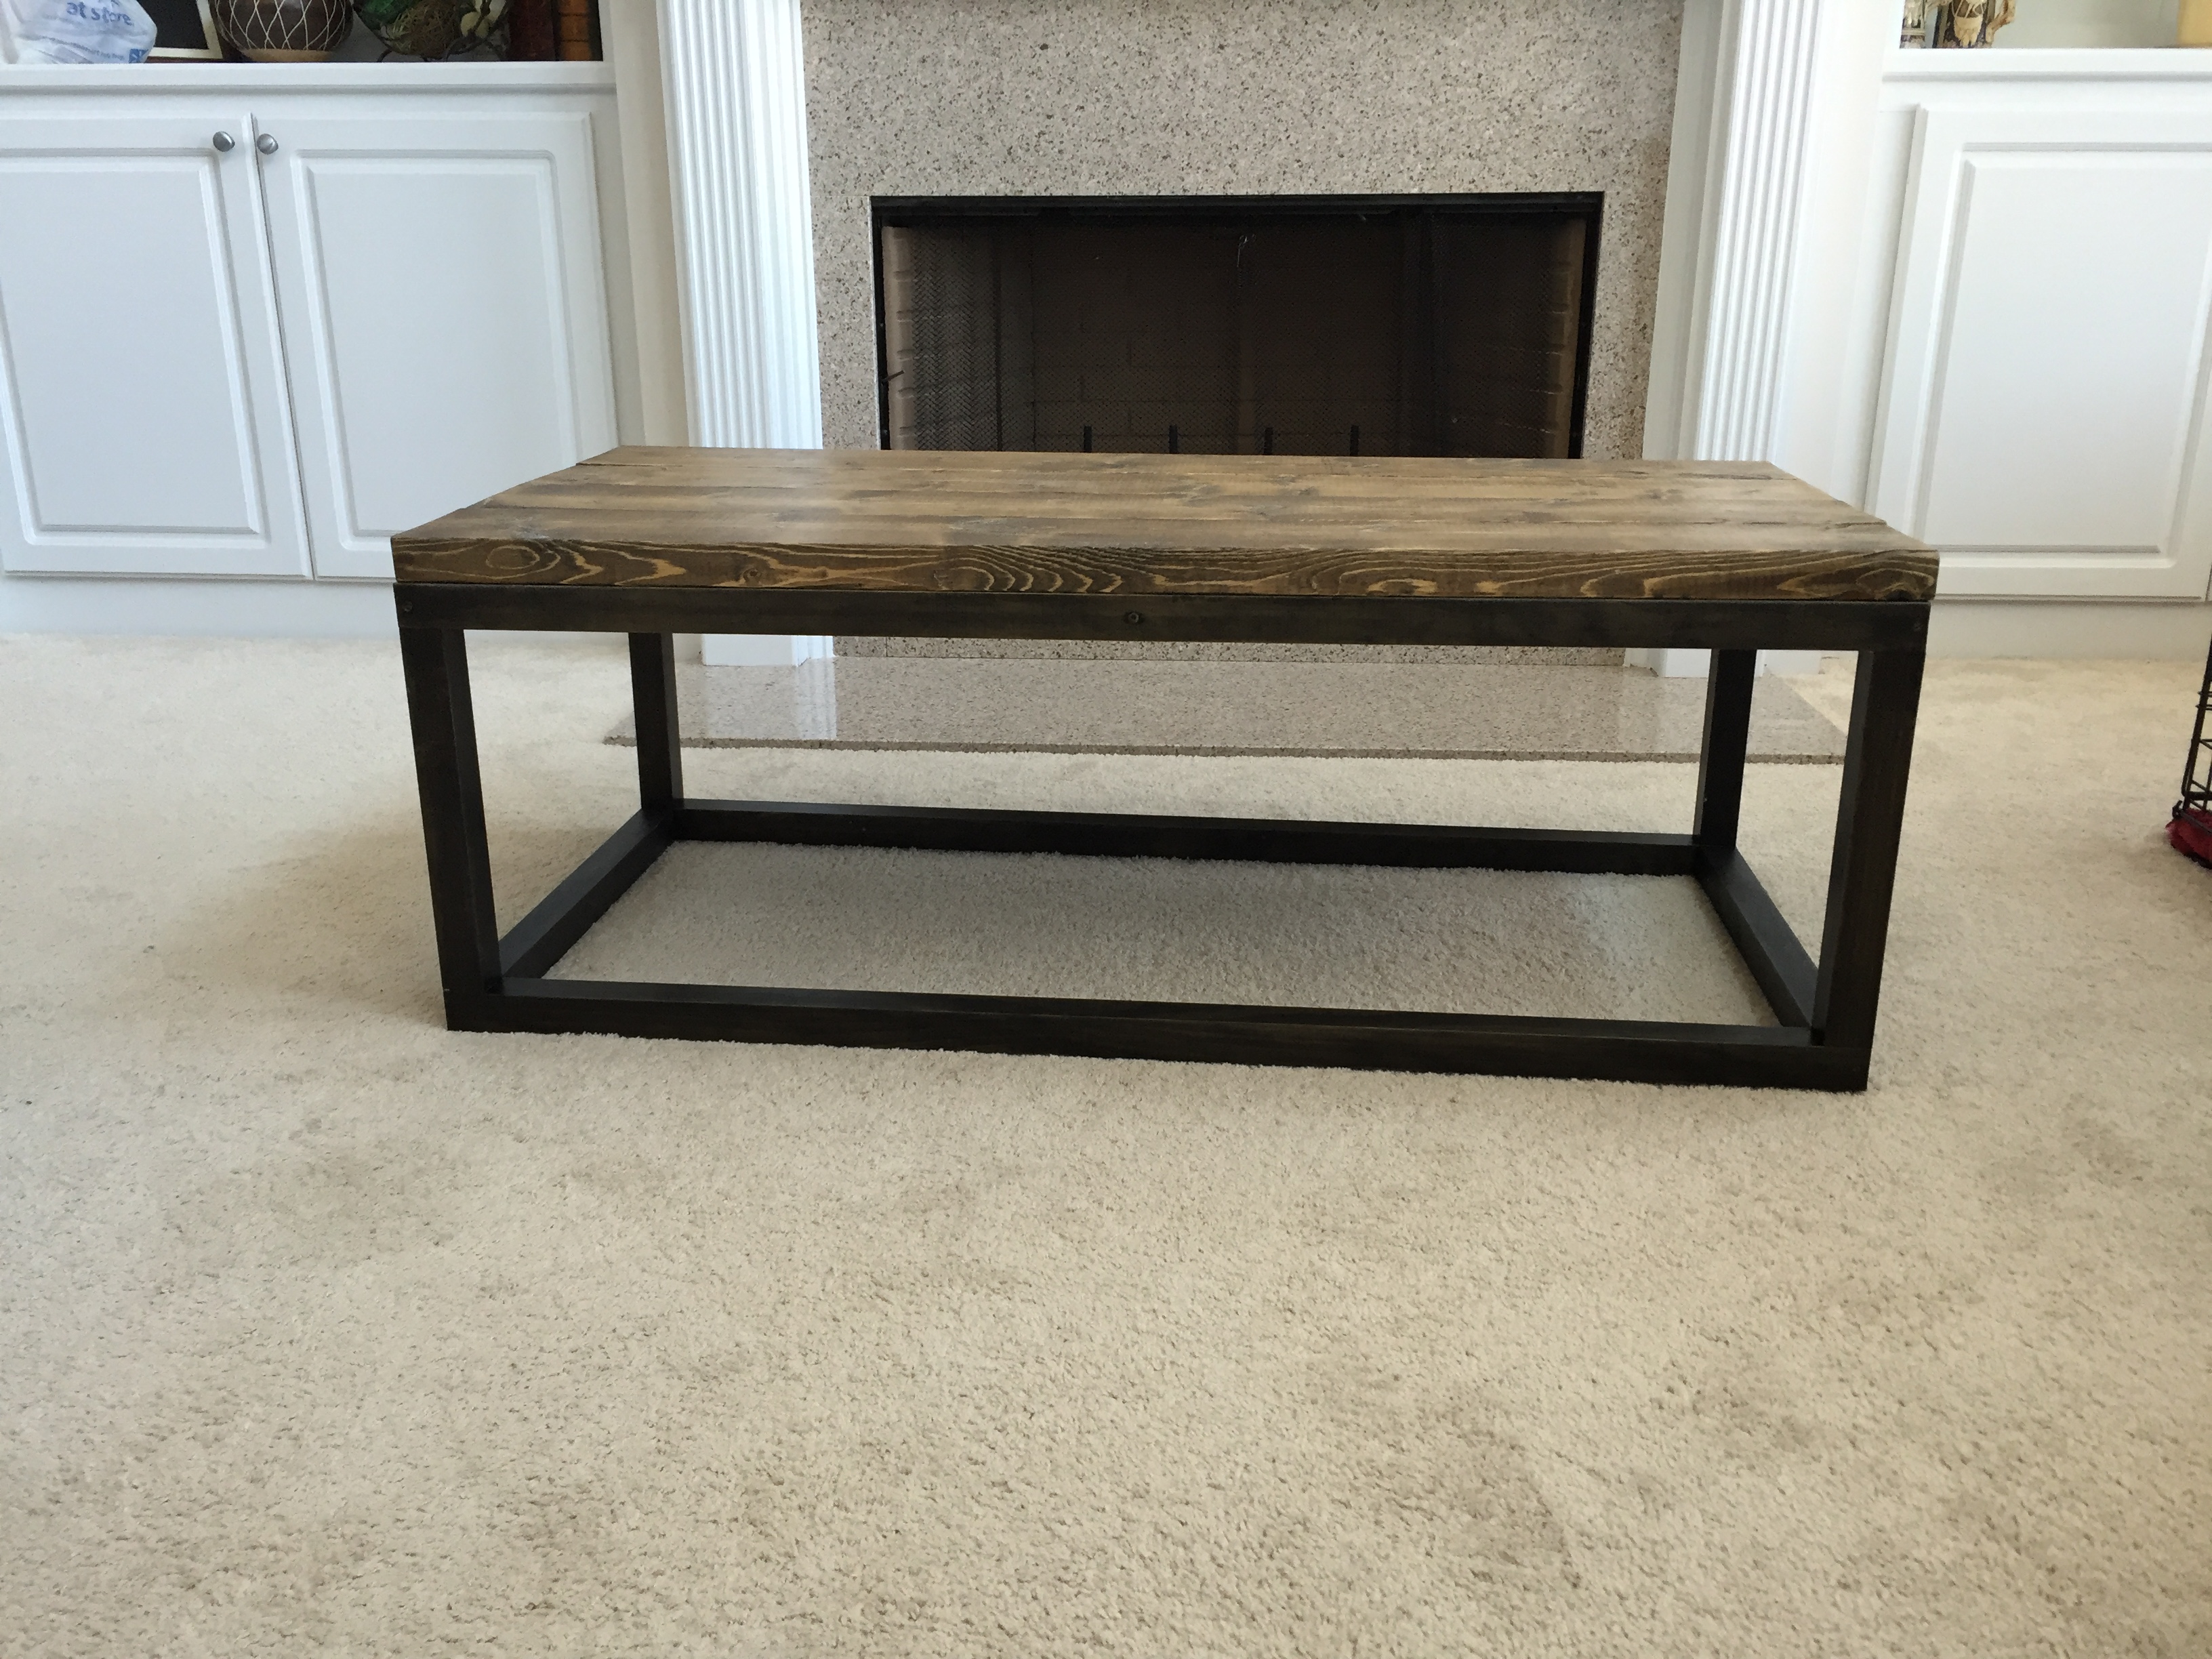
I used 2x2s for the base and stained them ebony. The top is made of 2x6s stained weathered oak & dark walnut. Caution: no matter how perfectly square your base is, if your top is even remotely warped/twisted, it will pull the whole thing out of whack. The base is not strong enough to fight the 2x6s.
Built from Plan(s)
Estimated Cost
$50
Estimated Time Investment
Afternoon Project (3-6 Hours)
Recommended Skill Level
Beginner
Stocking Stand
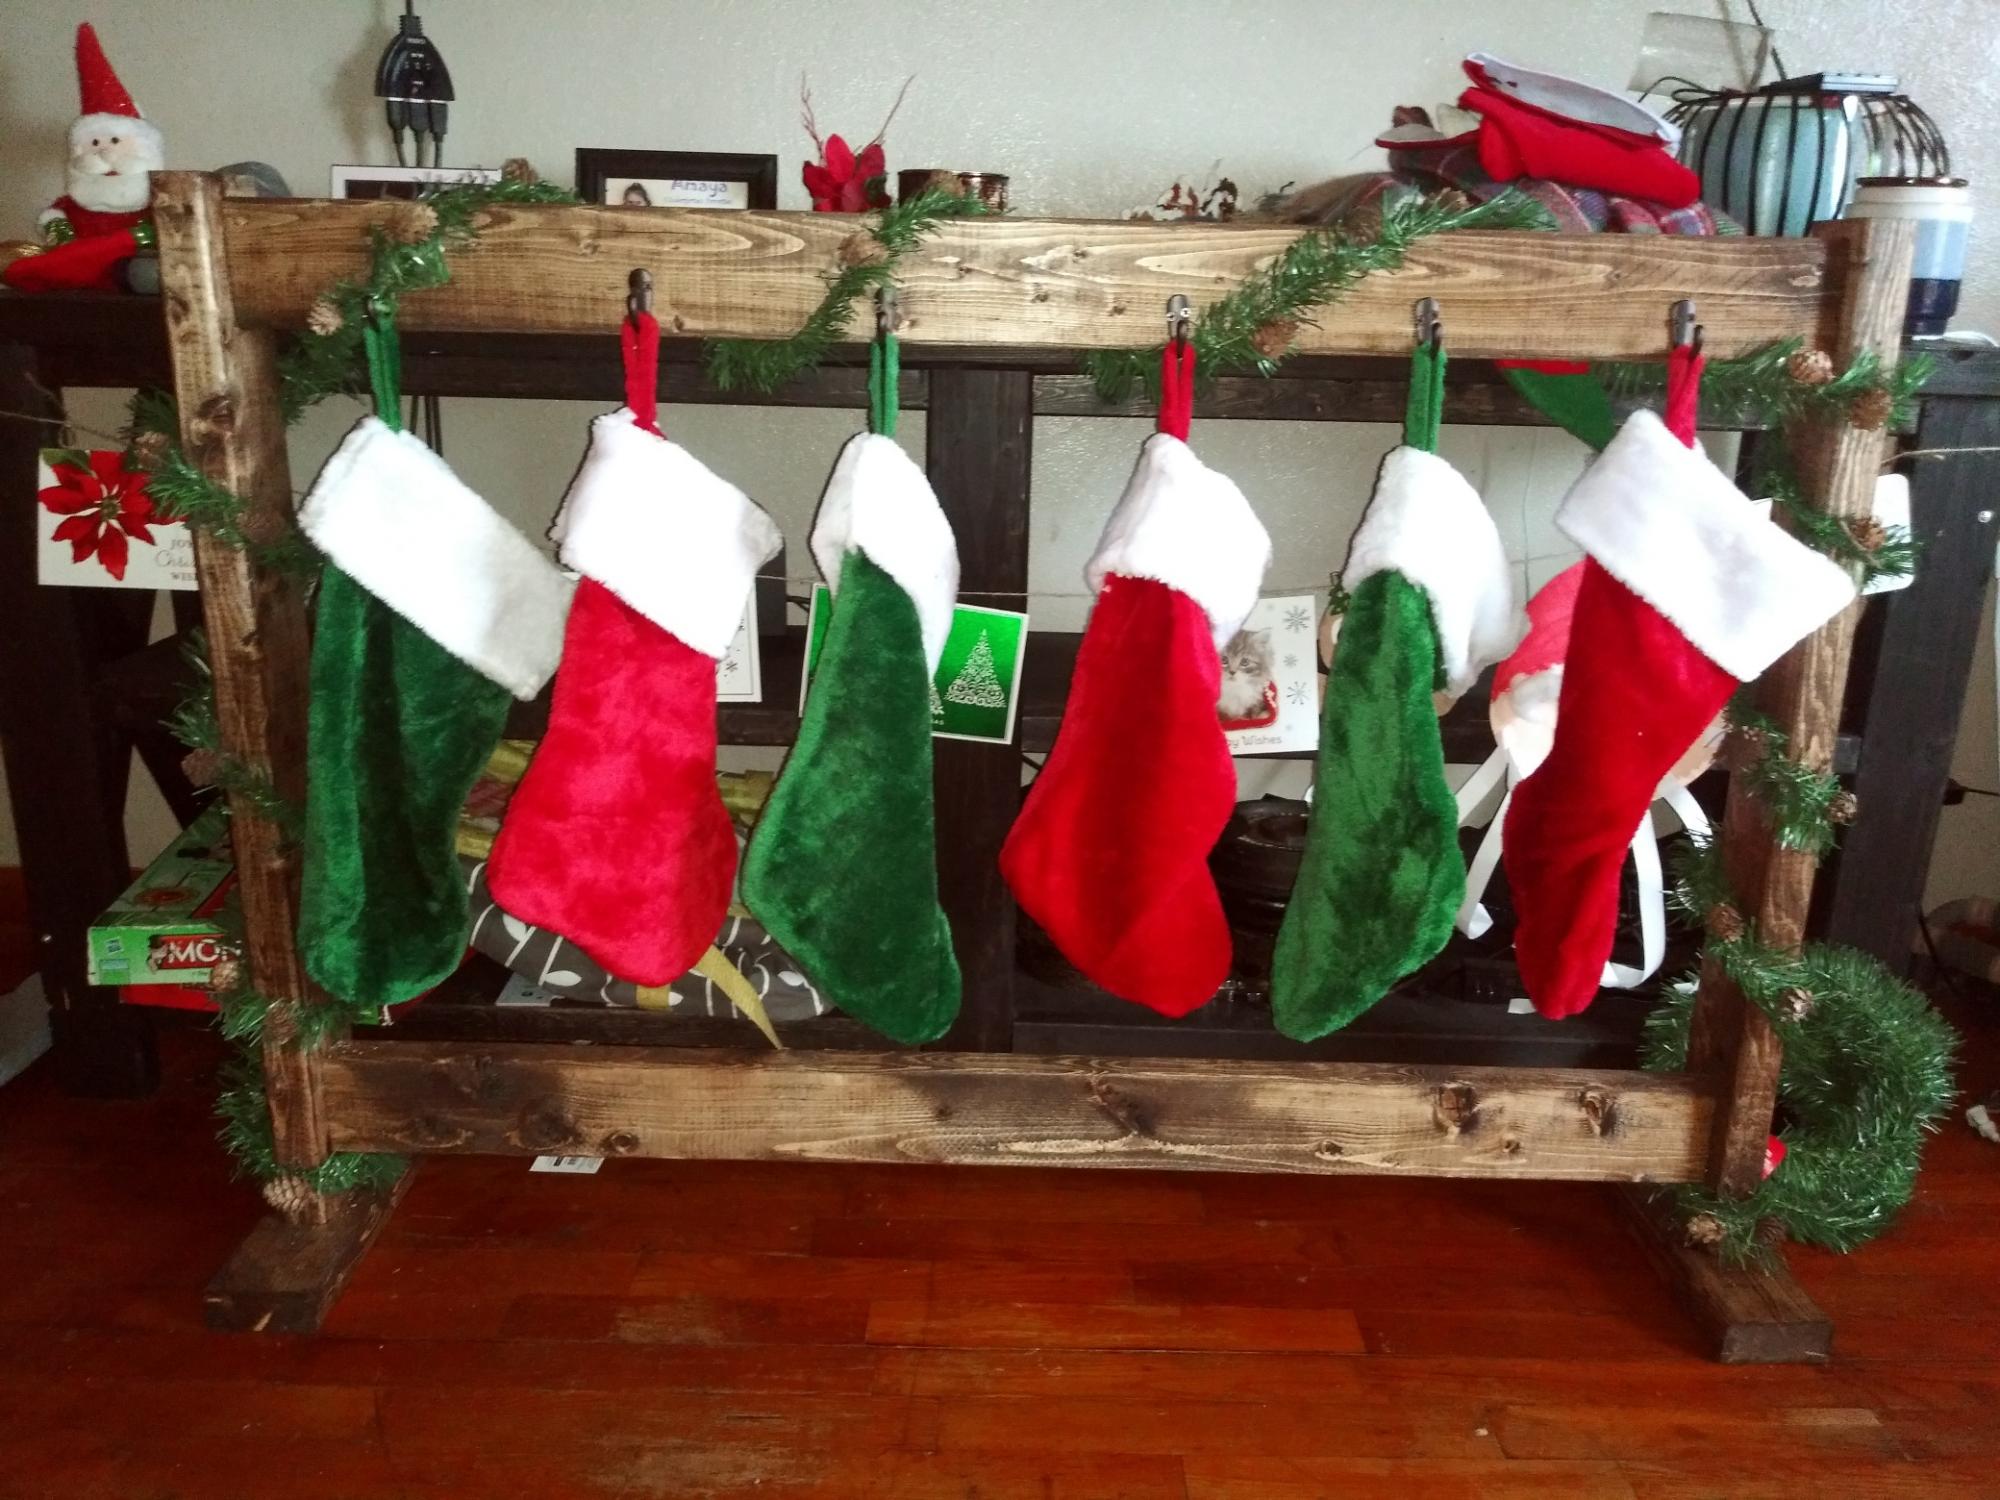
Made this for my little ones. They loved it! Merry Christmas!! <3
Built from Plan(s)
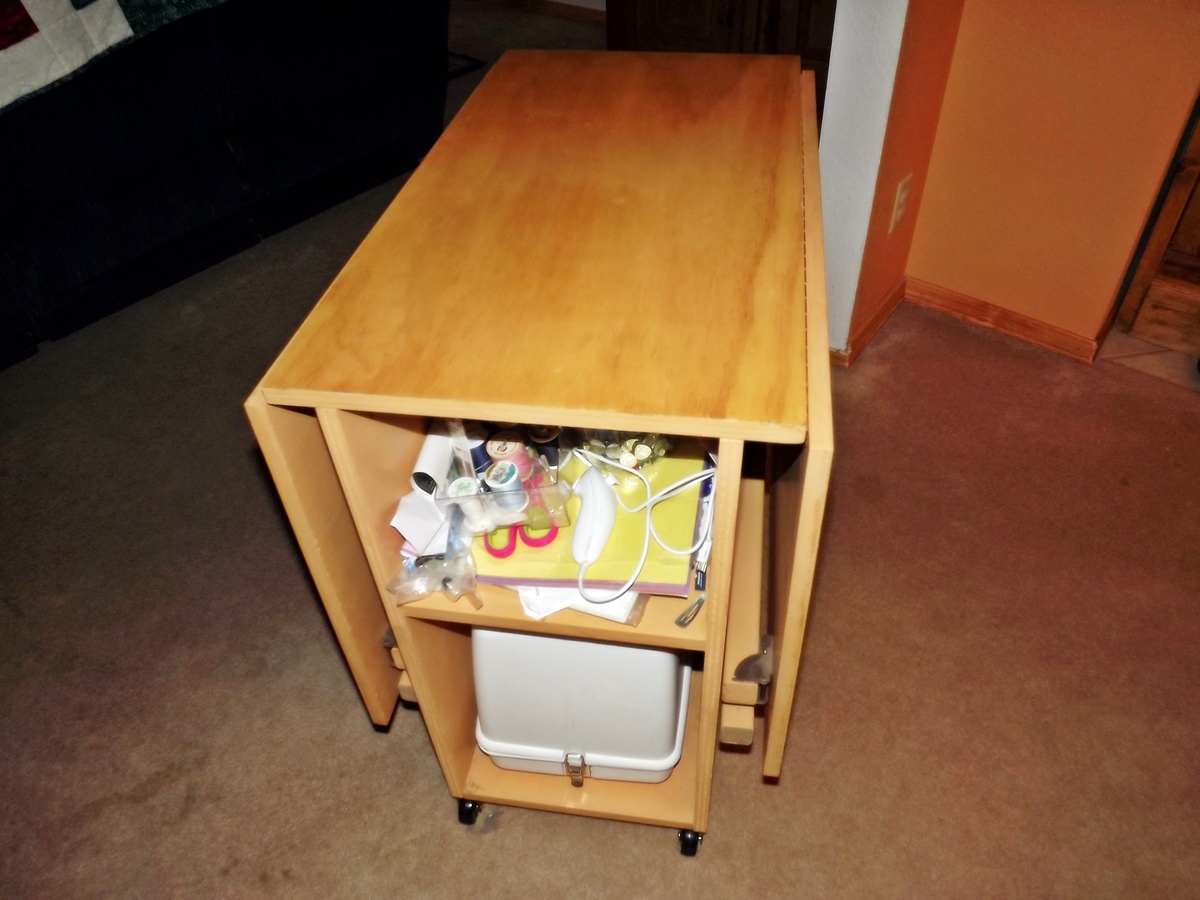
Sewing Table for Small Spaces

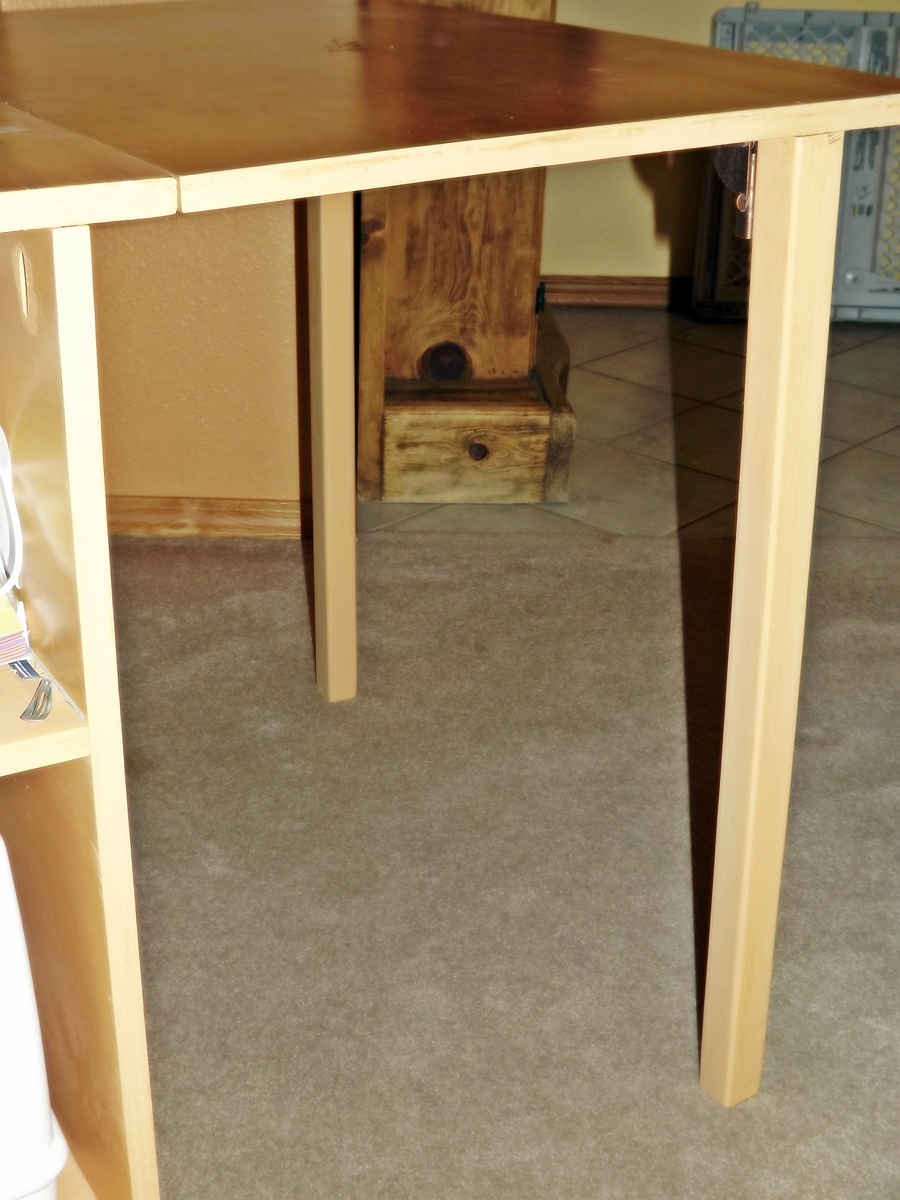
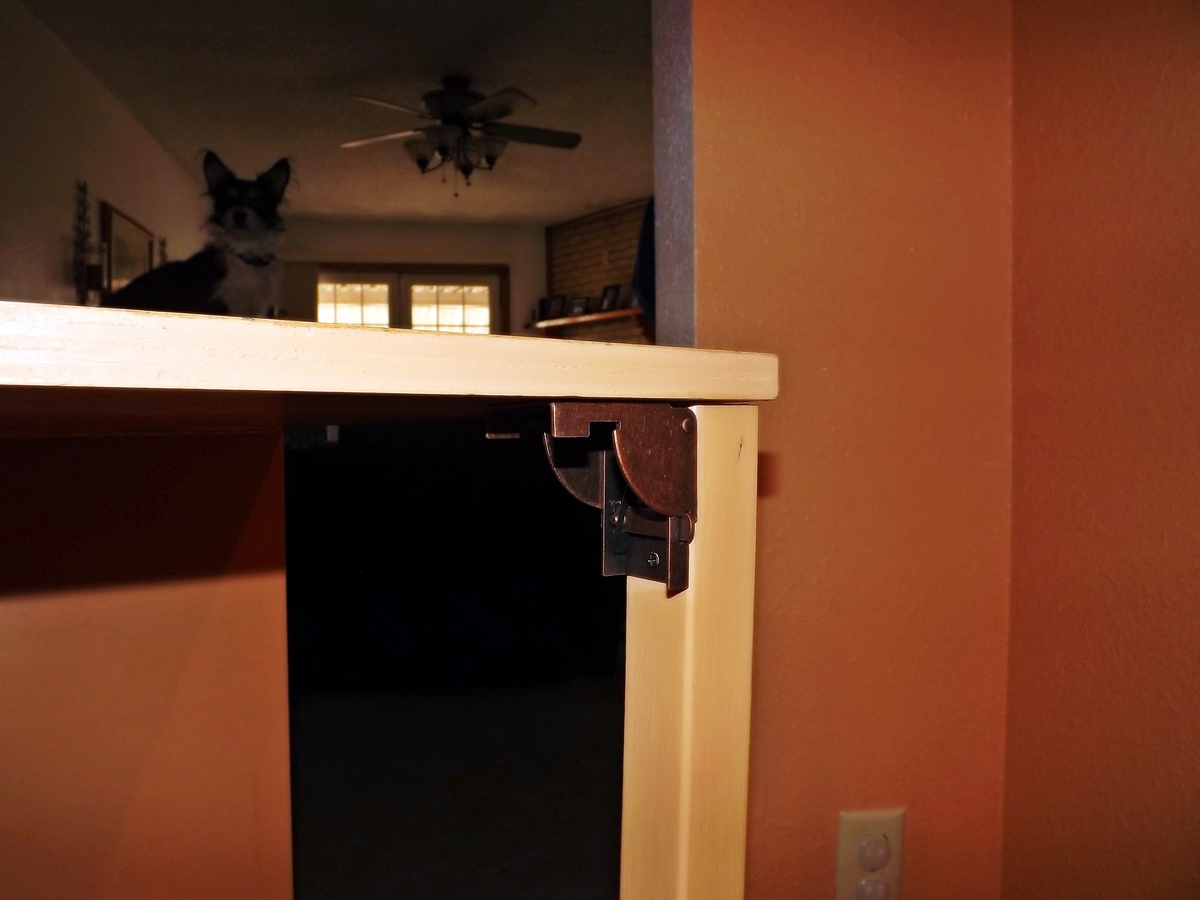
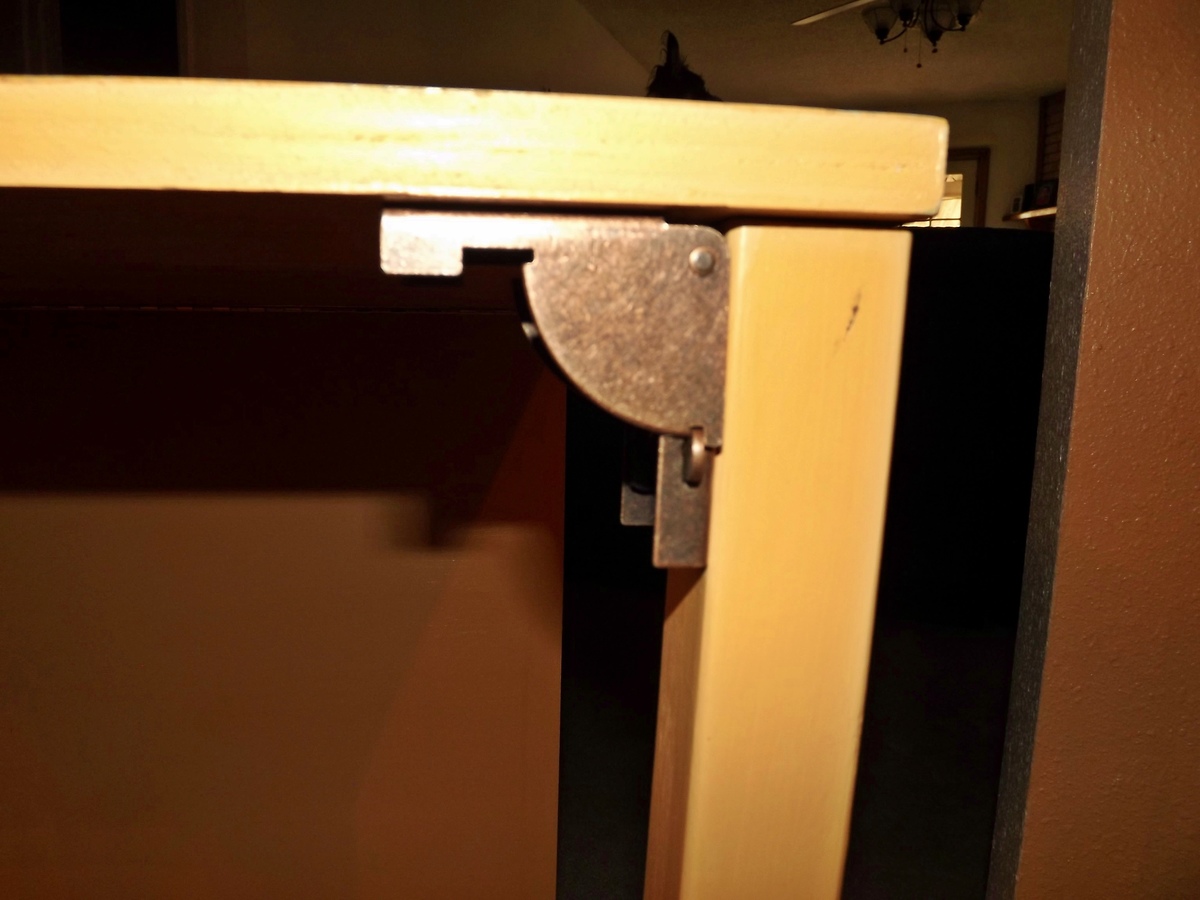
My daughter-in-law needed a compact sewing table, and this plan fit the bill perfectly! I did use 2 x 2 legs instead of 1 x 2s. This makes the table considerably more stable if you plan to use this table with your machine. If you do use the 2 x 2s for legs, you will need to widen your table top dimensions from 15 1/2" to 17" to accommodate the larger diameter of the legs. I also used a piano hinge for each drop leaf. They weren't much more expensive than the hinges listed in the plans, but again, they provide more stability (imho).
I wanted to show the locking mechanism for the legs in detail. I love these as they hold the legs in place when the drop leaf is down, and they pop into place when the leaf is in use. Called "folding leg fitting" it is part S-149L at $3.65 each at the following link:
http://www.hardwaretree.com/proddetail.php?prod=S-149L
When my daughter-in-law received her gift on Christmas Eve, she wouldn't even let me keep it for another day or two so I could touch-uppaint some spots...she loves it.
Thank you, Ana, for the wonderful plans!!
Built from Plan(s)
Estimated Cost
Around $75.00 not including stain and paint, which I had on hand.
Estimated Time Investment
Weekend Project (10-20 Hours)
Finish Used
Top and leaves stained with pine; box and legs painted w/ semi-gloss wall paint from my daughter-in-law's house (can't tell you the color, but it's from the terracotta color family). Three coats of poly on stained top.
Recommended Skill Level
Beginner
Comments
Sun, 02/03/2013 - 17:45
Great job! I can understand
Great job! I can understand your DIL's unwillingness to part with it even for a short amount of time!

Mon, 02/04/2013 - 07:49
Inspiration!
The table for my sewing machine costs almost as much as the machine did! This is a wonderful build. You have a very luck daughter-in-law.
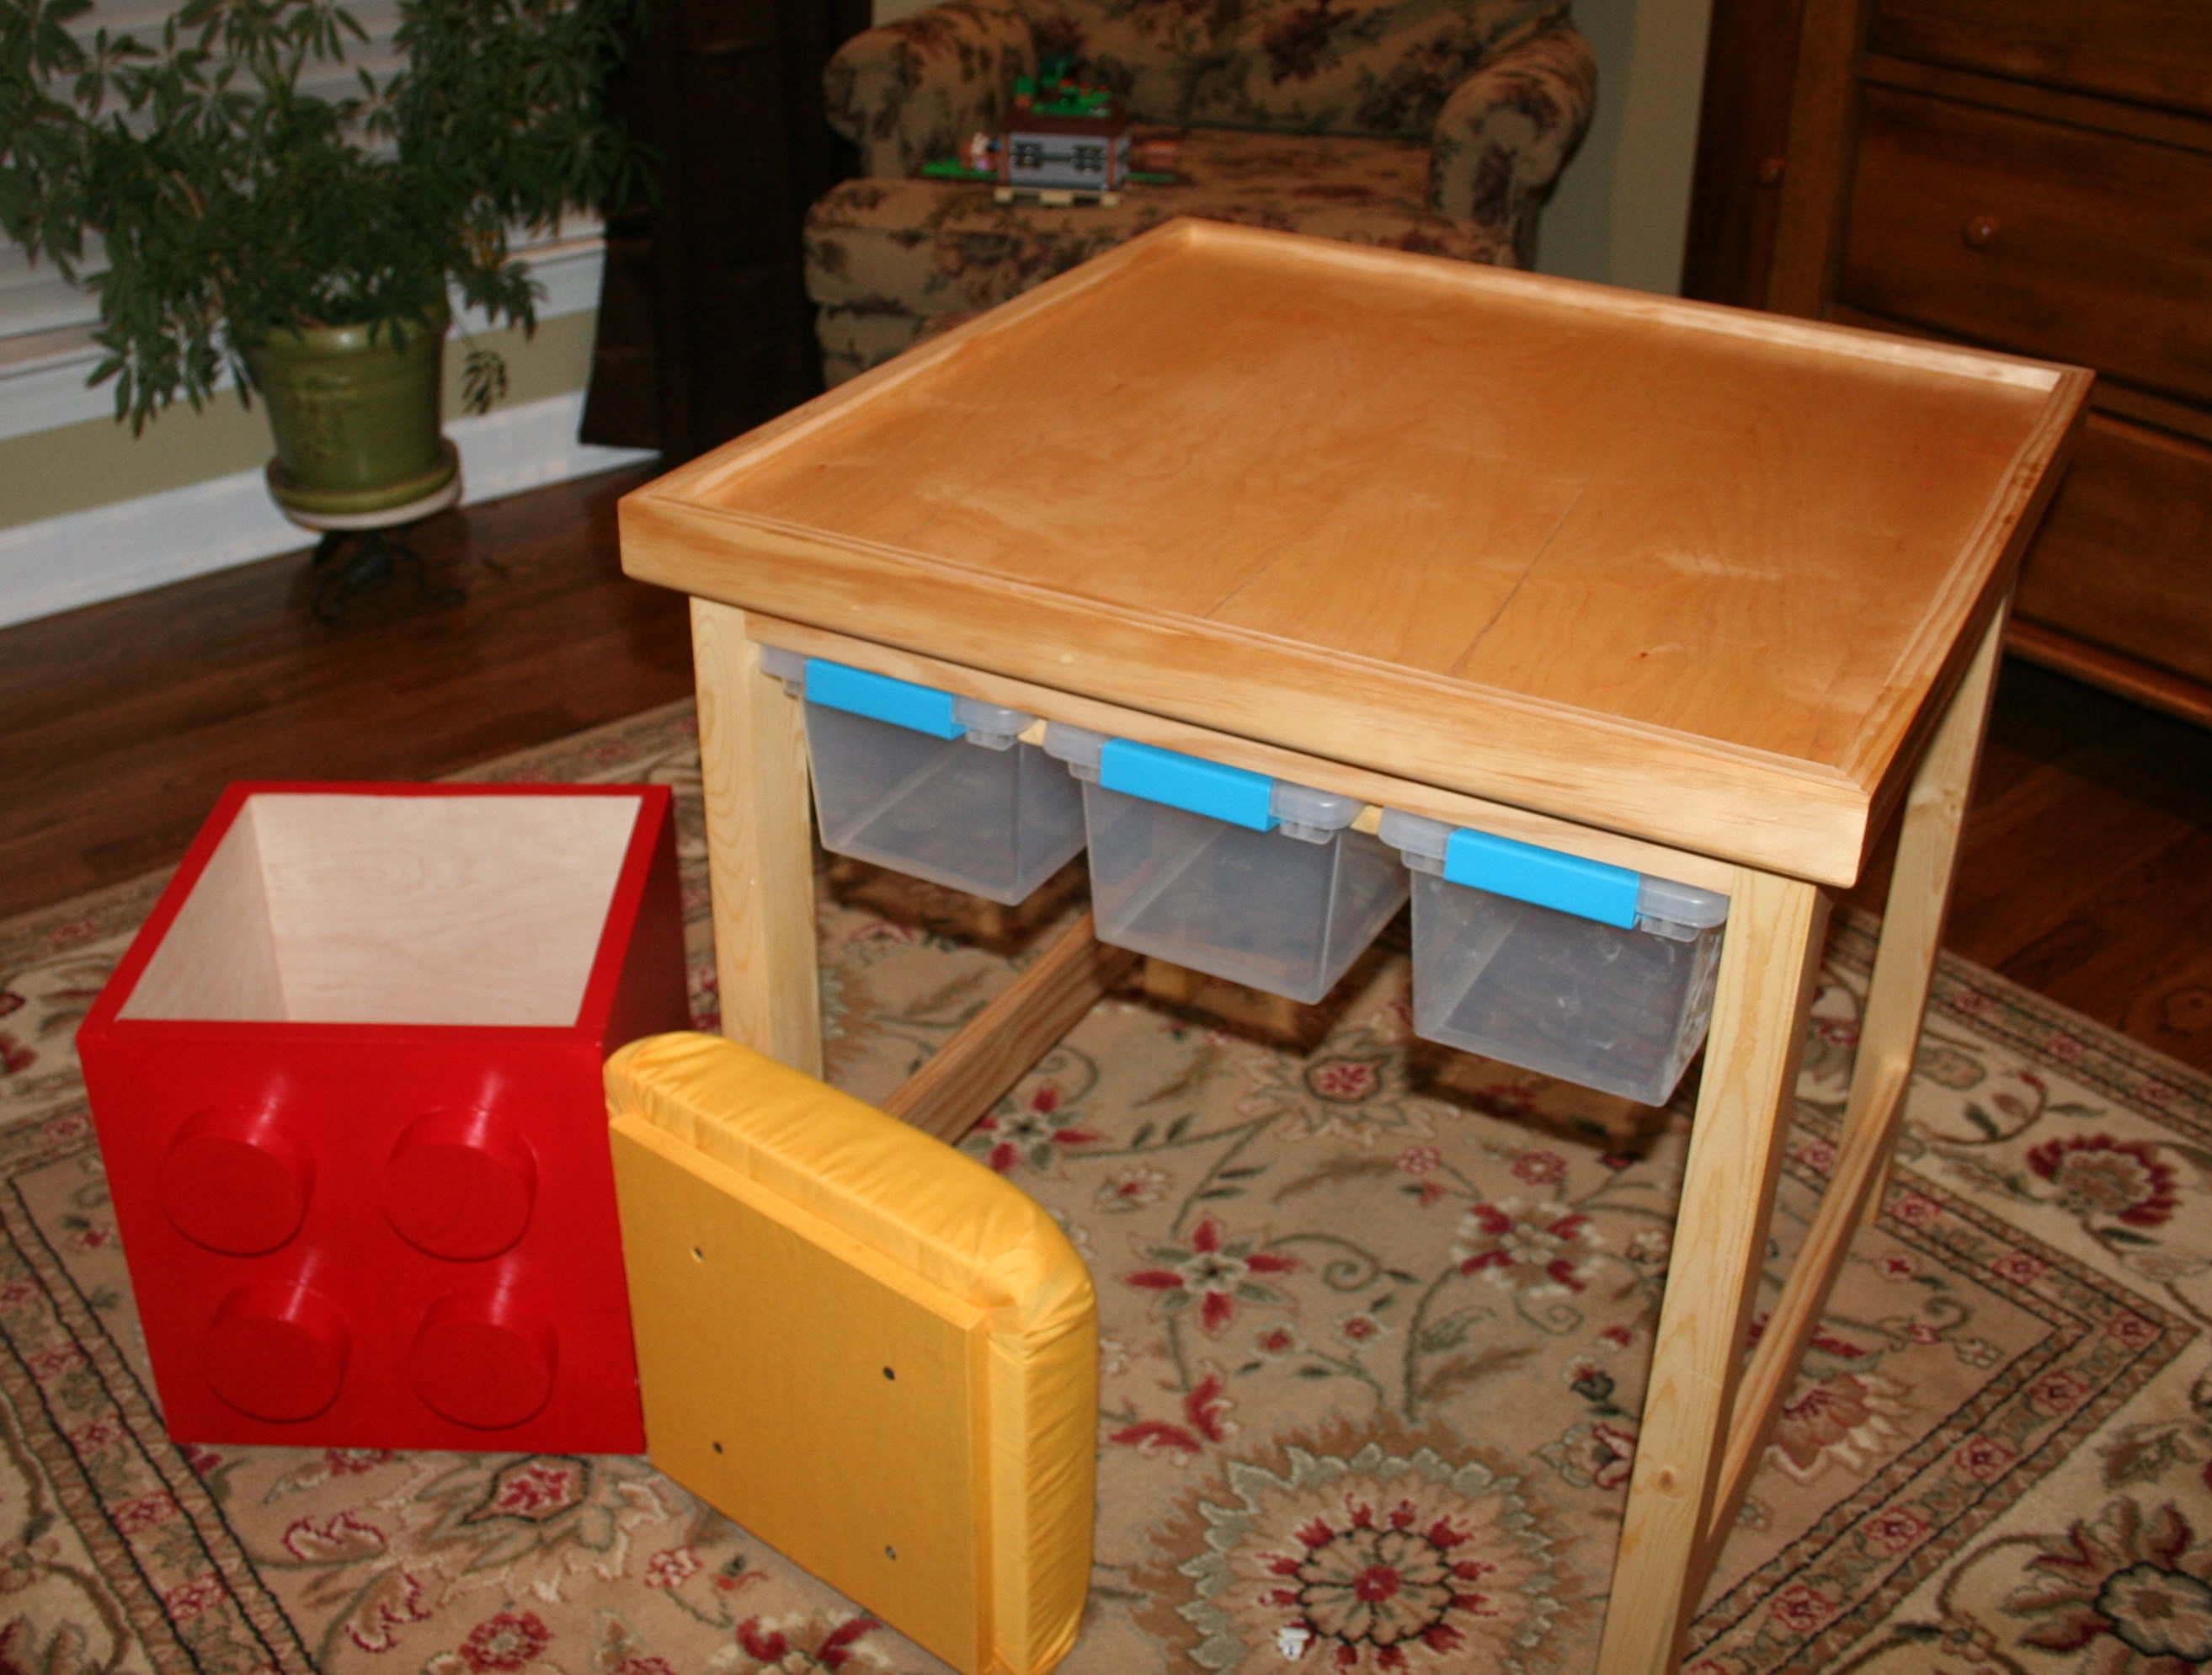
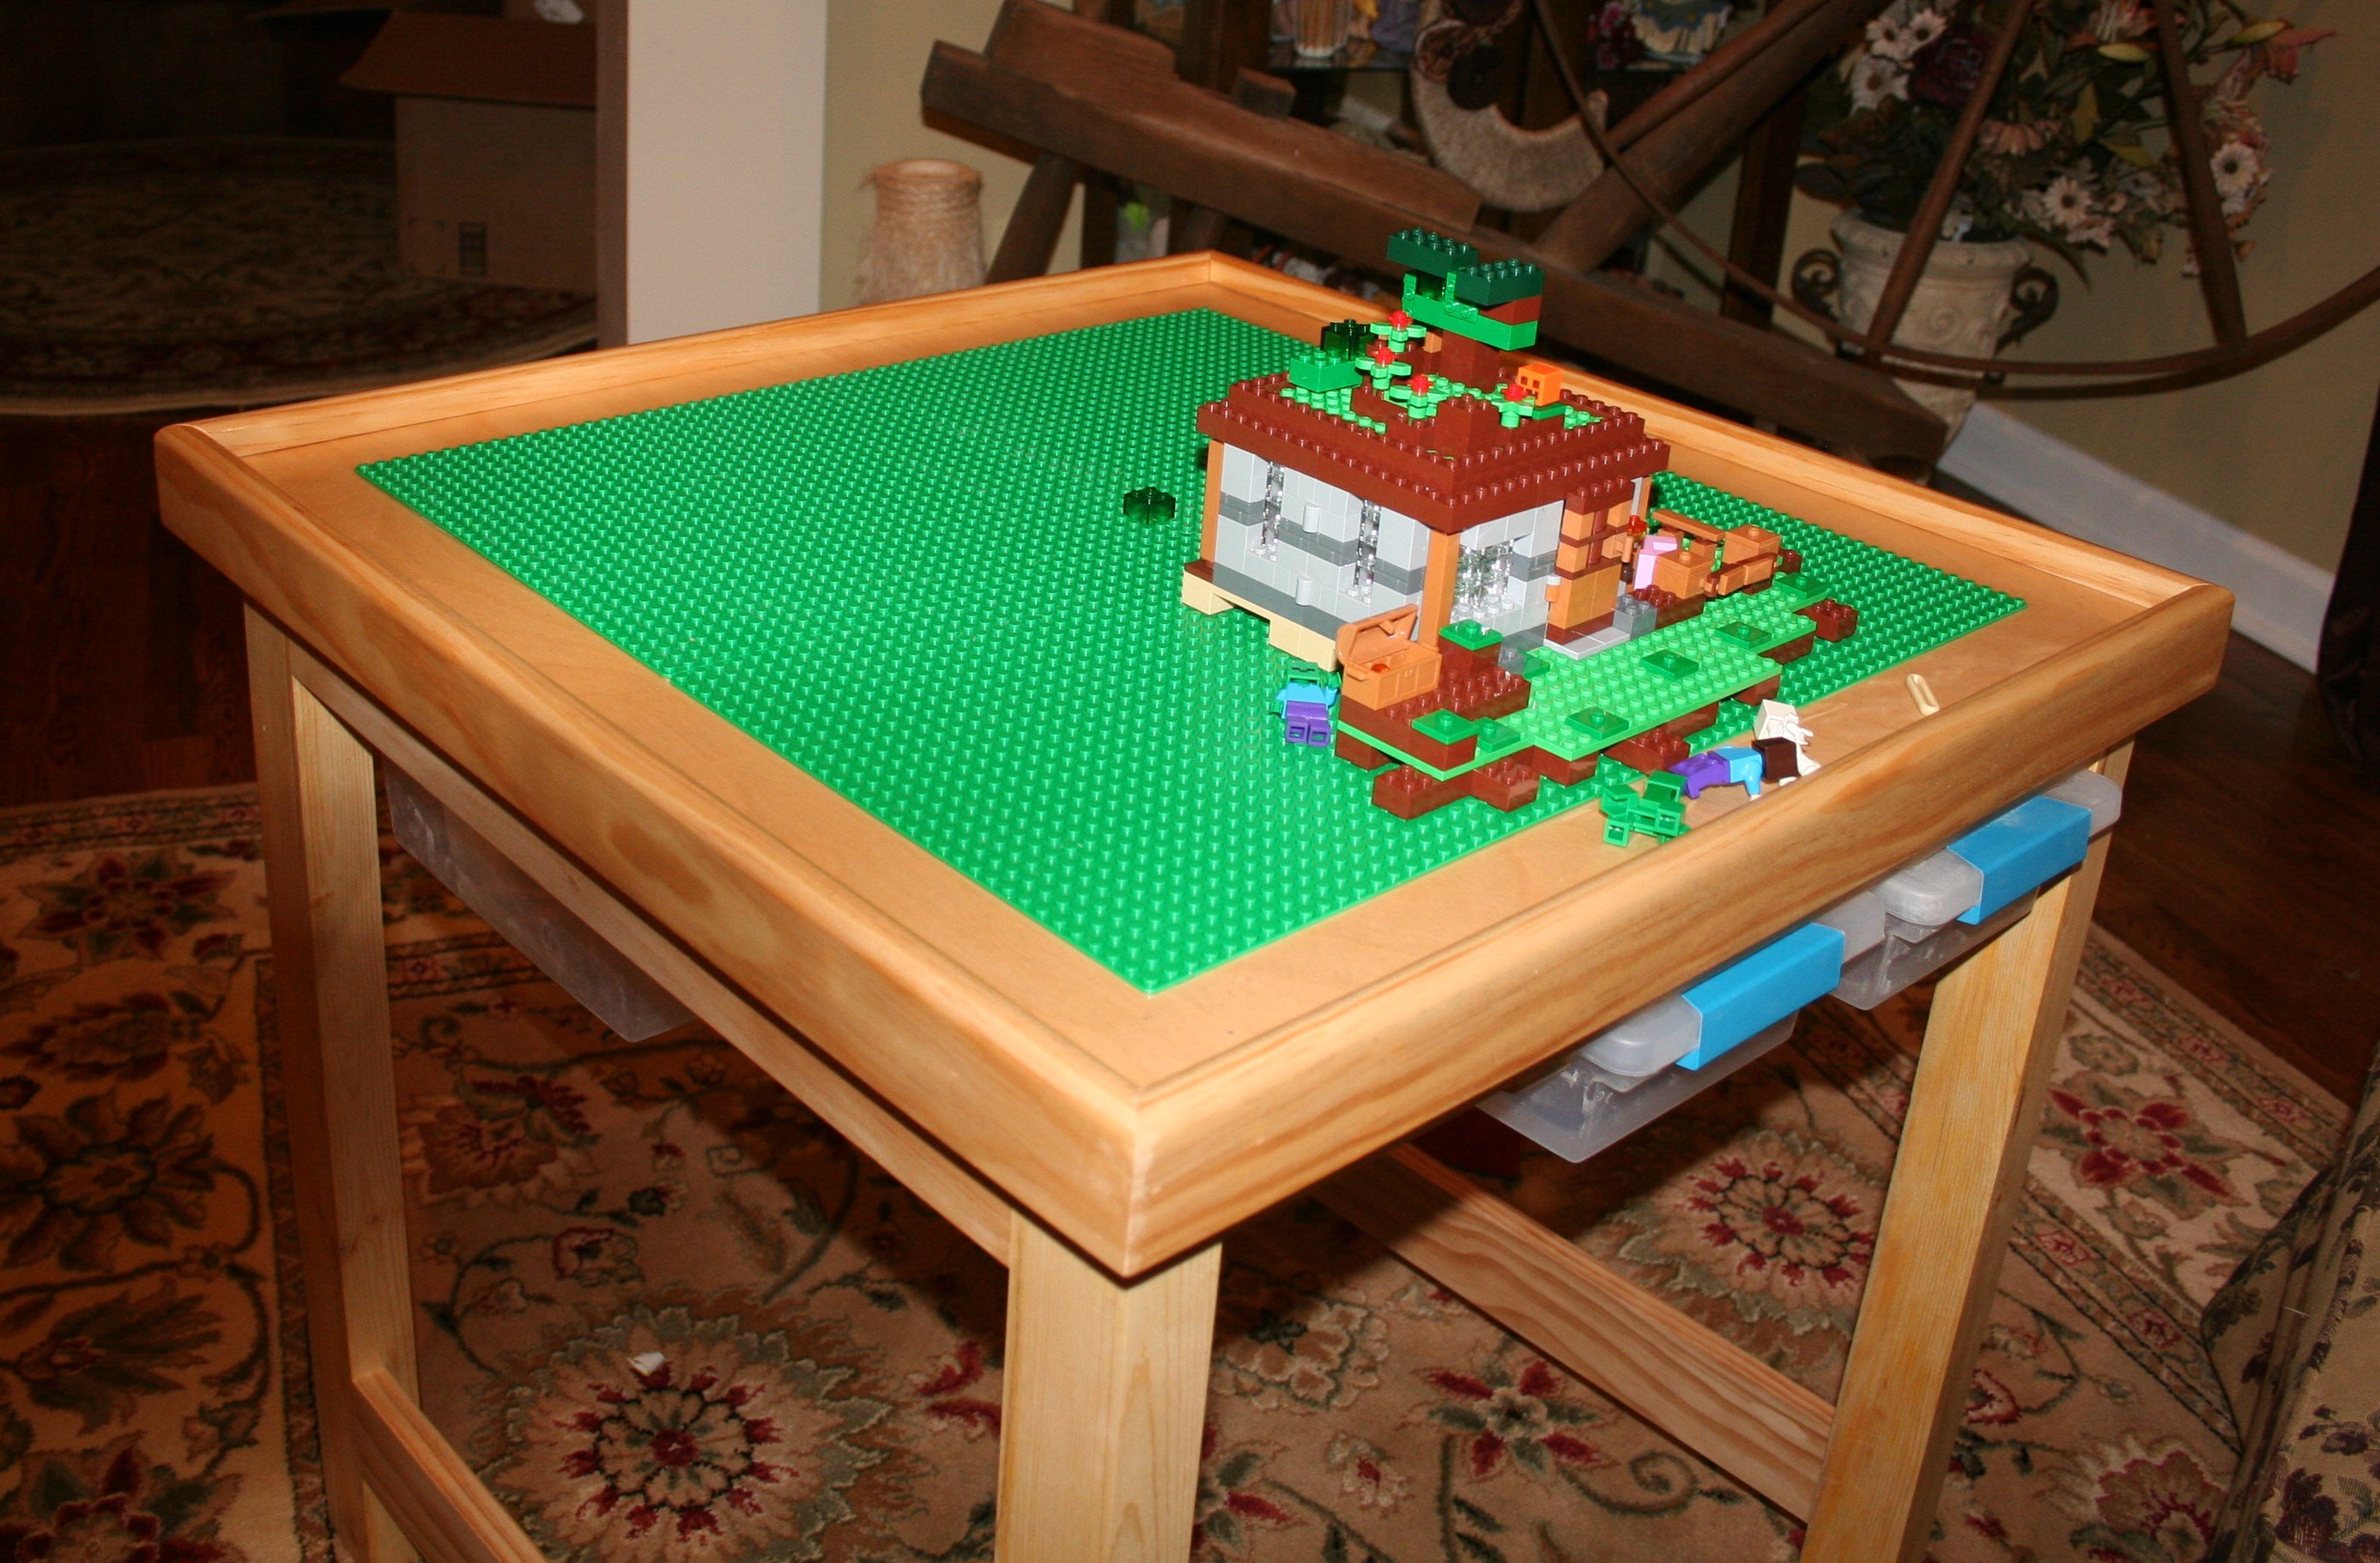
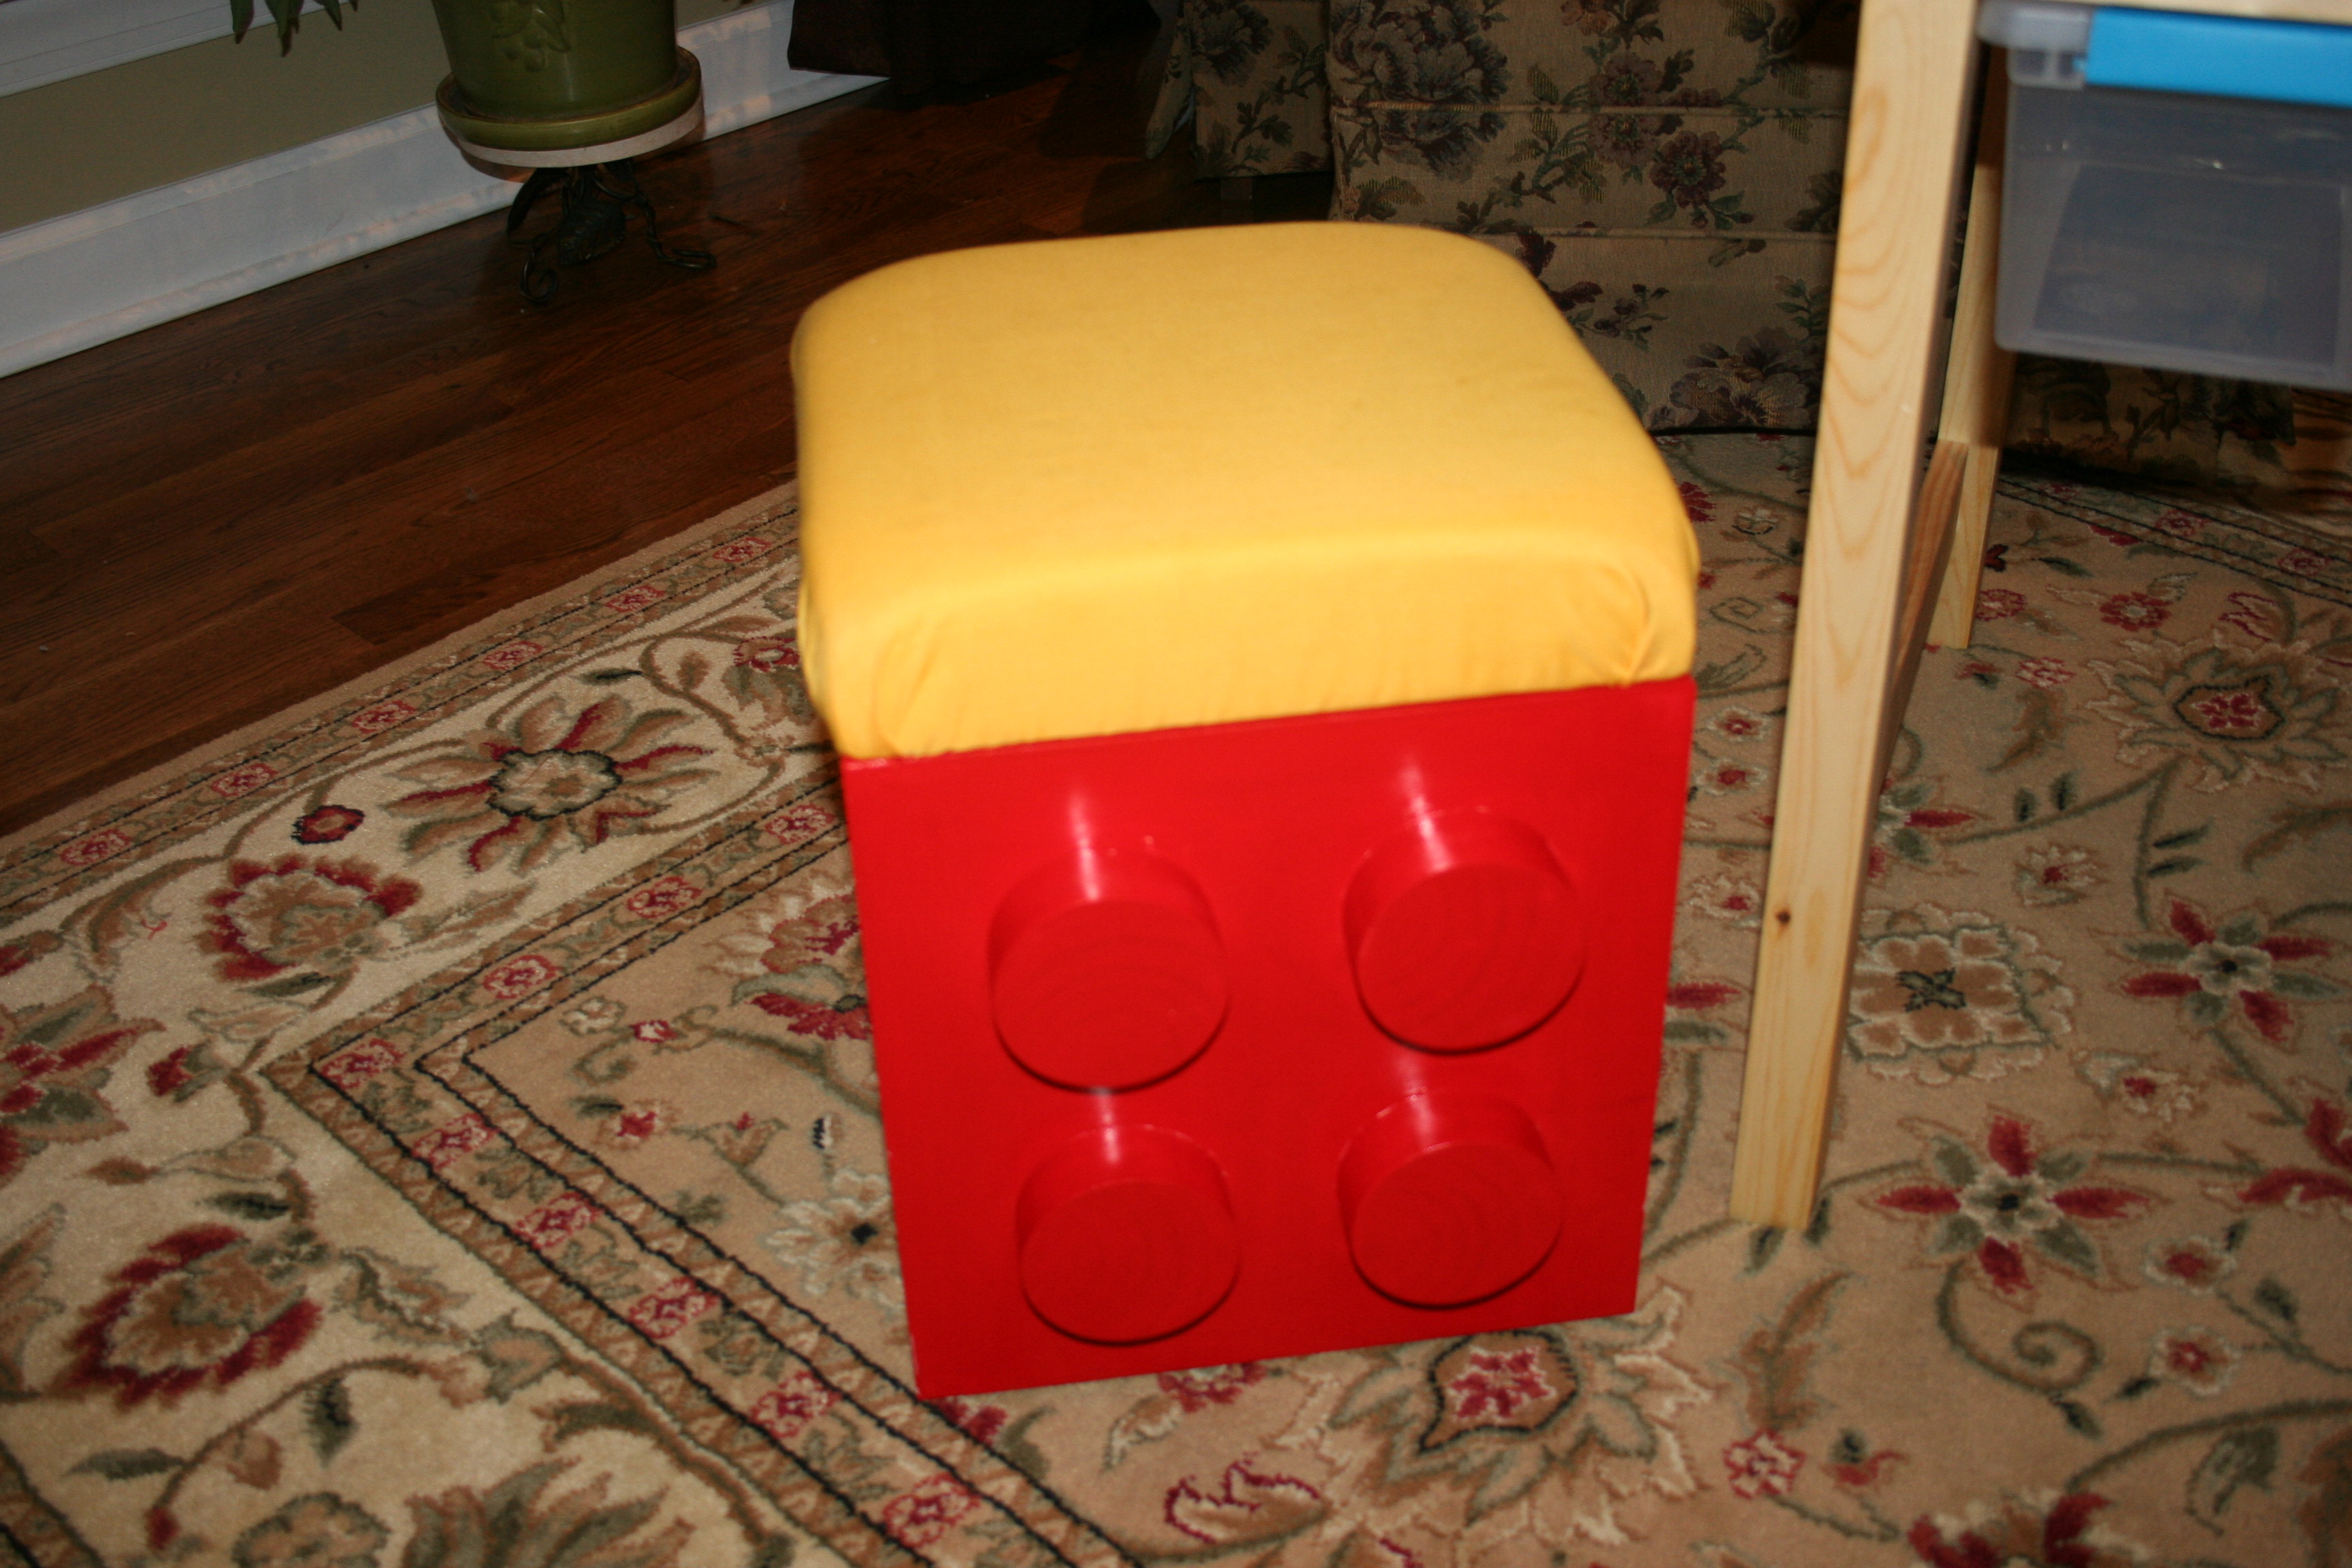
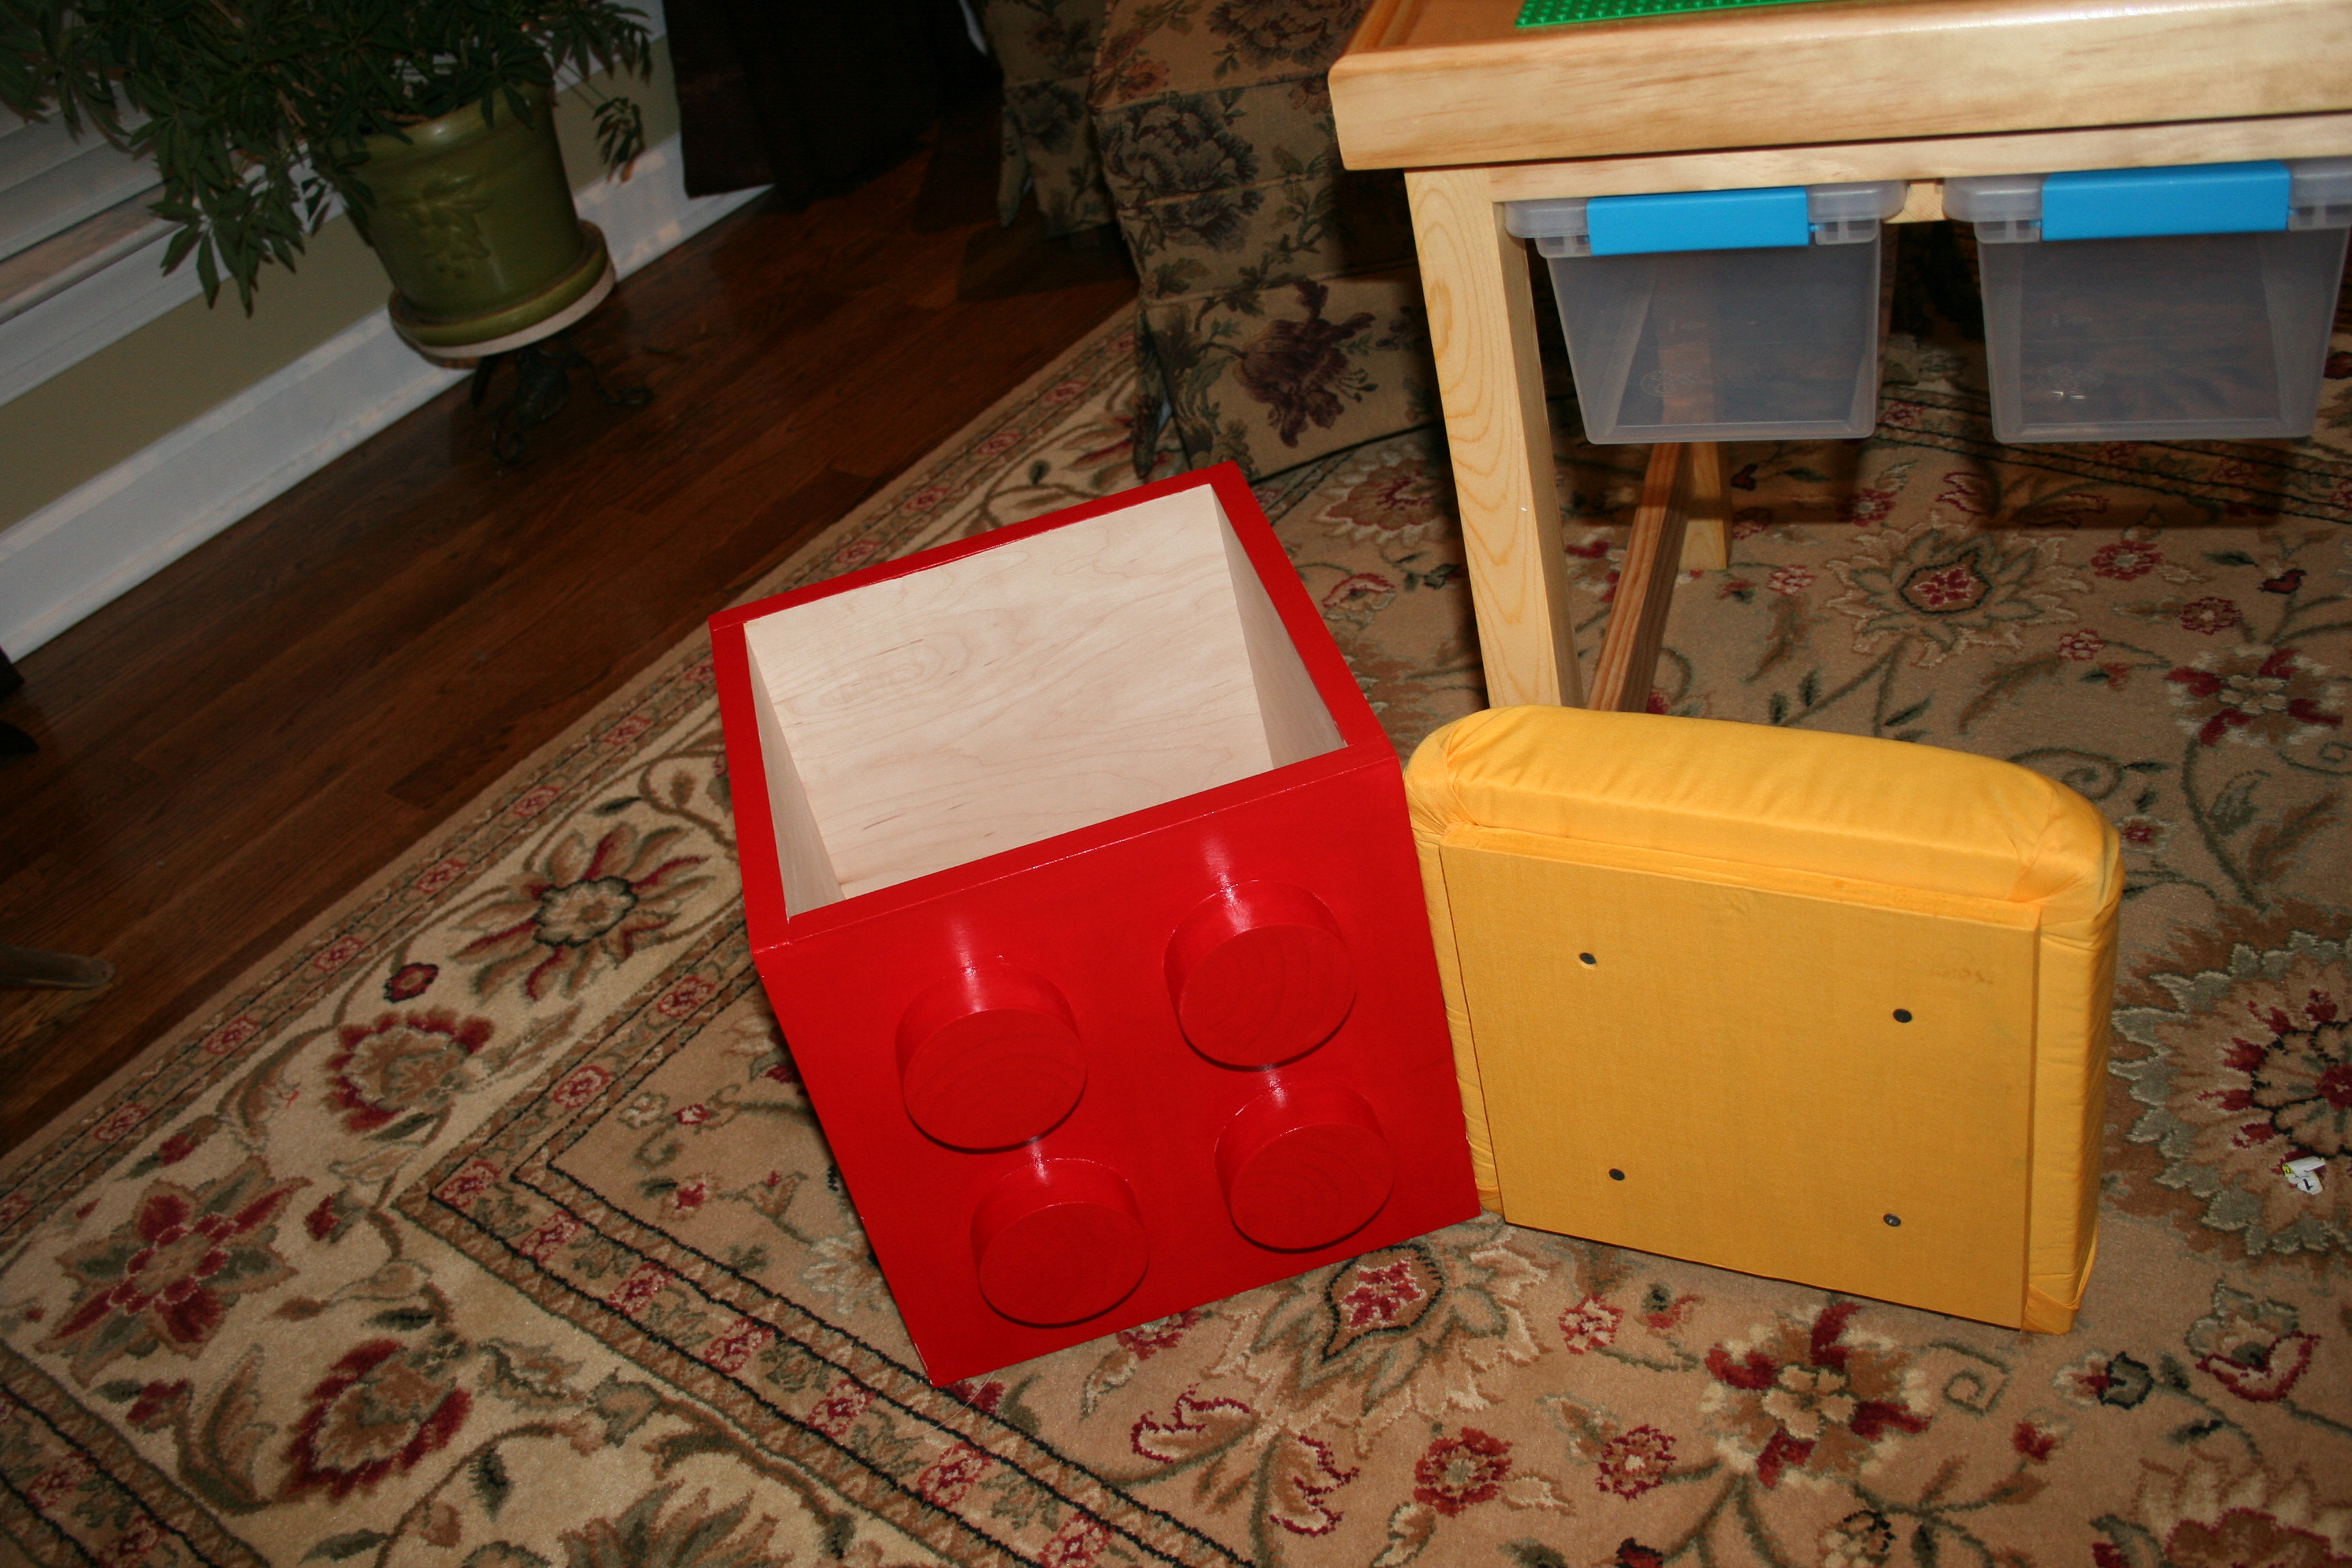
Lego Table/Stool
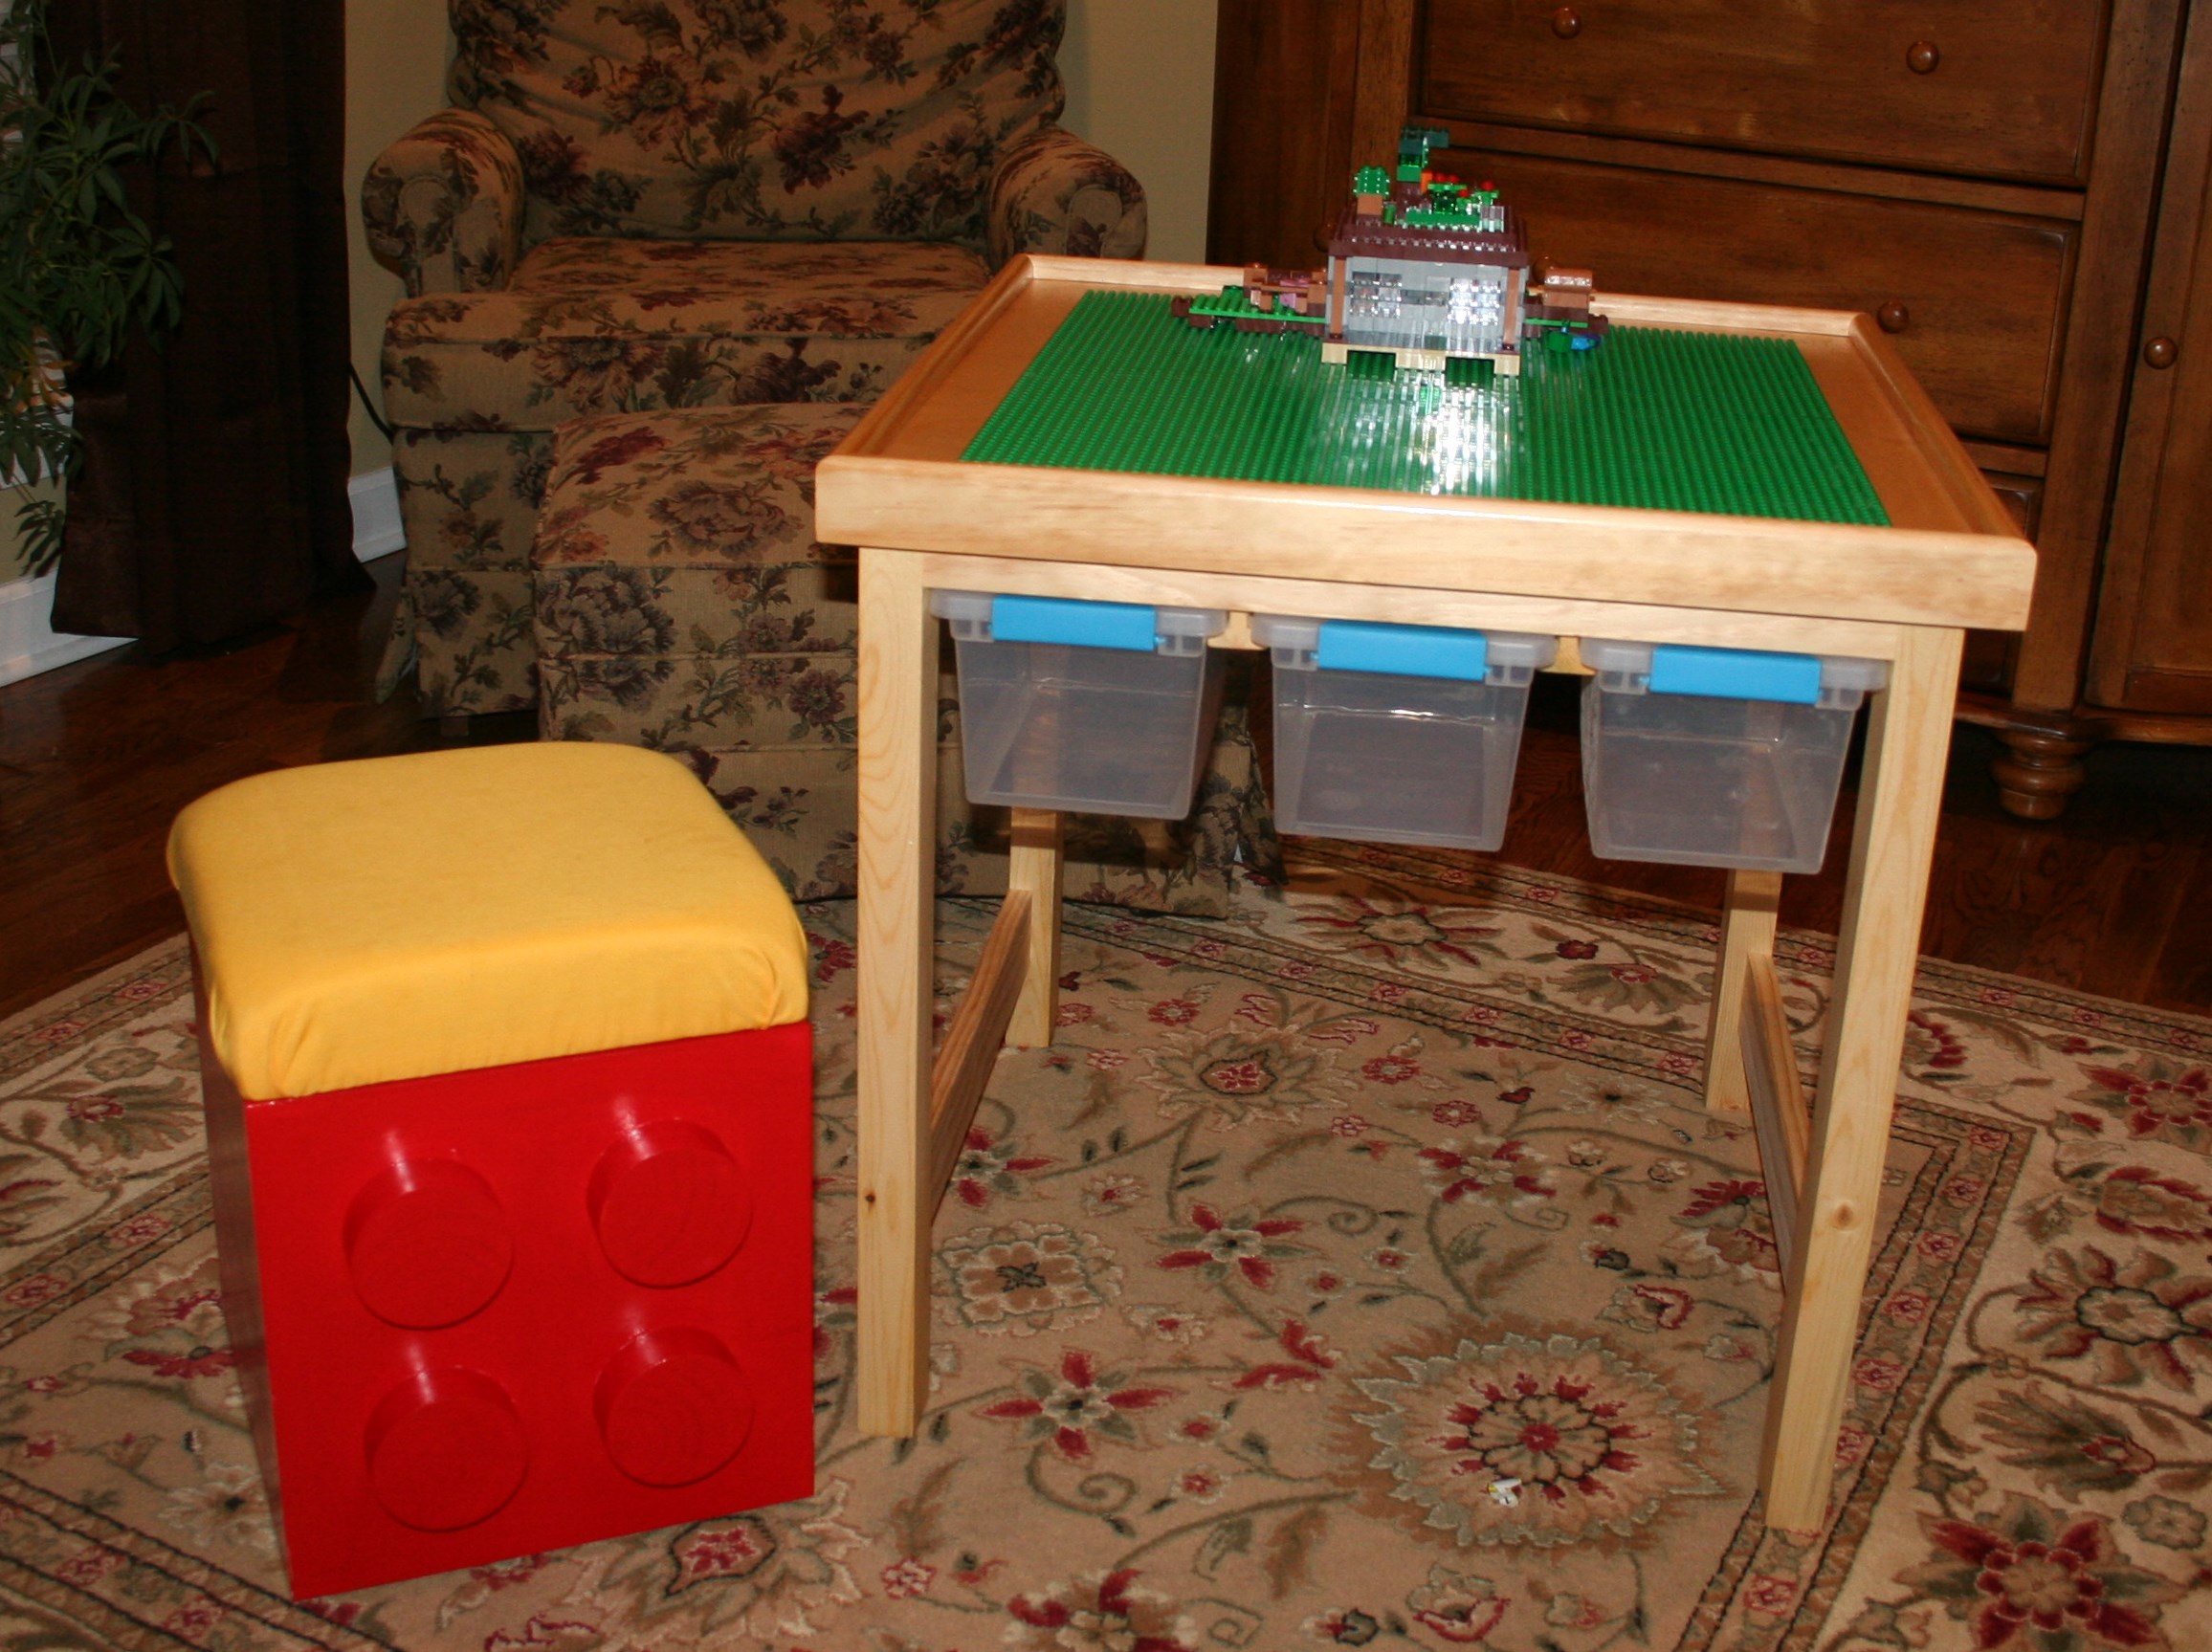
My grandson loves Lego's. So for his birthday I built him a Lego table. The top is reversible so it can be used for other activities when not playing with Lego's. It also has 6 storage bin's that slide out. I also built a stool that looks like a Lego. It has storage and it's on wheels.
Estimated Time Investment
Weekend Project (10-20 Hours)
Finish Used
Polyurethane, Apple Red paint (Rustoleum)
Recommended Skill Level
Intermediate
Comments
Mon, 03/09/2020 - 17:09
Love the design with the…
Love the design with the storage bins for easy storage.
Awesome and super sturdy bench
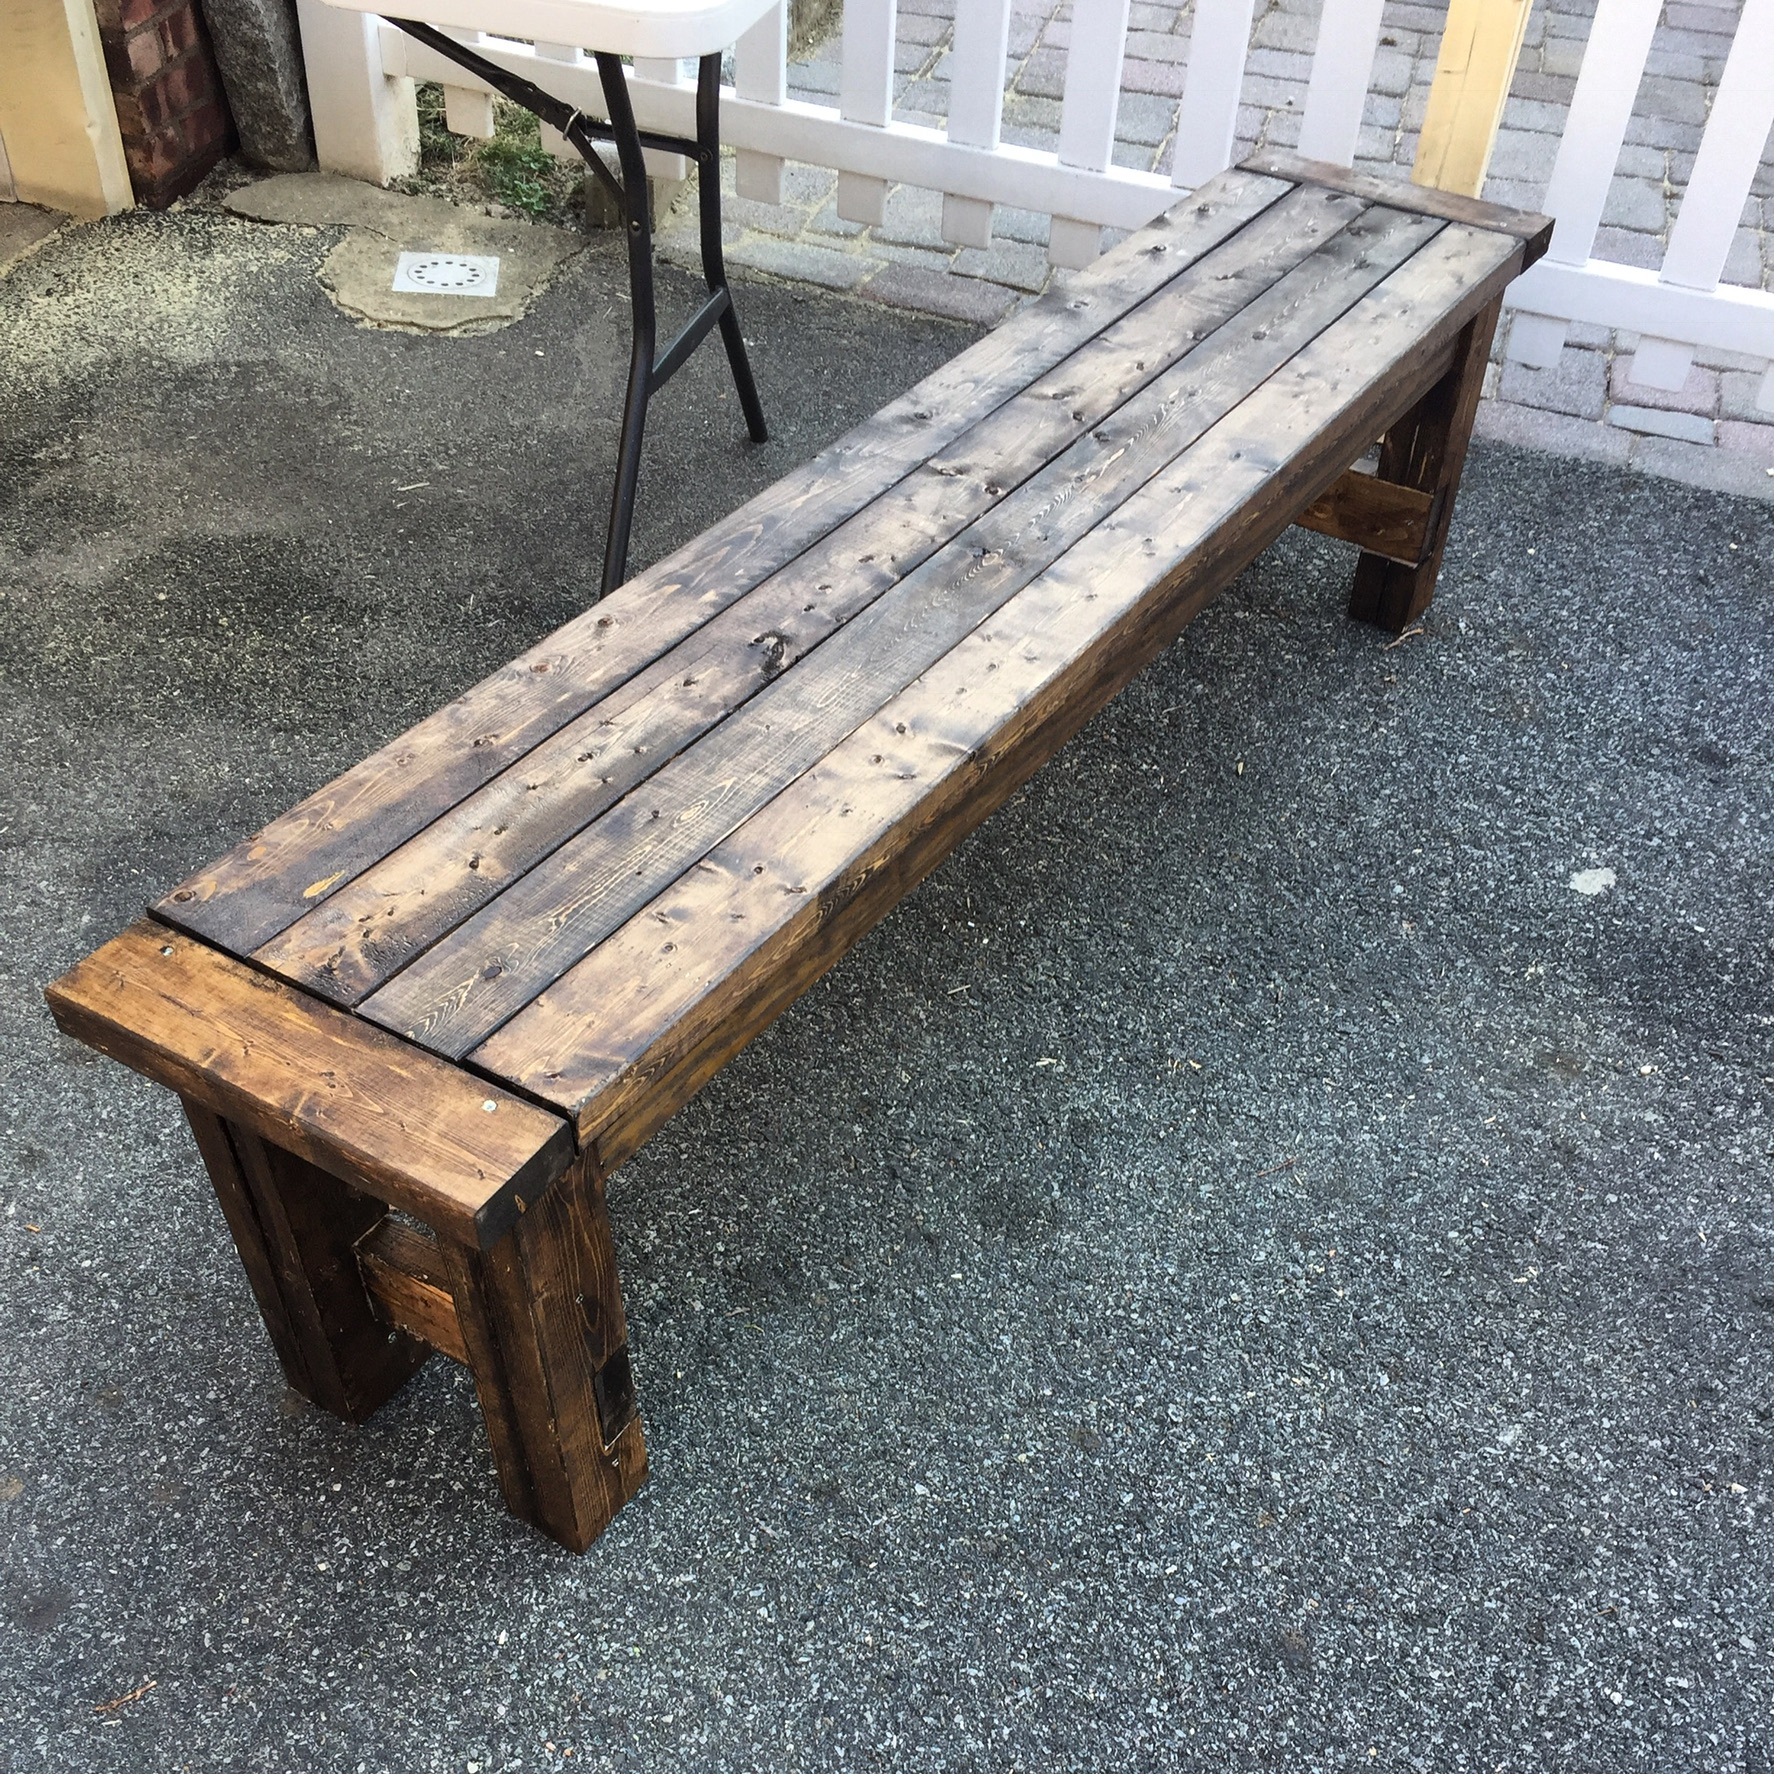
The plans are easy to follow and the result is a very sturdy pro looking bench that seats quite a few people. Great starter or beginner project
Built from Plan(s)
Estimated Cost
Around $35.
Estimated Time Investment
Day Project (6-9 Hours)
Finish Used
Miniwax espresso stain for indoor and outdoor
Recommended Skill Level
Beginner
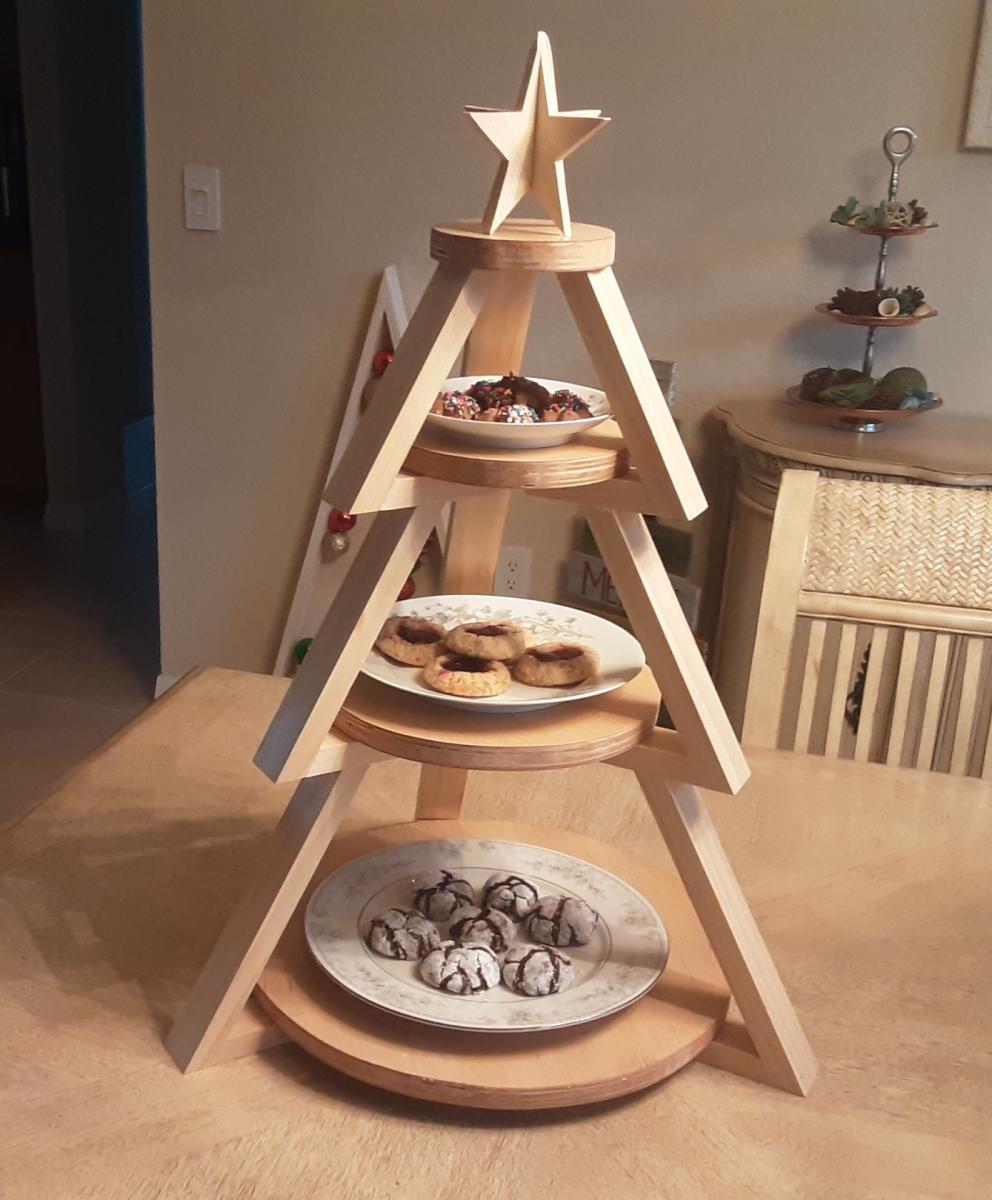
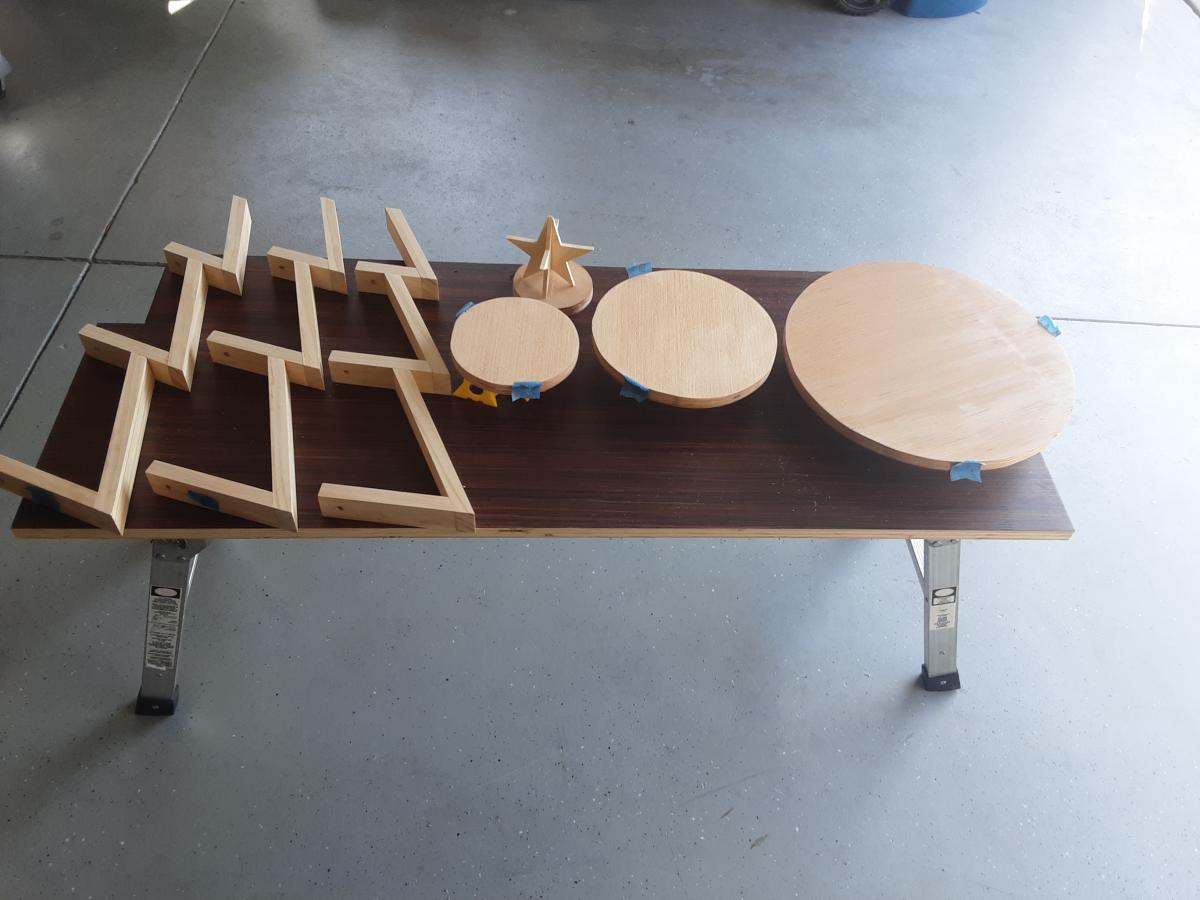
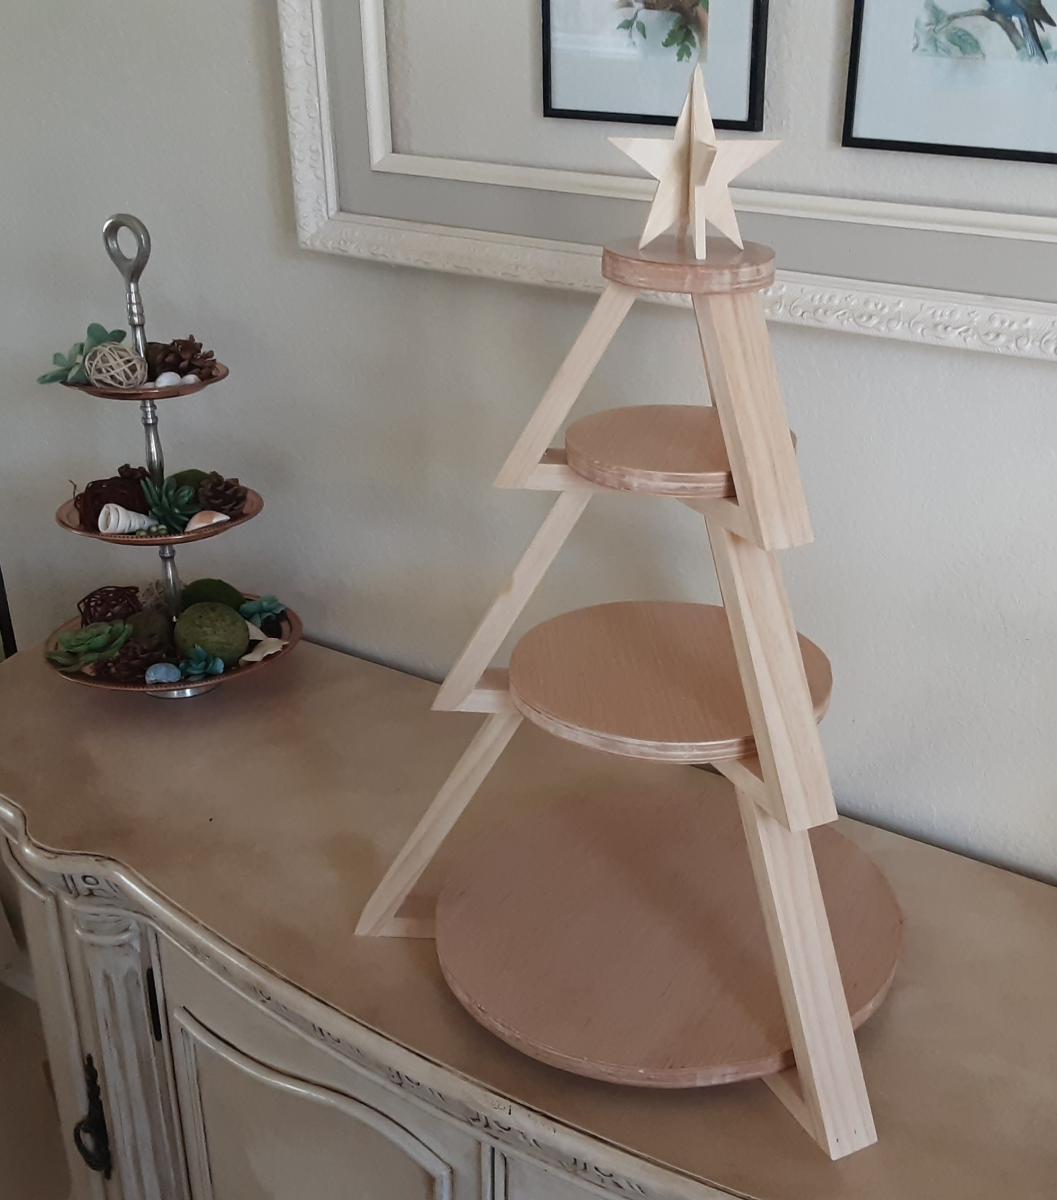
Christmas 3-tier cookie stand

Inspired by Shara of Woodshop Diaries, created this 3 tier tray for displaying cookies for Santa. Added a 3 dimensional star as the topper and simply followed the excellent photos and schematics on Shara's website.
Estimated Cost
$5
Estimated Time Investment
Afternoon Project (3-6 Hours)
Finish Used
Minwax paste wax
Recommended Skill Level
Beginner
Comments
Fancy X Farmhouse Table modification
We used the plans for the Fancy X Farmhouse Table and made some modifications to fit our space. Our first mod was to make it only 65 in long ... which meant the angled pieces in the middle aren't there any longer as it would have been too busy. The second mod we made was anywhere it stated to put 2 2x4s together we replaced it with Douglas Fir 4x4 (found at our Orange store).
Built from Plan(s)
Estimated Cost
$90 - $100
Estimated Time Investment
Weekend Project (10-20 Hours)
Finish Used
I stained it with an equal part classic grey and Dark walnut by MinWax (got color and 4x4 idea from another lady on here who did a mod on this same table) and finished it with 4 coats of Satin polyurethane.
Recommended Skill Level
Beginner
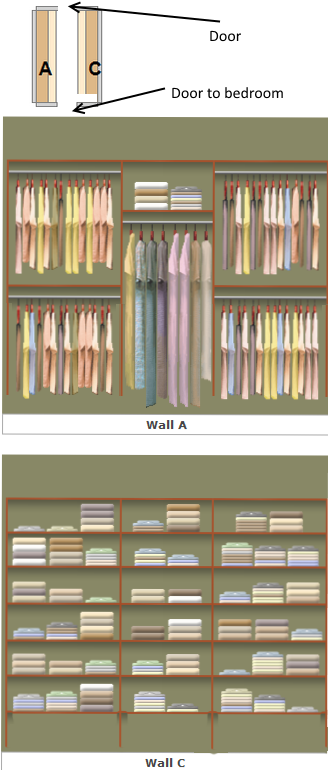
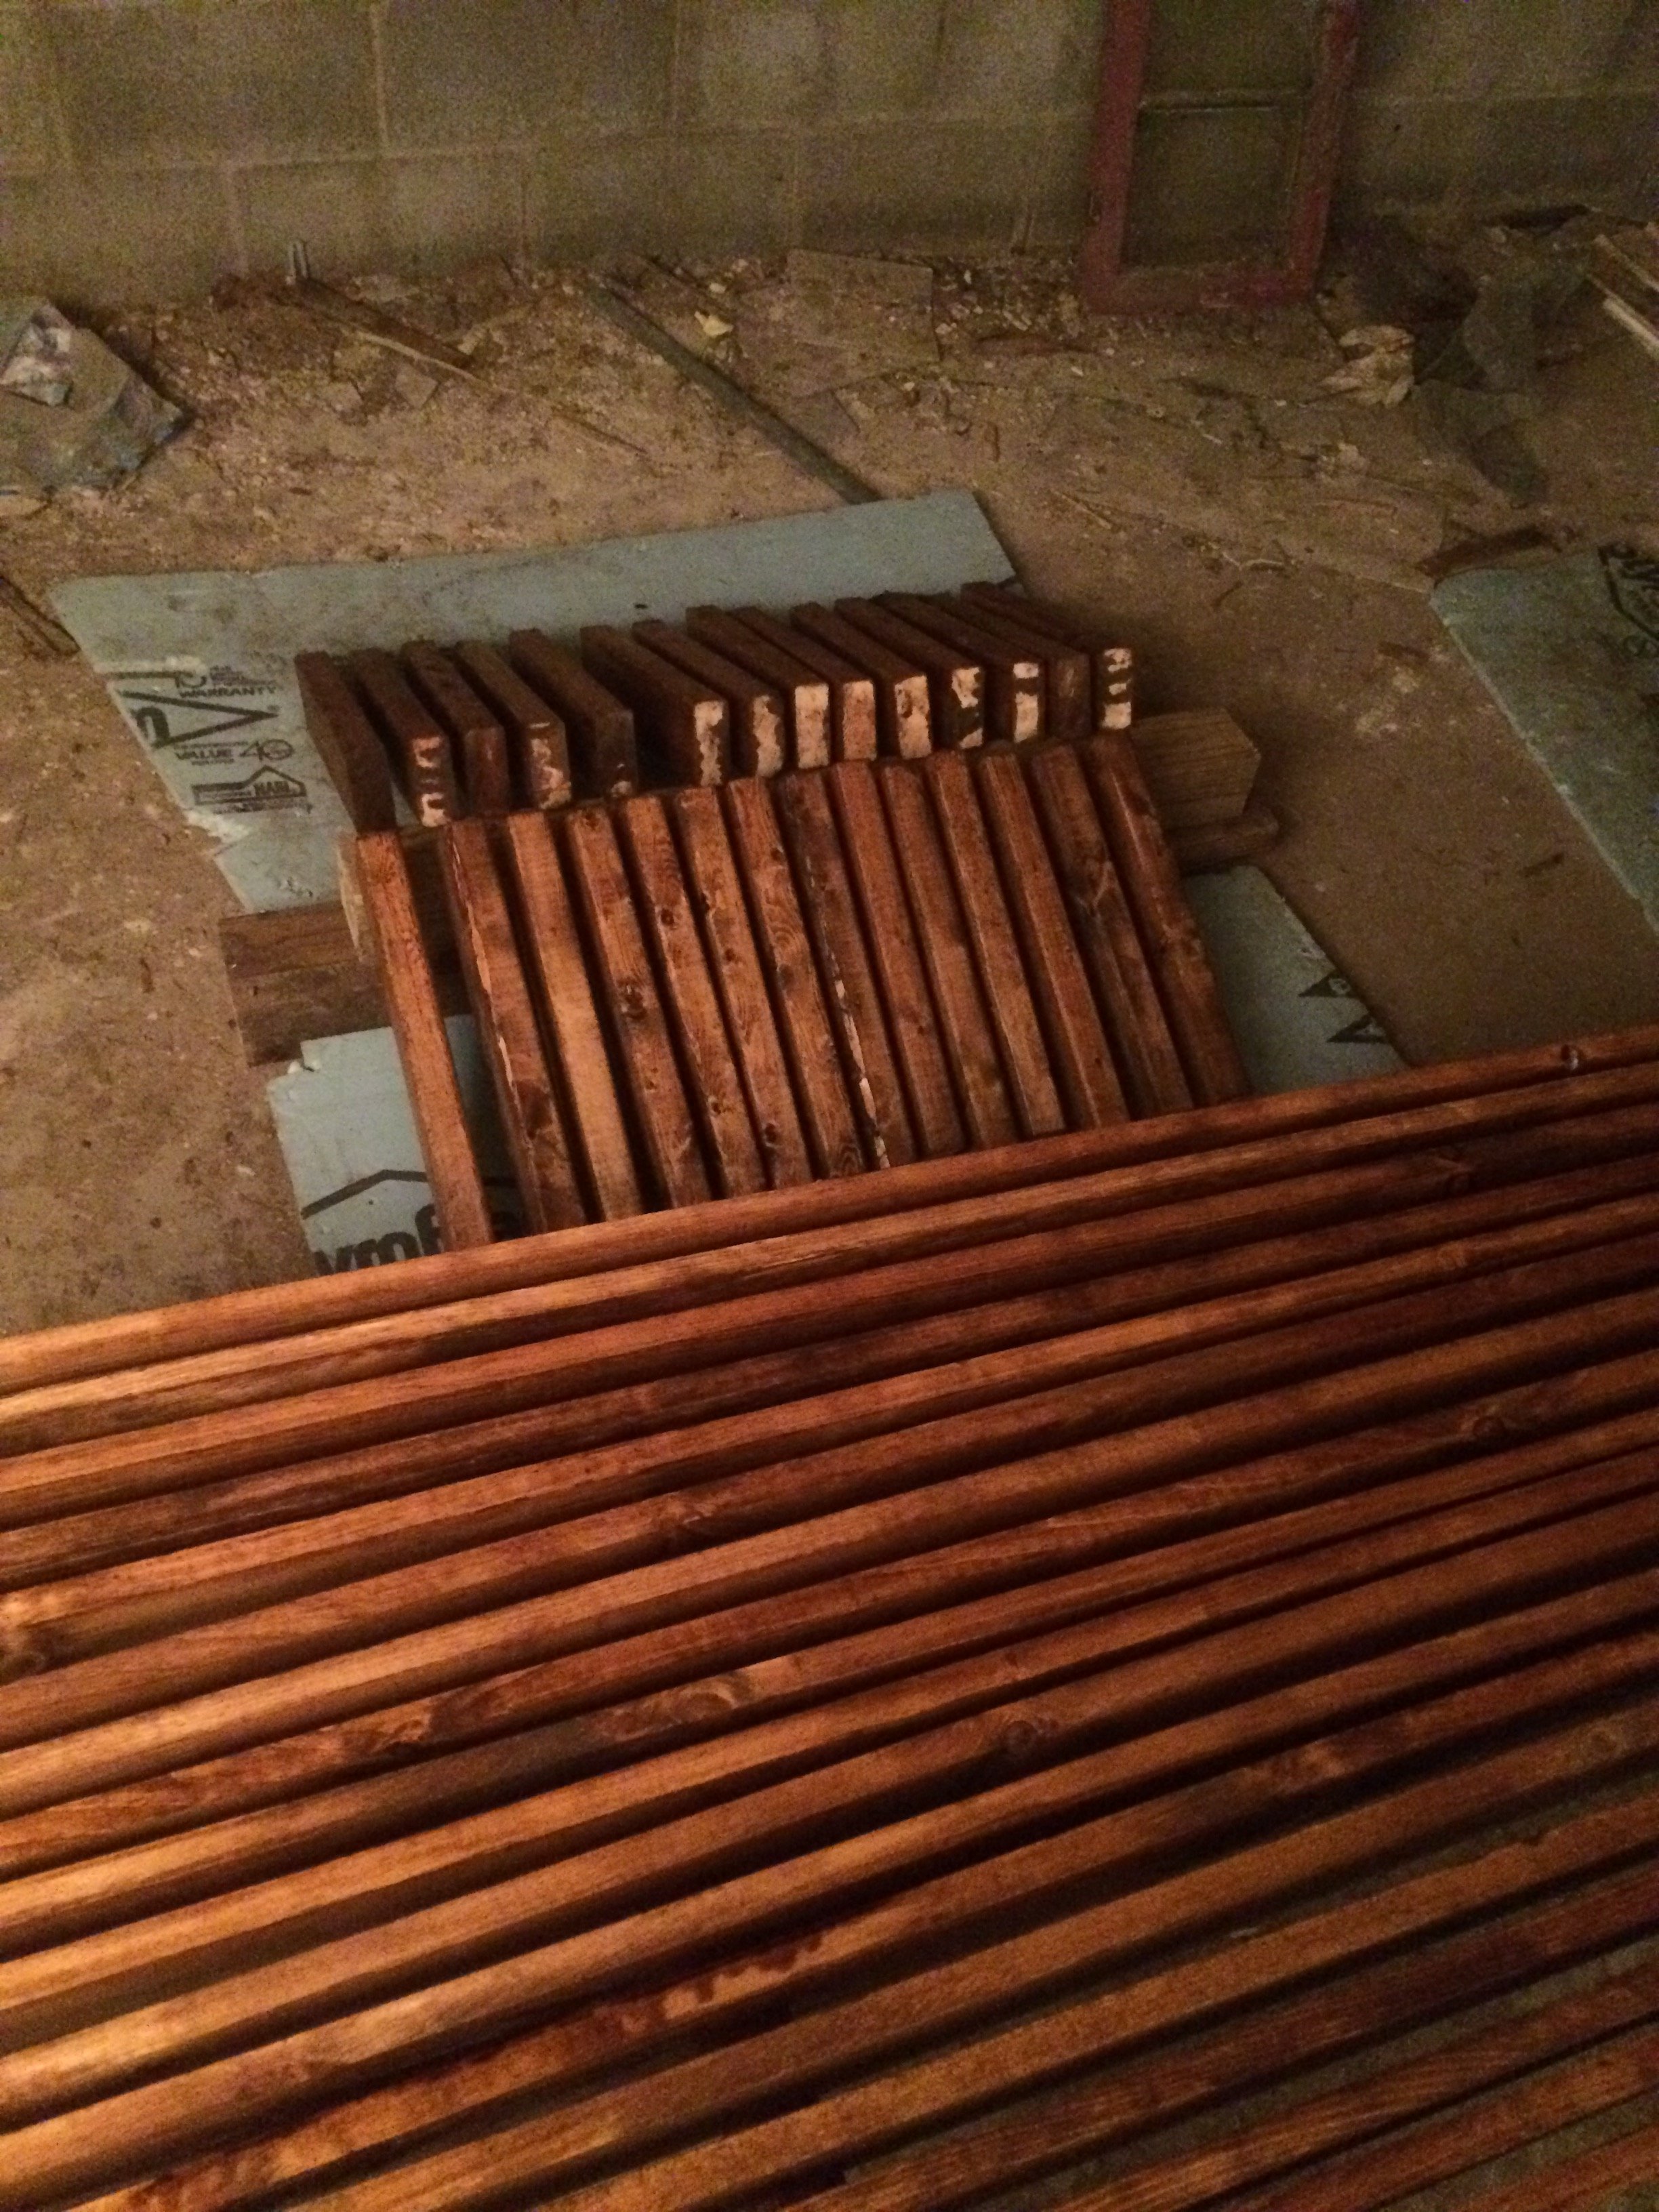
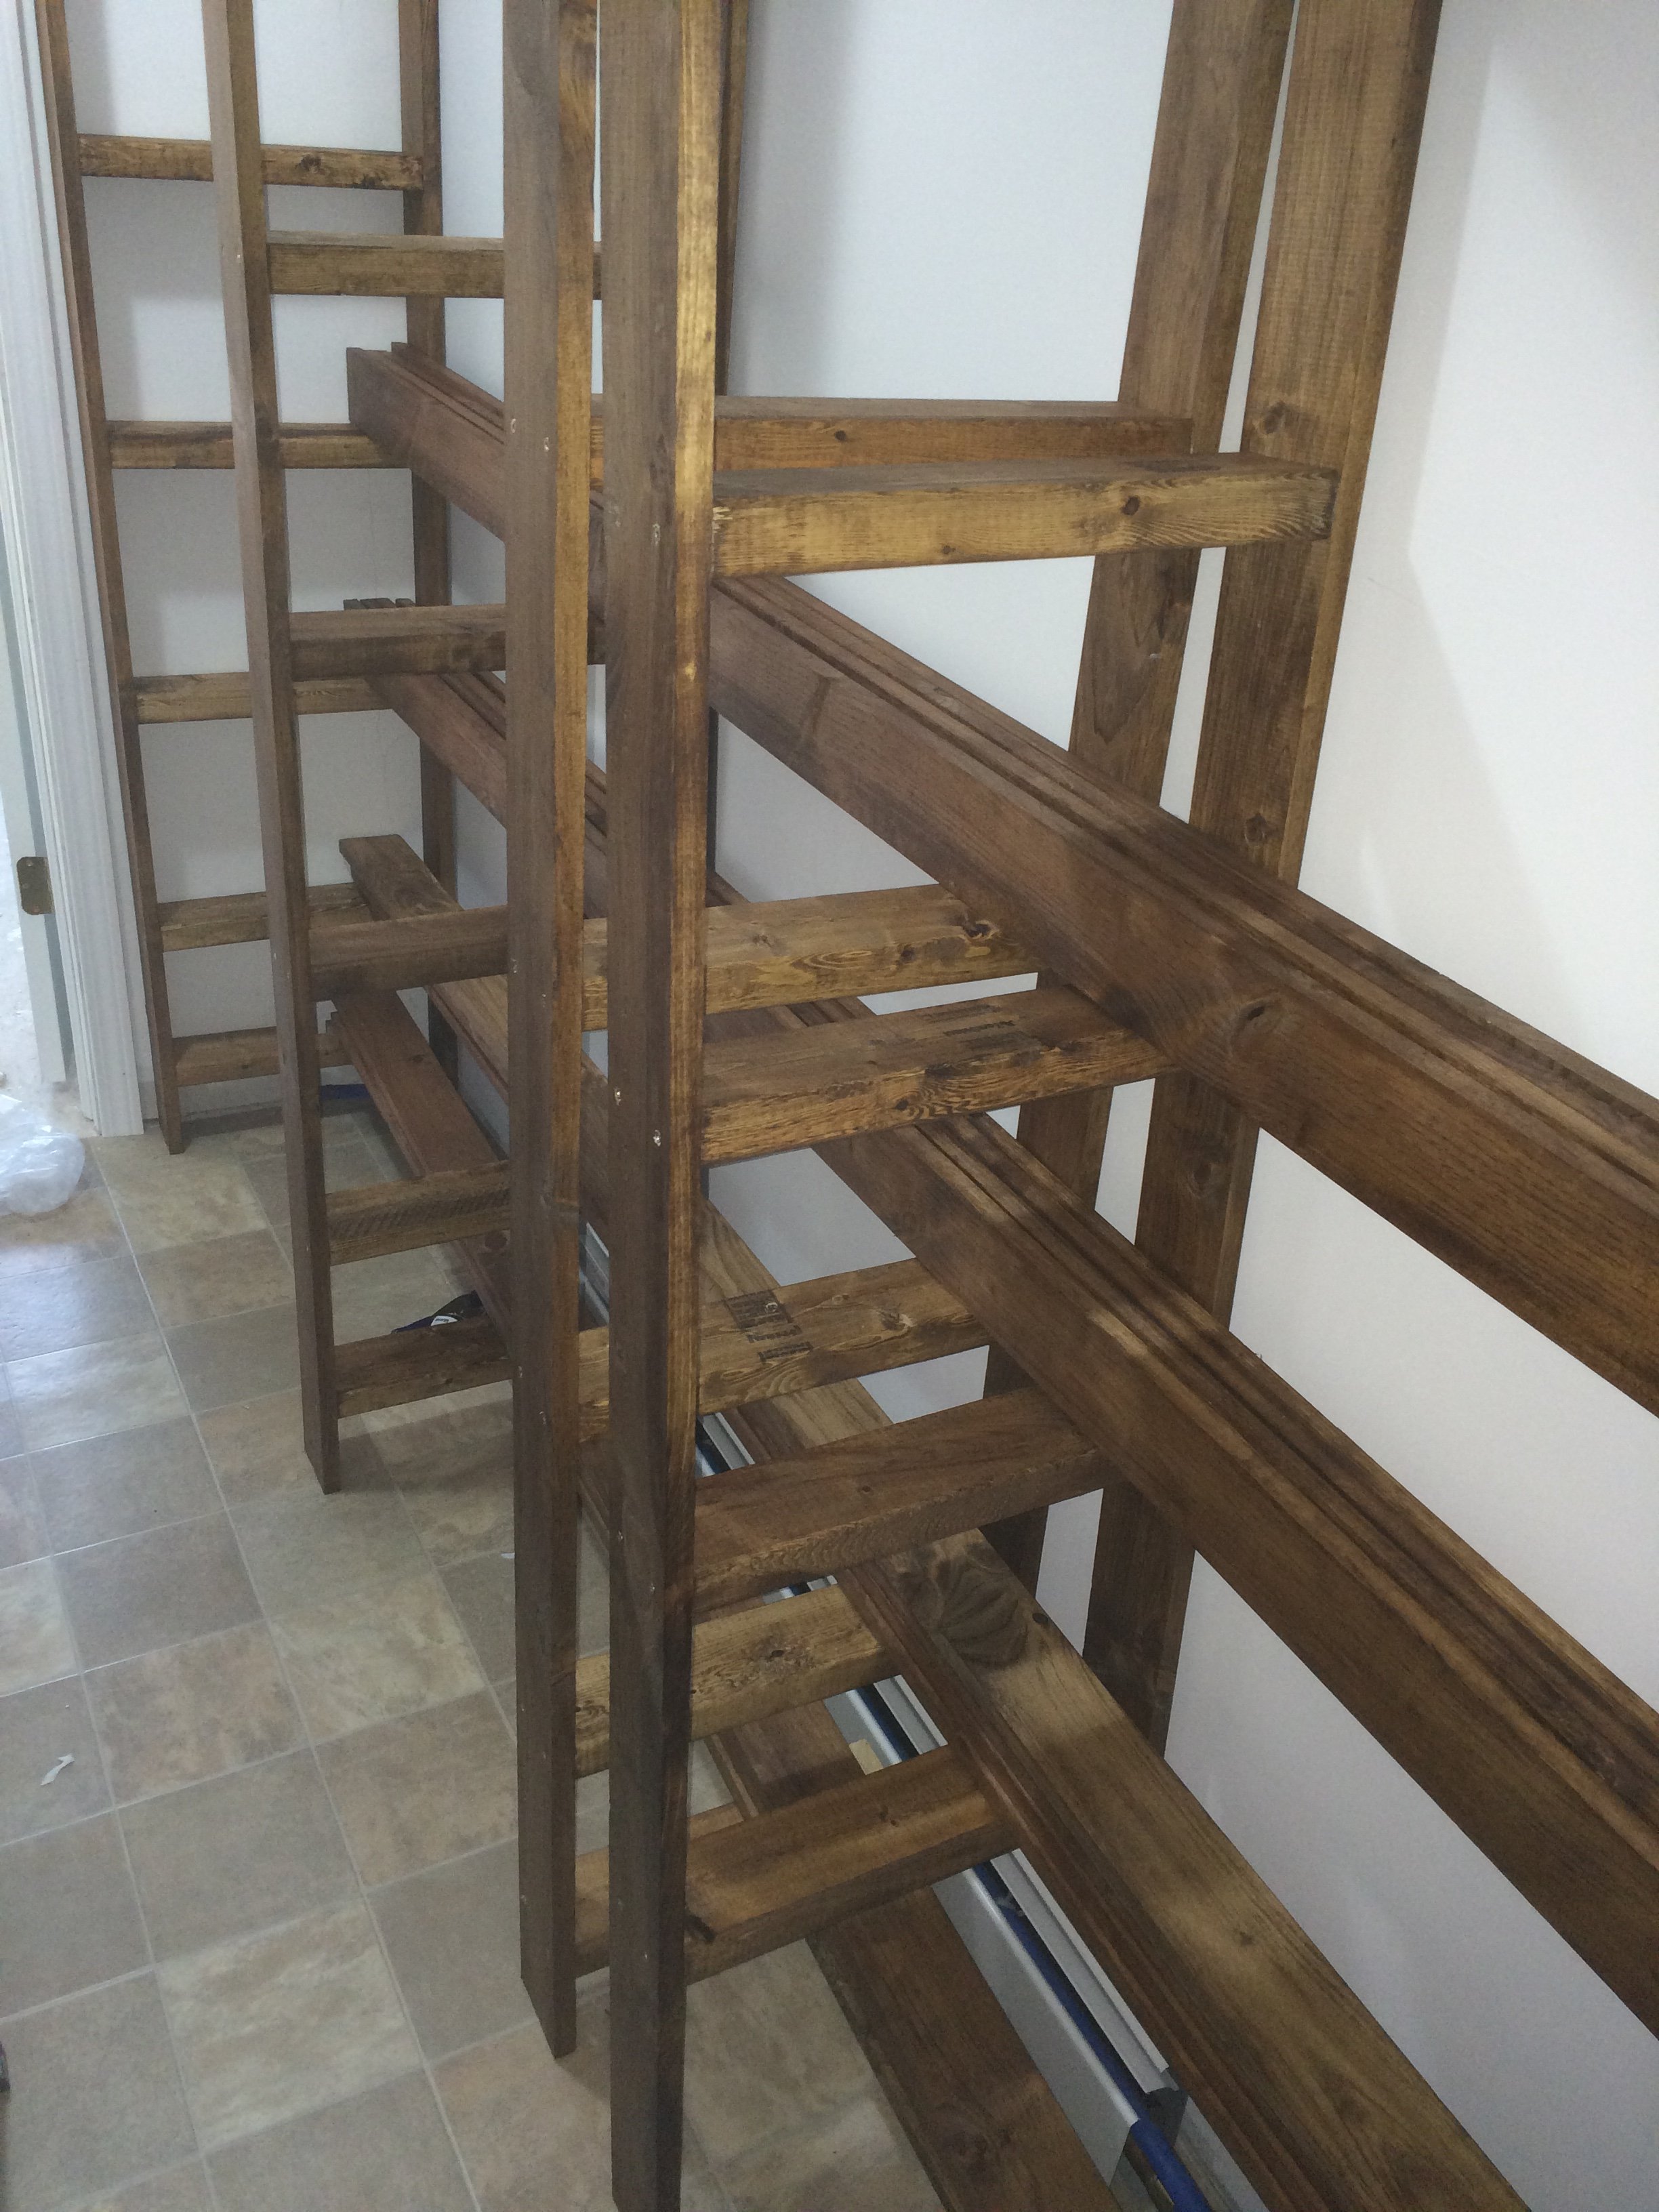
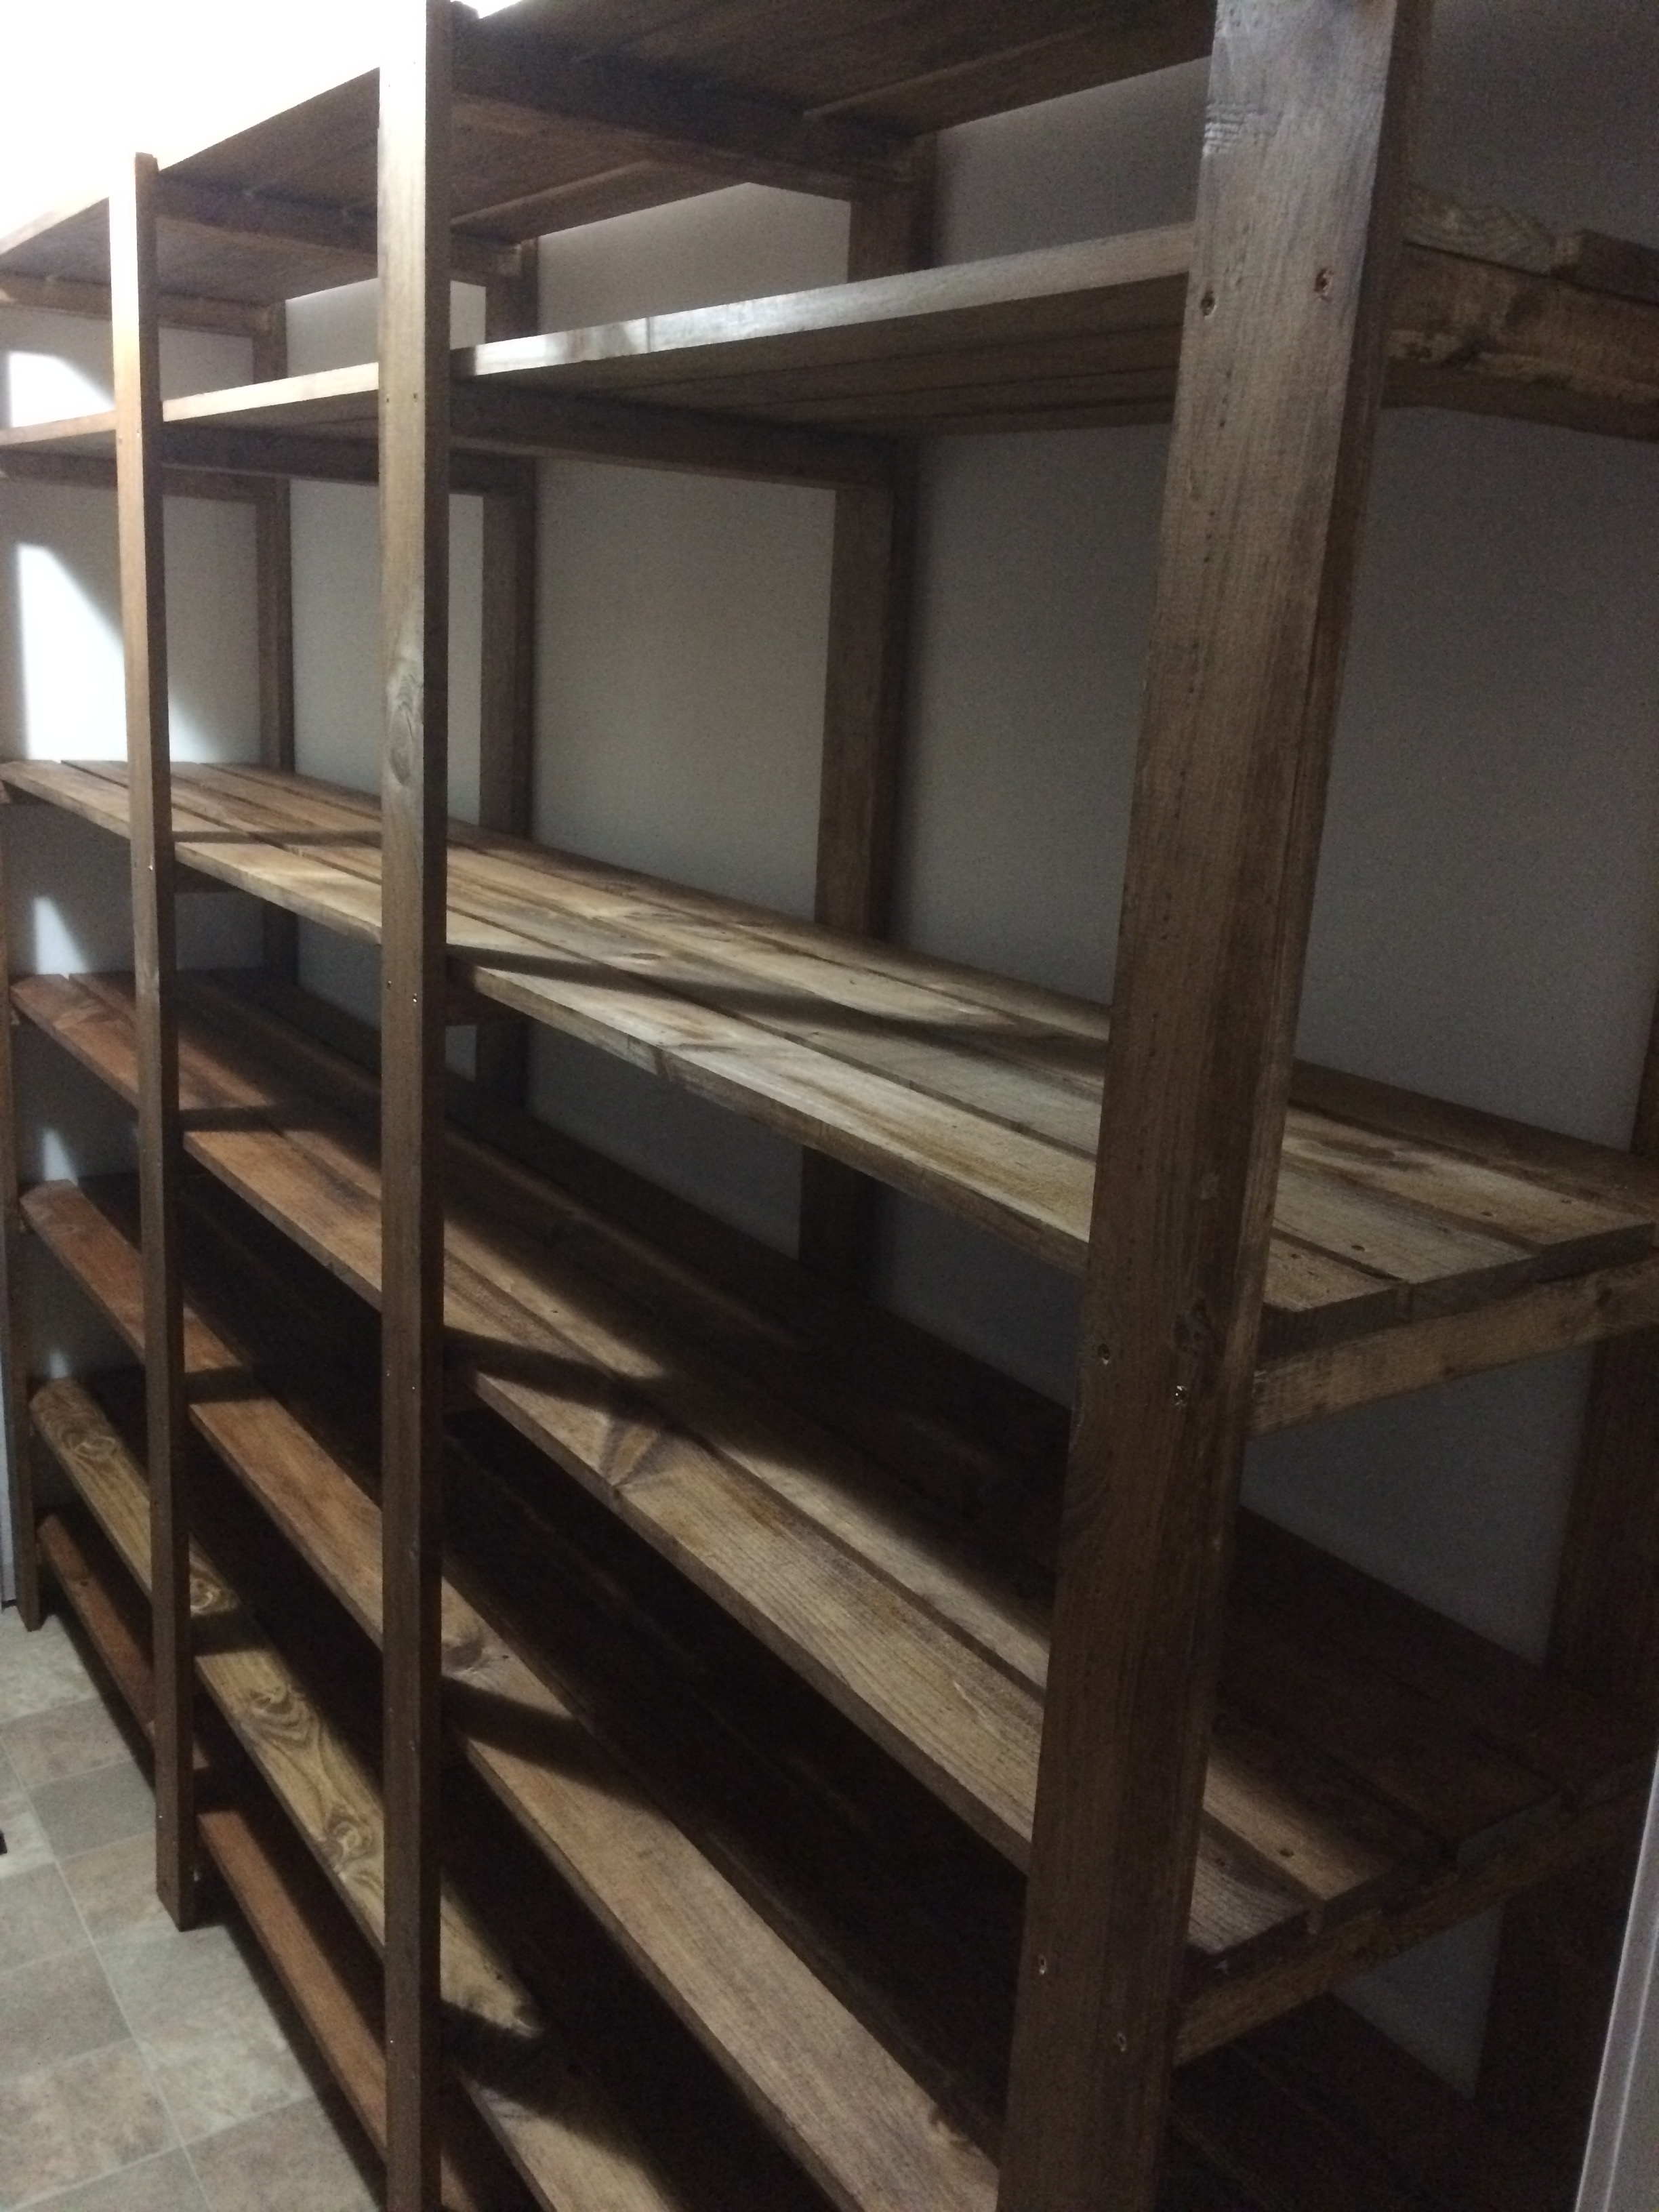
Custom Industrial Style Closet
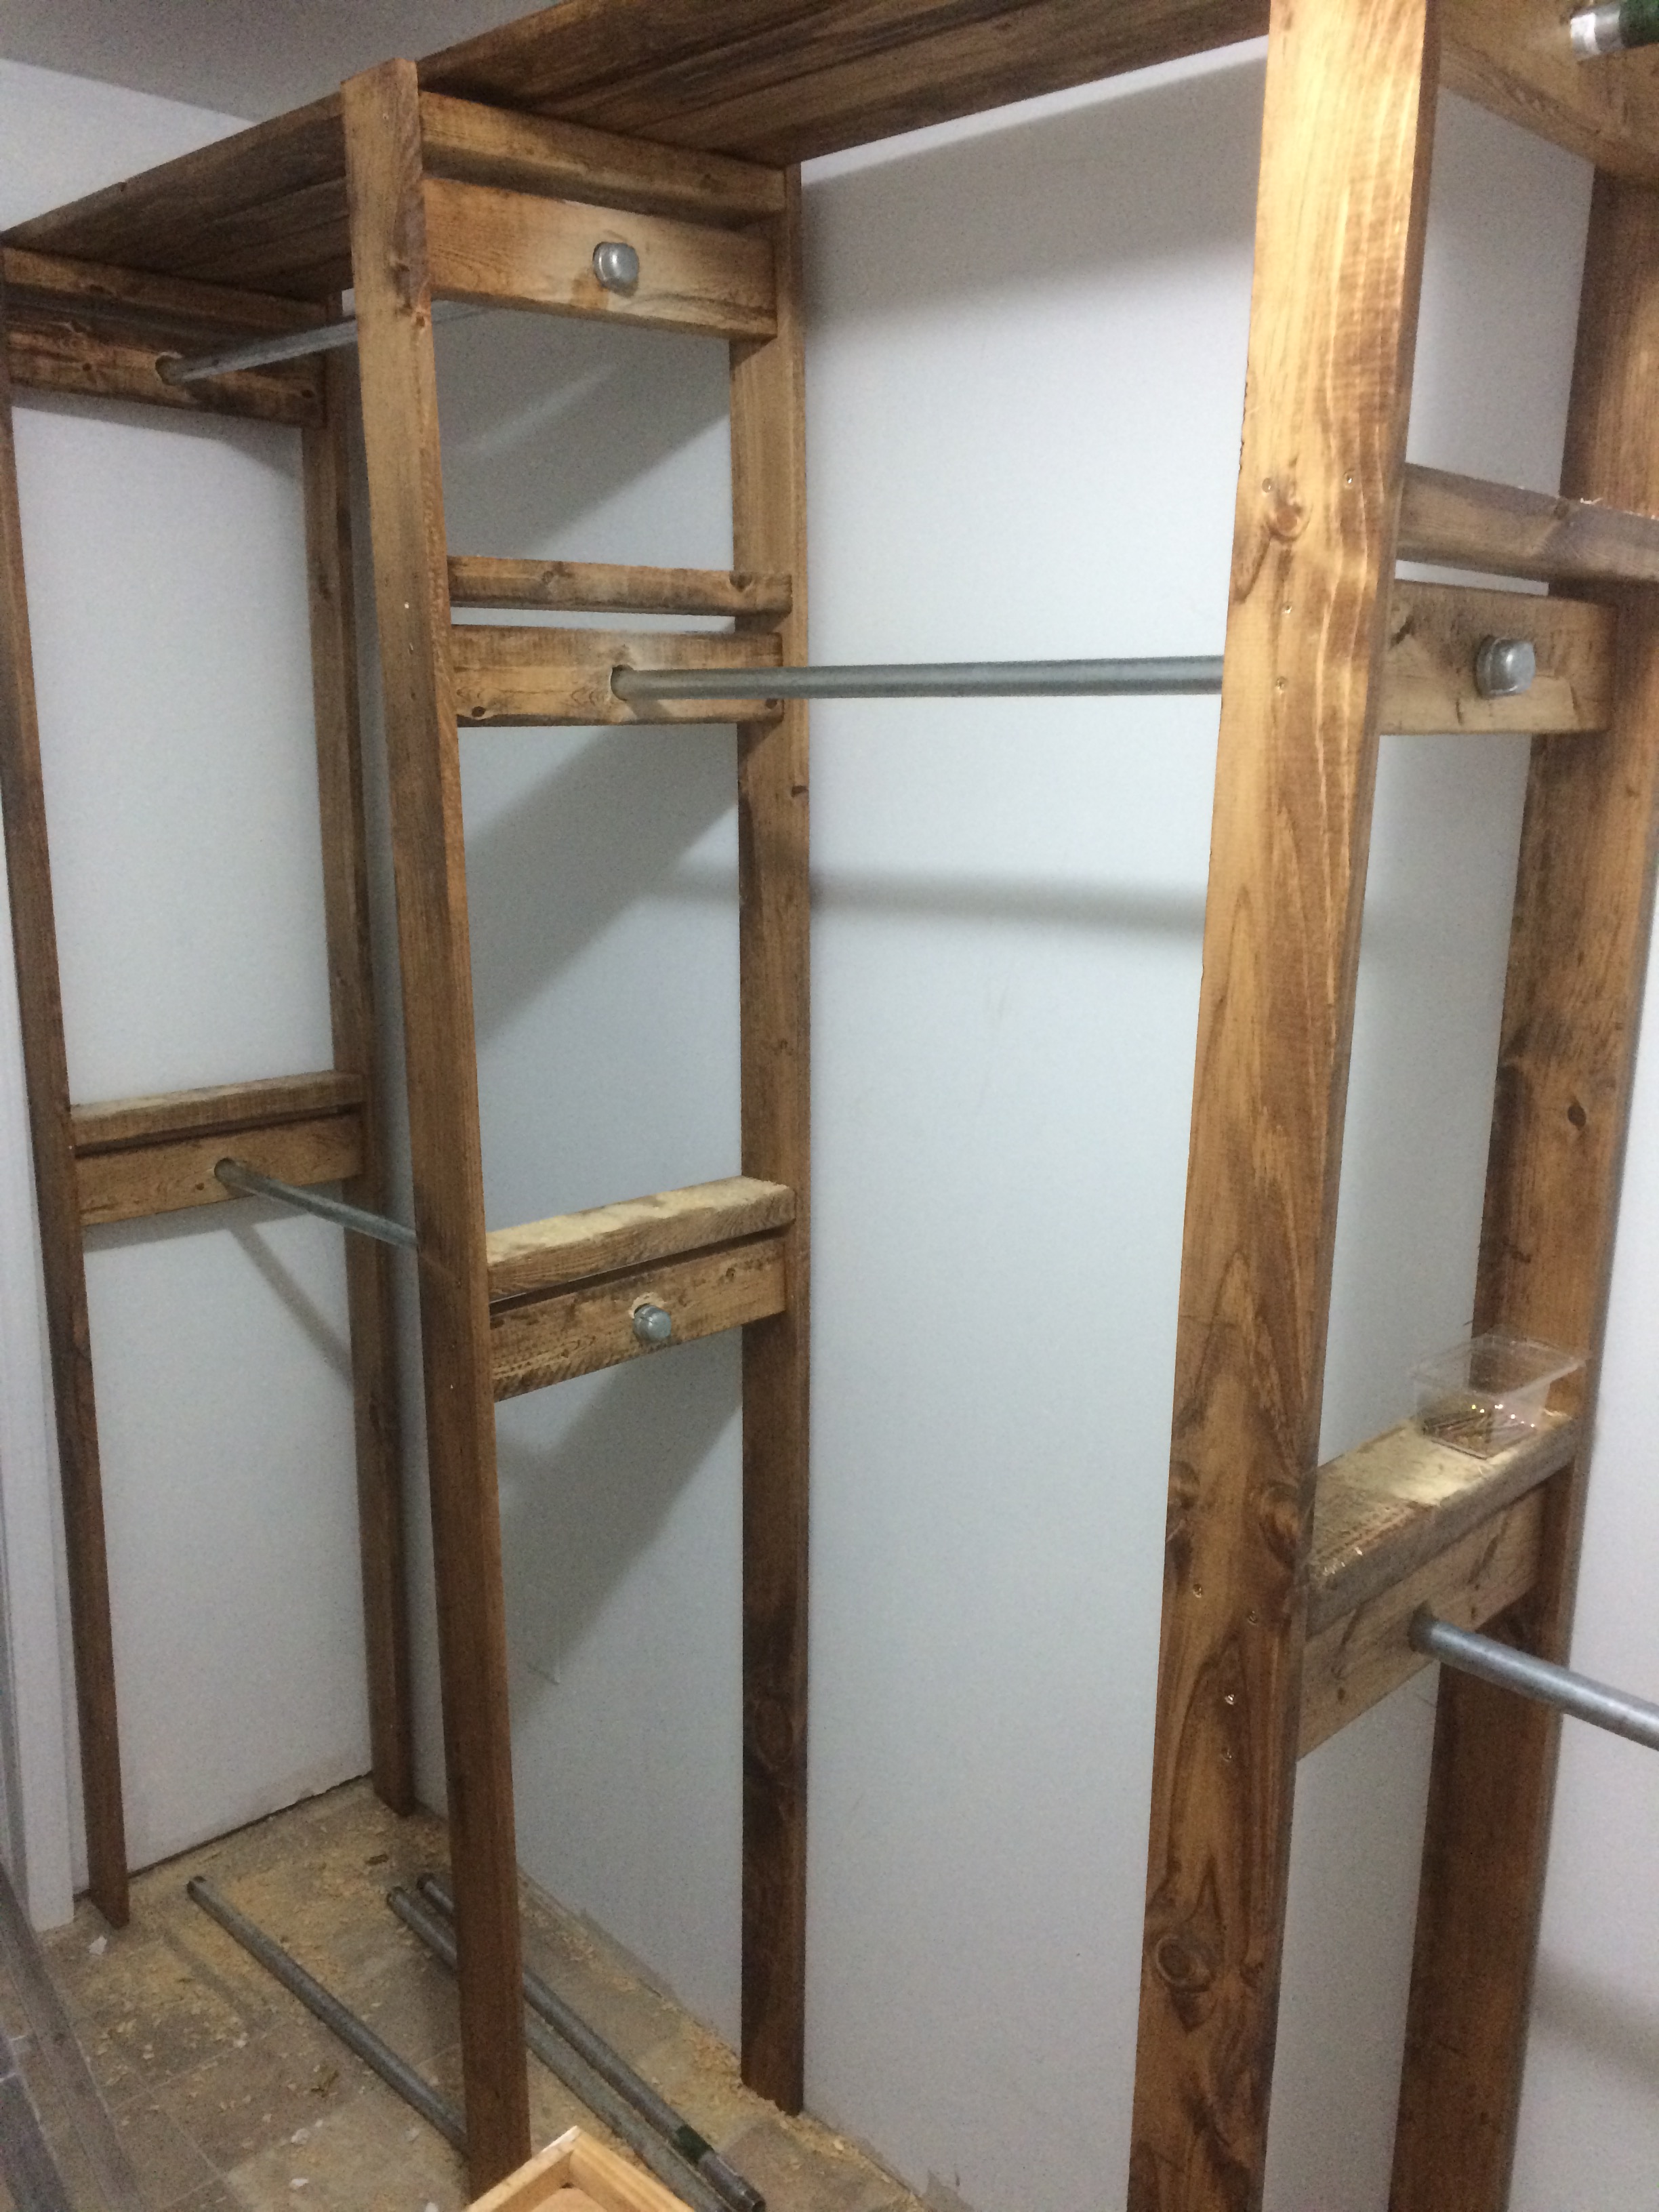
We remodeled our house and now had a new 9x6 master closet to fill. During construction I saw this design on ana-white.com and liked the style, but wanted to customize the layout. I found an online closet designer and played around until I found something my wife and I liked. We ended up with a 9 foot long his/hers double hanging on the ends and a long hanging section in the middle. And on the other side 8 feet of shelving (leaving about a foot for other storage).
I bought the pipe as a 10 foot pipe to be cut and threaded (for free by the store). I did have to change the design a little because the store cannot thread pipe less than 14 inches. So I ended up replacing the short pipes and T's with 2x4s. That made it a little cheaper and I still like the end result.
We stained all the wood using Minwax "Early American". This probably accounts for most of the build time.
Then I put together the supports and brought them into the closet to add all the pipes and slats. I started with the wall for hanging. And later did the shelving.
Here's another forum with more pictures of this project:
http://woodworking.formeremortals.net/me-mo-community/#/discussion/866/…
Built from Plan(s)
Estimated Cost
<$400 for whole closet.
Estimated Time Investment
Weekend Project (10-20 Hours)
Finish Used
Minwax "Early American"
Recommended Skill Level
Beginner
Comments
Wood dog crate end table
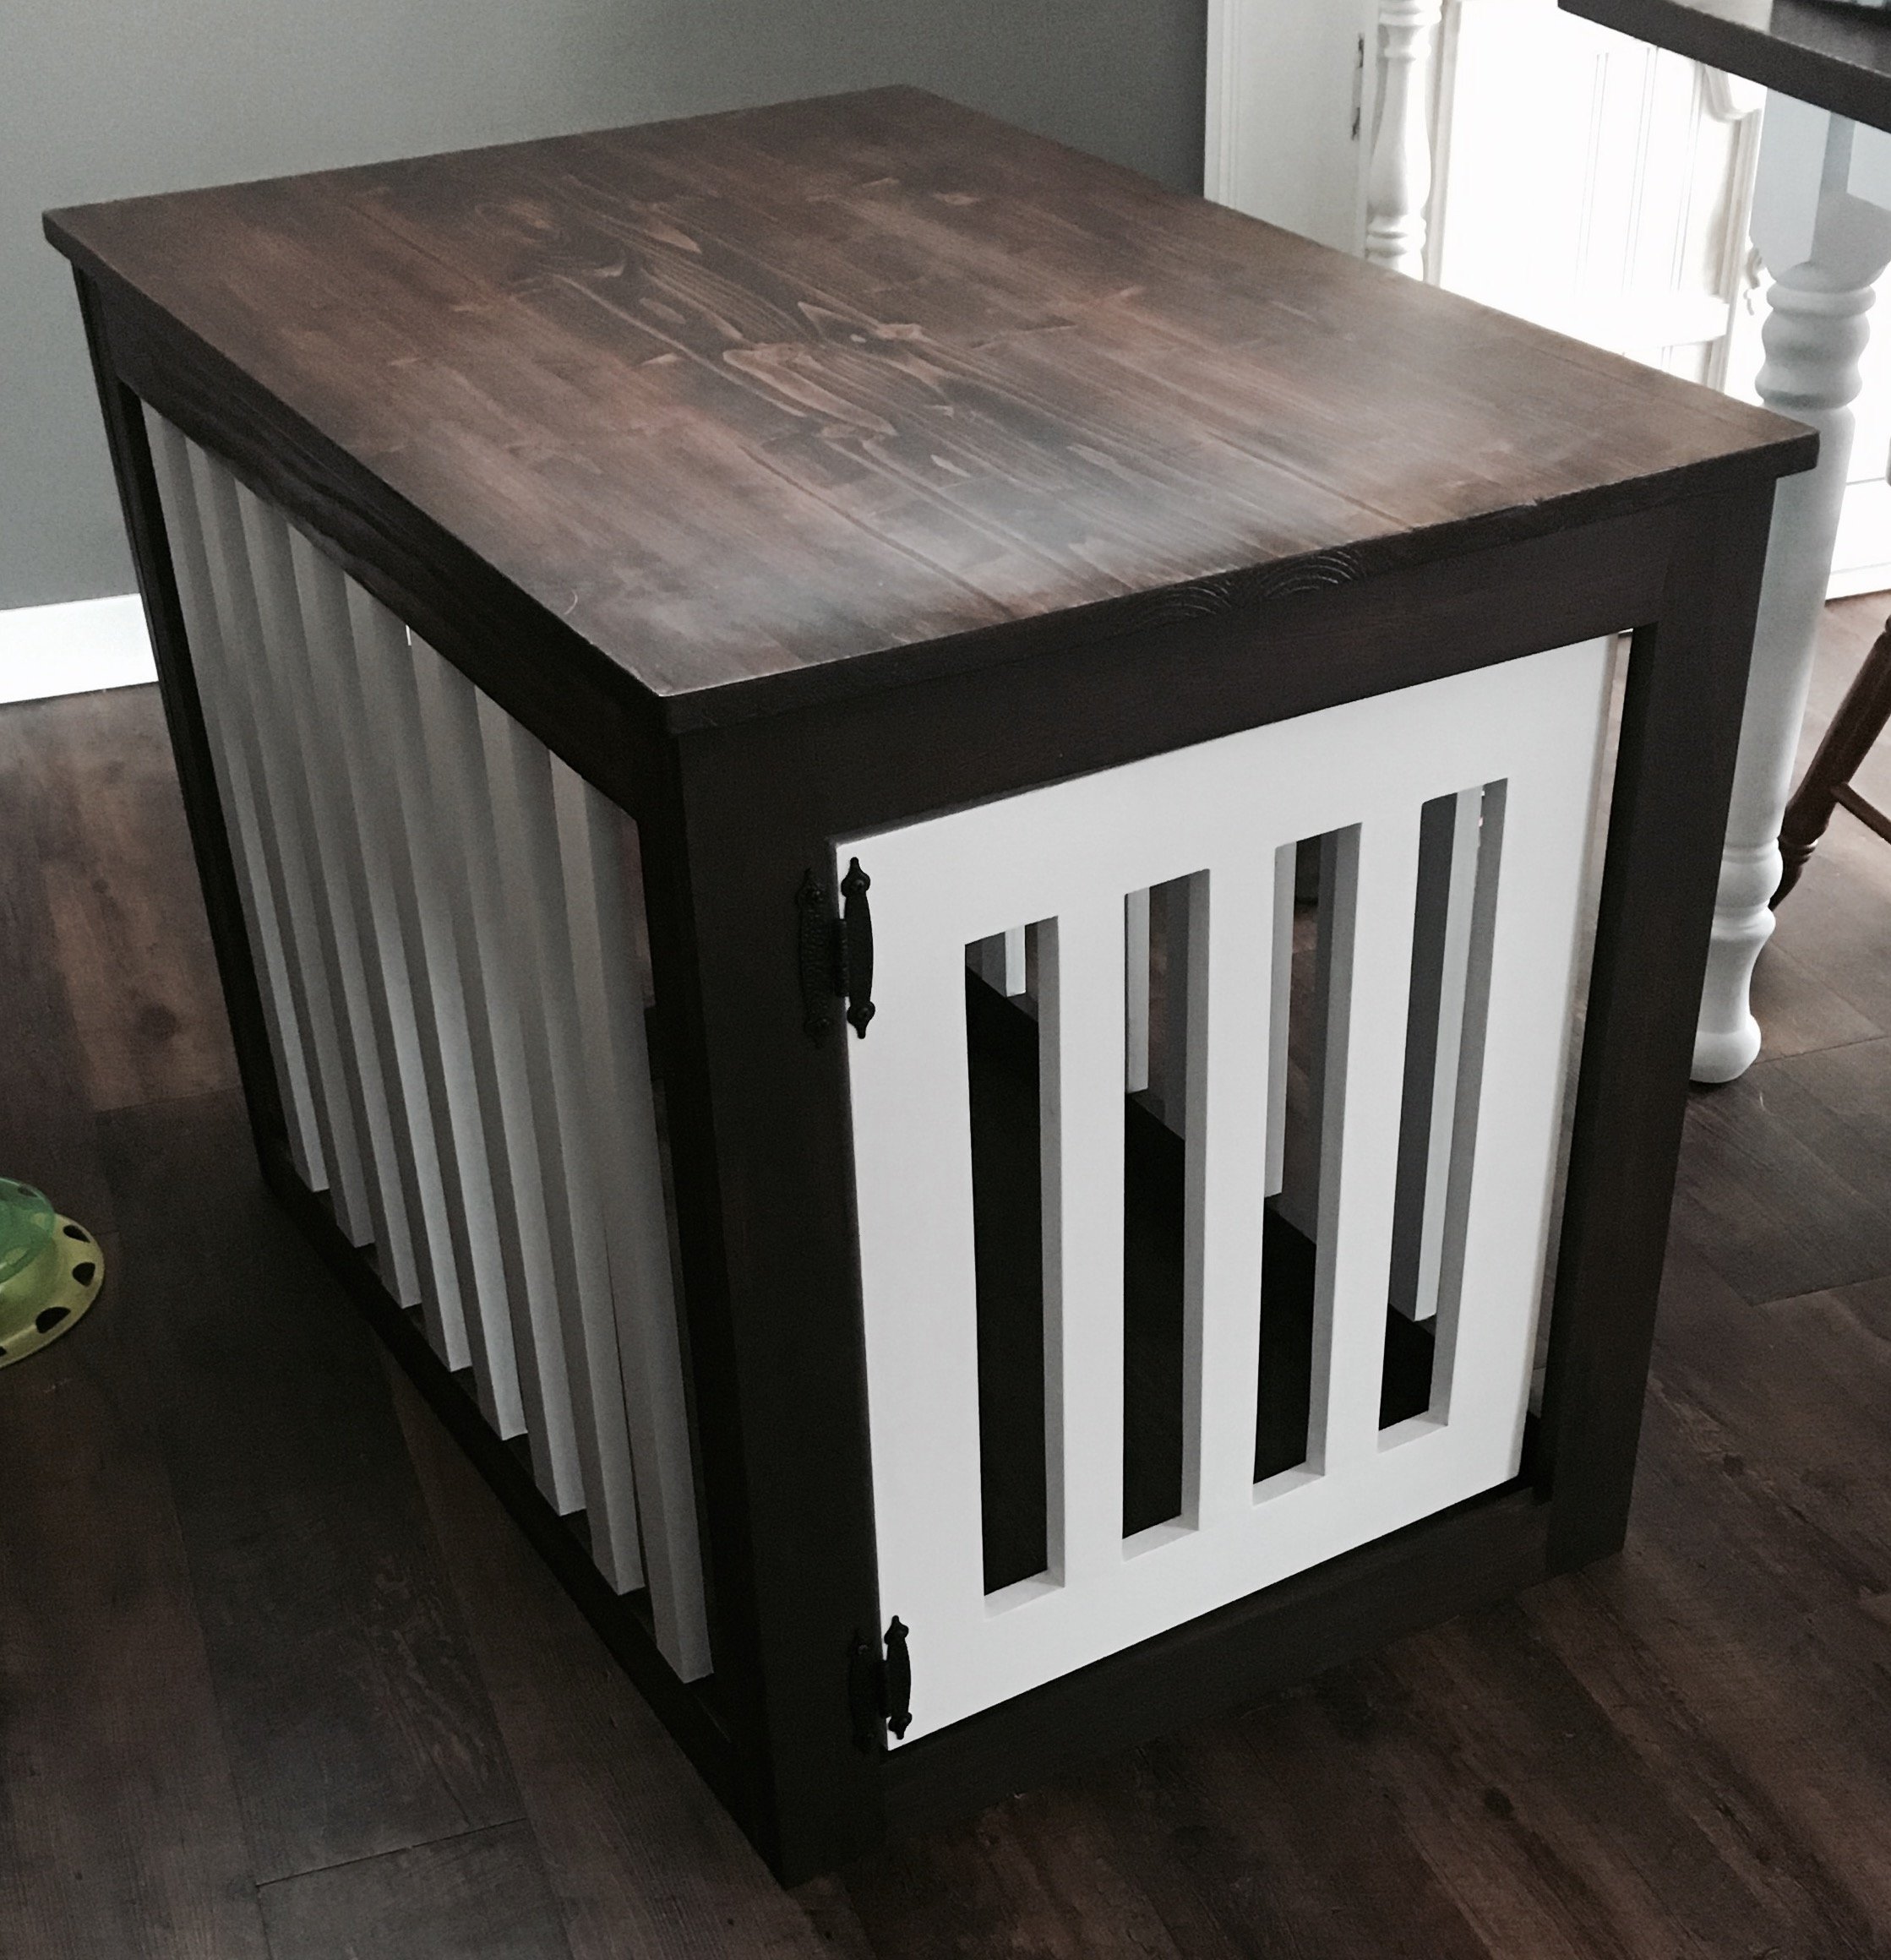
Really fun build! I changed the plans a bit and made the spindles go all the way to the bottom. Made it more open for the dog. Took a while to finish since I would tinker when I had the extra time! Turned out great with the two tone, stained from and top with white spindles and door. Thanks for the plans!
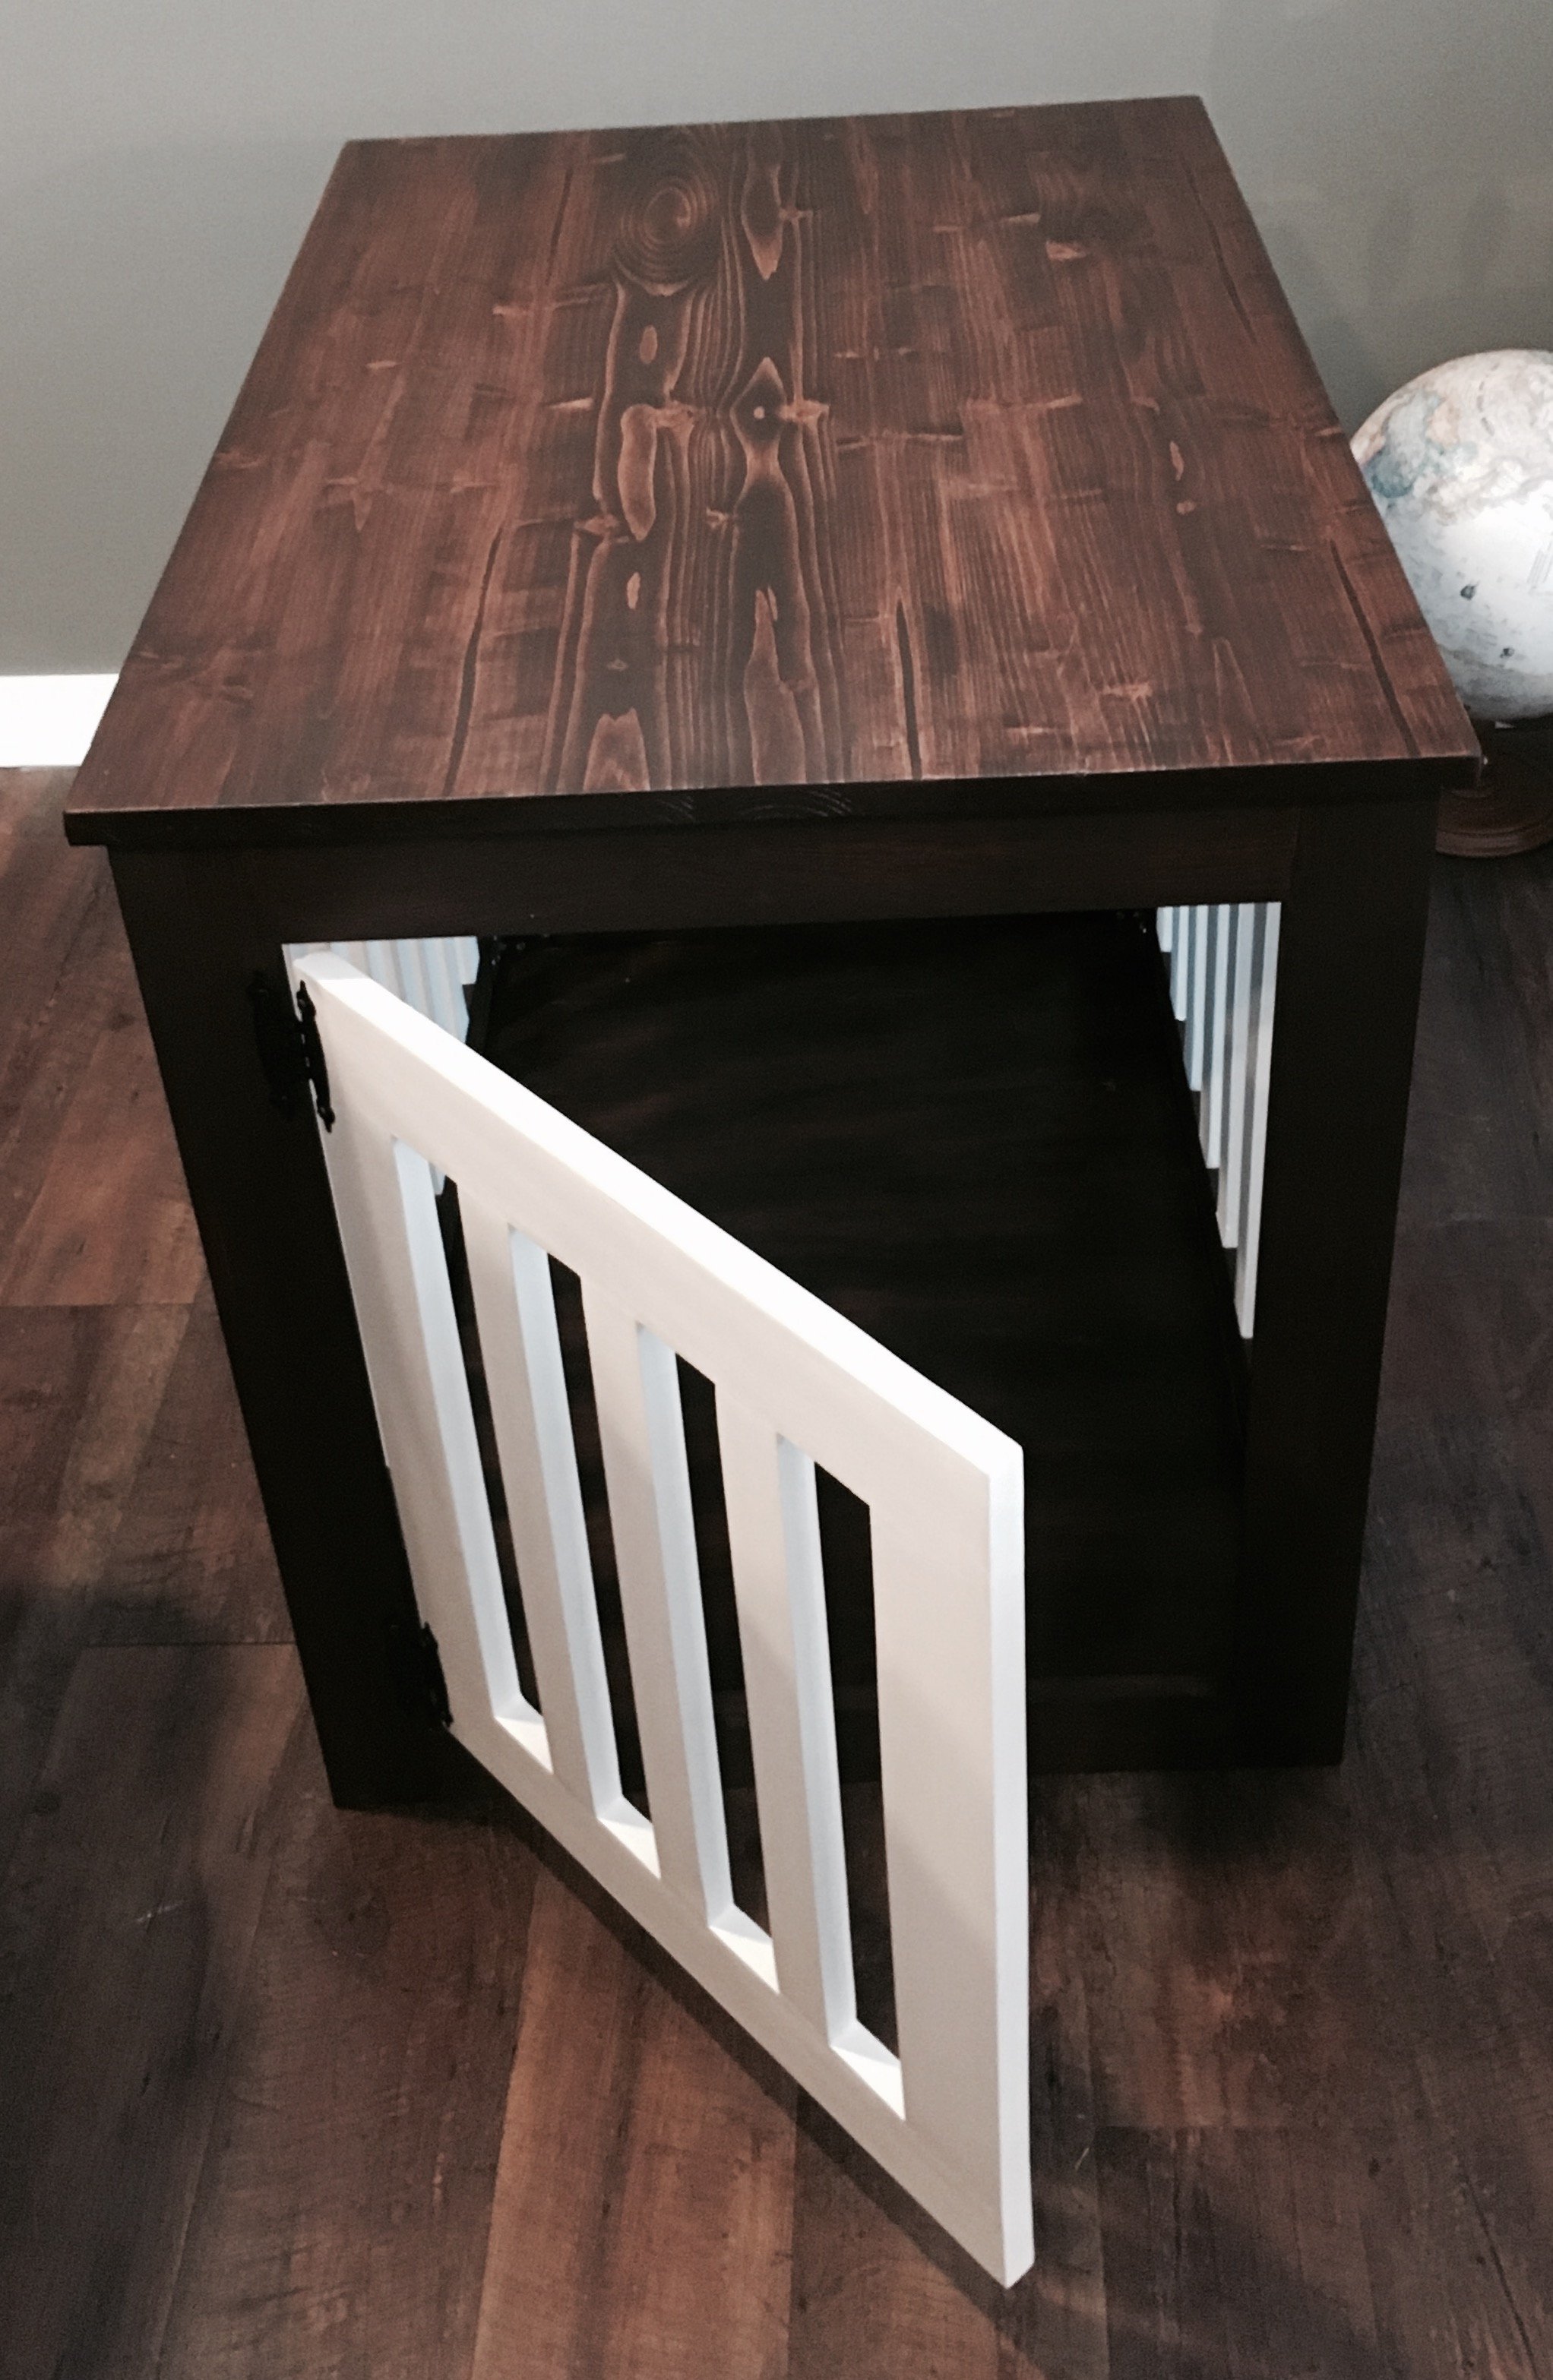
Built from Plan(s)
Estimated Cost
$50-$80
Estimated Time Investment
Week Long Project (20 Hours or More)
Recommended Skill Level
Intermediate
Cedar side table

I decided it would make a nice simple side table for my home office and show off the beauty of cedar by using oil.
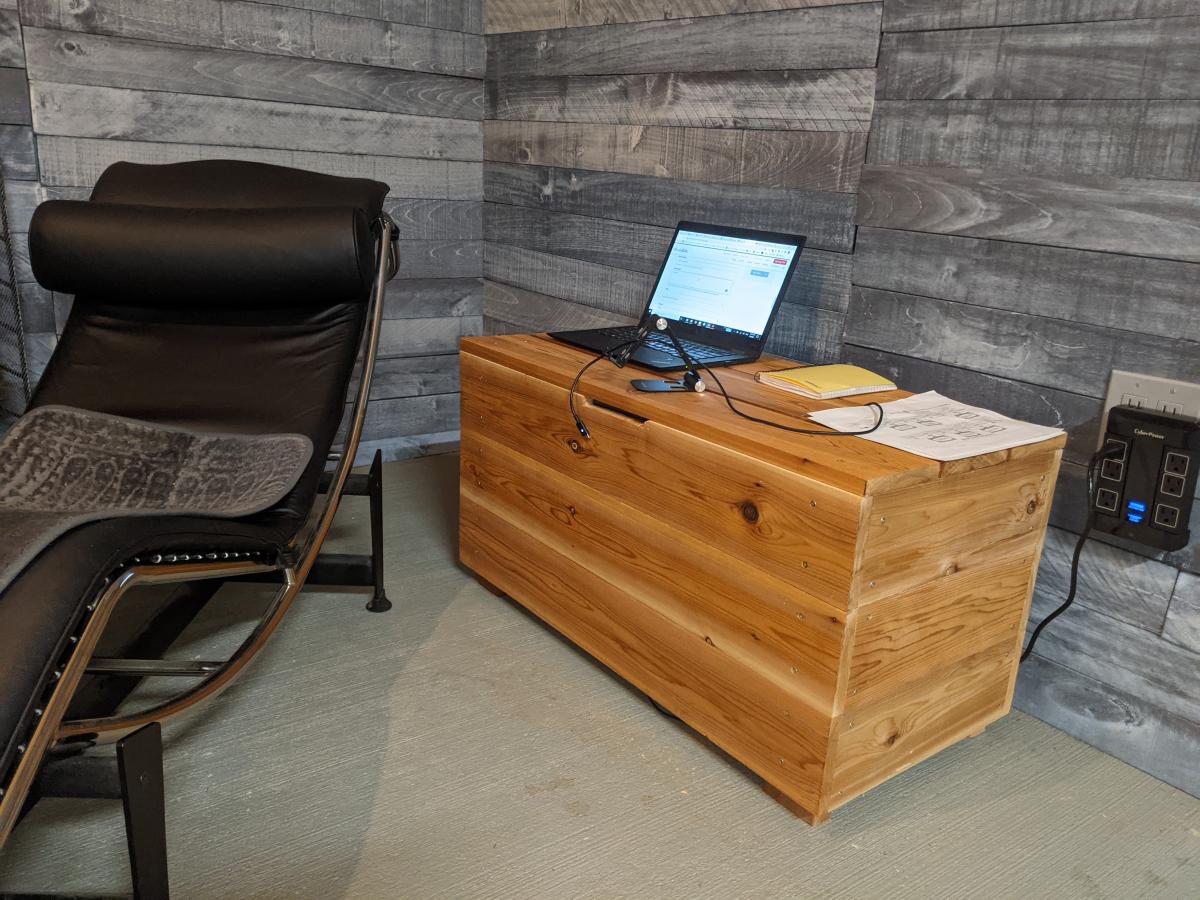
Built from Plan(s)
Estimated Cost
180.00
Estimated Time Investment
An Hour or Two (0-2 Hours)
Finish Used
Tung oil
Recommended Skill Level
Beginner