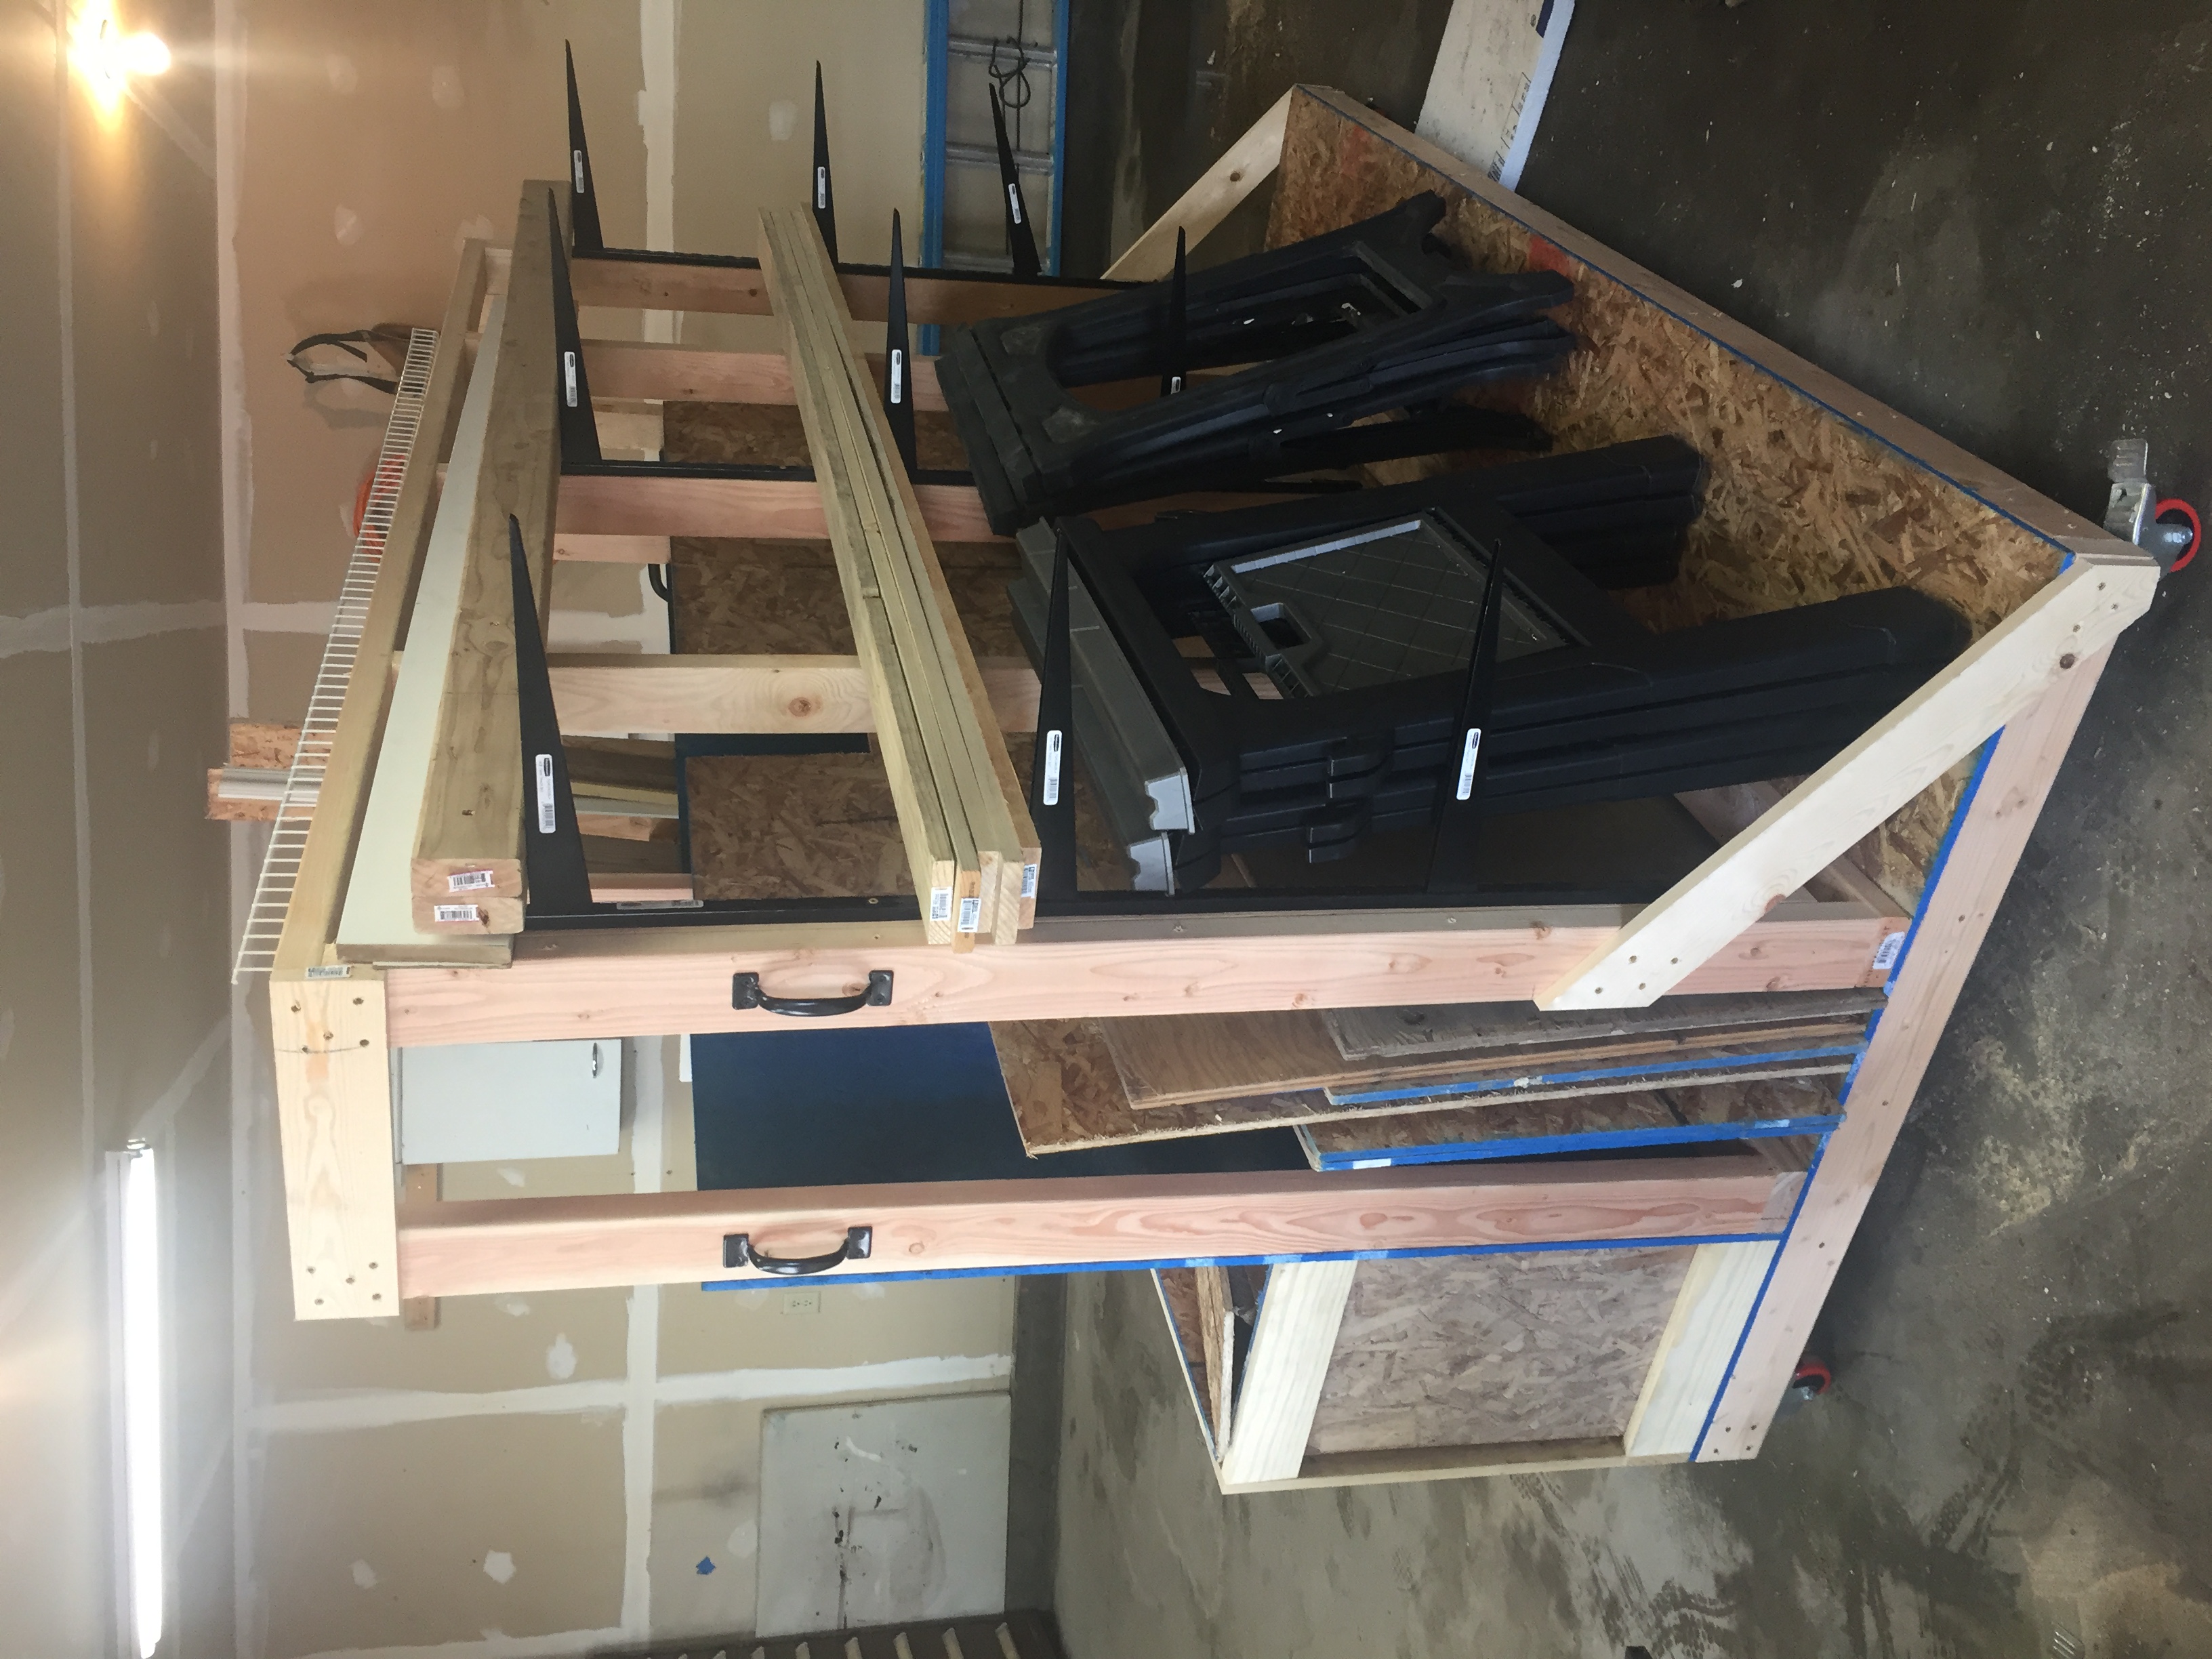
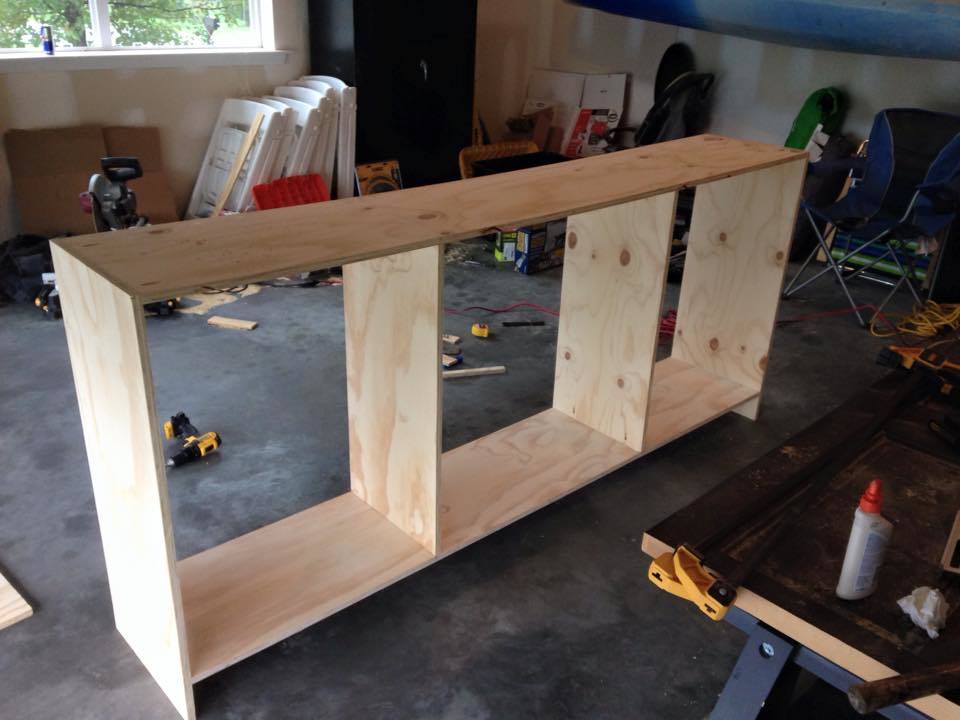
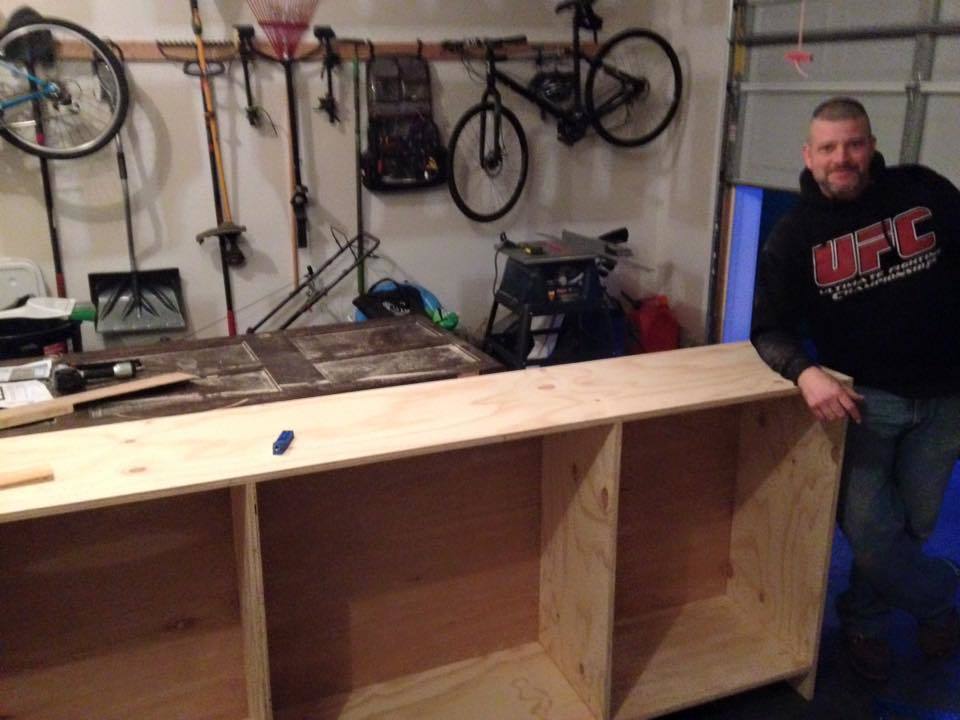
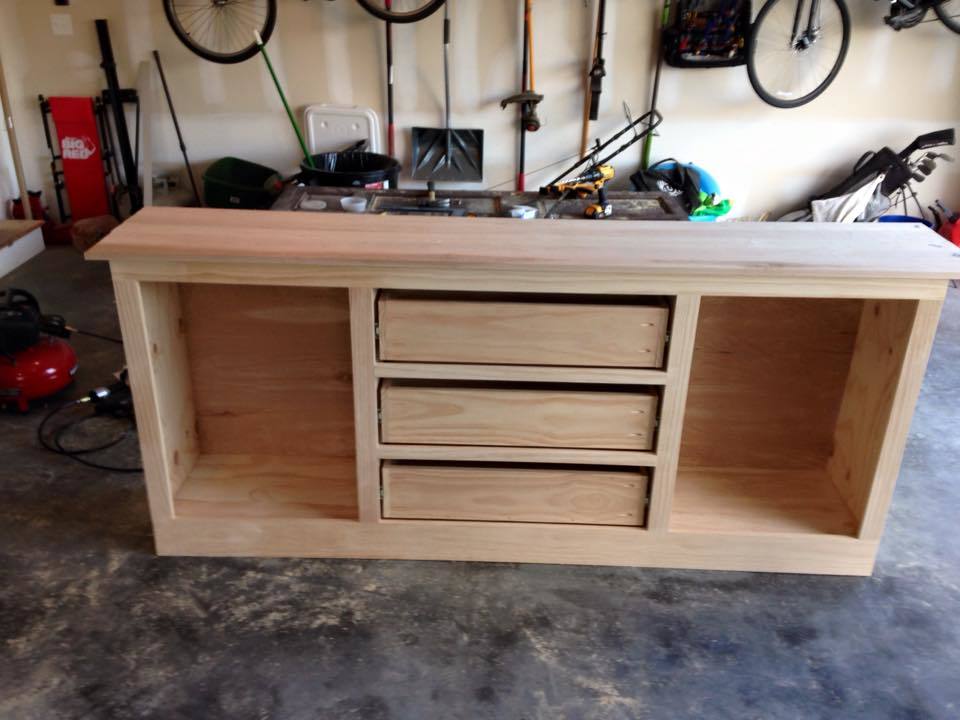
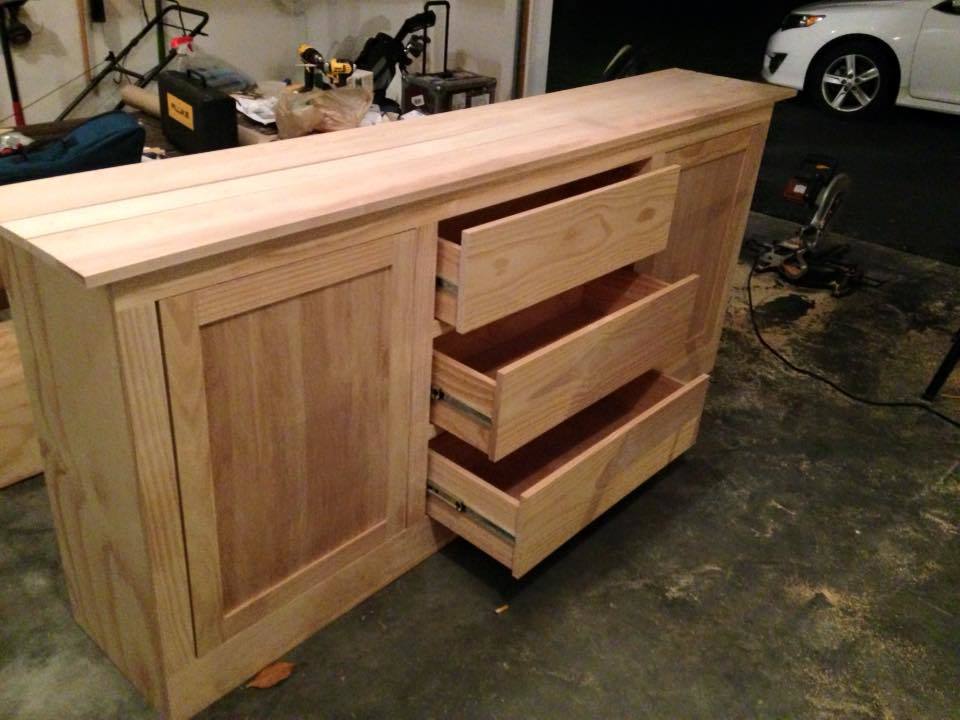
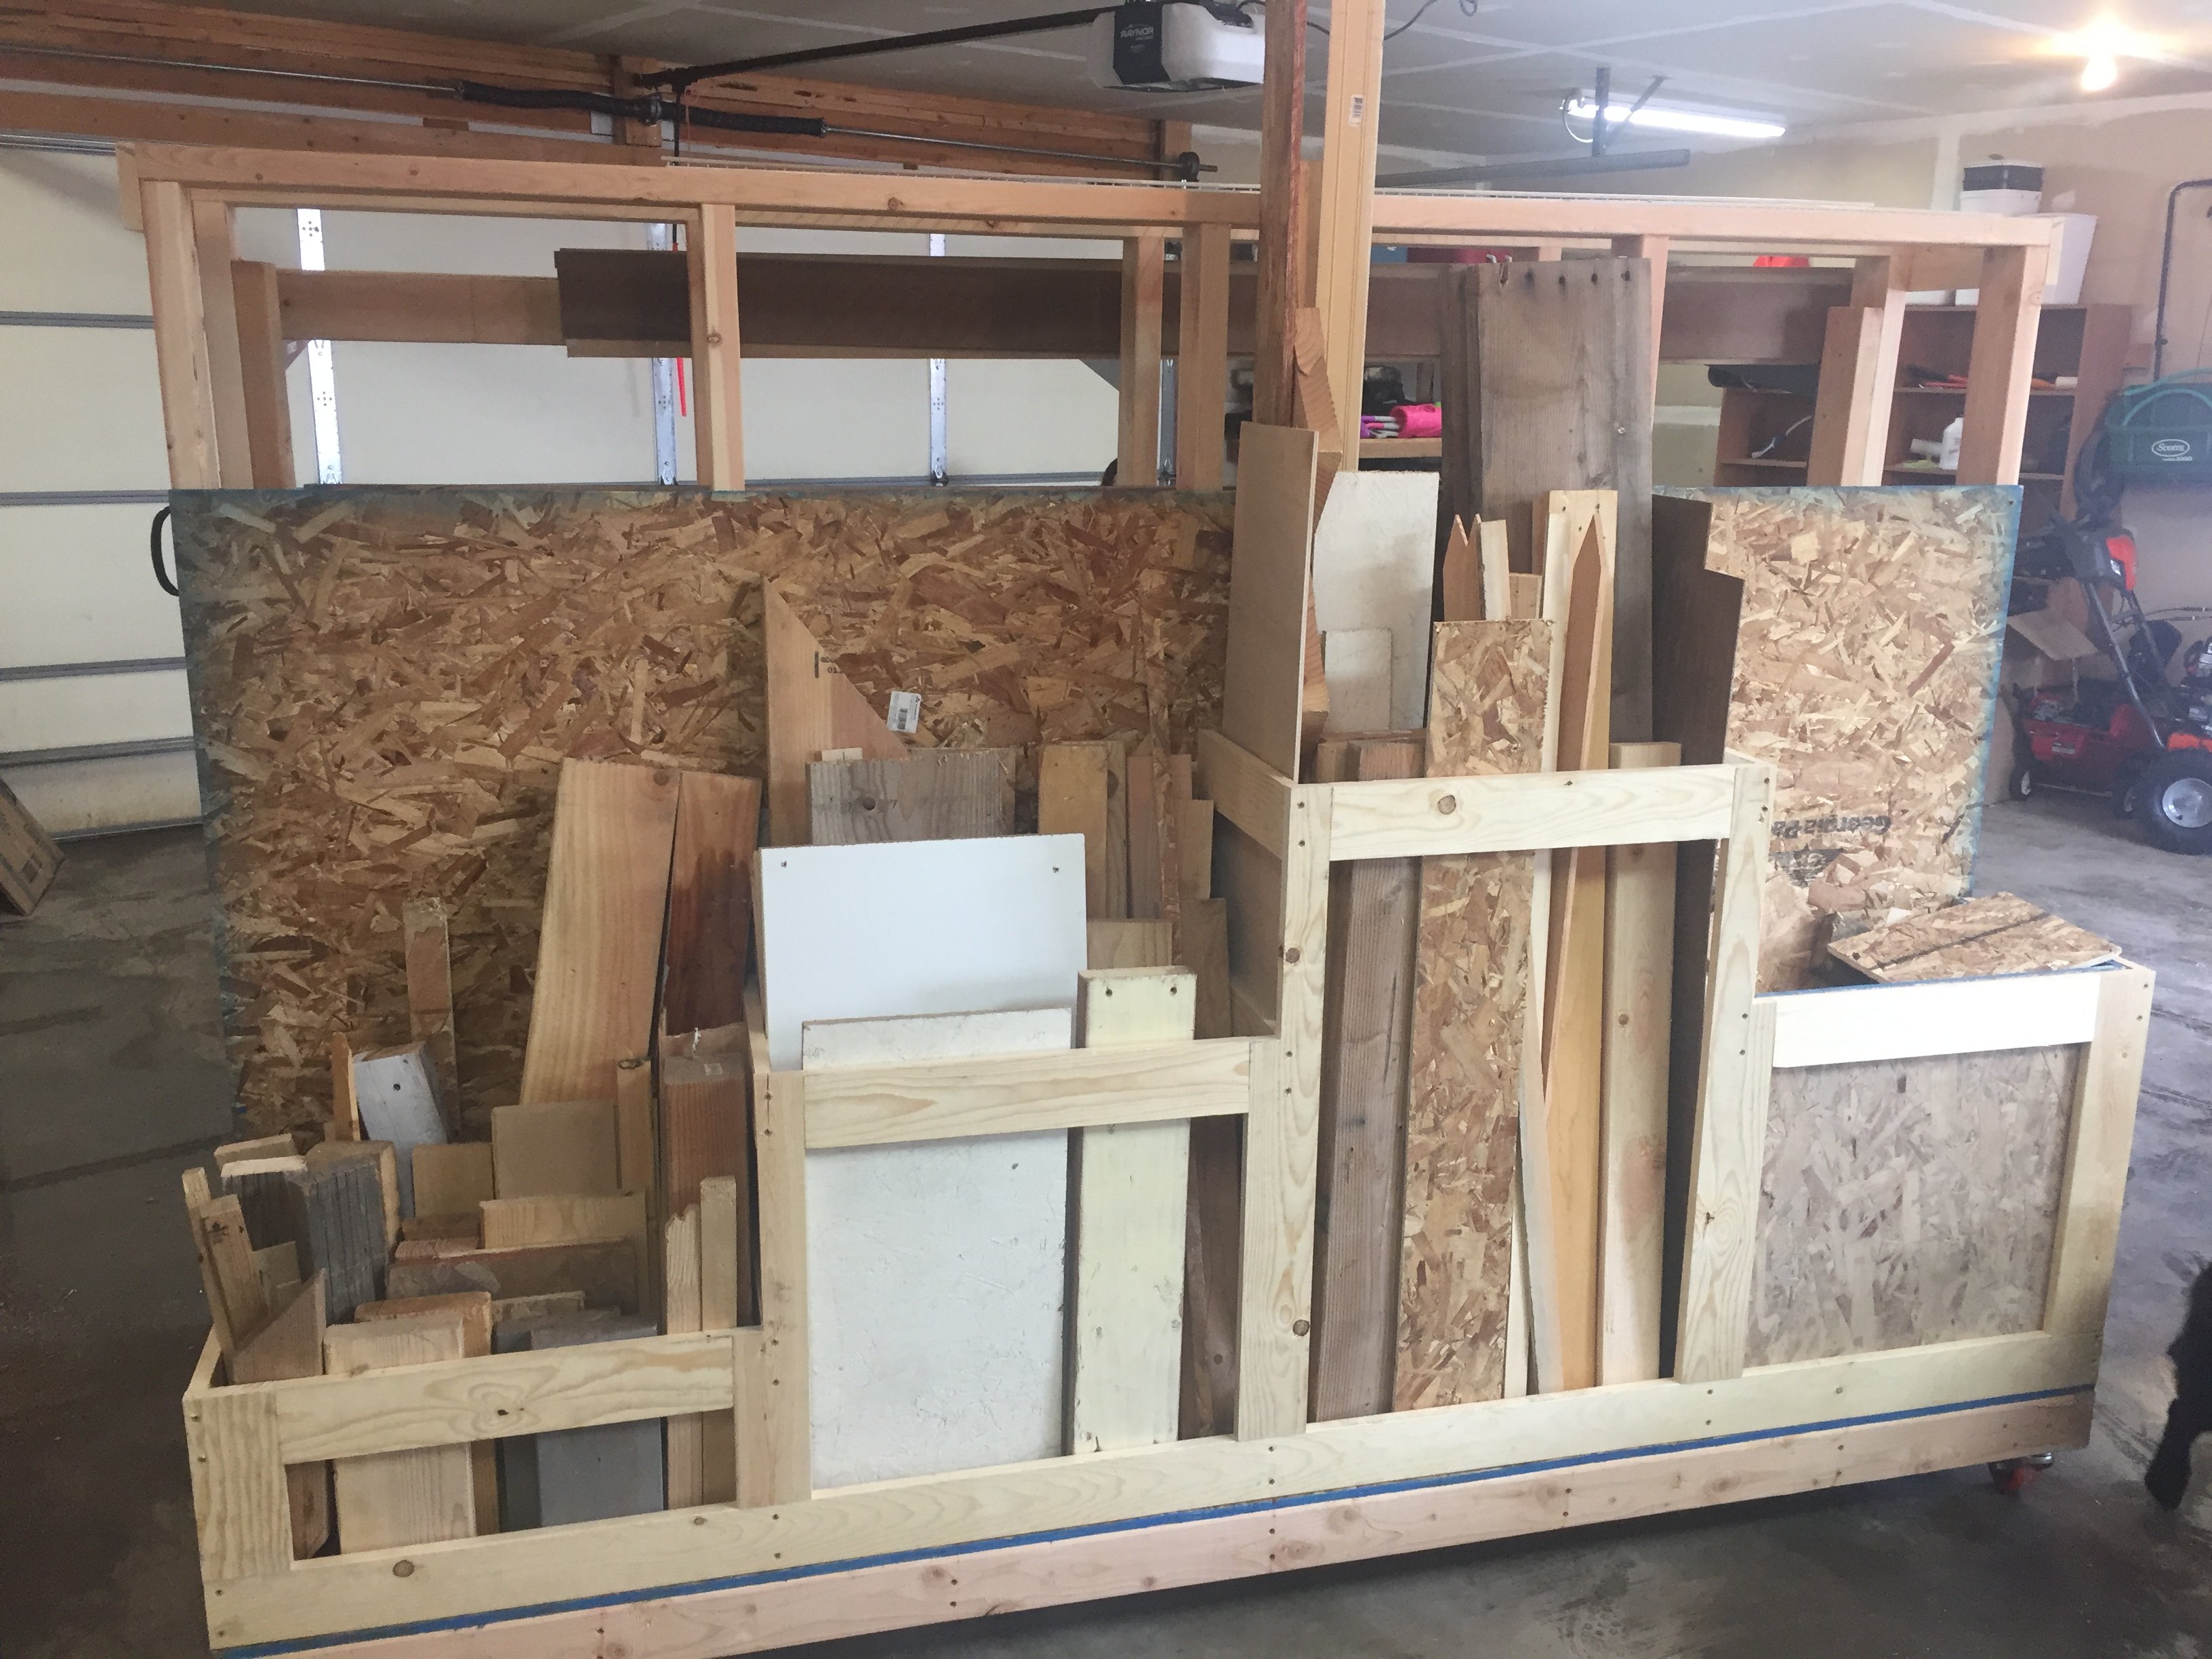
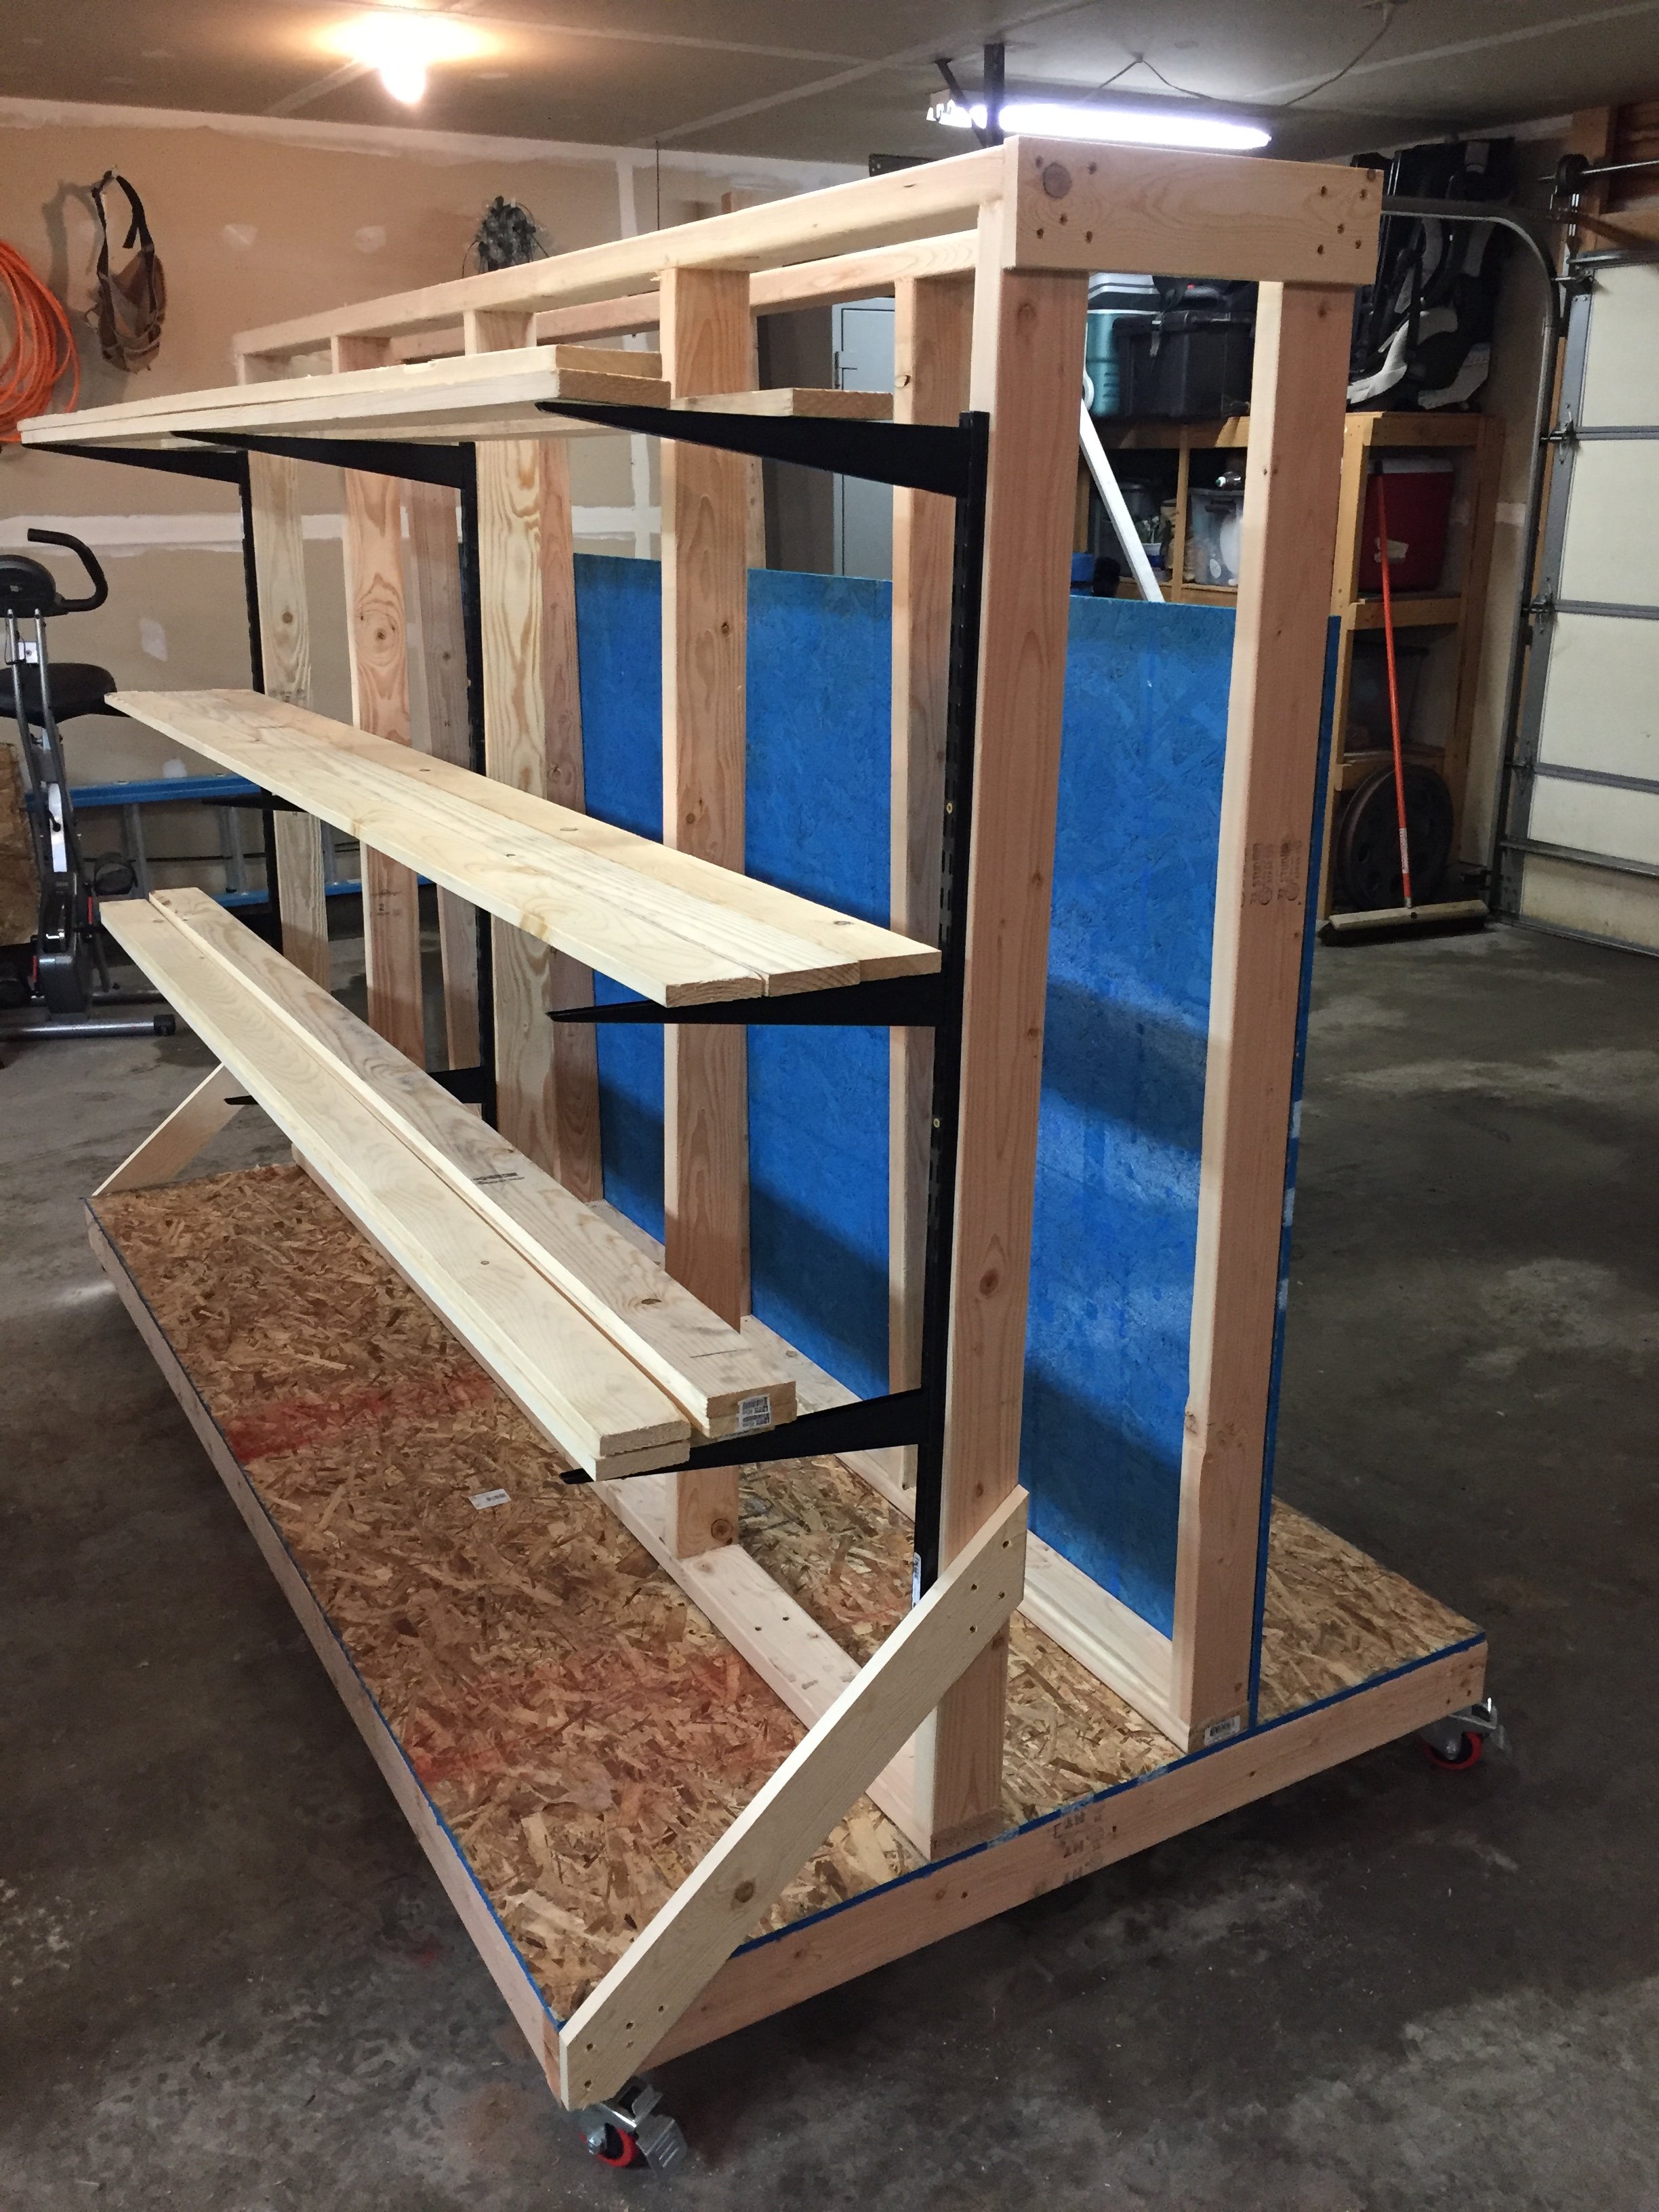
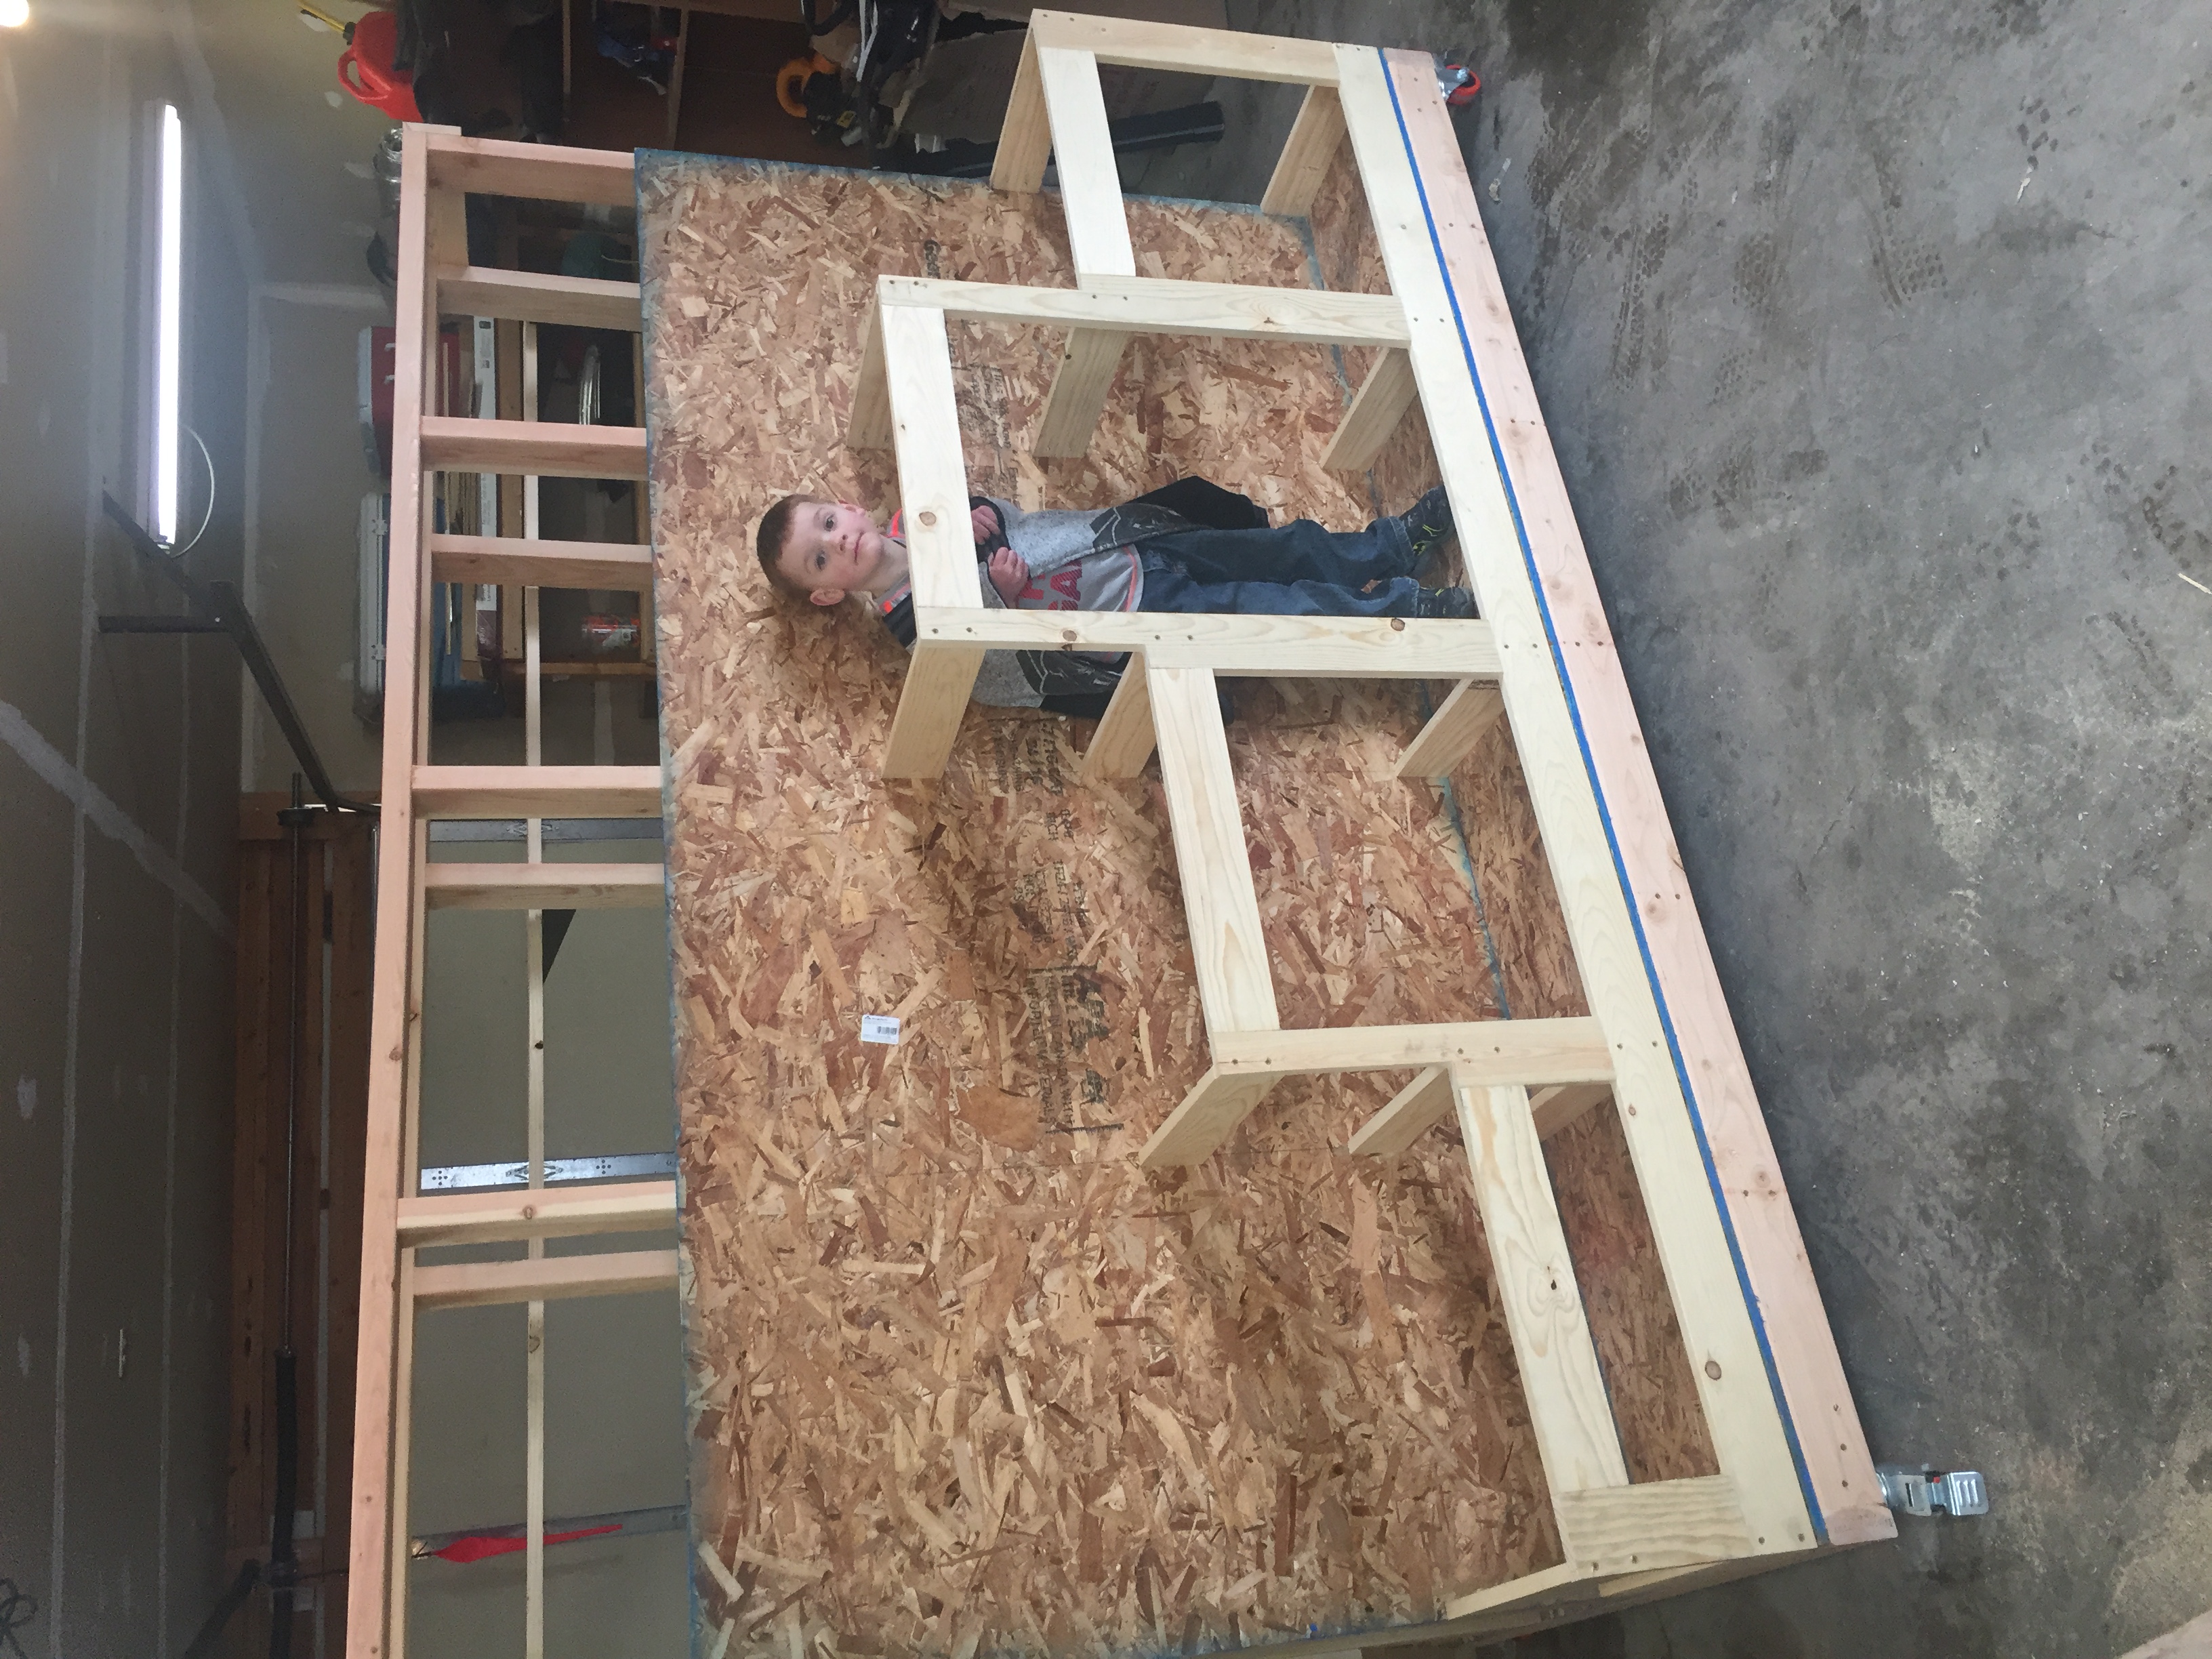
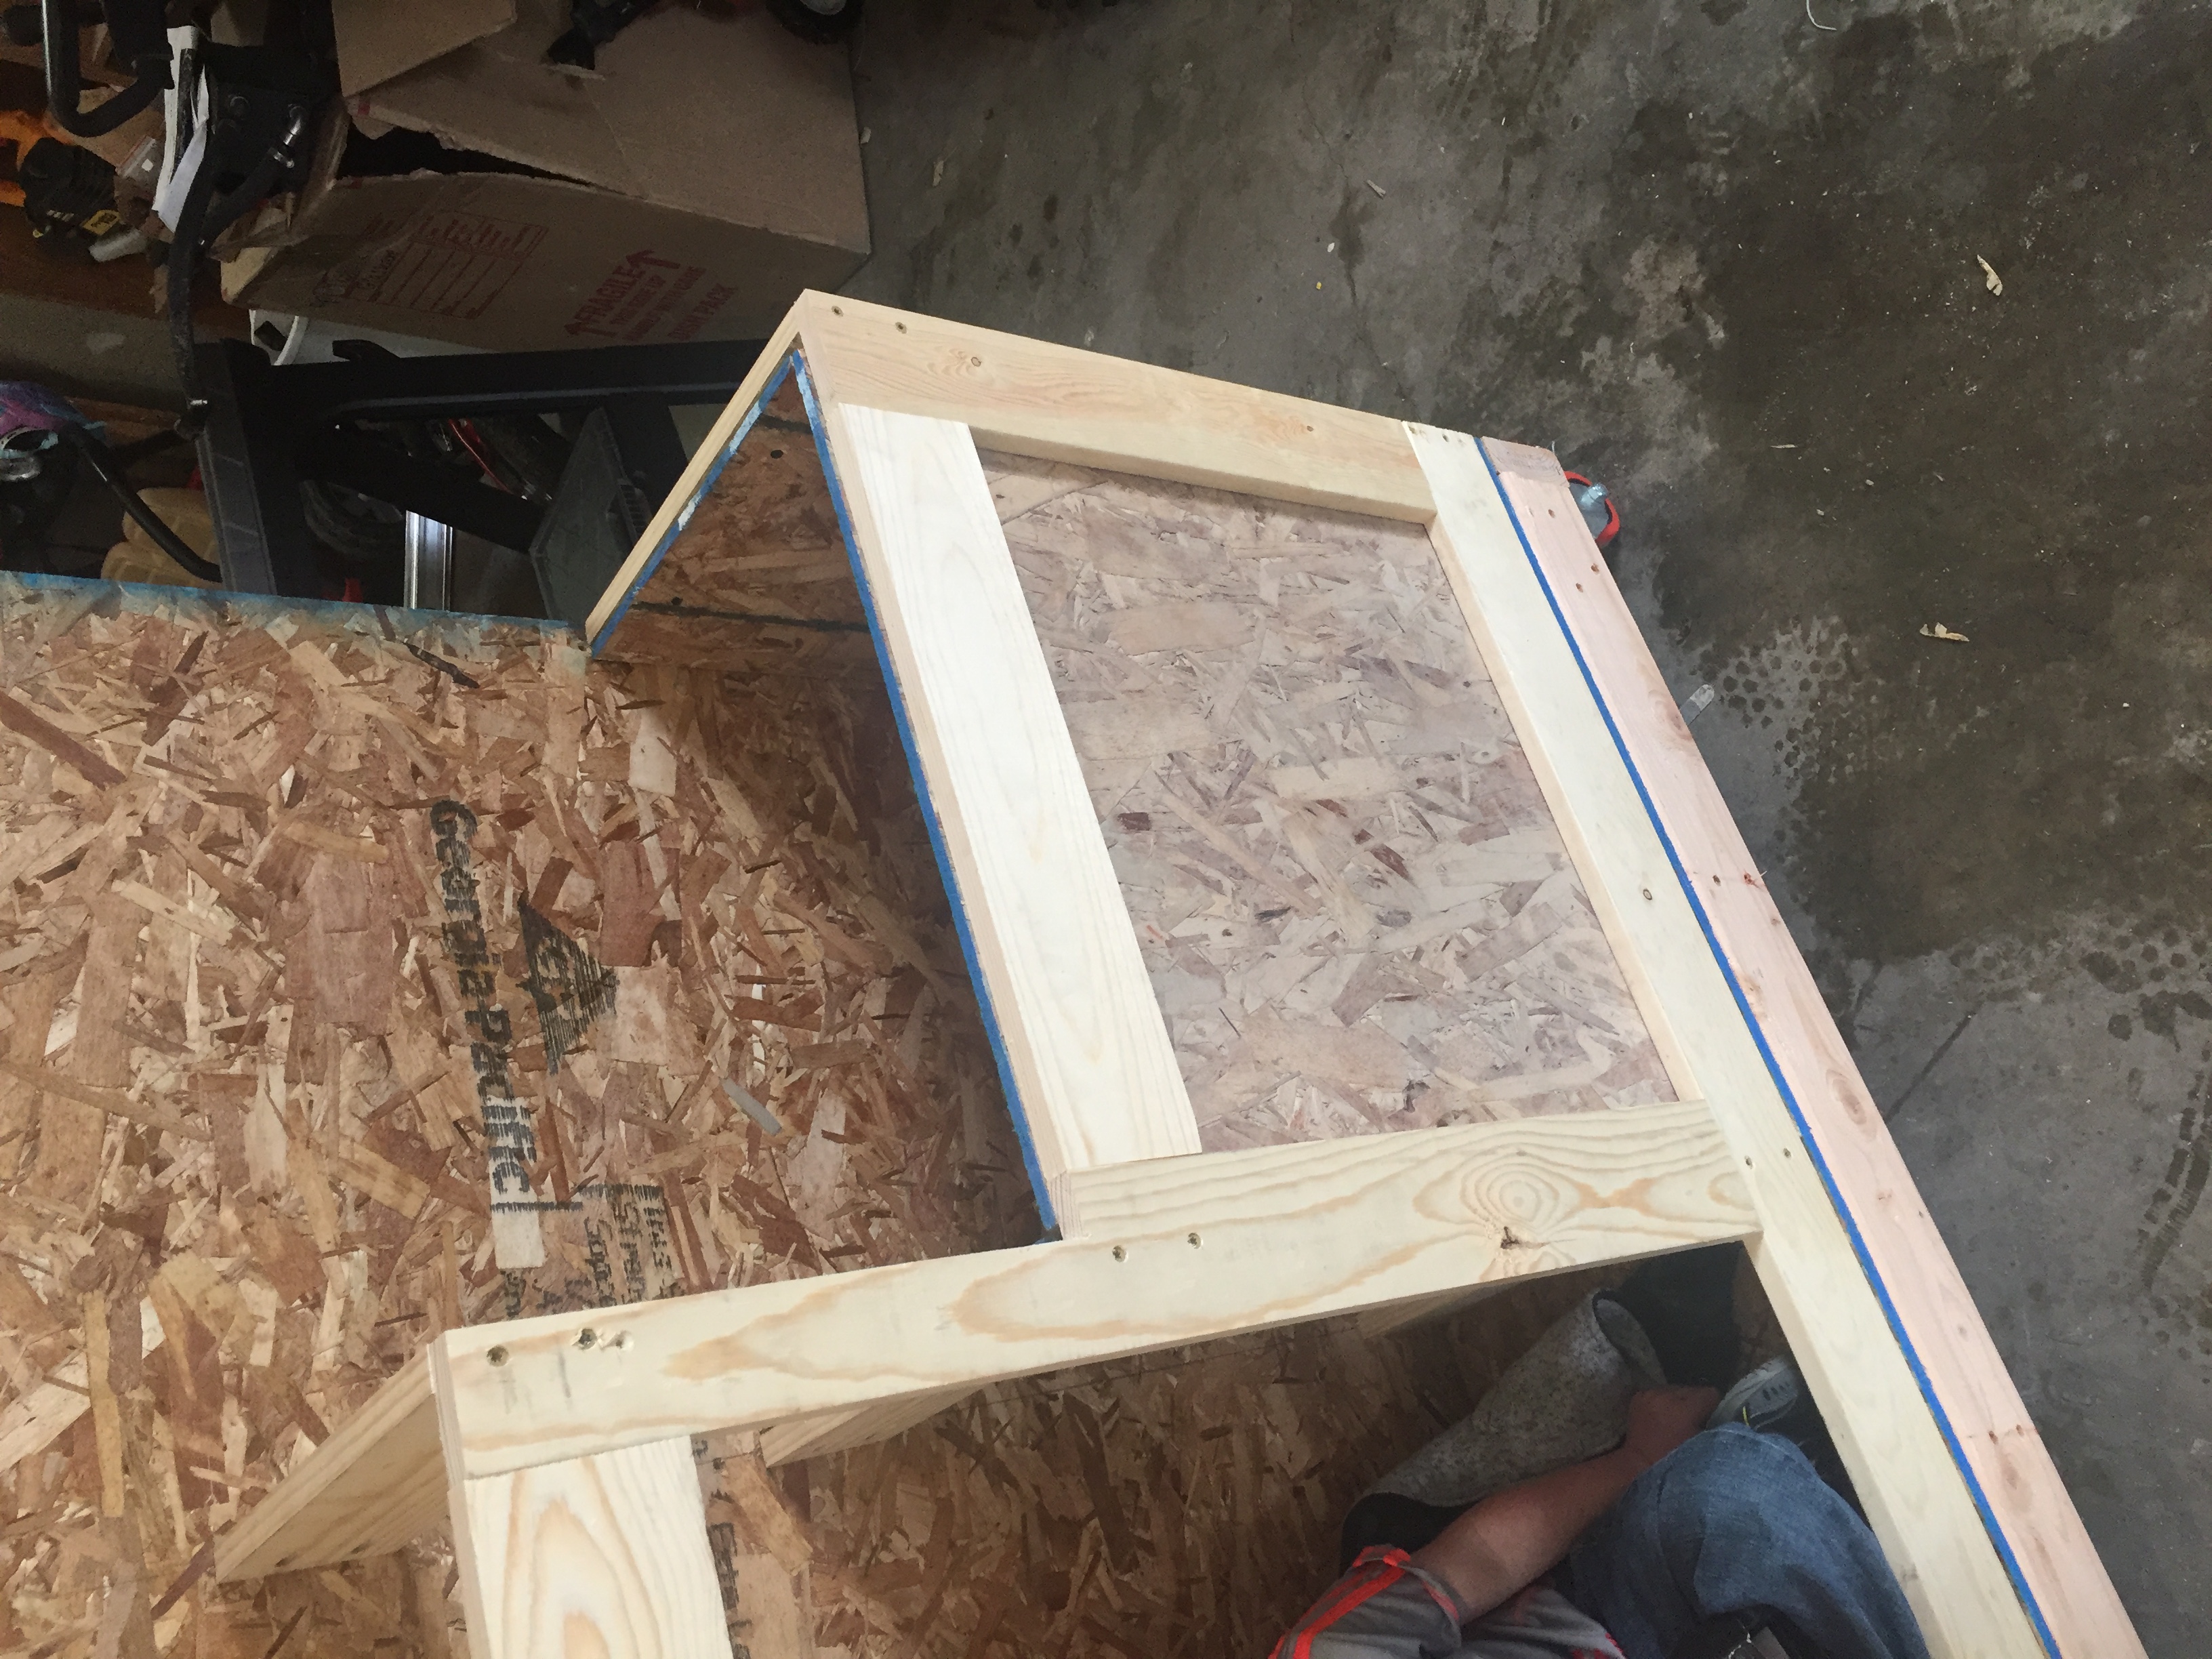
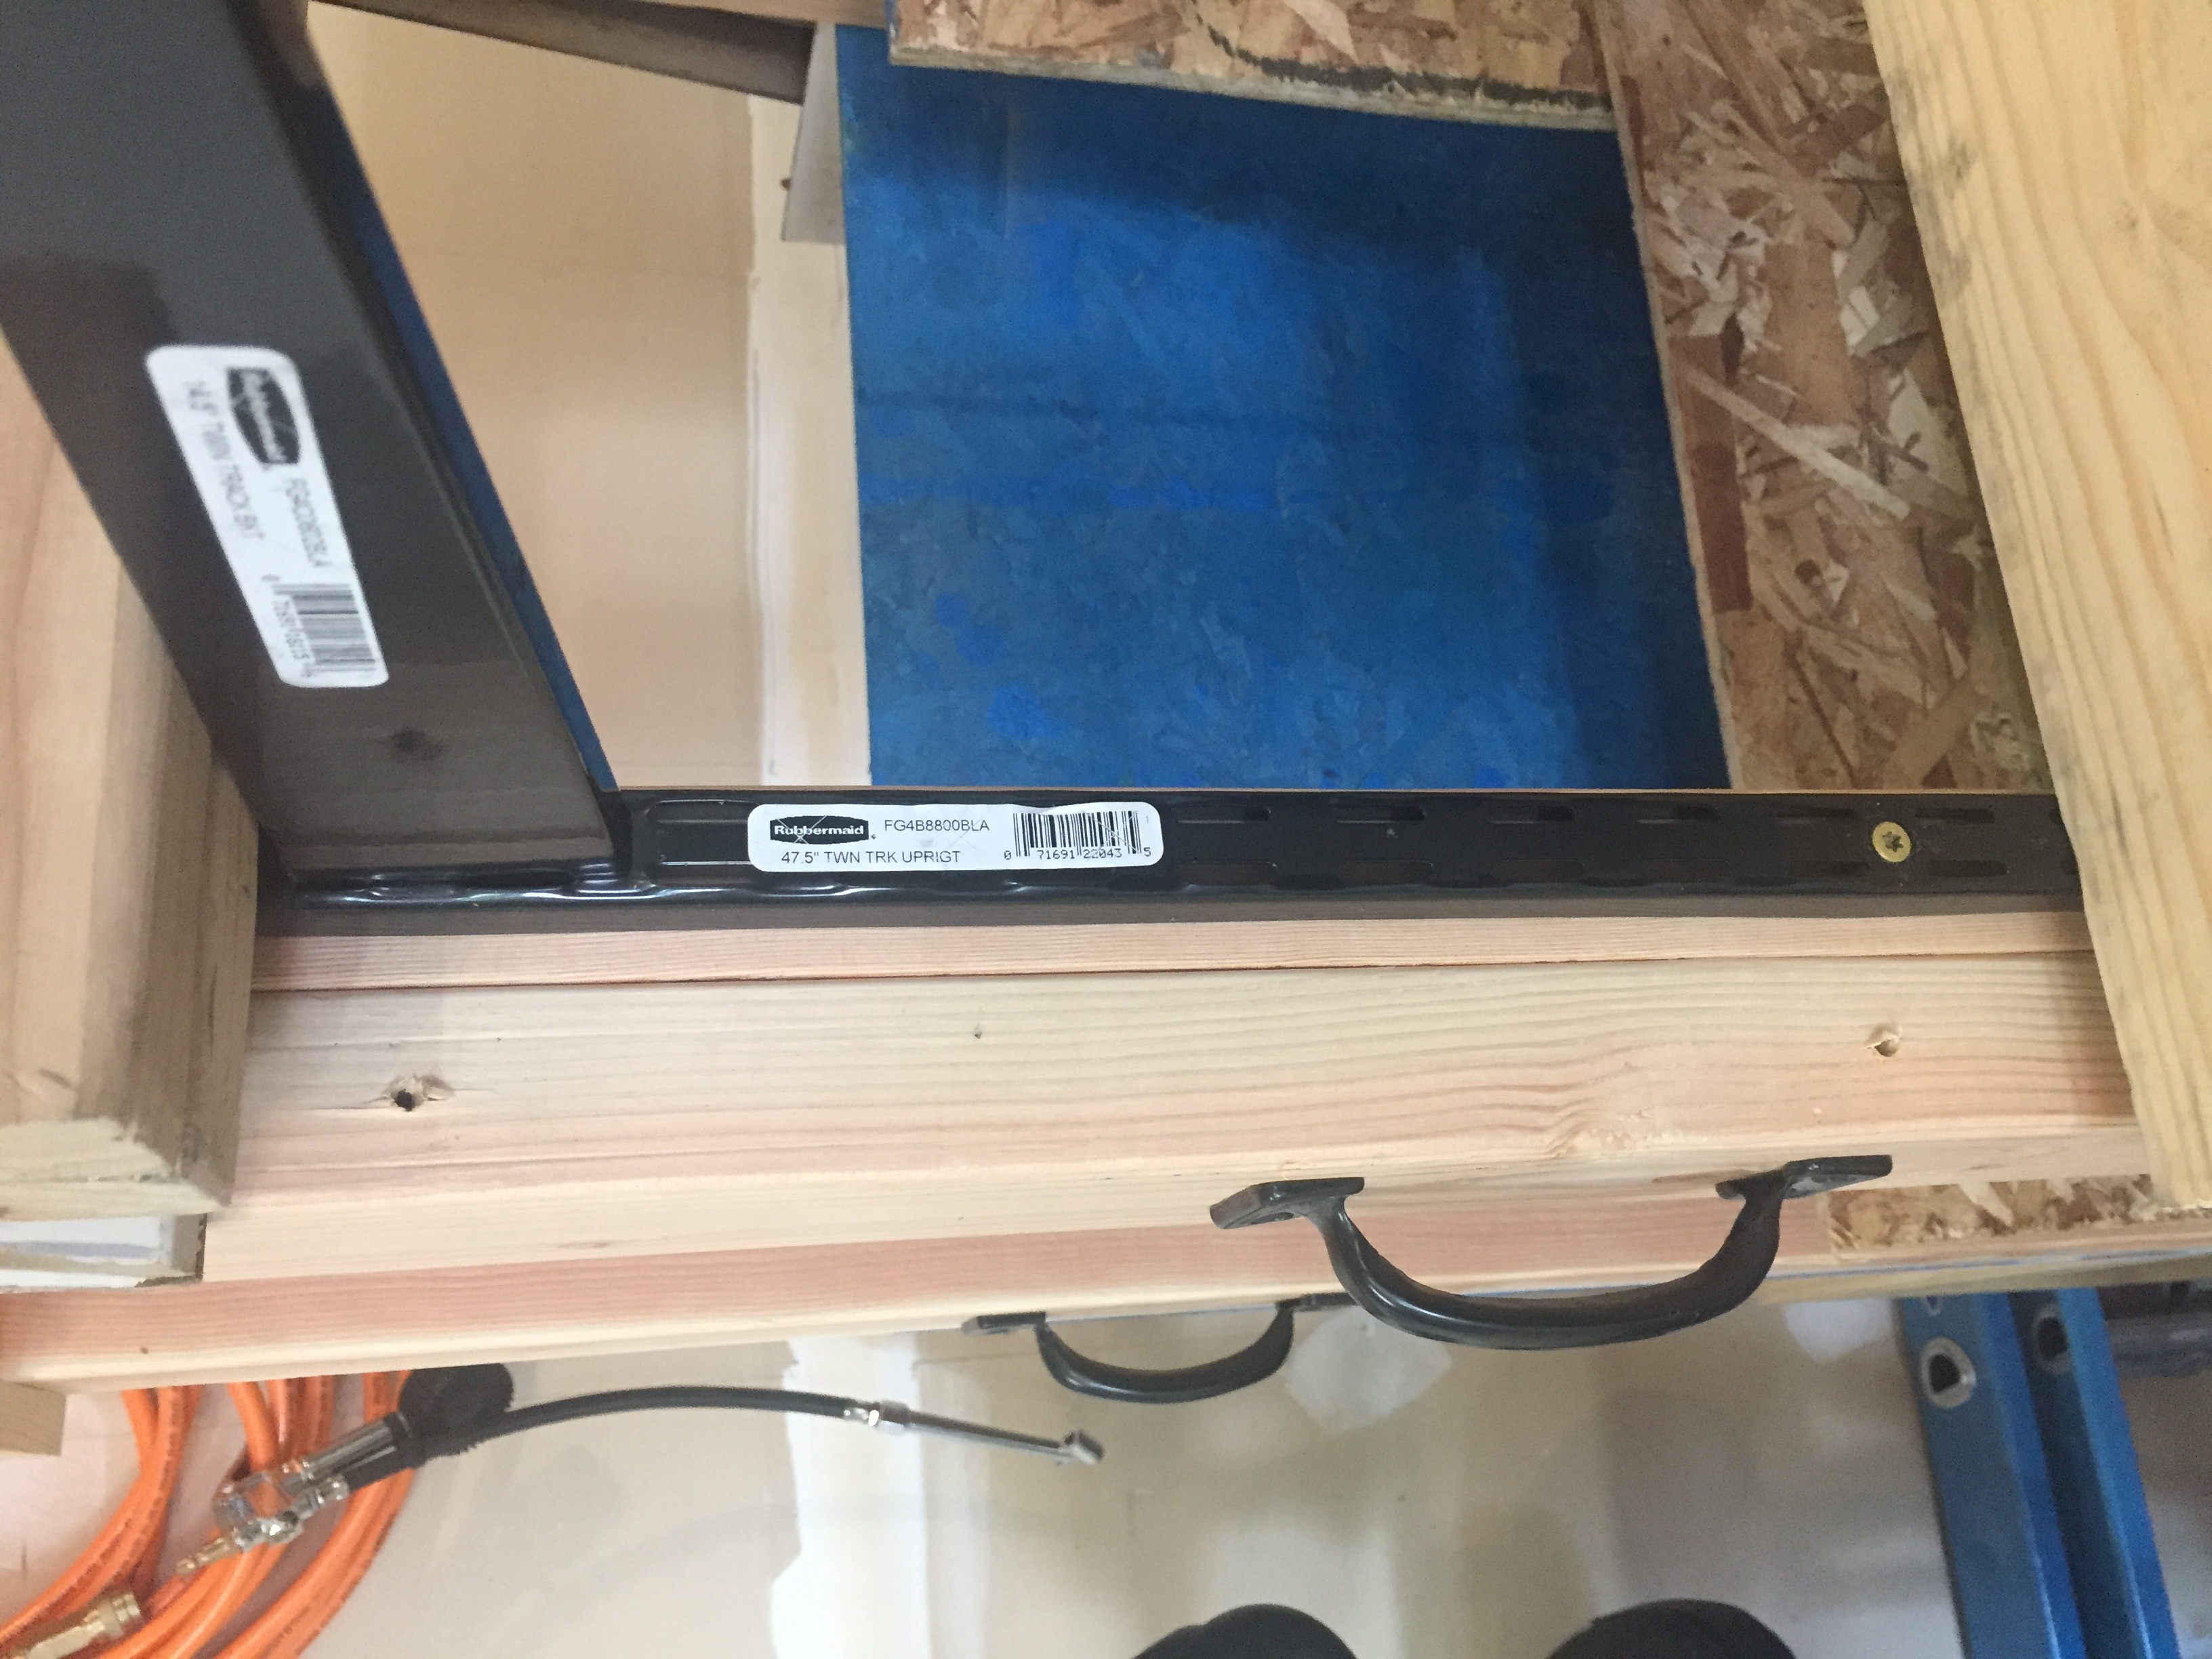
Community Brag Posts
Small A Frame Chicken Coop
![](/sites/default/files/black%20cooppin.jpg)
I wish I would have made the door a little bit taller. I added a nesting box and on one of the roof panels I put a hinge so that you could pull it up and clean the coope
easier.
Pat
![](/sites/default/files/black%20coop1pin.jpg)
Farmhouse furniture set
![](/sites/default/files/2F53F847-6A02-4CF8-BE63-1AE5D8CD0EE8.jpeg)
Had fun with this one
![](/sites/default/files/C2B2BFE1-DD88-42F5-BC93-08DA1C0A31AD.jpeg)
![](/sites/default/files/CEE805C8-7CD8-4FE0-A6E4-EB643311F91A.jpeg)
Outdoor Sectional and Adirondack Chairs
![](/sites/default/files/adirondack%20and%20sofapin.jpg)
Made 3 Adirondack chairs with your plans. They're waiting for stain but work perfectly around our fire pit!
Ultimate Work Bench using Ana's plans
![](/sites/default/files/09808B06-8FD0-4D70-A556-B6A656BC5C60.jpeg)
When I first saw Ana's Ultimate Work Bench I was blown away. I *had* to make this. I love how neat the garage looks when everything is put away.
I had to make a few extra cuts in order to allow room for my table saw fence, but other than that the only thing I did differently was to pretty it up using a white gel wood stain that I sealed with finishing paste. I also added trim using the leftover 1/4 inch plywood.
Thank you for being such an inspiration, Ana. I love your plans!
![](/sites/default/files/0AB94CE5-0A8A-48FF-A714-F583F69A8C79.jpeg)
![](/sites/default/files/1E635F2E-7599-4073-B240-49E8E99DD62C.jpeg)
![](/sites/default/files/4D19A96B-37B2-47FA-AE83-D7E19E375E1B.jpeg)
![](/sites/default/files/CB78B0D1-68FF-4C4E-A498-F3AD24B3E5C5.jpeg)
![](/sites/default/files/28EFE5B5-3D33-403C-A1AC-548309E98D25.jpeg)
Basement Storage
![](/sites/default/files/IMG_8998%20%281%29.jpg)
Thanks for the instructions! Here's my version. I haven't built much of anything before, but I needed it in my basement to handle kids' stuff. My version is 18 feet long. I combined a 12-foot and 6-foot 2x4 to get that length, which meant less cutting, which I had done at Lowe's (for free). I used the 6-foot 2x4s throughout the shelf to ensure it was strong (in other words, I didn't want a 12-foot "section" and a weaker 6-foot "section" added on).
I was able to get everything in my car but the ride home was slow. I also had to use my egress window to get the 12-foot boards in the basement.
Total cost for me was about $170 including a couple boxes of screws and wood glue. I could've easily spent double the cost on store-bought shelving. Thanks for the plans!
![](/sites/default/files/IMG_8997.jpg)
End of the bed storage bench
![](/sites/default/files/IMG_20170204_165952.jpg)
I changed up the dimensions to make a storage bench for the end of our bed. I wanted something different and couldn't be happier with the way it turned out. I stained it with weathered grey, then a coat of golden oak and then another of weathered grey. And painted the box with linen white chalk paint. I love the black knobs with the grey and white!
I only used 2x2s for the legs. I made the seat frame from 1x2s because of the warping I. The 2x2s. It made my life so much easier!
![](/sites/default/files/IMG_20170204_165948.jpg)
![](/sites/default/files/IMG_20170204_170113.jpg)
![](/sites/default/files/IMG_20170203_175530.jpg)
Three Bin Laundry Sorter
![](/sites/default/files/3154820734_1358831440.jpg)
Modified the original plan to meet our needs of a laundry sorter. Had problems with the hinges so ditched them. I used dowels with a combination of a chamfer cut on the bottom of the door. Dado-ed the trim on the doors and slide the bead board panels in. The face frame is all held together with pocket hole screws, which I highly recommend because it eliminates nail holes and keeps the face frame square. This was my first wood working project, took me a little long to get it done. Thanks for looking.
Modified January 28
So here are some more pictures of my project. I don't really have any good pictures of the dowels. But what I can tell you is, I drilled holes through the sides of the face frame and the trim pieces and then measured where the holes would be in relation to the "drawer". I then drilled holes in the drawers at those measurements, I was careful to not go to deep. I think I went in half an inch. After that I started at one end and placed the dowels in, then put each drawer in. It wasn't easy but with a little patience it worked. The key is to wax the dowels so they will last longer as well. I also am including pictures of the top and bottom trim. On the top the original plans called for an overhang piece and I didn't like the way that looked. I ran the top board an inch long on each side and then wrapped it in quarter round trim. I did this because I plan on adding the Mimi Hutch Top. The bottom was built per the plan, but I ran into a problem with my bottom trim not being level and you could tell. So I raised the whole unit on 1 1/2 legs then placed it on a level surface and again wrapped it in a decorative trim. The key on both trims was a nice miter joint. Last picture I added was of my stoppers. I took scrap from the 1x2 trim and cut them to an inch and a half or two (can't really remember), then using the Kreg Jig drill bit drilled recessed holes. I then opened the doors until the side 45s were level then mounted the blocks on each side. I feel that it is better than a chain or string catch. Again thanks for looking and I hope I answered all of your questions.
![](/sites/default/files/3154821234_1358831440.jpg)
![](/sites/default/files/3154821235_1358831440.jpg)
![](/sites/default/files/3154821236_1358831440.jpg)
![](/sites/default/files/3154821237_1358831440.jpg)
![](/sites/default/files/3154821238_1358831440.jpg)
Comments
Tue, 01/22/2013 - 11:29
Dowels! What a great idea!
Dowels! What a great idea! Would you mind sharing how you did it? Could you possibly add some pictures showing the dowels? You did a great job. It looks beautiful.
In reply to Dowels! What a great idea! by moosmani
Tue, 01/22/2013 - 20:11
dowels
Yes I will send you the info you requested, I'll try to get it out to you tomorrow or Thursday.
Wed, 02/15/2017 - 11:05
Plans
Can you send the plans to me?!?! I need this for my new home! [email protected]
Thu, 01/24/2013 - 09:27
Great Job!
I love what you have made! Could you post pictures of the top and the bottom trim? I'm very impressed that this is your first project!
Sat, 11/16/2013 - 18:23
Plans
I am a little confused. I love the three bin laundry sorter, but everyone is mentioning plans. I am not finding plans for it on the site. Also, what goes in to hold the clothes? There may be obvious answers, but I am not seeing them. I'd appreciate any help you could give.
Tue, 12/02/2014 - 02:58
Clever mods!
I've been thinking of working up one very similar to this, also with 3 bins, but I didn't want to use chain either. Those stoppers will be ideal - do you put them on both sides or is one enough? Thanks for the share!
Sat, 01/24/2015 - 11:29
3 bin laundry sorter
Hi-
Im not sure if you still have the plans to this awesome project, but if you do, would you be able to share them with me? Ive been looking to make something like this forever, but just couldnt find any help!
thanks,
karah
[email protected]
Wed, 02/25/2015 - 12:35
Do you still have these plans?
If you still have these plans, could you please send them to me? [email protected]
THANK YOU!
Wed, 02/25/2015 - 16:45
would love the plans!!!
I am searching for the plans for the gray corner entertainment center. Does anyone still have them that could email it to me….
Tue, 01/19/2016 - 17:43
Plans for this sorter!
Hi there! If you still have the plans for this I would love to have them! Thanks a lot
Tue, 04/12/2016 - 18:51
3 bin laundry sorter
I would love to have the plans for the laundry bin if they are still available, Thank you!
Wed, 02/15/2017 - 07:16
Great Design!
Can i also have the plans! This is perfect for what we want to do in our laundry room
Wed, 02/15/2017 - 11:24
GREAT DESIGN - SEND / POST PLANS, PLEASE
Can you please send me the plans! [email protected]
Mon, 07/10/2017 - 04:19
I absolutely LOVE your
I absolutely LOVE your laundry sorter!!!! You did a fabulous job and the TRIM, WOW amazing!!!! I've searched Ana's website and cant find the plans' could you please email me the plans to [email protected]. I started building my own furinture back in October 2016 and the reward is amazing... Keep up the good work.
Happy Building,
Lisa
Tue, 01/16/2018 - 19:55
Plan Request
Love this! Can you email the plans to [email protected] please?
Thank you
Tue, 01/16/2018 - 22:18
What a Great Piece - and So Useful!
I'm too new at woodworking to be able to tackle this right now, but would love to download the plans for future. My most successful project so far is a pretty standard bookshelf. I got a free plan, with lots of guidelines and explanations, at https://tinyurl.com/ydeup8lo -- it came with a 440 page guide, "The Art of Woodworking" that has tips and techniques, and am plowing through that right now.
Wed, 02/28/2018 - 12:53
3 bin laundry sorter
This is amazing. I am very new to woodworking. Could you send me the plans please? I would be most appreciatative
Wed, 03/11/2020 - 23:27
3 bin laundry sorter
I would love to have the plans for the three bin laundry sorter to build for my laundry room. Are the plans available? Awesome work!
Thu, 07/16/2020 - 14:14
3 bin laundry cabinet
Looks amazing!! I want to build one just like that, can you please email me the plans, thanks!! [email protected]
Tue, 01/12/2021 - 06:26
Plans for 3 bin laundry sorter
This looks like something I can build. Would you please e-mail me the plans? The address is [email protected]
Large square Balustrade Coffee Table
About This Project
Comments
Farmhouse desk
![](/sites/default/files/IMG_5884_1.jpeg)
Fun project
Frosty Garden Greenhouse
![](/sites/default/files/greenhousewithgardencart_0.jpg)
It was truly great for us to find a greenhouse design from a fellow Interior Alaskan blogger. We kept coming back to this design, enough times to where we decided to actually build it.
We would be the first to admit that tackling a gambrel style building was slightly intimidating and not what we had in mind for our very first self-built building! But, we faithfully followed the cut lists and directions. It turned out beautifully! If you're in the same boat, have confidence that you can build this too!
We love the options available for making it your own. We decided to stain the greenhouse lumber of ours to match our cedar sided home. We also built a semi frost-resistant foundation, since we're a little north of Ana at 65 degrees and sometimes experience frost heaving. We also added full climate controls to ours, adding both fans and louvers that keep our greenhouse at perfect temperatures.
The performance has been great! Building this greenhouse has been the single greatest thing we have done in our years of subarctic gardening. We might even consider building a second greenhouse down the road. No matter how big your greenhouse is, it's never quite enough!
Thanks for the great plans, Ana! We appreciate your work!
![](/sites/default/files/fansingreenhouse.jpg)
![](/sites/default/files/JUWvVU3YR1SfykmTPGBaLg_0.jpg)
![](/sites/default/files/WM4jTRnOS0eyplBRVC9zKQ_0.jpg)
Comments
Bench to Table conversion
We made two of the Picnic Table to Bench units in the month of March. The second one is in the bottom part of the picture hidden by the wood rack. I took the picture from our upstairs porch. My husband is still amazed that we accomplished this. He is not a DIY'er. We built a new house in 2016 and had a bunch of leftover wood sitting on our (unfinished) basement floor. We managed to build our benches mostly from that wood. We did have to buy 3 more pieces to finish the second back/tabletop. Then we got the balance of the wood moved out to our storage barn. The color is deck stain from our porches. I chose 20 hours as our time frame because the used wood required a lot of sanding and prep work. Our time frame was probably about 3 weeks but we are 68 and 73 years old and were really in no hurry. The plans were very simple to follow. We made them 6 feet long.
Comments
Bookcase/ laundry and cleaning storage
![](/sites/default/files/ACDD88A8-2BDF-4975-8AC0-AD9A2FE174C4.jpeg)
We mainly followed the plan but made some adjustments because we wanted the “ugly” side to be able to house brooms and mops and we cut the width down just a tad. We absolutely love how it turned out!! And we definitely needed this in our space!
![](/sites/default/files/278D16E2-28E6-4FBA-93AC-FD595BA222D4.jpeg)
Comments
Easy 8 ft shelves
![](/sites/default/files/198813339_10106341862887903_3168277254908438538_n.jpg)
Easy picture frame shelves.
Comments
Sat, 06/19/2021 - 10:09
Very nice~
Such a wonderful way to display photos! Wonderful job, thank you for sharing!
Firewood Shed using Round Posts and 2x4s
![](/sites/default/files/3154825522_1366066245.jpg)
I used the basic design principles from Ana's site but decided to use 3.5x6.5 round fence posts (purchased at my local Tractor Supply Company) for a different look plus they are a little cheaper than 4x4 posts. I also used pressure treated 2x4s for some added strength and perhaps longer durability. I used Ana's cedar fence pickets idea for my roof (these pickets are used as walls on one of the other shed plans on this site). I didn't need a very robust roof as my firewood shed sits underneath the deck which provides a lot of protection from the rain. I attached the structure using 3 inch deck screws and the roof with 1.5 inch deck screws (nails would have been more than adequate for the roof but I had the screws on hand).
I did run into some problems due to my design changes. Most of my issues involved attempting to square up the round posts which are much closer in shape to a jagged stick than dimension lumber such as a 4x4 post. If I had to do it over again I would not have used the round posts. Constant tweaks and adjustments to the posts significantly delayed my build time and frustrated me at times. I was just barely able to wedge my woodshed in between the 2 deck posts which actually came in handy as I was able to secure the shed to the deck posts with 3 inch screws...making the shed very solid! The final issue I discovered after loading up my wood shed. The 2x4s at the bottom of the structure began to sag. I fixed this by using my floor jack to raise them up and placed 8 inch tall 4x4s underneath (2 in the front and 2 in the back).
Overall I'm happy with the way it turned out and I really love all the plans on this site...GREAT ideas!!
![](/sites/default/files/3154825523_1366066245.jpg)
![](/sites/default/files/3154825527_1366066245.jpg)
Desk
![](/sites/default/files/deskteal.jpg)
This was my biggest project to date. The hardest part was finishing it.
Comments
Mon, 03/23/2015 - 03:01
I liked this desk. how much
I liked this desk. how much would it cost for doing this? I am a writer at one of the and btw way work full time infront of my PC, wish to have a separate work room with well interior designed.
Counter height dining set
![](/sites/default/files/received_4384543981600451_0.jpeg)
Threw this together over a 4 day weekend. Love how light these chairs are.
Substituted edge glued project panel for the table top and seats instead of joining several planks.
Used a combination dark walnut, jacobean, and early American stain on the finish.
![](/sites/default/files/received_268218128513019_1.jpeg)
![](/sites/default/files/received_606413030378396_1.jpeg)
Comments
Adirondack Chair (Home Depot Version)
![](/sites/default/files/3154828293_1370893189.jpeg)
Followed the new home depot plans, only change I made was using 2x4 instead of 2x2. Getting ready to build another one, but this time will also change the arms to be wider on the ends to accommodate wine holder on one arm and cup holder on other arm. :0)
![](/sites/default/files/3154828294_1370893189.jpeg)
![](/sites/default/files/3154828295_1370893189.jpeg)
![](/sites/default/files/3154828296_1370893189.jpeg)
Comments
Fri, 11/13/2015 - 20:36
Varnish
Hi Ana,
Thanks for all your free sharing and advice. I'd like to return the favor (hopefully)...
Just wanted to say (as I am a painter) that it is best to avoid using any sort of "clear" varnish (such as poly, or spar, etc...) on anything that sits outdoor (such as furniture, doors, decks), because UV rays from the sun will break-down the varnish and cause them to fail.
Instead, it is best to use a stain that is suited for decks, like Cabots Semi-Transparent, or semi-solid, etc,,
best regards,
Aaron
2x4 garage shelving
![](/sites/default/files/20150523_130315%20%282%29.jpg)
I built this to fit inside a closet that I have in my garage to store all my camping stuff. I built it 5 feet long so I only had to buy 2x4s that were 10 feet long. I also built the bottom shelf closer to the ground to allow just a little bit more space between the first and second shelf. All in all it was a very easy and fulfilling project. I was a little worried about how sturdy the shelves would be but they are very solid. Thanks Ana!
Comments
Sat, 05/23/2015 - 15:14
picture is weird
For some reason when I upload the photo it saves sideways....sorry
Wed, 08/12/2015 - 06:11
Your version is exactly what
Your version is exactly what I'm planning on building. Nice to see it before I get started.
Treehouse Bunk Bed
![](/sites/default/files/3154829446_1372360705.jpg)
My kids are very into the "Magic Treehouse" books so my version of the Sweet Pea Bunk Beds is called The Treehouse Bunk Beds!
I made a few modifications, mostly for ease of access and airflow. I added windows for each bunk on the non-stair side of the bed because my kids room tends to be really hot so I thought they would appreciate more cross ventilation.
I made the side panel on the upper bunk removable (so that I would have access to put the fitted sheet on that end) by using pocket hole screws to hold the boards together, which make it one solid panel then I put 1x2s behind where the panel would go so it wouldn't fall in and used 4 slide bolts to hold it in place so it wont fall out. Also I made the two front panels on the lower bunk hinged doors so I could just lean in to change the sheets. The method for these was basically identical to what I described above but I attached them with non-mortised hinges.
I'd love to get the storage boxes made on of these days. Maybe after they start kindergarten!
![](/sites/default/files/3154829447_1372360705.jpg)
![](/sites/default/files/3154829448_1372360705.jpg)
![](/sites/default/files/3154829449_1372360705.jpg)
Comments
Fri, 06/28/2013 - 00:44
Great Job! I love your latch
Great Job! I love your latch system. It looks so easy to access the beds and it looks like a simple addition to the plan. Way to take it to eleven!
Outdoor Sectional
![](/sites/default/files/sectional.jpg)
I scaled back the length of the sofa by a few inches and I made the sectional only one seat to fit my space on the deck. This was my first woodworking project that I did by myself. I got the cushions for more than 1/2 off at Ikea so the whole project cost about $150 ($80 for the cushions). It took me about a week to complete but the total time was less than 10 hours to build and stain. I'm pretty happy with how it turned out.
![](/sites/default/files/sofa.jpg)