Community Brag Posts

Pony Wall

Submitted by Anonymous (not verified) on Thu, 08/13/2020 - 06:17

Love your site. The 8’ pony wall I recently made was a great plan. I’m also going to build the outdoor storage plan you have. Thanks for your creativity!

Built from Plan(s)
Estimated Cost
$200
Estimated Time Investment
Weekend Project (10-20 Hours)
Finish Used
Linseed Oil

Modified camp style loft bed

Submitted by Firefly34 on Tue, 10/23/2012 - 21:00

I loved the simplicity of the loft bed. My daughter wanted it to be like a house so I built a wall. This is my first project ever using any power tools. I know it's not perfect but the joy if knowing that I did this all by myself with no help from my husband is priceless. It literally took me a day to cut the wood and put it together however since I am in no way a painter painting it took me a little over a week between priming the wood and getting the color just as my ever so picky 5 year old liked between painting the walls in her room at the same time.

Estimated Cost
Including wood, glue, screws, nails, and paint estimated $150.00
Estimated Time Investment
Week Long Project (20 Hours or More)
Finish Used
Glossy white mixed with purple stain (to make the deep purple my daughter wanted). I painted it after I put it together. I painted one section at a time since she has a very small room (8x9).
Recommended Skill Level
Intermediate

Max's New Camp Loft Bed with Stair

Submitted by chefreign on Tue, 08/12/2014 - 10:52

Awesome project and my son couldn't be happier.

Living in a small apartment in NYC, I had to rent the mitre saw from Home Depot ($50 for the day) and lug it and all the lumber up the flights of stairs. Other than that, the project was a breeze and took two days, by myself, from start to finish. I added some metal L brackets at some of the load bearing joints for extra support. Also used a 2x4 as the mattress rest (instead of a 2x2) and added another 2x4 as a center beam to support the mattress.

All that's left is painting and decorating, either with a curtain or plywood, depending on what my son wants. Thanks for the plans!!

Estimated Cost
Lumber - $80, Brackets and screws - $30, Saw rental - $50
Estimated Time Investment
Weekend Project (10-20 Hours)
Finish Used
N/A - to be painted. Covering for the bottom with either be a felt curtain with a design sewn on (castle, train, etc) or plywood cut into the shape he wants (firetruck, rocket ship, etc).
Recommended Skill Level
Beginner

Comments

Hippie and Blue

Sun, 01/04/2015 - 12:09

I love this! I am planning to build this bed, stain it and use the same brackets as industrial accents. I love that you added the basketball hoop to the front. I wondered where we'd hang ours. Great job!

Lit Farmhouse King

Submitted by wacman on Sun, 11/27/2016 - 18:59

A slight modification from Ana's original plans, but with the same character and feel.  I did not include the footboard, at least not yet, and we wanted reading lights mounted and wired to the headboard.  I bought track lighting fixtures, mainly because they were the size we were looking for. I ran each light to individual switches on each side of the bed posts and then concealed the wiring in routed-out board on the back and down the one post to a cord.  I also subbed out the 50w halogen bulbs (hot!) for 35w LEDs, which is the perfect amount of light and cool to the touch.  I did alternating width boards and then stained the edges of all the exposed wood with an ebony dark stain.  Once dried, I painted an antique white, distressed with sanding along the edges, exposing the stain, and then sealed with a light brown wax creme finish to give it a little more character.  A simple, solid and heavy project that should last for decades.

Estimated Cost
$100
Estimated Time Investment
Weekend Project (10-20 Hours)
Finish Used
Minwax Ebony Stain, Interior Eggshell paint/primer Latex, Light-brown wax creme
Recommended Skill Level
Intermediate

Tween X Desks.

Submitted by Anonymous (not verified) on Sun, 08/16/2020 - 11:26

I had fun doing this project. I dont have a miter saw but made happen with my circular saw. Desks are 48 in long and 24 in wide,I used a bookcase shelving panel for the top of the desk. I made this for my 8 and 4 yrs old kids.

Built from Plan(s)
Estimated Cost
$65 each.
Estimated Time Investment
Day Project (6-9 Hours)
Finish Used
Winwax, wood finish, dark walnut.
Recommended Skill Level
Beginner

Comments

Fancy Hall Tree

Submitted by reimb1nb on Sun, 10/28/2012 - 16:12

This project is the fancy hall tree made out of walnut and maple panels.

Estimated Time Investment
Weekend Project (10-20 Hours)
Recommended Skill Level
Intermediate

Comments

Big Girl Bed

Submitted by KCP on Wed, 08/13/2014 - 19:57

Grandpa made this bed for my daughter. He followed the plans but made some changes so that it could be taken apart if needed, changed some of the design elements. It's so cute! Love that it's handmade and can be passed down.

Built from Plan(s)
Estimated Time Investment
Week Long Project (20 Hours or More)
Recommended Skill Level
Intermediate

TV Console Shelf

Submitted by Scrivman33 on Thu, 12/01/2016 - 20:26

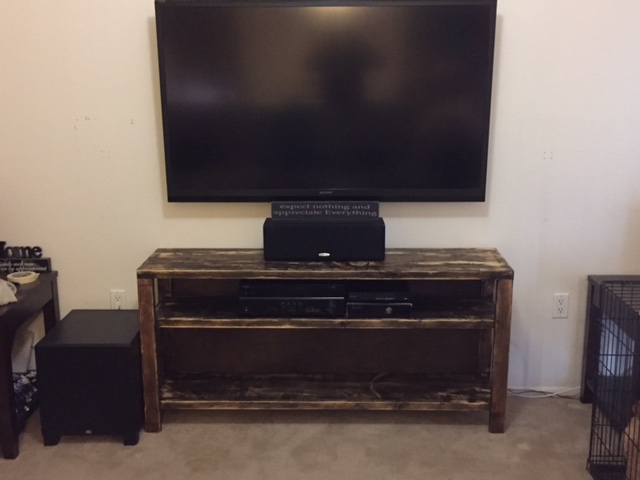
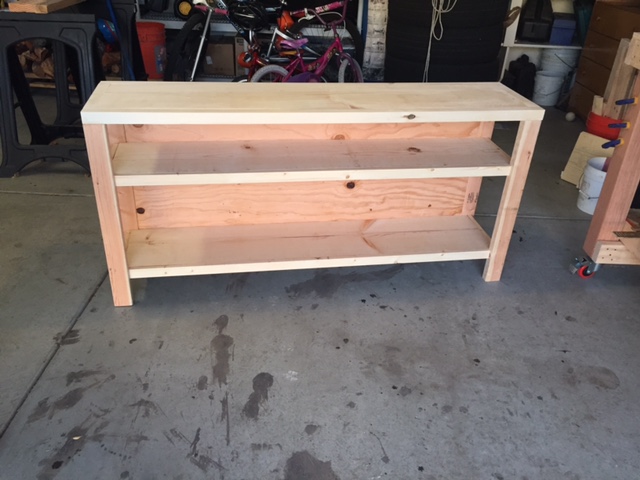
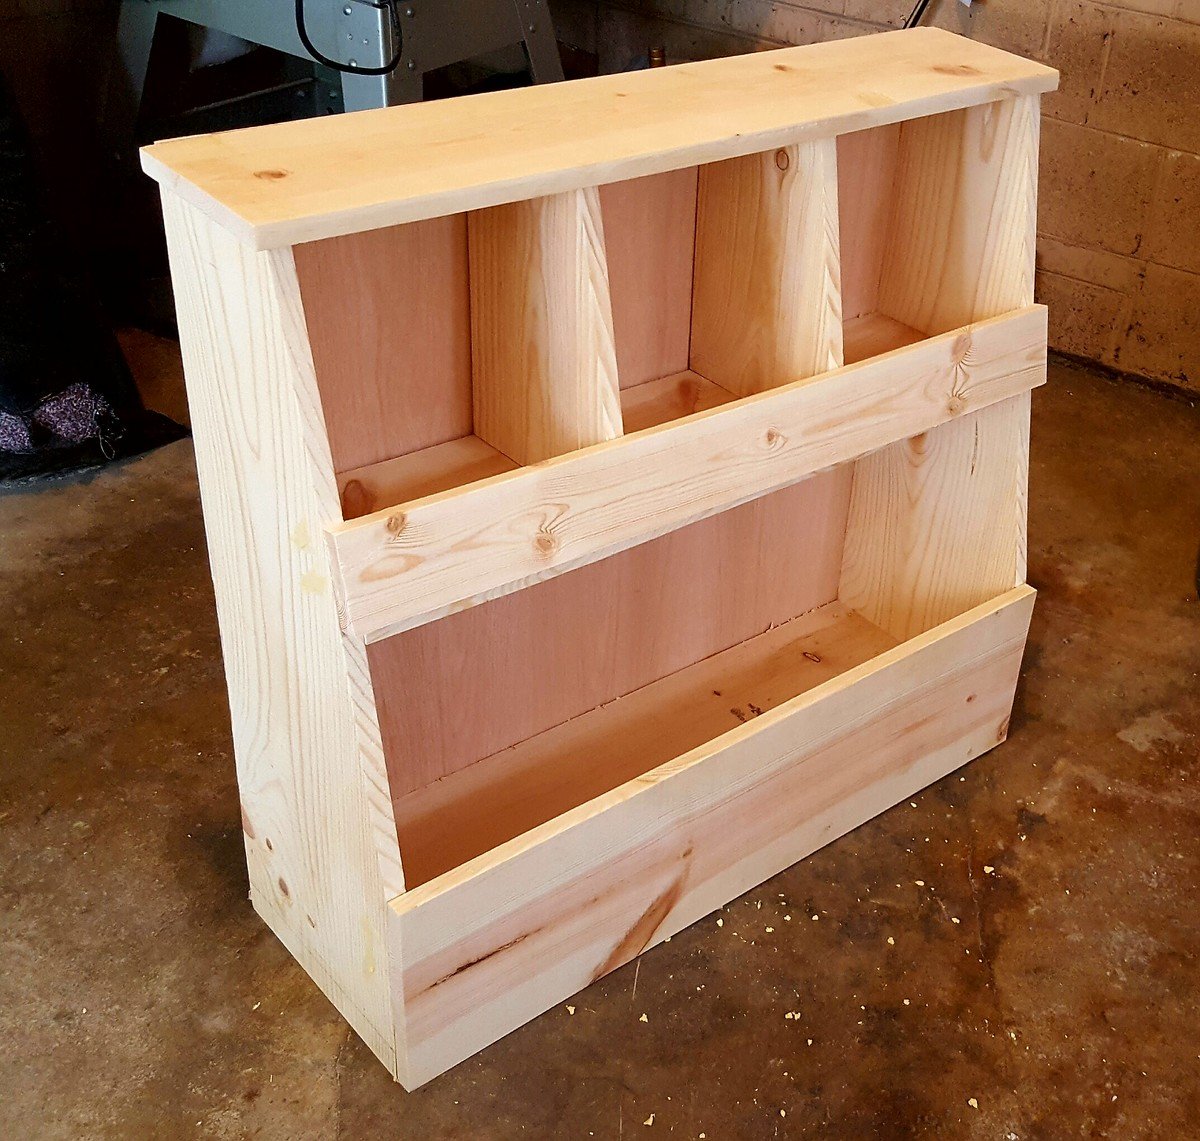
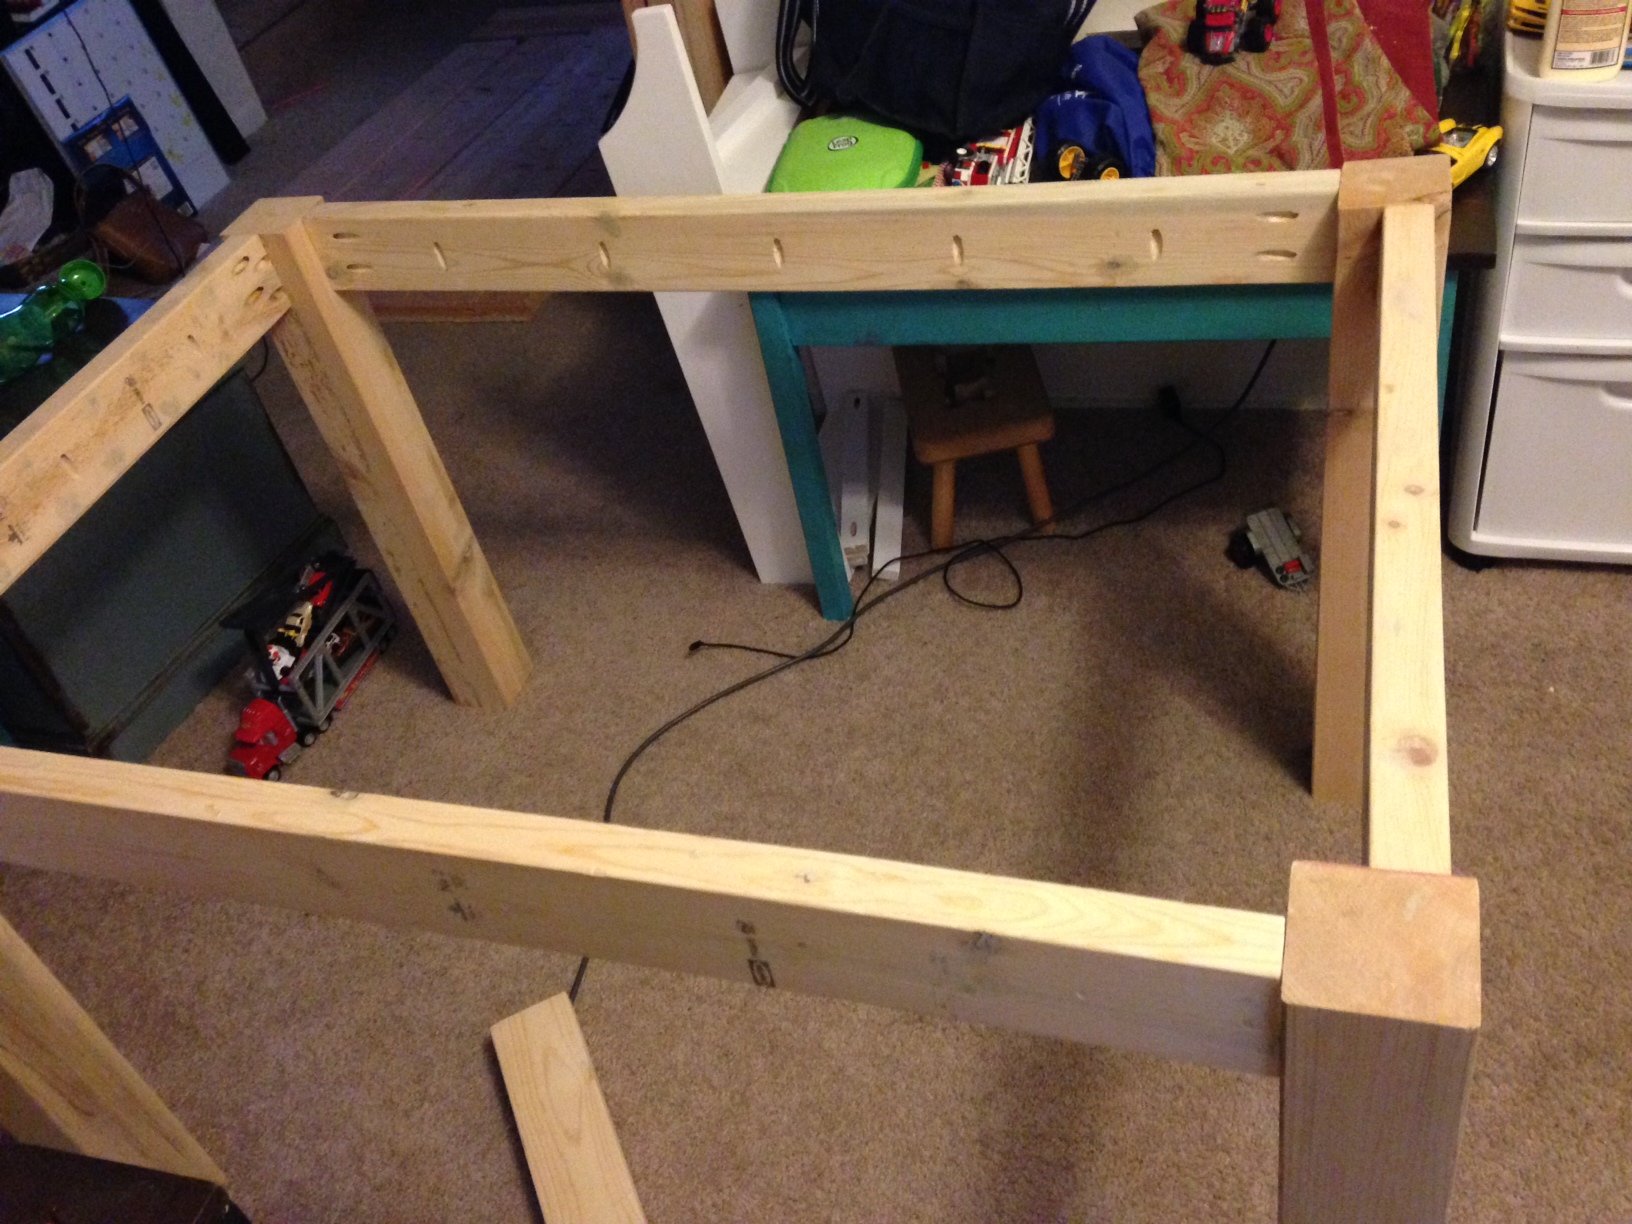
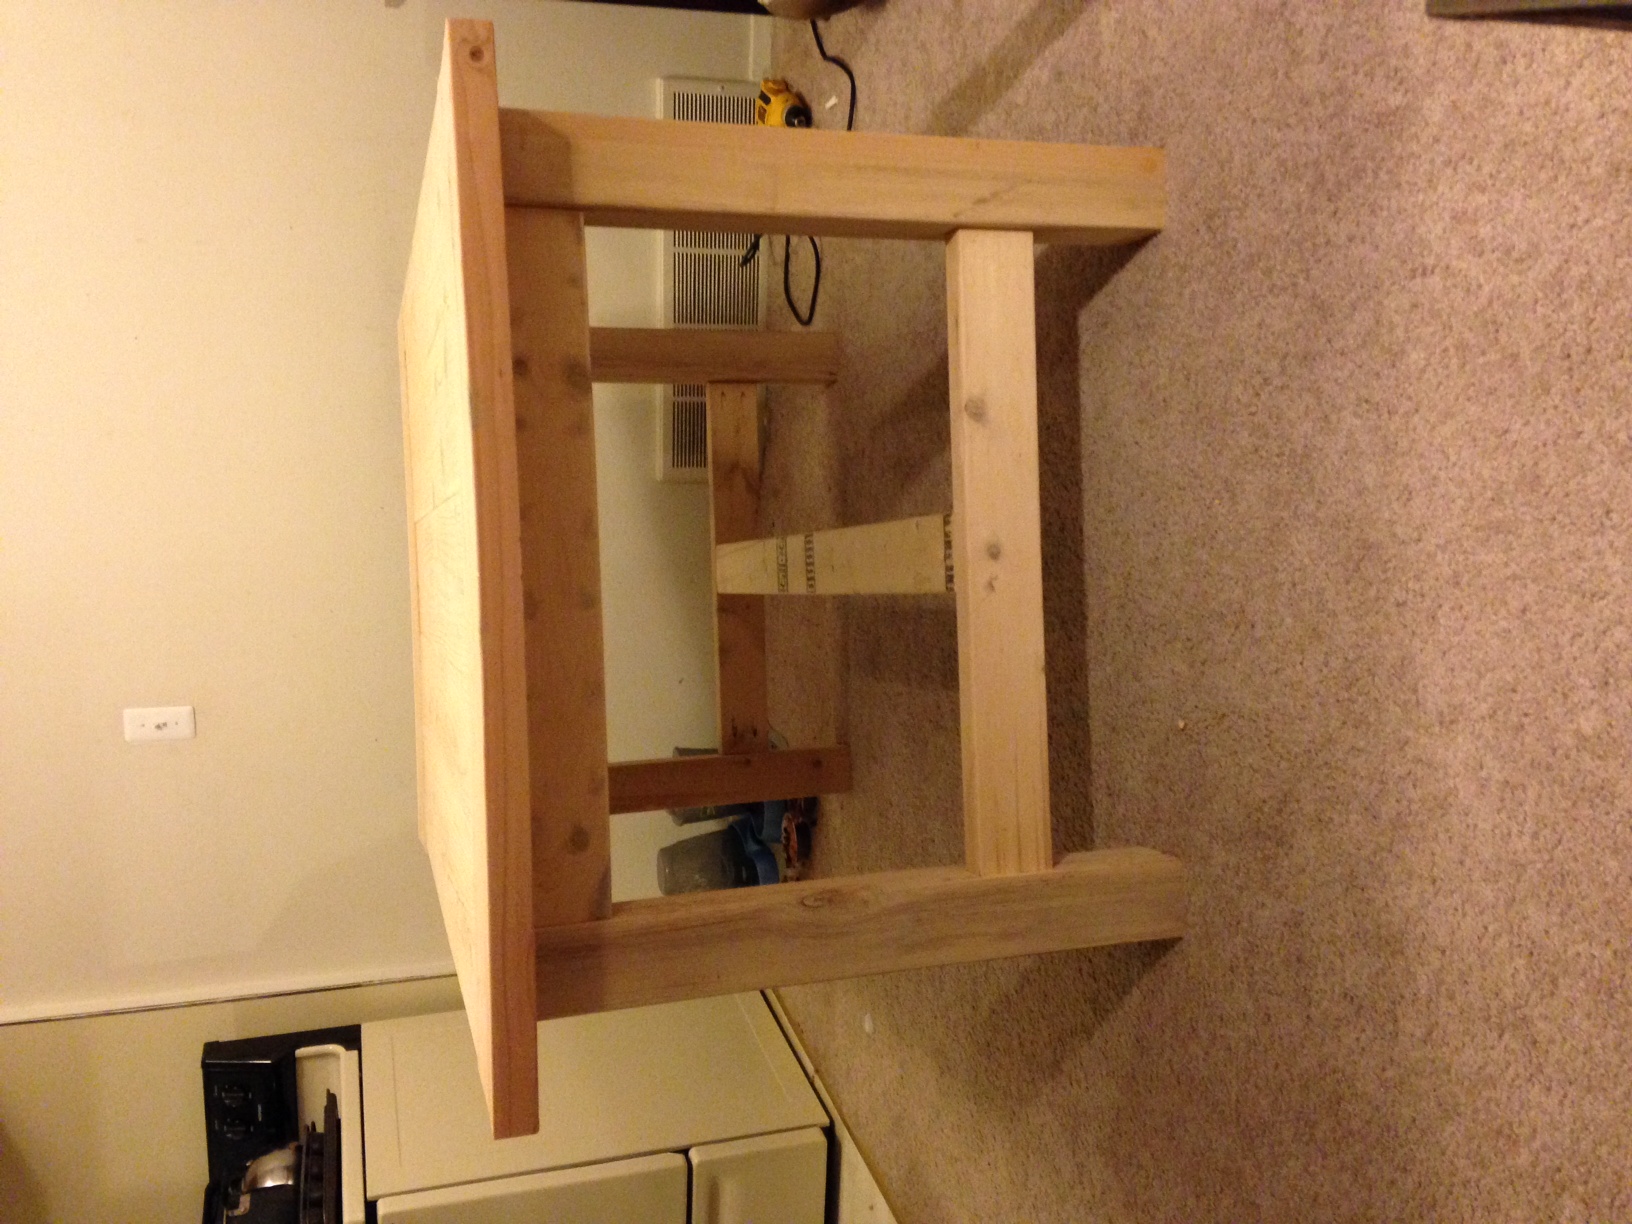
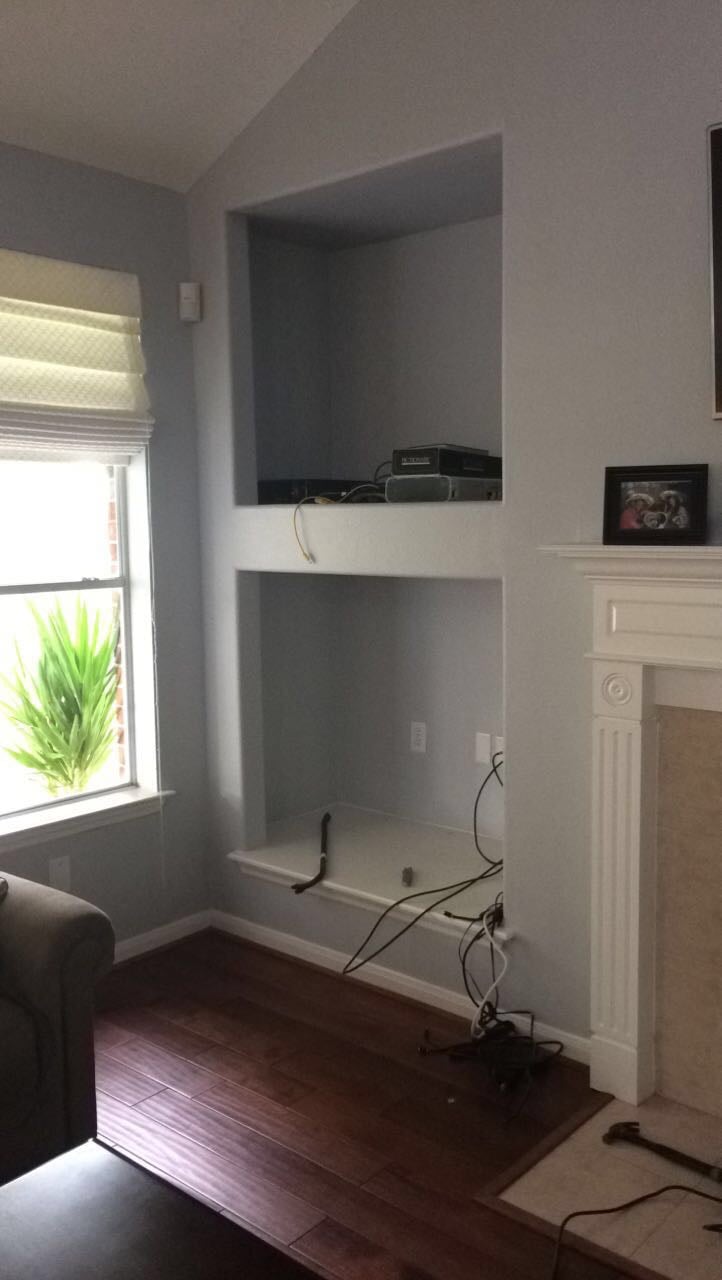
Used the Henry Media Console project as a starting point but wanted to change the height of the shelves to better fit my electronics. I put my center speaker on top, so my receiver and DVD player were going to be on the shelf. I measured it all out and decided I would go with a 7" shelf and a 13" shelf. My plan was to have a solid 3/4" back (so I could still use my PHs and screws) with a 1" opening at the top that wouldn't be able to be seen when watching TV. That would be for cable management and allow heat to escape. 


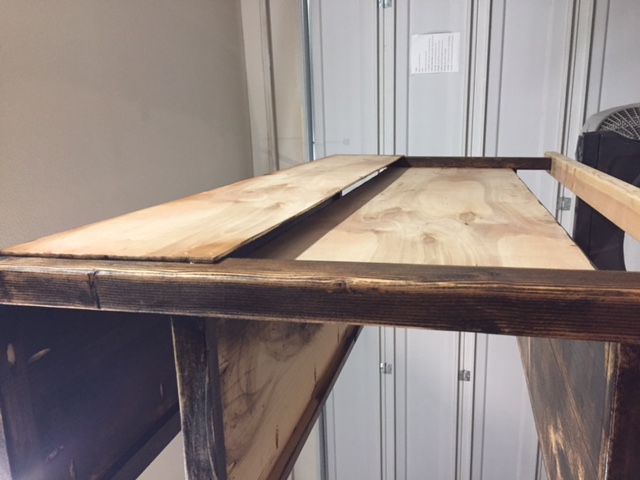
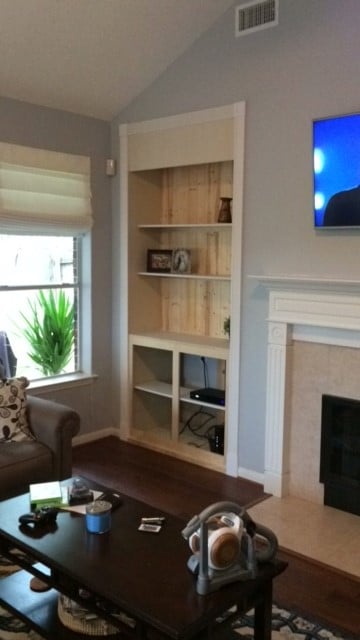
Well once it was all built, I realized the shelf was not deep enough for my receiver and that it was going to hang off the front of the shelf...I couldn't have that. So I ripped off the back panel I had on there and went and bought some luan. At that point I came up with a hidden way to allow for a deeper top shelf, allow cables to go down and out instead of up, and also not have any opening be seen. The bottom back is just attached to the shelves, the top back is attached to the back of the entire shelf. That leaves 1.5" of extra depth to the top shelf and allows the same distance for cables to escape to the back. I'm very proud of myself! ha!


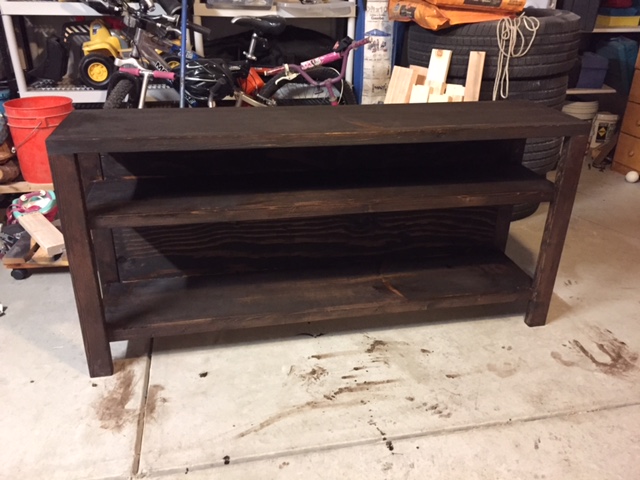
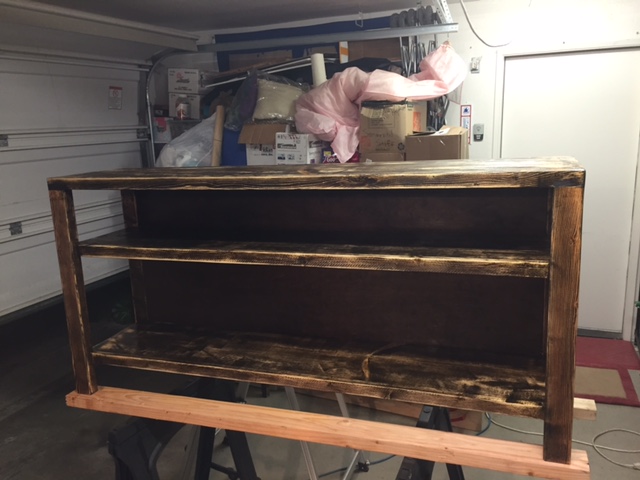
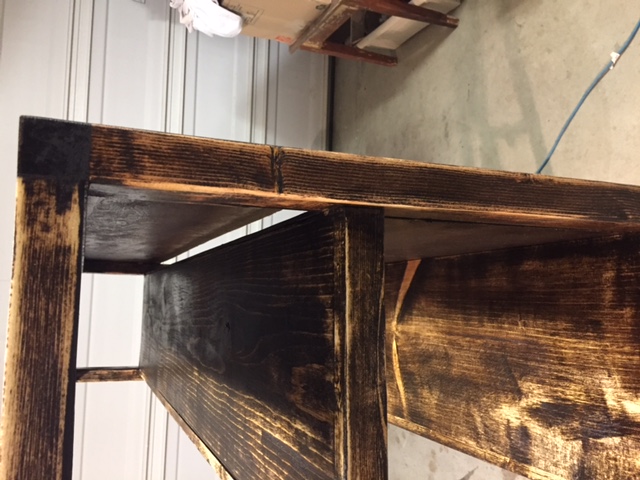
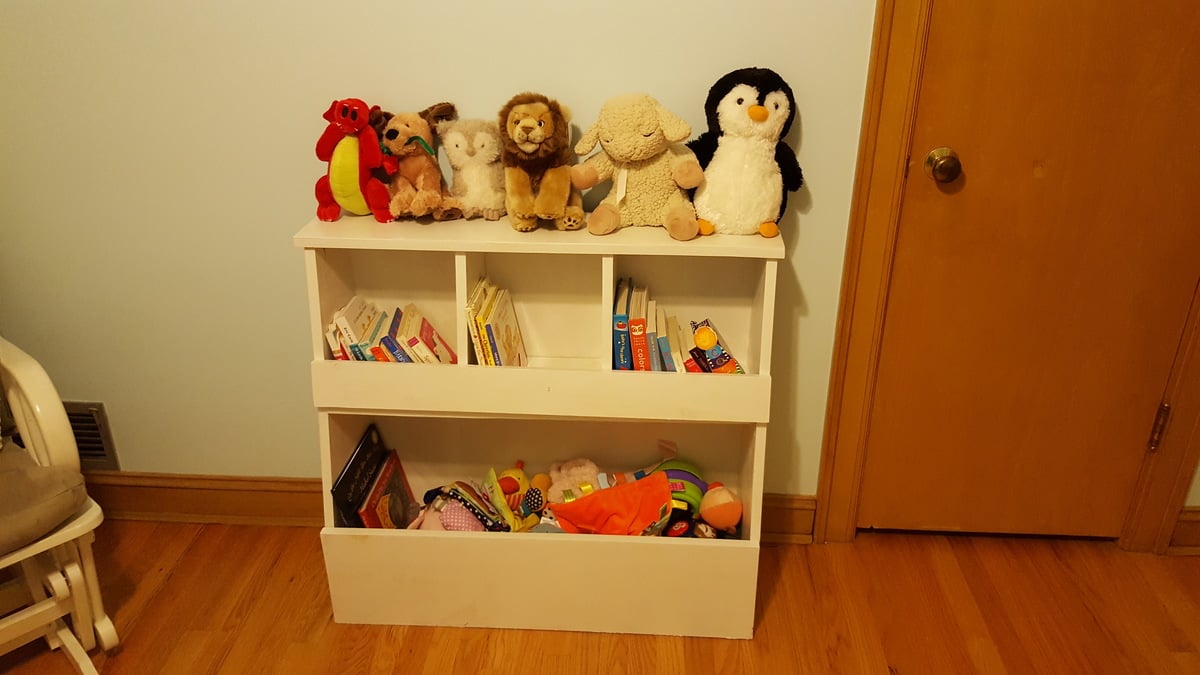
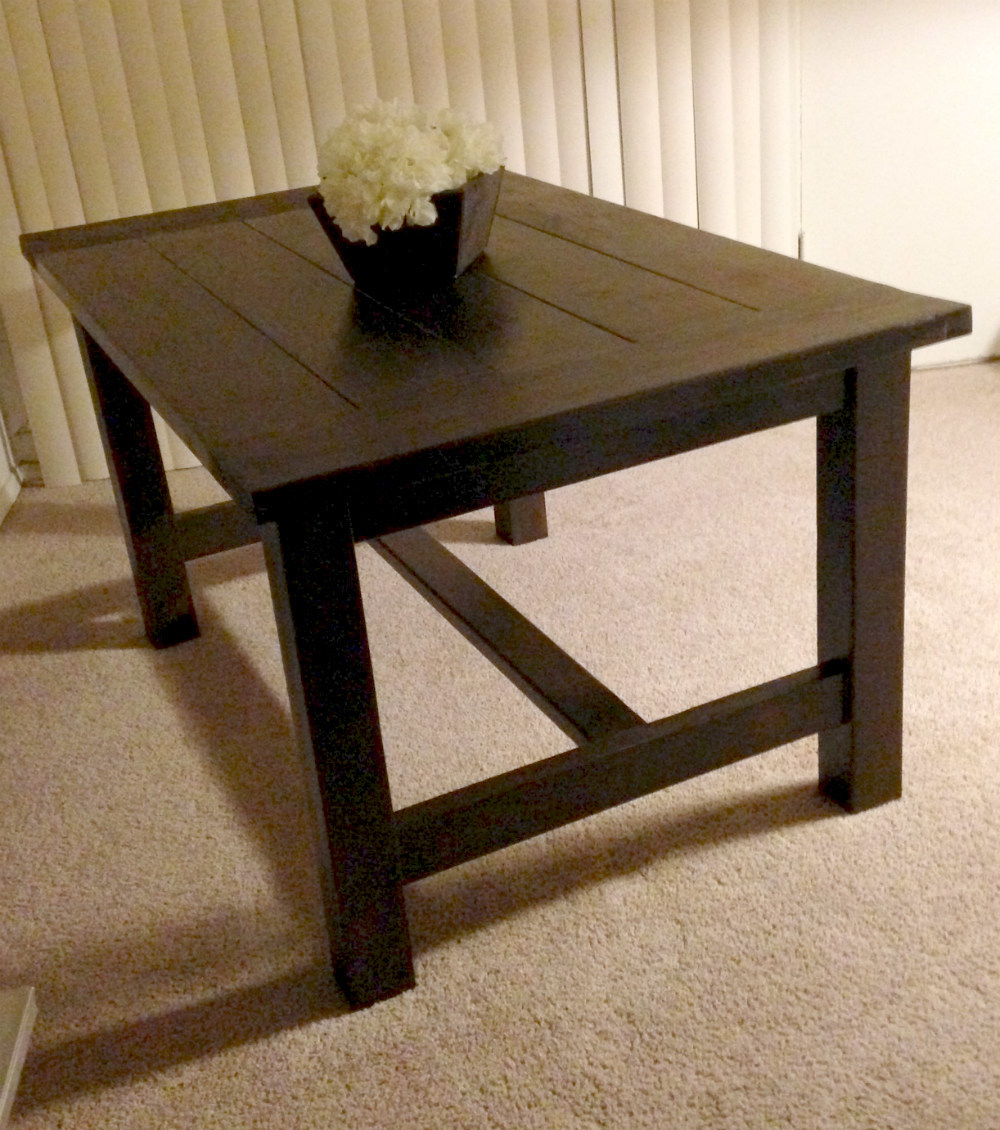
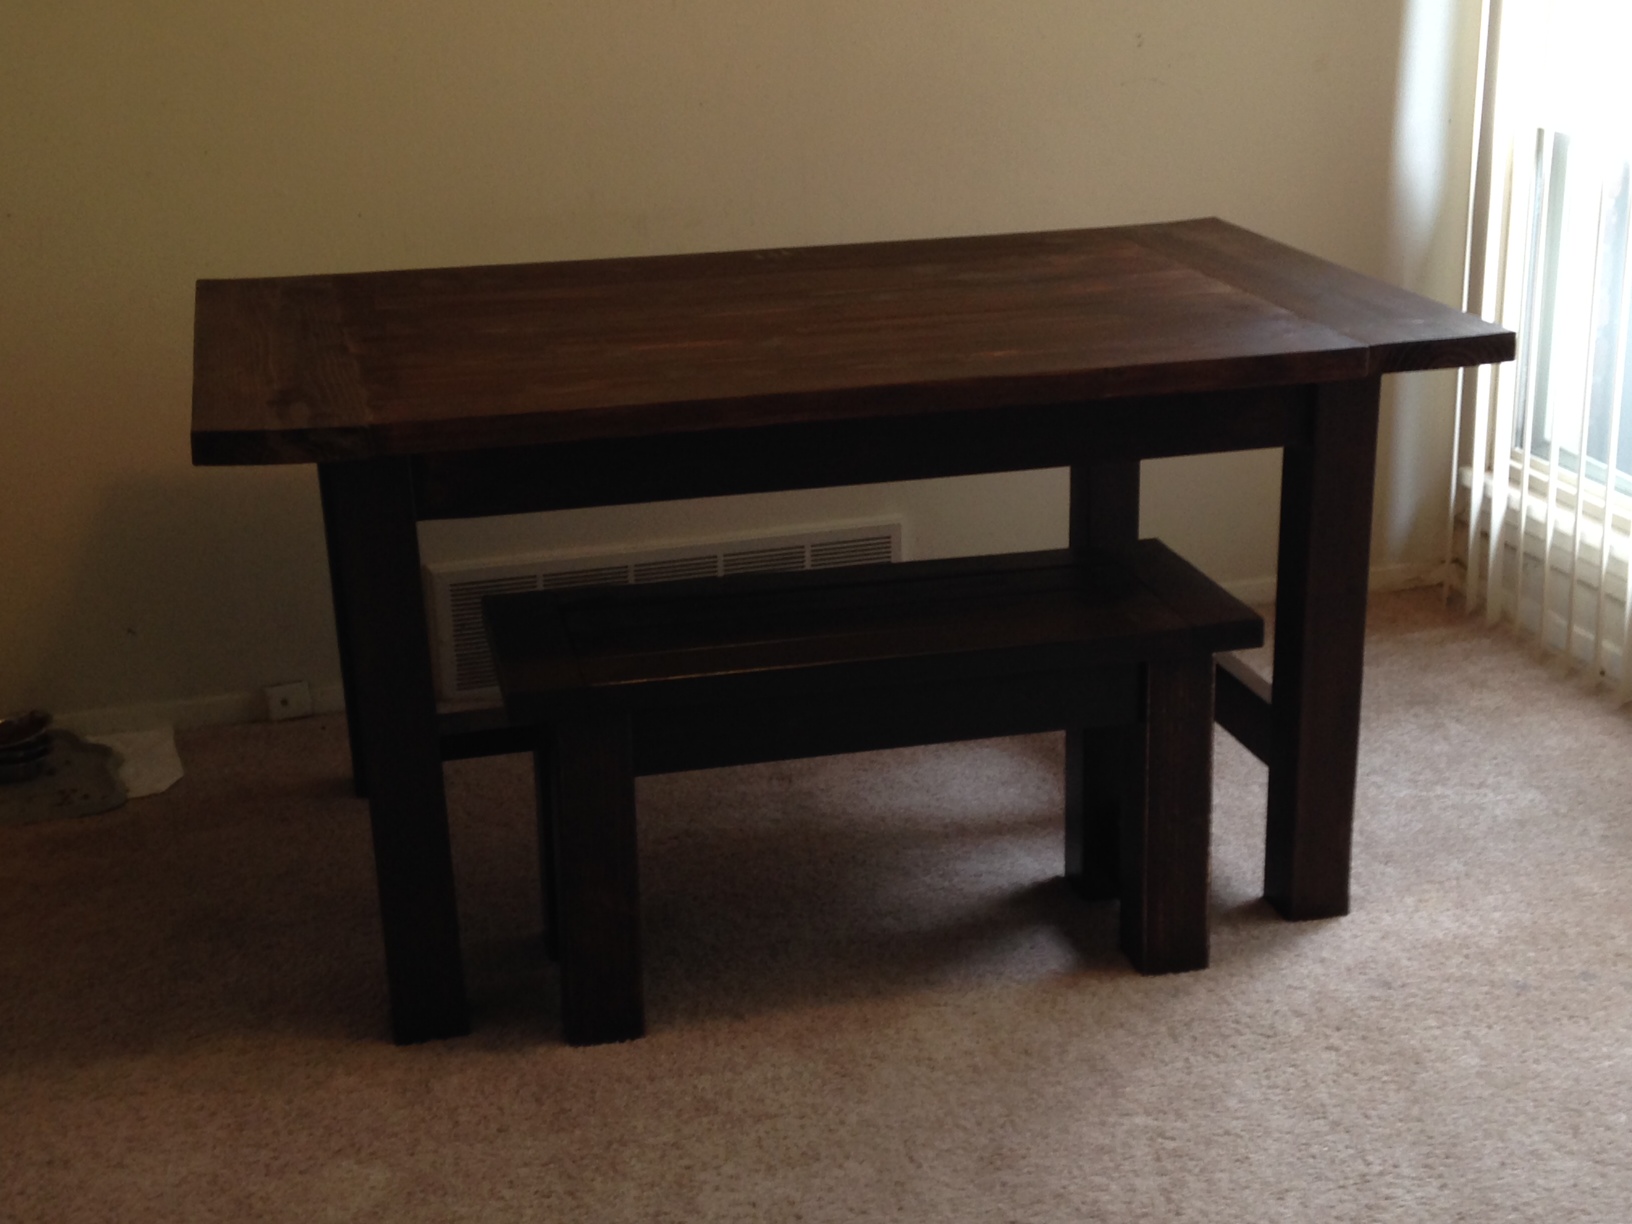
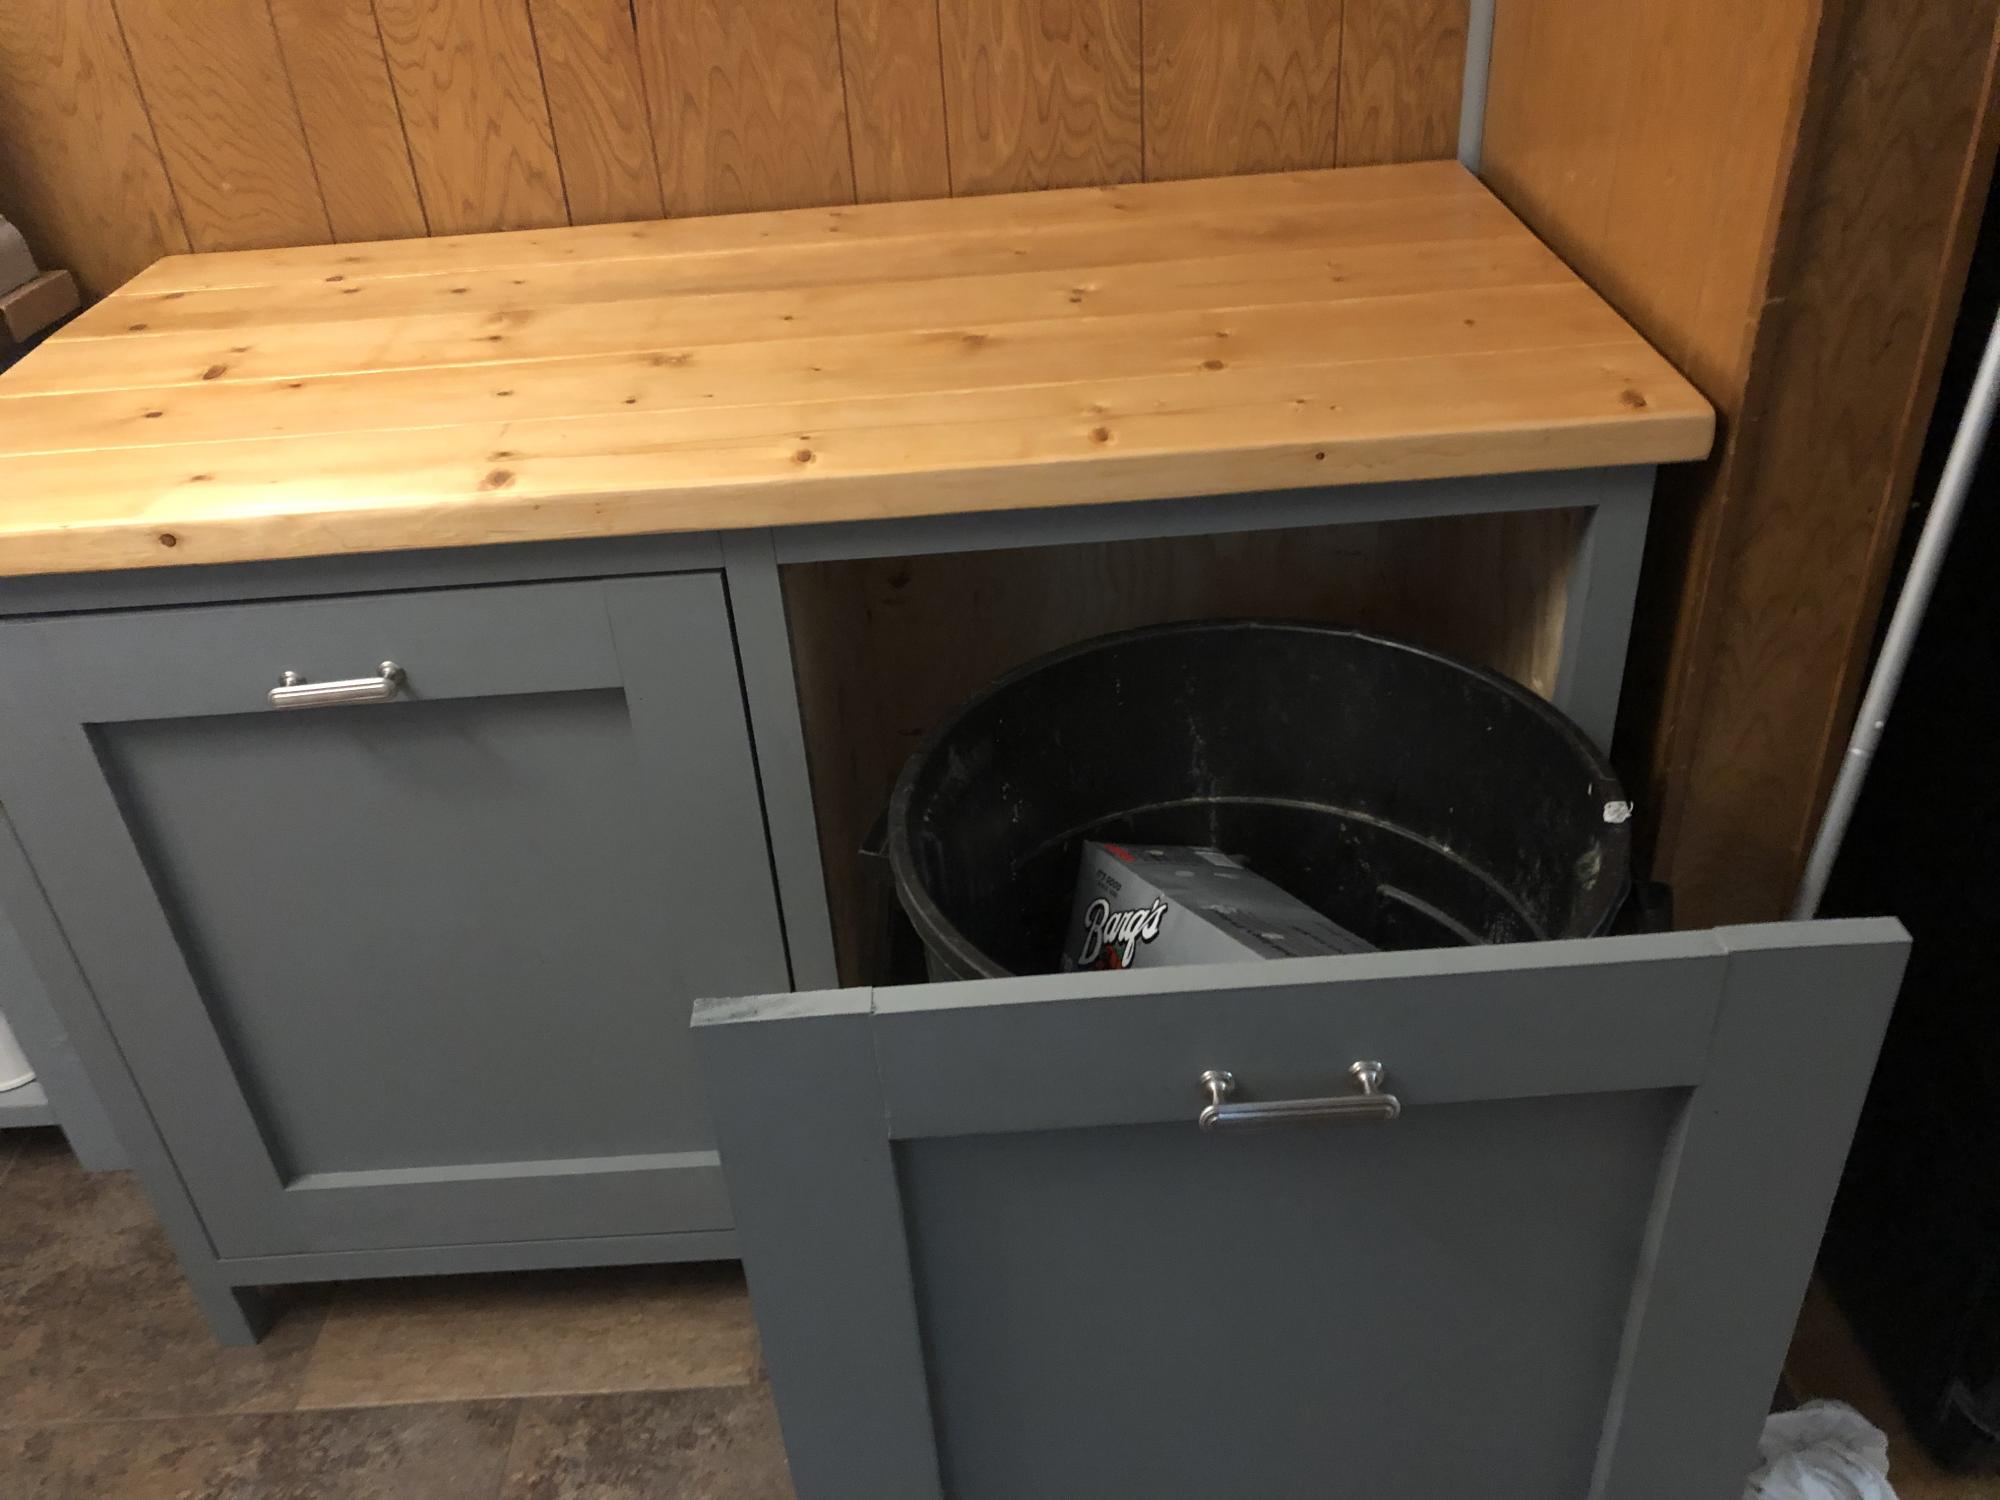
Once it was built I put the stain on using a cloth...never again. As you can see, it was way too dark. At that point I decided rustic was the way to go by sanding it all down. It turned out much better than I had ever imagined. 

Built from Plan(s)
Estimated Cost
$60 for wood, ~$25 for PH screws and finishing supplies
Estimated Time Investment
Weekend Project (10-20 Hours)
Finish Used
Minwax oil based stain - Espresso
Minwax aerosol poly - Semi gloss
Recommended Skill Level
Starter Project

Hall Tree

With only slight modifications to the plans for this Hall Tree, we wanted more arms on this bench, we now have our own Heirloom! I did change some of the joinery in this project to Mortise and Tenon, however the Pocket Holes would have been considerably easier and faster.

Estimated Cost
$179
Estimated Time Investment
Week Long Project (20 Hours or More)
Finish Used
English Chestnut Stain
Recommended Skill Level
Intermediate

Comments

$10 Ledge for the Bathroom

Submitted by hmagnani on Tue, 08/19/2014 - 12:14

I built a ledge from some scrap wood laying around but had to buy a 1X6X8 for the bottom. It took about an hour to build from cutting to finish and then another couple hours to paint. I needed this in our bathroom because we have no bathroom storage and I needed to get medicines and such up away from busy little hands. Awesome plans, great little shelf!! Thanks, Ana!

Built from Plan(s)
Estimated Cost
$15
Estimated Time Investment
Afternoon Project (3-6 Hours)
Finish Used
One coat of primer and then two coats of semi-gloss white interior latex paint.
Recommended Skill Level
Starter Project

Toy Storage Bin Box with Cubby Shelves

Submitted by Anonymous (not verified) on Mon, 12/05/2016 - 12:51

My very first piece of furniture.  Same dimensions as Ana's but I used pocket holes instead of nails and glue (excepts for the plywood backing panel).

Estimated Cost
$50
Estimated Time Investment
Day Project (6-9 Hours)
Finish Used
Chalk paint and poly
Recommended Skill Level
Beginner

Modern Outdoor Chairs

Submitted by zachnewc on Wed, 08/19/2020 - 07:59

This was my first woodworking project and they turned out great! My wife and I will use these around our fire pit for the summer. I spent one day cutting the wood and putting the project together, and then a couple weeknights sanding and staining the chairs. I thought the directions were spot on! I look forward to my next project!

Estimated Cost
$80
Estimated Time Investment
Weekend Project (10-20 Hours)
Finish Used
Paramount Semi-Transparent Deck Stain - Warm Teak
Recommended Skill Level
Beginner

Book Mirror Plan Turned Trophy Display

When I got Ana's book The Handbuilt Home, I was super excited to tackle a project. It just so happened that her mirror plan on page 37 also makes a perfect trophy display. I just replaced the mirror with stenciled cork board so my daughter could display keepsakes along with her trophies and medals.

I followed the plan pretty closely, but I added some cove molding to the center to hold the cork board in place. You can find more details on my blog.

Estimated Time Investment
Afternoon Project (3-6 Hours)
Recommended Skill Level
Beginner

Comments

Farmhouse King Bed

Submitted by JD-LIN on Thu, 08/21/2014 - 09:18

First big build with my boyfriend. We wanted to build this bed for his daughter's 14th birthday, so she would have something hand made from us to keep for a long time. This bed is solid and turned out amazing. The pictures don't do it justice as you cannot see the paneling on the head and foot boards. We used the kreg jig on the side panels attaching the head and foot board in order to make it easy to take apart and move when she goes away to college.

Estimated Time Investment
Weekend Project (10-20 Hours)
Finish Used
Primer and 2 coats of black flat paint
Recommended Skill Level
Intermediate

Two-Tone Rustic X-Console

Submitted by Anonymous (not verified) on Sat, 12/10/2016 - 07:36

I've needed a console table for under the stairs but everything I've looked at has always been too long. l took the plans for the Rustic X Console table and modified them to fit the space perfectly. I love the look that I was able to get by adding the 1x2 Xs to the top.

Built from Plan(s)
Estimated Time Investment
Weekend Project (10-20 Hours)
Finish Used
Danish Oil in Dark Walnut and stain in Kona
Recommended Skill Level
Beginner

Variation on the outdoor sofa

Submitted by AzSandrat on Sun, 08/23/2020 - 08:47

Being older, my wife and I wanted the deck sofa with an angled back, so... here it is, stained in a dark walnut. We bought the cushions cheap ($120 for all) at Home Goods.

Estimated Cost
$200
Estimated Time Investment
Afternoon Project (3-6 Hours)
Finish Used
Spar Urethane with a dark walnut stain
Recommended Skill Level
Starter Project

Added 2nd Tier

Submitted by Jaminj44 on Tue, 11/06/2012 - 10:17

We added a 2nd tier and left space from the beds as they have drawers that slide out. Will be building some filler boxes that come up about 2' creating kind of a headboard and another shelf area about 7" wide.

Built from Plan(s)
Estimated Cost
$150
Estimated Time Investment
Weekend Project (10-20 Hours)
Finish Used
Primed and finished with Satin paint.
Recommended Skill Level
Beginner

Farmhouse Table

Submitted by DMax2010 on Wed, 08/27/2014 - 06:30

This was my first attempt at a bigger project. As with most, the finish took the most time. I modified the size of the table because I made it for my sister. It was also the first time I used a belt sander, and I loved it! It made the top nice and even. I did have a huge debacle when trying to fill the gaps of the table with clear silicone...that is definitely something that requires practice! I ended up removing all of the silicone and just allowing the top coat to sink in. Luckily, it just peels right out, although it did leave some clumps that took a little extra care to remove. But overall, I loved how it turned out, and my sister loves it too. I made the bench too.

Estimated Cost
I think the lumber was under $50.00, the stain about $20.00
Estimated Time Investment
Week Long Project (20 Hours or More)
Finish Used
Minwax Express color-Walnut Stain, the final finish was General Finishes Arm-R-Seal, which was a matte finish
Recommended Skill Level
Intermediate

Comments

DMax2010

Wed, 08/27/2014 - 17:34

Thanks Ana! It is one solid table! I can't wait to make one for me next!

Converted TV wall niche

Submitted by Vol4Life1 on Tue, 12/13/2016 - 05:35

We bought this house about a year ago and we finally got around to removing this pointless niche!  The center divider and bottom were removed.  The cabinet and hutch were assembled seperately.  


This is still a work of progress.  I am looking for a nice decorative molding face for the top.  If anyone has any suggestions please let me know!  We will most likely paint it white to match the fireplace mantle.

Estimated Cost
300
Estimated Time Investment
Week Long Project (20 Hours or More)
Finish Used
Paint
Recommended Skill Level
Intermediate

Double Trash Bin

Submitted by Anonymous (not verified) on Wed, 08/26/2020 - 08:32

This was based on the "Small Kitchen Island" Plans but needed to put 2 - 33 Gal Trash cans in. I used Select Square edged Pine. The depth remained the same as the plans but the width changed dramatically (52" wide). I also increased the height to match the other furniture (3' High). I added 4 - 1 X 2's to the top of the cabinet to secure the top.

Estimated Cost
$350-$400
Estimated Time Investment
Week Long Project (20 Hours or More)
Finish Used
The bottom was paint that matched the other furniture, the top is an Classic Oak Poly/Stain - 3 coats
Recommended Skill Level
Intermediate

Comments