Community Brag Posts


First woodworking project - Coffee table

This coffee table was my first woodworking project ever. I followed the plans exactly but left the X off each end. They seemed a little daunting for the first time around, plus I like it without them better. Great plans and great result!
Built from Plan(s)
Estimated Cost
$60
Estimated Time Investment
Day Project (6-9 Hours)
Recommended Skill Level
Starter Project
Thanks Ana
This was a great build, awesome project for my girlfriend. Very fun and super satisfying especially at paint and stain stage! Everyone loves it. Grateful for the plans.
Took me about a week. Edge banded my face and spackled the sides. My drawers were installed with a dado. Everything else was pocket screwed and glued.
Definitely recommend.
Follow my journey @alexthenailbanger

Built from Plan(s)
Estimated Cost
400
Estimated Time Investment
Week Long Project (20 Hours or More)
Recommended Skill Level
Intermediate
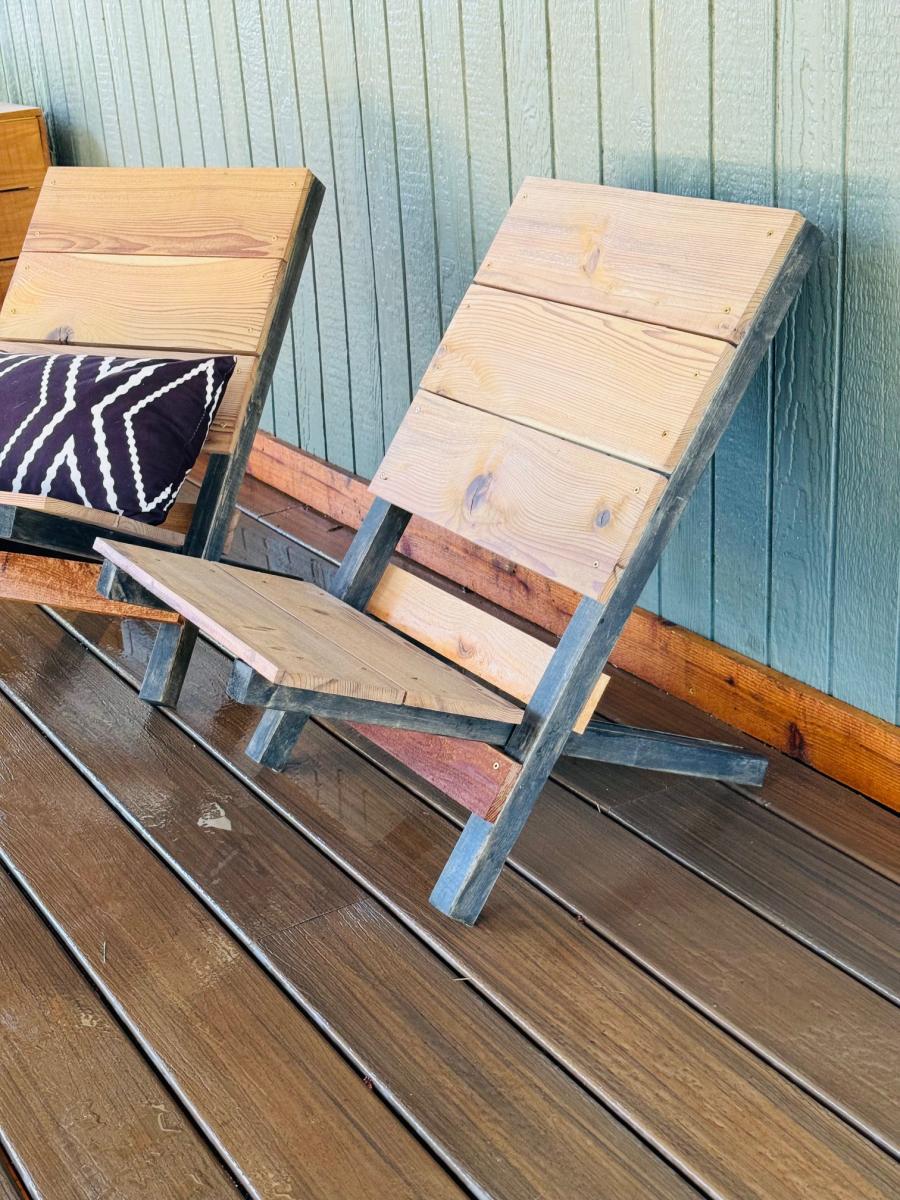
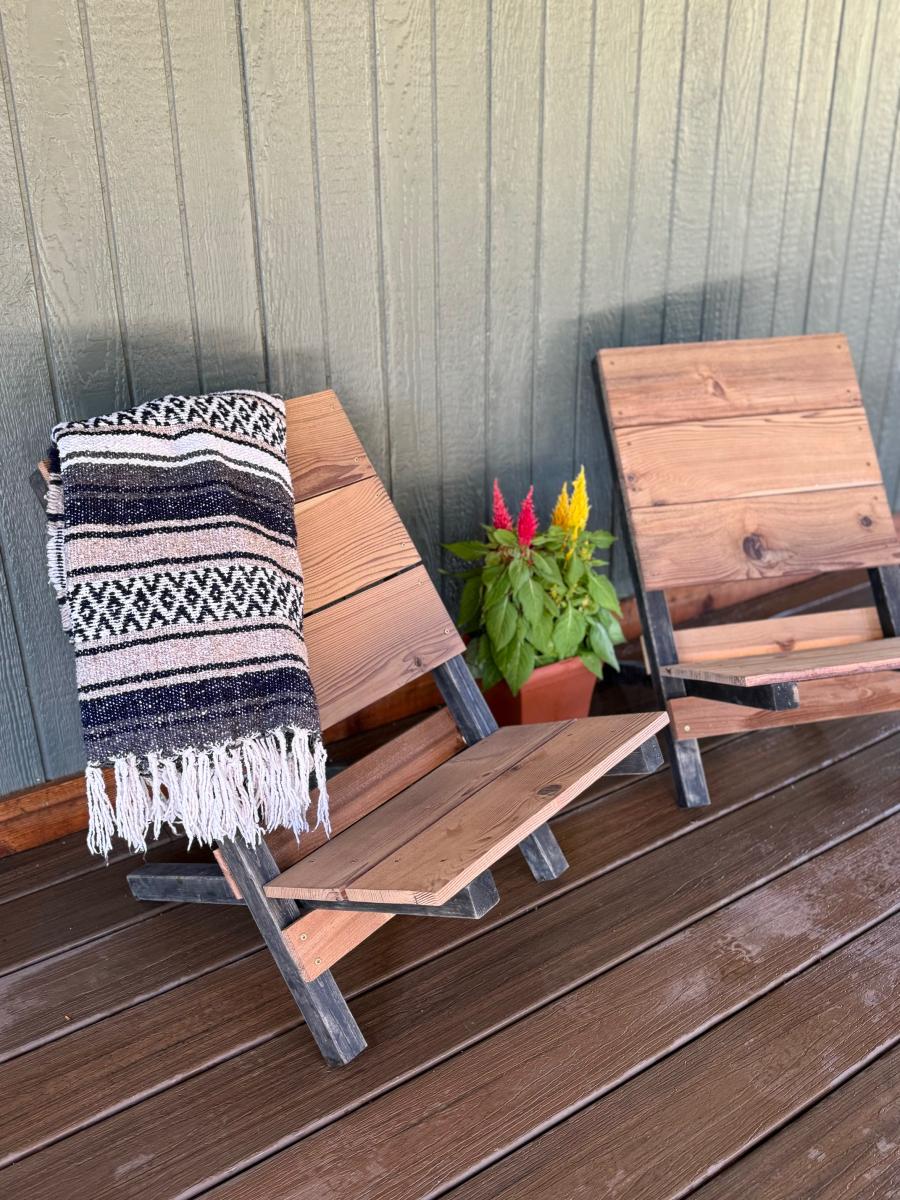
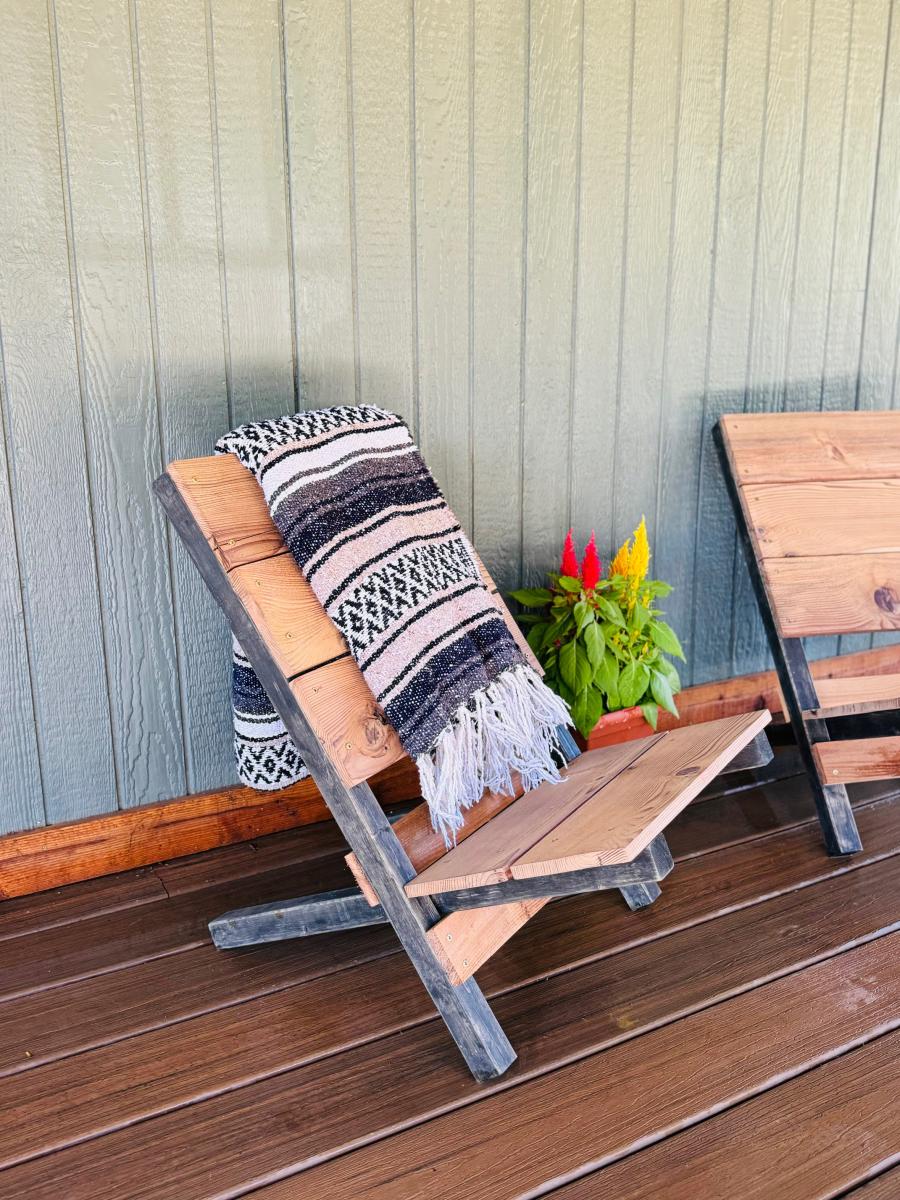
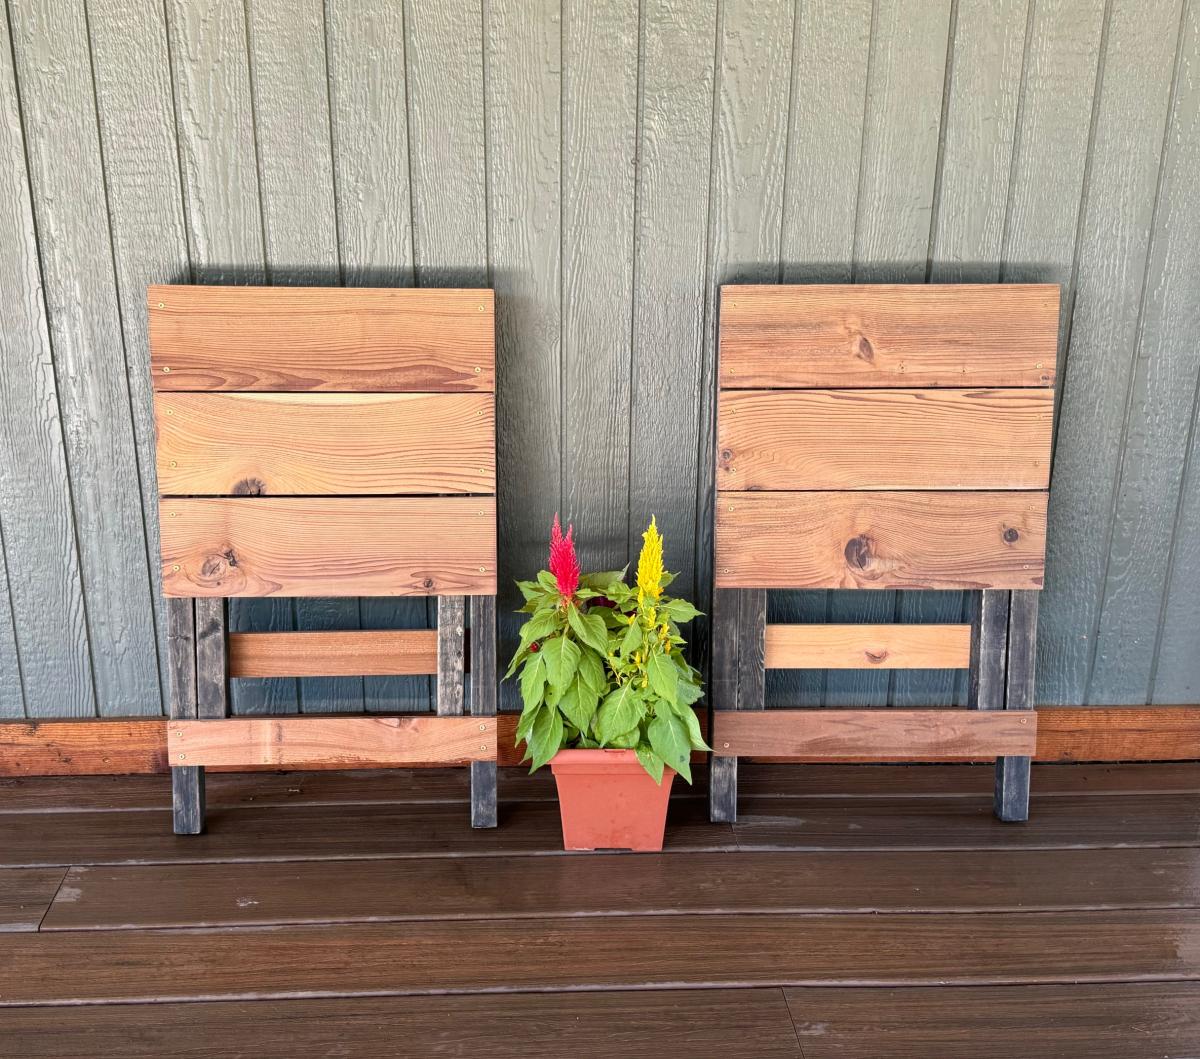
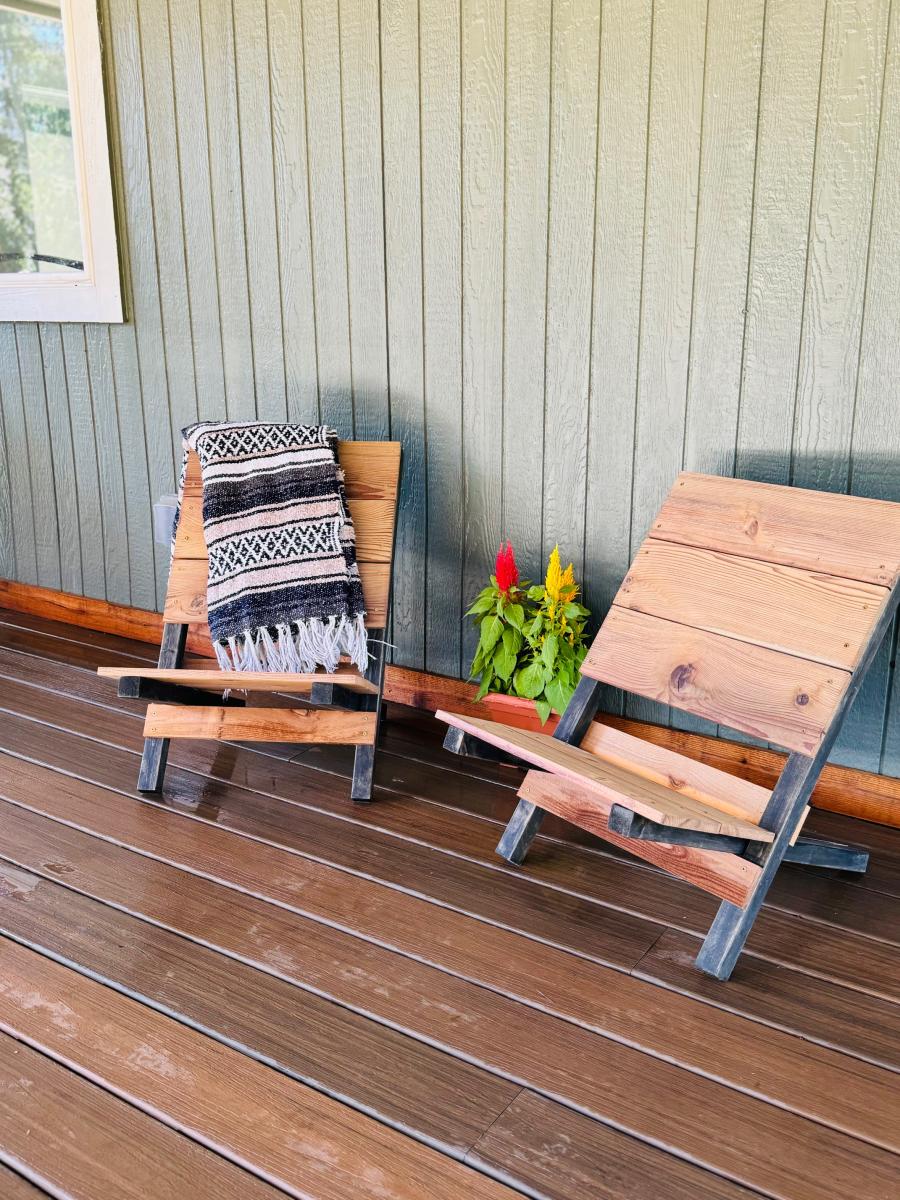
2 Piece Outdoor Wood Chair
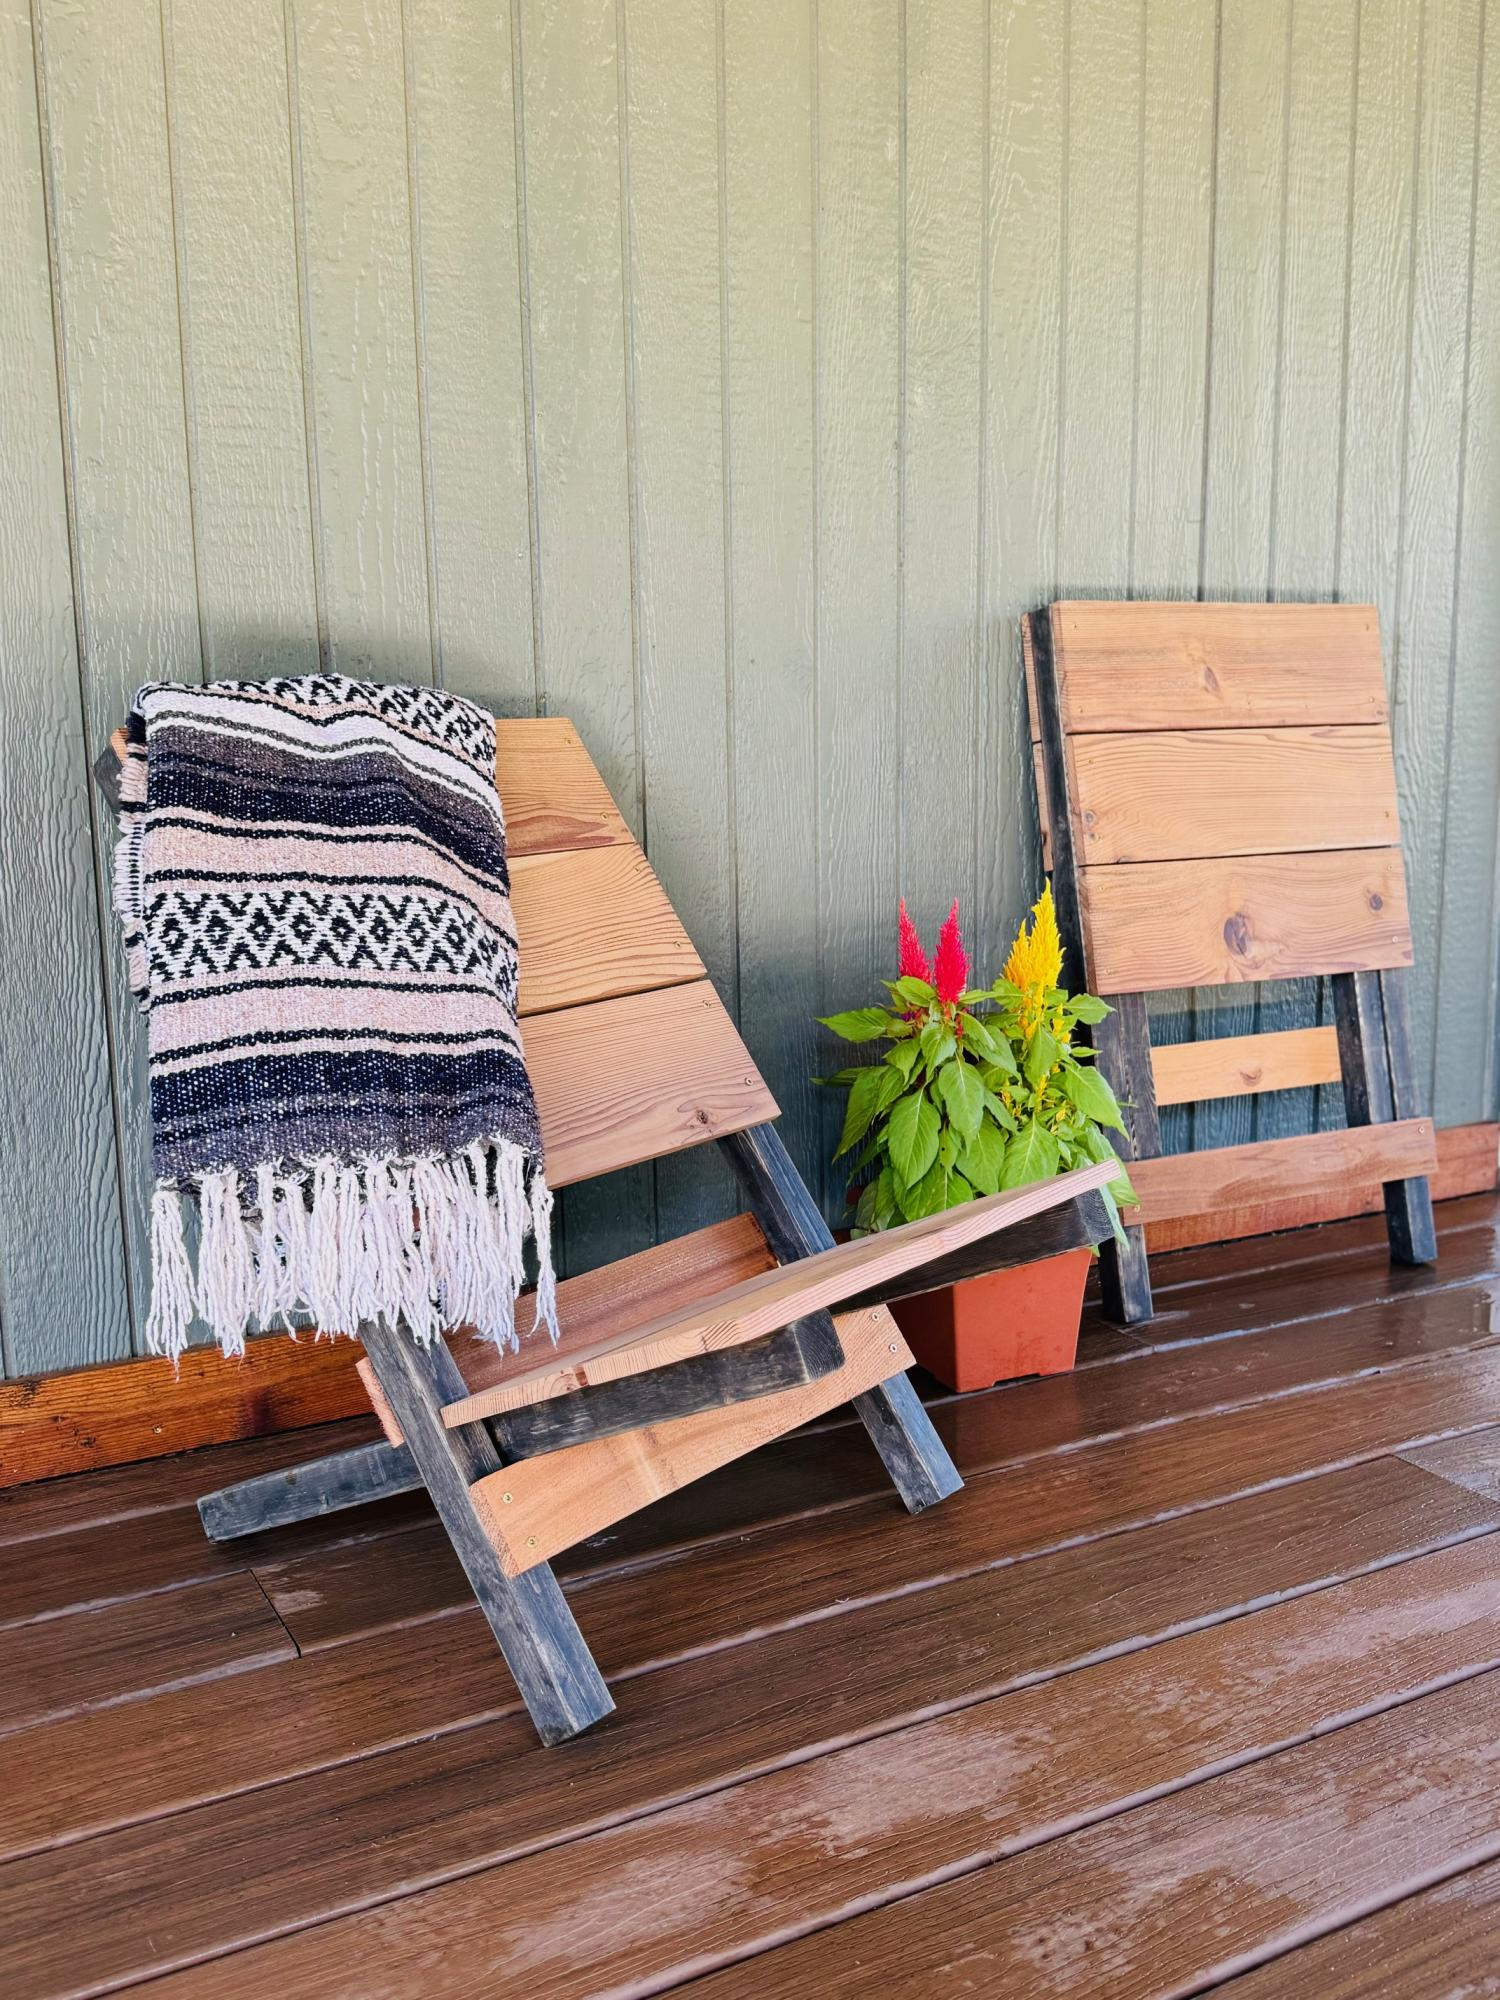
I built these chairs in about 90 minutes. I started with cutting enough boards for 2 chairs according to Ana's cut list. I then prefinished them by sanding and prestaining all the boards. Once they were dry I started assembly. At first I was having issues with the wood splitting, so I ended up predrilling my holes. I made the seat and the back 18" wide and where Ana uses the 1x3, I ended up just ripping the cedar fence picket to 2.5" wide. This was a fun build and will be nice to easily transport to an outdoor activity!
Built from Plan(s)
Seasonal And Holiday
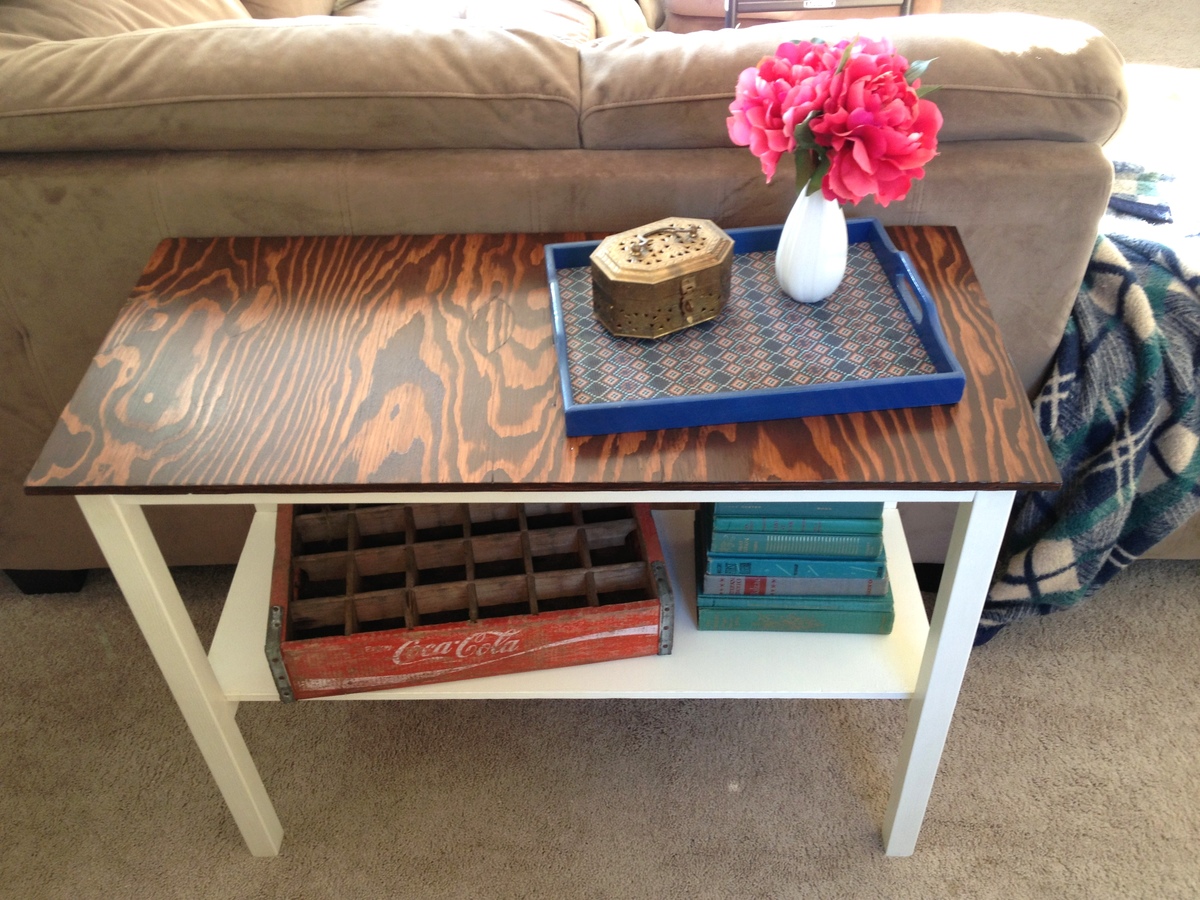
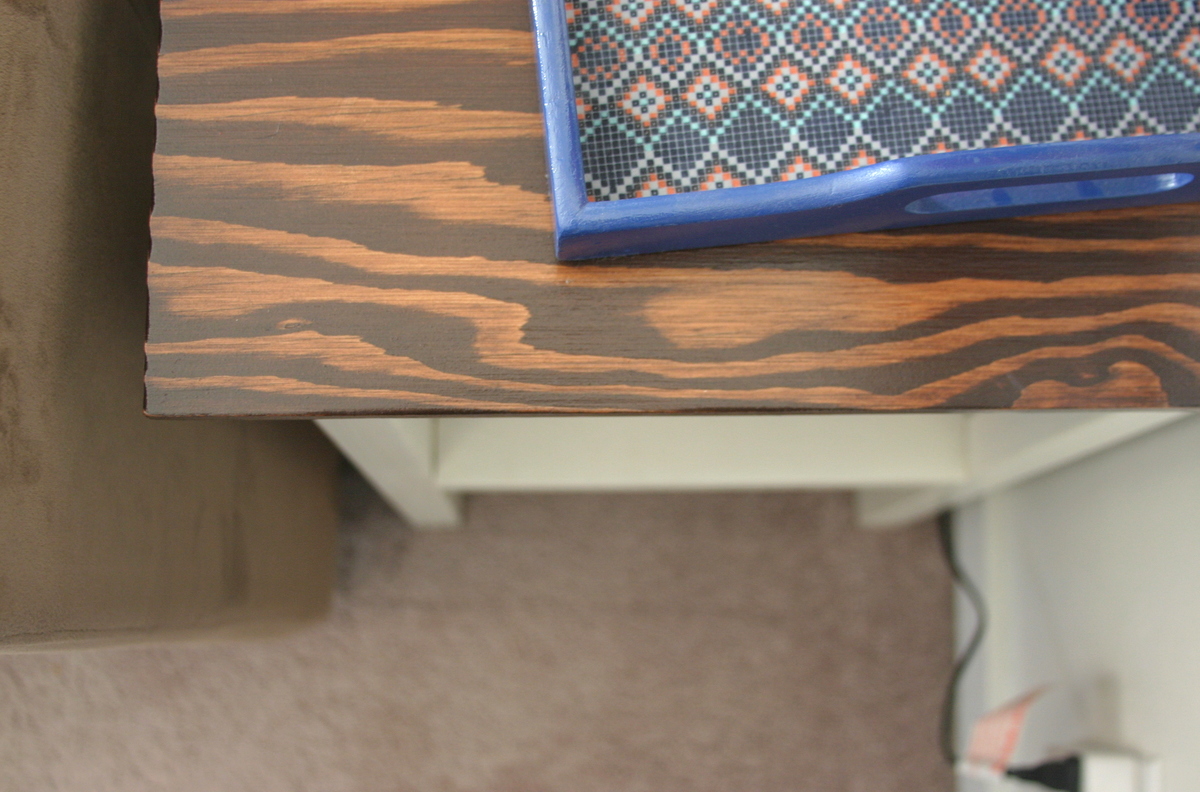
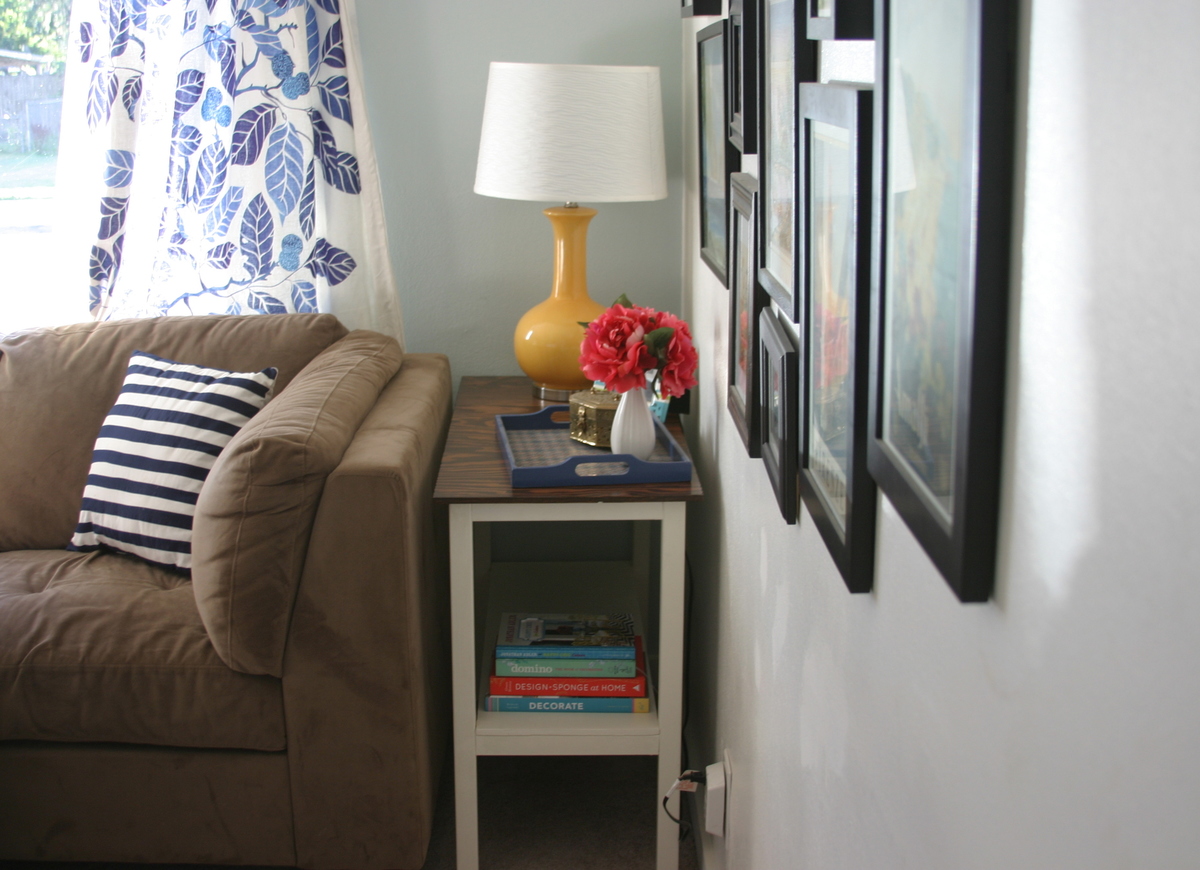
Perfect End Table
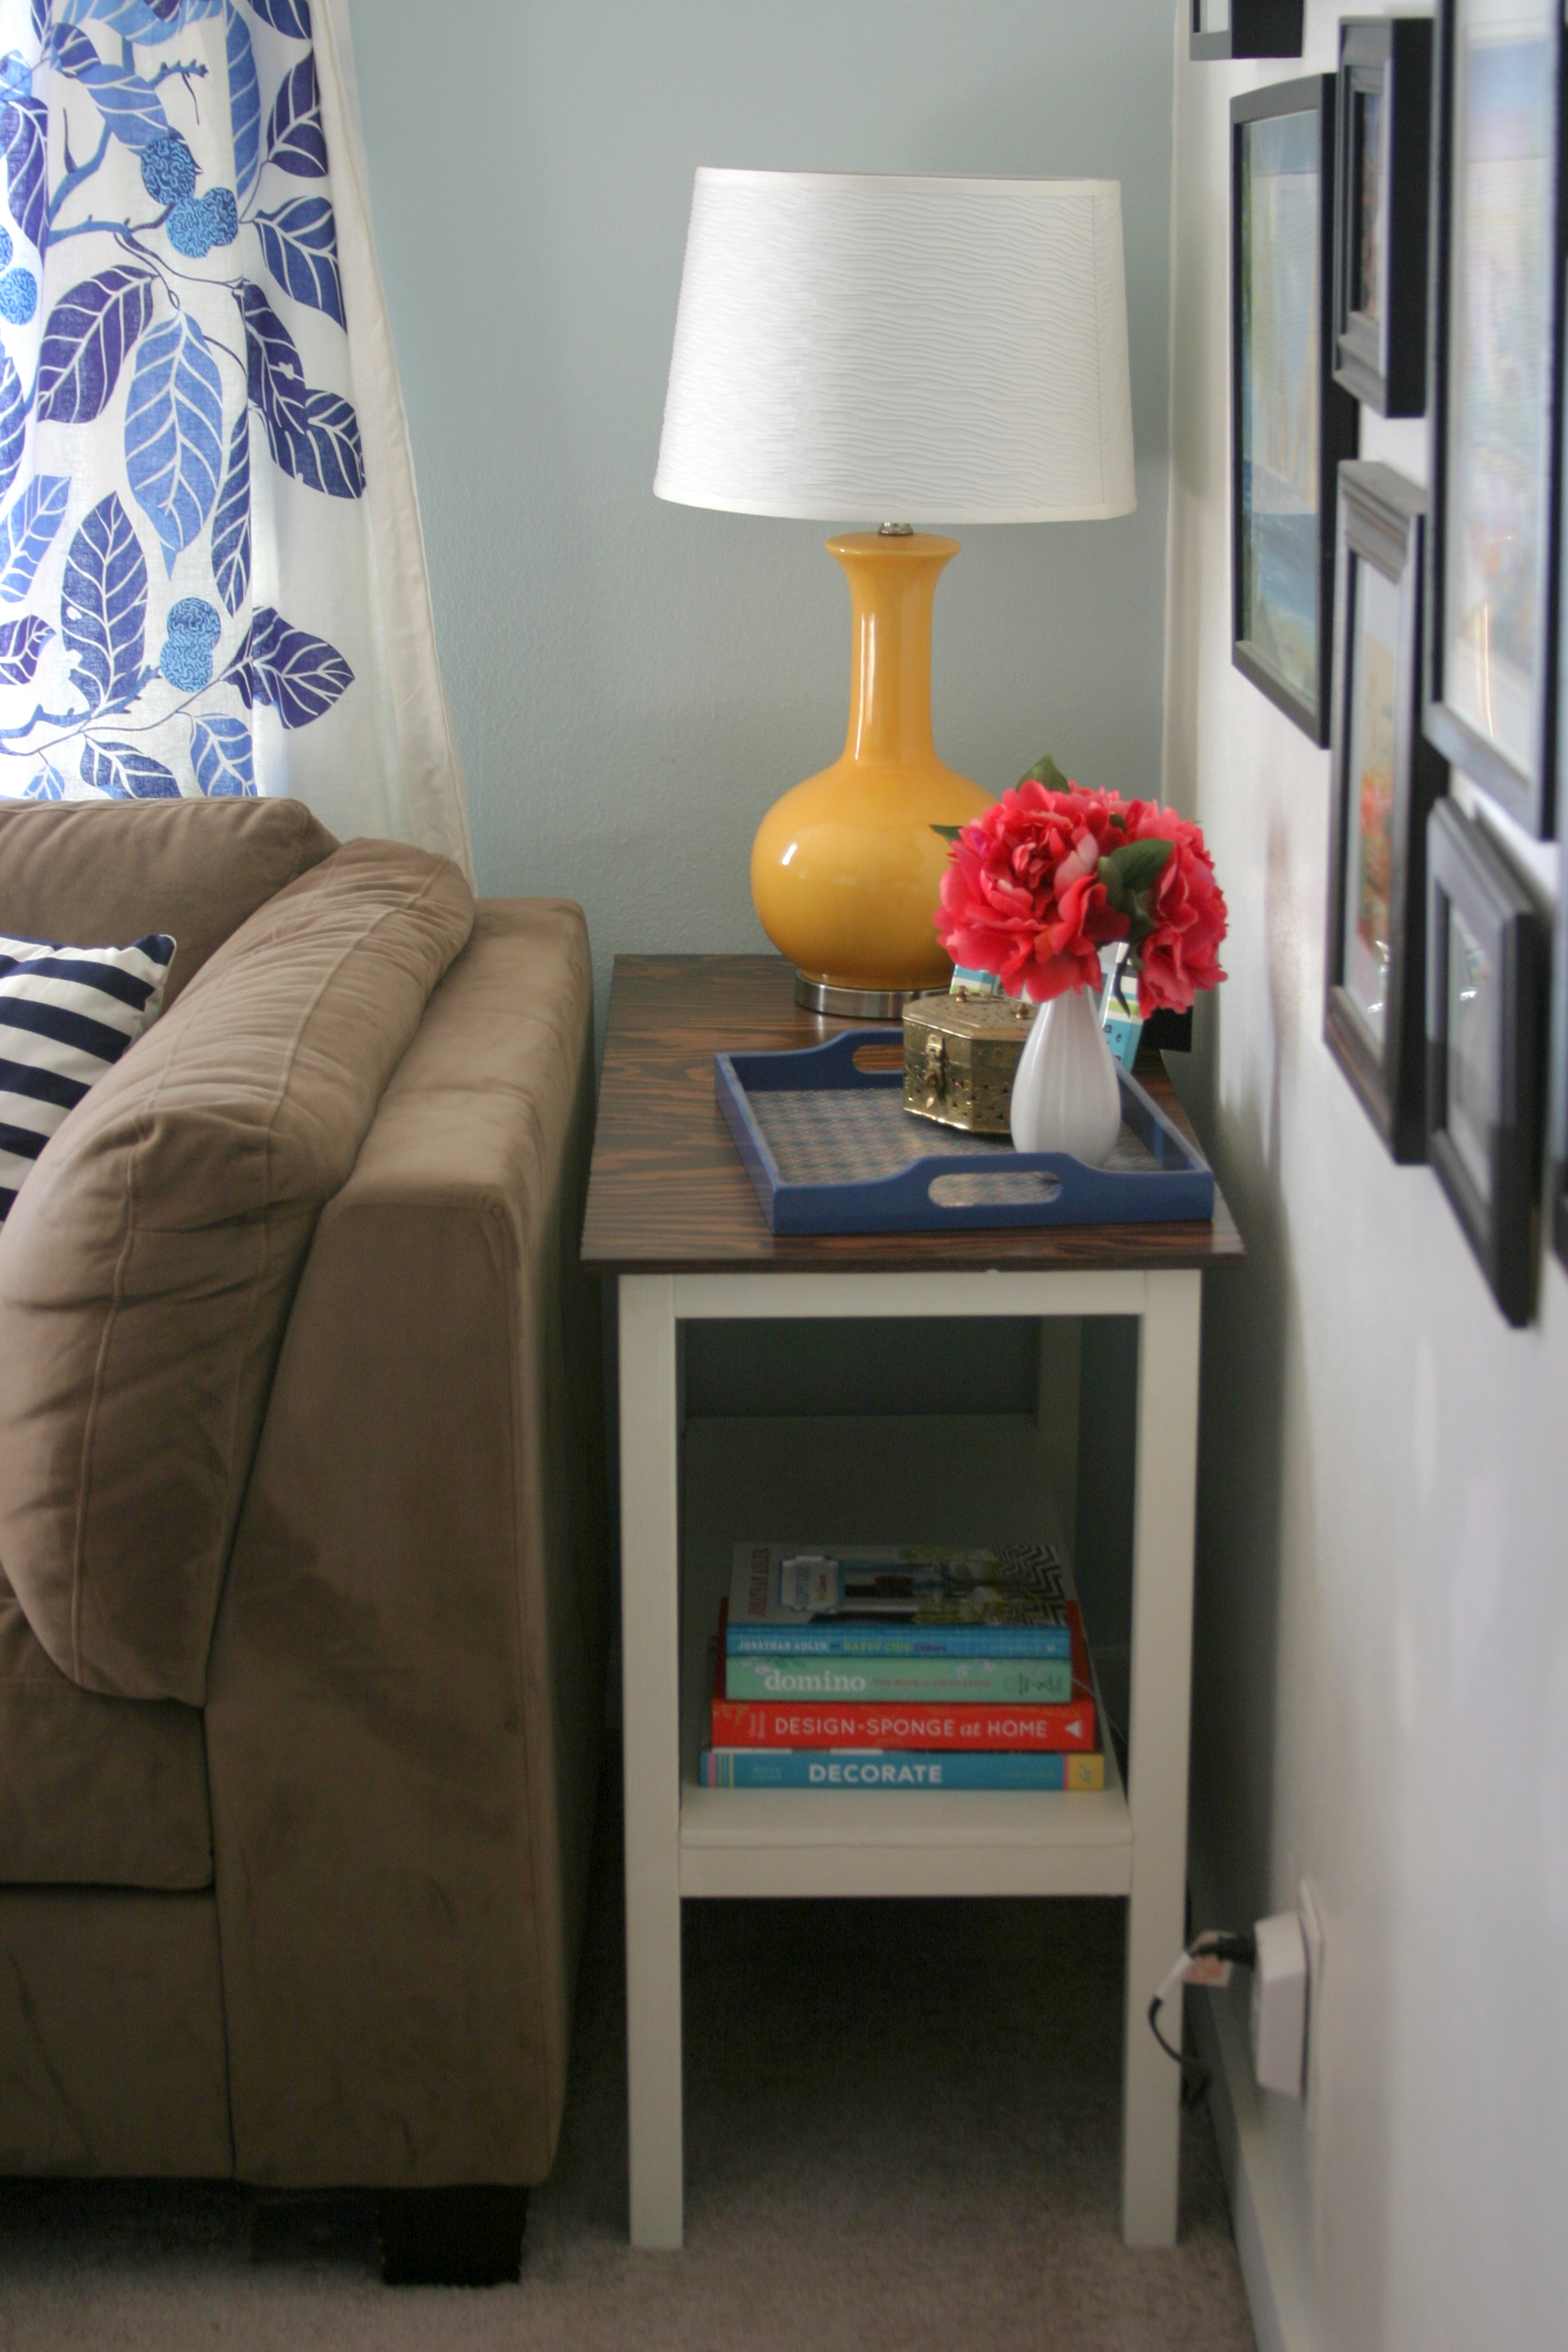
This was the first furniture building project for my husband and me. We changed the table height to 28 inches instead of 24 and used plywood for the top, like Jenn did in her post. It took us a little longer than we thought since we are not experts (yet!), but we made it work and love how it turned out! This is such a classic and stylish table. Perfect for a beginning project!

Built from Plan(s)
Estimated Cost
$70
Estimated Time Investment
Day Project (6-9 Hours)
Finish Used
Olympic Latex Flat in Heirloom Lace for the base (primer first, then at least two coats). Varathane Wood Stain in American Walnut for the top. Three coats of polyurethane on the top and then one more coat over the whole thing.
Recommended Skill Level
Beginner
Revised Dog Crate
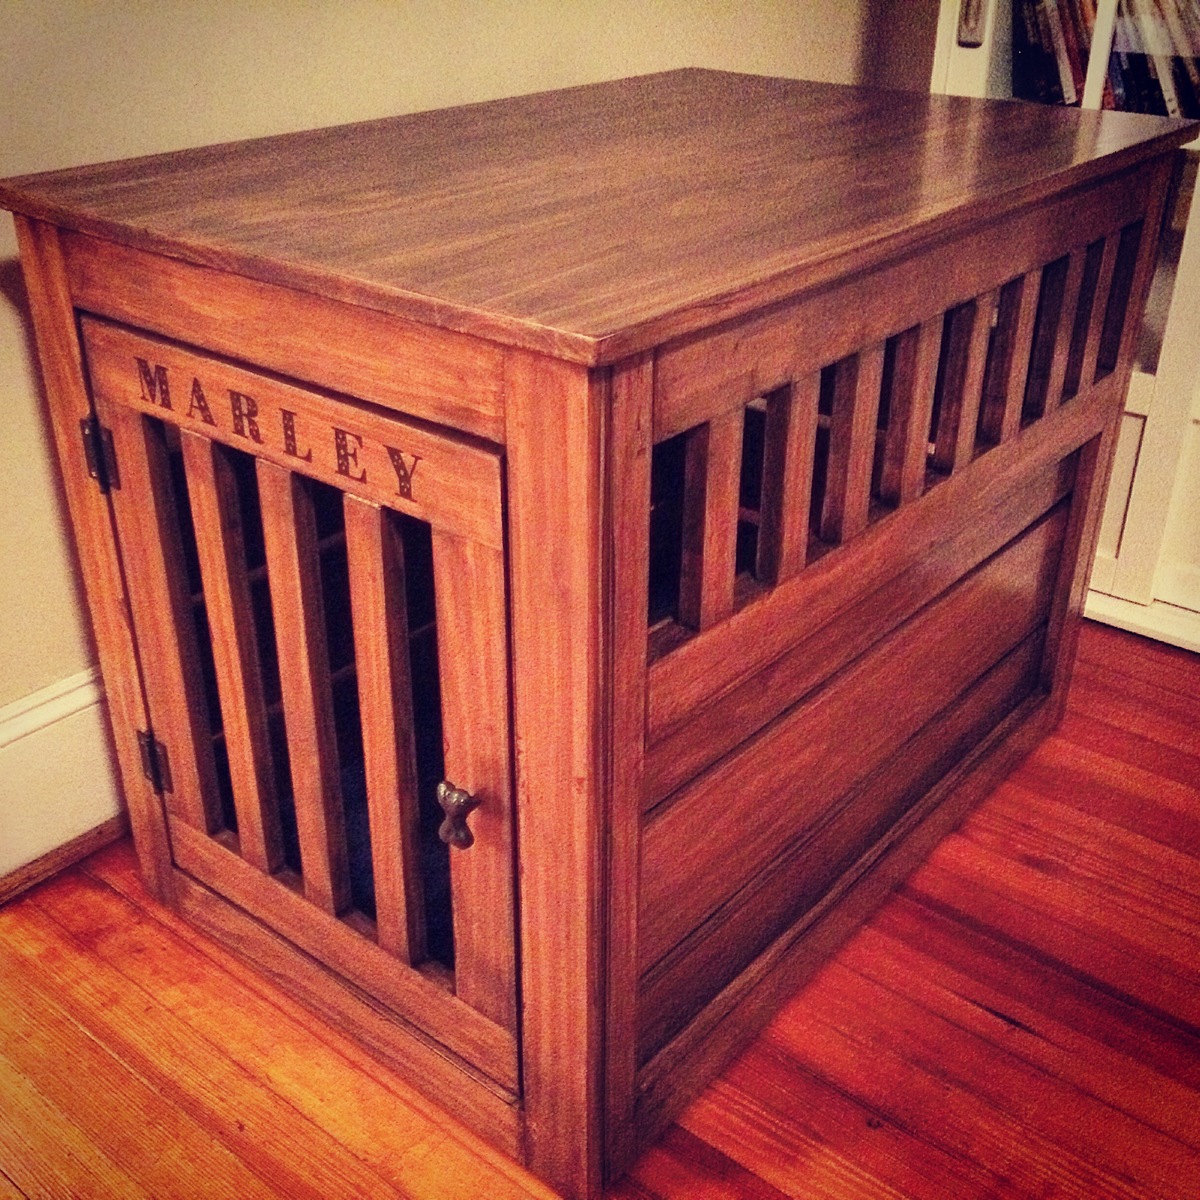
First project made from scratch....took me a while but glad it is finished! Will try to do one more of a larger size for my other dog.
Estimated Time Investment
Week Long Project (20 Hours or More)
Finish Used
SafeCoat Durostain (birch and walnut)
Vermont Natural Coatings for the topcoat
Vermont Natural Coatings for the topcoat
Recommended Skill Level
Starter Project
Comments
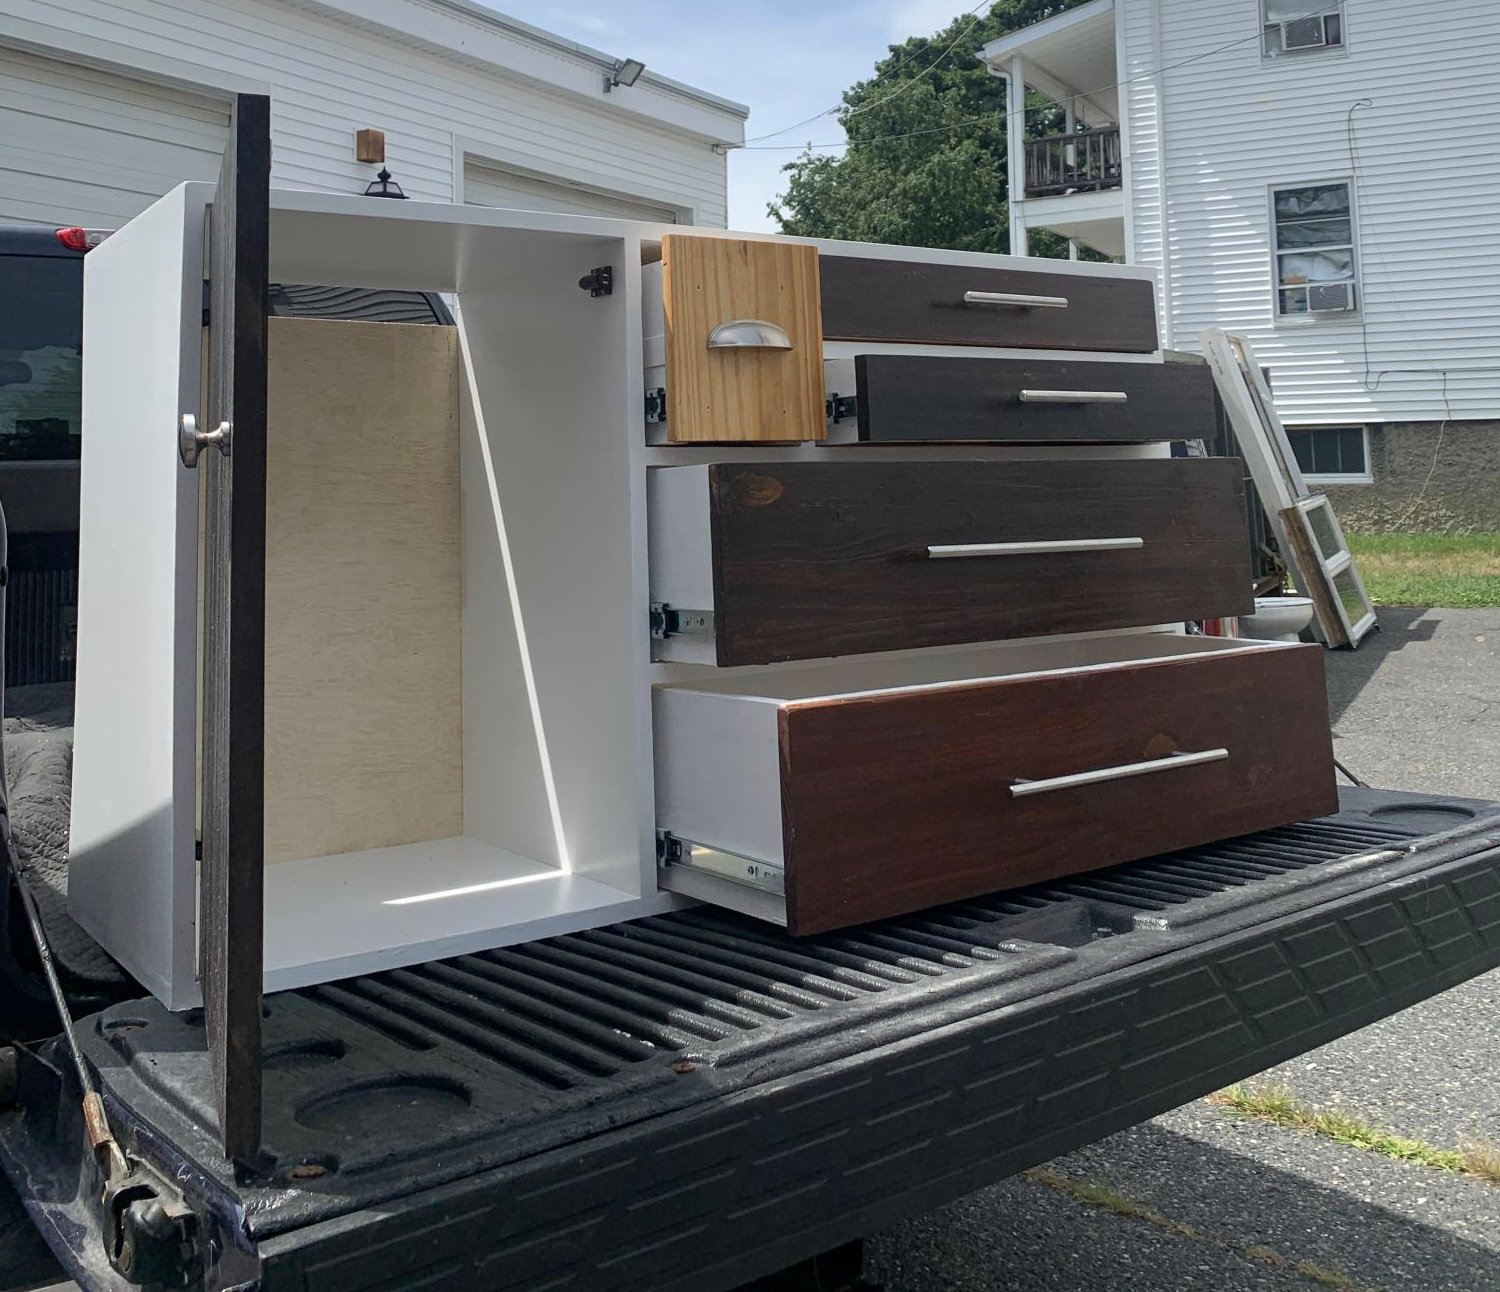
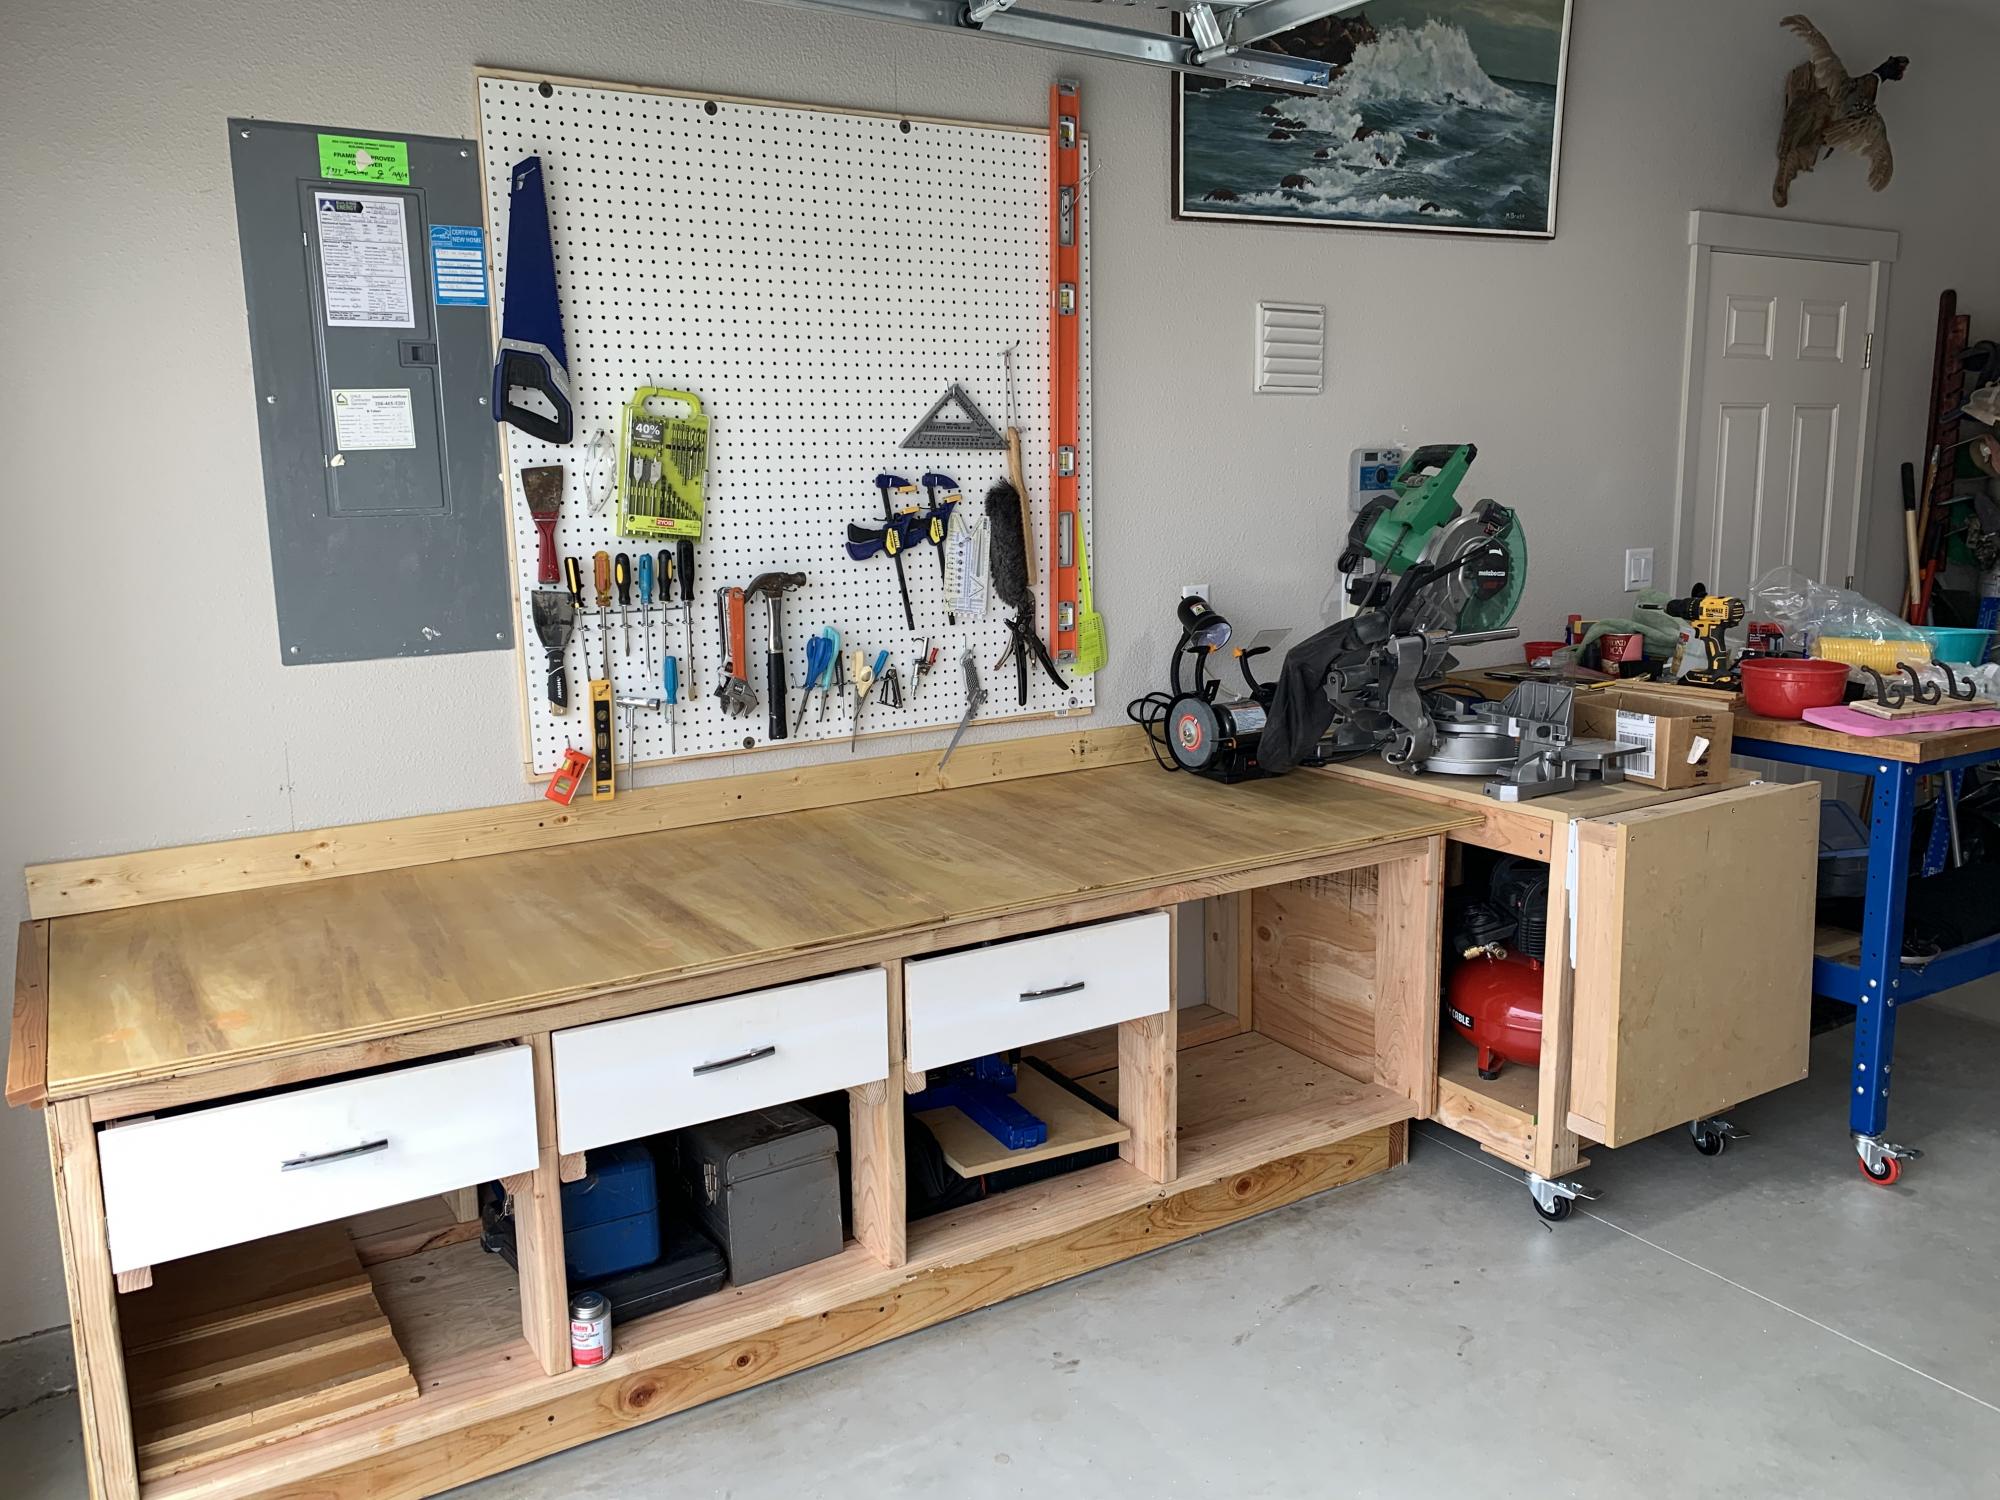
Modern White Dresser with Wood Drawers
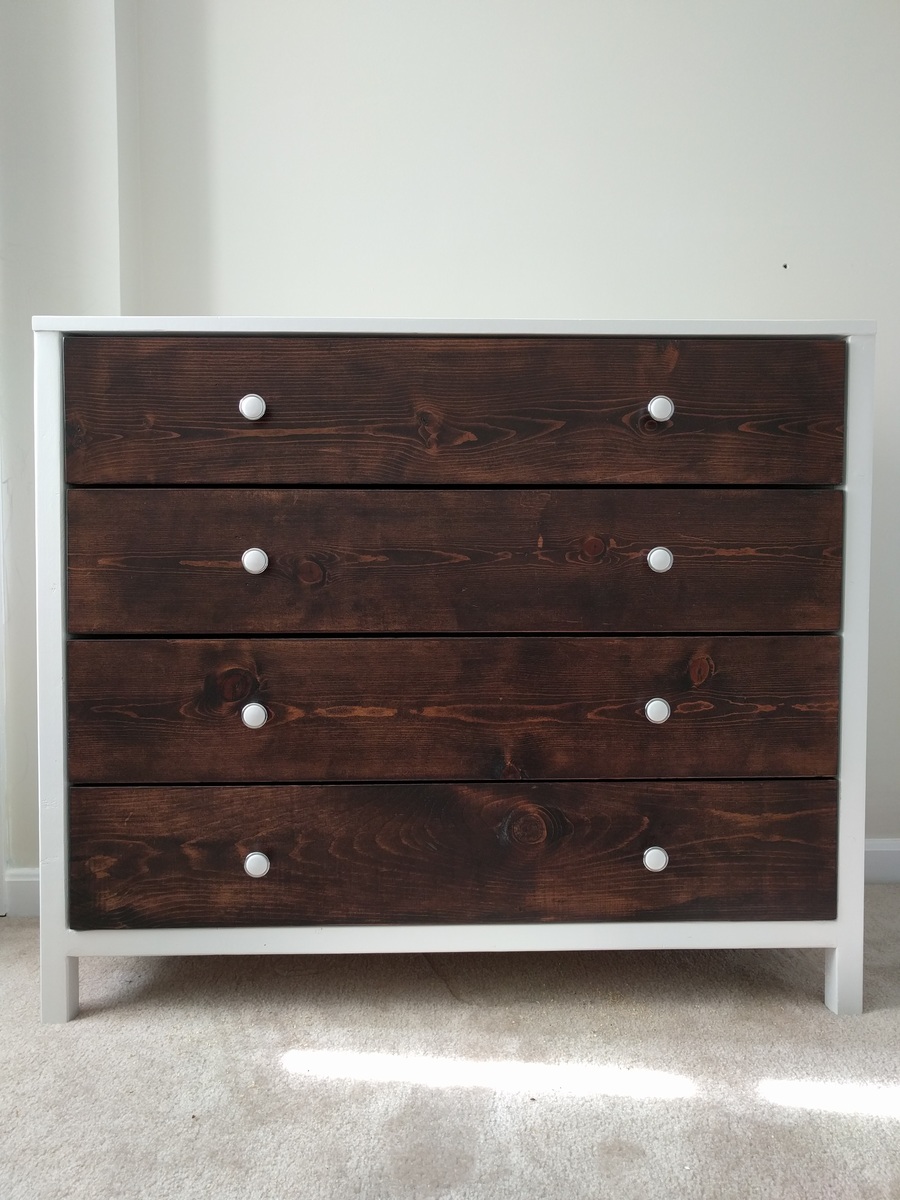
Seen here is my first personal wood working project. I loved the two tone look of this piece as the white really complements and makes the antique walnut stained drawer fronts pop! While the dresser turned out really well considering it being my first build, I learned a lot of lessons. I had a lot of challenges because like every new wood worker, you likely wont have all the right tools for the task at hand. I built this dresser with a circular saw, Kreg jig tool, a miter saw and Wagner spray gun. With these limitation, most task took 2x-3x longer than it normally would. In the end, I was pleased with the outcome.
Built from Plan(s)
Estimated Cost
$200-$300
Estimated Time Investment
Weekend Project (10-20 Hours)
Finish Used
Sherwin Williams ProClassic Alkyd Interior Enamel White Paint/
General Finishes Java Gel Stain/
General Finishes Water Based Poly
General Finishes Java Gel Stain/
General Finishes Water Based Poly
Recommended Skill Level
Intermediate
Rustic Modern Outhouse

I used your simple outhouse plans and modified the roof with clear corrugated plastic roofing for maximum light inside. I used the leftovers to line the hole and direct everything into the hole so no smelly wood. I also used wood from free pallets for door and inside trim to keep cost down.
I have to credit to “Girl in the woods” from youtube that mentioned you Ana, and for the roof idea. Your plans were easy to follow and I’m so proud of my first build.


Built from Plan(s)
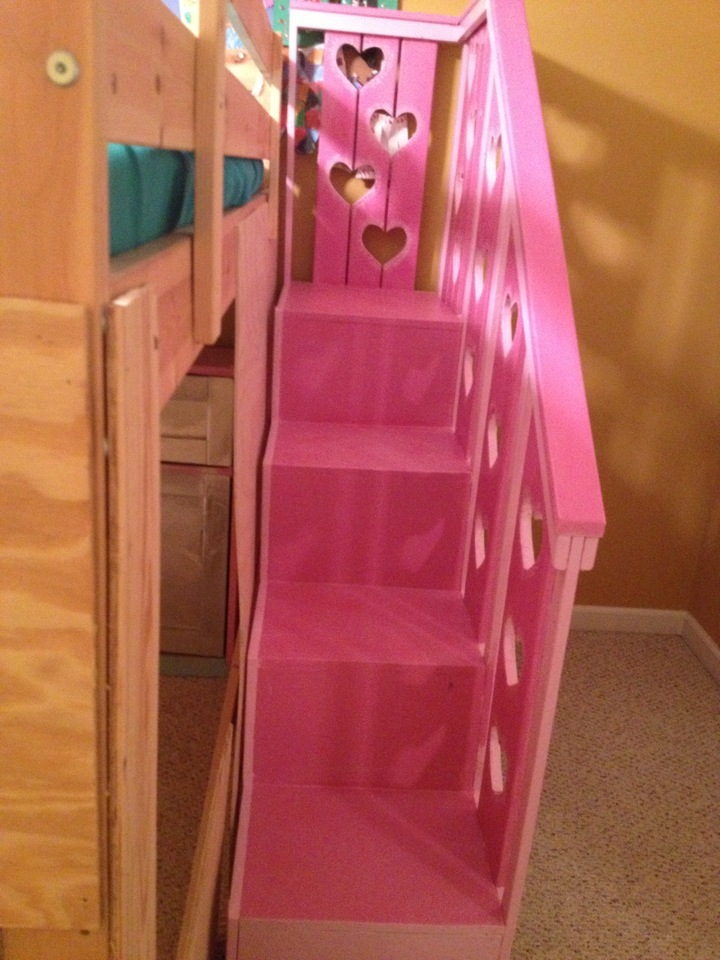
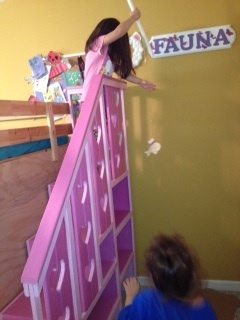
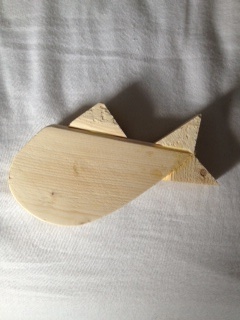
Sweet Pea Garden Bunk Bed Storage Stairs
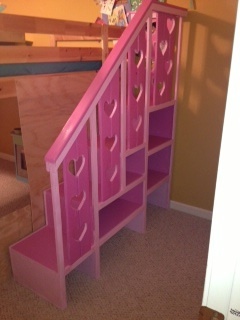
Jenny from www.birdsandsoap.com became my hero when I saw her sweet pea garden bunk bed plans on here! I love these storage stairs and everything else about the bed. I decided to build the whole works. Here are the storage stairs. I added the last couple photos to show what my girls and I did with the scraps from the cut out hearts. We made a fishing game out of it... used screws in the "fish" to make them magnetic and we just used fridge magnets for the end of the fishing pole. Pretty fun! We'll get to making more fish and painting them later... right now I gotta finish this awesome bed house! (I just wanted to share that to let everyone know how creative I can be... normally I'm just a big style biter off ana white and Jenny from birds and soap and Pinterest lol... I bet if you went in my house right after Jennys house they would look pretty identical. I also made her version of the farmhouse storage bed, what can I say? She's got good taste!) YEAH!
Built from Plan(s)
Estimated Cost
$50
Estimated Time Investment
Weekend Project (10-20 Hours)
Finish Used
Paint and Polycrylic
Recommended Skill Level
Beginner
Comments

Mon, 12/31/2012 - 08:50
Stair Plans
Where did you find the plans for the stairs? I can't find them on this website or the Birds and Soap website.
Mon, 12/31/2012 - 08:51
Where did you find the plans
Where did you find the plans for the storage stairs? I can't find them on Ana White's site or the Birds and Soap site.

In reply to Where did you find the plans by HollykmB (not verified)
Mon, 12/31/2012 - 22:28
Plans
This link should take you there... http://ana-white.com/2012/09/plans/sweet-pea-garden-bunk-bed-storage-st…
Hope that helps. Good Luck!
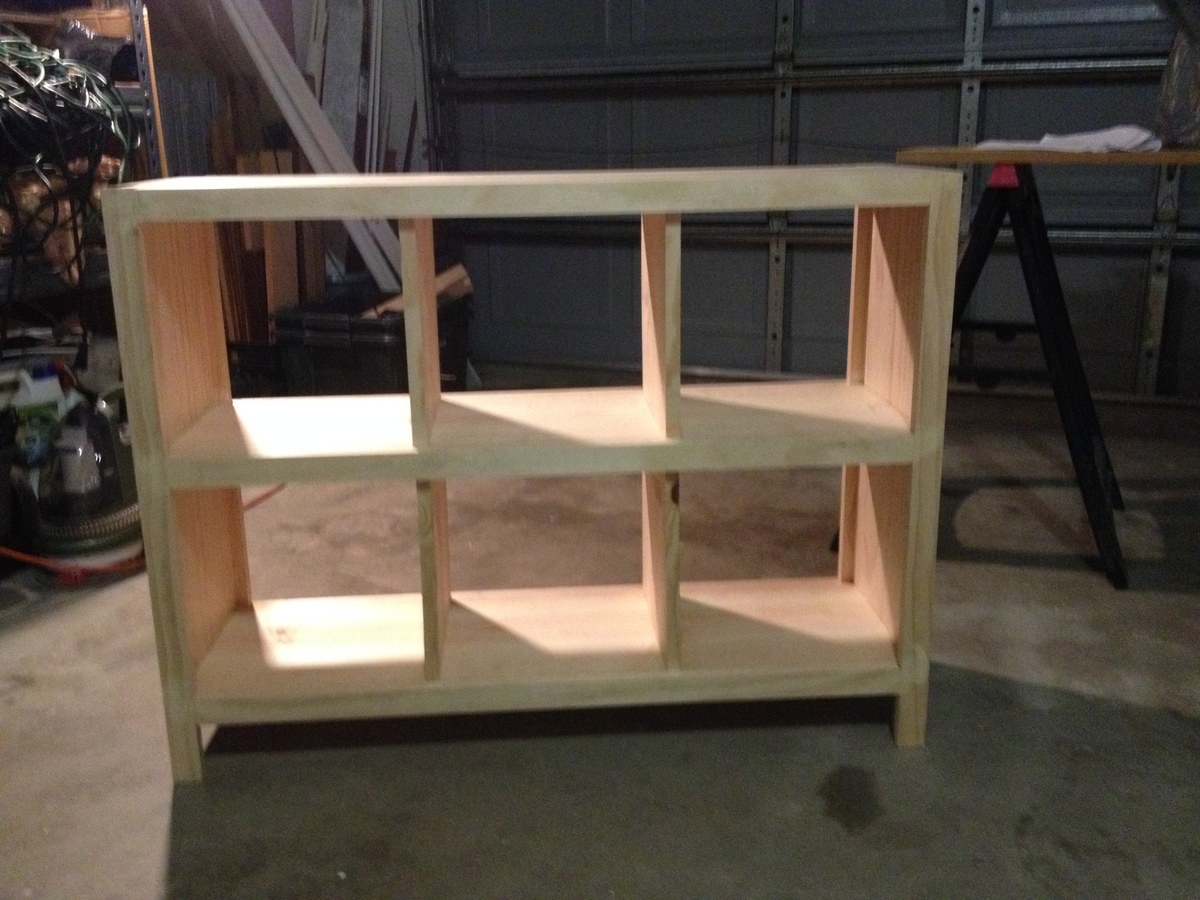
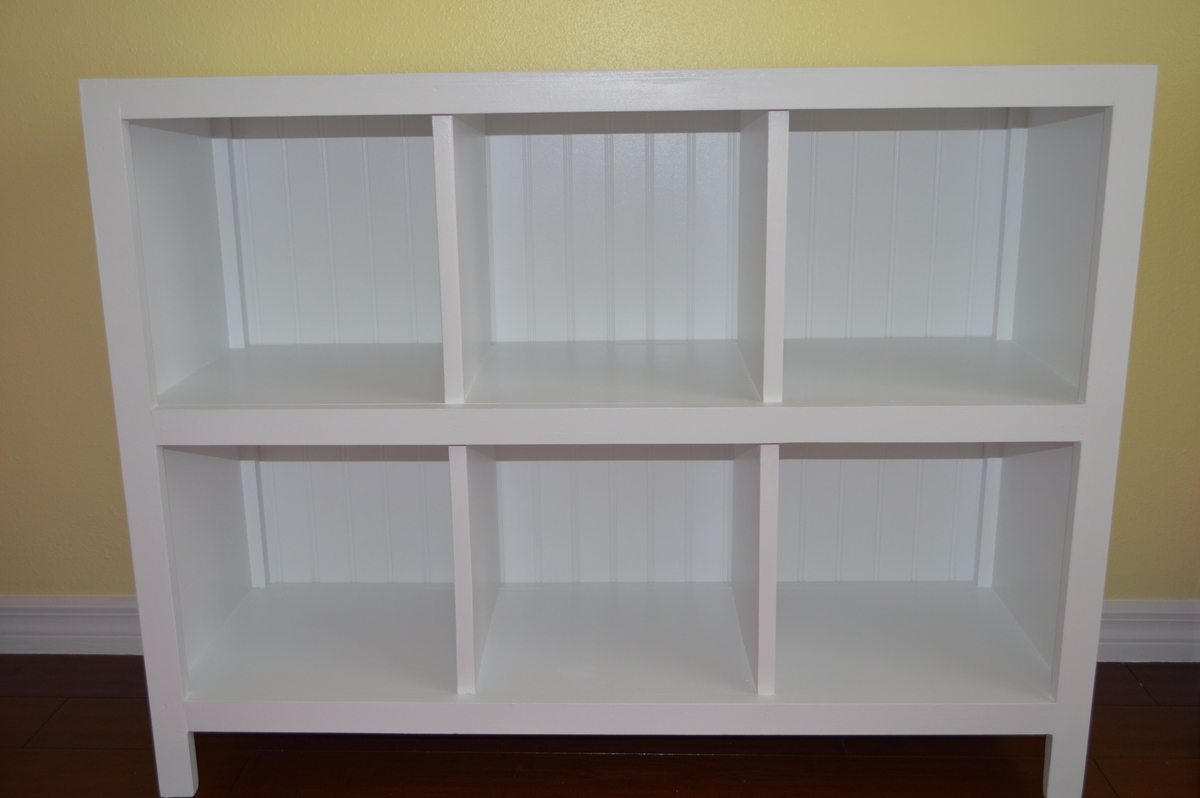
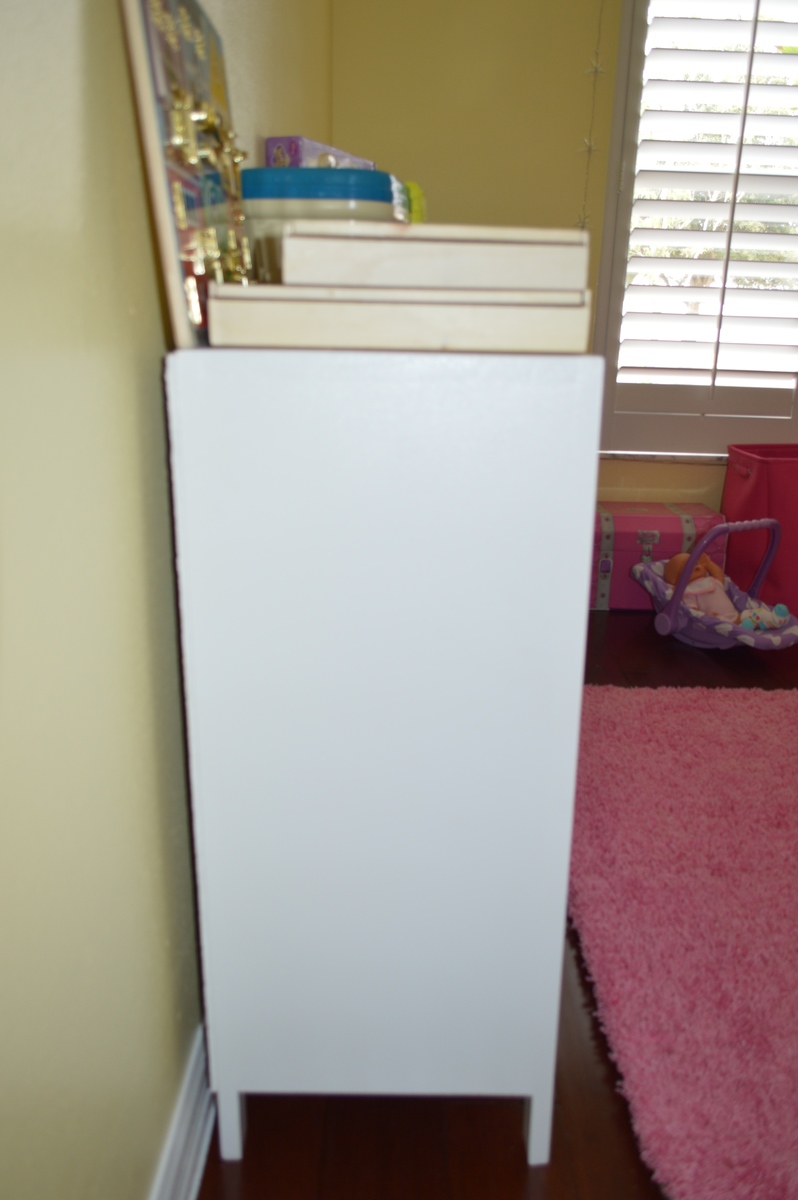
6 Cube BookShelf
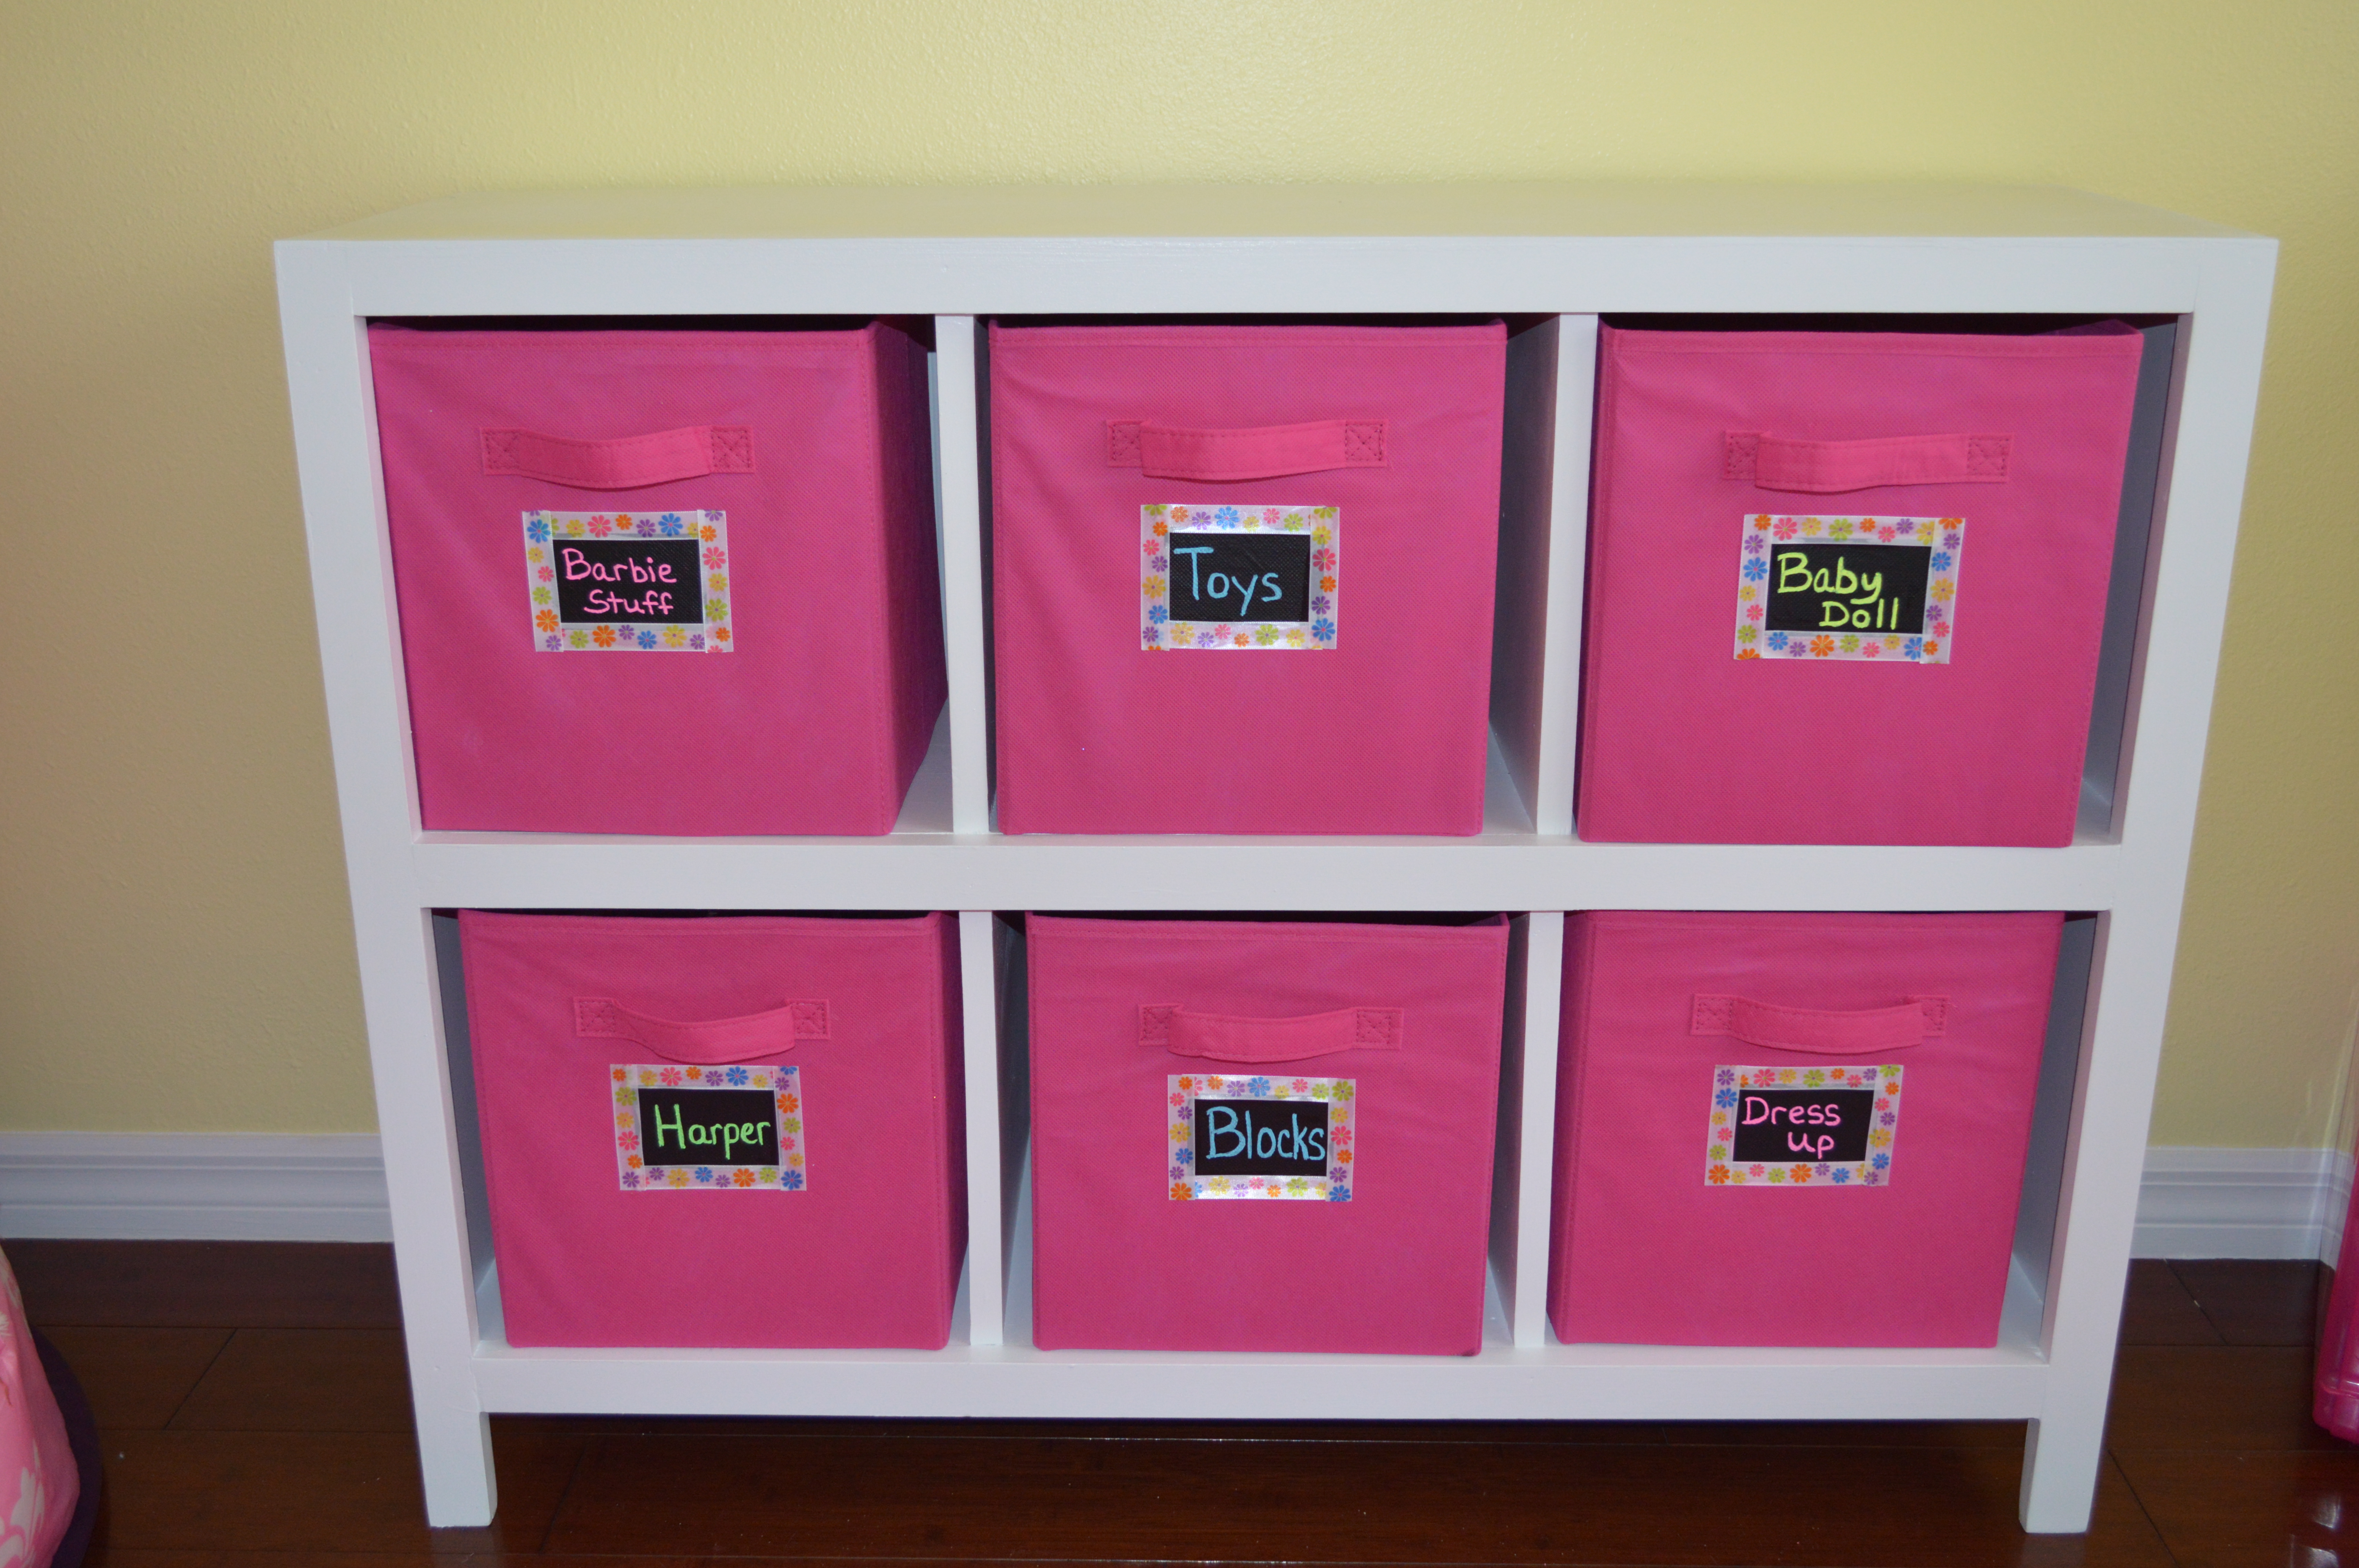
First project I have done by Ana White.
Built from Plan(s)
Estimated Time Investment
Weekend Project (10-20 Hours)
Finish Used
White high gloss paint oil based and then spray polyacrylic. Bead Board for backing. Pink cubbies from Office Depot, Fabric trim for labels and chalkboard paint.
Recommended Skill Level
Intermediate
Triple Pedestal Dining Table

Hello everyone, Happy Holidays. I know so many of you are very busy getting ready for Thanksgiving, I would like to say I am so grateful you took a moment out of your busy time to visit me. Thank You.
I also have been very busy. This year my husband challenged me to get our big table done before Thanksgiving. He didn’t think I could do it. Ha Ha, I showed him, and two additional chairs also.
This table is gorgeous, but I cannot take all the credit. This design comes from Ana White.


Built from Plan(s)
Estimated Cost
100
Estimated Time Investment
Week Long Project (20 Hours or More)
Finish Used
MinWax Espresso Stain
Recommended Skill Level
Intermediate
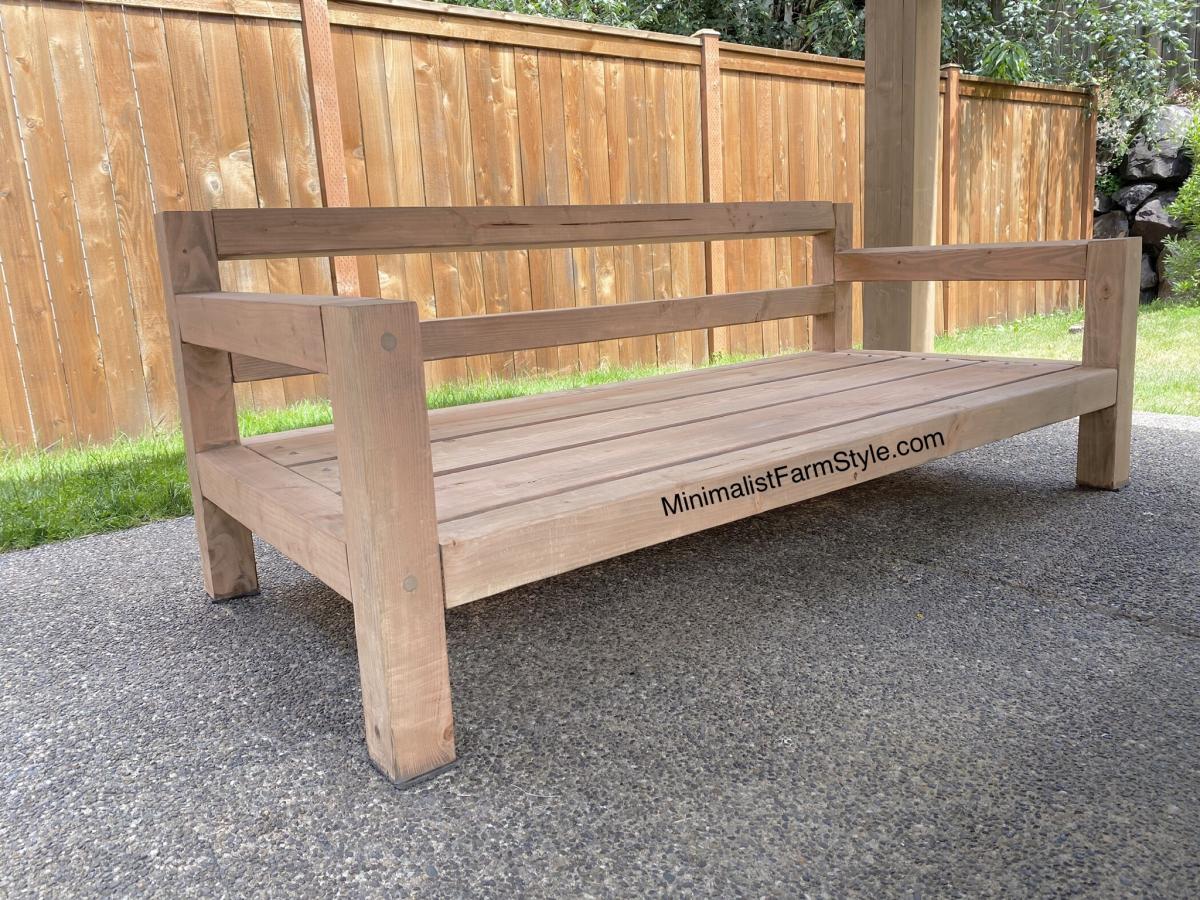
Outdoor Modern Sofa
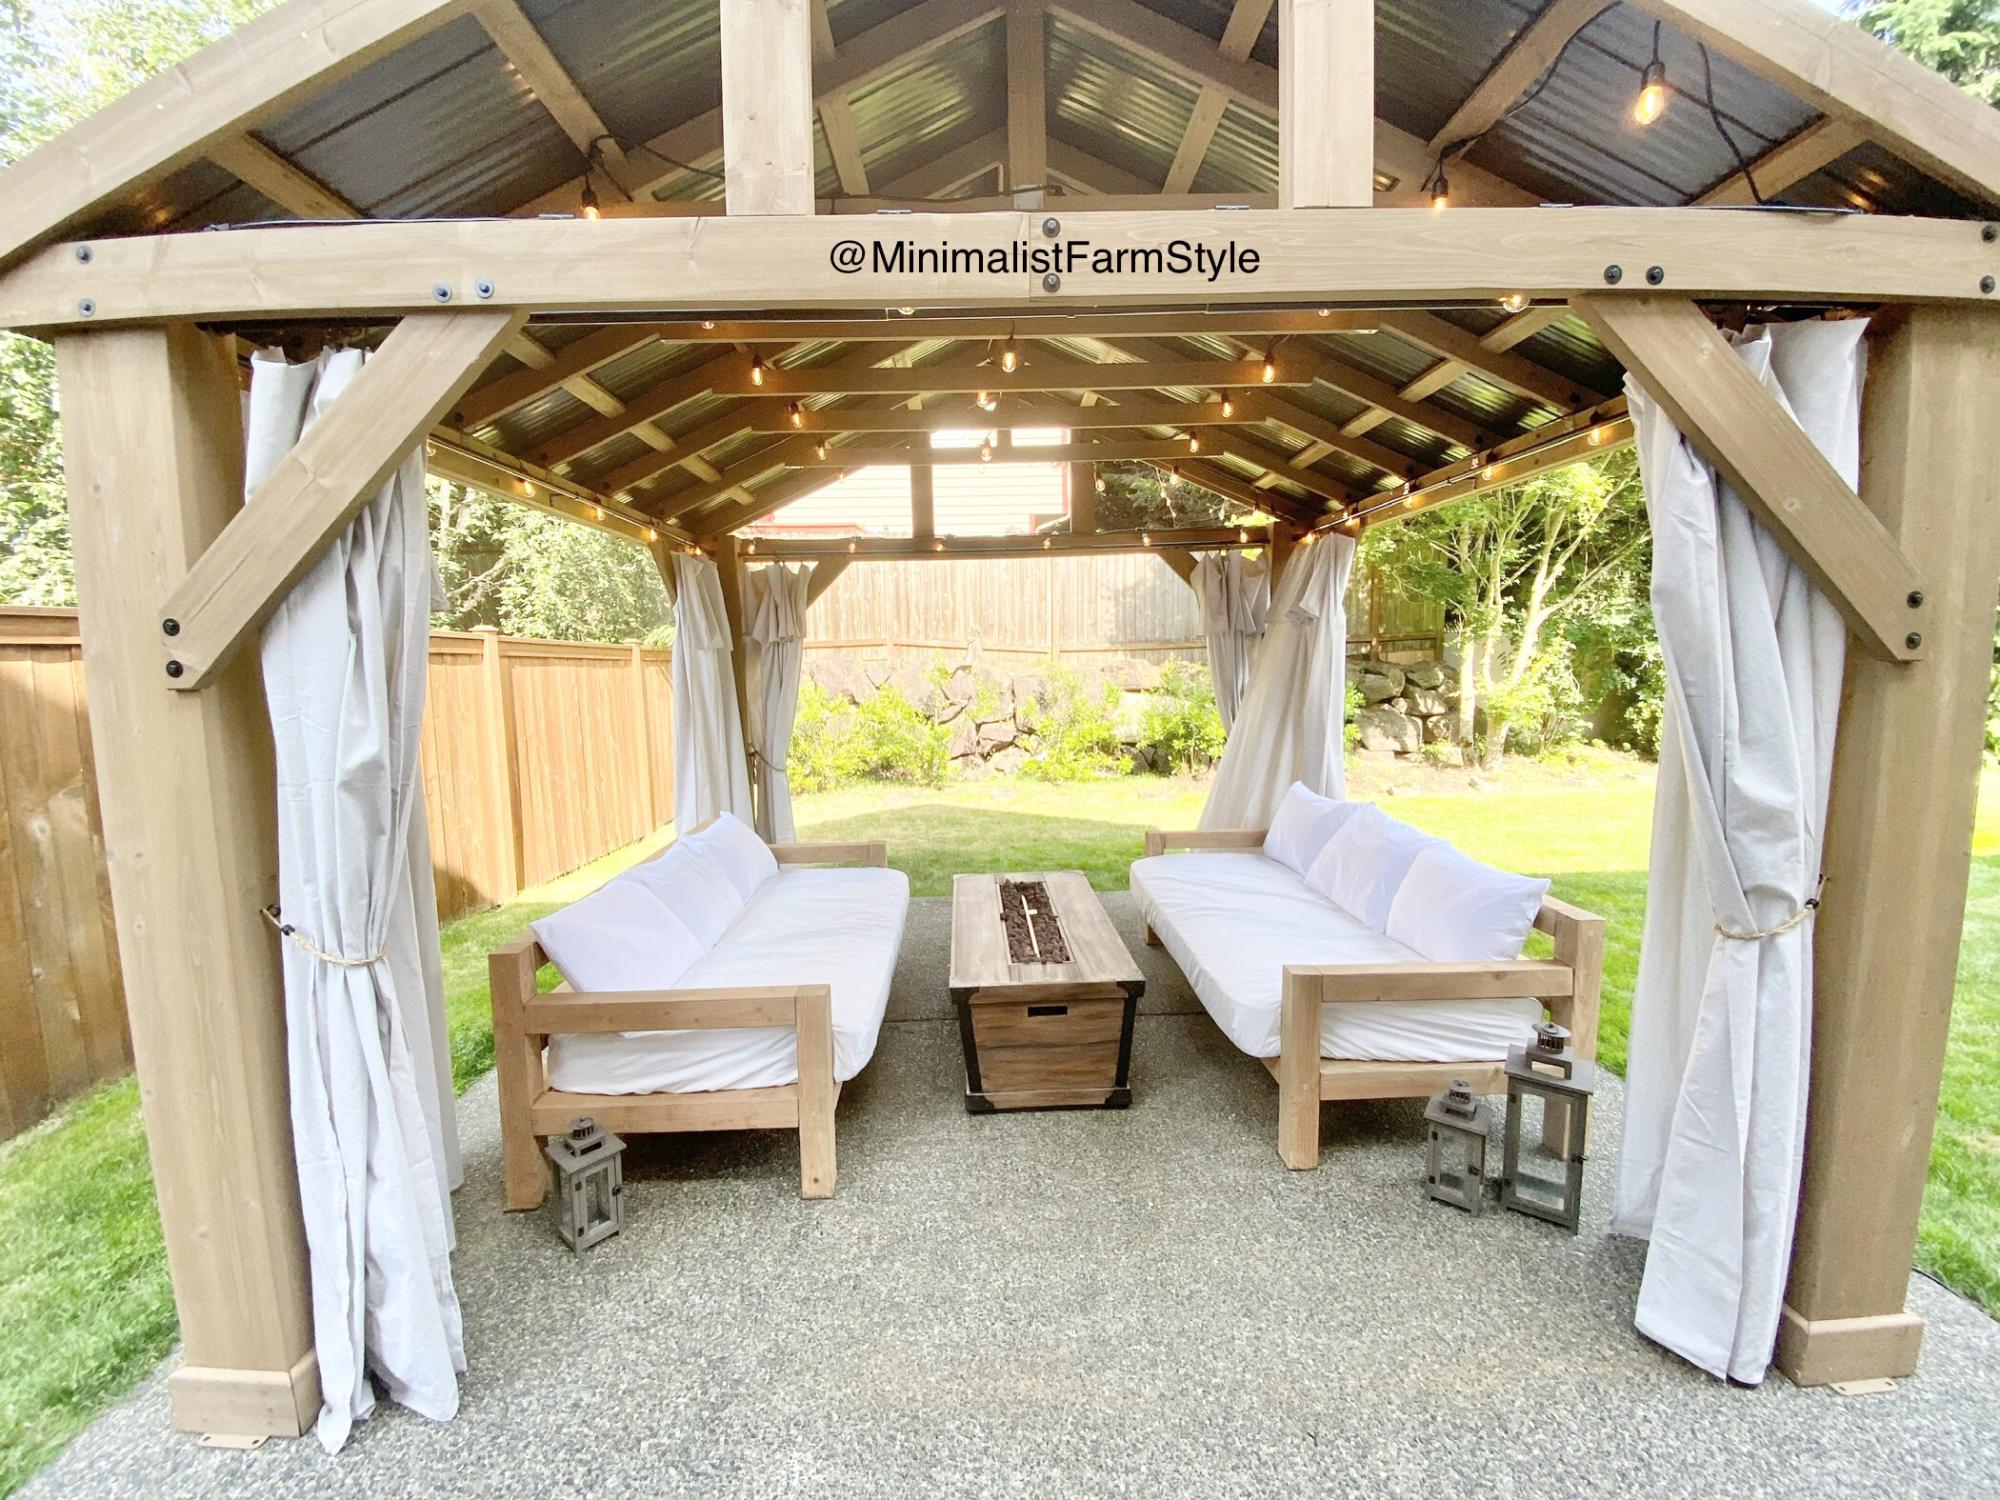
This was my first time DIYing furniture, so I definitely came up with a very easy design!
The dimensions for this sofa are modern as it sits low to the ground and has a squarish appearance.
Free detailed plan on Blog: www.MinimalistFarmStyle.com
Estimated Cost
$100
Estimated Time Investment
Day Project (6-9 Hours)
Finish Used
Watered down Varathane Water-based Java Bean.
Recommended Skill Level
Beginner
DIY Toy Chest
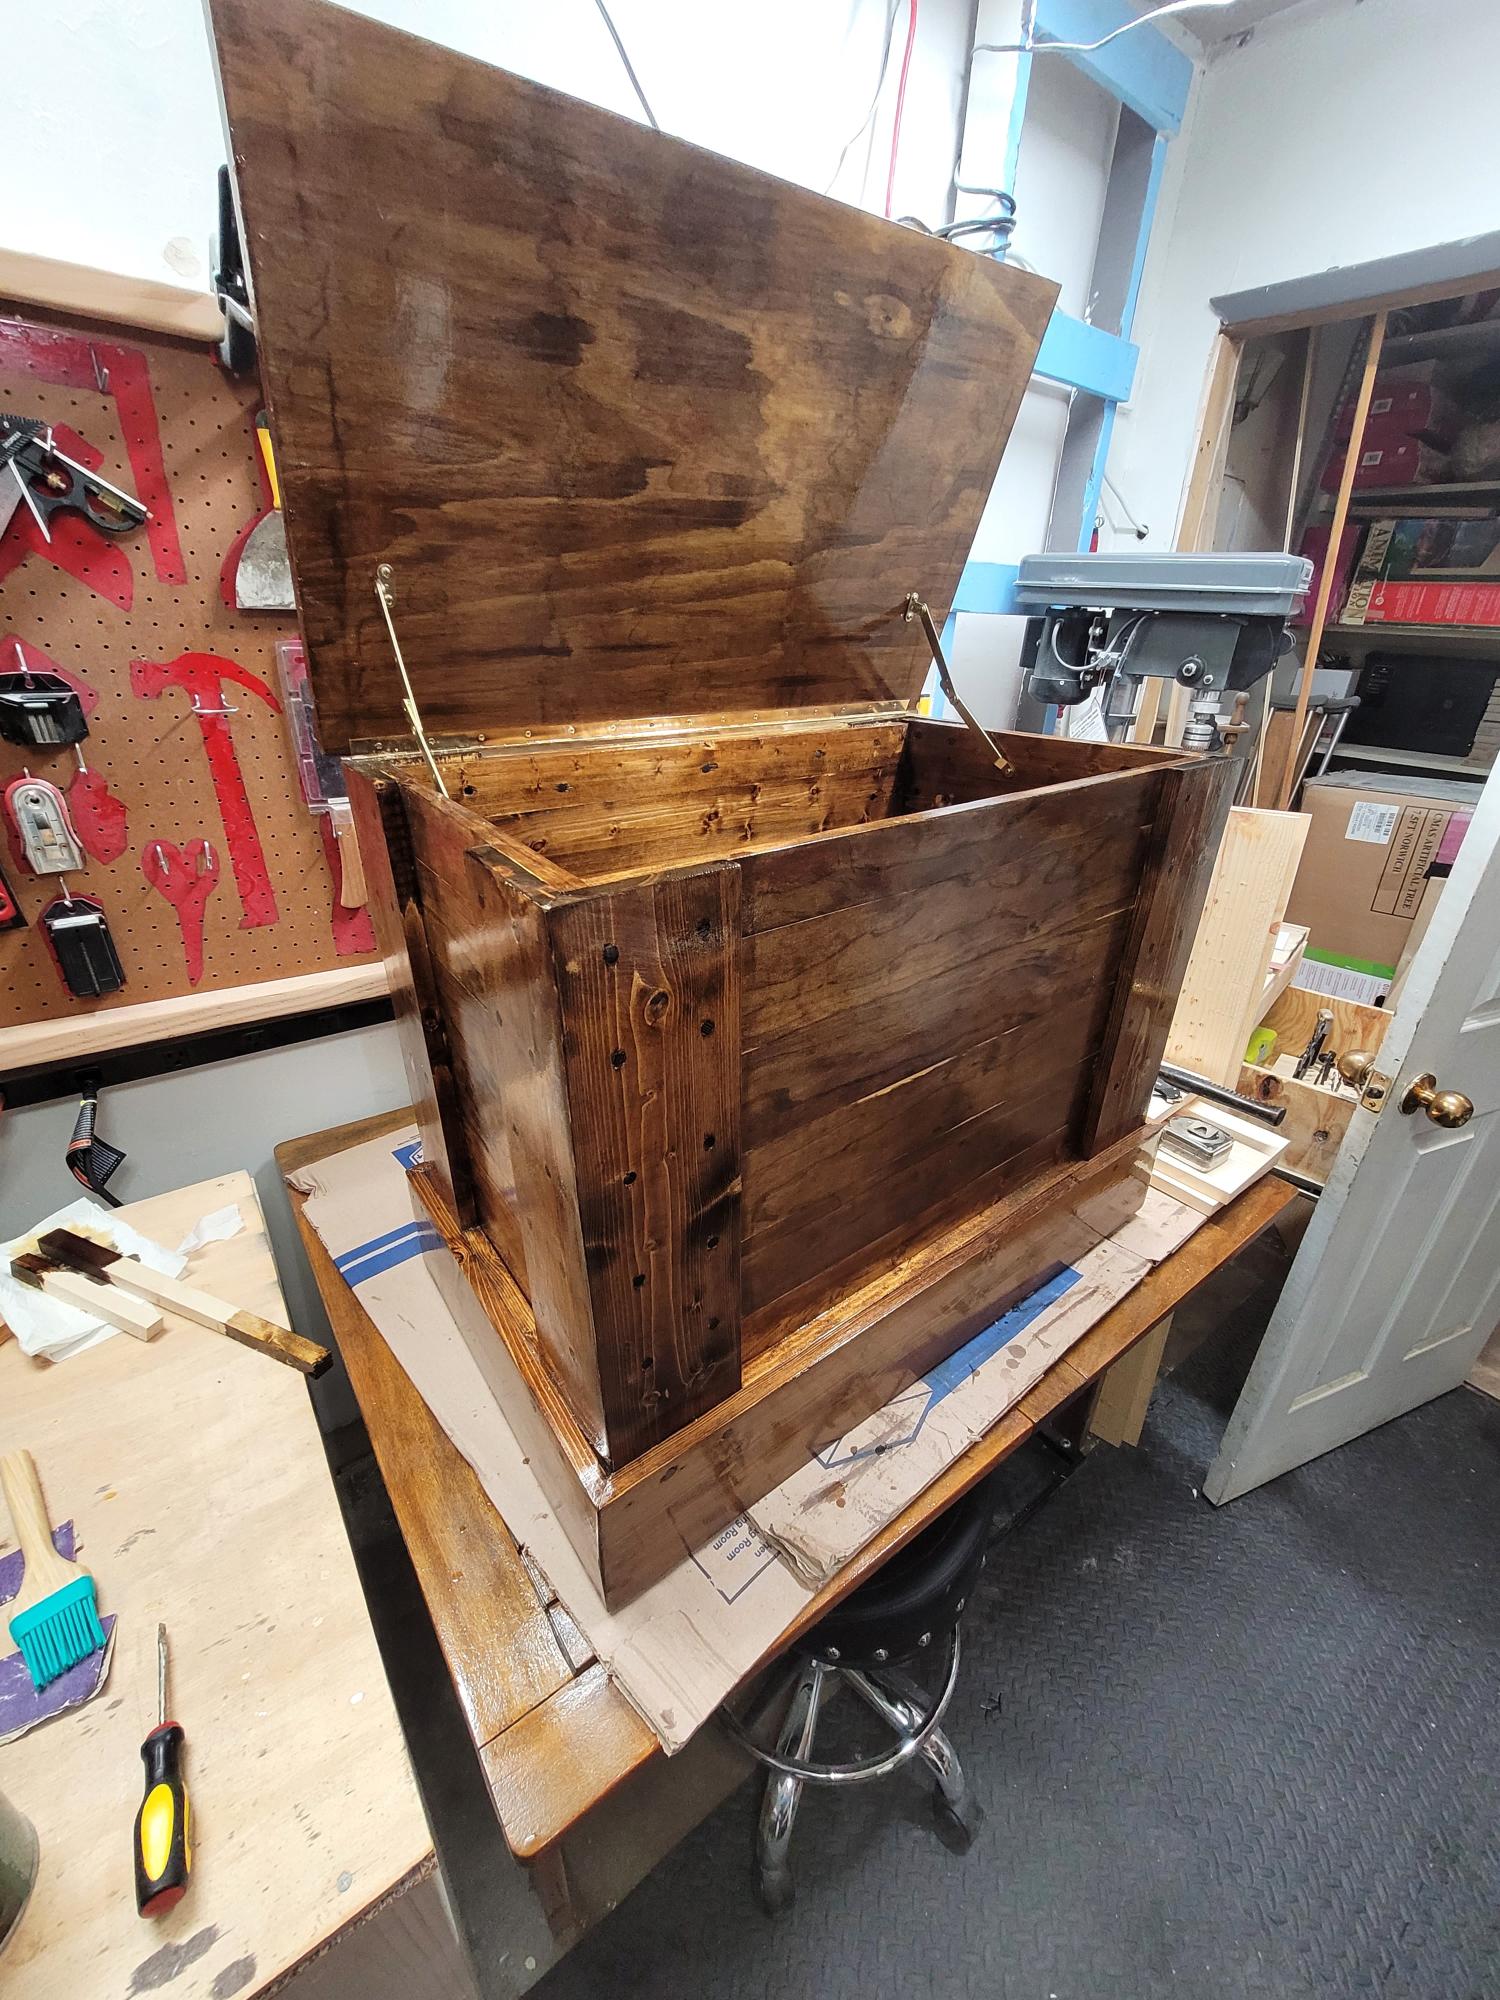
Toy chest / hope chest for great grandkids. My first project in about 30 years. Never had time before.
Ed Smith
Built from Plan(s)
Tara & Graham's Farmhouse Queen
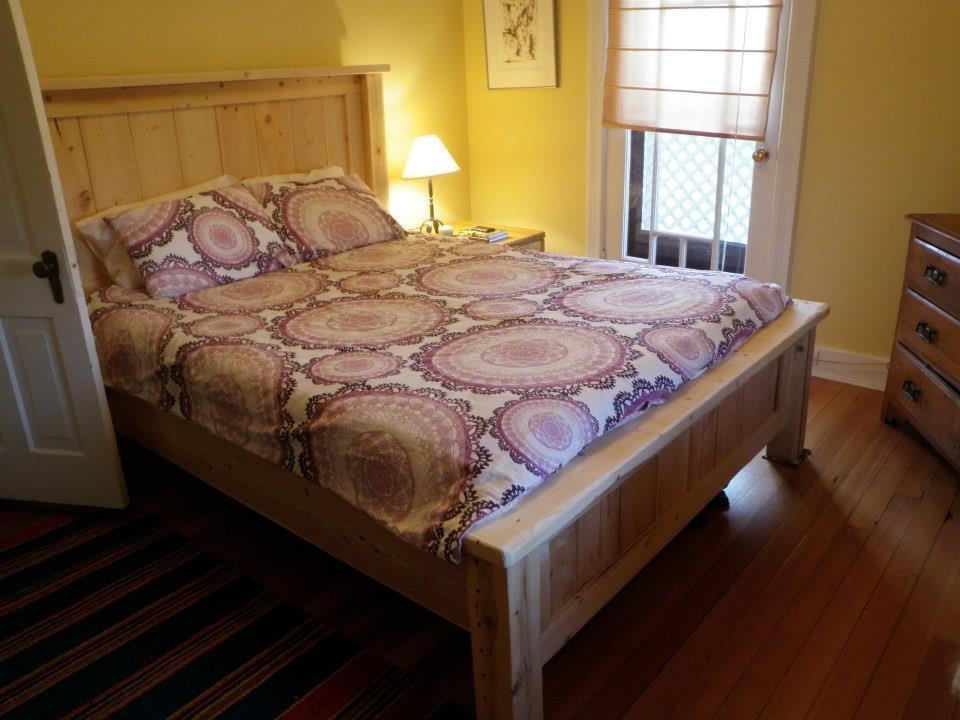
Tara and I built this bed over multiple weekends, between vacationing, gardening, and cleaning up the yard from a massive windstorm. We used unplaned cedar from a local woodlot for the posts so had to adjust the spacing. Also built up our own frame for our Ikea rubber mattress using 2x2's we ripped. The frame is modular with large lag bolts holding the frame to the footboard and carriage bolts for the frame/headboard connection. Which is good because the bed is HEAVY and the frame needed to be hauled up the back deck by rope and 3 people. Thank you so much for the design and inspiration, Ana and community!
Built from Plan(s)
Estimated Cost
160
Estimated Time Investment
Week Long Project (20 Hours or More)
Finish Used
None so far. Planning on simple oil finish.
Recommended Skill Level
Intermediate
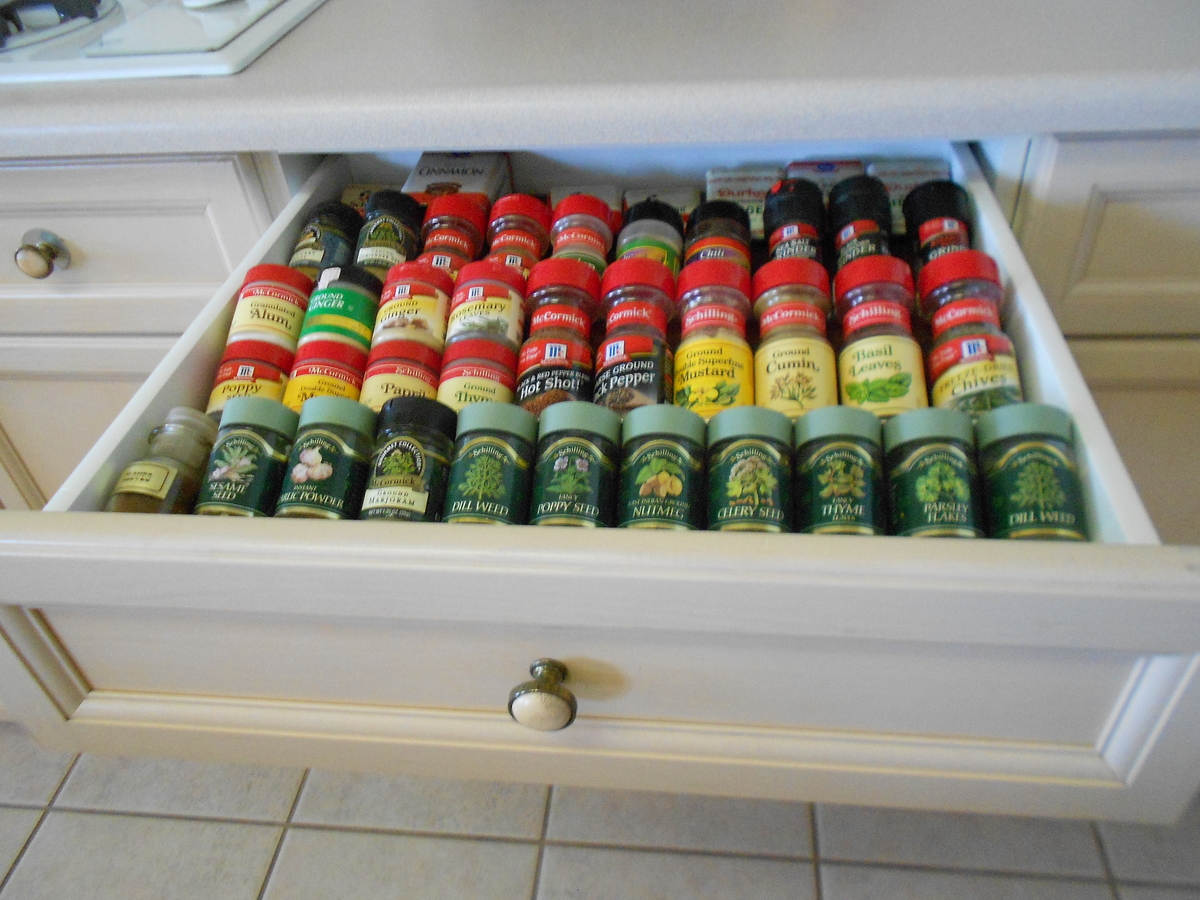
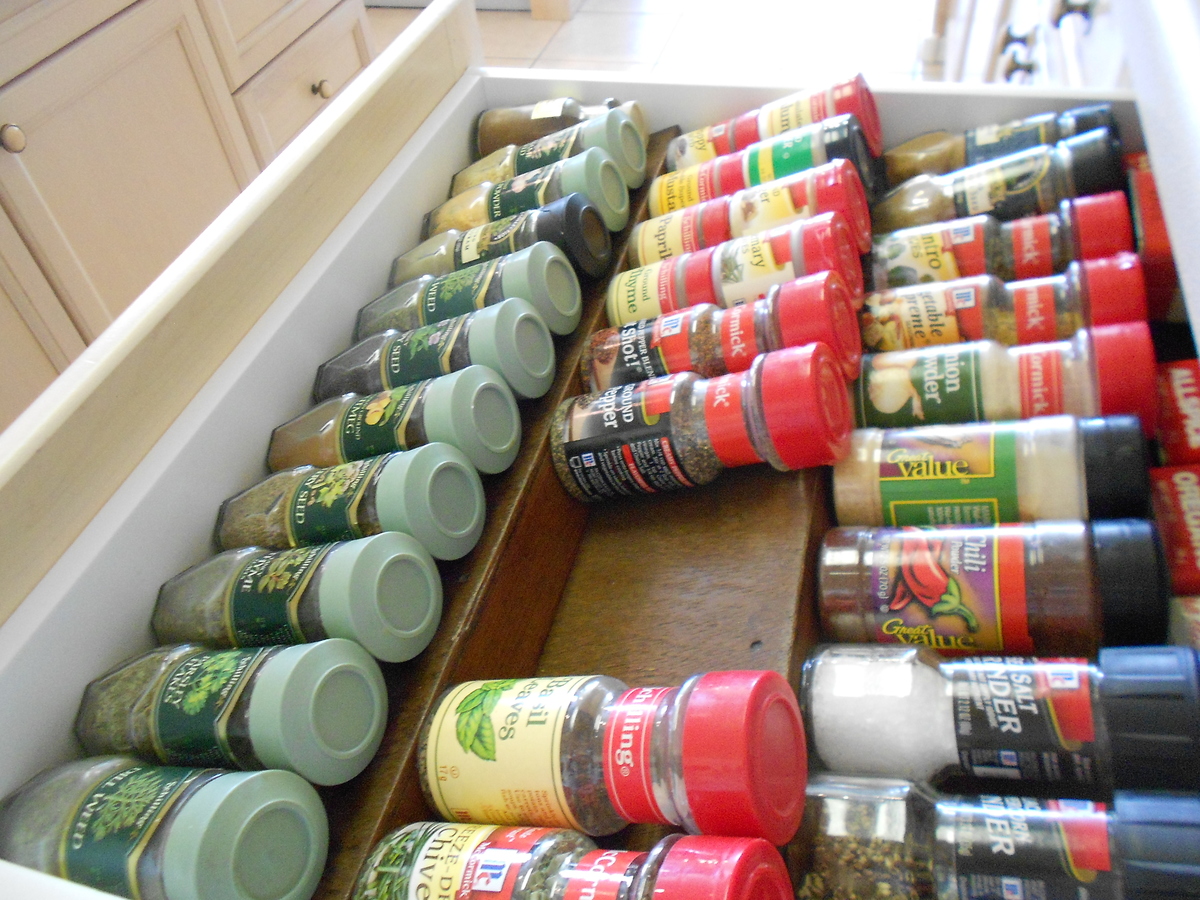
SPICE DRAWER INSERT
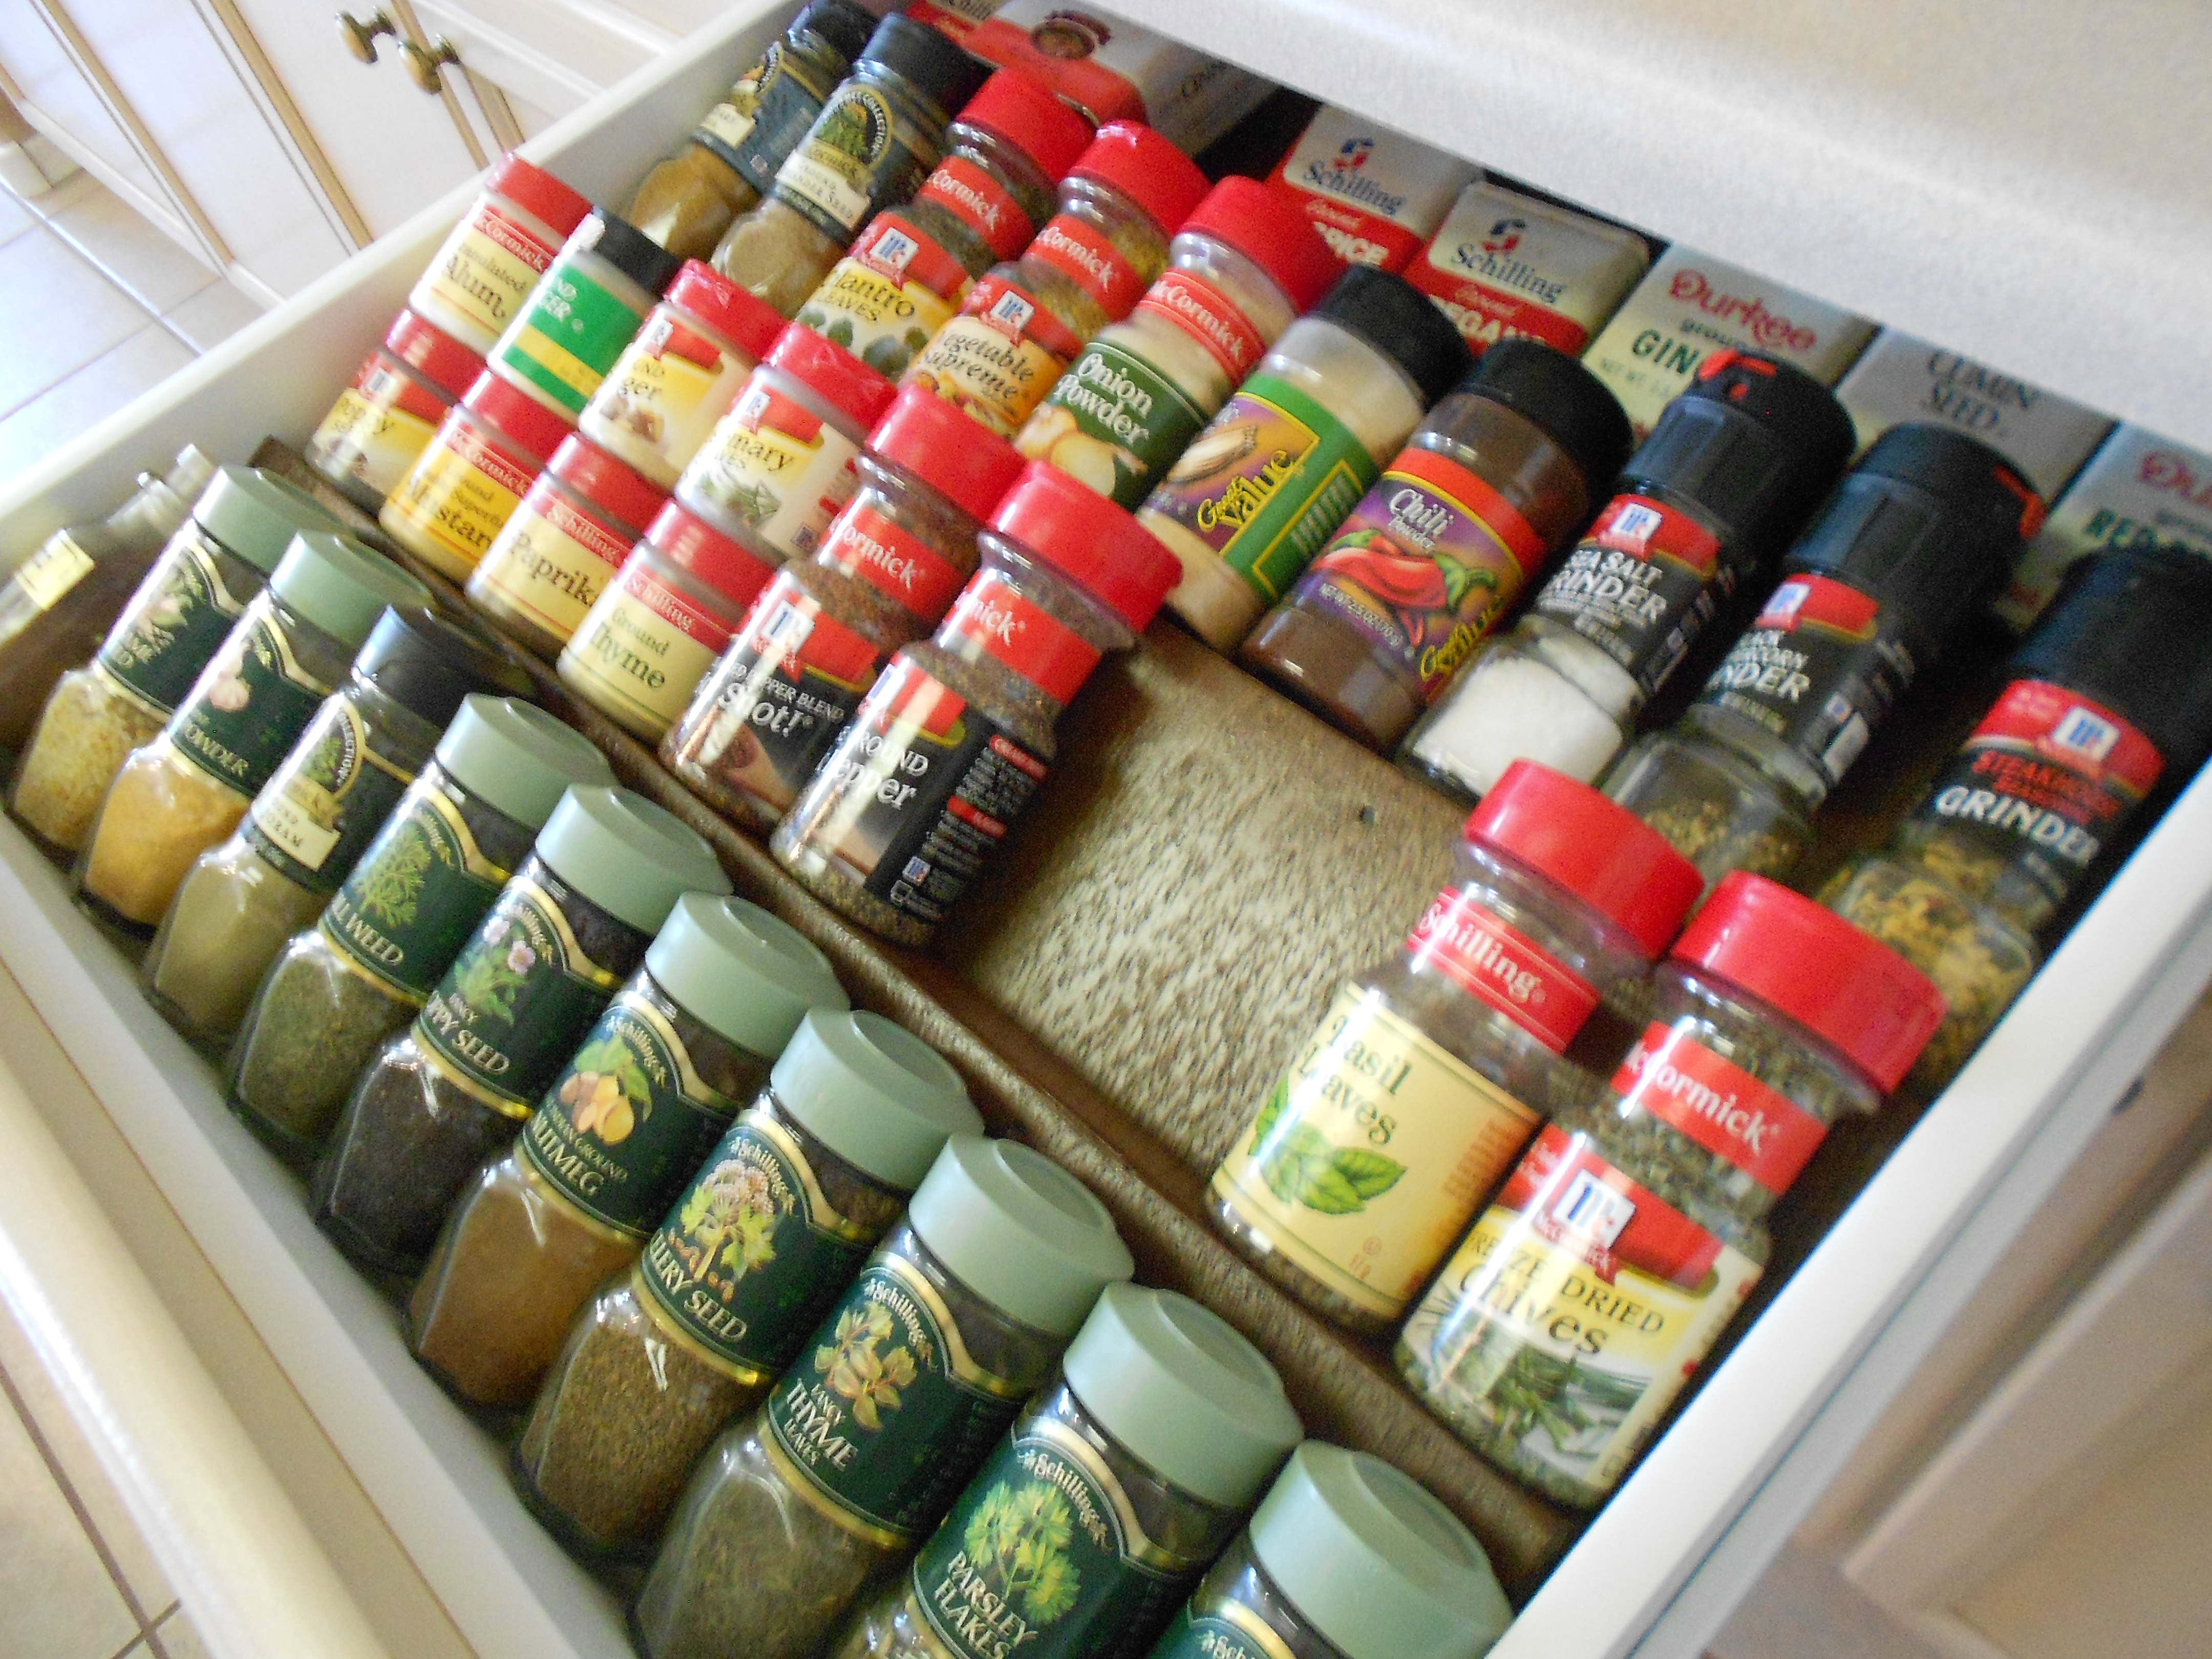
This was fast and easy, and it is so useful. Thank you for the plans!
Built from Plan(s)
Estimated Time Investment
An Hour or Two (0-2 Hours)
Recommended Skill Level
Starter Project
Fancy X Console Table
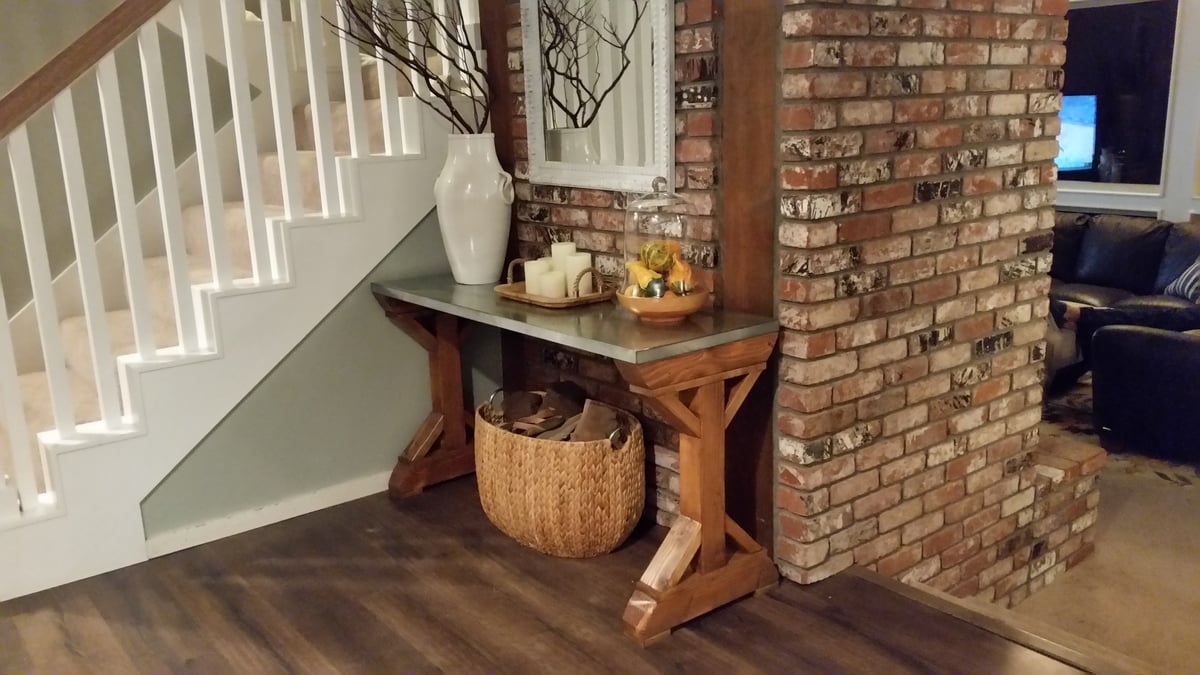
This was a scaled down version of the Fancy X Table. Dimensions are 19.25" deep, 30" high and 55" long. I eliminated the cross bases because I wanted to store baskets underneath. The sheet metal was cut to size and aged by a local guy for $50. Fun project!!

Built from Plan(s)
Estimated Cost
$80
Estimated Time Investment
Day Project (6-9 Hours)
Finish Used
Watco Danish oil medium walnut, then equal parts minwax special walnut and weathered oak
Recommended Skill Level
Intermediate
Pony Wall
Love your site. The 8’ pony wall I recently made was a great plan. I’m also going to build the outdoor storage plan you have. Thanks for your creativity!
Built from Plan(s)
Estimated Cost
$200
Estimated Time Investment
Weekend Project (10-20 Hours)
Finish Used
Linseed Oil
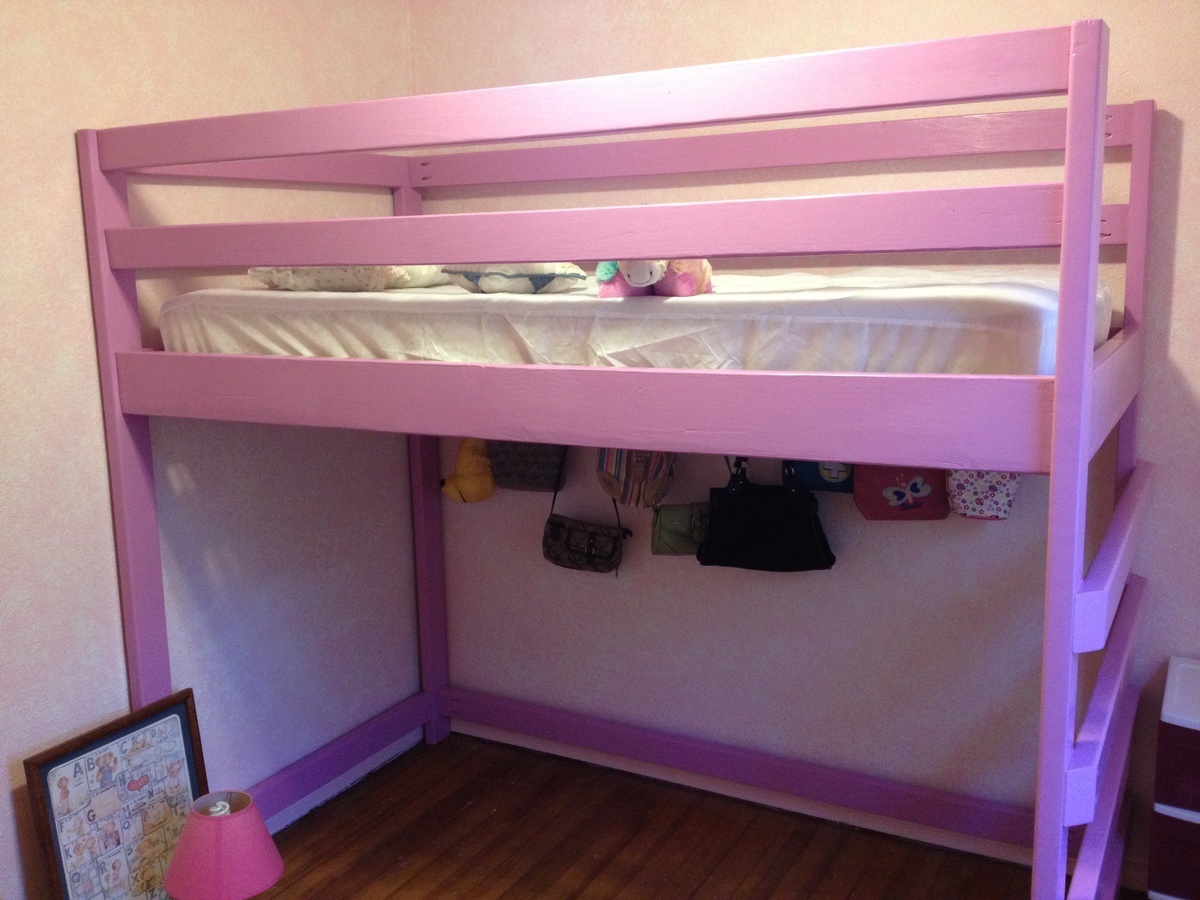
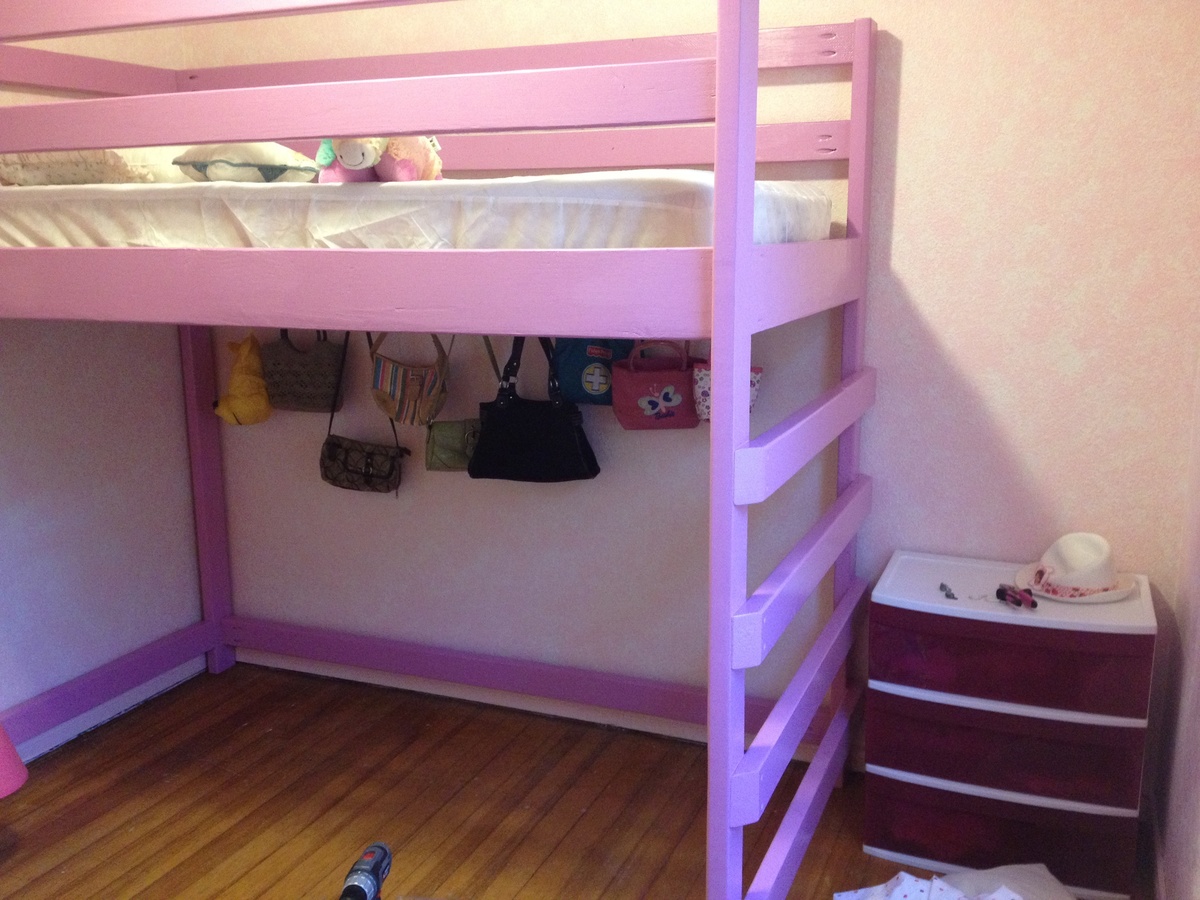
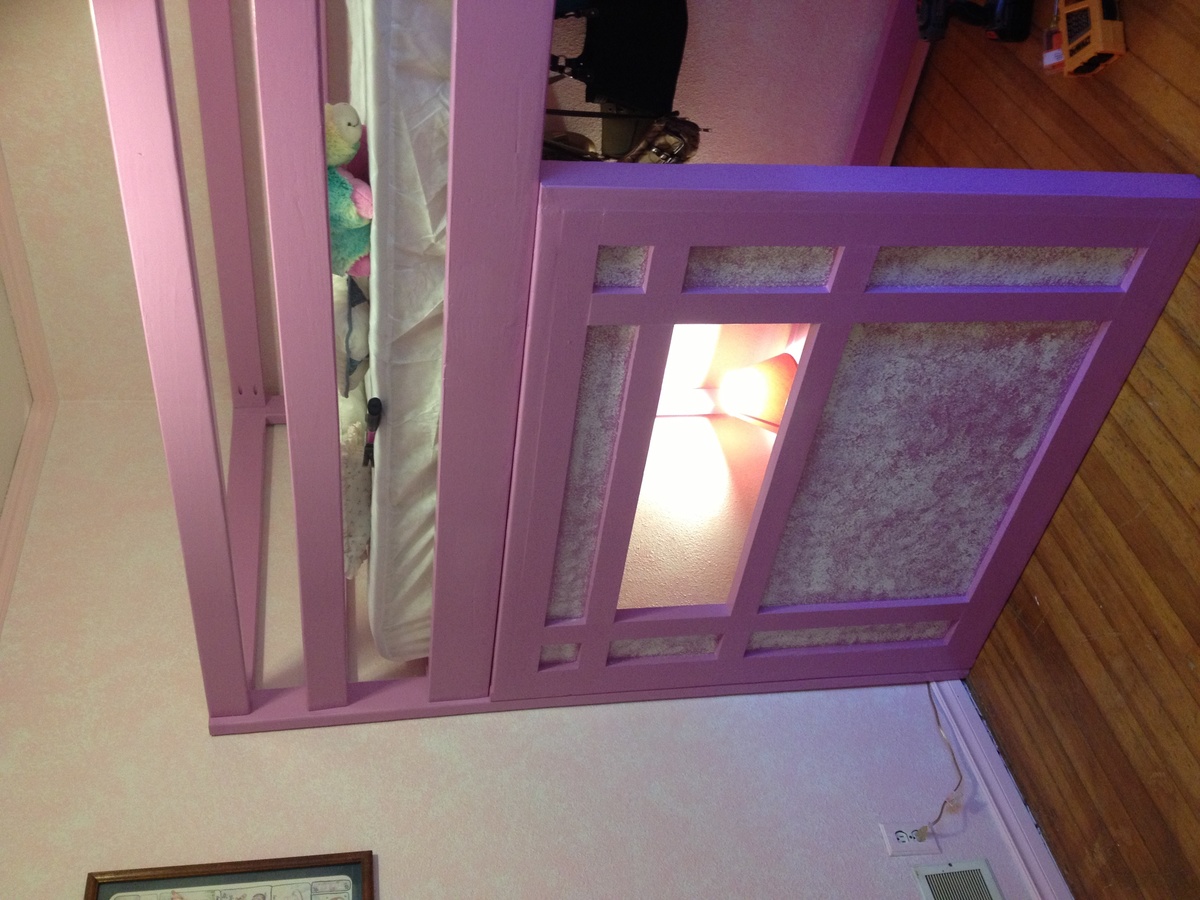
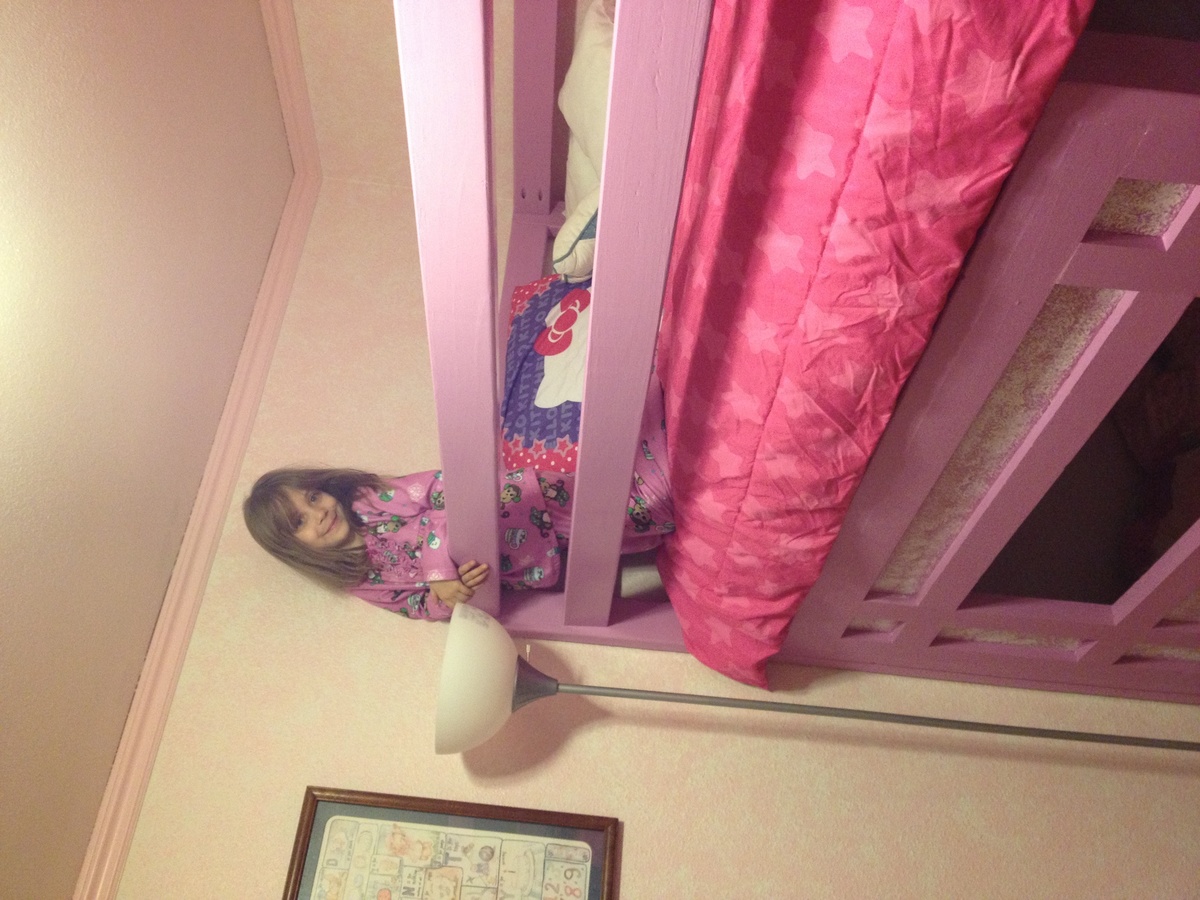
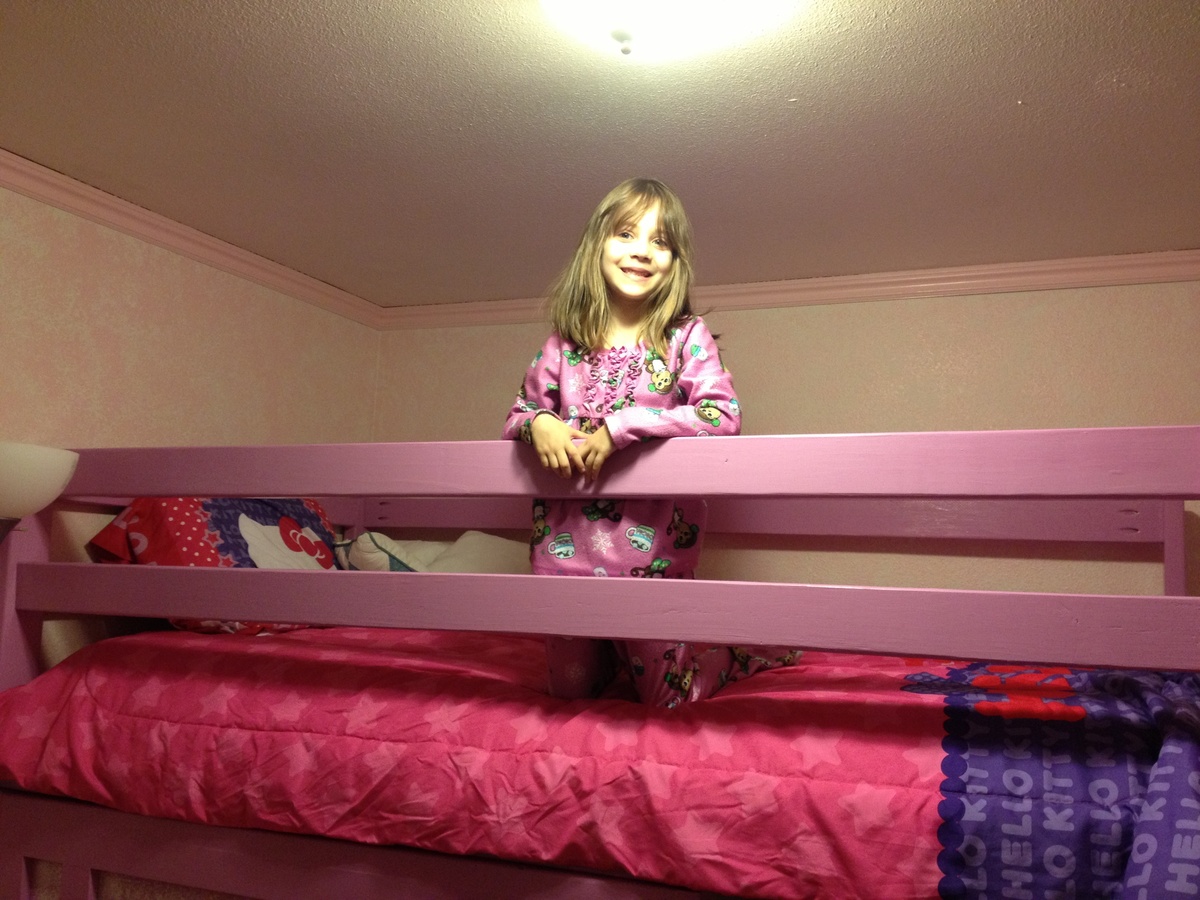
Modified camp style loft bed
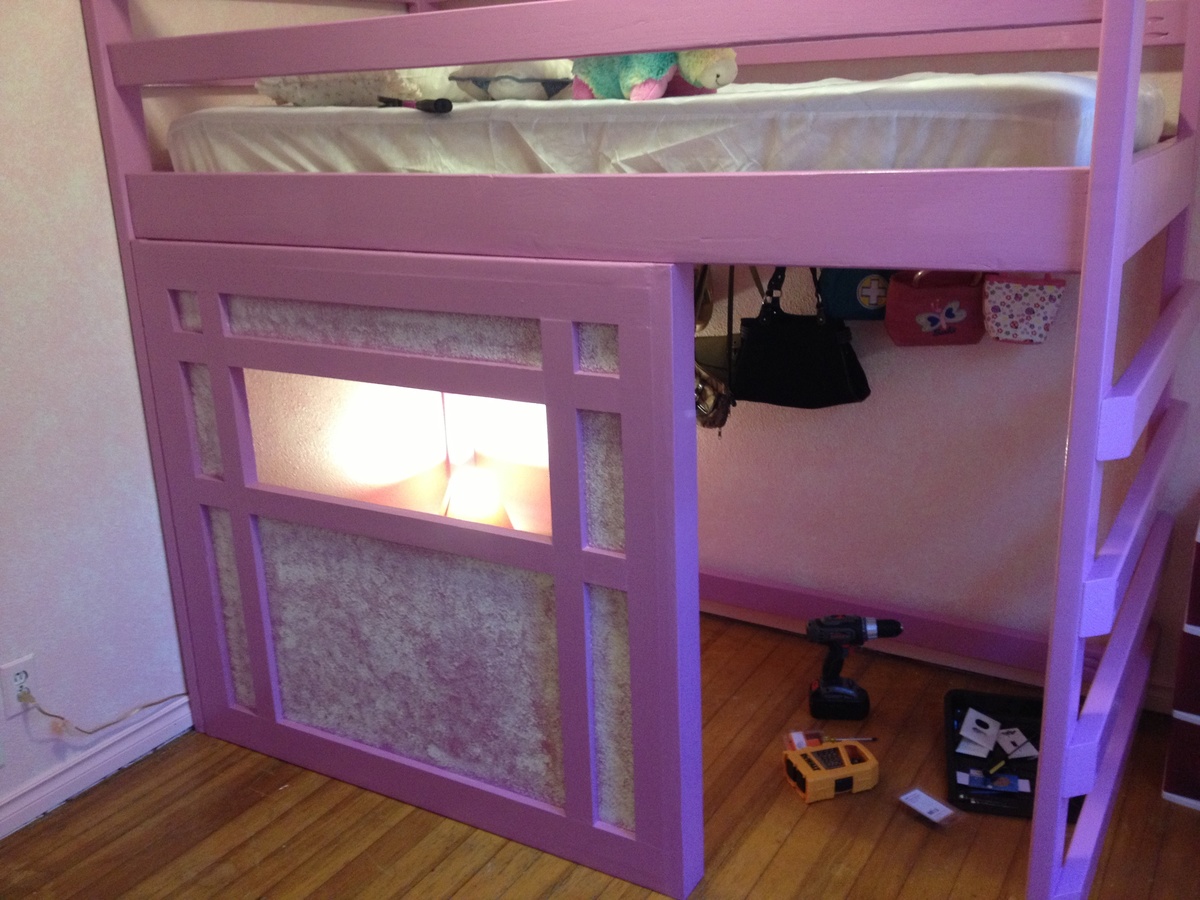
I loved the simplicity of the loft bed. My daughter wanted it to be like a house so I built a wall. This is my first project ever using any power tools. I know it's not perfect but the joy if knowing that I did this all by myself with no help from my husband is priceless. It literally took me a day to cut the wood and put it together however since I am in no way a painter painting it took me a little over a week between priming the wood and getting the color just as my ever so picky 5 year old liked between painting the walls in her room at the same time.
Estimated Cost
Including wood, glue, screws, nails, and paint estimated $150.00
Estimated Time Investment
Week Long Project (20 Hours or More)
Finish Used
Glossy white mixed with purple stain (to make the deep purple my daughter wanted). I painted it after I put it together. I painted one section at a time since she has a very small room (8x9).
Recommended Skill Level
Intermediate
Max's New Camp Loft Bed with Stair

Awesome project and my son couldn't be happier.
Living in a small apartment in NYC, I had to rent the mitre saw from Home Depot ($50 for the day) and lug it and all the lumber up the flights of stairs. Other than that, the project was a breeze and took two days, by myself, from start to finish. I added some metal L brackets at some of the load bearing joints for extra support. Also used a 2x4 as the mattress rest (instead of a 2x2) and added another 2x4 as a center beam to support the mattress.
All that's left is painting and decorating, either with a curtain or plywood, depending on what my son wants. Thanks for the plans!!
Estimated Cost
Lumber - $80, Brackets and screws - $30, Saw rental - $50
Estimated Time Investment
Weekend Project (10-20 Hours)
Finish Used
N/A - to be painted. Covering for the bottom with either be a felt curtain with a design sewn on (castle, train, etc) or plywood cut into the shape he wants (firetruck, rocket ship, etc).
Recommended Skill Level
Beginner
Comments
Sun, 01/04/2015 - 12:09
Industrial
I love this! I am planning to build this bed, stain it and use the same brackets as industrial accents. I love that you added the basketball hoop to the front. I wondered where we'd hang ours. Great job!
Lit Farmhouse King

A slight modification from Ana's original plans, but with the same character and feel. I did not include the footboard, at least not yet, and we wanted reading lights mounted and wired to the headboard. I bought track lighting fixtures, mainly because they were the size we were looking for. I ran each light to individual switches on each side of the bed posts and then concealed the wiring in routed-out board on the back and down the one post to a cord. I also subbed out the 50w halogen bulbs (hot!) for 35w LEDs, which is the perfect amount of light and cool to the touch. I did alternating width boards and then stained the edges of all the exposed wood with an ebony dark stain. Once dried, I painted an antique white, distressed with sanding along the edges, exposing the stain, and then sealed with a light brown wax creme finish to give it a little more character. A simple, solid and heavy project that should last for decades.
Estimated Cost
$100
Estimated Time Investment
Weekend Project (10-20 Hours)
Finish Used
Minwax Ebony Stain, Interior Eggshell paint/primer Latex, Light-brown wax creme
Recommended Skill Level
Intermediate