Shiplap Fireplace with Live Edge Mantel

I decided to go with a live edge mantel. I feel it really compliments my new hardwood floors.
thomasamayberry.com
Built from Plan(s)
I decided to go with a live edge mantel. I feel it really compliments my new hardwood floors.
thomasamayberry.com
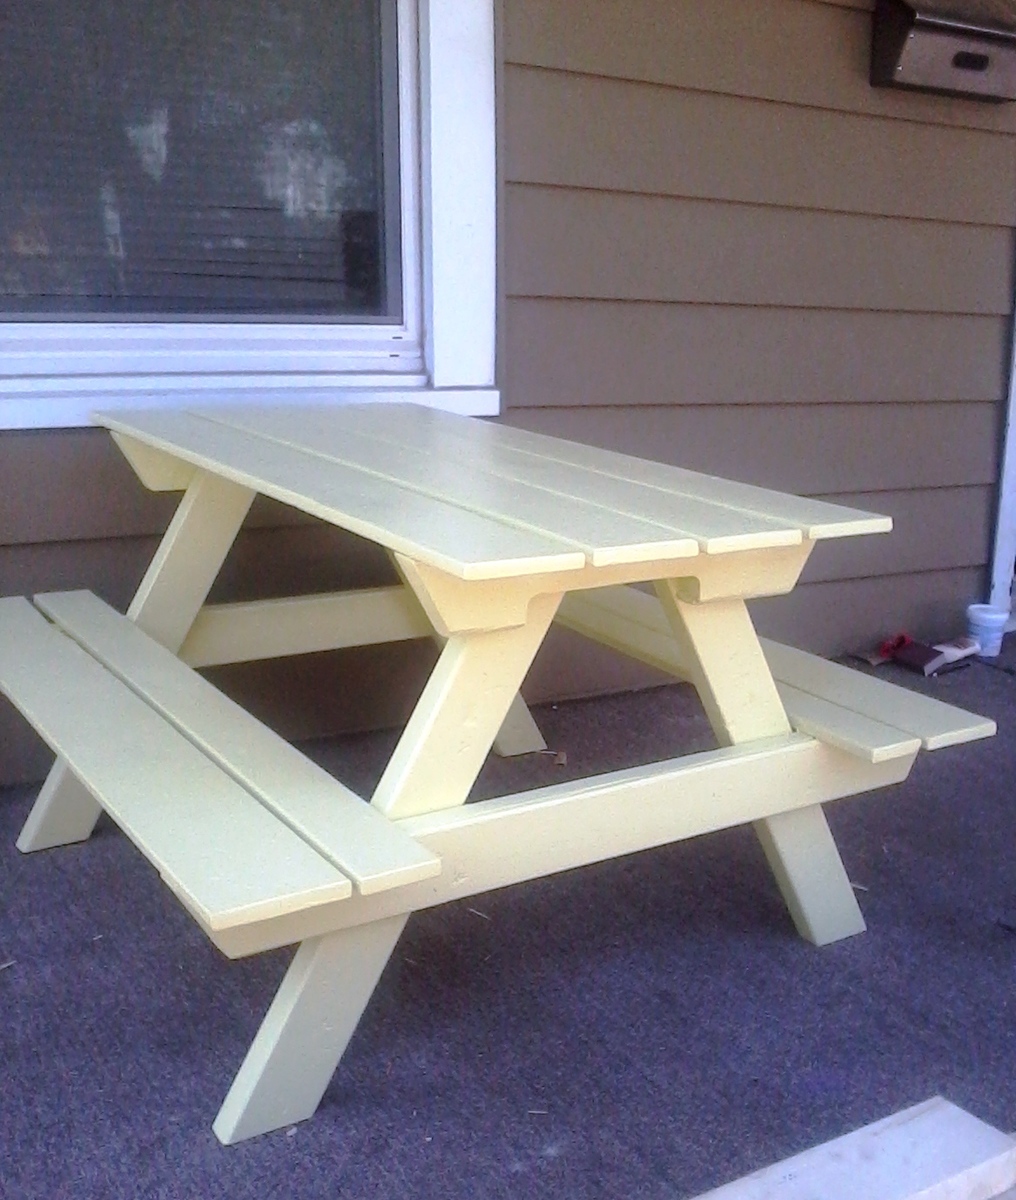
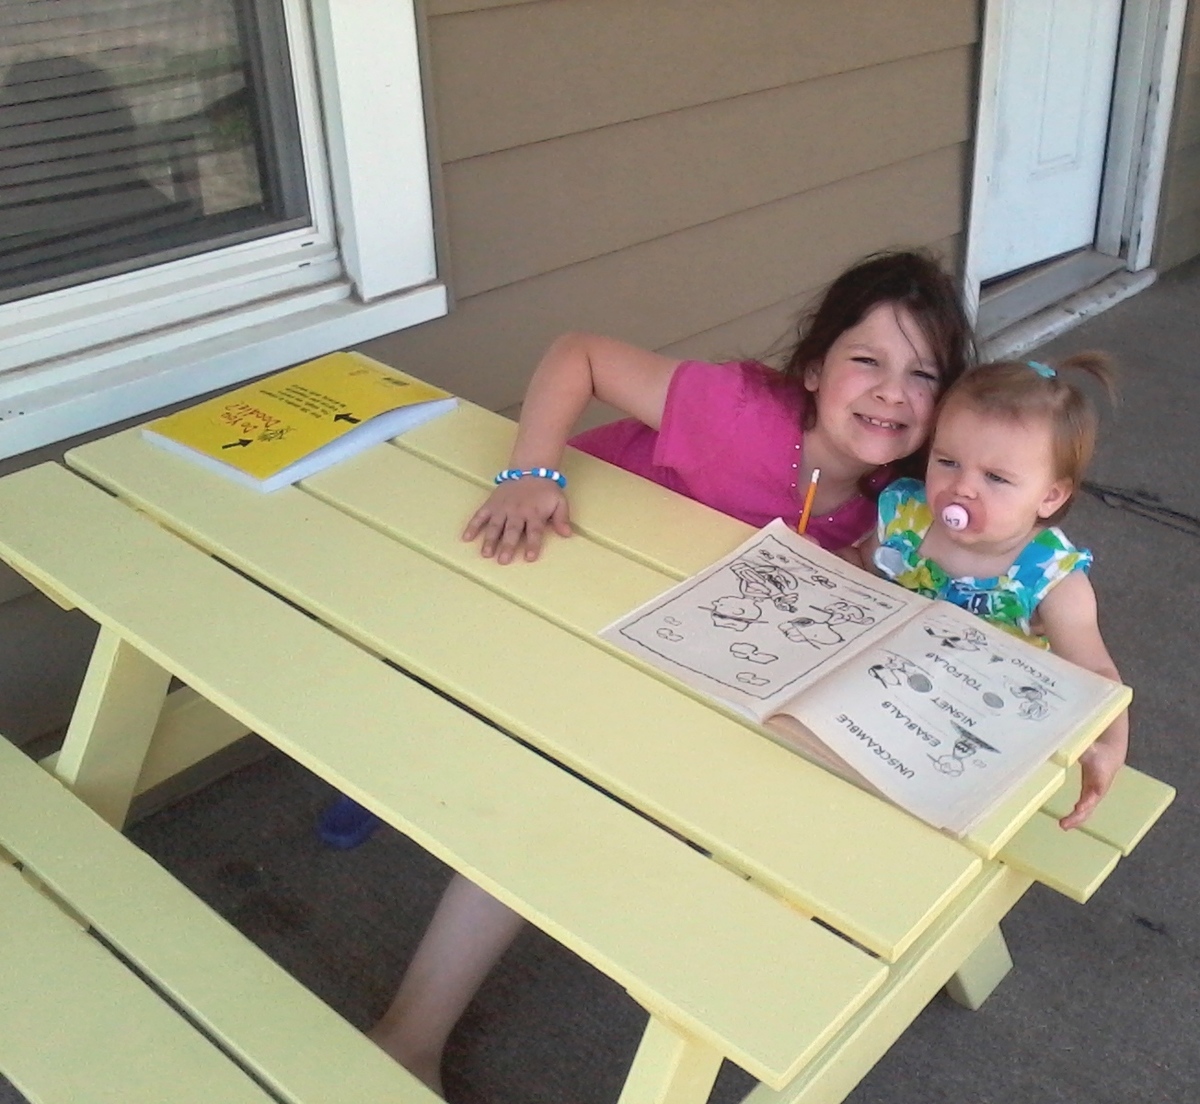
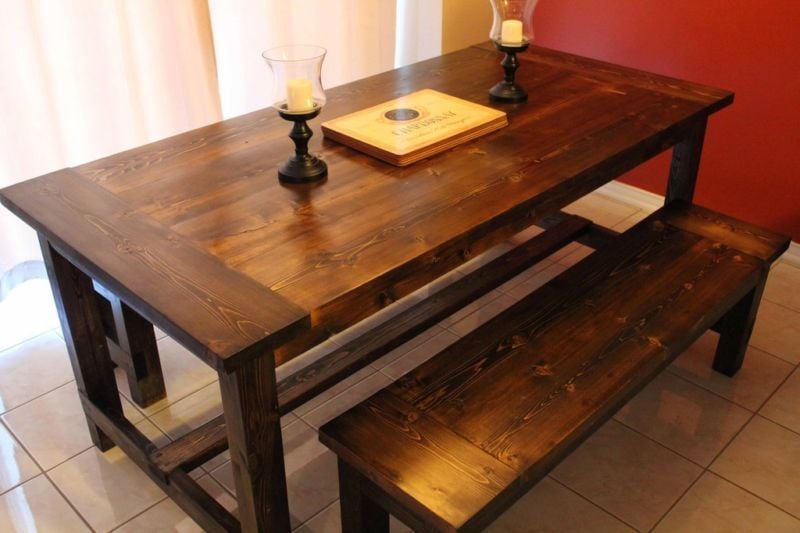
I've been looking at the Bigger Kids Picnic table and wanting to make one for awhile, so when I got some free pallets I went ahead and made it. The measurements were adjusted to work with what I had. We decided not to do the center support because we knew our kids would complain about it being in their way, and the table seems plenty sturdy without (ours isn't as long as the plan)
The only problem is our 1 yr old, who wants to be one of the big kids, likes it a little too much. Even after an hour of sitting there I had to pry her away from it. :-)
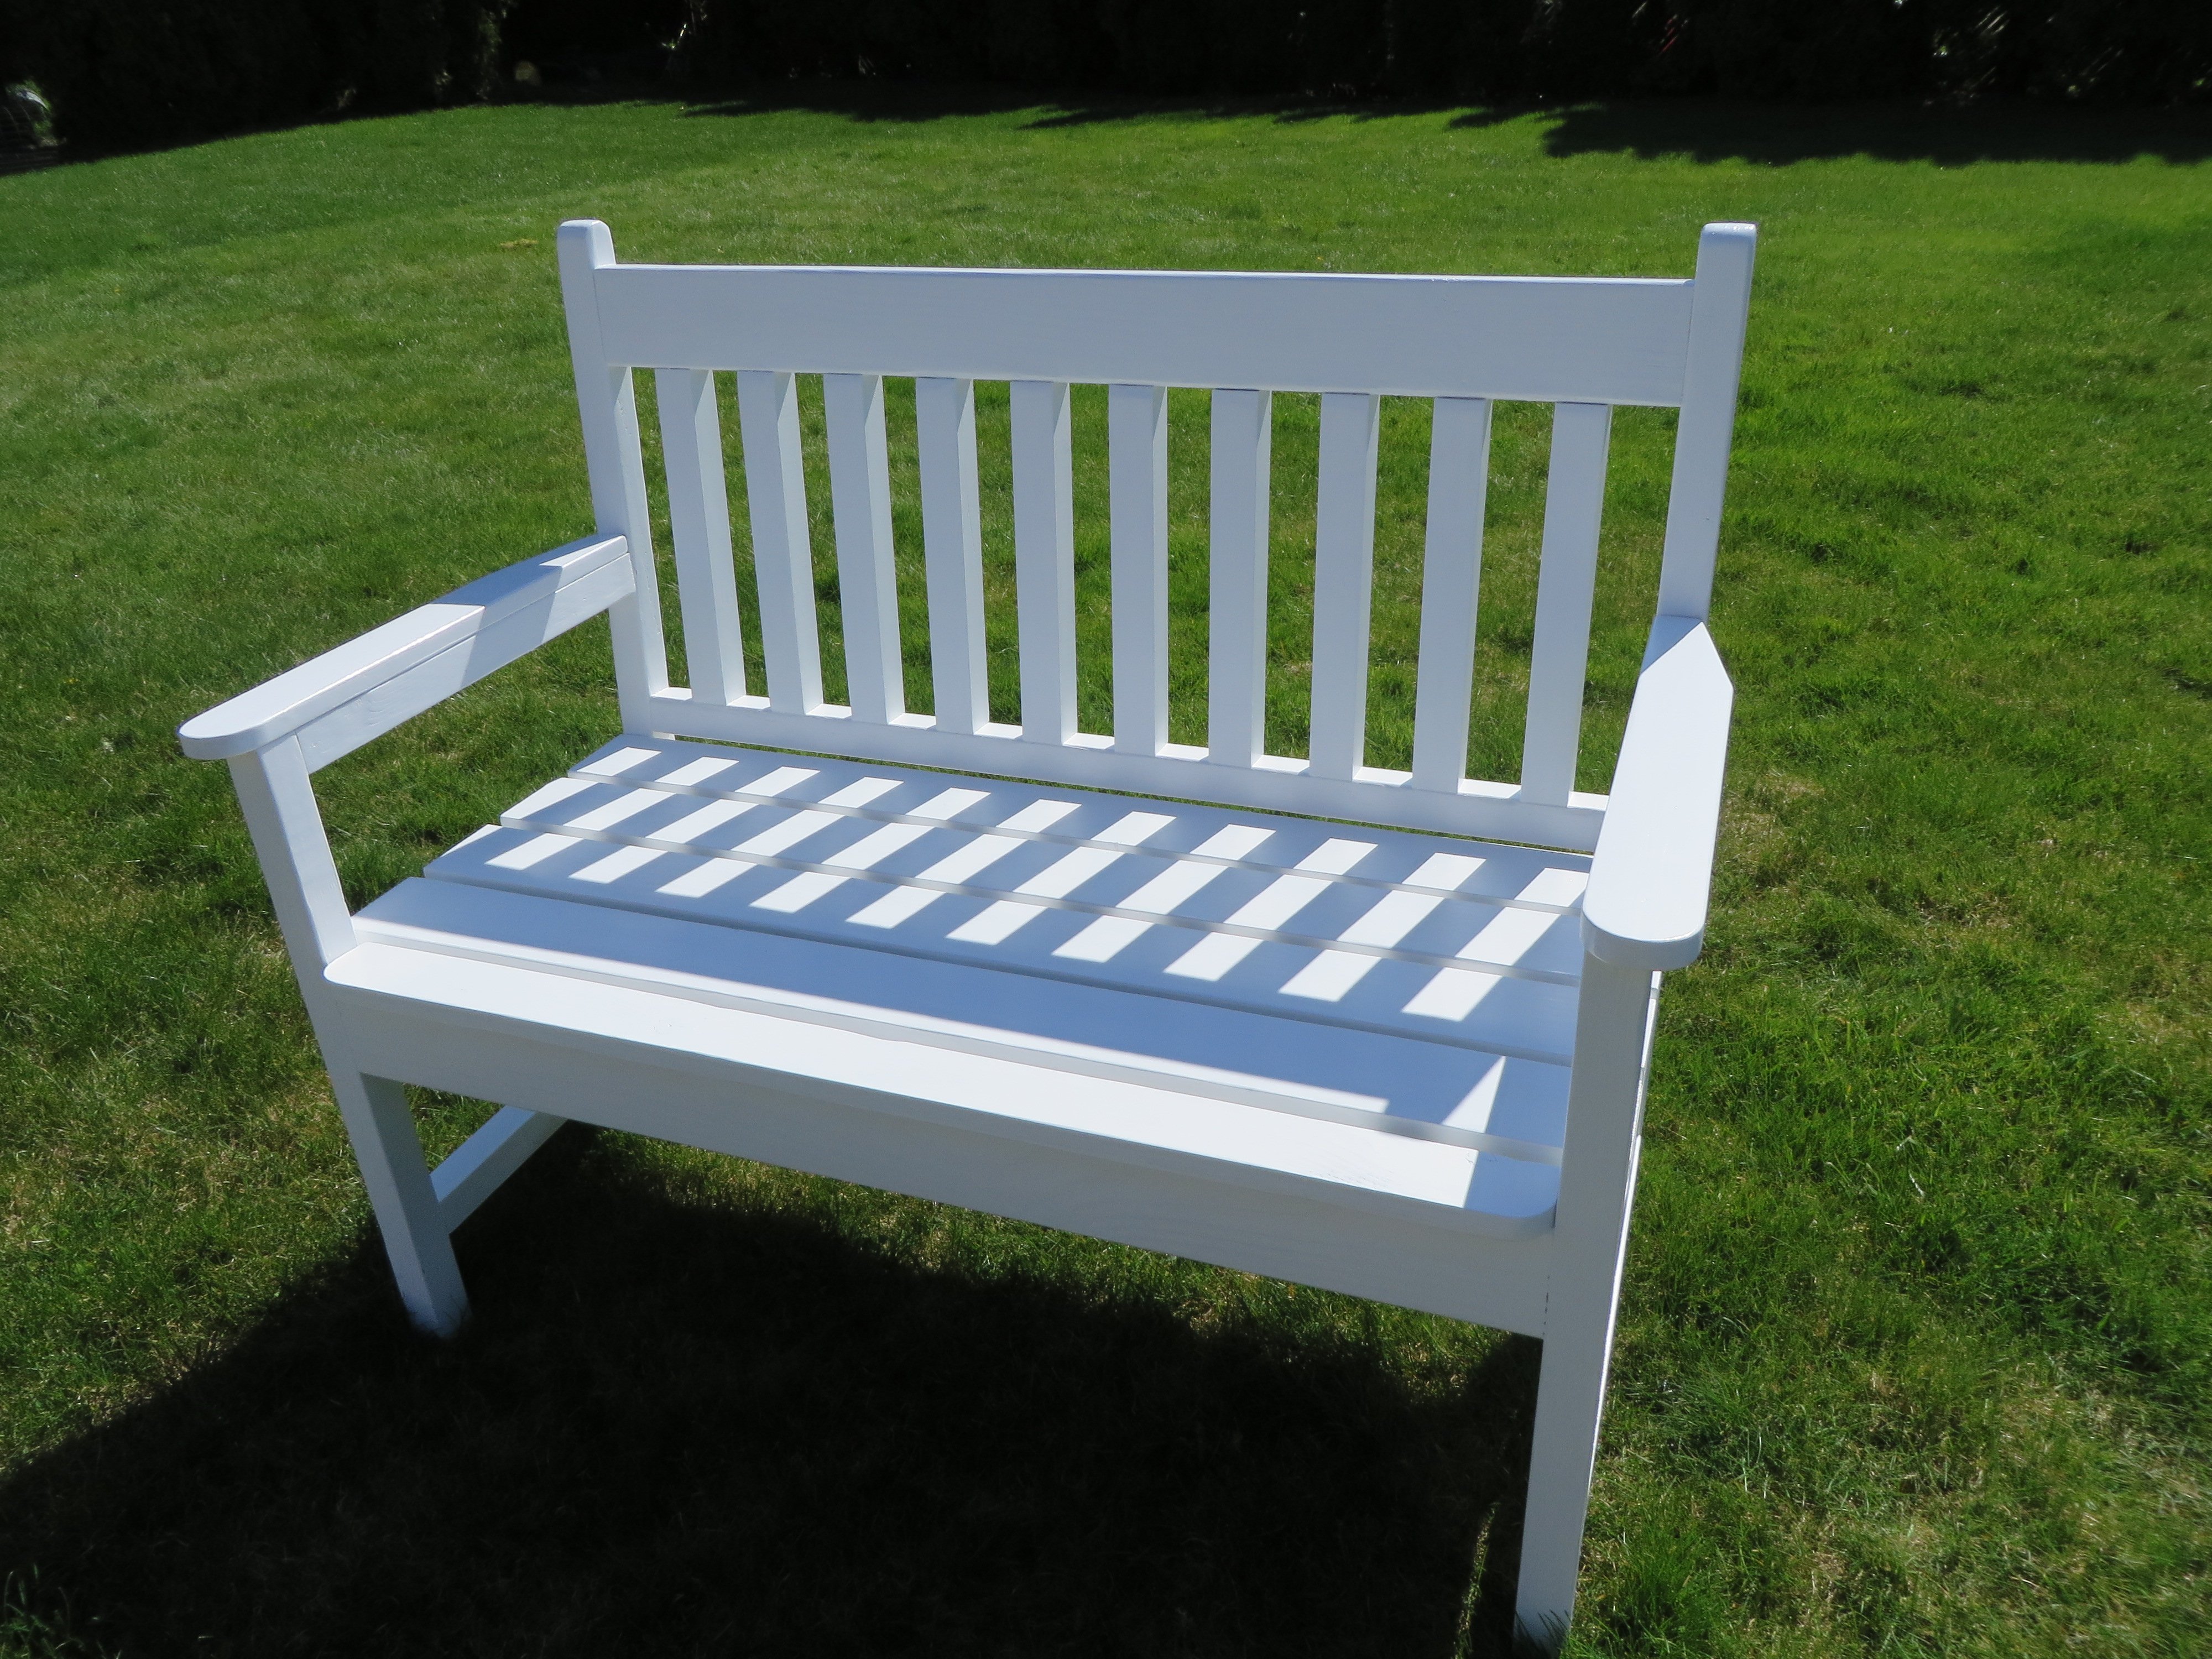
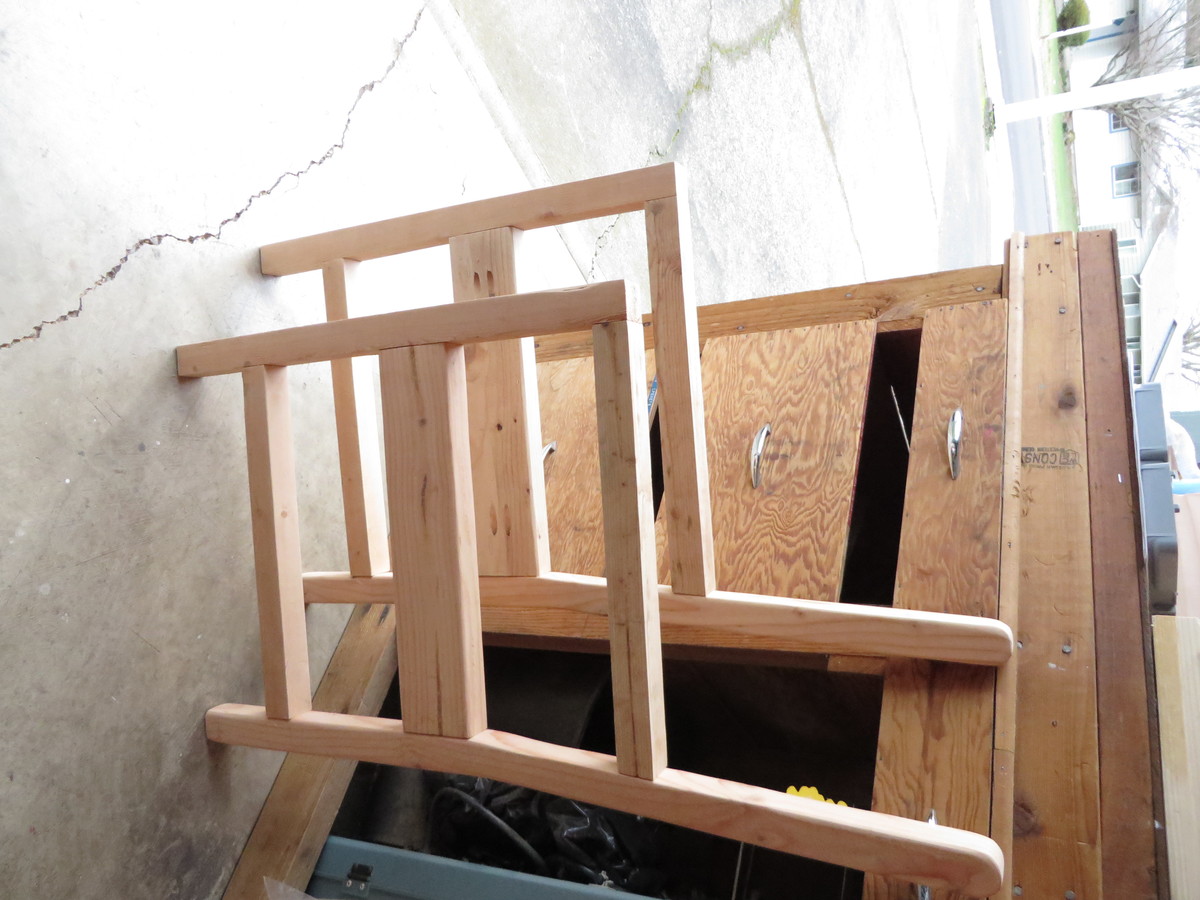
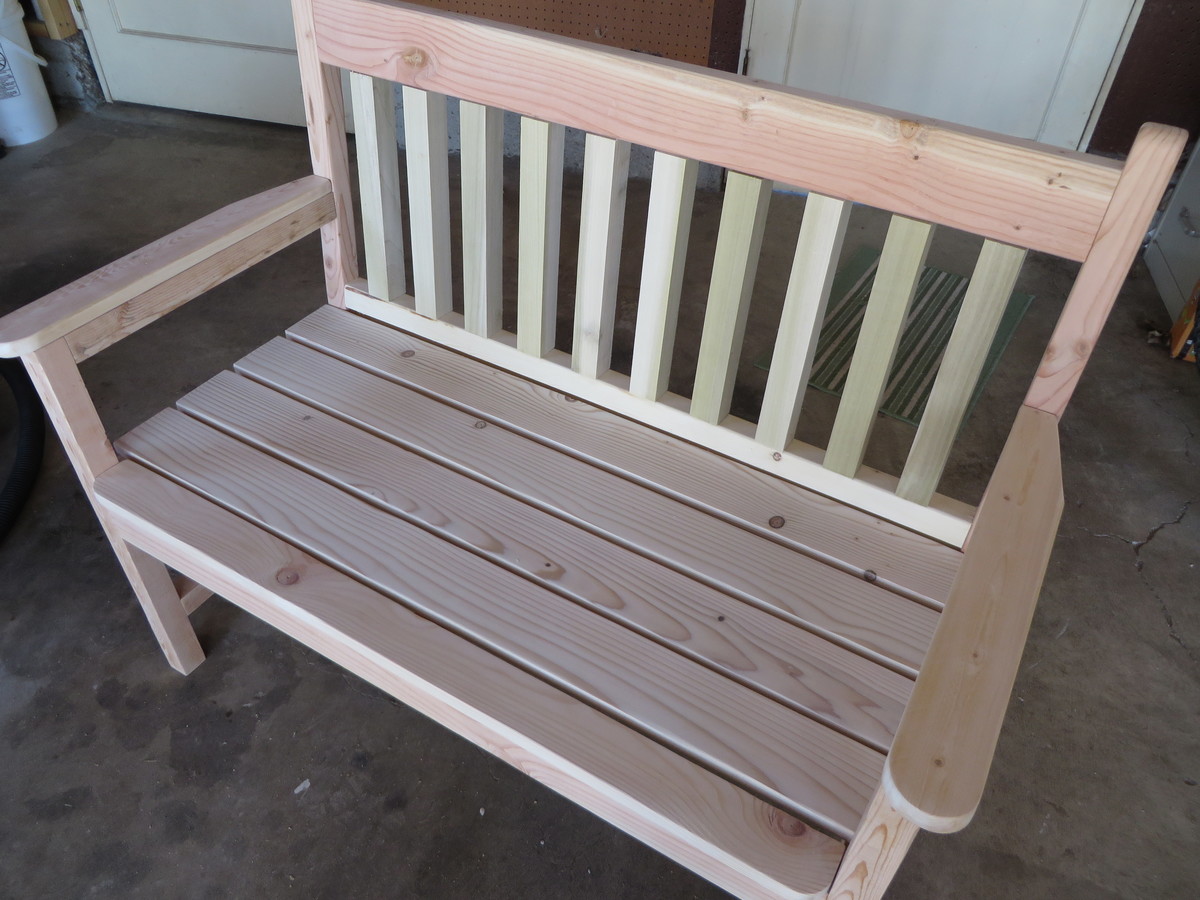
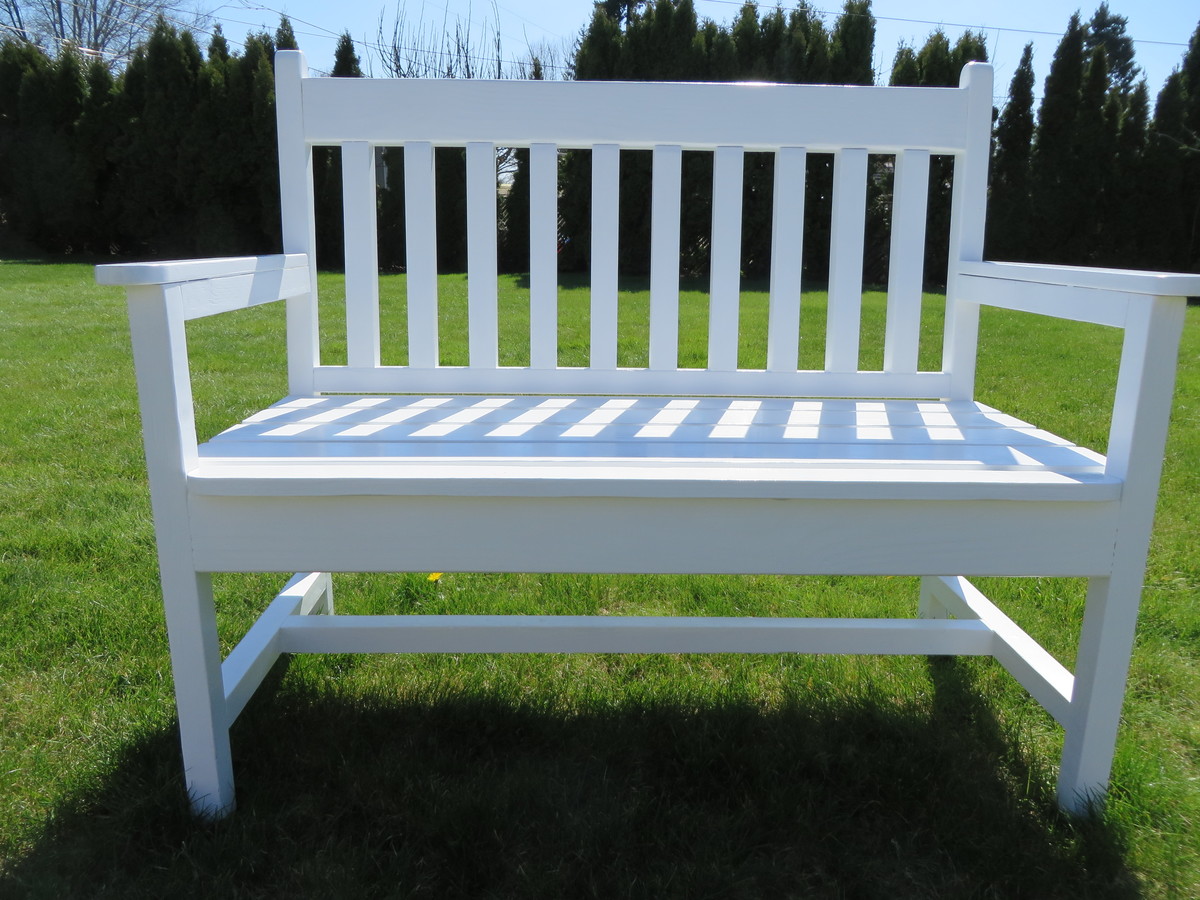
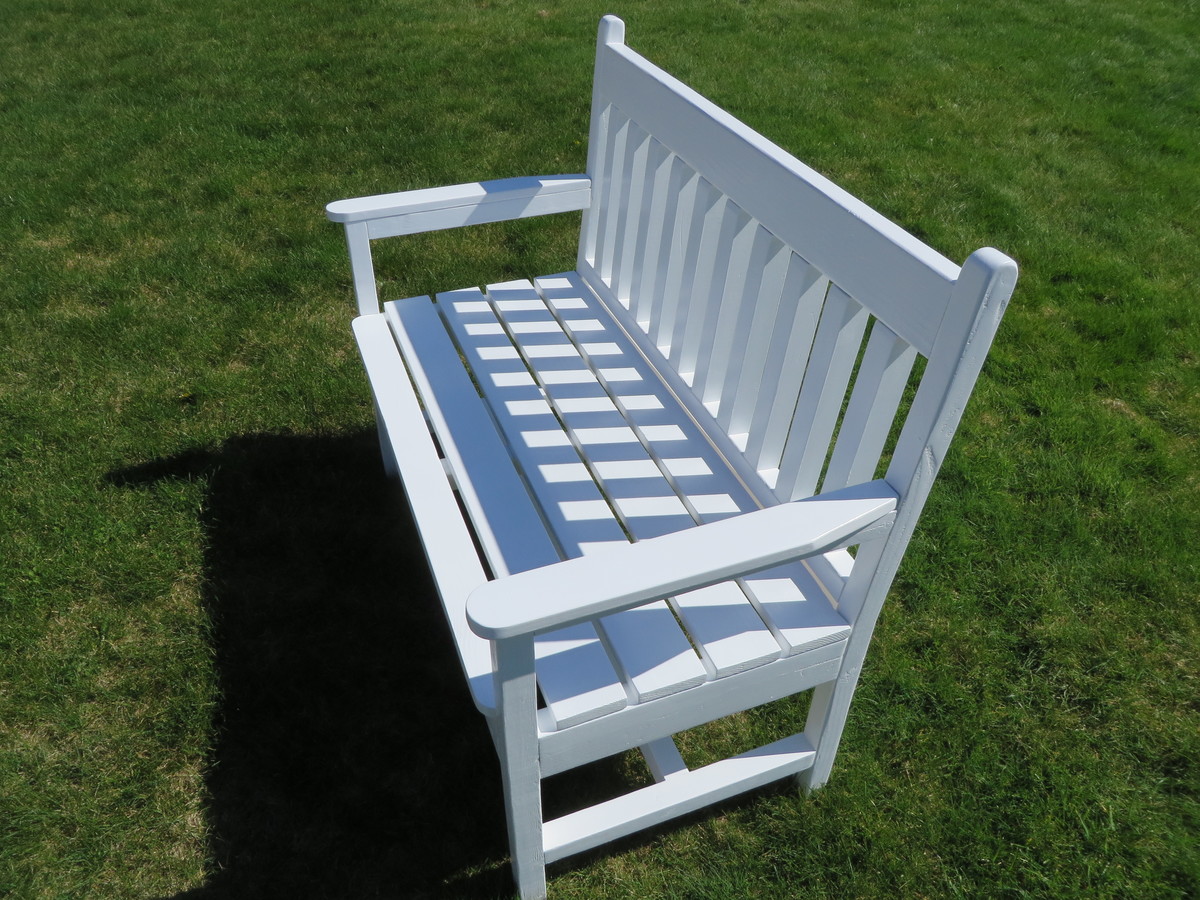
I modified the Woven Back Bench for this build. My brother's new front porch needed a bench, so I gave this as a housewarming present. The angle cuts on the back legs and armrests were intimidating before I started, but really pretty easy to do with a circular saw and a jig saw. Lots of sanding made everything work well. It was a fun build, but there were tons of pocket holes to drill and fill!
Added extra support boards for the breadboard ends, but other than that, plans were great.
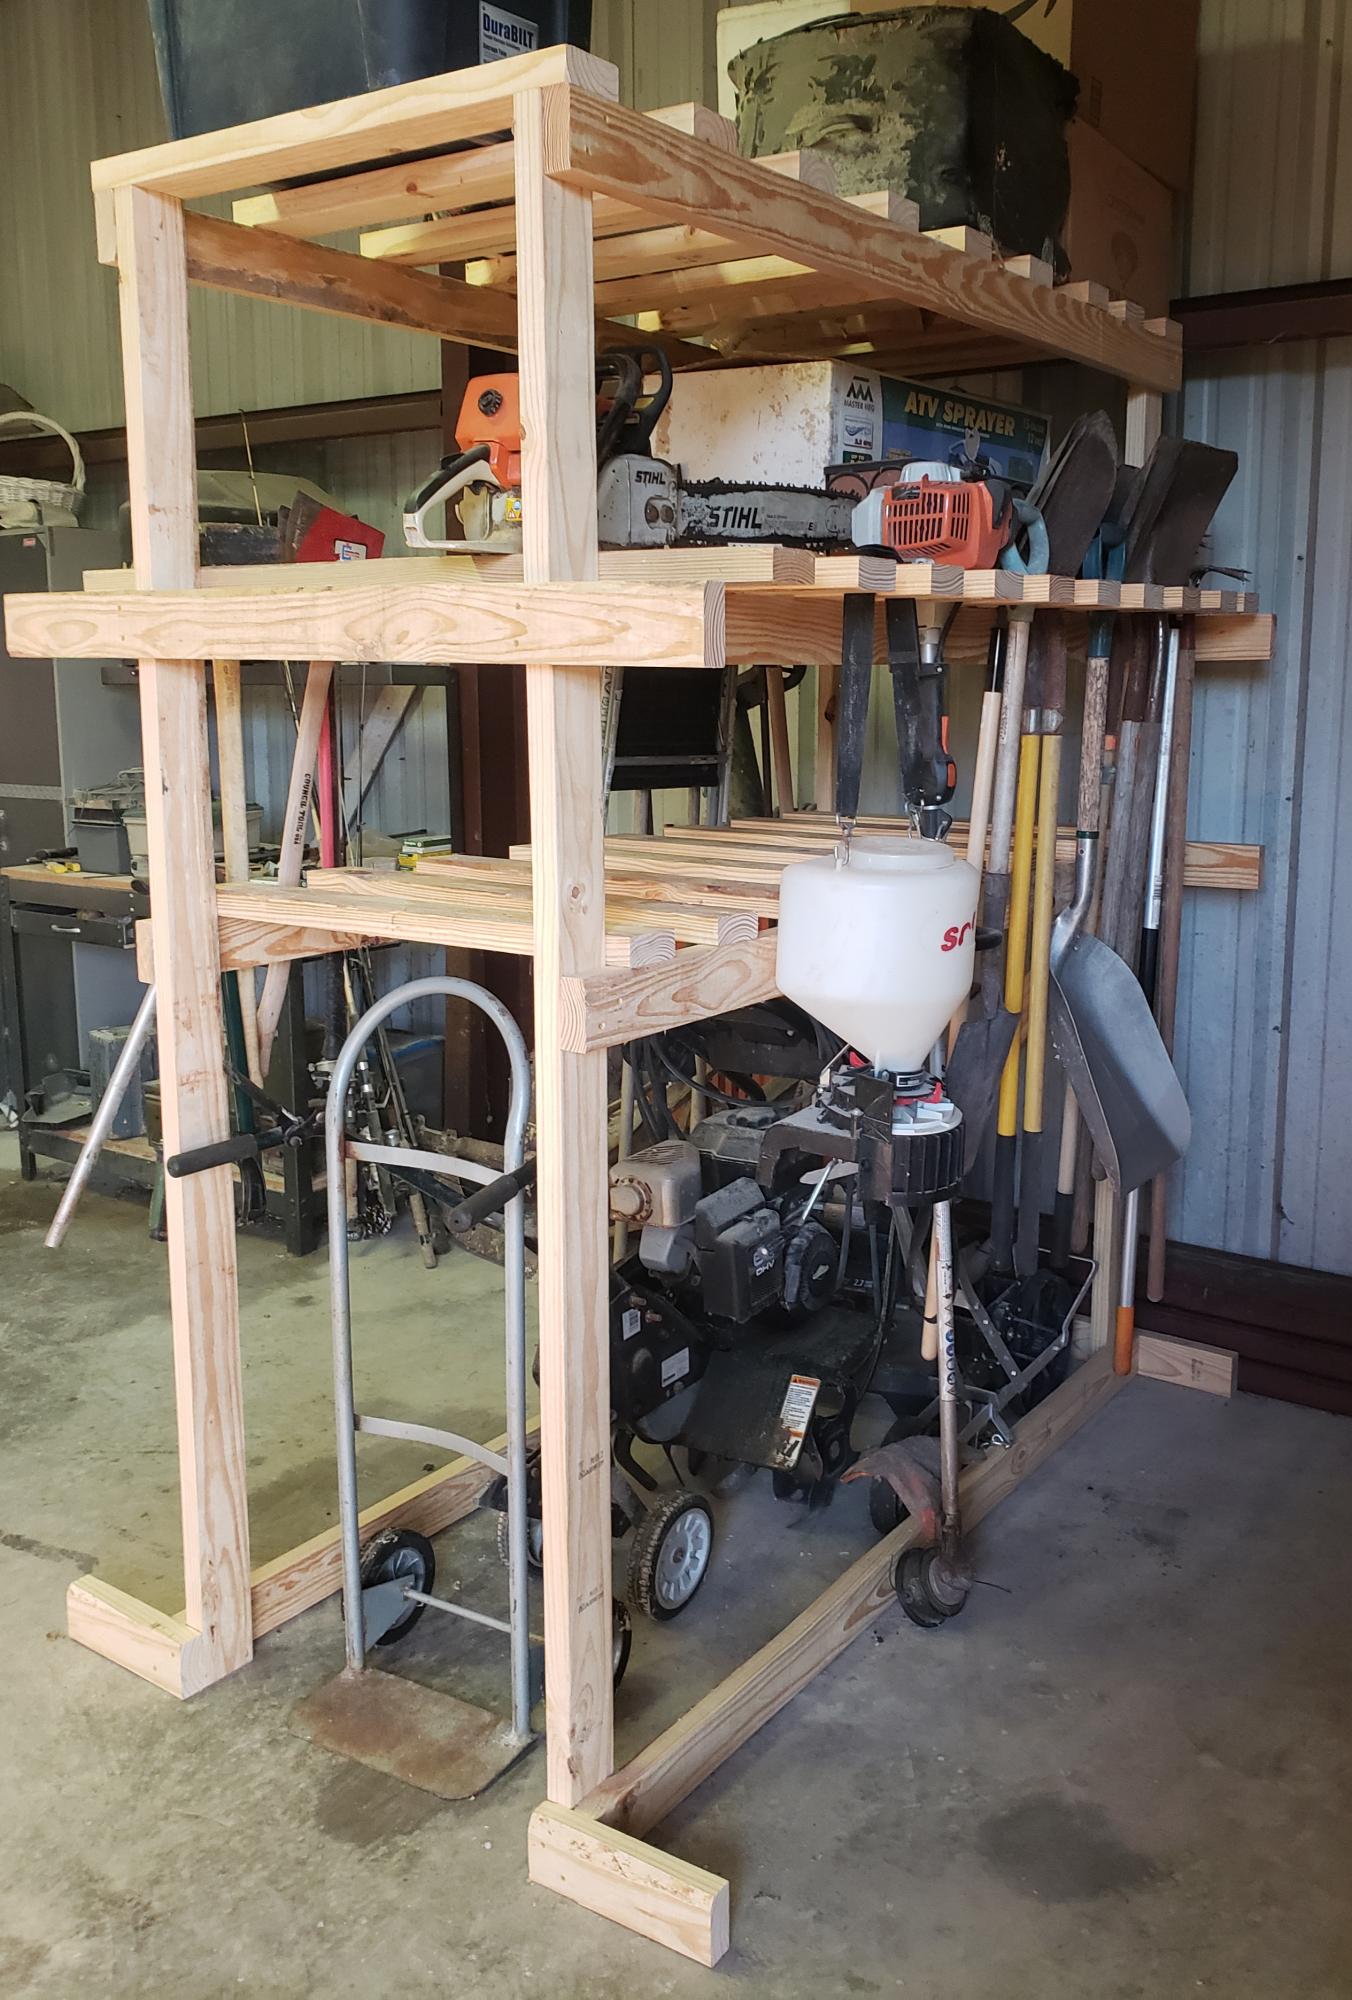
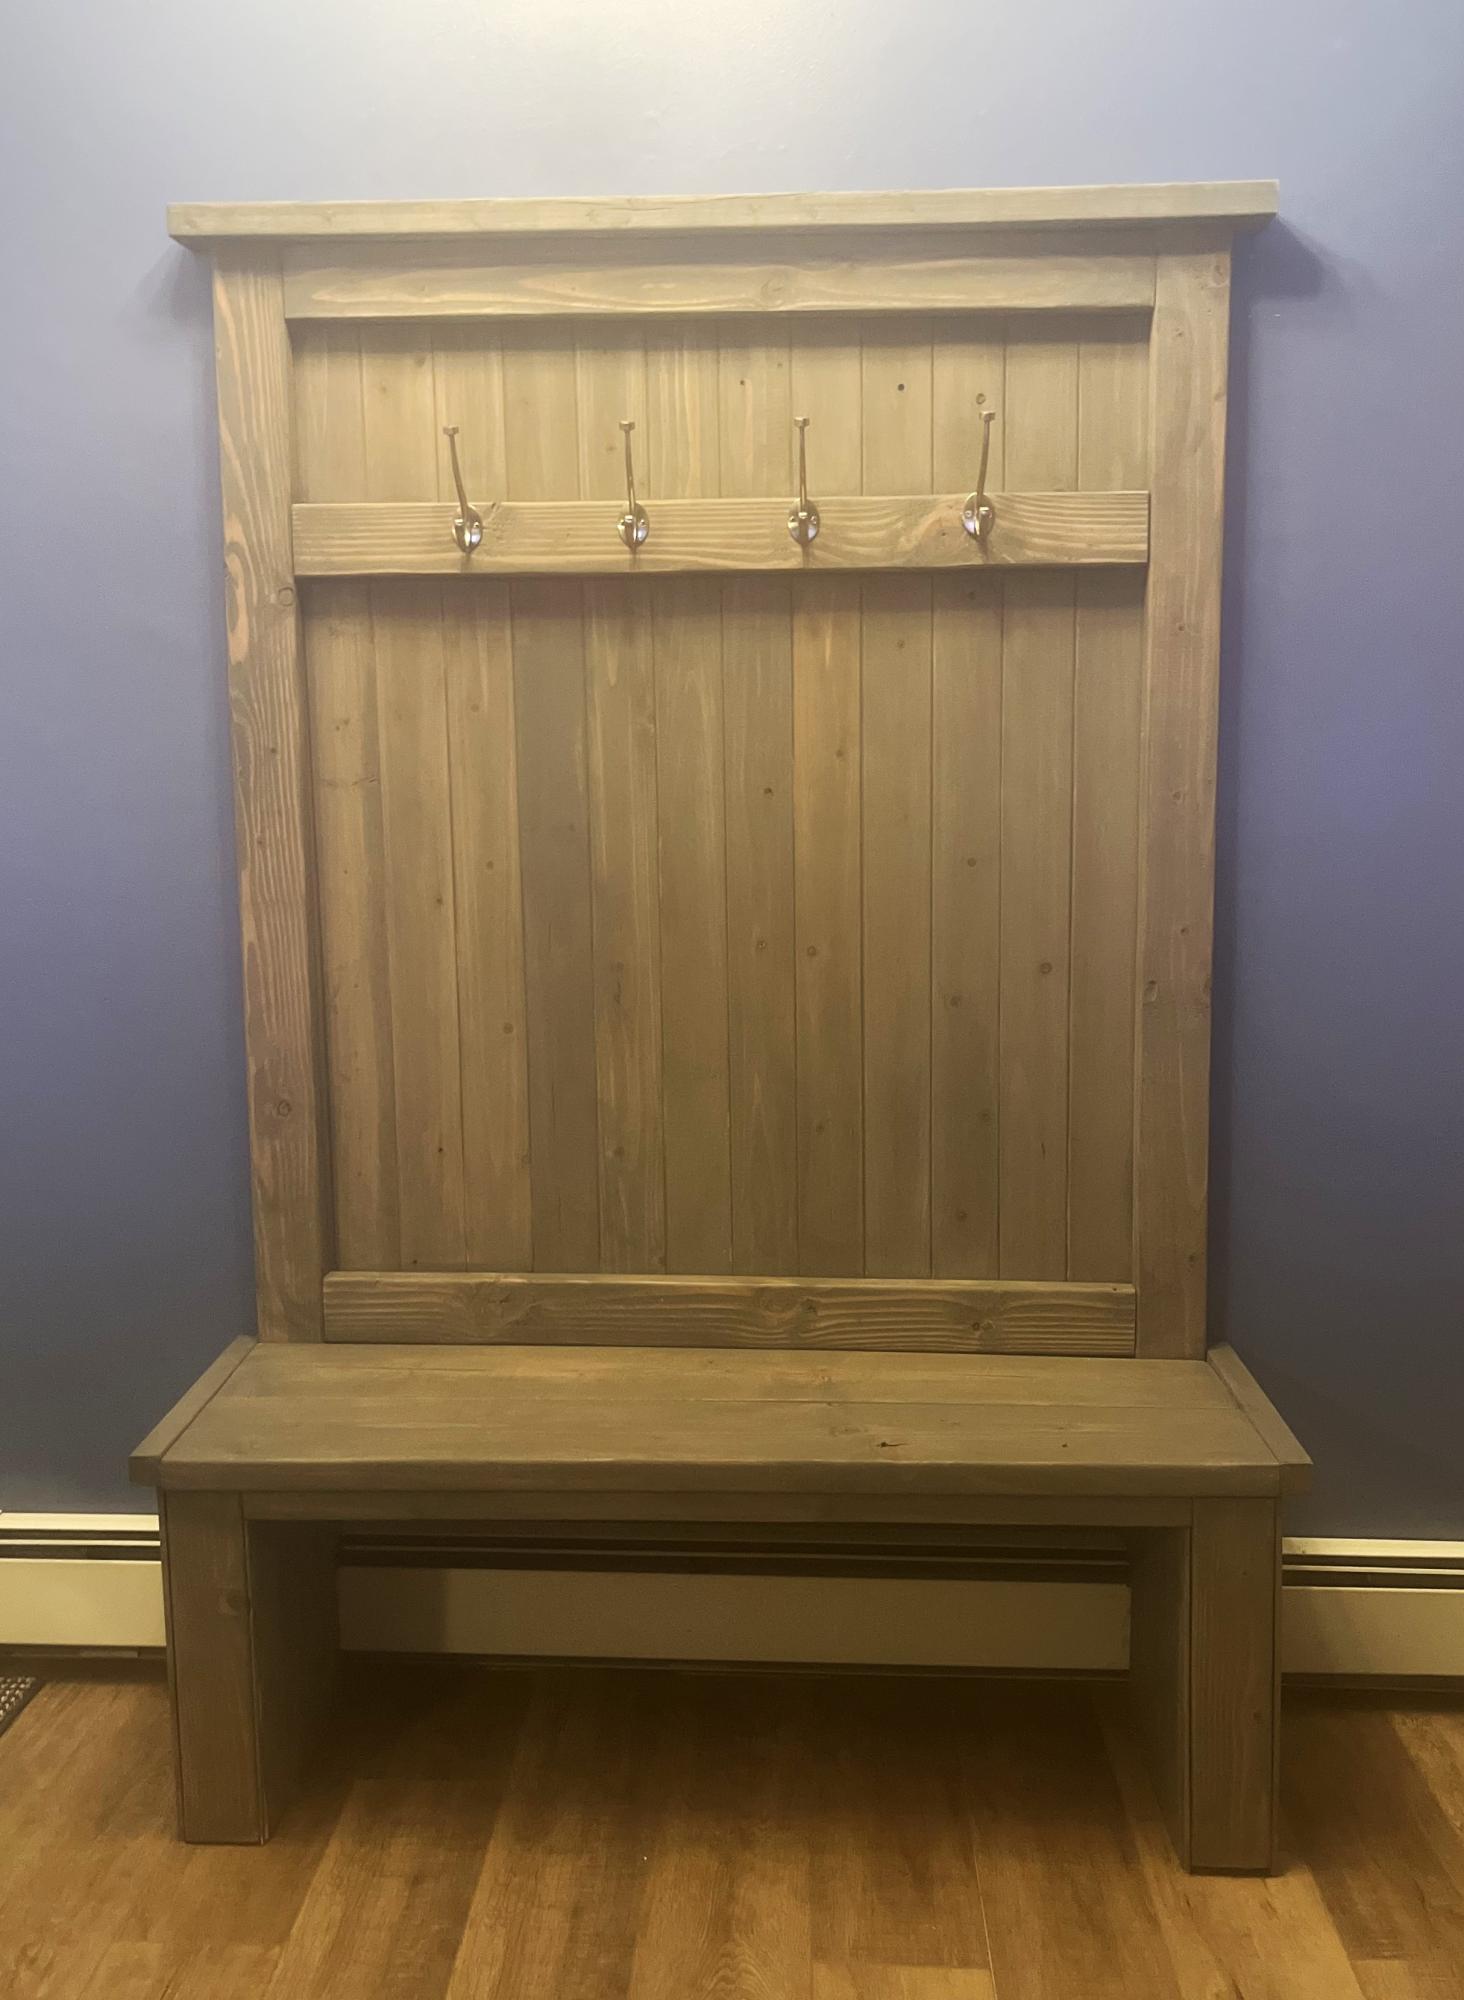
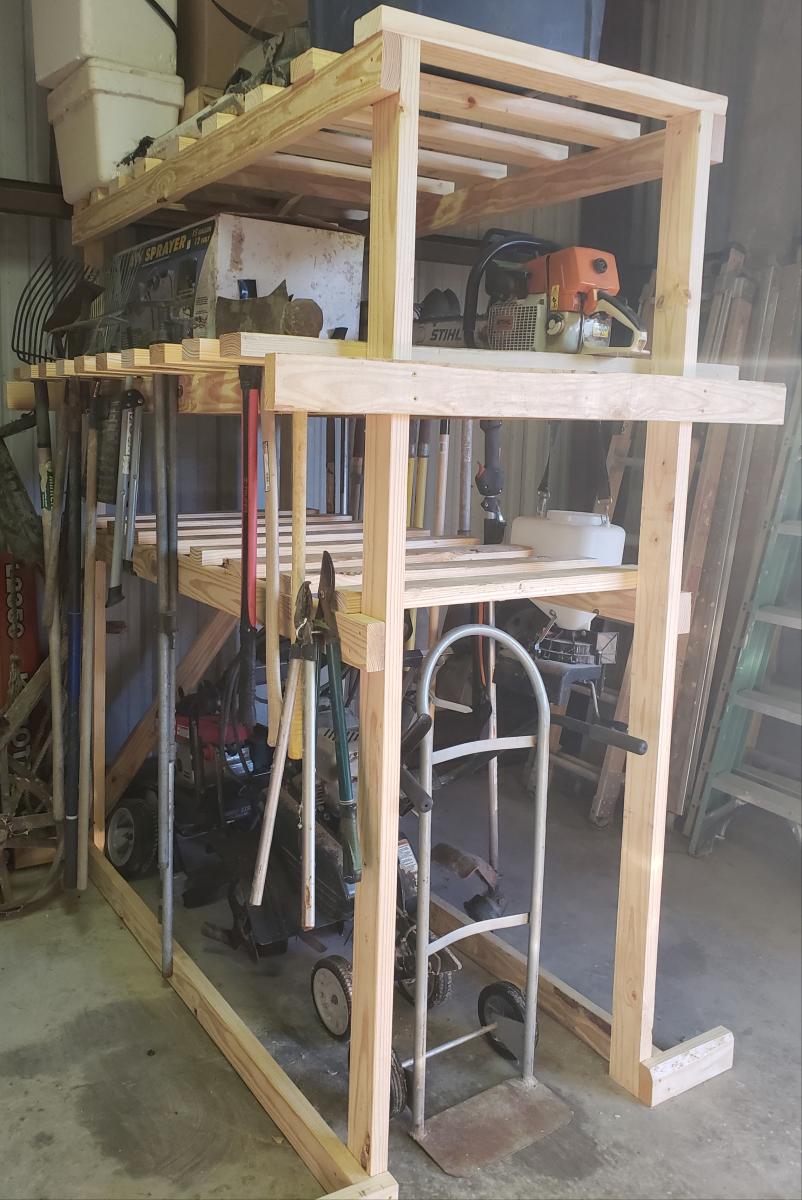
This isn't an Ana White plan but I've learned so much from this site that I designed and built this garden tool rack. Its pine 2x4 construction. I love it!
It is 84" tall x 72" long x 26 wide (opening) and 48"wide for garden tool hangers.

A big hello from South Africa.
We wanted to say thank you for sharing your Plans so freely.
We attempted the Patio Chairs and they came out beautifully. Our family are so impressed!
We need to sand and varnish them but so far we are ecstatic .
Kind regards
Jennifer & Andrew Horton
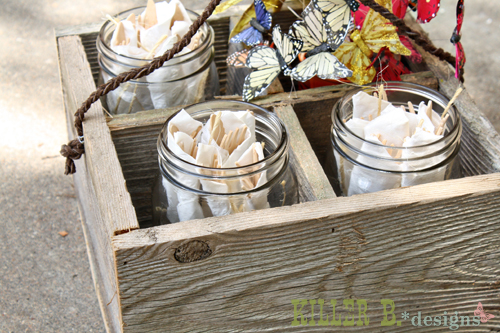
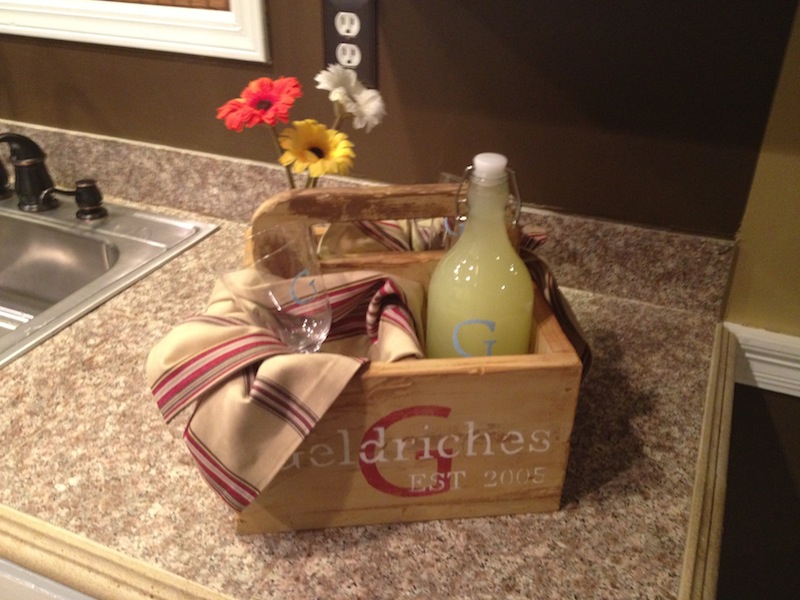
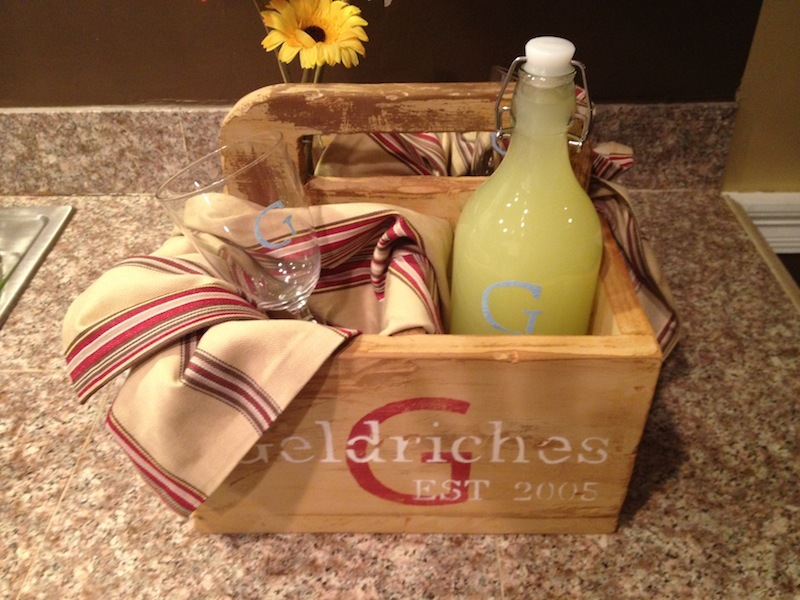
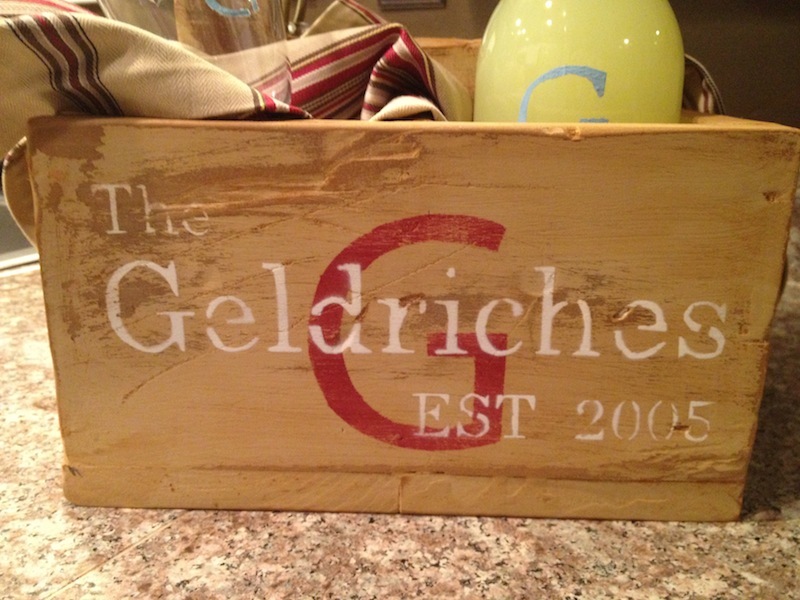
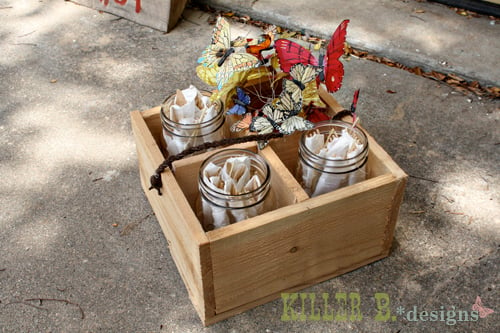
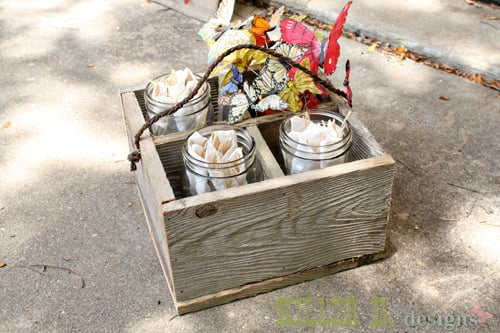
I had a large pile of fencing I picked up from the curb down the street, and needed something to do with them. I decided it would be quick and easy to make some Reclaimed Soda Crate Caddies. Since I didn't have any 1x8 size fence pickets, I decided to forgo the center piece with cutout handle and just use a 1x6 picket and staple some leather and twine to the sides to make handles. I think they turned out looking fantastic! I can't wait to make more and hopefully finish out my giant scrap pile ;)

Mon, 06/18/2012 - 05:08
Love these! Will those staples hold ok? I'd be afraid and drill a hole for the leather and twine. I knew I should have gotten those mason jars I saw at a yard sale! I've liked this since I've seen the plans (modified or not) and totally forgot about it. Anyway, great job and thanx for the reminder!

Mon, 06/18/2012 - 06:32
So far so good, though you could certainly drill holes and tie knots. Since the wood is just old fence pickets, it's not really meant to carry much weight anyway. I was leery of drilling holes and splitting the old wood. Plus they would be off center, and that would drive me batty! Oh, and if you don't have any mason jars, tin cans work just as well. That's what the butterfly bouquet is sitting in, an orange spray painted can
This was my first woodworking project in a long time and my first ever using a Kreg Jig. I love the way this table turned. My wife and I worked on this together and it was her first time building anything like this but we had a blast doing it and can't wait to start on the next project.
My hubby decided to build me this table for our dining nook. Came out gorgeous!
My first foray into pocket holes. Keys are taking your time and making sure everything is square. Turned into a nice Mother's Day gift.
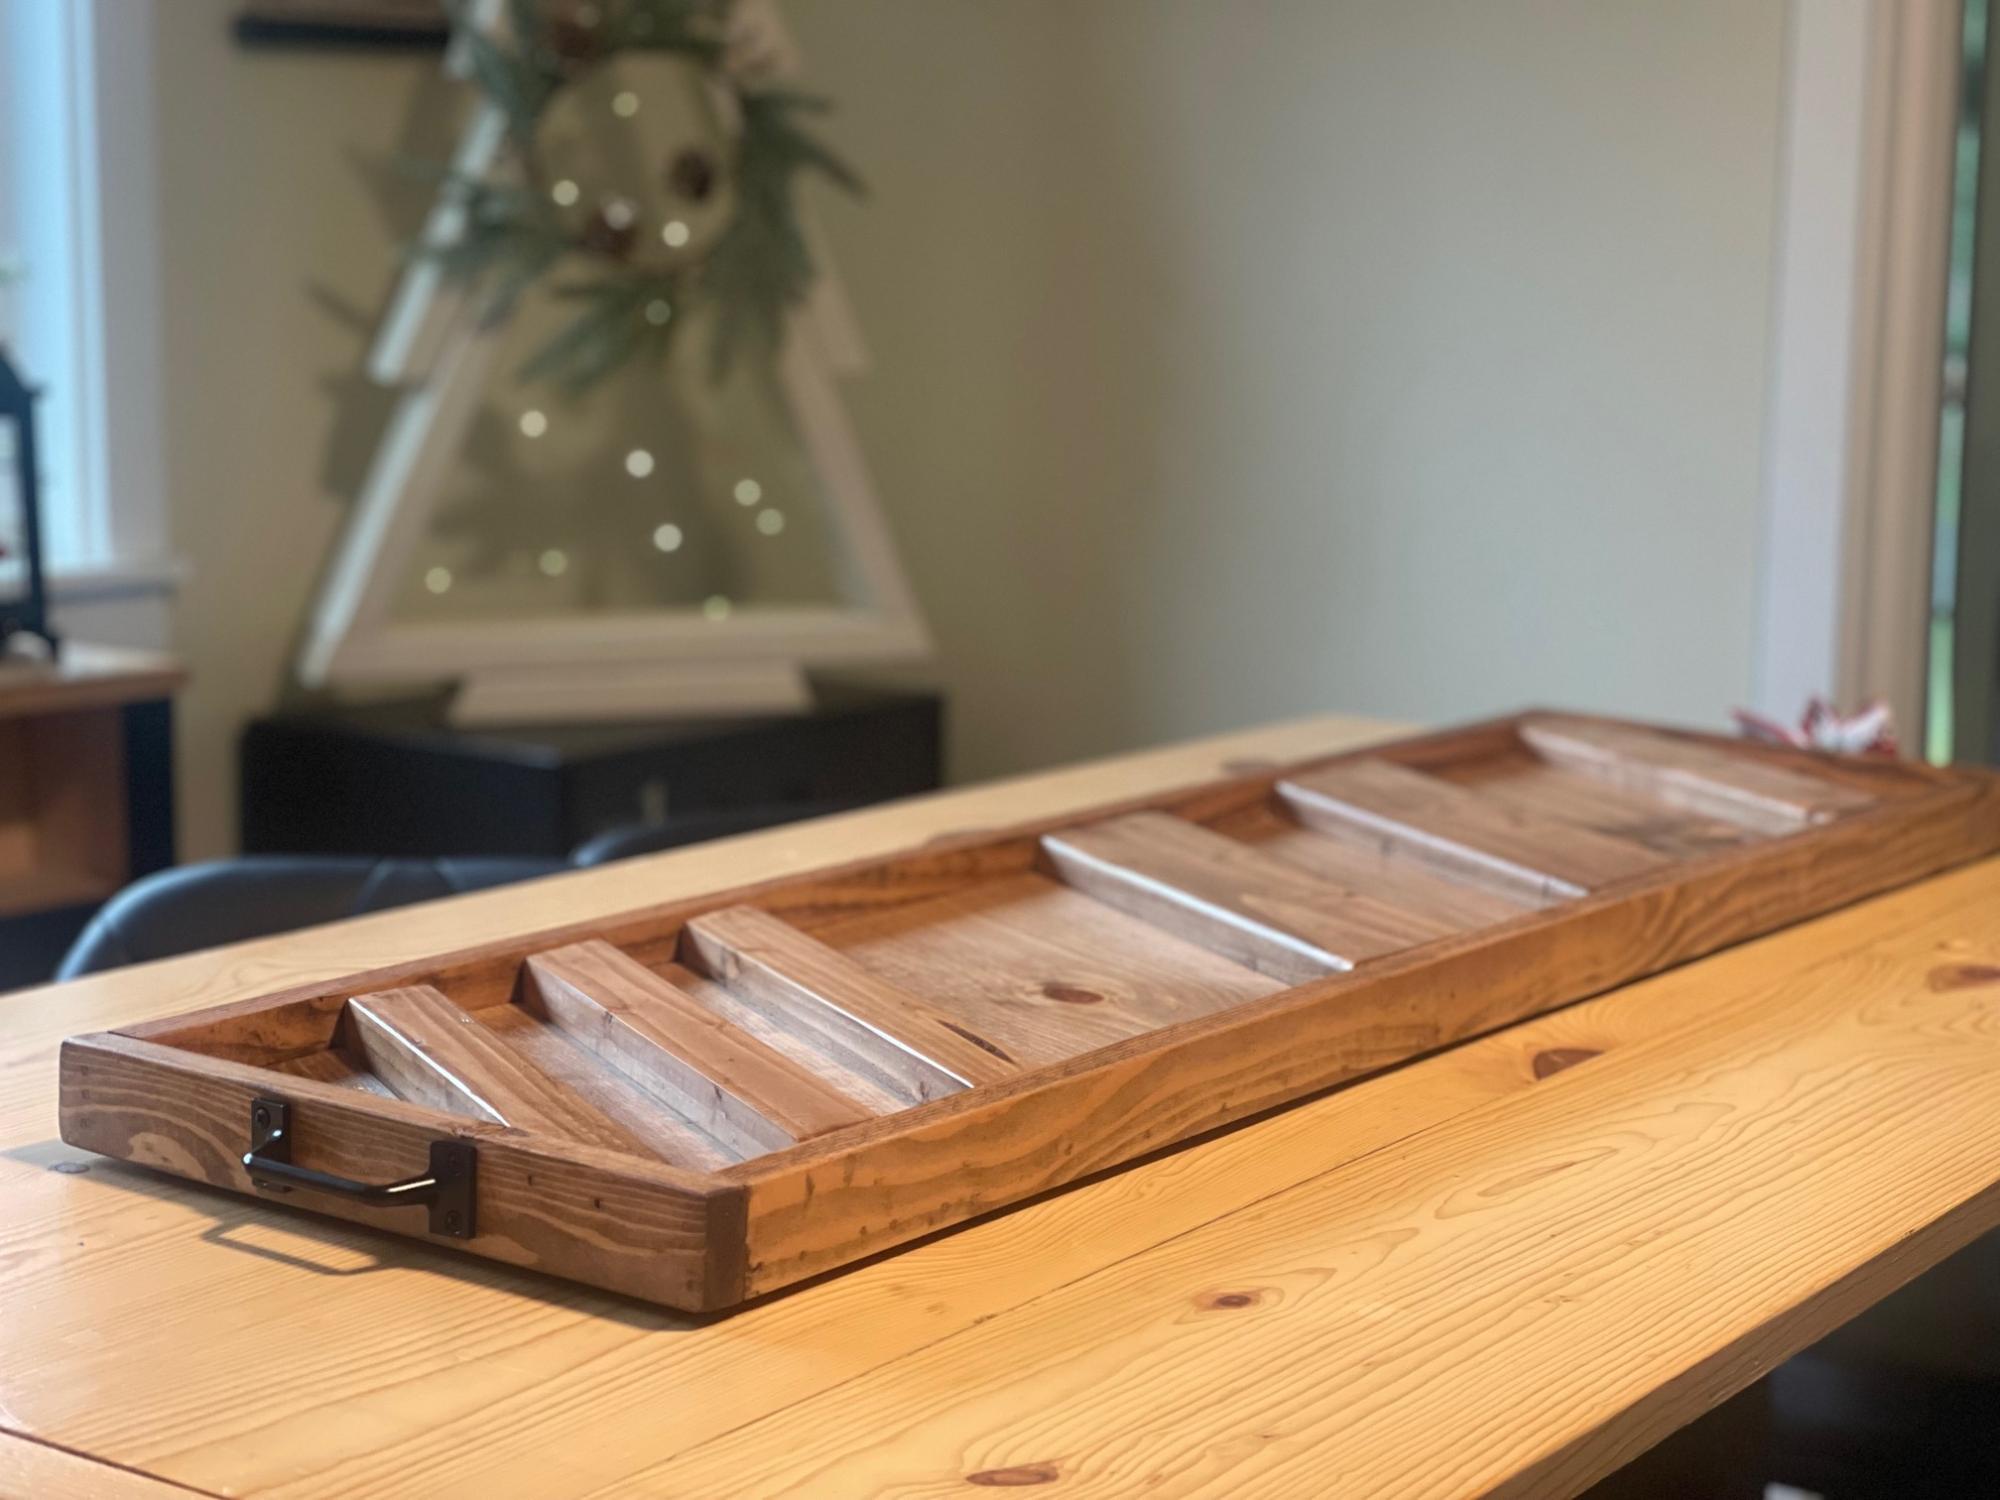
I wanted to give handmade presents this year. My brother likes to entertain at his house, so I made him a charcuterie boad. I added felt pads to the bottom and a handle to each end. He loved it!

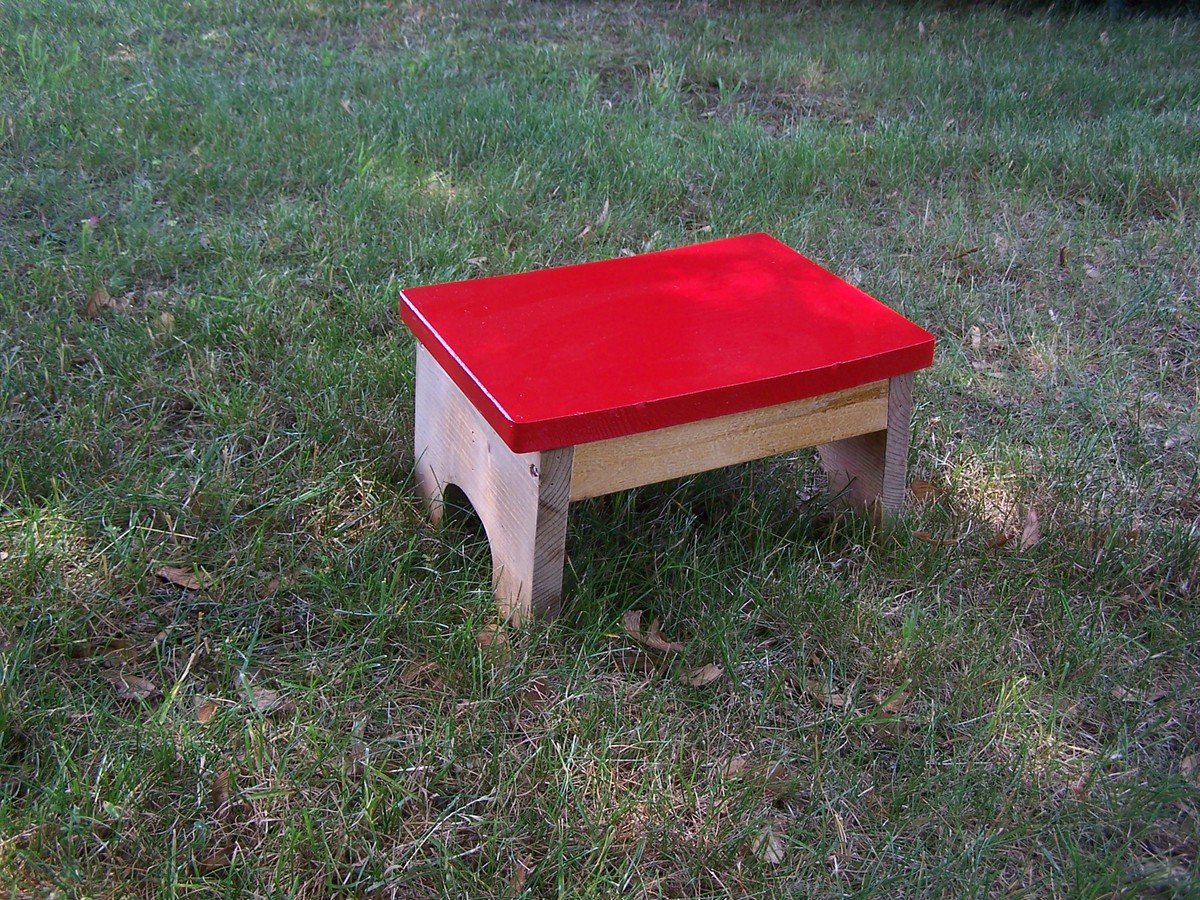
We remodeled our kitchen and I wanted a step stool that would match the decor a little better than the blue and pink plastic one that we bought when our children (who are all now in their 20s) were little. I like Ana's Vintage Step Stool but didn't need anything that big. So I adapted the plans for just one step. The first one that I put together I put the legs in too far and it was very tippy. So I took that apart, cut the top to fit the legs right up to the edge, and put it back together again. I think it turned out adorable! Thanks, Ana!
I have no idea how much it would cost to make this if you had to buy the materials because I made it from scraps of wood I had from other projects and used paint and stain that I already had used for other things in the kitchen remodel.
This is more of a beginner project rather than a starter project because of having to use a bandsaw or jigsaw to cut out the curve in the legs piece.
This should be an afternoon project (3 to 6 hours) if you make it right the first time and you don't have to take it apart and rebuild it like I did. Also make sure your paint is properly mixed and your daughter doesn't set a cardboard box on top of your paint job before it is completely dry like mine did. The first time I painted the top I evidently didn't get the paint mixed enough and it never hardened, just stayed a gummy, sticky mess. I scraped that off, made sure the paint was mixed thoroughly, and painted again. While the paint was curing (which takes about a week for the stuff I used) my daughter moved a box out of her way to get to something else and put it on top of the stool. I found it a couple days later, totally stuck in my shiny paint job! Sanded that down thoroughly and put another couple of coats on. Then I hid it for a week so it could cure completely without anyone else doing something to it!
Sat, 01/05/2013 - 19:08
I think you did a great job and especially how you kept at it even in the face of so many unfortunate situations. But, on the other hand, if you are a dedicated DIYer you will face many mistakes and unforeseen situations and you just deal with them. Keep up the good work.
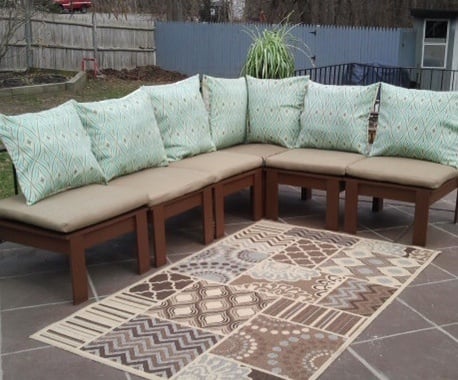
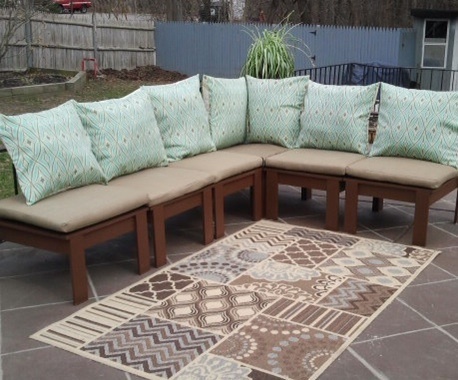
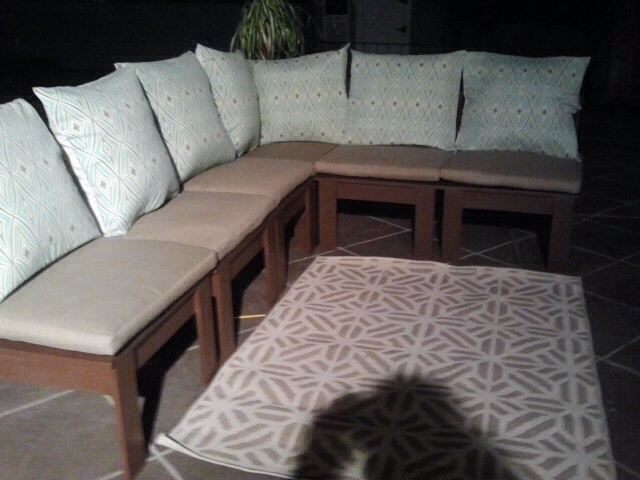
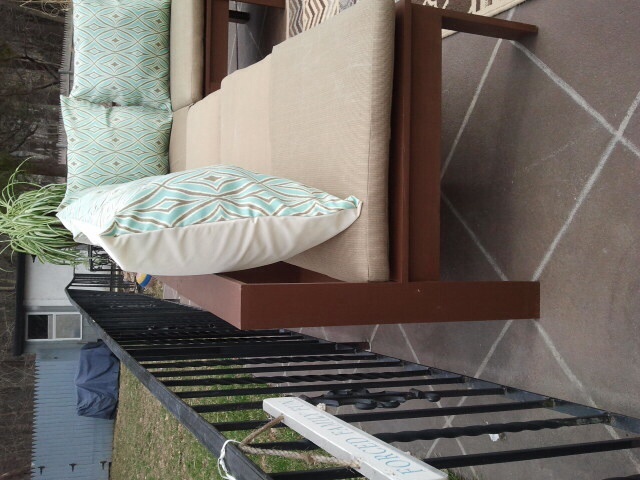
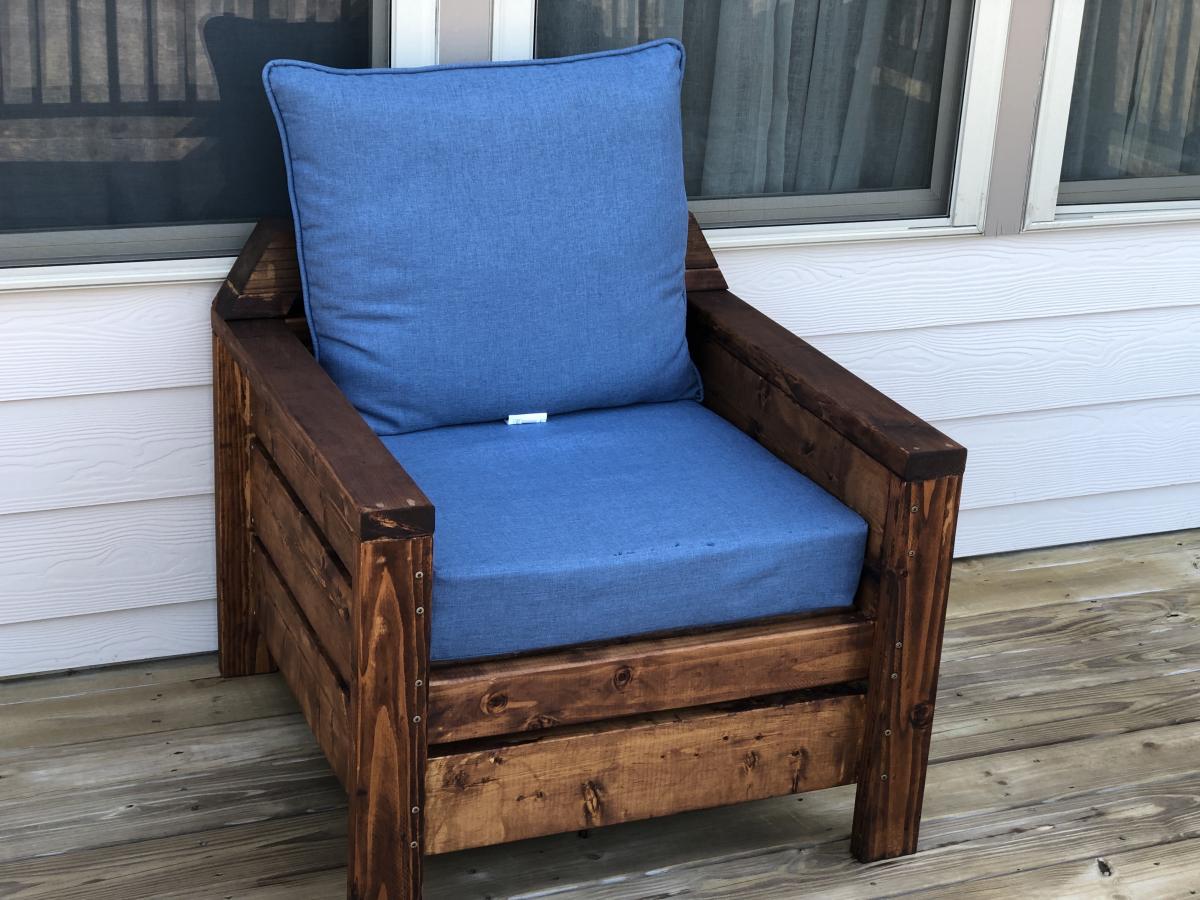
This was a simple project with lots of steps. One recommendation is to prime and paint/stain prior to assembling. The cushions posed a challenge due to the cost of purchasing but I buckled down and learned how to sew!! If anyone has any questions please feel free to message me and I will try to help the best I can. Thank you, Tammy
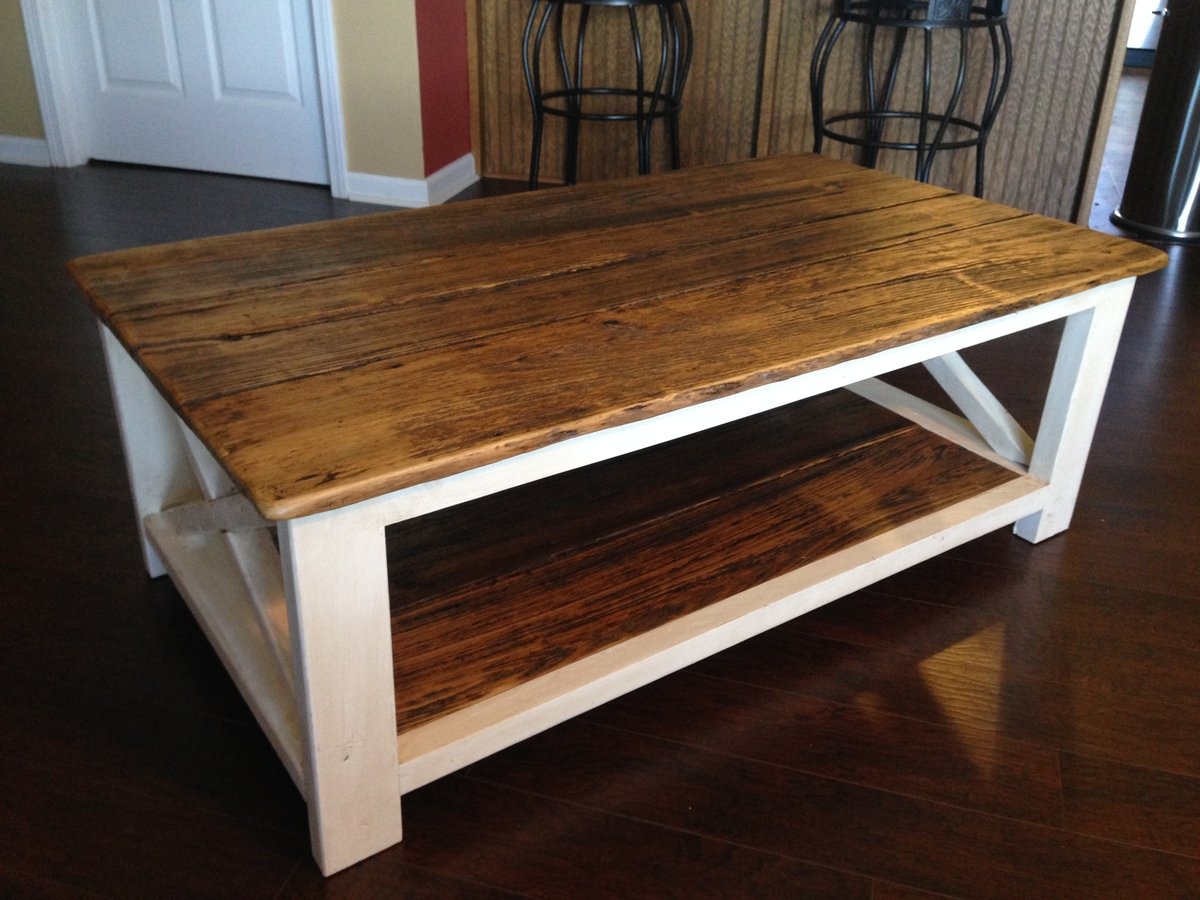
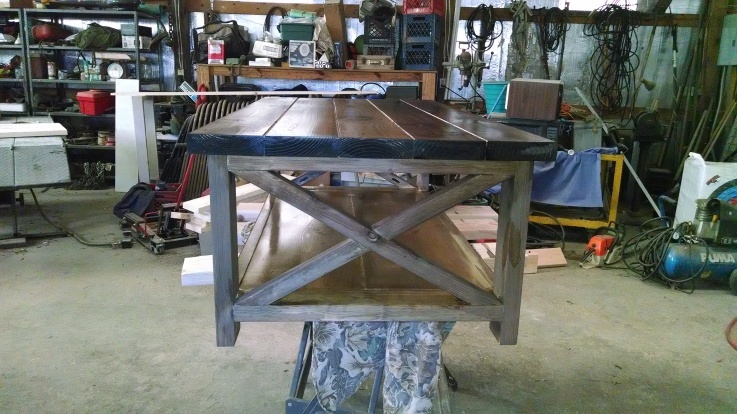
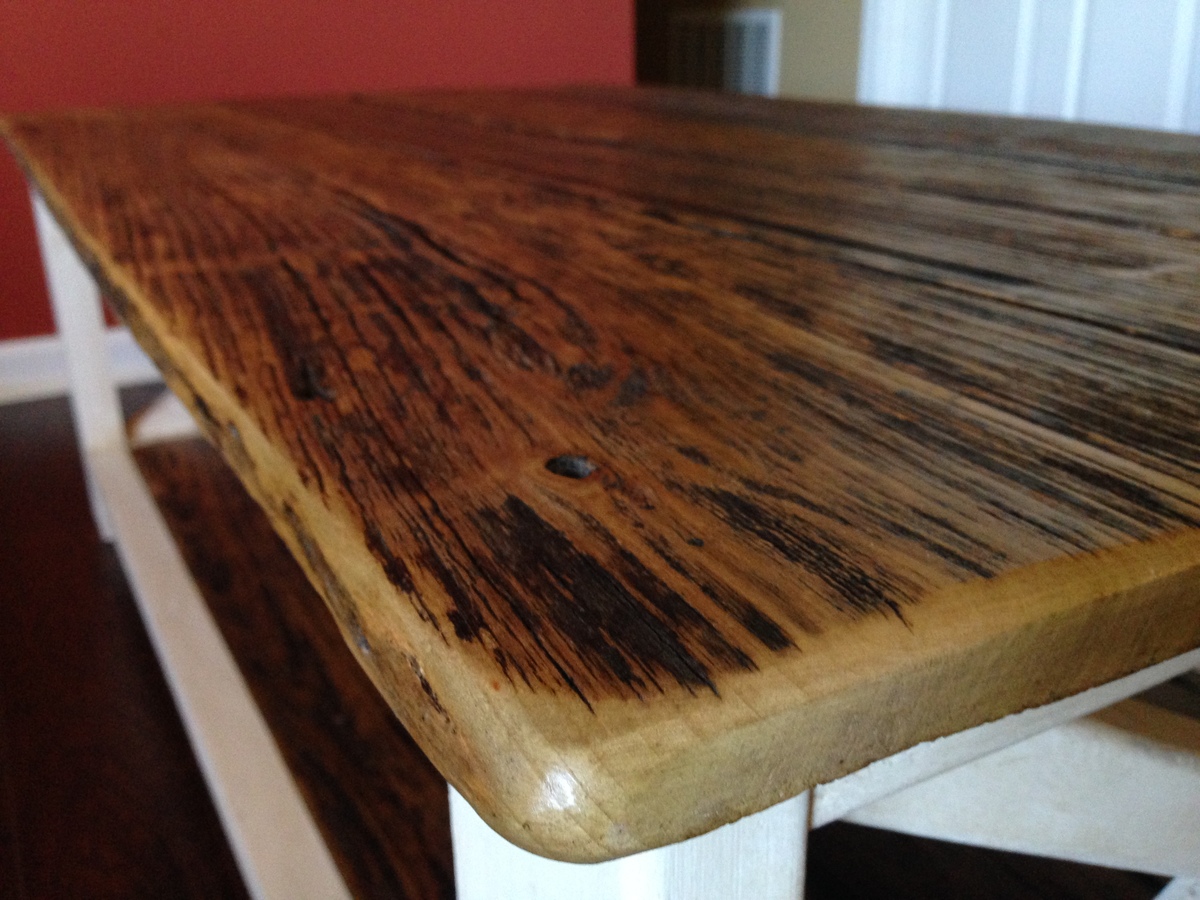
Built this rustic x coffee table from some 2x4's and repurposed barnwood. Finished it off with some white paint and antiquing wax on the frame and lacquer over the barnwood.
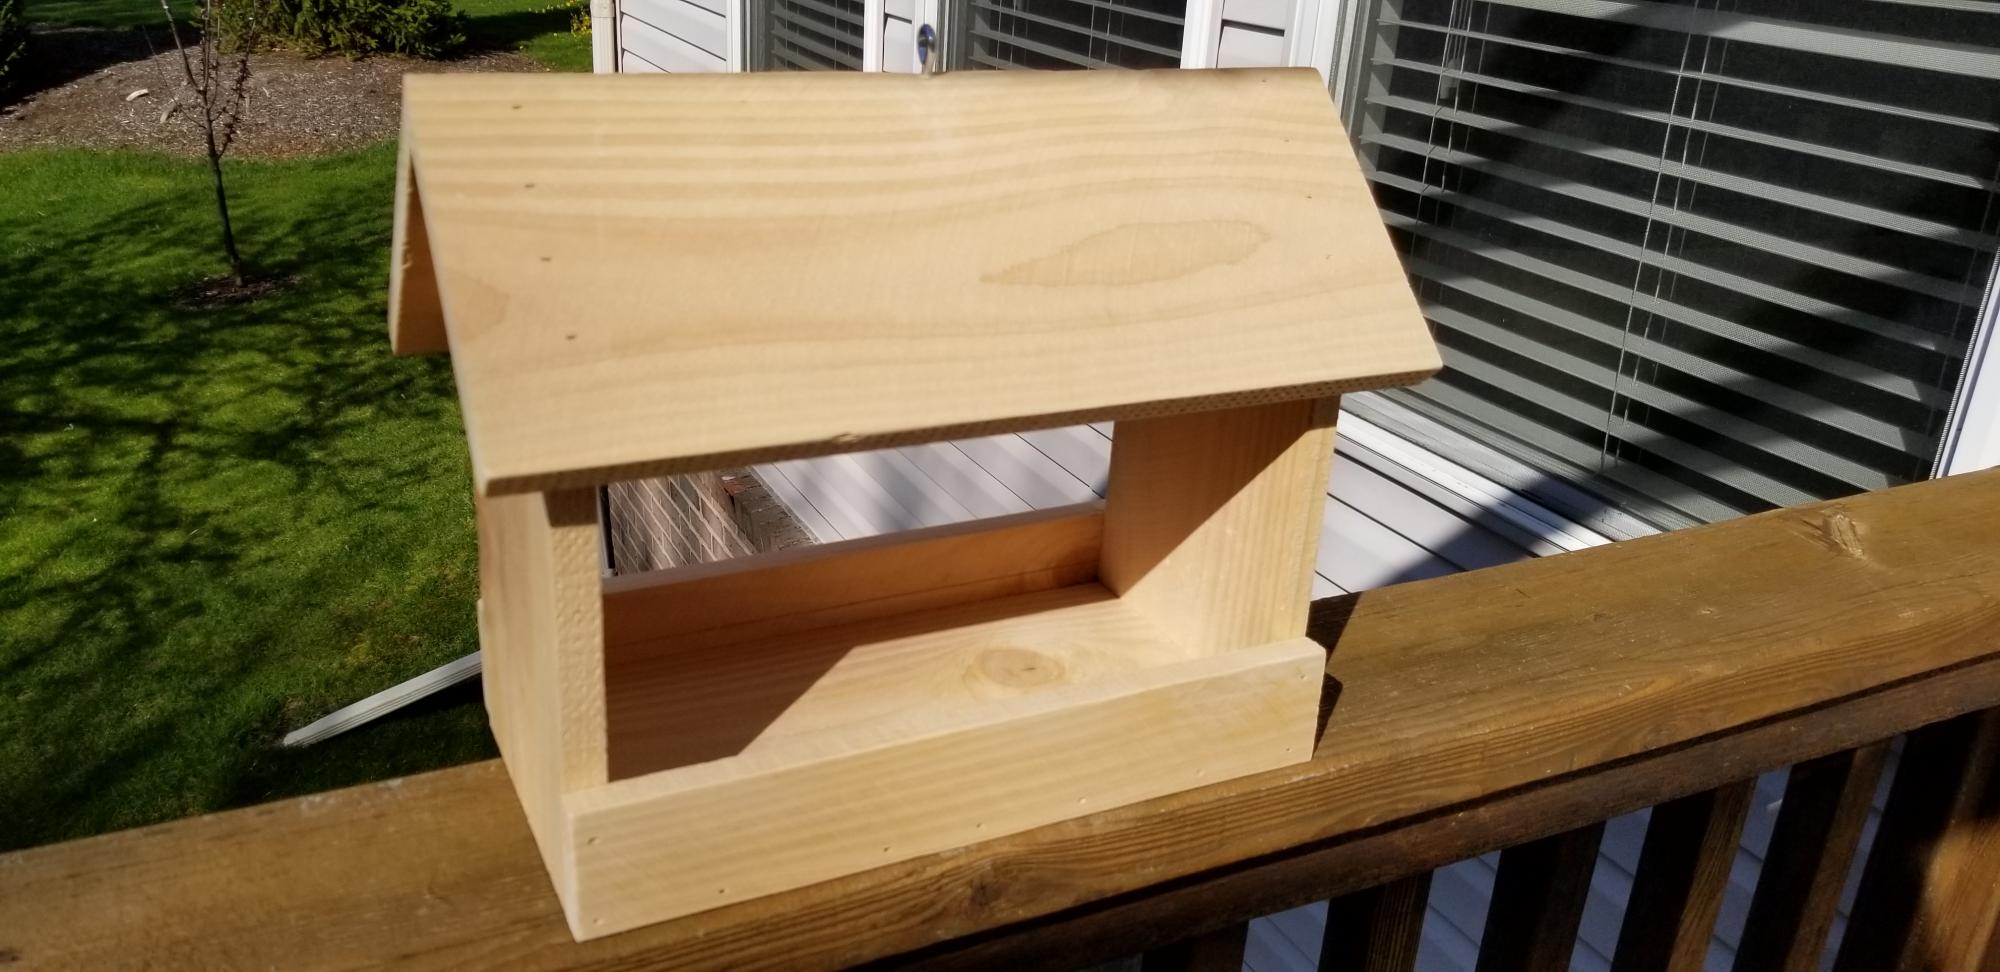
I made my feeder larger and was still able to use only one cedar fence picket. Very easy and fun project!
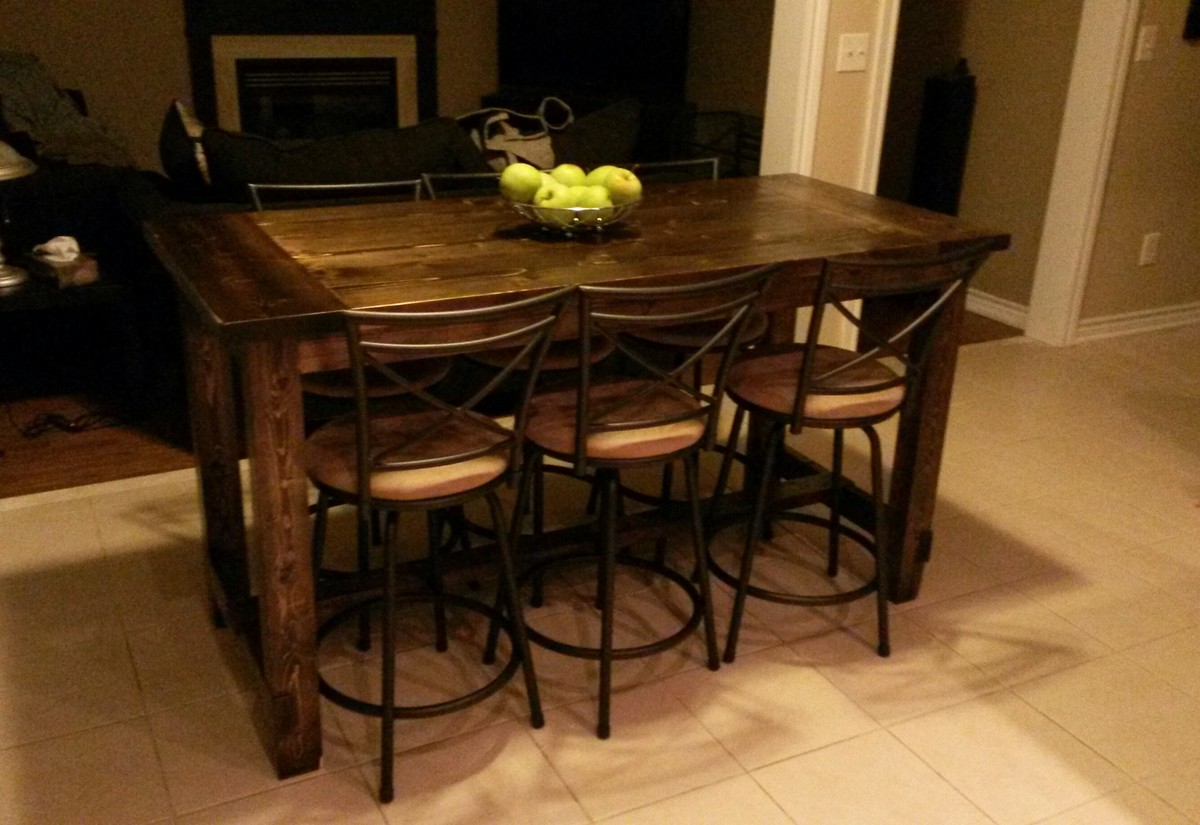
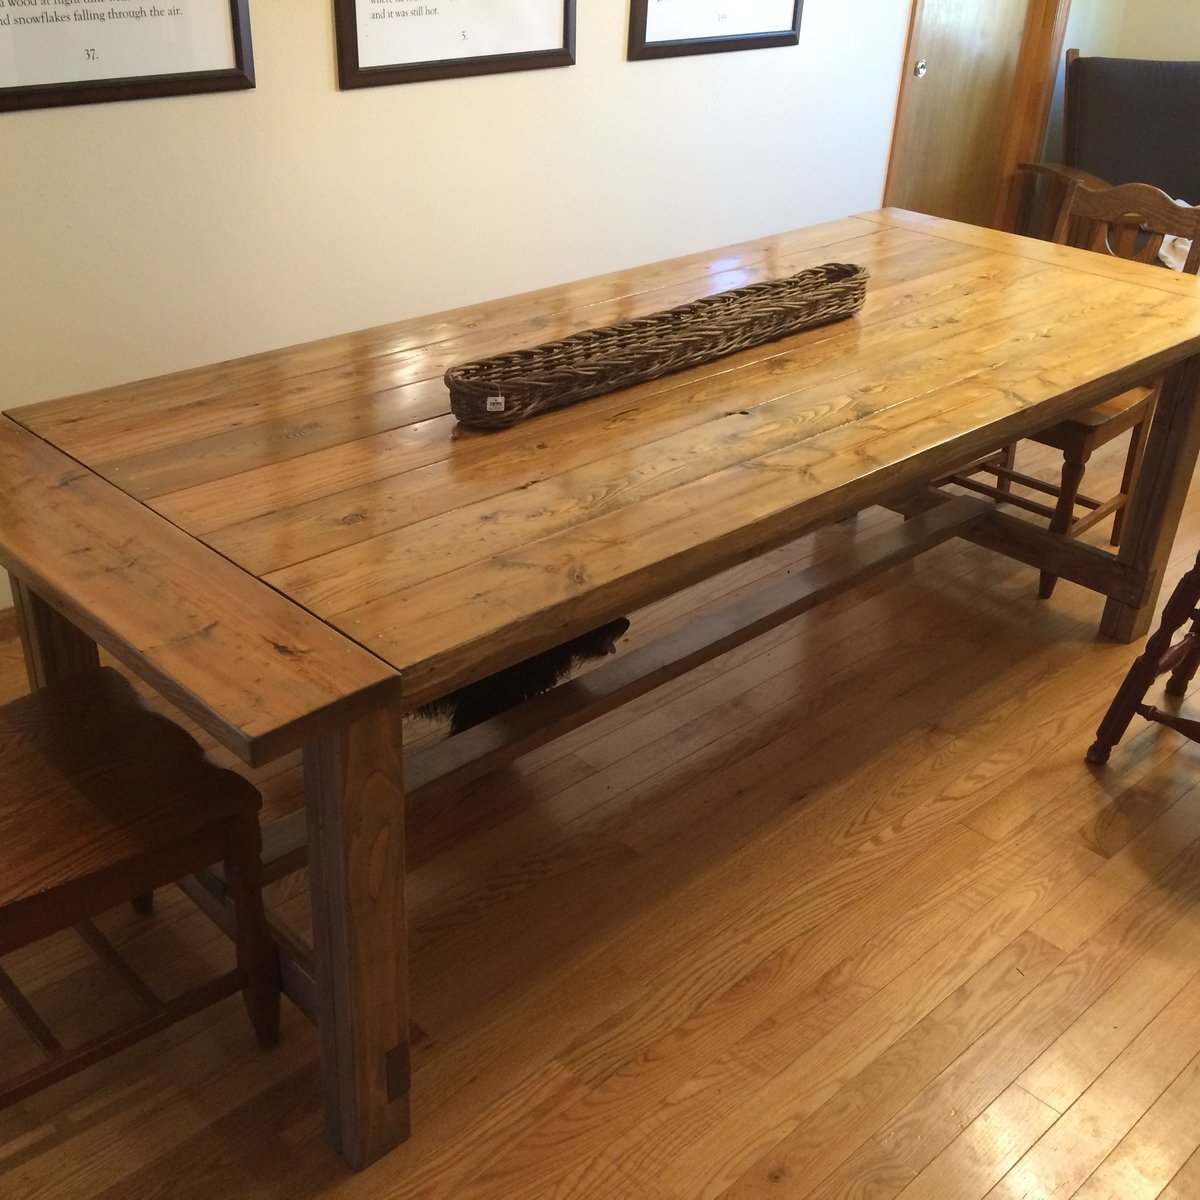
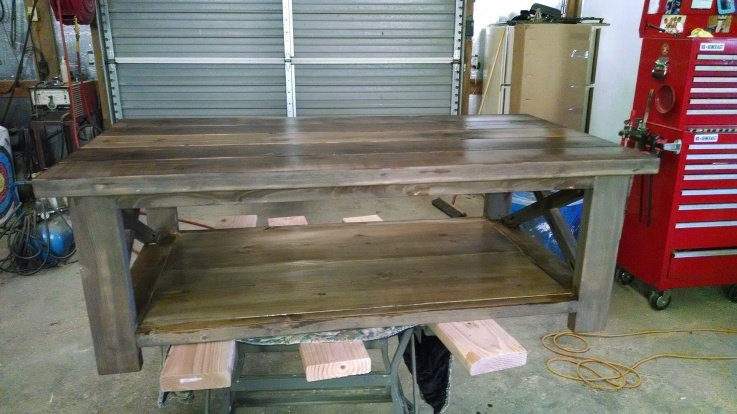
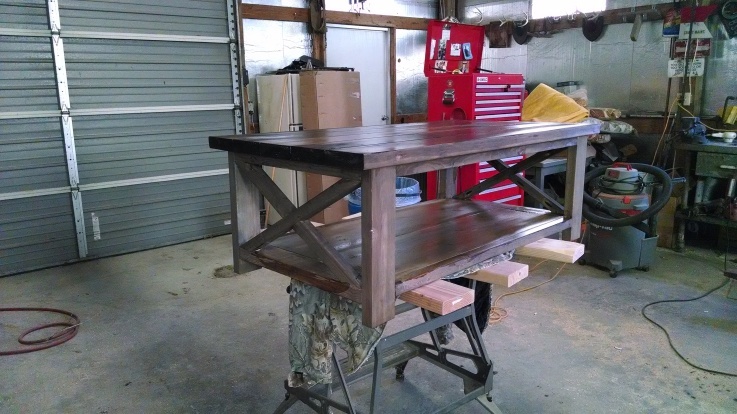
I started to make these tables and post them on my local classified ad. In the past few months i have made half a dozen tables. They seem to be pretty popular. The great plans on this site have helped me make a bit of extra income to support my tool addiction.
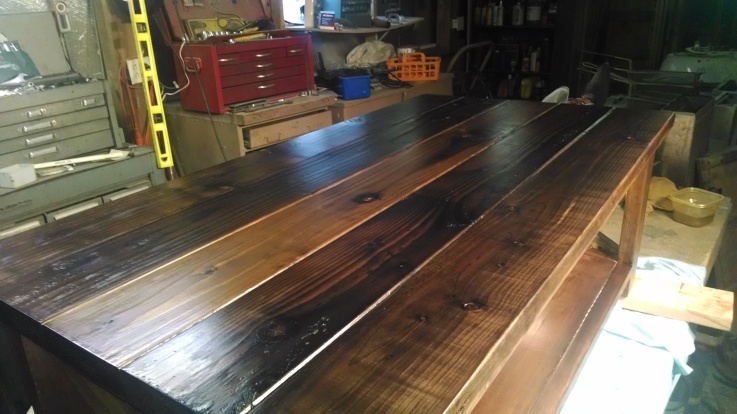
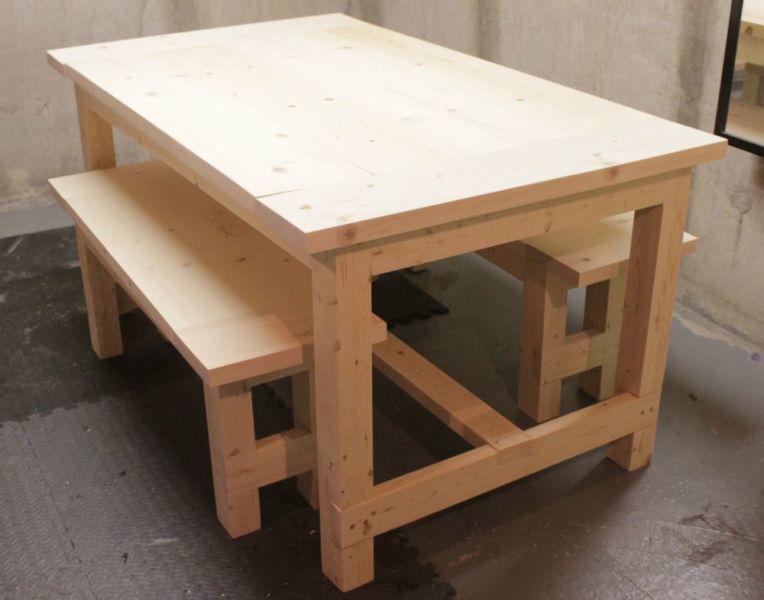
The tables are made from framing grade lumber from blue box store. I take each piece and cut it to rough length and run it through a joiner and planner to get it nice and square and smooth to start with. I cut everything to final dimension and start the glue up.
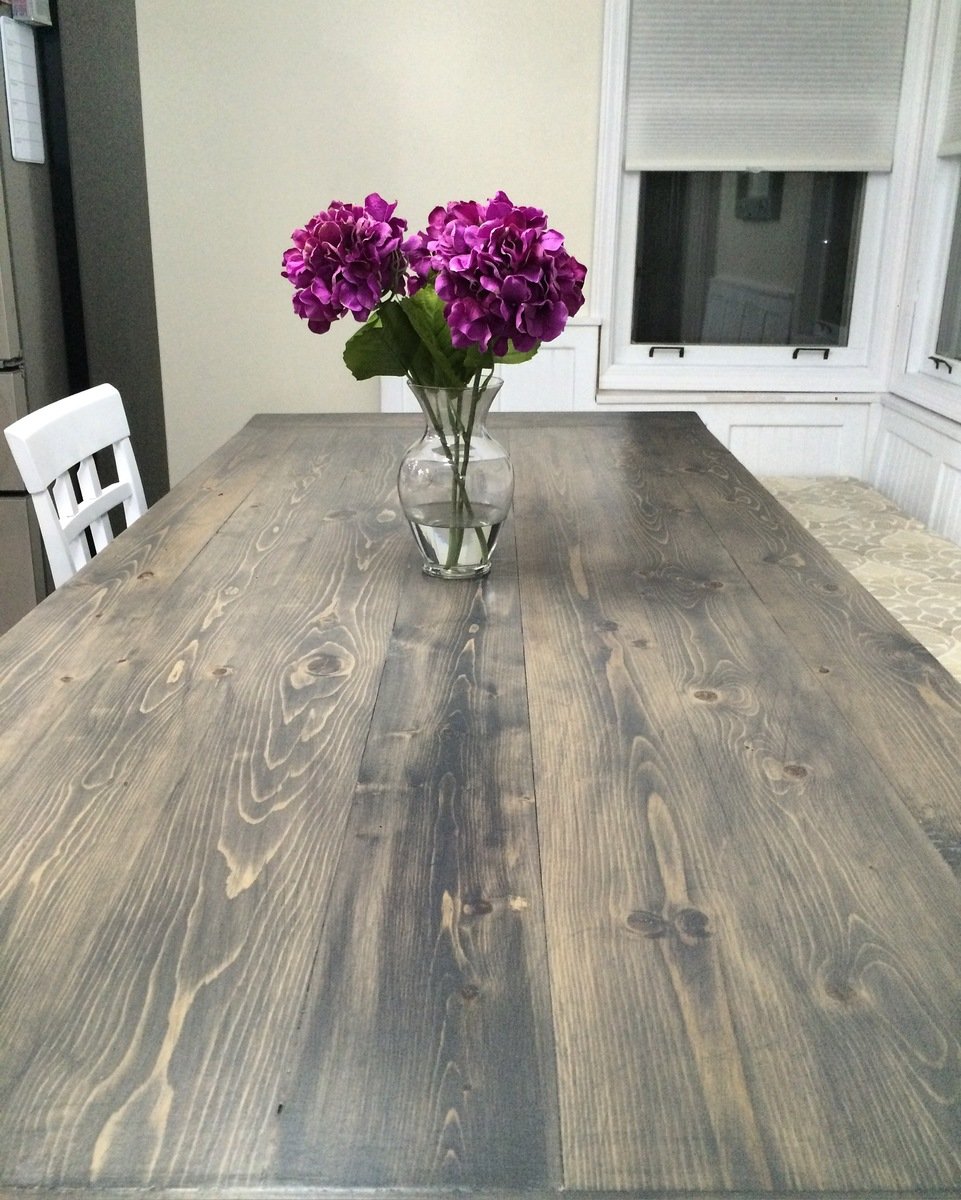
I wanted a nice flat and clean top for these tables so having straight and square lumber helps. To make the top I edge glue the boards together and clamp. No screws or anything else required. The breadboard ends are attached with a few pocket screws.
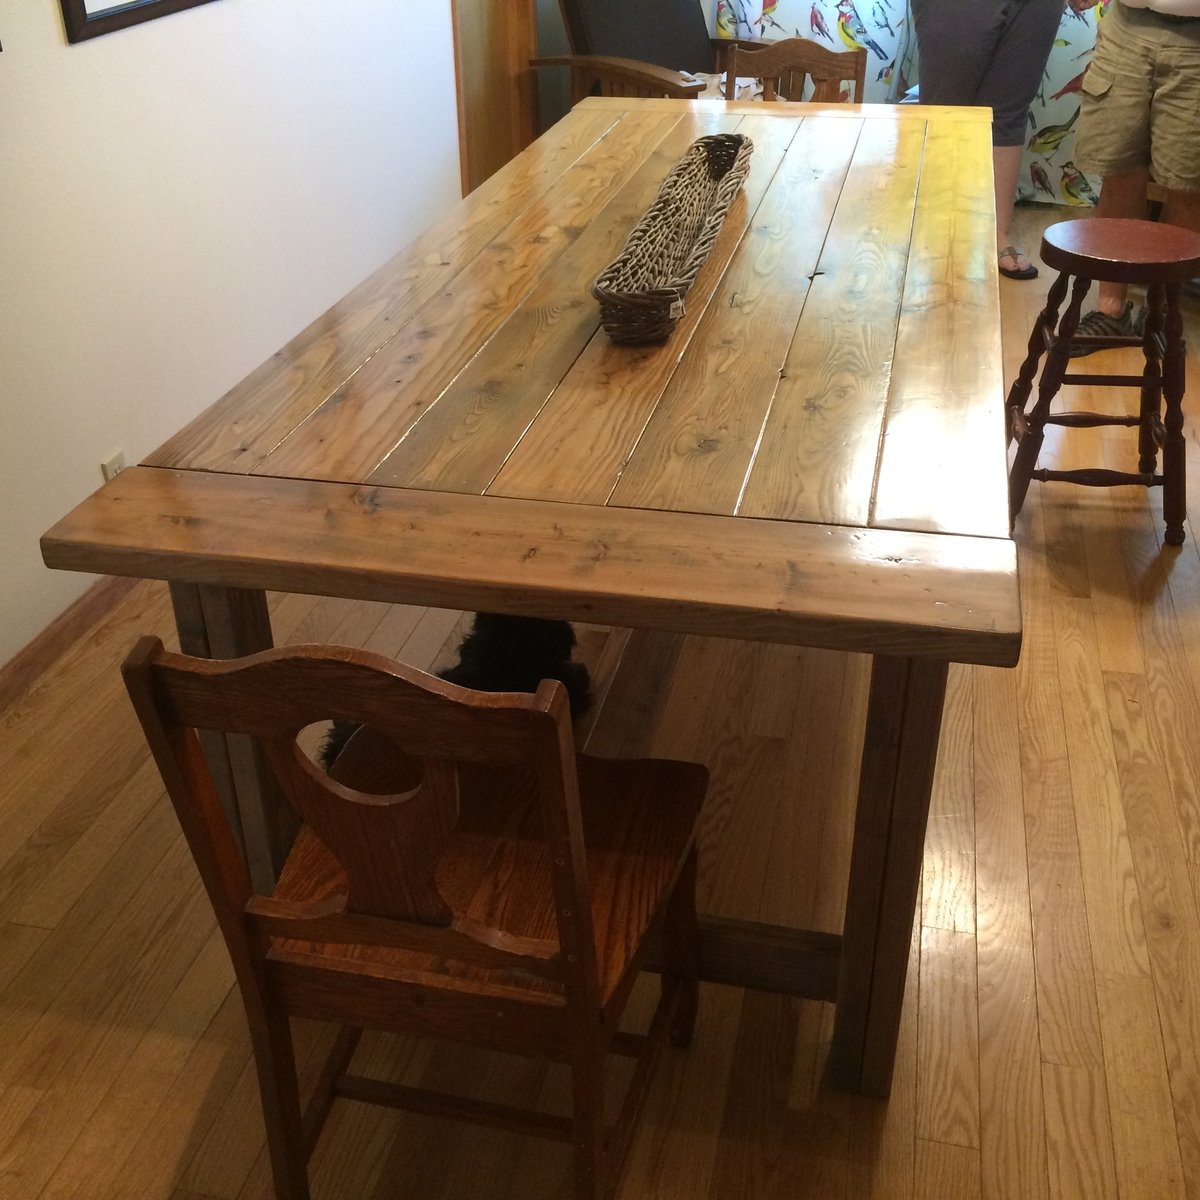
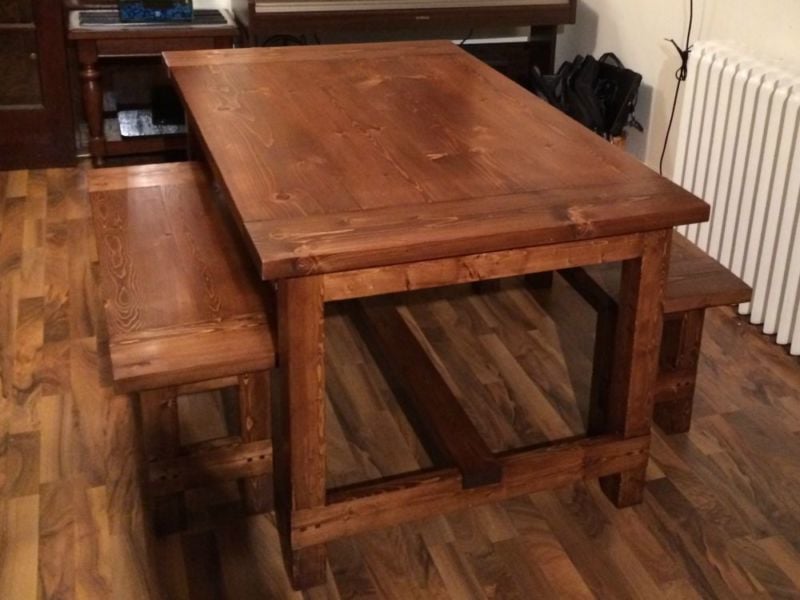
The table joints are are done using pocket hole screws and glue. I have trouble finding 4x4 in my area so I make the legs using two 2x4's glued together. I use 3 pocket screws per joint (skirt attaches to the legs). For the cross beams, i use a dado blade to notch out the legs and cross stretchers. I find this is the most accurate and quick way to go. The cross stretchers are attached with glue and screws, and the screw holes are filled with 3/8 pine dowels and cut flush.
Once the table is all assembled, I run it through a course of sanding from 80 grit up to 220 grit with an orbital sander. Then its time to start the finishing. I use minwax pre-stain conditioner to help it absorb evenly, then 2-3 coats of minwax stain of choice. I then use 3-5 coats of minwax wipe on poly. I find this stuff to be great. It goes on with a rag, no drip marks and provides a very smooth finish.
Each table takes about 25 hours to complete.
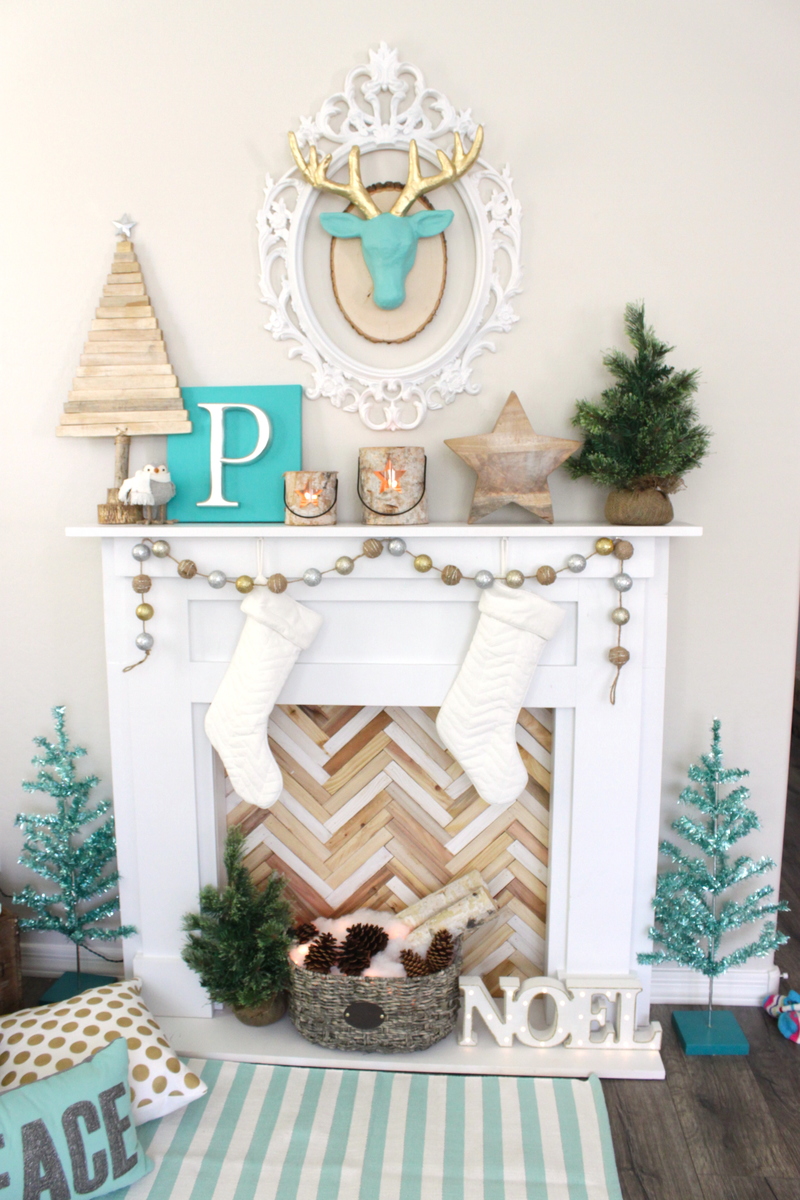
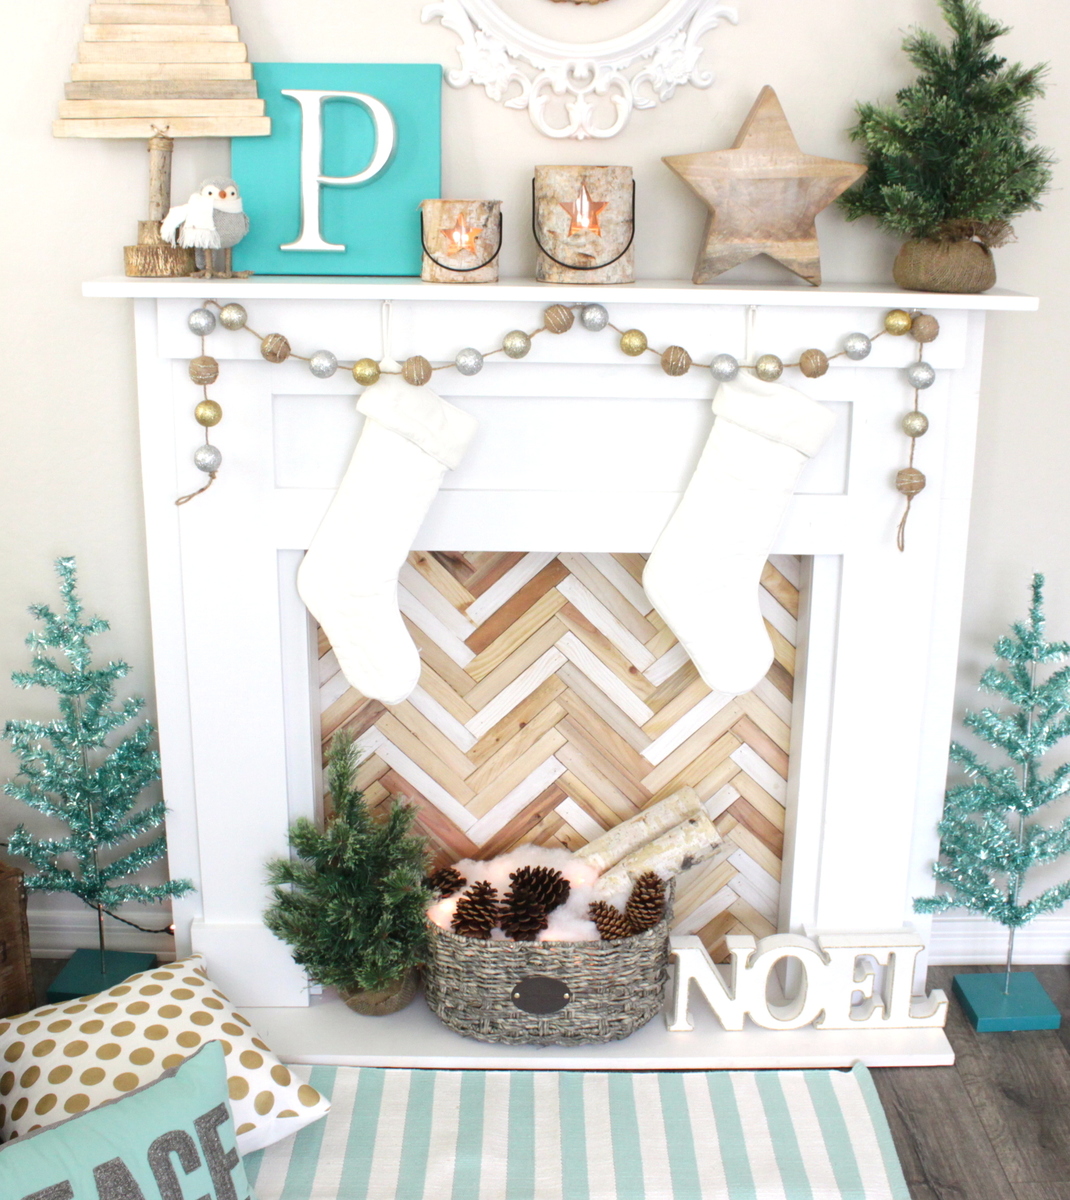
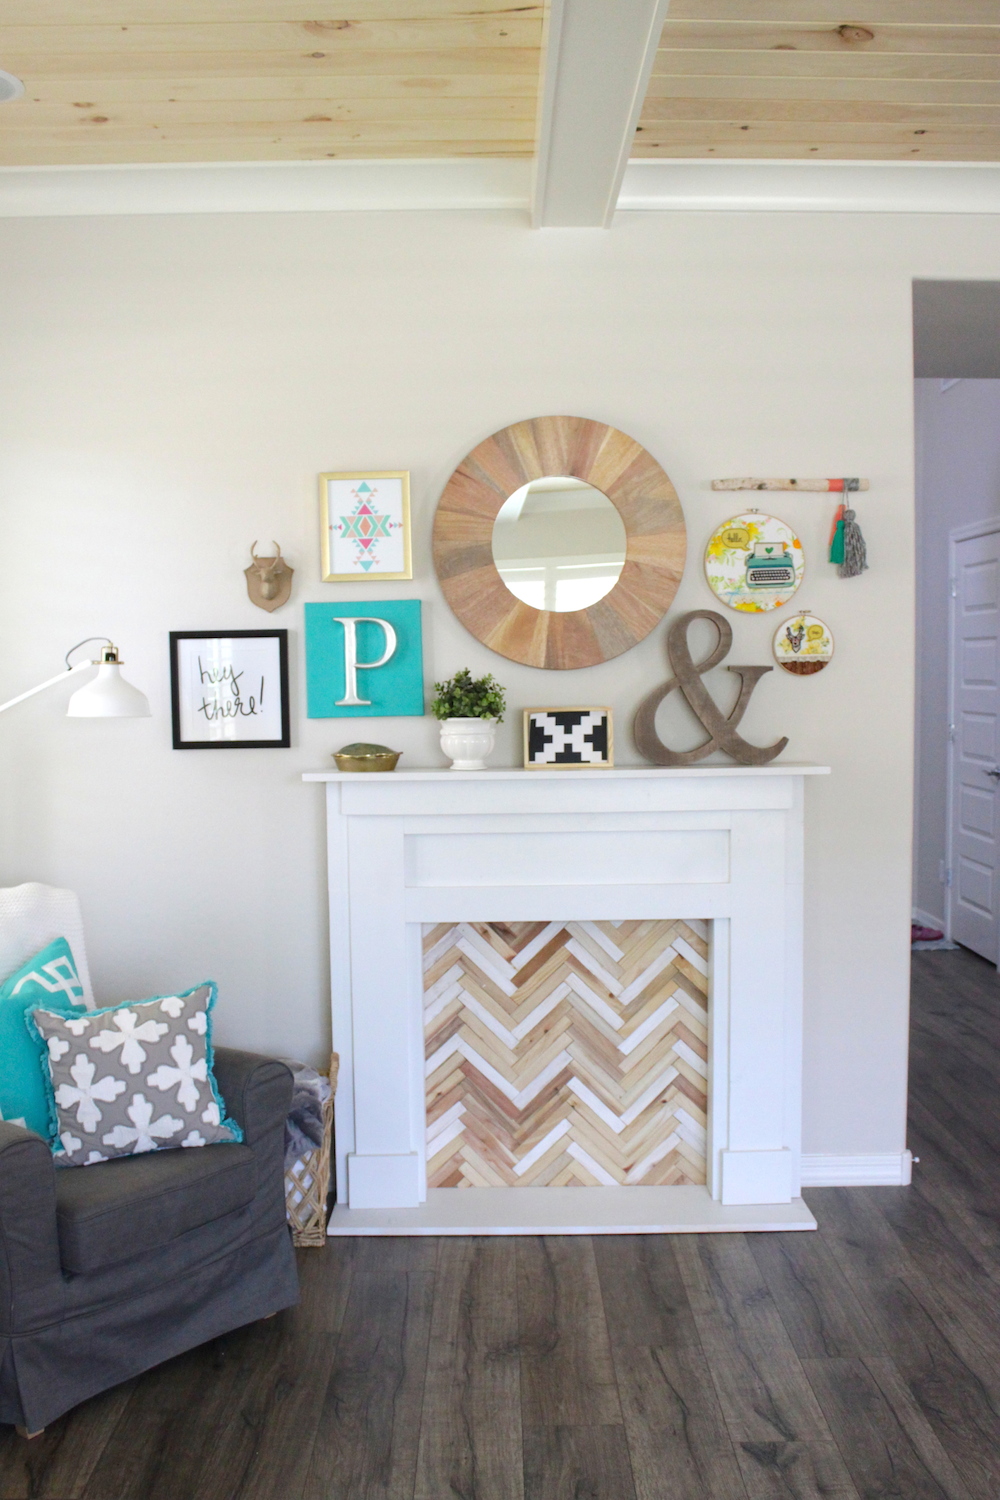
I used the plans as a jumping off point and made adjustment accordingly. I didn't want the wall to show through, so I made a firebox from wooden door shims laid out in a herringbone pattern. Some of the shims were left natural, while randon ones were whitewashed. The entire fireplace was painted using Behr paint in Polar Bear White.
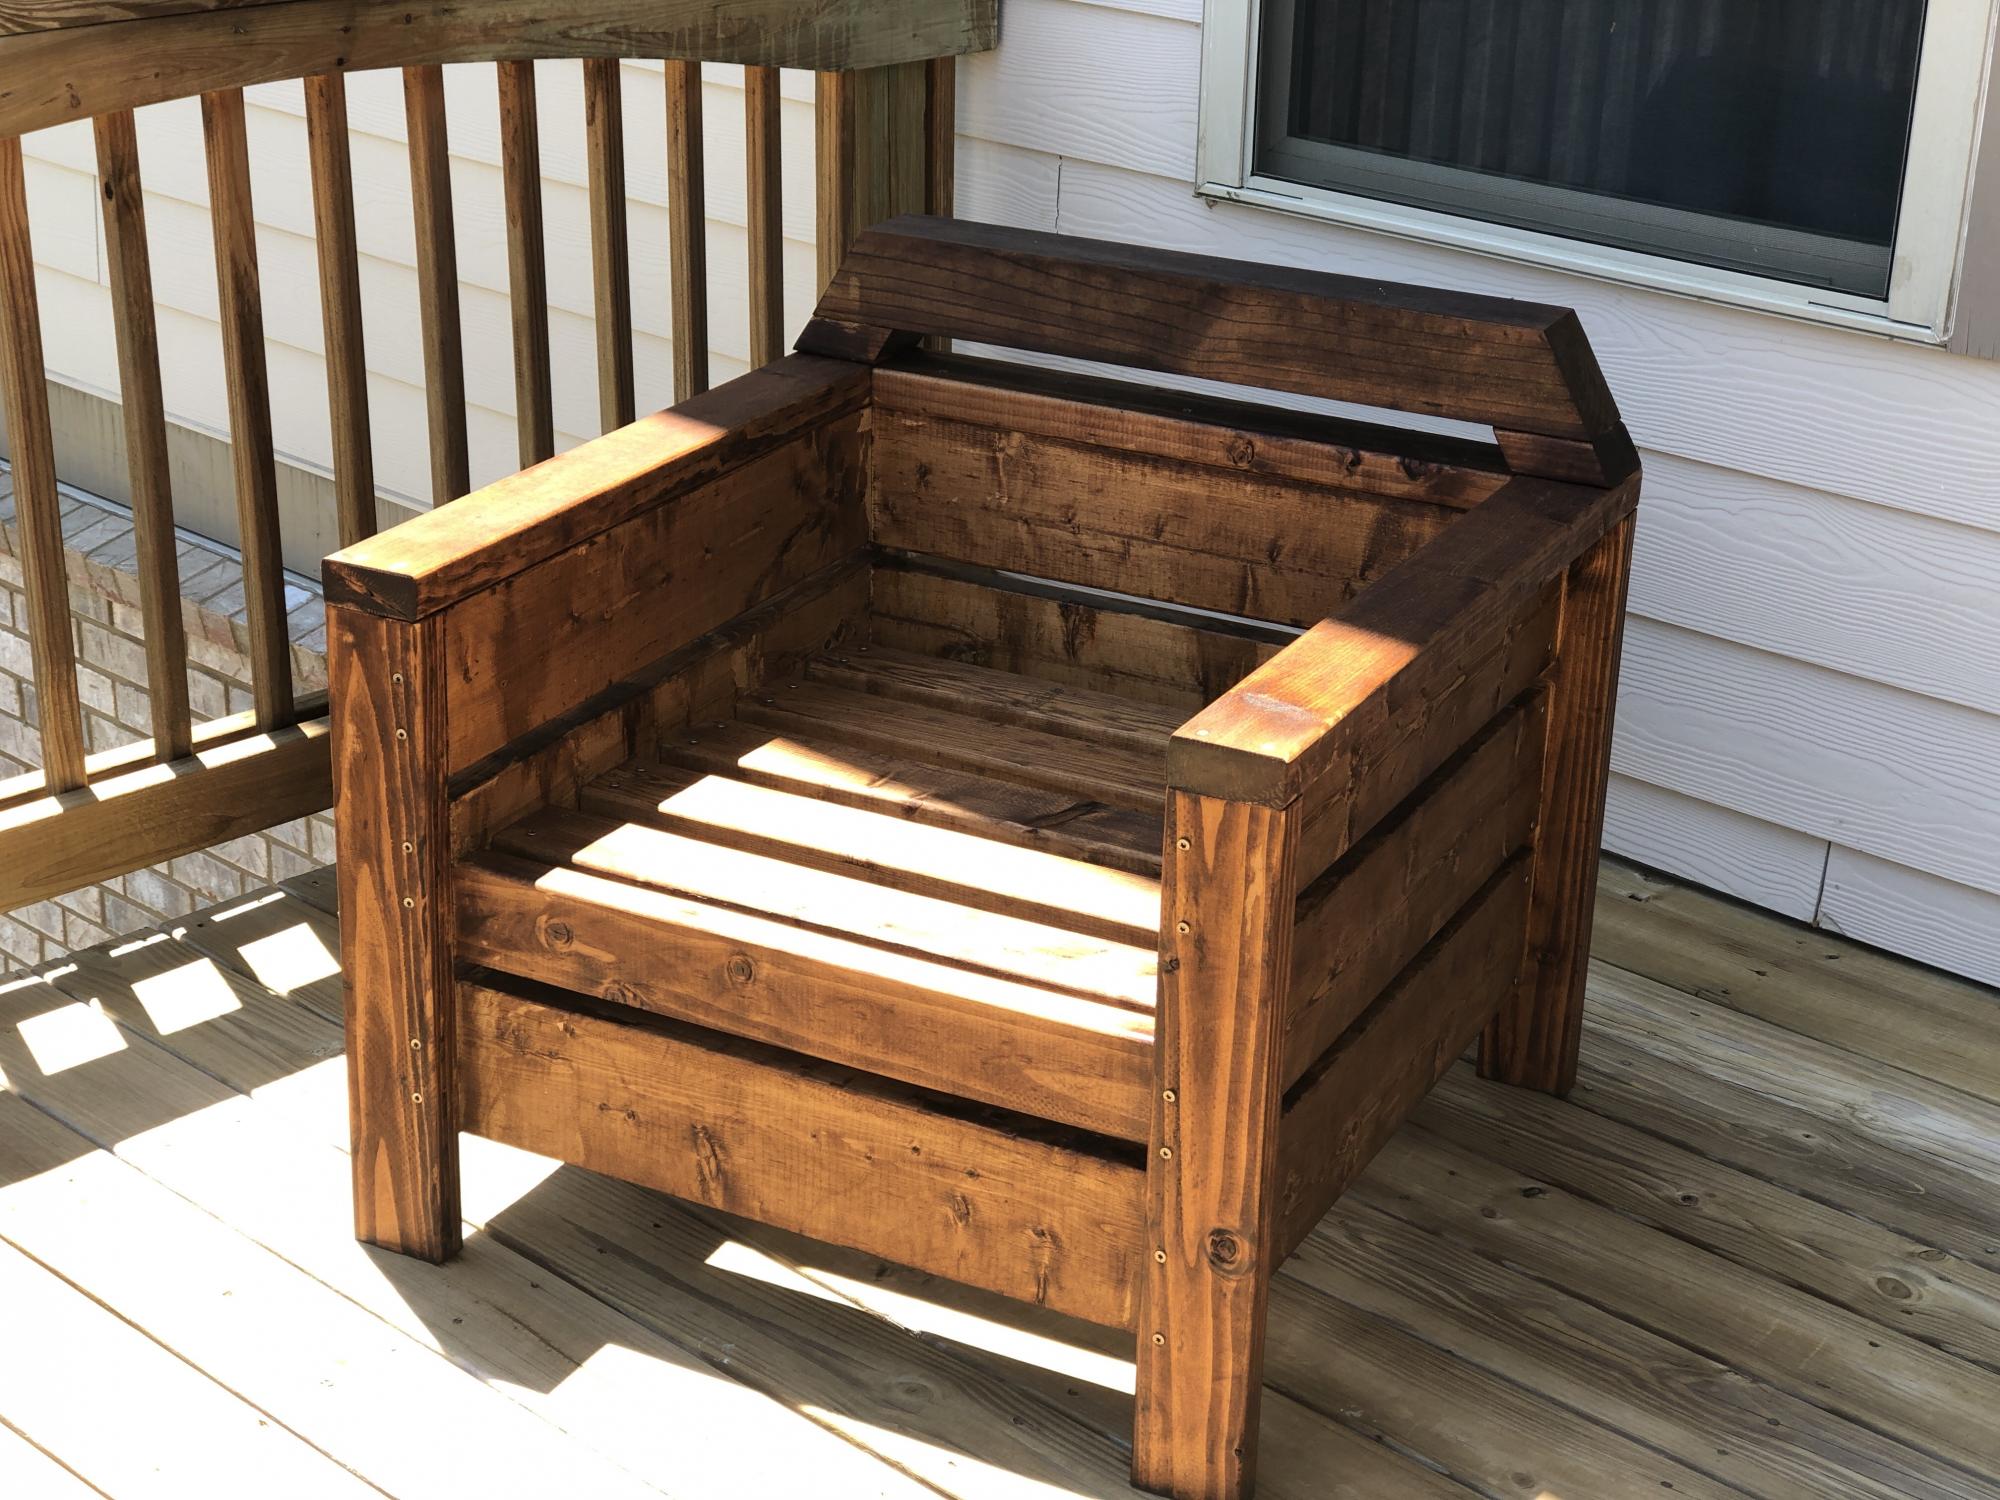
I Love the modern look of these chairs but definitely felt a little uncomfortable without the back rest so decided to add a little more back rest.
Great plan and easy directions to follow - my first wood working project.

Mon, 06/01/2020 - 07:29
Do you have measurements for back rest addition?
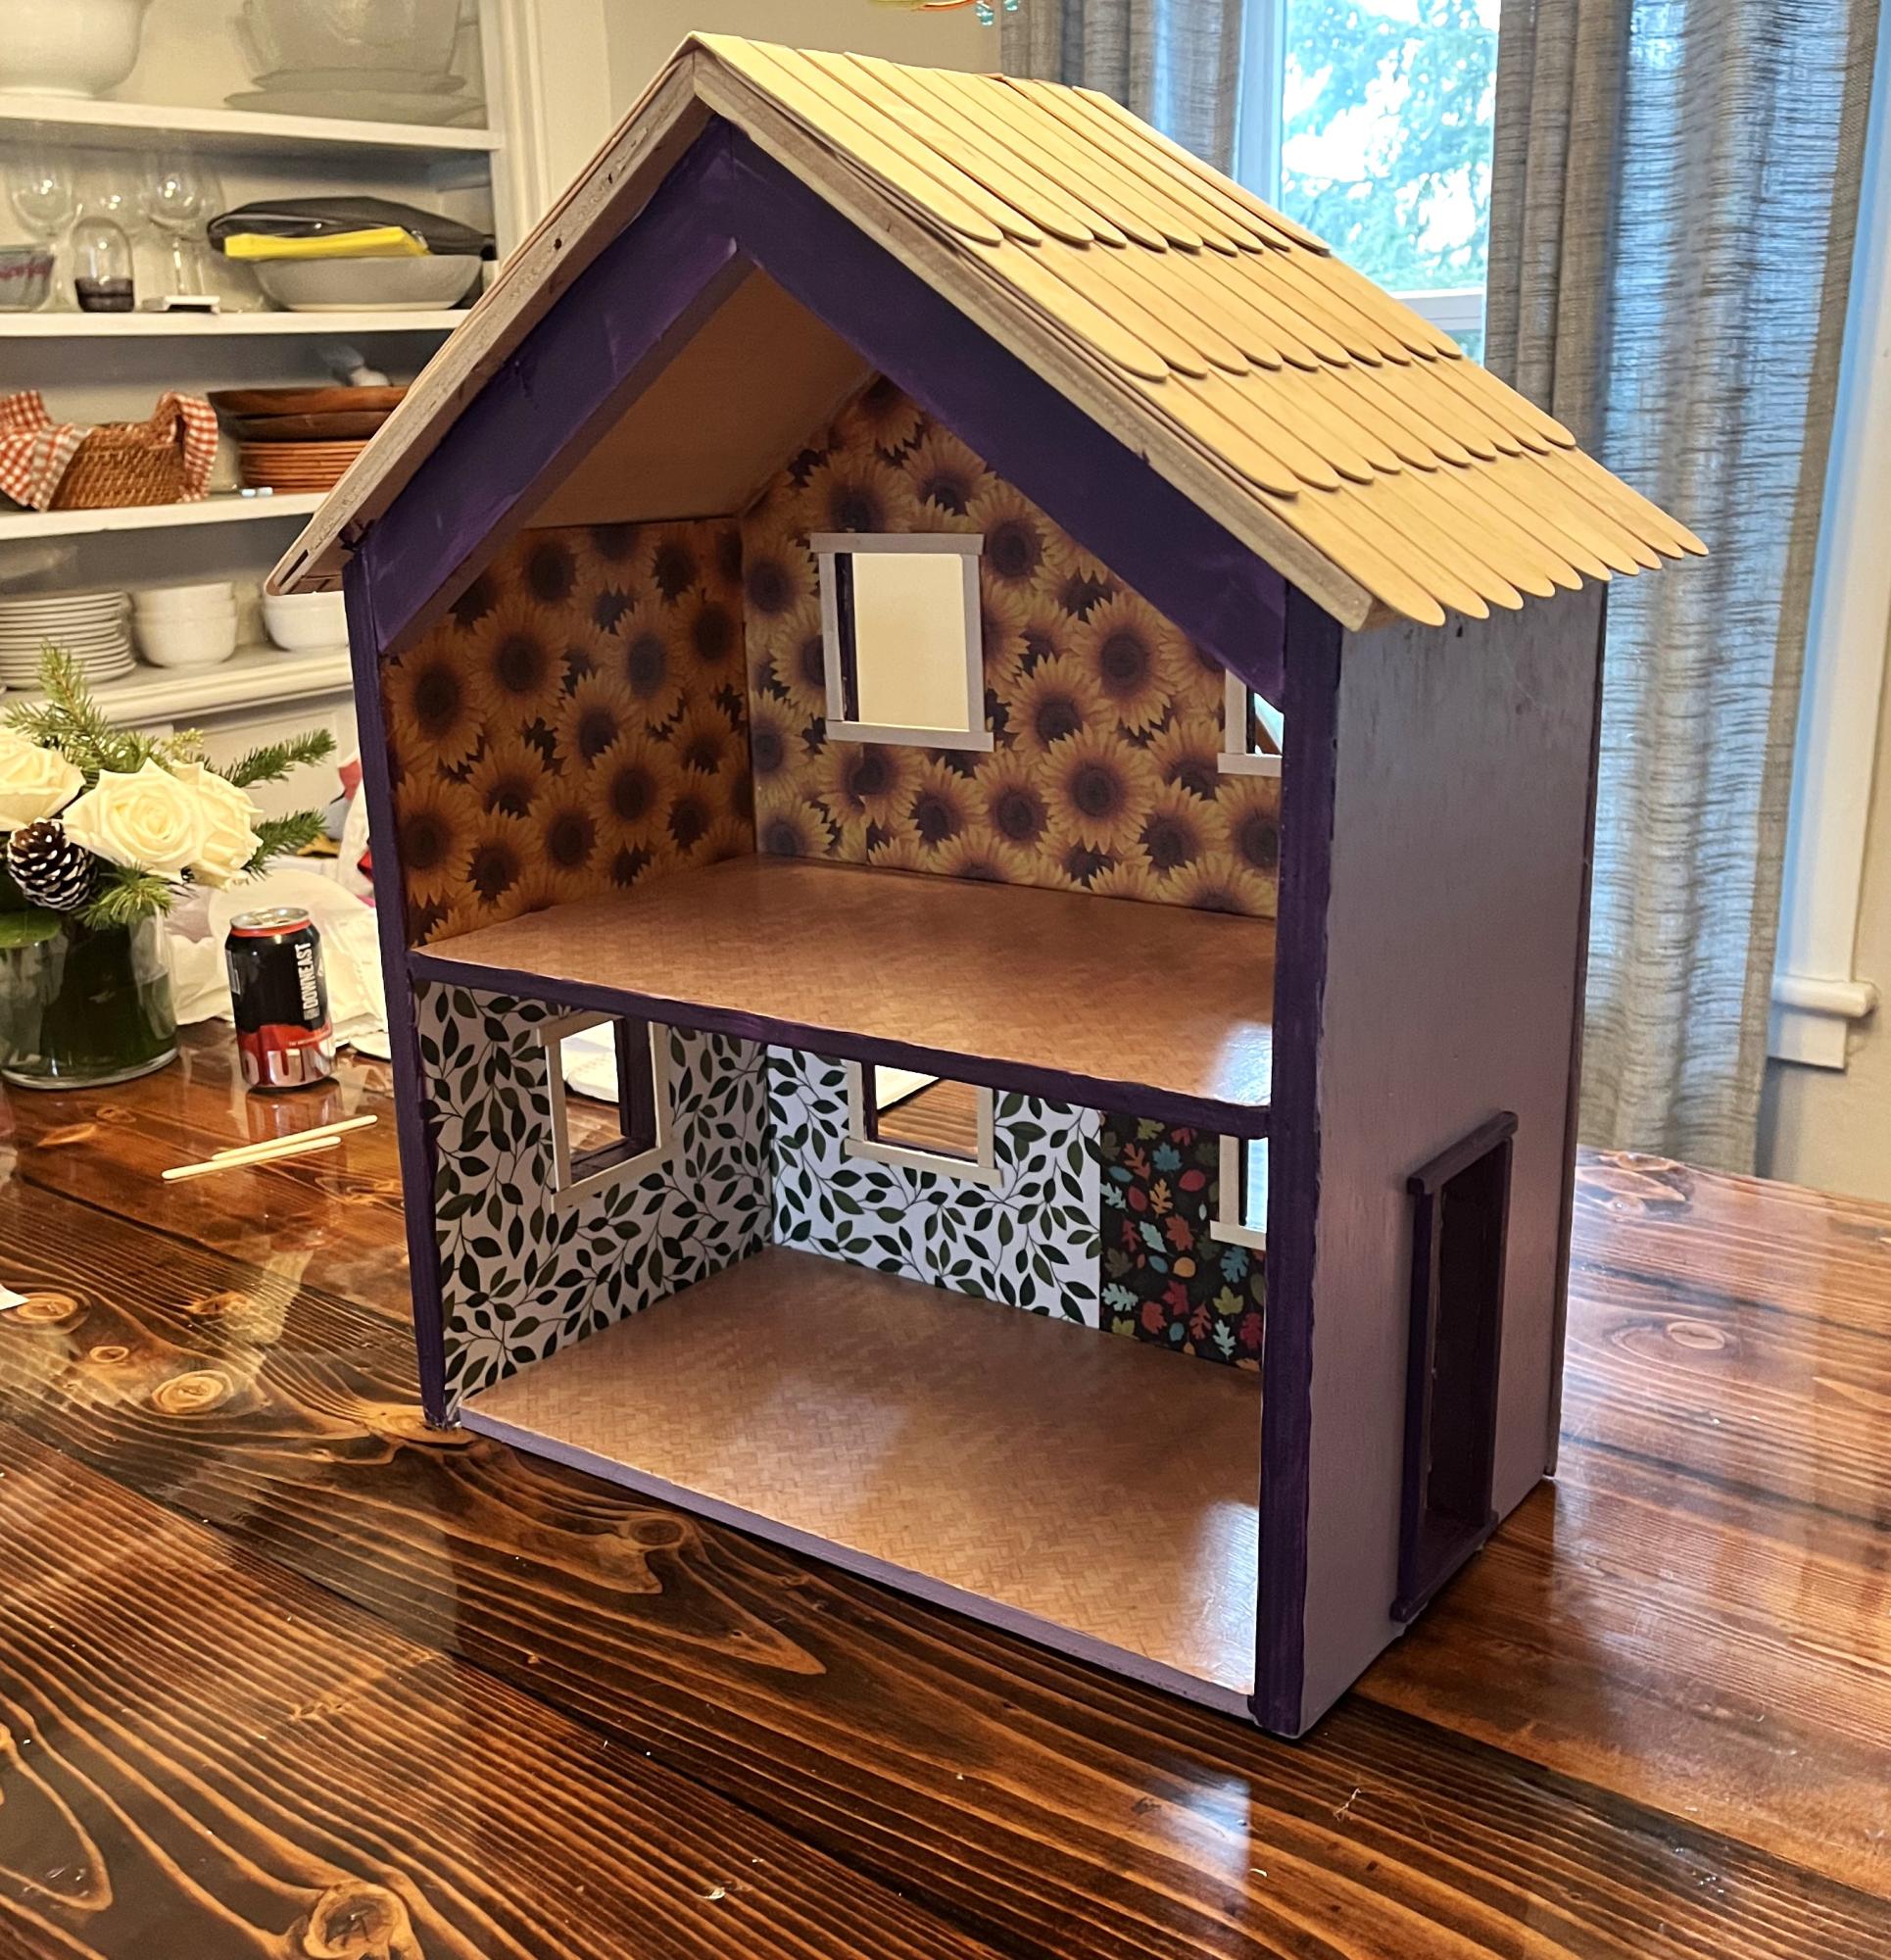
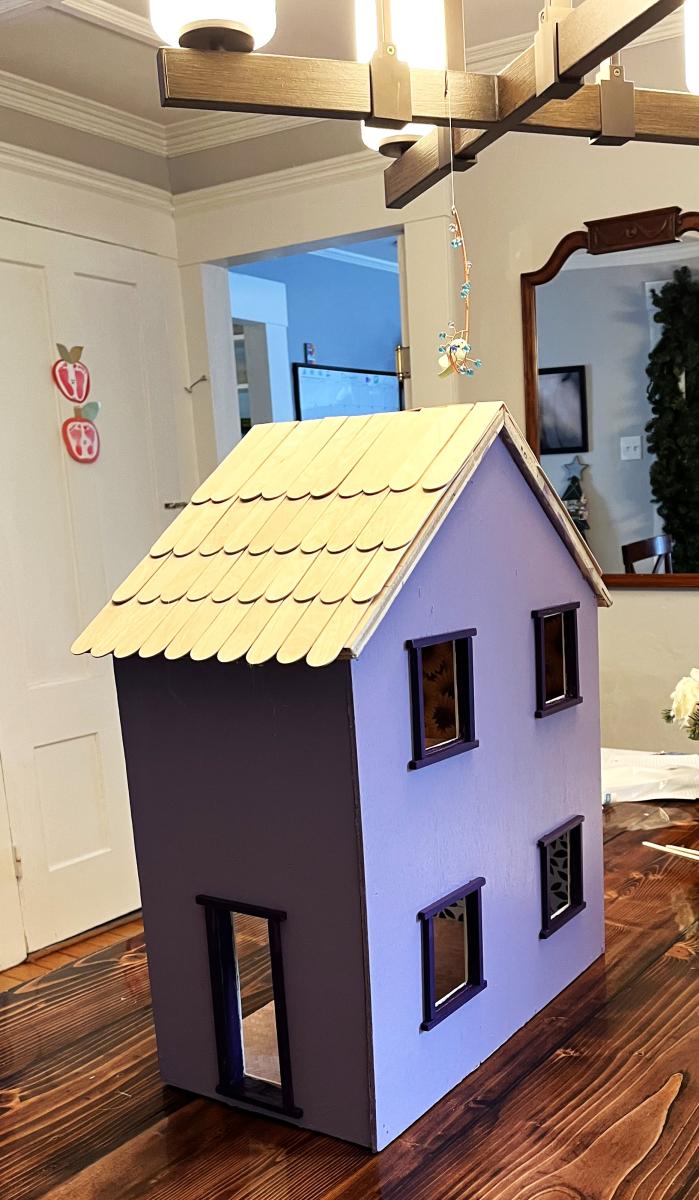
This is for my daughter’s 3rd birthday. I decopaged the walls and floor with patterned paper before assembling. I thought it would be easier.
I also didn’t bother with the middle ‘front’ door. The dollhouse in the example photos look beautiful from the outside, but kids don’t really play with the outside of the houses. So I made the windows a little bit bigger.
The windows and doors both looked terrible. My first time using a jigsaw was not a success. So I used tiny dowels for the trim around the door and craft sticks on the inside.
The last thing I need to do is put some lights in it. I ordered some fairy lights on amazon. I plan to use another dowel that I’m hoping I can wrap with the fairy lights and then wedge in the back on the ‘ceiling’ on the first floor and then Velcro the switch to the side of the house. It won’t look professional or anything, but being able to turn the lights on and off will be very fun.
Casey