Community Brag Posts

Our new storage bench.

Submitted by cherwoods on Sun, 02/23/2014 - 20:29

We followed Ana's plans to the letter and every cut, every corner, everything turned out perfectly! We put about 3 hours into the bench on day one, and finished up on the second day with stain and polyurethane. The only change we made was to make it slightly shorter and have less overhang on each edge.
Thanks Ana!!

Estimated Time Investment
Weekend Project (10-20 Hours)
Finish Used
Jacobean stain with a semigloss poly.
Recommended Skill Level
Beginner

Z-Man's Castle Bed

Submitted by Anonymous (not verified) on Tue, 05/24/2016 - 08:15

Awesome plans!  Followed everything and it came out great.  Thank you soooo much, my son loves it!!!

Estimated Time Investment
Week Long Project (20 Hours or More)
Recommended Skill Level
Intermediate

Rustic Side Tables

Submitted by zawatkins on Sat, 02/29/2020 - 08:04

Simple to build rustic end tables/side tables. These were stained in a red mahogany stain and satin finish polyurethane top coat. 

Built from Plan(s)
Estimated Cost
$115/set
Estimated Time Investment
Weekend Project (10-20 Hours)
Finish Used
Red mahogany minwax penetrating stain
Satin finish fast drying polyurethane
Recommended Skill Level
Beginner

School Bus Stop Bench

Submitted by Anonymous (not verified) on Fri, 10/20/2023 - 08:36

My daughter asked me to make a bench for her daughter’s school bus stop. After looking at many different plans I chose your plans for a 2x4 bench with modifications. I made it 7’ wide with an additional support piece in the center. I used pressure treated wood for the base and cedar for the seat and back. I finished it with a gloss “school bus yellow” and gloss black. It was very well received by the children and parents.

Ken Shallcross


Seasonal And Holiday

3 tier planter hand made from your plans

Submitted by Anonymous (not verified) on Sat, 05/28/2016 - 19:37

Easy 3 tier planter.  Made from Ana White's plan  Made for free from scrap wood  that I pulled out of the trash and portions from a pallet, ripped 2x4 and shipping container.  #ForMereMortals #planter    

Estimated Time Investment
An Hour or Two (0-2 Hours)
Finish Used
None
Recommended Skill Level
Starter Project

Changing table/dresser

Submitted by Anonymous (not verified) on Wed, 03/11/2020 - 16:51

The changing table/dresser came out so much better than I ever thought I was capable of! Thank you for the plans and courage to try!

Estimated Cost
$300
Estimated Time Investment
Week Long Project (20 Hours or More)
Finish Used
Primed with Valspar primer and finished with Valspar semi gloss paint
Recommended Skill Level
Intermediate

Media Console - Revised Ana White Design

Submitted by Indydil on Wed, 05/16/2012 - 10:27

What a fun project. Based on Ana White's Media Console that was very close to what I wanted. I changed up the size to work in my room. I needed a shorter length to fit the space I had. I did not use the doors or drawers. For my first project they intimidated me a bit. I also needed access to the TV box.

I subtracted for the legs so they ended flush with the bottom of the console and used some fun wheels to be able to move it around. Finally, I did not like seeing all of the cords behind it so I added a back with cutout for the cords and painted it the same color as the console.

As it was built "on the fly" I did not keep detailed measurements to share. Can't wait to pick out my next project! Thanks Ana for all you do.

Built from Plan(s)
Estimated Cost
$150.00
Estimated Time Investment
Weekend Project (10-20 Hours)
Finish Used
TV Console. Paint was Find Paints of Europe Hollandlac Brilliant in one of their purple colors.
Recommended Skill Level
Starter Project

Impossible Staircase

Submitted by mtairymd on Sun, 03/02/2014 - 12:37

The Penrose stairs, also known as the impossible staircase, is a two-dimensional depiction of a staircase in which the stairs make four 90-degree turns as they ascend or descend yet form a continuous loop. Although the staircase is conceptually impossible, it does interfere with your perception since it looks like a person could climb forever and never get any higher.

Watching the video is the easiest way to see how it works. I’ve included a drawing which is linked in the video description.

http://www.youtube.com/watch?v=VAAZBhA8Pfc

See my Youtube woodworking channel for additional projects

http://www.youtube.com/playlist?list=PLcLIJdluqiyiI7J9qp5VAXrALMOftr0RT

Estimated Cost
$5
Estimated Time Investment
An Hour or Two (0-2 Hours)
Finish Used
None
Recommended Skill Level
Starter Project

So comfortable!

Submitted by Anonymous (not verified) on Tue, 05/31/2016 - 09:28

This was my first BIG project that I have ever attempted.  Would I do it again?  Probably not, it definitely was a "bite off more than you can chew" situation.  Many adjustments had to be made to fit our needs, however it turned out wonderful and I am happy with the results.


I tweaked the plans for the folowing reasons:

  • Twin XL mattresses - I wanted something thick and soft, as well as supportive.  I was able to find memory foam twin xl mattresses (thank you amazon) and they delivered right to my door.  This was the first factor in changing around all the measurements (to fit the mattresses).
  • L shaped couch - The husband wanted an L shaped couch.  I wanted two identical couches, since it seemed a lot more simple to do this.  I lost that battle, perhaps I gave in to the notion that I could take on the added challenge.

The framing was easy as pie.  We opted to not do the storage concept- we have enough as it is.  We bought fabric online from a fabric wholesaler based out of Chicago (found them on Amazon).  This was probably the most costly out of everything, and with two cats and a dog I deeply regret going with blue-grey canvas.  It looks great, but shows stains very easily.


The padding was relatively simple to do.  I should have done more than just one layer, since it seems pretty hard on the corners and edges.  Again no big deal, I don't lay on the arm or backing.


For the pillow cases and mattress covers, we found a woman who sews in her spare time to make zipper cushions, so we could easily take the cushions on/off to clean them.  This was a little pricey, and I wish I could sew, but sadly I do not have the patience (or sewing machine for that matter).


Stapling the fabric and assembling the couch together... oh what a nightmare and test of patience that all was!  Again since I caved on the L shaped approach, I wanted an arm rest for the "chaise" portion of the couch.  Seemed pretty simple and straight forward, right?  NOPE!  I had to strategically assemble and staple the fabric, so the last part to staple down wasn't in a visible area.  And to top it all off, the framing was too large to just assemble in the garage and bring inside.  Assembled, this five thousand pound monster couldn't even fit through my doorway!  So assembling it all together, and uphostering was done in the living room.  I must say that this is the most solid (and heavy piece of furniture) that I have ever encountered.  If a tornado came ripping through my neighborhood I would probably try to find refuge and hold on to the couch- I can barely move it, it's so heavy.


It was so much fun doing this project.  The fabric portion was a challenge to say the least.  It was a fabric rubix cube, but we got through it with patience and planning.

Built from Plan(s)
Estimated Cost
1500
Estimated Time Investment
Week Long Project (20 Hours or More)
Recommended Skill Level
Advanced

Floating Shelf

Submitted by sophie on Mon, 05/21/2012 - 00:09

I took the building ideas from Ana's shelf but made mine a lot bigger so that it snaked up the wall as boxes.
It was a really easy project to do - the most complicated parts were measuring out exactly where to make the cuts and keeping them straight with the jigsaw.
I attached my shelf to the wall using keyhole hangers rather than L brackets as suggested, as I wanted floating shelves where you can't see the hanging hardware.
Have a look at my blog for photos of the hanging hardware and more photos of the shelf.

Built from Plan(s)
Estimated Cost
€50
Estimated Time Investment
Afternoon Project (3-6 Hours)
Finish Used
High gloss white paint
Recommended Skill Level
Beginner

First project: Farmhouse Storage Bed

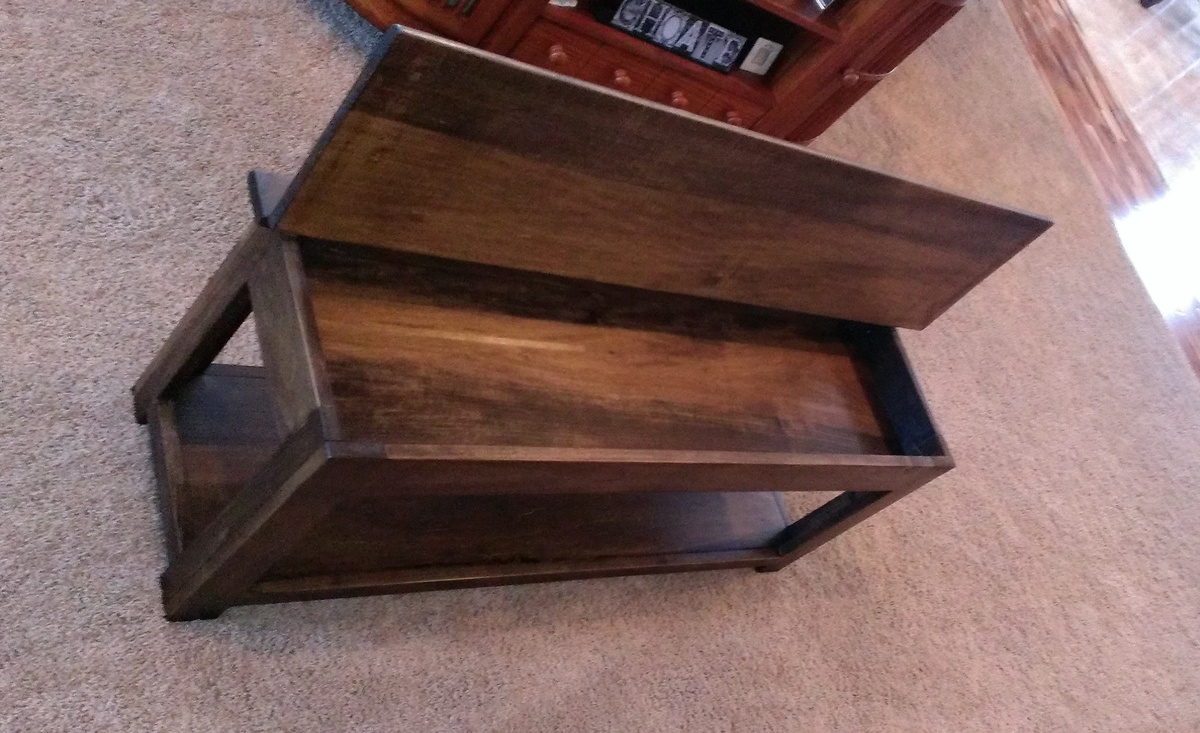
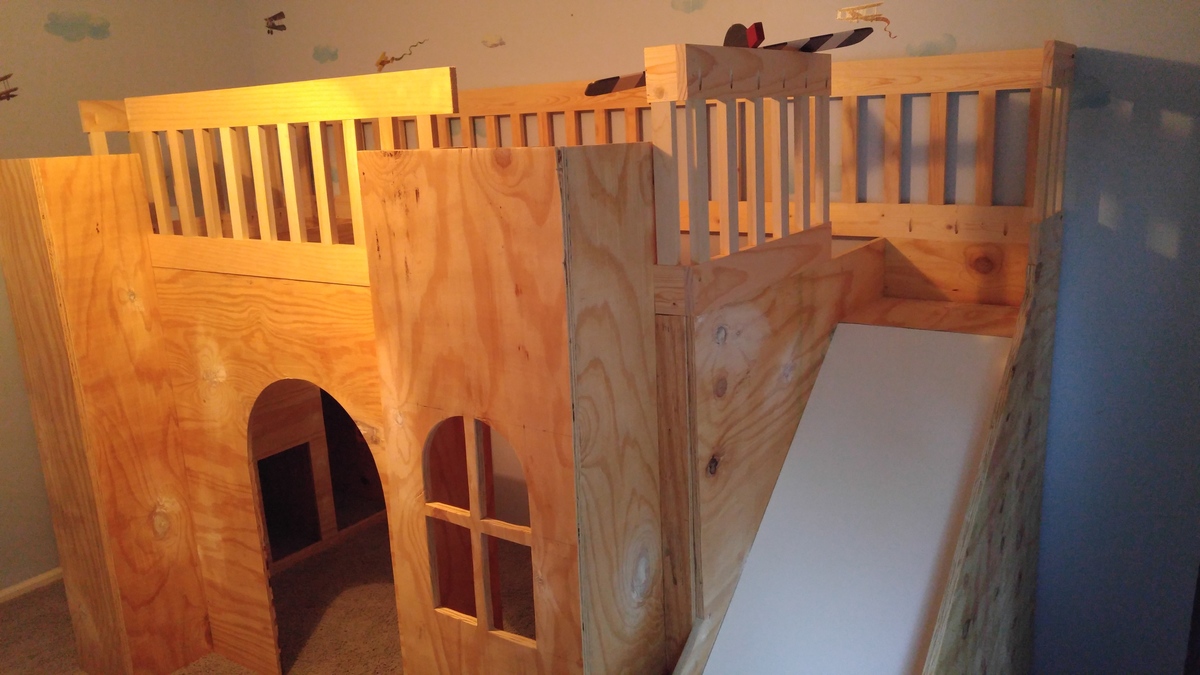
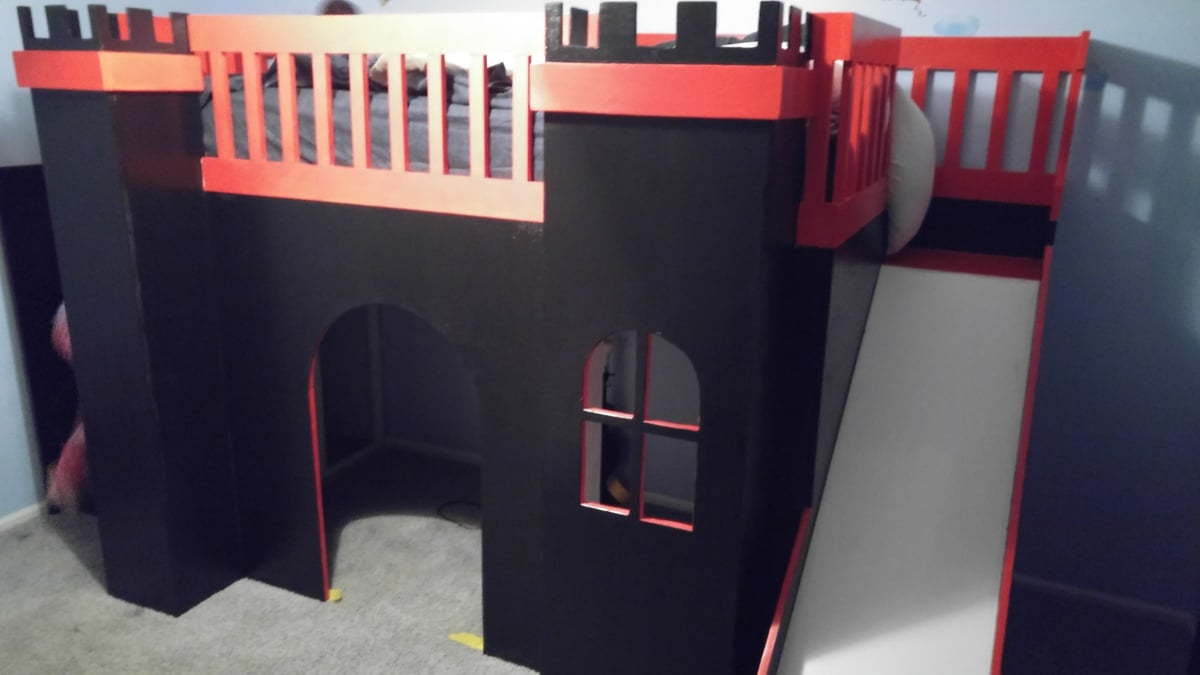
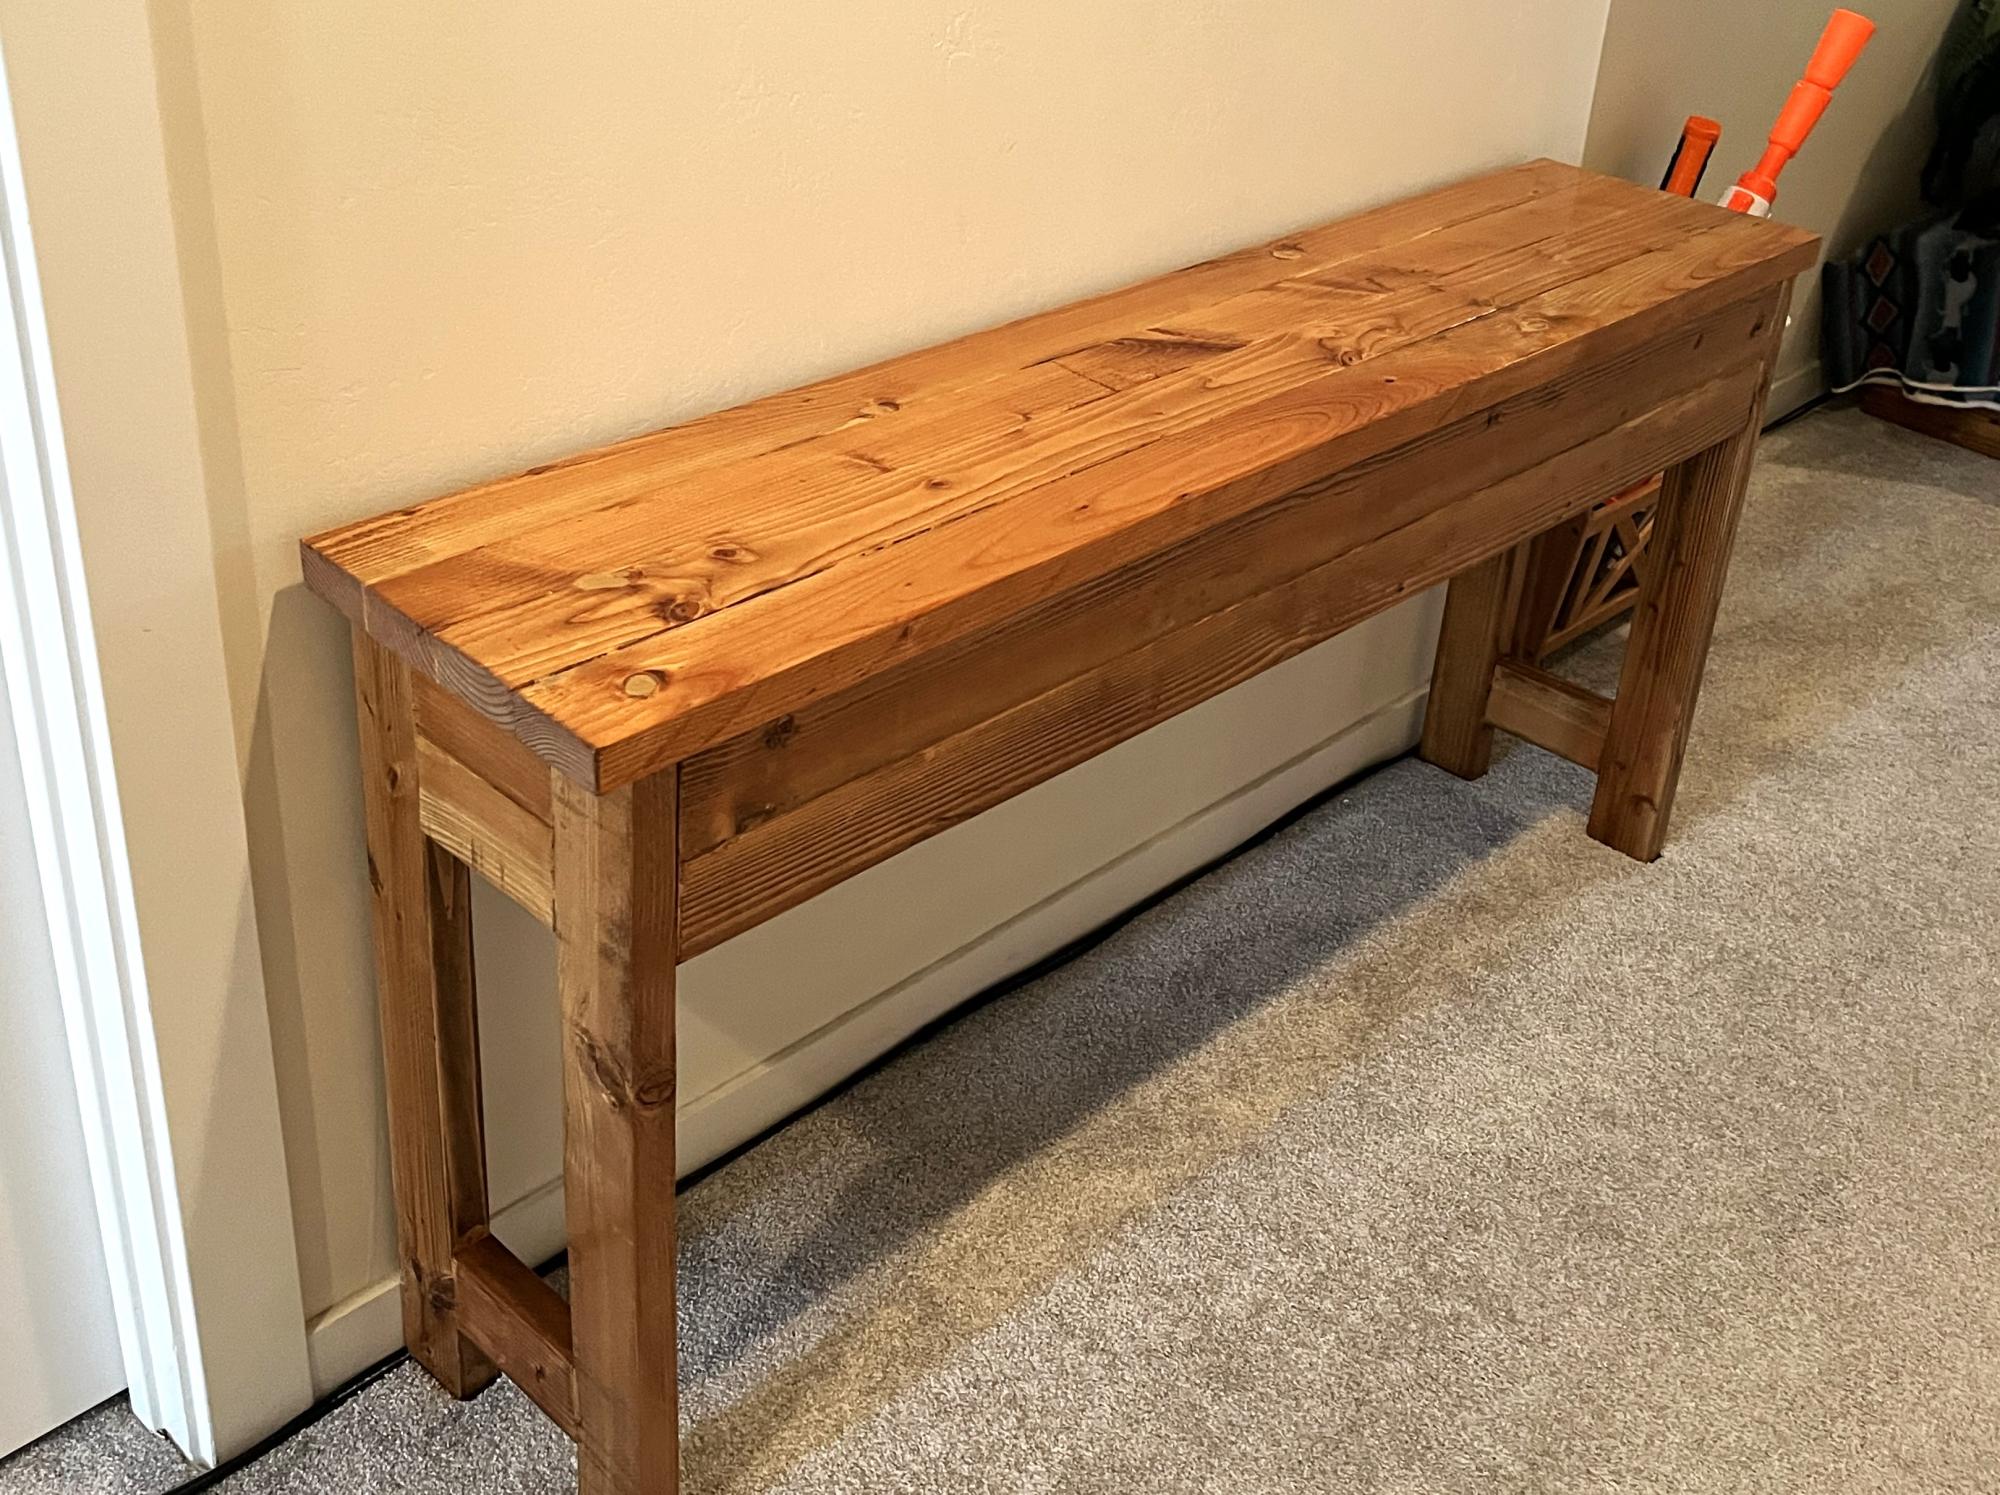
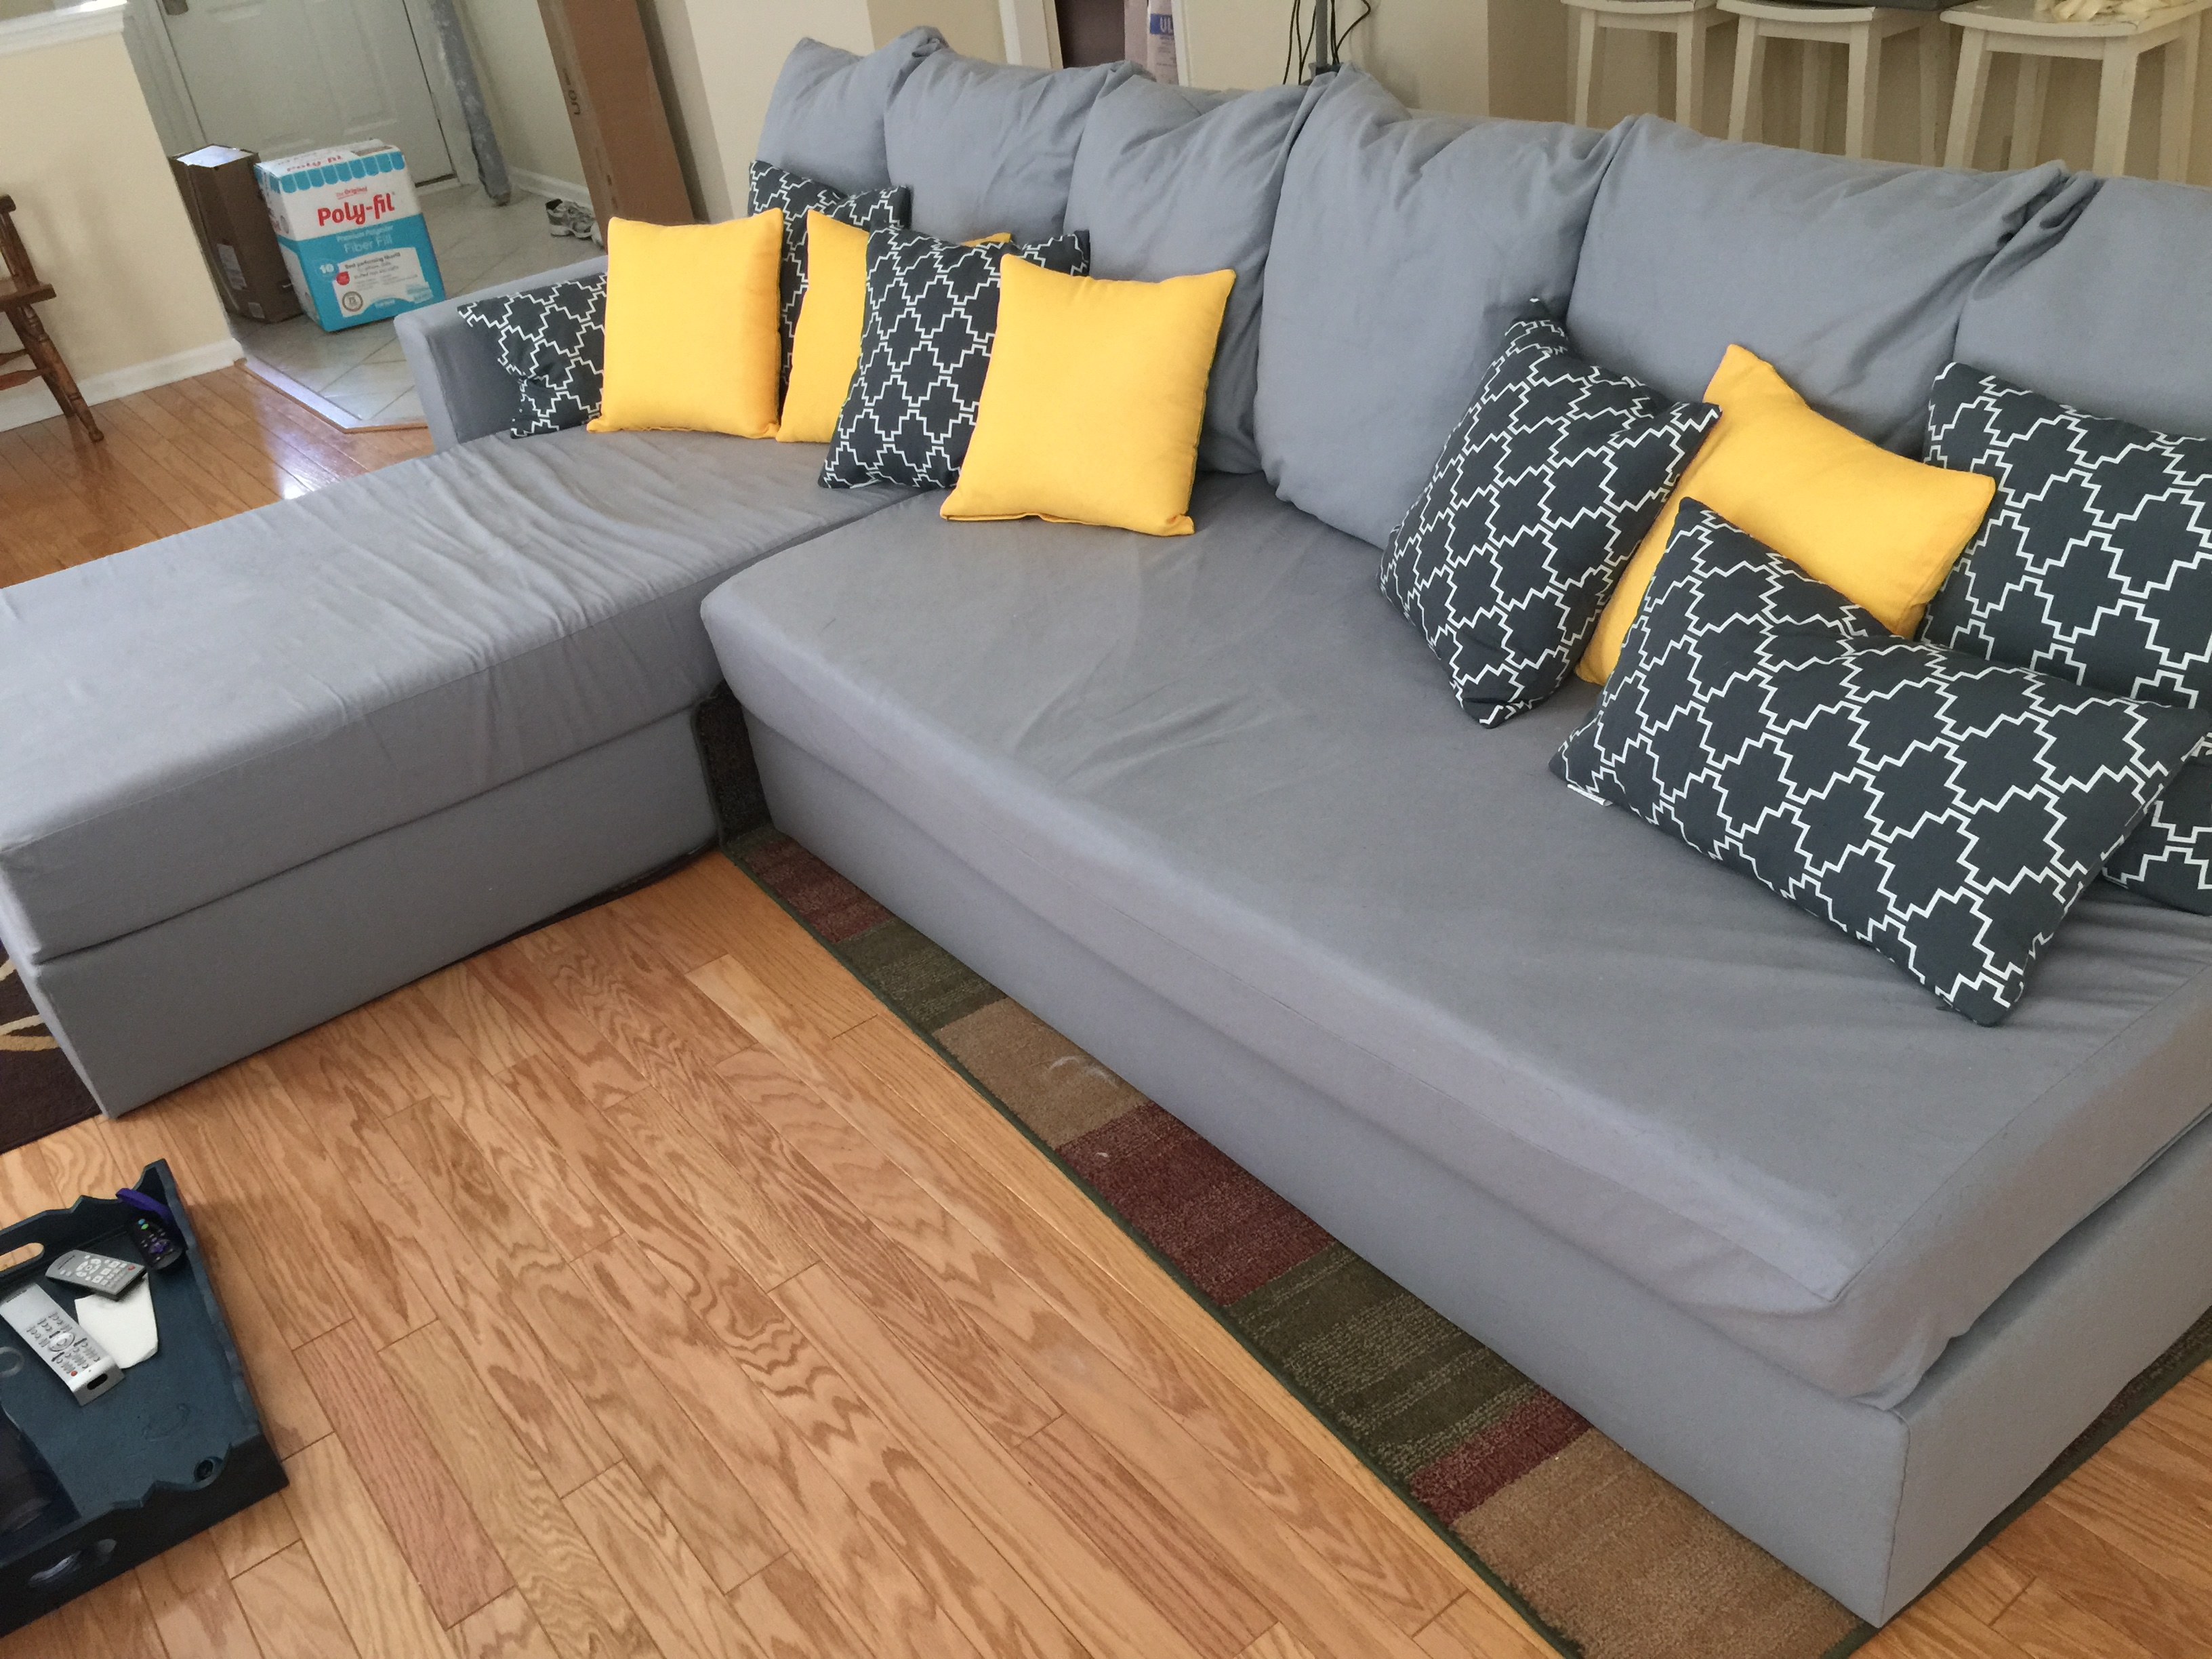
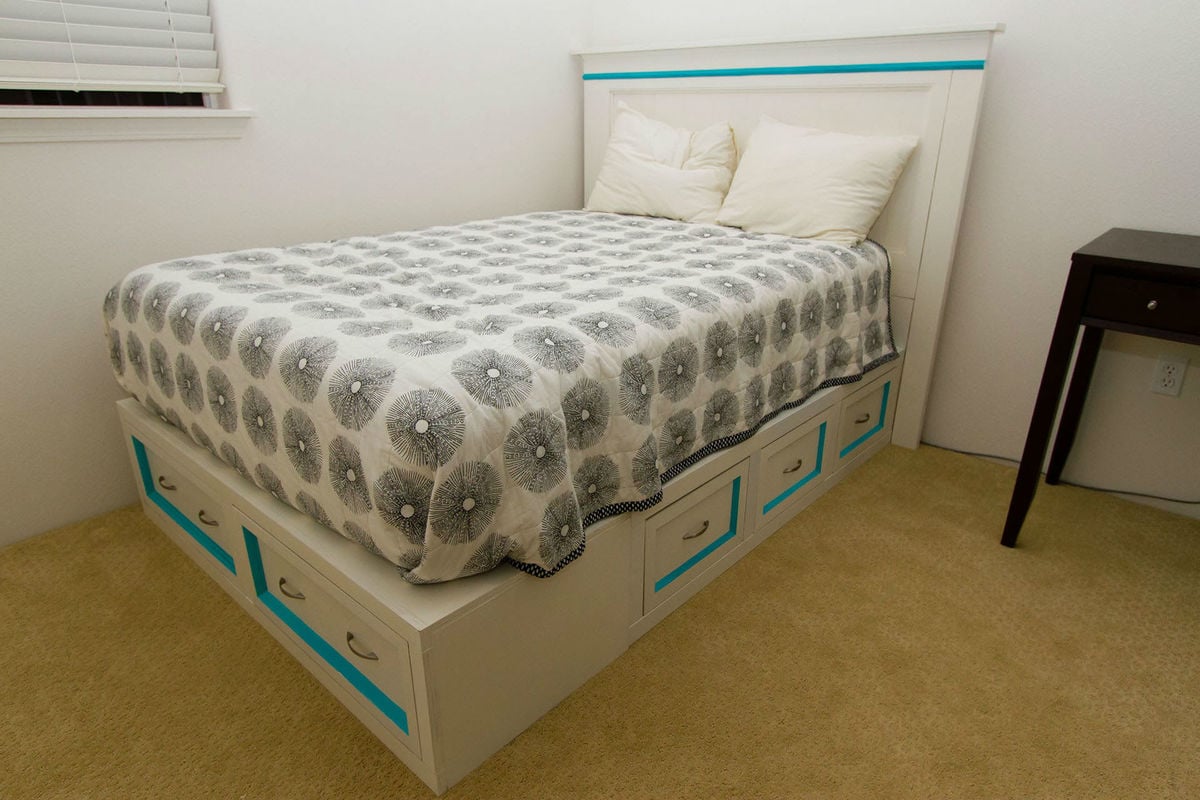
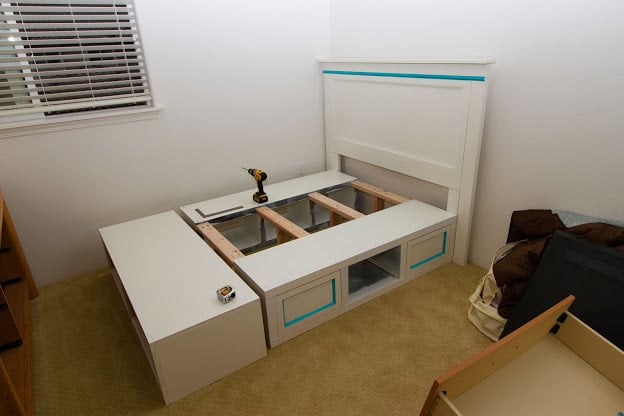
This bed frame was my first project. There are some mistakes, but overall, I love the way it turned out. I combined two plans: "Mom's fancy farmhouse bedframe" and the storage bed.

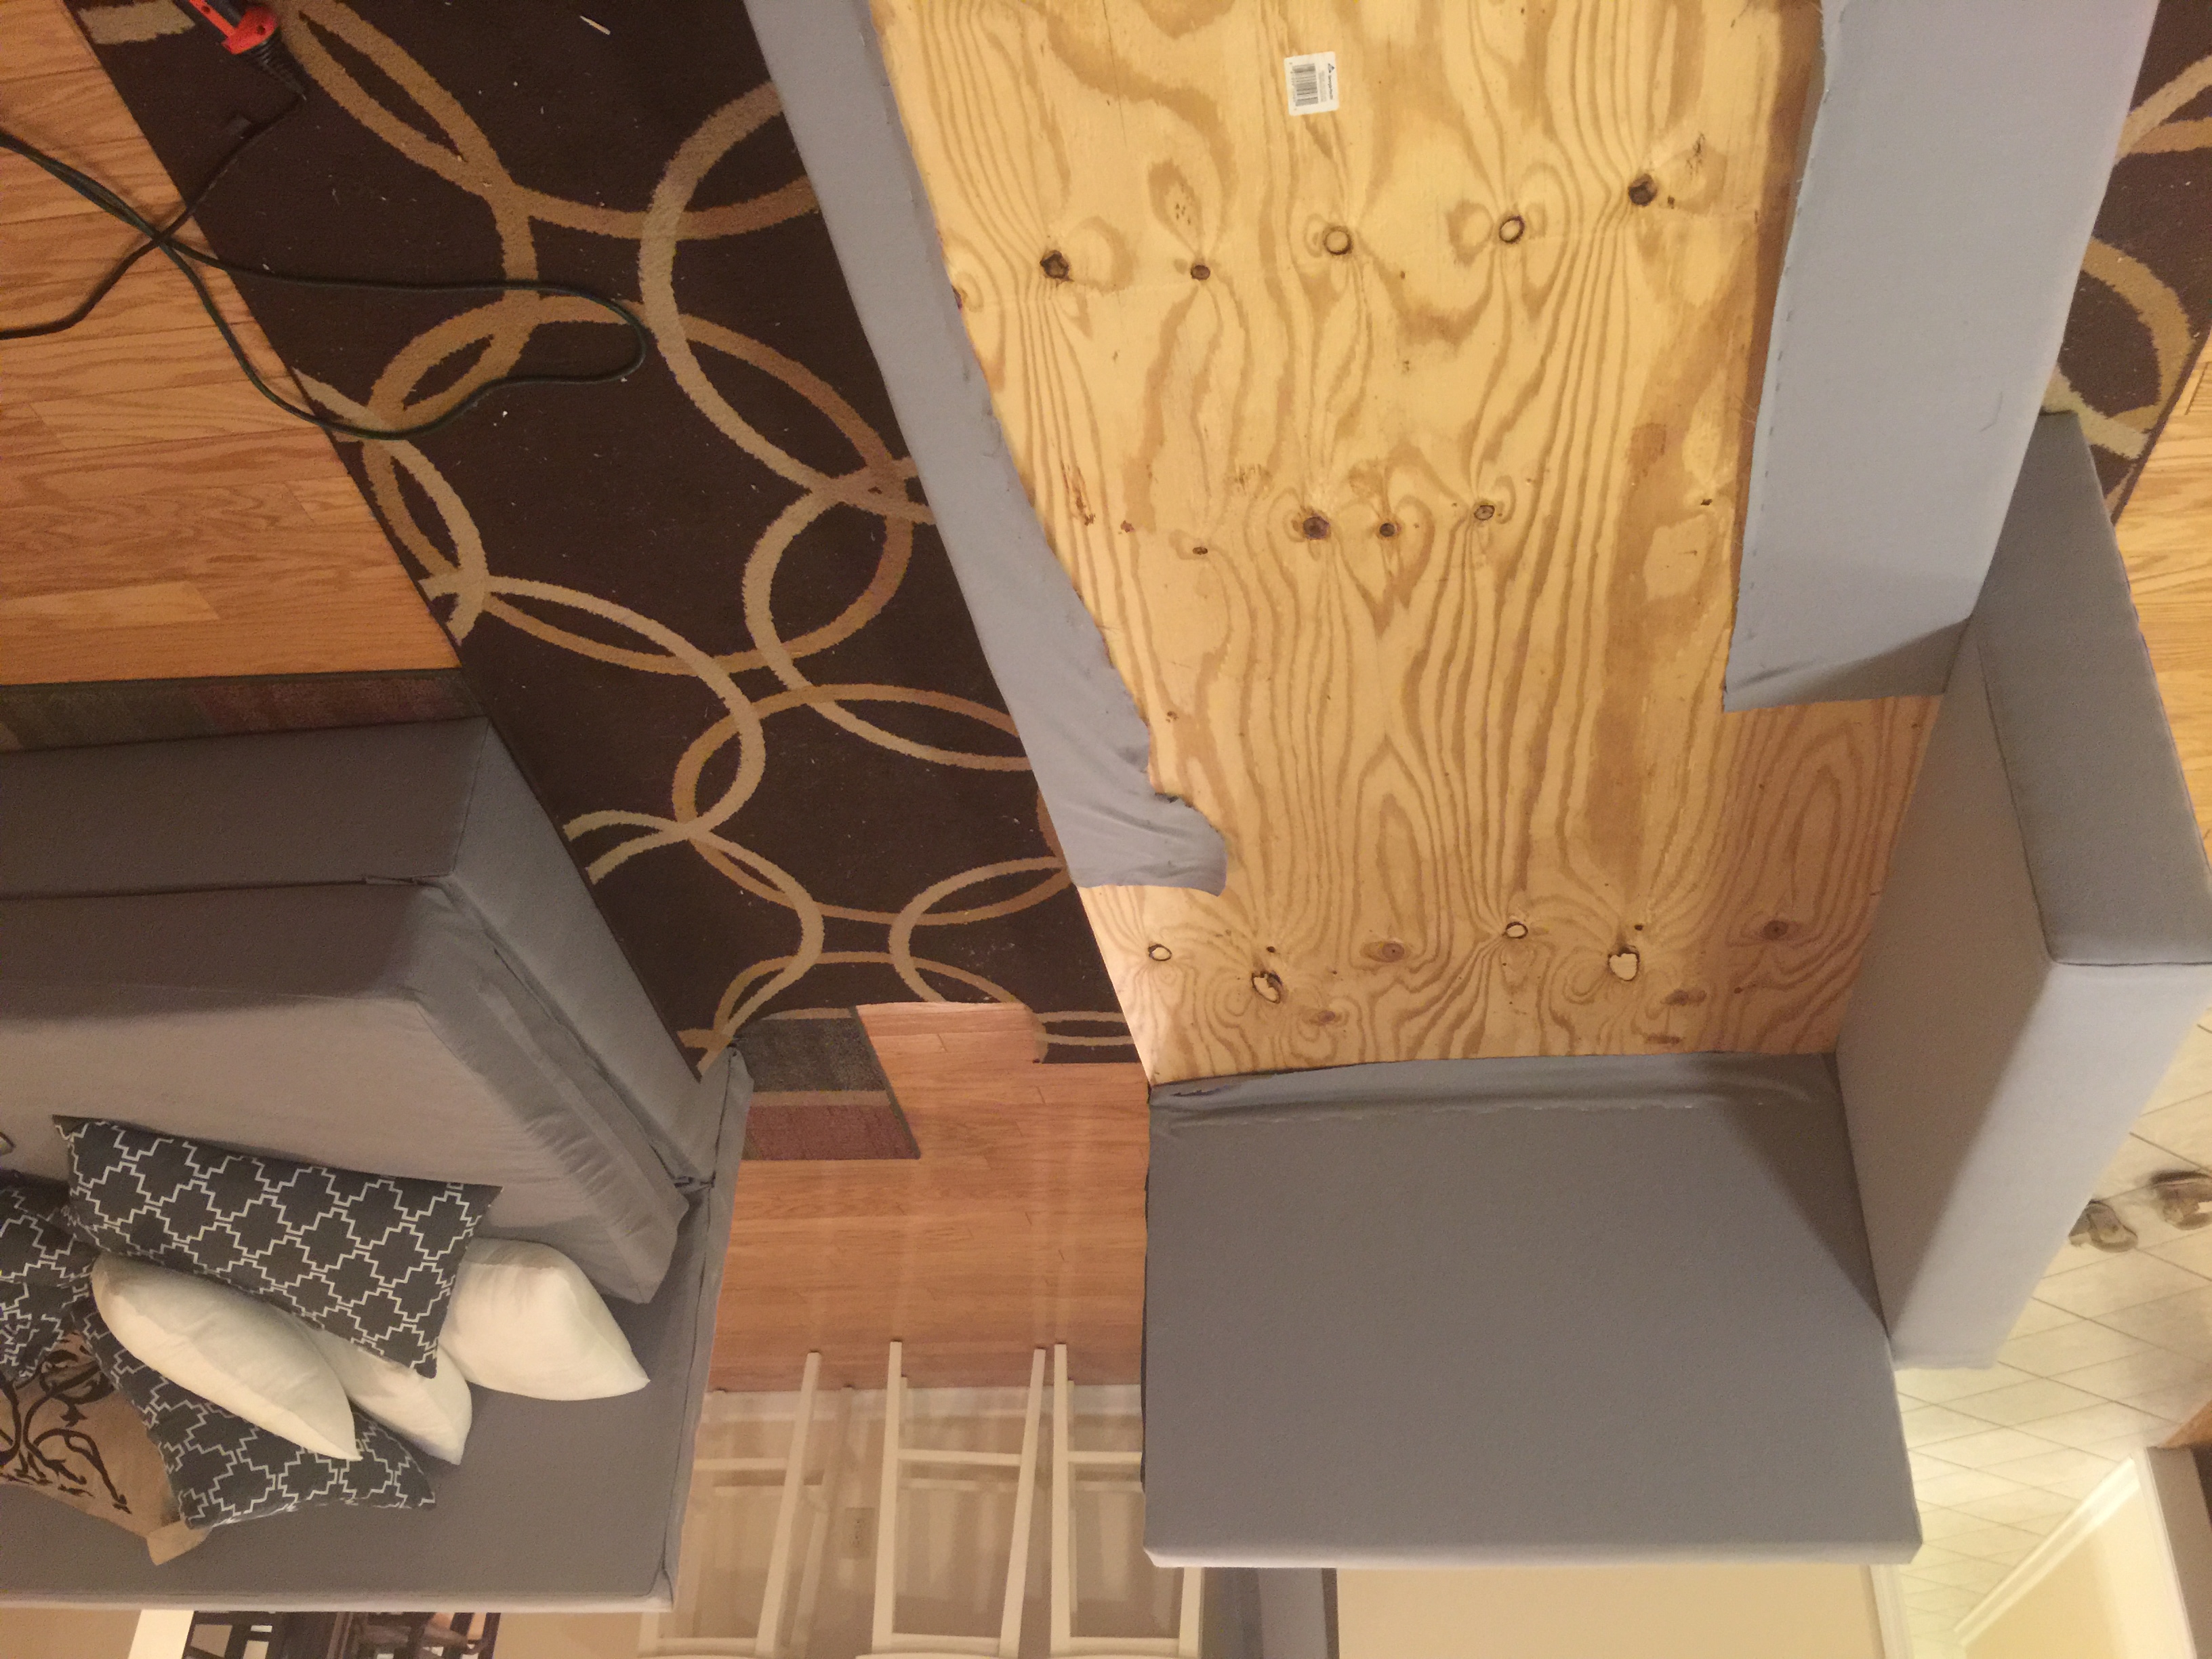
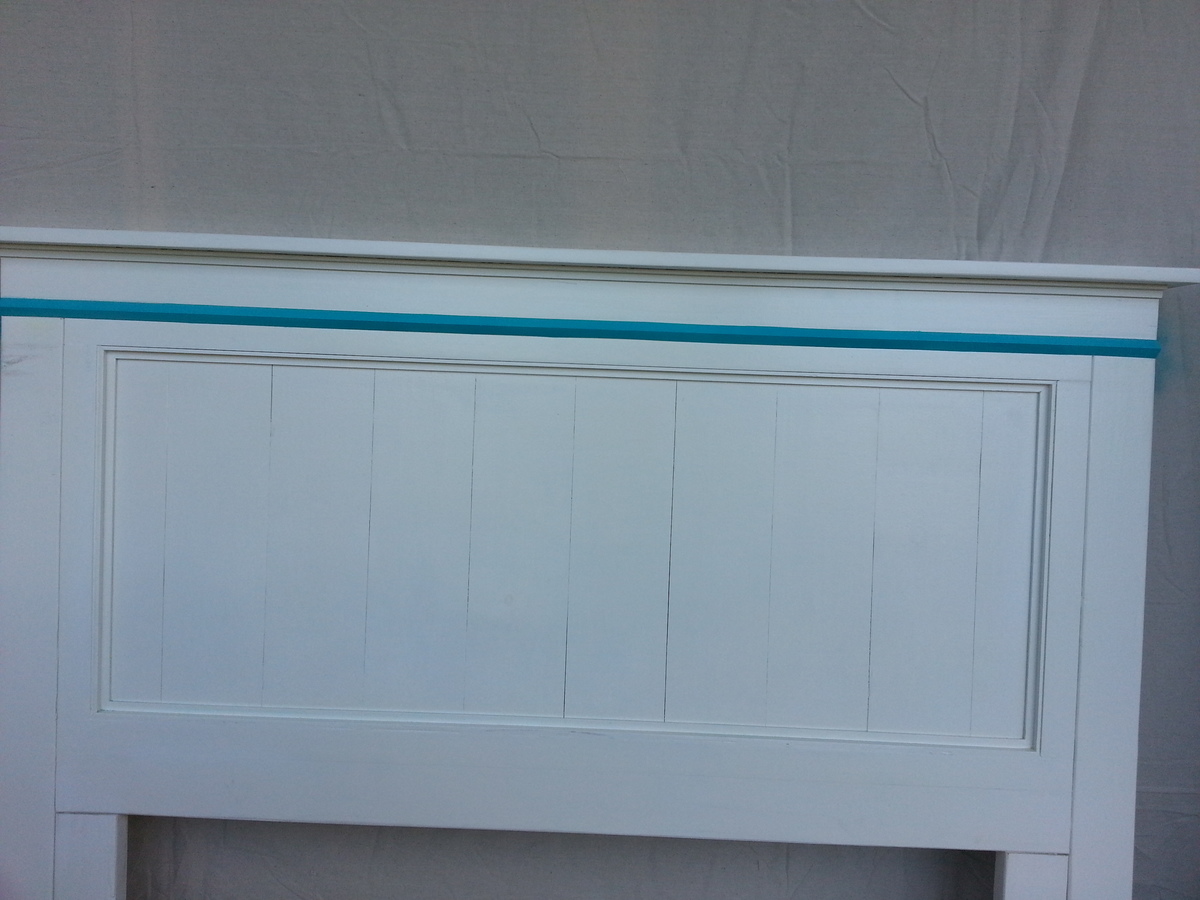
I love the look of wood and would have loved to stain this project. However, this project was painted due to the fact that I repurposed Ikea bookshelves for the two side pieces. The pieces I built were the headboard, bottom storage bench, and the drawers. 

There are a couple of things I learned during this project. 

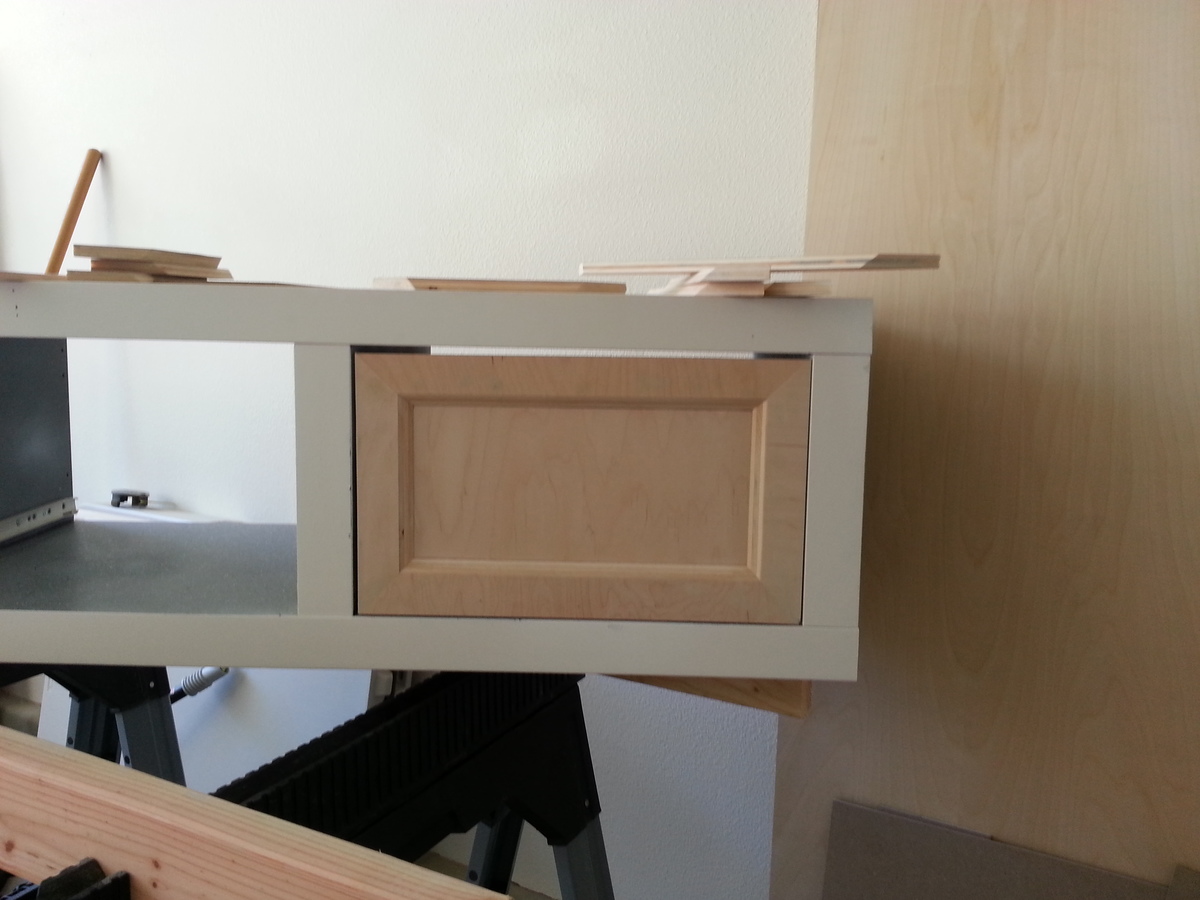
1. Measure, remeasure and if you're building pieces like drawers to fit your frame, measure just one more time. I did not plan to frame the bottom storage box I built, so when I made measurements for my drawers, it was for the frameless box. I, however, changed my mind and ended up framing the box and cutting the drawers. I put them together and checked to see if they fit and ooops.....they don't because I added frames. So, lessoned learned was to double check before I make cuts especially since I made measurements at the beginning of my project. 

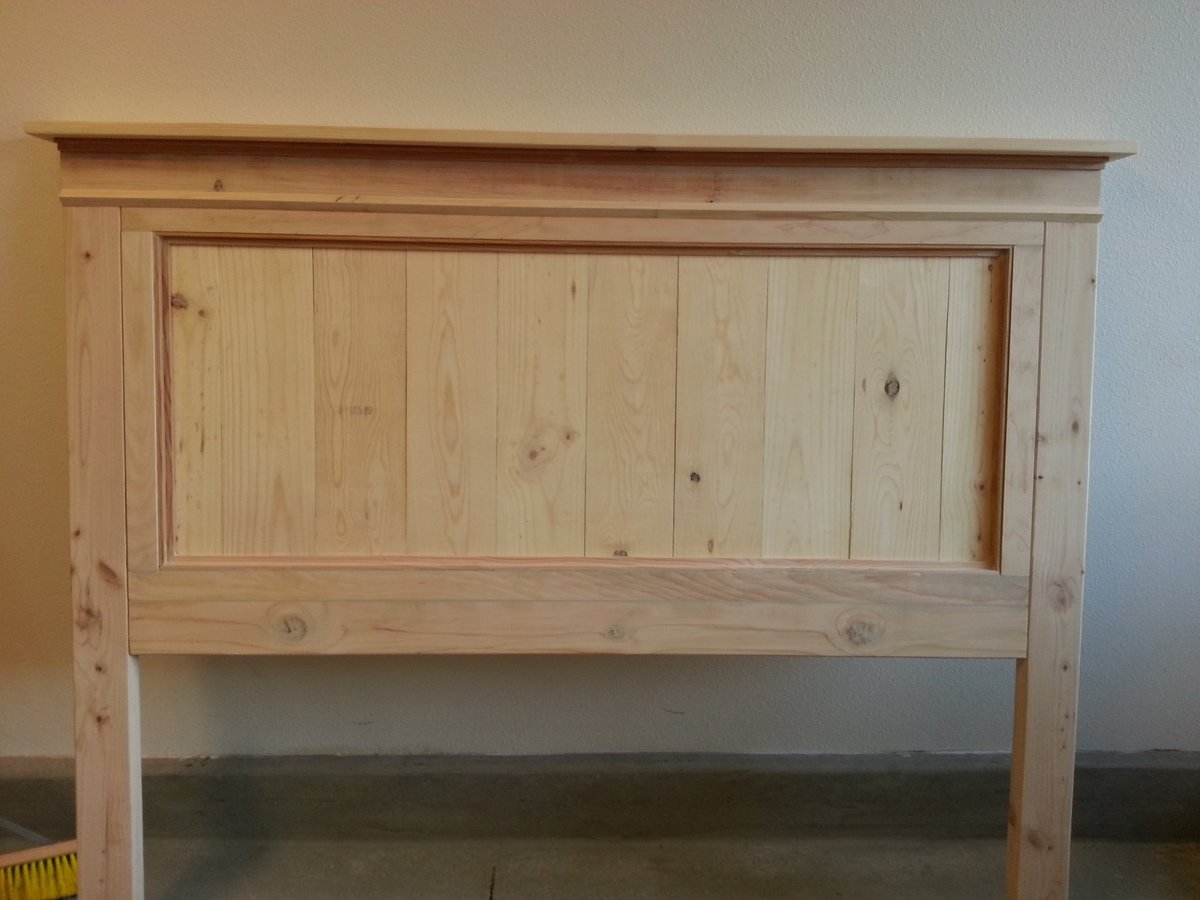
    1A. I also ended up going off the measurements for the "farmhouse bed frame" for the headboard and didn't match my calculations for the storage bed frame to match. So, the headboard ended up being wider than intended and it sticks out. I did not end up rebuilding the headboard or the bedframe since I thought it would be too much work.

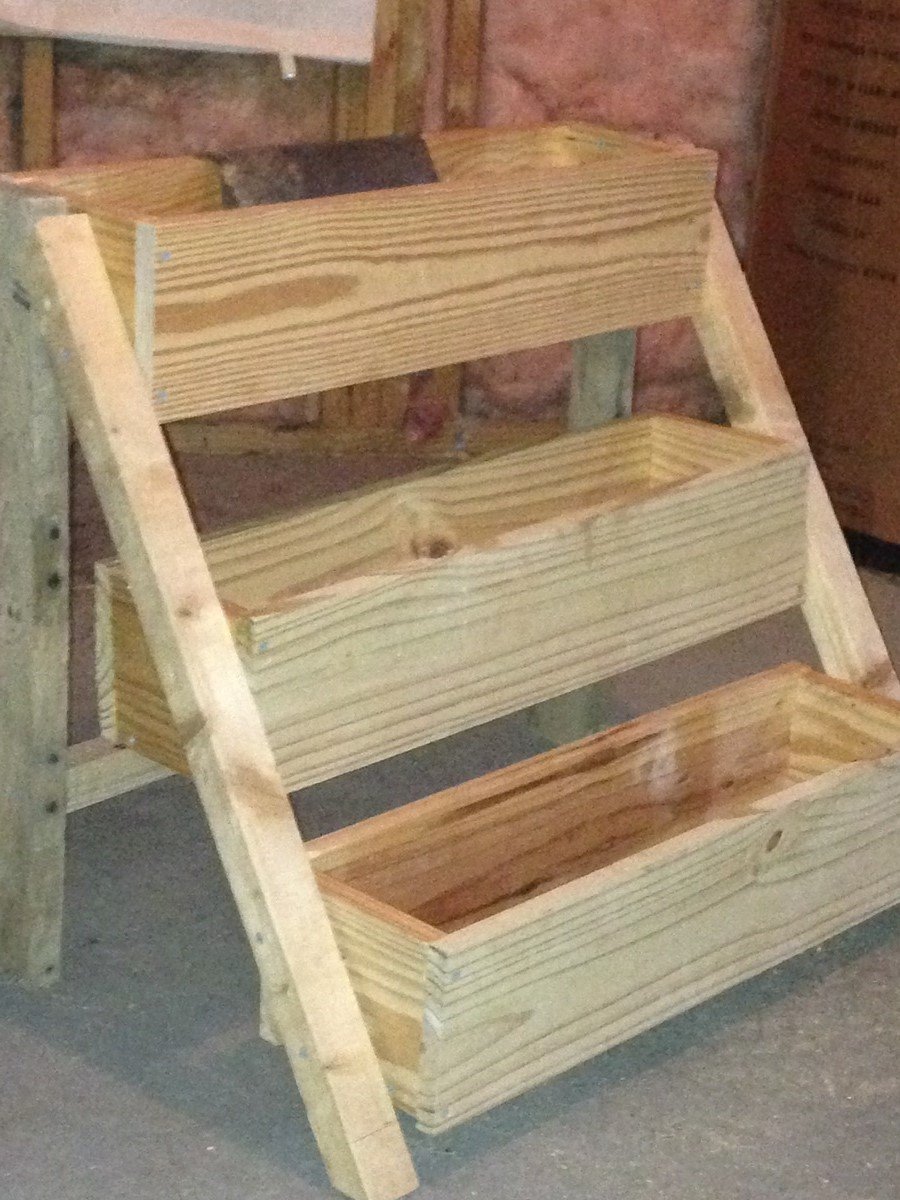
2. Making drawers did not agree with me. I seriously had to redo my first drawer four times due to my mismeasuring or calculating. After everything clicked, the rest of the drawers were a breeze.

3. The drawers I made with 1/2 plywood. Looking back, I would have made them with 3/4 plywood. I also would have made the drawers shorter so I could have built the faces of the drawers using Ana-white's drawer face plans (they seem so much easier!).

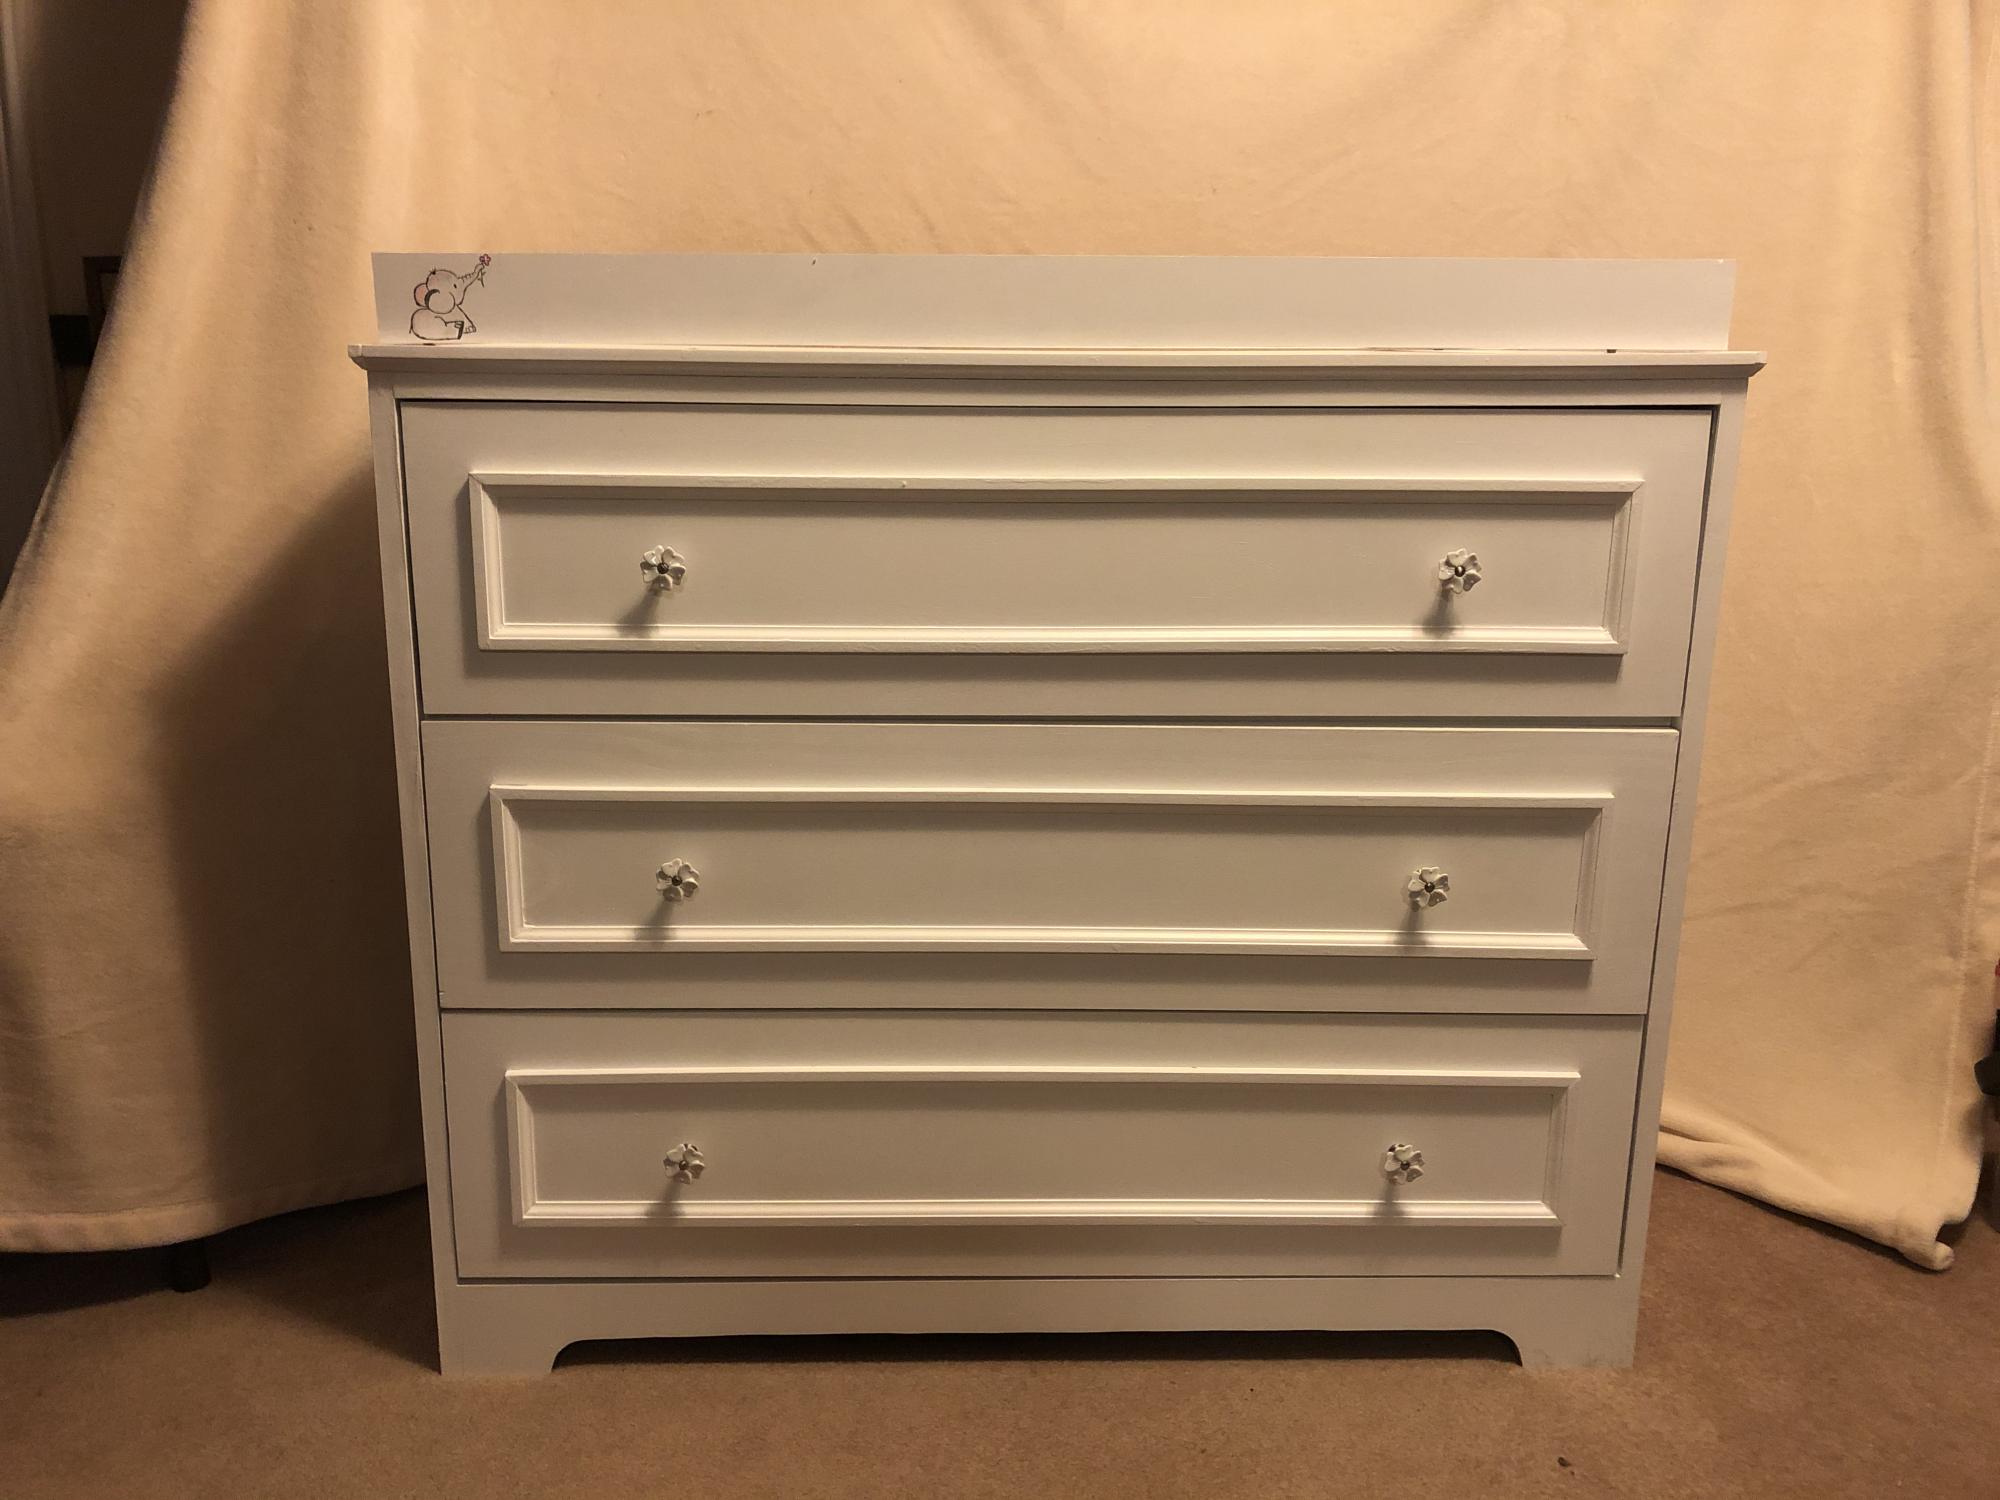
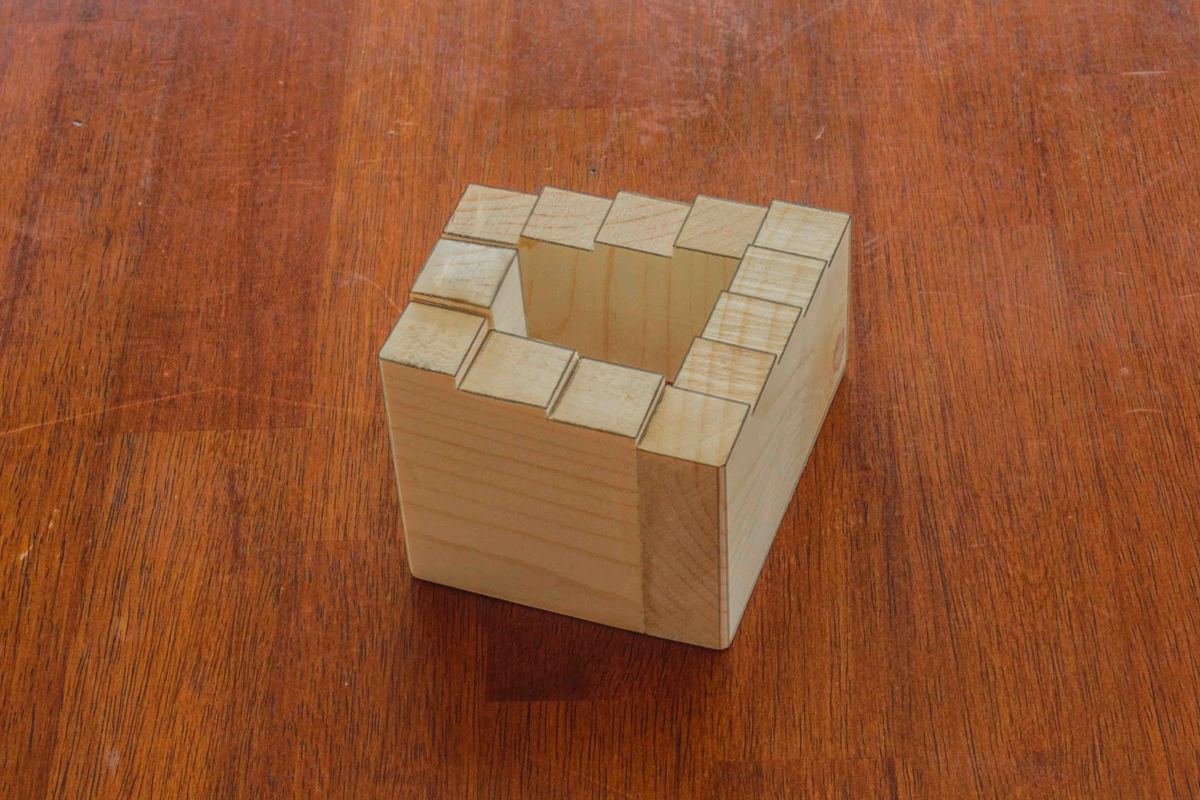
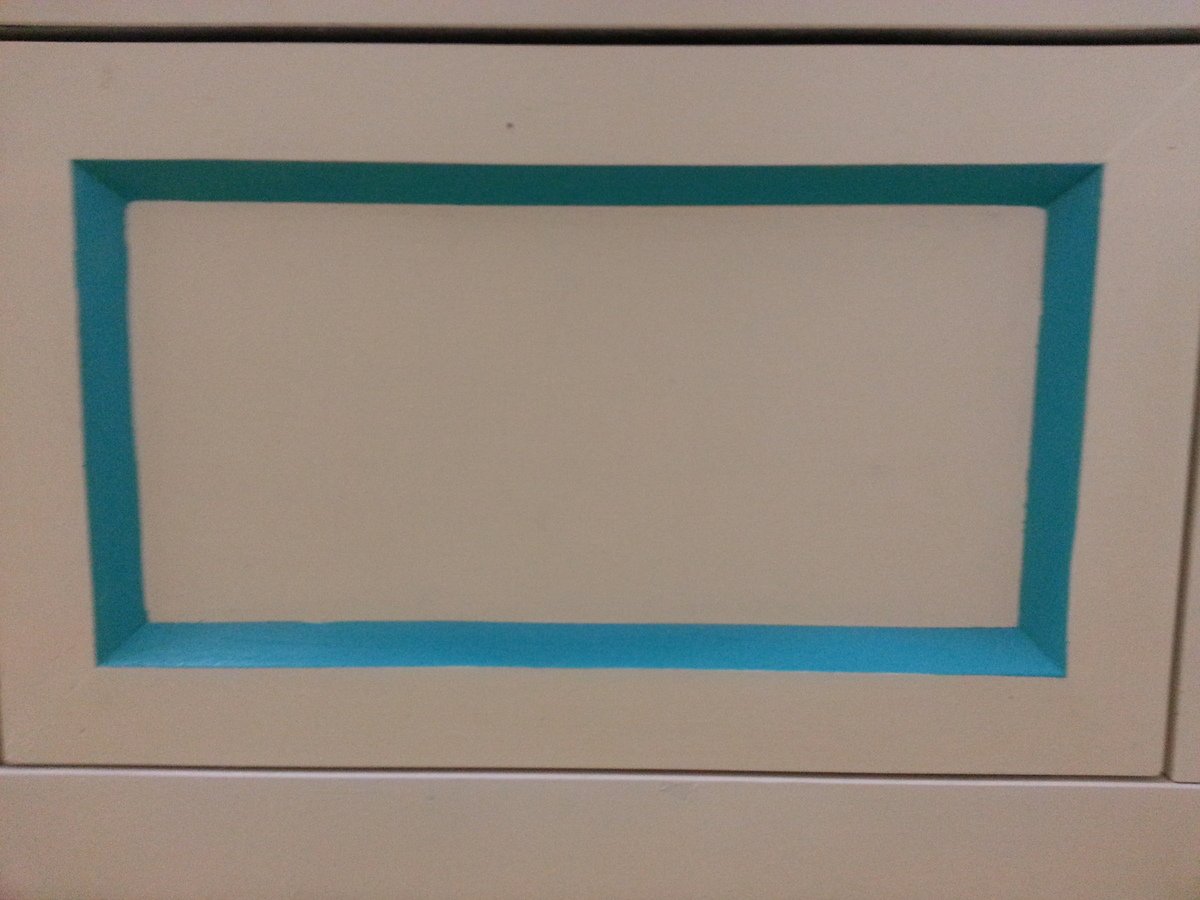
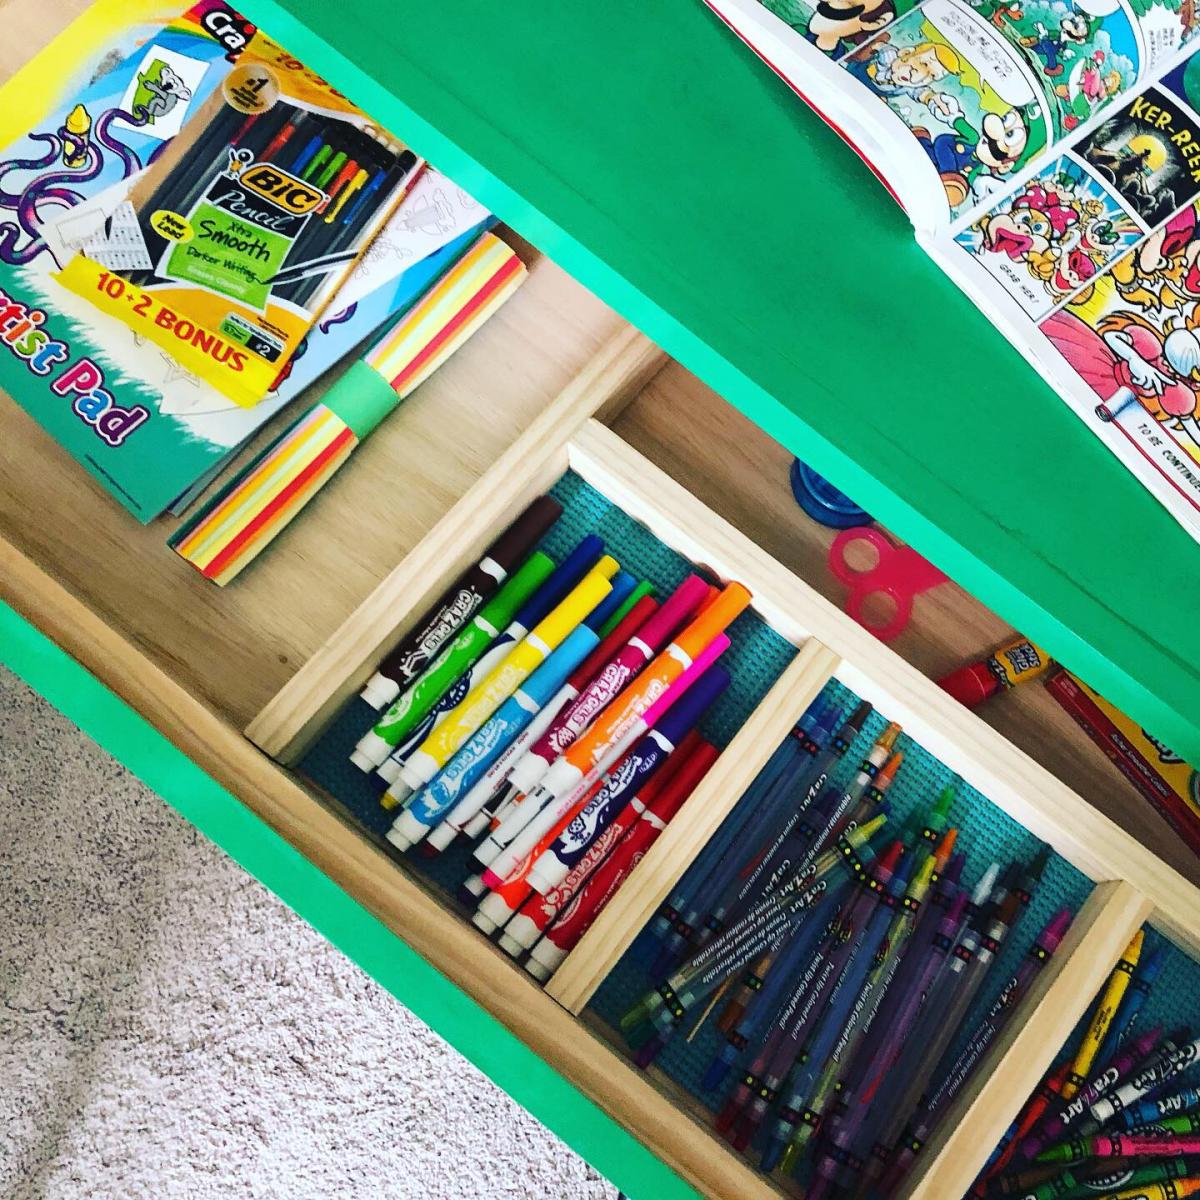
4. The drawer faces were made with 45 degree cuts to add more interest vs the straight pieces of wood. I'll admit, this was my husband's idea and I LOVE it. However, getting the pieces just right weren't the easiest thing (and they aren't perfect, but it's our first project and it's good enough). It made painting the bevel a little more difficult too.  So, if I were to do this again, I would have made the drawers shorter, used 1/2 ply for the face and glue the frame on the 1/2 ply to attach to the drawer.

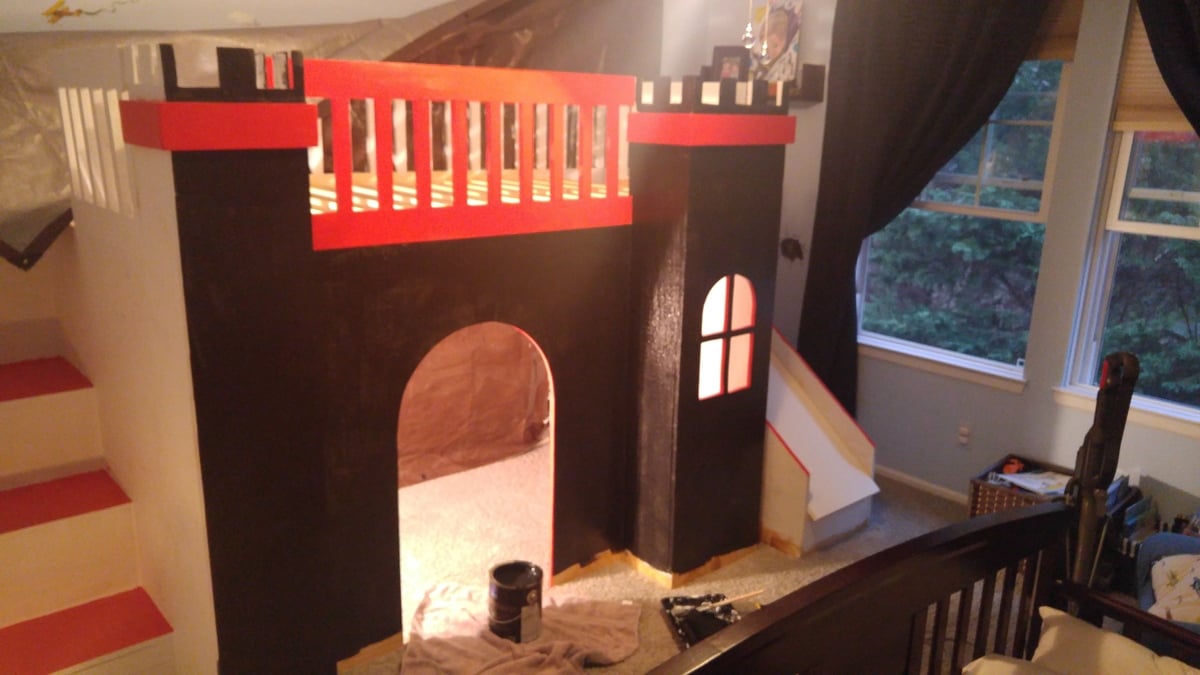
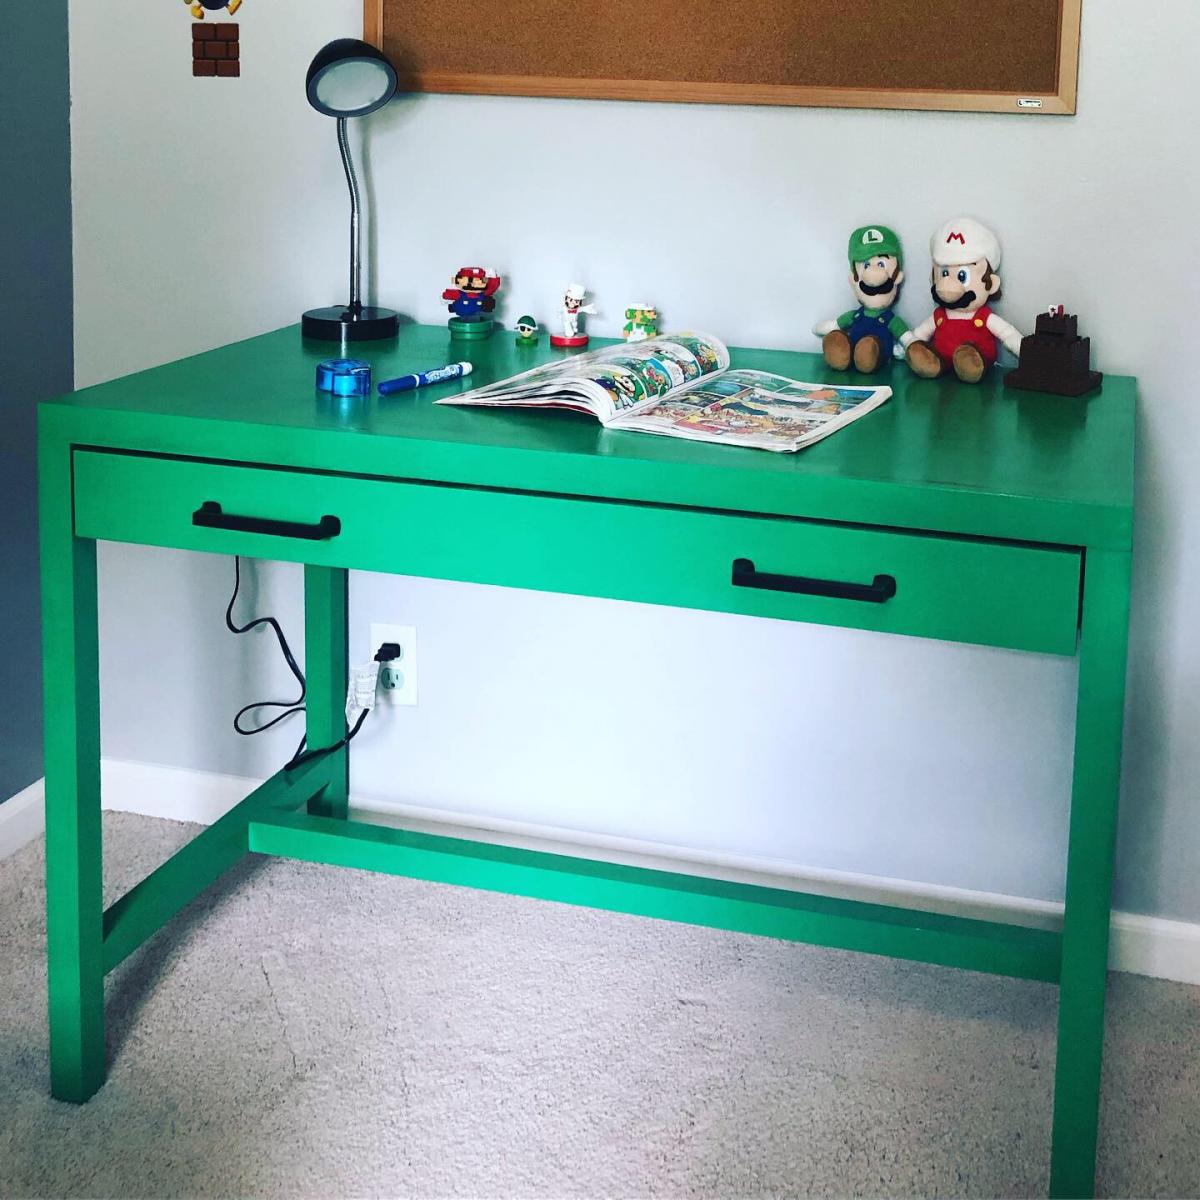
5. The finishing part took the longest. I used Glidden semi-gloss white paint off the shelf. I actually used old paint that the previous owner of my house left. I would NOT use old paint again. The paint must have been at least 3 years old and I thought I mixed it well, but it seems like there's some yellow in the paint. I'm guessing I didn't mix it well enough.

Estimated Cost
$200
Estimated Time Investment
Week Long Project (20 Hours or More)
Finish Used
Glidden semi-gloss in white (off the shelf), Rustolem Seaside, and Minwax polycrylic.
Recommended Skill Level
Beginner

Farmhouse Table

Submitted by Anonymous (not verified) on Thu, 06/02/2016 - 22:18

This build was my 5th build and turned out pretty good. I used weathered oak for the base and early american for the top. I will be building a few farmhouse benches to go along each side, and then pick up some oak chairs to refinish for the ends. Total cost for table was probably around $110, since I had polyurethane on hand, and it took me a couple weekends to build. Love how it turned out, very stable table!.

Estimated Cost
$110 +/-
Estimated Time Investment
Weekend Project (10-20 Hours)
Finish Used
Minwax Weathered Oak
Minwax Early American
Rustoleum Triple Thick Polyurethane
Recommended Skill Level
Beginner

Comments

Flag sign

Made a 1776 flag sign for a charity auction (less stars to carve in 1776)! Torched and stained!

Estimated Cost
$30
Estimated Time Investment
Day Project (6-9 Hours)
Finish Used
Colored stain & poly

Kids Loft Playhouse Bed

Submitted by Anonymous (not verified) on Mon, 11/06/2023 - 09:11

My Kid loved his new bed, I made an extra storage for his toys in the space under the bed so he can play.

Juan Carlos C.

Built from Plan(s)

Computer Desk

My wife wanted her own little office and we needed to free up our spare bedroom. So we decided to use the walk in closet underneath the stair case. We attached cable and hardware to the desk and ceiling to give it some added character. We spray painted the hardware black with hammered paint. I went to Home Depot to the discount wood section and found wood that had worm holes in it! Given I already had the hardware and cable this project only cost me $10.

Built from Plan(s)
Estimated Cost
$25
Estimated Time Investment
An Hour or Two (0-2 Hours)
Finish Used
Early American stain and black hammered spray paint.
Recommended Skill Level
Starter Project

Comments

Miguelkennedy

Wed, 09/04/2019 - 07:38

Really great setup for workplace at home! It's amazing how small space it took for placing a table with computer. My appartment is really small, and I'm working from home as a freelance writer at https://vip-writers.com writing basically from a lap, so having a desk like that would drastically improve my performance! Thanks for advice!

Chalkboard

Submitted by AndyH on Fri, 03/07/2014 - 15:50

Made this frame for a mirror and intended to use an existing mirror and break into 2 equal sizes to make two framed mirrors.

Broke the mirror though after making the frame (learnt my lesson there!) and the only mirror glass I could buy would not fit this frame.

Decided rather than waste the frame to make a chalkboard for the kitchen.

Finished in new Minwax Classic Grey and two coats of Minwax Wipe on Satin Poly.

Estimated Cost
$20
Estimated Time Investment
Afternoon Project (3-6 Hours)
Finish Used
Finished in new Minwax Classic Grey and two coats of Minwax Wipe on Satin Poly
Recommended Skill Level
Starter Project

Made into 2 chairs!

Submitted by Anonymous (not verified) on Tue, 06/07/2016 - 05:42

Built the bench first and even made a 7 foot bench for the barn then decided to try making chairs and having my husband paint them!

Estimated Cost
$40.00
Estimated Time Investment
Afternoon Project (3-6 Hours)
Recommended Skill Level
Intermediate

Super Mario Themed Simple Desk

Submitted by advanlente on Sat, 03/28/2020 - 10:49

My youngest son is 6yo and he loves Mario! He is such as little artist so I thought it would be fun to surprise him with a Mario desk! I did not want to paint it red as he already has a ton of red Mario themed items in his room, so I chose pipe green instead! My little guy LOVED it! I even made some dividers to separate his crayons, markers, and other odds and ends in his desk. You will notice, I customized a normal bulletin board with a sharpie marker to make it go with the Mario theme :)

Built from Plan(s)
Estimated Cost
$100
Estimated Time Investment
Weekend Project (10-20 Hours)
Finish Used
Green Spray Paint and Polyurethane

Floating Wood Table Runner

Submitted by Anonymous (not verified) on Mon, 11/13/2023 - 09:00

I made one of these for my dining room table and my family liked it so much I made 2 more. The last one I made from a live edge piece of black locust and made the base out of black limba. The second one my daughter wanted a little wider so I used a 1X10 instead of a 1X8. A lot of fun to make and everyone really likes them.

Keith Ullrich of Windsor Woodworks

Seasonal And Holiday
Back