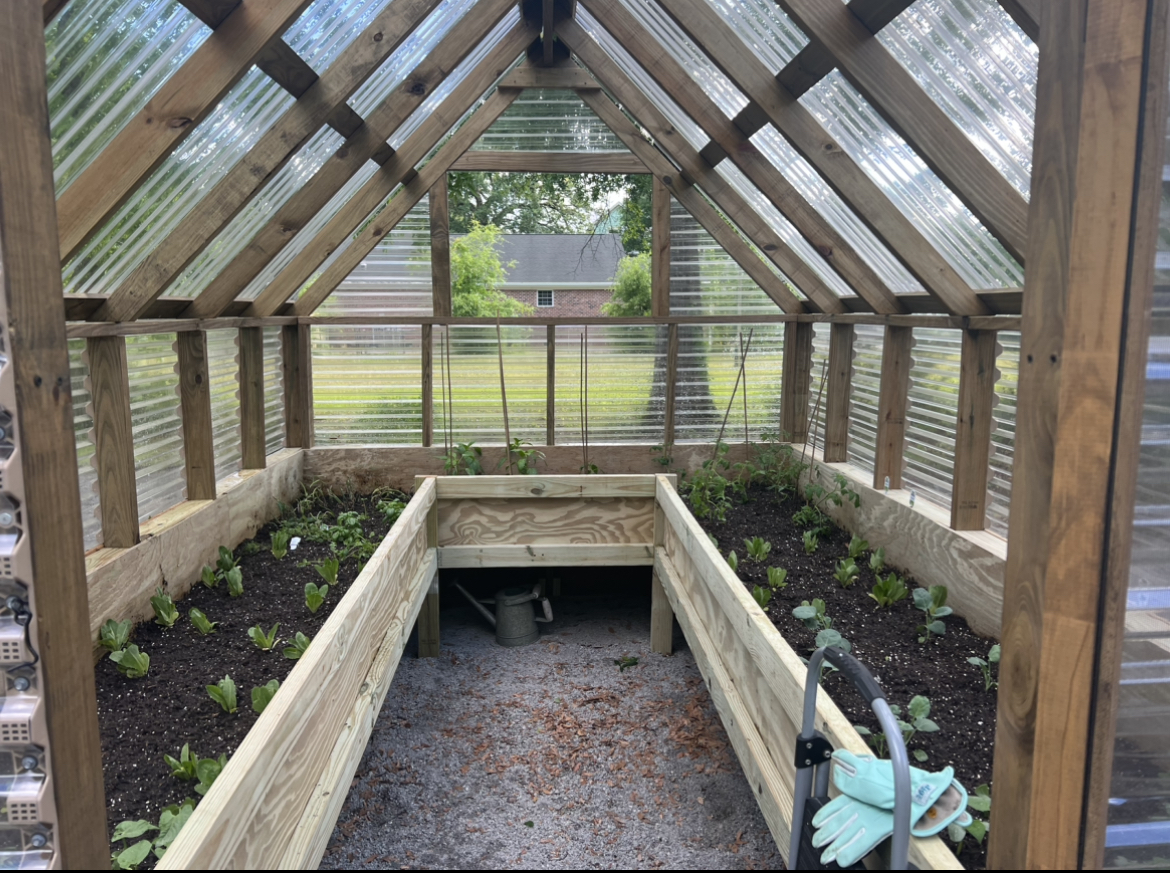
DIY Gable Style Greenhouse

Greenhouse Project - Built to Plans Exactly
Christy LaChapelle
Built from Plan(s)
Greenhouse Project - Built to Plans Exactly
Christy LaChapelle
Thanks for the plan; I’m proud of how it turned out and my family loves it!
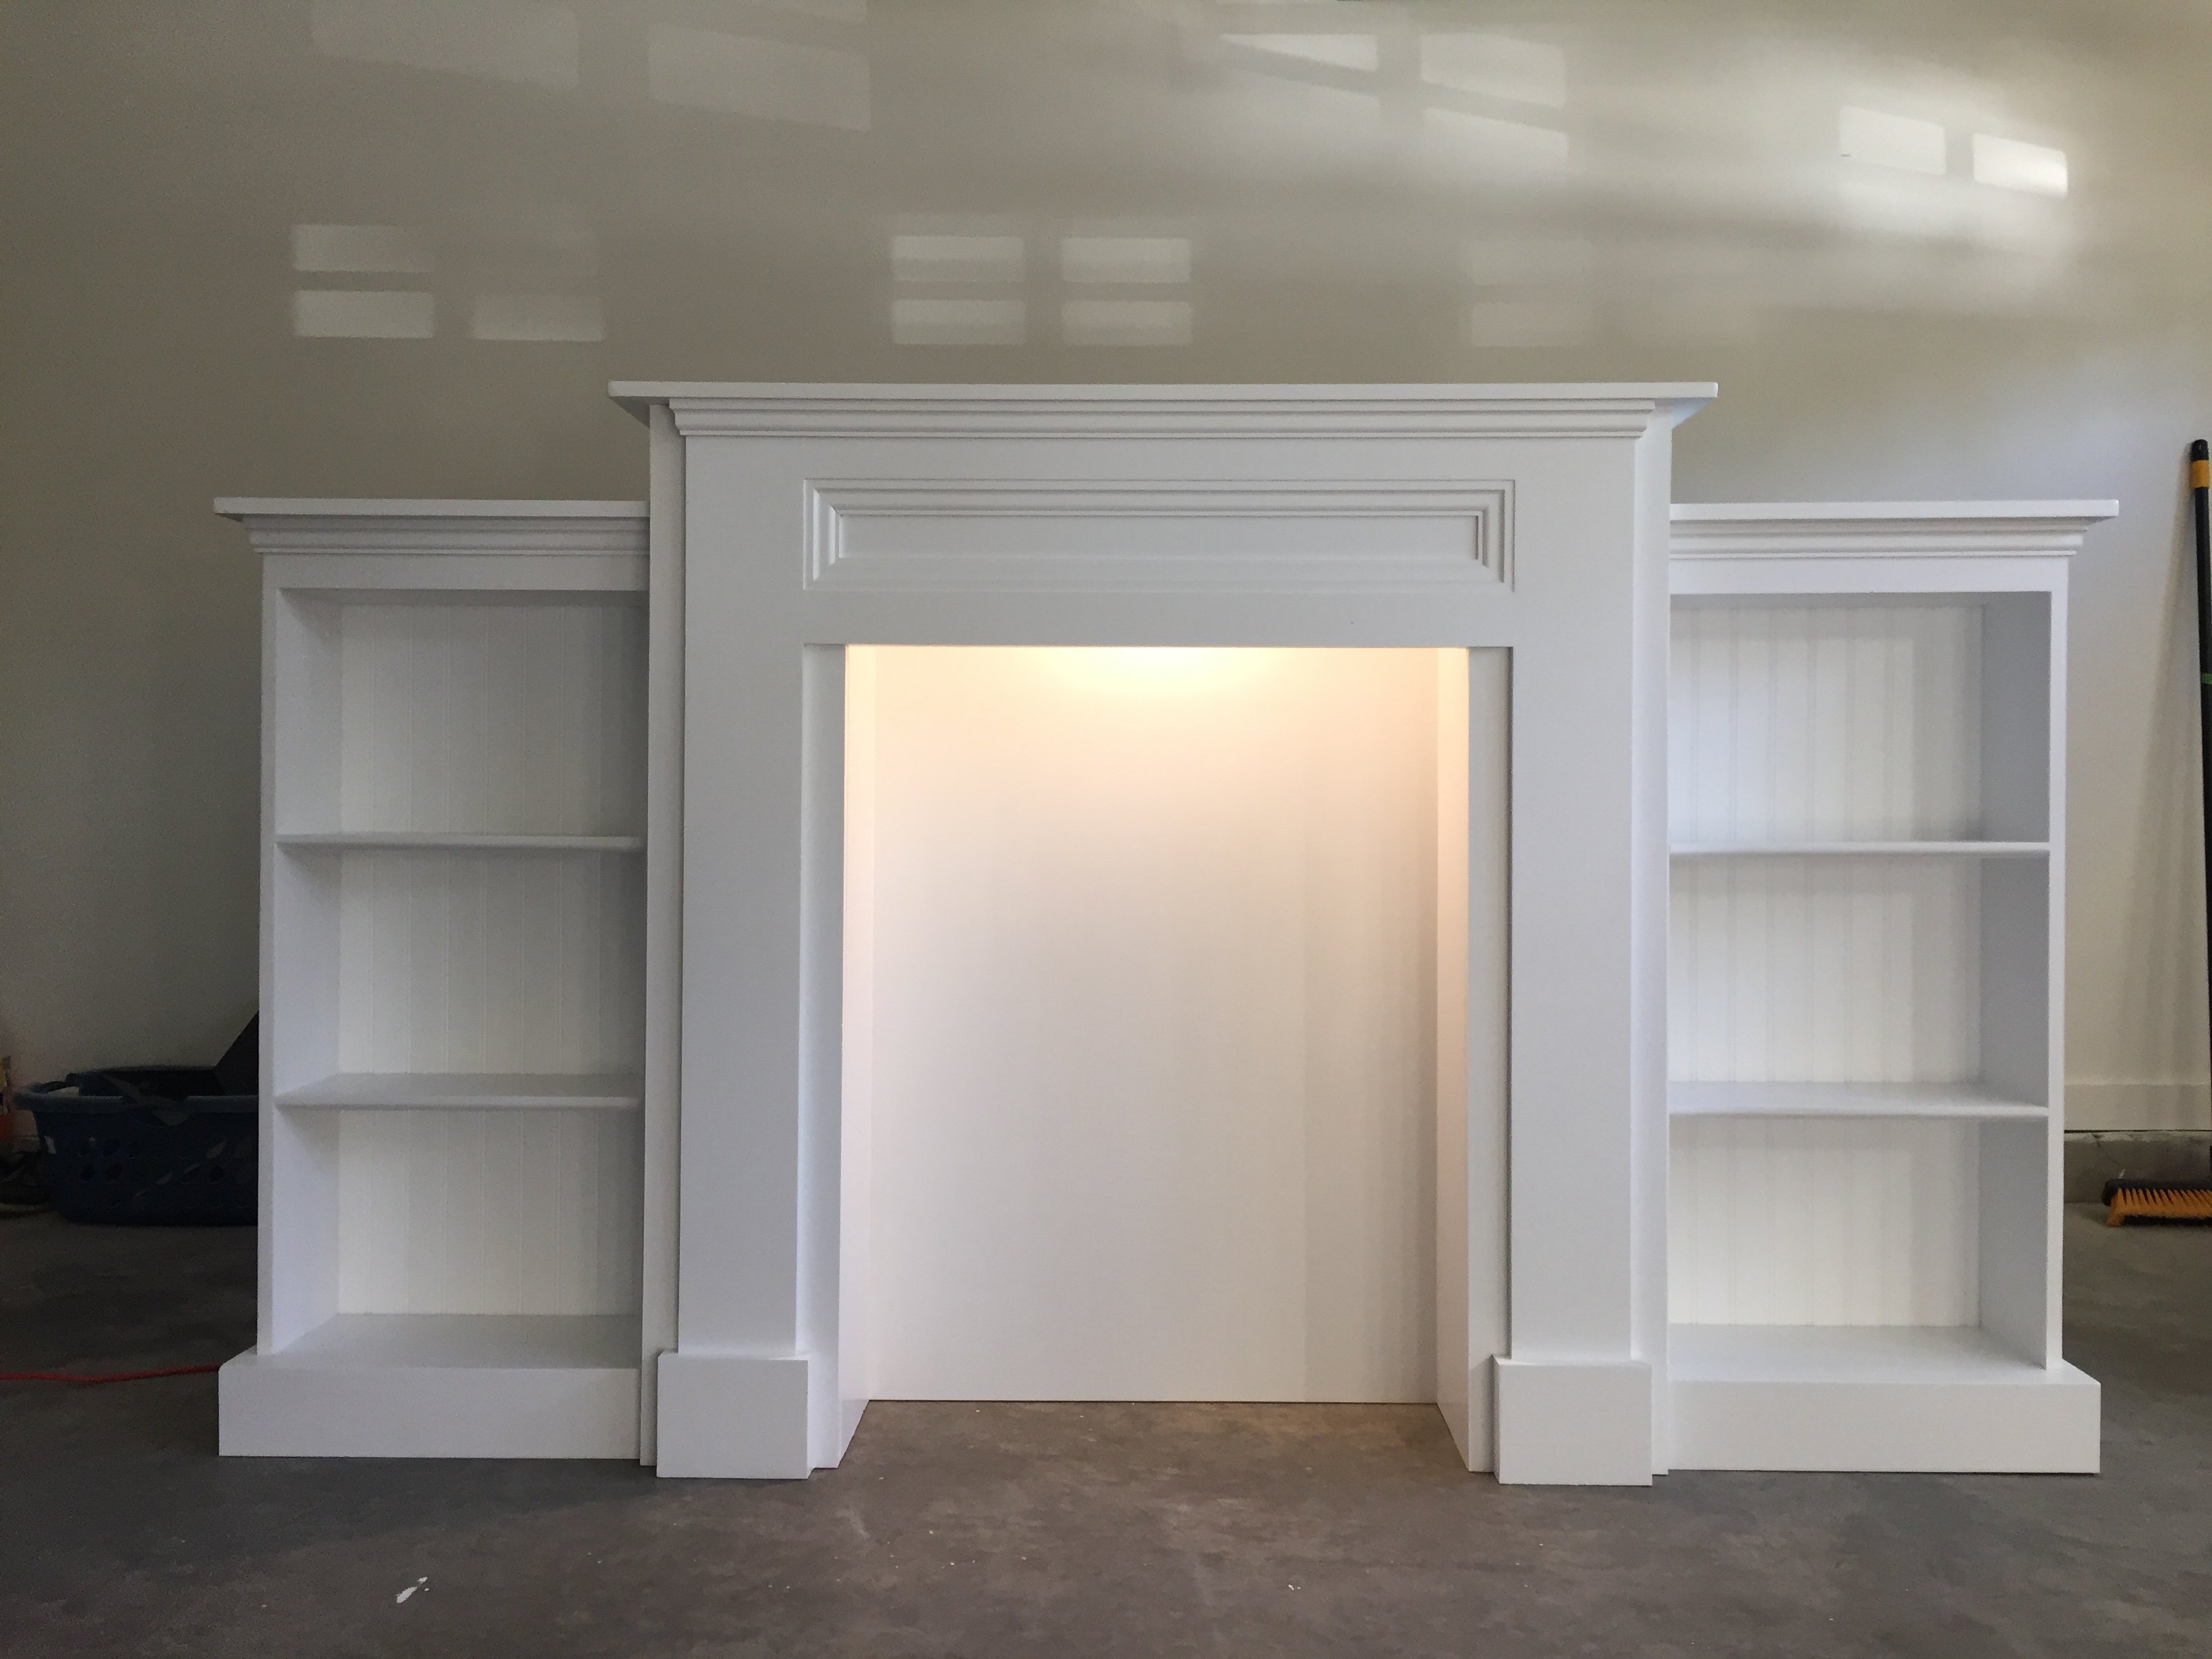
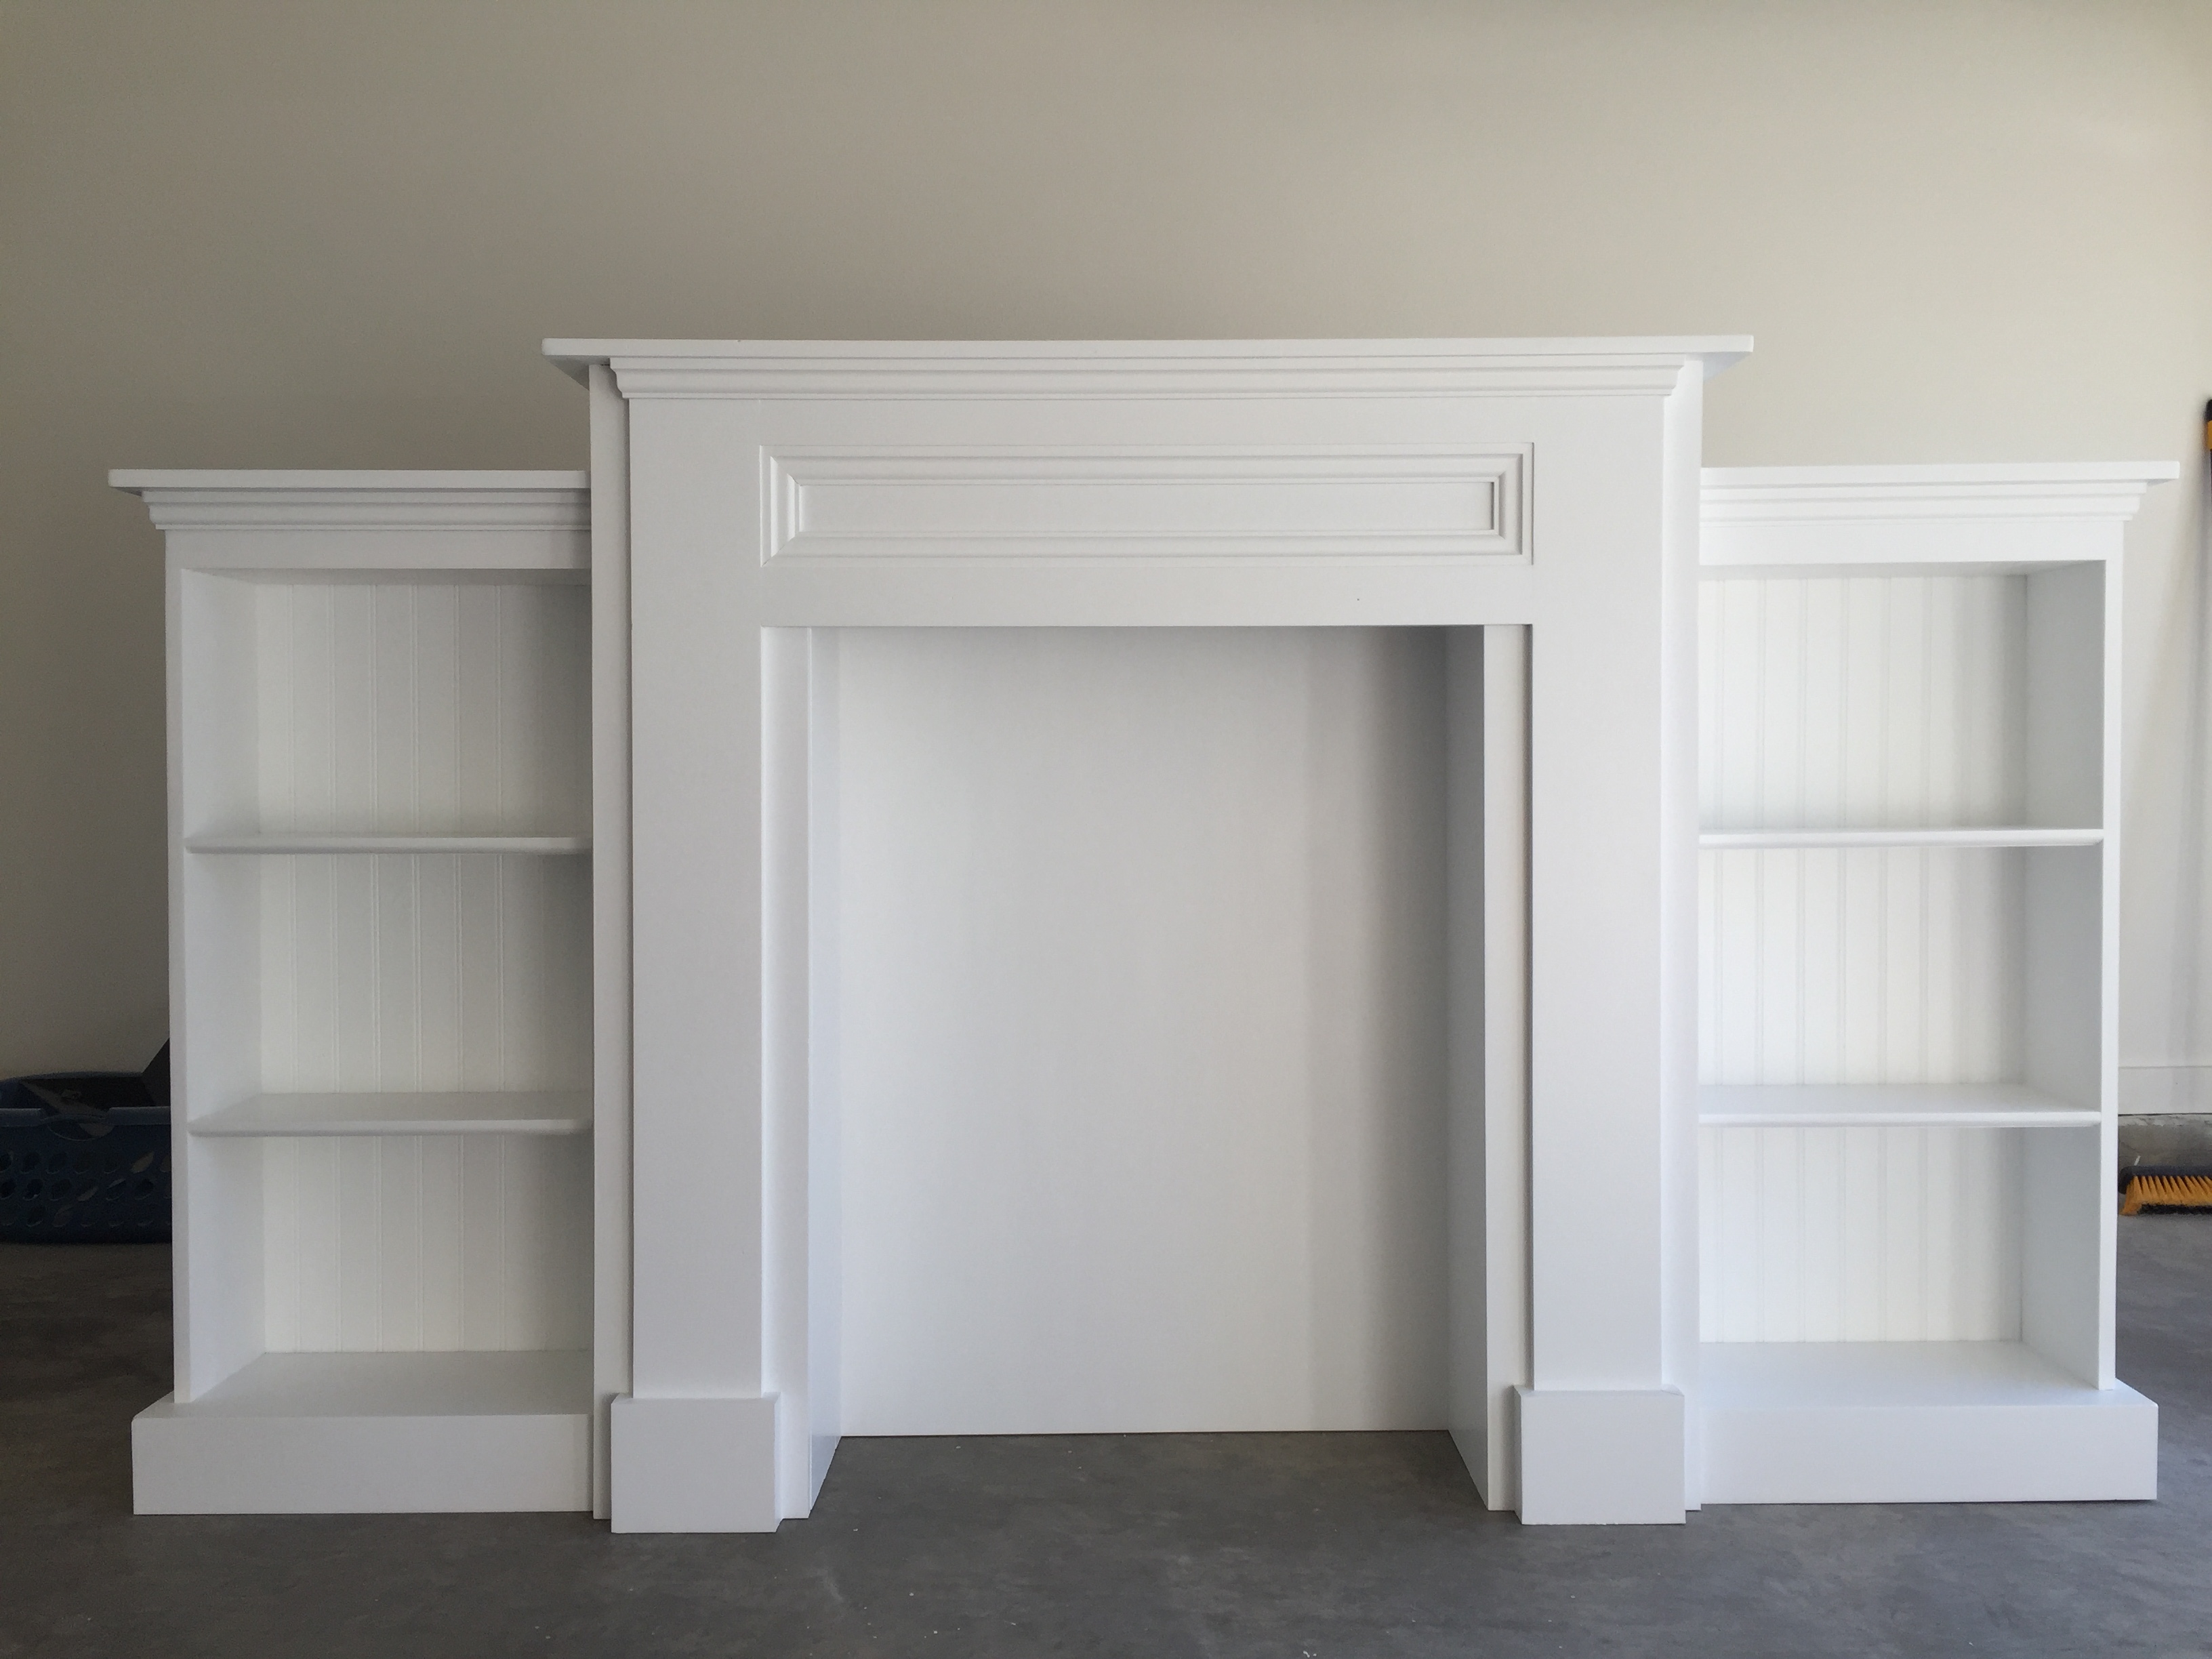
Made from the modified Mimi's Faux Mantle design from another brag post.
Tue, 12/19/2017 - 22:01
Are you able to tell me how wide this is from the end of one bookcase to the other? I'm trying to find out if it will fit in my living room. Thanks!
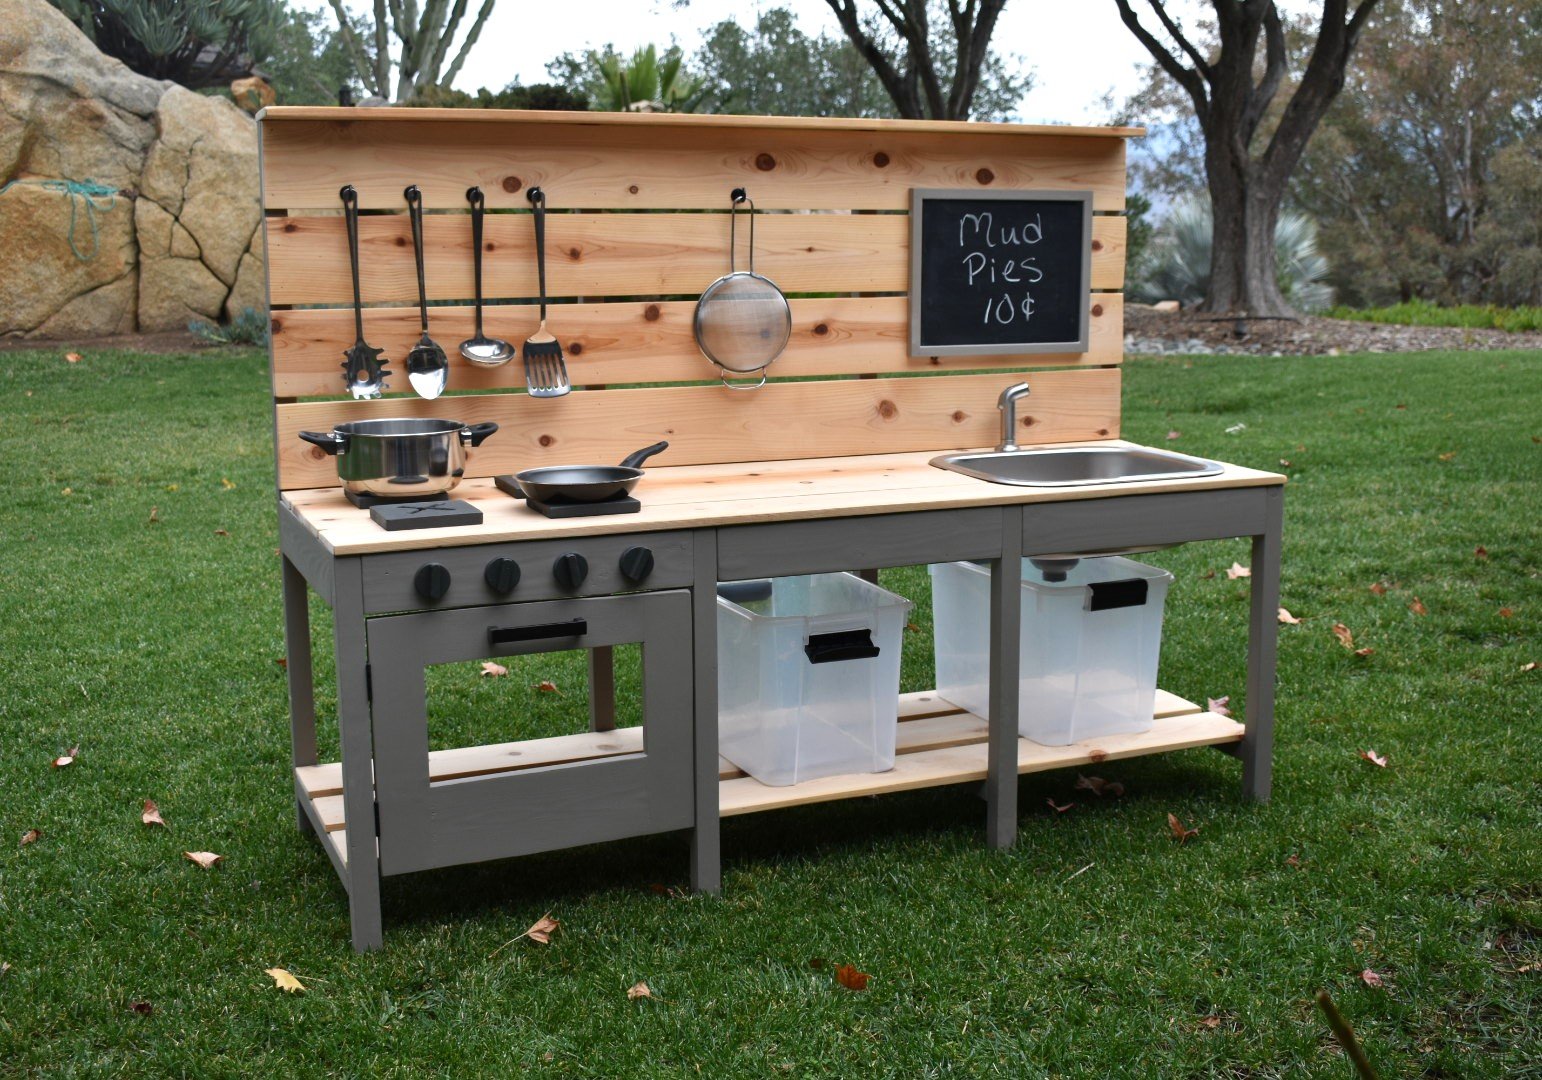
We modified Ana White’s excellent Mud Kitchen plans, adding a third section and scaling the whole thing slightly larger to be a better size for our 4 and 6 year old grand daughters. It was so much fun to make and accessorize!
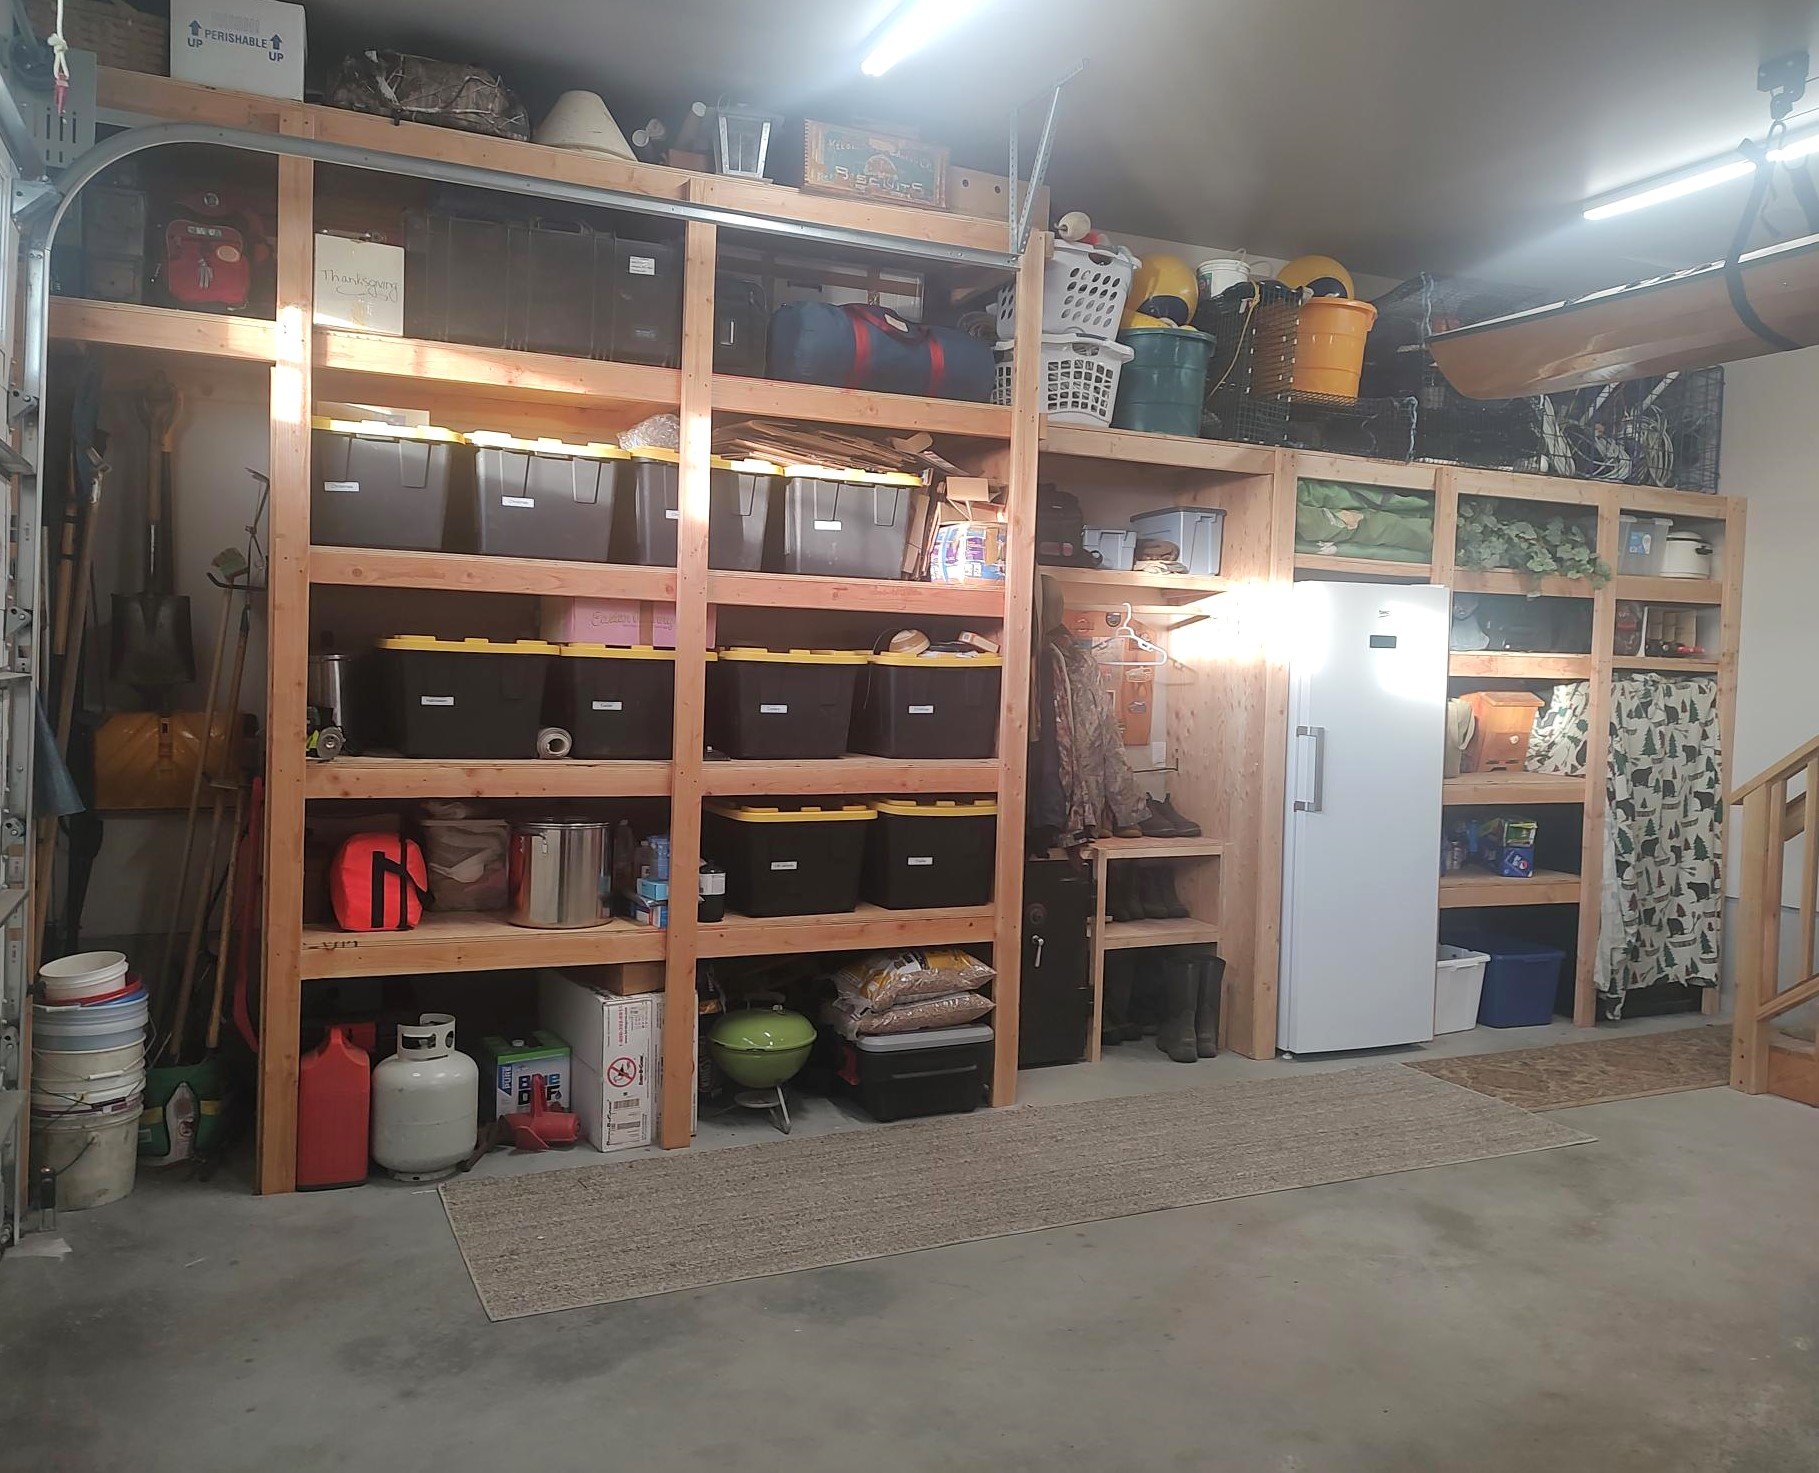
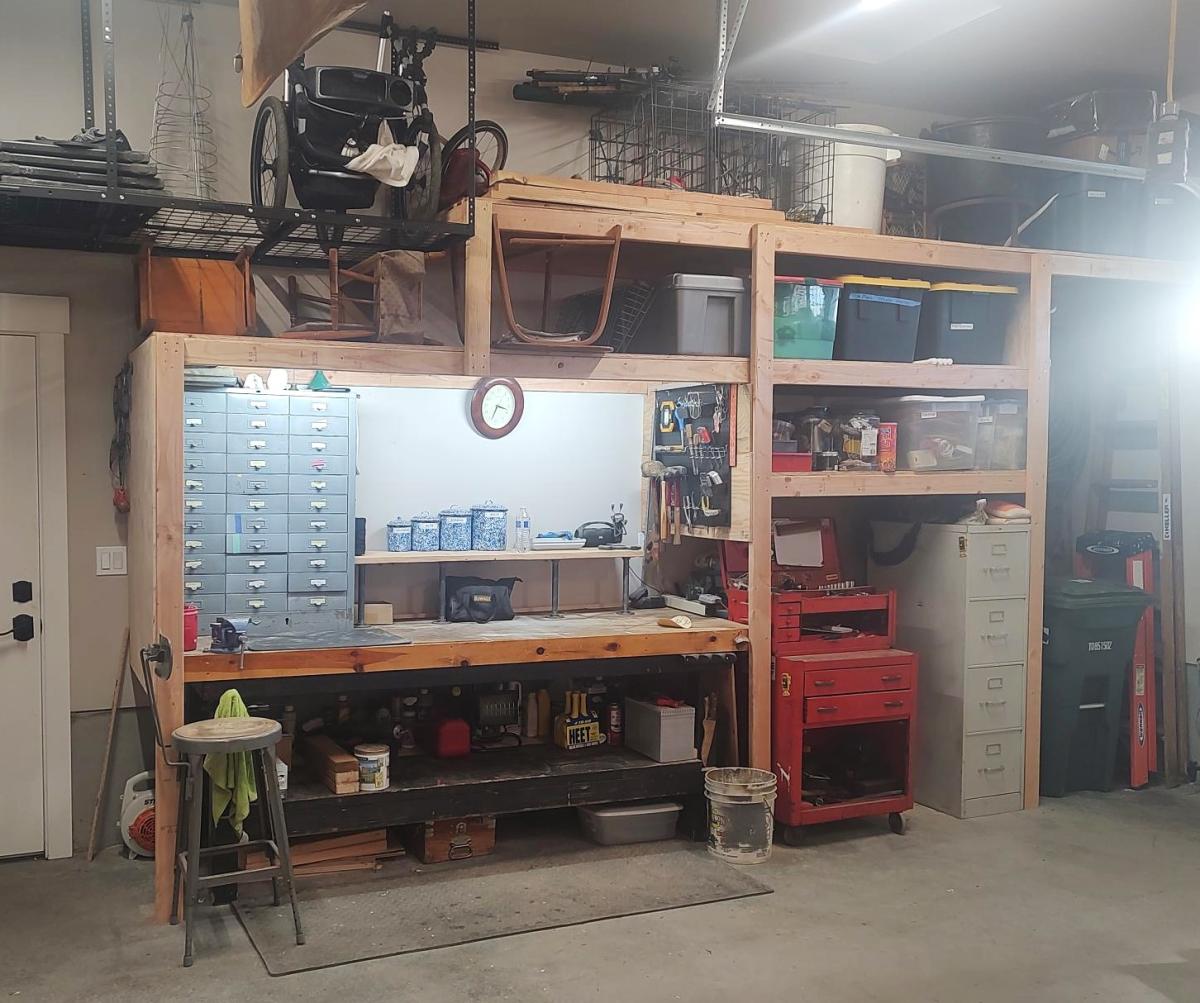
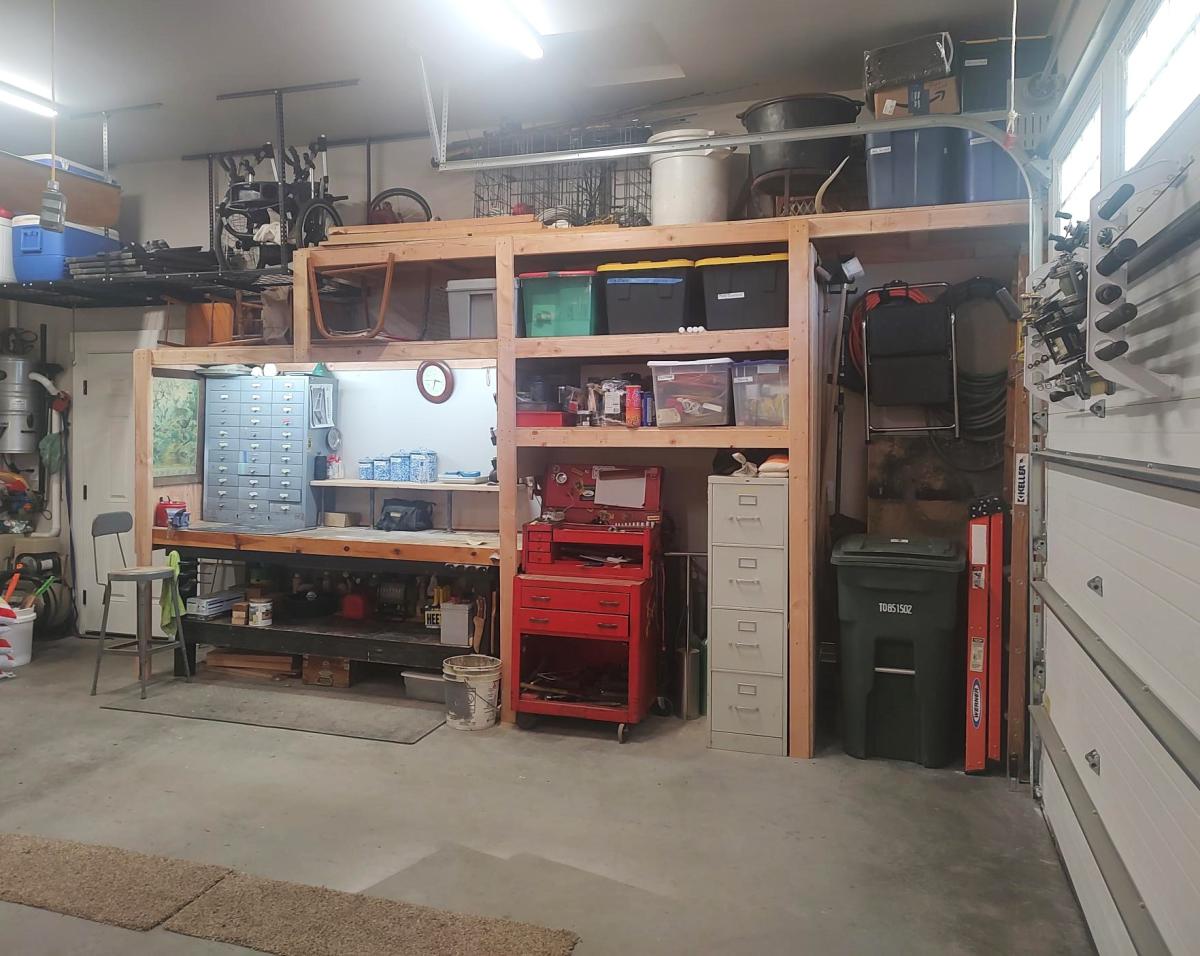
I just finished shelves on both sides of my garage using your video. I built a coat rack and boot rack. I also made space for tall items like tools and ladders near the garage door. I had to also build in a gun safe, freezer and my work bench. Everything came together and now I have everything in bins on shelves.
Gary Hoffman

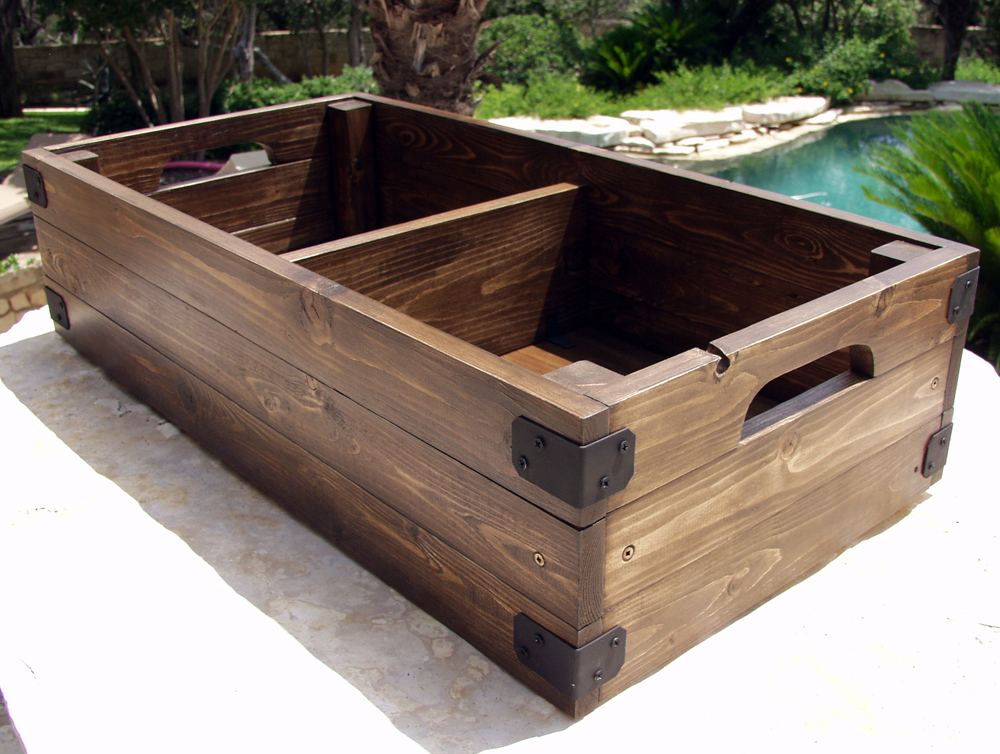
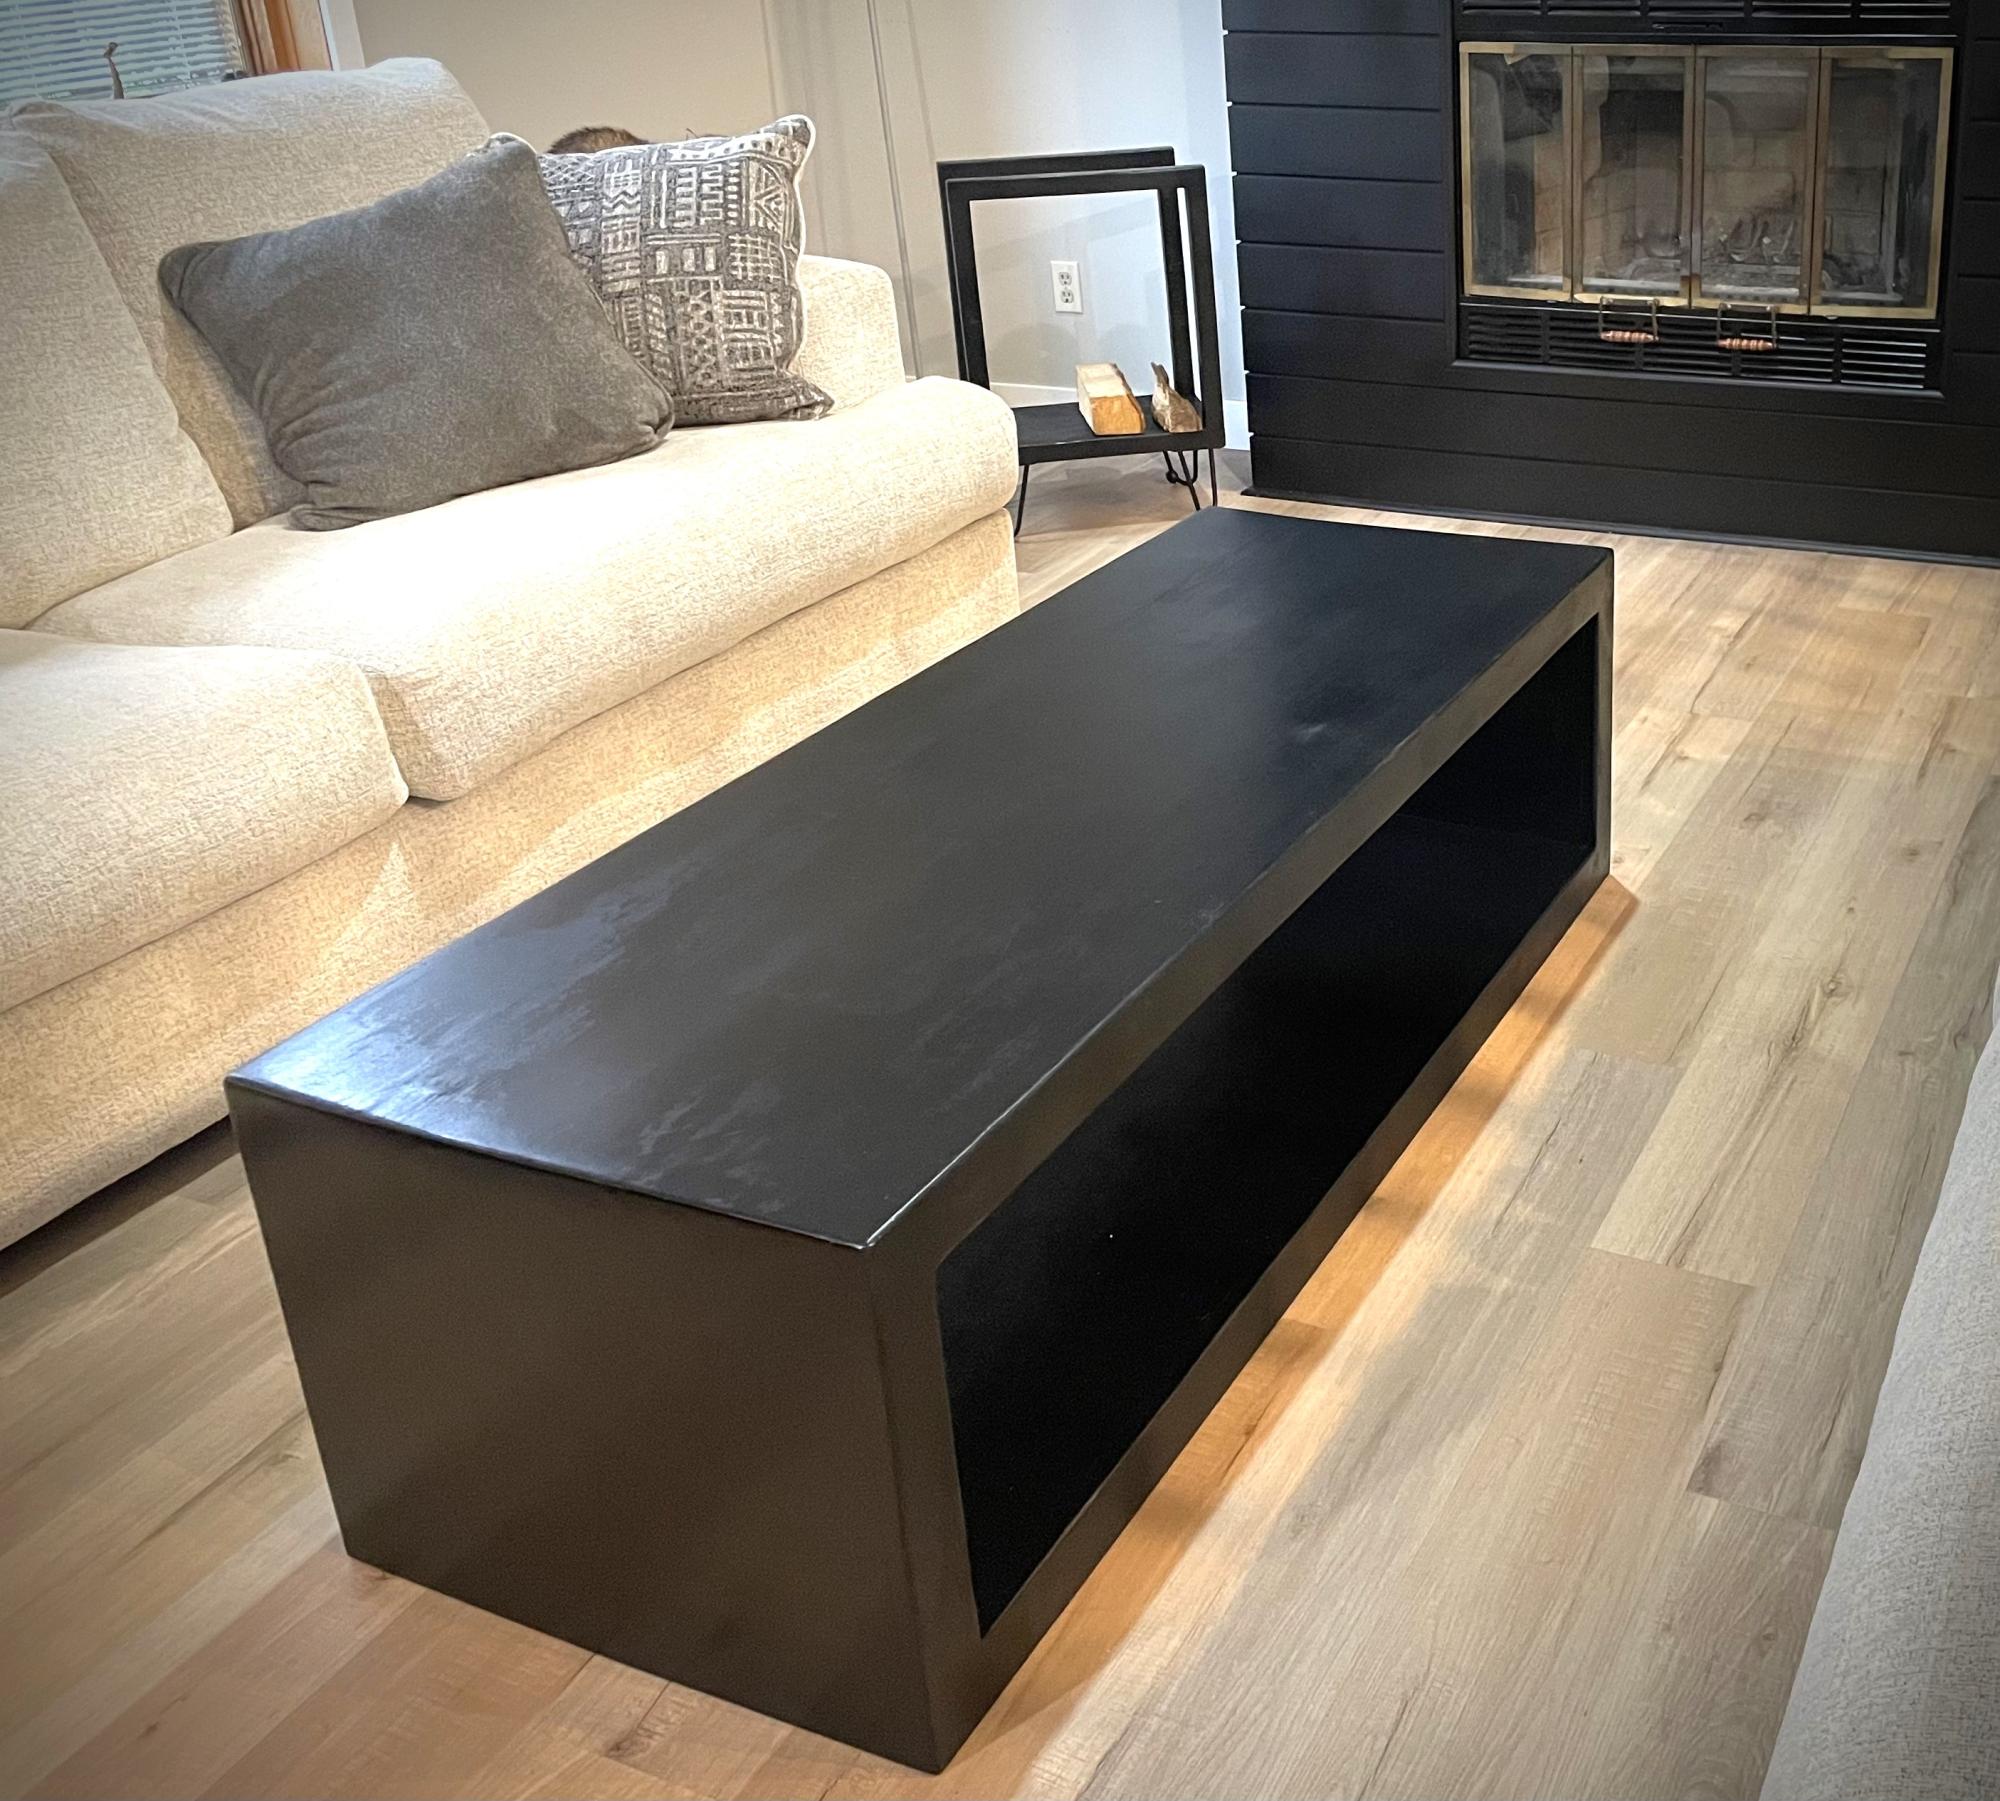
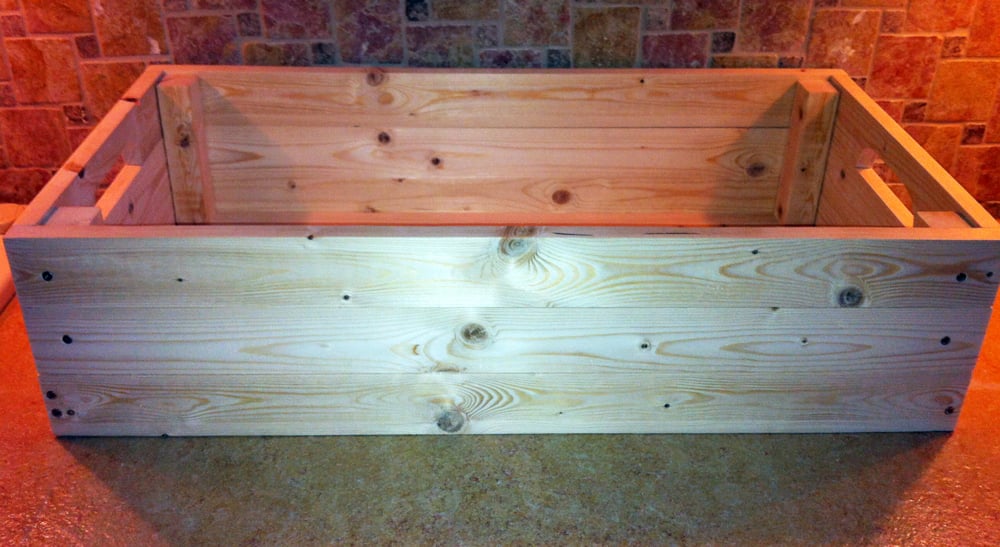
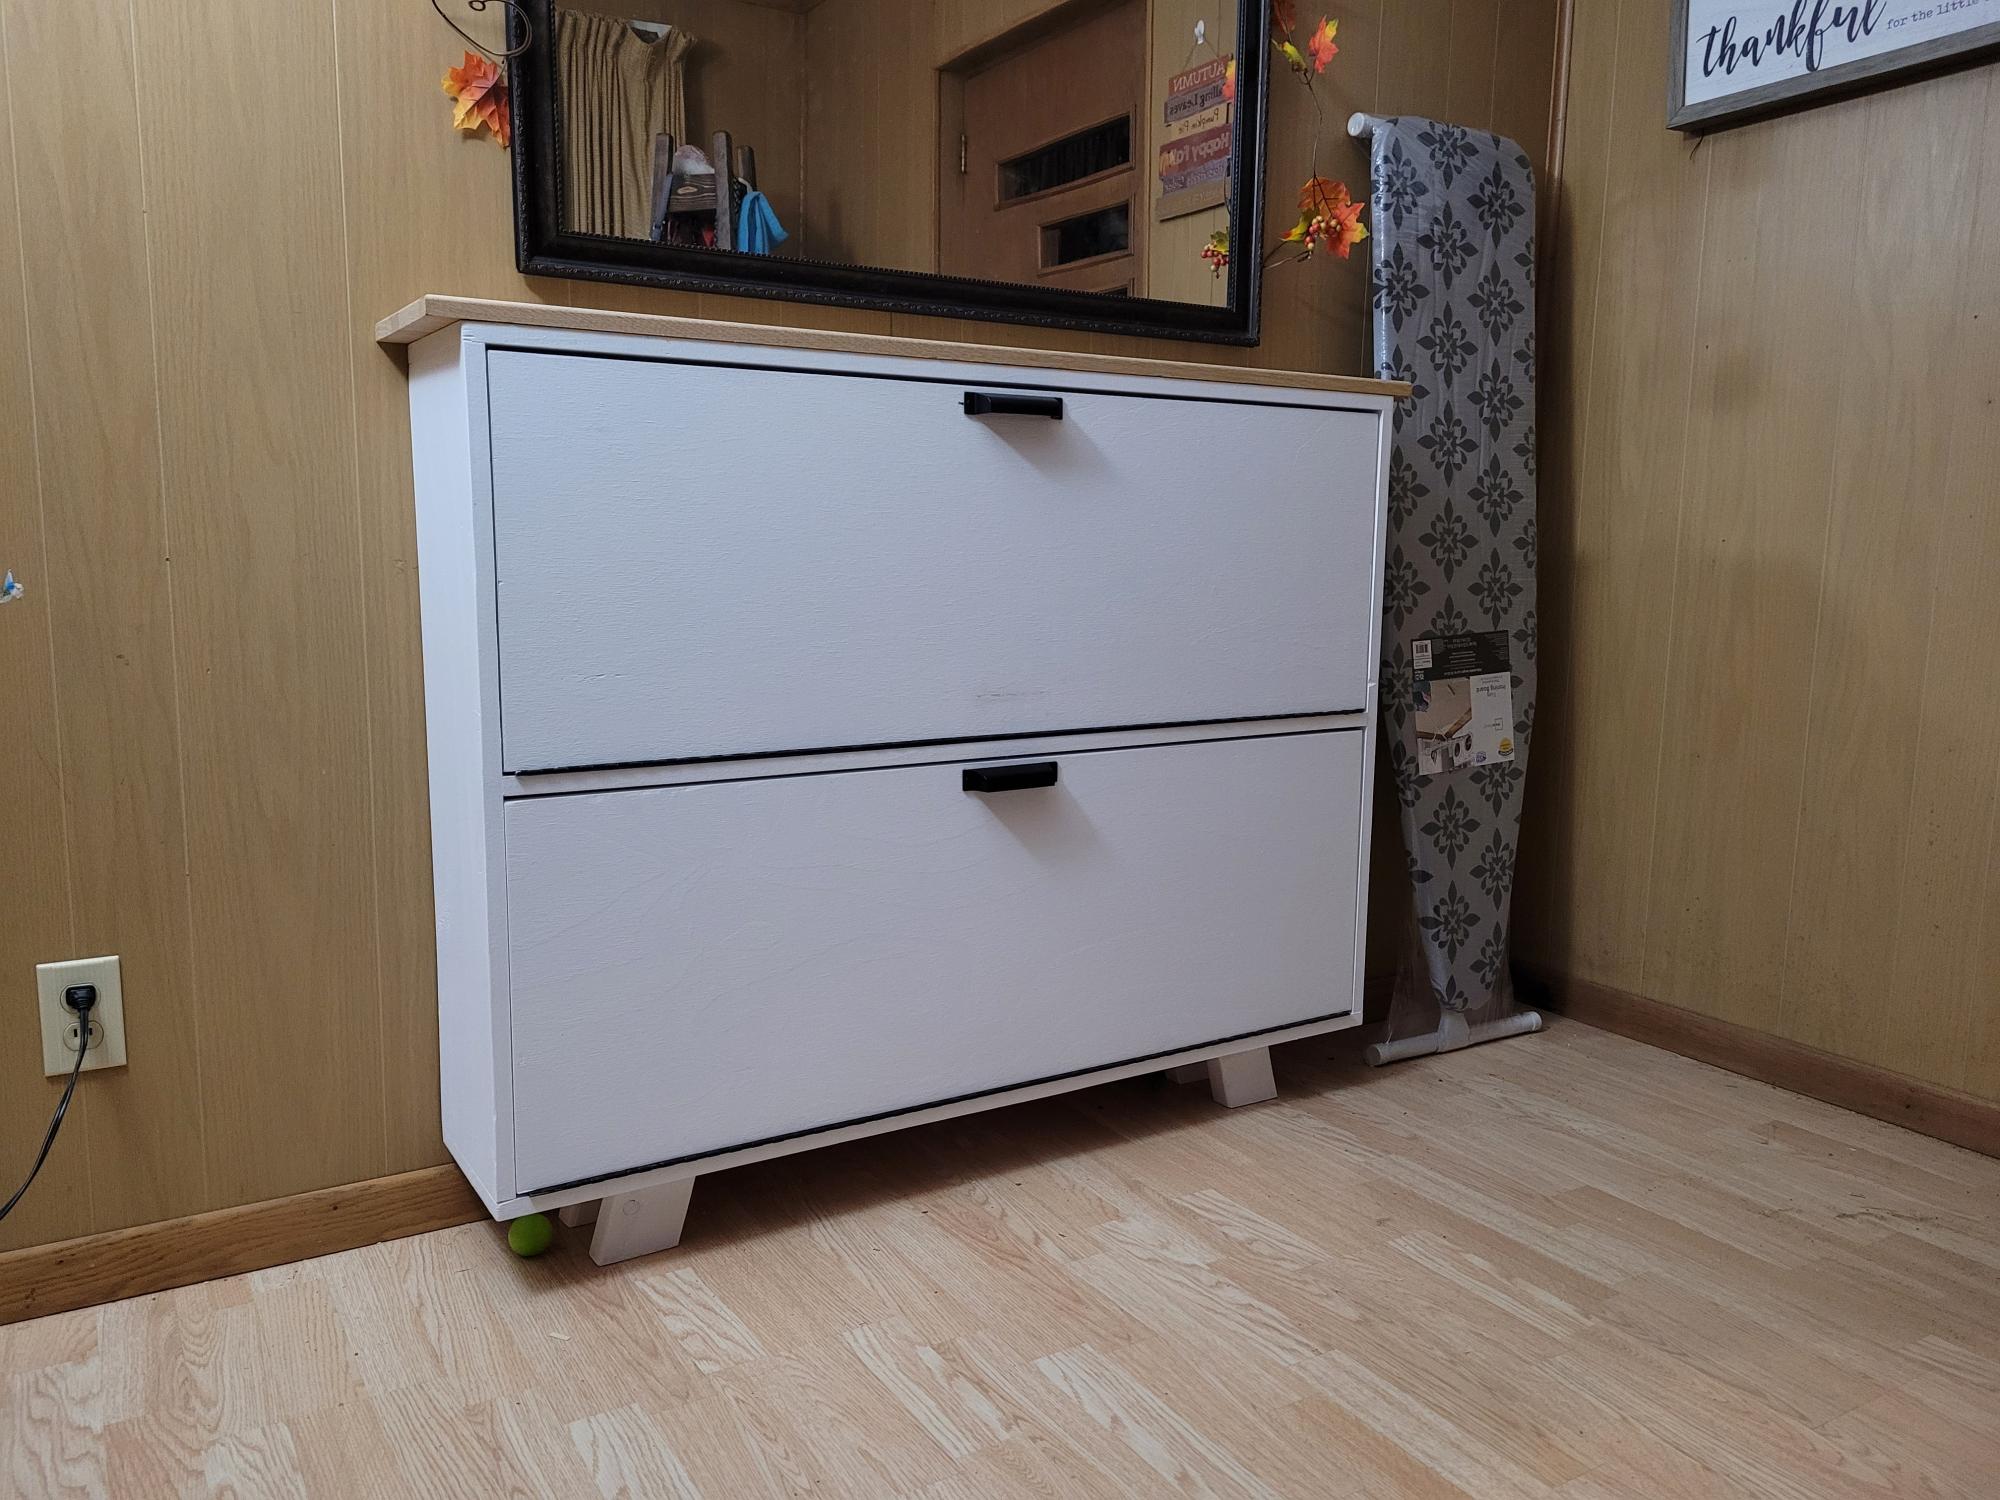
I needed a large box to use at the base of my stairs for shoe storage, so this is it! I made 2 compartments, and put handles on the side for easy moving. Being solid wood, this thing is heavy and a lot larger than it looks.
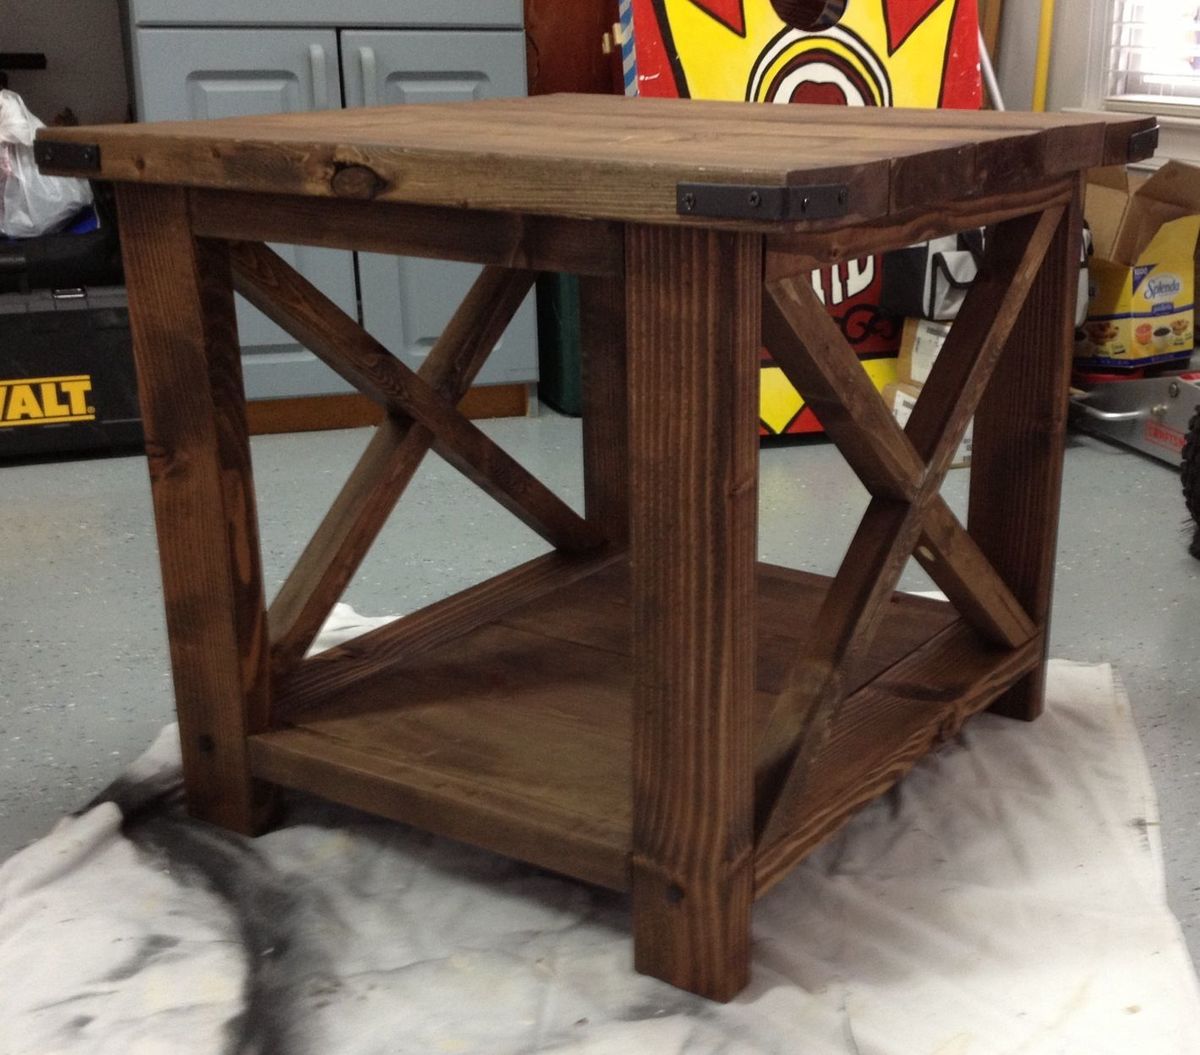
I wanted to do Bri-wax as a test on a smaller project before possibly messing up a larger one. Bri-wax advised me to wait a week to let the stain 'cure' prior to using the product. The stain was beautiful prior to using Bri-wax, but didn't look nearly as good when the wax took off some of the stain and kind of changed the color. I love the look of the Bri-wax finish, but probably won't be using it again (unless the finish has been cured for a long time). Bri-wax also told me not to use it over varnish or poly, as it would damage that surface. I would be interested in hearing from you guys who have used it successfully on top of other finishes.
Sat, 07/14/2012 - 21:00
Hello Joni,
I've used Briwax over a clear, satin poly finish without any damage, though typically, I apply a 100% Briwax finish on the majority of my pieces as I prefer the natural finish and find it's complimentary to the reclaimed wood I use.
Simply a personal preference.
Looking at your other projects want to commend you on your table too. Nice color distinction and accents. Very nice!
Mike
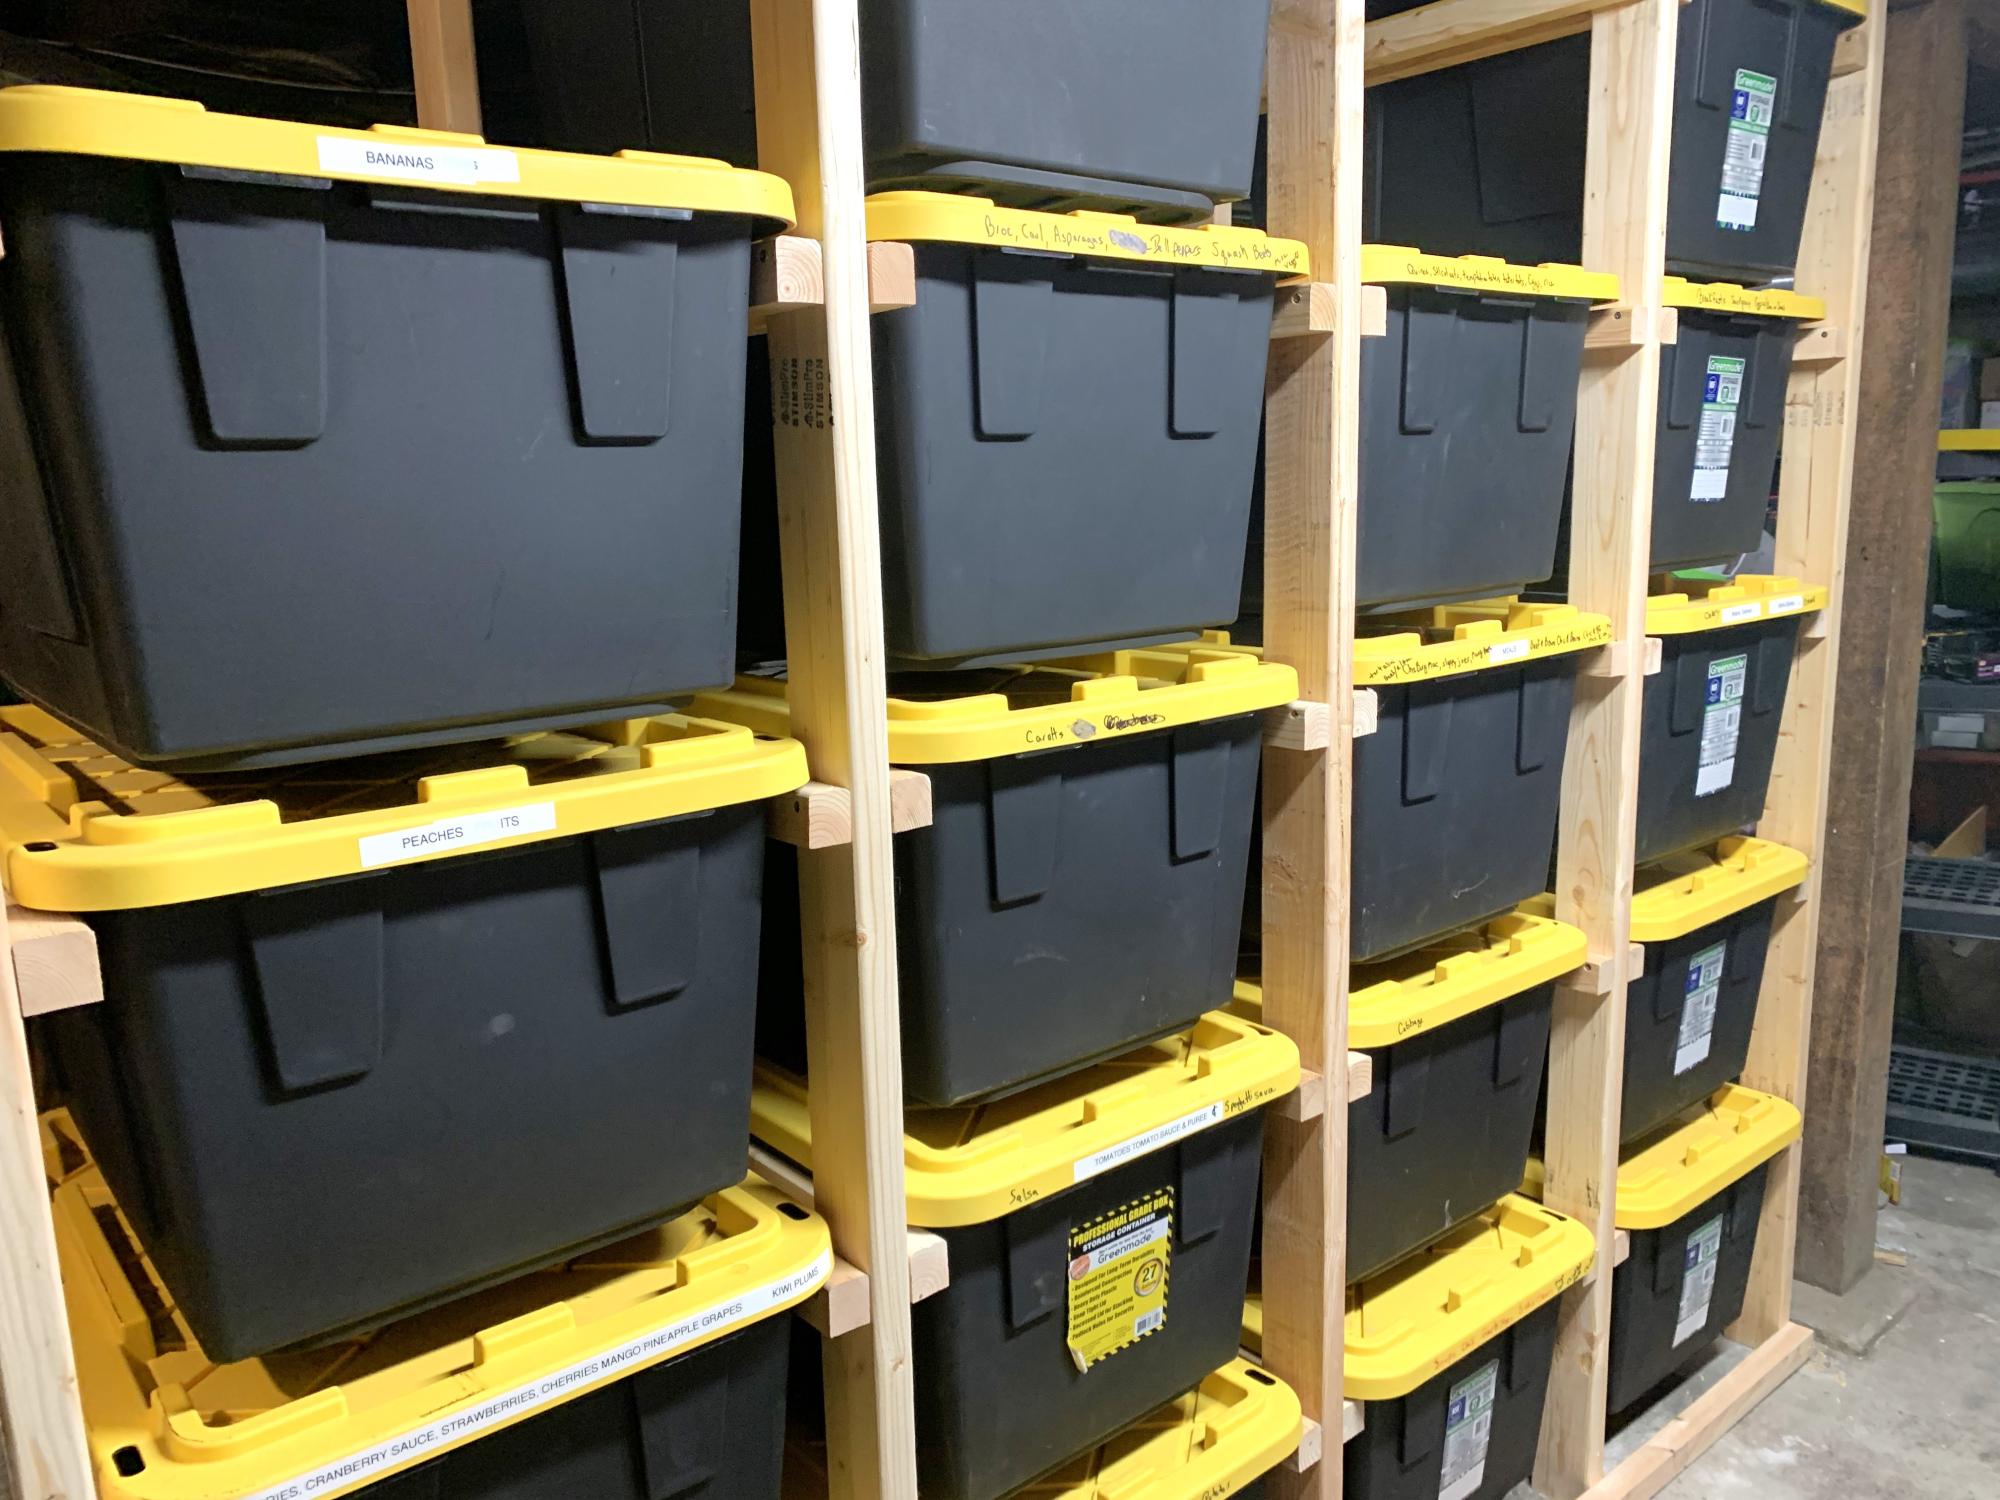
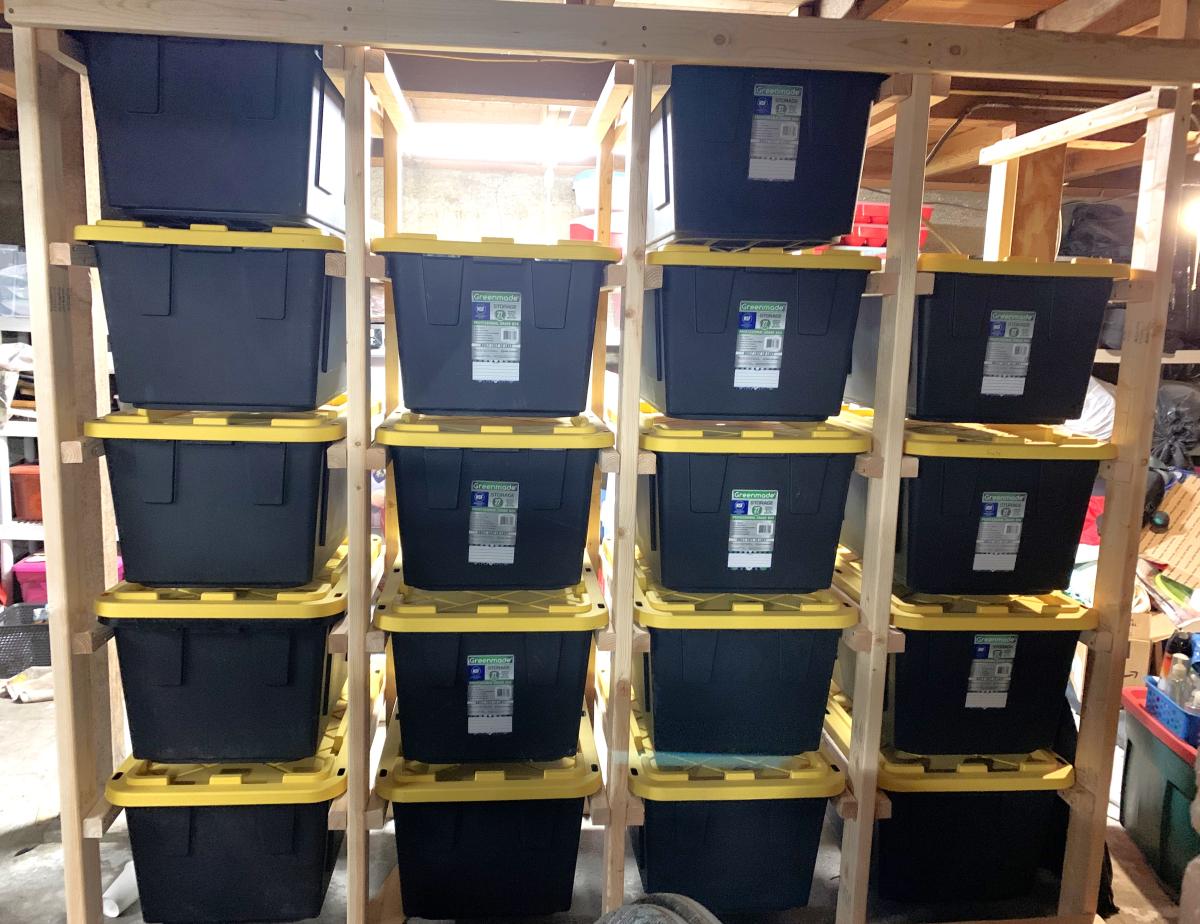
storage for totes - can be made to accommodate any size totes - just adjust the measurements basically it is "ladders " 2x4s for legs 2x2s for "runs" 2x4s across the bottom & top this is in a basement with short ceilings so if you have a taller space you can go taller or you can go shorter.
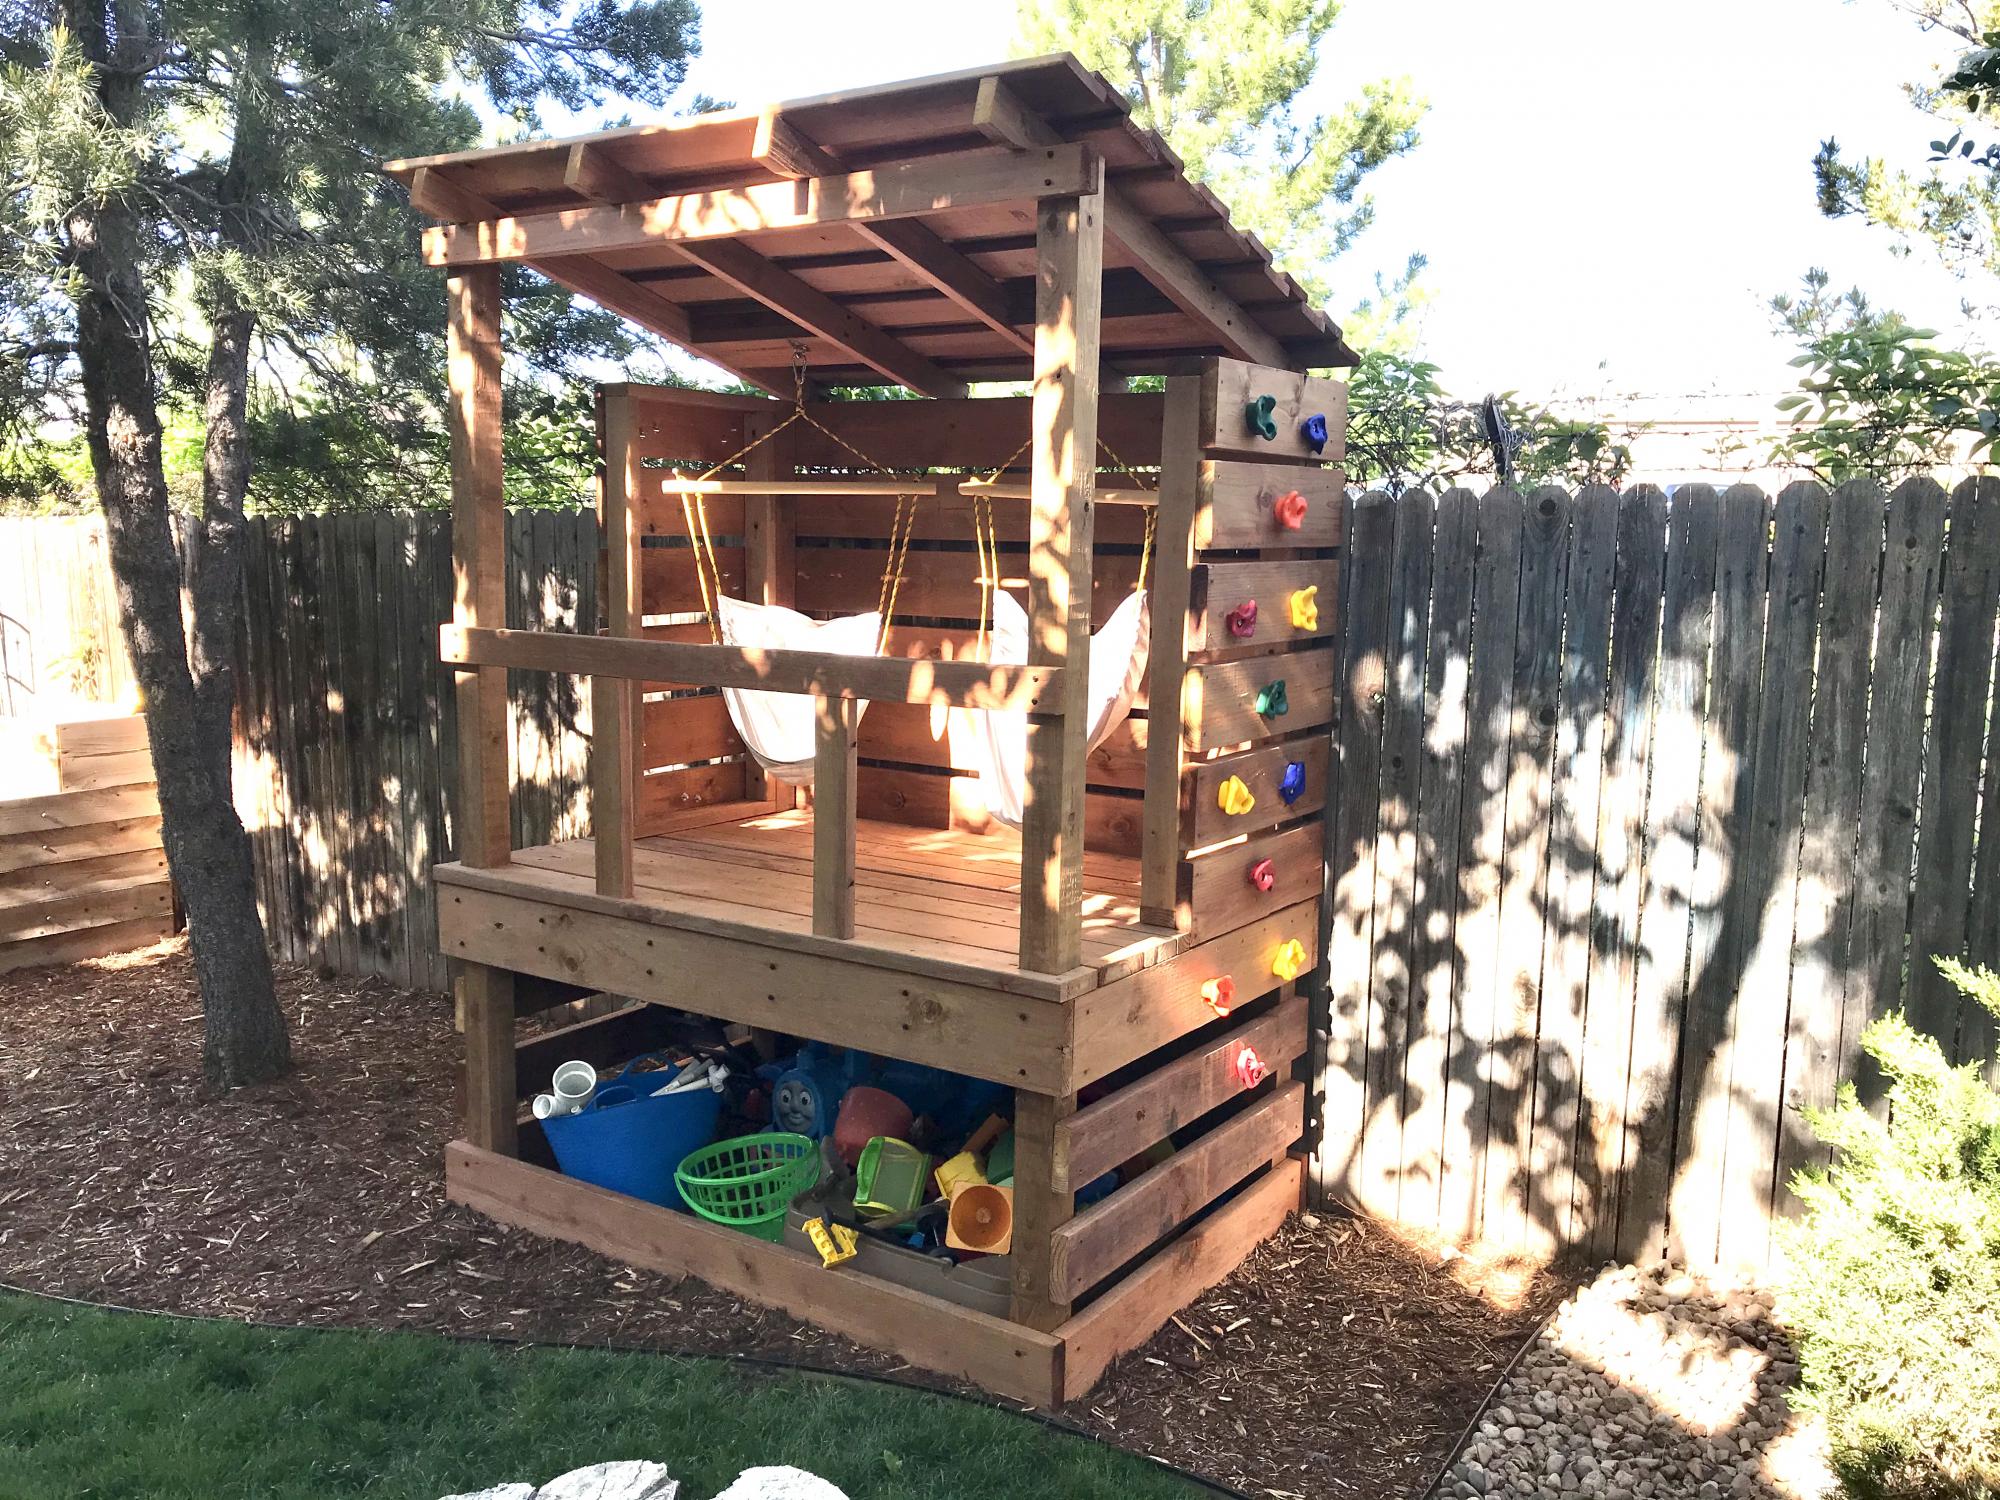
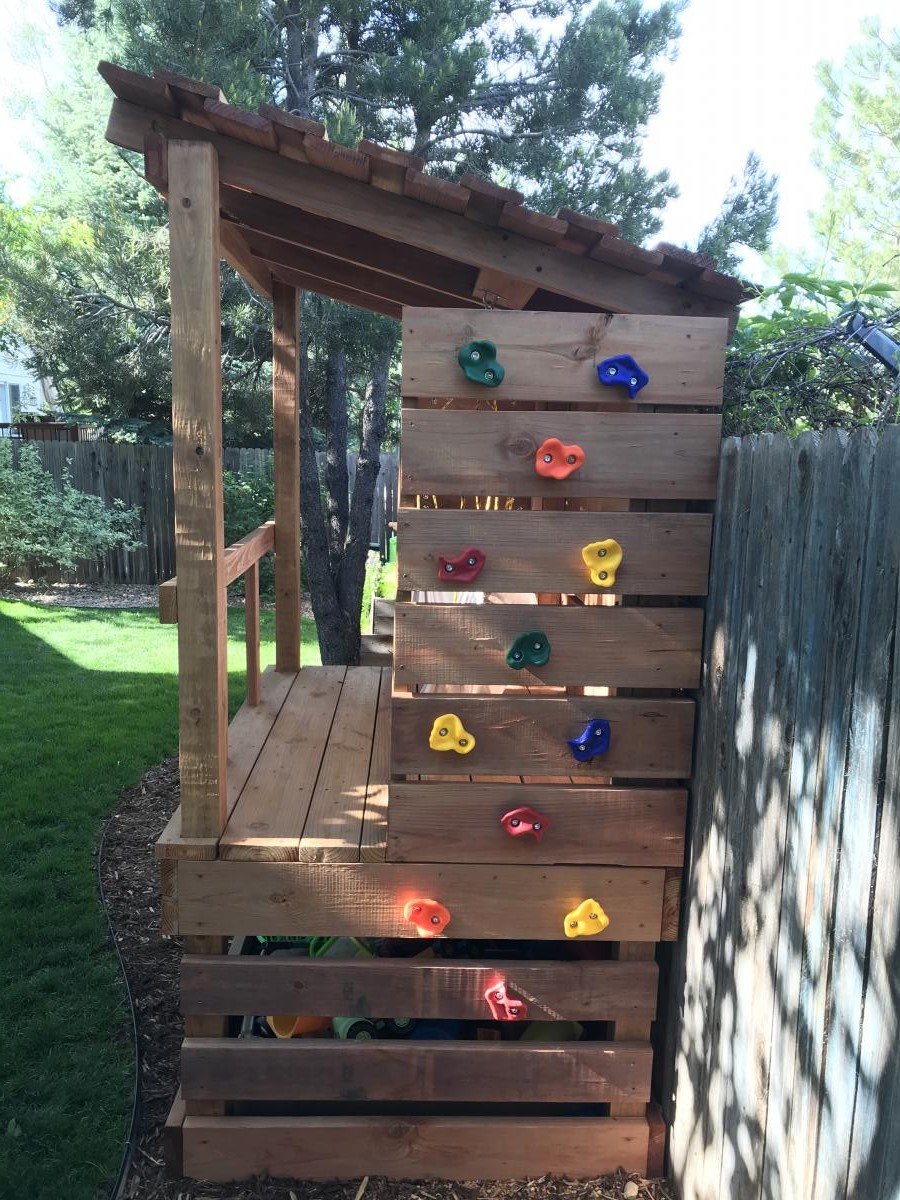
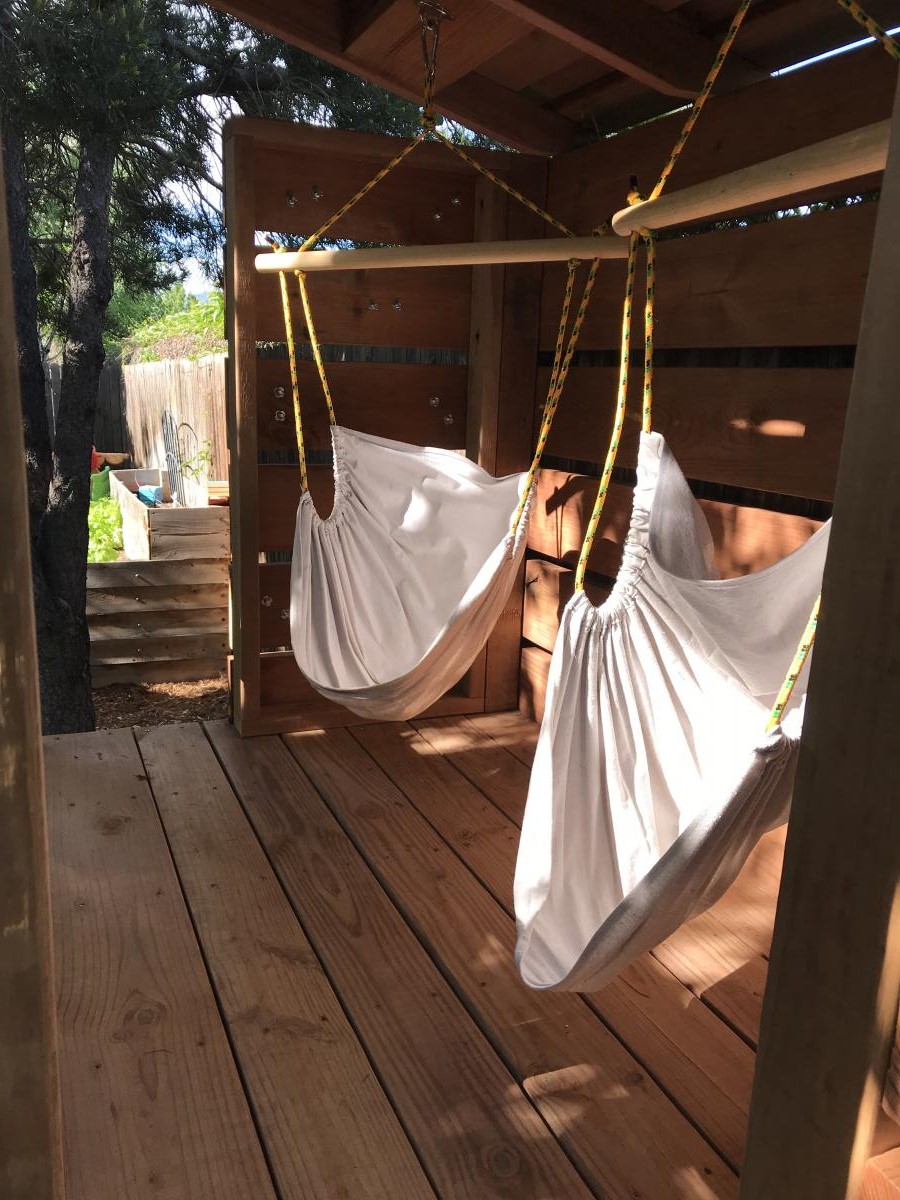
Built a fort for the boys with two climbing walls, a spot for their toys, and added some hammock swings

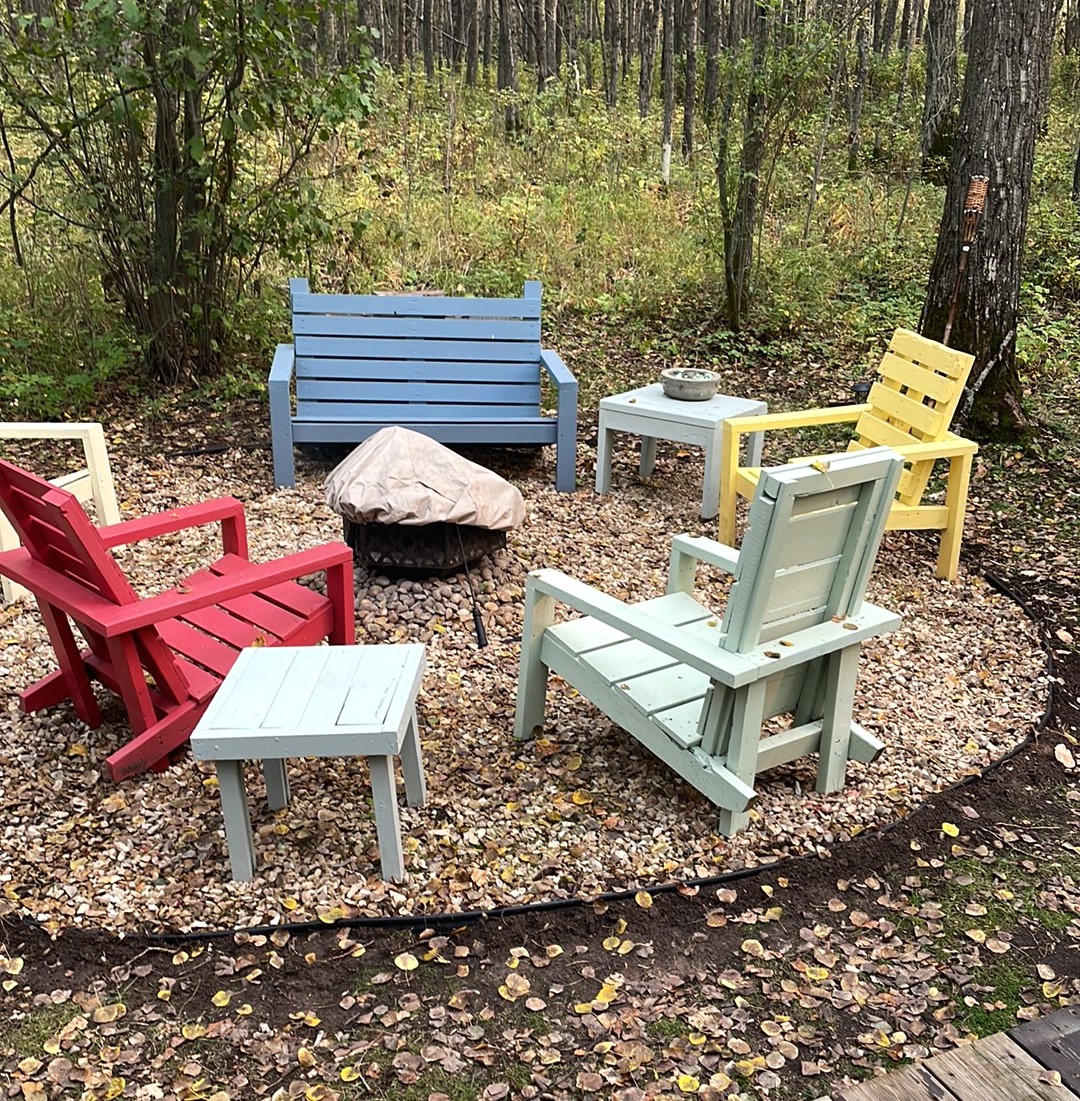
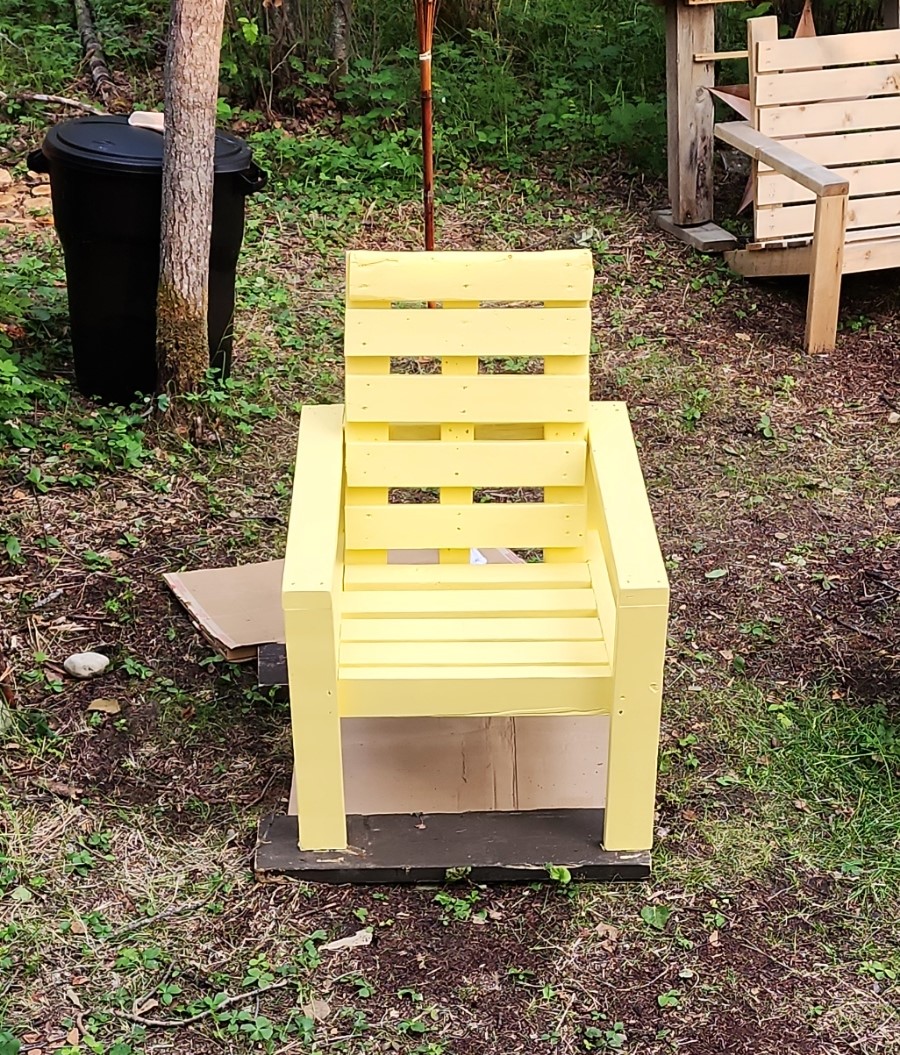
I made these modern Adirondack chairs for our business in Anchorage. GREAT and easy to build design by Ana - we upgraded the arms to tapered 2x6 and they're awesome!


I recently had a workshop built and I have been trying to now work on the furniture for it. My first project was this workbench inspired by the plans "garage workshop workbench". I added drawers on each side and will probably end up adding a shelf in the open area as well after letting my kids finish decorating the top. It's already a nice addition and I may build a smaller version for my garage. I added casters and have the option to roll the table around or have it stationary.
Tonie

I made these with your plans first time I ever made anything. Your plans are amazing.
Janet Power
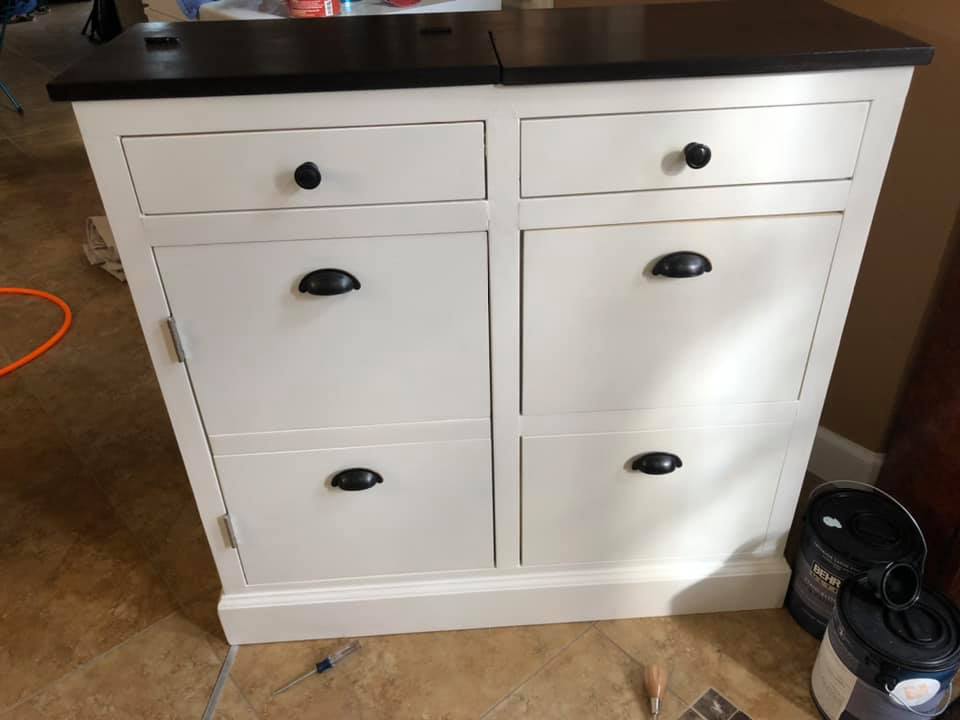
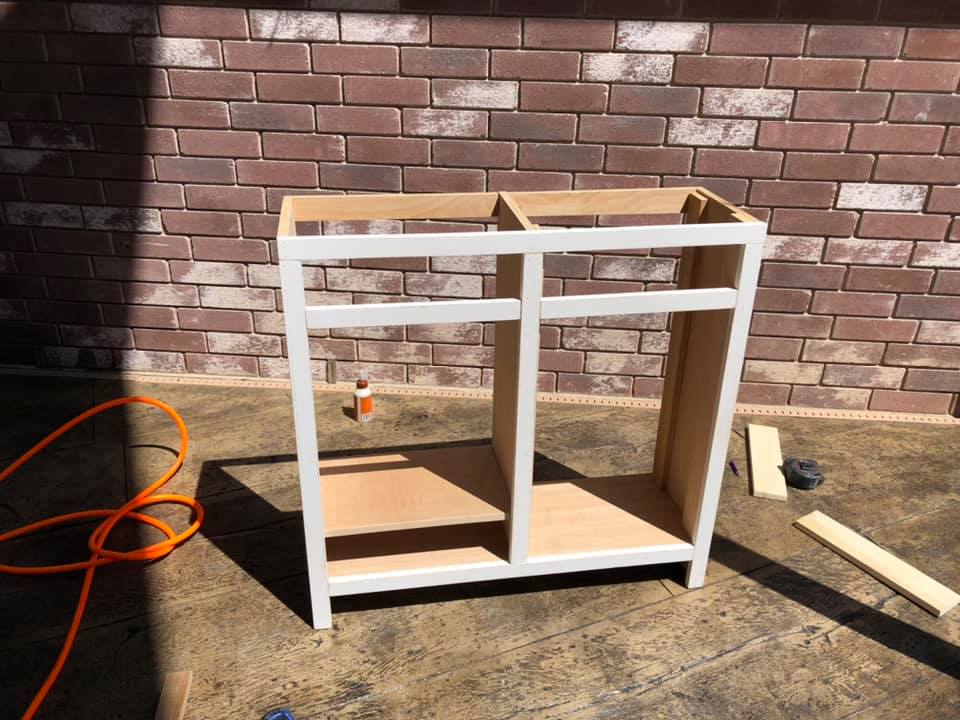
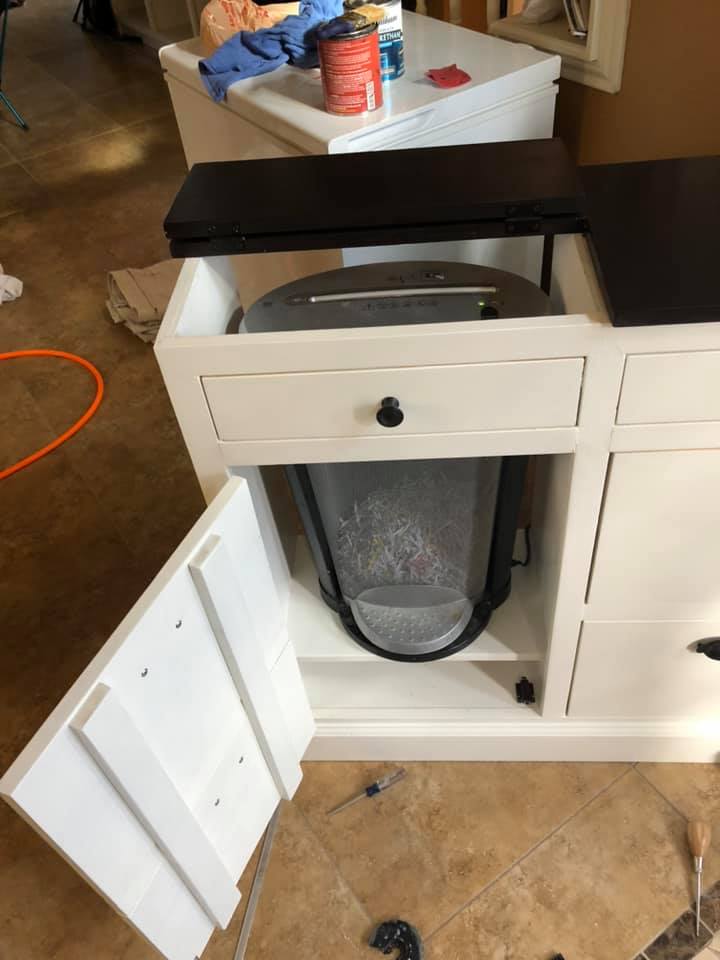
After scouring the internet for a piece of furniture that could hide my shredder and act as a filing cabinet, I decided to look here, and lo and behold, Ana had posted this project the week before. It was literally an answer to prayers!
I had a lot of leftover plywood that I cut to size to build this project. The drawer slides were the most expensive part of this project. It was pretty tough and I made a lot of mistakes, but I am very happy with it. It was just what I was looking for. Installing the drawers was the hardest part of this project. I made the shredder compartment to fit my specific shredder, and it barely fits. I already had drawer pulls and paint.
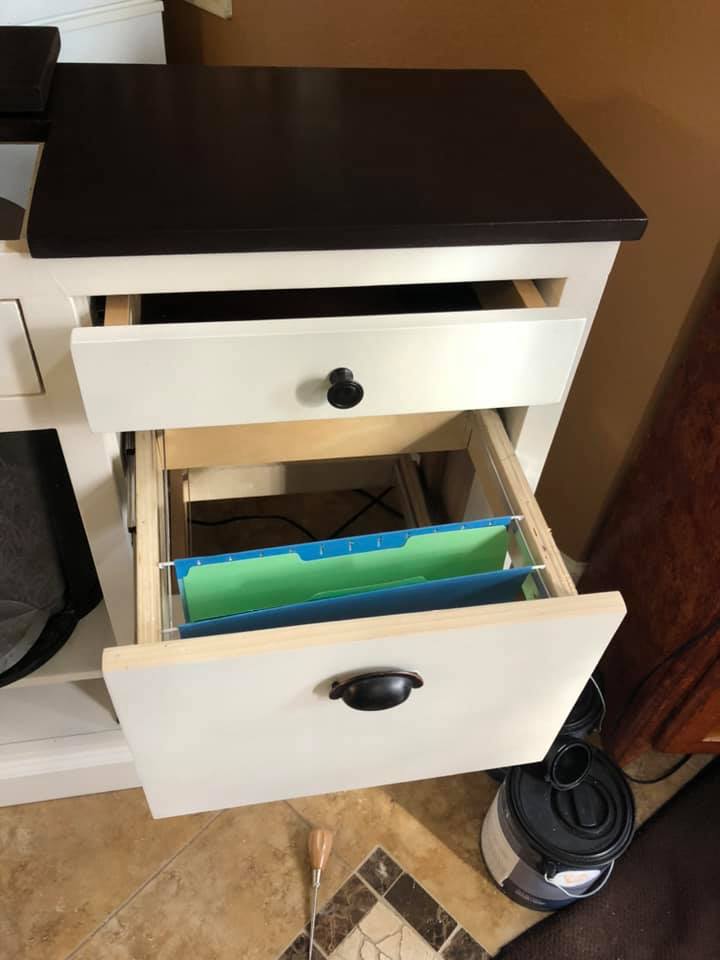
Fri, 12/04/2020 - 21:27
It's a hard working piece and you did a great job! Thanks for sharing:)

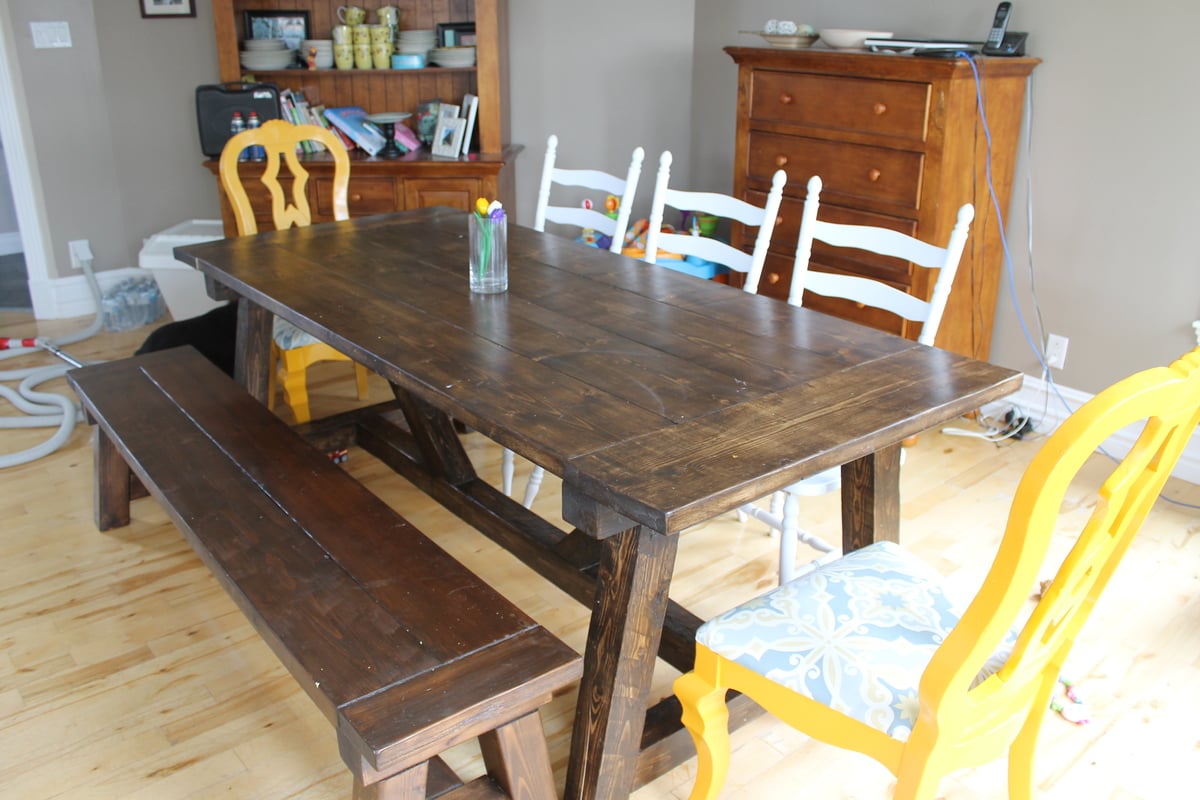
We needed a big sturdy table for 8-12 persons for our big dinning room but didn't want to pay 3000$ for it. Then i found Ana-white's site and thought "why not!". It's my first project, i started whit the bench and then made the table. All buy myself, my husby doesn't even know how to use a saw. He help me carry it inside thought ;) The plans were realy easy to follow. Somebody stop me, i'm refurnishing my hole house, i can't stop! In 2 months i'v made 2 dinning tables, 2 patio tables, 1 coffe table, 5 benches. So if i can do it, you can too!
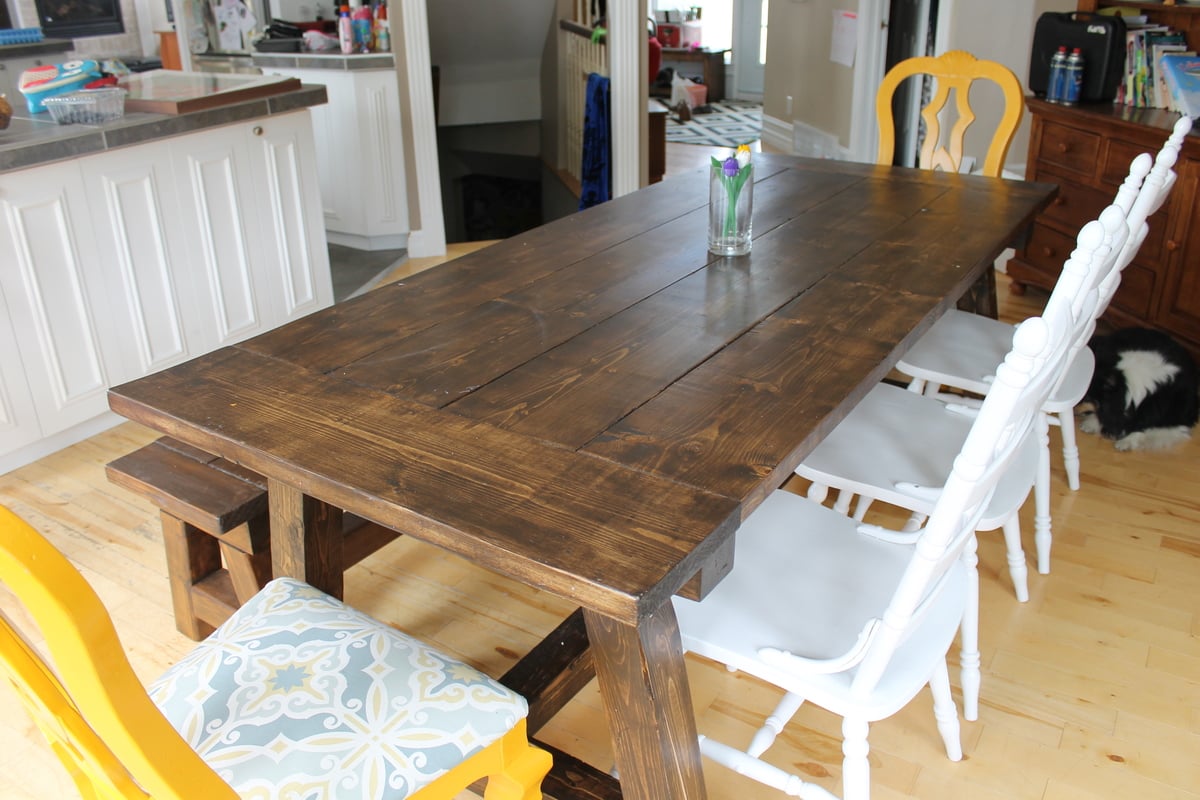
This was my first attempt after finding the site. I was so happy with the ease of the plans and the way it turned out i made the dining table
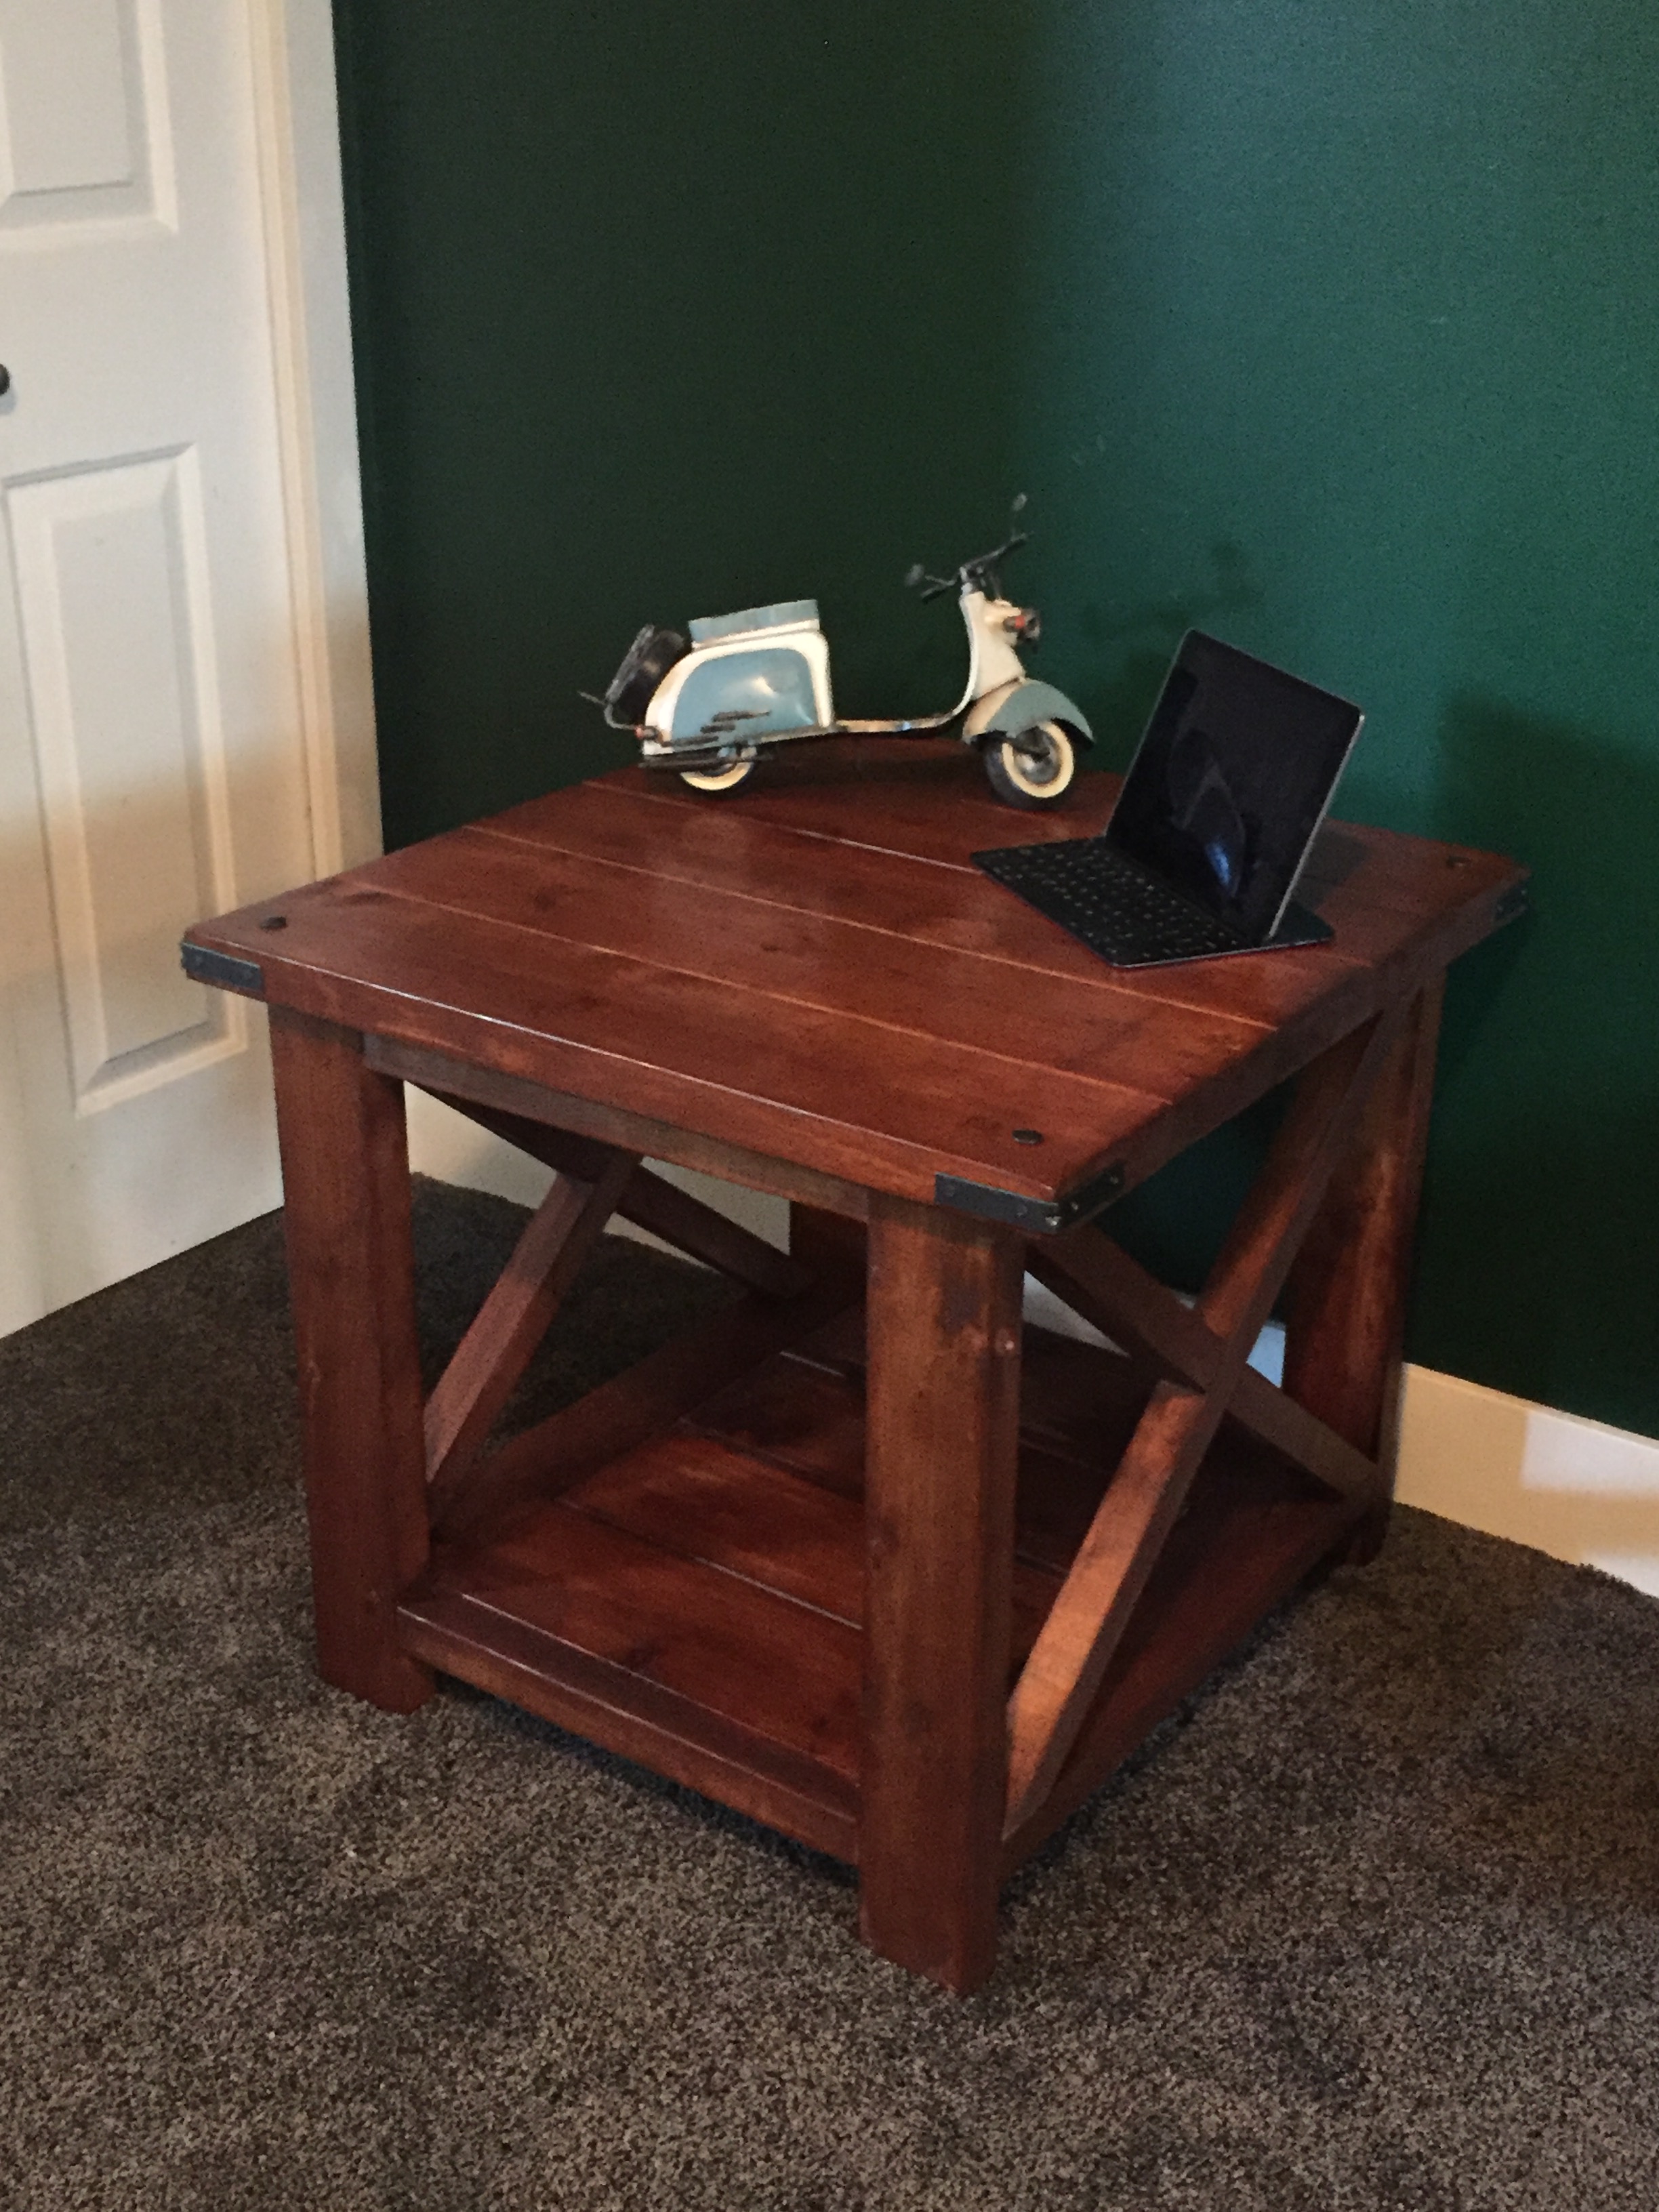
I've been wanting to make this for so long! I still have a couple blemishes to touch up but I'm super pleased with how this turned out. Easy construction and tons of customization options! THANK YOU ANA!!!
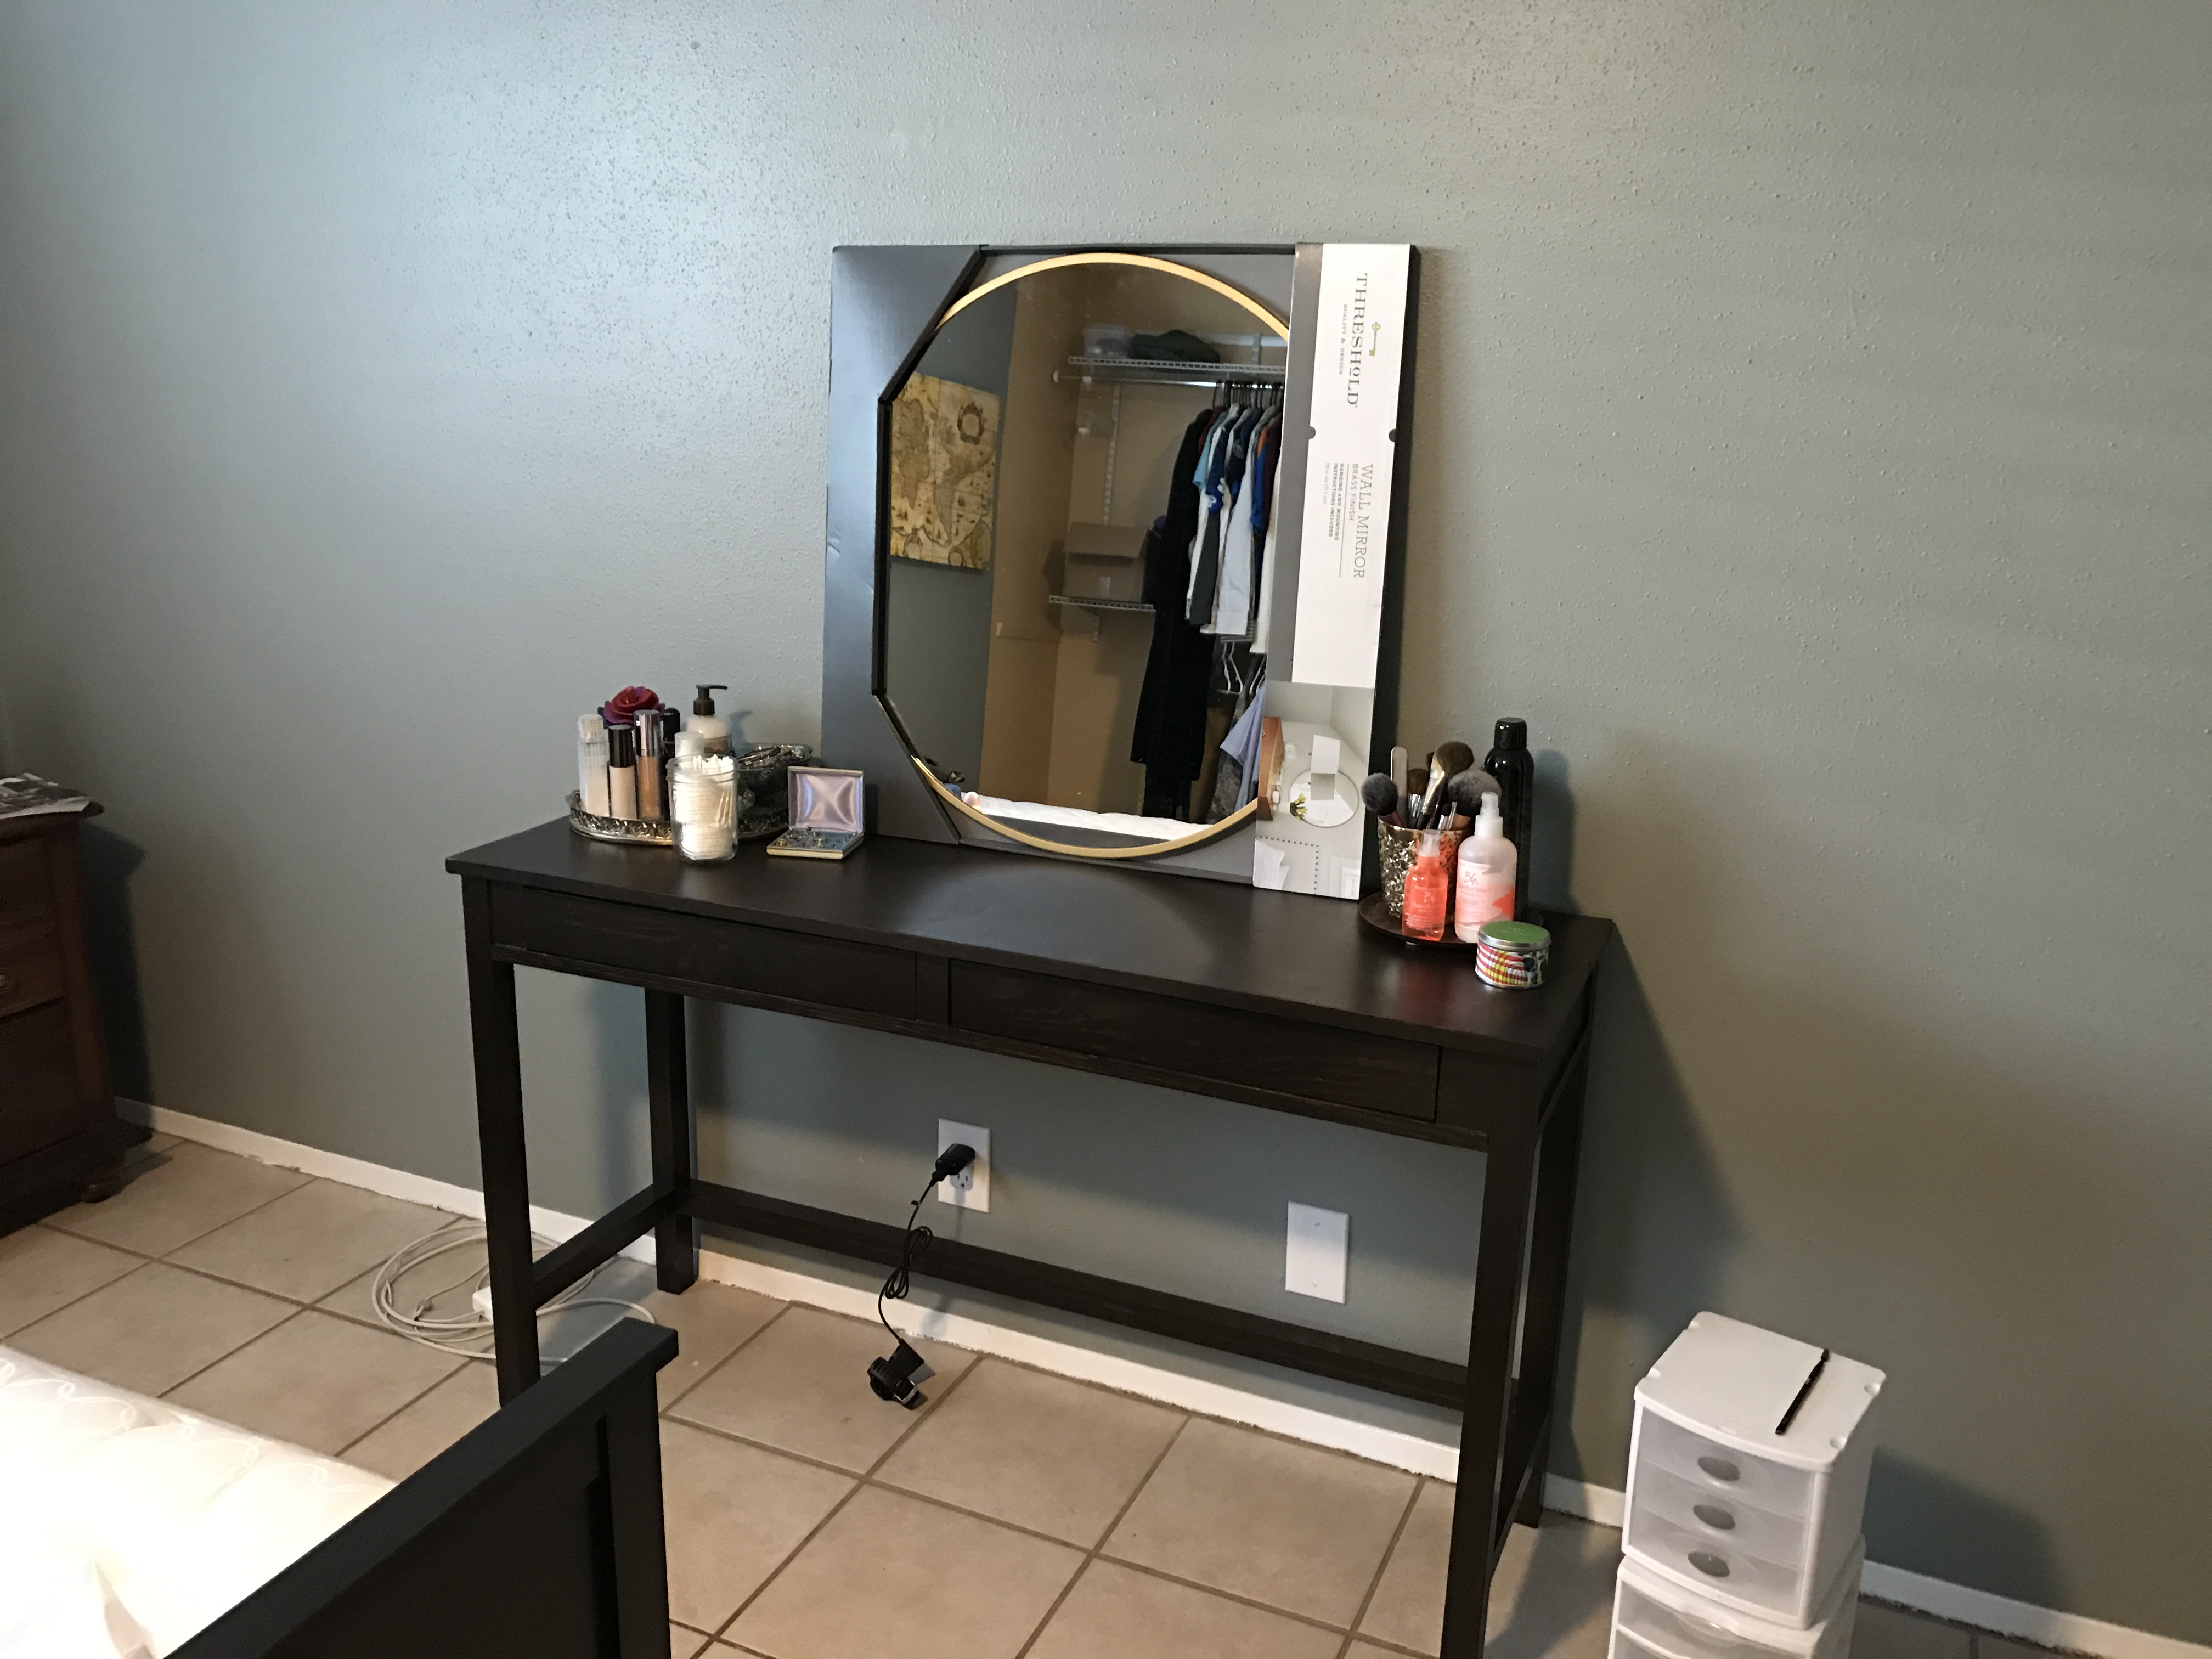
This was my first furniture project, and I modified these plans slightly to get 2 drawers, as well as a smaller depth of the desk. I took this photo before I added drawer pulls, but I love how it turned out!

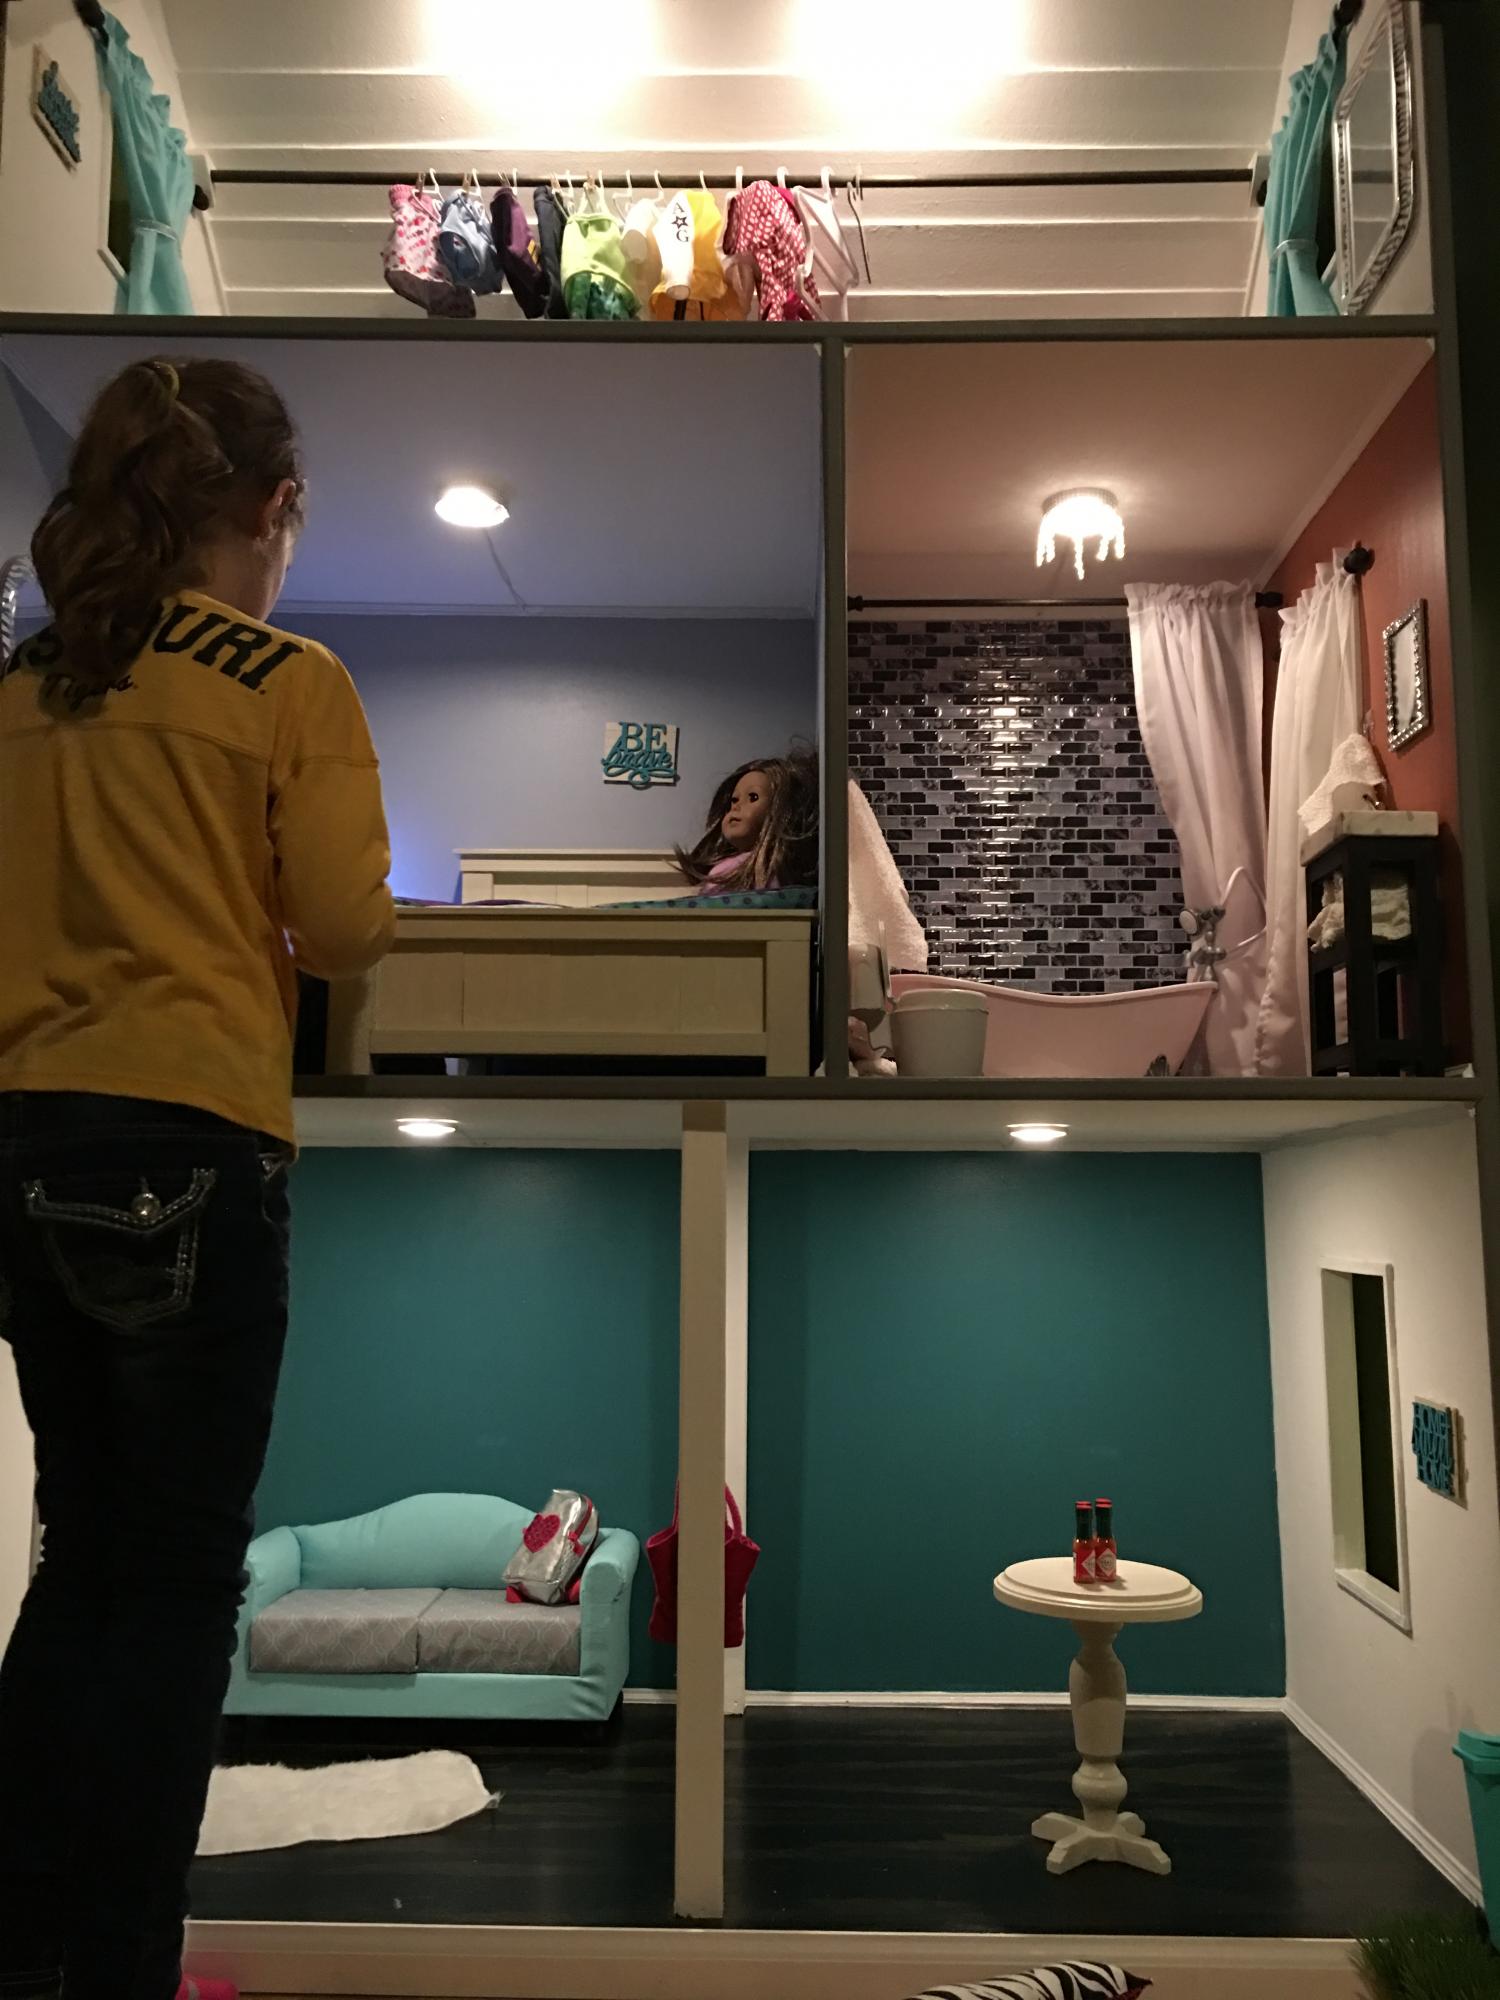
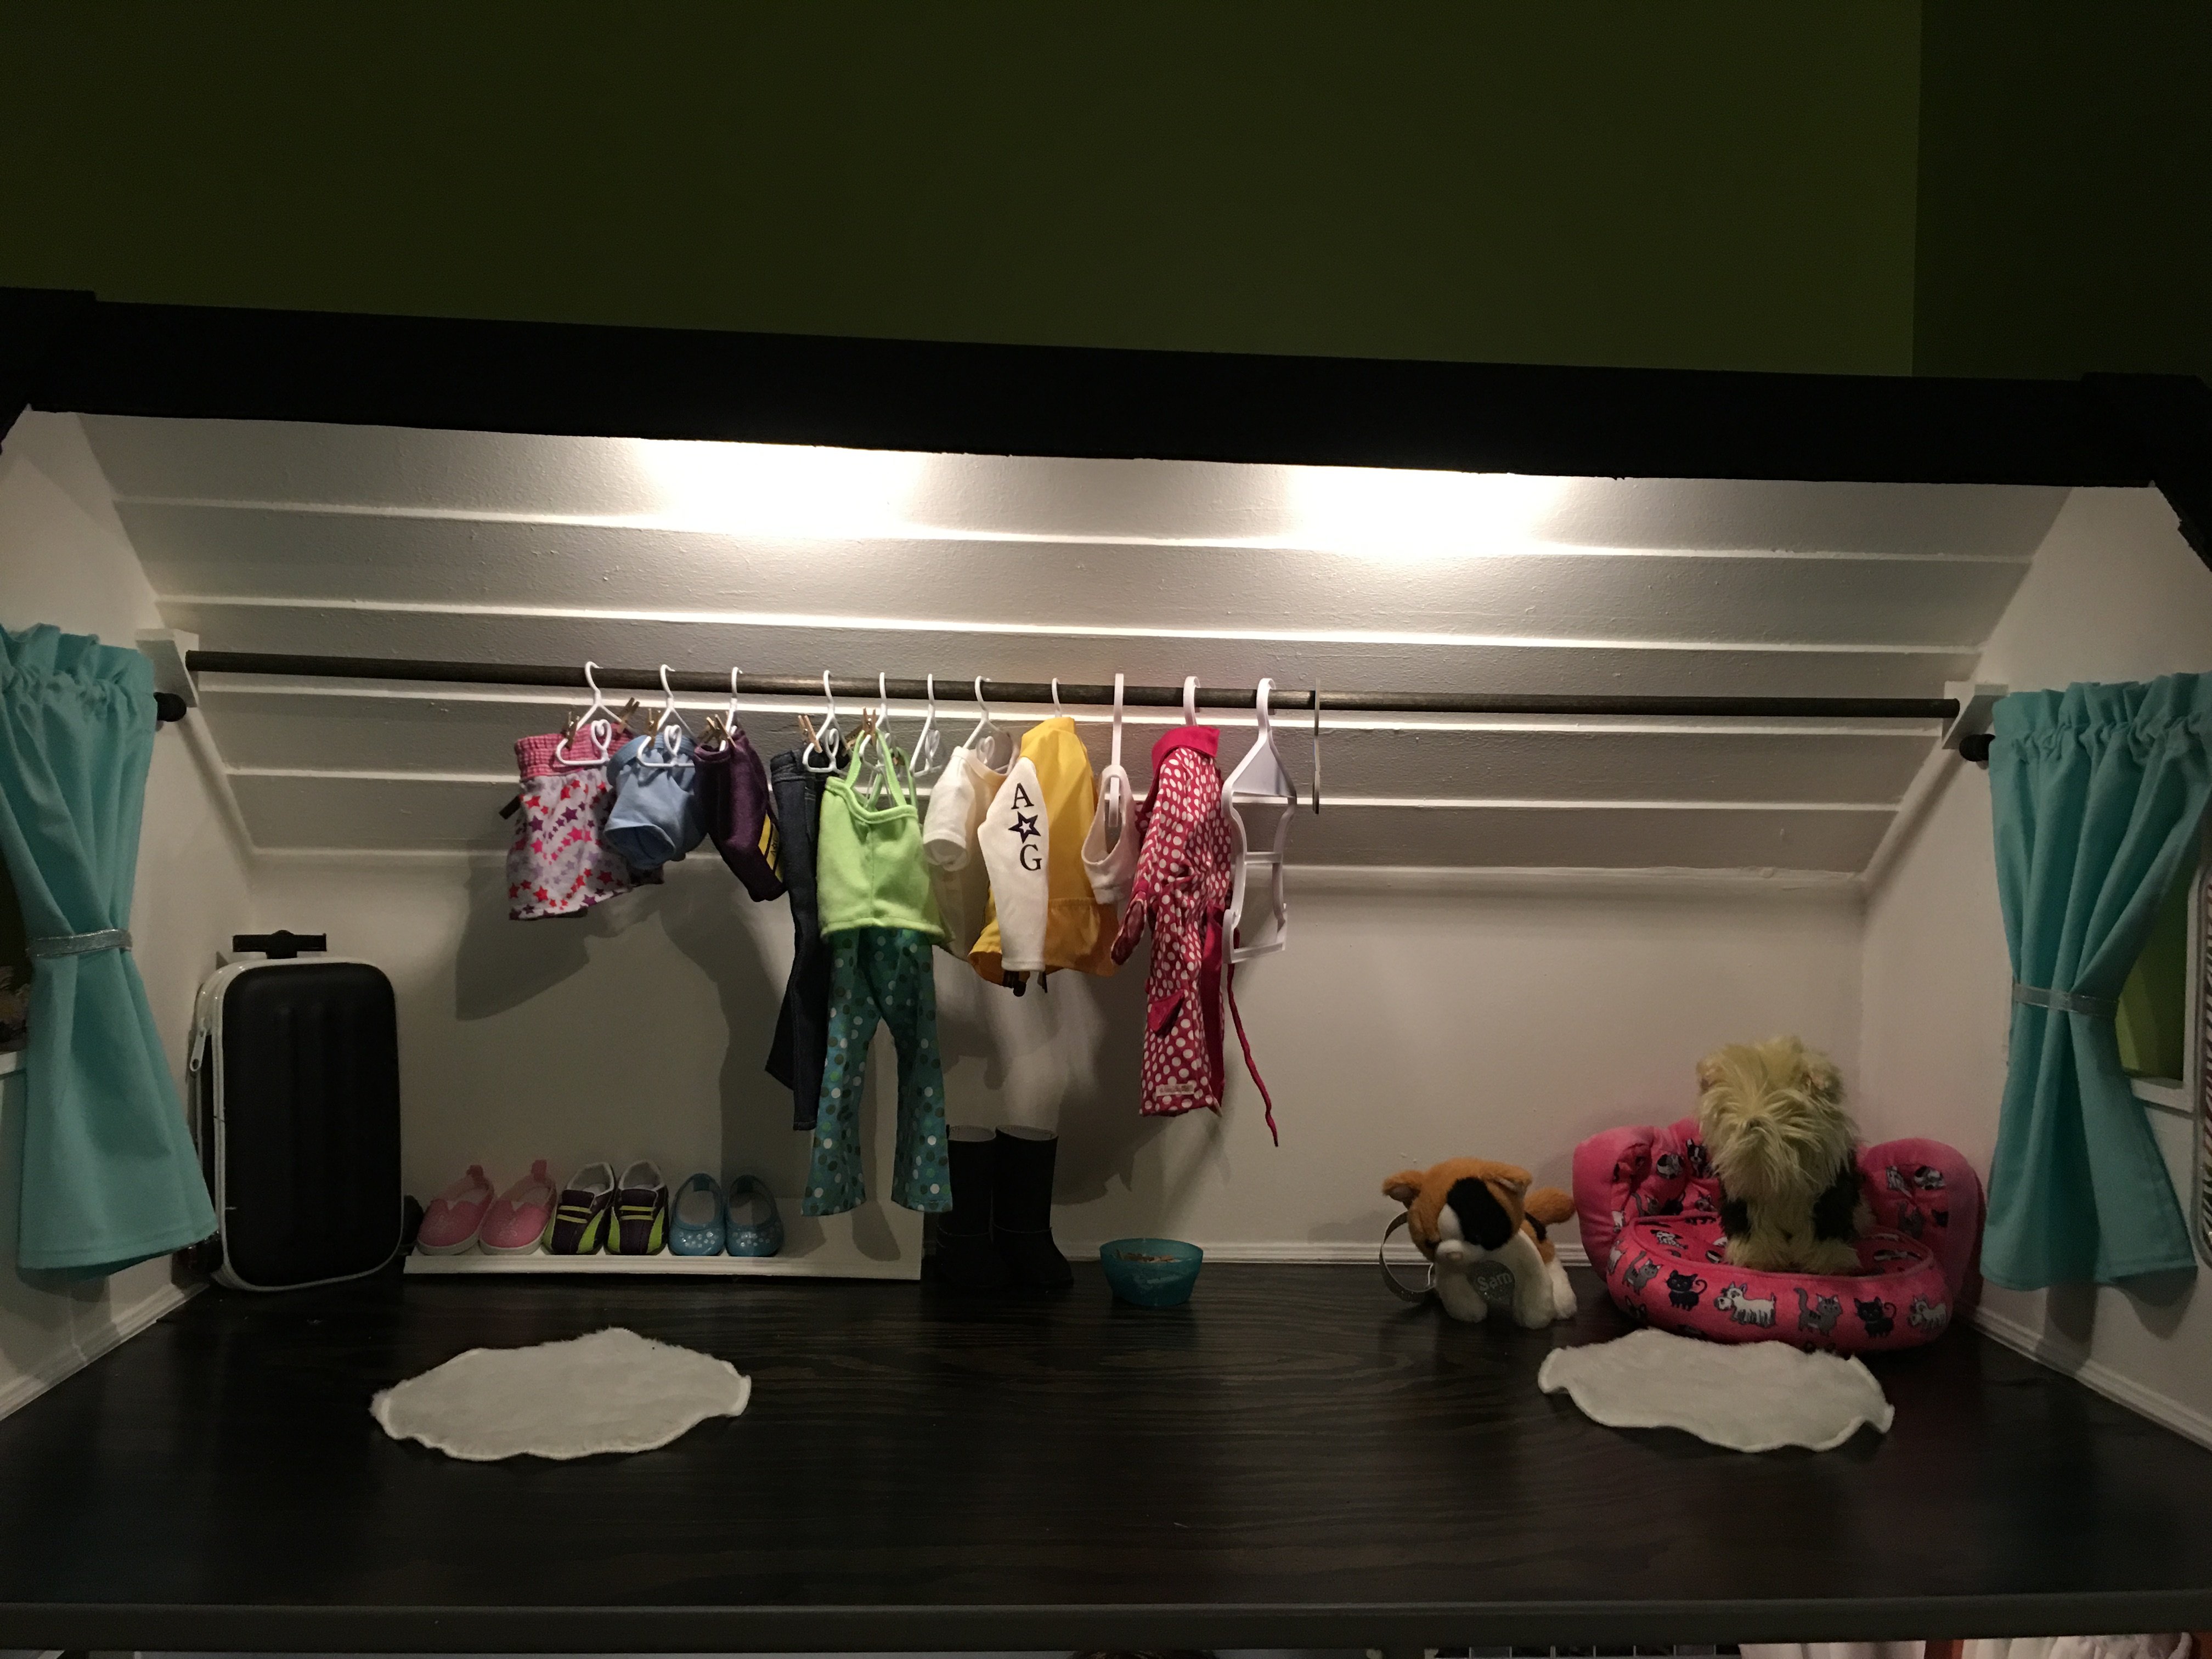
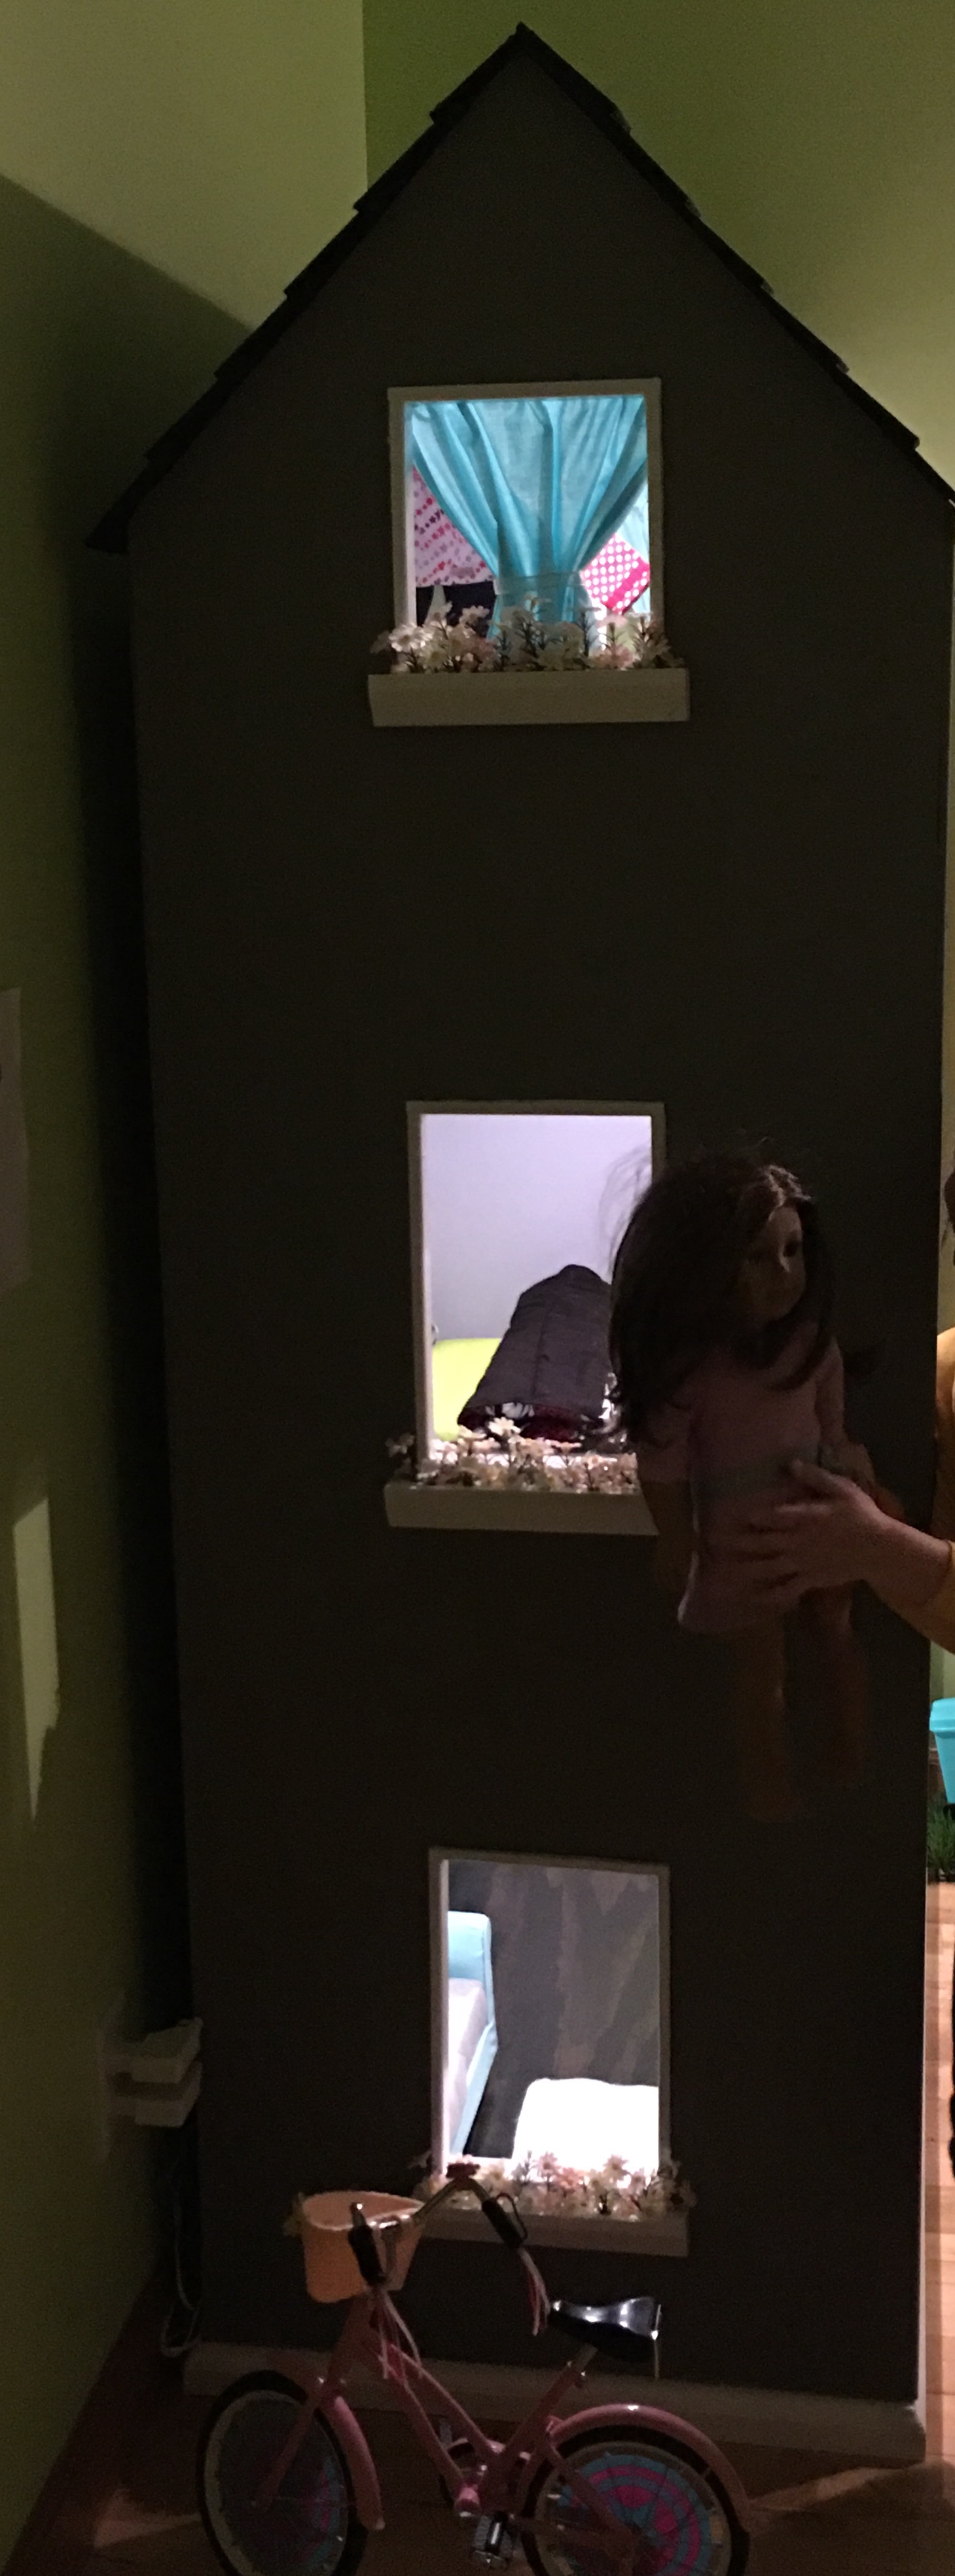
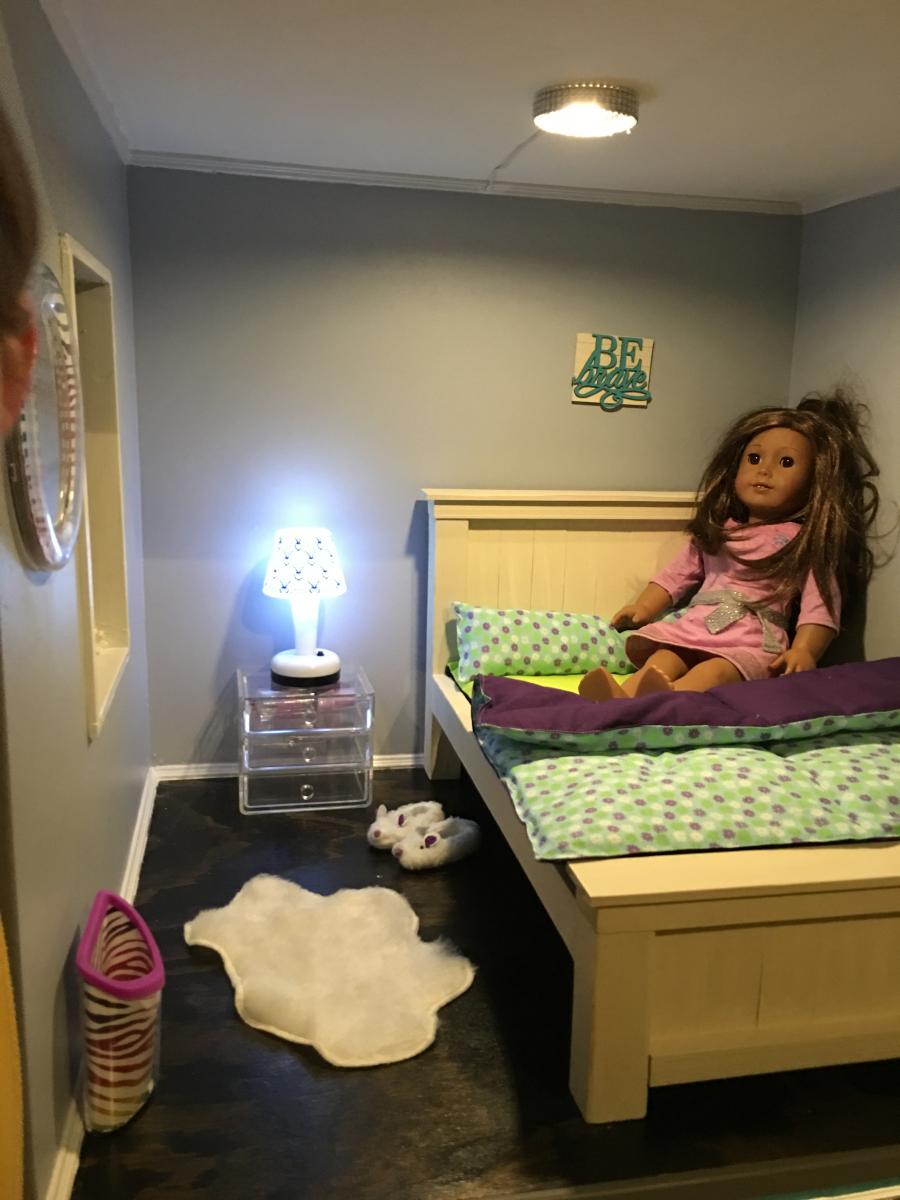
This dollhouse was super easy to make! Harper (the doll) wanted an open concept living/kitchen, and that is the first floor. Second floor are the bedroom and bathroom. Top floor is the closet. The roof is made from 3.5" slats of luan glued together and painted with black sanded paint. Notice the baseboards and crown molding? The window boxes are really cute, too! I still owe my granddaughter a garage and patio with pergola, and kitchen appliances and chairs, but that will wait until summer when she can help craft/build them.
Harper's bed is modeled after the farmhouse bed plans available on this site, but I used smaller scrap lumber. I wanted milk paint but was unwilling to pay the high price, so I bought a sample jar of antique ivory paint and watered it down. It turned out great!


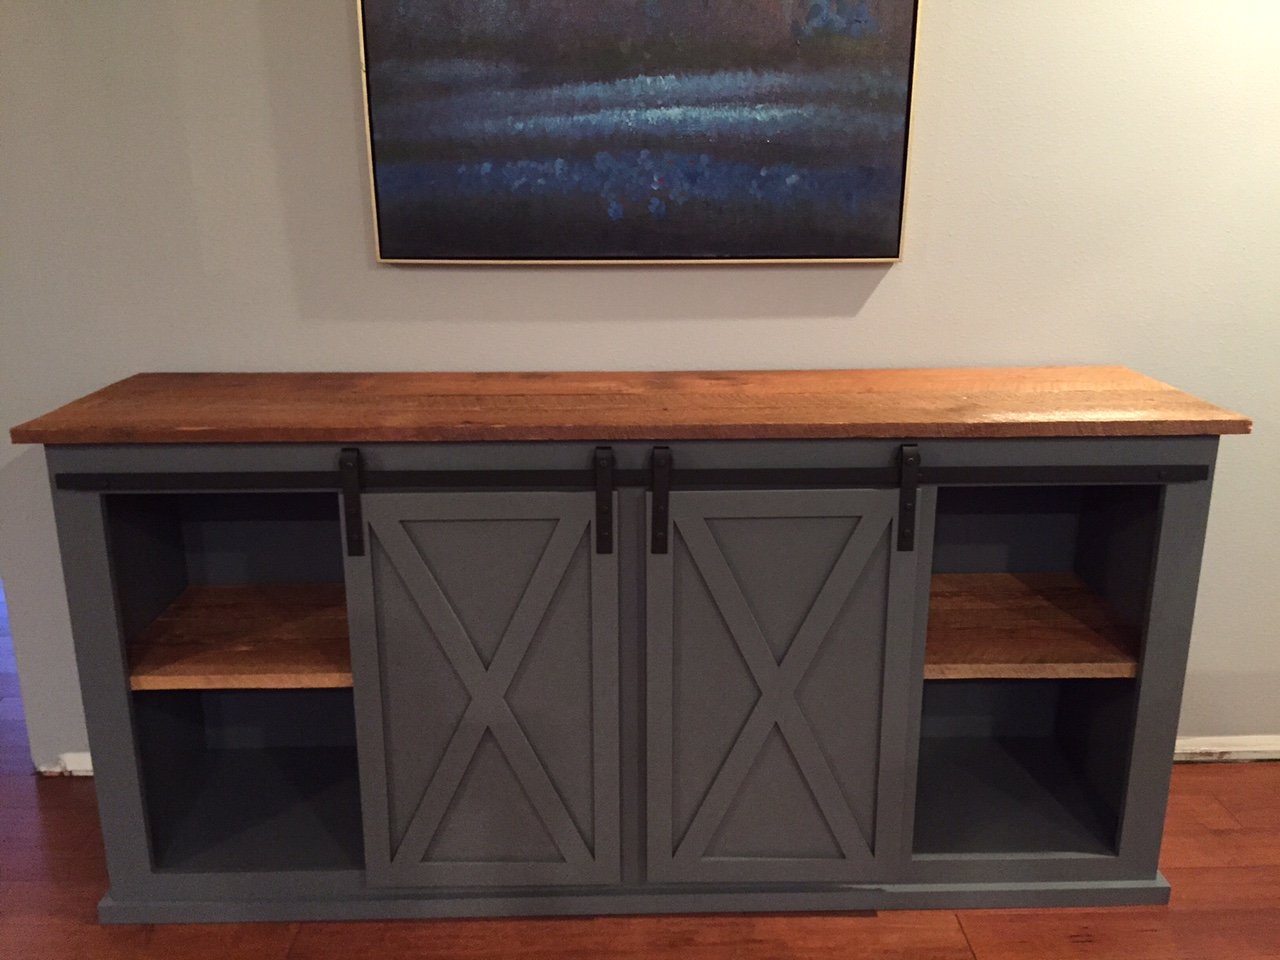
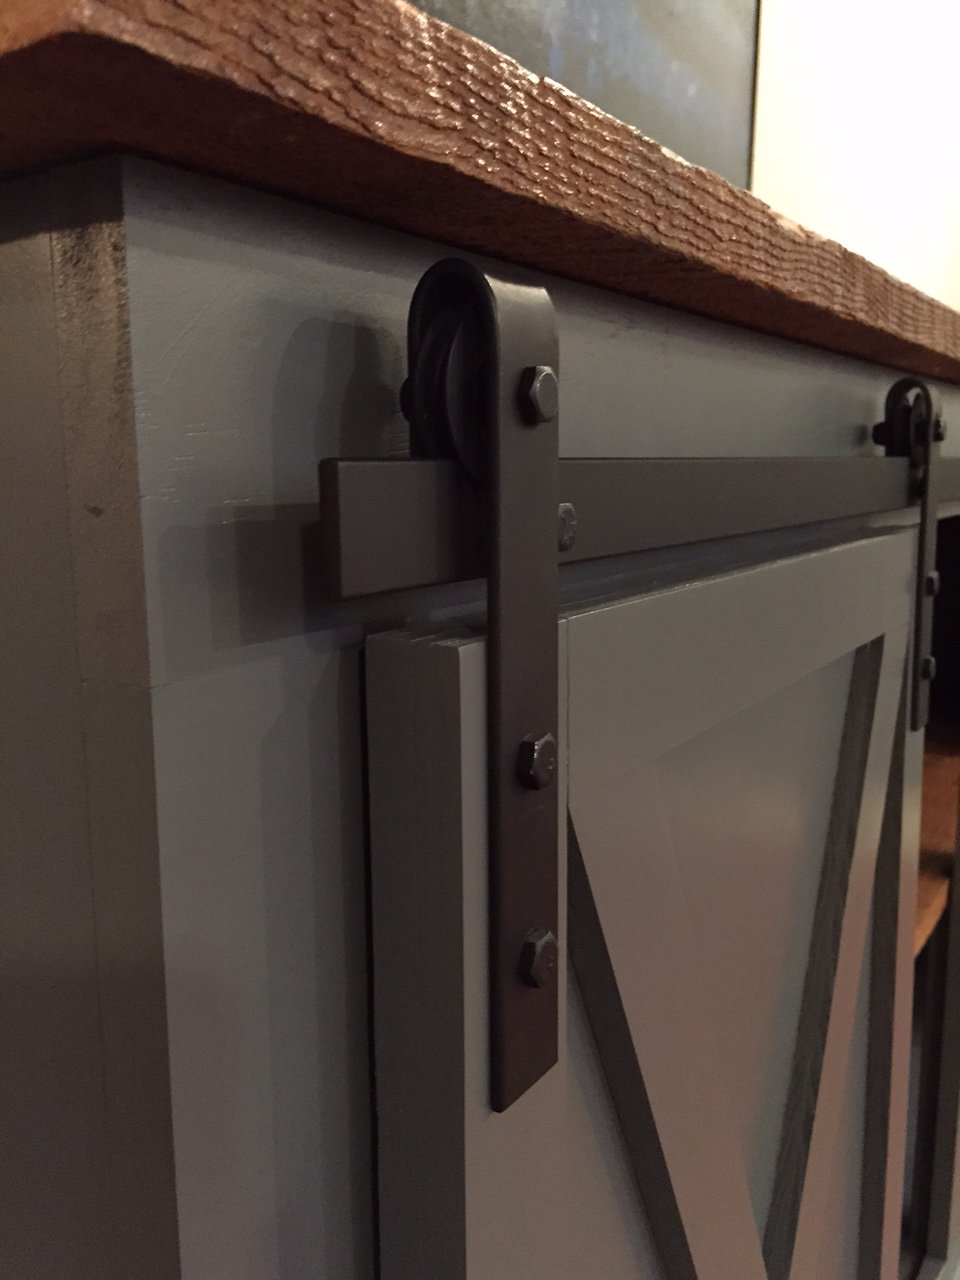
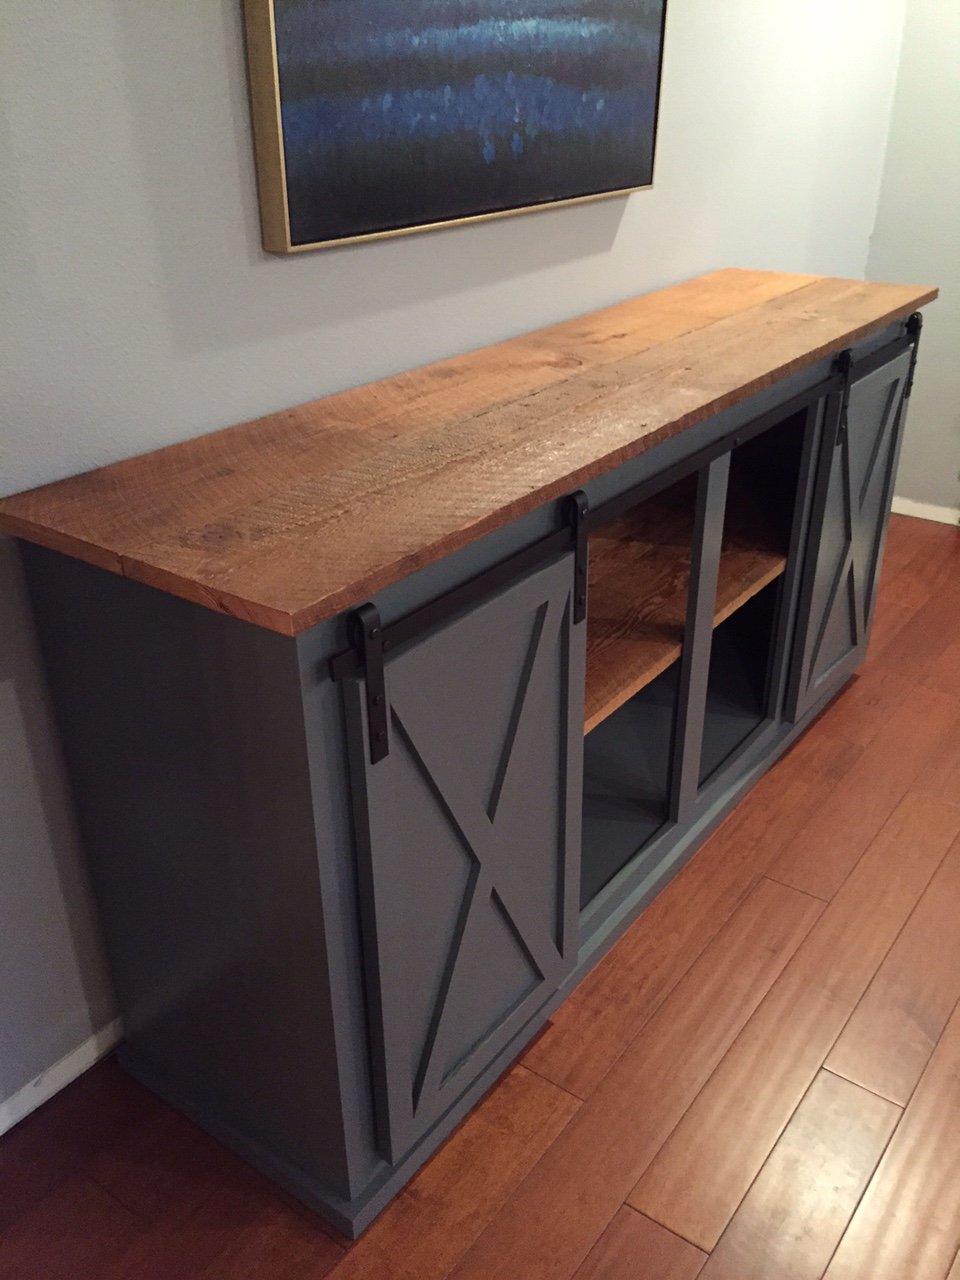
Built the buffet and doors in one day...spent two days making the hardware....1" flat bar (1/8" for mounting wheels and 3/16" for track). For the wheels I used screen door sliding wheels.. materials for sliding hardware totaled $30. Barnwood was obtained from a CL guy tearing his barn. Donated this buffet to my local high school Booster club for their auction.

This was our first furniture project together. It was not as simple as we thought it would be, but we are very pleased with how it came out. We are planning on making the sofa table to match next!
Fri, 03/08/2013 - 14:51
Hey jbayer80 - you could just go to your local orange or other hardware store and get braces and paint them whatever color you like. It would probably be a cheaper alternative to buying painted decorator hardware. Here is a link to some on orange.
http://www.homedepot.com/p/t/202033908?catalogId=10053&langId=-1&storeI…
Erik
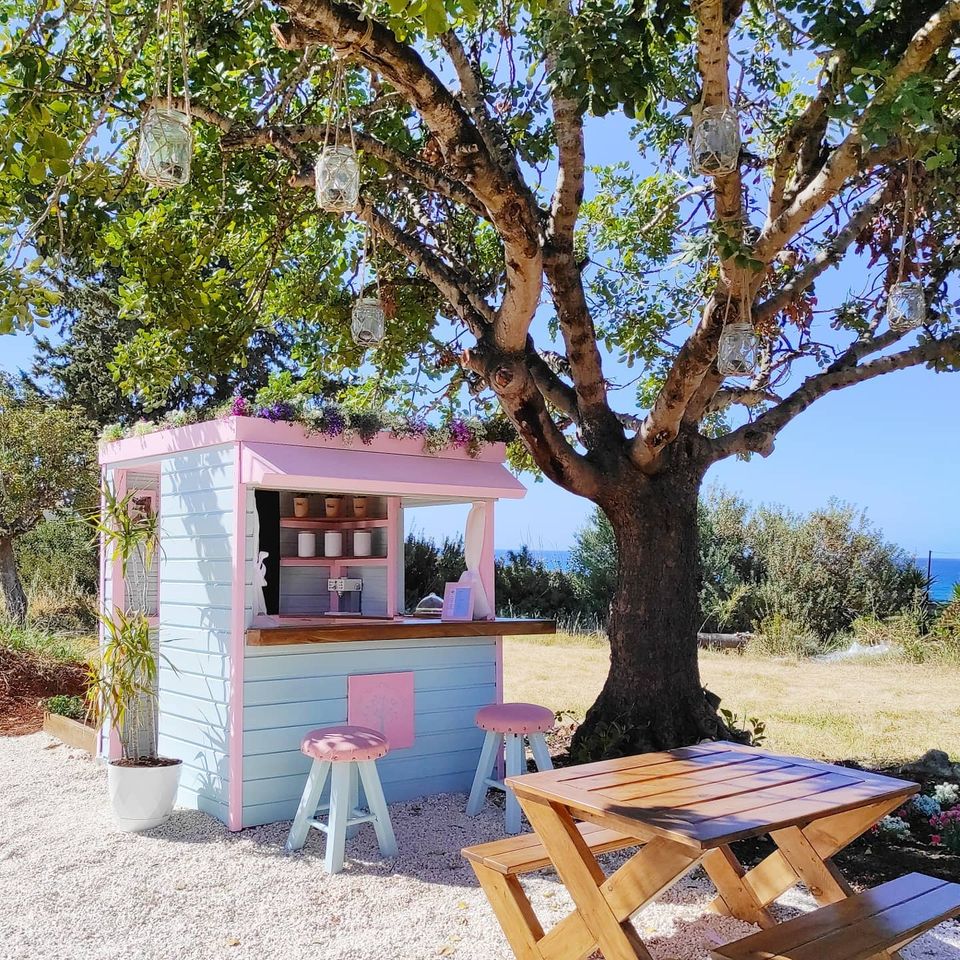
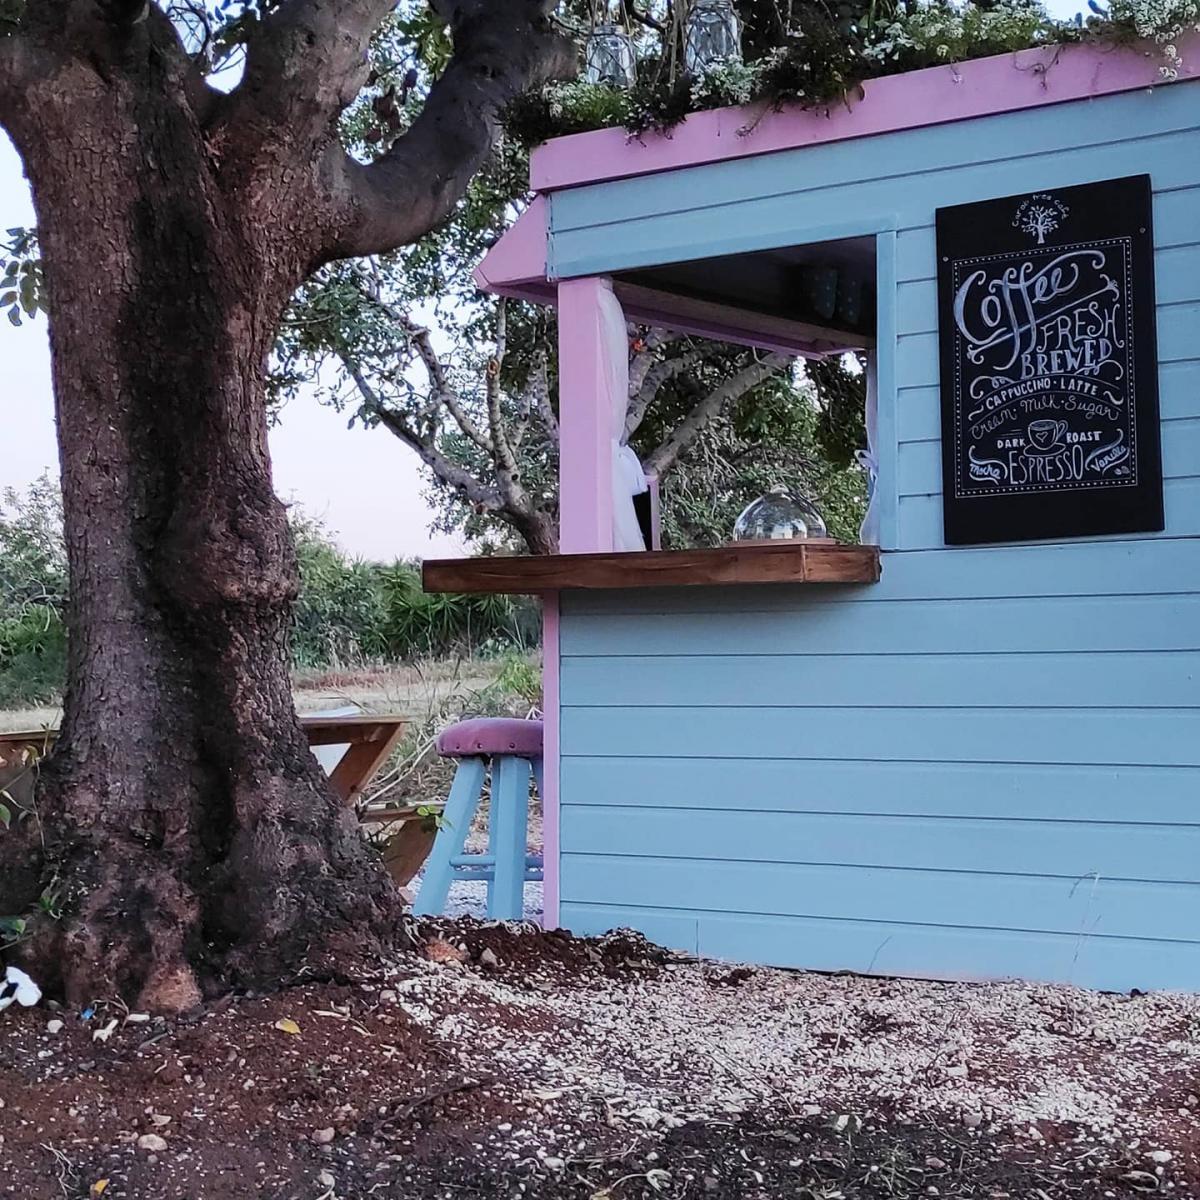
With another total lockdown happening here in Cyrpus, right at the same time as my Daughter will be on Easter holidays, I'm trying to knock up as much outdoor play kit as I can to keep her entertained and off the iPad.
The design of this was very simple, a 2x2 frame clad with T&G; the countertop, shelves, and roof are from marine grade baltic birch (the roof also has additional levels of water prof membranes, root barriers, etc to support the living roof).
Finish-wise, for the pinks and blues, I've used wood aqua by Kraft paints, and for the counter, shelves, and picnic bench, high protection wood stain in walnut by V33.