Community Brag Posts

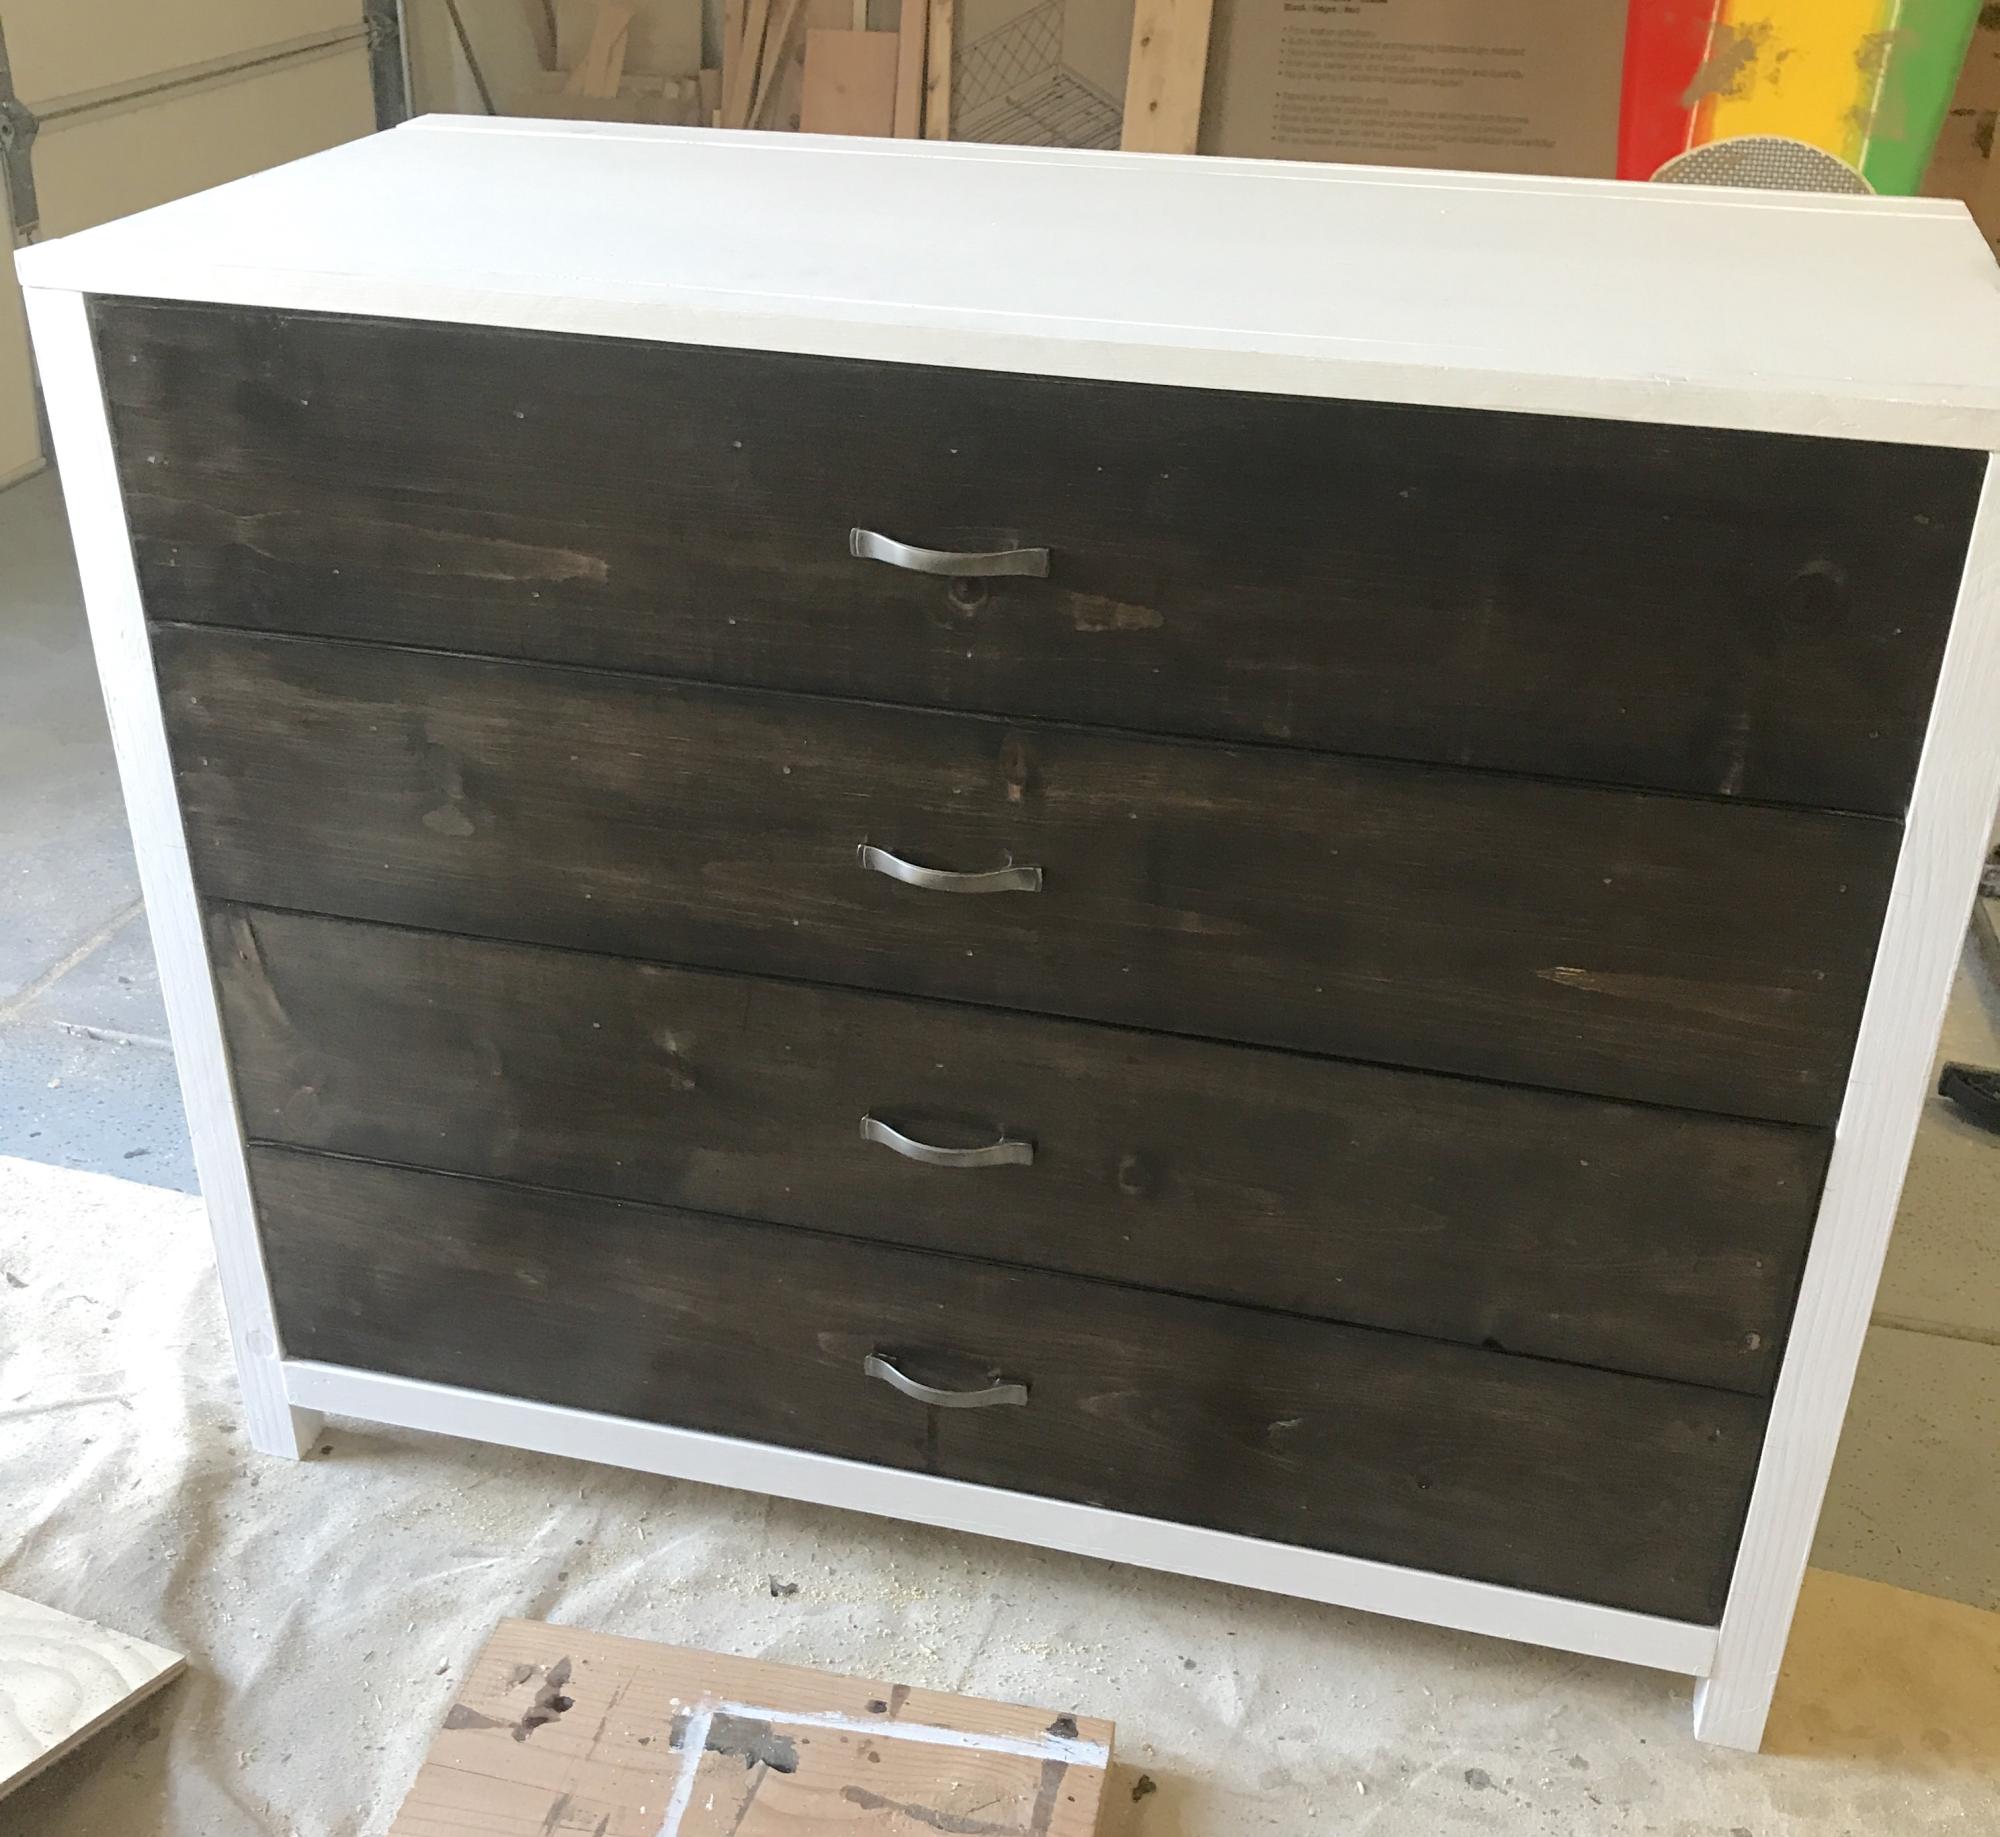
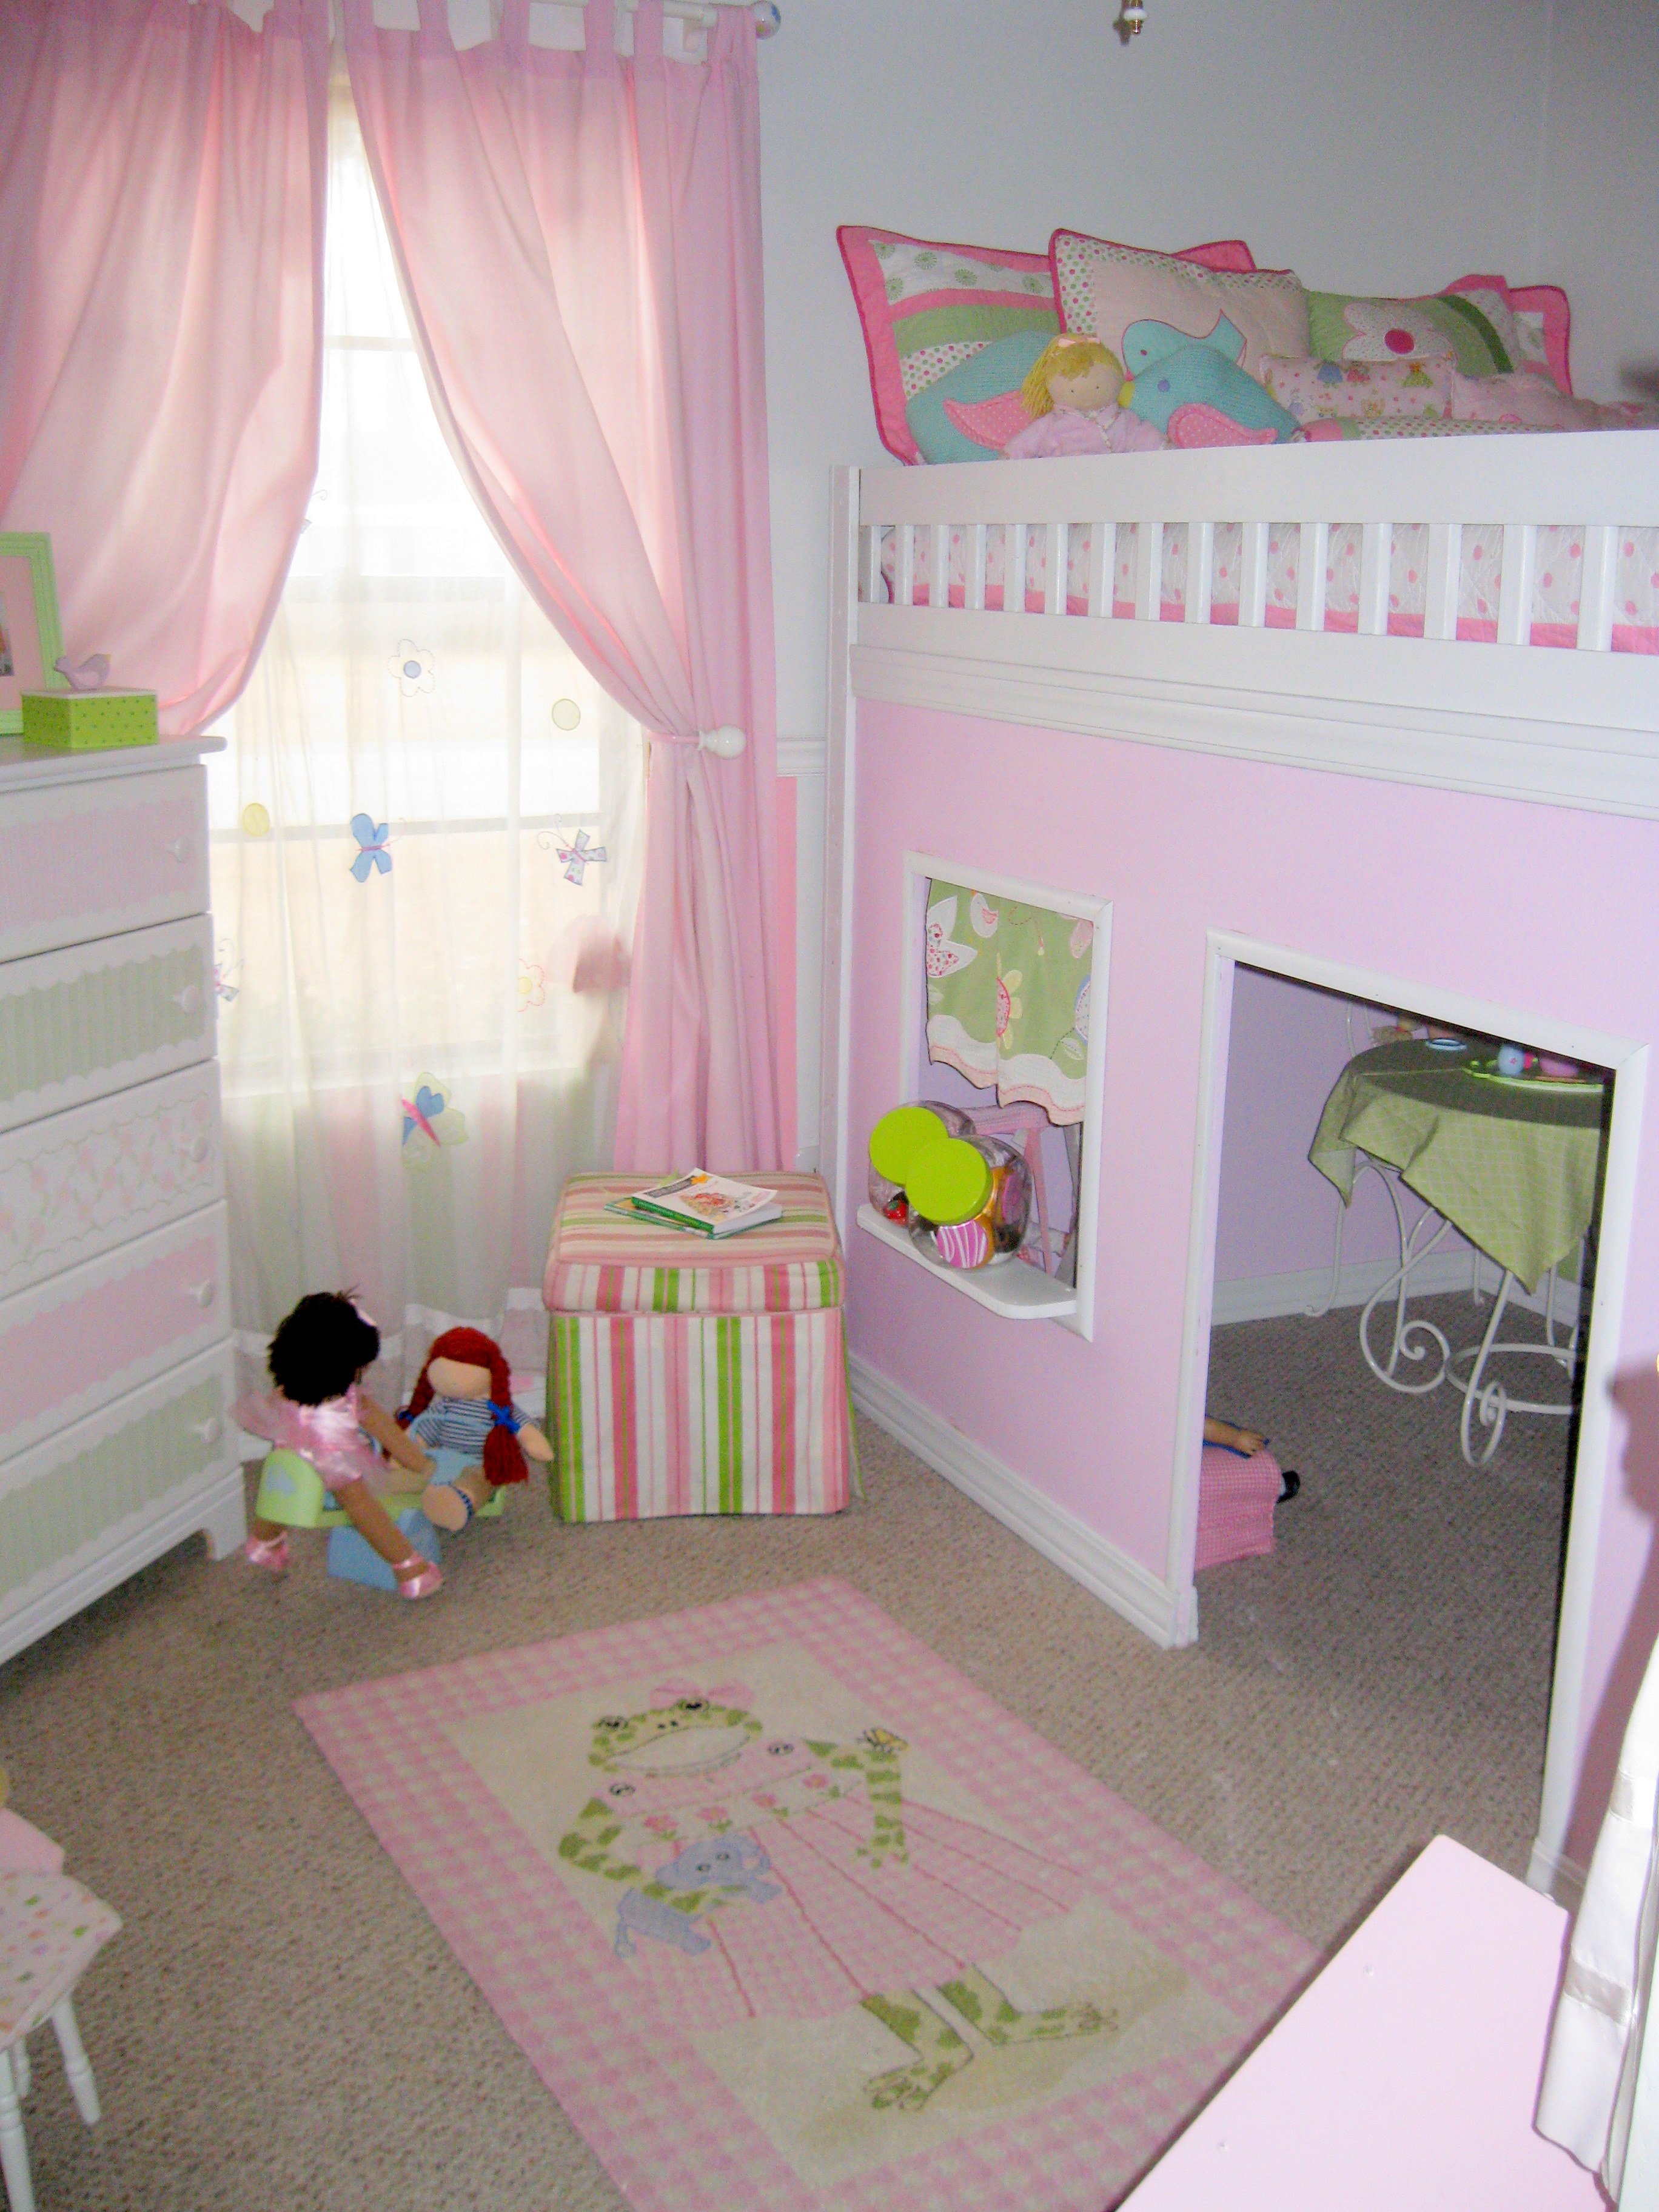
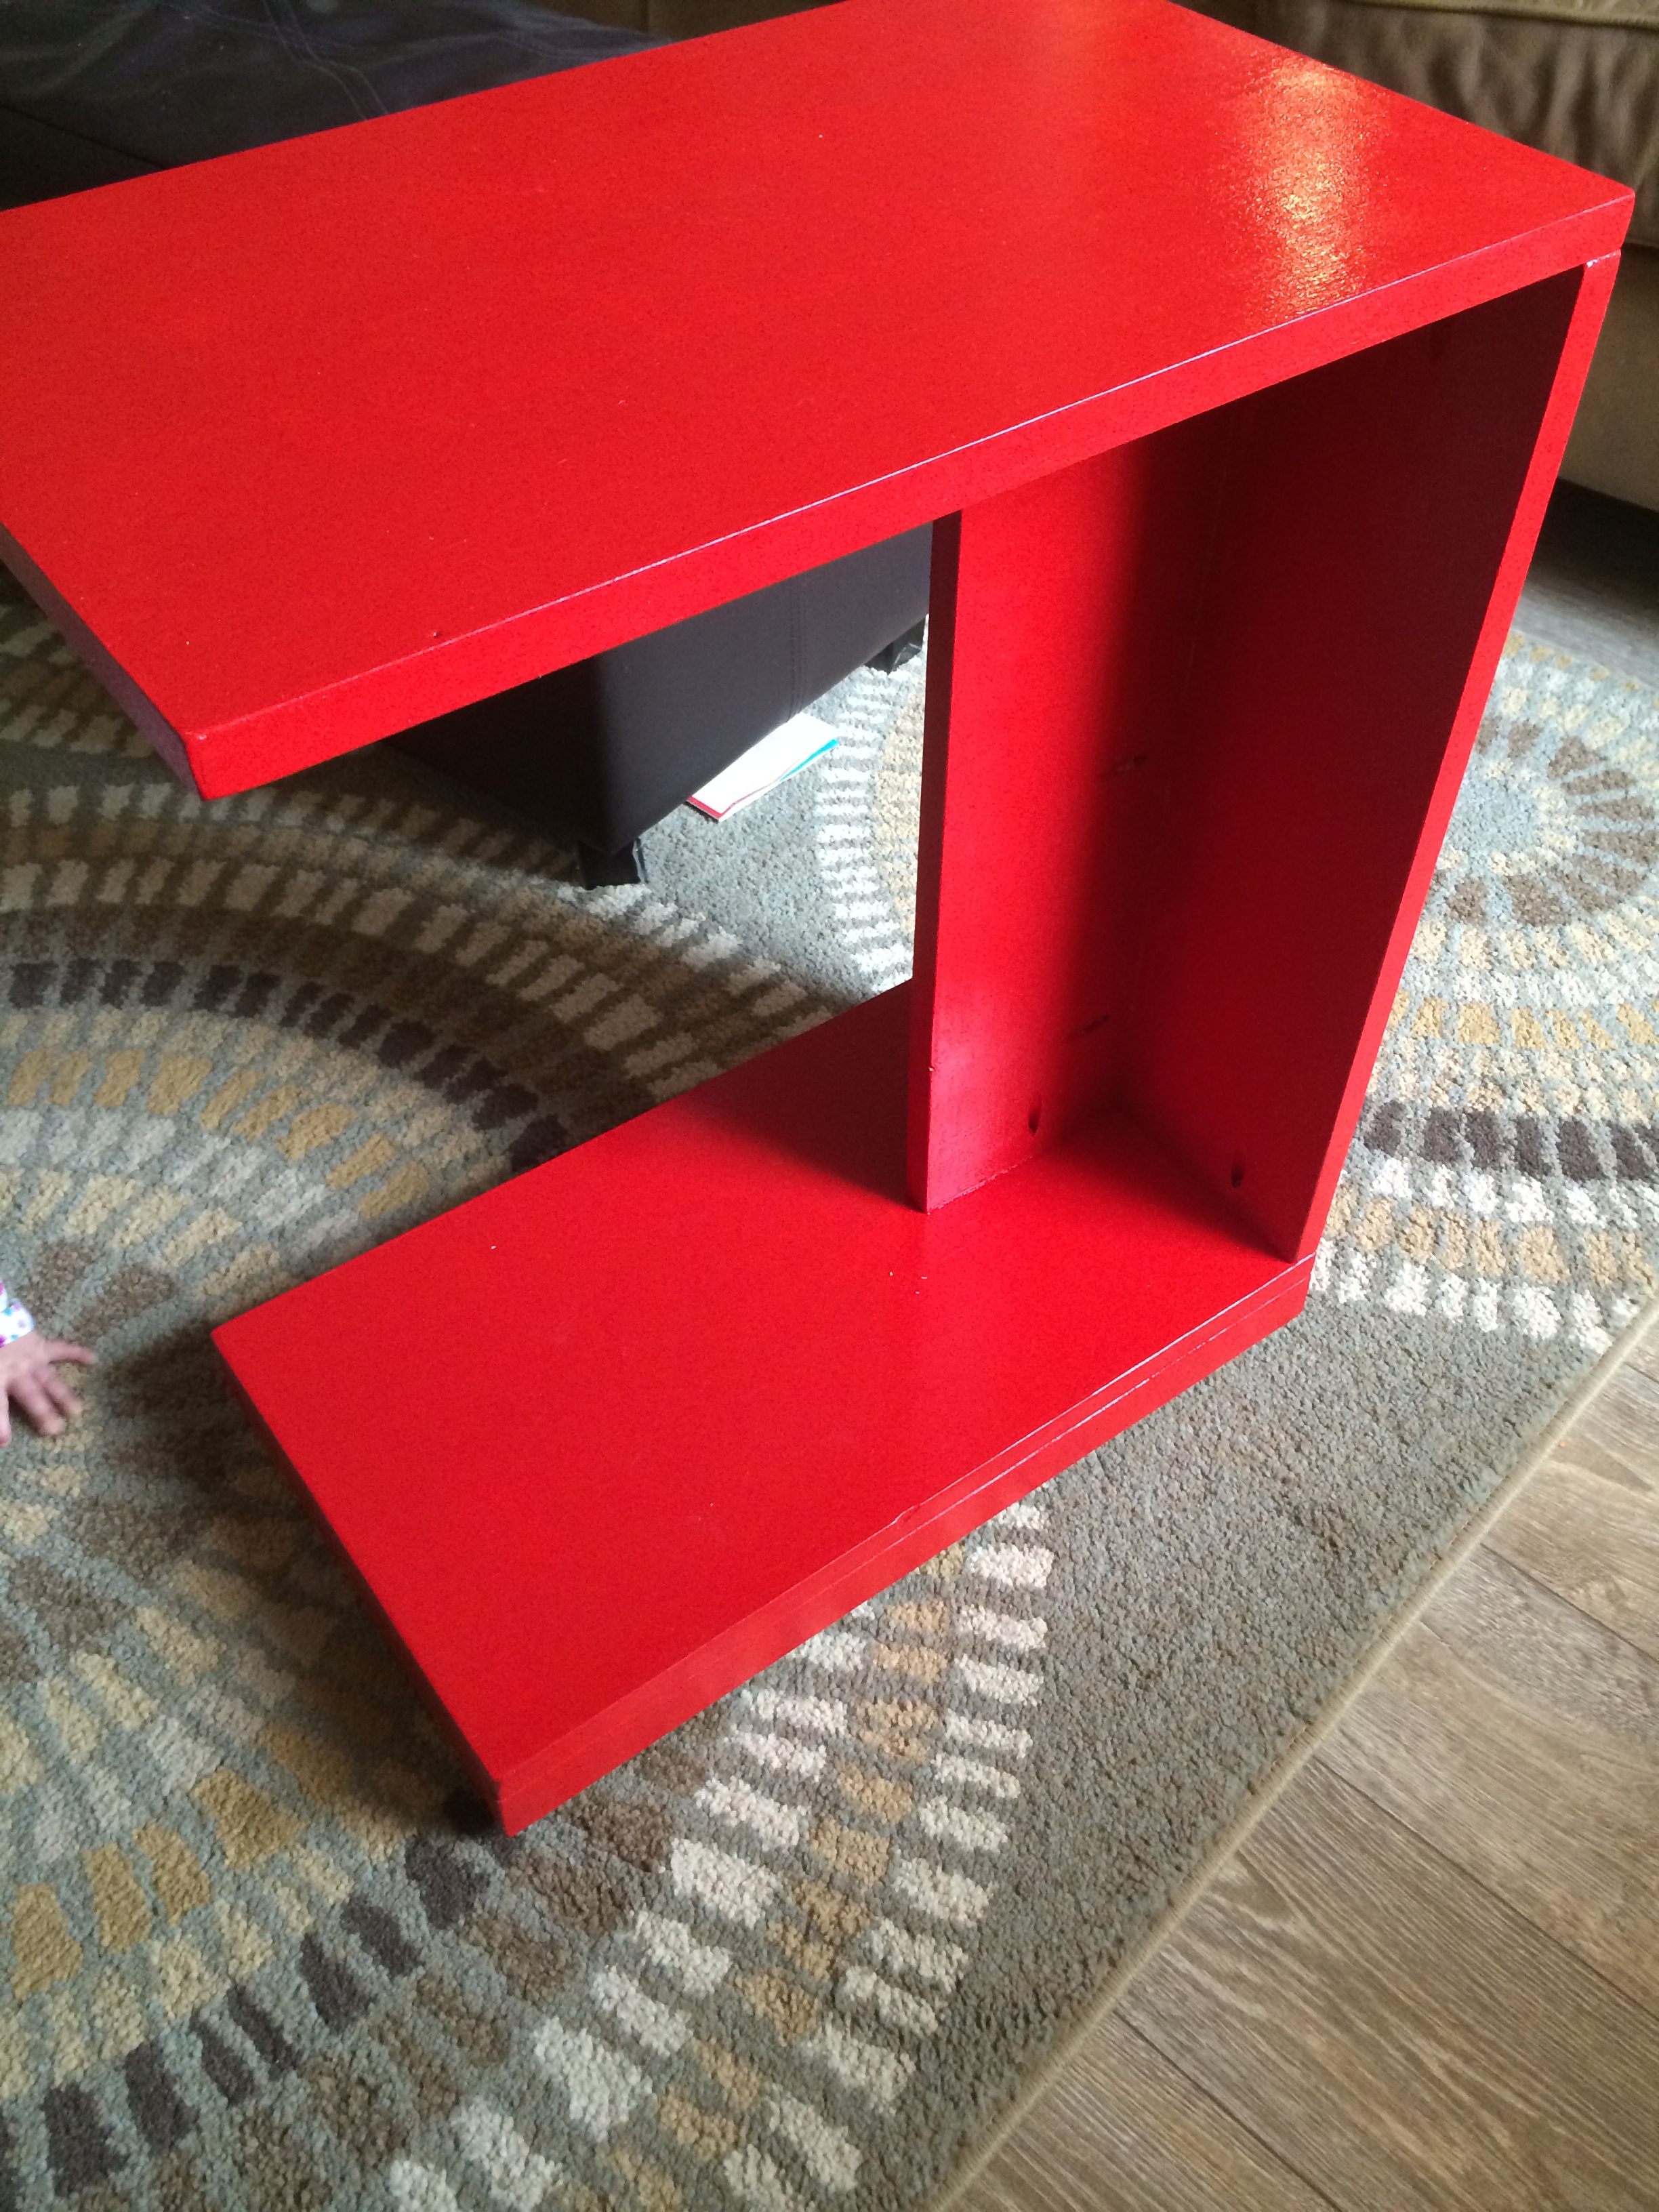
Christina's Cubby Bookshelves

Submitted by community-cont… on Fri, 02/25/2011 - 11:52

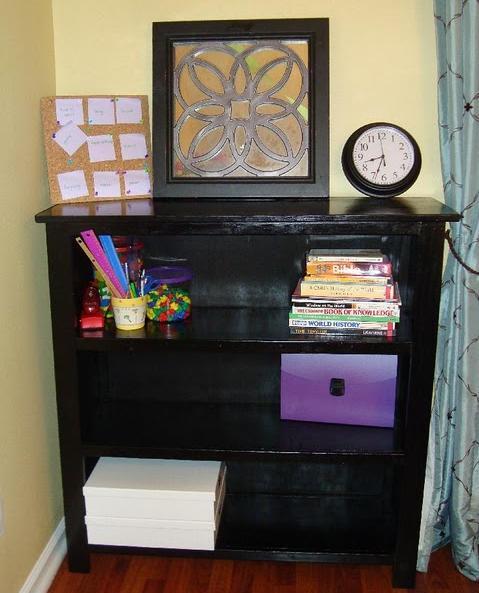
It was my first woodworking project ever and I am so proud of my new bookshelf. I went to Home Depot for my supplies and the gentleman that helped me kept asking “Who’s helping you? You’ve never done this before?” and seemed skeptical about how the whole project would turn out. I went back several days later to get some more wood for another project and ran into the same gentleman again. He asked how my bookshelf was coming along and I said “Great! I have a picture on my phone I can show you.” When I showed it to him he said “Wow! You made that?! Wow! I’m impressed. That is a really nice bookshelf! You brought a tear to my eye!” I laughed so hard. So thank you again Ana for the confidence and plans!

Built from Plan(s)
Estimated Cost
Unknown
Estimated Time Investment
Day Project (6-9 Hours)
Recommended Skill Level
Starter Project

Toddler picnic table

Submitted by kevinsauer on Thu, 05/09/2013 - 15:10

Project for a friends 2 year old, seats will hold a 200 lb adult. NIce starter project, best part was watching the little ones sit at "their" table once it was done

Estimated Cost
30
Estimated Time Investment
Weekend Project (10-20 Hours)
Finish Used
custom tint to Olympic outdoor stain
Recommended Skill Level
Beginner

Doll Farmhouse Bed for a local tricky tray

This is the third farmhouse doll bed we have made and it is by far my favorite!

We used Carrington stain which dried in one hour to it's perfect color (just be sure to wipe down after a few minutes as it sets more quickly than the regular oil-based stains).  And I sewed the blanket out of a $5 throw I had purchased at WalMart (the same throw made two scarves also!).  The mattress was made from a foam mattress topper wrapped in fleece.  Since we had all the wood as scrap in our garage, this project cost us nothing!

We donated it to a local tricky tray and it was priced in the $200+ range!


Estimated Cost
$15
Estimated Time Investment
Afternoon Project (3-6 Hours)
Finish Used
Rustoleum Carrington stain
Recommended Skill Level
Beginner

Comments

Outdoor bench

Submitted by Anonymous (not verified) on Mon, 10/04/2021 - 13:27

I used the 2x4 outdoor sofa plans. Finished with a Shou sugi Ban and few coats of outdoor finish. The build was pretty simple for a rookie wood worker! Thanks 🙏🏾

Comments

Farmhouse Queen Headboard (Pine)

For our guest room redesign, Brian and I made the Farmhouse headboard in pine. It took less than an hour to cut all the boards and begin assembly. We stained the headboard in a dark walnut. For less than $100, I got EXACTLY what I wanted!

Built from Plan(s)
Estimated Time Investment
An Hour or Two (0-2 Hours)
Finish Used
Dark walnut stain from Minwax:
http://www.minwax.com/products/color-guide/#
Recommended Skill Level
Starter Project

Kids' Storage step stool

Submitted by MamaYoung2 on Sun, 05/12/2013 - 07:10

My first project from this site! It was a blast to make, and my 2.5 yr old son can now reach the sink to wash his hands.

Built from Plan(s)
Estimated Cost
$25 - $30
Estimated Time Investment
Afternoon Project (3-6 Hours)
Finish Used
acrylic tole paints, leftover latex paint from my son's room, polyurethane to seal.
Recommended Skill Level
Beginner

BABY SHOWER LEMONADE STAND

Cutest plan ever

Built from Plan(s)
Estimated Cost
50.00
Estimated Time Investment
Weekend Project (10-20 Hours)
Finish Used
Used everything the same as Ana's plans except for the sign is chalkboard paint
Recommended Skill Level
Starter Project

Comments

Modern dresser

Submitted by Anonymous (not verified) on Tue, 07/04/2017 - 22:16

Instead of the double handles I went for a center handle. Little darker stain than what's posted. 

Built from Plan(s)
Estimated Cost
$200
Estimated Time Investment
Weekend Project (10-20 Hours)
Finish Used
Flat white oil based paint and a kona brown poly stain
Recommended Skill Level
Intermediate

72” round dining table

Submitted by Anonymous (not verified) on Mon, 10/04/2021 - 13:52

I wanted a 72” round dining’s table for my new home and found your video online. It was not easy to cut a circle, but it was easier than I thought it would be! I’m so happy with the finished product. I used turned legs with a square base instead of the pedestal shown. Have had so many compliments already and it looks fantastic in the space.

Comments

Nail Polish Cabinet

Submitted by Anonymous (not verified) on Fri, 07/14/2017 - 00:28

I hope everyone is having a fun summer! I decided to take advantage of the long 4th of July weekend and tackle my 2nd woodworking project: a custom-built cabinet to house all of my nail polish! While I don’t consider myself a “girly-girl”, I have always enjoyed painting my nails and thus have accumulated quite the collection over the years. The building process went fairly smoothly. I began by cutting all of the pieces to size (hooray for using a miter saw for the first time!) and pre-staining them a trendy weathered grey. After that, the piece came together quickly. I constructed the cabinet and door separately, added the stainless steel handle and glass inset, and finished the piece off by attaching the door with 2 profile hinges.

Built from Plan(s)
Estimated Time Investment
Weekend Project (10-20 Hours)
Finish Used
Weathered Grey Stain, applied with foam brush, let sit for 2 minutes, then wipe of excess stain
Recommended Skill Level
Beginner

Playhouse loft bed

Submitted by lanah16 on Wed, 03/09/2011 - 13:33

My husband and I decided to make a playhouse loft bed after realizing that our daughters had nowhere to keep their toys. They absolutely love it! We modified the plan slightly to utilize a full size mattress rather than a twin and ended up using the ladder that came with their old bunkbed rather than building a ladder or making stairs. It probably took about two days total to put together.

Estimated Cost
200.00
Estimated Time Investment
Weekend Project (10-20 Hours)
Finish Used
Fairest of them all by Behr (disney princess line)
Recommended Skill Level
Beginner

Vegetable Bin Conversion- Shoe Rack

I have had this space under my television that I never knew what I should do with it. There is a baseboard heater on the wall so I always figured I could put anything against it. I also have a lot of shoes. When I saw the plans for the vegetable bin I figured I could convert it to hold my shoes. 


I used 1x8s for the middle legs allowing the cabinet to sit over my baseboard heater. I adjusted the height of each cubby to fit the various sizes of shoes I own. I put 1x4s along the back so as to allow everything to breath. It took me about 2 days to complete. 

Built from Plan(s)
Estimated Cost
175
Estimated Time Investment
Weekend Project (10-20 Hours)
Finish Used
I used American Walnut stain. I then painted over the stain with white paint. I sanded all of it down and added another very light coat of the American Walnut.
Recommended Skill Level
Beginner

Farmhouse Table Makeover

Submitted by kellyh88 on Wed, 03/09/2011 - 16:14

My husband had a hideous kmart table (see the before pic) with target chairs that he bought before we were married more than 9 years ago. I have never liked that table but it was what we could afford at the time. The table managed to make it through 4 military moves before I ripped it apart last week and used Ana's farmhouse table plan to make the planked top with pine boards. Her plan calls for 2 inch boards and I used 1 inch boards but it turned out great and I love it. And I bought new chairs from walmart.com to go with it. I'm a beginner woodworker and have only made a few small projects but this one was manageable for me. I love love love my new table!

Estimated Cost
Including wood, screws, primer, paint, stain, poly, sandpaper, and brushes, just under $100
Estimated Time Investment
Weekend Project (10-20 Hours)
Finish Used
On the tabletop: Minwax Dark Walnut oil-based wood stain (used wood conditioner first) and then 3 coats of Minwax Semi-Gloss Polyurethane. For the stain, I brushed it on with a foam brush, let sit 15 minutes and then wiped excess off with a rag. Only one application was needed for a nice deep warm color. On the table bottom and legs: Valspar Dark Kettle Black semi-gloss paint.
Recommended Skill Level
Beginner

Side Table

Submitted by rsawyer05 on Mon, 05/20/2013 - 16:05

This is made from the Tryed Side Table plans. I made a few changes to it that made it easier for me. I made the top from 5/4 deck boards that I had left over from a deck I built recently and I used pocket hole screws to hold it all together. I also chamfered the boards on the interior and used a round over bit around the edges. I really like the table and it is sitting next to two Adirondack chairs I made. I painted them blue to remind me of the ocean since I don't get to see the ocean much where I live.

Built from Plan(s)
Estimated Cost
I used boards left over from the deck I built a few weeks earlier
Estimated Time Investment
Day Project (6-9 Hours)
Finish Used
Tinted stain from Home Depot
Recommended Skill Level
Starter Project

Comments

Rolling C End Table

Submitted by JoeP on Wed, 04/08/2015 - 10:45

Great little table that is perfect for snacks or drinks while watching the game or a movie.

Estimated Time Investment
Afternoon Project (3-6 Hours)
Finish Used
Left over paint from the rocket bookshelf project
Recommended Skill Level
Starter Project

Twin farmhouse

We used the least expensive pine at Lowe's because I really like the variation in the wood.  I think it adds character.  This was the first time I've used Weathered Oak and boy is it sheer!  You can hardly tell it's there over the dark walnut but it did seem to lighten it just a little and give a slight grey to the very dark areas.  Really liked the outcome!

Built from Plan(s)
Estimated Cost
$180
Estimated Time Investment
Weekend Project (10-20 Hours)
Finish Used
Weathered oak over dark walnut
Recommended Skill Level
Beginner

Farm Table and floating shelves

Submitted by Anonymous (not verified) on Mon, 10/04/2021 - 17:23

Built for my Daughter and Son-in-laws new home

Comments

Toddler storage bed

This bed was a lot of fun to make! The plans made it super simple and my daughter loves her new bed! The drawer width was a challenge at first but I learned a lot in the process.

I recommend getting the plywood ripped at the home store if you do not own a table saw. Thanks for the awesome plans!

Estimated Cost
$300-$400
Estimated Time Investment
Week Long Project (20 Hours or More)
Finish Used
Glidden "crisp linen white" paint. Semi gloss
Recommended Skill Level
Beginner

DIY Loft Bed

I assisted a friend in building a loft bed for her daughter.  We followed free plans by Ana White for the junior loft bed. We made a few modifications such as changing it to fit a full-sized mattress (more details on my blog). The loft bed is the largest furniture item that I have built thus far. I have learned a lot from working on the project.


Estimated Cost
$300
Estimated Time Investment
Week Long Project (20 Hours or More)
Recommended Skill Level
Intermediate