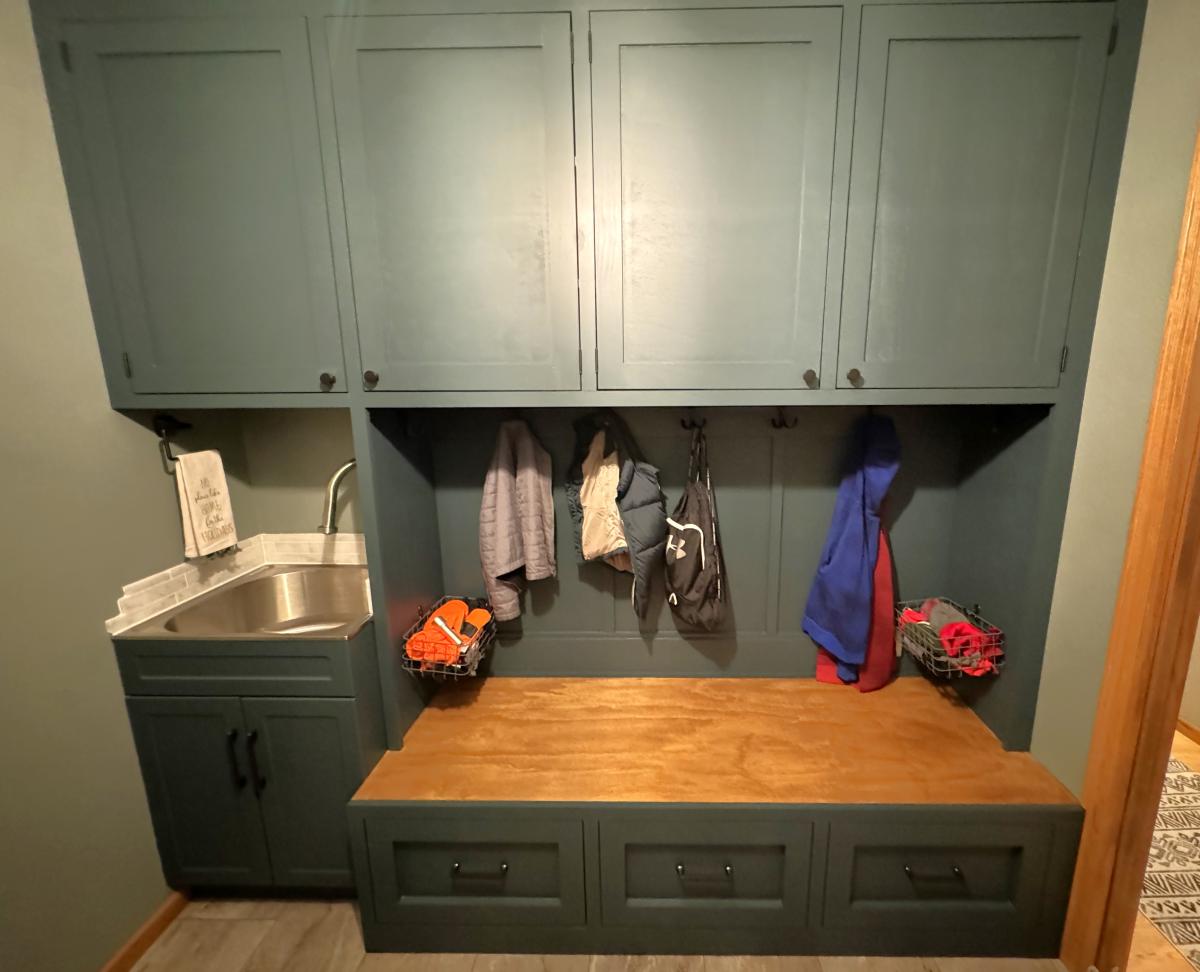
Mudroom Built-in with Sink!
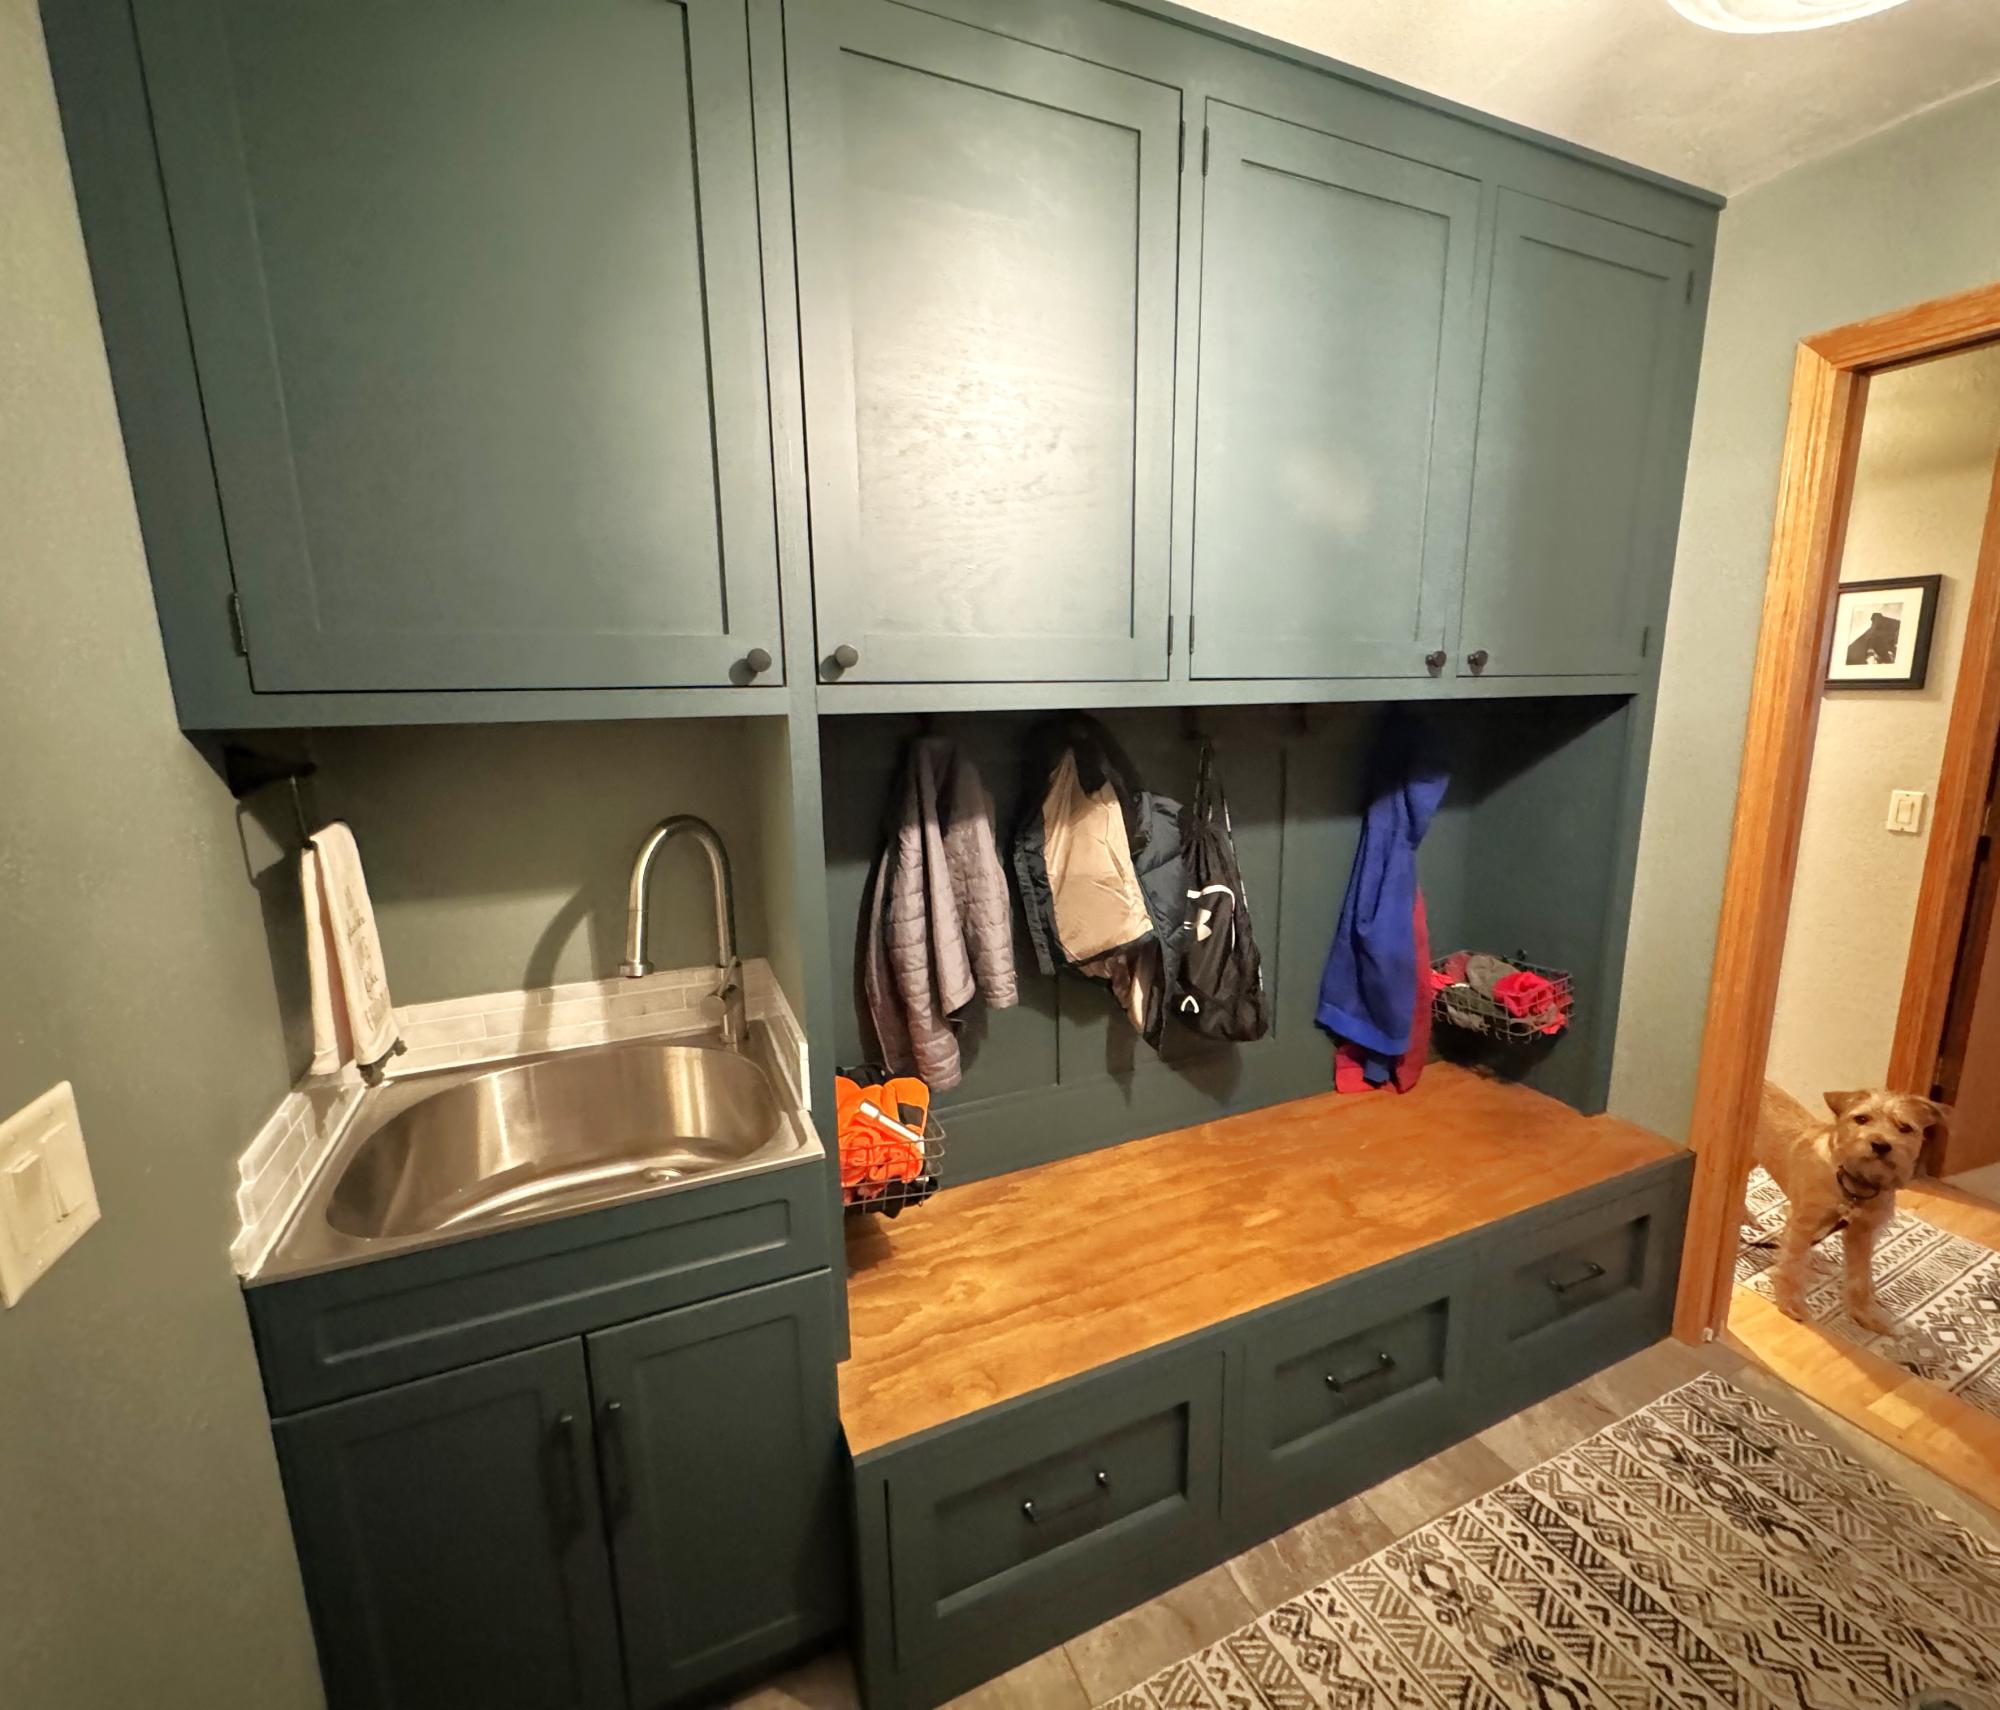
We totally gutted a former hallway and closet to make this huge Mudroom. We followed the bench and cabinet plans, plus added in a laundry sink!
Bethany Hoffmann
Built from Plan(s)
We totally gutted a former hallway and closet to make this huge Mudroom. We followed the bench and cabinet plans, plus added in a laundry sink!
Bethany Hoffmann
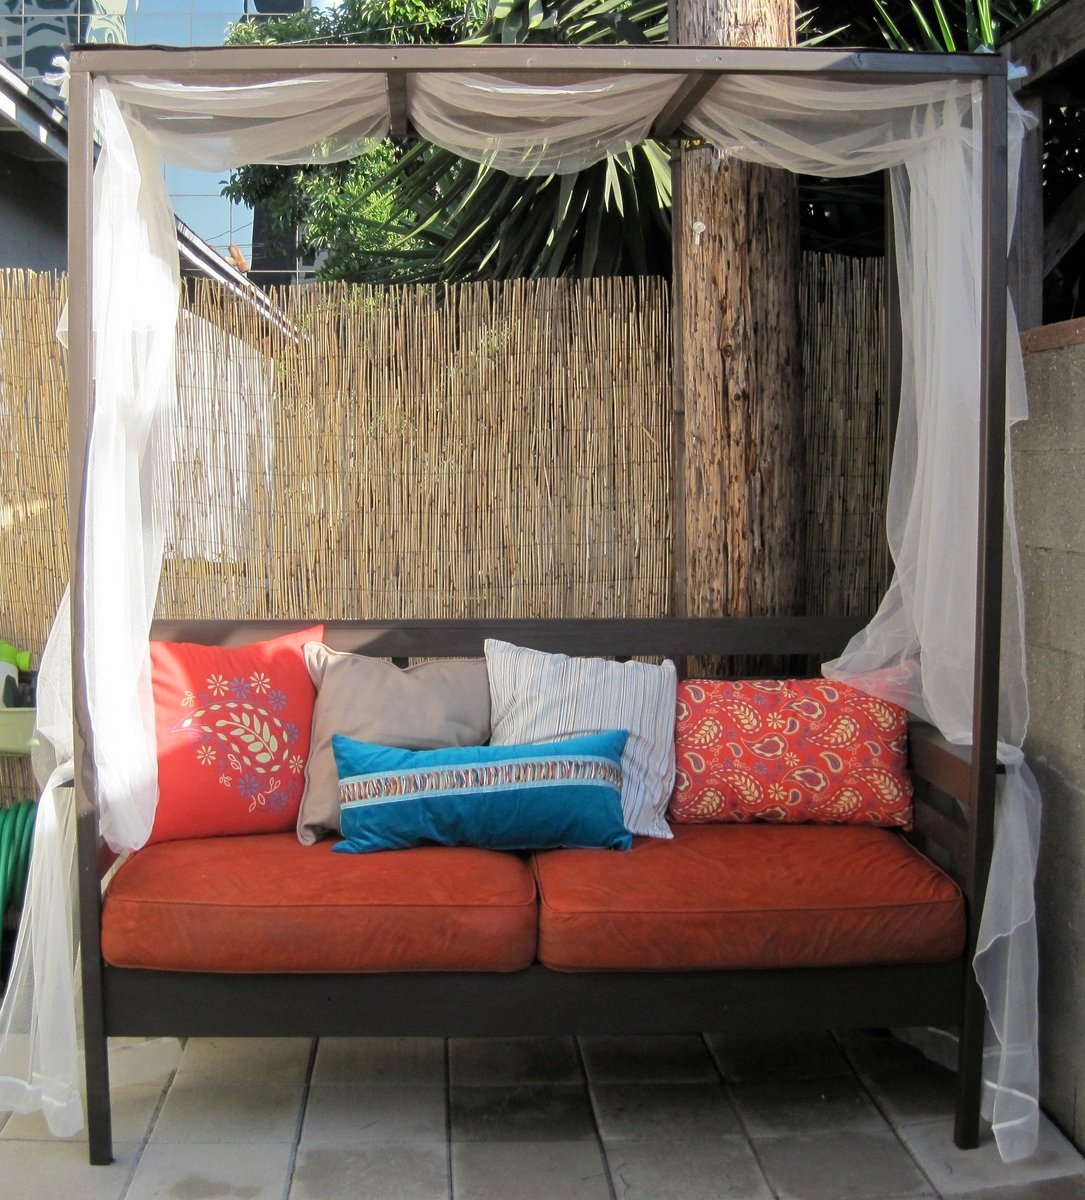
Thank you anawhite.com for this project! It was exactly what I was looking to build for my outdoor space. The outdoor daybeds with this look are WAY too expensive for us to buy and these plans were just what I needed!
My husband and I built (and painted) this project over one weekend. Not included in that time are 2+ hours shopping for materials on the friday night before and extra hours over the next few days to buy pillows, tie on the drapery, and finish the cushions.
We actually changed the plans to make more of a smaller 'daycouch' rather than a 'daybed' because we had some old cushions from a loveseat we just got rid of that I wanted to repurpose. It worked out great for our small space. If you do change the proportions keep in mind that a 1X3, 1X4, etc., are not exactly 3", 4", etc.
This project is totally doable, so go for it! The only things I would recommend are that you have some skills with power tools, know a little about carpentry (the directions are pretty spartan), and paint the pieces beforehand (if you have the patience; it really does cut down time on painting all those slats).
*Important note: the materials list is missing 2 2"X4"X8" (for the 2 cleats) that you need to complete the project.
Fri, 07/13/2012 - 23:26
Thank you! We are pretty happy with the way it turned out. If you do the project please post a pic!
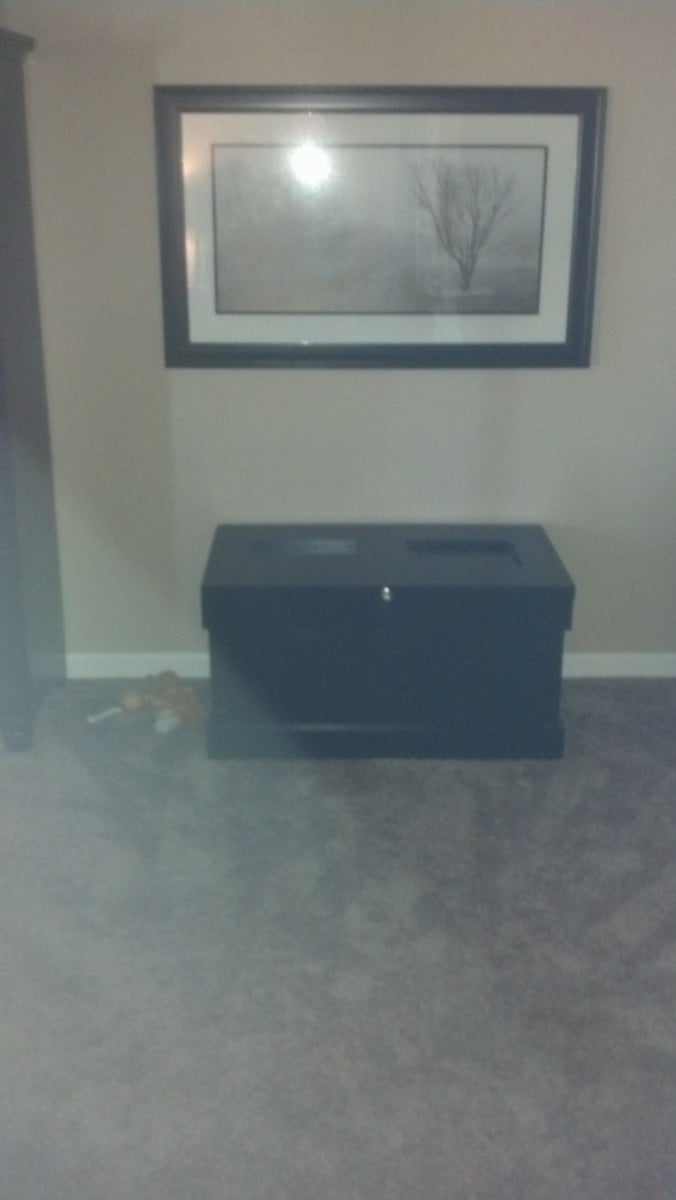
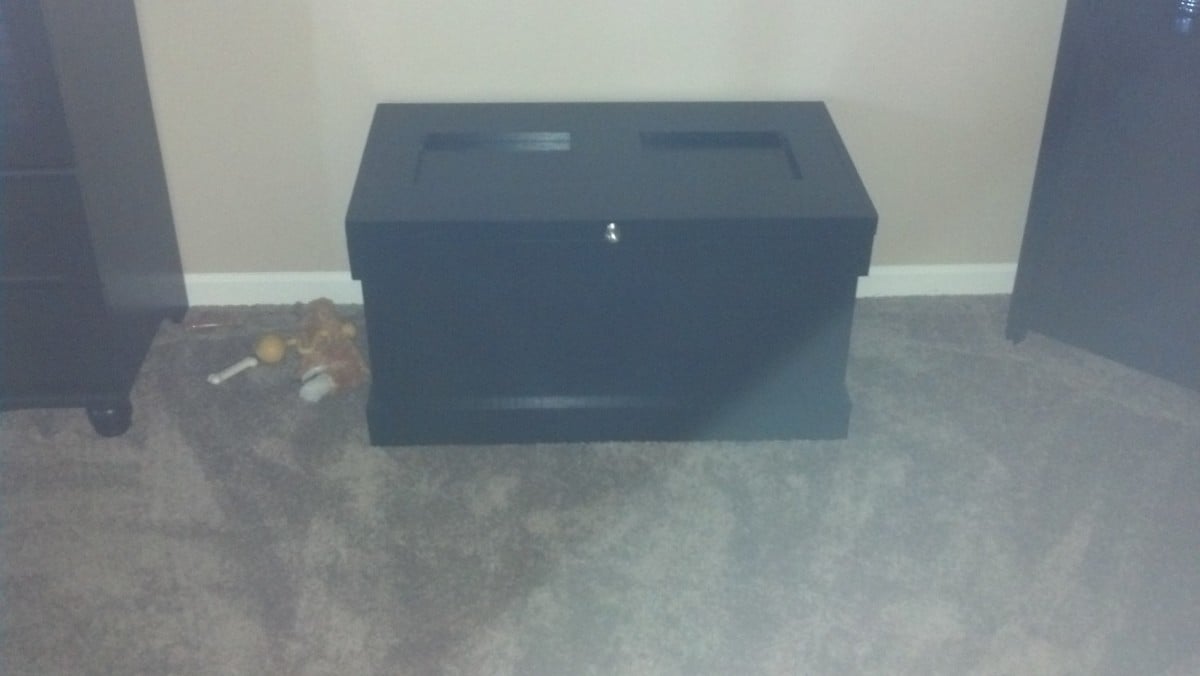
My wife wanted a new chest to store blankets in. I saw the plans for the Becca and thought it would be perfect for what we were after.
I used some regular plywood I had laying around and some select pine for the trim. I liked the look of the top in the plan but wanted some more texture to it, so I used a solid piece of plywood for the top and layer pine for the trim features. I tested my new chisels to recess the hinges to minimize gapping under the lid.
We painted it solid black to match the rest of the basement furniture. A few coats of poly finished it off for durability.
This took about 2 months for me to get around to finishing. That's probably about...12 hours of actual work, plus finishing.

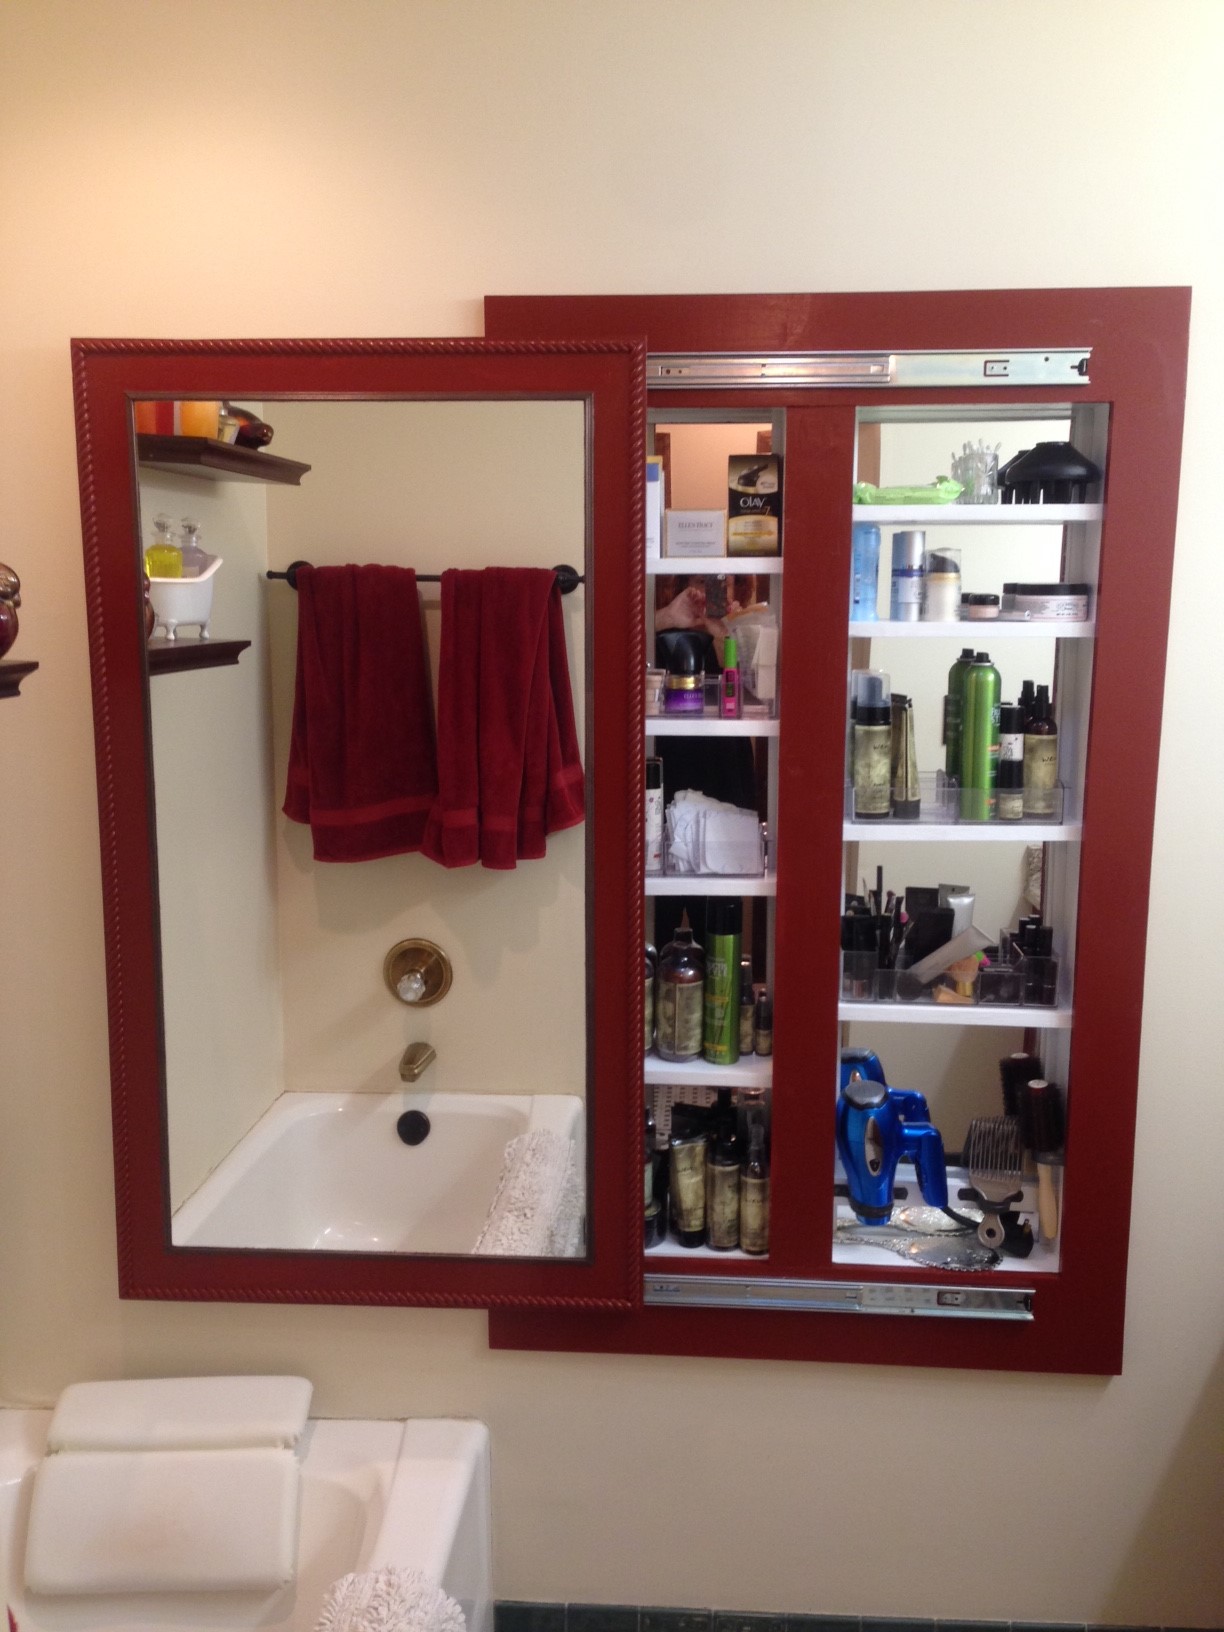
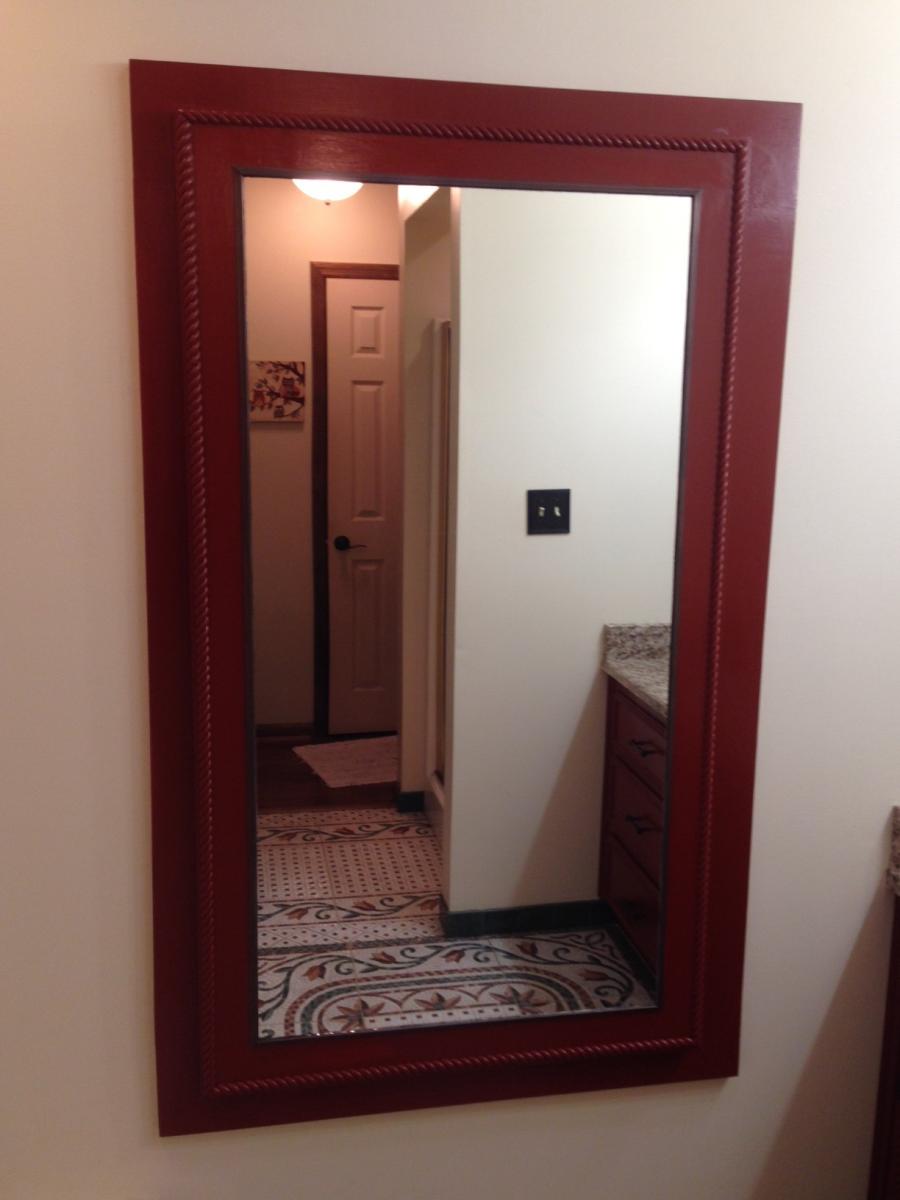
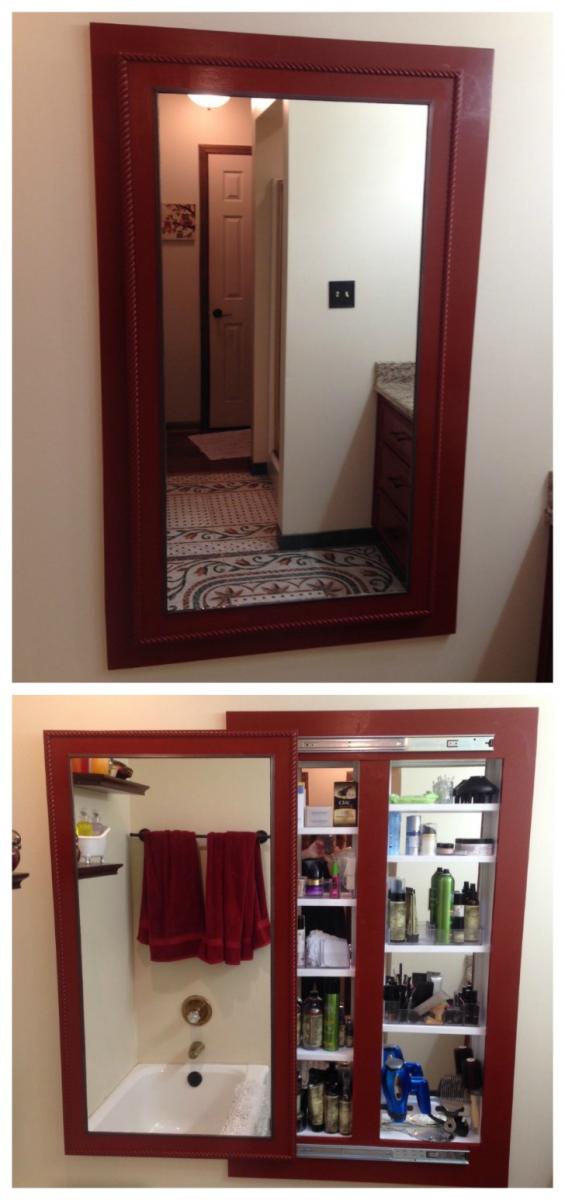
Adapted Ana's full length mirror storage idea. I needed to recess the cabinet into the stud cavity to save needed floor space. Opened two cavities and made the interior the same length as the cheap $6 behind the door mirror. Was able to just sit them on a ledger board and the shelves hold them from falling forward.
The cabinet looks wonderful and holds a TON of things. Thanks Ana for the inspiration!

Thu, 07/25/2019 - 18:20
I love this!! So smart to make it recessed. Thanks so much for sharing the photos!
Sun, 02/27/2022 - 15:58
I am wanting to build a thin or recessed cabinet for an incredibly small area in my bathroom and knew to go right to Ana White! The combination of these two projects is perfect and exactly what I was looking for! Now here’s to praying I can pull it off!! 😬
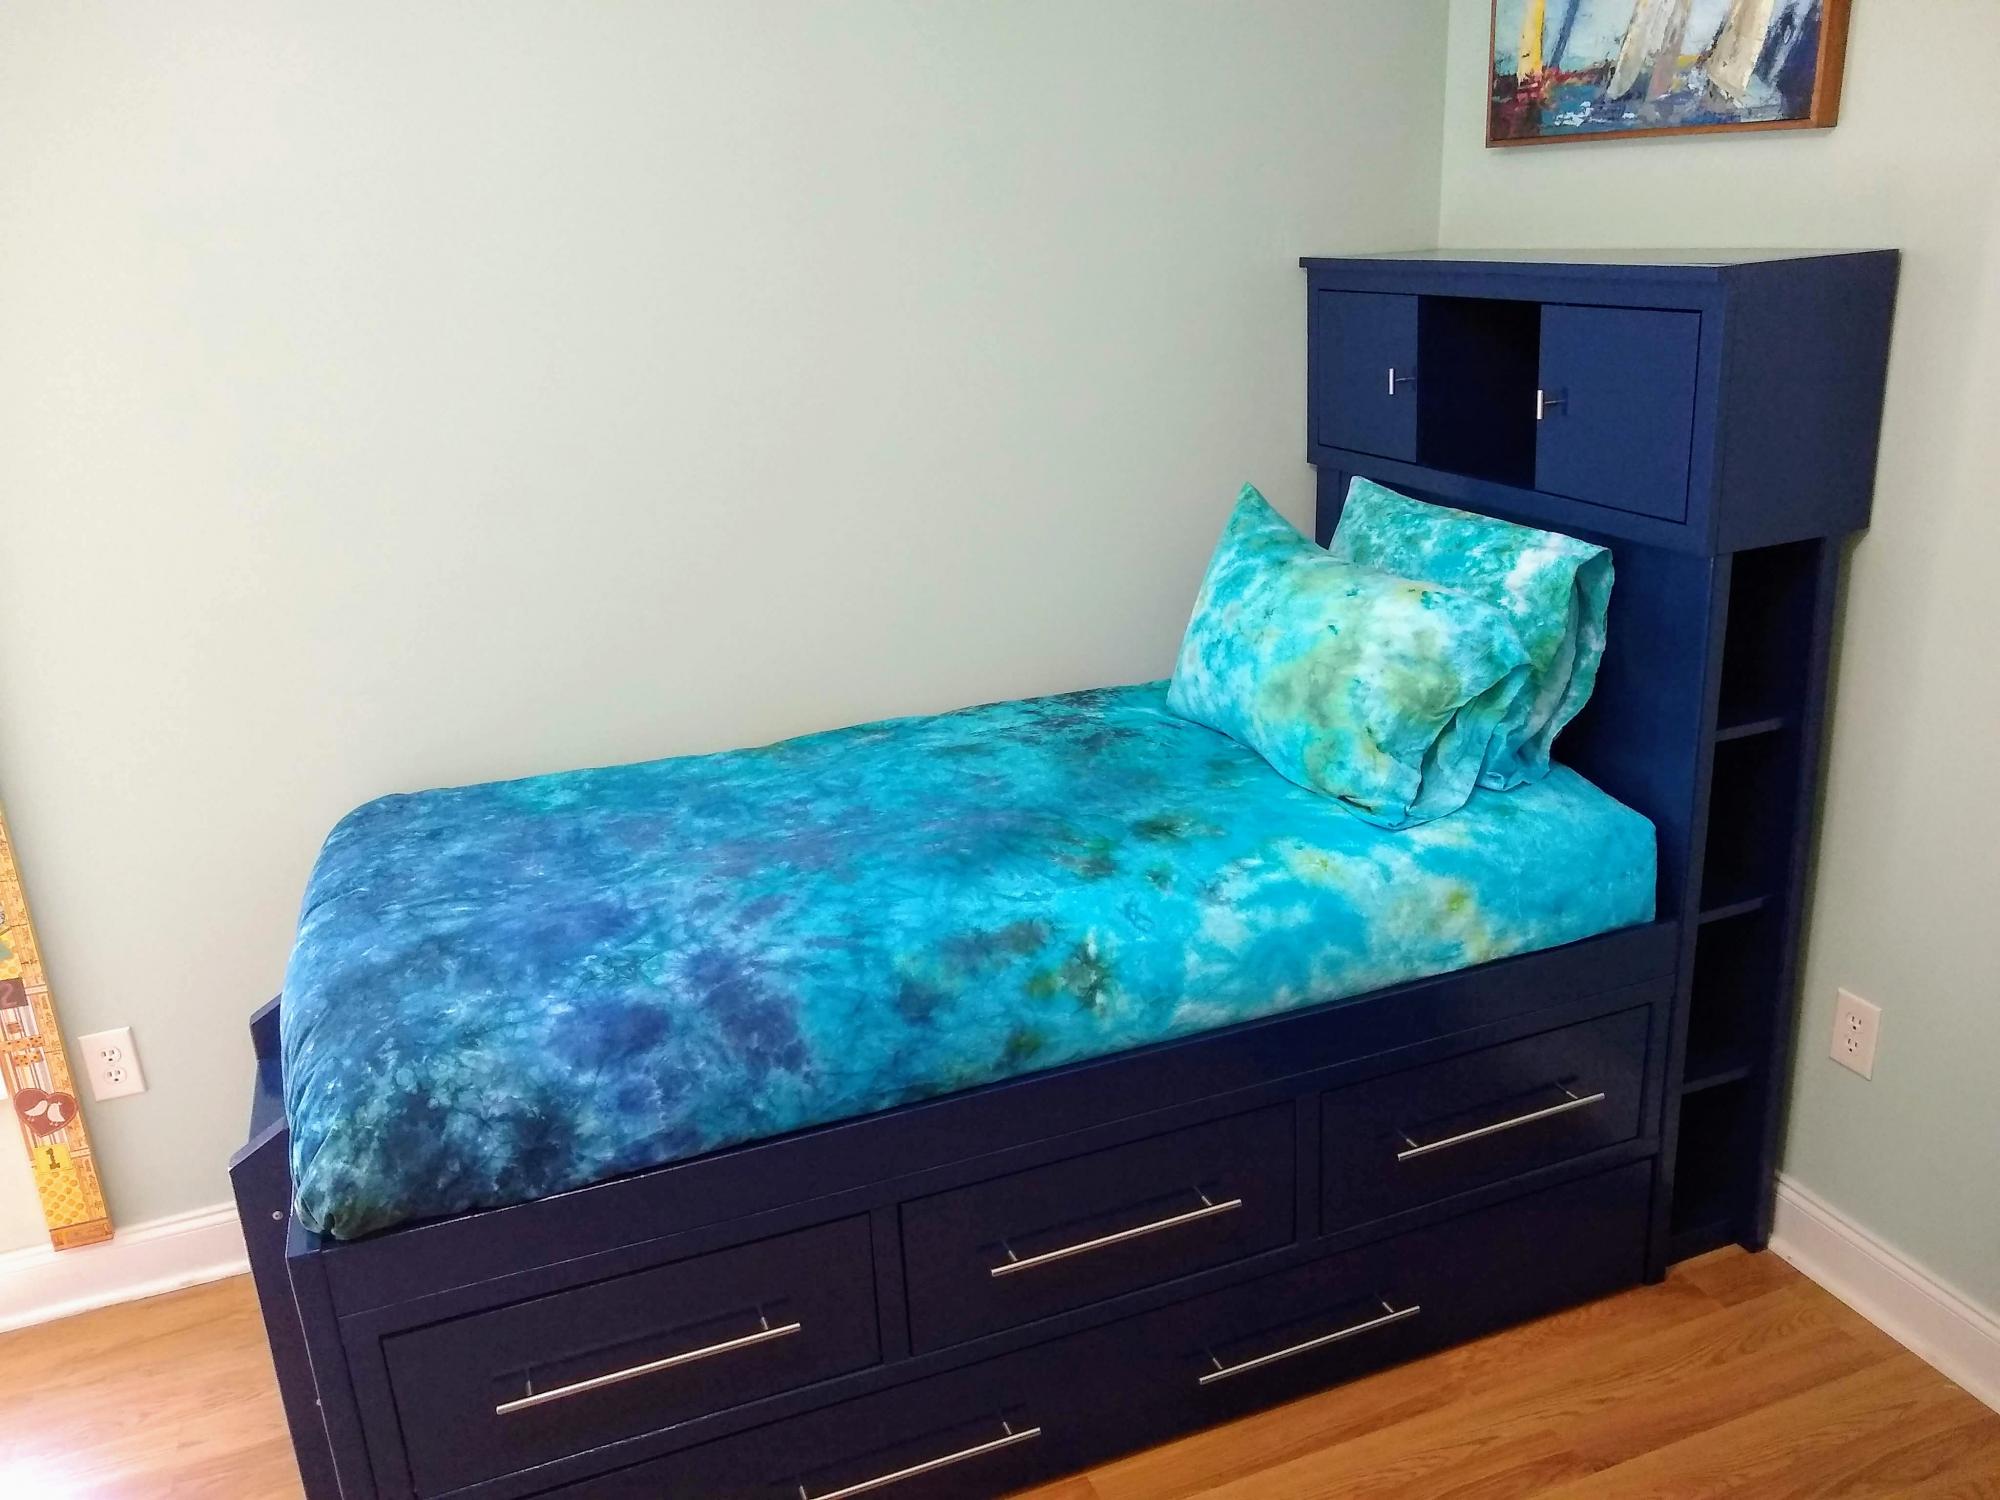
My son needed a bigger-boy bed, moving into his own room from sharing a room with his brother and sleeping in a loft bed. I loved the drawers and trundle bed in this captain's bed, but wanted also a headboard where my son could keep his books, Kleenex box, and alarm clock. I felt that he had aged out of the rails keeping him in bed, as well. I combined three Ana White plans to make this bigger-boy bed.
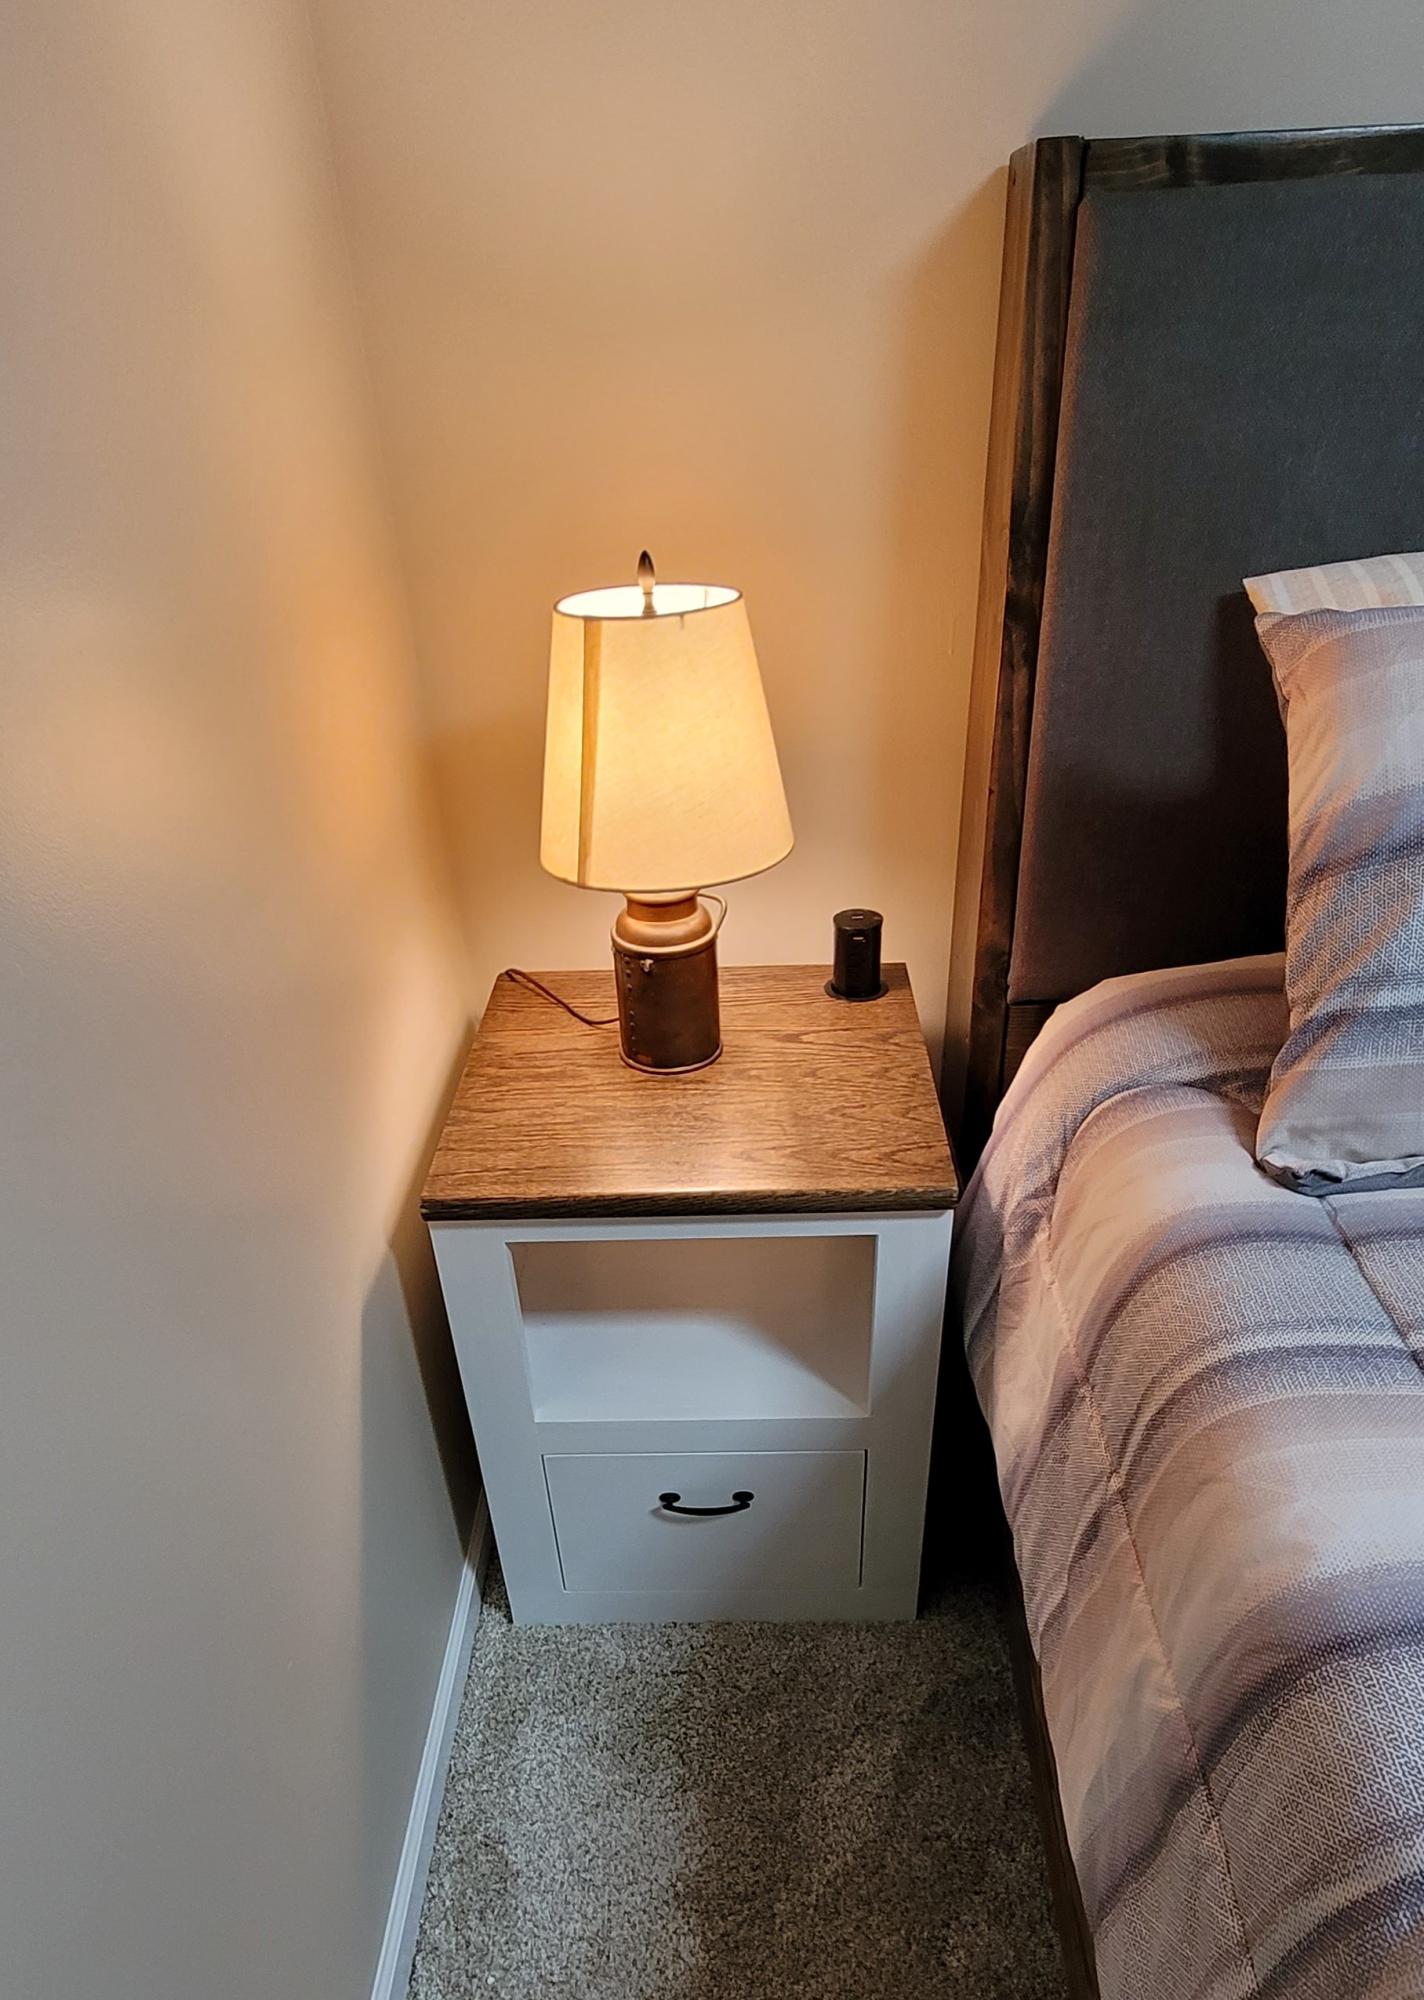
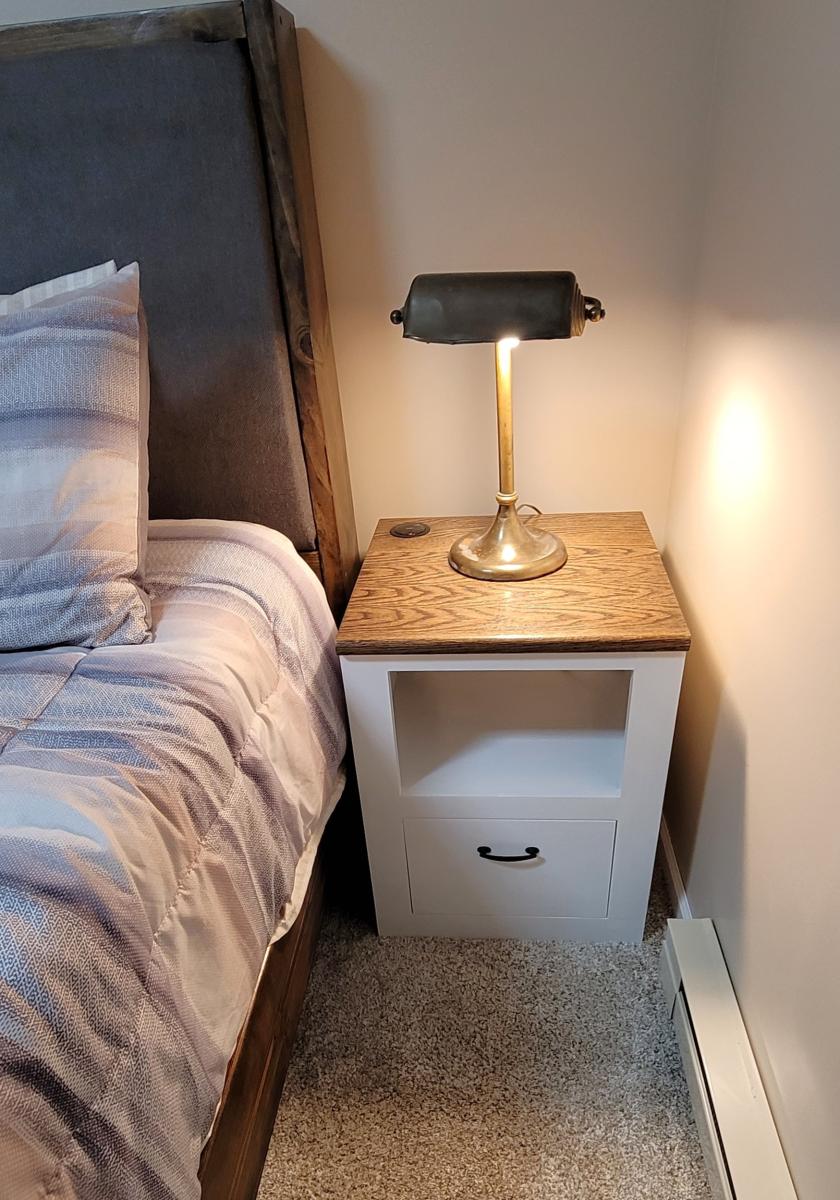
I downloaded th minimalist modern nightstand plans nearly a year ago and just got around to building them last week. Actually I modified them quite a bit because I had a small space to work with and because I wanted them to follow the design theme of some of the other furnishings and features I had made for my basement renovation. In particular I changed the top and made it out of oak stair treads. I also added pop-up electrical/USB sockets as well. I really appreciate the sequencing in the plans. Though I made some dimensional and design plans, I followed the sequencing steps. It made the project much easier to complete-particularly the drawer construction and fitting. If I had done it on my own, I would probably have permanently installed the middle shelf before fitting the drawer which would have made fitting the drawer and drawer front much harder. Thanks for teaching me that.
Craig Holstedt

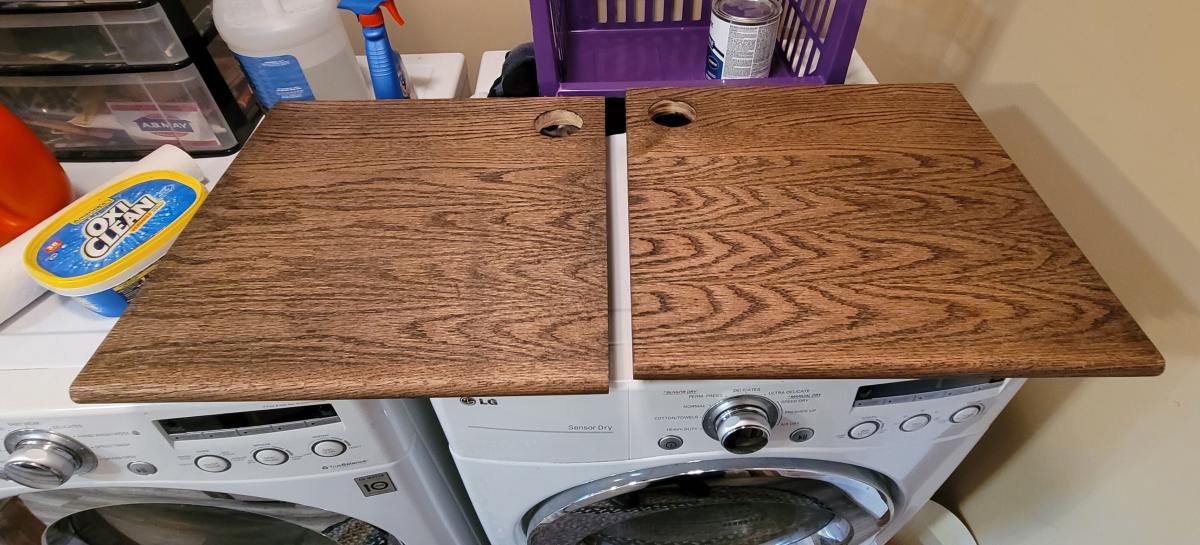
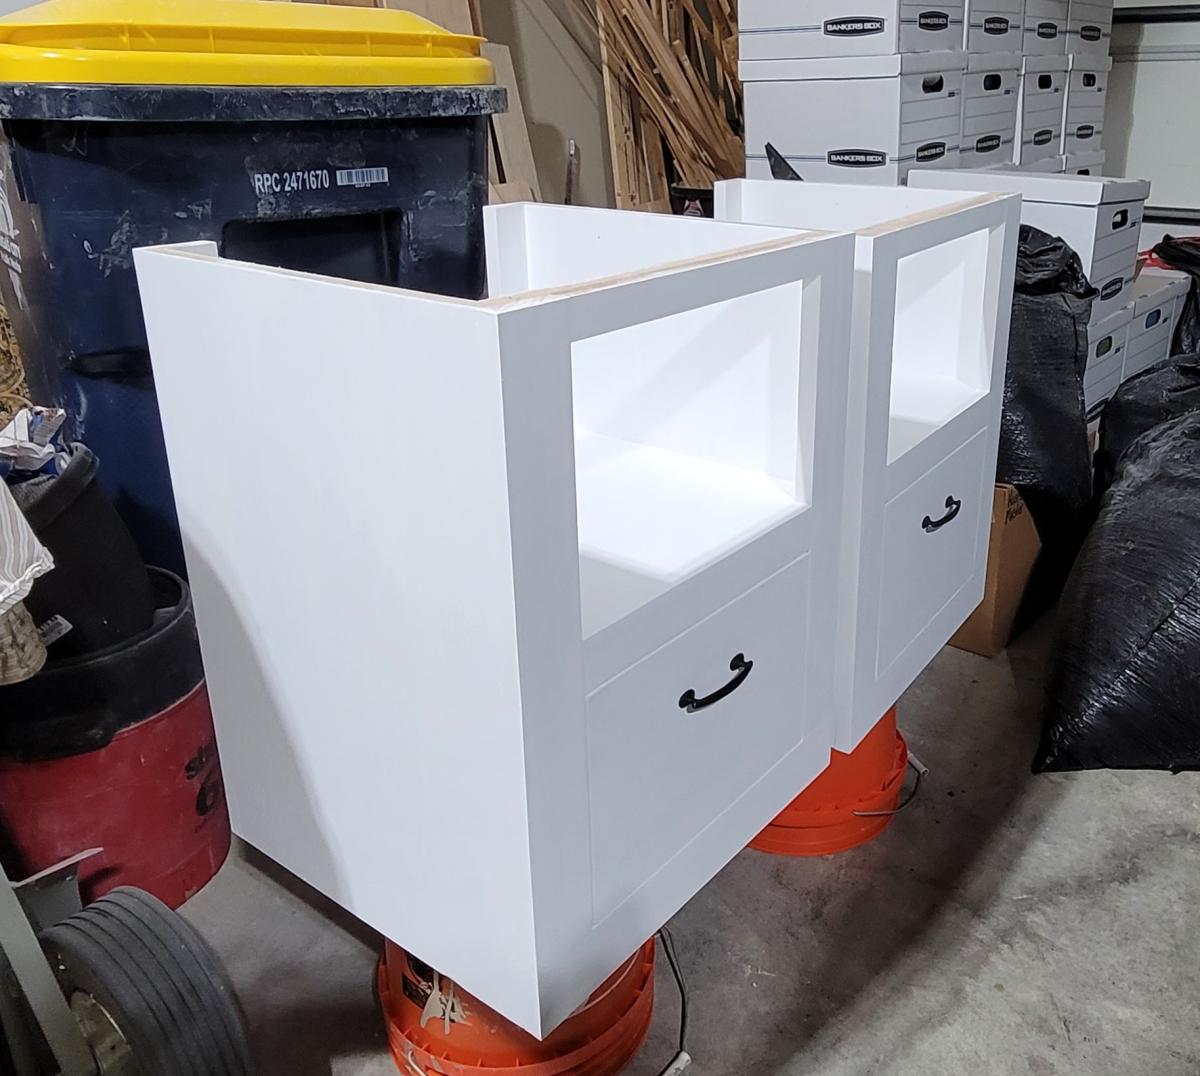
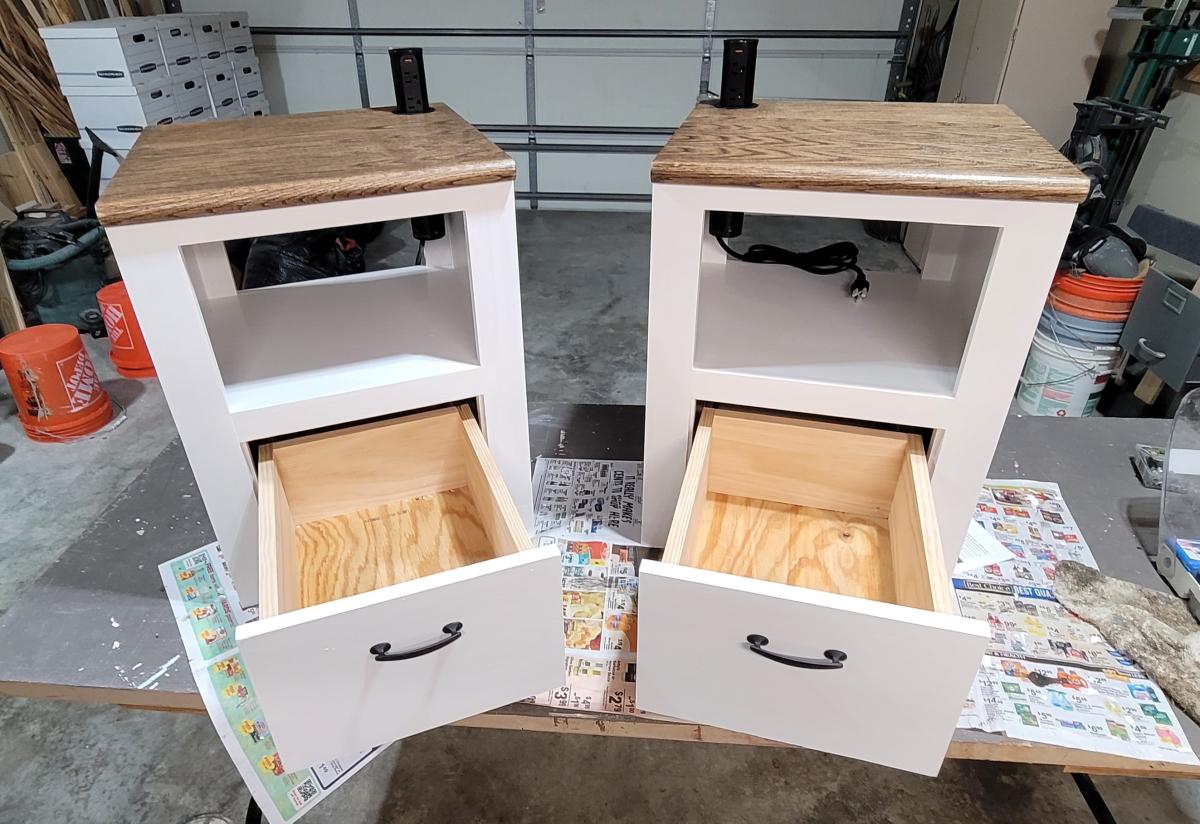
Tue, 01/09/2024 - 08:31
Thanks for sharing, love your finish choice and the pop up outlets are a great addition!

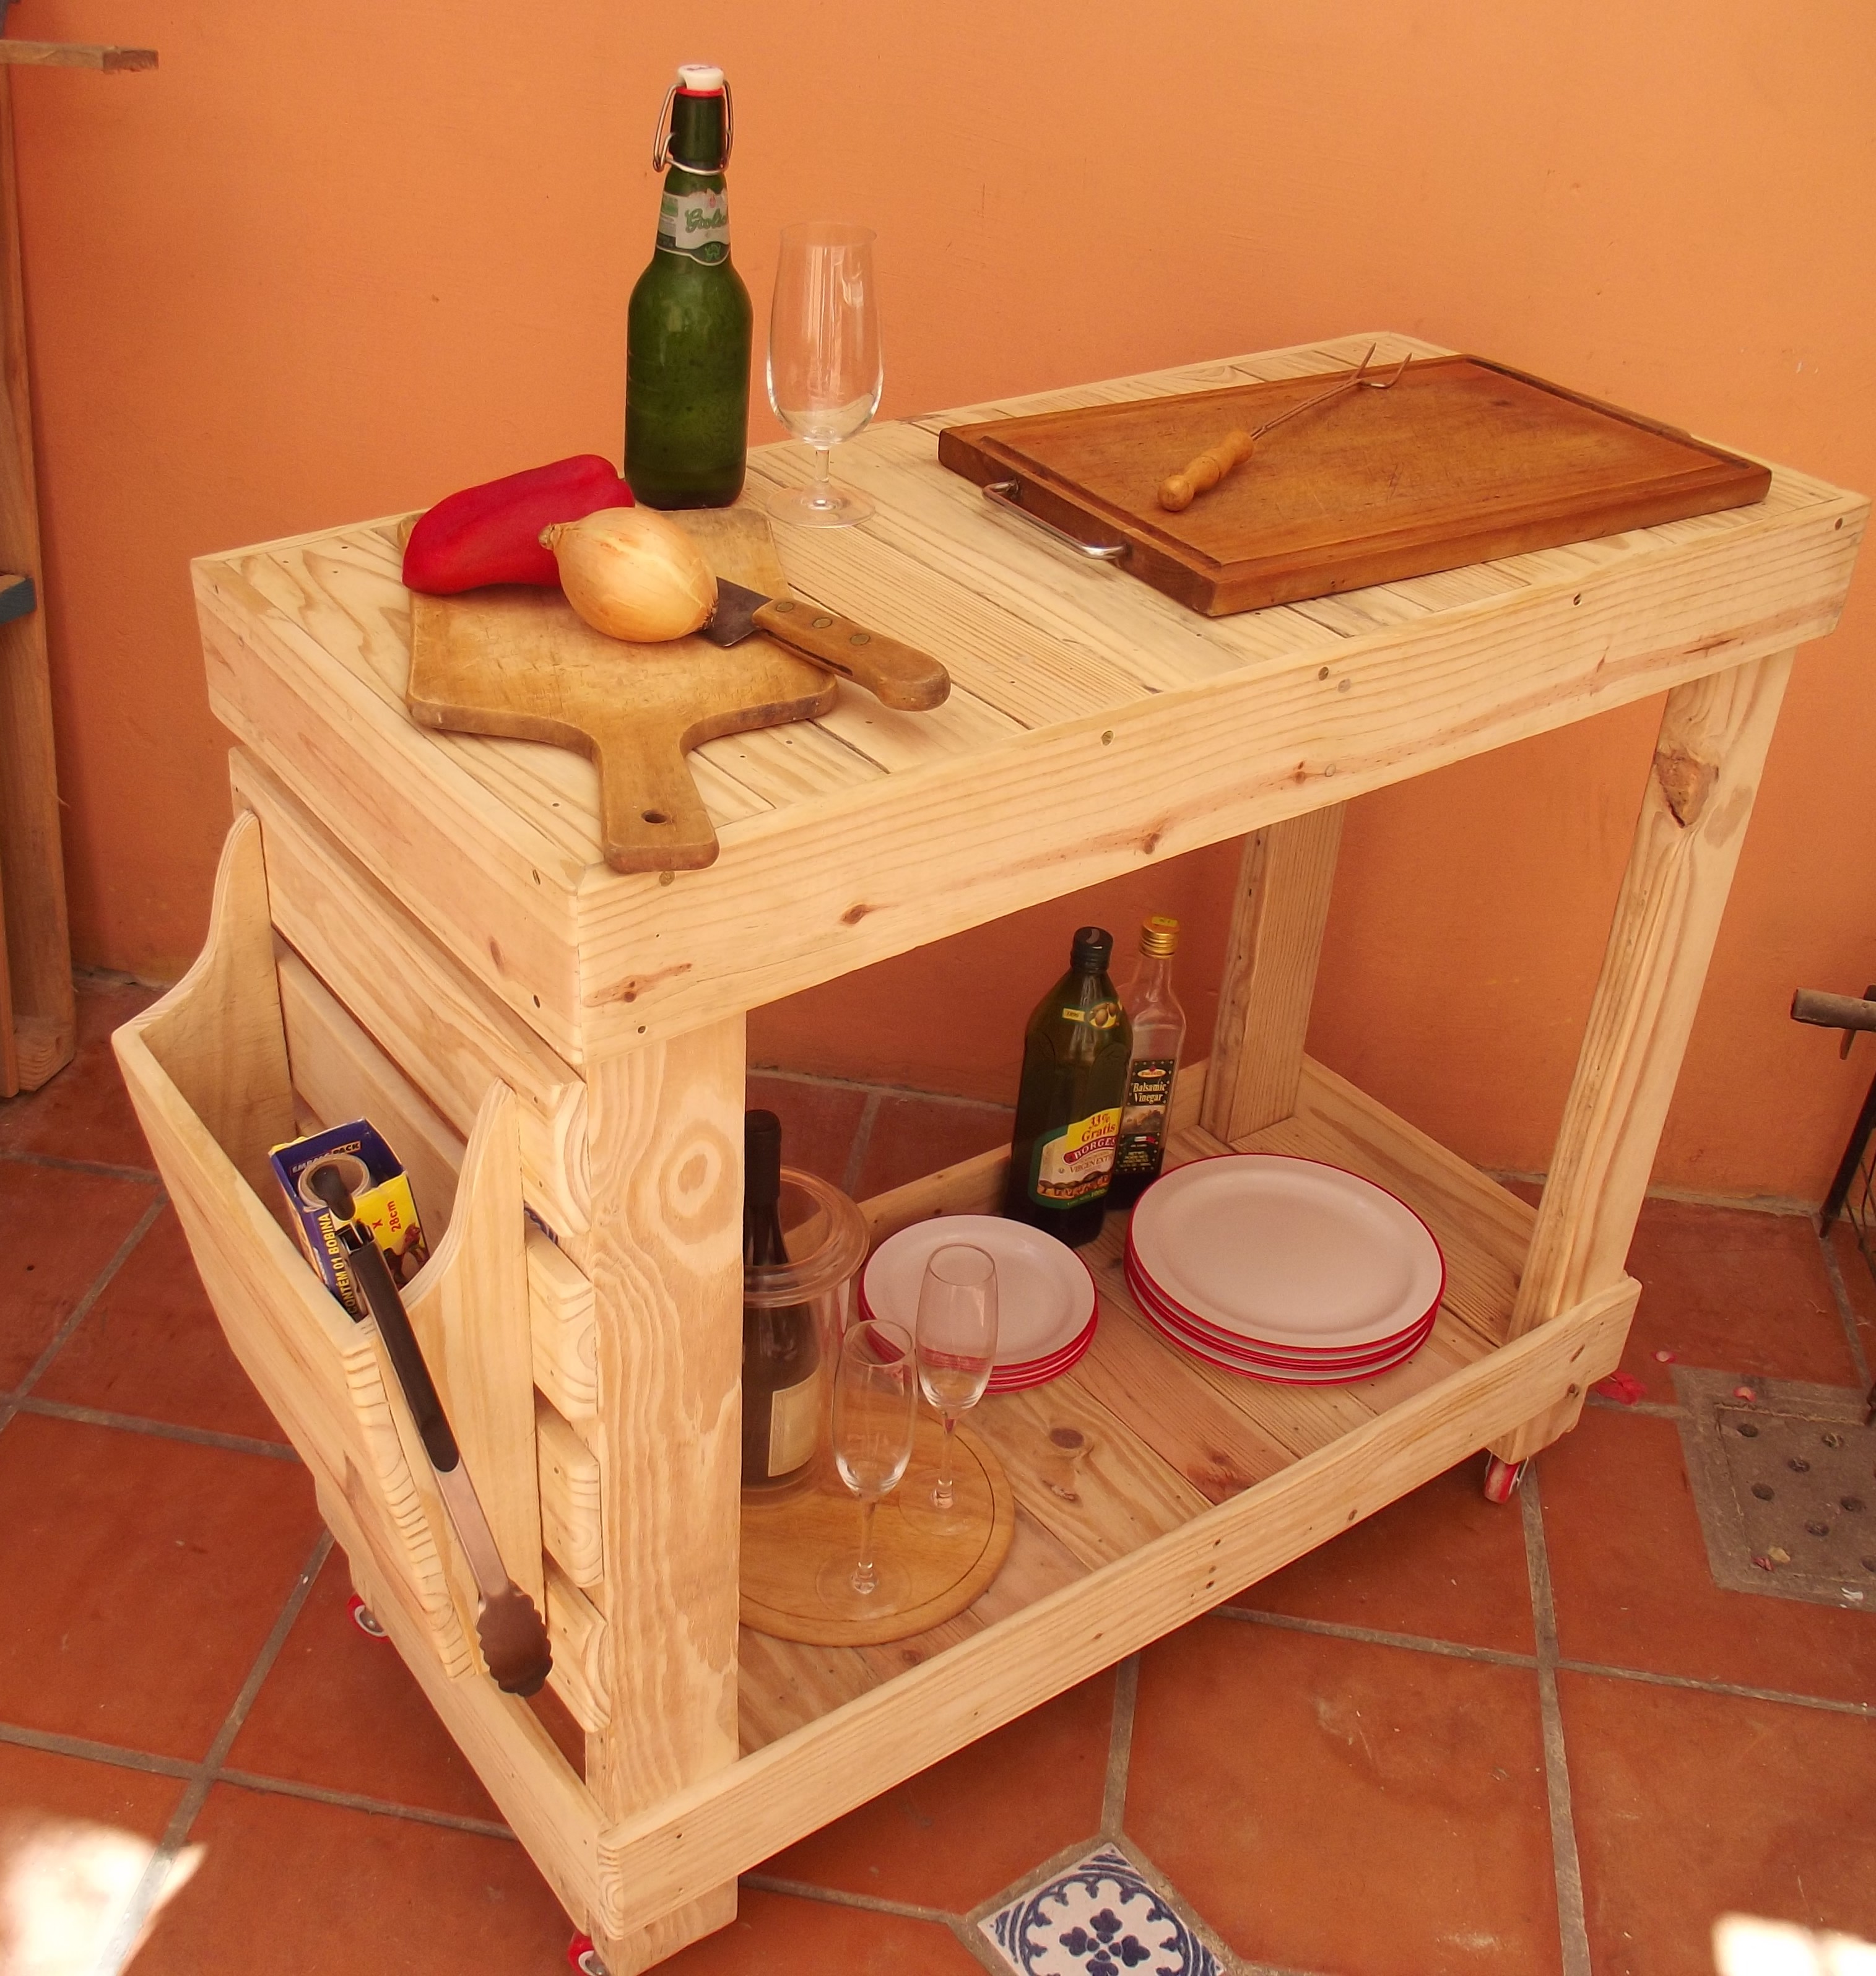
I made this kitchen island for a friend who wanted it unfinished. I got the plan from Ana's site but it was submitted by Brookifer86. I made no changes to the original plans. I did splurge on a project top from Lowes at $22 and the stair stiles (i think you call them that) for the legs at about $2 each. What a really nice project and so easy to build. Hardest part was the 22 cross members on the bottom shelf. I think I will make another one but try to add a small drawer.
The lady that I made the table for has wanted to start building. So I made one small easily fixed mistake for her to fix. When she gets here to pick the island up I will hand her safety glasses, hearing protection, square, pencil and tape measure and let her go to work. She is also bringing shaker pegs that she can install. Should be fun.


THE TOP OF THE TABLE WAS MADE FROM A PINE TREE I CUT DOWN IN MY BACKYARD, THE LEGS ARE MADE FROM 4X4S I FOUND ON THE SIDE OF THE ROAD

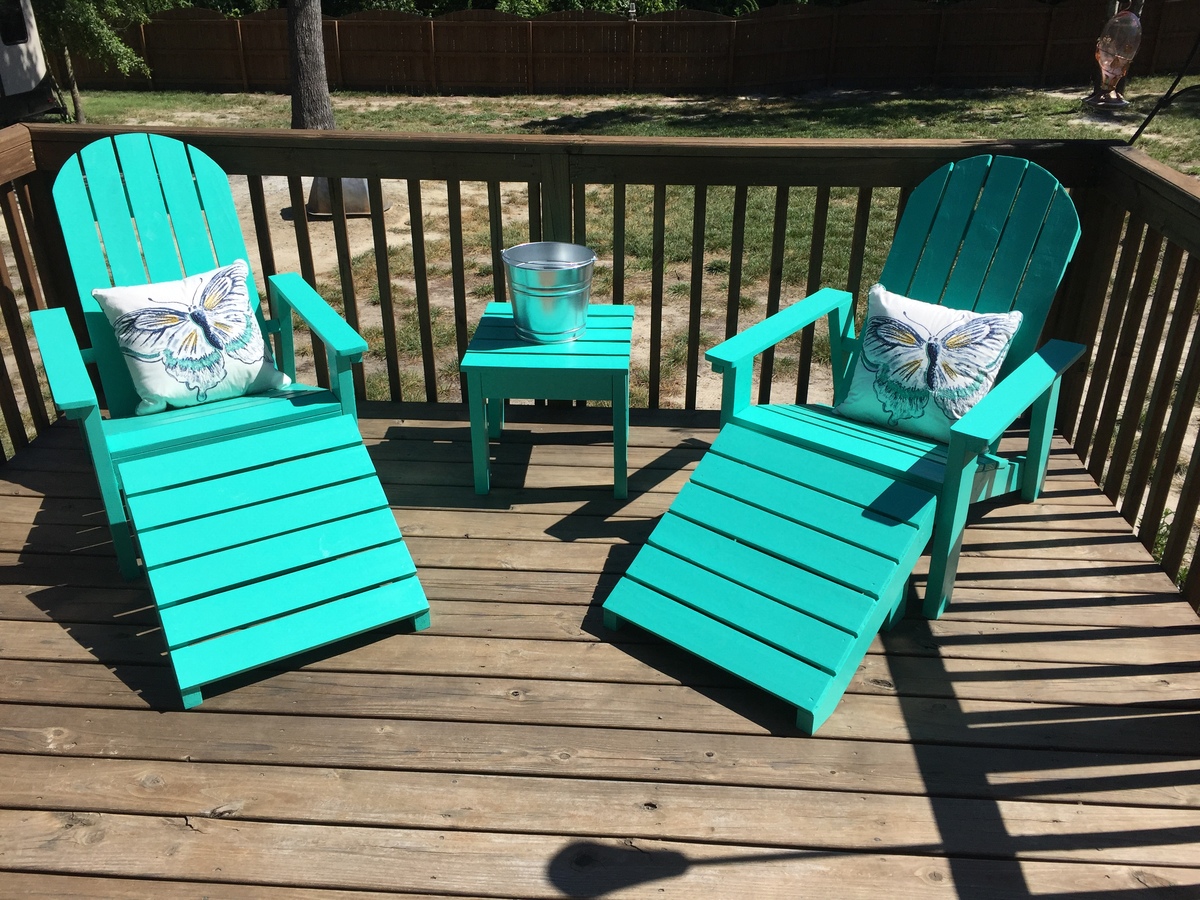
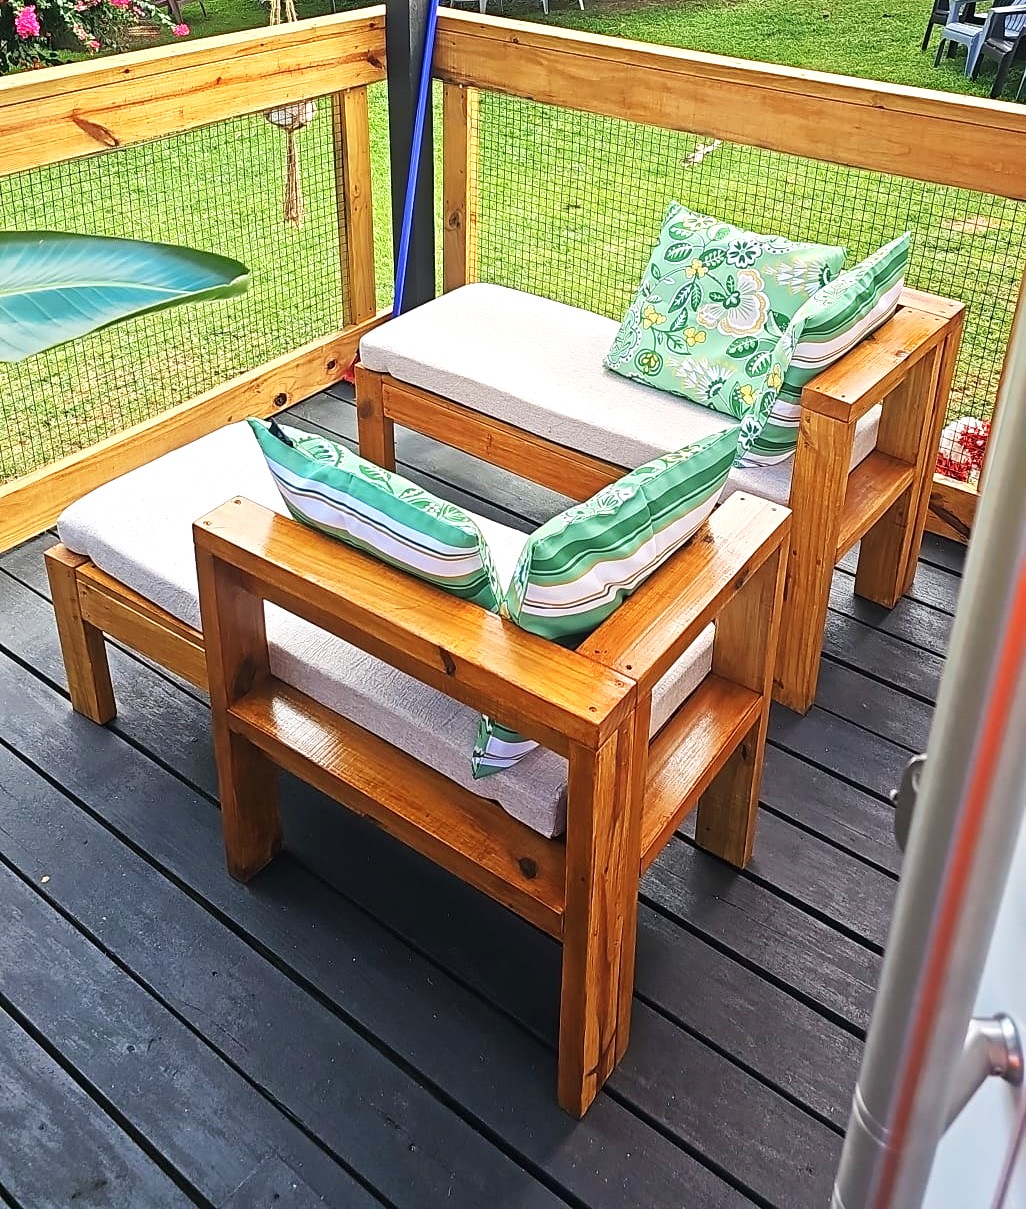
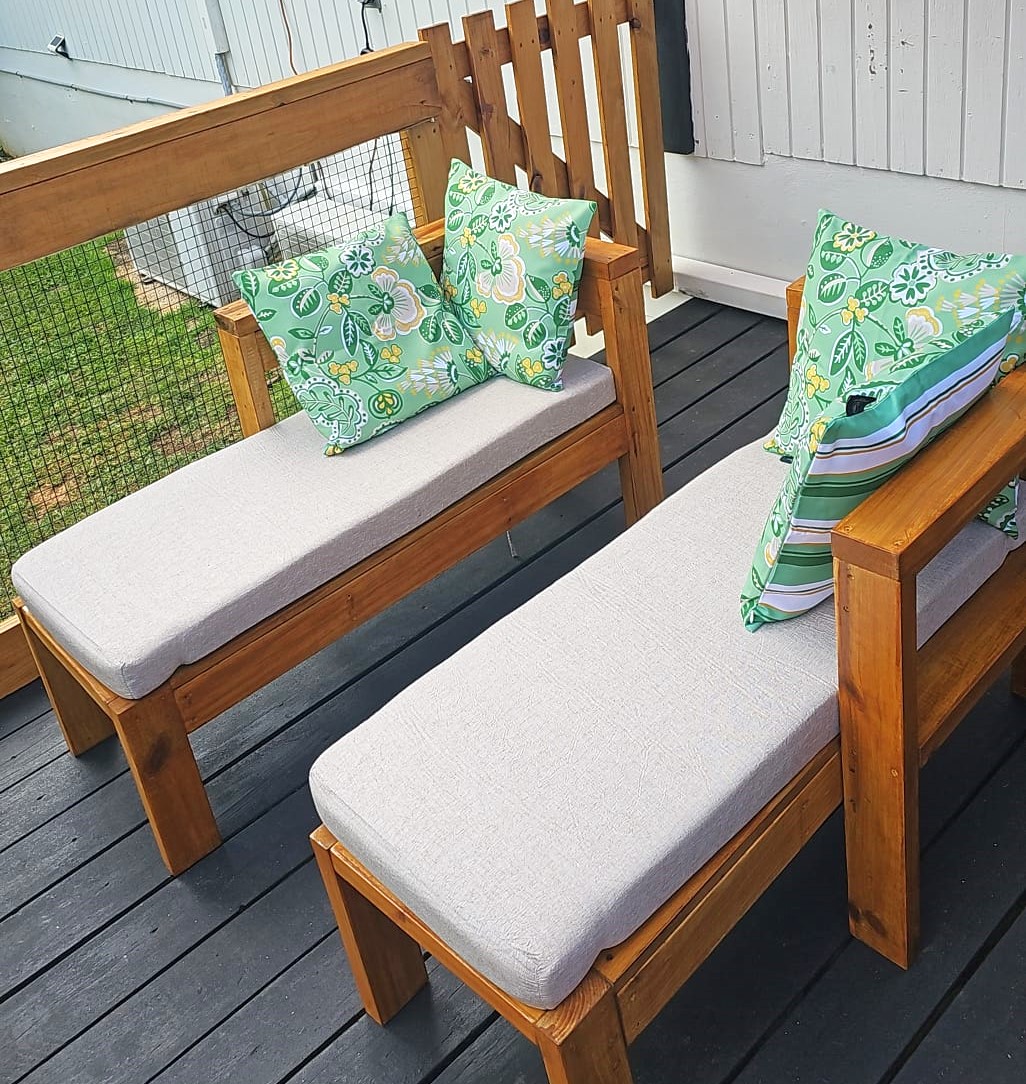
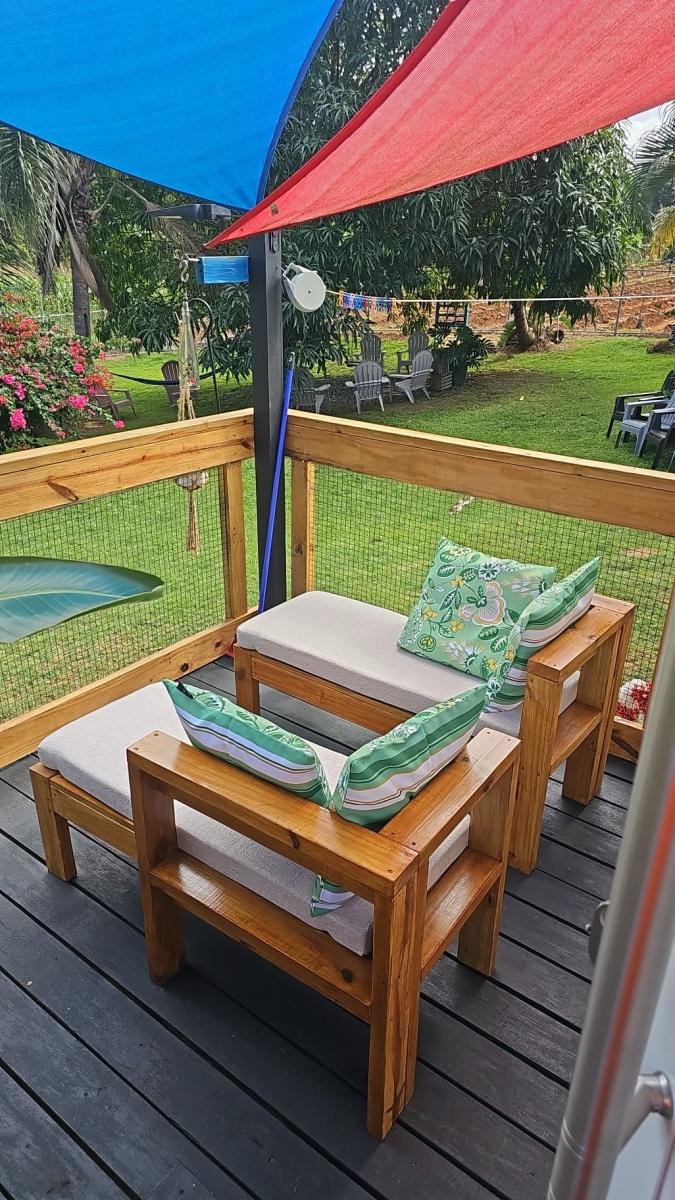
I made a couple of chairs to lounge in and added an end table out of scrap wood. This is an easy project, very fun, and very comfortable. I loved the pillows and wanted to add a fun color so I chose "surprise teal". I definitely recommend these plans for a beginner like myself. Thanks again Ana!
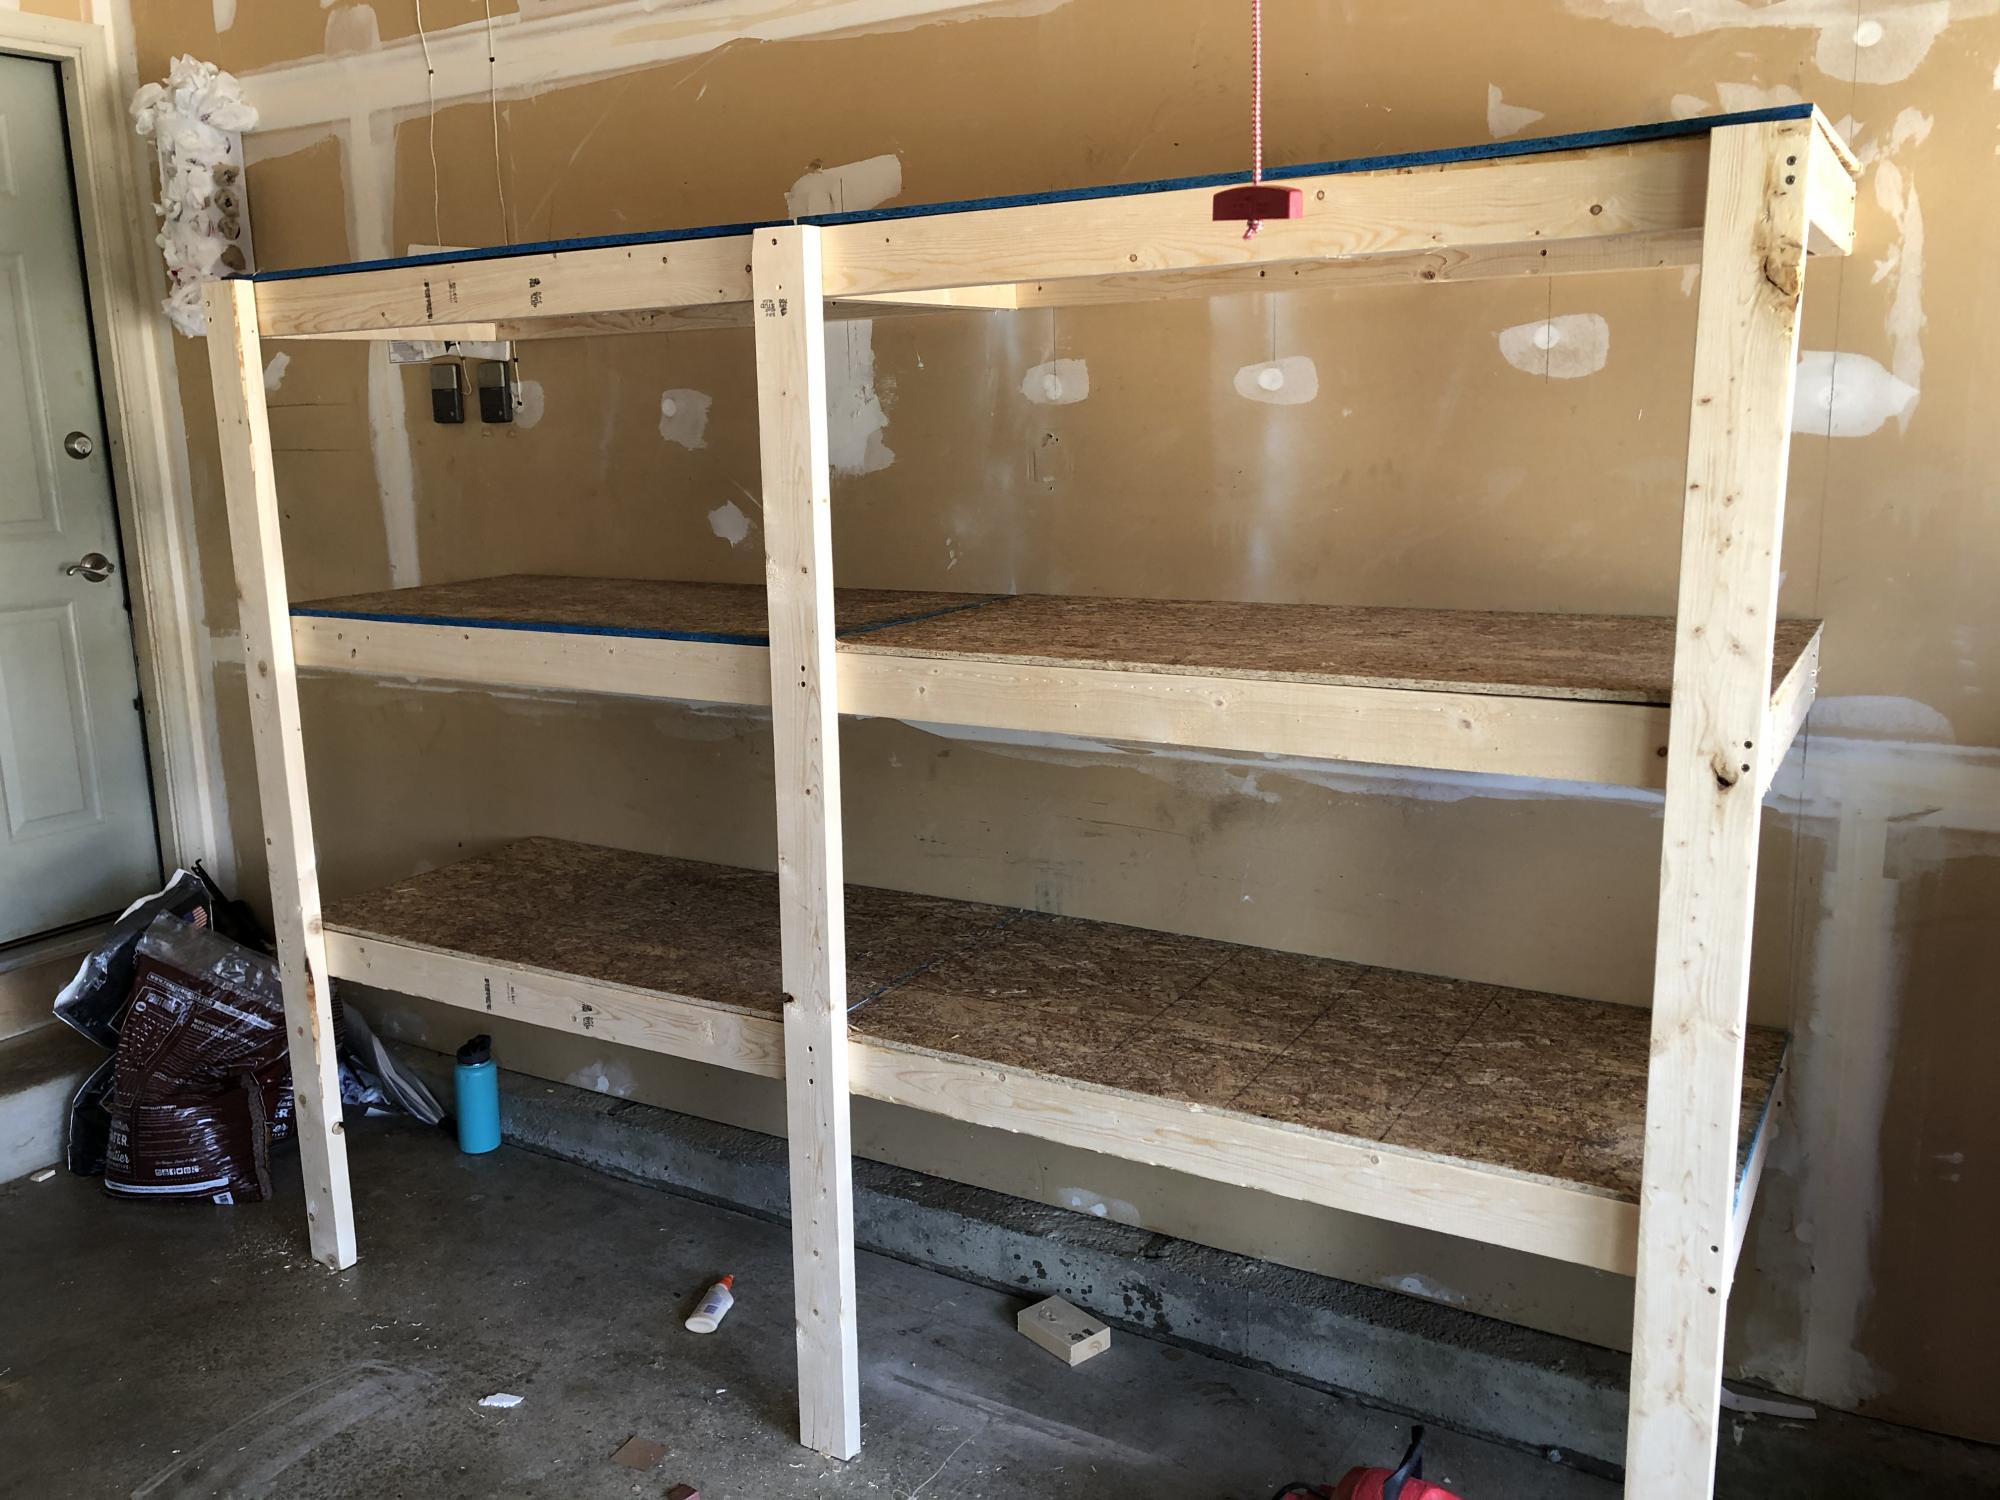
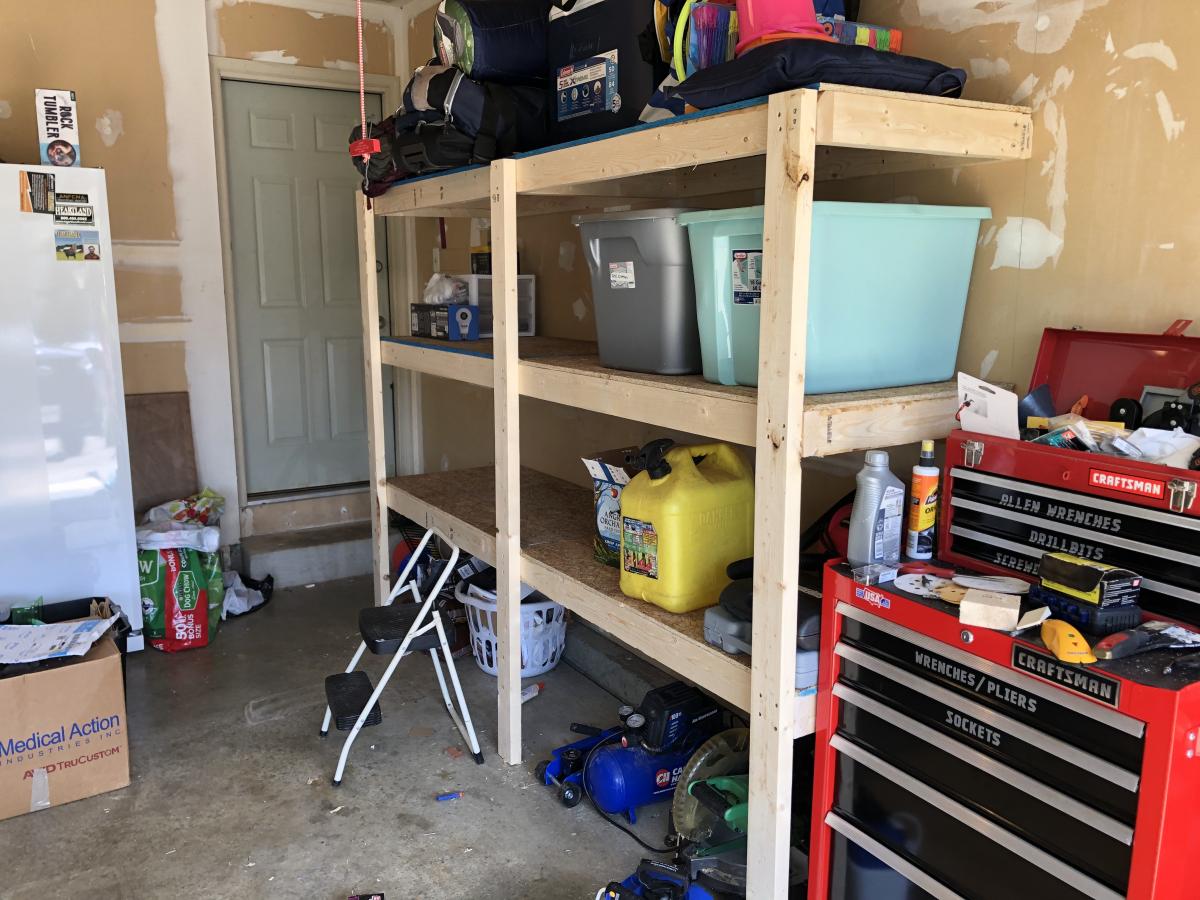
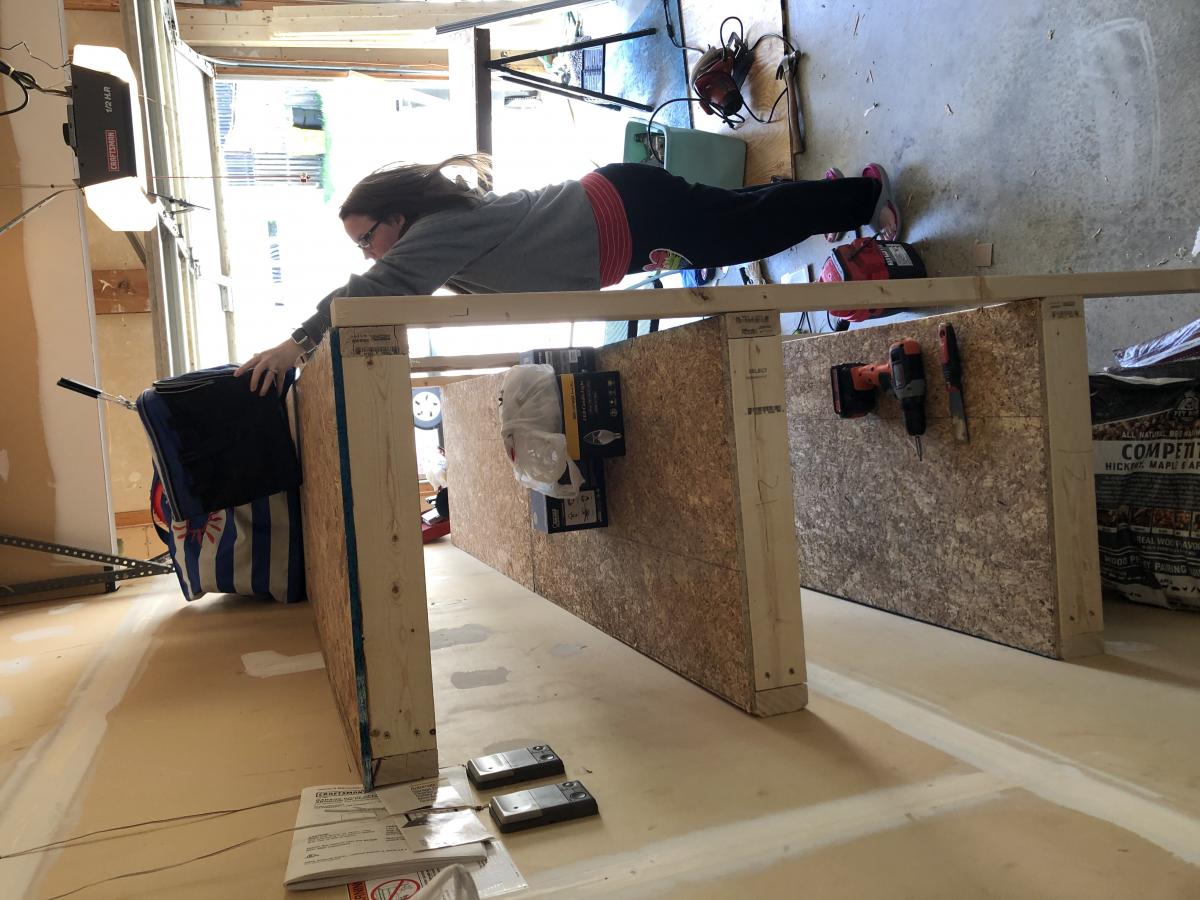
Built this using the BEST DIY Garage Shelves (Attached to Walls) post from here. Was straight forward, and works great. Can't wait to start organizing the garage (finally)!
I had to really adjust the size due to not having enough space for the bigger one but I love how it came out. Your plans are amazing to follow.
Griselle from Puerto Rico

This was my first project I used poly on and I messed it up. I knew it was going outside and I put the poly on to thick to fast. Other then that I like how it turned out.
Mon, 07/09/2012 - 15:39
This is my first piece of outdoor furnature. I got the basic plans from Ana-White.com and added to the legs a little. Im really happy with the way it turned out.

Built from scratch whith fake drawers, 3 big doors with shelves inside
reclamed palletwood top plained and sandered, finished with Osmo hardwax.


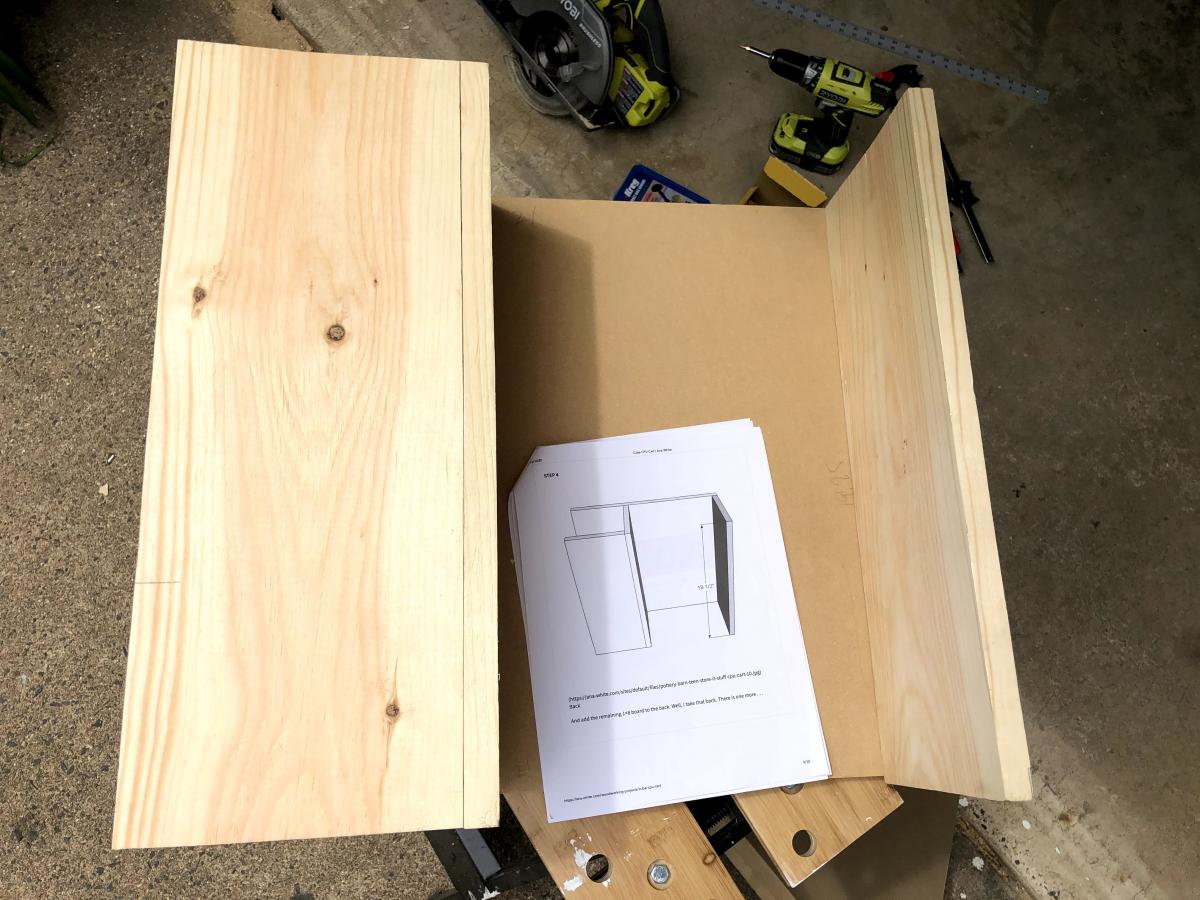
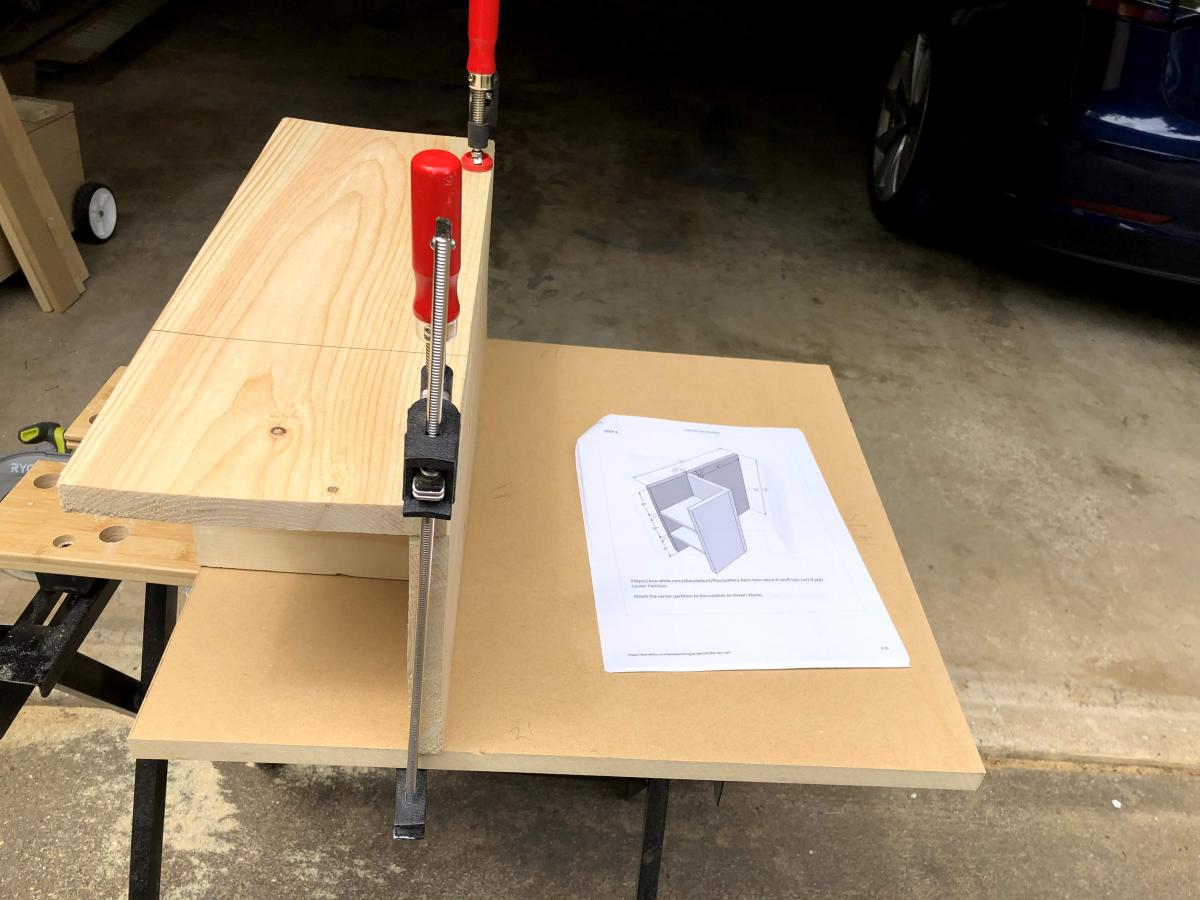
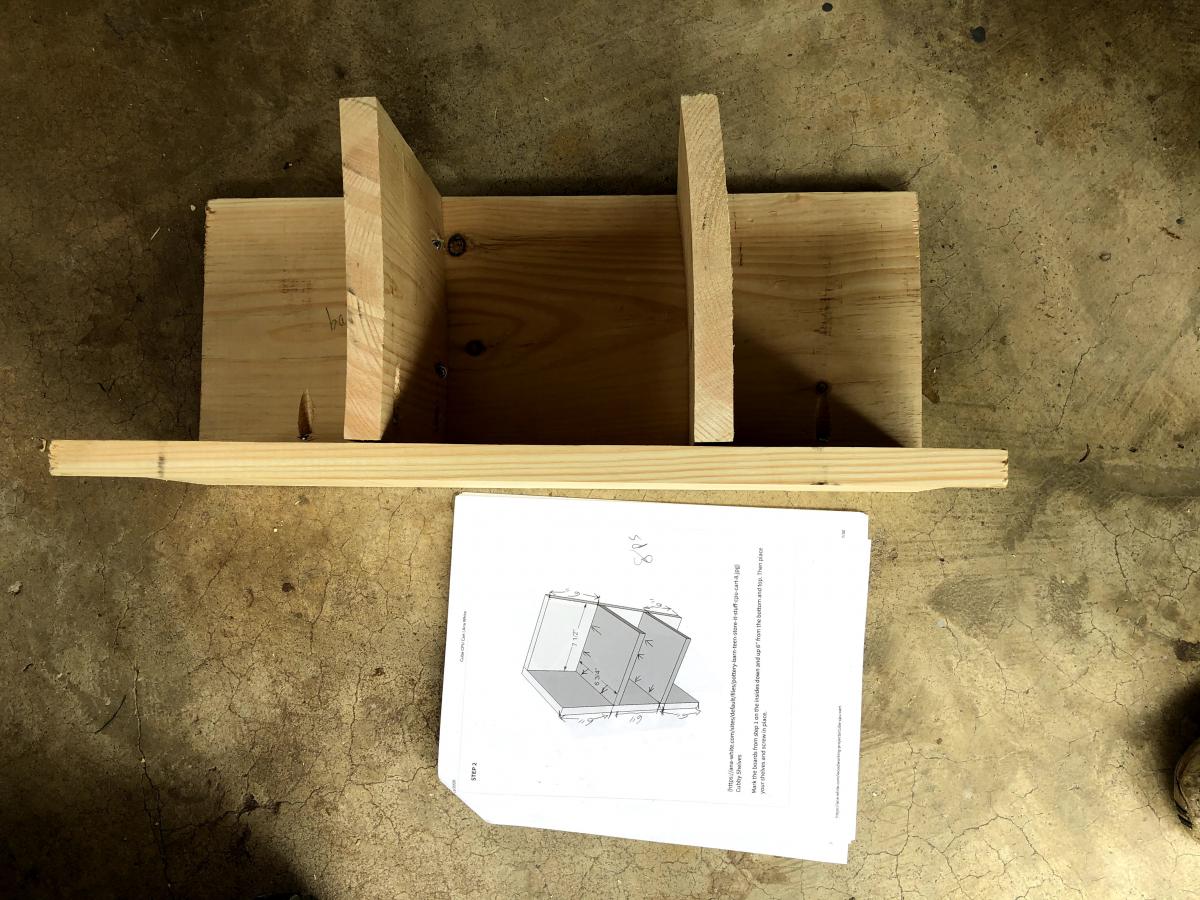
I built the Cube CPU Cart plan to make this cart for my wife's crafting materials. It was a good beginner project and my first working with MDF. The MDF was heavy and cutting it produced more sanding dust than sawdust. Finishing the MDF - sanding, painting, varnishing - was more involved than working with plywood or wood also, but the finish was much smoother - if you take the time to sand the primer, paint, and varnish. I purchased inexpensive 1x8" boards for the shelves. Next time, I'll invest in some better wood for the shelves though since the generic board I got didn't stay flat. Cutting and construction was a day project. Sanding and finishing took an additional 1.5 days to let coats dry. It was a fun project and now I have a request to make a second one for my daughter! Thanks for sharing the plan.
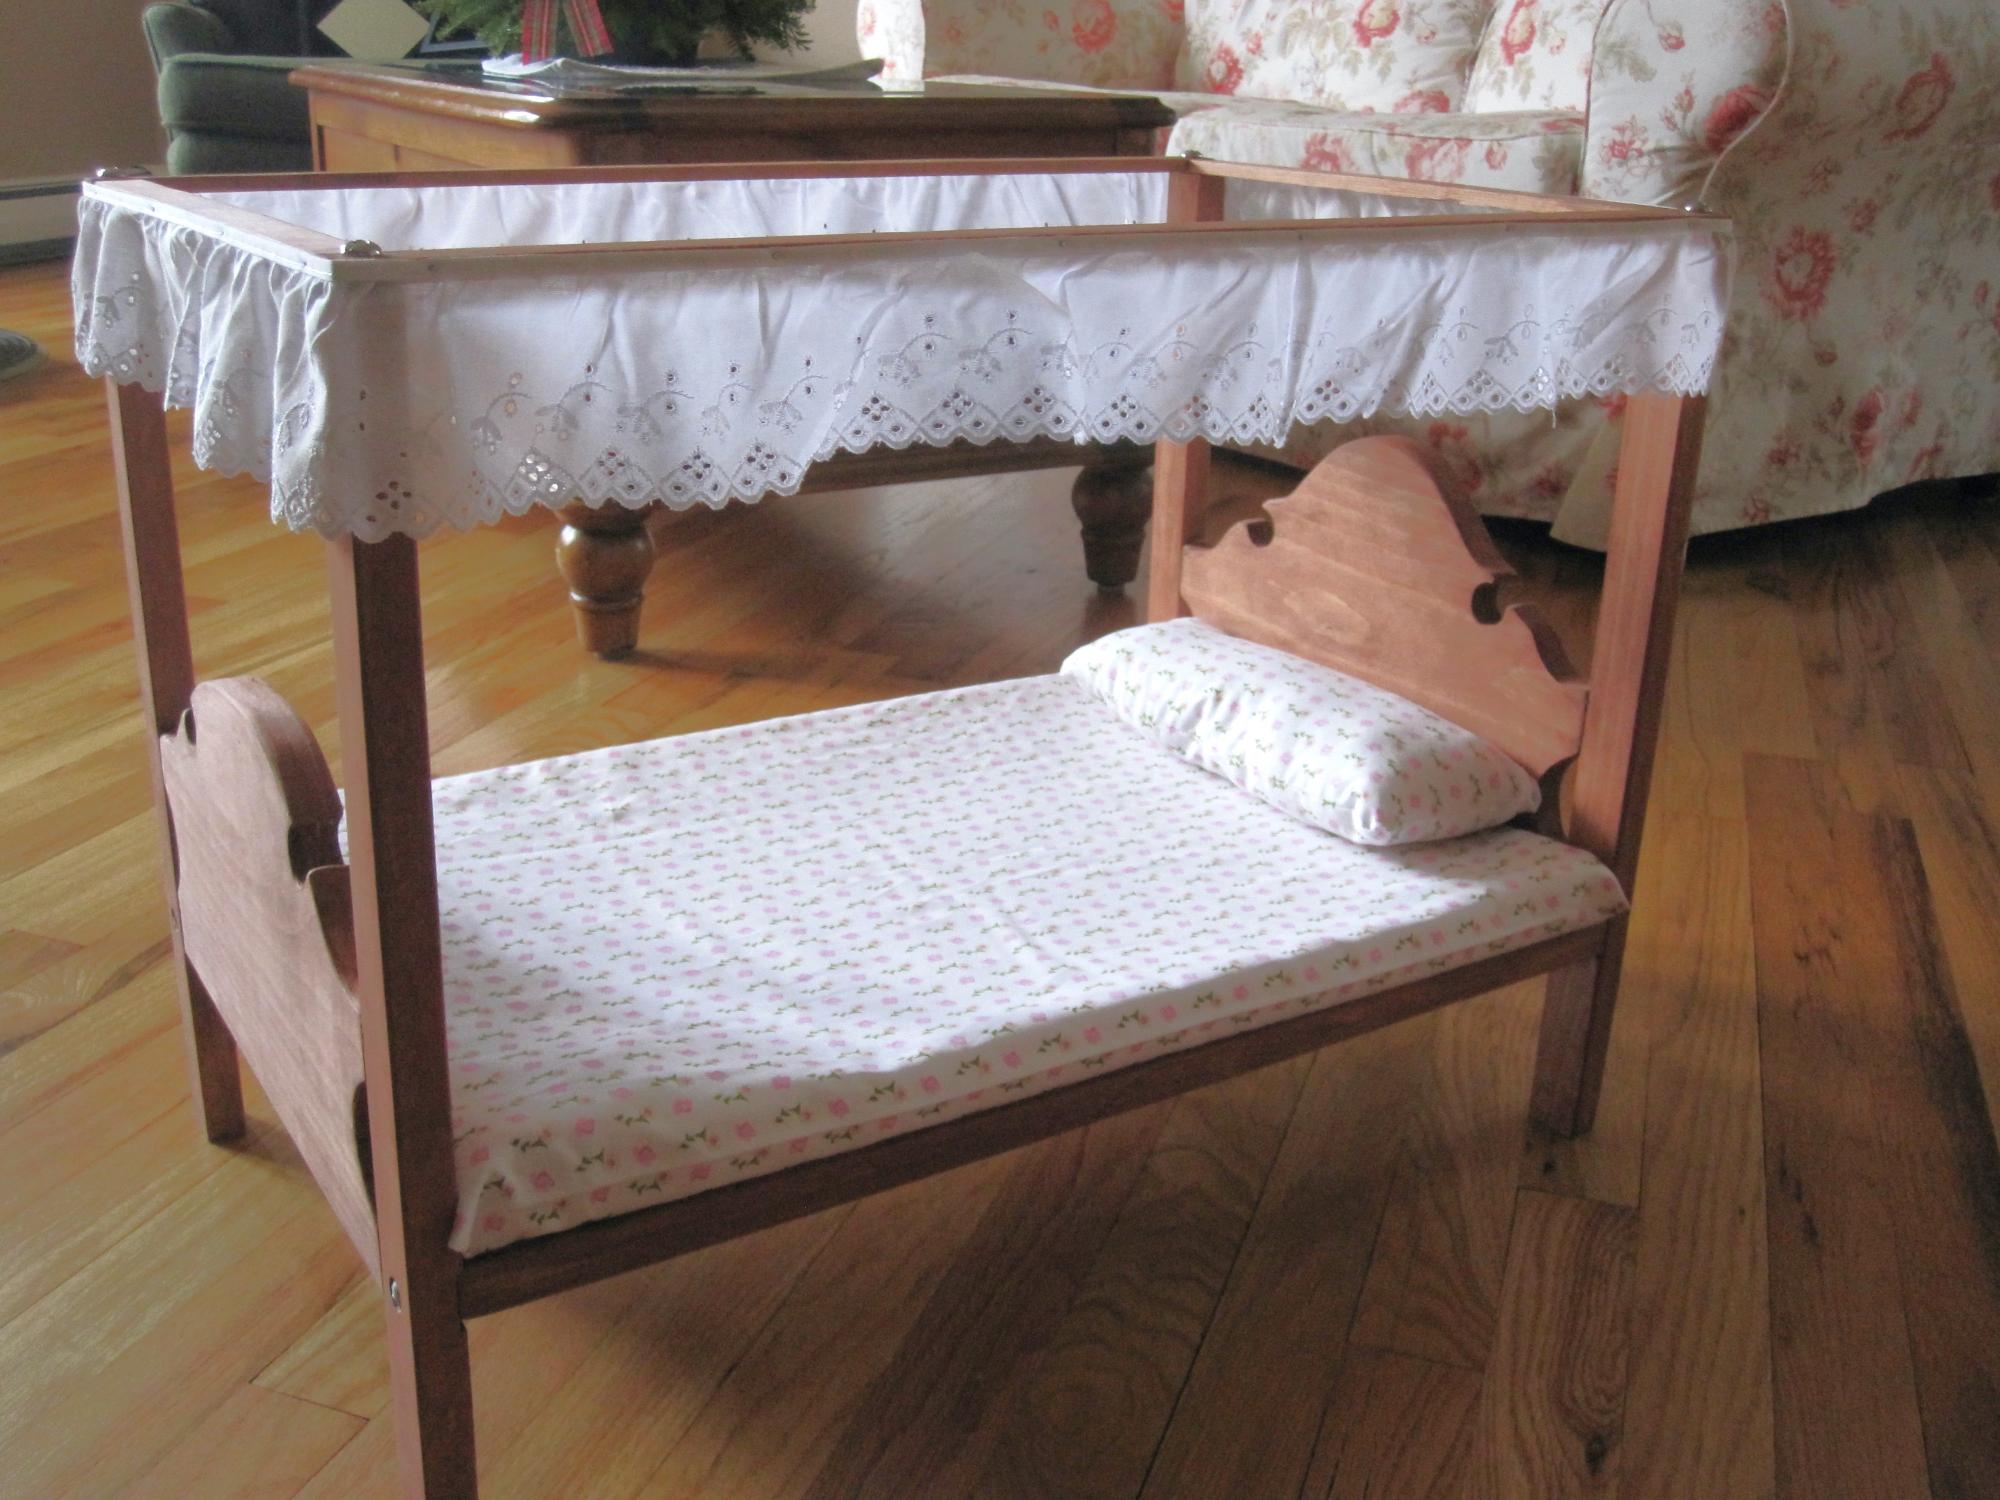
Our 1st granddaughter wanted doll crib so this is what I made for her. It has survived over the years and has been used by her two sisters.
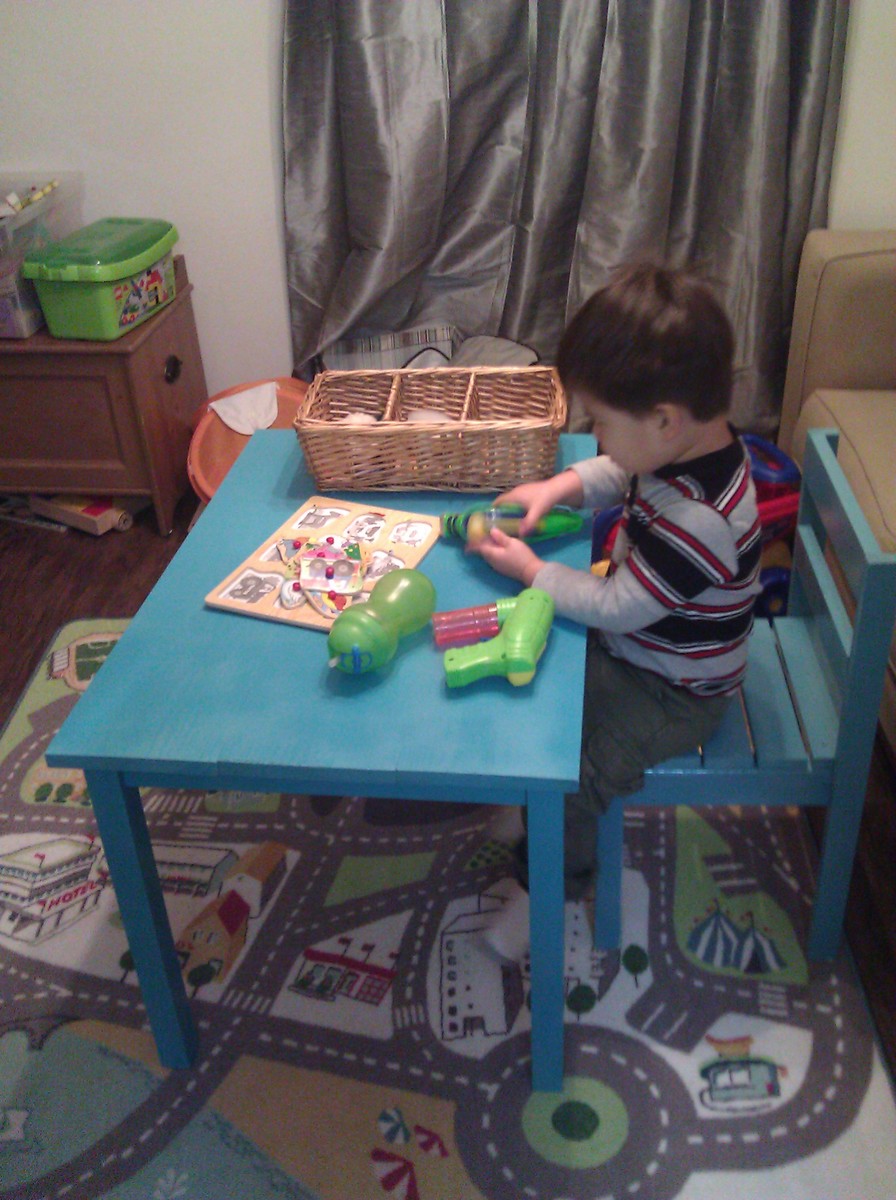
My little boy needed a table to sit at. The adults needed a “kids table” for when we have dinner guests. This served both functions. I had enough scrap for two chairs and spent a few bucks of the lumber for the table, some Valspar primer and spray paint, and there it was.
The only modification I made to the chairs was that I used pocket holes to fasten the back aprons to the side aprons for added strength instead of using wood screws through the end grain. I was barely able to squeeze my drill in the square but did it by severely contorting my wrist and hand.
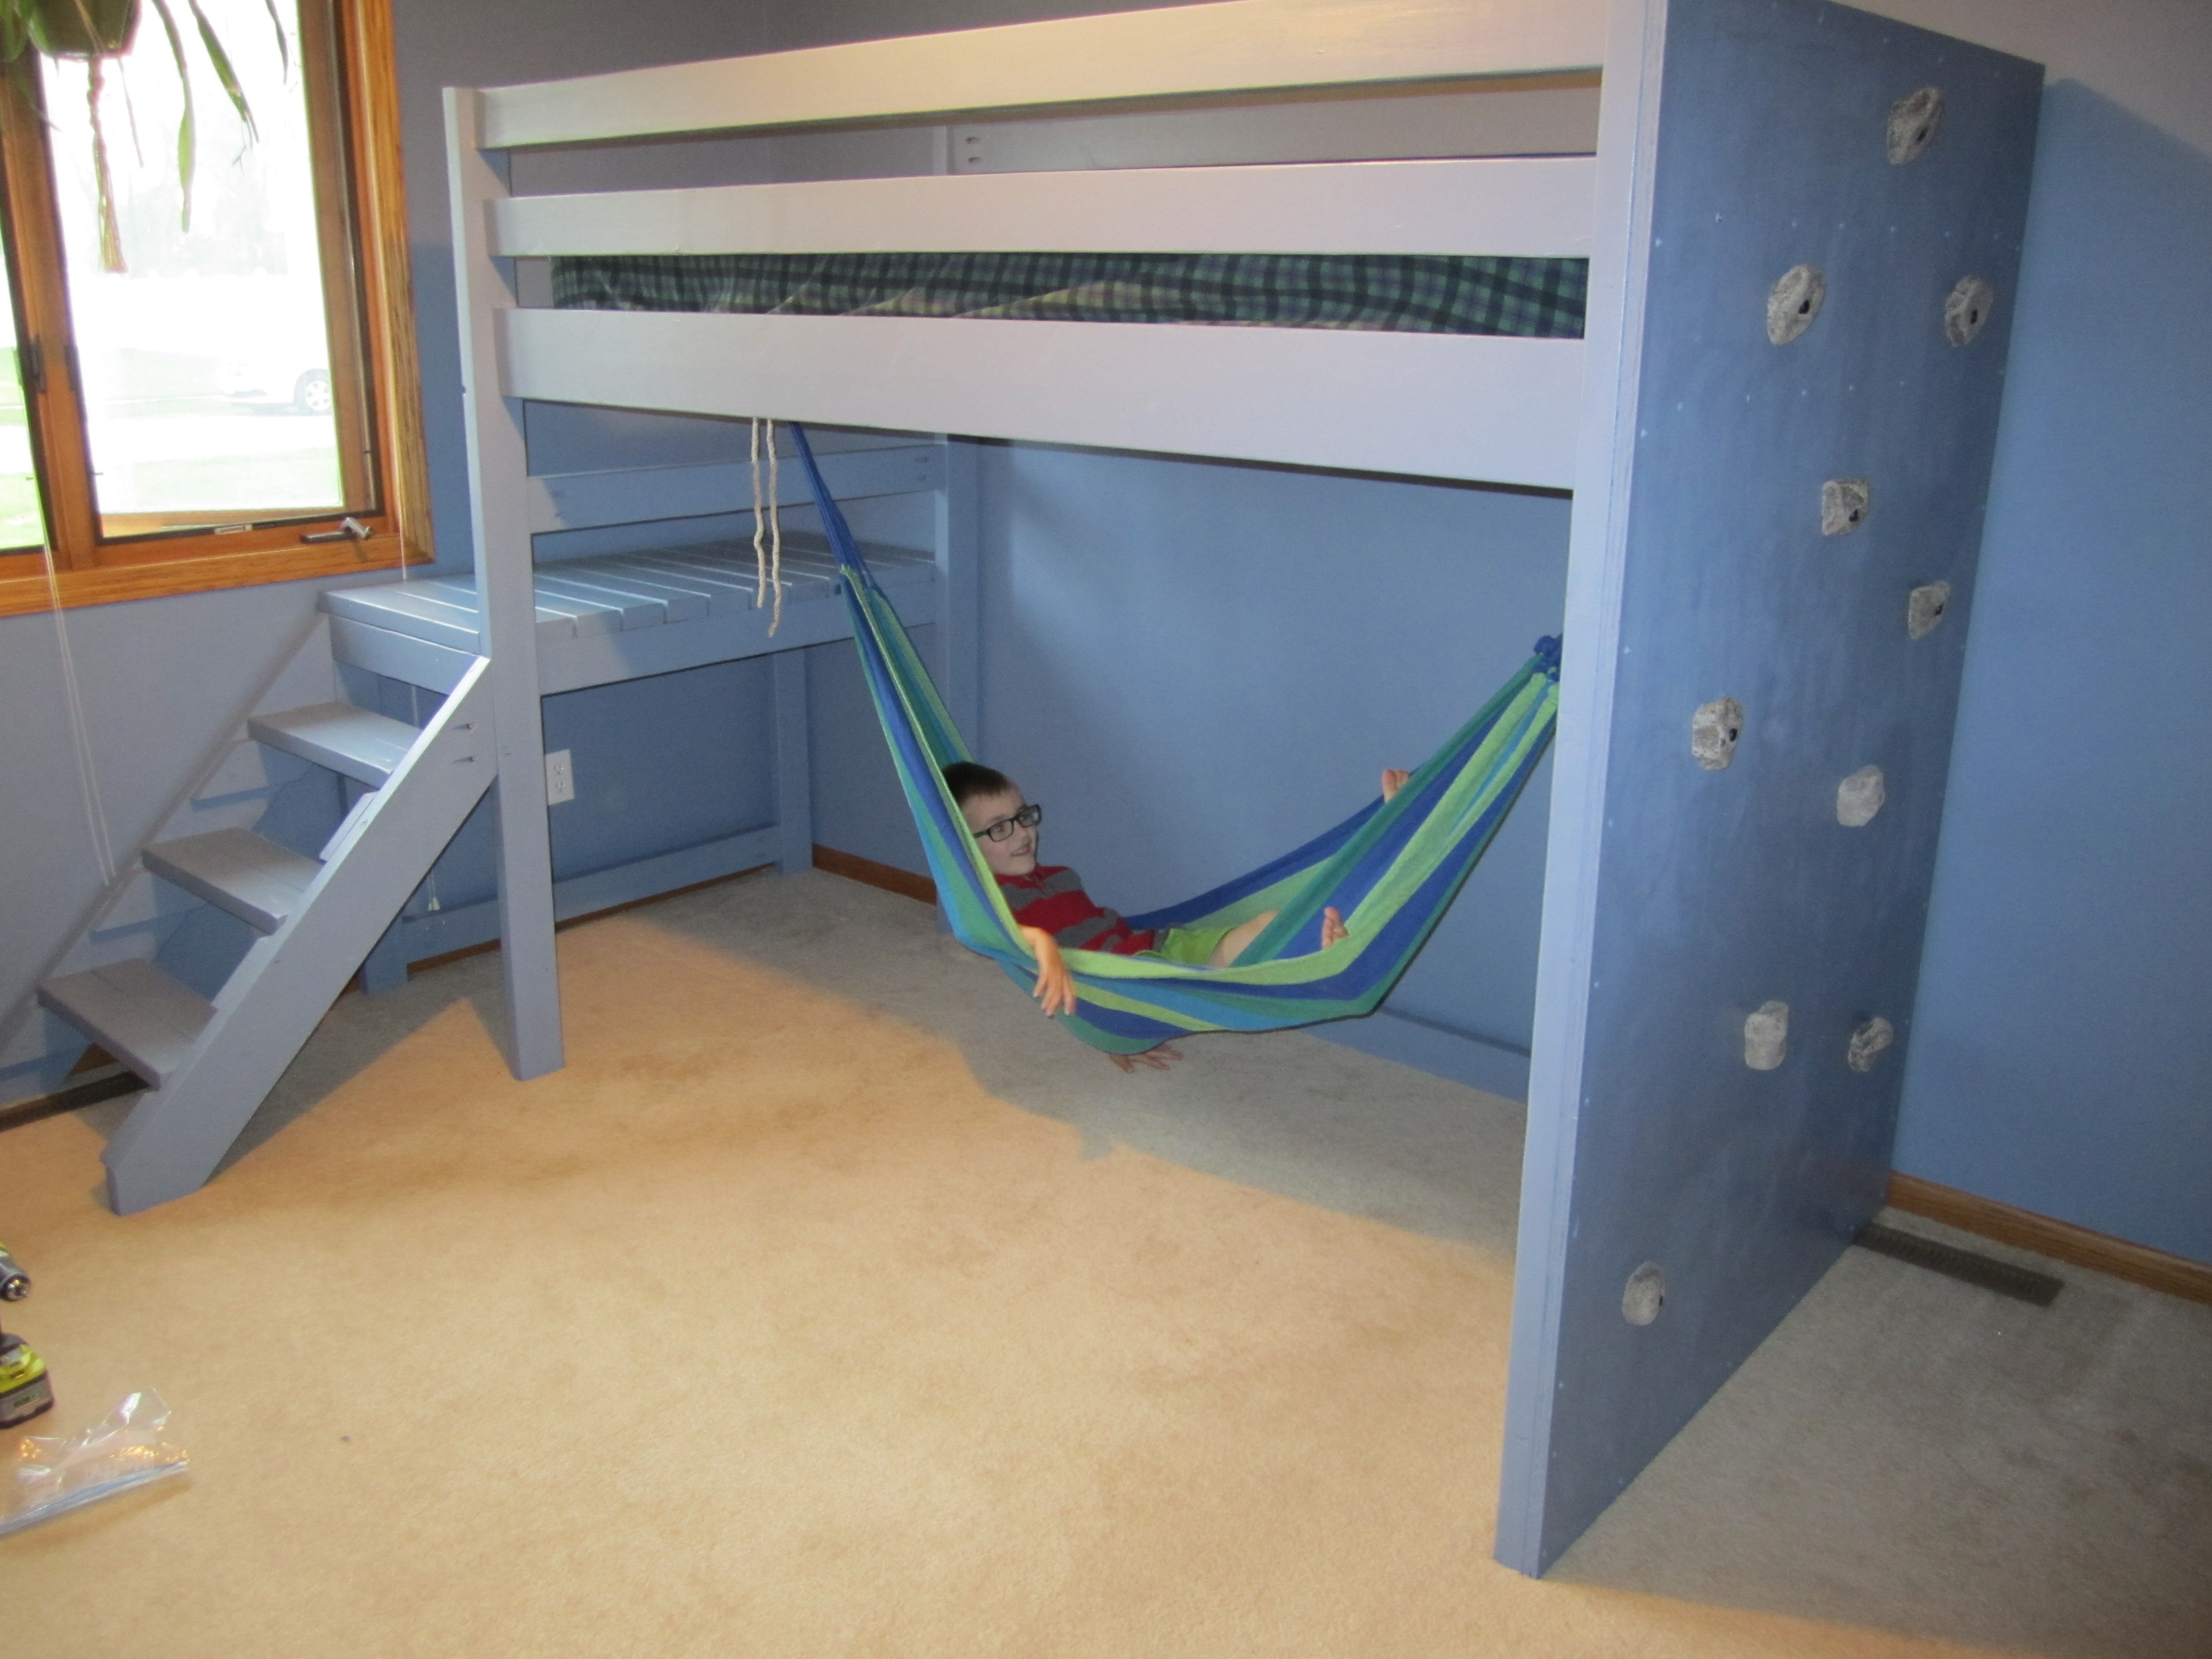
Found this awesome project but decided to add on a rock climbing wall and an underslung Hammock to upgrade it to full Birthday present levels. My son now calls it his "Epic Bed" and absolutely loves it!

My dad and I built my closet based off your plans but did a little modifying. we made four instead of two spaces to hang clothes and the very bottom part will have doors to make them into drawers.
This took me a while since I had pretty minimal free time with my 3 kids. I had to wait until the days my husband was off to watch them. It was also my first real project, so there were of course the "stupid" errors. I'm pretty happy with how it turned out and I learned a lot!

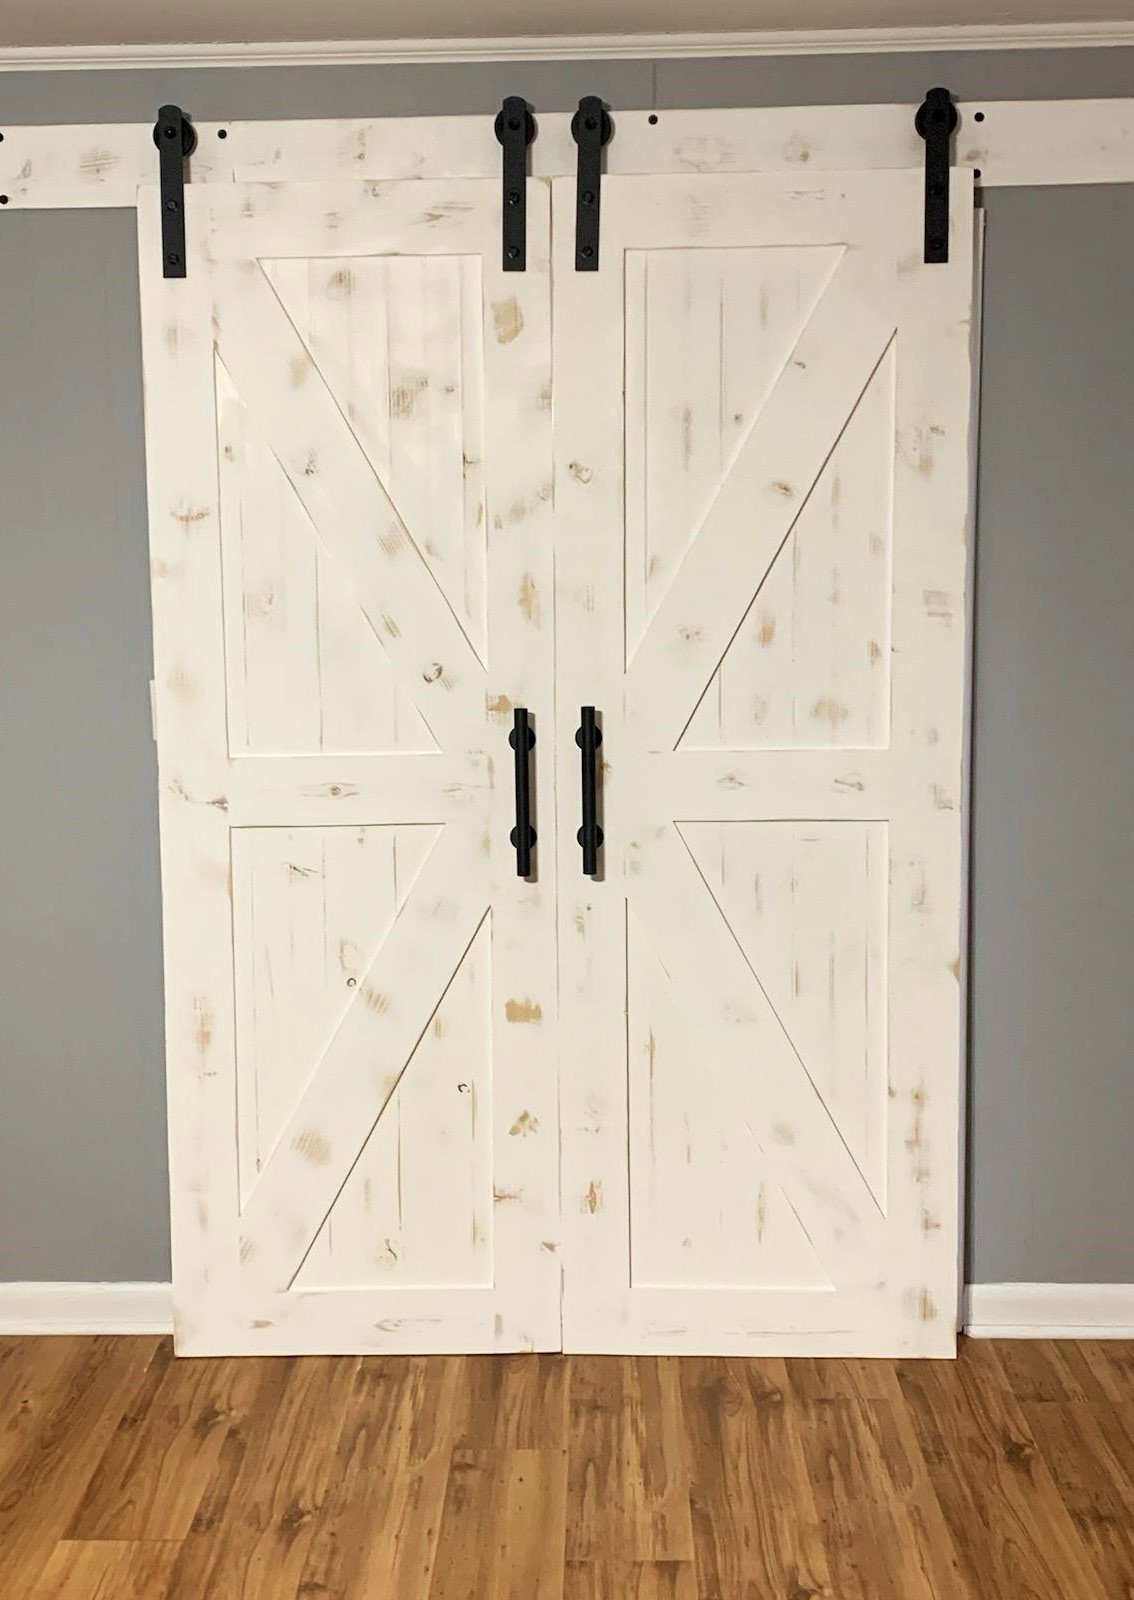
Made some sliding barn doors for a friend.
Allen Clark