Community Brag Posts
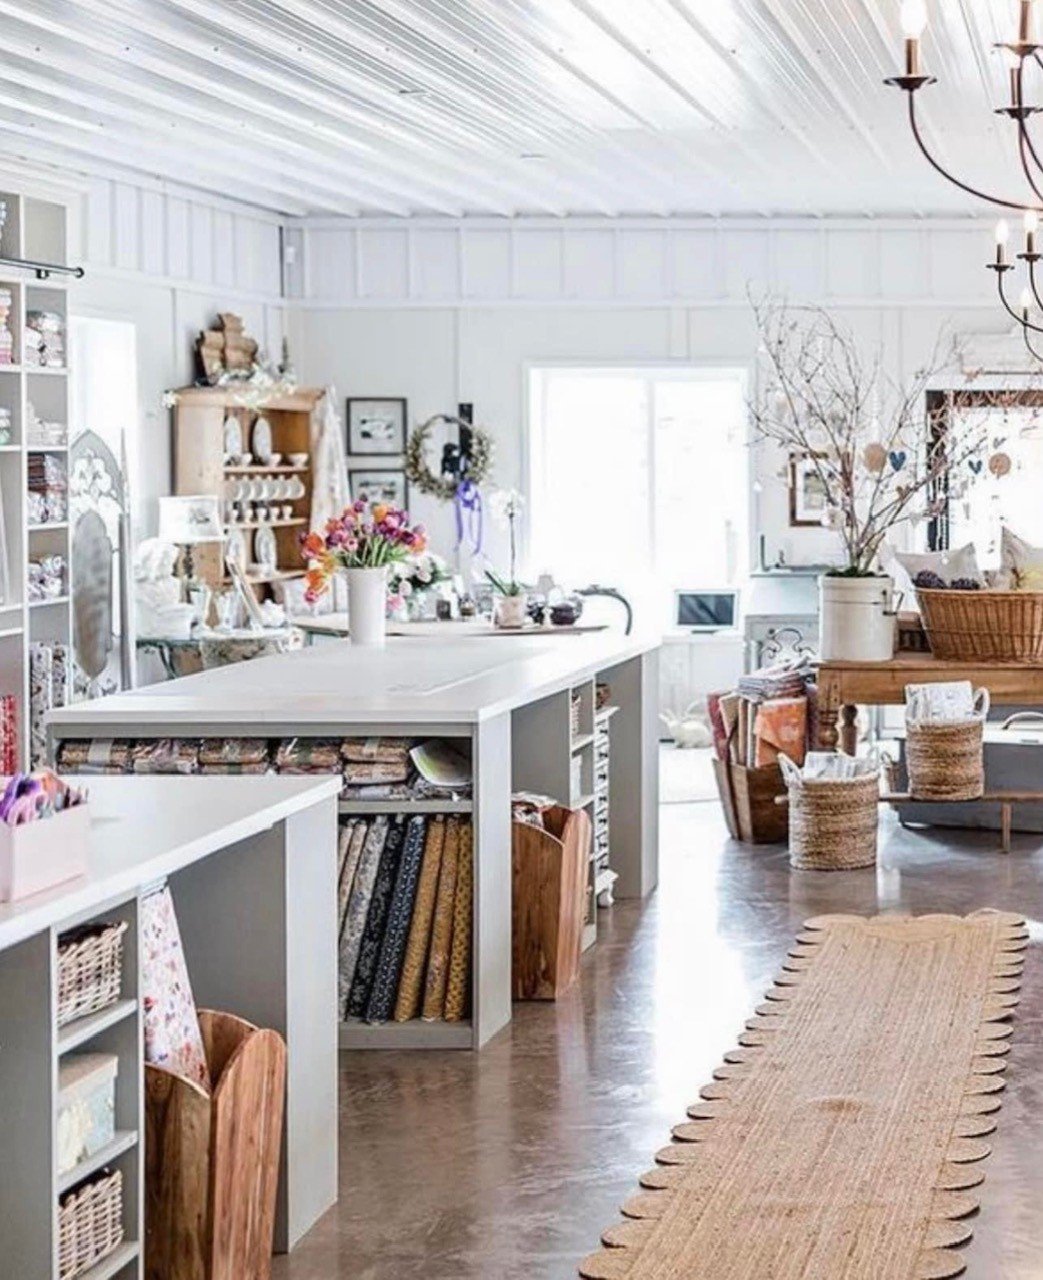
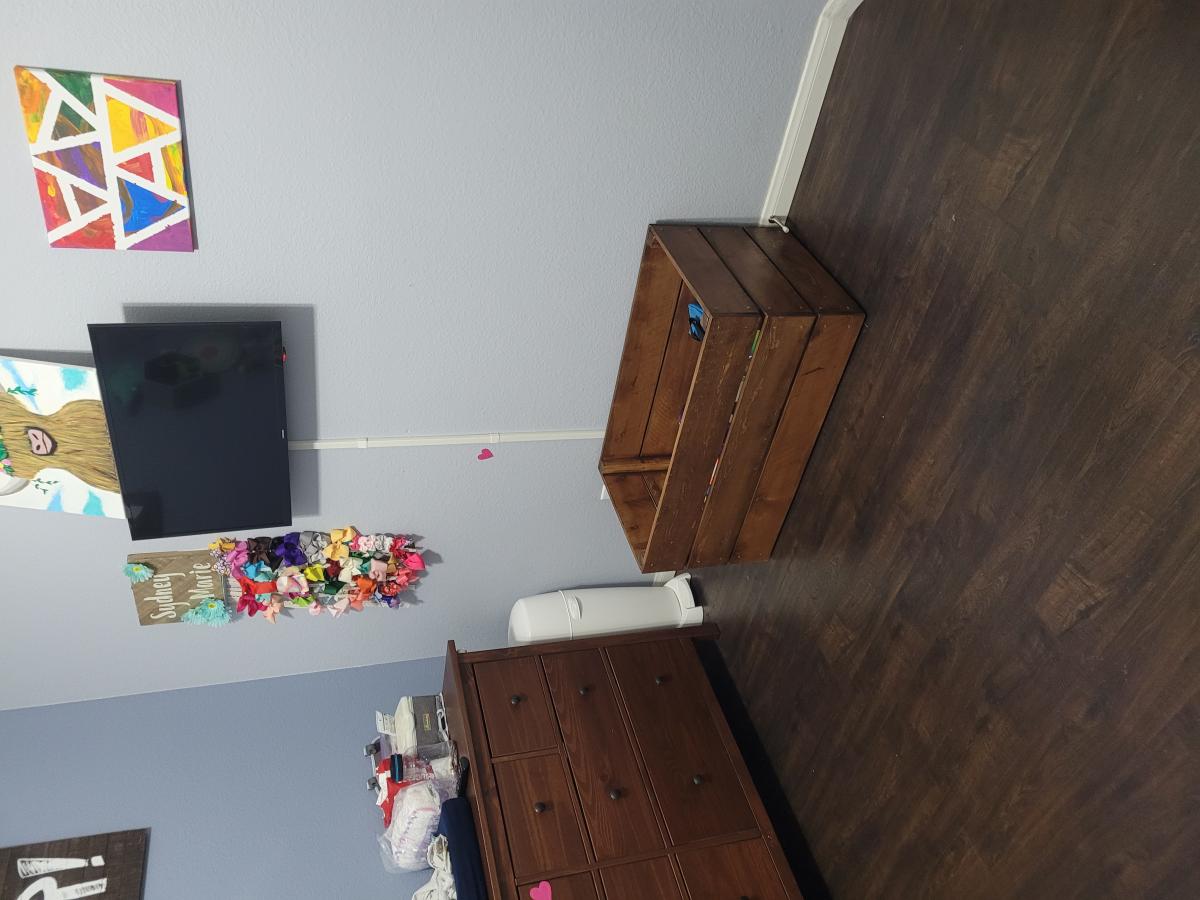
Large Quilting Craft Table
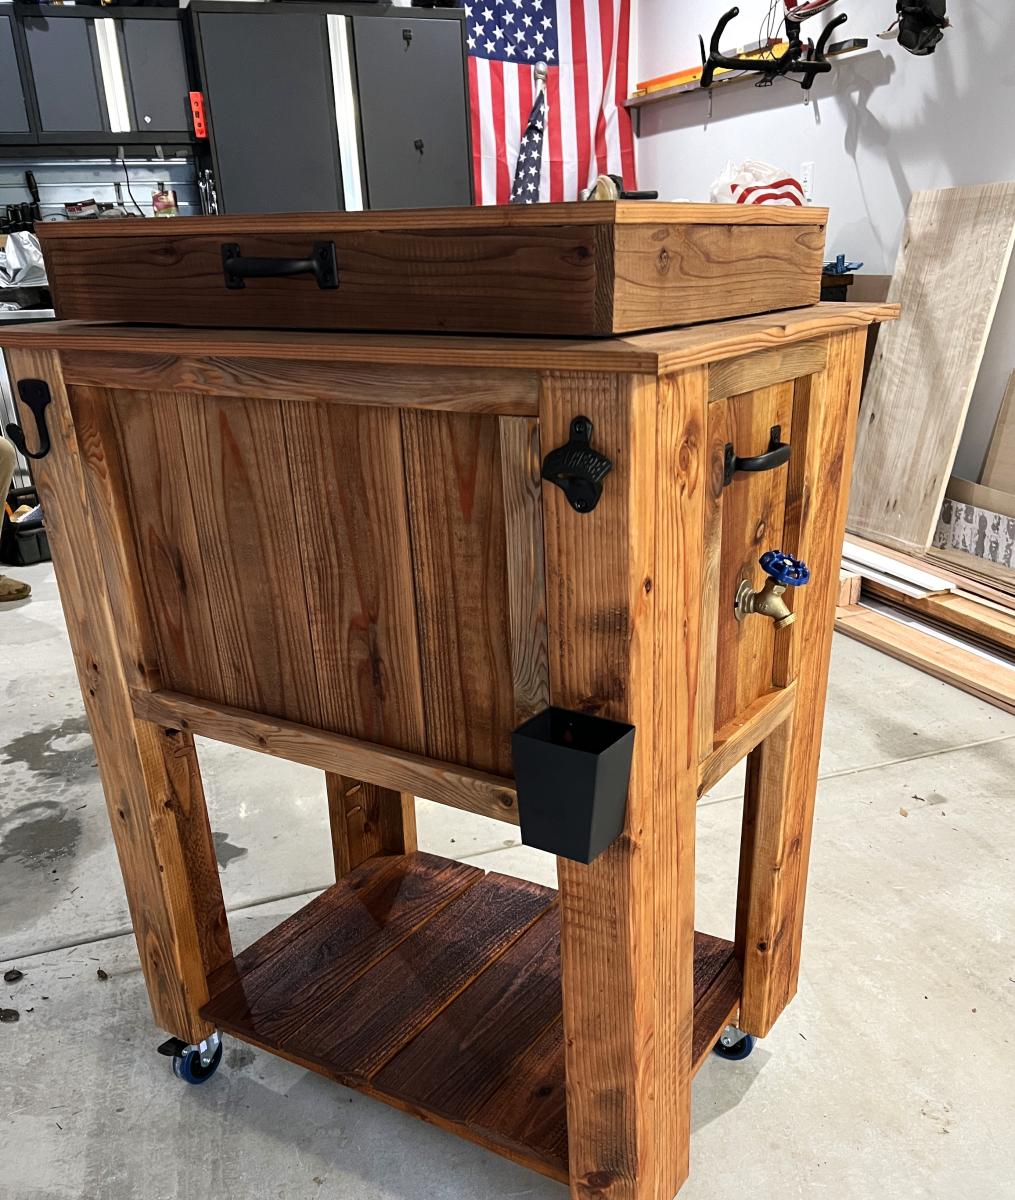
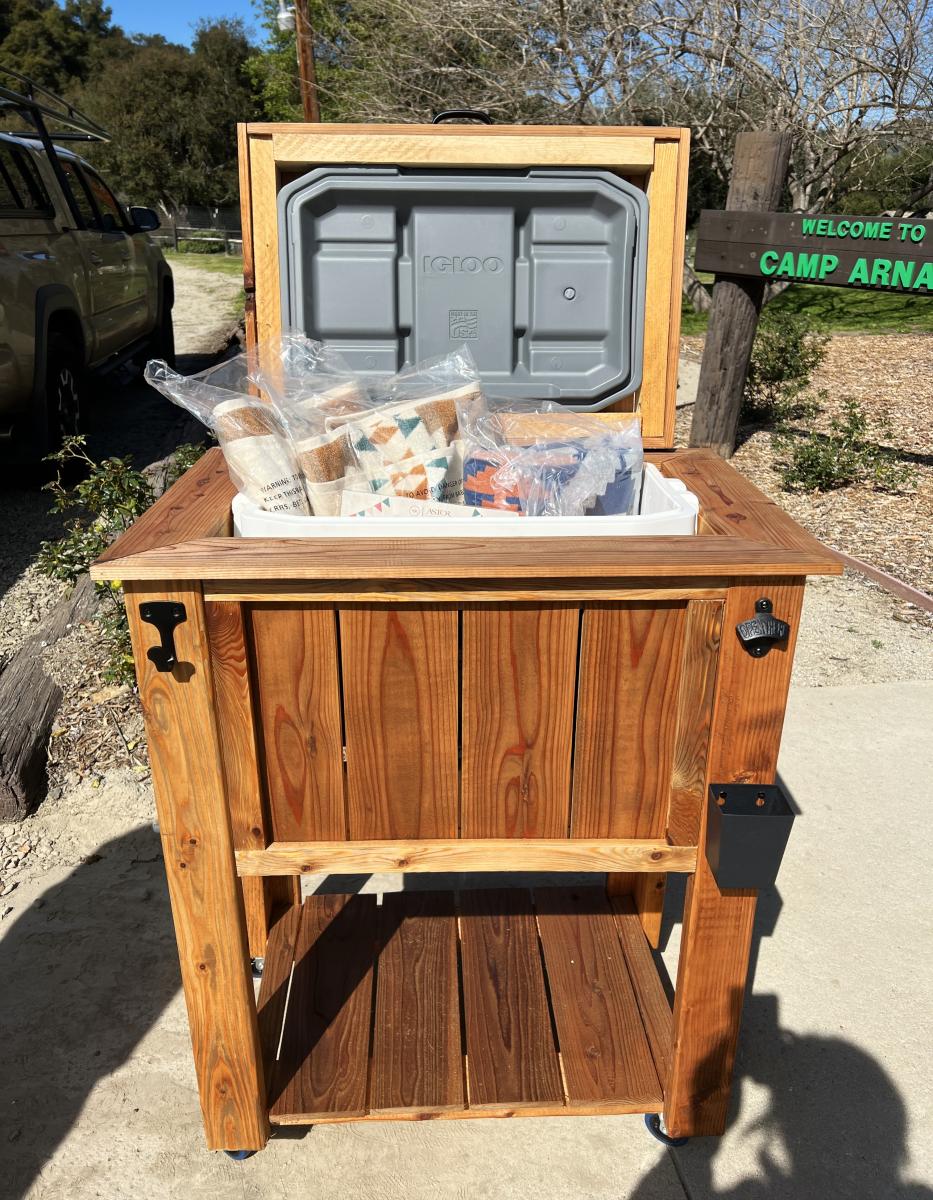
Custom Wood Cooler Stand
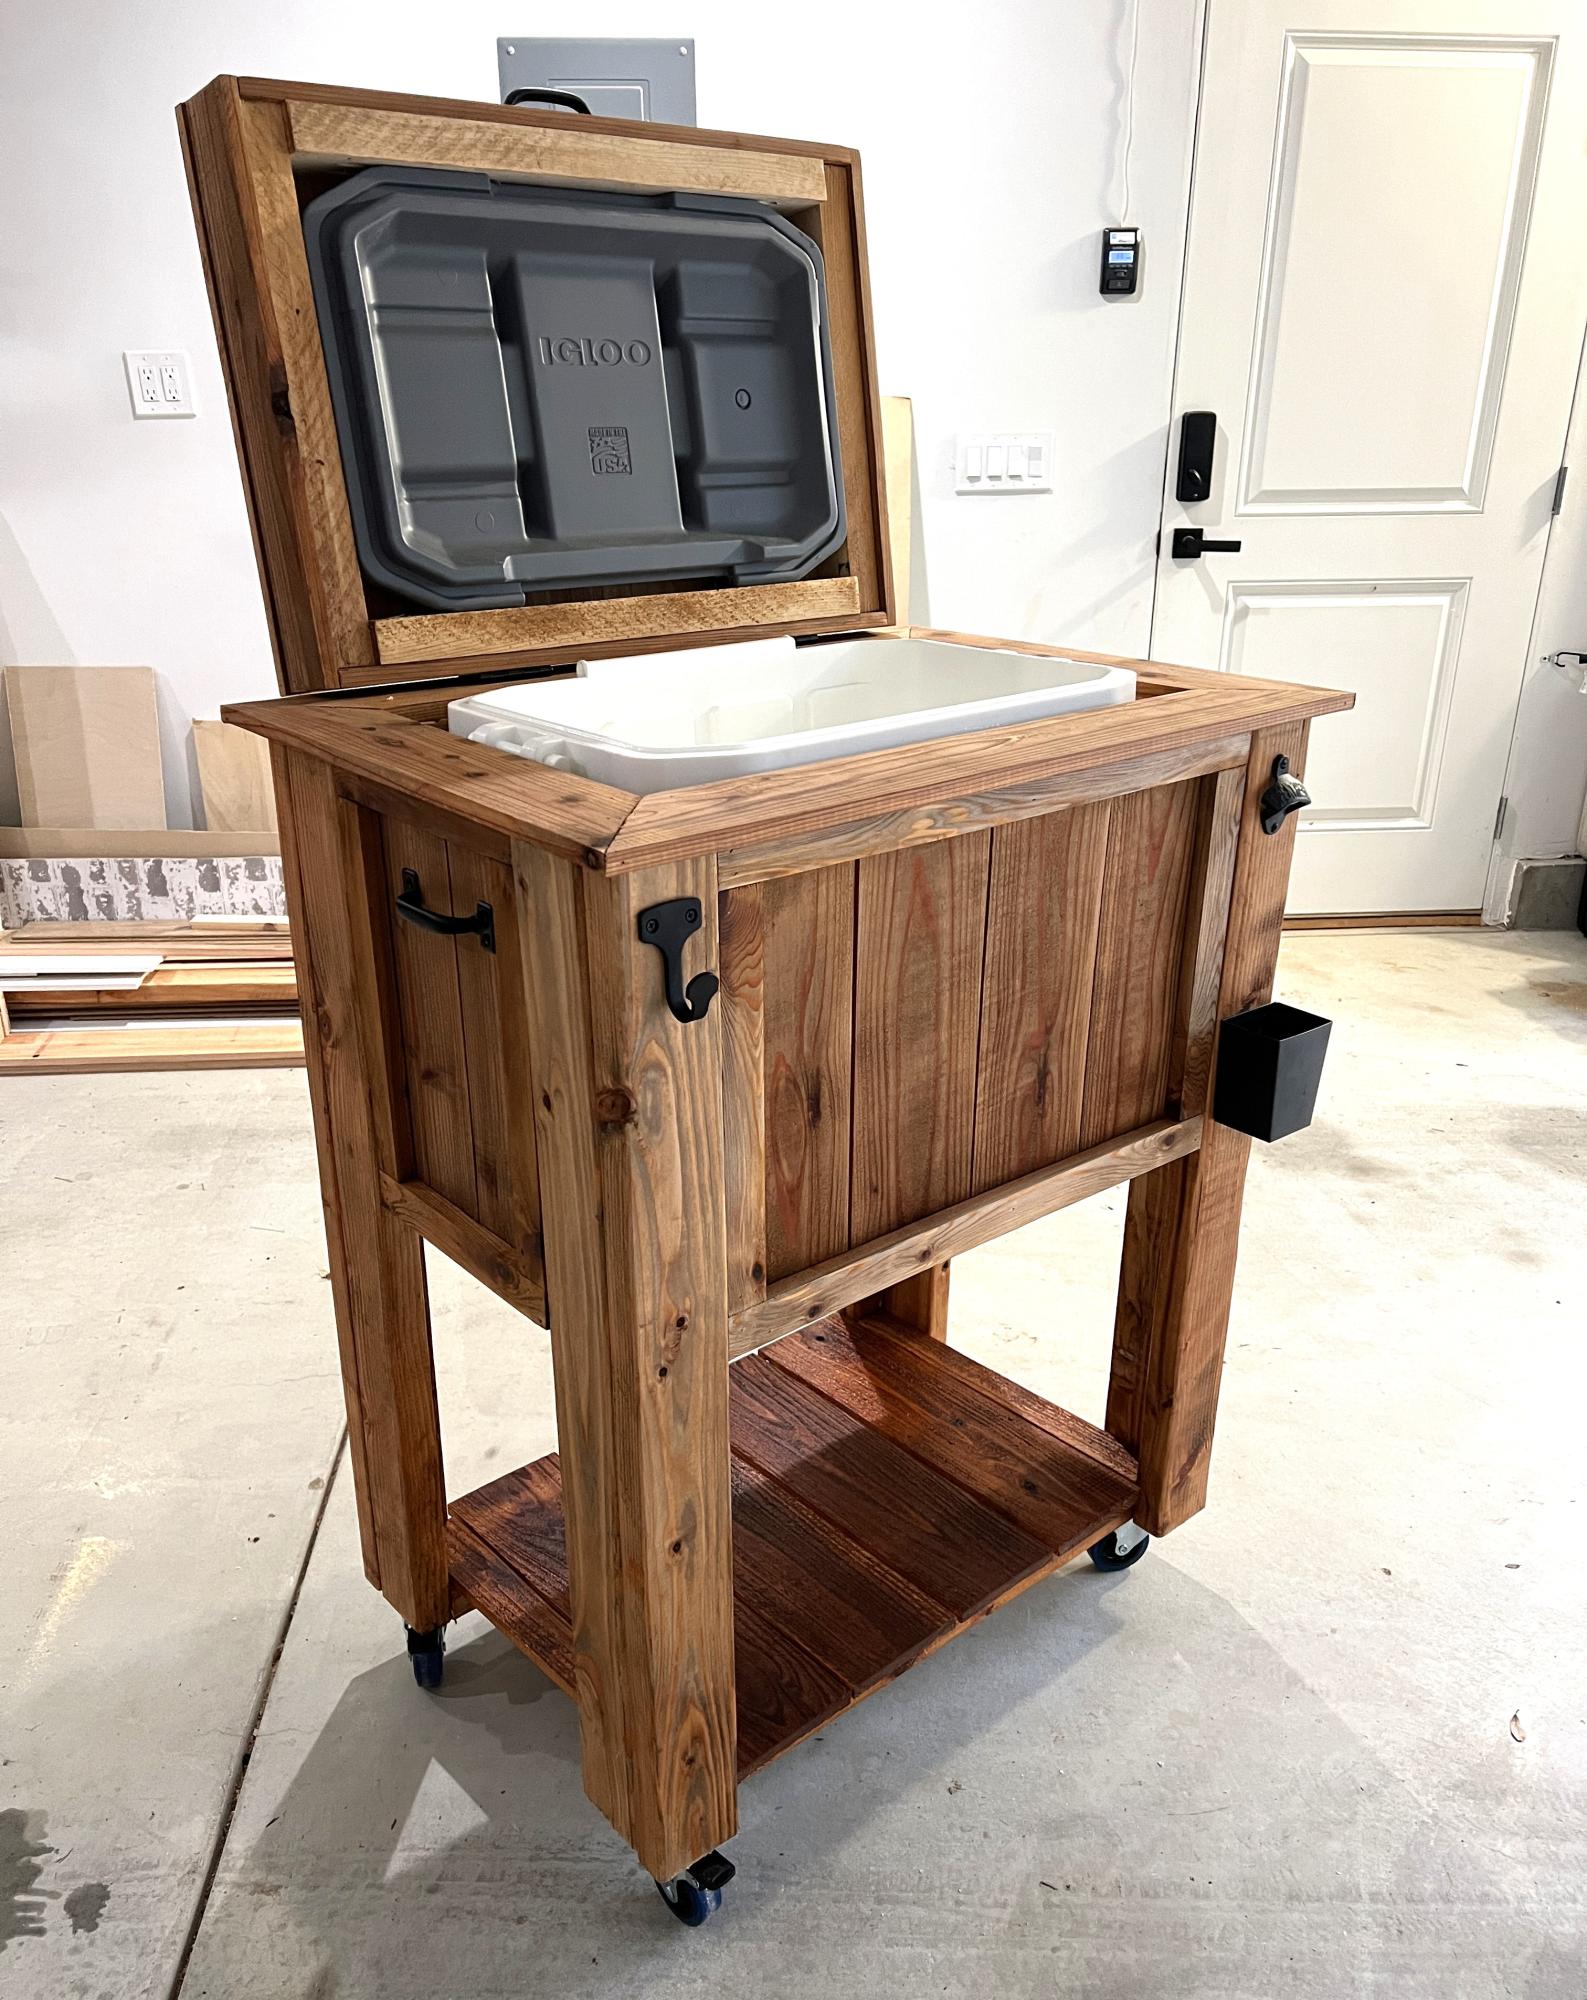
I made this Ice Chest Cart for my son’s schools silent auction. It features a spigot for drainage, bottle opener, hook for a bar towel and I also set it on castors so it can be easily moved.
Built from Plan(s)
Just My Size Closet
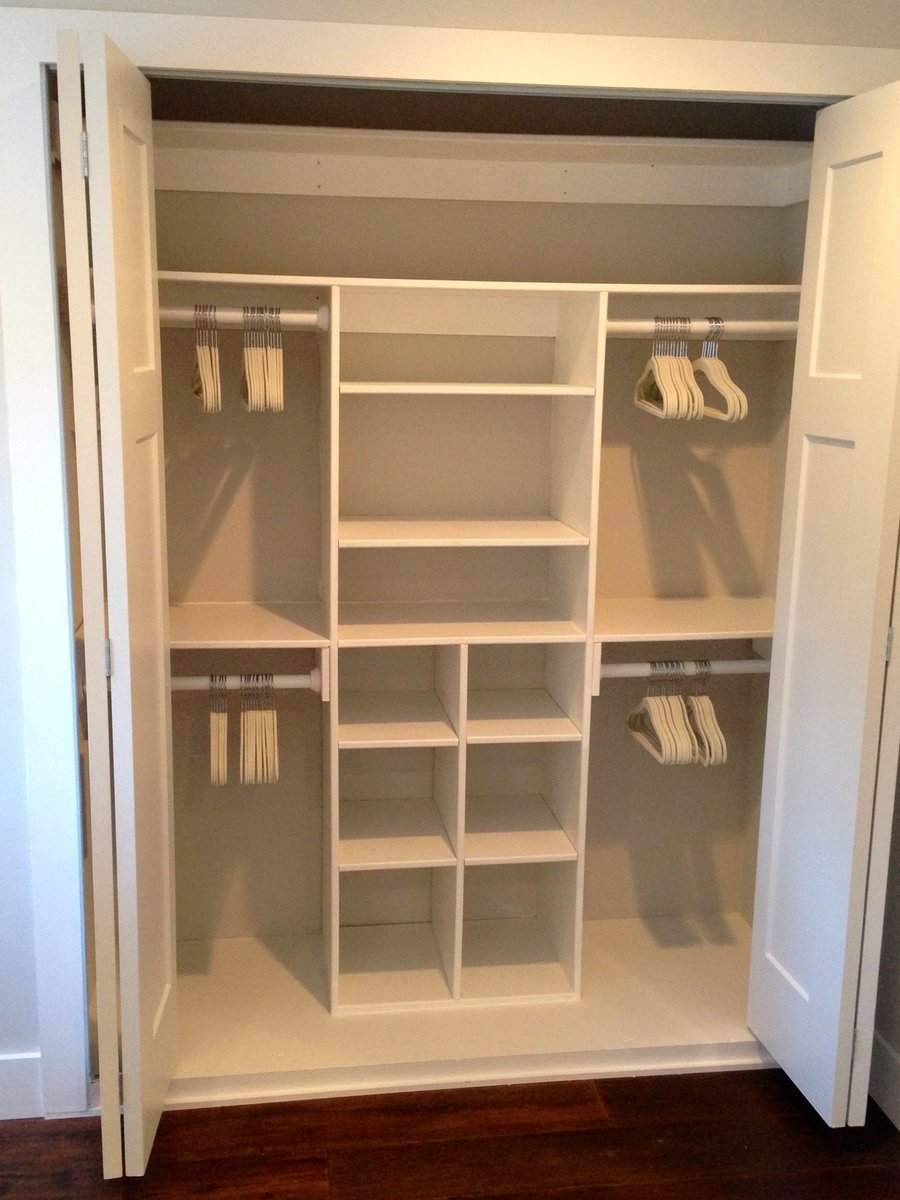
Just My Size Closet!
Built this from Ana's plans with a few modifications.
Started with a big empty box after ripping the old stuff out and finished with this look.
Adjustable shelves and all !
Built from Plan(s)
Estimated Time Investment
Weekend Project (10-20 Hours)
Finish Used
Whatever white paint my wife bought !!
Recommended Skill Level
Beginner
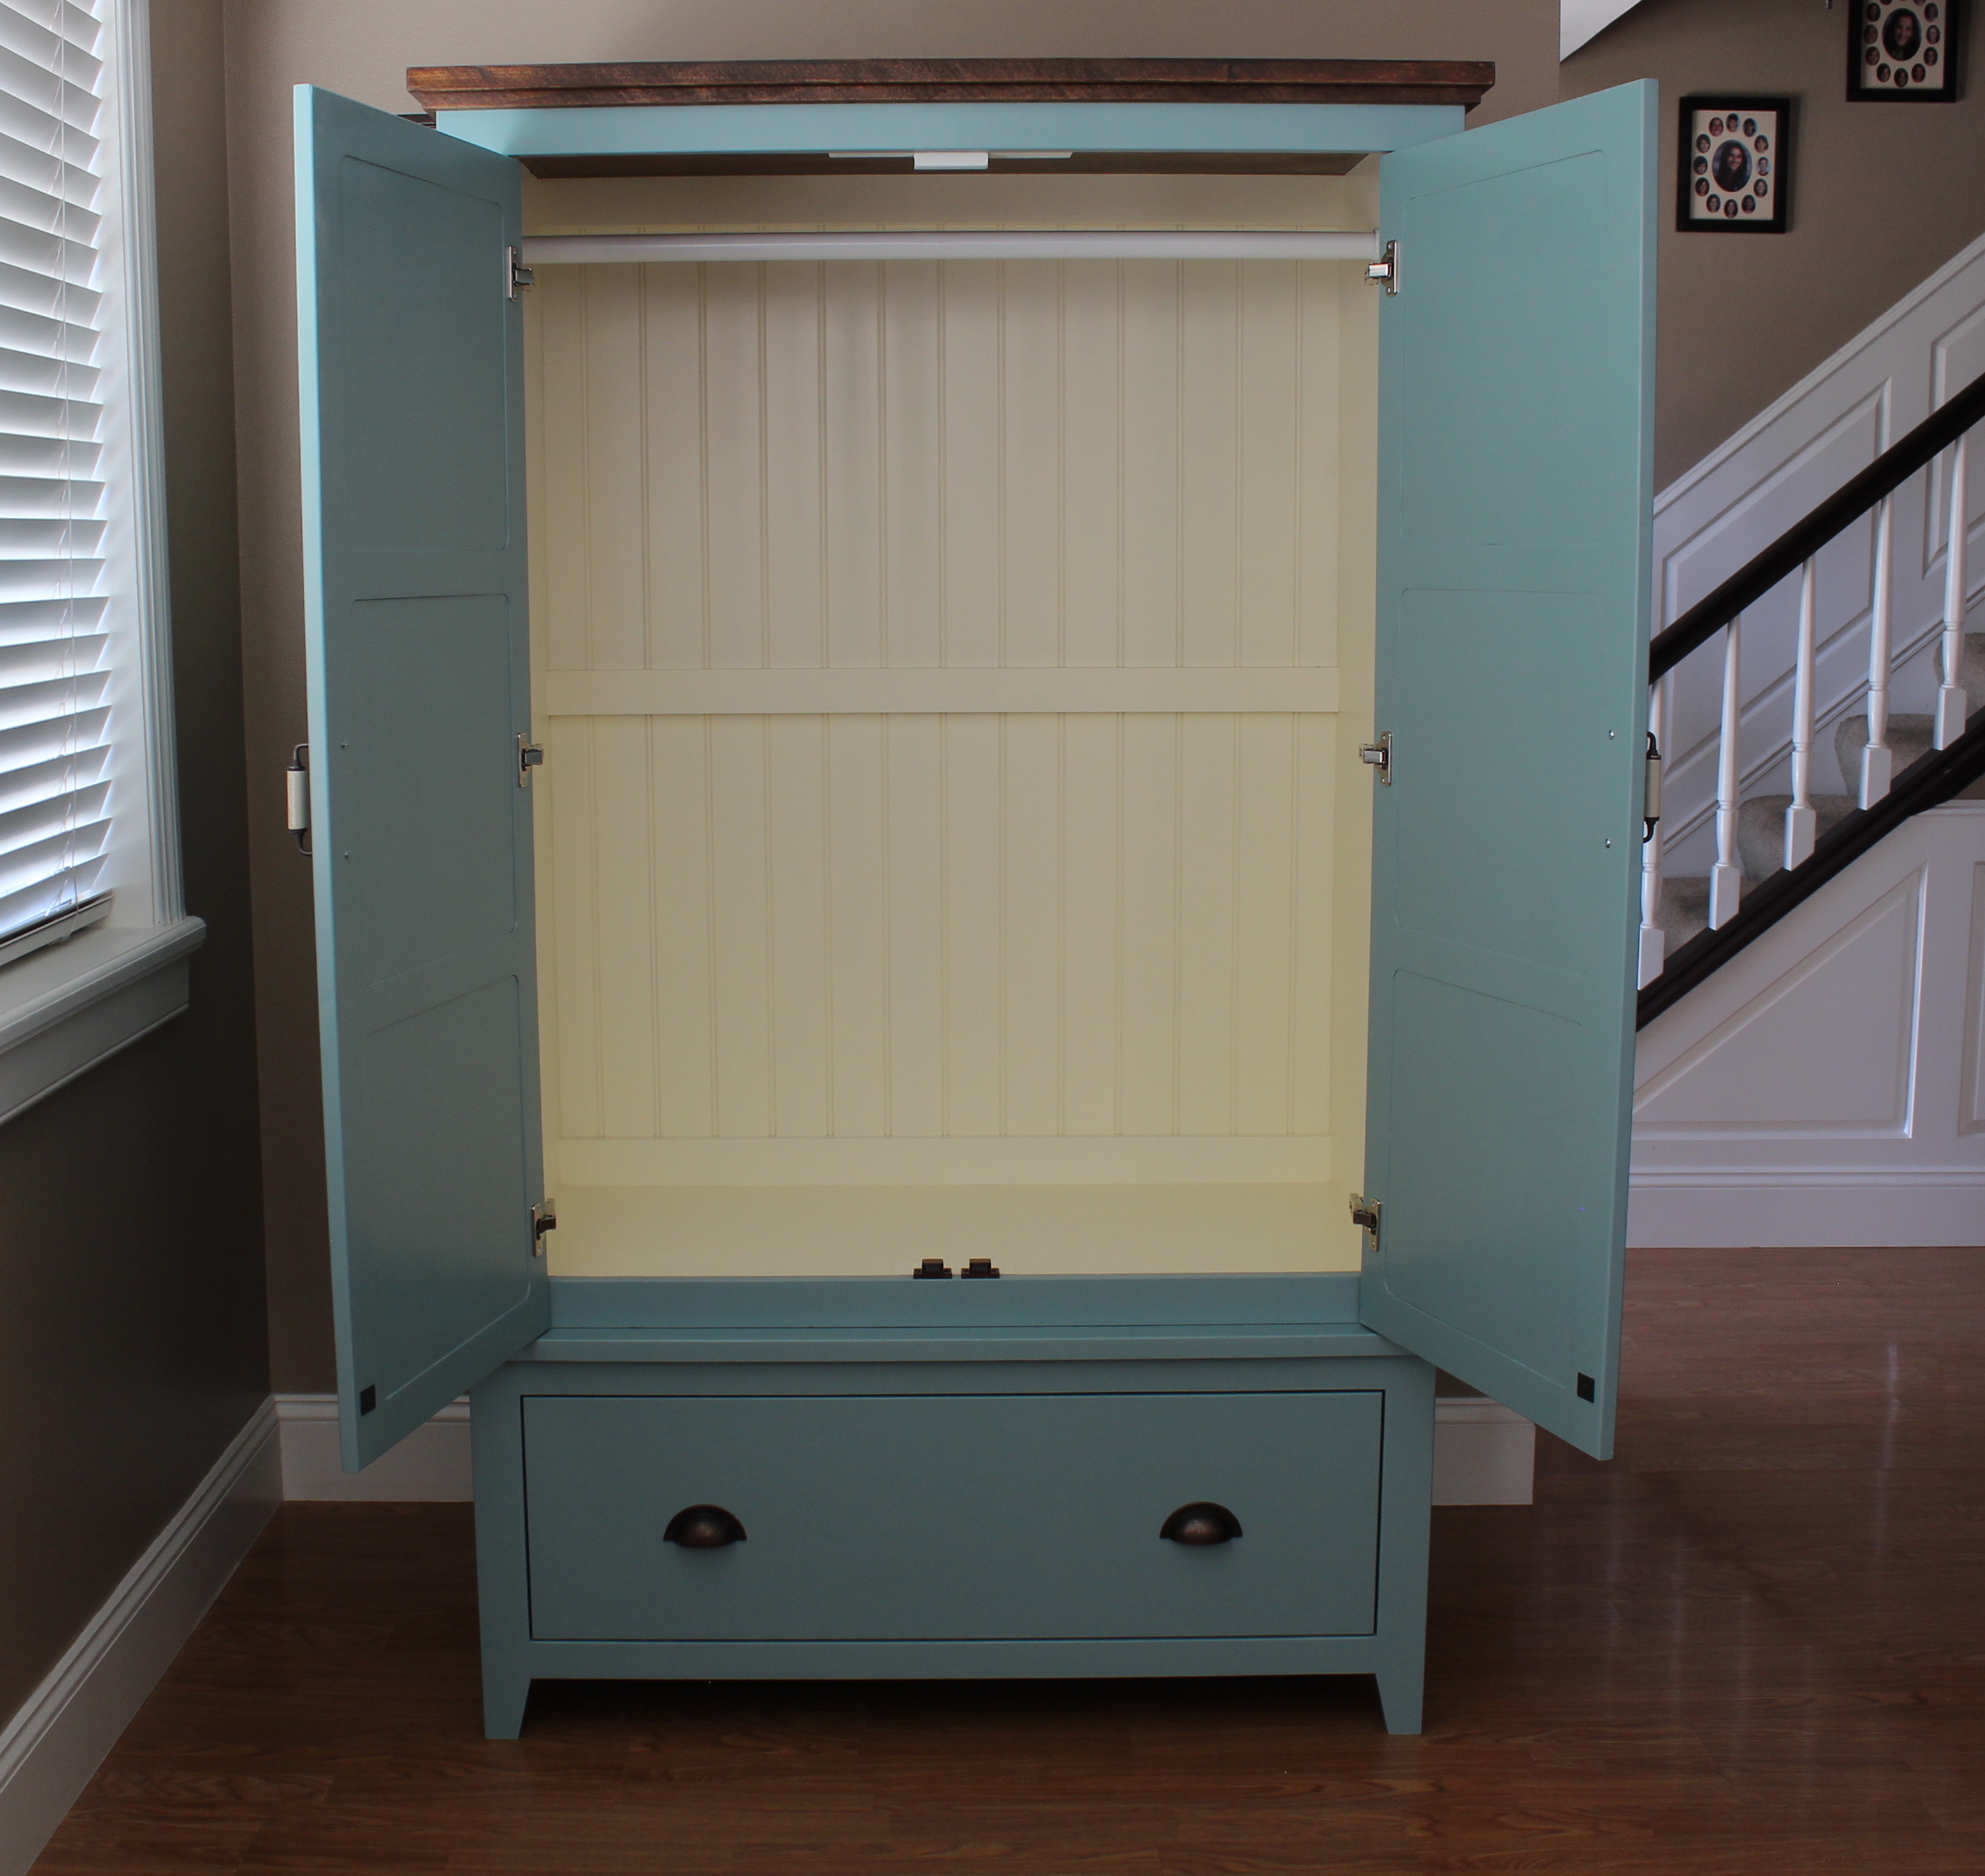
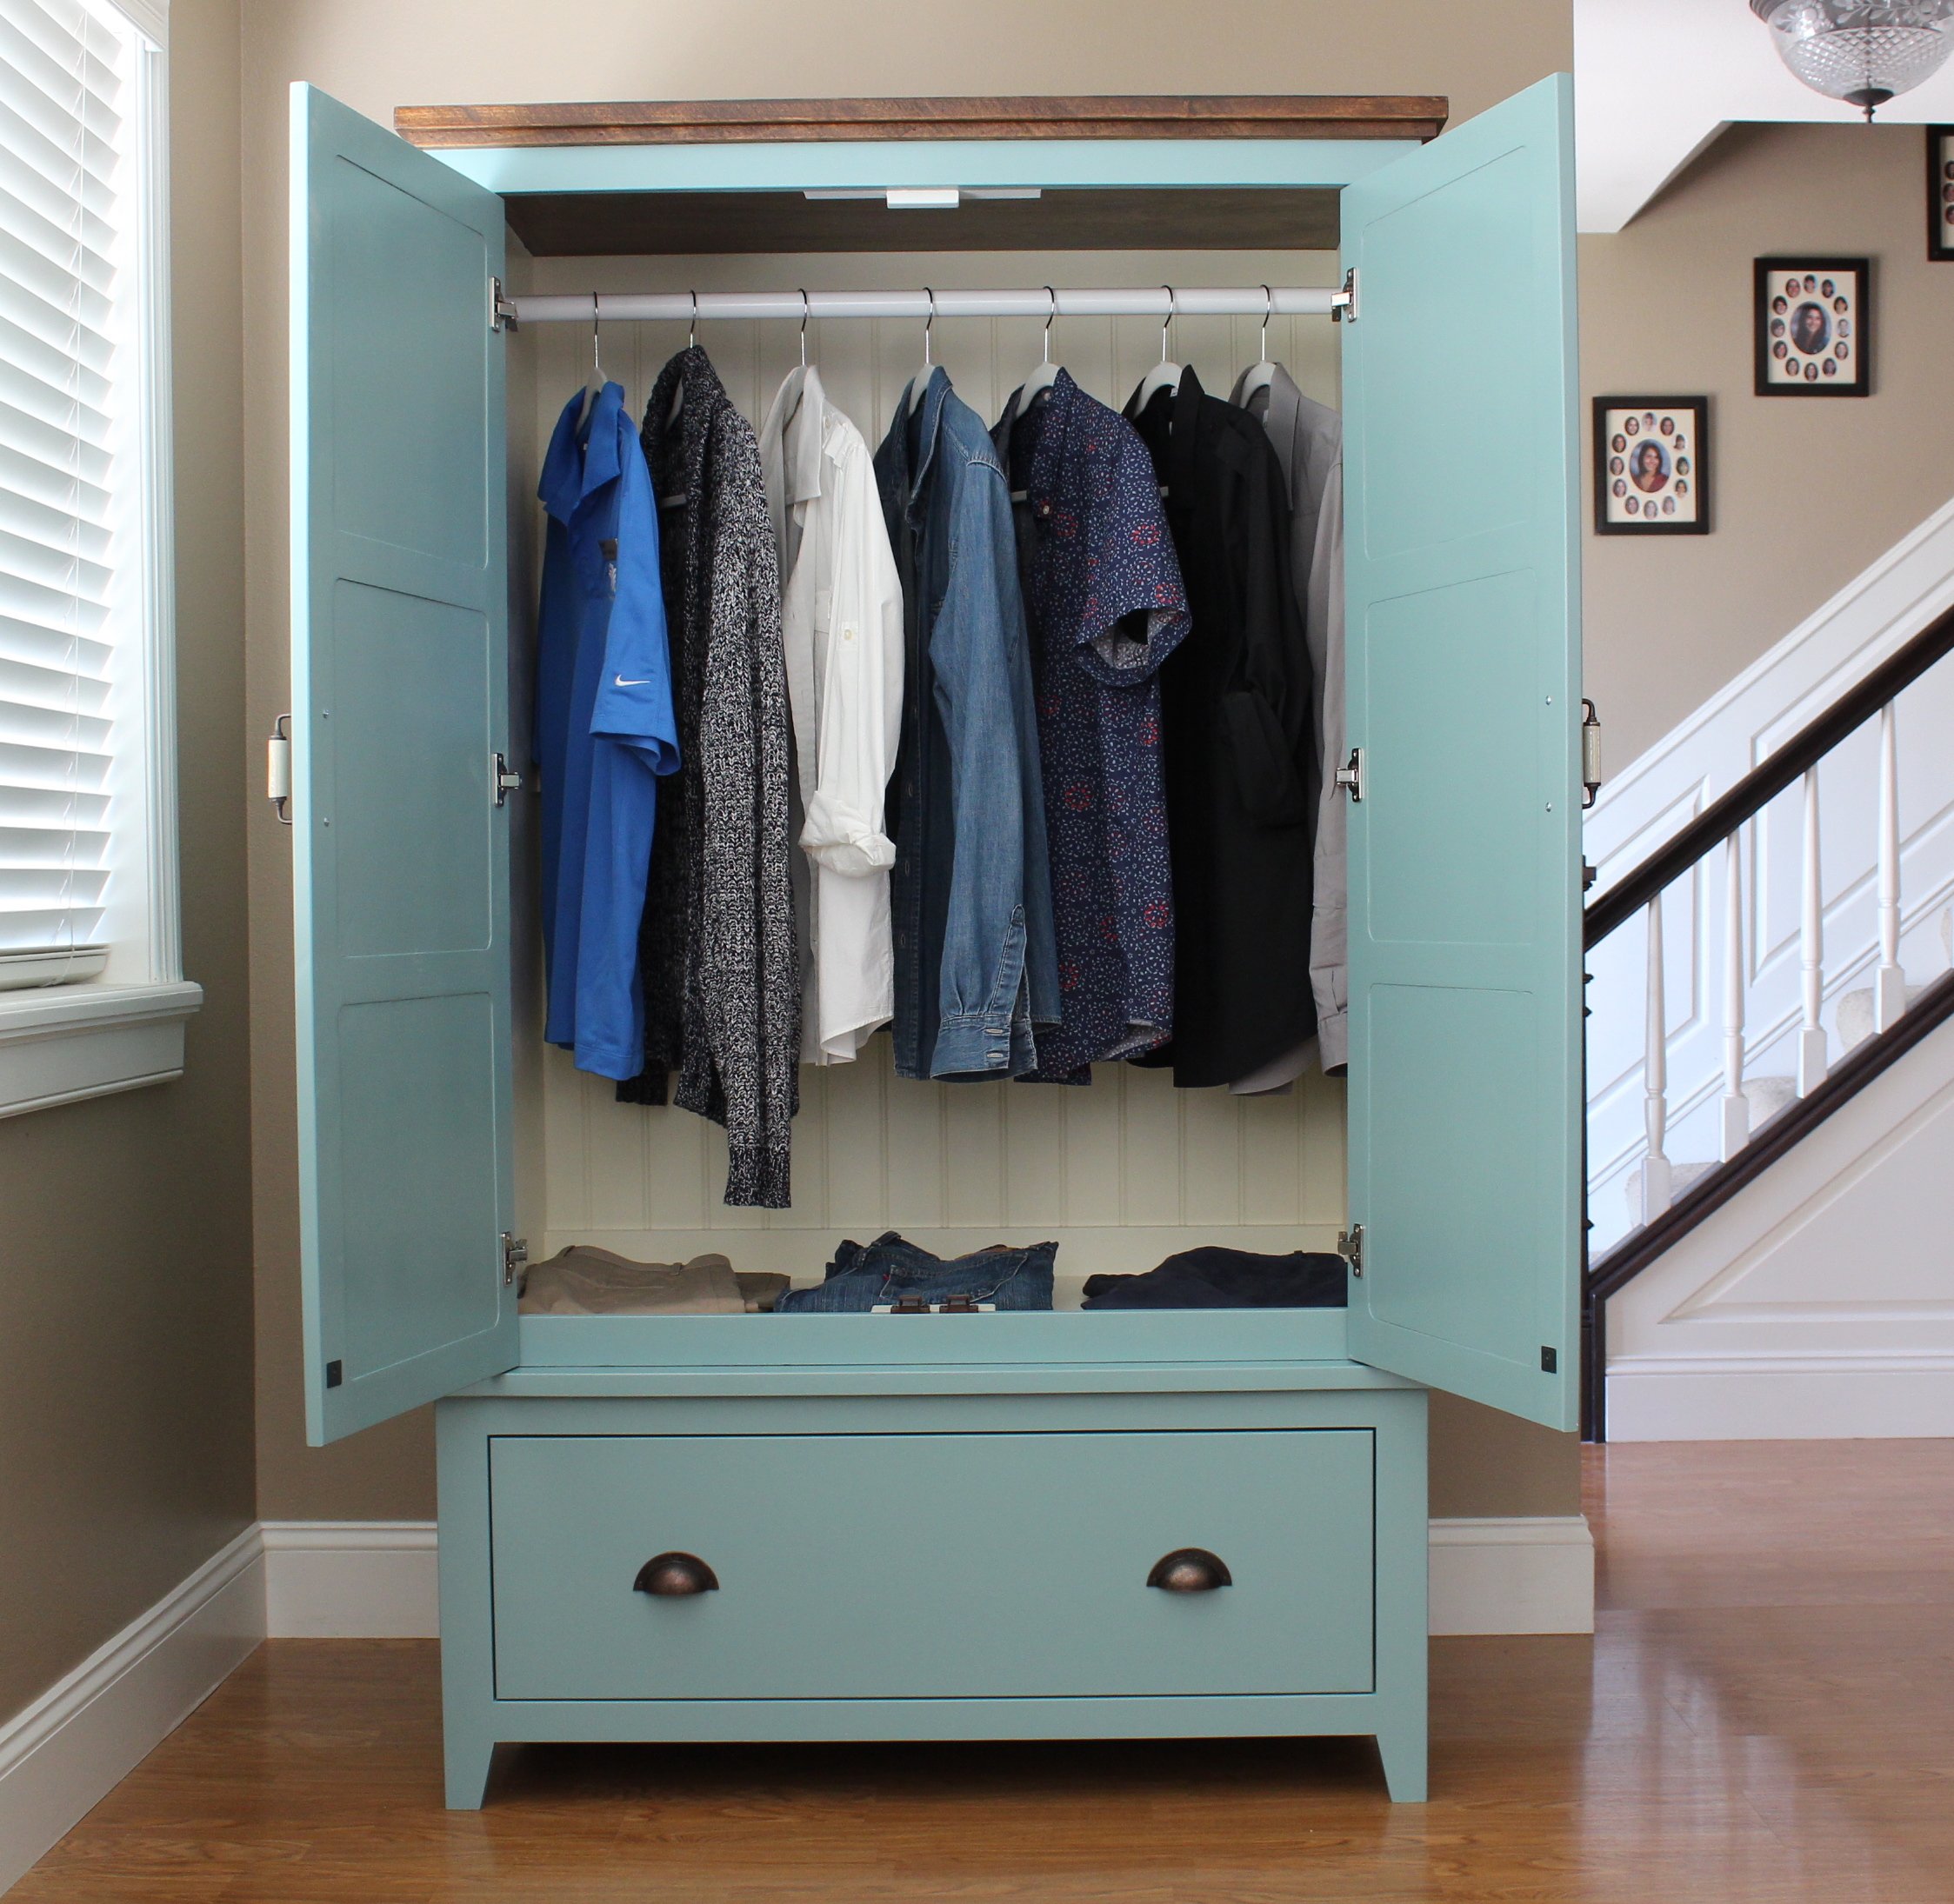
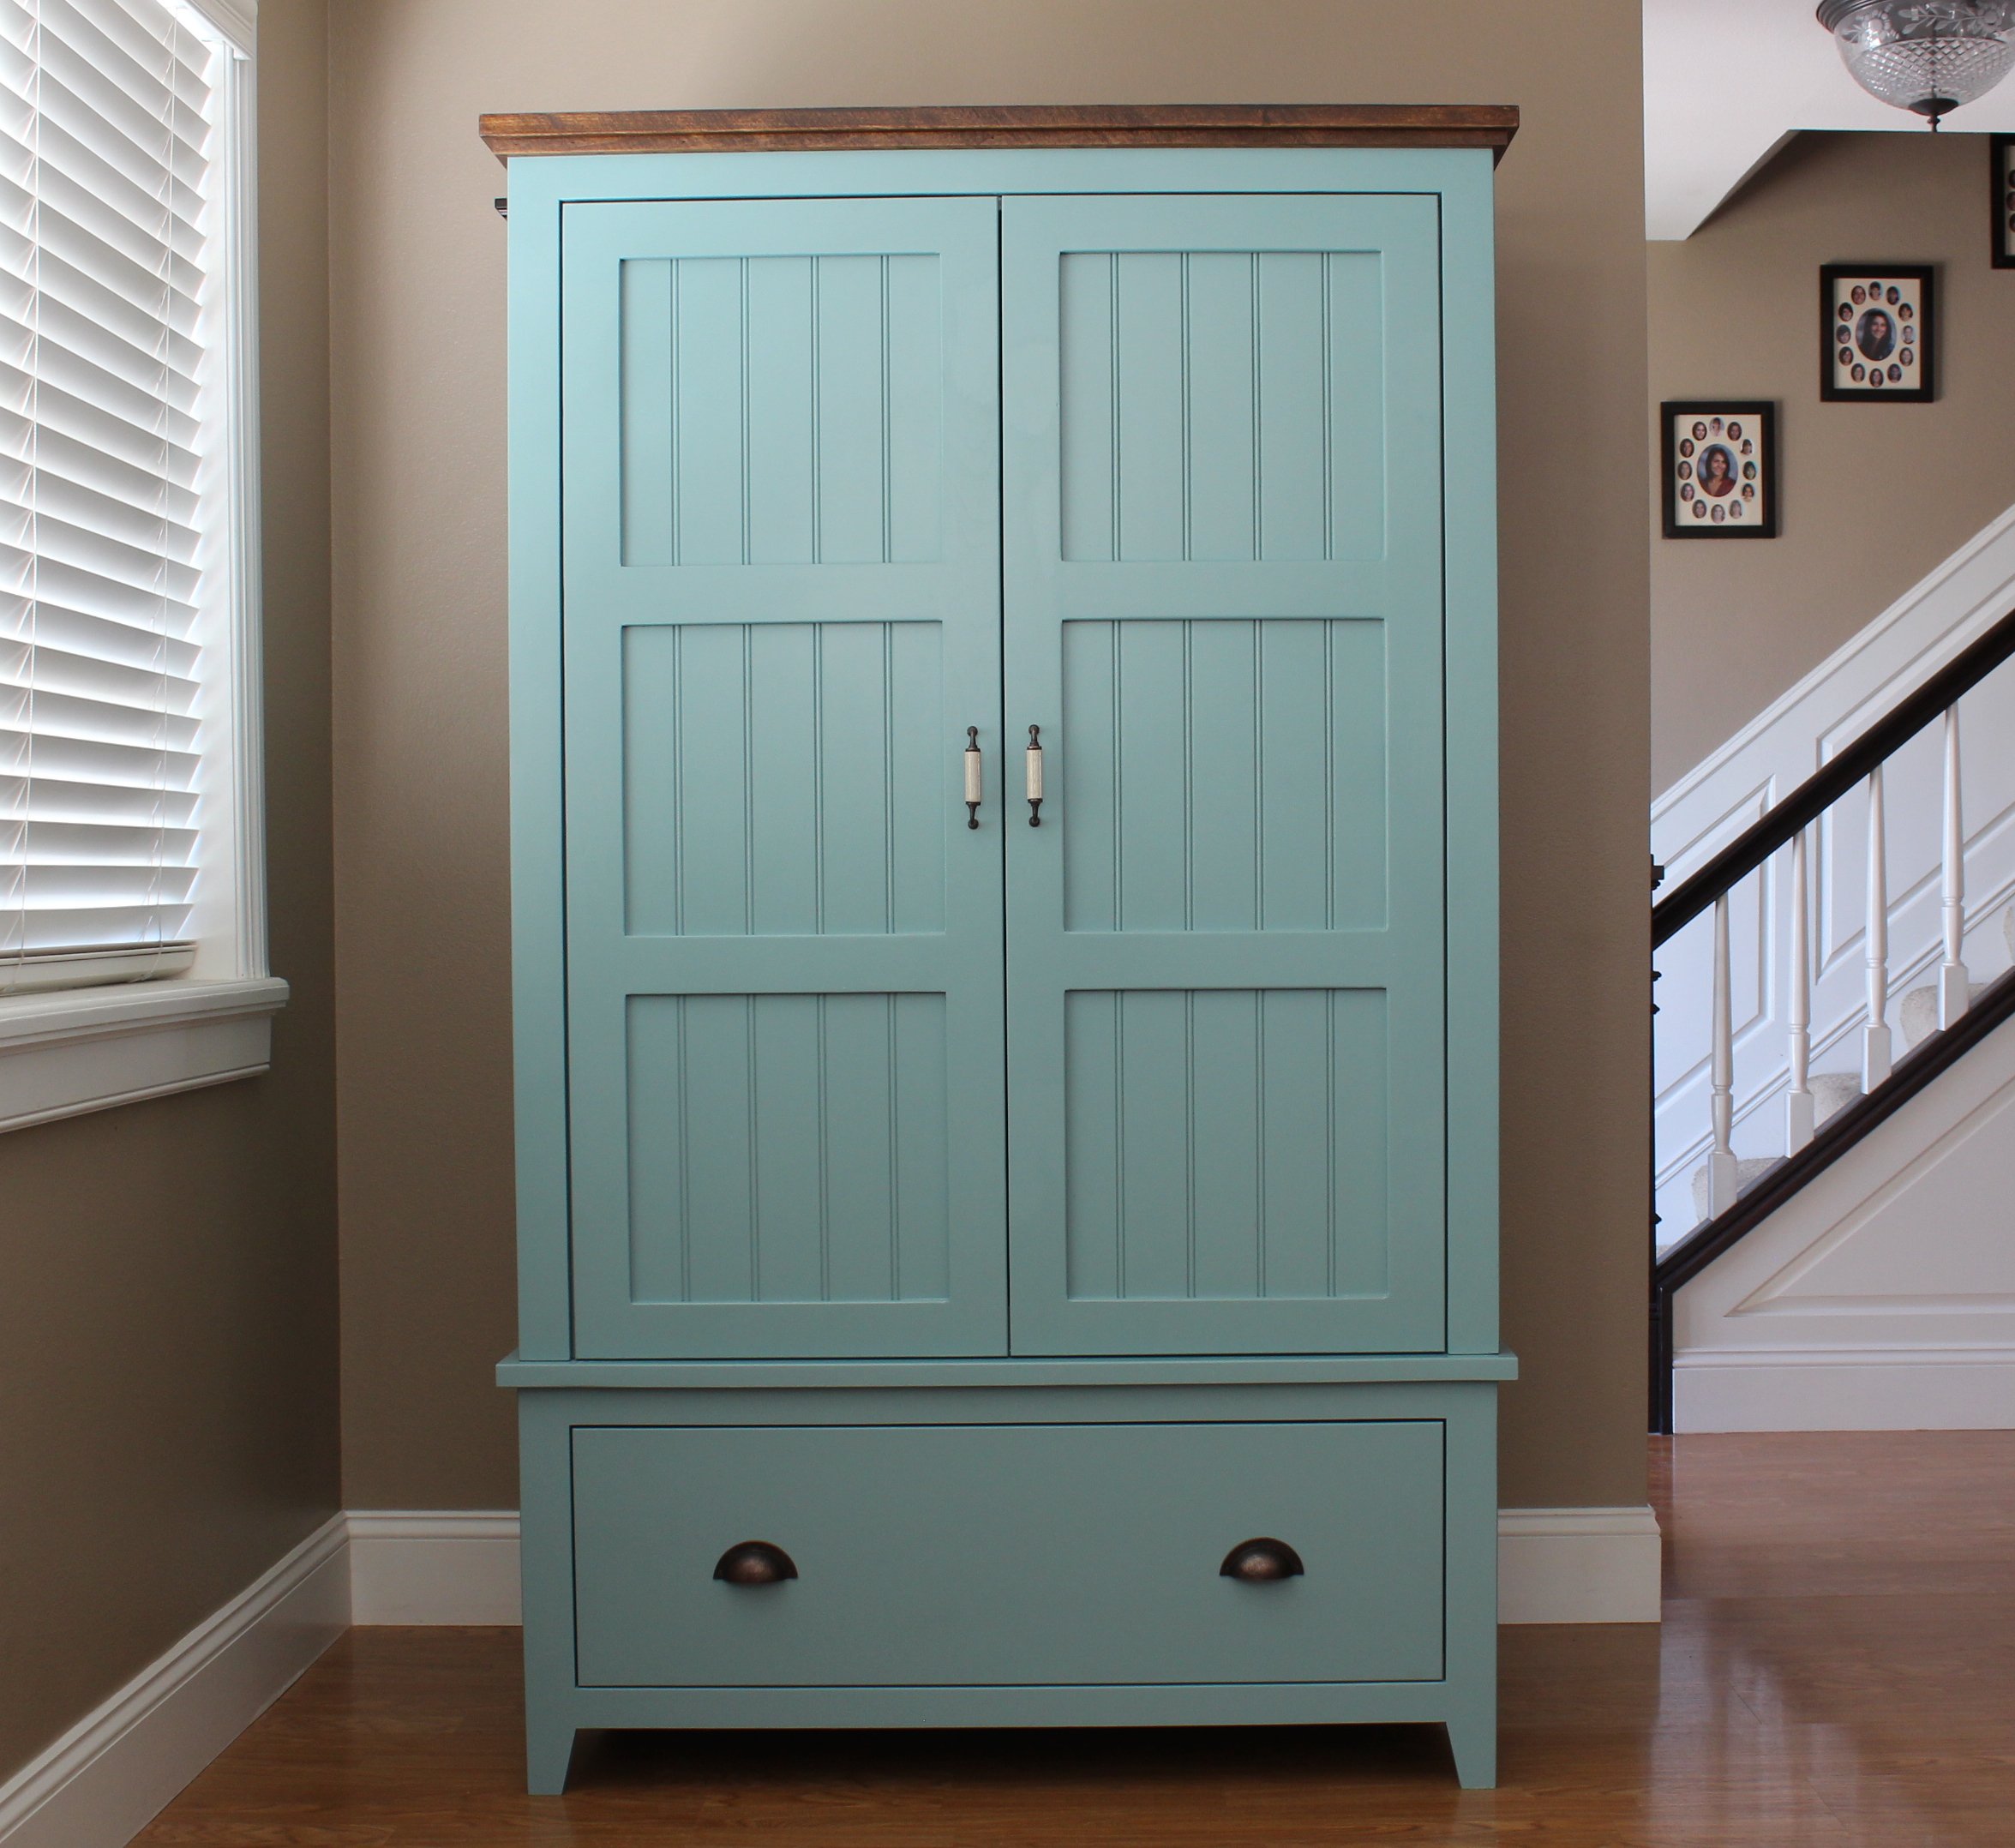
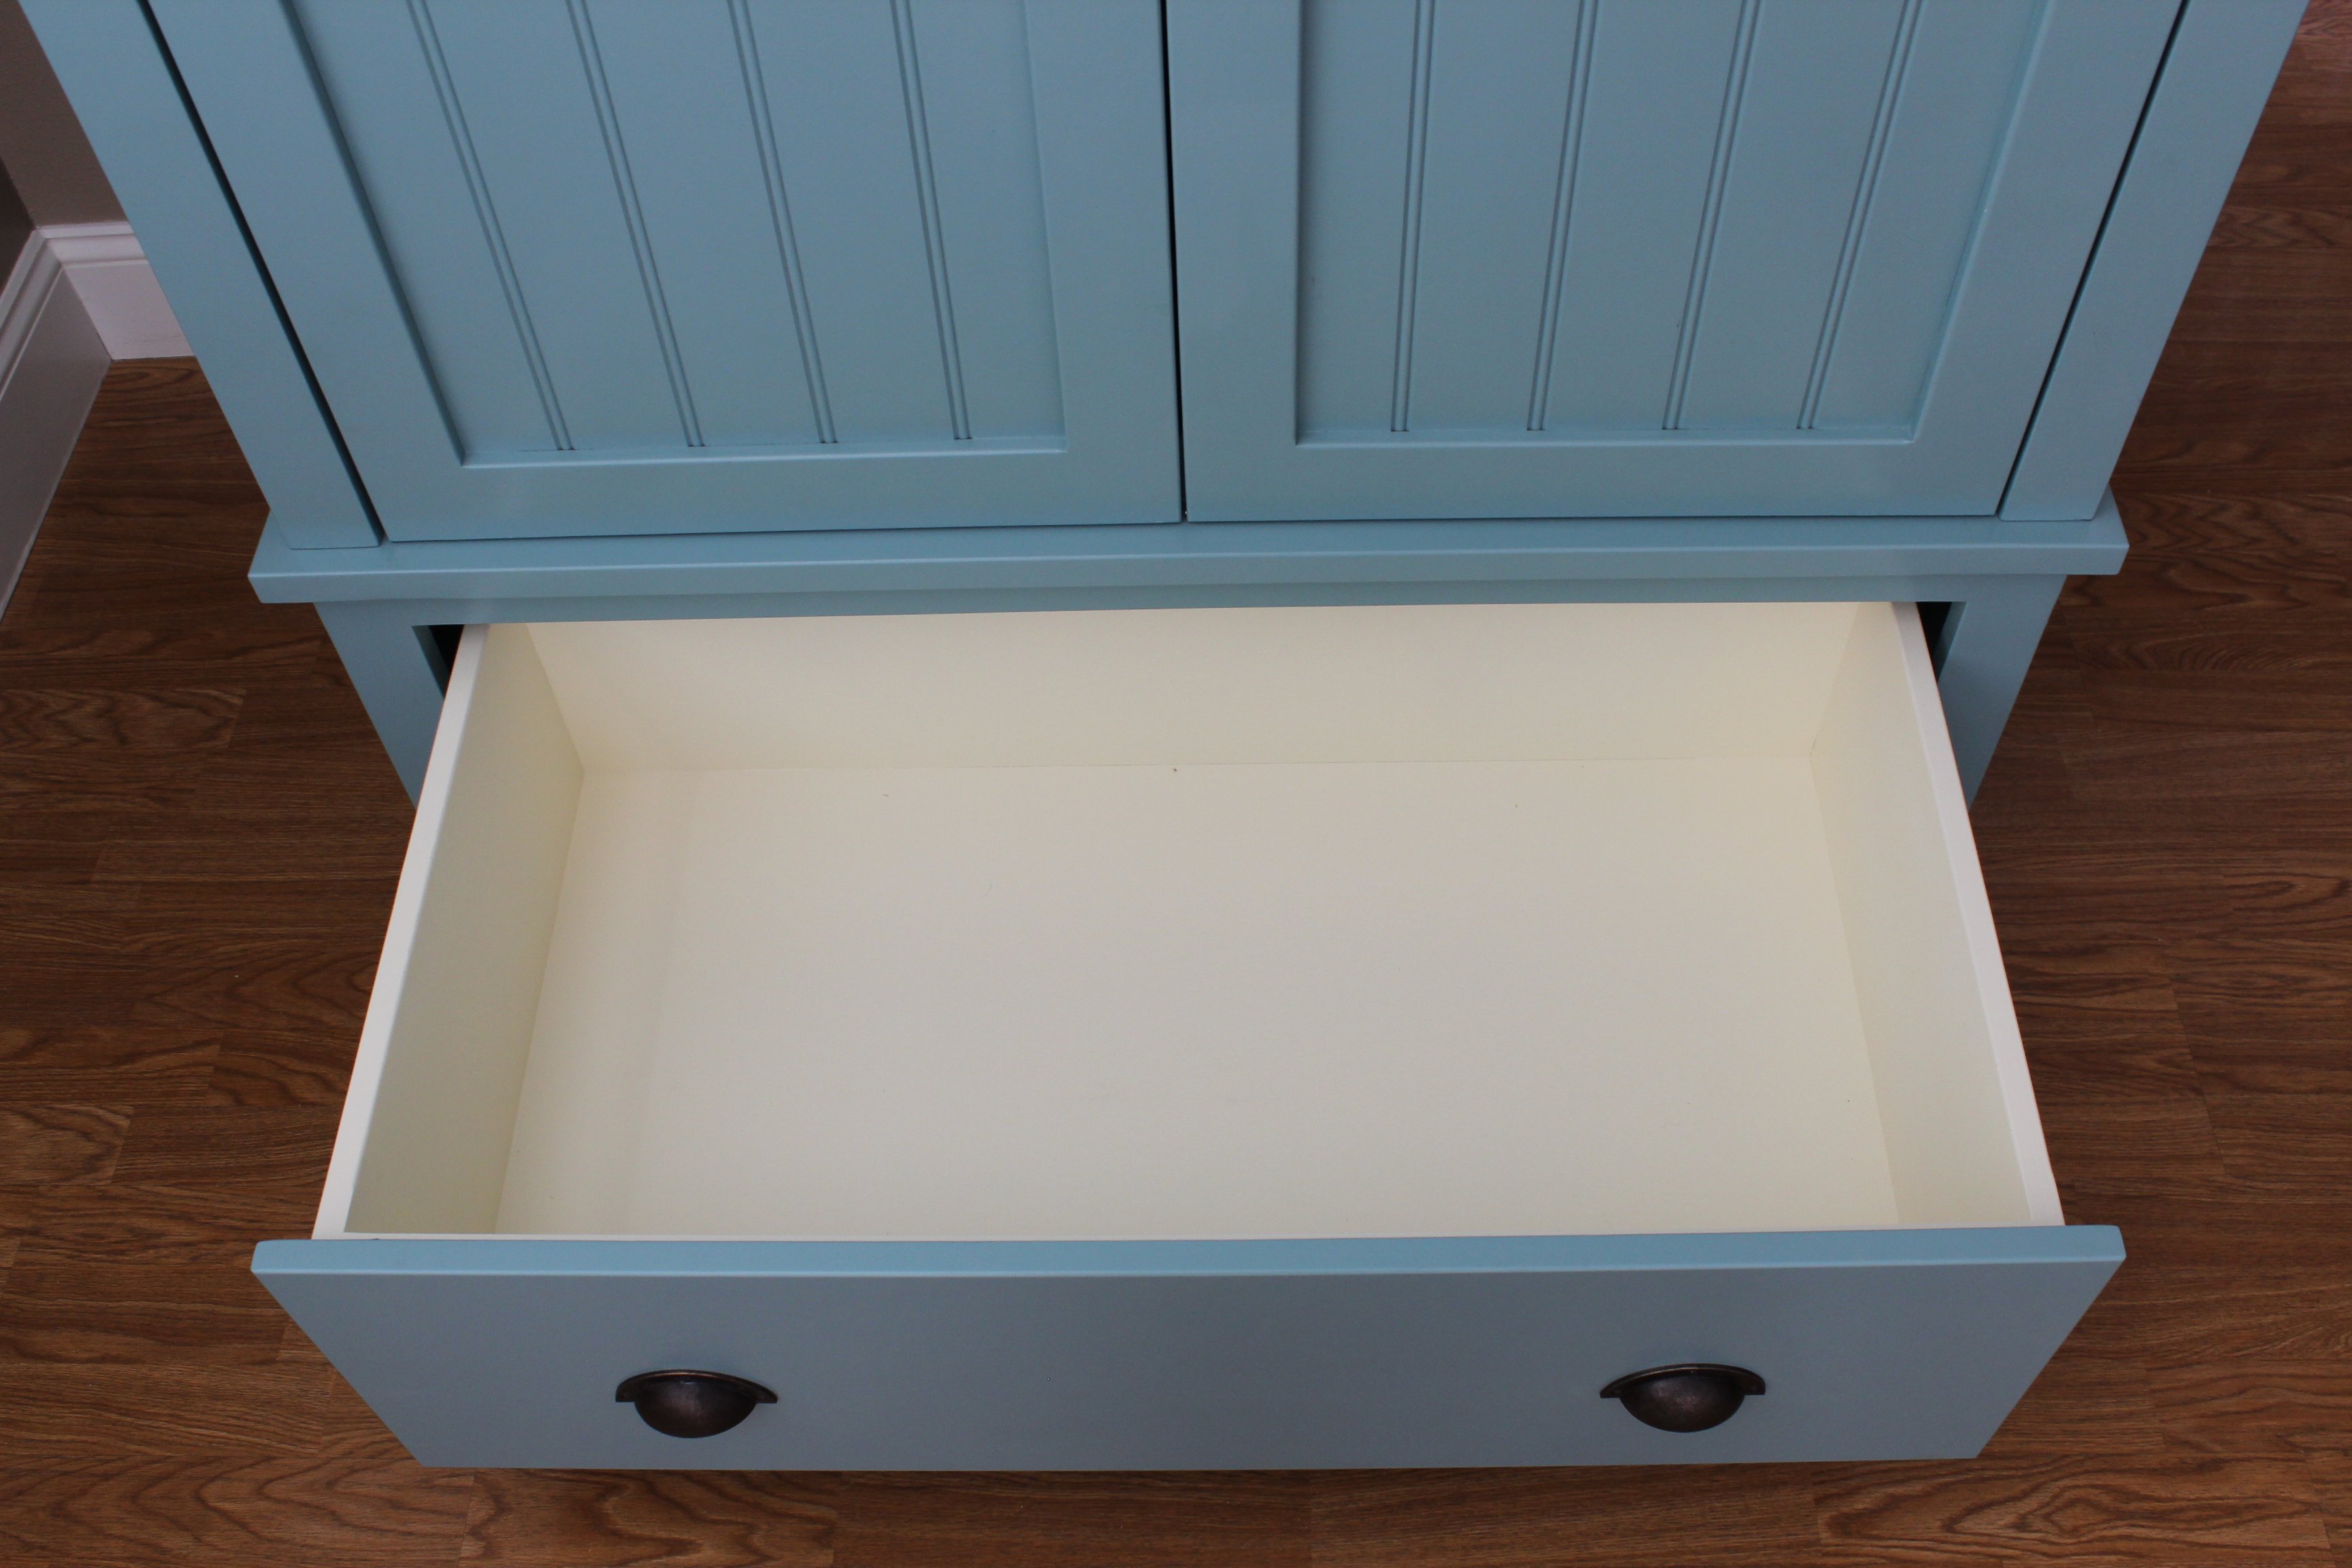
French County Wardrobe
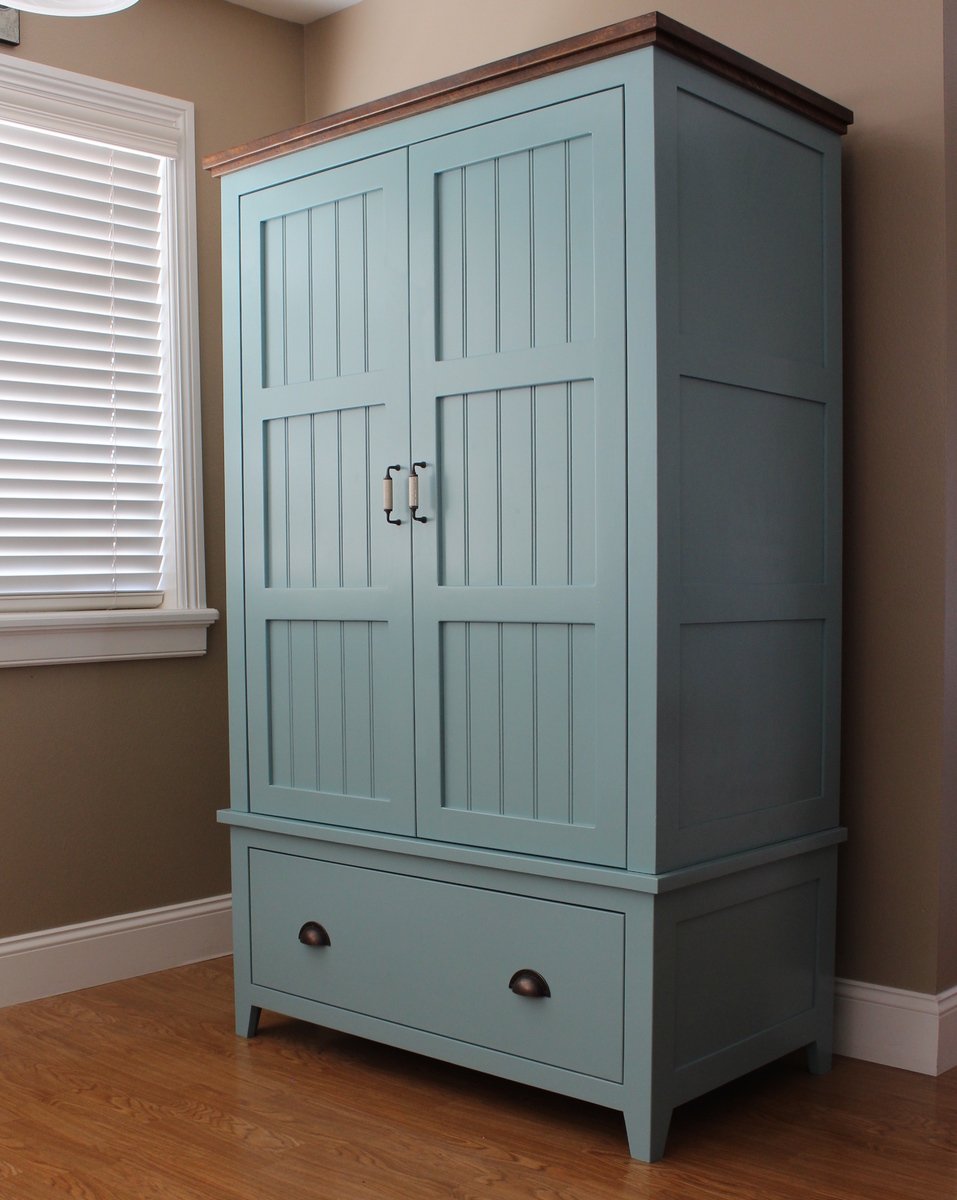
This is probably one of my favorite pieces I have built. Challenging but fun. I built it as two separate sections, an upper and lower cabinet to make it easier to carry indoors. I added a full-extension drawer below for storage. The two-toned paint combination did take a lot of extra time. Because I used an airless spraying to paint I had to tape and cover each section separately.

Built from Plan(s)
Estimated Cost
$300.00
Estimated Time Investment
Week Long Project (20 Hours or More)
Finish Used
Venus teal and creme brulee by Behr. Dark walnut stain for the top.
Recommended Skill Level
Intermediate
Comments

Fri, 03/06/2015 - 10:43
GREAT job !!!
WOW it looks awesome the extra time spent on the painting was more than worth it looks spectacular. I bet you also could make a great profit selling this Wardrobe either on line or in a consignment shop, if I had the need for one and the money I would defiantly buy one!!

Sat, 03/07/2015 - 18:55
I love all the attention to
I love all the attention to detail. Great job! I especially love the color selection. How did you achieve the look of the top stained piece?
In reply to I love all the attention to by handmadewithash
Mon, 03/09/2015 - 22:01
Hi Ashley,
Hi Ashley,
The top was built separate, stained, varnished and then attached to the painted wardrobe. :)
- Brad
Sun, 03/08/2015 - 07:36
Great job!
This looks awesome! I love the the paint finish and it your profession work

Mon, 03/09/2015 - 17:30
Beyond Beautiful
I agree this is your best so far...which is hard to say b/c all your projects are amazing! I love the style, the paint colors, the stained top, and the hardware!
In reply to Beyond Beautiful by TwoCuteKids
Mon, 03/09/2015 - 22:02
Thank you so much! :)
Thank you so much! :)
Sat, 03/19/2016 - 15:06
Any plans or sketches?
It looks really great!
I have fallen in love with it the second I saw it and somehow I am now convinced that I need a new wardrobe ;)
I guess you don't have plans for the wardrobe laying around - but would you mind doing a fast sketch (just a simple one on paper) with all the measurements noted? I would be thrilled to try building it myself in the summer.
Greetings from Germany!
Sat, 03/19/2016 - 15:07
Any plans or sketches?
It looks really great!
I have fallen in love with it the second I saw it and somehow I am now convinced that I need a new wardrobe ;)
I guess you don't have plans for the wardrobe laying around - but would you mind doing a fast sketch (just a simple one on paper) with all the measurements noted? I would be thrilled to try building it myself in the summer.
Greetings from Germany!
Tue, 07/18/2017 - 05:43
Links to plans??
Are there plans used for this beautiful piece? I do not see any links. Help please!! I absolutely need to make this armoire :) :)

Fri, 01/03/2020 - 08:09
Anyway I can get plans for…
Anyway I can get plans for this beautiful piece?
Mon, 01/03/2022 - 05:53
Plans to Build French Country Wardrobe
Love this wardrobe! Are there plans available to build it?
Thank you.
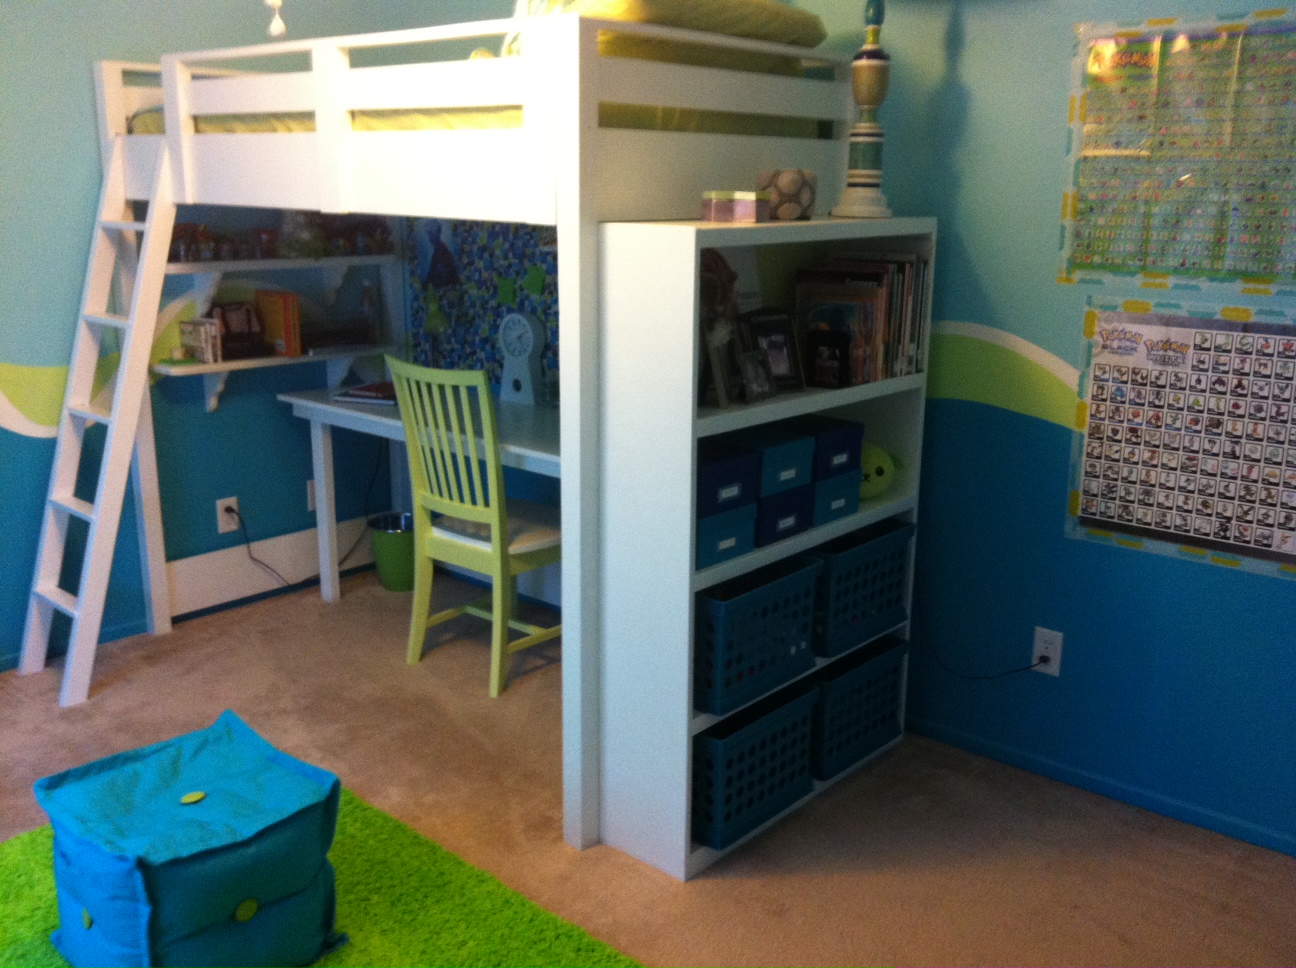
Chelsea Loft
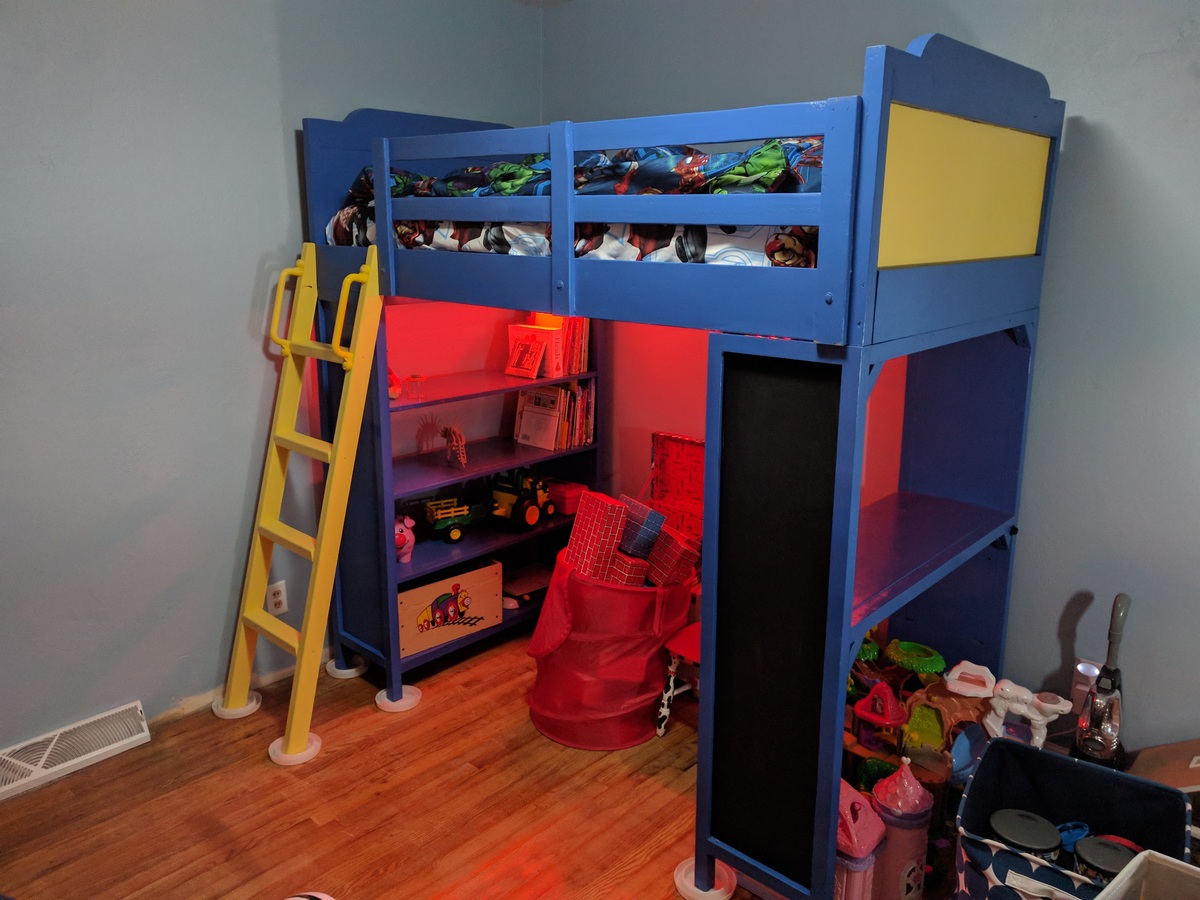
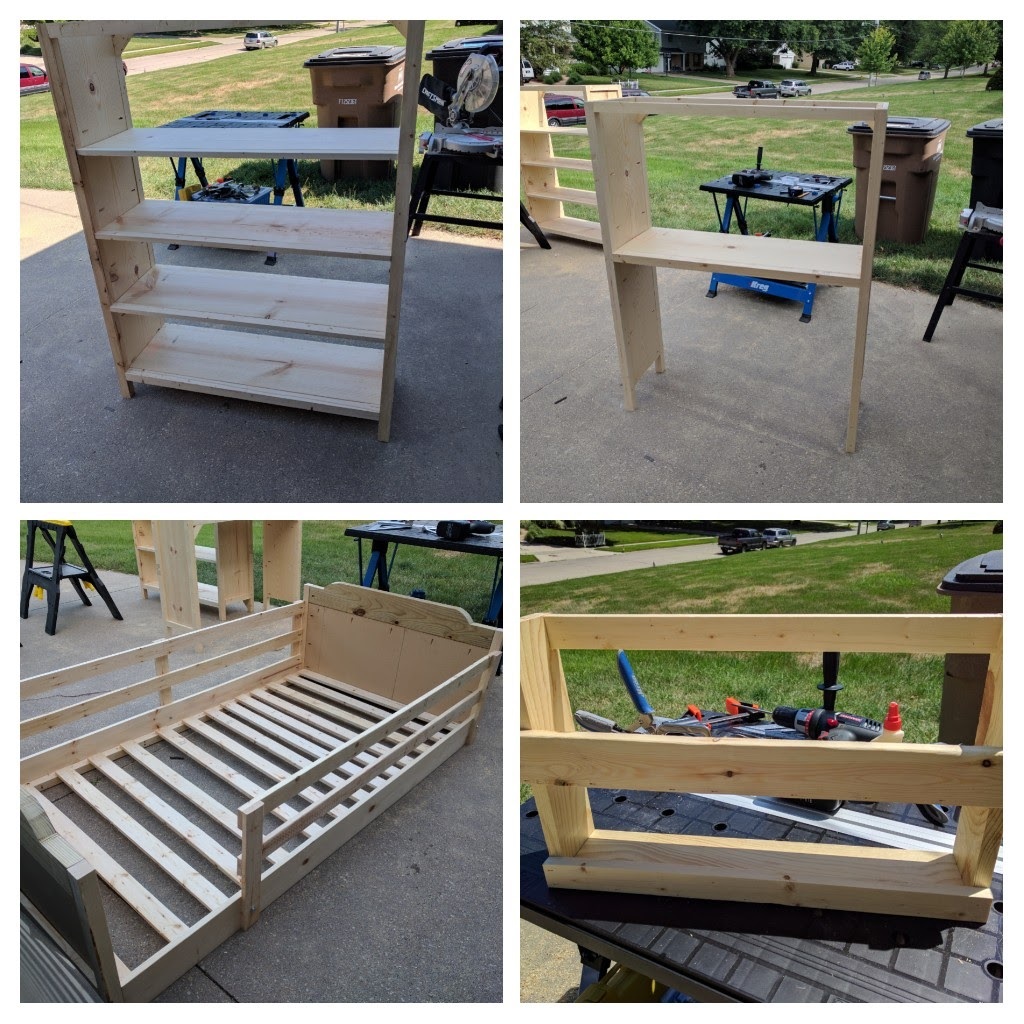
Wanted to make a loft bed for my 4-year-old son's room that could accommodate a toddler bed beneath it for when my 1-year-old daughter eventually starts sleeping on her own. I was torn between the Chelsea and Cabin bed plans, but eventually settled on the Chelsea because I liked the look of the headboard better.
I looked through all the brag posts to get modification ideas. I ended up mostly stealing ideas from "chadwickstafin", and like him took the great idea from "groovymom2000" to use chalkboard paint (though I only used it to paint the side of the desk end, since I knew the bookshelf end would be mostly blocked by a ladder). I decided to skip the decorative feet and just extend my 2x2s to the floor for extra strength, a mod that most people appear to be doing with this plan. I saw some people using 2x3s in place of 2x2s for added strength, but I can confirm that 2x2s are plenty strong enough on their own (2x2s are stronger than people give them credit for, and there's 8 of them here to distribute the load).
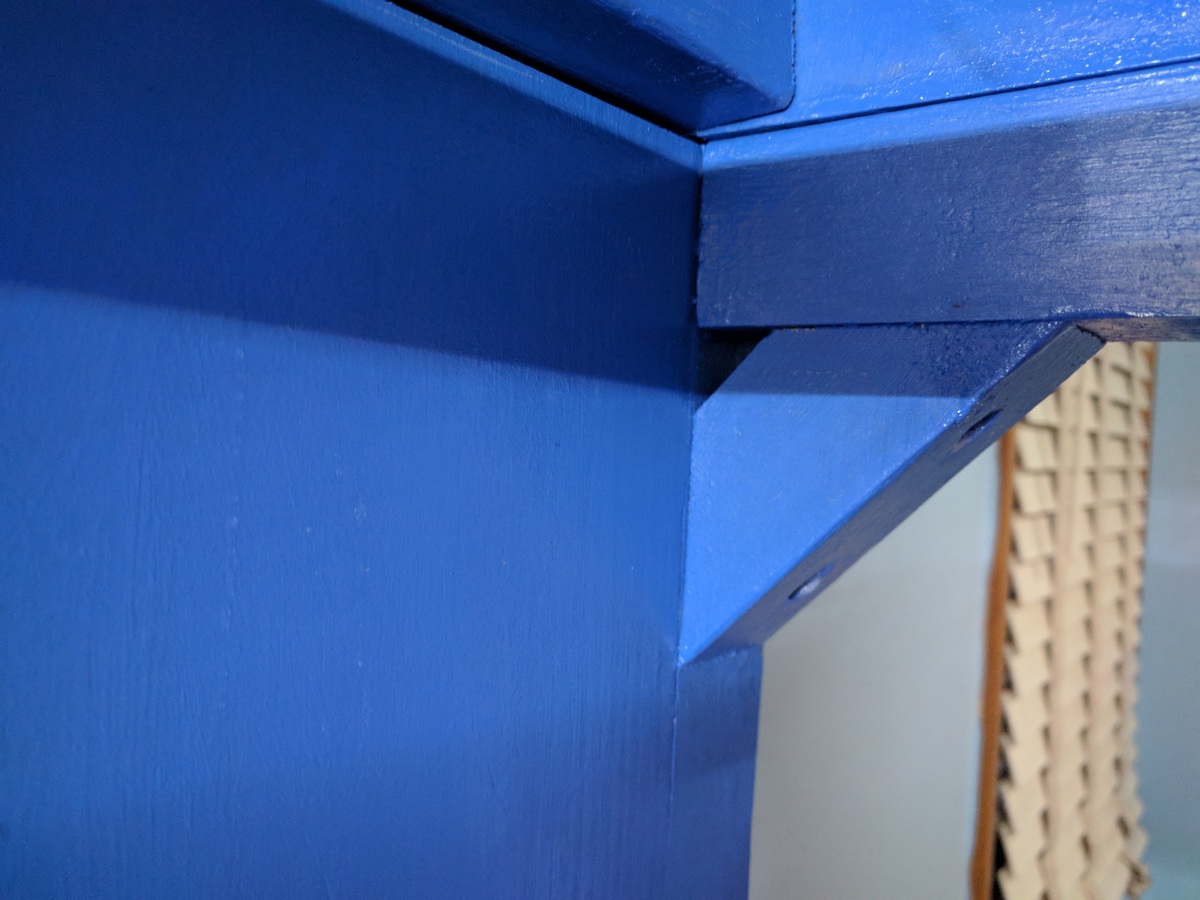
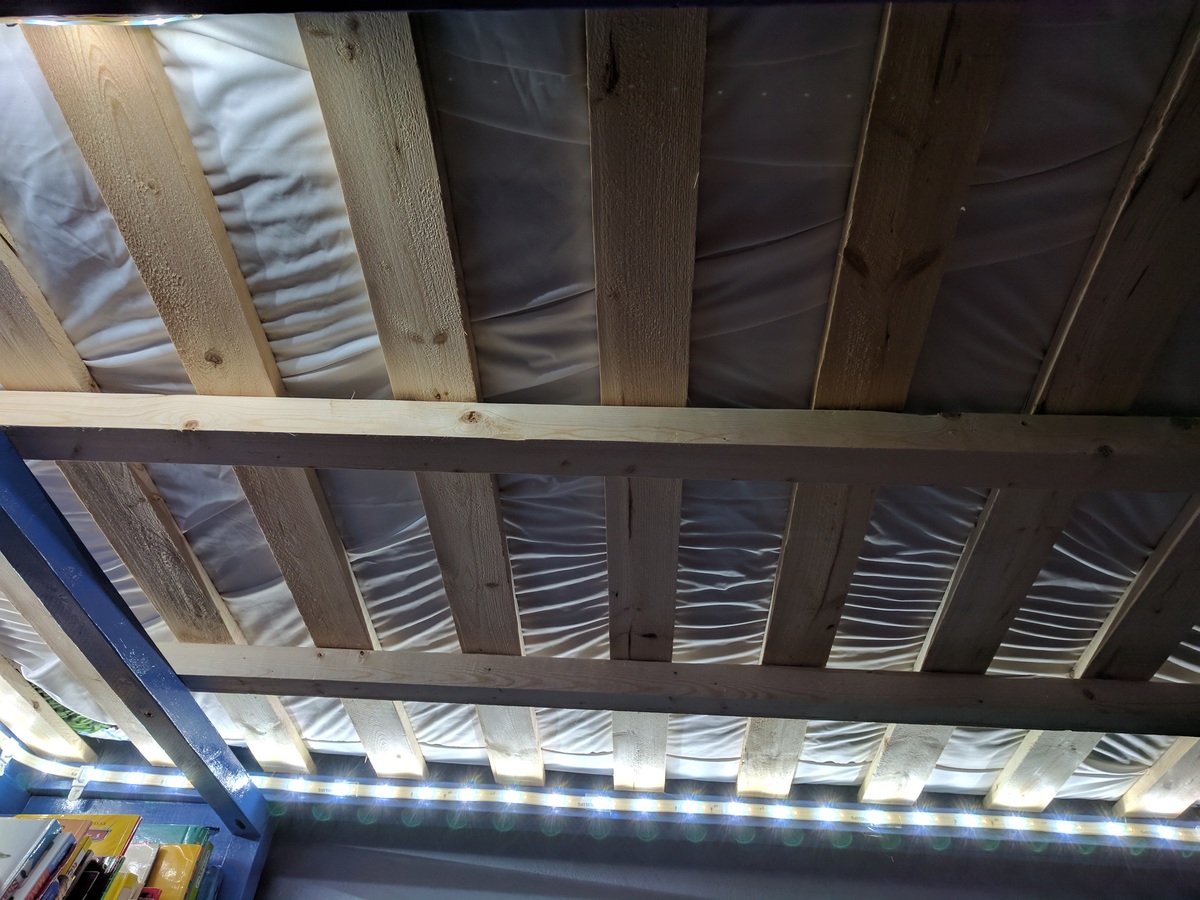
Like chadwickstafin, I cut my headboard a little differently, and I used short lengths of scrap 2x2s cut at 45-degrees to brace the top and bottom corners of both end units. There is no wiggle to the bed at all, it's stabilized so well. I also added a middle support to the short rail, just for a little extra safety, and secured the inside ends of the railings to the headboard/footer with pocket screws. I skipped the filler pieces for the railing, and just did a little extra sanding to make sure all exposed corners were smooth and splinter-free. I made the opening to the bed a bit wider than the plans, 15" instead of 13". I used 2x3s for the ladder, which gave me the sturdiness I wanted without the full bulk of using 2x4s, which looked especially chunky next to a loft unit made with mostly 1x boards. I played with some different angles, but eventually went with a 15-degree ladder. There were some leftover plastic handles sitting in my garage (originally from an outdoor playset ladder before I replaced it with a climbing wall), so I added those near the top of the ladder for some extra safety. I put some color-changing strip lighting under the bed, so there would be plenty of light for the desk and bookshelves (my little guy loves to just plop down on the ground beneath his bed and read).
I spaced the 1x3 slats about 3.5" apart (used scrap 2x4 blocks as spacers). Because my wife or I will lay in bed and read to our son at night, I easily added a couple 2x2 support rails under the 1x3 slats for extra mattress support. I'm a big dude at 6'3 and 250 lbs, and the slats alone WERE strong enough to hold me when I did a test, but they bowed just enough in the center (unnoticeable to me up on the mattress, but I had my wife watching the slats for me below) that I felt I should add a bit more support. Now there's no bowing at all.
I also used Ana's Top Bunk Organizer plans to give my son a little extra storage up top (and a place to set a glass of water during the night), and painted it to match the bed's color scheme. Everything was sanded, painted, sanded again, repainted, and then given a couple coats of polycrylic (the painting process took longer than the cutting & assembly!).
Cost-wise I was extraordinarily lucky. We have a Habitat For Humanity ReStore near us, so I was able to get my paints and a 3x6 sheet of MDF for $15 total. I also had some rebate cards from Menards (regional hardware store, similar to Lowes or Home Depot), plus happened to go there on a week when pine wood was on sale, so I got all my lumber for less than $60.
I could not be happier with the end results, and my son absolutely loves his new bed.

Built from Plan(s)
Estimated Cost
$100
Estimated Time Investment
Week Long Project (20 Hours or More)
Finish Used
PPG Speedhide semigloss paints, Minwax Polycrylic finish
Recommended Skill Level
Intermediate
Built in bookcase with lights

Built in bookcase with lighting and power outlets in cupboards for audio and DVD equipment to feed to the wall mounted tv (to the left).
The photo with the lights is when it was unfinished and I also decided that I didn't like the inset doors and so made new overlay ones. Now I have four doors I need to use on another project...


Estimated Cost
$1000
Estimated Time Investment
Week Long Project (20 Hours or More)
Finish Used
Sherwin Williams Pro Classic Extra White Satin.
Recommended Skill Level
Intermediate
Comments
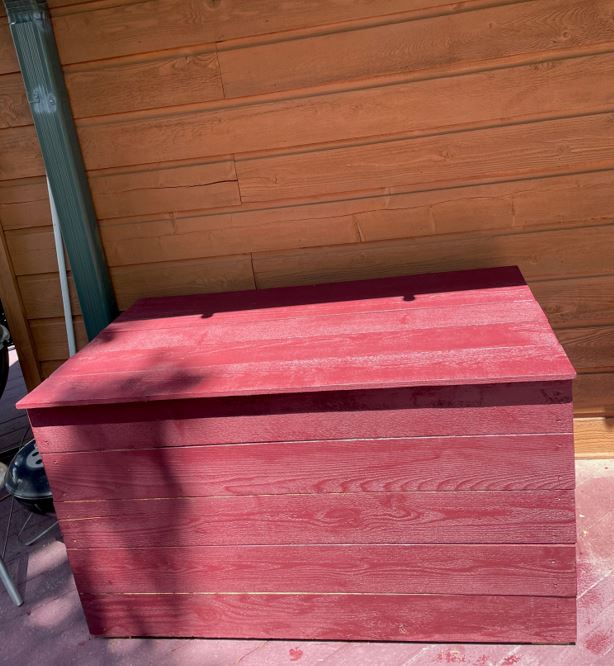
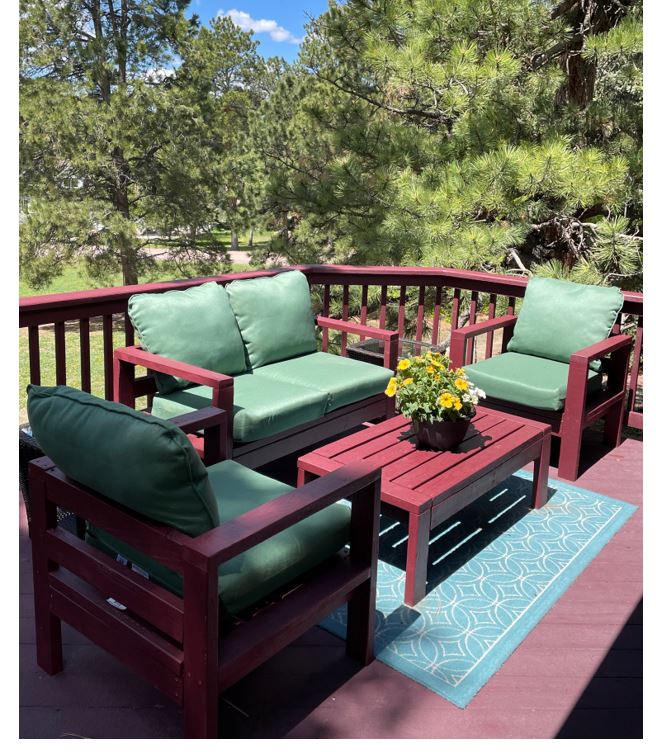
Modern Cedar Outdoor Storage Bench
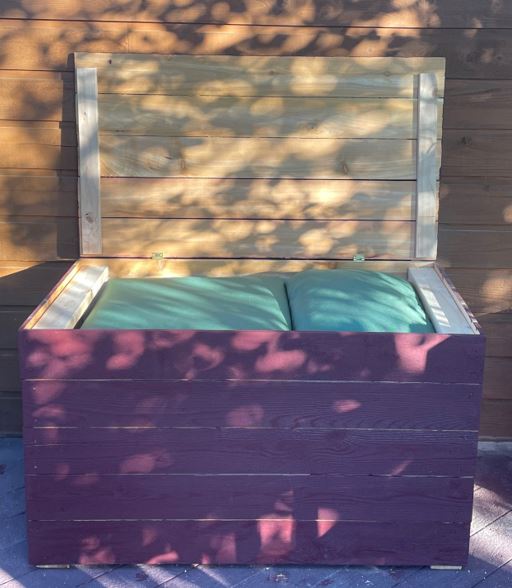
I had built two outdoor chairs with love seat (modified from the sofa plans) with 2x4s. The cushion seats were 24" x 24". Where to store them? I modified the Modern Cedar Outdoor Storage Bench plans to make the box wider, higher, longer to accommodate the cushions. With five boards comprising the top, it's a bit wider than the box so I didn't need to carve in an opening.
Built from Plan(s)
Comments
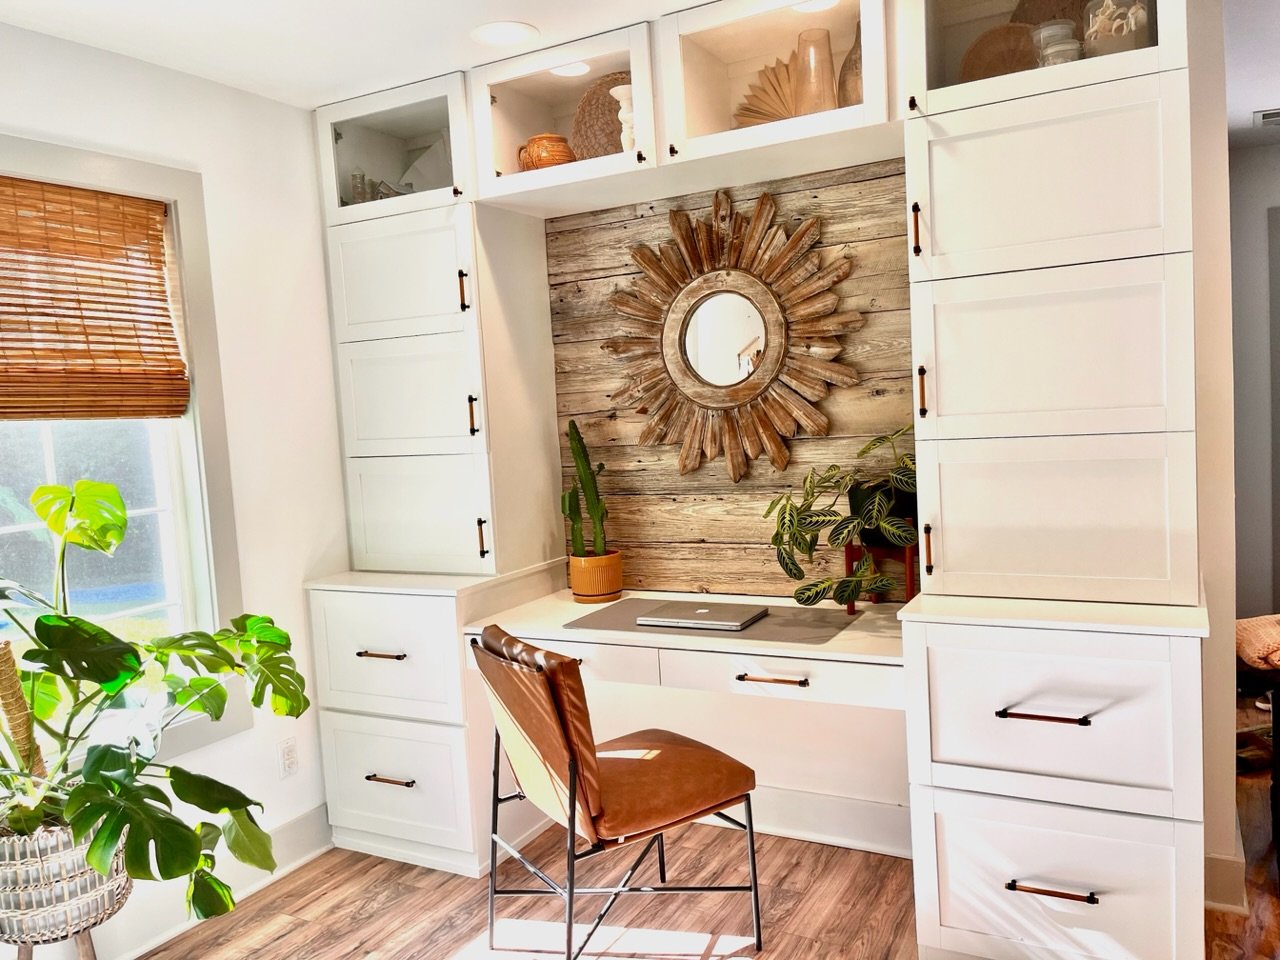
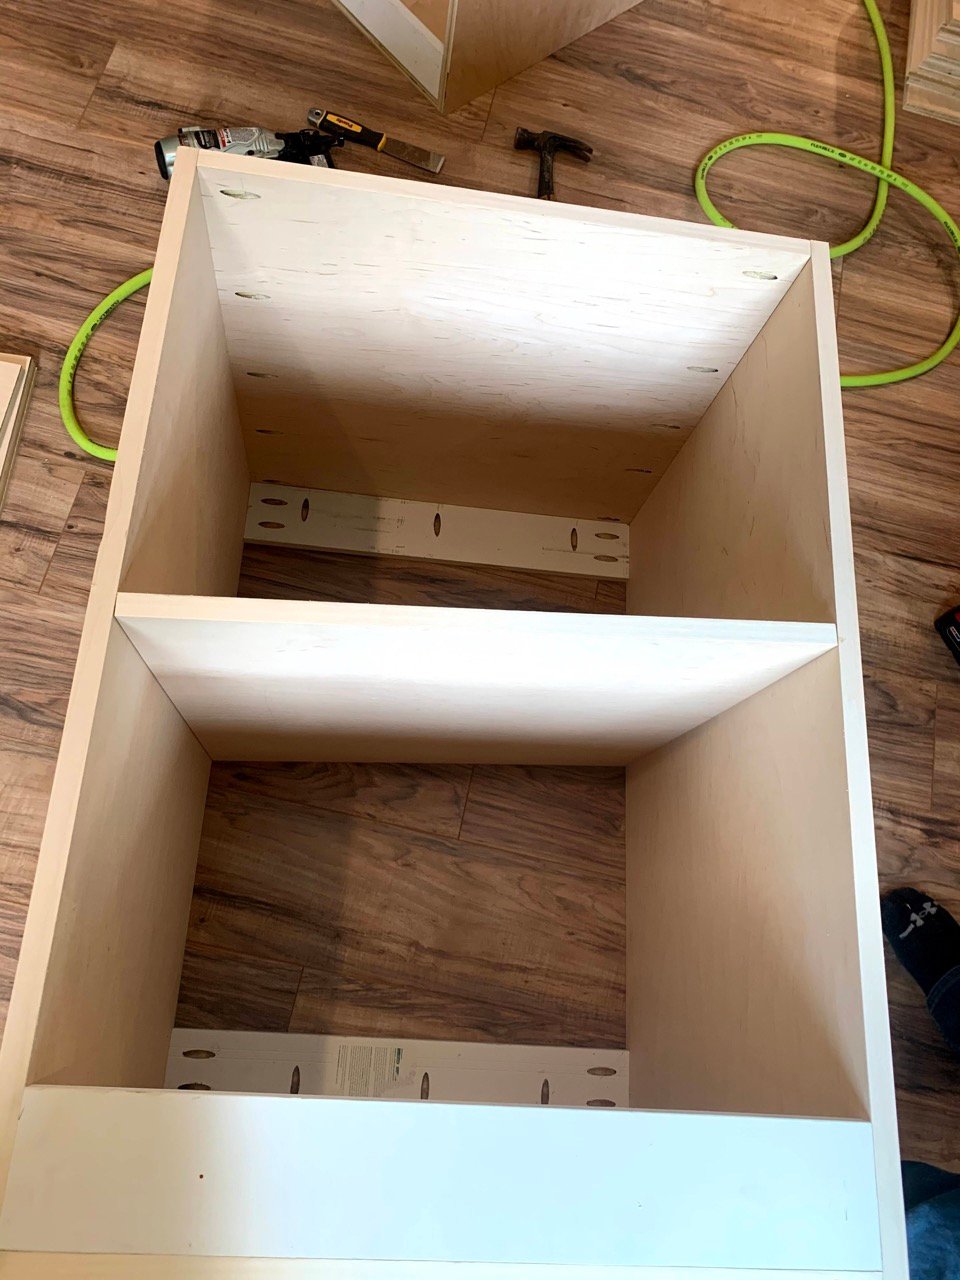
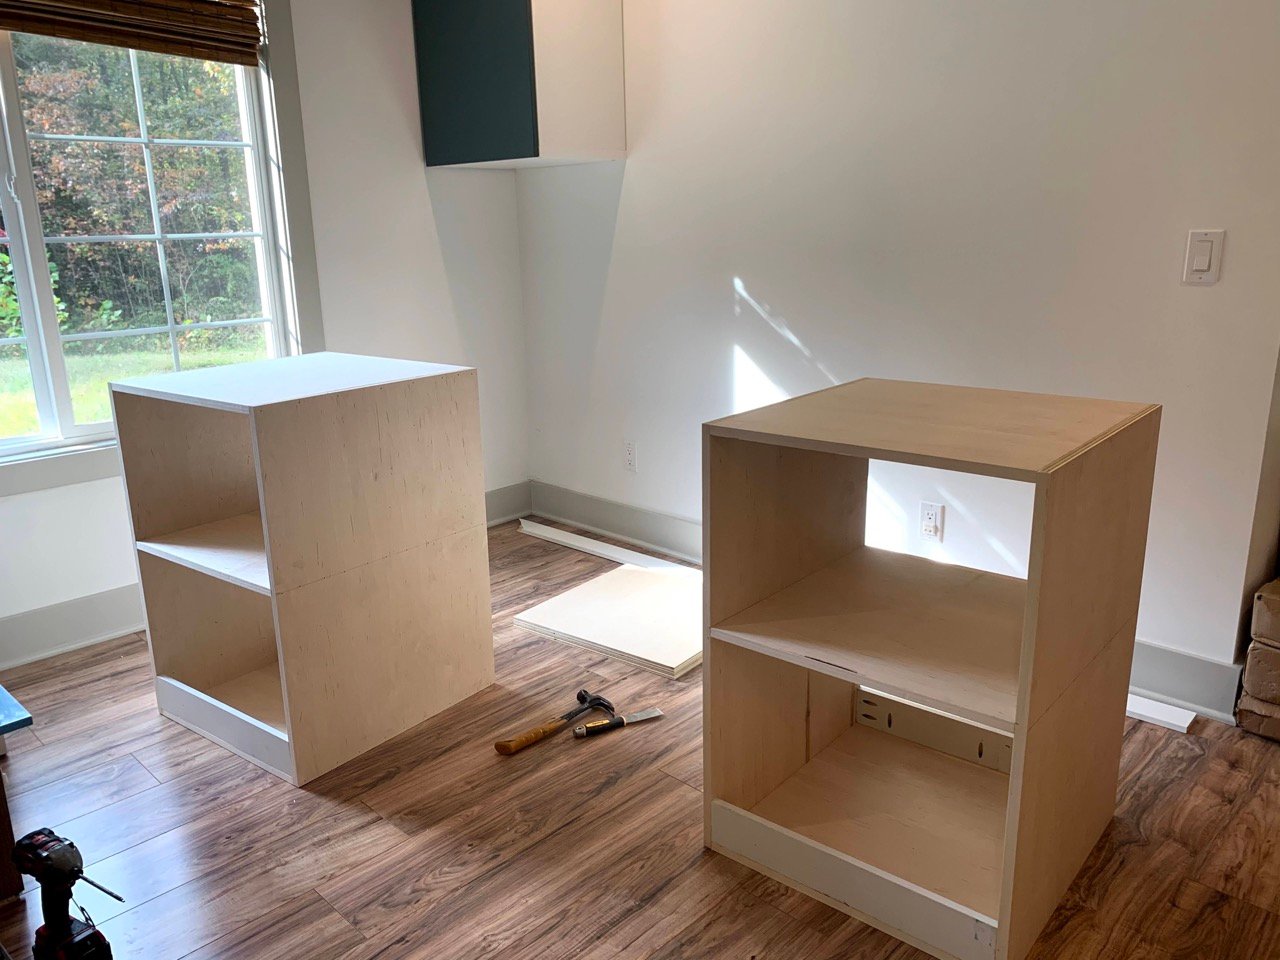
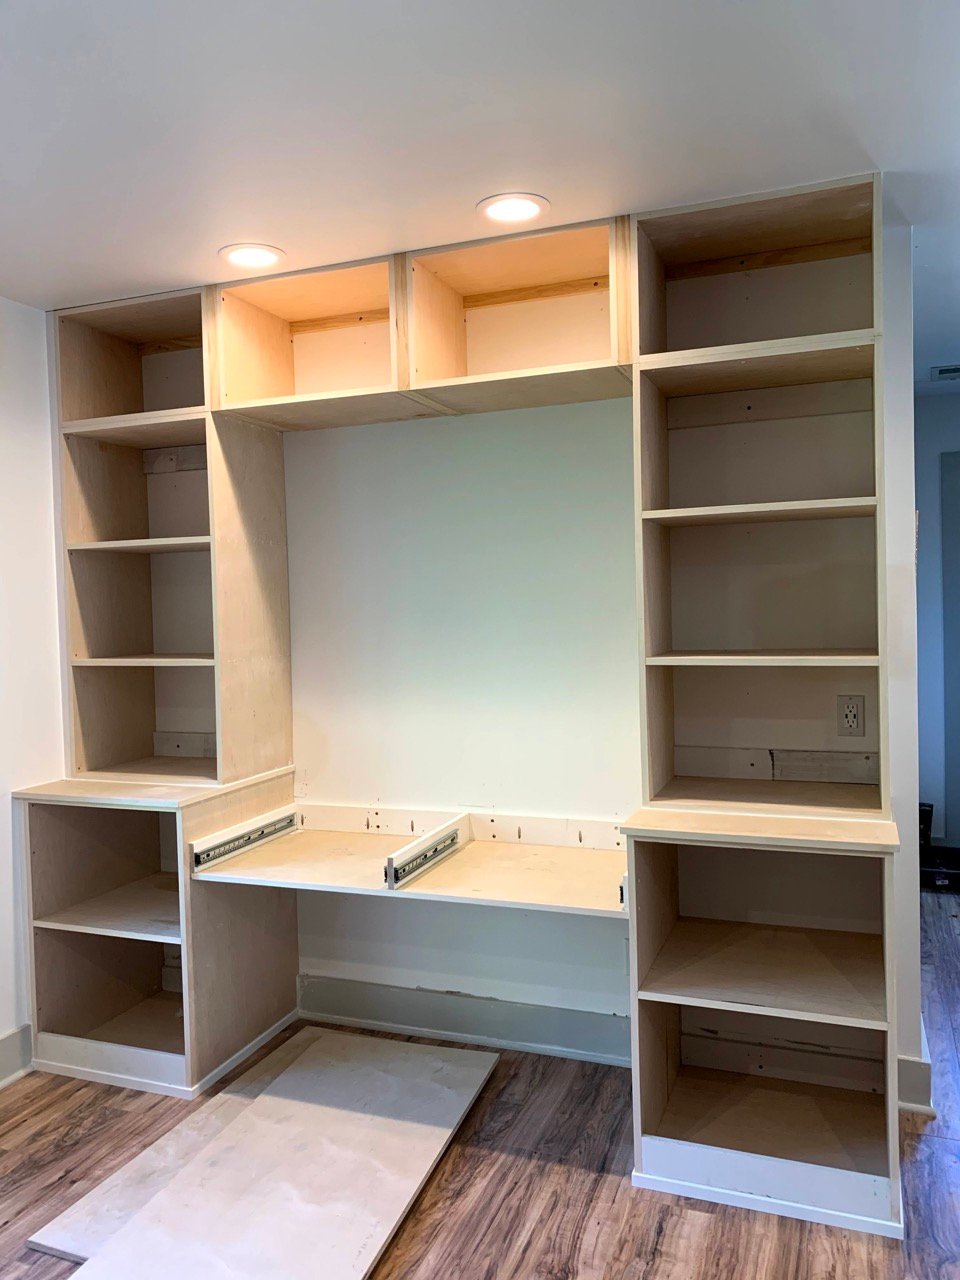
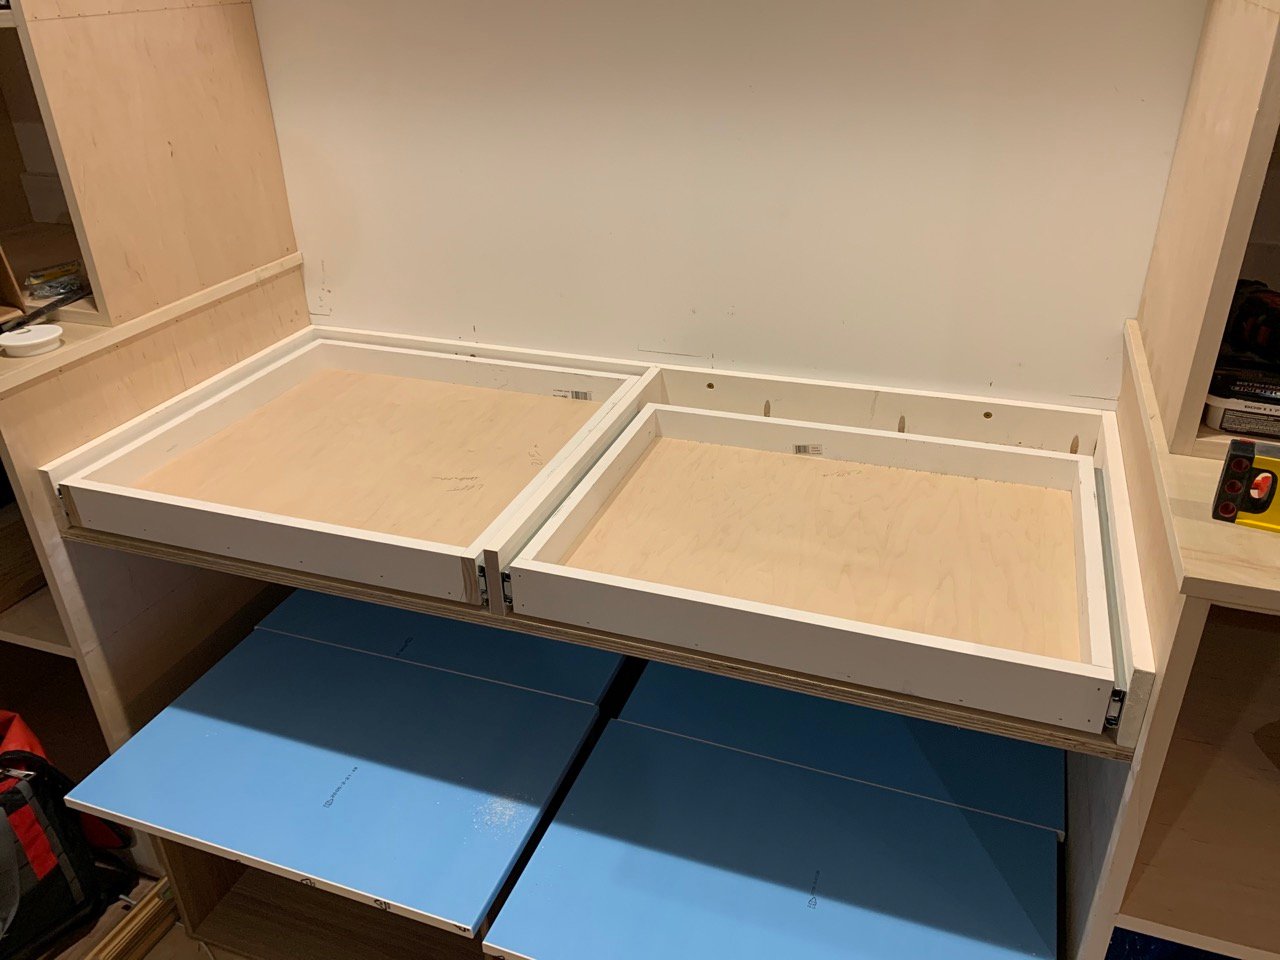
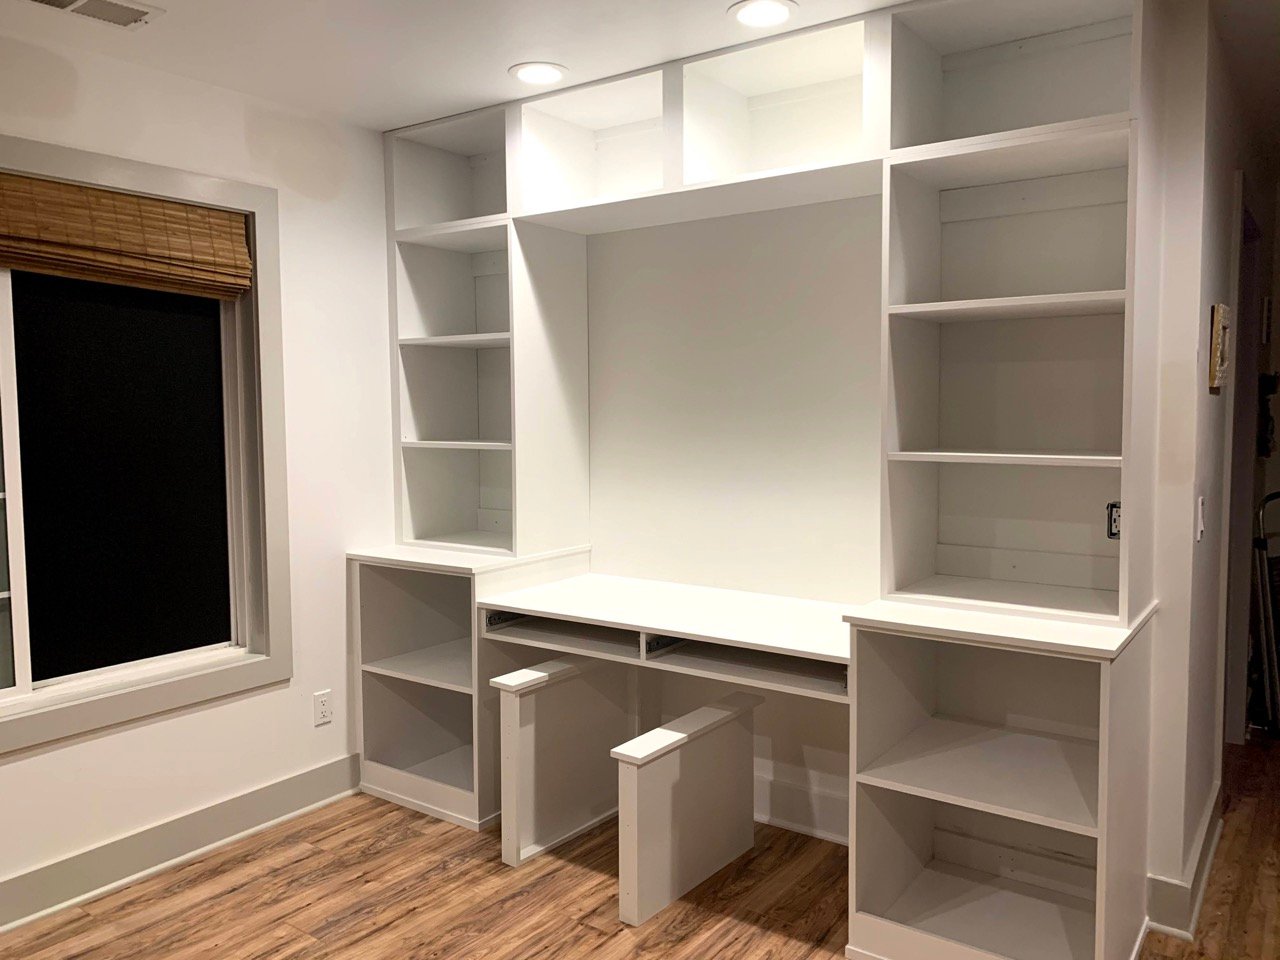
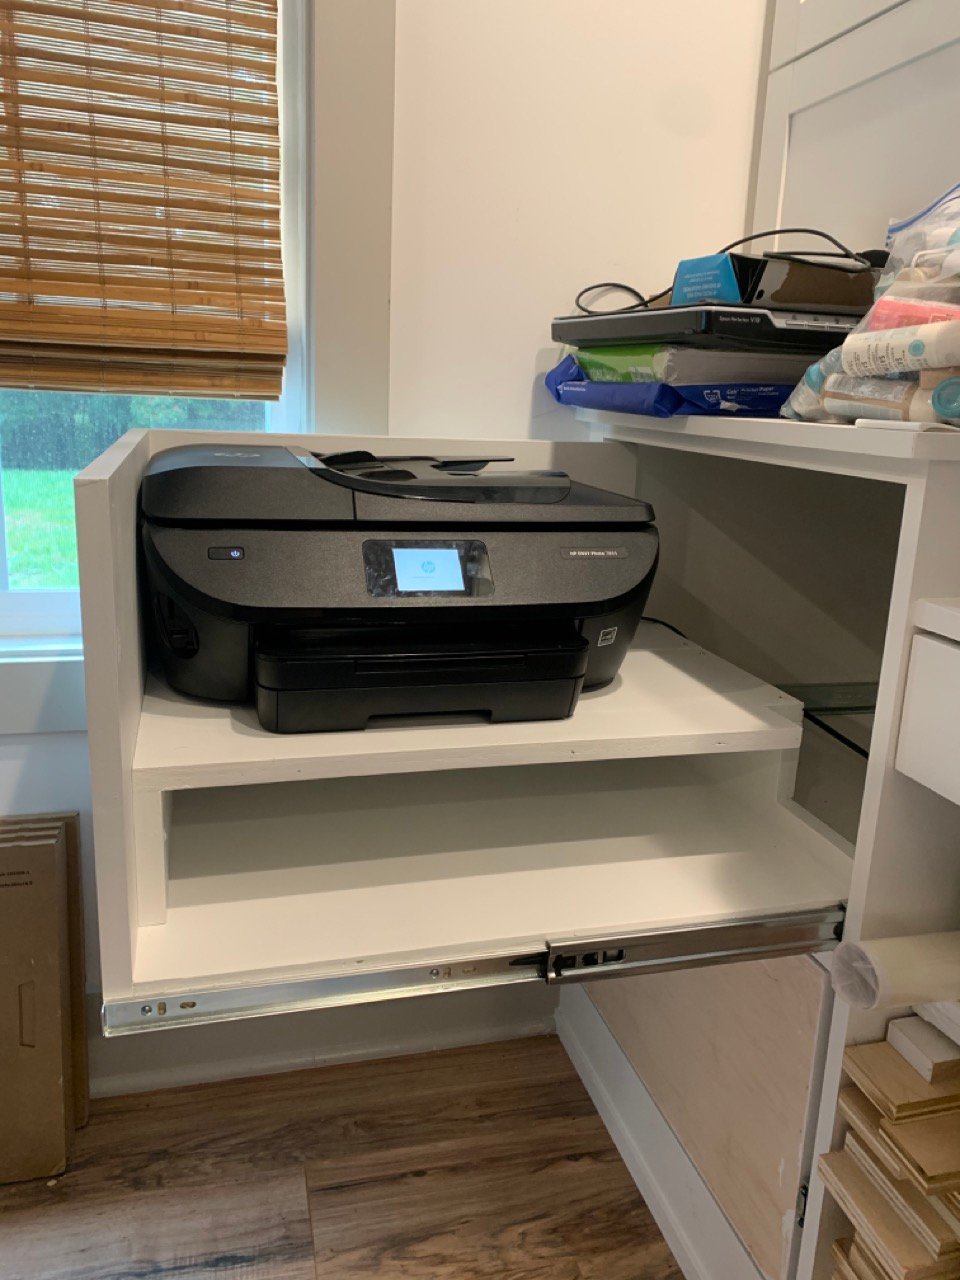
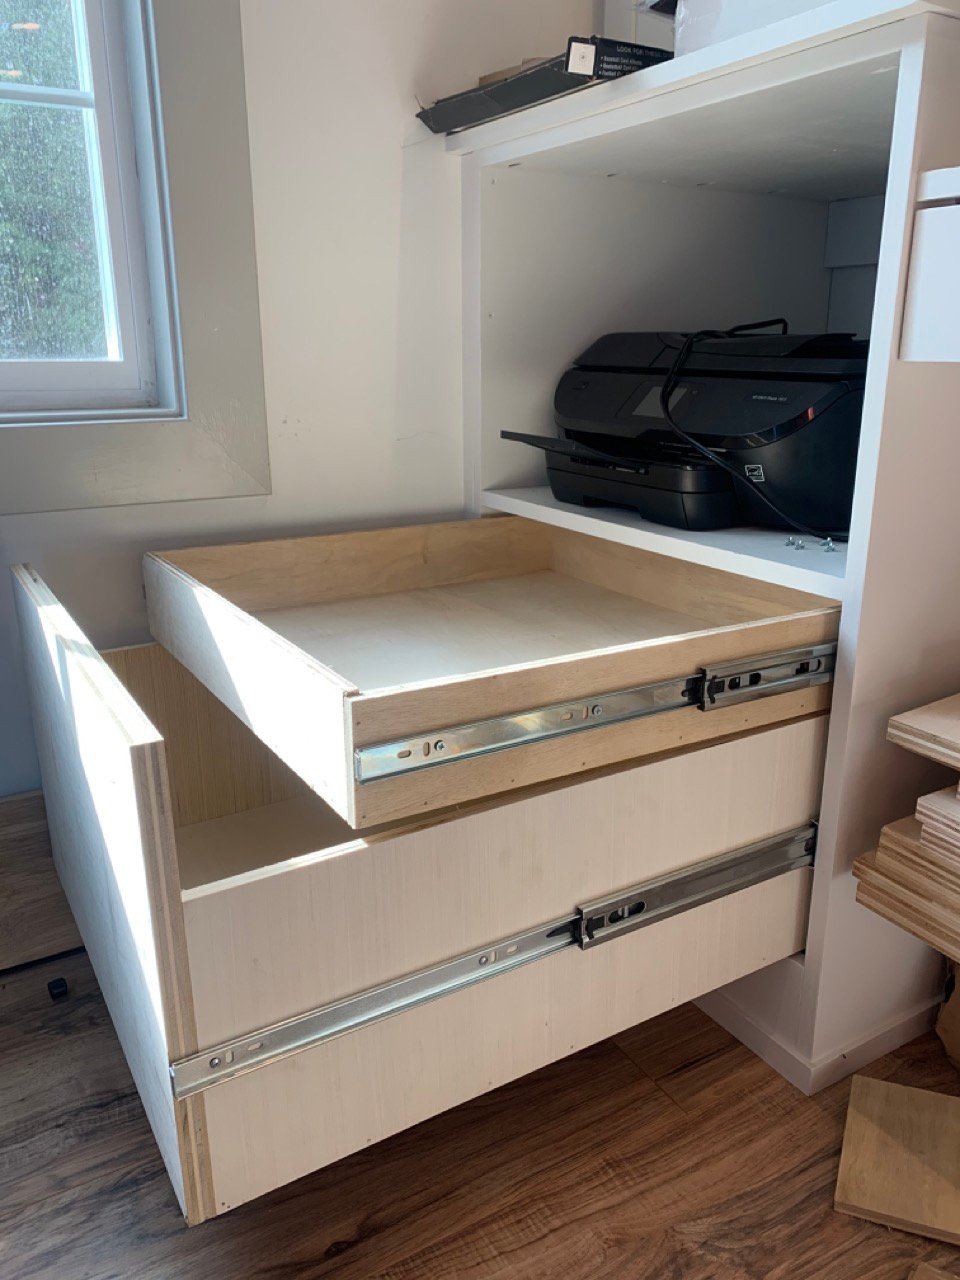
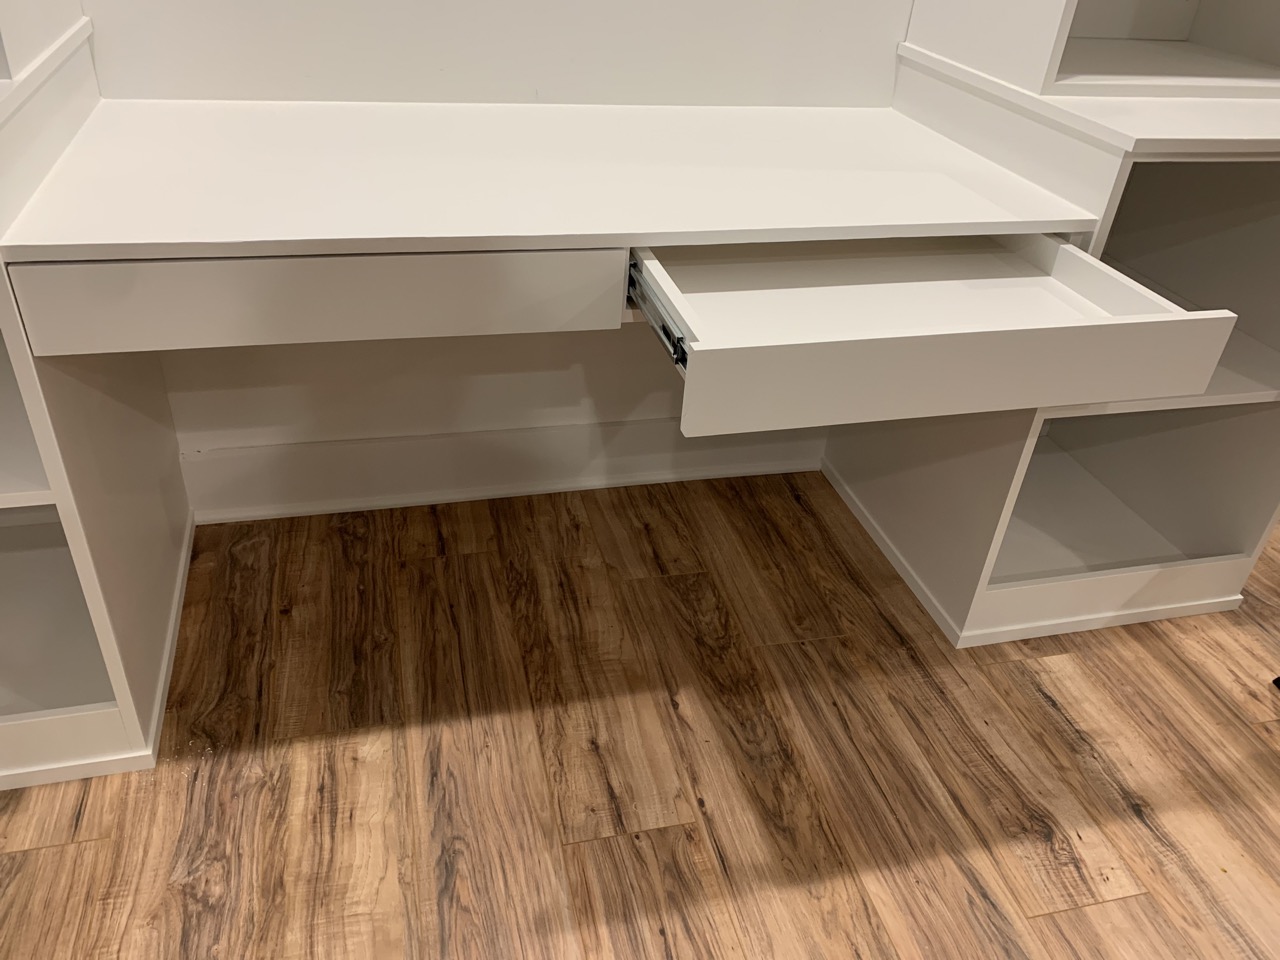
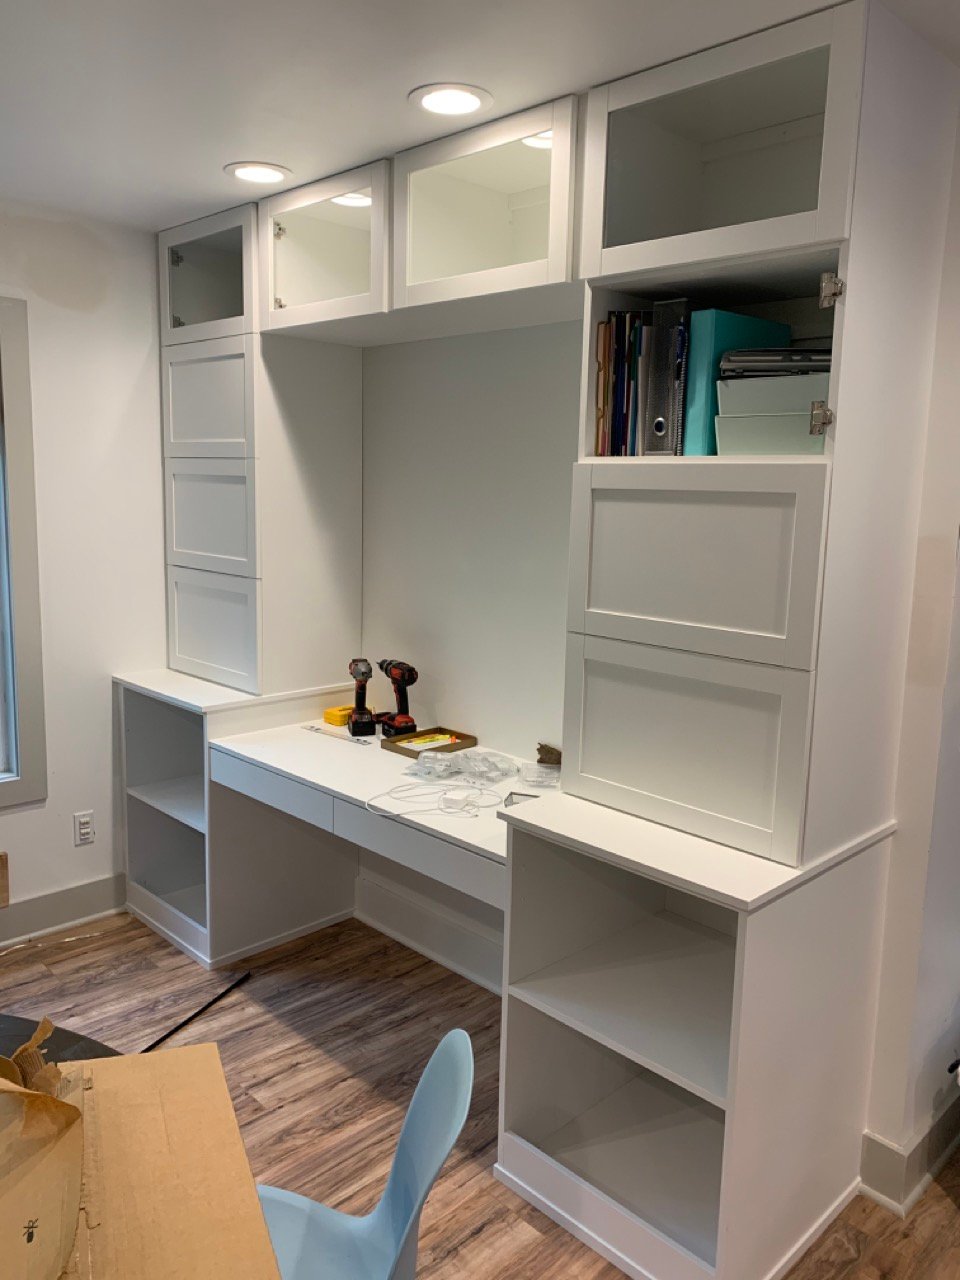
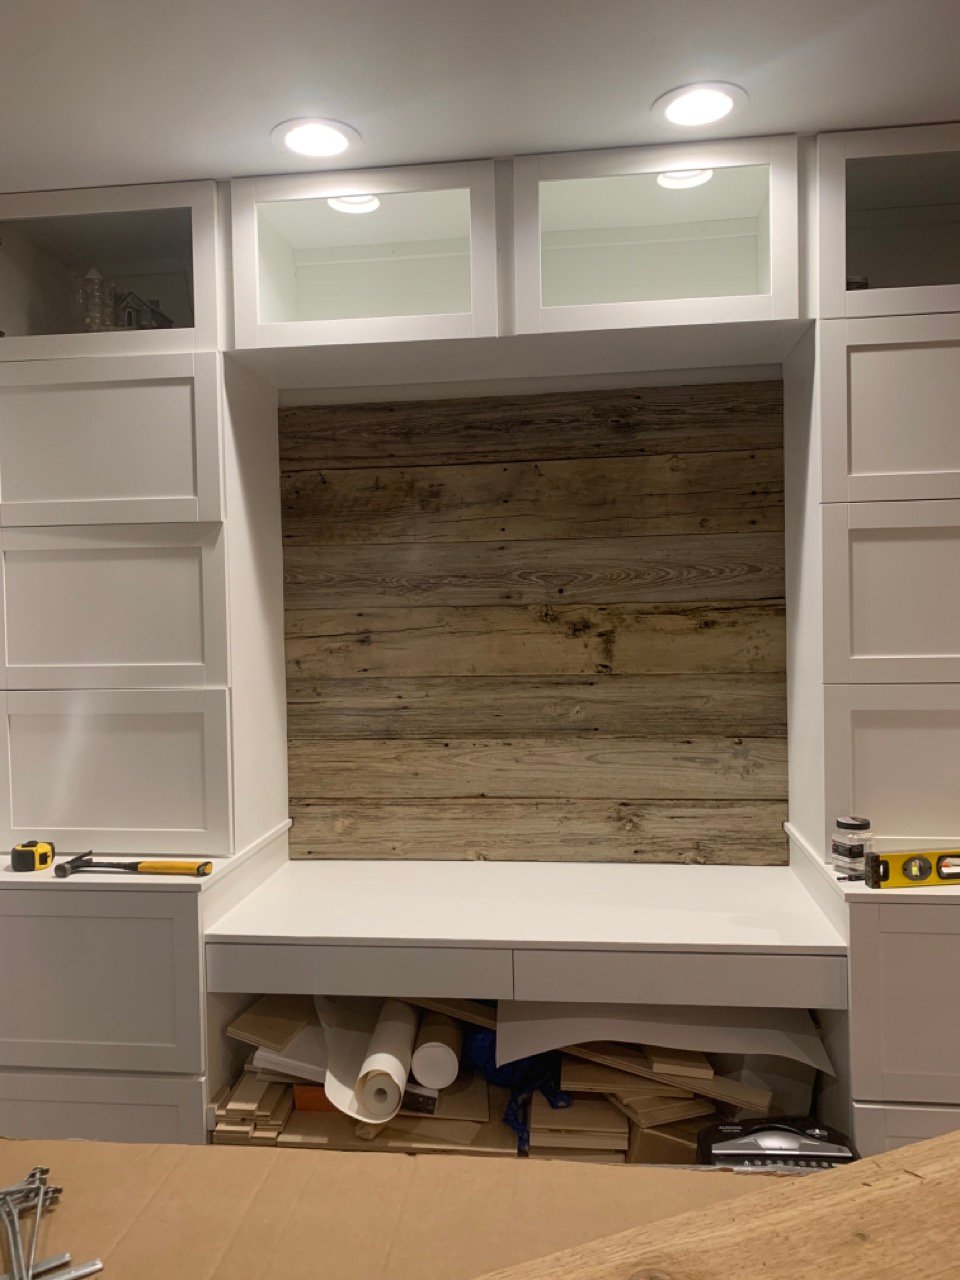
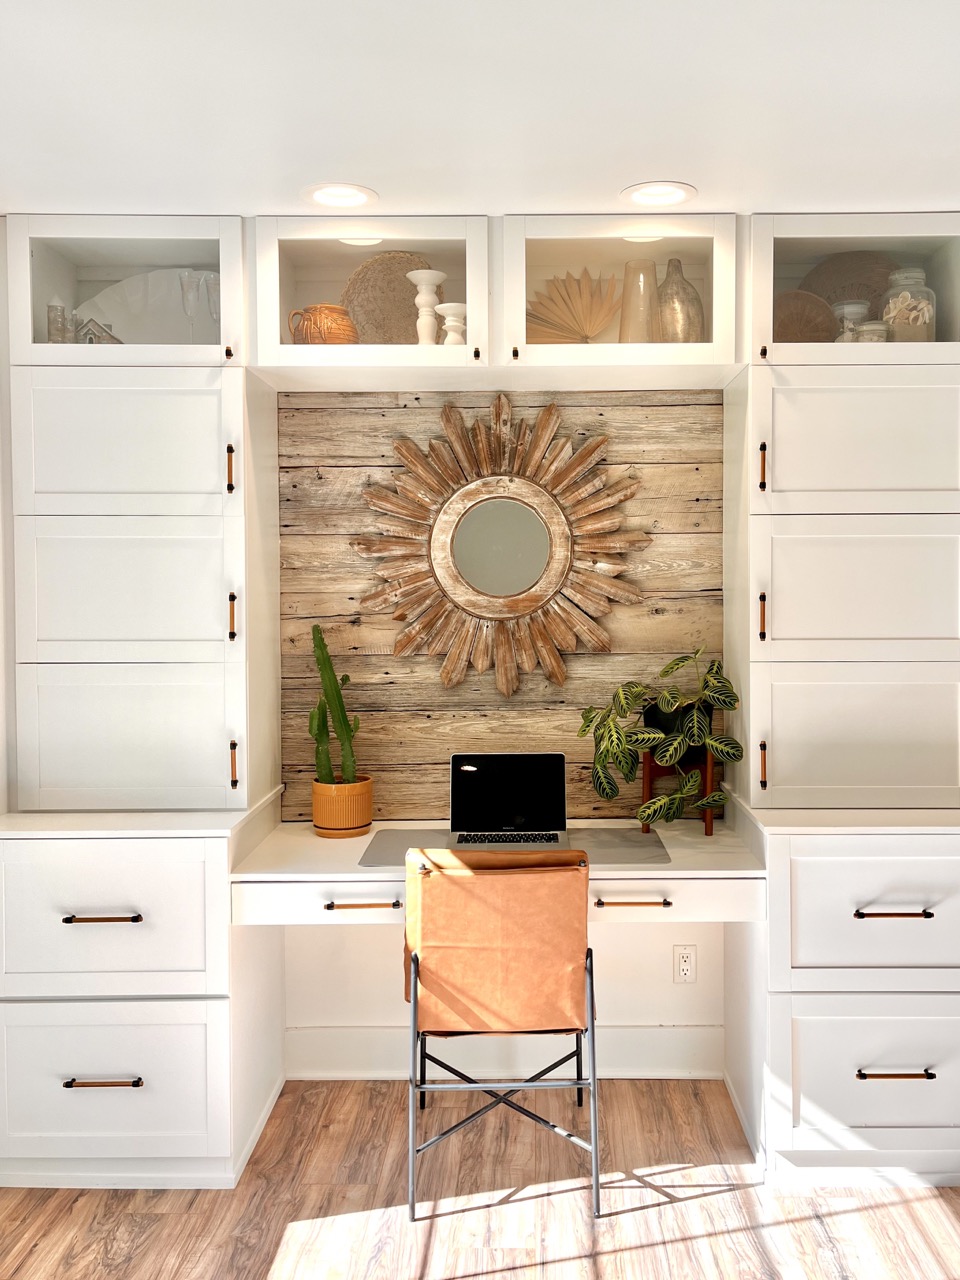
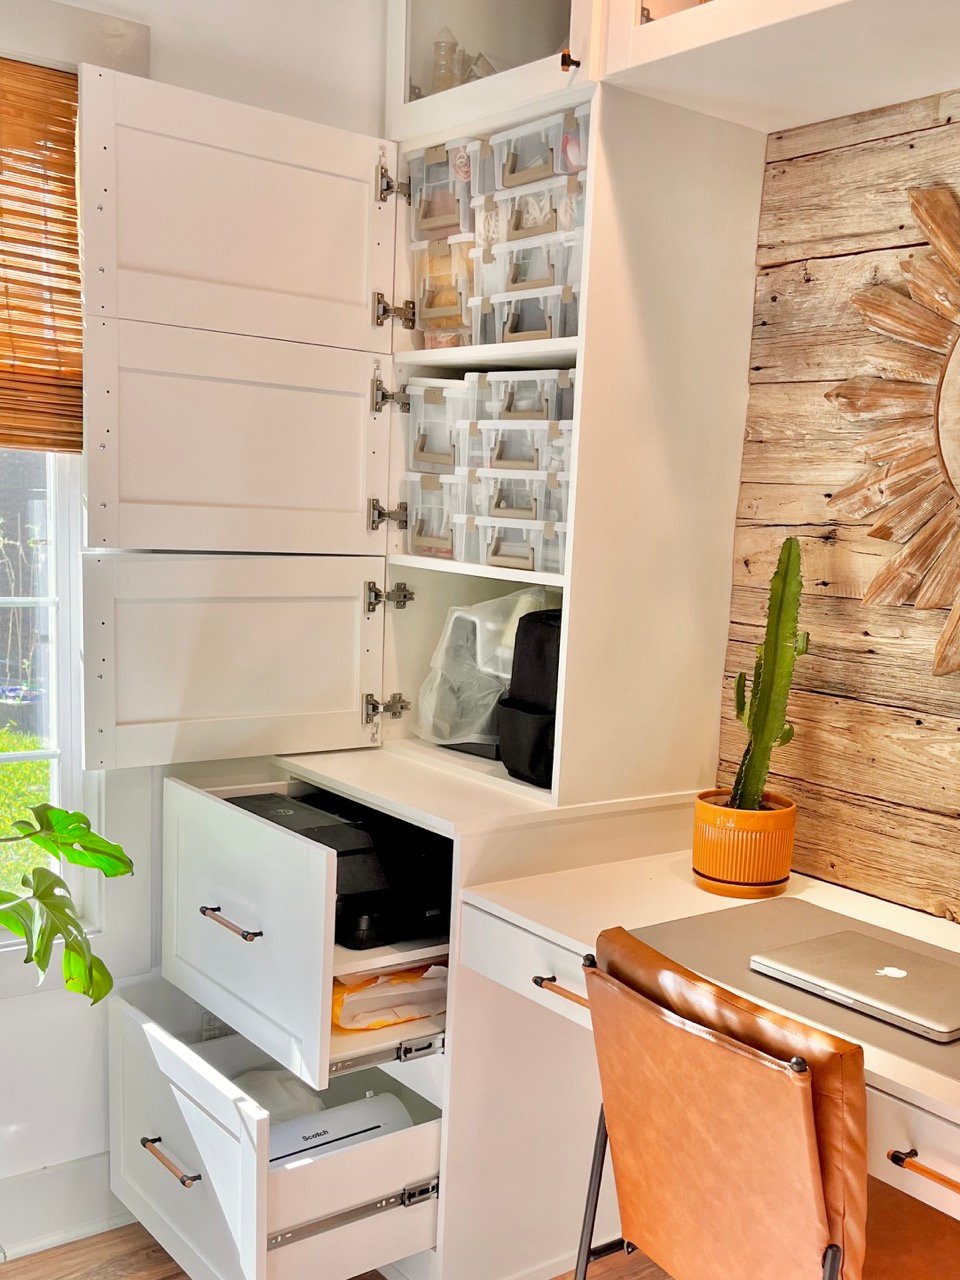
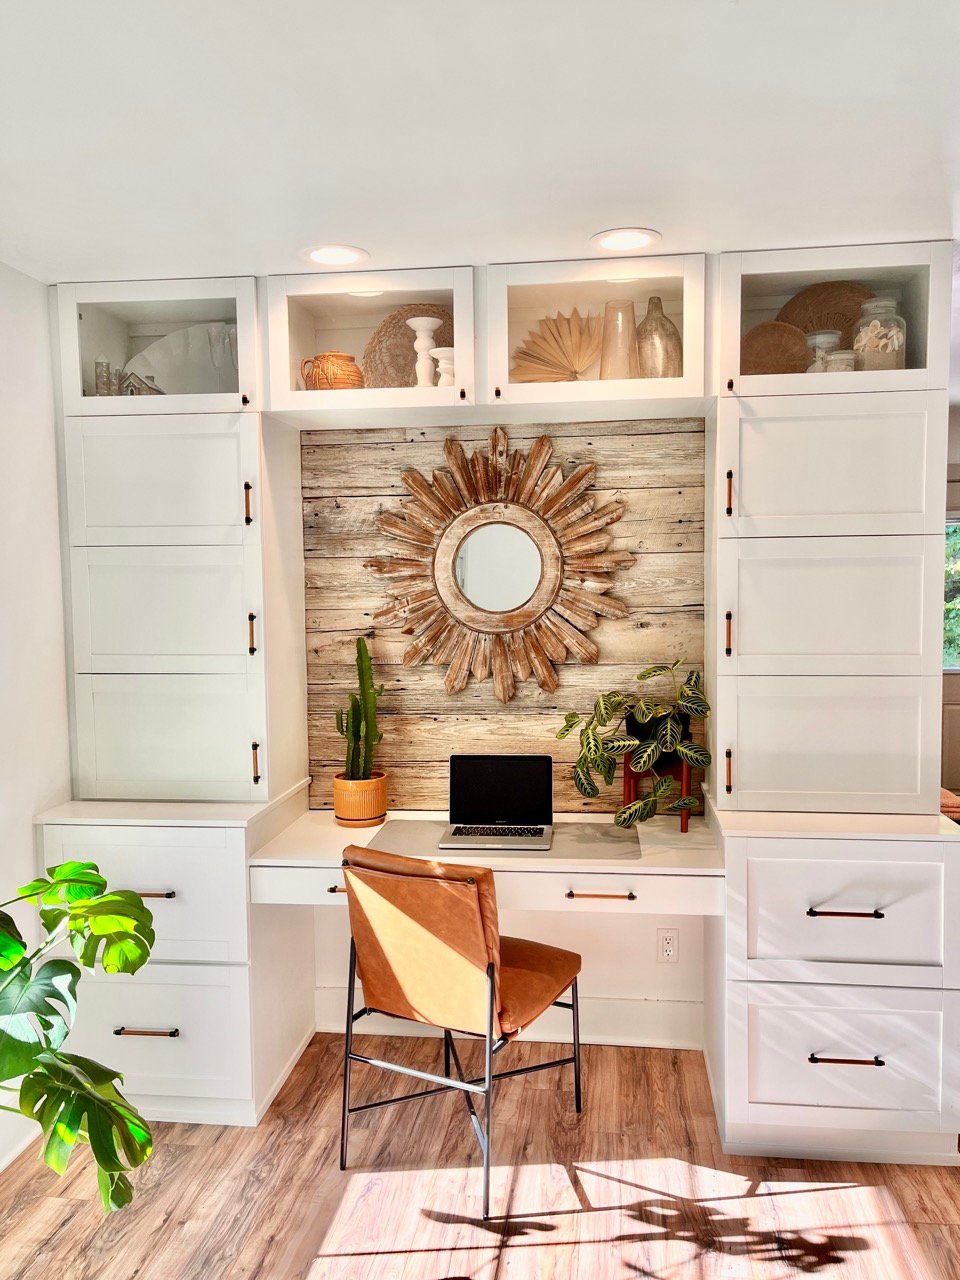
Desk Wall System with IKEA Door Faces

Seasonal And Holiday
Adirondack chairs
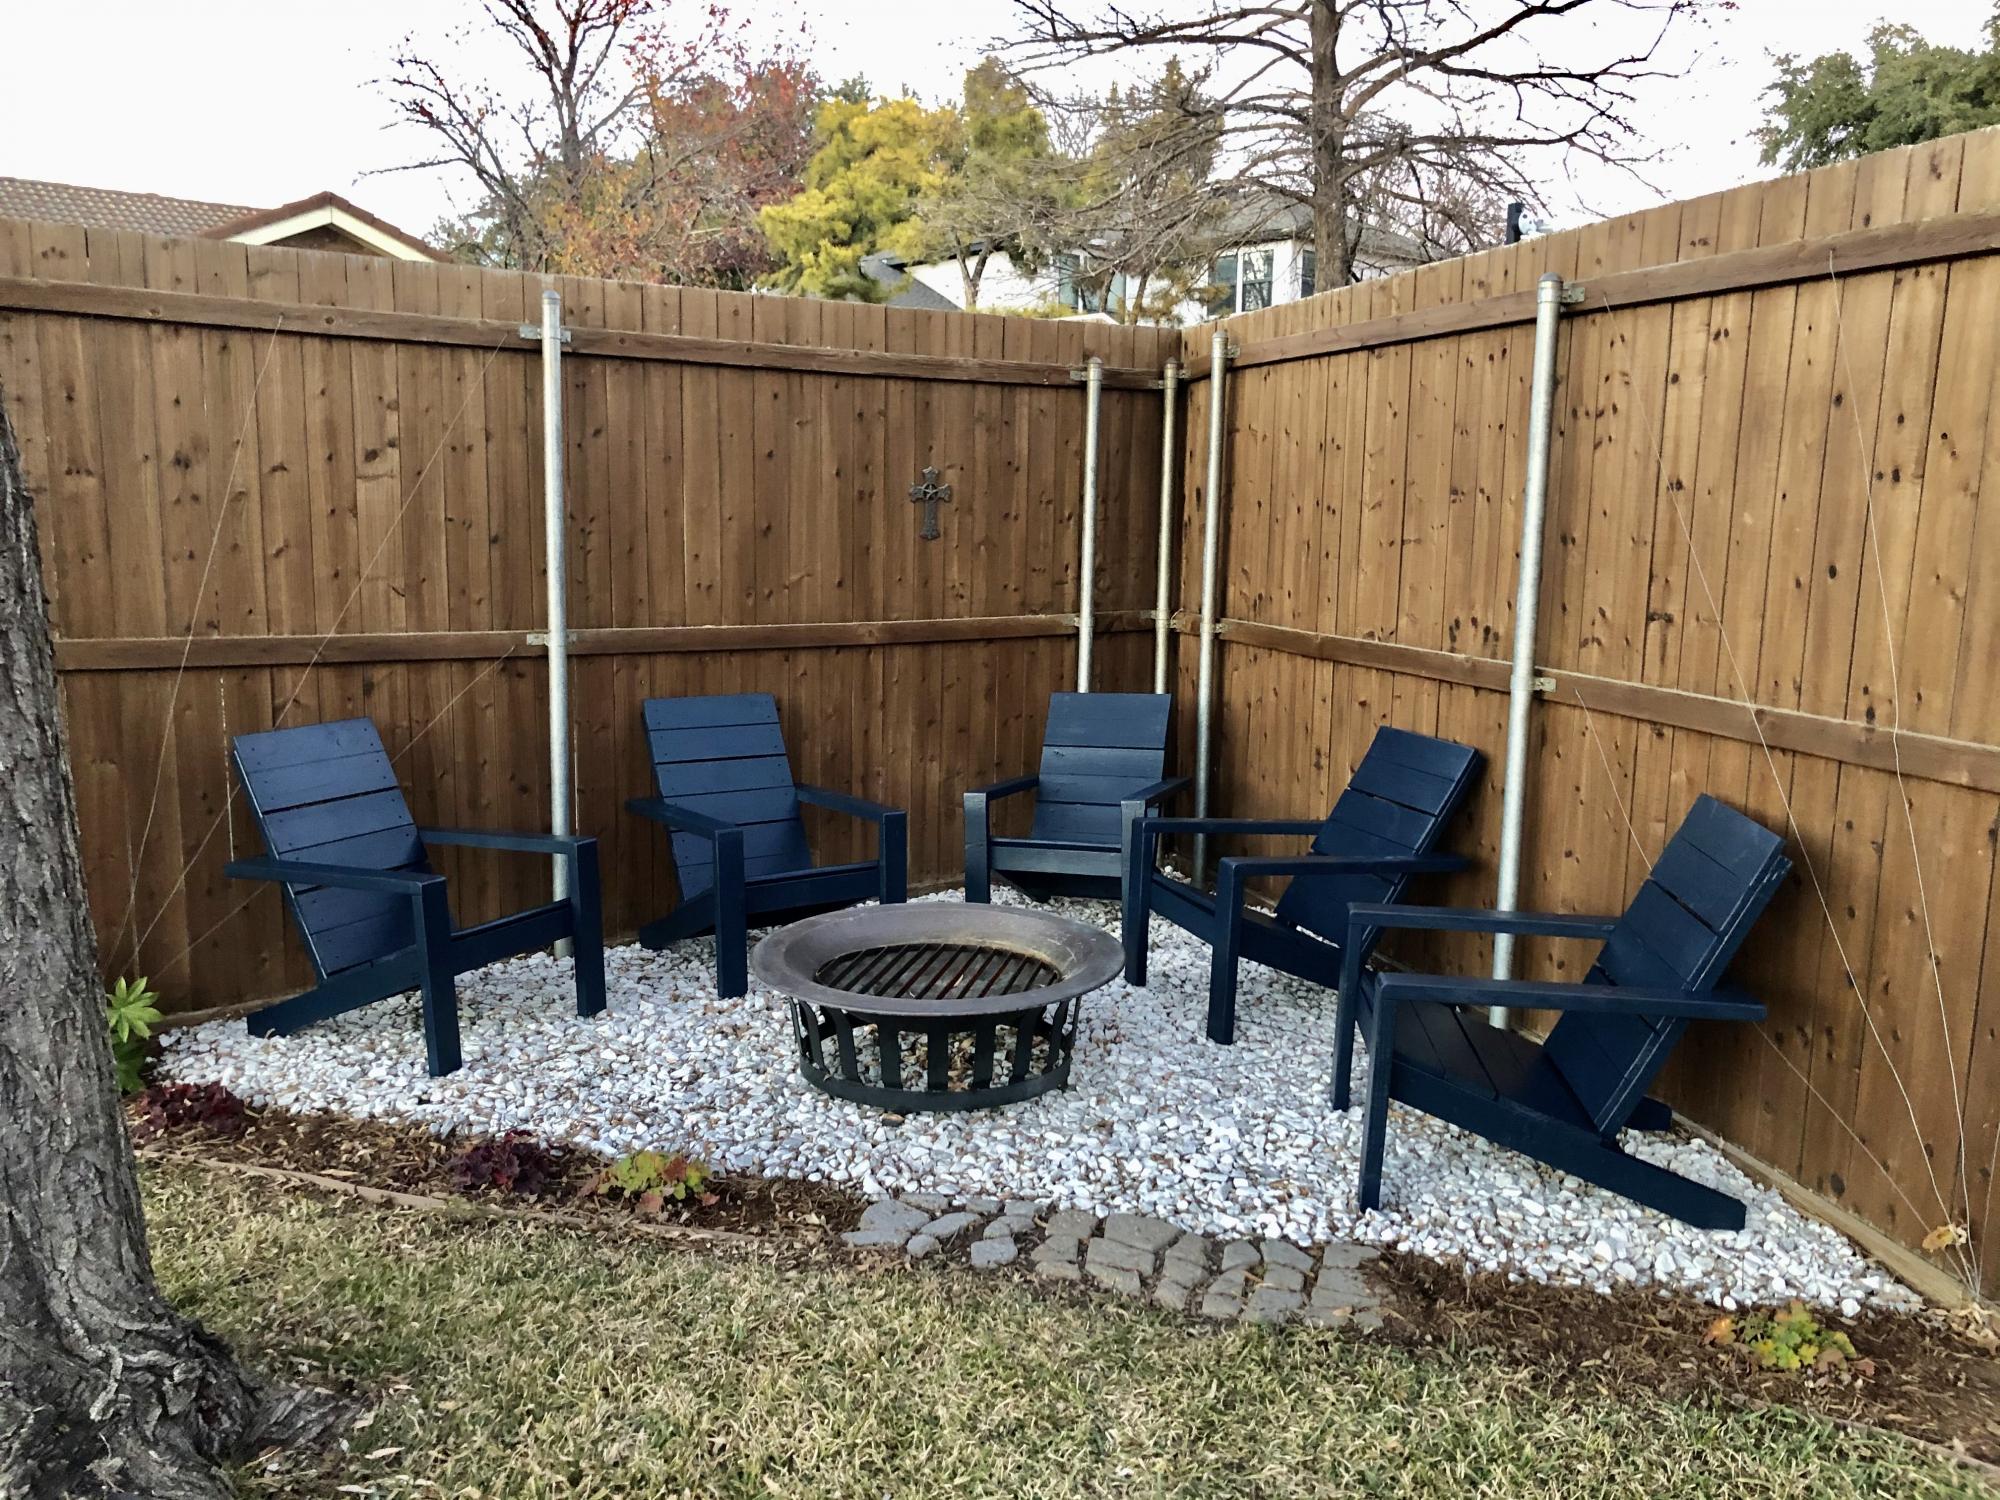
Thanks for the awesome plans Anna! God bless.
Eddie Jimenez
Built from Plan(s)
Comments
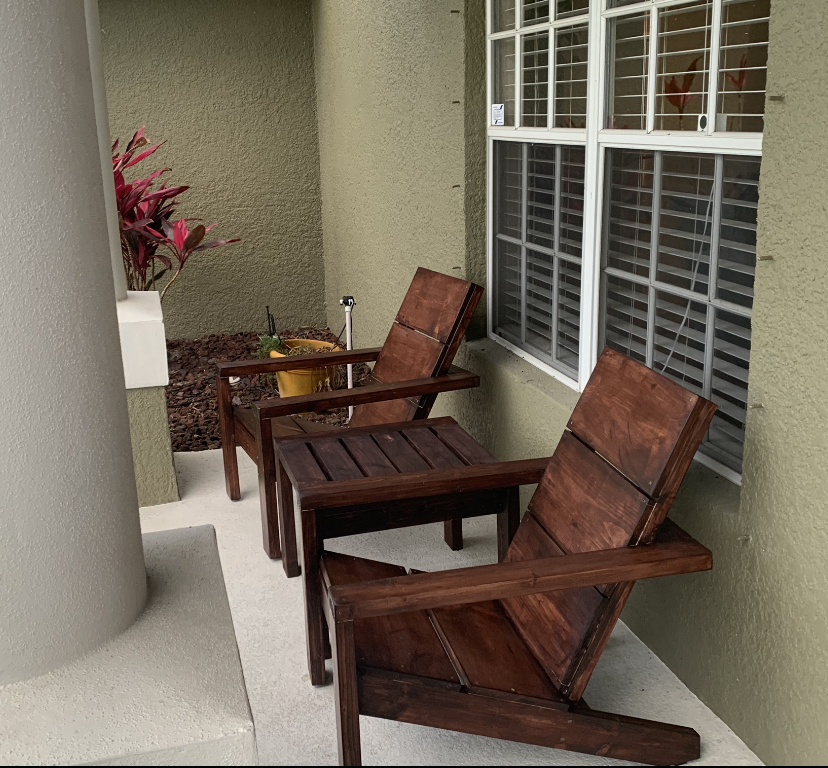
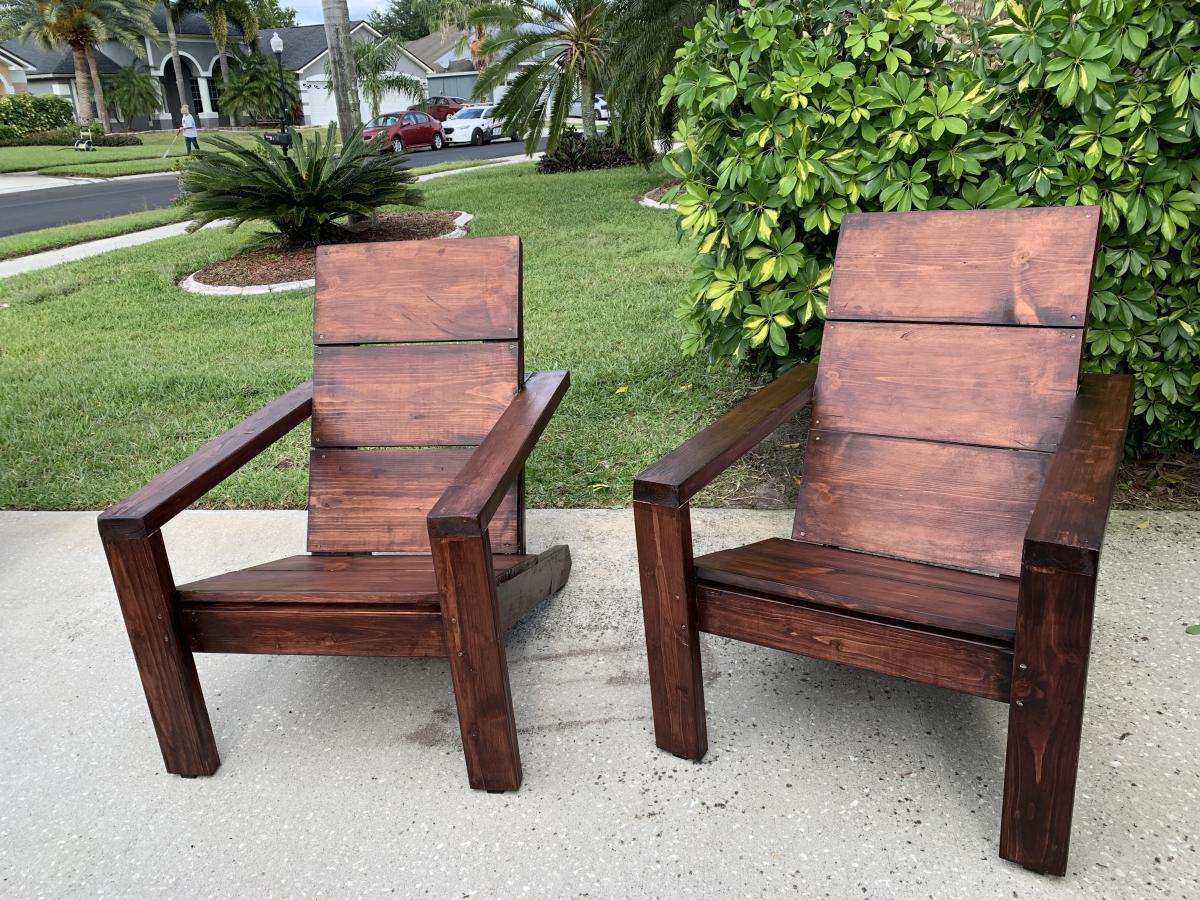
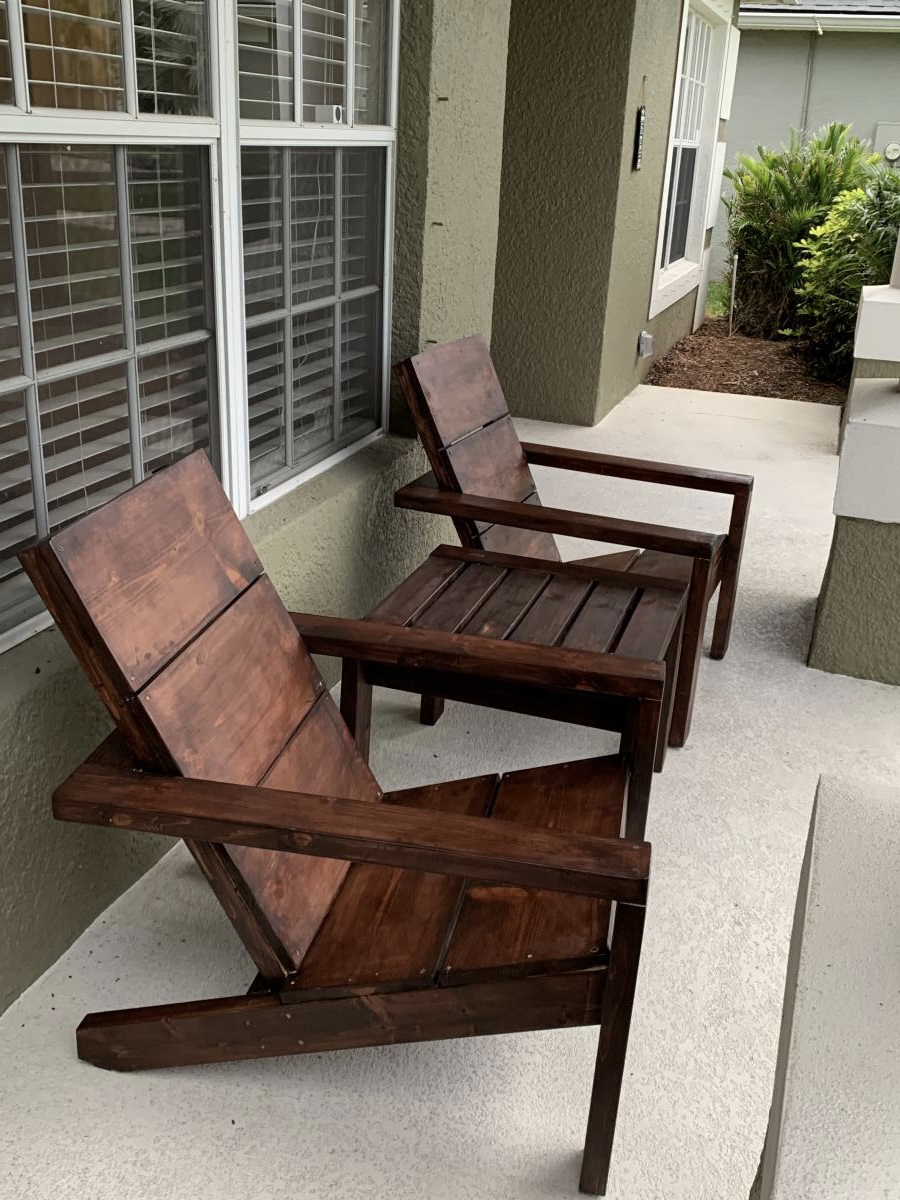
Modern Adirondack Chairs & Outdoor Side Table
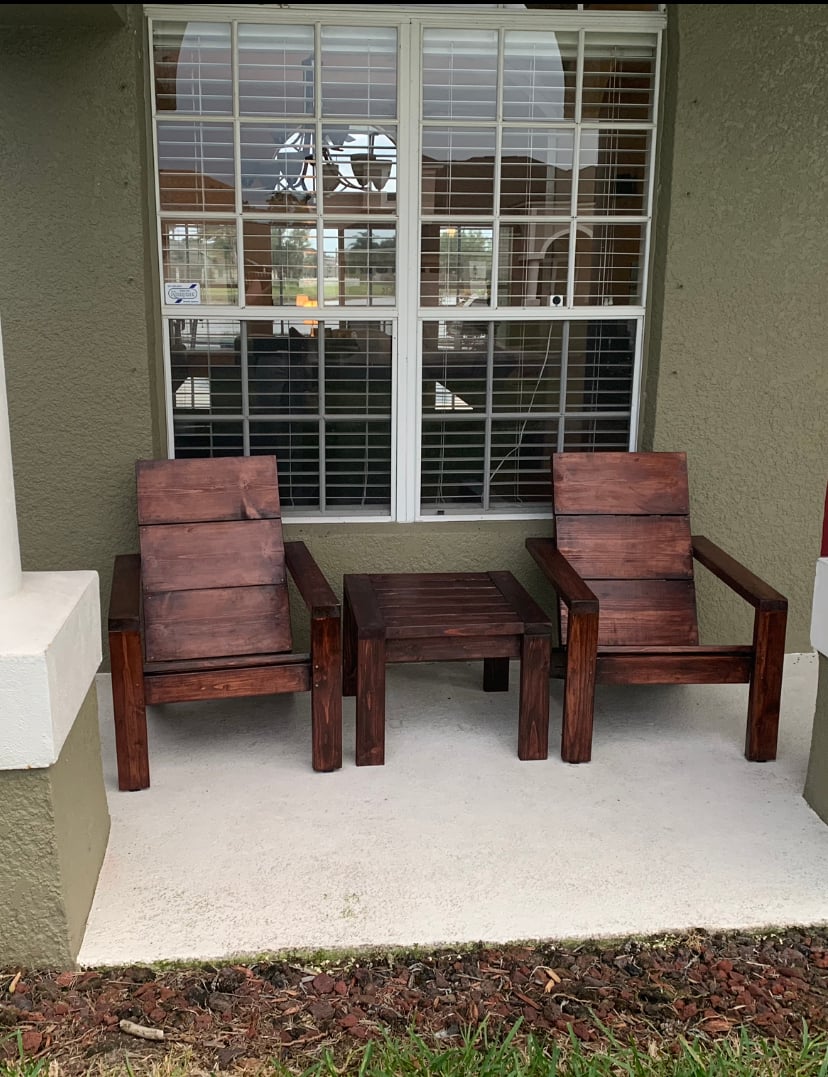
These modern Adirondack chairs were my first wood working project ever and they turned out awesome! I wanted to build a small table to complete the set and Ana’s new side table plans were exactly what I was looking for. I am truly amazed at how easy these projects were to make and how great they look on our front patio. Ana’s step-by-step plans make it so simple. My wife and I can’t wait to build some more of these projects for our backyard lanai and pool area.


Built from Plan(s)
Finish Used
General Finishes Red Mahogany stain
Spar Urethane
Spar Urethane
Comments
Mon, 04/12/2021 - 10:21
First project!
Amazing job on your first build, I see more handmade pieces in your future!
Bunk Beds for 4 to 6
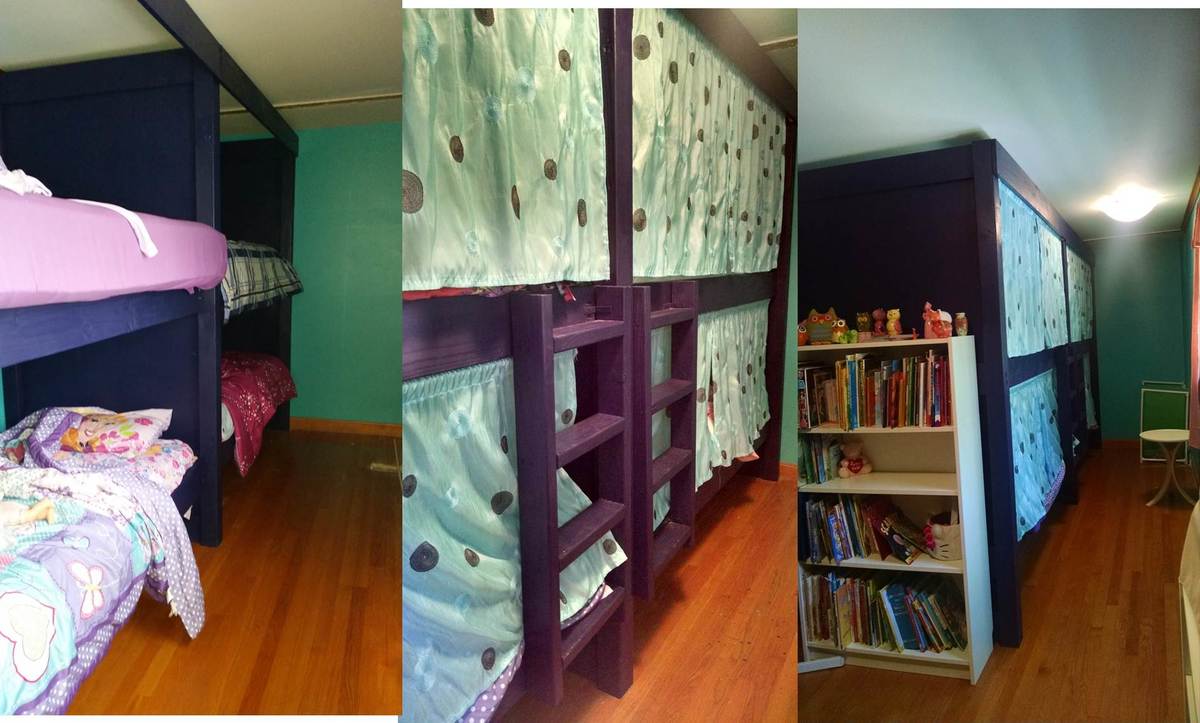
We used the Build a Simple Bed plan and the Bunk Bed from Simple Bed. I modified the plans to build a double bunk bed. We needed a way to fit up to 6 small children in a long, narrow room. Although we haven't built the trundle beds yet, each bunk will also have a trundle bed. The kids especially love their "privacy" curtains!
Built from Plan(s)
Estimated Cost
Under $300
Estimated Time Investment
Weekend Project (10-20 Hours)
Finish Used
paint
Recommended Skill Level
Beginner
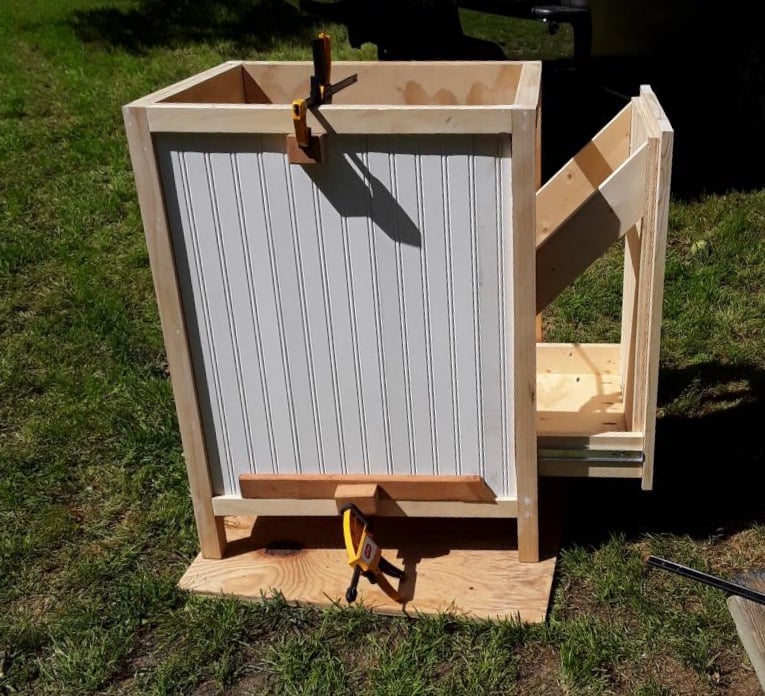
Small kitchen island with slide out double trash cans
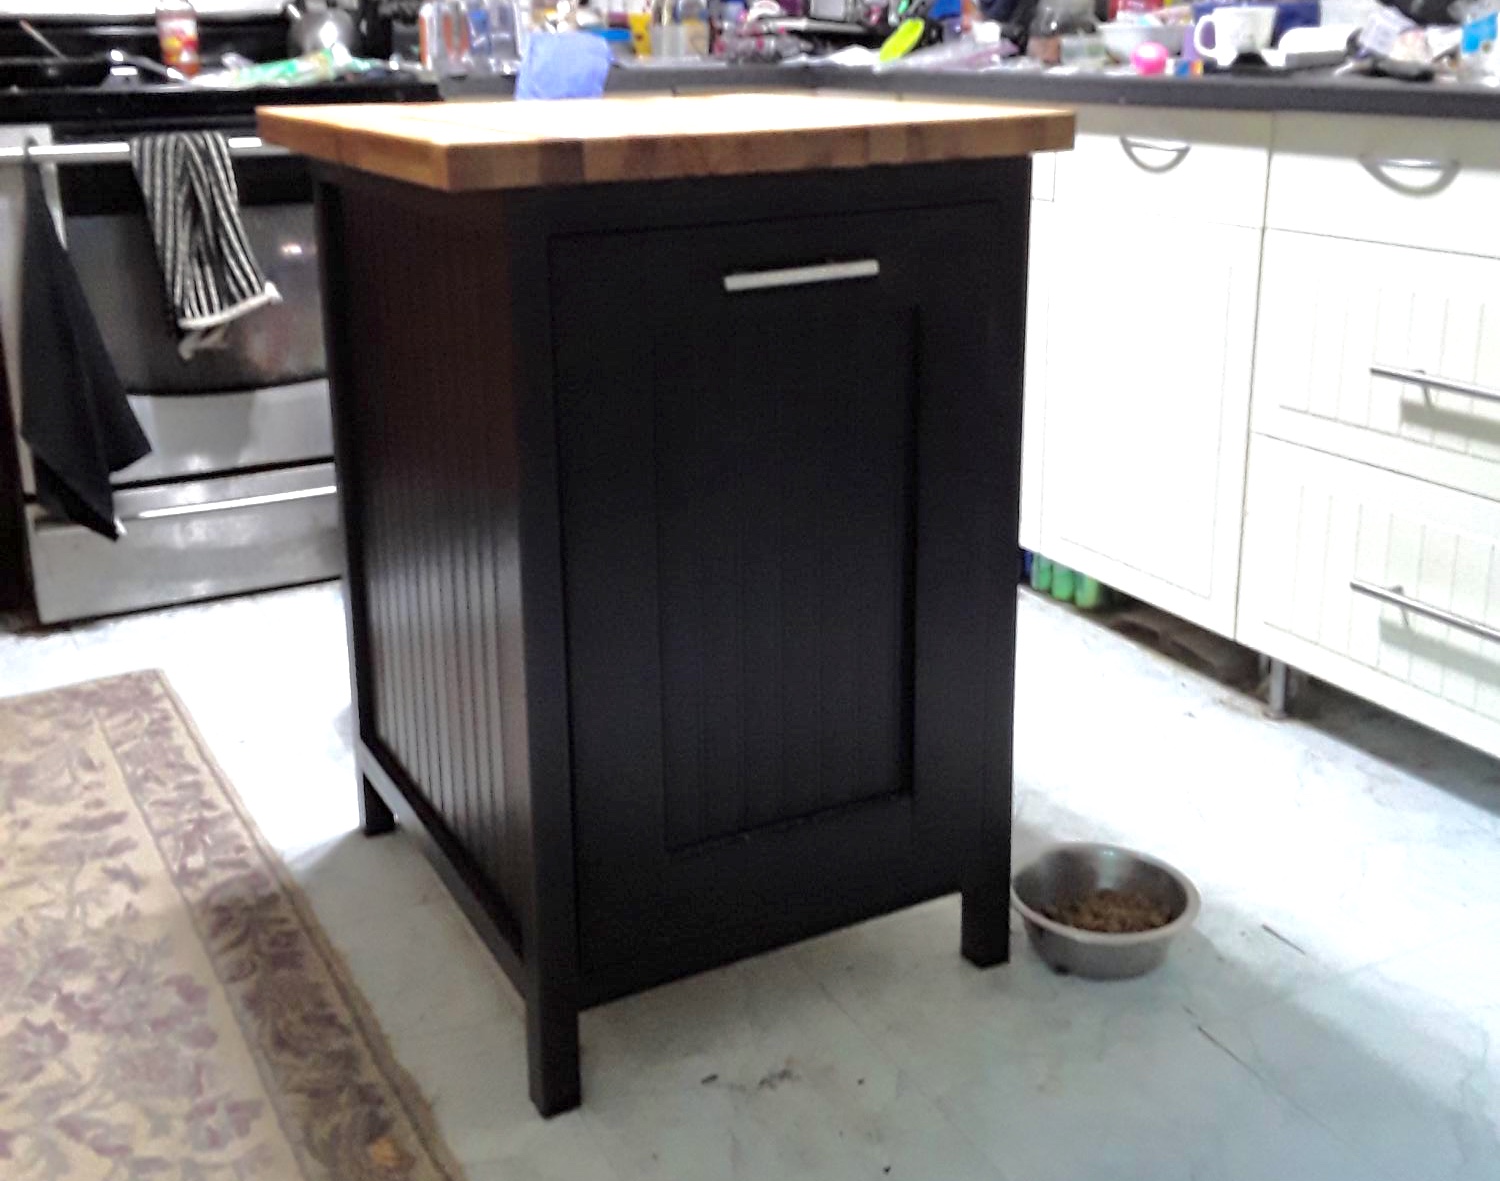
This was a mommy do during work furlough. Wasn't too hard. I have minimal experience with saws, but with hubby help, we got it done. Some of the instructions didn't make sense, but but we were able to figure them out or change them to work. I used bead board on the front and sides that we added over the existing sides. I used a manufactured butcher block that had to be cut down. Looks great and now my trashcans don't walk around the kitchen when the dogs play. The downside, the dog bowls slide under the island. If you have to cut down butcher block, make sure you have the proper blade.
Built from Plan(s)
Estimated Cost
$200.00 because of the manufactured butcher block.
Estimated Time Investment
Weekend Project (10-20 Hours)
Finish Used
Black cabinet paint
Recommended Skill Level
Beginner
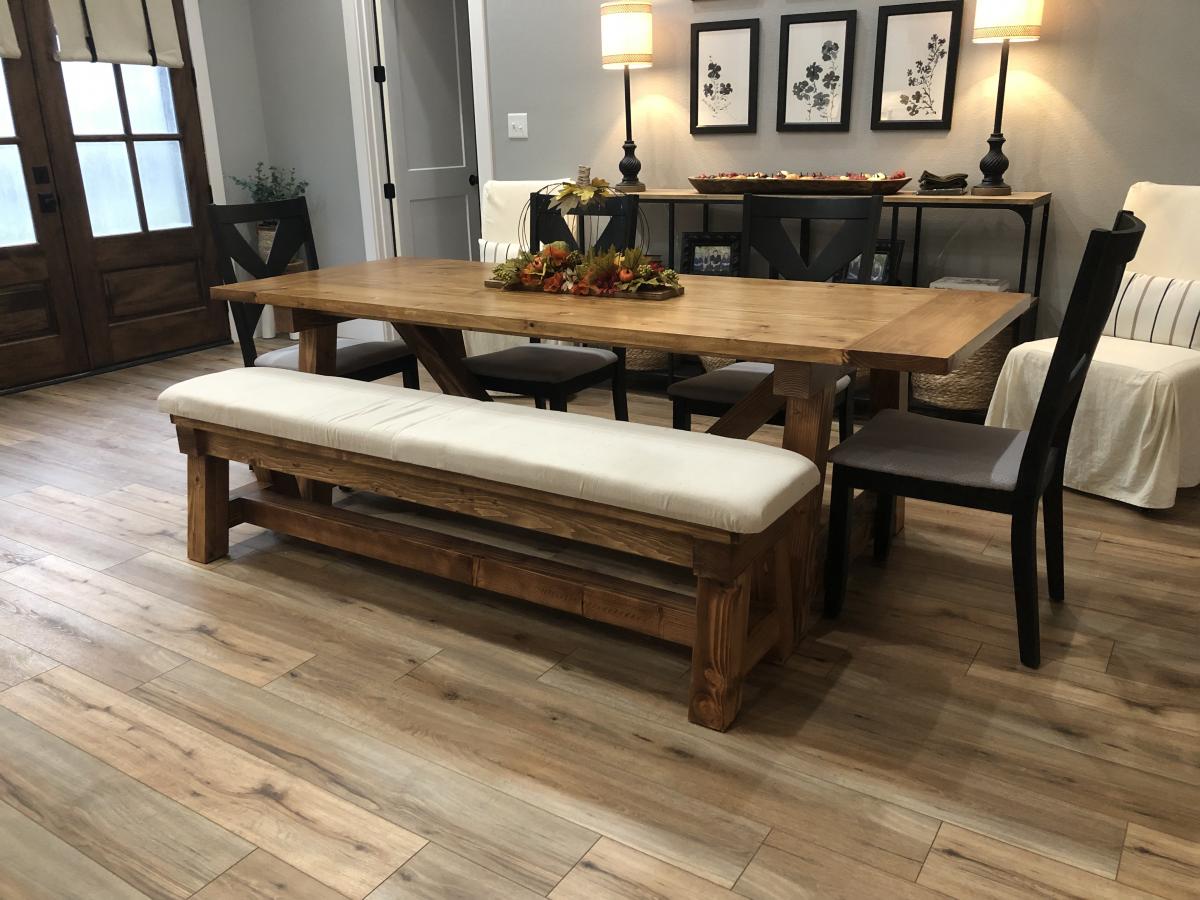
4x4 Truss beam table and bench
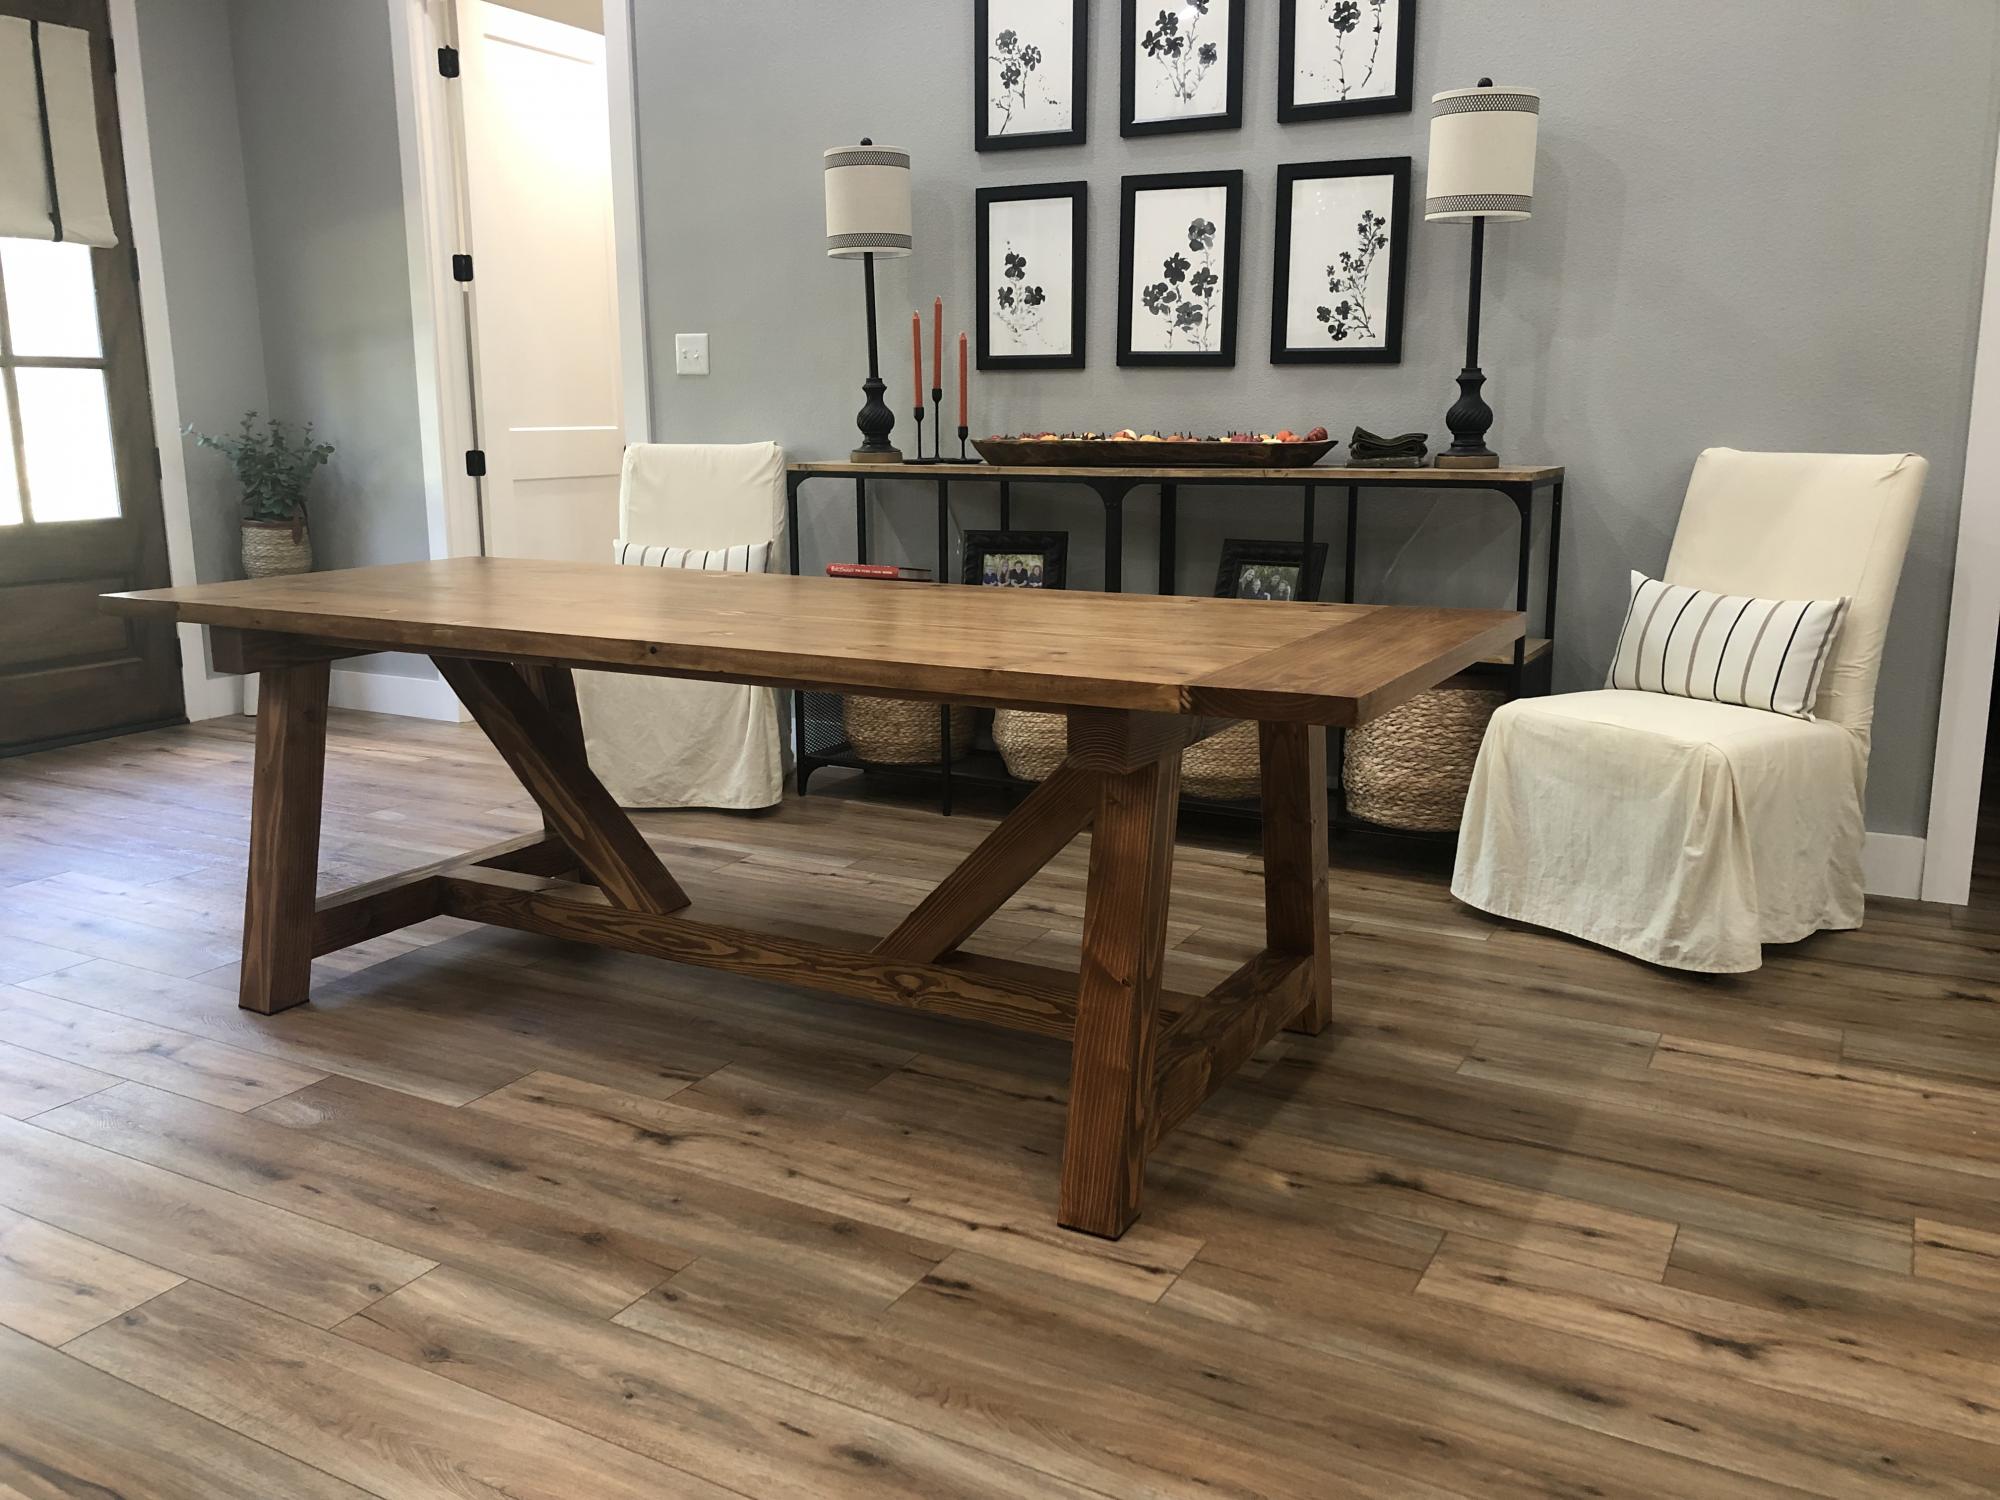
The plans were very easy to follow for non avid woodworkers. We decided to upholster the seat on the bench.
Built from Plan(s)
Comments
Tue, 10/05/2021 - 10:43
Great addition!
Looks professionally done and well built, the upholstered bench is a beautiful addition!
Cedar Toy box
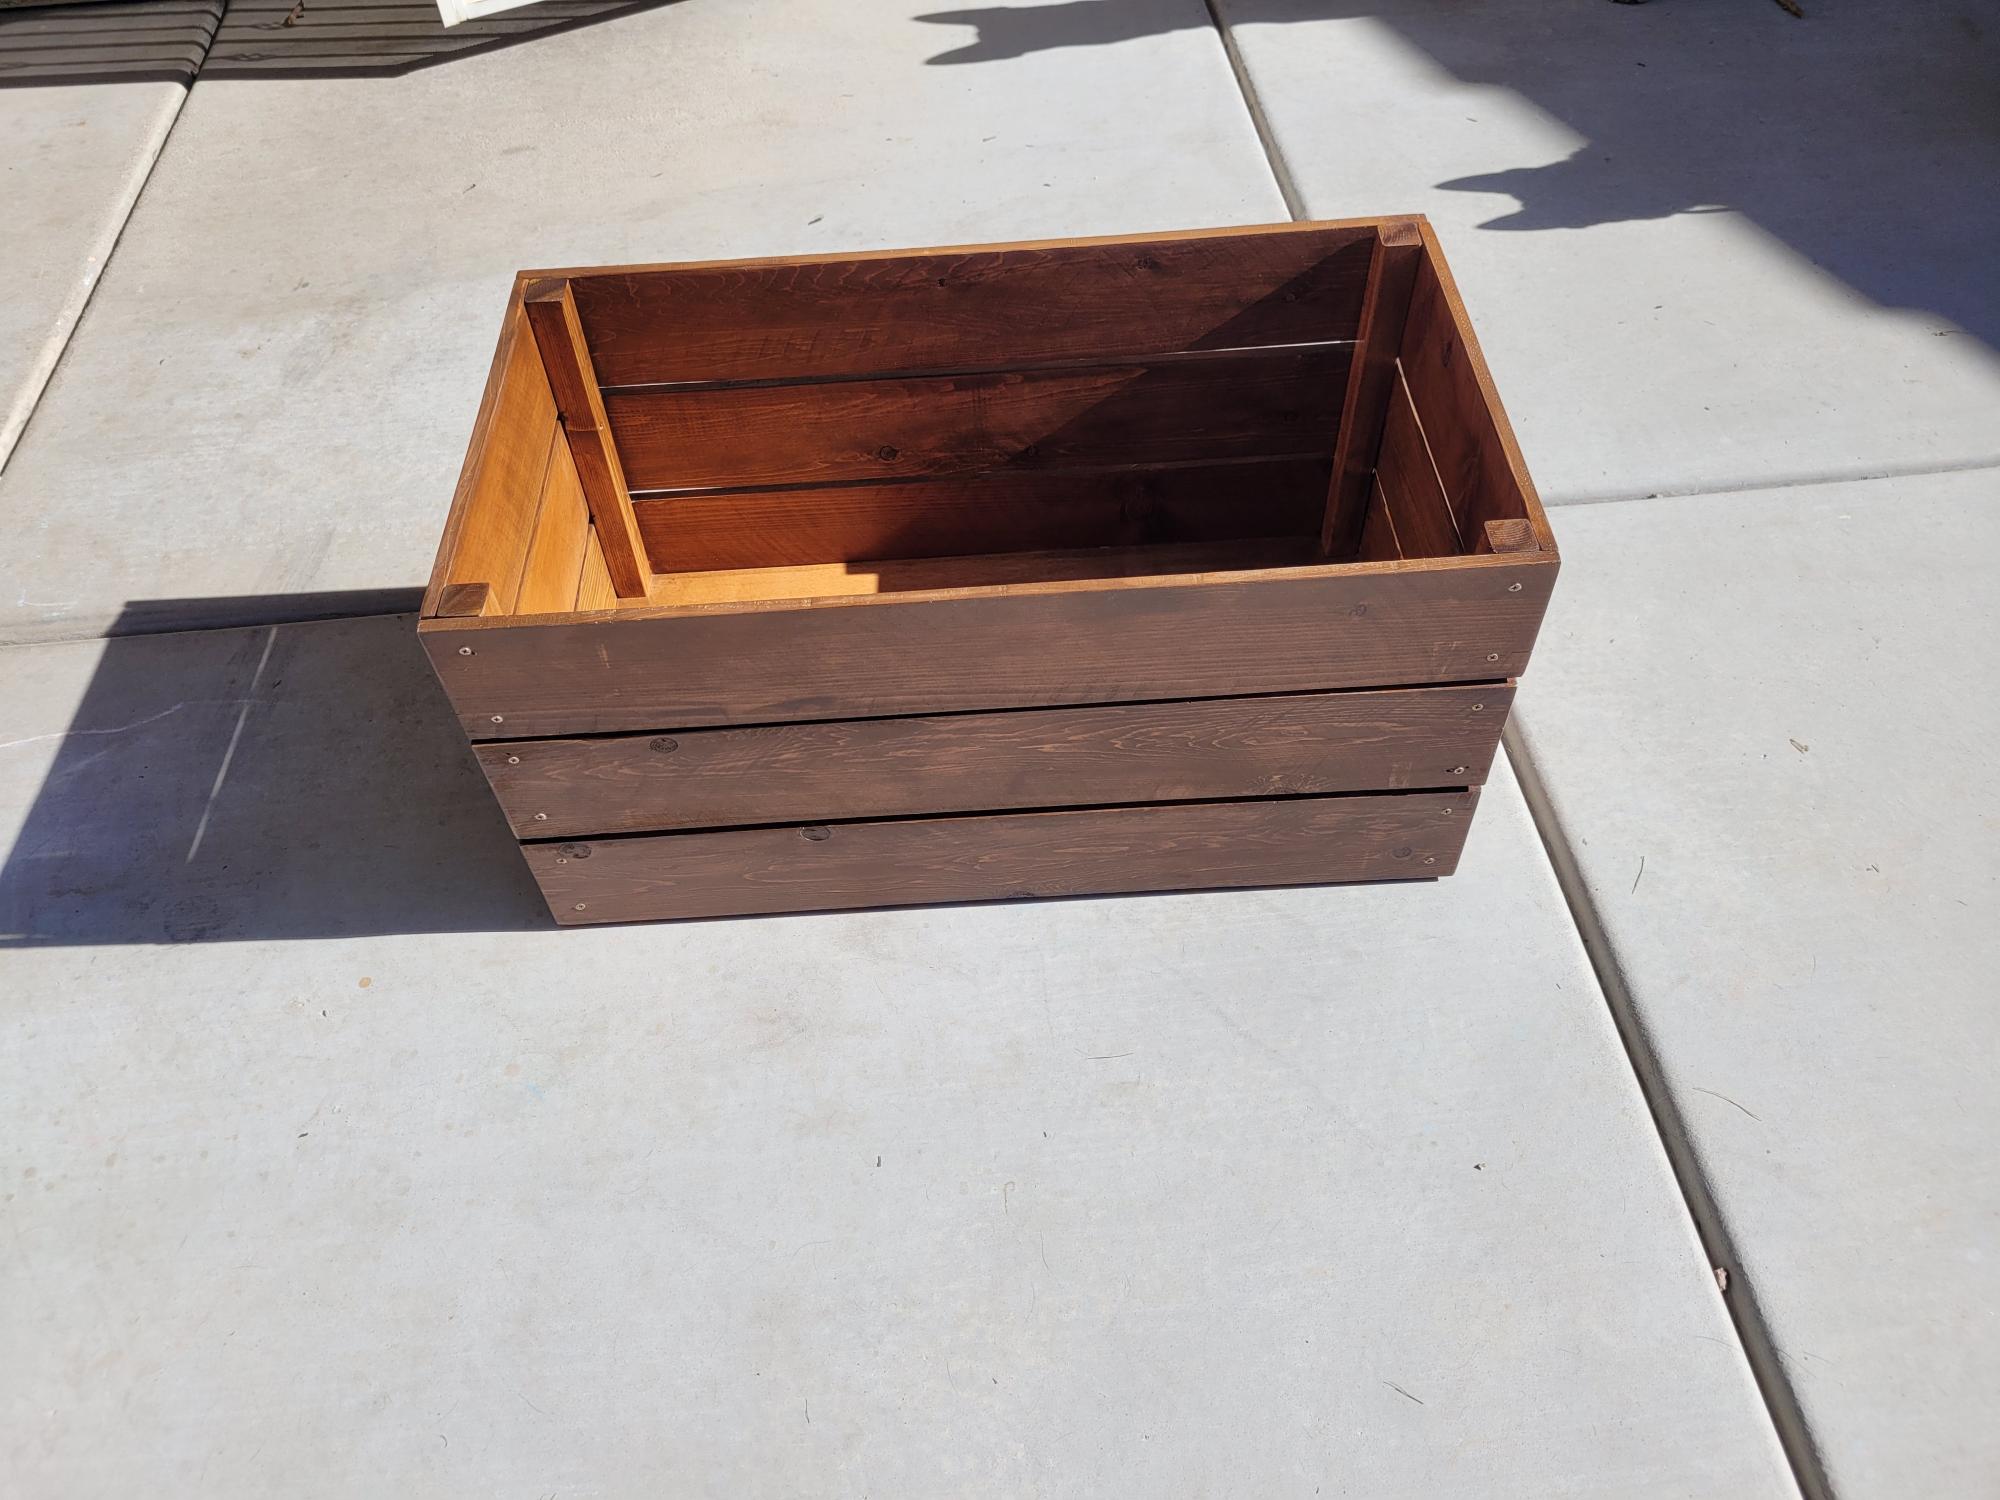
My first project, I've never done any kind of wood working at all. I made and noticed several mistakes however, I'm still very pleased with how it turned out. I learned from all my mistakes and now know the best ways to avoid them in the future. Super excited to begin my next project!
Built from Plan(s)
Comments
Sat, 11/20/2021 - 09:23
Great choice for a first project!
It looks great and even better, its functional! Thanks for sharing:)
DIY Planter Box
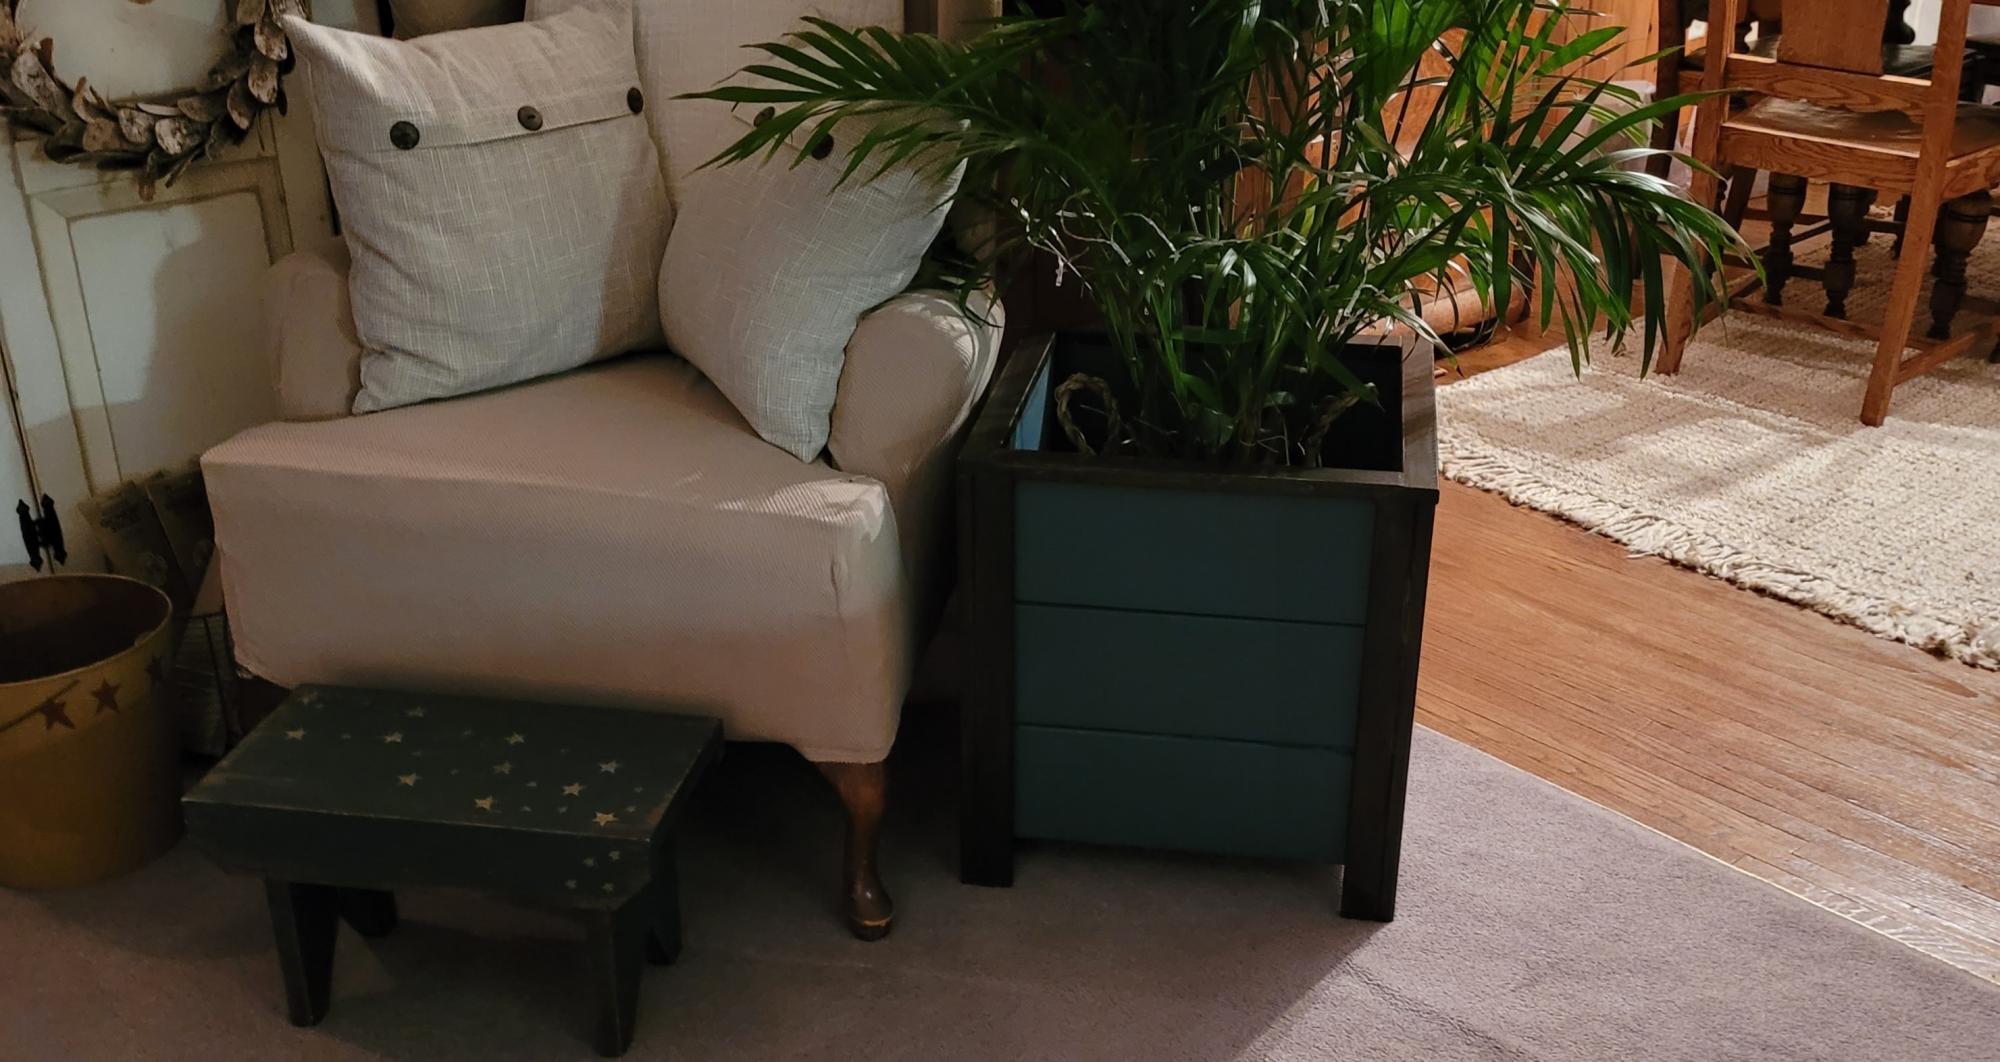
My very first project. Was so easy thanks to Ana's instructions. Dark walnut gel stain and Fusion Seaside. Thank you so much Ana.
Built from Plan(s)
Comments
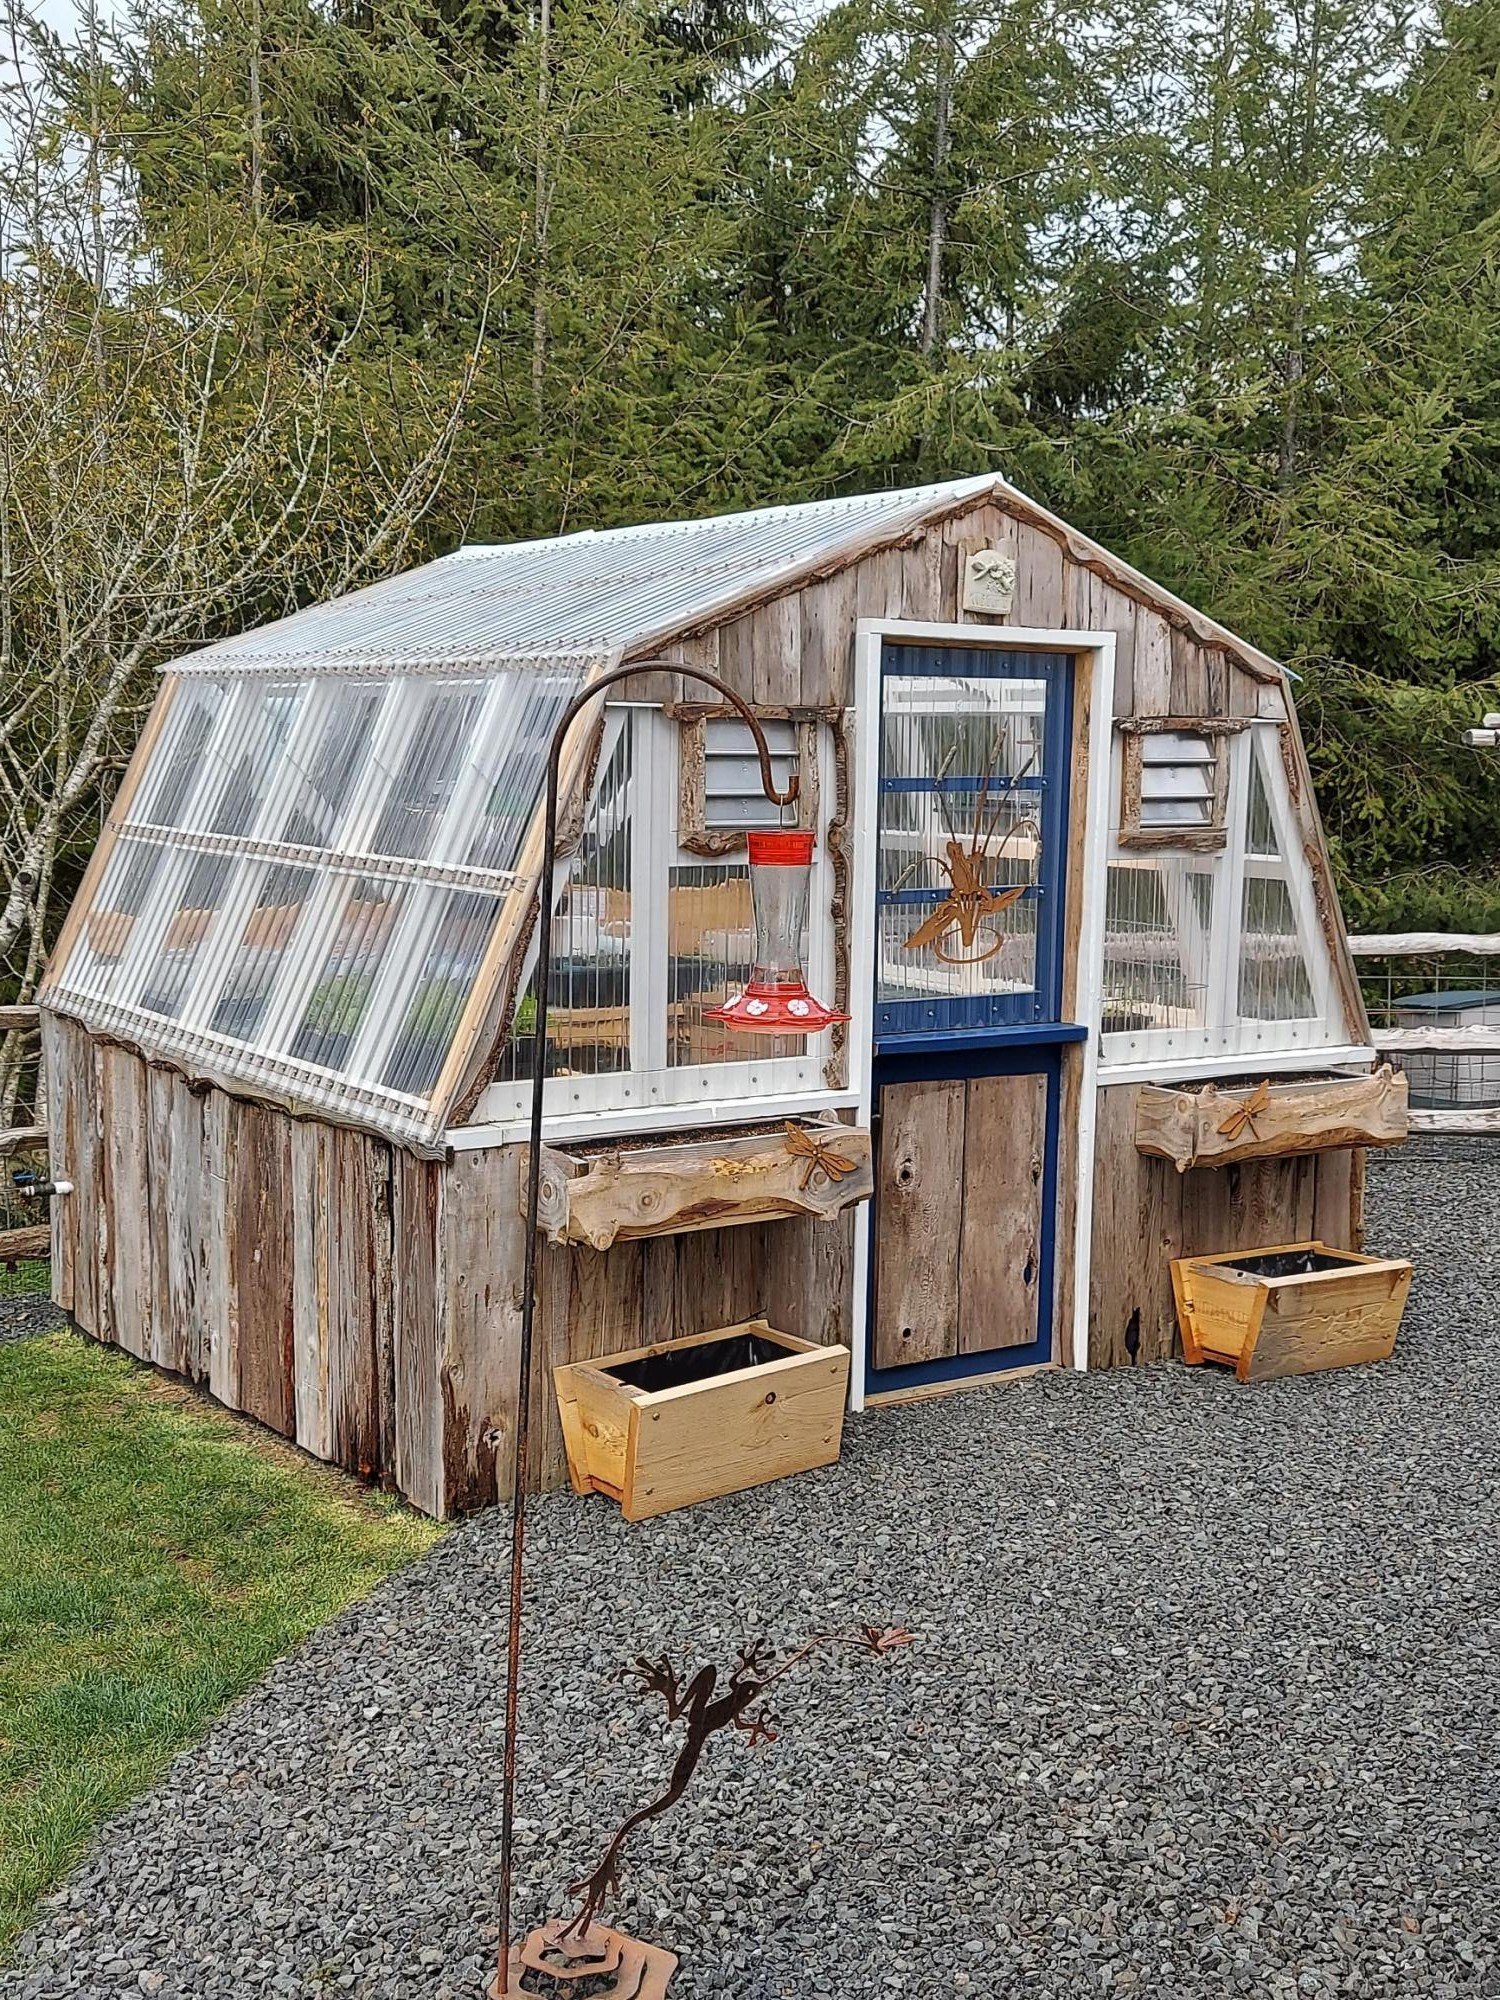
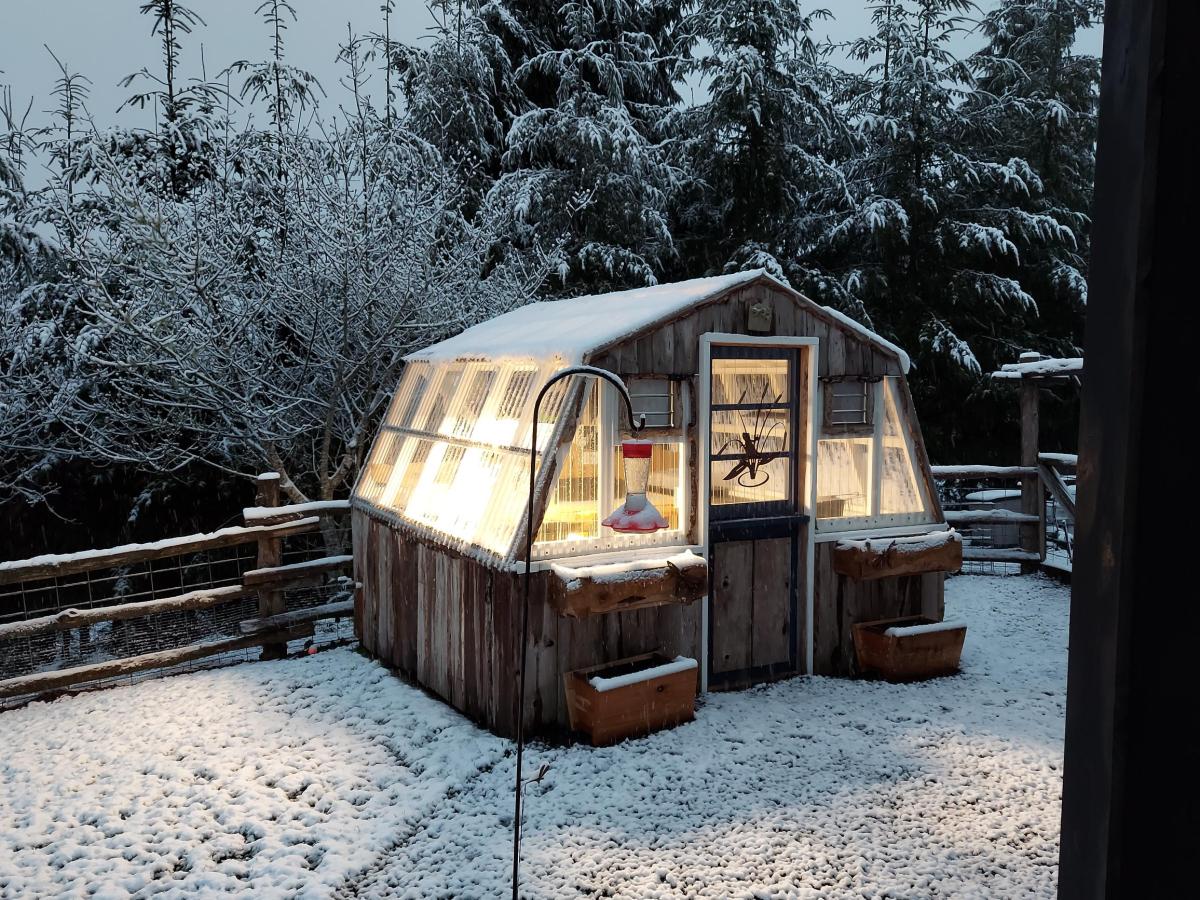
Reclaimed Cedar Board 10x 10 Barn Greenhouse
Thank you for sharing your plan!
10×10 greenhouse made with re-claimed cedar boards from old barn on Menlo, WA
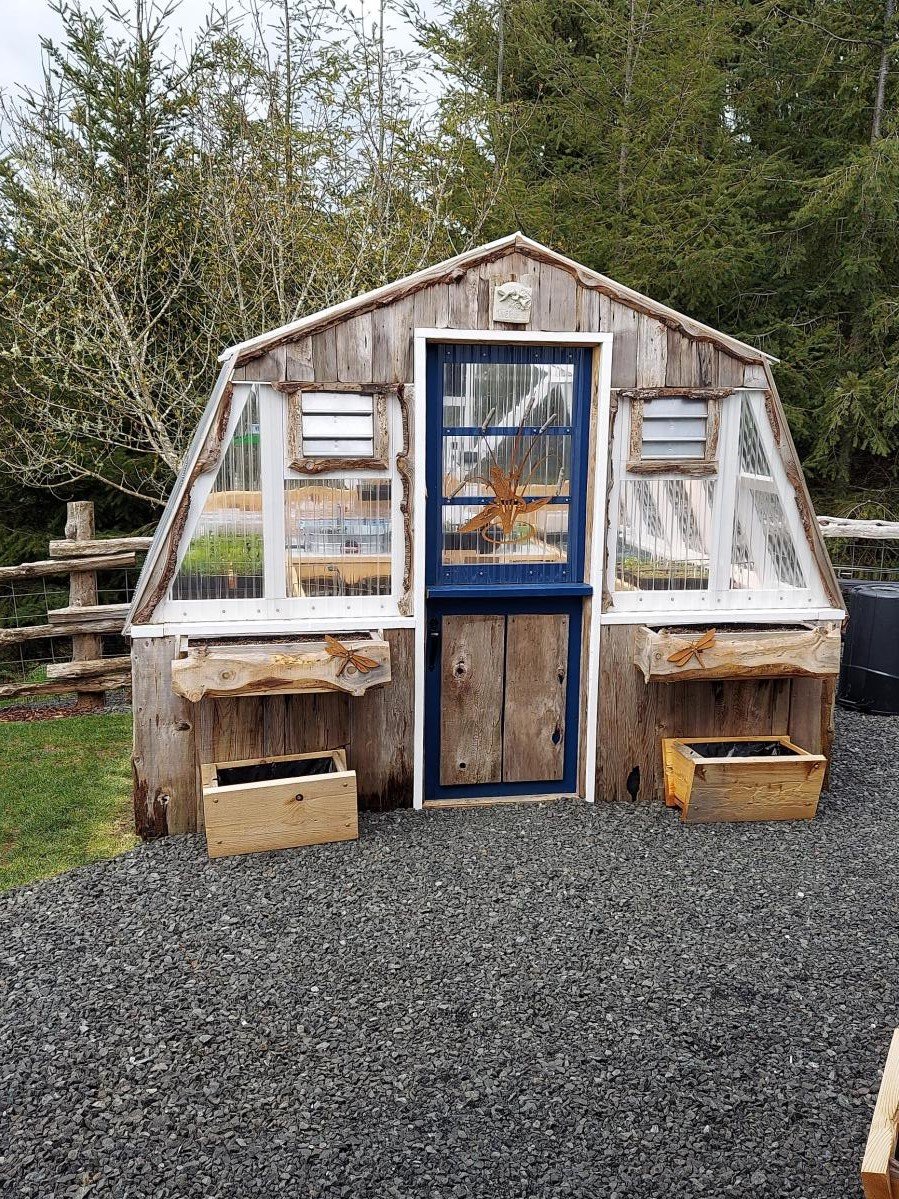
Built from Plan(s)
Comments
Wed, 06/08/2022 - 05:52
I love your design changes! Trade? ;-)
Beautiful! I like the fact that you bucked the trend and turned your clear panels for Washington rainwater runoff. There are good and bad with both directions, vertical makes the most sense. I can see myself re-doing ours at some point to change the panel direction. At least they're pointing the right direction on my skylights.
Great design, and of course, I love the 'live edge' details you added throughout!
Loft Bed for Renee's Room
This is the 2nd of two loft beds I have built using Ana's plans - they came out great and my girls love them! I did make some modifications to each, as the girls have different needs. It was a great project and I would like to thank Ana for the concise plans, cut lists, ideas, etc. You made it so easy!
If you are interested in seeing more about this project feel free to visit my blog at www.mothersmusings.net. See you there!
Built from Plan(s)
Estimated Cost
$150.00
Estimated Time Investment
Week Long Project (20 Hours or More)
Finish Used
I must say, if I had it to do again I might have upgraded on the wood, but I got the cheapest pine I could find. This led to using A LOT of wood filler and sand paper - and probably took me about twice the time it would have taken had I used prime wood. I used an oil based primer to make sure the knots stayed covered, and 2 coats of Behr high gloss white paint for the finish. Extra work...yes - but ultimately I think I cut my cost in half.
Recommended Skill Level
Beginner
Love love love my new bedroom!!!!
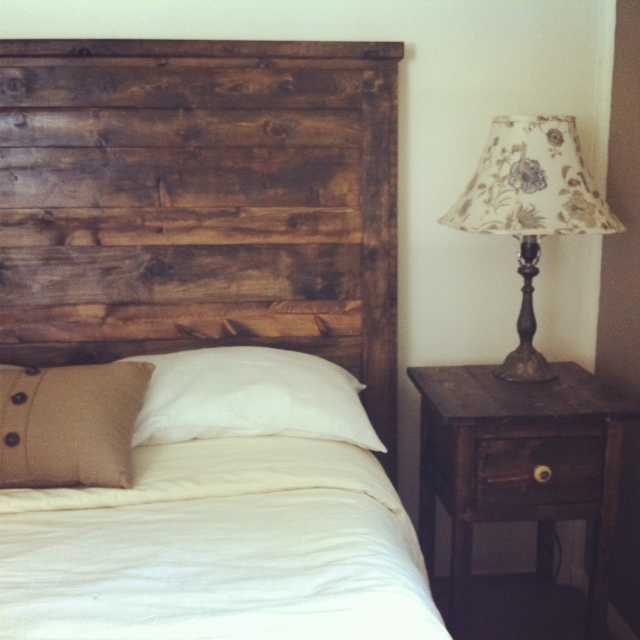
I've posted pictures of these separately, but I'm so excited about how these things came together in my room! This is the reclaimed wood headboard (queen) and the mini farmhouse bedside tables (only 1 pictured but the other is identical). Thanks so much Ana (and friends) for these awesome plans which have given me a fun thing to do in my free time and also inexpensively furnish my house!
Built from Plan(s)
Finish Used
Minwax Jacobean (looks slightly lighter in the picture than it is in real life)
Recommended Skill Level
Beginner
Cottage bedroom bookcase
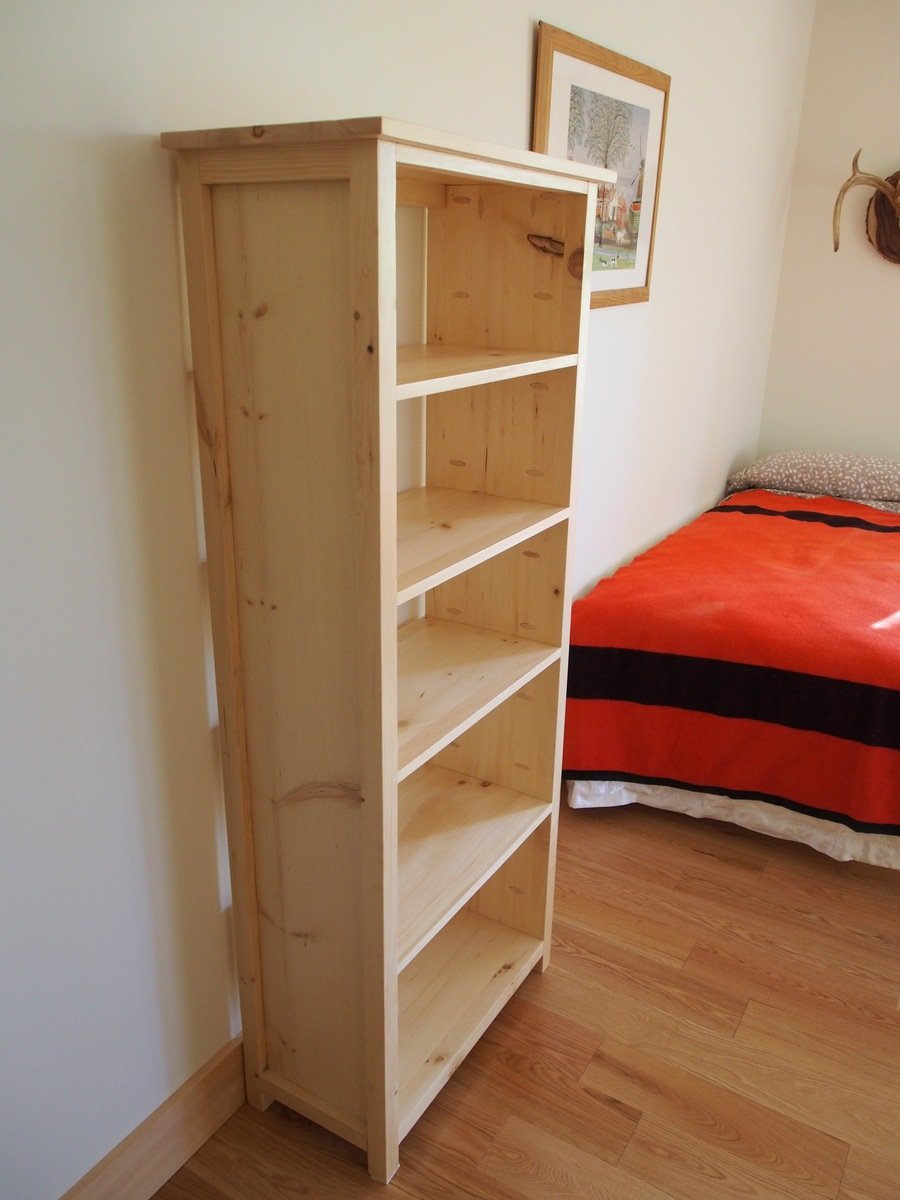
I used 1 x 10s to make the bookcase a little shallower, and left the back open. Thanks for the great plan.
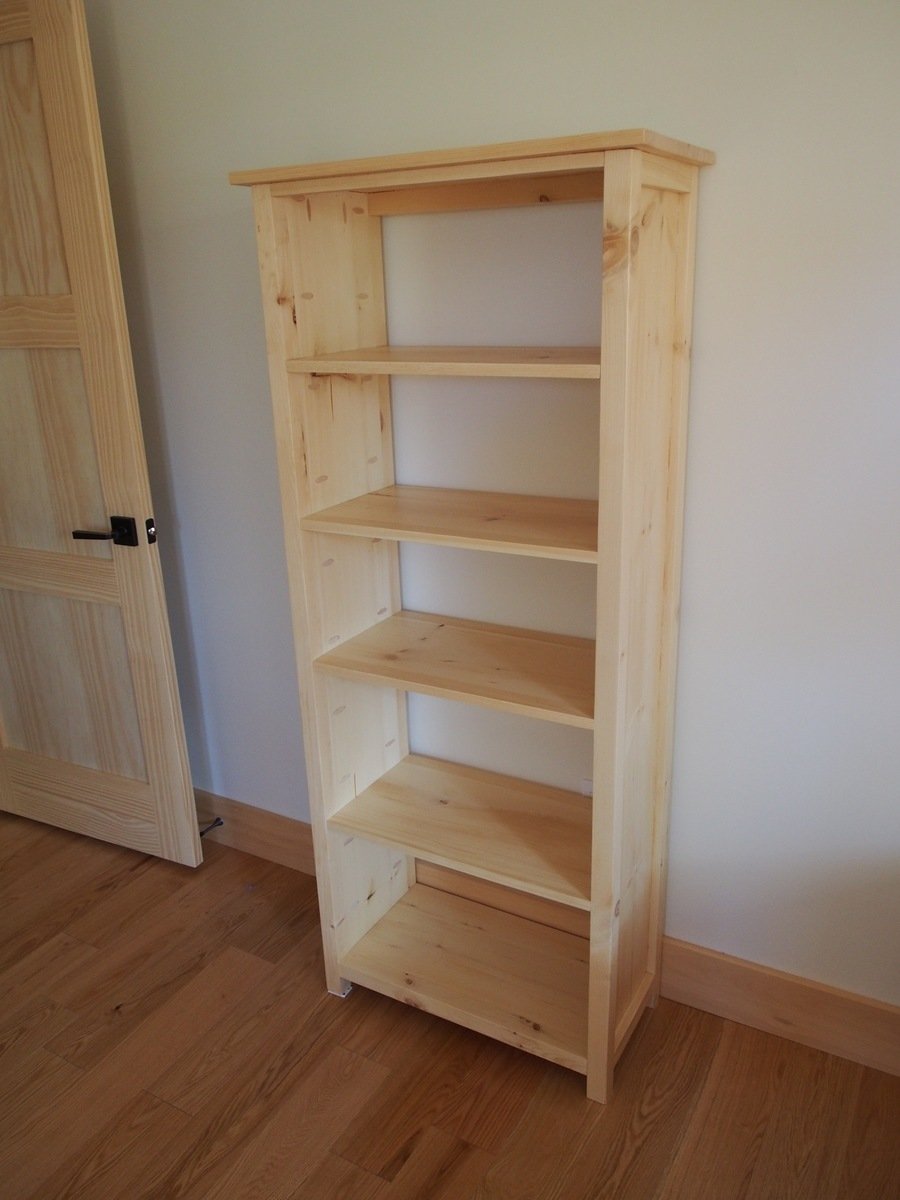
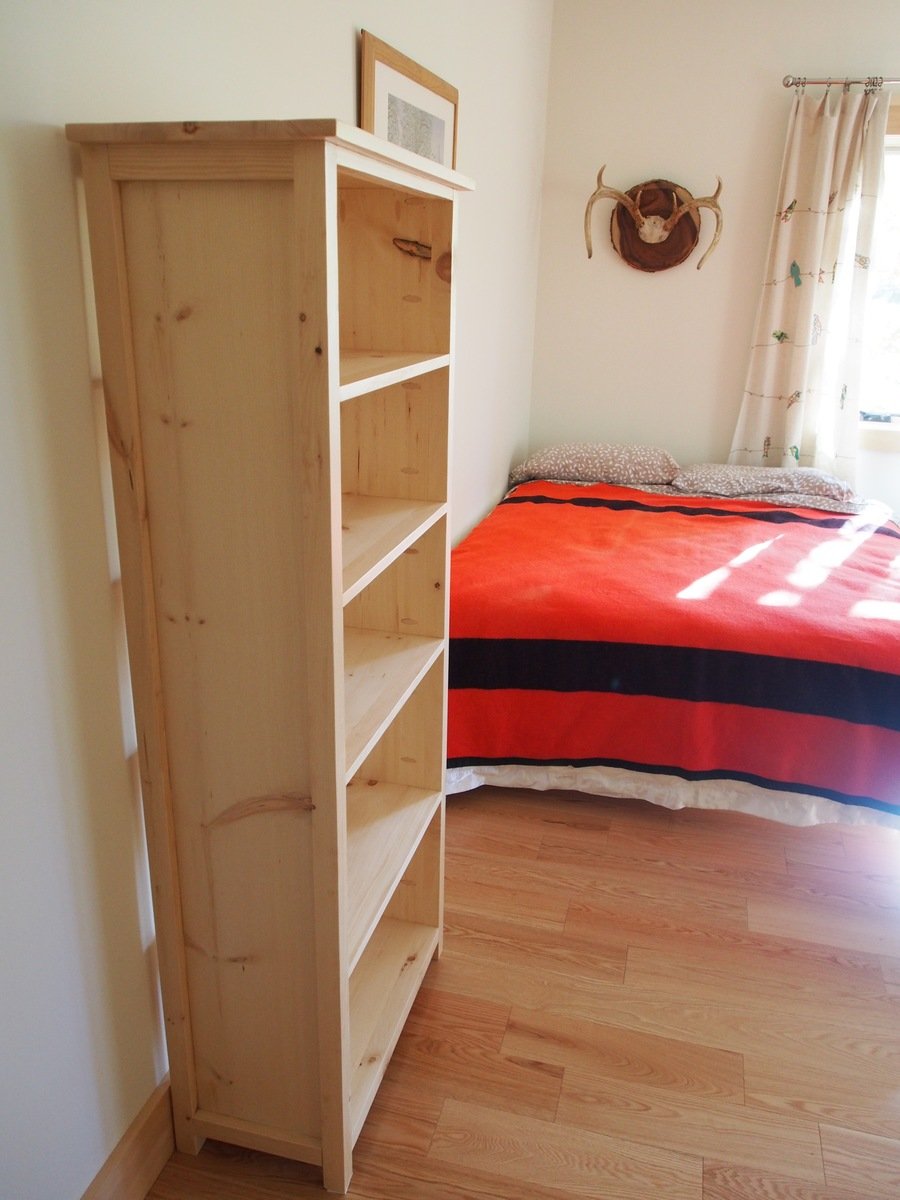
Built from Plan(s)
Estimated Cost
$100
Estimated Time Investment
Weekend Project (10-20 Hours)
Finish Used
Varathane diamond finish water-based polyurethane, satin.
Recommended Skill Level
Beginner
Christmas Tree Shelf with Lights

I made this Christmas tree shelf using the plans here.
I modified it by adding on two shelves so that it could accommodate the 6 hooks I needed for my family's stockings. I also hot glued a string of lights to the perimeter. This is serving as our Christmas tree due to space constraints, so I wanted it to be "fancier" and more like an actual tree.
I think I did ok for my first real build and my family seems to really like it.
Estimated Time Investment
Weekend Project (10-20 Hours)
Finish Used
Rustoleum Sage Green spray paint in Satin
Recommended Skill Level
Beginner
Comments

Sun, 12/06/2015 - 18:37
You did awesome!!! It looks
You did awesome!!! It looks great and I love how you just made the tree larger to accommodate your needs. Great job! Love the lights!