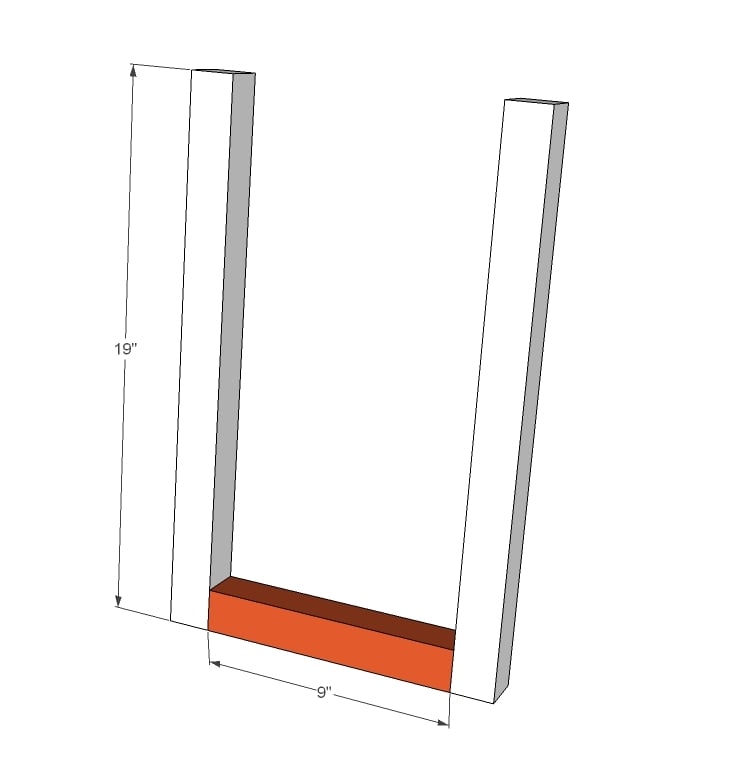
Reclaimed Wood Potting Bench
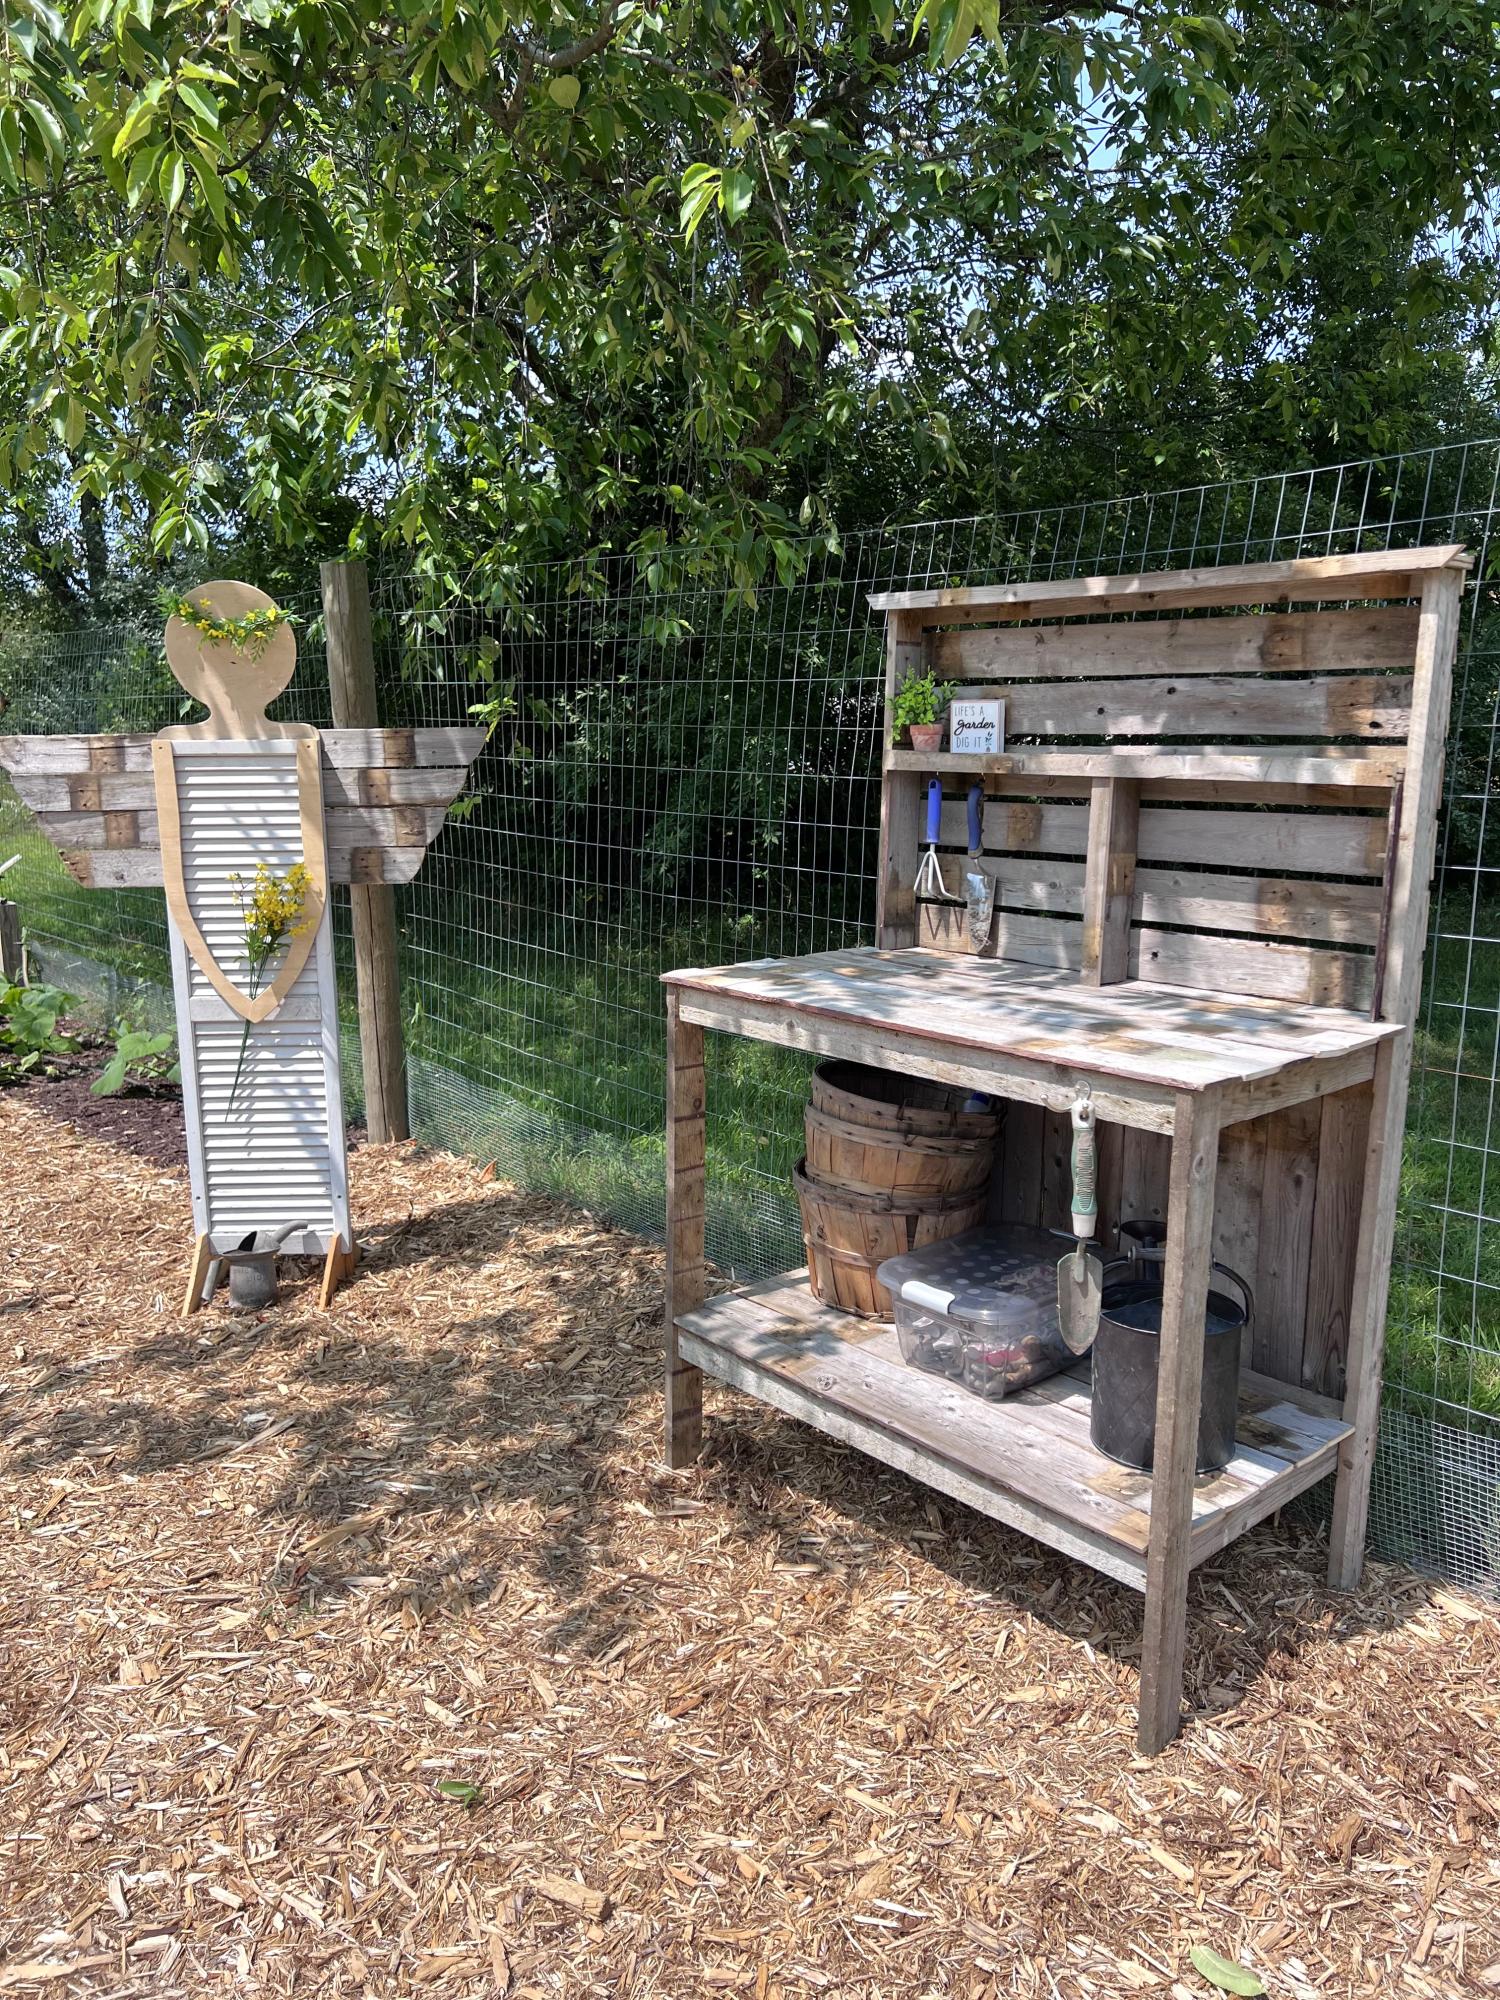
I used an old fence that friends took out of a yard for this potters bench. Modified the plans a little but thank you for making your plans available. I’m having so much fun.
Pam G.
Built from Plan(s)
I used an old fence that friends took out of a yard for this potters bench. Modified the plans a little but thank you for making your plans available. I’m having so much fun.
Pam G.
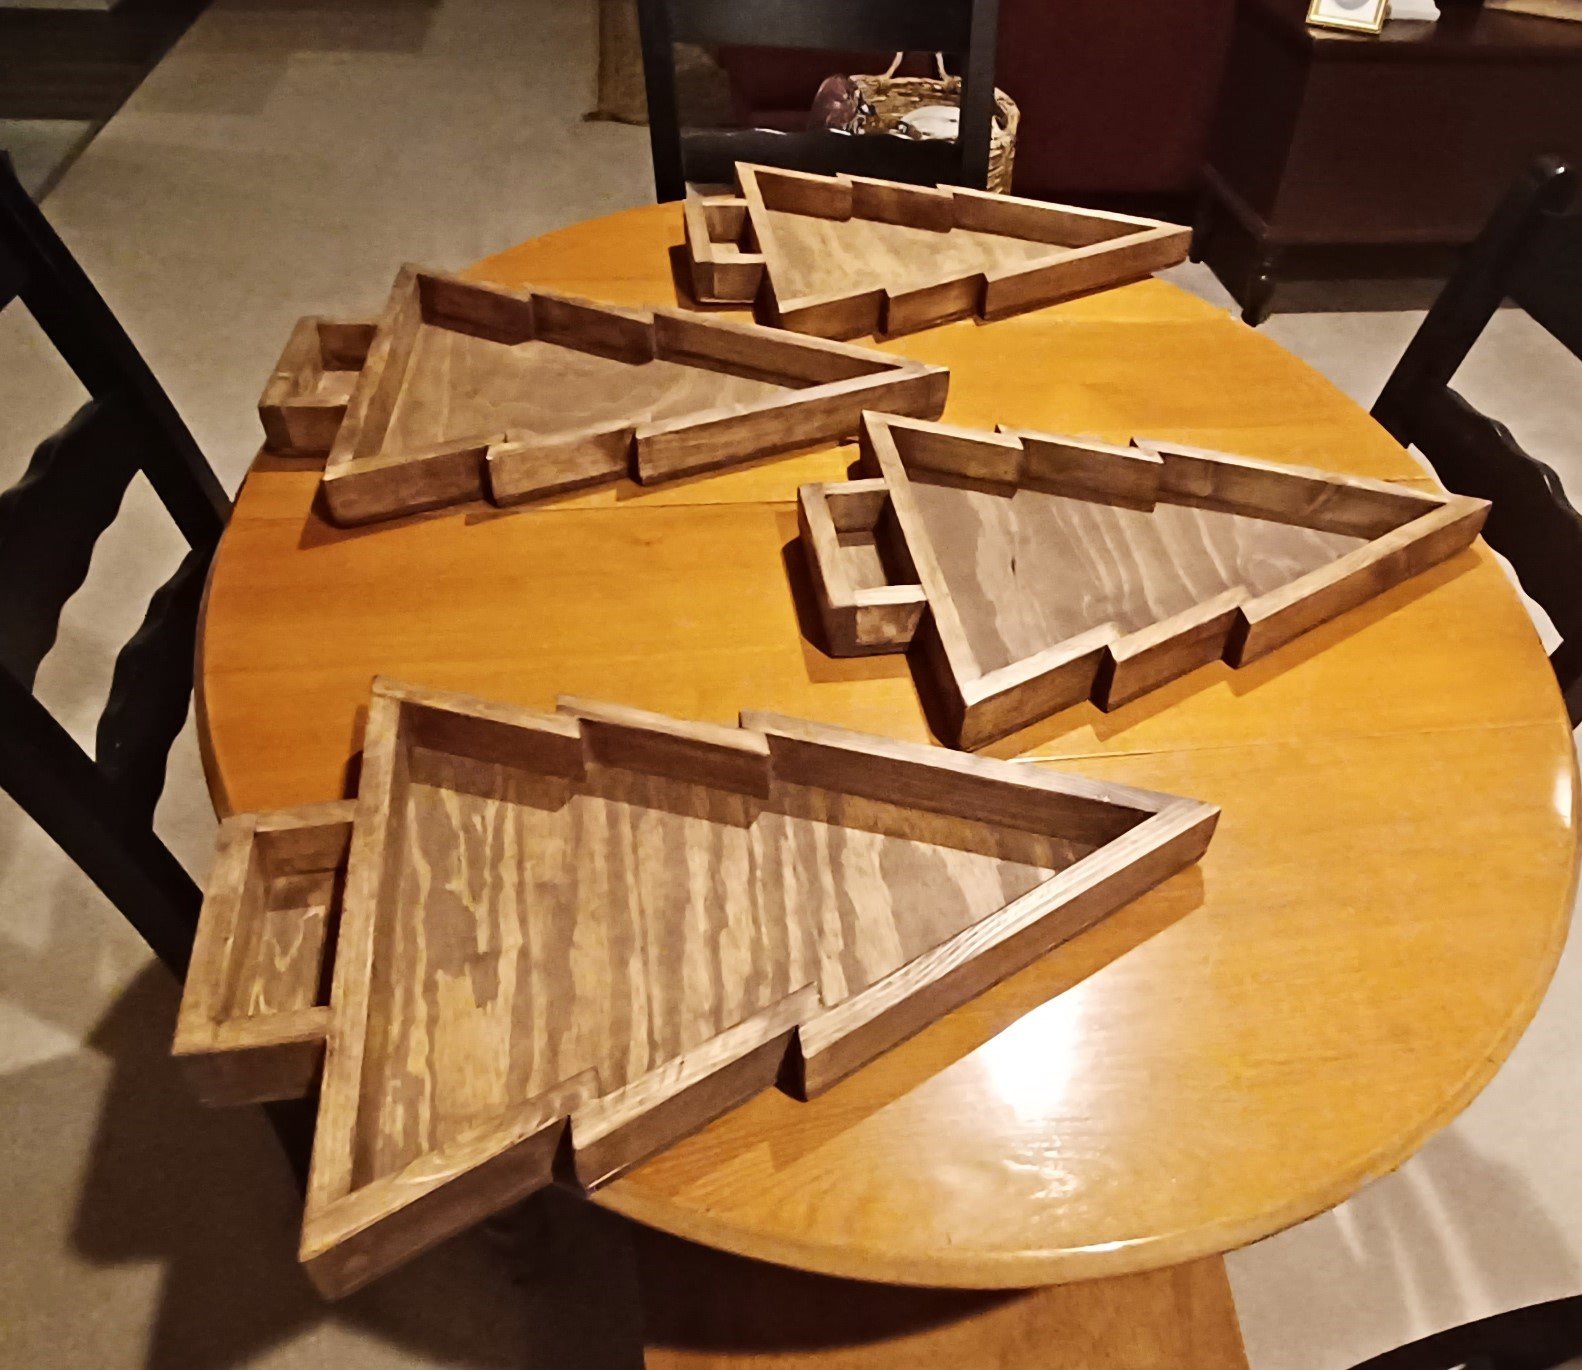
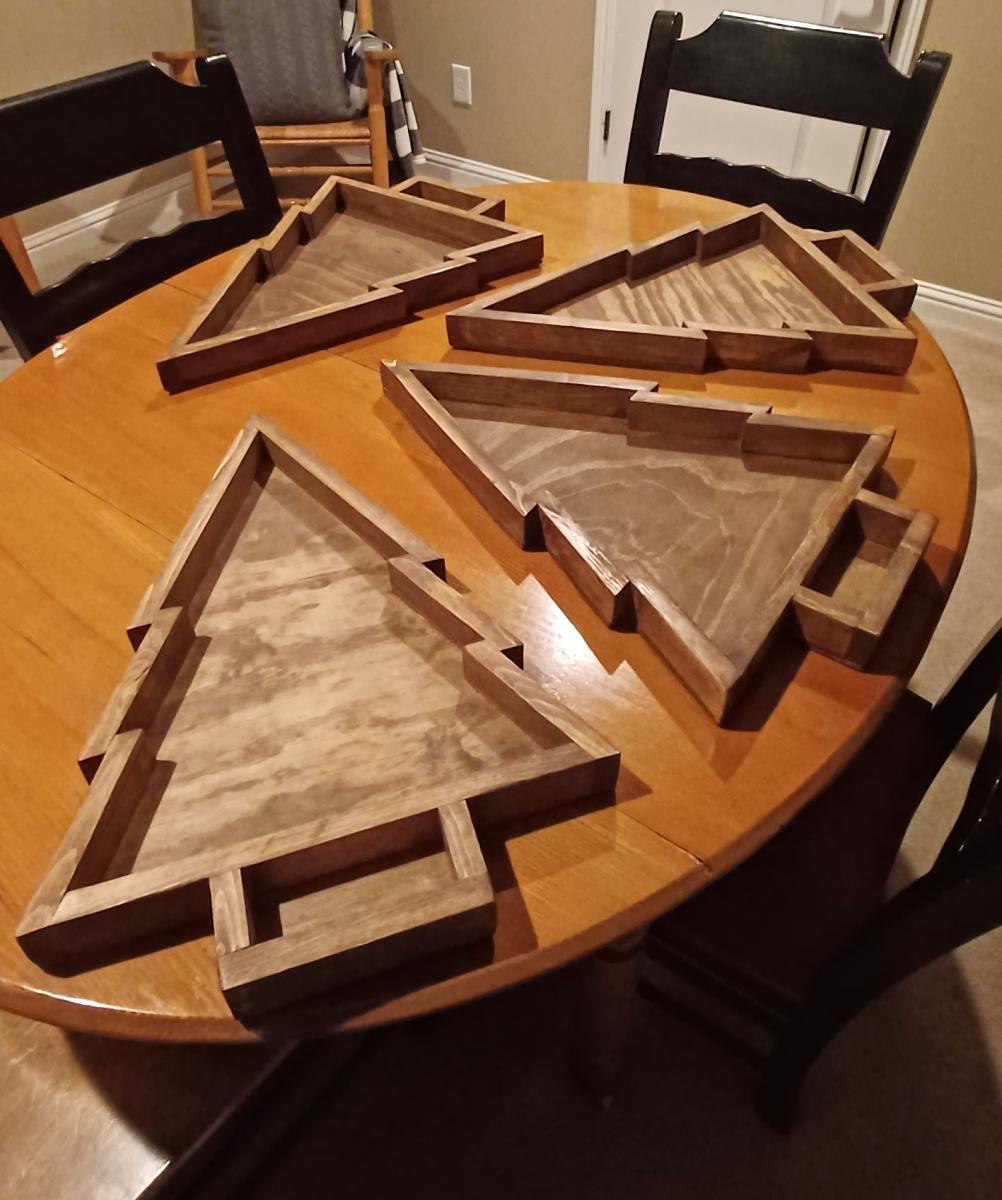
Christmas Tree Trays . Made these for my wife to give away as gifts as Hostess gifts to fill with food or other items. Also can used as a decoration. Easy to make and all wood user was scrap. Used Butcher Block stain. - Wfisk
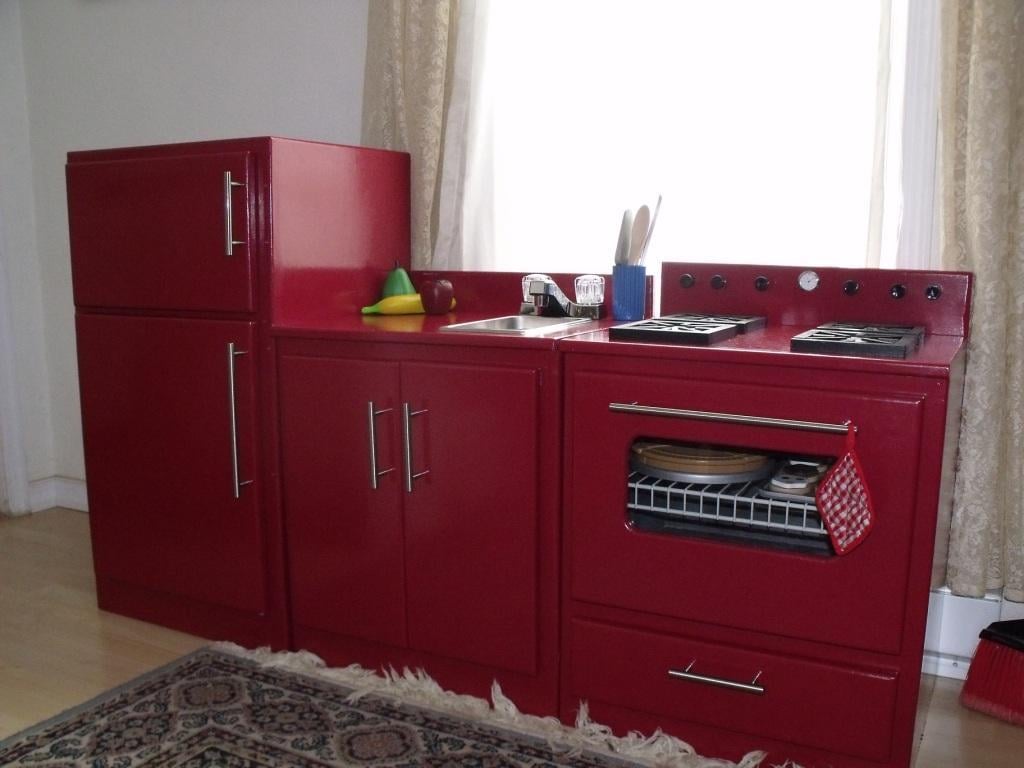
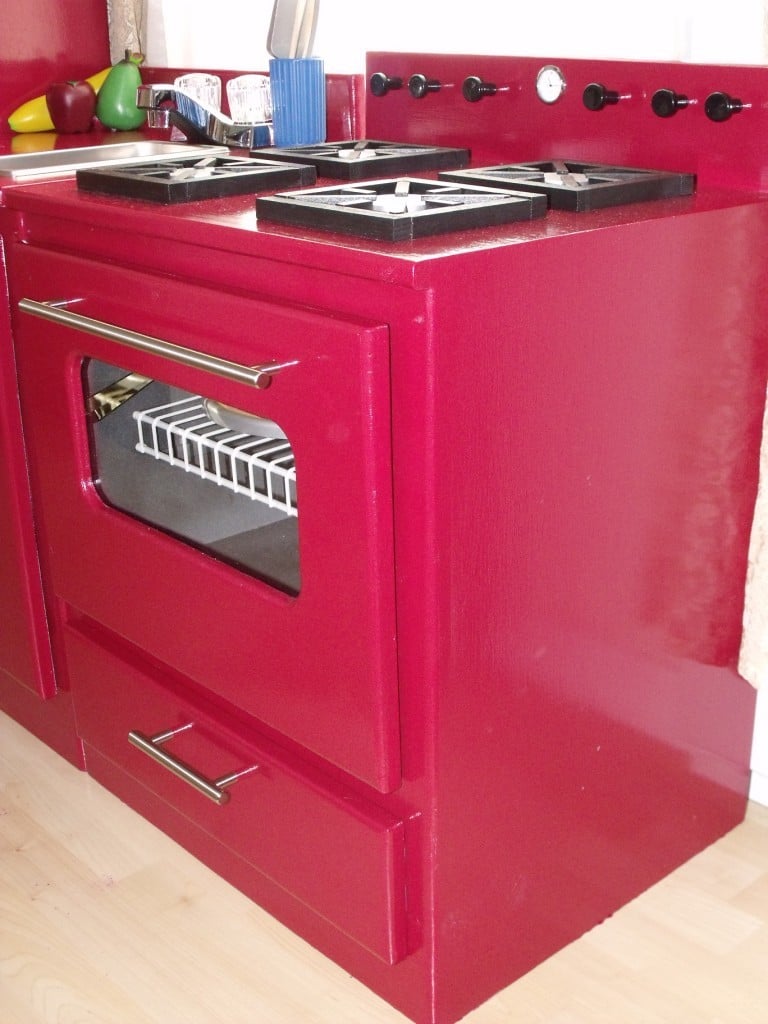
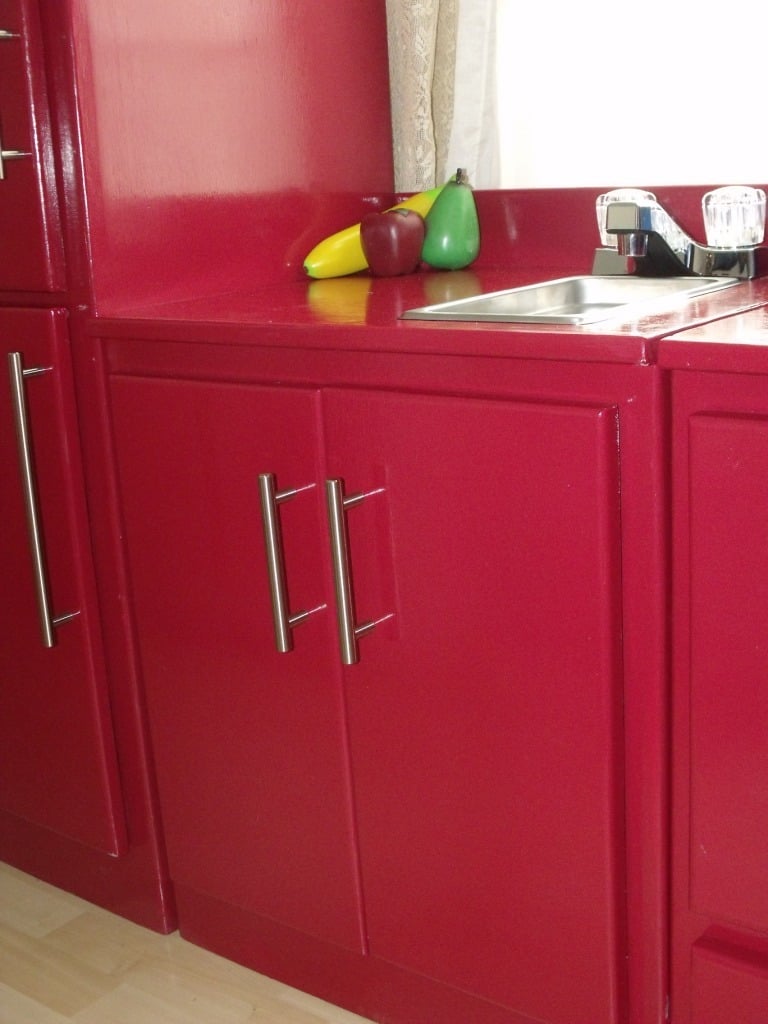
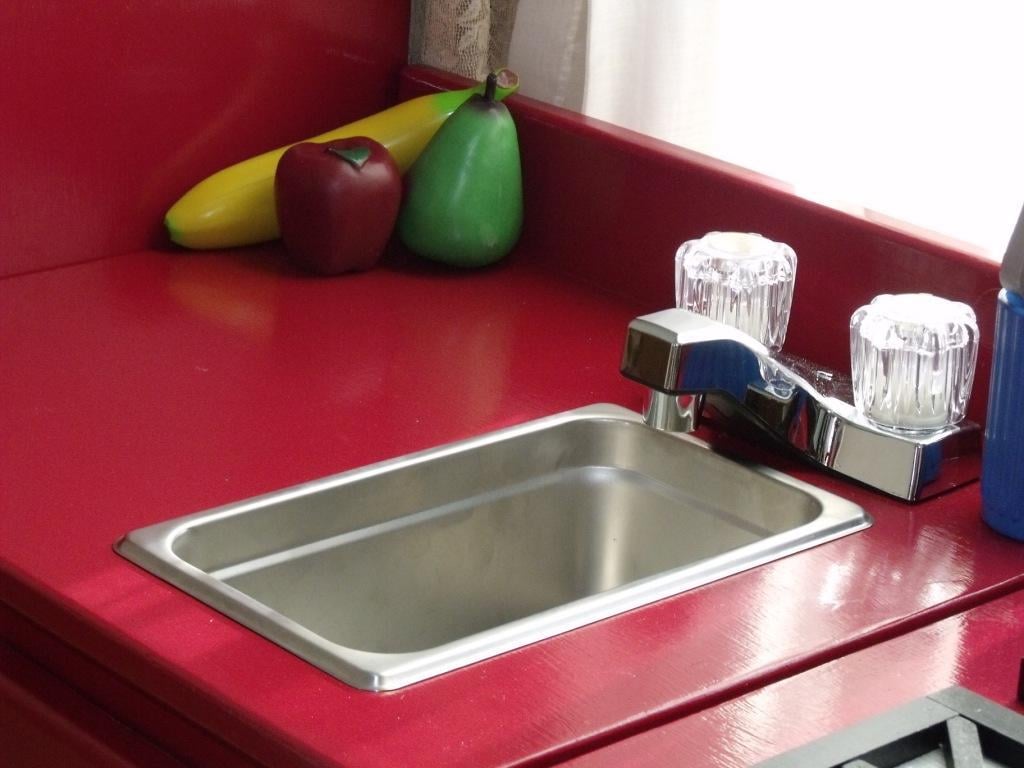
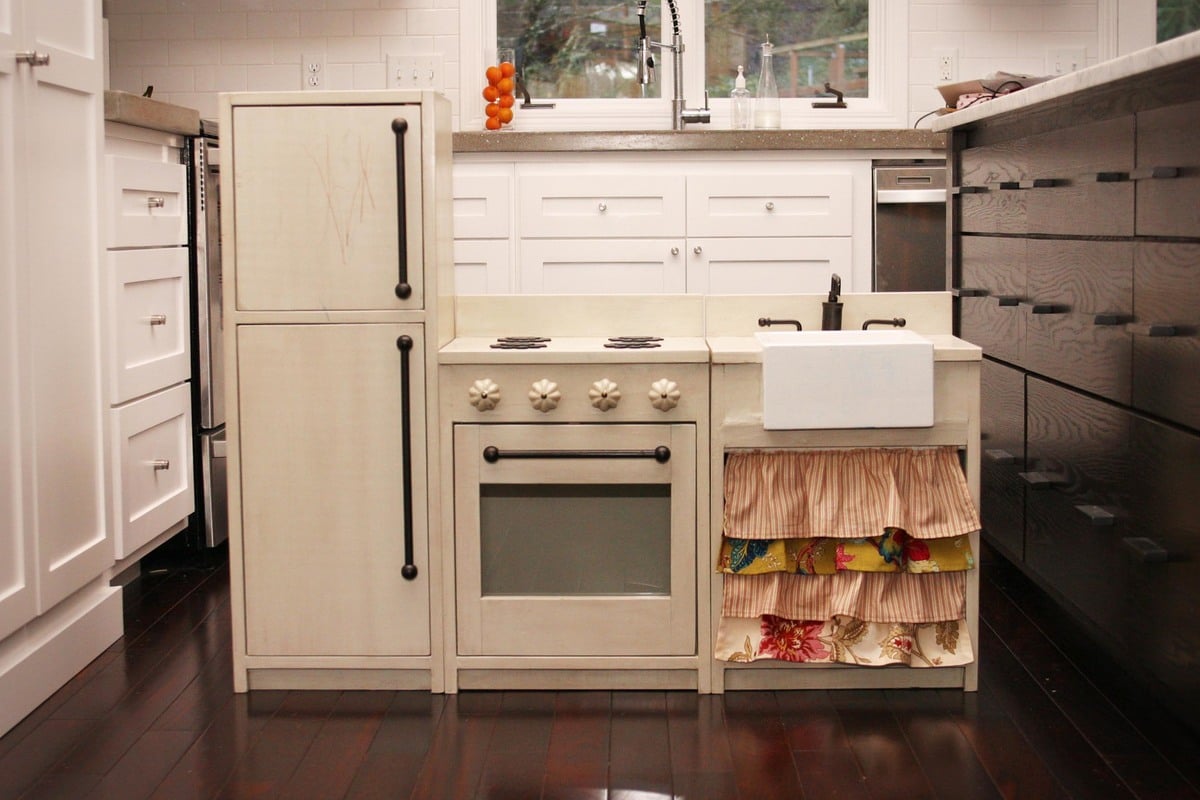
My father in law and I built this kitchen set for my two daughters, ages 3 yrs and 9 months. It was so fun to work with my father in law. I have built a few things before (table, chairs, doll bed, etc.) but nothing of this quality or magnitude. He is a great woodworker and knows how to do all the neat finishing touches that just make the project look really professional. I learned a ton working with him and had a blast!
I was inspired by Ana's kitchen sets and used a combo of then and the Lowes plans and I was very happy with how it turned out. I changed a few things: put two doors under the sink, made "gas" burners instead of "electric", used half the sink cabinet top for the sink and left the other half for counter space, added a clock to the stove, made the oven door open down.
The sink is a food service warming pan 1/4 size and the faucet came from Wal-Mart for $10. I will probably replace it with a nicer one from the ReStore when I get a chance
Break down of costs:
Lumber: $100
Hinges and pulls: $40
Paint and primer: $45
Burners: $20
Sink: $24


Mon, 12/26/2011 - 12:33
What a beautiful kitchen! I love the burners! And the warming drawer! Thank you for sharing.
Mon, 12/26/2011 - 13:09
Holy cow! Fantastic job! You guys really pulled it together and I really love the creative use of hardware, etc.
Wed, 12/28/2011 - 07:50
Thanks guys! Only problem is that my girls use it so much, I only get a chance to play with it when they go to bed! :)
Wed, 02/29/2012 - 10:03
Sorry I didn't see your comment sooner - I made the burners with craft wood circles and squares and 1/2 inch pieces of wood. I notched the ends over the circle with a chisel.
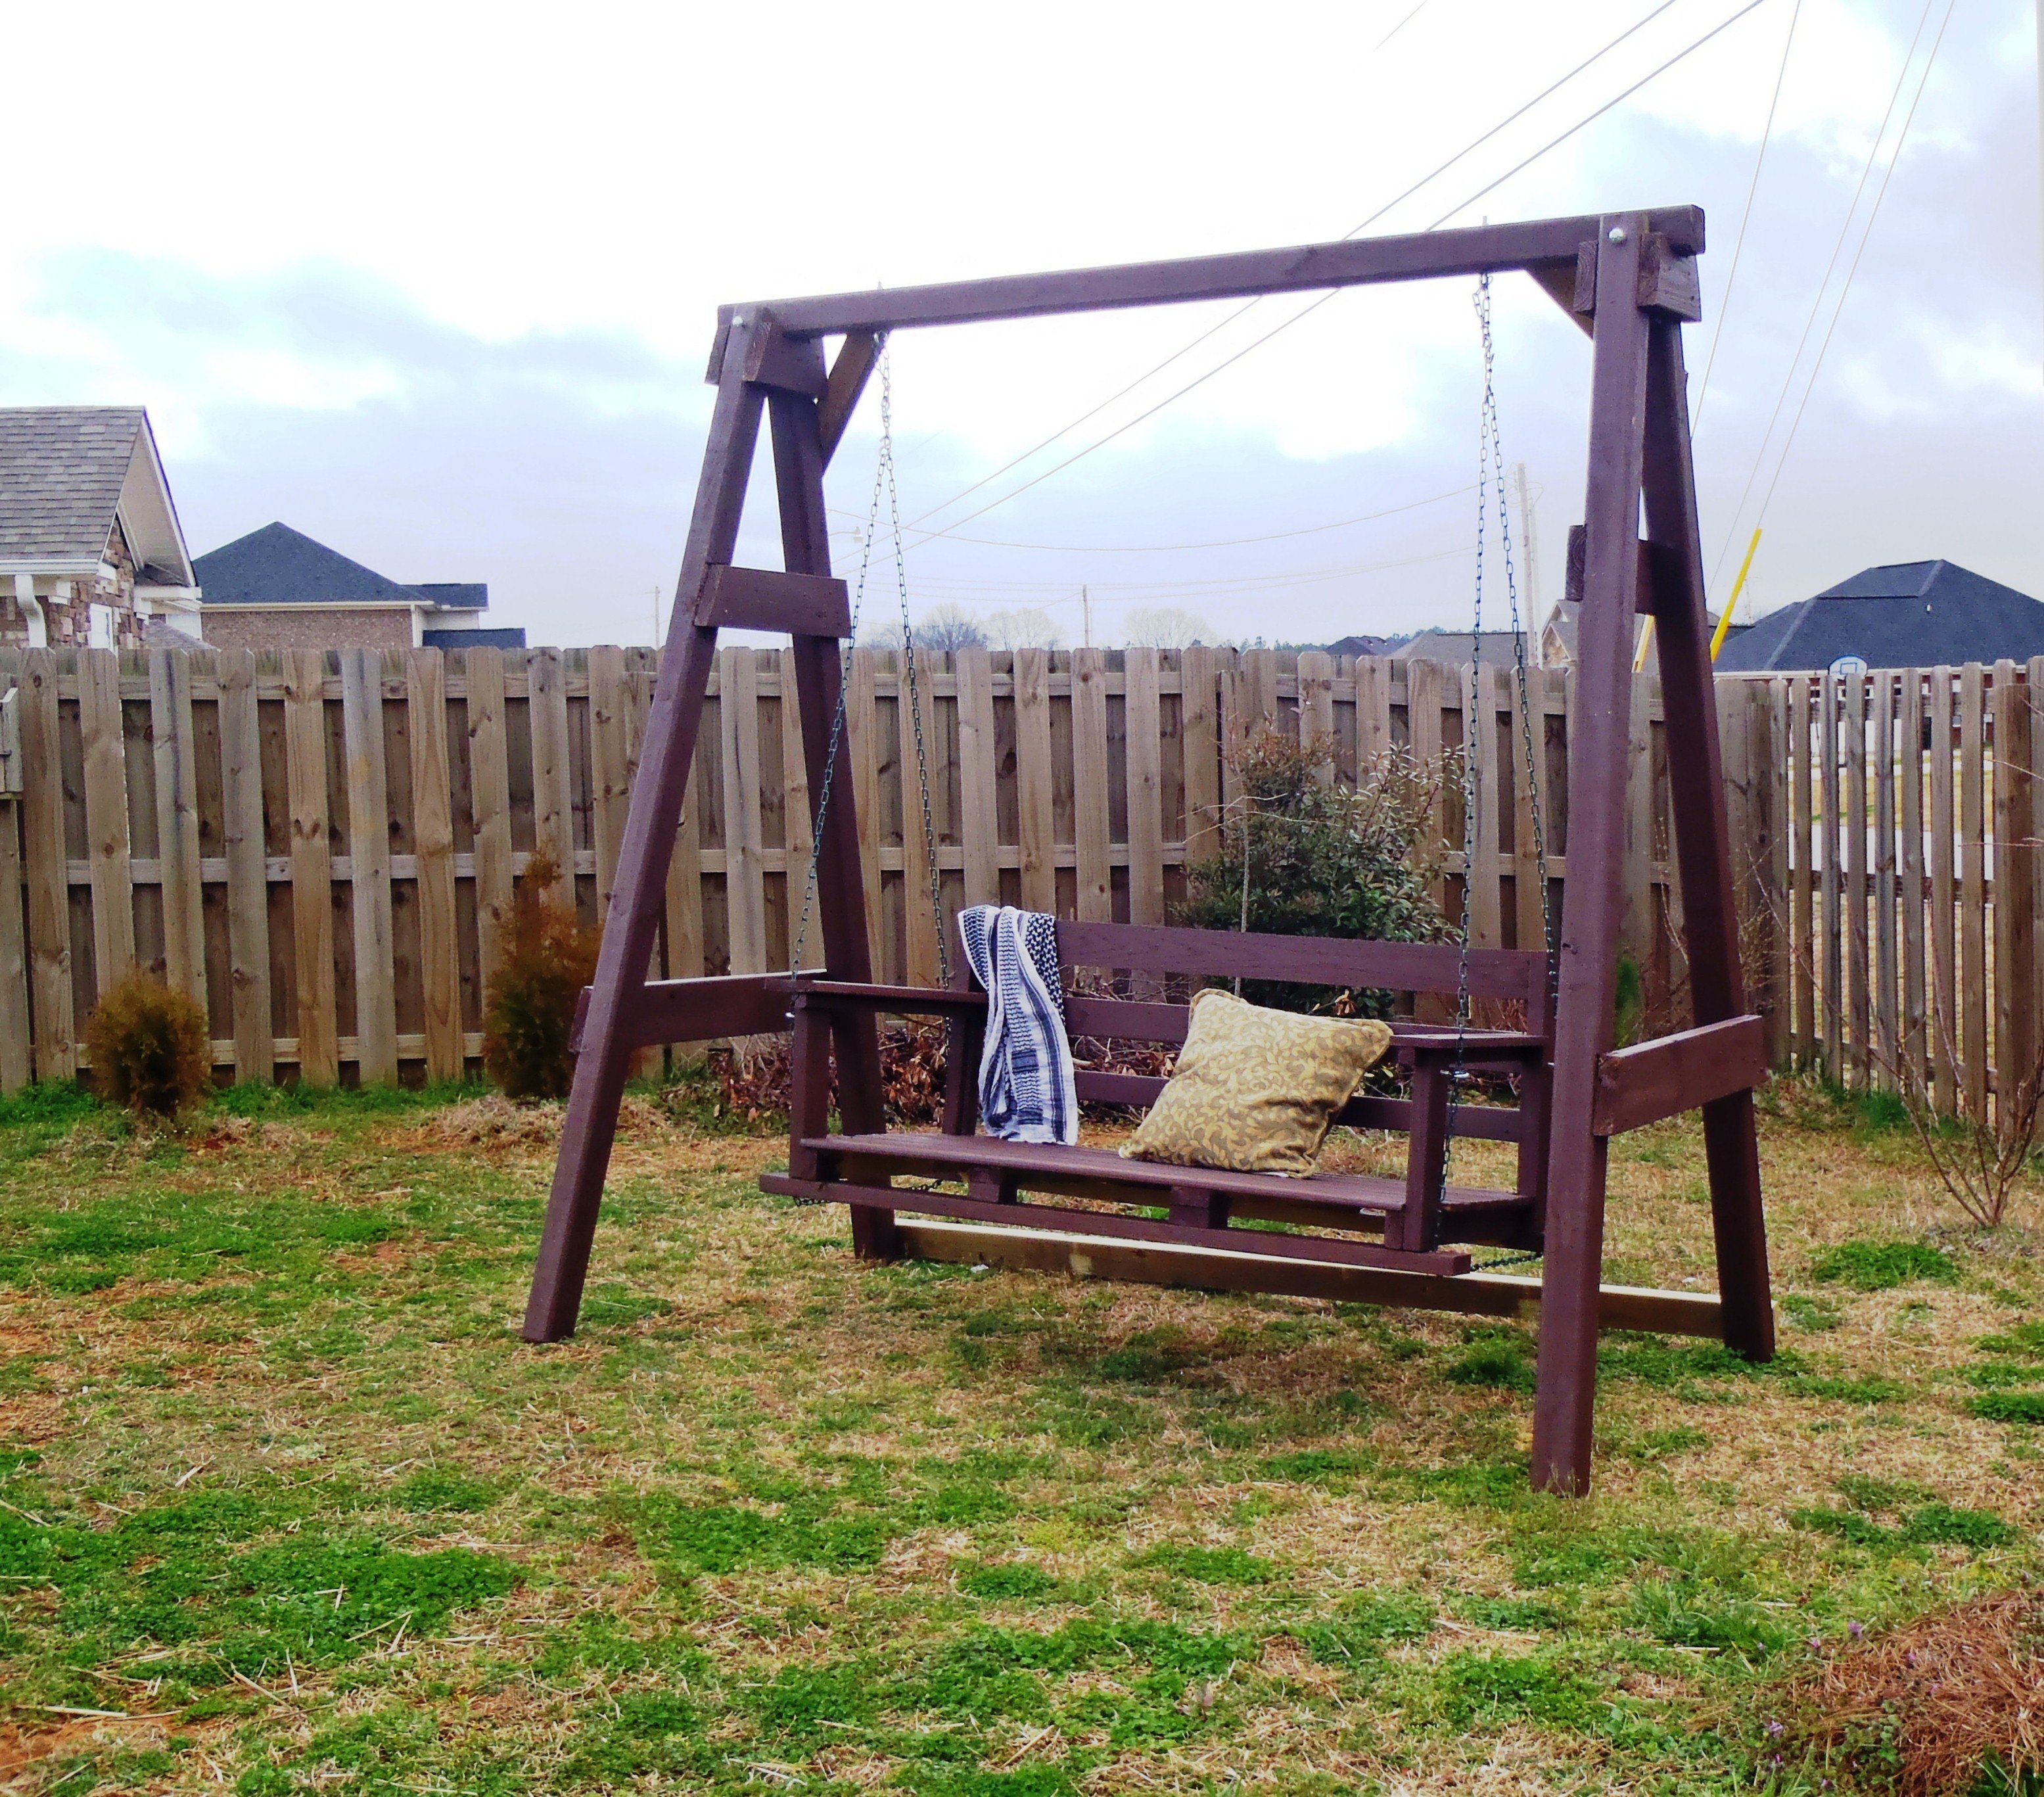
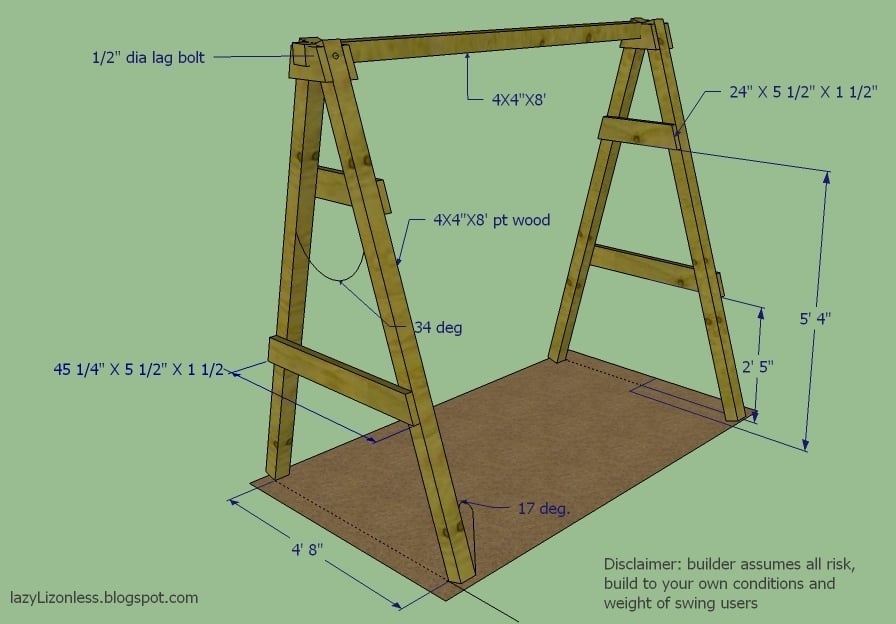
I've finished my swing but my porch don't have enough clearance so I built A frame stand for it.
Fri, 03/02/2012 - 07:09
You did such a great job on your swing! I hope I can build up to making one someday.

In reply to I love this swing! by beachmama79
Thu, 05/10/2012 - 14:02
Thanks and you will. I just added the dimensions in case
Fri, 04/19/2013 - 15:37
I love the idea of adding the A-frame considering that where i live there are no real trees to hang it on and building a porch where one doesn't already exist is a pain in the butt! Lol. How wide do you think we could go before it starts compromising the frames integrity? And how much weight can it hold?
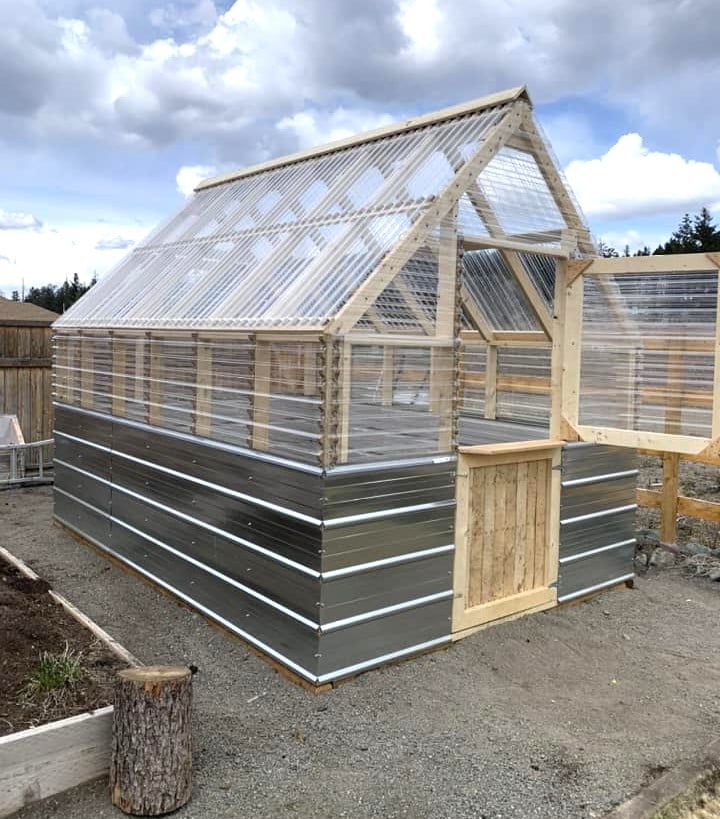
DIY Greenhouse by Trenton Kirby on Facebook!
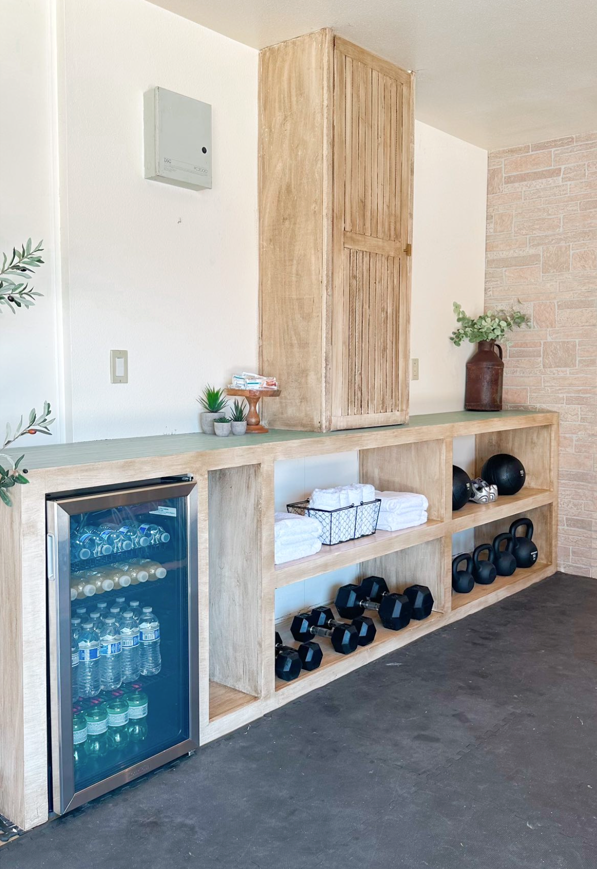
Fabulous home gym by Nailgun Nelly!
*Incorporated and modified the grand waterfall console plan
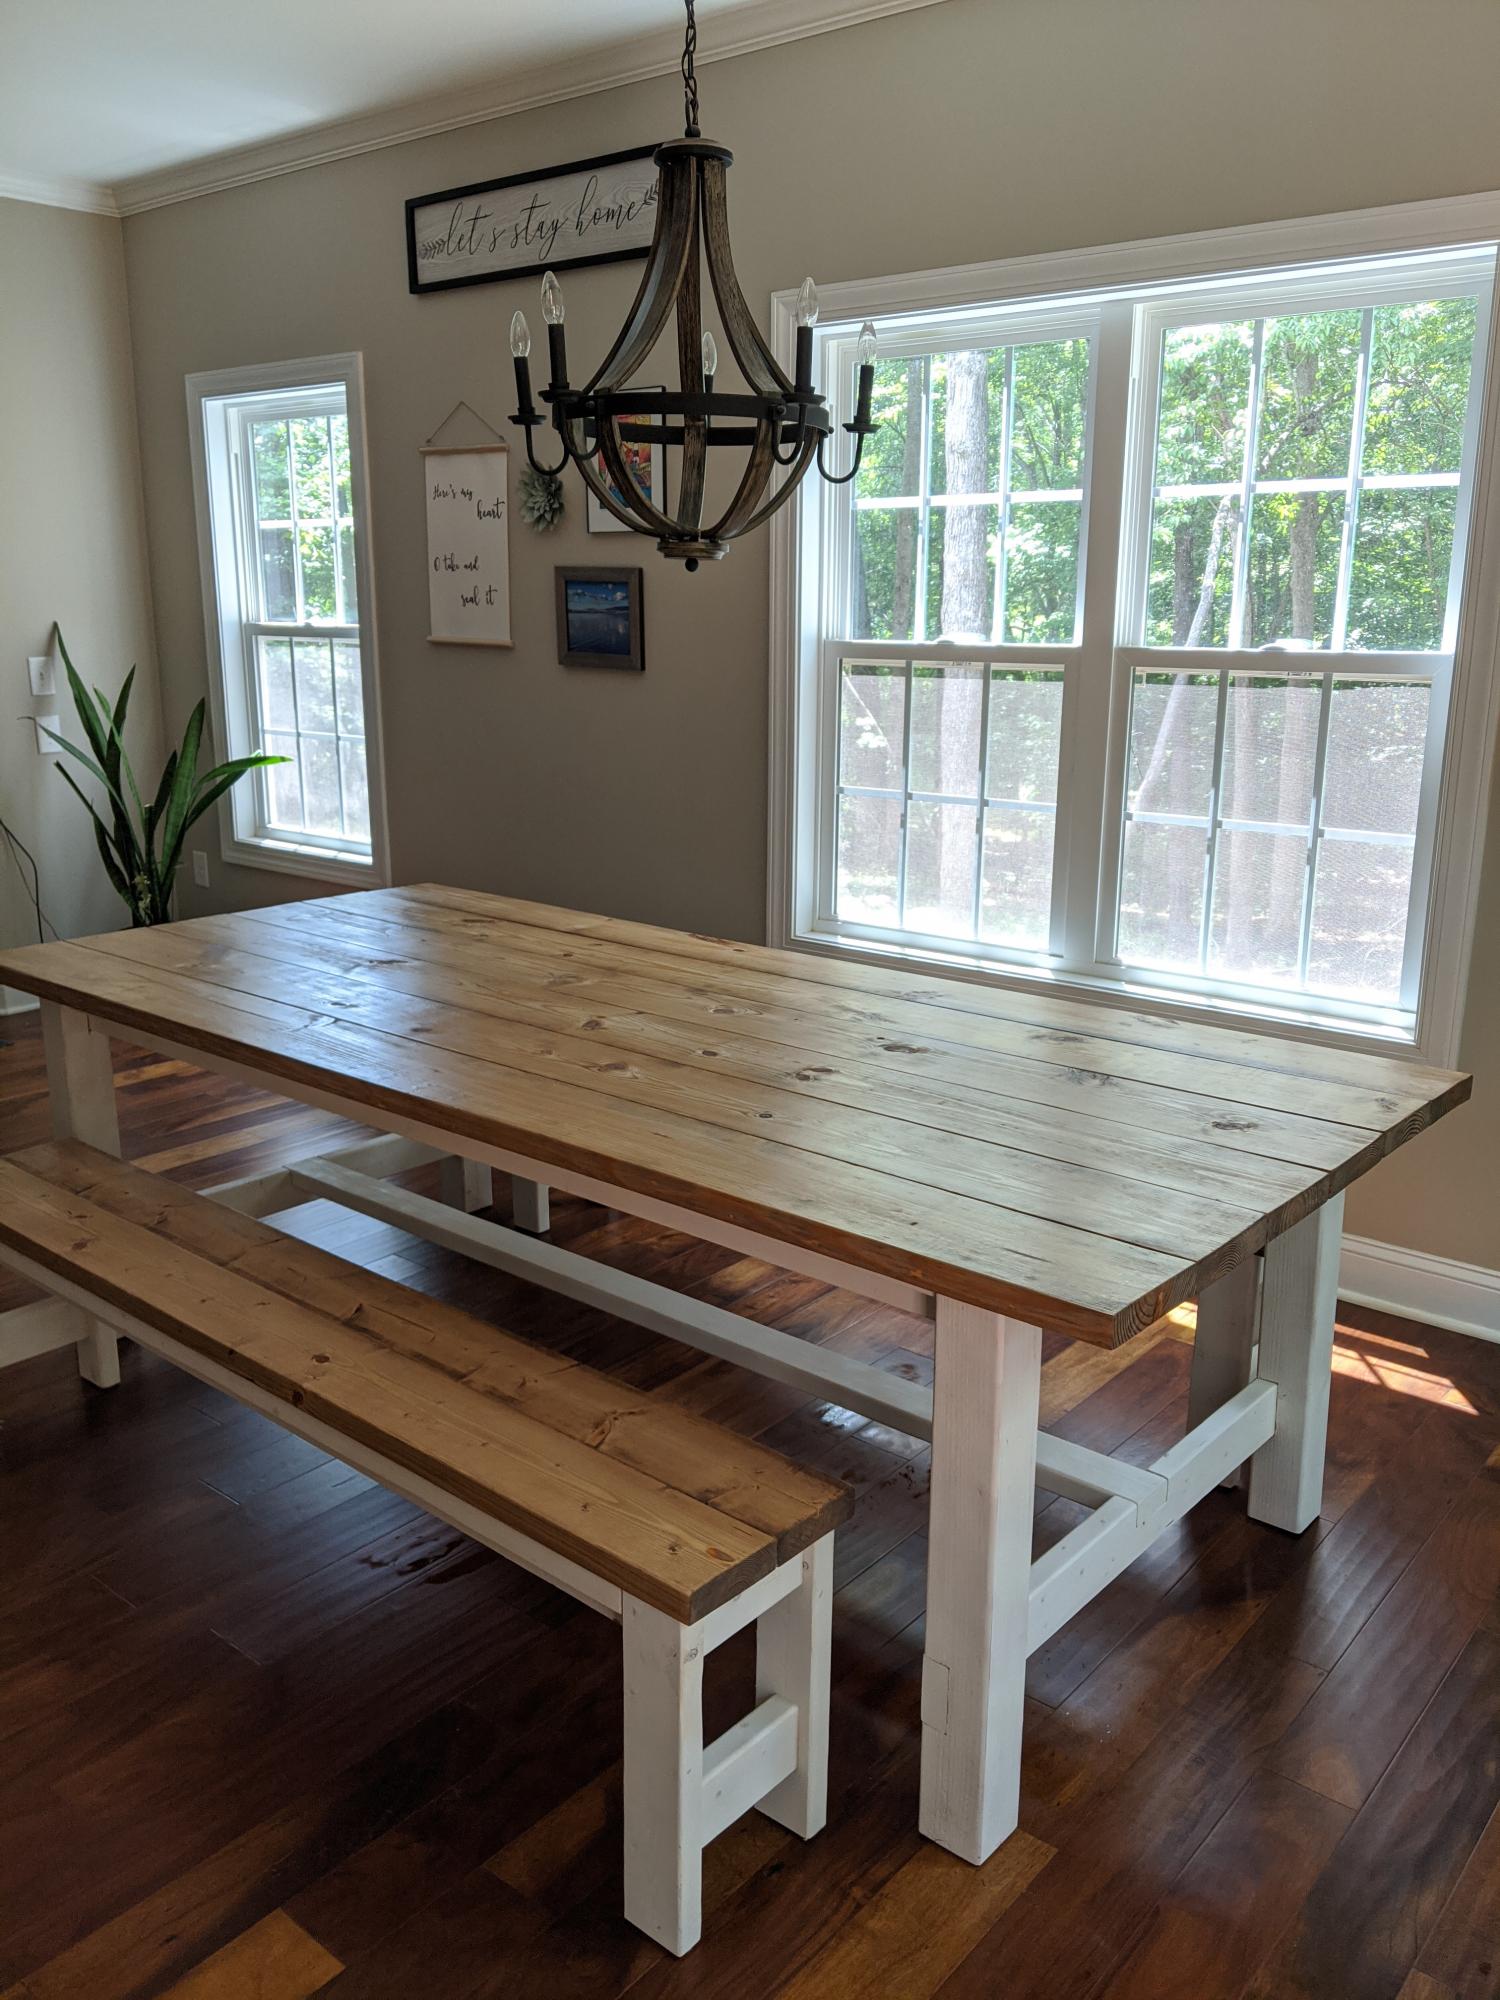
First table build! We modified the plans with no breadboard ends since we live with lots of humidity and wanted to allow the wood movement. We also used 4x4s for the legs. White chalk spray paint legs and custom mix of special walnut and weathered oak stains. We LOVE it!!
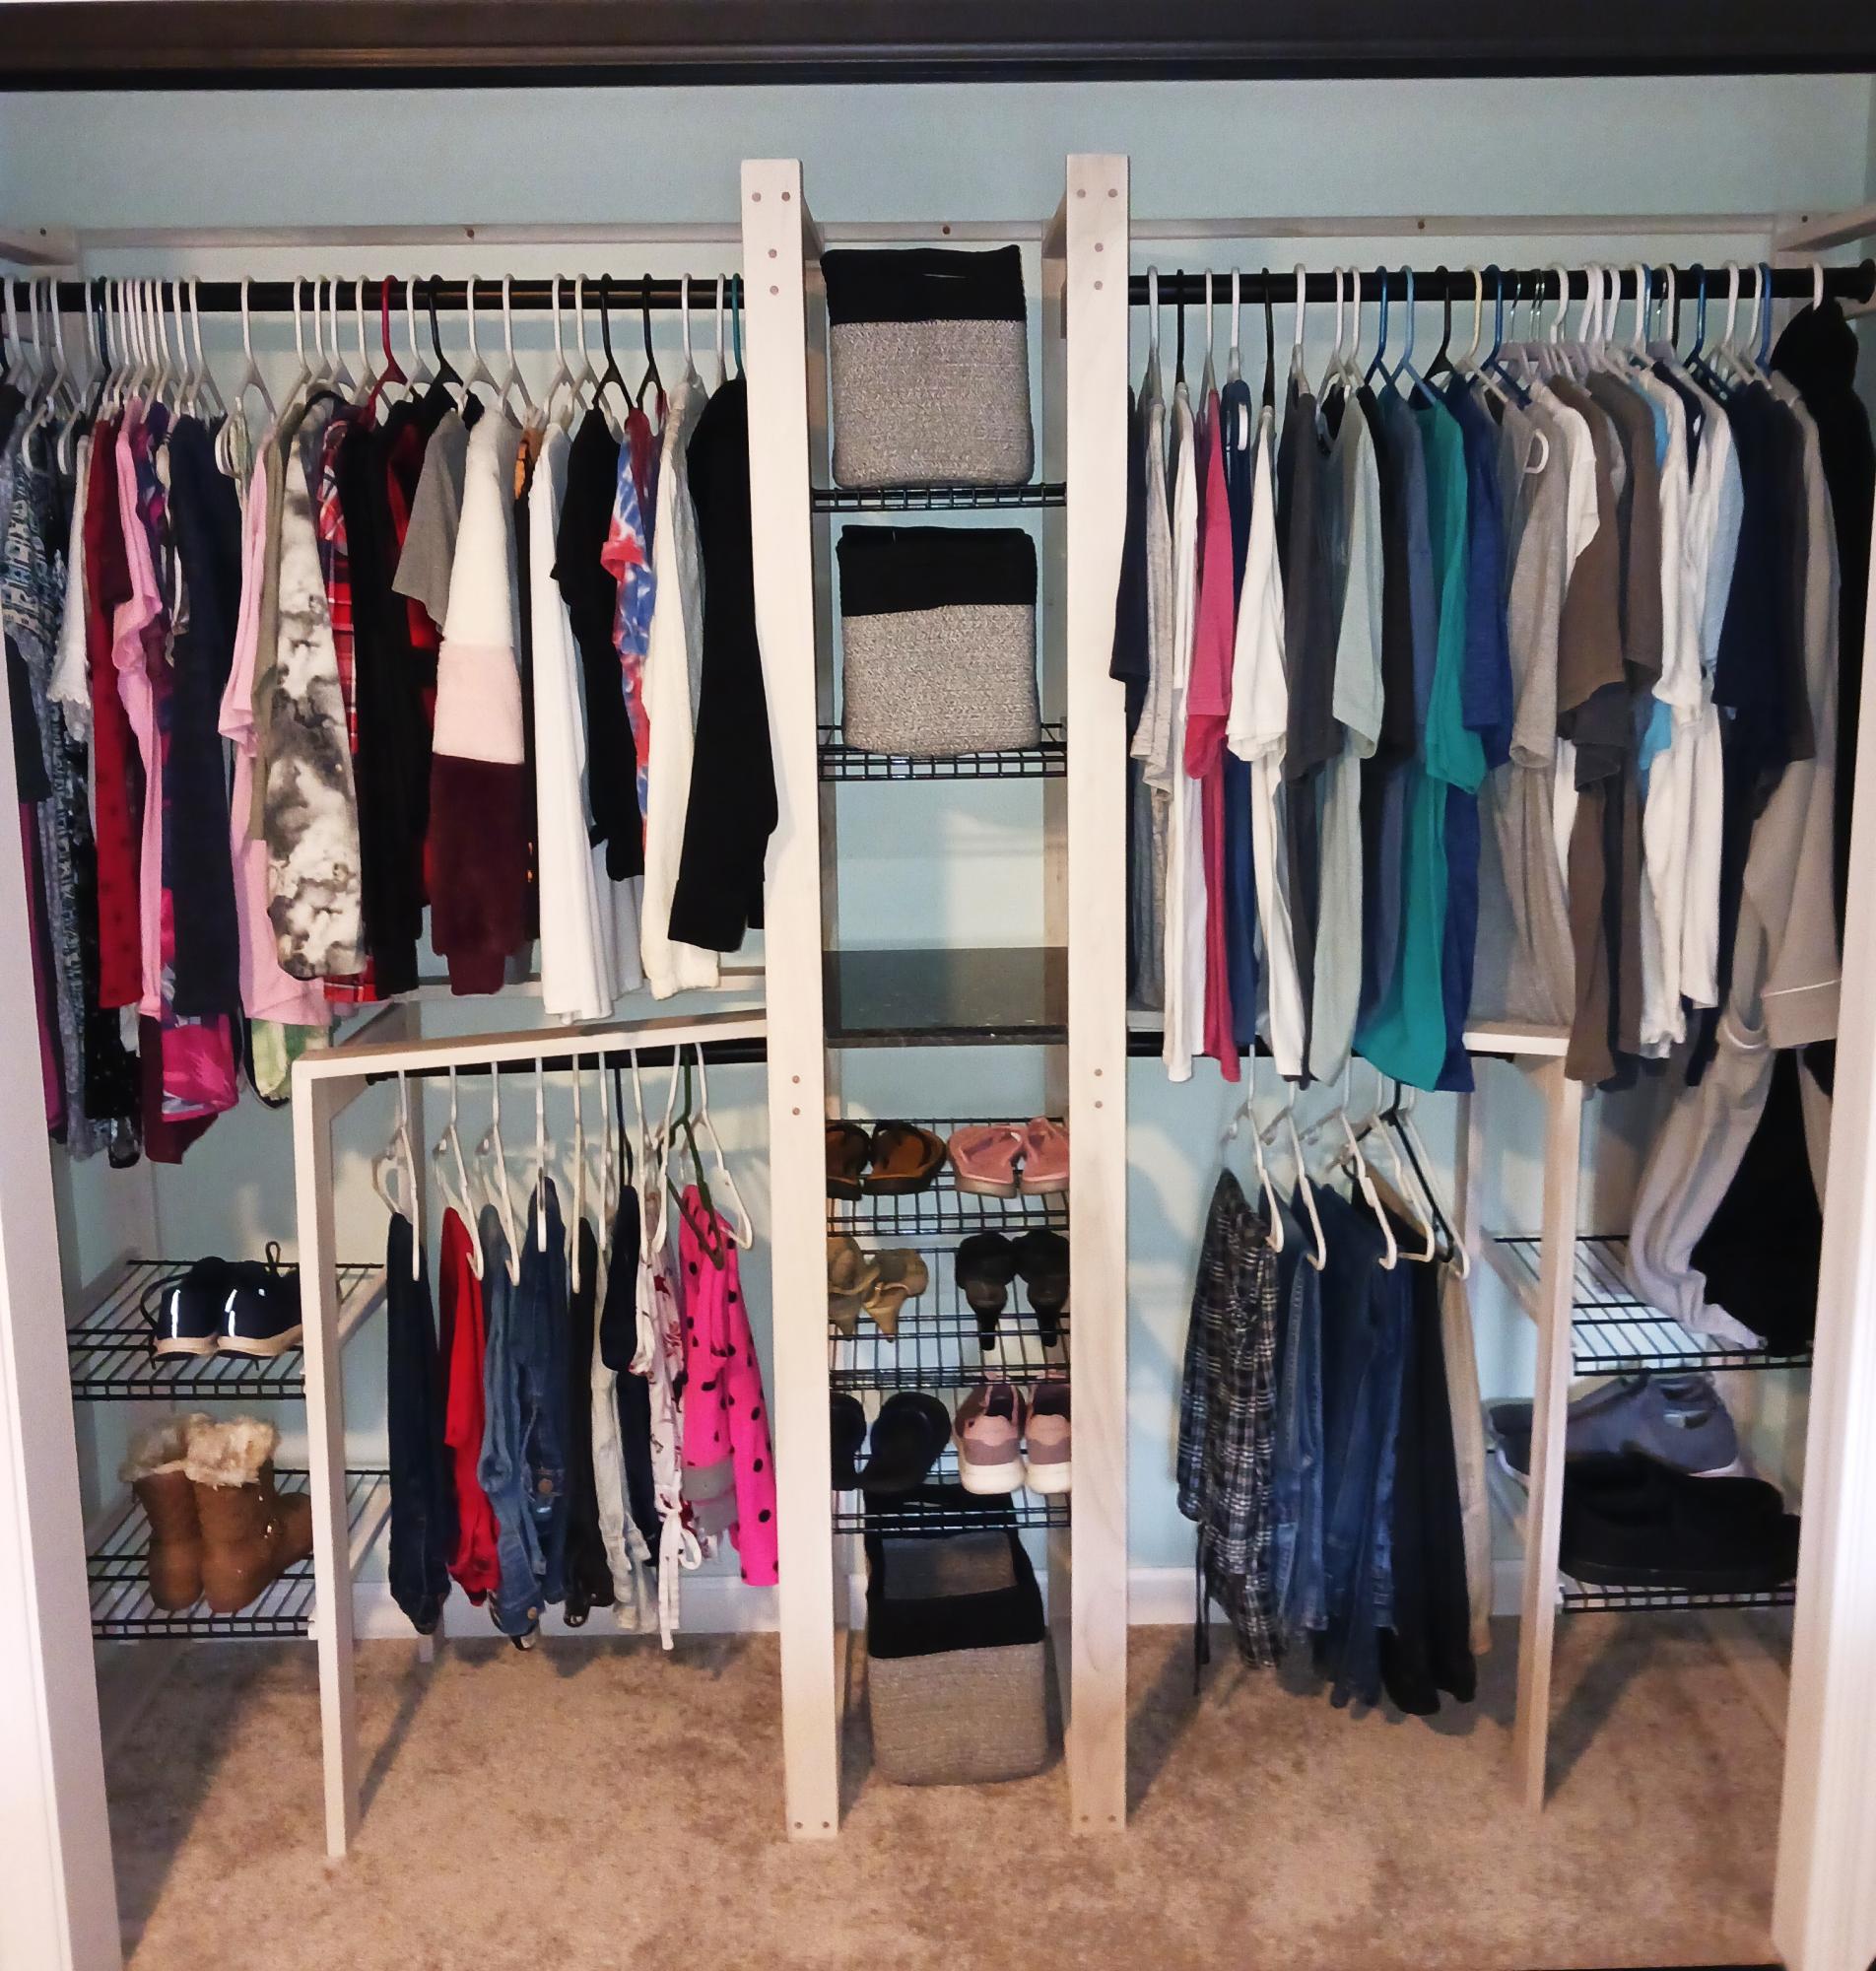
I took your 2x4 closet organizer I liked it cuz it looked easy but then I went crazy and modified it used one by three maple with a whitewash turned out great thanks for the plans.
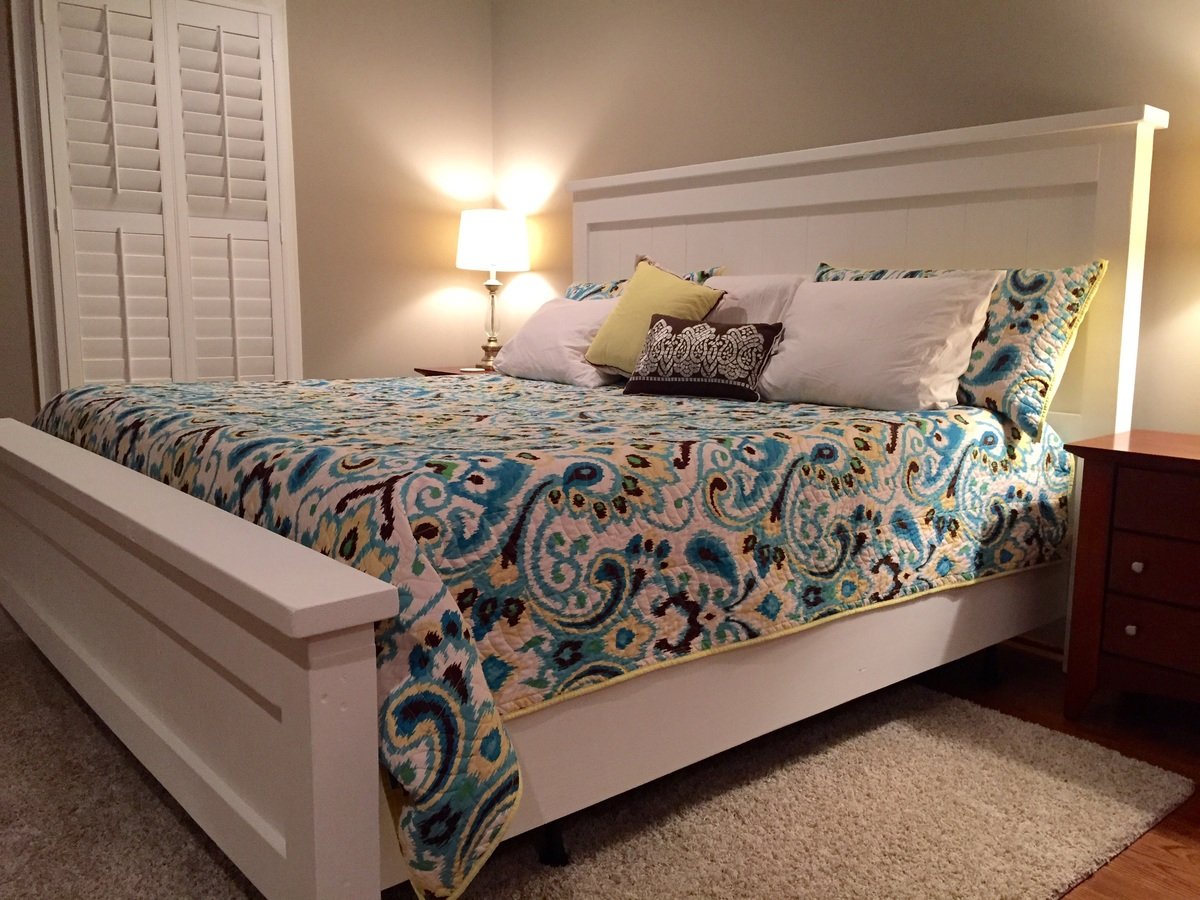
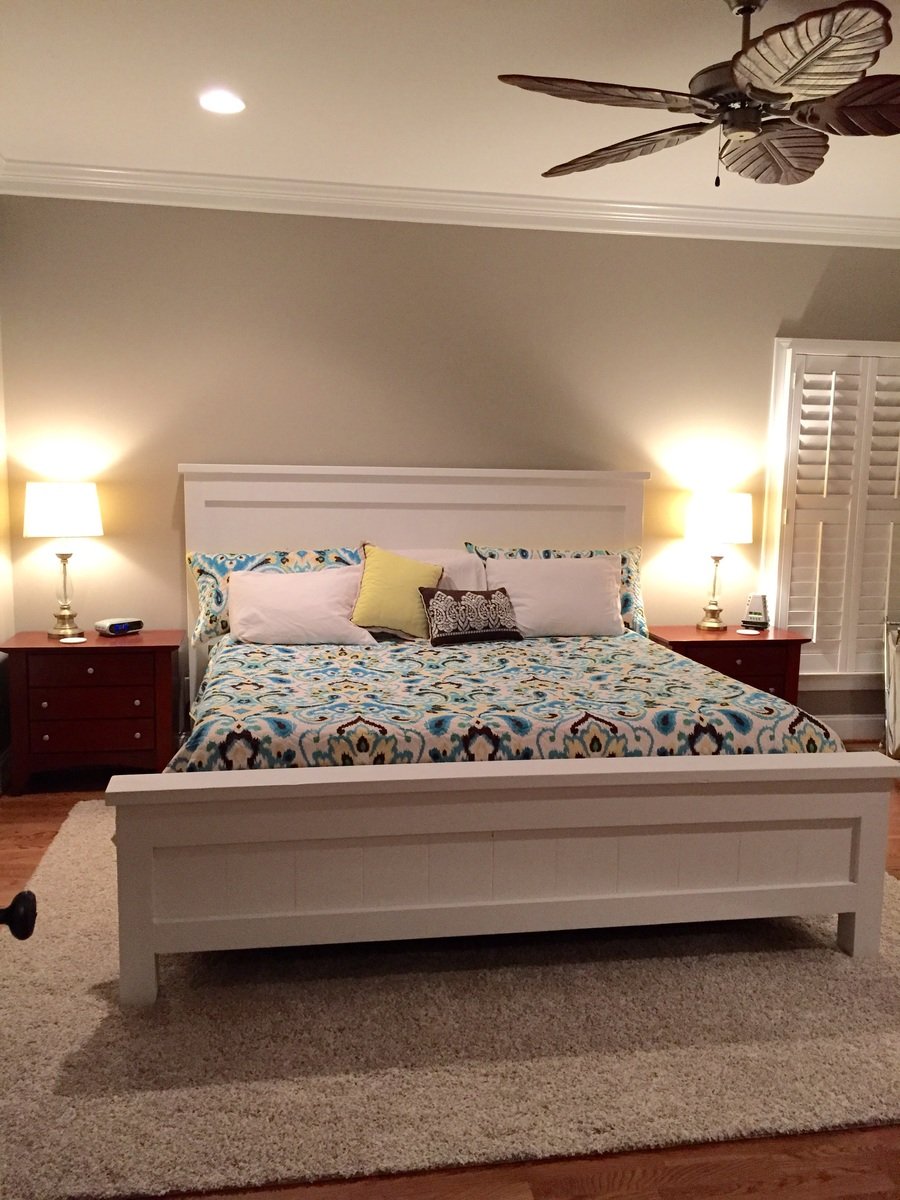
First project my husband and me attempted- turned out awesome! Very sturdy bed. The metal frame and box springs are not attached, it just sits inside the wood rails, headboard and footboard. We worked on this a few hours at a time on Saturdays and Sundays for one month since we work full time. Definitely more projects to come!
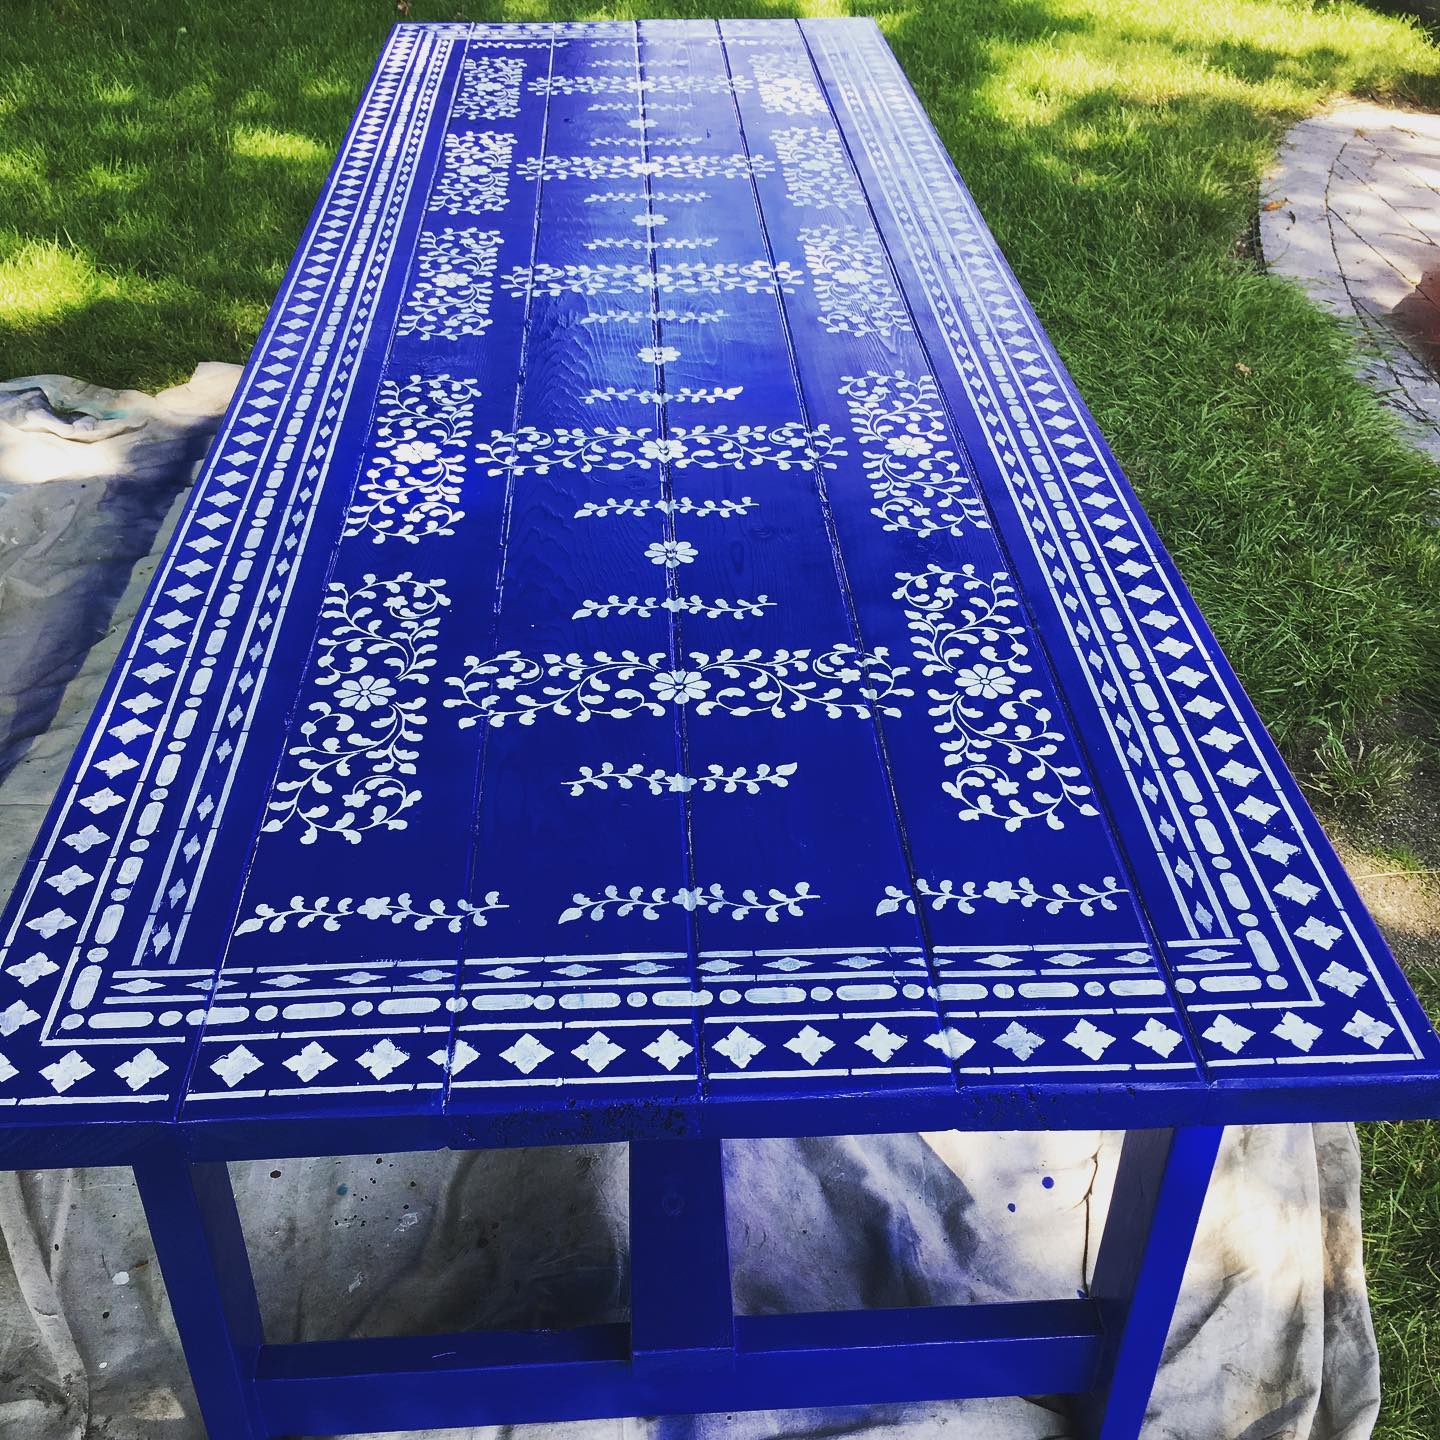
We used Ana White's plans beginner farm table plans to build this table and can't recommend these plans more! Thank you Ana! The build took my husband and I two hours to build. The sanding, sealing, painting, stenciling, and finishing took several days, but the actually build was VERY easy and straightforward. We're total beginners, so we were very happy. The stencils are from Cutting Edge Stencils and are called "Indian Inlay Furniture Stencil Kit by Kim Myles."
I made this play kitchen for my daughter's second bithday. It was my first project!
Tue, 01/03/2012 - 14:04
So beautiful! I love the colors and farmhouse apron sink!
Tue, 01/03/2012 - 15:23
Looks awesome. Love seeing everybody's kitchen. Do you have more pics of the sink?
Sun, 01/08/2012 - 16:12
Thanks! I'll try to post more pics of the sink soon.
Tue, 01/10/2012 - 15:36
More photos of the sink on flickr:
http://www.flickr.com/photos/65952314@N04/?saved=1
Thu, 12/27/2012 - 20:00
This is so cute! What did you use for the burners?
Thu, 07/14/2016 - 15:41
Question what did you use for your handles? This is beautiful. I'm hoping to make once close to it for my son's 2nd Bday

For my son's wedding!

DIY Rustic Porch Swing
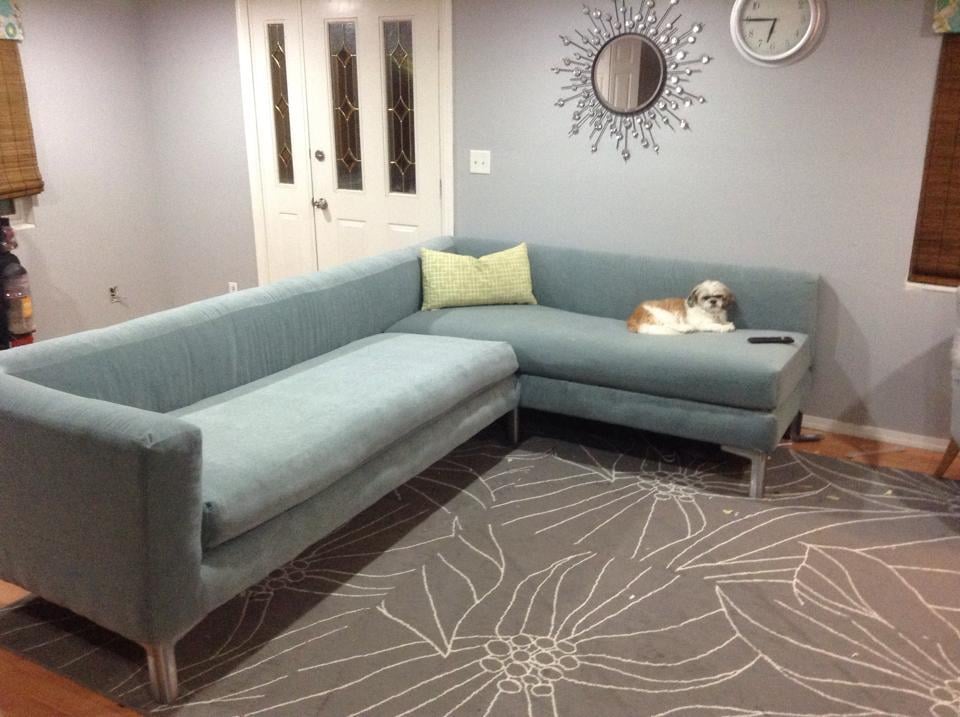
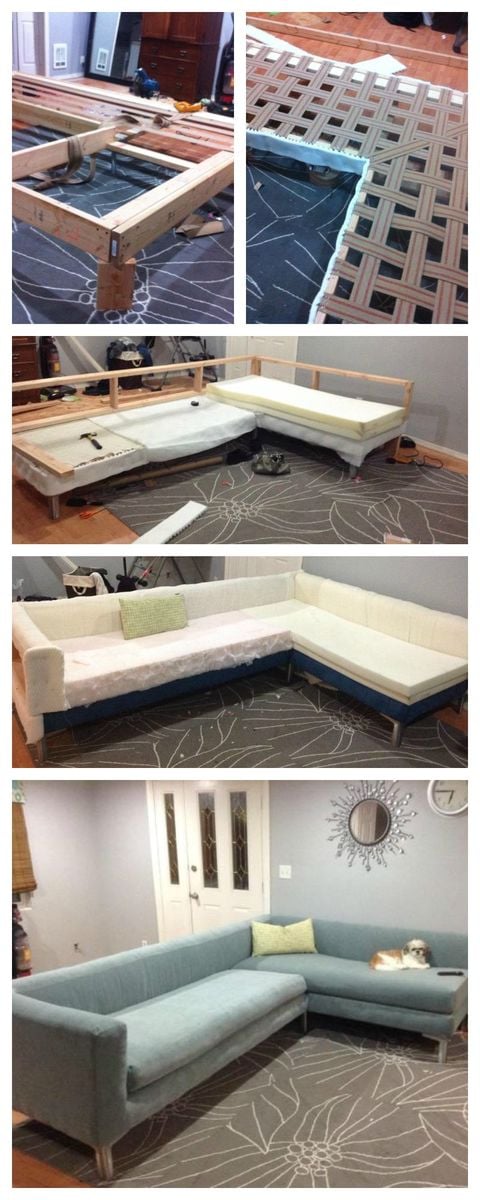
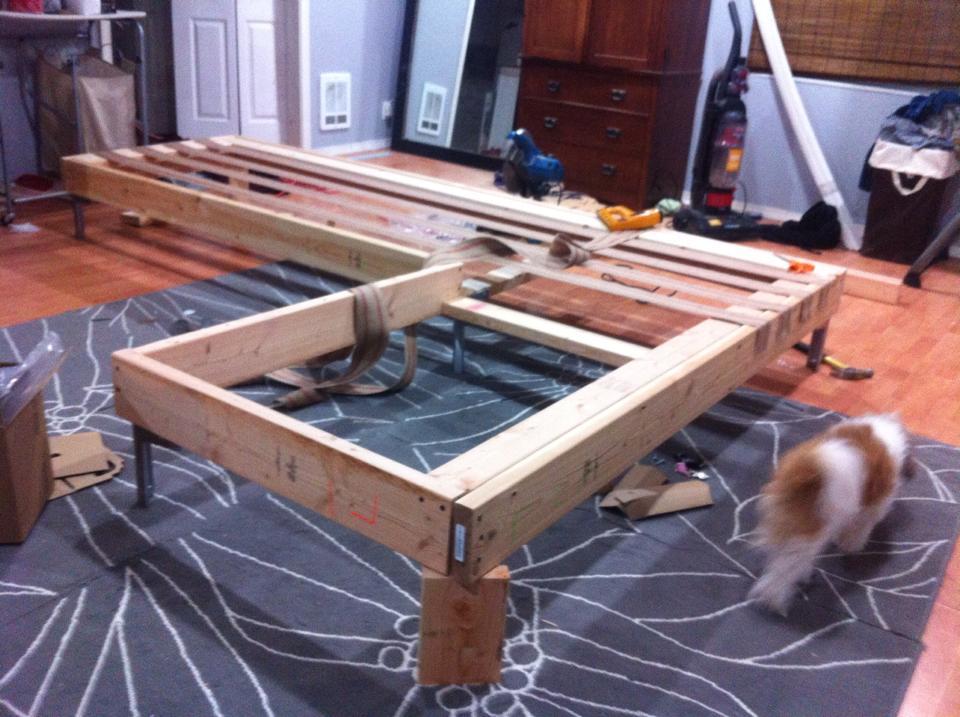
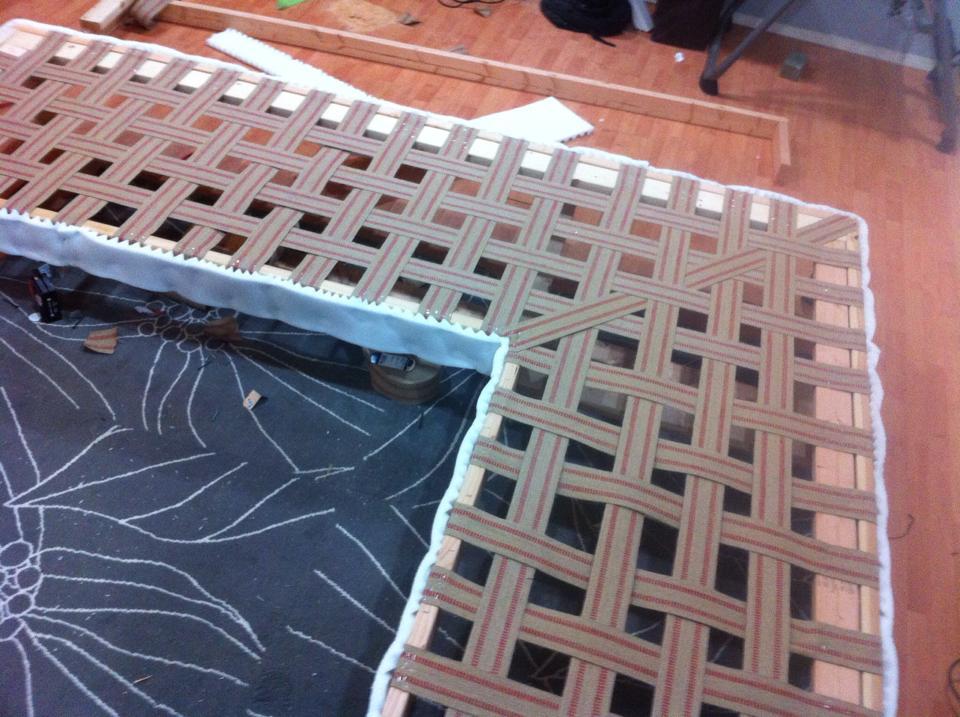
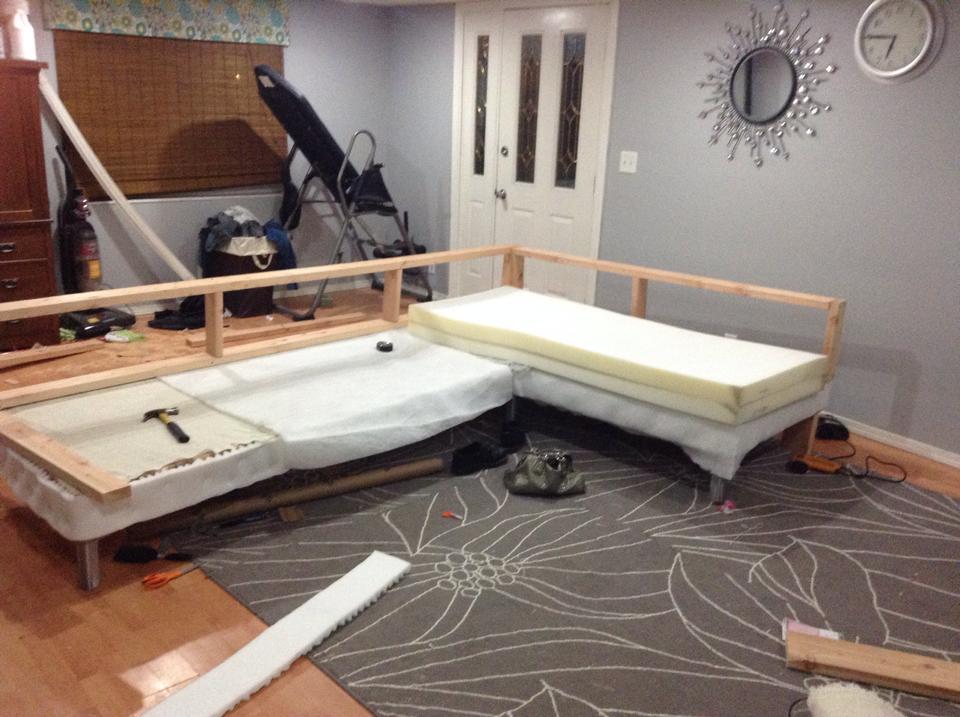
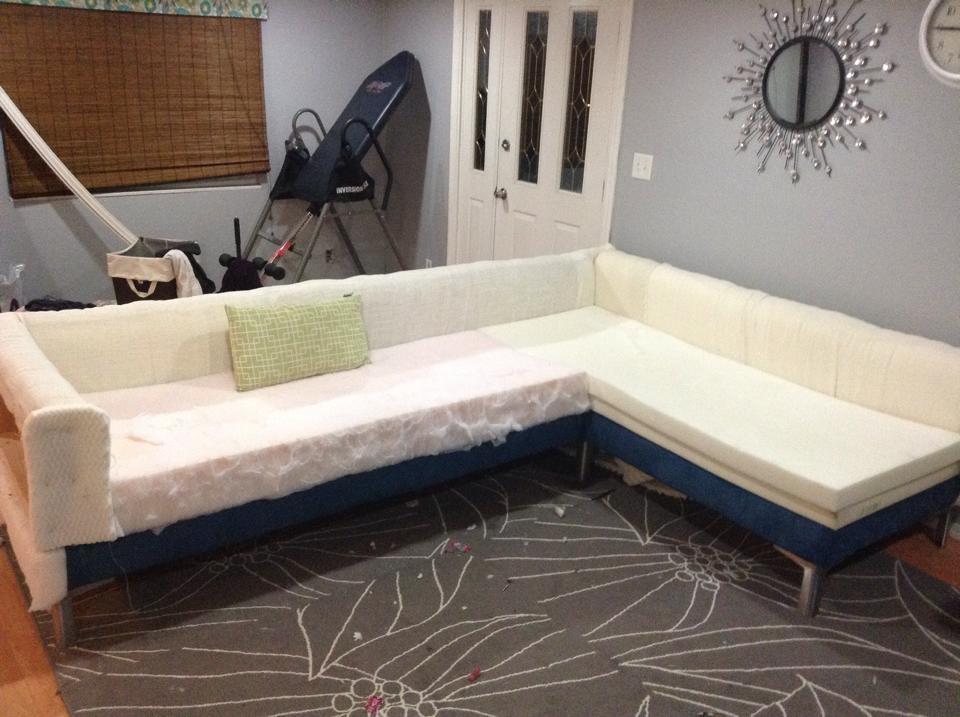
I looked all around my town for a sofa that meet my needs. I wanted something with tall legs, modern lines and fit my living room. I did not have $3,000 to buy one online so I said to myself why not???
Sat, 07/25/2015 - 12:28
You are my hero ! Your modern diy sectional is amazing, love the blue fabric! Thank you so much for sharing! Ana
Mon, 08/03/2015 - 14:52
I've been looking for plans for a big sectional this would be perfect!
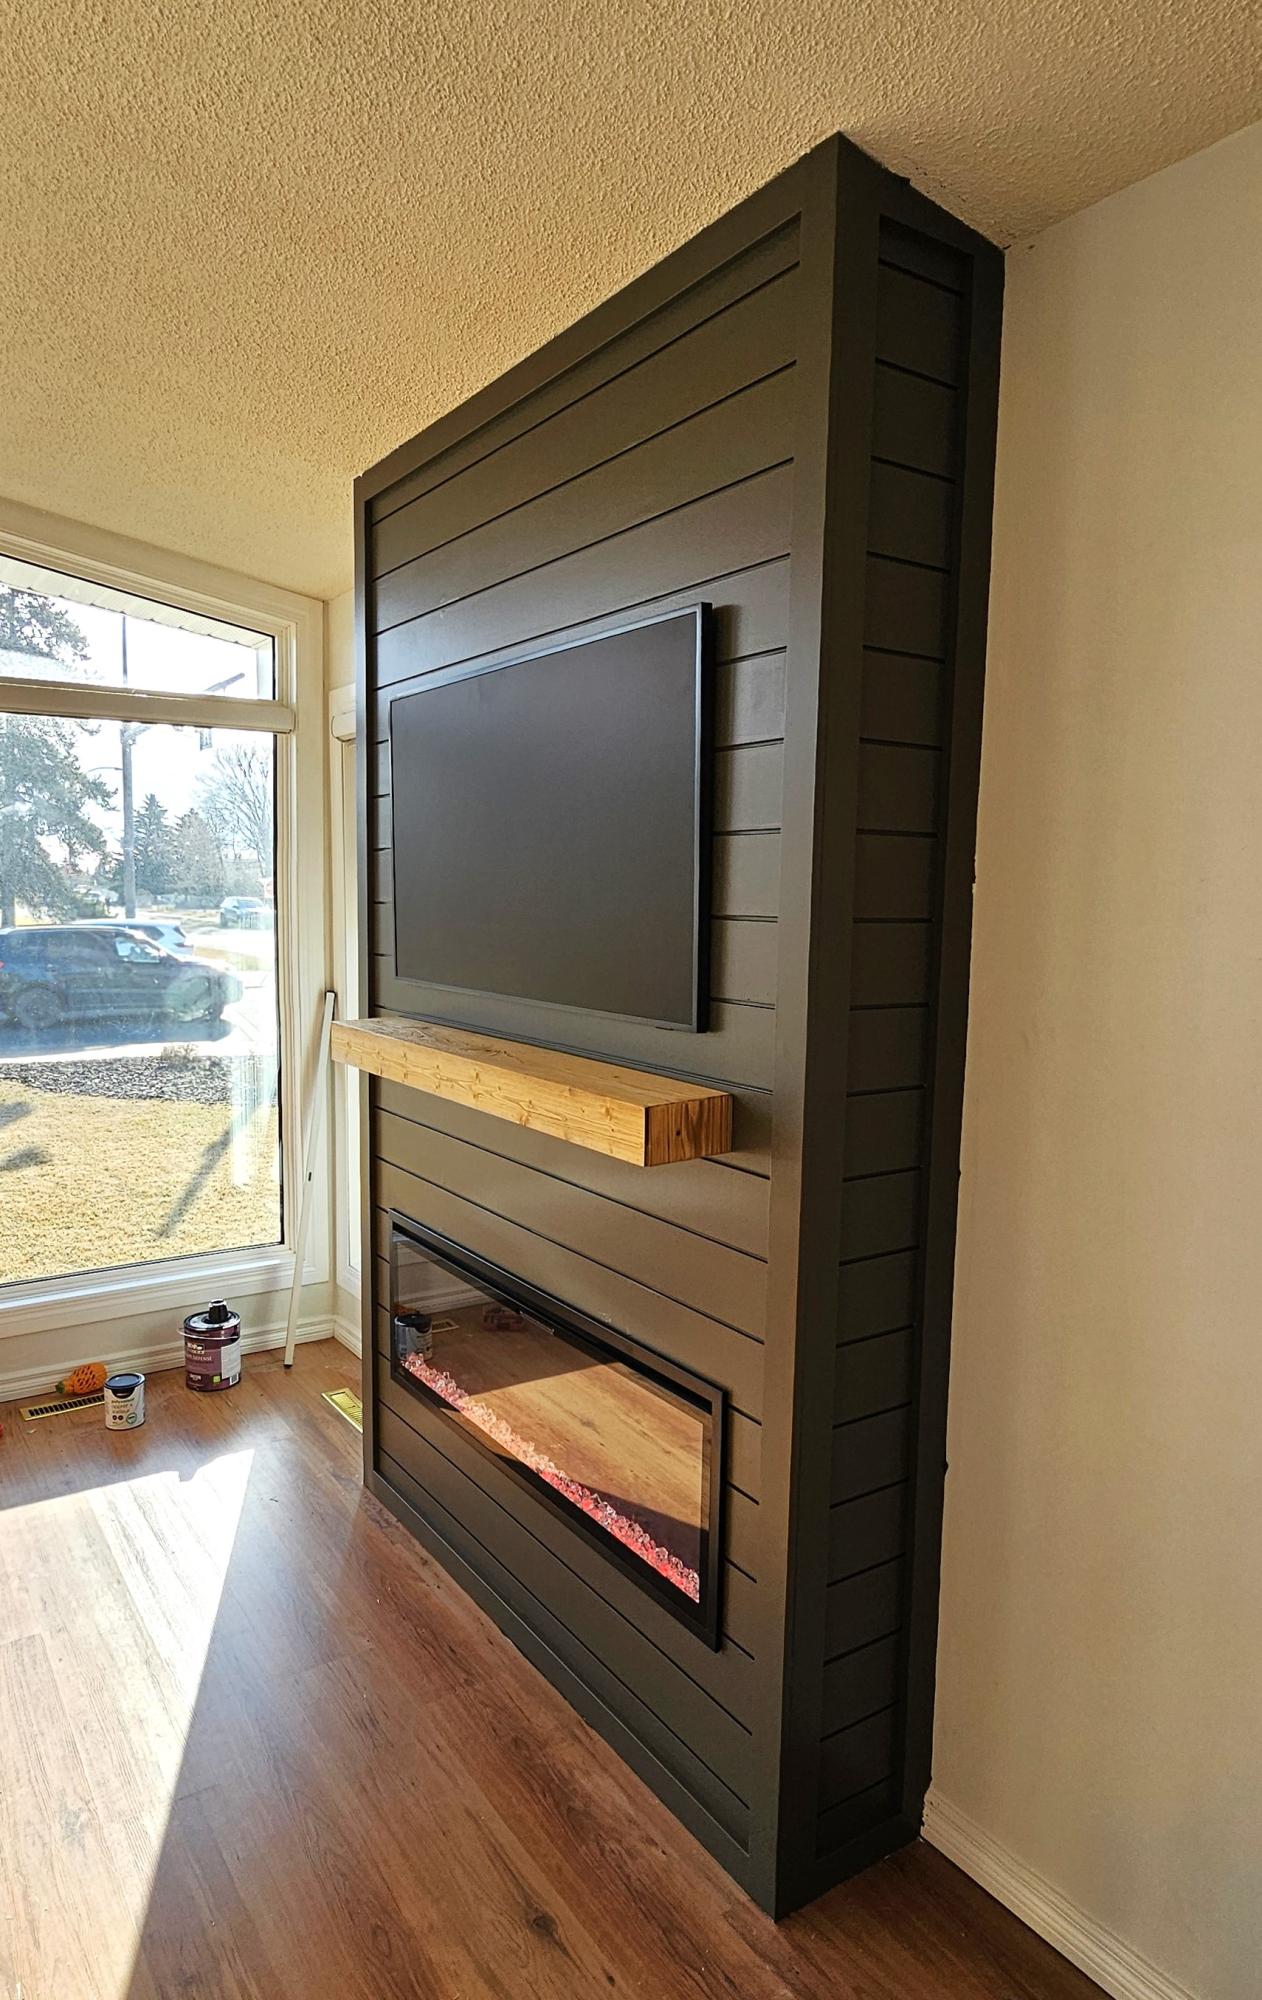
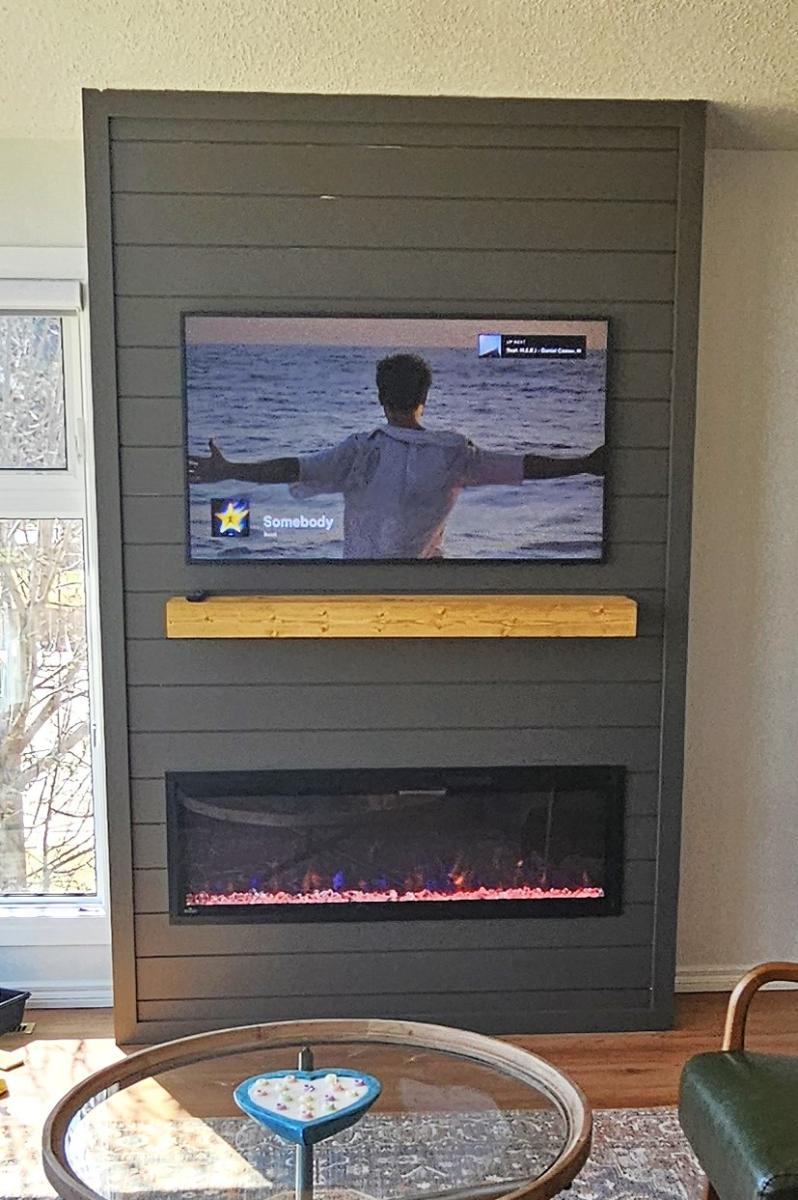
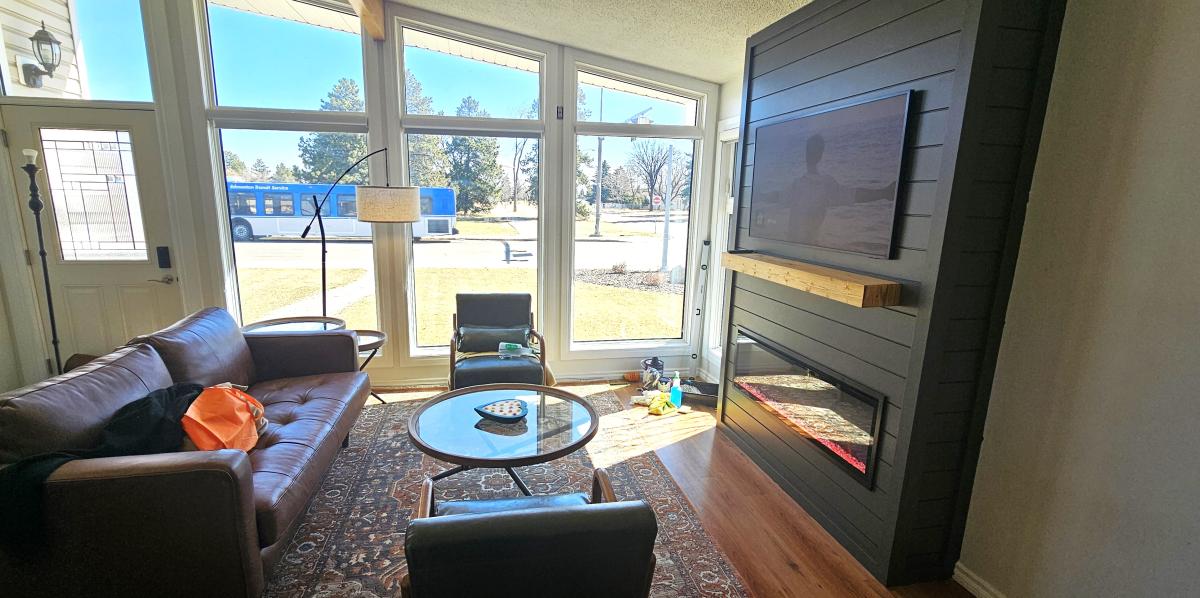
Used Ana's plans to build my floor to ceiling shiplap fireplace. Excellent guide made it easy.
Angelo
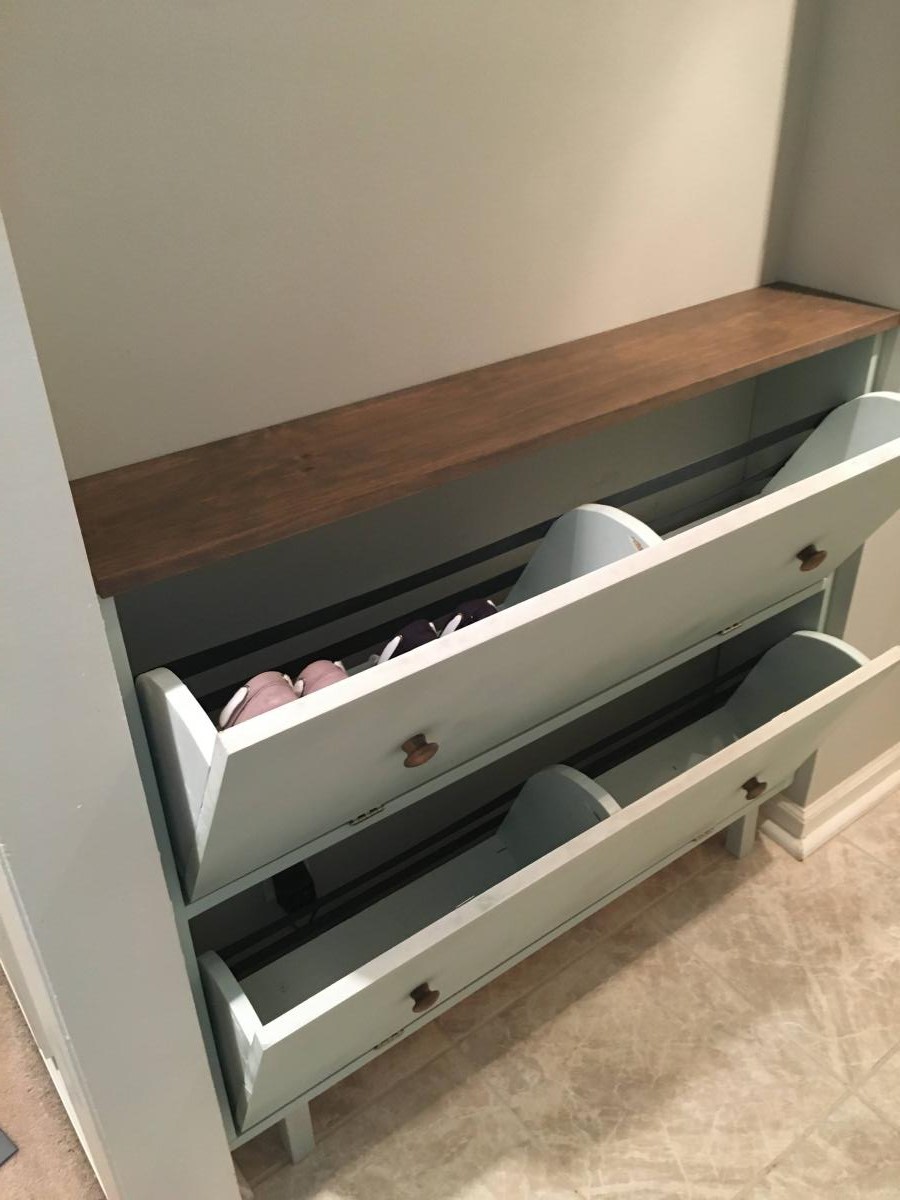
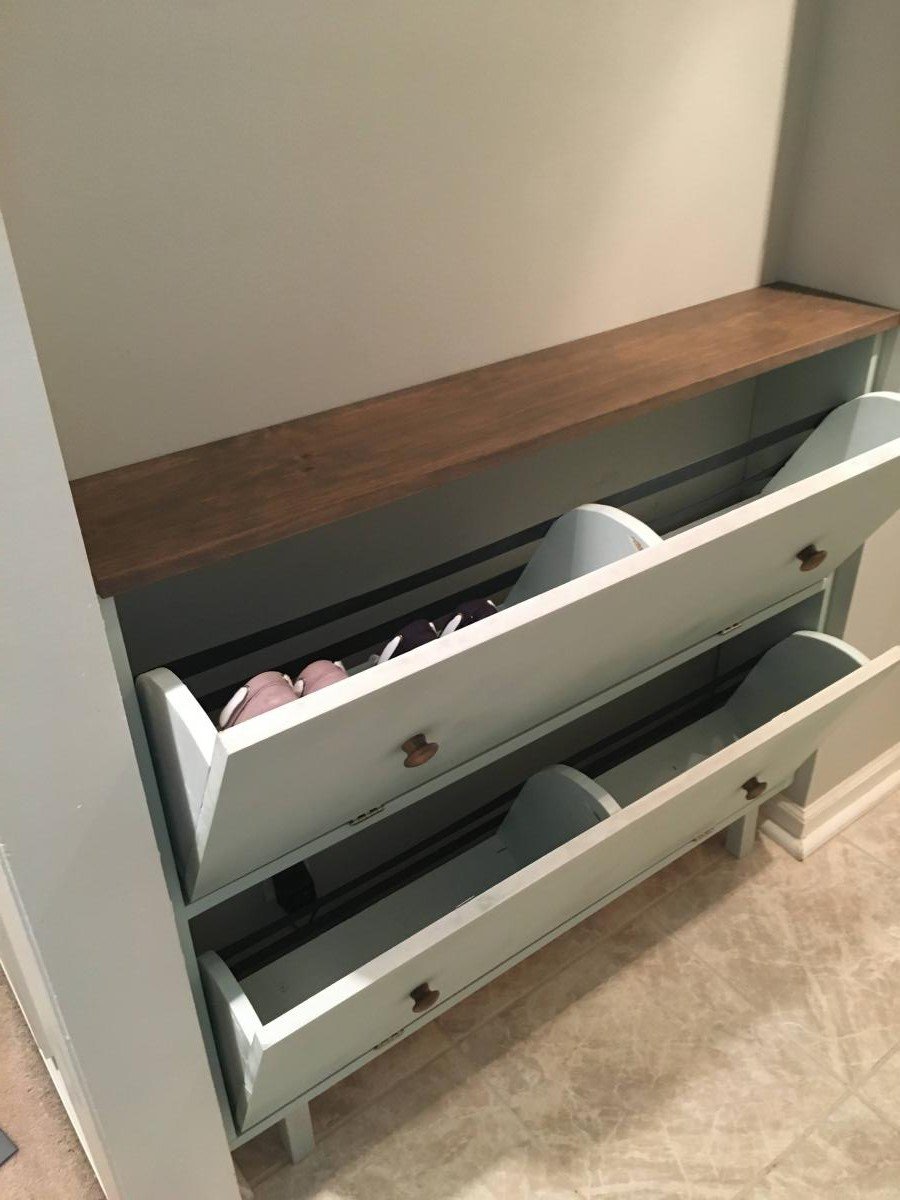
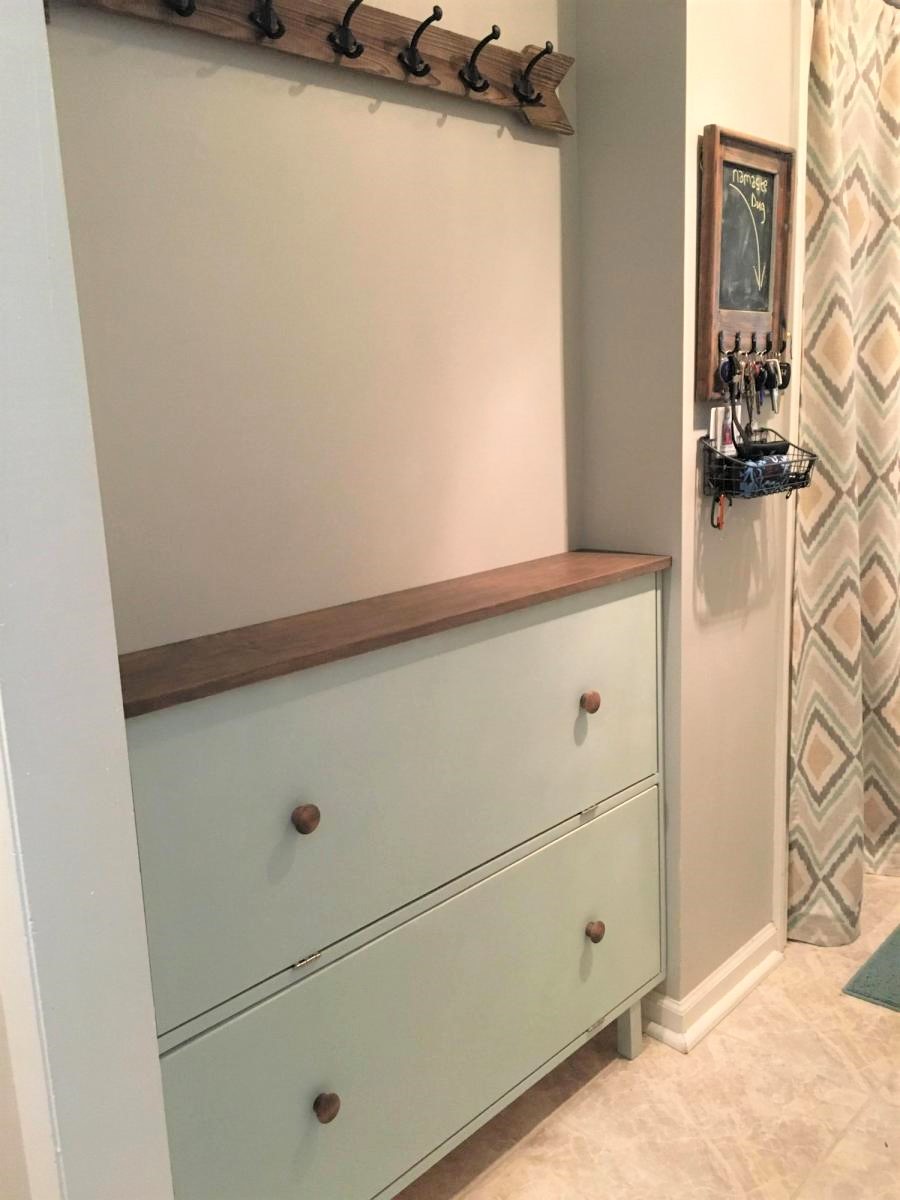
I had this space in my mudroom that was a perfect spot to make a custom shoe dresser. I adjusted the plans I found on this website to custom make storage for shoes. Now this weird little space is functional.
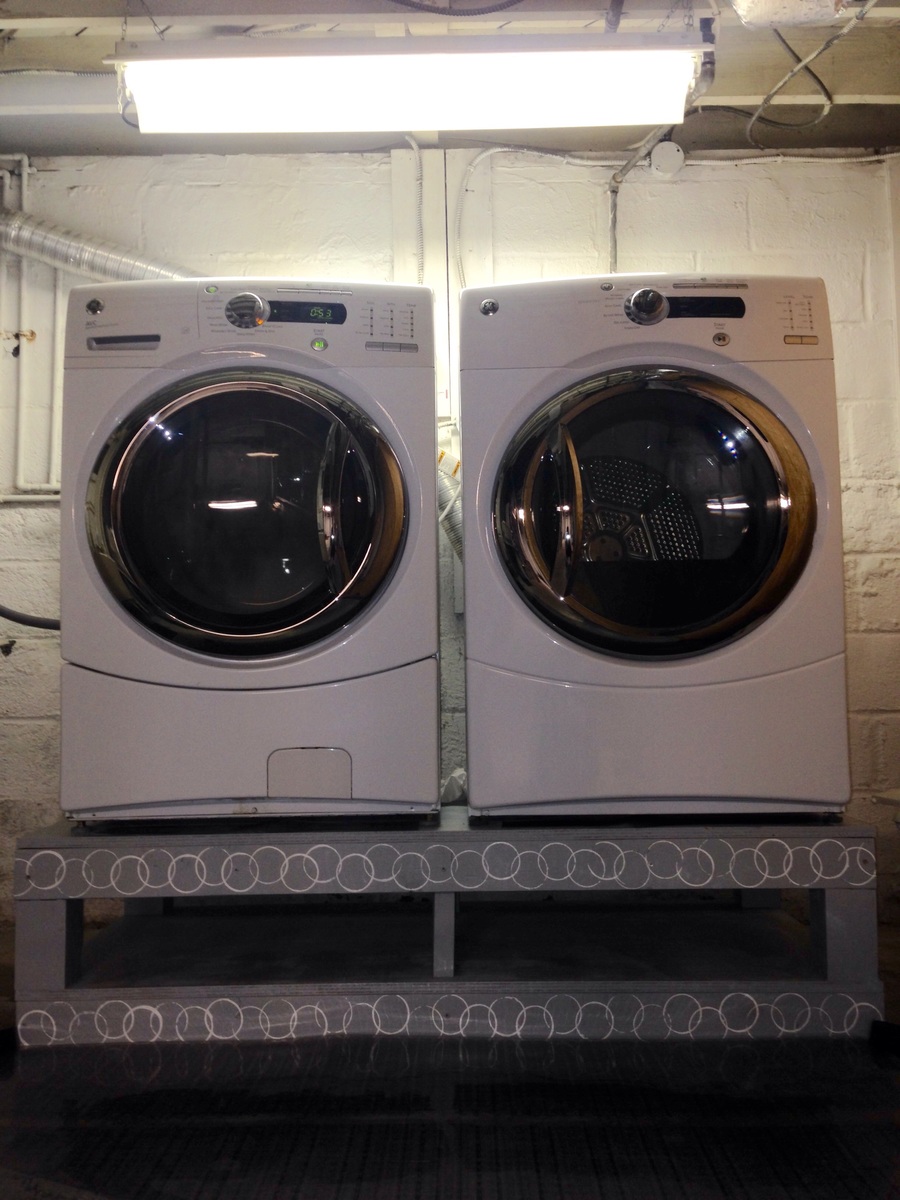
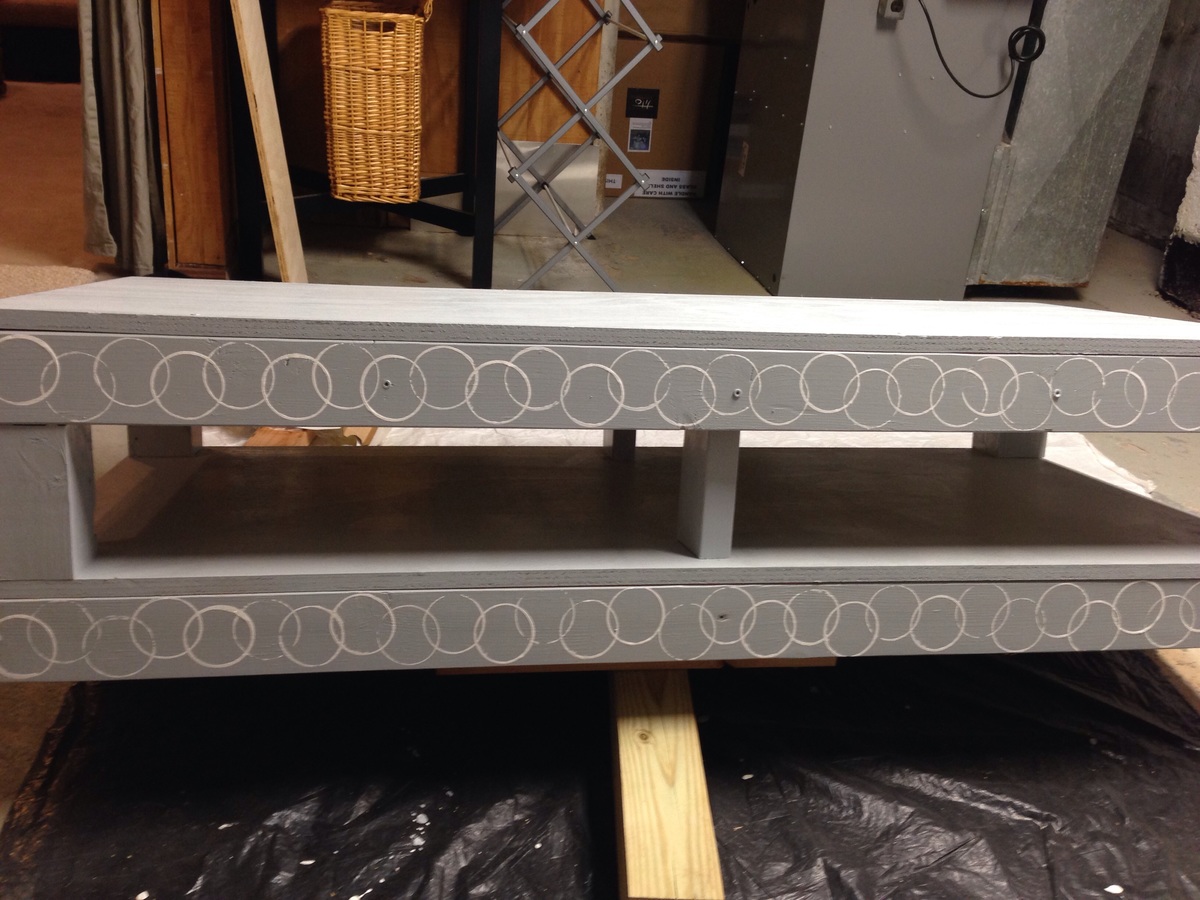
Thank you so much to Sausha and this site for the instructions, shopping list and measurements! I finally have my pedestal! No more back aches! I modified the height to 15" by making the posts to 6" and added center posts using 2x4.
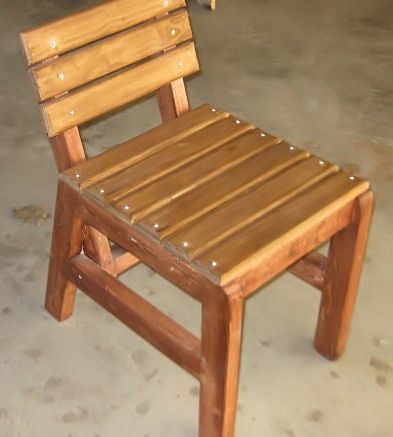
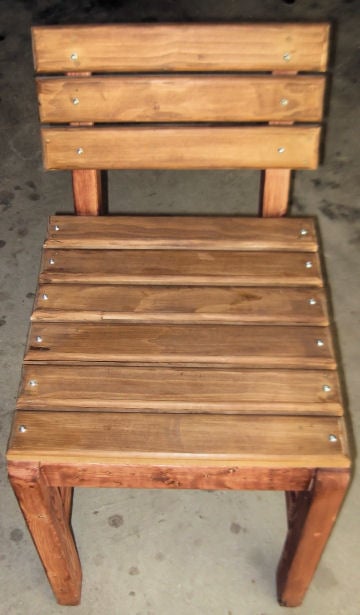
I saw this chair and was looking for something for back yard BBQ's I just beefed it up by using 2X3's instead of 2X2's left the measurements the same. I was playing around with Minwax Express Color to see how well it does and I like it helps control Blotching very easy to use except be careful when squeezing the tube or you like me will have a permanent shirt for staining

I am so happy with my work.. It has turned out perfect. I love them.

In reply to Cute paint job by CSaintD
Wed, 12/30/2015 - 04:25
Thank you for your kind words and I am so excited that you took time to leave me a reply.

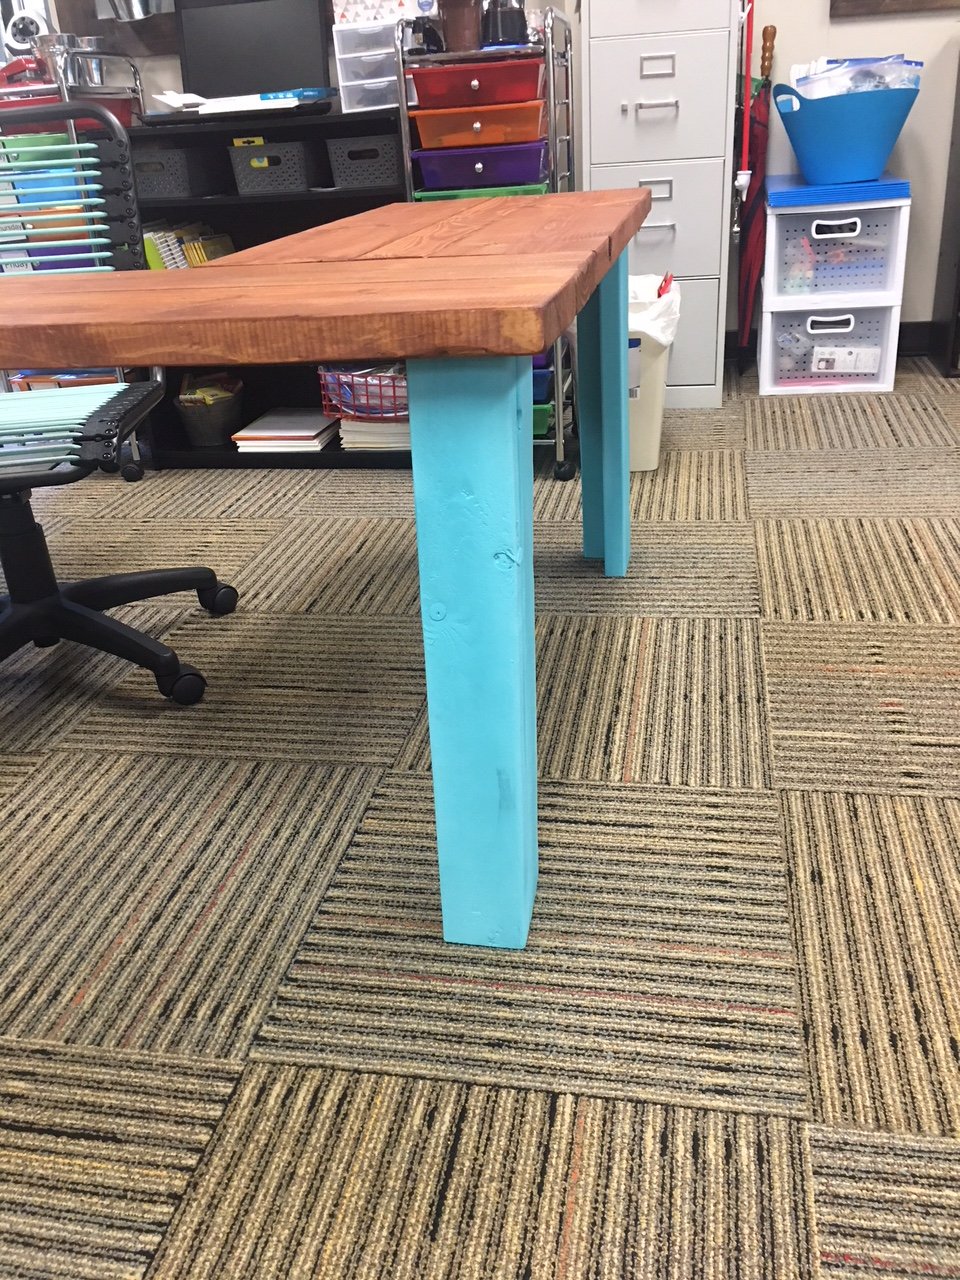
Been a while since I had time to actually build anything worth posting about! My wife wanted some items for her Kindergarten classroom this year, so built several items, most inspired by the Farmhouse family.

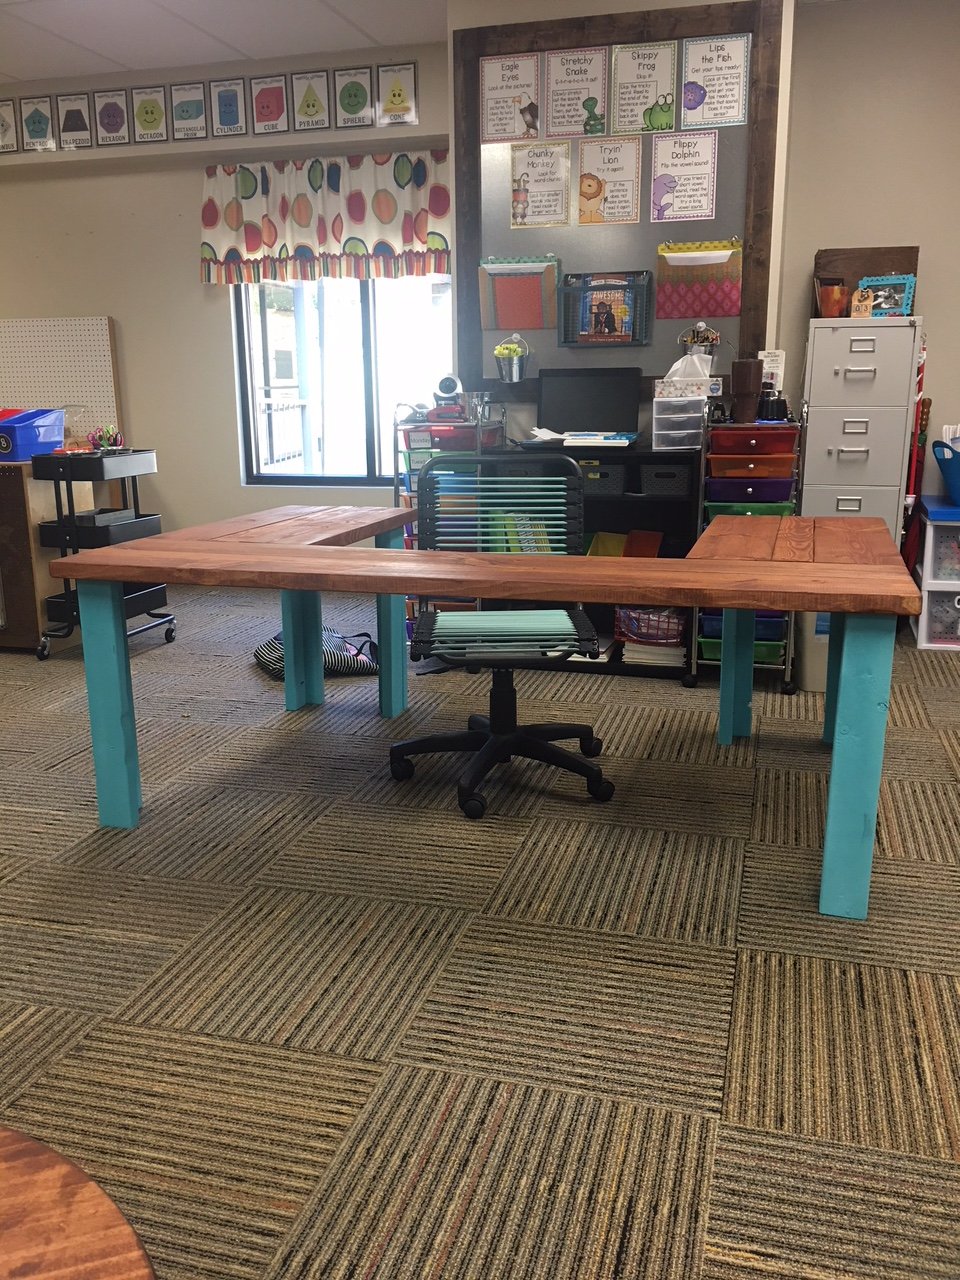
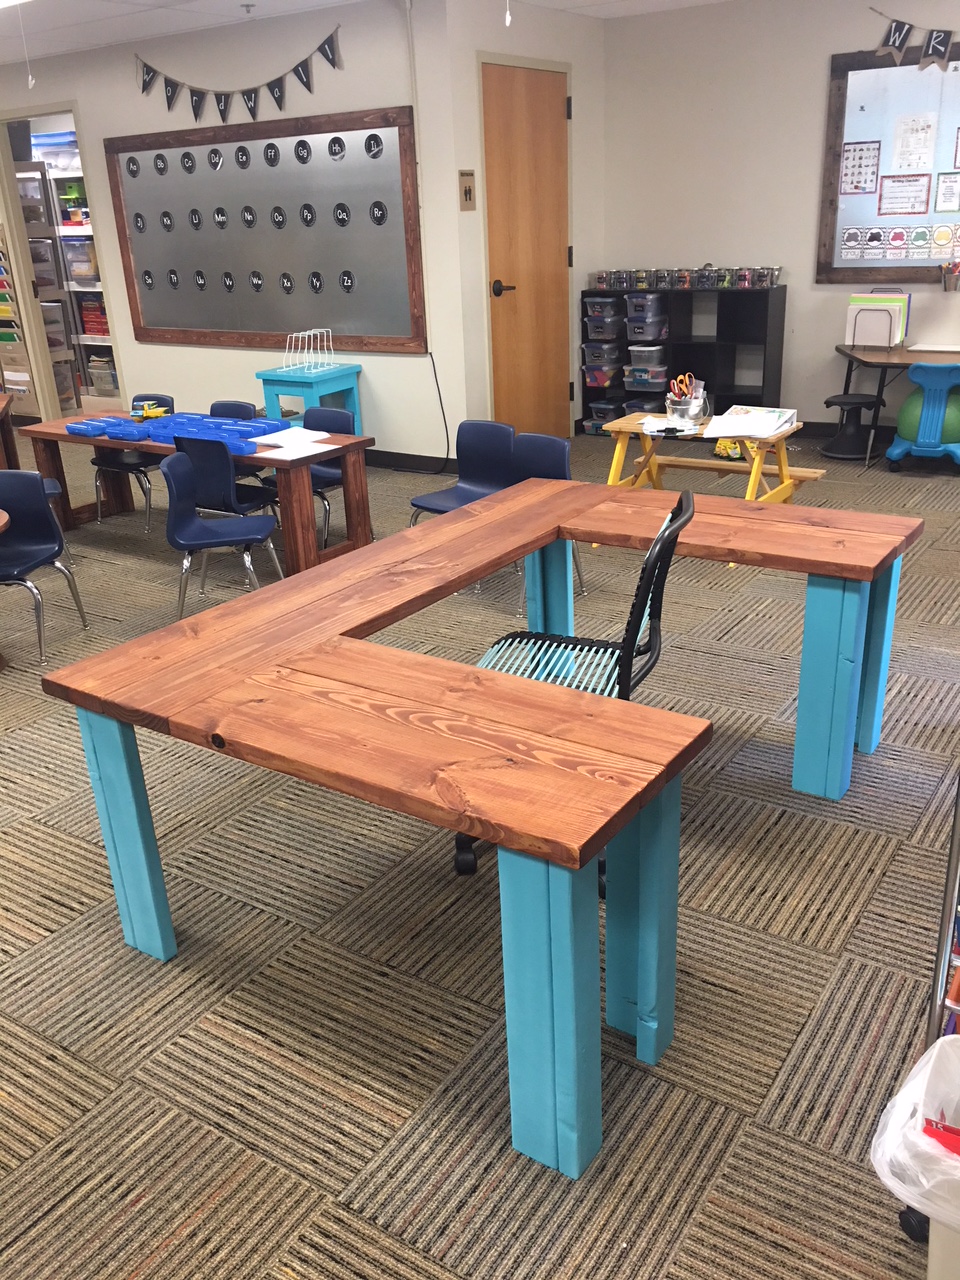
Sat, 06/29/2019 - 05:47
I love this! Can you give me the plans and list of materials for constructing it?
Sun, 06/30/2019 - 12:33
I am also a teacher and would love to build this desk for my reading class. Do you have plans?
Mon, 07/01/2019 - 18:05
I love this table for my classroom. Can you share the plans or the dimensions?
-Stephanie
Sun, 07/07/2019 - 09:46
I would love plans/dimensions for this! I was thinking I could also paint the top with wipe off board paint.
Sun, 07/07/2019 - 14:59
I would love to make one for my classroom. Can you share the plans and materials list for this table?? Thanks!!
Mon, 07/08/2019 - 19:11
I am looking to make this for my fourth grade classroom - can you provide the dimensions you used? Thank you so much.
Wed, 07/10/2019 - 11:59
Love this!
I would love this for my classroom! Can you share the plans and materials.
Thank You!
Mon, 07/22/2019 - 18:25
Anyone have any luck with figuring out the dimensions??
Thu, 07/25/2019 - 17:20
Has anyone gotten the plans for this table? I have contacted Ana White and tried other ways also. I would love for someone to share.
Thank you
Teri
Mon, 08/19/2019 - 12:09
I am guessing the corner posts are 2 x 4s, the top is 2 x 10s. It looks like the width is 6’ (looking at the floor carpet tiles being 24” square). So 2 - 2 x 10s side by side for the main part of the desk top and 2 - 2 x10s perpendicular on each side of the chair. I guess the height is subject to choice and the length of each side would also be subject to choice or to the length of the 2 x 10s to be economical.
an educated guess would be 4 - 8’ 2x10s for the top and 6 - 6’ 2 x 4s for the legs?
Anyone else have any input here? Open to suggestions.....