shelf
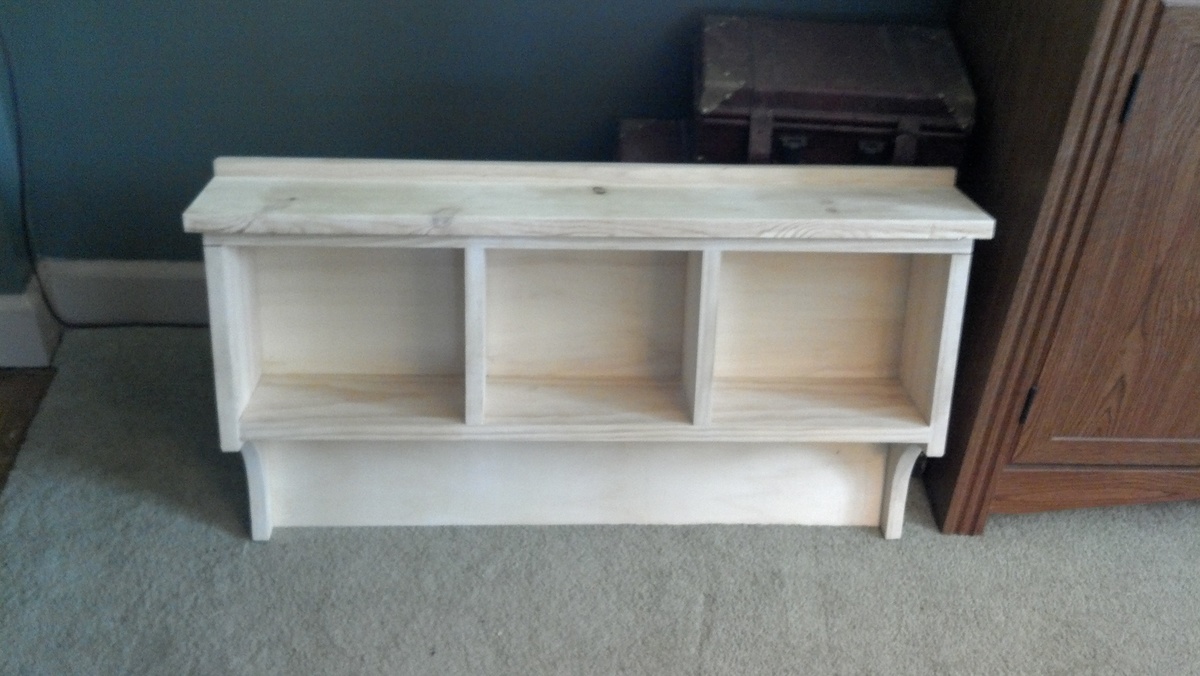
I made this shelf one for my mom, and one for my sister.
Built from Plan(s)
Recommended Skill Level
Beginner
I made this shelf one for my mom, and one for my sister.

While working on this project I thought it was extremely challenging but in the end I changed my opinion and was extremely happy I took on and completed the challenge. One rule I stand by is if you start something you finish it. I learned how to use a router, jigsaw, and learn even more how clamps can be our bff's!!!!! My advice is to take this project on, go slow and if you need it ask for help! Good luck!
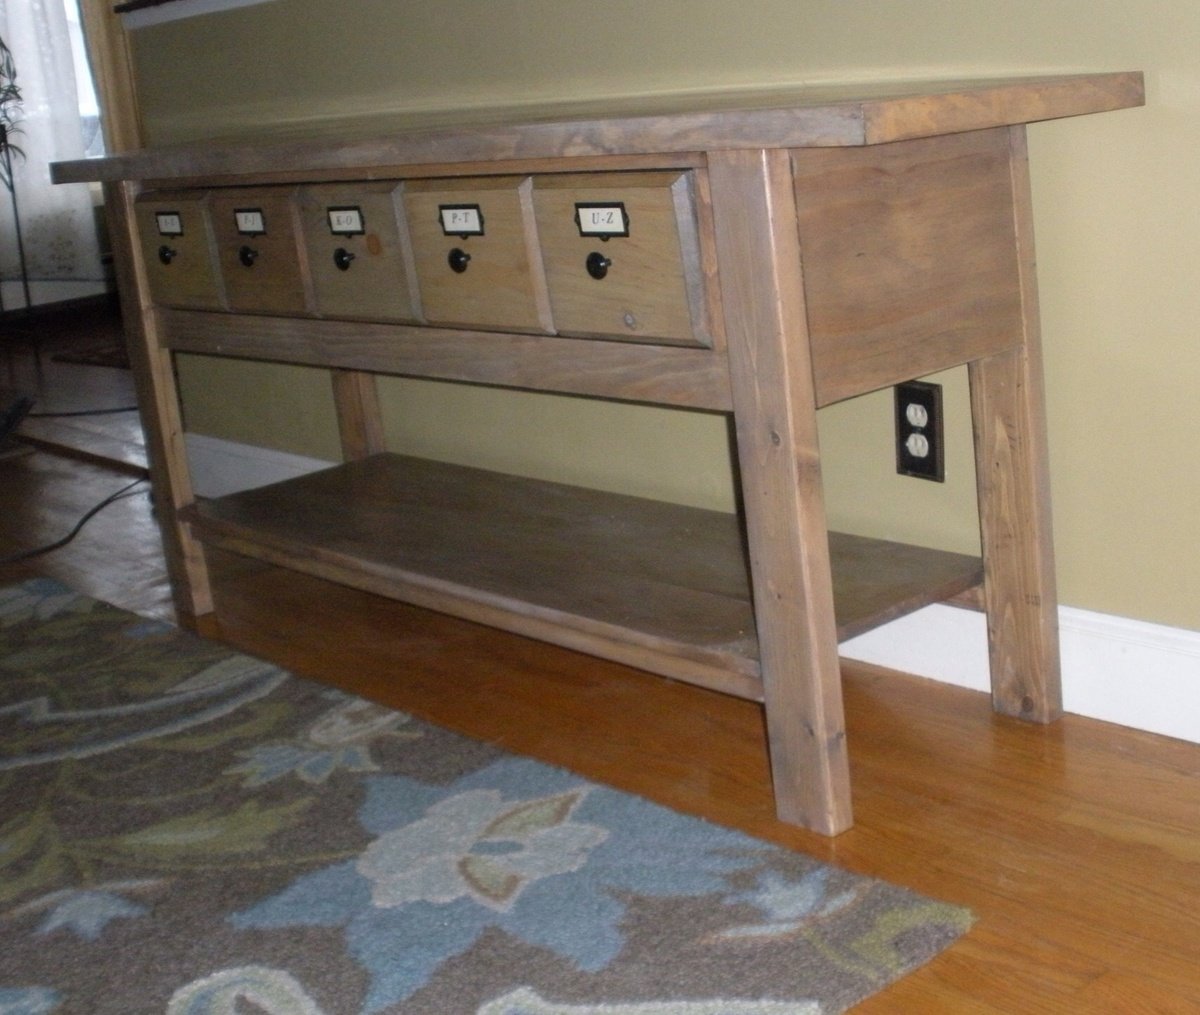
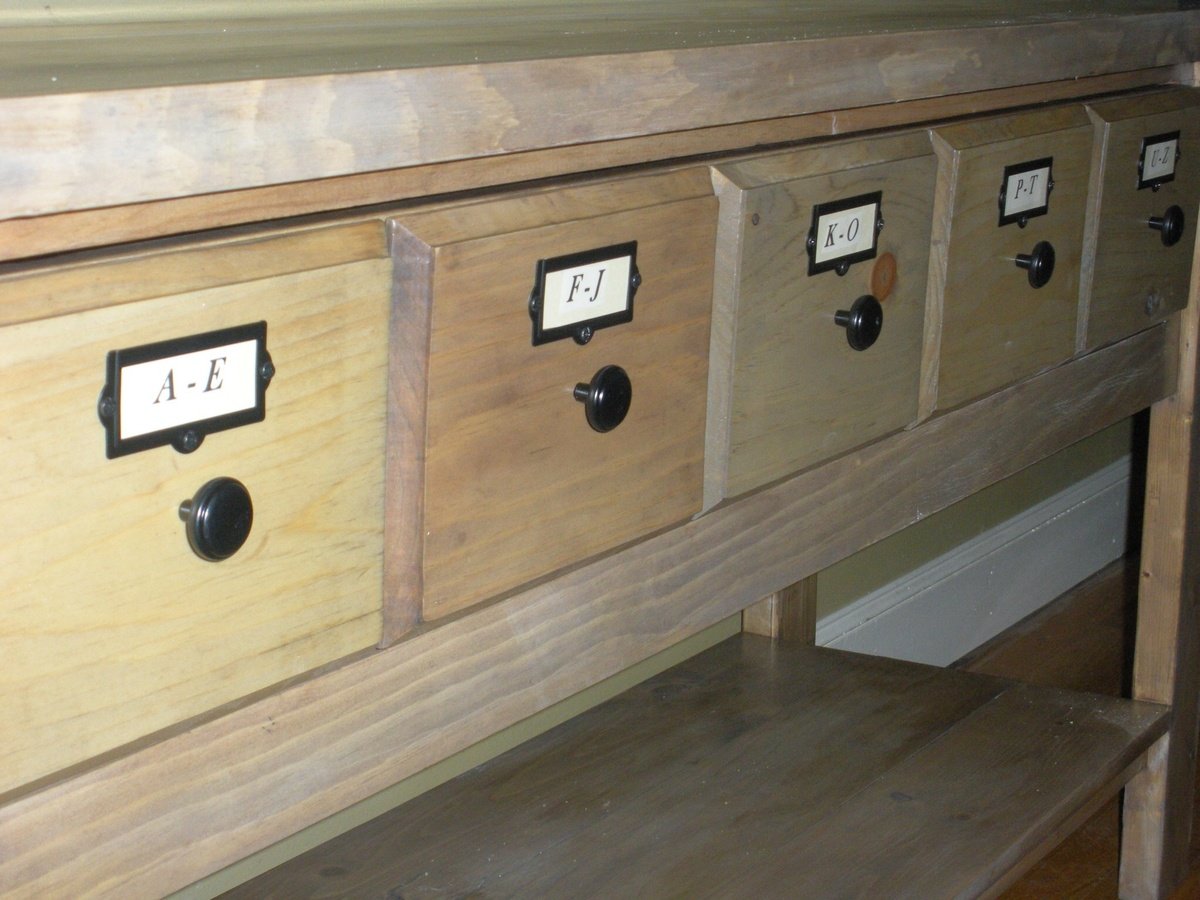
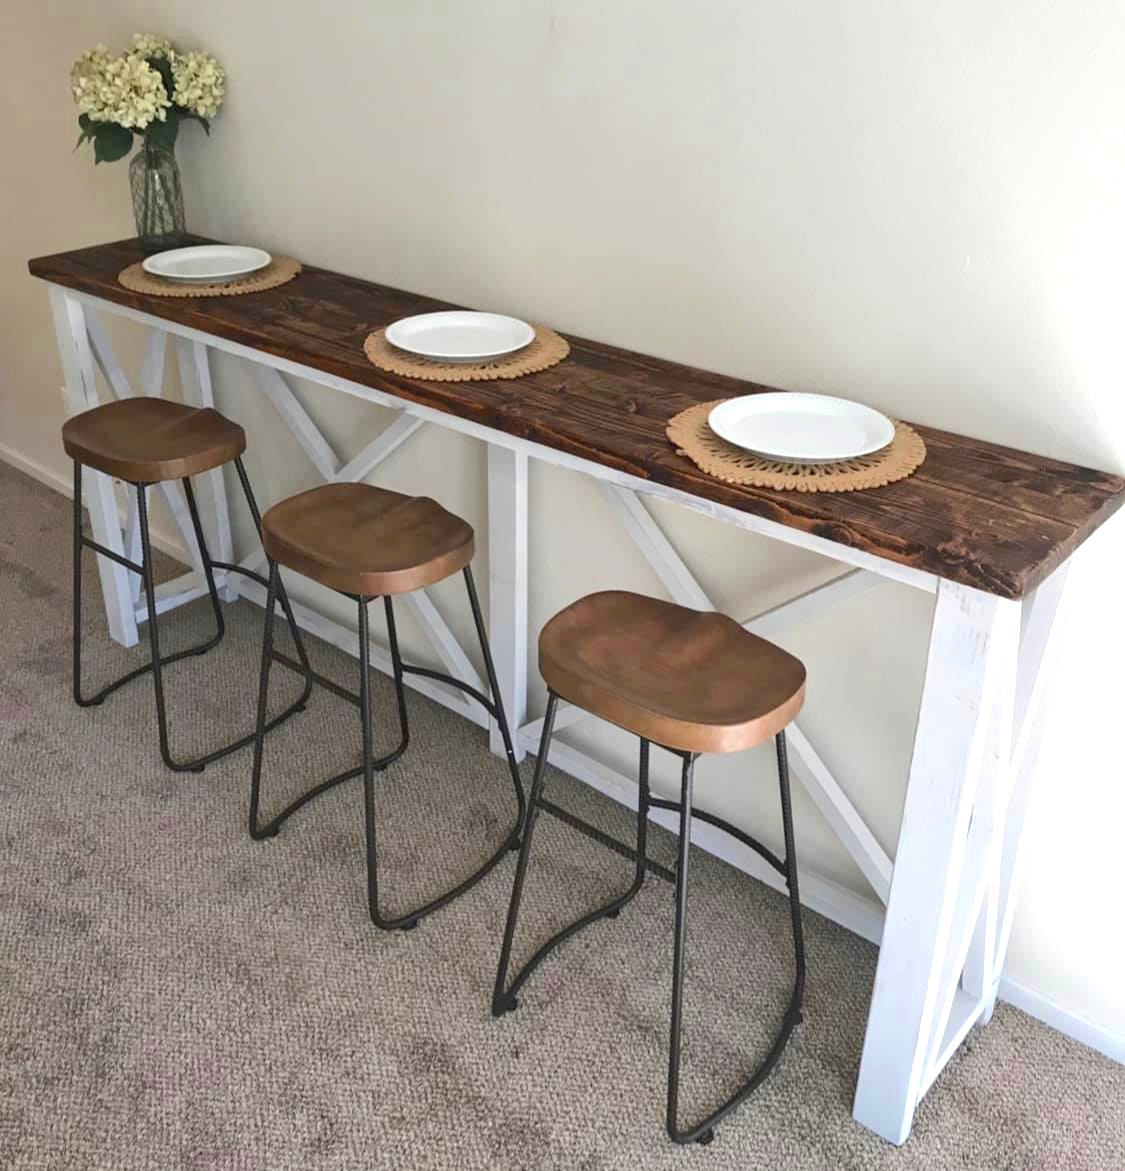
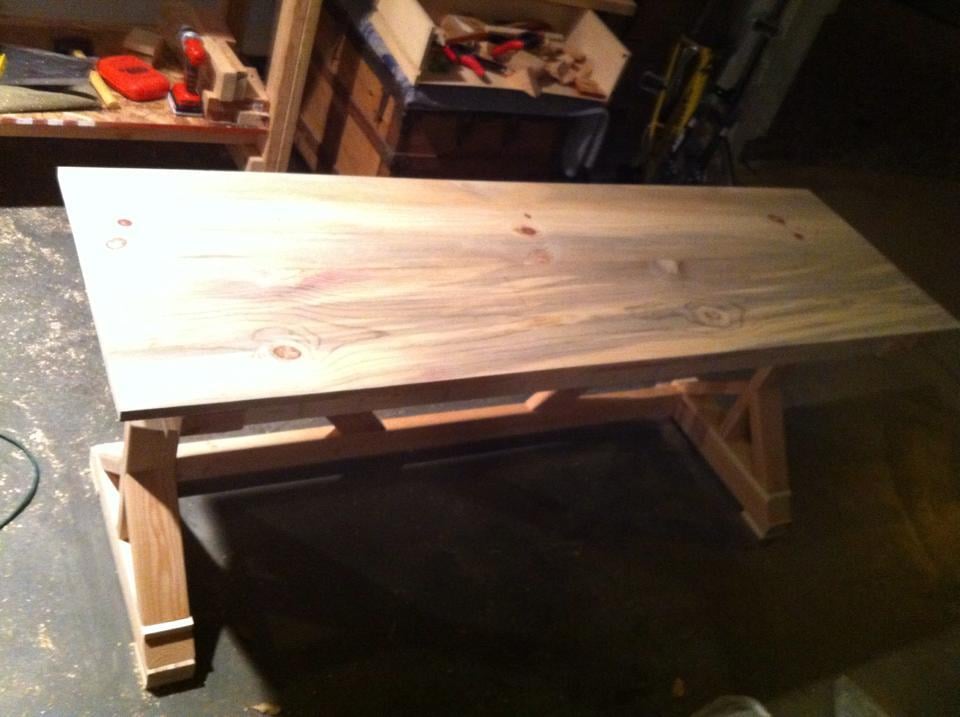
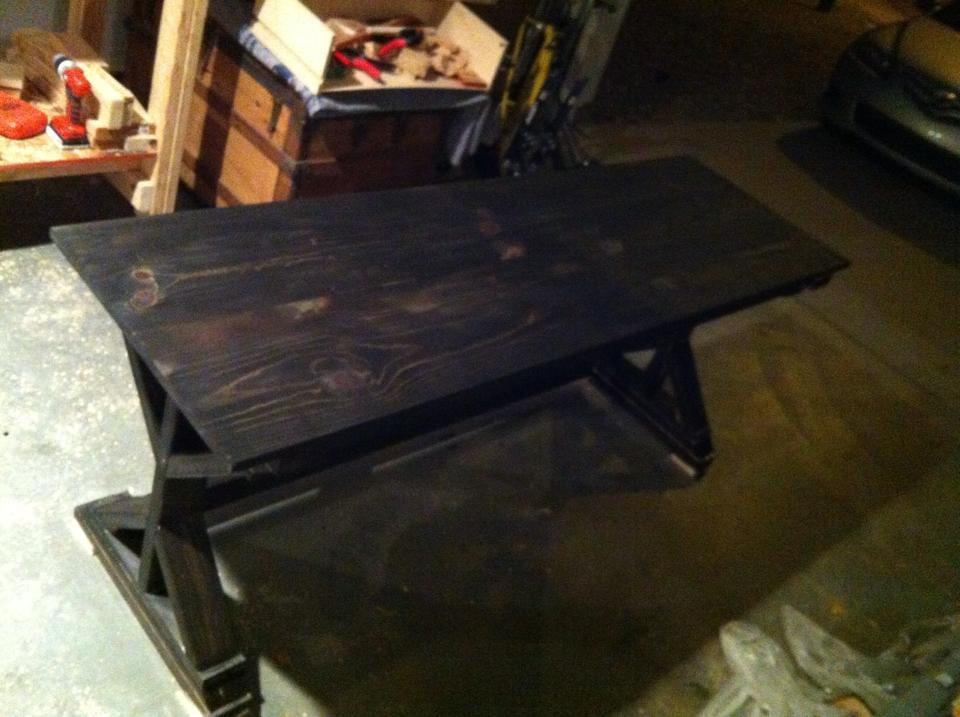
Needed custom size table that is versatile. Daughter can do homework, act as bar table, and work area. Chairs repainted and reupholstered. Screwed in multiple plug outlet to the side. First of many projects. Learned how to use Kreg Jig.

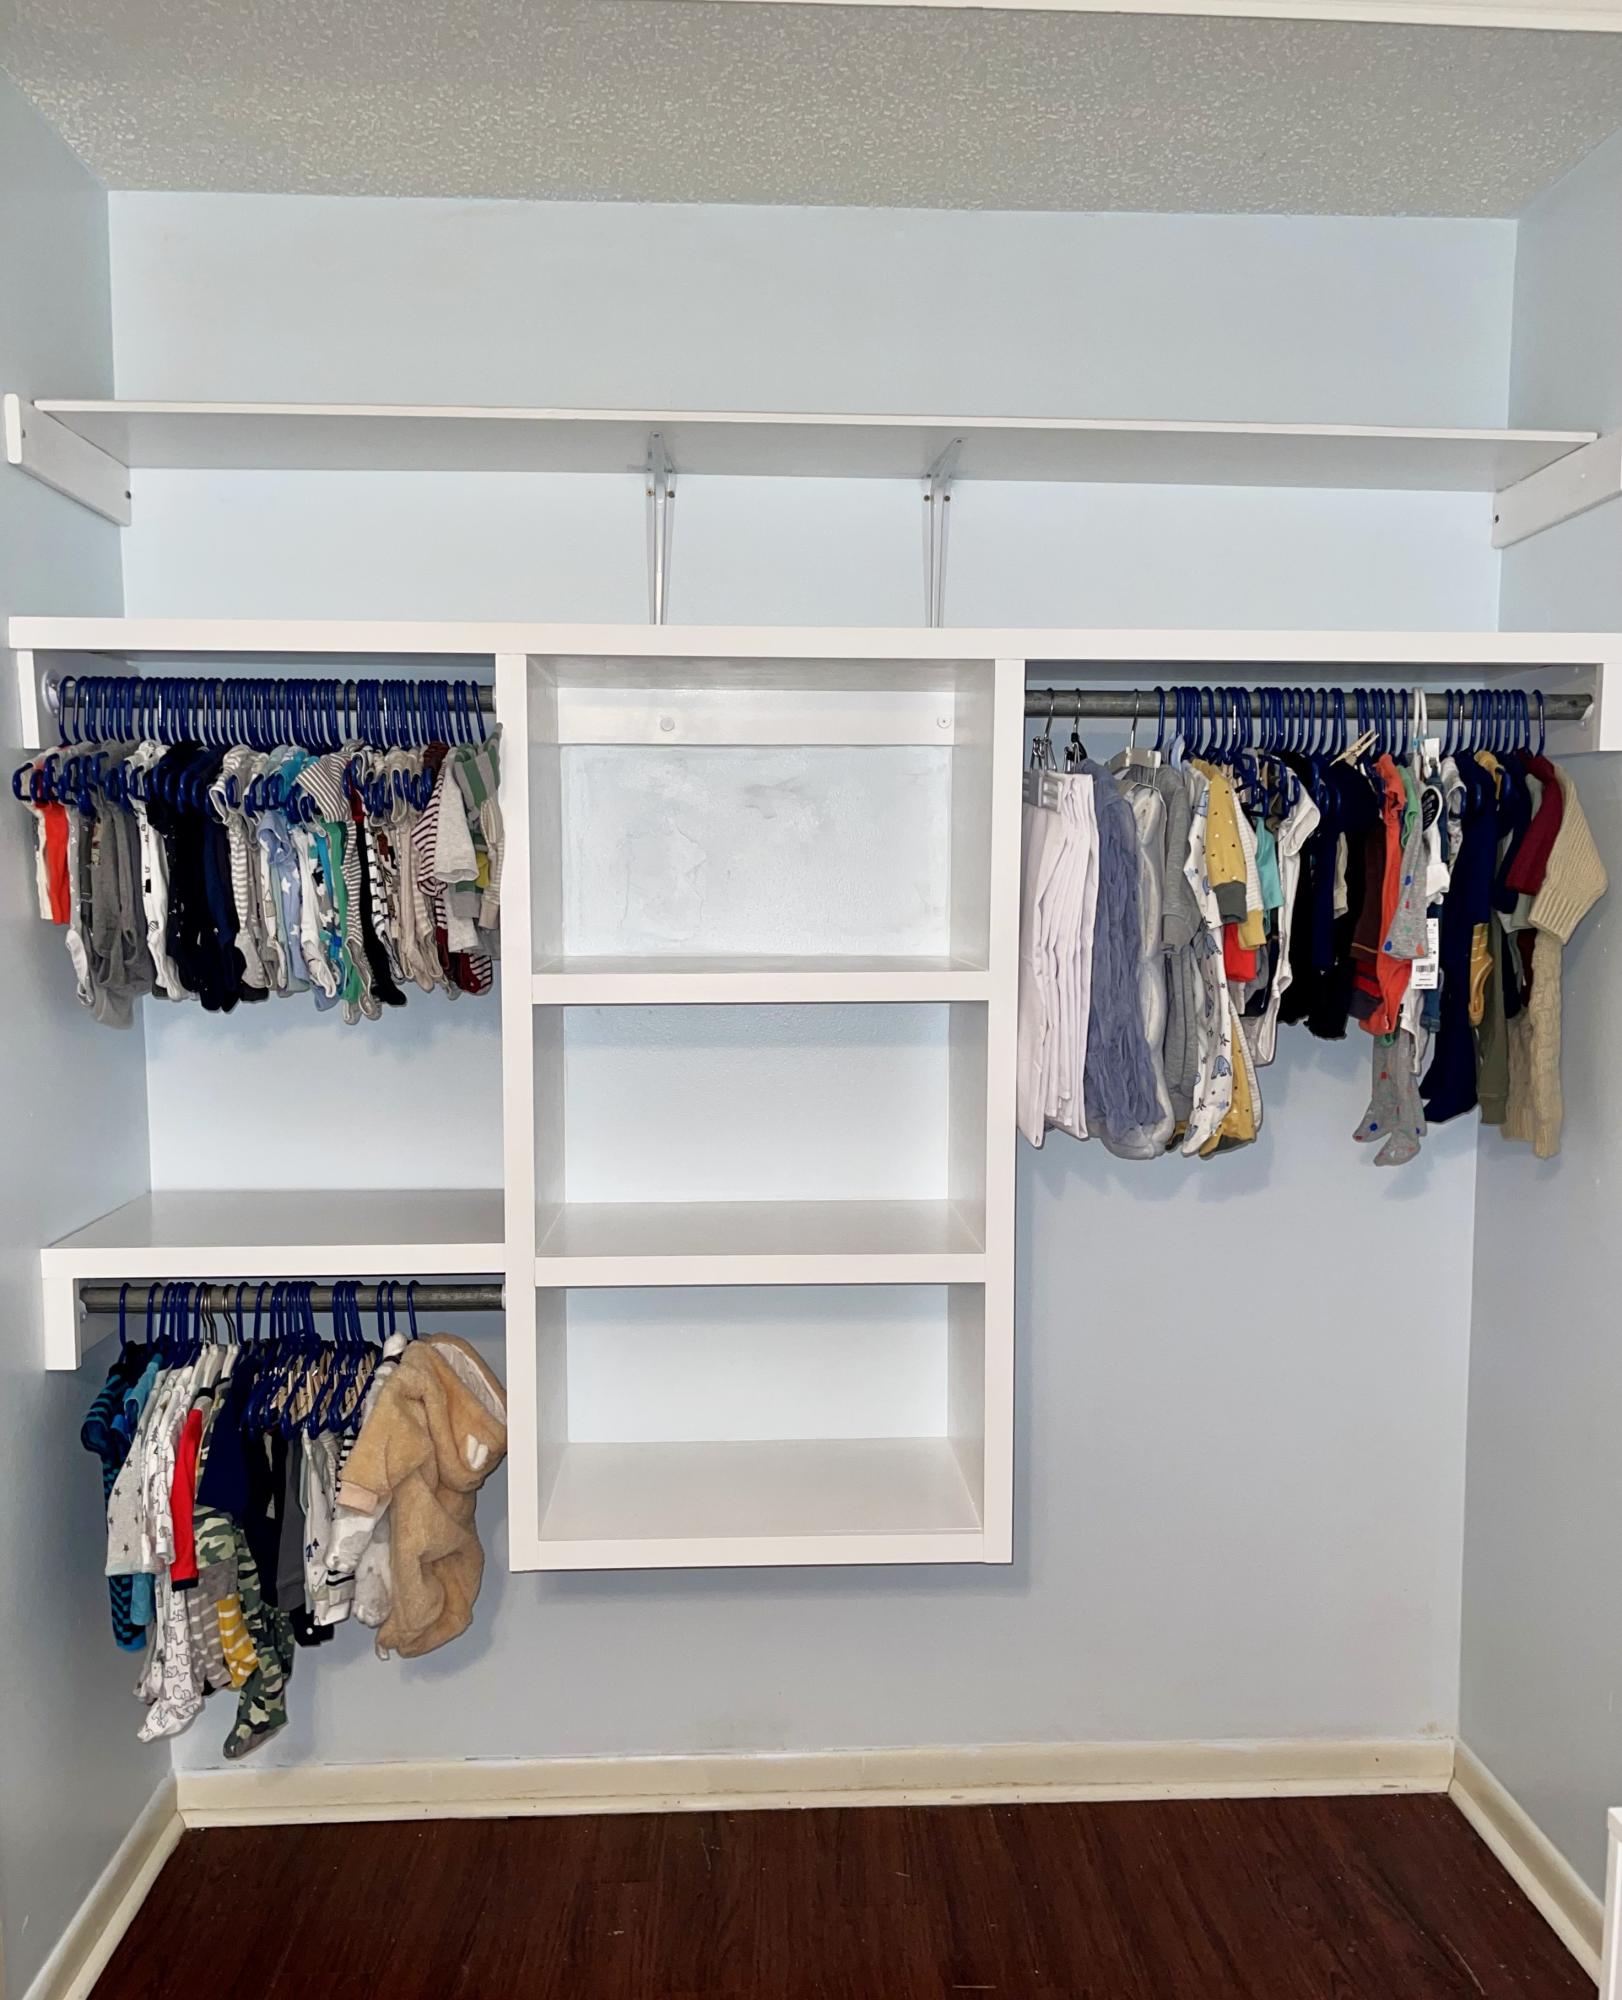
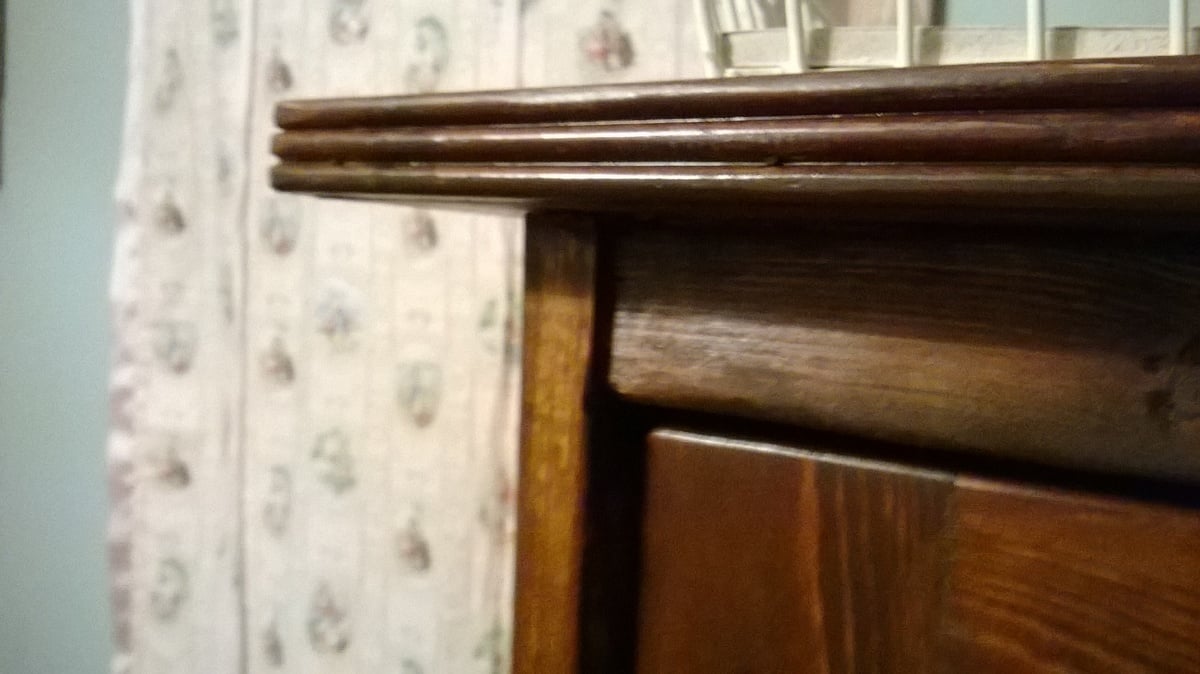
This project is based on the floating closet tower build. This is the first time I’ve attempted a renovation project of this size, and I feel satisfied with the results. I did not purchase my boards from shelf help, I cut mine from a sheet and a half of plywood. Thank you for providing your plans for free. They are very helpful for beginners like me!!
Charity P
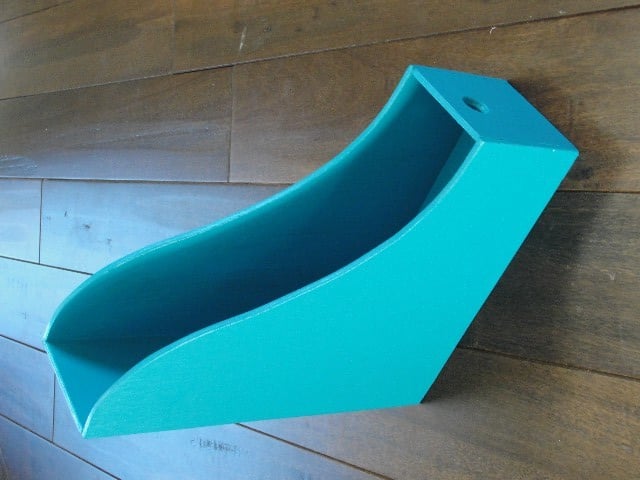
A long time ago I saw a picture of an old magazine file turned on it's side and used as a shelf. I loved it. And it had a curve that I loved too. After waiting over a year for vintage magazine file to fall into my lap, I decided it was time for me to take action.
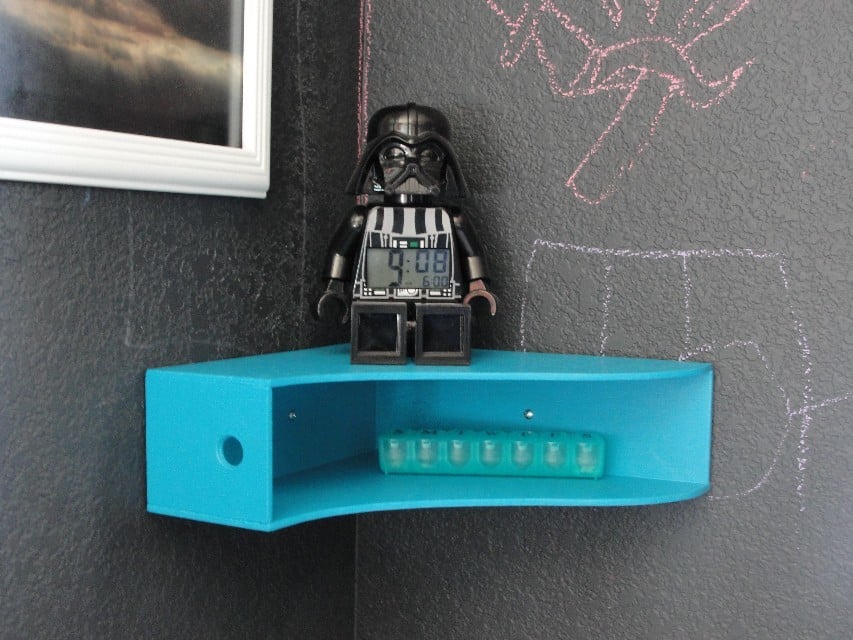
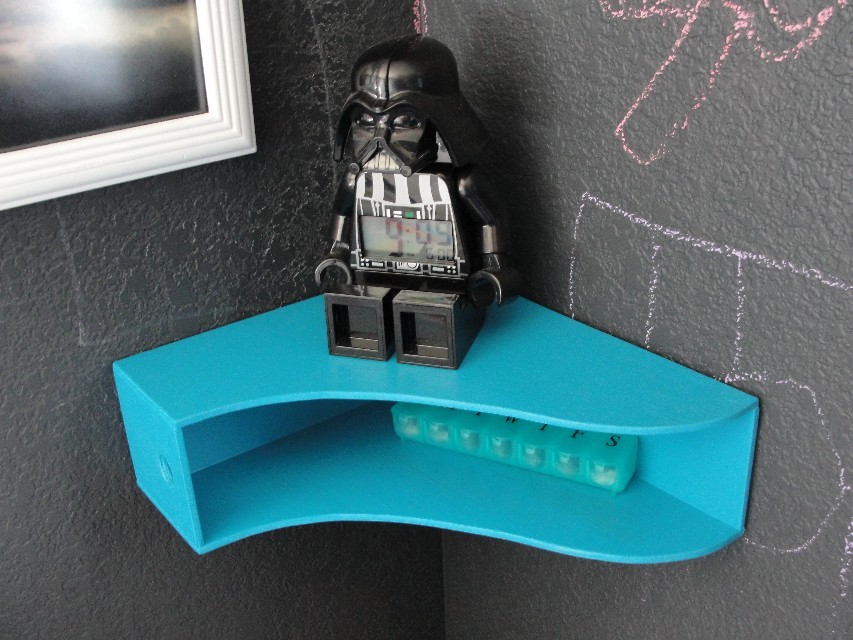
I have it attached in the corner by my son's bed. It is a perfect little spot to hold his glasses, water, pills, and of course Darth Vader.
A few changes I made-
After cutting the side panels I drew a curve on them. It was 12 inches tall, and I started the curve up 4 inches from the front. I used painters tape to hold the 2 side pieces together and cut them on my scroll saw, you could also use a jig saw.
The old one in the picture had a whole on the front, so I added one too.
Because I planned to turn this on it's side, I attached the front and back to the bottom first. Then attached the sides. That way the sides rest on the back and front for a little support. I had to adjust the width on all sides for that.
It was super quick and super easy.
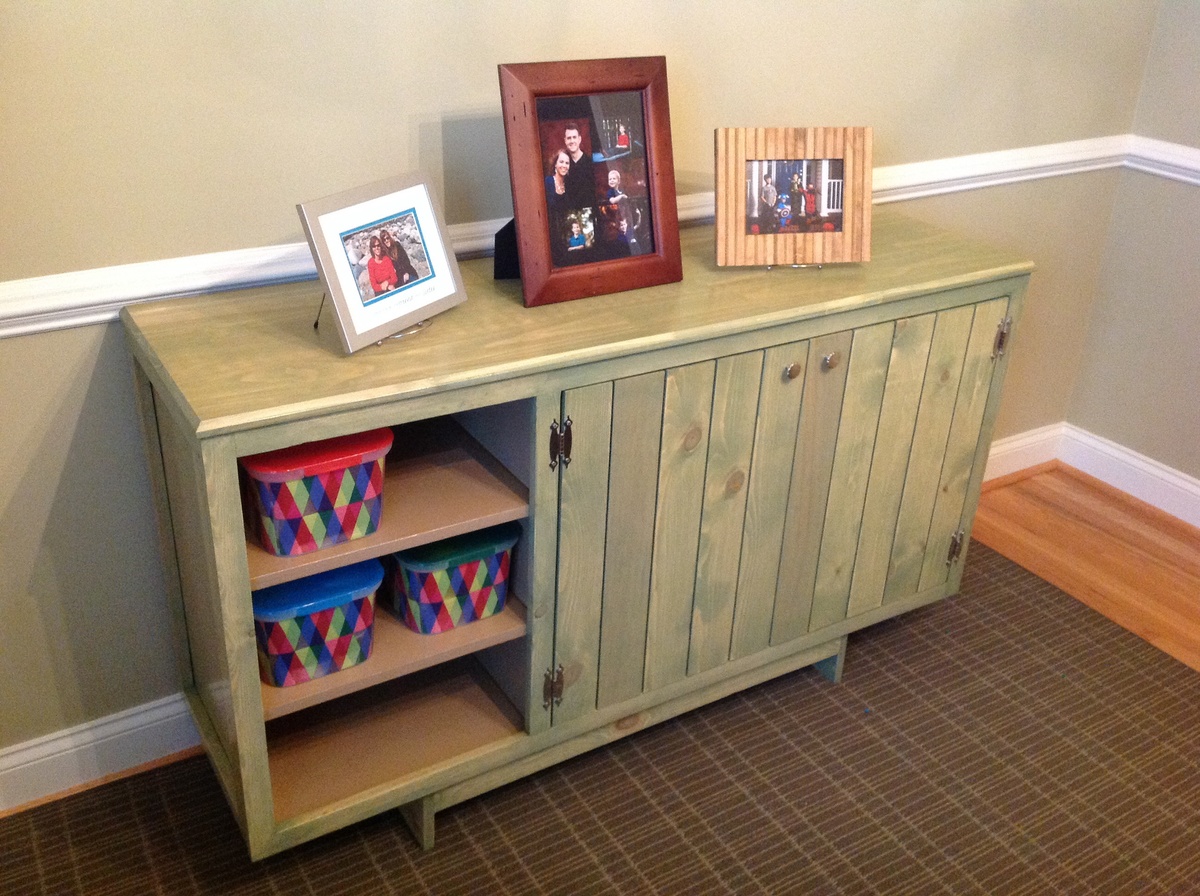
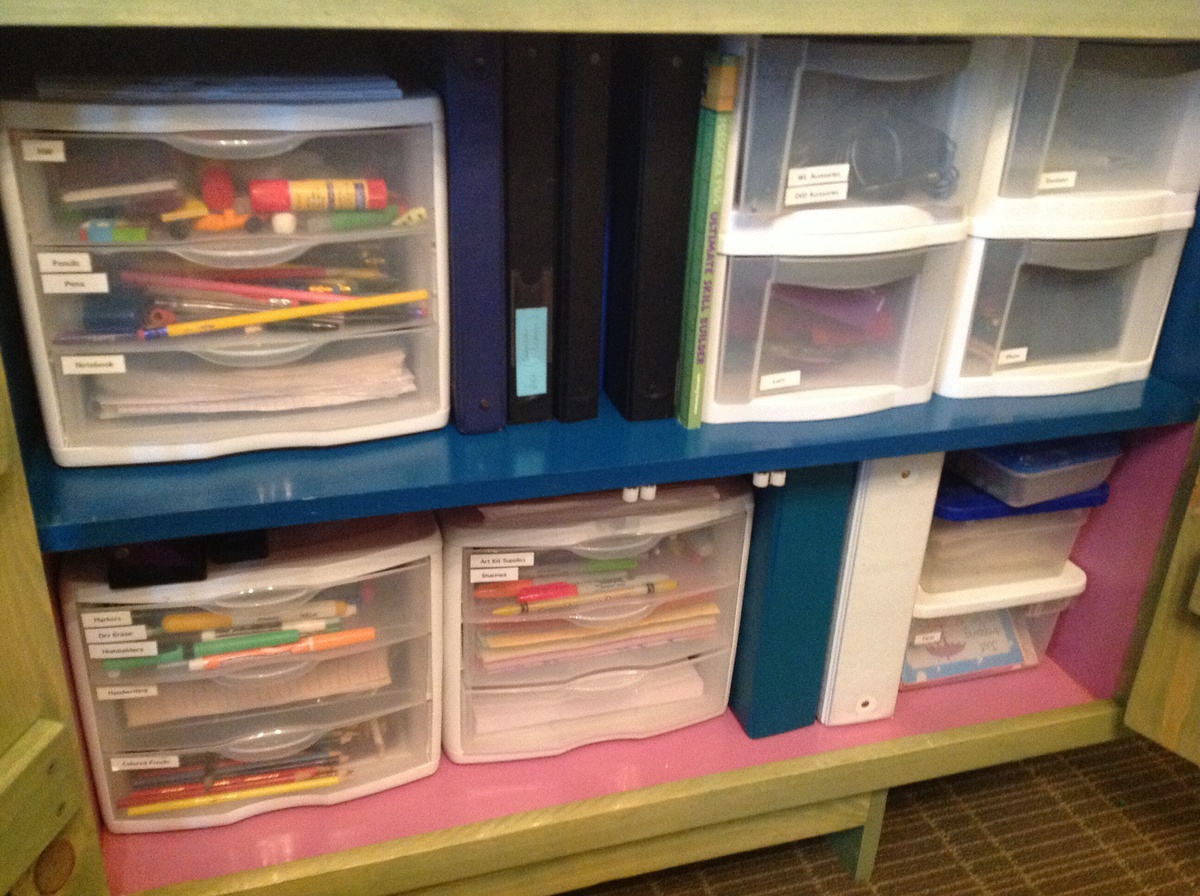
We used the plans for the Emerson-inspired buffet to create a cabinet for our kiddos school and art supplies. It turned out so beautifully that we put it in our dining room.
Made a few mods. Super fun...
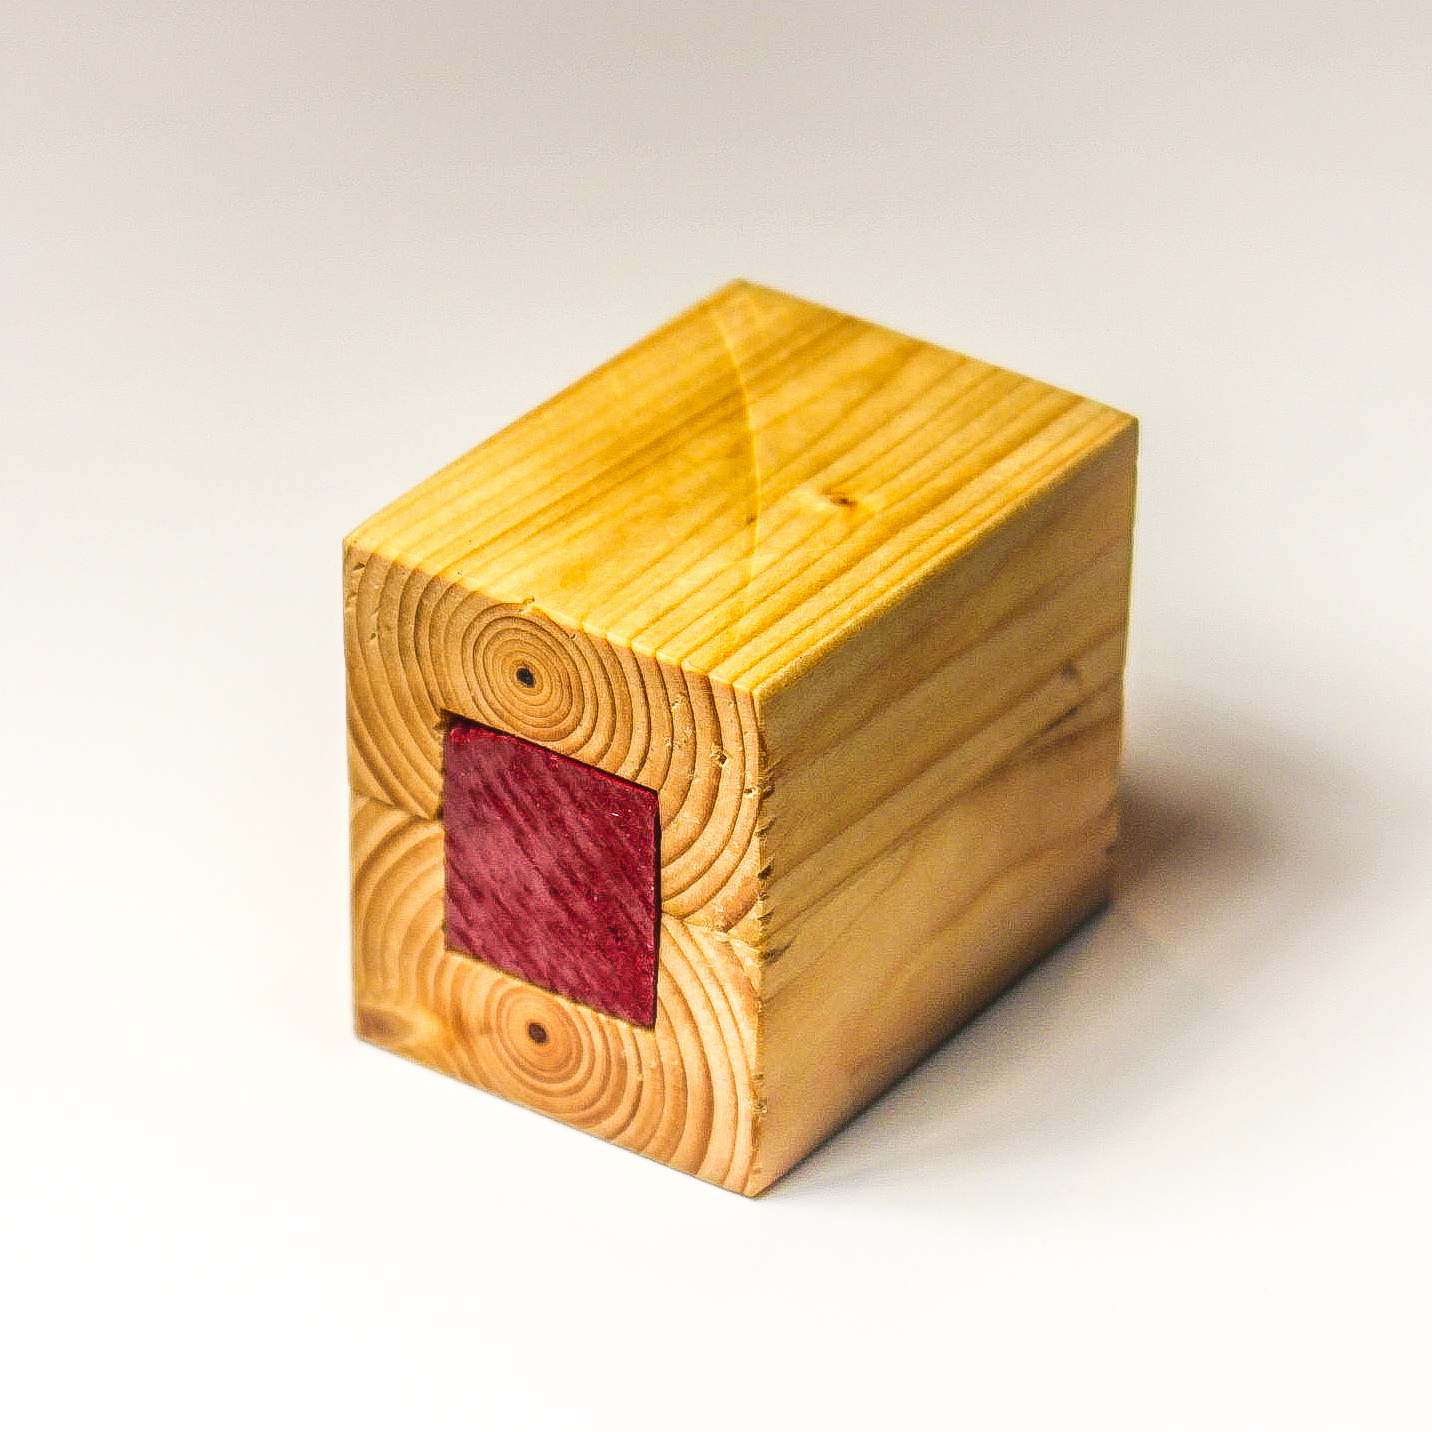
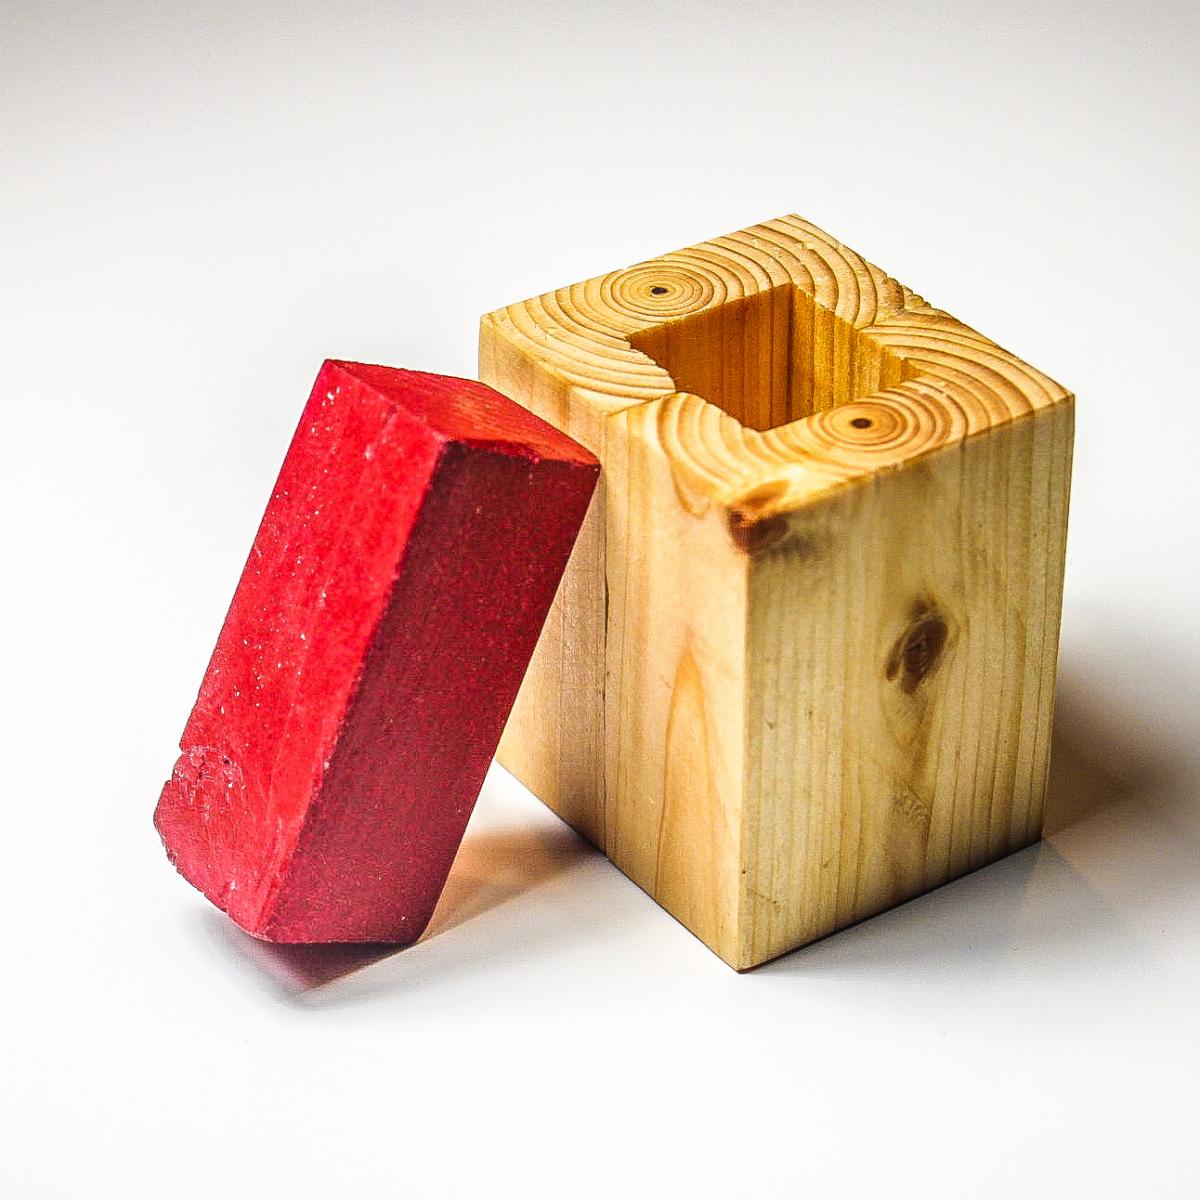
This little puzzle was pretty fun to make and allowed me to use up some of the magnets from my last project. The goal of the puzzle is to remove the center piece from the tube. You will quickly notice that there isn’t much to the puzzle – no buttons, latches or any other obvious locking mechanism.
Build Instructions: https://www.instructables.com/id/Tube-Puzzle/
How it Works / Solution: https://youtu.be/N4ID3-wBdik
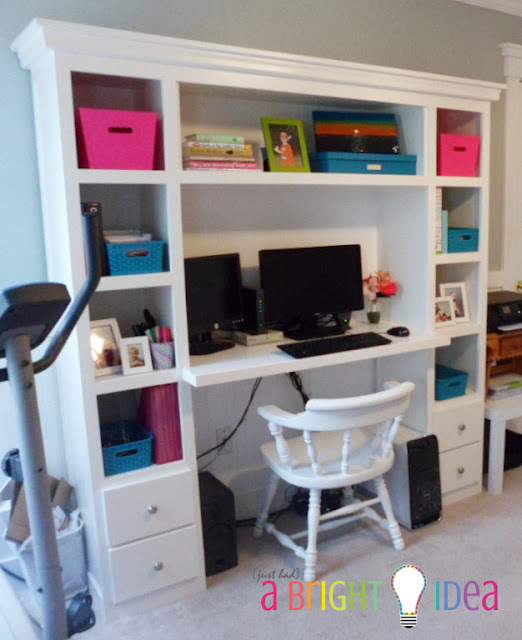
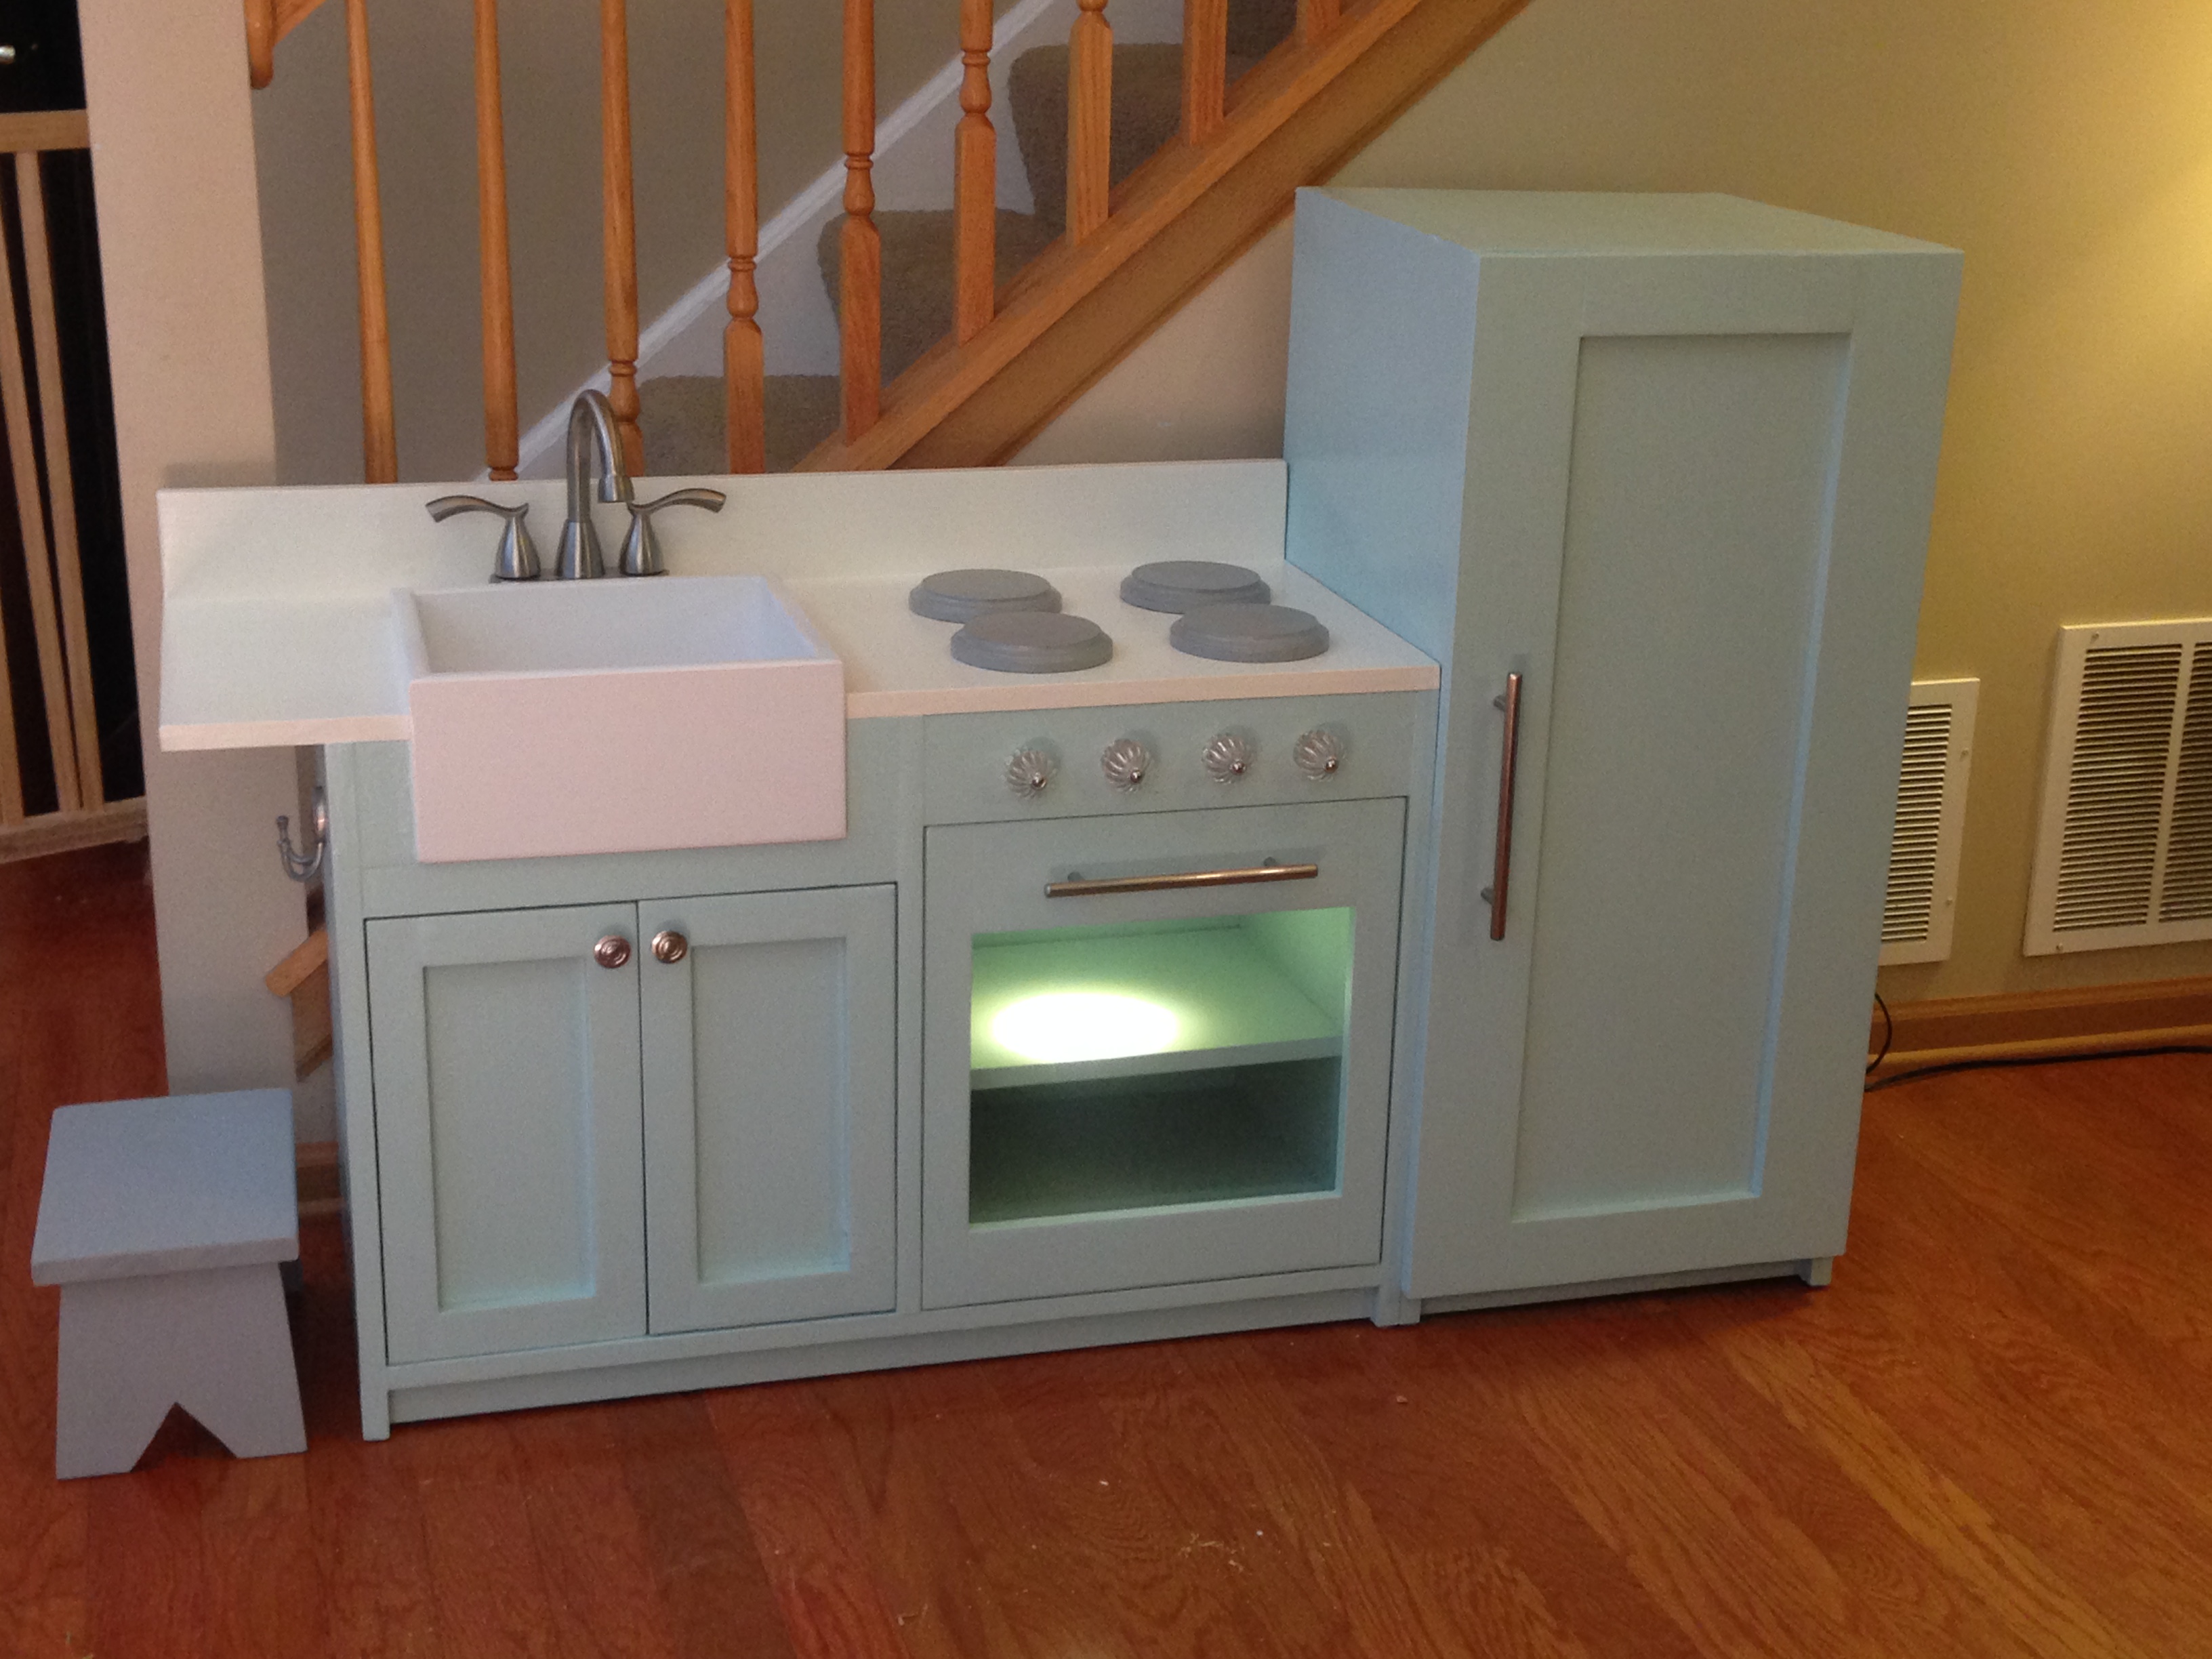
I had the idea for this project after seeing how Jen at IHeart Organizing made her desk out of two IKEA Expedit shelves. I fell in love with the desk - cubbies, organization, great space, etc. My husband is the one who made this for me, he is a carpenter by trade. He didn't use the IKEA bookshelves, instead made his own, which ended up saving a lot of money. Expedit shelves are $60/ea and we ended up only having to spend $60.00 on the project. I don't have build plans, but the lines are very straightforward, so I think most could fashion this desk themselves just by looking at the picture - that's what my husband did! I gave him the measurements from IKEA's website for the bookshelves and he loosely based his measurements on those. Here are some links to my blog with the posts updating on the progress:
http://justhadabrightidea.blogspot.com/2012/04/desk-progress-almost-the…
http://justhadabrightidea.blogspot.com/2012/04/sneak-peek-my-new-desk.h…
http://justhadabrightidea.blogspot.com/2012/04/desk-update-it-has-arriv…
http://justhadabrightidea.blogspot.com/2012/04/desk-update-all-moved-in…
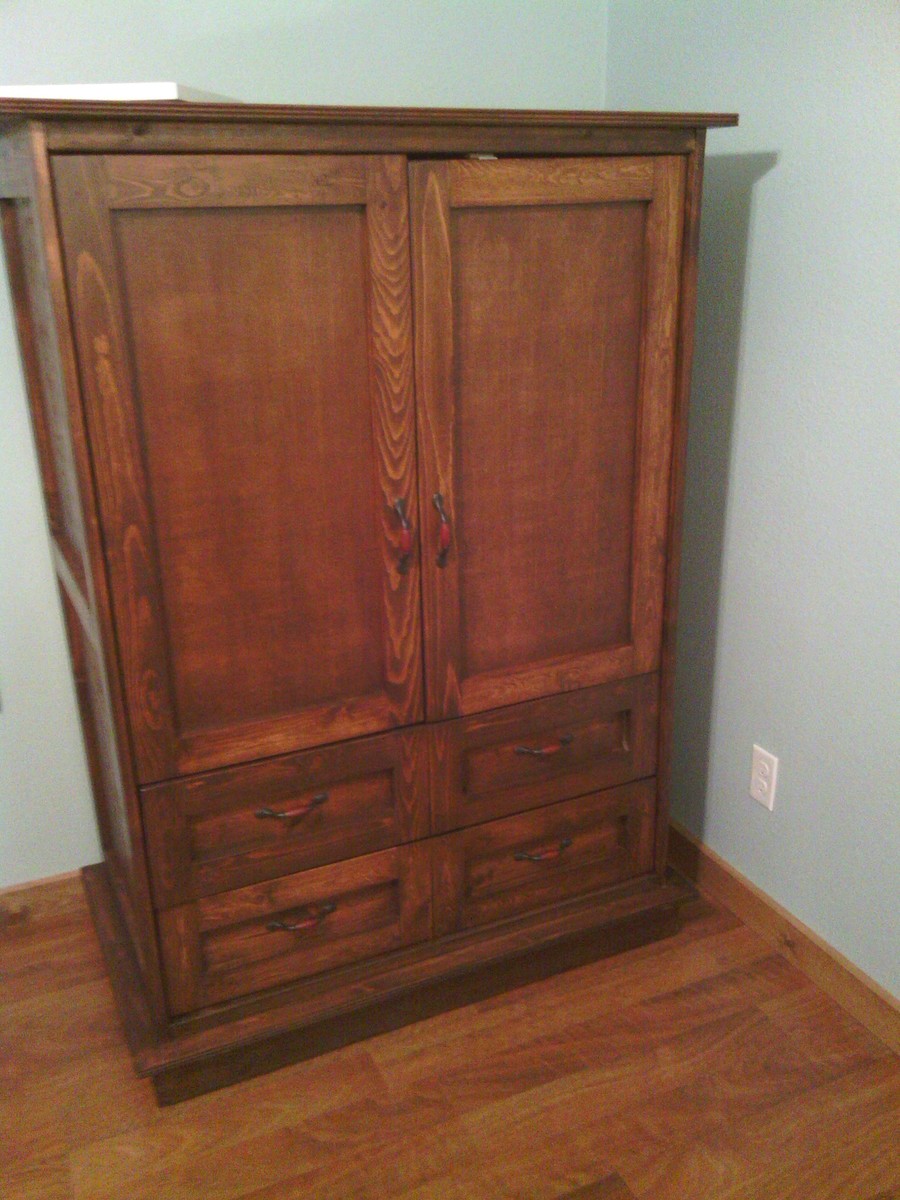
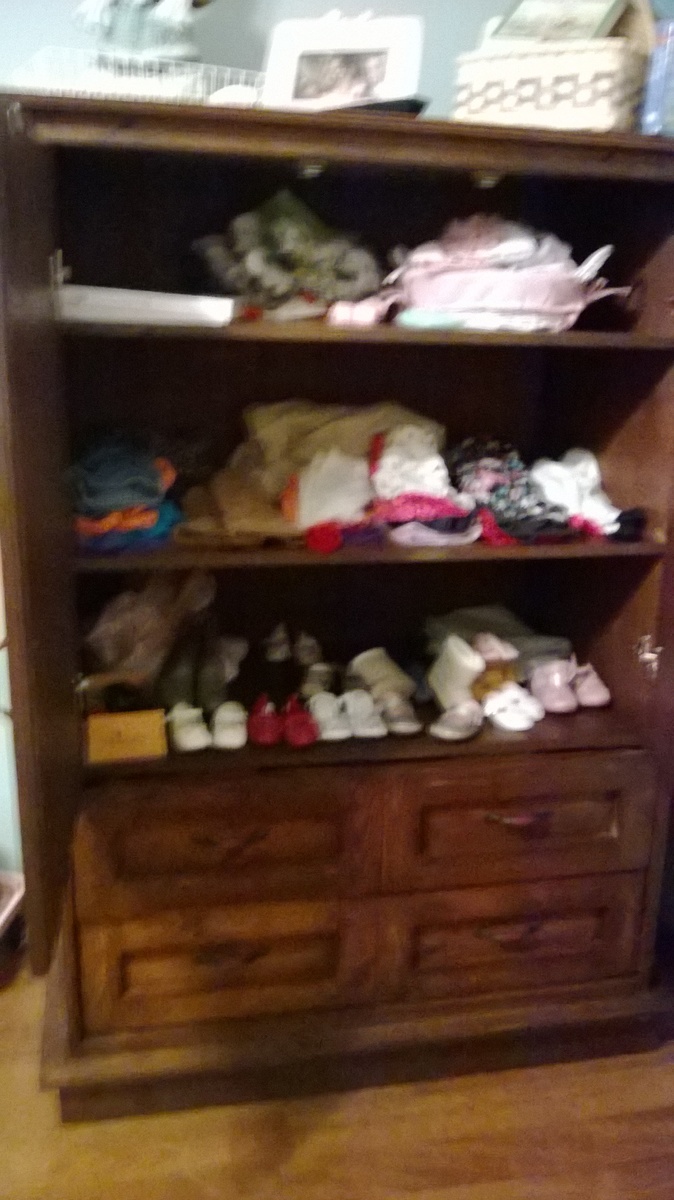
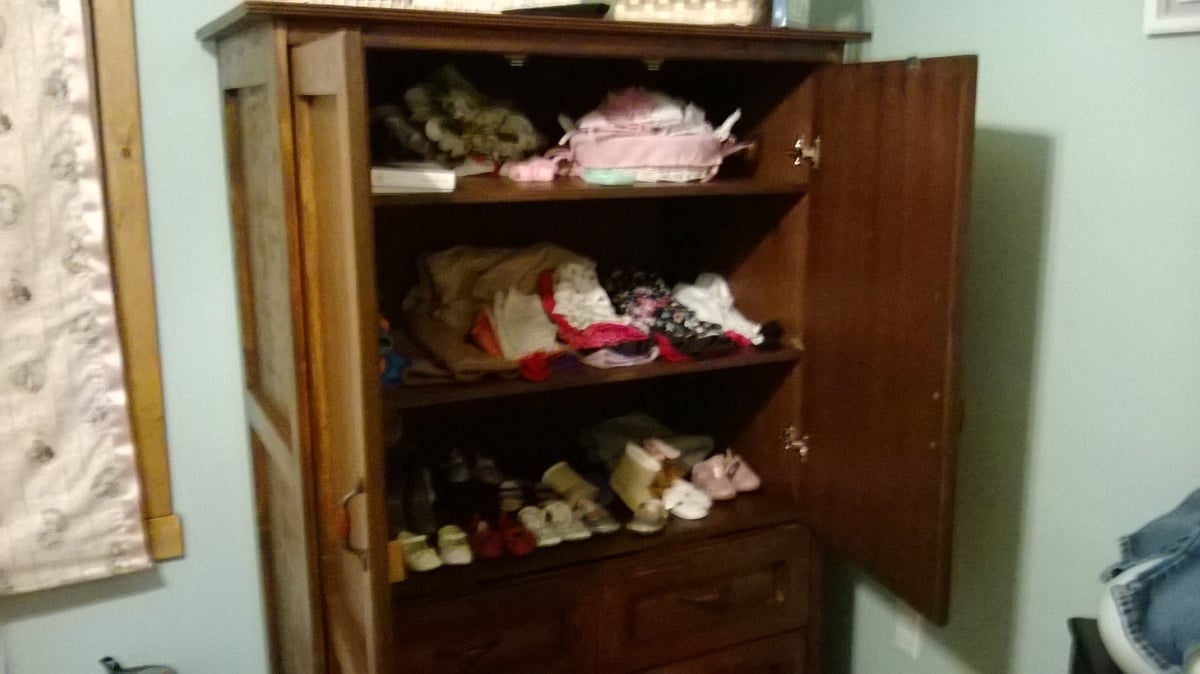
Little Ella needed a big armoire for all her clothes and shoes, so daddy made her one.
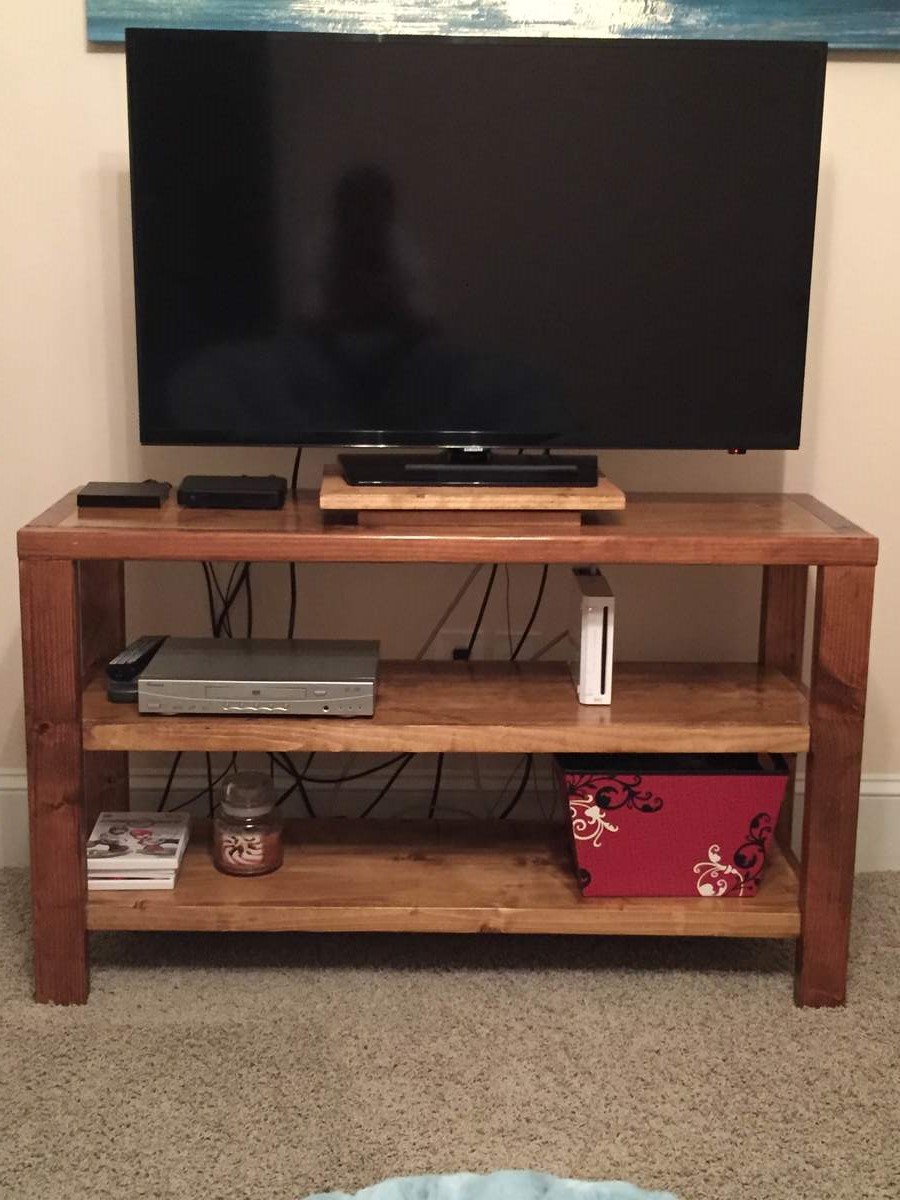
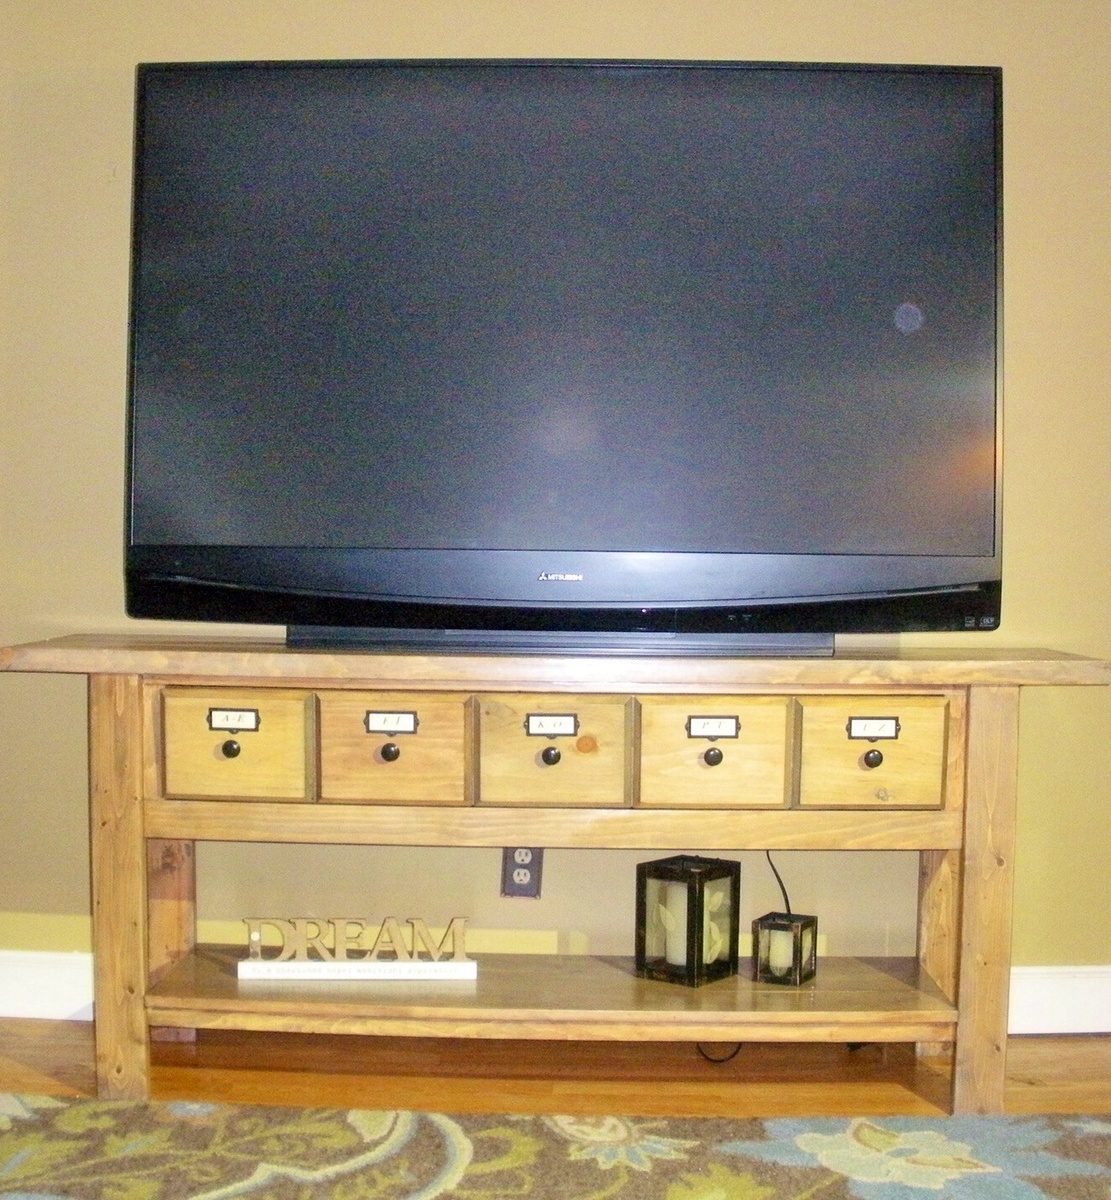
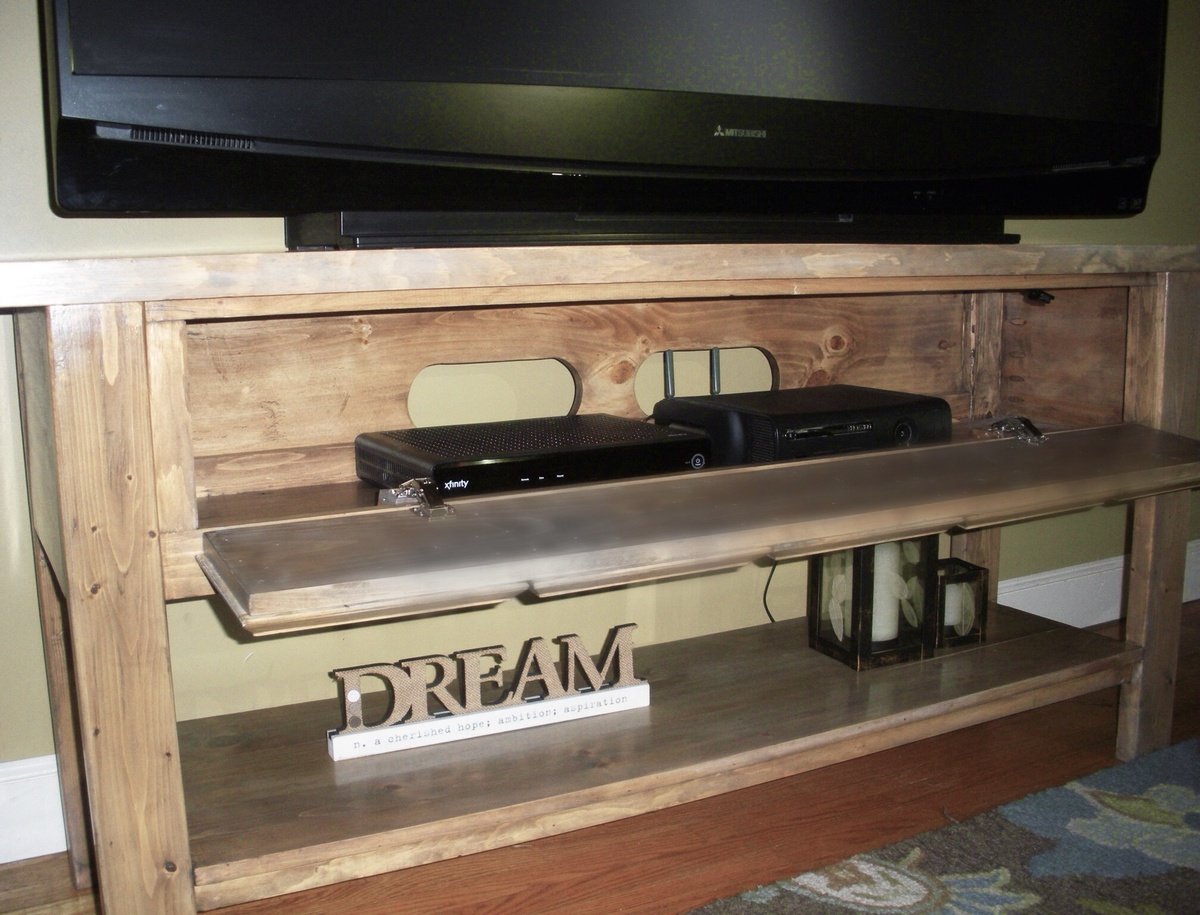
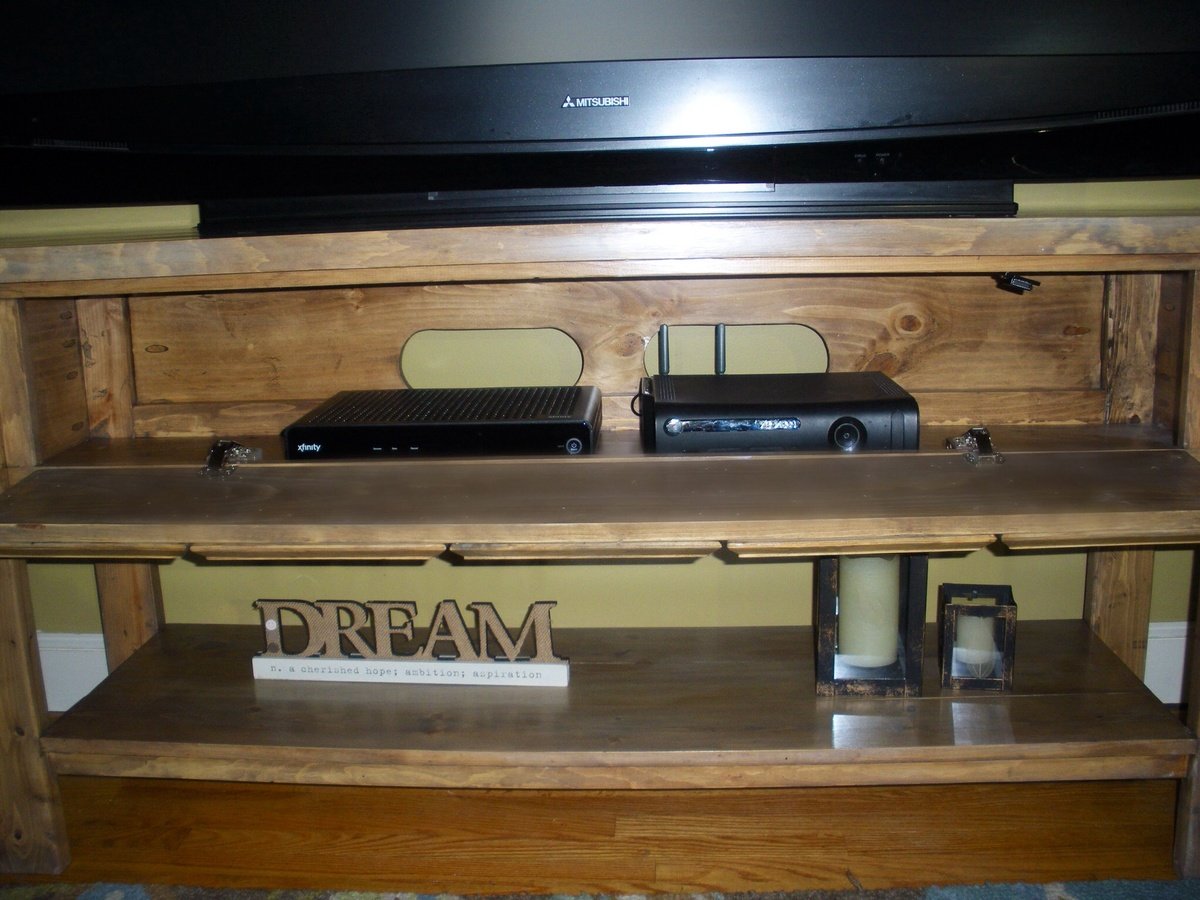
Henry media console built with pine and Puritan Pine stain. Added a lazy Susan since the stand didn't swivel
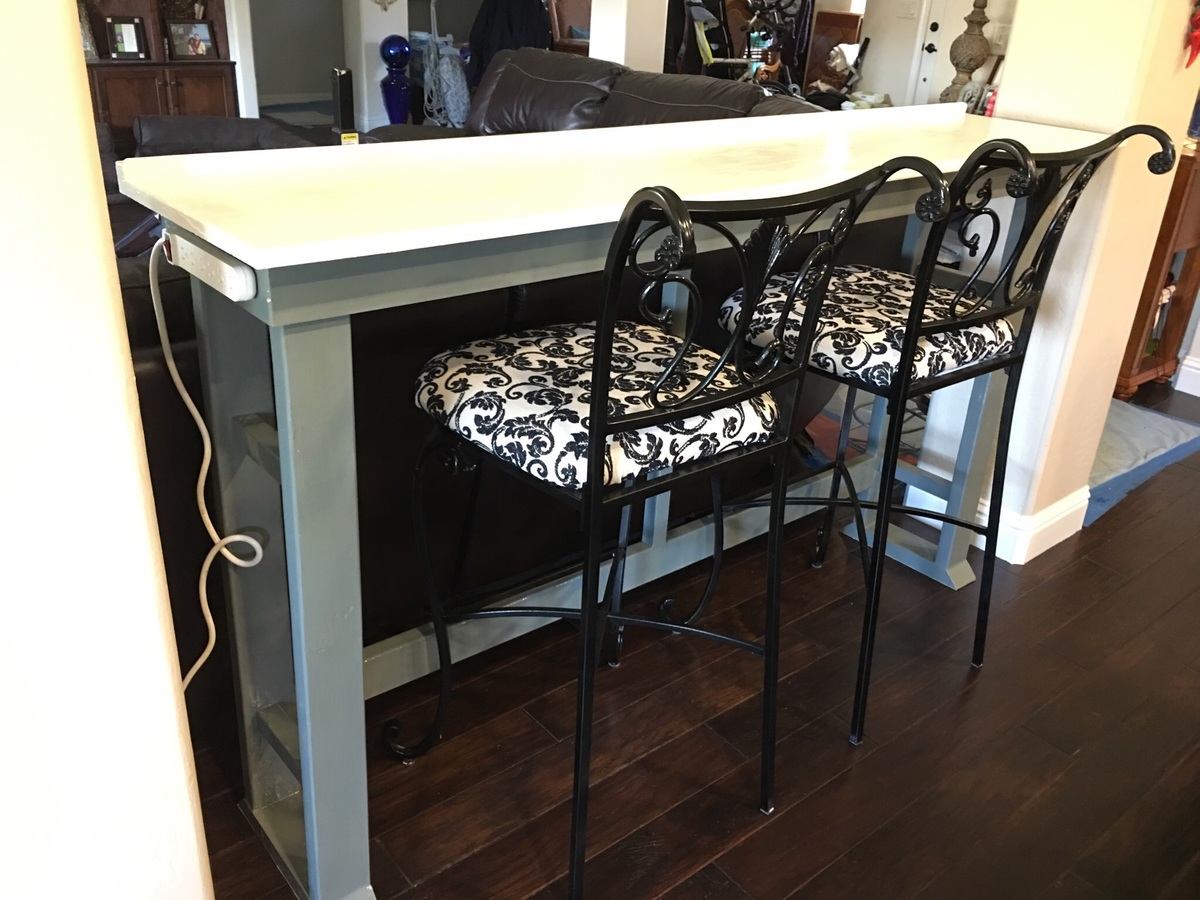
Hand made breakfast bar check us out on Facebook marney Marie

Needed a small desk for the vacation home - modified Ana’s plans slightly to use some wood I had sitting around. I am so happy with how this turned out!
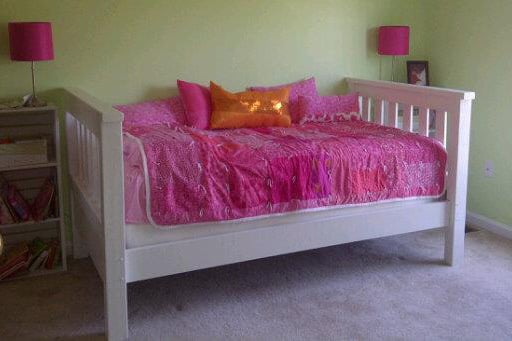
My dad used the plans for the Simple Bed - twin size and built two. Then he took the headboards from both to build the bed for our daughter's room. It sets against a wall, so it looks like a daybed since both ends are the same height. She loves it! The other bed will have both foot boards and will be used in our son's room when he is old enough for a twin bed. Our daughter loves the bed and our son can't wait to get his....and we all love that Pap made it just for them! :)
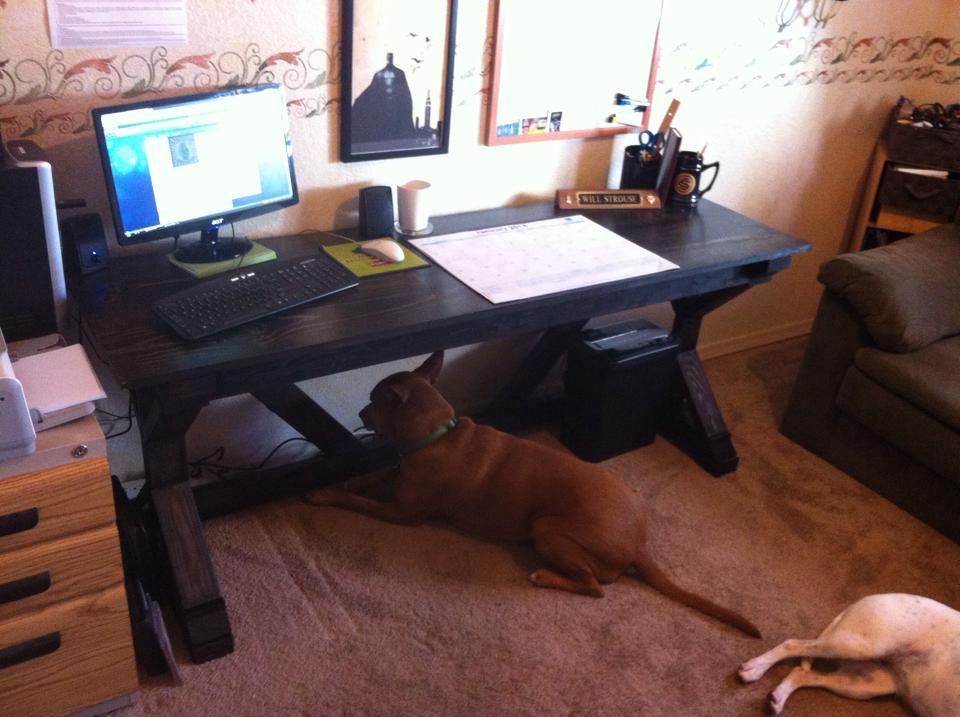
Great first project I used to justify the purchase of a miter saw to the wife. She promptly provided a list of additional items to build for her. This was a great beginner's project and confidence builder for follow on builds. Thanks Ana, Home Depot and Lowe's should be thankful for your site also.
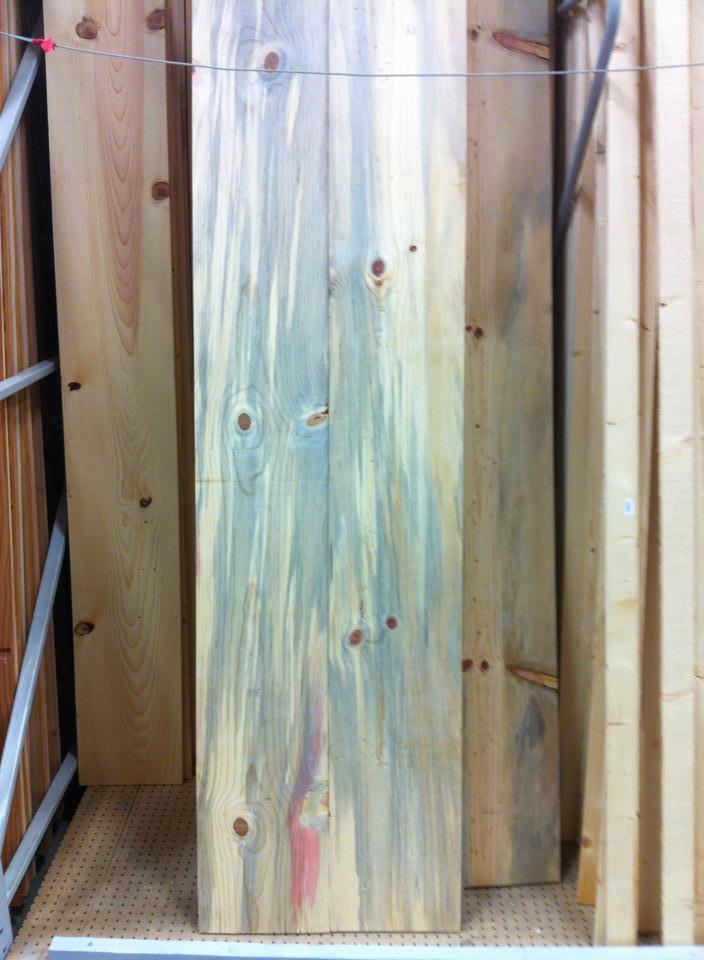
Tue, 02/18/2014 - 07:12
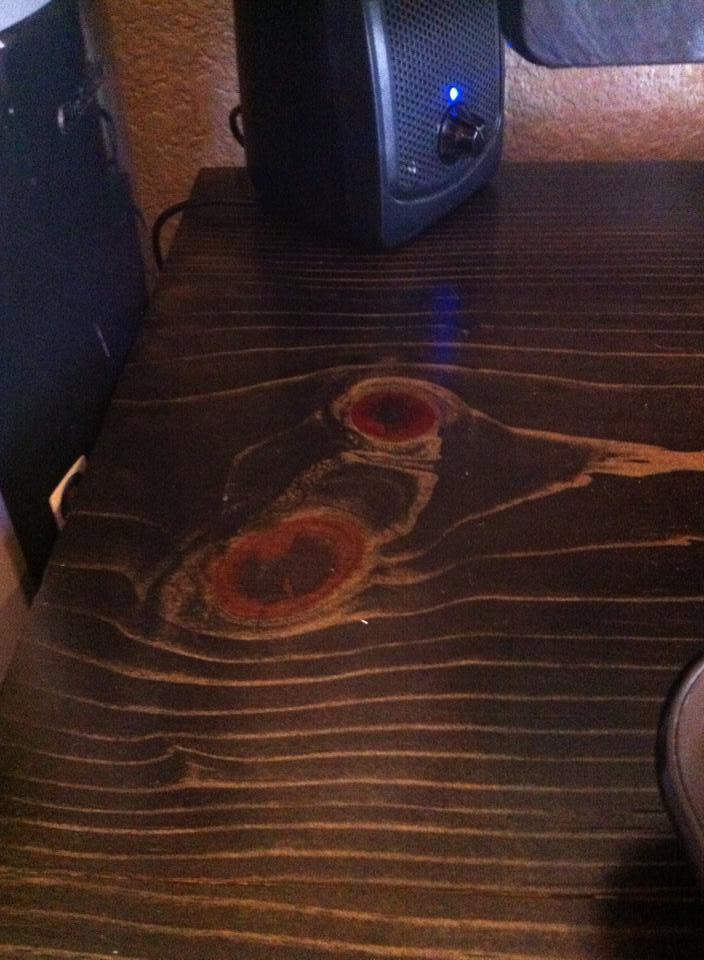
The dark staining in the pine you purchased is most likely the result of the pine beetle. This is the appearance of the wood infected with the beetle. It does not affect the quality of the wood but adds some beautiful colors and patterns!!
Very nice desk!
Wed, 02/19/2014 - 20:36
I managed to snag another pine board with similar coloring for the top of a bookshelf I'm building. Thanks for the info - can't imagine why these haven't all been snatched up - are they less desirable? The wife insisted on the dark stain but in the future these will get poly or a light stain to show it off.
Thu, 02/20/2014 - 10:06
I personally love the beetle stain. Apparently you either love it or hate it. For interest sake google a company called Azure wood. They are a company that harvests pine beetle infected wood and they make amazing and beautiful one of a kind furniture.
We altered Ana's plans and made a little bit smaller version of it. :)
Built by Holli Peterson
Fri, 04/17/2020 - 09:30
Can someone post plans for this? Materials? Cost?
I love it!!!
Thanks!!
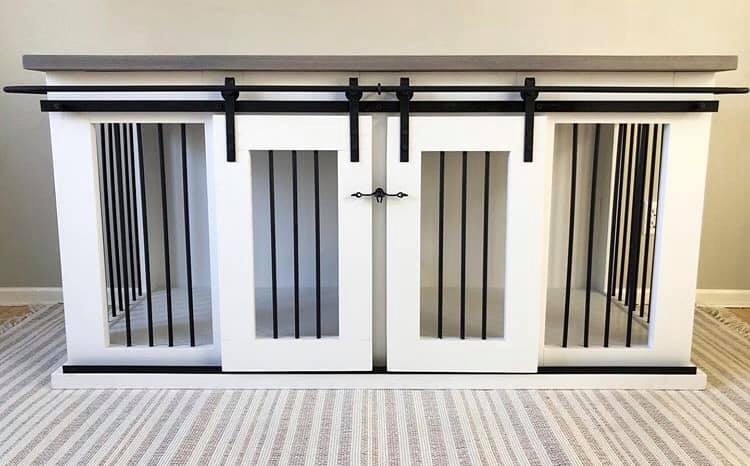
Thu, 08/31/2023 - 21:23
I’m looking to make one similar to this but looking to make it a little bigger for two Great Danes. Do you still have the plans and or cut list for this project to help me out. I’d greatly appreciate it if so.

DIY Rustic Porch Swing
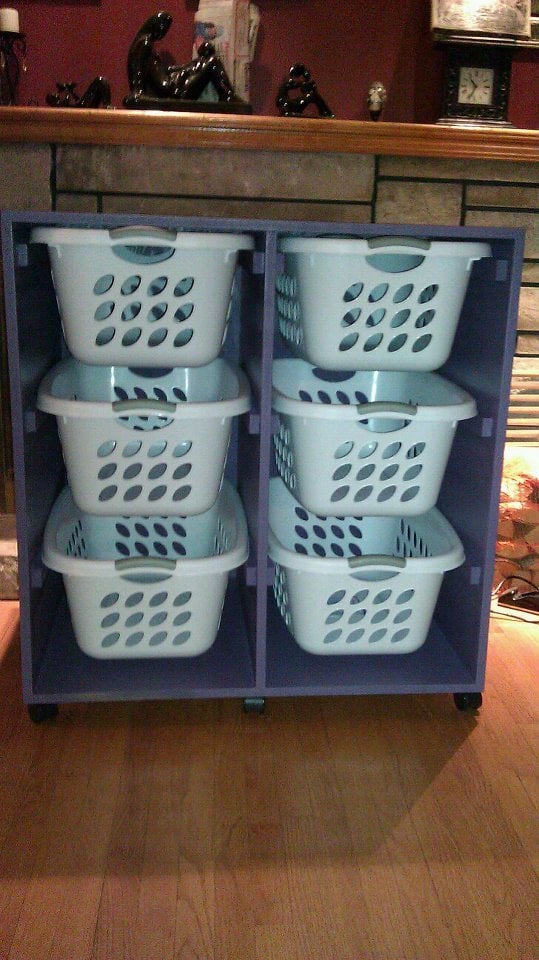
I modified the tall and lengthwise laundry basket dresser a bit to make this shorter version. I also combined it into a single dresser instead of it being two separate dressers side by side. I put the dresser on casters so that I can roll it around my laundry room. I can tuck it away in the closet area or roll it out and use it as a folding counter.
Sun, 05/13/2012 - 09:02
I would love to do this modified version! Can you share your dimensions?
Sun, 05/13/2012 - 19:35
Jenna, I used 3/4" MDF and these are the dimensions:
1 Back piece - 37 1/4" x 37 1/4"
2 pieces for top & bottom - 37 1/4" x 25"
3 pieces for sides and middle - 35 3/4" x 25"
I used the same dimensions for the 1x2's as are in the original project and pretty much assembled it following the steps as she has written. Just remember to add 1x2's on both sides of the center divider and you're good to go! Hope that helps and if you have any questions, I'll be happy to try to help. :)
Tue, 08/07/2012 - 09:41
Do you know what kind of laundry basket you used & where you got them? Based on the pictures they look like the sterilite 2 bushel ultra however the dimensions look too big. Did you have to modify the plans to make them wider?
Thanks!
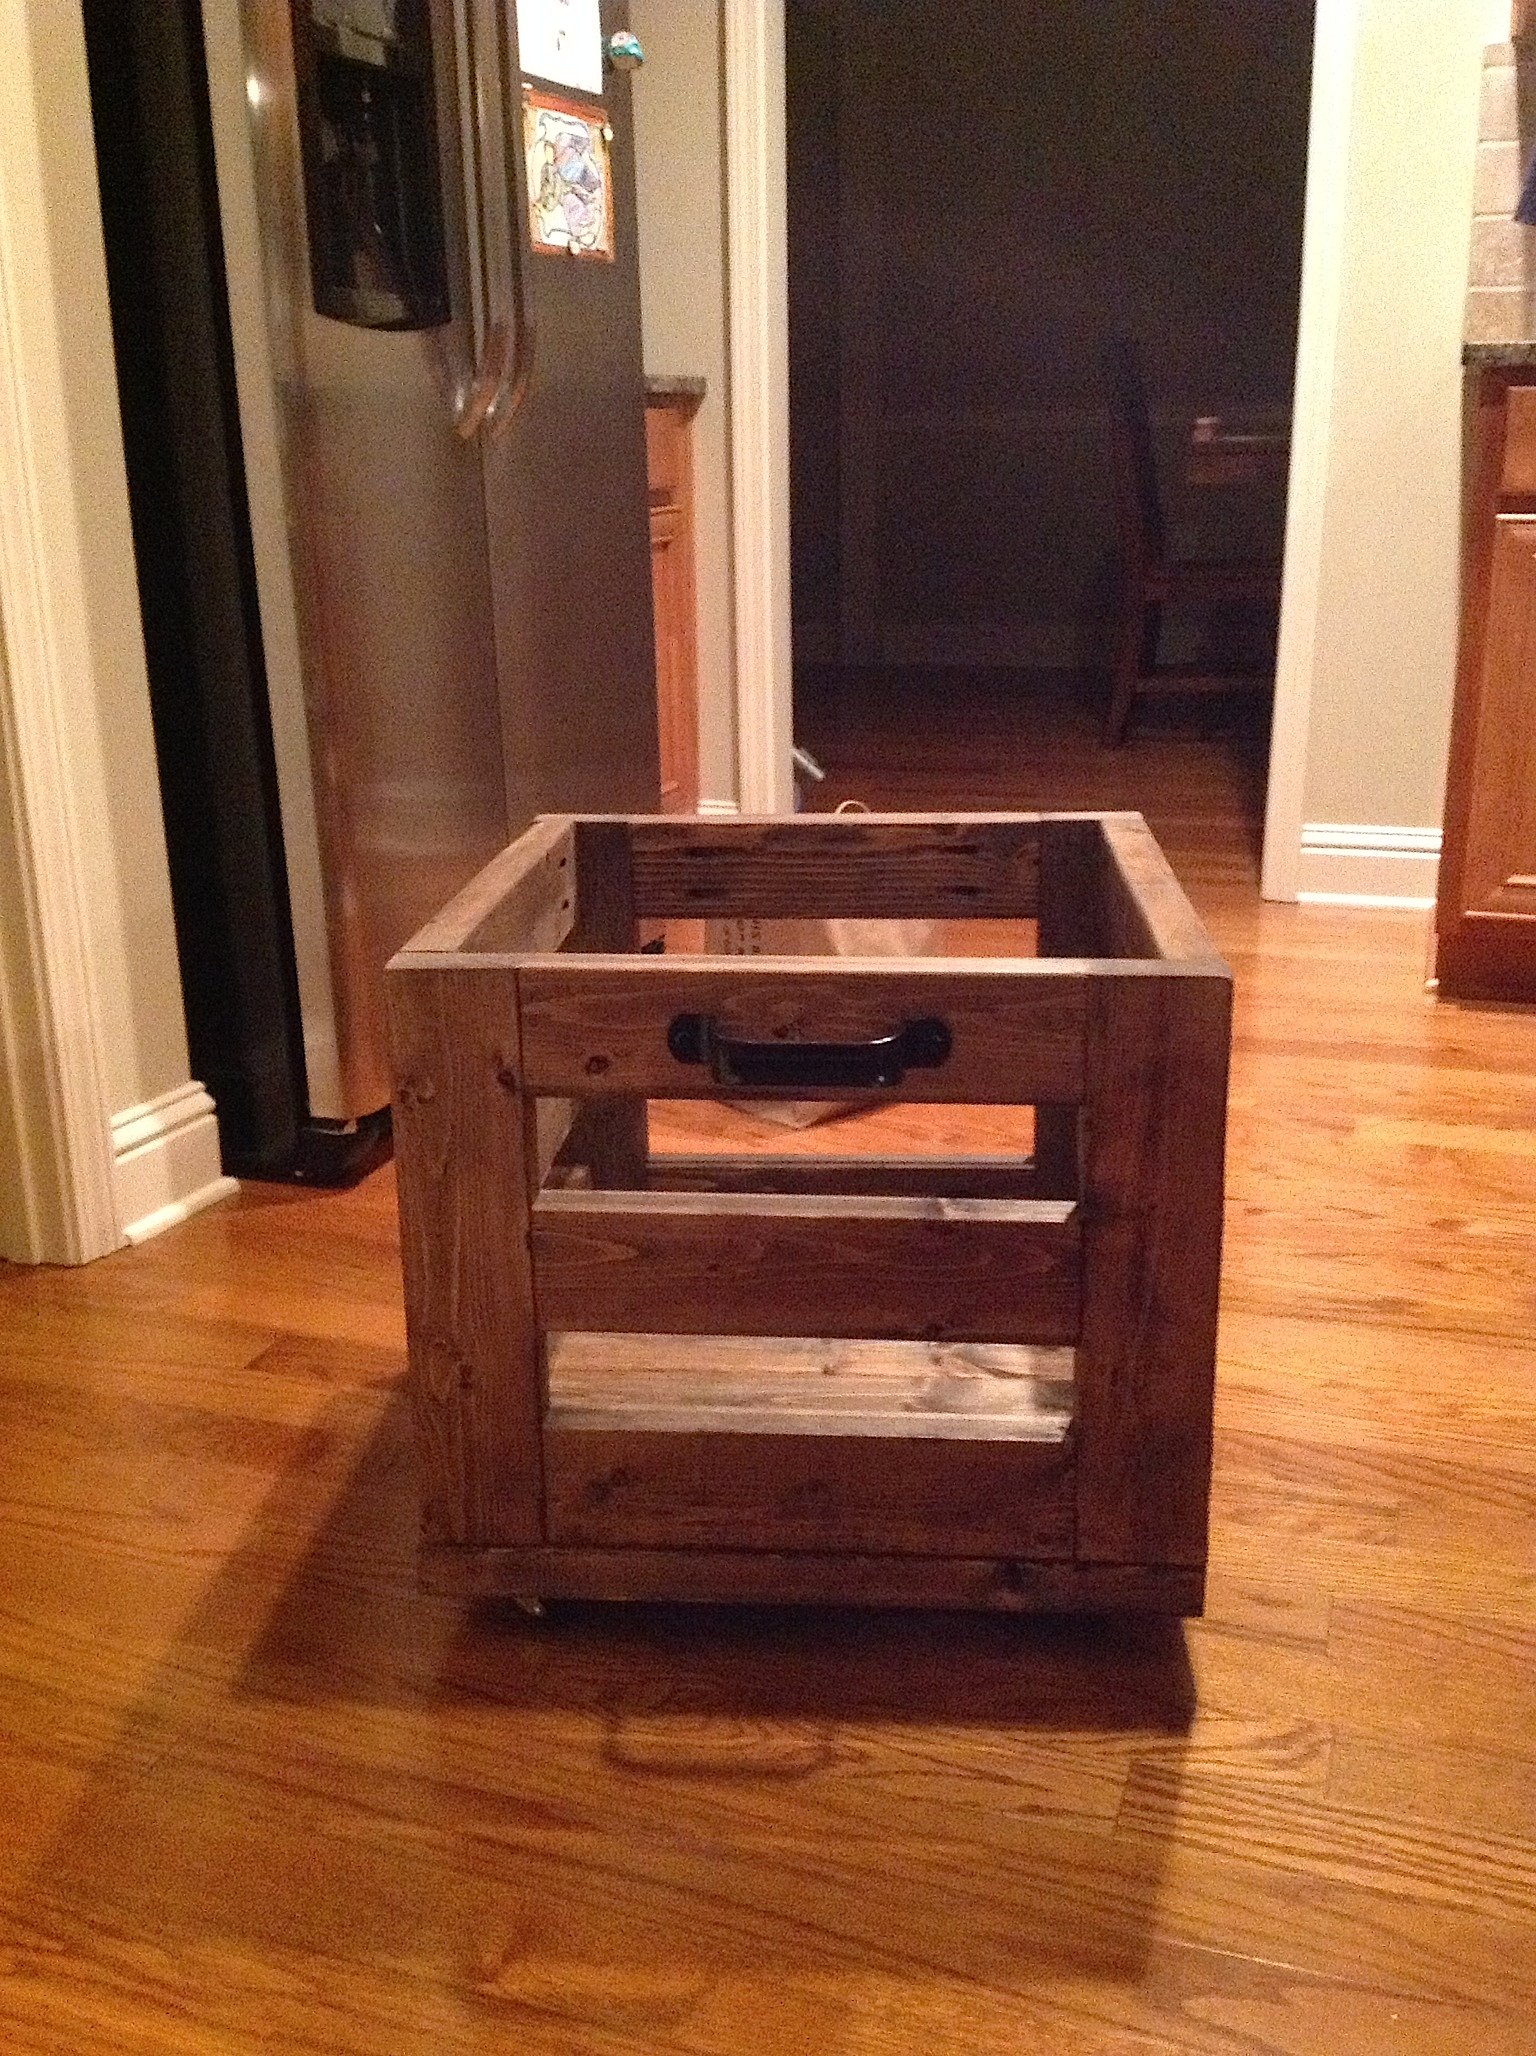
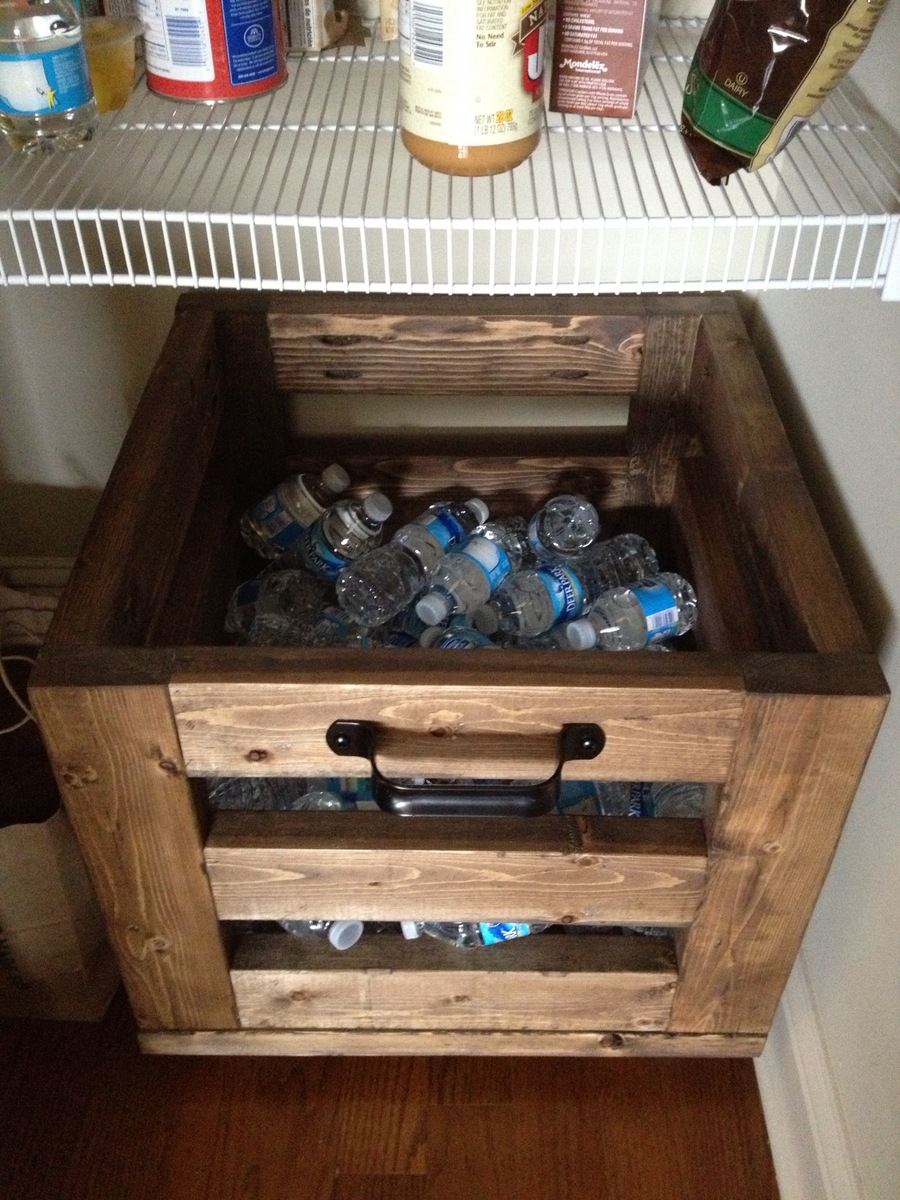
I am re-doing my walk in pantry, and this was the first step. I desperately needed a place for the hundreds of water bottles we keep. I put all those water bottles that were previously rolling all over the place and put them in this beautiful Industrial-style crate. I will admit before doing that my kids enjoyed going on a few laps around the house in it first!! Very pretty, very versatile.
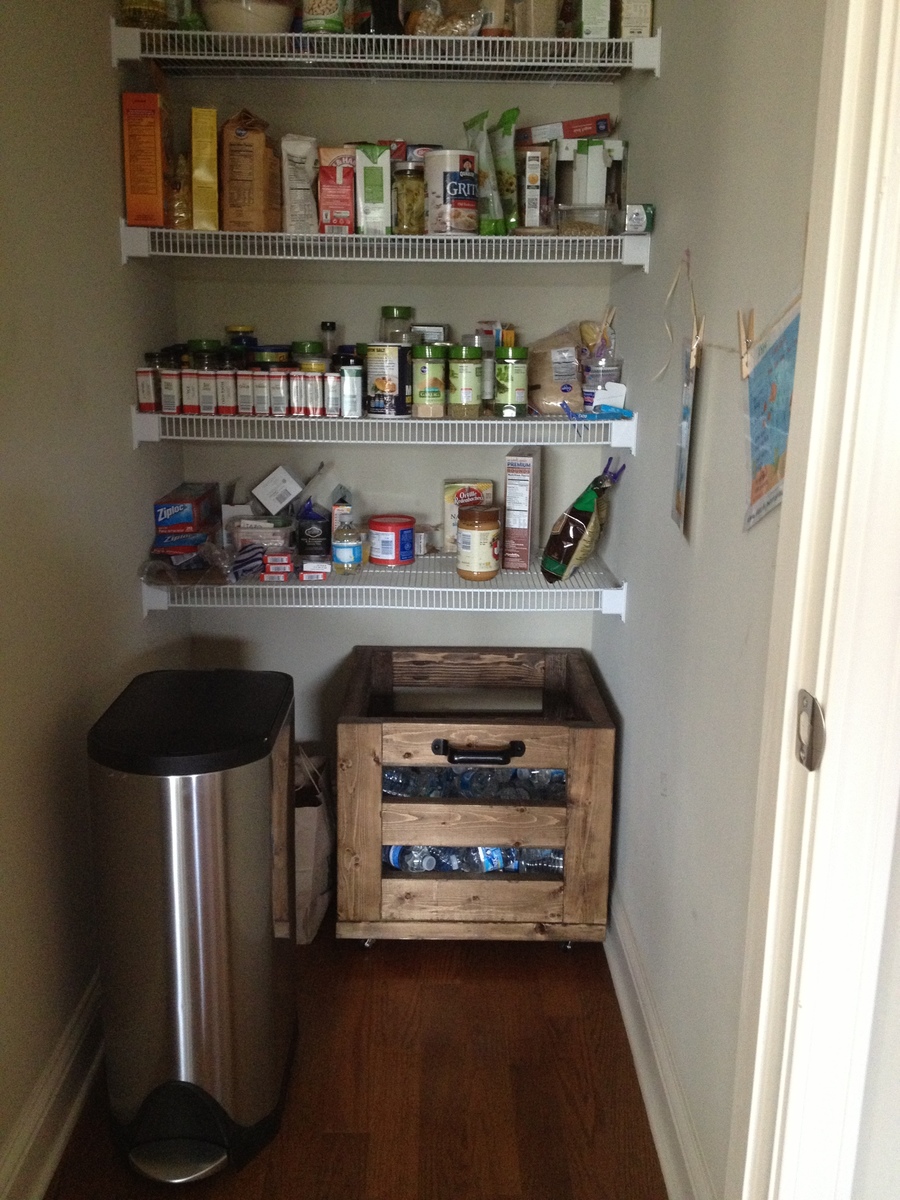

Tue, 02/25/2014 - 22:27
I built this crate too! I love how roomy it is, and what a good way to store water bottles. You did a great job!
Val @ artsybuildinglady.blogspot.ca

This is the murphy bed I made using ana's plans and making the bed legs when it's down and a shelf when it's up! This was to keep the bed off the floor. Thanks again Ana

Sun, 02/12/2017 - 06:05
Hi Ana! I love the Murphy bed and feel like it is just what I need for my new home. I have sold my family home of 30 years and am moving closer to the grandchildren. Looking at buying a 1905 home that is less than 1/2 the size of my old home. I am 63 and most of my friends are in the same age range. If they come to visit, I need a bed that's a little higher off the floor. I don't really want to hang the bed off the floor as shown in some of these, but instead like the look of a cabinet. However, I was thinking of putting doors on it so we could pull the bed down with fold out legs of some sort. Any suggestions?


