Counter height bar stools
![](/sites/default/files/11072537_10153097929638376_1950077302576120364_n.jpg)
Love my new bar stool, now to build 3 more. I think it turned out great.
Great plans. Made a height adjustment to fit better in the space. I'm pretty new to the game but this was a great project to work with the Kreg Jig. Make sure if you are going to use the Kreg Jig to attach the table top, drill your pocket holes on the under side of the frame BEFORE you install your middle shelf... I made that mistake and had to live with counter sinking 2 1/2 screws from the top. For the door hardward: Home Depot had awning pulleys that allowed you to take the pin out for easy extraction, make sure to find some that have little spacers in the middle so you can keep the wheel from locking up.
Really excited to keep on building!
So thankful for these plans. Took me weeks of on-again / off-again work - I’m slow and have a busy schedule. At times frustrating and challenging (I think I overestimated my abilities when I chose this project). But totally worth it.
Made the upper story a play area. Added a ladder due to limited space. Storage boxes are awesome and provide ample storage. Daughter couldn’t be happier.
Sun, 08/22/2021 - 12:03
Love how you made the upper level a play area, very well done! Thank you for sharing.
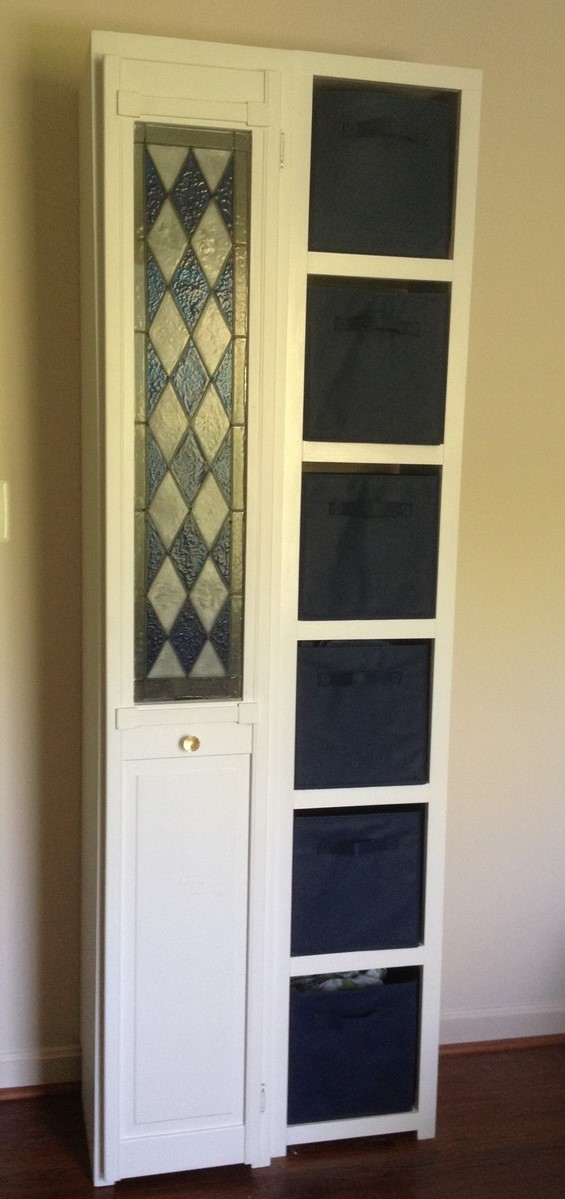
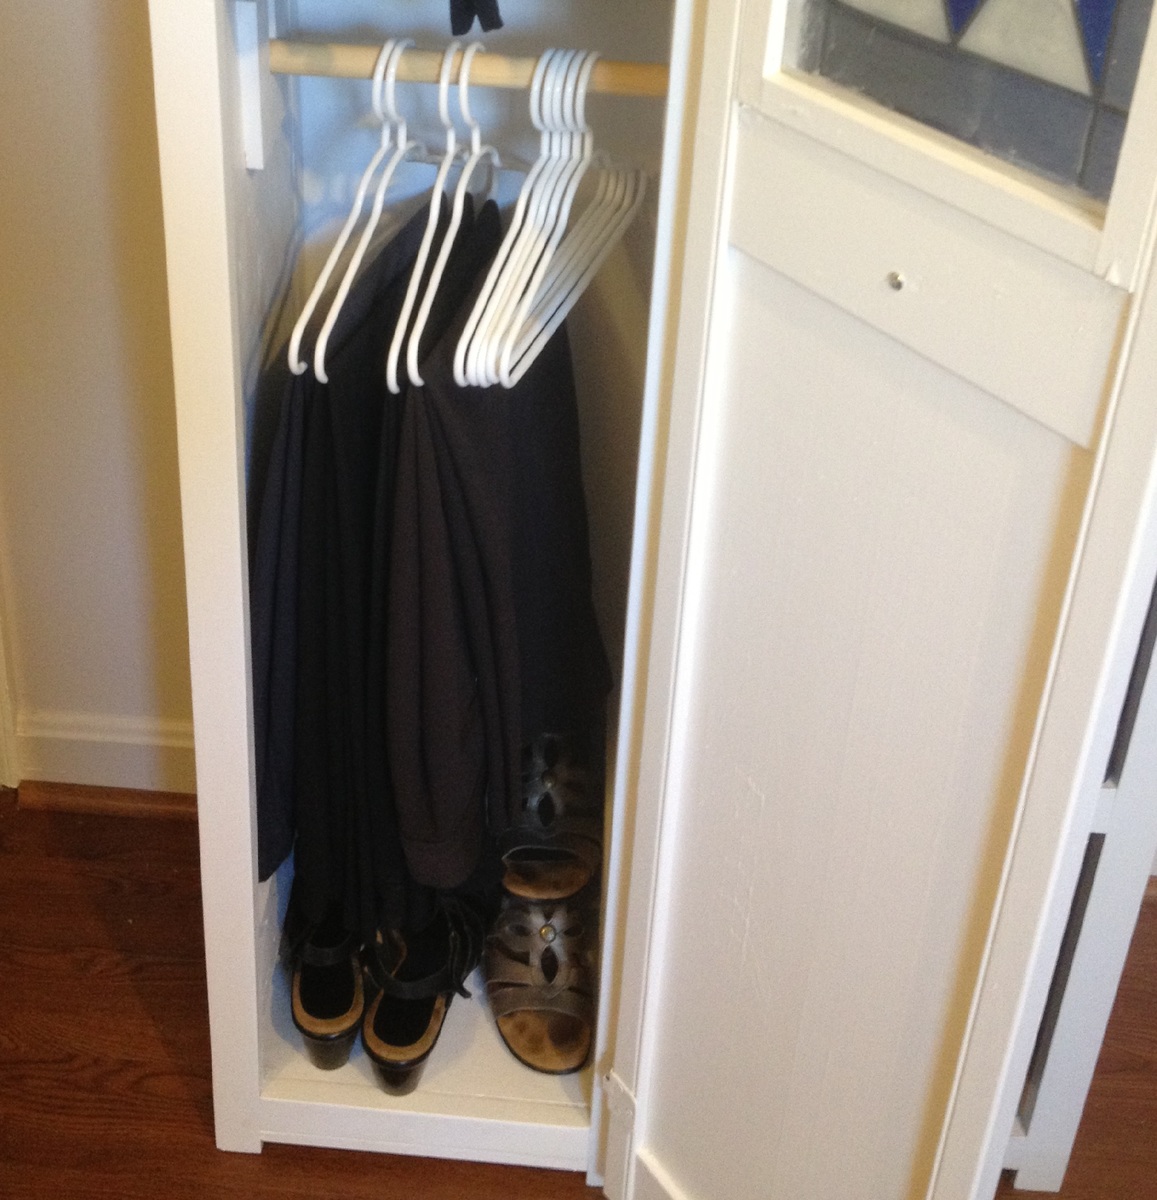
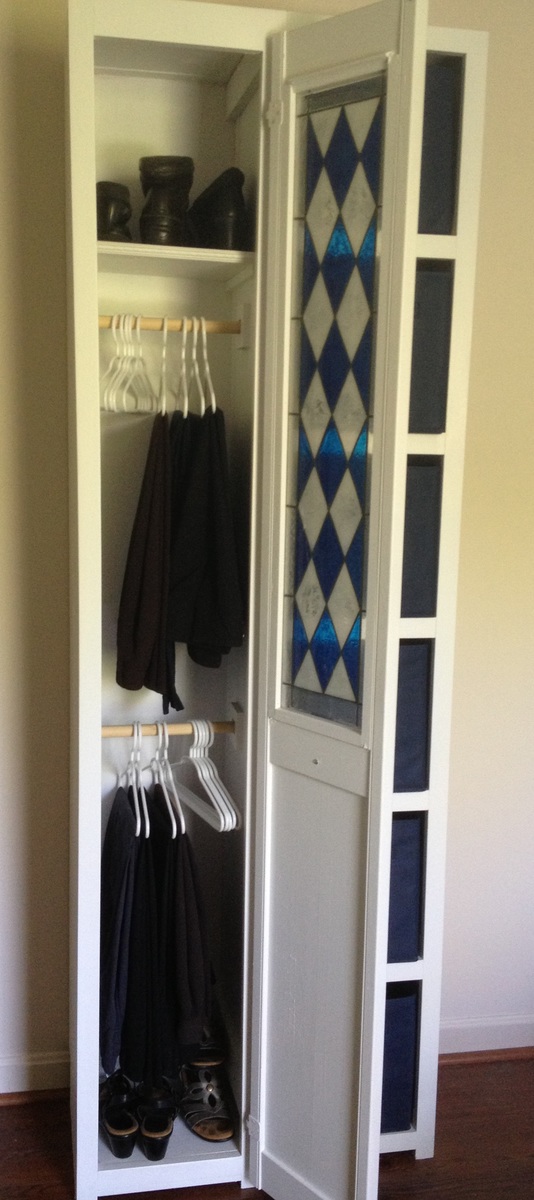
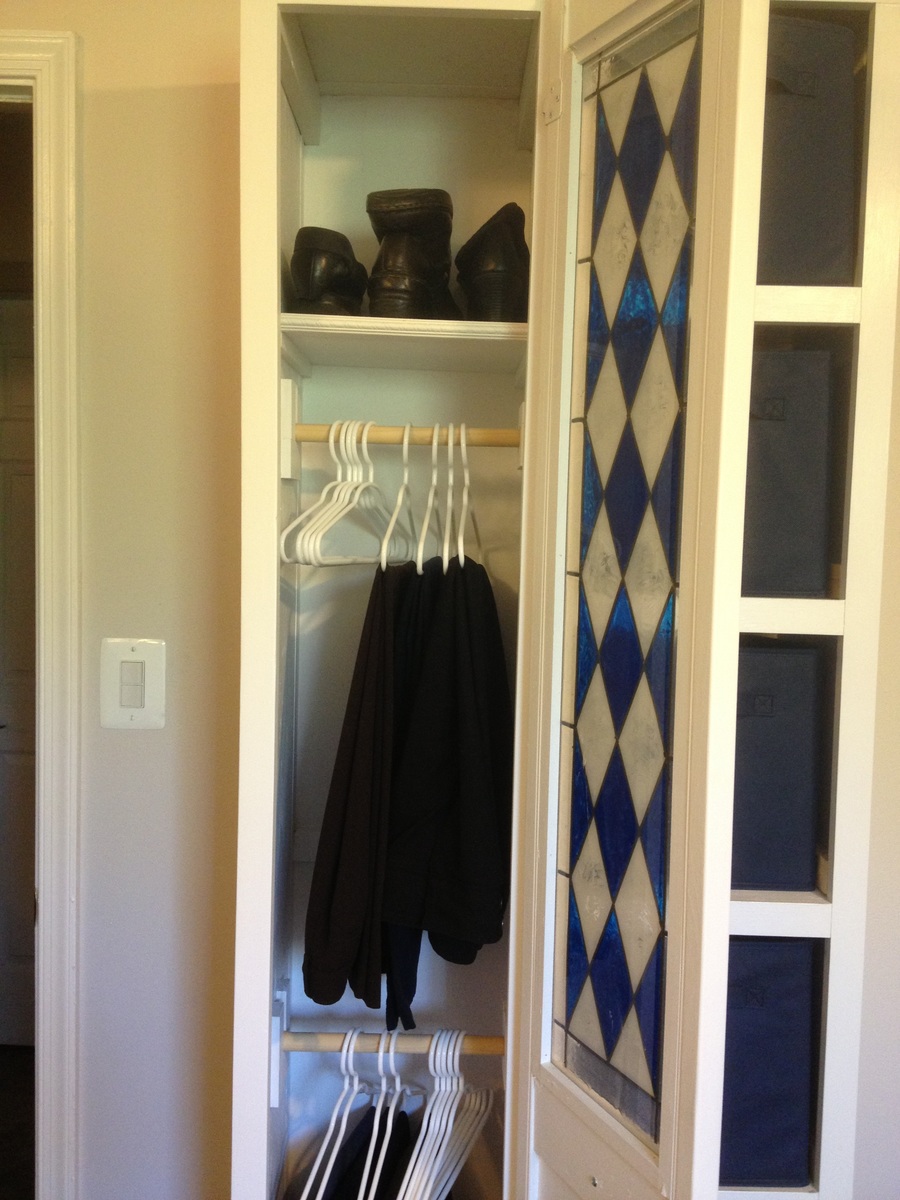
This closet tower is from the Craft Room Storage Tower plan, and made mostly with left overs from other projects. I wanted a shallow tower storage just deep enough to hang pants and slacks in, and to use a 12" wide door I already had in my garage. At Target I found some kid-size hangers that were just the right size - about 12" wide. Trouser hangers are about this same width, but they weren't available in-store so I went with what they had. The only things I bought for this project are the knob, hinges, some 1x2's, and the hangers. The sides are from a lengthwise half-sheet of C/D plywood, ripped down to 12" strips on the table saw, with 1x2 edge joined at the back to create a "toe kick" to clear the baseboard. The front is trimmed out in 1x2 with a scrap of 1x3 to trim the top. The removable closet poles are from a flagpole, and the ends are held in place with some 1/2" craft boards. The back is 1/4" plywood. The longest part of this project was the sanding, because the plywood wasn't the pretty kind - used lots of wood filler on the knots and as a grain filler, then sanded it a lot. This project took about 9 hrs total, (sanding took the longest), construction with the Kreg jig and nailgun was very quick, and then paint and adding the door and poles. The removable shelf was added as an afterthought and is a scrap of plywood, with some S4S to hold it up, and a 12" scrap of moulding across the front of the shelf. It is 82" tall, 13 1/2" wide, and 14 1/4" deep. It's a perfect pair with the 6-cube tower that I built from Ana's cube tower plans a couple of years ago.
Fri, 08/30/2013 - 17:56
This is such a clever build! :) Thank you for sharing in detail how you put this together. =D I love how tall this is and how little floor space it takes up, which is especially a big issue for smaller home dwellers like myself. =D
Sat, 08/31/2013 - 06:23
Yvonne, thanks so much for the nice comment! I just love tower storage, you get so much for such a small 'footprint' in the room. We've replaced our bulky dressers with towers, which makes the room look much more spacious. If you build some, I'd love to see pictures!
There are 2 other items not mentioned above, that I added during this build: I added the 1x3 at the top of the insides, to help keep the joined side boards tighter together at the top (at the time I was thinking the joint might try to pull apart if it got humid). The second thing (you can hardly see this in the photo) is a 12" piece of 1x2 attached across the back, spaced between the 2 closet poles. This was added to help keep the side pieces the same distance apart when attaching the back, and provided an additional place across to nail it. I thought it would help make it more rigid. This piece is used every day, and so far it has held up great. :)
A client/friend asked for a rustic cooler she could use for her 30th birthday party. Thats what we came up with.
We have full plans on the blog: http://firefinishblog.com/2015/03/18/diy-rustic-cooler-with-plans/
I loved building this bench!! I was able to use only 6 2x4's which cut down the cost a little bit :) For the stain I used Semi-Transparent Chocolate from HD and Wedgewood in a Solid Stain color from HD as well. Building the bench itself was really easy but the X's do take some extra work. I found that using a yard stick vs. a tape measure made the world of difference. I also nailed the X's in vs. using the kreg jig.
I looked forever for a sideboard which matched my planked dining room table and this was it, so decided to build it. It took me 3 months as I had no prior woodworking experience. Behind the drawer panels I actually wrote on the drawers 'Maybe should have started with a birdhouse!'. I could not love it more if I had given birth to it. LOL On to the next project...
I had been looking for pretty wooden planters for the front porch and couldn't find anything affordable when I came across Ana's plans for a planter box. So I just made it a square and made it a bit taller.
I used finishing nails and glue to put the whole thing together. If you make the sides 17 1/4" then the bottom is wide enough for three pieces side by side. I added four pieces the same as the strips that were made to the bottom so that they stuck out into the center of the planter. Then I laid the bottom pieces on top of those. I left them loose so they could be replaced if needed after a few summers of water and dirt. You could also put a liner in. The width is just enough to give space for water to drain out.
Out of 5 pickets I could have made the side strips a bit longer and put a strip across the bottom. But I had a couple other projects in mind for the scraps so I didn't.
With the left over scraps I made the small flower box for a table on my deck. I glued and nailed that together too. So for less than the price of one planter box I made two and the small flower box. If I hadn't cut one piece wrong the first time I could have made a second small flower box.
Made this for a animal rescue charity dinner auction. The bottom is made out of all scrap pine i had laying around. The top is made from 1x4 oak.
Painted the base with an off-white and the top was finished with Early American Minwax and topped with a water based poly.
This was a really fun project and super easy to make. I shaved just an inch of my sides for my bottom to fit better. My fence boards were 3rds.
My father-in-law wanted a display case for his shot glasses, but I didn't like the idea of putting that much glass, hanging vertically. So I suggested a coffee table. This is what I came up with. I used 1x4 boards for most of it. ¼" plywood on the bottom, with 2x2 supports underneath, the actual display part is from ½" project panels I had laying around, and the dividers are from ¼" plywood scraps. The legs I picked out from the store (I don't have or need, a lathe). For the top, I used ¼" thick acrylic. I thought about glass, but they have lots of grandkids over all the time, and I didn't want a little hand going through the glass. (Side note on the acrylic, when you cut it, do it by hand, not with a power tool, as the acrylic will heat up and can melt). Other than that, I got a couple hinges and small lock closure for the acrylic, and stained it all. (Sorry for the white background picture, I tried to crop out everything else around the table)
I modified these plans just a bit. I added 10 inches to make it 48 inches across. I also used a 1x3 on the top face frame instead of a 1x2. The plan calls for just a 1x12 on the top but I wanted it to be wider so I used my Kreg Jig to add two 1x2's to make the top 15 inches deep. I planned on staining the whole thing but made a few errors and had to paint the bottom as it is more forgiving. I loved how Brooke used the coffee staining technique but didn't like the way it was turning out so I just went with distressing the edges and staining the top like she did on her coffee table with the stain I had on hand. It took only a few hours to make the bench and about 3 days to finish it as I worked in the evenings after work.
Sun, 08/11/2013 - 18:53
I love how the white paint and dark wood look. I like the extra width, and the light distressing looks great.
I used the plan for the base idea for my sofa. I decided I'd prefer arms to curl up in and also to add a convertible feature turning an ottoman using the same base plans into an extension option for using the set as a bed or lounge area. Twice the storage, twice the function!
Fri, 07/23/2021 - 19:33
I was planning on building your storage sofa, but when I saw the one with the arms; I thought that I would rather build that one. In the spot where the plans should have been; it refers you to the storage sofa. The problem is; it doesn't tell you what you need for or how to build the arms. If they are somewhere else; could you tell me what heading that they are under.
Sandra Cahoon
Made from pallet wood.
Painted and stencilled.
Sat, 06/24/2017 - 06:17
Thank you. I made the stencils myself using my silhouette cameo.
What a fun project, and great bench. We had someone ask us if we could make this for them, and we decided to make 2 while we were at it.....now we just need to find a spot big enough for the second one at our house. Loved this build, and look forward to sipping coffee on it on a cool morming.
This table was built from my existing plan of a modified tryde coffee table. This was built with hidden flip-top storage and a matching side table. I hope you like it
Mon, 05/06/2013 - 06:44
Thank you. It was a bit challenging but overall it came out ok
I loved the look of the farm table that Anna has posted. I created my own with a few small modifications. I bought the legs of the table from my local Lowes store instead of ordering online. It was more cost affective for building this table which was mostly for staging purposes, but I love the table so much, it will be going in my new house (if the real estate agent or the new home buyers don't talk me into selling it to them)!
Thu, 03/26/2015 - 04:54
Sorry that was supposed to say mahogany not magazine!! Autocorrect issues...
In reply to Sorry that was supposed to by AndyH
Wed, 04/01/2015 - 17:55
I wasn't sure if you received the email response regarding stain color, so I thought I'd repost here just in case.... The mix was 1/2 and 1/2 of the walnut and the mahogany stain done ant the same time. This is the same combination that we used on our home made walnut headboard with stacked stone. Love this color combination!
In reply to This is gorgeous and I love by Ana White
Wed, 04/01/2015 - 17:57
Thanks... and thank YOU for the inspiration to do this project. I plan on doing many more when we move into our new home. :)
Made this one with shelf edges/trim just on the sides. Somehow my top shelf didn't span the width so had to add a little shim on each side but it all worked out! We had all the pallets and used 1x3s for the frame because some of my pallet wood was heavy hardwood. It was not without frustration because I was working with uneven/warped pallet wood but it hits the rustic look. I am happy with how it turned out.
I have 5 grandchildren that I made chairs for
Thanks to Ana-White's easy coffee table plans I was able to build what I could not find for a decent price. Keep the plans coming!
I love how this bench turned out! It's one of my favorite builds so far. It's simple but really beautiful to look at. I have a few pictures of the process and the stains I used to finish it up on my blog. Thanks, Ana, for another great plan!
Comments
RobA
Thu, 06/16/2016 - 12:08
Wow
Looks great!