Community Brag Posts

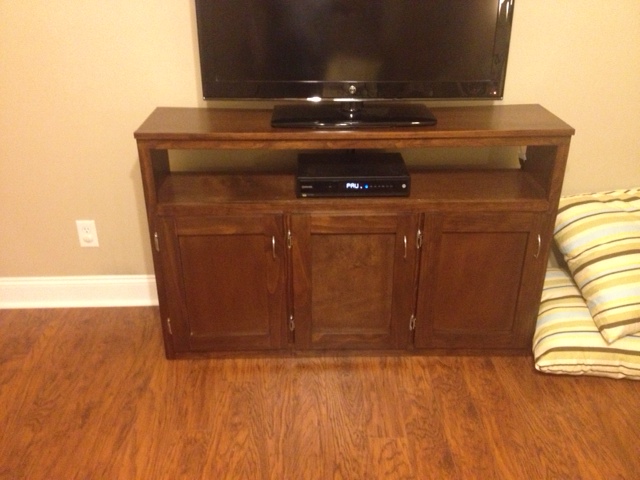
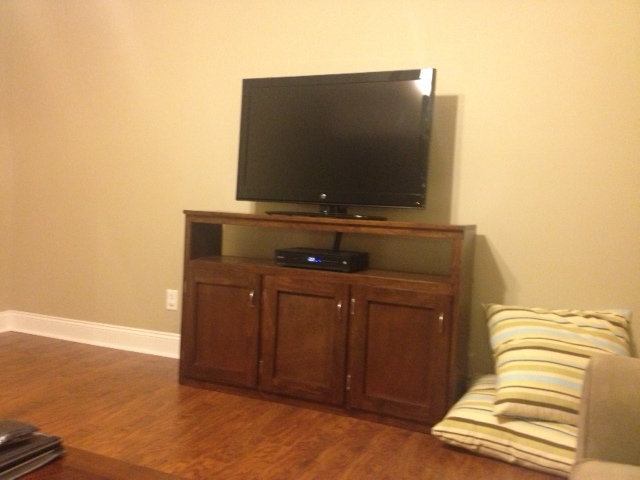
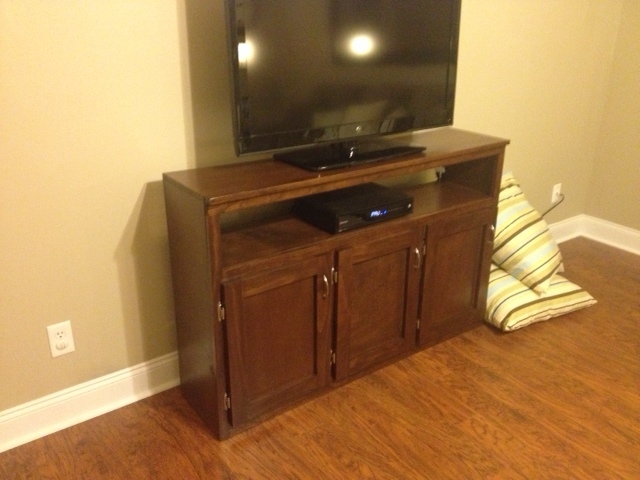
Fireplace Wood beam hearth,shiplap and new molding

Submitted by Anonymous (not verified) on Fri, 03/04/2016 - 05:10

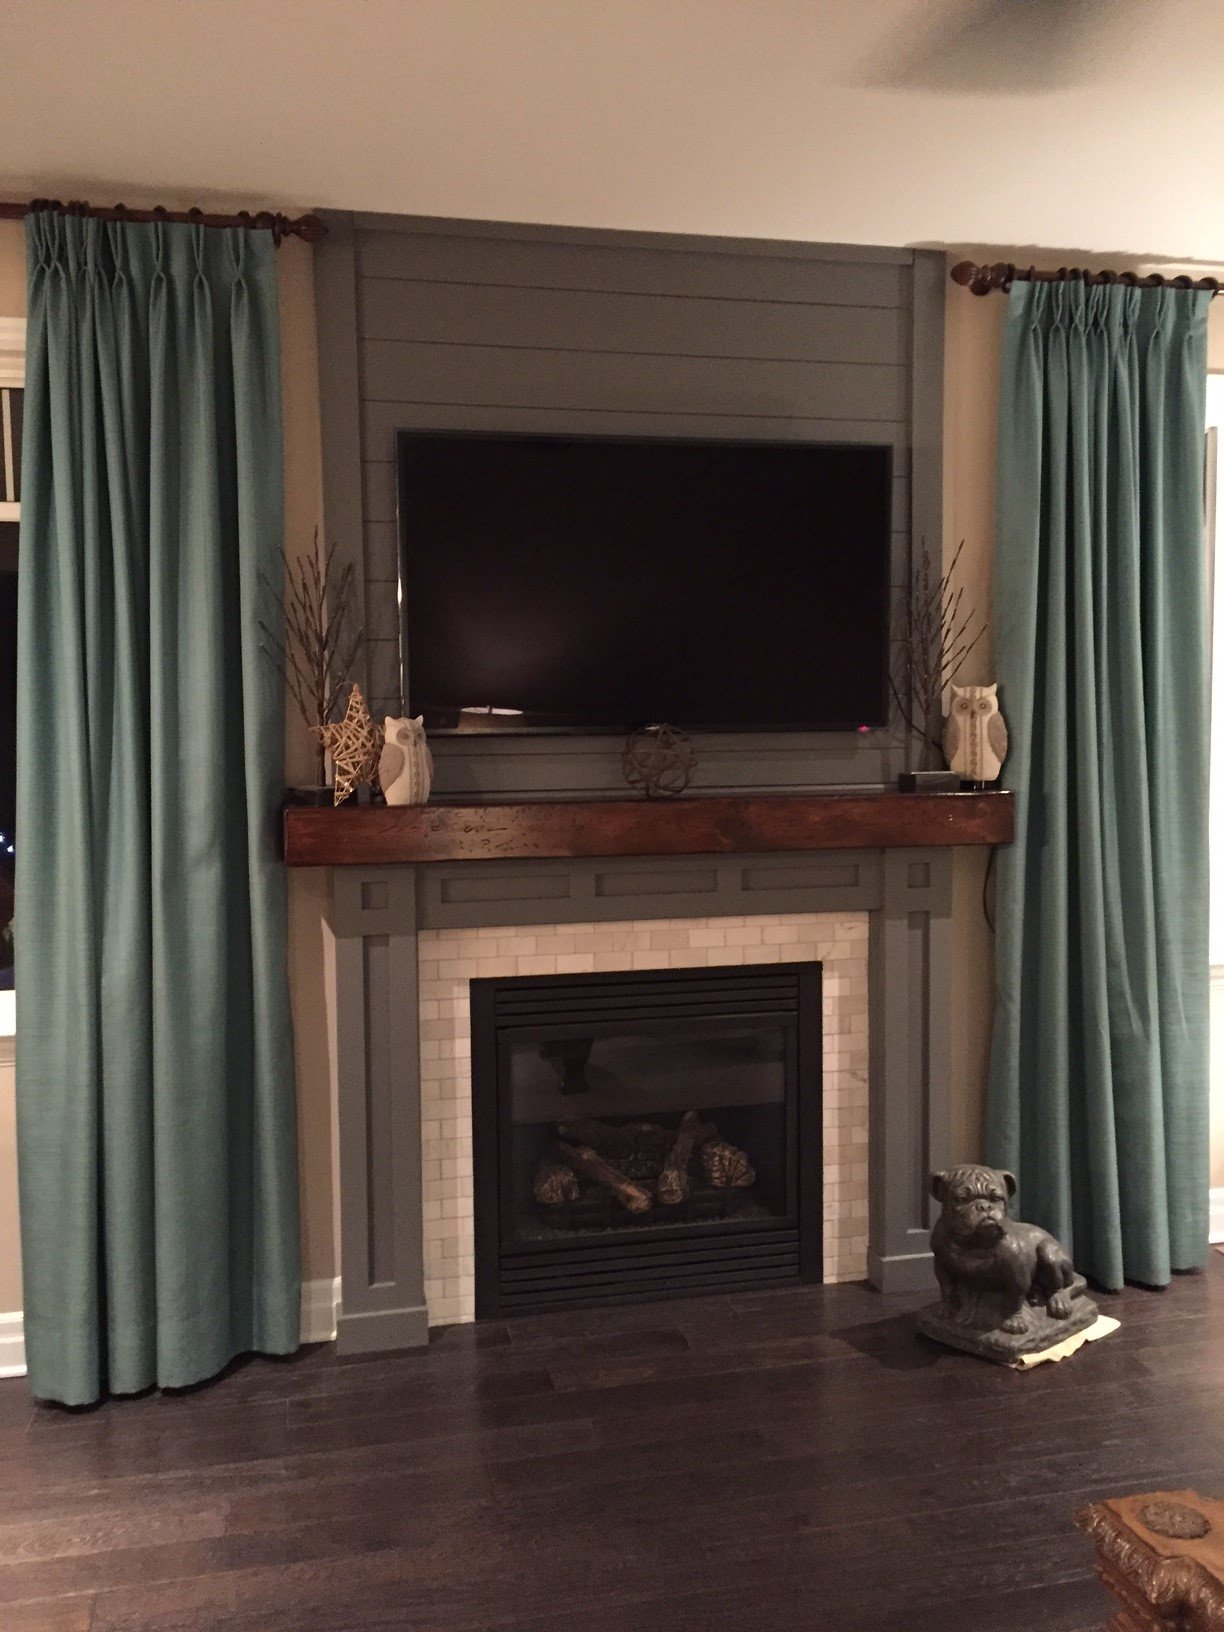
I started this project with 1x3 mdf primed molding and used 1x5 for the base. For the hearth I used 1x8 knotty pine and created a box, distressed and stained it. I glued veneer to the sides so you couldn't see the seems. To finish off the project I used 1x6 mdf boards to create shiplap effect and painted them grey. I love how cozy this fireplace makes the room.

Estimated Cost
The shiplap effect was about $65, the rest of the project was about $100.
Estimated Time Investment
Week Long Project (20 Hours or More)
Finish Used
Polyurethane Dark Walnut Stain & poly in one, Sherwin Williams Peppercorn paint.
Recommended Skill Level
Beginner

Floating Shelves (over Bath)

Wife wanted some shelves to put bath bombs, candles, and her other bath luxury items on.

Built with the same mounting technique as the "DIY Floating Shelf" plans noted below, using standard 2x4s for the pocket hole mounted supports.

Additionally, I used 1 in x 6 in x 6 ft Premium Kiln-Dried Square Edge Whitewood Common Boards instead of cutting plywood down for them.

{The pocket hole mounting technique is no joke. I sat two of my kids on the upper finished shelf just to prove to my wife they would support anything she put on them.}

Built from Plan(s)
Estimated Cost
Around $10 each
Estimated Time Investment
Afternoon Project (3-6 Hours)
Finish Used
Varathane
1 qt. 'Espresso' Satin Oil-Based Interior Stain and Polyurethane

Sanded very smooth hoping to match the existing cabinets. First coat ended up raising the grain out of the wood (moisture?) and making it rougher than expected. Lightly sanded with a 400 grit paper to knock down flat again and applied second coat. Glad I did, much smoother finish and almost perfectly matches the bath cabinets.
Recommended Skill Level
Beginner

Tapered Cedar Tall Planter

Submitted by Anonymous (not verified) on Sun, 07/02/2023 - 11:30

My husband made these fabulous tall planters based on your plans and video. We painted them the same color as the trim on our home. We live in Florida so instead of filling the entire planter with potting soil my husband put screening about 1/4 from the top so the plants can drain easily, especially in the rainy season. He made the planters with pressure treated wood which is perfect in south Florida.

Thank you so much for providing us with such a beautiful idea for unique and custom planters. My husband had a great time with this project and the results are just fabulous.

Annemarie

Built from Plan(s)

Dress-up Station -- first finished project!

Submitted by brigitep72 on Sat, 02/18/2012 - 22:39

I've been working on a couple of doll beds, but since the storage cabinet that was keeping my girls' dress-up clothes partially collapsed, I put those on hold to make this.

I followed the dimensions as written, though in hindsight, I wish I had made it a little larger. This is for three girls and already jam packed. Or maybe we need to pare down our selection. :-) I skipped the wheels for now but did add the upper shelf. The shelf is holding three Closetmaid fabric cubes which contain shoes, wands, crowns, purses, etc. I put a little 3M plastic hook on the side which is holding their fairy wings.

The actual piece went together fairly quickly -- ~2 hours. It took me a few days to do all of the sanding, priming, painting, and poly.
The design is an Uppercase Living vinyl rub-on. It's not perfectly placed because I had it on the wall in the playroom at our old house. I took it off when we moved and kept it stored between two pieces of Glad Clingwrap. It took a little tinkering to get it to reapply. I rubbed it onto a Cricut cutting mat and then rubbed it again back on to the wood. The cutting mat wasn't large enough so I had to do three transfers to get it all on...part of the reason it's so wonky.

I wish I had time for a blog, but I'm too busy reading everyone else's.

Estimated Cost
$20
Estimated Time Investment
Afternoon Project (3-6 Hours)
Finish Used
I used leftover SW primer for smooth surfaces, paint satin latex paint (SW Duration) and Varathane Crystal Clear water-based satin polyurethane. Maybe not the most ideal products, but they were all already at my house.
Recommended Skill Level
Starter Project

Comments

Jen Pedro

Sun, 02/19/2012 - 16:01

I love the shelf on top. I was thinking of making one of these for my niece, but didn't know where to put her dress-up wigs and hats. Those bins would be perfect!

TV Console

Submitted by Papu5477 on Wed, 12/25/2013 - 19:49

My version of the Rebecca Media Center - Console.
Had a great time completing this project, being a professional wood-finisher I was able to match it exactly to the other pieces of furniture in our family room.
Can't wait to start the next project.

Estimated Cost
85.00
Estimated Time Investment
Week Long Project (20 Hours or More)
Finish Used
Wiping stain w/ satin conversion varnish
Recommended Skill Level
Intermediate

Walk in Pantry

Submitted by brittanyj on Sun, 03/06/2016 - 15:37

This was the most complicated project I've taken on so far as it included electric, tiling, drywalling, painting, and carpentry. I did it all by myself from start to finish in a little over a month. What was before a small cabinet pantry where all our food got lost in the abyss, is now open shelving where all the food is accessible and visible. With a light overhead and plenty of space, no food gets left behind.
The project involved knocking down a wall, framing new walls, removing cabinetry, countertop and soffit, replacing subfloor, tiling, running electric in for an overhead light and switch, drywalling, texturing, painting, building the shelves and routing moulding for the end trim, and installing baseboards.
I love how my new pantry turned out! Now onto the rest of the kitchen cabinets : )

Estimated Cost
$300 which included electric, drywall, tools, wood, tile, mortar, and paint
Estimated Time Investment
Week Long Project (20 Hours or More)
Finish Used
Behr paint
Recommended Skill Level
Intermediate

Variation of the farmhouse console table

Submitted by Anonymous (not verified) on Thu, 10/17/2019 - 04:47

We needed a large surface in our office that could be used as a desk, sewing space, drawing area, and office work surface. I loved the farmhouse look. We had taken down a large cherry tree a few years ago and had it milled, and we're waiting for the perfect project for her.. We love repurposing and thought this would be he perfect project for some of the milled cherry and some of the landscaping pallets we had given to us.

We used our planer to get all of our legs and cherry slabs to the right dimensions. This saved us a ton of work. Lol. We glued and kregged all of the pieces as needed, but left the top alone. This way it is more manageable. ( The table is 100" long) . Once it was all stained, sanded, and polyurethaned ; remember to sand between coats. Then we took all of the sections into the office where we kregged the top to the legs ( no glue). We didn't glue the legs to the top, that way if it ever needed to be moved, we could do it easily.

It turned out just as I sketched it - our variation of your console table. Thanks for the inspiration Anna.

Built from Plan(s)
Estimated Cost
Minimal. Had everything on hand.
Estimated Time Investment
Weekend Project (10-20 Hours)
Finish Used
Satin minwax poly for the cherry.
Minwax chestnut for legs,with satin minwax poly.

Lots and of patience and don't forget to sand with 220 or higher between coats for a smooth feel.
Recommended Skill Level
Intermediate

Pottery Barn Benchmark Media Stand

Submitted by akswartz85 on Wed, 02/22/2012 - 18:16

My dad and I built the Benchmark Media console!We made a few minor adjustments but pretty much stayed to the plan.

Built from Plan(s)
Estimated Time Investment
Week Long Project (20 Hours or More)
Finish Used
Minwax Jacobean, polyacrylic gloss
Recommended Skill Level
Intermediate

Two Toned X Shelf

Submitted by bellpm75 on Sat, 12/28/2013 - 14:28

I made this piece a little different. I used 2x2's vise 2X4's for the frame. I also made the width 4 inches shorter. My friend found a 3/4 inch 4x8 birch plywood piece being thrown out, so I paid next to nothing for it from him and used it for the shelf. The framing was made using select pine which was a little expensive, but the boards were clean and straight as an arrow. Well worth it! Making the X was difficult! I had to go through a few cuts to fit them just right. I used one clamp in the center of the X to hold the X in place while the glue dried.

Built from Plan(s)
Estimated Cost
100
Estimated Time Investment
Weekend Project (10-20 Hours)
Finish Used
I used Miniwax Ipswich Pine for the "X" and Dark Walnut for the rest. I followed the finish with two coats of oil based poly. Sanded with 220 grit between coats.
Recommended Skill Level
Intermediate

scooter

Submitted by jczimmcoll on Mon, 10/21/2019 - 02:11

I made this for my Grandson's 1st birthday.  He absolutely loves it!!  I modified it slightly as it was a little too tipsy.  Thank you so much for the inspiration.  

Hanging Plant Stand

Submitted by Anonymous (not verified) on Sat, 07/08/2023 - 09:51

I made this for a friend. The hardest part of the build was finding the correct font.

Allyn

twin over full bunkbed

Submitted by sjknecht on Sun, 02/26/2012 - 14:38

This project was so much easier than I thought it would be when we started. If you follow ana's plans your bunkbed will be much stronger than anything you can buy for a fraction of the price. I would never do it but I honestly think I could park my truck on these beds. The finish is red mahogany stain with a couple coats of polyurethane over it. They say not to use dark stain over pine because of the uneven coat but i like the way it striped the grain. Not everyone's cup of tea but we love it.
We've all heard the saying "give a man a fish and you feed him for a day, teach a man to fish and you feed him for life. Thank You Ana for teaching me to fish. This was the first, but will not be the last project i do from your site.

Estimated Cost
about 200
Estimated Time Investment
Week Long Project (20 Hours or More)
Finish Used
minwax red mahogany stain, and 3 coats of minwax polyurethane
Recommended Skill Level
Beginner

Comments

Main closet bench and shelving

Submitted by Anonymous (not verified) on Sun, 10/27/2019 - 13:11

We have a 10 ft closet in our entry which offered plenty of space but had three closet sliding doors. Only one could be open at a time. Had two upper shelves and a rod. Wanted to get things more organized and have a place to get shoes on. Always give my 1 and 3 year old easier access to dress/undress themselves. First attempt at building anything. As I went along changed things based on materials and to get around issues with our closet or my skill level/available tools.

Estimated Cost
200
Estimated Time Investment
Week Long Project (20 Hours or More)
Finish Used
Painted areas are Olympus white sherwin Williams. Stain is classic oak.
Recommended Skill Level
Starter Project

Full Toy box bookcase

Submitted by ana8178 on Fri, 03/02/2012 - 06:46

We knew we wanted to make this bookcase as soon as we saw it! I plan to put baskets and toys in it later, but for right now all books. The only difference to the original plan is that we put some plywood behind the bottom two shelves so that we could have a backing when we do use toys. My three year old loves to sit and go through all the board books at the bottom and clean up is a snap!

Built from Plan(s)
Estimated Cost
$120
Estimated Time Investment
Weekend Project (10-20 Hours)
Finish Used
Minwax Polyshade Bombay Mahogany
Recommended Skill Level
Beginner

Comments

My first piece of furniture that I built!

Submitted by strotter13 on Mon, 12/30/2013 - 23:41

This was my first attempt at building furniture. I decided to make new nightstands for my wife and I. I used the bedside table plans, and they worked excellent. I used poplar hardwood for the material. I stained it using Minwax Special Walnut, and I used Minwax Satin Polyurethane. I am currently working on the second one, which will be my wife's (she said she wanted me to build mine first, so that if I messed it up, hers wouldn't be messed up, lol). Mine turned out good, I am very happy with it. Thanks for the plans! After the next nightstand is built, I would like to build a matching triple dresser...

Estimated Cost
75
Estimated Time Investment
Weekend Project (10-20 Hours)
Finish Used
I used one coat of Minwax Wood Pre Stain Treatment,
Then two coats of Minwax Special Walnut
Then 3 coats of Minwax Spray on Satin Polyurethane
Recommended Skill Level
Intermediate

Comments

Fancy X Desk

Submitted by WesleyT on Wed, 03/16/2016 - 15:13

I stuck to the plans for the most part. The only change I made was to add an additional 2x6 to the top to make it a bit deeper. I added a few inches to the bottom/top 2x4 on the base to support the additional depth of the top.

Built from Plan(s)
Estimated Cost
$60
Estimated Time Investment
Weekend Project (10-20 Hours)
Finish Used
Finished base with Minwax Ebony stain and top with vinegar/steel wool stain. Finished with 2 coats of Mimwax Polycrilic clear satin.
Recommended Skill Level
Beginner

Rustic Farmhouse Queen frame

Submitted by Anonymous (not verified) on Mon, 10/28/2019 - 19:16

I’m absolutely loving the outcome of this design. The plans were perfect and so much fun. I used it as a welcome home gift for my wife and she said it was the best gift ever. Literally my favorite project. Thank you Ana

Built from Plan(s)
Estimated Cost
$200
Estimated Time Investment
Weekend Project (10-20 Hours)
Finish Used
Weathered Oak then painted Antique White then sanded down hard to distress
Recommended Skill Level
Intermediate

Chelsea Bunk Bed System

Submitted by steasck on Wed, 01/01/2014 - 14:36

My dad and I built these beds for my 7-year-old daughter for Christmas. We followed the plans almost completely, with a few tweaks of our own. We didn't feel that the decorative feet would be very stable, so we just continued the length of the bookshelf and desk all the way to the floor. We put a piece of 1/4 in. MDF on top of the slats to help support the memory foam mattress. We also stapled canvas to the underside of the top bunk to hide the slats. I didn't want a headboard or foot board on the lower bunk (toe-stubber!), so instead of building the matching Chelsea bottom bunk, we just made a simple platform bed. We added magnet boards to each side of the desk. I liked the idea of magnets better than bulletin boards. Since this plan didn't include a ladder, we built the ladder from the Loft Bed plan. The bed had some significant wobble to it, so we attached it to the wall. Took ALL of the wobble out and it is very solid and secure now. I'm very pleased with how these beds turned out and my daughter loves them as well!

Estimated Cost
$375
Estimated Time Investment
Week Long Project (20 Hours or More)
Finish Used
We used spray primer and spray paint. It was easy to do it this way, but very messy and it took us about 18 cans to get the entire thing covered.
Recommended Skill Level
Intermediate
Back