Community Brag Posts

Wide Cabin Dresser

Submitted by jmsmith12 on Thu, 10/18/2012 - 13:37

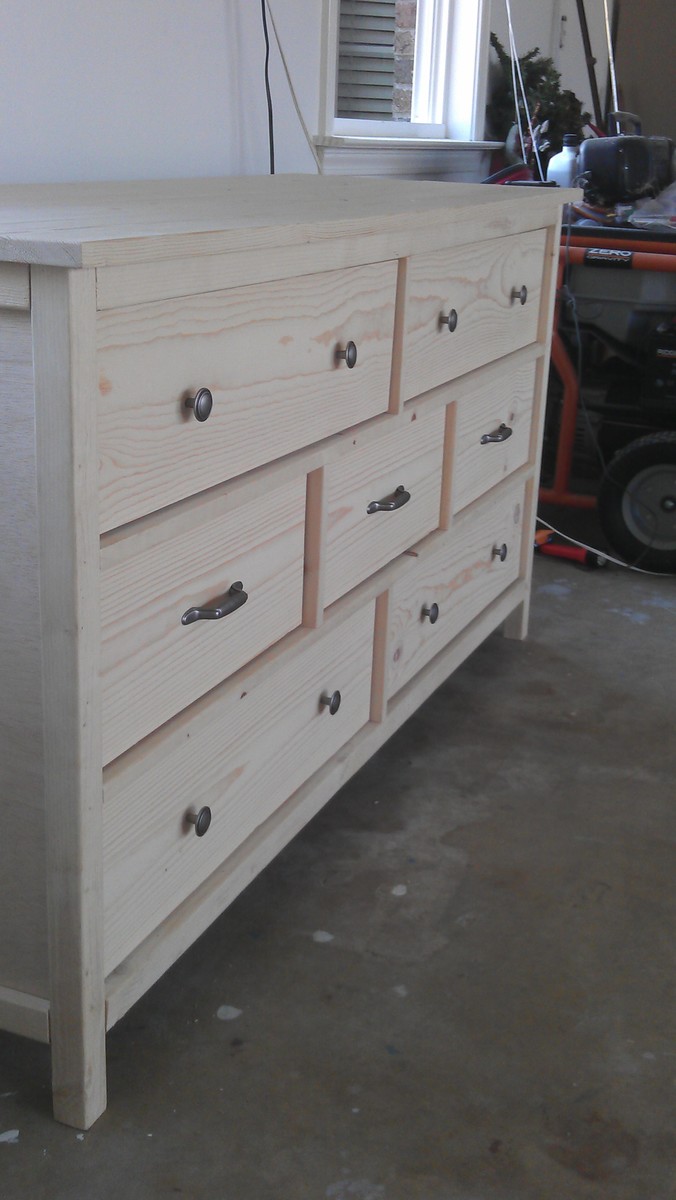
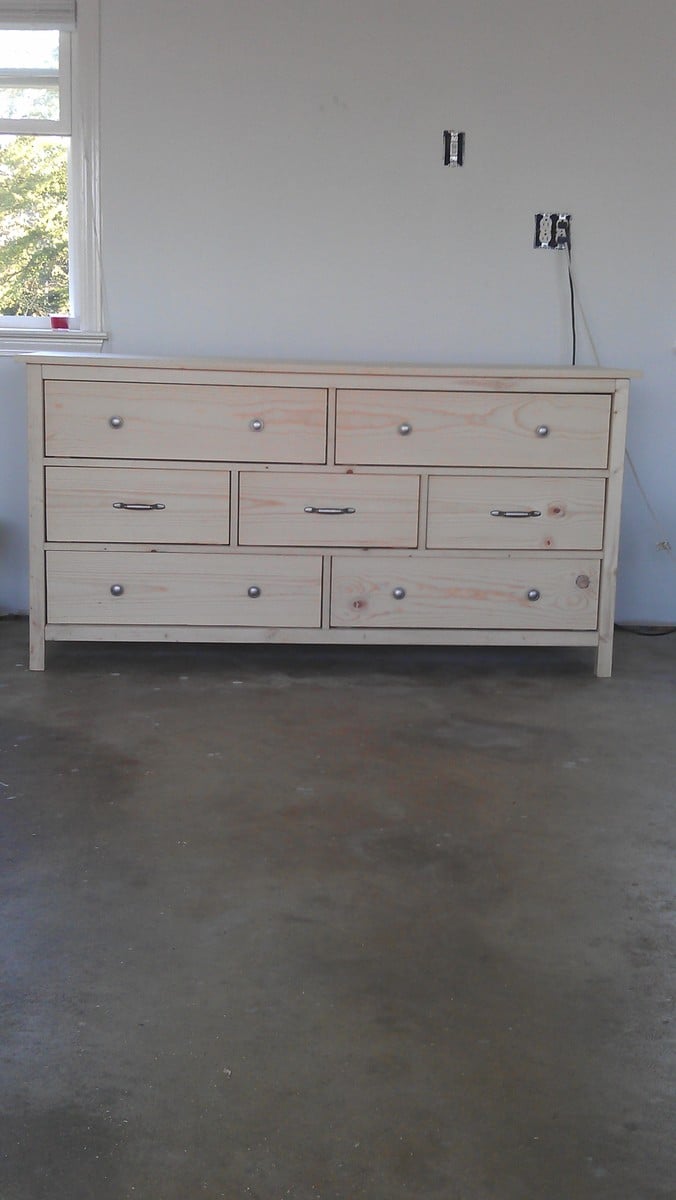
Modified wide cabin dresser with metal full extension drawer slides on the bottom of the drawers. The extra set of drawers on the bottom were added to give more space for storage.

Estimated Cost
200-250
Estimated Time Investment
Week Long Project (20 Hours or More)
Finish Used
Any advice for a finish with a linen covered bed?
Recommended Skill Level
Intermediate

Comments

mebohn

Thu, 01/31/2013 - 14:04

Beautiful! I was wondering if it would look pretty with the extra drawers on the bottom. I'm building this plan for my son right now, but I might build another with extra drawers for myself!

dbwalk

Sun, 11/23/2014 - 05:29

Your build looks awesome!  I'm going to be doing this for my twin daughters room very soon.  I was just wondering how you modified the dimensions on the left and right sides.  What were the measurements and dimensions of all the pieces since it had to cover all the way to the bottom?


Papu5477

Thu, 01/25/2018 - 18:29

Are plans available for this build? I love the extra drawers. 

Shiplap Fireplace Mantle with Storage

Submitted by Anonymous (not verified) on Sun, 07/28/2024 - 13:45

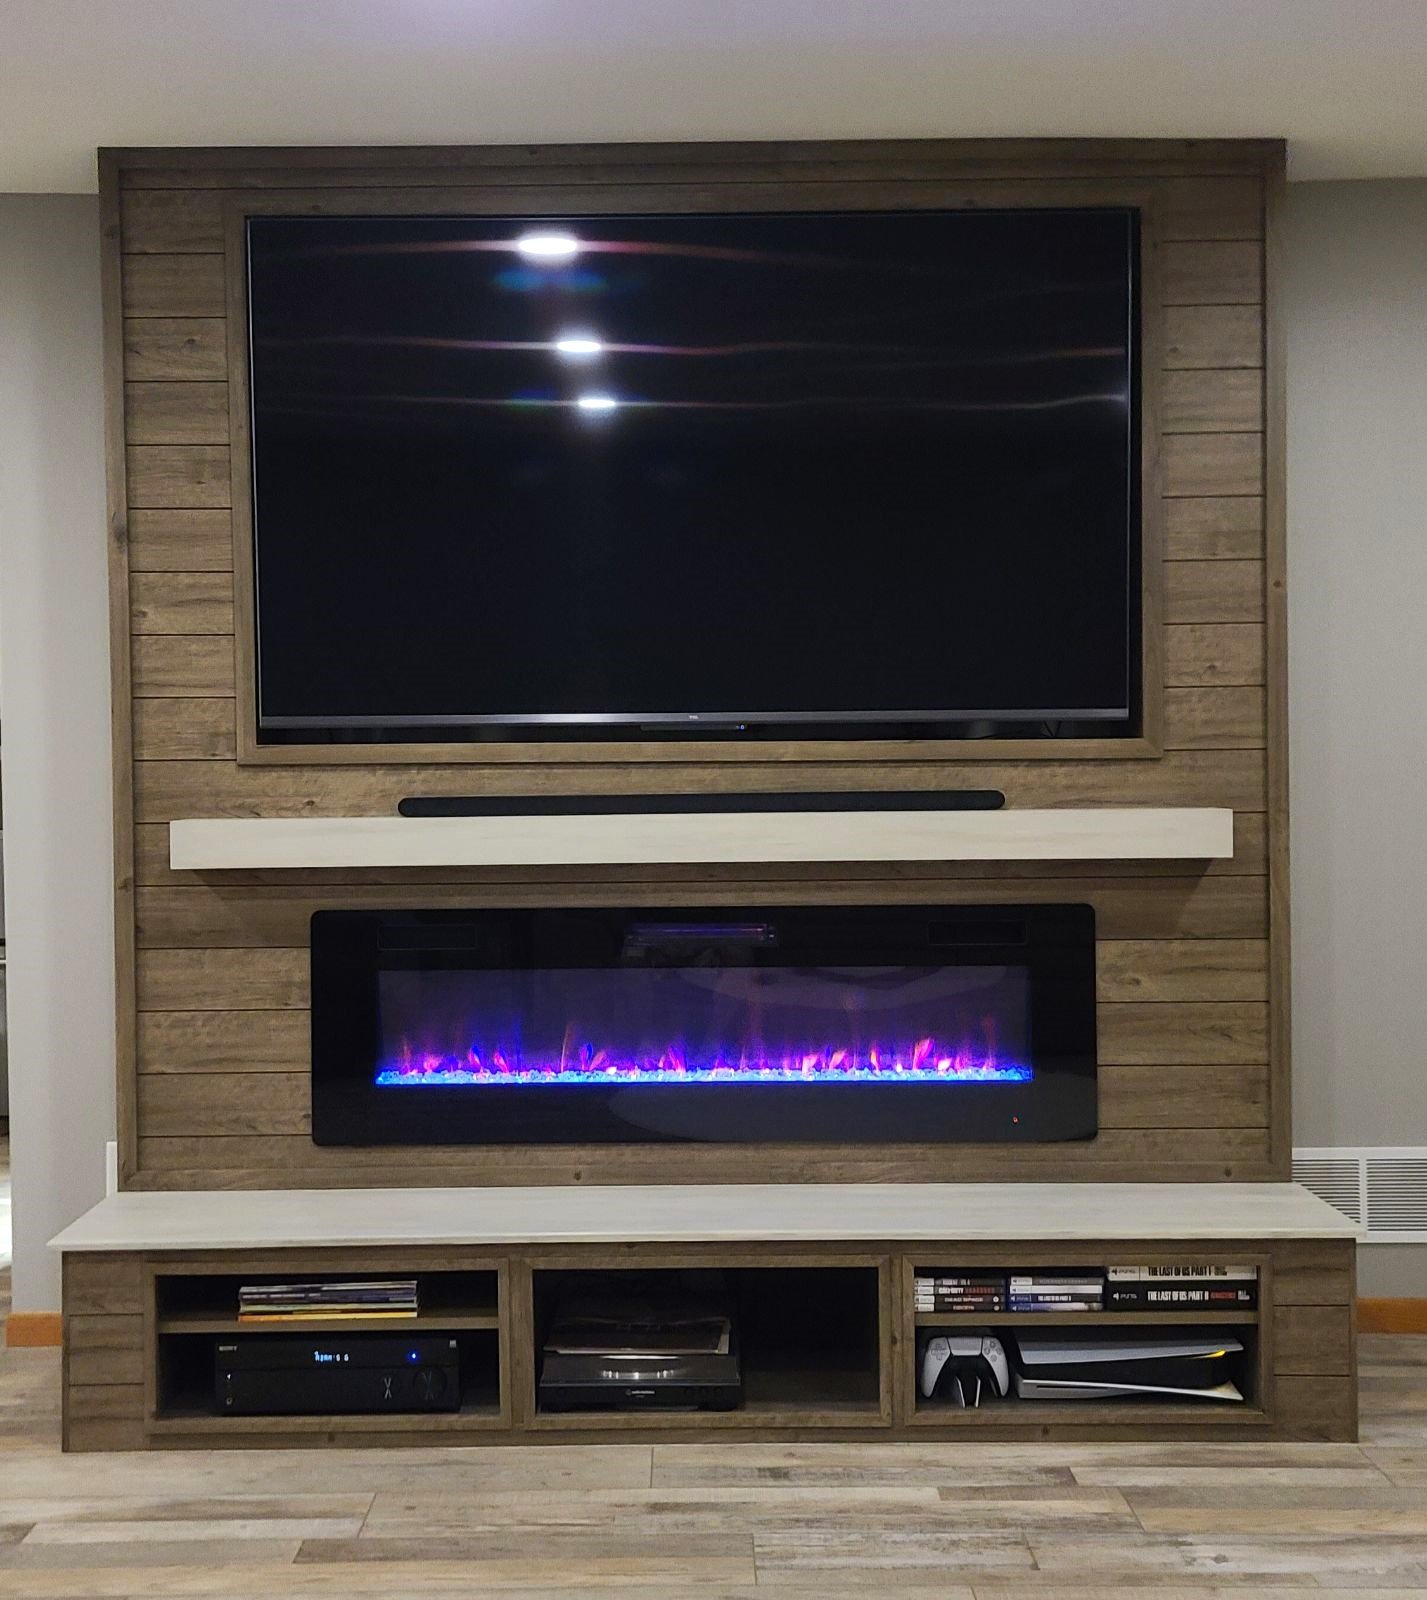
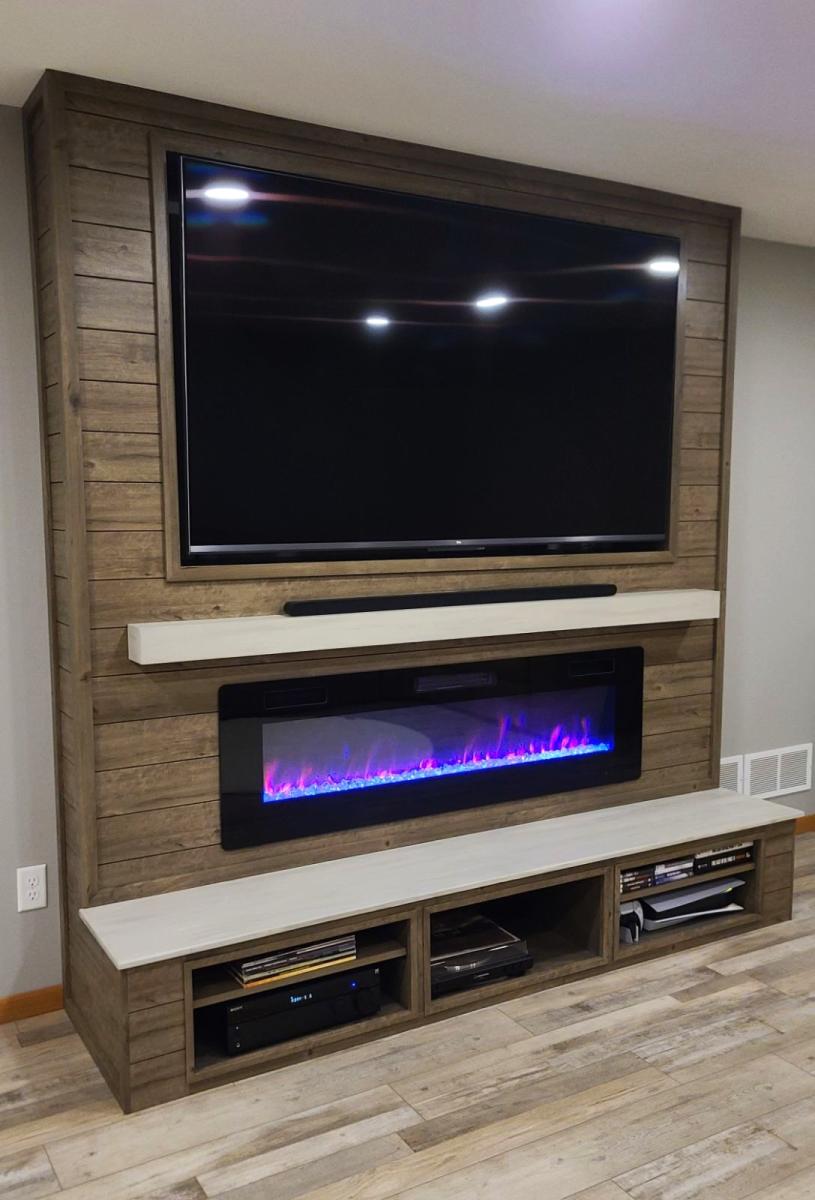
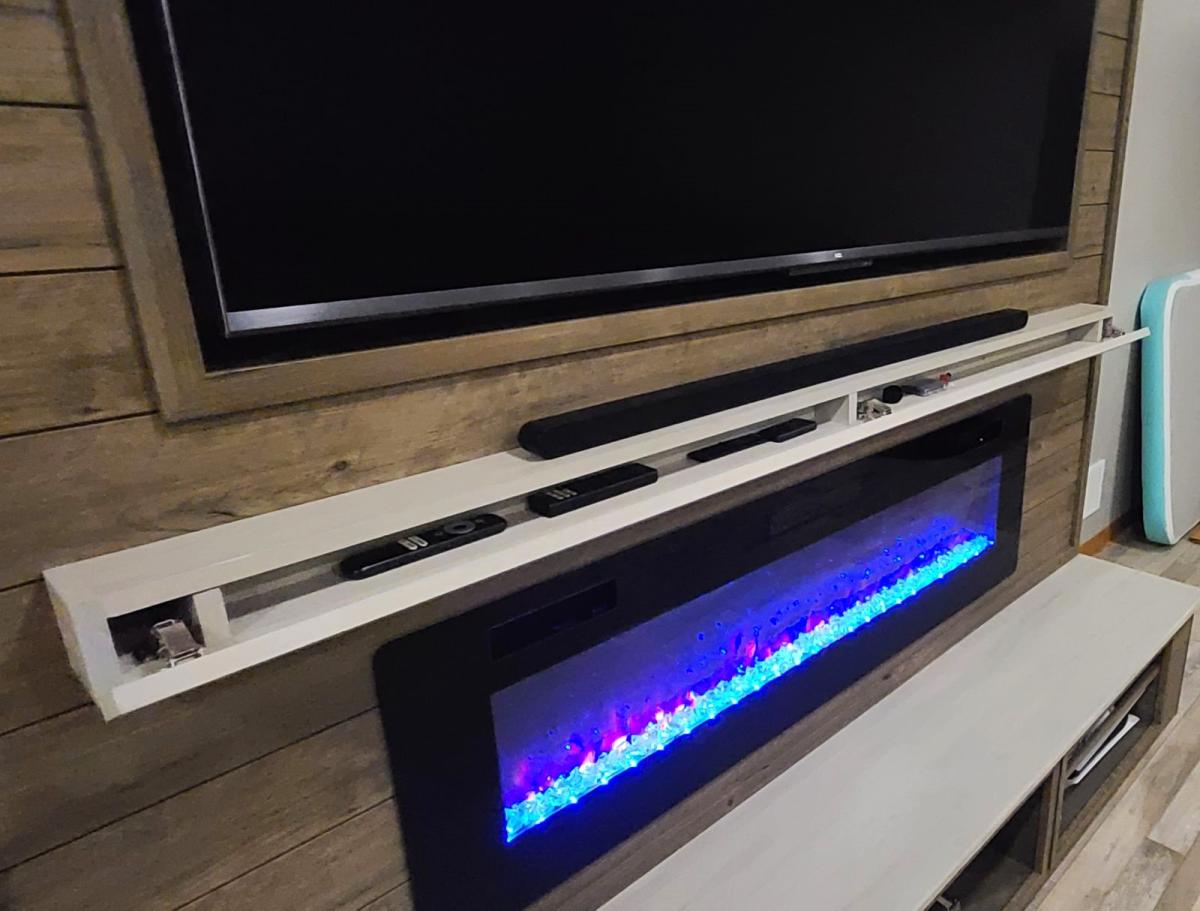
During a complete basement renovation, we combined the Shiplap Fireplace plans as well as the Flip Open Mantle plans to create this beautiful TV & Fireplace Wall with bench and open front for peripherals. We modified plans to make the TV more "built-in" allowing us to hide cords and cables better, plus just give it a sleeker feel.

We customized the front to be open so that we had a place for peripherals and some air flow. This included shelving in the outside front compartments. We were able to accommodate a PS5, games & controllers, record player, records, and a receiver/amplifier. A slim soundbar for the TV sits on top of the custom mantle. The bench gives it a nice touch and dimension.

Adam Wiebe

Seasonal And Holiday

Playhouse Loft Bed

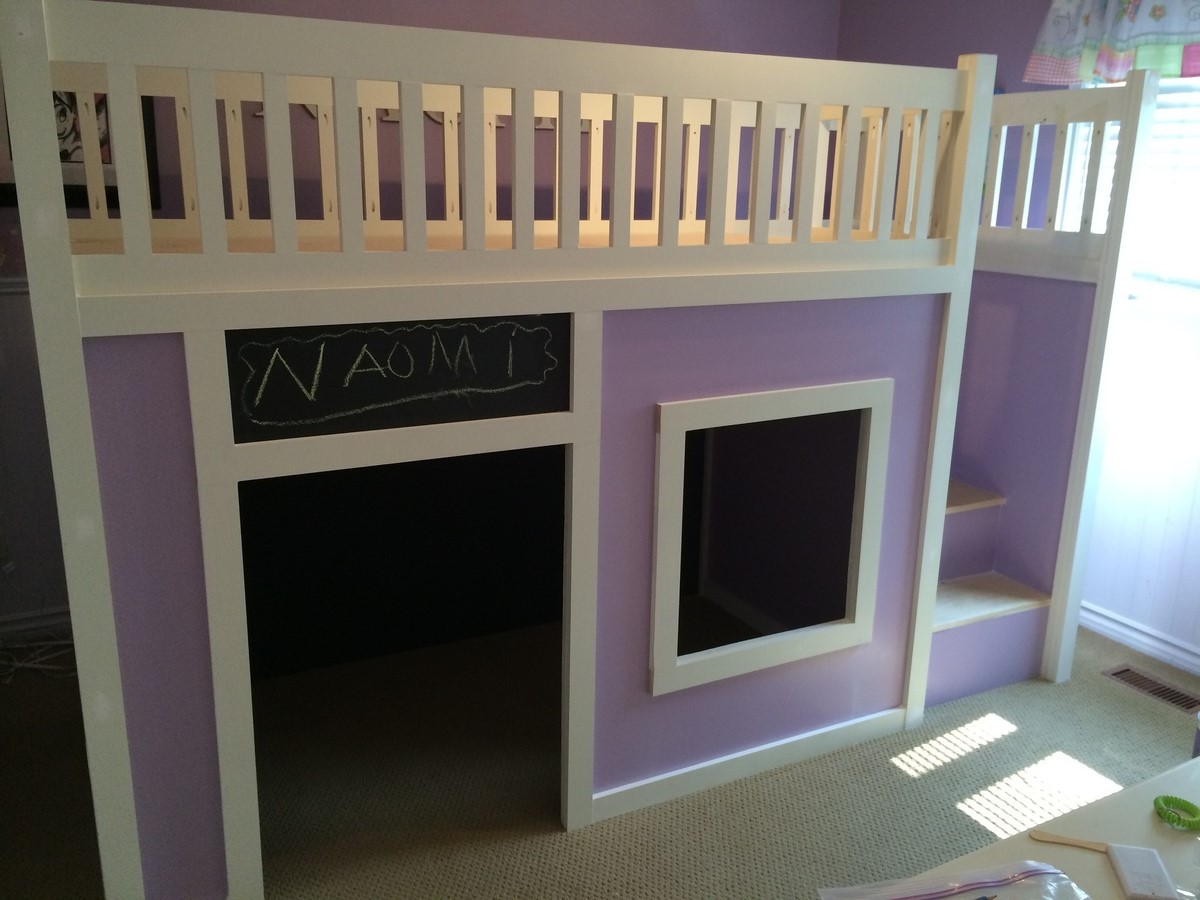
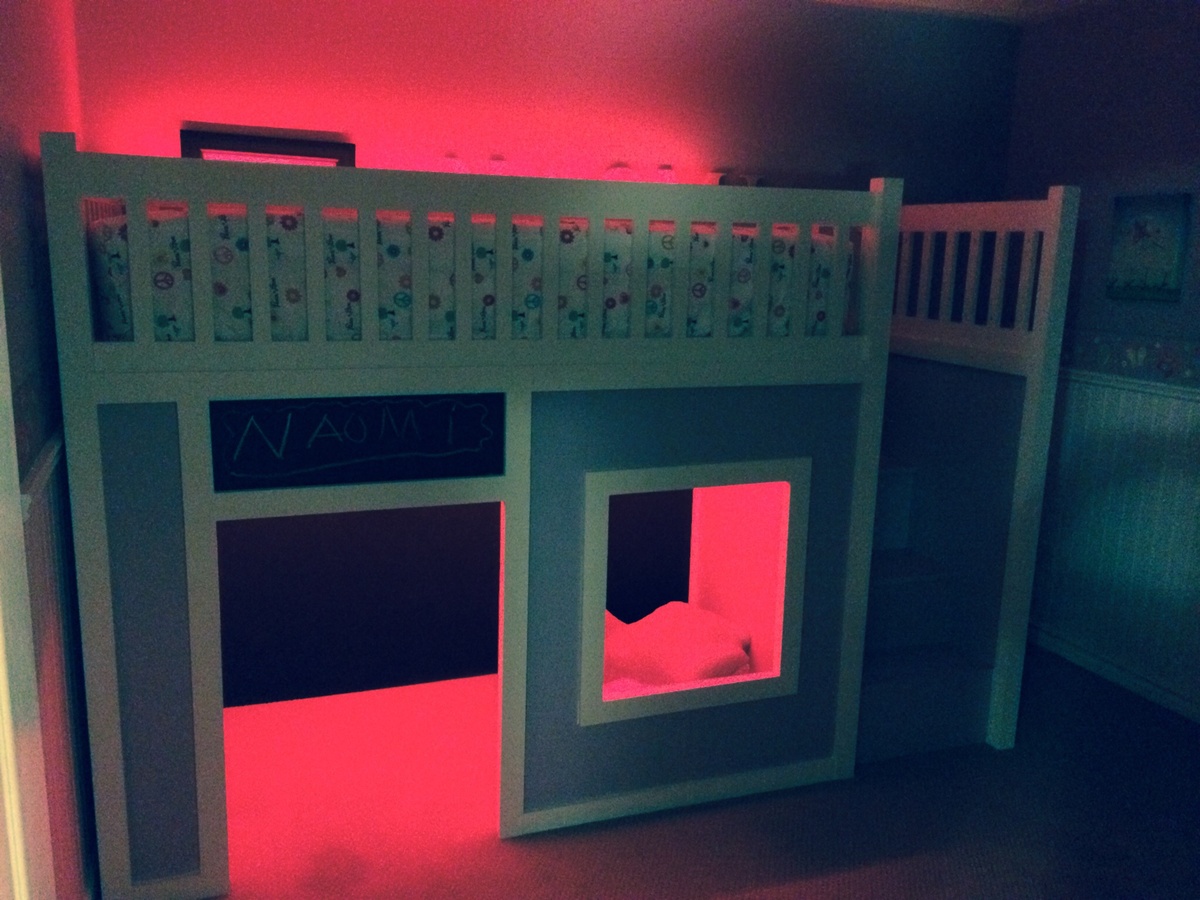
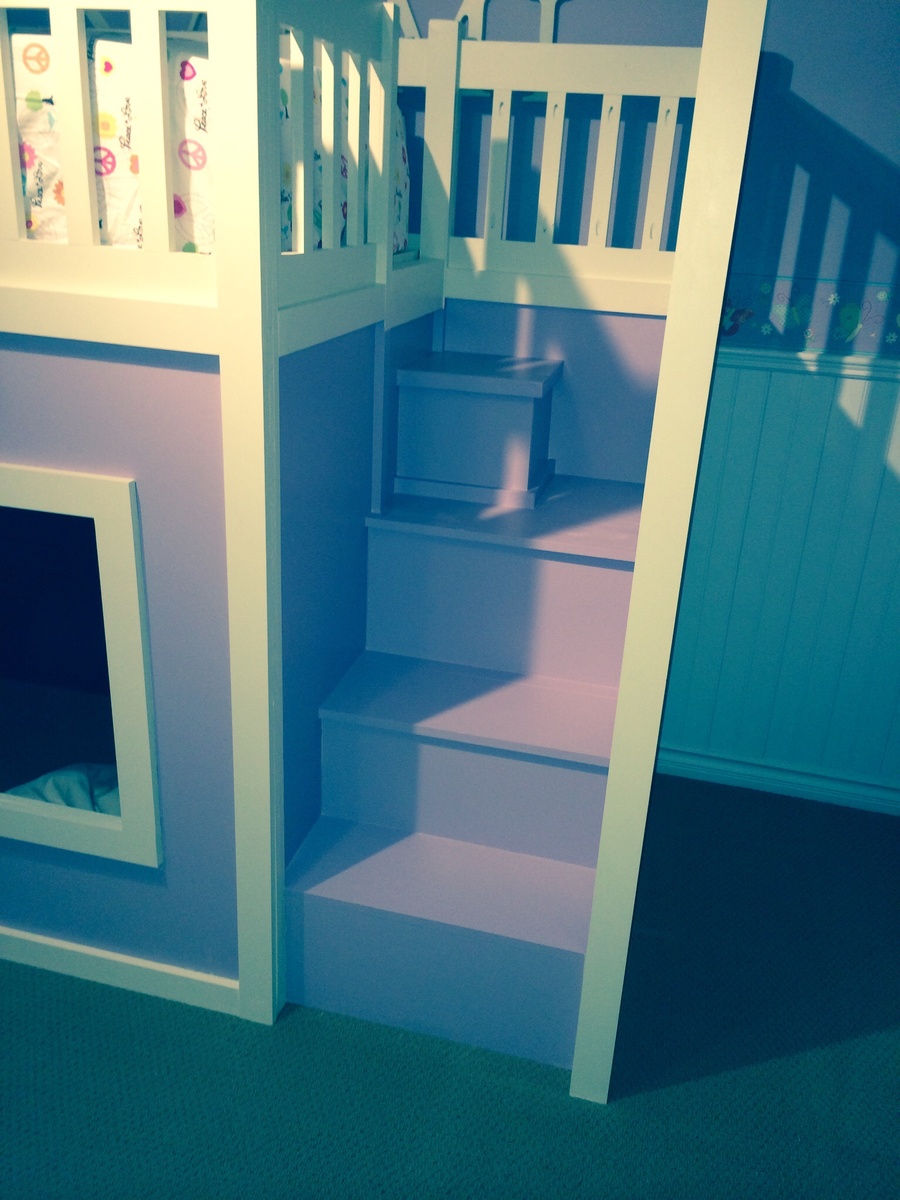
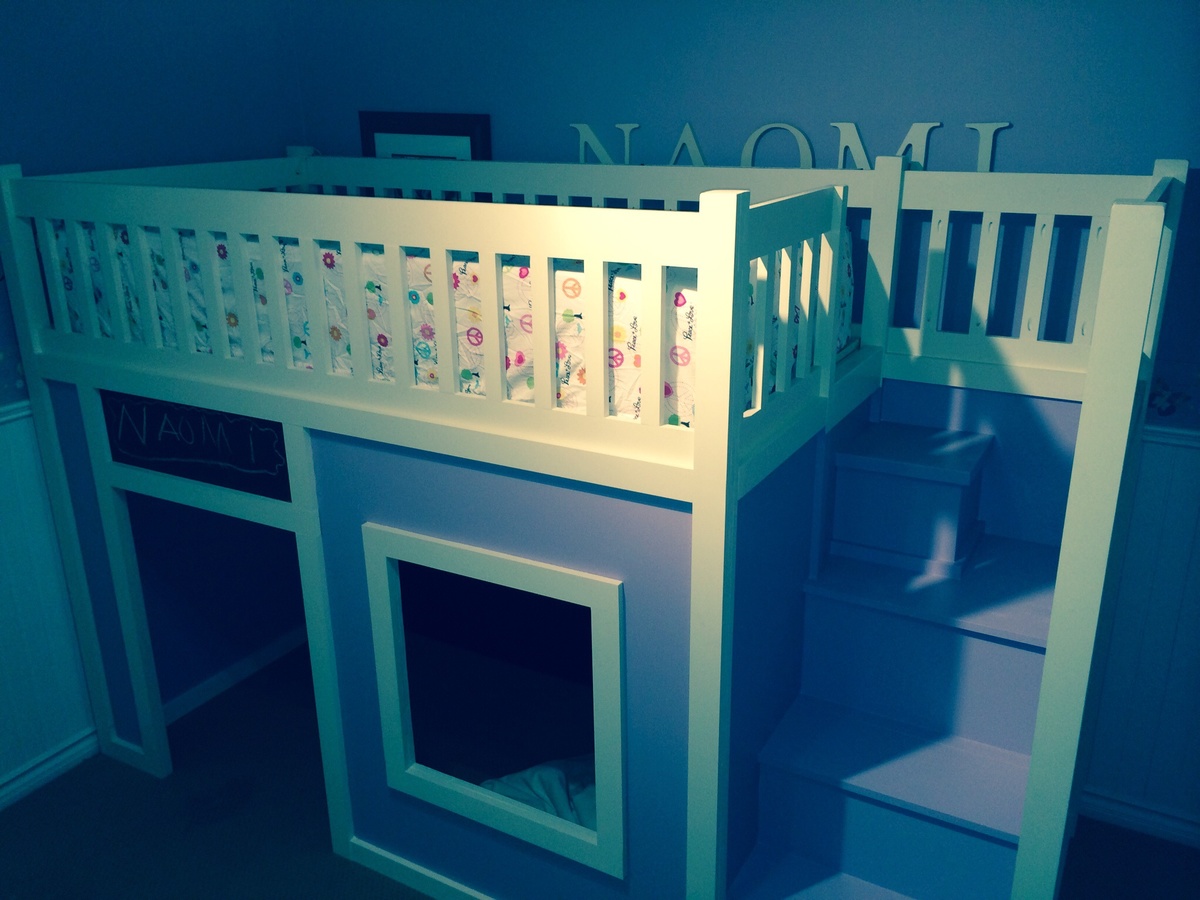
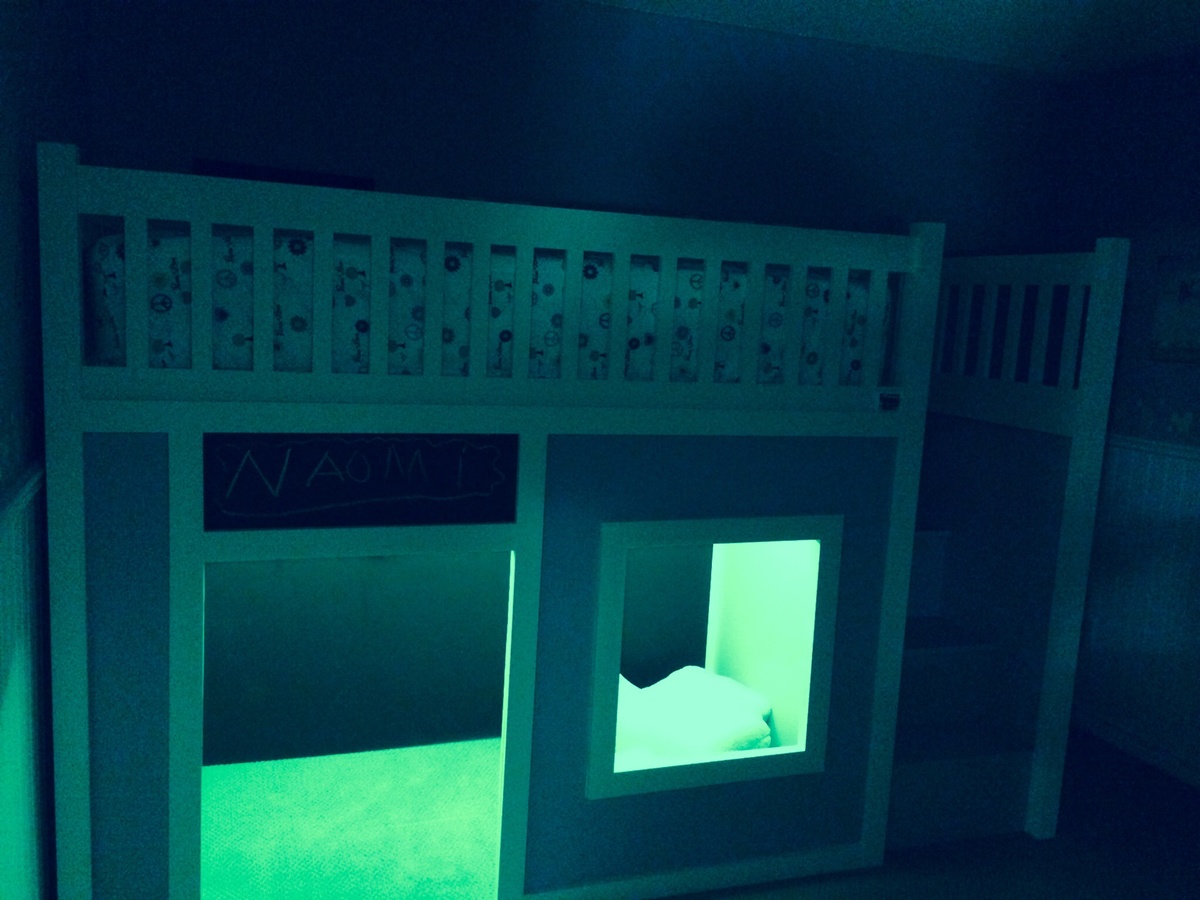
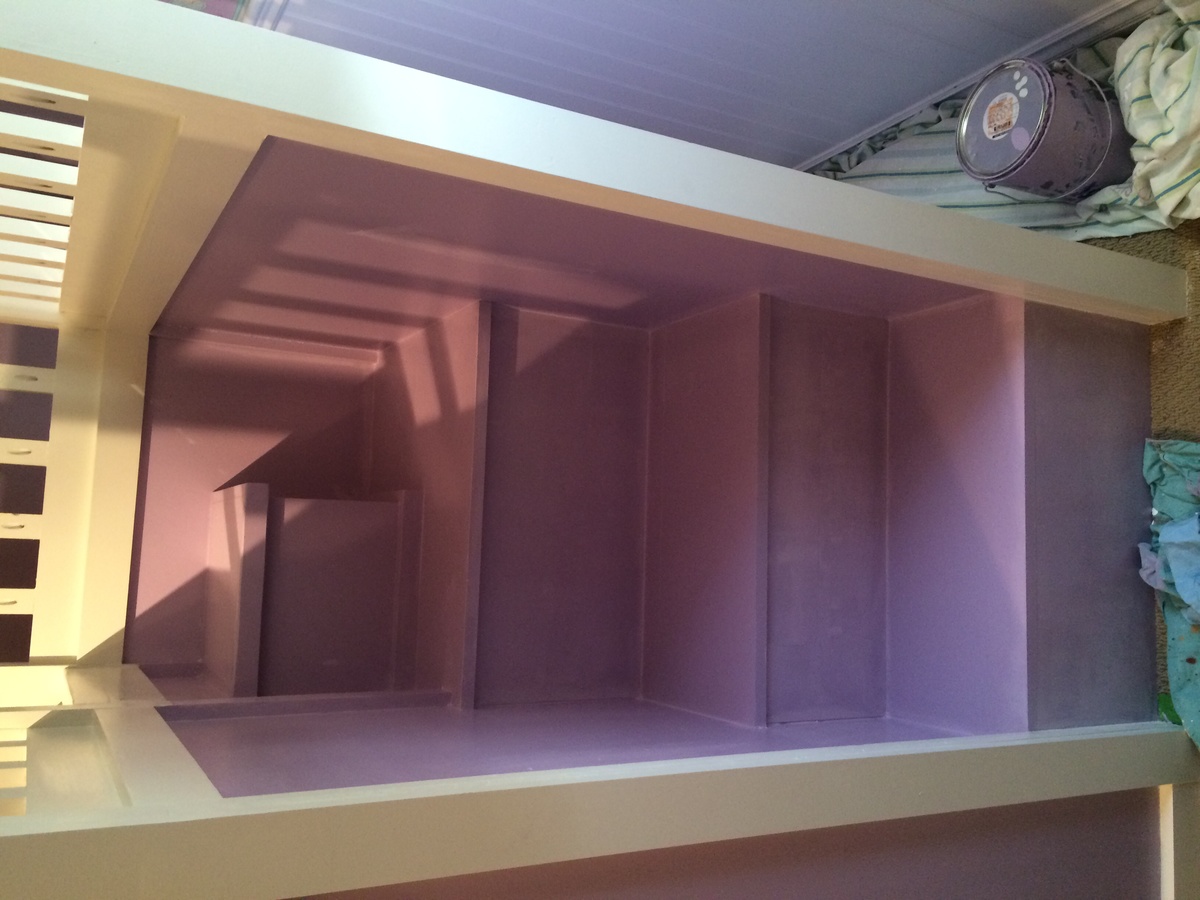
This was a great plan to follow. I made a few modifications such as adding a back wall that I painted with chalk paint so my daughter can draw to her hearts content. I also added a bit above the door so we can post messages such as her name or "girls only". I decided to skip the stairs being storage thinking it would simply be a junk collector and added a small step at the top as she found it a bit too high to get into her bed. Finally the painting took sometime as I used cabinet quality paint for durability but it's a bit tricky to work with. As a final touch I installed LEDs from Costco on the interior ceiling and back top rail all controlled by a remote with over 20 colors to choose from and adjusting brightness. Can't wait for my next project.

Built from Plan(s)
Estimated Time Investment
Week Long Project (20 Hours or More)
Finish Used
Cabinet and melamine paint. More durable and will stand up to kids.
Recommended Skill Level
Intermediate

Pallet Shelf Spice Rack

Submitted by rjh2006 on Thu, 11/01/2012 - 17:33

My mother lives with me and we loved the Pallet Shelf Project and made a back door shelf/coat rack. Then, task maker that she is, she decided we need a spice rack in the kitchen, and viola. Still needs another coat of minwax, but should be ready to hang tomorrow! Thanks Ana!

Finish Used
Minwax
Recommended Skill Level
Beginner

Double Trash Bin

Submitted by Anonymous (not verified) on Wed, 08/26/2020 - 08:32

This was based on the "Small Kitchen Island" Plans but needed to put 2 - 33 Gal Trash cans in. I used Select Square edged Pine. The depth remained the same as the plans but the width changed dramatically (52" wide). I also increased the height to match the other furniture (3' High). I added 4 - 1 X 2's to the top of the cabinet to secure the top.

Estimated Cost
$350-$400
Estimated Time Investment
Week Long Project (20 Hours or More)
Finish Used
The bottom was paint that matched the other furniture, the top is an Classic Oak Poly/Stain - 3 coats
Recommended Skill Level
Intermediate

Comments

My First work - folding workbench

Submitted by saariko on Mon, 08/31/2020 - 03:54

So this is my first ever work.
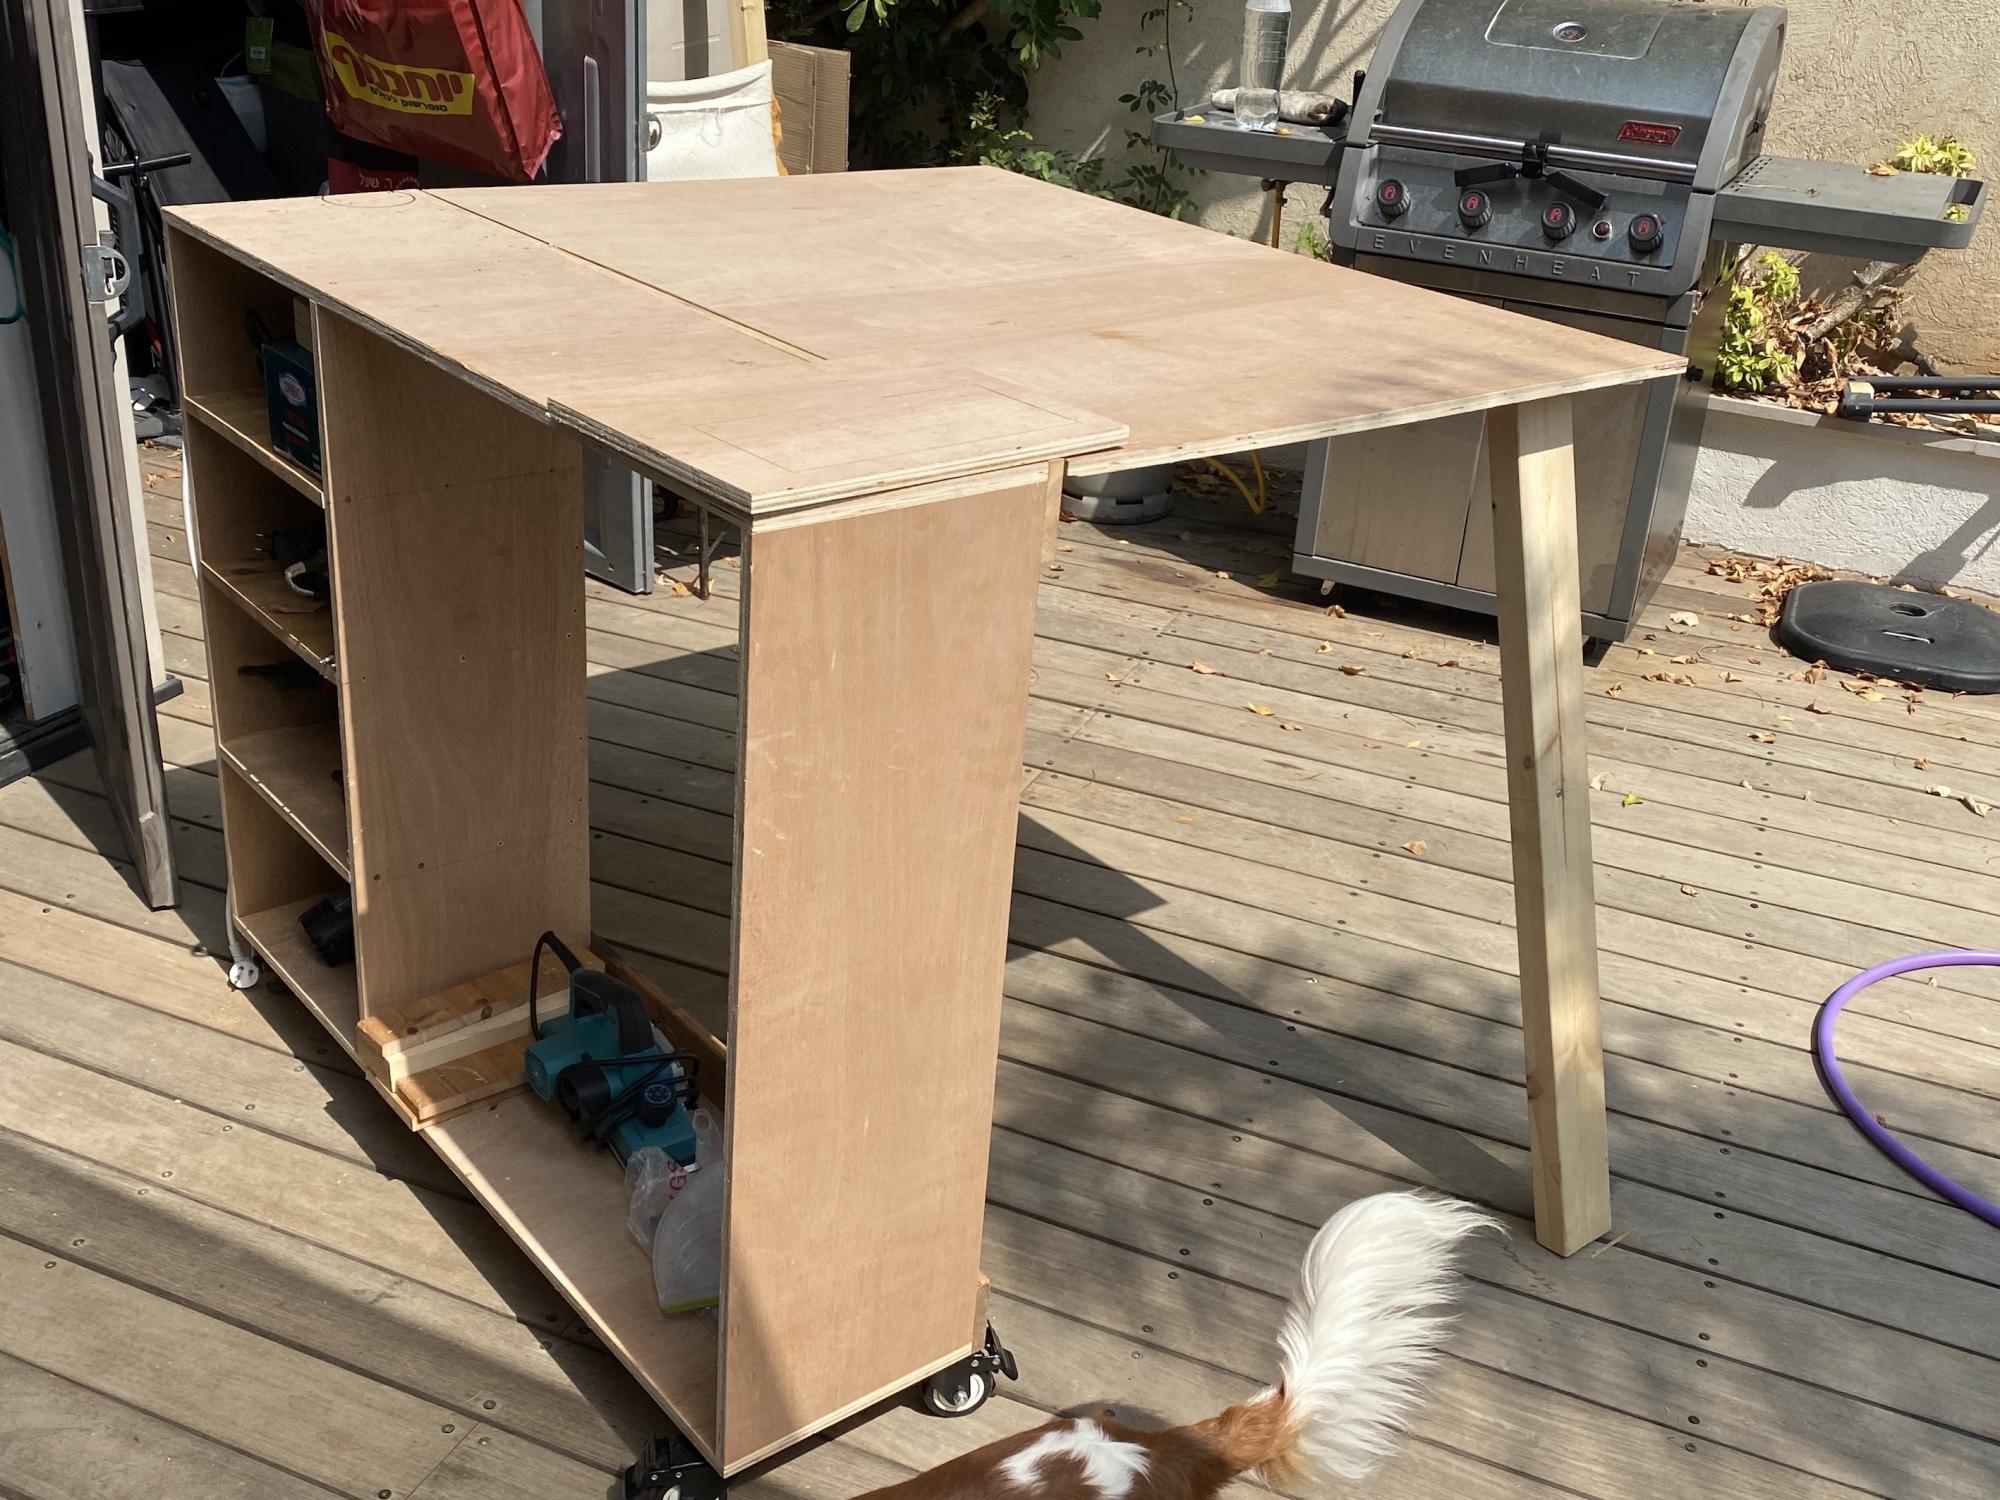
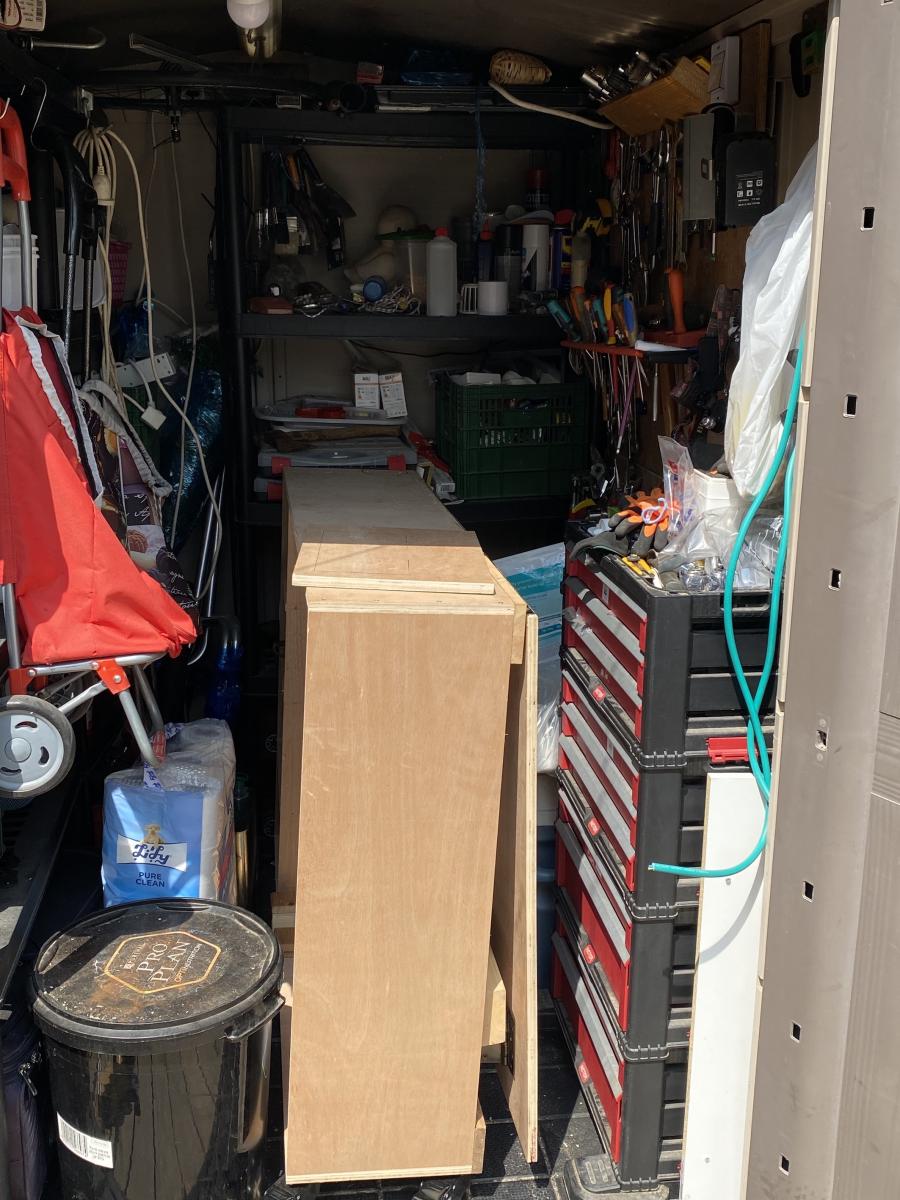
I have a very limited storage place (outside shed) and the super benefit, is that folded, this workbench is just the perfect fit (you can see in the picture how well it's fitted).

I am a tall person, so I took the liberty to add some CM's to the total height, and also extend the 'Flap' to be bigger. It's both beneficial but also adds some risk, as it's less stable when folded. And needs to be taken care when moving around.

I added magnets to the legs, with a piece of metal on the bottom side of the flap, so when opening the flap, the legs are held until released. (you need a fairly strong magnet for the 2X4.

One thing I noticed, and needs to modify is that the hinges holes are paralel to each other, that mean, that you either need very flat screws, or as I did, screwed them on alternating holes. So when closed, there is no pressure from the tip of the screw. Another solution is to use a hinge where the holes are not parallel to each other. ( i saw something like that online.)

I still want to add 2 top drawers, and a shelf, but it's pretty complete and functional as it is.

Super excited !!!

Built from Plan(s)
Estimated Cost
70$
Estimated Time Investment
Afternoon Project (3-6 Hours)
Recommended Skill Level
Starter Project

Modified this to fit my bunny!

Submitted by Anonymous (not verified) on Wed, 12/28/2016 - 15:48

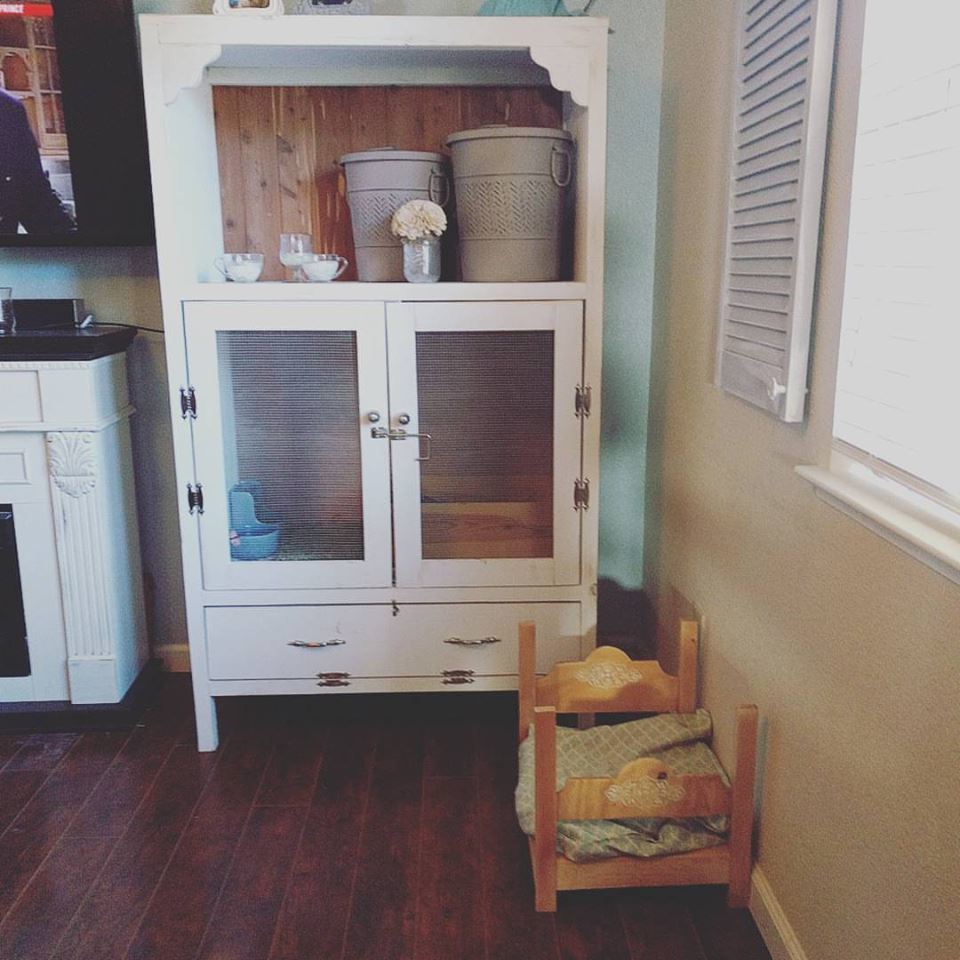
I used Ana's plans, but switched things around a little as I went. I wanted something fancy for my bunny to hang in when I'm not home. The biggest modification I made for a bunny was the bottom. I wasn't happy with the stability of the chicken wire even though my bunny is just a few pounds. I used a more solid plastic called plaskolite ( you can find it in the lighting section of Lowes) We are planning on adding levels for the bunny as well as a cloroplast tray to fit the bottom since bunny poo can get stinky. We took about 2 weeks to complete this project and it was definitely a learning experience! We also tried to cut costs by getting some of the wook and backing from Habitat for Humanity! 


We also made the little bed with the leftover wood from this project :-)

Built from Plan(s)
Estimated Time Investment
Week Long Project (20 Hours or More)
Finish Used
We used a chalk paint and painted everything BEFORE we added the doors and hardware. Then we distressed it a bit with some sandpaper.
Recommended Skill Level
Intermediate

Daughter's Dresser

Submitted by Calgary on Thu, 01/05/2017 - 18:40

Built for my new baby girl! Followed the plans with a few modifications. Used dadoes for the drawer bottoms. Added bracing for attaching the drawer slides. Used an old door for the top!

Estimated Cost
$300
Estimated Time Investment
Weekend Project (10-20 Hours)
Finish Used
White paint and polyurethane
Recommended Skill Level
Intermediate

Ten-ish Dollar Shelves

Submitted by gwinnclan on Tue, 12/11/2012 - 14:11

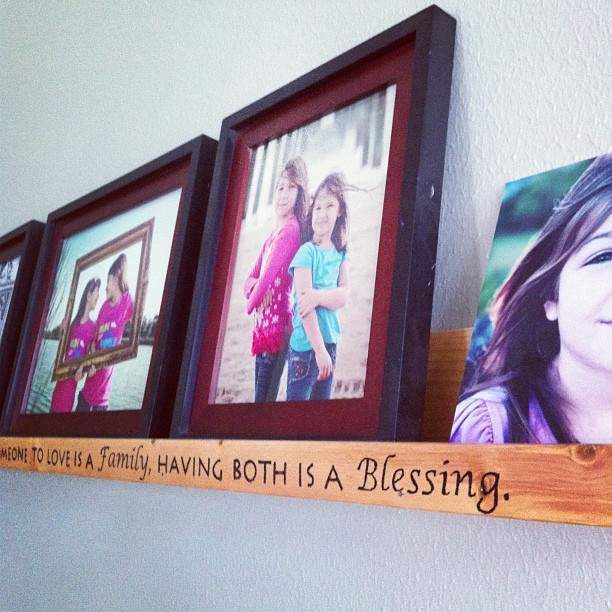
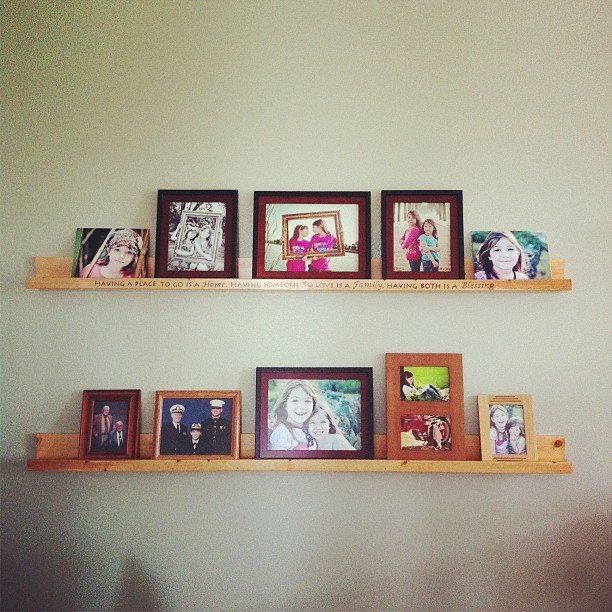
I wanted to add a little homey touch to my ledges so I burned a saying into one of the two ledges in each pair. My husband and I used the plan for the Ten Dollar Ledges and instead of painting, we finished them with Stain/Finish in one.

Built from Plan(s)
Estimated Cost
$15-20
Estimated Time Investment
Weekend Project (10-20 Hours)
Recommended Skill Level
Beginner

Comments

MamaHowell09 (not verified)

Tue, 12/11/2012 - 16:11

I love how this looks!! I must know! How did you burn it? And are they individual letters? Anyways, this is so lovely! Almost as much as the pictures on the shelves!! :)
spiceylg

Wed, 12/12/2012 - 05:25

I agree, I love the additional touch of the letters. Great idea and so pretty!

Sliding "barn" door from reclaimed pallet wood

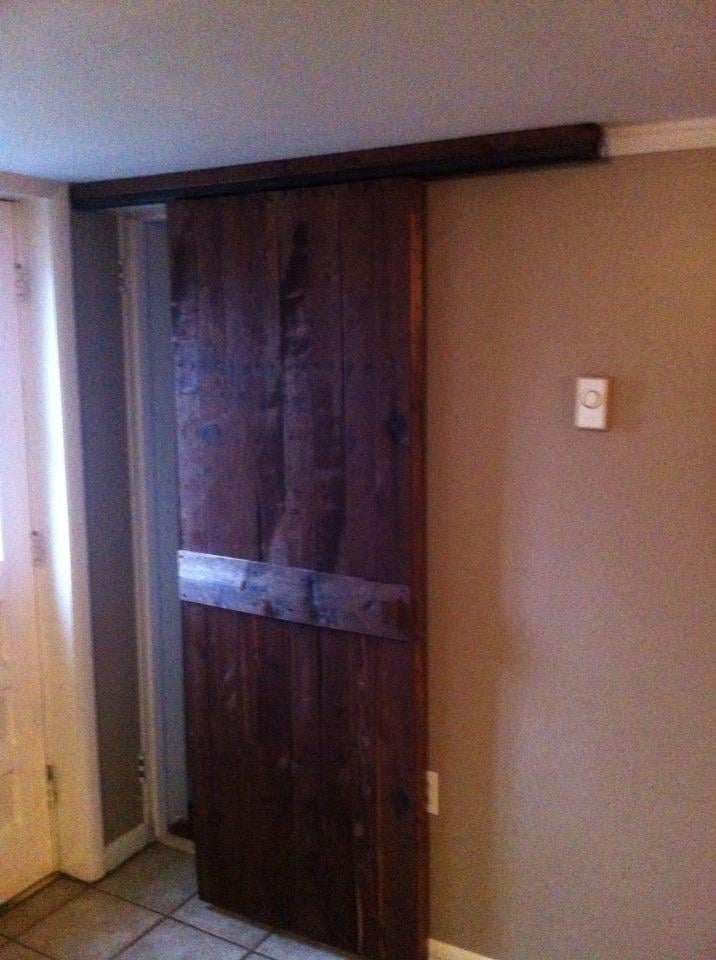
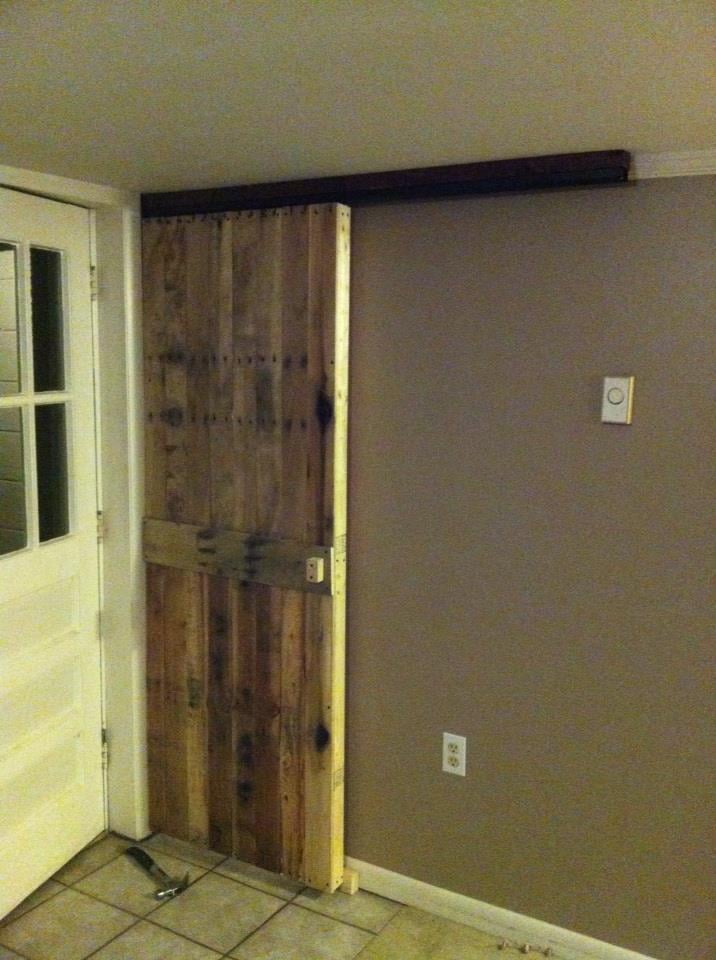
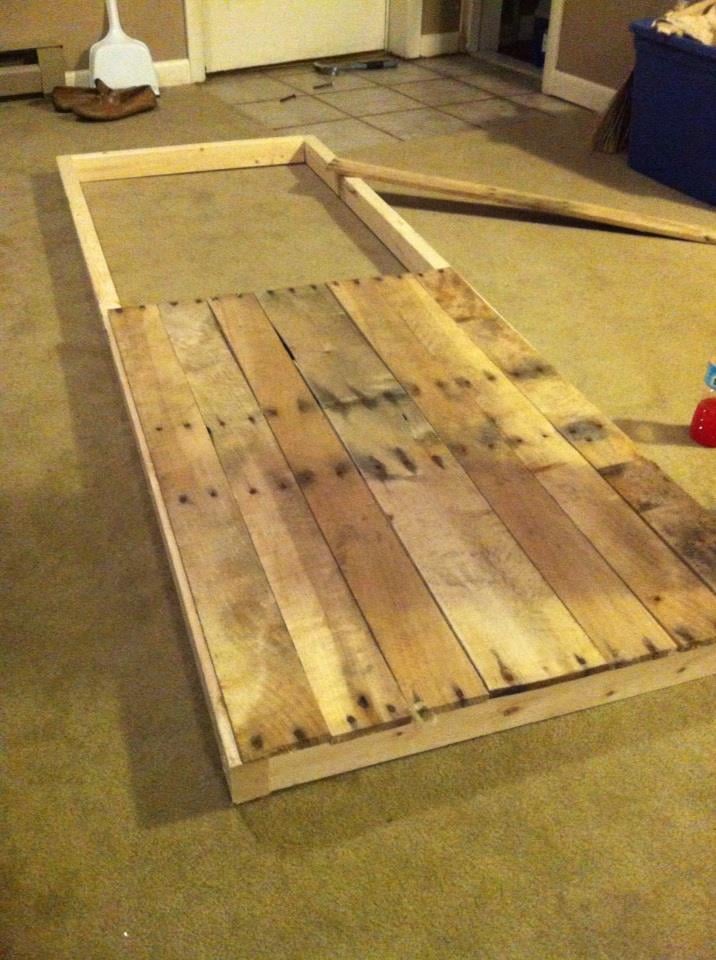
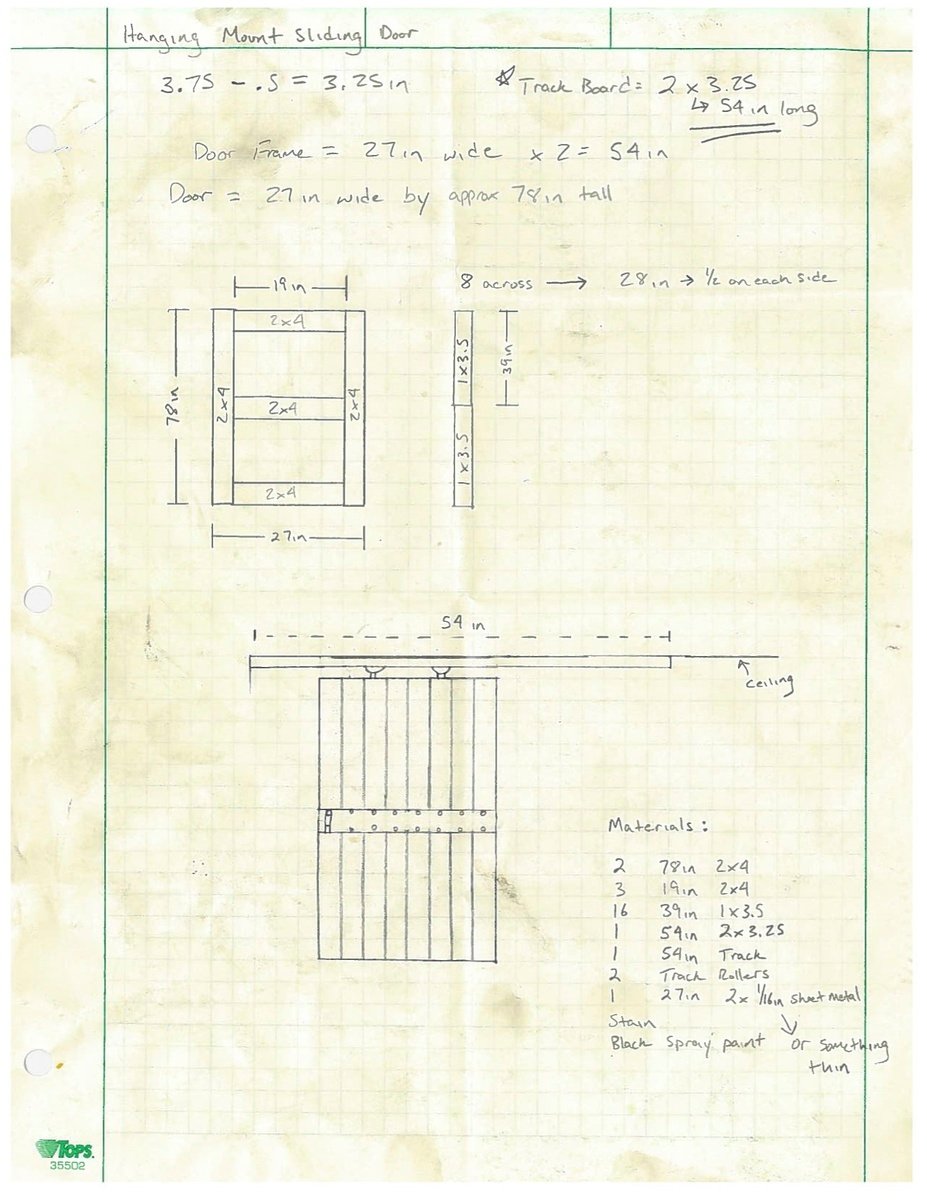
I saw many different sliding door projects online, so I did my own spin on one. I was able to get several old pallets for free (pine and oak). I went to Lowes and bought a few 2x3s which I used as the frame, and the track hardware which was only $13! Most doors I see are mounted from the wall, but since I have 7' ceilings downstairs I mounted mine from the ceiling. This project only took about 4 hours total and cost about $40 when you figure in costs for screws, stain, etc. The most difficult part was taking apart the pallets. Using a reciprocating saw with a 12'' demolition blade is the best way to take them apart. Thanks for the idea Ana.

Estimated Cost
$40
Estimated Time Investment
Afternoon Project (3-6 Hours)
Finish Used
Minwax Dark Walnut
Recommended Skill Level
Beginner

Comments

BREATHESMILEBE

Mon, 05/13/2013 - 20:00

Hi!!
This looks so awesome! I came across this and was hoping to repeat it. You mention that you found the door hanging hardware at Lowes for $13. I can't seem to find it. Do you happen to remember the name of it? I'm entering "hanging door hardware" into Lowes and Home Depot and can't seem to find any hanging door hardware at all. I'd appreciate the help. Thanks!
Tina

2 Drawer Rustic Kitchen Island

modified a bit to add 2 drawers and only 1 shelf, also make with 6" overhang around for stools or chairs.

Built from Plan(s)
Estimated Cost
225
Estimated Time Investment
Weekend Project (10-20 Hours)
Finish Used
Special Walnut
Recommended Skill Level
Intermediate

Comments

MegsBK

Sun, 10/05/2014 - 08:51

Isn't that the best plan? So versatile. I love the look - would love to see a picture after you have the island as part of a kitchen scheme.

Shoe Dresser

I had this space in my mudroom that was a perfect spot to make a custom shoe dresser. I adjusted the plans I found on this website to custom make storage for shoes. Now this weird little space is functional.

Built from Plan(s)
Estimated Cost
80
Estimated Time Investment
Day Project (6-9 Hours)
Finish Used
Rustoleum chalk paint Serenity Blue, classic grey and special walnut Minwax
Recommended Skill Level
Intermediate

Comments

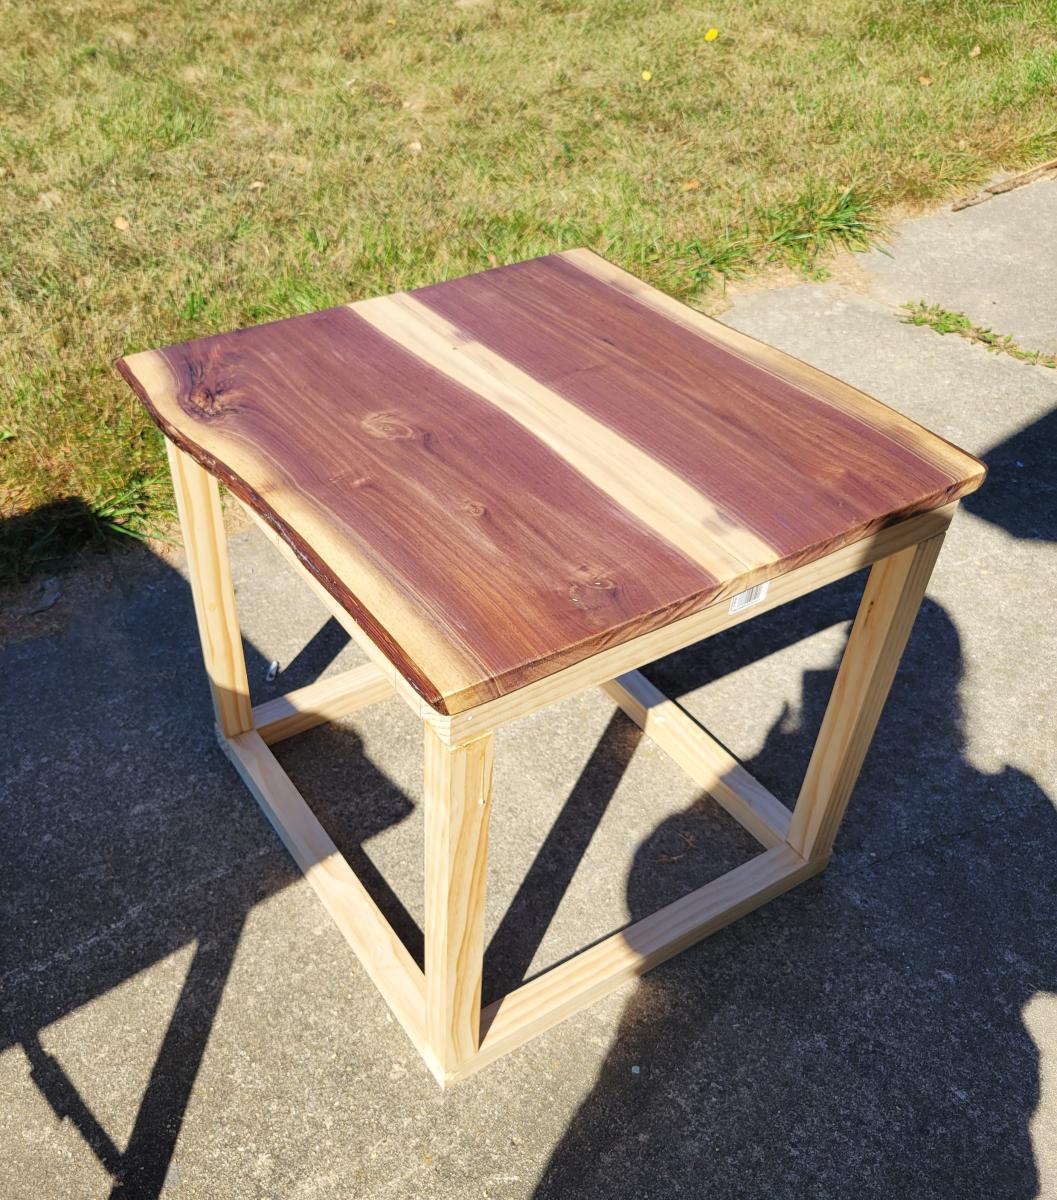
Live Edge End Table

Submitted by Anonymous (not verified) on Fri, 11/15/2024 - 08:12

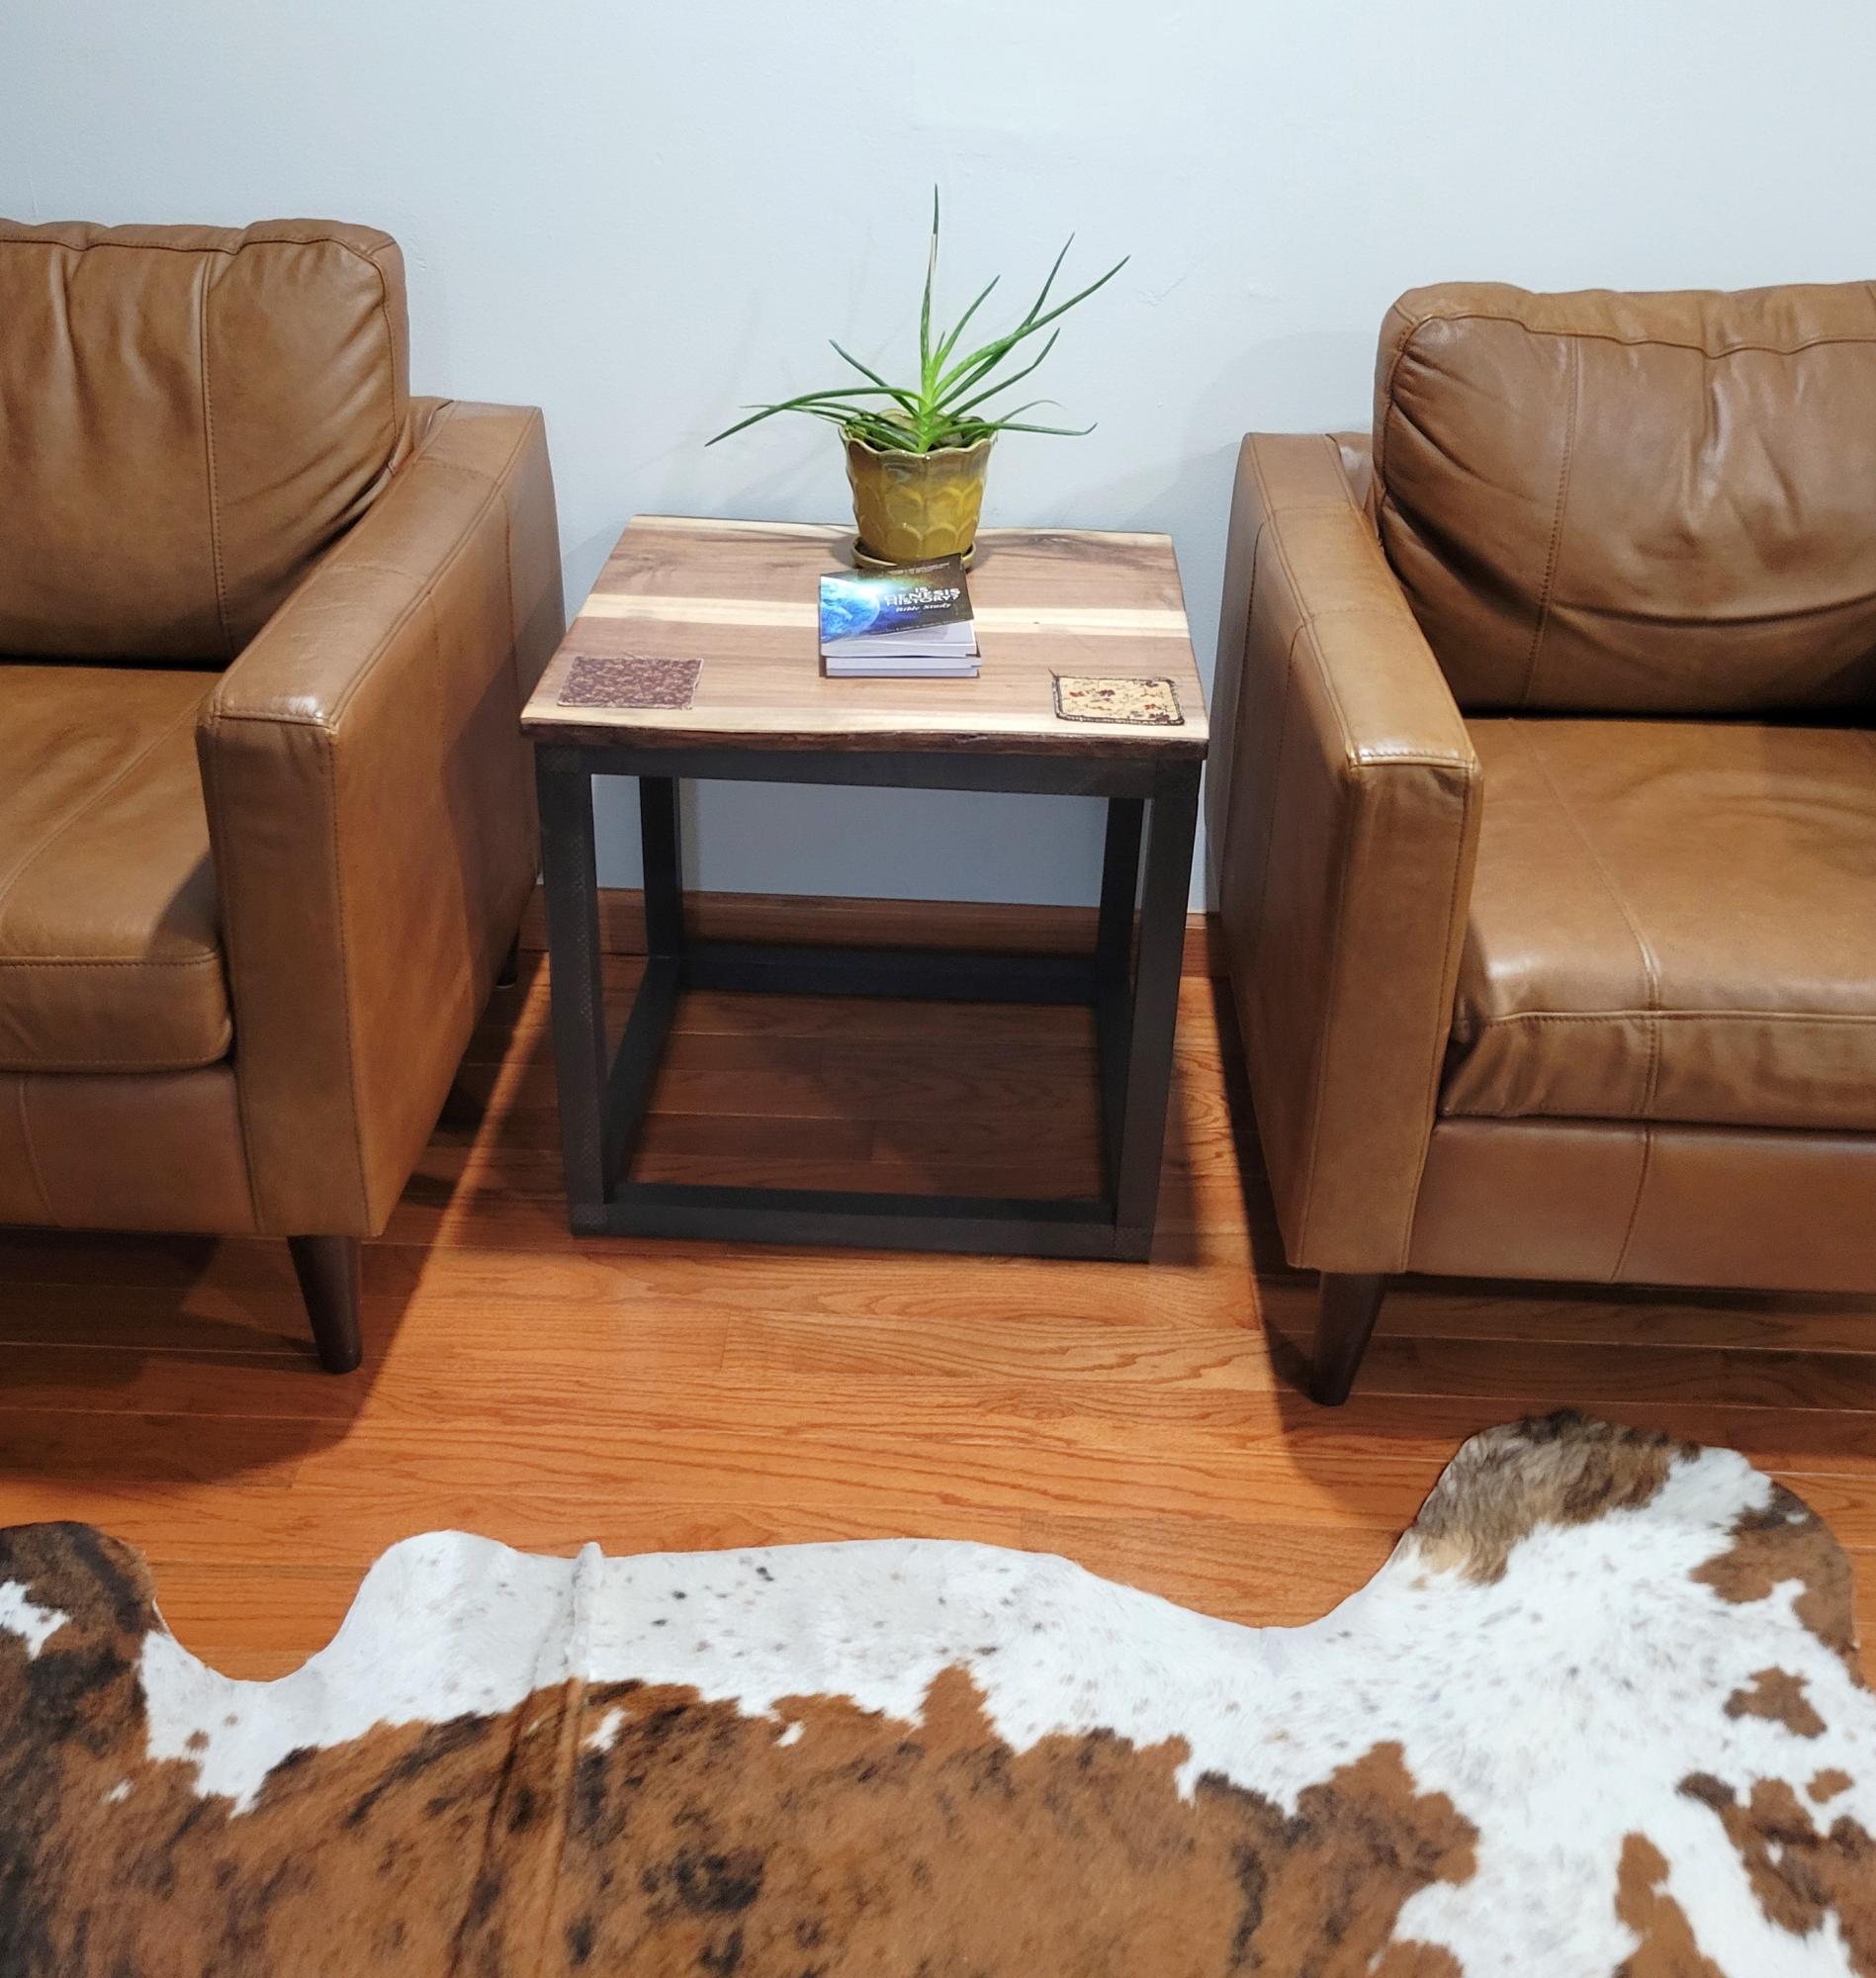
I have been looking for ways to use the live edge walnut from our property. I adapted Ana's side table plans to make several tables.
I used select 2x2 pine and painted the legs bronze to coordinate with our windows.

Built from Plan(s)

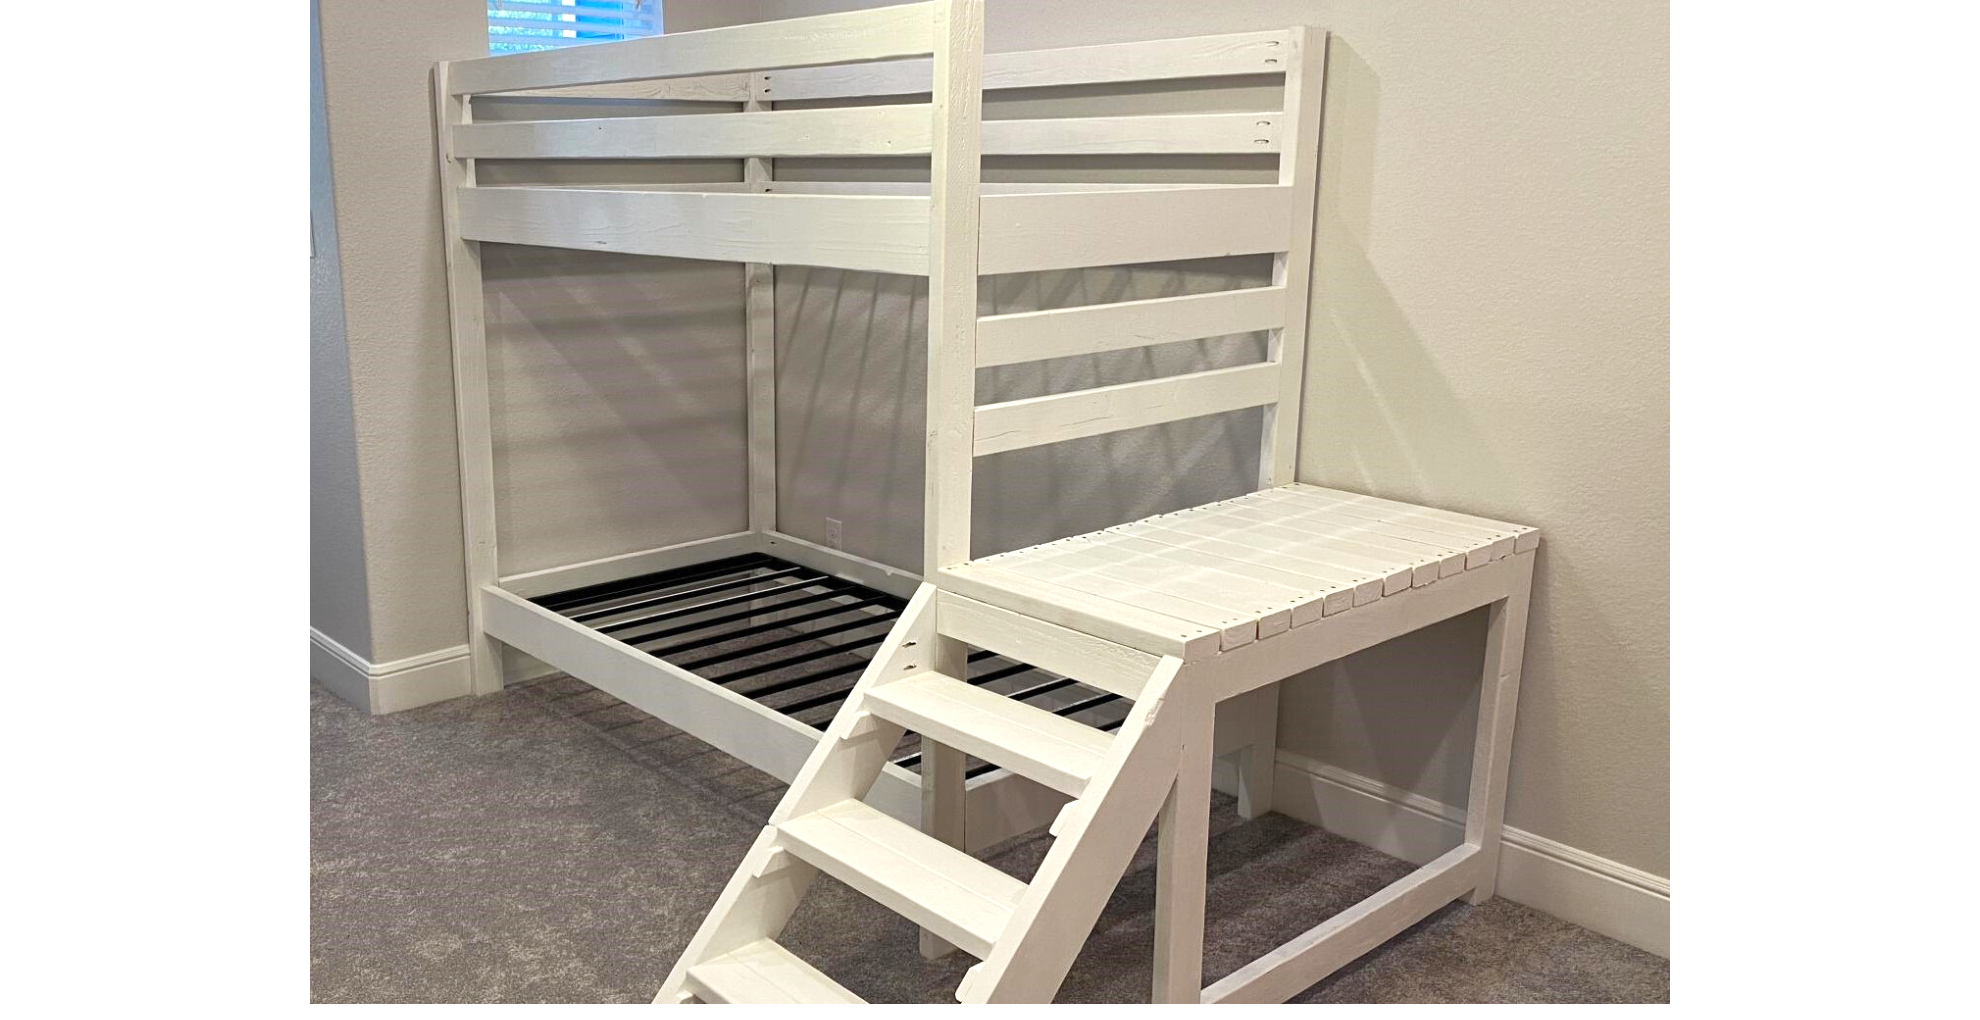
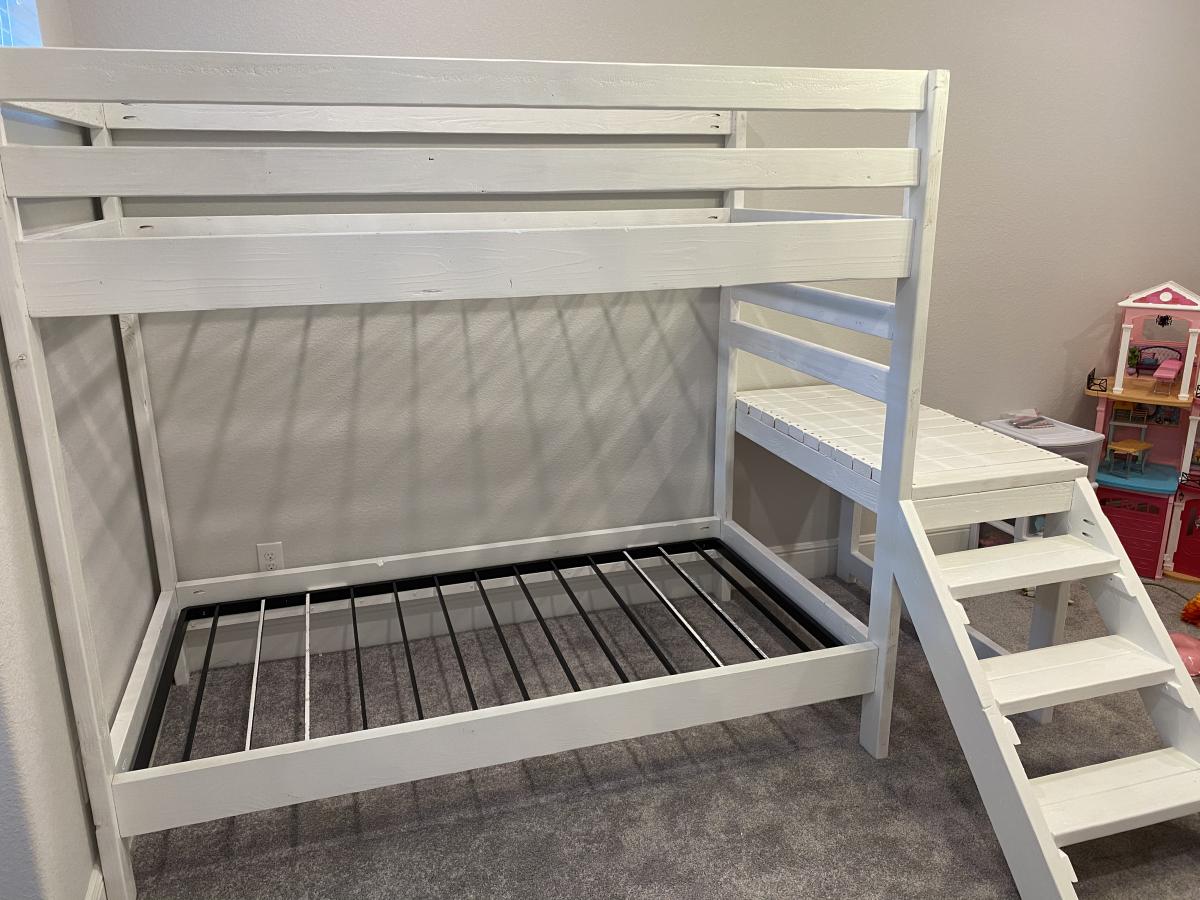
Camp Loft Bed With Stairs Bunk Style

Used the Camp Loft Bed with Stairs Plans but double the bed rails. I just loved that the stairs and platform make it a little safer getting in and out.

Estimated Time Investment
Weekend Project (10-20 Hours)
Finish Used
Just Ultra White.

Comments

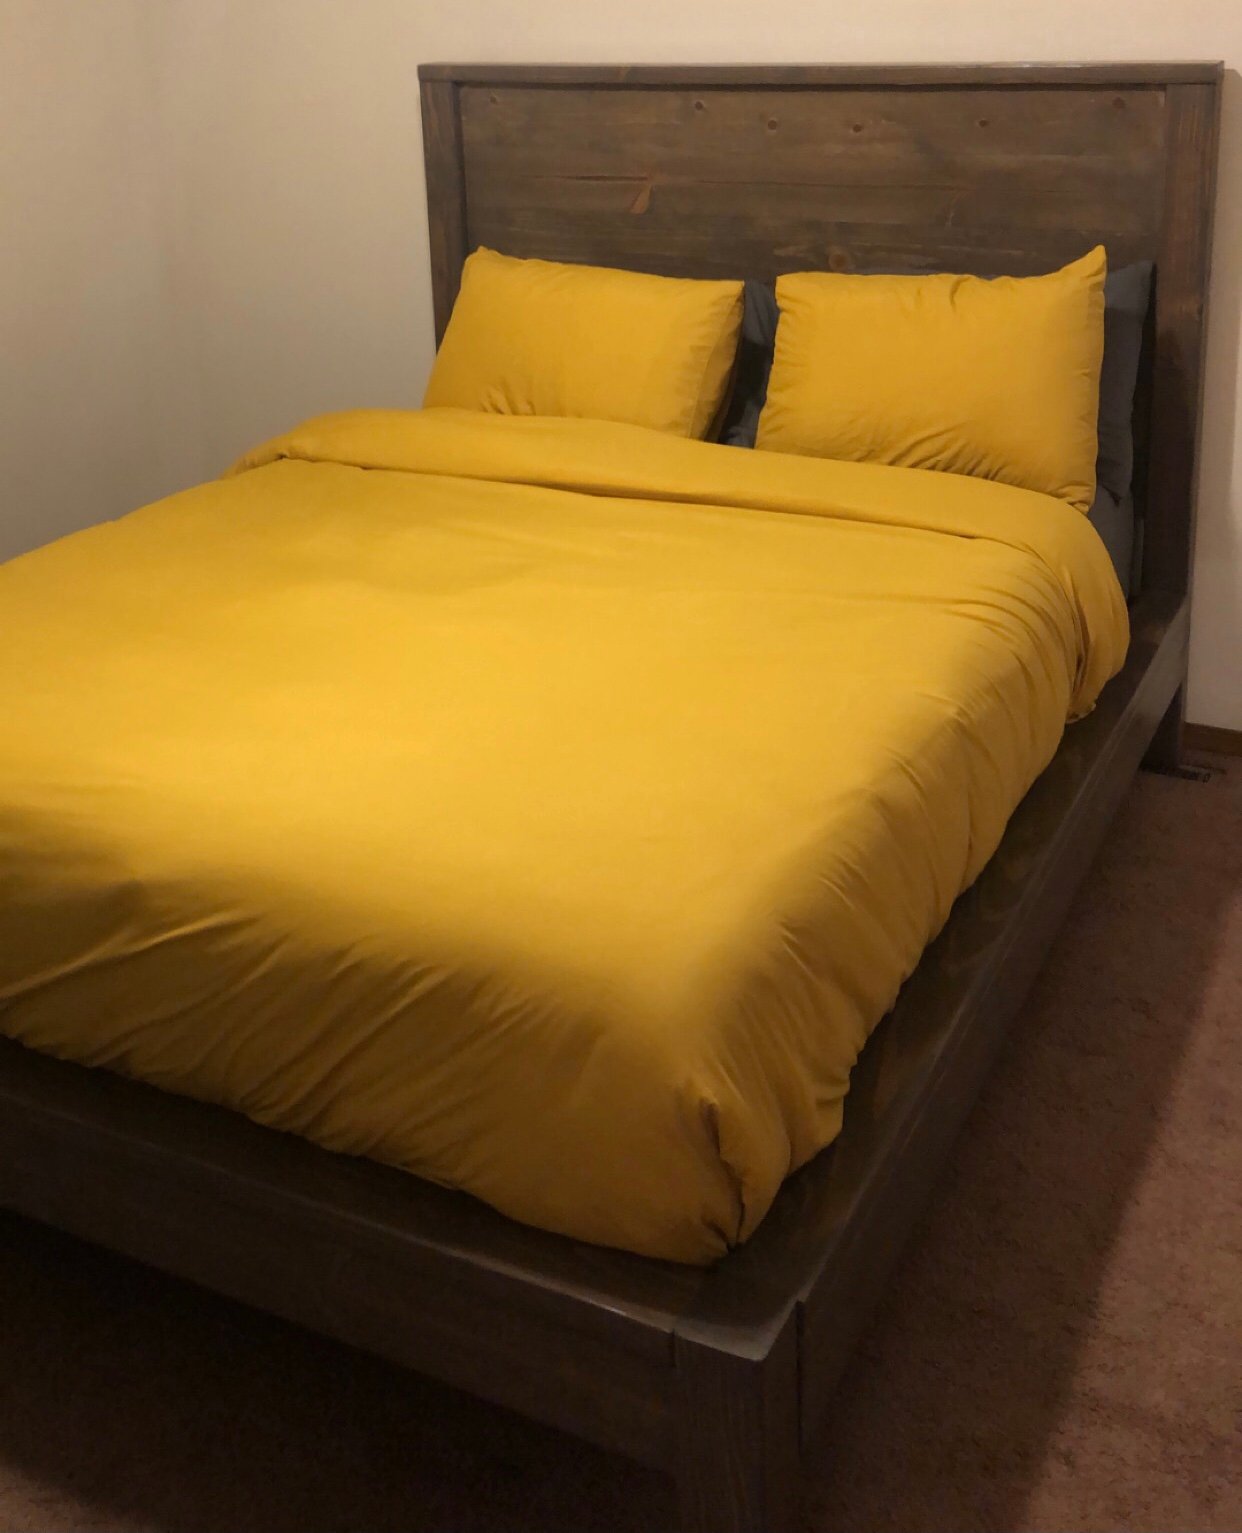
Modern Farmhouse Bed Frame

Submitted by Anonymous (not verified) on Fri, 10/23/2020 - 06:26

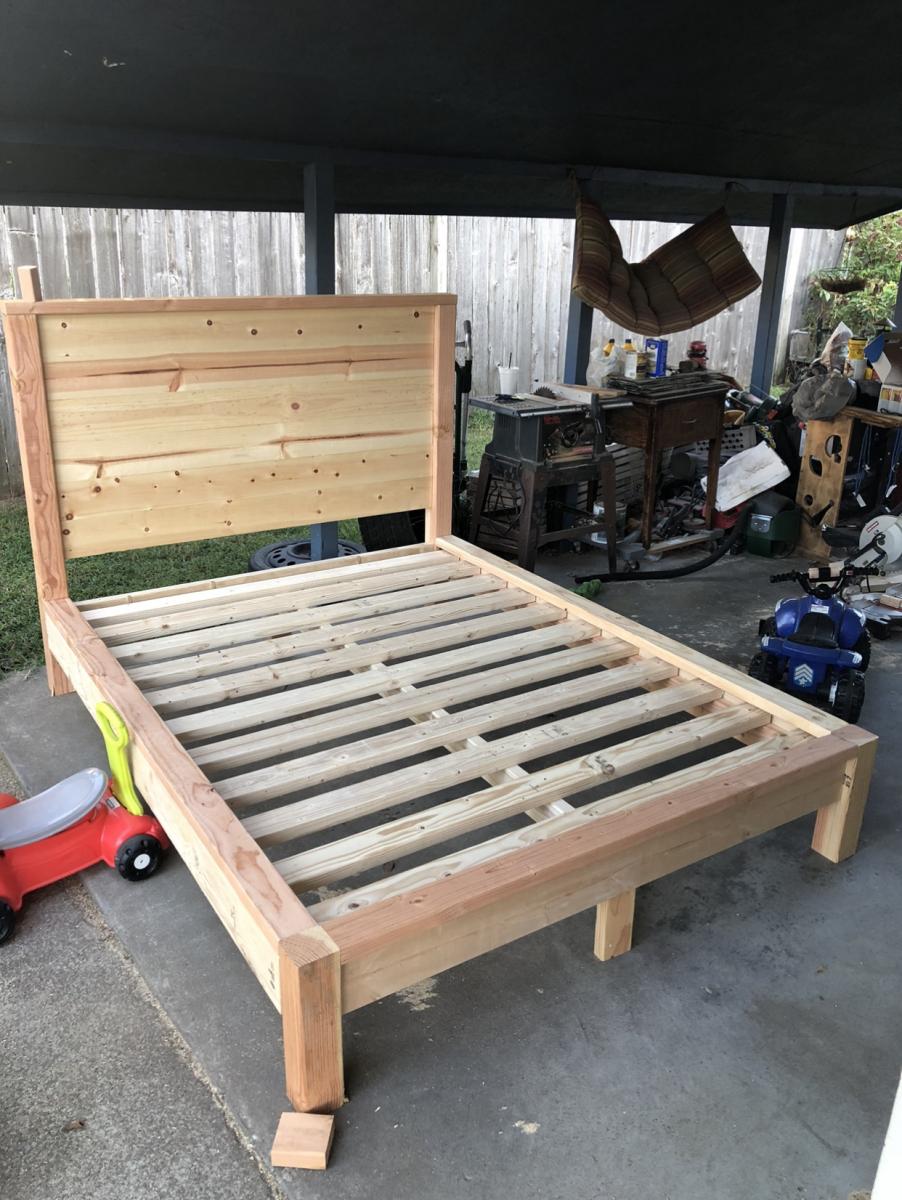
My dad and I built this bed together as our first wood working project. We worked on it off and on for about three weeks before it was finished and in my room. We used brackets instead of pocket holes/screws to attach the side rails. Next up will be matching nightstands and a dresser!

Built from Plan(s)
Estimated Cost
300
Estimated Time Investment
Weekend Project (10-20 Hours)
Finish Used
Varathane Briarsmoke Premium Fast Dry Interior Wood Stain
Recommended Skill Level
Beginner

Welcome Post

Submitted by TamarasJoy on Thu, 02/02/2017 - 18:05

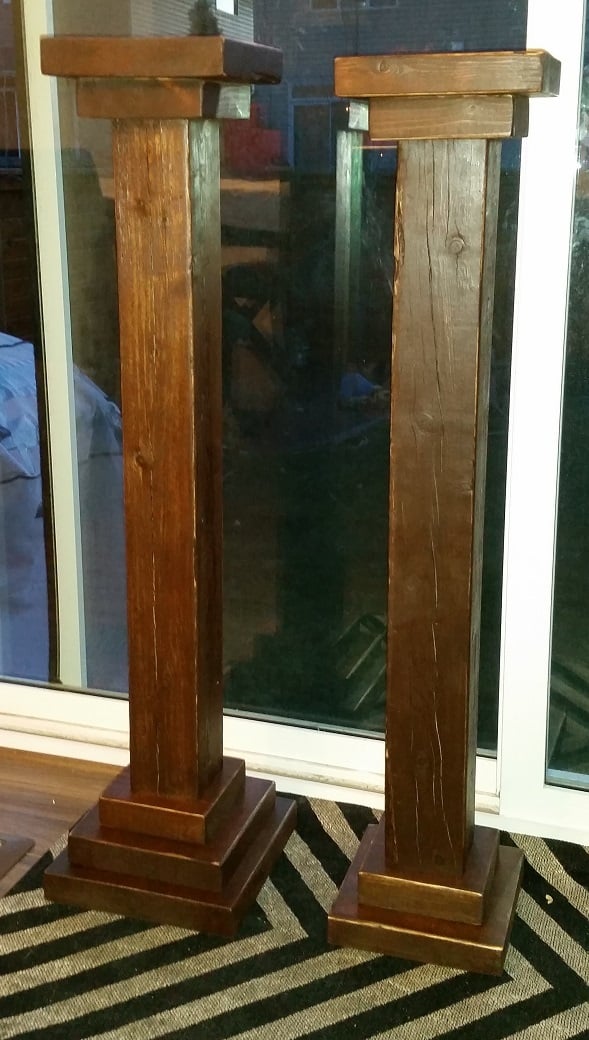
Full Instructions HERE

What you will need to build this DIY Welcome Post:

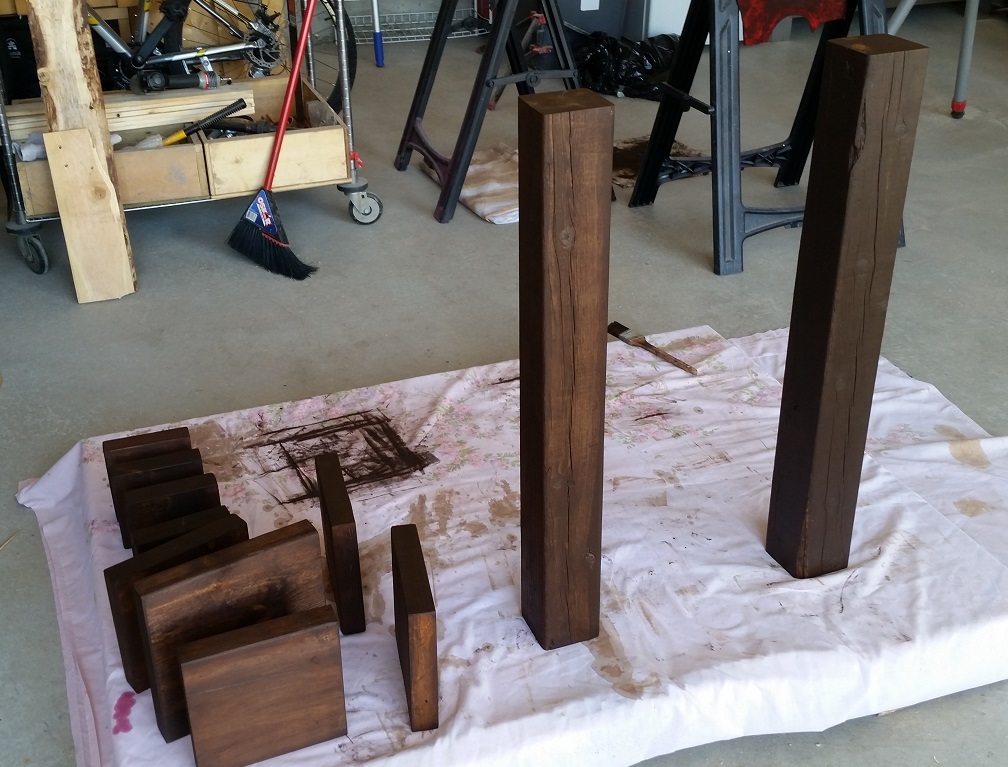
  1. 4 x4 Fence Post Cut: 30 inches long 1×6 down to make 2 5 1/2″x5 1/2″ squares and 2 4 1/2″x 4 1/2″ square.
  2. Different Widths of wood cut into squares. For the three tear welcome post I have 3 different sized squares. They measure: SMALL: 5 1/2 by 5 1/2 inches MEDIUM: 7 1/2 by 7 1/2 inches LARGE: 9 1/2 by 9 1/2 inches.
  3. Single Hook
  4. Long wood screws & Drill
  5. Stain
  6. Rust-Oleum Varathane Outdoor Classic Clear Water Based Spray, Gloss Finish
  7. Wood Glue
  8. Orbital Sander or some muscle & some sand paper
  9. Wood filler (not required)

Full instructions on how I put this together on my blog.

Estimated Cost
This is a project that I built from all scraps and left overs.

If I had to guess it shouldn't be more then $25 if you can do some scrounging :)
Estimated Time Investment
An Hour or Two (0-2 Hours)
Finish Used
Dark Stain & three coats of the spray can polyurethane
Recommended Skill Level
Starter Project

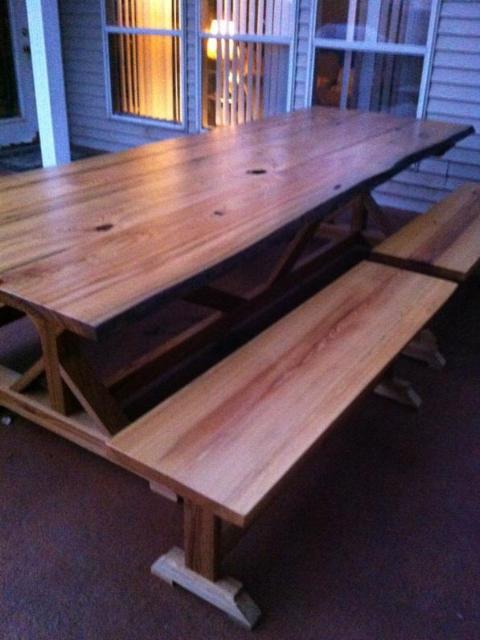
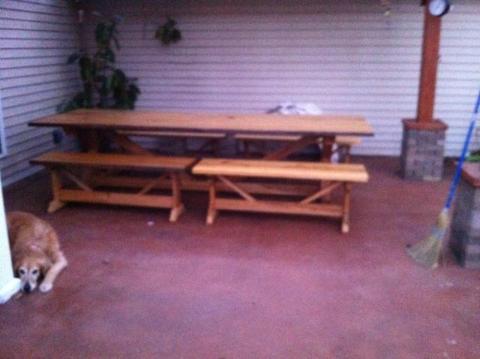
fancy x farmhouse table from sinker cypress

Submitted by ashmass on Tue, 10/28/2014 - 08:07

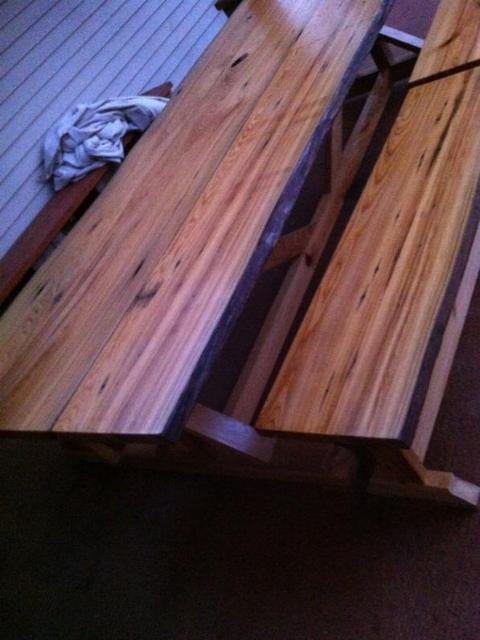
Built this table 11 feet long with live edge sinker cypress. Hand rubbed 12 coats of tung oil, then finished with Waterlox satin.

Estimated Cost
600
Estimated Time Investment
Week Long Project (20 Hours or More)
Finish Used
outdoor dining
Recommended Skill Level
Intermediate

Comments

ashmass

Wed, 10/29/2014 - 08:26

Thanks! Took me two months to get the finish right. I love the look of sinker cypress. I'm building an indoor dining table from sinker pecky cypress, should be pretty nice

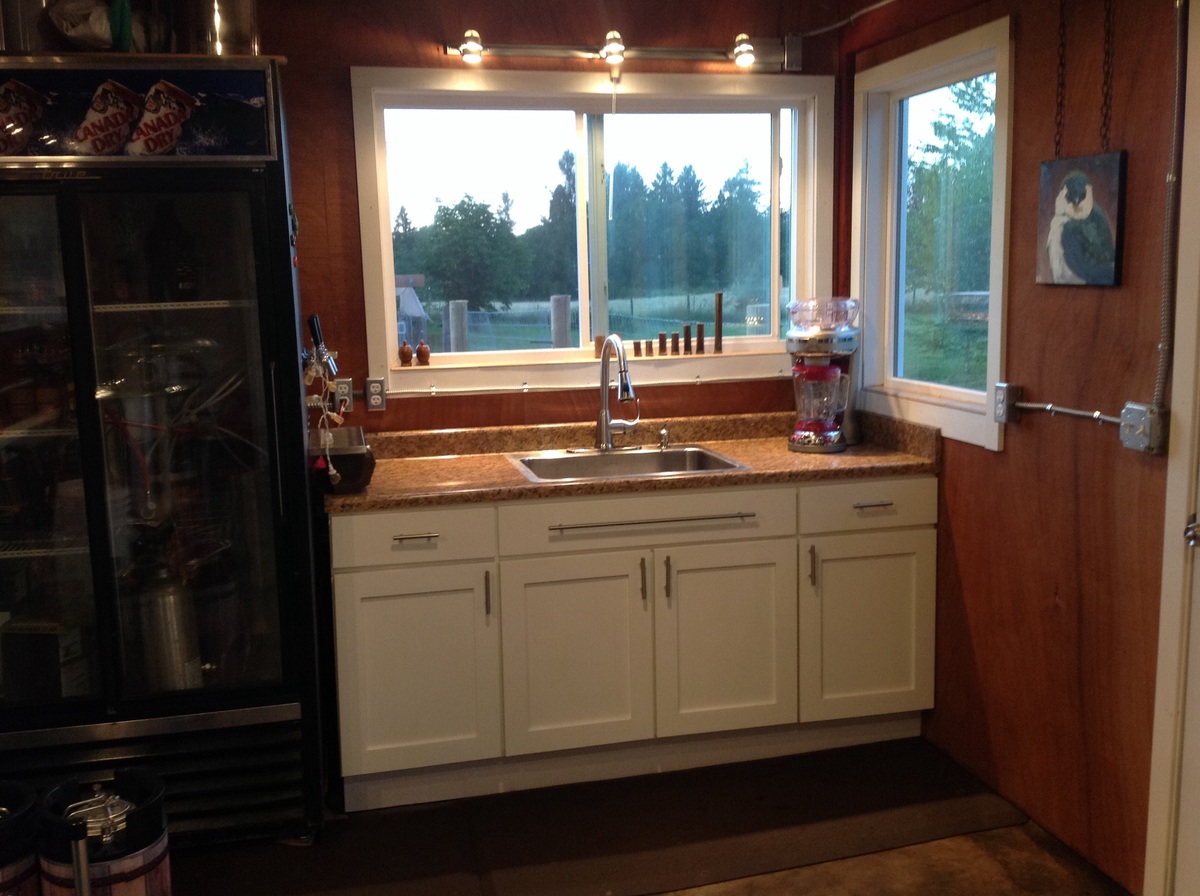
36" sink base cabinet

Submitted by Lanelle on Sat, 11/01/2014 - 21:54

A 36" sink base is the center, flanked by two 18" cabinets made by modifying the 21" base cabinet plan.

Estimated Time Investment
Weekend Project (10-20 Hours)
Recommended Skill Level
Intermediate

Comments

Reclaimed wood kitchen island

Not much to say here other than THANK YOU ANA! I built it right to the plan, used plain dimensional spruce for the drawer box, and reclaimed fir for everything else.  Had fun using my thickness planer to save many hours on the belt sander.

Built from Plan(s)
Estimated Cost
Cost was mostly in the reclaimed lumber, so no useful info here.
Estimated Time Investment
Week Long Project (20 Hours or More)
Finish Used
tung oil
Recommended Skill Level
Intermediate

Comments

Garage Storage

Submitted by jlrd13 on Sun, 11/16/2014 - 11:00

I improvised on this a bit.  I envisioned being able to put small items on the shelves at some point so I made it with solid shelves instead of all 2x4's.  Except the stuff I bought for the shelves was so flimsy I had to add the support pieces. Ahh, well.  I'm learning.  And with the three support pieces (2x4's cut to size) running widthwise, it turned out to be a solid shelf.  LOVE this site!!  Thank you again, Ana!  Next project is a bathroom vanity.


Estimated Time Investment
Afternoon Project (3-6 Hours)
Recommended Skill Level
Starter Project

Comments

Back