Community Brag Posts

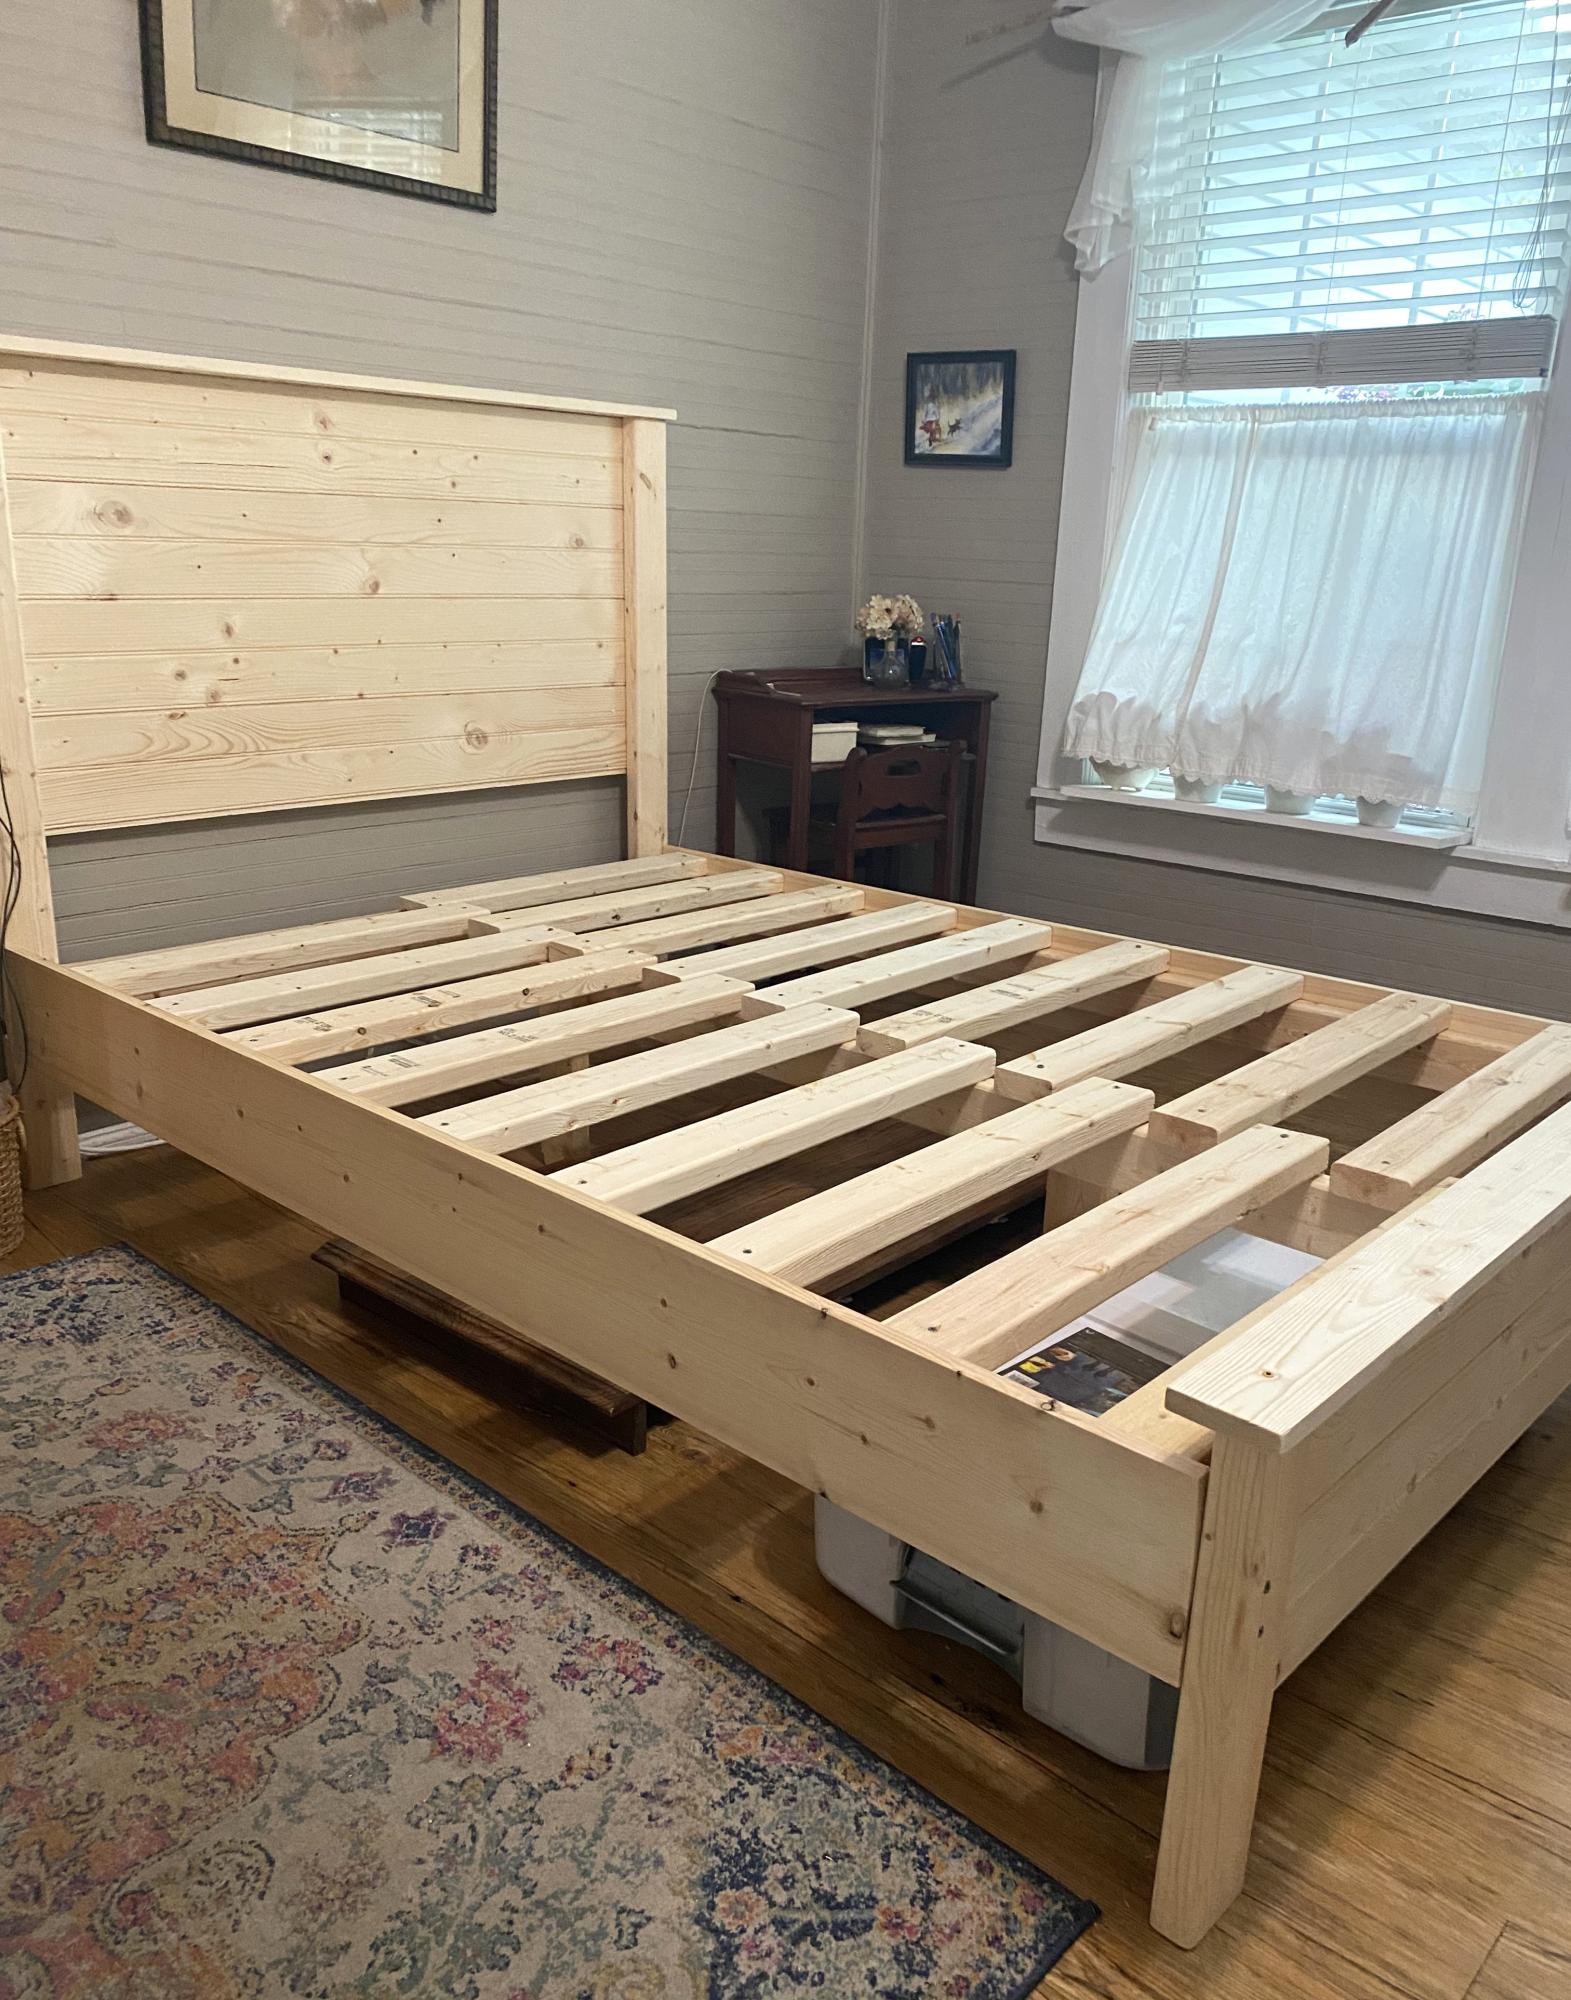
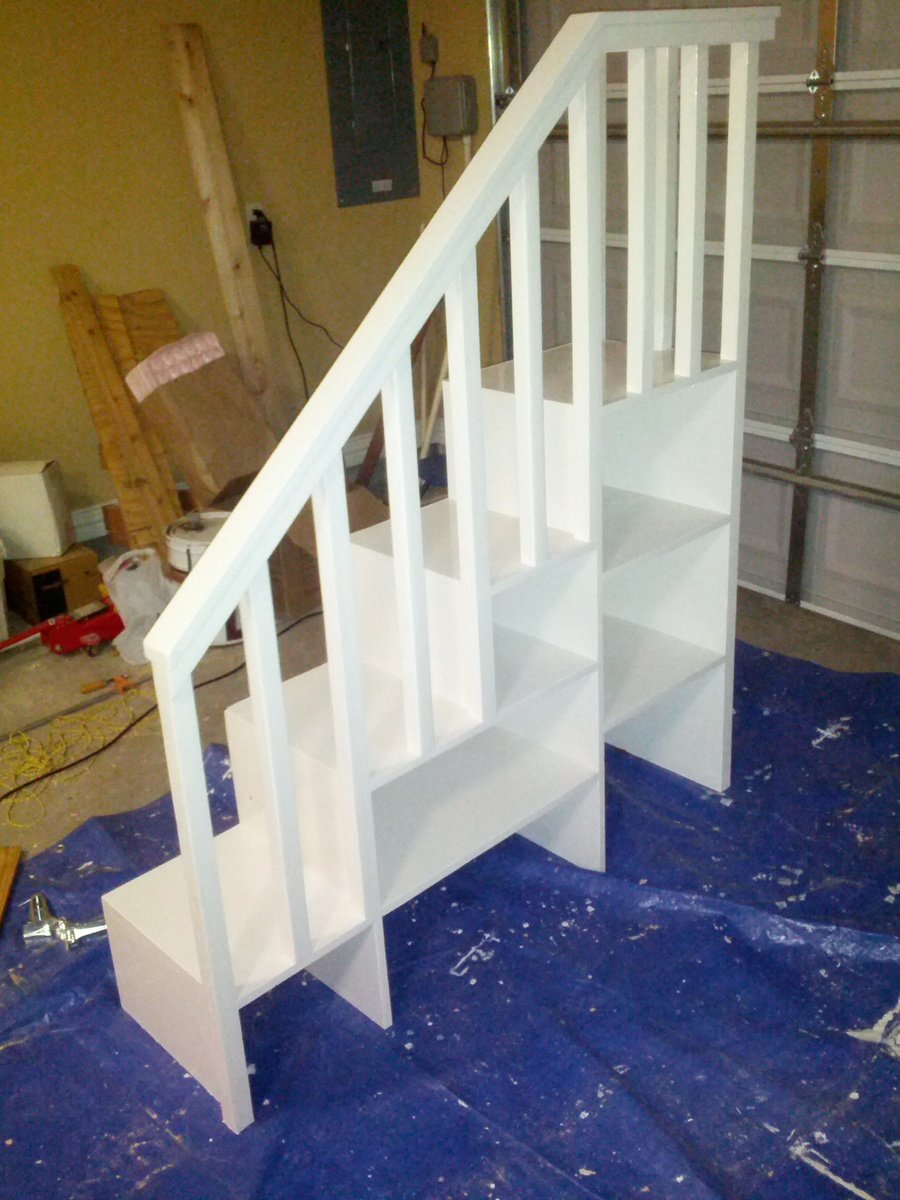
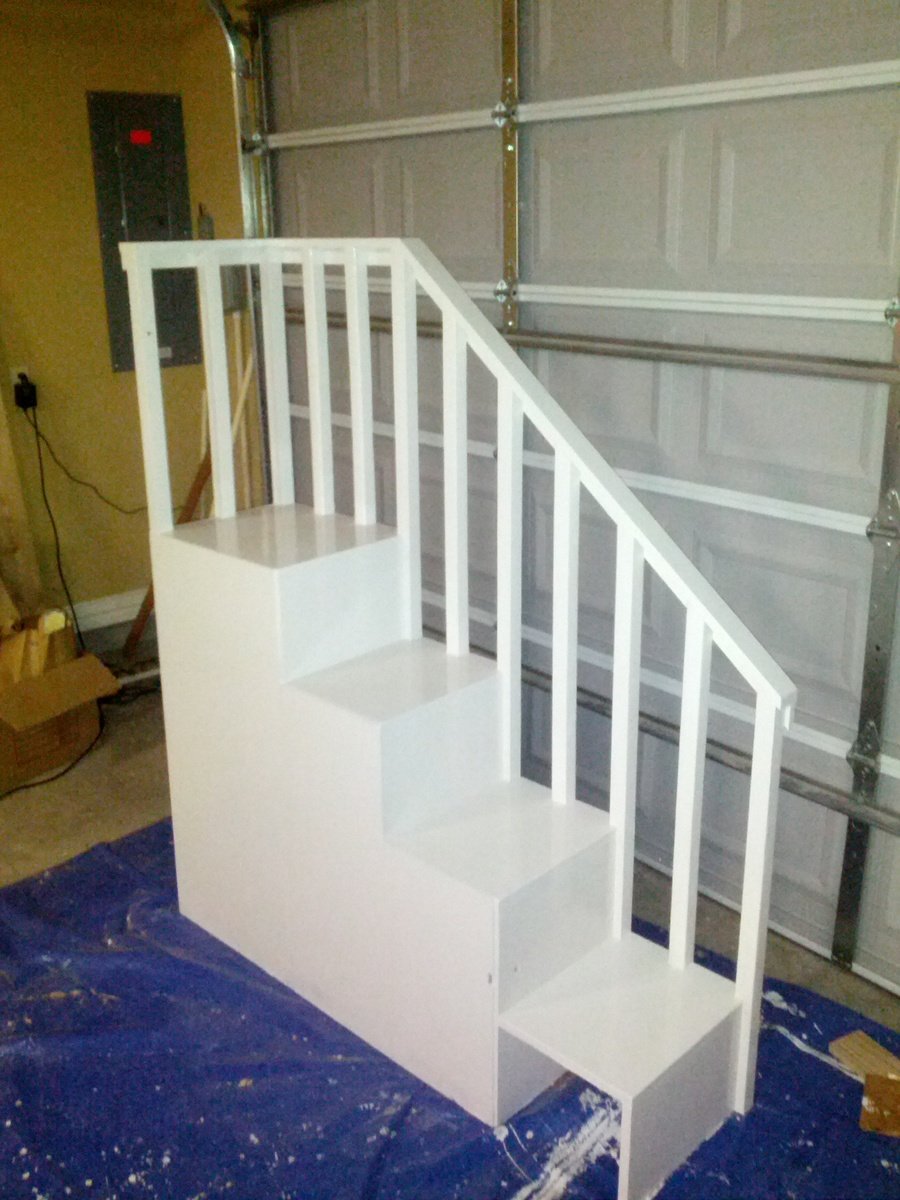
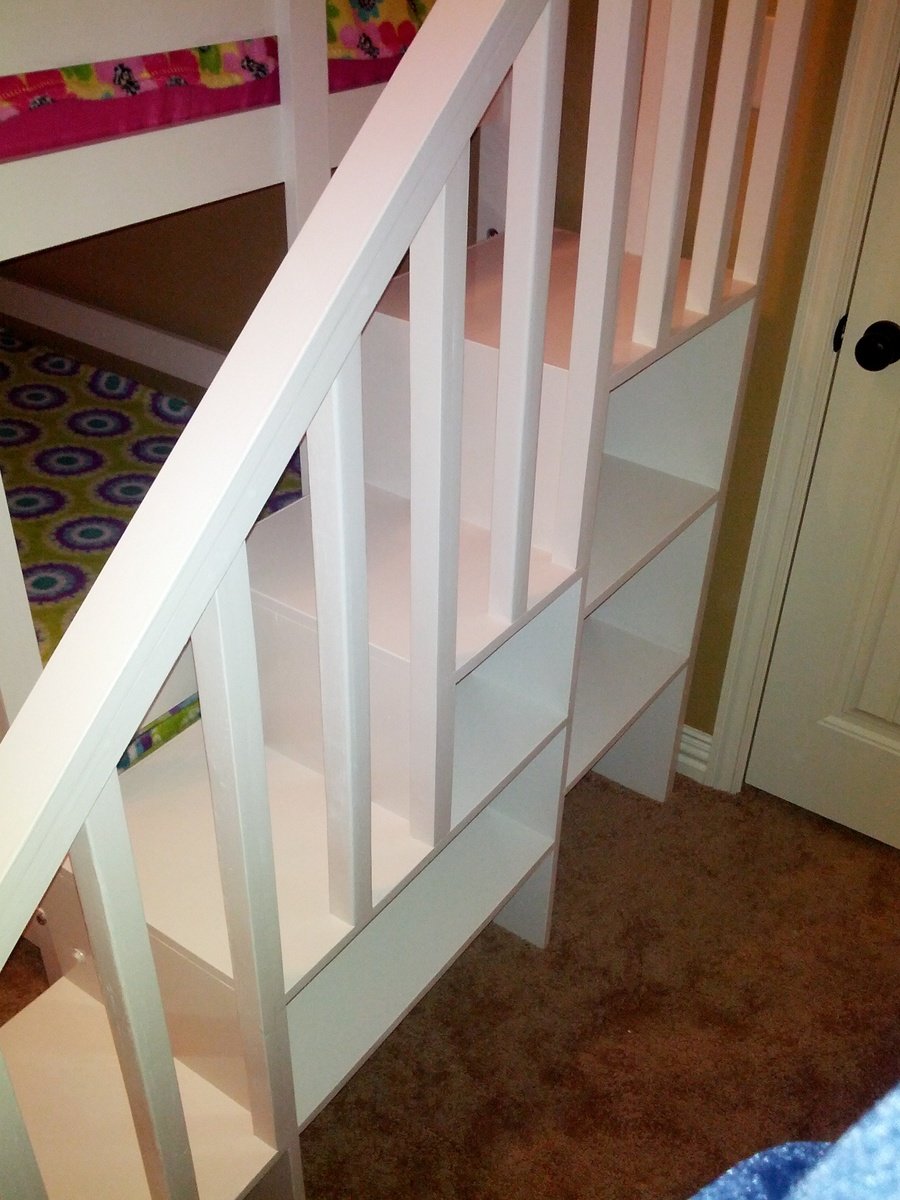
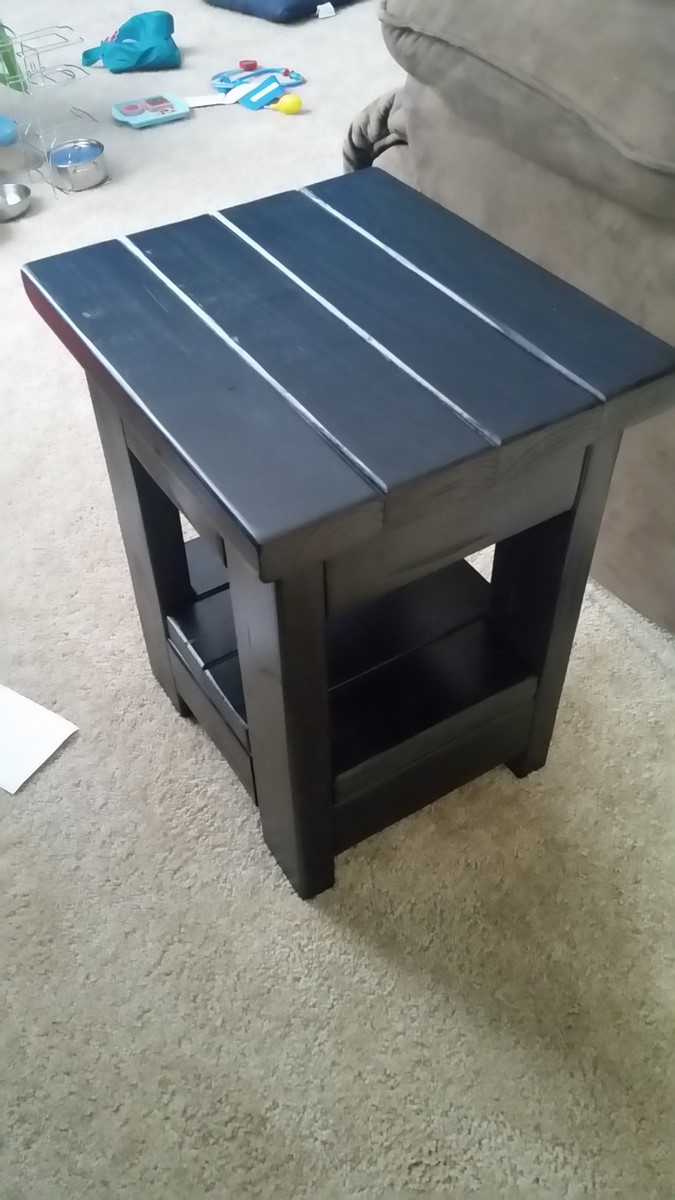
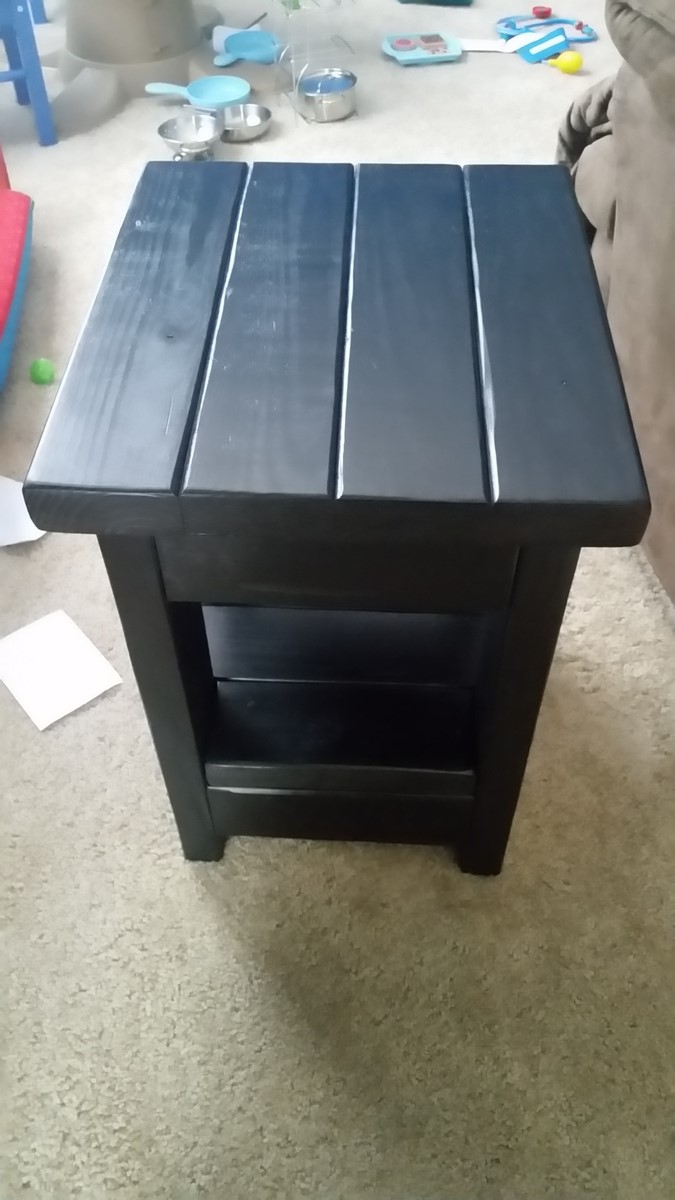
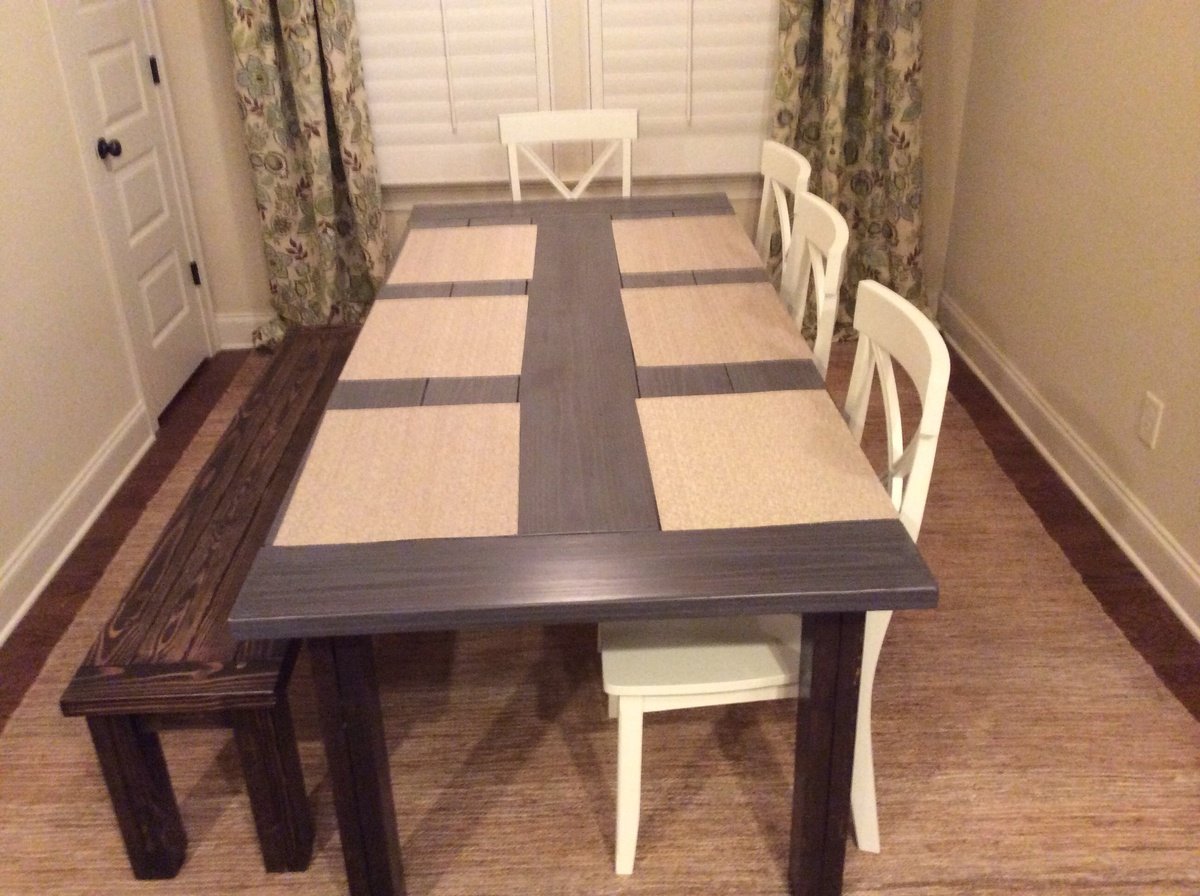
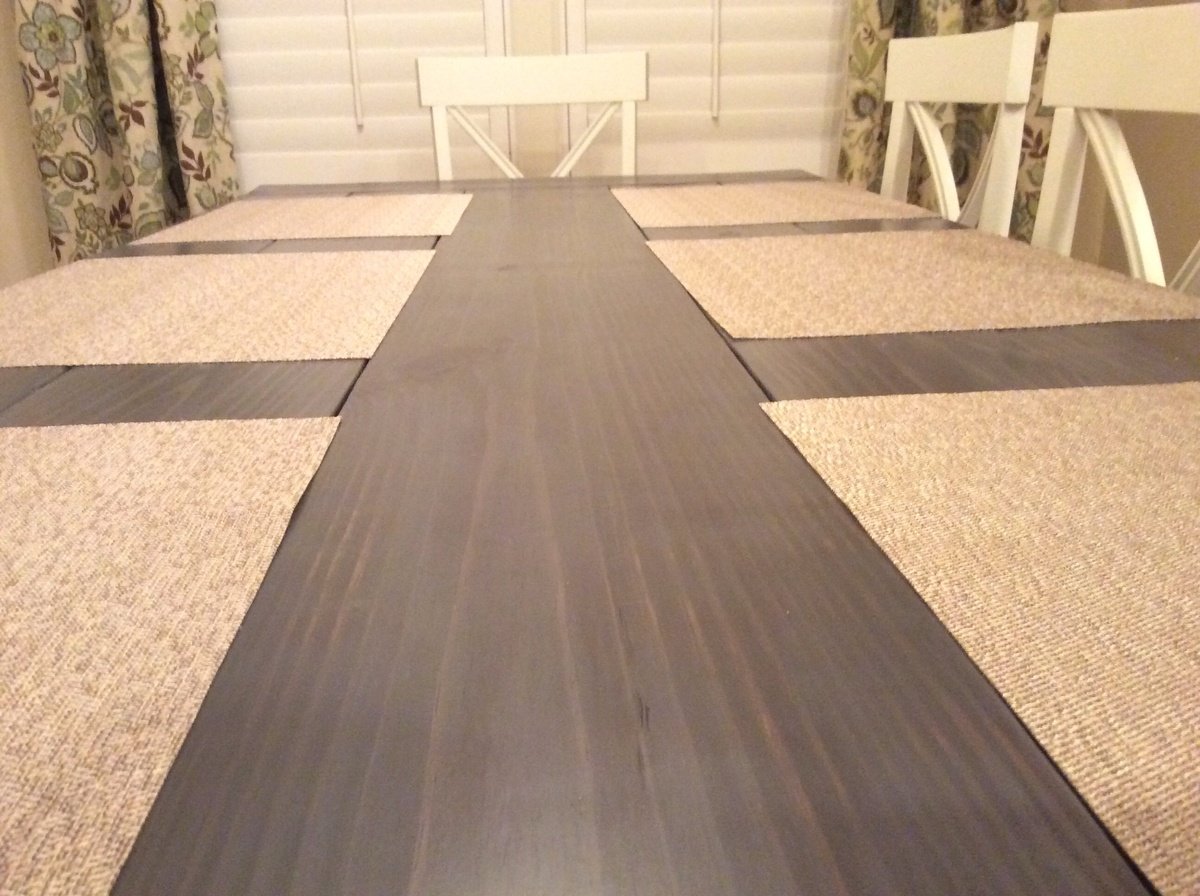
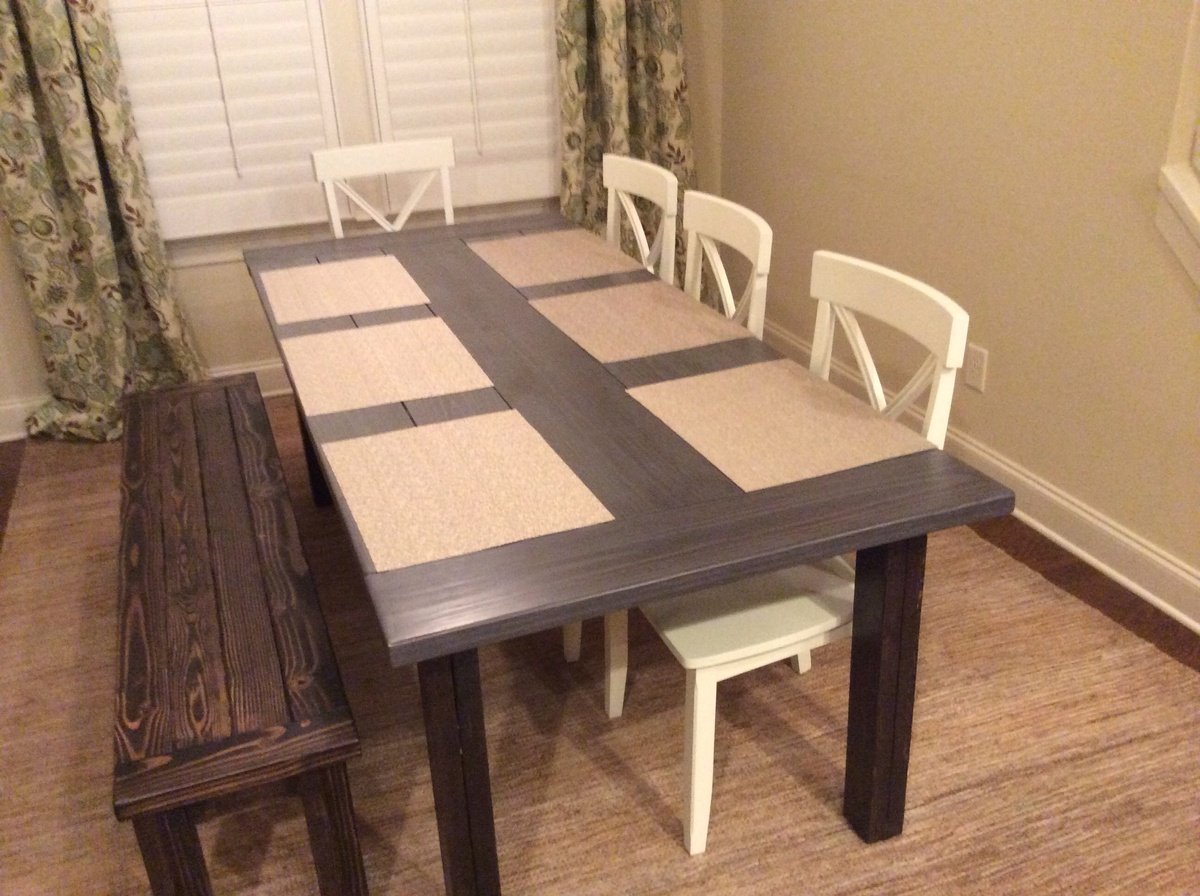
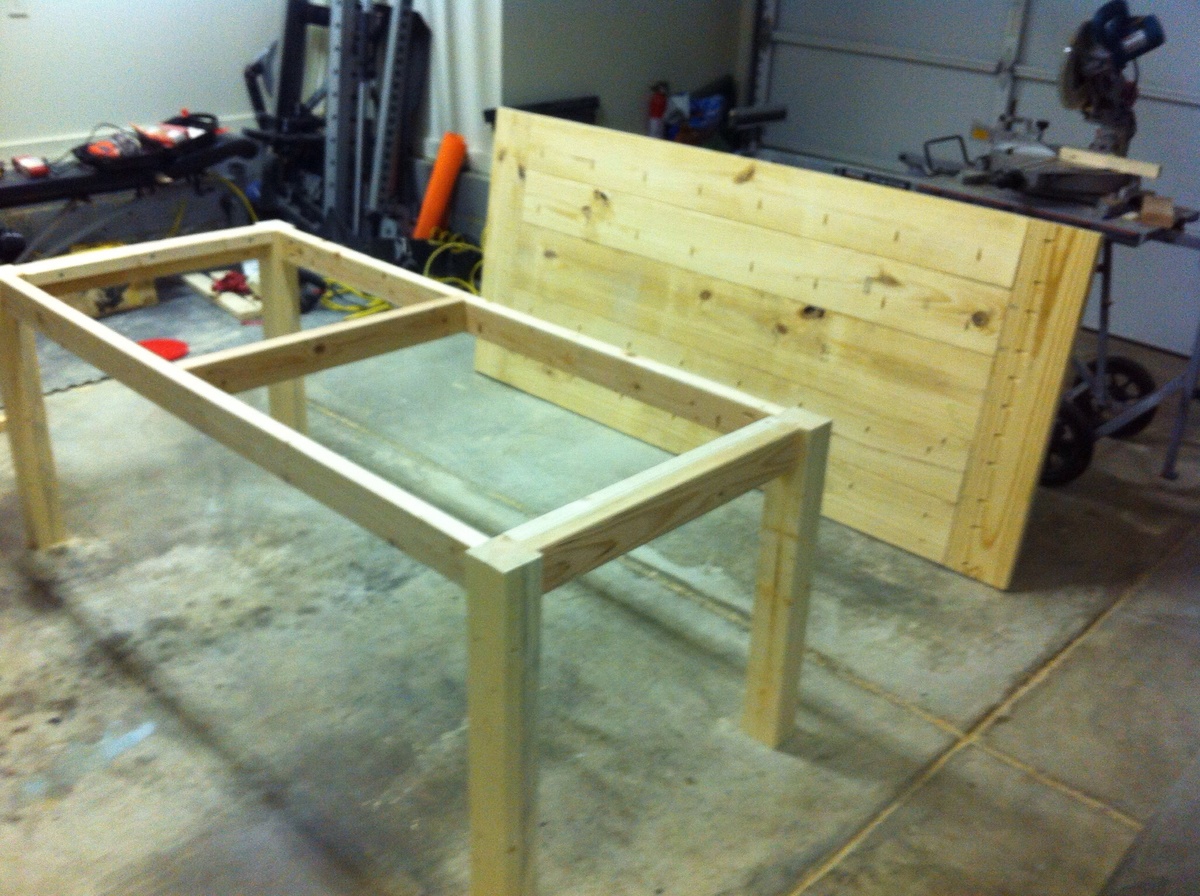
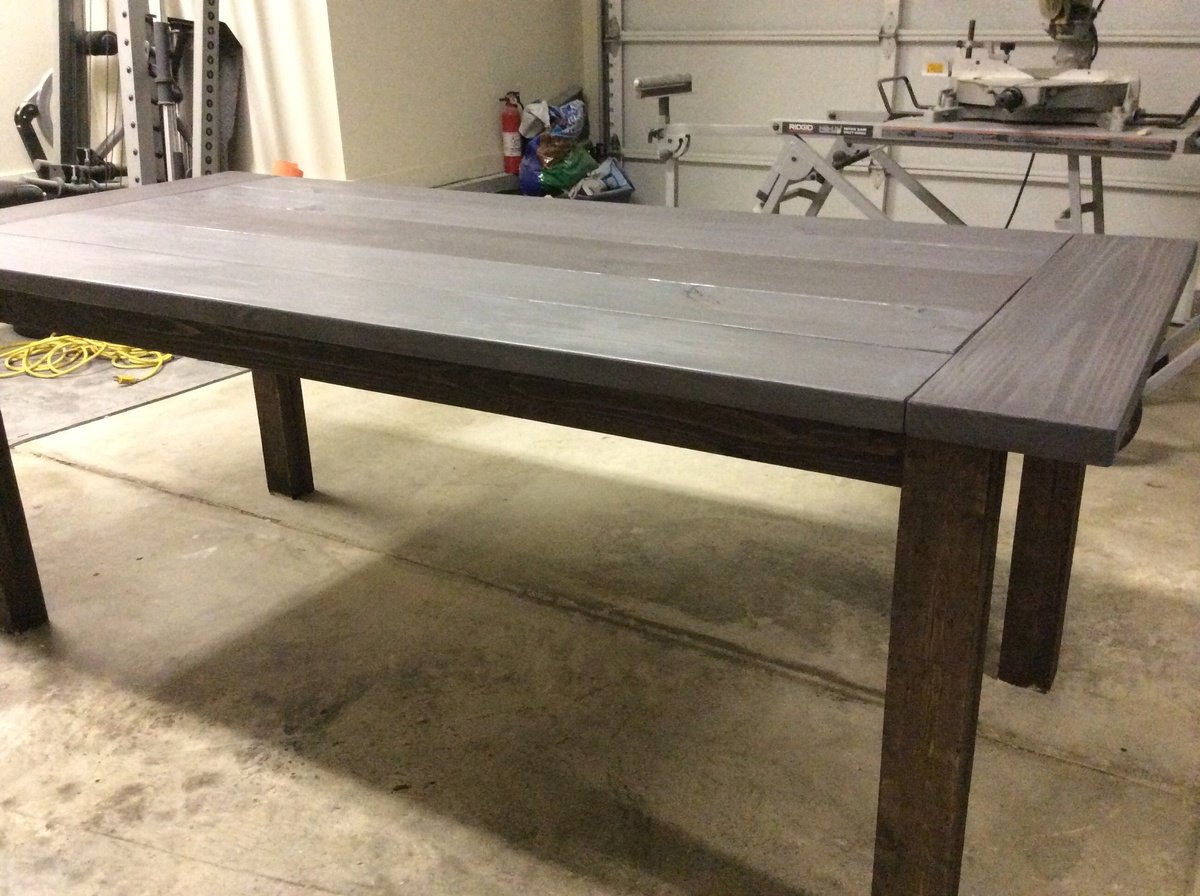
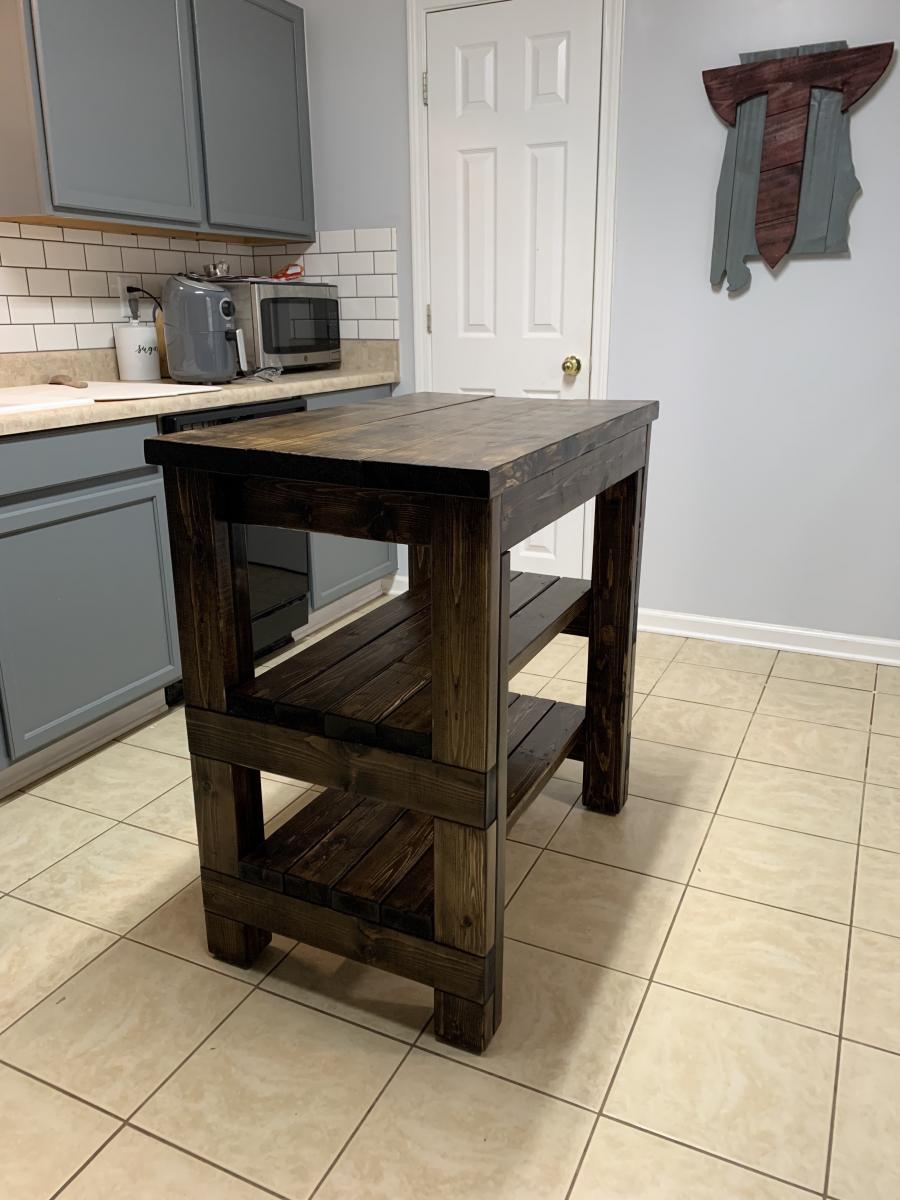
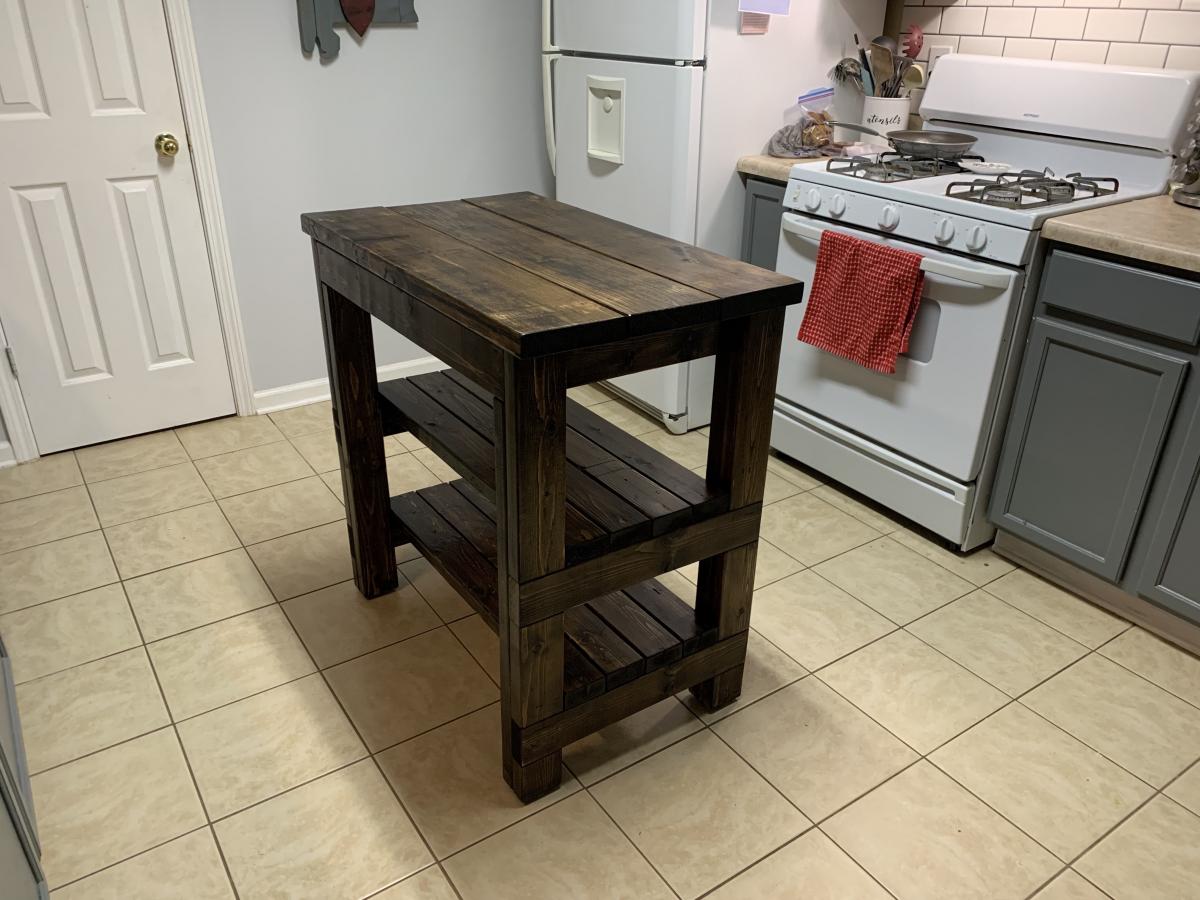
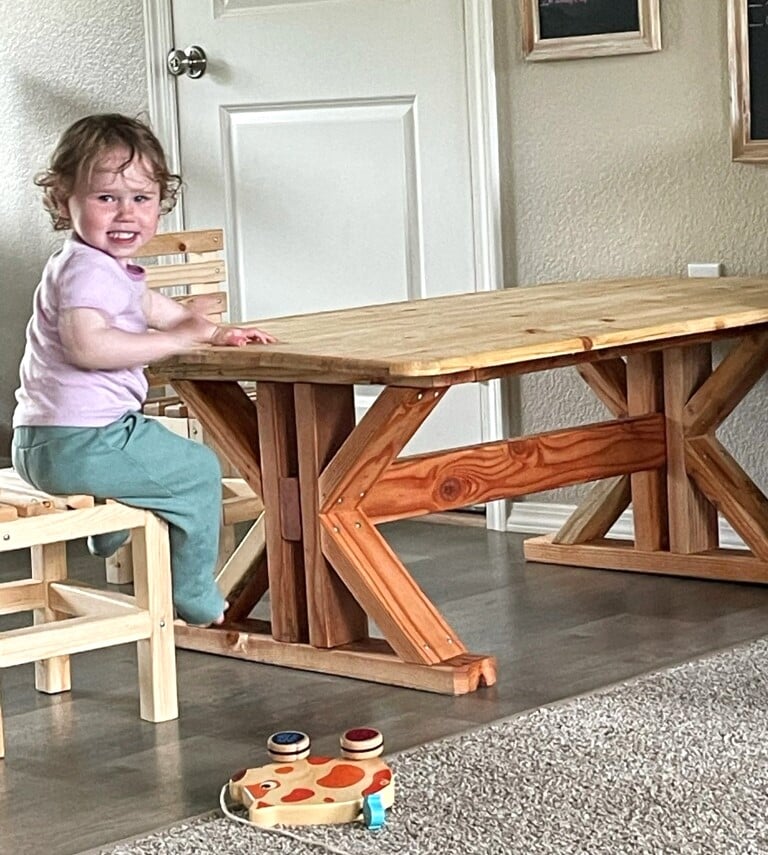
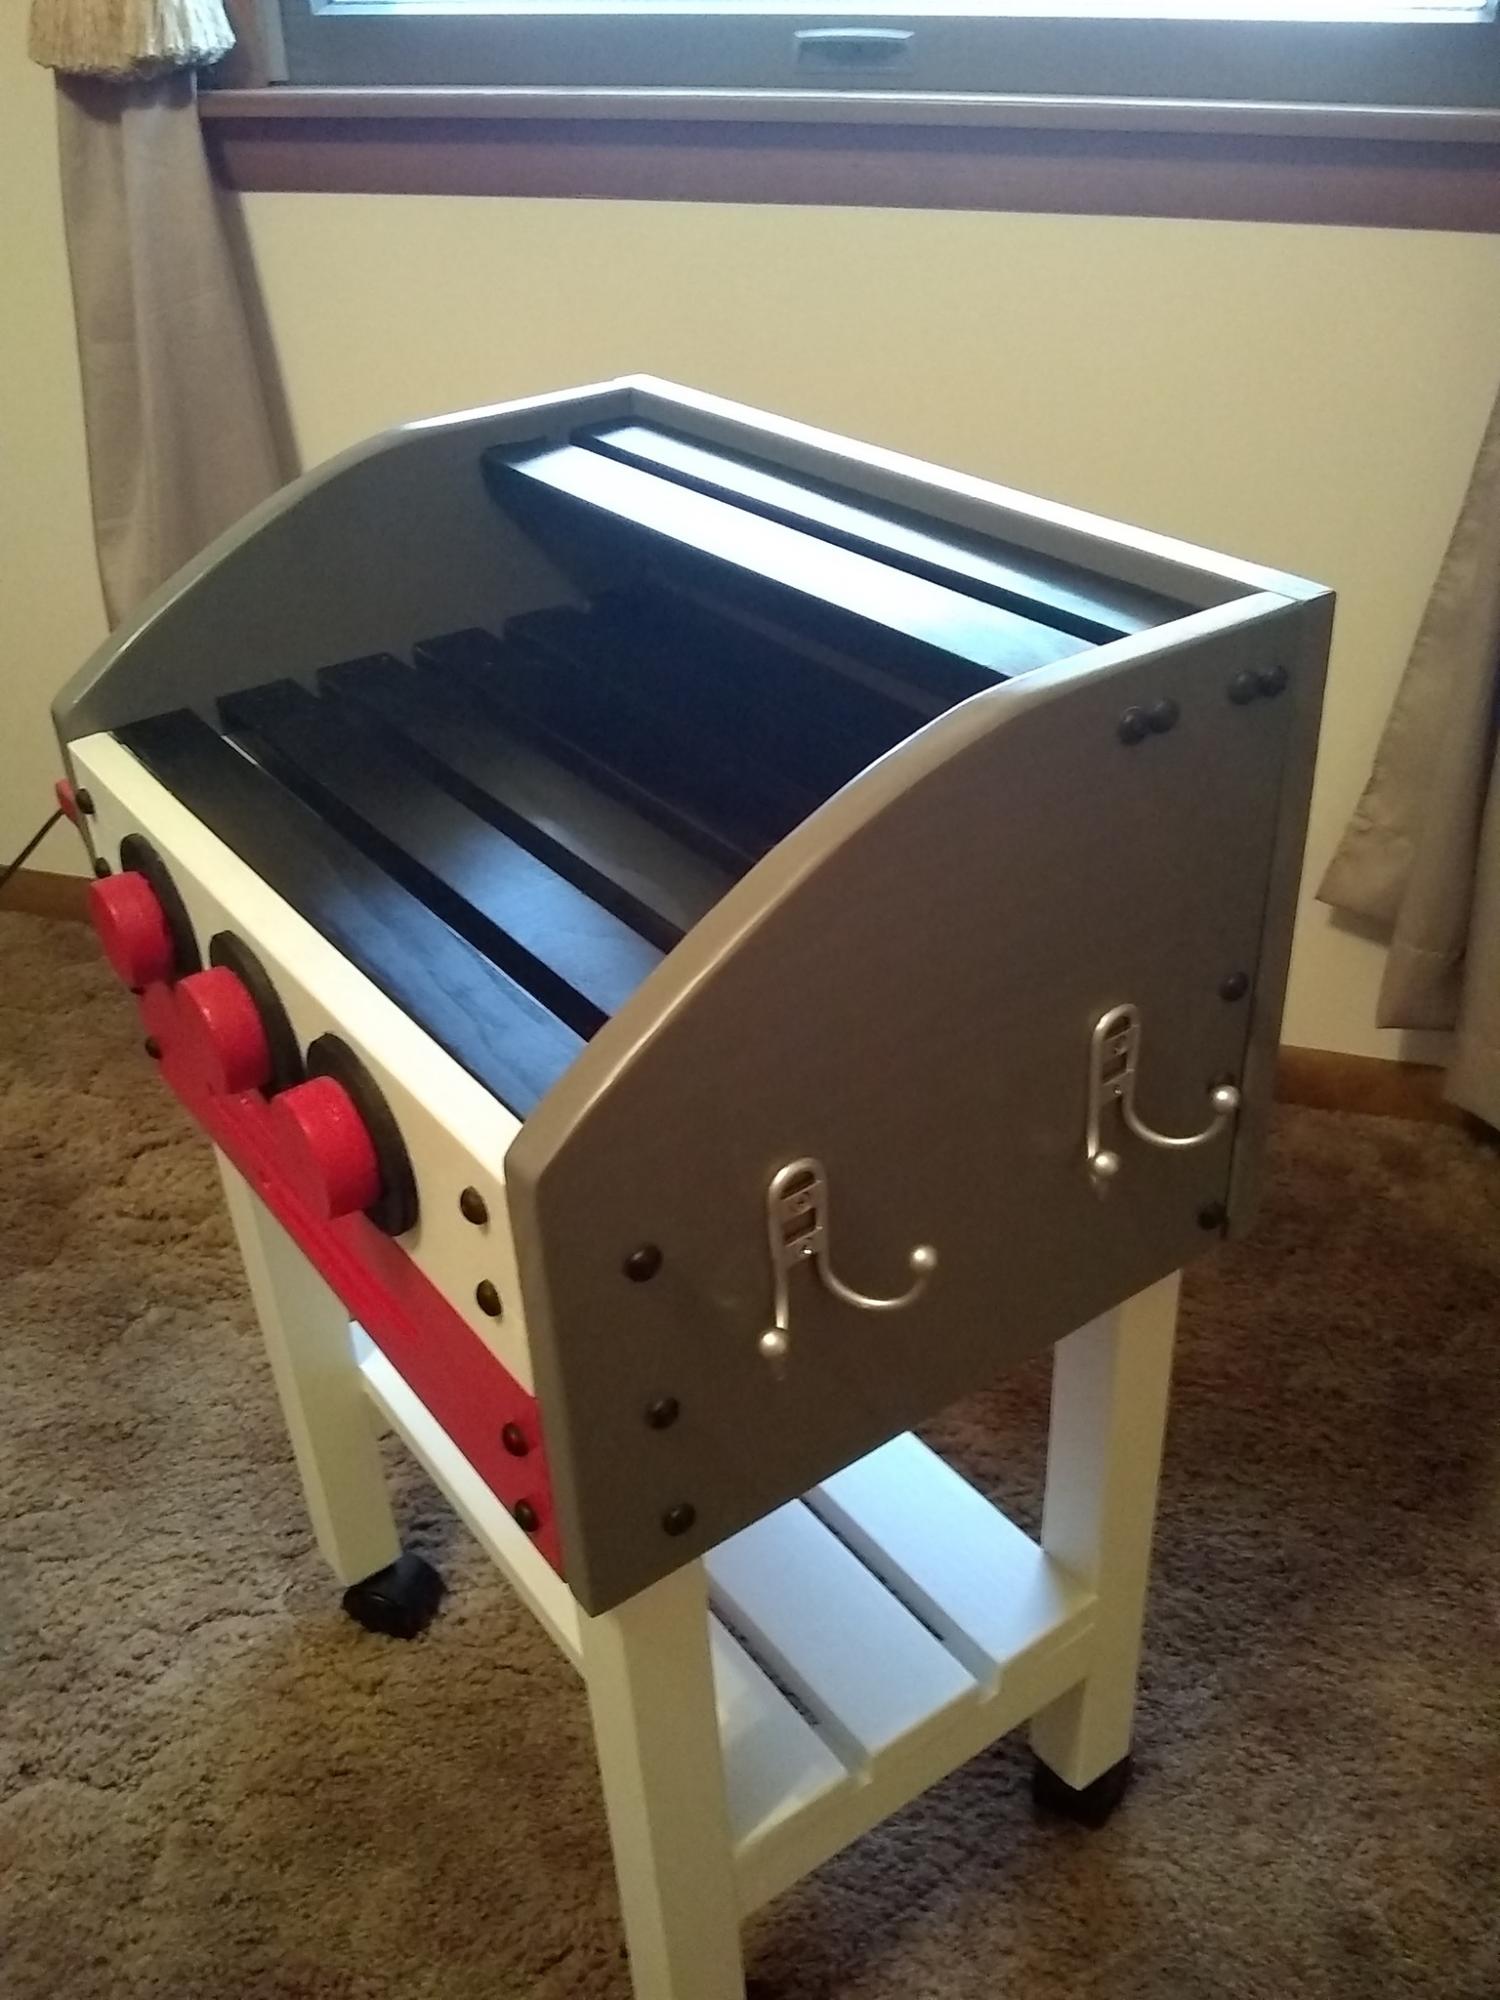
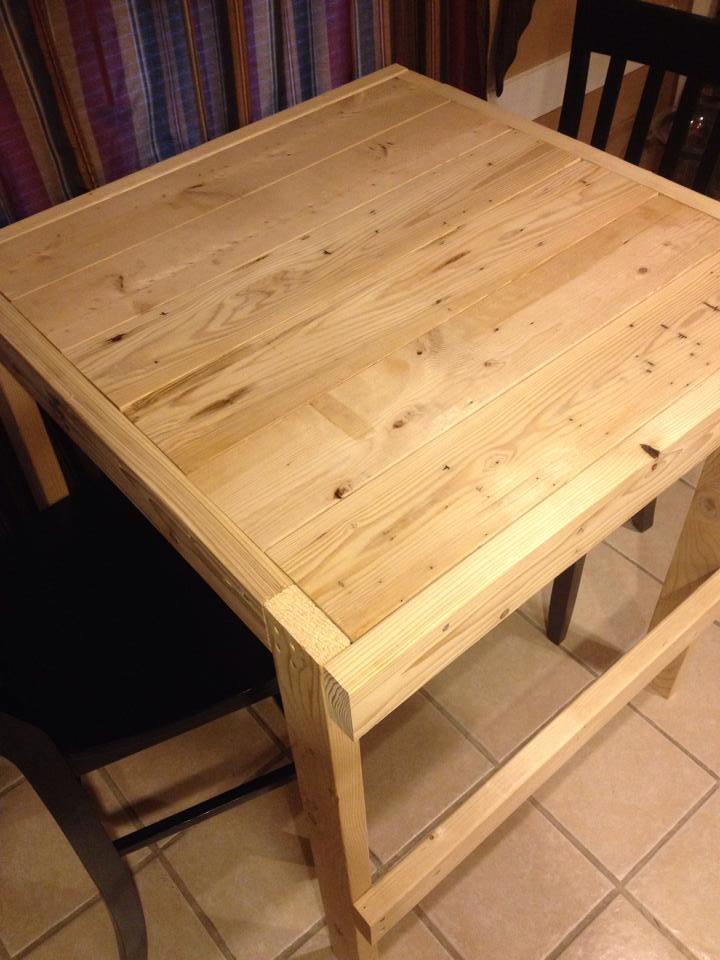
Square Modern Farmhouse Table

Submitted by Cheli on Wed, 01/15/2014 - 08:57

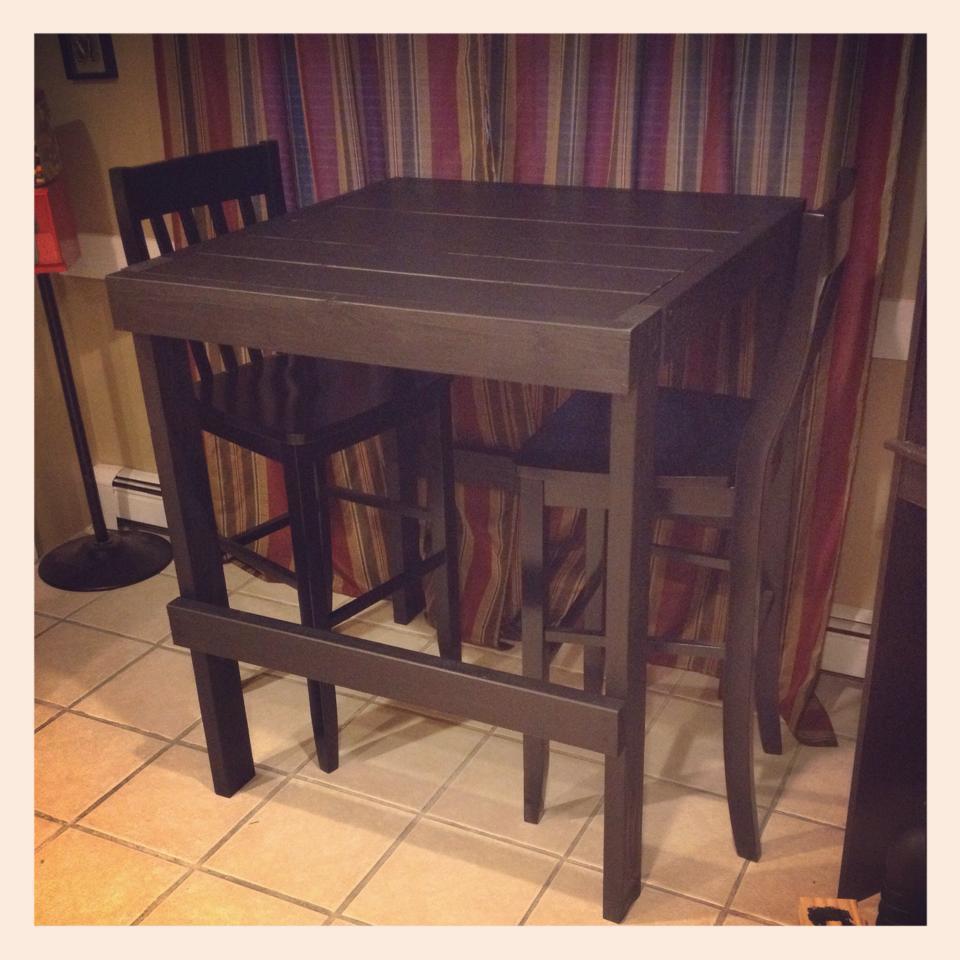
I modified this pattern to use with tall bar stools I already had. I built it 42" high and added a foot bar along the bottom for added stability since it's tall. The foot bar is only across the front and back so the stools can still slide in on the sides.

This table is exactly what I was looking for and I couldn't be any happier with how it turned out.

Estimated Cost
$50 (This cost doesn't include the paint I already had)
Estimated Time Investment
Afternoon Project (3-6 Hours)
Finish Used
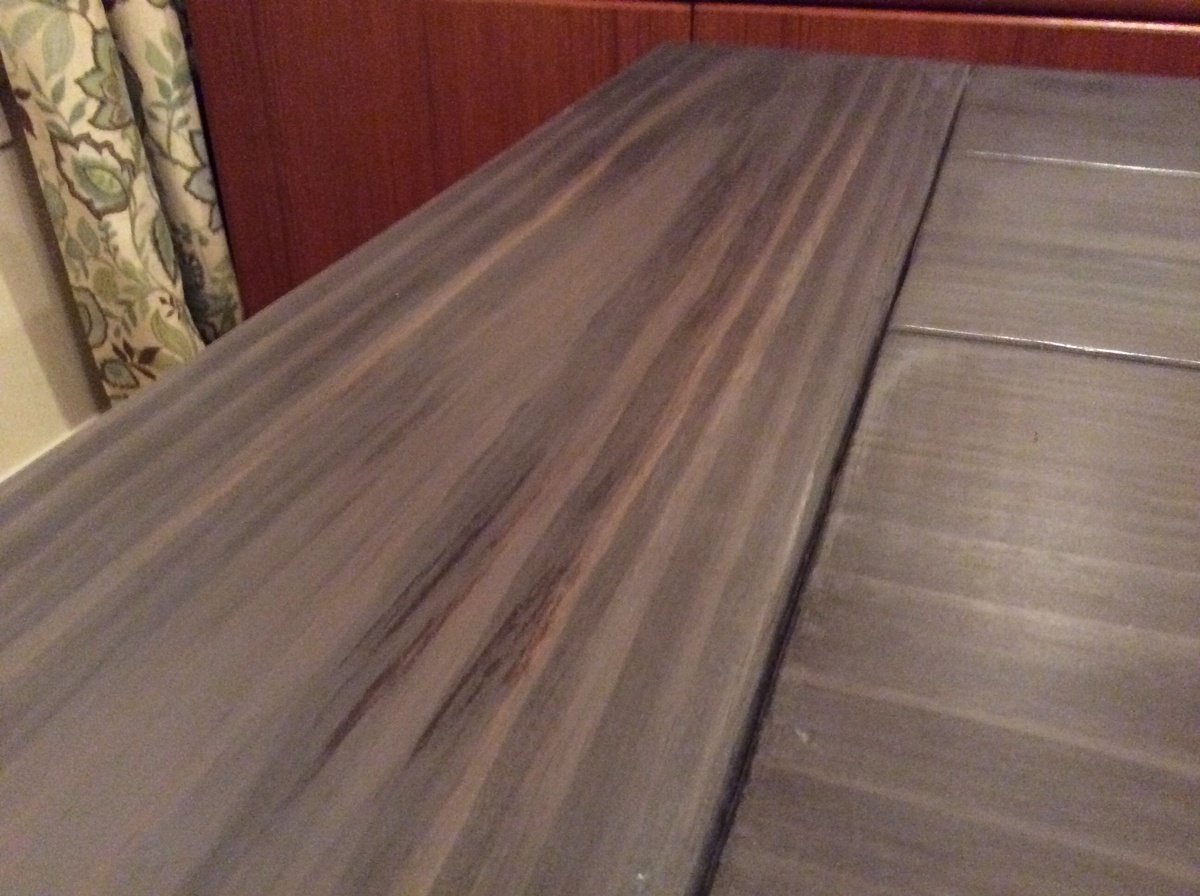
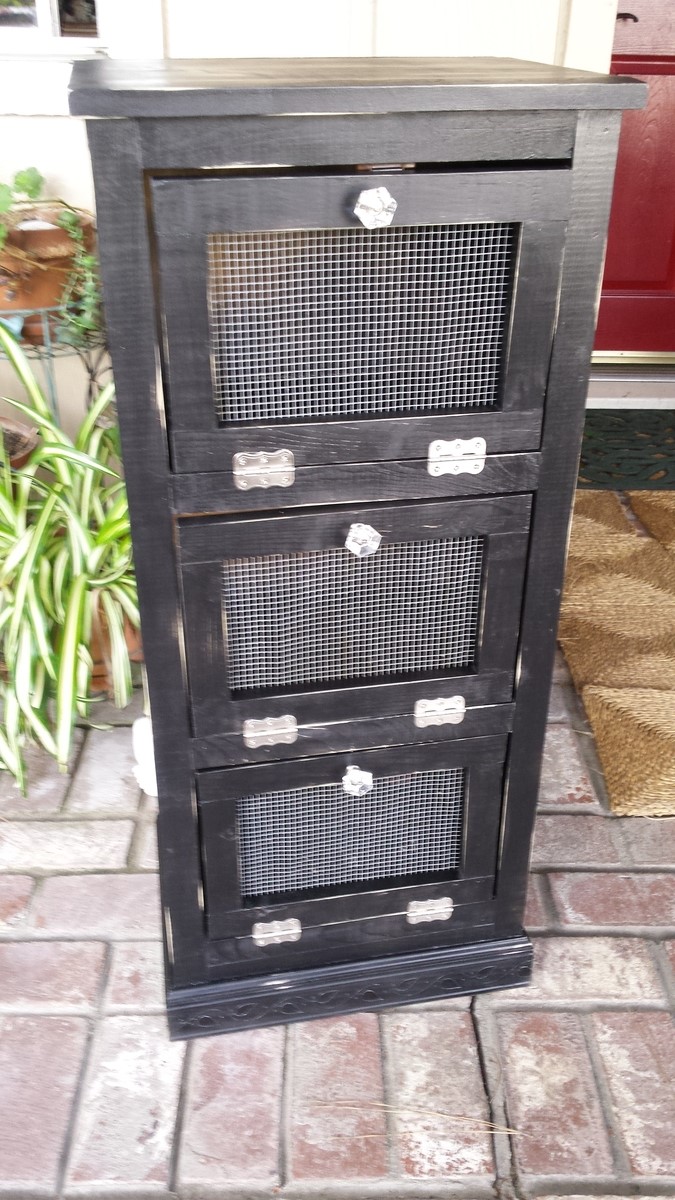
I painted with three coats of black eggshell paint. I haven't put a finish on it yet but I plan on using a couple coats of Minwax urethane.
Recommended Skill Level
Beginner

Planked wood sideboard

Submitted by Anonymous (not verified) on Thu, 04/07/2016 - 10:45

This sideboard buffet took me several months to complete mostly because I have little kids and had to have my husband home to give me the time I needed! The hardware and paint was the most expensive piece. I first stained it with kona stain then painted it with ASCP in Provence. I still need to put the wire mesh in doors but I'm still searching for options:-) This was my first project with drawers and it was not easy!

Built from Plan(s)
Estimated Cost
$350
Estimated Time Investment
Week Long Project (20 Hours or More)
Finish Used
Kona stain
Annie Sloan chalk paint in Provence
Clear wax to bottom
Polyacryllic to top
Recommended Skill Level
Advanced

Lap desks

Submitted by mandee on Sun, 12/15/2019 - 15:14

I made these for my nieces for Christmas. They seemed to really like them and now I want one for myself. 

Estimated Cost
25
Estimated Time Investment
Day Project (6-9 Hours)
Recommended Skill Level
Beginner

Easy Farm Bed

Submitted by Anonymous (not verified) on Sat, 08/19/2023 - 10:42

For a while I’ve been wanting to build a bed. I had two days free this week so I began. I actually completed it in about 6 hours. First time doing this size project. Plans were SO easy to follow. Thank you Ana
I LOVE IT! And am motivated to do more.

Edith, SC

Built from Plan(s)

Classic Bunk Bed with Sweet Pea Stairs

Submitted by e_hutch on Fri, 01/17/2014 - 19:03

I wanted a bunk bed for our daughters, it needed to be easily moveable like the "classic bunk beds." I also wanted stairs like the "Sweet Pea Garden" bunk bed because we have toddlers in the house. I modified the classic bunk bed to put the ladder on the end, then built the Sweet Pea stairs to fit to the opening (I think the only difference in dimensions was a 20" top stair. I didn't want the unfinished ends of plywood so I got 4'x16"x3/4" pine boards from lowes which happens to be the width of the stairs in the plan. Instead of using the 1x2's as trim on the ends of the shelves I put two of them together, one all of the way down the front of each stair and one resting on the top of the stair (screwed together) so I wouldn't lose lateral stability. I then spaced 2x2's in between to keep it "simple" looking instead of the heart shaped decorations from the sweet pea bed. I used some 1/4" paintable composite board to provide a backing to the stairs. I bolted the stairs on to the bed with some flat bar stock cut to size and 3/8' in hex bolts cut to length. I used pocket hole joints wherever possible and countersunk all other screws and used 3/8" dots from lowes to fill the holes. I painted it with a coat of primer and a coat of Glidden Trim and Door paint in antique white from the Easy Vintage Step Stool project.

Estimated Cost
$400
Estimated Time Investment
Week Long Project (20 Hours or More)
Finish Used
Glidden Door and Trim, Antique White
Kilz Complete Primer
Recommended Skill Level
Beginner

Comments

zaphod

Mon, 06/23/2014 - 06:39

This is absolutely beautiful! Did you modify the size for toddler mattresses?
I would love to do the same for my kiddos - is there any way you could send me your version of the plans? [email protected]

Thanks so much!

Small End Table from 2X4's

Submitted by jbknakal on Sun, 04/10/2016 - 11:55

I made a smaller version of the Tryde End Table with Shelf. I made 2 of them from 6 2X4's

Estimated Cost
$30
Estimated Time Investment
Afternoon Project (3-6 Hours)
Finish Used
Black Paint
Recommended Skill Level
Beginner

Comments

Eagle Scout School Shed Project

Submitted by Anonymous (not verified) on Fri, 08/25/2023 - 11:10

My son used your plans to help students at his old elementary school for his Eagle Scout Project. He was able to adjust the plans to meet the school's needs. Local Austin Texas news did a report on it. Thank you for the inspiration!

https://www.fox7austin.com/news/boy-scout-builds-shed-stocks-it-with-re…

Robert Saul

Built from Plan(s)
Seasonal And Holiday

bypass closet doors

About 6 months ago the husband and I purchased a foreclosure for dirt cheap, hoping to rehab it into something livable. It turned out to be a total gut job. So much of the budget was blown on the big stuff--roof, electrical, water, plumbing, that we've really had no choice but to figure out how to do much of the work ourselves with occassional assistance from my son-in-law, a general contractor who lives 400 miles away.
Although he did most of the basic sheetrocking I decided that I was going to build my own closet. After all, how hard could it be. I got it framed out and sheetorcked. Between the low ceilings in the room and the fact that I mismeasured the door frame height, I wasn't able to put in standard doors. But that's okay, I think I like these better.
Thank you, ladies, for giving me the courage to tackle some of these jobs that need doing. I've learned a lot of new skills, done things I never thought I would ever do...and love the feeling that so much of myself is going into making this house my home.

Built from Plan(s)
Estimated Time Investment
Afternoon Project (3-6 Hours)
Finish Used
behr semigloss white paint.
Recommended Skill Level
Beginner

Comments

Debi_G (not verified)

Wed, 04/04/2012 - 15:38

I love these doors. This is now on my to-do list!

Farmhouse Table

Submitted by Bob_Ross on Sun, 01/19/2014 - 18:18

I finished this project a few weeks ago, and it started to keep me busy during the Christmas break. My wife had wanted a new dining room table and this was pretty easy to build after the X Console Table.

For the stain, it was a combo of Rustoleom Kona down first, and put it on darker on the middle plank and bread board ends. After that I did a few coats of Minwax Weathered Gray, and then a few coats of poly.

Estimated Cost
120
Estimated Time Investment
Week Long Project (20 Hours or More)
Finish Used
Rustoleom Kona and Minwax Weathered Gray and Minwax Satin Poly
Recommended Skill Level
Beginner

Comments

Bob_Ross

Mon, 01/20/2014 - 18:30

Hey Ashley,

We found the chairs on overstock, and they were a great deal! Ours are the antique white.

Bob

Easy Rustic Kitchen Island

Submitted by zawatkins on Wed, 12/25/2019 - 13:37

This was my first handmade project and it was really simple and easy to modify the measurements to the size I needed. I was able to cut and assemble everything by myself in about 2 1/2 hours. 

Estimated Cost
$60
Estimated Time Investment
Weekend Project (10-20 Hours)
Finish Used
Used pre-stain first, then used dark walnut stain, then sealed with fast-drying polyurethane (all by minwax)
Recommended Skill Level
Beginner

Jewellery Cabinet

Submitted by dsteinberg on Wed, 01/22/2014 - 08:33

Modified the original plan a bit.

- Instead of using a wire door I used a board instead to give it a more closed look.
- Attached a mirror to the inside of the door
- Attached lots of hooks on the top piece of wood to hang more necklaces
- added a magnetic catch at the bottom and a rubber stopper at the top to ensure the door closes evenly and holds
- attached to dry wall with 4 toggle bolts

Built from Plan(s)
Estimated Time Investment
Afternoon Project (3-6 Hours)
Finish Used
- Brushed on black tea
- Brushed on solution of vinegar and steel wool that sat for 72 hours
- Vermont Natural Coatings Wipe on PolyWhey
Recommended Skill Level
Starter Project

Comments

Val Manchuk

Thu, 01/23/2014 - 09:15

Wow, did you ever do a great job on this project. The tea stain looks good!

Val @ artsybuildinglady.blogspot.ca

Knot Good with Wood

Thu, 01/30/2014 - 09:41

I'm actually building one for my wife right now, but was stuck on how I wanted to design the door. Your design is very cool. Can I ask what you used for the back and door...is is just wainscoating? And what did you apply to support the mirror on the inside of the door?

Thanks in advance!

dsteinberg

Thu, 01/30/2014 - 10:01

I am glad you like my design :-)

To support the mirror I used a combination of mirror tape

http://www.homedepot.com/p/Erias-Home-Designs-Mirror-Mounting-Tape-Squa…

and adhesive

http://www.homedepot.ca/product/lepage-pl-610-mirror-adhesive/827654

http://www.homedepot.ca/product/lepage-no-more-nails-all-purpose-clear-… (I used this one, it says not for mirrors but it didn't ruin the backing at all. The one above is probably safer to use)

As for the the back and the door, to be honest I don't remember the name of the board. I think I got it at home depot or maybe lowes. It came unstained and it was pretty thin. I cut it down to size for both. Sorry I can't be more help there. I did just check the home depot and lowes websites and couldn't find the exact panel. I am sure if you go and show them a picture they will be able to find it. The panel was around $15.

Let me know if you have any other questions!! Post a link here to yours when you are done, I would love to see it.

Knot Good with Wood

Fri, 01/31/2014 - 07:46

Excellent feedback, thank you! I found some small sheets of wainscoating at Lowes for around $10, and it's more than enough to do the job.

I'm heading to Home Depot after work today to pick up these other items so I can finish out this project. I figured if I delay long enough it will make a great Valentine's Day present.....

I'll be sure to post pics once completed. Thanks again!

-Brian

Knot Good with Wood

Fri, 01/31/2014 - 07:47

Excellent feedback, thank you! I found some small sheets of wainscoating at Lowes for around $10, and it's more than enough to do the job.

I'm heading to Home Depot after work today to pick up these other items so I can finish out this project. I figured if I delay long enough it will make a great Valentine's Day present.....

I'll be sure to post pics once completed. Thanks again!

-Brian

JoanneS

Fri, 01/31/2014 - 08:24

This looks beautiful! What did you use to add the "handcrafted by" personalization on your project? That is a very nice addition. Great job!

Vegetable Bin

Submitted by Anonymous (not verified) on Fri, 04/15/2016 - 11:03

Vegetable bin chalk painted and hand distressed.

Built from Plan(s)
Estimated Time Investment
Weekend Project (10-20 Hours)
Recommended Skill Level
Beginner

Workbench

Submitted by sawd1216 on Sat, 12/28/2019 - 15:18

Tried this project to inspire my woodworking. My hats off to Ana for these detailed plan. So enjoyed putting it together and creating something that will trigger other projects. Mounting the table saw was a trick but I finally figured it out. 

Estimated Cost
350
Estimated Time Investment
Weekend Project (10-20 Hours)
Recommended Skill Level
Intermediate

Cubby Bookcase for a big girl!

Submitted by ferbit on Mon, 04/09/2012 - 18:36

My youngest needed a new bookcase so bad! All she had was an old baby bookcase that hardly fit her books anymore. I was so excited to see Ana's plans for the simple cubby bookcase. Yay! I made it a smidge narrower to fit the space and taller so she could have more adjustable cubbies. :)

I used pine 1x12 boards for the box and pine 1x2's for the trim. I used my Jig-It Adjustable Shelving Jig and drilled every other hole. Didn't feel like I needed quite as much "adjustability" for books. :-)

I wanted a more rustic look, so I left a lot of brush strokes on purpose and didn't fill any obvious knots in the wood. I really like how it turned out. :) When we were putting all of the shelves in, my daughter was so cute - she made sure all of the knots were facing OUTWARD so she could see them. She thought it looked neat that way.

Estimated Cost
$60
Estimated Time Investment
Day Project (6-9 Hours)
Finish Used
Behr semi-gloss off-white
Recommended Skill Level
Beginner

Custom Bird Cage Stand

Submitted by Mamabear2 on Thu, 01/23/2014 - 10:33

I wanted our bird's cage up higher and on something that the kids wouldn't be able to tip over. So my Husband came up with this. Its car siding. and stained. it has 2 hinged doors and a shelf.

Estimated Time Investment
Weekend Project (10-20 Hours)
Finish Used
I purchased a stain in color of choice and clear coat
Recommended Skill Level
Starter Project

Modified folding table/benches

Loved doing this build, I have been thinking of making these for a while.

Based off of a few of the comments I read, I modified the plans a little bit. Instead of using three 2 x 6s for the benches, I used two 2x4s with one 2 x 6 in the centre. Shortened up the bench support length by 3" to make up for the difference. This allowed for a smaller seat, which is easier to get in and out of when in table mode, but still plenty to sit on when used as a bench.

I am trying to come up with an alternate system for pinning the table in each position. I have found that after only a few uses, the table has some wiggle in the top, most likely from the bolts going in and out repeatedly. I would love some ideas on how to get these to hold nice and snug when in each position!

I posted a few pictures of these on my Facebook page, where I now have been asked how much I am selling them for and have about 3 orders already placed! Looks like the spring will be busier than expected!

Estimated Cost
For the two, 8 foot benches, about $80 for the lumber, and $10 bucks for the hardware. So totaled at about $90.00 Canadian for the 2, prior to any staining.
Estimated Time Investment
Afternoon Project (3-6 Hours)
Recommended Skill Level
Beginner

My version kids play grillKids wood play grill

As in a lot of plans I made them to fit my needs. This one was no different. I love Anna and her site. Sometimes things are not always clear. With simple knowledge you can solve most of the problems. I made this version for my 5 year old niece for Christmas. I decided to use 1x12 in place of the plywood . It was easier  to work with and made it much stronger With the solid wood I think I lost 1/4 inch in height. I also had extra 1x3 boards I used them for bottom shelf. For the dials I used what I had. I used my hole saw and filled in center with filler. It was cheaper than buying a dowel. I think it is easier to mount the shelf before you put the sides on. Top grill I stayed with 1x2 I thought it looked much vetter that 1x4 board. I finished it off with castors I think that put the icing on the cate and made it even better. She loved it.

Built from Plan(s)
Estimated Cost
$70
Estimated Time Investment
Weekend Project (10-20 Hours)
Finish Used
Satin Spray paint
Recommended Skill Level
Intermediate
Back