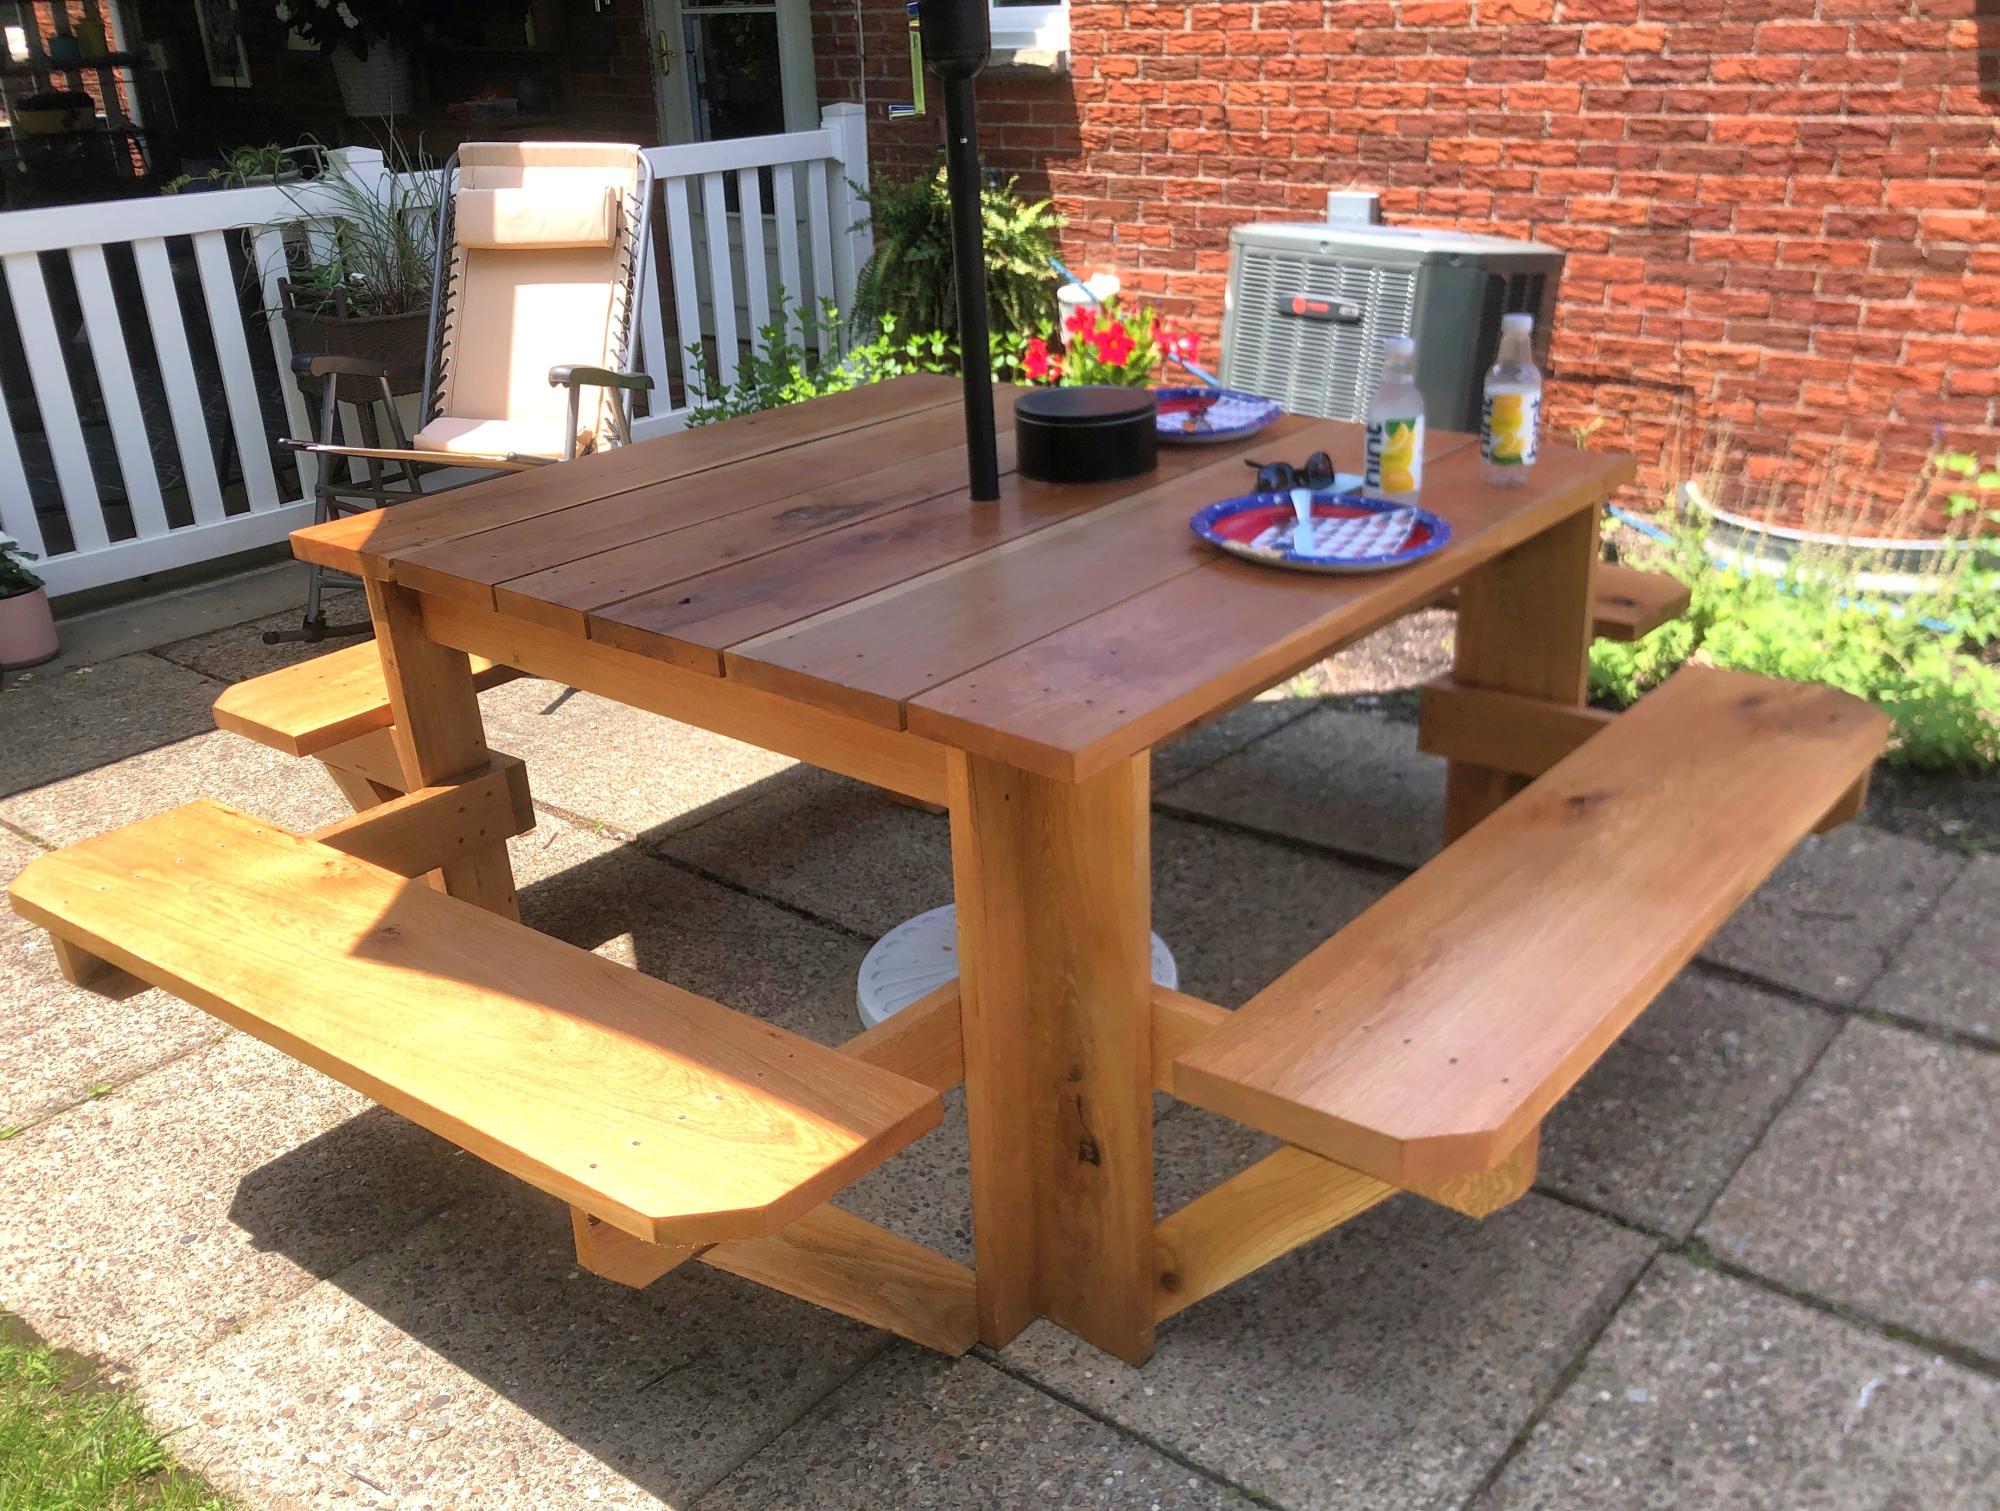
Octagaon Picnic Table
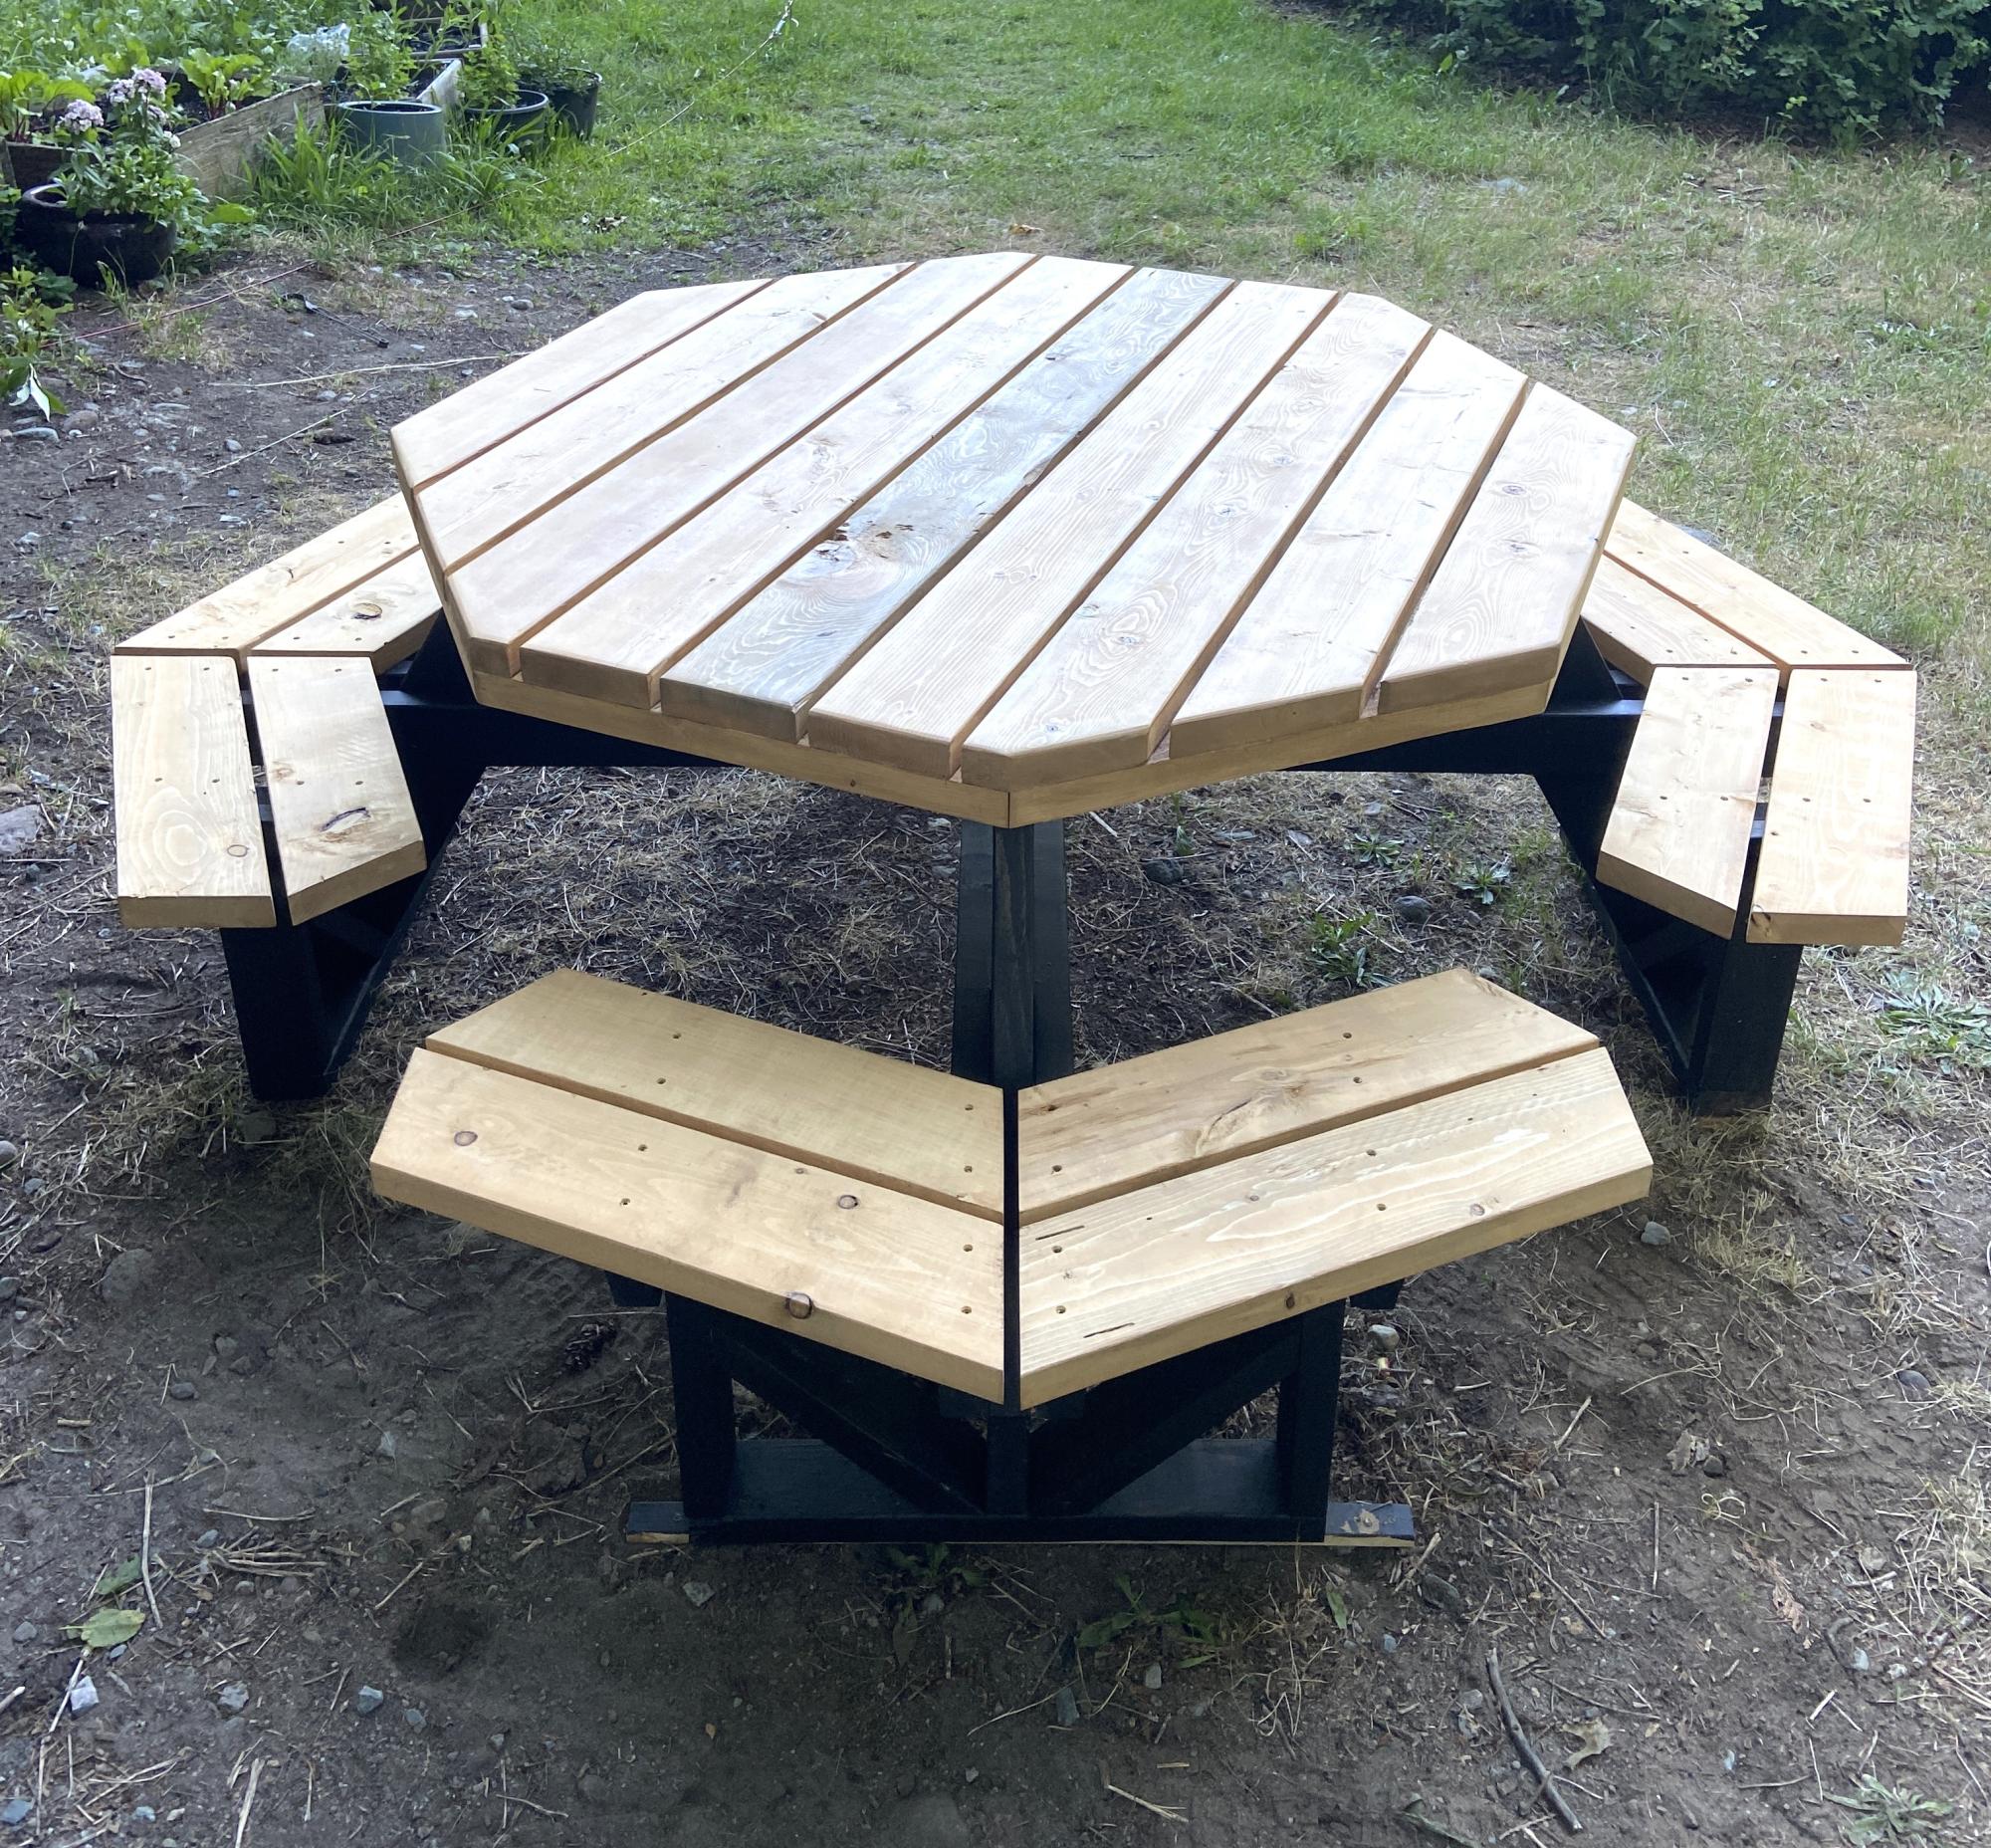
Octagon picnic table! Built exactly to plan. This challenged my carpentry skills but I managed to pull it off all by myself. Great plans easy to follow and a great design! Would build again!
Built from Plan(s)
Octagon picnic table! Built exactly to plan. This challenged my carpentry skills but I managed to pull it off all by myself. Great plans easy to follow and a great design! Would build again!
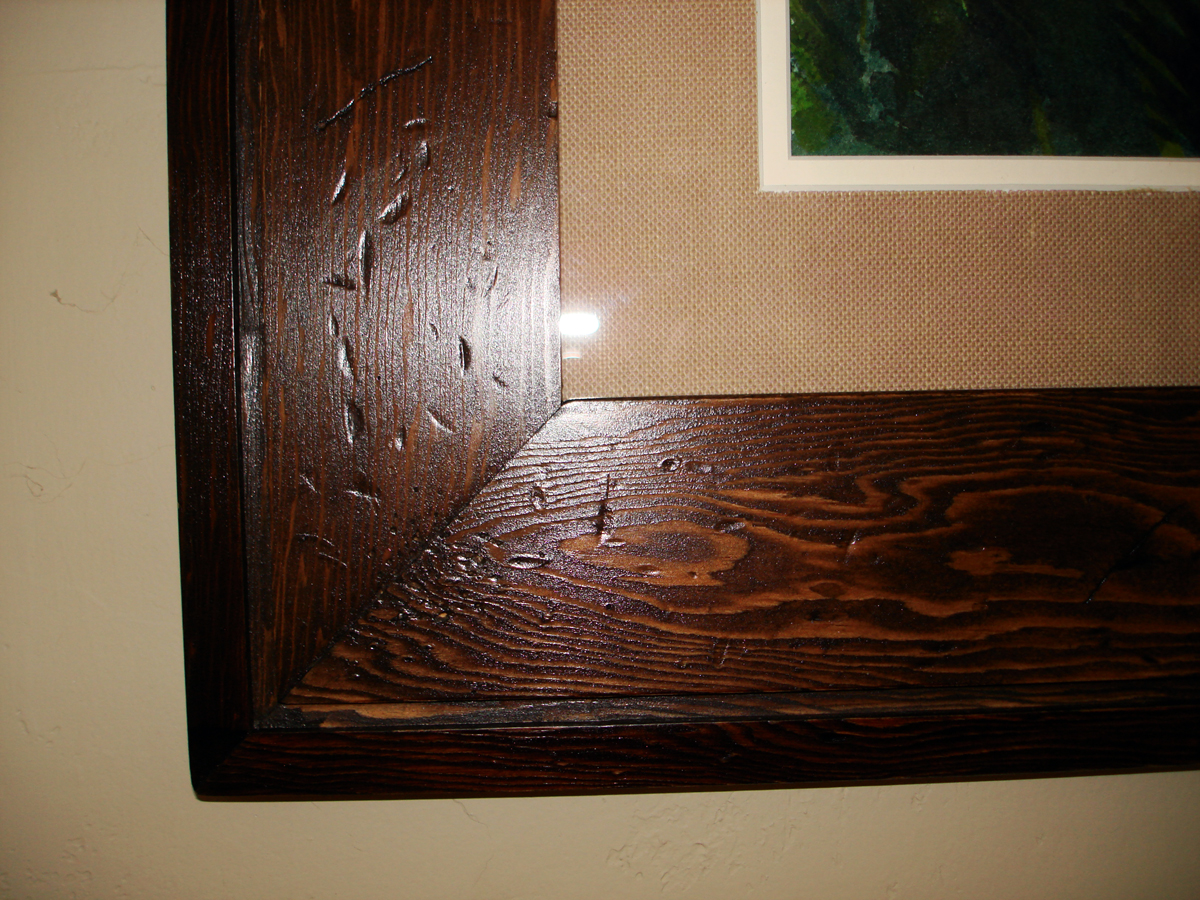
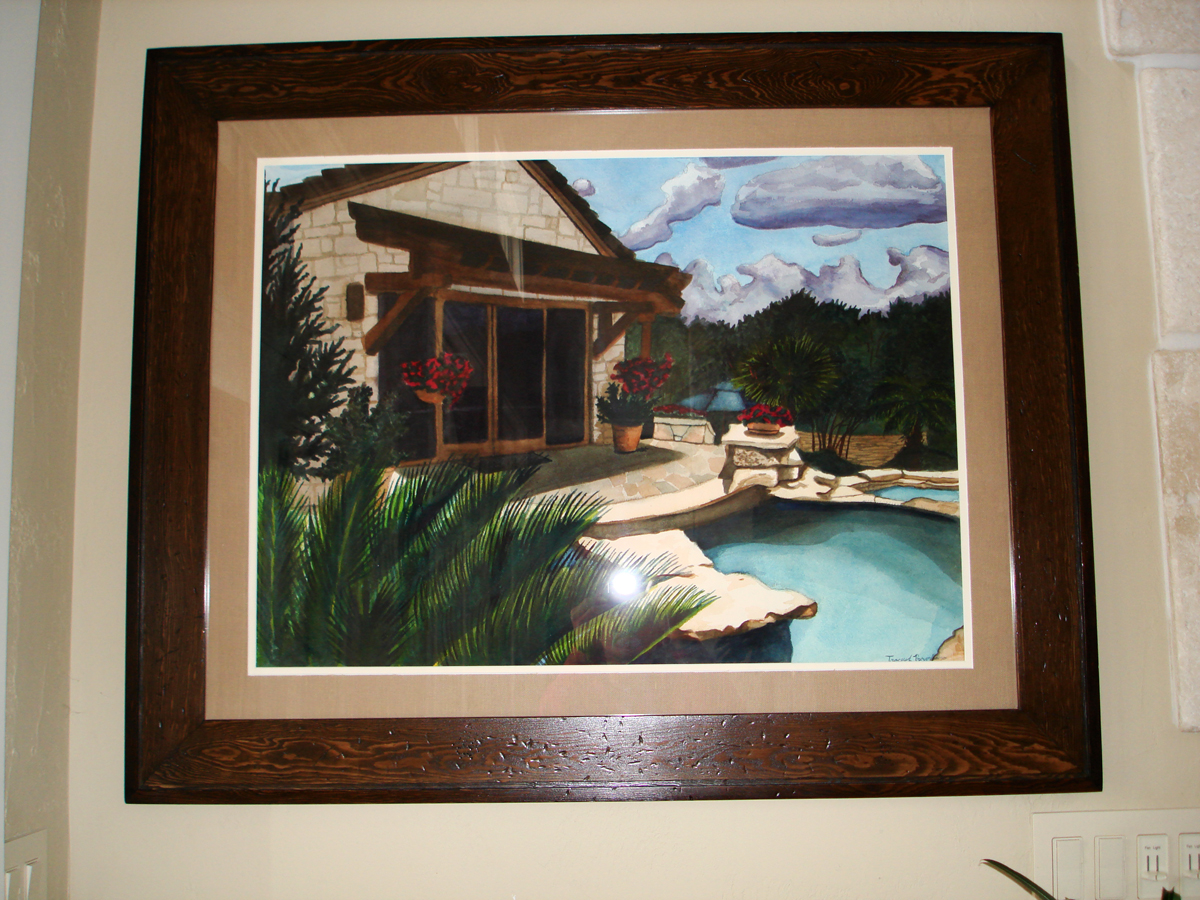
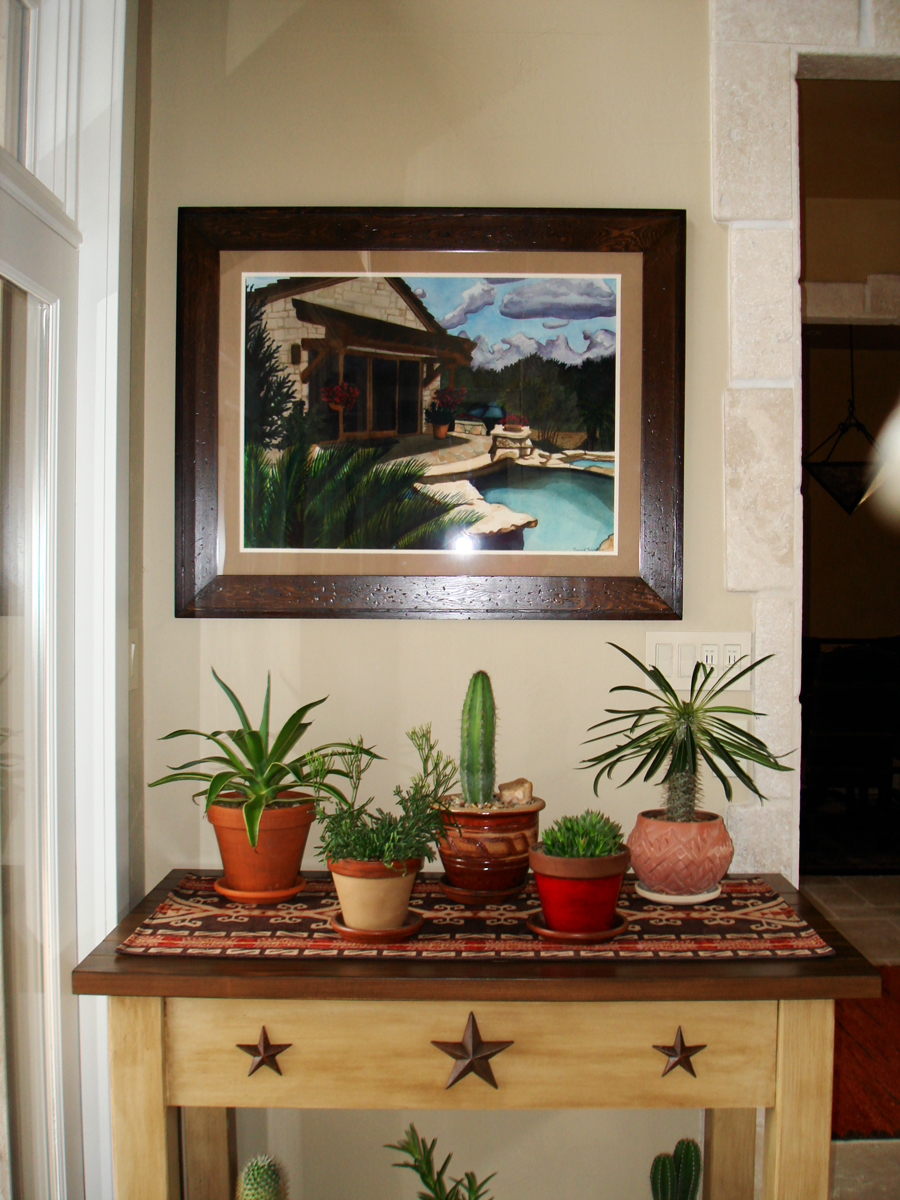
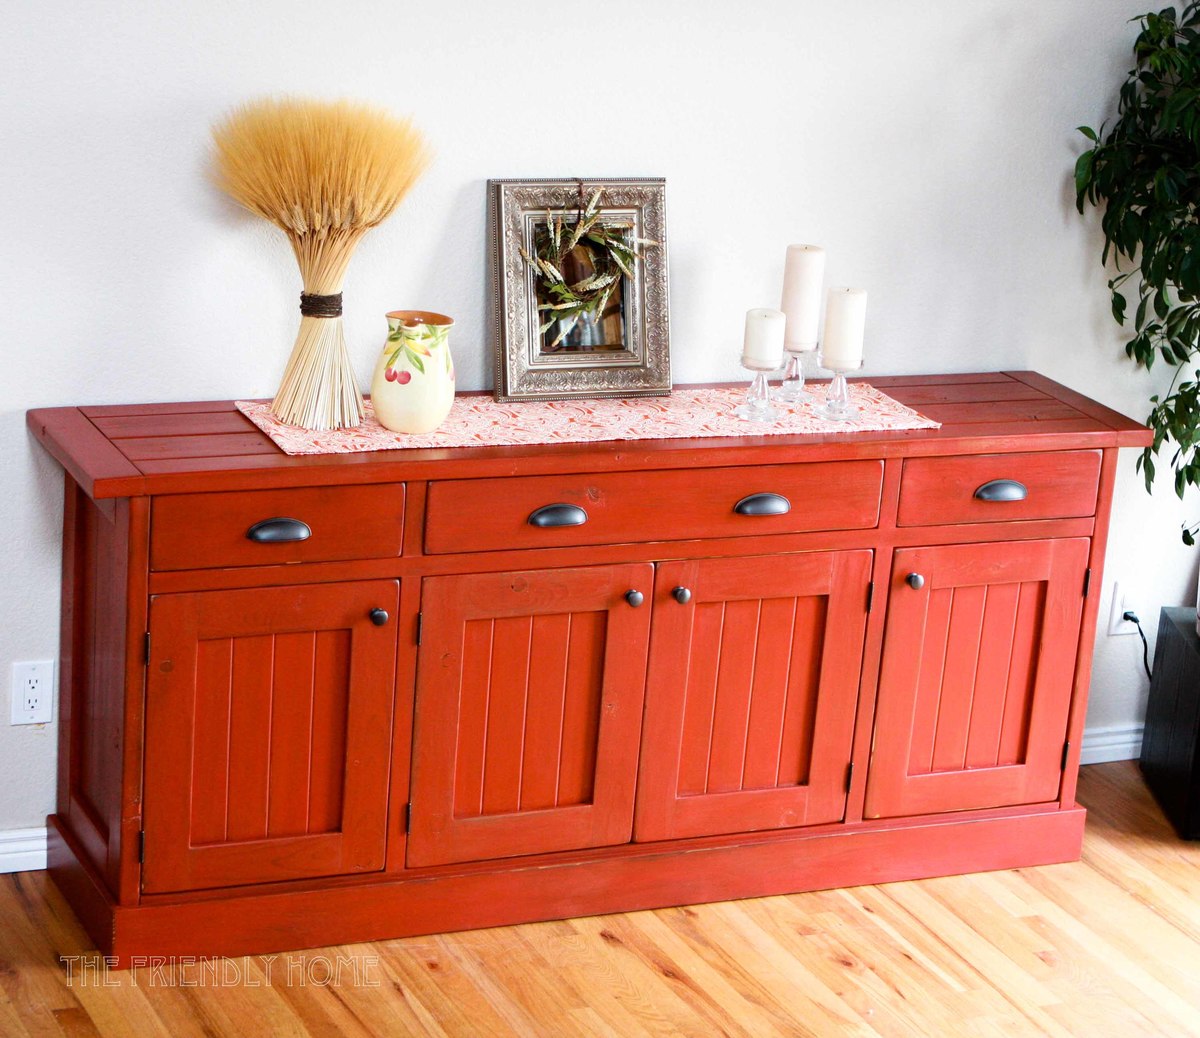
Have you checked out prices at framing stores lately? Since I didn't want to pay $250 for a frame, I decided to make one out of some spare 1x4 Douglas Fir that I had. It's a single board with a router cut at the edge for detailing. I routed a rabbet onto the back, and kreg-jigged it together. I distressed the wood by beating it with a hammer and chain.
Prior to completing the frame, I took a sample piece to the framing store (who would be matting it) to make sure they could work with my rabbet size. I ended up having to make it deeper and wider to accommodate them, so I would advise doing this if you're taking it to a framer.
I never dreamed I could actually make a frame, much less a piece of furniture. Thanks so much to Ana for sparking all of this. I've found my creative calling thanks to her!
Thu, 02/16/2012 - 04:32
That is really beautiful! I've been considering the same build for the same reasons. Framing costs are outragous! I've never used a router before and I guess I'm a little intimidated by them. What do you think? Are they too hard to use? Worth investing in?
Thanks!

In reply to Good job! by Becky Smith (not verified)
Tue, 02/21/2012 - 08:11
Becky -- thanks for the feedback. The router is hard for me, but I don't think I know all the ins and outs of how to use it. For making the rabbet on the back, I've found out that a table saw works SO MUCH BETTER than trying to use the router. I believe that a dado blade for the table saw could make the decorative cut (and much easier, faster, and cleaner than trying to use the router).
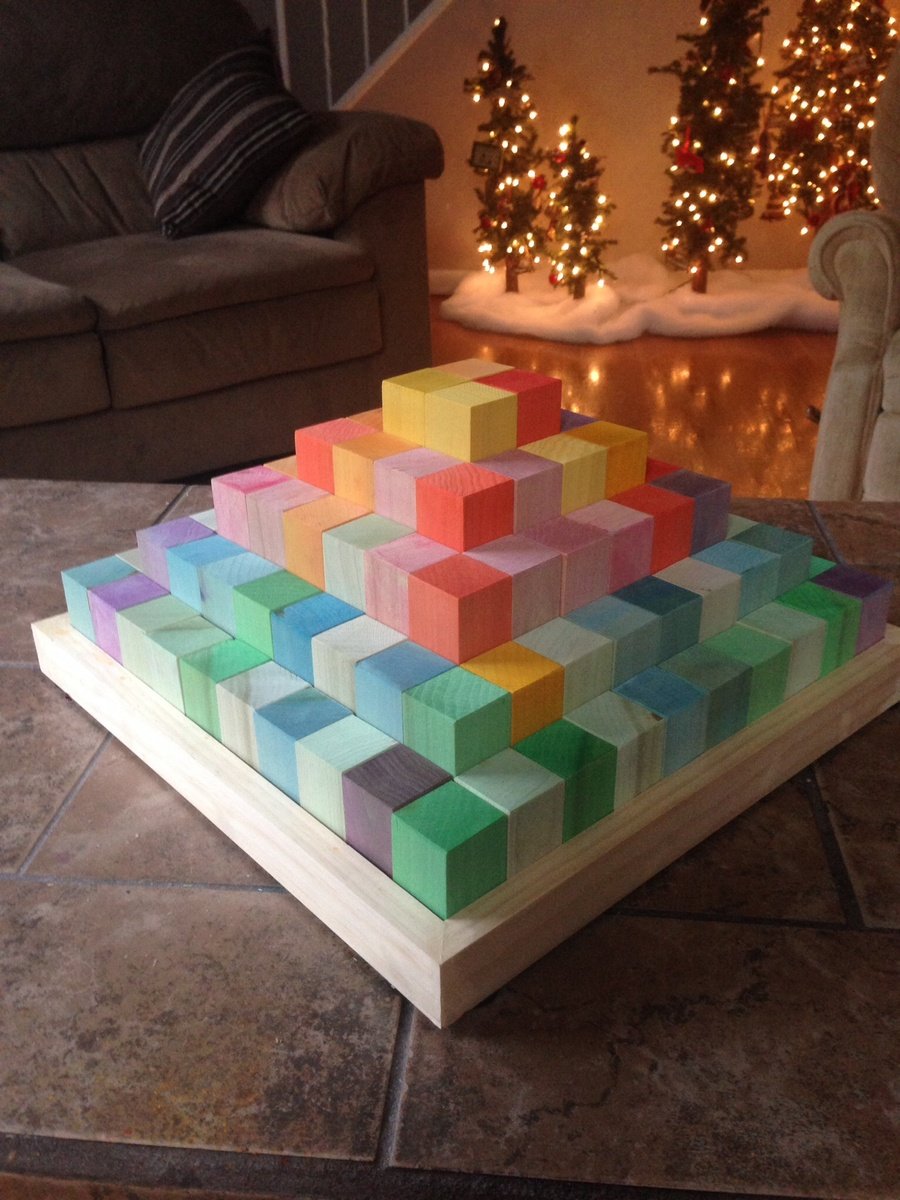
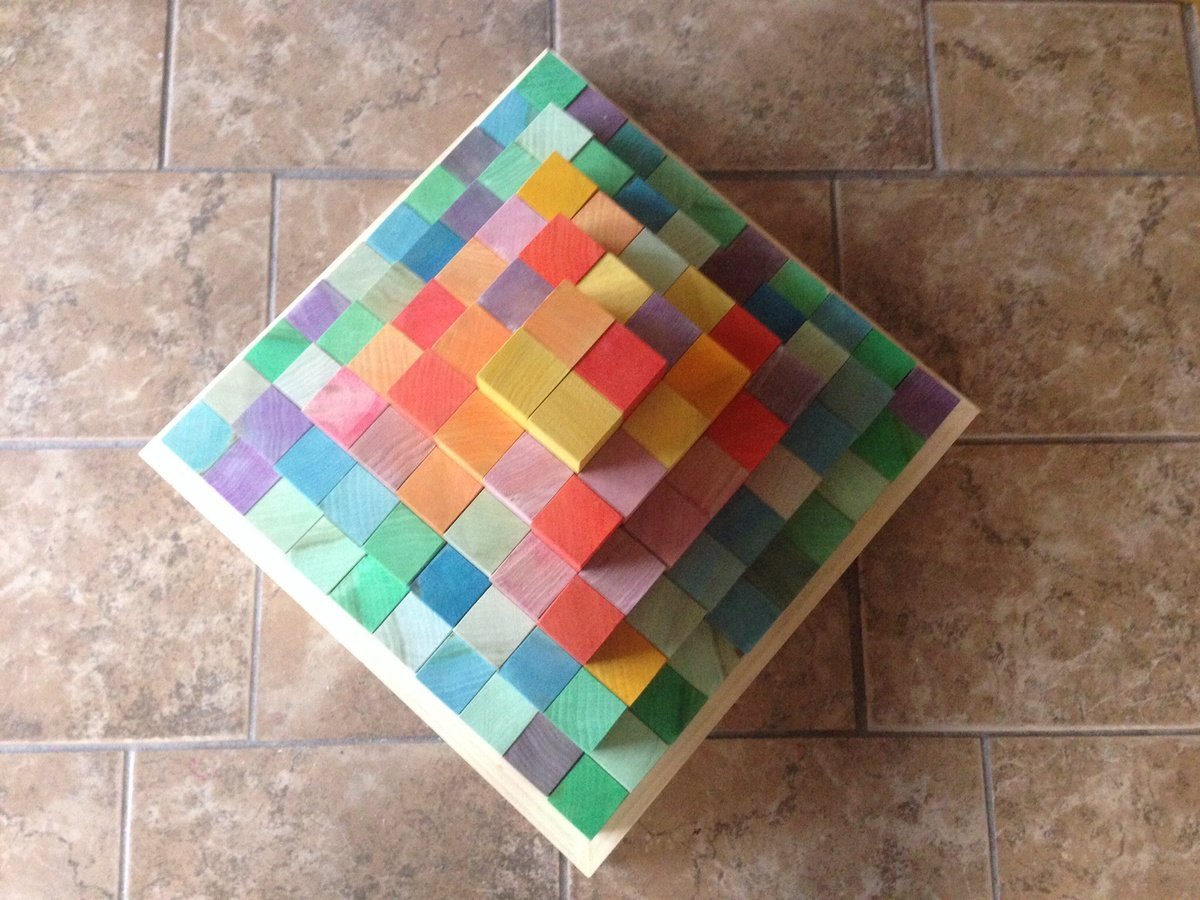
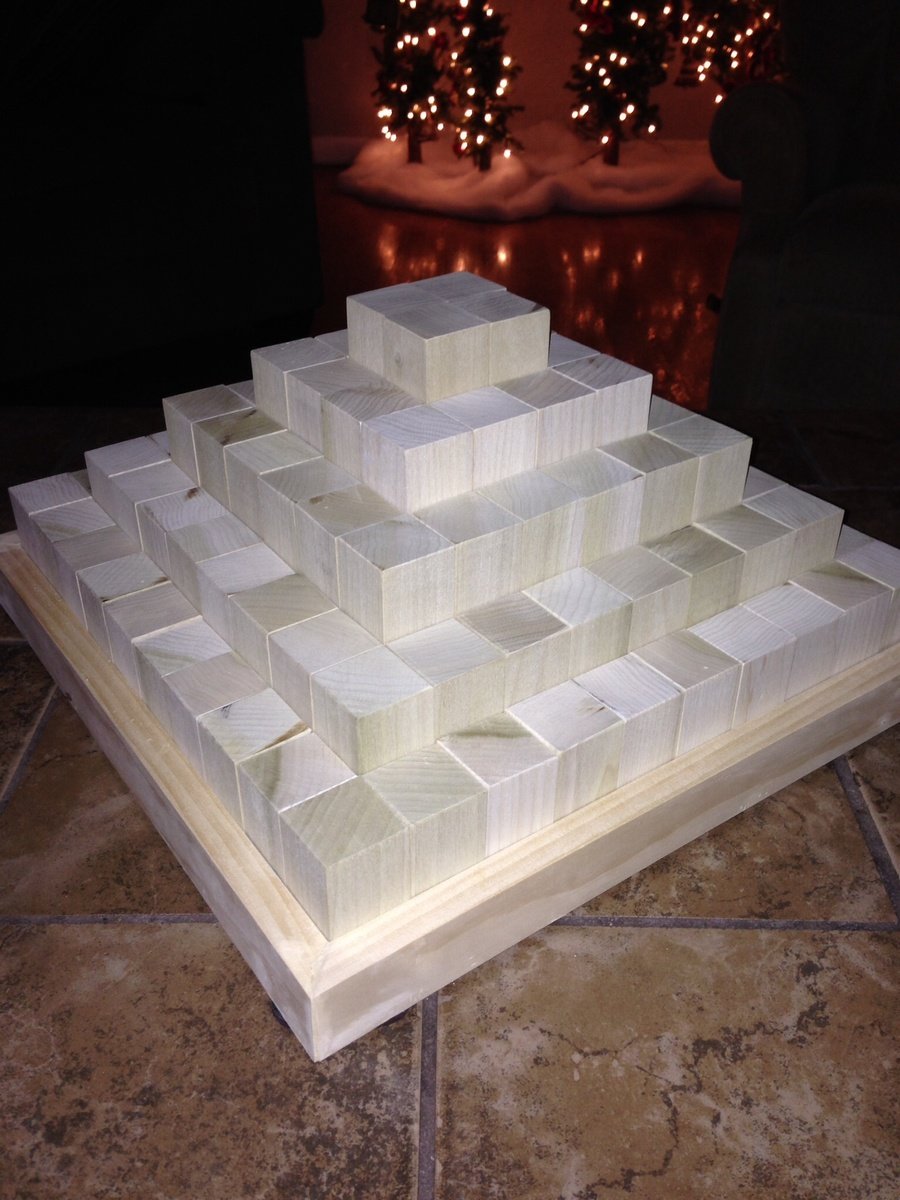
What a great little gift idea and made this in about 4 hours. HD had 2x2 poplar turning blocks that were perfectly straight and pretty smooth to start with. Required minimal sanding. Each board was $1.98 but was 32 inches long. So you have to buy 15. Start with the larger cuts first. The end of each board will produce one or two of the smaller cuts. Used the food coloring and also coconut oil on the blocks.
Great project, had fun doing it.

Tue, 07/21/2020 - 11:16
This is awesome! I cannot wait to try this. Any advice on painting with food coloring?
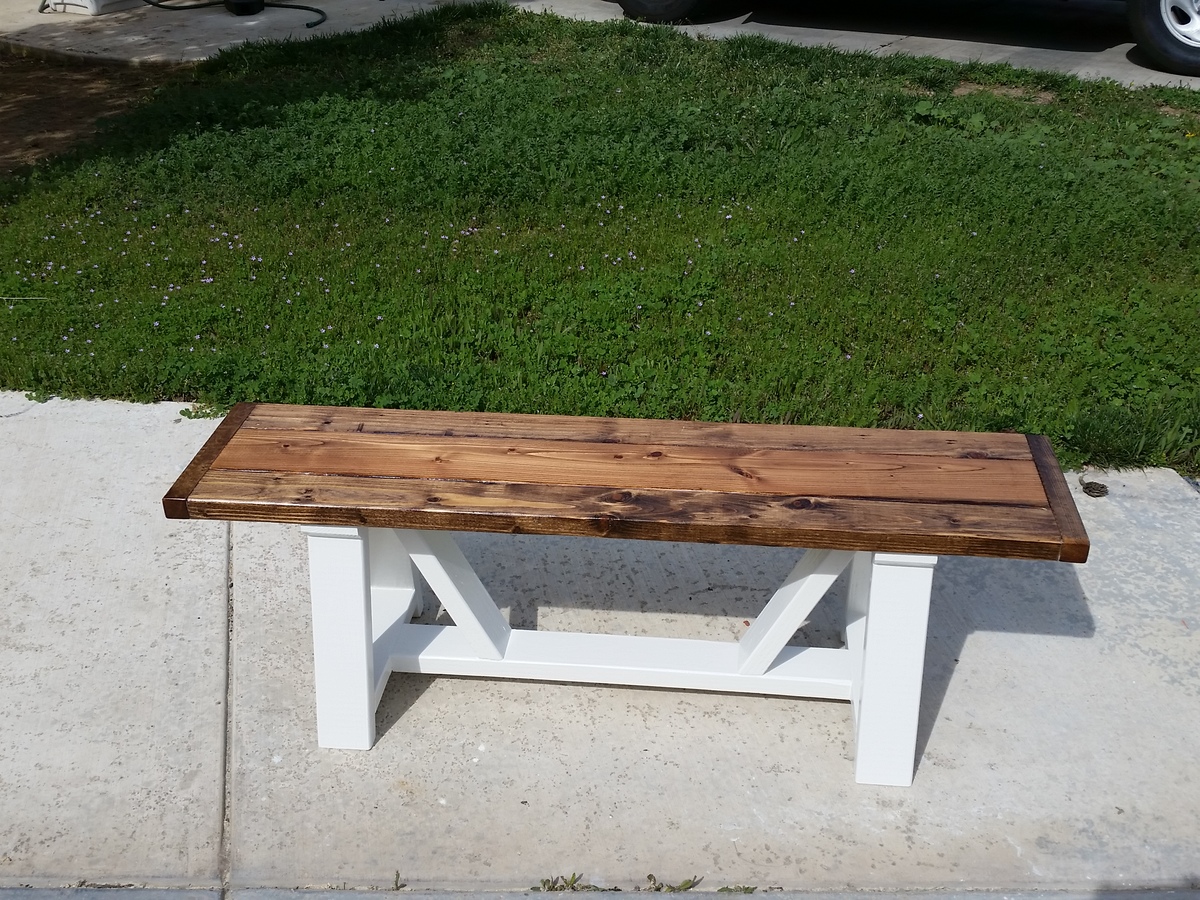
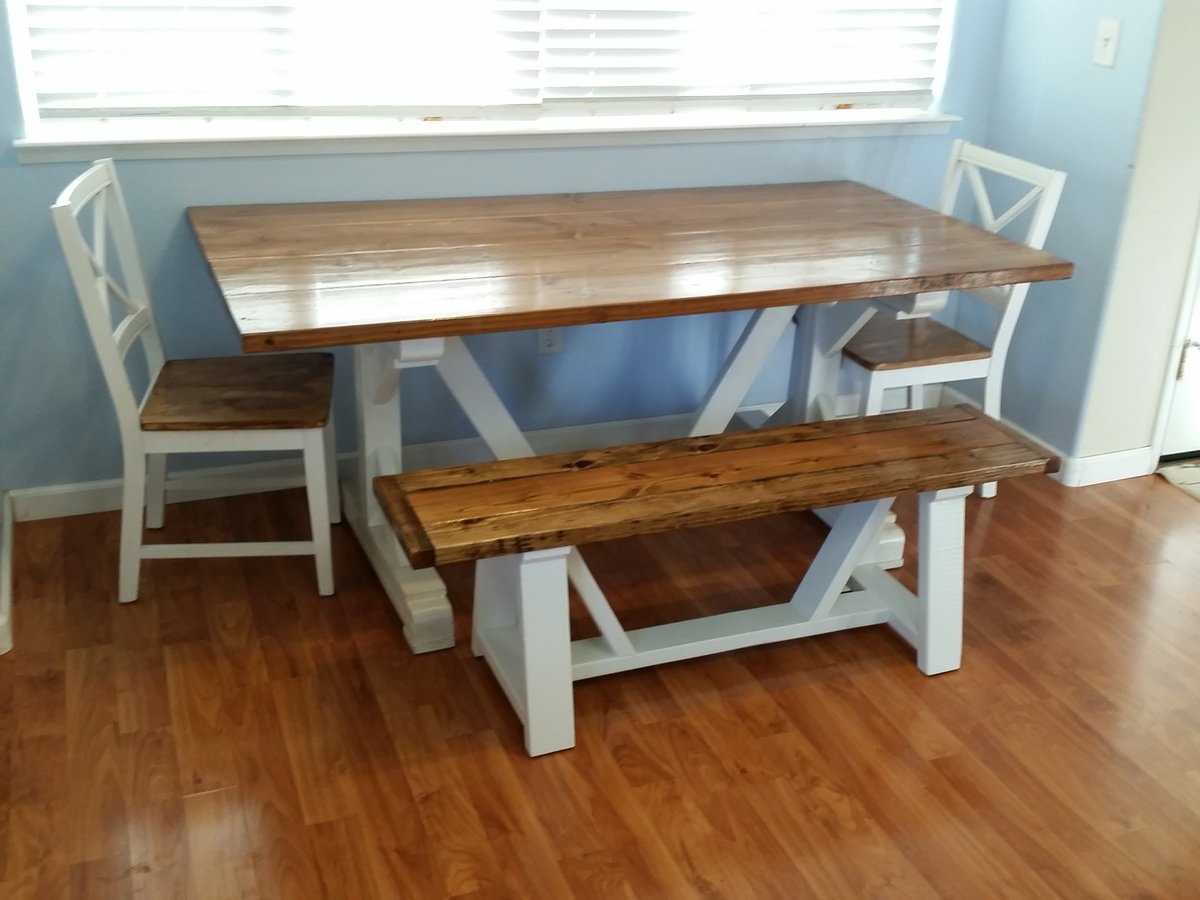
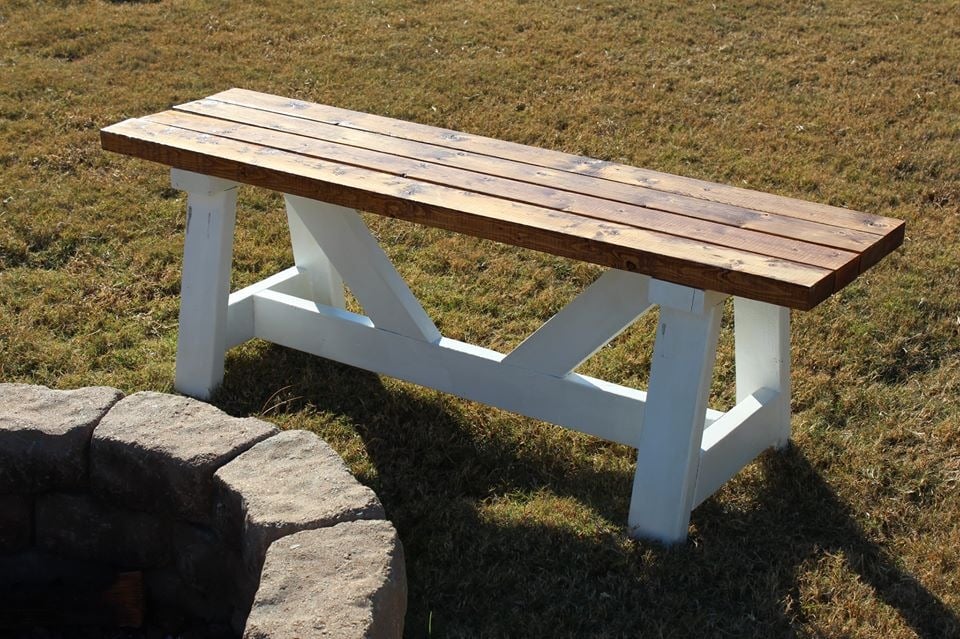
I made my bench a little shorter (54") and did not need the center support. I also cut the top and bottom of the leg horizontals 3/4" shorter so the legs tucked under the bench top more. It was a great bench and looks good with the Fancy X Farmhouse Table I also followed from Ana White.
Mon, 02/29/2016 - 19:11
In case there is any questions, this is my adaptation of the Alaska Bench.
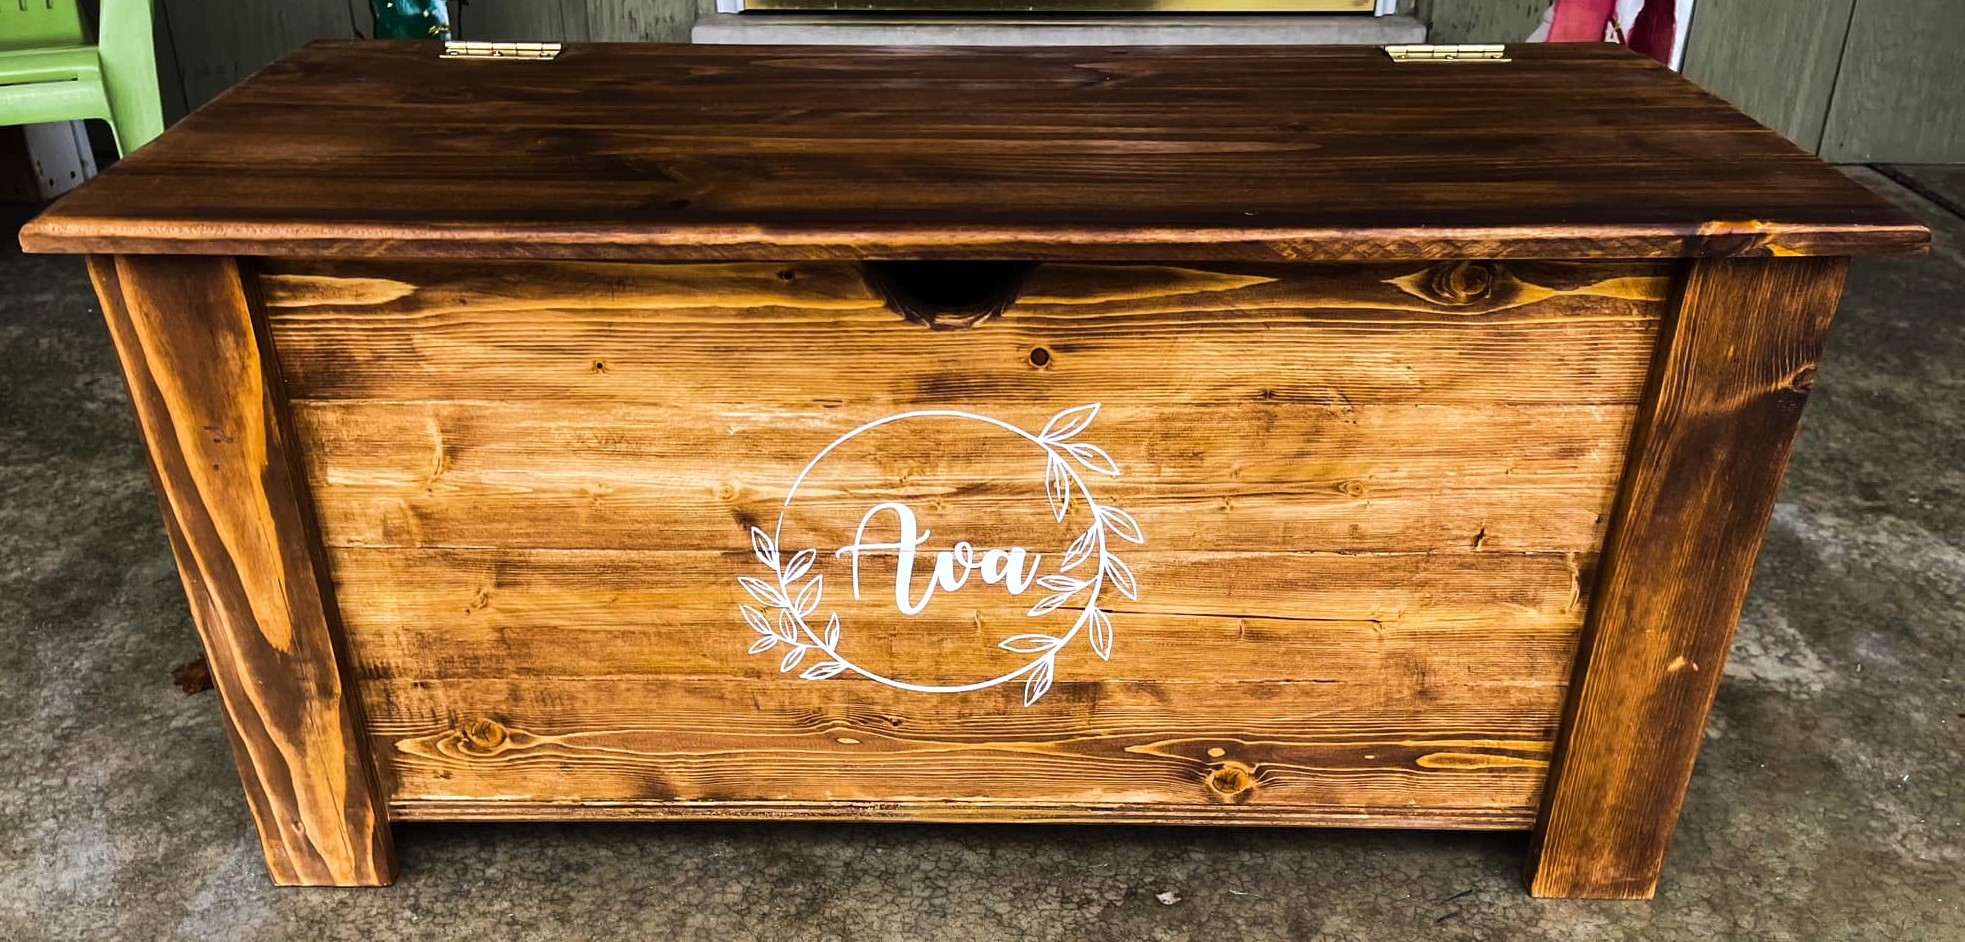
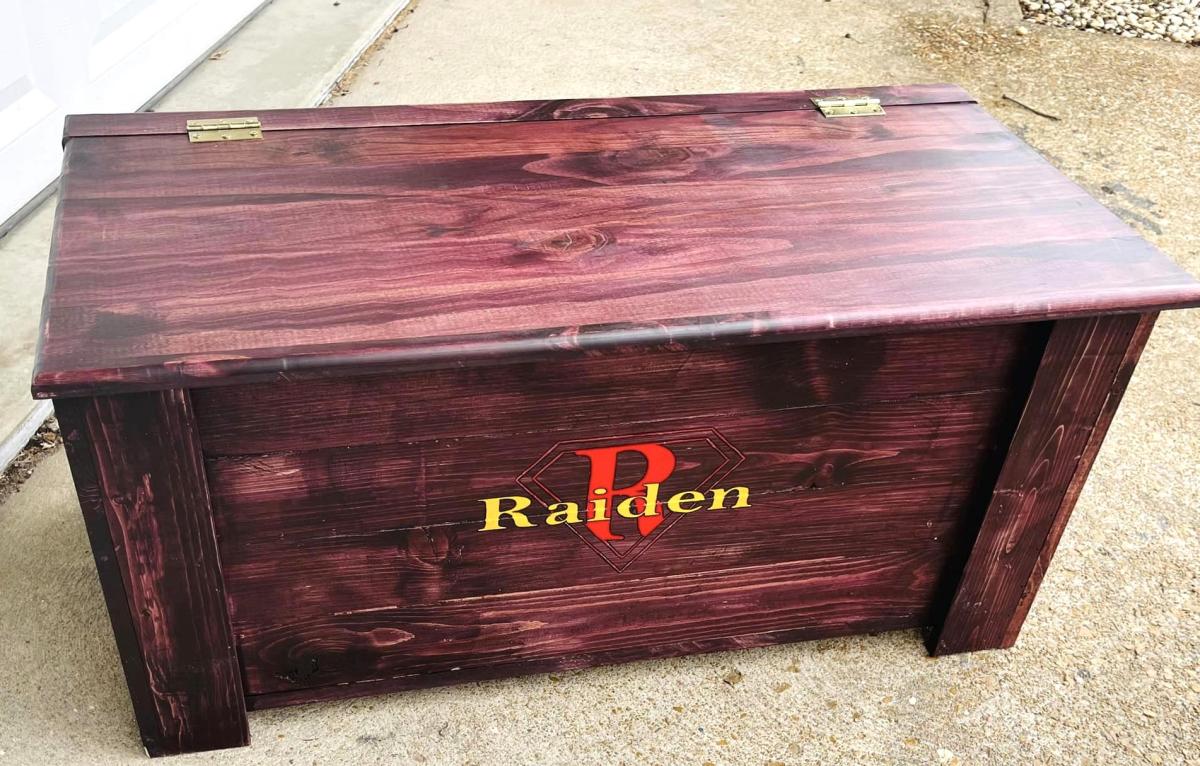
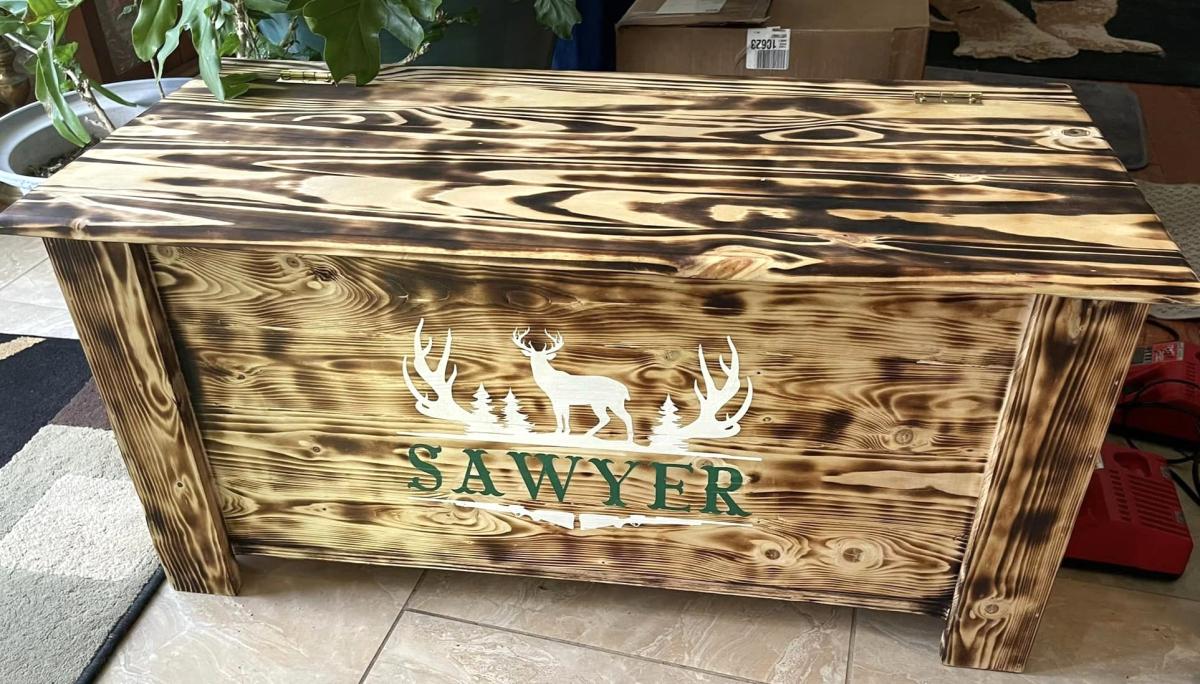
I love the toy box plans!! I've done some woodworking previously, but this was my first larger project. The first one was so simple and easy to make that I decided to make more!
Tiffanni
I loved this bench when I saw the plan and had to try it. Thanks Ana!
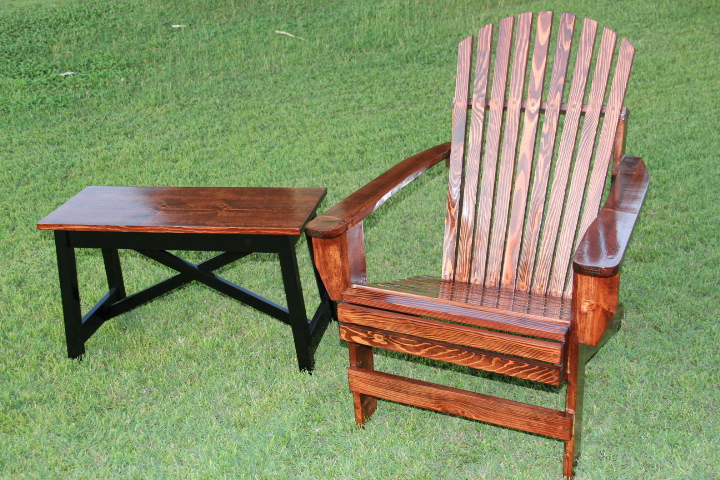
This was an easy plan to follow! We built these for around our fire pit. The finishes is what took the longest. The tops are stained American Walnut.


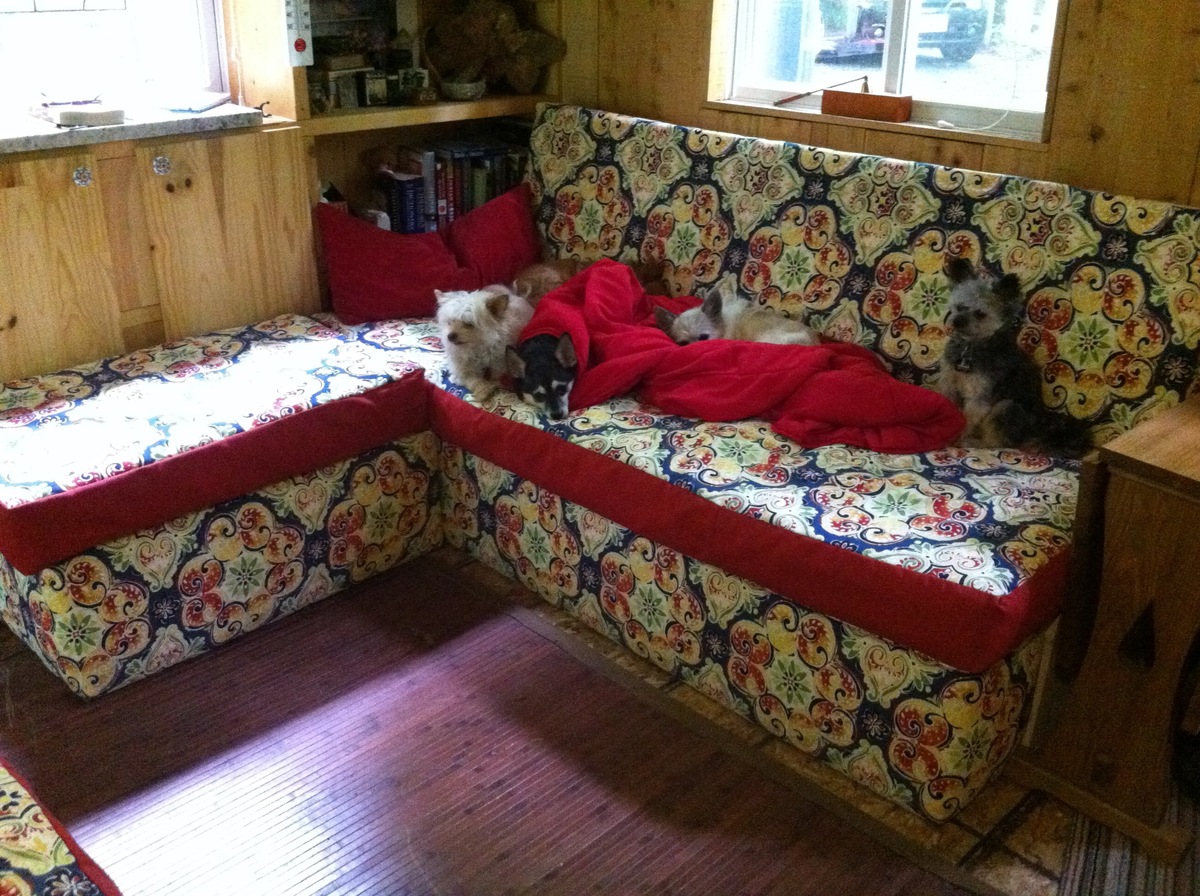
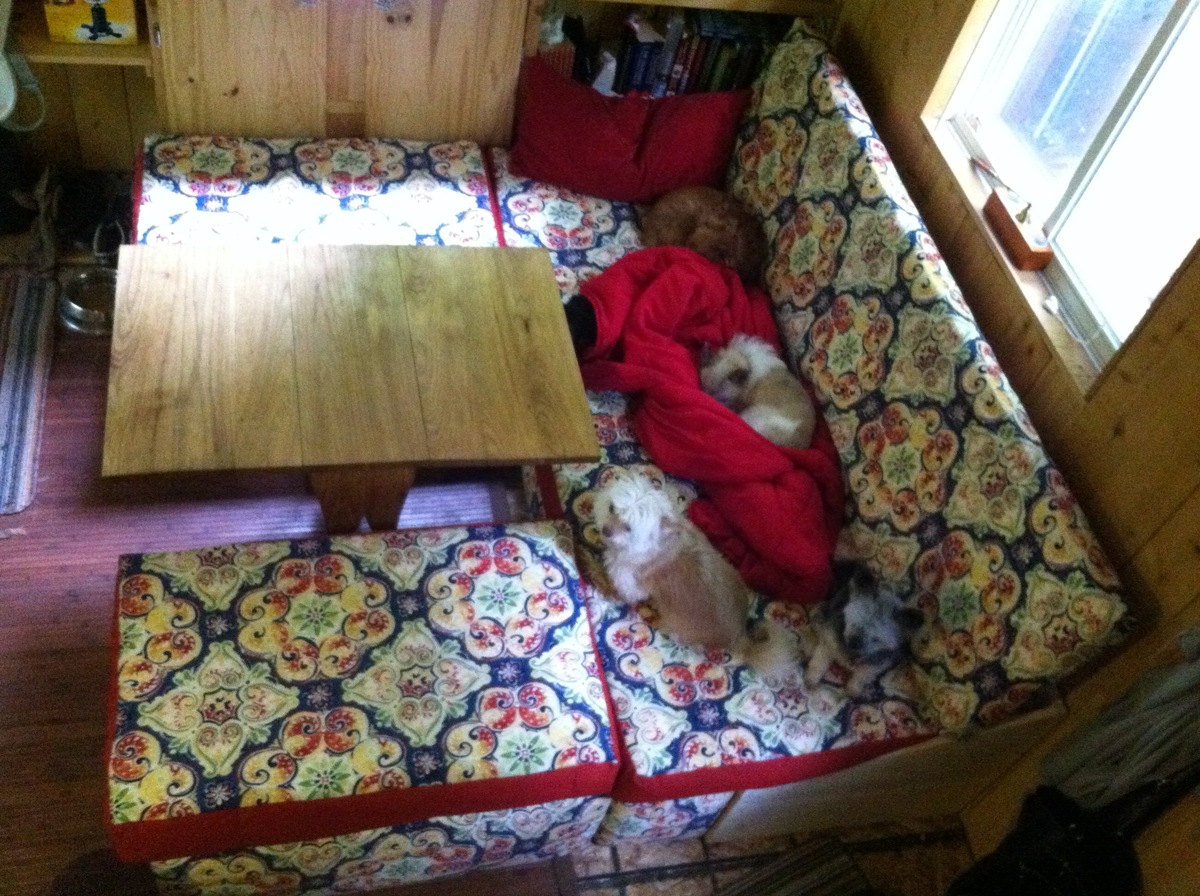
I looked at all the sofas that people built and took bits out of a lot of them to decide what I needed to fit my needs. I am in a tiny house and I wanted the sofa to be super versatile as well as being good for storage. I decided to build it the size of a double bed, but to divide this into three sections so that it can be used as a sectional, a seating area for meals and a bed for overnight guests. It was a lot easier than I thought it would be.
Thank you for this, I would not have known where to begin.
I decided on brightly printed outdoor fabric because the interior of my tiny house is all wood and I though the bright colours would be a nice addition. The outdoor fabric was chosen so that it would resist water and stains as well as pet hair.
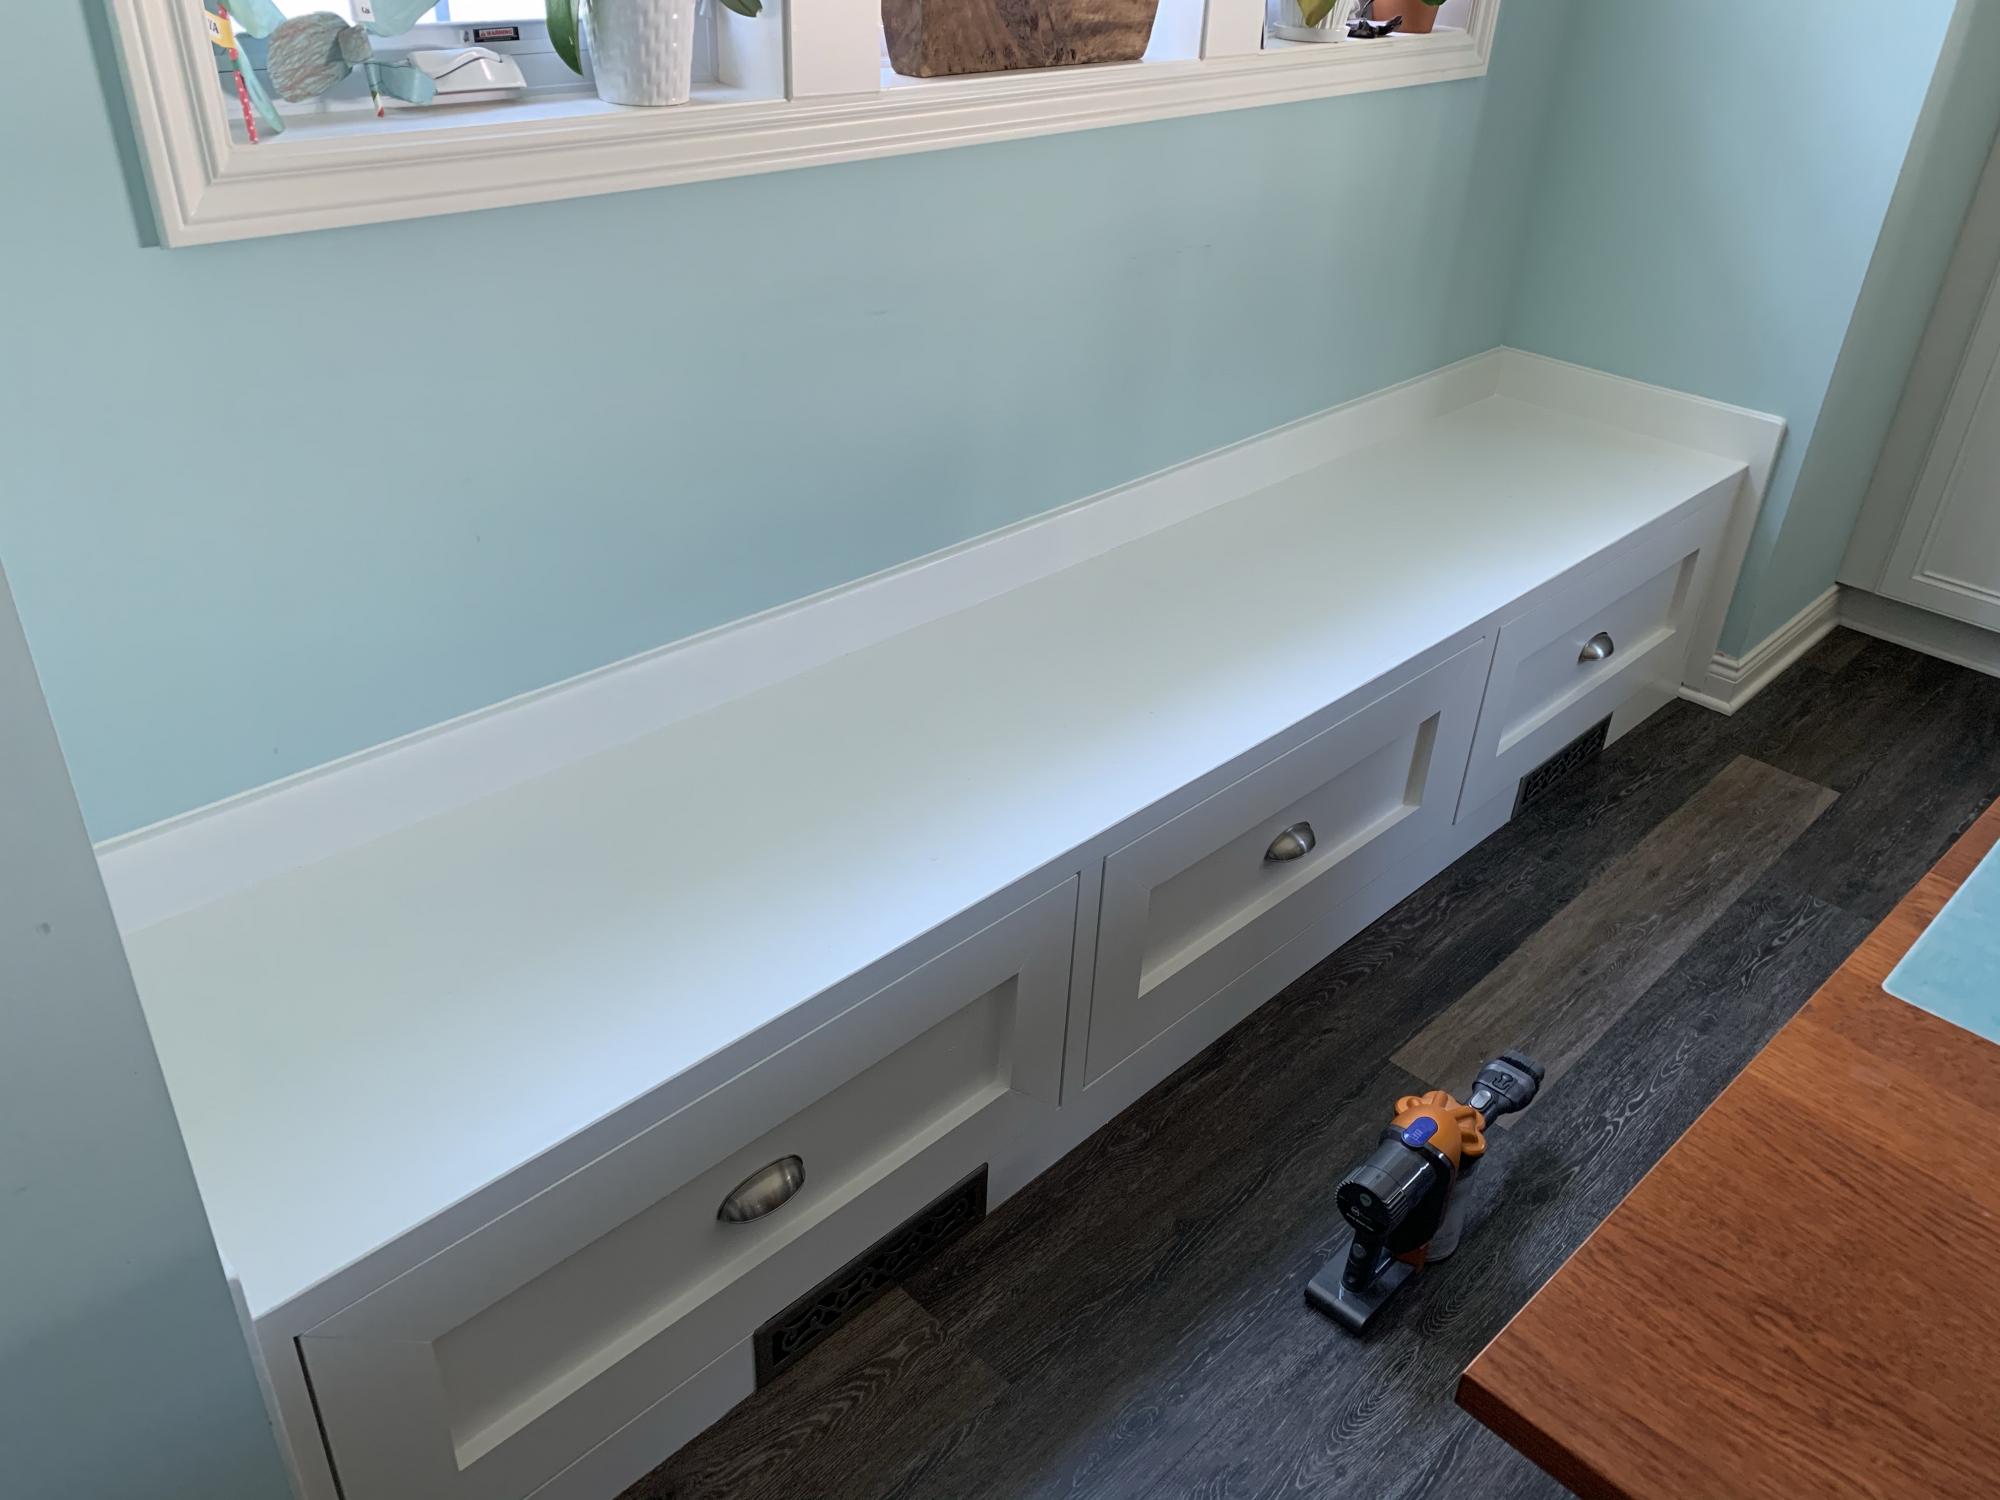
I used the mudroom bench plans and modified them slightly to account for the wider space and air registers underneath. Thanks Ana!

Mon, 10/14/2019 - 12:43
Awesome! I'm going to do something similar in our dining room too!
Yours turned out great!
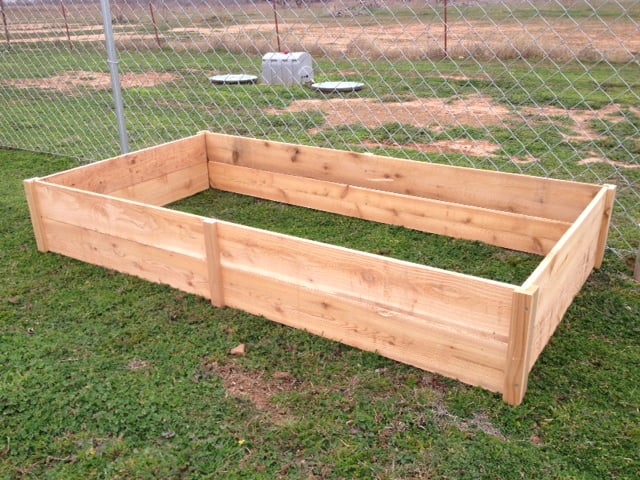
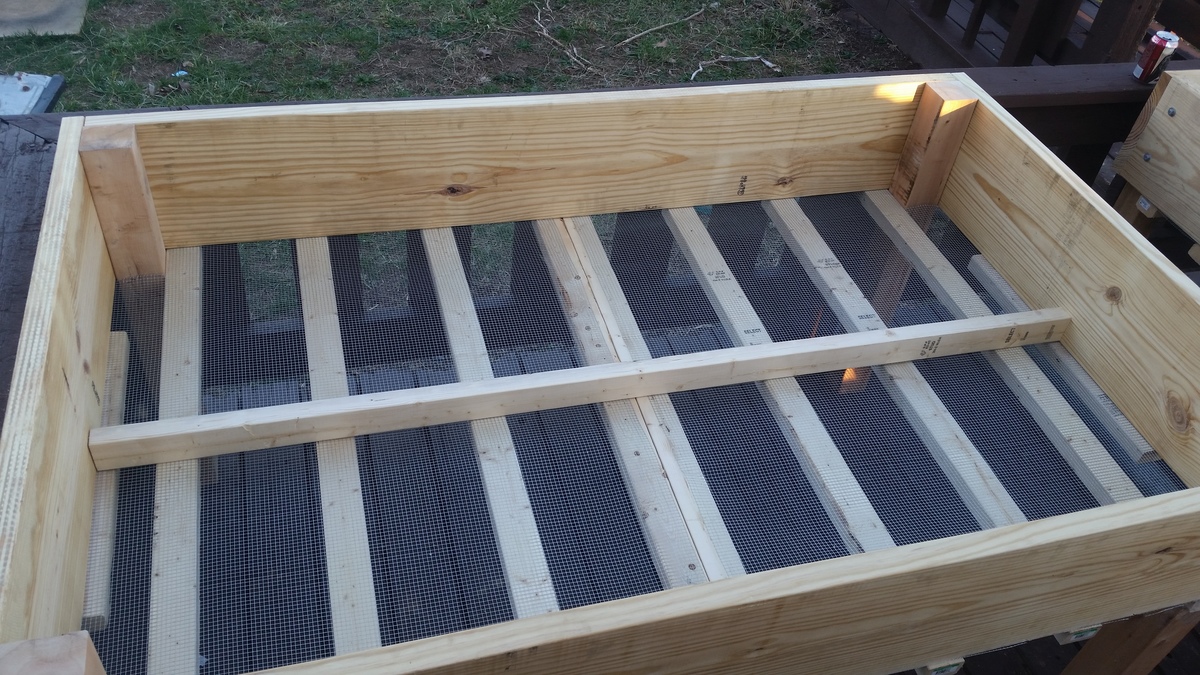
I made this garden bed in one evening. I love it! I bought 6 6' cedar fence pickets and two cedar 1x2s. I don't have a table saw, and they wouldn't rip a fence picket for me at the store, so I had to buy the cedar 1x2's but the project was still very affordable. I wanted it a little wider than the original plan, so I just cut the 6' pickets in half for the sides.
It is 6' x 3' and I didn't bother to cut the dogears off. You probably wouldn't even be able to tell they are there. I didn't trim the top out because that would add on about $6, and I like it just the way it is.
Now, lets see if I can actually grow some plants in it!!
I'm a beginner, and this project was really easy.
Fri, 05/24/2019 - 10:06
Awesome! These turned out amazing!
I love your can do attitude too!
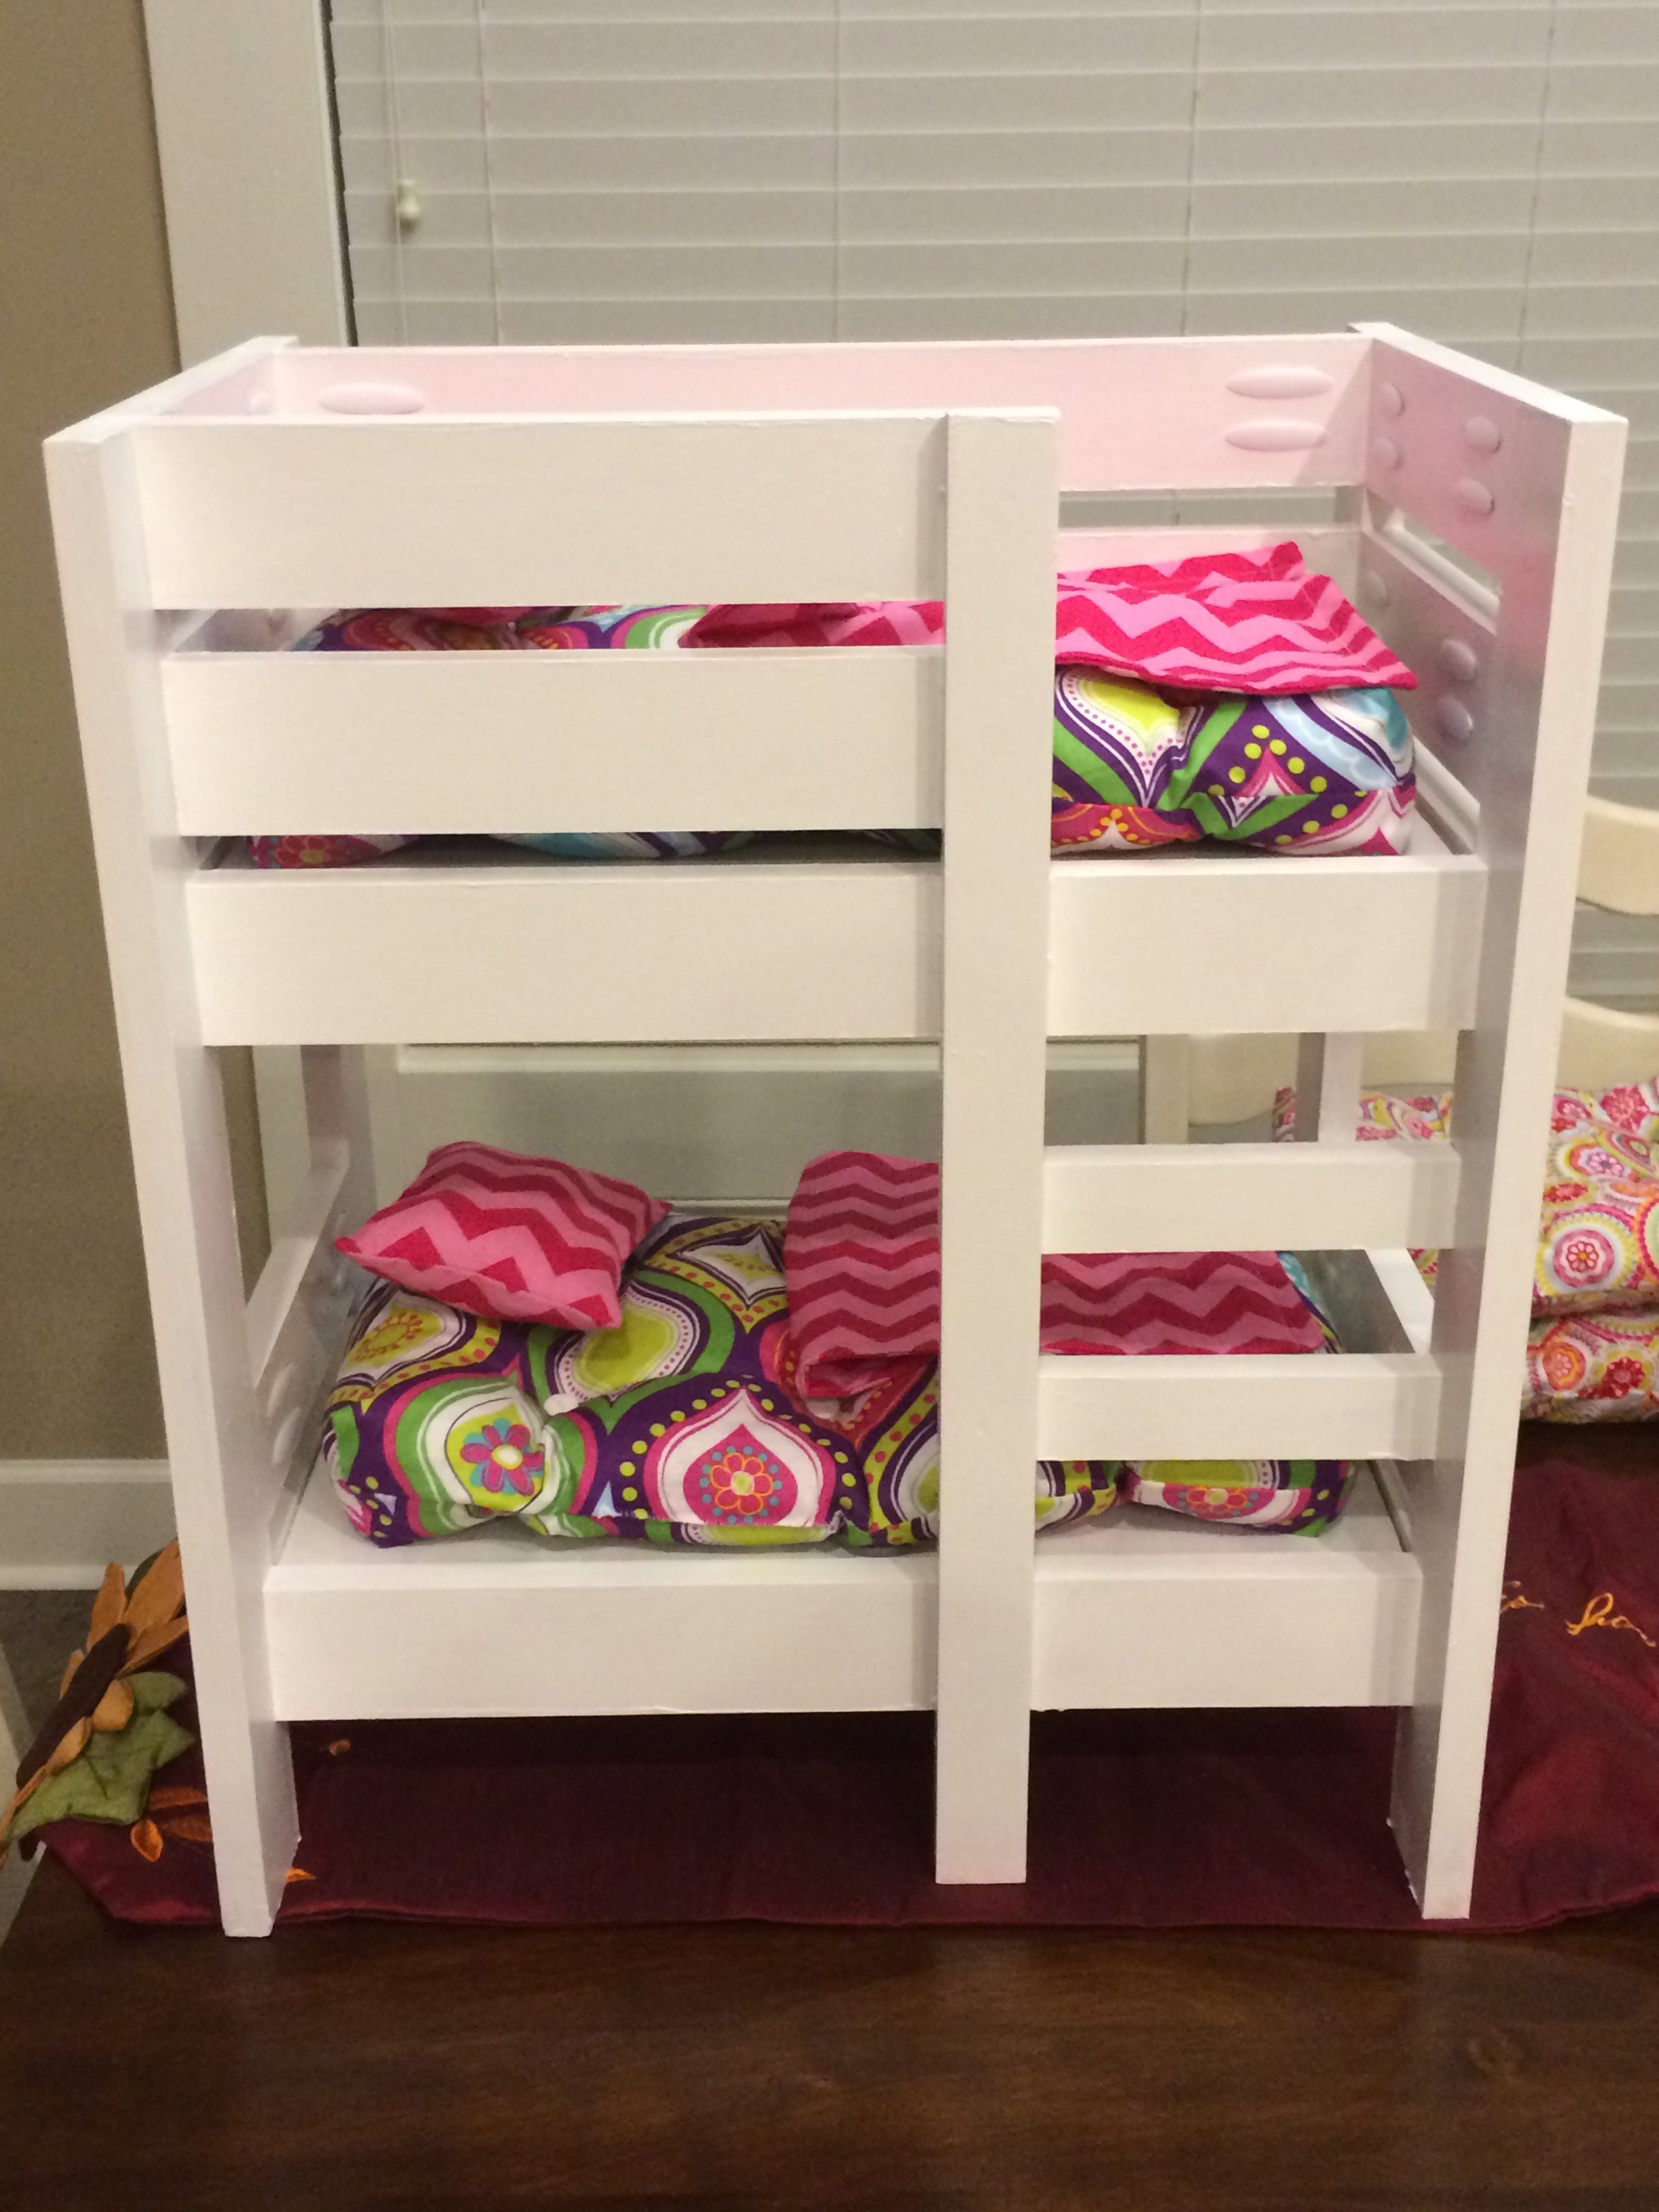
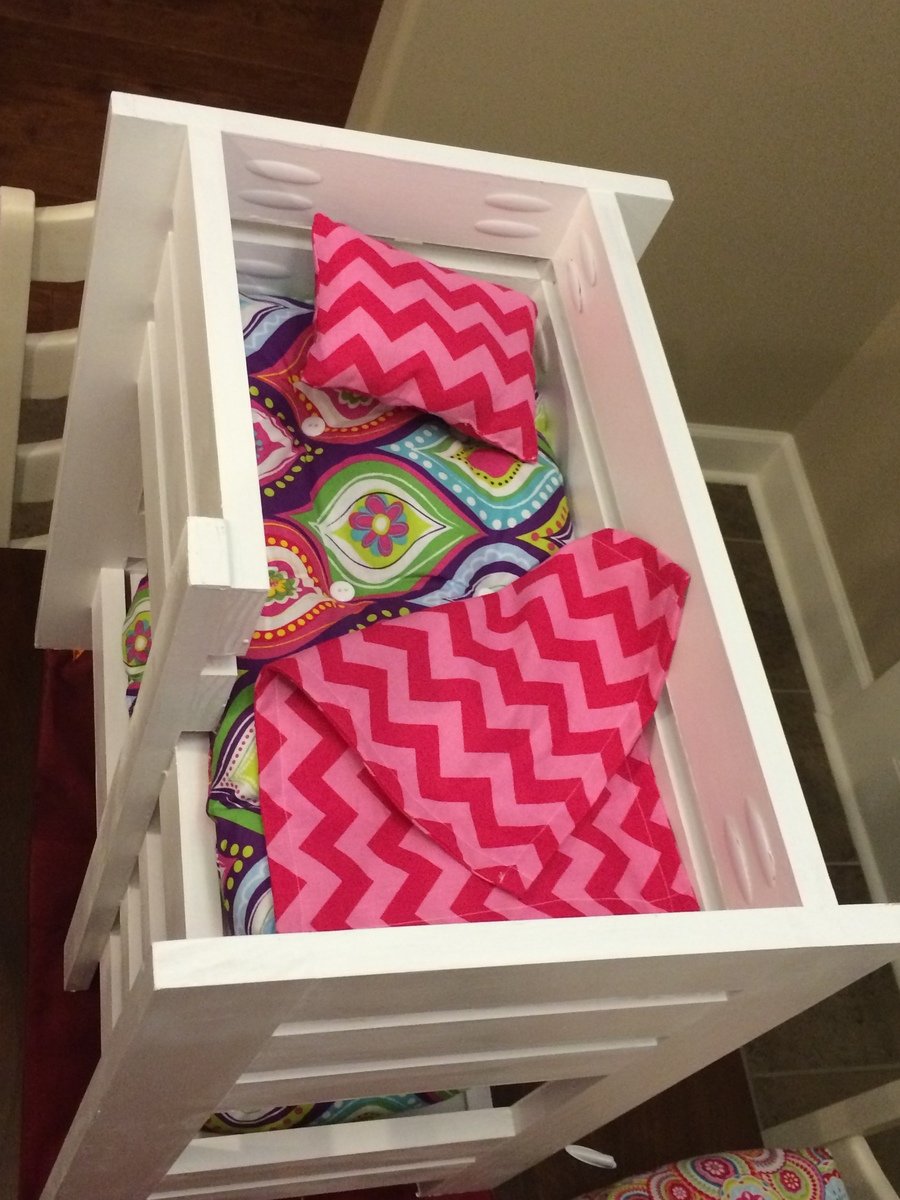
Made a few beds for my niece and her friends.
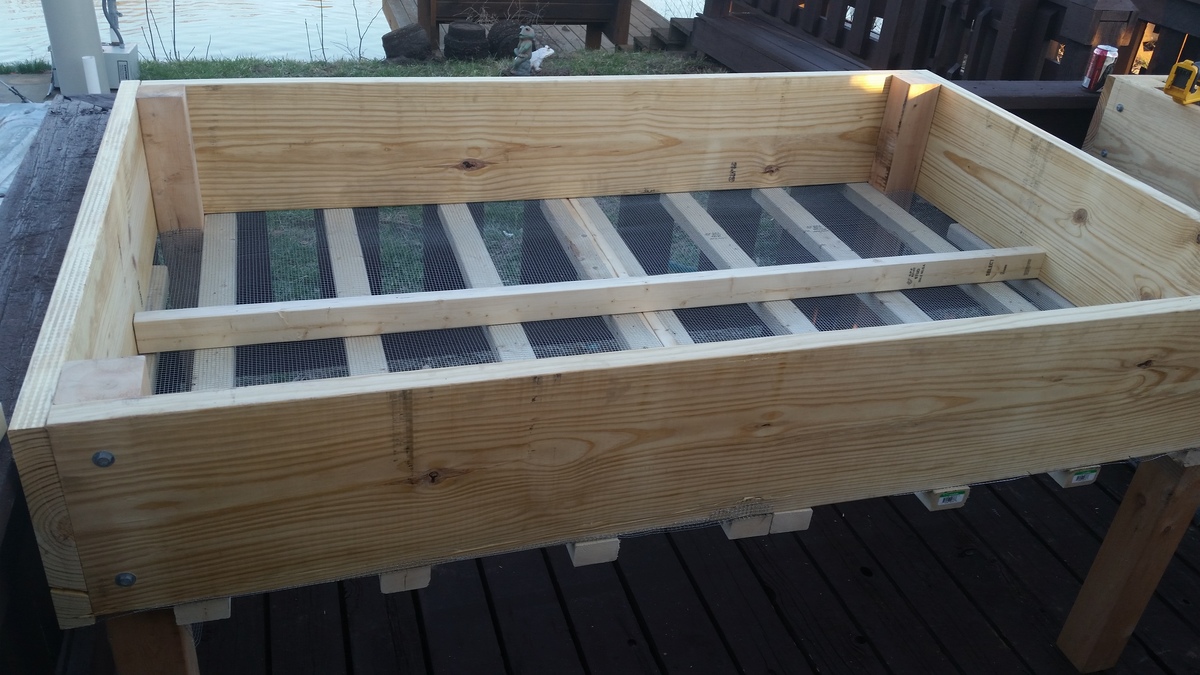
2 - 2x12x8
2 - 2x3x8
2 - 4x4x8 (cedar, fur is cheaper and will work fine also)
16 - 5/16x4 lag screws
16 - 5/16 washers
3x10 feet 1/4 hardware wire
20 - 3inch wood screws (outdoor rated, deck screws or the like)
you will have left overs if you buy extra lags you can make some other boxes depending on how high you want these, or set them on ground without legs. and use the wood screws
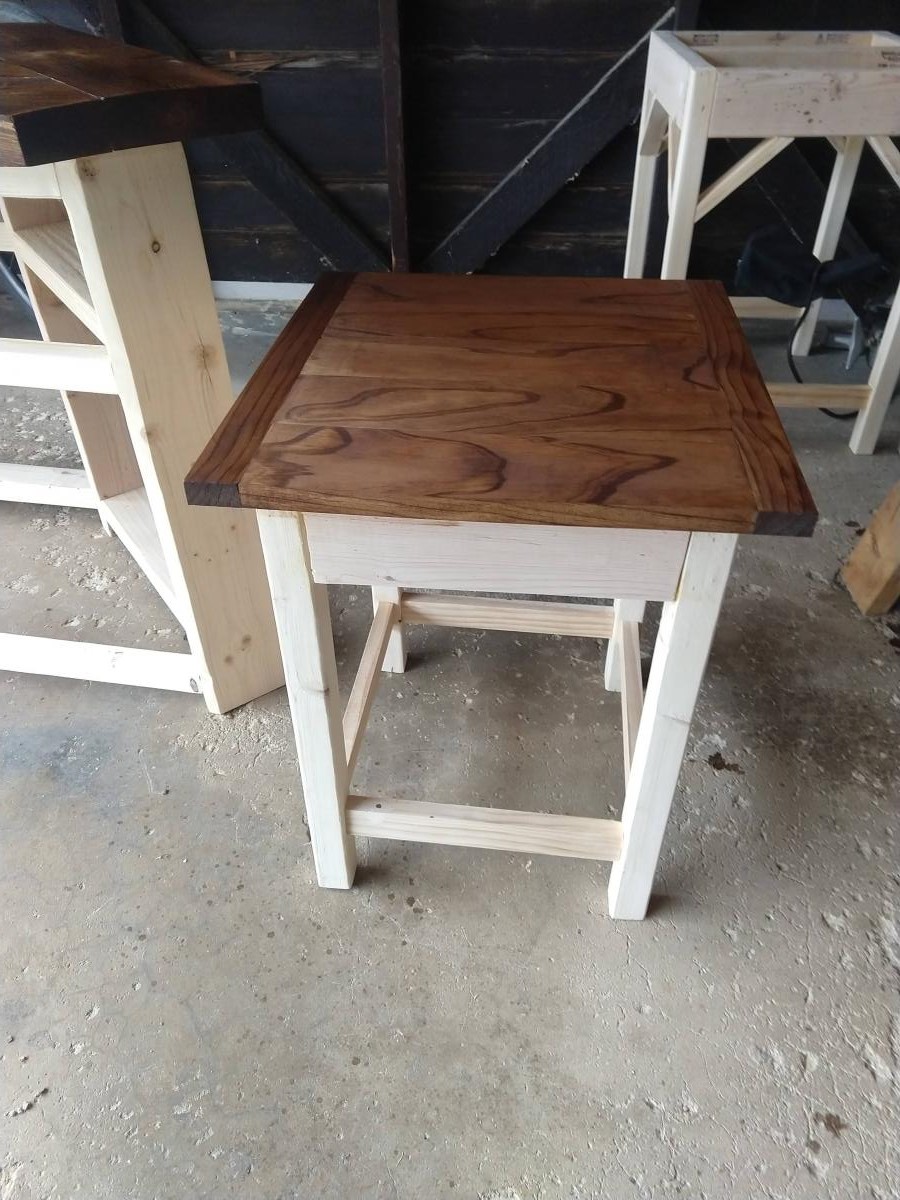
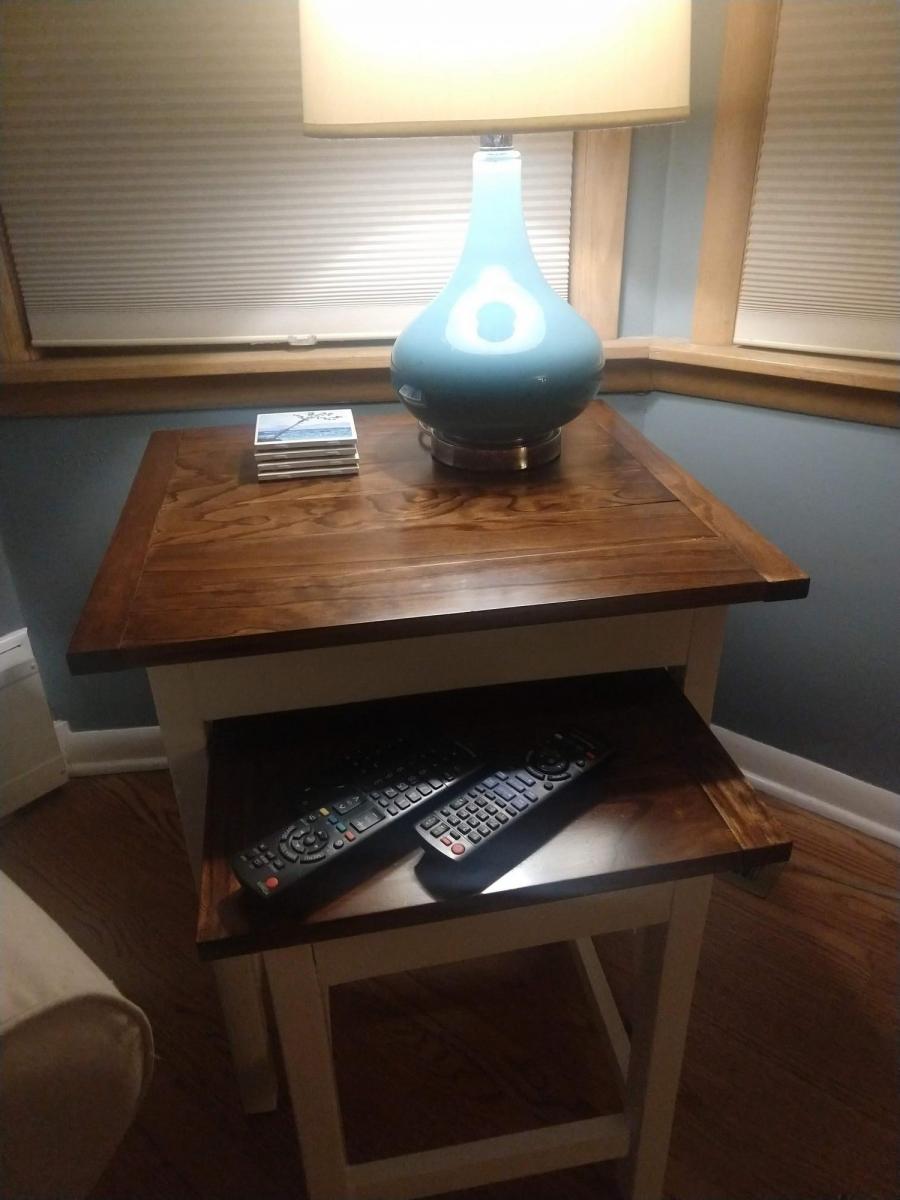
First real furniture project. Used pocket screws for just about everything and added some decorative 2" bread boards.
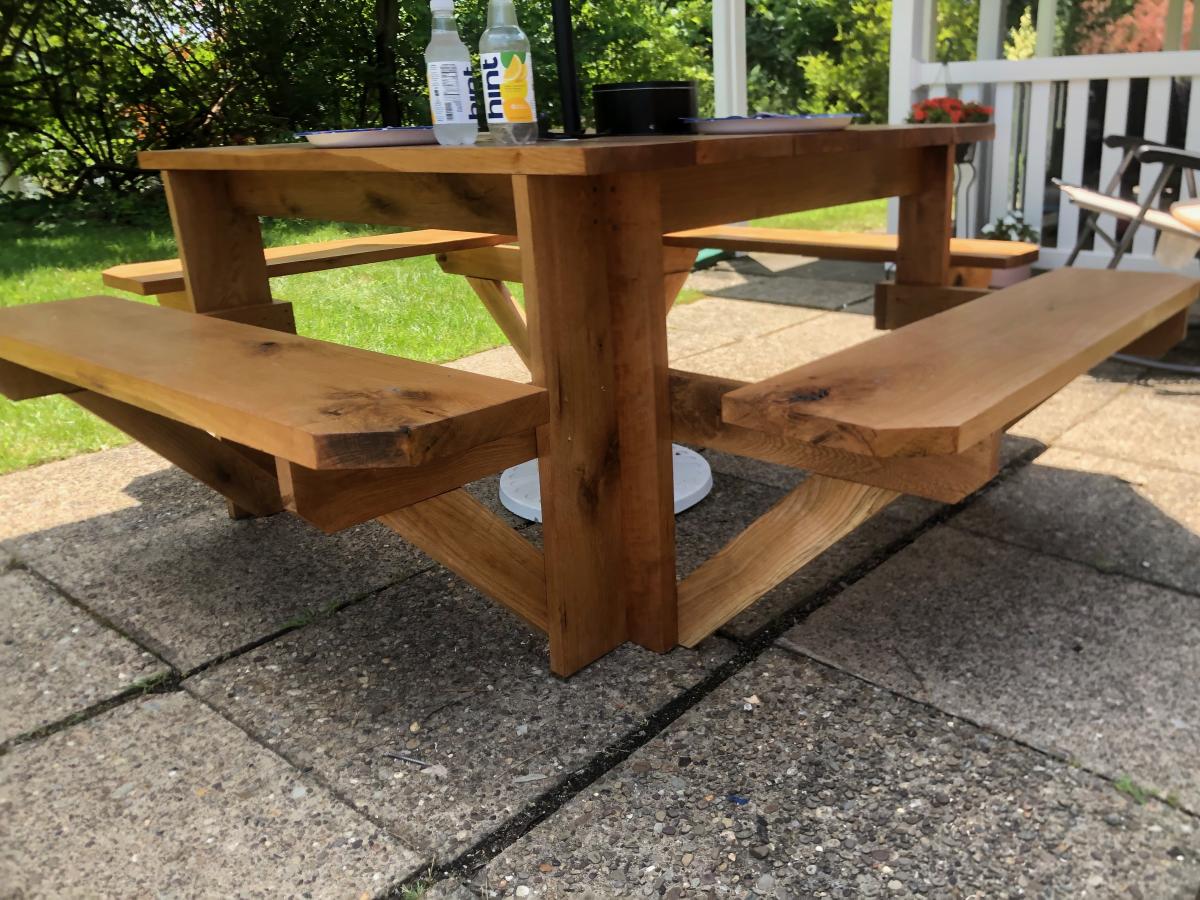
Used your plans to make a sturdy, durable hardwood picnic table for a friend. Top is black cherry (1 1/4") and base/seats are white oak (1 1/4"). The seats are one piece, 11" wide from a white oakoy cut and sawed on our property! Sealed with two coats of Spar Urethane.
Chip McCoy
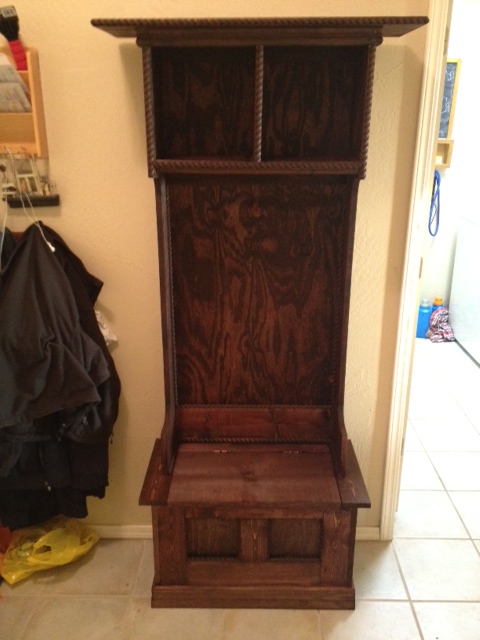
This is my first ever build (so be gentle). My fiance has always wanted a Hall Tree and her birthday was comming up so I posted a request for a Hall Tree and that afternoon there was a post from Ana with Mimi's Hall Tree, so I figured that was a sign I HAD TO BUILD IT! So I took the lists went to the local Home Depot and bought all the wood, plus a Jig Saw, Kreg Jig, Sliding Compound Miter Saw, Circular Saw, Clamps.... a few weeks later just in time for her birthday this is what I had. I have to admit its flawed but we love it!
I can't thank Ana and company for turning me on to my new hobby and I am looking forward to my next build!
PS I will be putting the hooks on tonight, I will post more photos when the hooks are on and there is stuff on the Hall Tree
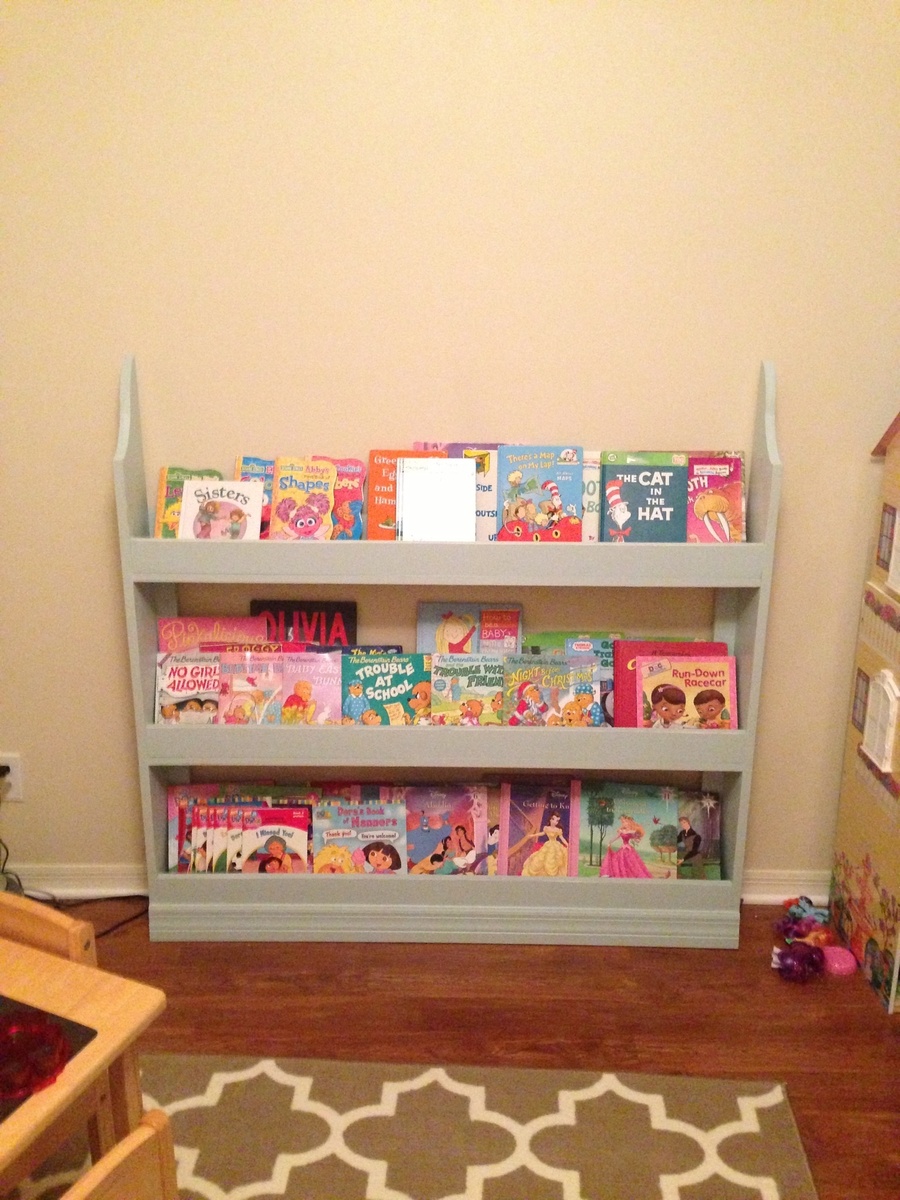
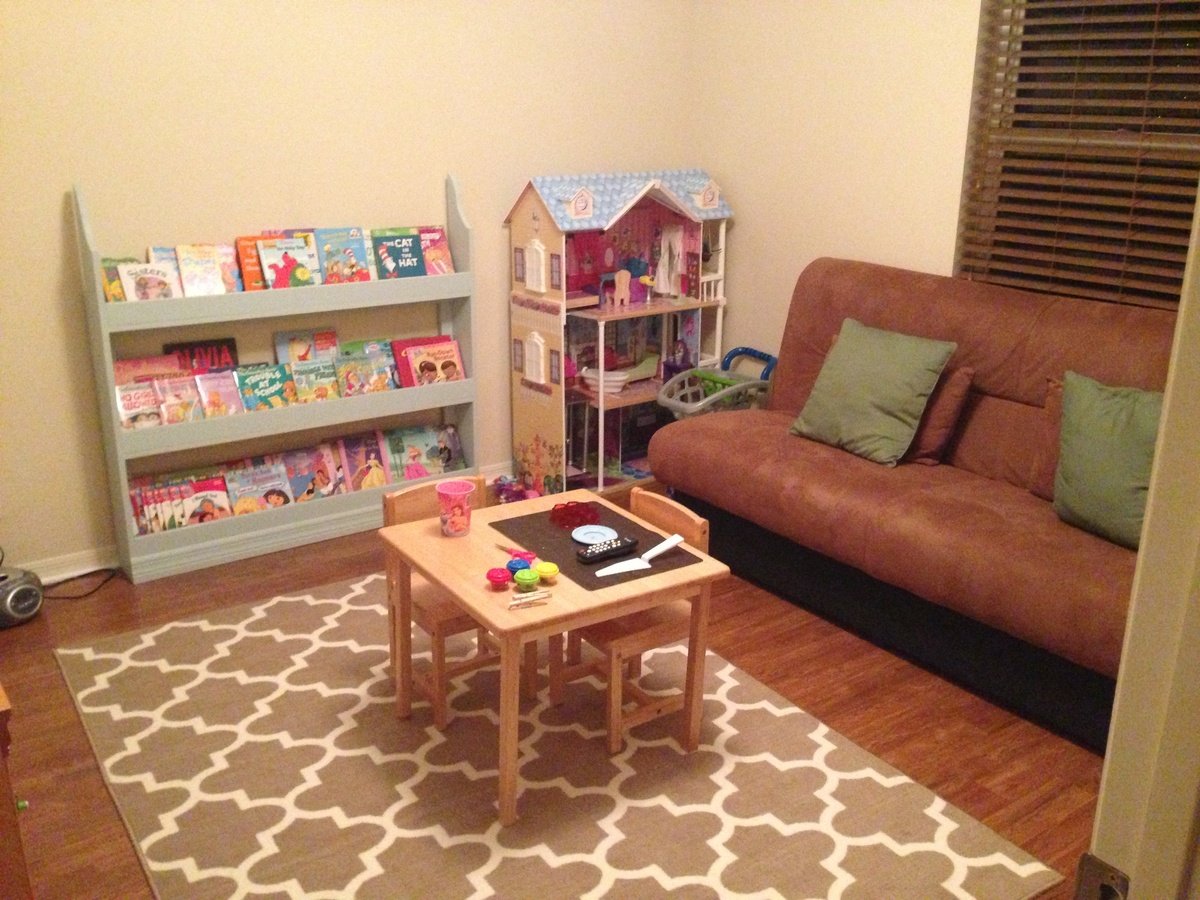
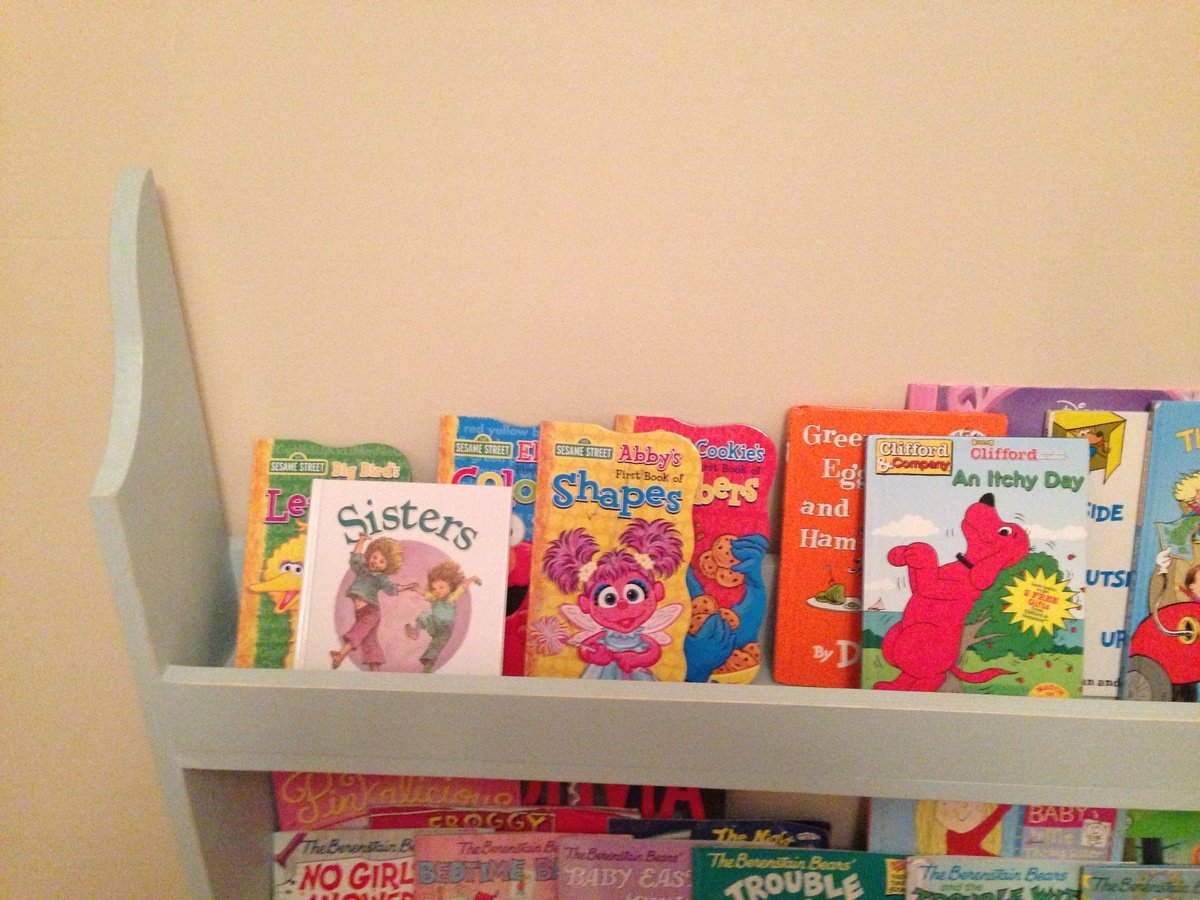
I modified the original plans by making the book case low and wide so my 5 year old could reach all of her books. I also added some 1x3's to the back of each shelf to keep the books from falling off the back and everything square. I have quarter round moulding on my baseboards, so it doesn't sit flush against the wall.
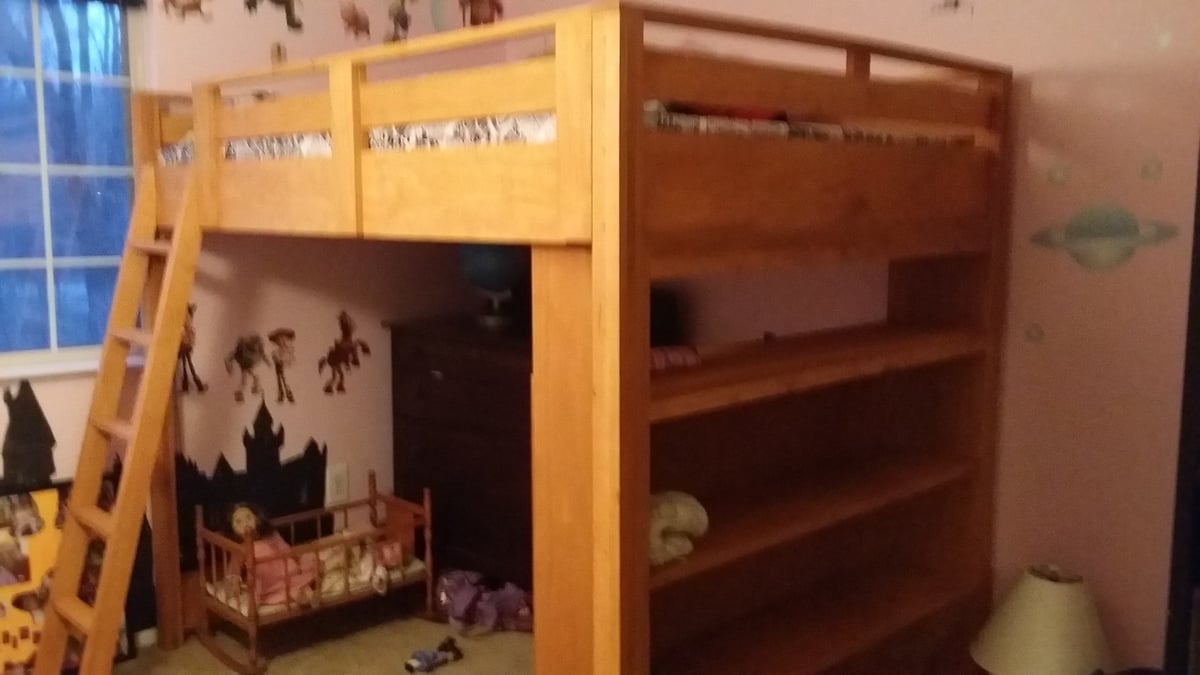
We made this a double bed and lowered the height by 3 1/4 inches because we have low ceilings. We added an extra support under the mattress since it's a double. Plan to add the desk and low shelves later. Followed the plans very closely, worked out great. One thing I would suggest is to do the slats after the guardrail. Otherwise you can't stand under the bed and it's hard to get a good angle when screwing it on. Many happy hours of reading Harry Potter up there in the first week :).
My son absolutely loves the platform bed I built him
For his birthday. Such a quick easy build thank you Ana for the plans

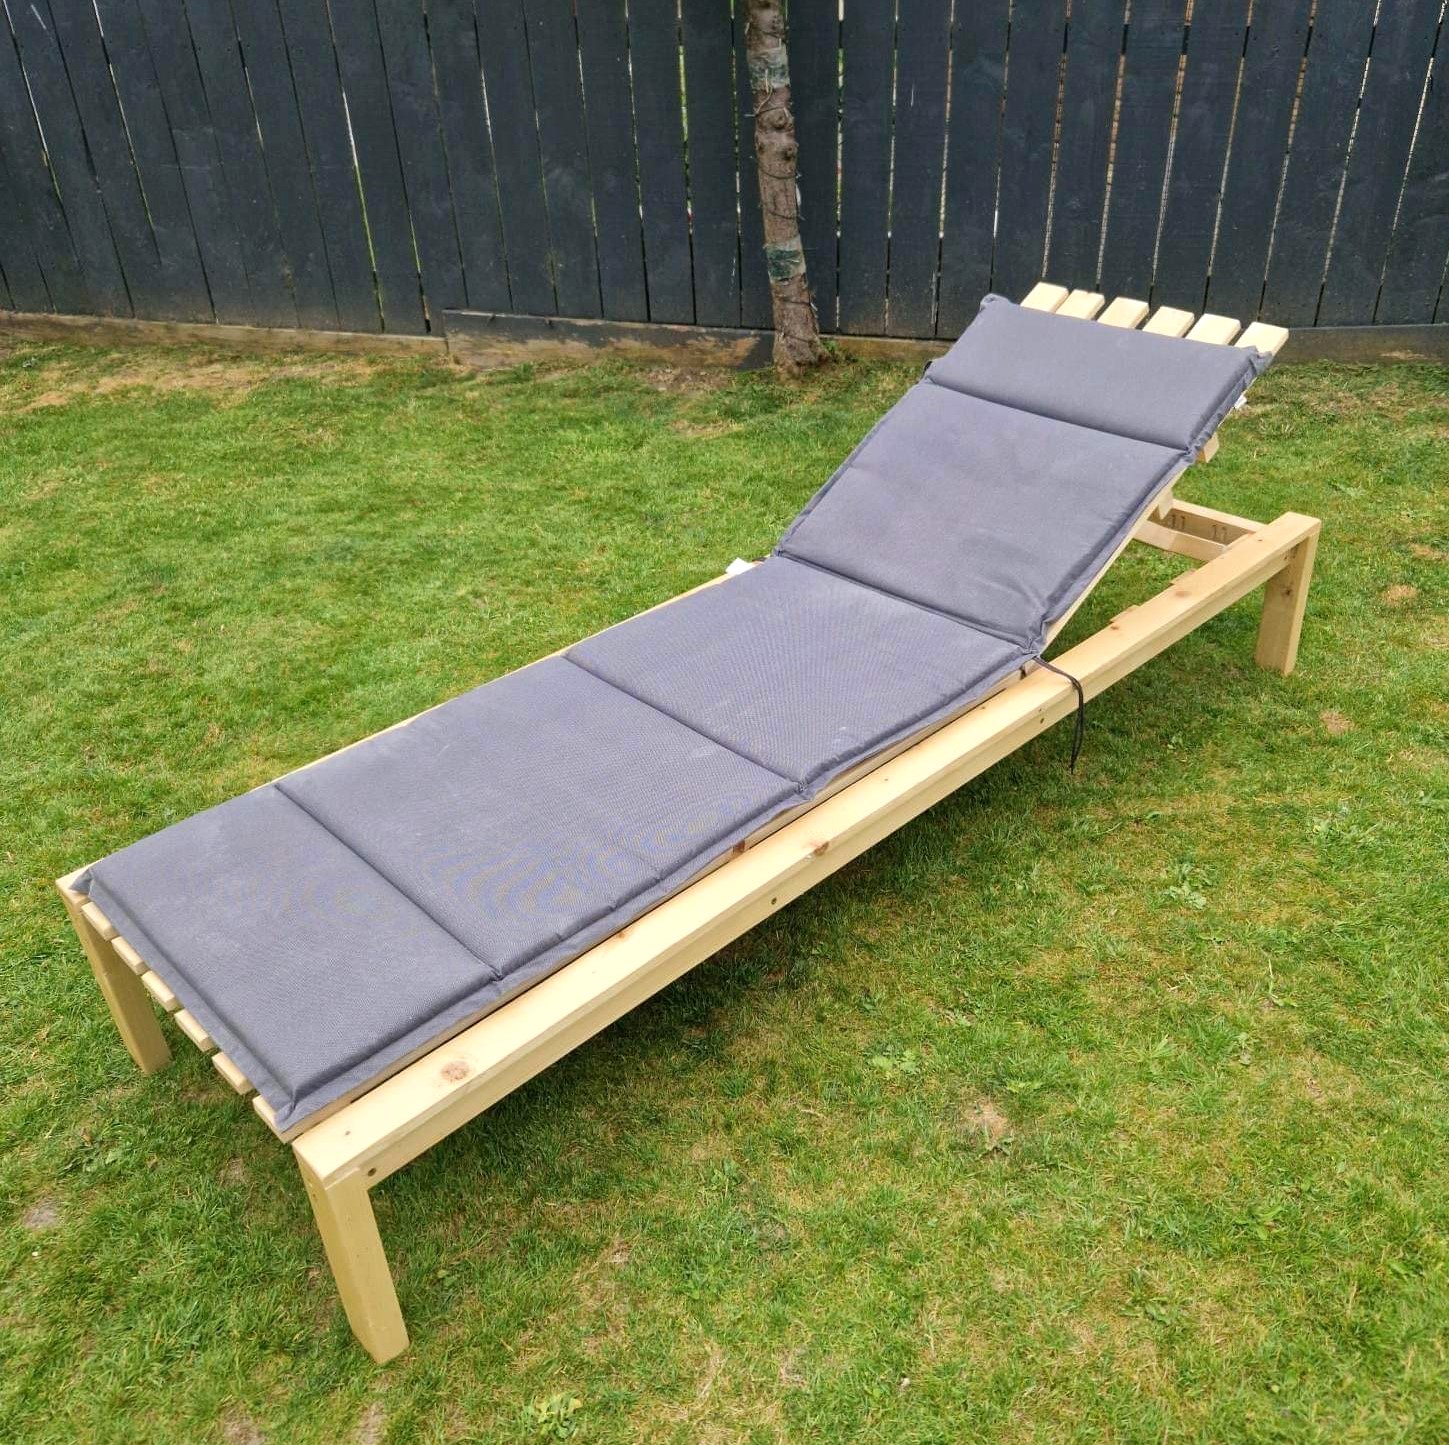
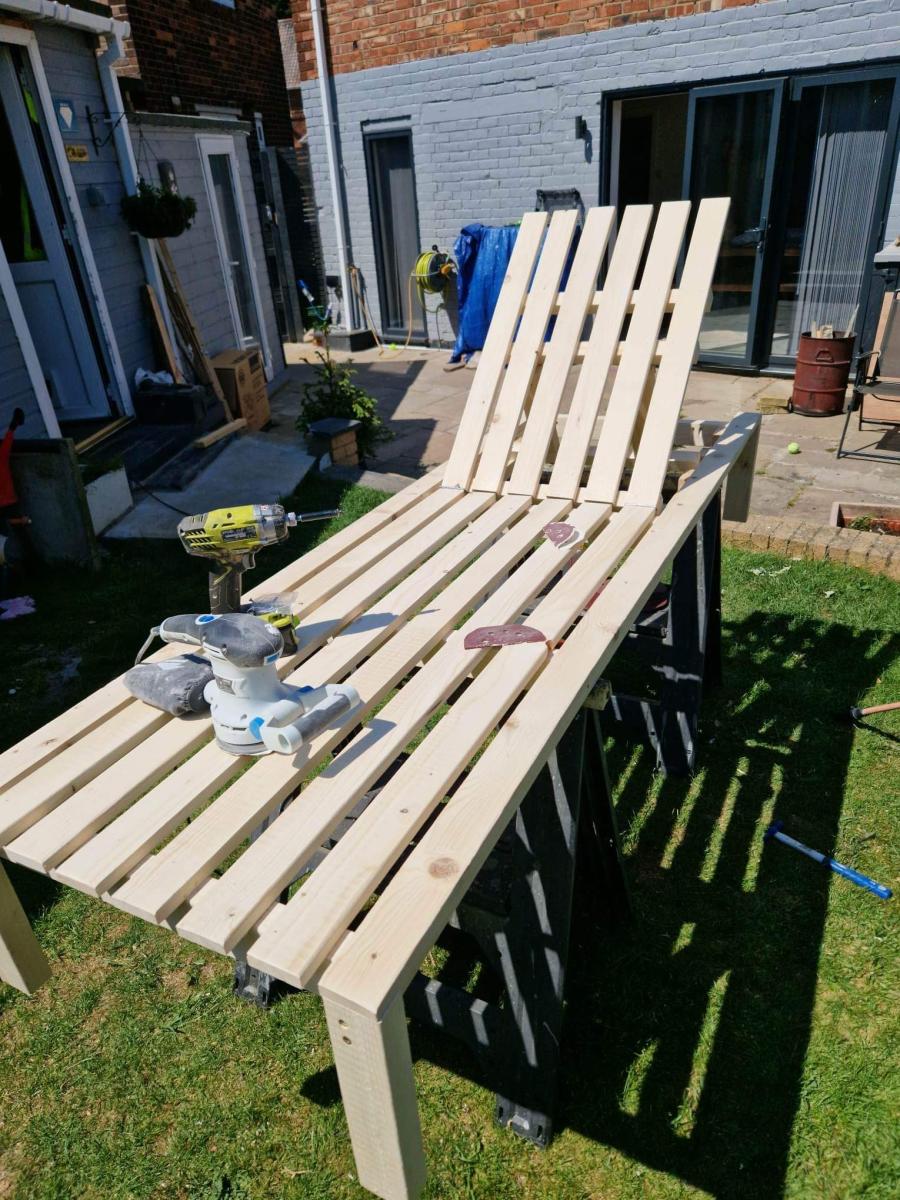
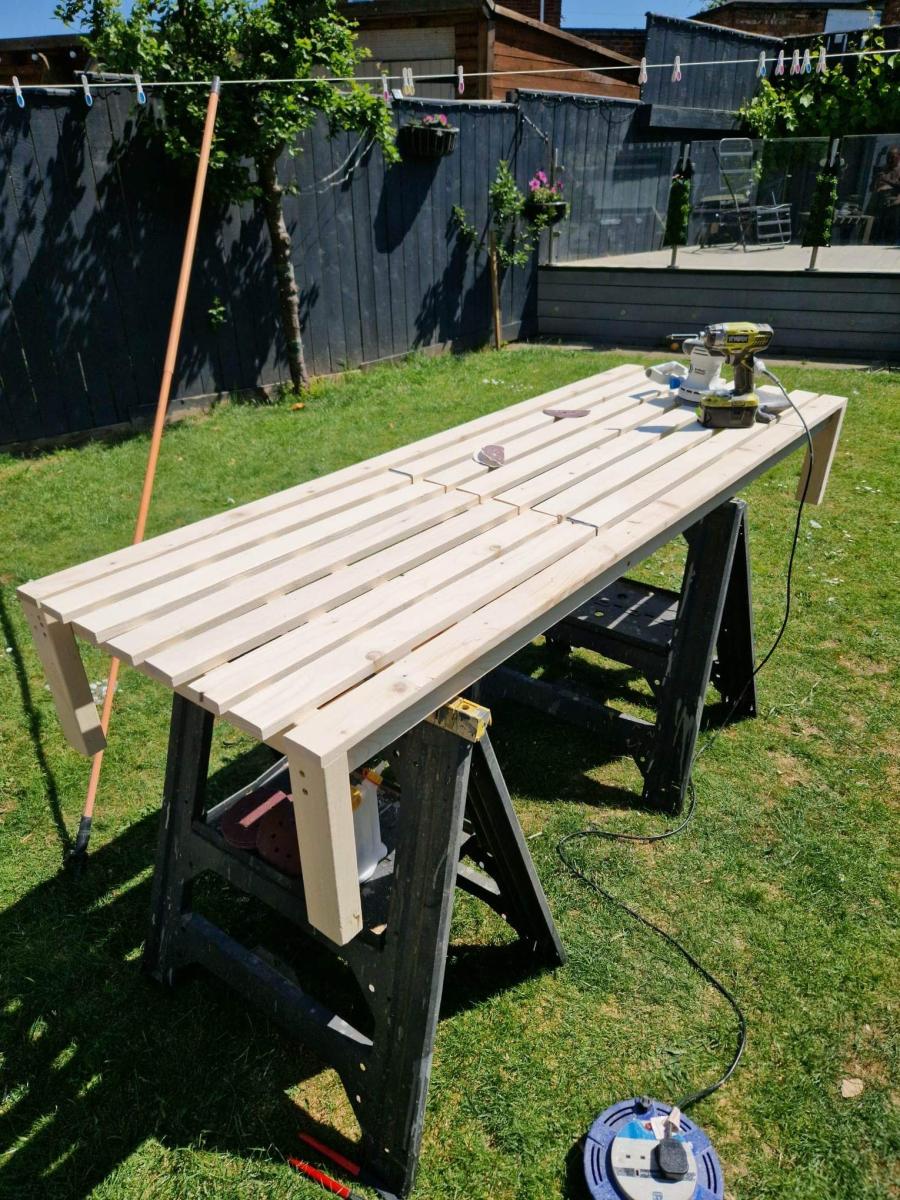
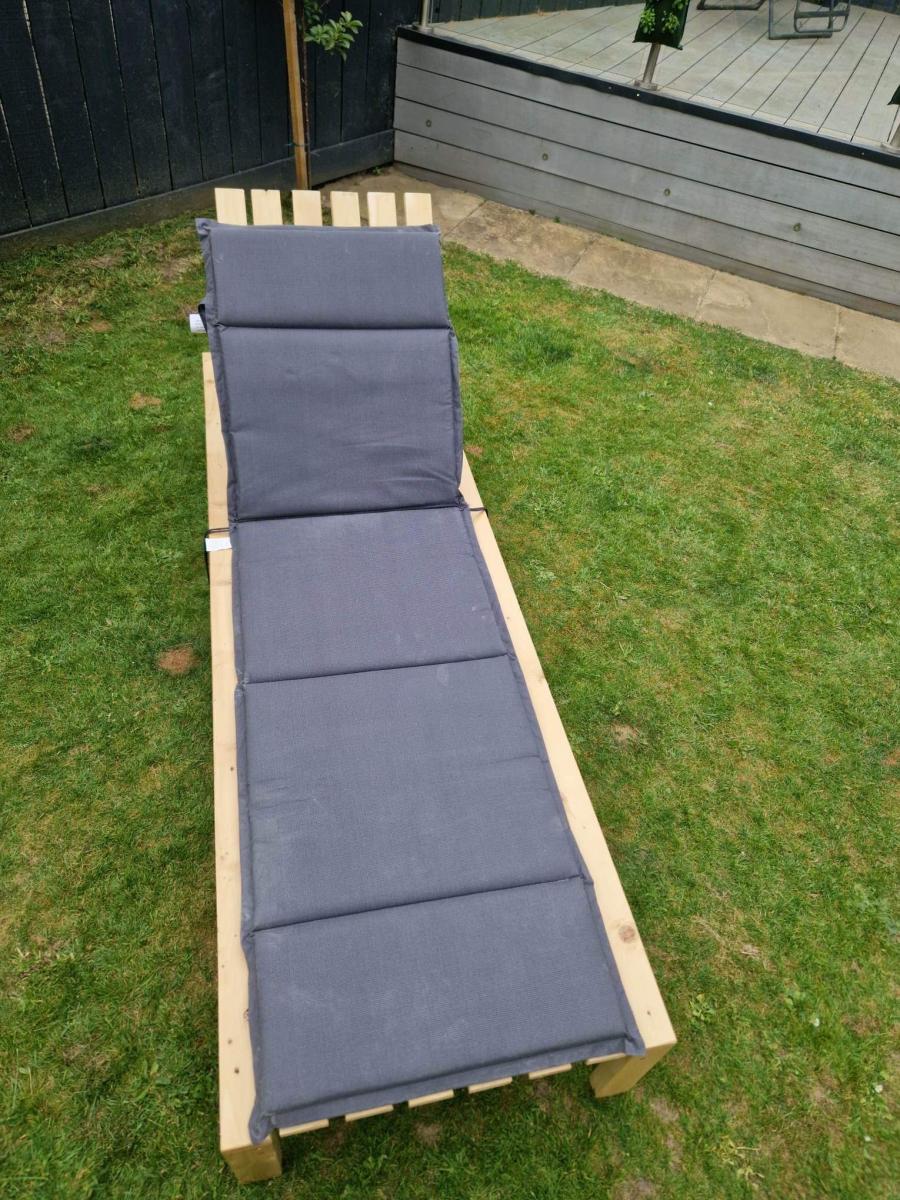
Modified lounger, made from 75mm x 38mm (cls) timber, sealed with 3 coats of exterior varnish.
Had great fun making this one, already on with making my second lounger.
A bit of wood
Check out my blog post for more on building this giant, hardworking piece! It took me about 45 hours to build it from start to finish (I work slowly) and cost about $400 in materials.
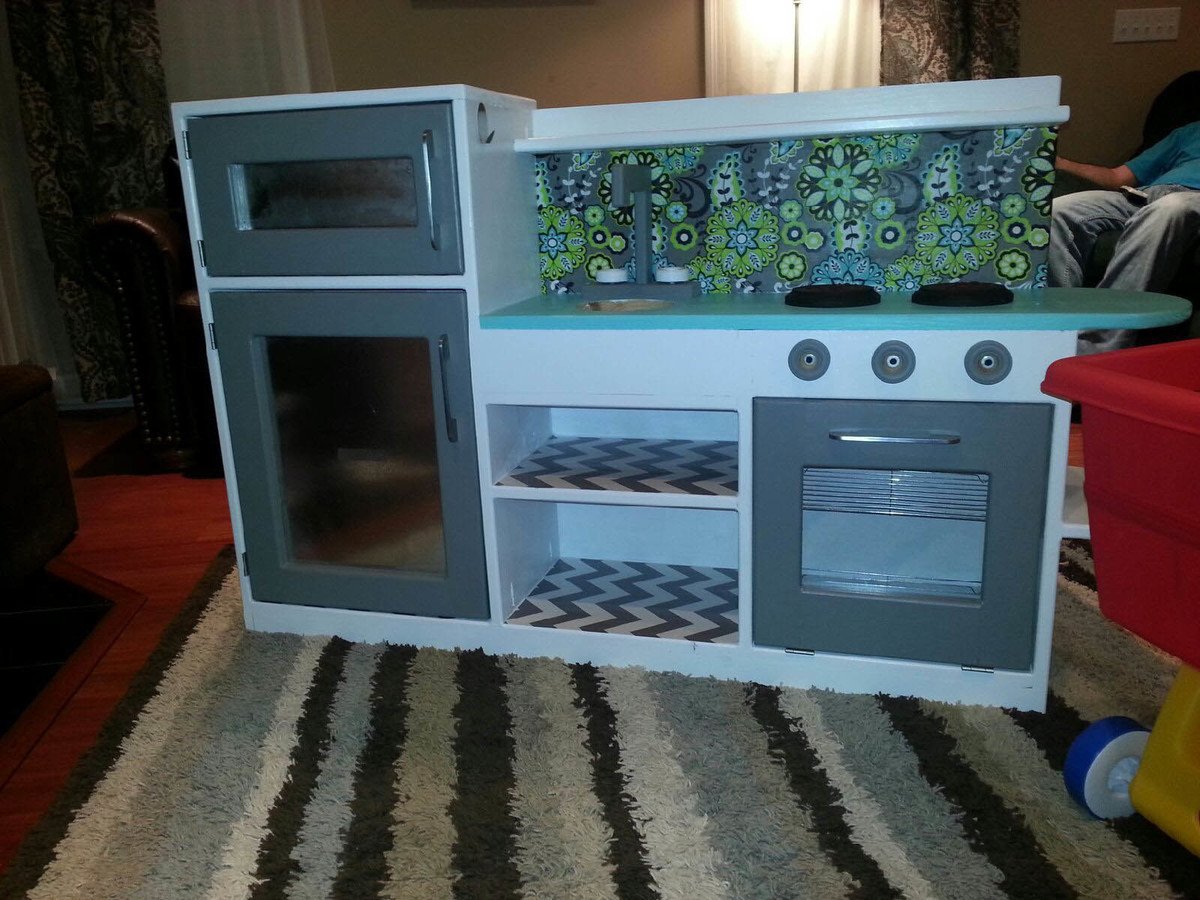
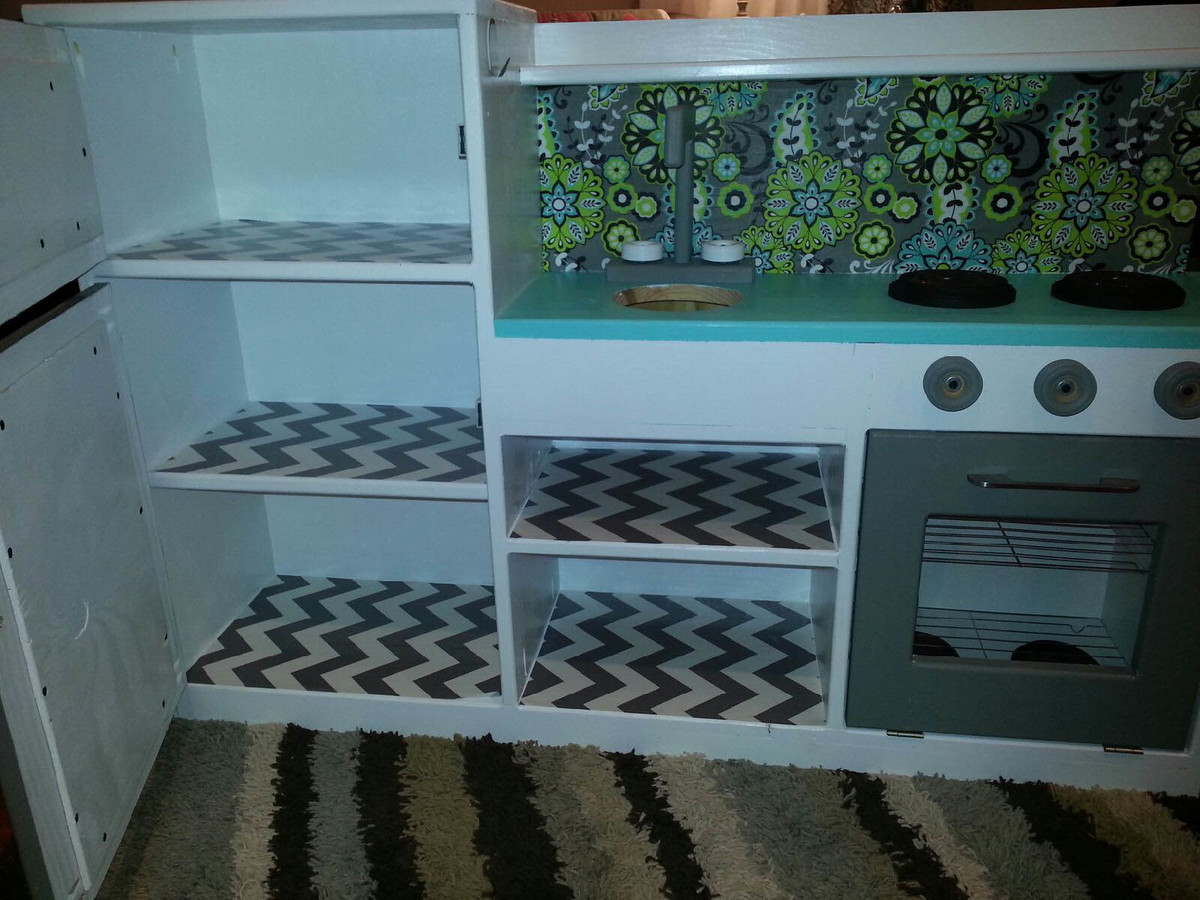
I wanted my daughter to have a play kitchen for Christmas - so I was excited when I found these plans on ana-white.com. My husband is a very skilled, self-taught, craftsman - so I knew he could do this! I'm pretty crafty myself - so combined, we made this awesome kitchen. We couldn't be prouder of how it turned out.
The back splash is a piece of remnant cloth from Hobby Lobby - I modge podged it on. The shelf liners are laminated fabric also from the Hobby Lobby remnant bin, that was put down with a little bit of spray adhesive. Oven racks are from the Dollar Tree - cookie drying racks. The stove eyes and oven burners are wooden disks from Hobby Lobby as well as the knobs. The stove eyes and oven burners have red glitter glue swirls on top to give the realistic "hot" look. The sink was a stray dog bowl we've had for a while. The handles were left over from another project we did a while back.
My husband built the faucet and knobs from plans he dreamed up as he went. We used metal sheets in the fronts of the fridge doors so she could put magnets on them.. like a real fridge! He also added an additional shelf in the lower part of the fridge. He used magnetic closures on each of the doors so they will stay shut nicely.
He built the entire kitchen in one day -- the drying time on the paint -- slowed us some due to the weather we've been having. Over all it took us about 1.5 weeks to finish - working on it a little each evening.
Our daughter loves it.. she's cooked us several meals since Santa brought her kitchen. LOVE IT!!