Community Brag Posts
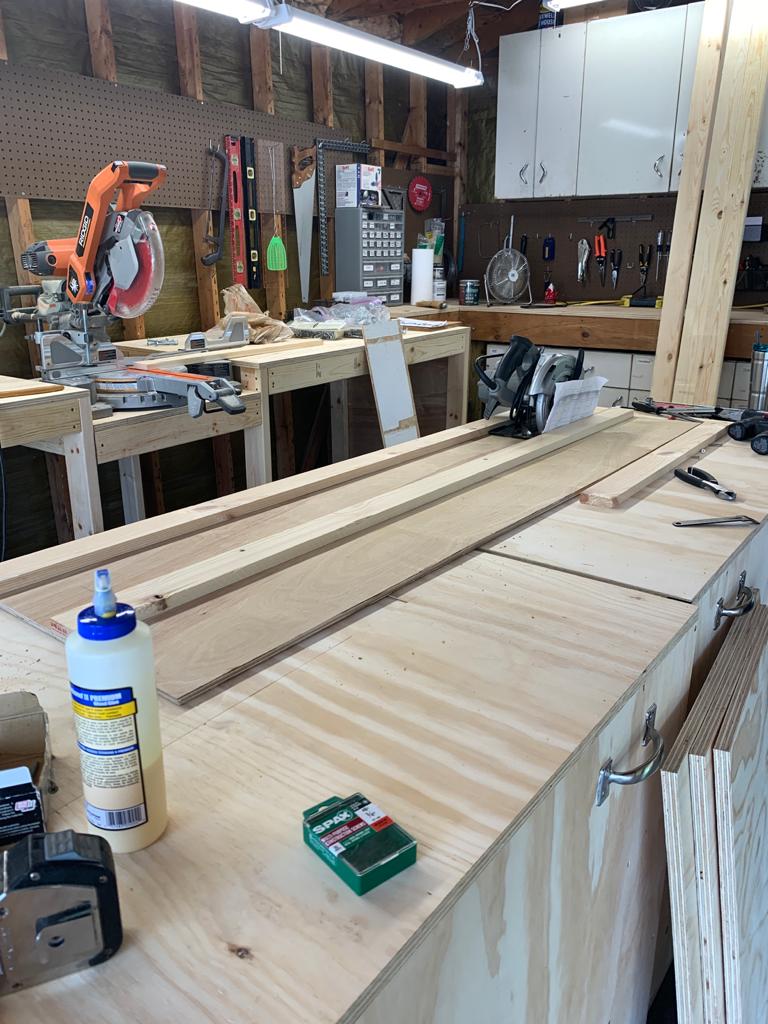
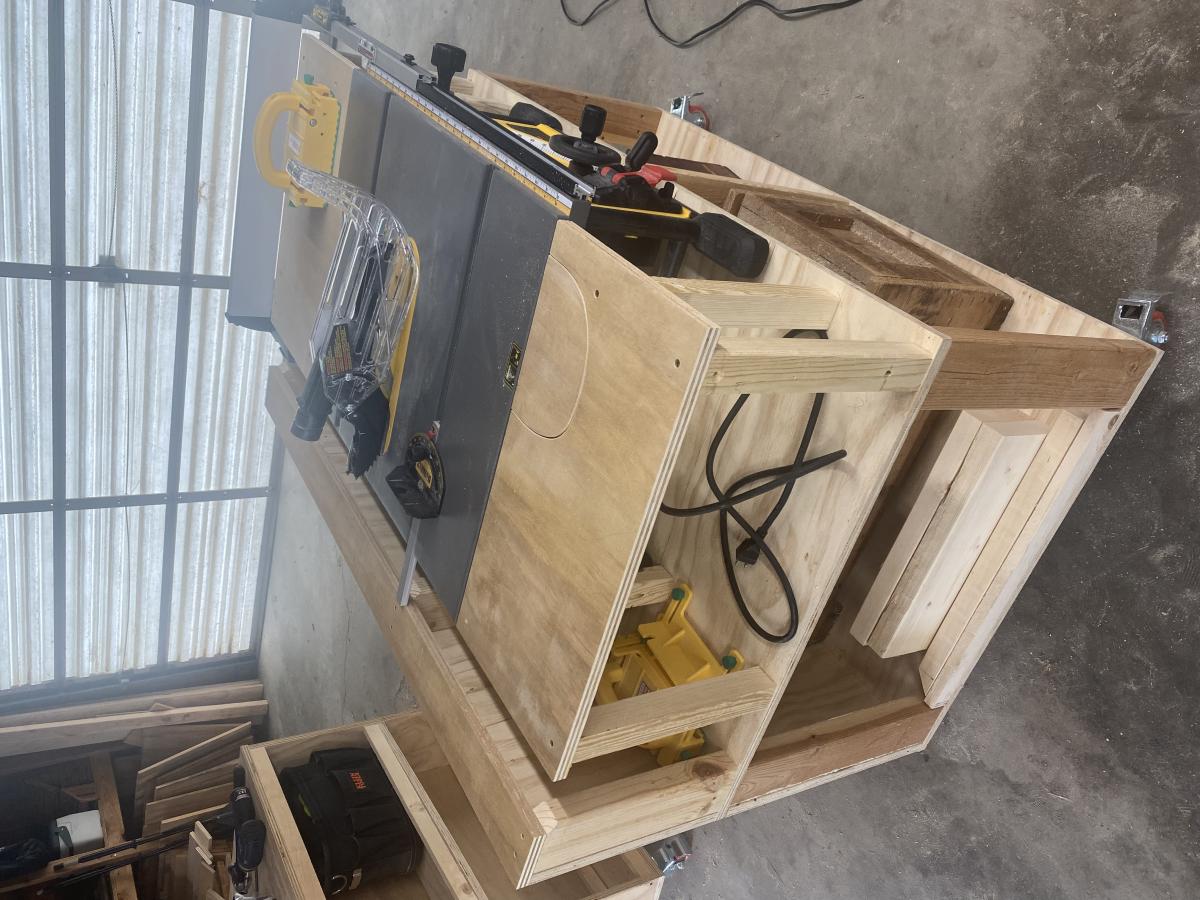
Ultimate roll away workbench
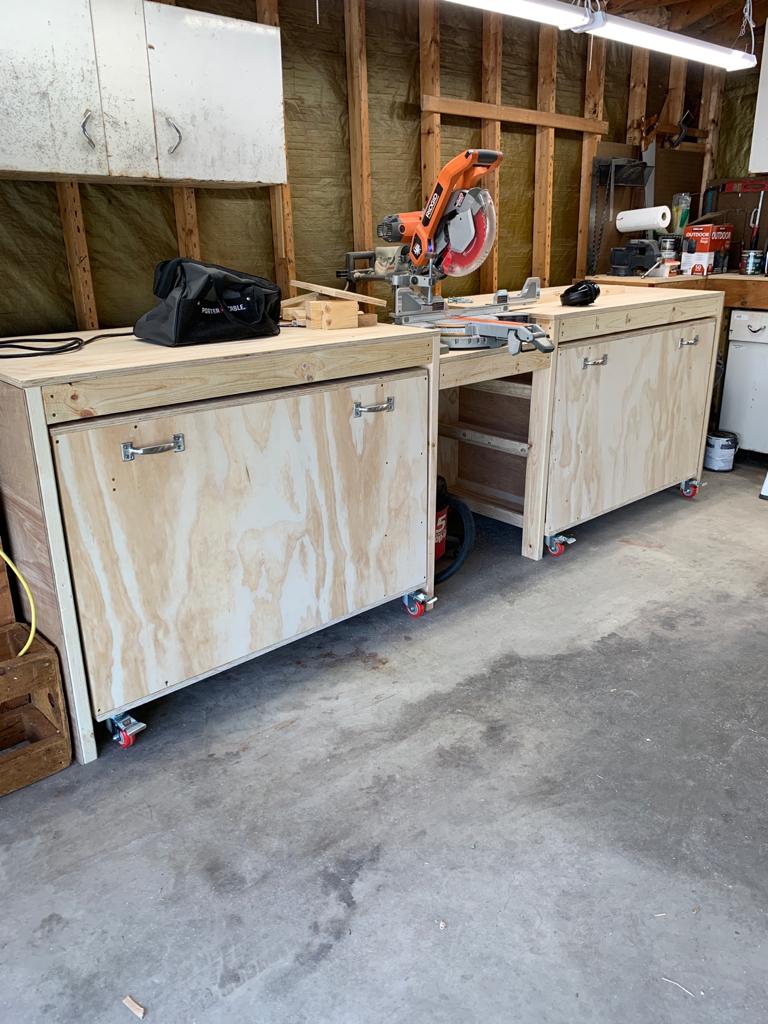
NINE MONTH UPDATE: After using the bench for almost nine months, we’ve made some changes. The first is that our table saw, a Dewalt 7491 didn’t fit in the way the plans called for because of the fence. We ended up cutting down and rebuilding the table to make a platform for the saw, then we built three “tables” around it to leave a gap for the fence operation. We also added a curved piece that can be removed to access the riving knife lever.
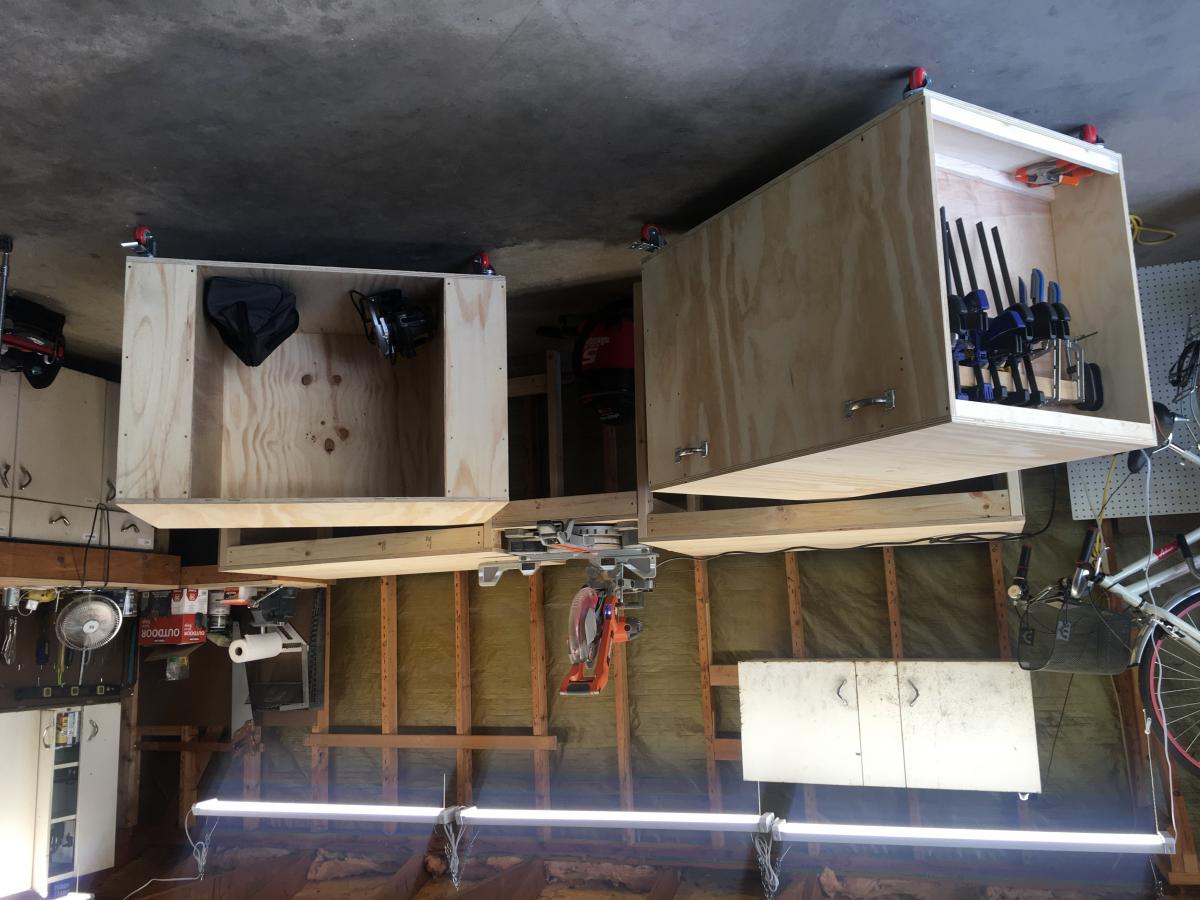
The other change we made was to take out the clamp storage that was in one of the cart ends. When we rolled the cart in and out, the clamps would catch and fall off. We put in another shelf instead.
Otherwise, we love the bench. Having the two rolling carts that we can reposition based on where we need a table extension is great. The miter saw stand works perfectly, and our dust collection setup rolls right underneath. We’re also in the process of building a router table that fits in the removable bench room area.
ALSO, sorry for the upside down/sideways pics. It won’t let me remove or fix them.
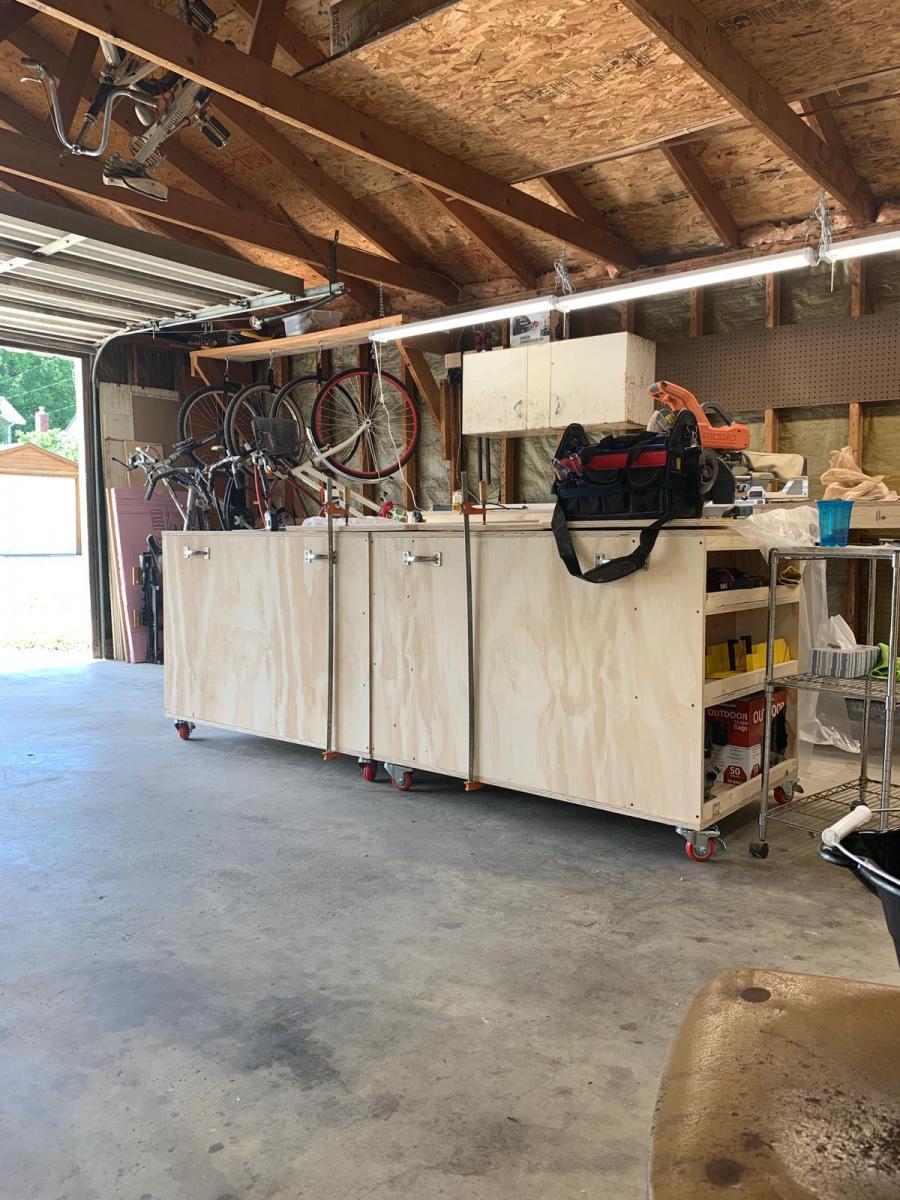
We made the ultimate roll away workbench with very few changes. Added the clamp hanger on one end as pictured. We didn’t add the shelf under the miter saw, as well be putting a dust collection cart.
We absolutely love the cart.M, now to save up for a table saw. The only change I would like is that I wish the side shelves were a little deeper, more like 10” instead of 8”, so more tools would fit.

Built from Plan(s)
Estimated Cost
380
Estimated Time Investment
Weekend Project (10-20 Hours)
Finish Used
None
Recommended Skill Level
Beginner
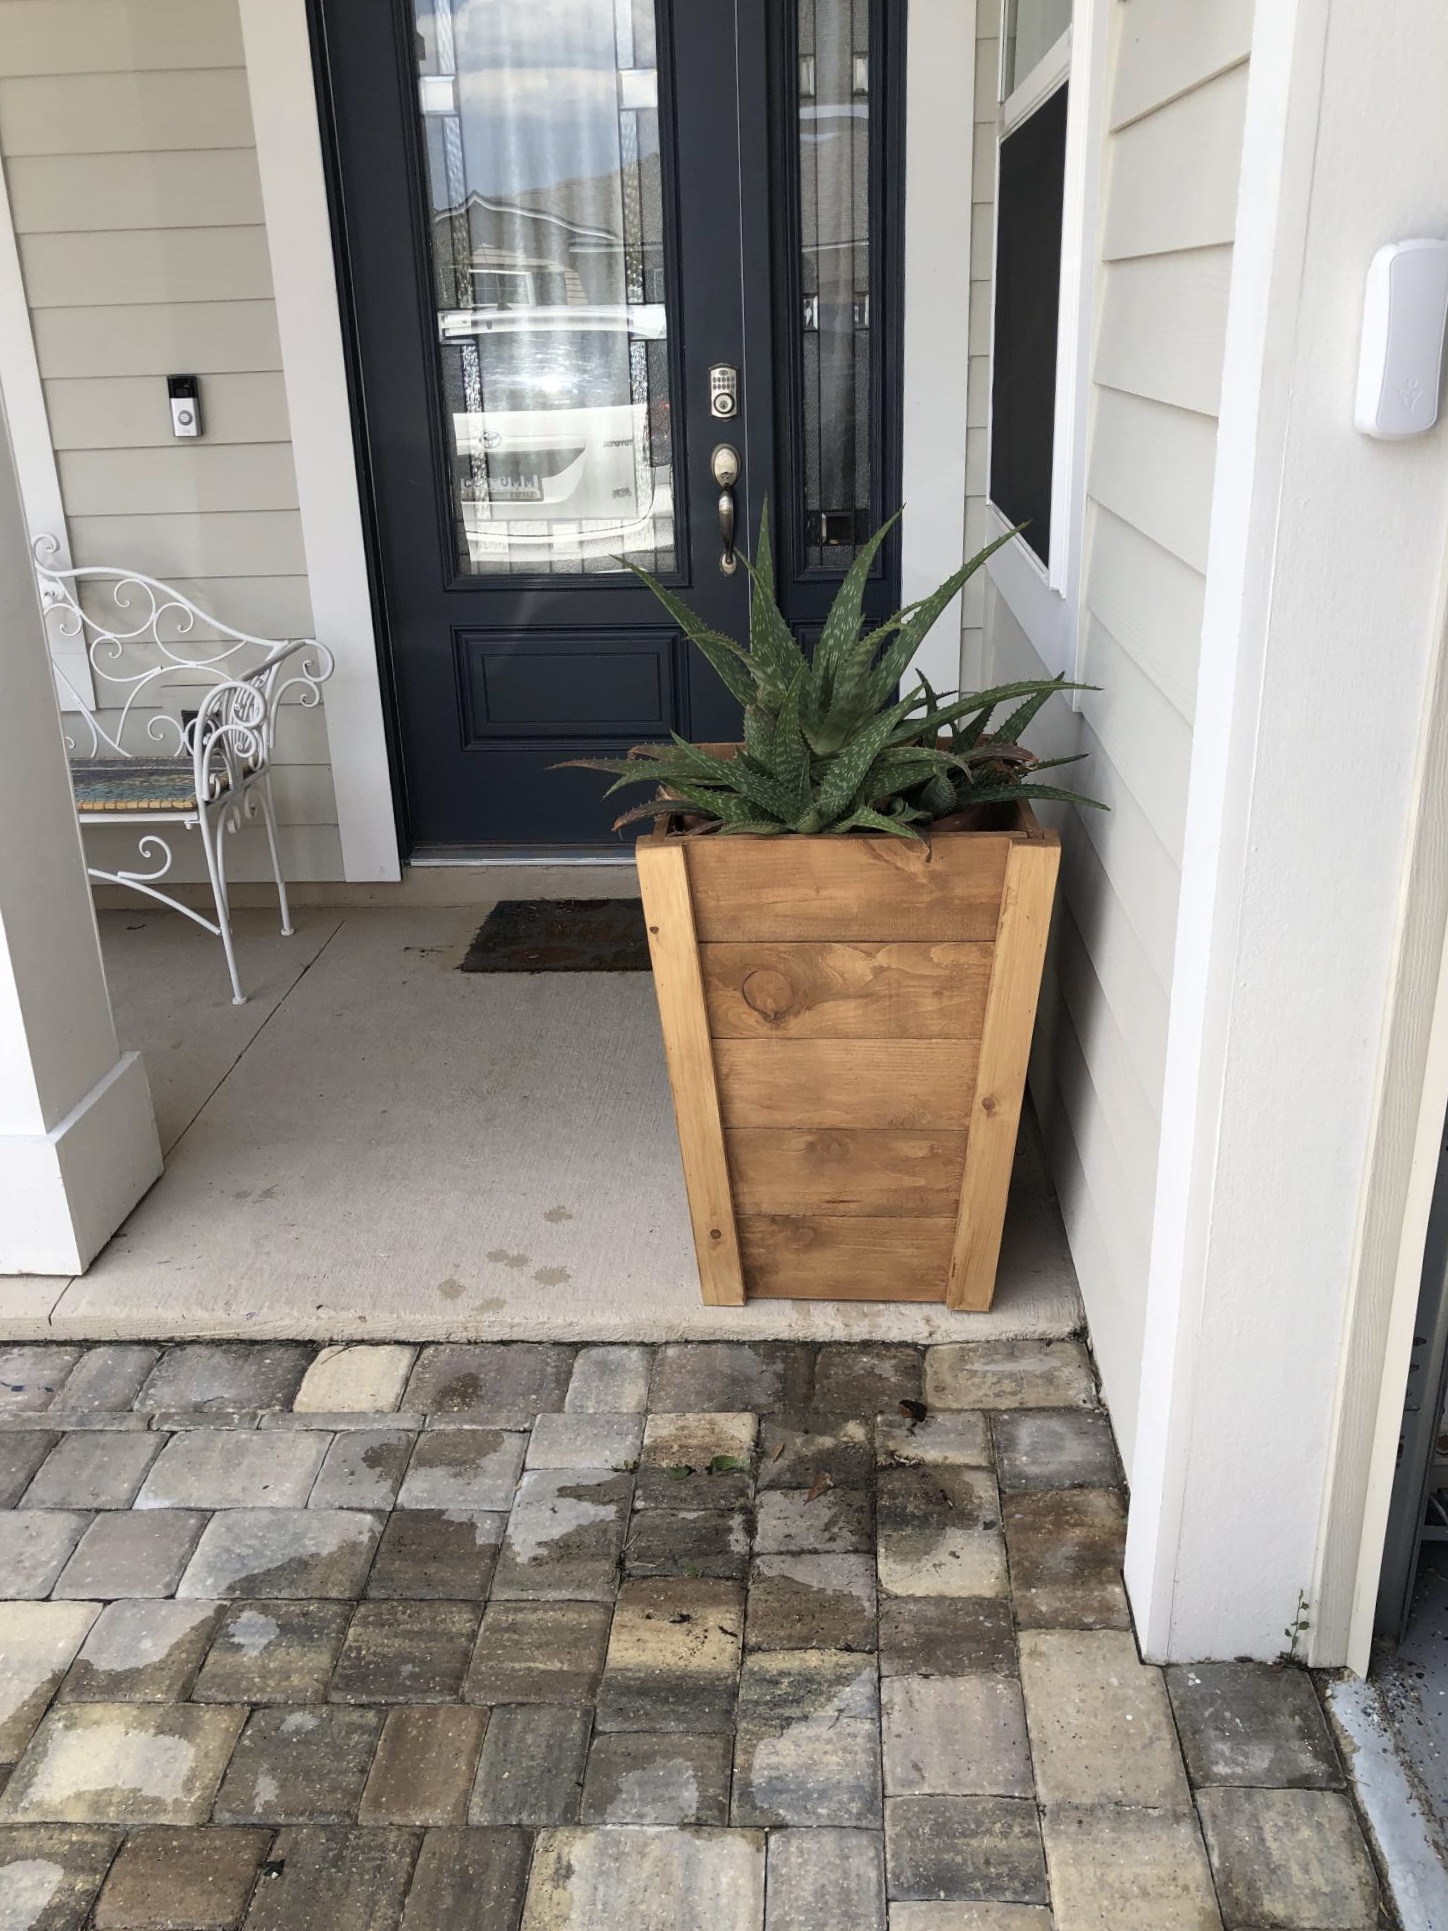
Flip Top Storage Bench
Ana's Flip Top Storage Bench. I made this ASAP, after I saw it in the book, and then online. I thought it was going to be longer and was thinking it would go great in the mudroom, but after it was finished it turned out to be the perfect size for a fireside seat.
This is my first time using hinges....are they supposed to show? By the time I got them on and working I was pooped and didn't want to test my luck. Maybe I'll have to get some more decorative looking ones!
Used my Kreg Jig, still had splitting issues.
Used finishing nails around the shelves to secure a bit.
Oh and HD didn't have a 1x12x12 so I had to get three 1x12x6 . Bet that cost more, but I'm happy to have some more scrap wood to play around with.
Thanks Ana!
Built from Plan(s)
Estimated Cost
Lost my reciept....maybe that's a good thing?!
Estimated Time Investment
Afternoon Project (3-6 Hours)
Finish Used
minwax color expressions walnut, about 2/3 of the tube.
Recommended Skill Level
Beginner
Comments
Sun, 10/21/2012 - 09:27
You did a great job on this
You did a great job on this table. What color stain did you use? And did you put a coat of poly on it?
Yes, the hinges are supposed to show. I made this table about two years ago when Ana first posted the pans, but I don't use it as a table. I use it as a bench in my entryway to hold gloves, hats, etc. It's held up great all these years, and now I'm thinking of building another one for by my garage door, since that's where we come in and out most times.
Sun, 10/21/2012 - 09:38
Stain
Thanks, I used Minwax color expressions in walnut, I haven't put poly on it yet, I thought I might just put a wax over it to make it a bit smoother. I don't really know what I'm doing quite yet, so I'll have to learn my options!
I'm thinking of making the longer version for the mud room....should go quicker on round two right!
:) Valerie

Mon, 10/22/2012 - 09:06
Hinges showing question
I think in order to get your hinges to be more minimally showing you can inset them by using wood chisels to shave a rectangle of wood from the surface where the hinge lays. I've used hinges on a couple things so far and that's what my husband said to do but I was being to lazy to get some chisels. You can get them at any hardware store for pretty cheap I think. Now I'm not positive on any of this since I haven't been doing this hobby for too long. Your bench looks great by the way!
Saddle Seat Stools

After a lot of cutting, screwing, chiseling and sanding... oh and a lick of paint! My new little Saddle Seat Stools are complete. Time will only tell whether they will hold up to the abuse the boys give them especially Brodie! These new stools only cost me $48 to make the pair and I got all the timber from Bunnings
Built from Plan(s)
Estimated Cost
$48
Estimated Time Investment
Weekend Project (10-20 Hours)
Finish Used
Teak and White Enamel Paint
Recommended Skill Level
Beginner
Home Depot DIH Workshop Rolling Storage Cart
So I went to the DIH Workshop held at my local Home Depot and finished my cart over the weekend. I had the guy at HD cut my plywood down, won't make that mistake again. He made each one about a inch shorter than I asked for so I had to make my adjustments for everything else based on that. Next time I will take a tape measure with me to make sure instead of lugging everything to my car, taking it home and then measuring.
All-in-all I like the way it came out even with the minor adjustments still a fantastic cart.
Built from Plan(s)
Estimated Cost
$52
Estimated Time Investment
Weekend Project (10-20 Hours)
Finish Used
Olympic Paint Gold
Recommended Skill Level
Beginner
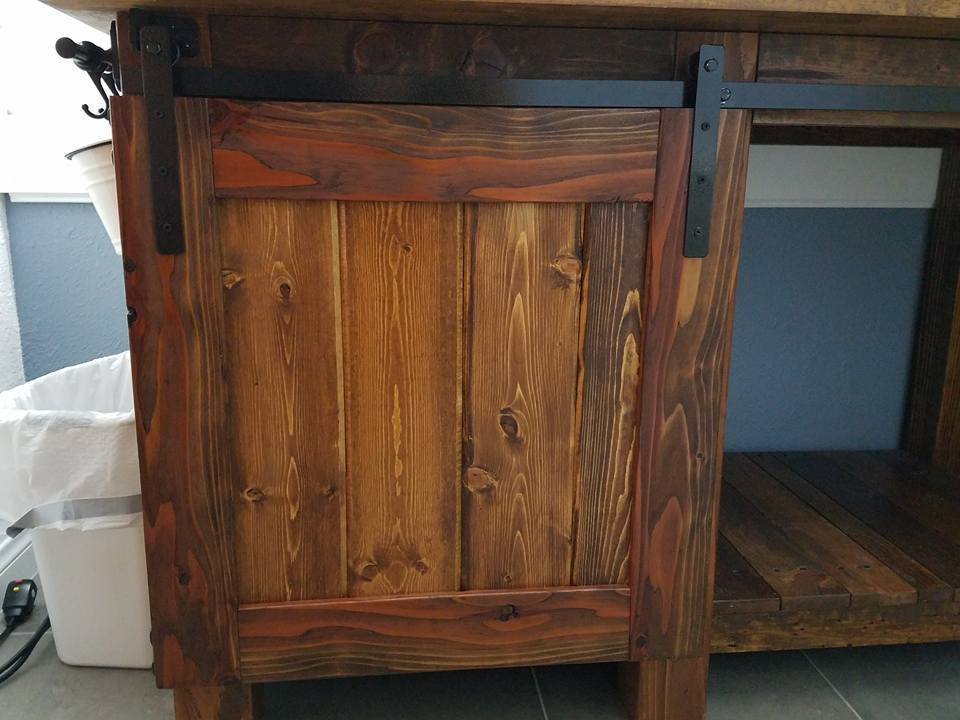
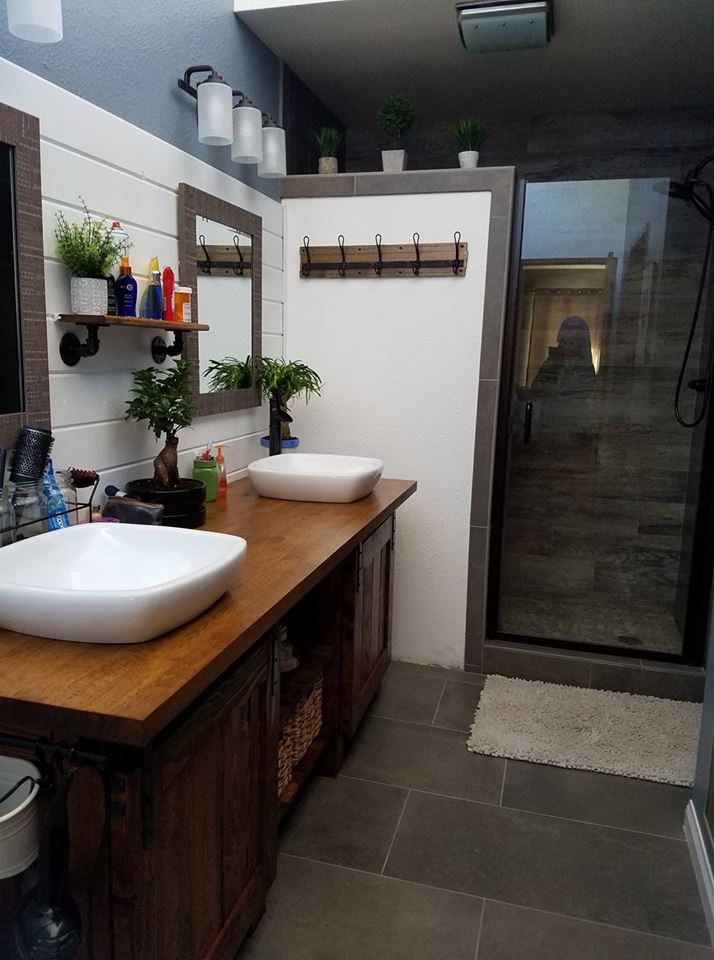
Rustic Vanity

Ana, we saw your plans for the barn door cabinet that was pinned in pinterest and absolutely loved it and felt we had to build it but we had to completely modify the plans to have it custom fit our bathroom. It was a trial and error experience never having built anything before. Thank you for giving us the idea.
Estimated Cost
$275
Estimated Time Investment
Weekend Project (10-20 Hours)
Finish Used
Lacquer and Early American stain
Recommended Skill Level
Beginner
Comments

Sat, 05/18/2019 - 19:54
This is amazing! I can't…
This is amazing! I can't believe I did not see it sooner. I'm so inspired! Ana
Fri, 01/01/2021 - 10:54
Gorgeous Rustic Vanity
Where can I find these plans. It would be perfect for my master bath. Spectacular.
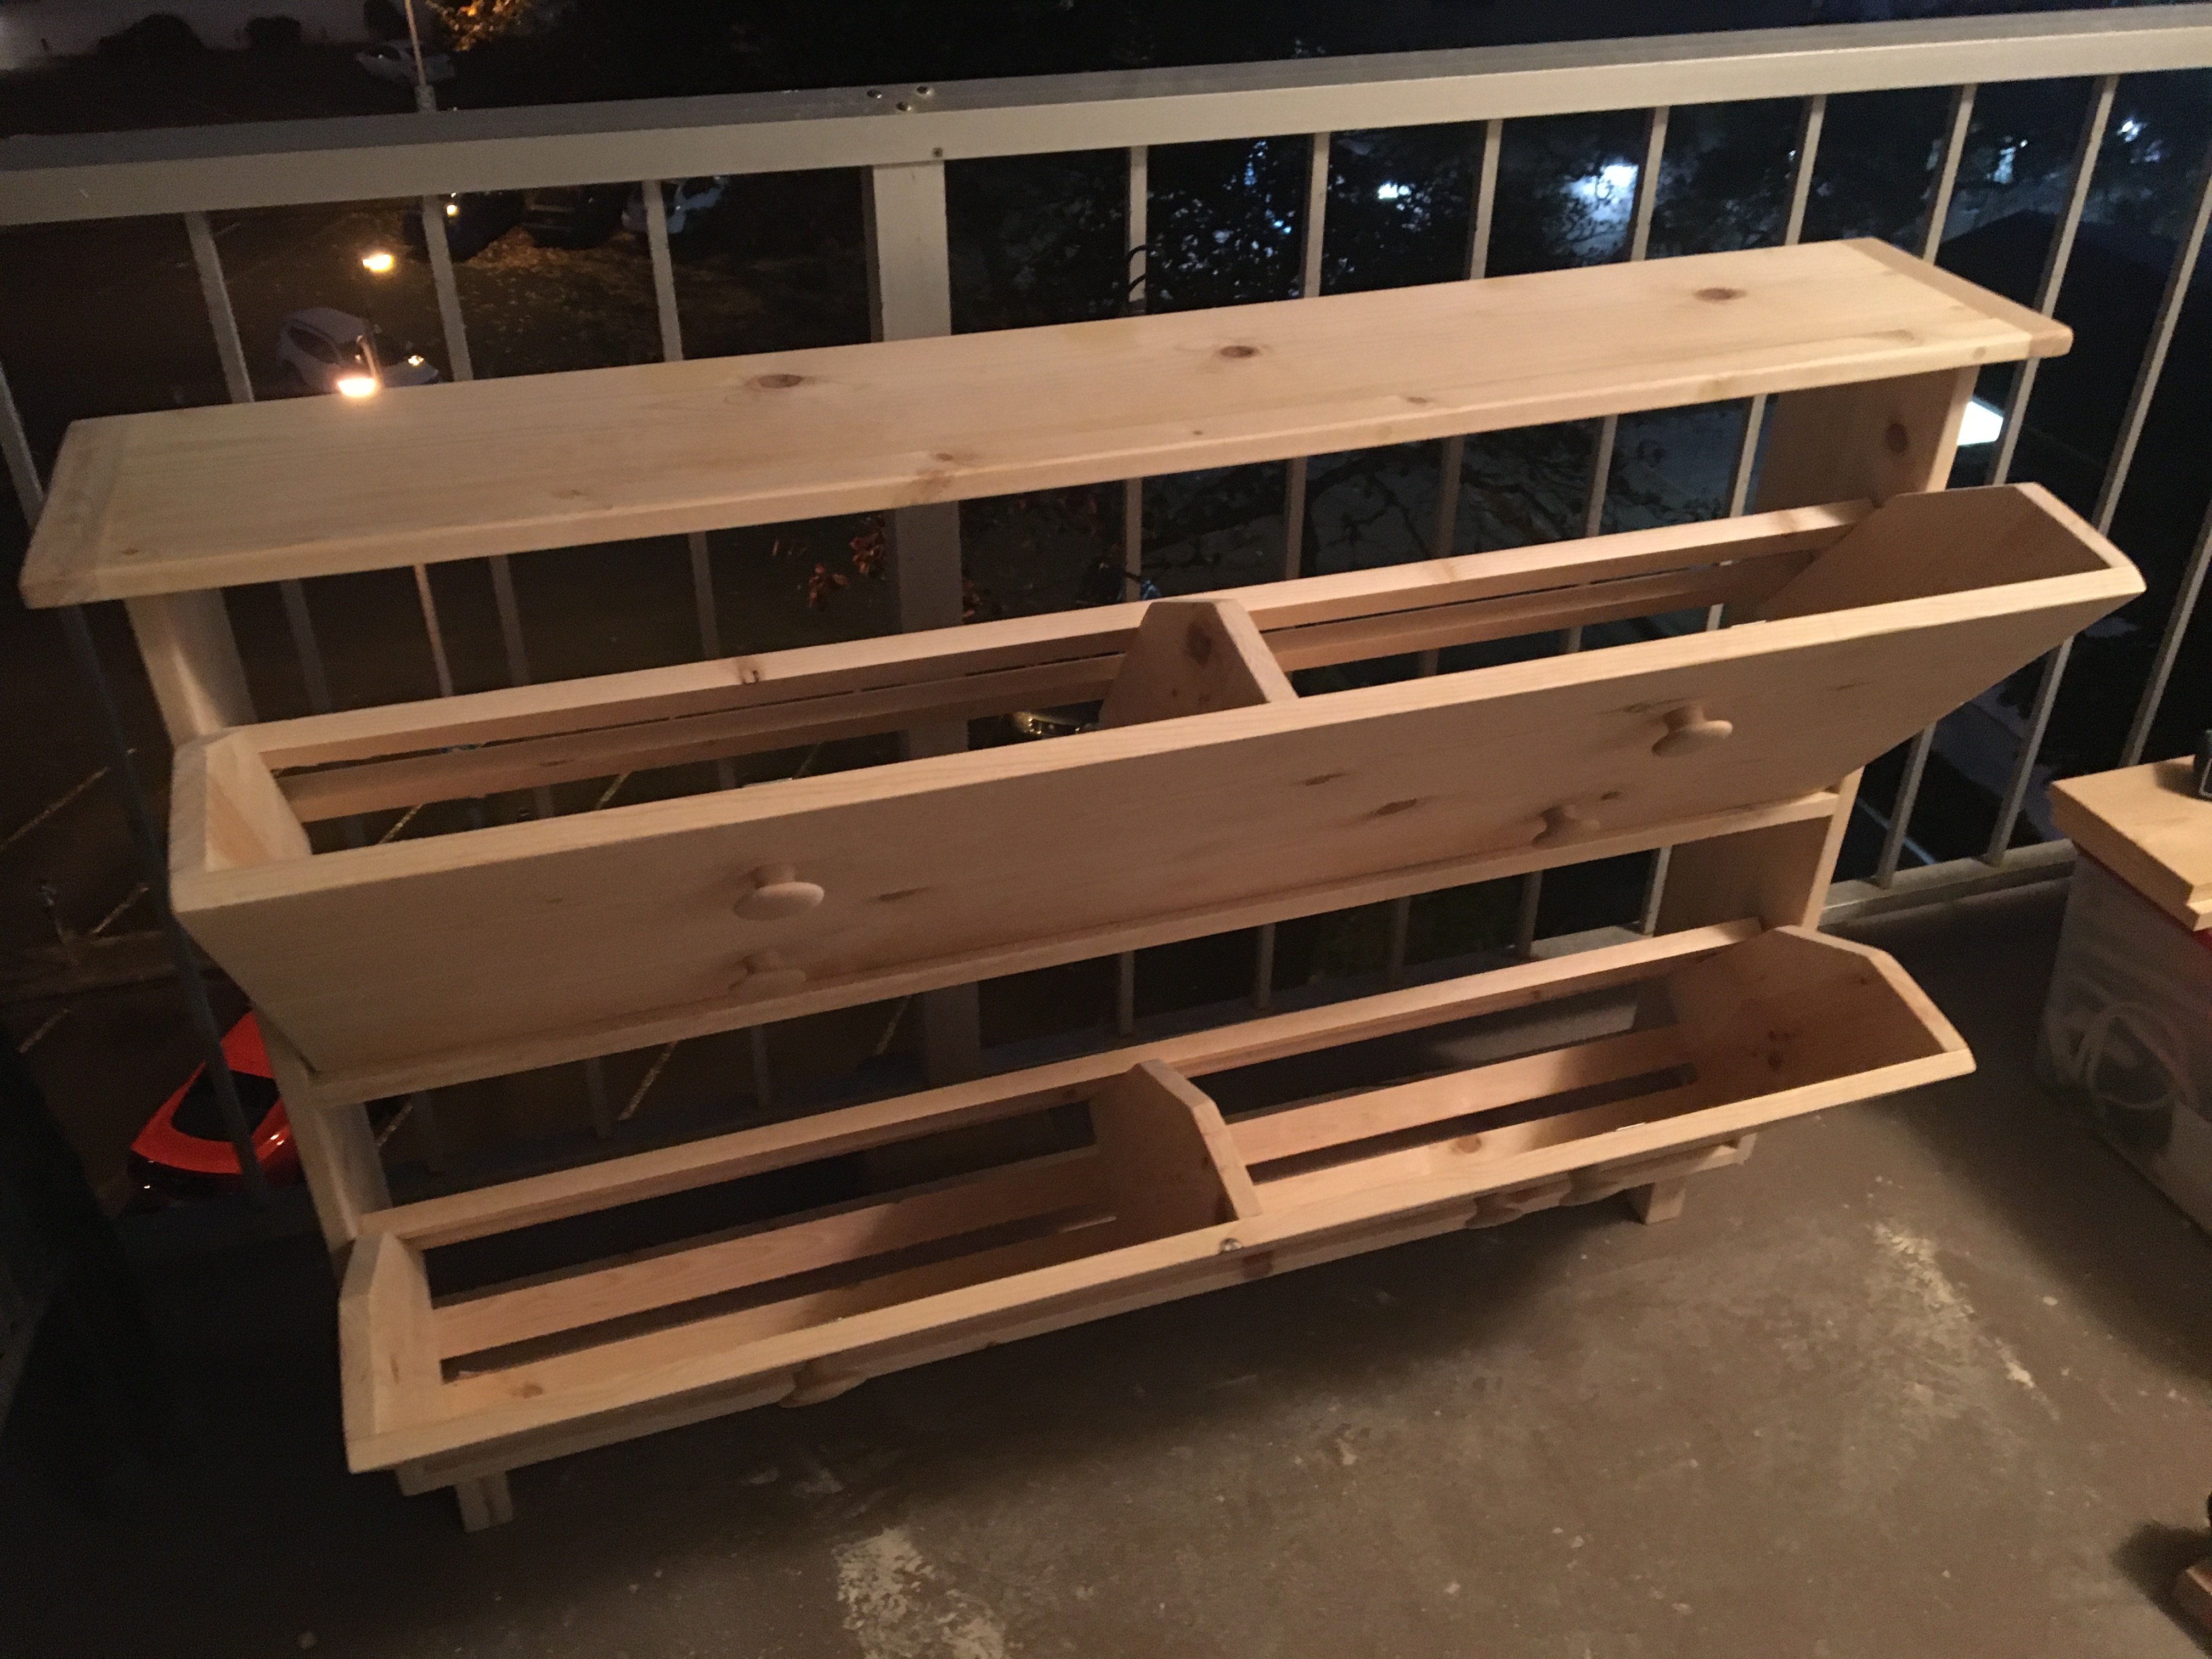
Shoe cabinet!
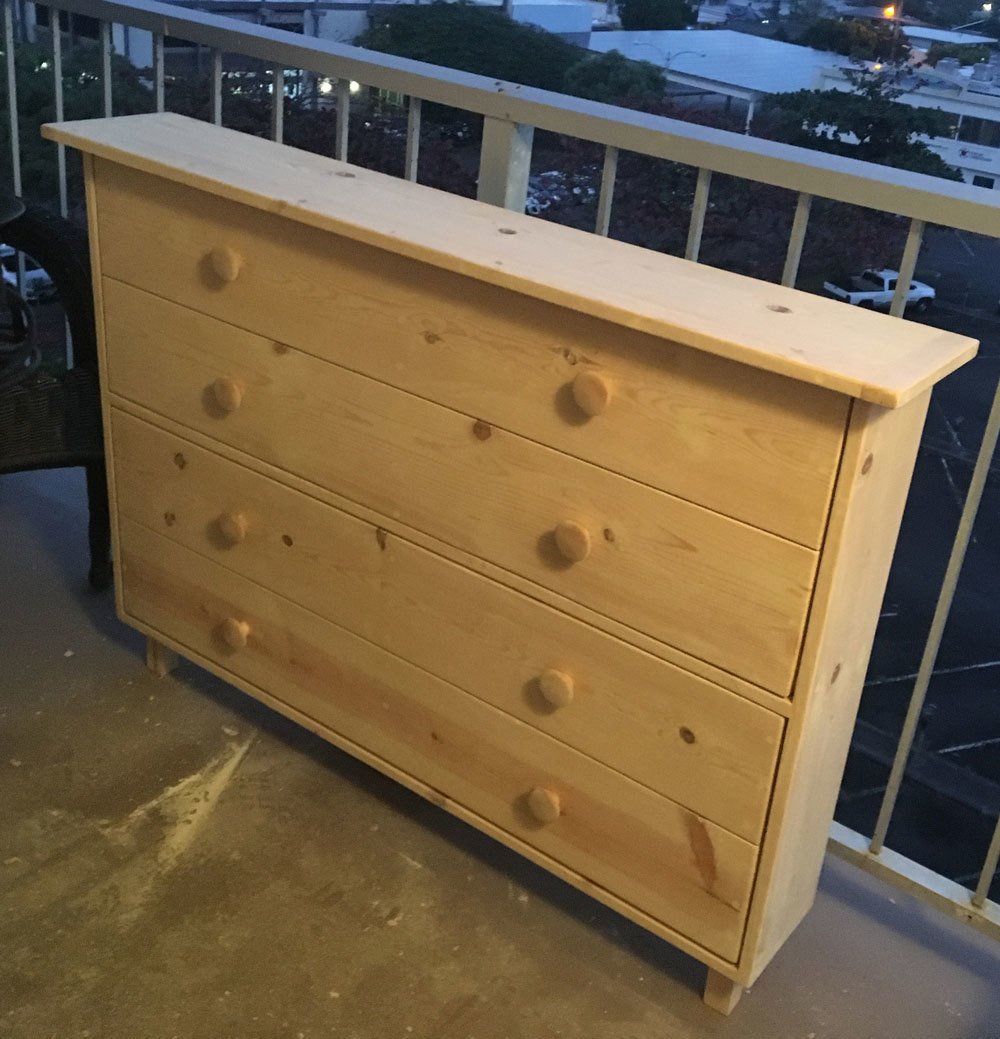
Created my own version out this plan.
Built from Plan(s)
Estimated Cost
$80
Estimated Time Investment
Weekend Project (10-20 Hours)
Recommended Skill Level
Intermediate
Pantry Cabinet

Had to re-size from the plans to fit my space, but my wife loves the extra storage we now have in the laundry room. Put in adjustable shelves.
Built from Plan(s)
Estimated Cost
300
Estimated Time Investment
Week Long Project (20 Hours or More)
Recommended Skill Level
Beginner
Comments
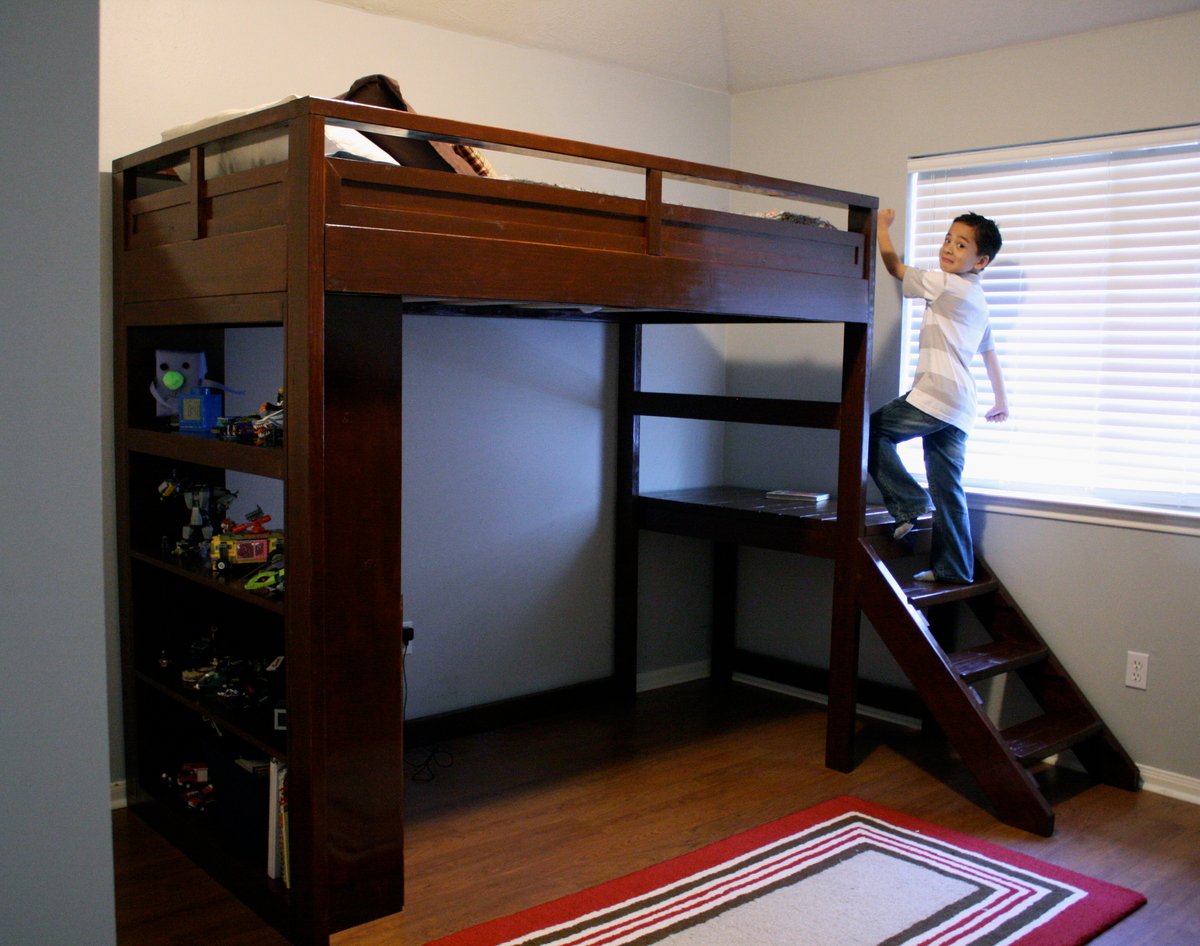
Camp Loft Bed w/ Stairs
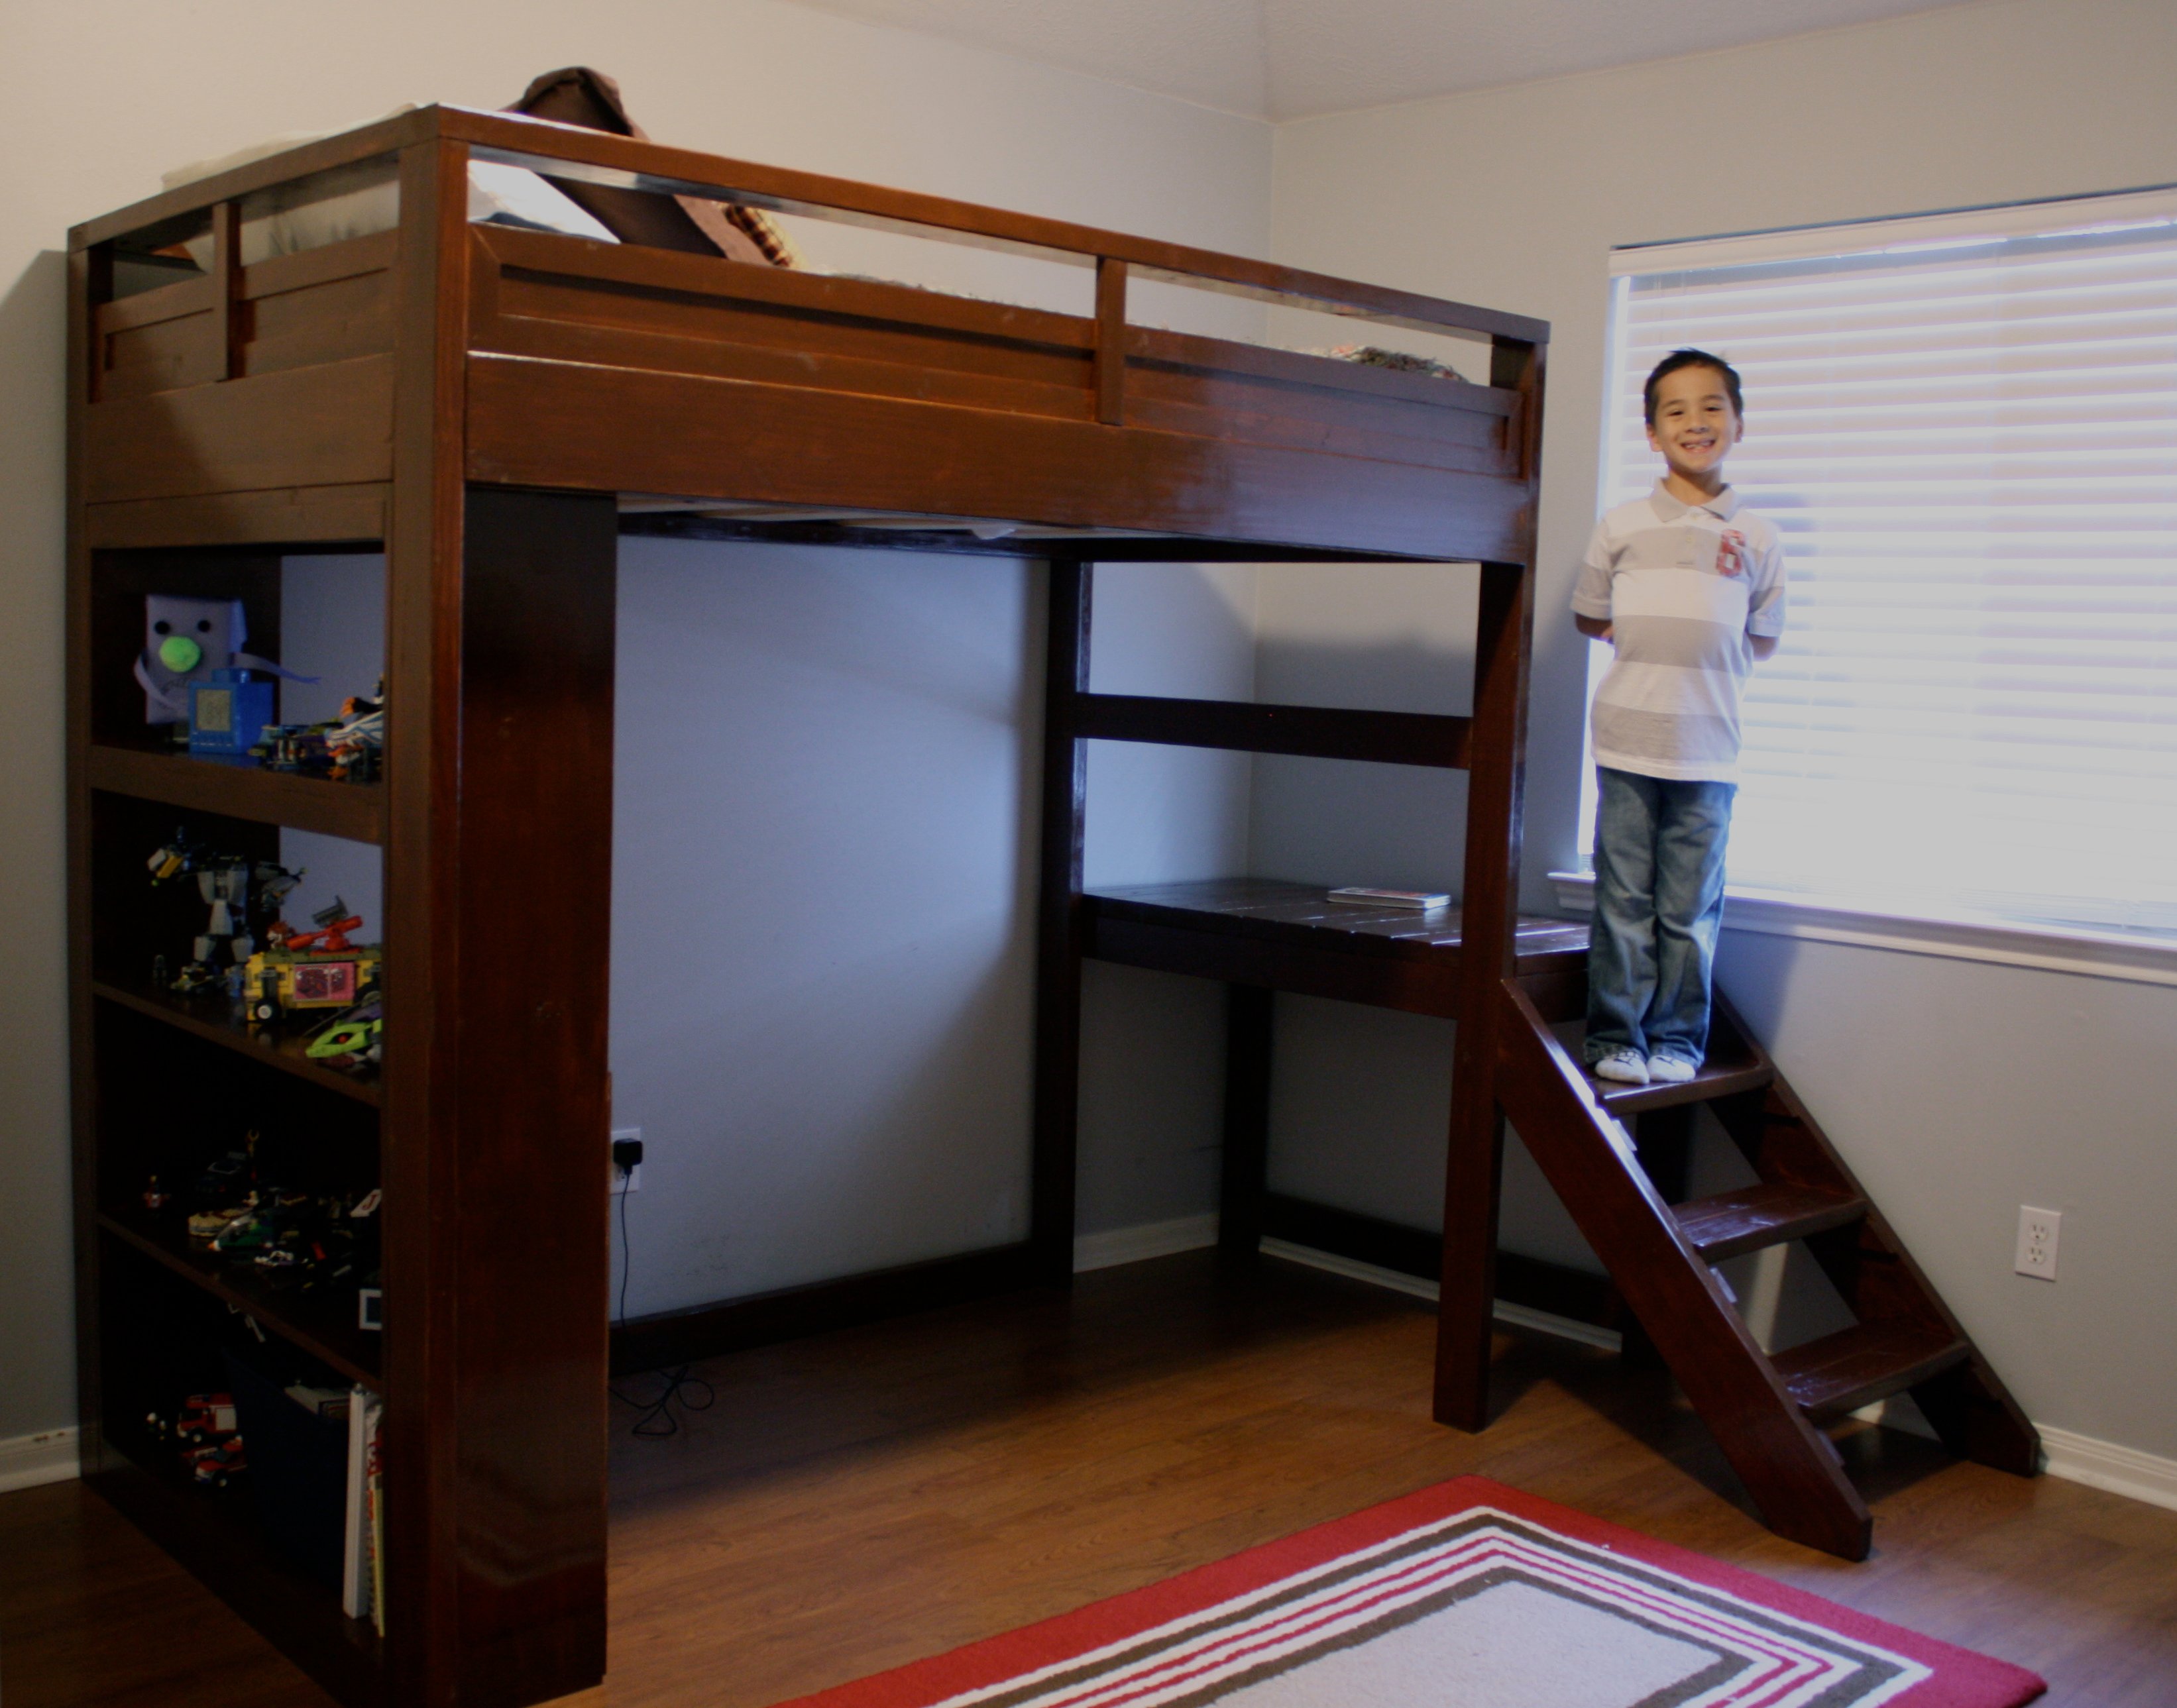
My husband built this bed for our son by combining 2 of the plans from here. The Loft bed and the Camp Loft Bed w/ stairs. We knew we wanted to build a loft bed for our son but liked the idea of the platform w/ stairs so it wouldn't block his window. We also wanted to incorporate a bookshelf for his growing collection of Legos to display as well as books, etc. The next project to add to this will be the desk for underneath. I'll add pictures when we build that. Instead of using 2 x 4's for the top rails of the bed, he improvised and created his own version of a panel for the top. I love how it turned out!
Built from Plan(s)
Estimated Cost
$200
Estimated Time Investment
Week Long Project (20 Hours or More)
Finish Used
Fully sanded the furniture down, then applied 1 coat of Minwax American Chestnut Polyurethane & Stain in One Gloss Finish. After allowing it to dry overnight, we applied a second thinner coat.
Recommended Skill Level
Intermediate
Comments
Mon, 06/10/2013 - 22:25
loft/camp bed
absolutely love this, just what I would like to have for my son! Thanks for the inspiration :-)
Mon, 07/01/2013 - 05:14
perfect!
Just love this, I'm hoping to do something similar in a full size for my 9yr old daughter. She feels a bit sketchy with a ladder so the stairs will be better and I love using my Kreg jig so not having to piece together the supports sounds good to me!
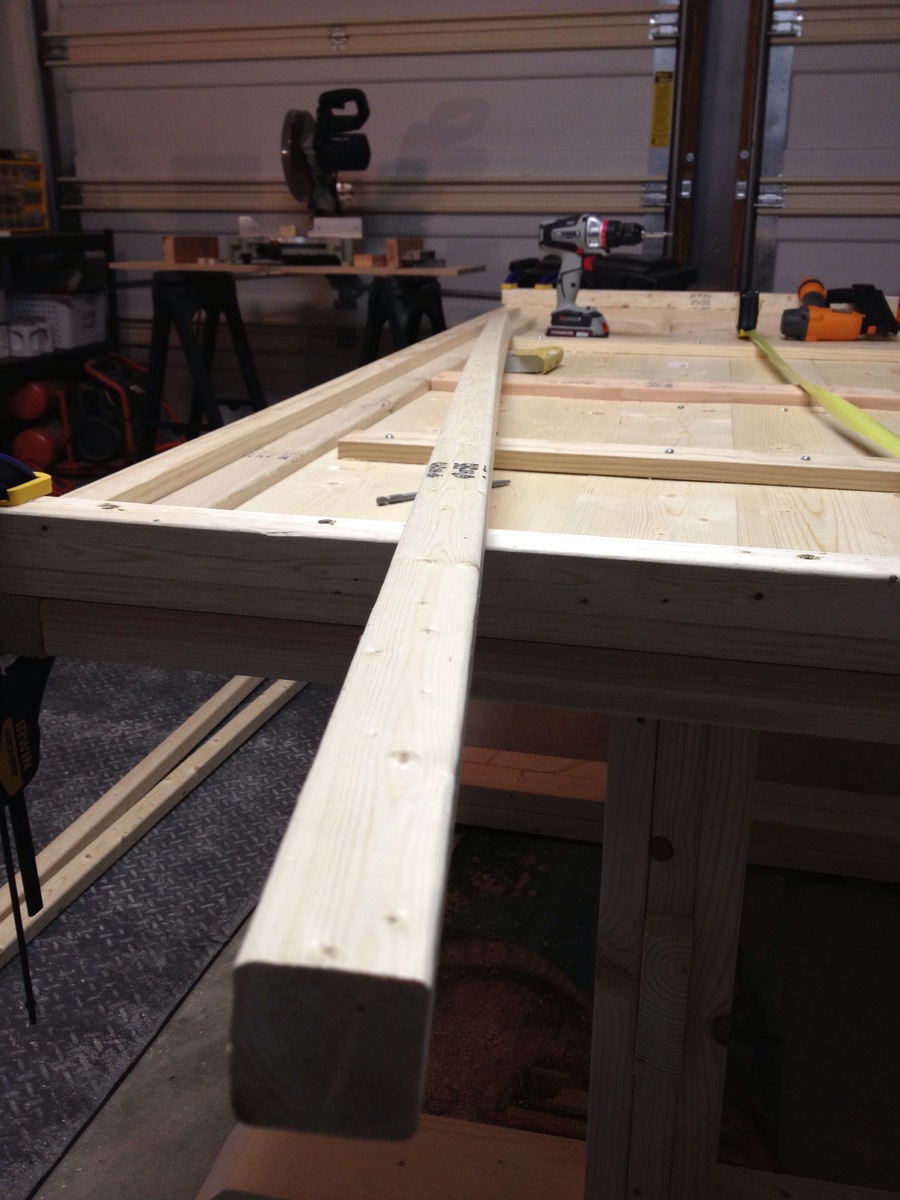
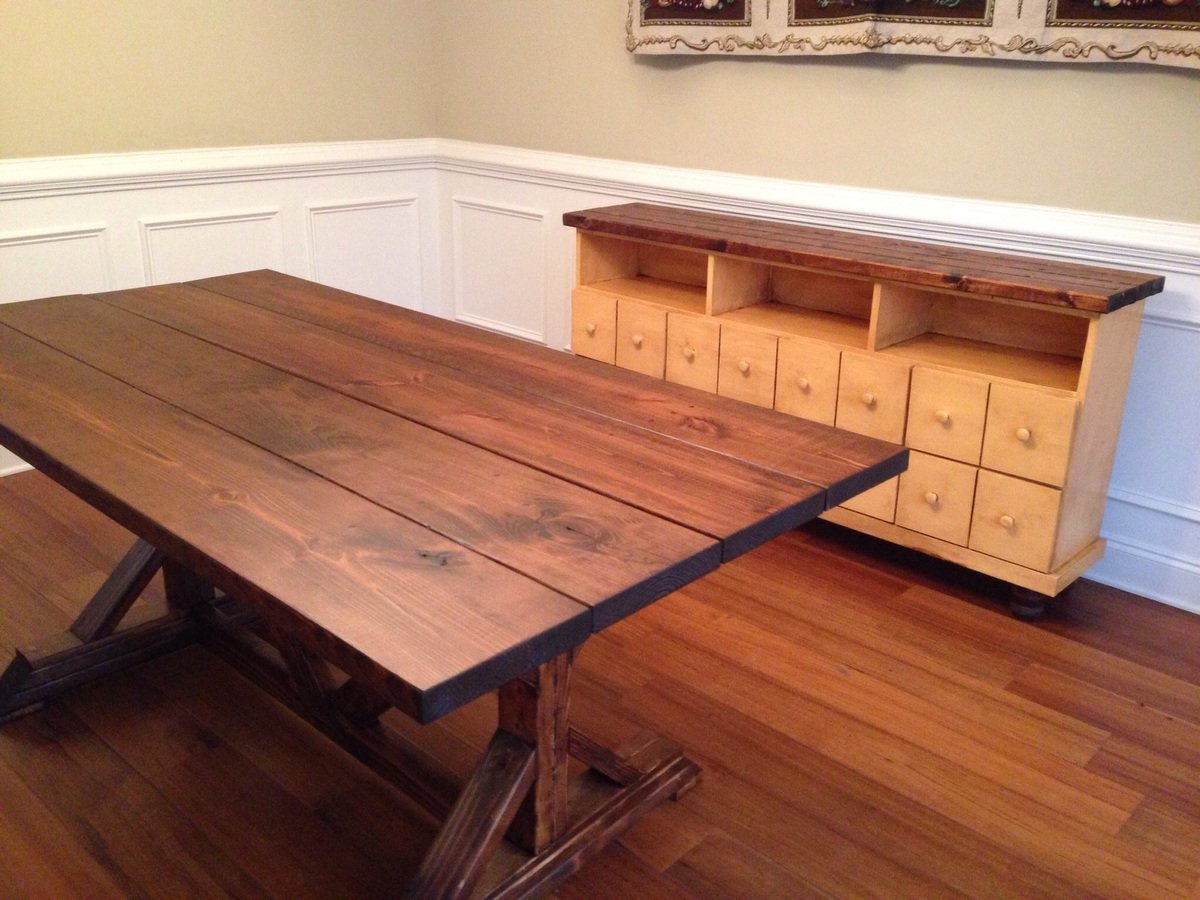
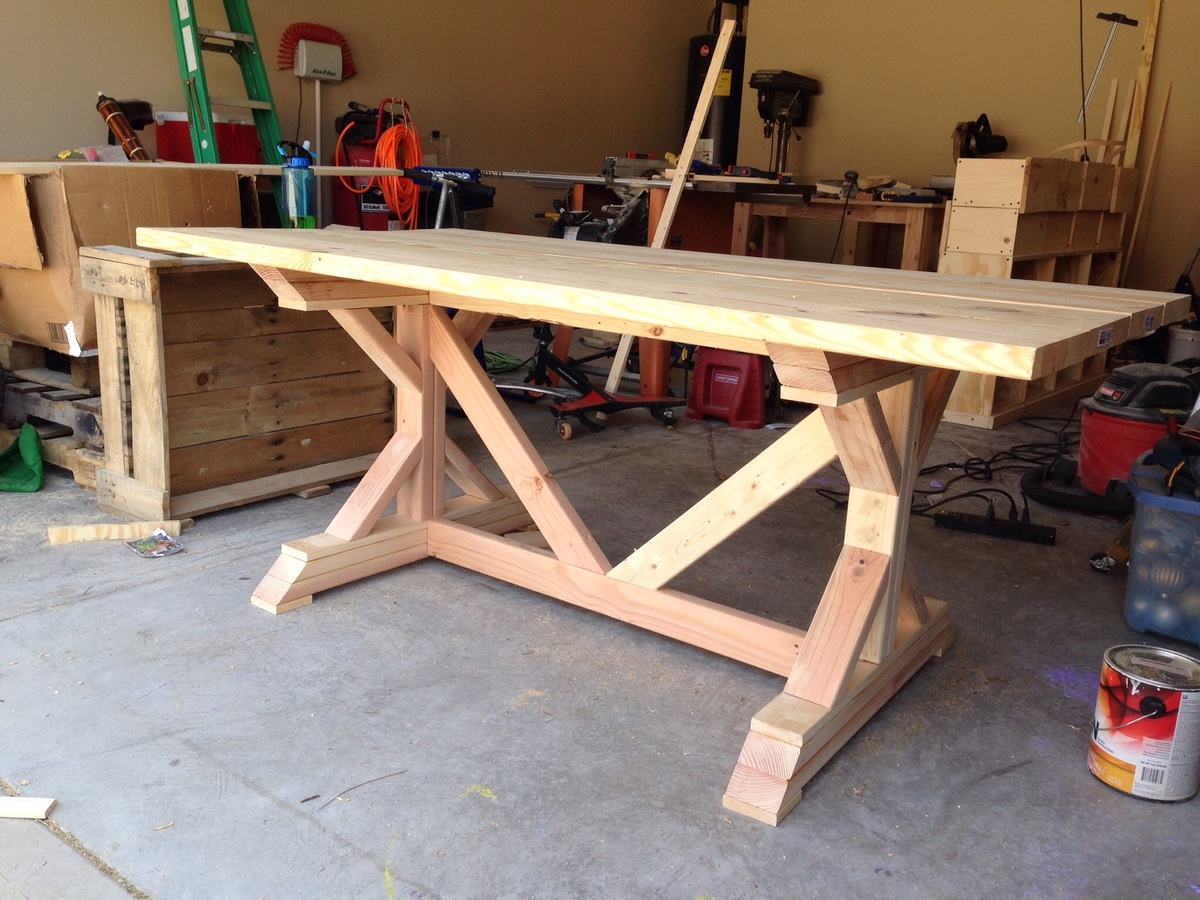
Triple Pedestal Farmhouse Table
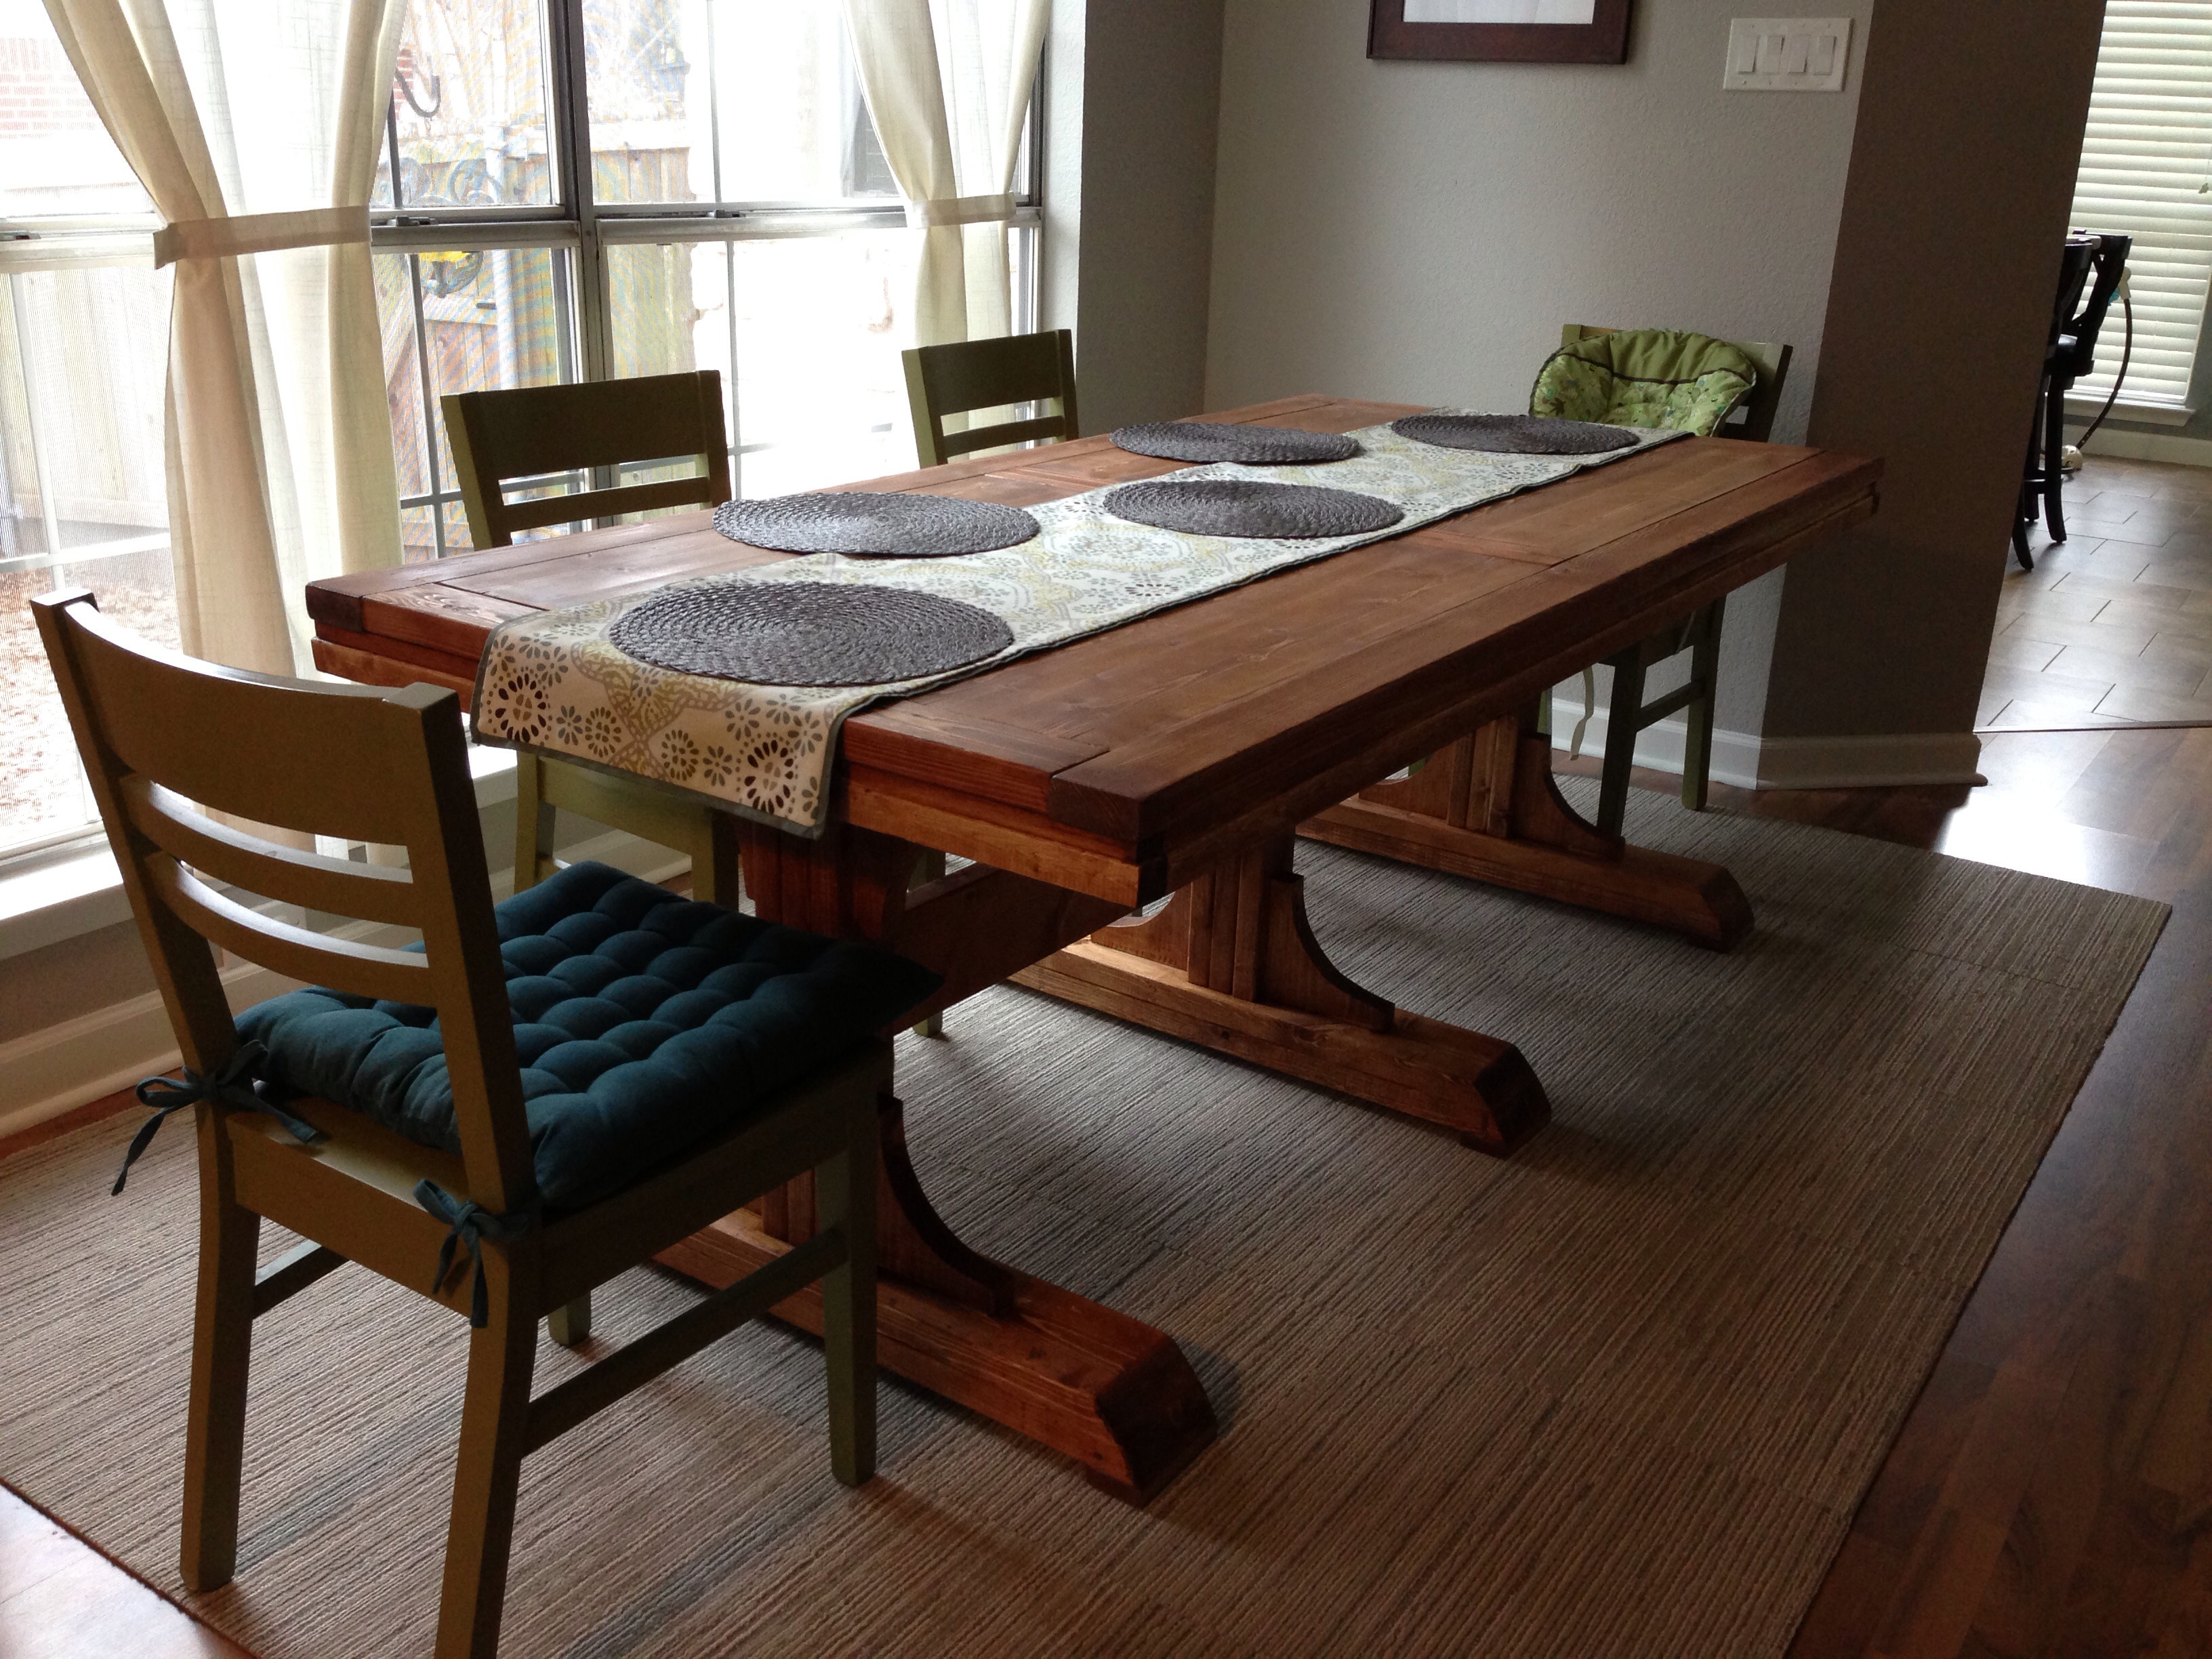
Putting this table together was a lot of fun! We knocked off about two feet from the plan so that it fit in our modest dining area. Many of my saw blades were replaced at some point during this project in favor of sharper and cleaner-cutting replacements, so we spent quite a lot making sure we didn't end up with a giant splinter of a table. You can see from one of the photos how poorly I chose some of the wood (the 2x2 is like a cork screw), so I had to replace a few pieces. Still, I think I could have replaced all of those tools altogether and still spent less than this table would have cost at the store.
Something I learned during finishing: I knew beforehand that wood glue didn't stain, but I didn't realize that even the residue of wiped-up glue will keep the wood from taking stain. When the matching bench is made later on I'll be sure to sand all of the places where glue might be hiding, invisible. The stain color generally wasn't quite what we imagined and the legs seem to have taken it differently than the top, but when the word "Farmhouse" appears in the table style, you can chalk all of those imperfections up to its "rustic" style. For that I am grateful.
The poly dried a bit rough, but a fine sanding sponge smoothed it out and also gave it a little bit of that greywashed RH look. Win-win. We wound up putting "Flor" tiles underneath the table to give it some contrast since it ended up resembling our floor color a bit too closely. Now we actually have a dining area, instead of just a table.
It took about a week and a day (I started Saturday morning and we finished it the following Saturday night). Fortunately our ten-month-old can sleep through just about anything. I'm glad it's done now and we can enjoy it!

Built from Plan(s)
Estimated Time Investment
Week Long Project (20 Hours or More)
Finish Used
Rust-Oleum Early American, Minwax Clear Matte Polyurethane
Recommended Skill Level
Intermediate
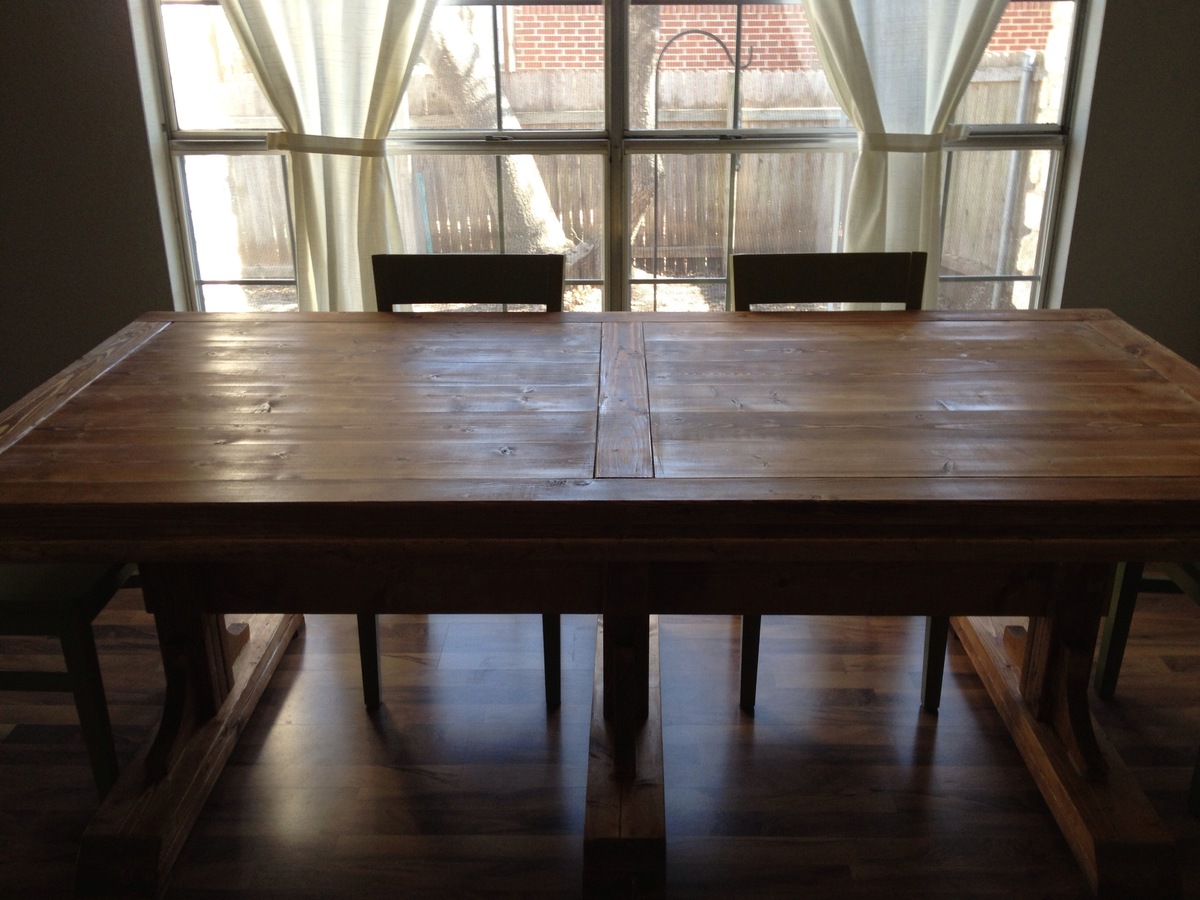
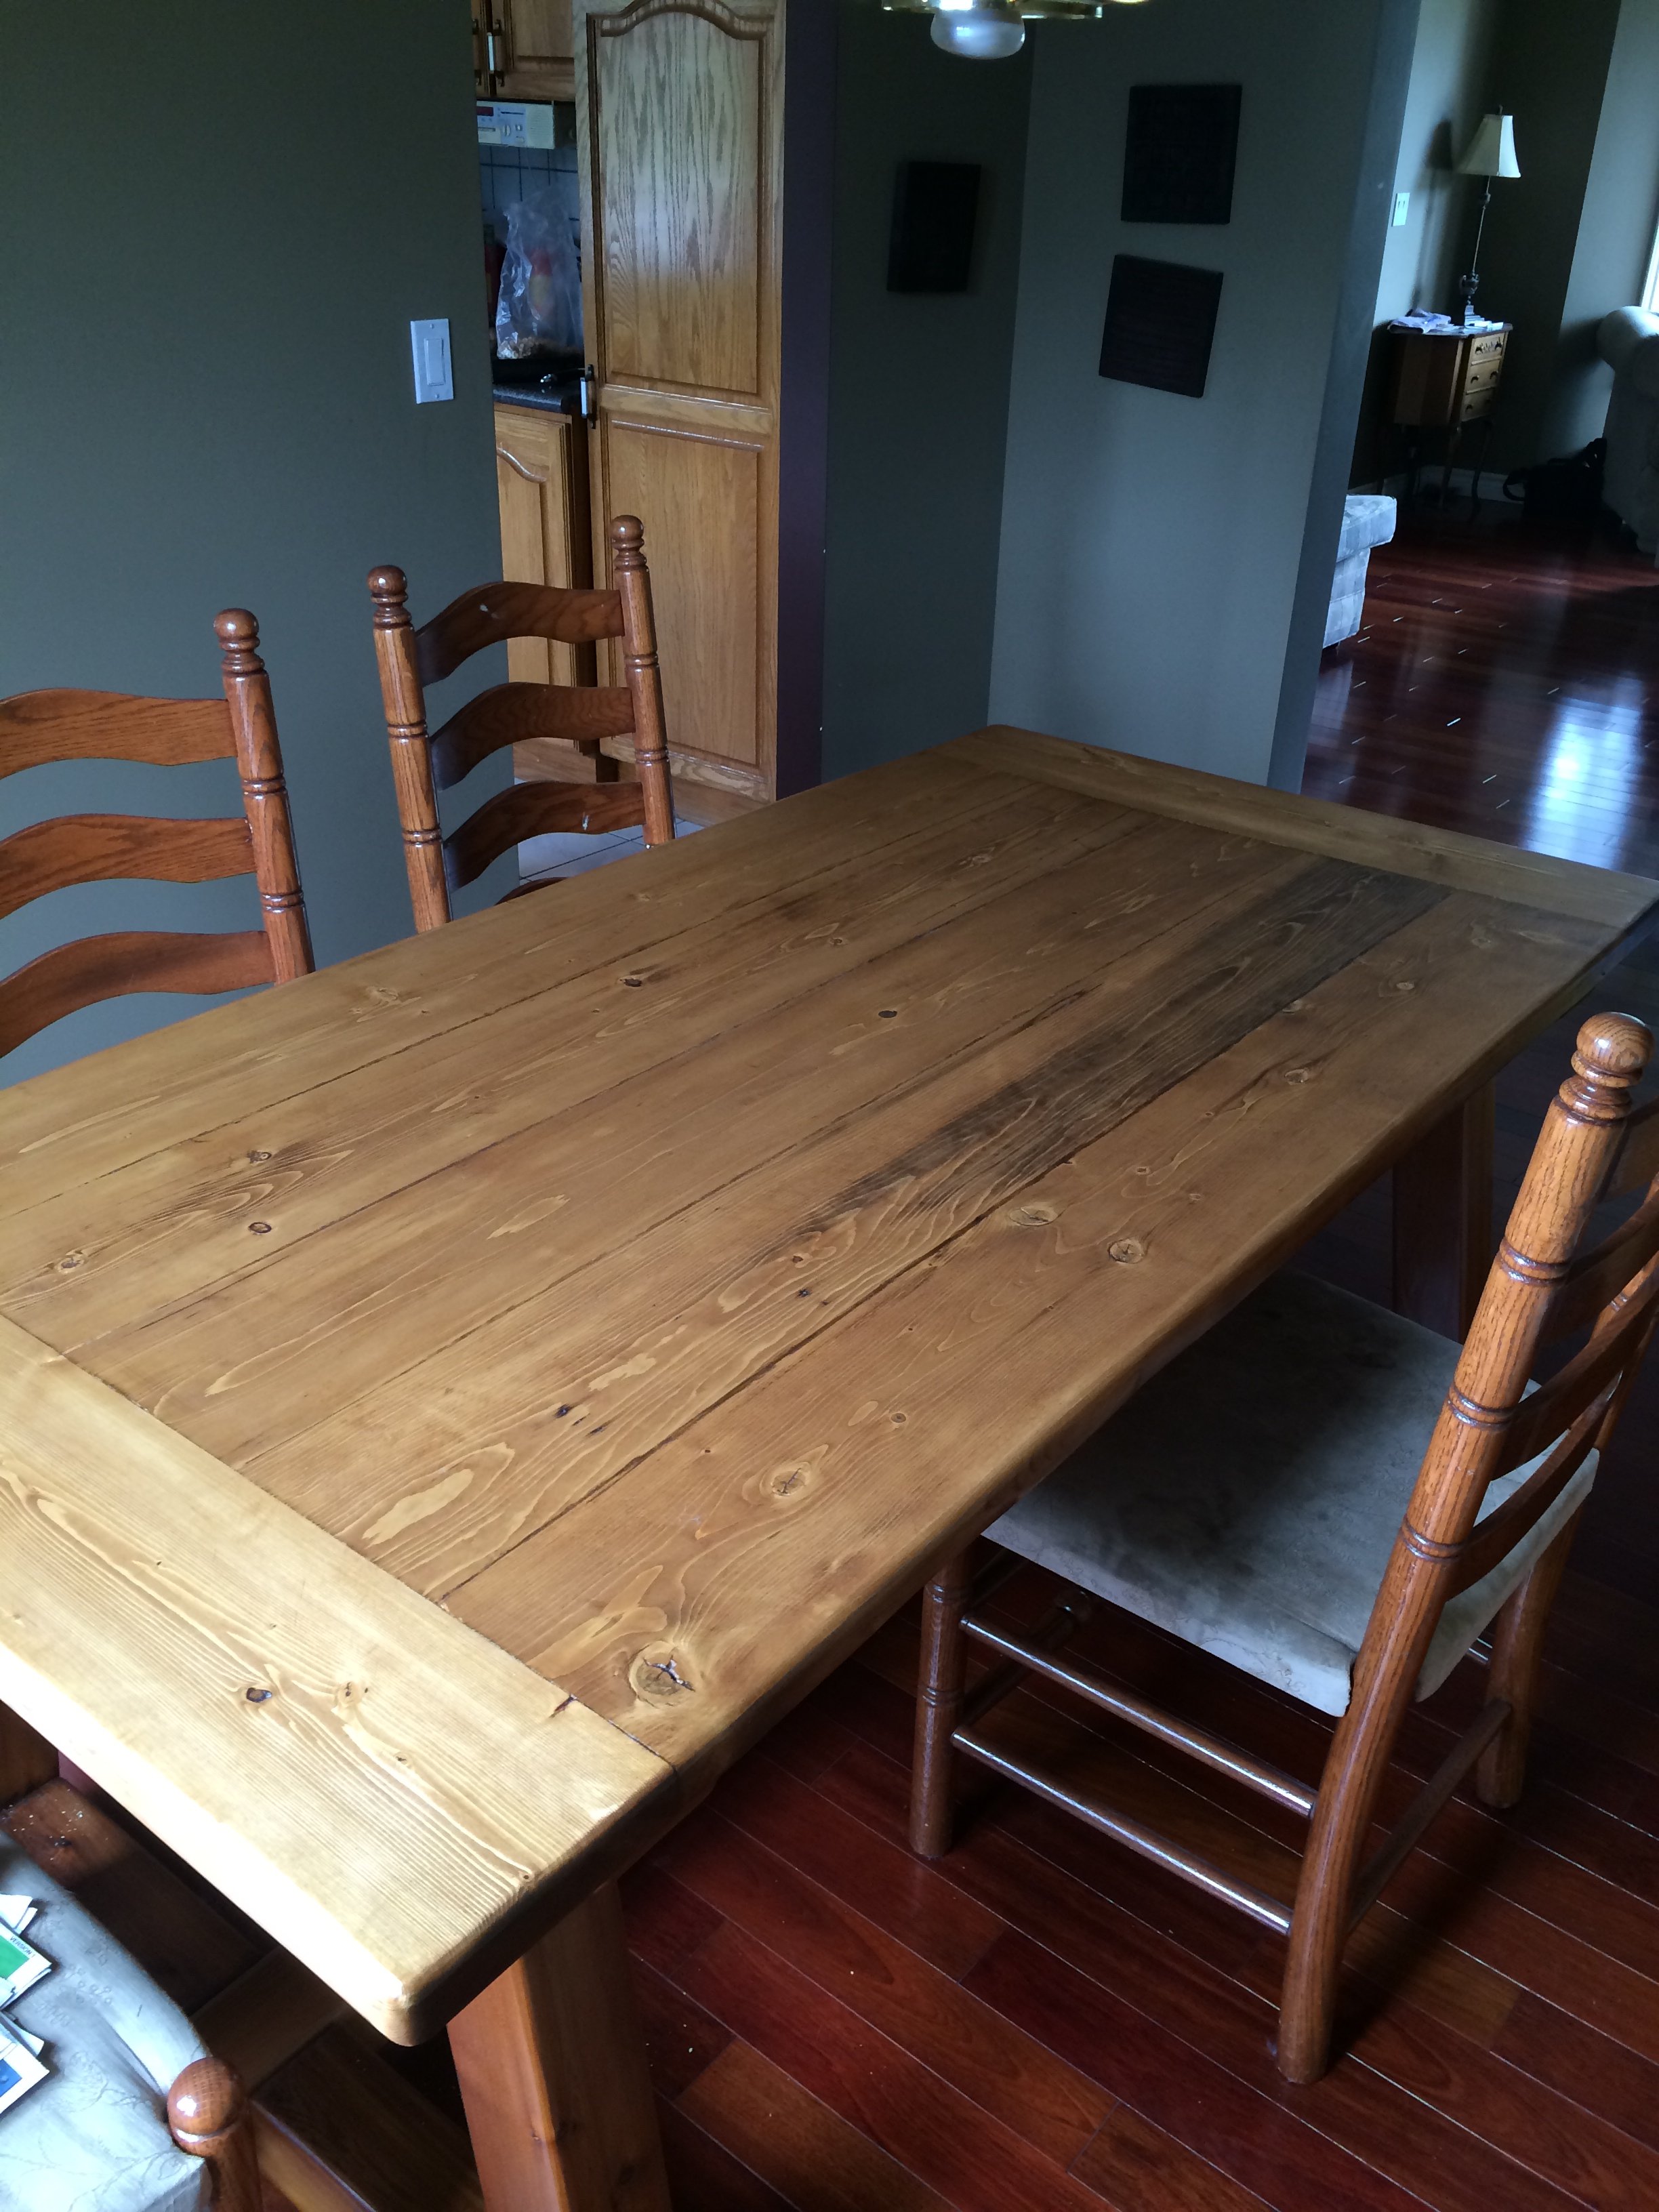
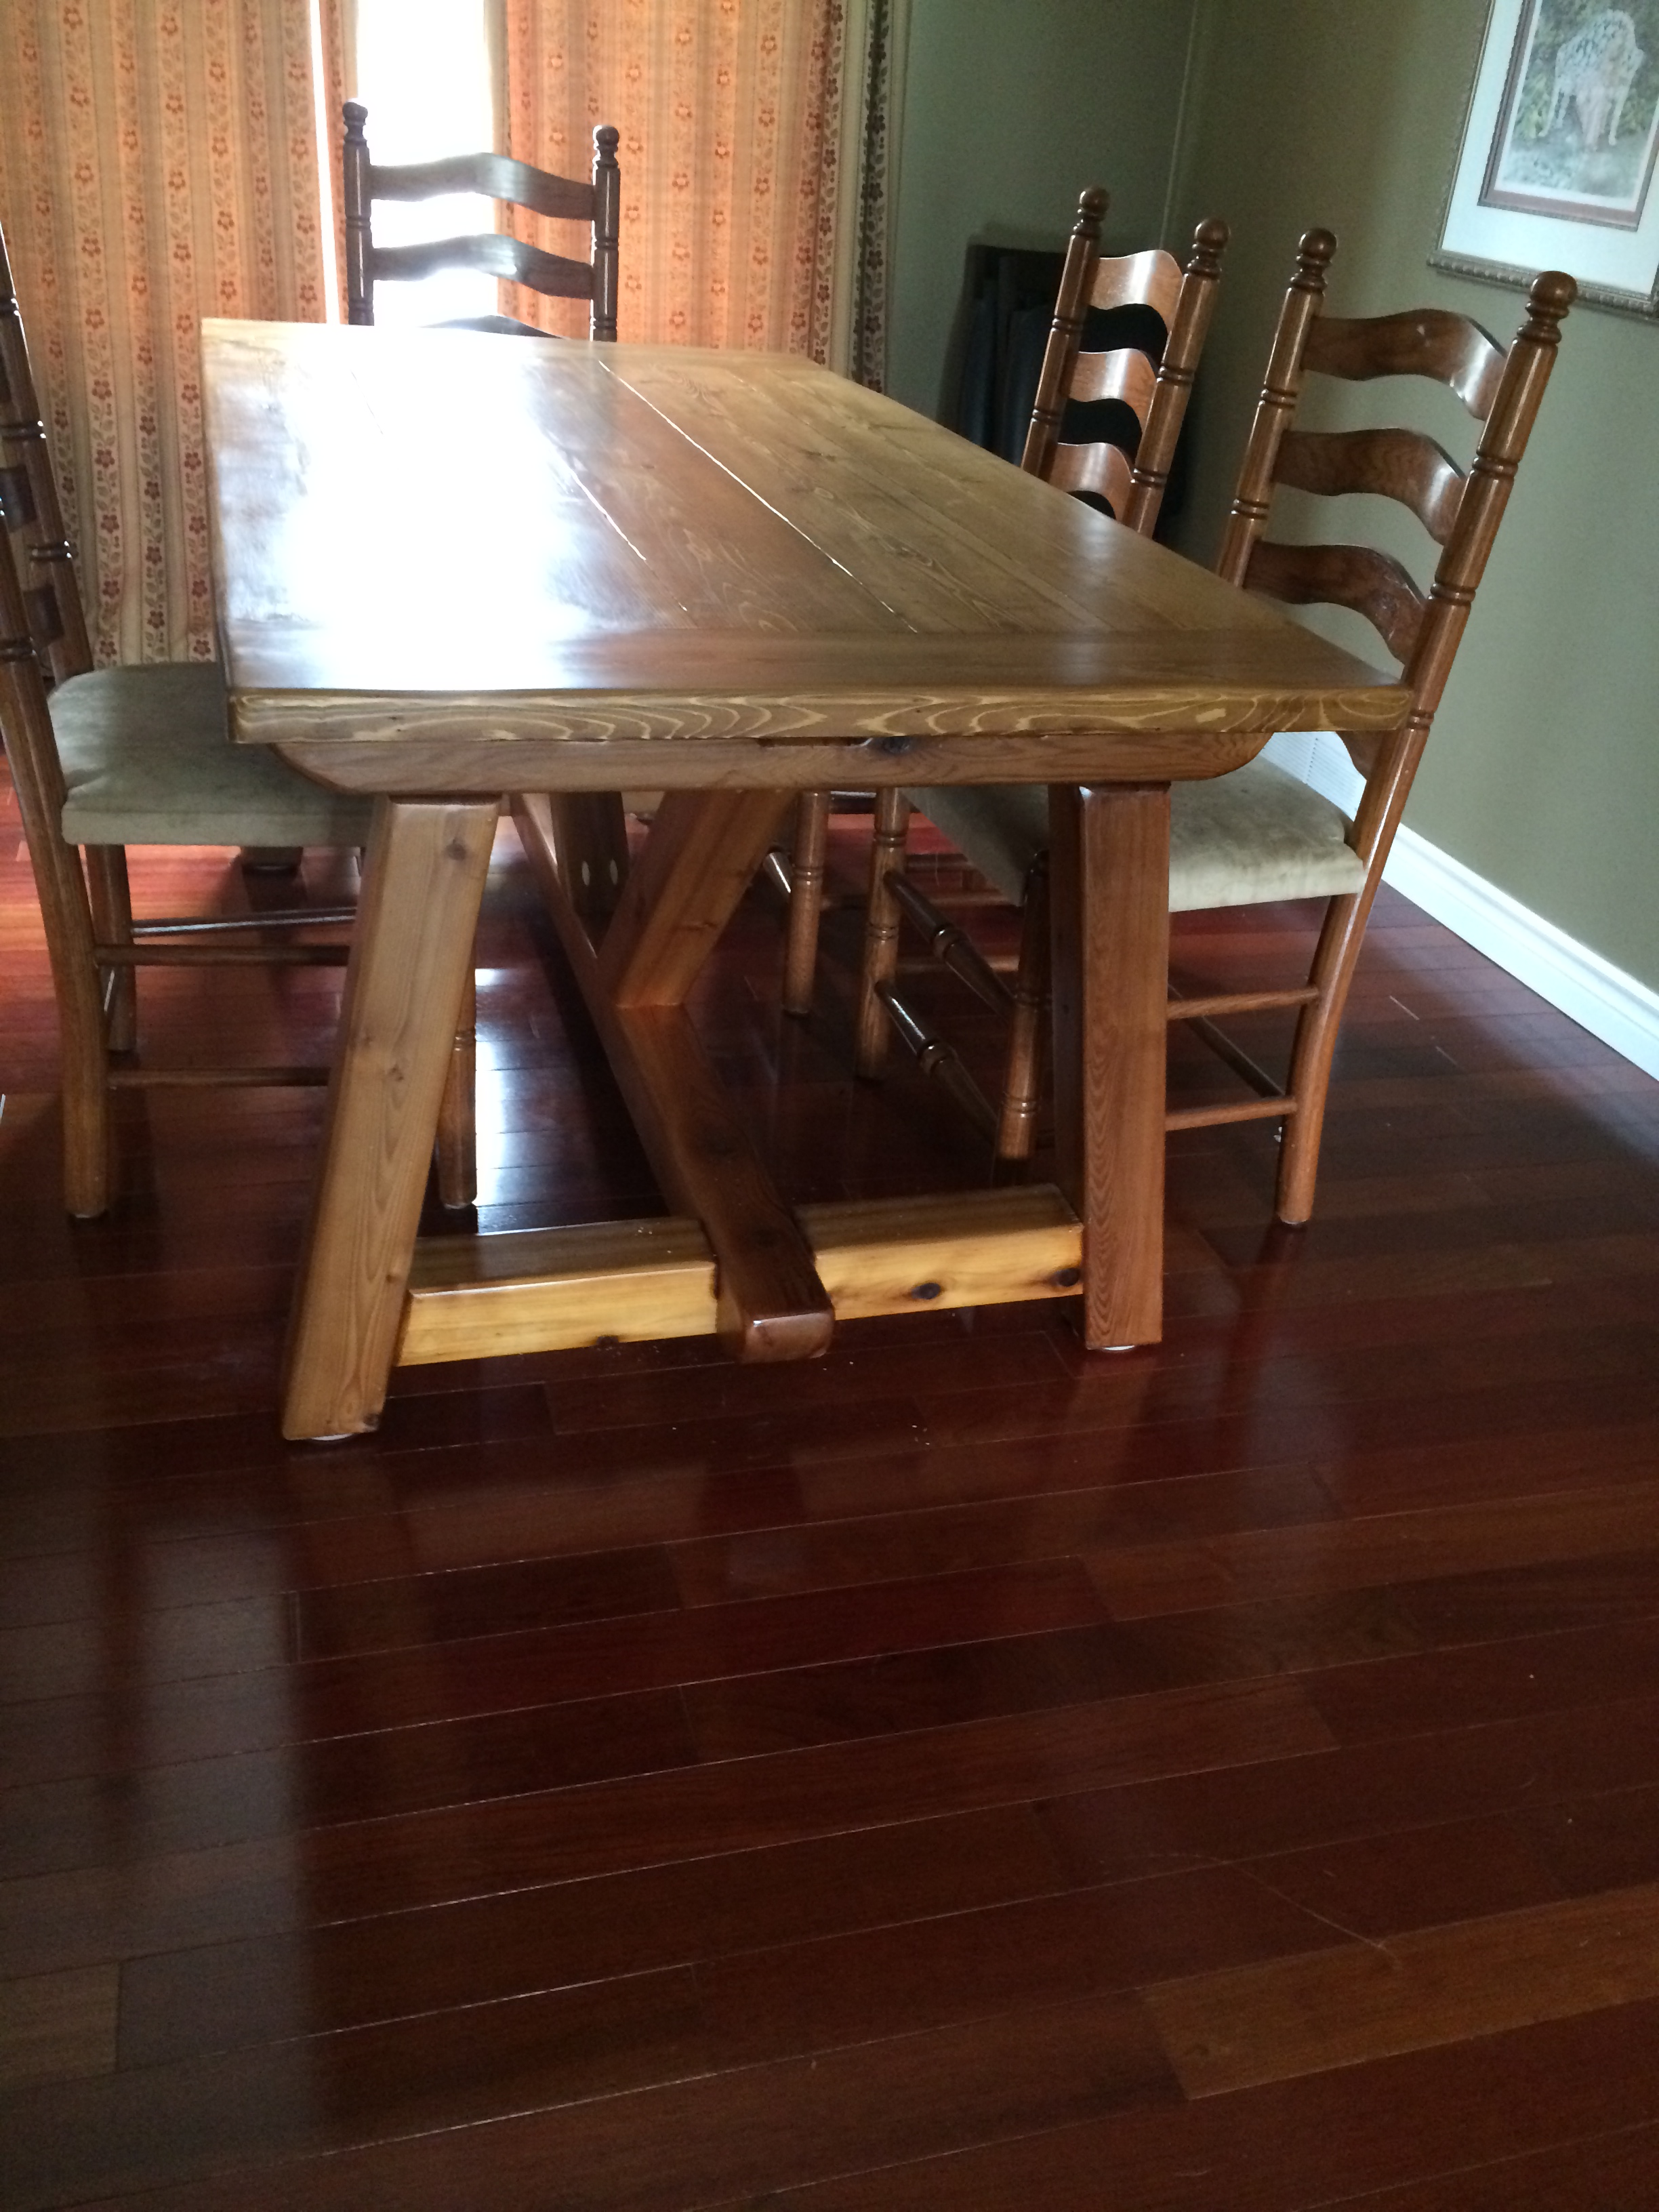
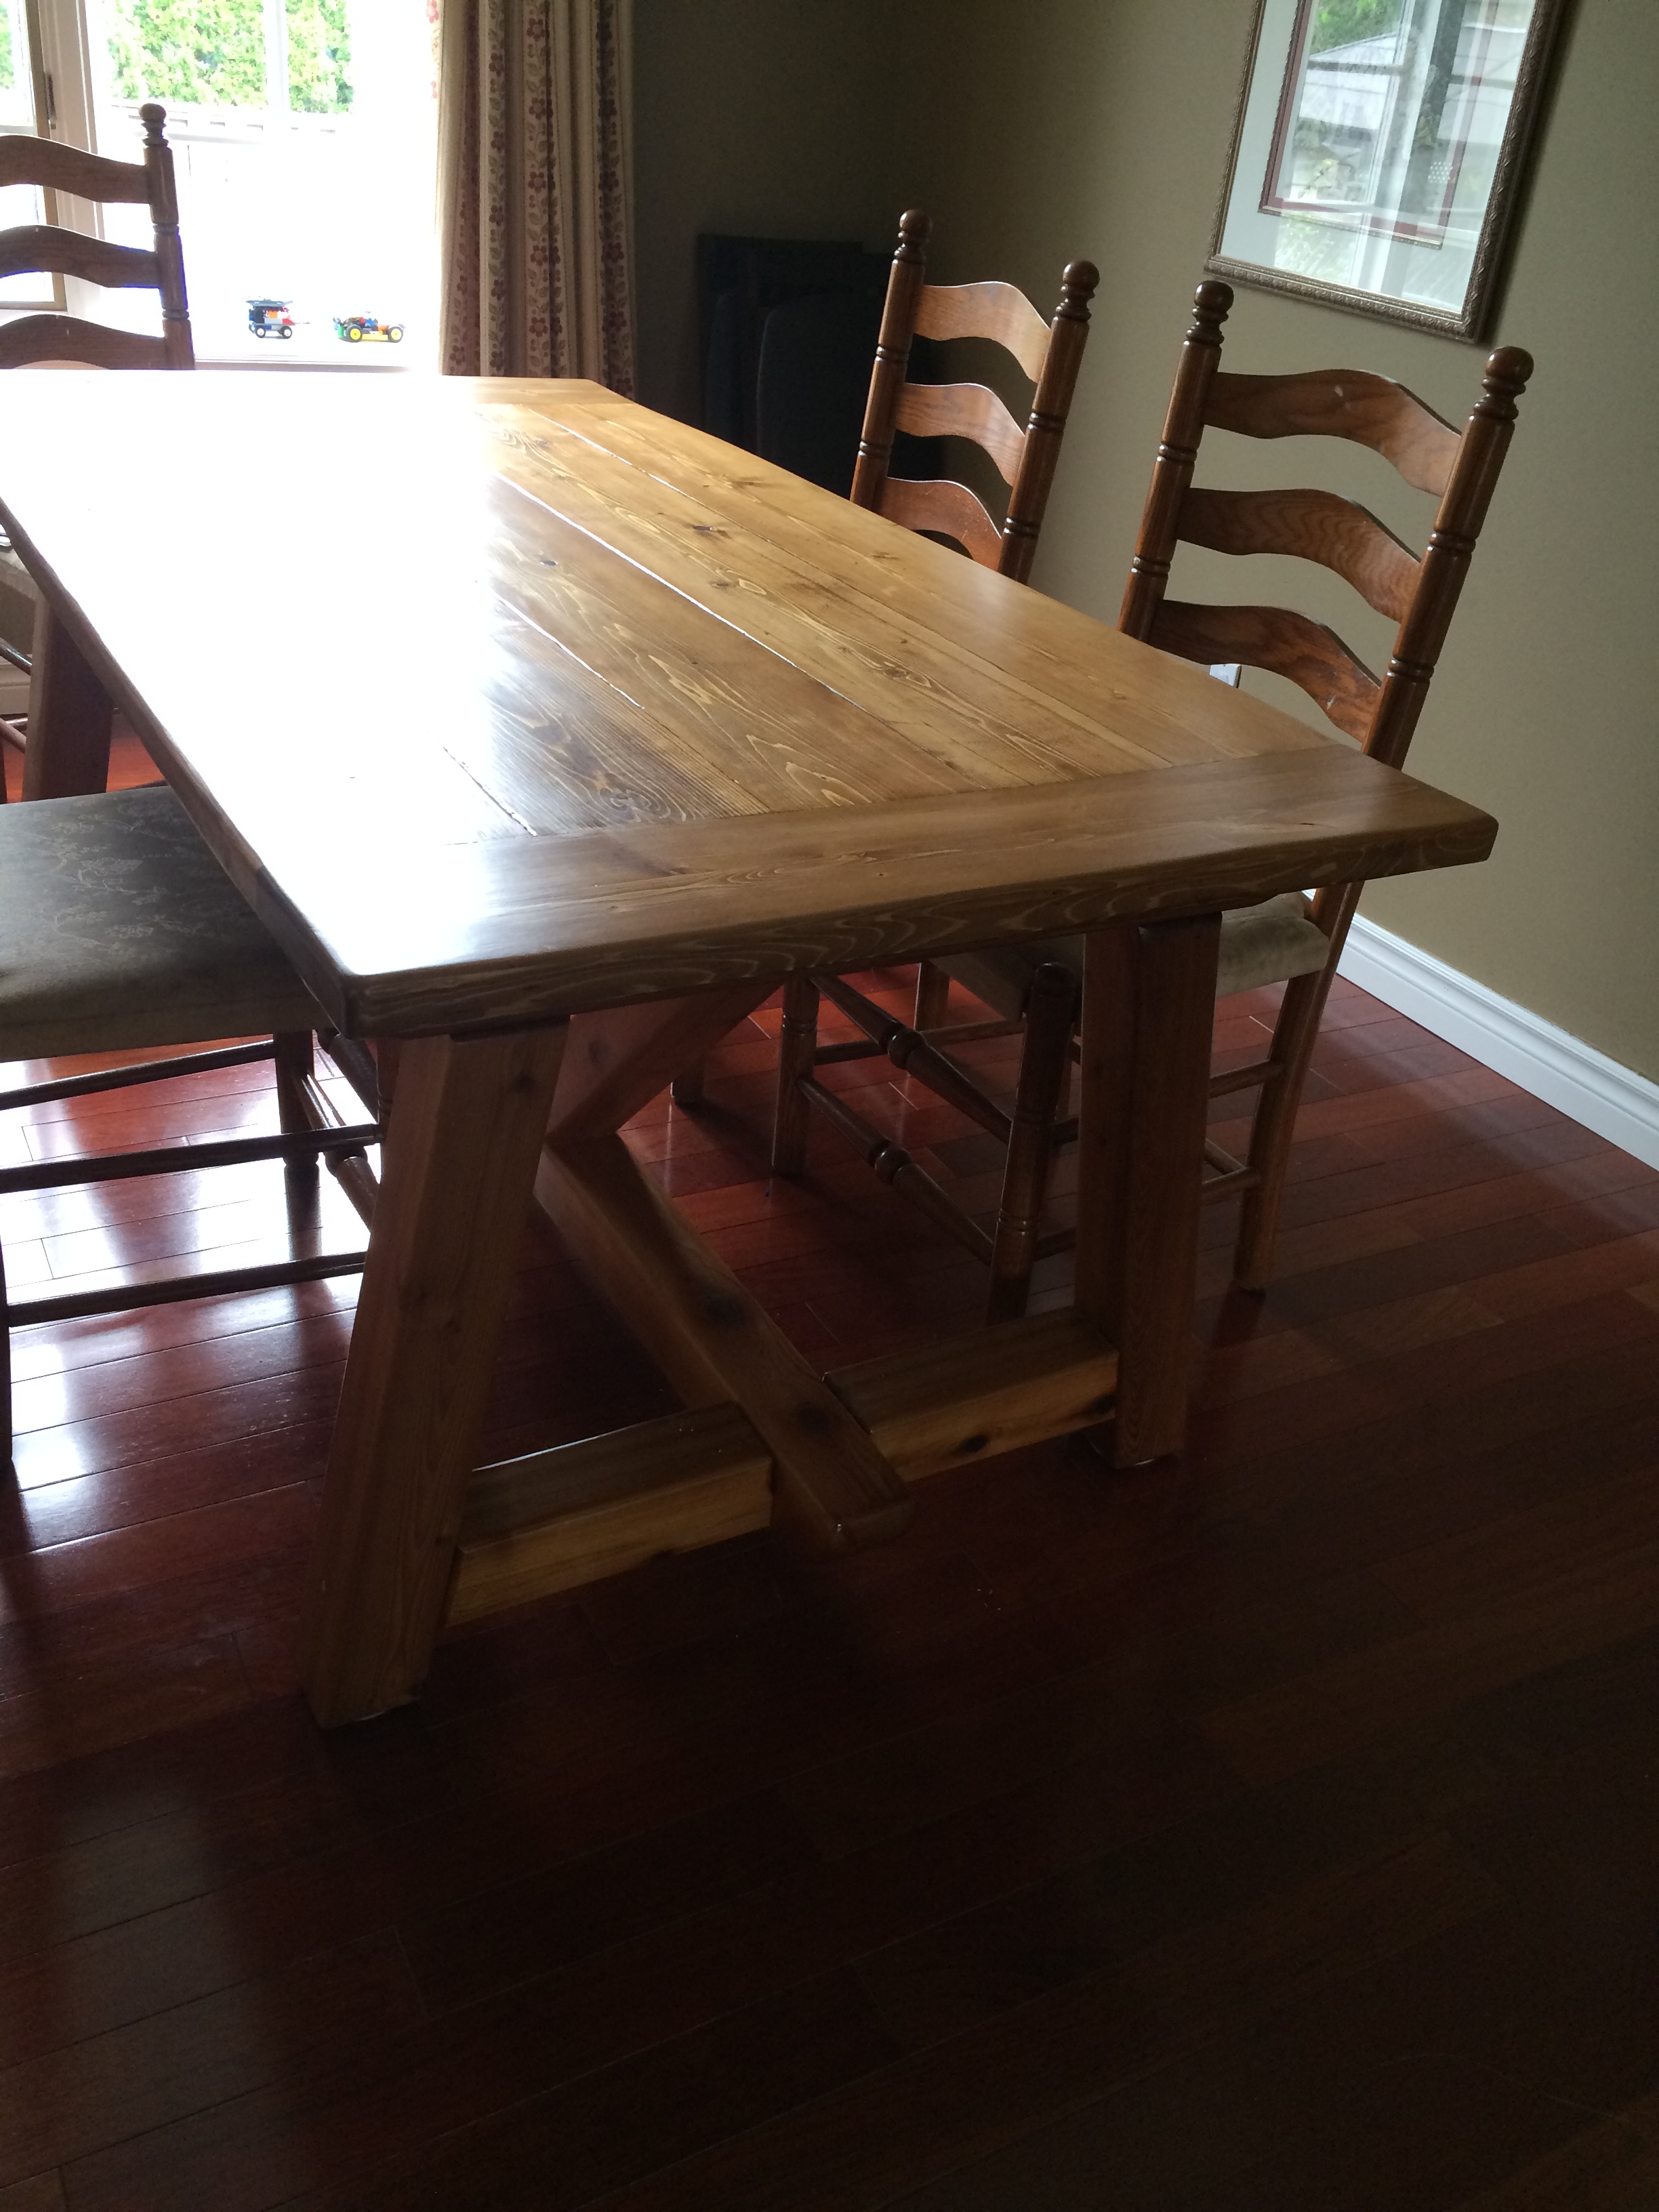
Chunky Truss Table
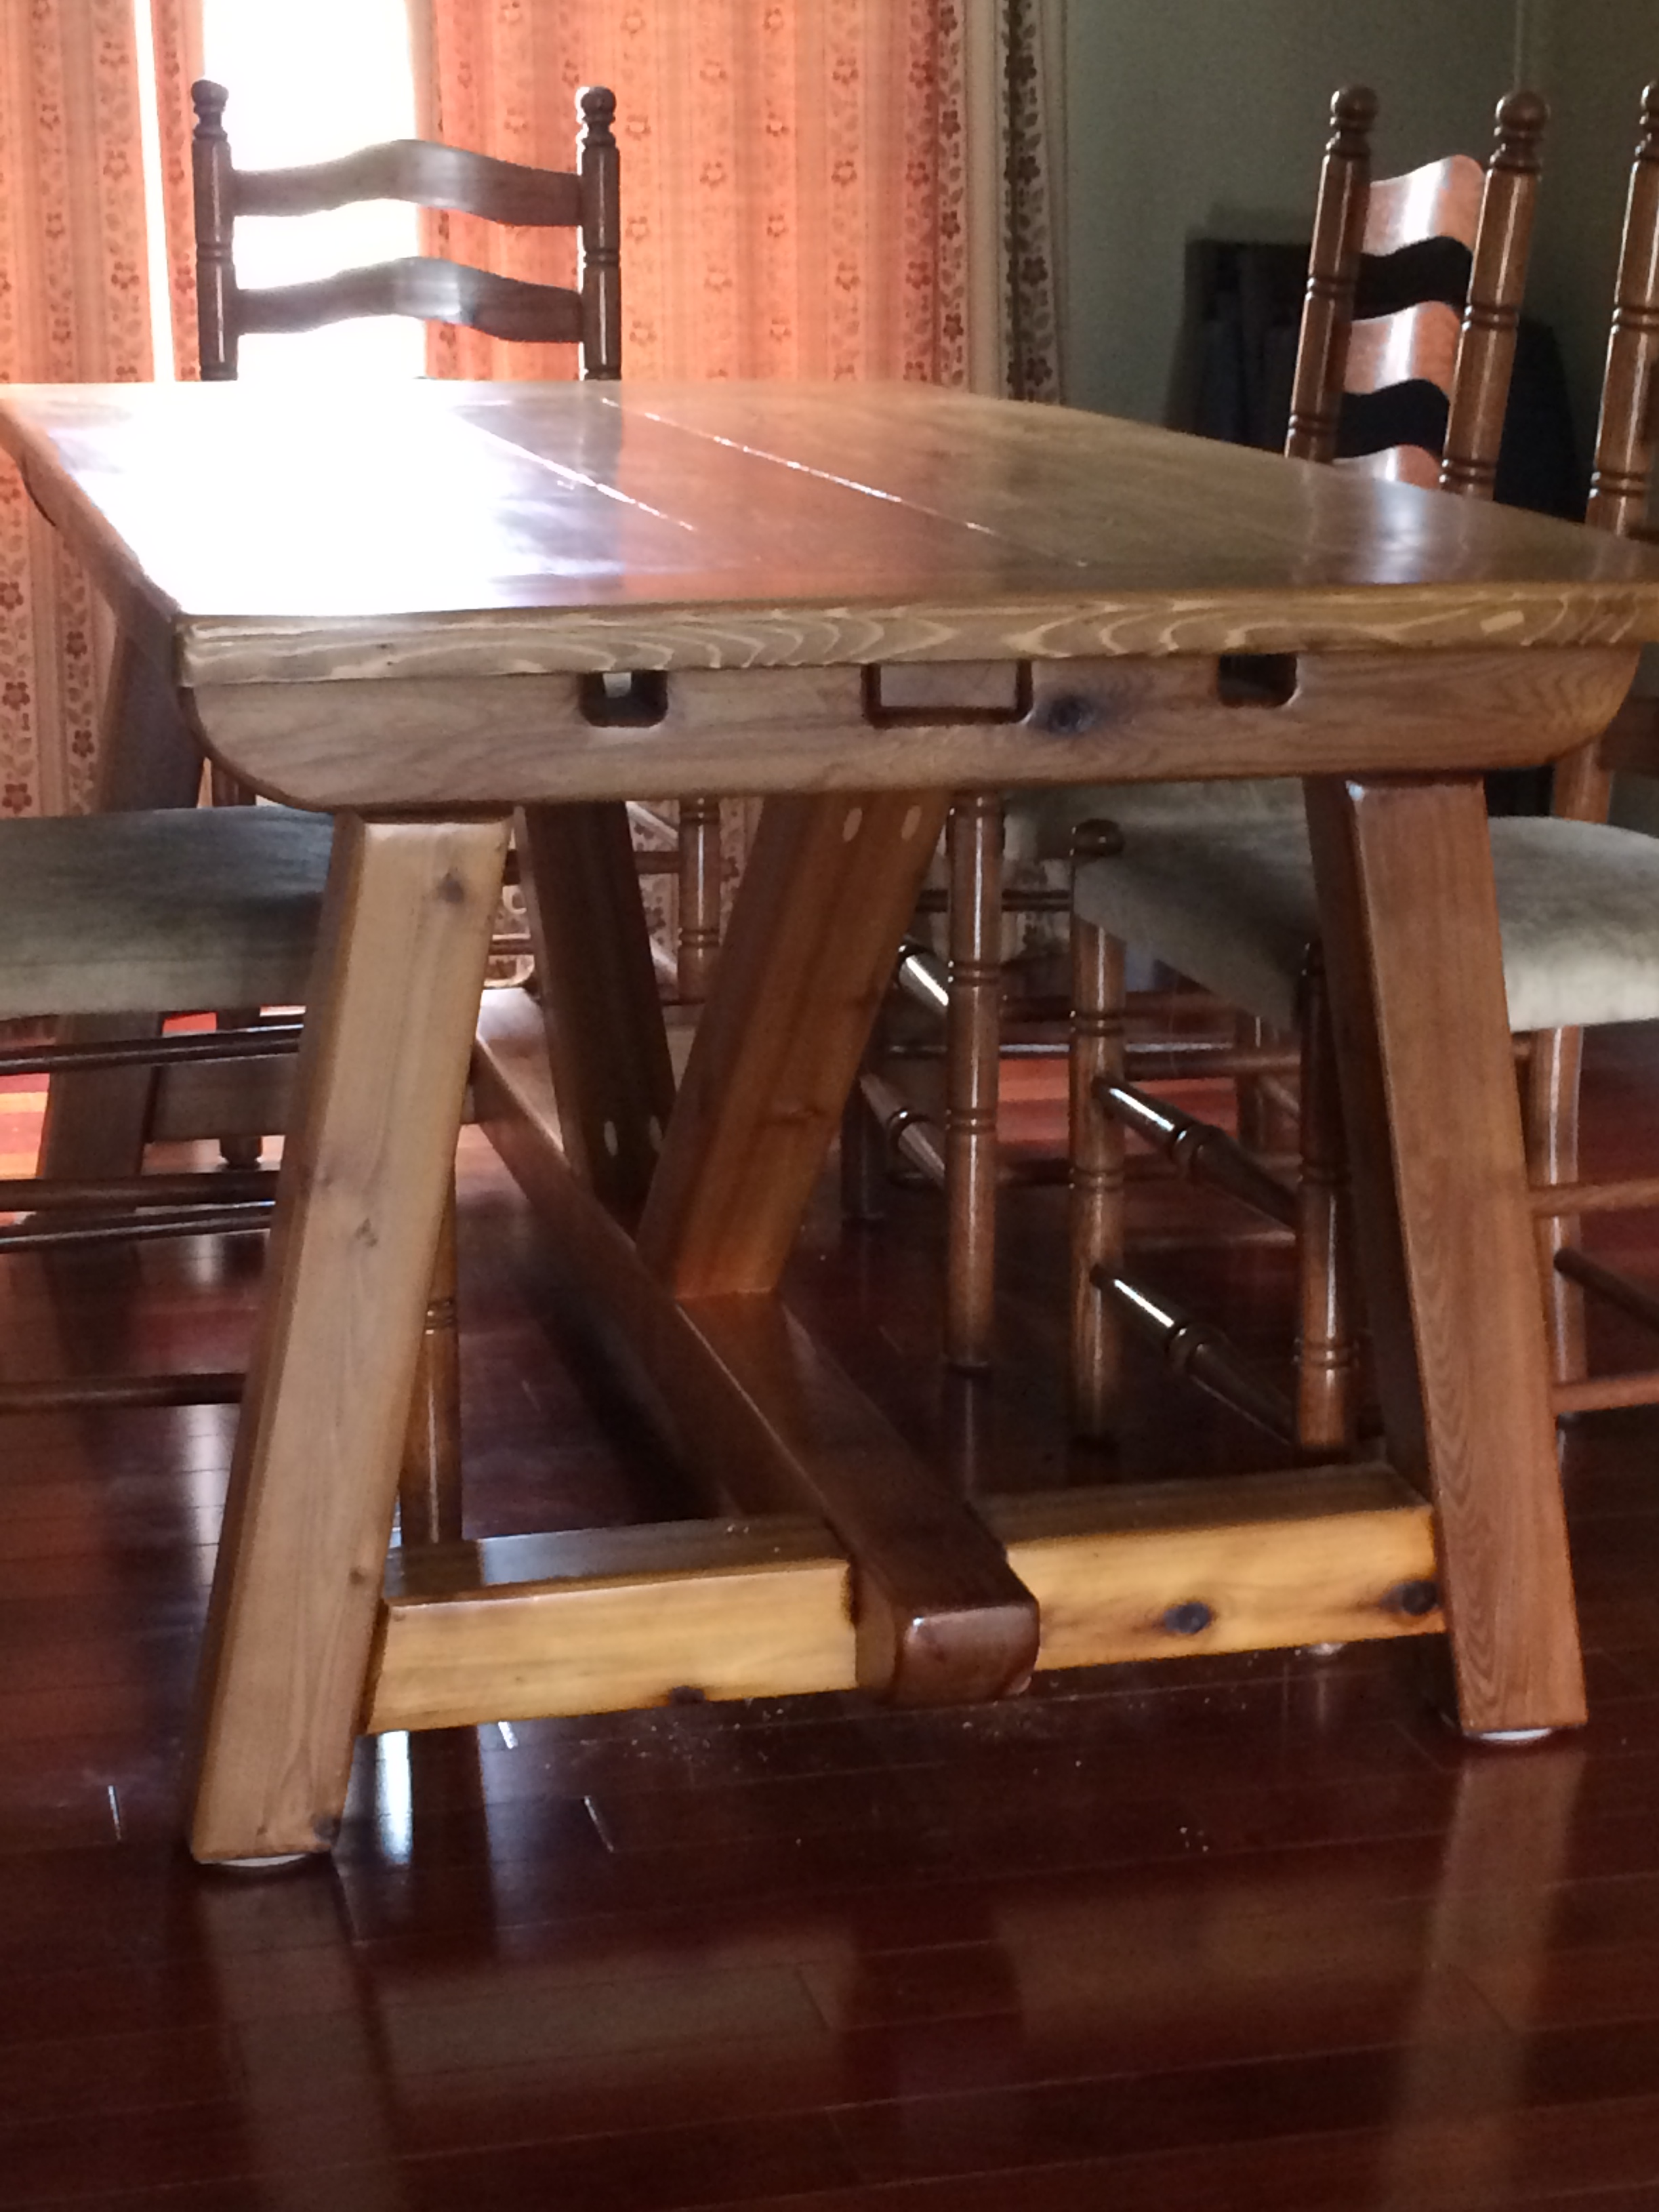
This is my first full sized table project. I wanted to make an inexpensive dining table with nice looks and this one fit the criteria. I deviated from the plans by making the legs frames and the middle truss using rabbit and dado joinery. As a result the middle truss and leg frames did not have to be fastened together with any screws. This design modification made it easier to build in the garage and be able to move easily into the house for final assembly. Top is made of SPF lumber stained to match the natural colour of the cedar legs and truss frame. Thanks Ana for the inspiration to build this beutiful piece.
Built from Plan(s)
Estimated Cost
$150-$200
Estimated Time Investment
Week Long Project (20 Hours or More)
Finish Used
Minwax Stain (early american) and Minwax Helmsman finish.
Recommended Skill Level
Intermediate
Comments
Thu, 12/11/2014 - 17:11
Beautiful!
Love how you rounded the edges of the 4x4s and taylored the cross beam underneath. Just simply fabulous
Fri, 12/12/2014 - 11:07
Love the Table!
Great job on this build, looks fabulous! Thanks for sharing!
Mon, 07/24/2017 - 05:24
Finish
Hey Dangerdad! Wife and I bought cedar for the base and have all sanded, but are torn on how to stain. I liked your table, and was reading your description of your finish. Did you stain your cedar? You say you stained the top to match the natural cedar, so am thinking maybe you just sealed it without any stain?
Could you clarify? Thanks so much!
Thu, 11/02/2017 - 11:39
sorry for the late response.
sorry for the late response. I didn't have to stain the cedar at all. Just applied a natural satin poly finish. Hope yours turns(ed) out good!
Mon, 07/24/2017 - 05:25
Finish
Hey Dangerdad! Wife and I bought cedar for our table base and were discussing how to finish it. Did you stain your cedar? Your write up seems like you may have just finished it and not stained at all, and only stained the top? Just curious
Thanks so much!
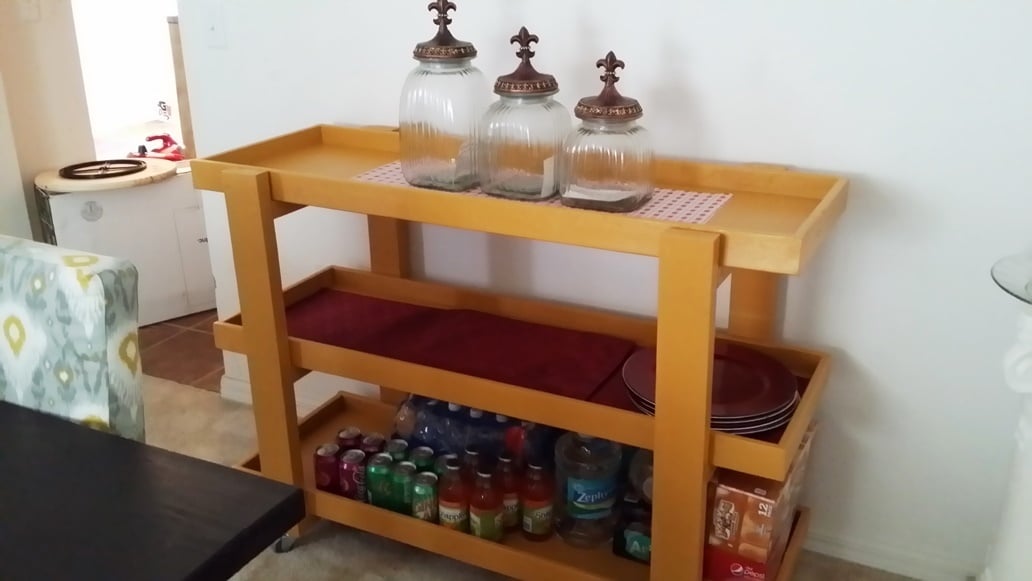
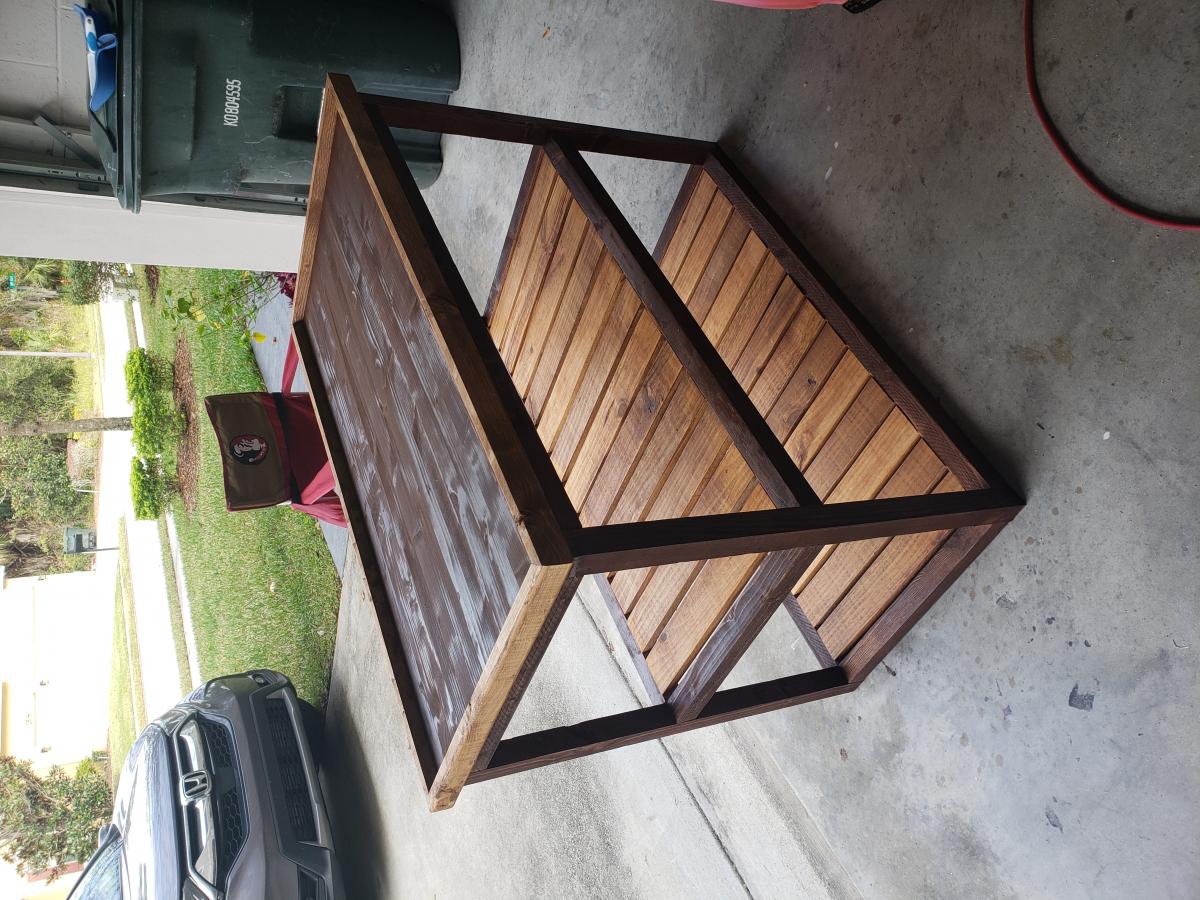
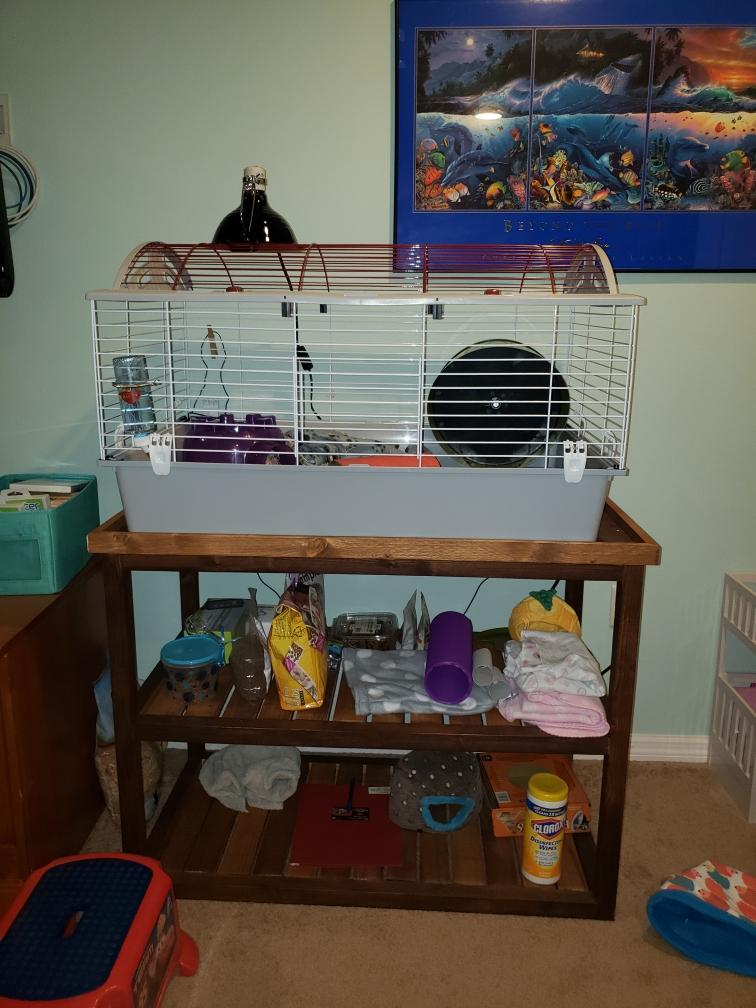
Console table turned Hedgehog cage holder
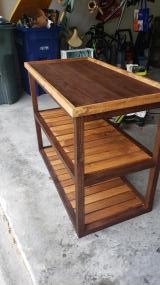
Sorry, the pictures are on their side. I used the Rustic X console table plans, but left out the X and made it taller and wider. I didnt have a stripper nor enough skinny wood to lay the slats on the shelf like that did in the video, so each of those slats are held up by pocket screws. Whew! Will avoid doing that again if possible! I did, however, stain BEFORE i built and that made all the difference! Also for the top I used a quality piece of compressed wood which bumped the cost $20, but seeing that a cage was going on top, i wanted a solid piece to hold any shavings. I also added a railing so the cage would stay in place. My neighbors LOVE it and I'm just super happy with how the stain job came out. It was actually a fluke, I think I failed to stir it completely on the first coat and when I was touching up it got waaay darker so I just rolled with it and made it two toned. LOVE the result and not sure if I can pull it off again haha
Built from Plan(s)
Estimated Cost
78
Estimated Time Investment
Weekend Project (10-20 Hours)
Finish Used
Verathane classic Wood Stain in Special Walnut. Like I said before, the two tone was a fluke. I don't think I stirred it completely on the first run, and while touching up it became much darker. I rolled with it and just highlighted the edges and I LOVED the outcome. This was my favorite build to that point. :)
Recommended Skill Level
Beginner
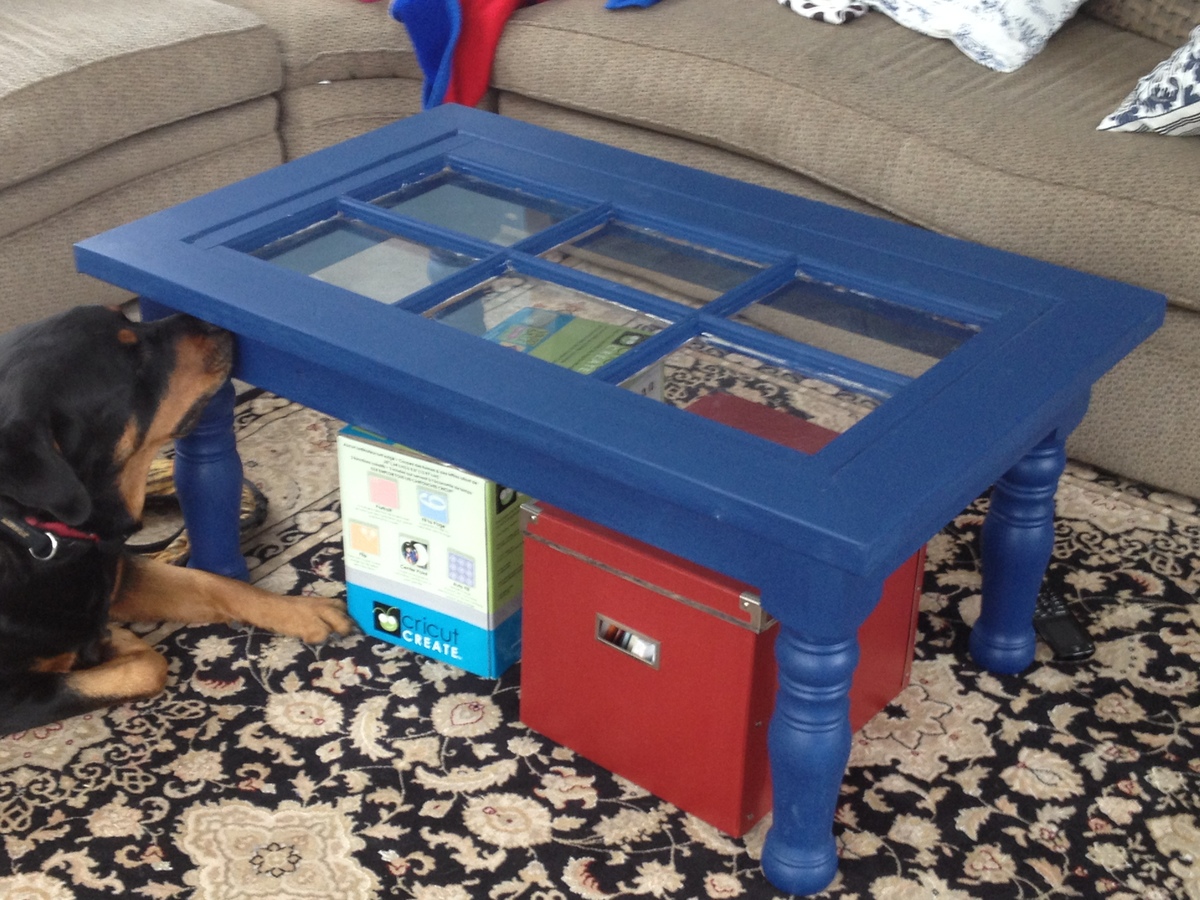
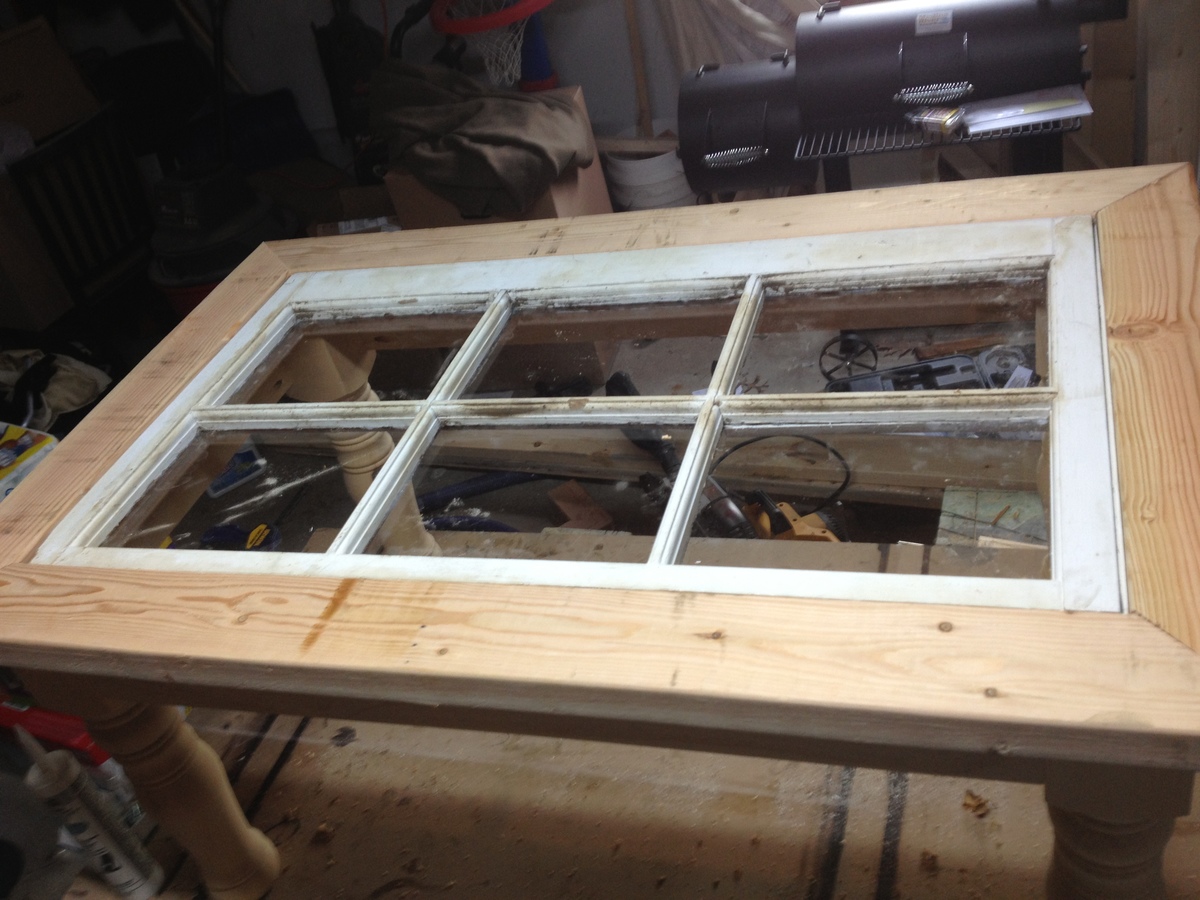
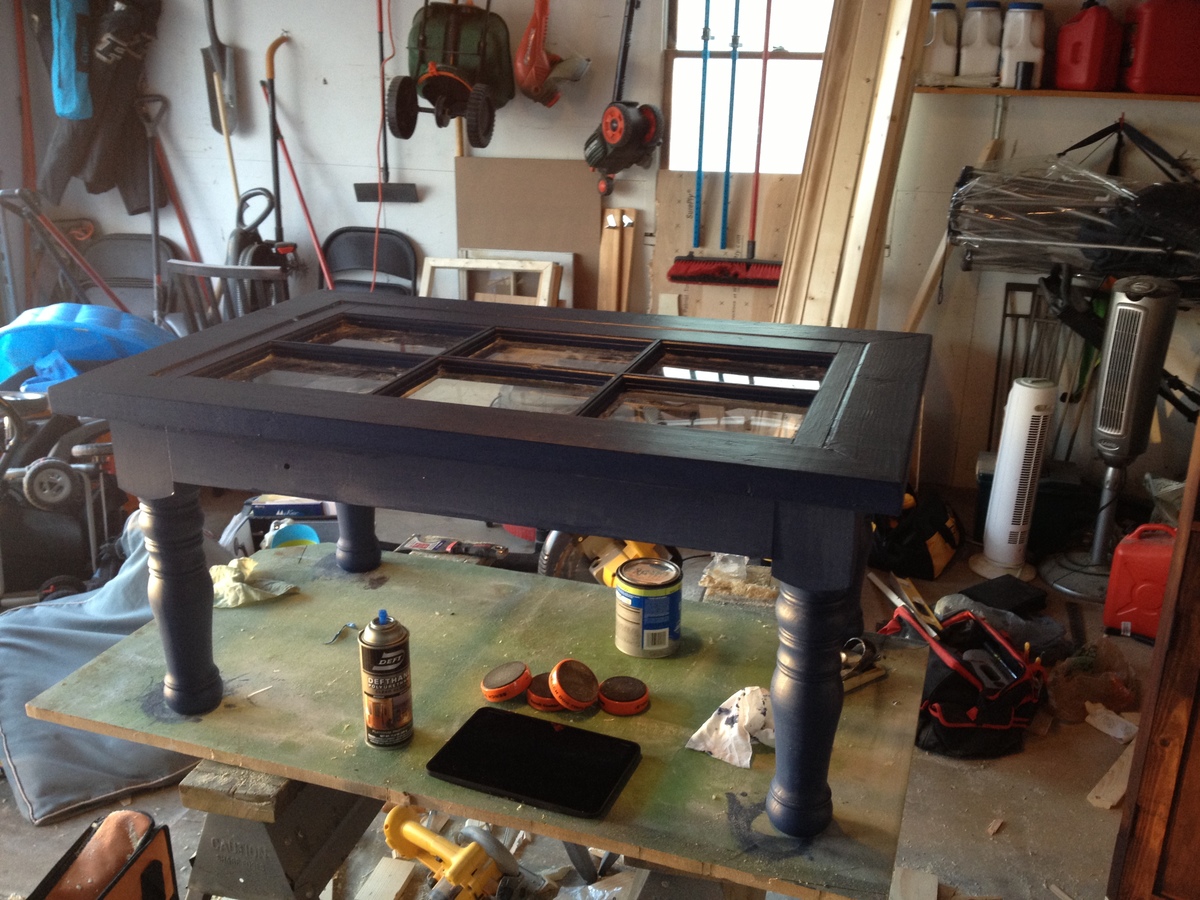
Window Coffee Table
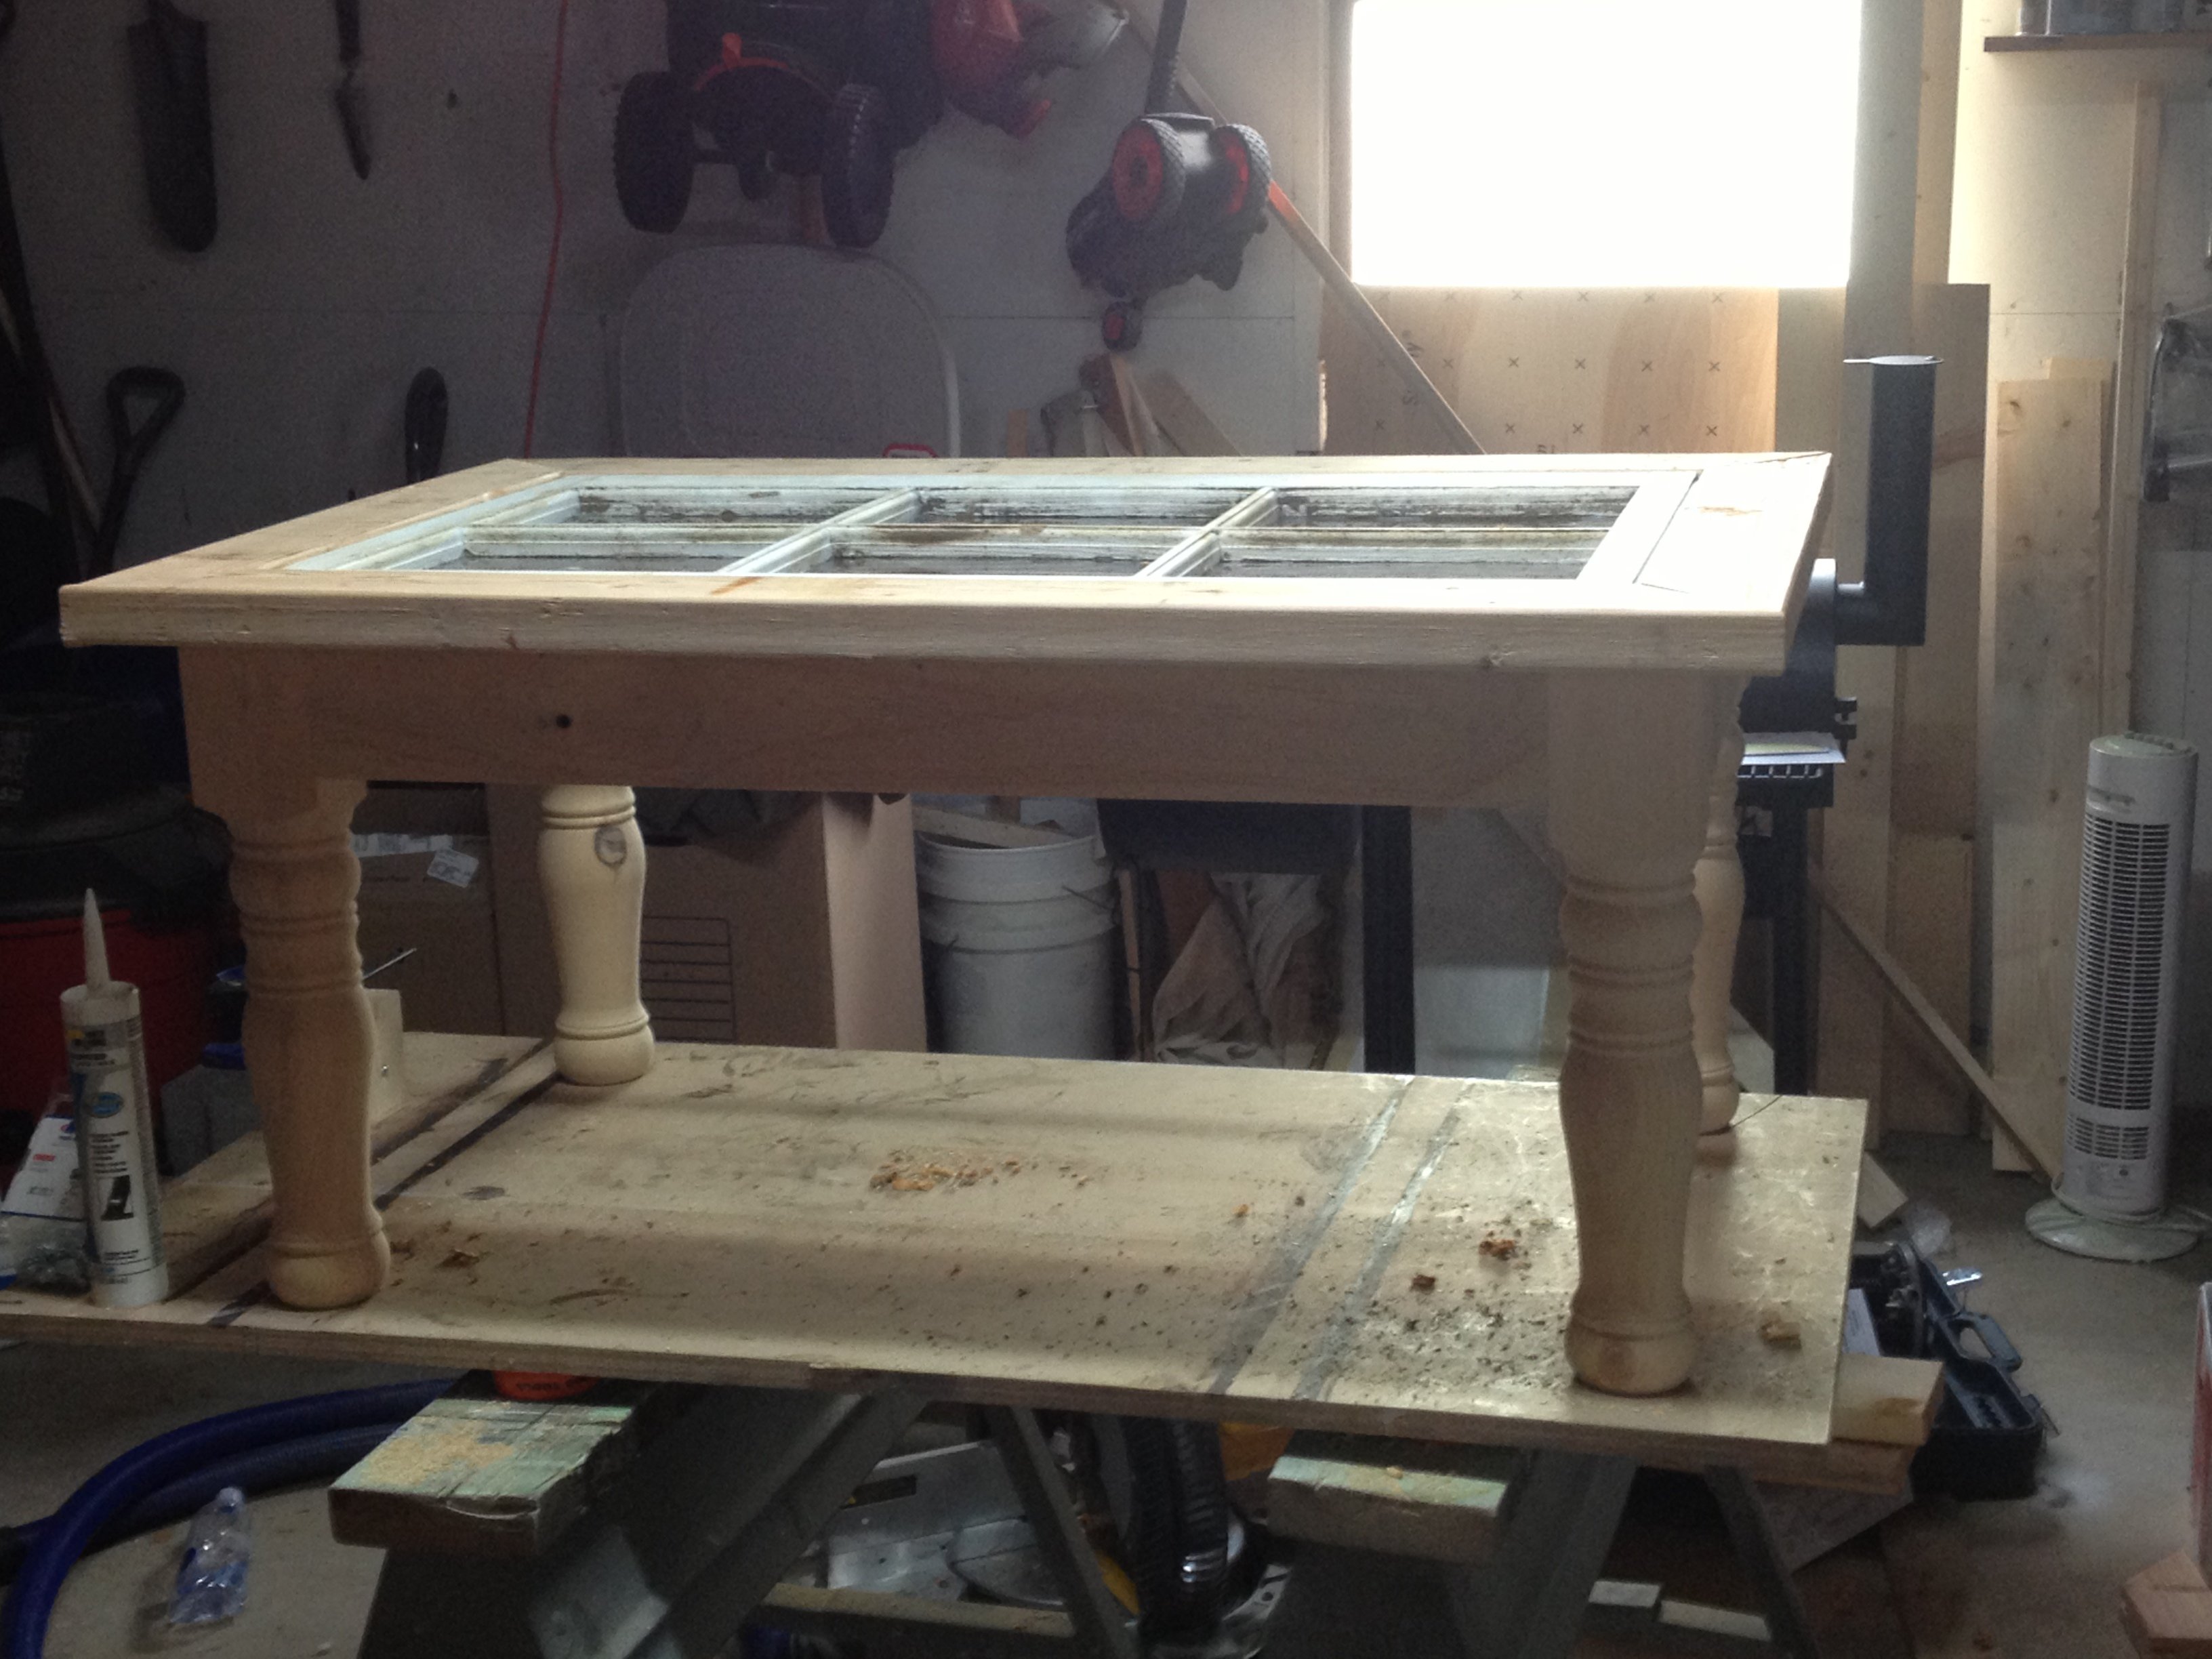
We needed a new coffee table in the family room, one that went with the ever changing decor. One of my neighbors threw out a rather nice, but older wooden framed window that they had been holding onto for who knows how long. My wife actually grabbed it out of the garbage with both the kids sitting in the car while she loaded it into her SUV in dress clothes.
Anyway, I broke down the window into two sections and used one of the sections to build this table. The area around the window is made out of 2x4 and the table skirt is 1x4. I bought the turned legs from www.osbornewood.com (colonial coffee table leg). This project was made a lot easier by using my kreg jig to attach the skirt to the table legs as well as the top to the skirt. Knowing that I would have two young kids playing around and setting things on the table I placed the glass panes with plexi that I bought from Lowes. This will be safer as well as more durable in the future.
Estimated Cost
100.00
Estimated Time Investment
Weekend Project (10-20 Hours)
Finish Used
Royal Blue Satin paint
Recommended Skill Level
Intermediate
Comments
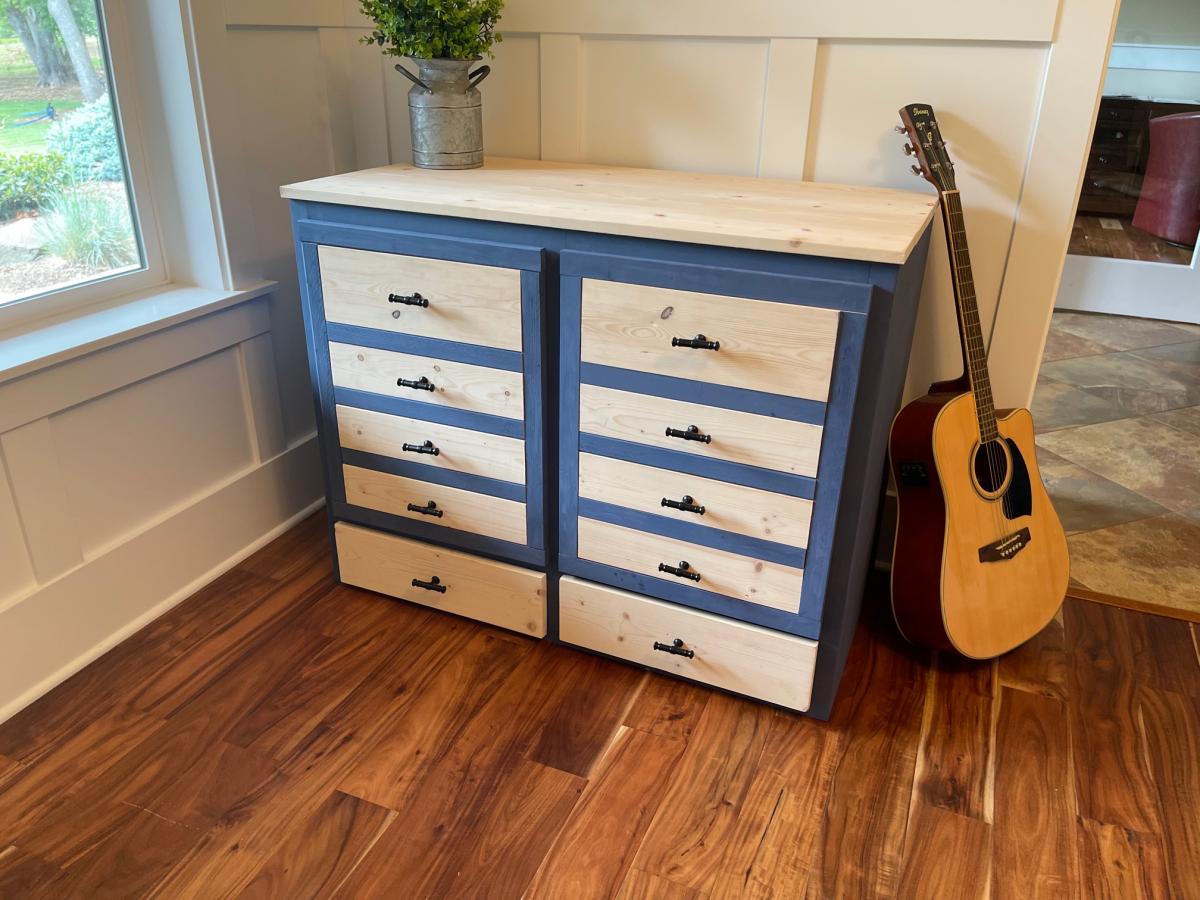
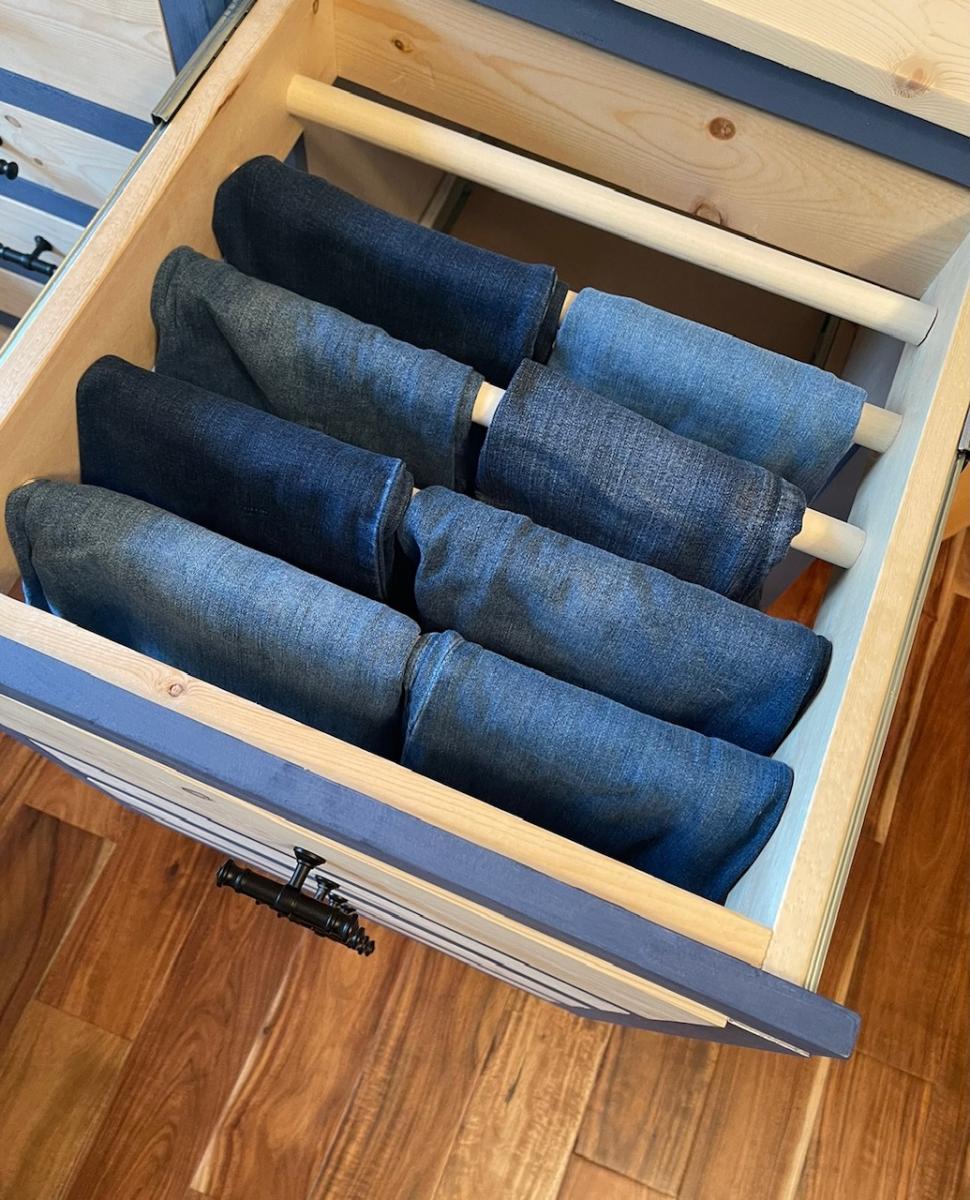
Apothecary Jeans Dresser
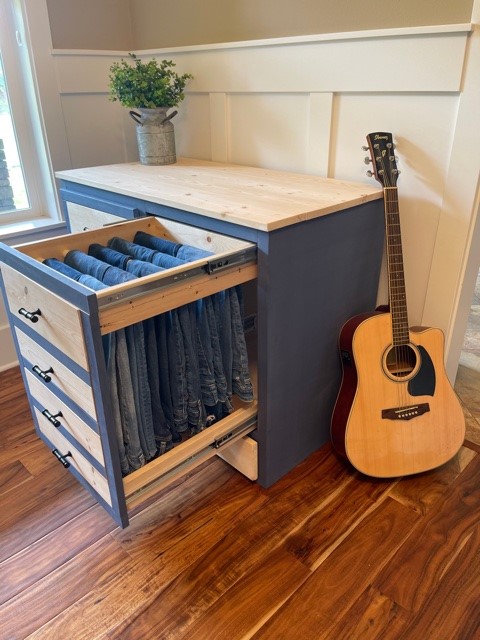
I used Shelf Help for the plywood pieces and a mash up of Ana's plans for the rest. I shared a video on my family page for steps used here https://www.youtube.com/watch?v=urFoX5j4J0s
Built from Plan(s)
Estimated Cost
250
Estimated Time Investment
Weekend Project (10-20 Hours)
Recommended Skill Level
Beginner
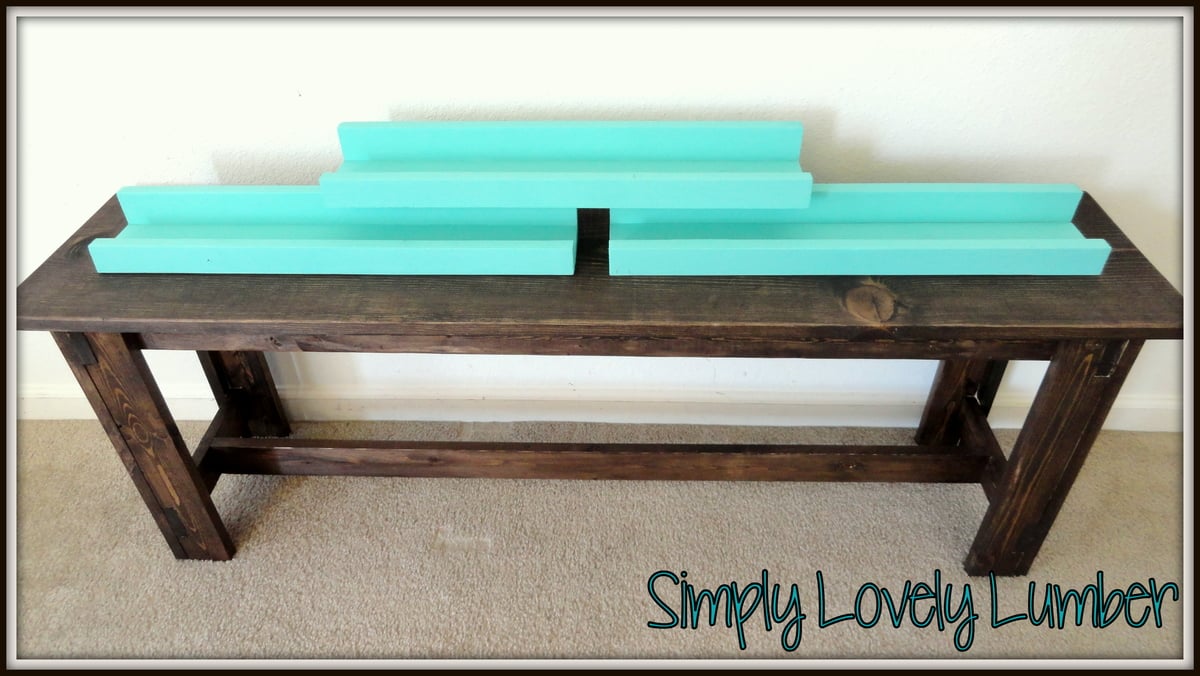
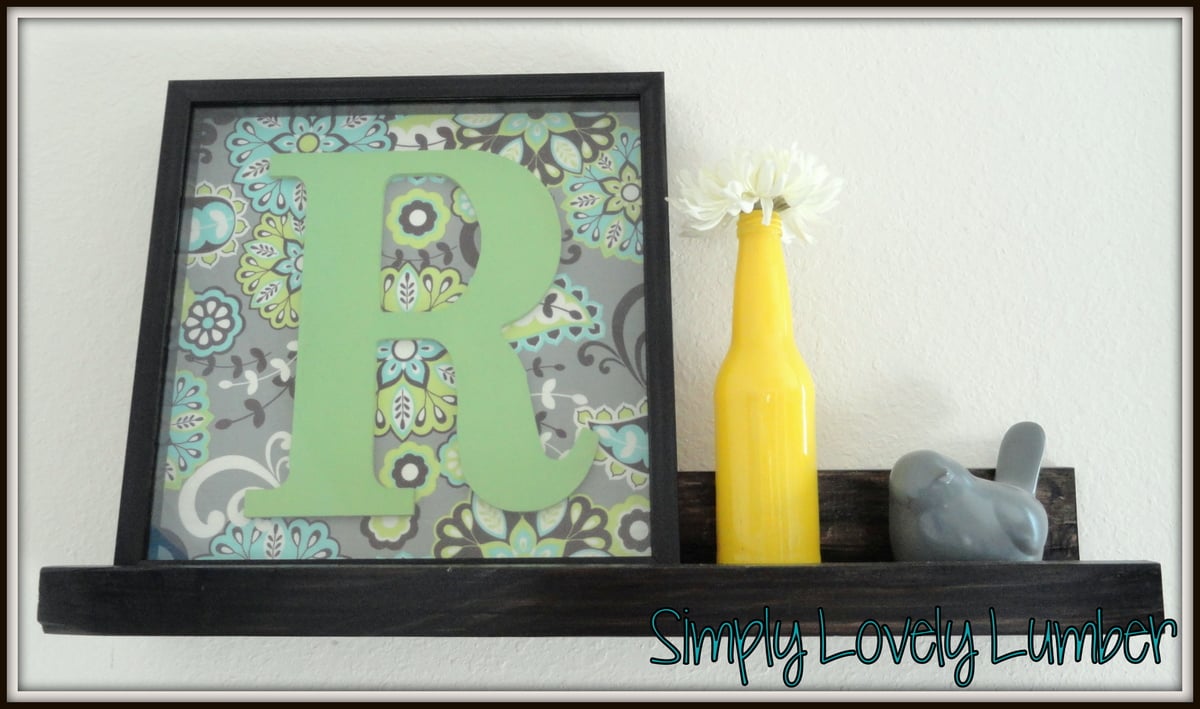
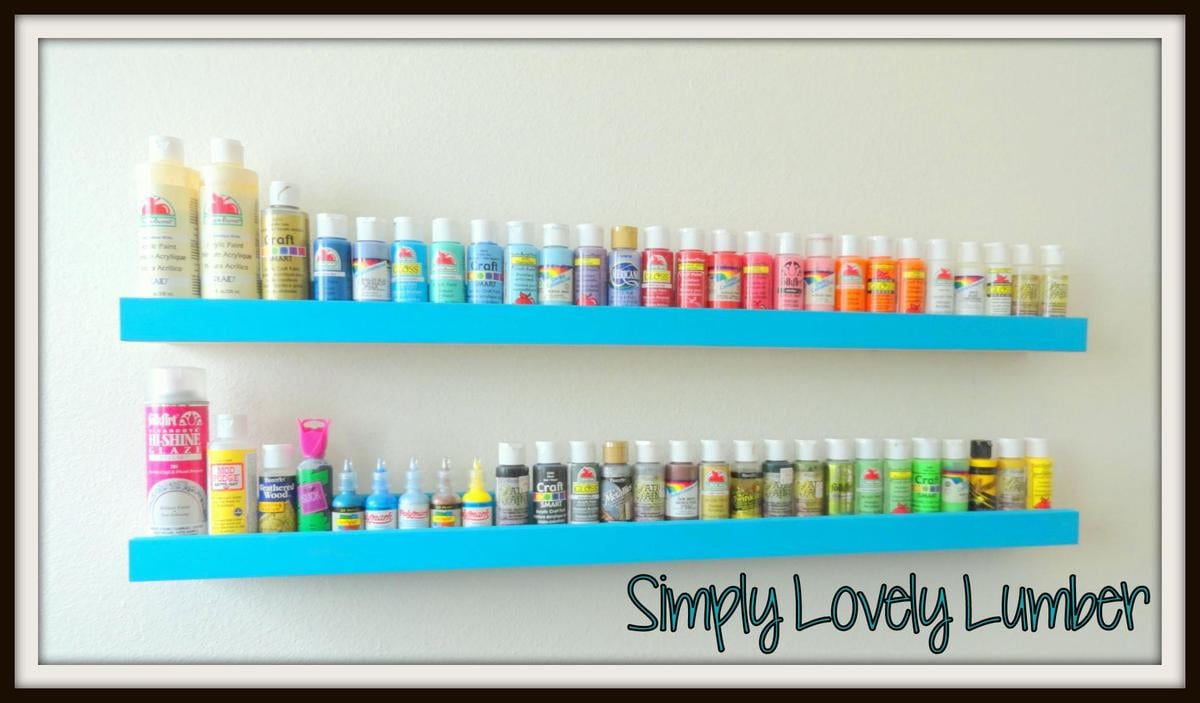
Picture Ledges
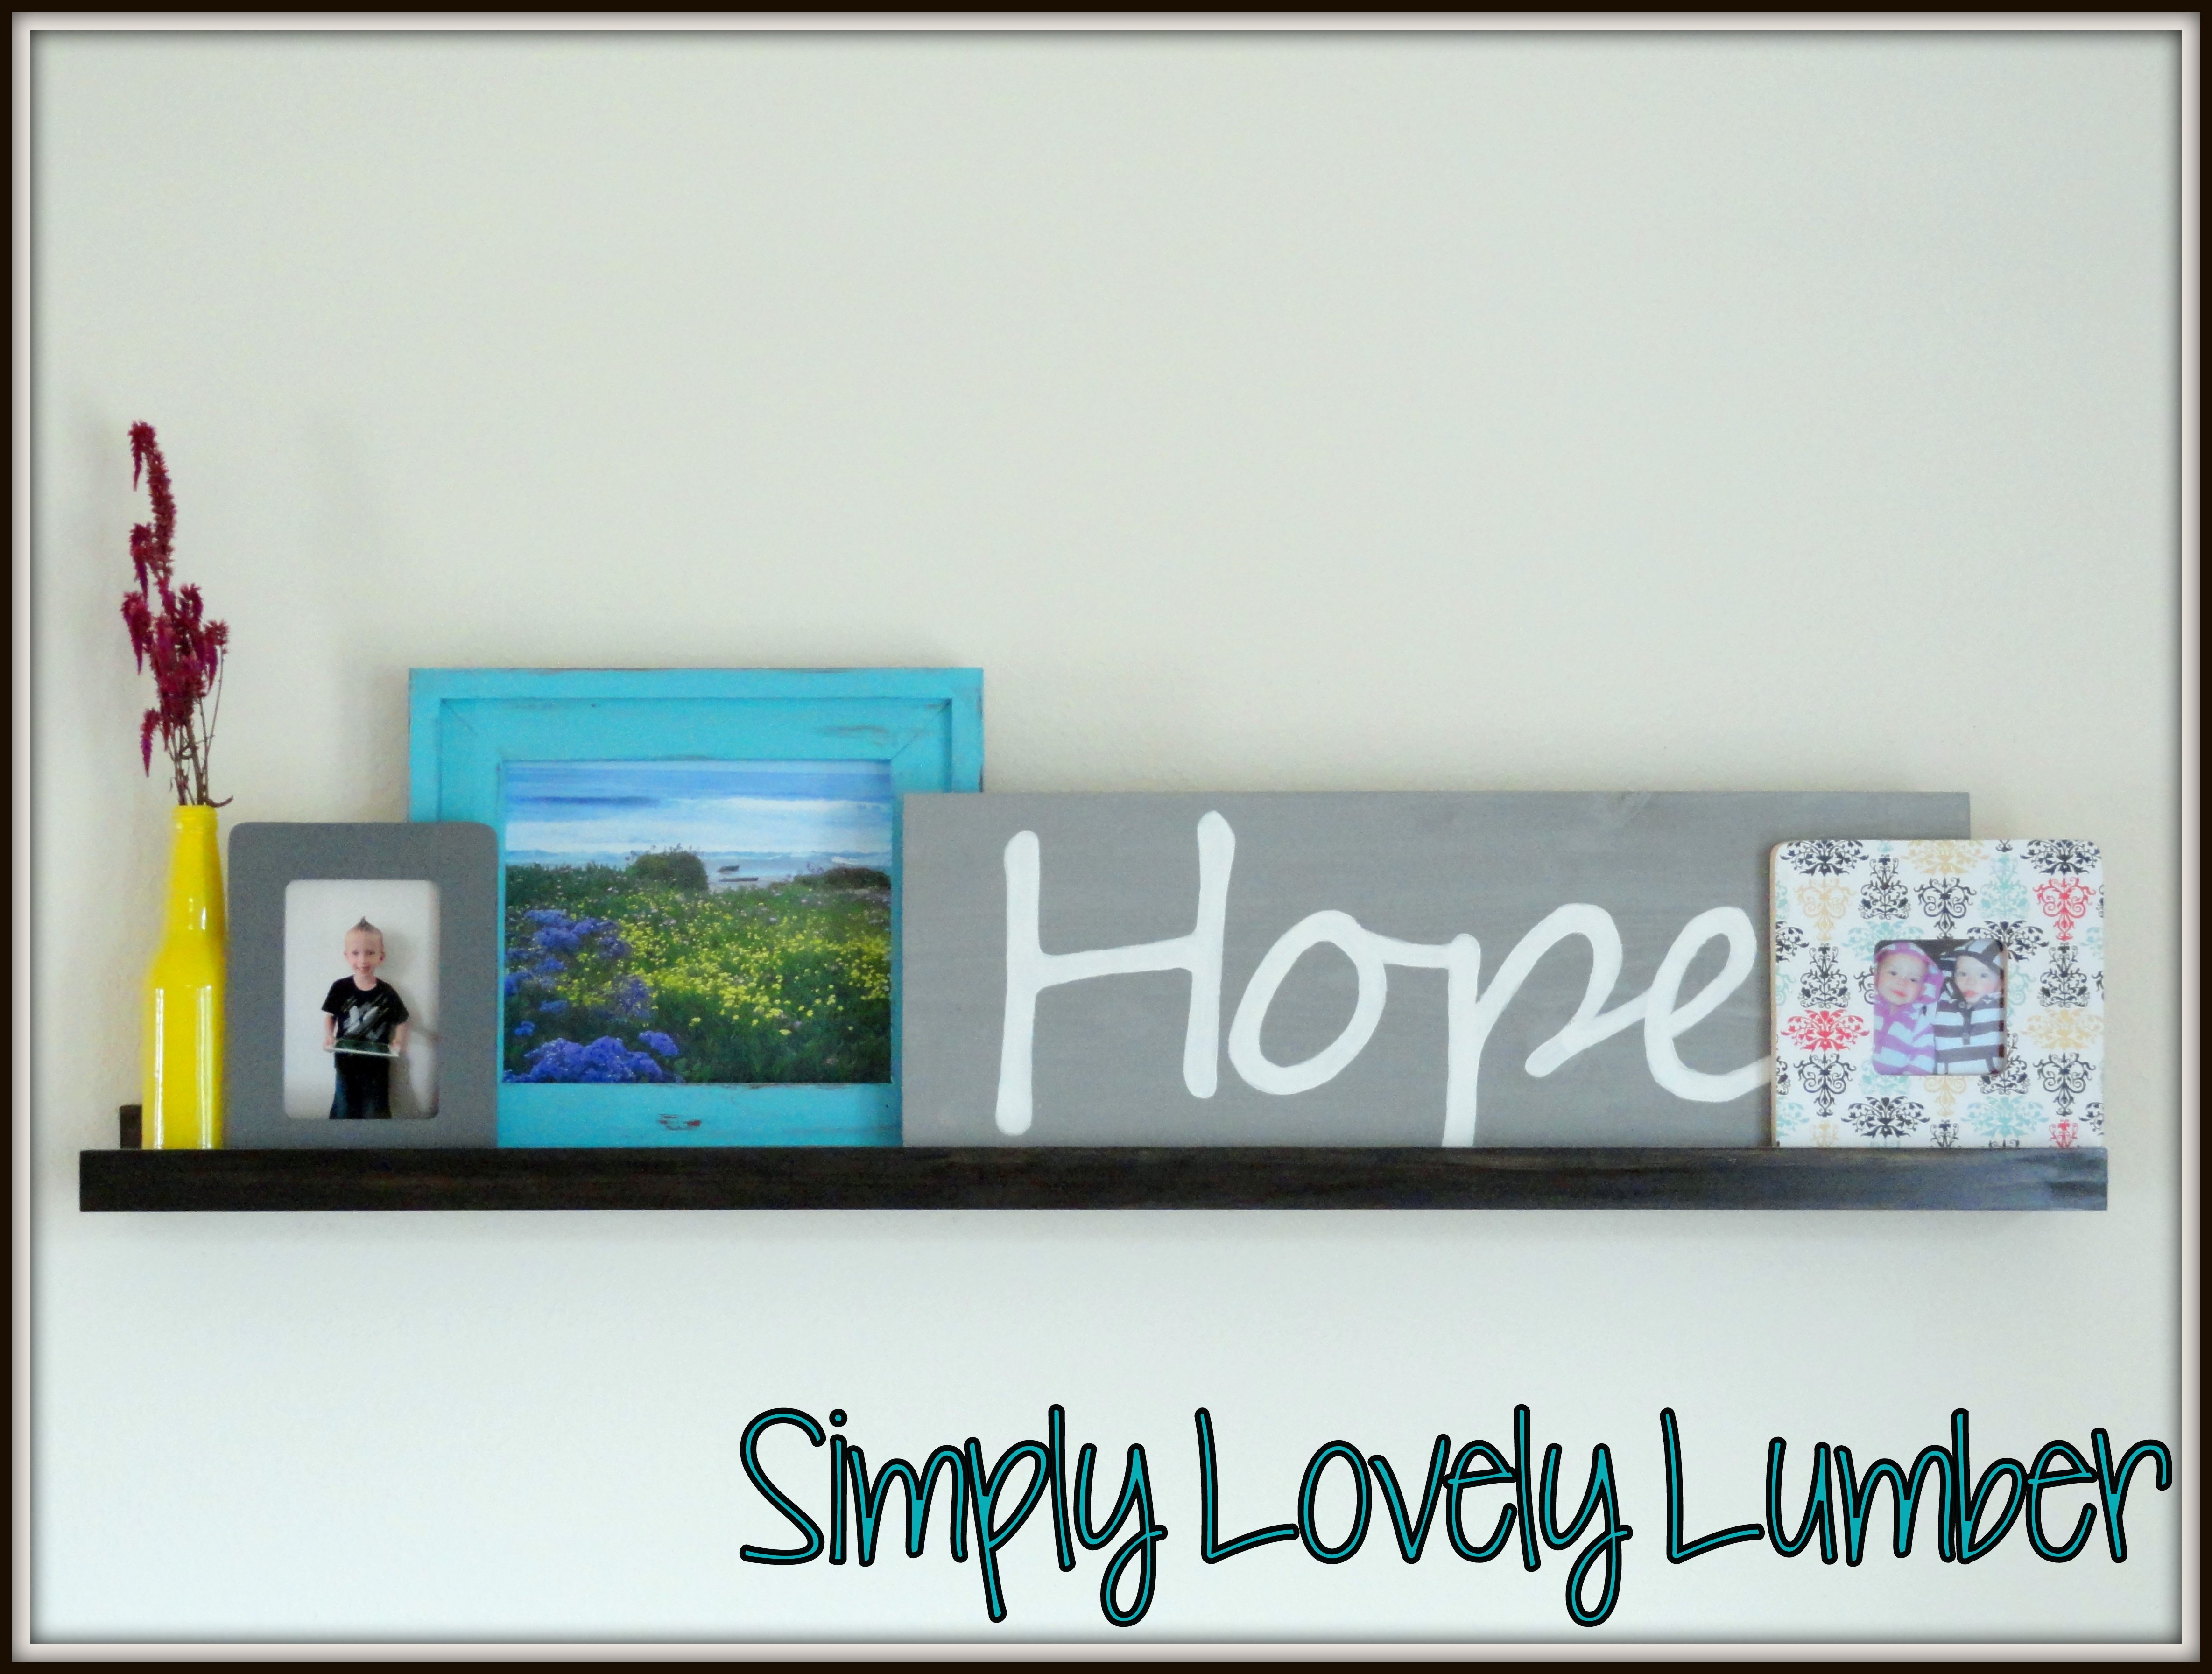
I have made many of these ledges and I just love them so much! I love that I can build them to any length or depth I want. I like to use them for more then just pictures. I feel like there will be many more of these in my future!
Built from Plan(s)
Estimated Time Investment
An Hour or Two (0-2 Hours)
Recommended Skill Level
Starter Project
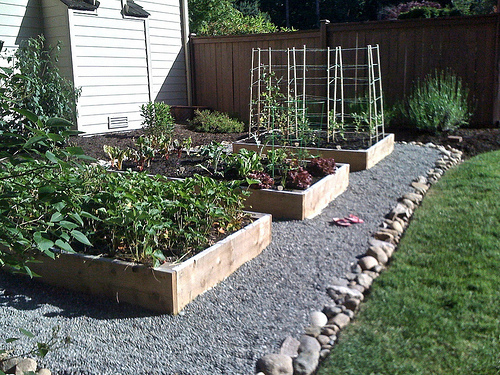
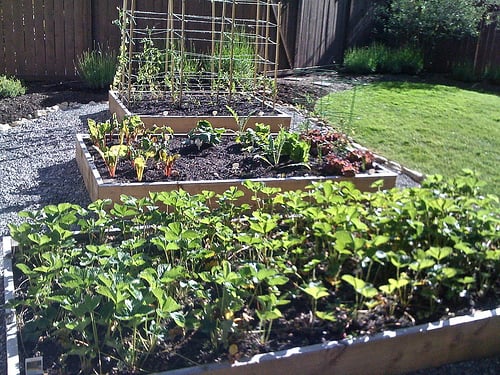
Raised Garden Beds!

Yay! Here are my raised beds, motivated by Ana White's post. :) I decided to use 2x lumber rather than 1x lumber because I plan to add benches on the ends of each bed. I just love how these turned out! I used Hemlock rather than cedar because it was a THIRD less expensive. Orange told me hemlock would last roughly 5-6 years whereas cedar would last 7-9 year. I staggered the sizes too - first bed (with the strawberries) is 4' x 10', second is 4' x 8' and the third (with the stakes) is 4' x 6'. Hubby hauled in a bunch of pea gravel to surround the beds while the girls and I added rocks from around our yard to the perimeter. :)
Built from Plan(s)
Estimated Time Investment
An Hour or Two (0-2 Hours)
Finish Used
None!
Recommended Skill Level
Beginner
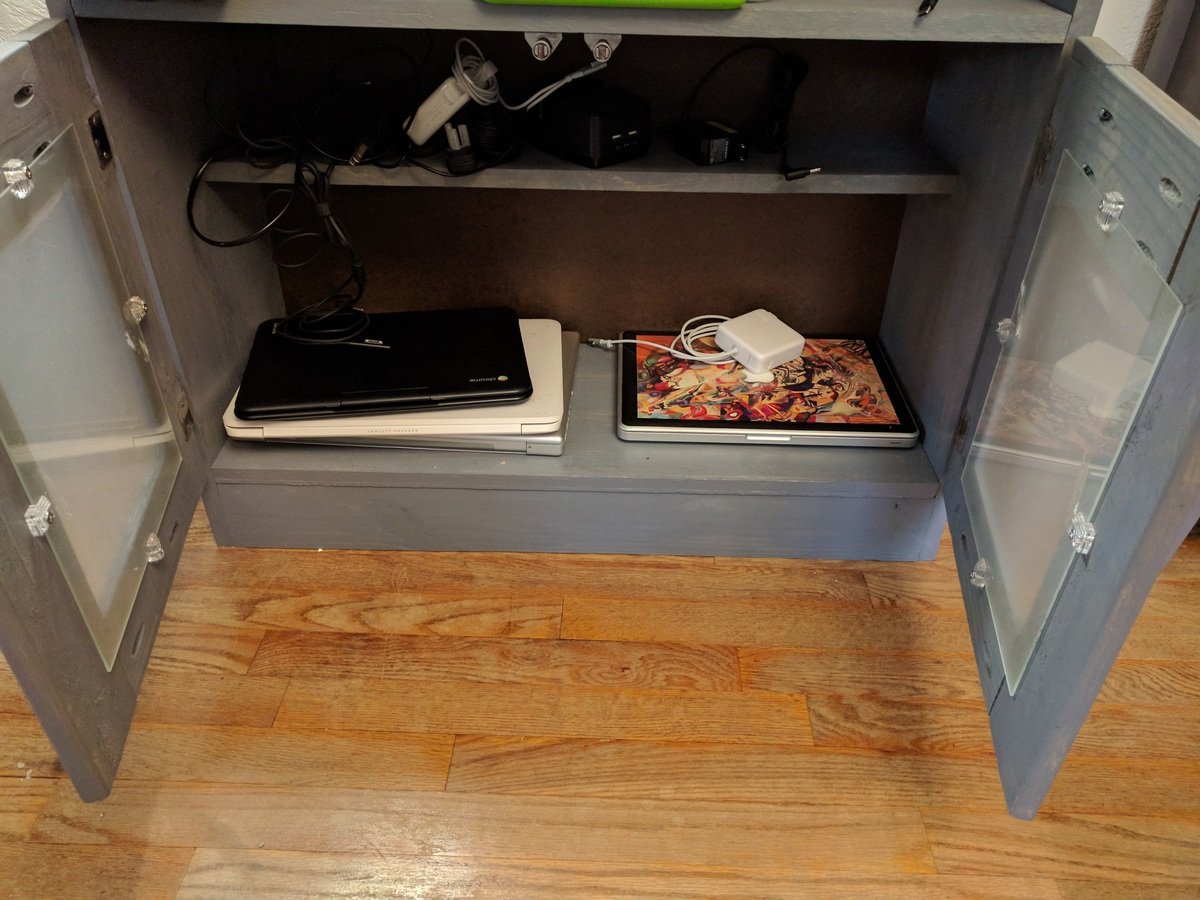
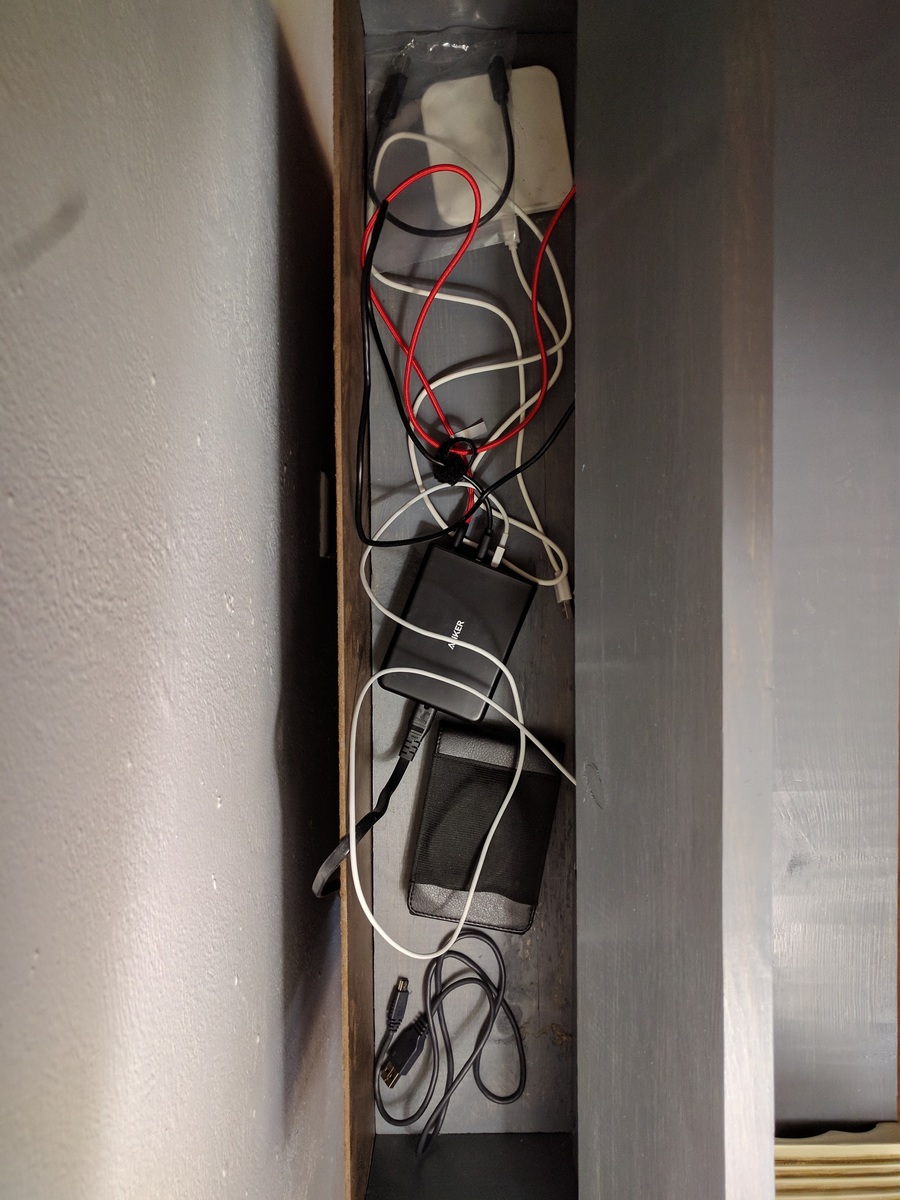
Charging Station
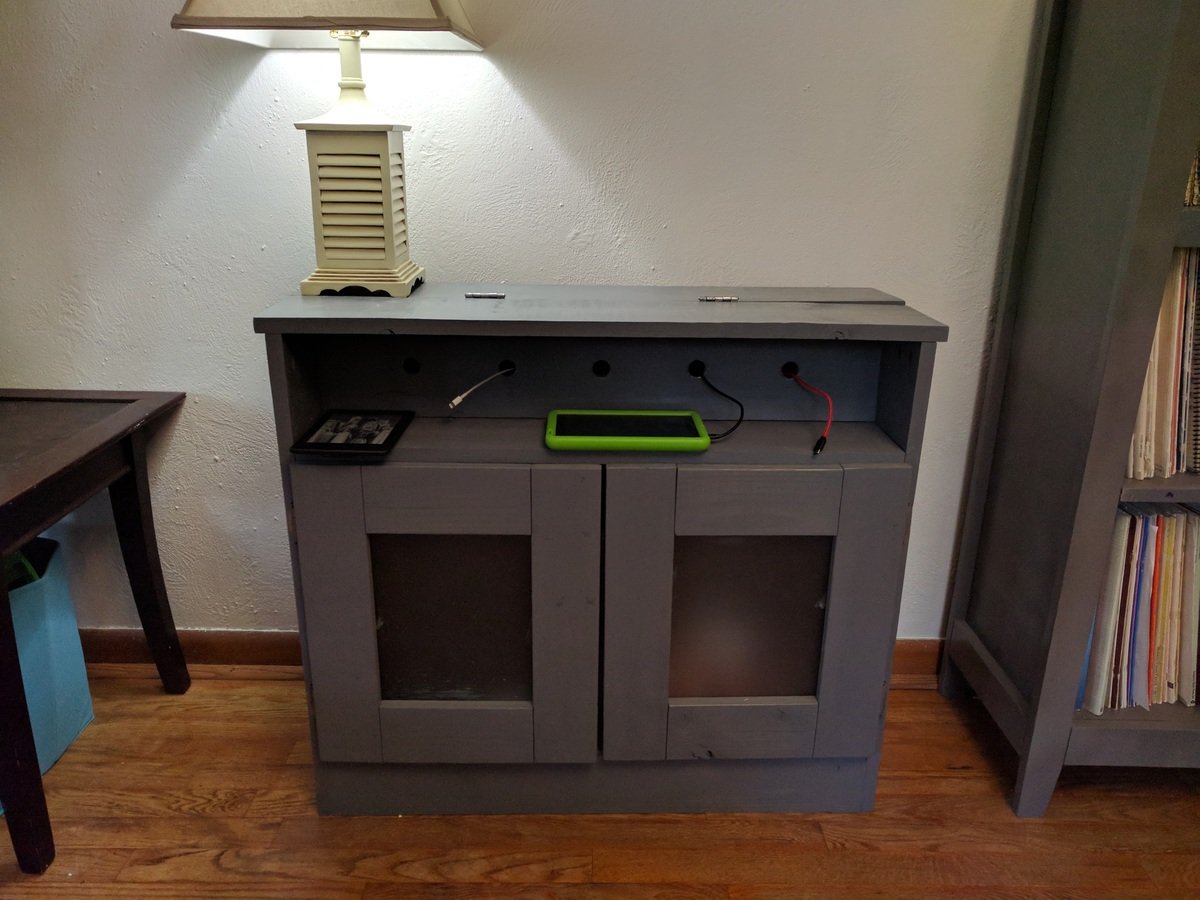
I used the charging station plans as my first attempt at building something using pocket holes, and also my first real attempt at building any piece of furniture from scratch. I stuck pretty much to Ana's plans except for not cutting the front footer (I didn't own a jigsaw at the time) and using panes of frosted glass as the center of the doors.
As a piece of furniture it gets used every day, but it has been most invaluable to me as a learning experience. I've built many pieces of furniture in the time since I made the charging station, growing my skills each time. But this project was where I started, so it always feels a little extra special to me.
Built from Plan(s)
Estimated Cost
$40
Estimated Time Investment
Afternoon Project (3-6 Hours)
Finish Used
Varathane Premium Fast Dry Wood Stain, weathered gray
Recommended Skill Level
Intermediate
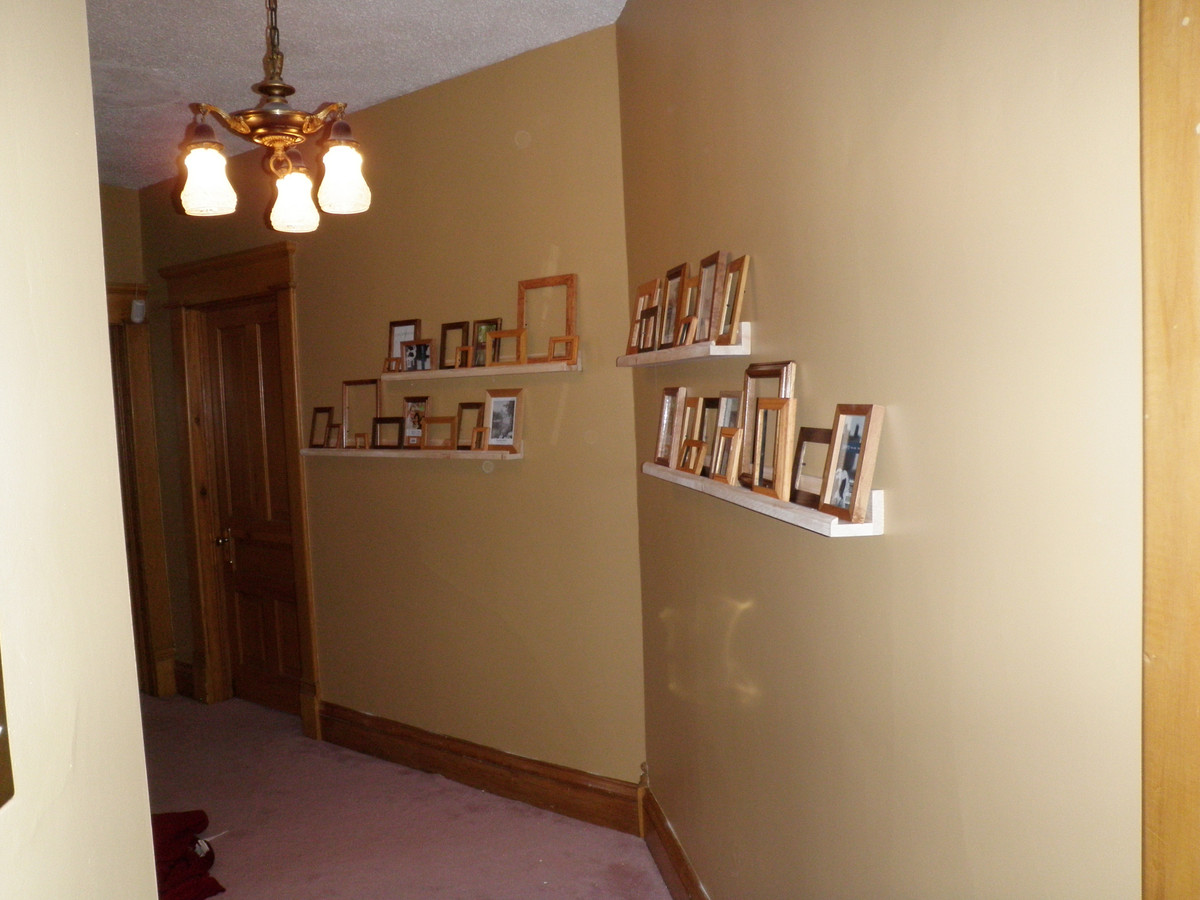
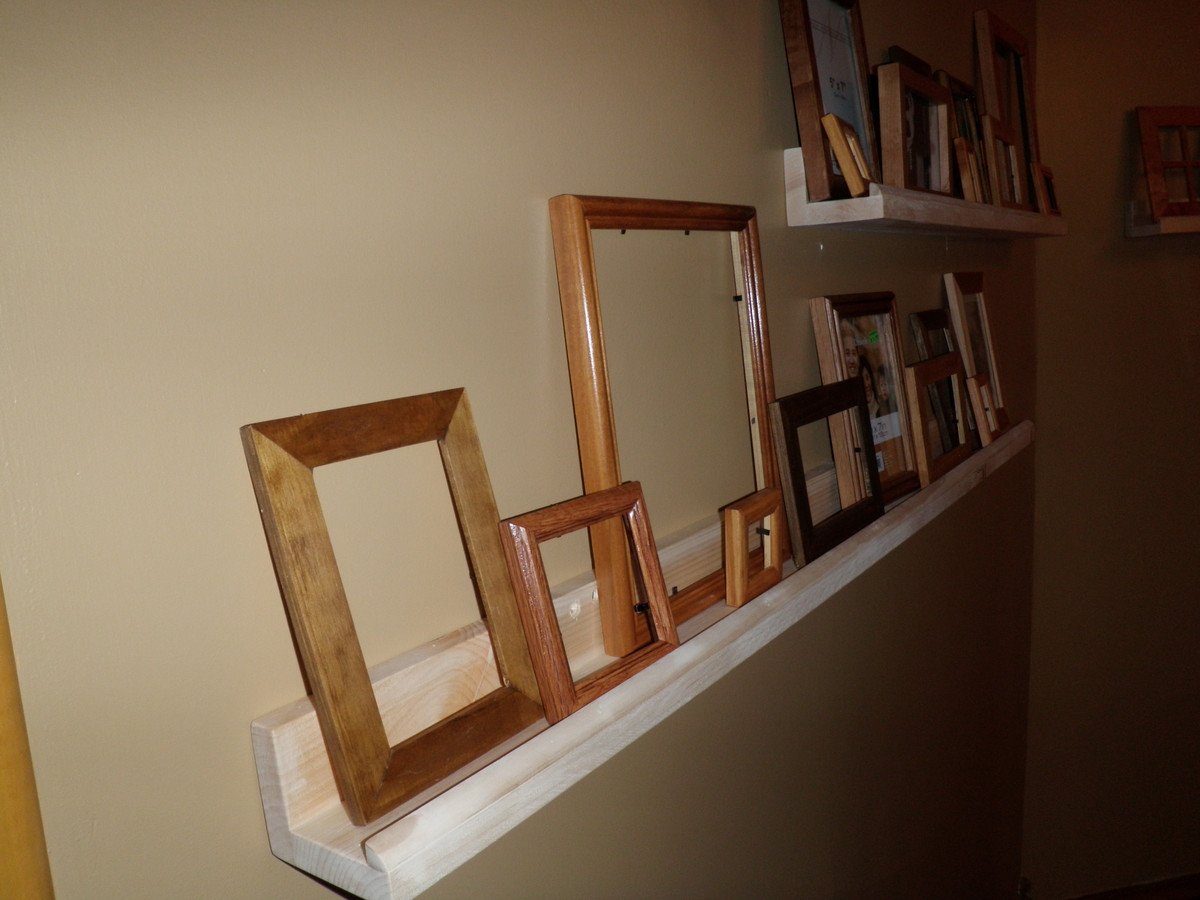
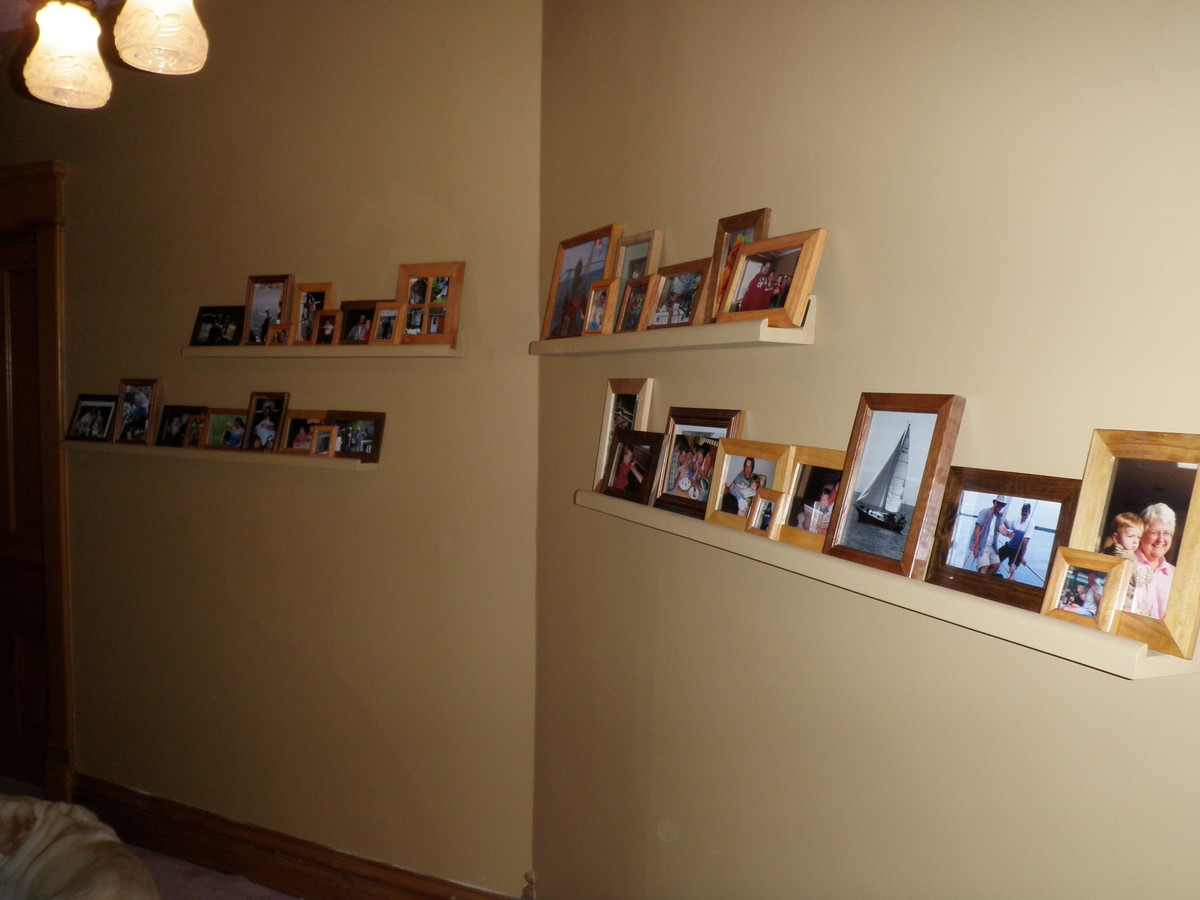
Photo Gallery Ledges
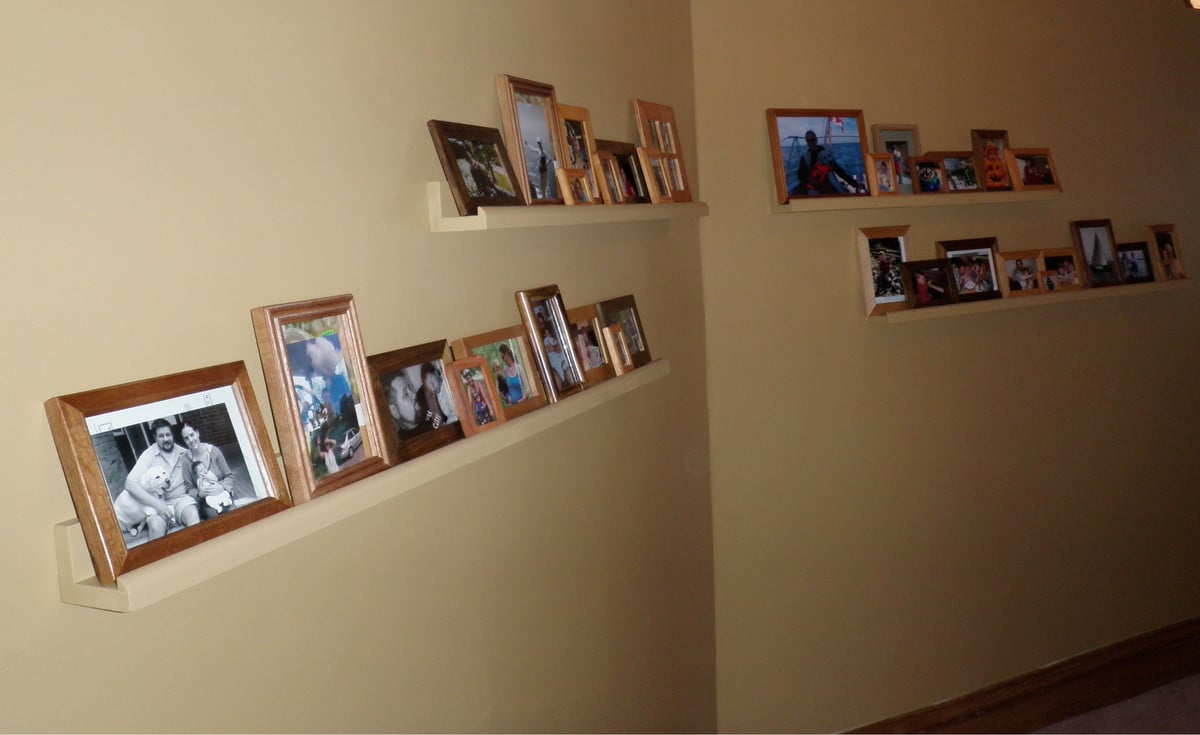
I was always a fan of the gallery wall, but not having a big empty space in any of my main rooms I didn't think I could have one. However, once I finally got my stairway and upper hallway painted, I realized the wall needed something and the gallery ledges would be perfect! Save the old plaster walls from being bashed with picture hanging nails too!
I build them out've 1x3's and a small 1/4 round for the front edge instead of a 1x2.
I made 2 3' long and 2 4' long and staggered them on the walls, as the walls are at a slight angle to each other.
I decided to paint them the same colour as the walls so they would blend in and the picture frames would stand out. All the frames are varying wood stain colours that go with the trim in the house.
I love having a place to put all the pictures I never find time to put up!
Built from Plan(s)
Estimated Cost
$24 for all 4
Estimated Time Investment
An Hour or Two (0-2 Hours)
Finish Used
Paint. Home Hardware 'Burnt Sugar'
Recommended Skill Level
Starter Project
Built for my sister
Built for my sister. Because she liked mine so much :) I also built her an apothecary console to use as a side board in the dining room
Built from Plan(s)
Recommended Skill Level
Intermediate
Comments
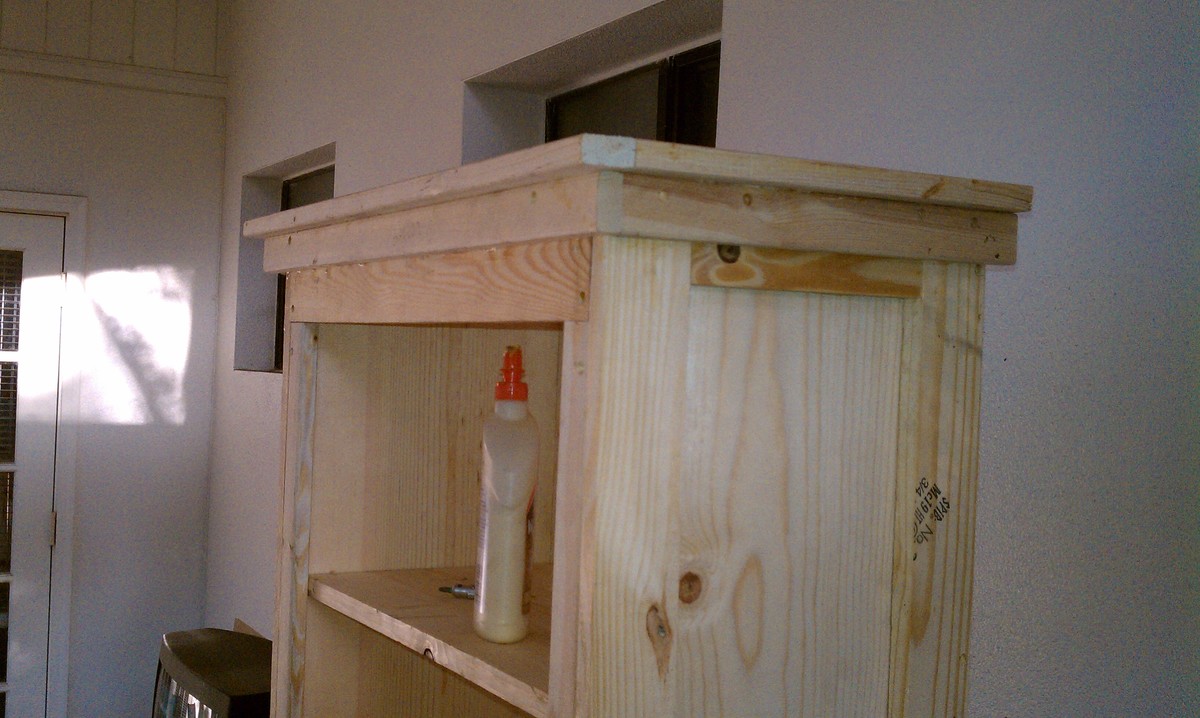
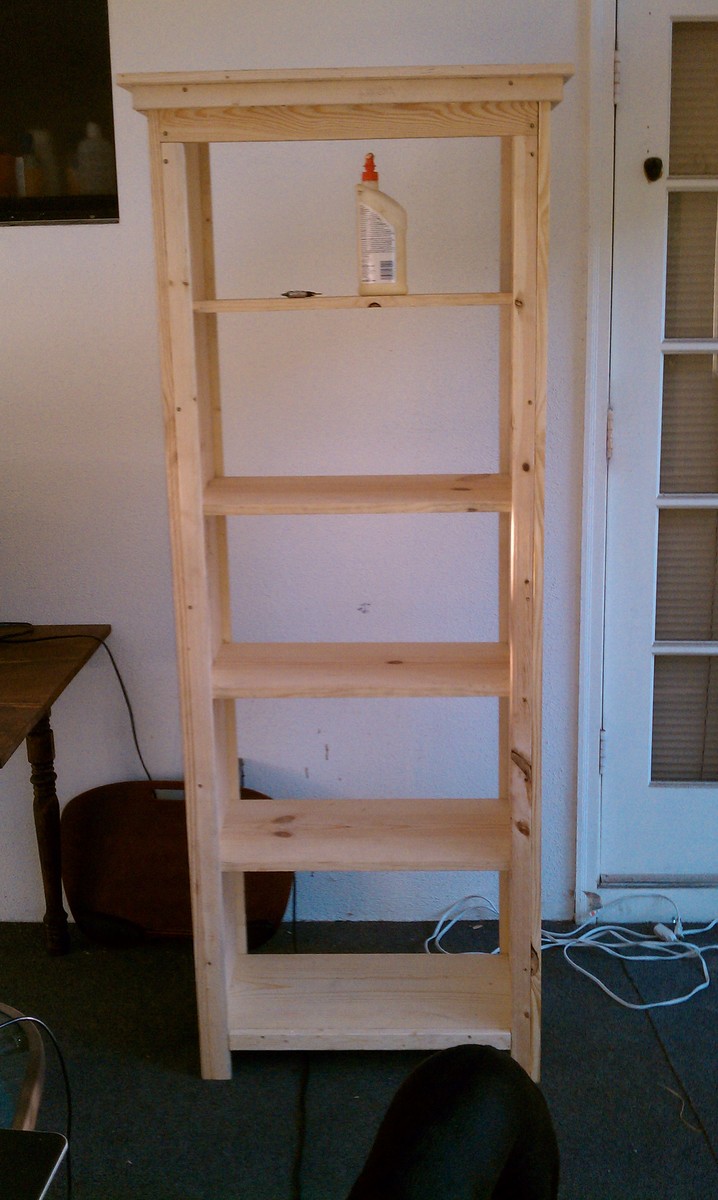
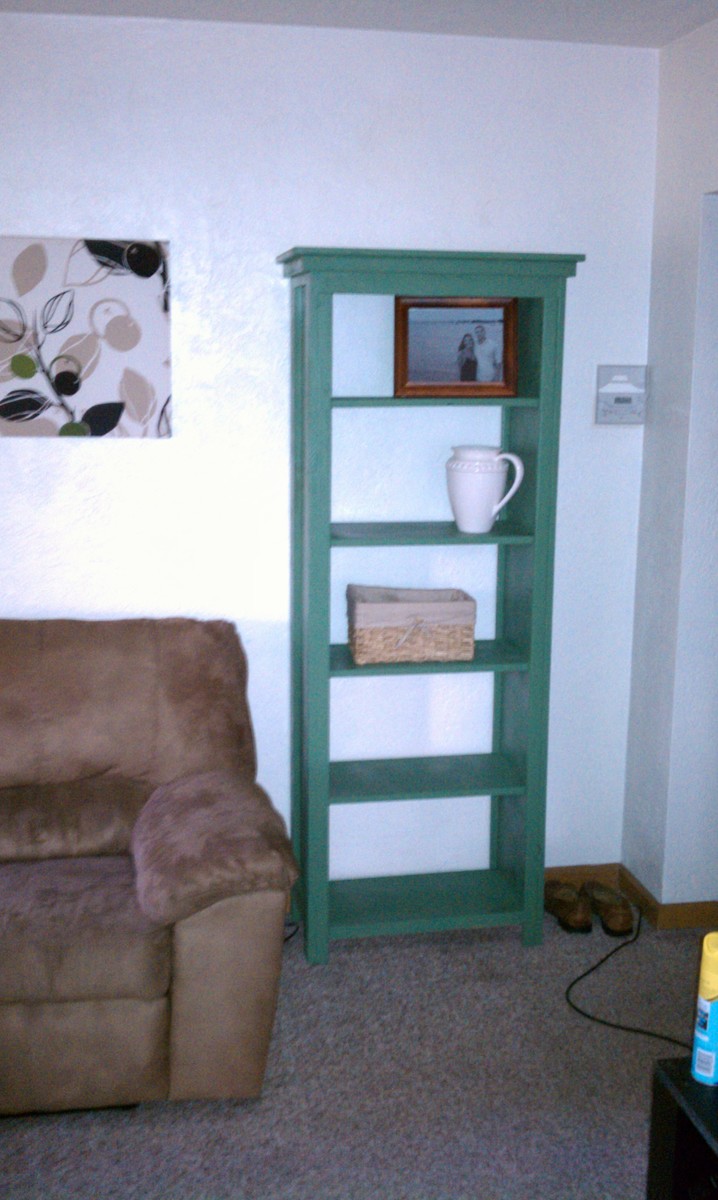
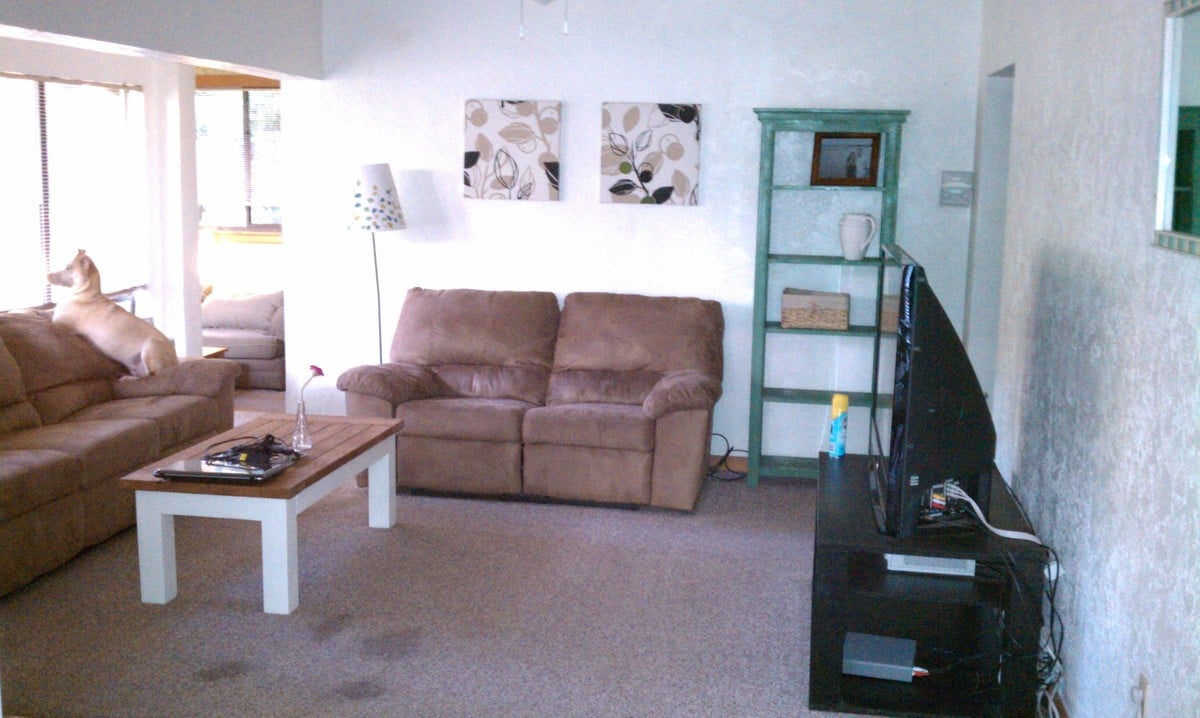
Favorite Bookshelf
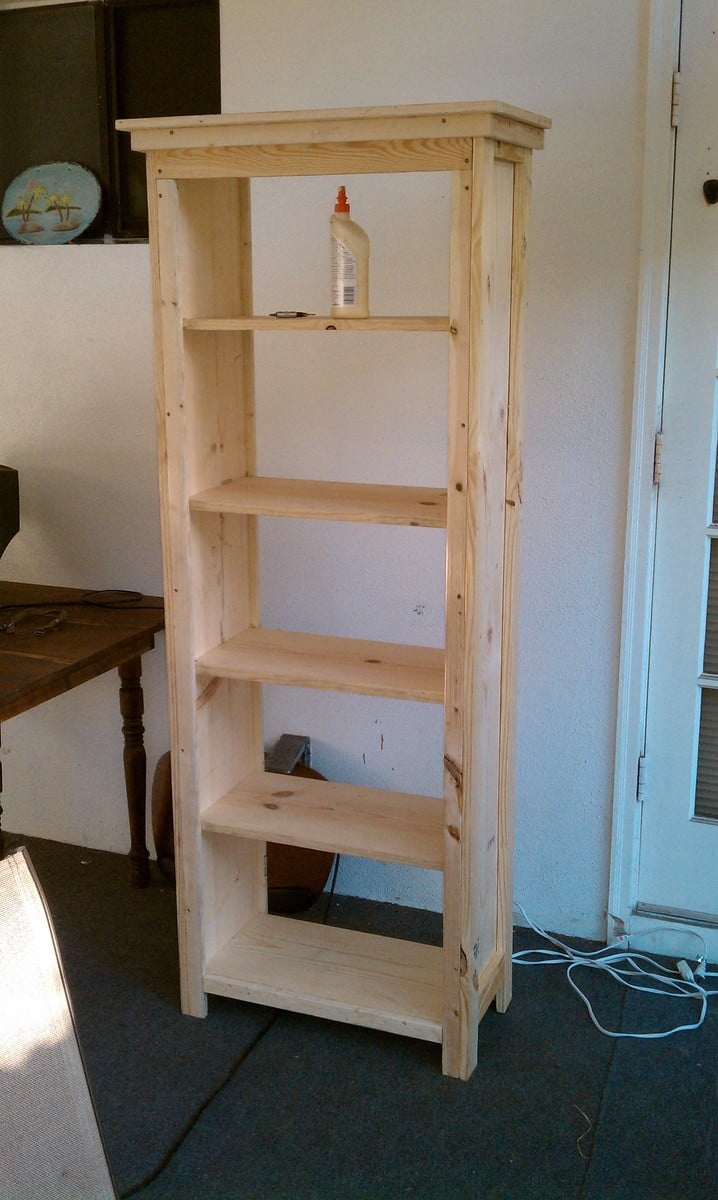
Favorite Bookshelf - 2nd project - slowly replacing all of my furniture - took about a day - all day - sprayed about 3 coats of spray paint on there - came out pretty good - hardest thing is to screw in shelves level - but overall not too bad
Built from Plan(s)
Estimated Cost
40 - 50 bucks
Estimated Time Investment
Day Project (6-9 Hours)
Finish Used
moss green spraypaint - saw another user that used color so i stole it - sorry
Recommended Skill Level
Beginner
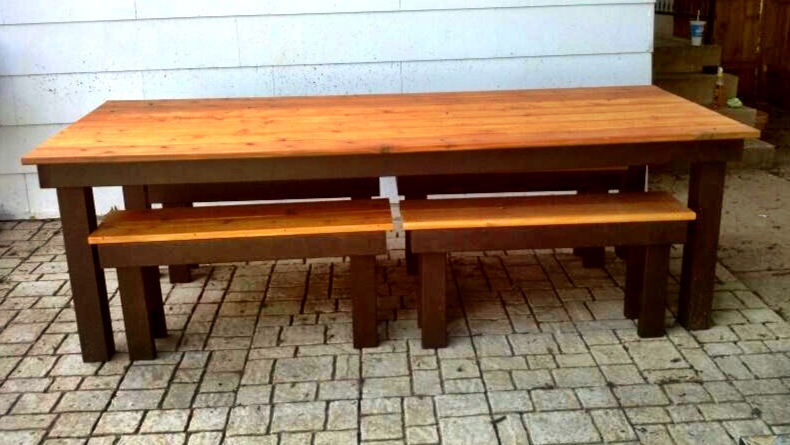
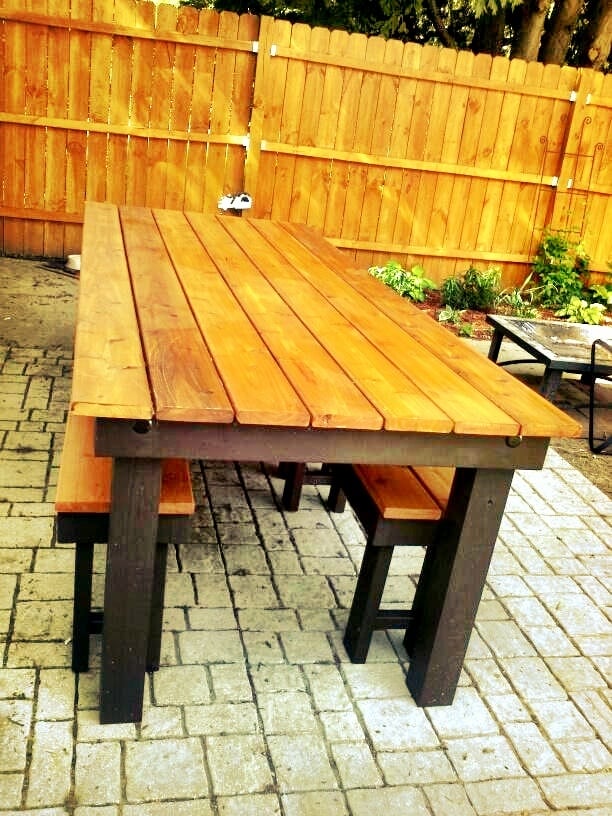
Modified rustic table and benches
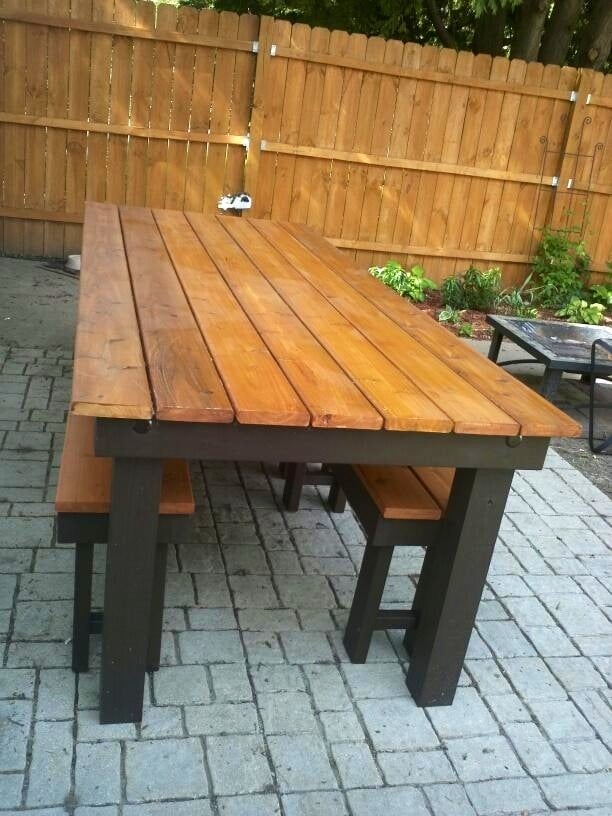
We built this table for my brother and new wife's wedding present. We modified it to use as an outdoor dining set. Instead of using the 1x10 for the tabletop we used 2x6's and for the legs we used 4x4's. We attached the top boards with a Camo fastening system we used last year on our deck (works great to conceal the screws). I stained the frame in Behr Cordovan Brown and the top boards in Behr Cedar Naturaltone. It was our first attempt at building a table and I think it turned out great, only problem was giving it away!
Built from Plan(s)
Estimated Cost
$300
Estimated Time Investment
Week Long Project (20 Hours or More)
Finish Used
Behr cordovan brown stain and Behr natural cedartone
Recommended Skill Level
Beginner
Comments
Mon, 06/17/2013 - 10:57
Very nice! I'd been
Very nice! I'd been considering this plan for my outdoor table, but my husband liked the modern farm table better. Same idea--I am leaving gaps to allow the water to drain. Love the two-tone finish! It's amazing what you can do with plain old 2 x 6s!