Community Brag Posts

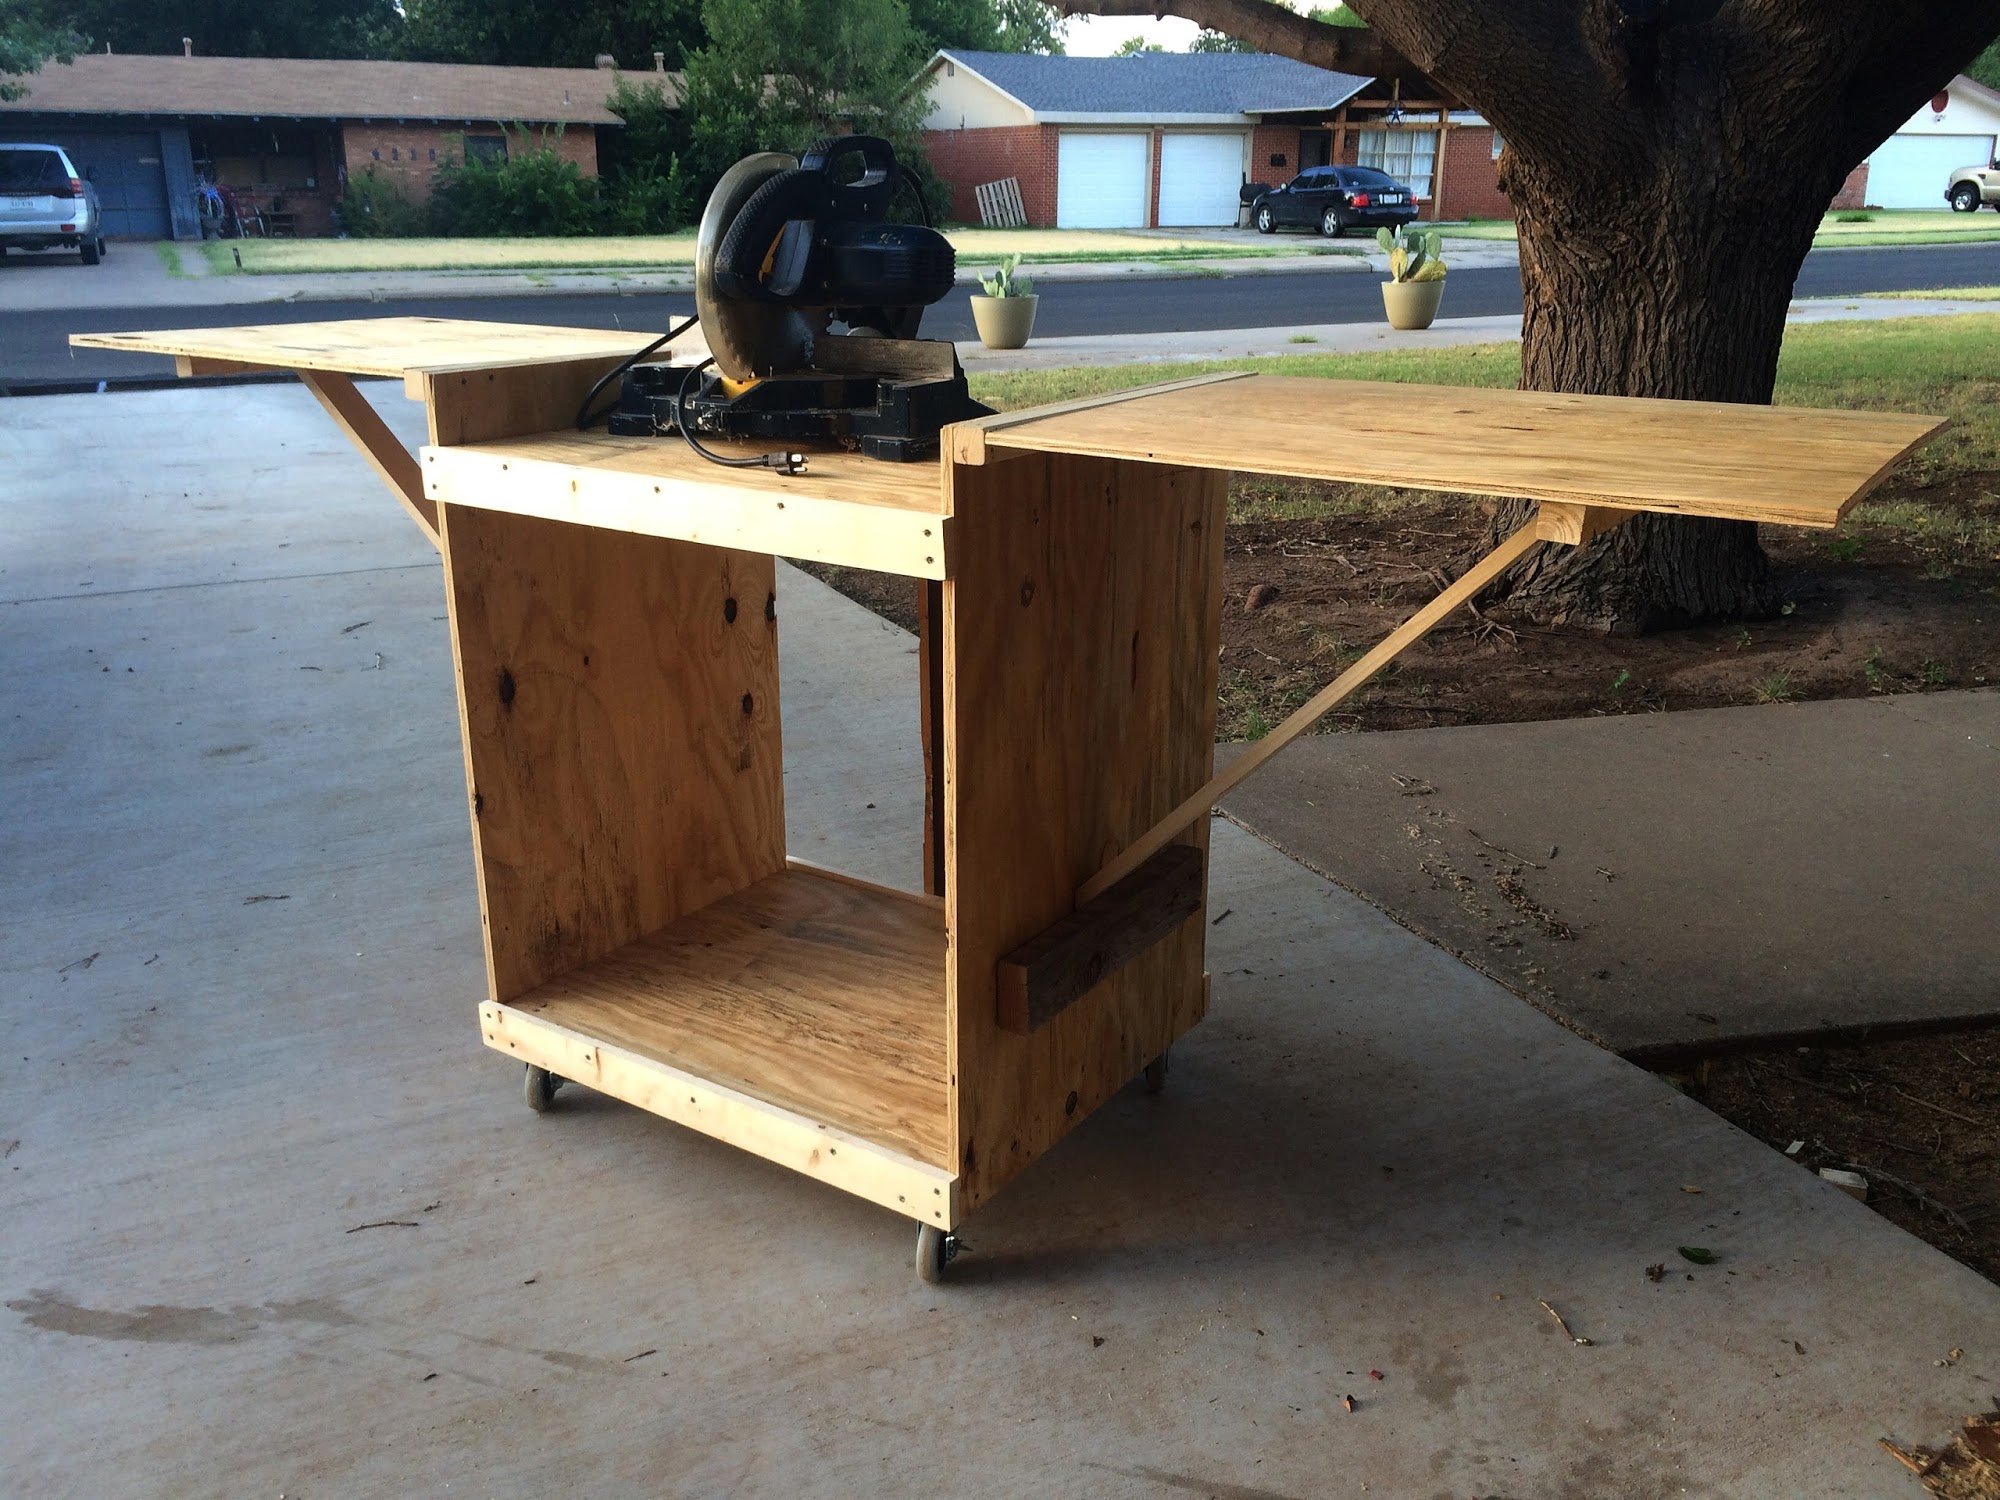
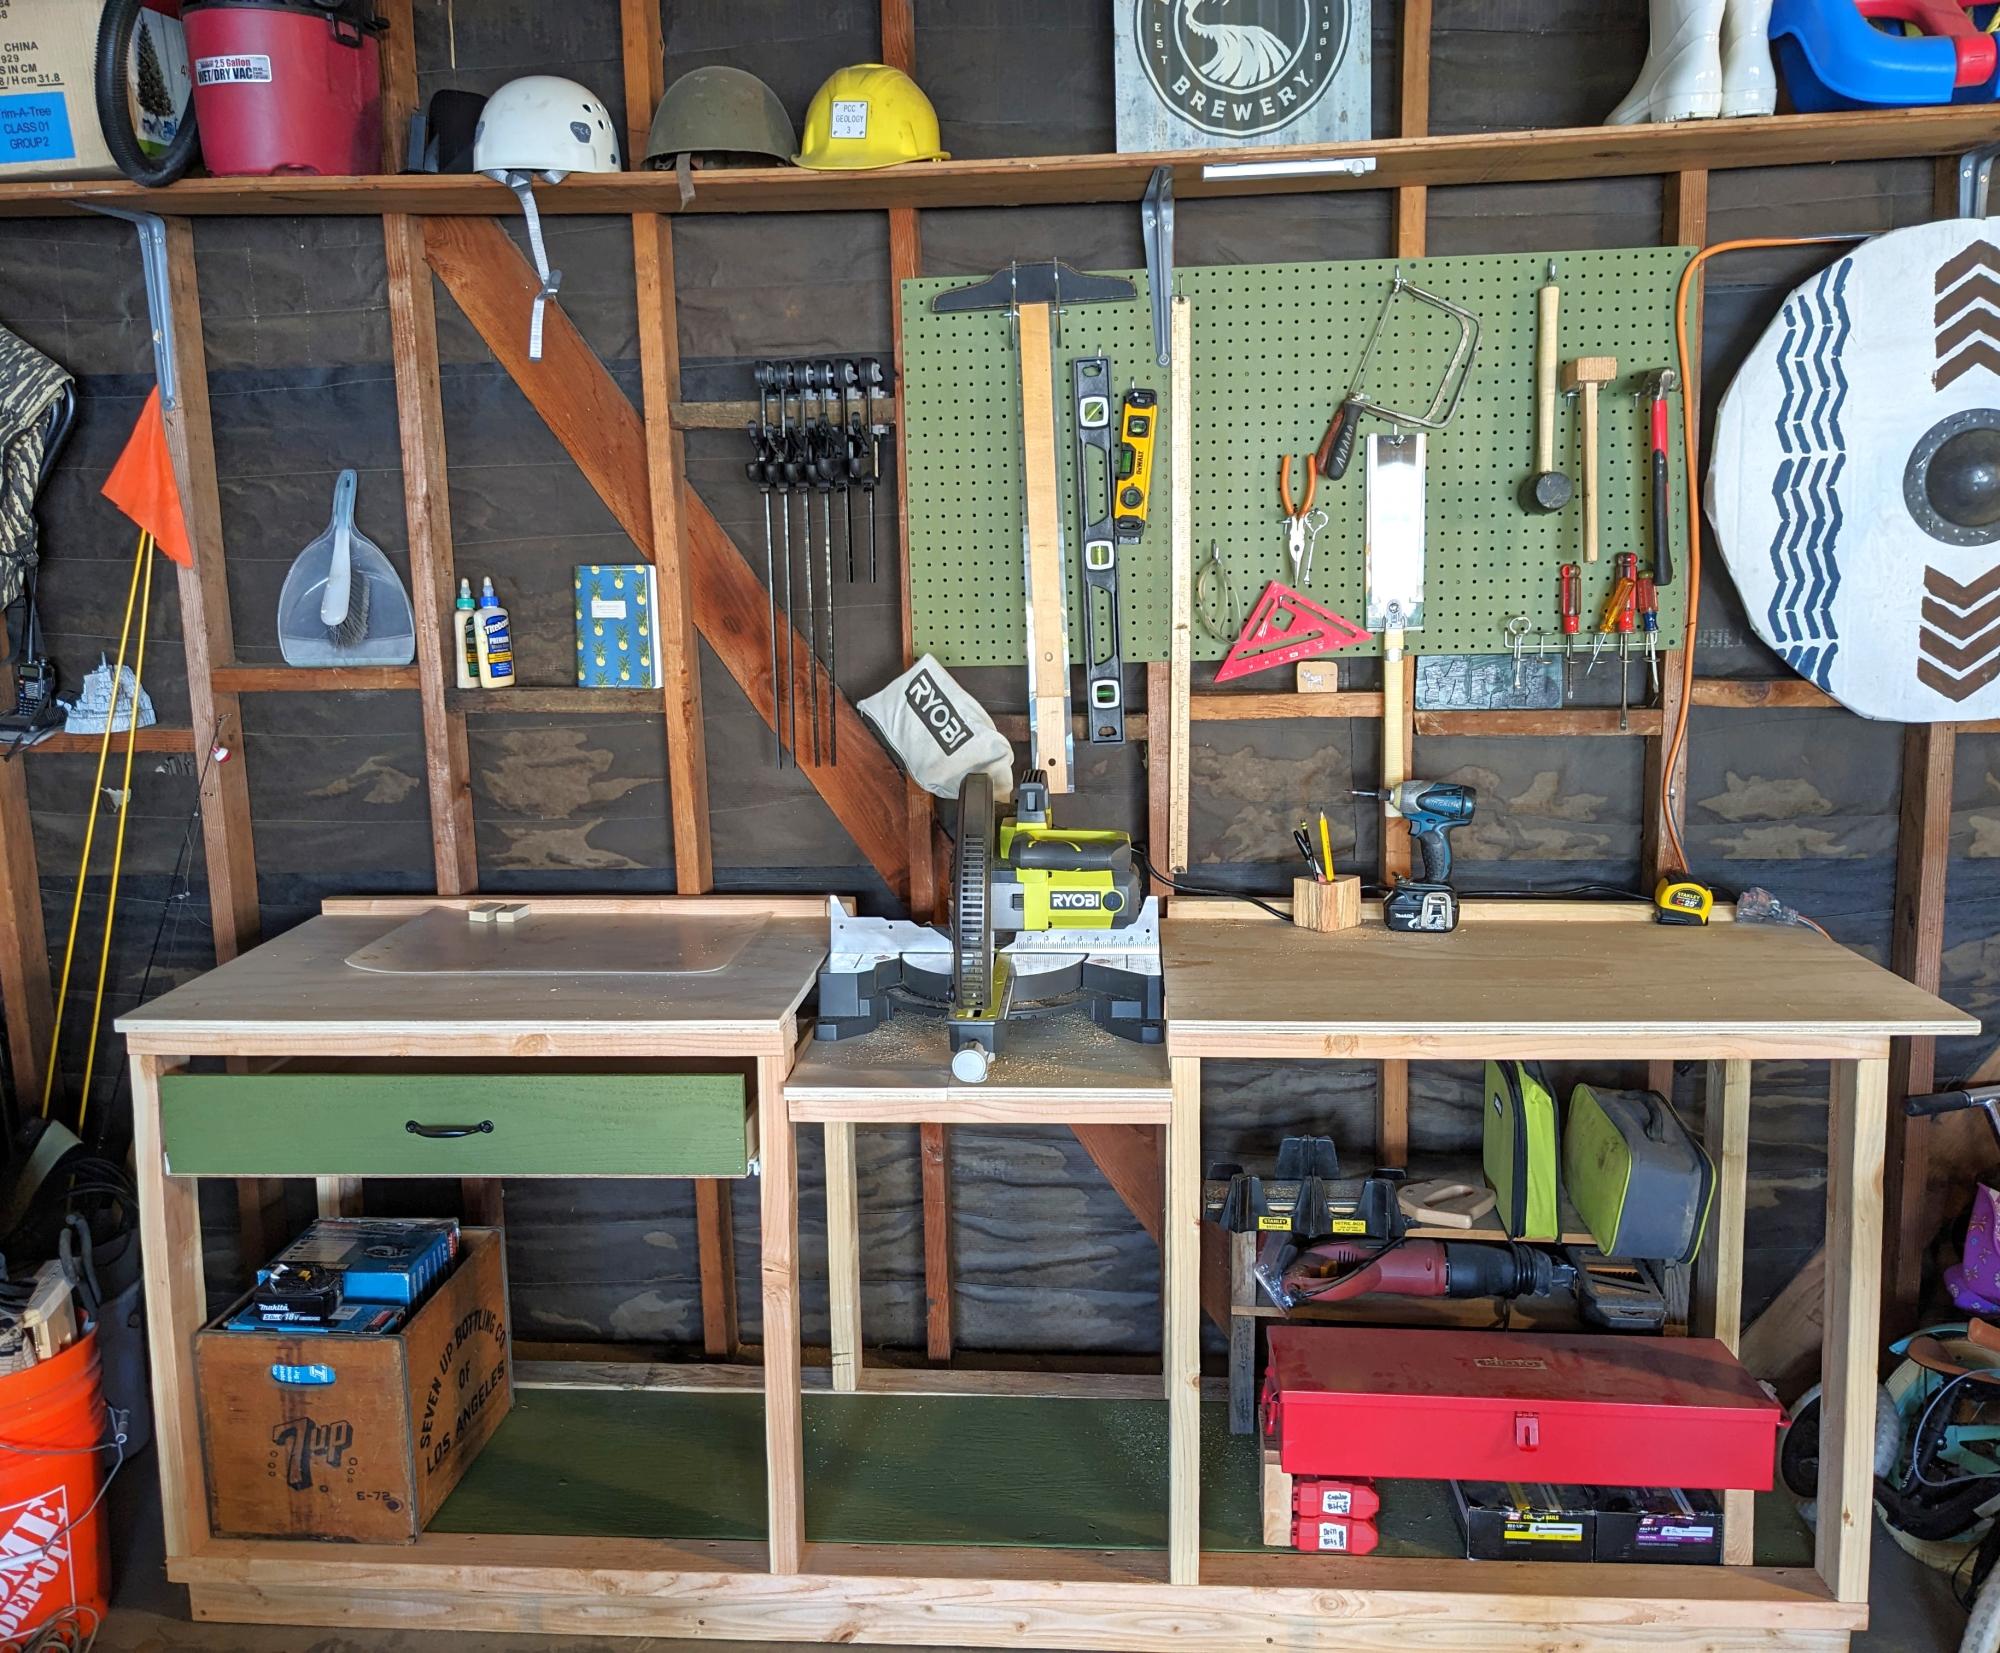
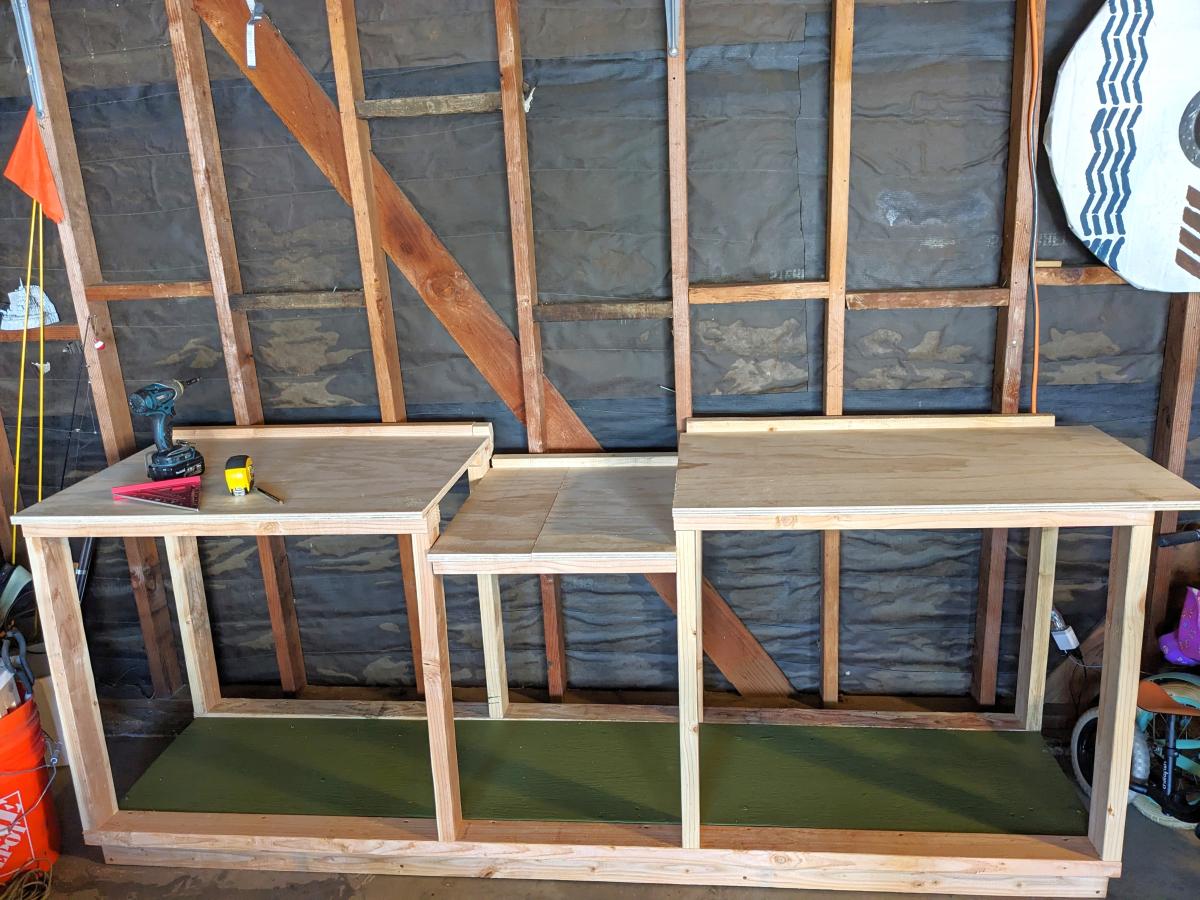
Miter Saw Cart
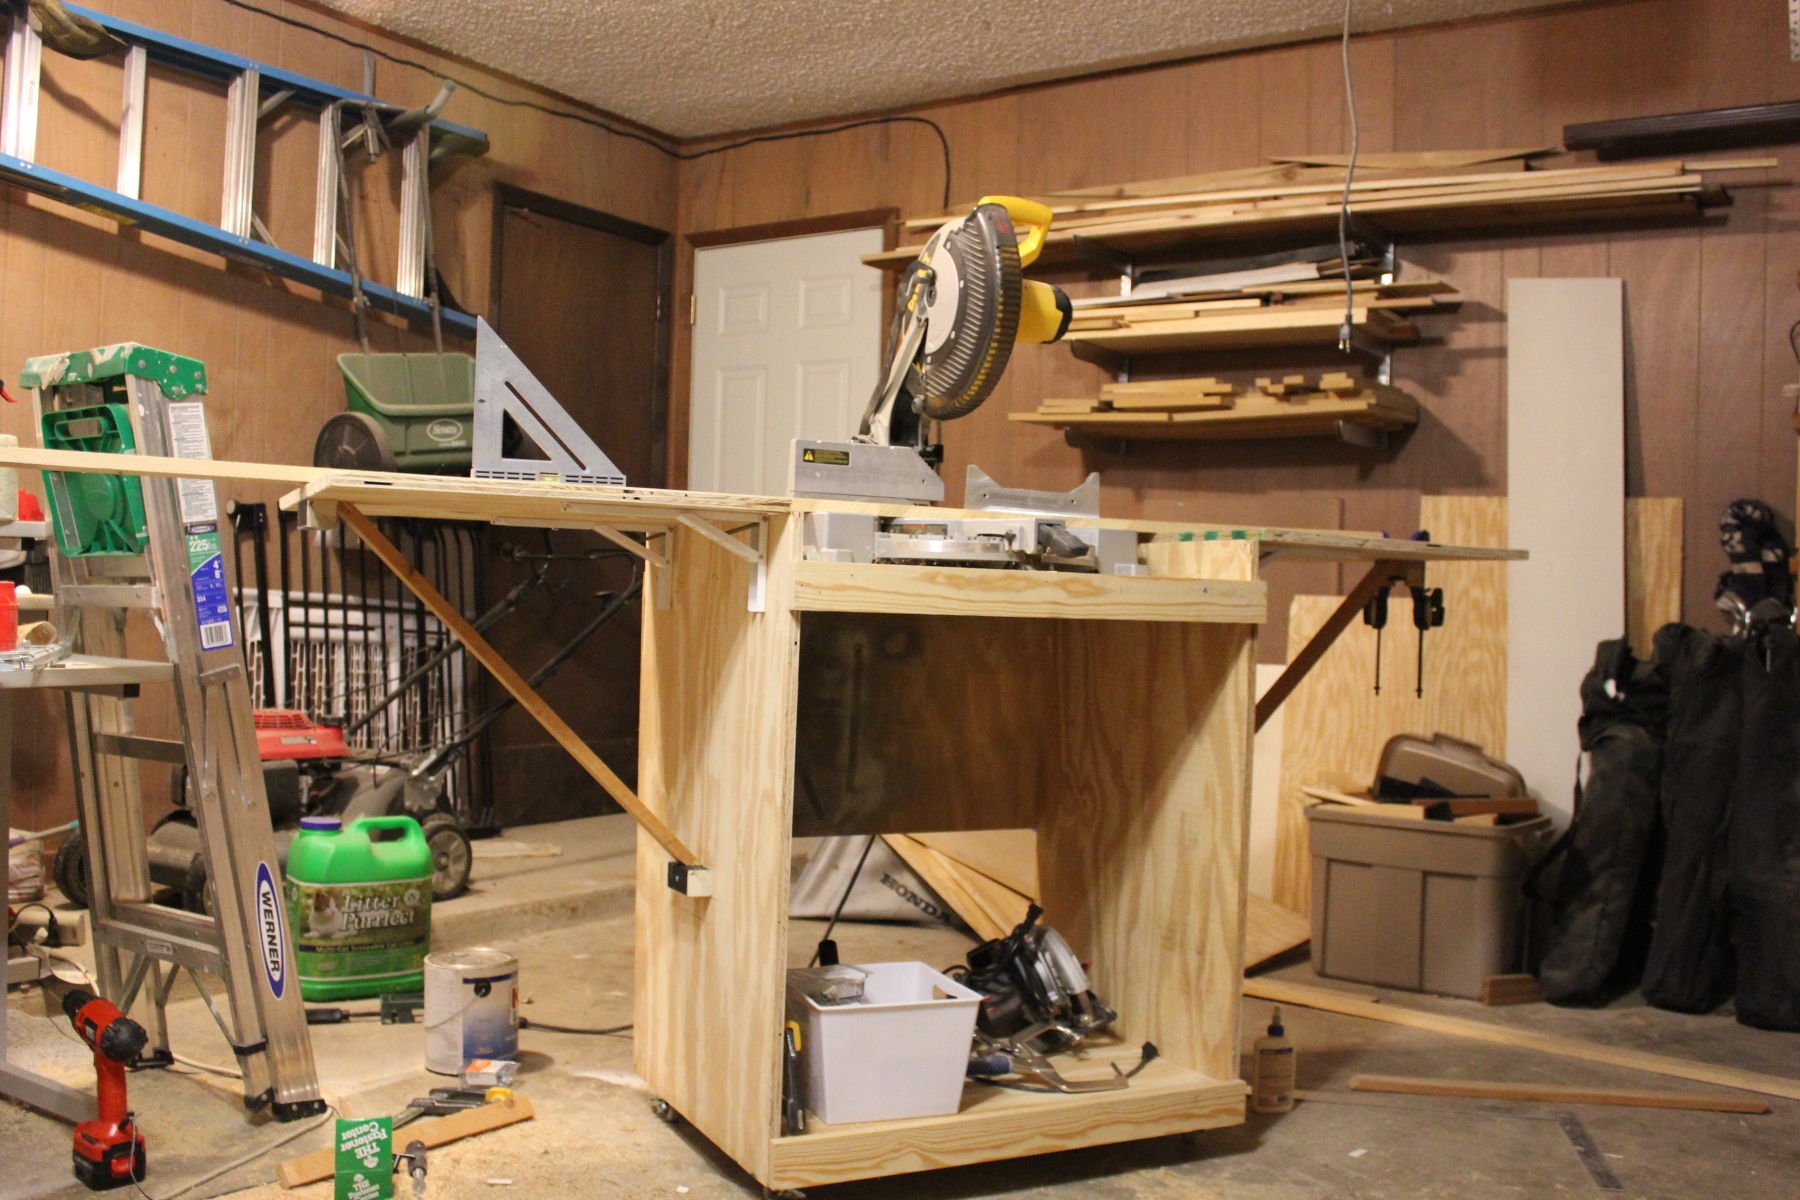
I saw Gina's post and this moved straight to the top of the to-build list. It's gotten my saw off the floor of my garage and provided a ton of storage for my other tools and bits. I also added another shelf after taking this picture. I modified this slightly: I made the wings 24" only, added a short back to provide more stability and reinforcement to the top shelf, added a diagonal support to the wings, and reinforced the top shelf from the sides with 3" dowels. I got my wood from a local lumberyard and the wheels from Blue.
Built from Plan(s)
Estimated Time Investment
Afternoon Project (3-6 Hours)
Finish Used
I sanded the heck out of everything. Other than that, nothing.
Recommended Skill Level
Beginner
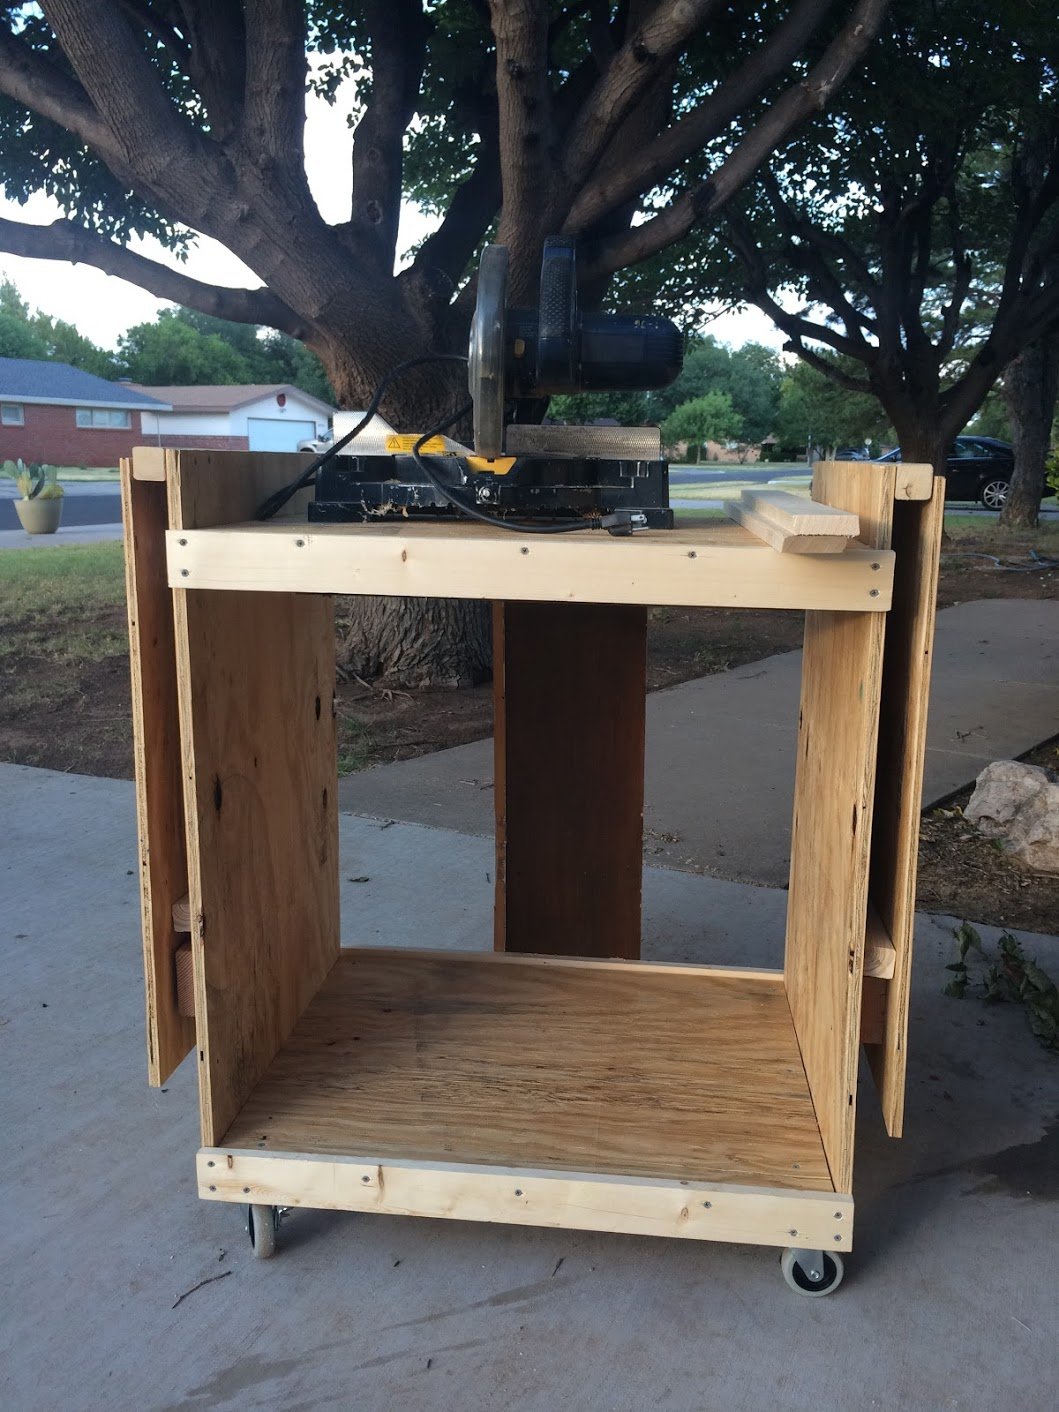
Miter Saw Modification
I followed the plans as listed pretty closely. I added a 2x4 under the main shelf for extra support, and used 2x4s instead of 2x2s at the bottom, so I could have something to attach the casters to. I also opted for 1x3 braces, rather than the hinges to hold up the sides. I need to add the fence and paint it white.
Built from Plan(s)
Estimated Cost
$80-100
Estimated Time Investment
Afternoon Project (3-6 Hours)
Finish Used
white paint (forthcoming)
Recommended Skill Level
Beginner
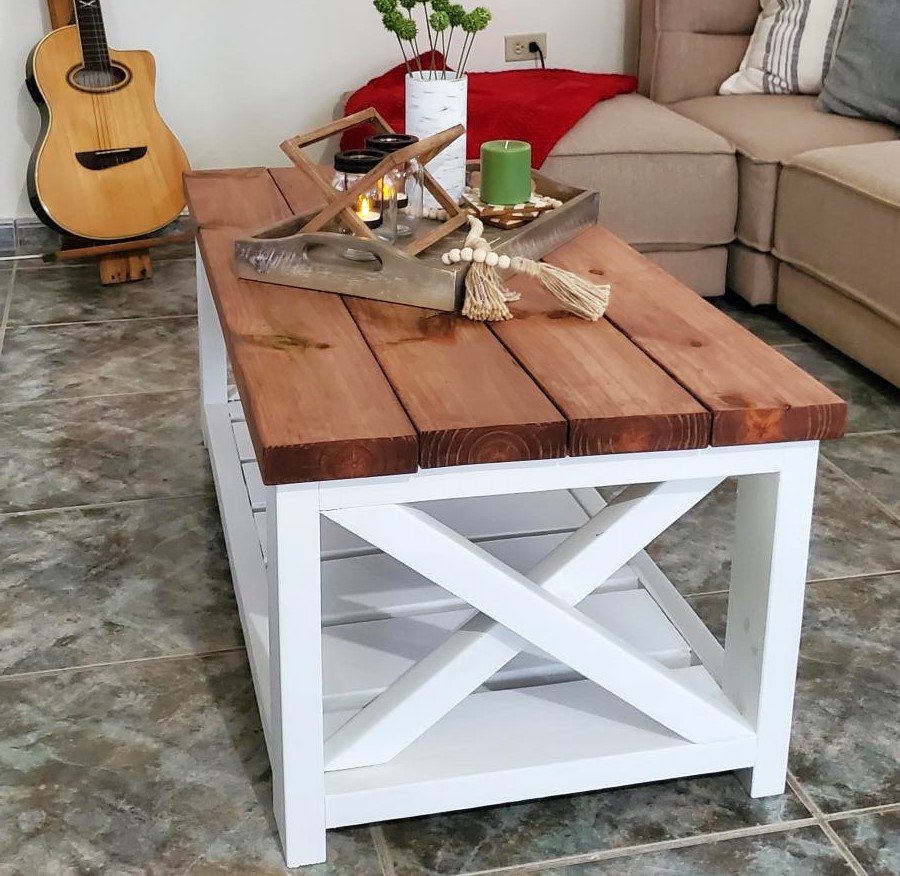
Farmhouse Coffee Table
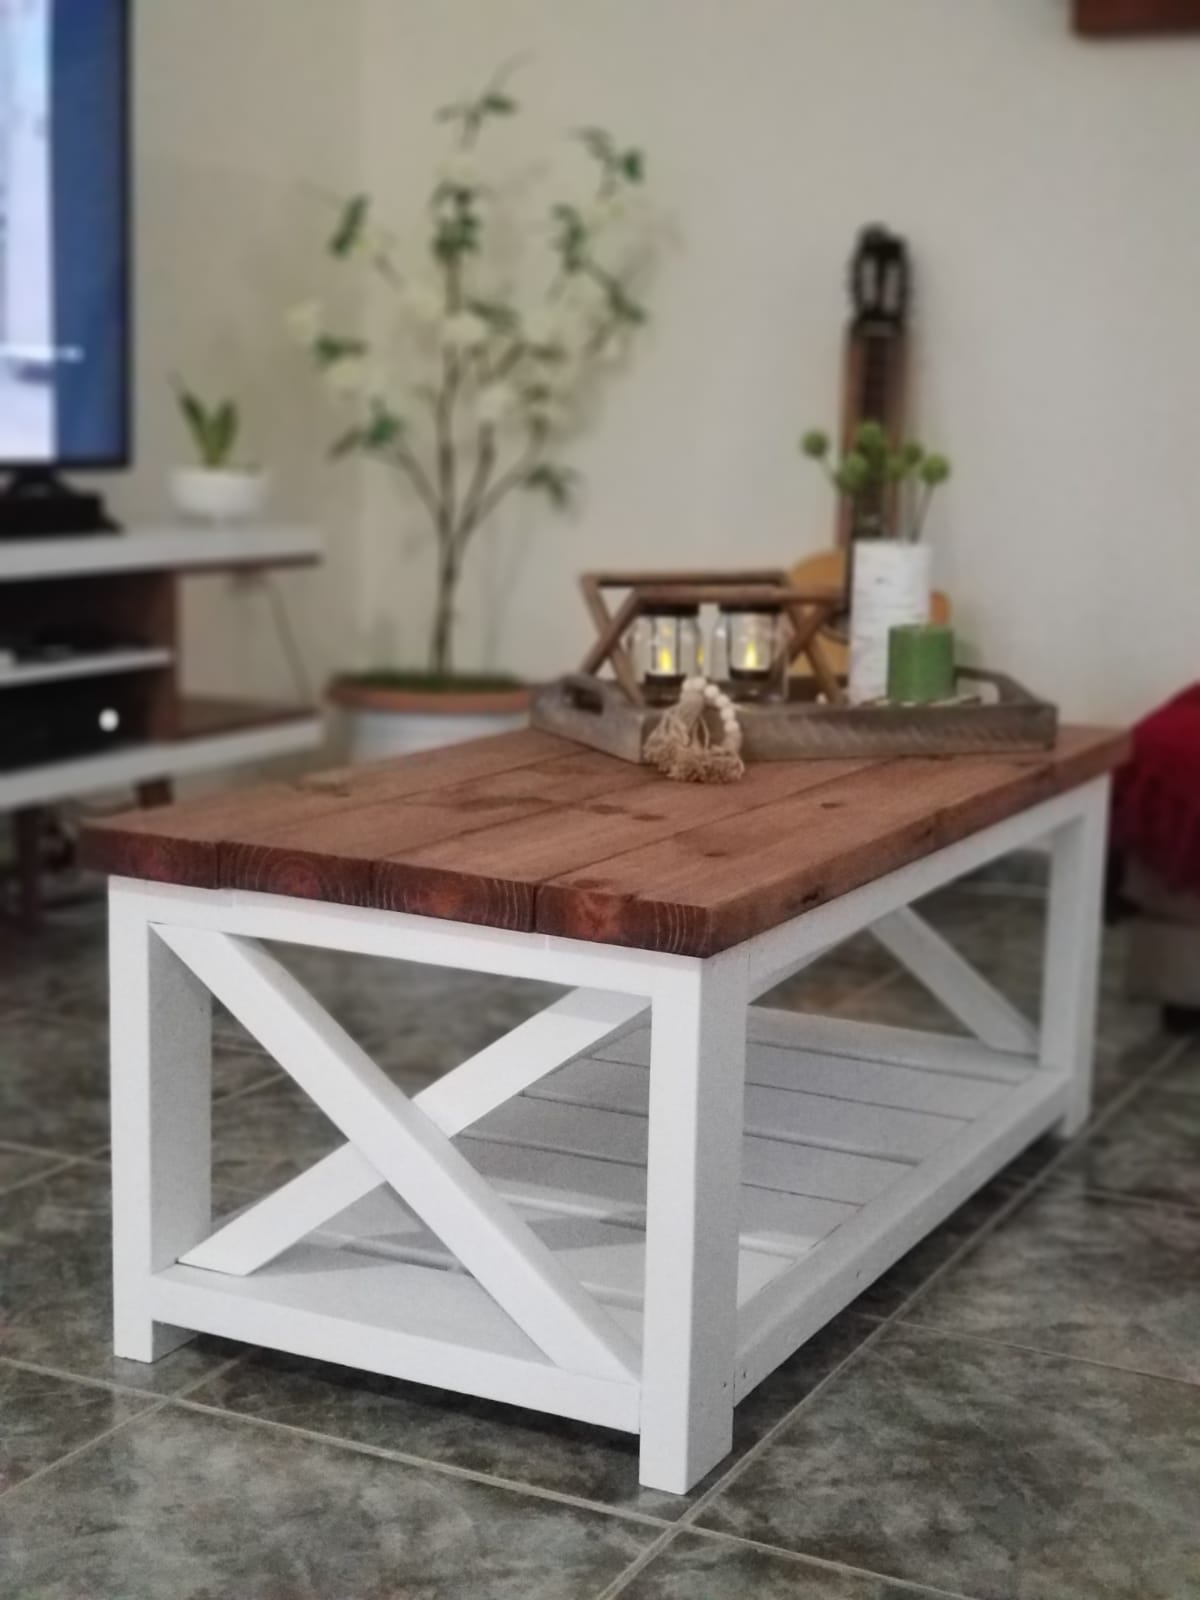
This is my first time making this kind of project and it turn out amazing!!! Looking forward to built some end tables with this same design!!!
Estimated Cost
$70.00
Estimated Time Investment
Weekend Project (10-20 Hours)
Finish Used
White acrylic flat and red wood varnish and polyurethane
Bar Cabinet with Floating Shelves
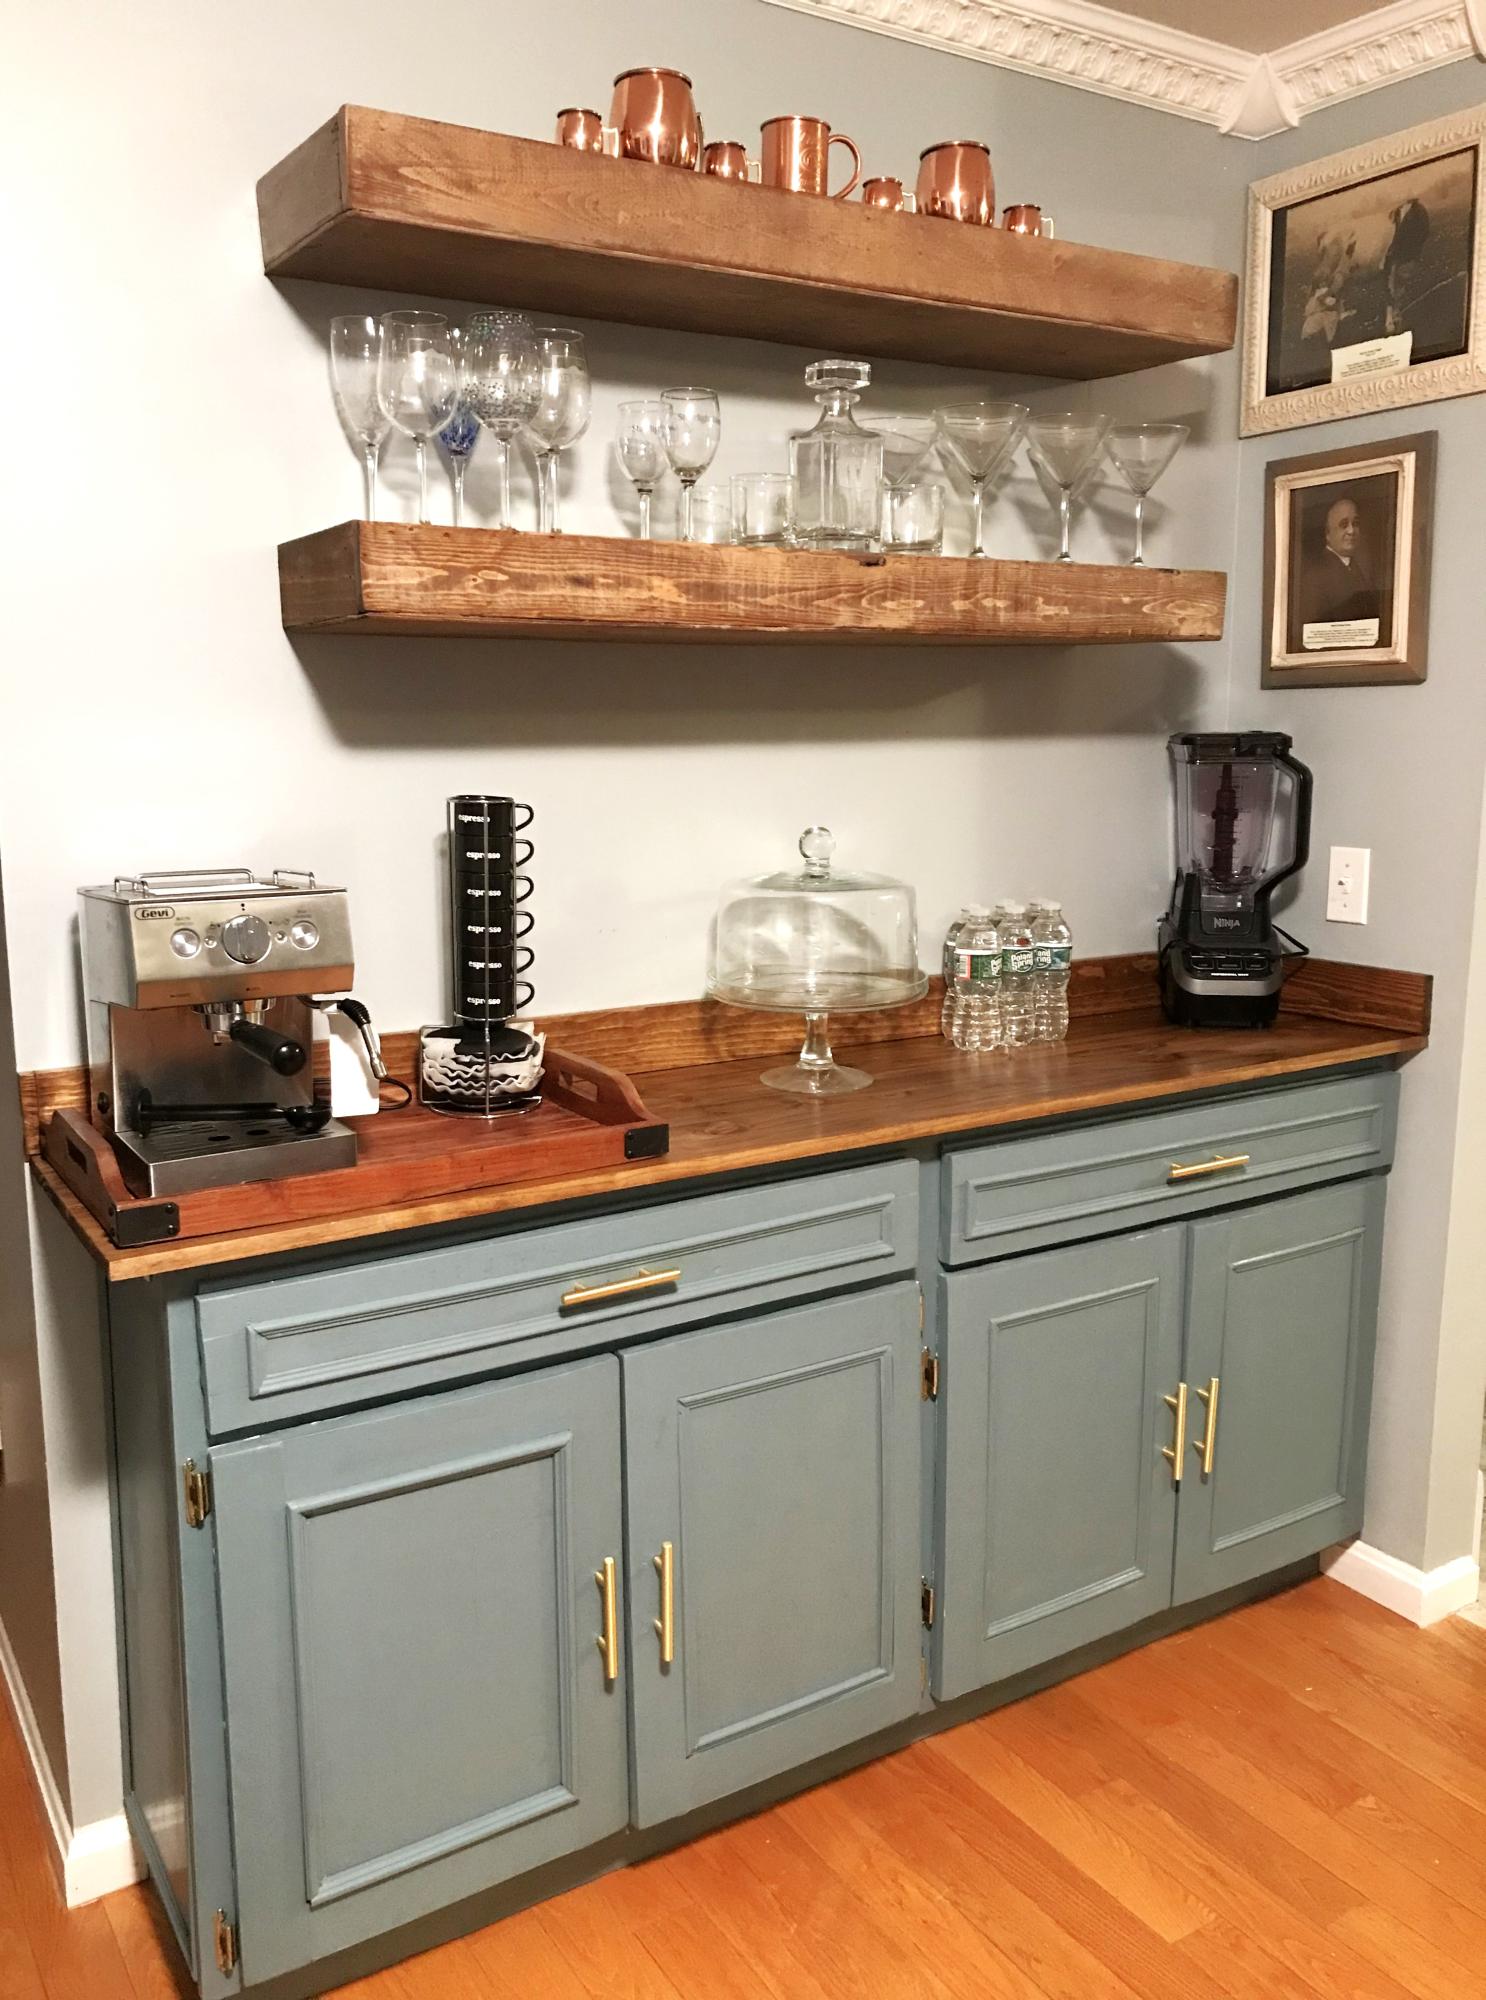
I had never built cabinets before, but I’ve been wanting to learn how to, and this corner in our house had been screaming for a bar area for awhile. I’m quite happy with the result, given that I’m only one year into woodworking! Thank you, Ana, for all your inspiration!
Jaclyn Pietrafetta
Wood Plank Magnet Boards
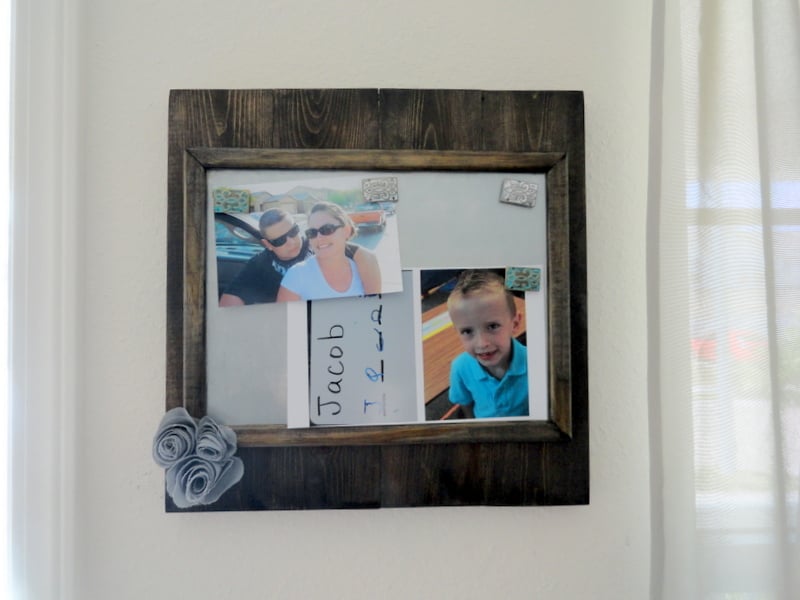
I actually got the idea from Shanty 2 Chic and I thought I would share my take on it here. It was super simply...I just kreg jig'd the boards together and built a frame to the size I wanted. I bought the aluminum from Lowe's and cut it down. I actually built 6 of these so I could give 5 away as thank you gifts. The price for all 6 was under $50 and I think only about $30 of that was the materials to make the boards. The rest was spend on the stuff I made for the boards.
Here is a link for their post! http://www.shanty-2-chic.com/2012/05/diy-12-magnetic-memo-board.html
Estimated Time Investment
An Hour or Two (0-2 Hours)
Recommended Skill Level
Starter Project
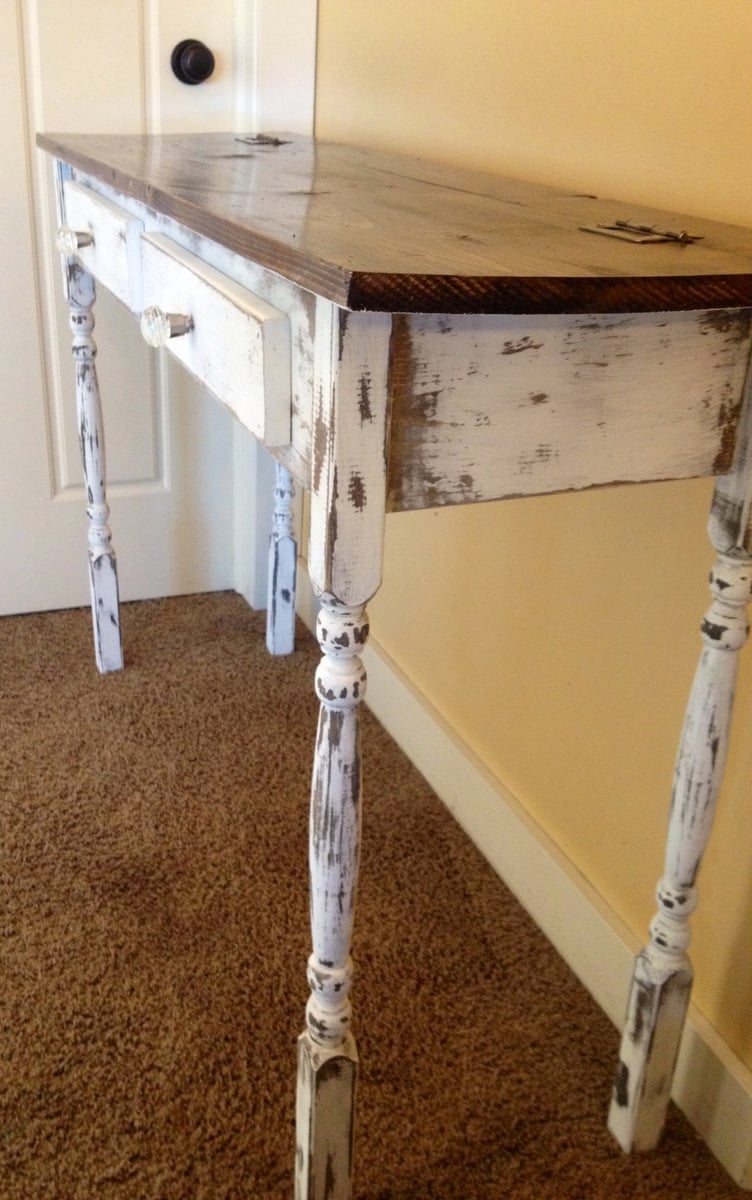
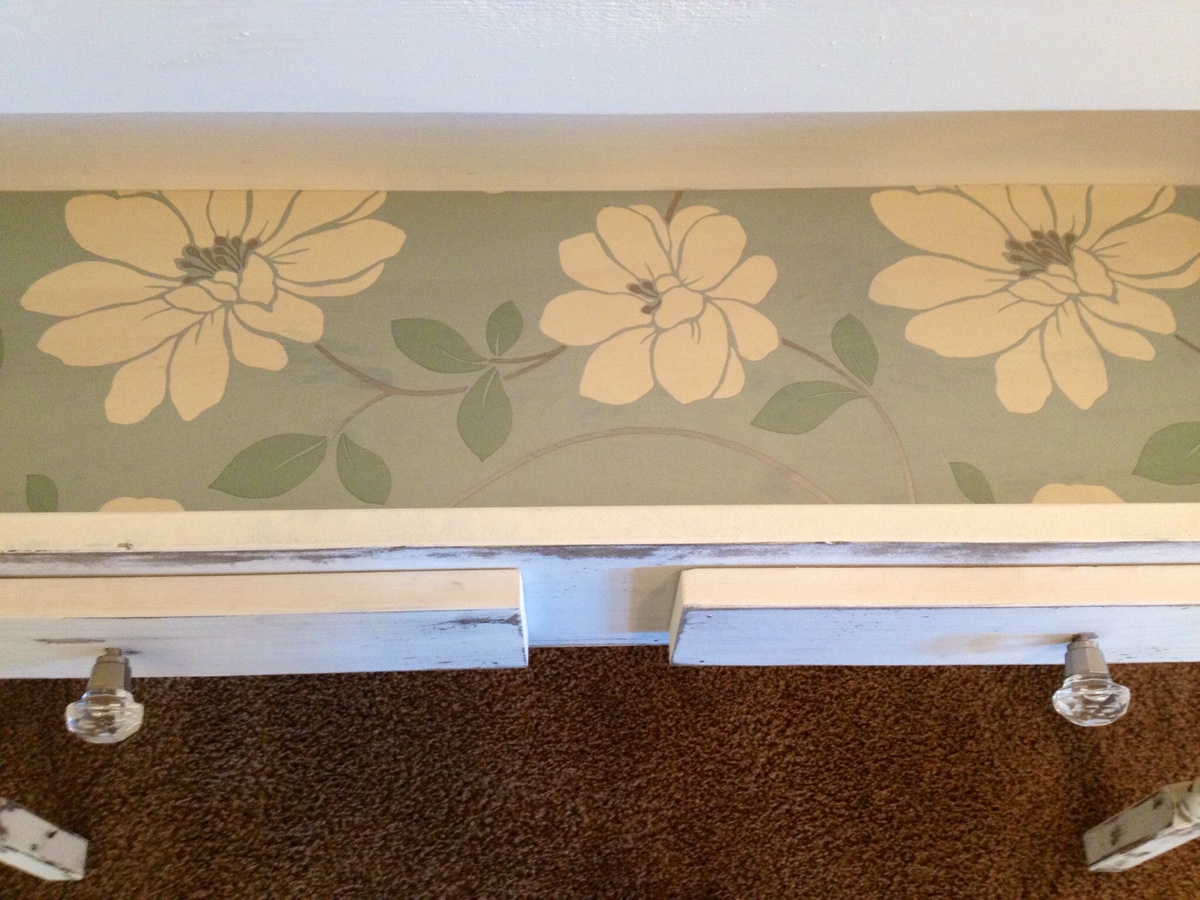
Stair Leg Flip Top Console Table
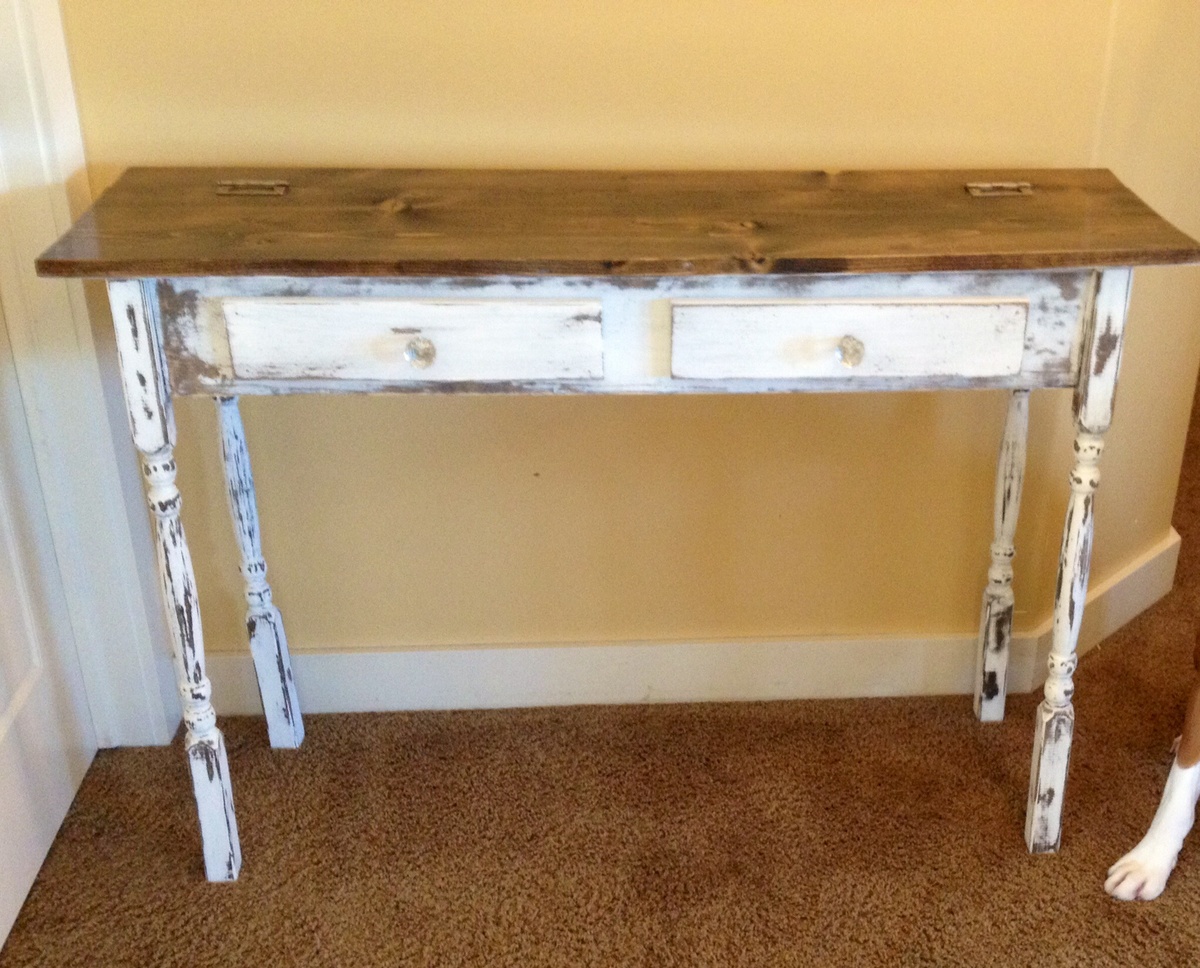
This build was quite easy. I didn't run into any issues. I went with stair balusters for the legs instead of the 2x2's that the design calls for, but the balusters ended up being 2x2 anyways so I didn't need to make any changes. My building costs were a bit pricier as I find there's a slight price difference for lumber here in Canada. The construction of the table itself took about an hour or so, however the finishing took much longer due to the painting, staining and then lacquering and waxing!
I decided to go with a more distressed/aged look for my finish, and I thought the glass knobs would look gorgeous. I also decided to line the inside storage area because it just looked a little bland to me! All-in-all I'm very happy with the outcome!
Built from Plan(s)
Estimated Cost
$60-$70
Estimated Time Investment
Weekend Project (10-20 Hours)
Finish Used
Chalk paint
Stain
Lacquer (table top)
Furniture wax (body of table)
Stain
Lacquer (table top)
Furniture wax (body of table)
Recommended Skill Level
Beginner
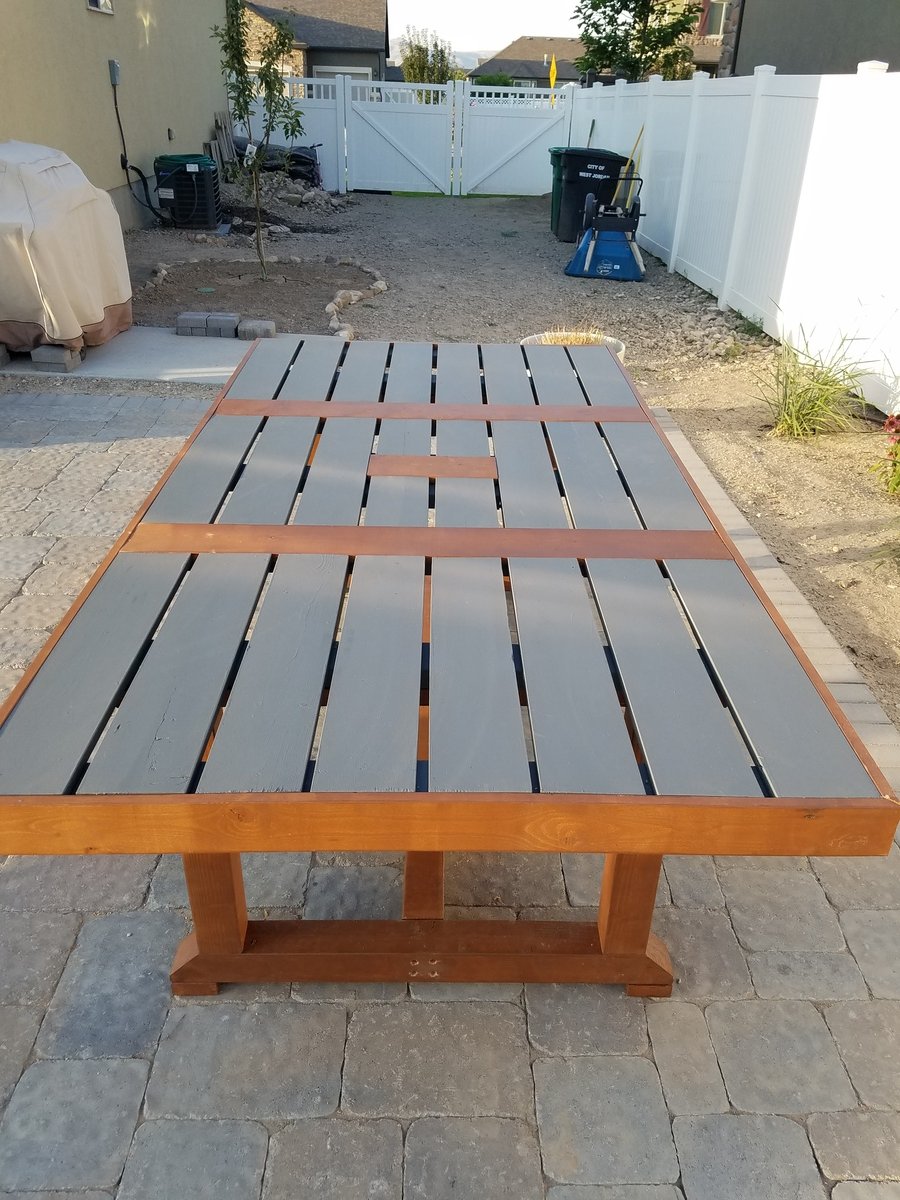
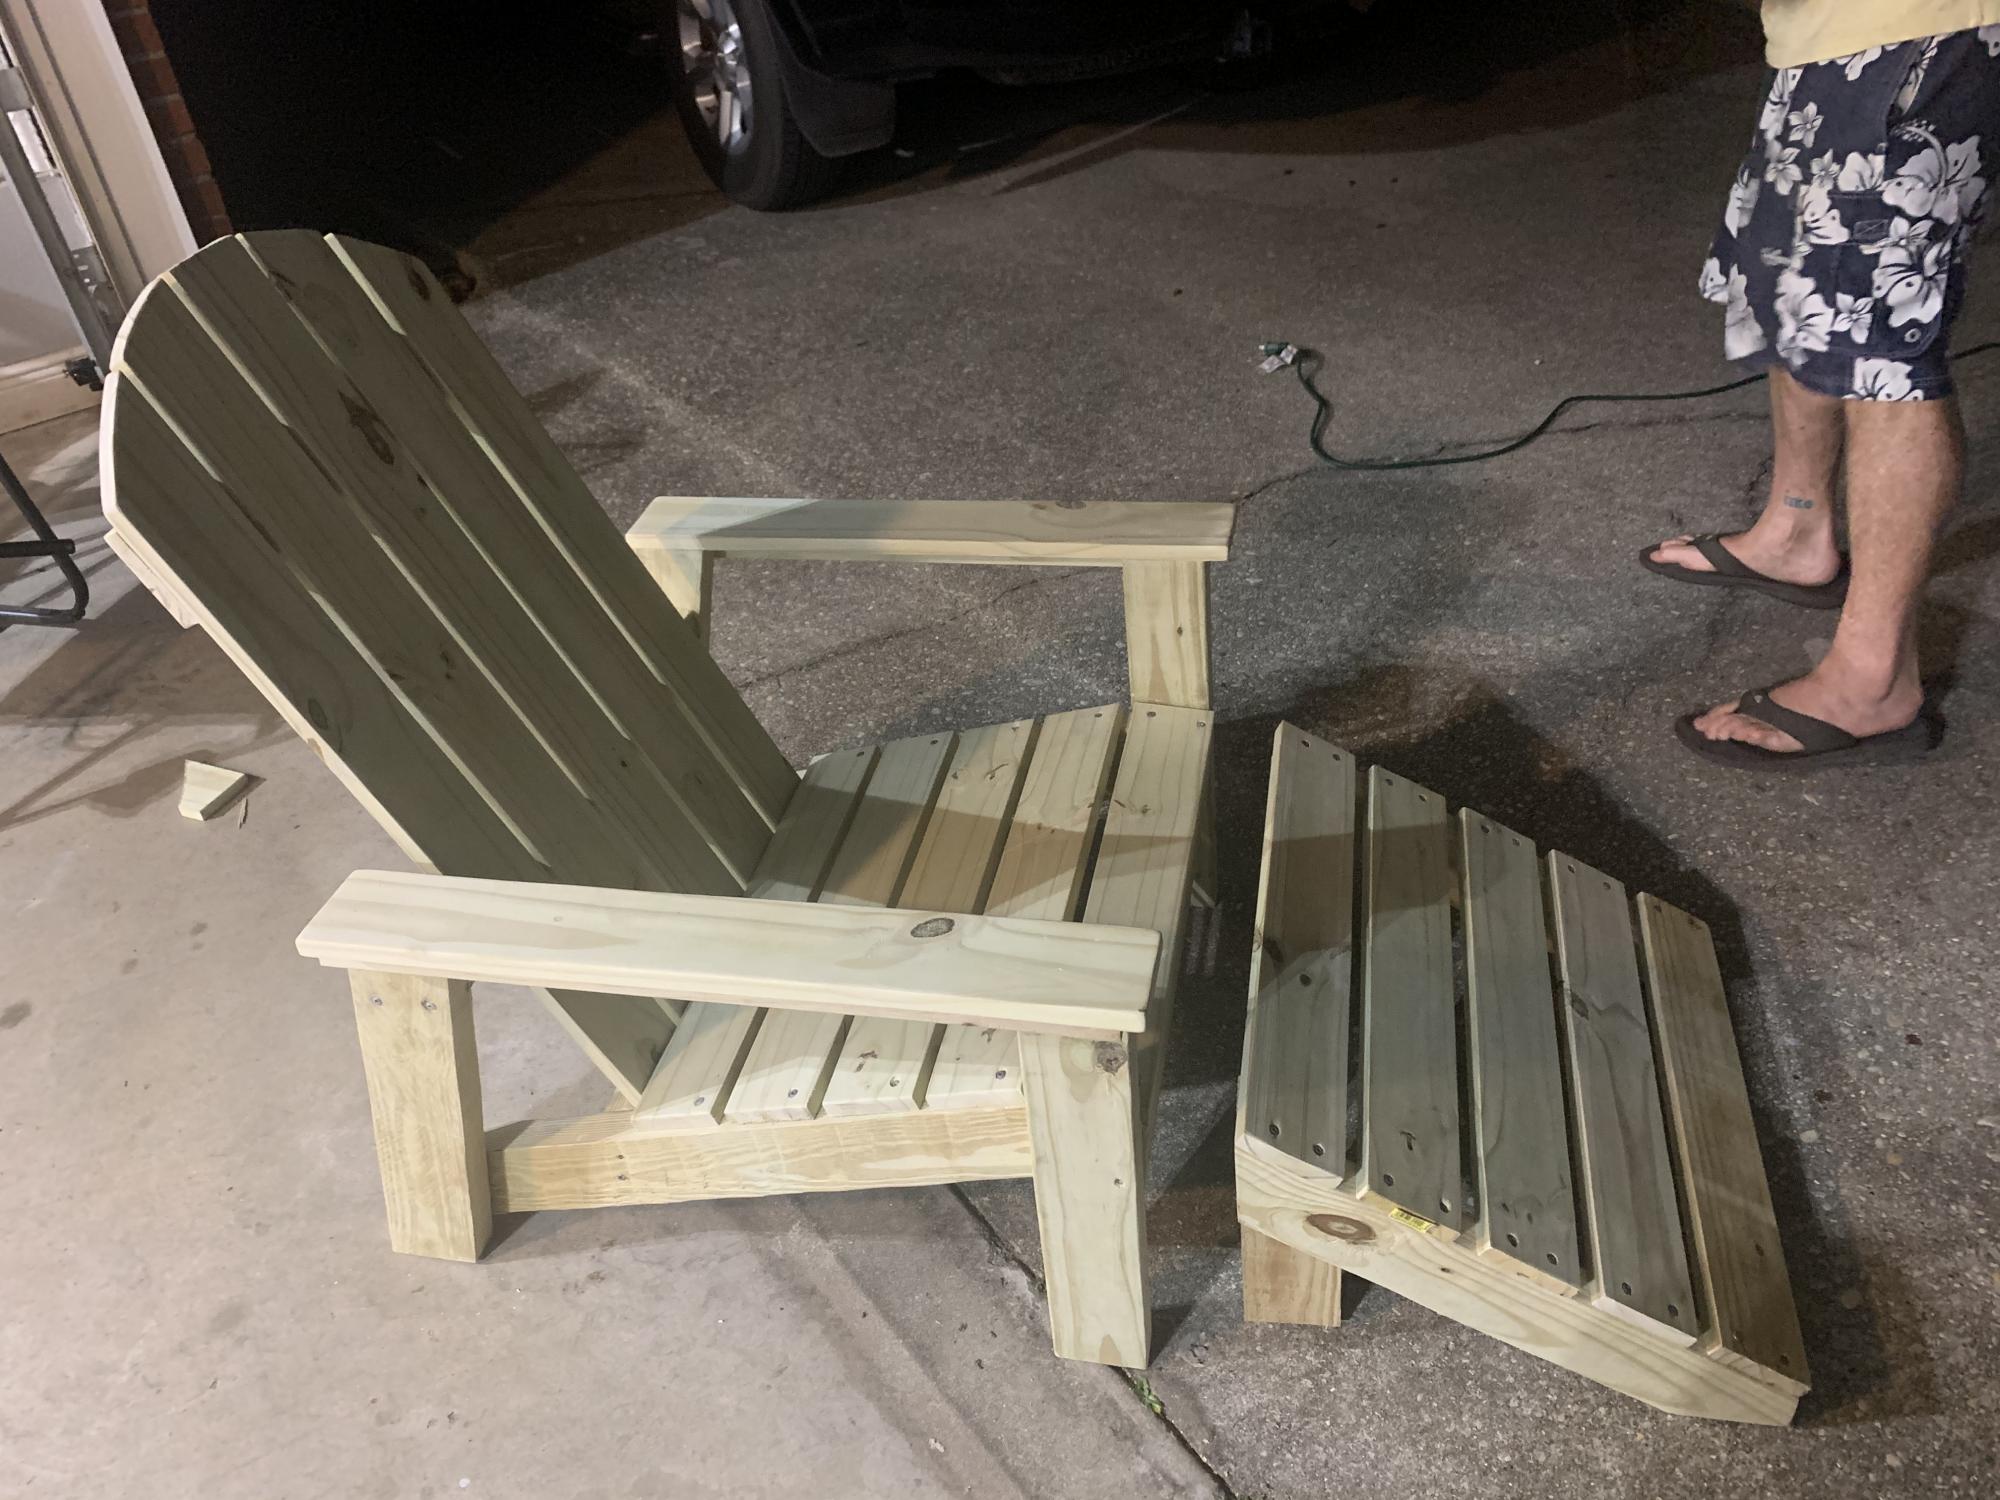
Our New Patio Table
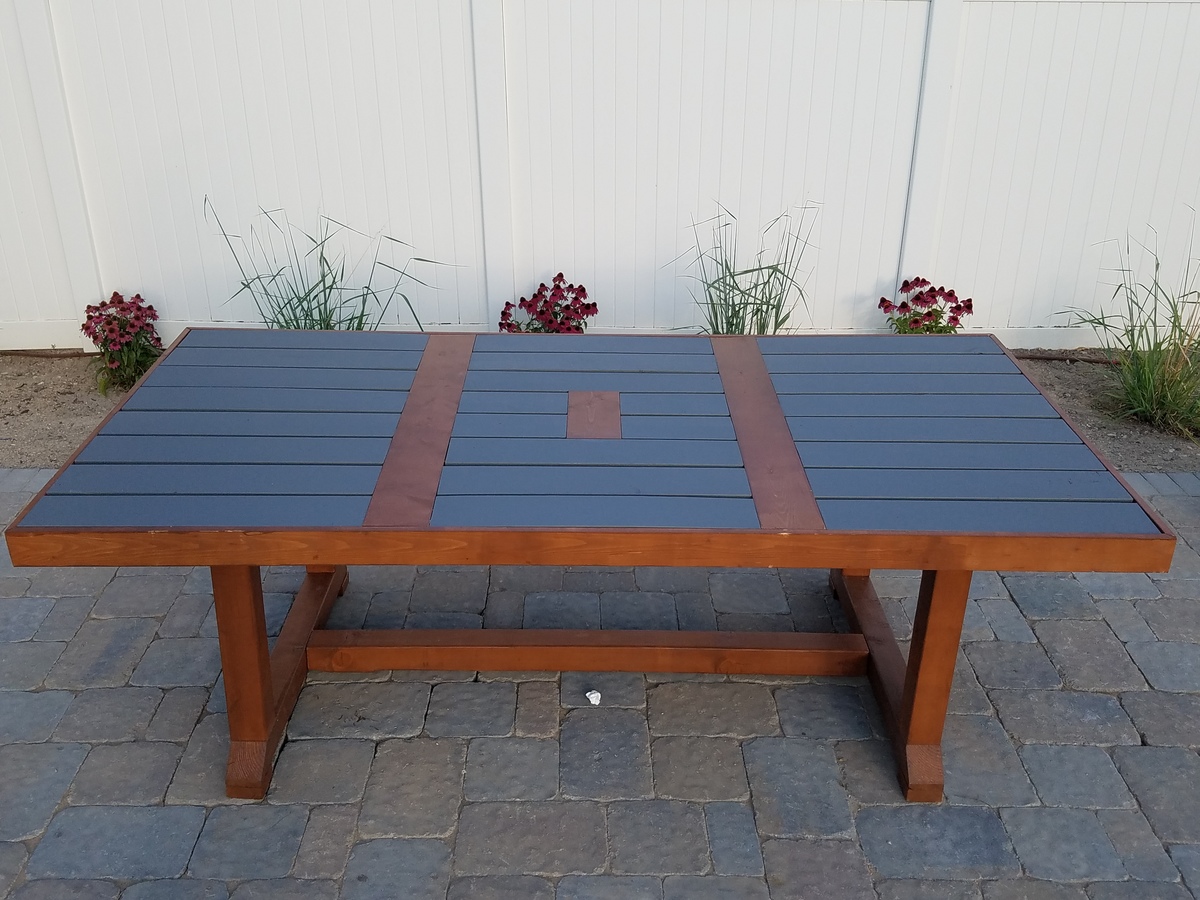
This took new novice DIYers about 25 hrs. Also this table is really heavy when complete so build it where you want it to sit or build in it one place and right before you are about to finish move the 3 built peieces separely where you want it to sit and finish assymbling it. Also, when completed this is counter height. We are going to take ours apart abit and shave 6in or so off the legs to be normal table height.
Built from Plan(s)
Estimated Cost
About $175
Estimated Time Investment
Weekend Project (10-20 Hours)
Finish Used
Bear Solid and Semi- Transparent Stain
Recommended Skill Level
Beginner
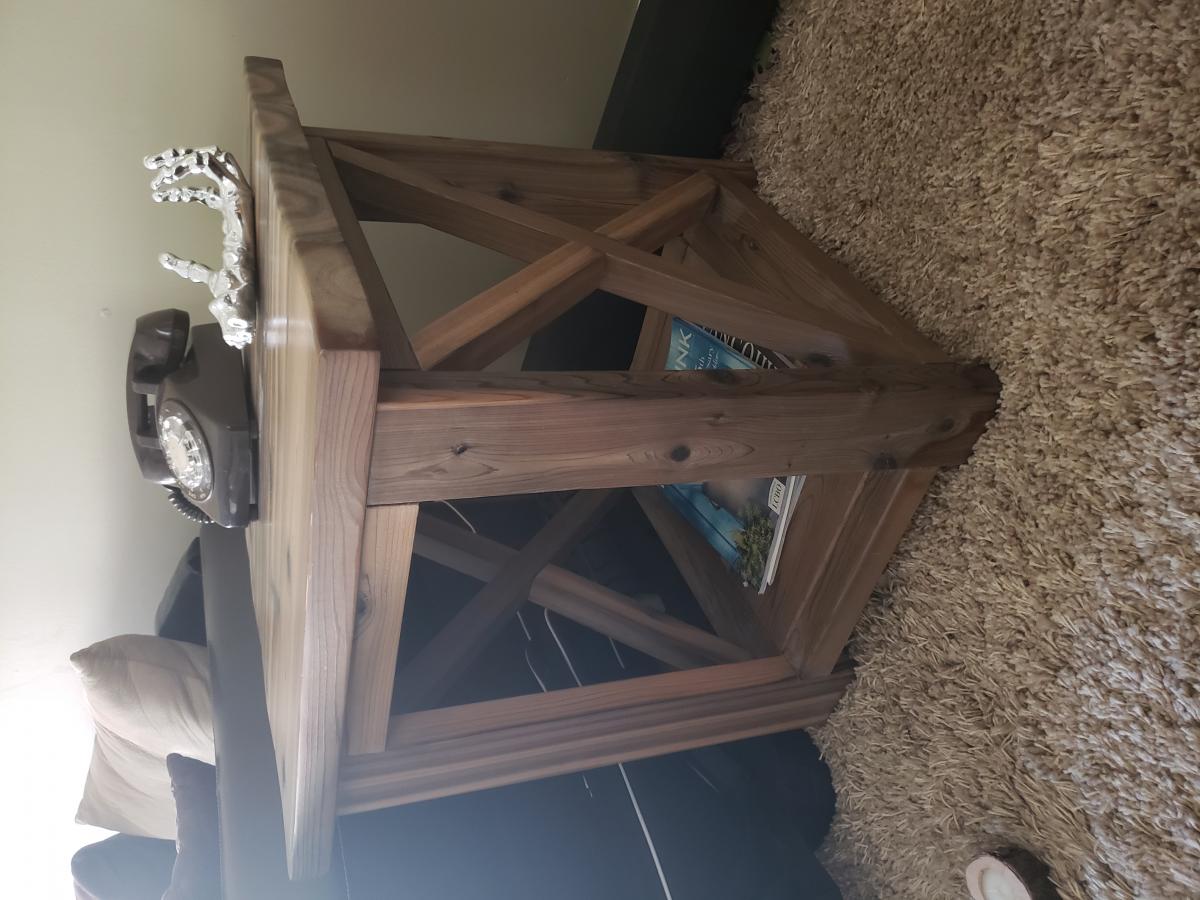
Rustic X project

Cedar coffee table and side table from rustic x plans.
*lesson learned: I weathered the wood for each table about a week apart. This meant my vinegar mixture sat for an extra week. The second table came out much darker as a result.
Built from Plan(s)
Estimated Time Investment
Weekend Project (10-20 Hours)
Finish Used
Steel wool dissolved in white vinegar for creating a weathered wood look.
4 coats of Polywhey for a soft semi-gloss finish
4 coats of Polywhey for a soft semi-gloss finish
Recommended Skill Level
Intermediate
Jewelry Box
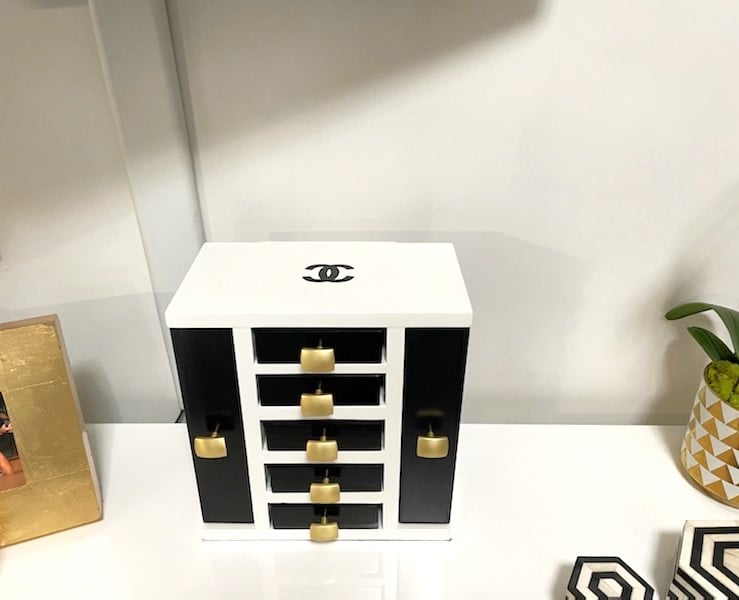
Fancy Jewelry Box, first attempt doing anything like this.
Built from Plan(s)
Patio Table
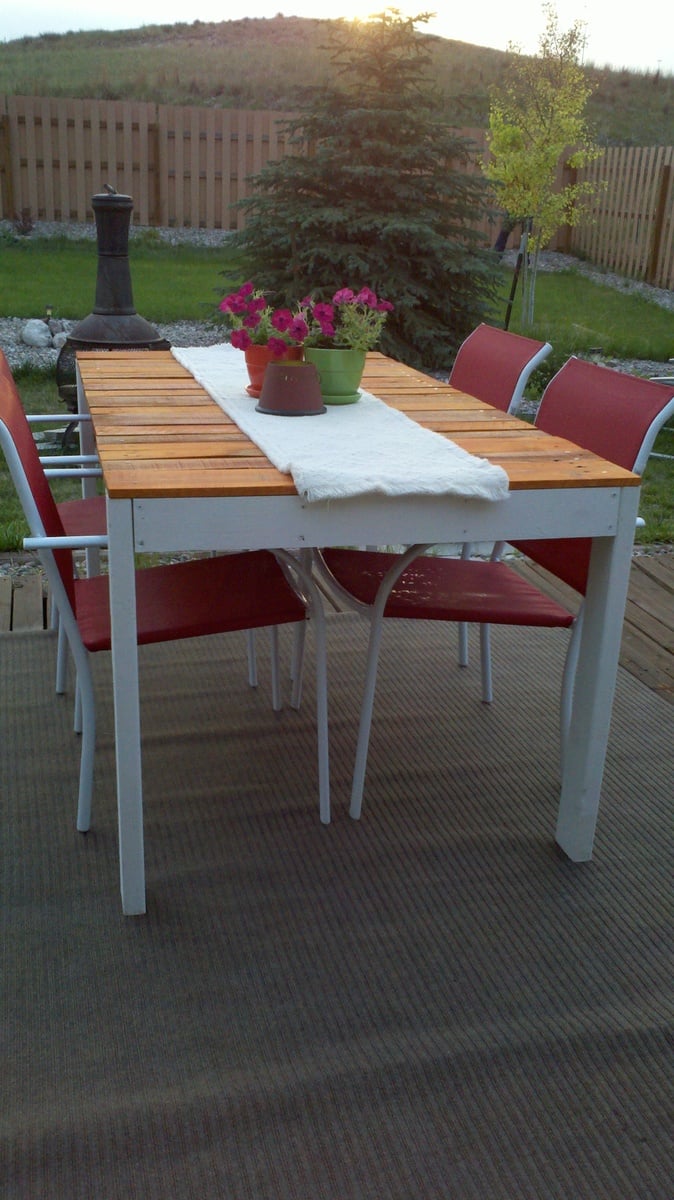
We built this table using Ana White's patio table plan. We modified it slightly only to use pallet wood for the top. With the pallet wood varying by width, we had to adjust the quantity of slats needed for the top. Using the pallet wood for the top also reduced the cost a bit. We think it turned out great! The plan was VERY easy!
Estimated Cost
$15
Estimated Time Investment
Day Project (6-9 Hours)
Recommended Skill Level
Starter Project
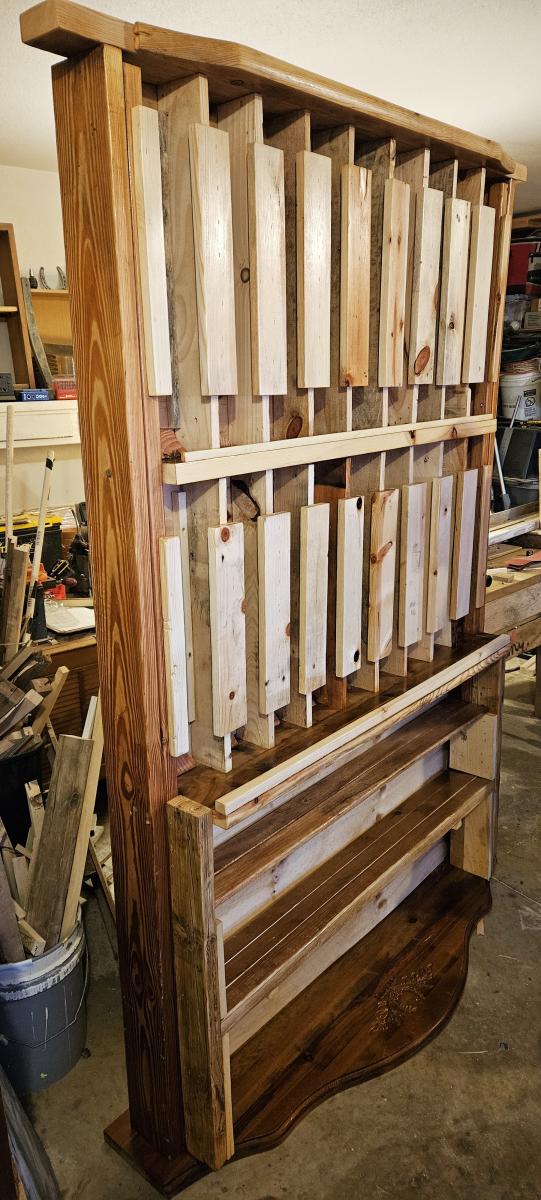
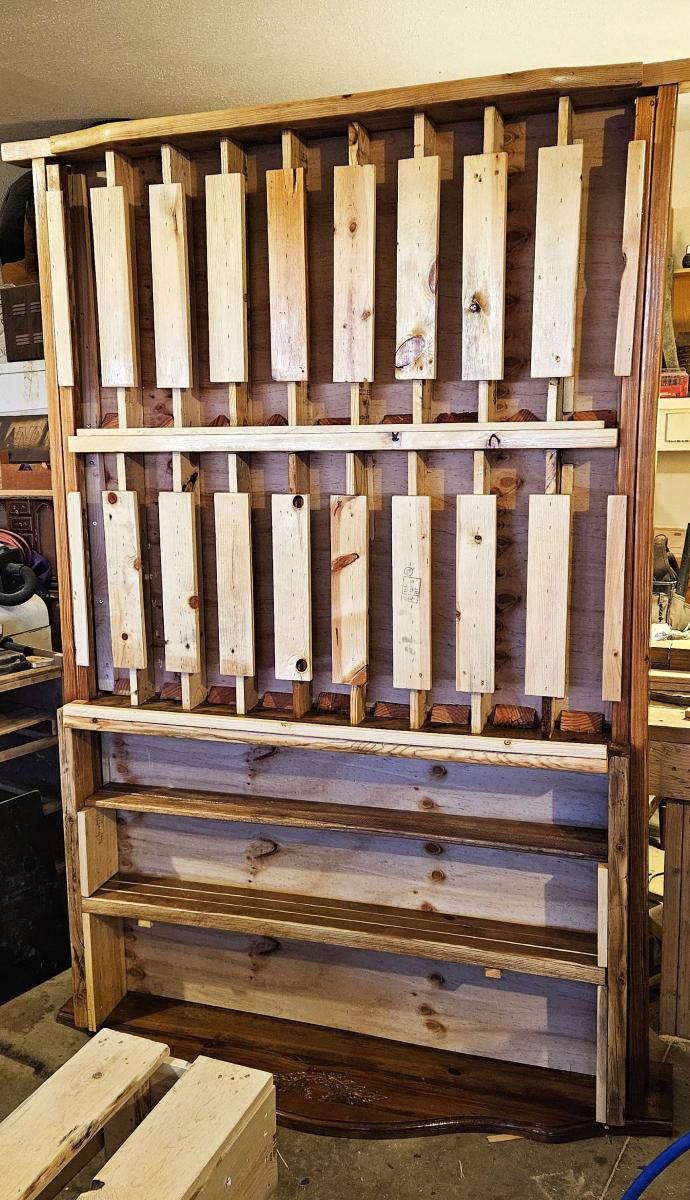
Fancy Hall Tree - First Project!
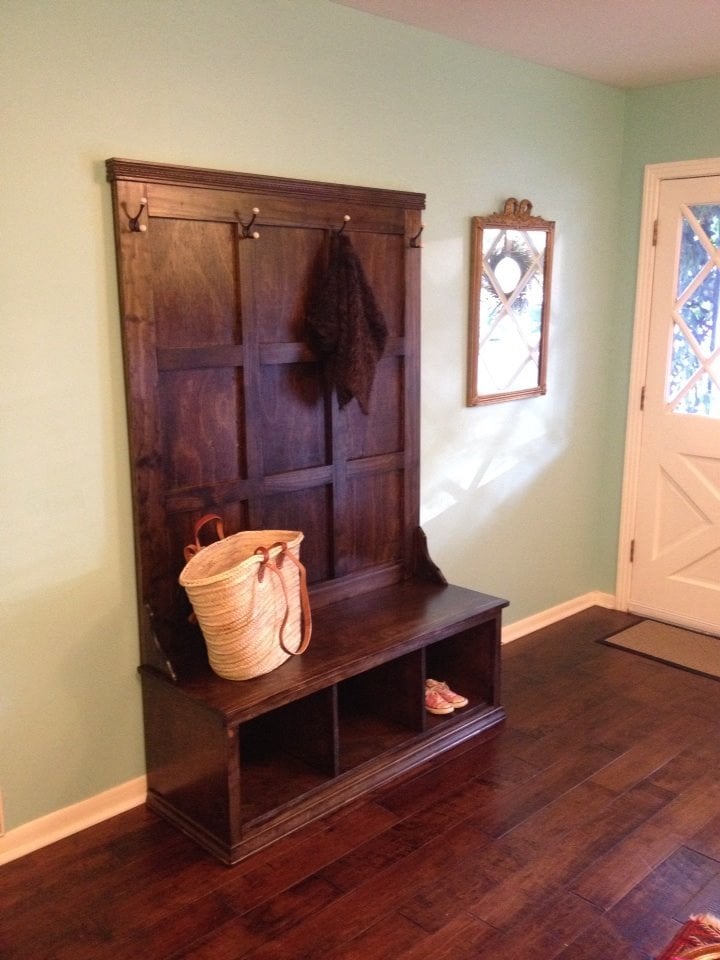
This was my first major woodworking project, and I am so pleased with it! I have been looking for a piece of furniture like this and couldn't find something that I liked and could afford. I spent about $180 in lumber, and also took Ana's advice and invested in a Kreg Jig. I HIGHLY recommend this! It is expensive ($100) but so worth it. I had to learn a few things along the way, and had encountered some obstacles, but in the end I am very pleased with the project. A few things I learned on my first project:
1. Exact cuts are SO important. Every 1/8" matters. It was helpful to do as many cuts as possible at the lumber store.
2. Ana mentions this in her beginners section, but it bears repeating: wood glue will repel stain. Be sure to wipe away ALL residue of wood glue before staining, and be sure to give extra sanding attention to areas that had wood glue. Otherwise you will have a white spot in the midst of your stain.
3. On this plan in particular there is one change that I recommend. Do not add the wrap around trip on the top and bottom until AFTER you have put the plywood backing on in the last step. The reason is that the plywood adds another 3/4 inch, and so there was a gap between the edge of the trip and the back on the furniture. I redid it on the top because it was so noticeable.
Built from Plan(s)
Estimated Cost
$180
Estimated Time Investment
Week Long Project (20 Hours or More)
Finish Used
Minwax Dark Walnut, satin polyurethane
Recommended Skill Level
Beginner
Comments
Wed, 04/30/2014 - 11:14
This is gorgeous! You did a
This is gorgeous! You did a great job! I want to make this but I have no place to put it in my tiny apartment. Someday…
Flower Storage Table

Built this table for my niece 3 years ago which she still wont let go of even though its getting small for her.. I mostly had all the materials needed minus paint which i got from home depot. Pretty straight forward project that i got done in a few hours. She was 3 at the time and is now 6 and still has the table which she still uses and has.
Built from Plan(s)
Estimated Cost
$12
Estimated Time Investment
An Hour or Two (0-2 Hours)
Finish Used
Sanded with 220 grit sand paper. primed and painted with behr ultra satin color
Recommended Skill Level
Starter Project
Corn Hole Boards for a Cause!
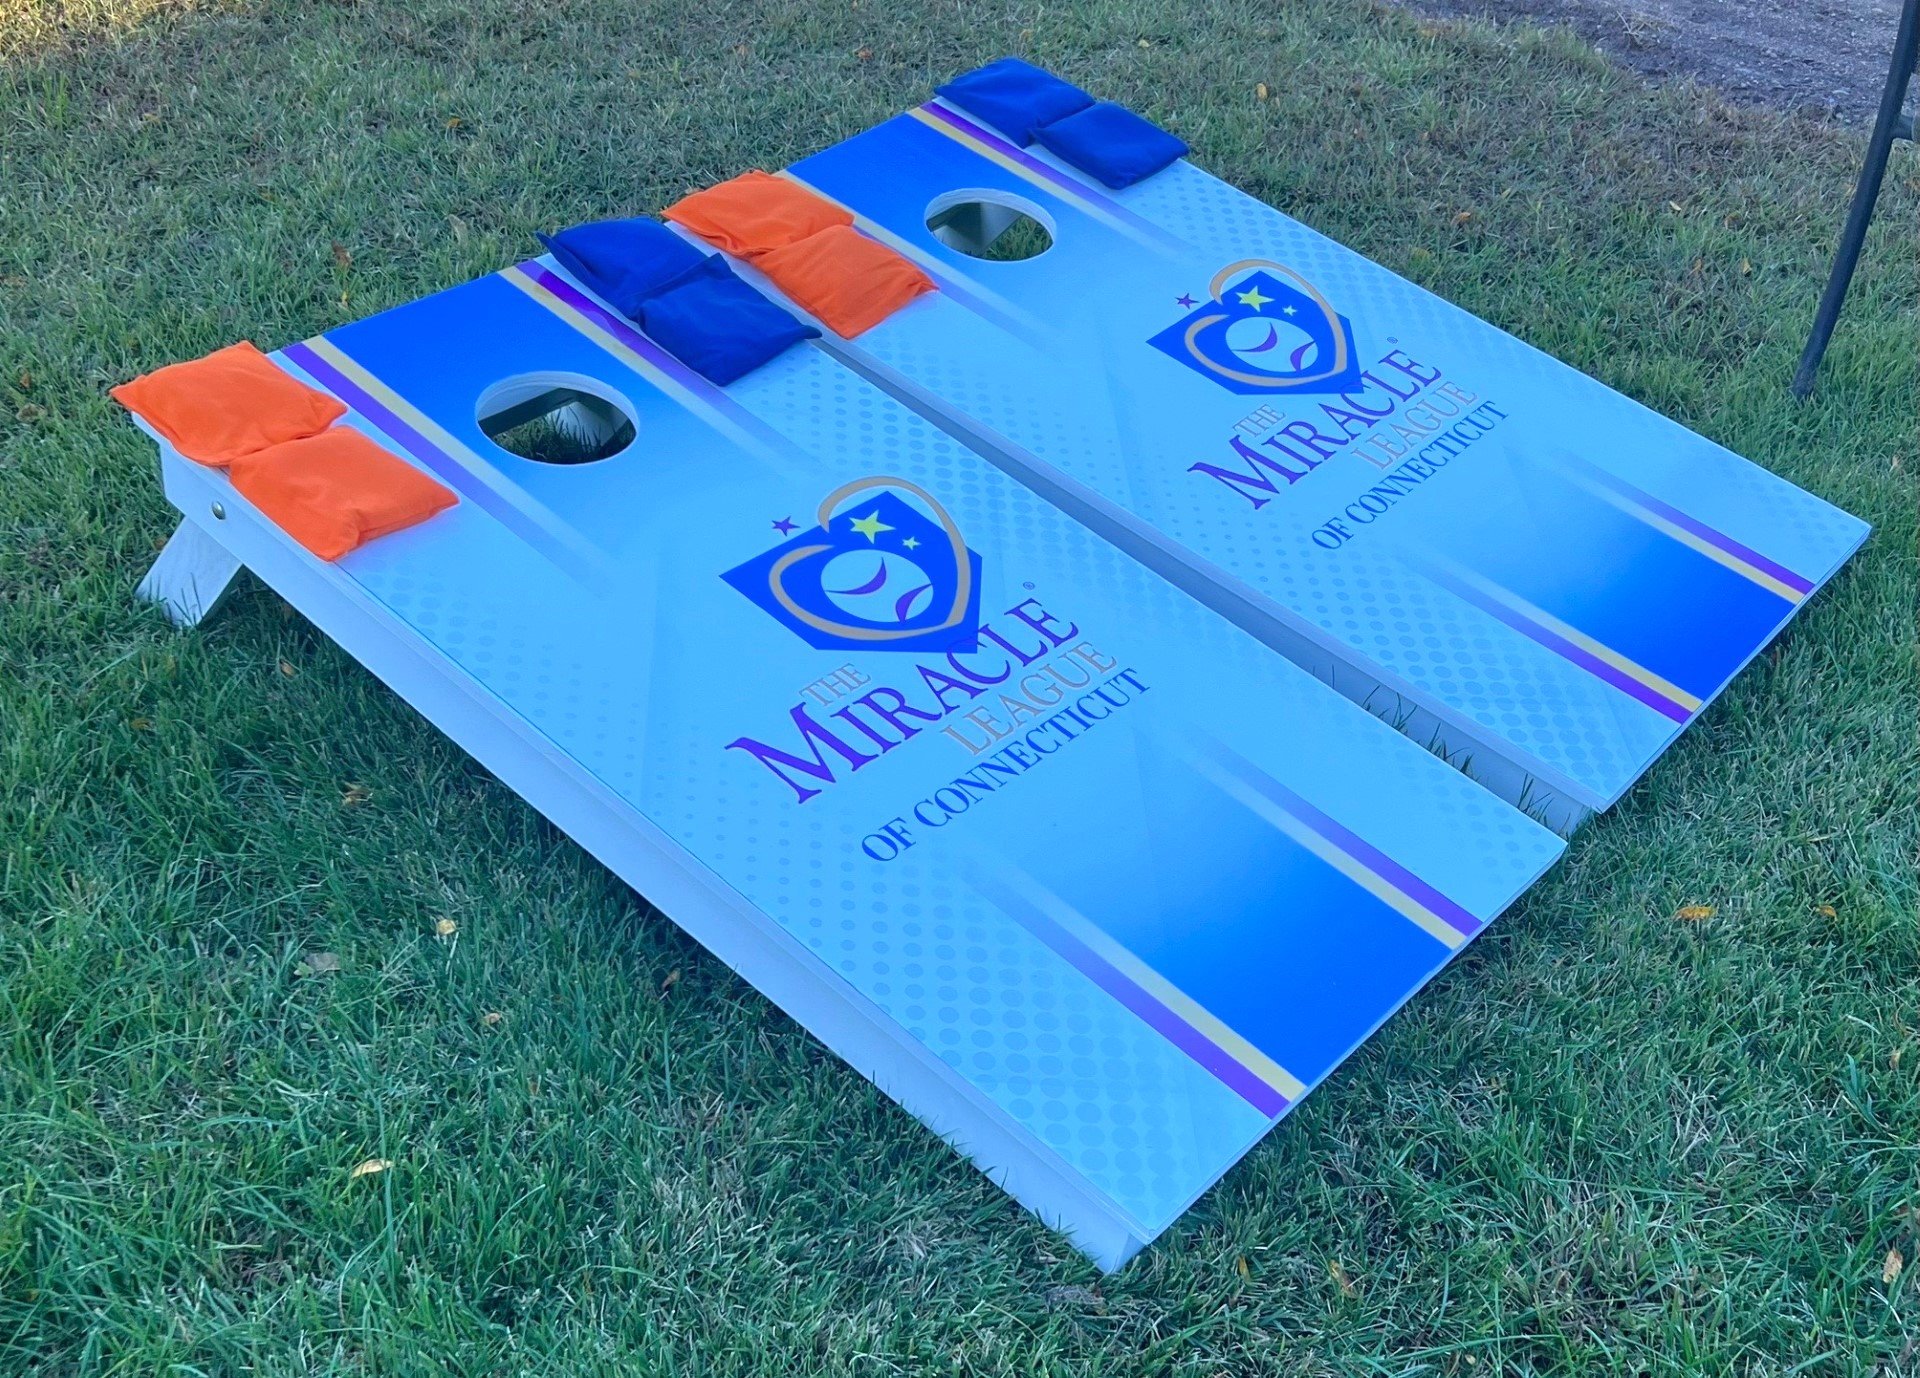
A Cornhole set I donated to a charity golf tournament. The Miracle League of Connecticut puts on social events for kids with intellectual and physical disabilities. It's built to ACL specs.
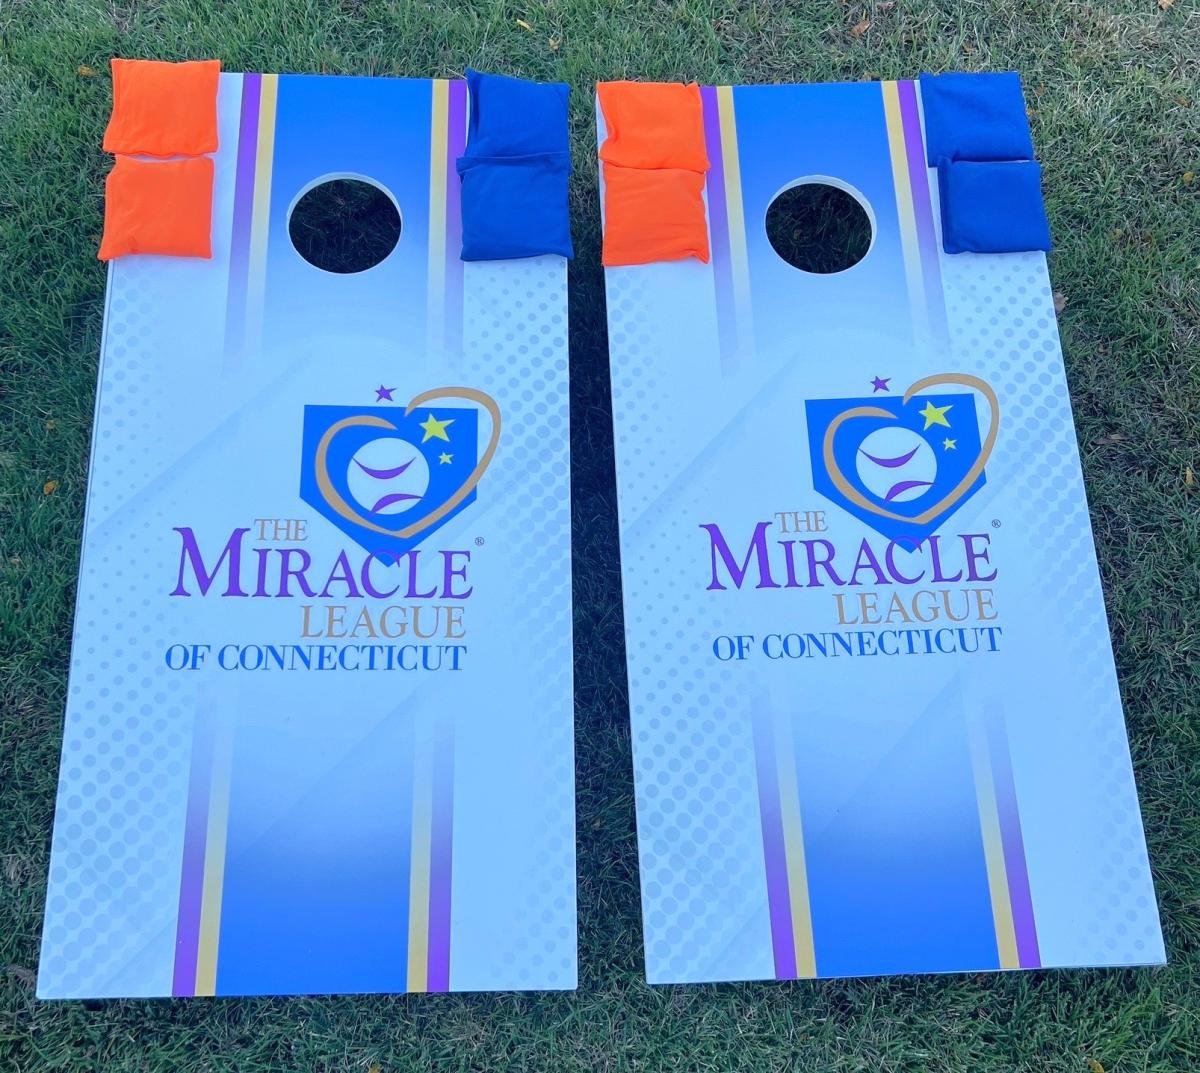
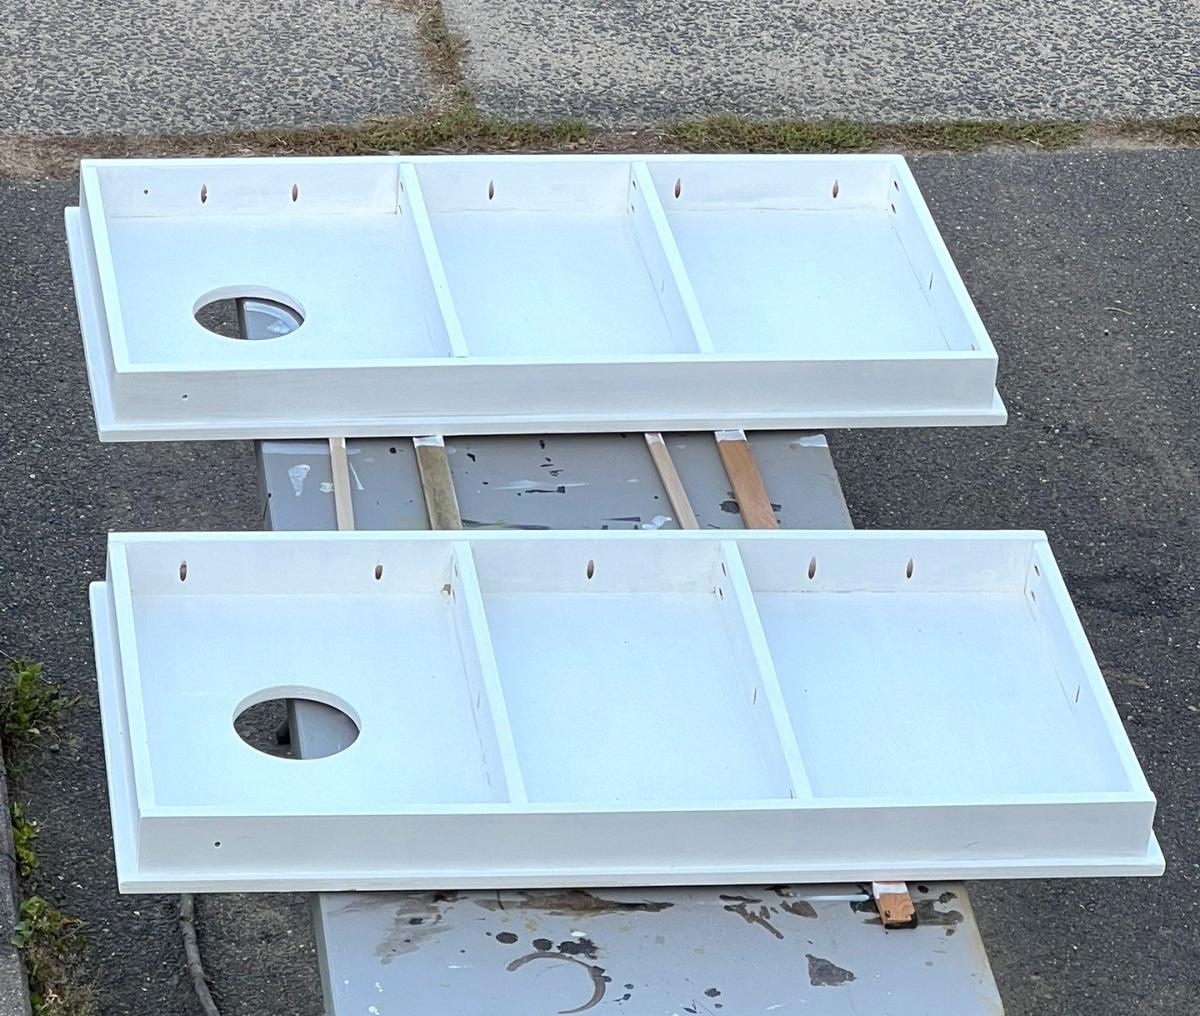
Built from Plan(s)
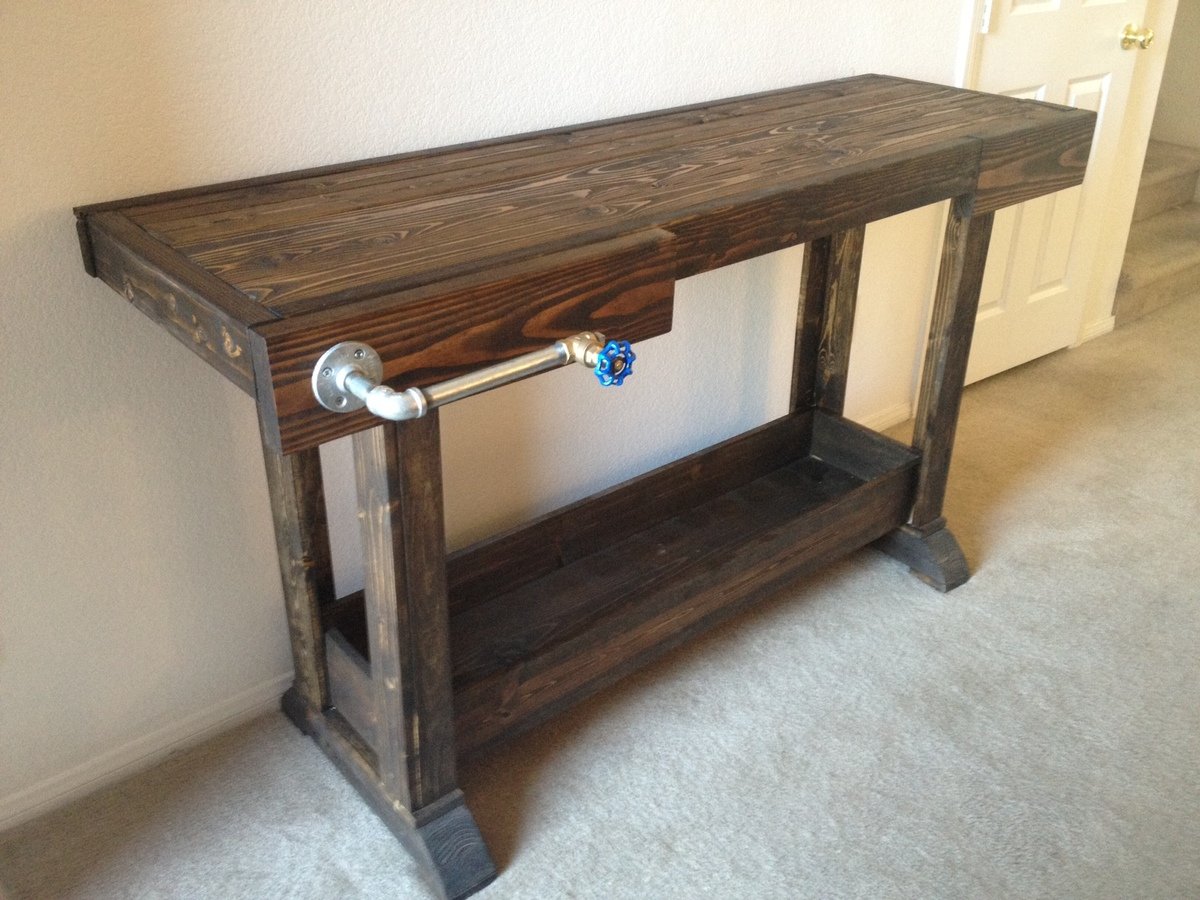
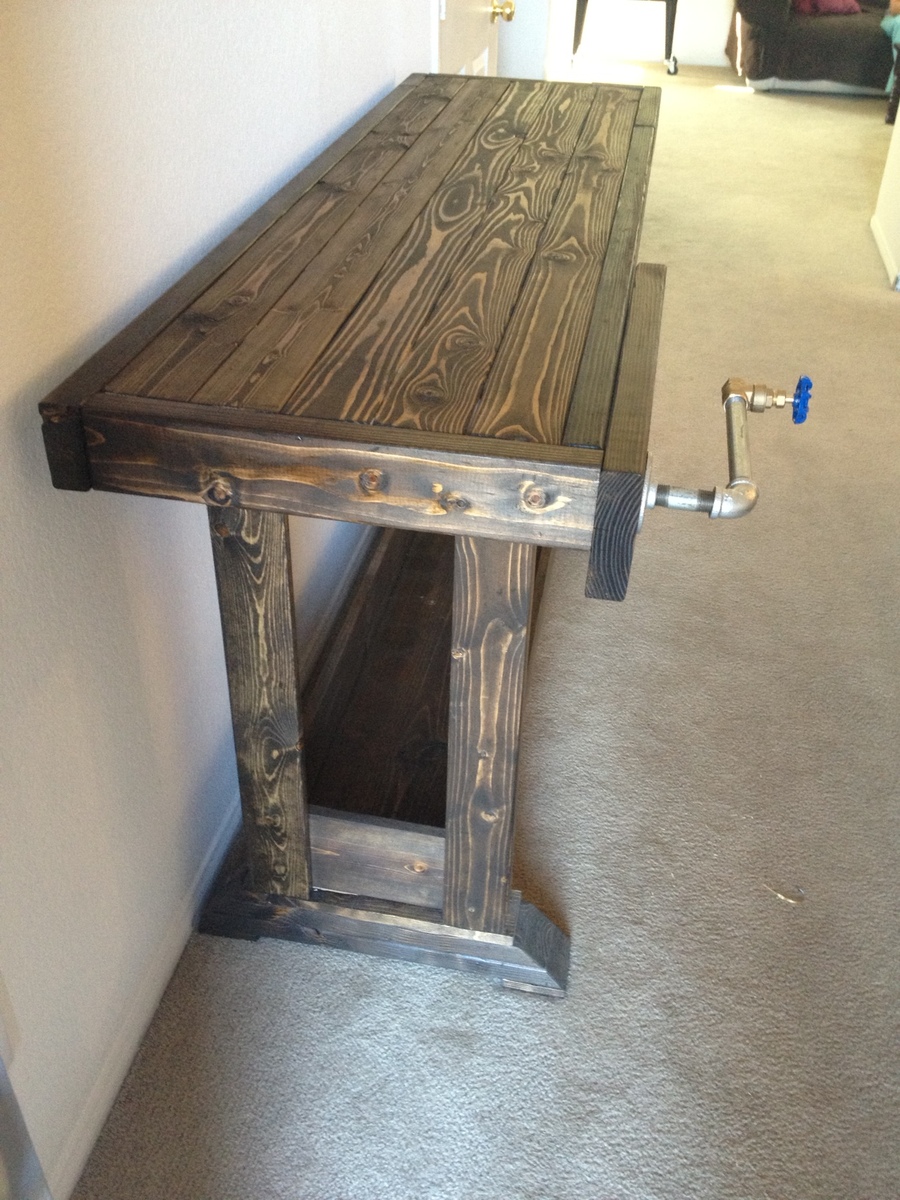
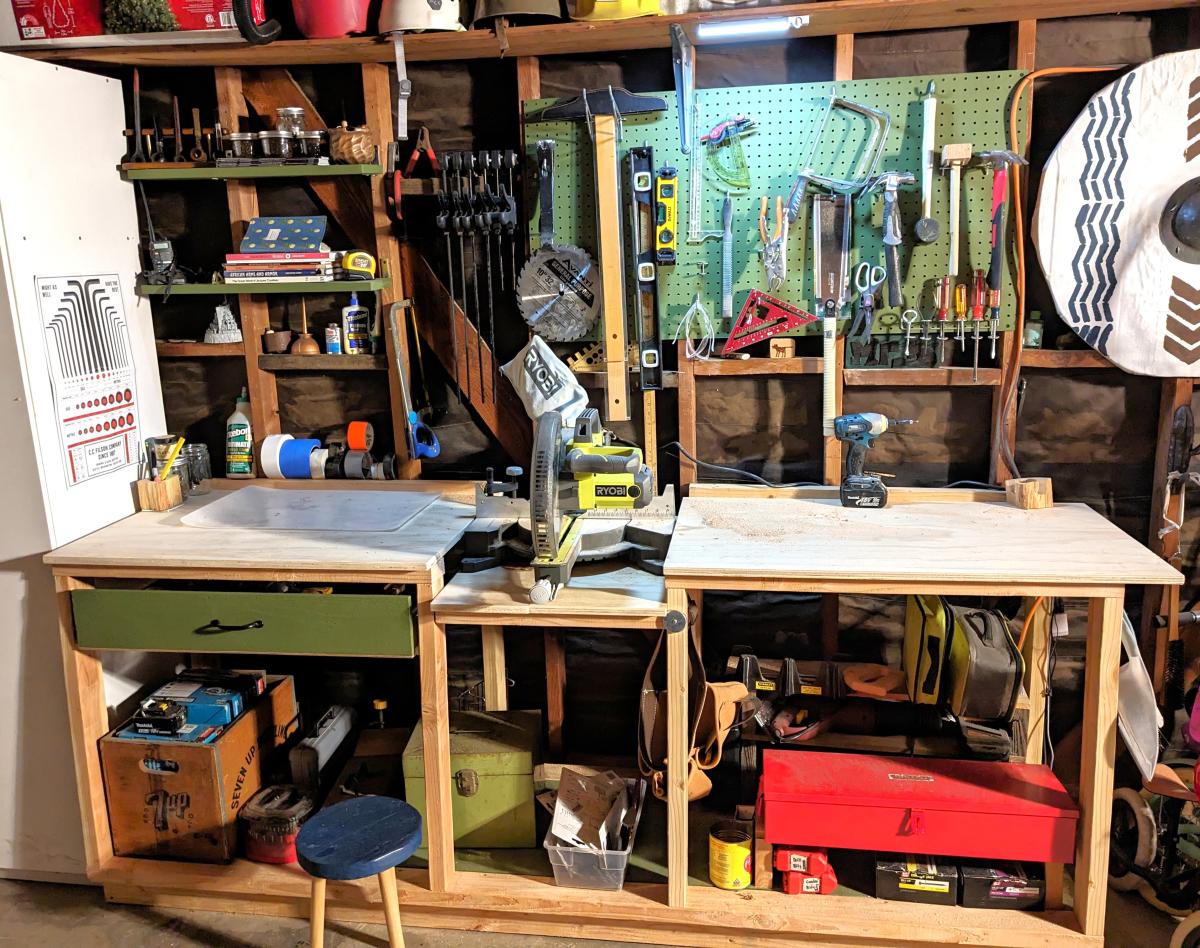
Workbench Console Table
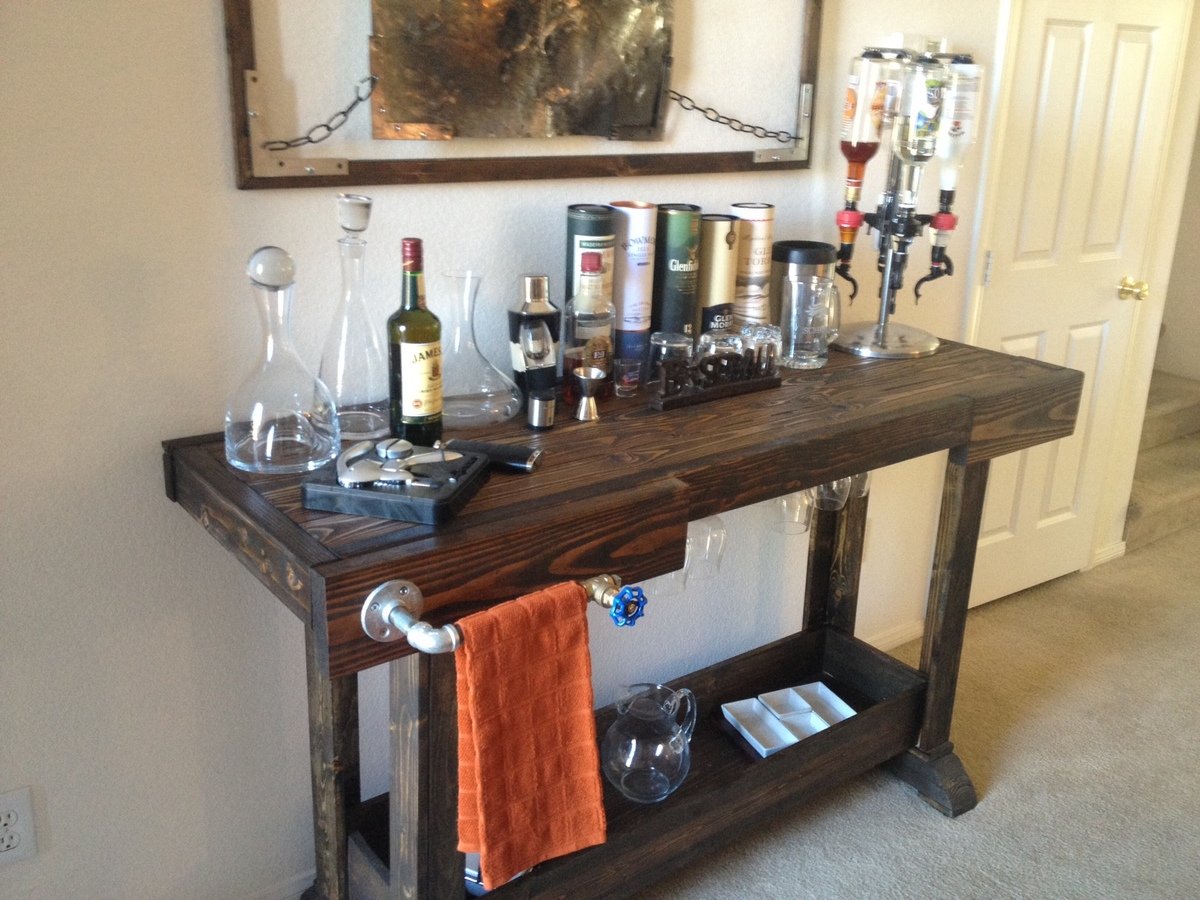
This is my version of the workbench console table. The plans were very easy to follow. I used studs for the top of the table, but at least one of them was warped. This left me with a warped top. Therefore, I had to redo the top, ensuring that I had straight studs the second time. I actually laid them all out in the aisle of the hardware store to make sure they were straight. I wish I did this the first time.
The towel rack is just piping and a valve from the hardware store. There's also a bottle opener on the right side.
I was going for a more rustic/industrial feel, so I didn't use a polyurethane.
Built from Plan(s)
Estimated Cost
$50
Estimated Time Investment
Weekend Project (10-20 Hours)
Finish Used
I used a mahogany stain, and no sealer. I wanted to keep an industrial/rustic look to it with no shine.
Recommended Skill Level
Beginner
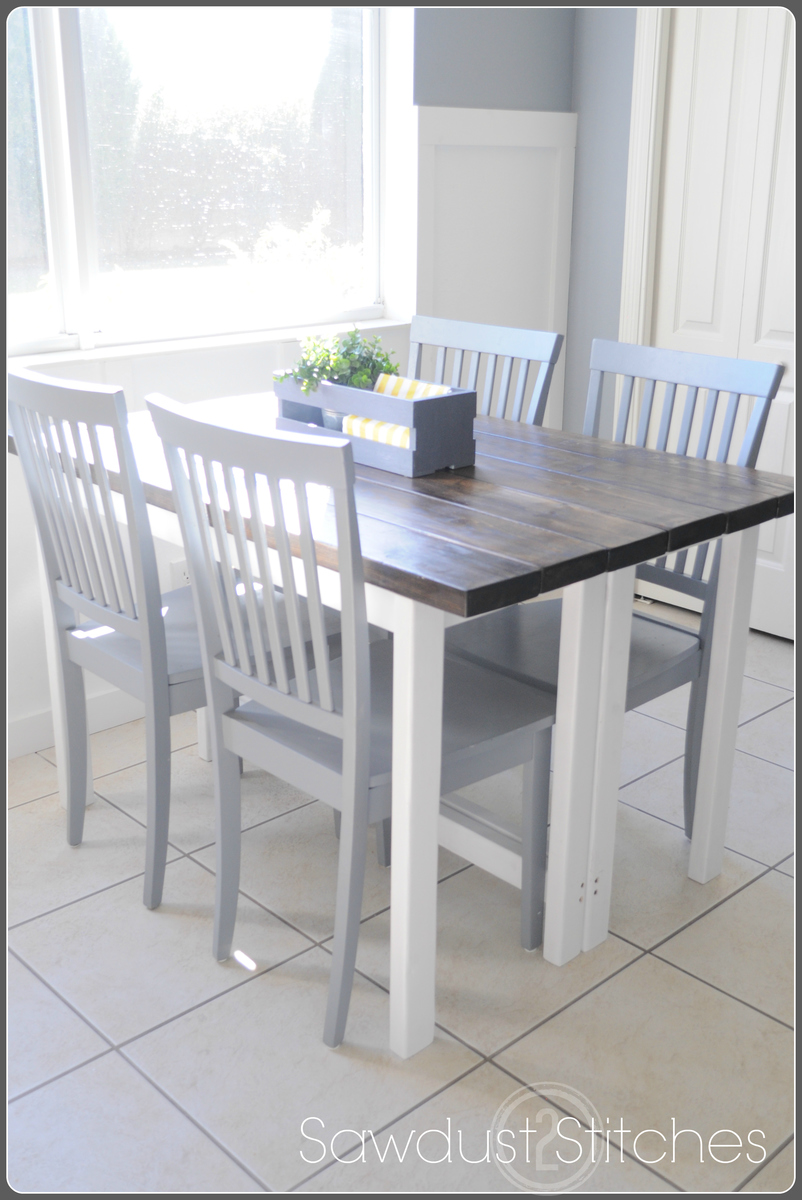
VersaTABLE
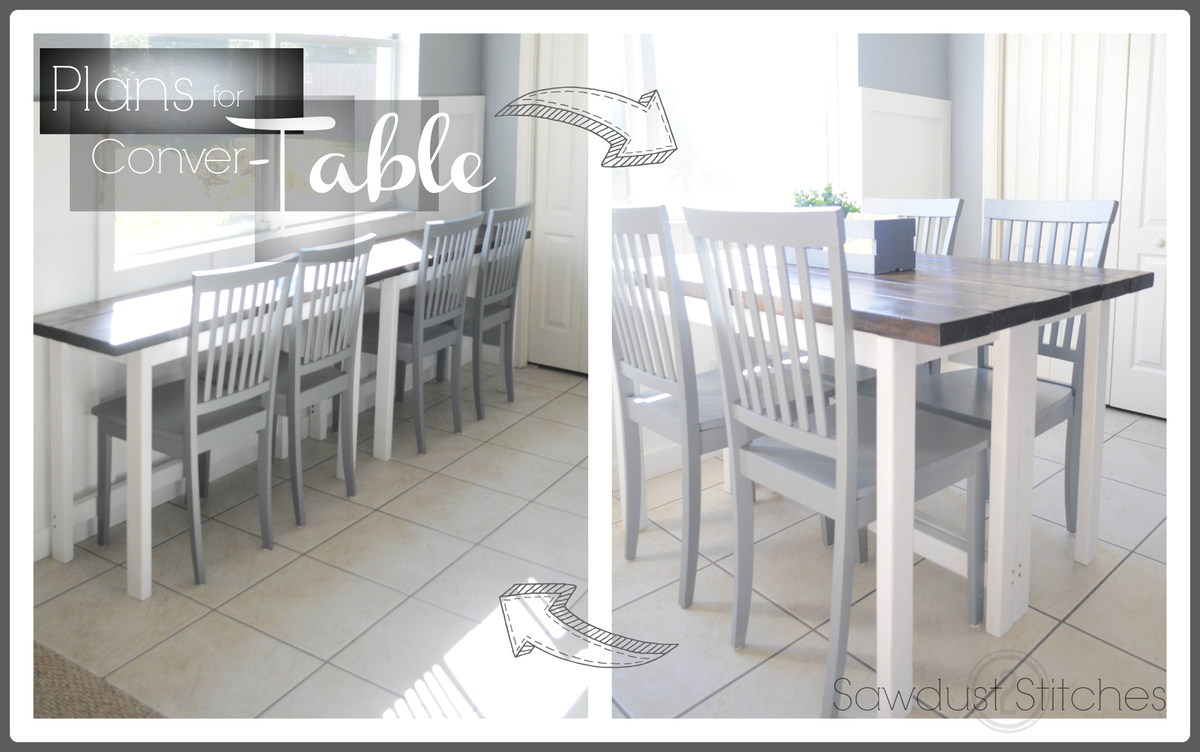
A table of my own design, that can can be pulled apart in order to save floor space, and create work space.
Estimated Time Investment
Day Project (6-9 Hours)
Finish Used
Jacobean minwax, Satin finish minwax poly and Behr Ultra Pure White Semi-Gloss
Recommended Skill Level
Beginner
Comments
Outdoor Sofa
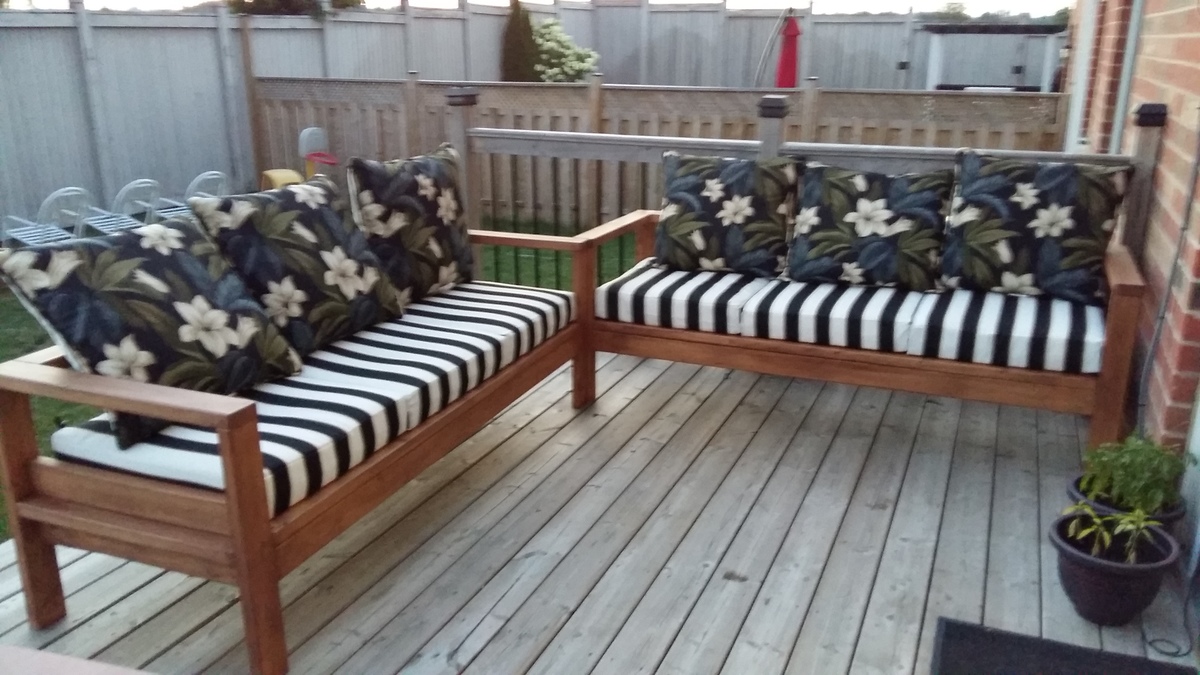
Had an awesome time building this! Very little modification from original plans. Used Thompsons water seal, Desert Brown.
Estimated Cost
$90 without cushions
Estimated Time Investment
Weekend Project (10-20 Hours)
Finish Used
Thompsons water seal, Desert Brown
Recommended Skill Level
Beginner
Potting Bench
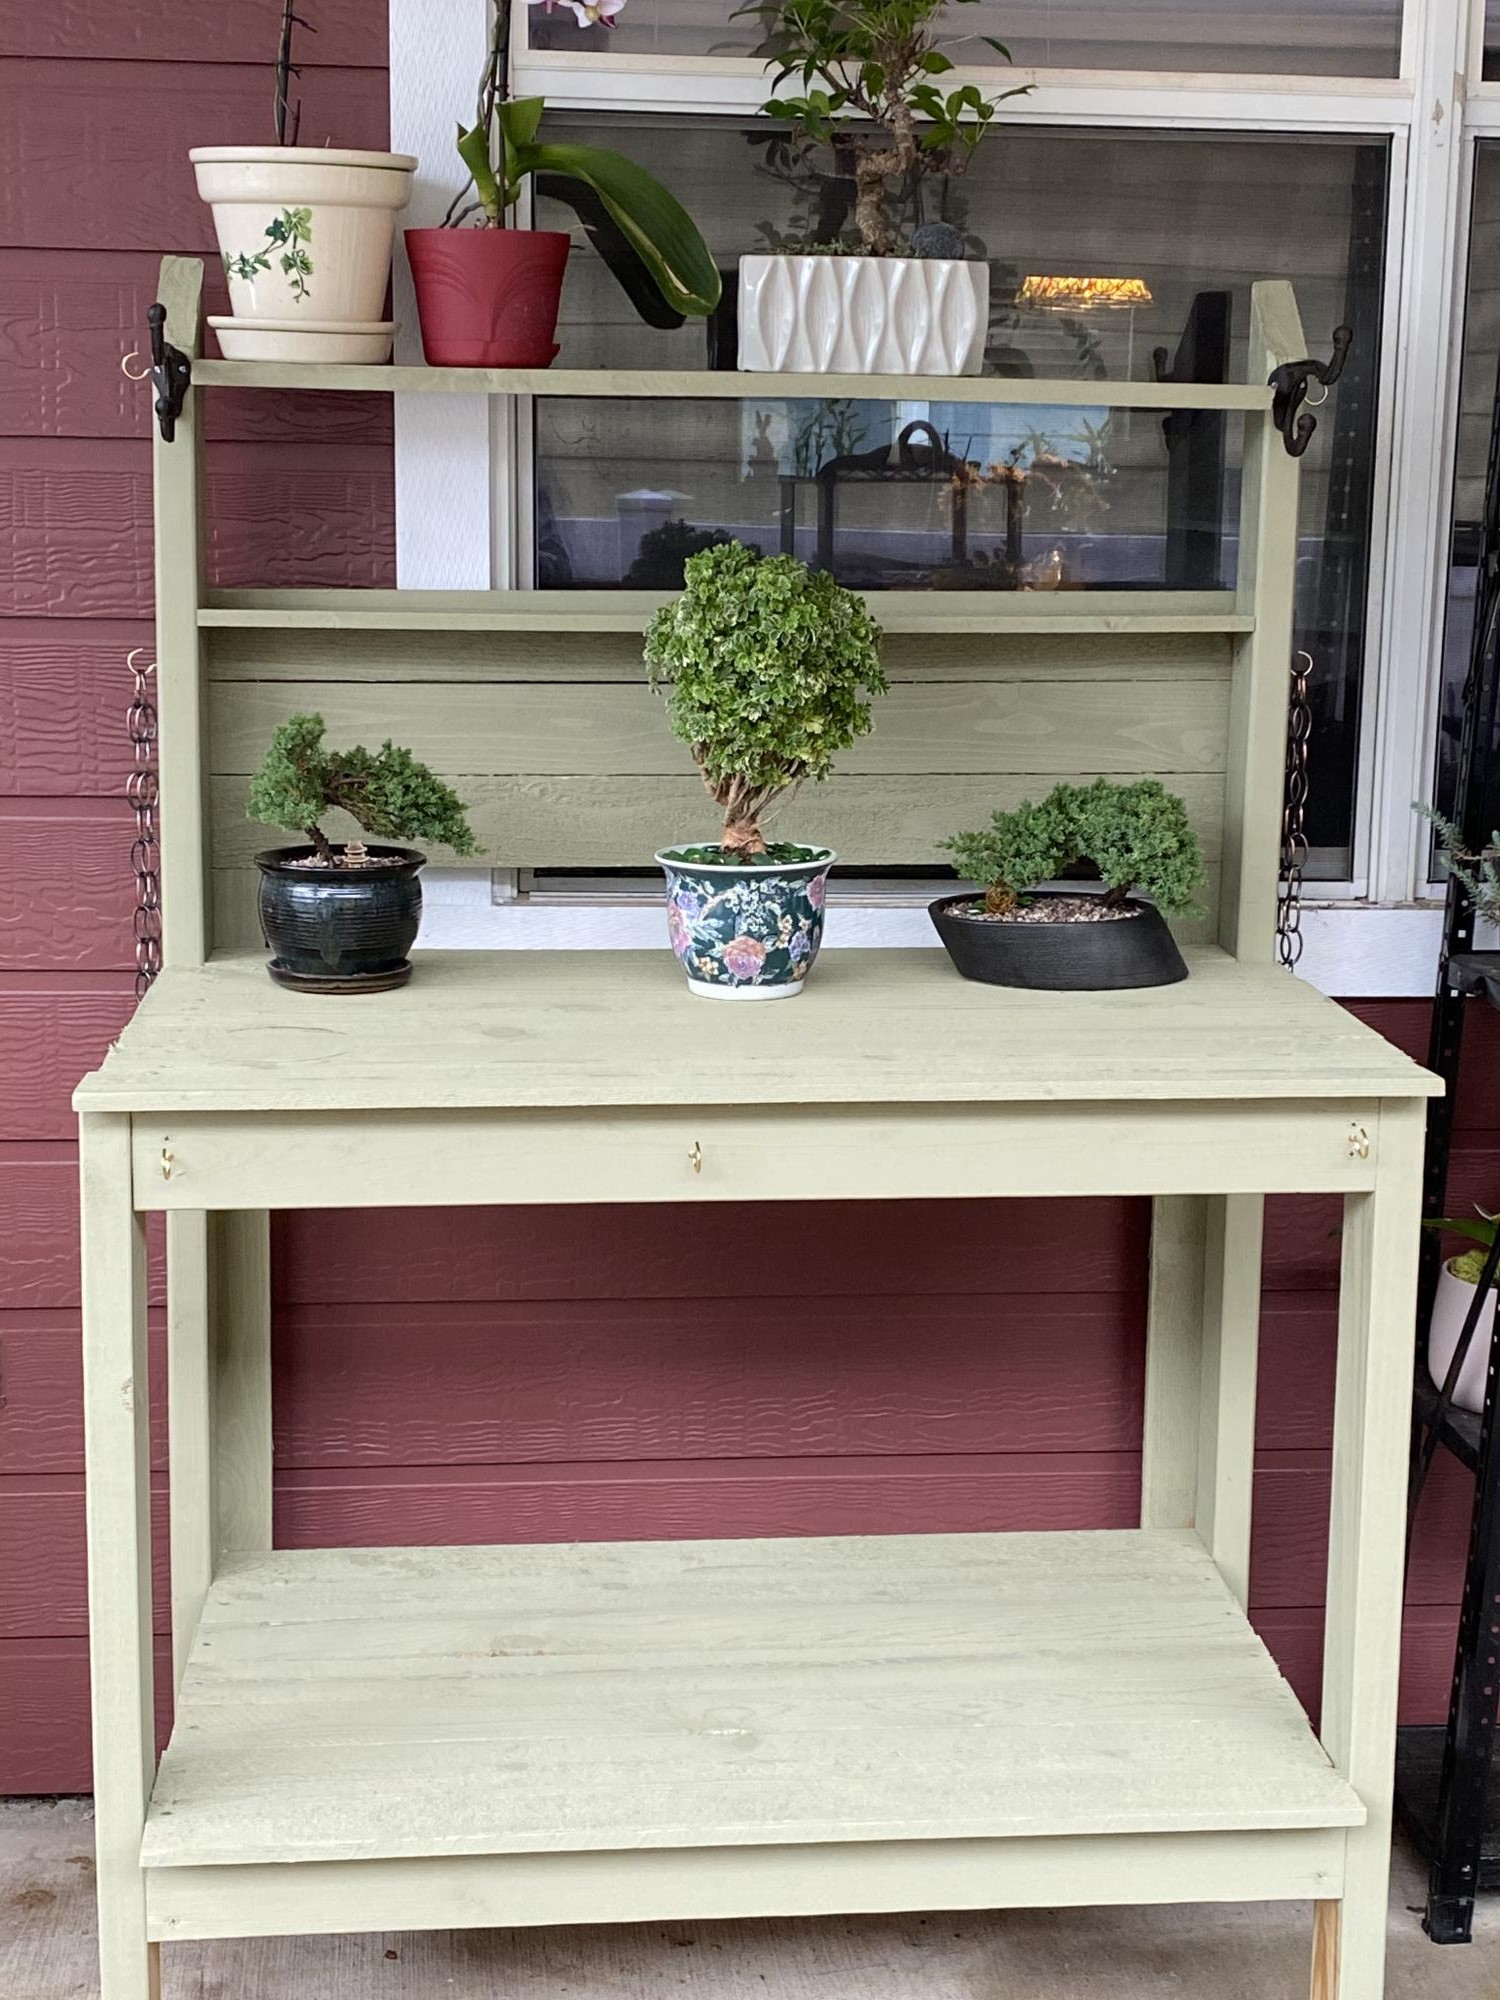
My first attempt at a potting bench! Not quite exactly to plan, but it came out exactly as I hoped!
Thanks Ana!!
Built from Plan(s)
Pony Wall Workbench with Drawer
Made mine 8ft long, with just one drawer. So far the bench is great for my space, highly functional, holds all my stuff, and looks good too (I think).
bonan.califonica
Built from Plan(s)
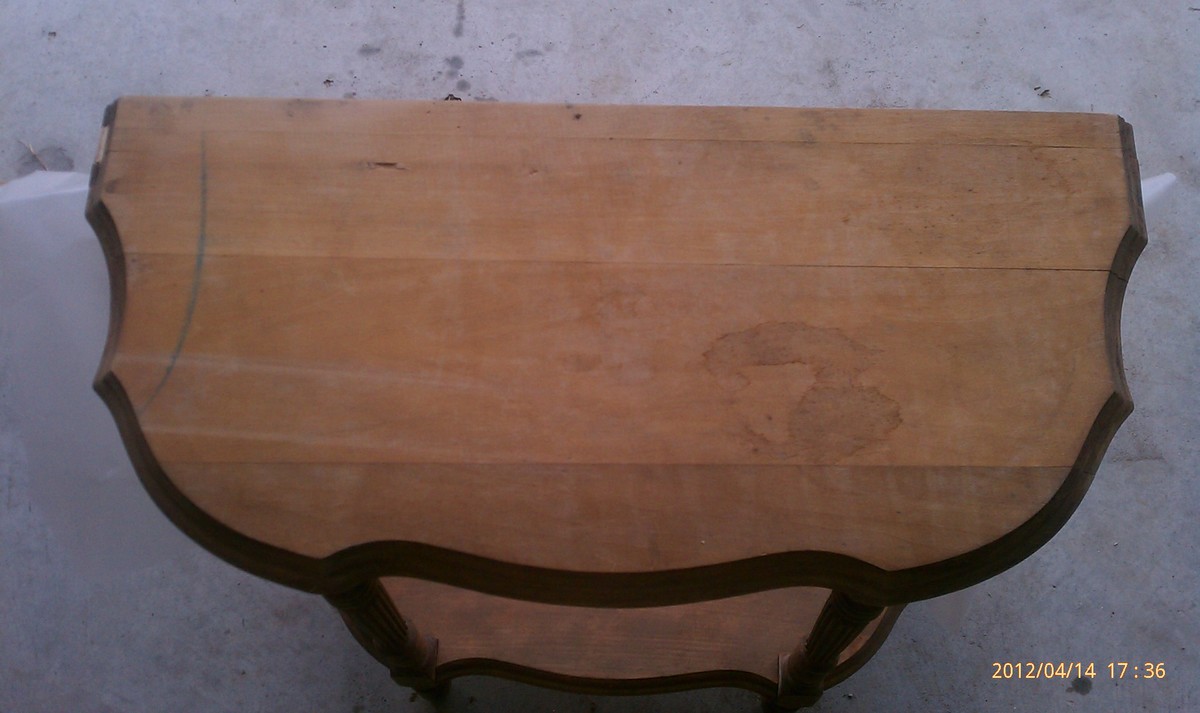
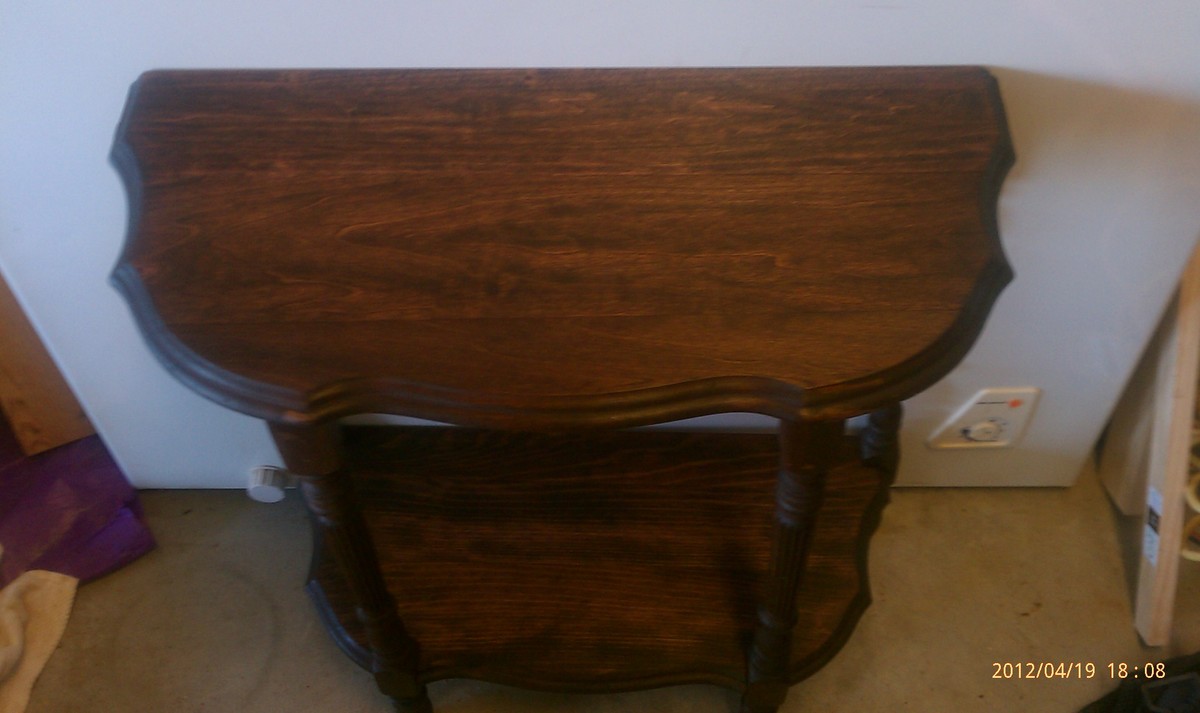
Refinished End Table
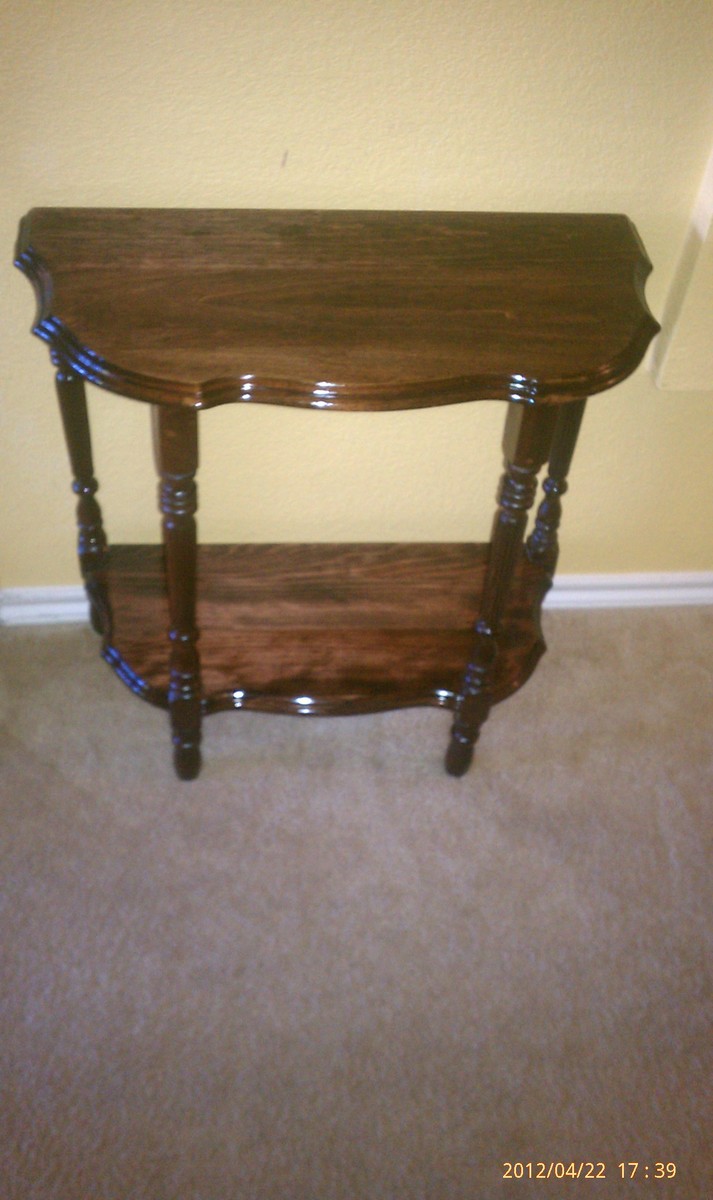
My mother found this old end table in her mother's basement in the mid 90's and brought it home with her to refinish. The table was very flimsy and Mom just didn't know how to fix it, so it sat in her garage since then. I saw it back in March when helping clean out the garage. I asked if I could restore it for her. I think it turned out really nice. Thanks to this site, I have been given the confidence to tackle projects like this. Just wanted to share the project and say thanks to everyone here for making this site a great resource.
I fixed the table legs, sanded the table, used red mahogany stain, and about 15 coats of Poly to give the table a high gloss finish.
The additional photos are 1 of the original table and 1 of the table after staining and no Poly applied.
Mom was shocked with the finished project. Nothing more pleasing then see Mom smile!
Built from Plan(s)
Estimated Cost
$10.00
Estimated Time Investment
Week Long Project (20 Hours or More)
Finish Used
red mahogany stain and Poly.
Recommended Skill Level
Beginner
Comments
Ana White Admin
Sun, 01/14/2024 - 19:44
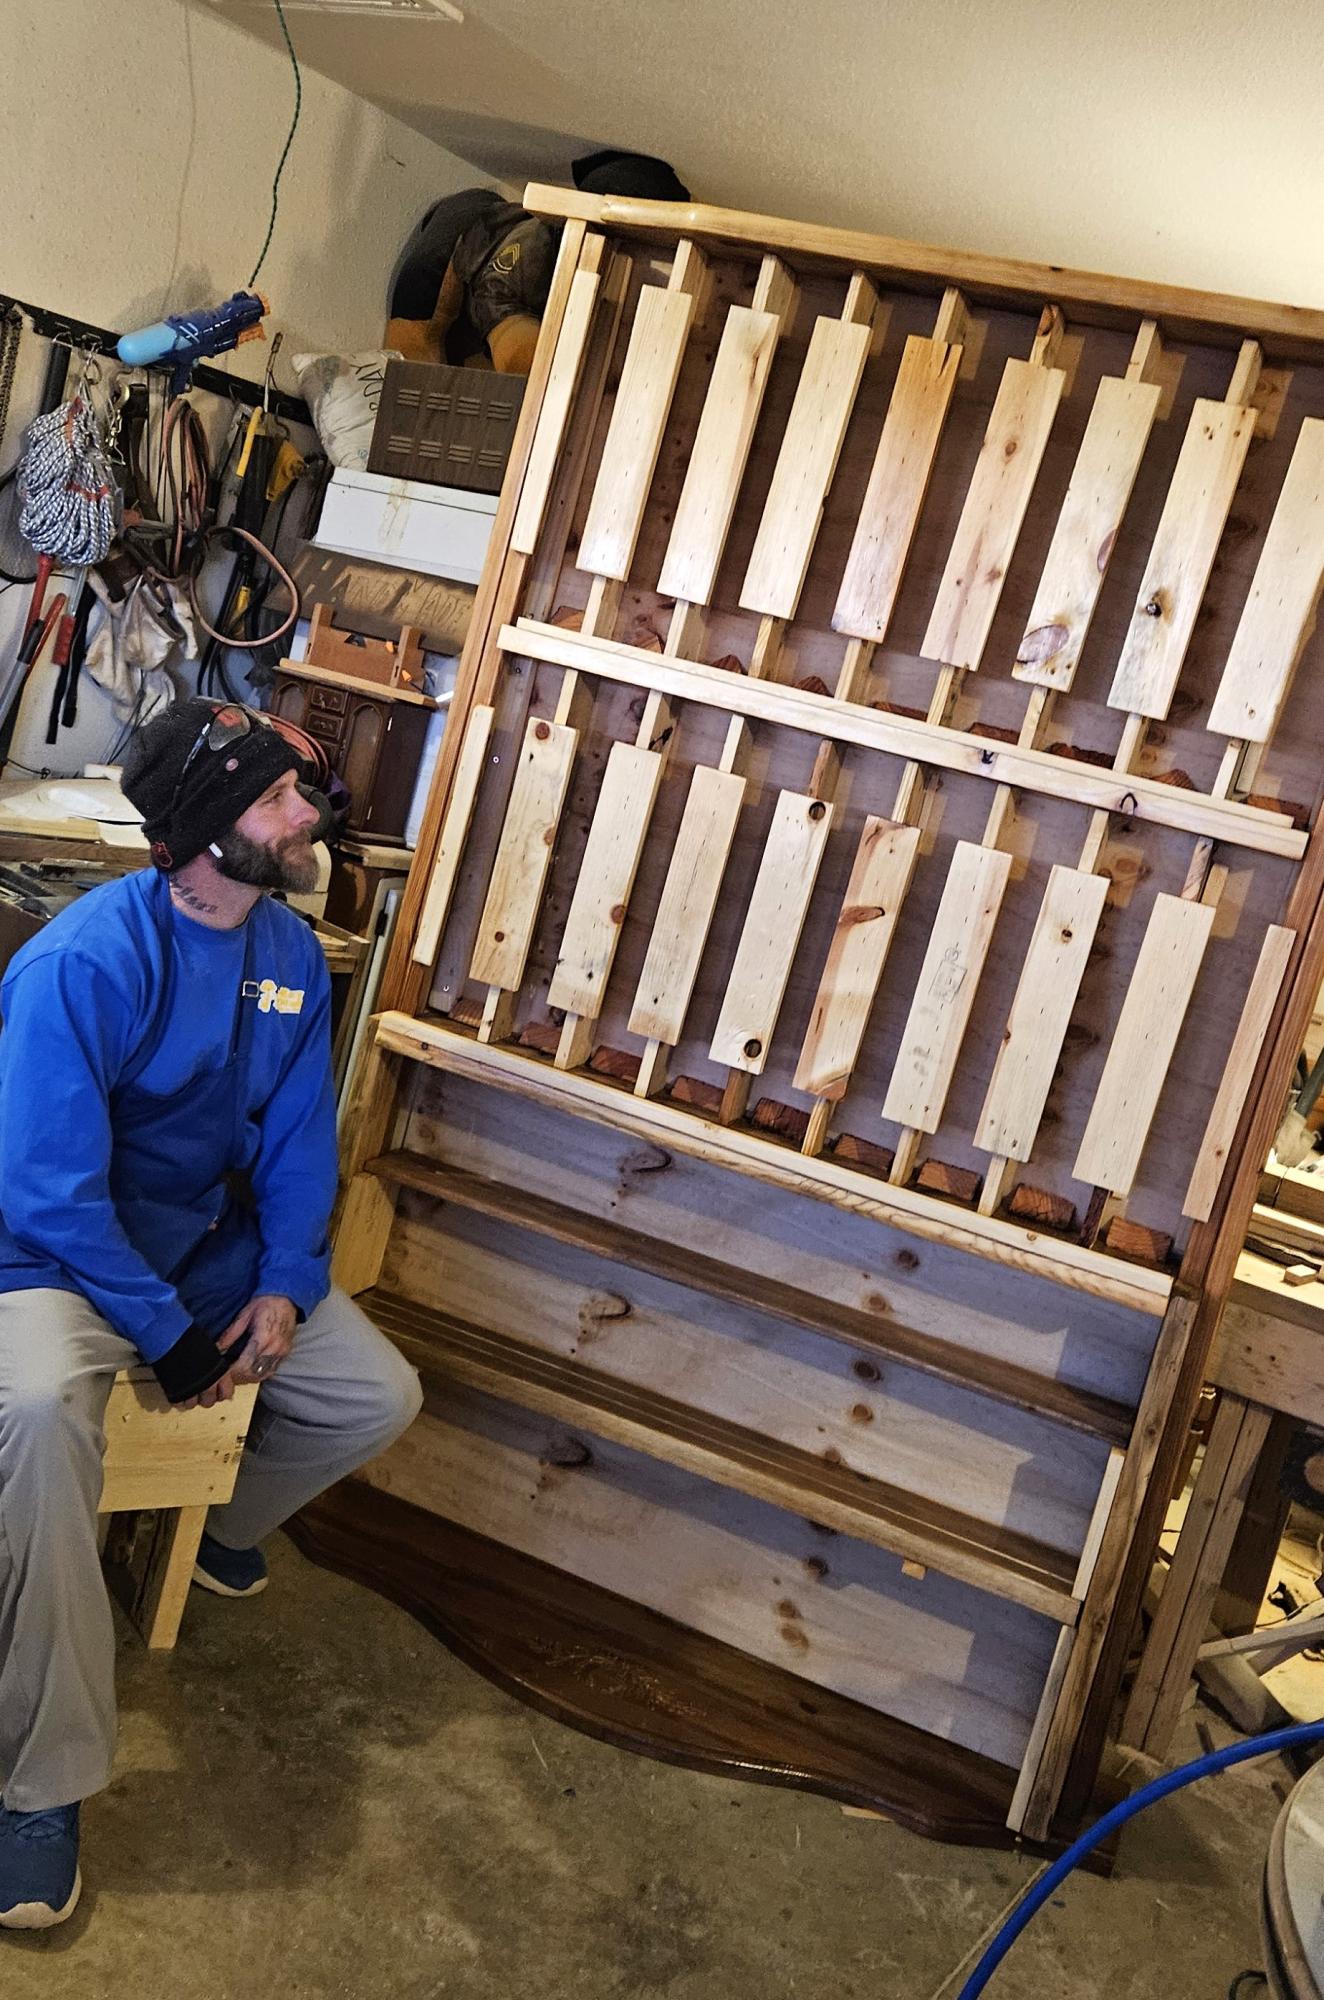
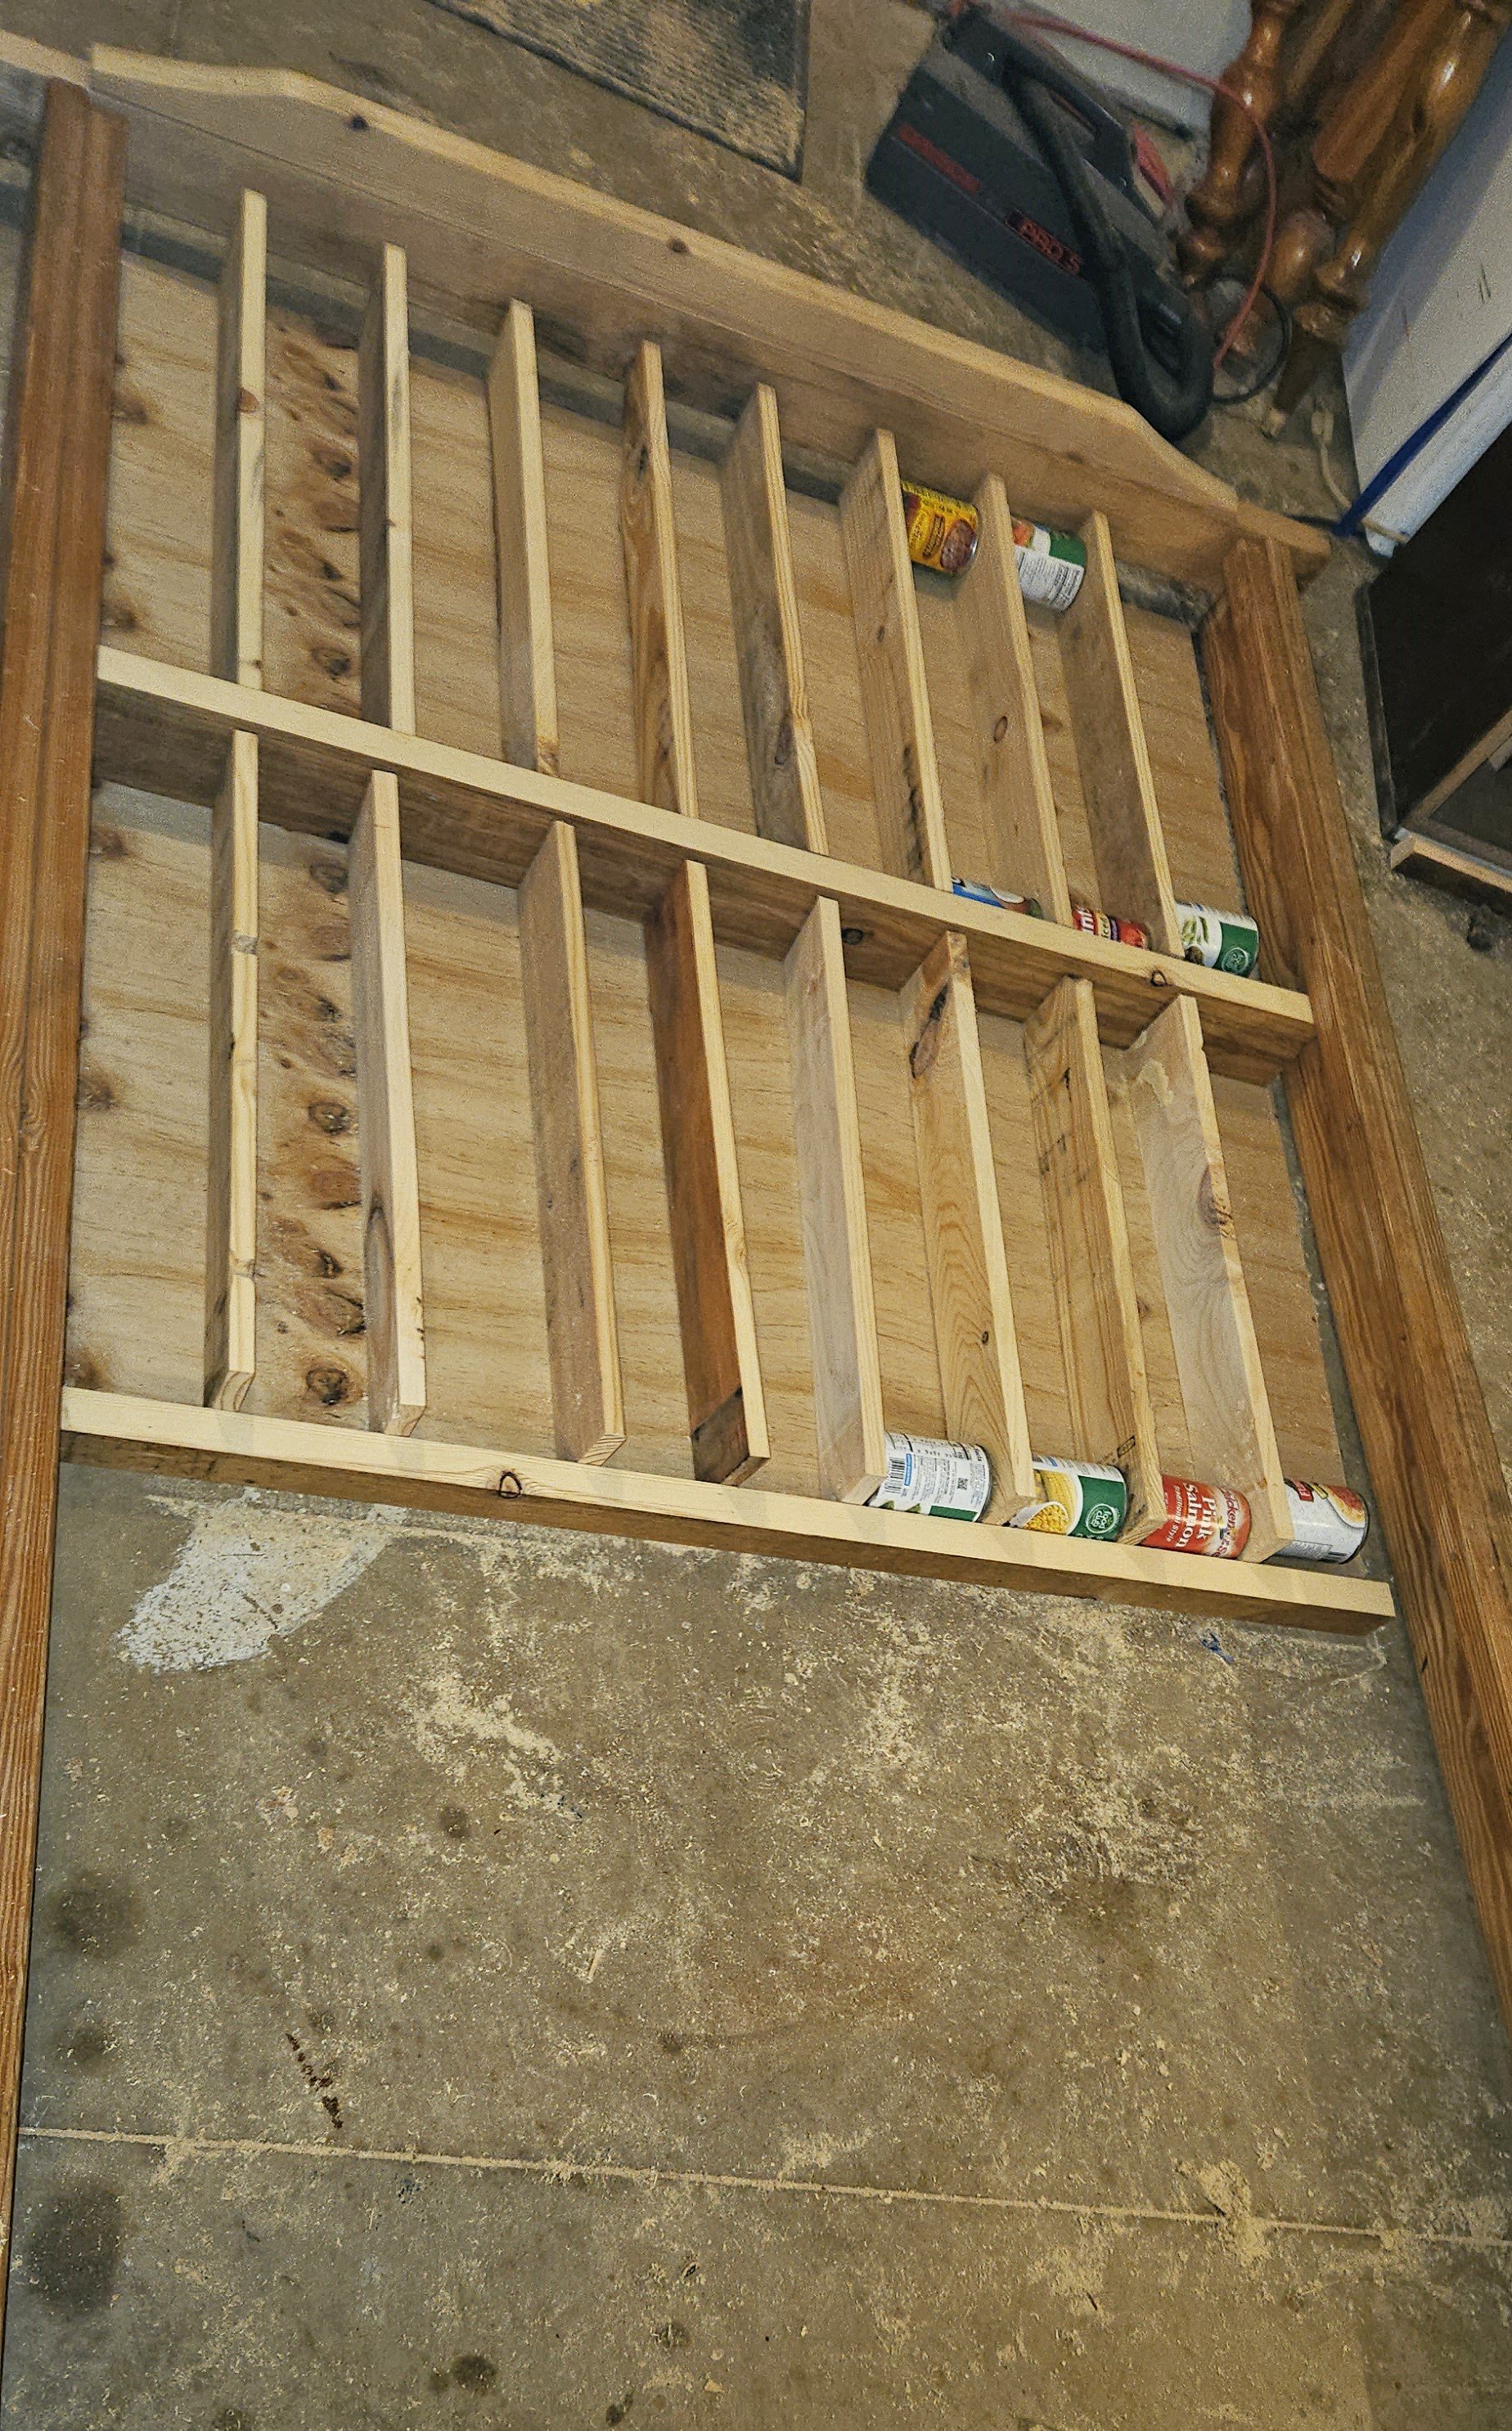
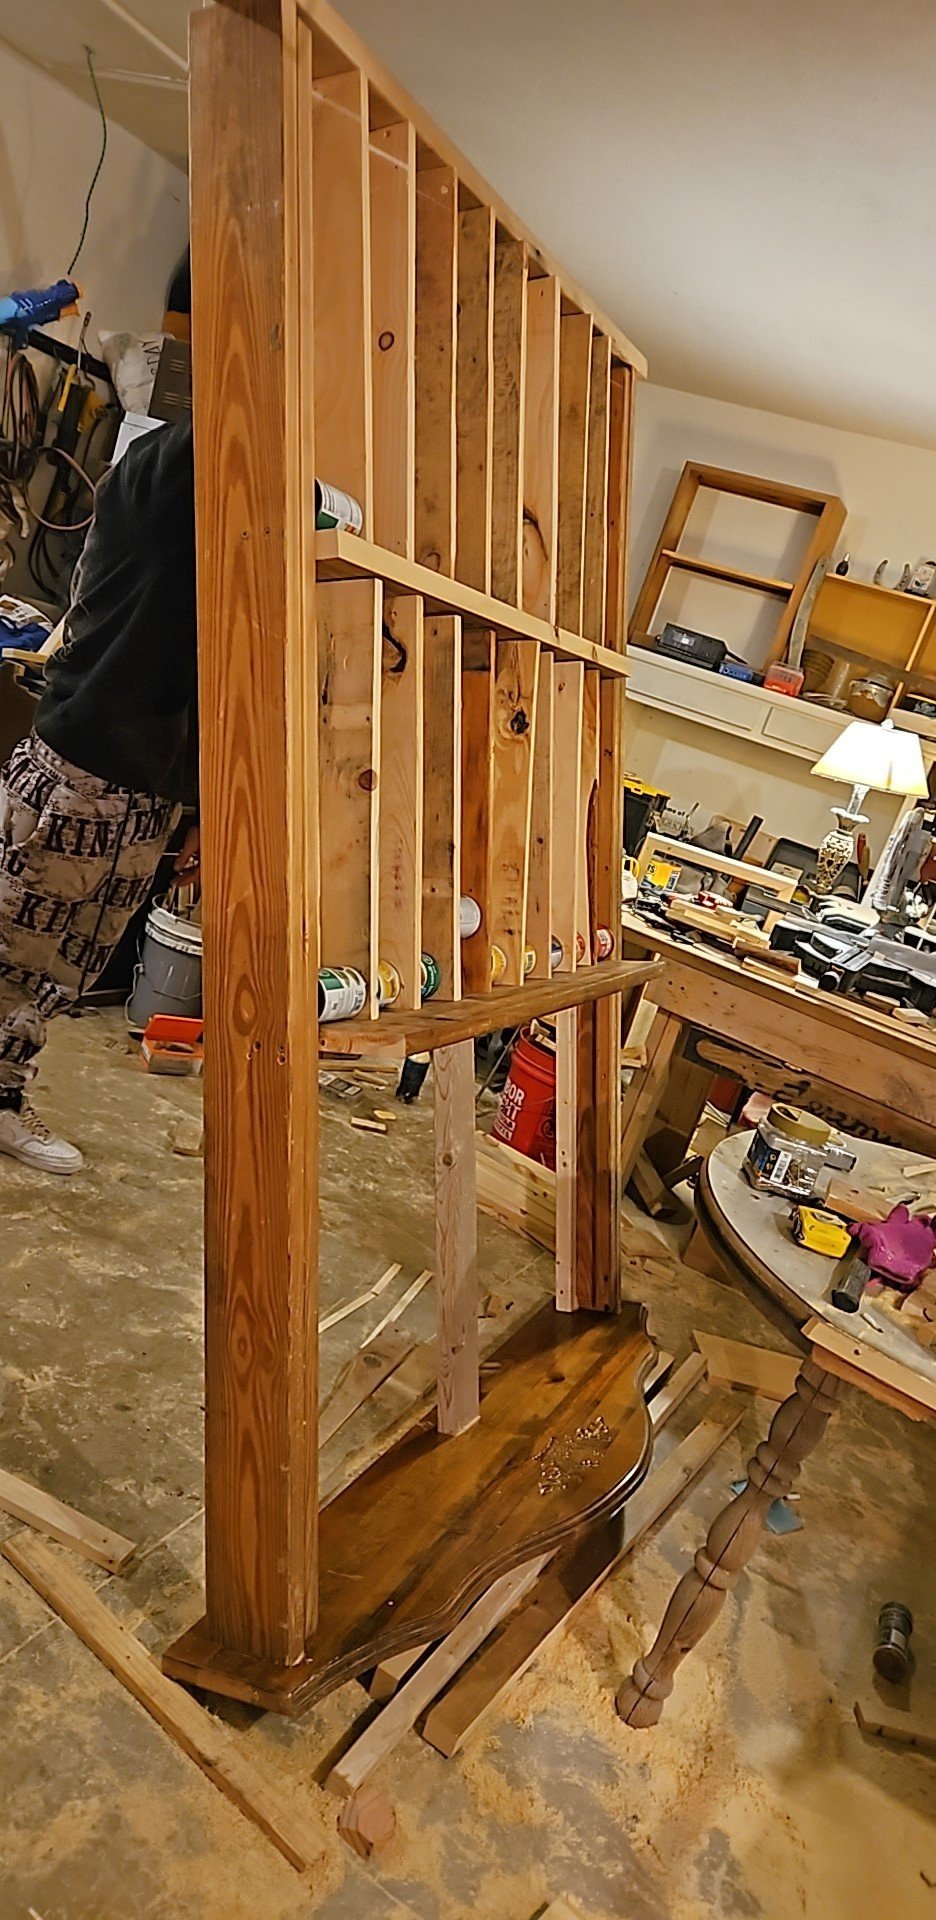
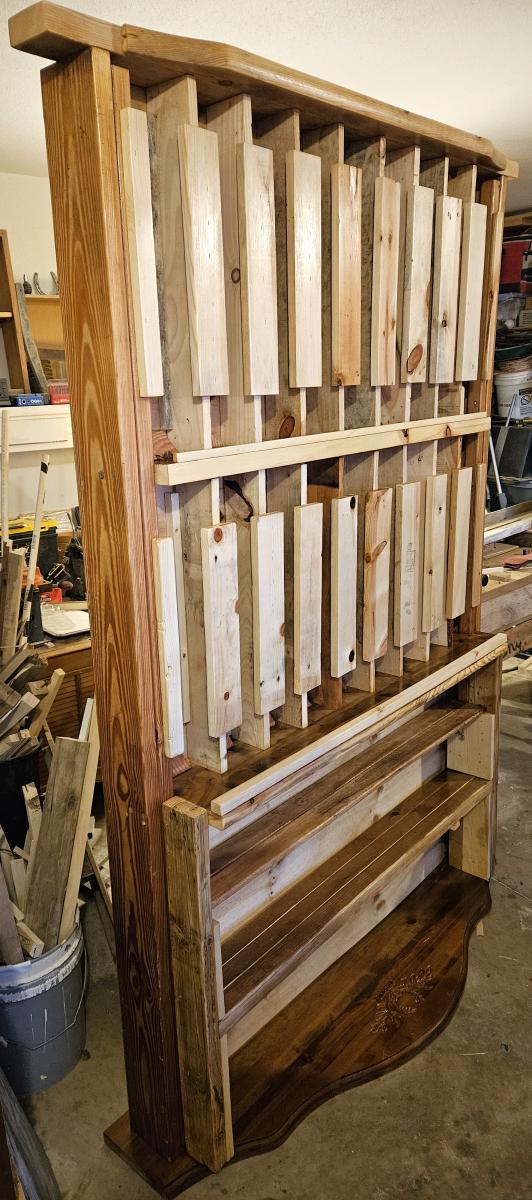
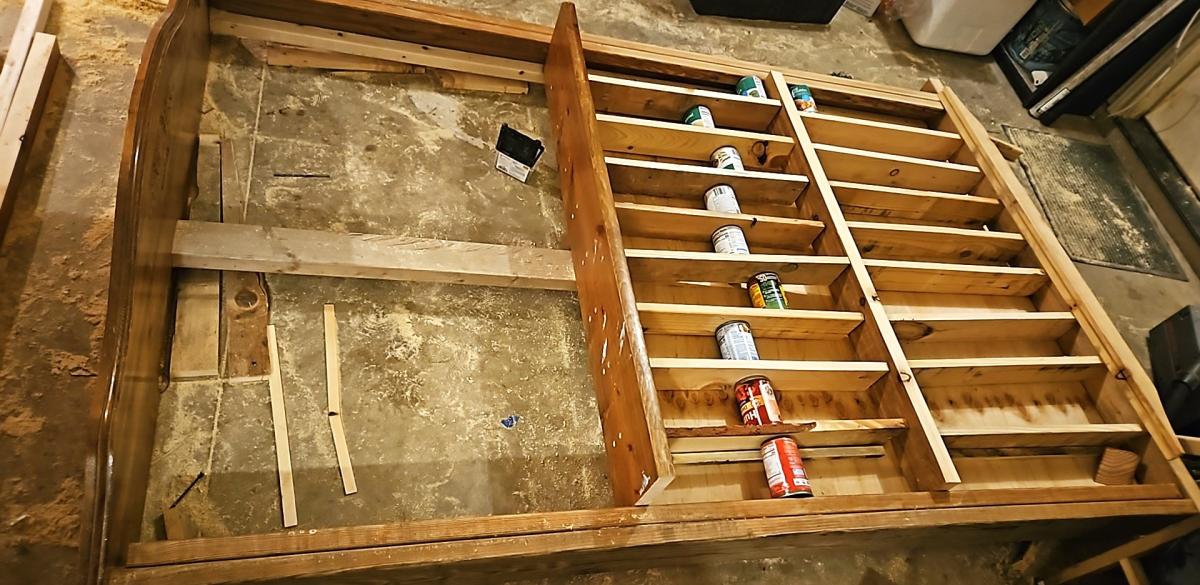
Superb Can Storage!
This looks amazing and stores so many cans! Thank you for sharing.:)