Community Brag Posts
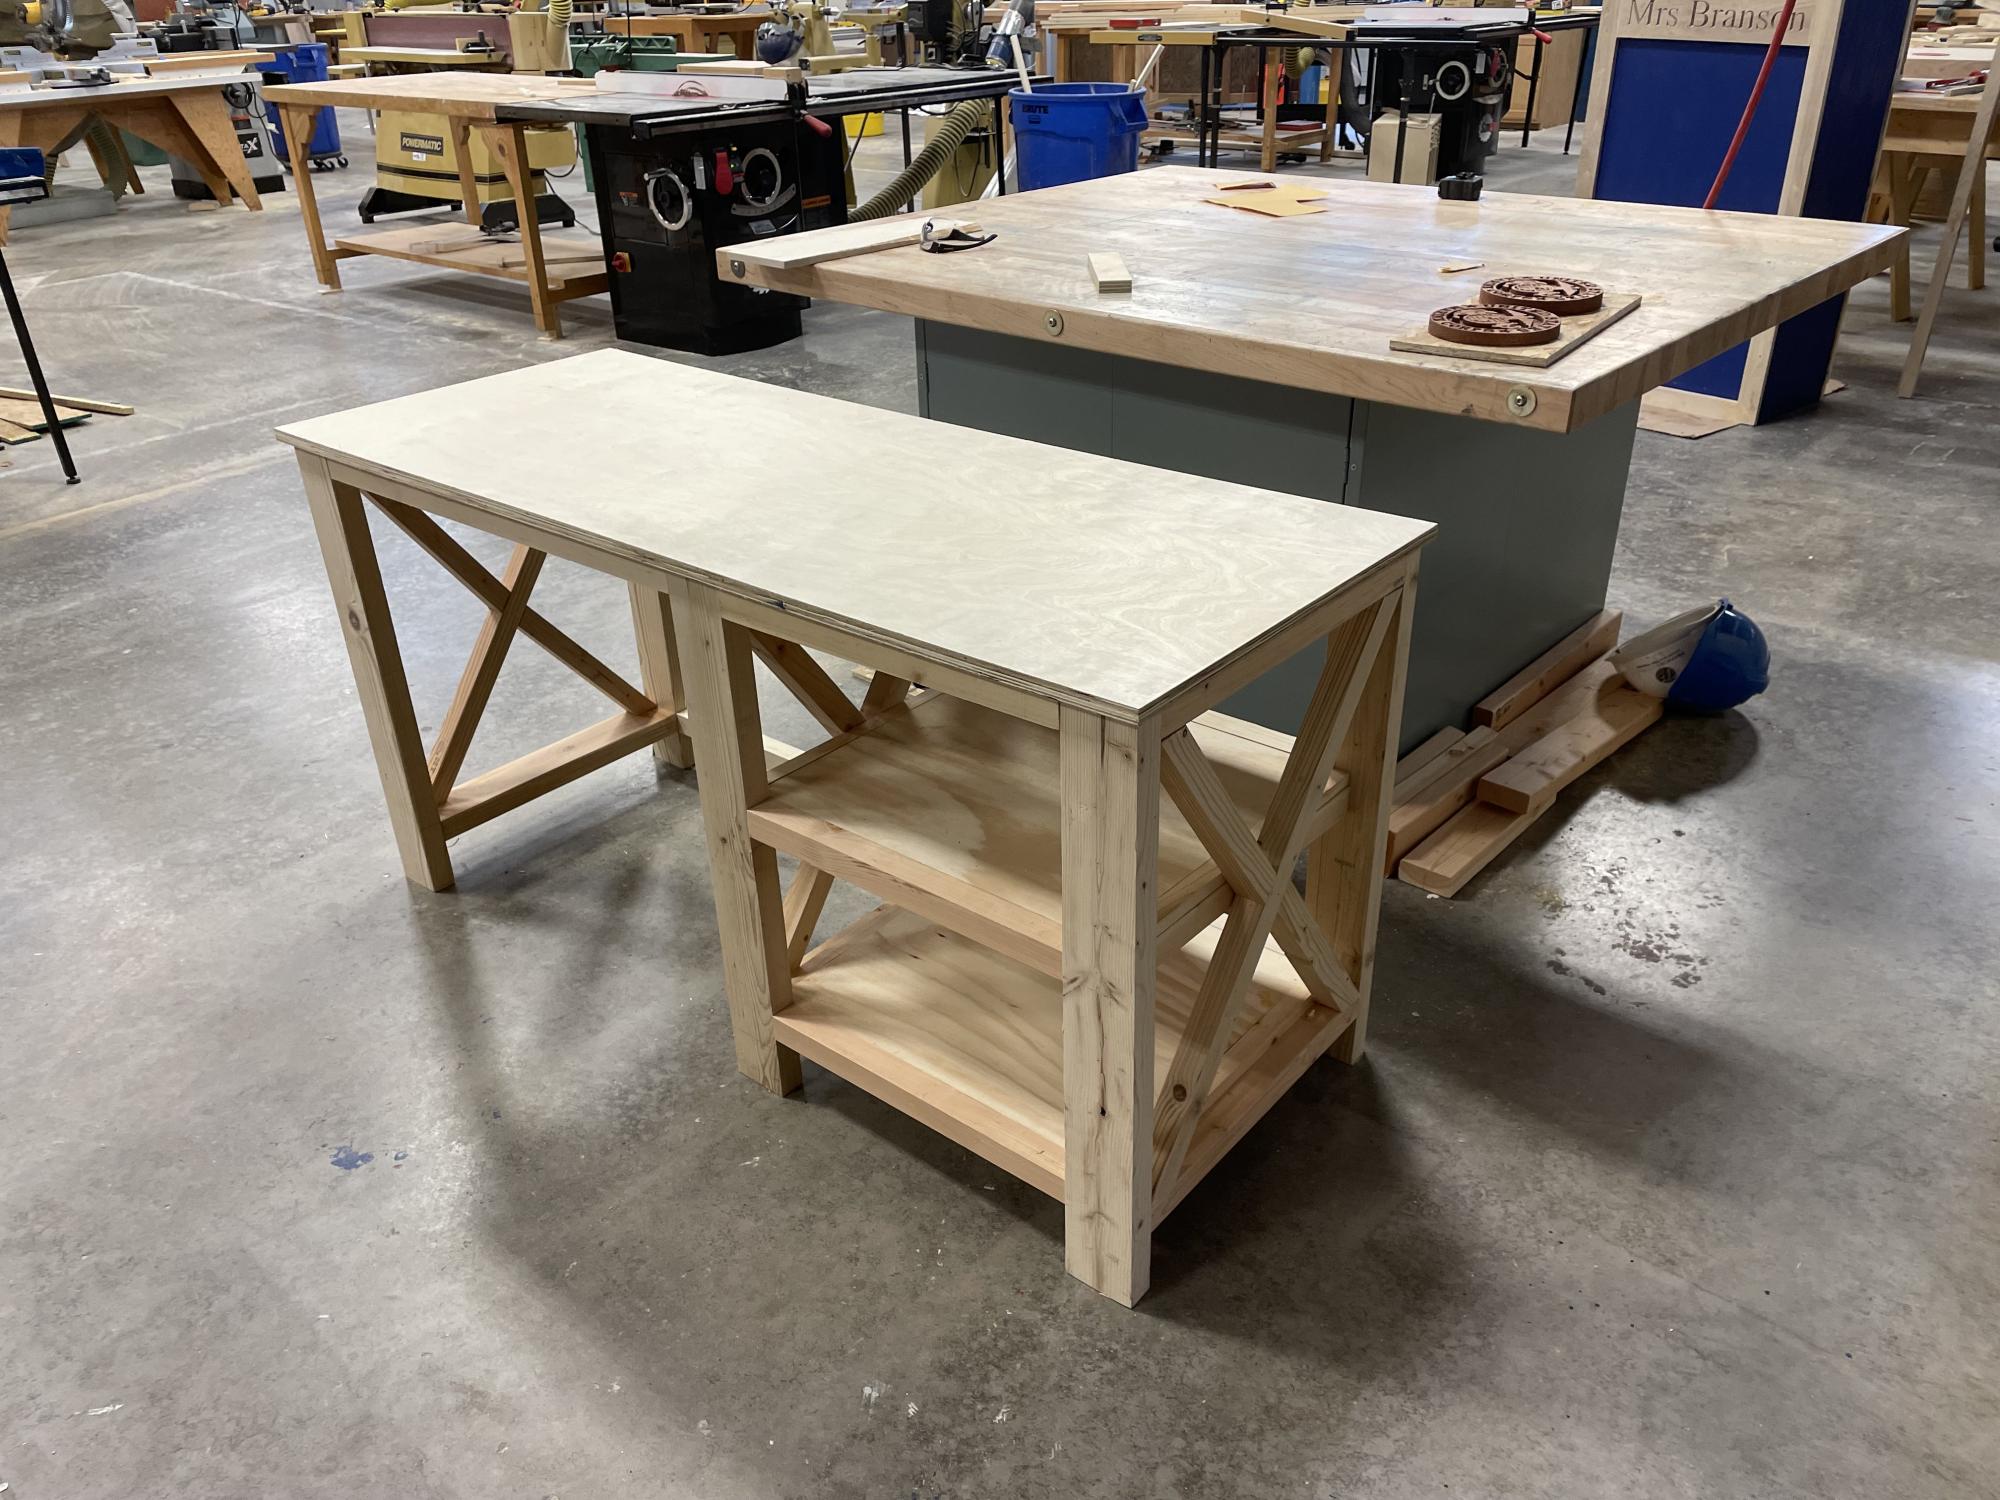

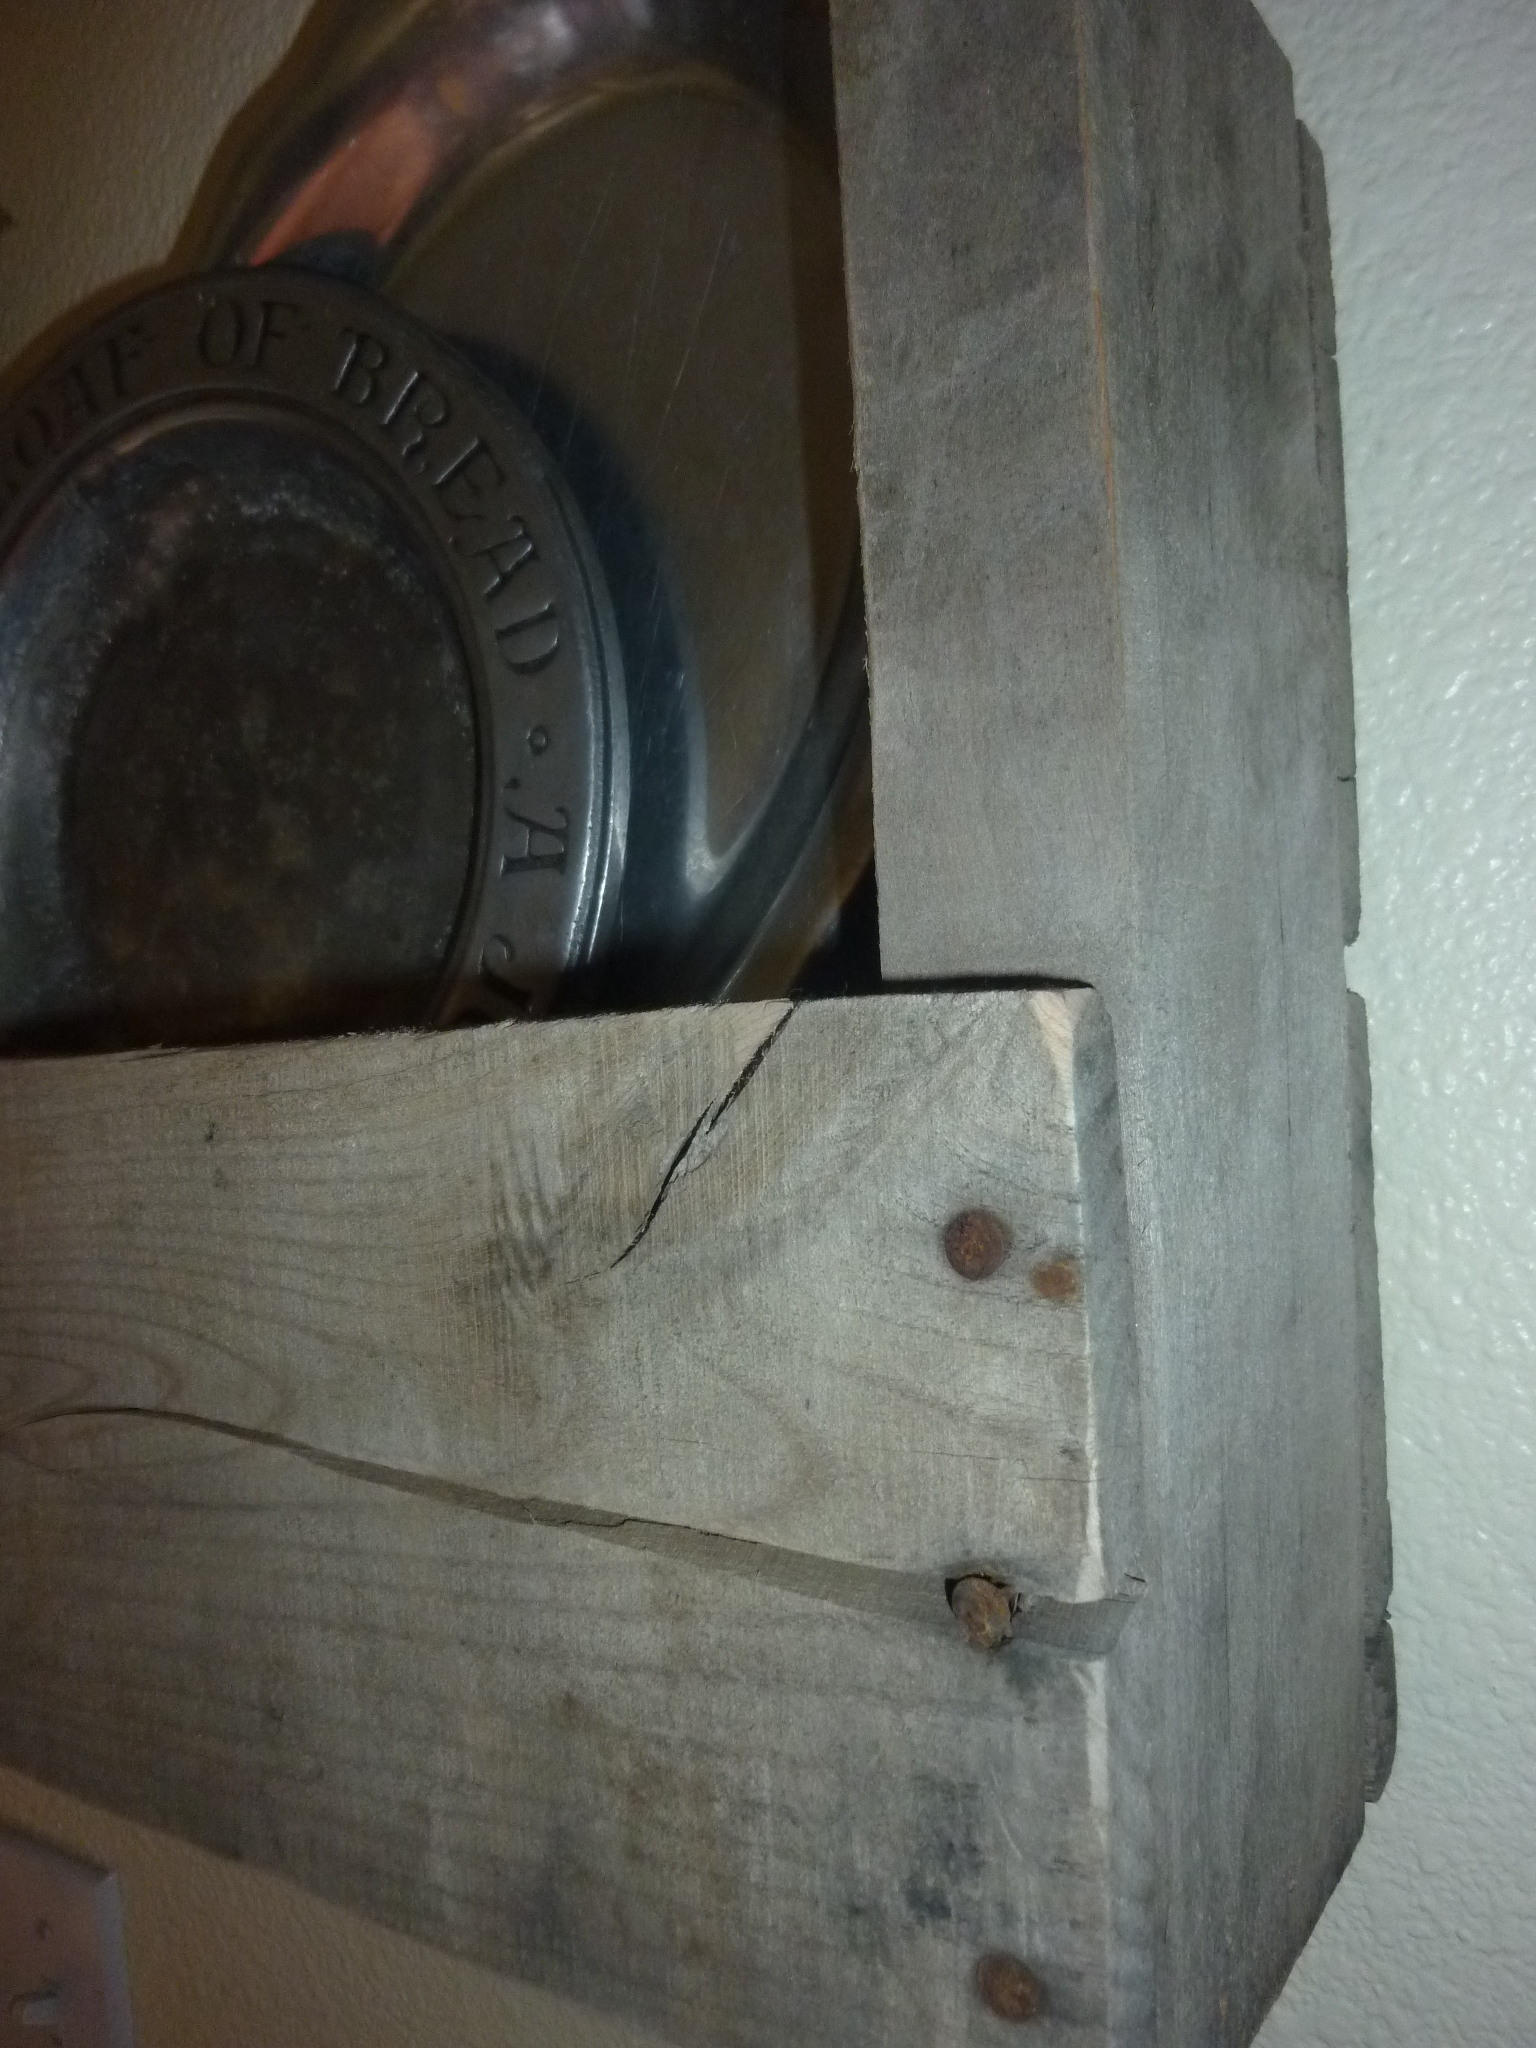
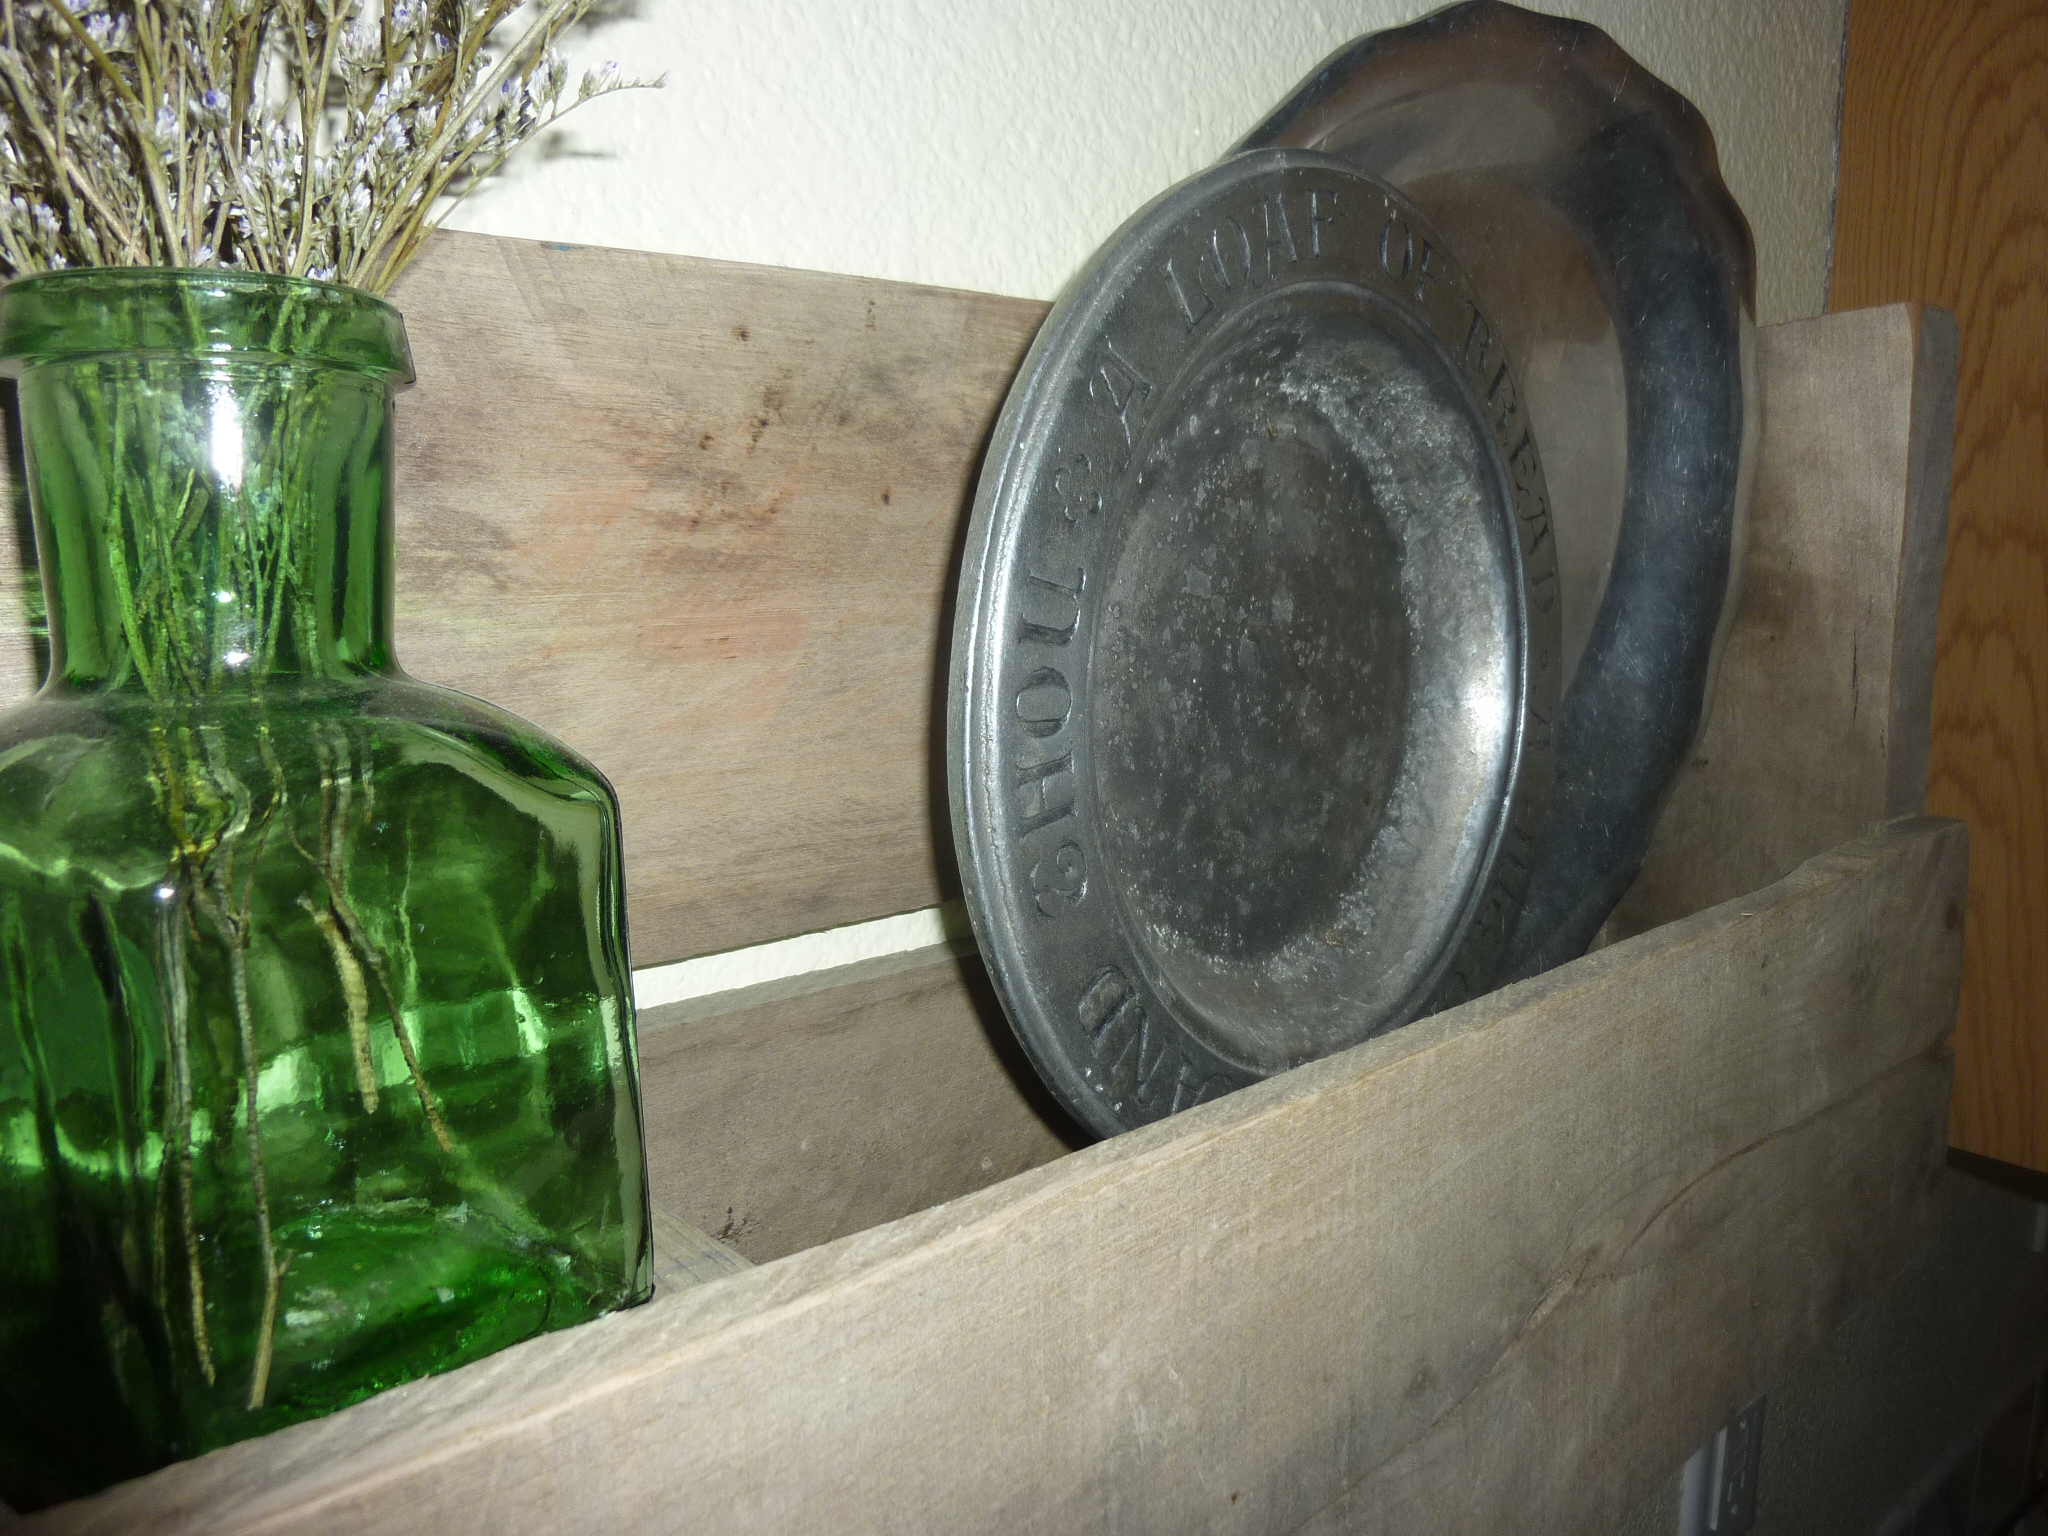
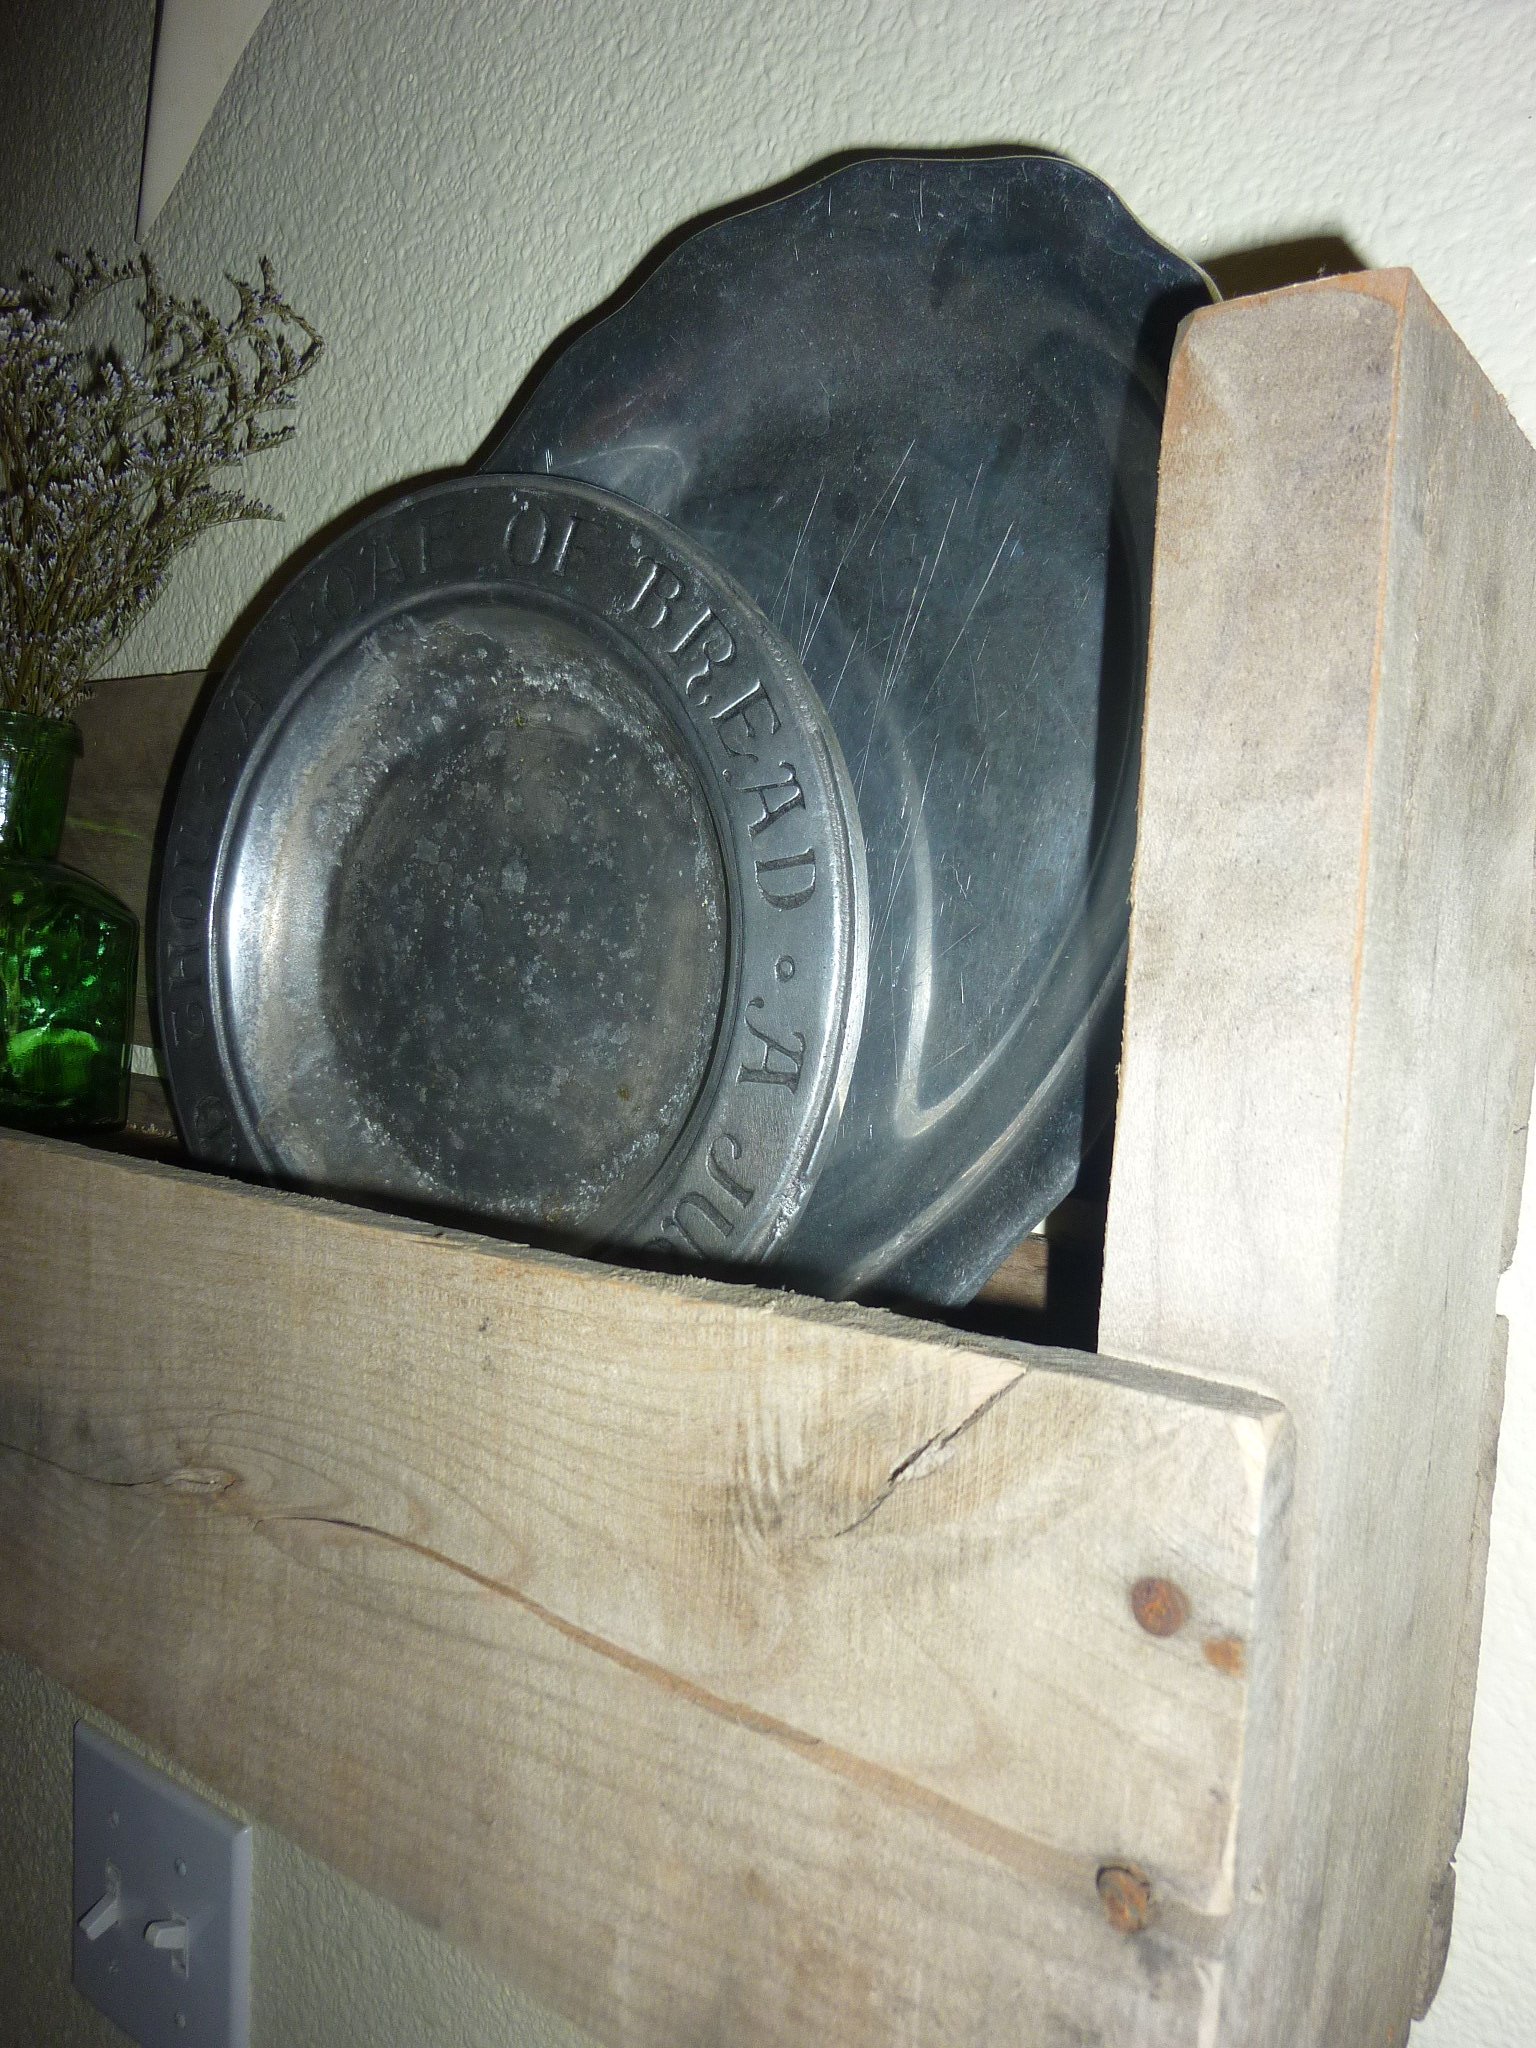
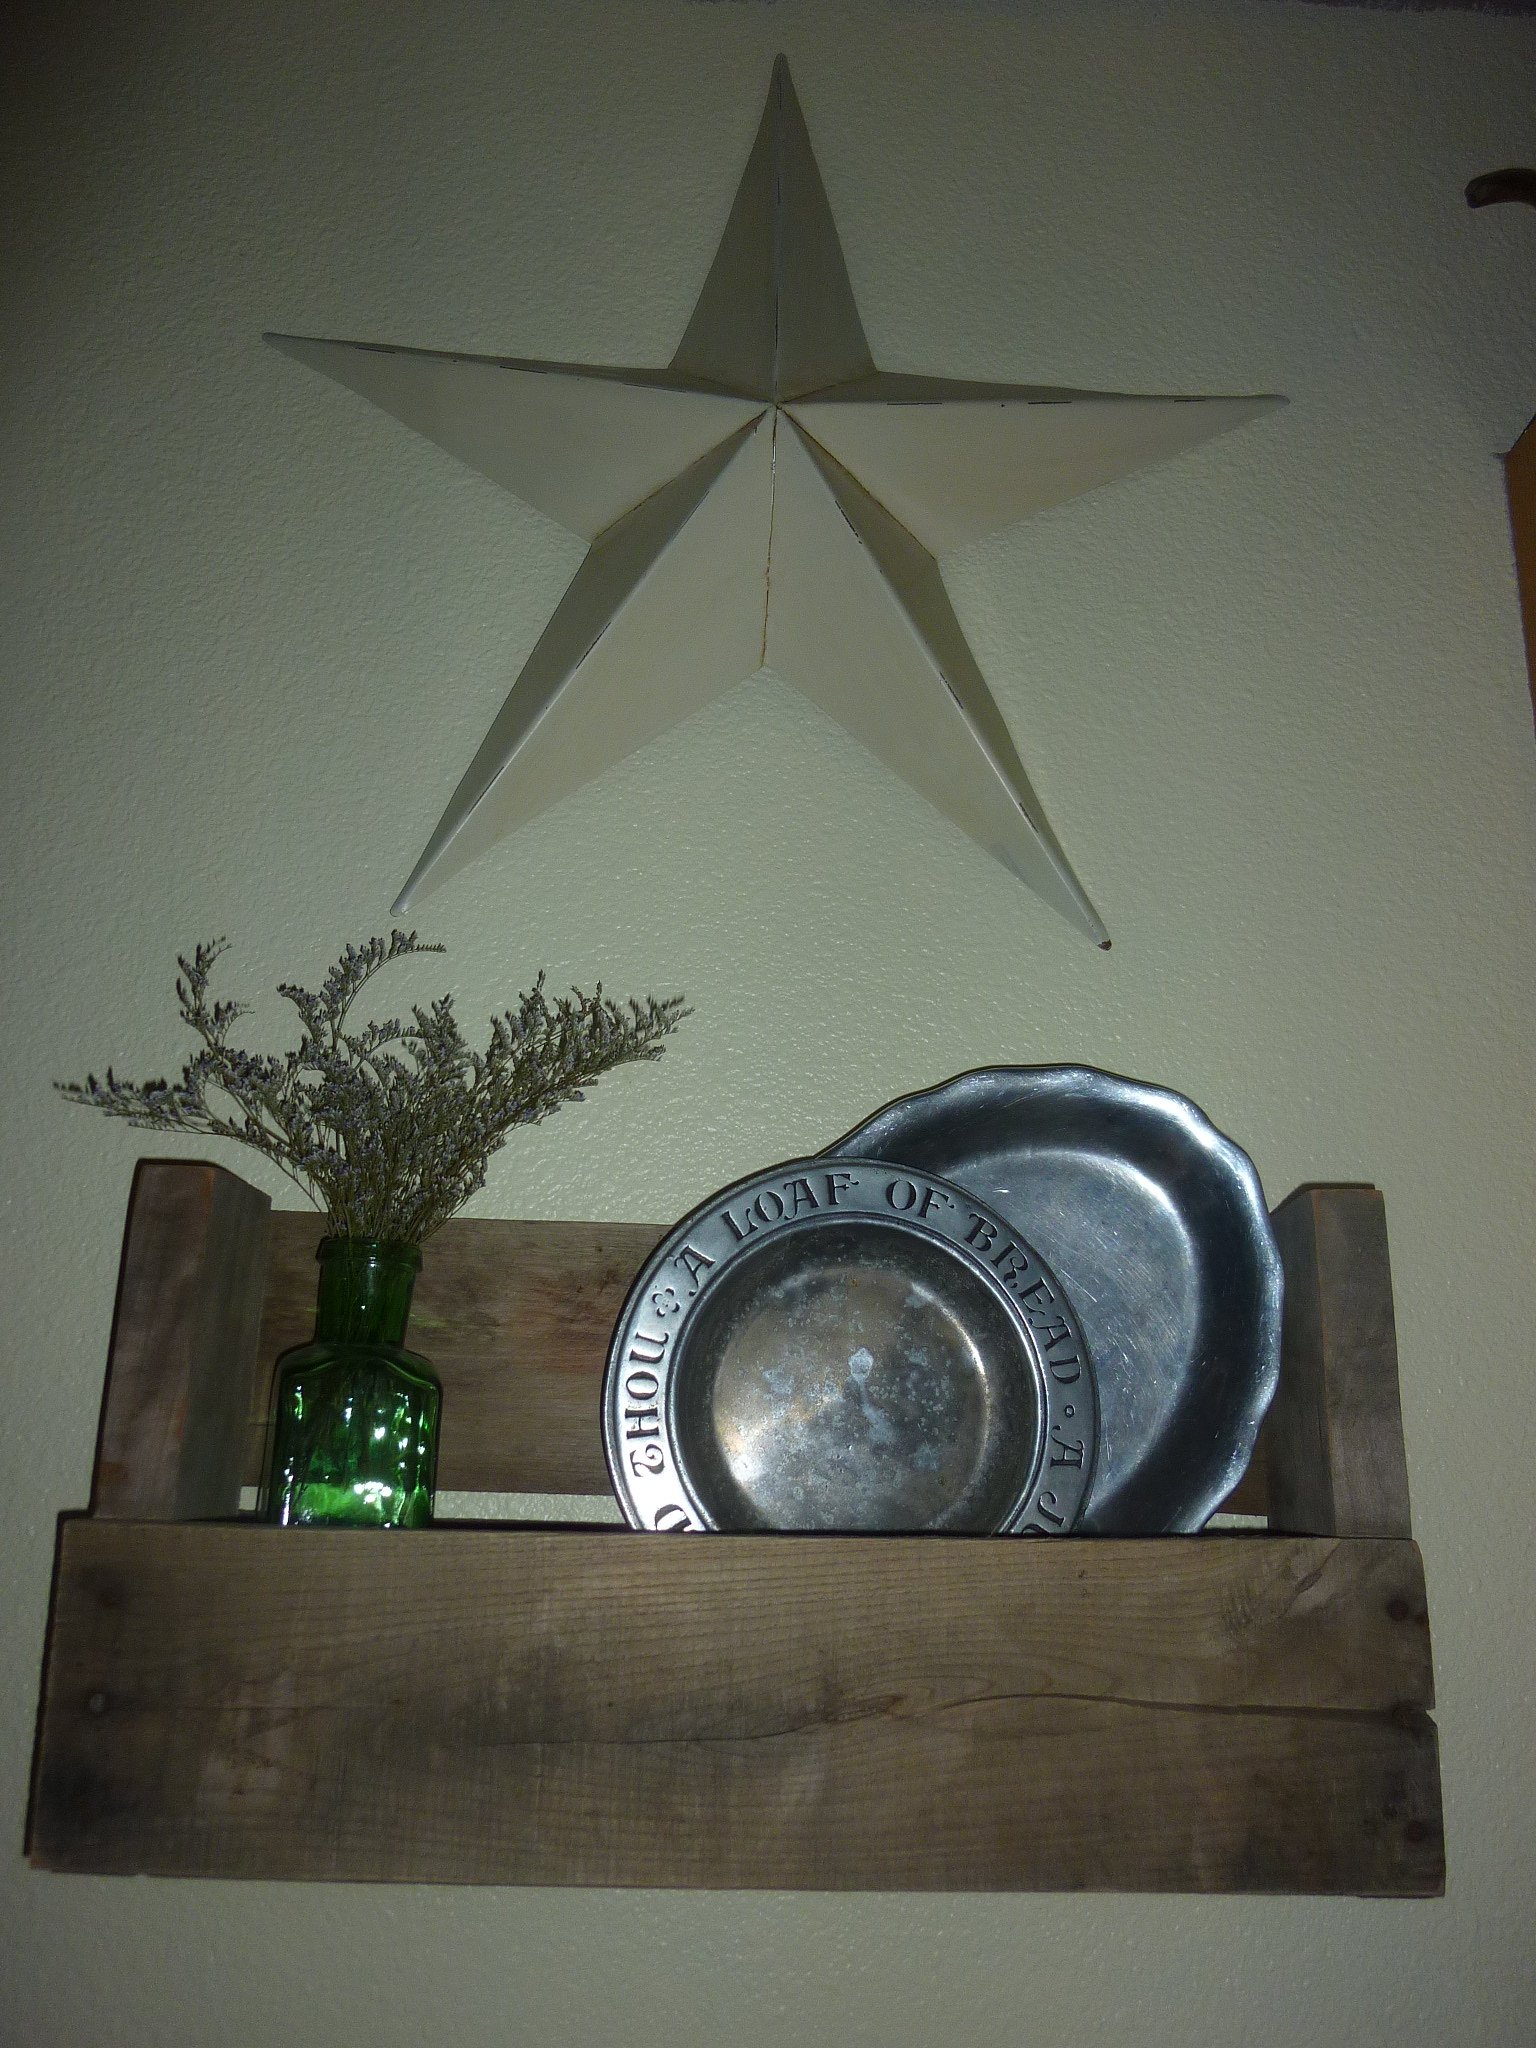
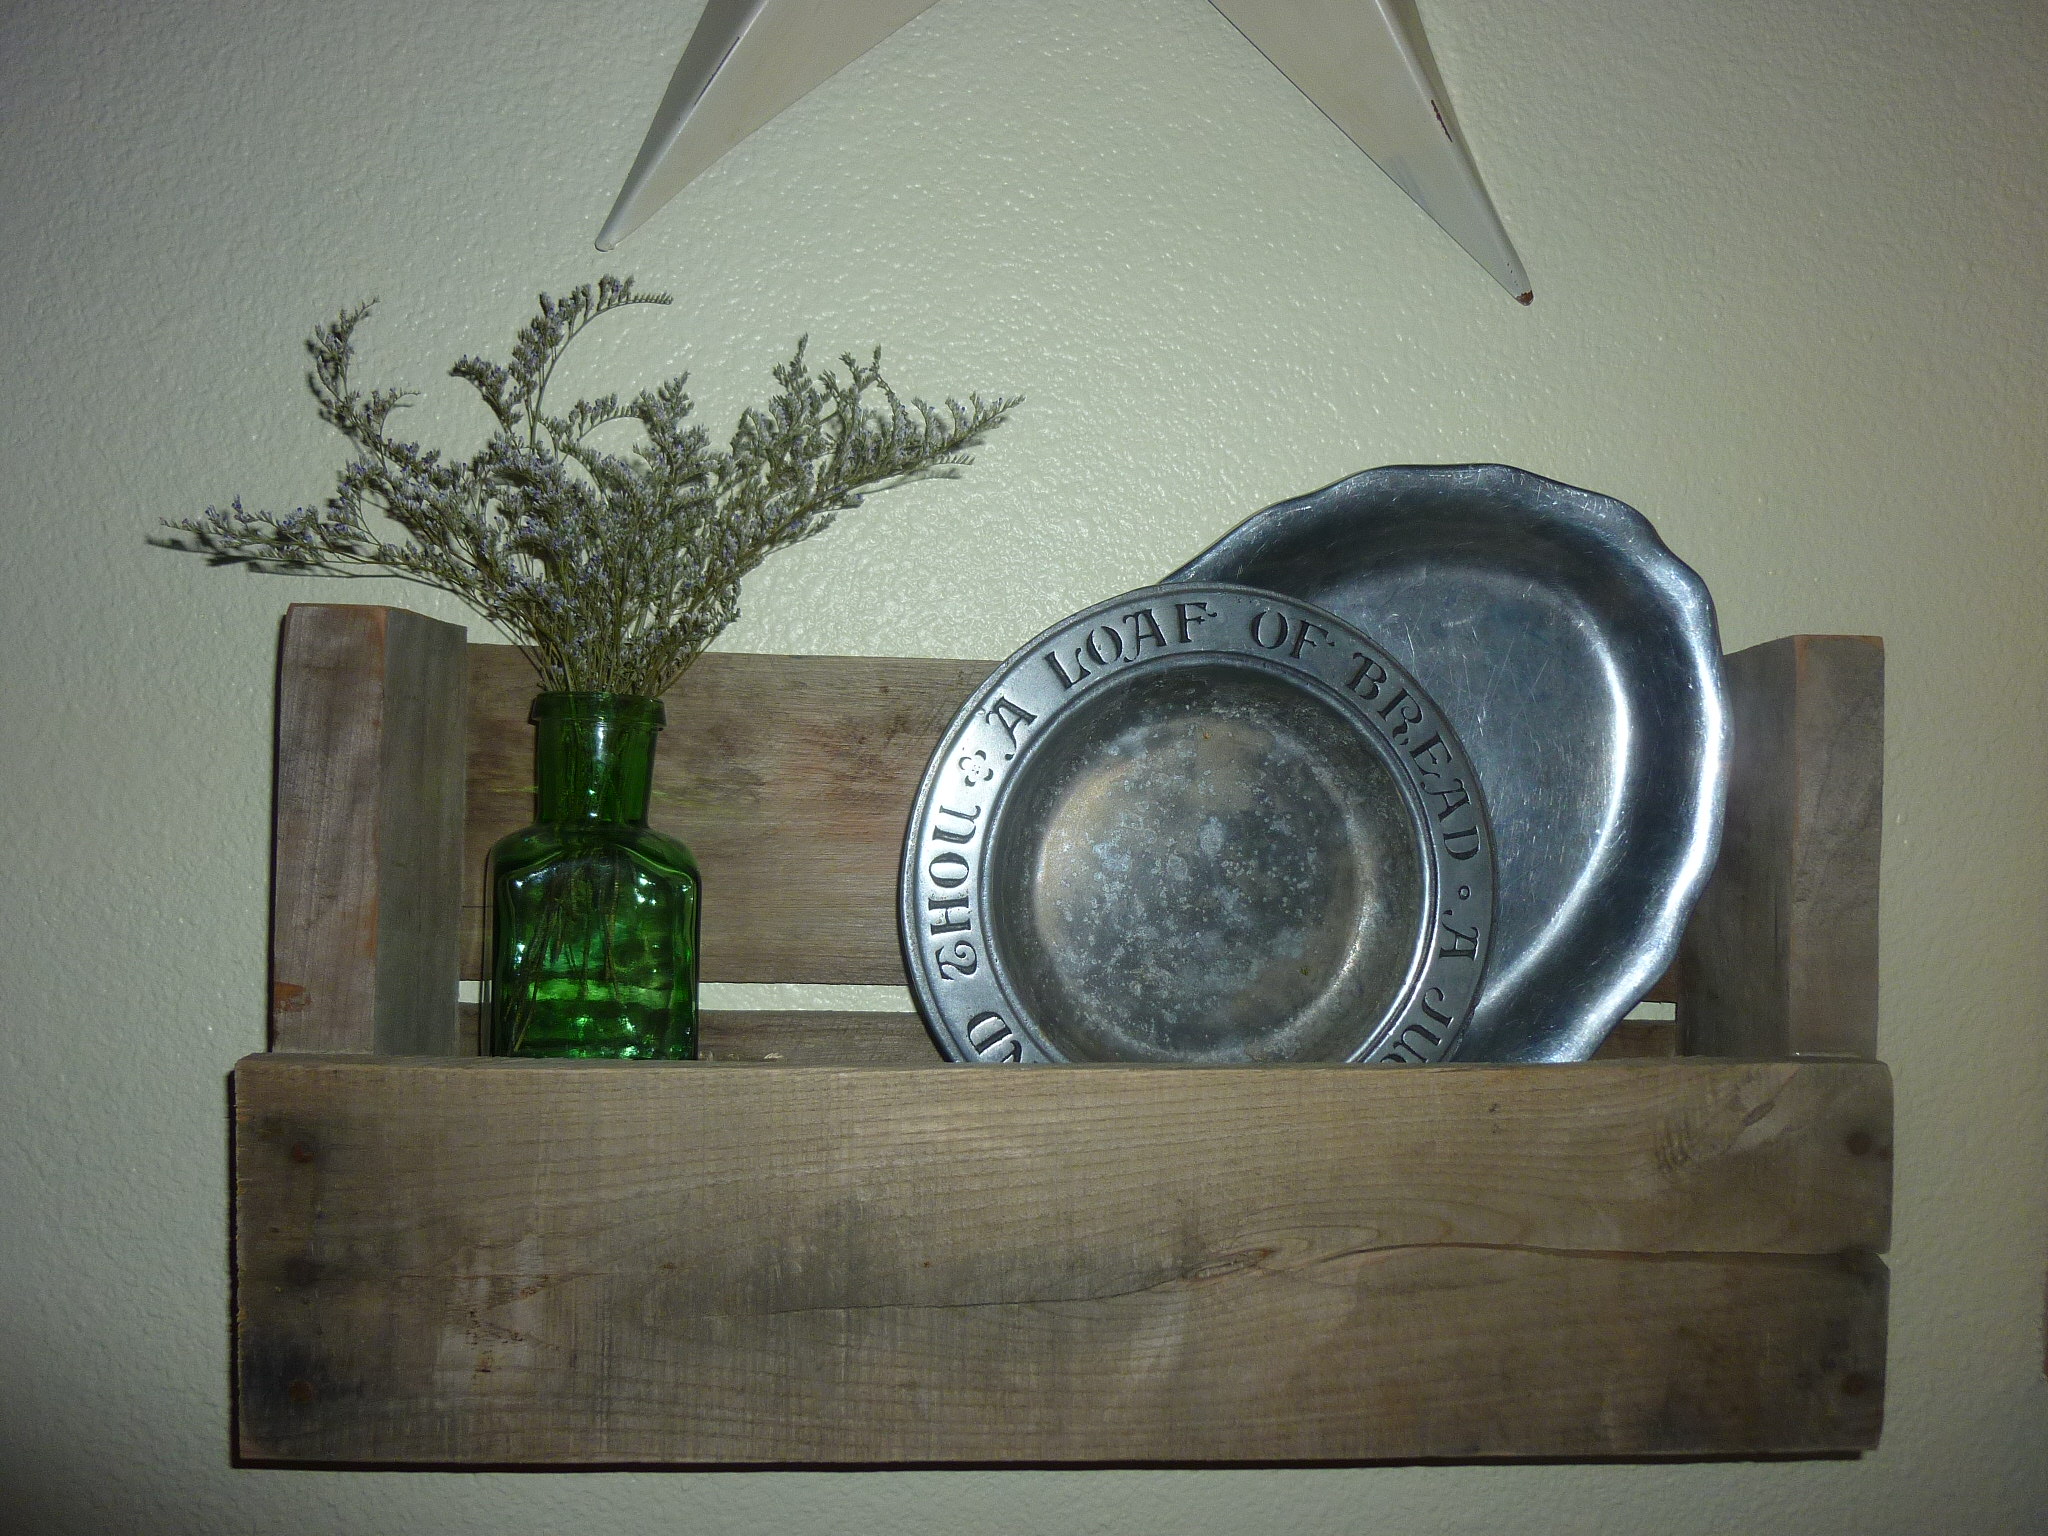
The Easiest Shelf!
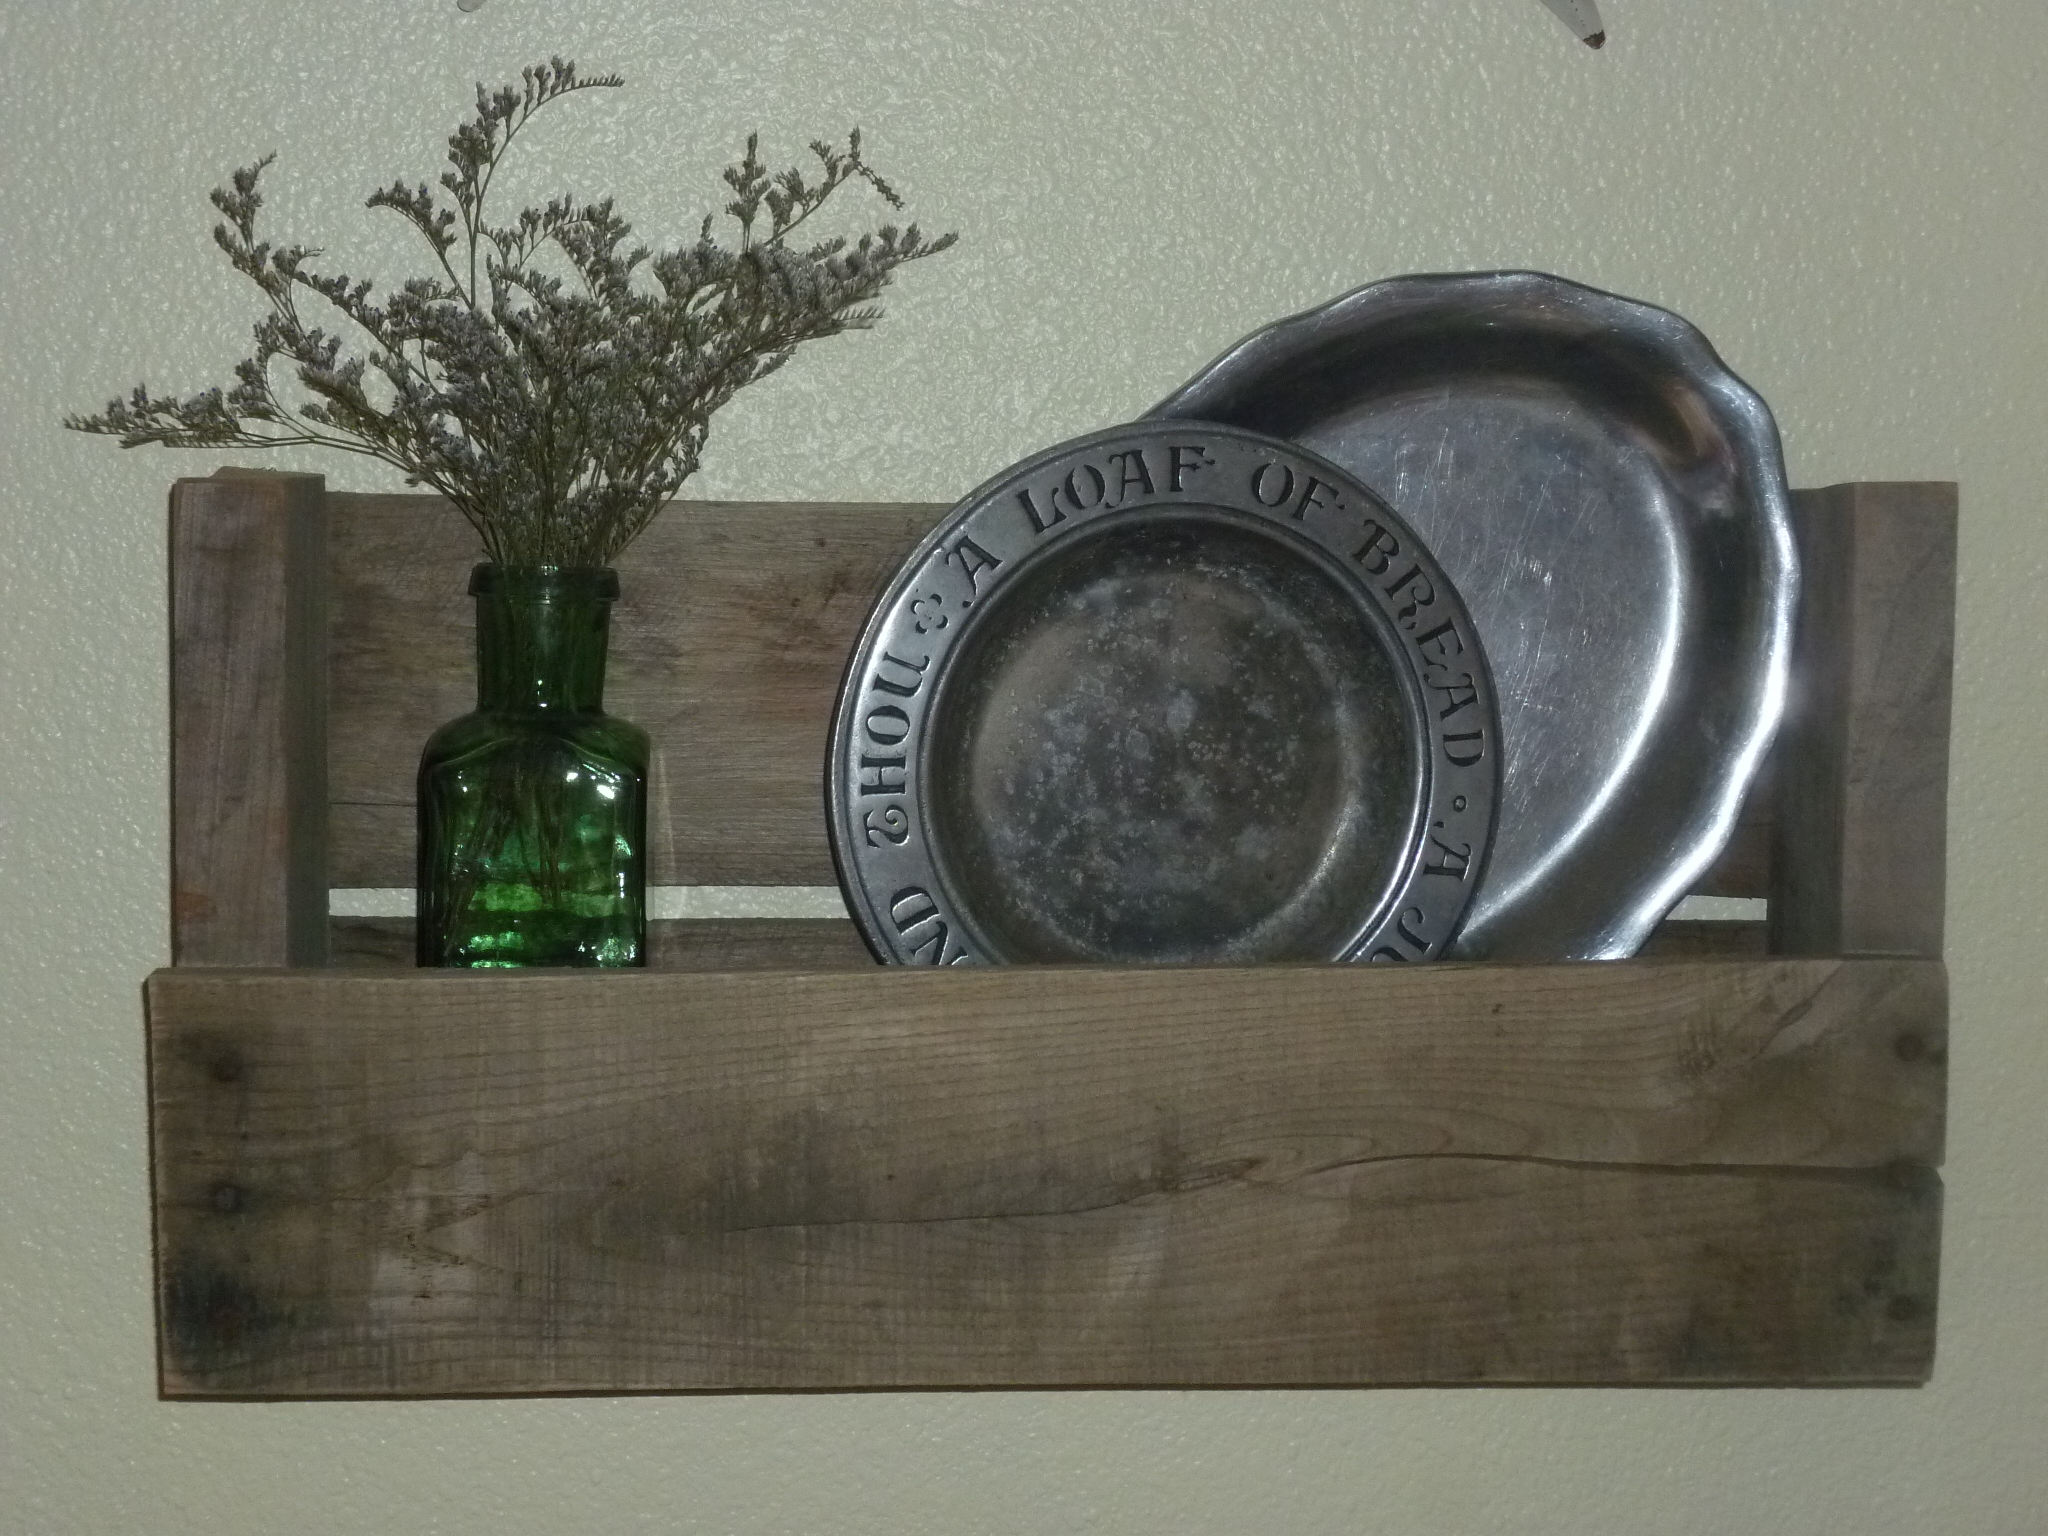
This really is a easy beginner project and adds instant decor for your wall.
This project is also pretty versatile because it lends itself to ANY decor. You could go totally country like I did or pick a nicer, newer pallet and paint or stain it for a more modern or traditional take. Whatever you choose, it's something you can do in no time at all!
Another great thing about this is you don't need any fancy tools, although it does make it easier! You can choose from a circular saw, a sawsall, a jig saw or even a hand saw to cut your section out.
Built from Plan(s)
Estimated Cost
Free
Estimated Time Investment
An Hour or Two (0-2 Hours)
Finish Used
Lightly sanded then sprayed with a light coat of polyurethane.
Recommended Skill Level
Starter Project
Comments
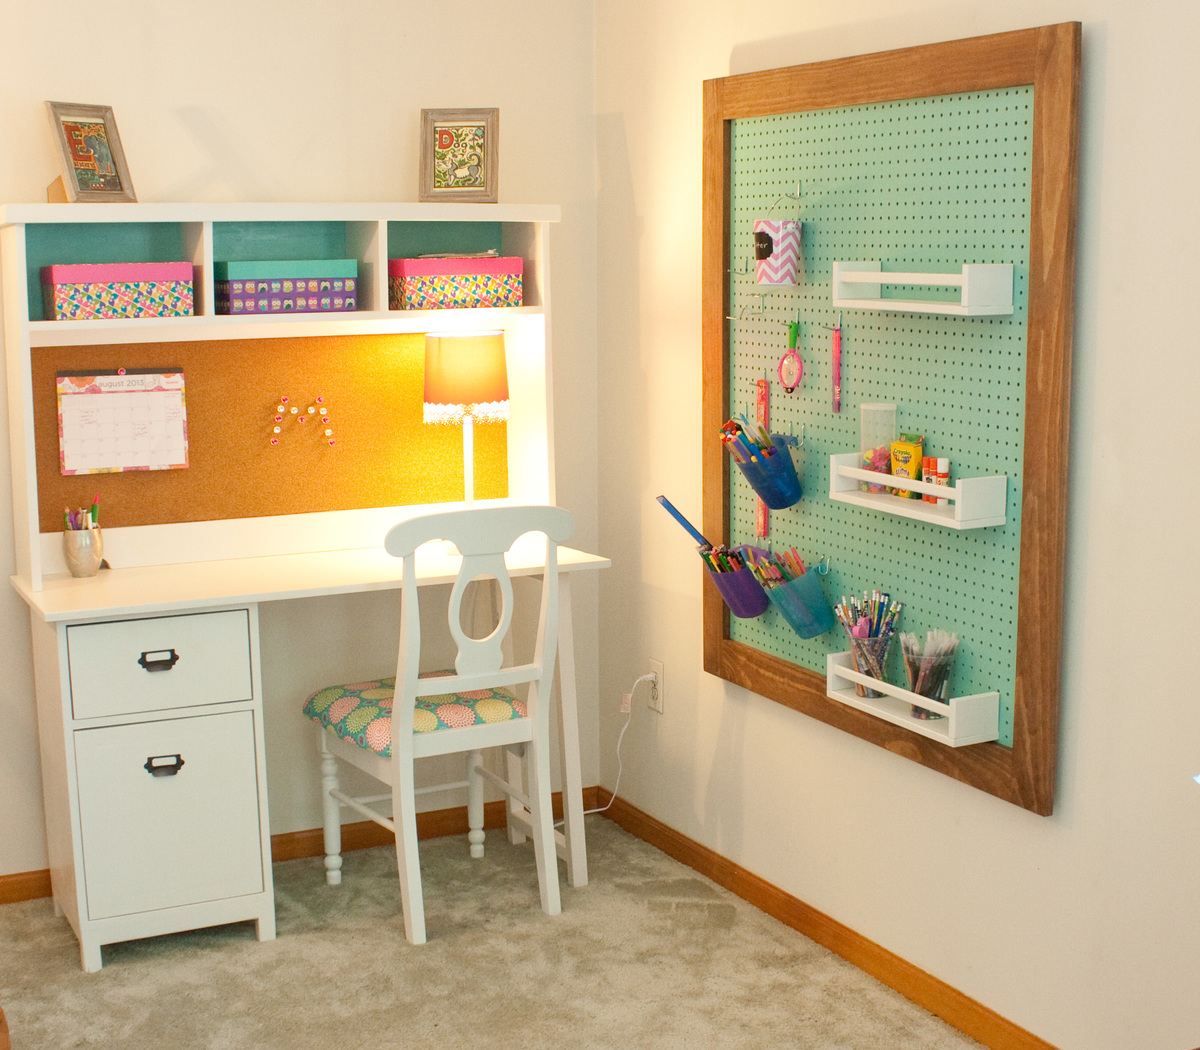
Back to school desk
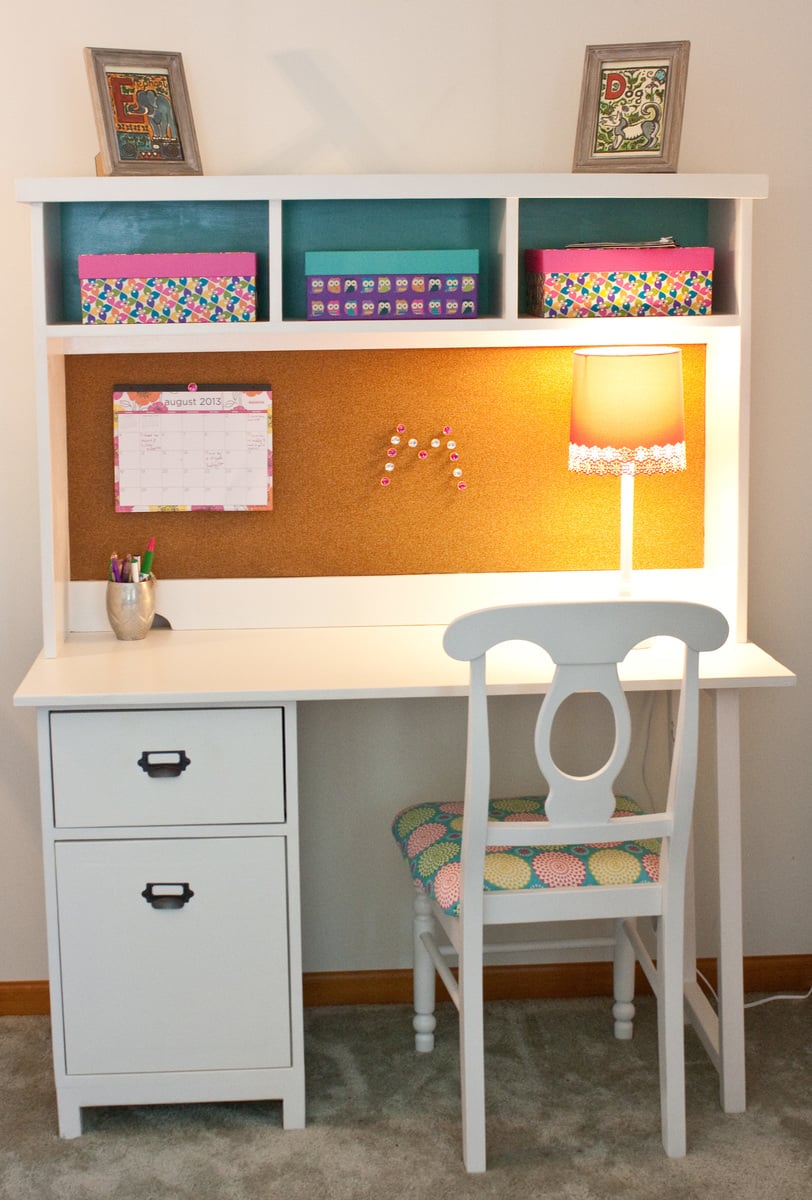
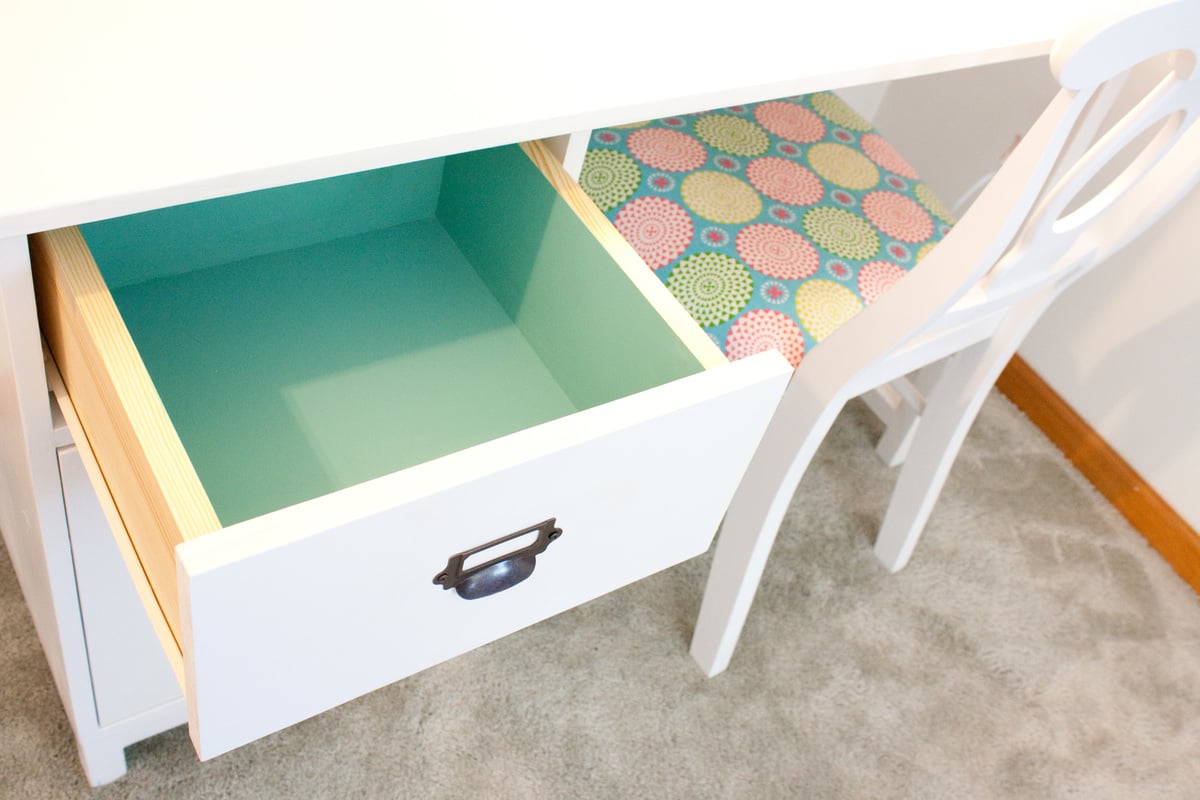
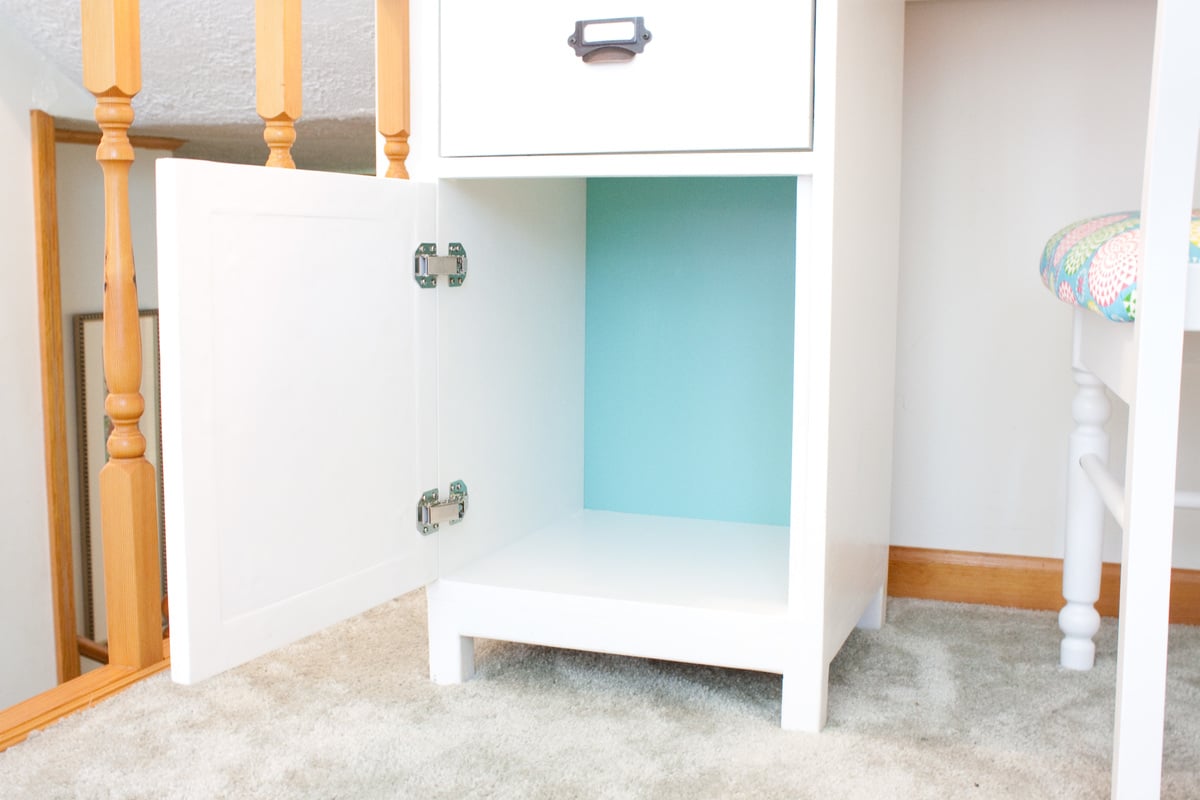
I made this for my 6 year old who just started the first grade. The only modification I made to the plans was to make a couple cutouts in the hutch for cords. I also added cork which comes in a 24 by 48 inch roll.. I ordered all the hardware from the same place that Jaime from That's my Letter suggested in her build post. This was my first drawer and it was intimidating but it was fairly easy and cute as it can be:-) The plans were very easy to follow! I got the idea for the peg board organizer from the Shanty 2 Chic website. It's just 1x4 frame around the pegboard. The chair was a craigslist find I painted and made a cushion for with some foam and cute fabric. I'm really happy with how it turned out and look forward to the day when my daughter will actually use it. LOL
Built from Plan(s)
Estimated Cost
100$
Estimated Time Investment
Weekend Project (10-20 Hours)
Finish Used
The paint is Olympic satin white with the primer already in it but I also used Kilz oil based primer since the wood was bare. I really thought it made a huge difference. The tealish color is actually just oops paint from Lowes I already had. I used 3 coats of satin Polycrylic on the top.
Recommended Skill Level
Intermediate
Comments


Mon, 08/26/2013 - 07:39
Absolutely adorable!
Absolutely adorable! I love all your finishing details as well.
Wood Crate Coffee Table
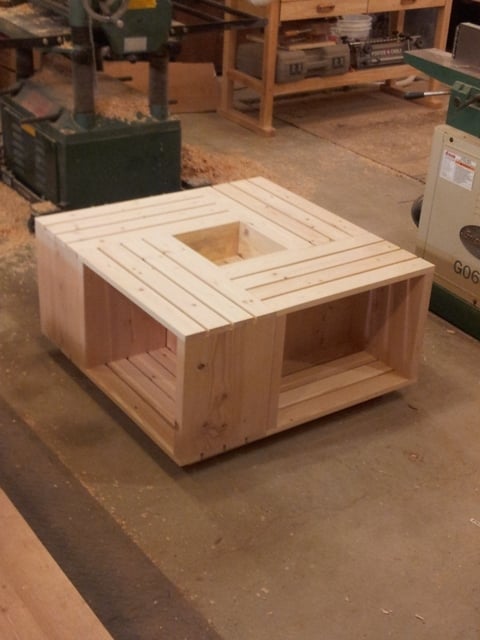
A buddy of mine showed me a picture of a coffee table his wife wanted that he found online. It appeared to be several crates attached together. I came up with this design. I added a base to raise it off the floor a few inches to make cleaning around it easier. Was made using all scrap. It was a very easy project and took about 2hrs. This picture was taken before any finish was applied.
Estimated Cost
$25
Estimated Time Investment
An Hour or Two (0-2 Hours)
Recommended Skill Level
Beginner
Comments

Wed, 11/11/2015 - 07:24
thanks for the compliments.
thanks for the compliments. Actually, I made the crates from scrap lumber No need to have crates on hand.
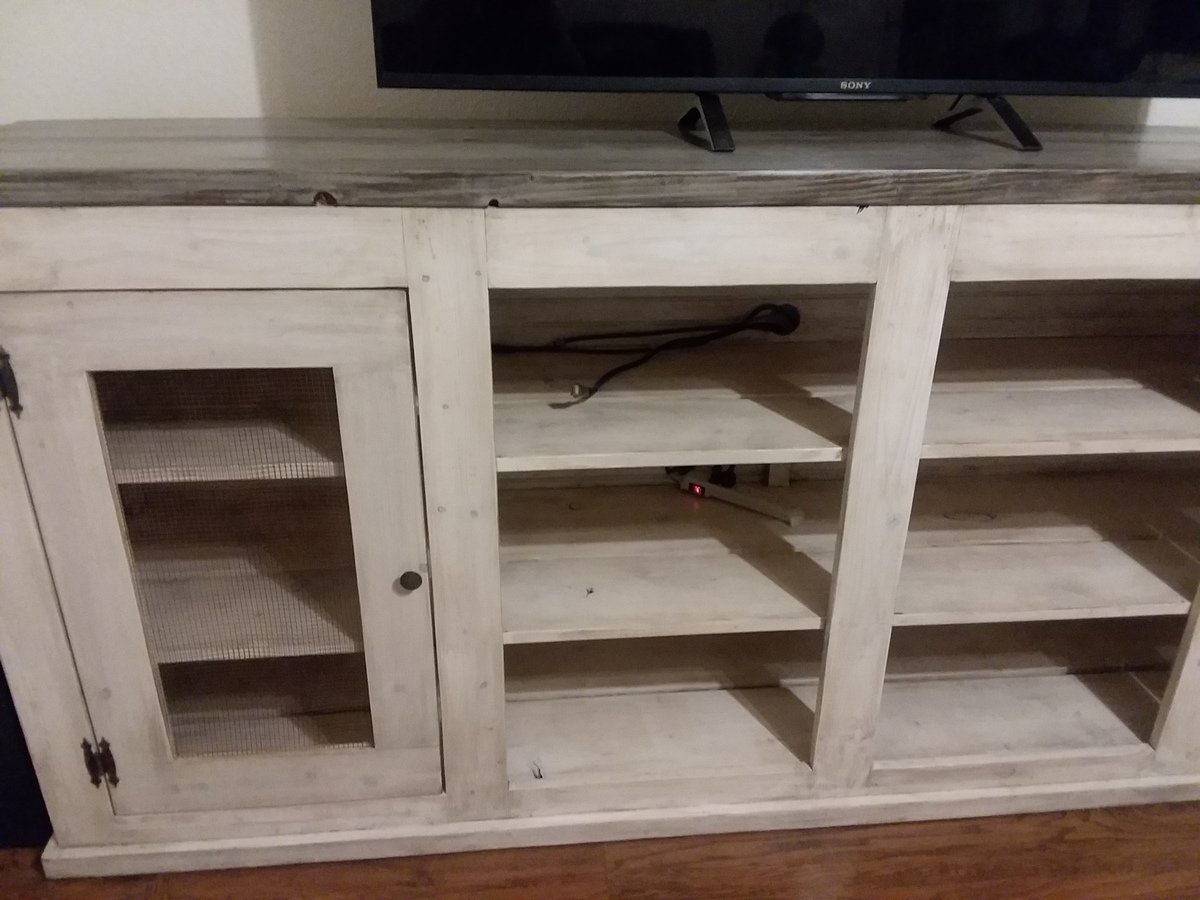
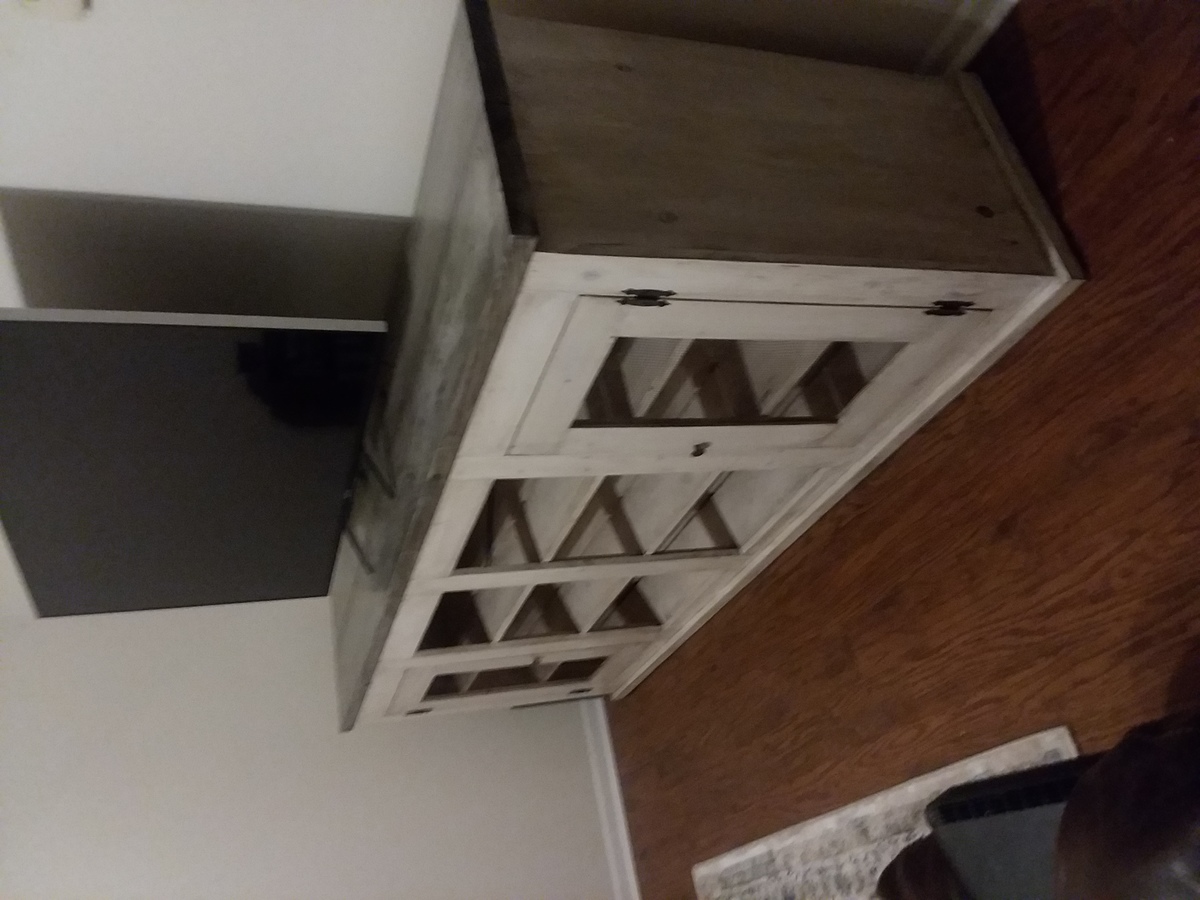
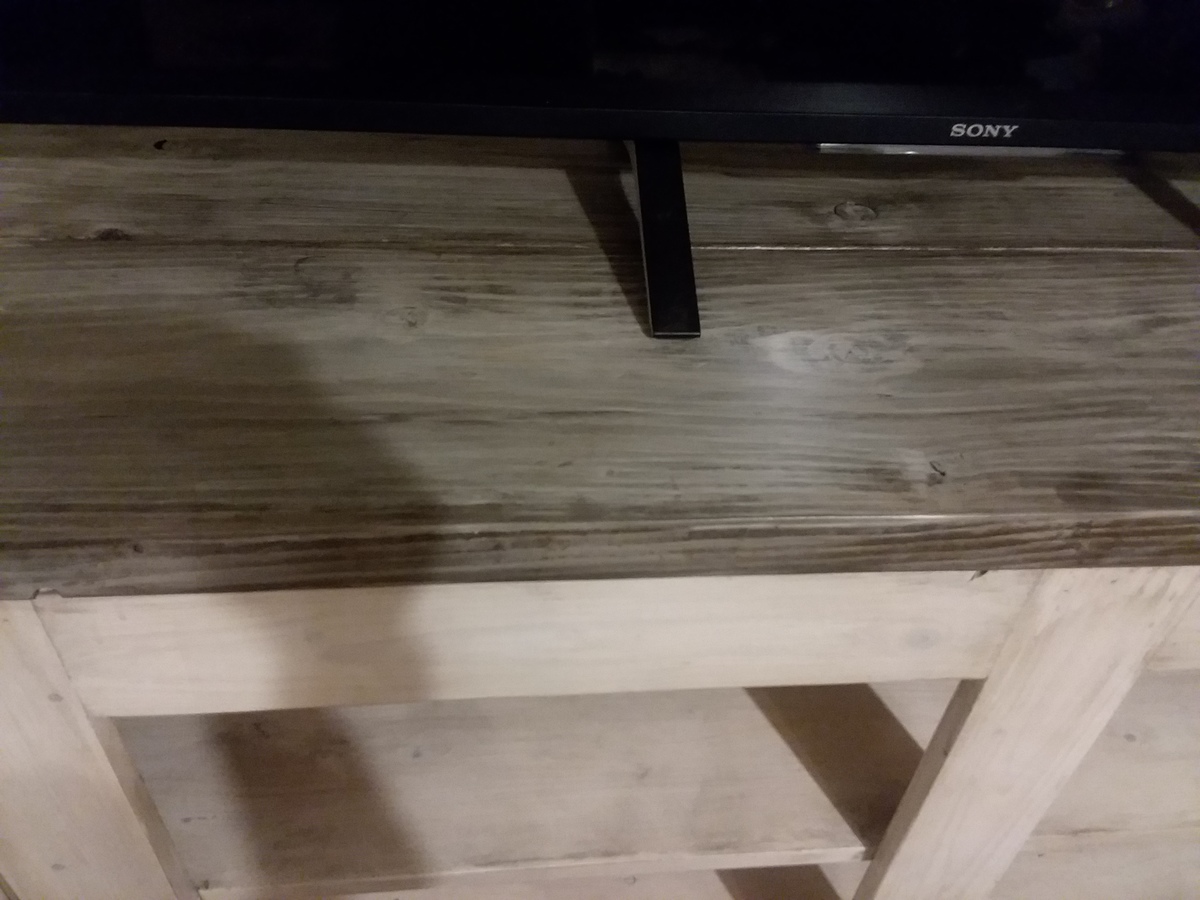
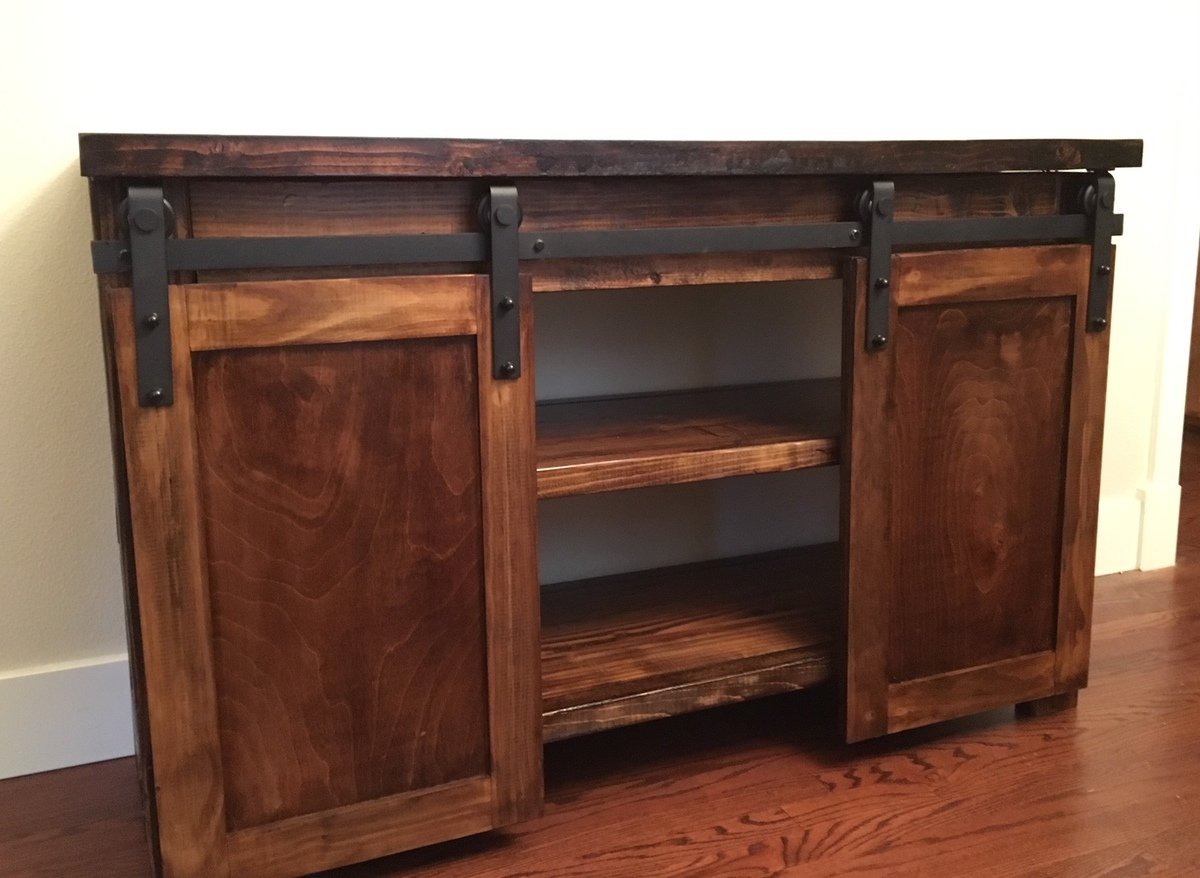
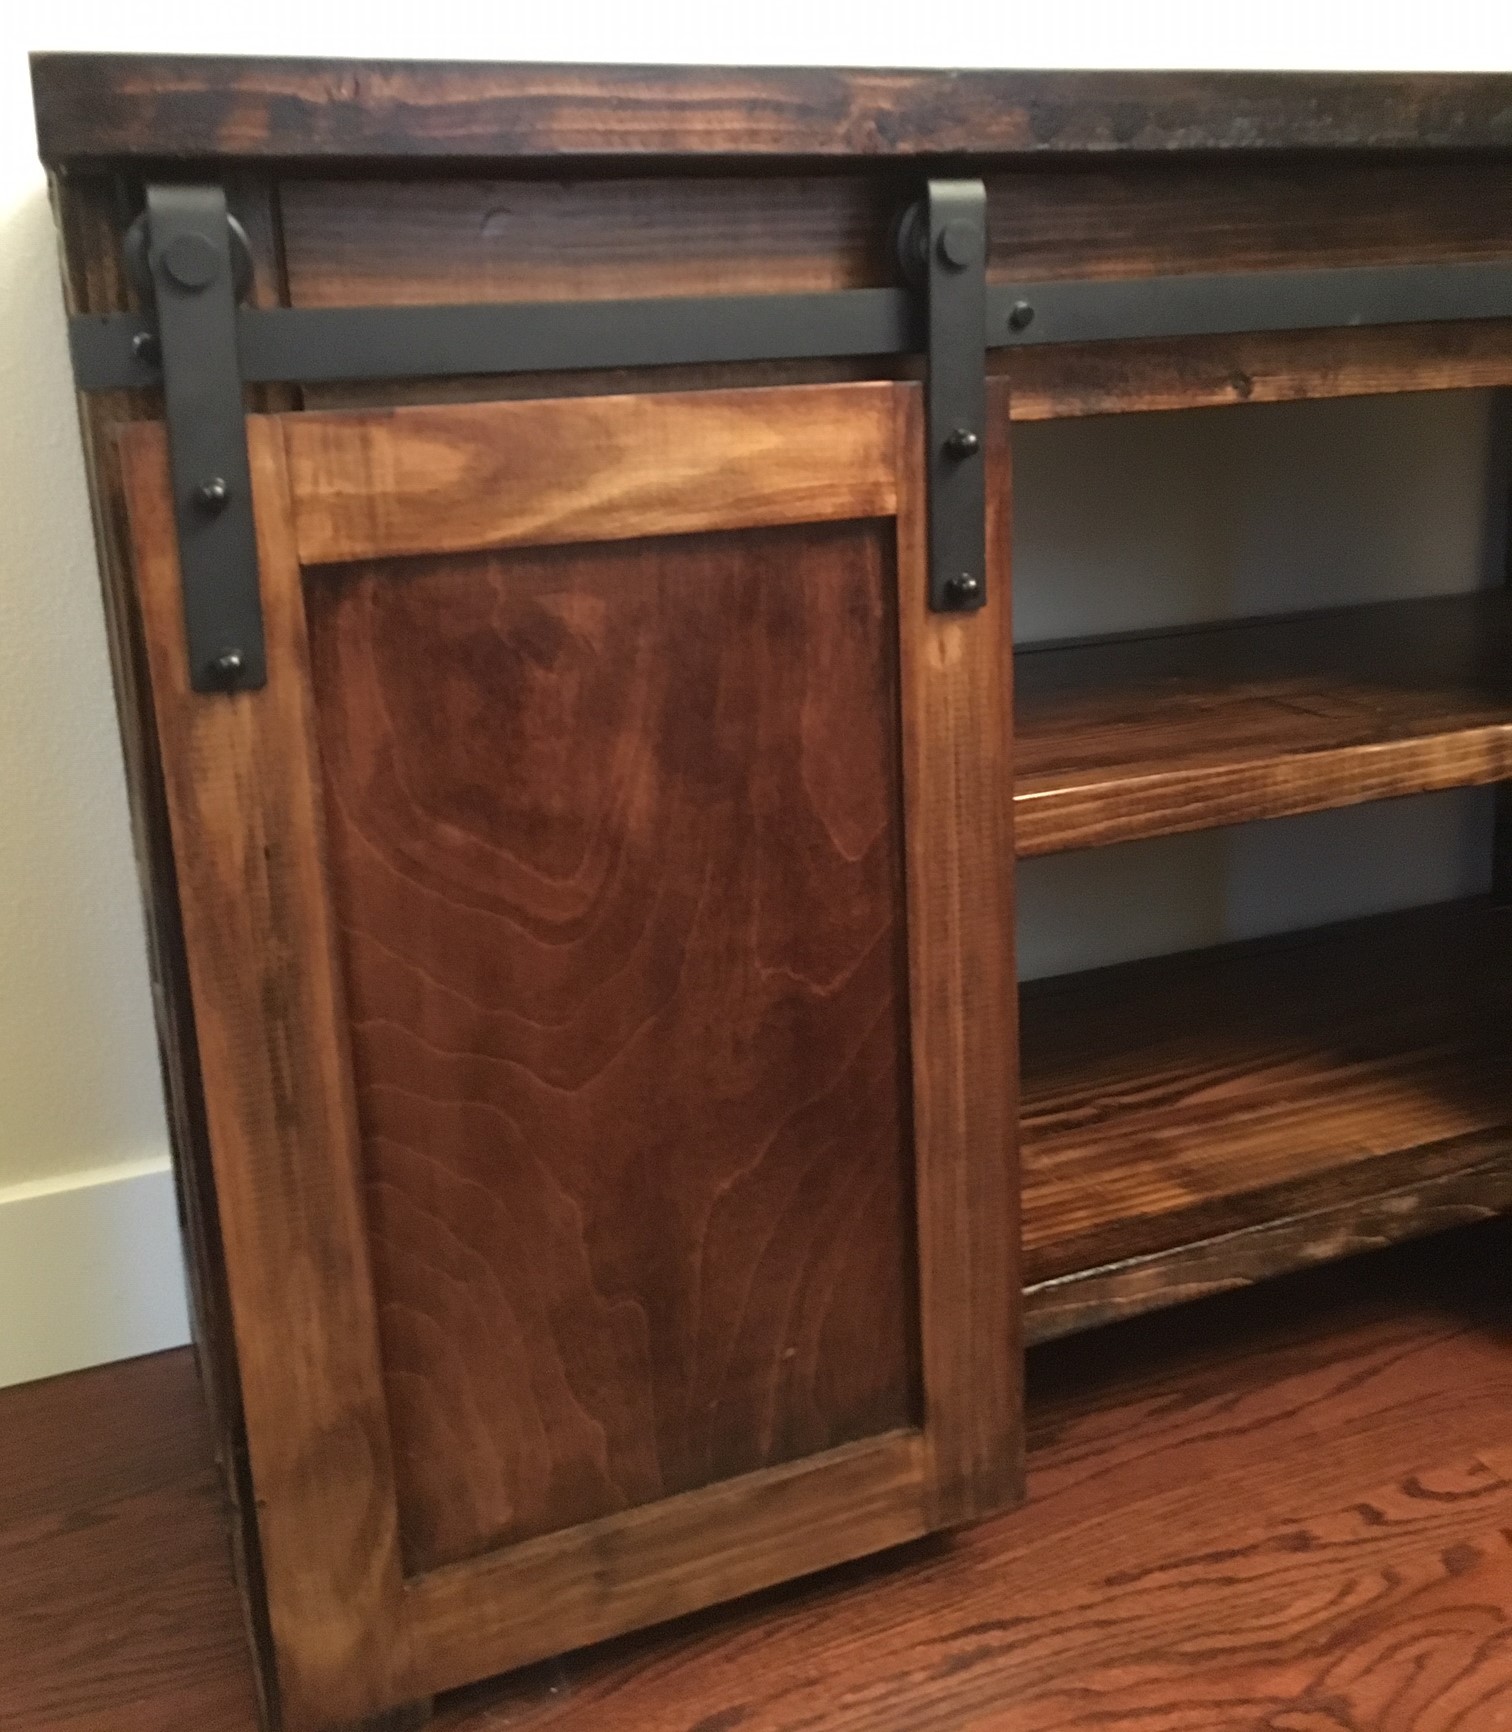
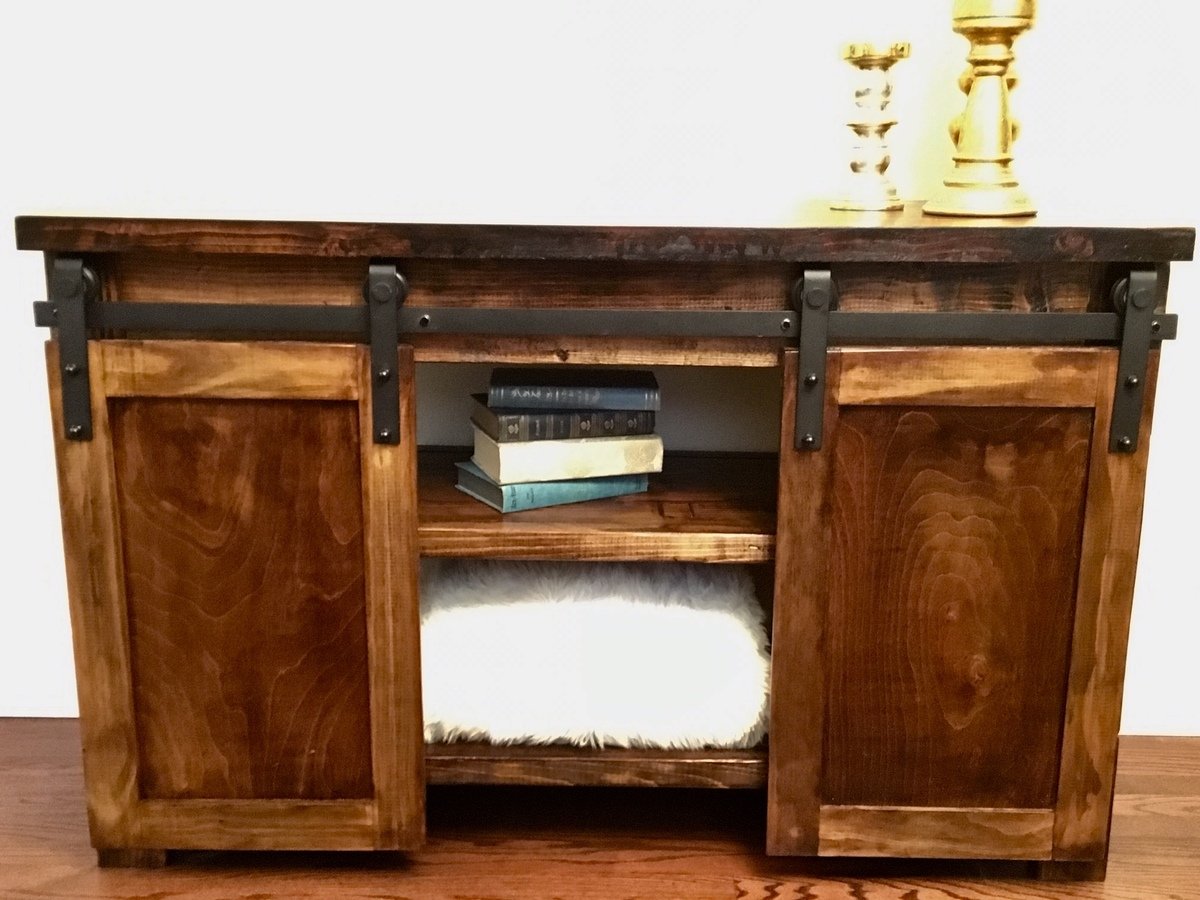
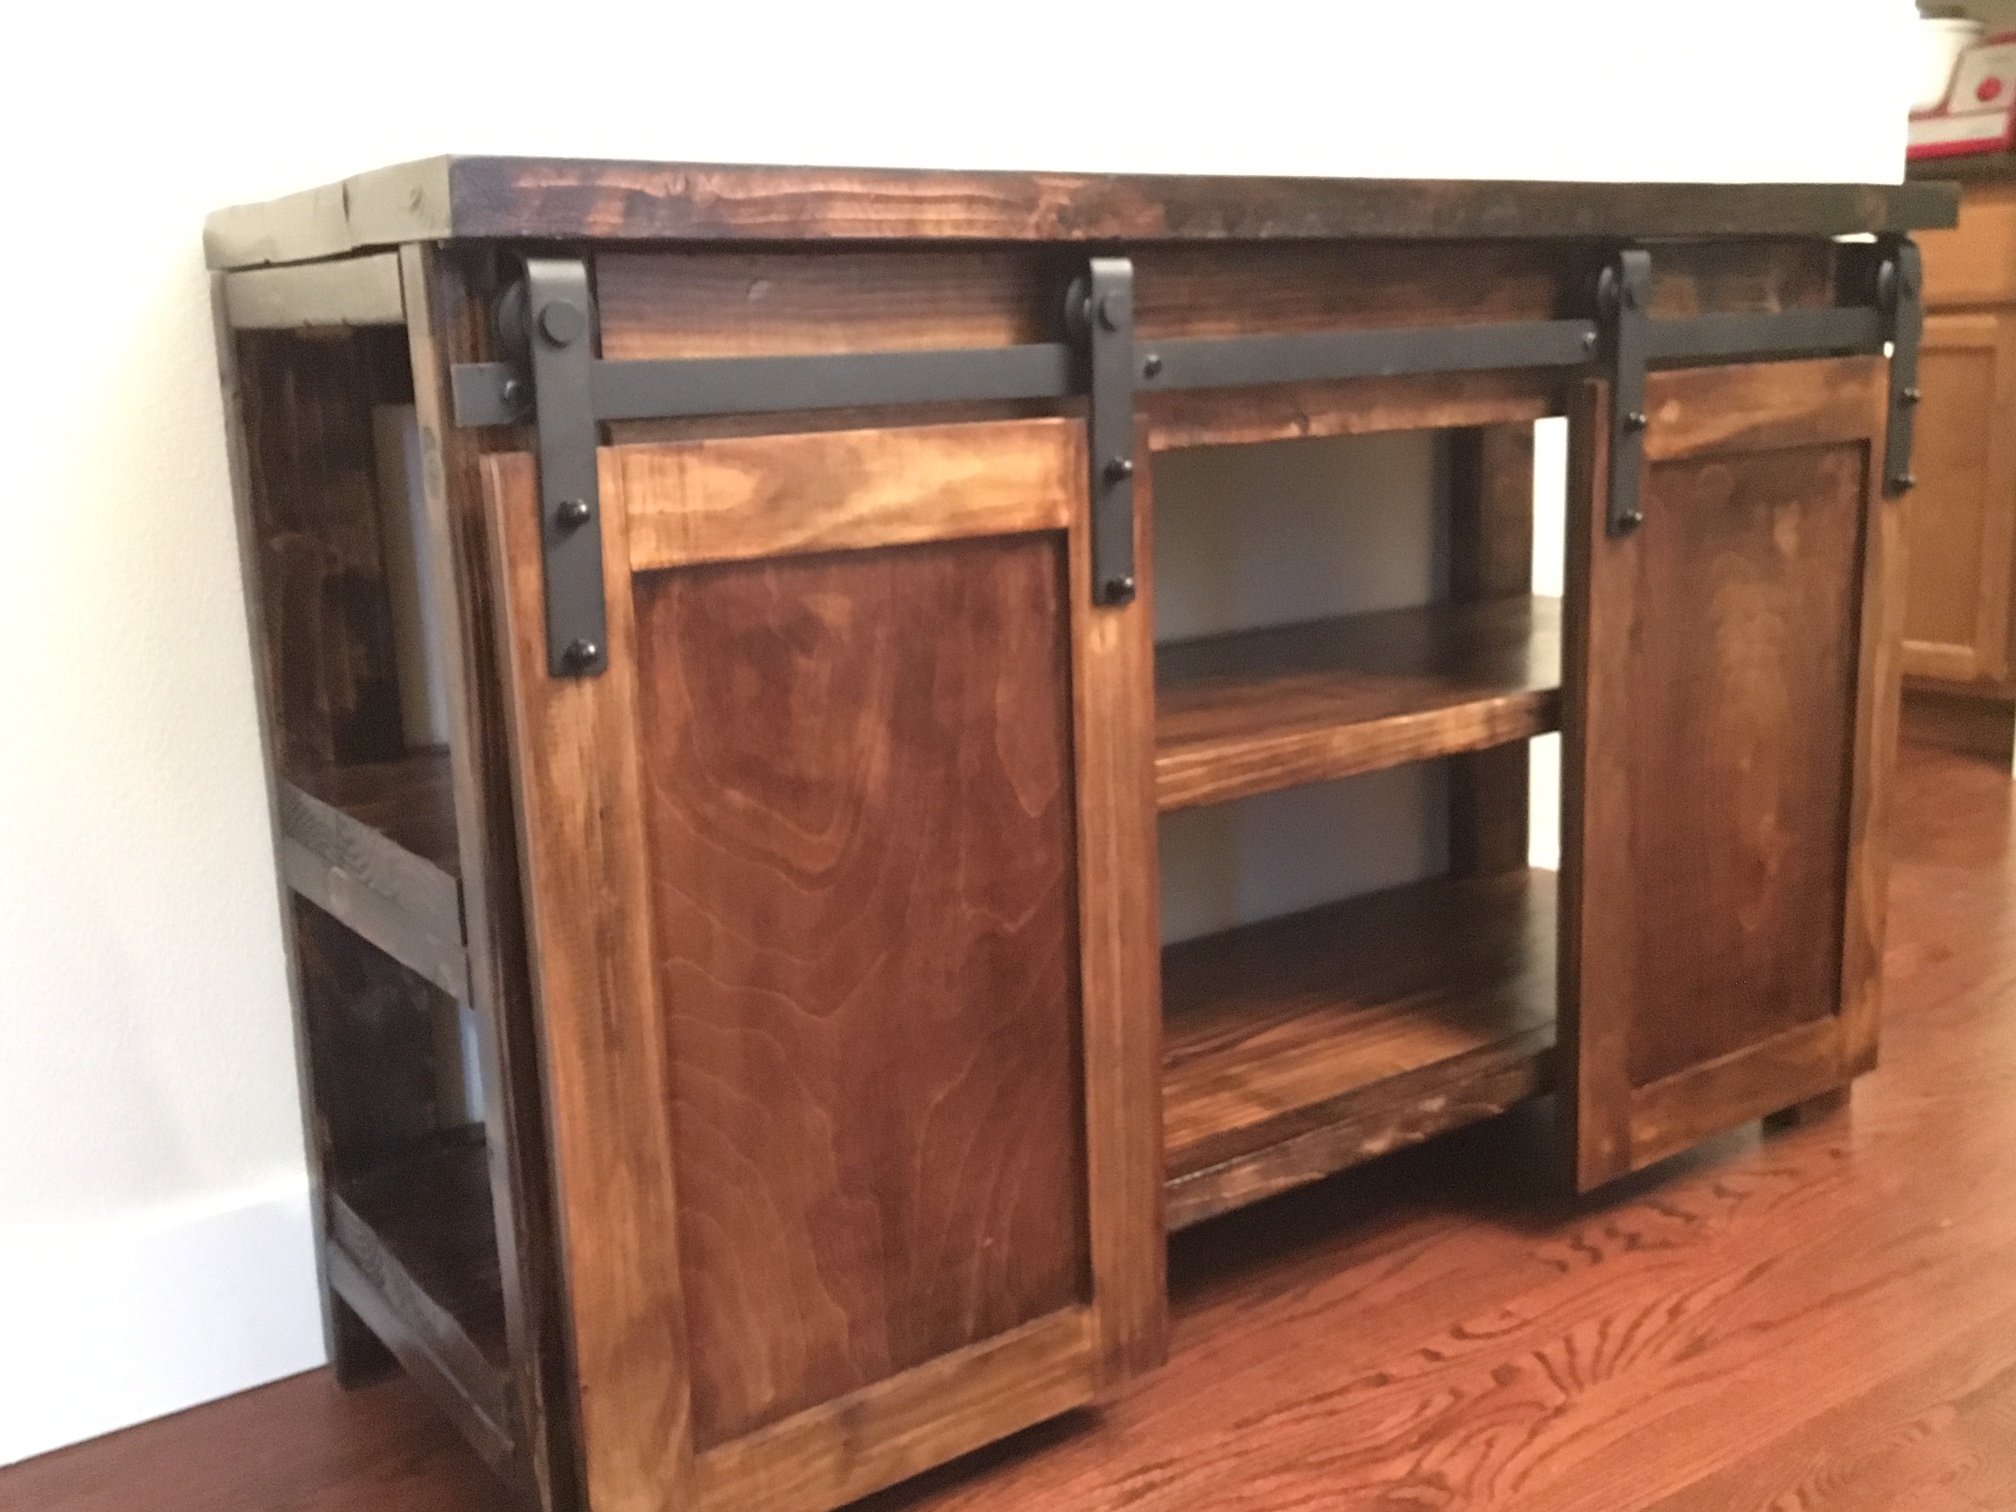
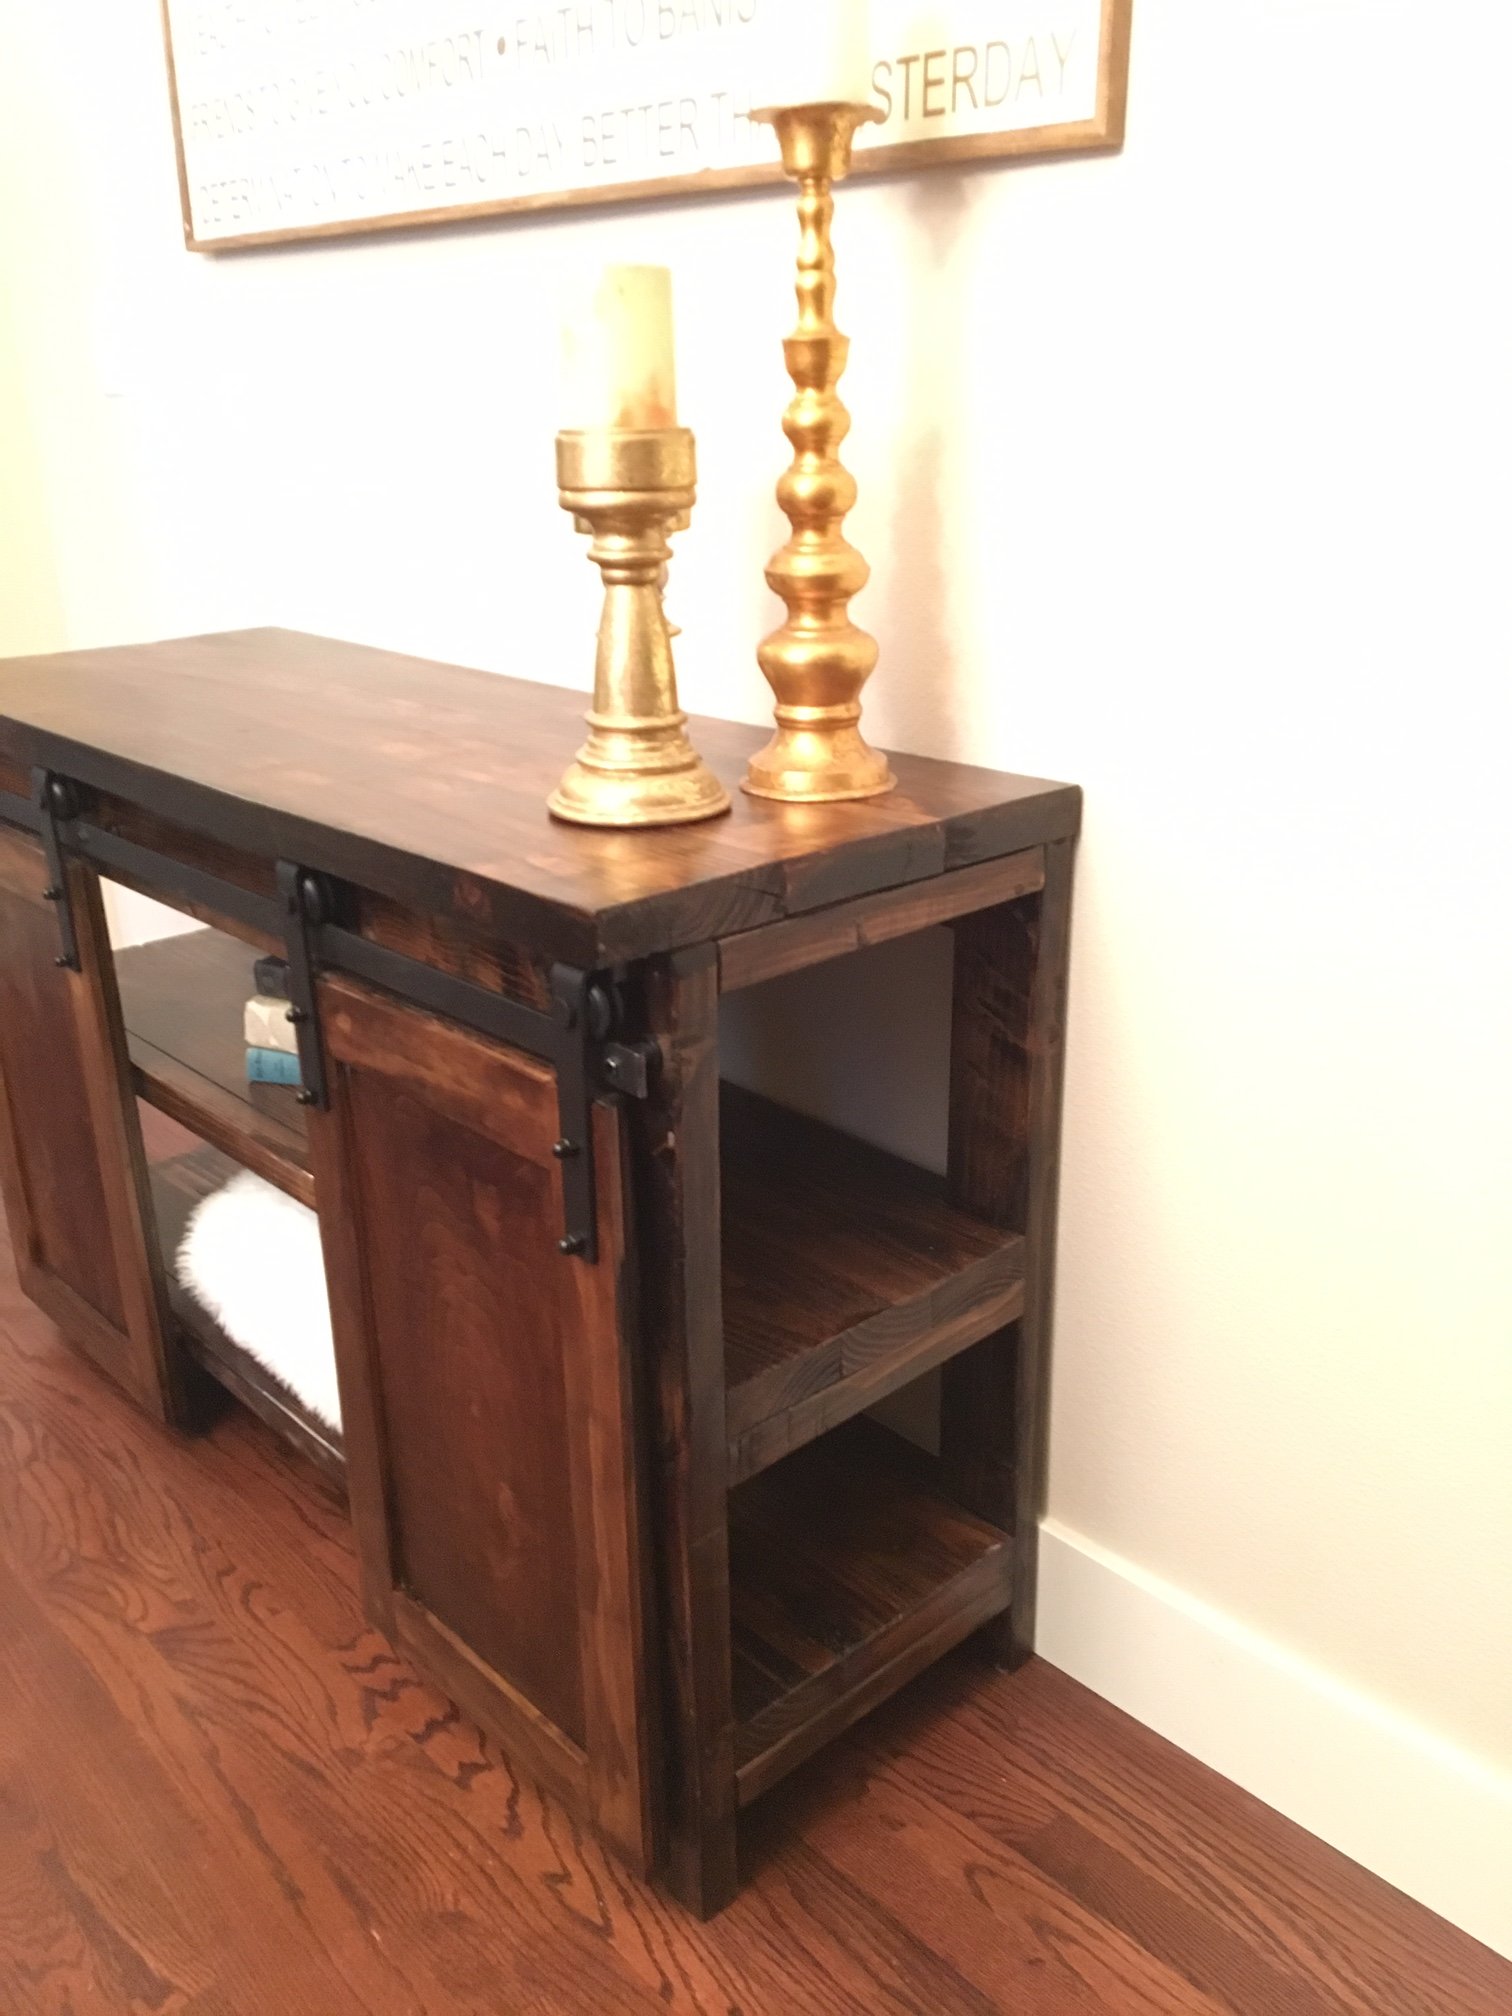
Lovely entertainment center

I went with inset doors with chicken wire instead of the sliding barn doors, and I added an additional shelf.
Estimated Time Investment
Week Long Project (20 Hours or More)
Finish Used
Whitewash pickling stain, an antiquing glaze, sanding sealer, and polycrilic.
For the top, I stained the bare wood with the antiquing glaze, then I added the whitewash pickling stain over that once dry. Then a sanding sealer, and finally the antiquing glaze again, concentrating on the outer edges and knots. It gave it an old, barn wood look.
For the rest, I used the whitewash pickling stain (Minwax), sanding sealer, and then the antiquing glaze (Valspar). I did 3 coats of polycrylic on everything after.
Recommended Skill Level
Intermediate
Crooked Dog House
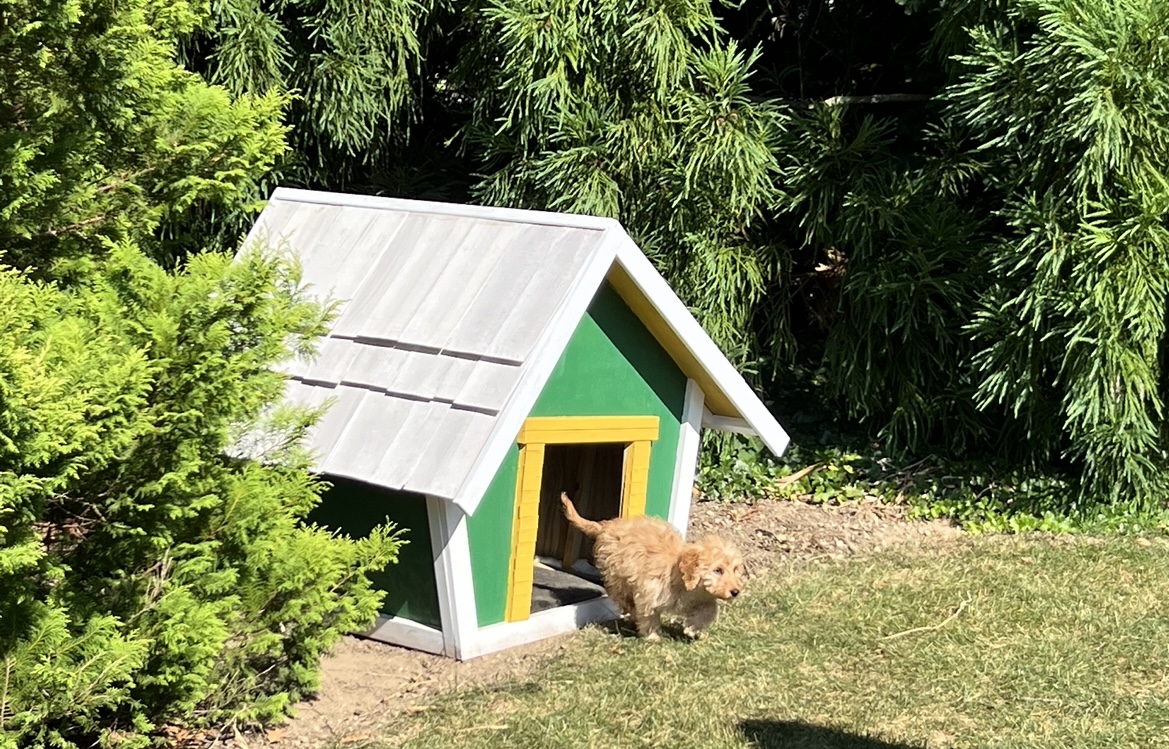
Thanks for these plans! Worked perfectly. One day build.
Built from Plan(s)
Comments
I couldn't be more happy about a garbage can!
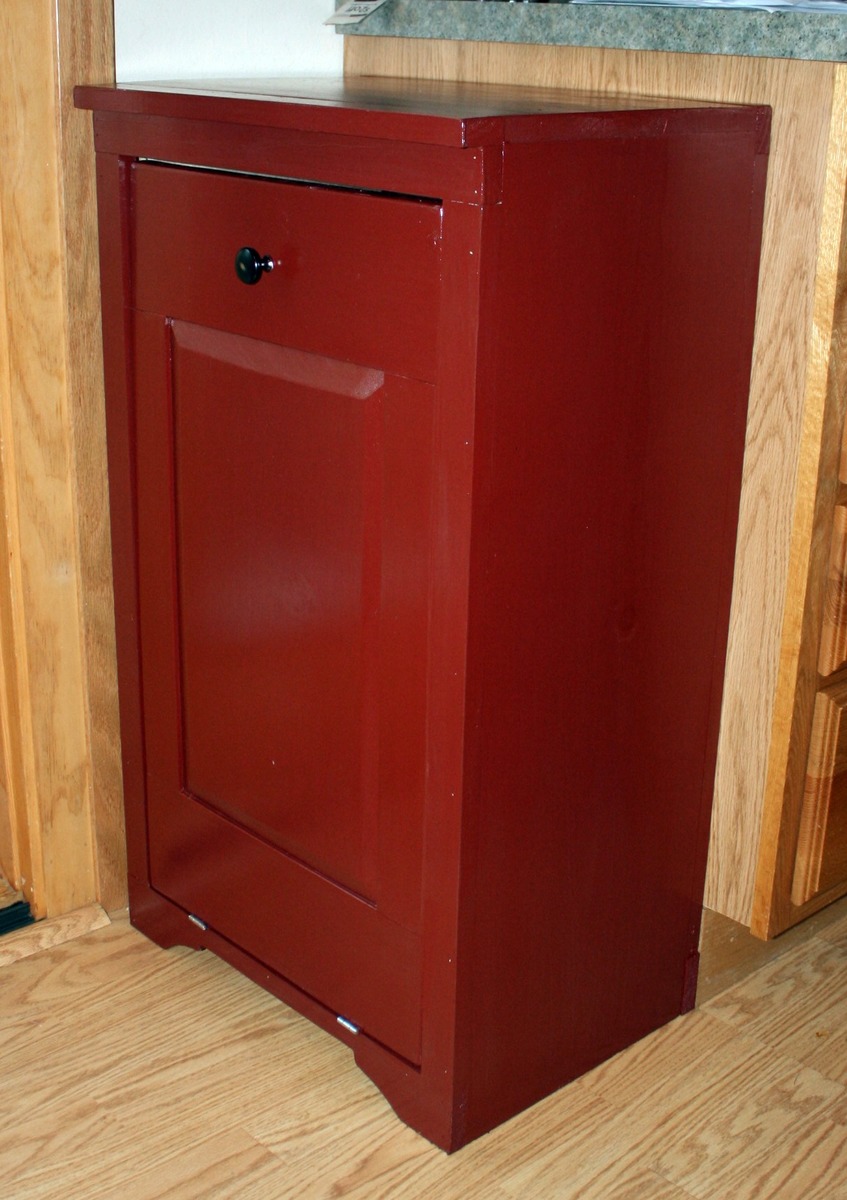
I started this project thinking that I would put in a rental home we were working on. But after I completed it I couldn't part with it.
I found the plans to be easy to follow! I watched the videos and tackled the raised panel doors. I wanted to add some height so added a few inches just in-case. I couldn’t bear the thought of completing this project and my garbage can not fitting. So I did use 1x6 for the rails and found it didn't look too bad.
I put a lot of thought about what color and finish I wanted. I thought about distressing it but couldn’t decide on the color or technique. So I decided on Color Place paint that I had left over from another project. I am going to find a spray paint that matches and do the inside.
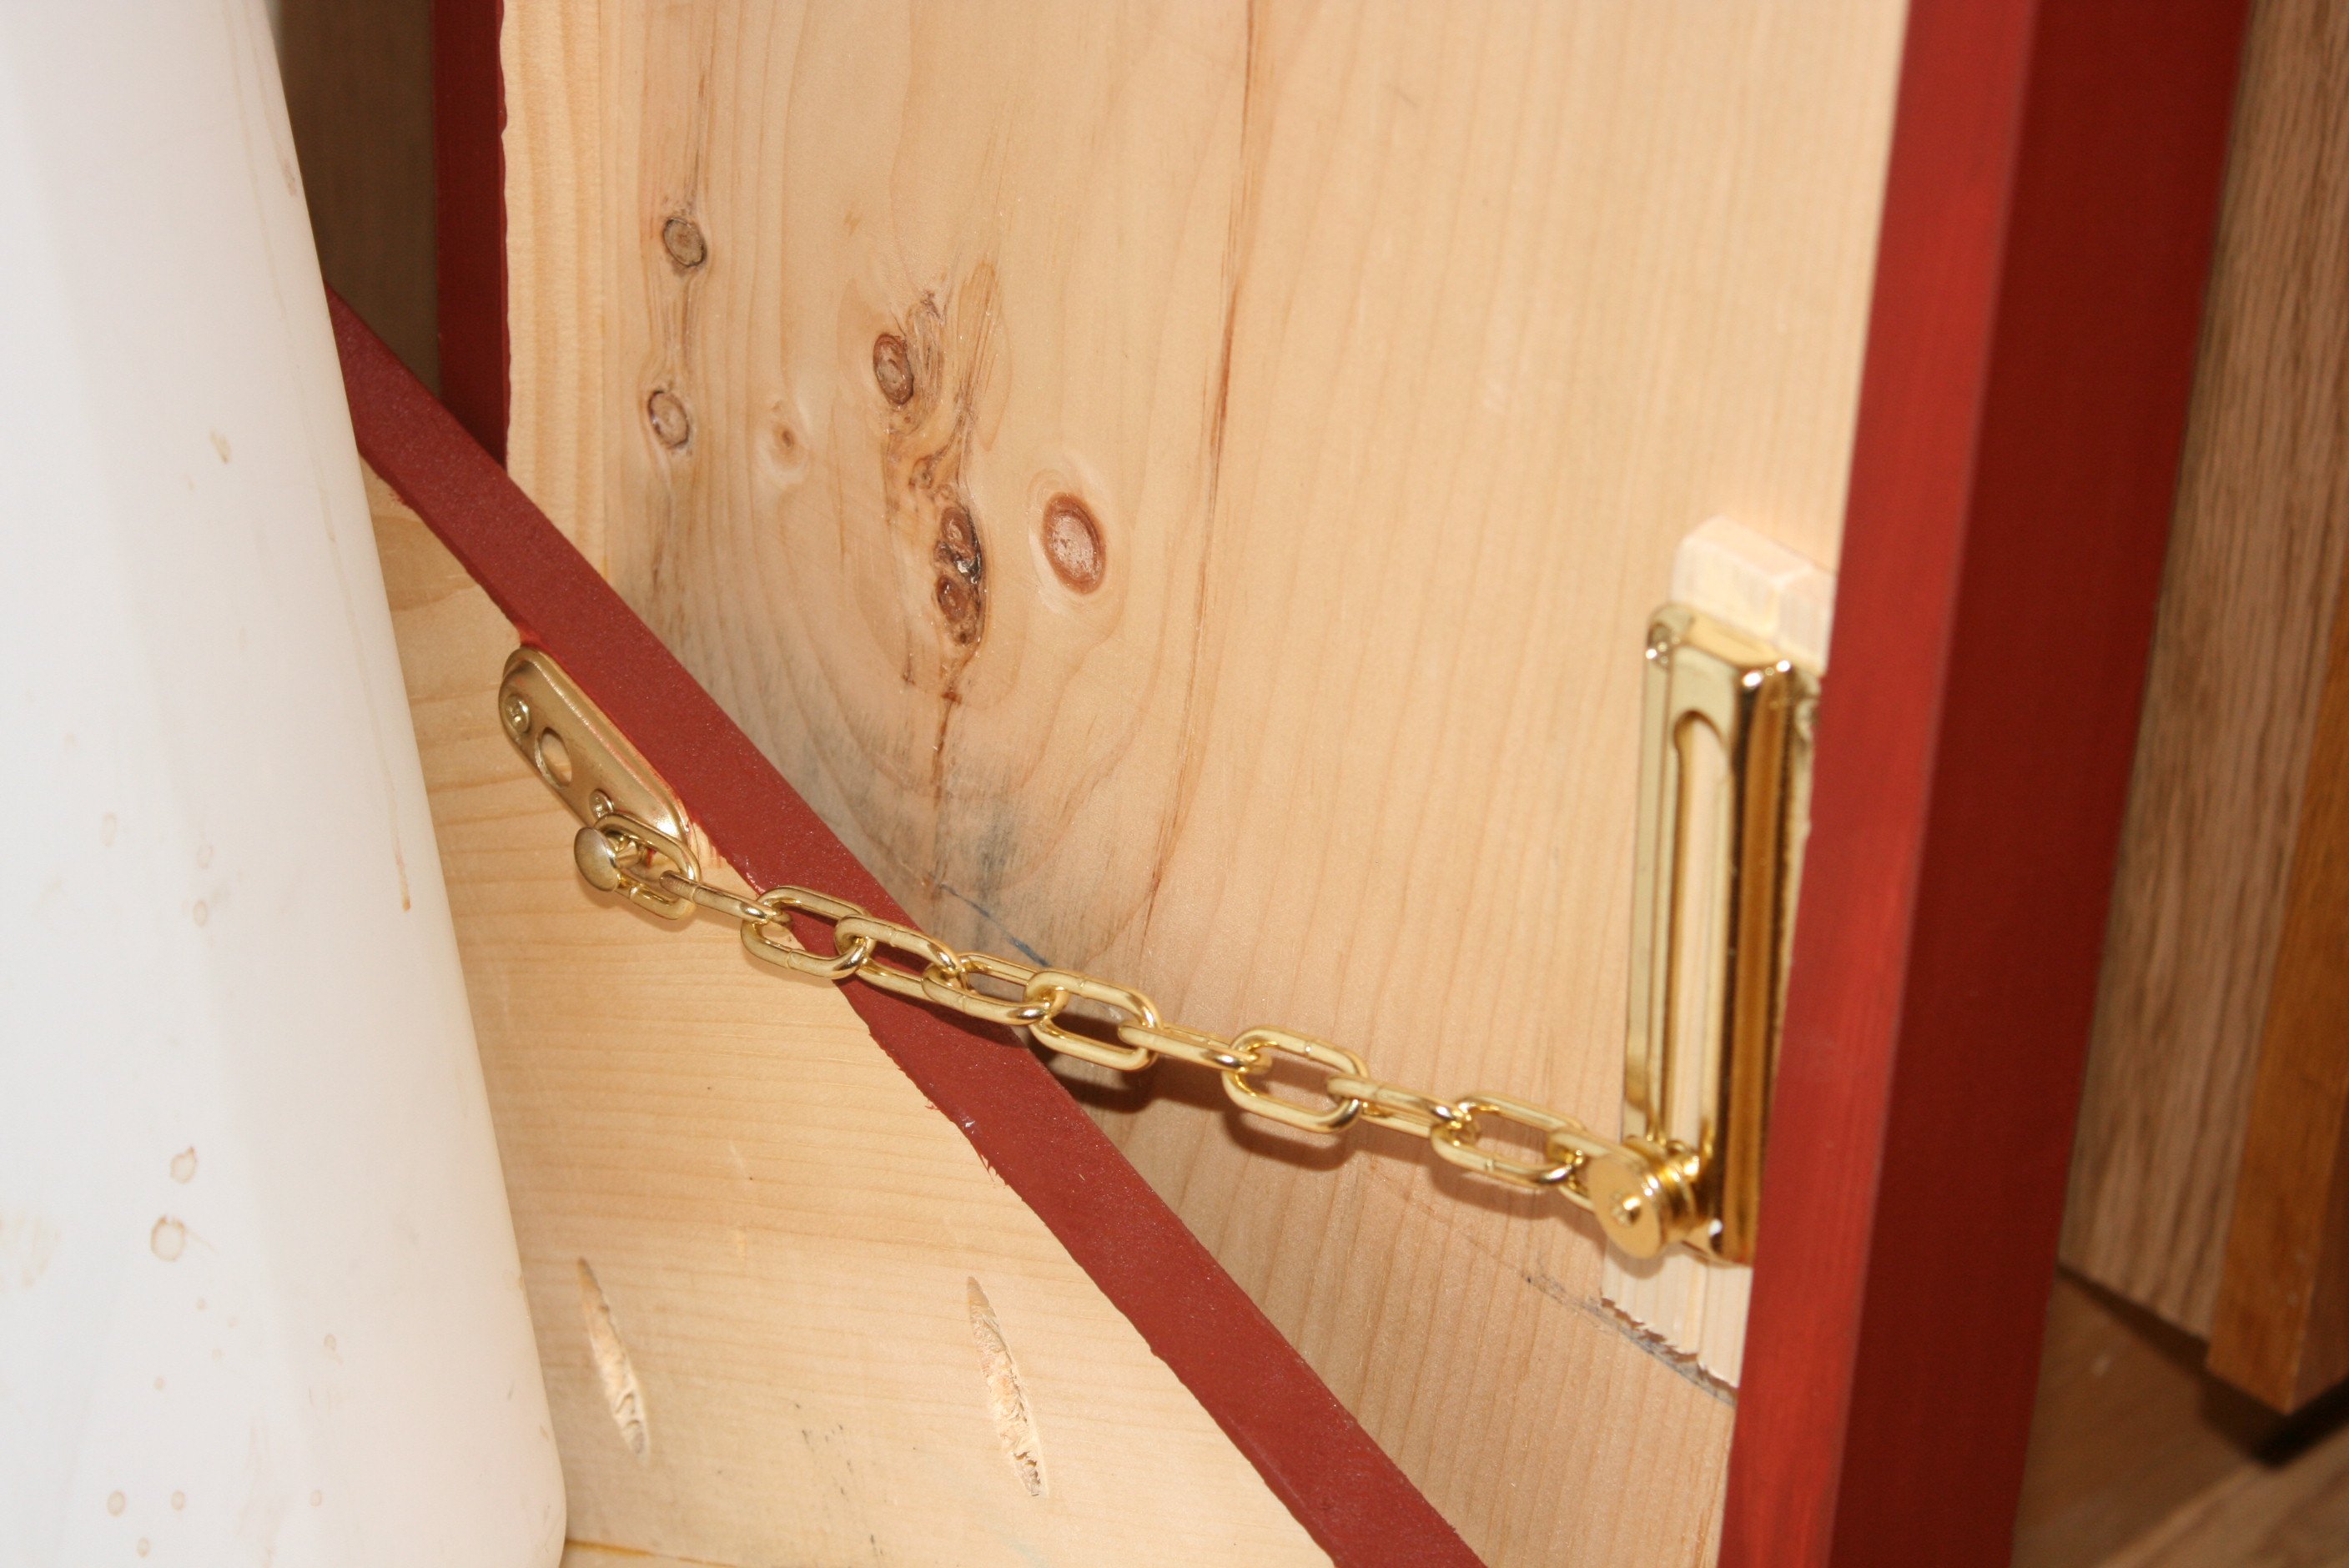
I choose an oil rubbed bronze knob that I had left over from a kitchen remodel, added a magnetic closure as well as a door safety chain. I have lots of little hands and toes that I don’t want getting smashed. I like the idea that if I want to open it all the way for cleaning all I have to do is unhook the safety chain.
Over all I am so pleased with how it turned out. It keeps the garbage and smell in and curious fingers out! My kids love to put stuff in the garbage now!
I spent a weekend with a visiting friend and made one as well as completed two more for Christmas gifts.
Thanks Ana
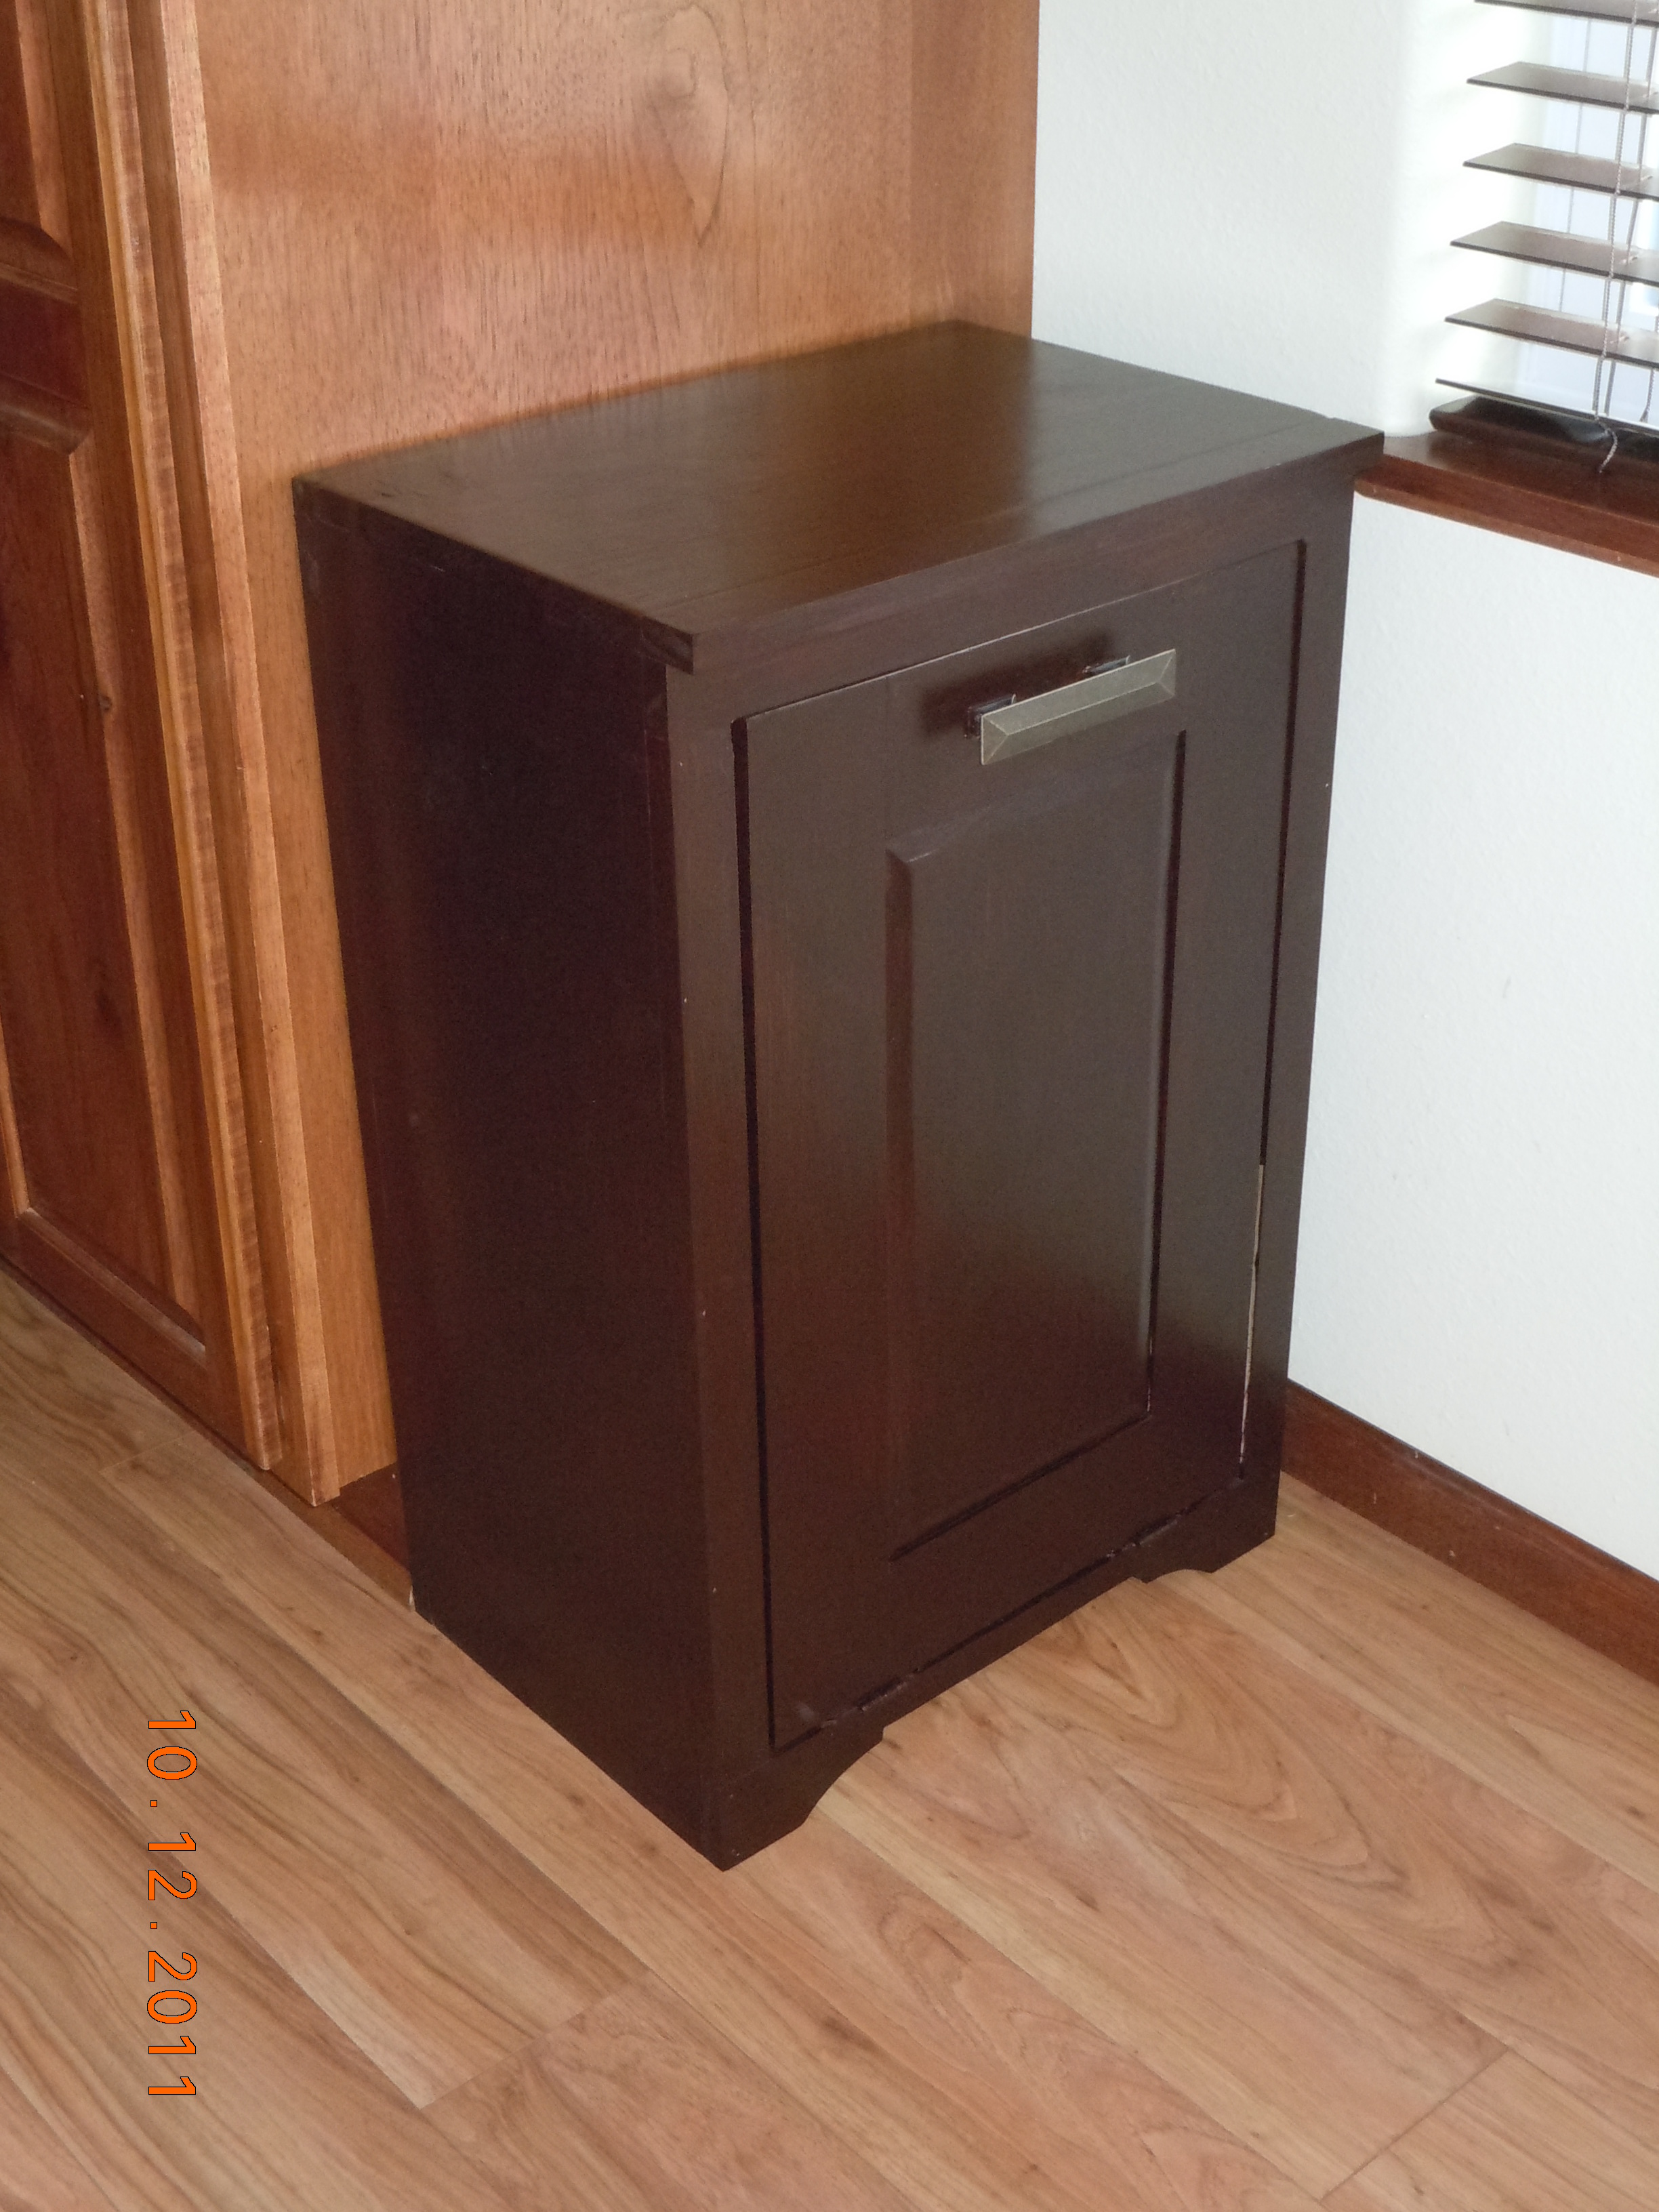
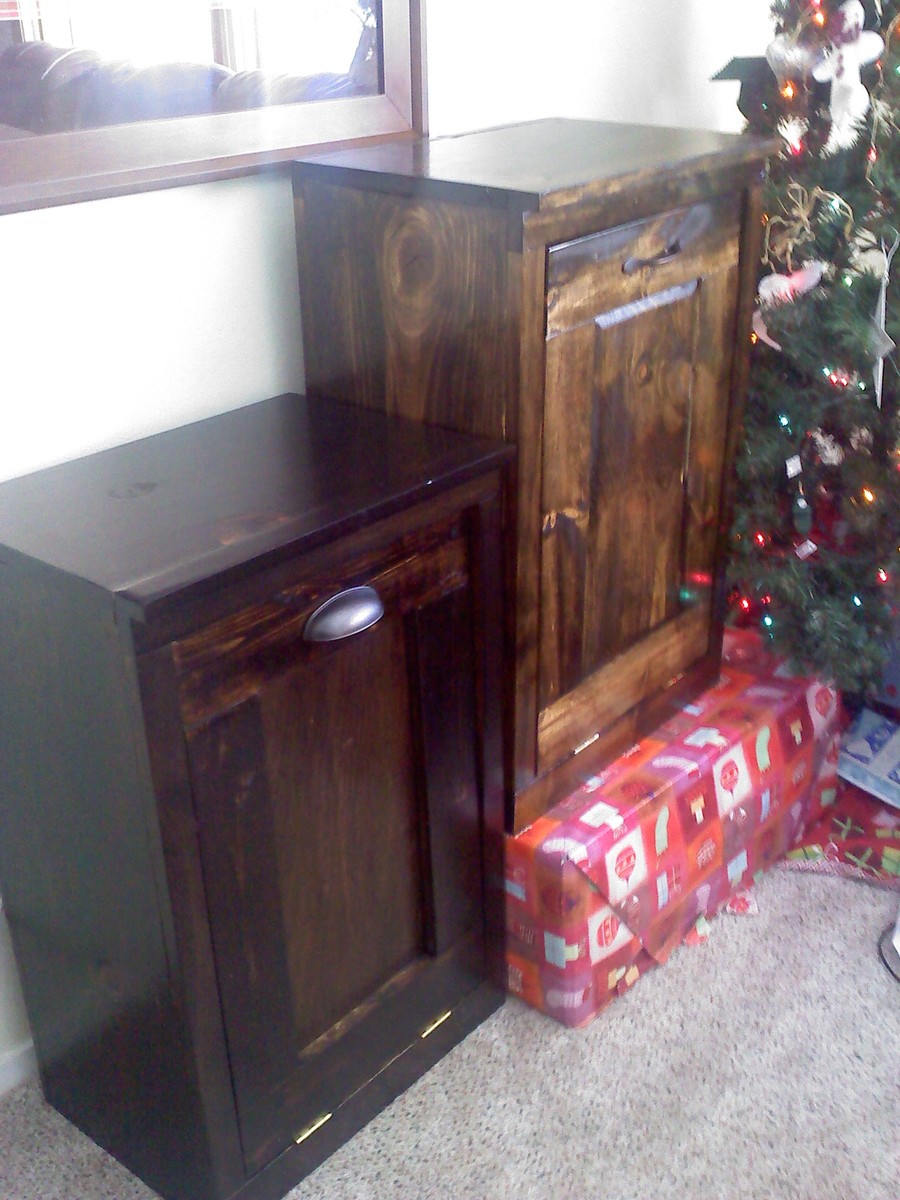
Built from Plan(s)
Estimated Cost
$30-35
Estimated Time Investment
Afternoon Project (3-6 Hours)
Finish Used
2-3 coats-ColorPlace-Redwood semi-gloss exterior
1 coat-Minwax-Polyurethane-Semi Gloss
1 coat-Minwax-Polyurethane-Semi Gloss
Recommended Skill Level
Intermediate
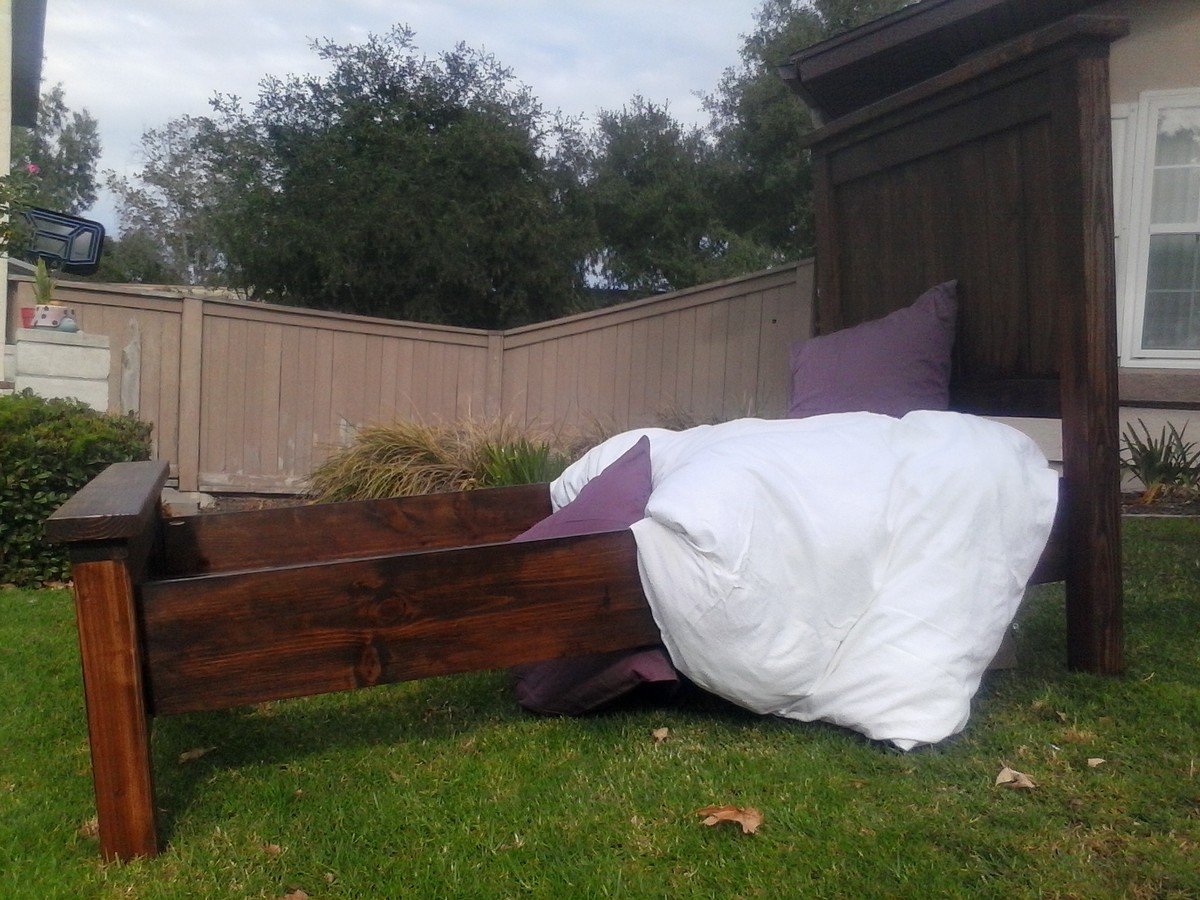
Twin Farmhouse Bed
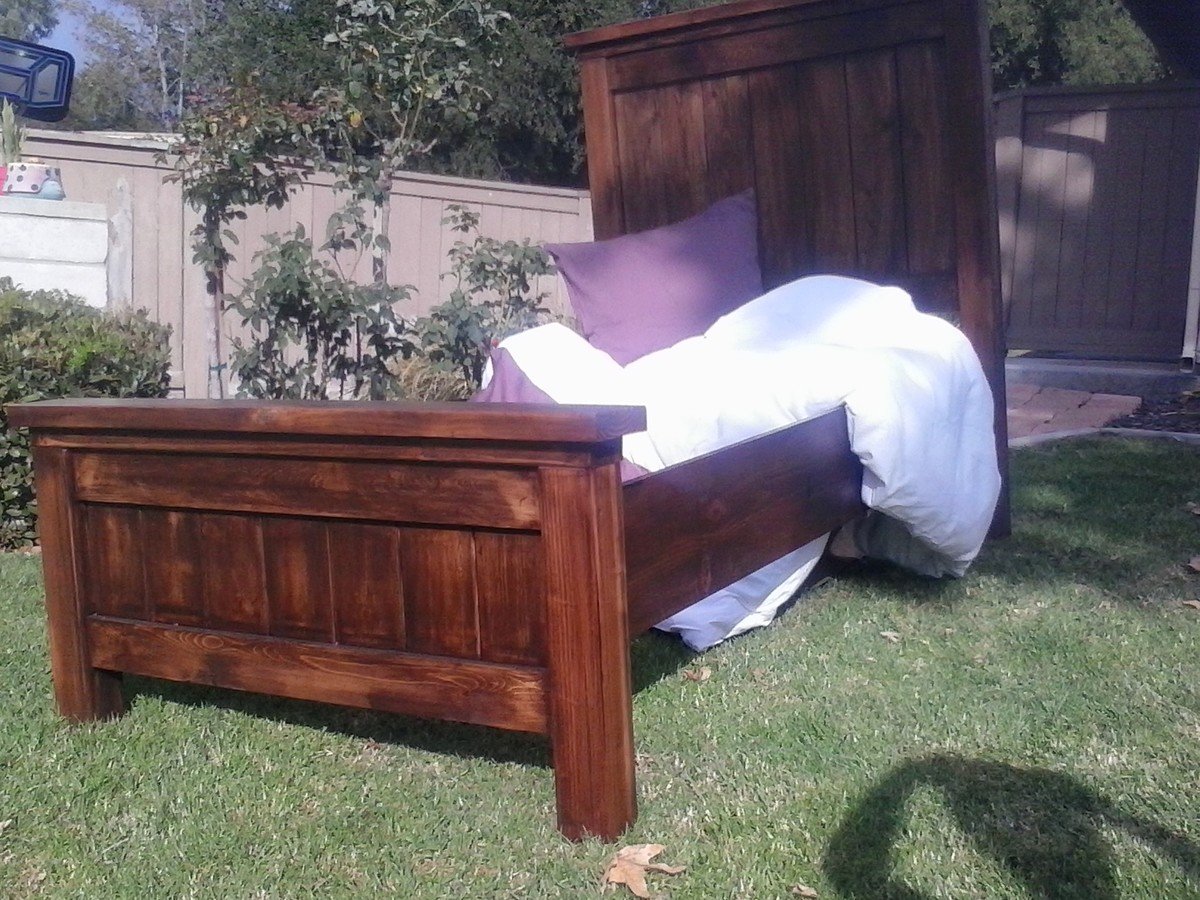
Built 2 of these for a customer. Stained with Rust-Oleum Dark Walnut and finished with Rust-Oleum Satin Ployuerethane.
Built from Plan(s)
Estimated Cost
150
Estimated Time Investment
Weekend Project (10-20 Hours)
Finish Used
Rust-Oleum Dark Walnut and Satin Polyurethane.
Recommended Skill Level
Beginner
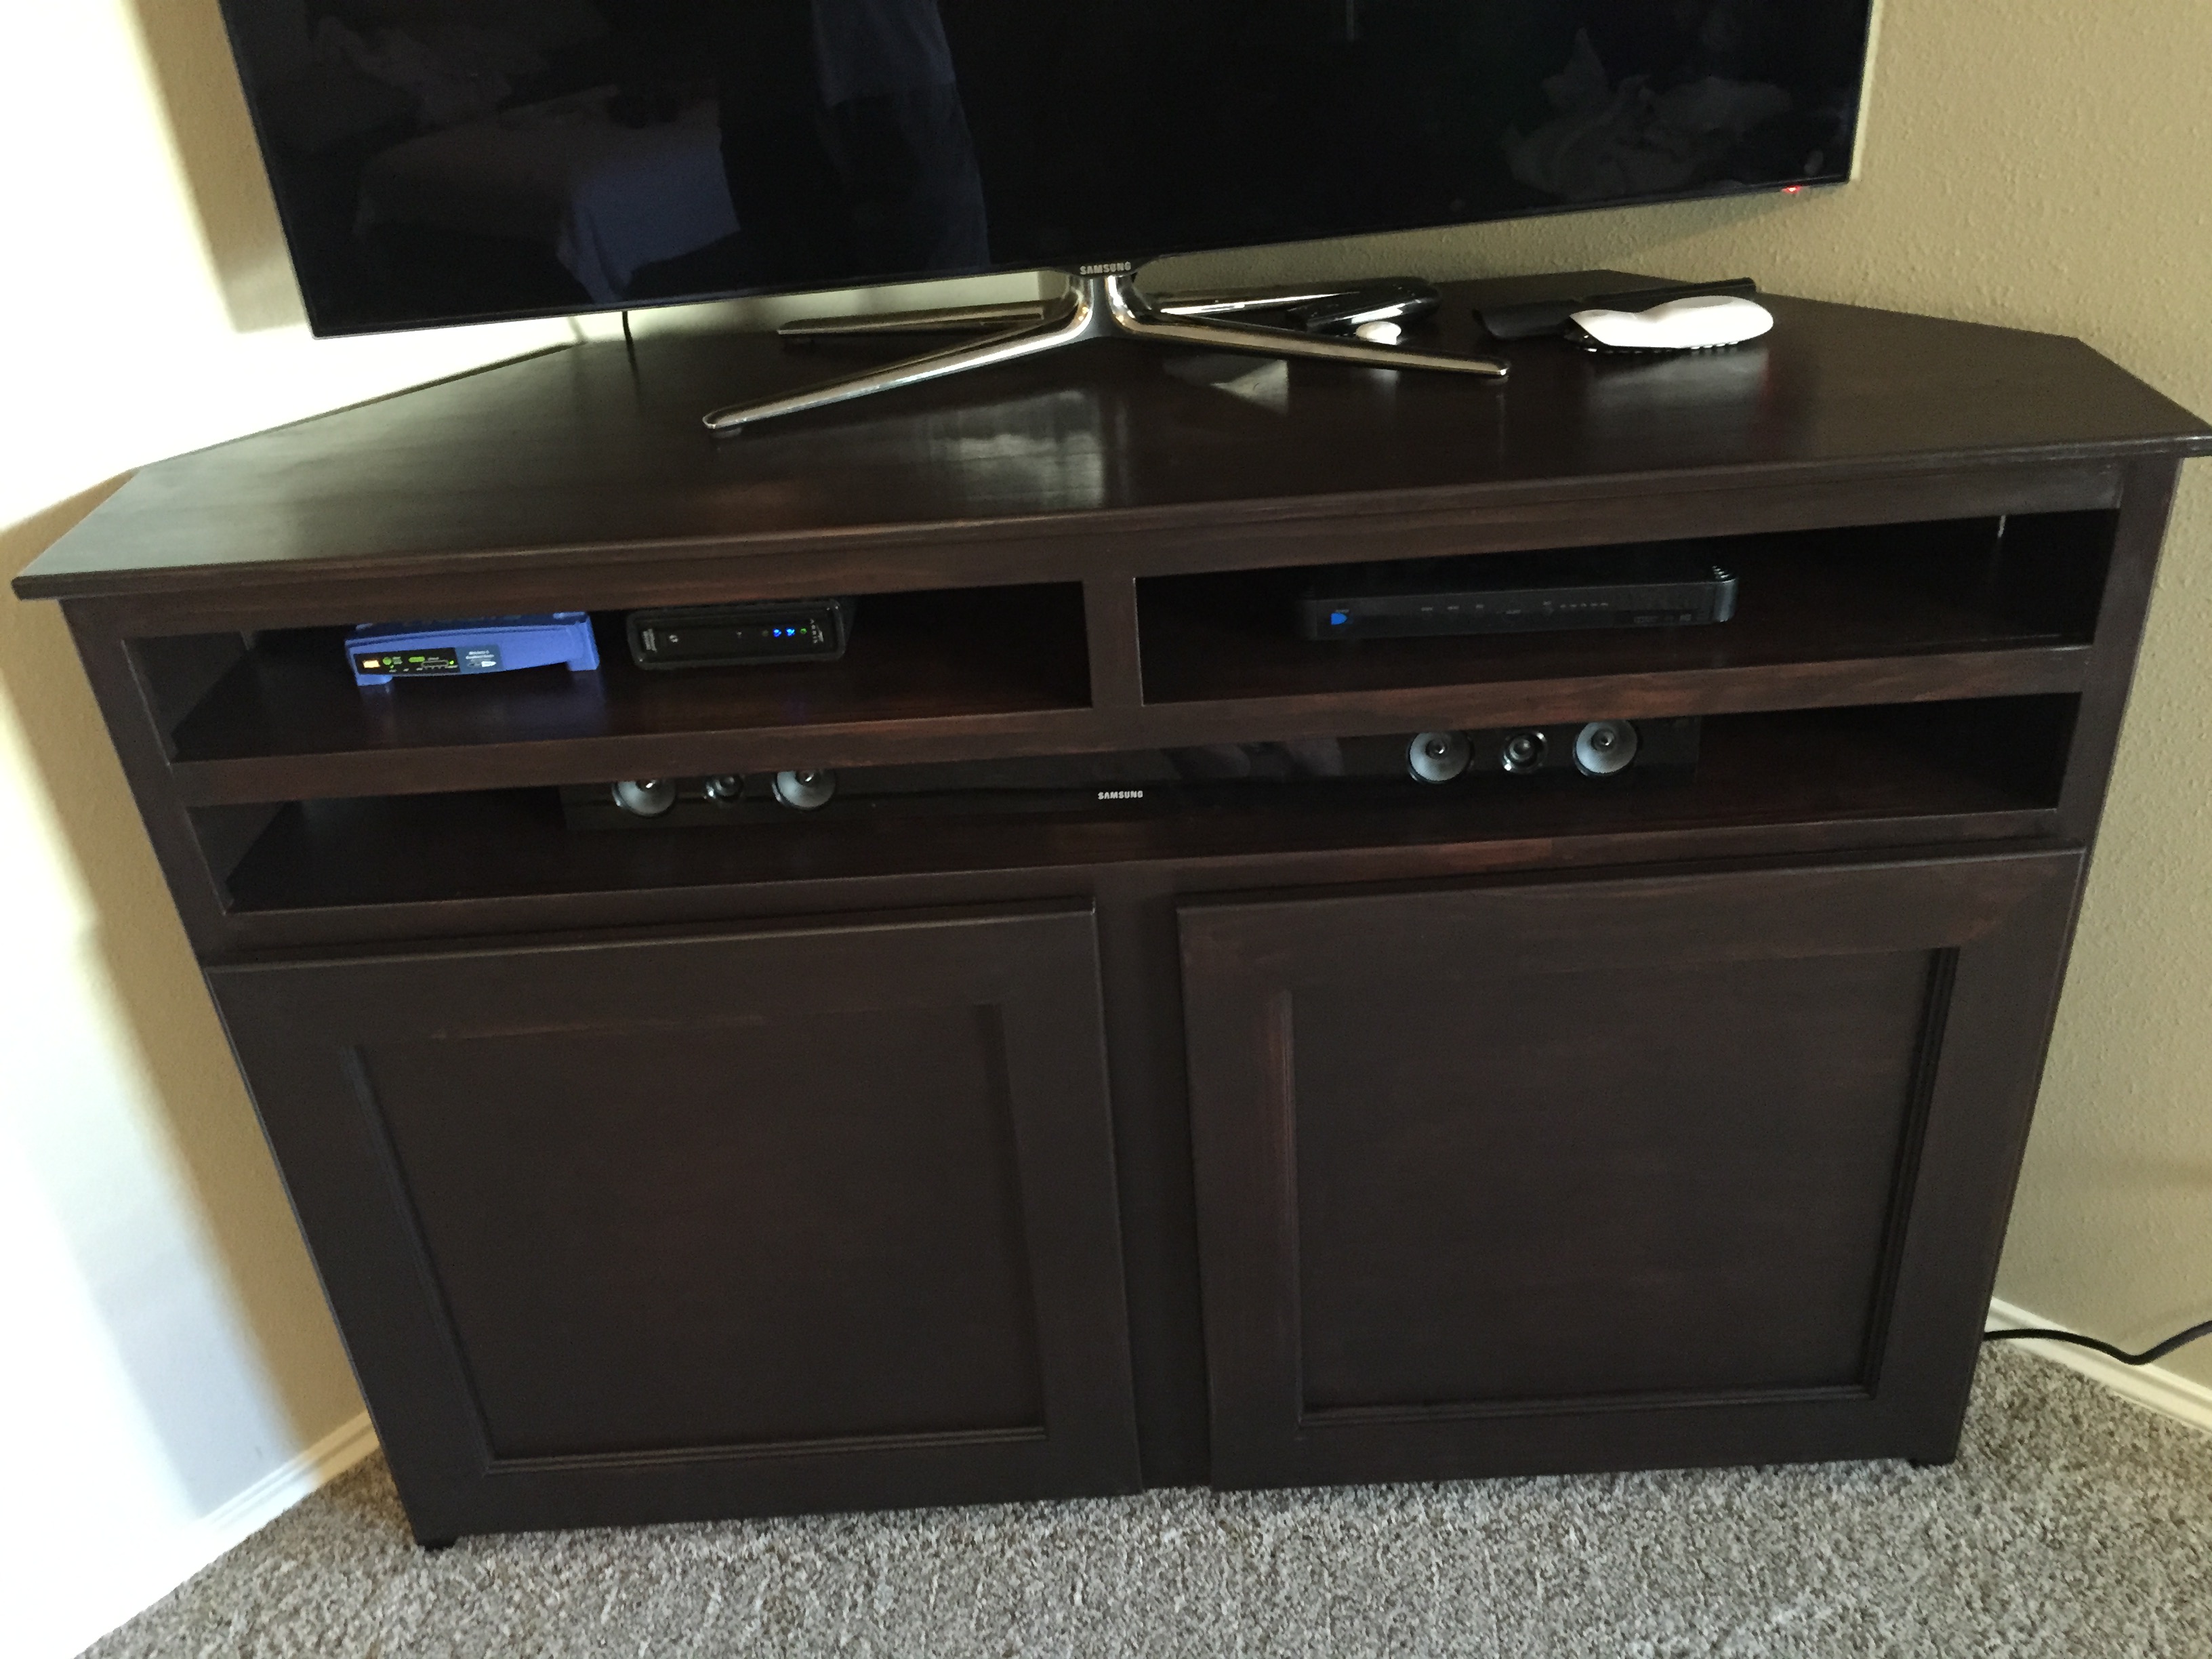
Corner TV Stand
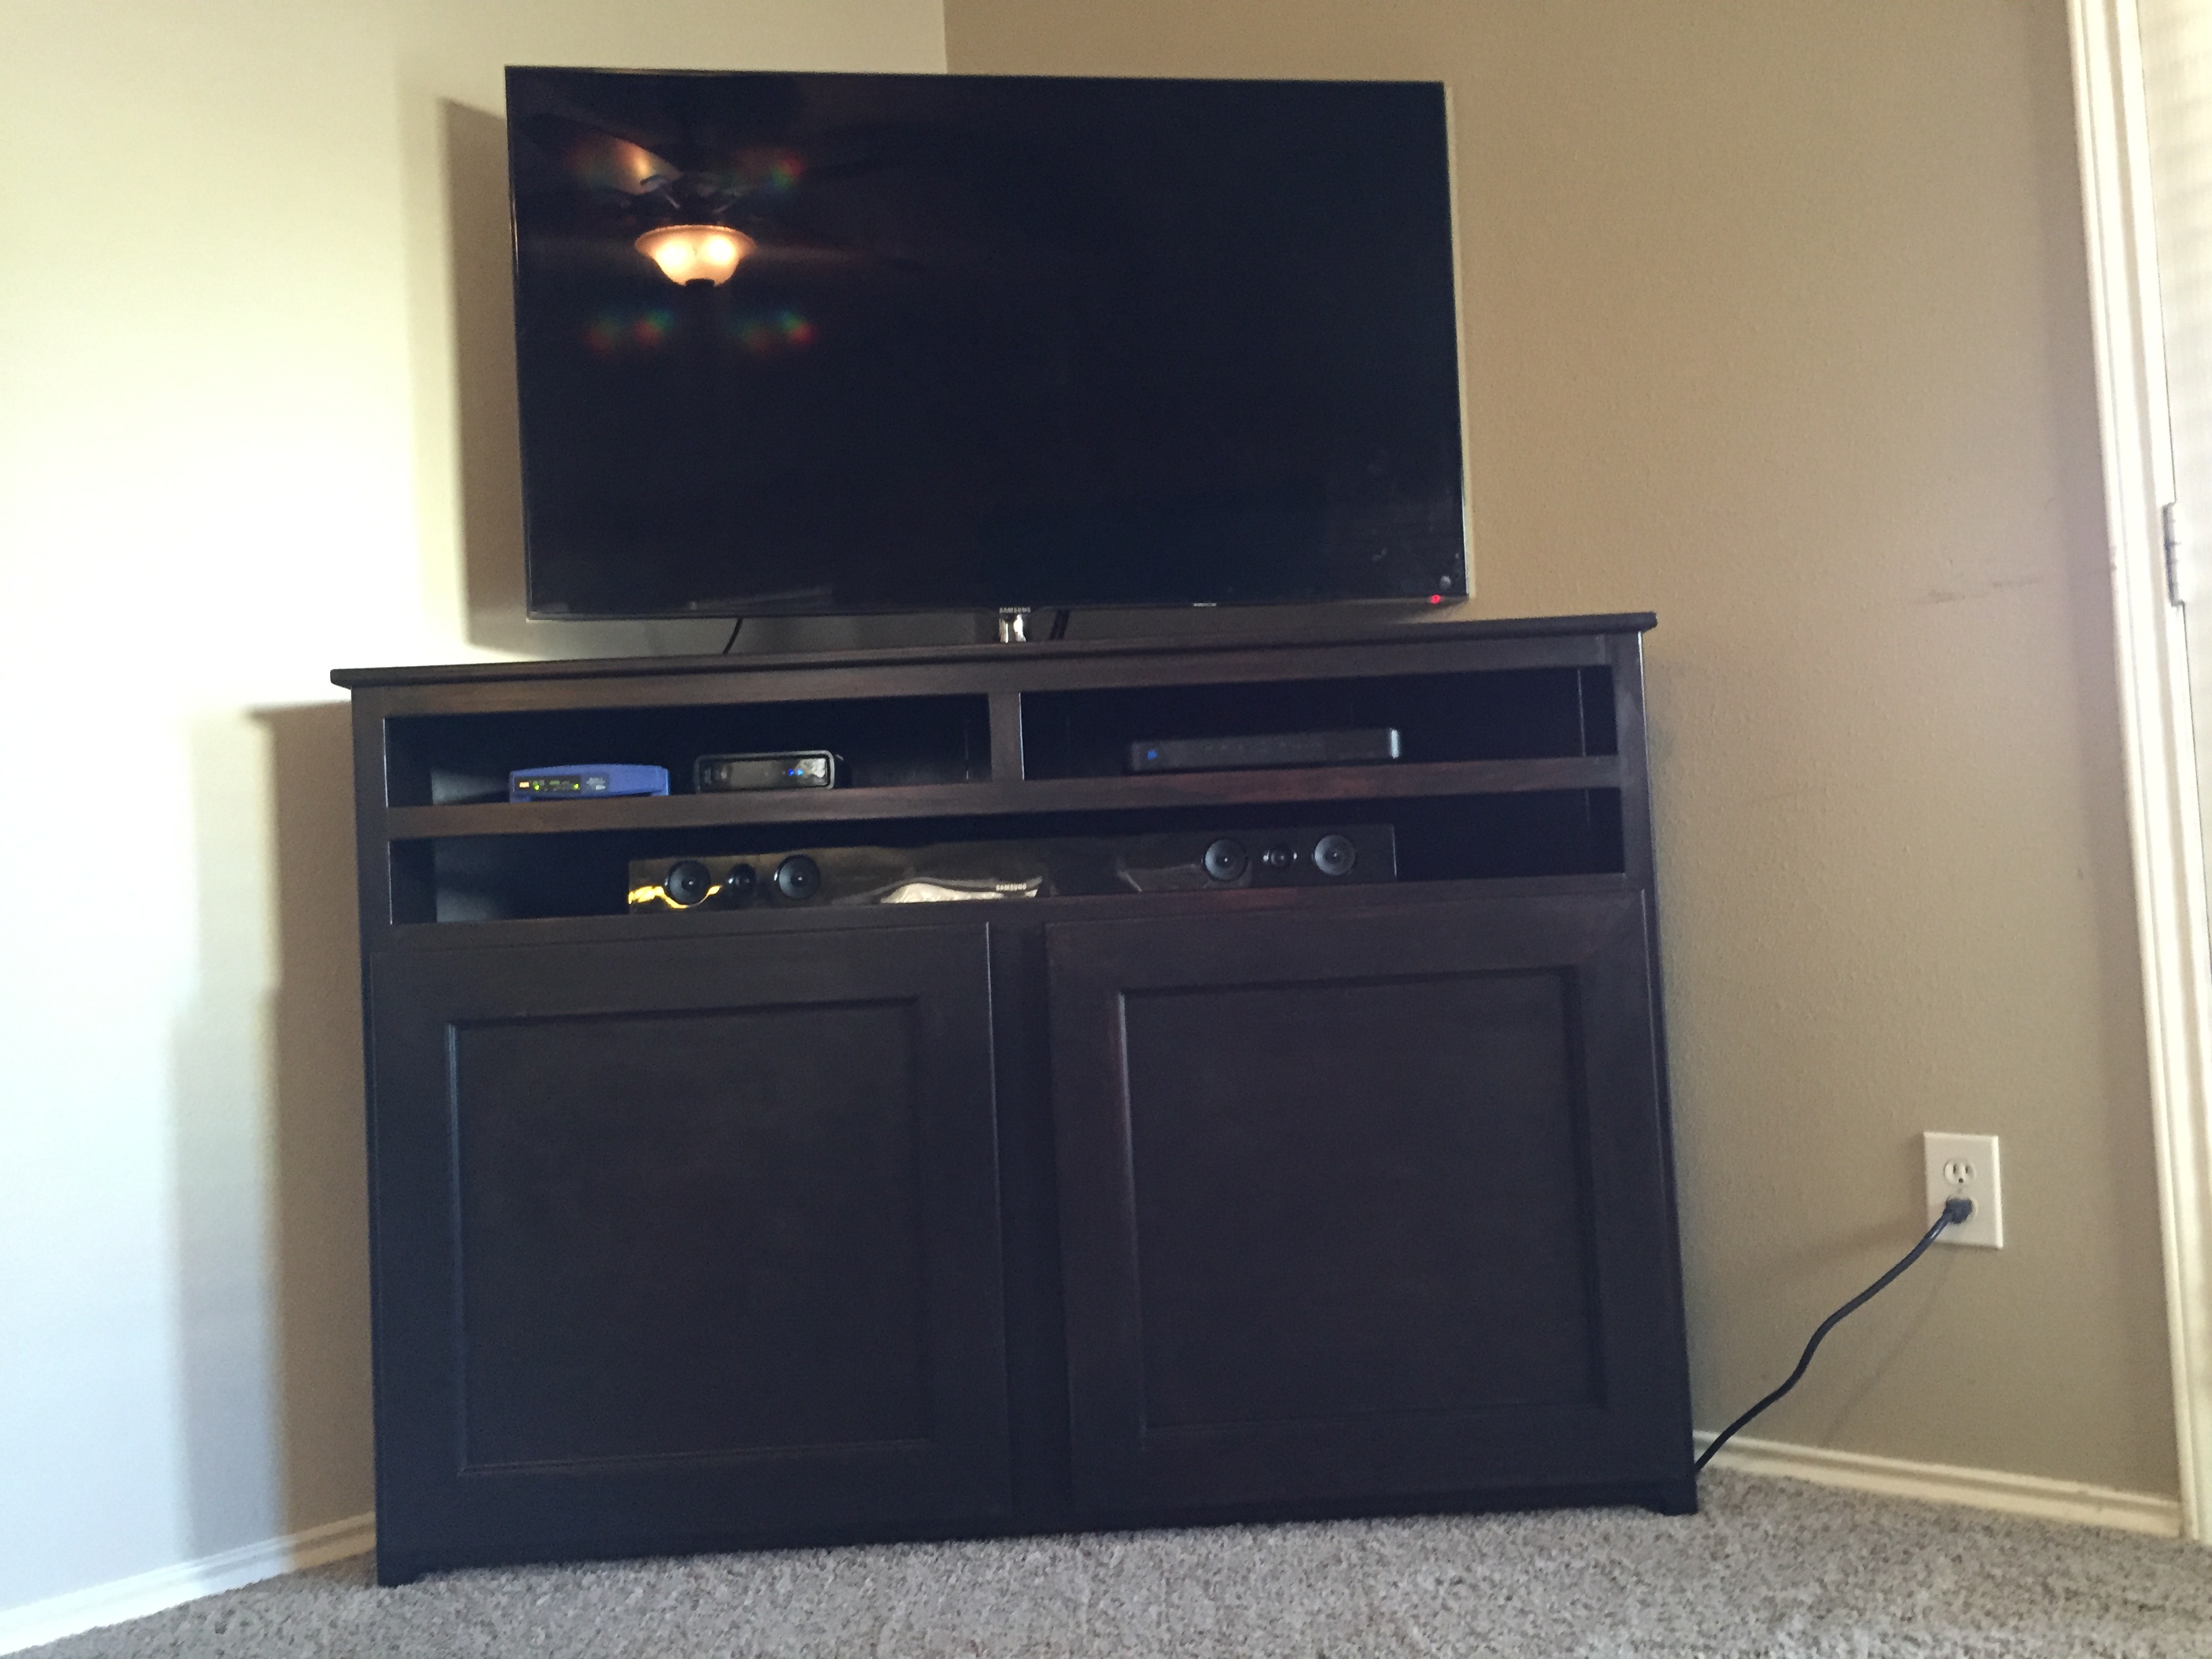
We've searched for a corner TV stand but couldnt find anything we liked. I finally decided to build one.


Built from Plan(s)
Estimated Time Investment
Week Long Project (20 Hours or More)
Finish Used
General finishes java, 2 coats. several coats of satin for top coat (GF as well)
Recommended Skill Level
Intermediate
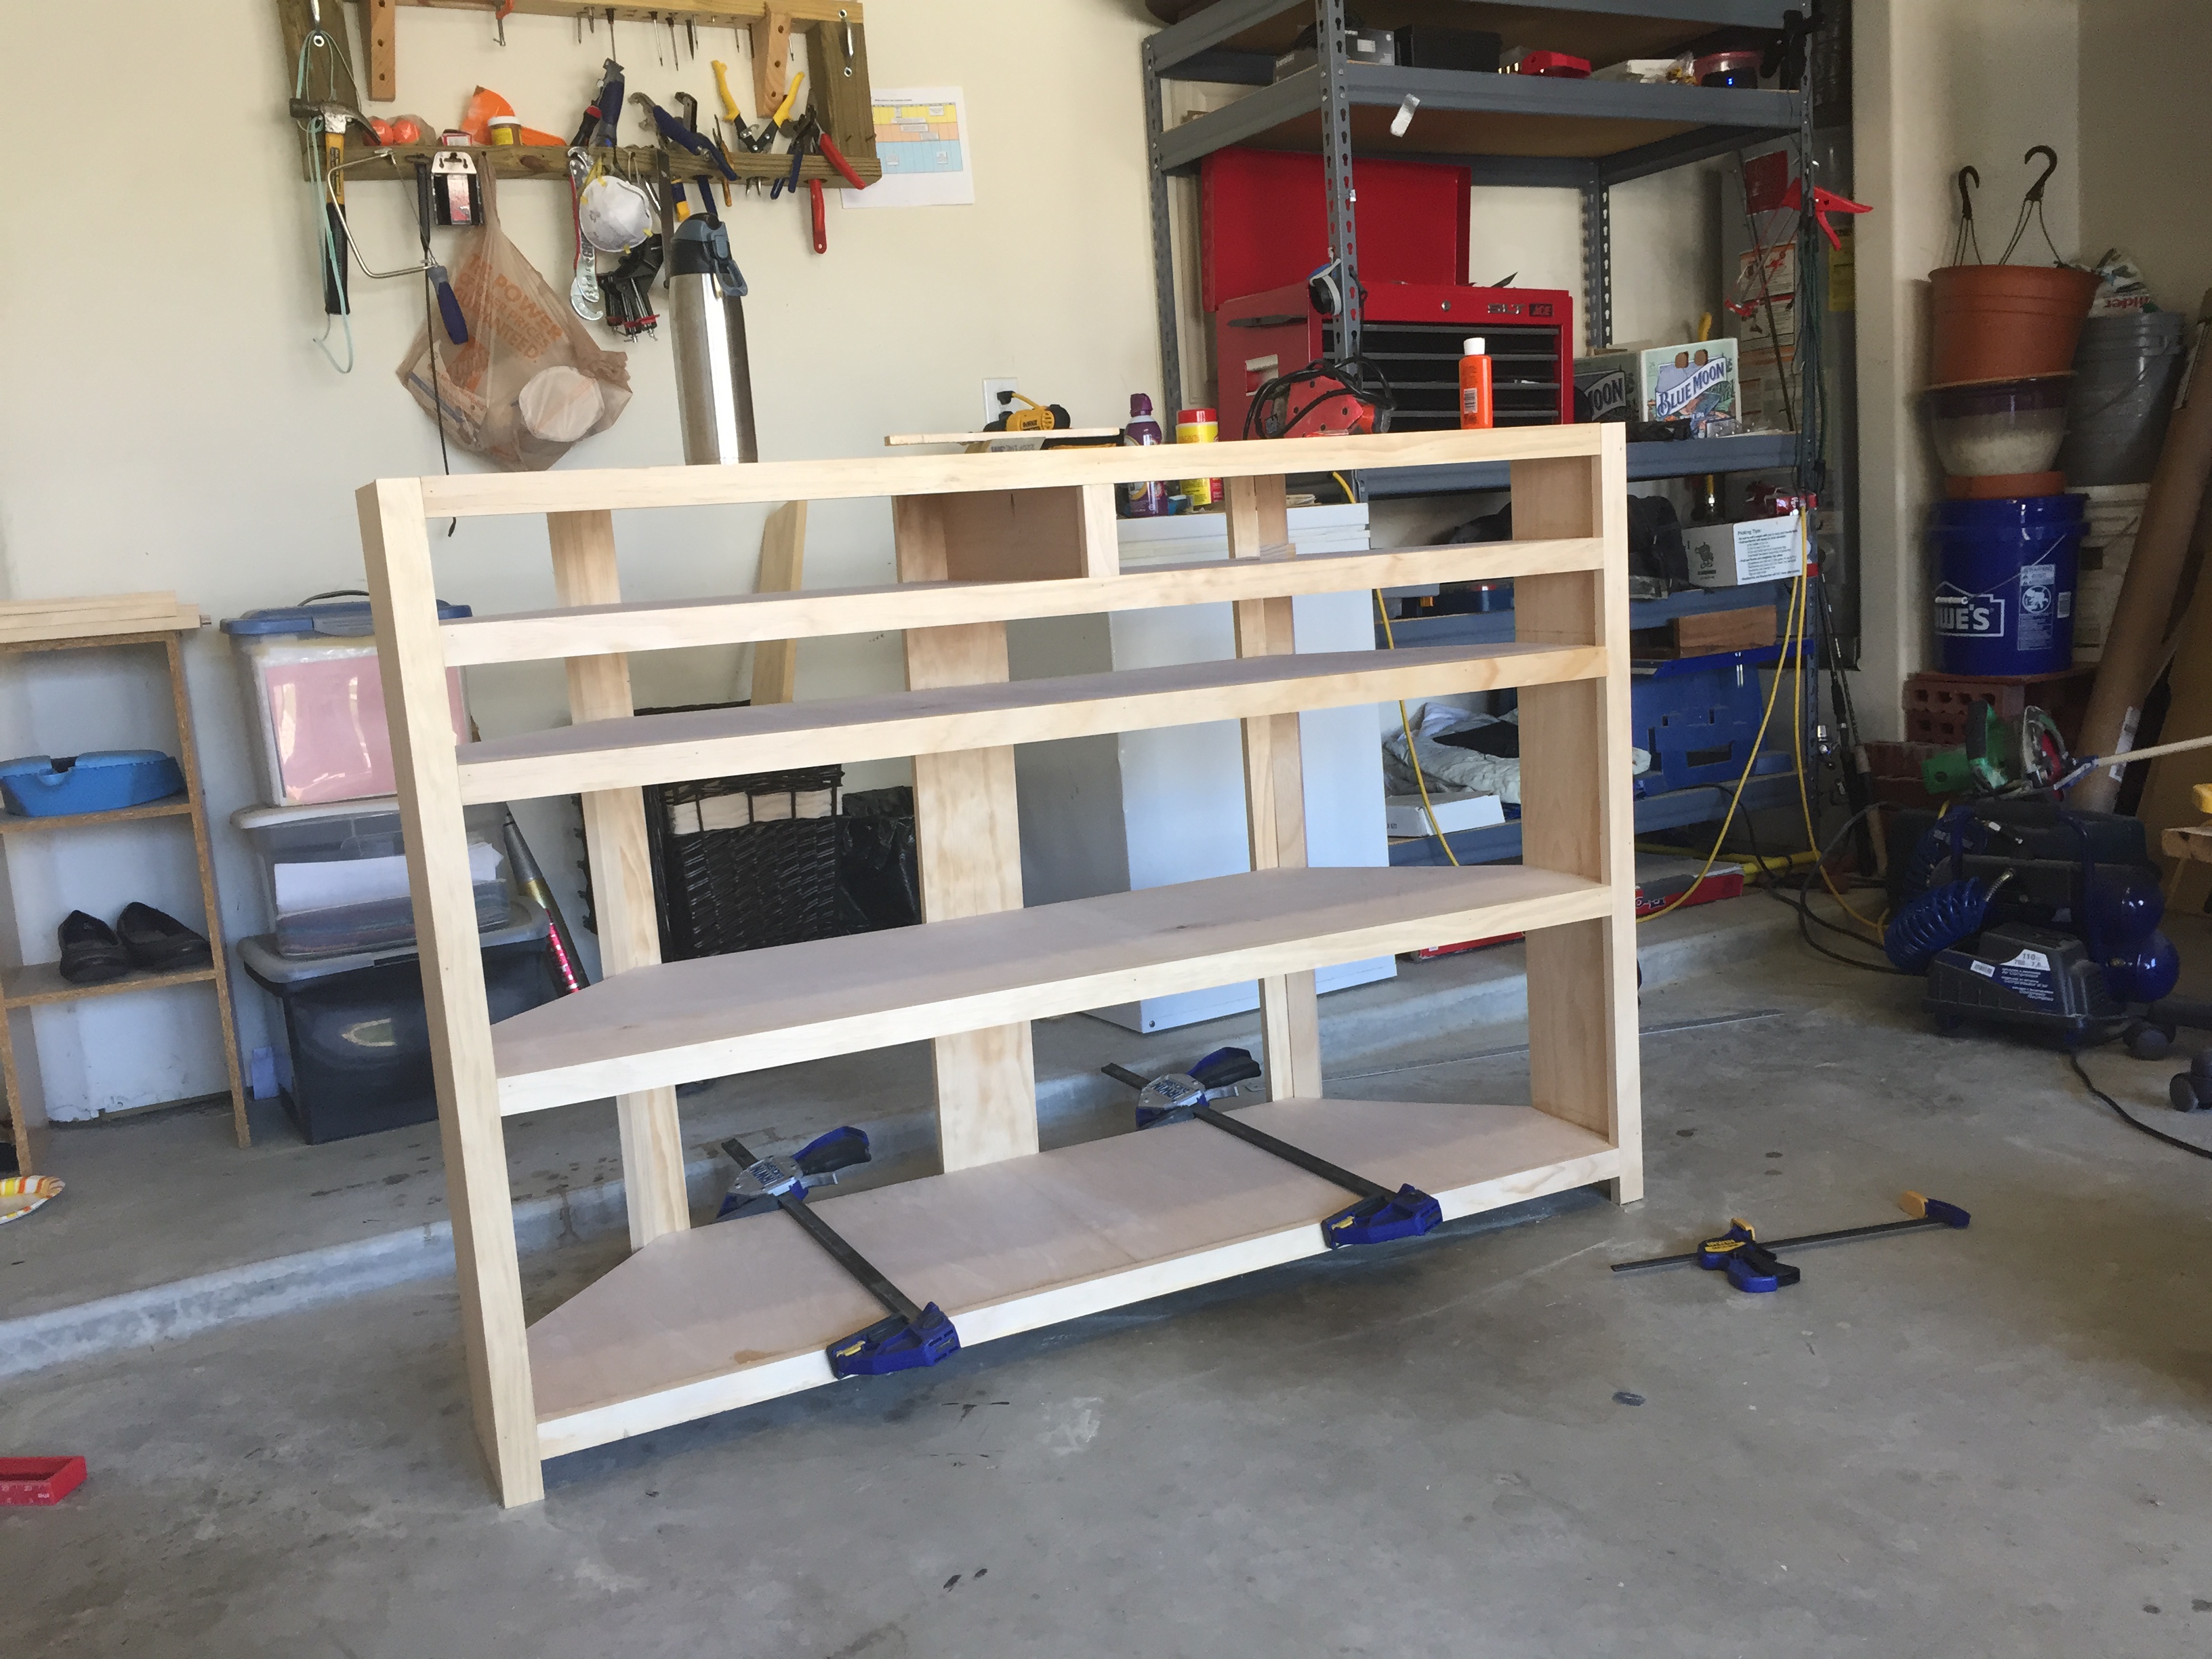
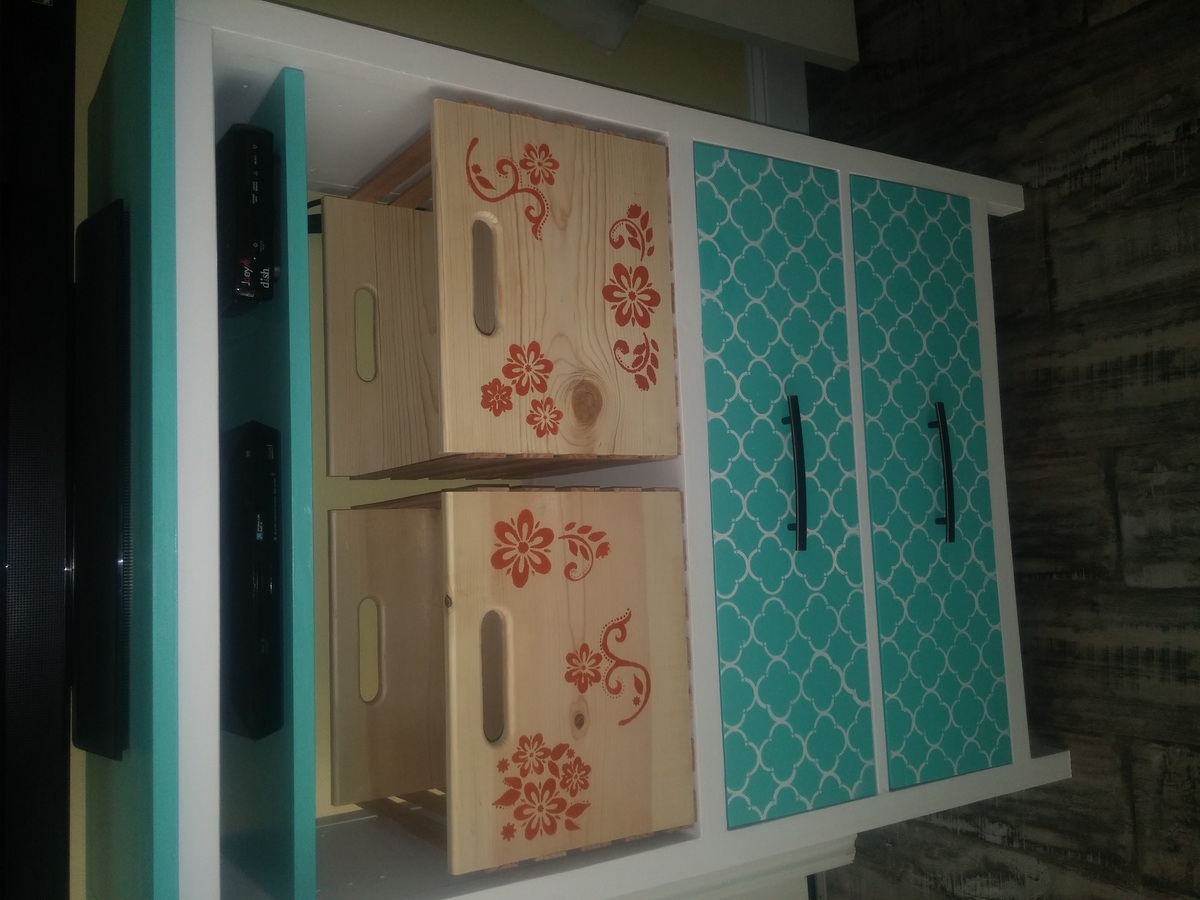
Patrick's Beach Cottage Media Center
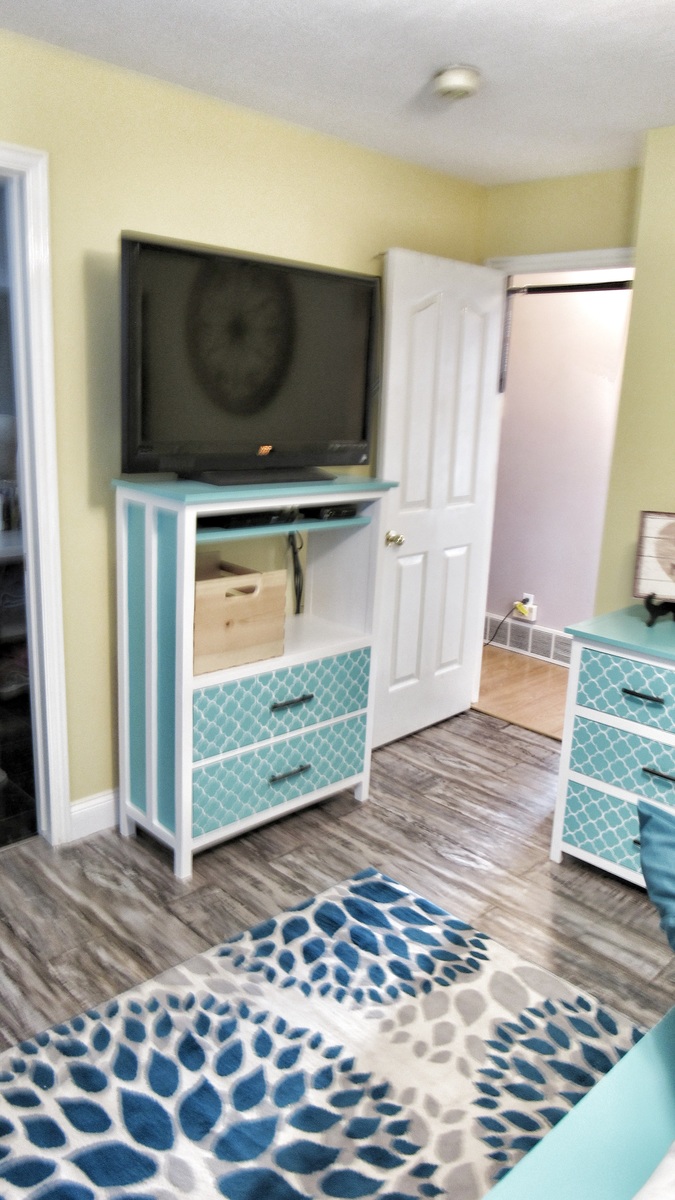
Modified the plans to have sides like the wide cabin dresser, and took out top two drawers for media center
Built from Plan(s)
Estimated Time Investment
Week Long Project (20 Hours or More)
Recommended Skill Level
Intermediate
Comments

Wed, 11/14/2018 - 05:54
Thanks, the stenciling about
Thanks, the stenciling about killed me... Stupid OCD... lol
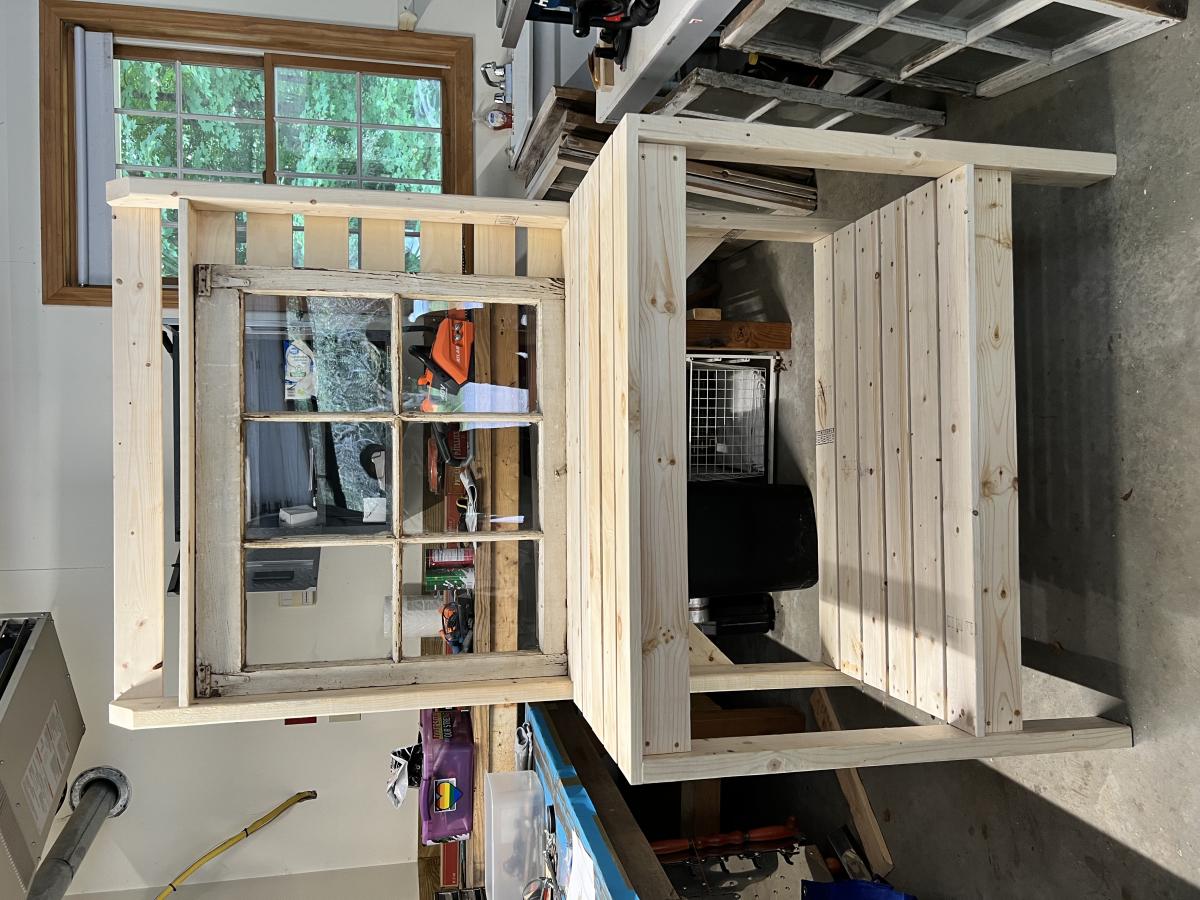
Simple 2x4 potting bench modified to include antique window.

I made this for my Mom as a birthday gift. I adjusted the dimensions a bit to accommodate the window, gave it a shabby chic look, and then added some decorative hardware. Very happy with the result!
Built from Plan(s)
Comments
Mon, 07/25/2022 - 21:43
Great gift!
The end result is fantastic. I am sure your mother is thrilled! Thanks for sharing:)
Red Coat Tree
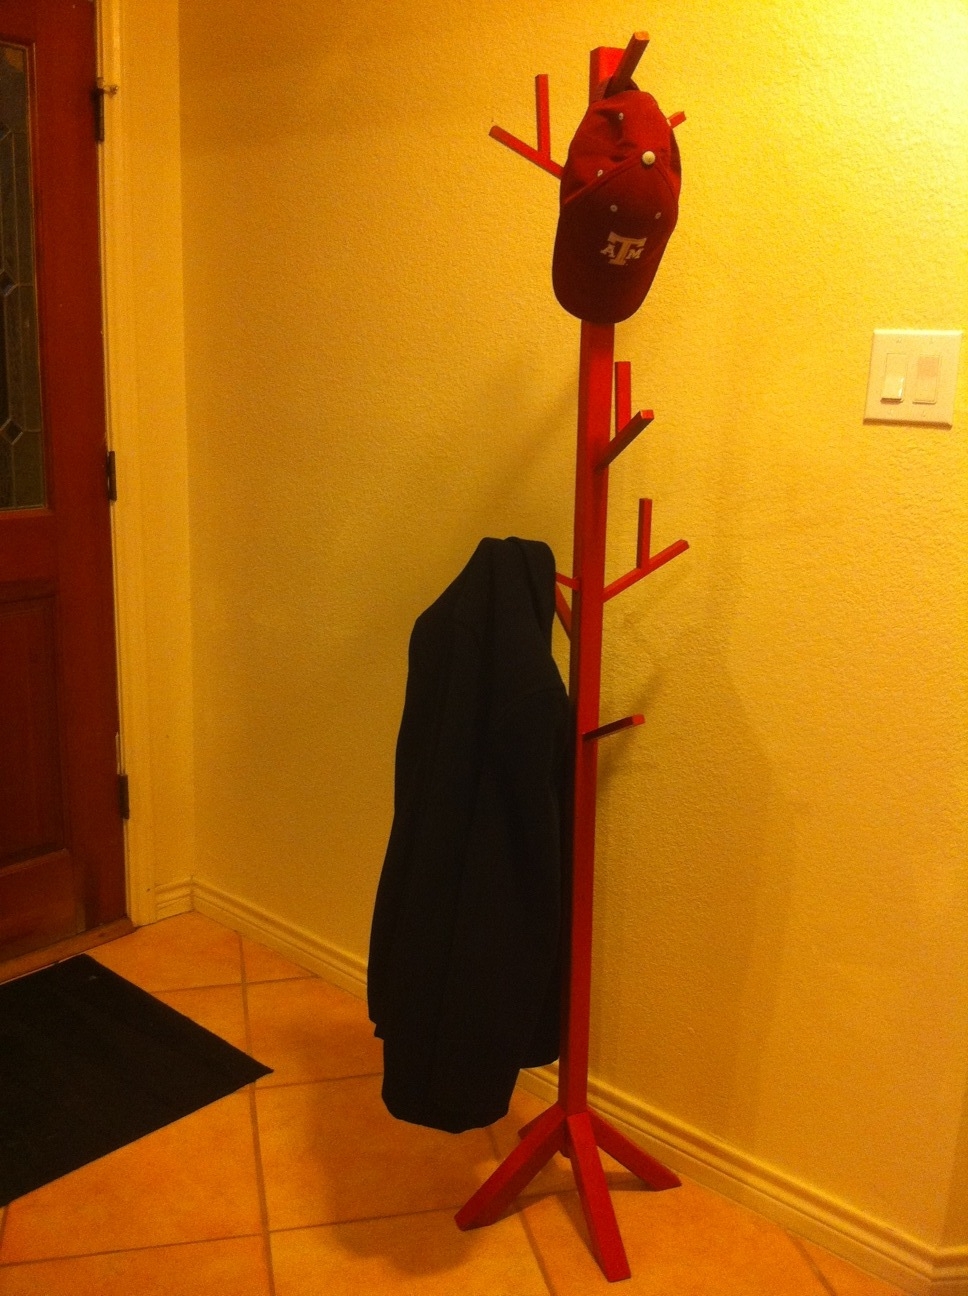
So I finally painted my coat tree this weekend (in the 105+ degree heat). I love it. It's far from perfect but it was only my second project and was a great learning project and serves great for towels, coats, hats, dog leashes, etc. Sorry about the poor photo.
Overall the project took much longer than it should have since I was cutting everything with a crooked cutting circular saw so getting the angles right took a long time. (I have learned that a power miter saw is worth every penny!)
I'm very happy with it. Thanks for the great plans Ana!
Estimated Cost
$10
Estimated Time Investment
Afternoon Project (3-6 Hours)
Finish Used
One coat of spray primer, two coats of Krylon Pimento spray paint (Satin finish).
Recommended Skill Level
Starter Project
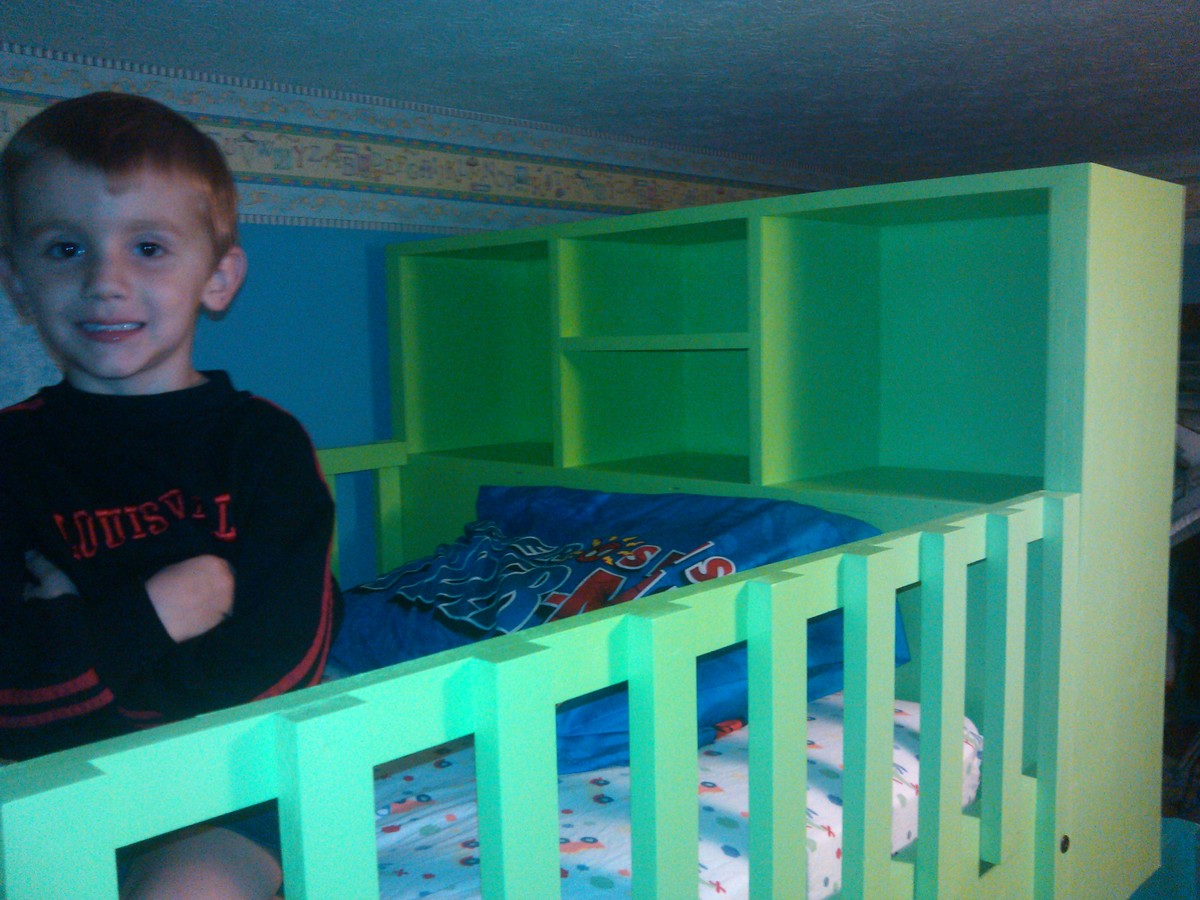
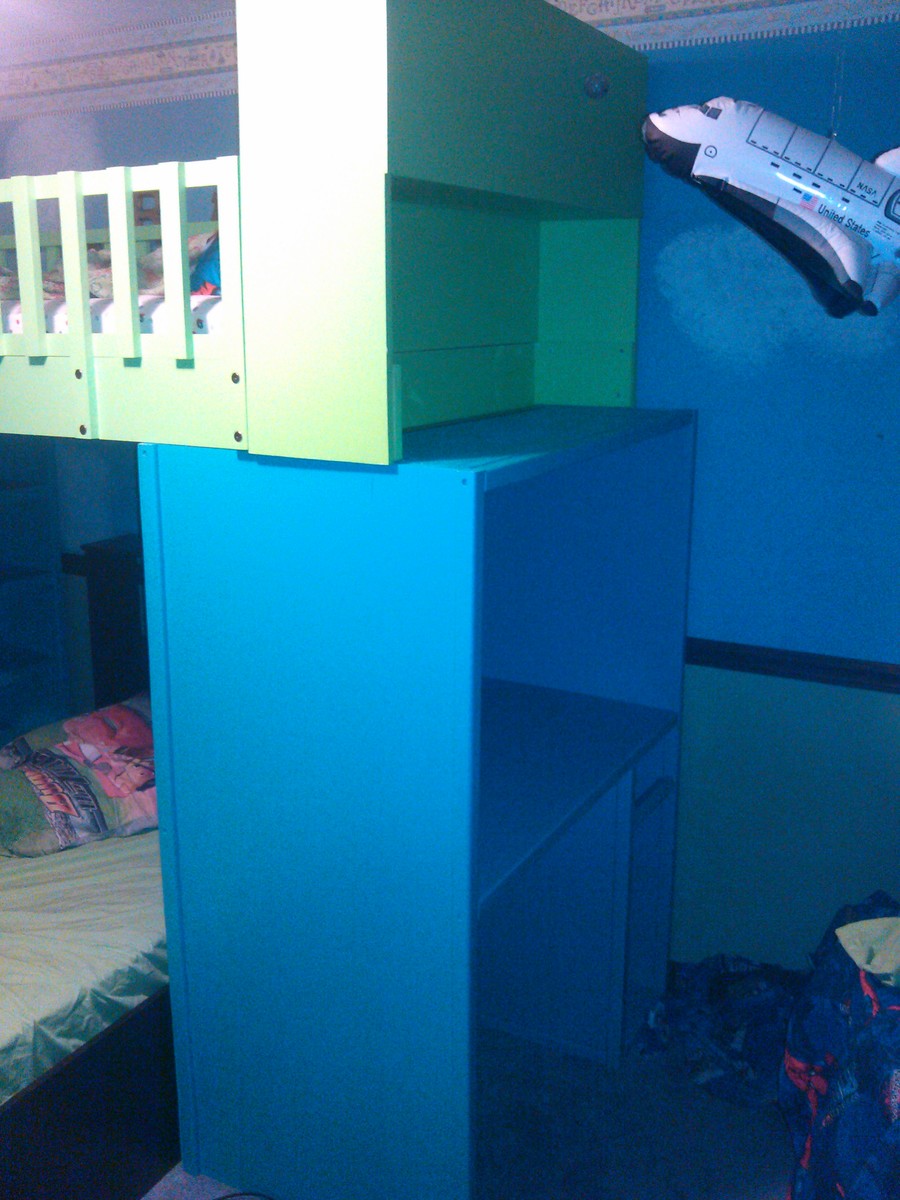
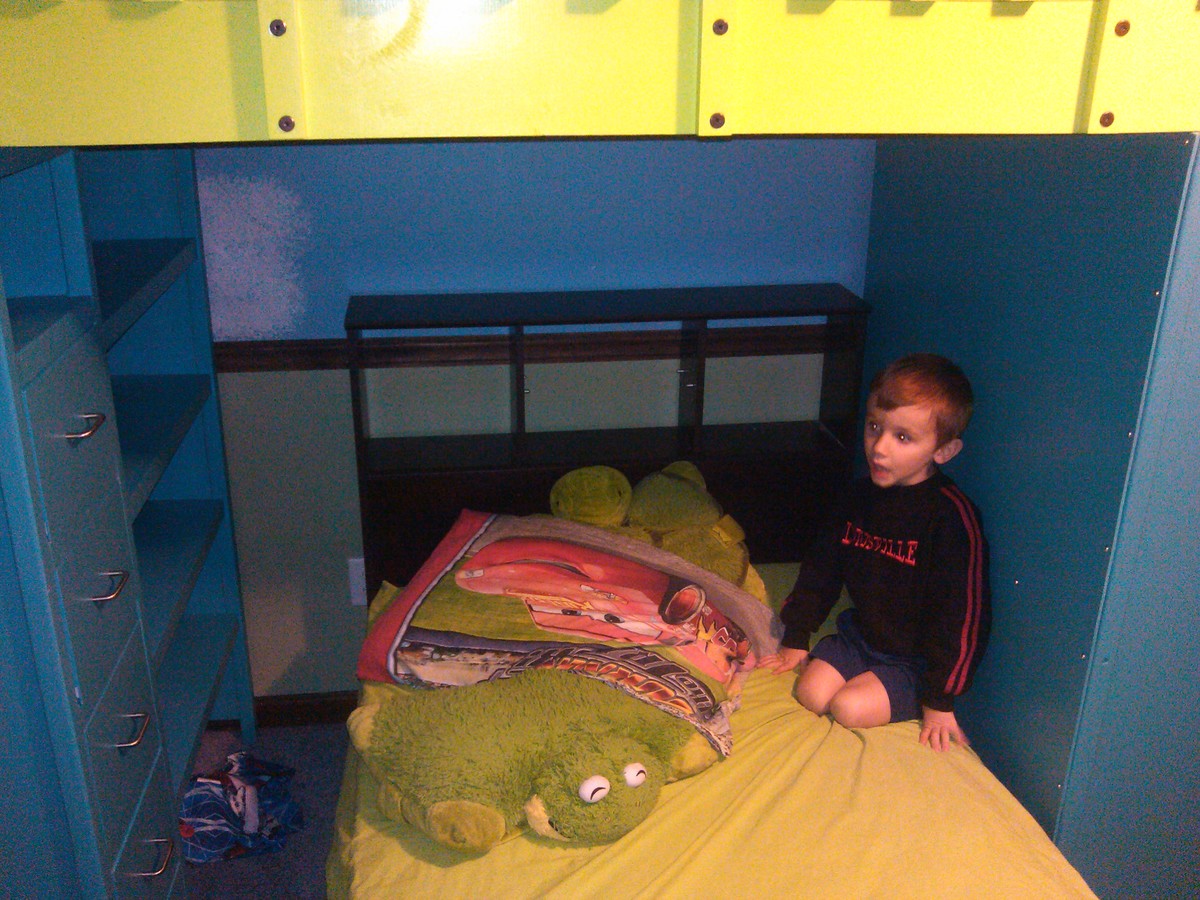
Modified Loft bunk
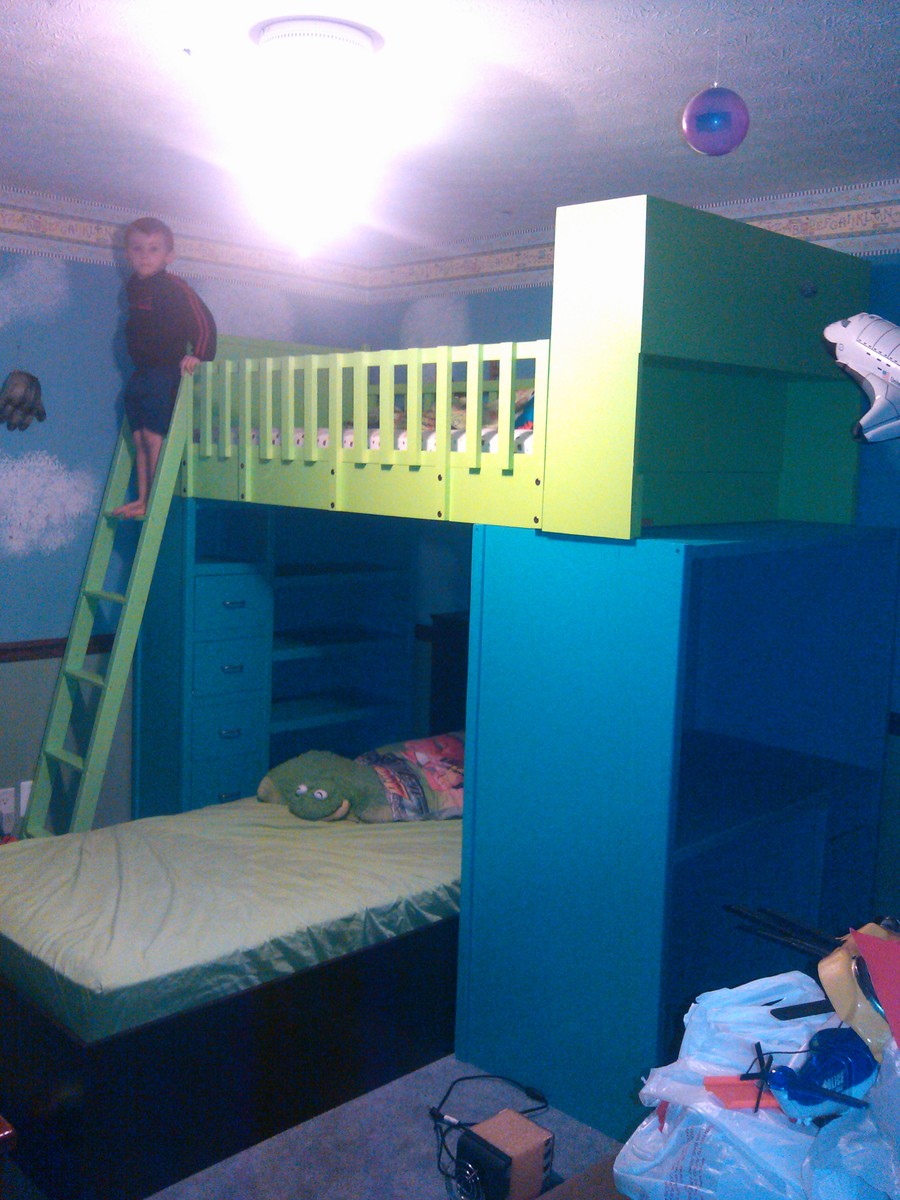
My boys have to share a room so I needed to have some storage and increased usability. I added a 10" deep headboard to the top bunk and extended the desk to 10" deeper. I couldn't put the ladder in the middle of the room so i had to put it beside the bookcase and in turn had to turn the drawers to the inside so they wouldn't be under the ladder. I then needed a gap between the bookcase and the bottom bunk to access the shelves the the drawers on the side of the bottom bunk, so now there is a large shelf above the desk which is also the underside of the headboard. I also modified the desk to accommodate a computer tower when they get a bit older. There will also be a slide out keyboard tray and a small drawer. (haven't built them yet.) I managed to build this without adding much materials at all. the headboard was all scraps from the rest of it. The desk and bookcase are also 3" taller than the plans(seemed too short, in hindsight, now its too close to the ceiling... oops. )
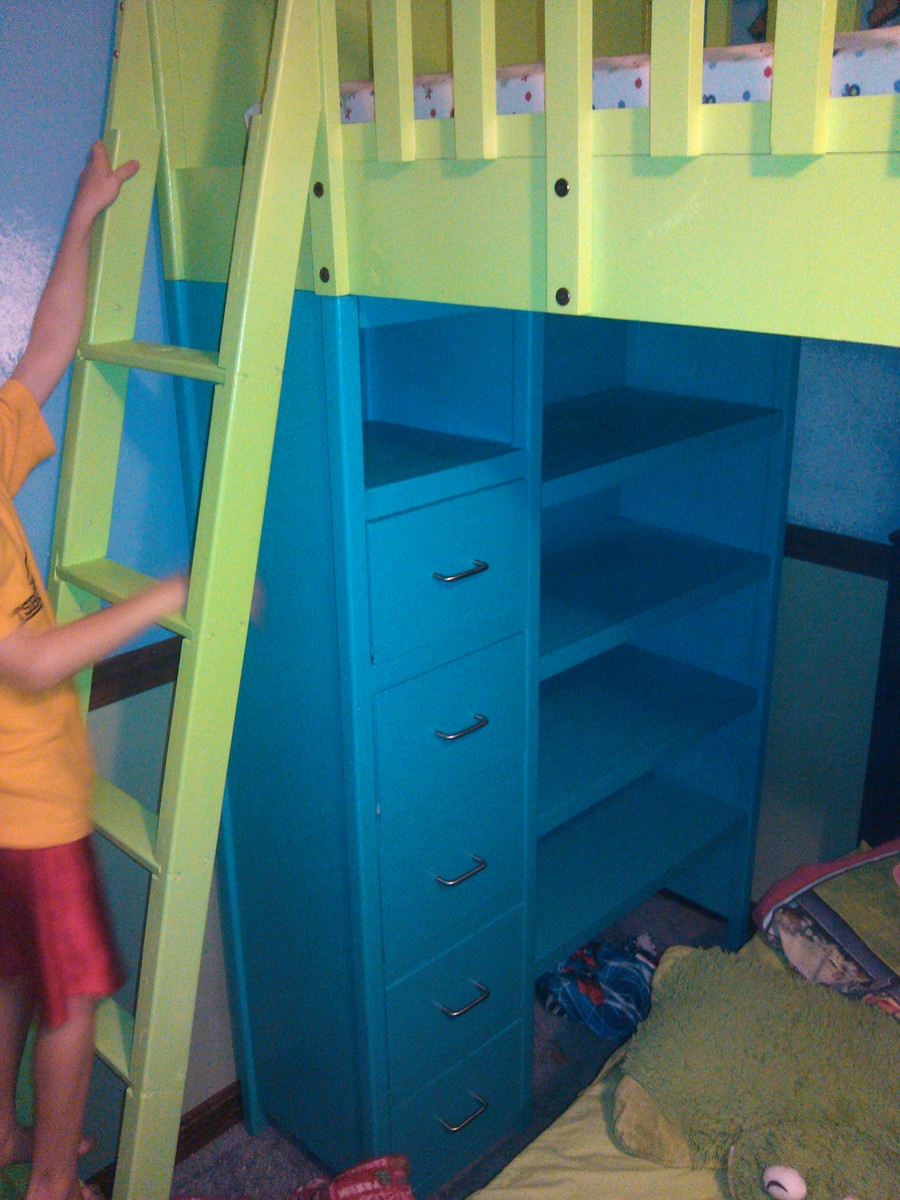
Built from Plan(s)
Estimated Cost
$500
Estimated Time Investment
Week Long Project (20 Hours or More)
Recommended Skill Level
Intermediate
Donated bed

I made another one of these bunk beds for a family near my community. This time I made all cuts from longer boards 16' + The boards had less nknots, which required less sanding and came out better!
Built from Plan(s)
Estimated Cost
220.00
Estimated Time Investment
Weekend Project (10-20 Hours)
Finish Used
Watco Medium walnut (2 coats)>
Recommended Skill Level
Beginner
Comments
Red Hen Home: Vanity Project
Although it looks like a console now, the eventual use of this project will be as a vanity with a top-mount sink!
Estimated Cost
$175
Estimated Time Investment
Weekend Project (10-20 Hours)
Finish Used
Minwax Dark Walnut. Satin Varathane.
Recommended Skill Level
Intermediate
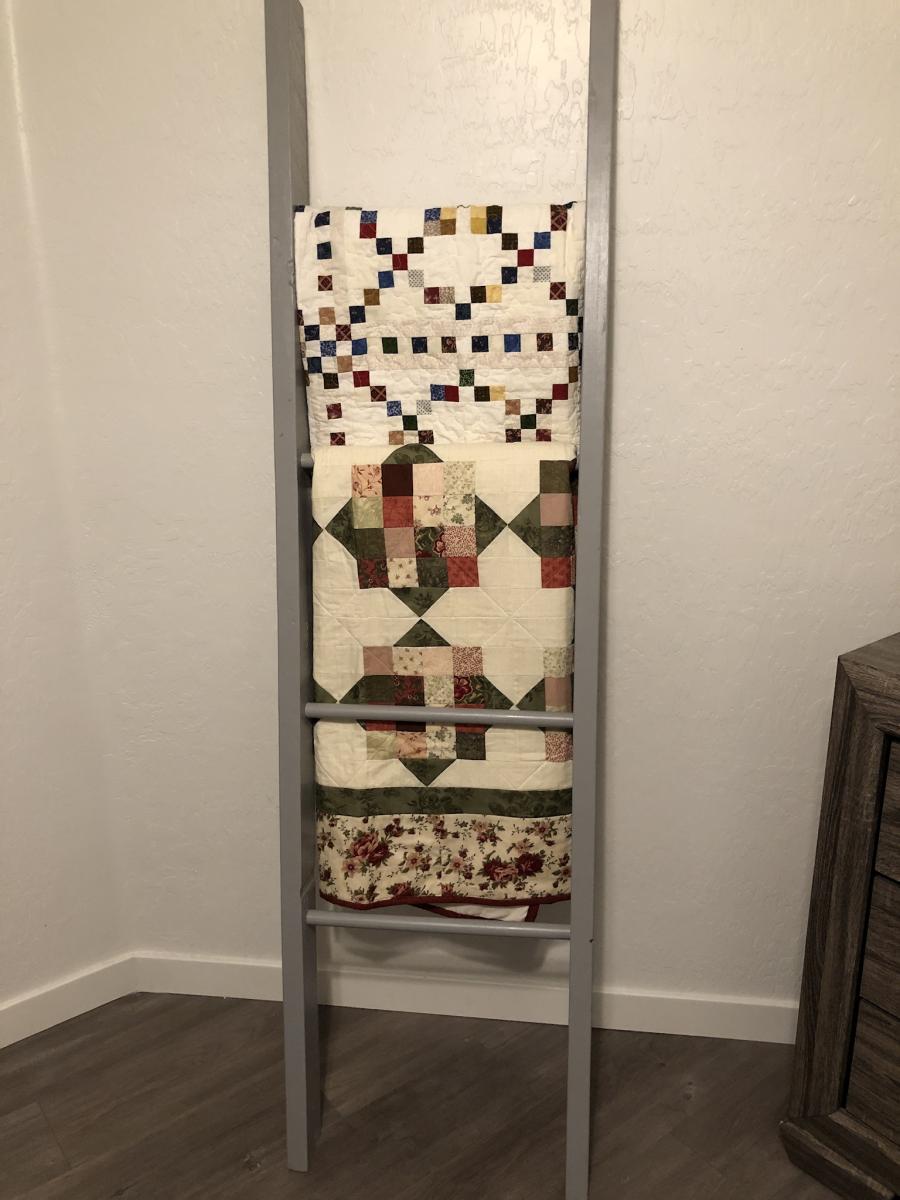
Blanket Ladder

My husband was an amazing woodworker and when he passed away he left me a wood shop full of tools. No skills but with amazing directions, I was able to make a blanket ladder to hold the quilts that I so dearly loved. I think my husband would be very pleased!
Built from Plan(s)
Comments
Fri, 08/05/2022 - 12:06
Very sweet and touching!
This is fantastic, great job indeed, thank you for sharing.
Playhouse loft bed
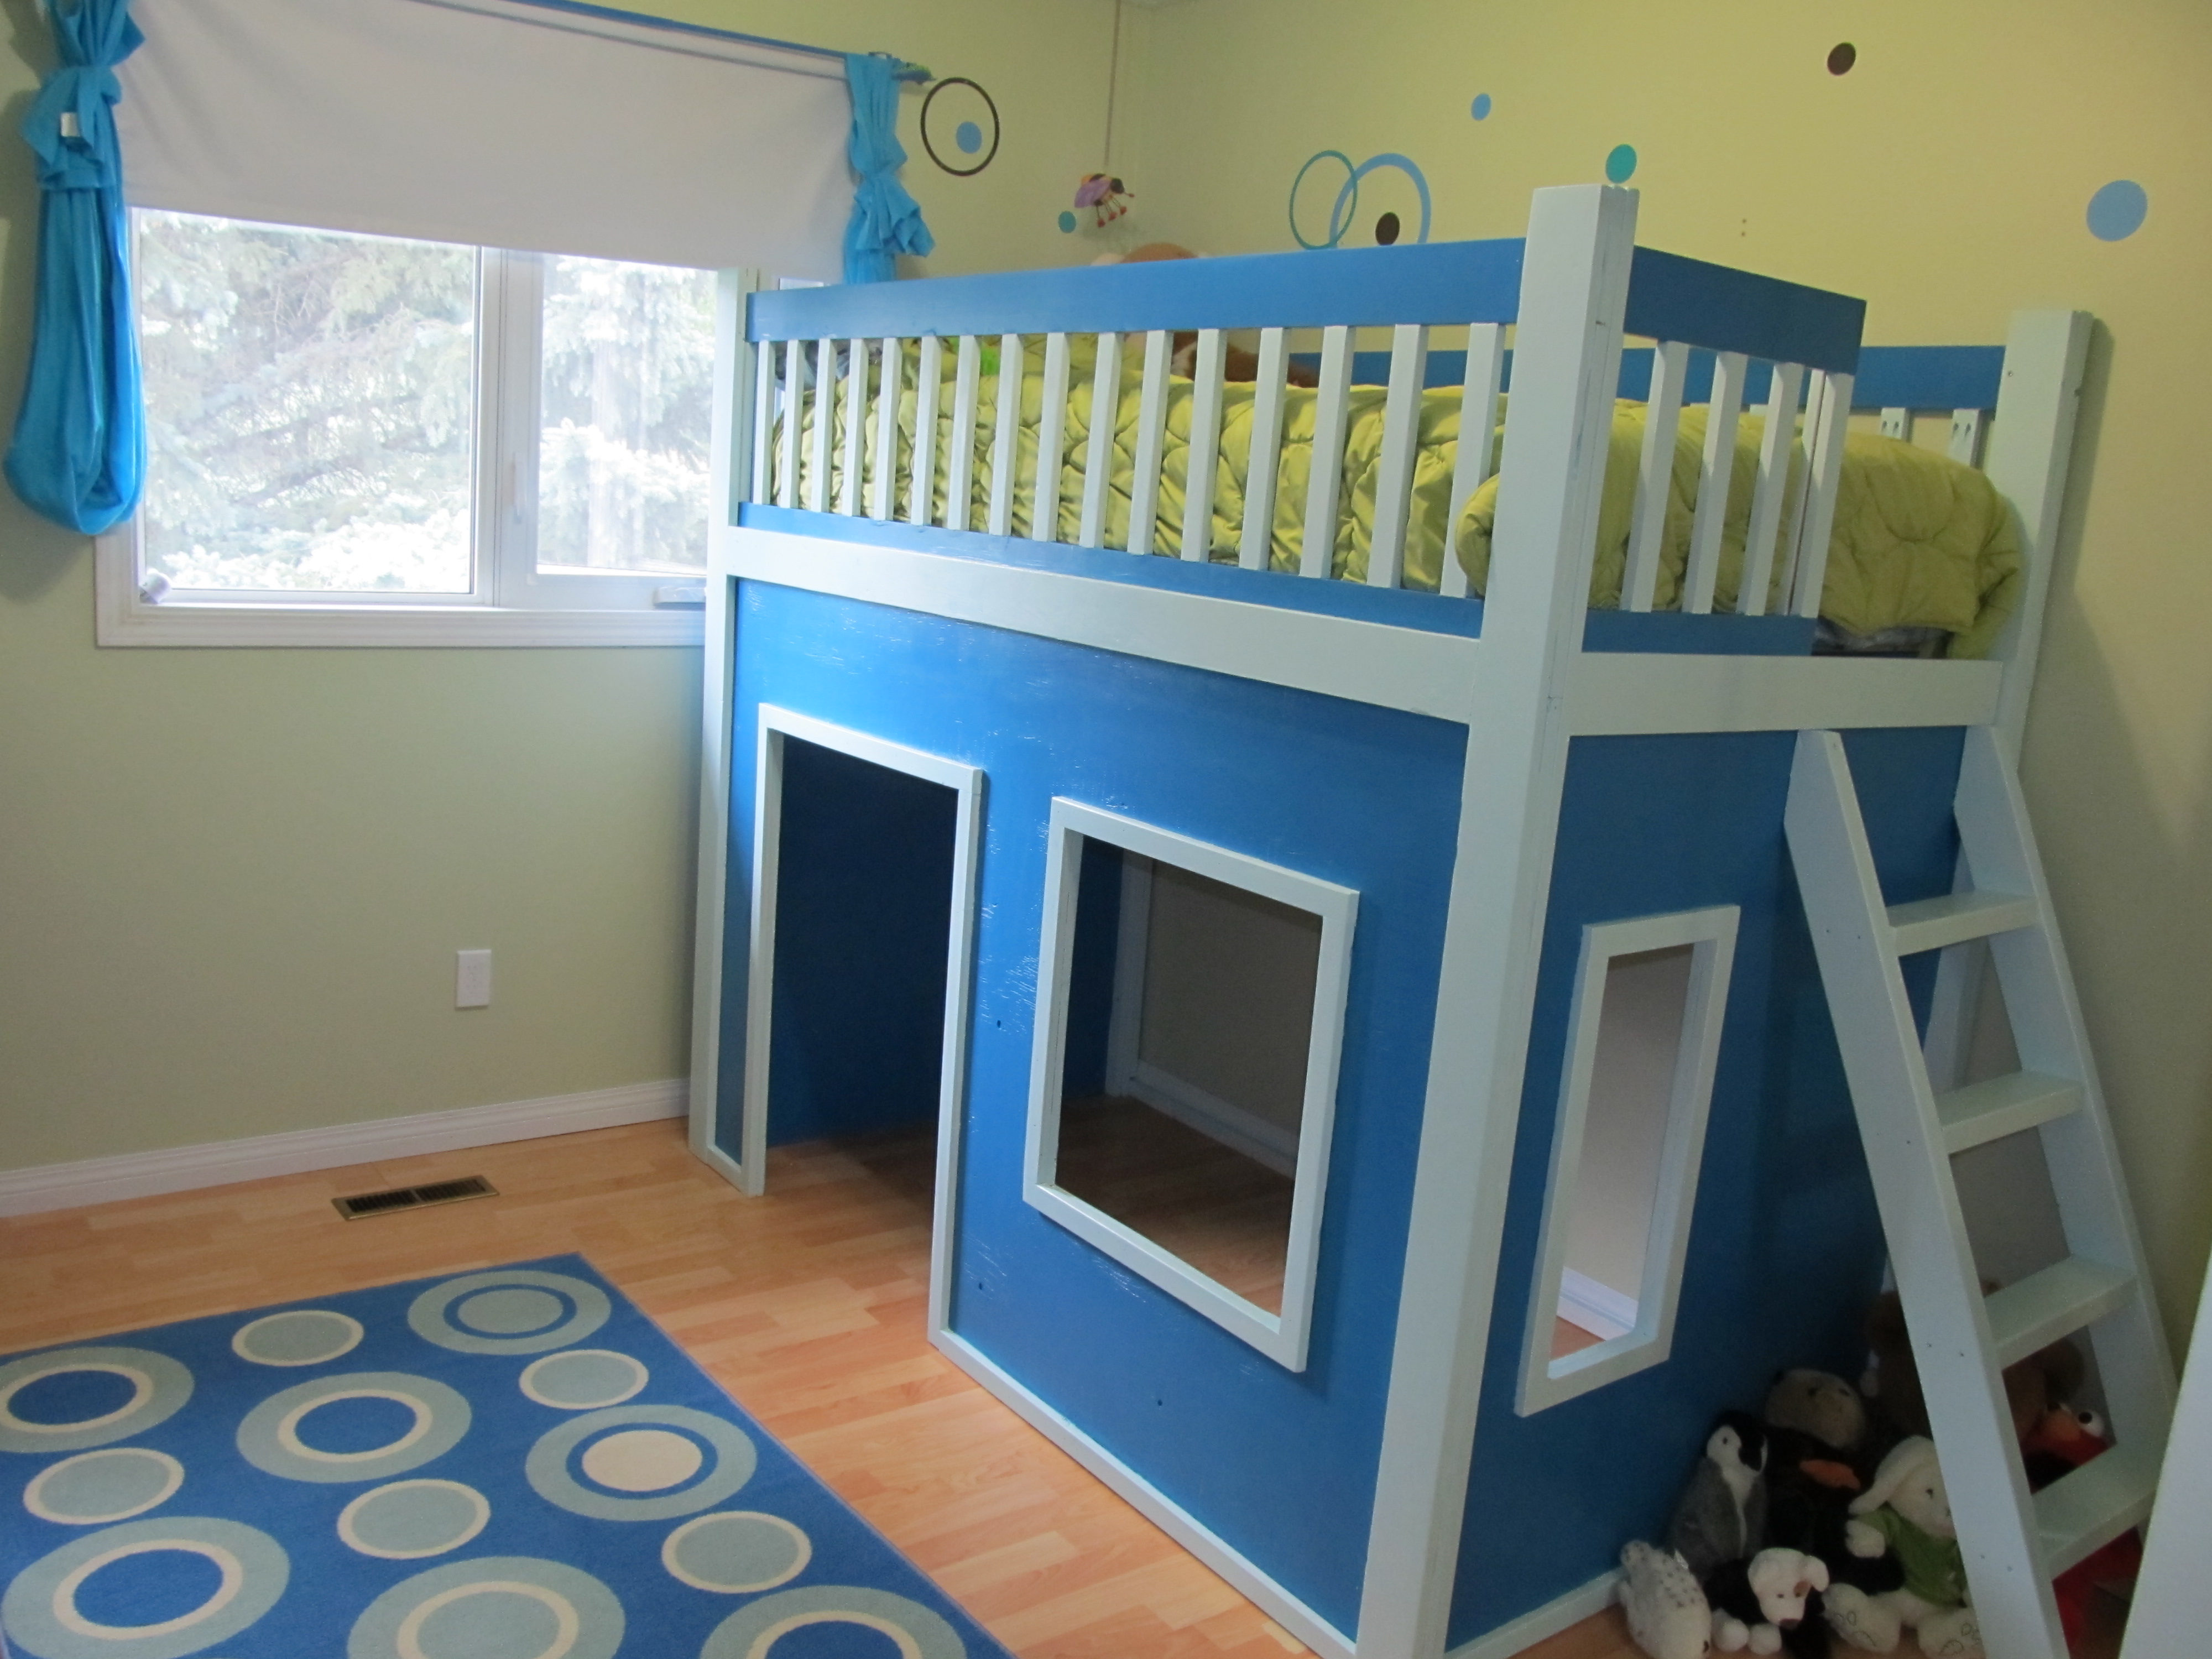
This is my very first project! I had so much fun building this for my son. His room wouldn't fit the stairs so I modified the ladder so that it was inclined to make it a bit easier to climb and less scary for him. This was such a fun project to take on. Thanks Ana for the plans!
Built from Plan(s)
Estimated Time Investment
Week Long Project (20 Hours or More)
Recommended Skill Level
Beginner
Comments
Sun, 12/11/2011 - 12:35
Painting Loft Bed
Hi. my husband is just about finished building this bed, and now it's time for me to paint it. Just wondering how you painted it for a nice finish. Did you use rollers or brushes? And tips on technique?
Thanks!
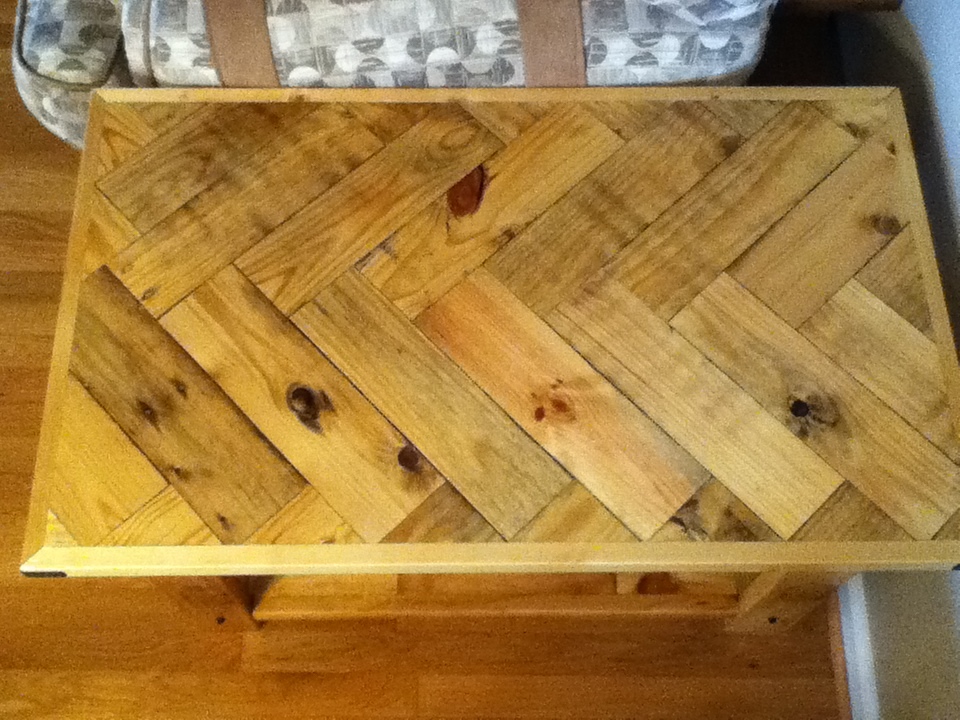
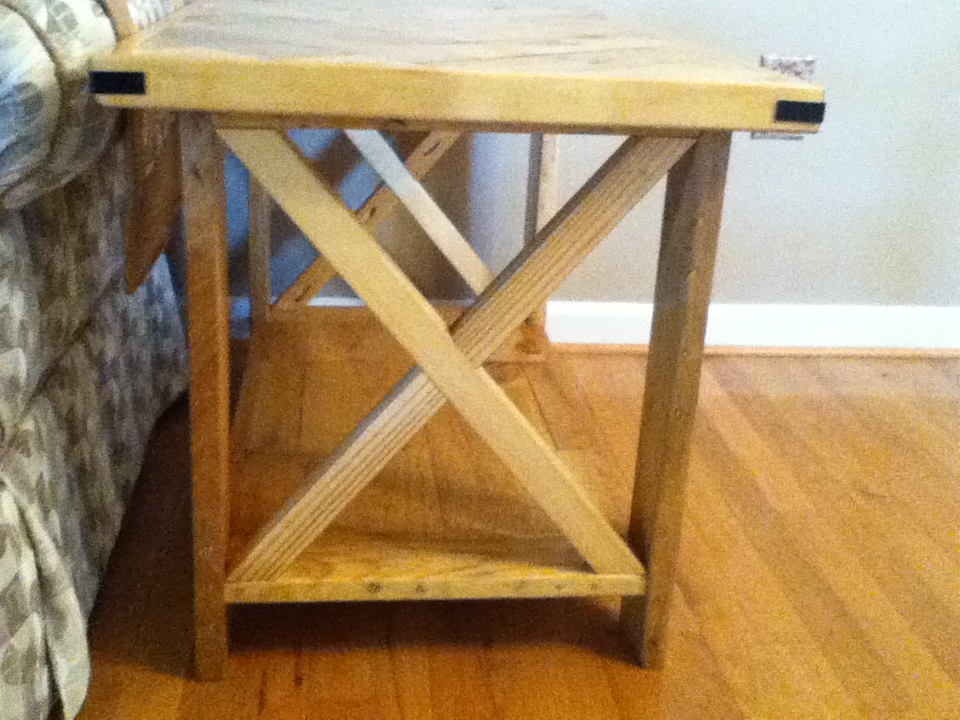
Rustic X End Table
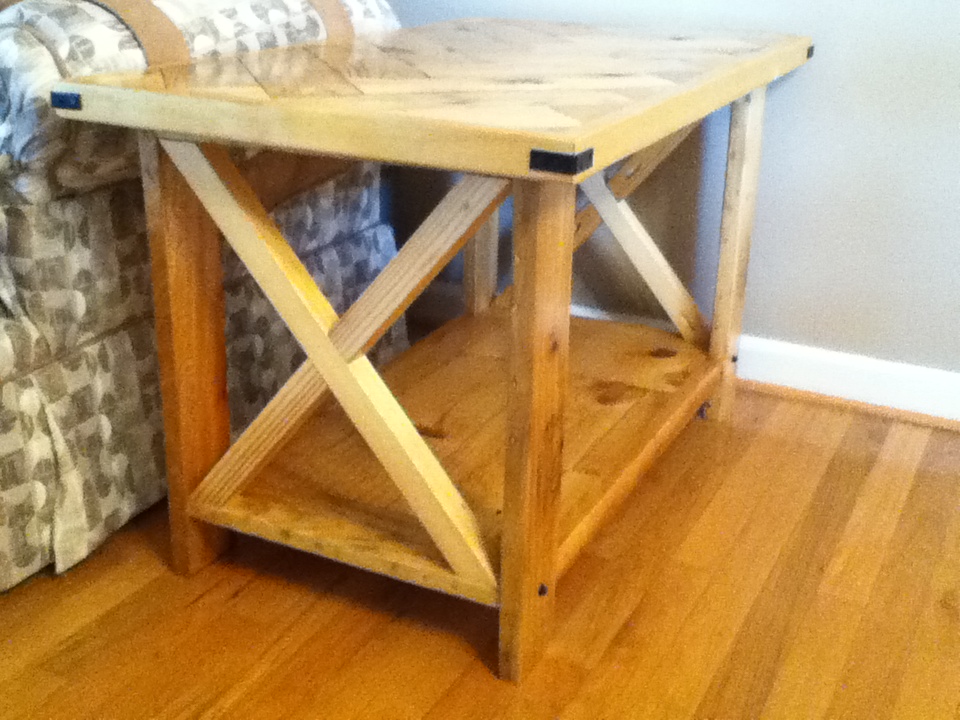
I modified the original plans to fit the height and length of my sofa as well as to show off the chevron planks. I was offered some pallets...so, I greedily accepted them, to which my husband rolled his eyes and sarcastically said, "Great, more wood!" I tried to make all of the table from the pallets but I ended up using pine for the table edging and the "X."
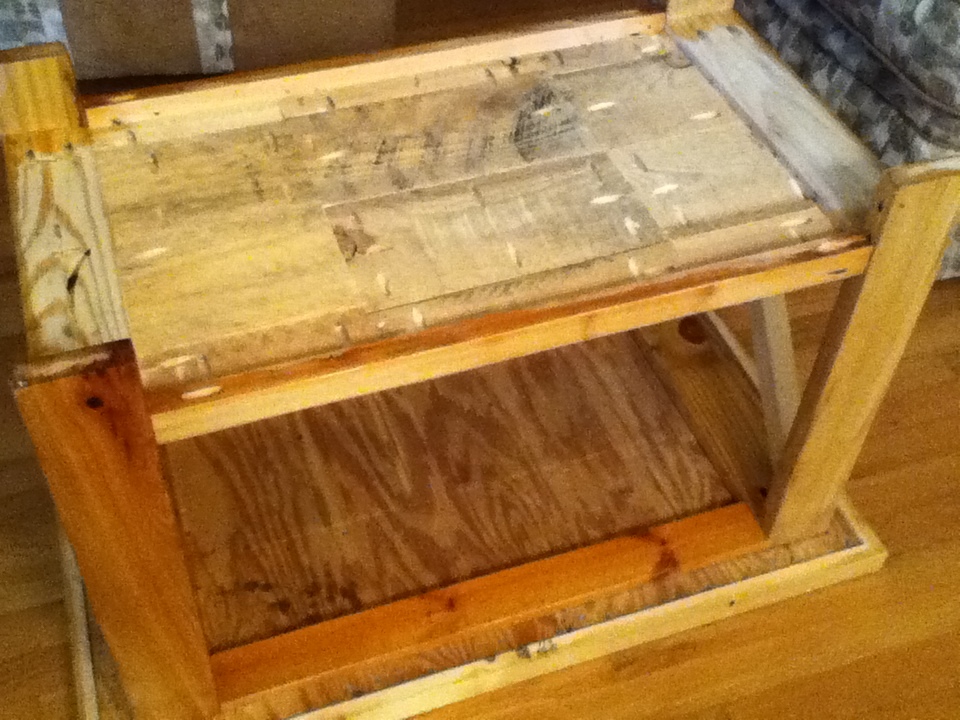
I laid out the table top in a chevron style on 1/2in plywood, glued and screwed them in from the bottom with wood screws. I attached edging with pocket holes. For the bottom part of the table, I attached larger pallet boards using glue and pocket holes instead of attaching to plywood. I actually attached the edging first to the bottom boards and then attached to the table rather than attach the bottom edging and then try to make the boards fit. I sanded the top and bottom tables with 40, then 80, then 120, and then 240 grit sand paper until smooth. I also sanded the legs the same way. To say that total time sanding for the entire project was 20 hours maybe an understatement. If you look at the underside picture, you can see the roughness of the wood...and I had already lightly sanded them! I ripped my own 1x2's for the edging and "X" from 2x4's with my table saw because I could not find anyone who sold unwarped wood...so frustrating!! The wood was so much straighter when I ripped them. I will rip my own wood as much as possible for now on!!
The "X's" were a challenge and I ended up cutting the ends at a 47.5 degree angles. I do not know why I had such a problem. I had right angles, but the wood is imperfect in many ways and not perfectly straight. I attached the "X's" together and to the table with glue and pocket holes. The legs had ink stamping, so I tried to keep that and not sand the ink completely off.
I added the metal "bling." I dulled the metal, primed and painted with metal paint. The paint chips off easily. So I think will end up replacing these pieces later on. The bolts were originally black, so they will stay.
Total time...several weeks because of all the sanding. I cannot devote whole days to woodworking because of family and work and I can only sand one hour at a time before my hands start to go numb. Also, the Waterlox requires at least 24 hours between each application. Cost: approximately $15...for the pocket holes screws (fine Kreg screws), hardware, other wood screws and 1 8ft 2x4. Everything else I already had (I already had the Waterlox, bolts, screws) or was given to me (pallets).

Built from Plan(s)
Estimated Cost
$15 +
Estimated Time Investment
Week Long Project (20 Hours or More)
Finish Used
Waterlox. I have a friend who does beautiful woodworking and he considers staining (and polyurethane) a sin. Because pallet wood has unique coloring, grains and textures, I nervously leaned towards his "no stain" stance and did not stain. I used Waterlox sealer, 3 coats original and 1 coat gloss, for protection. The Waterlox brought out a lot of color in the pallet wood, but since the pine has less color to bring out, the pine looks a little lighter than the pallet wood, which may look odd in the pictures but is really cool looking.
Waterlox is expensive, but I like it much better than polyurethane. Waterlox is easier to work with in that I do not get ANY bubbles or brush marks. Polyurethane seems to dry before I am finished, making it so difficult to work with and to get nice look. The Waterlox may take 24 hours to dry between applications, but I can apply it and keep "working" it until I like the way it looks and then it dries evenly without drips and without dull or uneven looking patches. Also, in the future, if I want to add more coats, I can without stripping. When the Waterlox is dry, it does not have a plastic look to it and it does not yellow, so my pine will keeps it color.
Waterlox is expensive, but I like it much better than polyurethane. Waterlox is easier to work with in that I do not get ANY bubbles or brush marks. Polyurethane seems to dry before I am finished, making it so difficult to work with and to get nice look. The Waterlox may take 24 hours to dry between applications, but I can apply it and keep "working" it until I like the way it looks and then it dries evenly without drips and without dull or uneven looking patches. Also, in the future, if I want to add more coats, I can without stripping. When the Waterlox is dry, it does not have a plastic look to it and it does not yellow, so my pine will keeps it color.
Recommended Skill Level
Intermediate
Tryde End Table with a Colorado Logo
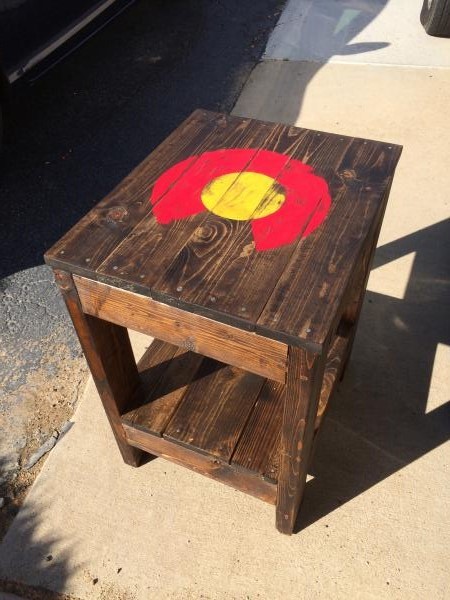
Skipped the 2x4 top and shelf and replaced with a 1x4 board. Got lucky with some scraps. The Colorado logo was distressed with a rotary sander.
Estimated Cost
$20
Estimated Time Investment
Day Project (6-9 Hours)
Finish Used
Dark stain and spray shellac
Recommended Skill Level
Intermediate
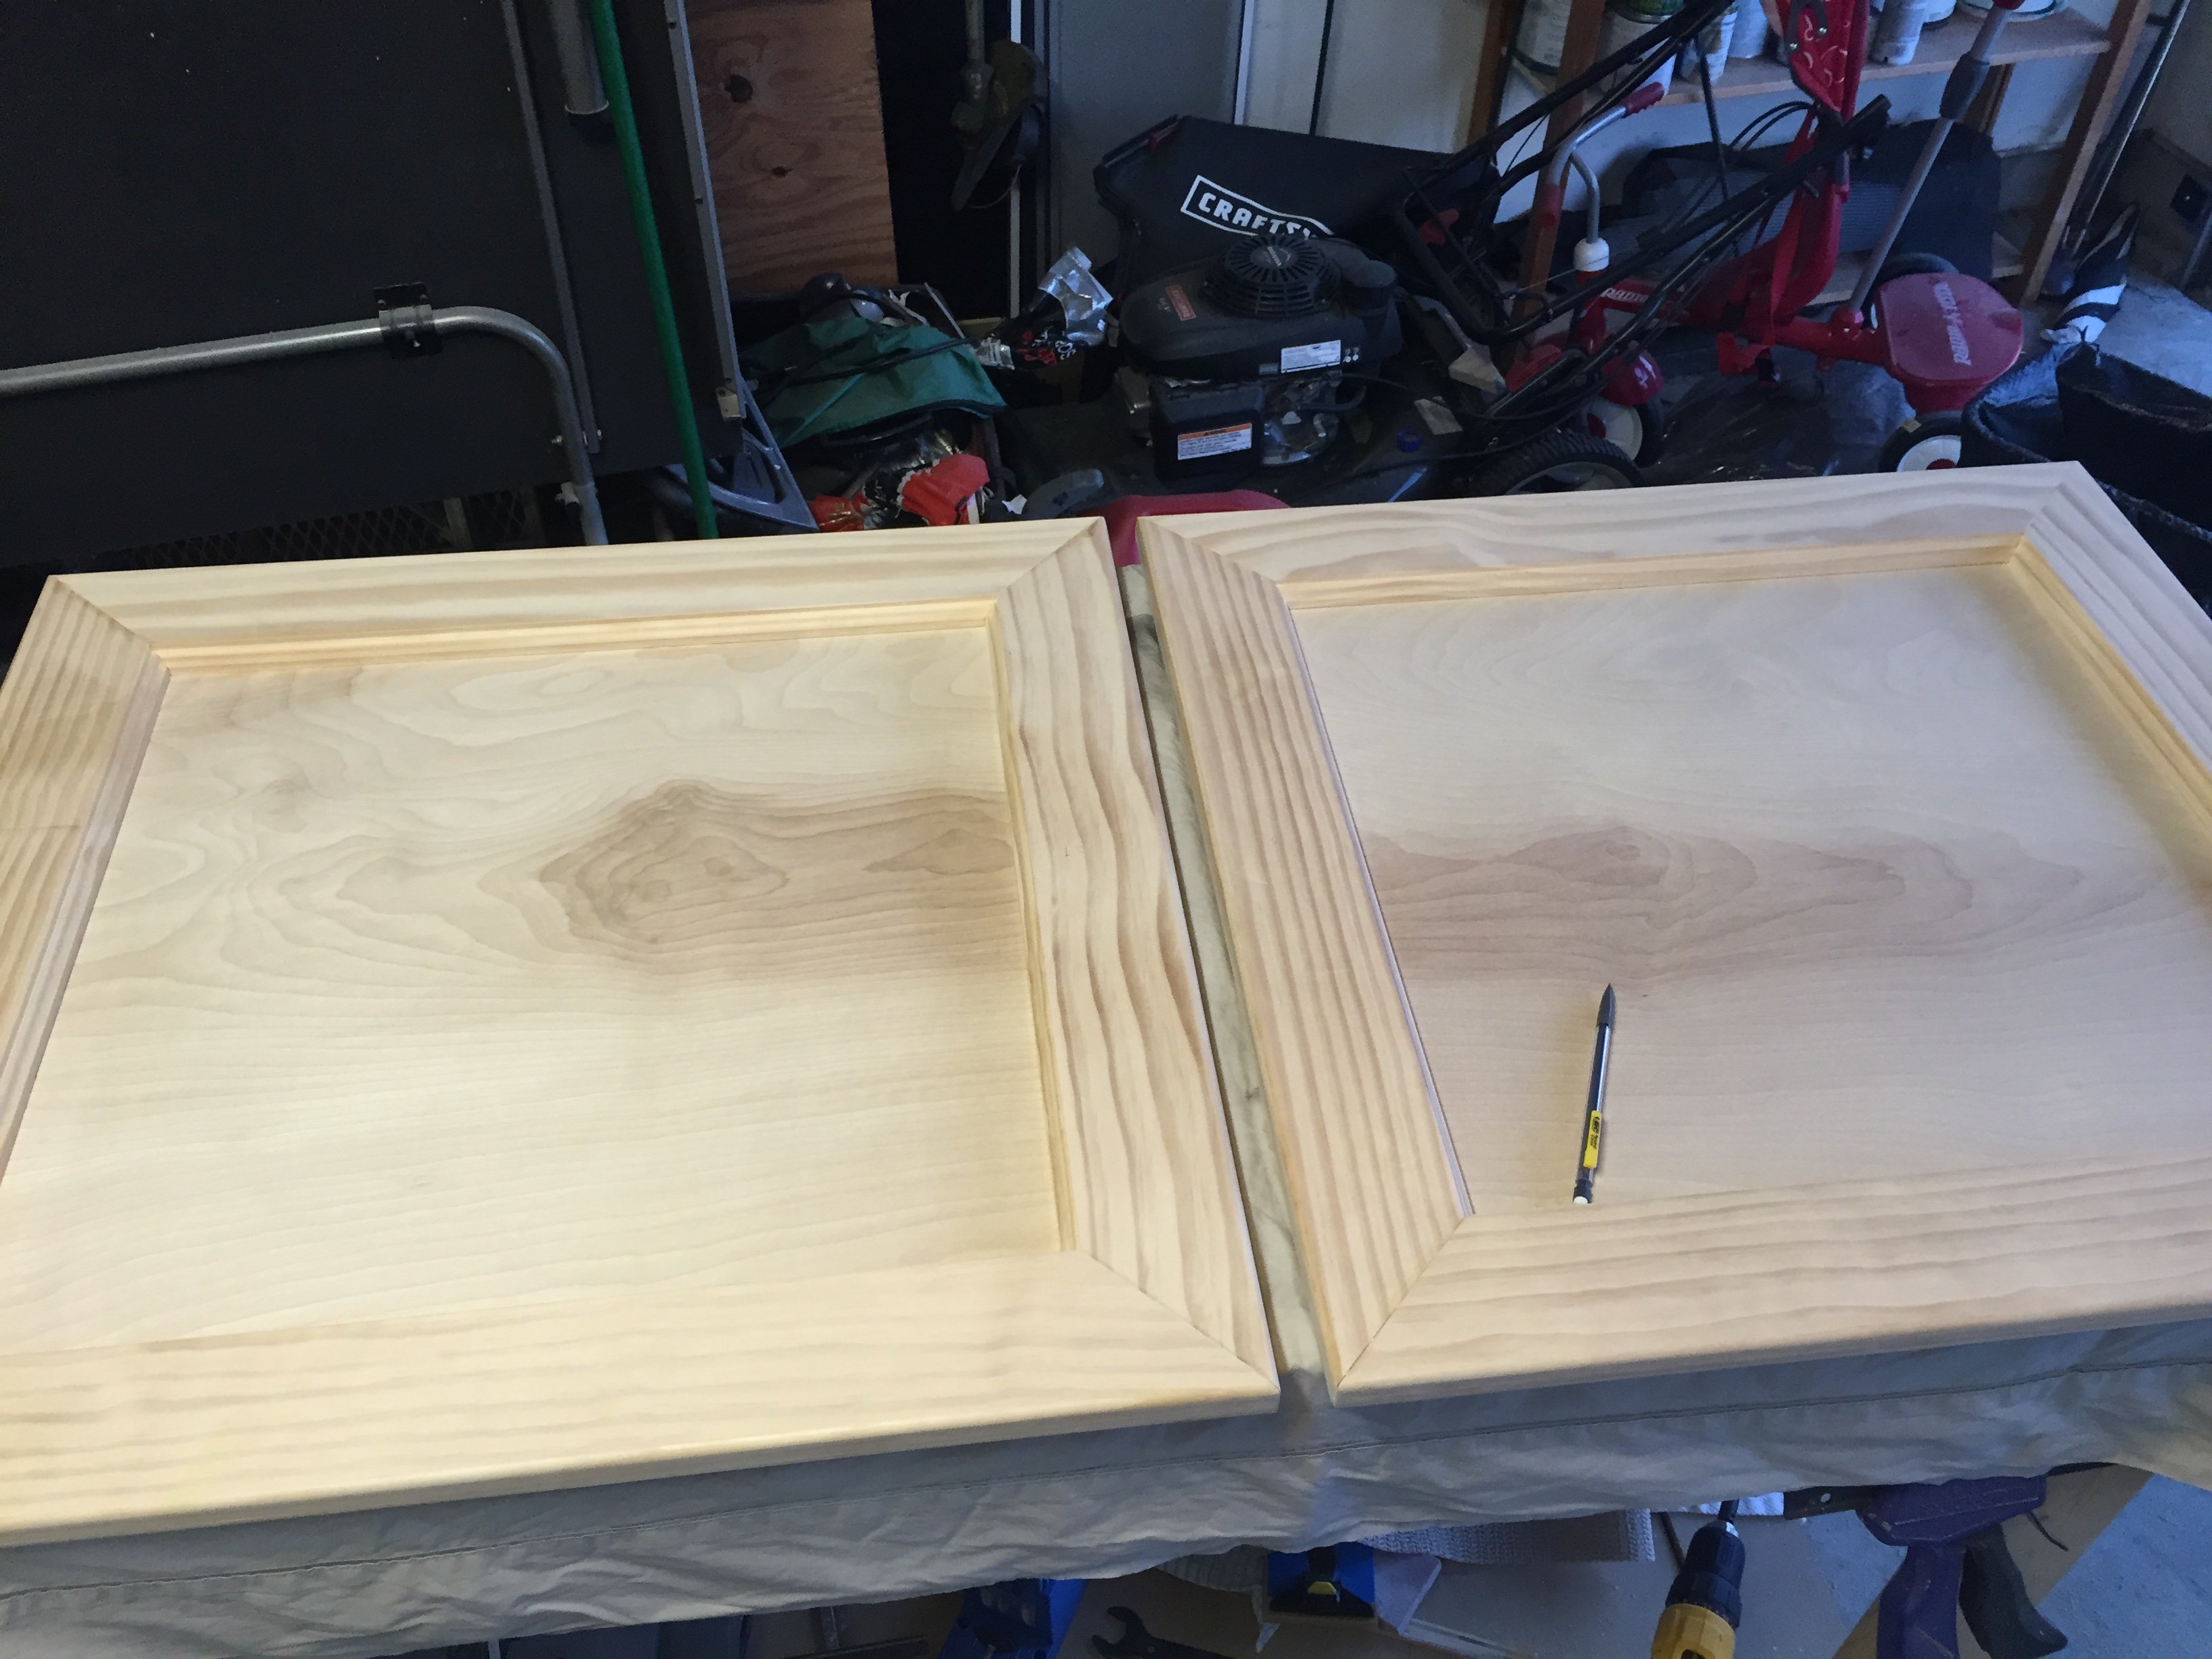
Kitchen Cabinets with Countertops
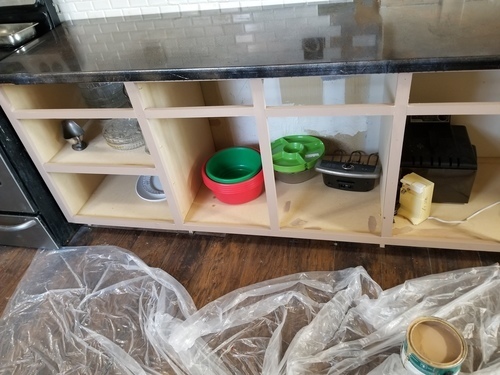
I would like to thank www.stonecoatcountertops.com for the ideas on the countertops,
first off I used 3/4 MDF for this project, Ana White's momplex cabinet plans and just extended the plans to the size i needed, i created the doors out of MDF cut to size and used a router to create the design on the edge and the countertops are made with MDF, expoxy,spray paint, and metallic powder in 91% alcohol. this plan was so eazy, and my kids had a blast doing it, Thanks Ana for the cabinet plans
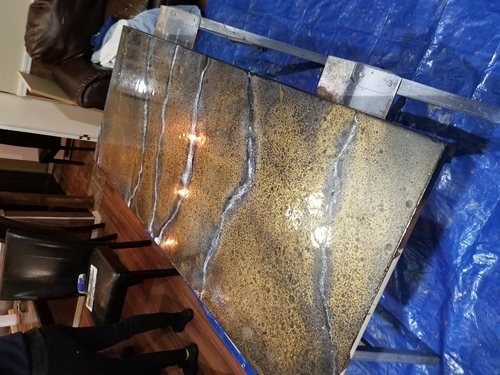
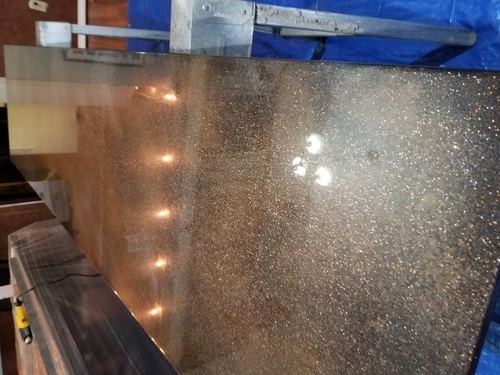
Estimated Cost
MDF $26 per Sheet- 2 sheets
Epoxy $95gal
spray paint
metallic powder $30
Epoxy $95gal
spray paint
metallic powder $30
Finish Used
Leftover paints i mixed together together the color.
Recommended Skill Level
Intermediate
Modern Park Bench Plan
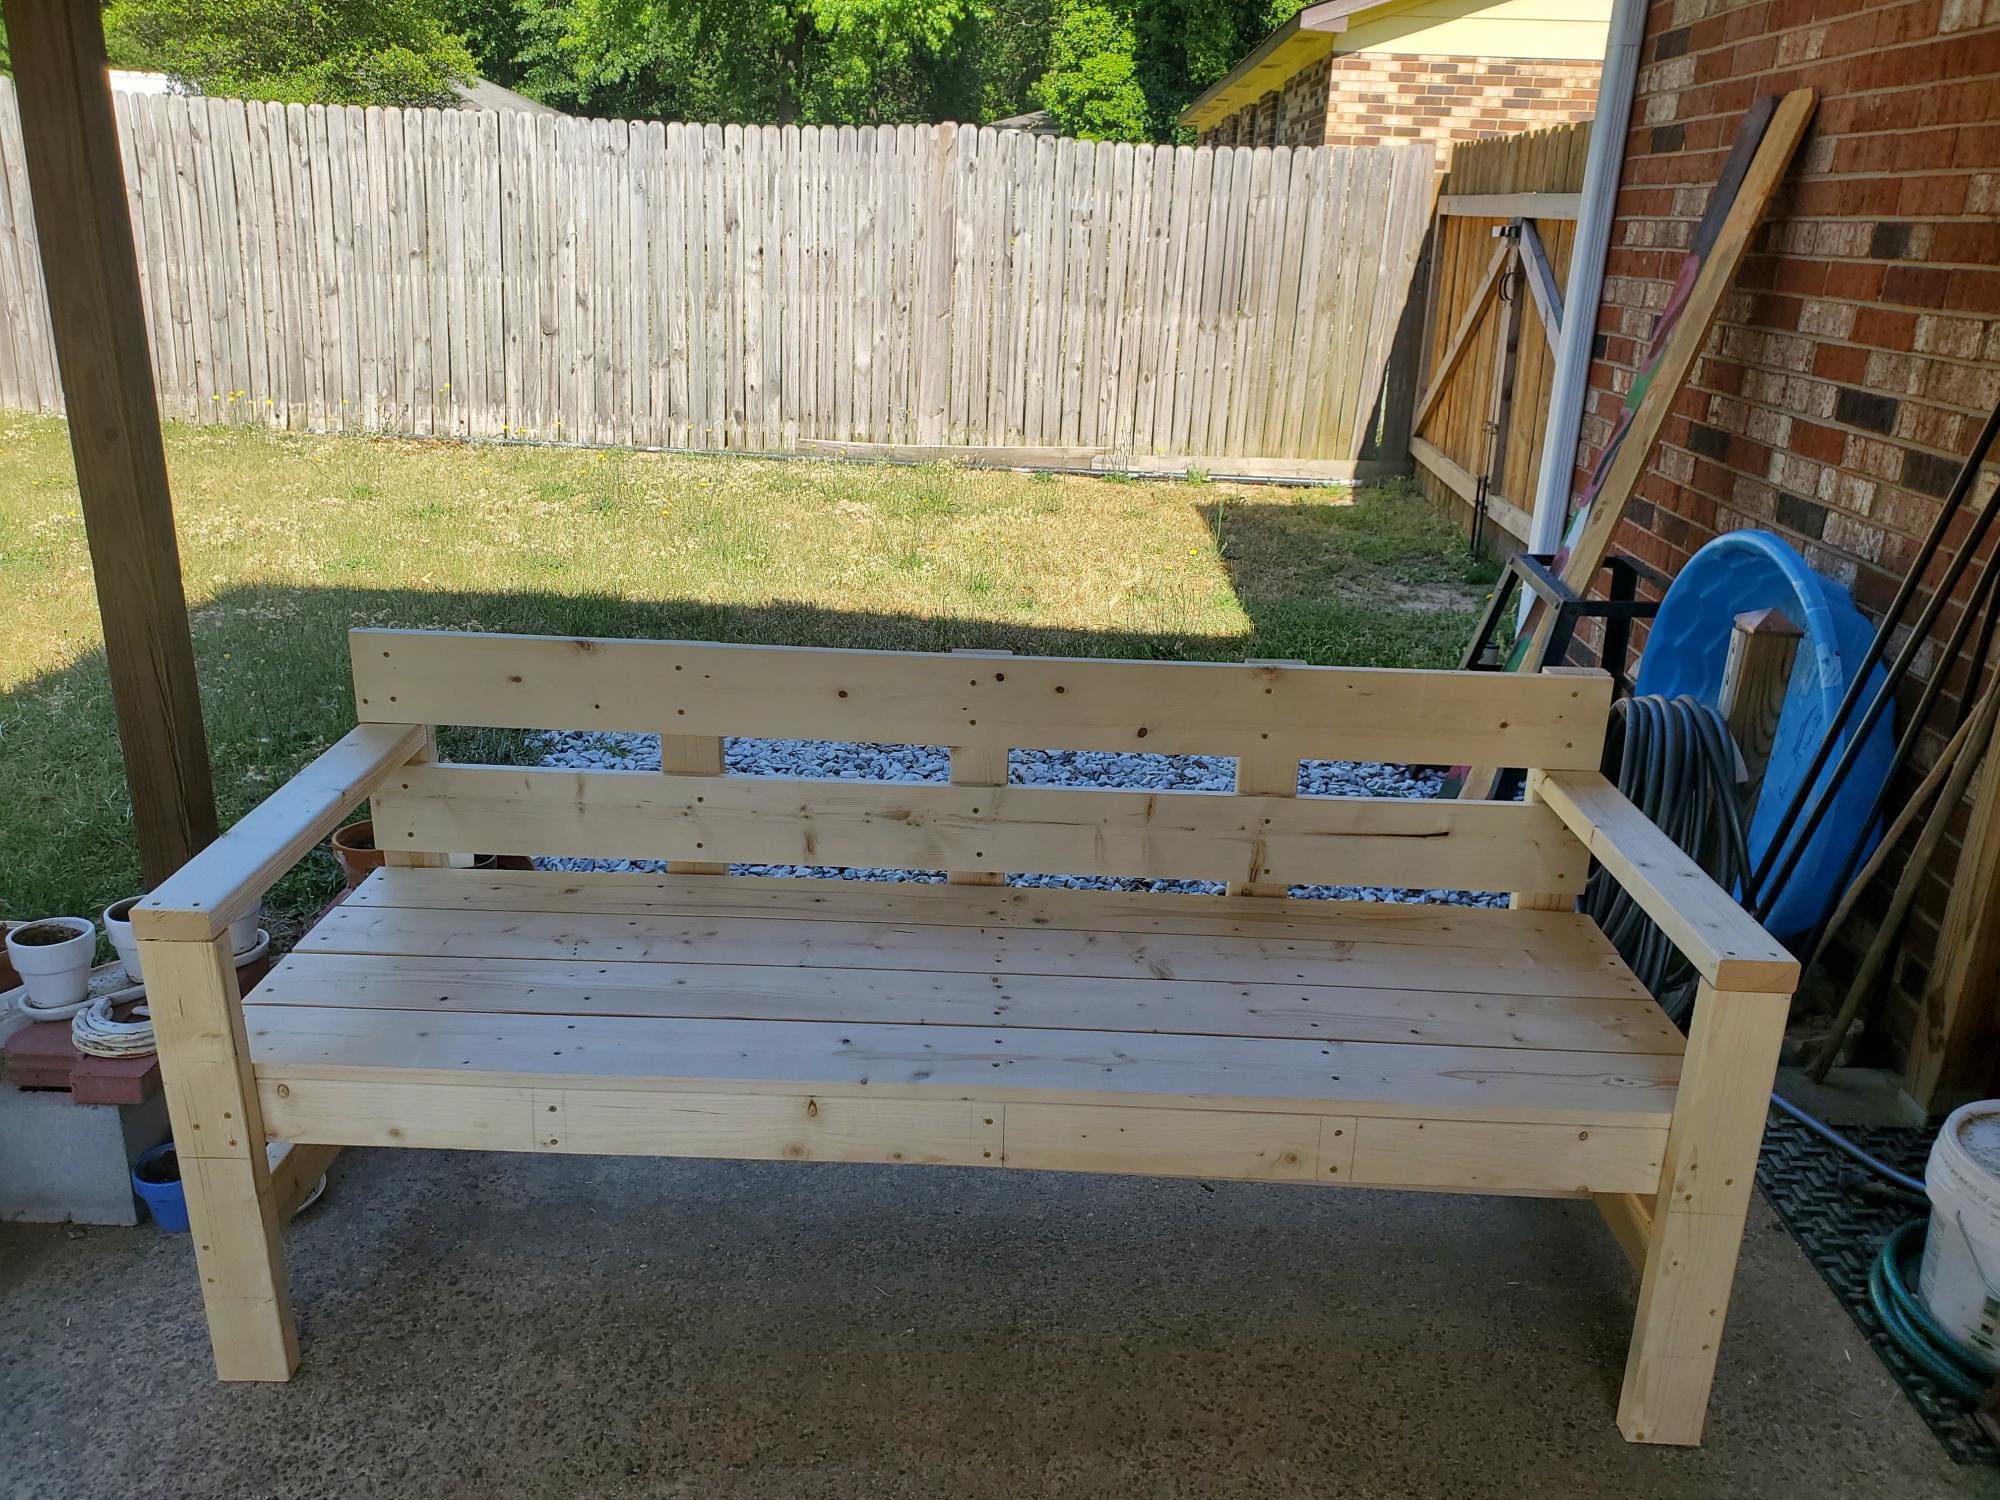
I love the plans for this bench! Very well thought out plans, easy to cut the wood and easy to put together. Thank you for all the hard work in coming up with all of these great plans!
Reanna Tovar
Built from Plan(s)
Comments
Ana White Admin
Fri, 07/01/2022 - 11:11
Stunning work!
Thank you for sharing, this is amazing!